CDW
-
Posts
7,759 -
Joined
-
Last visited
Content Type
Profiles
Forums
Gallery
Events
Everything posted by CDW
-

M-50 Israeli Sherman - FINISHED - MP Models - 1:35 Scale
CDW replied to CDW's topic in Non-ship/categorised builds
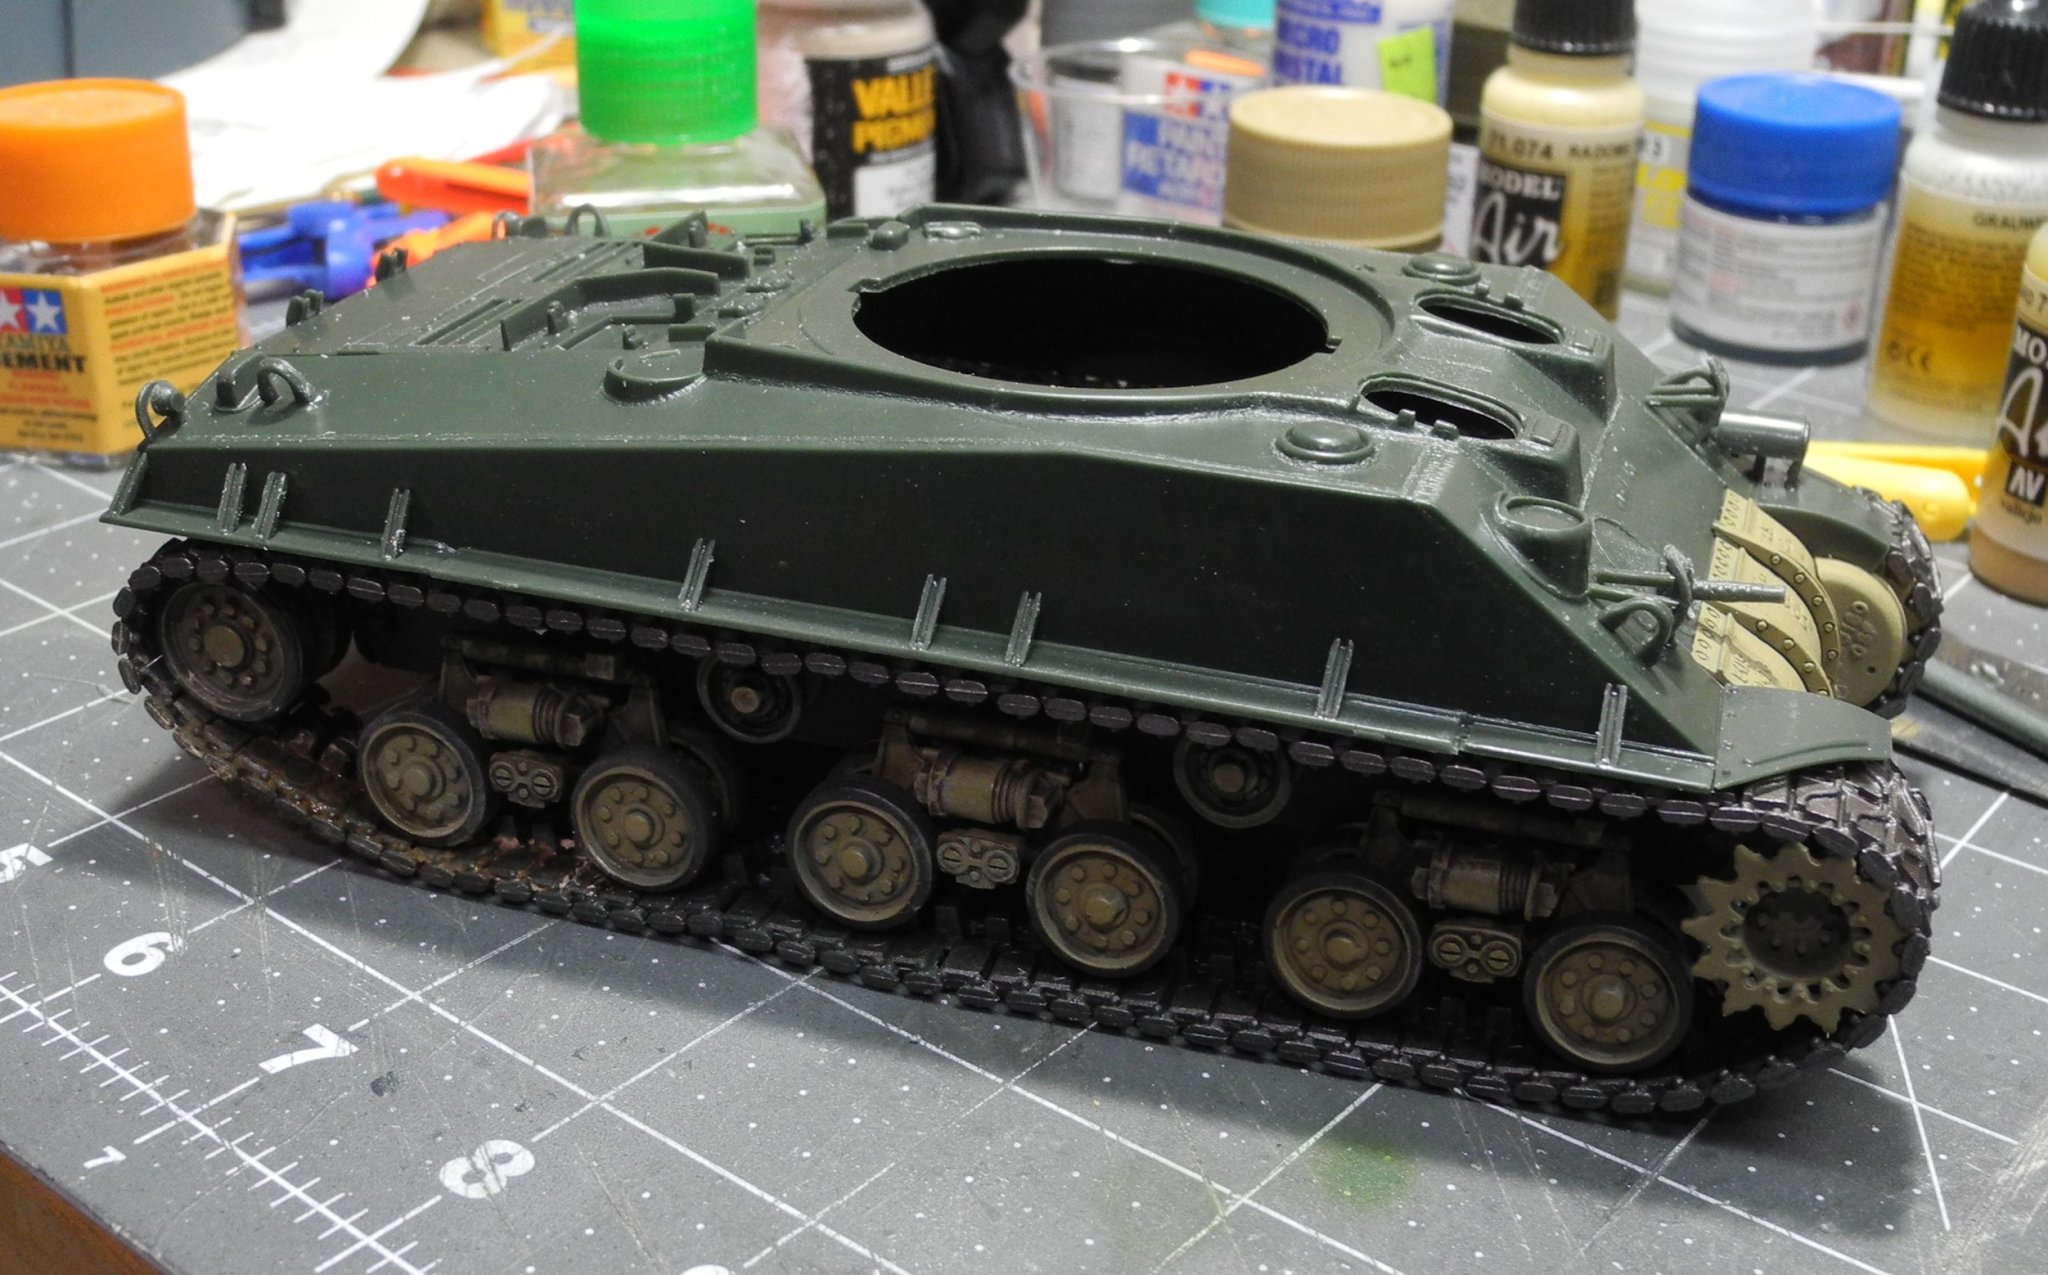
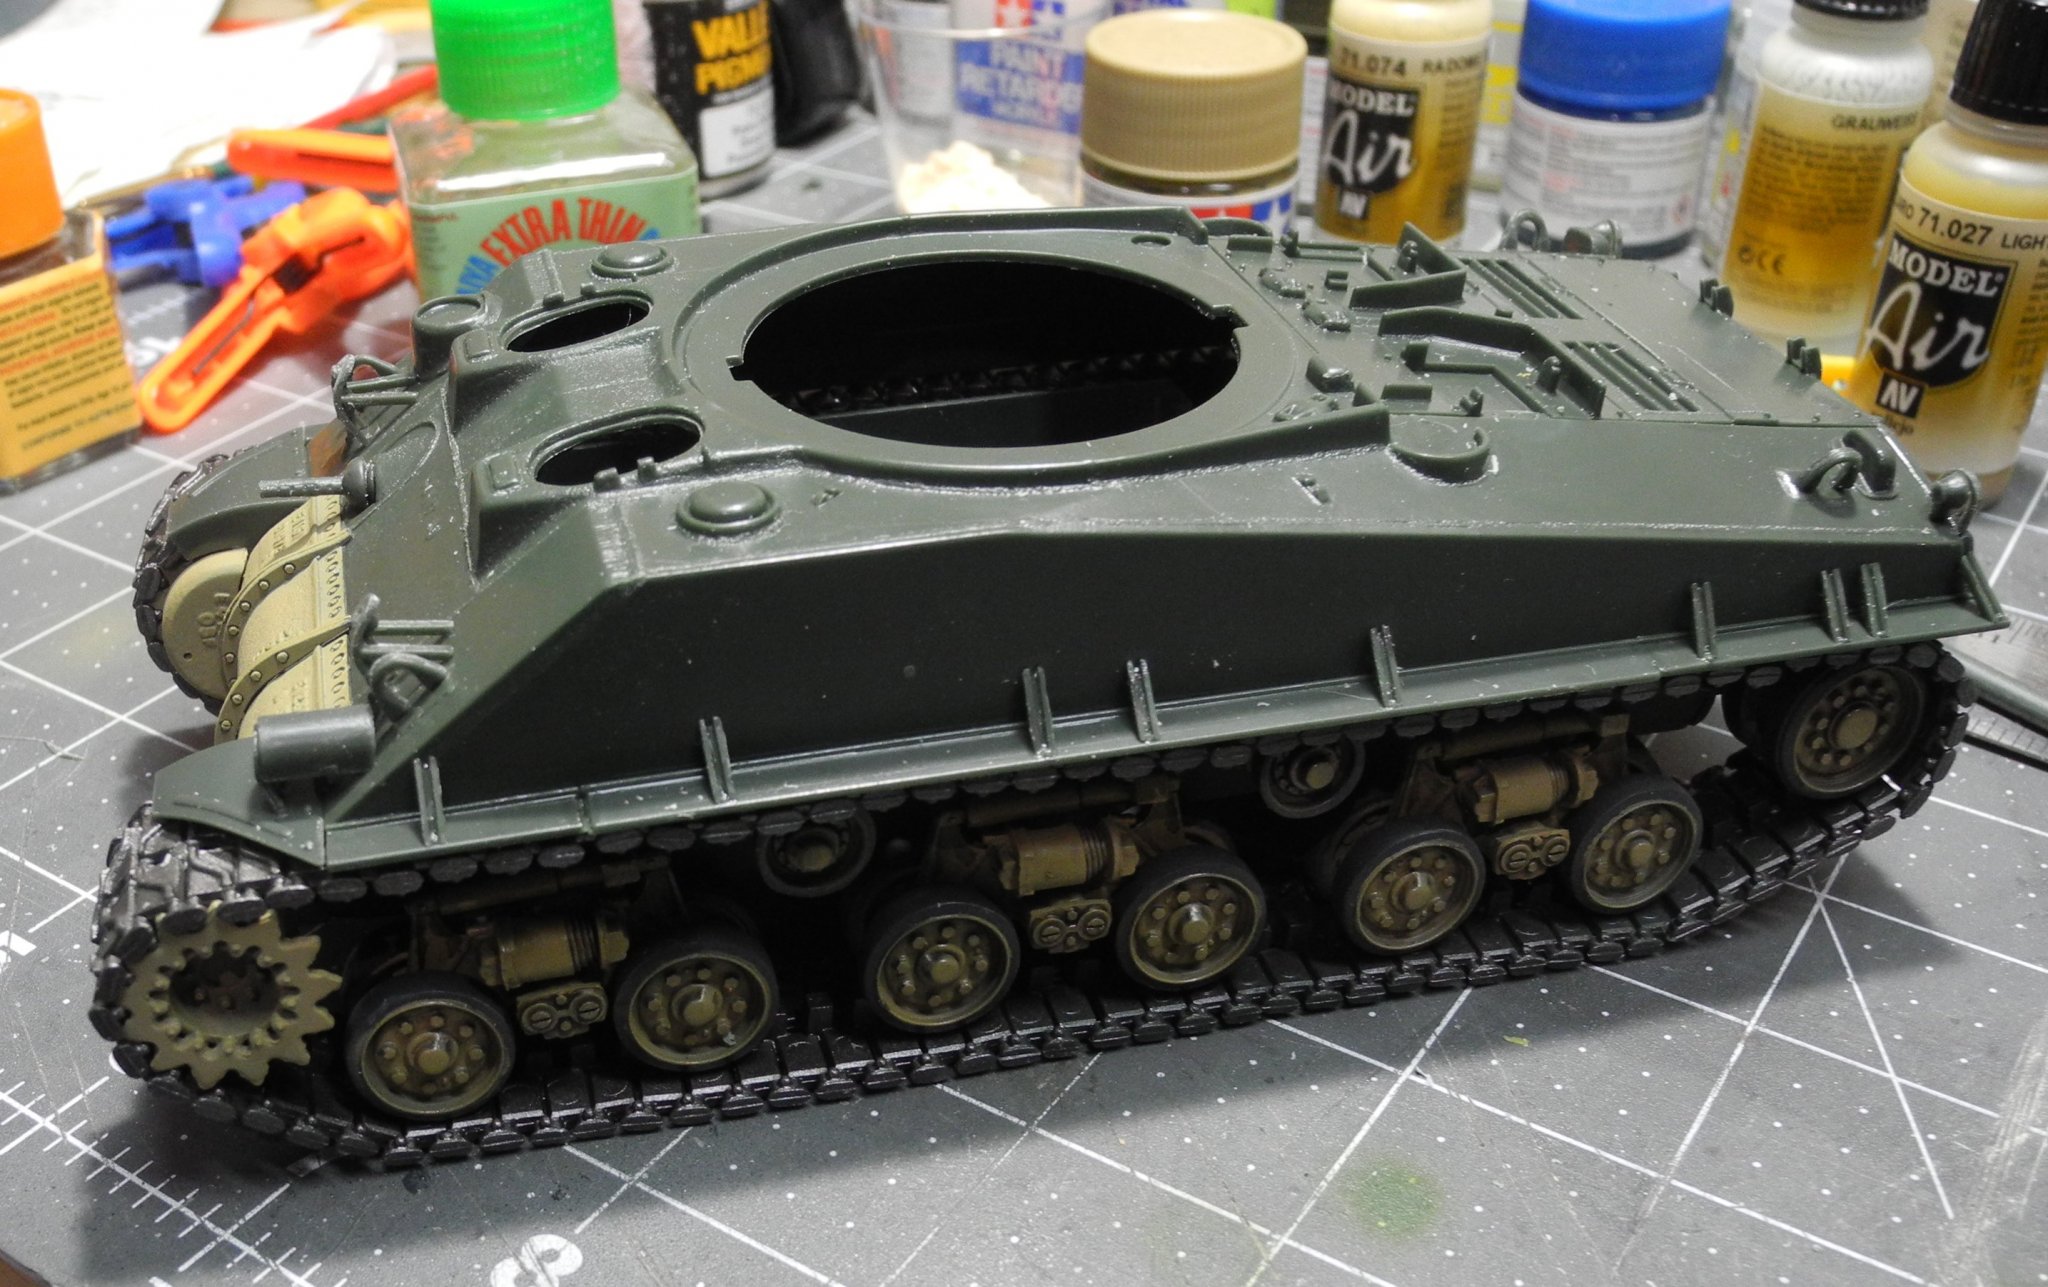
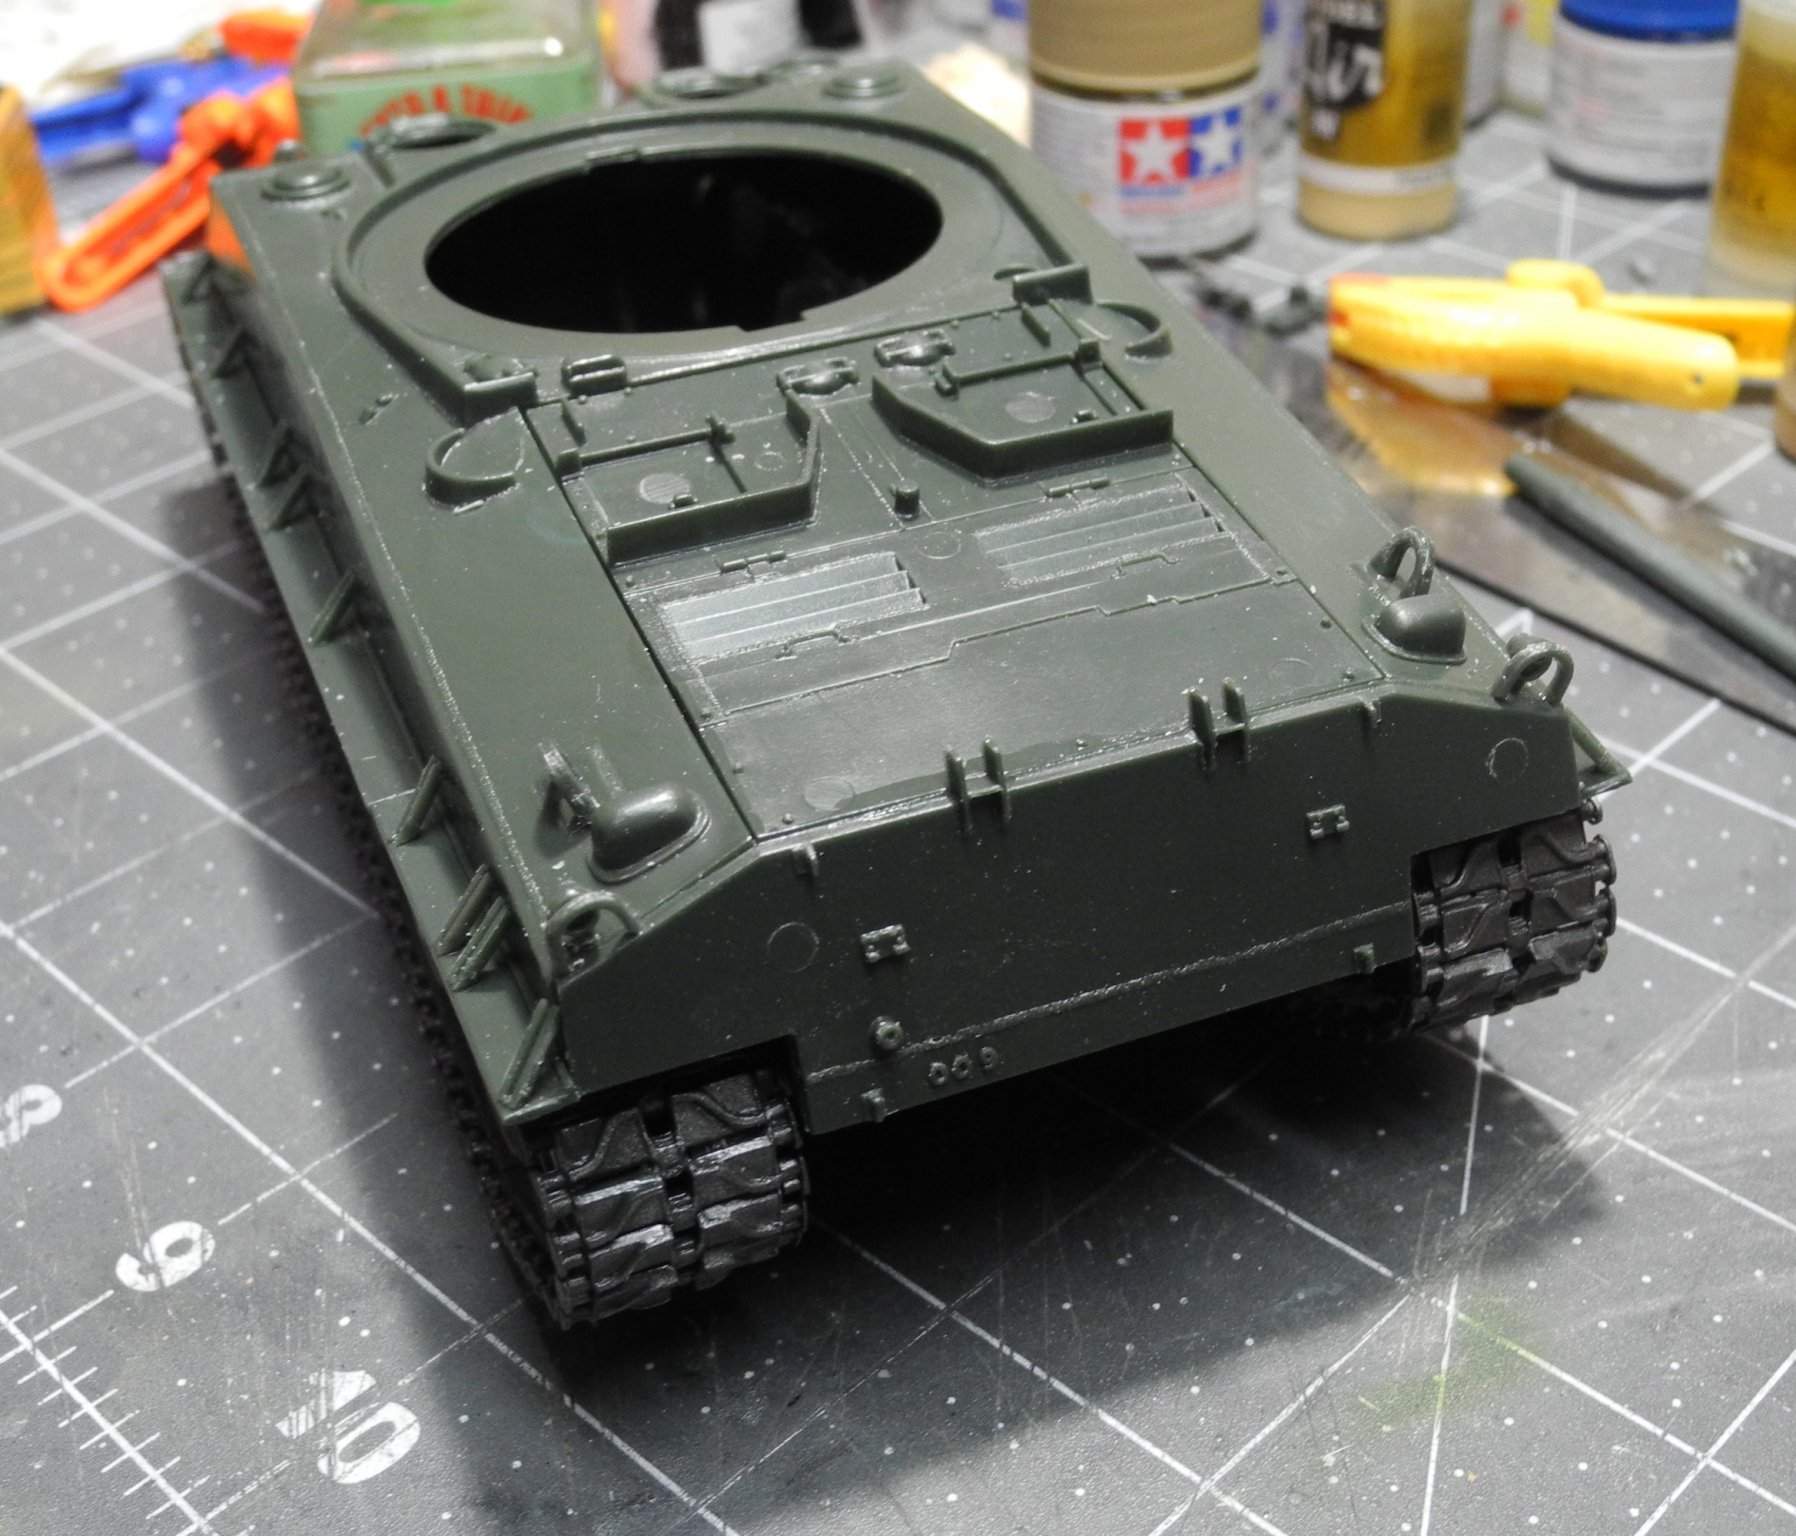
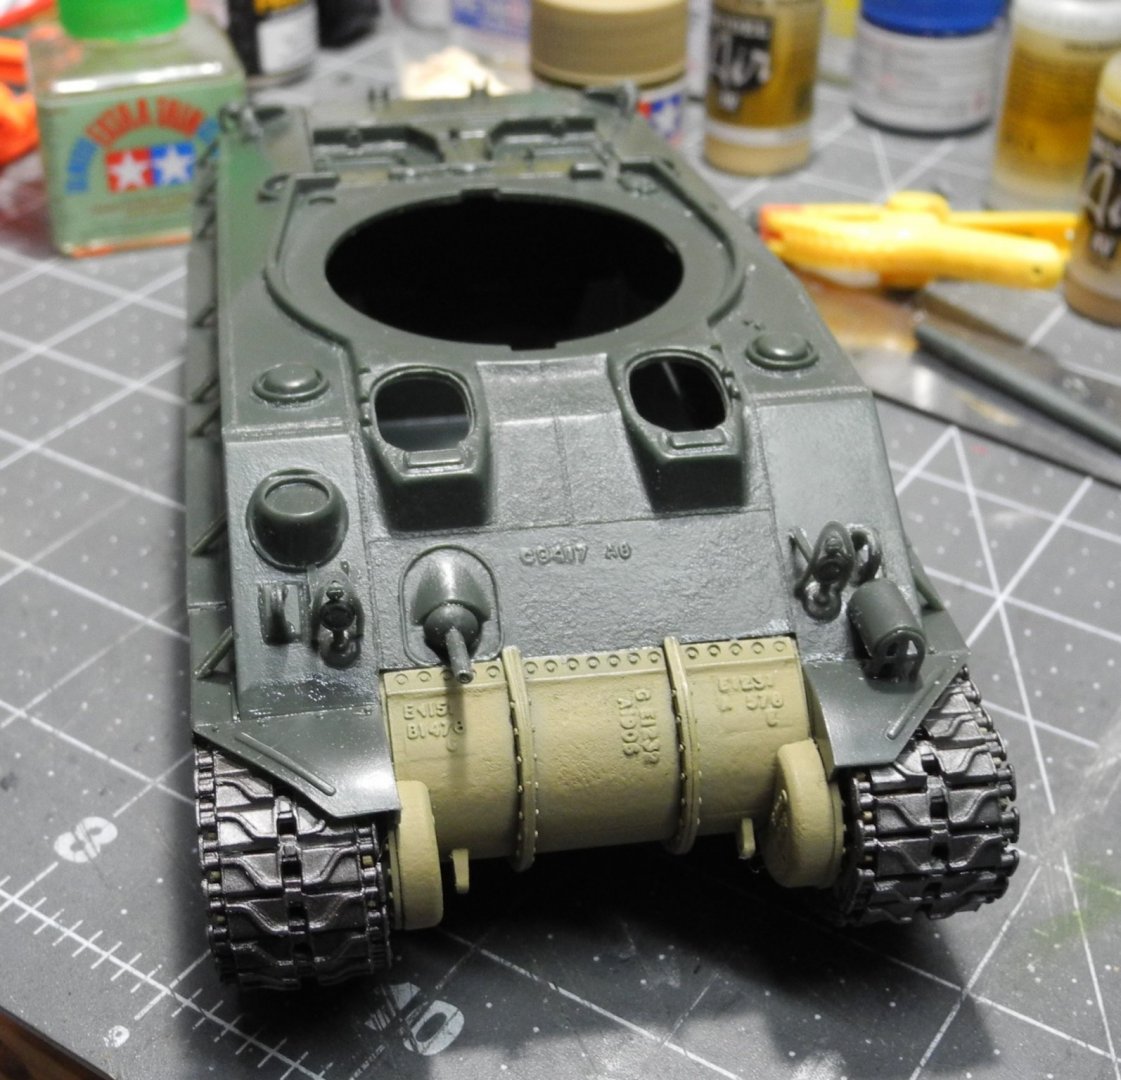
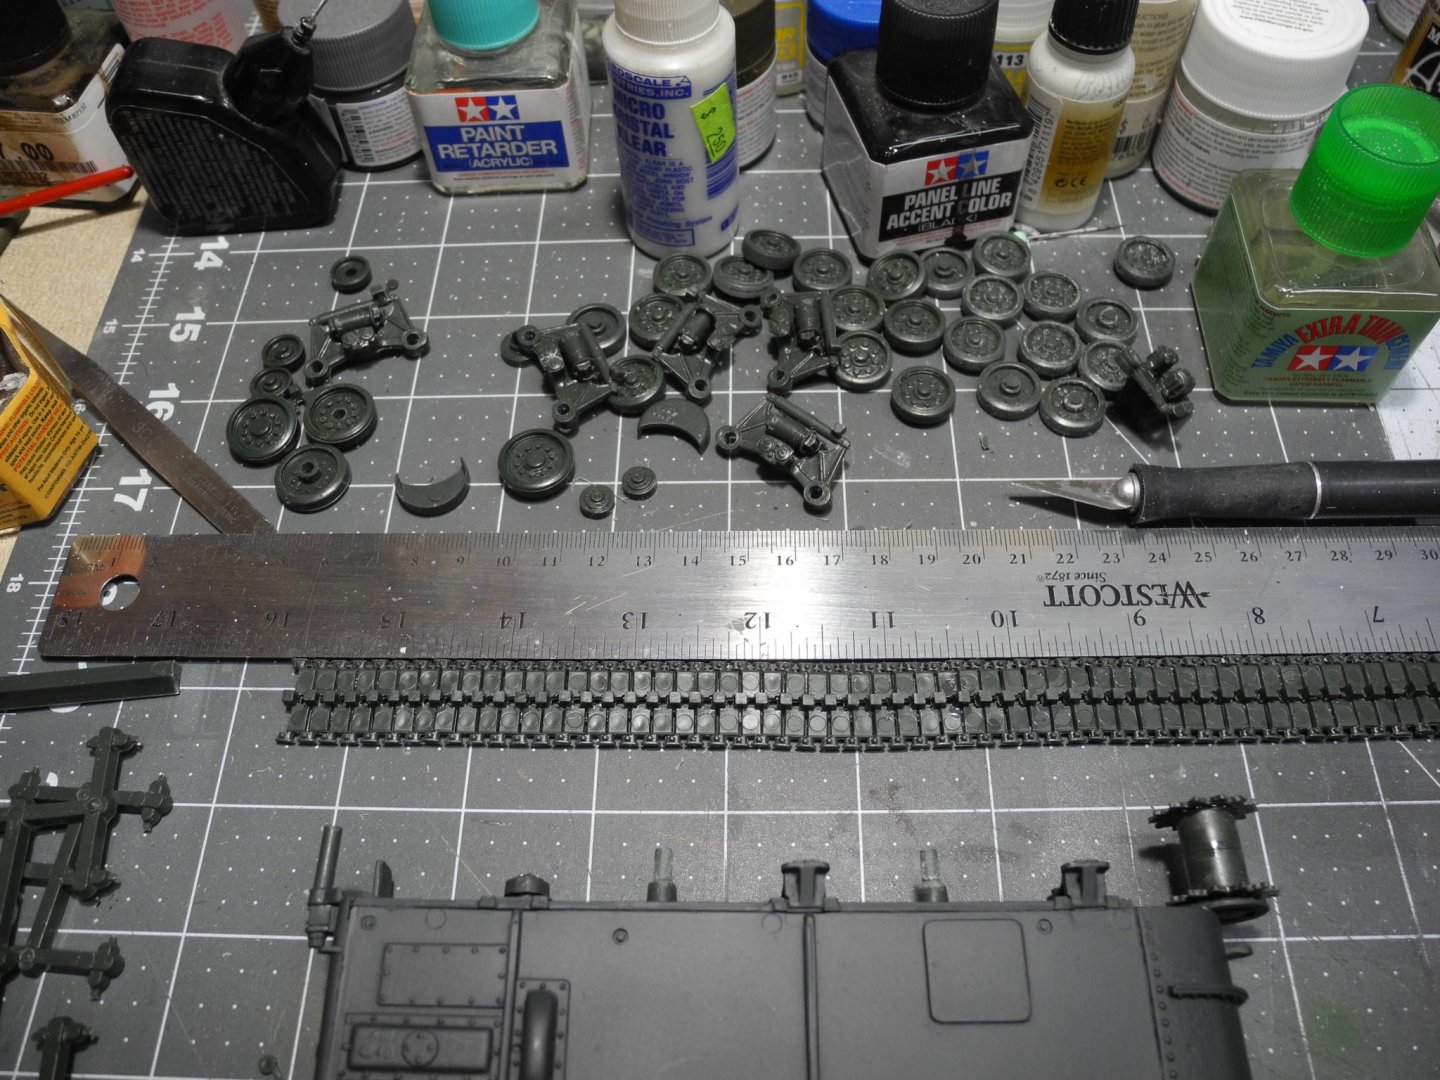
Thanks, Ken. It's fun working with an armor model as they are not as sensitive to painting errors as are automobiles, aircraft, and ships. None of the parts of this model are assigned a part number. All you can do is follow the crude pictorial "instruction" sheet, that's really more of a suggestion sheet as the correct part locations are very loosely shown. It helps tremendously to have lots of reference photos from other sources. Here, I started the assembly of the upper hull and finished another set of tracks before I ran out of gas for the day. It was a good rainy day for modeling, tomorrow will try to finish up the upper hull and start getting some paint on it.


- 107 replies
-
- 10
-

-
Beautiful model, Don. I appreciate you sharing it with us.
- 36 replies
-
- 3
-
-
- calypso
- billing boats
- (and 1 more)
-
Hey OC. Just found your build log. Beautiful model you're doing, and I like your choice of paint schemes.
-
Gotha G.lV by ErnieL - Wingnut Wings - 1/32 - PLASTIC
CDW replied to ErnieL's topic in Completed non-ship models
Right after reading this thread, I went out (virtually speaking) and bought a copy of "Marked for Death: The First War in the Air", by James Hamilton Patterson. It's an Audible book, and what I like to listen to while building my models. Usually I like Westerns, but it's high time I heard/read some WW1 aviation books! -
Gotha G.lV by ErnieL - Wingnut Wings - 1/32 - PLASTIC
CDW replied to ErnieL's topic in Completed non-ship models
Love your Gotha bomber model. I'm a big fan of Wingnut Wings kits, but the Gotha was one I never acquired. Seeing yours makes me wish I had acquired one. Very interesting about the oxygen being piped to the crew, and about the 20,000 ft. service ceiling. Never read up on the history of the WW1 German bombers, but my interest is now piqued. -
M-50 Israeli Sherman - FINISHED - MP Models - 1:35 Scale
CDW replied to CDW's topic in Non-ship/categorised builds
Oh yes, I think it was probably the old DML T-72. Recall it had individual links as well. Another 80's kit. -
M-50 Israeli Sherman - FINISHED - MP Models - 1:35 Scale
CDW replied to CDW's topic in Non-ship/categorised builds
Thanks OC. Yes, indeed they are fiddly. Just can't get in a big rush or else it'll end up a mess. The idea is to assemble long straight pieces, let the glue set up, then come back and gently bend them round the drive sprockets, hoping you've "guessed" the right number of links to match up at the ends where they join. It's not an exact science, more like trial and error. -
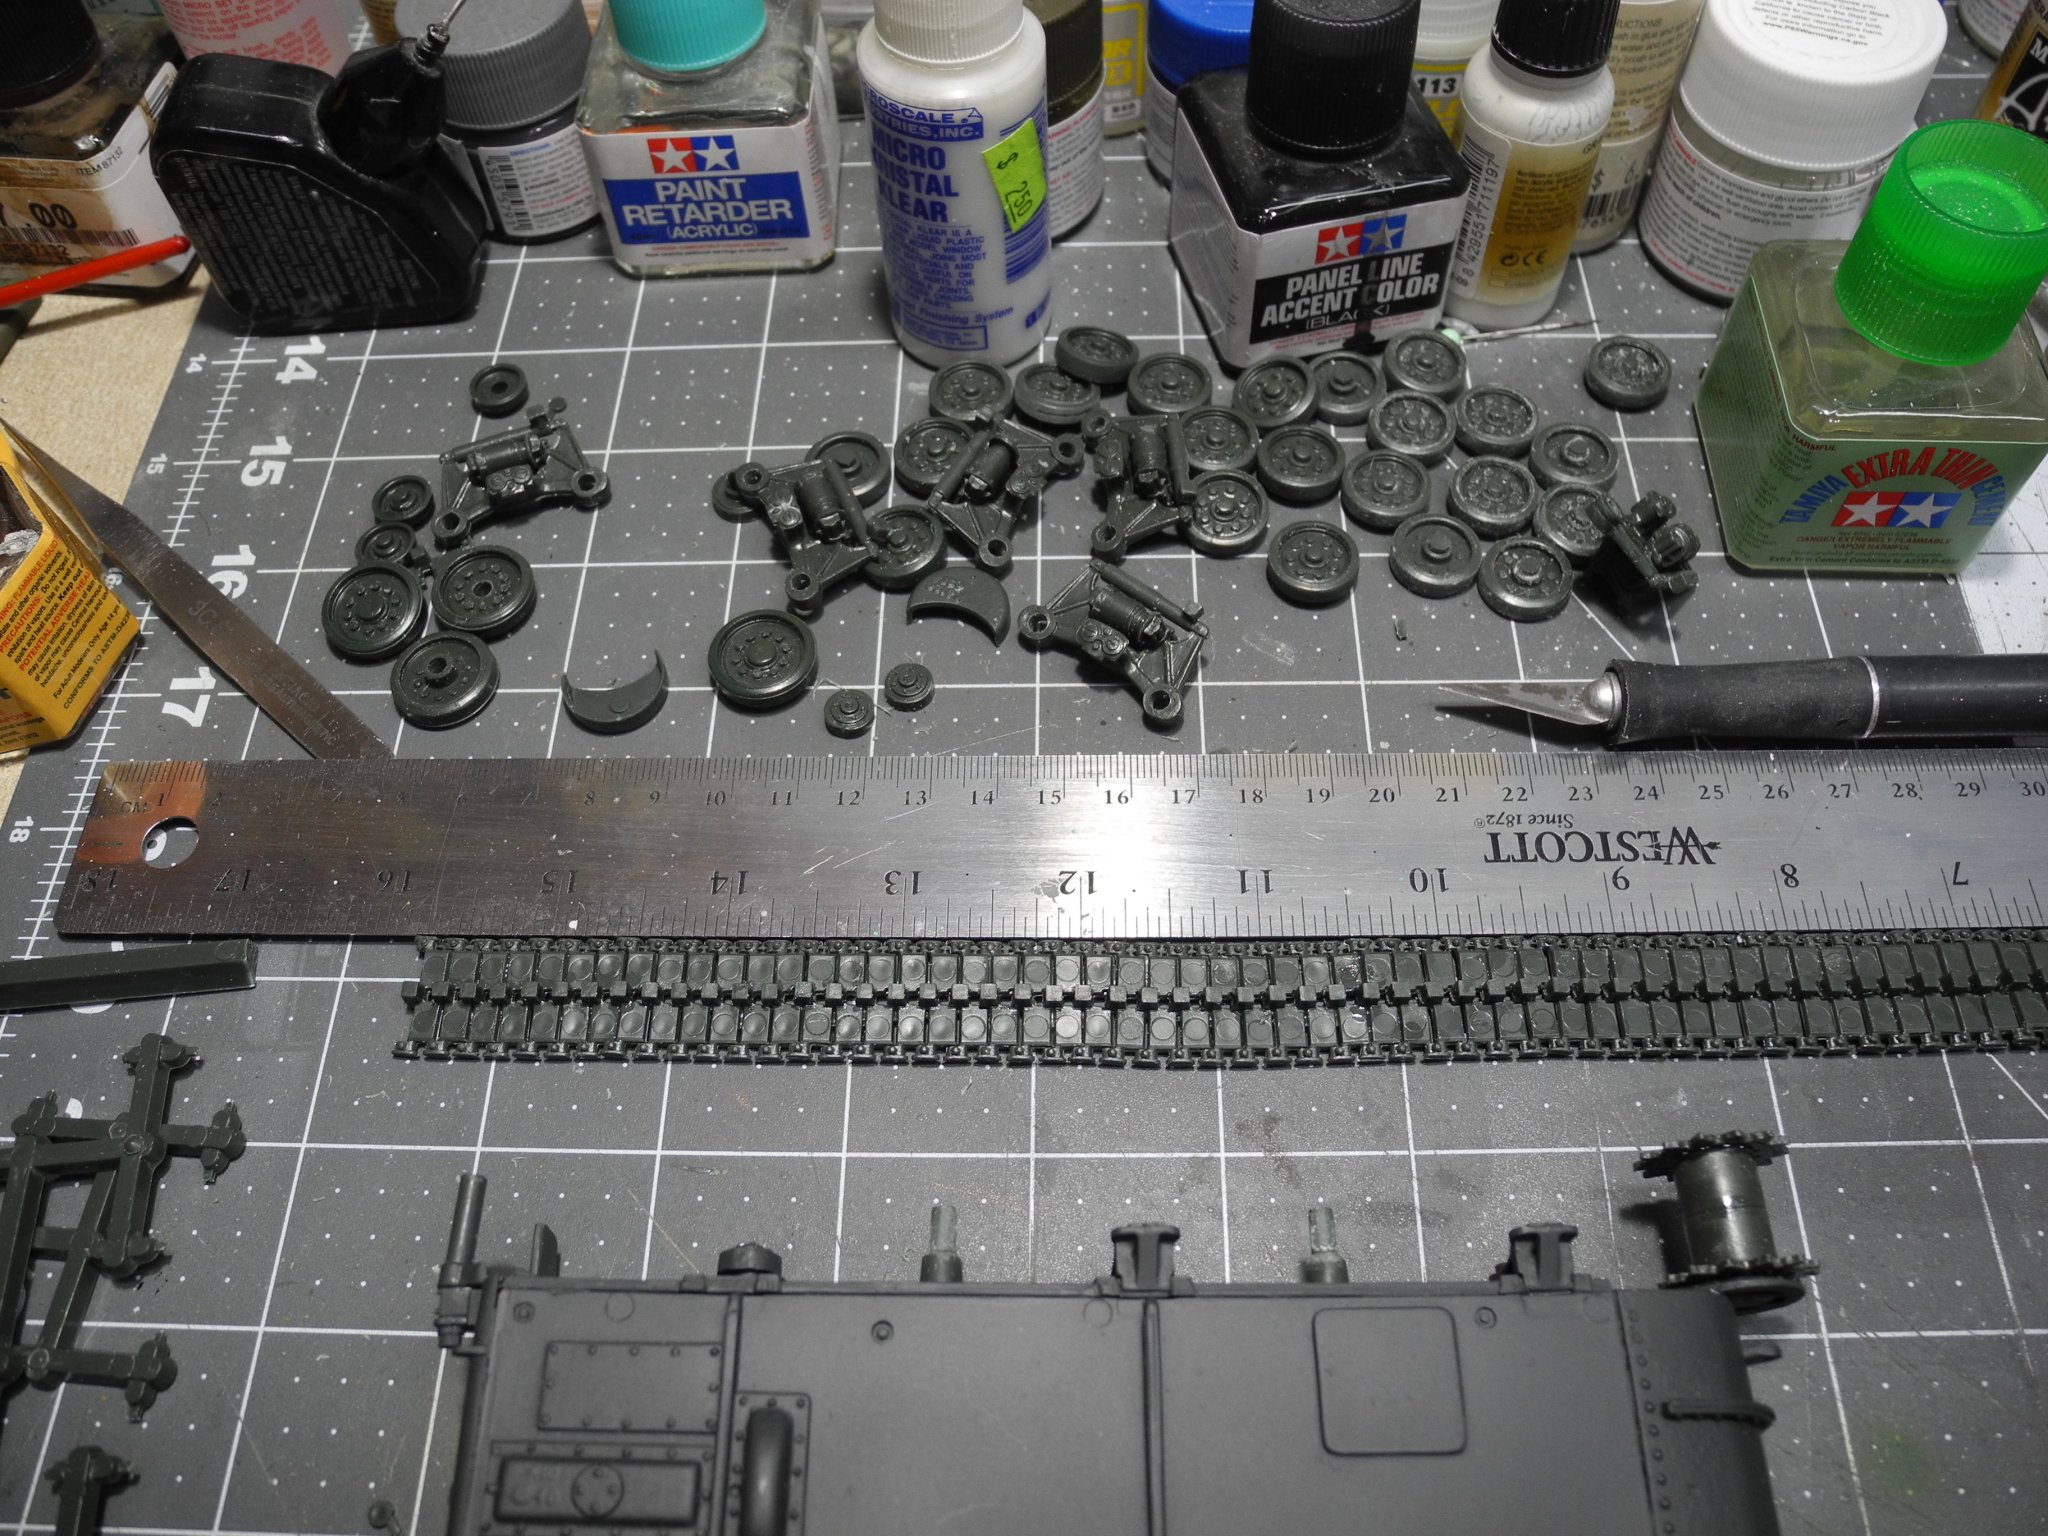
M-50 Israeli Sherman - FINISHED - MP Models - 1:35 Scale
CDW replied to CDW's topic in Non-ship/categorised builds
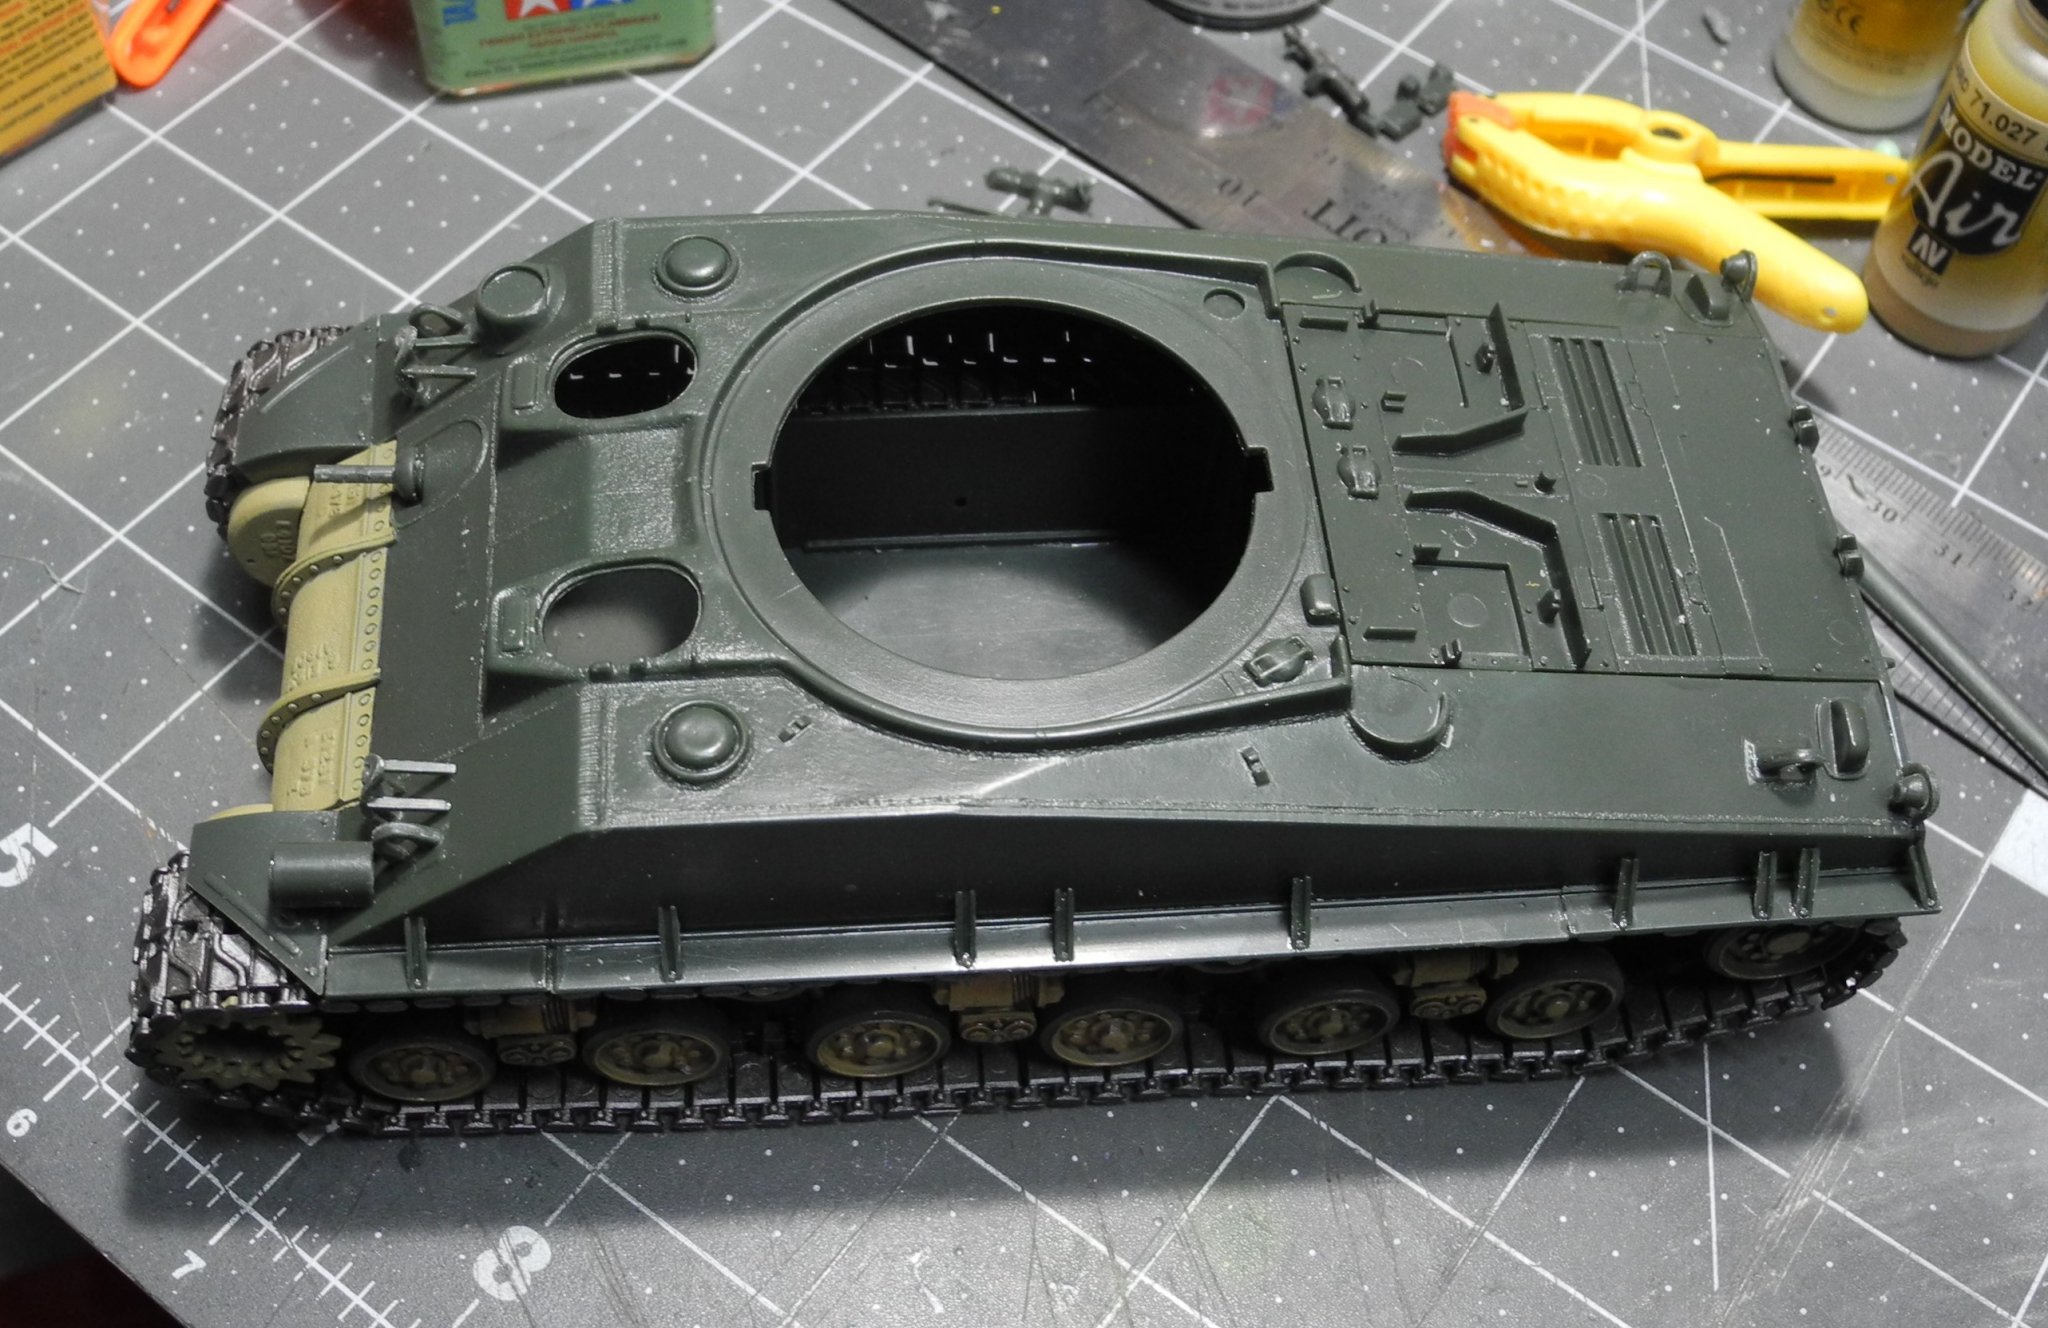
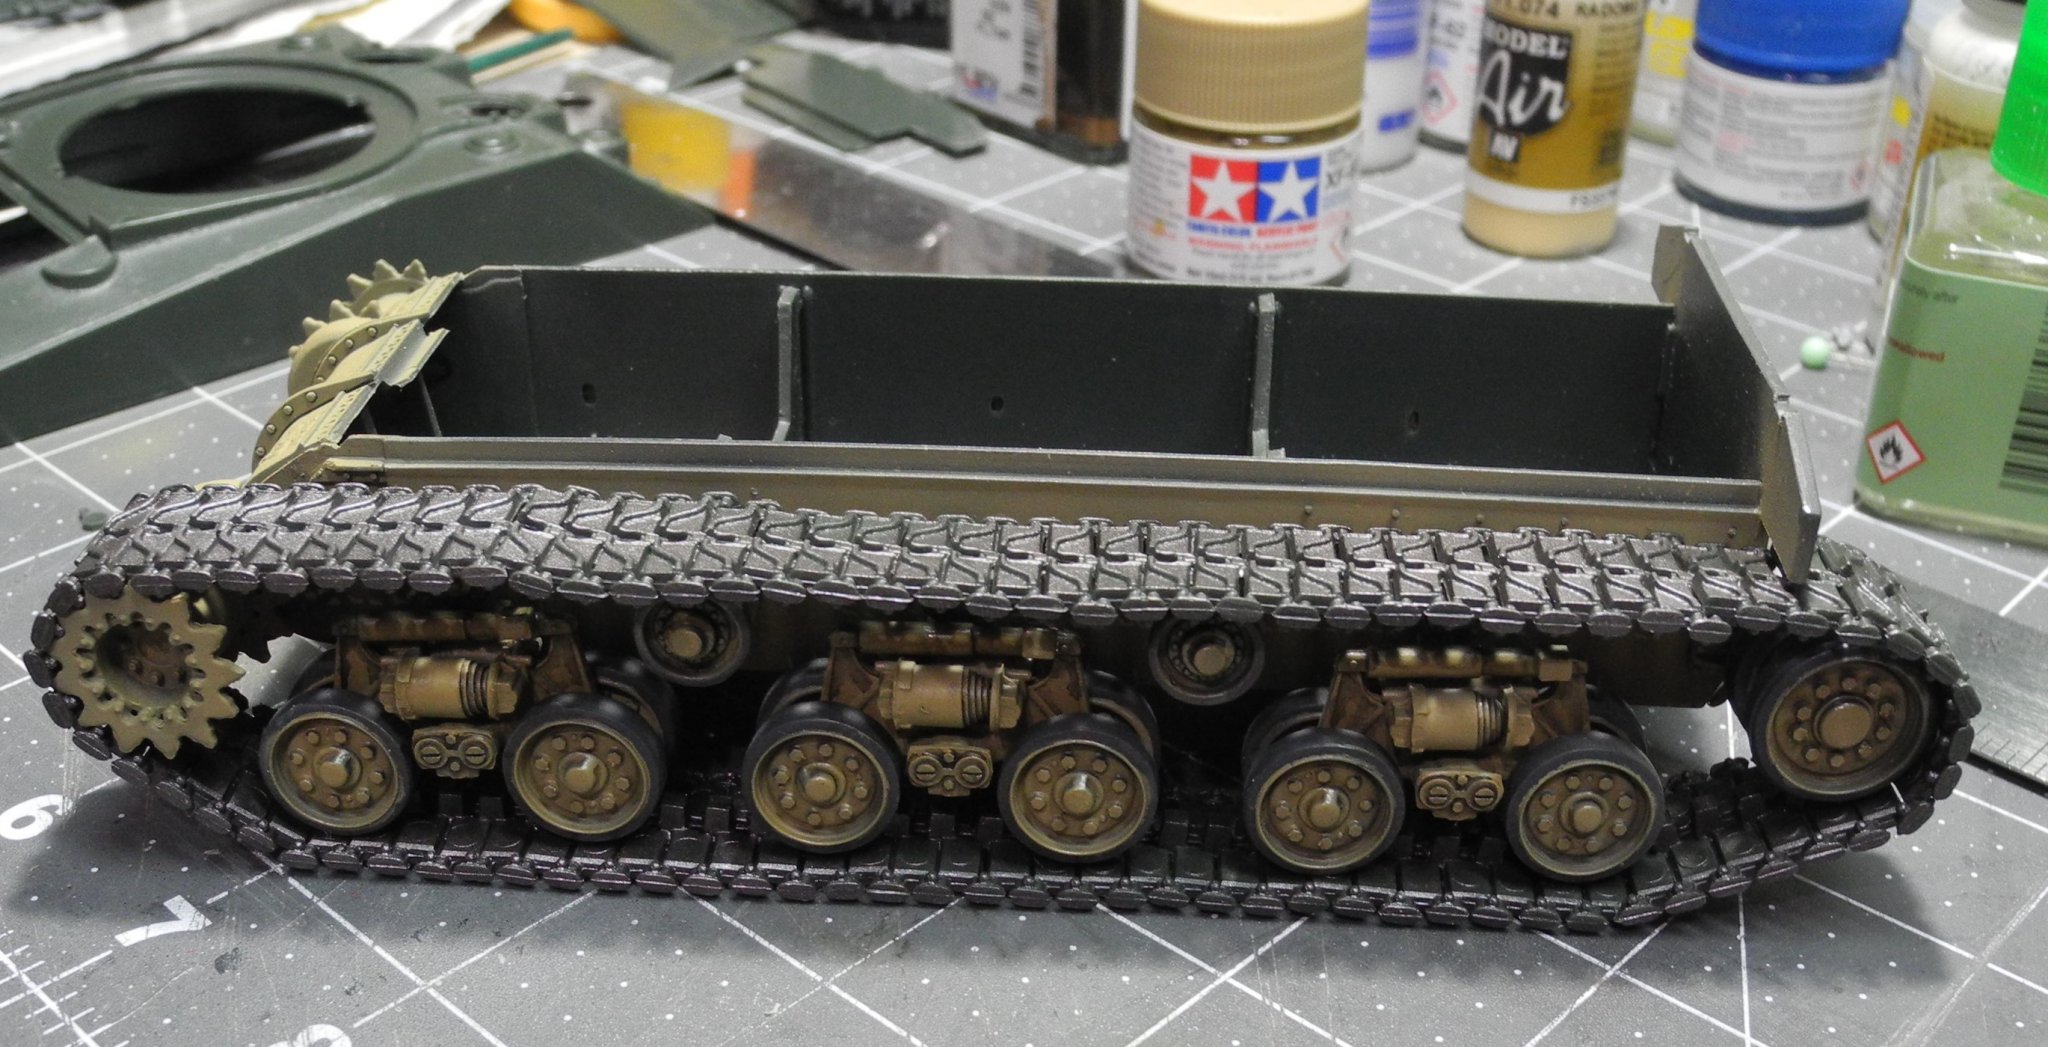
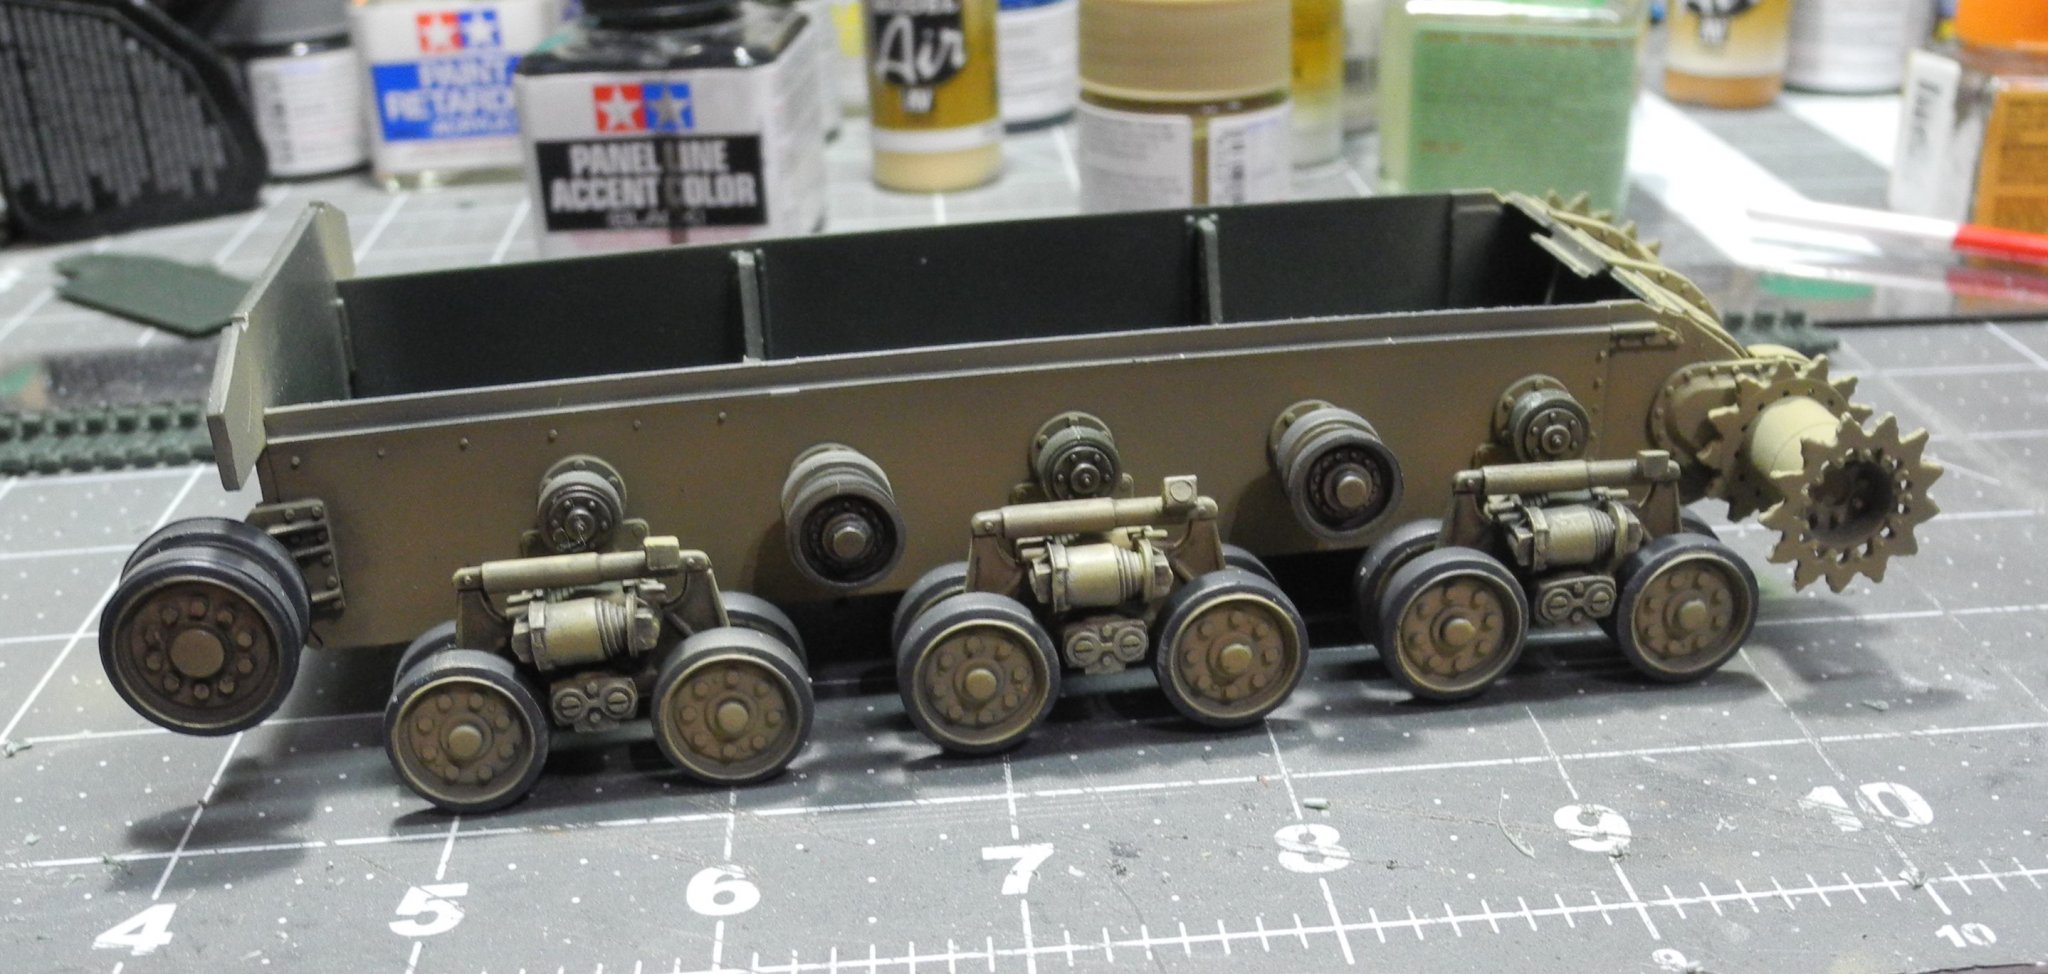
This was a limited run model made in the 80's, and not nearly as high tech and well designed as today's CAD assisted molds. The track links are individual units and must be assembled piece by piece with just a few mating points on each link and are secured by glue...each and every link. In these photos, I have assembled one set of tracks then painted them in gun metal. Once the glue has time to properly set up, will build, paint and install the opposite set, then will weather and detail them before installing the upper tank hull.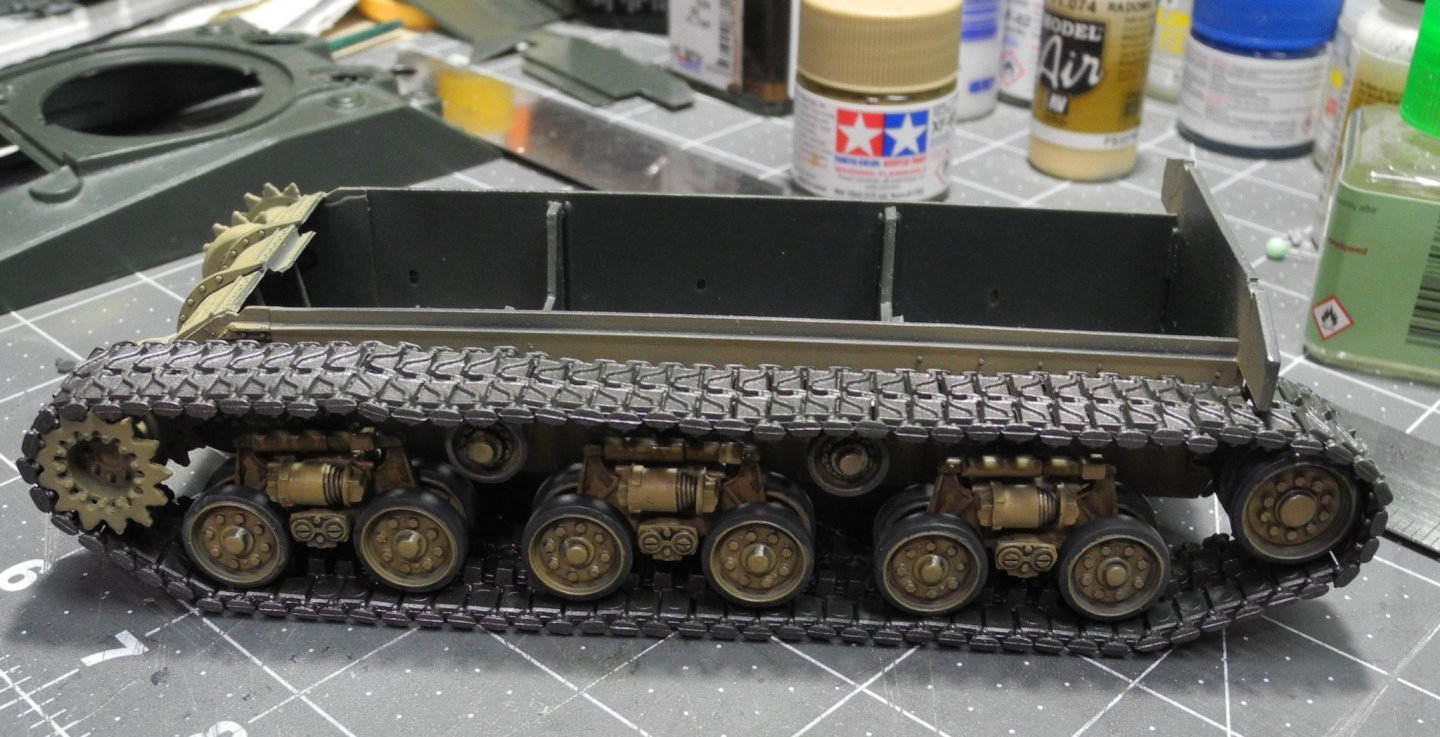


- 107 replies
-
- 10
-
-
M-50 Israeli Sherman - FINISHED - MP Models - 1:35 Scale
CDW replied to CDW's topic in Non-ship/categorised builds
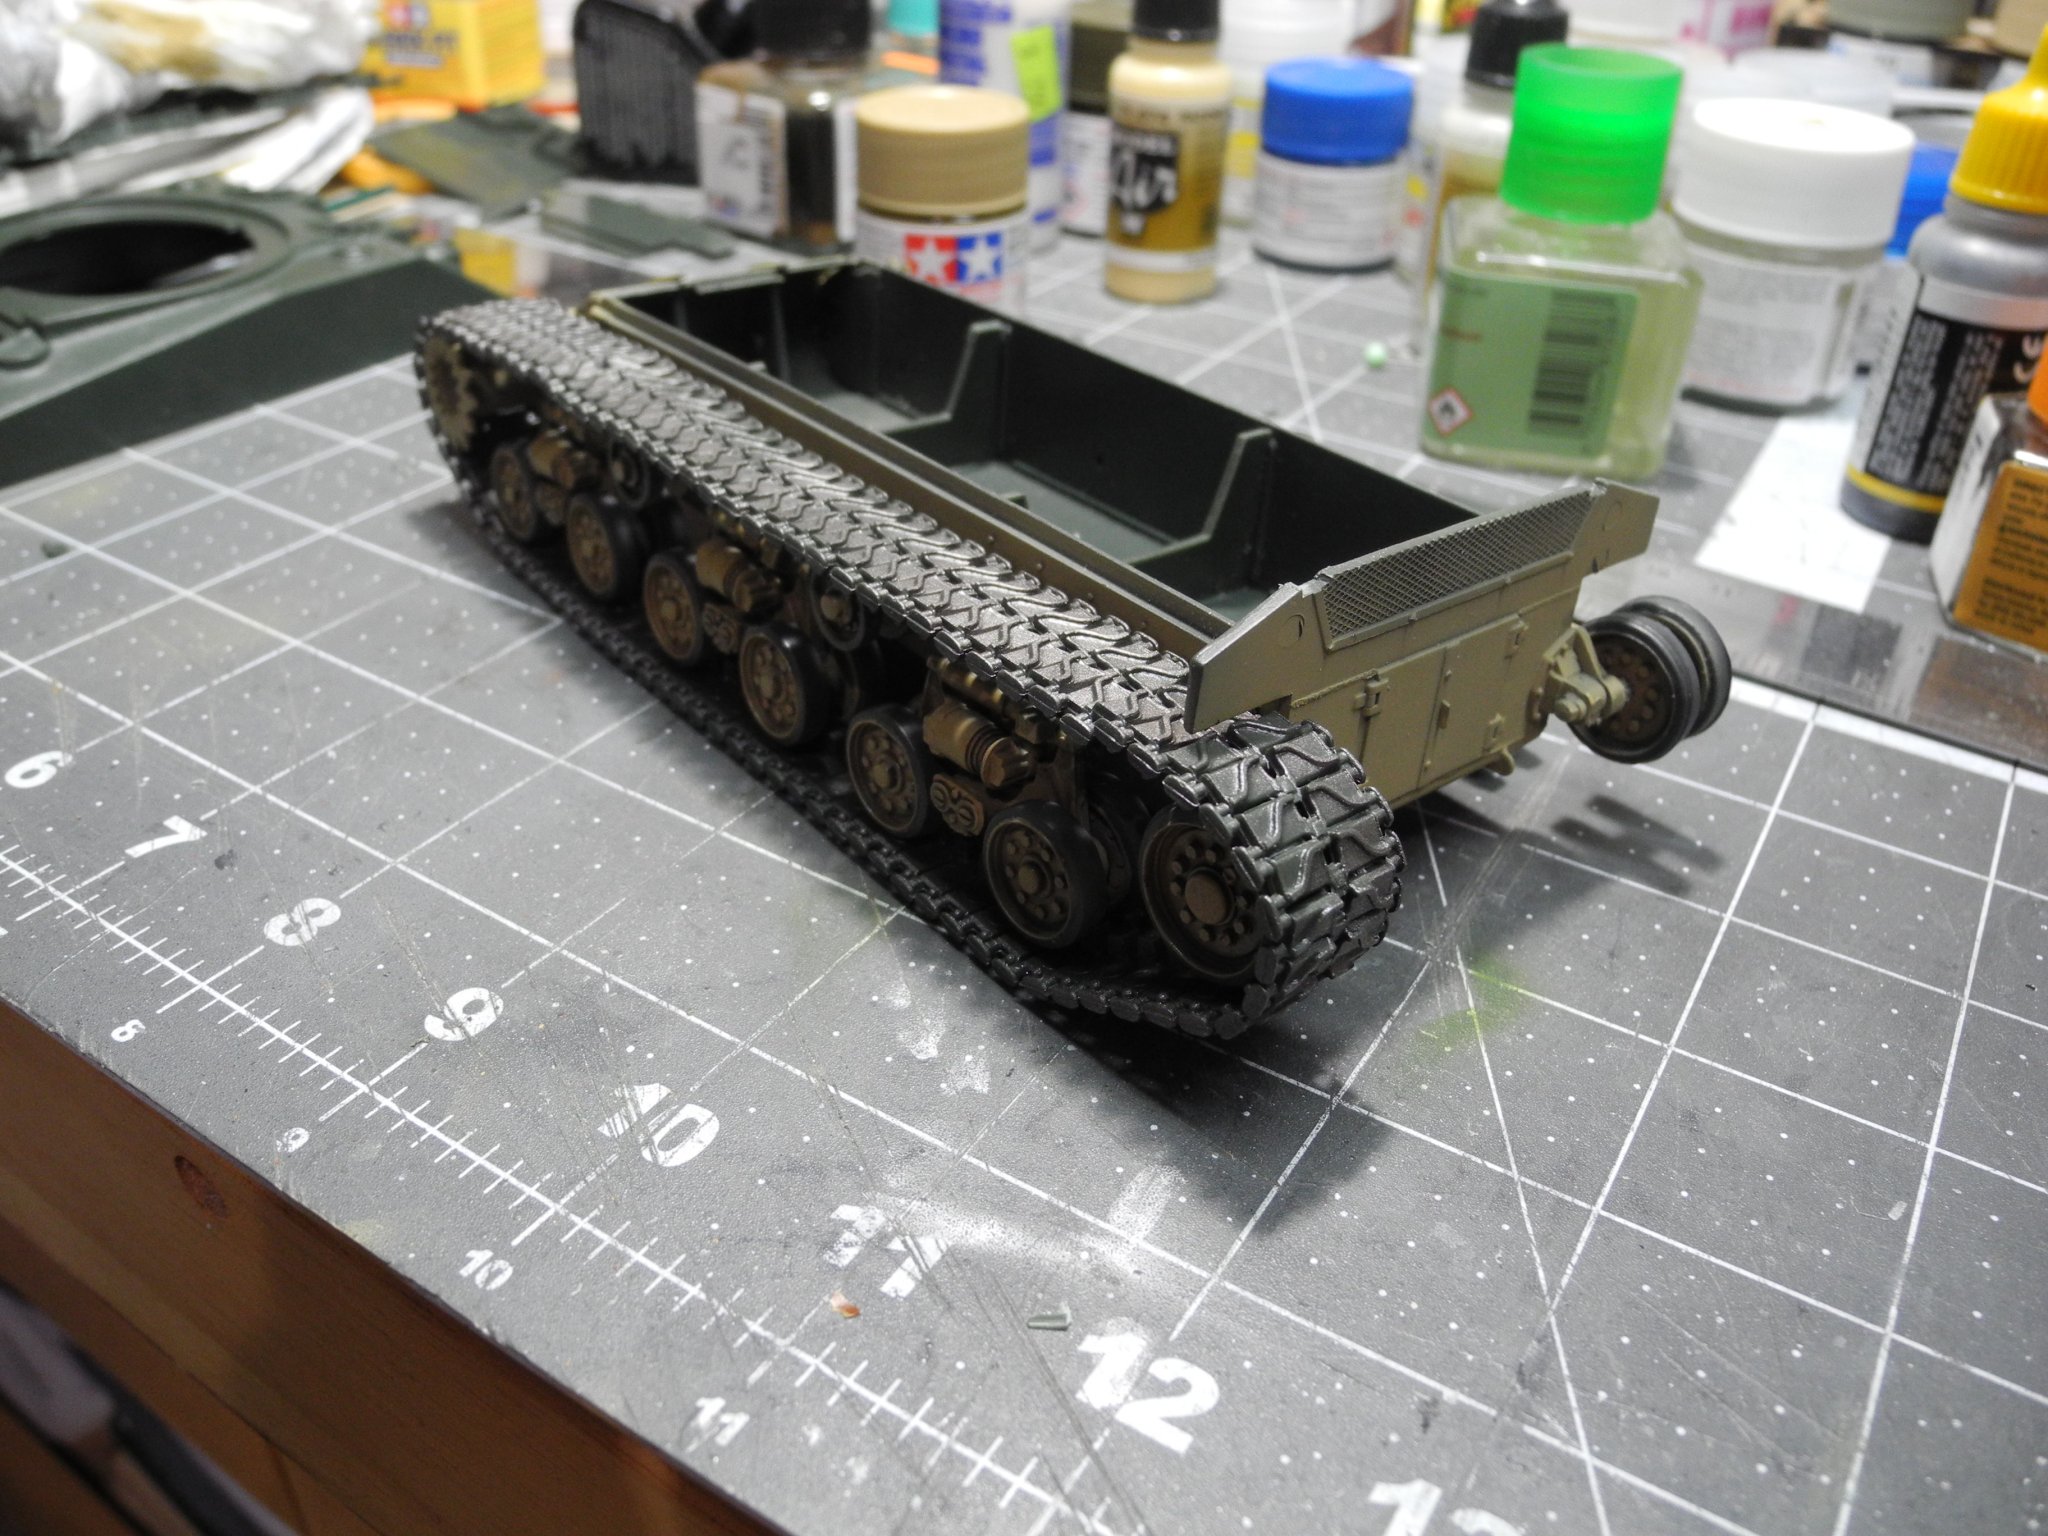
Before it's all said and done, I'll mix in varying percentages of flat white with the dark yellow, get that reduced down real thin, then use it to highlight various places on the model to give the dark yellow a sun faded, battle worn look. I'll do that last once most of the model is assembled and before I add on all the fuel cans, stowage, and tools. -
M-50 Israeli Sherman - FINISHED - MP Models - 1:35 Scale
CDW replied to CDW's topic in Non-ship/categorised builds
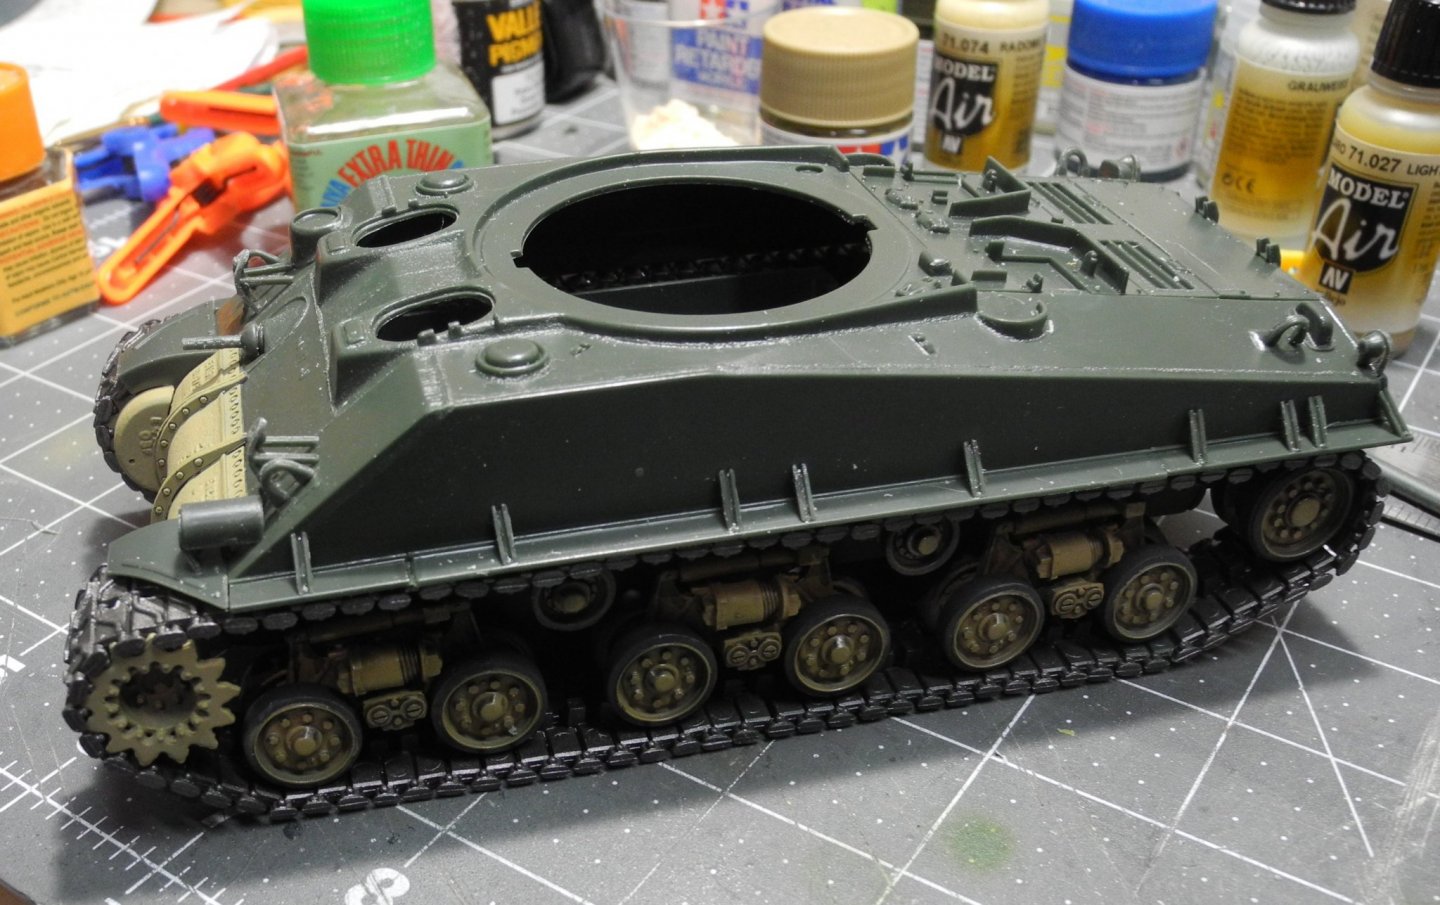
That's Tamiya XF-60 Dark Yellow over Vallejo Panzer Gray primer. I reduce my dark yellow WAY down then apply thin coats until I get the look I want over the panzer gray primer. I probably used five coats to get to that color, that way some of the dark primer color shows through in the creases. -
Aston Martin DB5 by Fnick - FINISHED - Revell - 1:32
CDW replied to fnick's topic in Non-ship/categorised builds
Very true. Nothing shows a blemish like silver. -
M-50 Israeli Sherman - FINISHED - MP Models - 1:35 Scale
CDW replied to CDW's topic in Non-ship/categorised builds
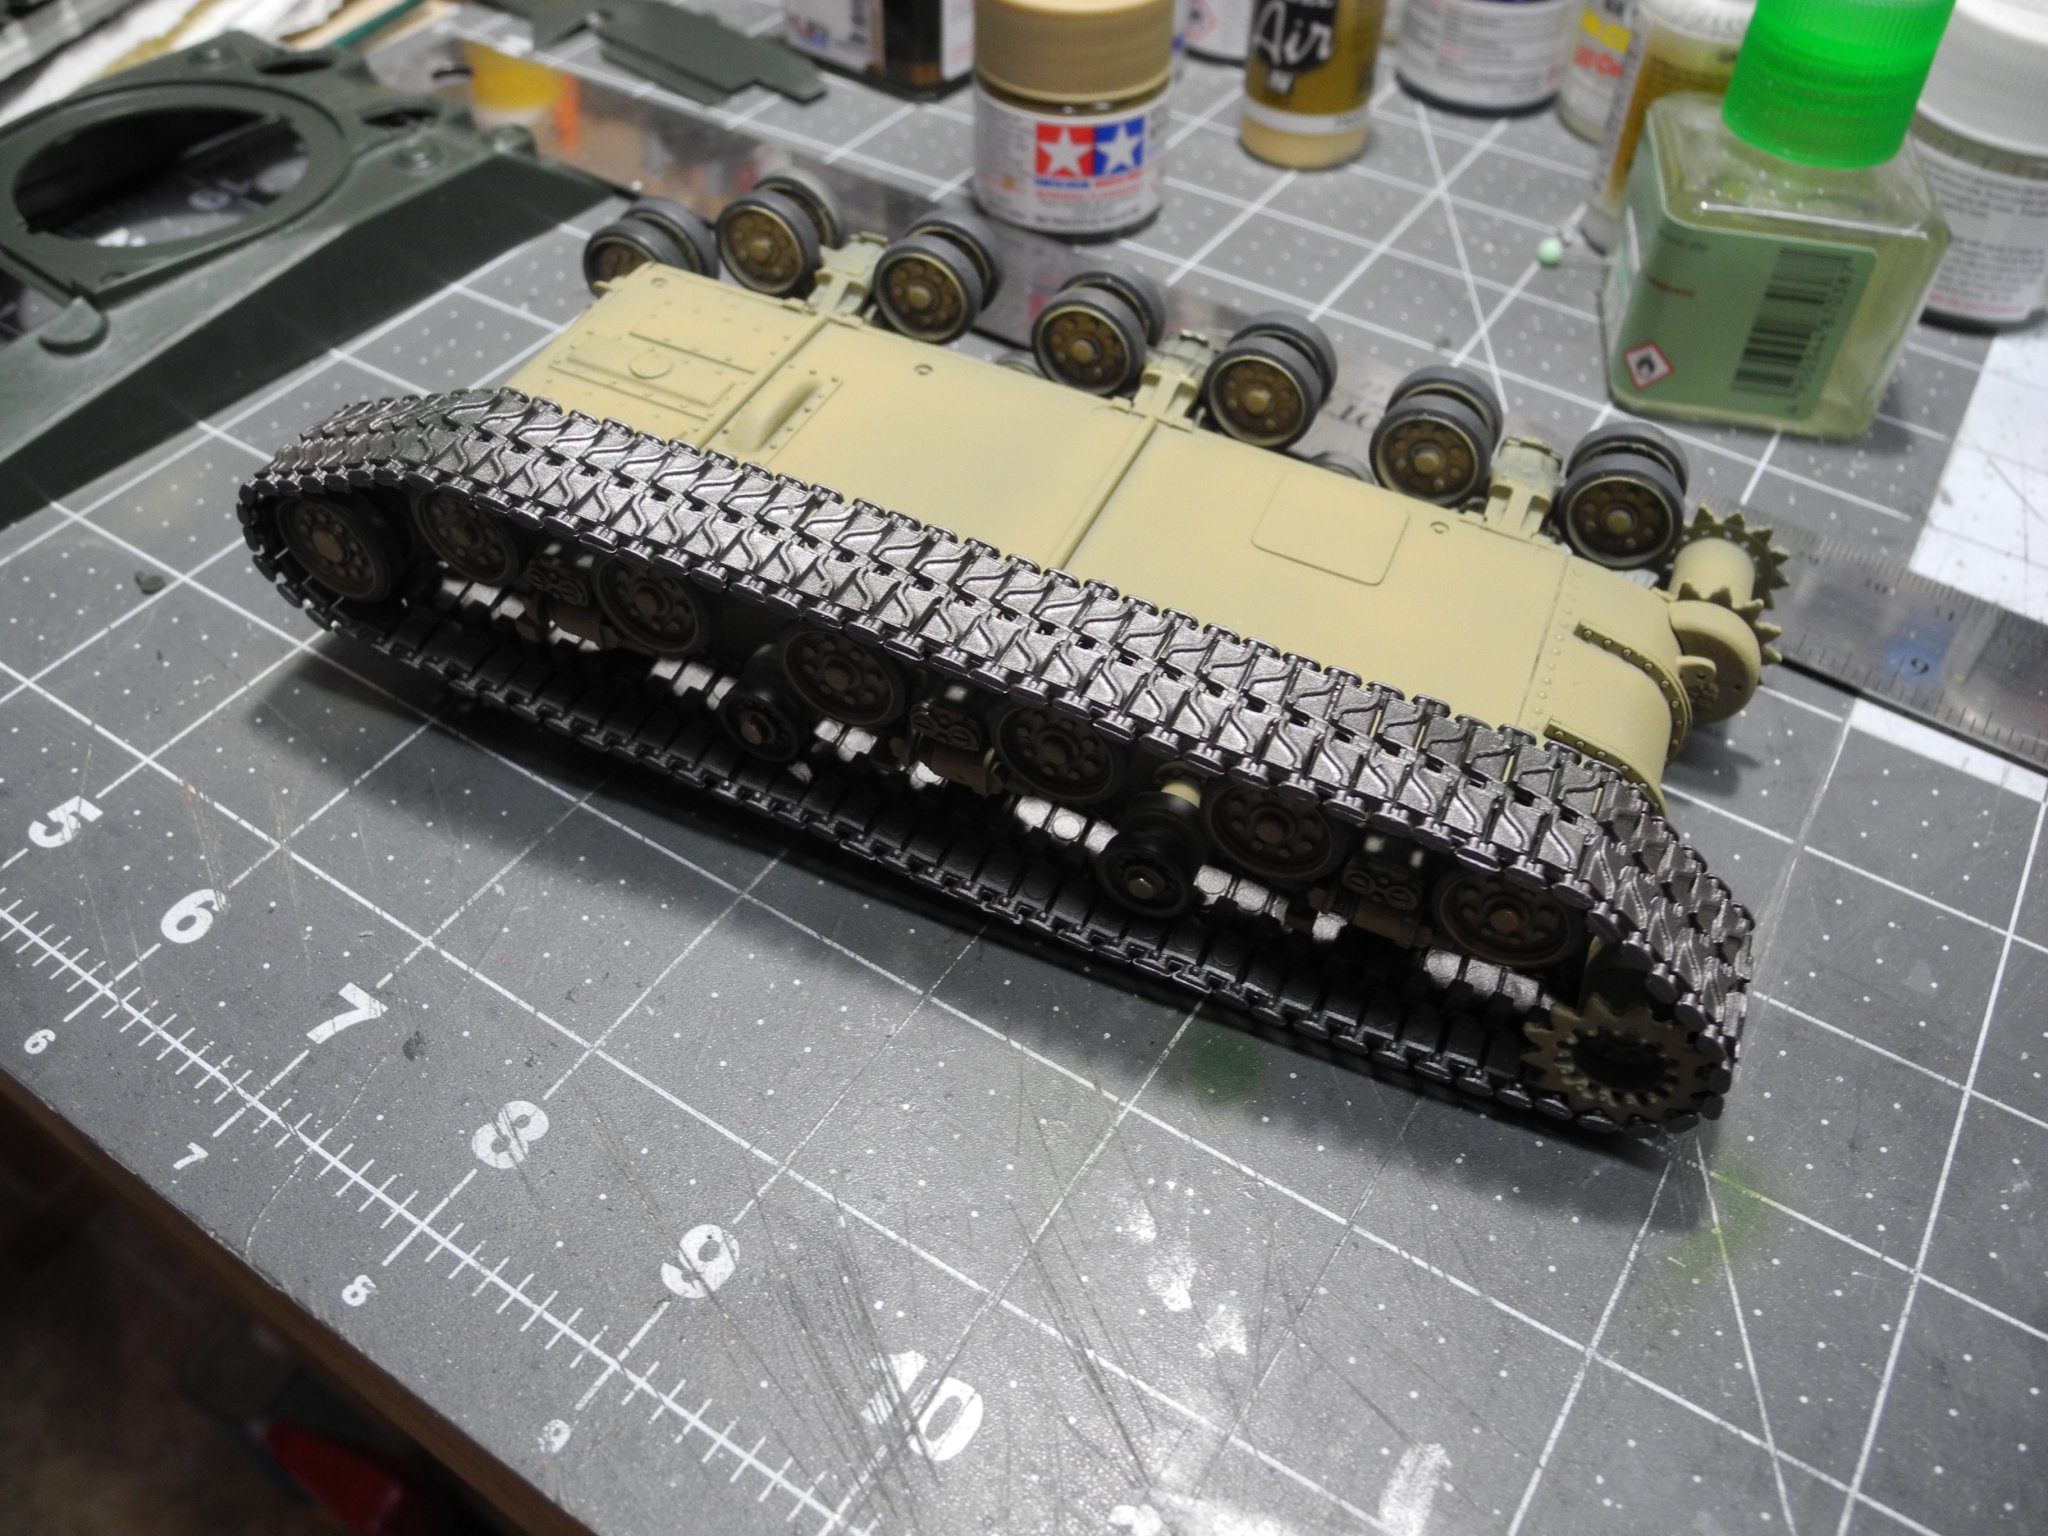
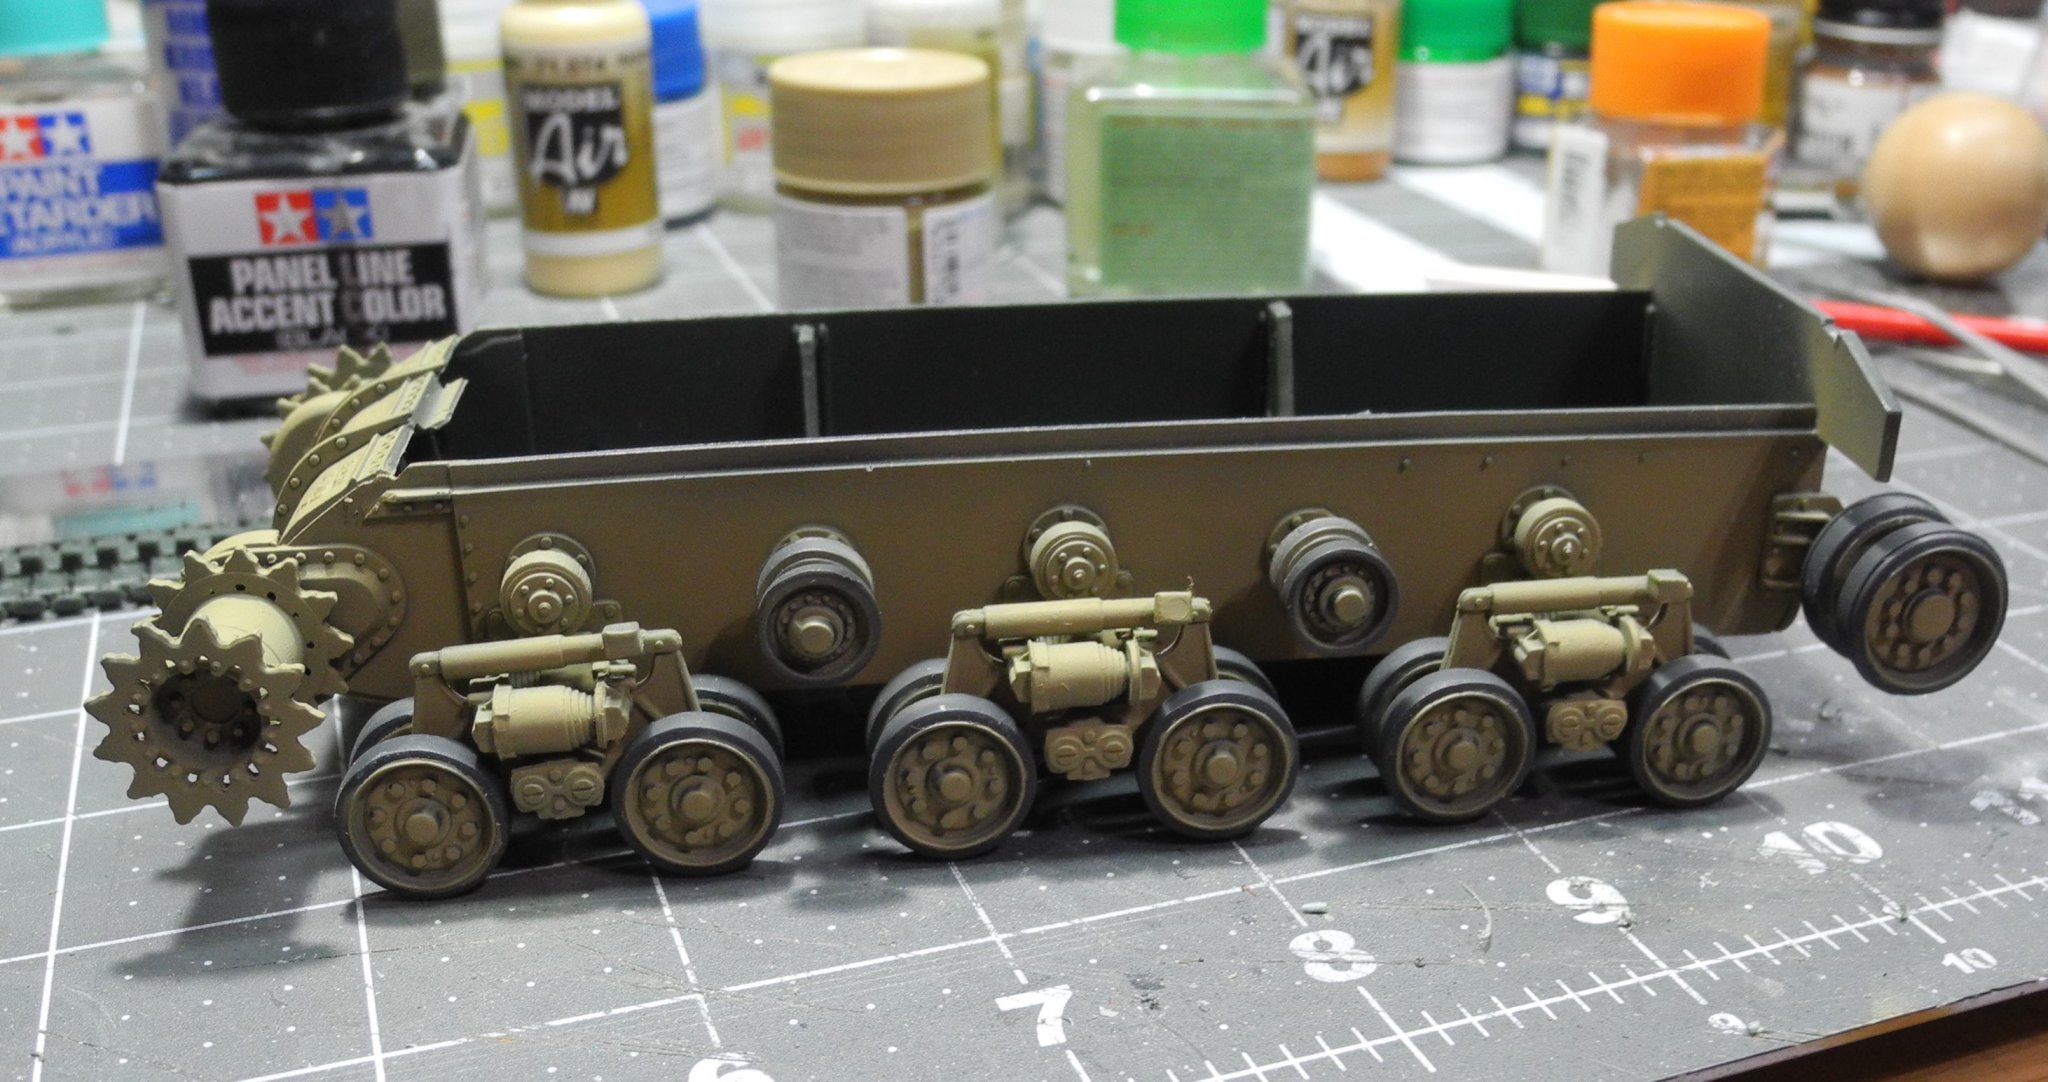
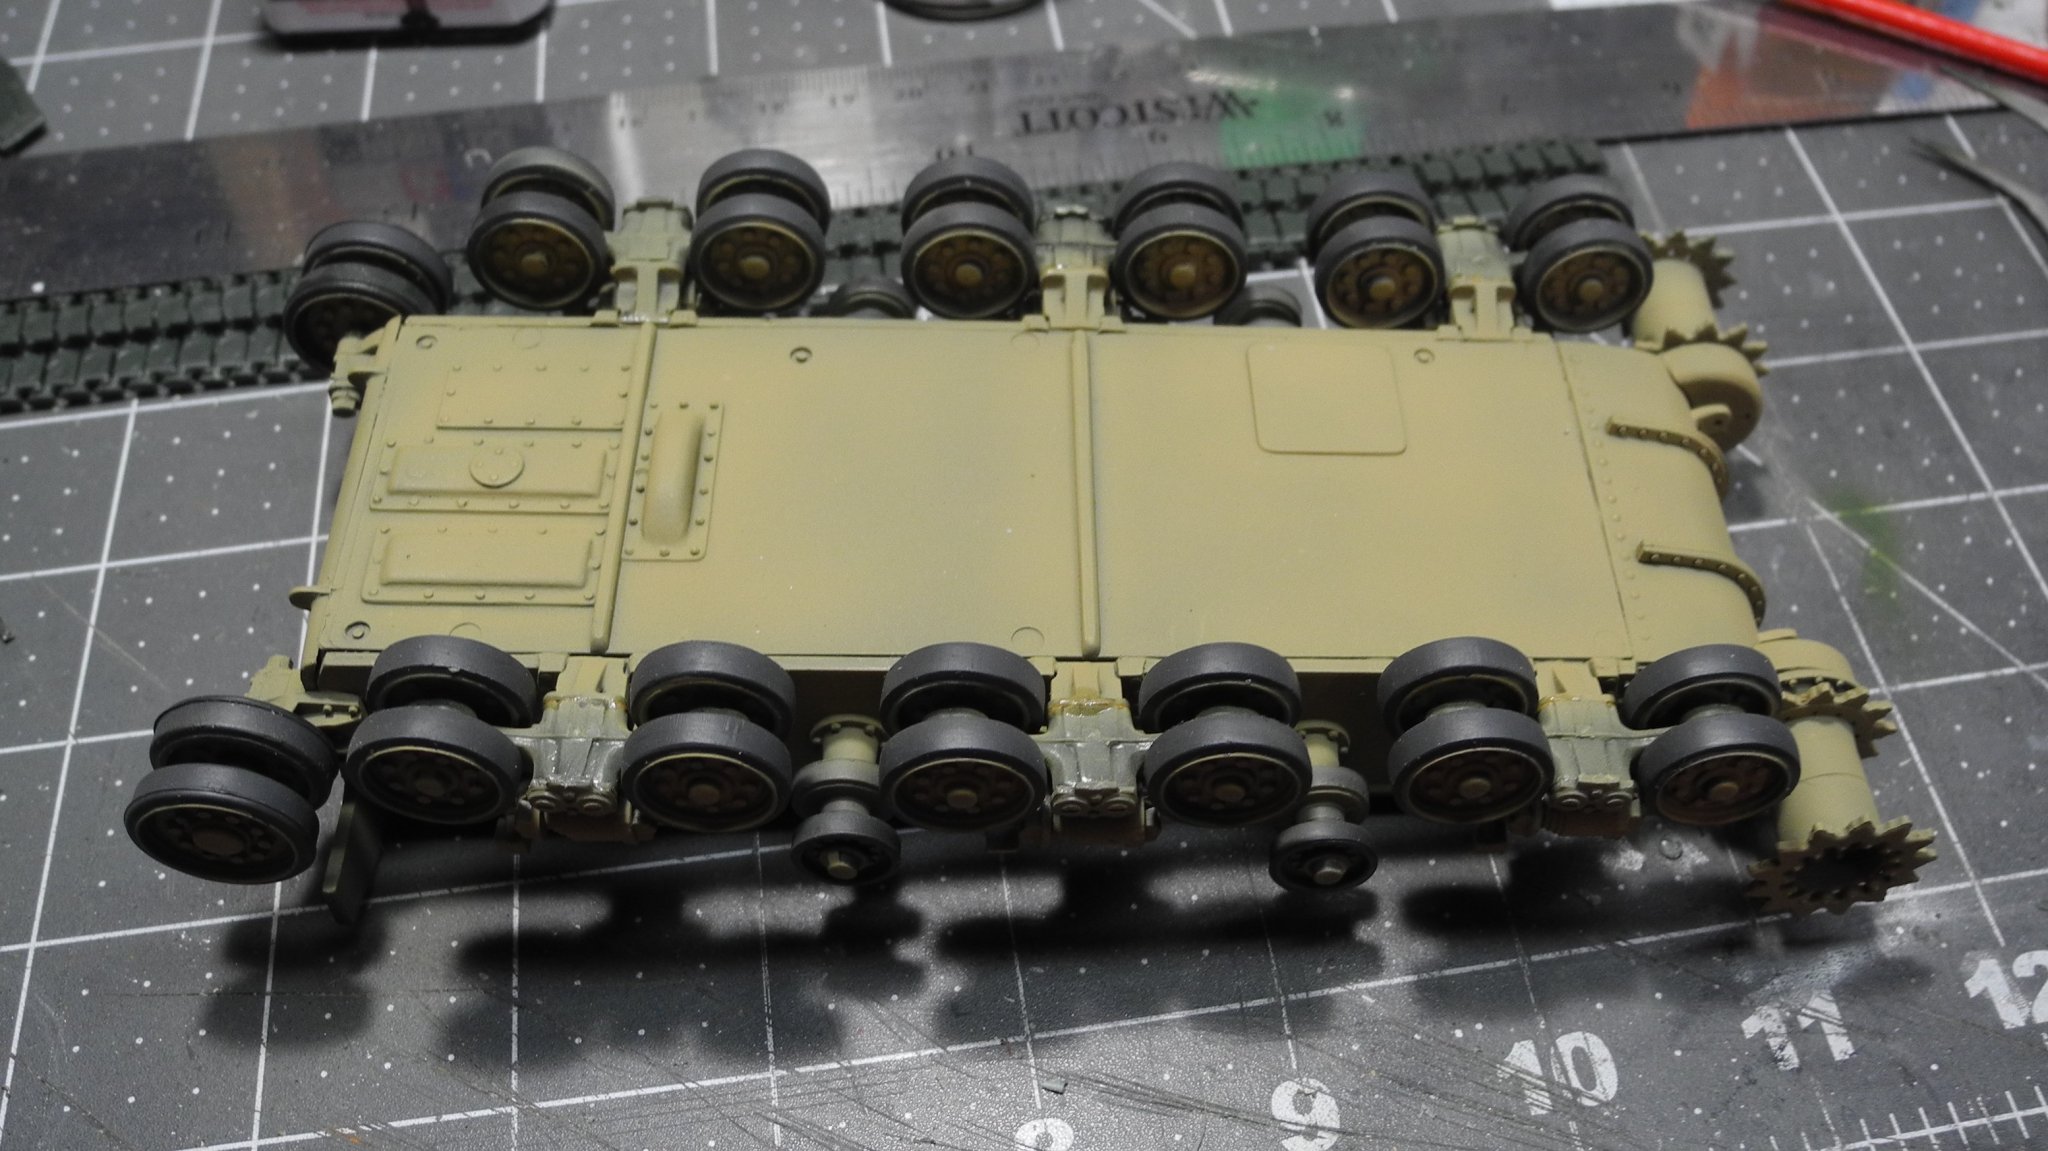
Road wheels all painted and lower hull assembled, it's ready for the tracks at this point. Got to first get the tracks painted.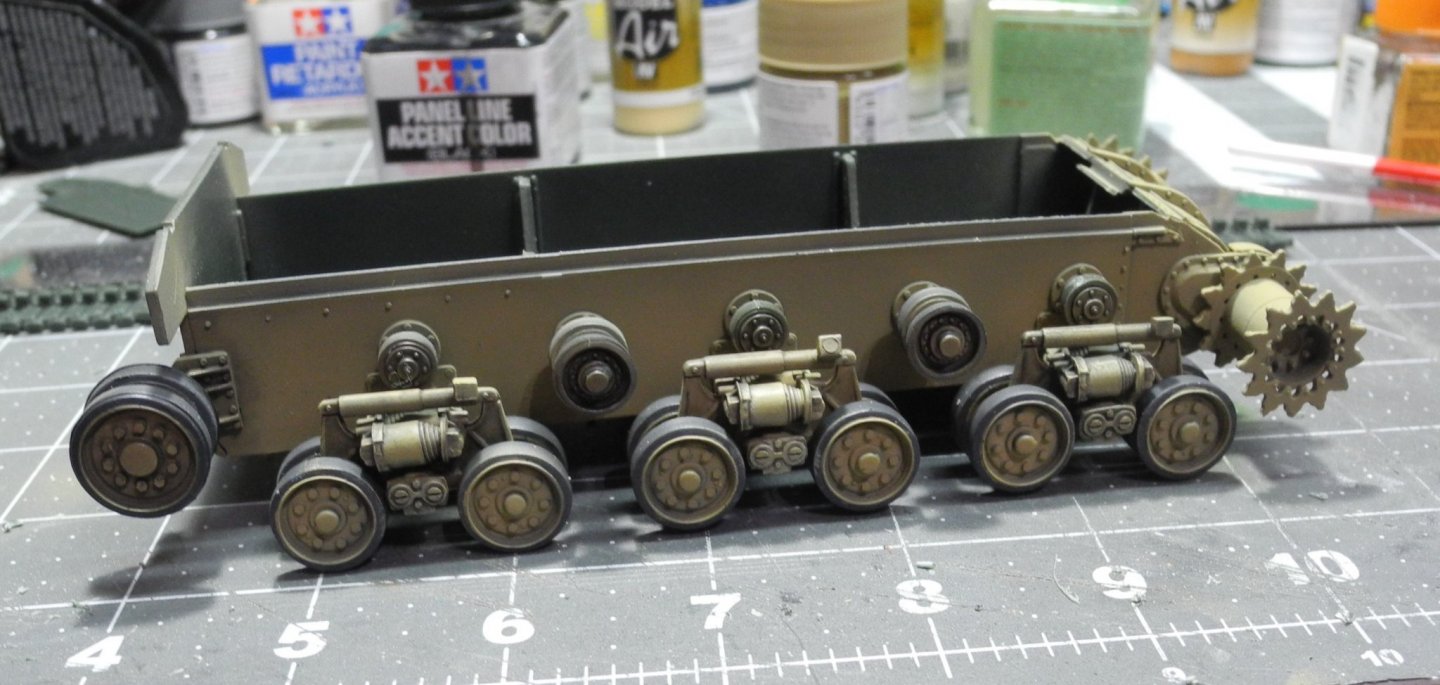


- 107 replies
-
- 11
-
-
M-50 Israeli Sherman - FINISHED - MP Models - 1:35 Scale
CDW replied to CDW's topic in Non-ship/categorised builds
Interesting video about the Sherman tanks, including this model/version and the subsequent purchase of the tanks by Chile. A long, storied service life of the Sherman tank. -
M-50 Israeli Sherman - FINISHED - MP Models - 1:35 Scale
CDW replied to CDW's topic in Non-ship/categorised builds
Never heard of them, but it seems their prices are in Canadian dollars. -
M-50 Israeli Sherman - FINISHED - MP Models - 1:35 Scale
CDW replied to CDW's topic in Non-ship/categorised builds
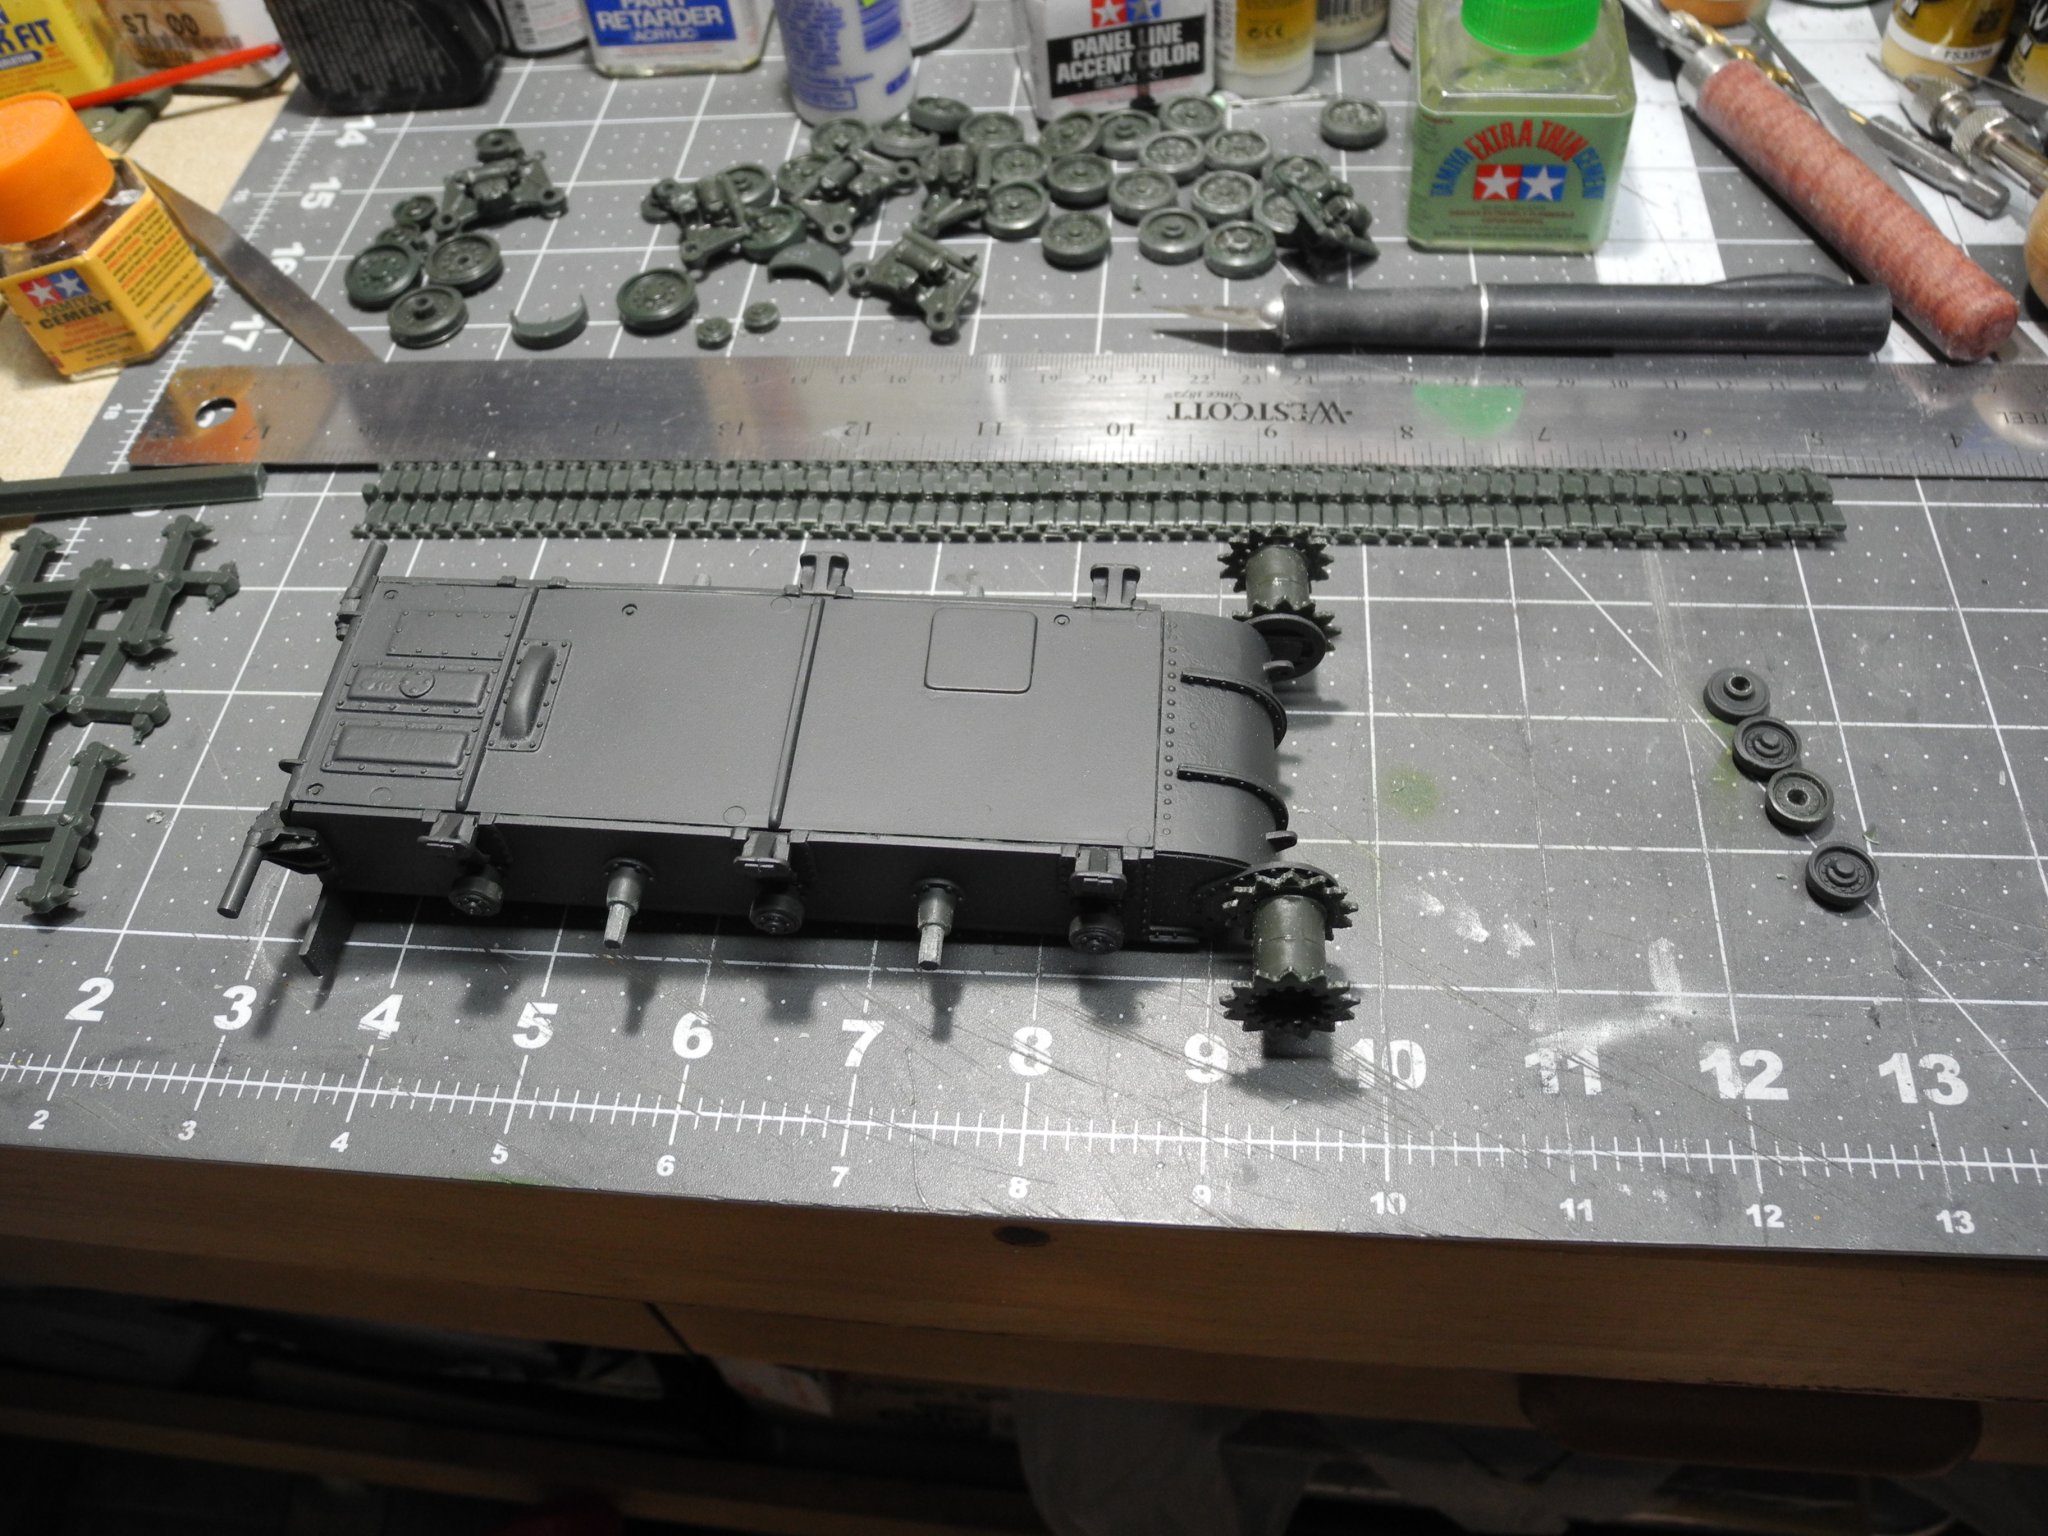
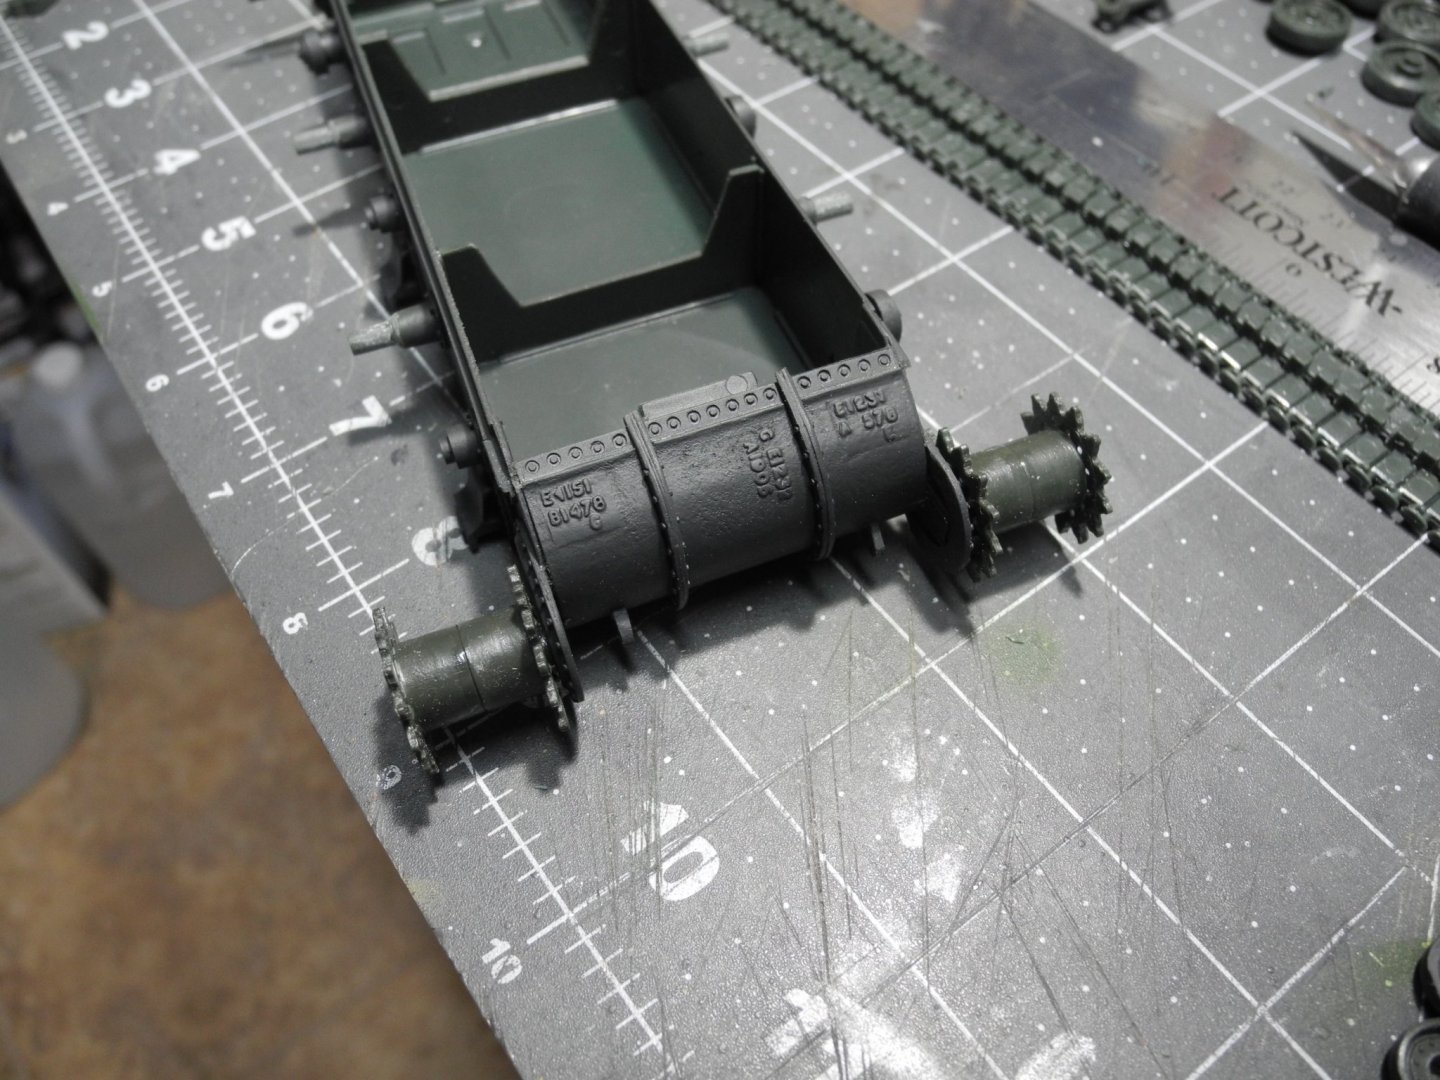
Assembled the lower hull and primed it with Vallejo Panzer Gray Primer. Each link of the tracks are glued together along side of a metal ruler to keep a straight alignment. I like the way they have included the casting numbers in the hull parts. The kit includes the parts to do several iterations of the M-50, but I have chosen to model the 1973 version with this build.
- 107 replies
-
- 11
-
-
I bought the 1:48 Hobby Boss Firebar and it's pretty nice.
-
These Roden kits give a modeler a workout, but you are dealing with it very well Denis. Started work a while back on an Encore SE5A. The plastic parts are Roden, the fuselage was warped like a banana. I tried working with it and ended up putting it all back inside the box. Later, I acquired a straight Roden kit of the same model and the fuselage is fine on that one. Sometimes, it's just the luck of the draw as to whether you get a straight copy of the Roden kits or a warped one. They are not all the same or consistent quality.
-
Tom We visited our daughter and son in law in New Hampshire and loved it up there. Such a beautiful state, very nice people. Love the way your model is turning out. She's a beauty.
-
Aston Martin DB5 by Fnick - FINISHED - Revell - 1:32
CDW replied to fnick's topic in Non-ship/categorised builds
I think she looks great. Love the Aston Martins. In the stash, have an old old Aurora 1:25 Aston Martin DB5. It's the one that came with opening doors, hood, and trunk. -
Lol, yes, I can't be still. It's (modeling) a nice break away from the yard work and other chores done in the heat. Spring has sprung here in Florida, and it's hot as heck already. Weird thing is, my pool is still a little too chilly but I get in it every day anyway. It's another nice break from the heat.
-
M-50 Israeli Sherman - FINISHED - MP Models - 1:35 Scale
CDW replied to CDW's topic in Non-ship/categorised builds
I enjoyed that game a lot. -
On the truck bed, I used Tamiya olive drab and added 25% flat white. For the truck cab, I used Tamiya olive drab but added 33% flat white. For the darker green camo color, I used Tamiya field green. All the color paint is mixed 40% paint, 60% reducer. The chassis and radiator shroud is painted Tamiya olive drab. Over top all the paint is Mr. Color semi gloss clear, mixed at 30% clear to 70% reducer. So any observed difference in sheen is the actual paint pigment underneath the semi gloss clear coat. For some reason, I have found that clear coat takes more reducer to have it lay down smoothly. Without that extra reducer, it comes out pebbly and orange peel. That's because the paint is drying before it hits the model. With the extra reducer, it dries on the model. Oh and by the way, the reducer is Mr Hobby 400 Leveling Thinner. It has a retarder that allows extra time for the paint to dry and level itself out.
-
M-50 Israeli Sherman - FINISHED - MP Models - 1:35 Scale
CDW replied to CDW's topic in Non-ship/categorised builds
Have you played World of Warships, Lou? I've played a few games. -
M-50 Israeli Sherman - FINISHED - MP Models - 1:35 Scale
CDW replied to CDW's topic in Non-ship/categorised builds
My maternal 2nd great grandfather was a Florida pioneer. He bought his homestead in 1843, being one of the first to settle in what is now Sumter County. Back in those days, he was living in the middle of nowhere, but a Confederate Marshall found him and conscripted him into the Confederate military where he served in the 2nd Florida Cavalry, H Company, under JJ Dickinson. The same was true for my other maternal 2nd great grandfather, only he lived in Alachua County and served with the Florida 9th Regiment after he was conscripted. In those days, you either served or could be shot for refusing to serve. -
M-50 Israeli Sherman - FINISHED - MP Models - 1:35 Scale
CDW replied to CDW's topic in Non-ship/categorised builds
Indeed, I would love to do that.