CDW
-
Posts
7,760 -
Joined
-
Last visited
Content Type
Profiles
Forums
Gallery
Events
Everything posted by CDW
-

Military Wrecker - Revell - 1:32 Scale - PLASTIC
CDW replied to CDW's topic in Non-ship/categorised builds
-
Military Wrecker - Revell - 1:32 Scale - PLASTIC
CDW replied to CDW's topic in Non-ship/categorised builds
We have two sons as well, but they were not in this photo. -
Military Wrecker - Revell - 1:32 Scale - PLASTIC
CDW replied to CDW's topic in Non-ship/categorised builds
Thanks Denis. That's my grand daughter by the way. Here is my wife and our 4 daughters. Wife is on the far left, standing next to her is the mother of the grand daughter. I took this photo right after our youngest daughter was baptized.
- 76 replies
-
- 10
-

-
Military Wrecker - Revell - 1:32 Scale - PLASTIC
CDW replied to CDW's topic in Non-ship/categorised builds
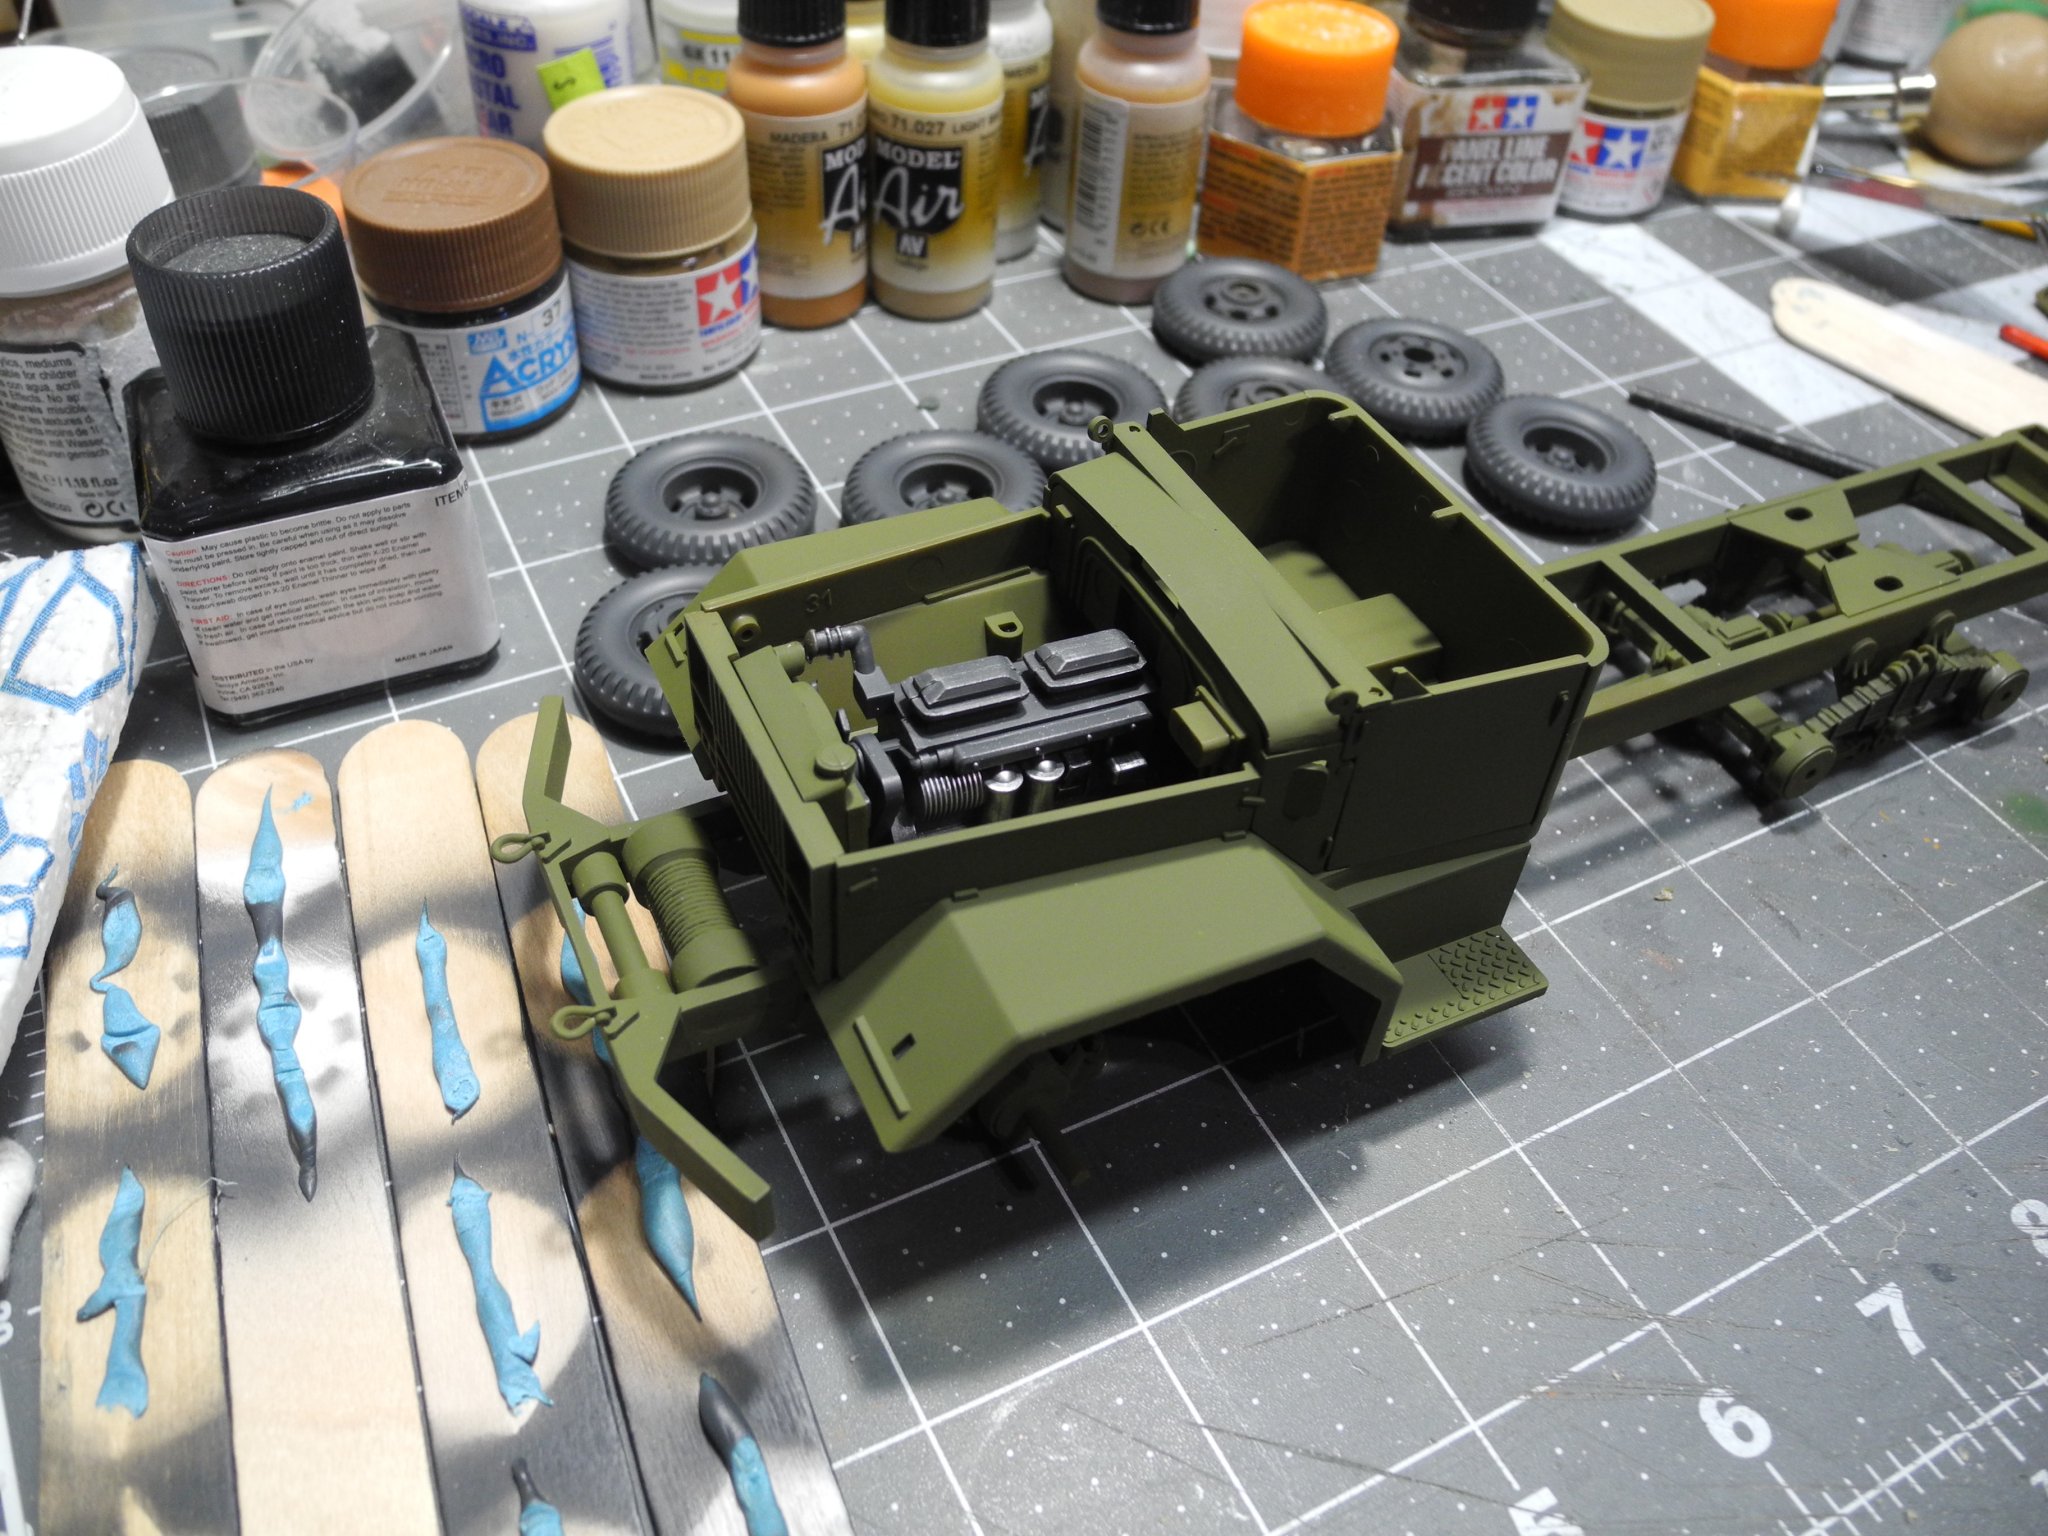
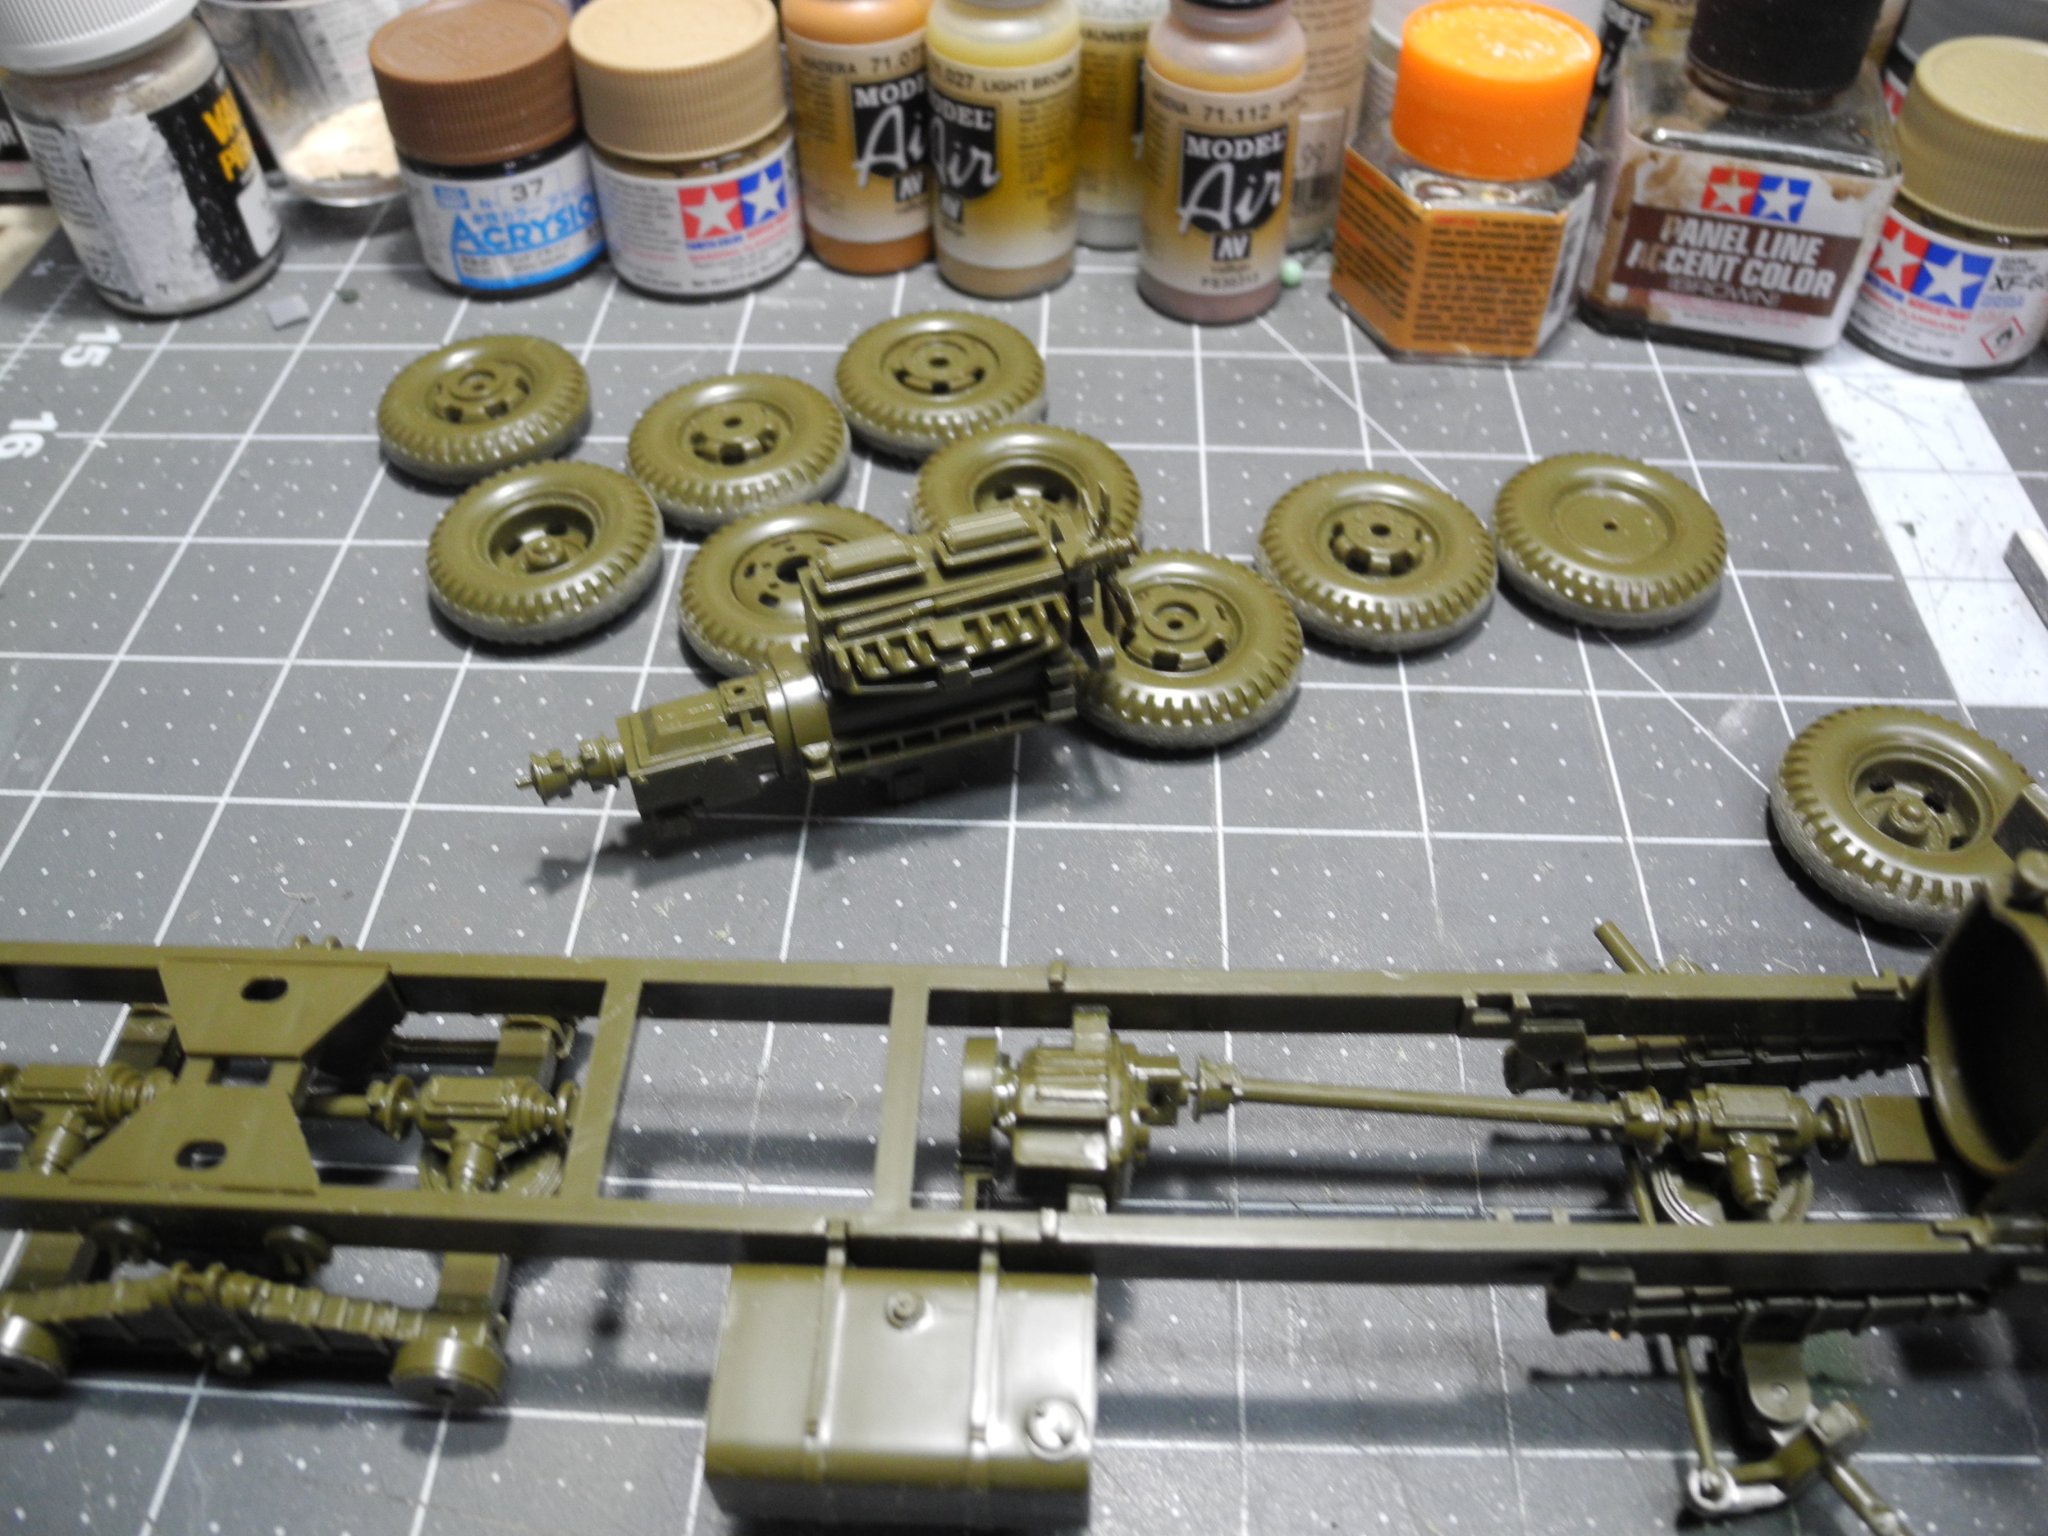
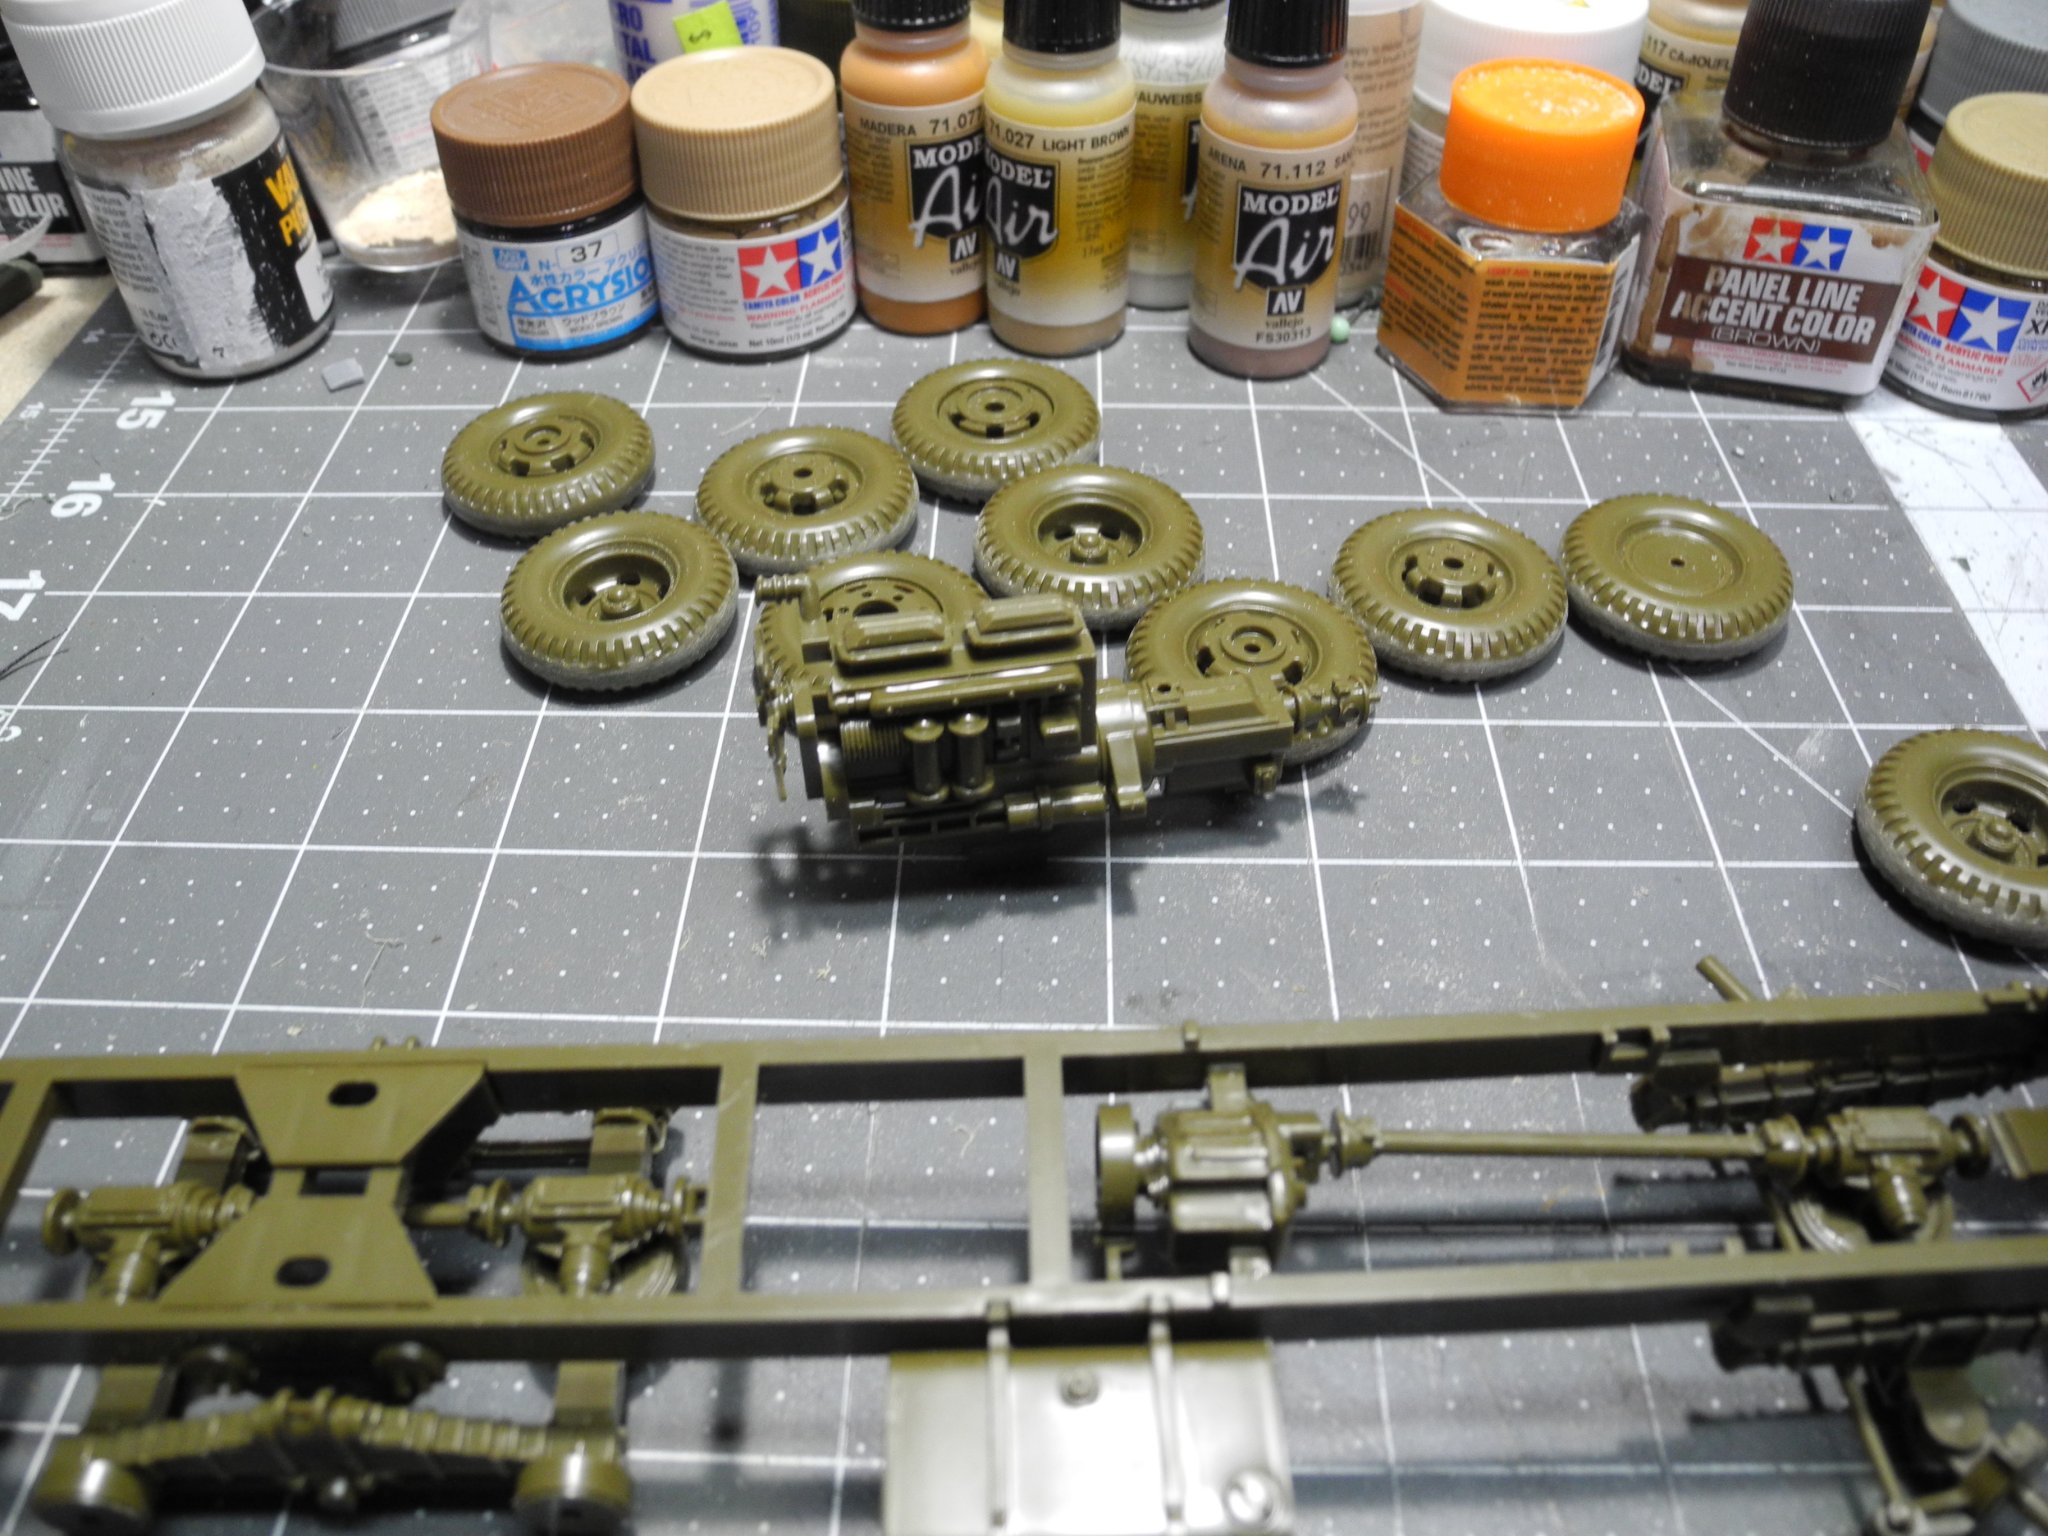
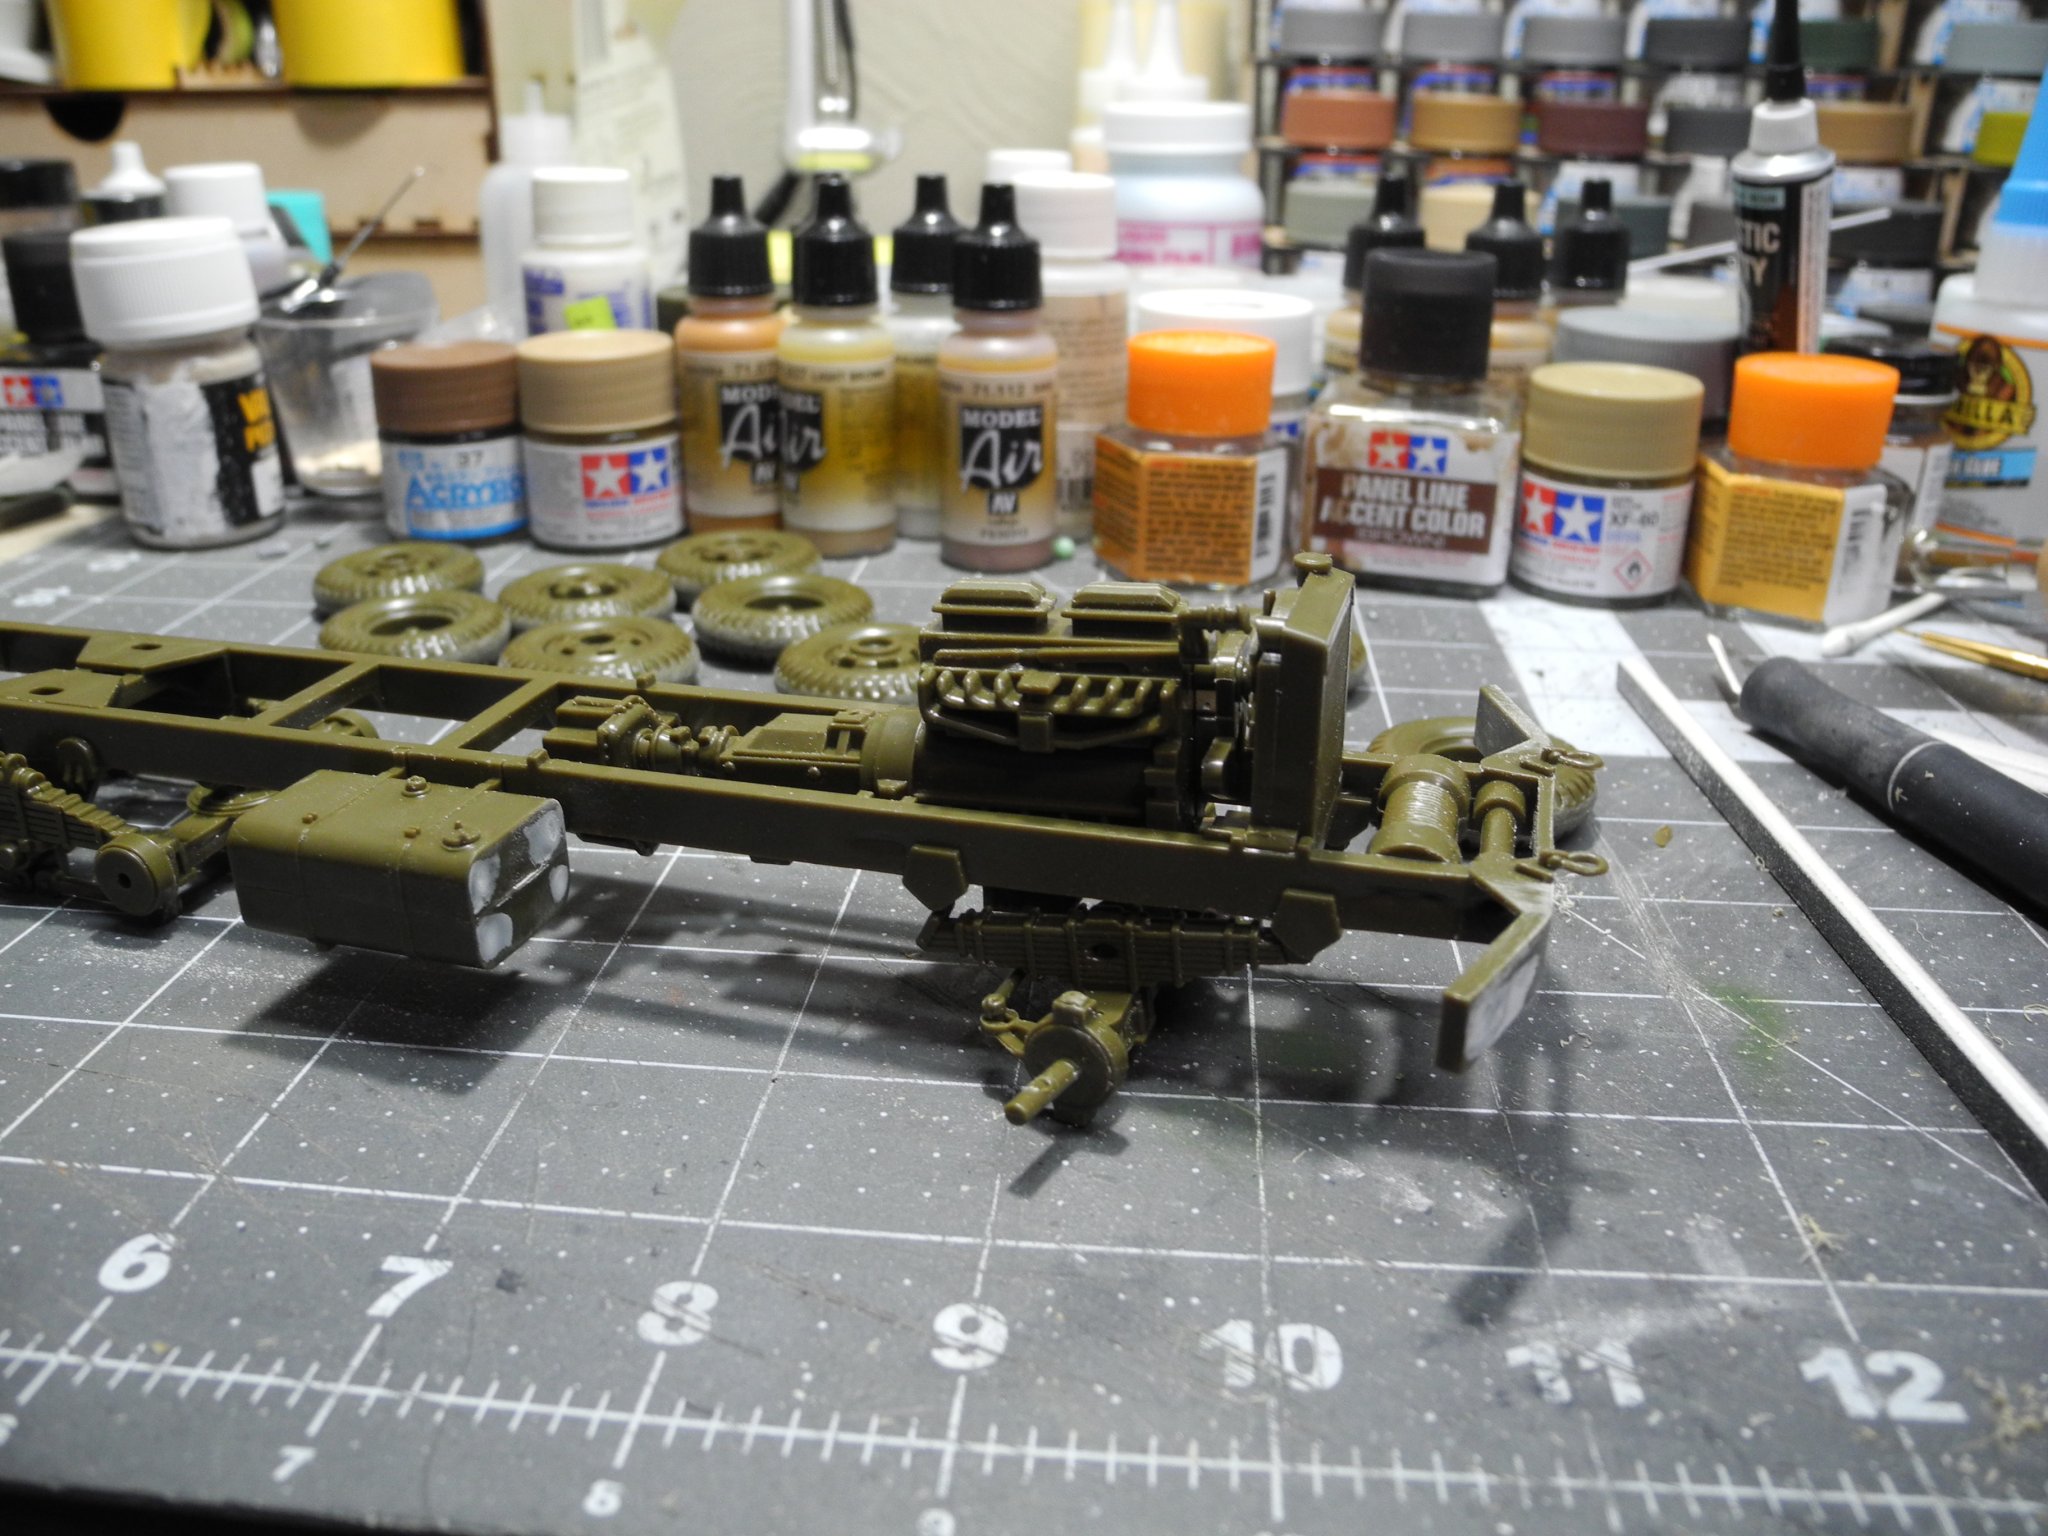
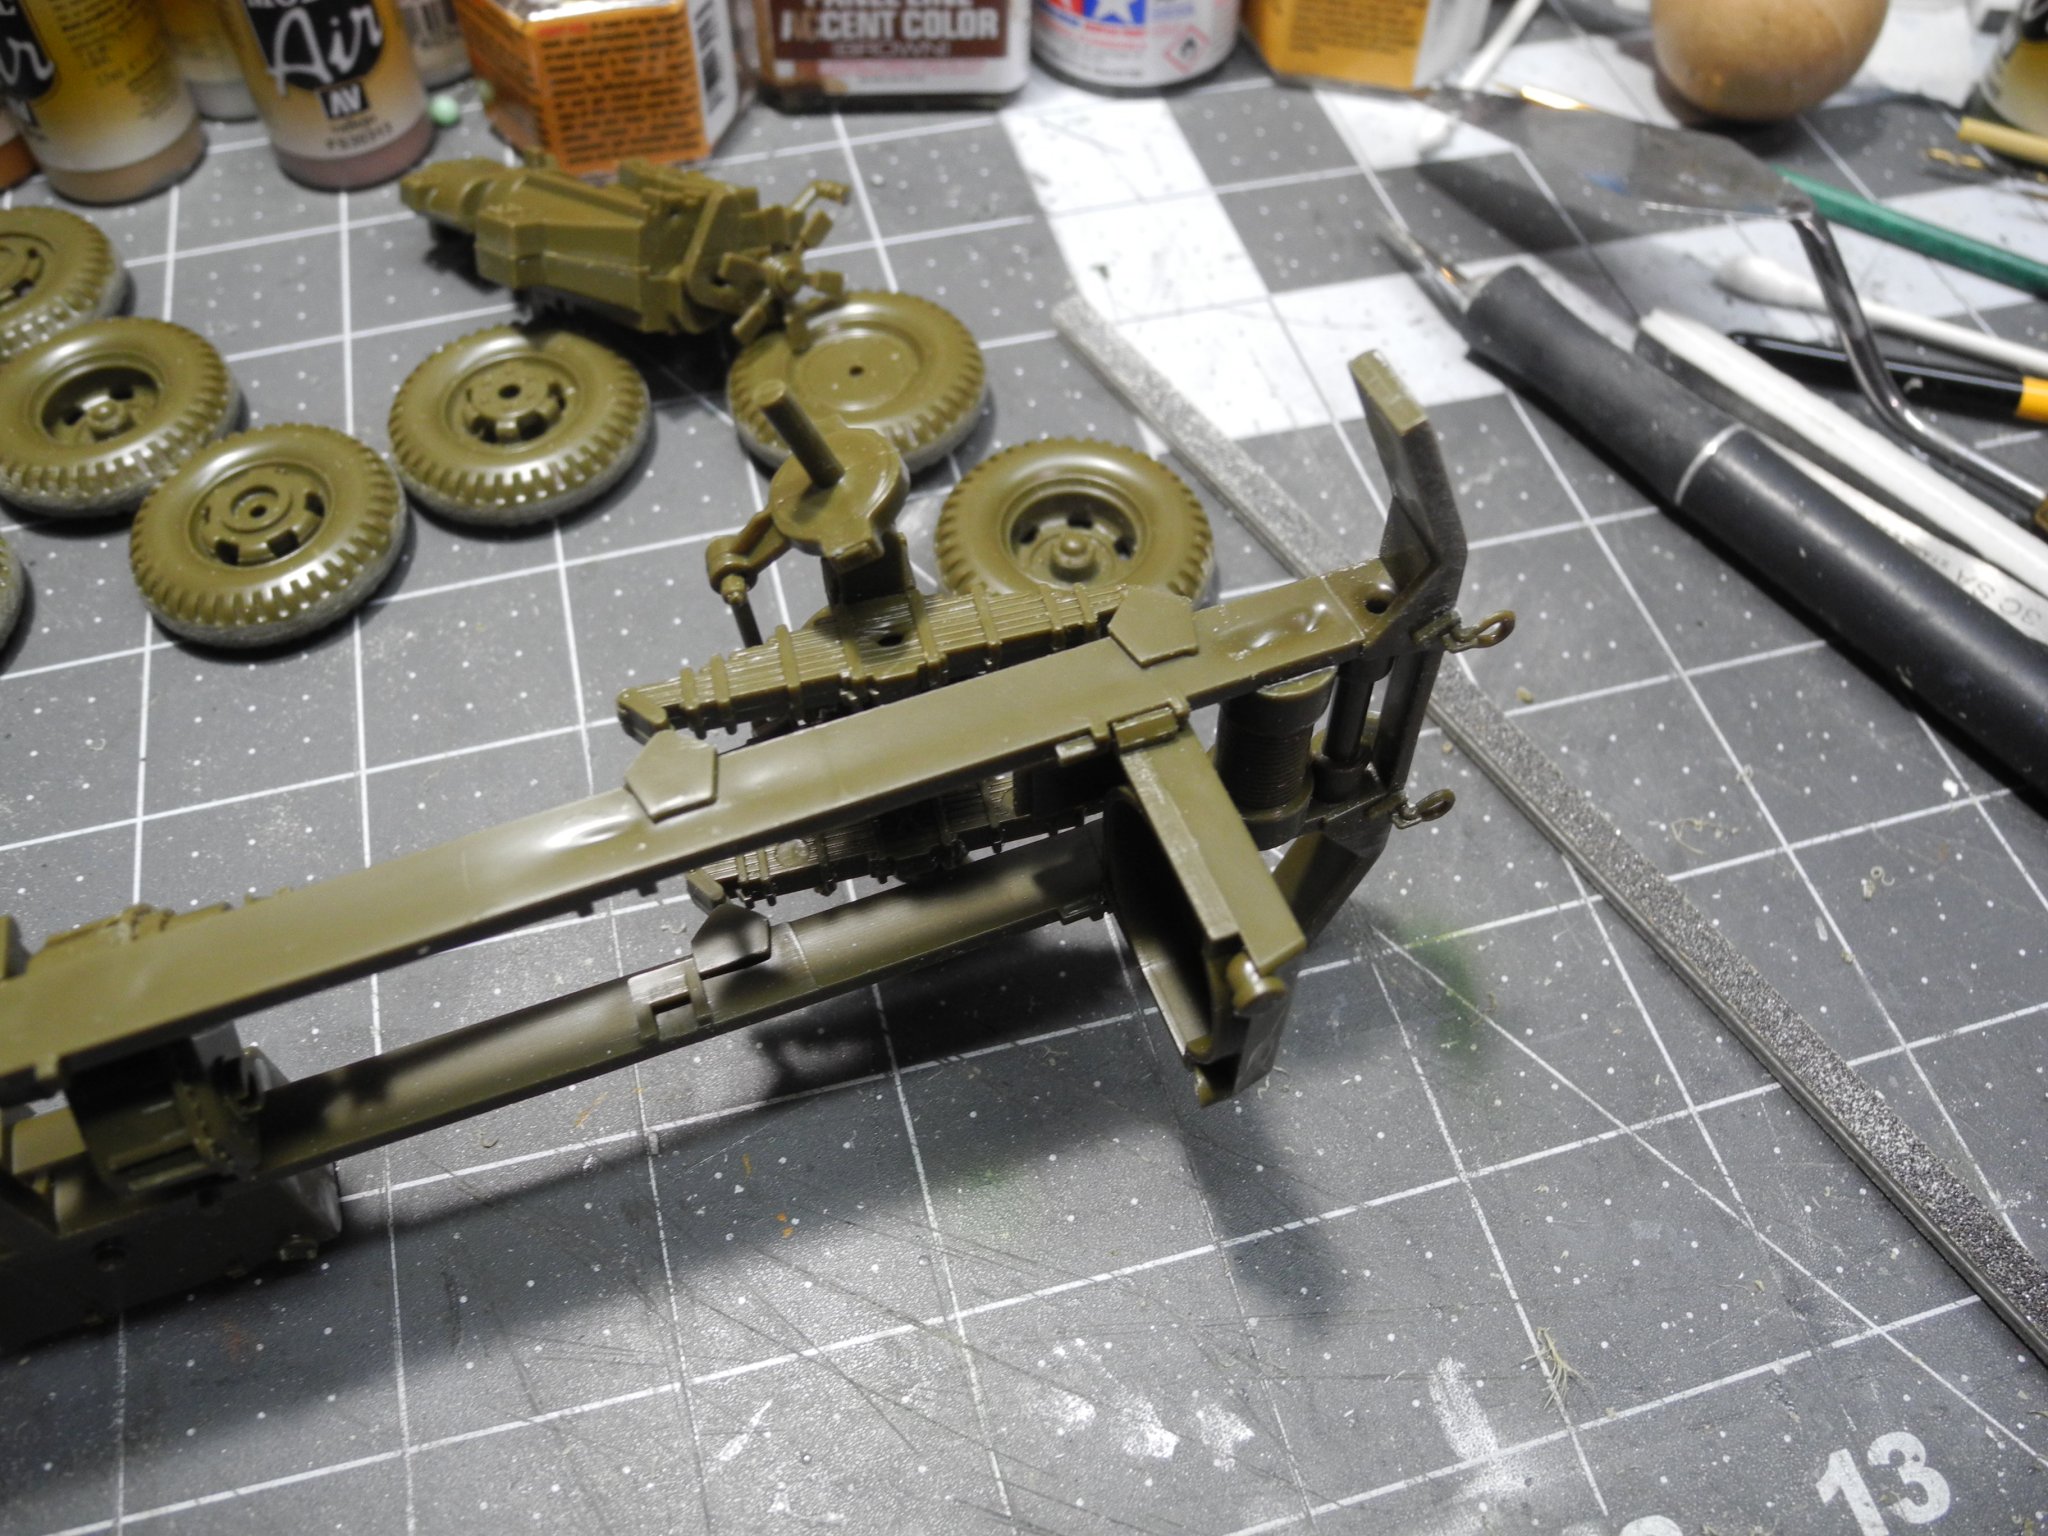
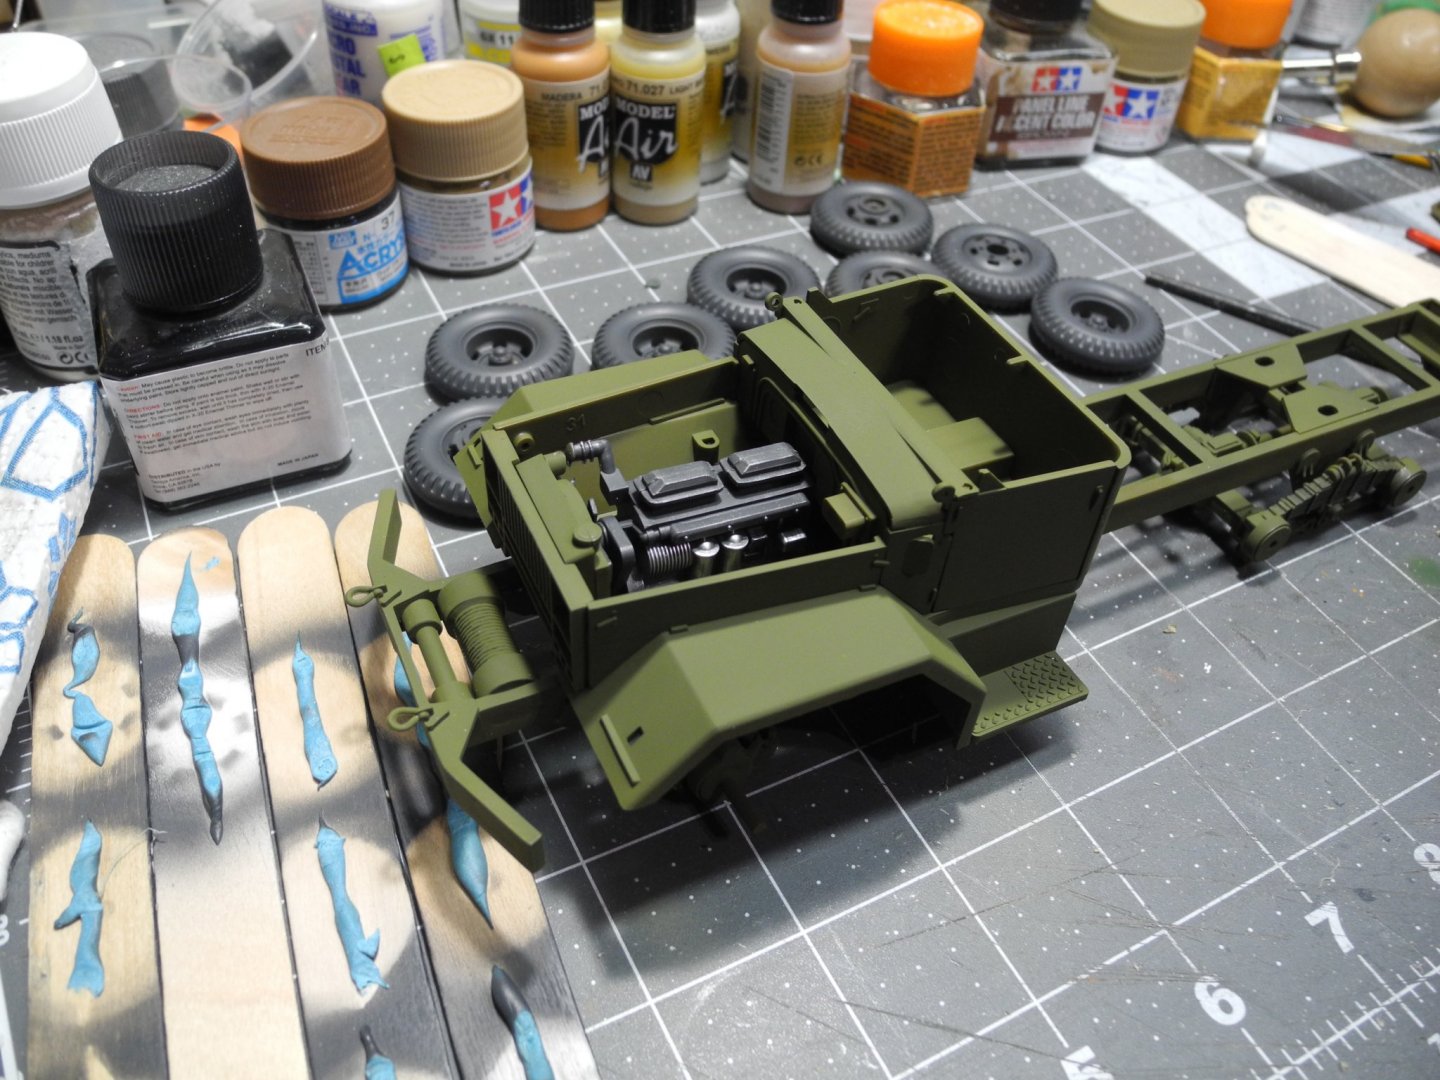
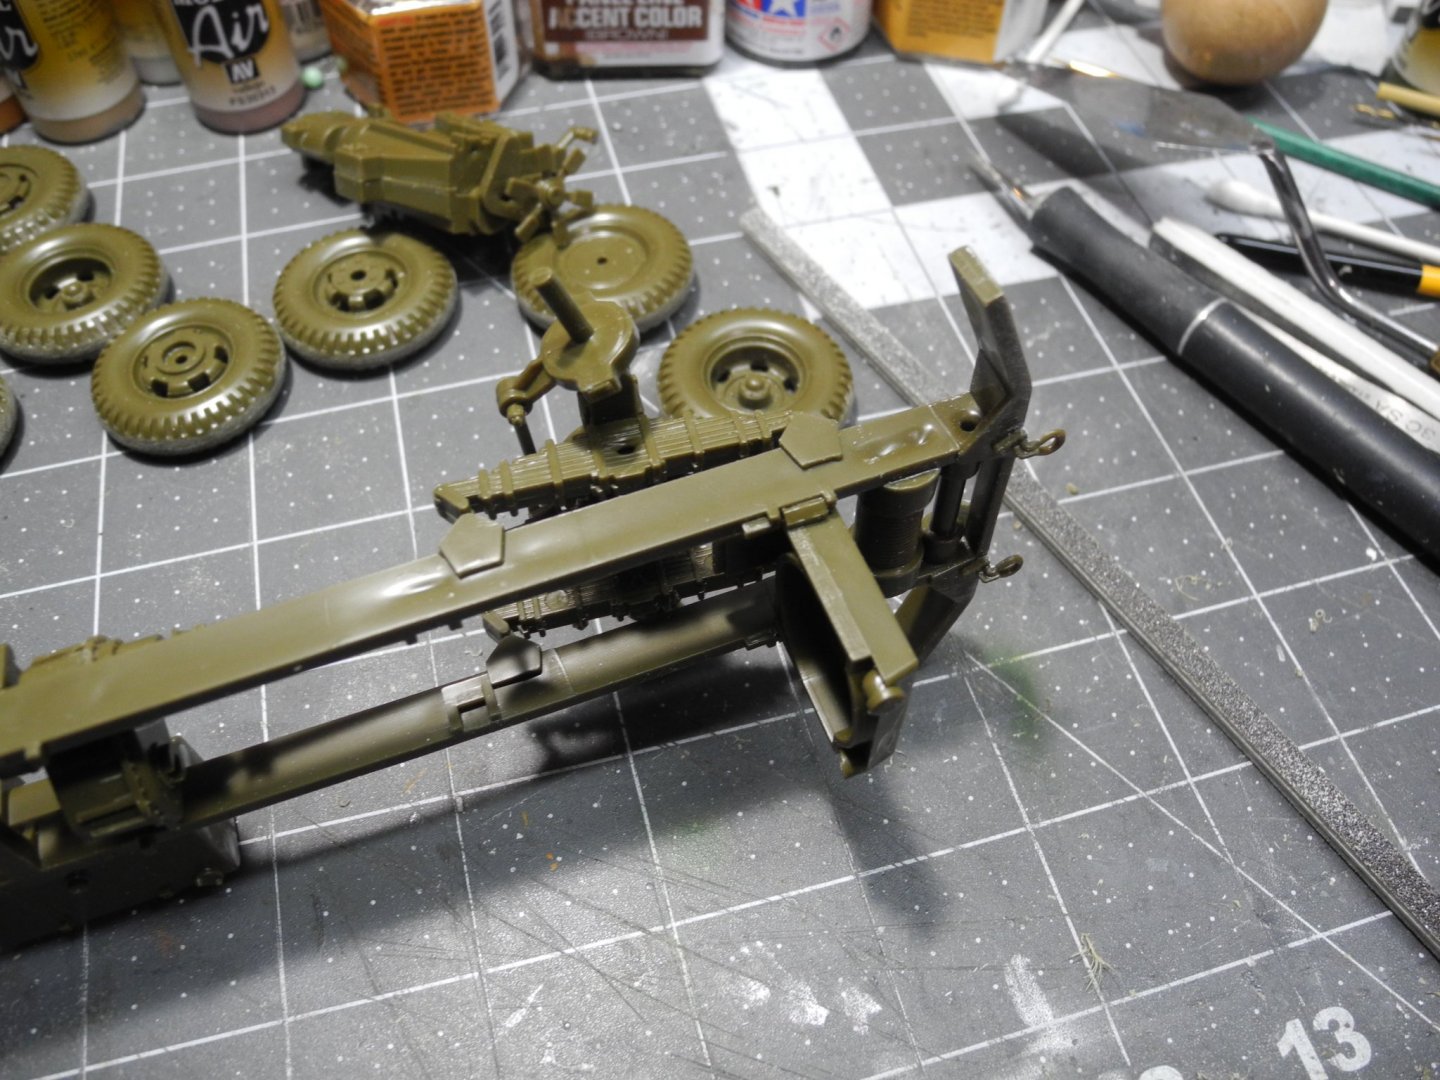
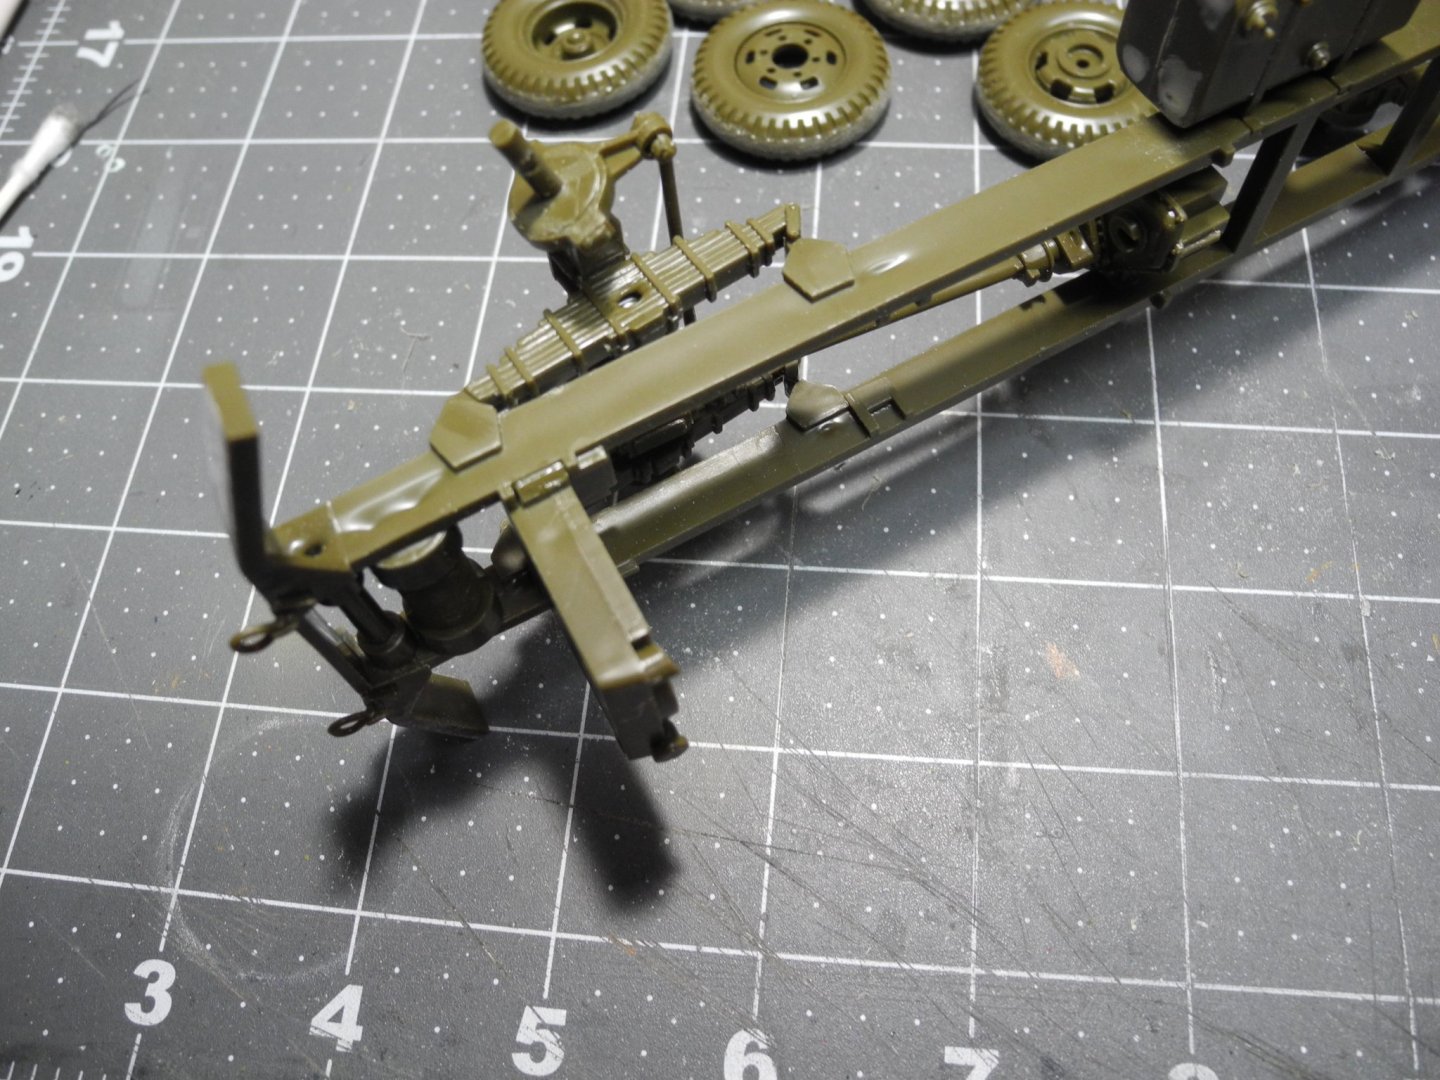
Tamiya Olive Drab is WAY too dark for what I'm trying to do right here. I'll do a little damage, wear, here and there. -
Military Wrecker - Revell - 1:32 Scale - PLASTIC
CDW replied to CDW's topic in Non-ship/categorised builds
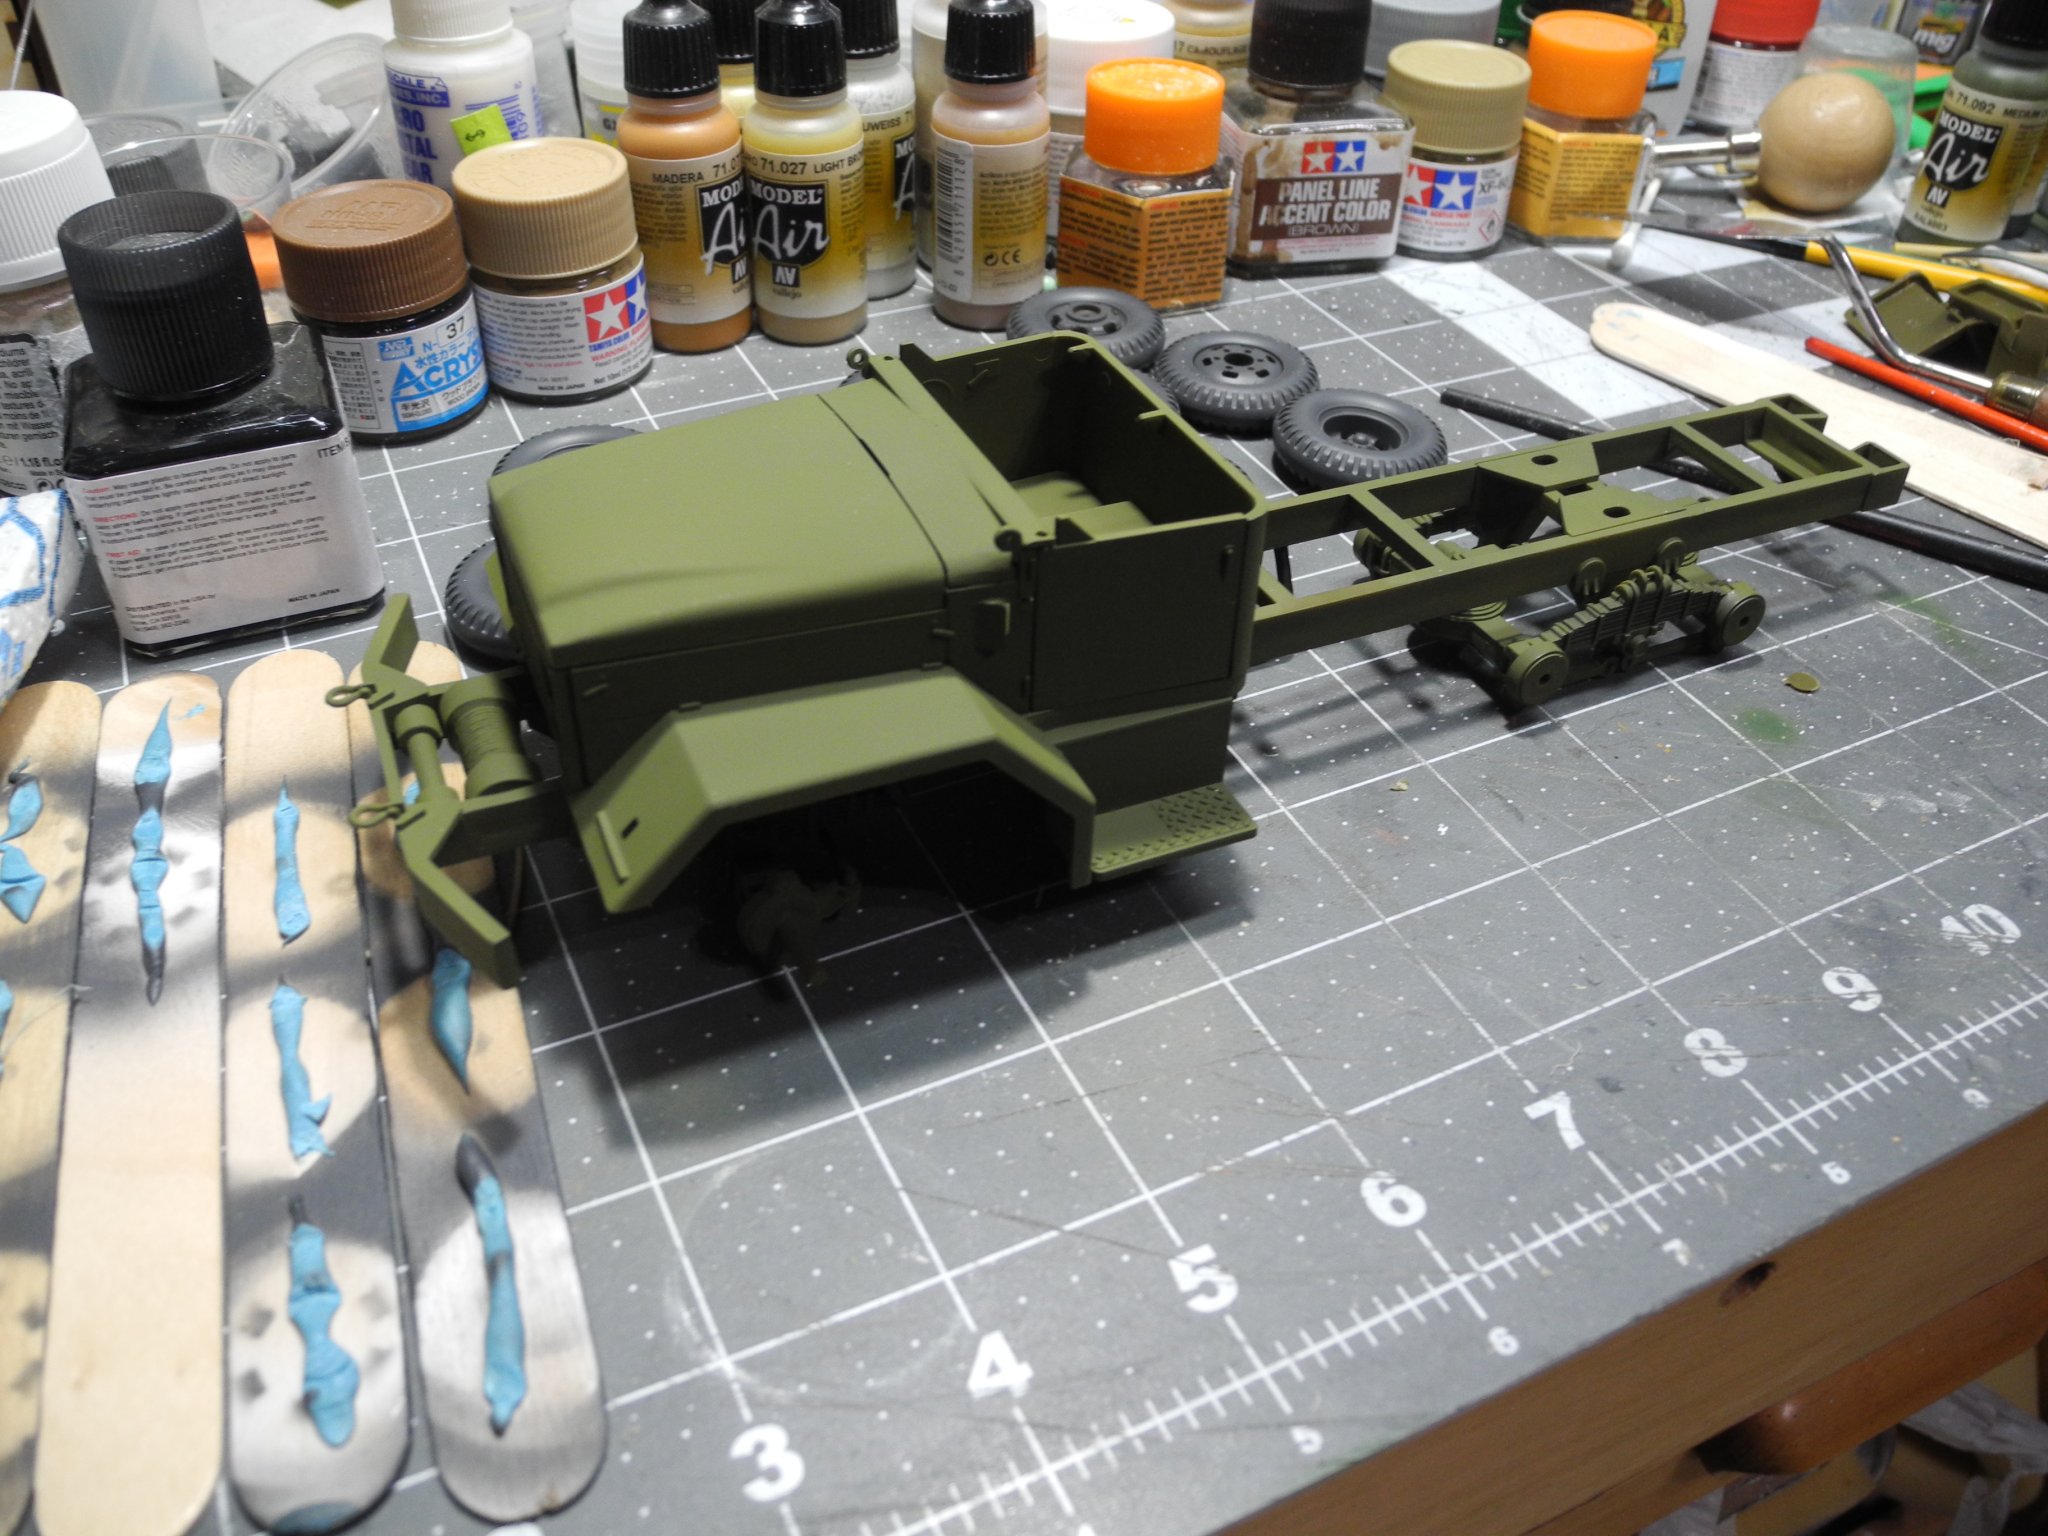
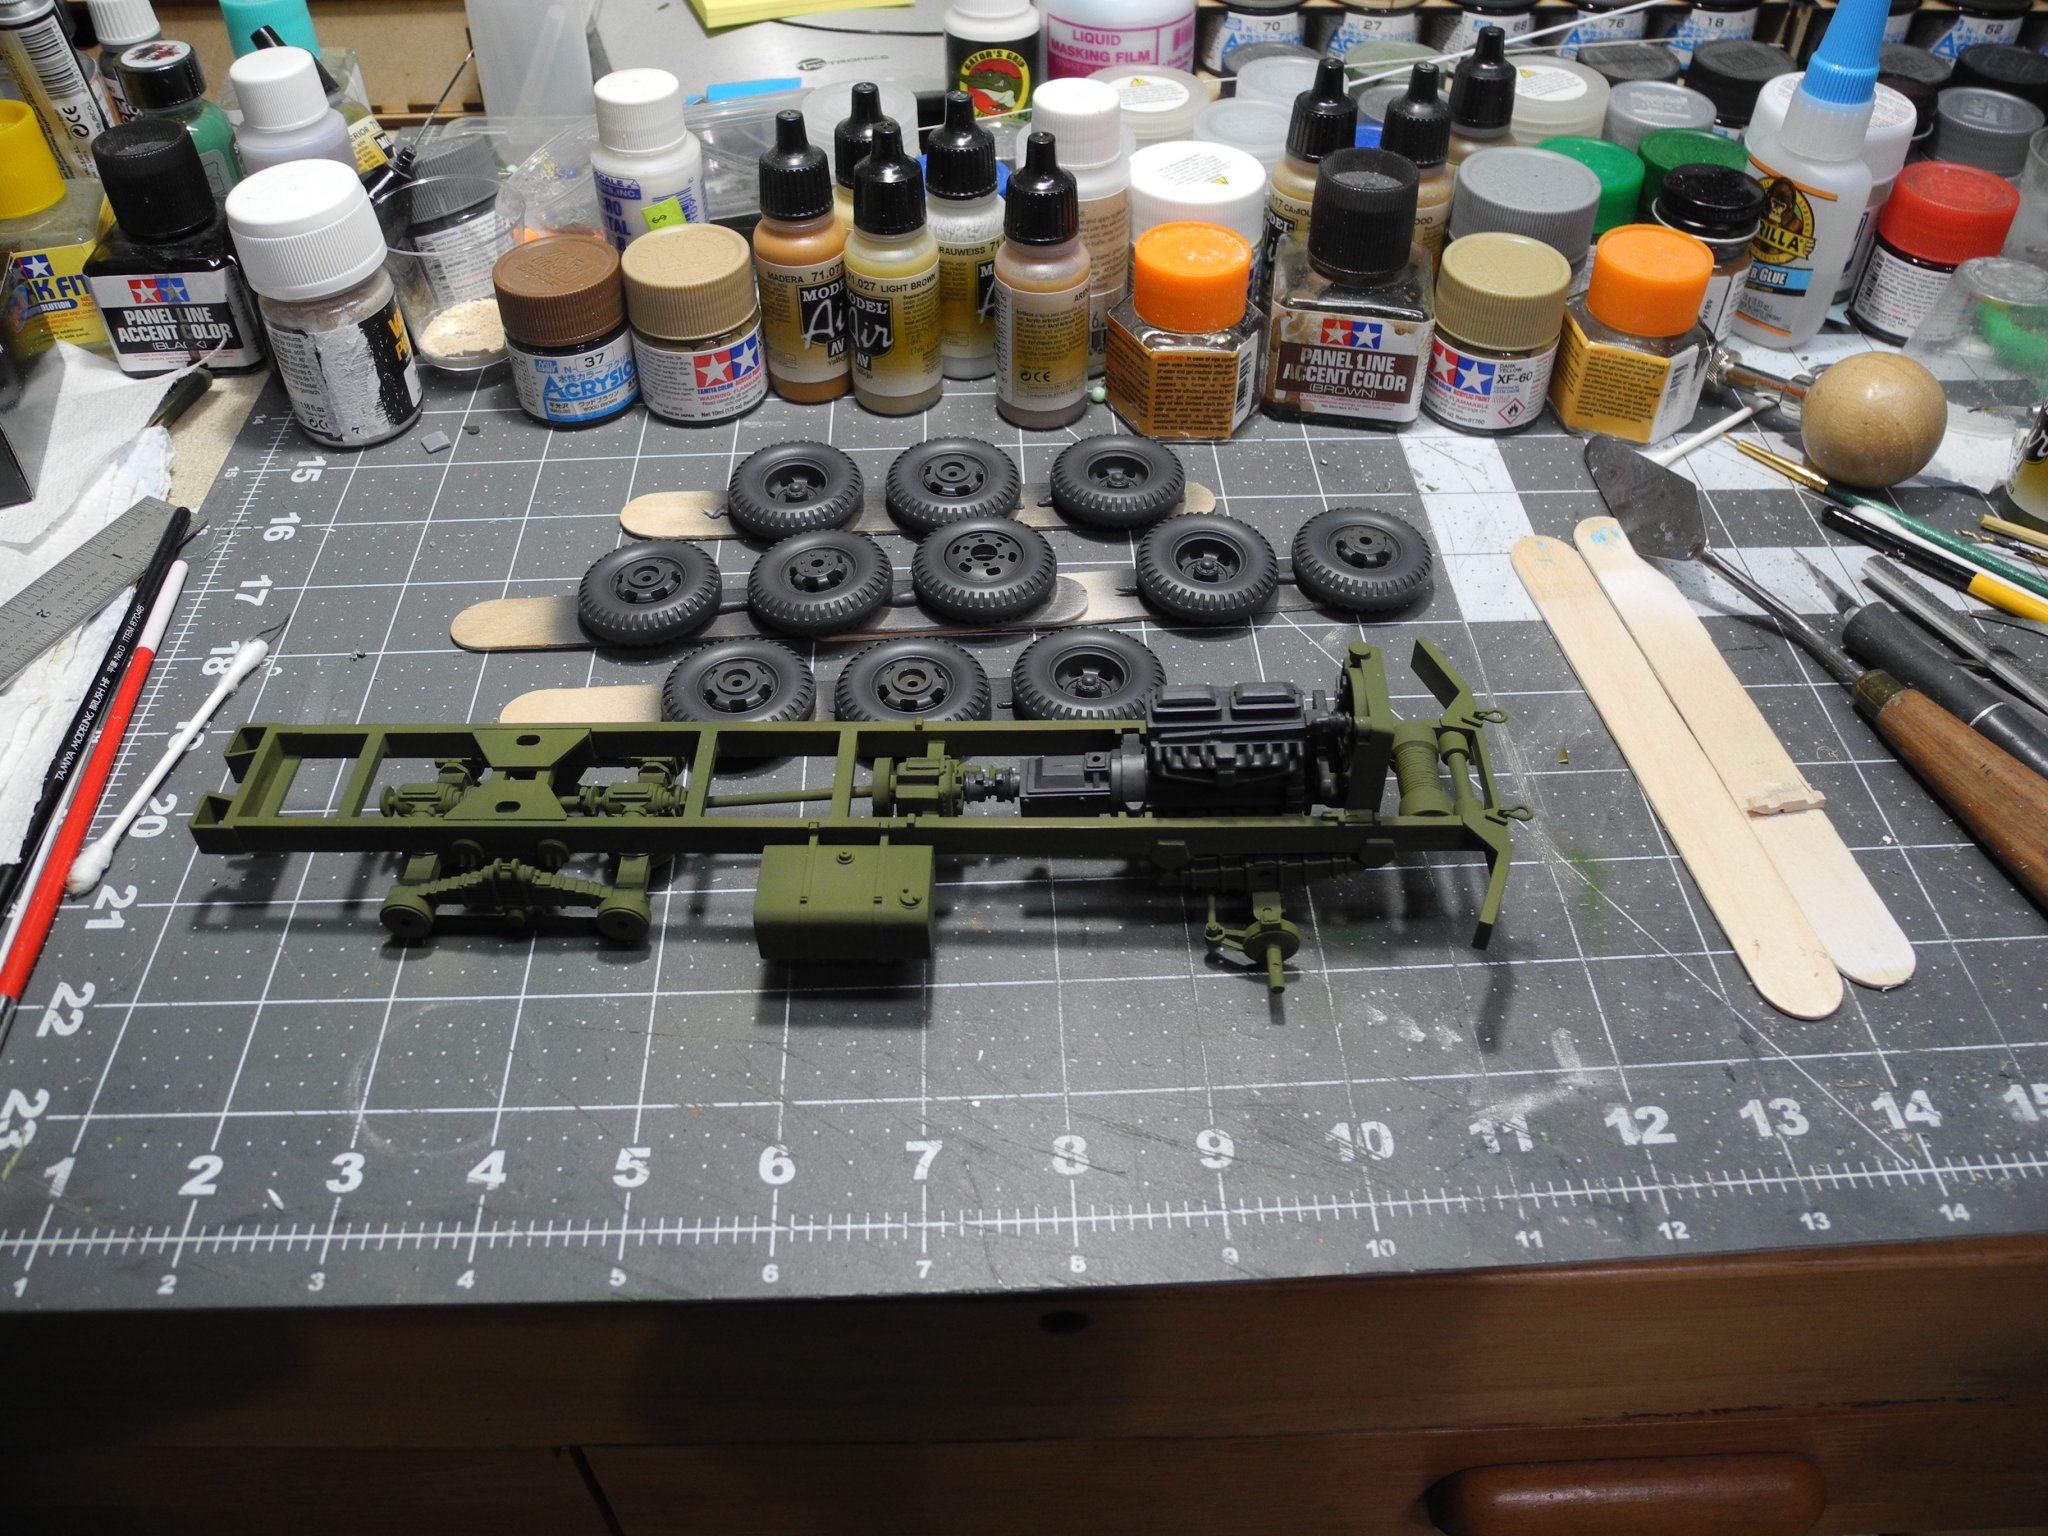
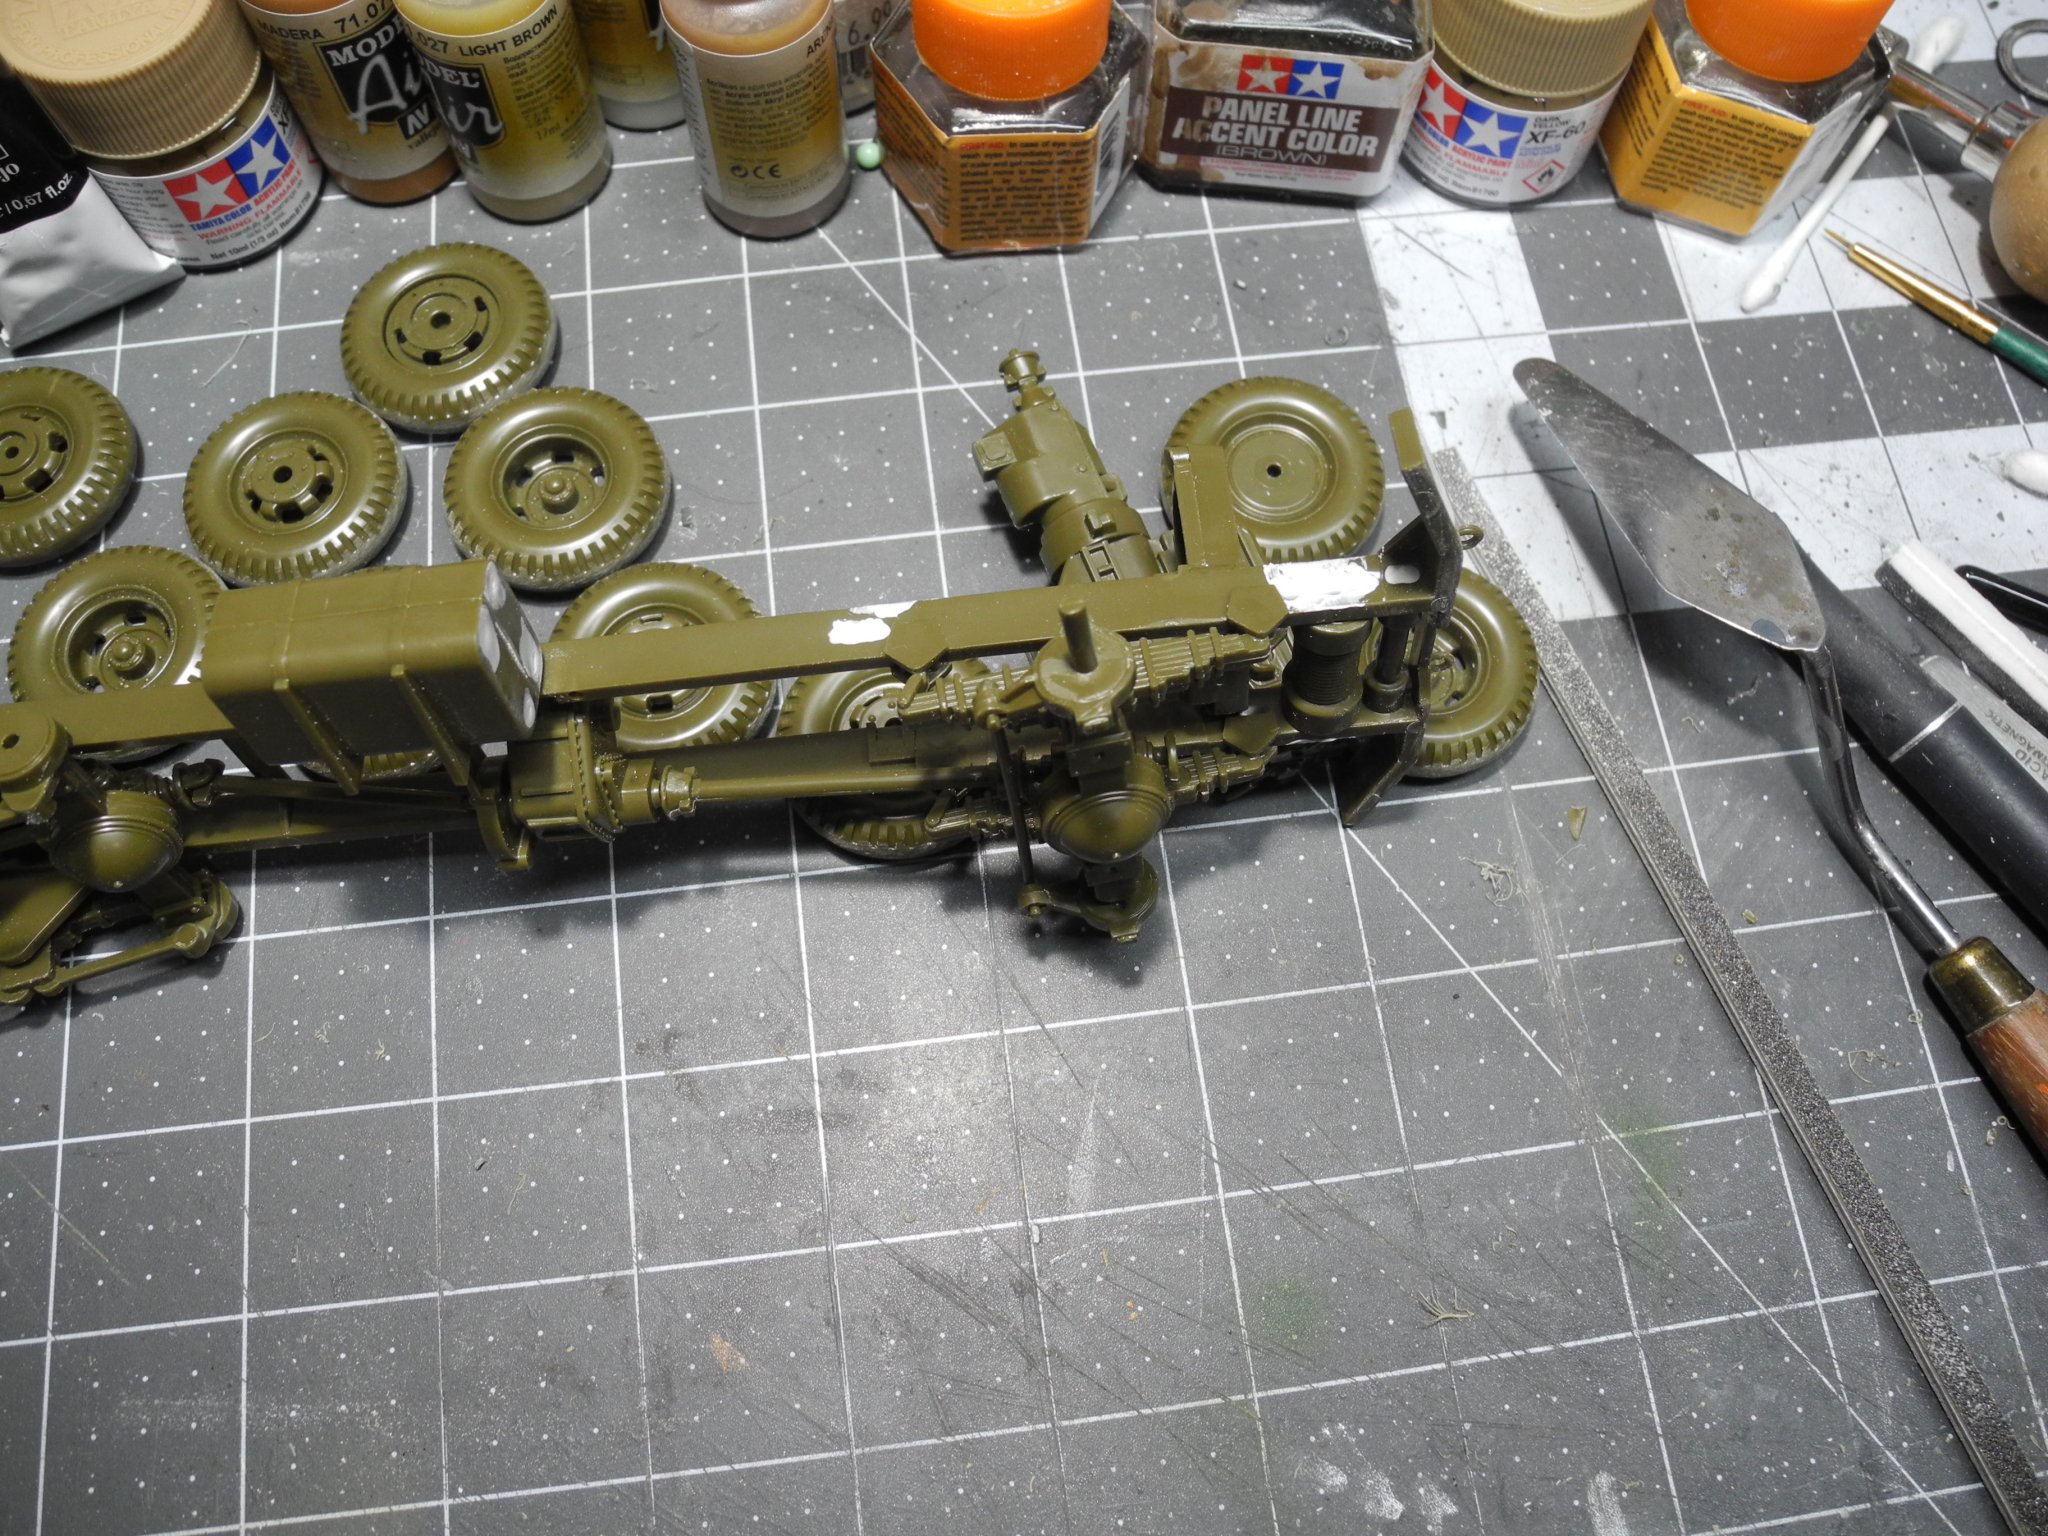
Moving along with the program: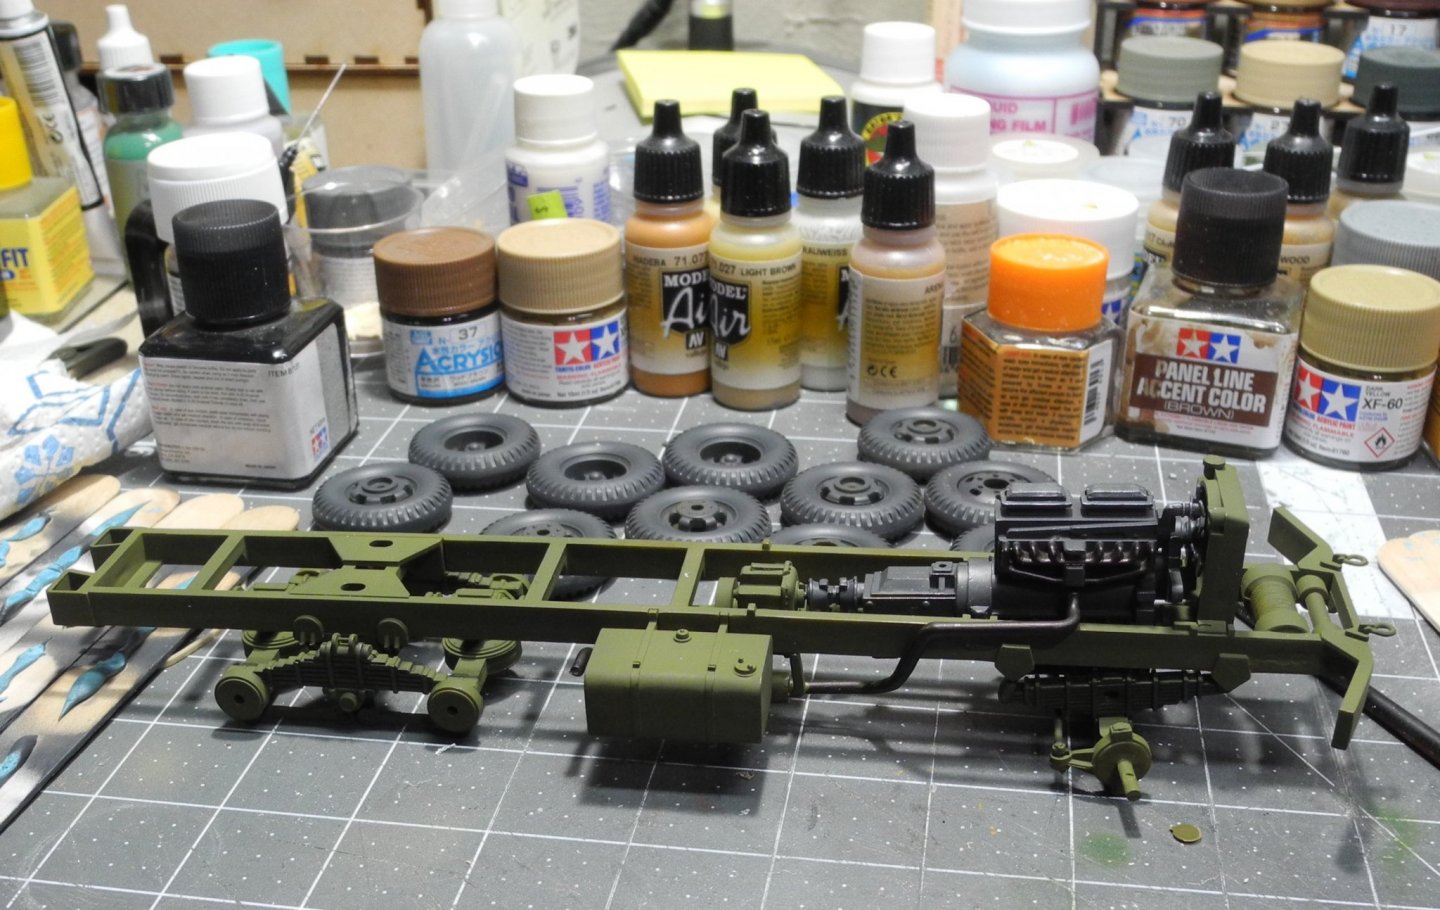

- 76 replies
-
- 11
-
-
Military Wrecker - Revell - 1:32 Scale - PLASTIC
CDW replied to CDW's topic in Non-ship/categorised builds
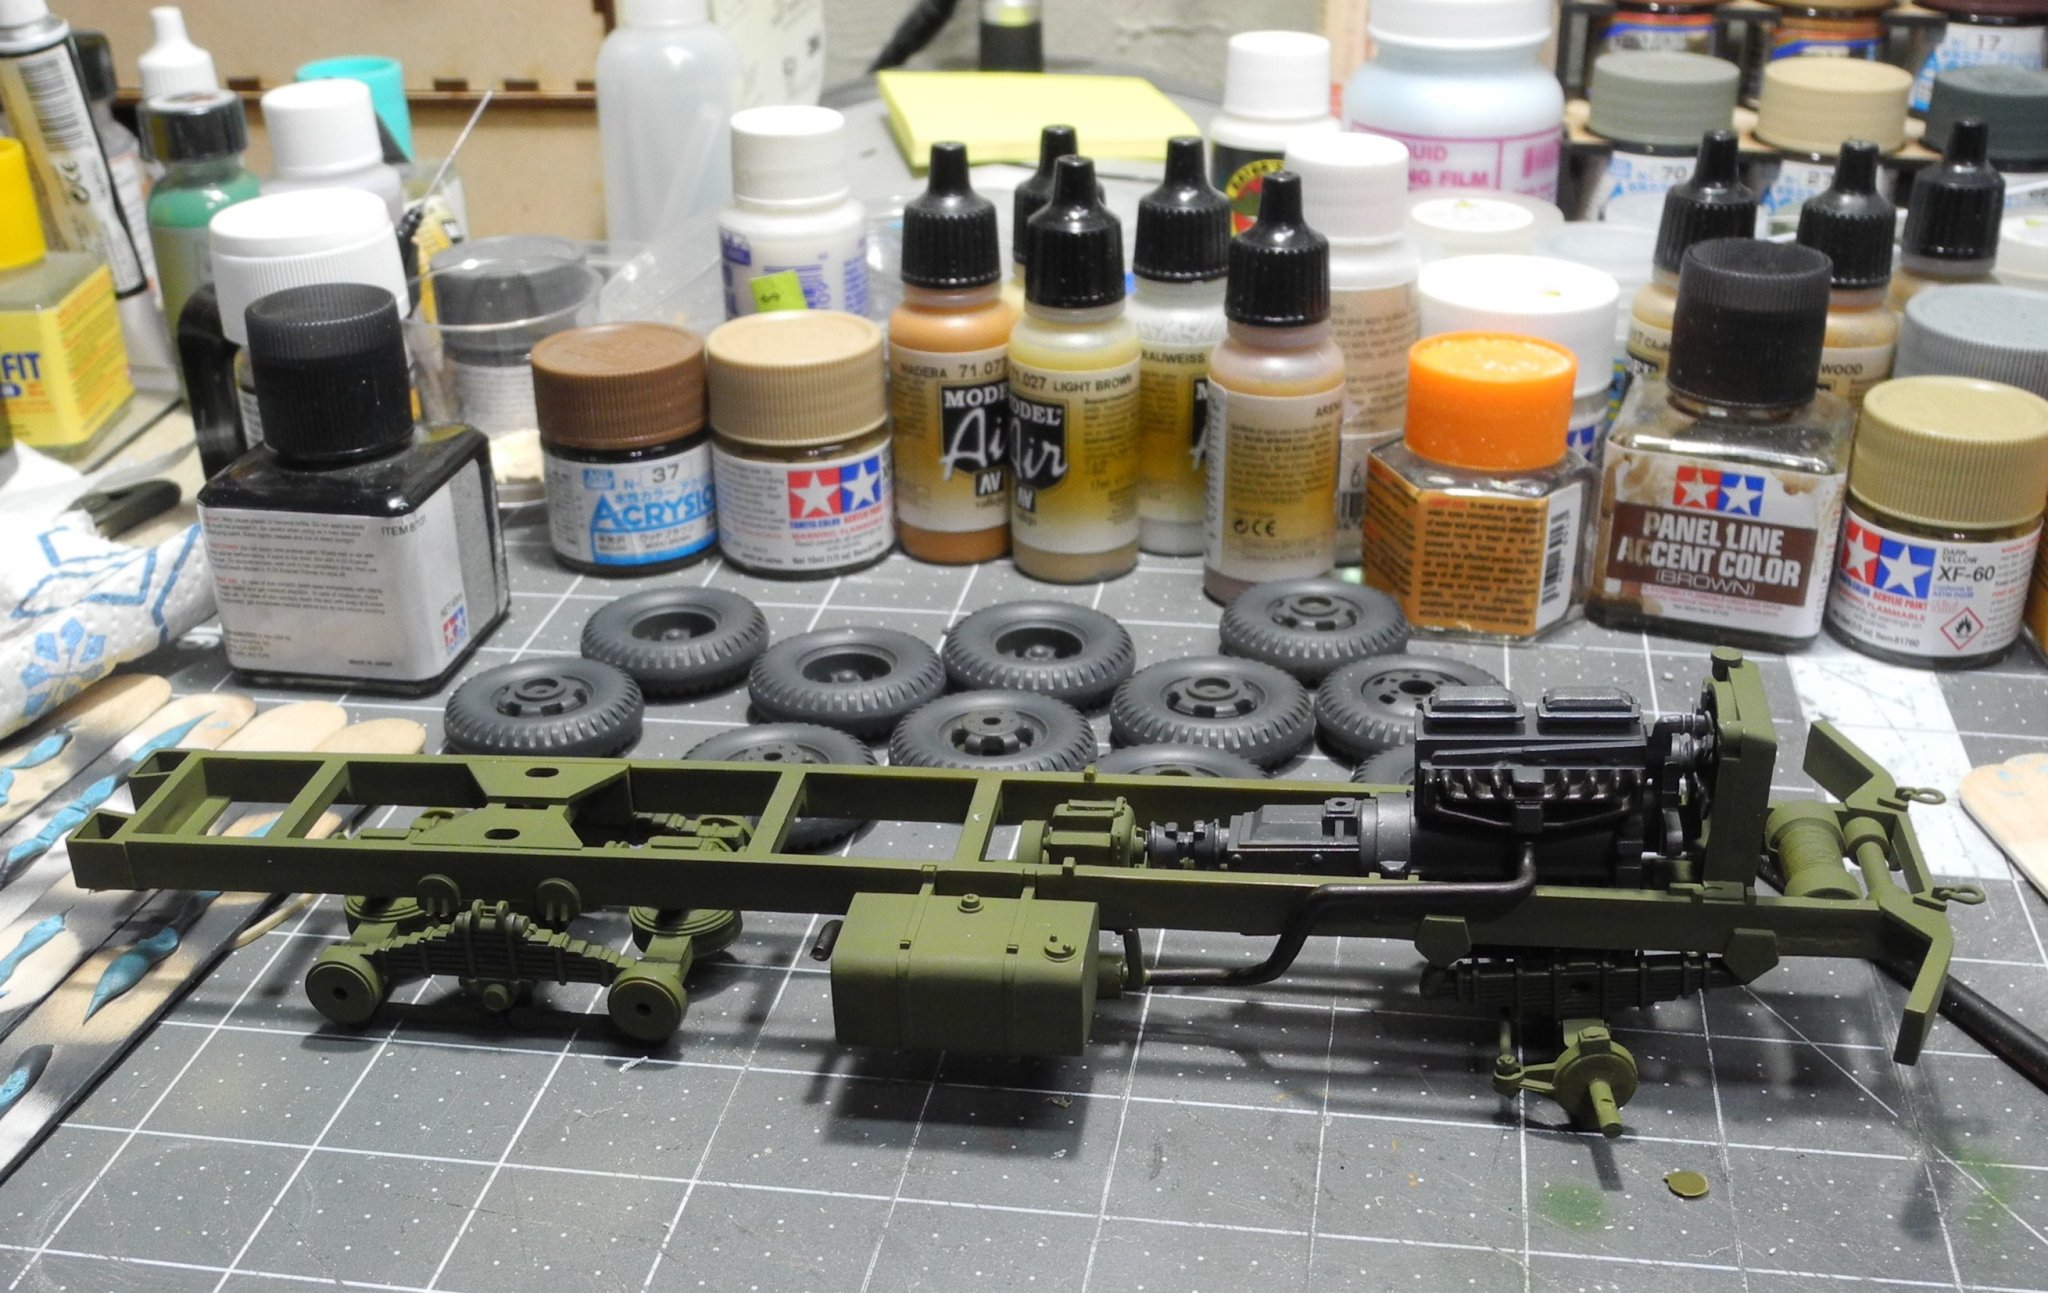
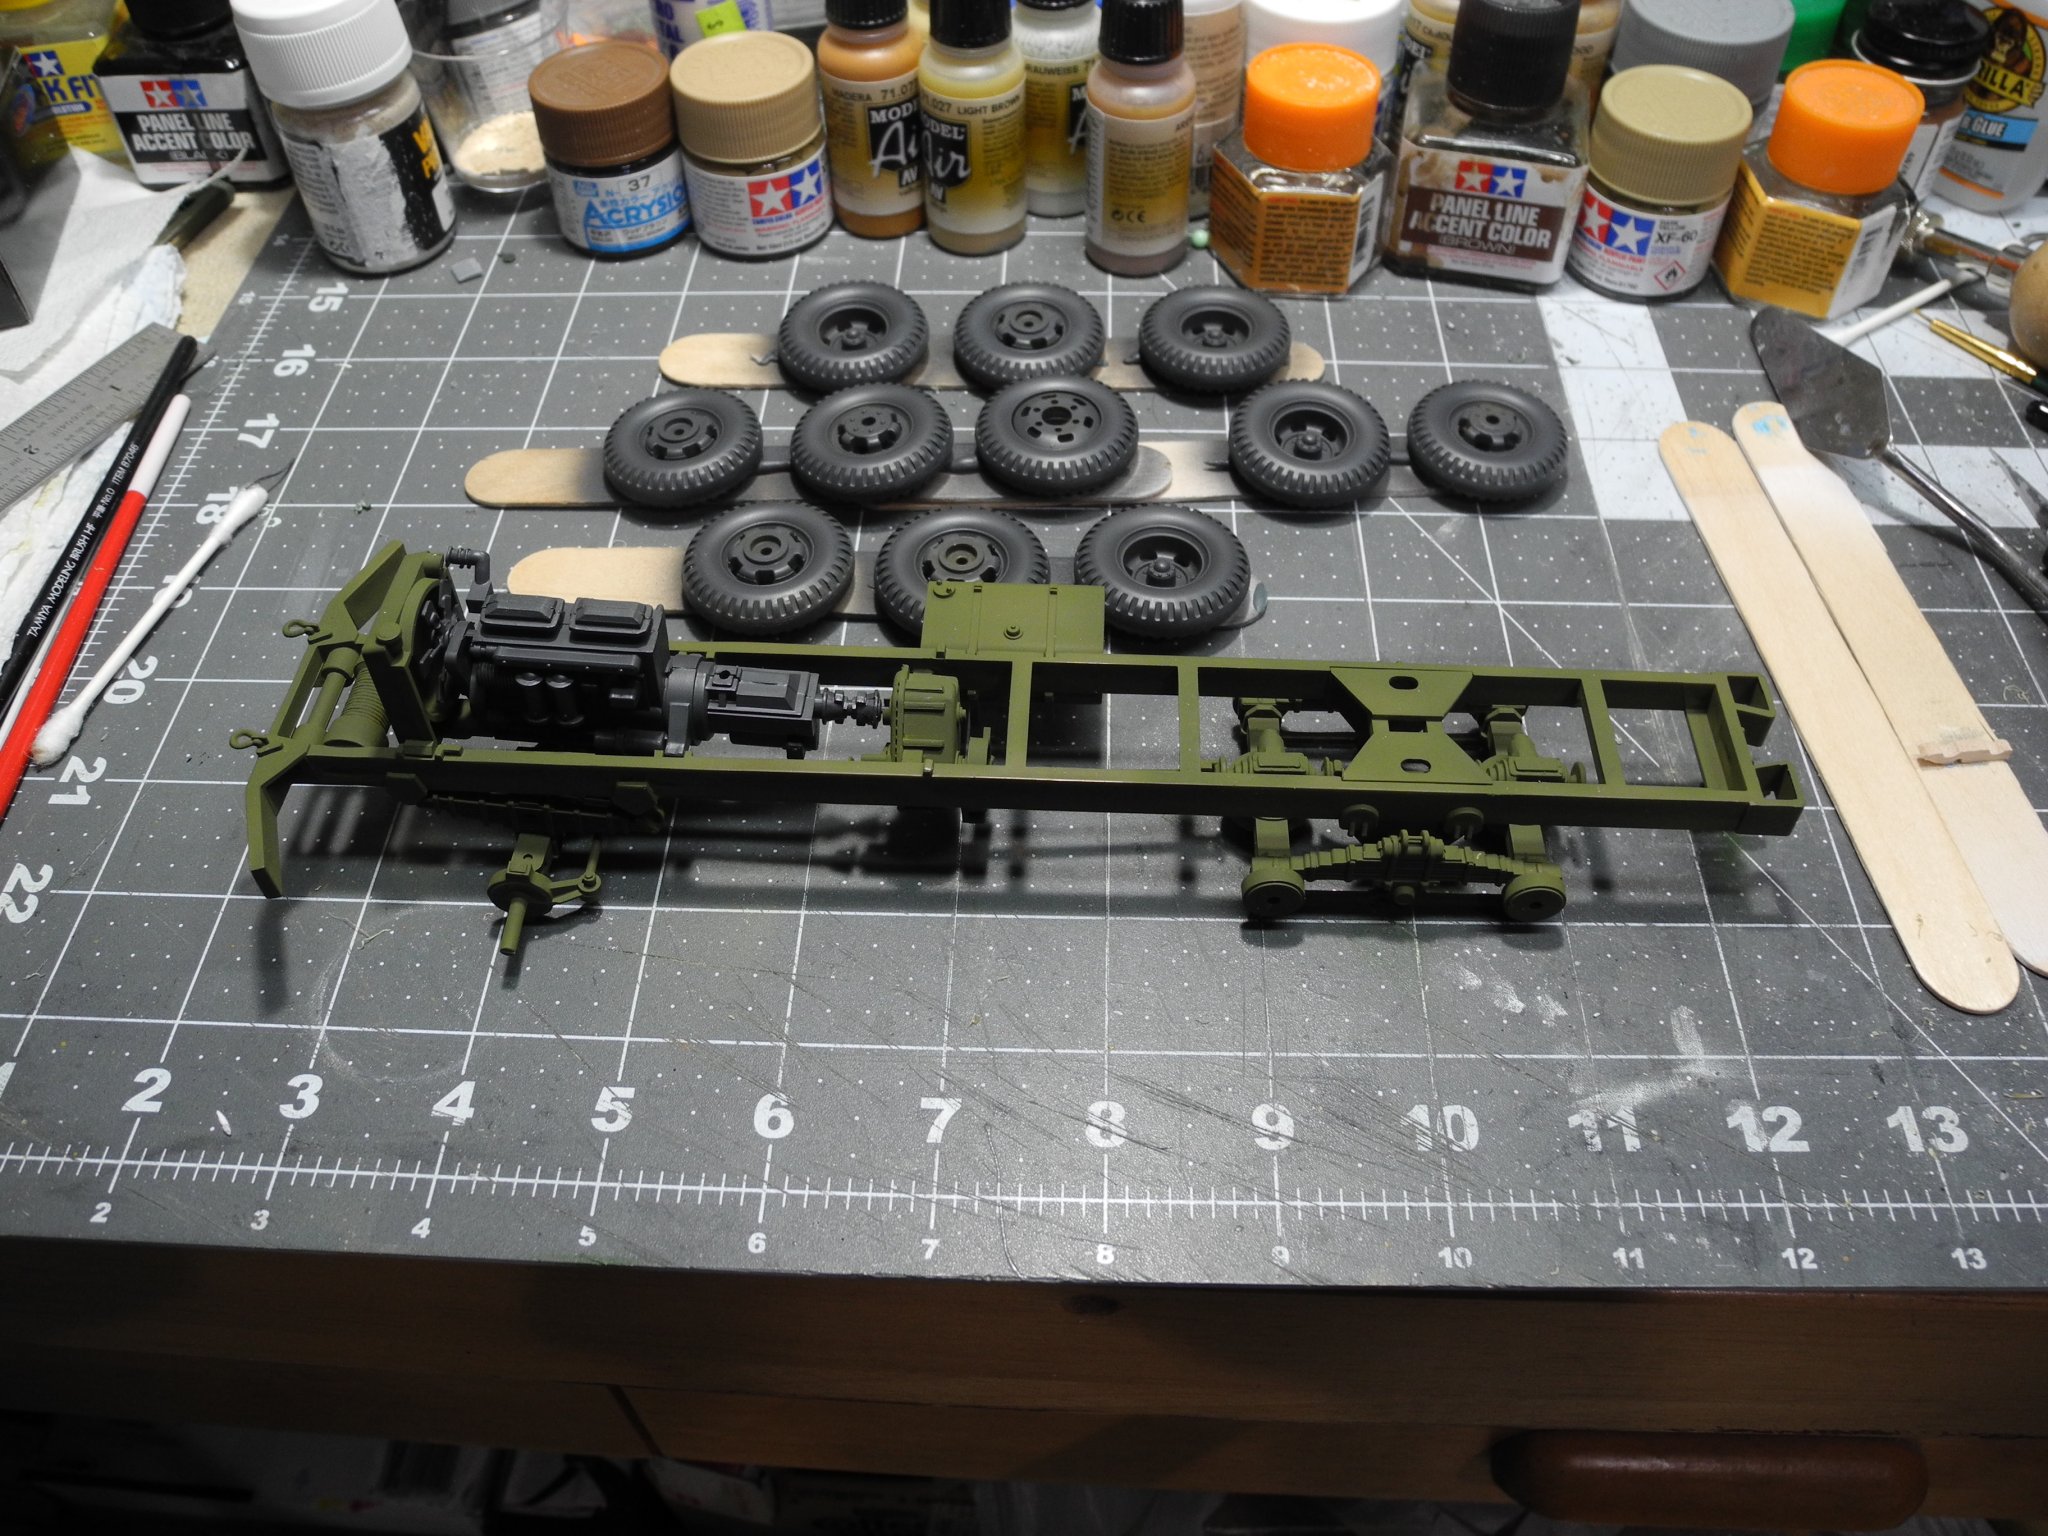
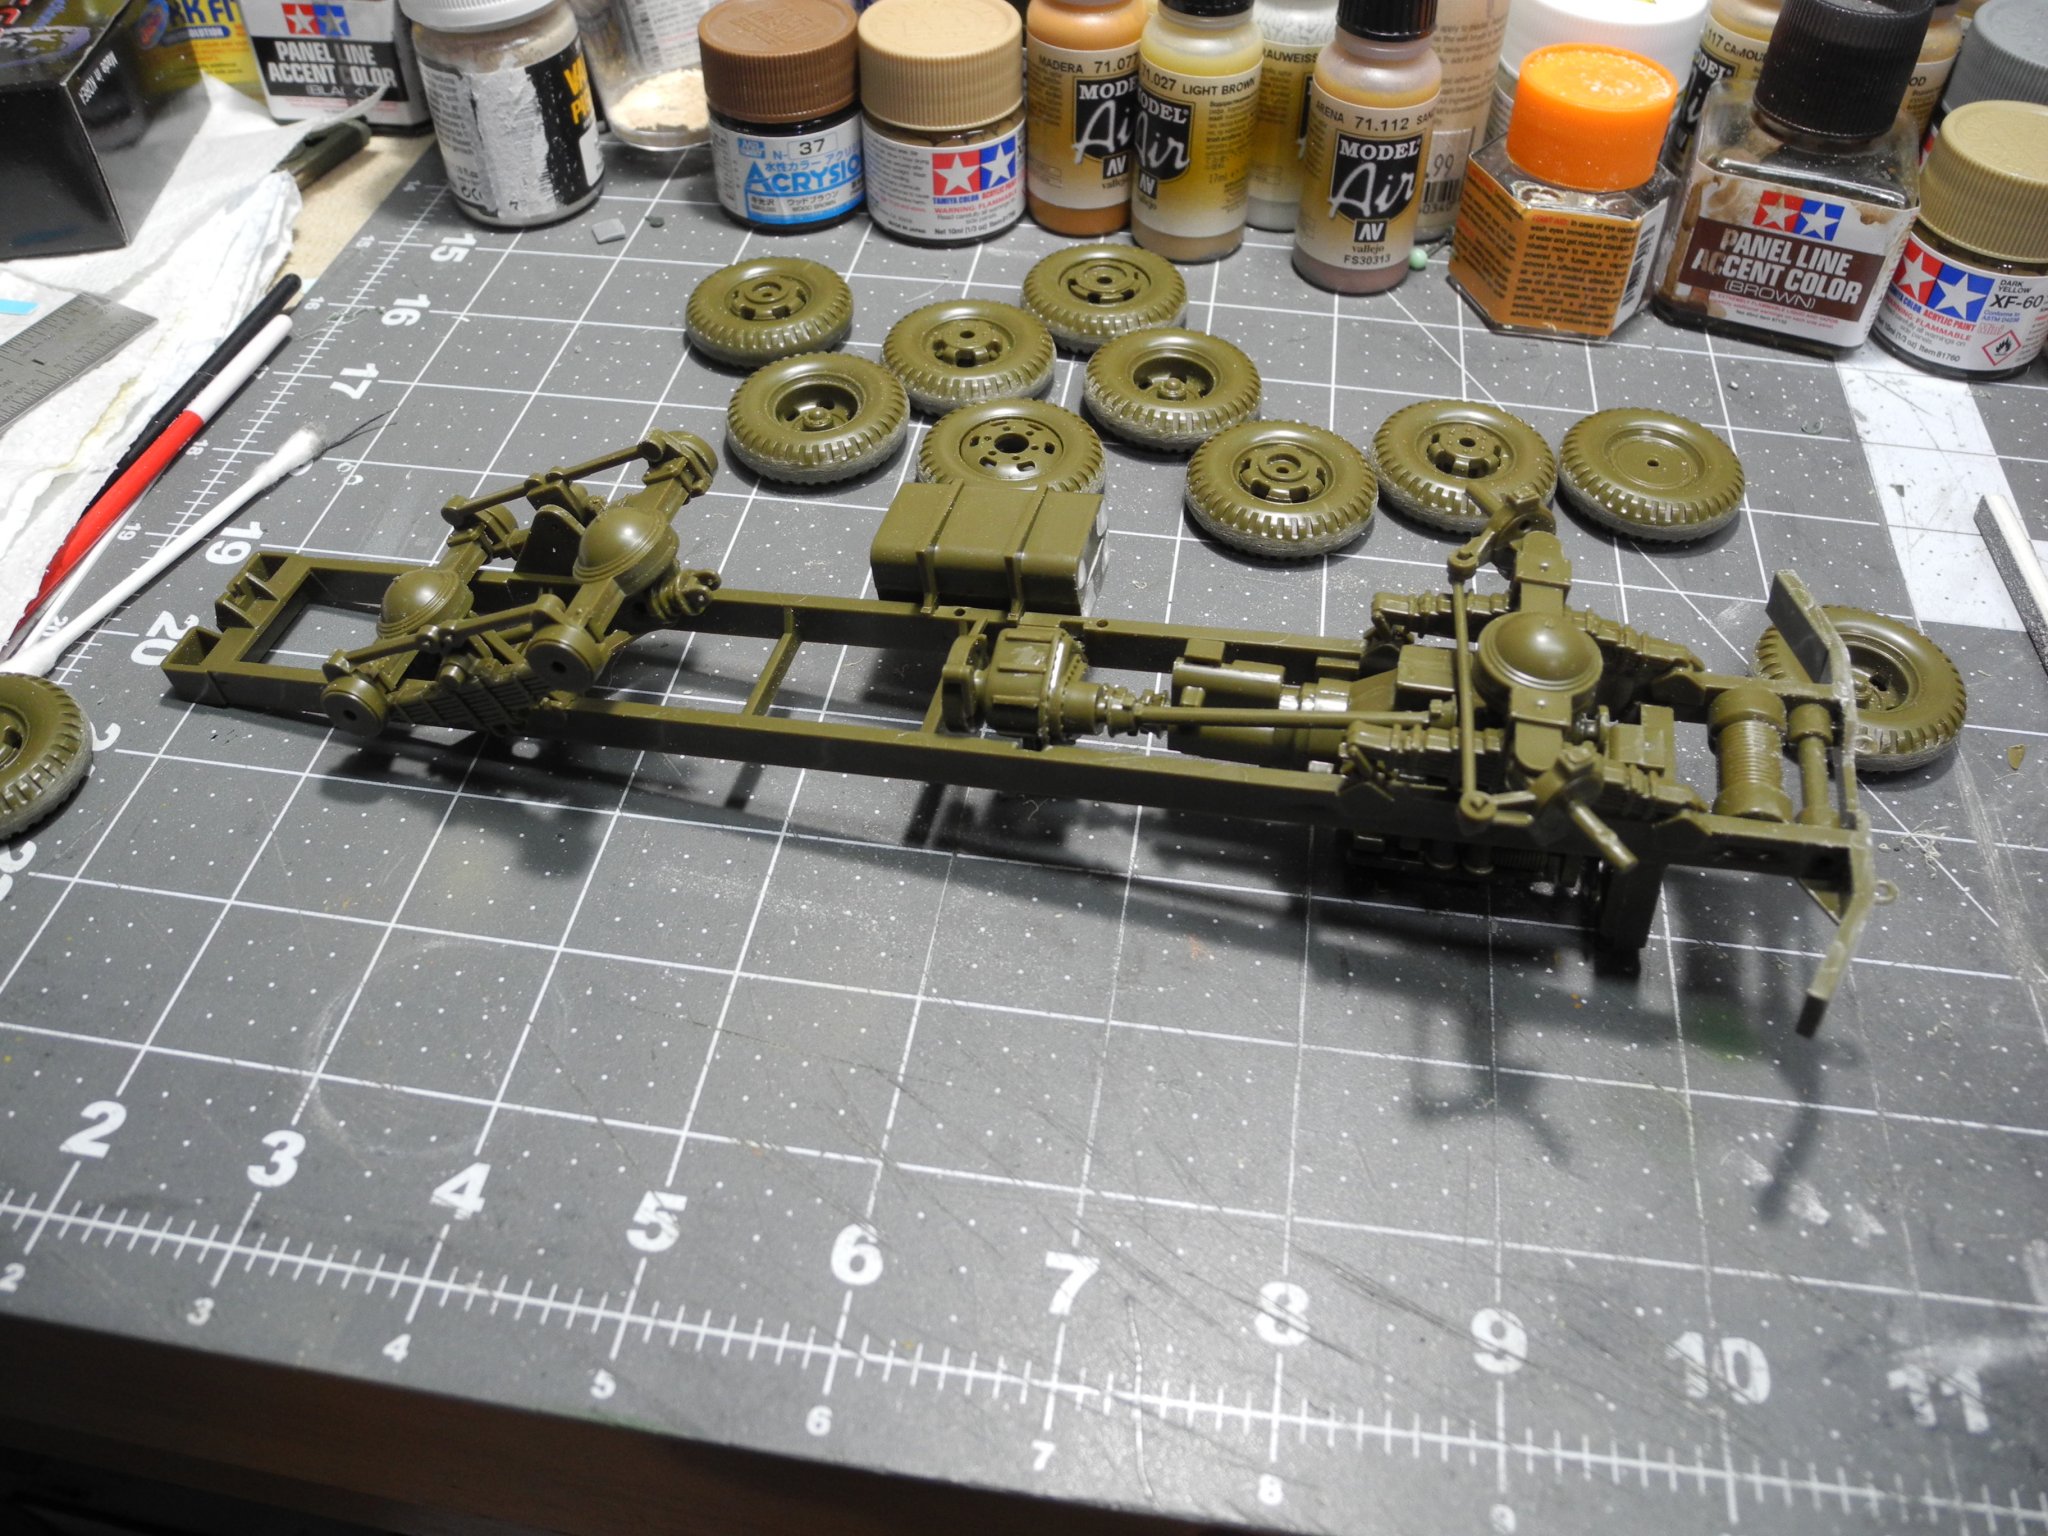
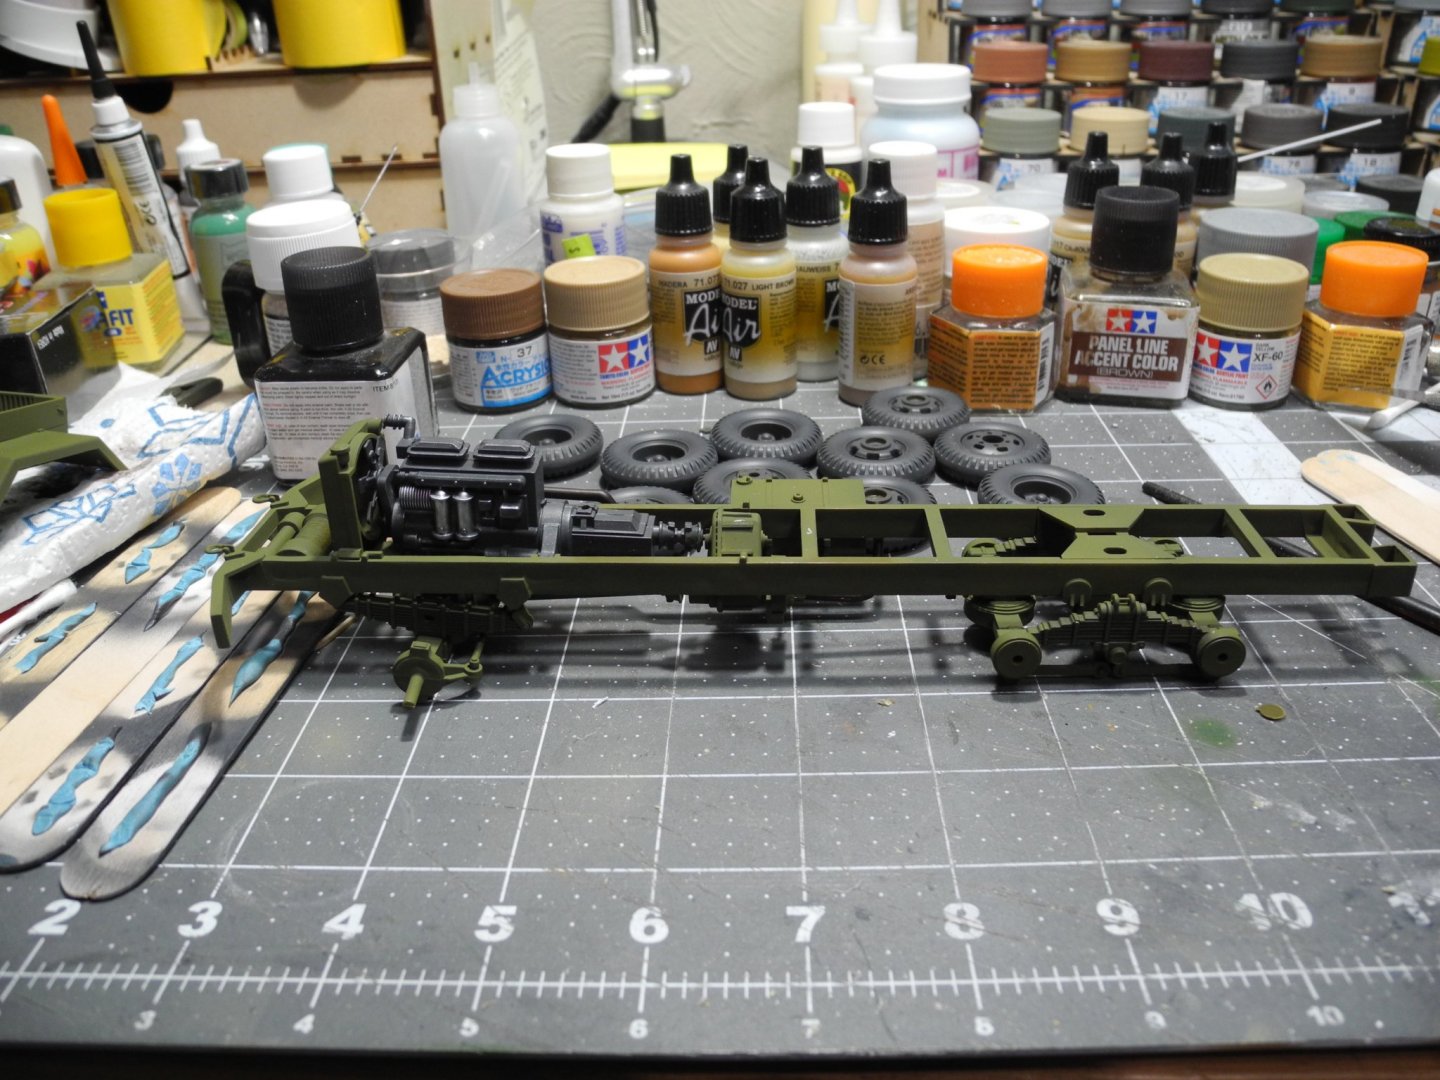
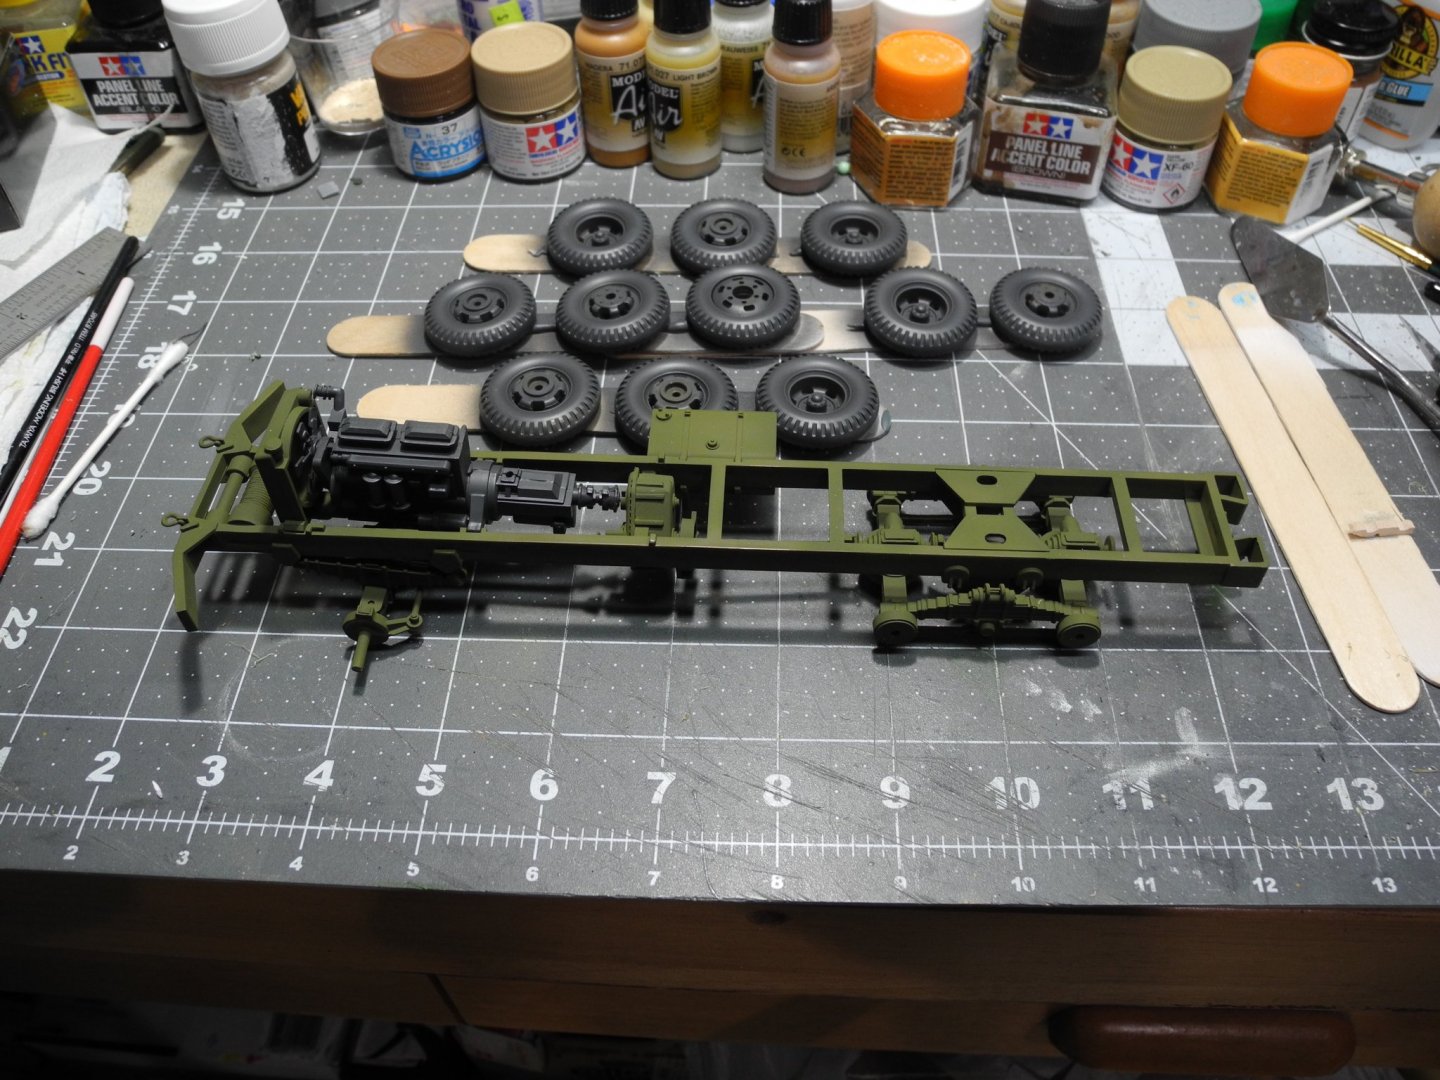
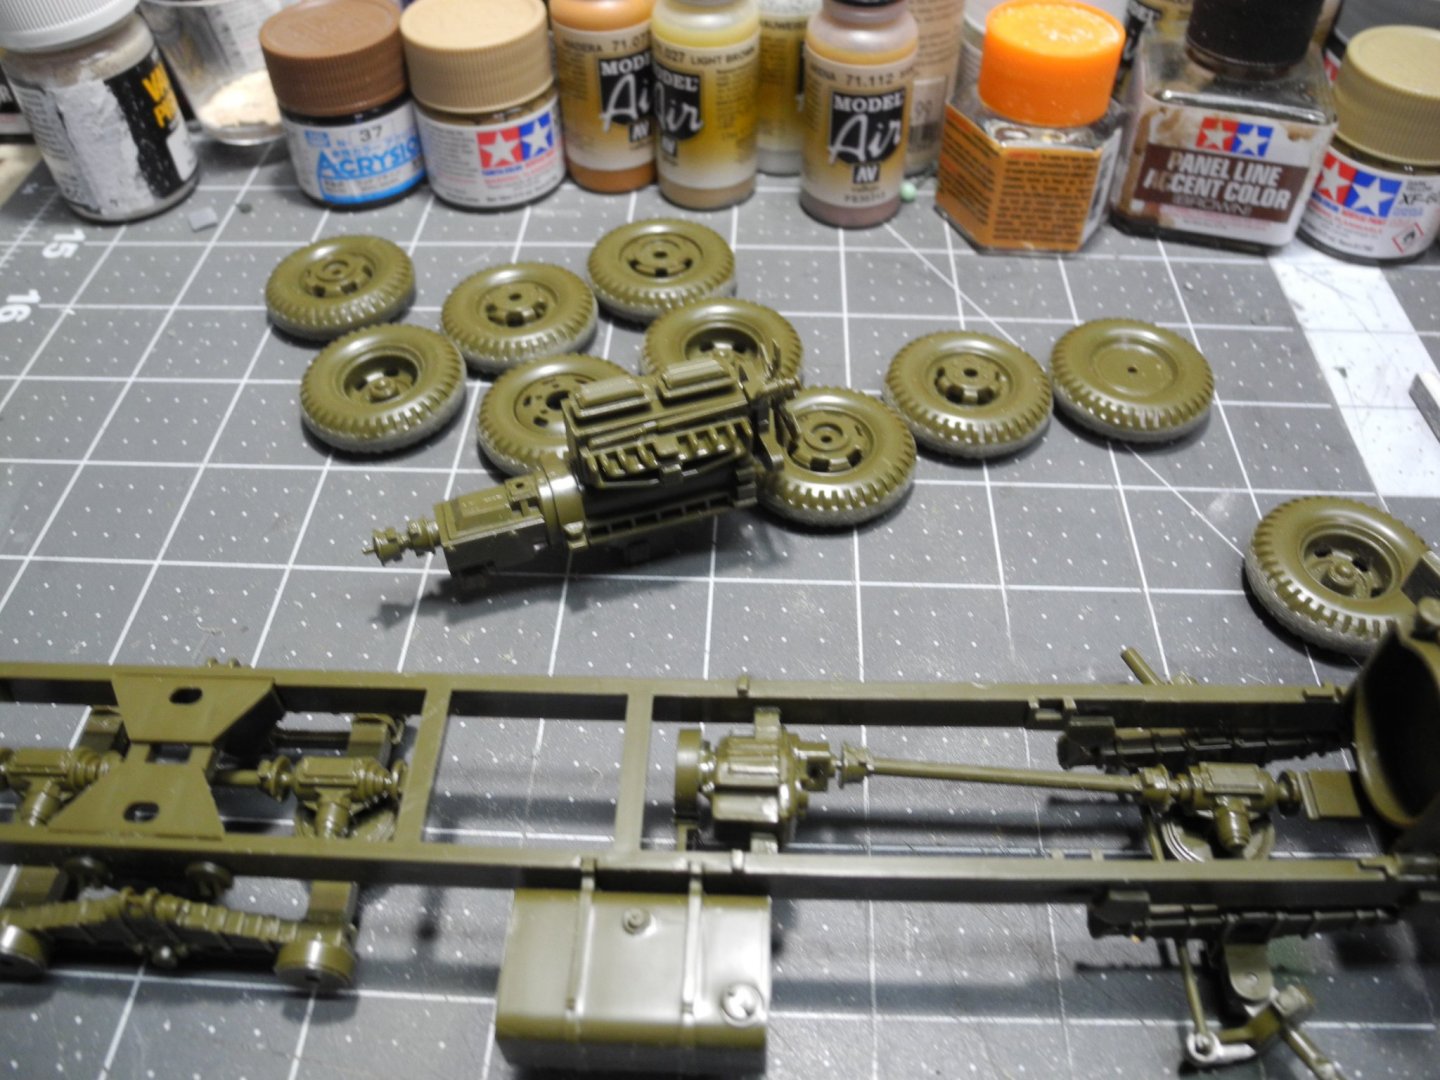
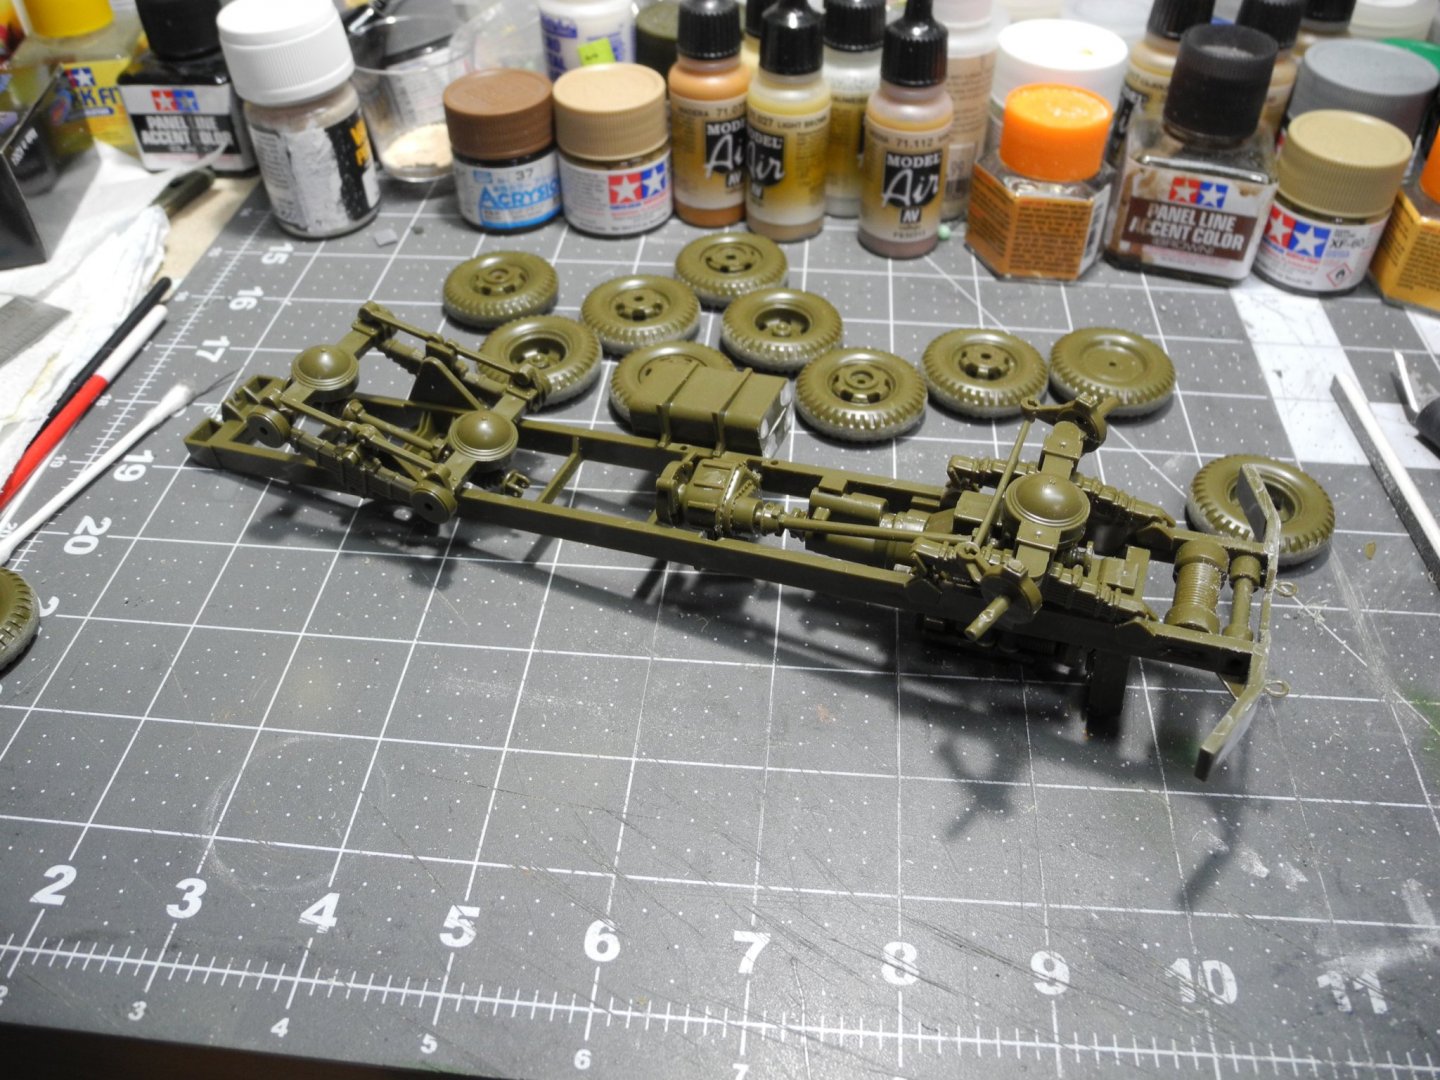
You got that right. Sometimes a lot of work. Here I've painted the chassis and suspension in Tamiya Olive Green mixed 50:50 with Tamiya Flat Yellow. The engine is painted in Vallejo Black Gray, as well as the tires. Using this as the basis to start, will begin picking out the details and shading/detailing the chassis and drive train.
- 76 replies
-
- 10
-
-
Military Wrecker - Revell - 1:32 Scale - PLASTIC
CDW replied to CDW's topic in Non-ship/categorised builds
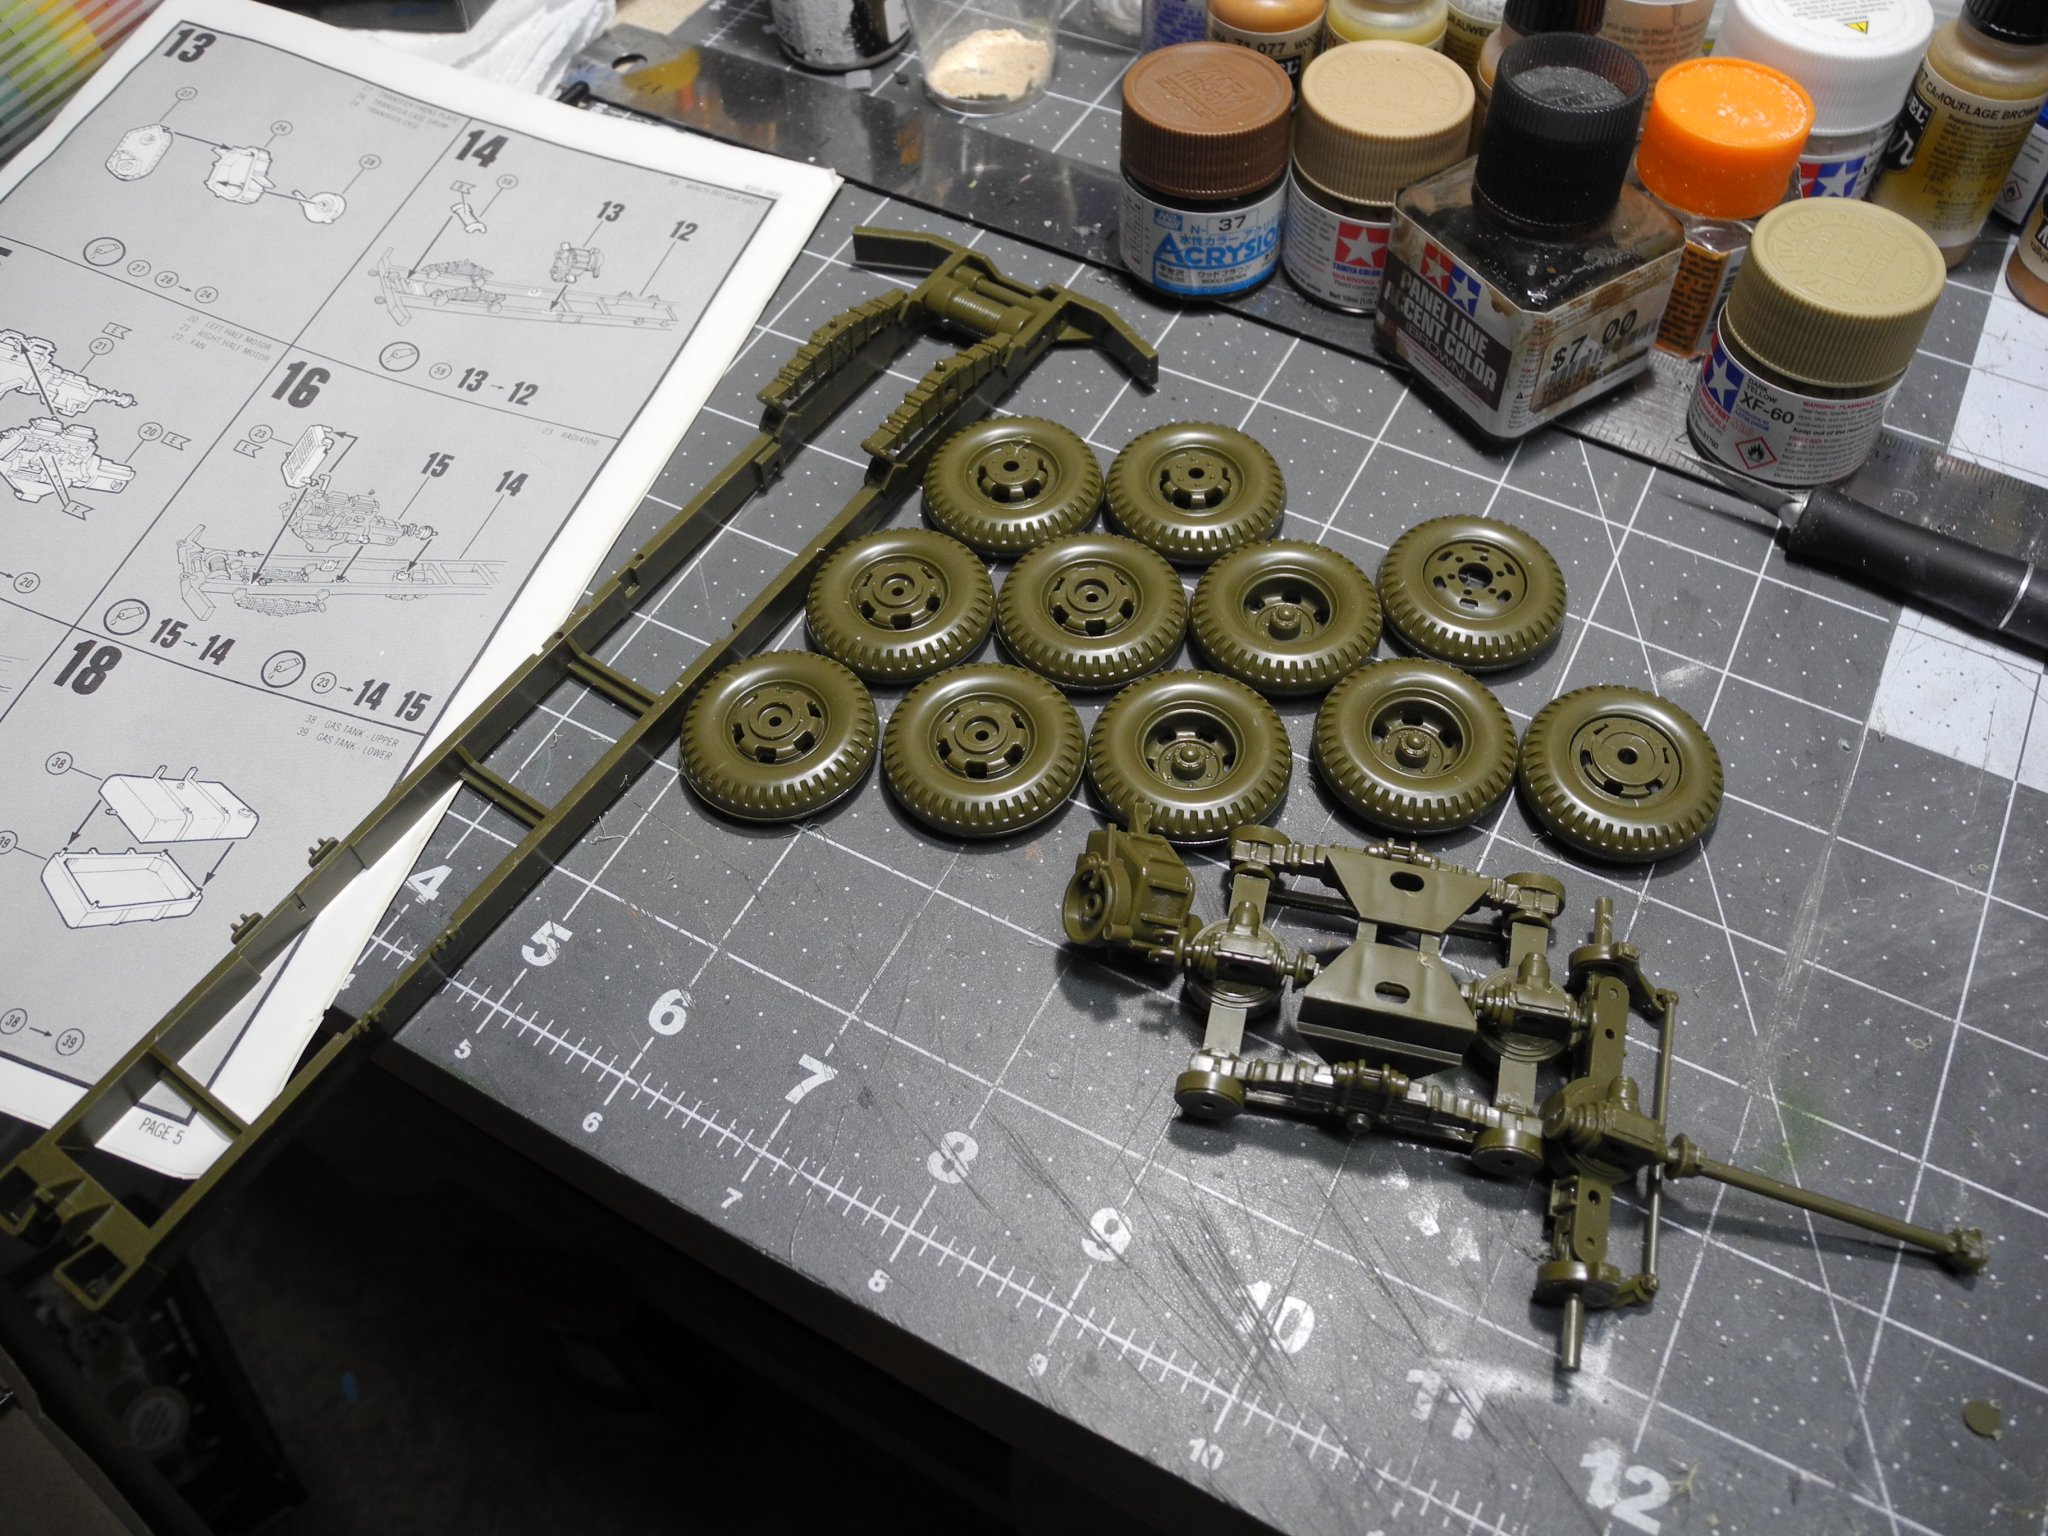
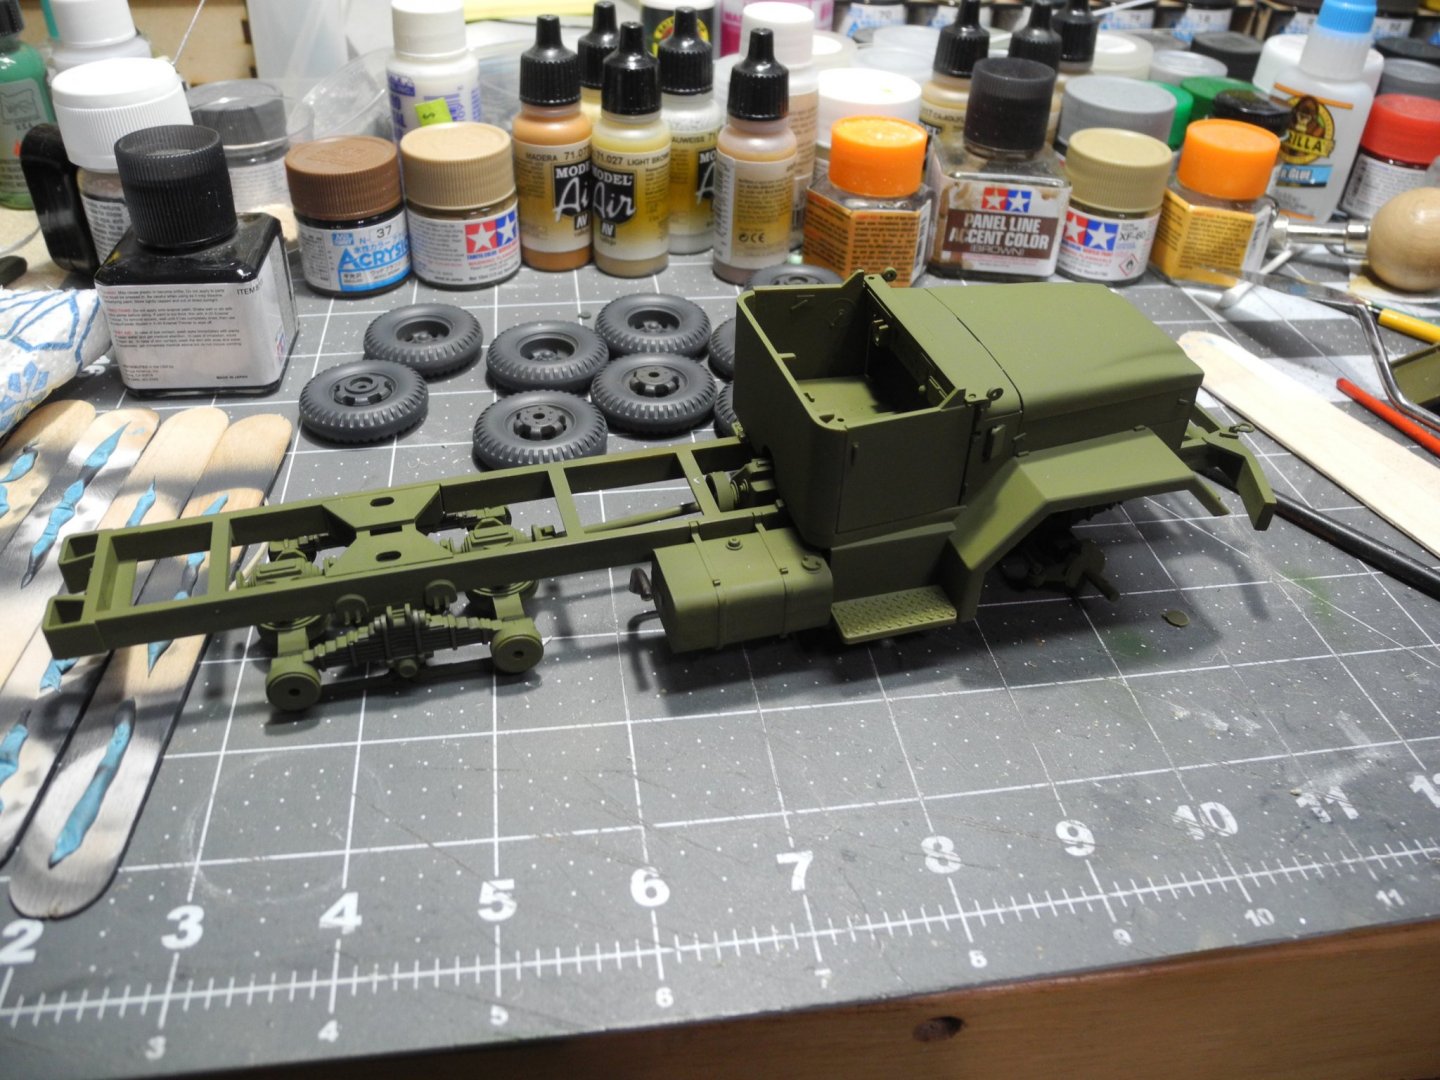
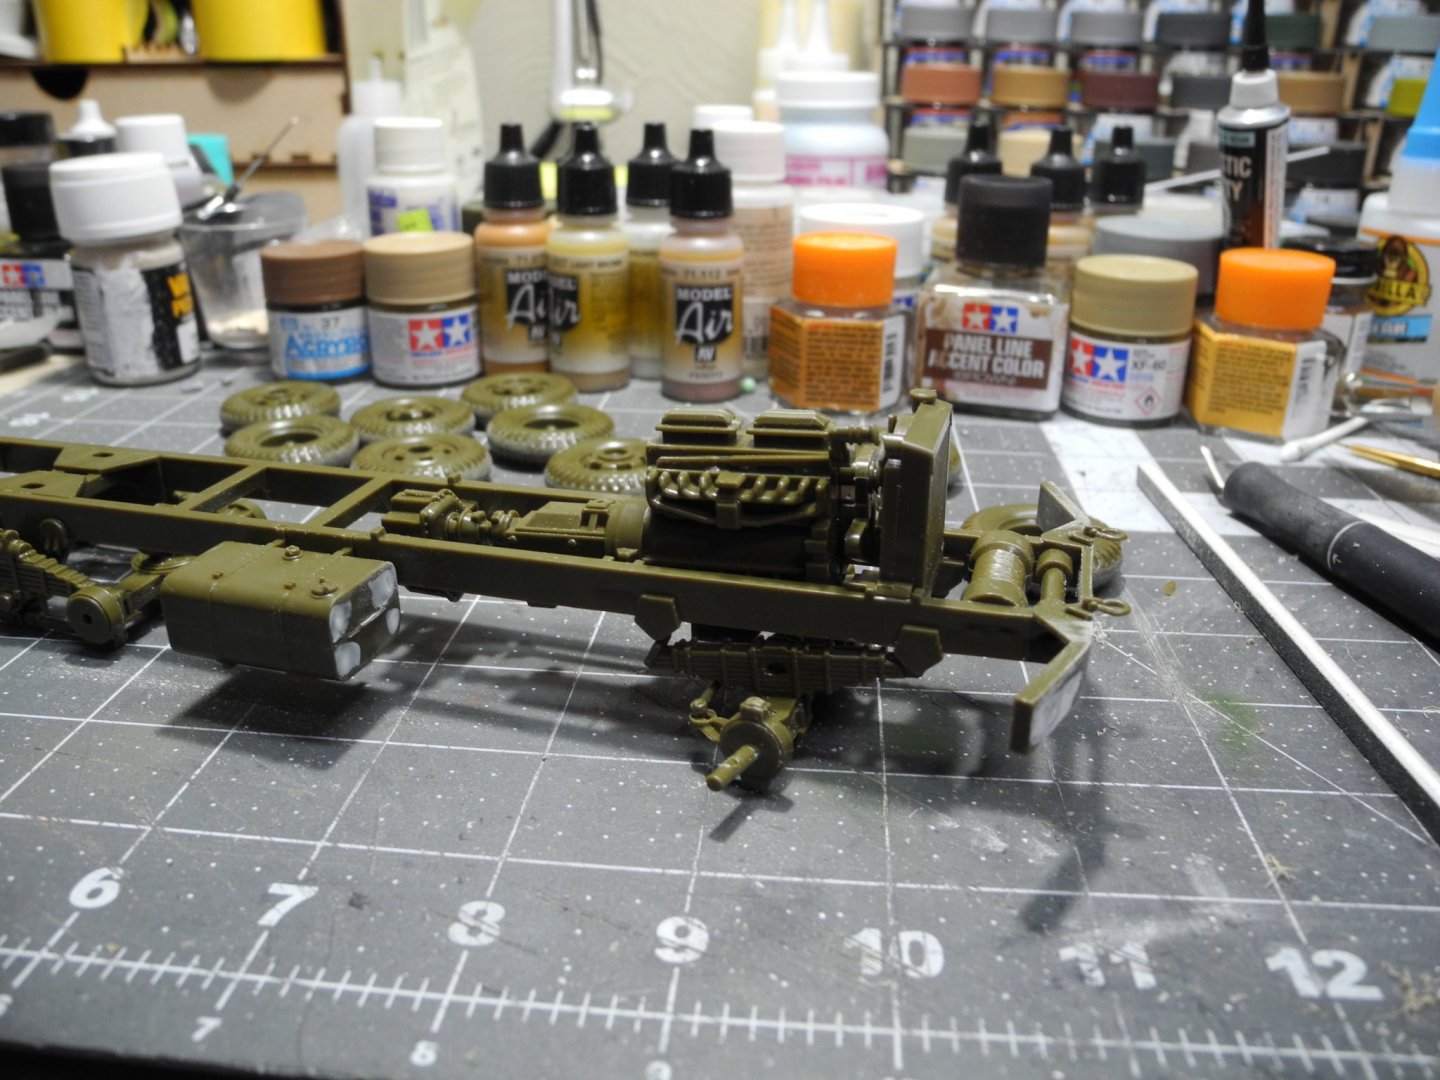
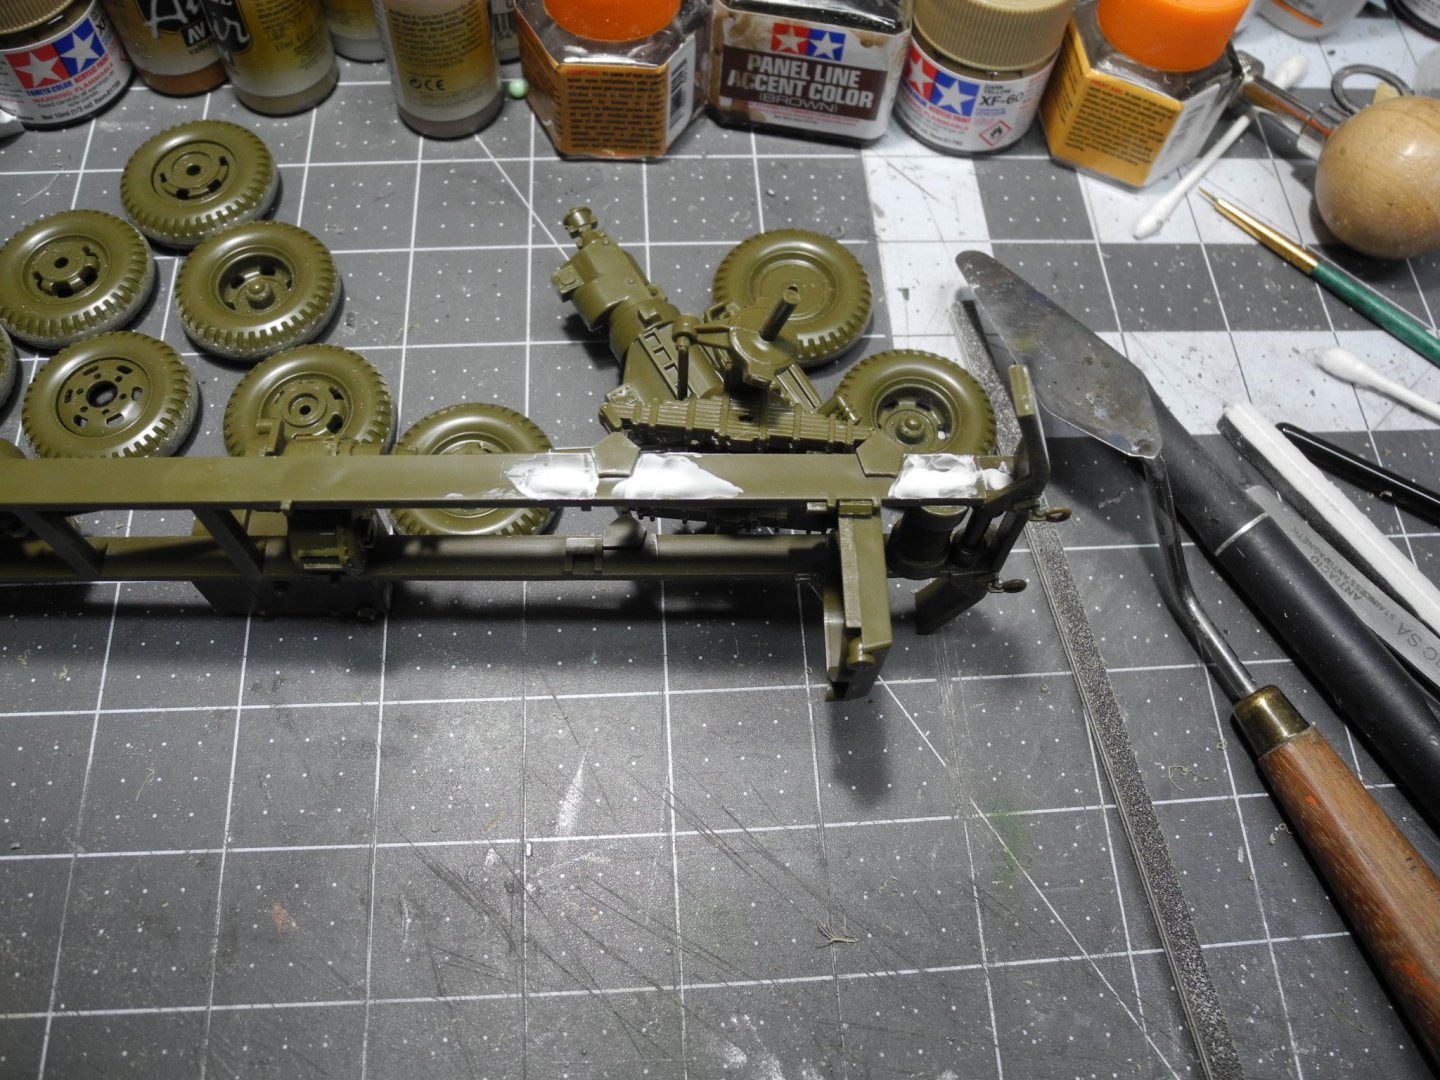
While the Revell kit is basic, it does a pretty decent job capturing the major details of a recovery vehicle like this. The steering and the rear suspension are articulated, which is neat. Then there are some crater-sized sink marks that must be filled because they will be visible in significant areas. I won't try to fill all the sink marks, such as the one that can be seen on the sides of the front leaf springs. After the wheels are on, they won't be noticeable on a display shelf. As soon as the putty dries and I sand it down, will begin the basic painting of the chassis and power train.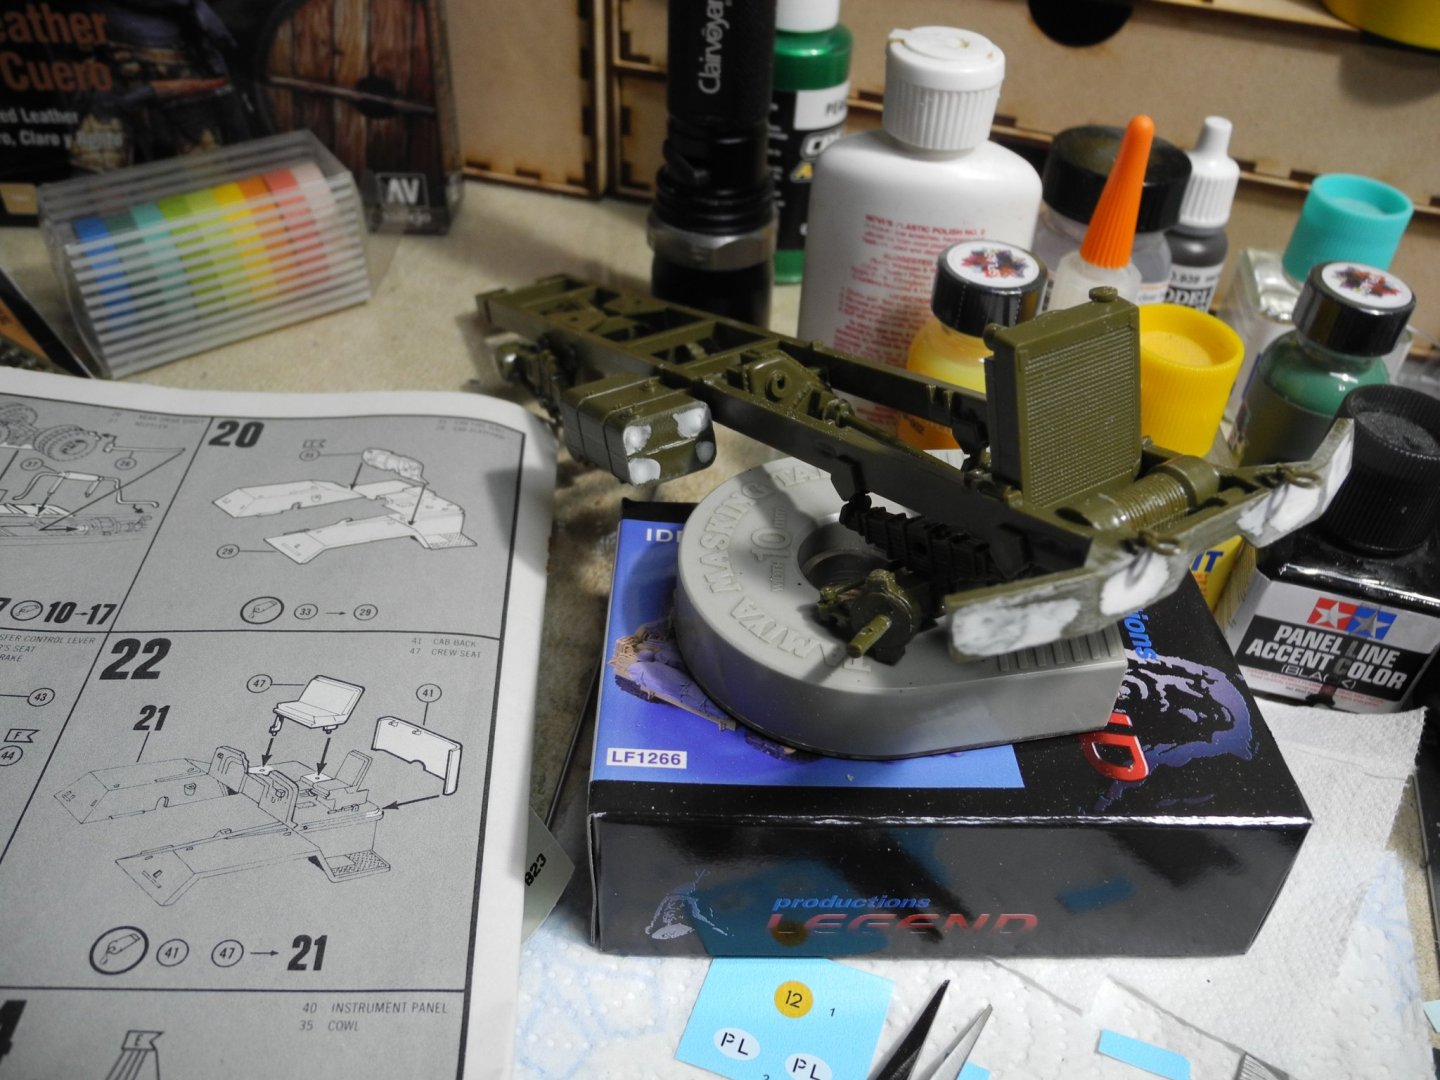


- 76 replies
-
- 10
-
-
Military Wrecker - Revell - 1:32 Scale - PLASTIC
CDW replied to CDW's topic in Non-ship/categorised builds
You forgot to mention, sometimes it also involves "going broke". 🙂 -
Military Wrecker - Revell - 1:32 Scale - PLASTIC
CDW replied to CDW's topic in Non-ship/categorised builds
If she does like her mother did, my daughter will have some gray hair before it's all said and done. 😄 -
Military Wrecker - Revell - 1:32 Scale - PLASTIC
CDW replied to CDW's topic in Non-ship/categorised builds
We had a birthday party/cookout for one of our grand daughters yesterday. Can you believe she just turned 13? I sure as heck don't remember girls looking like grown women when I was 13..jpg.0d032c18484744789b05d6c7b74a0abf.jpg)
-
Wow Jack, your diorama looks super! Did you learn doing the diorama's with model railroading?
-
Really like the little Willys Jeep. Nice kit.
-
Military Wrecker - Revell - 1:32 Scale - PLASTIC
CDW replied to CDW's topic in Non-ship/categorised builds
Yeah, and it came from an Ace Hardware store. 😄 -
M-50 Israeli Sherman - FINISHED - MP Models - 1:35 Scale
CDW replied to CDW's topic in Non-ship/categorised builds
Anybody here ever drove in West Virginia? There are some white knuckle roads there, I'll guarantee you. Some of the edges drop off immediately at the edge of pavement with no chance of recovery if your tire leaves the pavement. Falling rocks, too. But that doesn't stop those hillbillys from driving like Mario Andretti in their 4x4 pickups 🤣 When we lived there, every time we crossed the border from WV into Ohio, the Ohio State Troopers would pull us over as soon as they saw our WV tags...just to check our vehicles, tags, insurance, and registration. -
Military Wrecker - Revell - 1:32 Scale - PLASTIC
CDW replied to CDW's topic in Non-ship/categorised builds
Me too, Lou. -
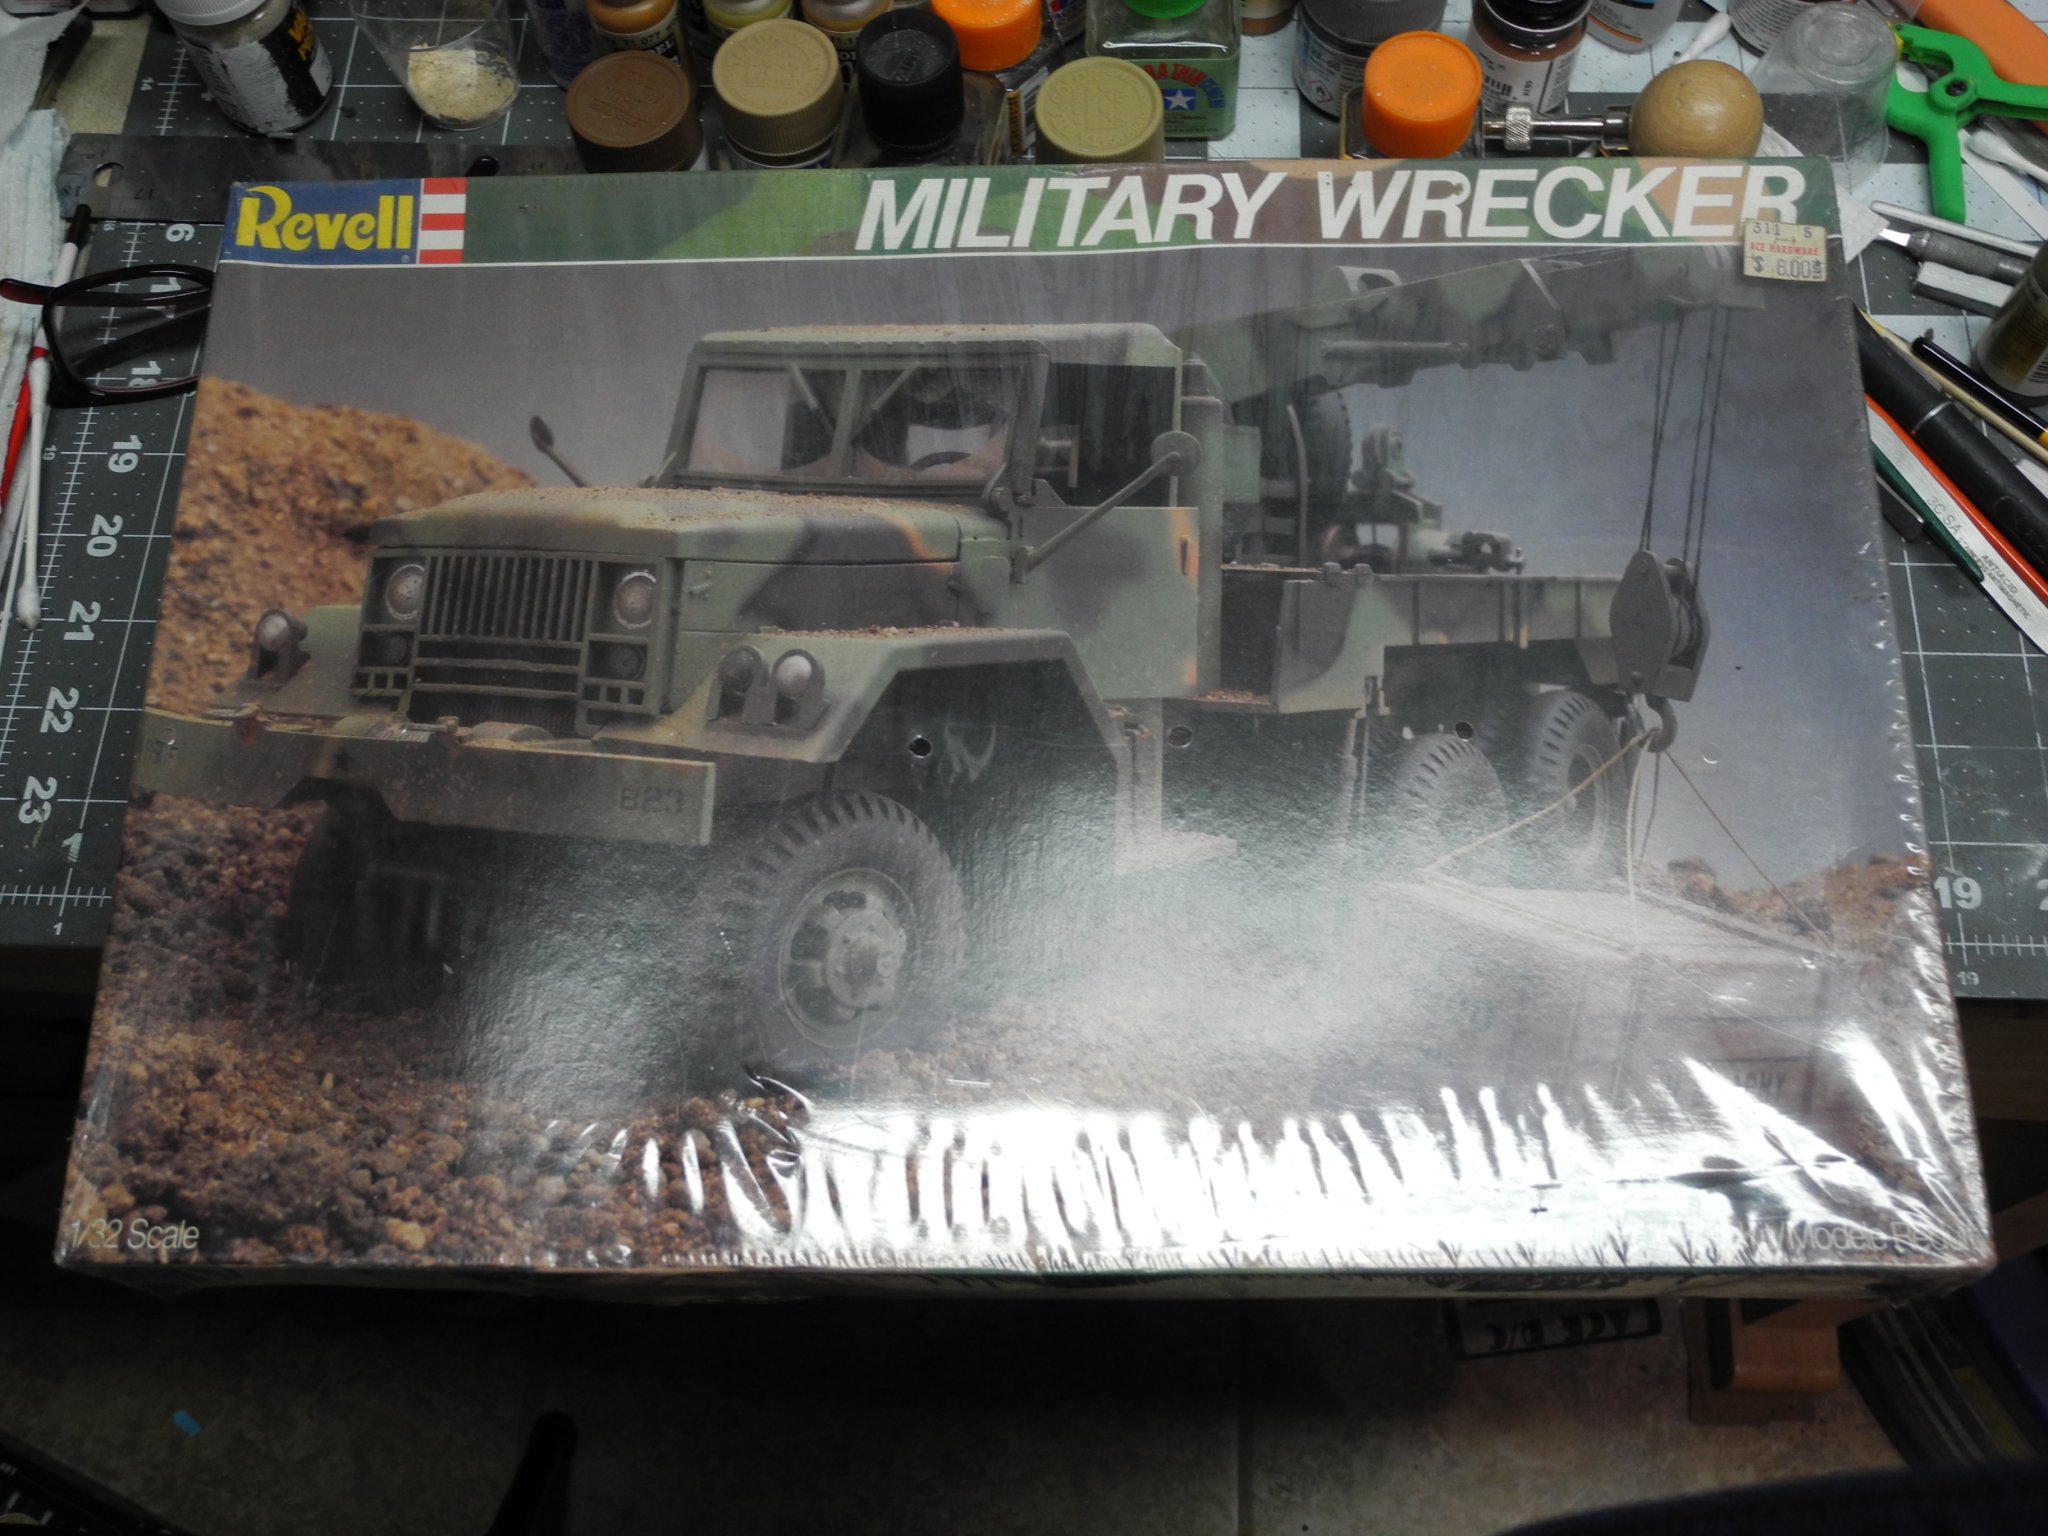
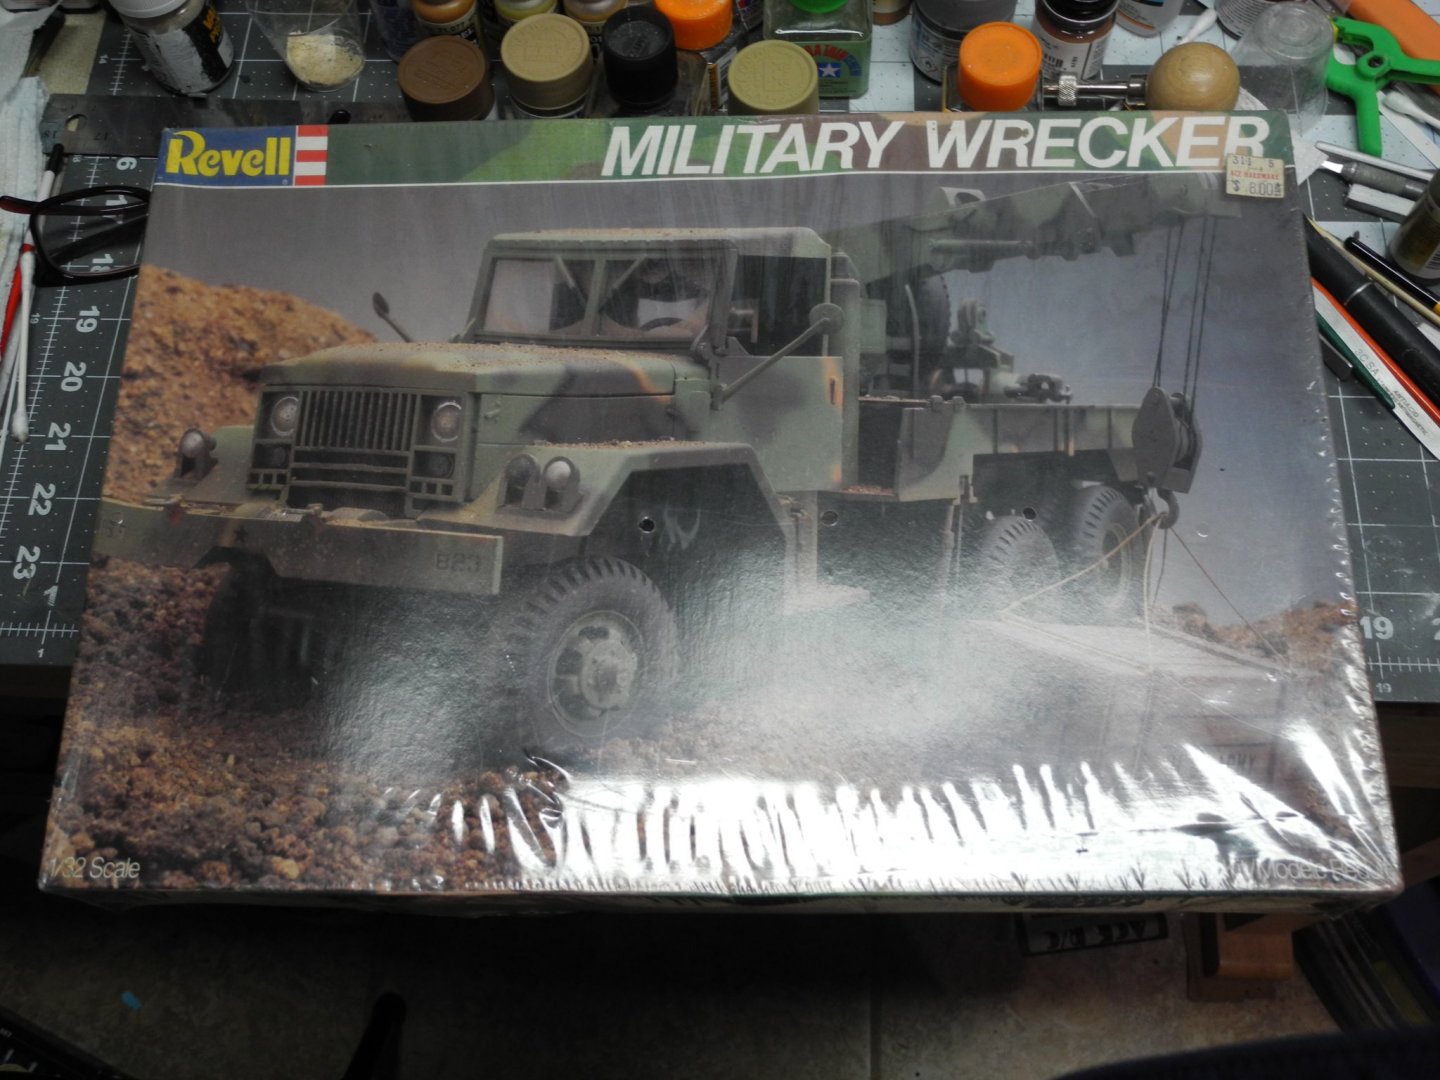
One day this past week, a box arrived on my doorstep that I wasn't expecting. When I looked at the shipping label, I saw a familiar name on the sender's line and realized a good friend had surprised me with something. I opened the package and found I had received this vintage 1:32 Revell Military Wrecker kit. Right up my alley! I love military wreckers, and wreckers in general. This one is much larger than the previous military wrecker I recently finished on this forum. Part of that is because it's in a larger scale, 1:32 vs: 1:35 scale, but mainly because this wrecker was larger than the Scammell. Anyway, getting down to business, I have begun assembly of the major sub assemblies and will soon begin painting them before assembling and painting/detailing the model. These vintage Revell kits were simple to build, so this one will go fairly quick. Stay tuned...

- 76 replies
-
- 11
-
-
That's finer than frog hair. Outstanding recovery from a near disaster.
-
M-50 Israeli Sherman - FINISHED - MP Models - 1:35 Scale
CDW replied to CDW's topic in Non-ship/categorised builds
Hey, thanks Lou. Did you enjoy the drive? Glad you're back. I started working on a subject today that's familiar to you. Will post some photos of it tonight or tomorrow. -
M-50 Israeli Sherman - FINISHED - MP Models - 1:35 Scale
CDW replied to CDW's topic in Non-ship/categorised builds
Looks like he would be right at home with her. Thanks for the compliment. -
This reminds me of the gun that sits in front of our local VFW. I'll take a photo of it next time I go past it. In front of University of Tampa are some huge naval shore gun emplacements. Those are interesting to see, and massive. I think those might be from the Spanish American War era.
-
M-50 Israeli Sherman - FINISHED - MP Models - 1:35 Scale
CDW replied to CDW's topic in Non-ship/categorised builds
Thanks OC -
Very nice kit EG, the first one I've laid eyes on. Did you order this kit or find it in a hobby shop?
-
M-50 Israeli Sherman - FINISHED - MP Models - 1:35 Scale
CDW replied to CDW's topic in Non-ship/categorised builds
Thanks Lou, I appreciate the kind comments. -
M-50 Israeli Sherman - FINISHED - MP Models - 1:35 Scale
CDW replied to CDW's topic in Non-ship/categorised builds
Thanks, Jack. If you start with a dark base color like Tamiya dark yellow, then mix 25% white, 40% white, and last 50 % white, you can achieve this effect by shooting on the layers in that order with the intent to highlight the high spots to give the model an appearance of depth. Also, I used a dark brown wash in the creases and on weld lines. -
Tiger 1 by marktiedens - FINISHED - Dragon - 1/35 scale
CDW replied to marktiedens's topic in Non-ship/categorised builds
I think this is one of the nicest kits Dragon has ever produced. You probably won't see many others done like this, ever. I bought the Dragon German 88 mm Flak Gun a few years ago and it came with all the turned metal extras, a very complex kit. I started building it and had some fit issues that annoyed me badly, I put everything back in the box until my mental attitude toward finishing it improved and I could work through the problems. Still need to finish that one.