CDW
-
Posts
7,755 -
Joined
-
Last visited
Content Type
Profiles
Forums
Gallery
Events
Everything posted by CDW
-
 Moving ahead methodically.
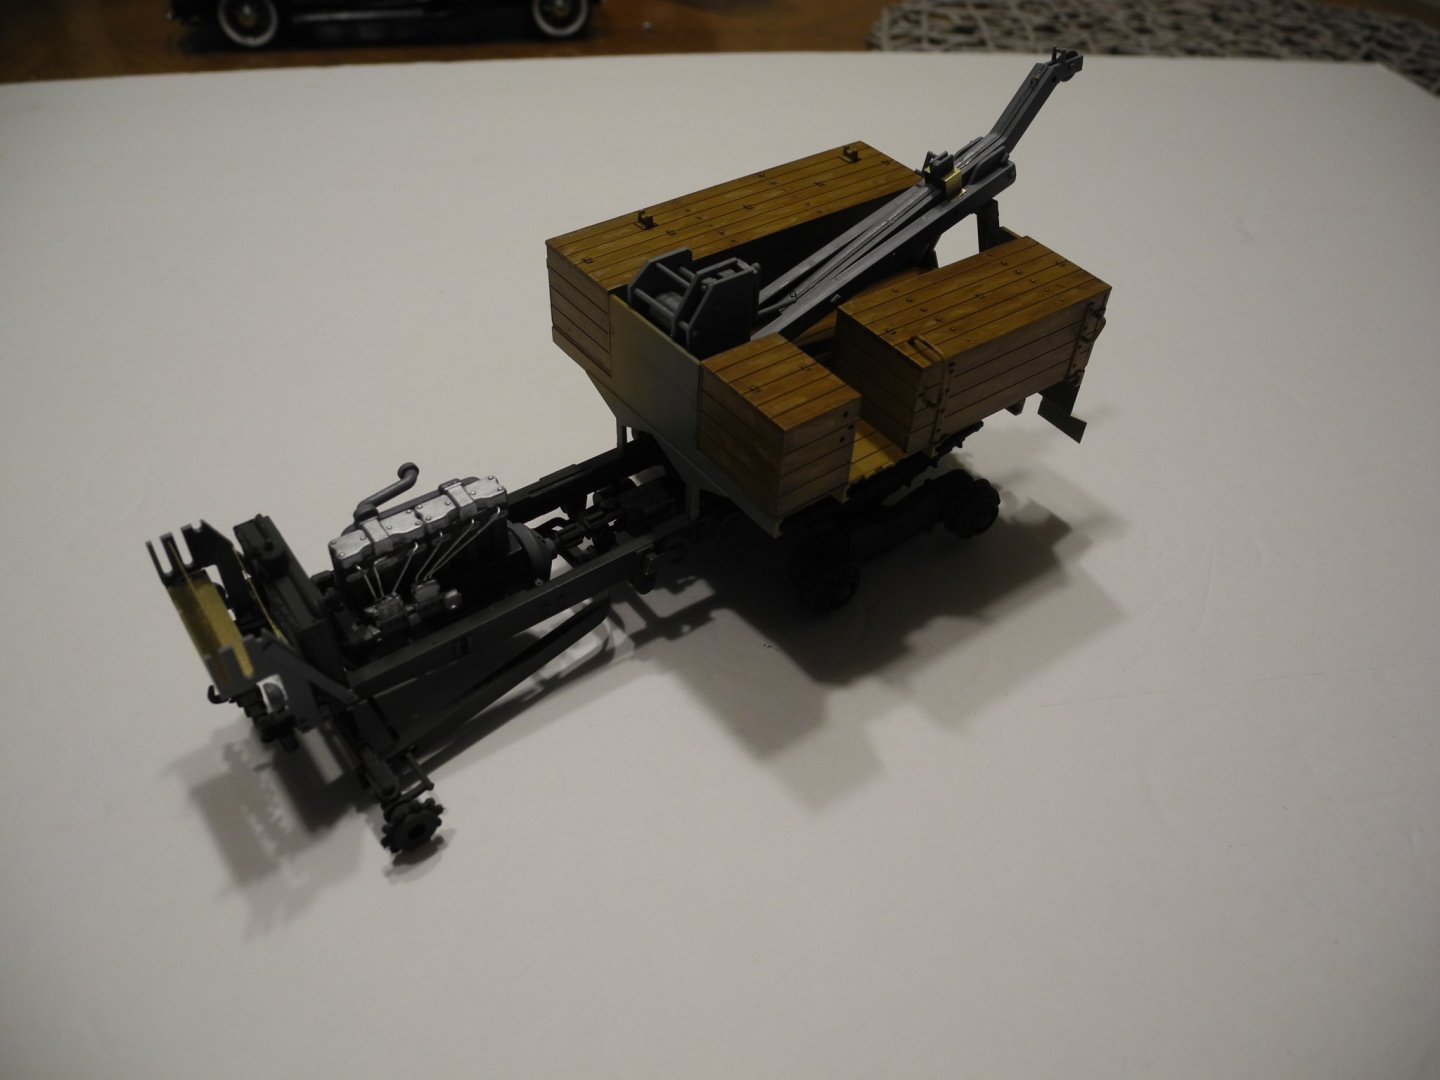


-
1931 Cadillac by CDW - FINISHED - JoHan - 1:25 Scale - PLASTIC
CDW replied to CDW's topic in Non-ship/categorised builds
I'll bet there's more than one on this forum. 😄 -
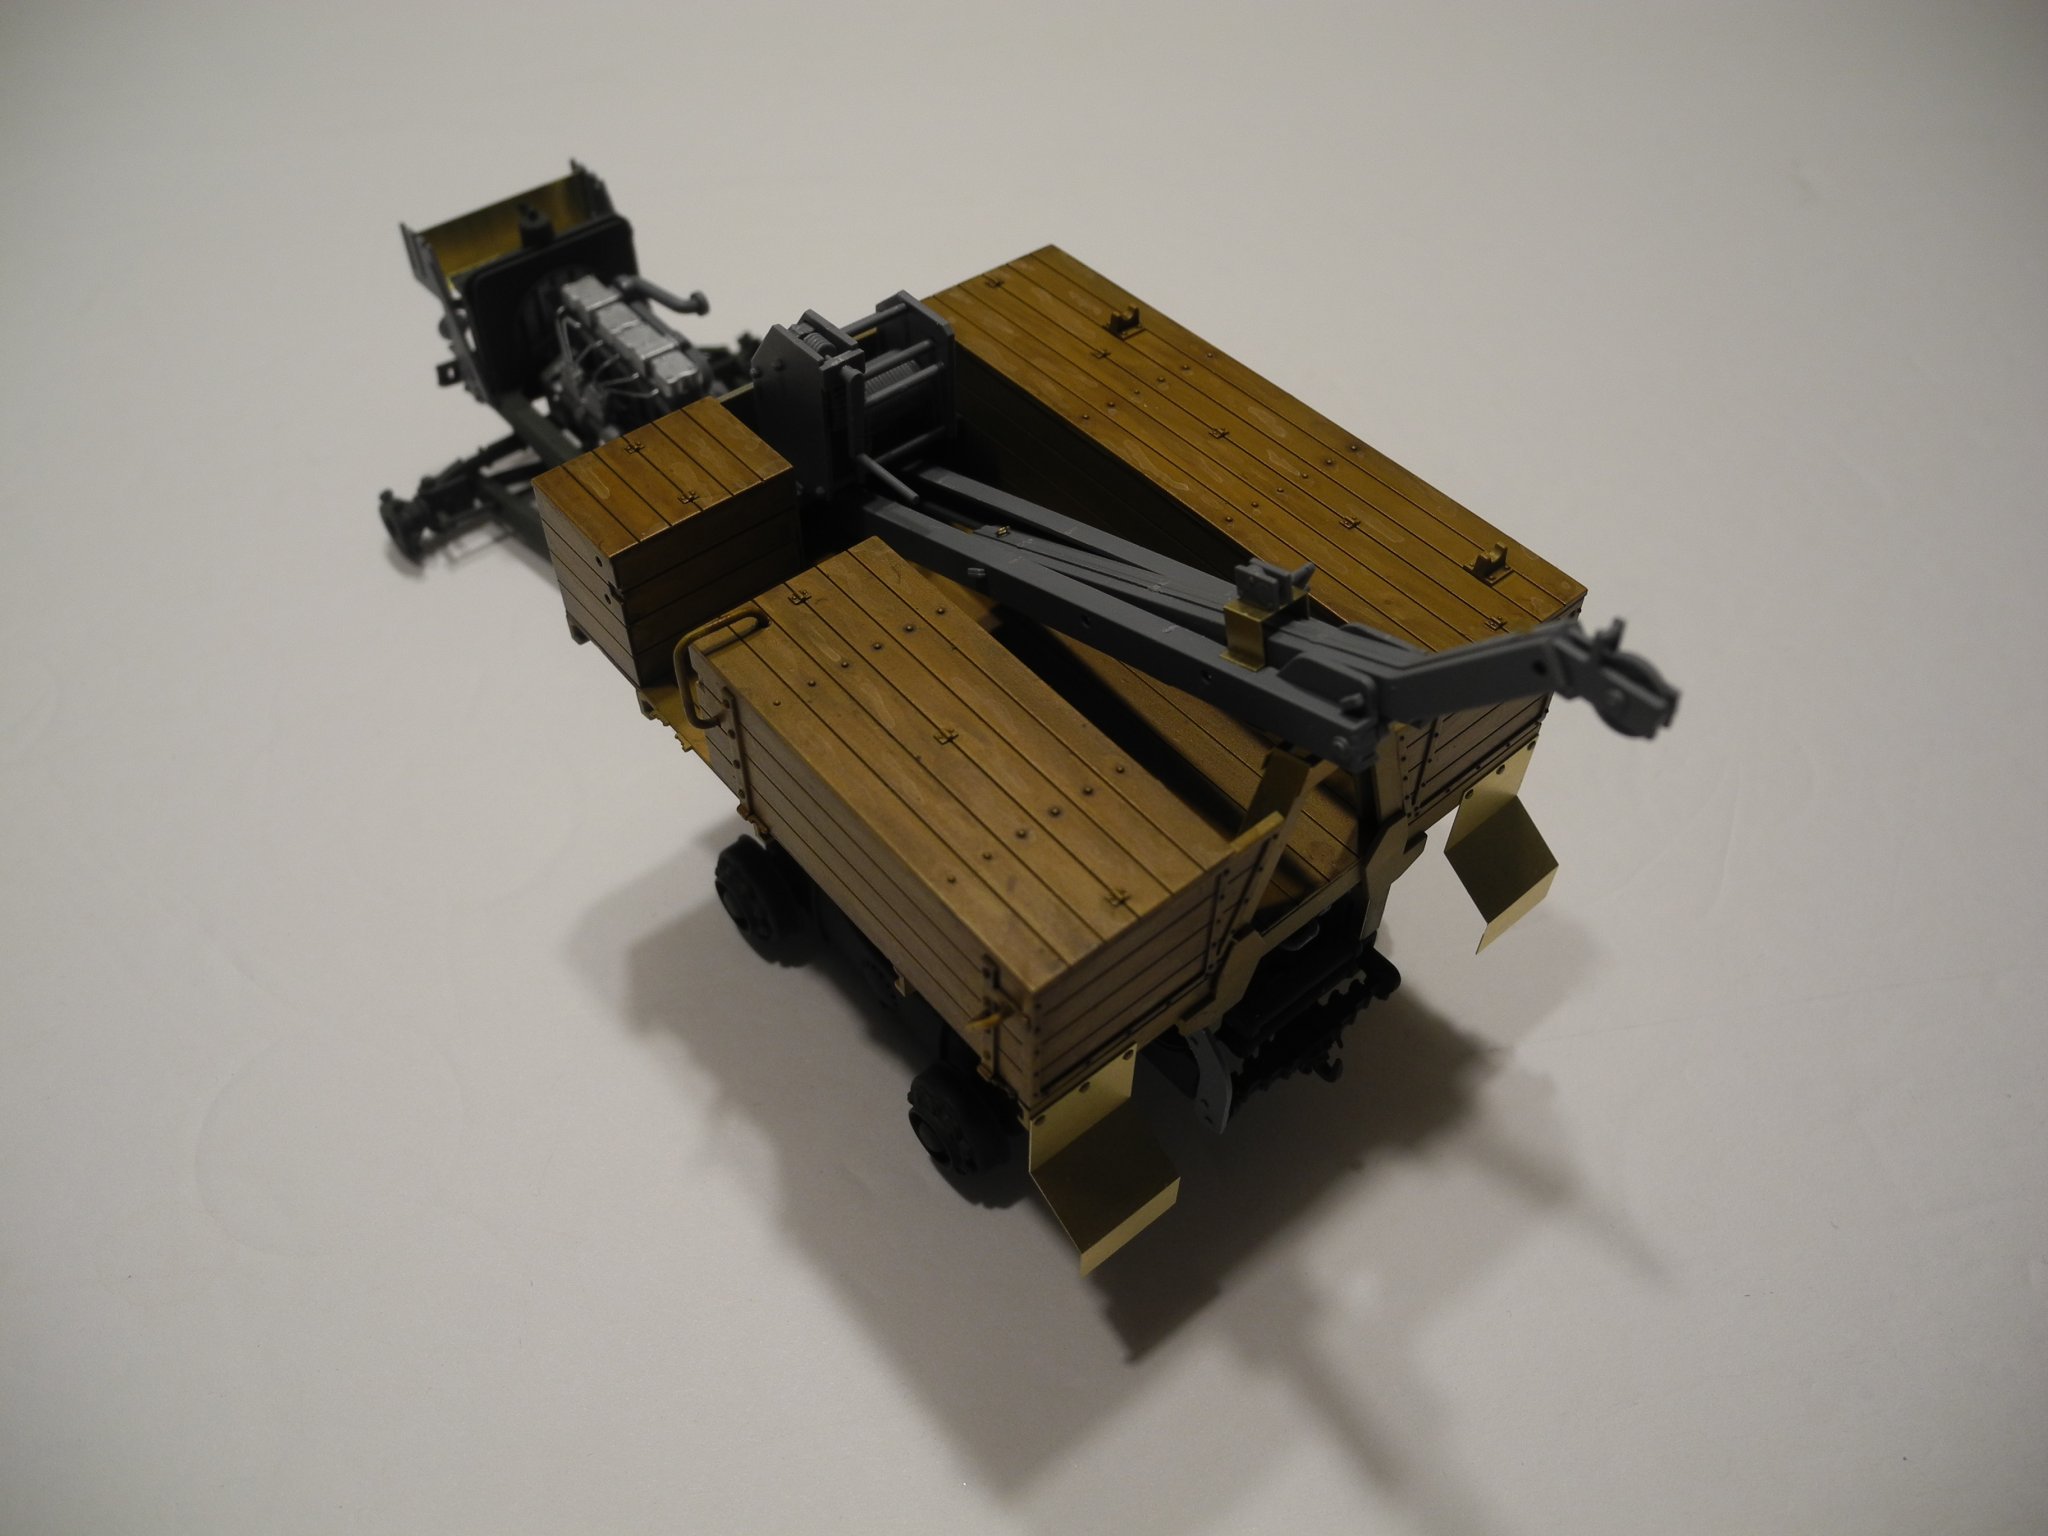
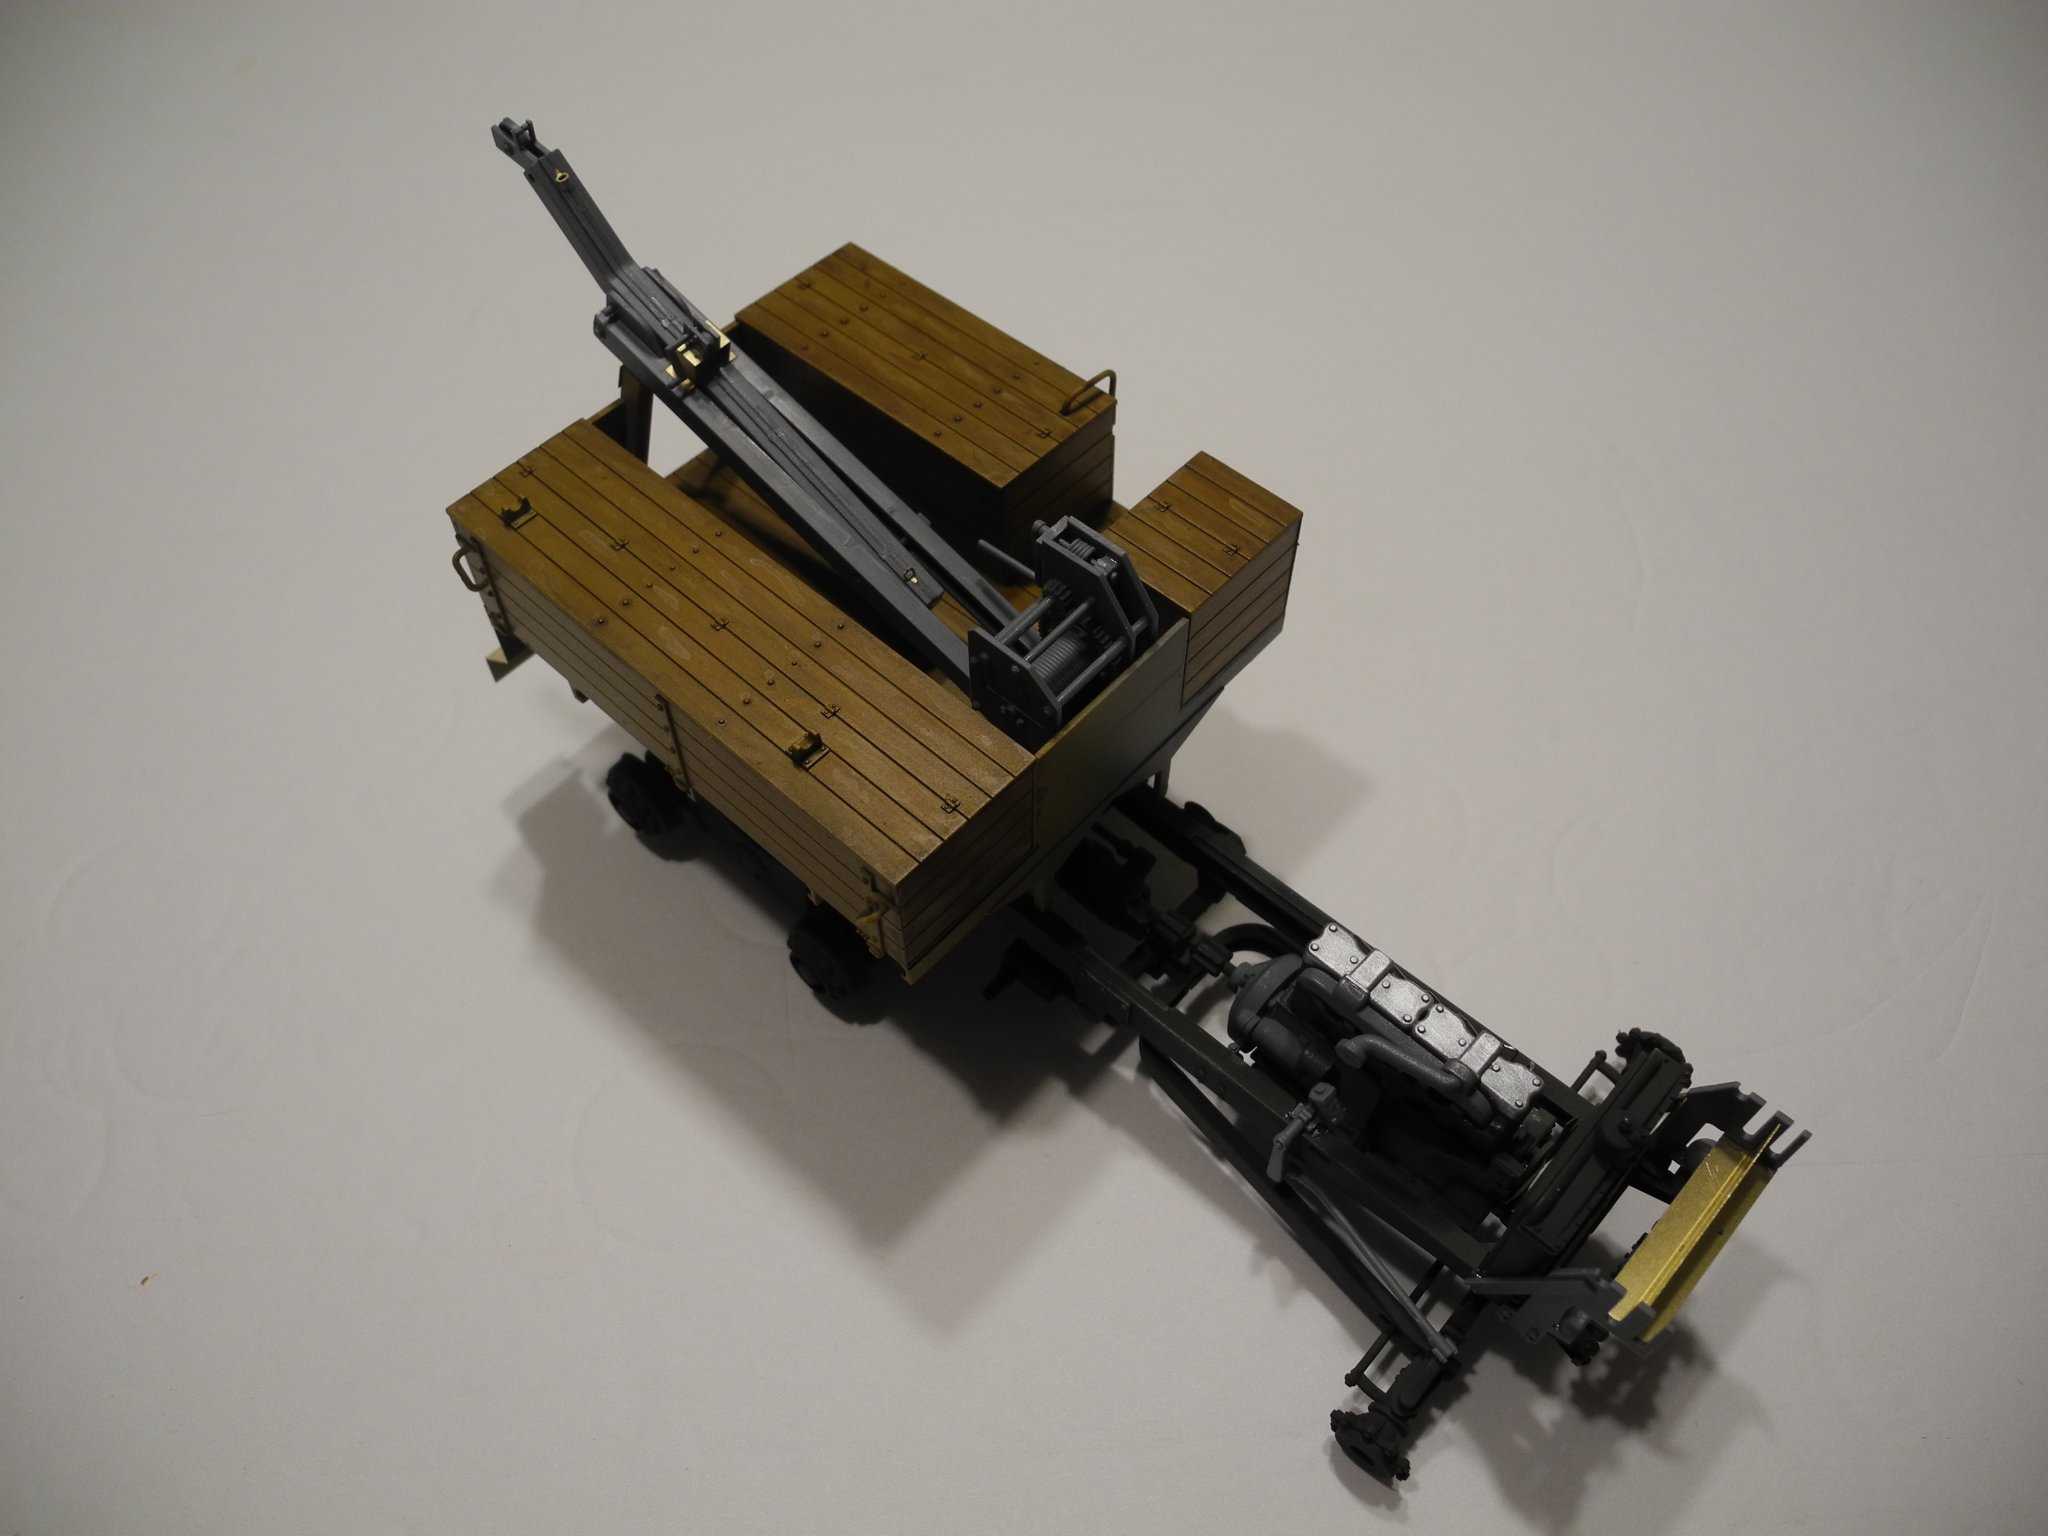
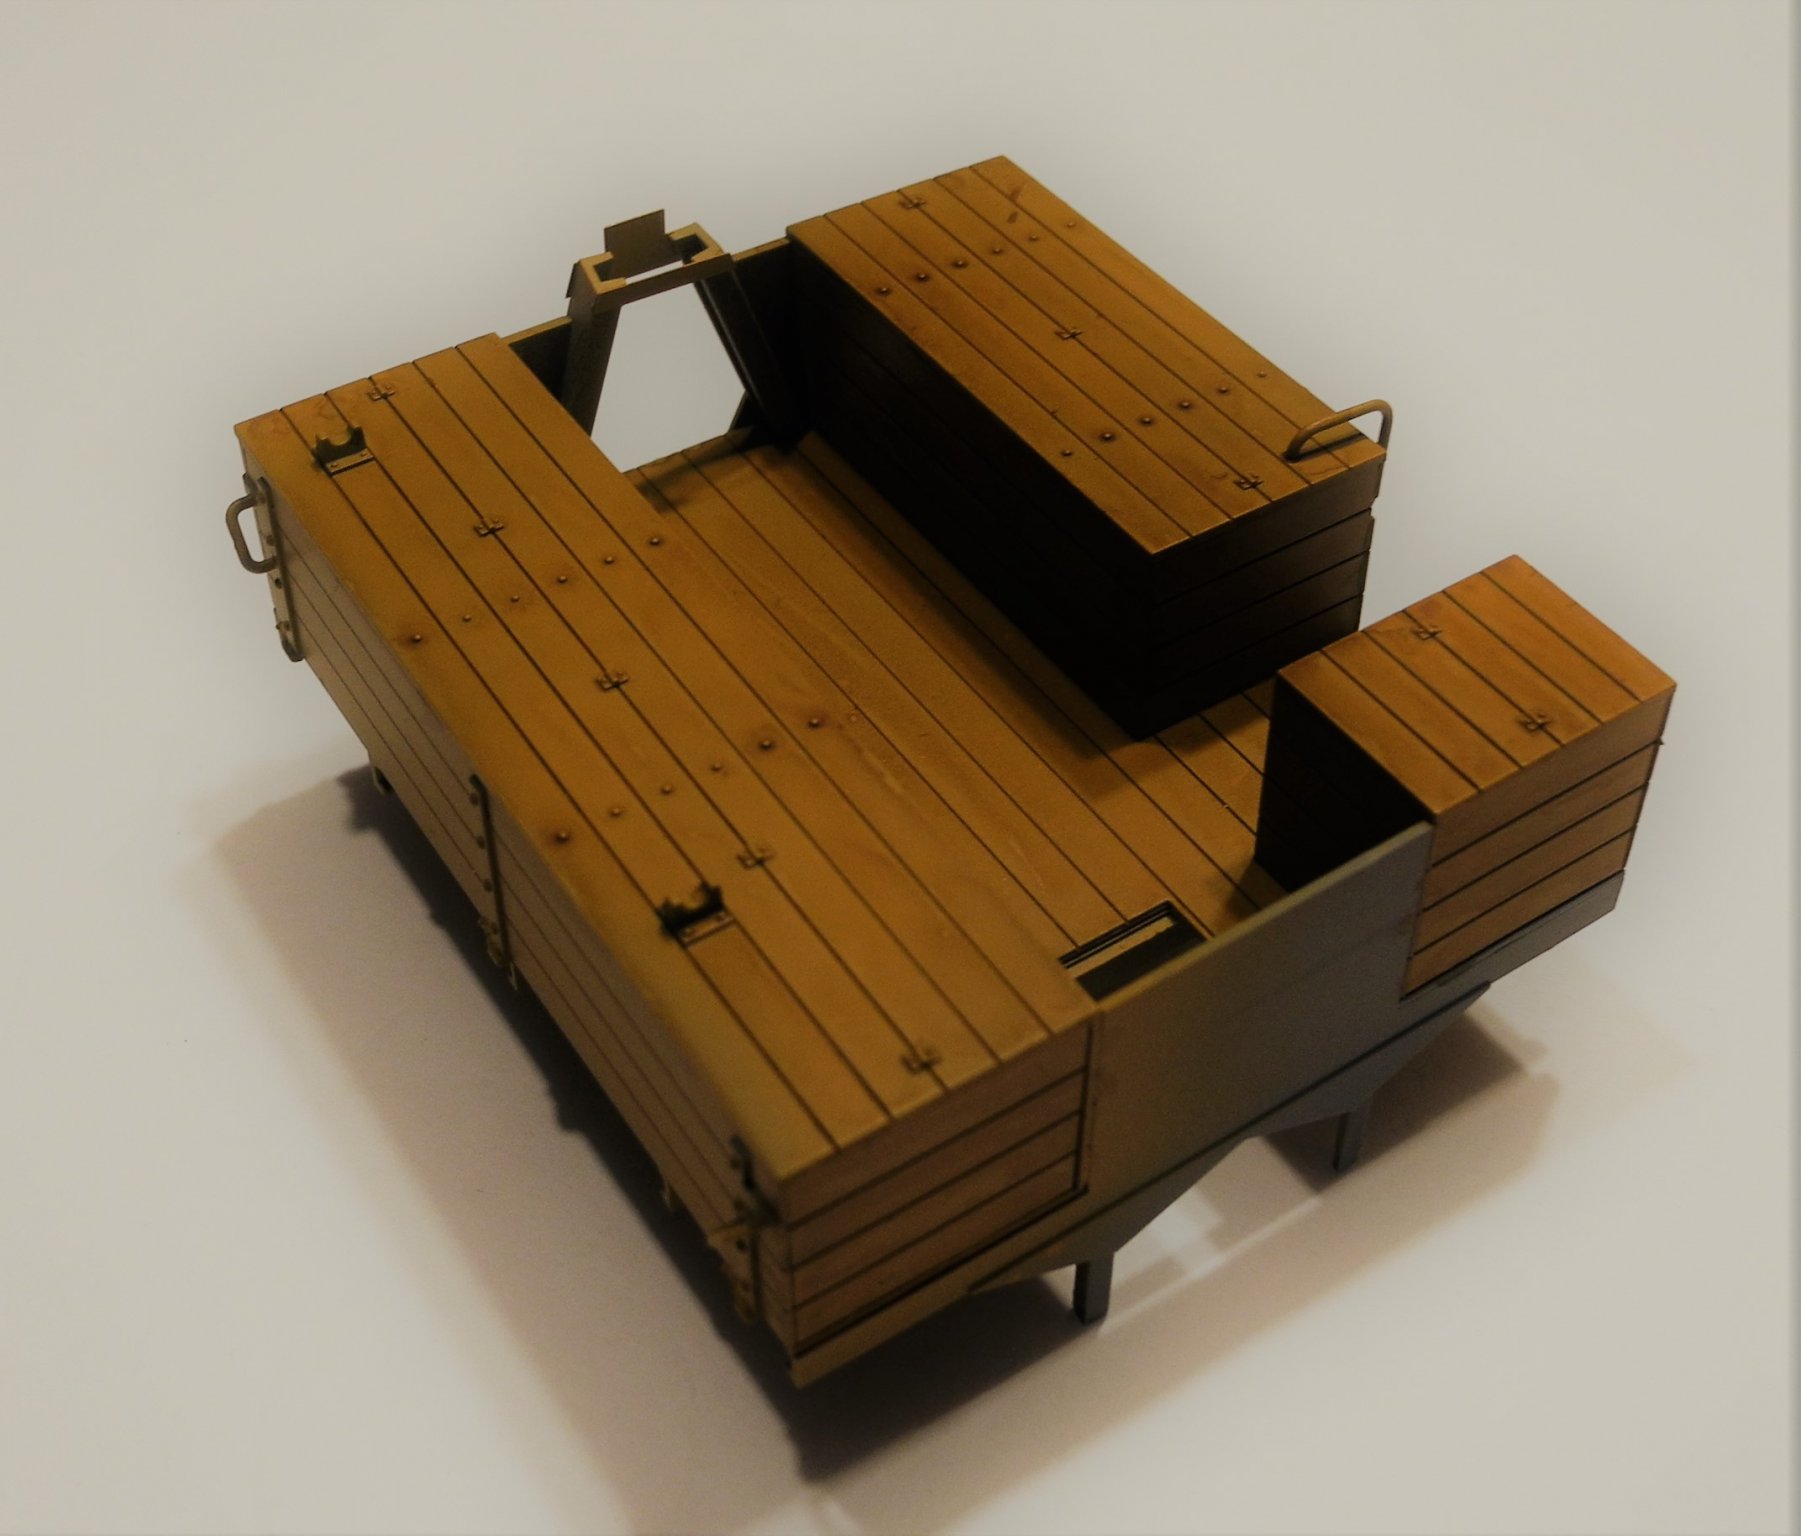
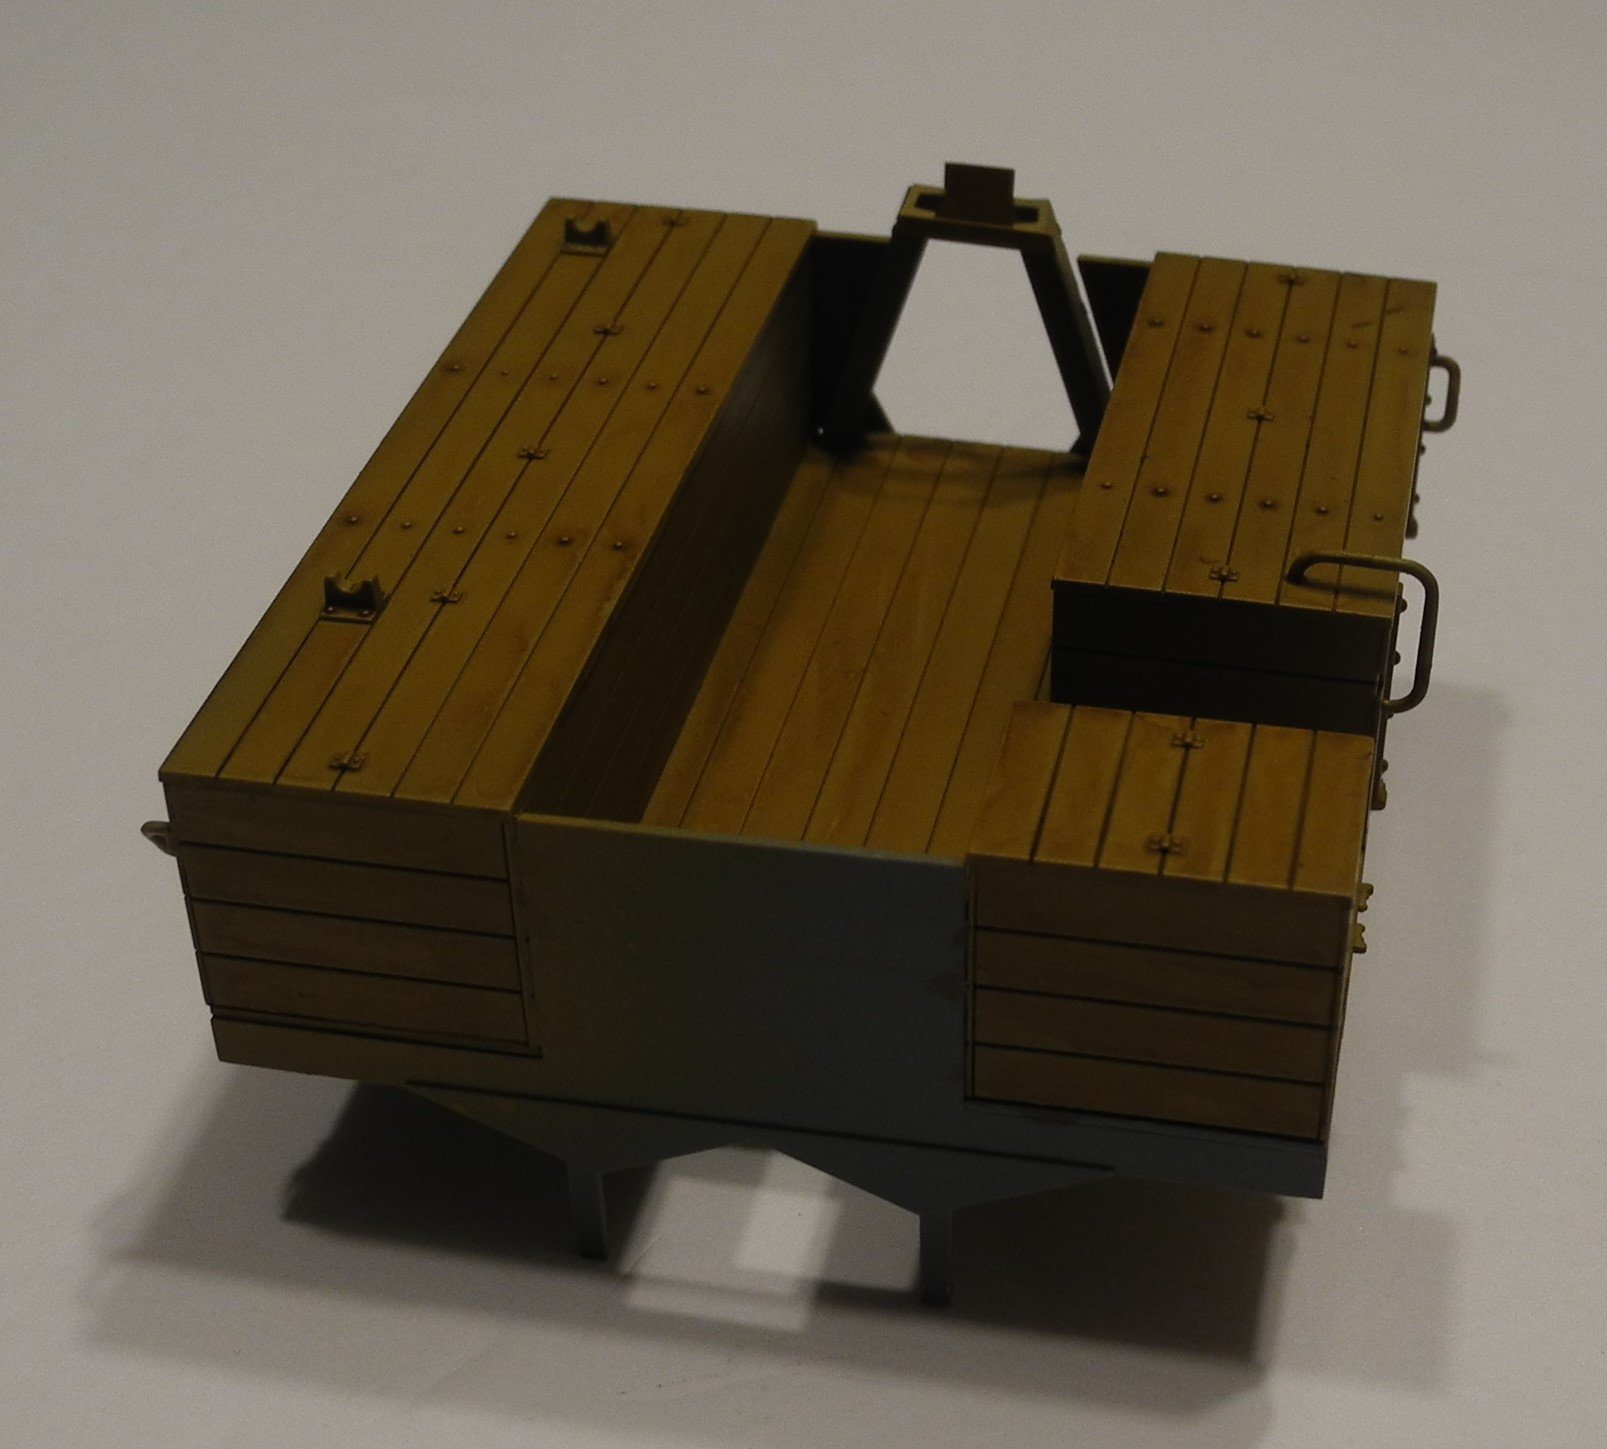
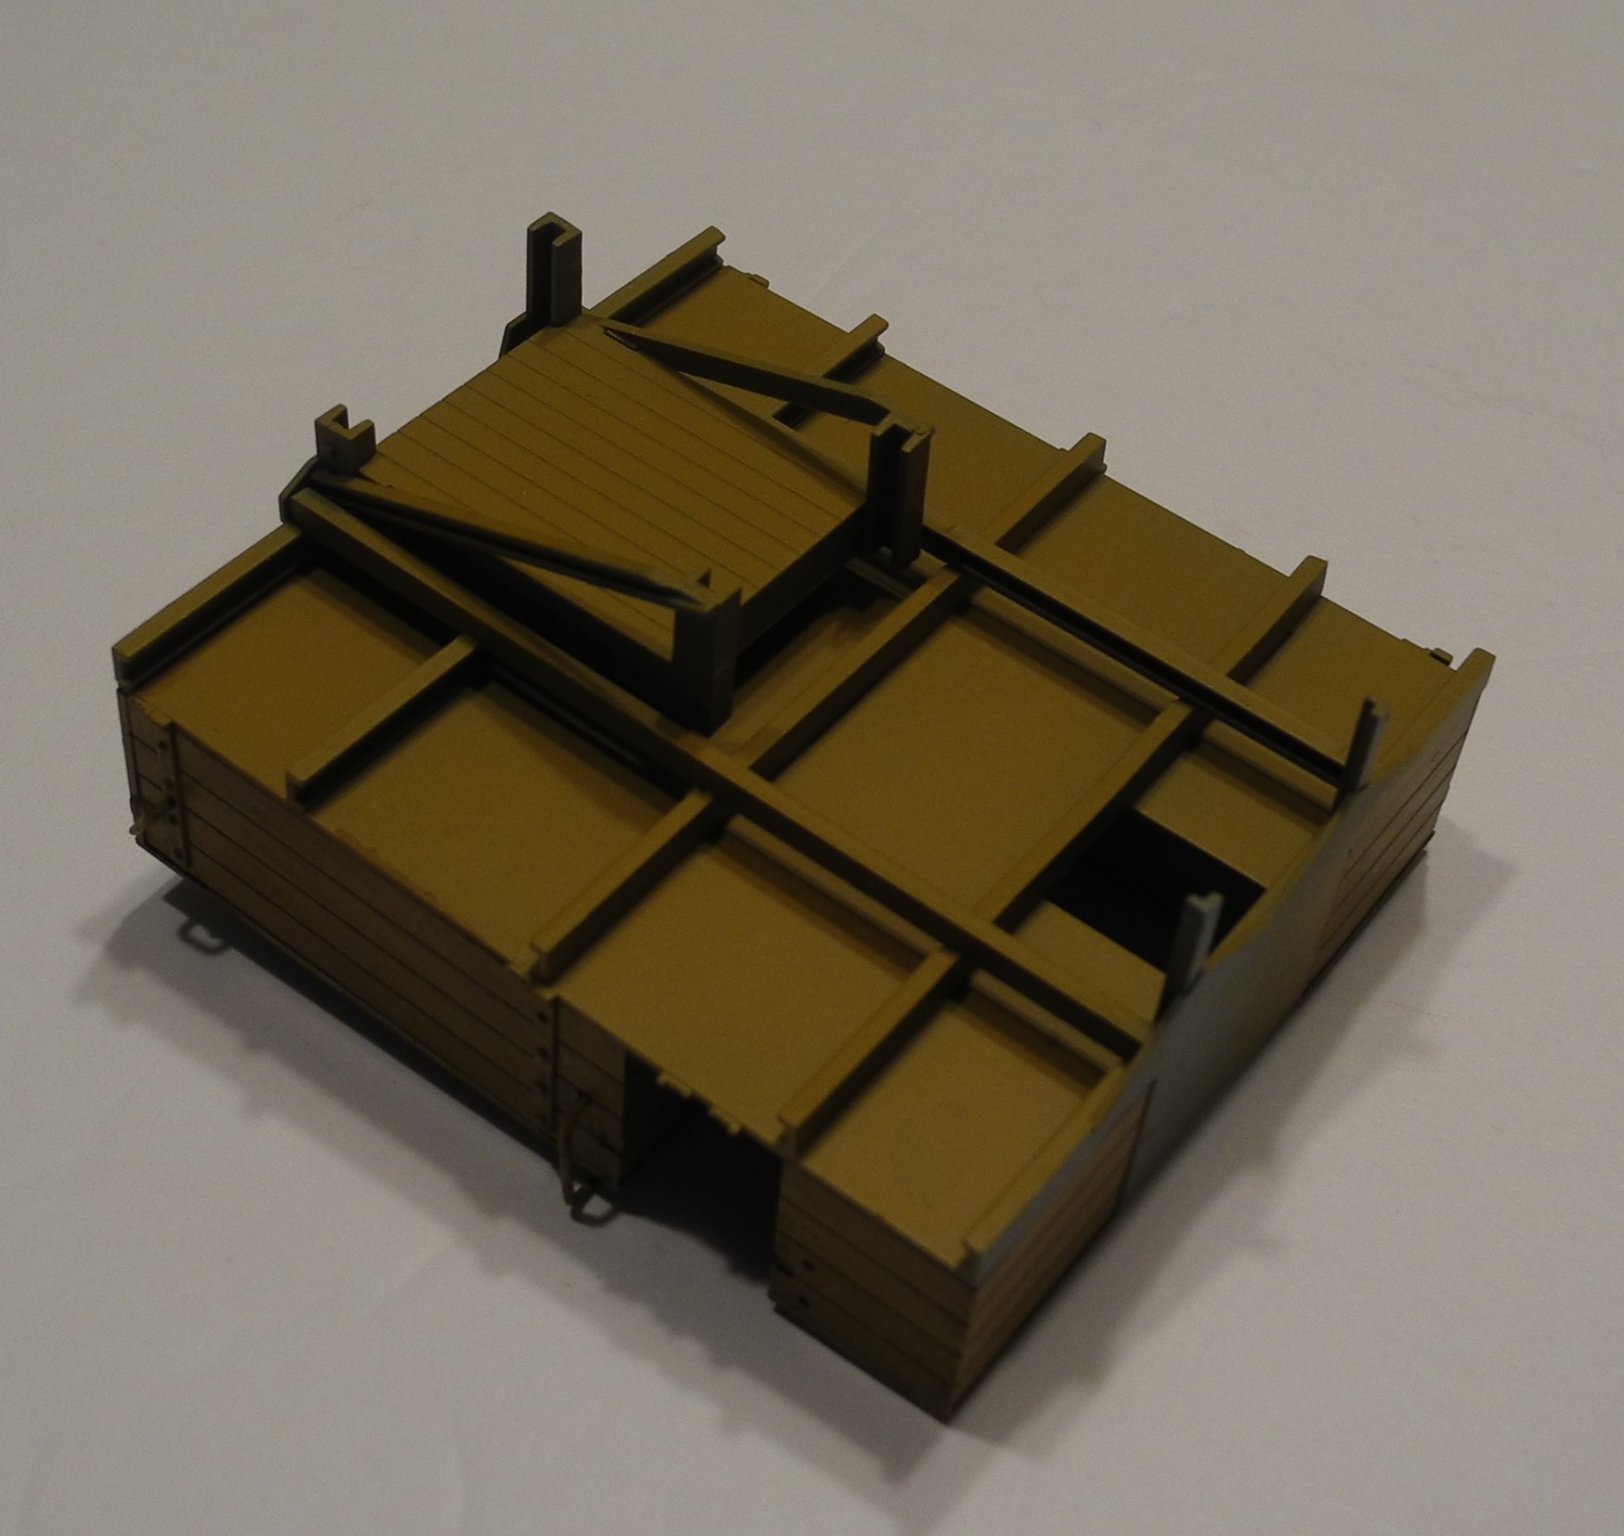
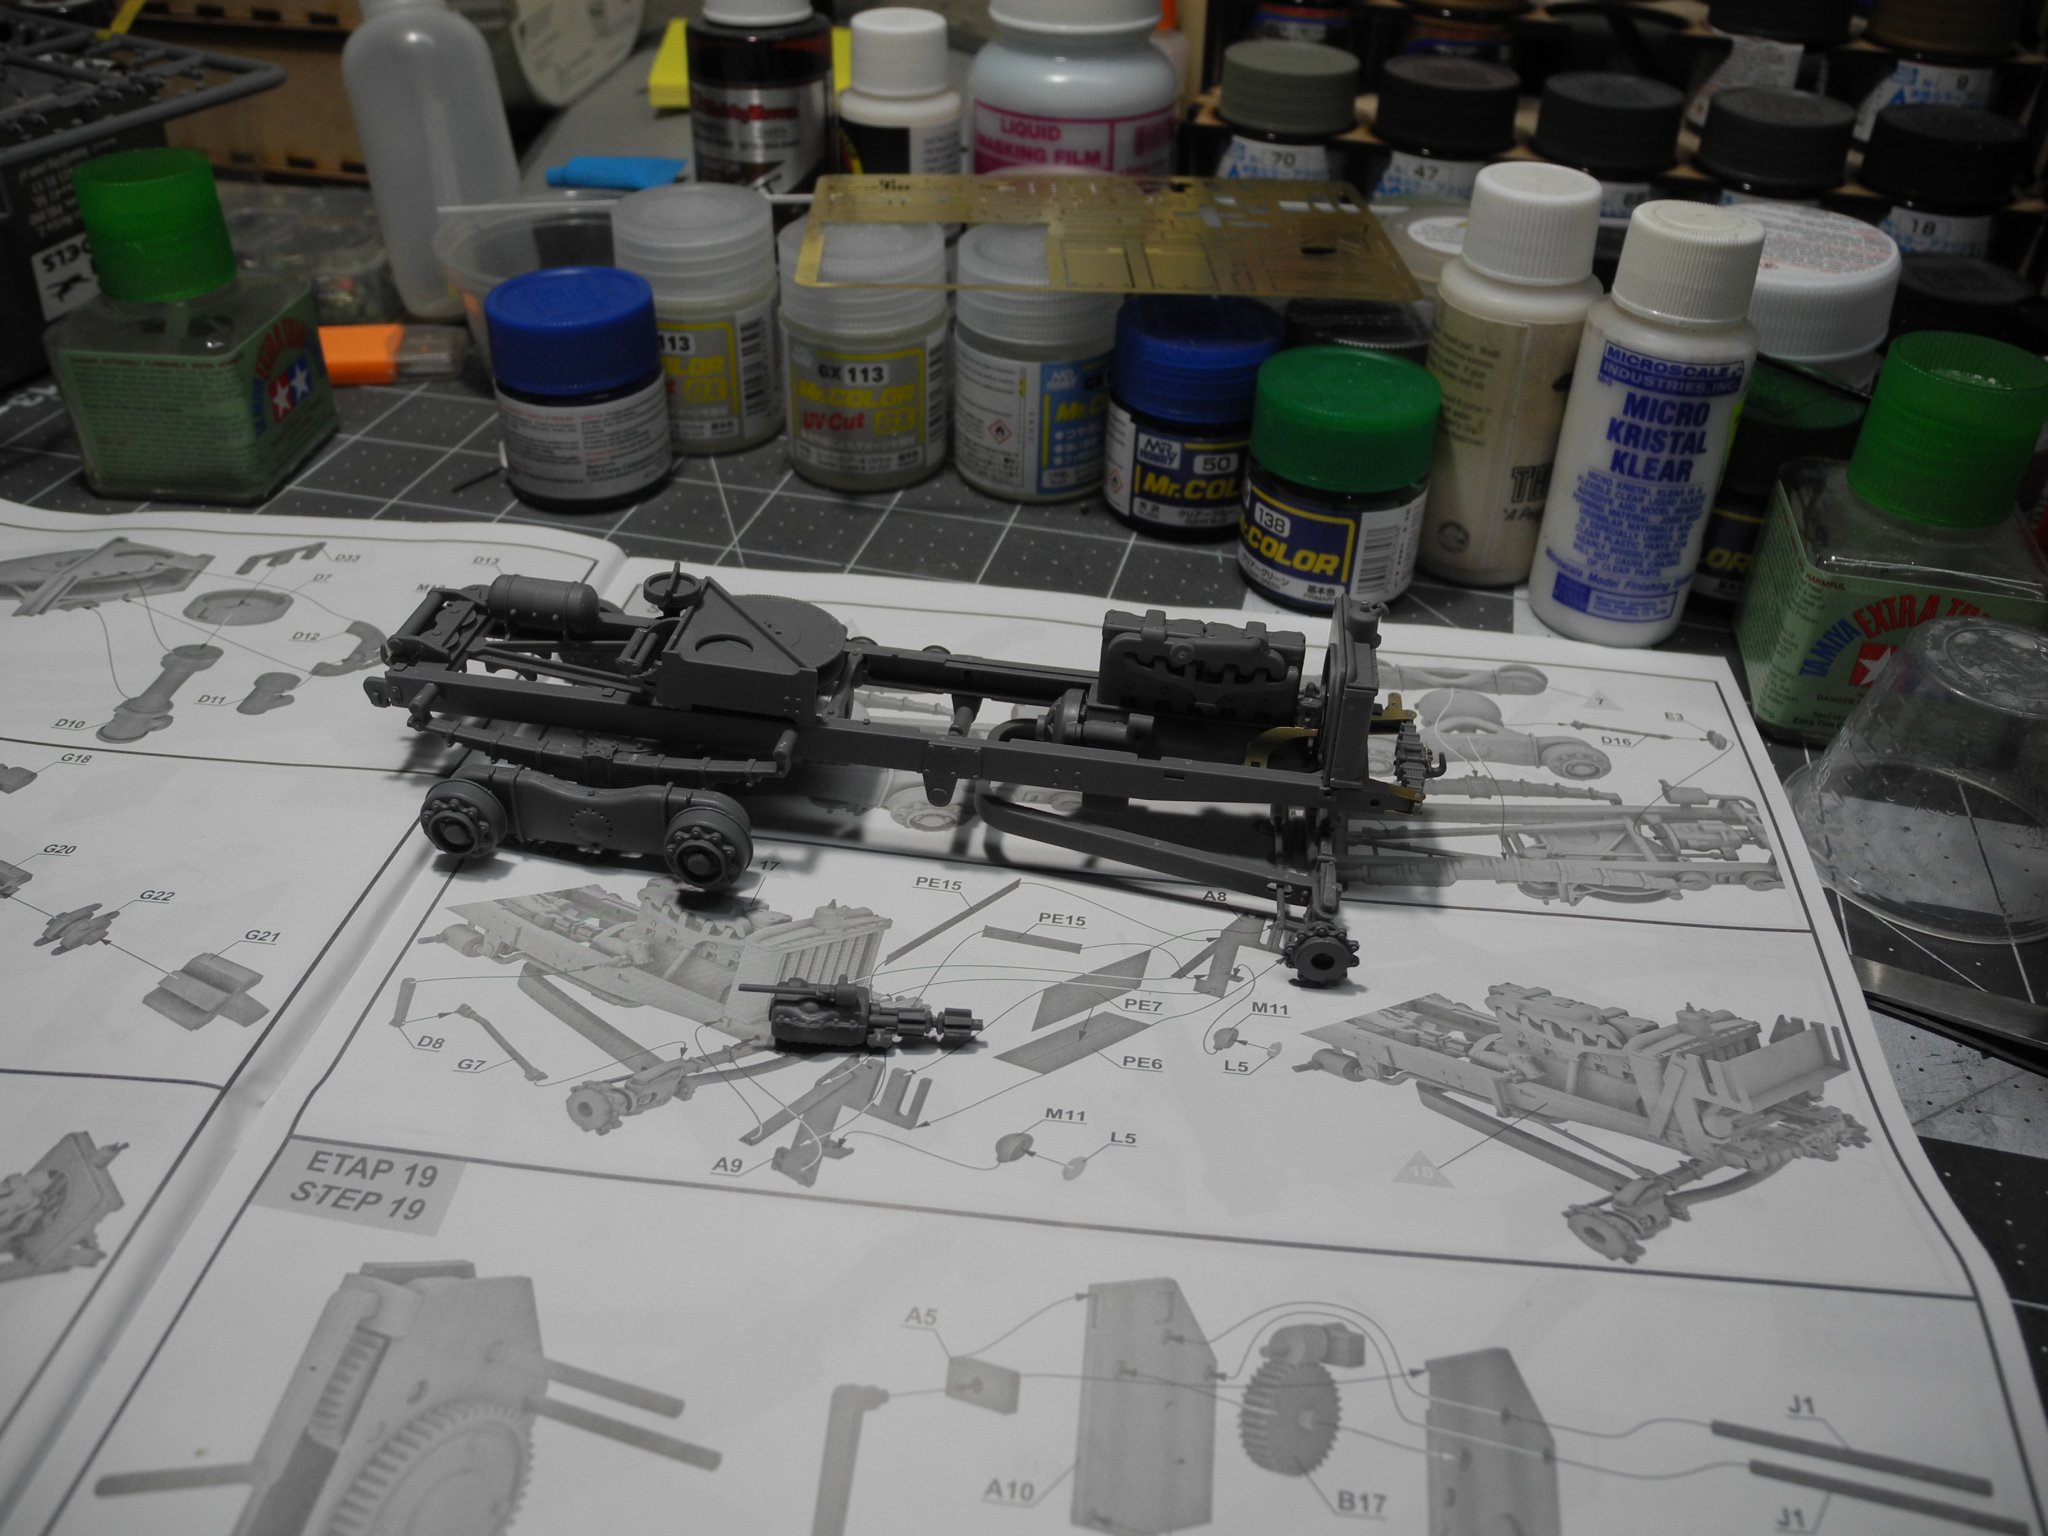
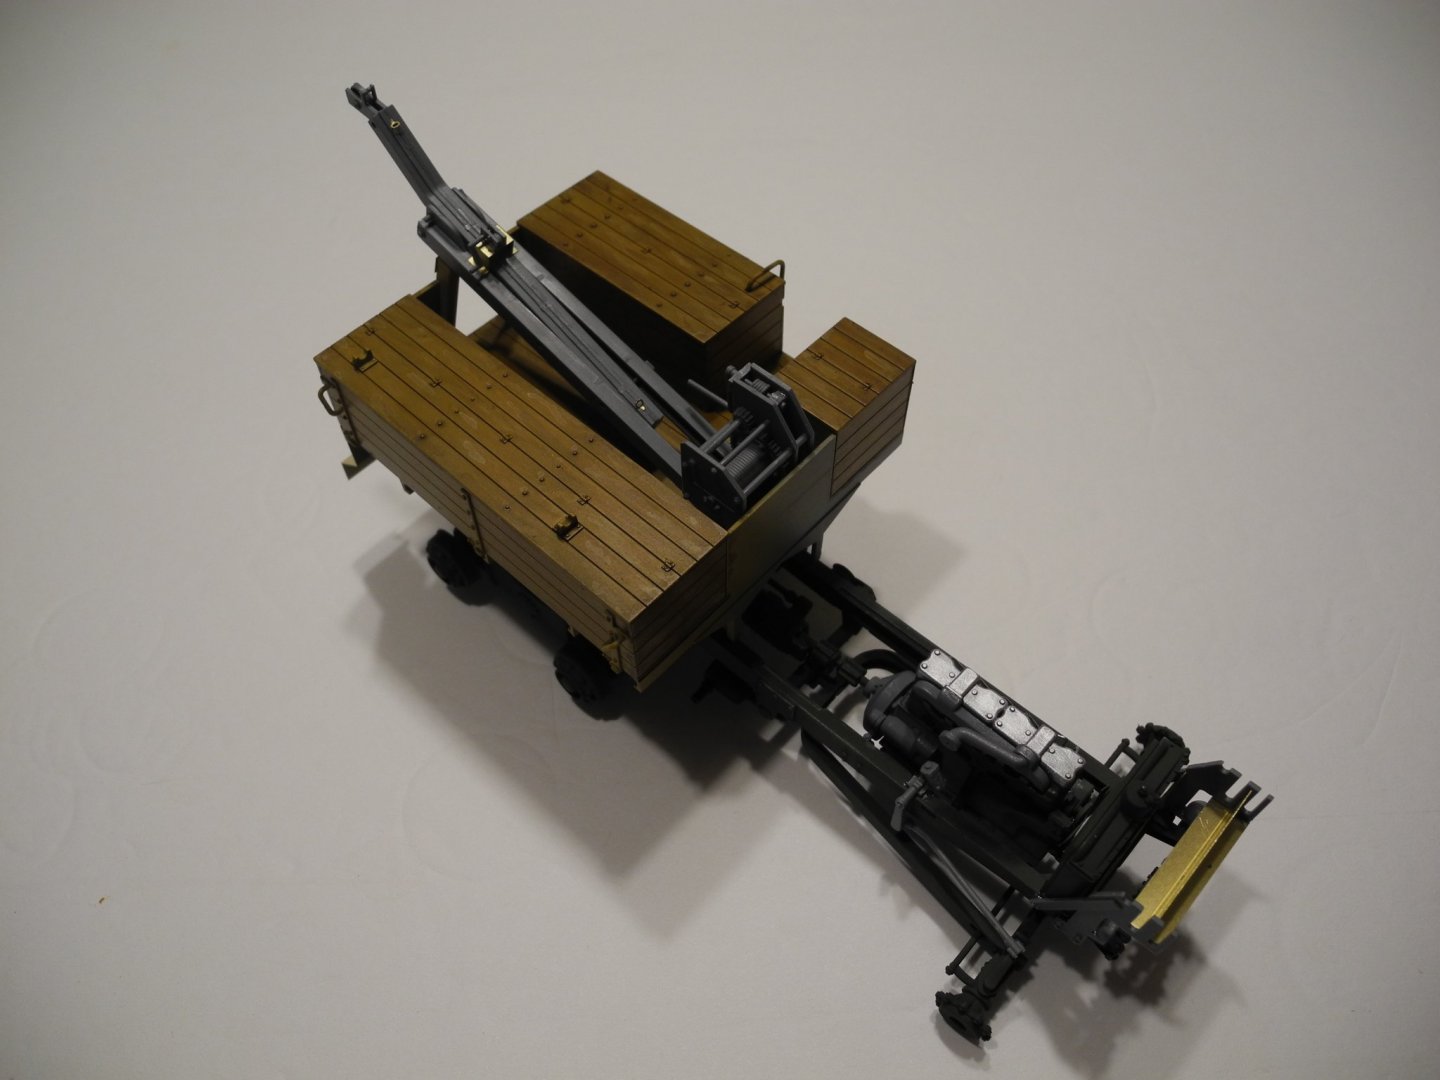
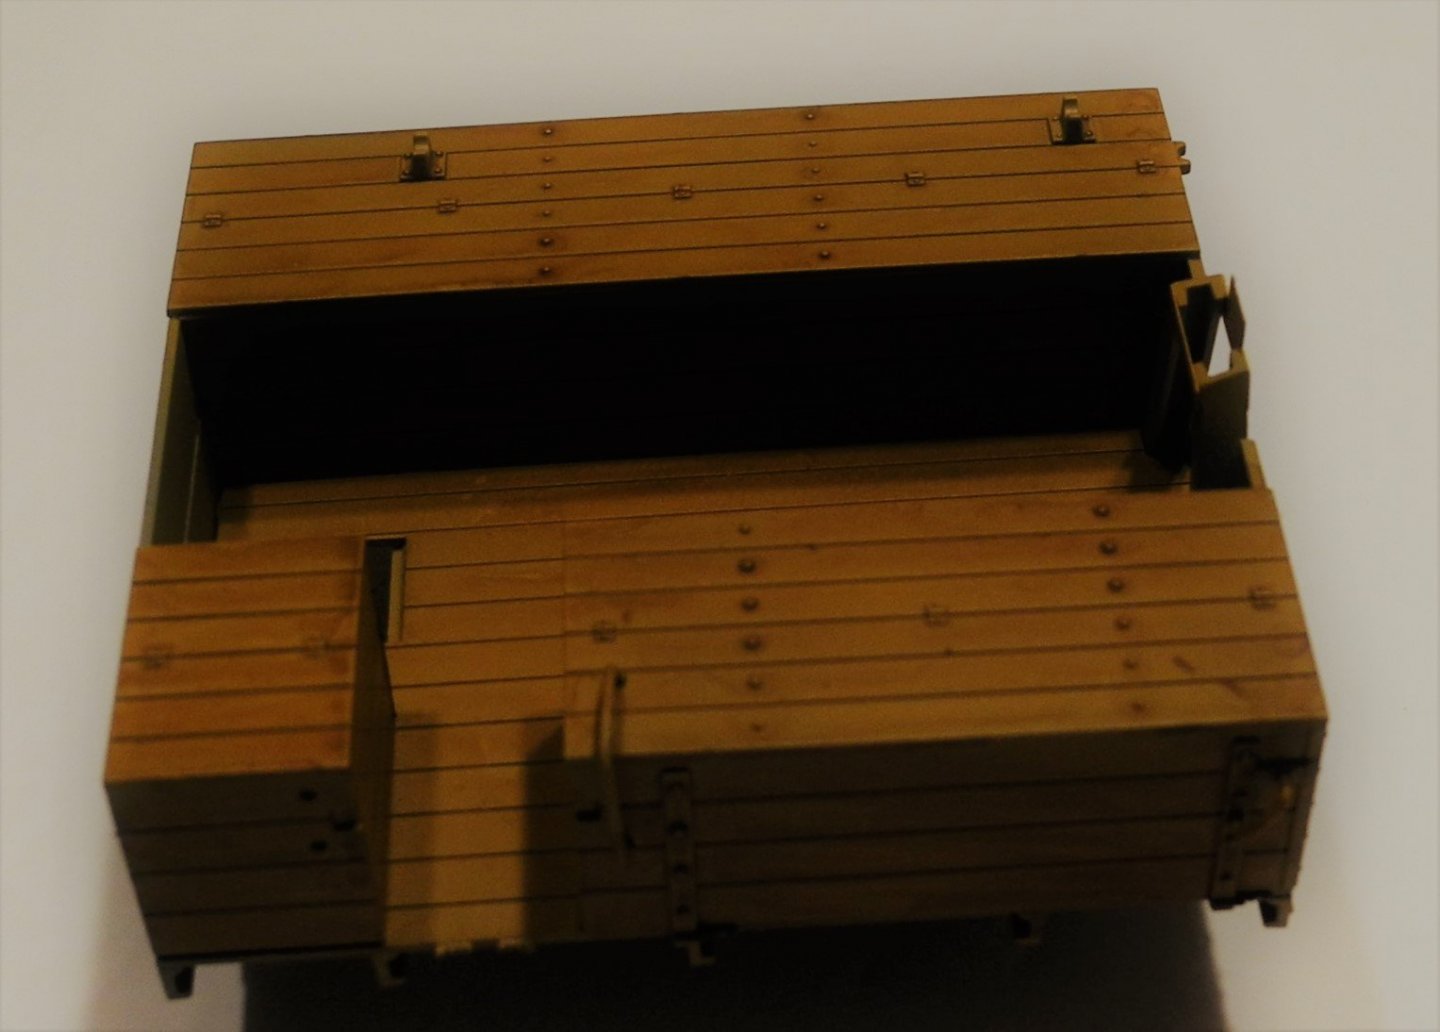
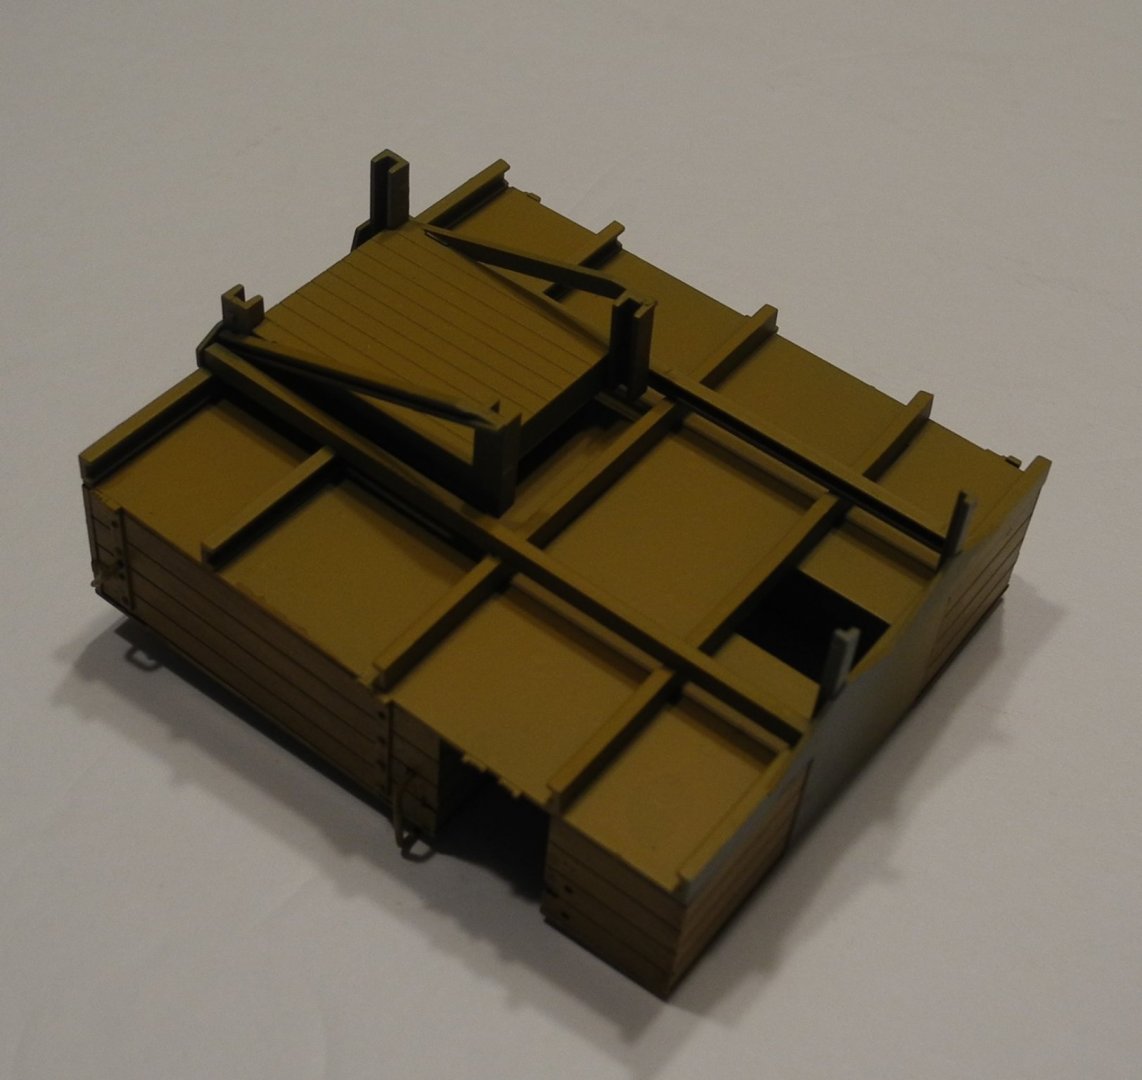
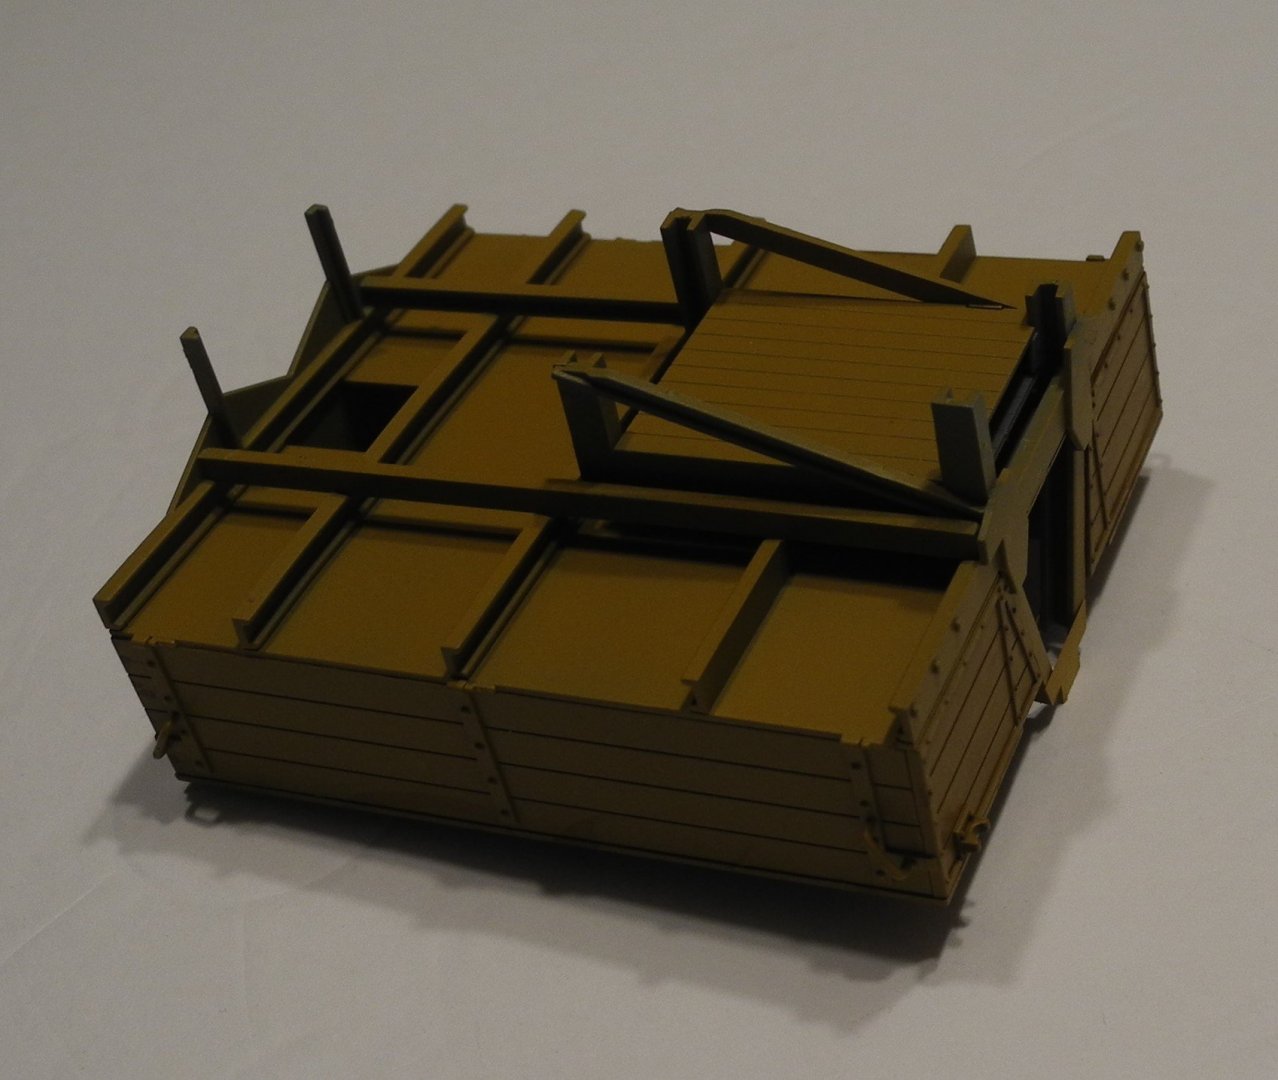
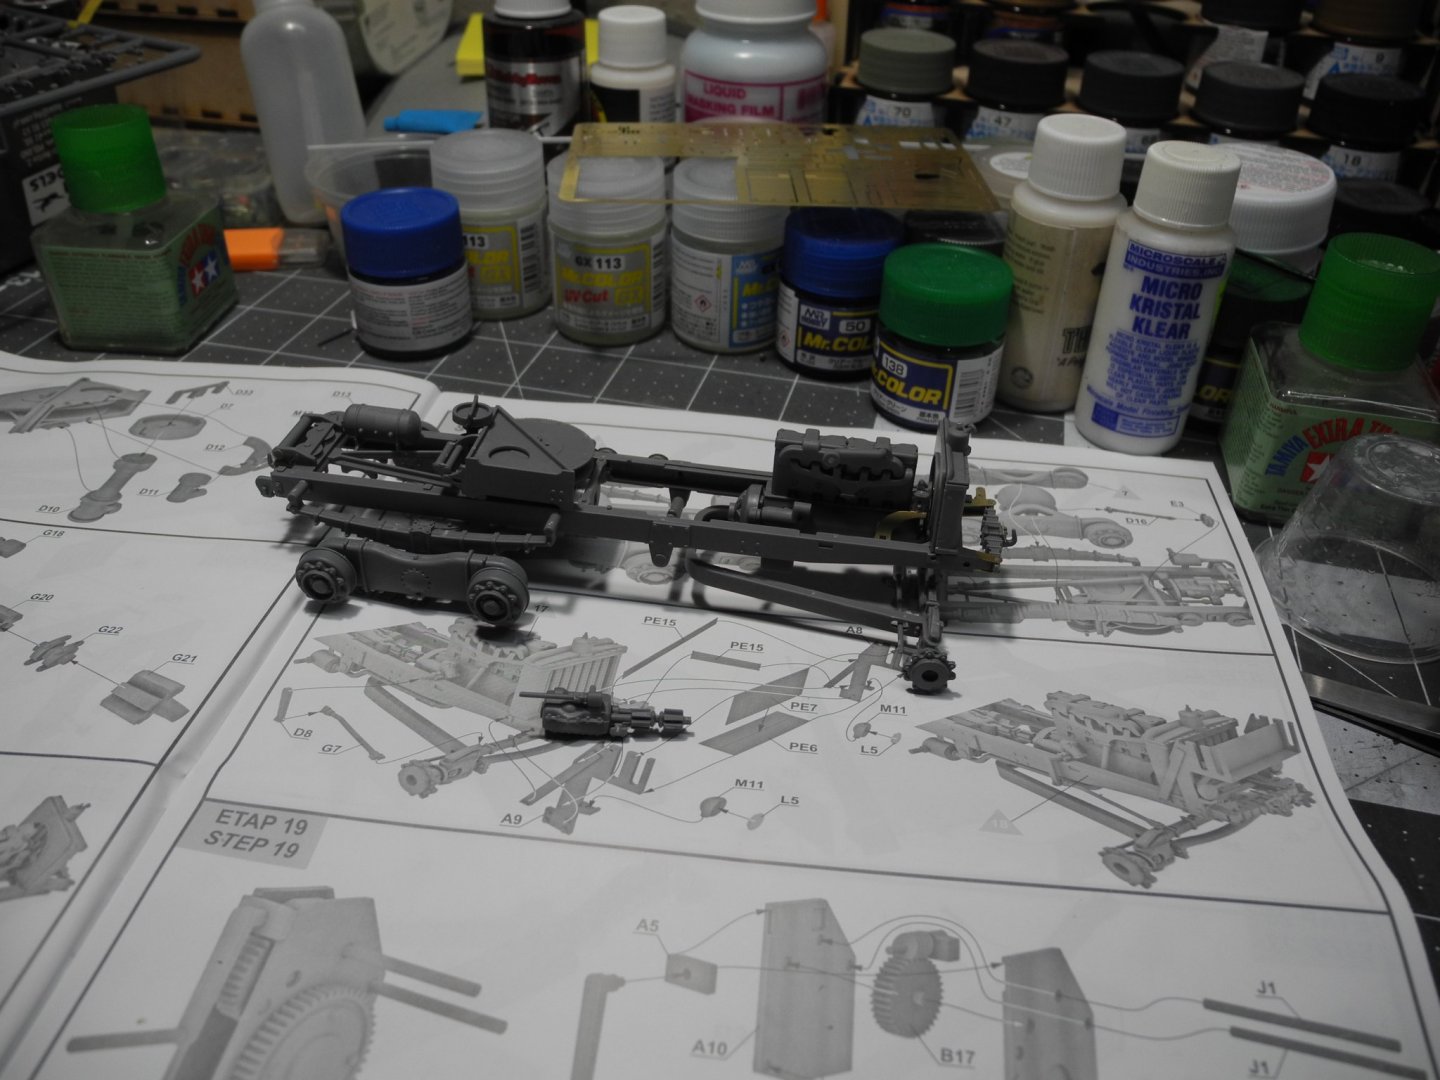
Steps 19 thru 28 deal with the body, bed, and boom. I got so carried away with building and painting the body and bed, almost forgot to take photos. The body, bed, and boom sub assemblies have been completed and painting has been started. Because this body and bed has so much wood in the construction of it, I decided to take some artistic license to paint it in a natural wood color with only the framework in olive drab. Maybe before I'm done with it, I'll put OD over the wood and do some scuffing/chipping, wear and tear, to show off the wood underneath. Haven't decided for sure yet. Anyway, here's where I am with painting the body/bed assembly right now. Just a Vallejo wood color with a Vallejo burnt umber wash, so far. Before it's all done, will add more wood tones to make it look more authentic.


-
1931 Cadillac by CDW - FINISHED - JoHan - 1:25 Scale - PLASTIC
CDW replied to CDW's topic in Non-ship/categorised builds
I do believe this might be the Entex kit reboxed and sold by Revell, just as you said. It makes sense. I don't remember ever seeing it in an Entex box before, but I do remember, and owned, many of the Entex kits myself. Once upon a time, I literally had thousands of different kits collected in my garage. I put most of them on Ebay and sold them all away when the auctions were in their heyday. -
1931 Cadillac by CDW - FINISHED - JoHan - 1:25 Scale - PLASTIC
CDW replied to CDW's topic in Non-ship/categorised builds
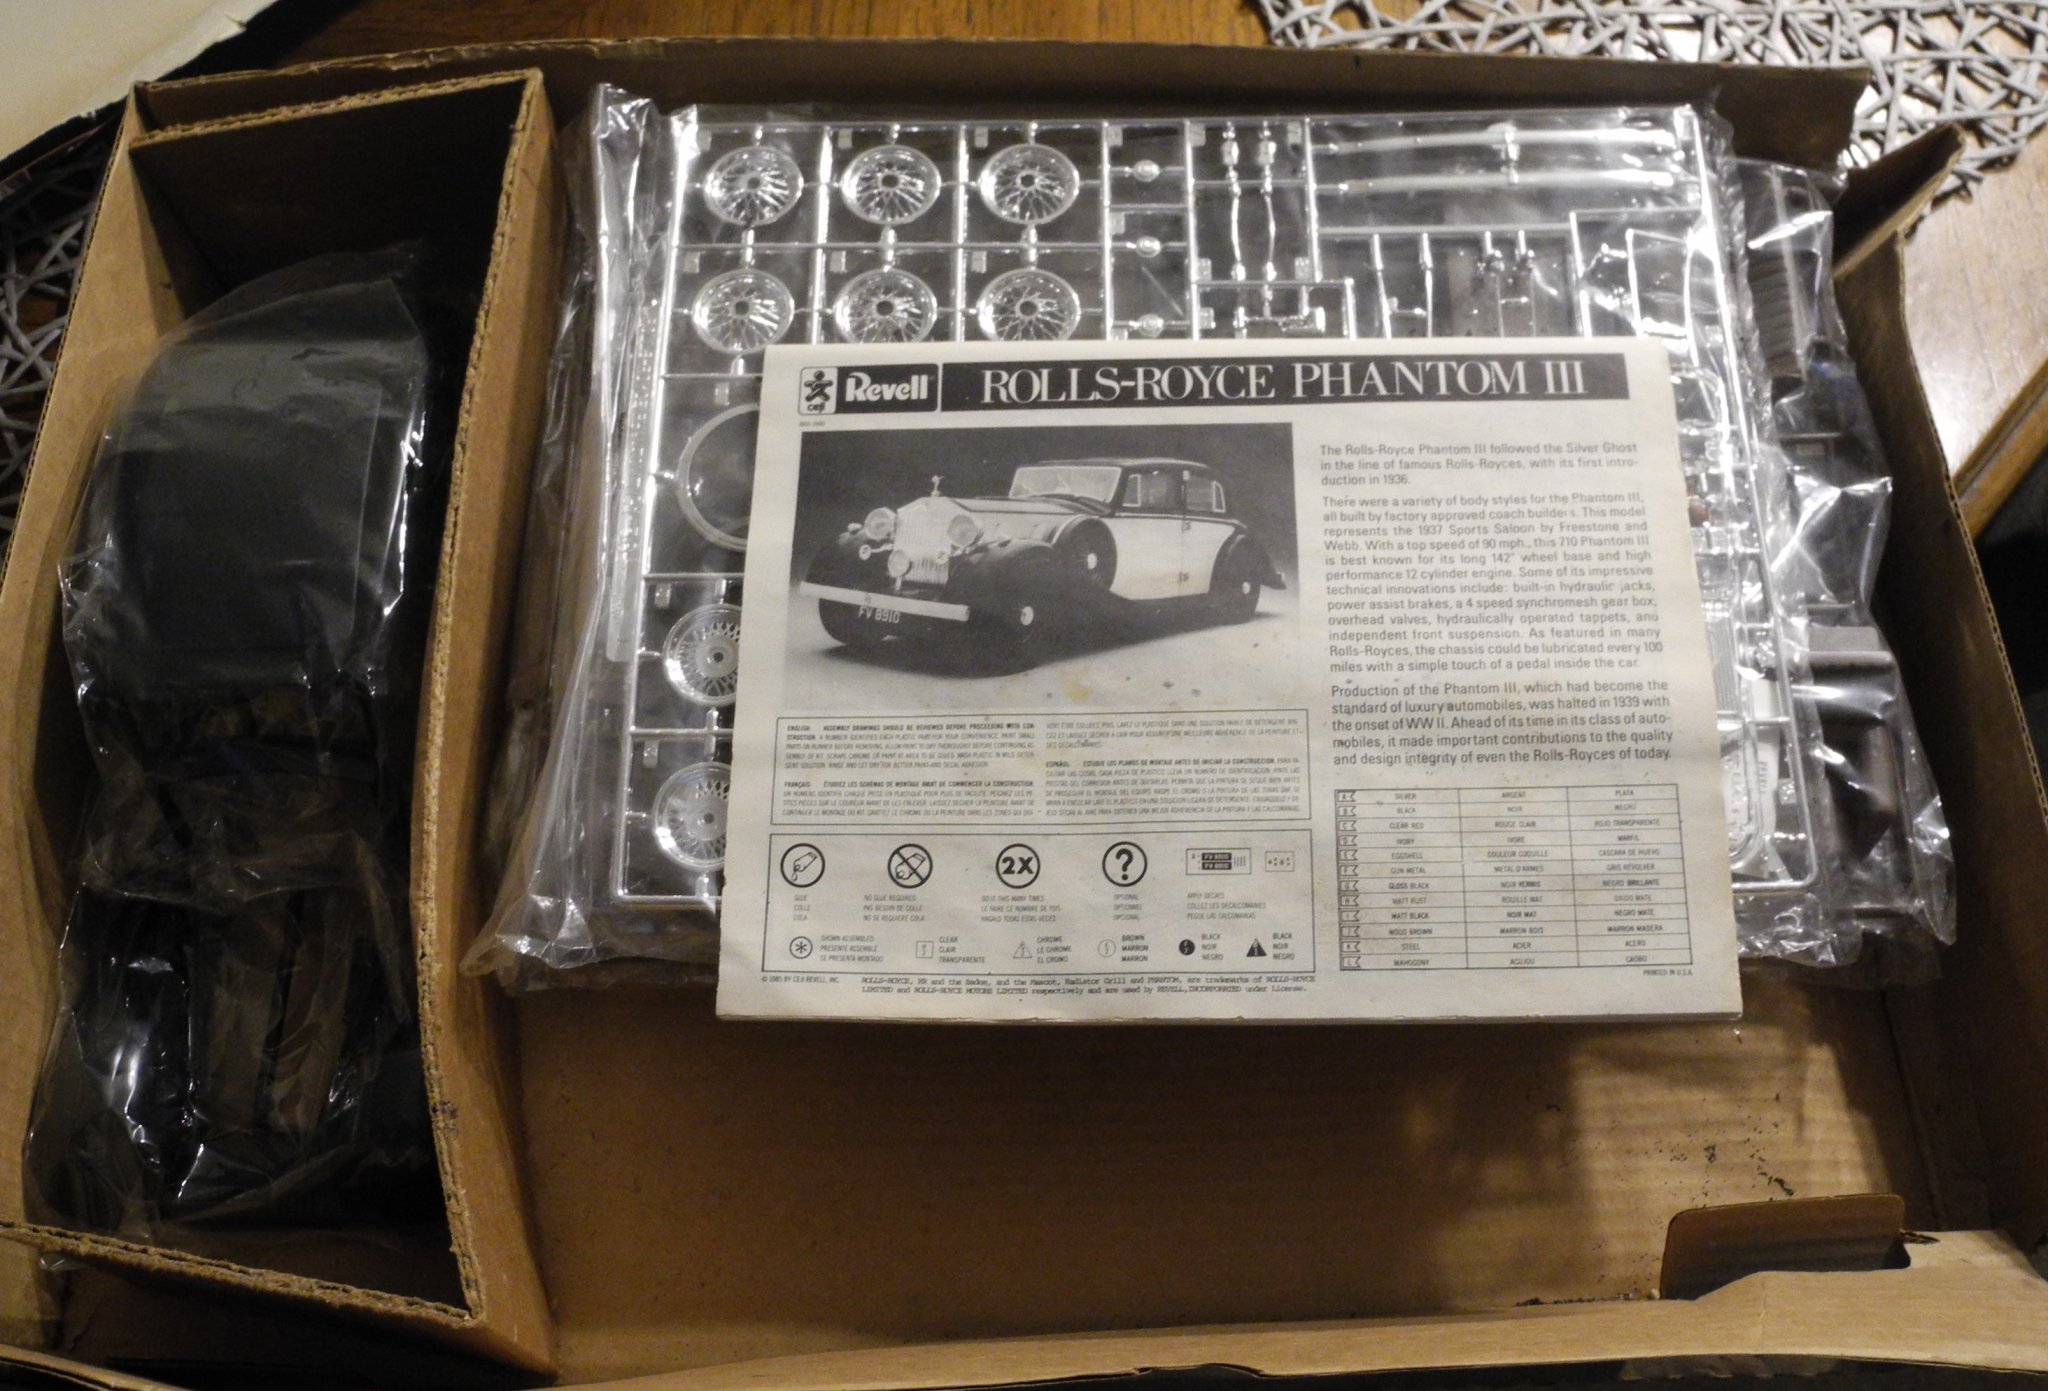
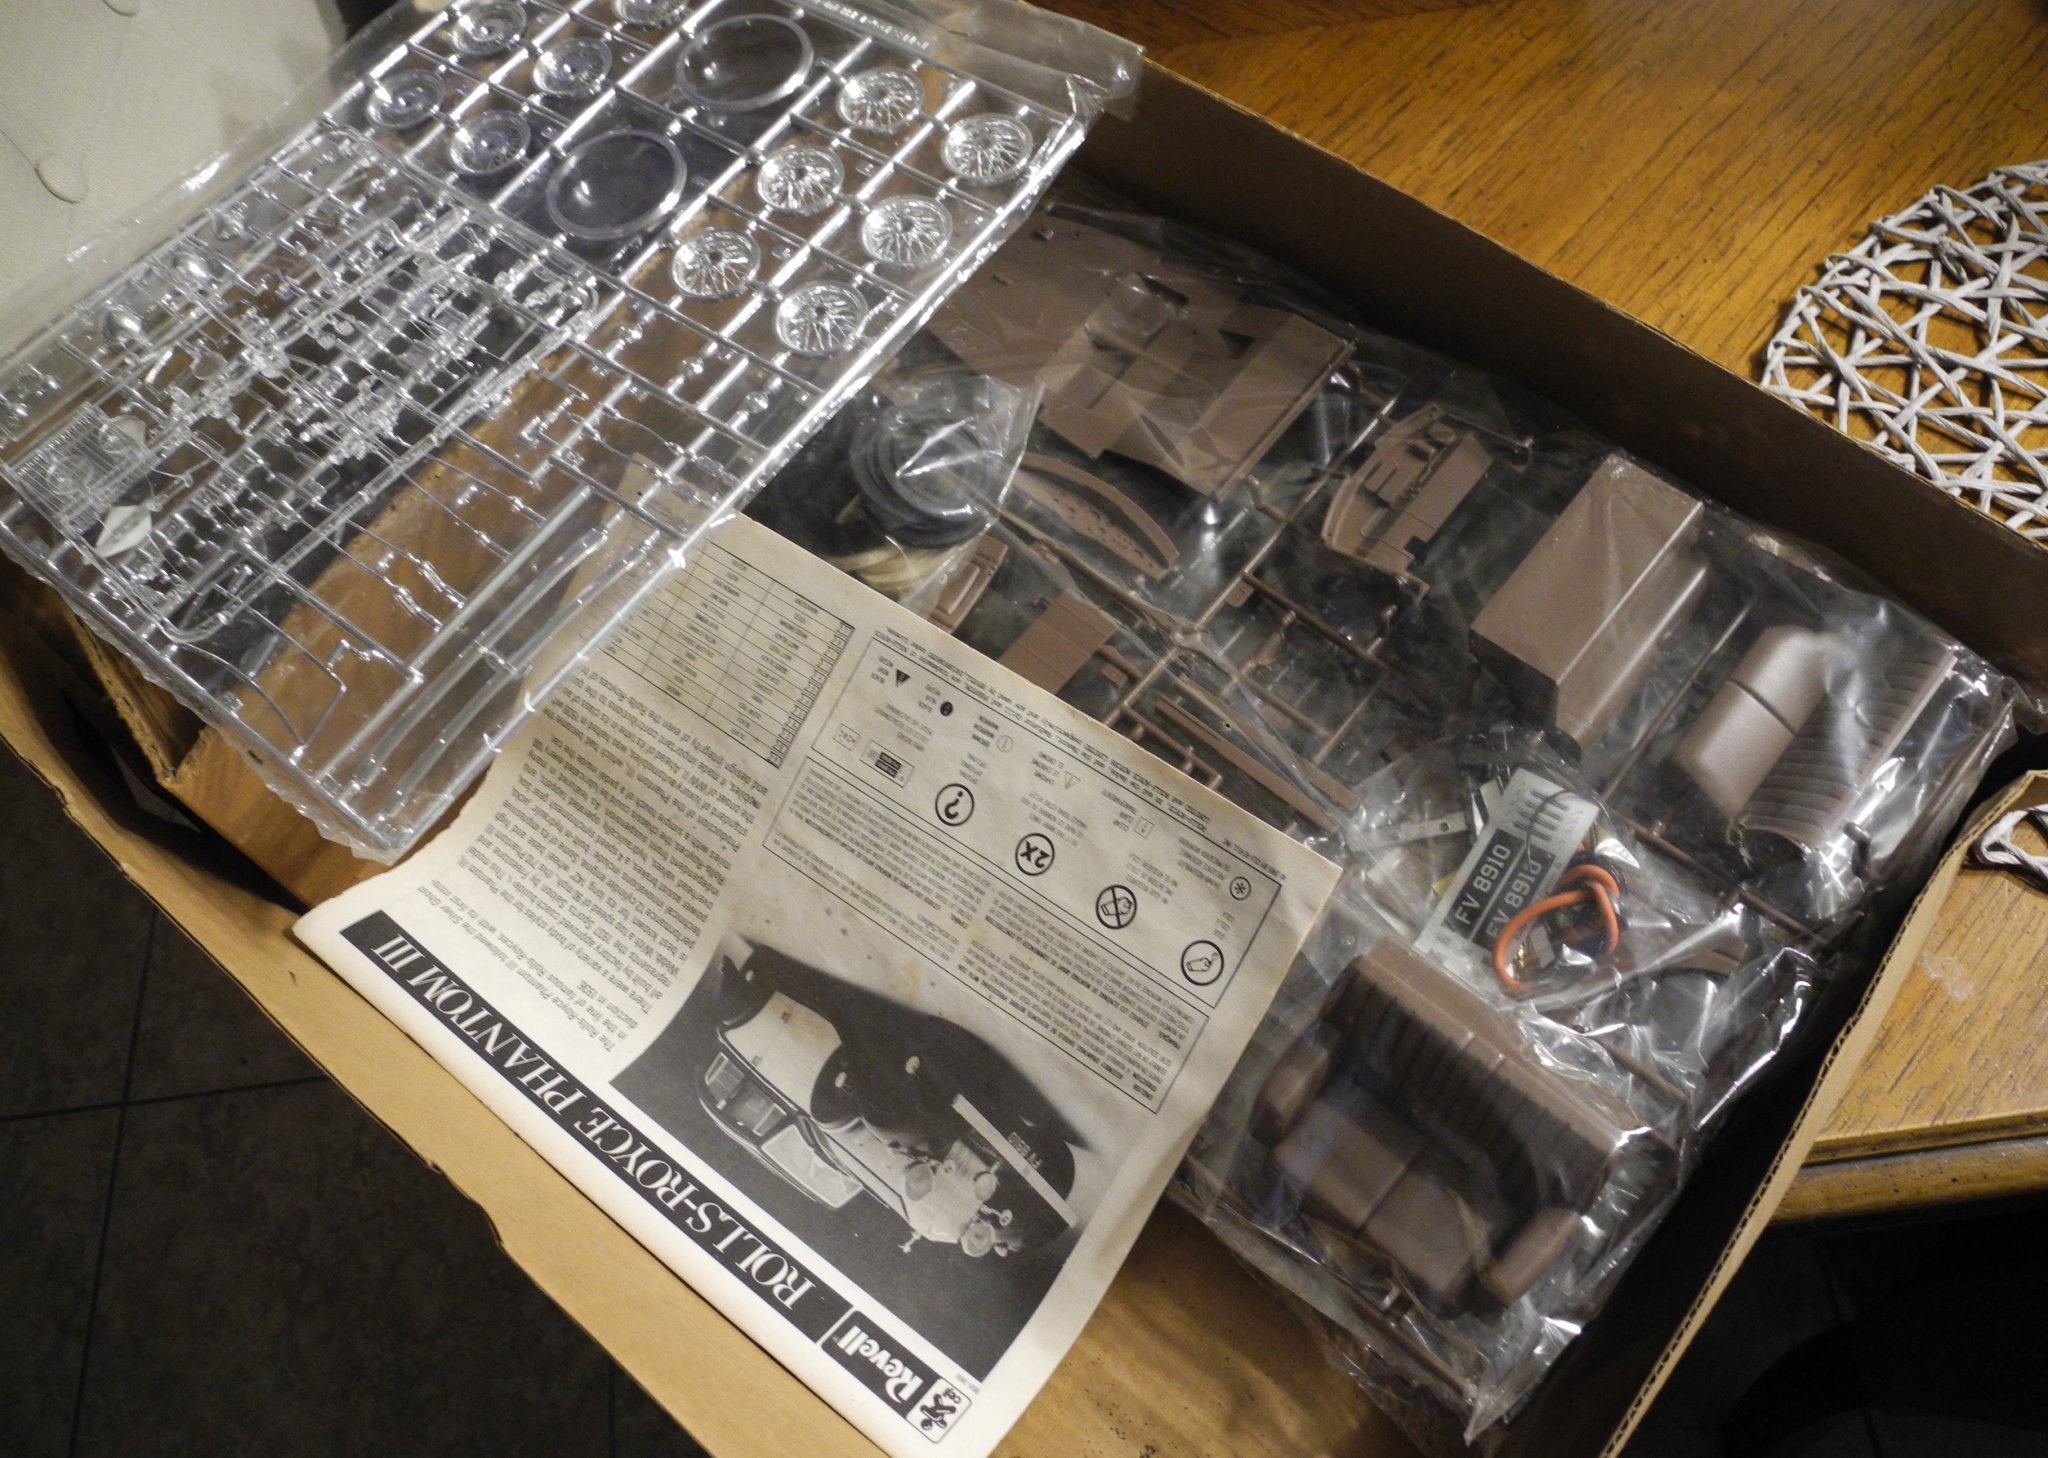
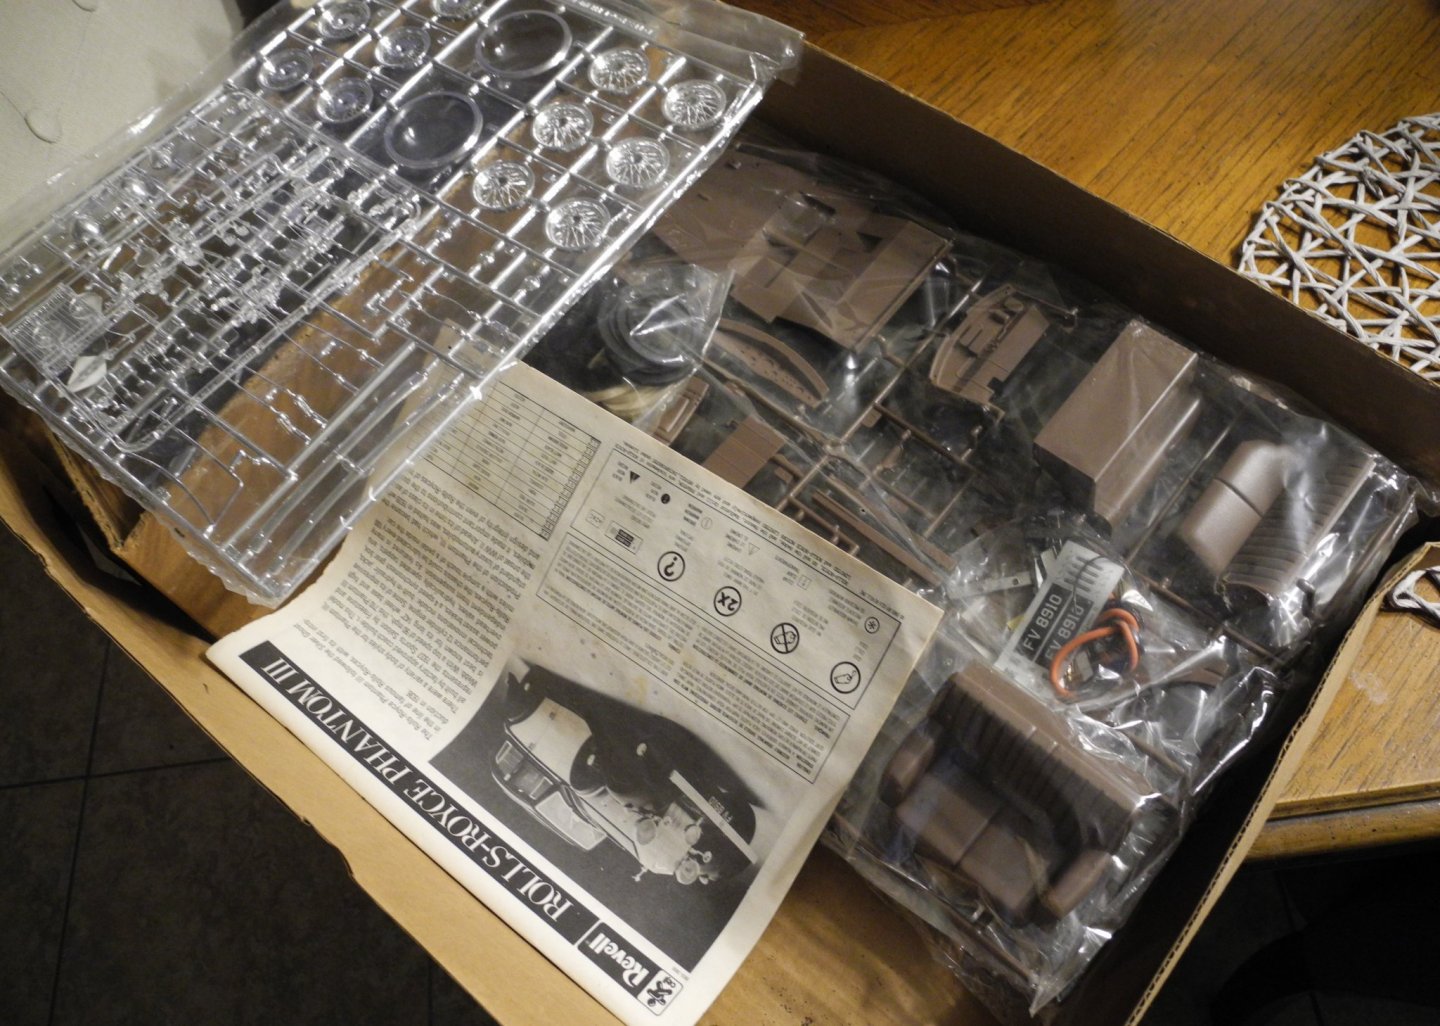
I went on a deep dive in my garage this week and salvaged a kit I have not laid eyes on for a long, long time. This is a 1980's vintage Revell 1:12 scale Rolls Royce Phantom III kit, made in Japan. It's well detailed and a good size, so it will be easier for me to detail it out. Made in Japan usually means a better fit quality, so I'm keeping my fingers crossed. When the time comes, will start a separate build thread for this one. I'm not sure how rare this kit might be, but I can tell you I've been collecting models for a long time and this is one I personally have not seen around much.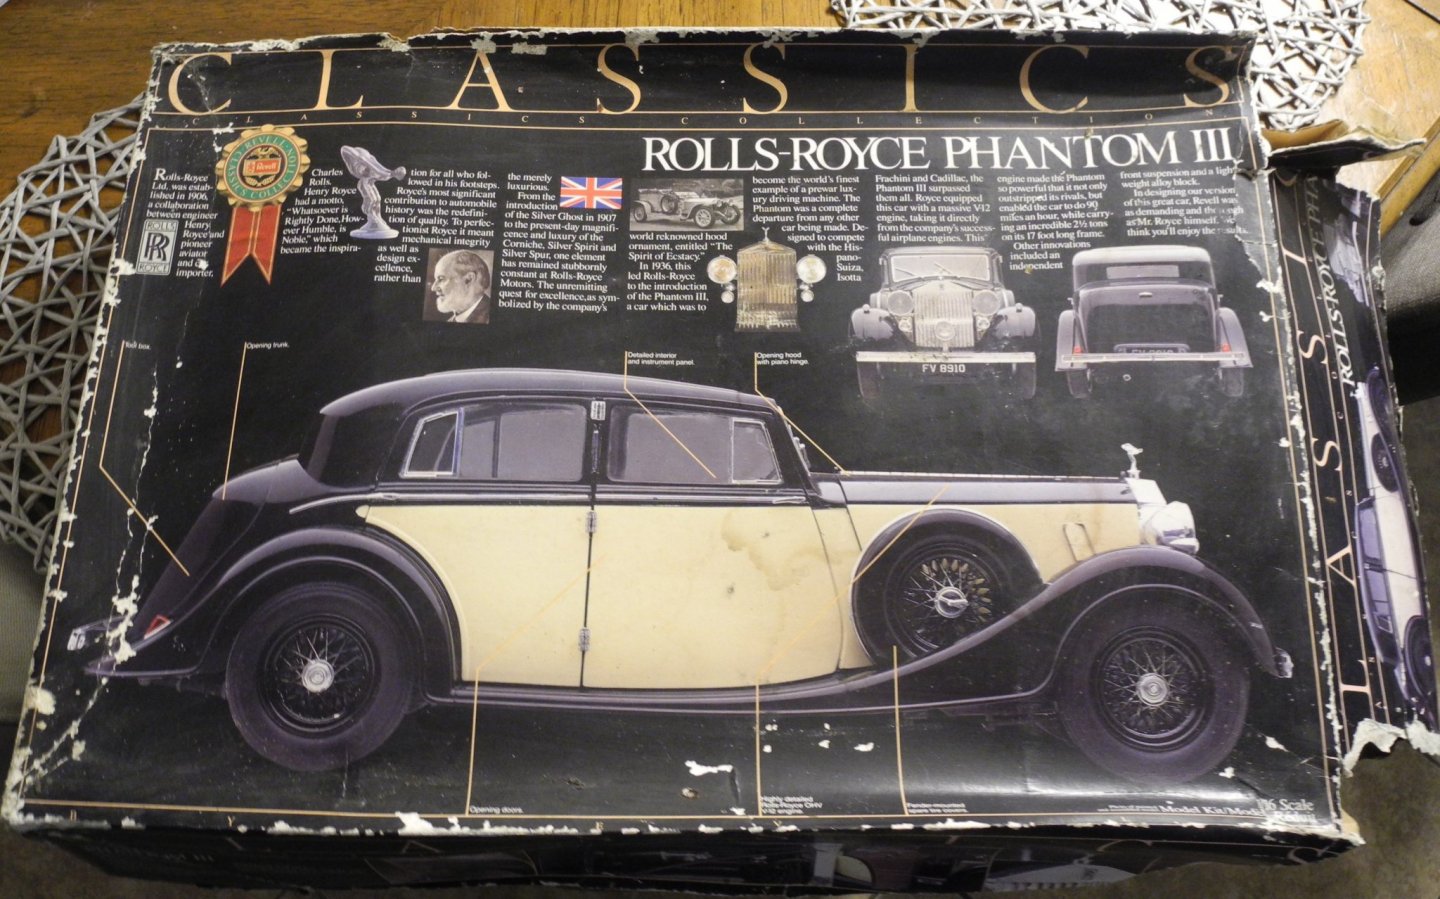


- 175 replies
-
- 11
-

-
Nowadays, there are some very fine armor models out there, but none of them include the nice infantry figures like Tamiya did with their armor models. Always liked the extras Tamiya kits provided.
-
Yes. After you have applied the paint and it's had time to dry (to the touch), it's gassed out when you can no longer detect the smell of the paint. If you smell it and it smells like paint, it's still gassing out.
-
Just caught up with your Mossie build thread OC. So sorry to learn about your paint troubles. I don't want to muddy the water here, but I have to say, I use lacquer based primer on almost every model I build. As a rule of thumb, if you can smell the paint after the application of it, it's still gassing out. When you can't smell it, it's gassed out. Simple as that. I never have an issue with any other paint over a lacquer primer, provided it's gassed out. My favorite primer is either Tamiya (in the bottle) or Mr Surfacer (in the bottle) reduced with Mr Hobby 400 Leveling Thinner. Tamiya spray primer is good, too. Just make sure it's gassed out (smell it). Tamiya bottled paints are notoriously bad for brushing. They need a retarder added when brushing. When I use their bottled clear, I always thin it considerably with Mr Hobby Leveling Thinner (40% paint to 60% thinner), sprayed on with an airbrush. It just does not give good results brushed from the bottle. I know it's too late now, but just for future reference.
-
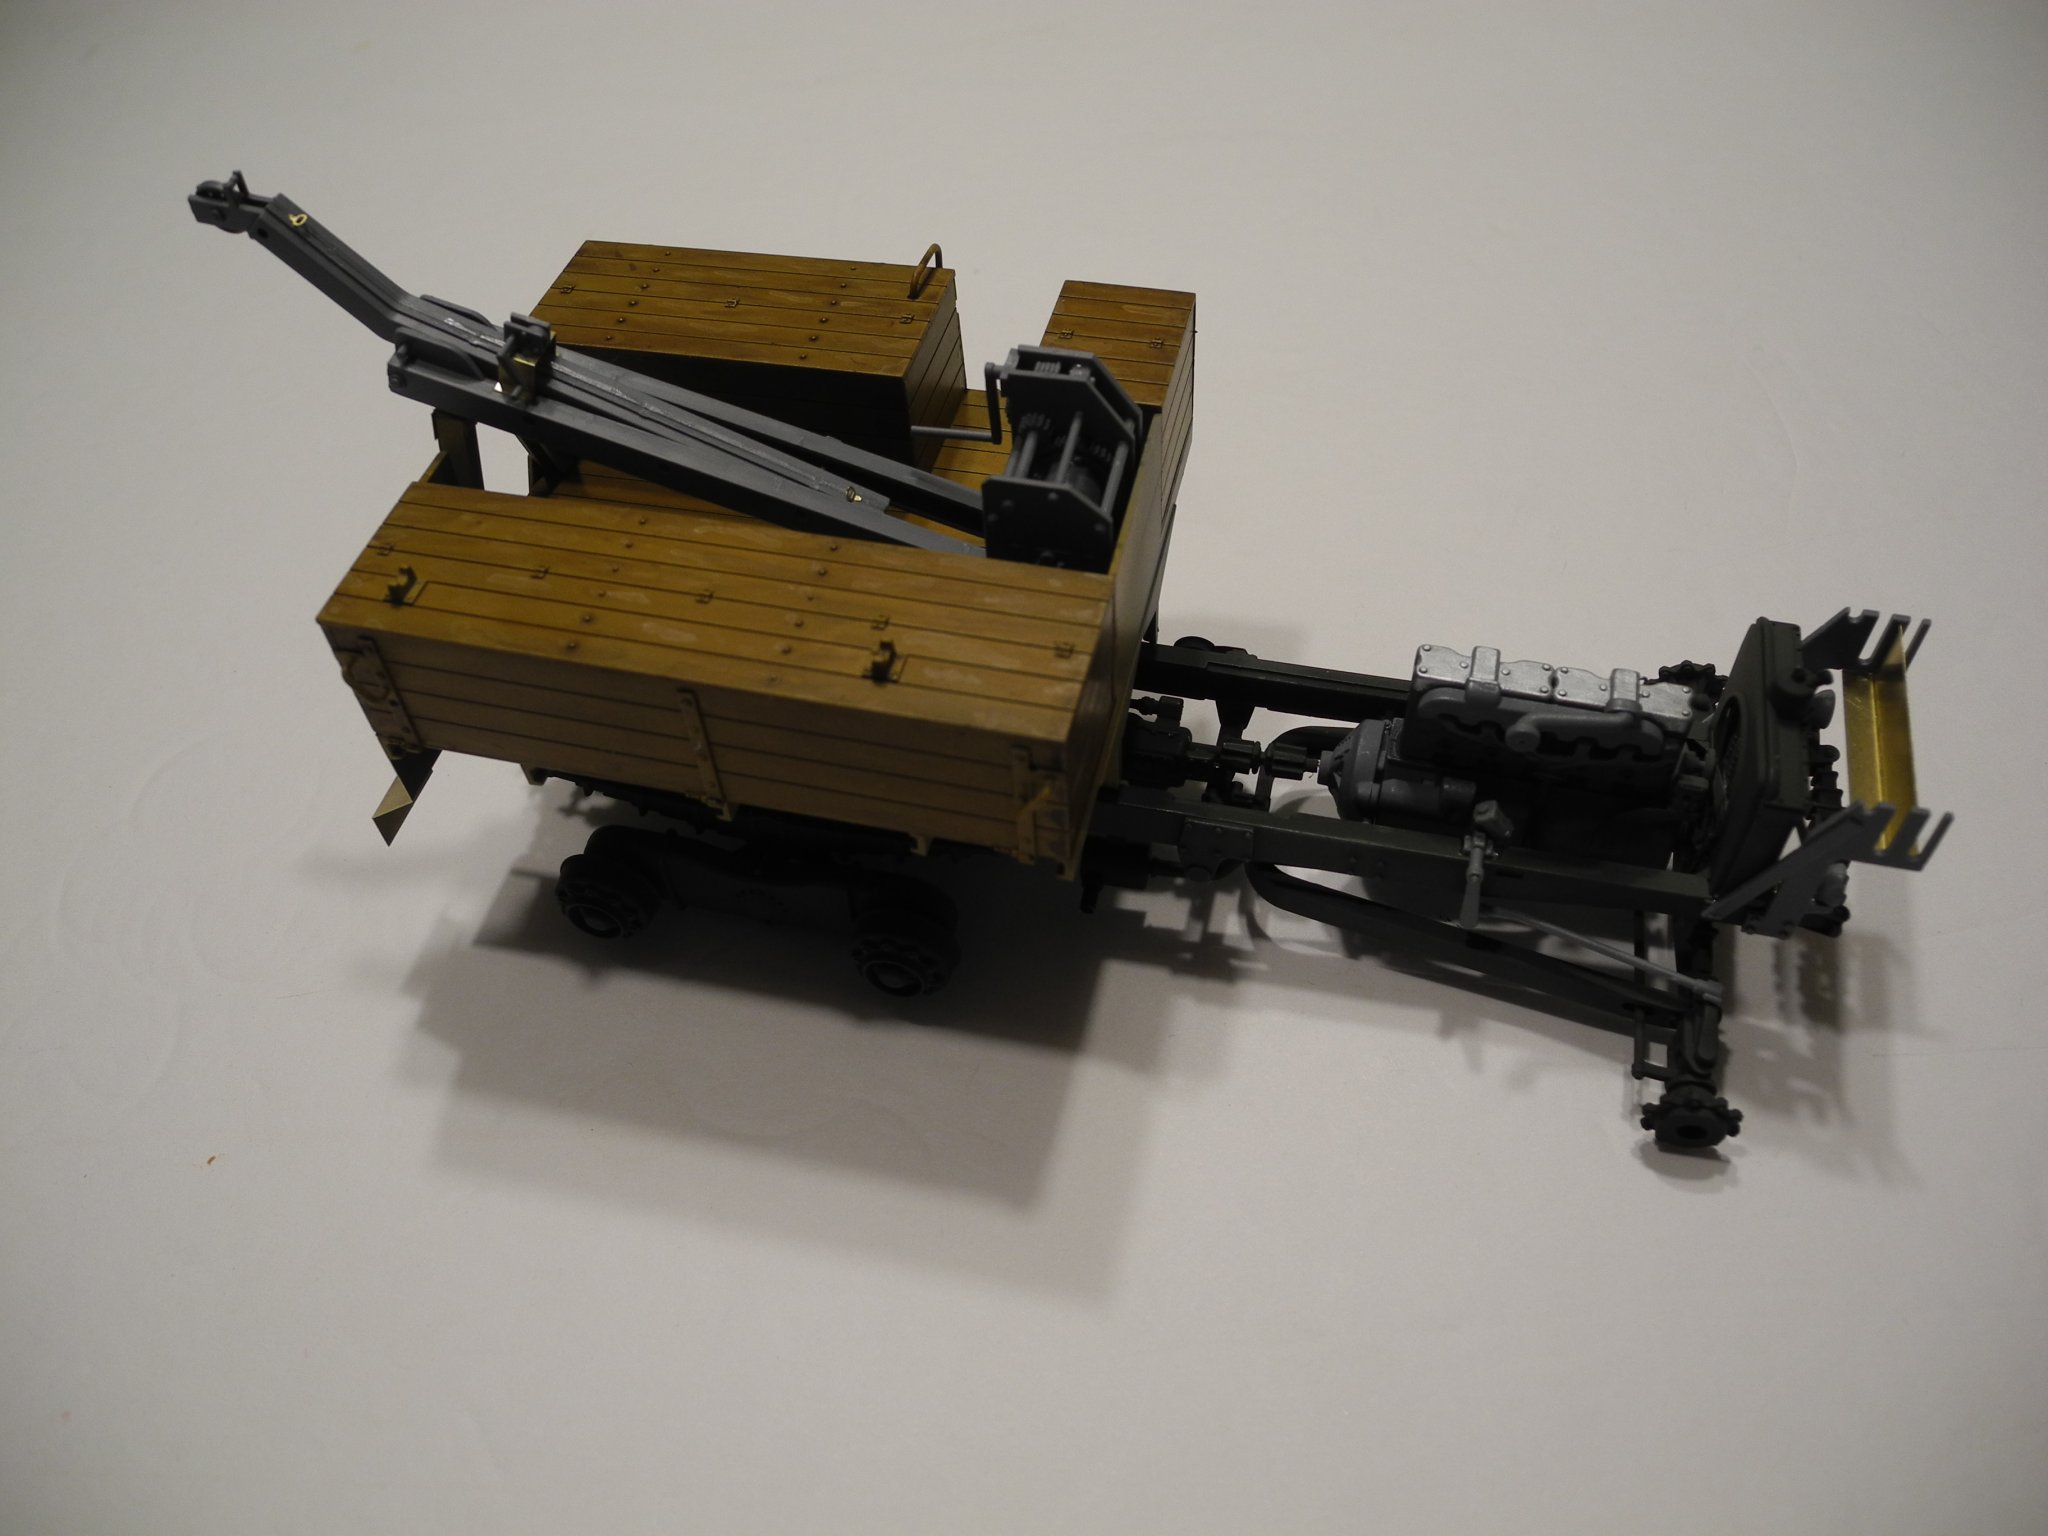
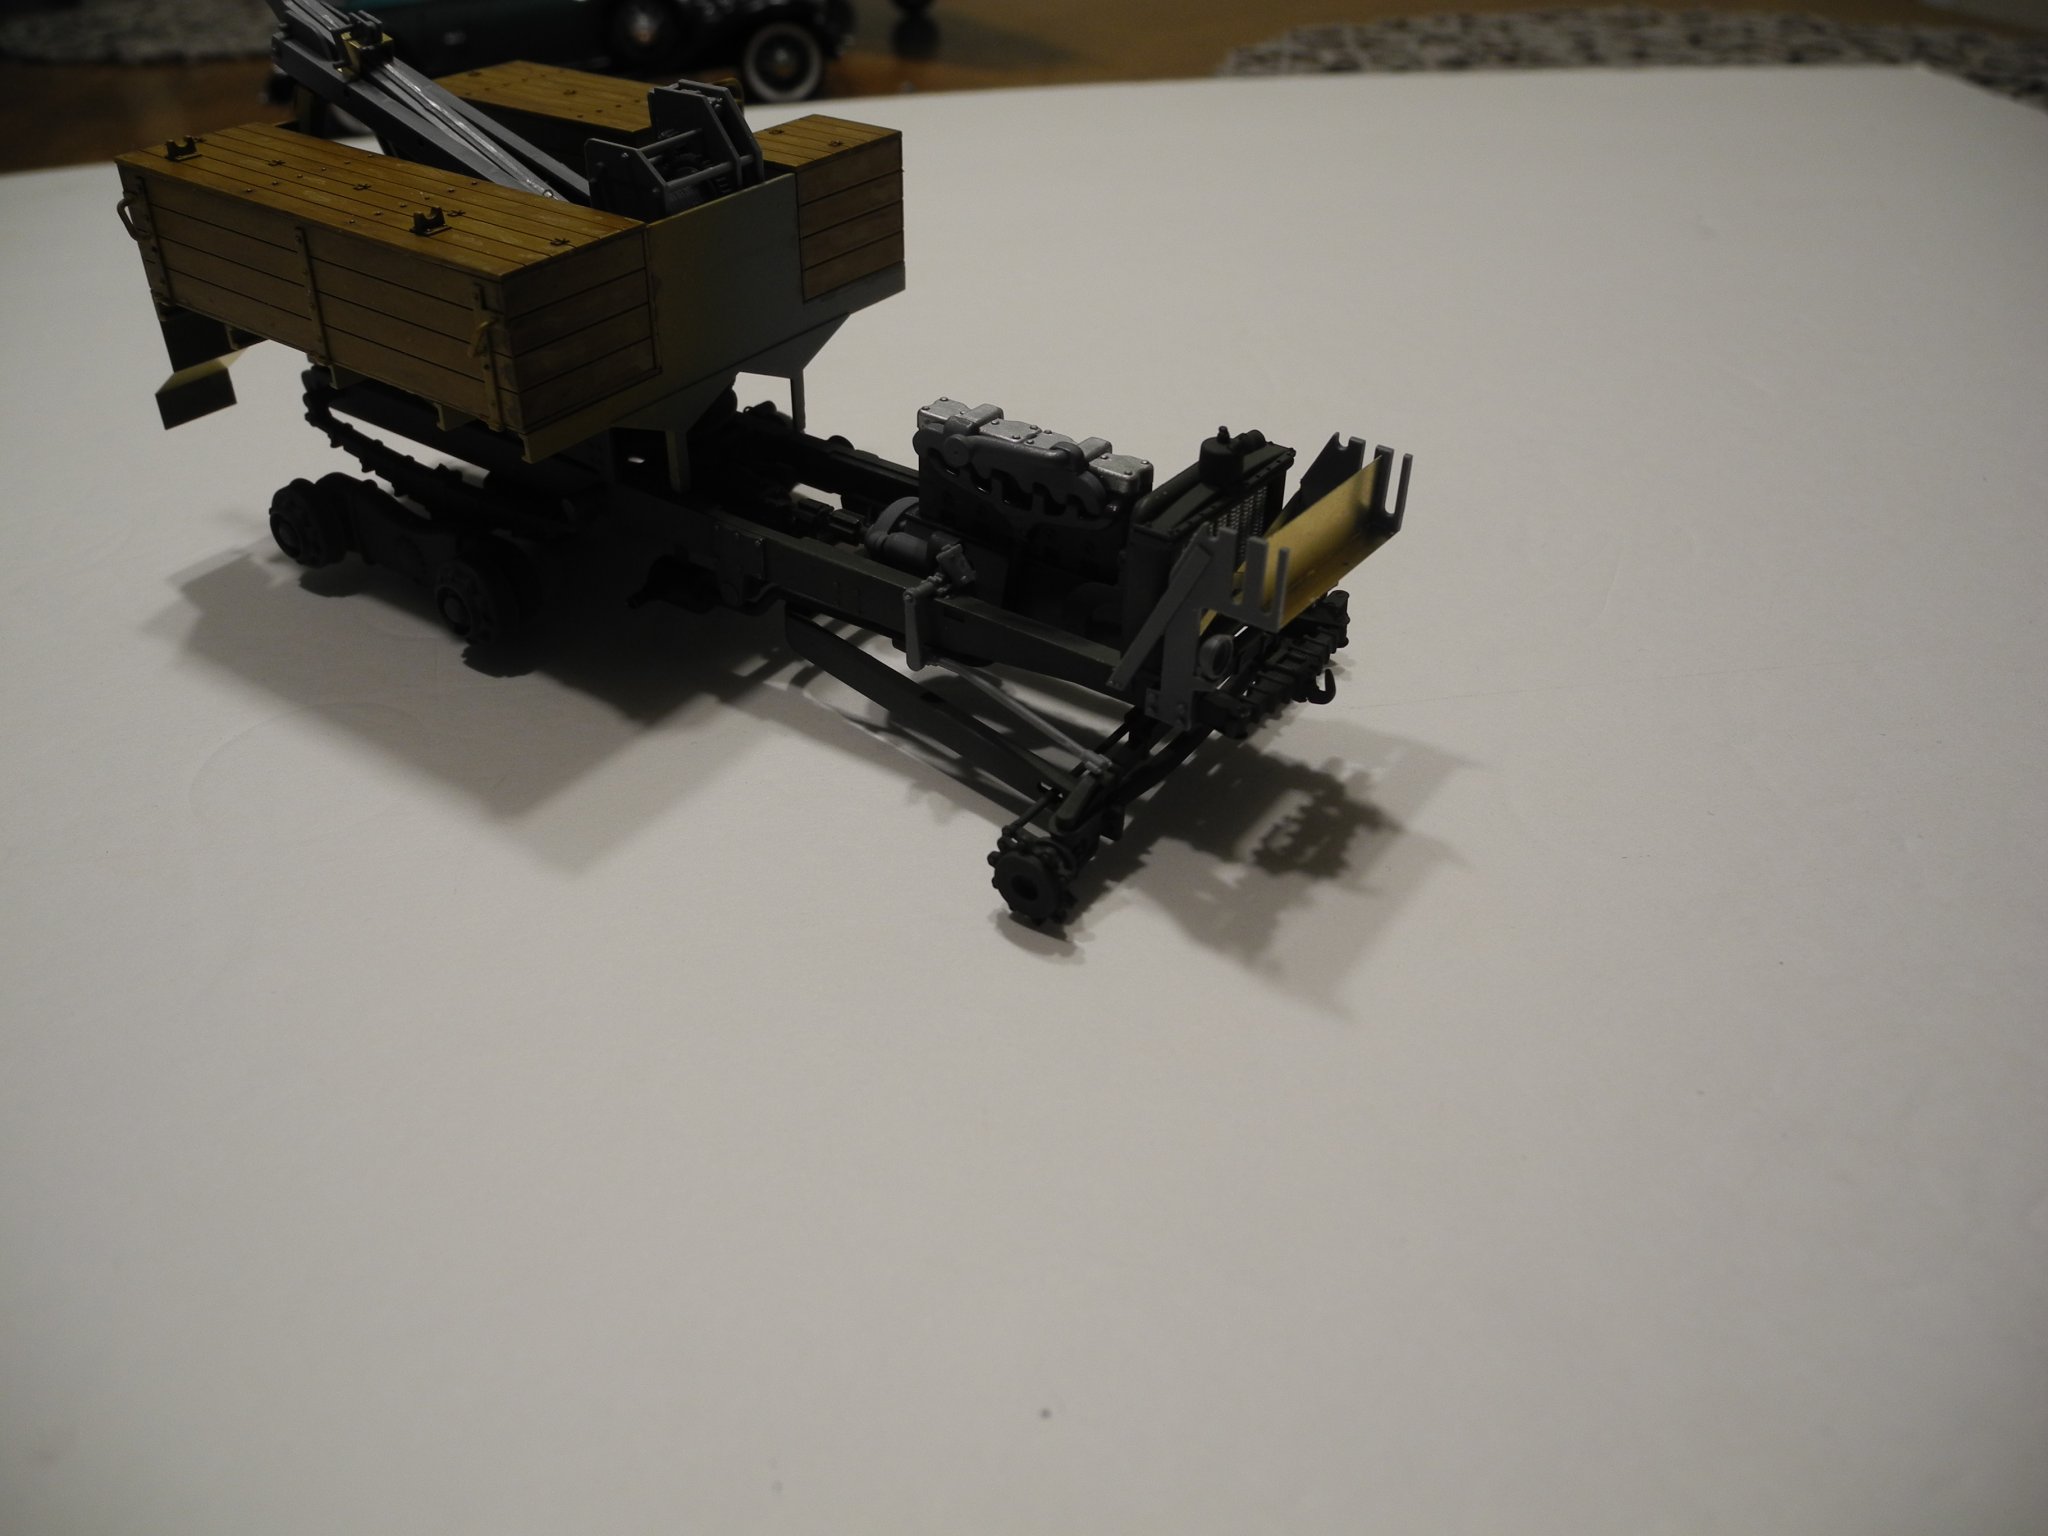
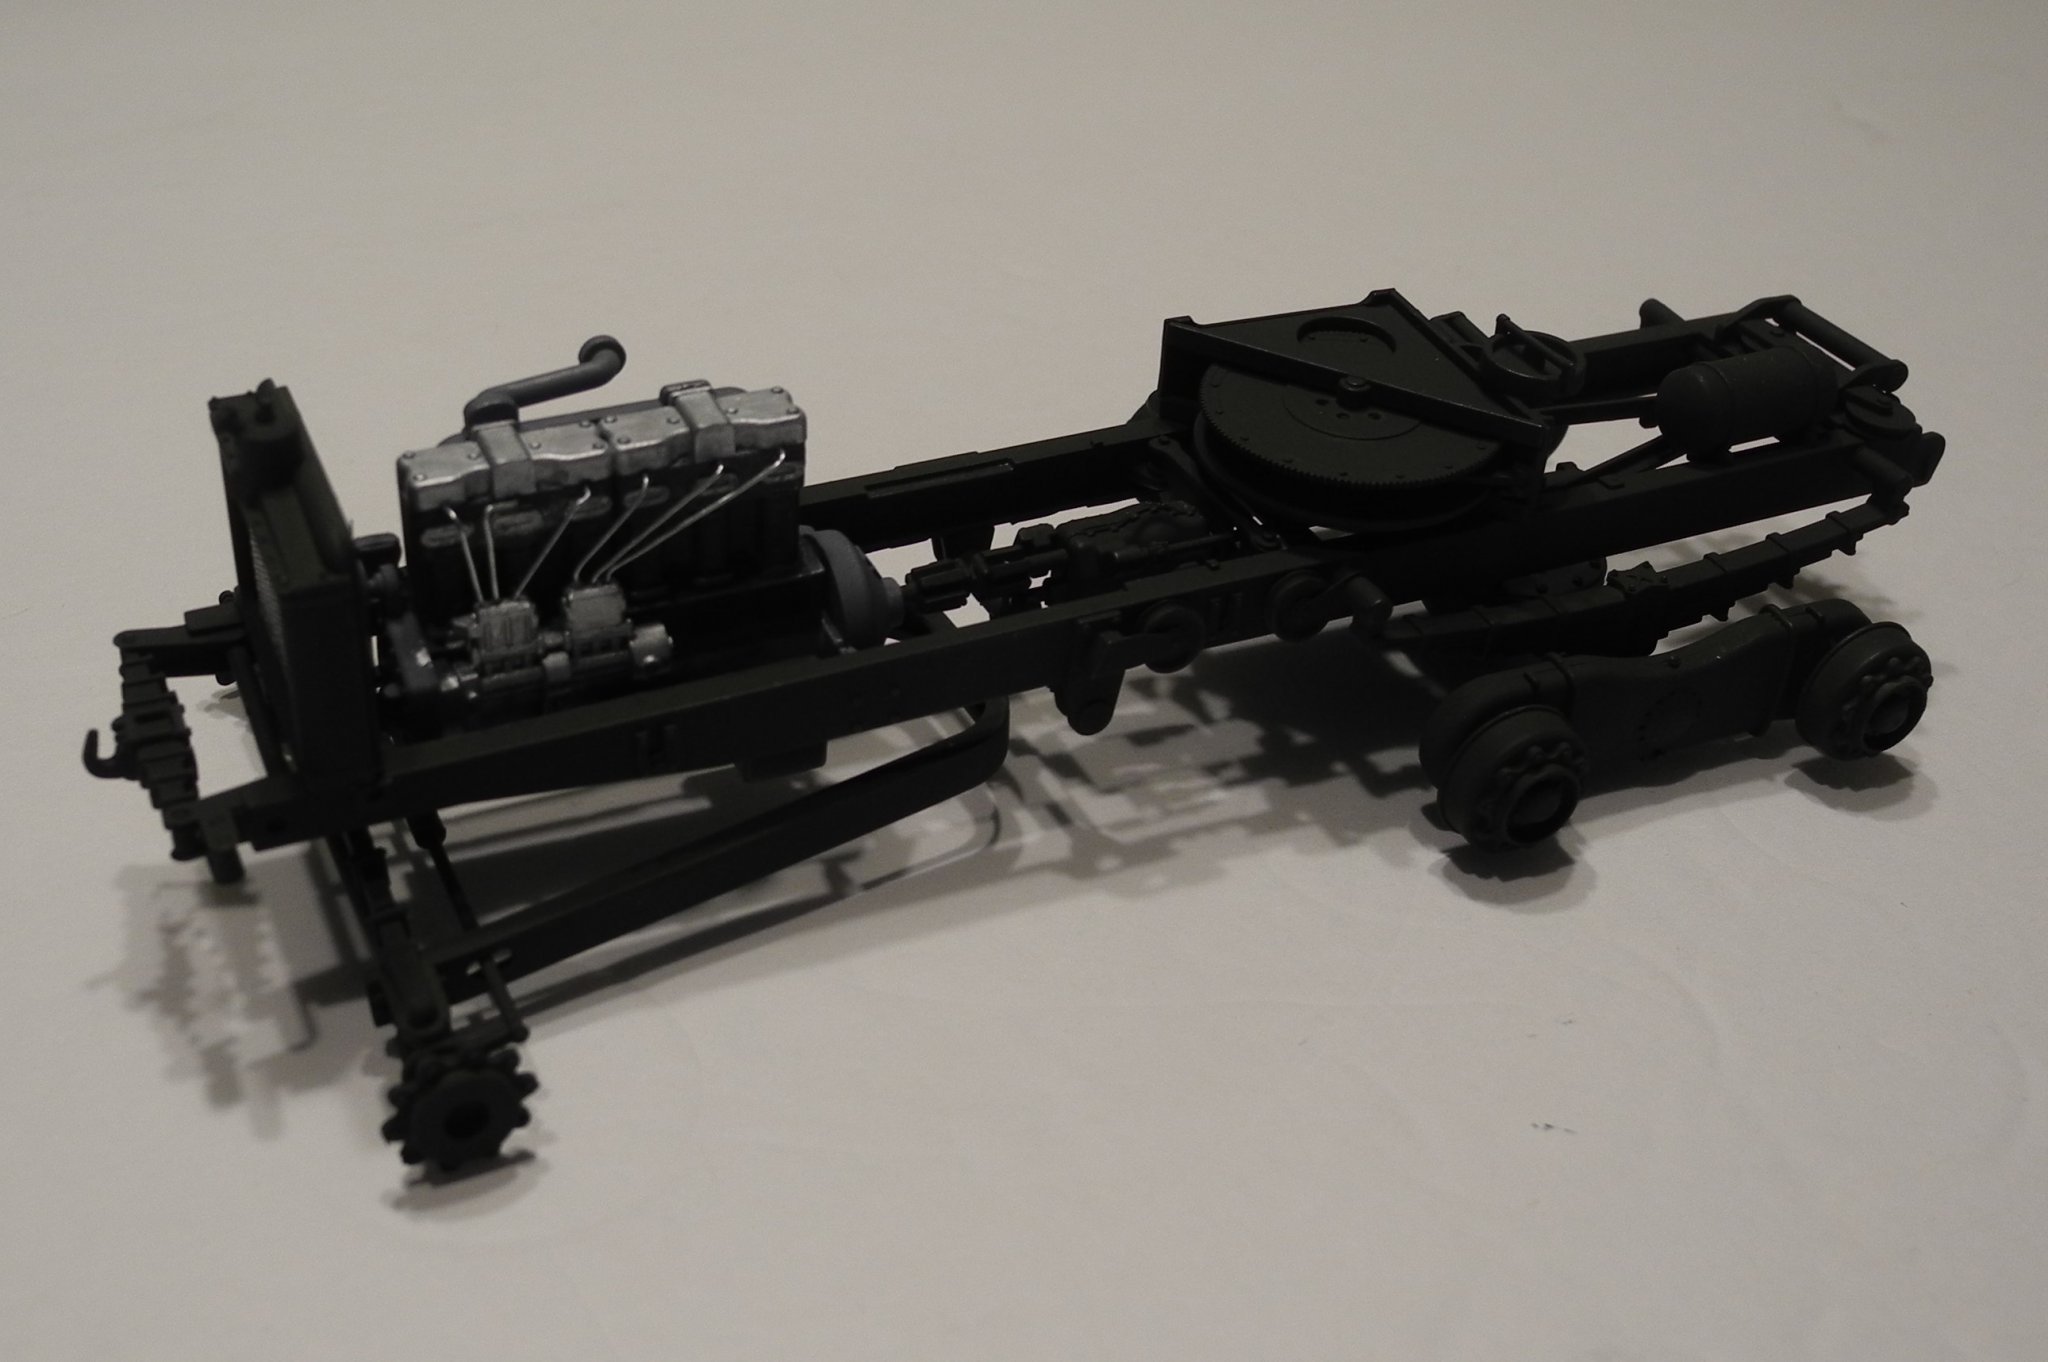
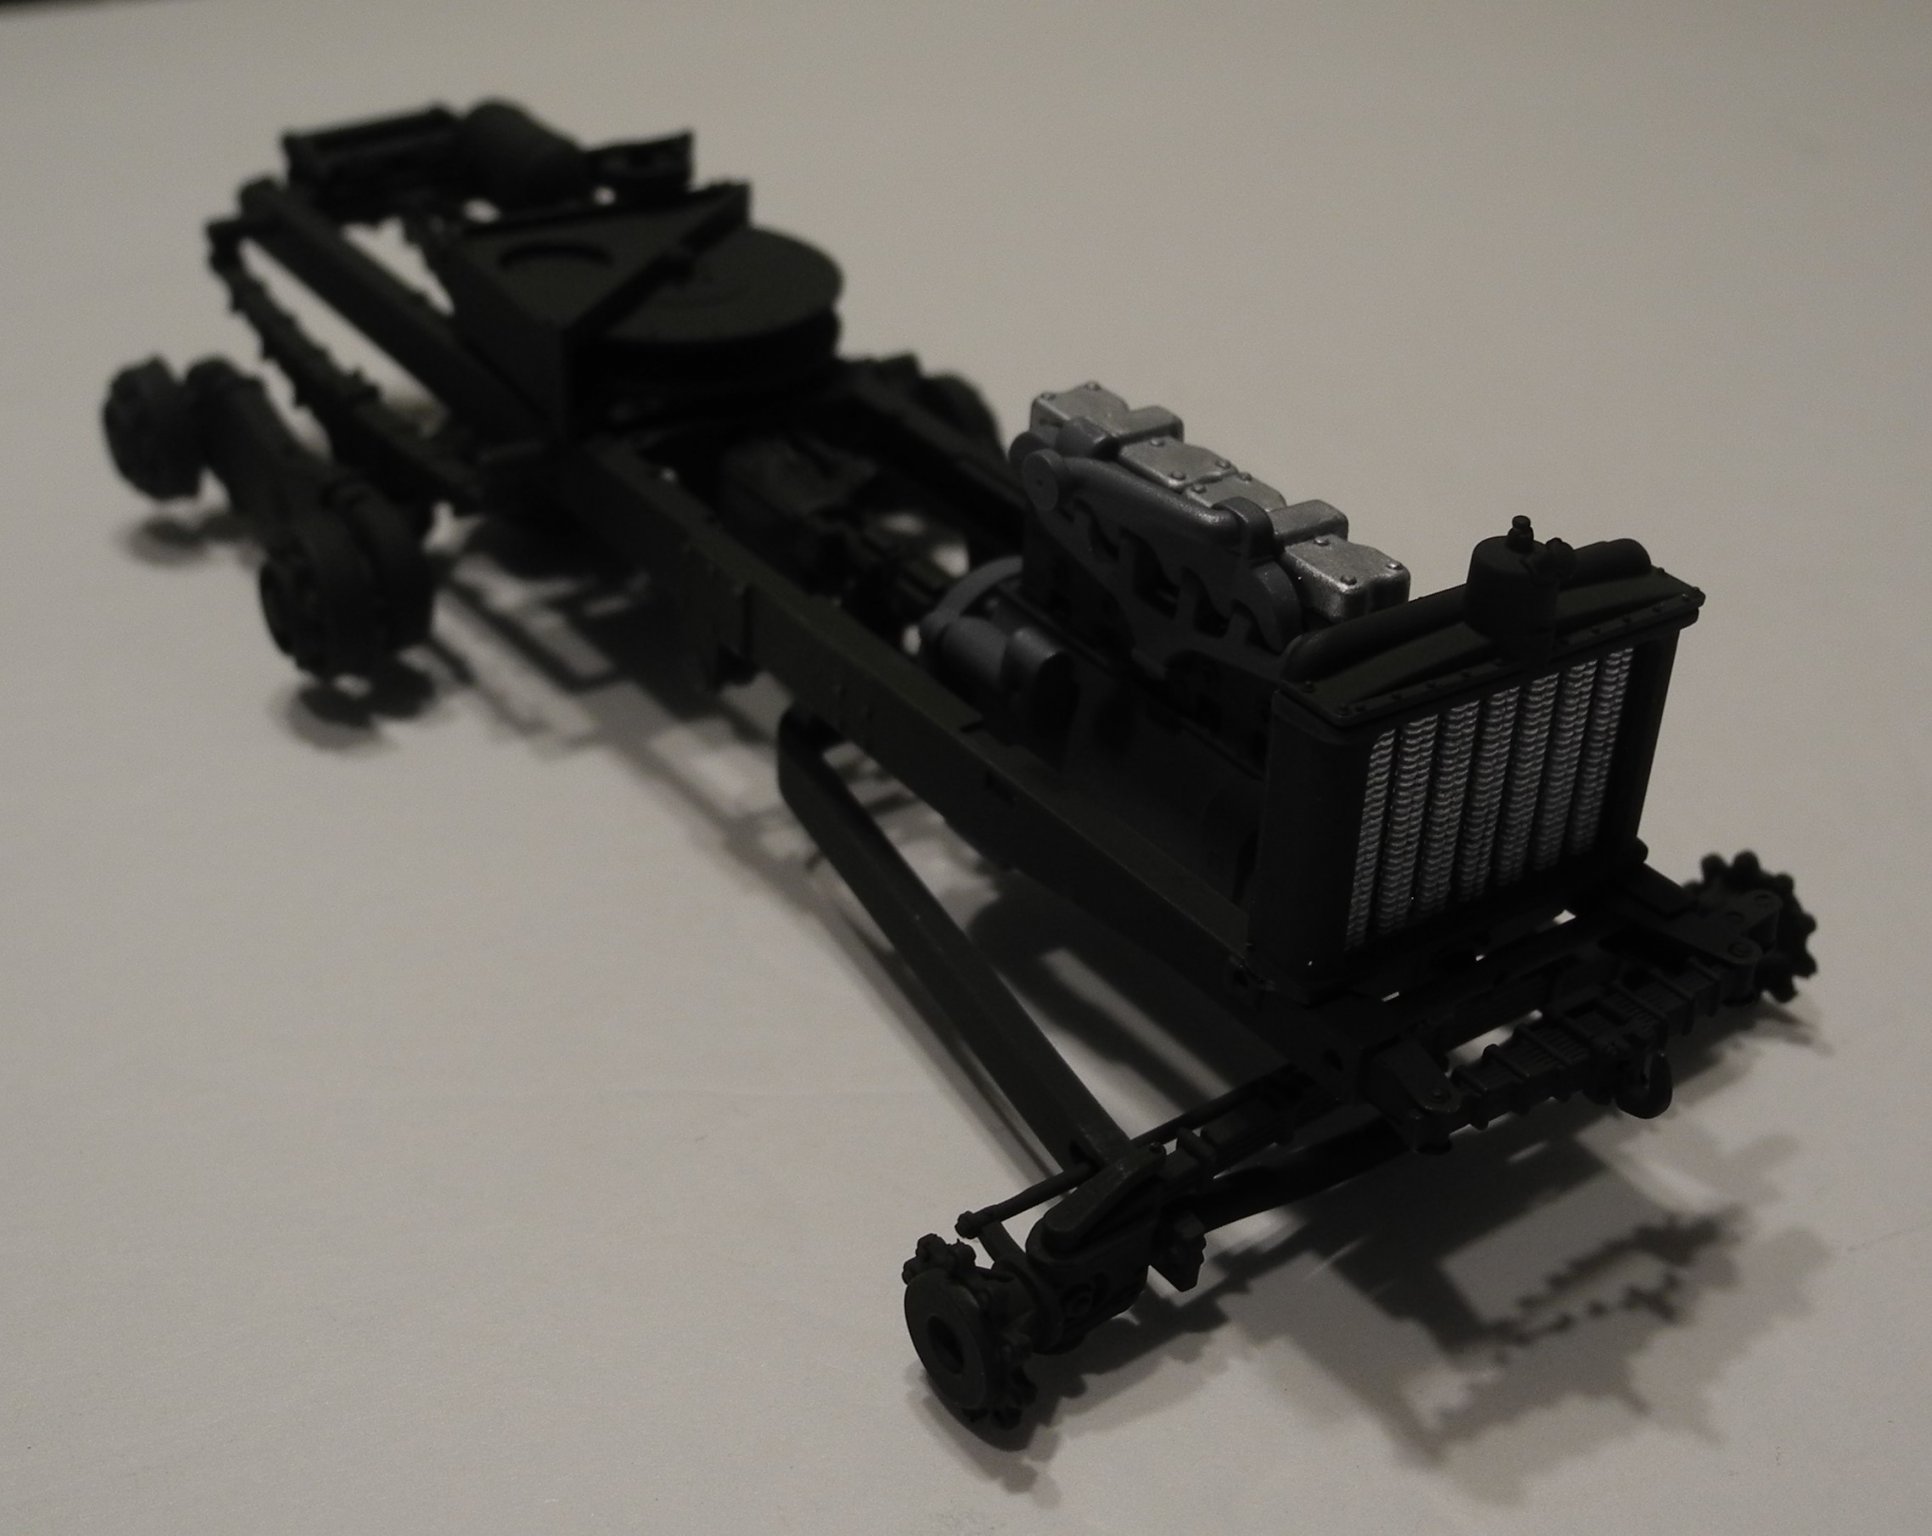
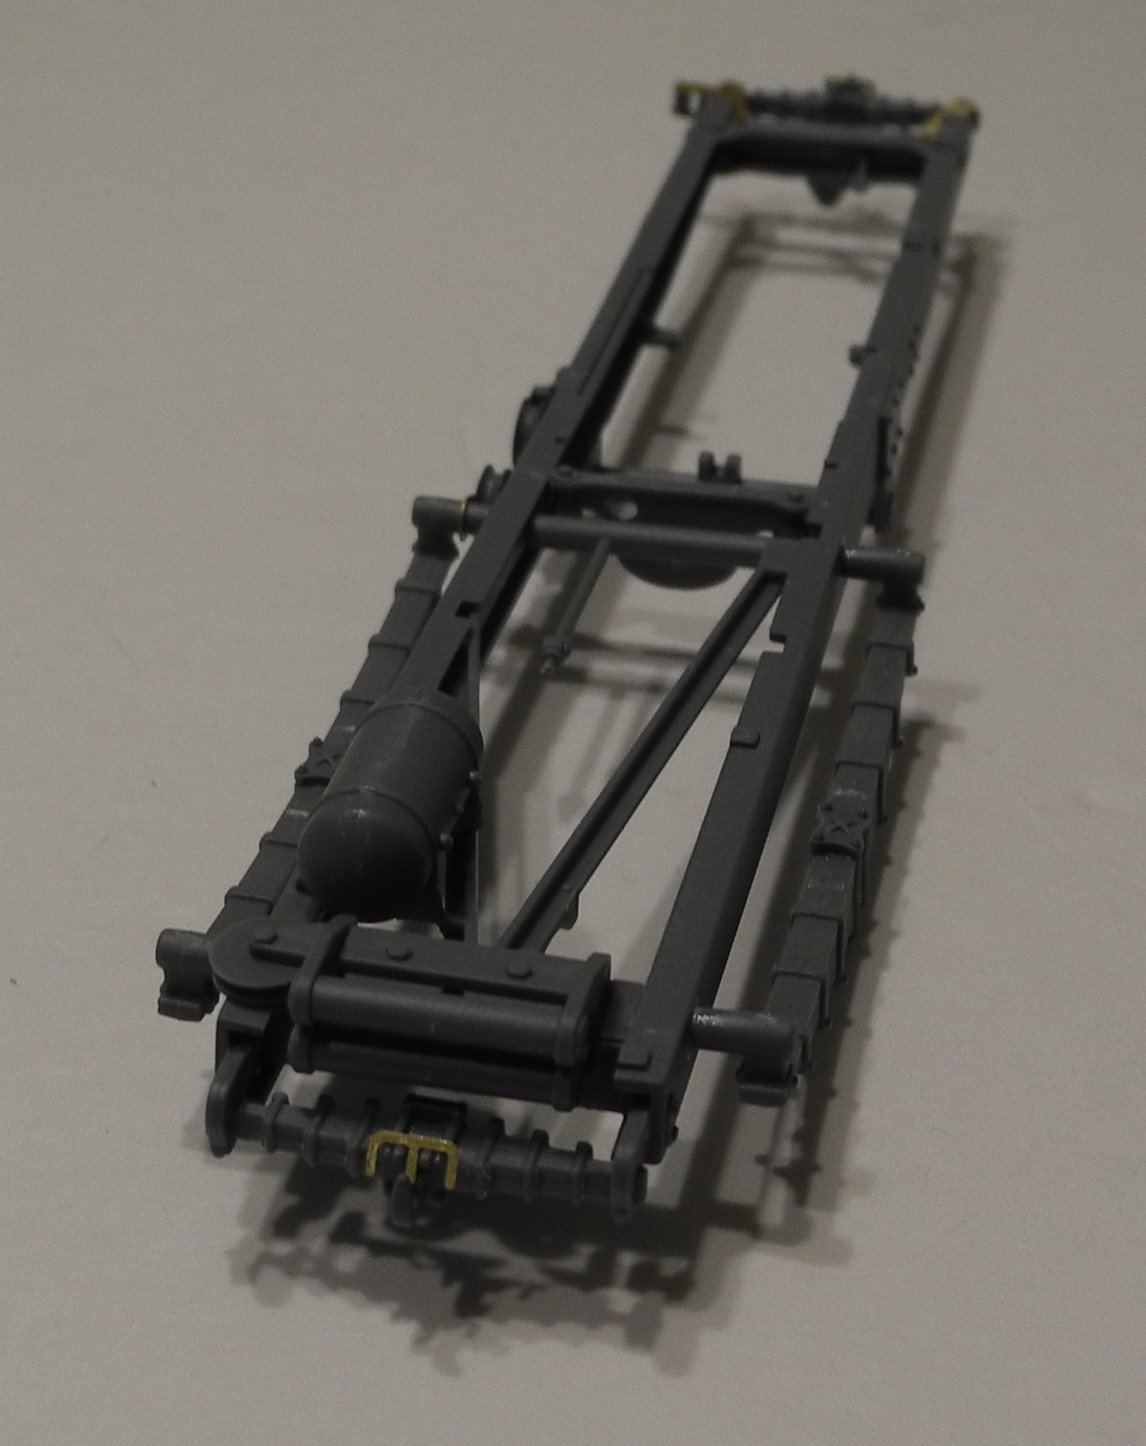
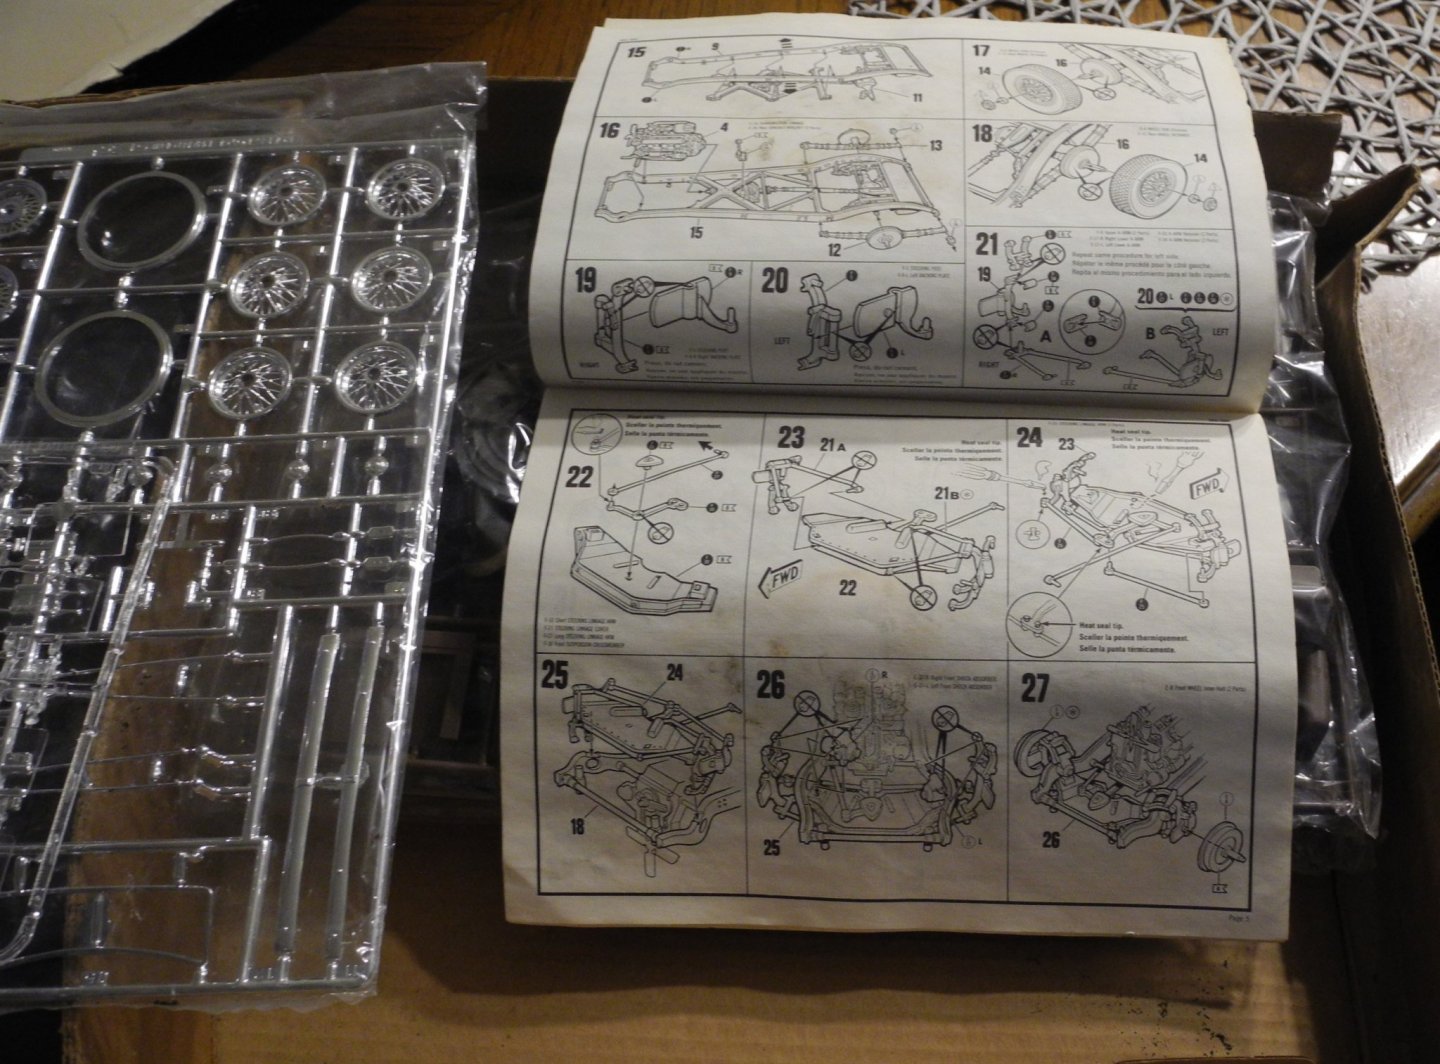
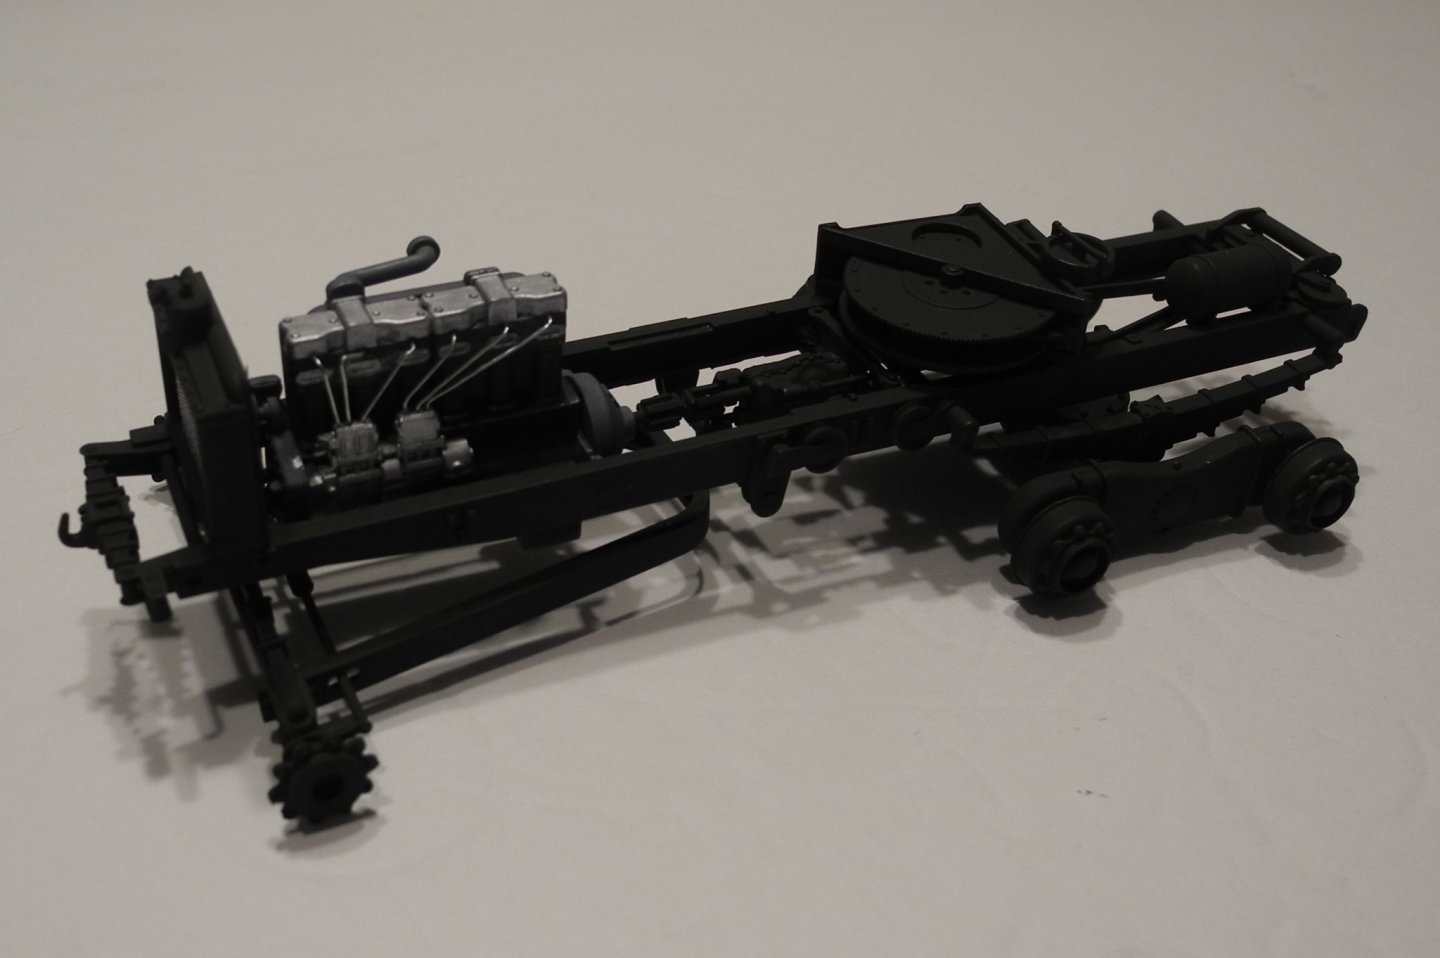
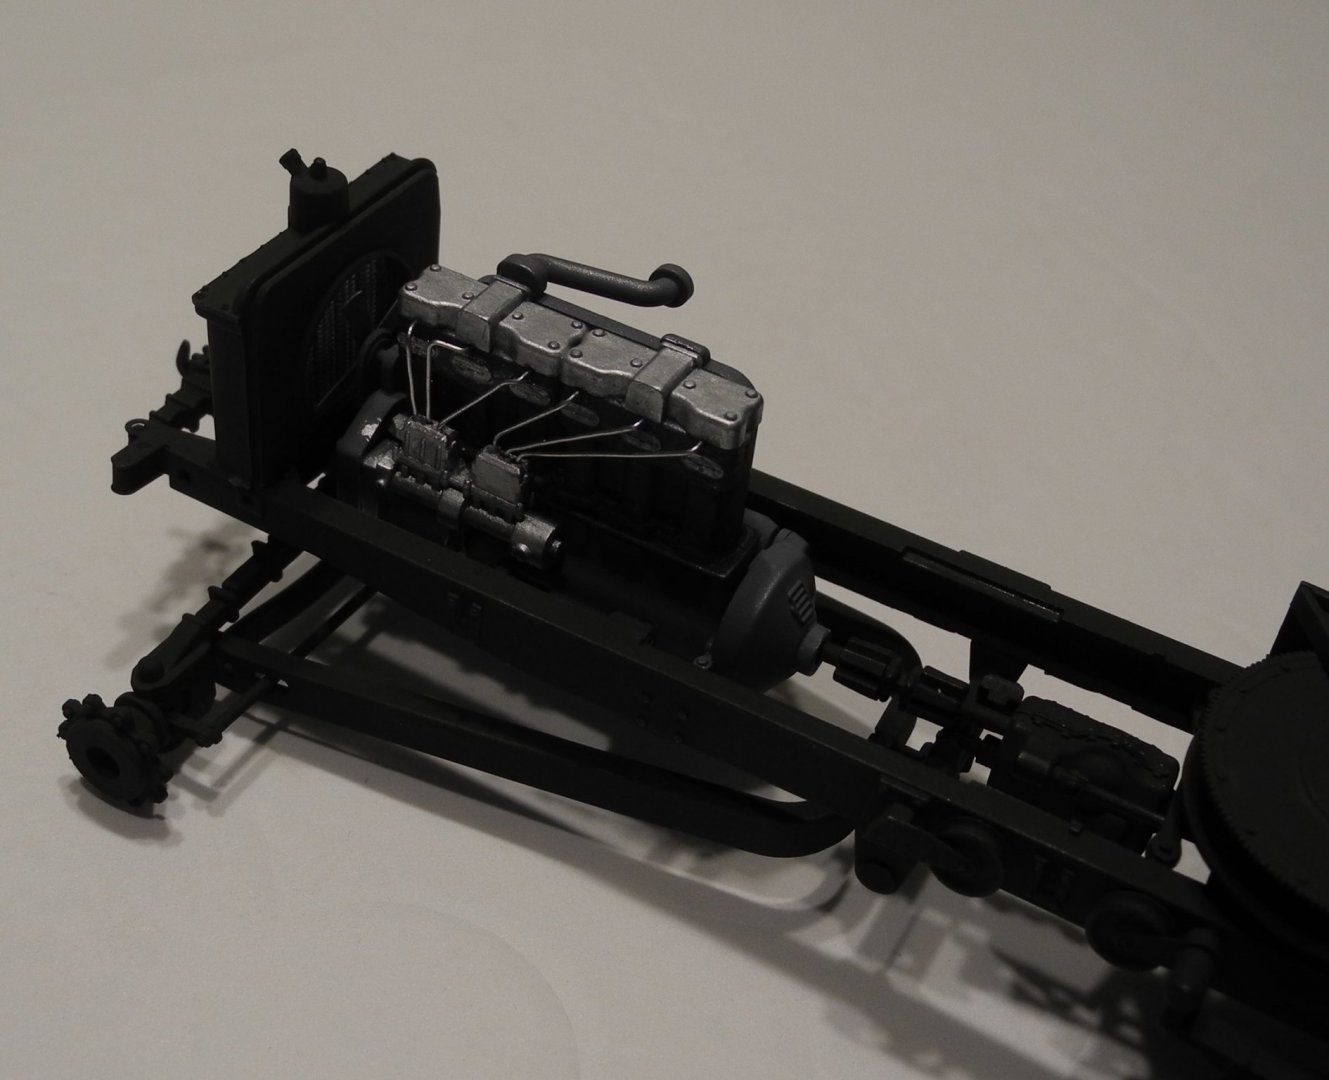
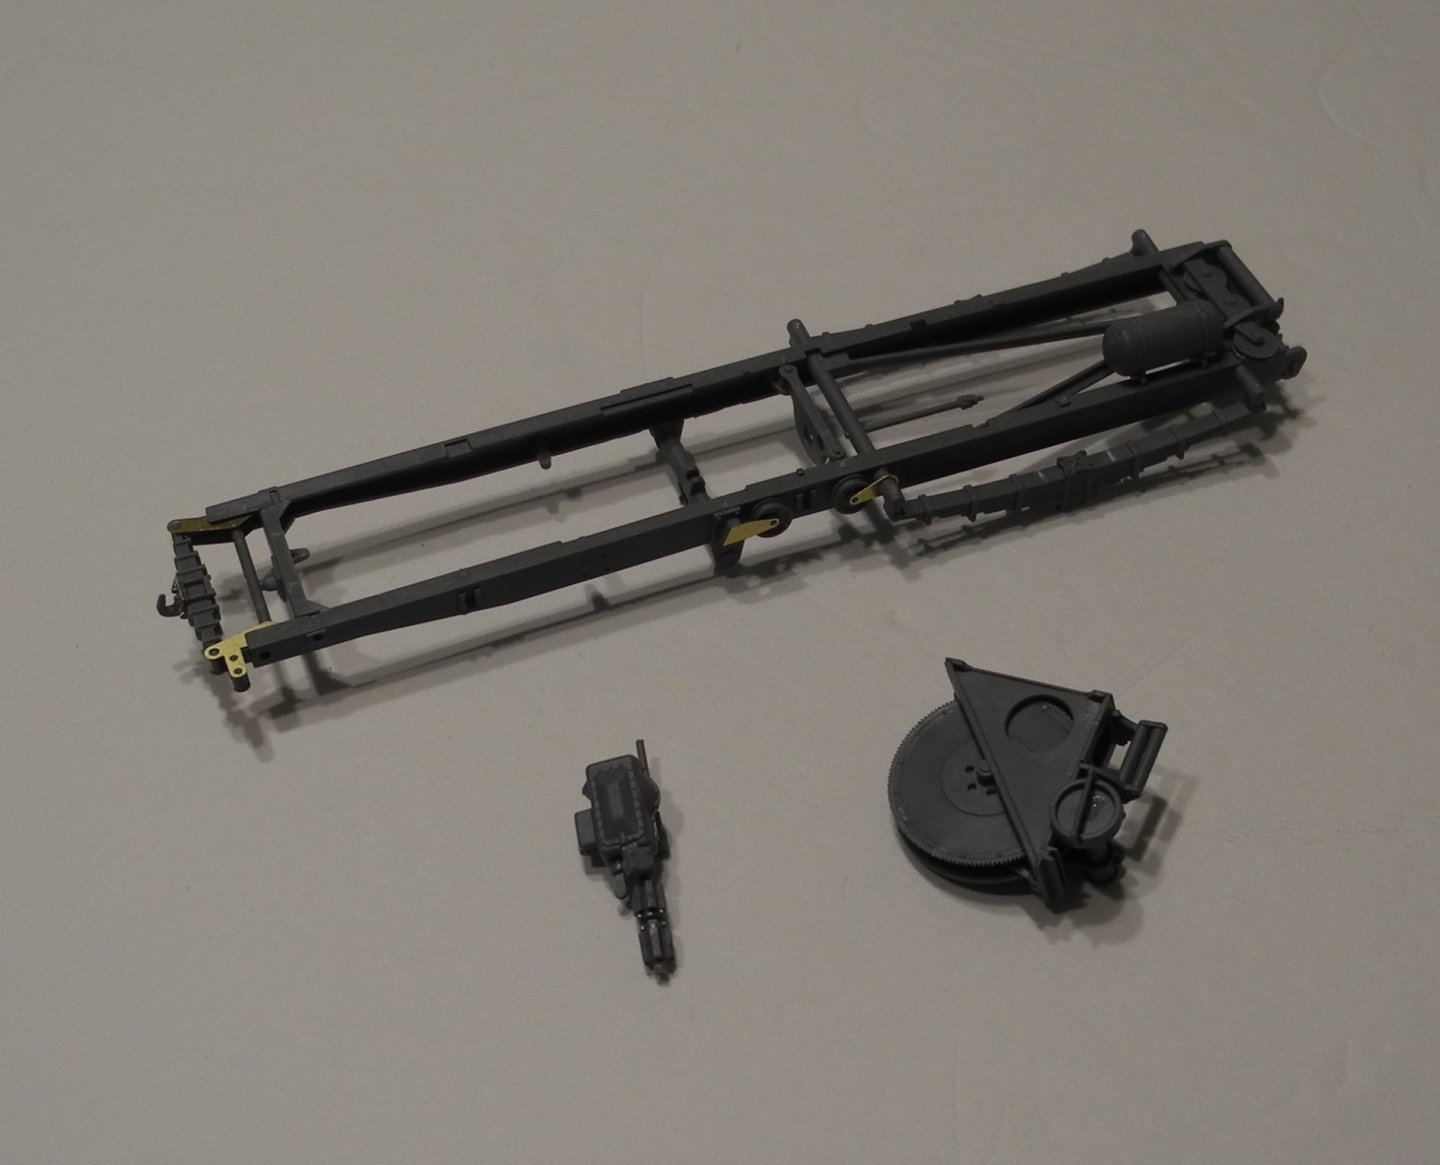
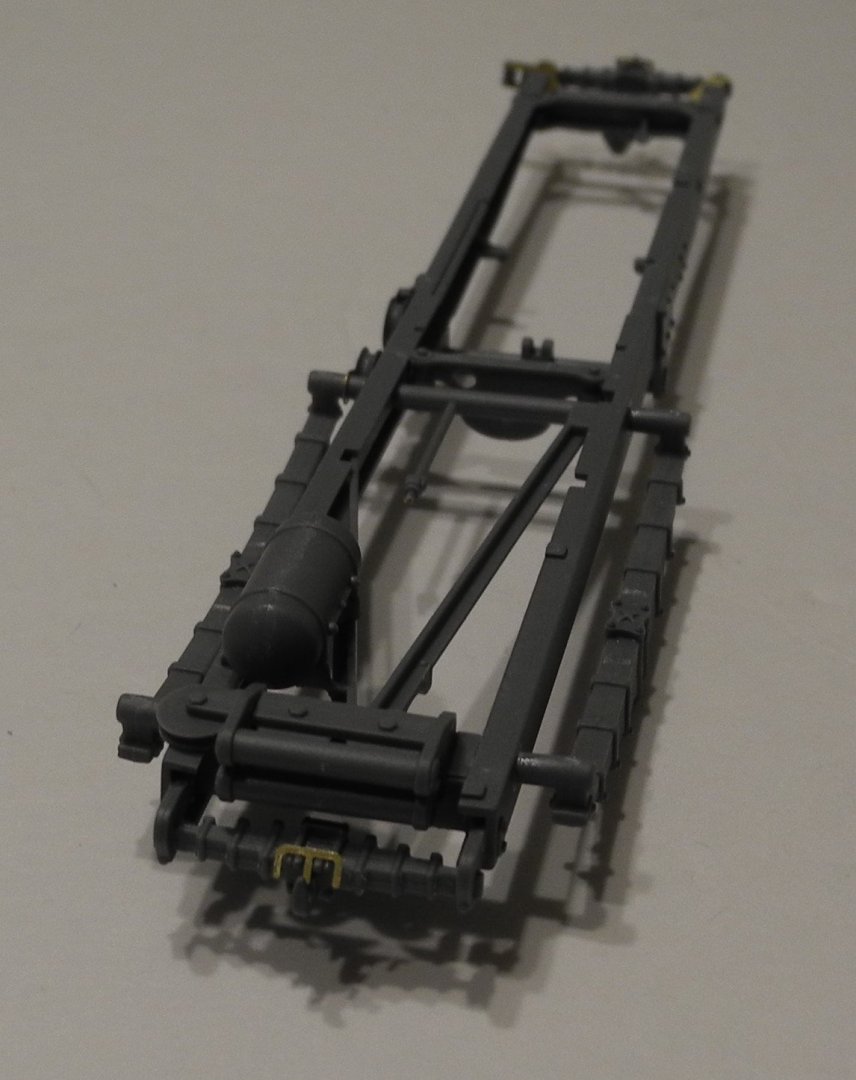
Here the chassis sub components and drive train are assembled and painted in olive drab.


-
Beautiful!
-
Curtiss P-40B Warhawk by Asat- Airfix- 1/48
CDW replied to ASAT's topic in Non-ship/categorised builds
Boom and zoom is what it's all about baby. Boom and zoom. The P-51 could boom and zoom as well. Don't know whether it's an accurate comparison for 1:1 aircraft, but with scale flying models, the P-51 is just amazing. It's handling characteristics is what makes it a favorite. Handles and tracks like a dream, no ill habits at all. -
Curtiss P-40B Warhawk by Asat- Airfix- 1/48
CDW replied to ASAT's topic in Non-ship/categorised builds
The F-22 has it all...in spades. There's a good reason it's not exported. 🙂 -
Over many years, I have tried to concentrate on a particular genre just to keep it reasonable. It never worked. I like them all. 😀
-
Same here, Rick. Looked through the kit, thought about it, then ended up trading them off several times. Did that with kits I now regret as they are so darned hard to find.
-
Citroen Traction Avant by kpnuts - FINISHED - Heller - 1/8
CDW replied to kpnuts's topic in Non-ship/categorised builds
When you can find the time, would love to see your Bentley, Corvette, and the bus. 🙂 -
Curtiss P-40B Warhawk by Asat- Airfix- 1/48
CDW replied to ASAT's topic in Non-ship/categorised builds
The P-40 was extremely effective as a boom and zoom fighter. When it utilized it's strengths, it was superior. The Zero did not climb nor dive well. -
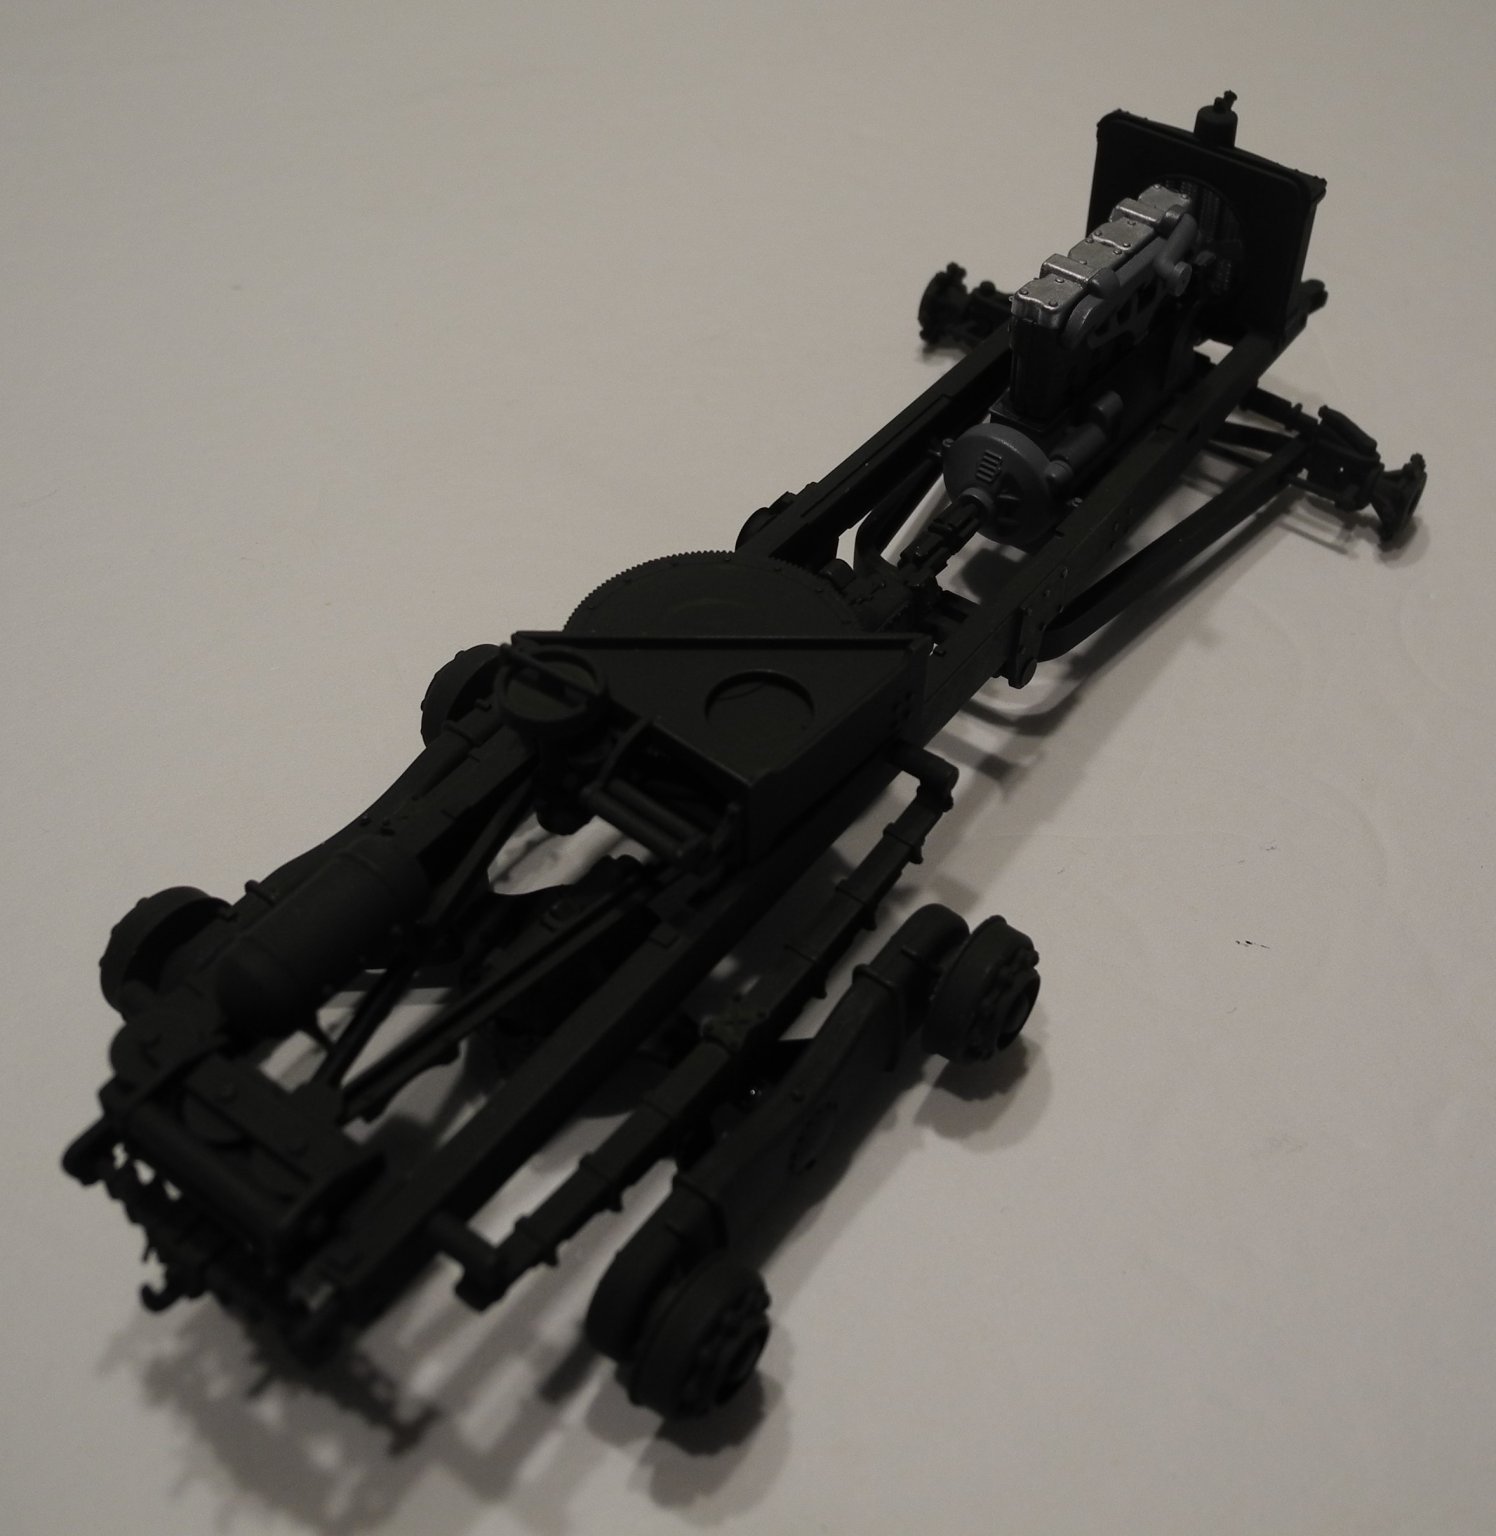
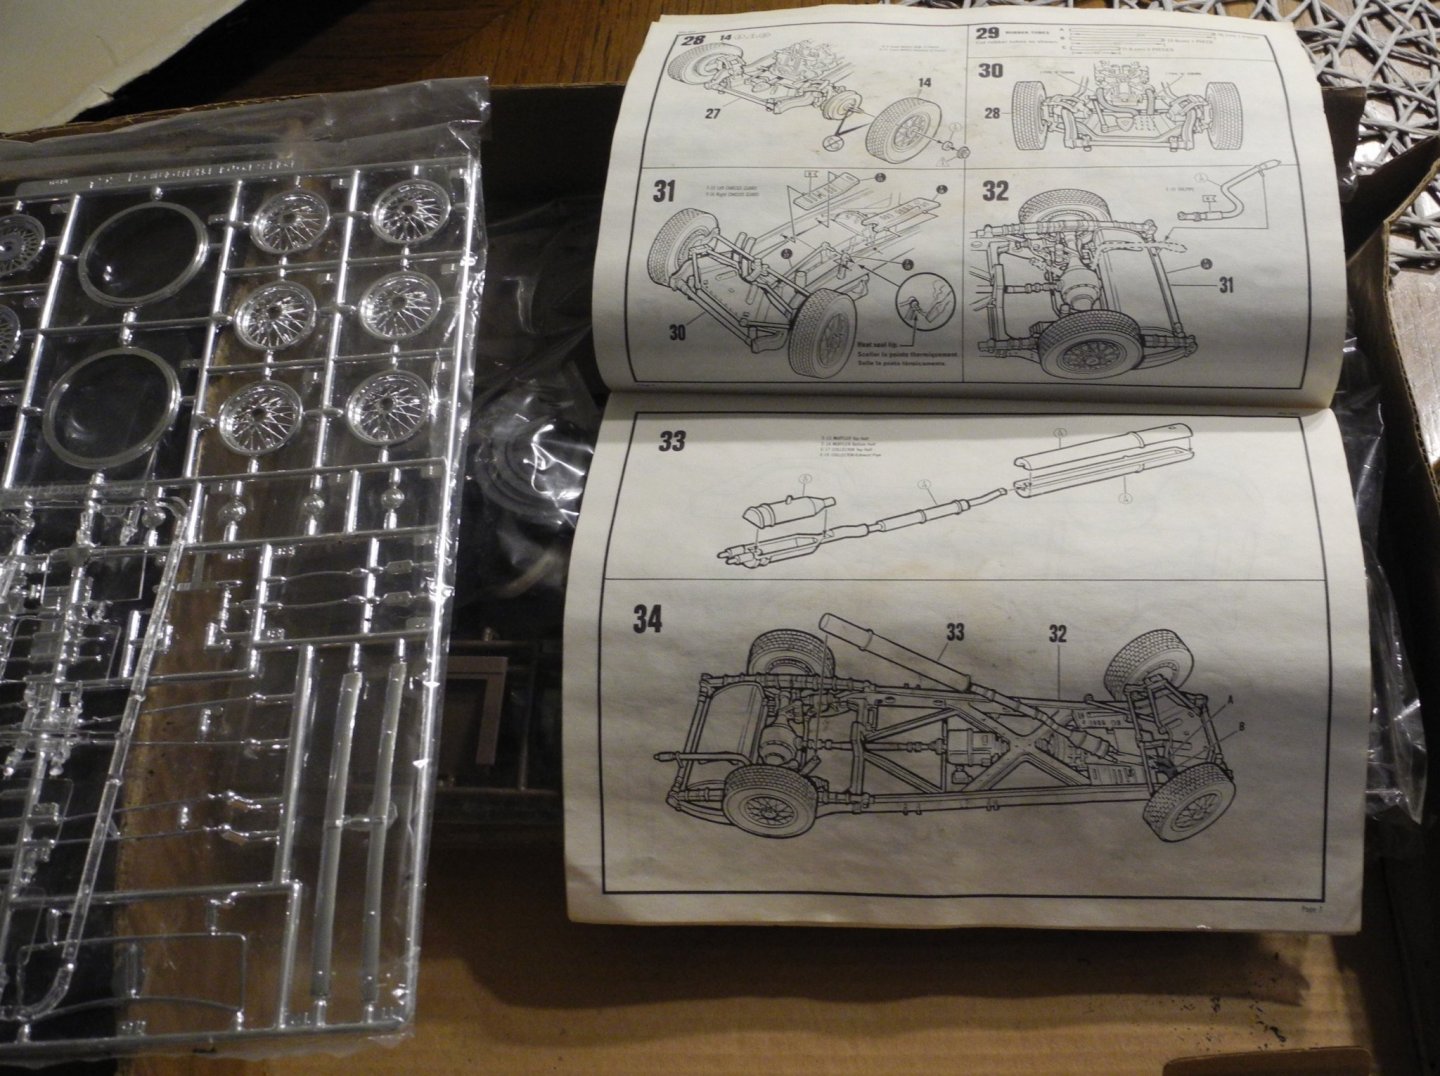
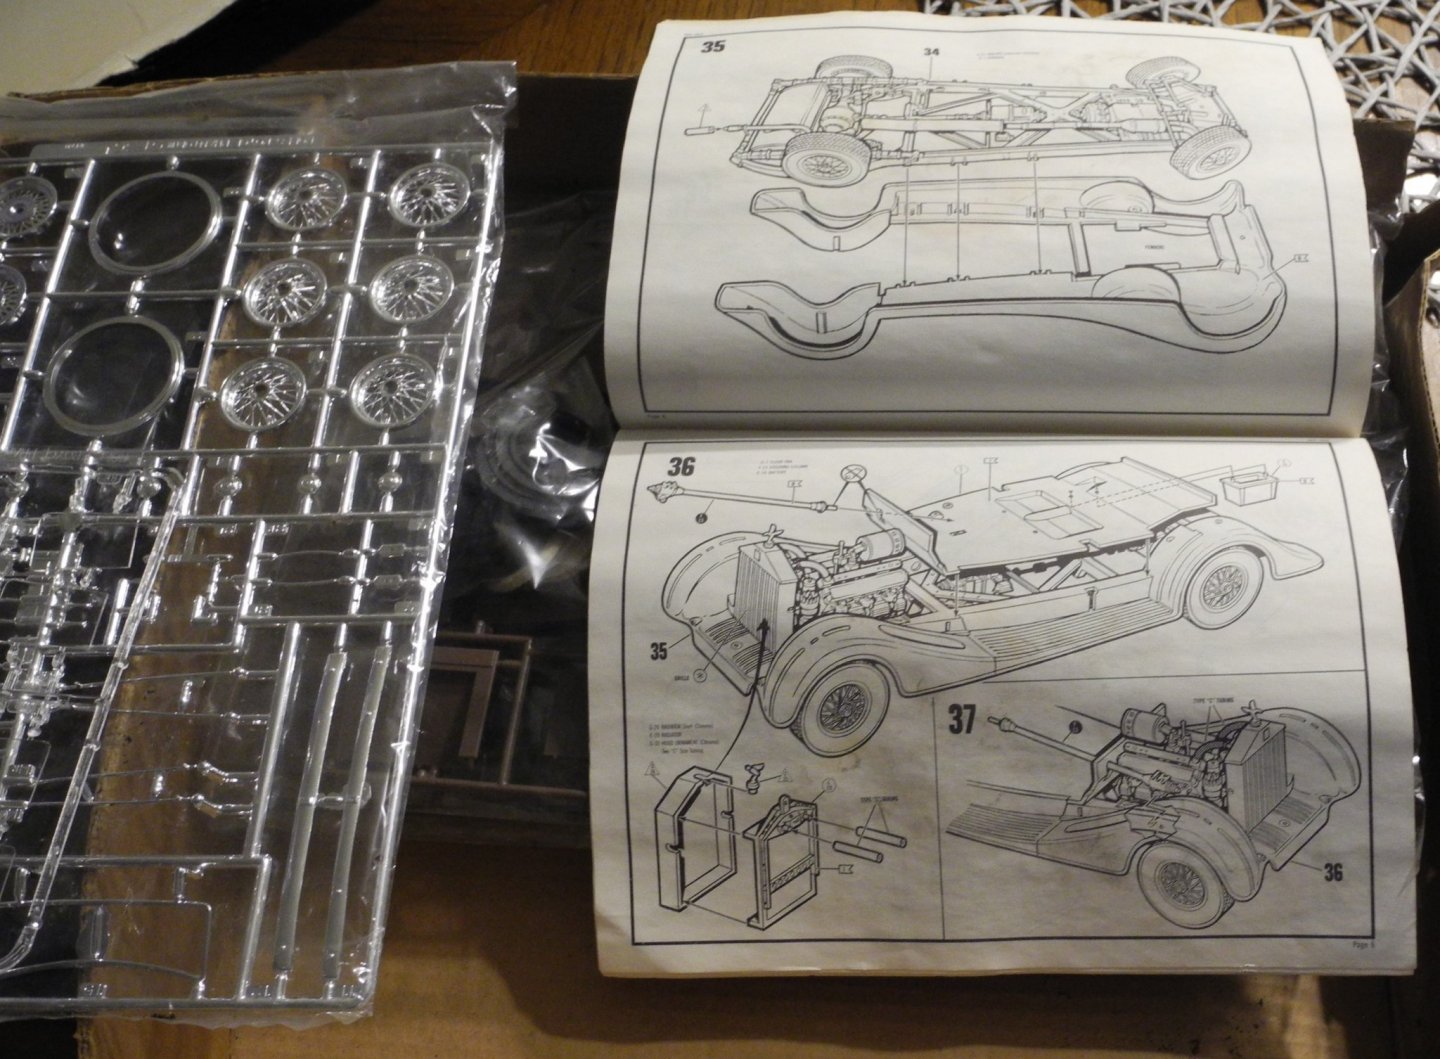
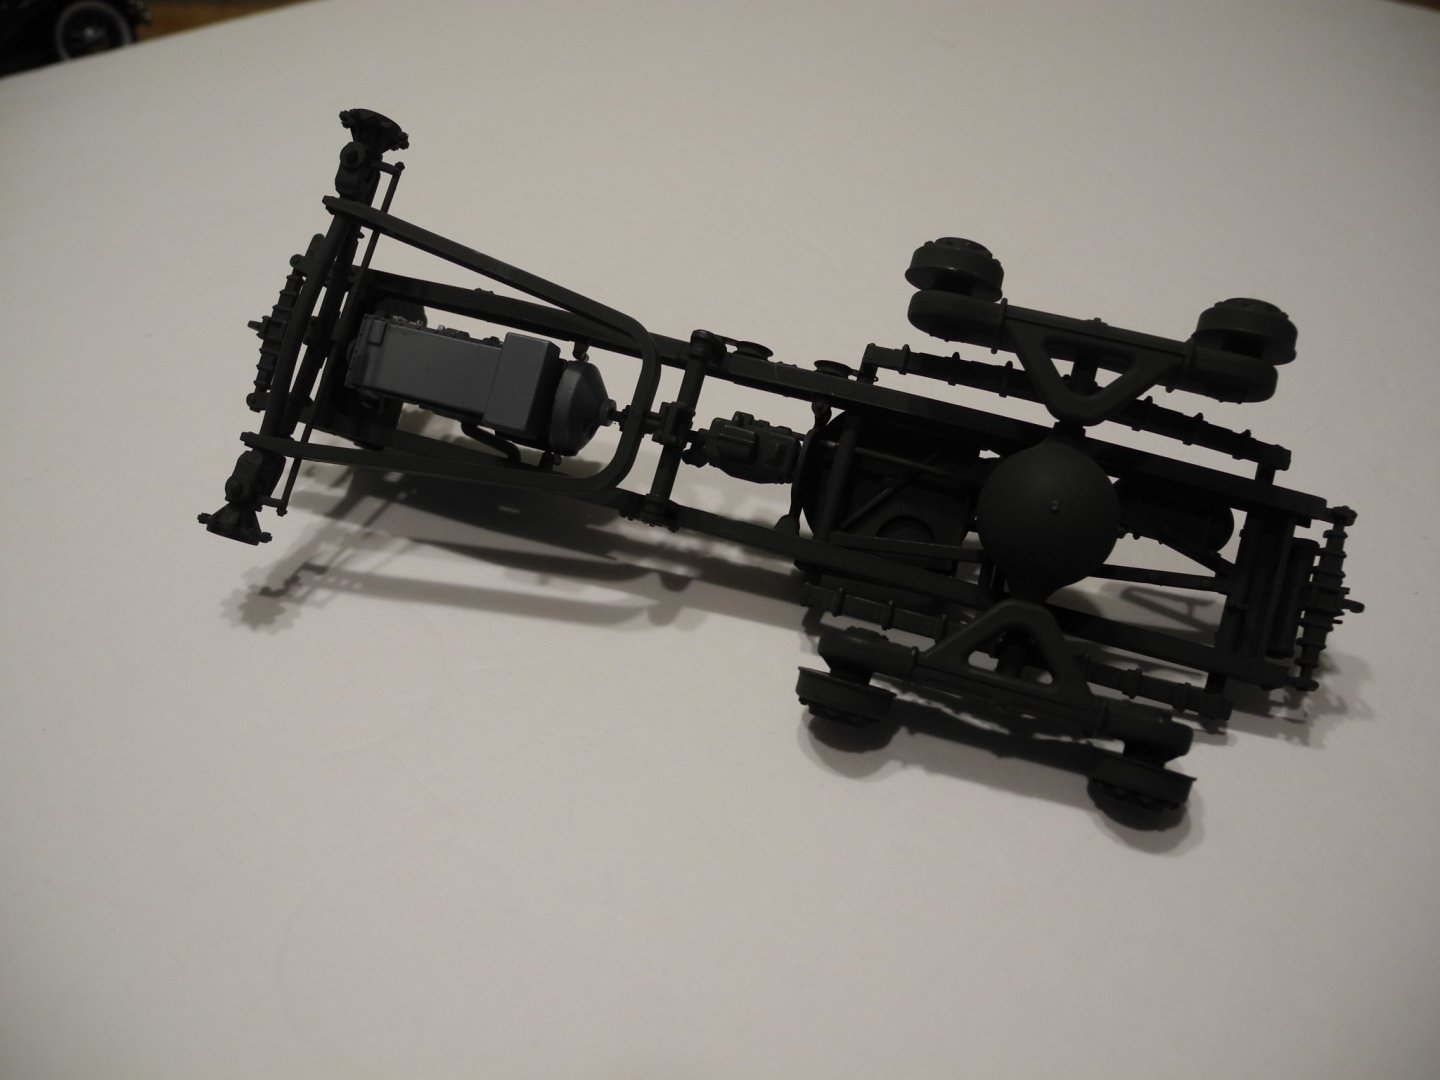
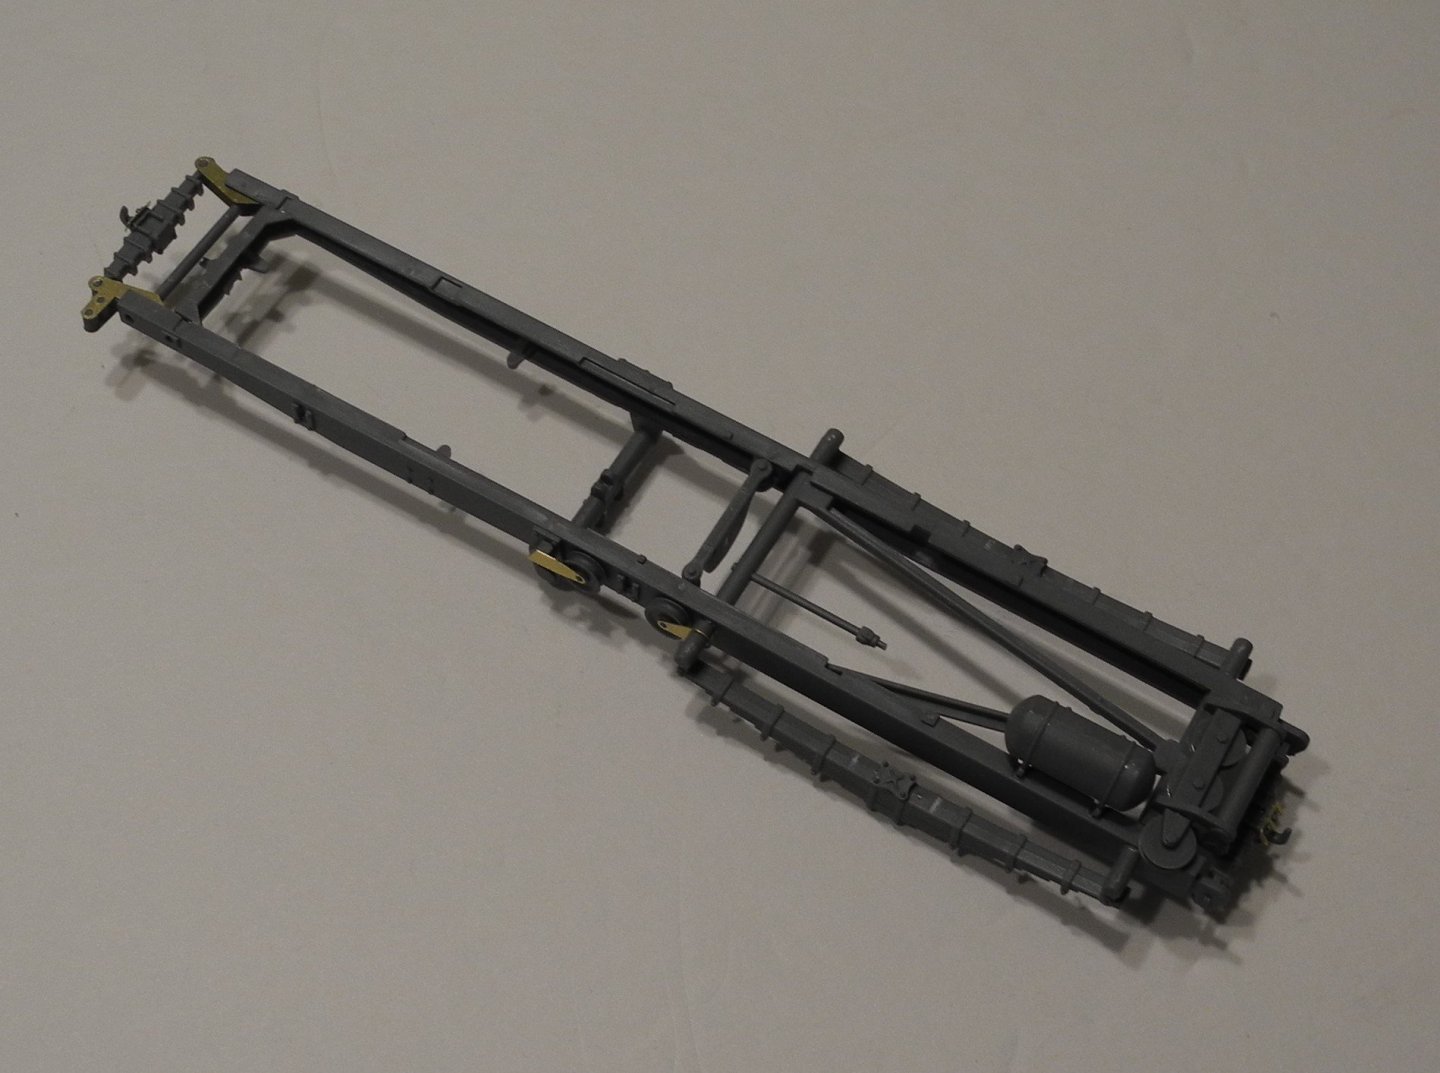
A dry fit of the chassis/drive train sub assemblies.
-
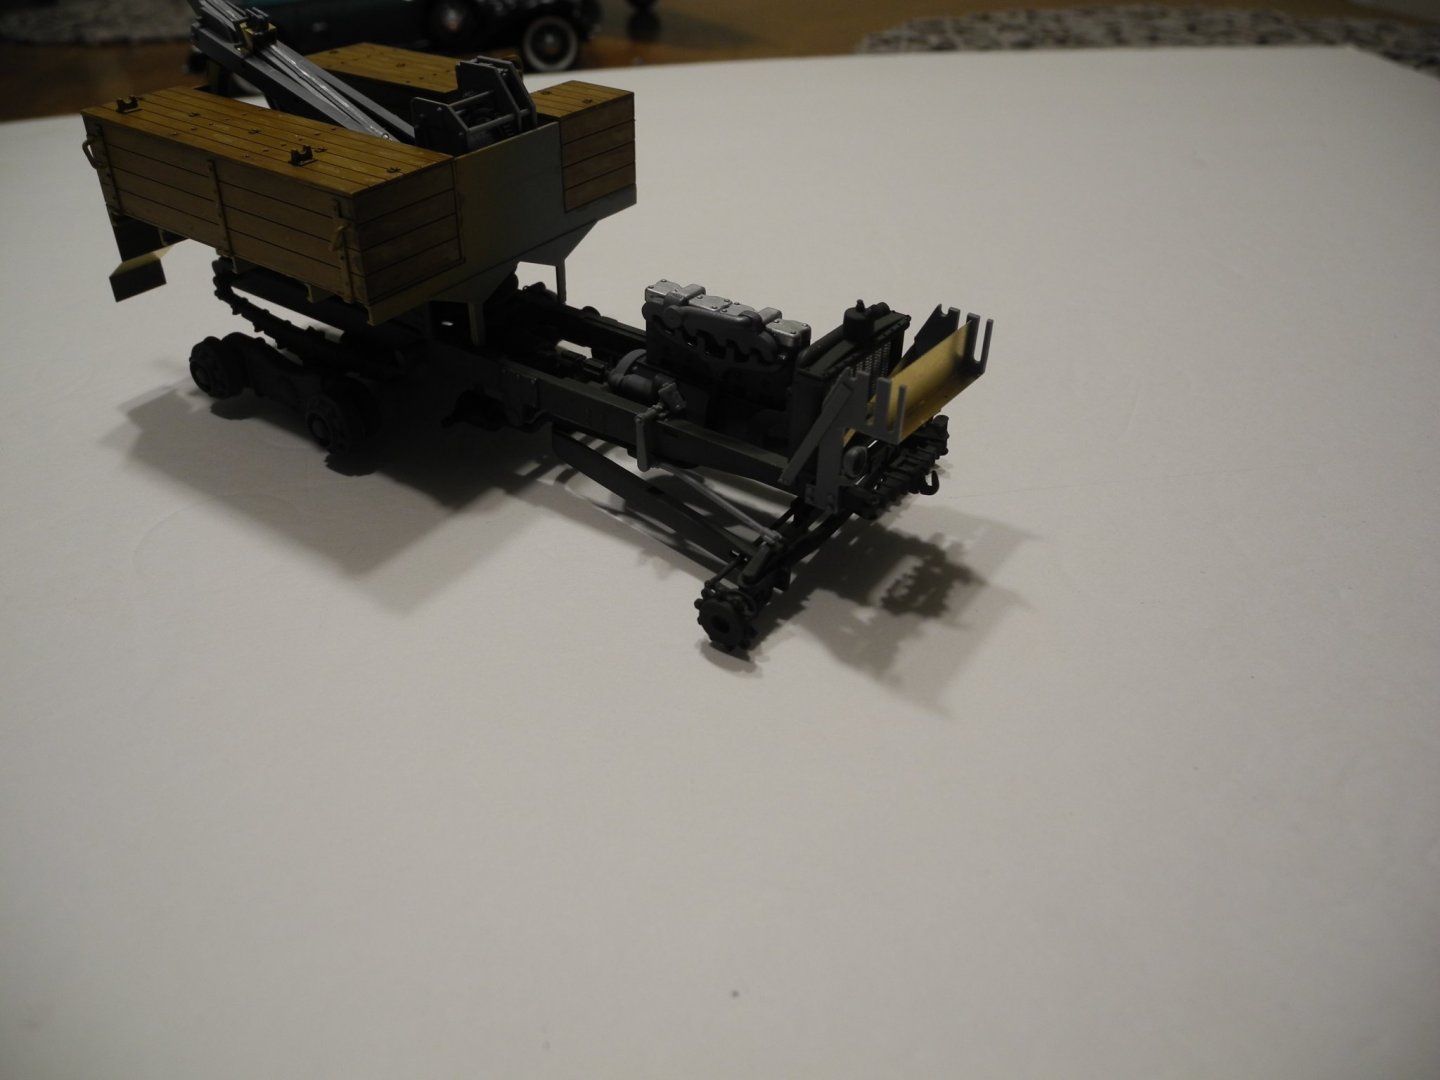
Subsequent assembly/construction steps deal primarily with assembling the previously constructed sub assemblies. I need to decide now how I want to paint this model as it will be easier to paint the sub assemblies before assembling them I think, particularly some of the smaller parts that need attention to paint details.
-
Curtiss P-40B Warhawk by Asat- Airfix- 1/48
CDW replied to ASAT's topic in Non-ship/categorised builds
The paint came out great on your P-40 Lou. Very smooth finish. -
A brilliant diorama, Jack. Thoroughly enjoyed your build thread, a wonderful tutorial.
-
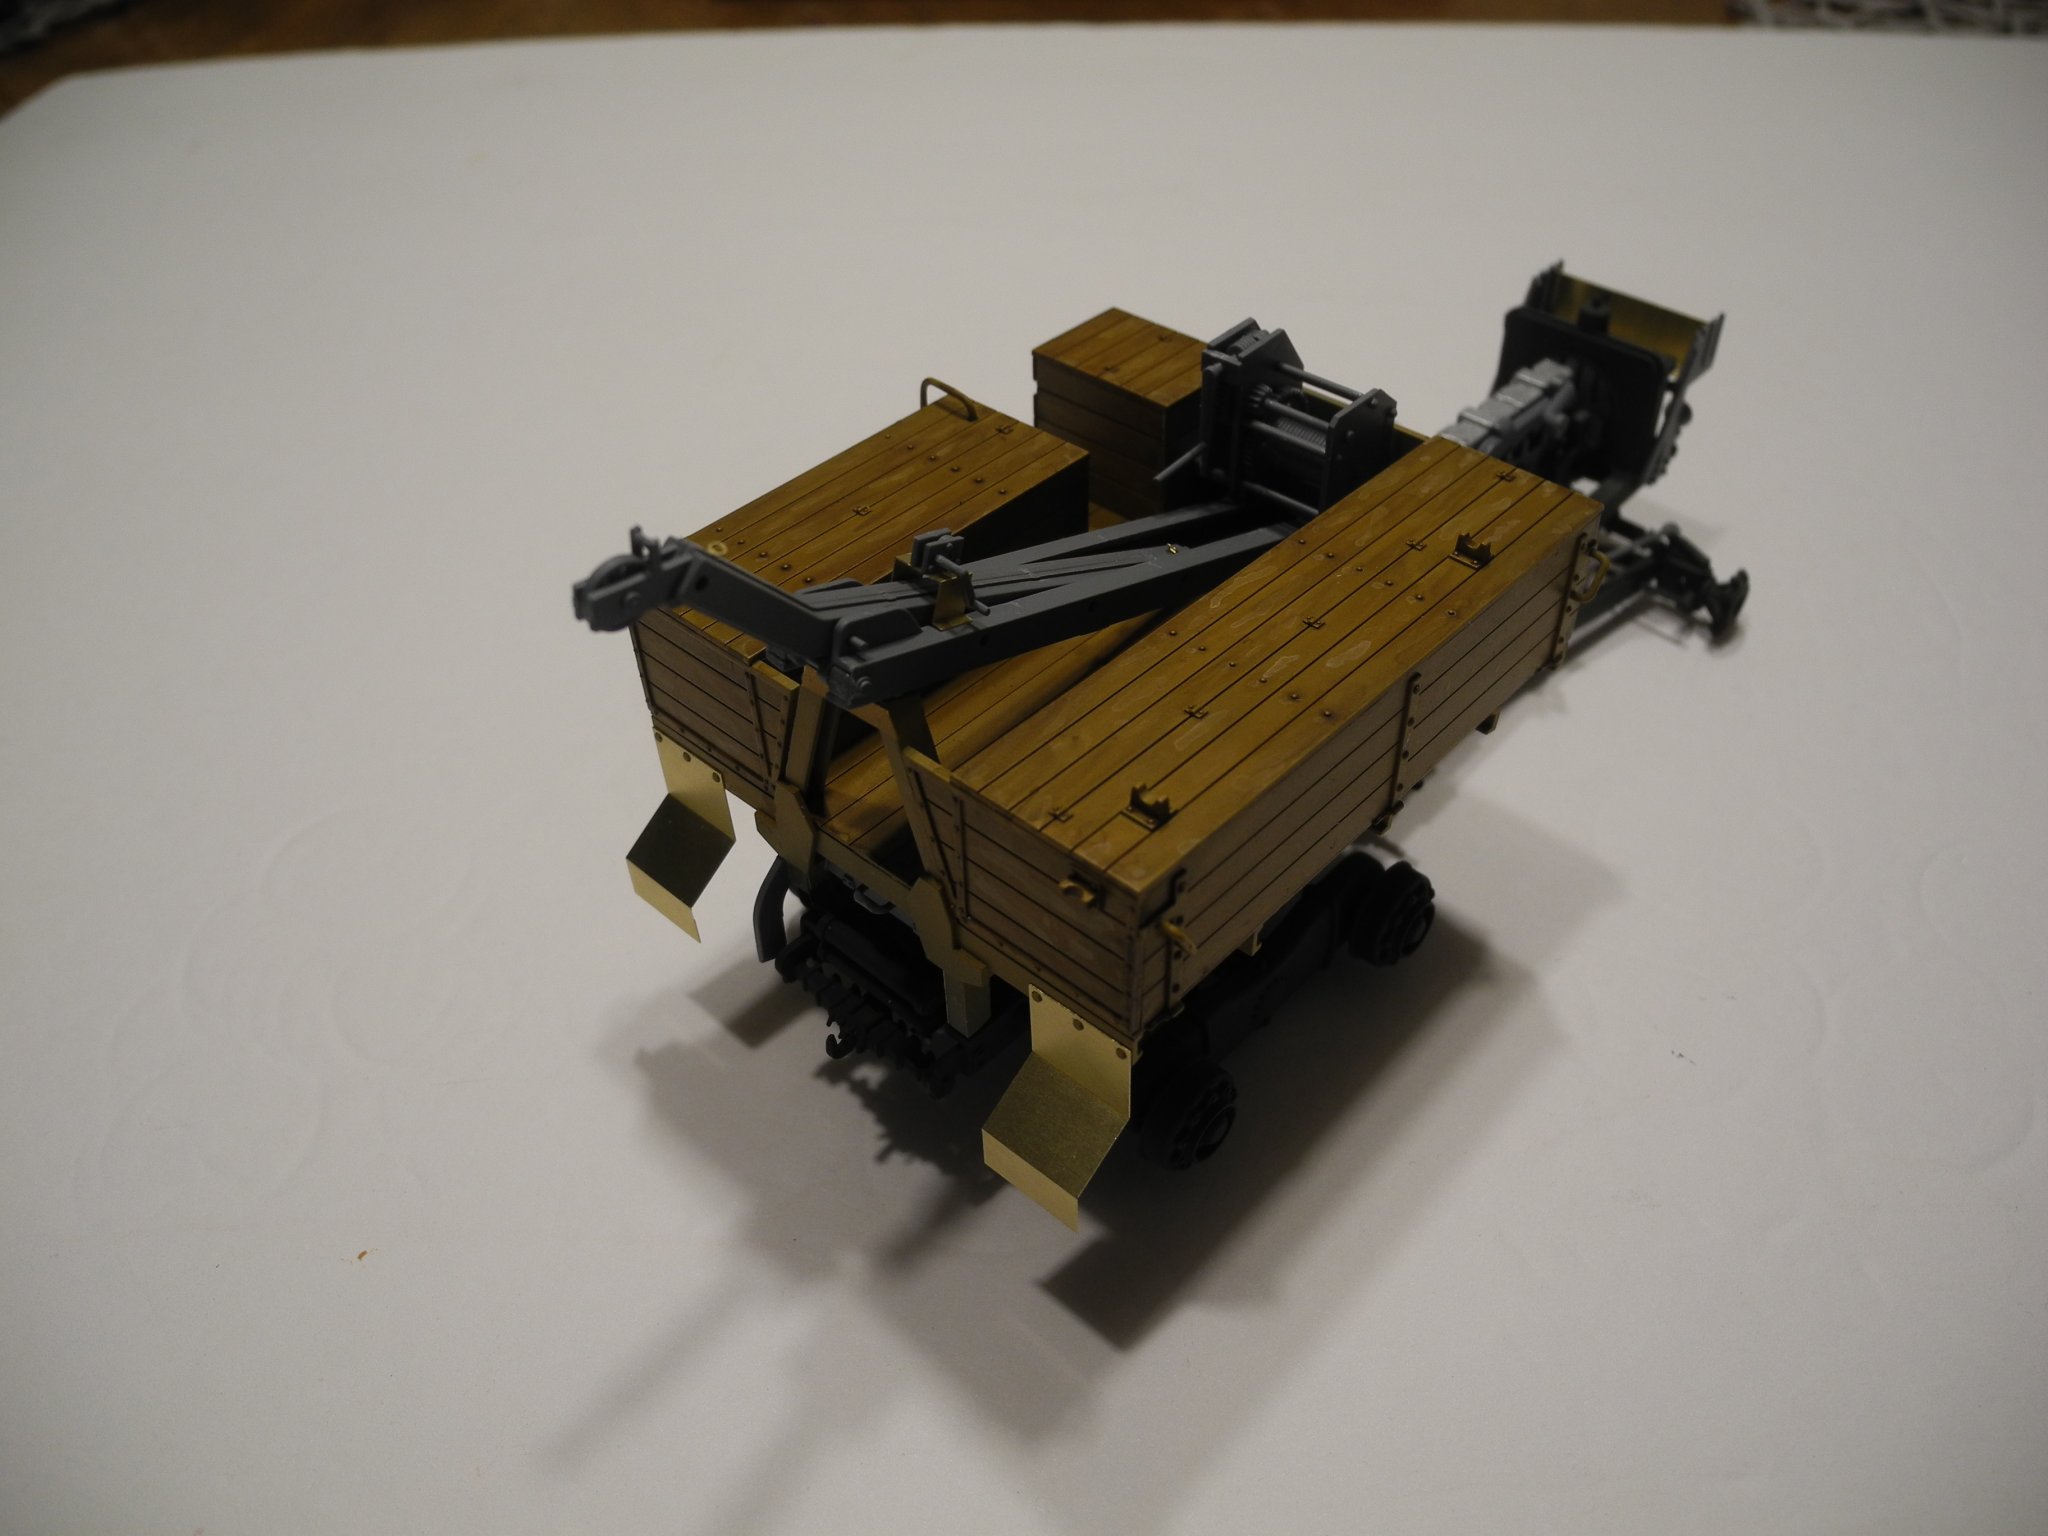
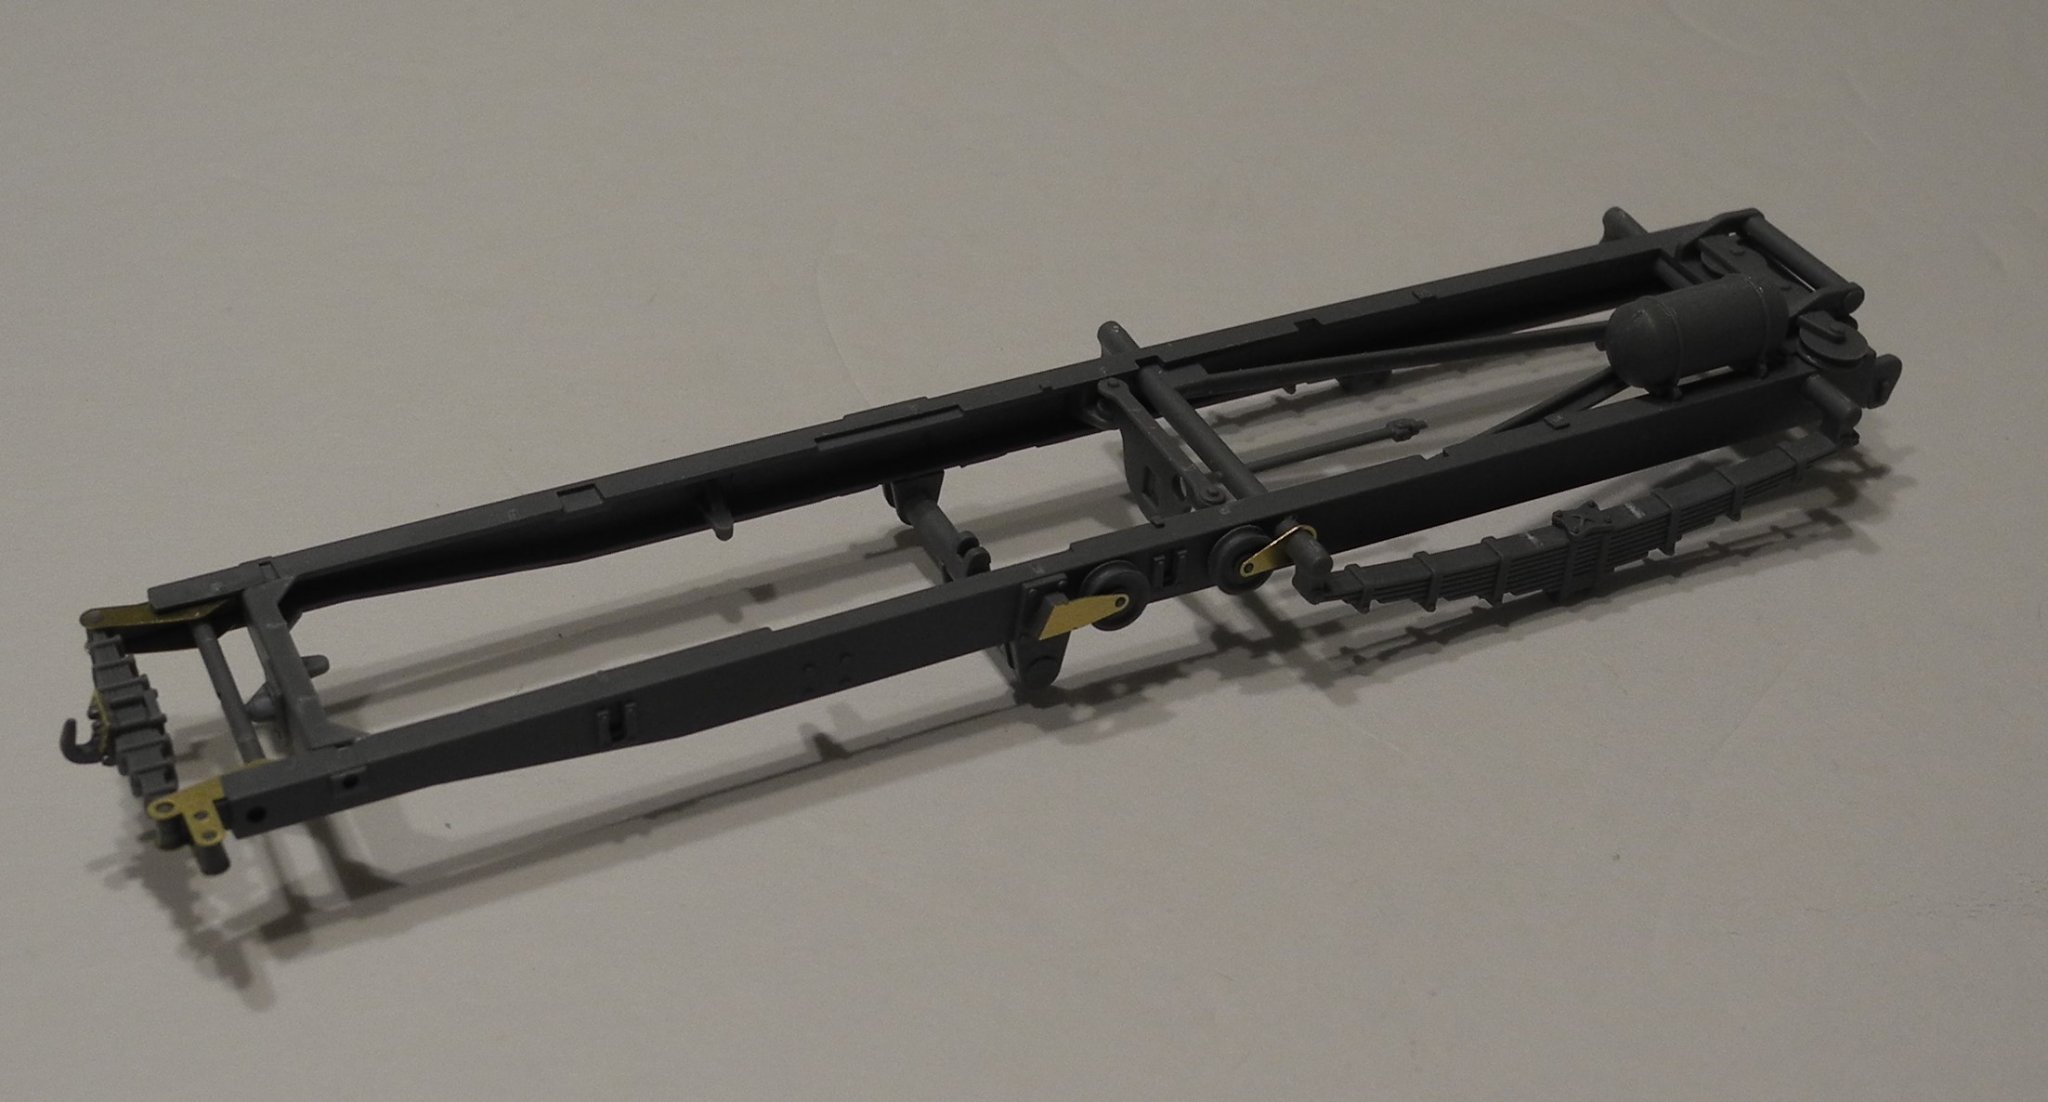
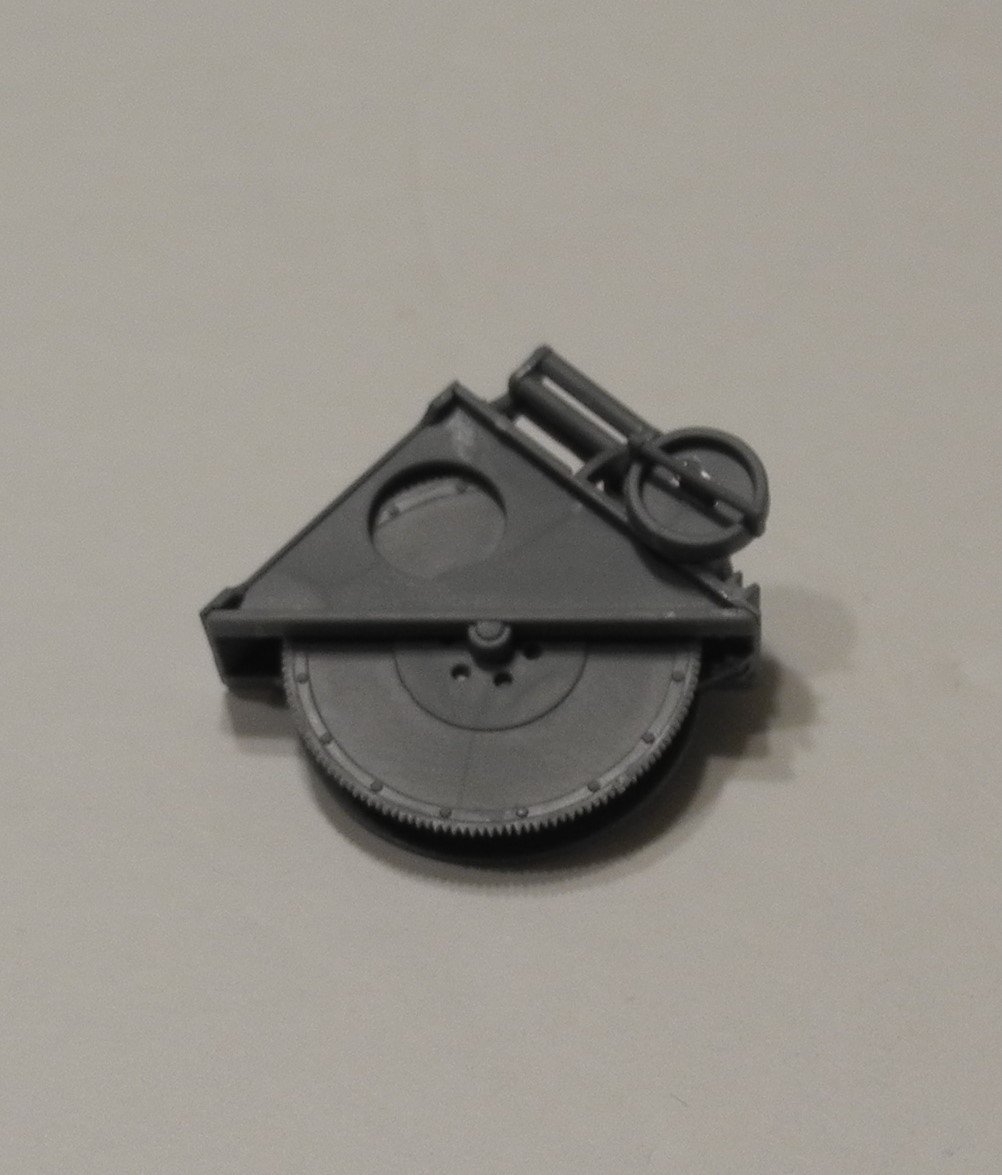
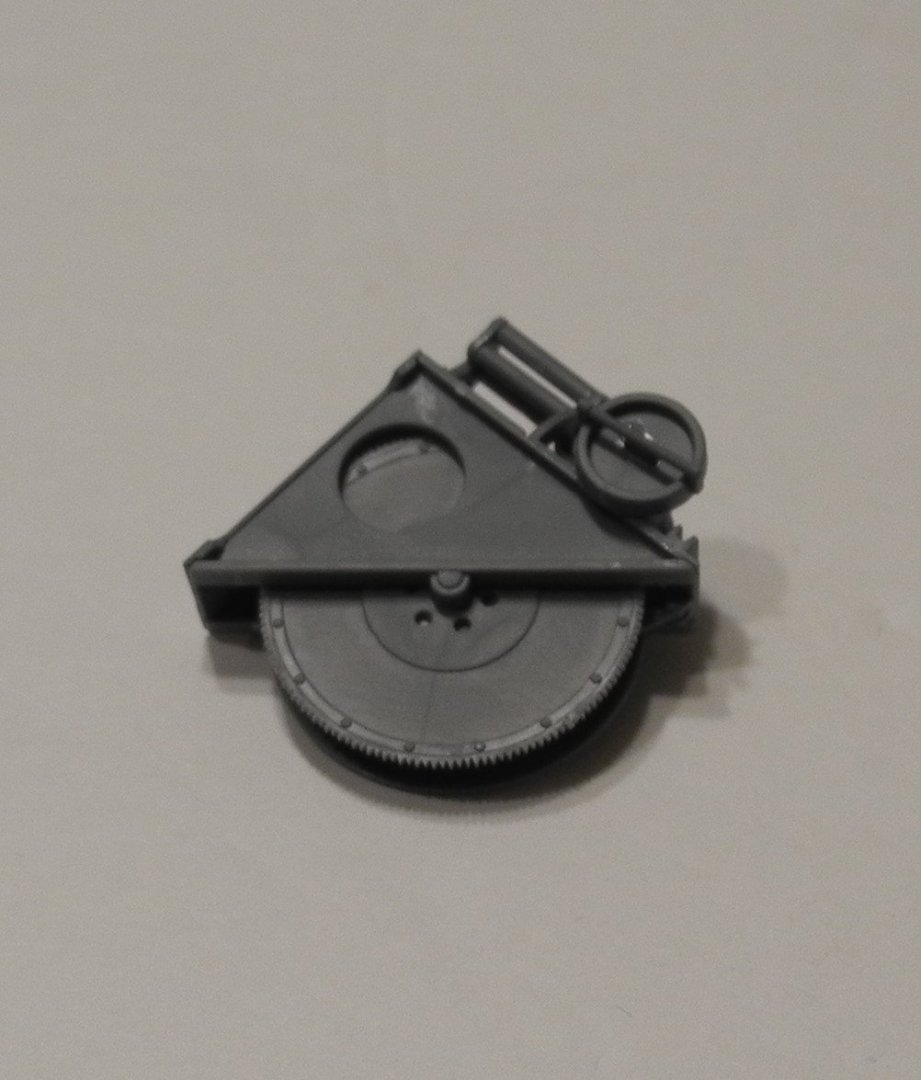
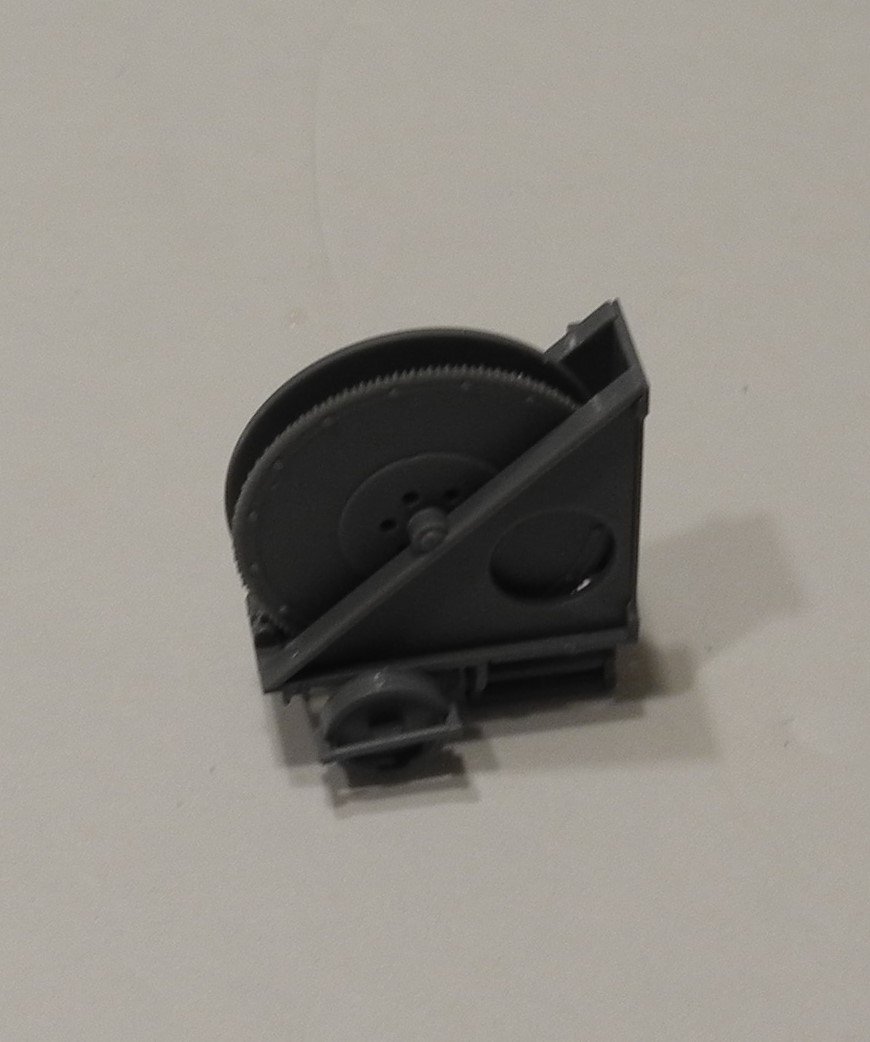
Steps 9 thru 12 14 dealt with the chassis, the main winch, and the power take off. The chassis. Lots of pulleys and rollers to utilize the winch and cables in heavy vehicle recovery operations. The winch. The power take off.


-
Citroen Traction Avant by kpnuts - FINISHED - Heller - 1/8
CDW replied to kpnuts's topic in Non-ship/categorised builds
I got so interested seeing your Citroen build thread that I went and bought the kit on Ebay yesterday. This time, will build it, not trade it away. -
Yes, the big Gardner 6 cyl diesel engine was the source of that power and reliability. The kit comes with the markings for a number of different countries that used them, including Nazi Germany. Here is an interesting little video on the Gardner 6 cyl diesel. This one is being used in a marine application, but the old mechanic testifies to the reliability of the engine.
-
B-25 Mitchell "Meet Miss Runyon" by Javlin-HK-1/32
CDW replied to Javlin's topic in Non-ship/categorised builds
She's big and beautiful Kevin. Congratulations on another outstanding model. Wow, you were so close on the balance of the model. Just the single elevator causes it to tail sit? Did you weigh the amount of ballast you added to the nose? Is it possible to add more weight without disassembling the model? -
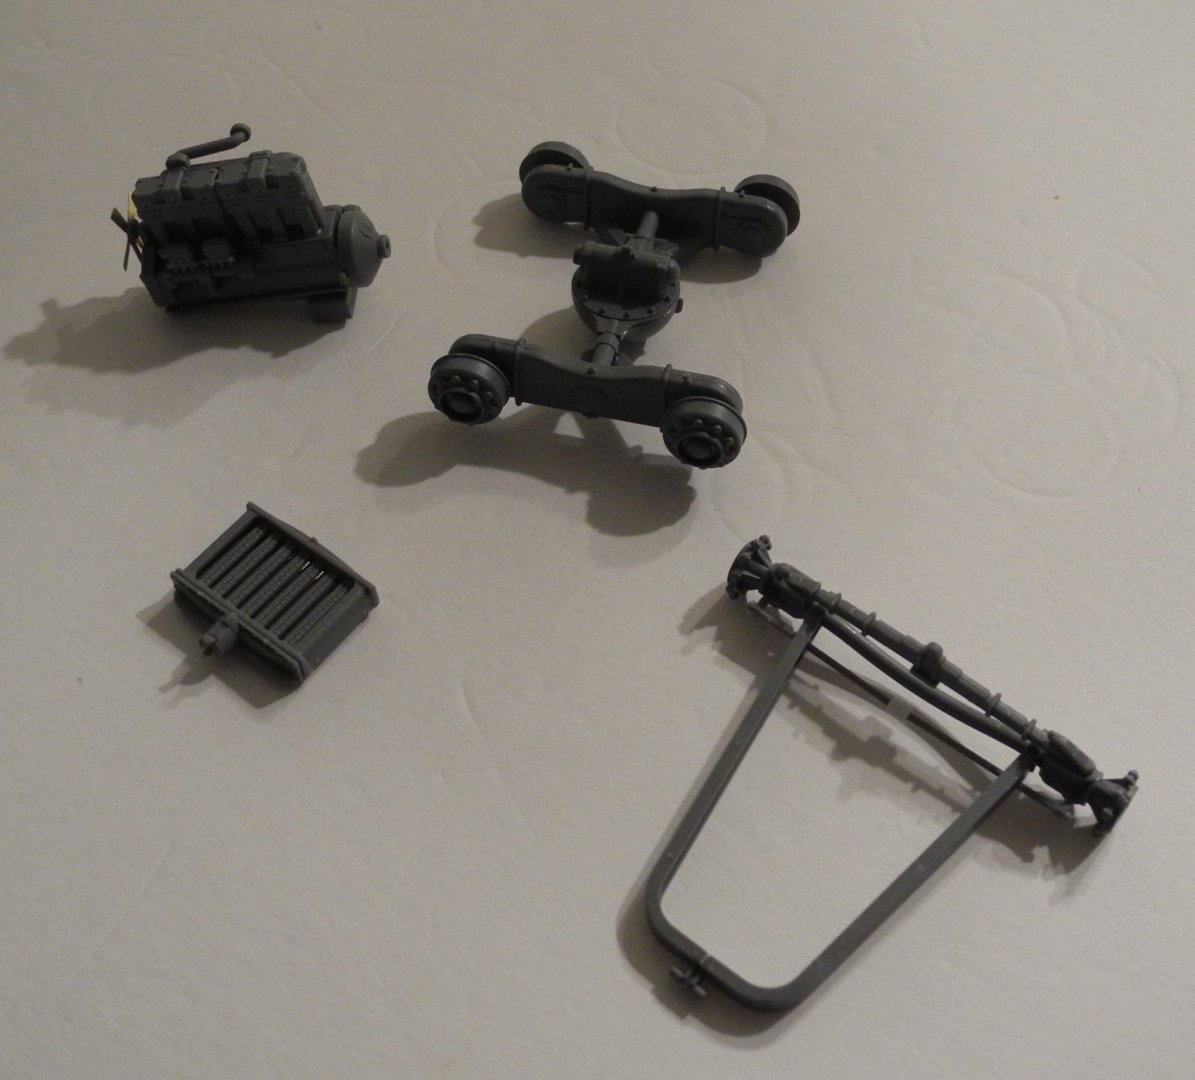
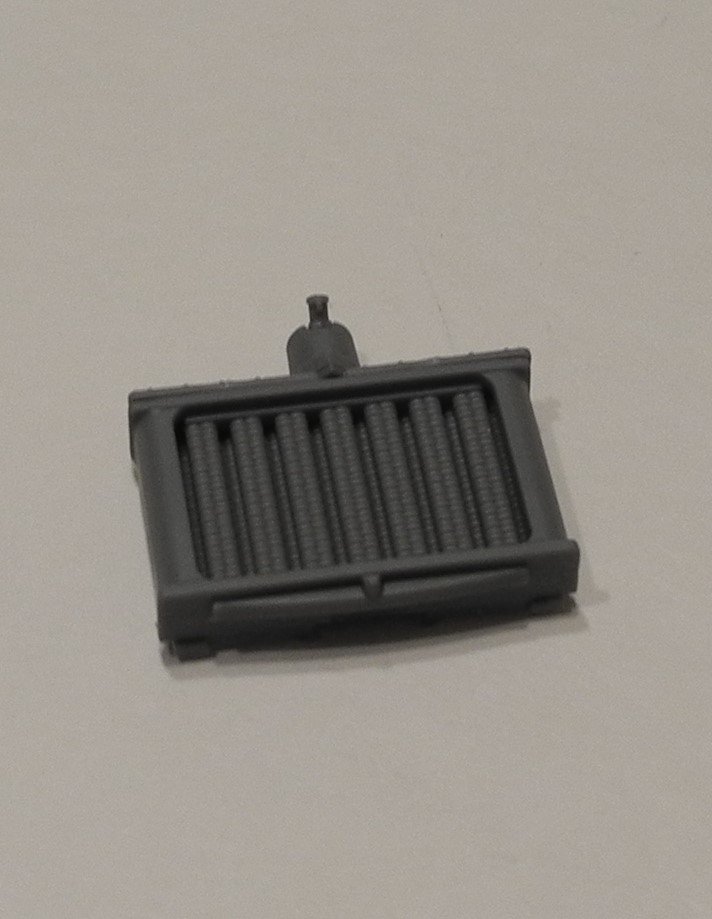
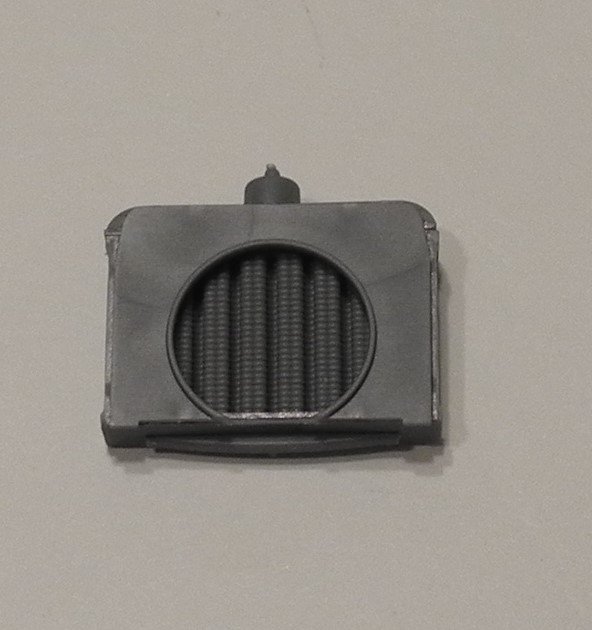
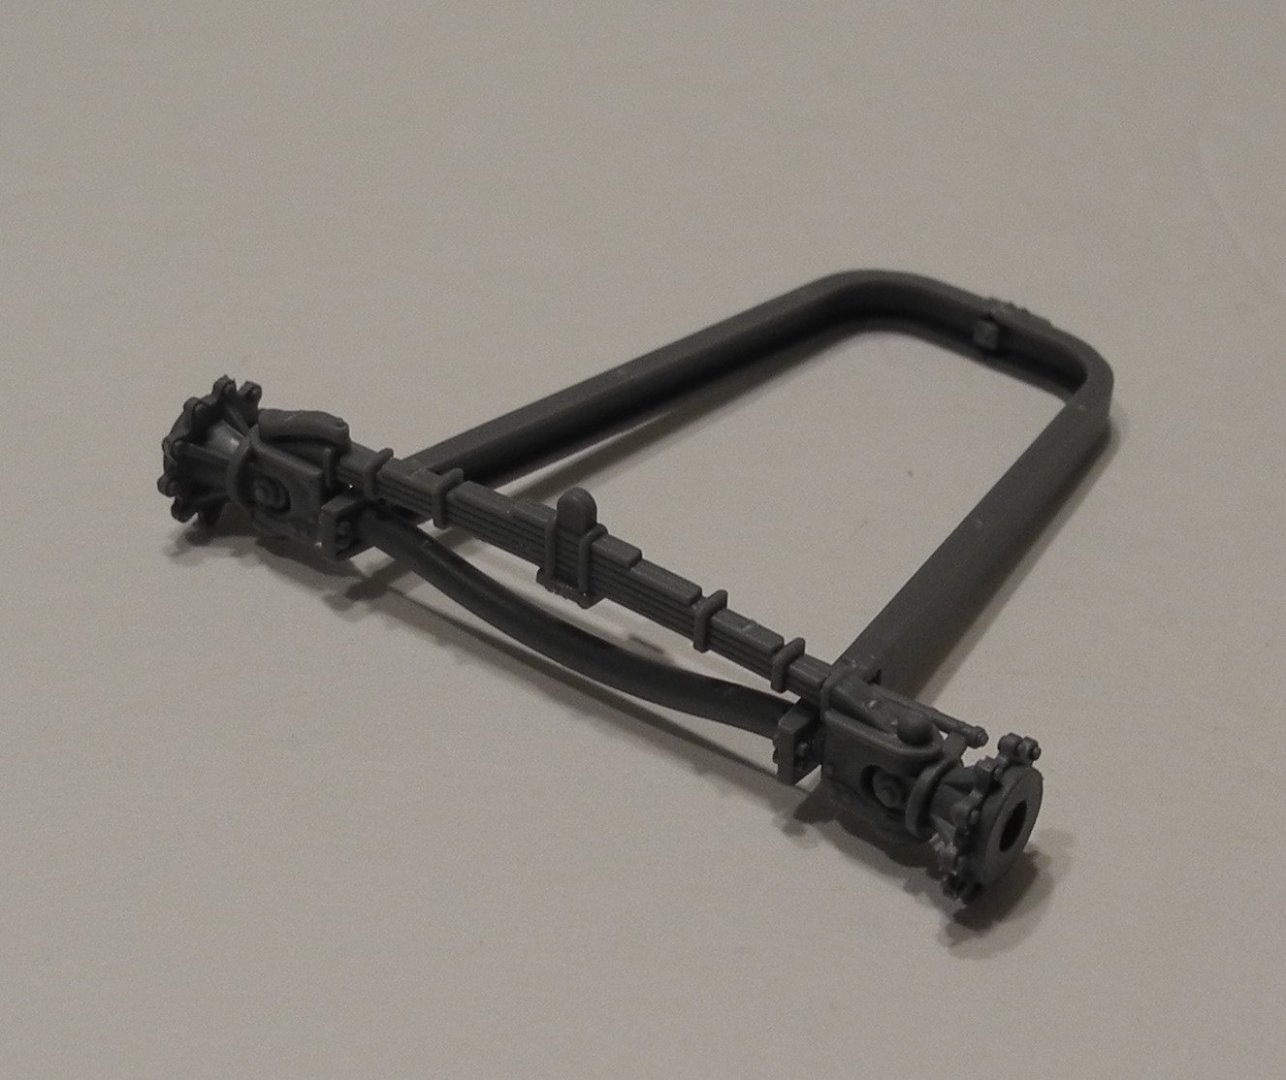
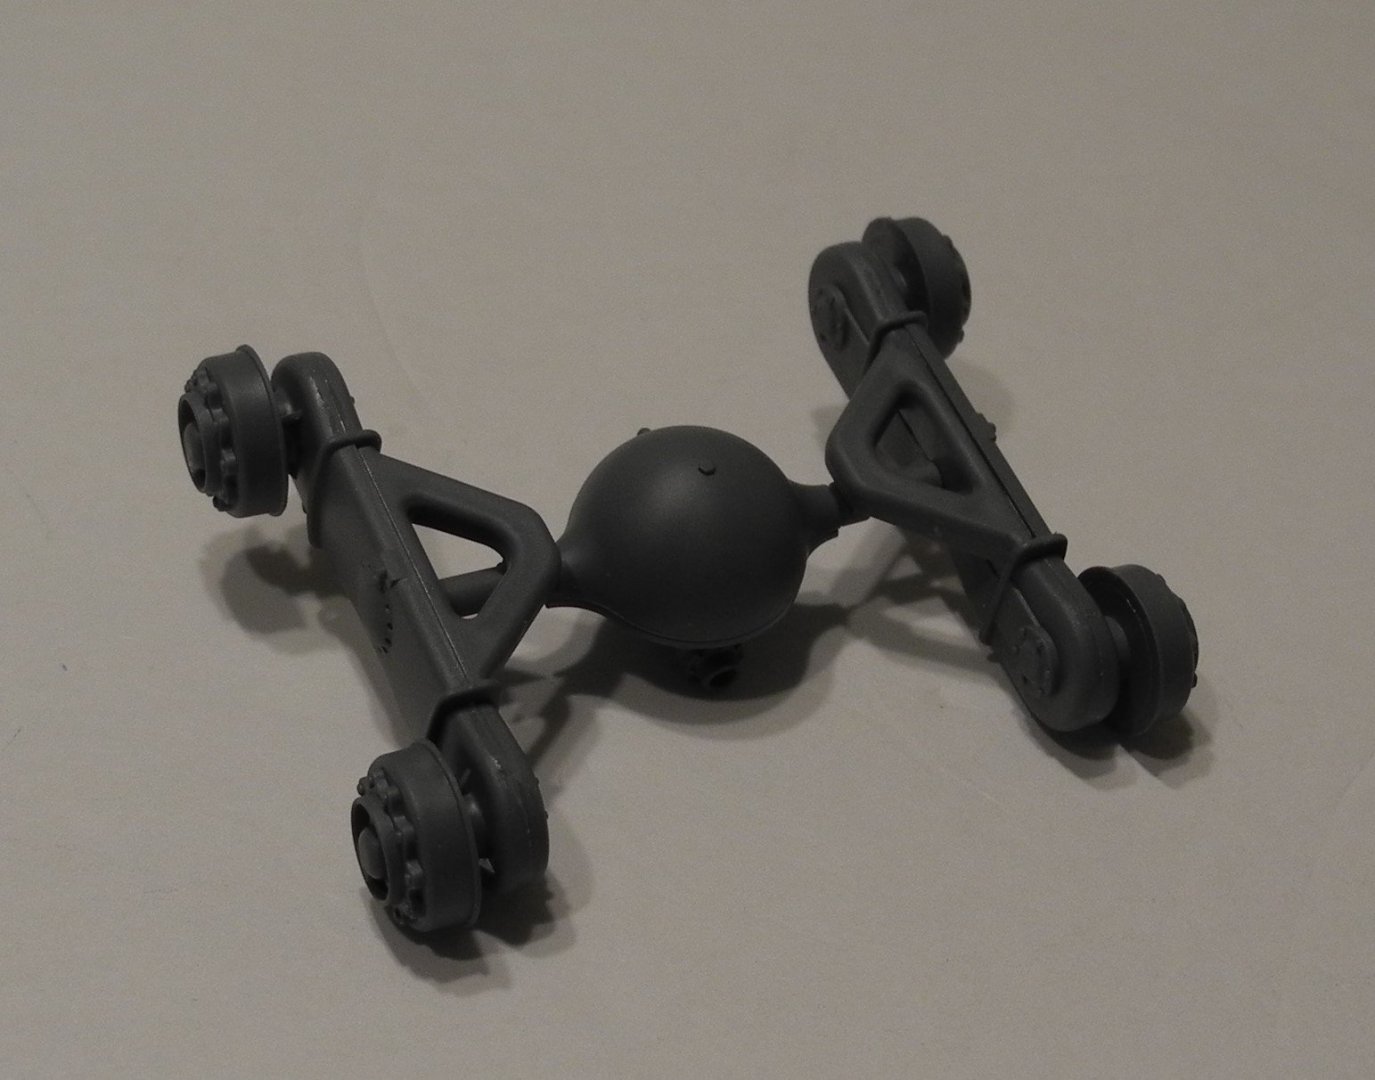
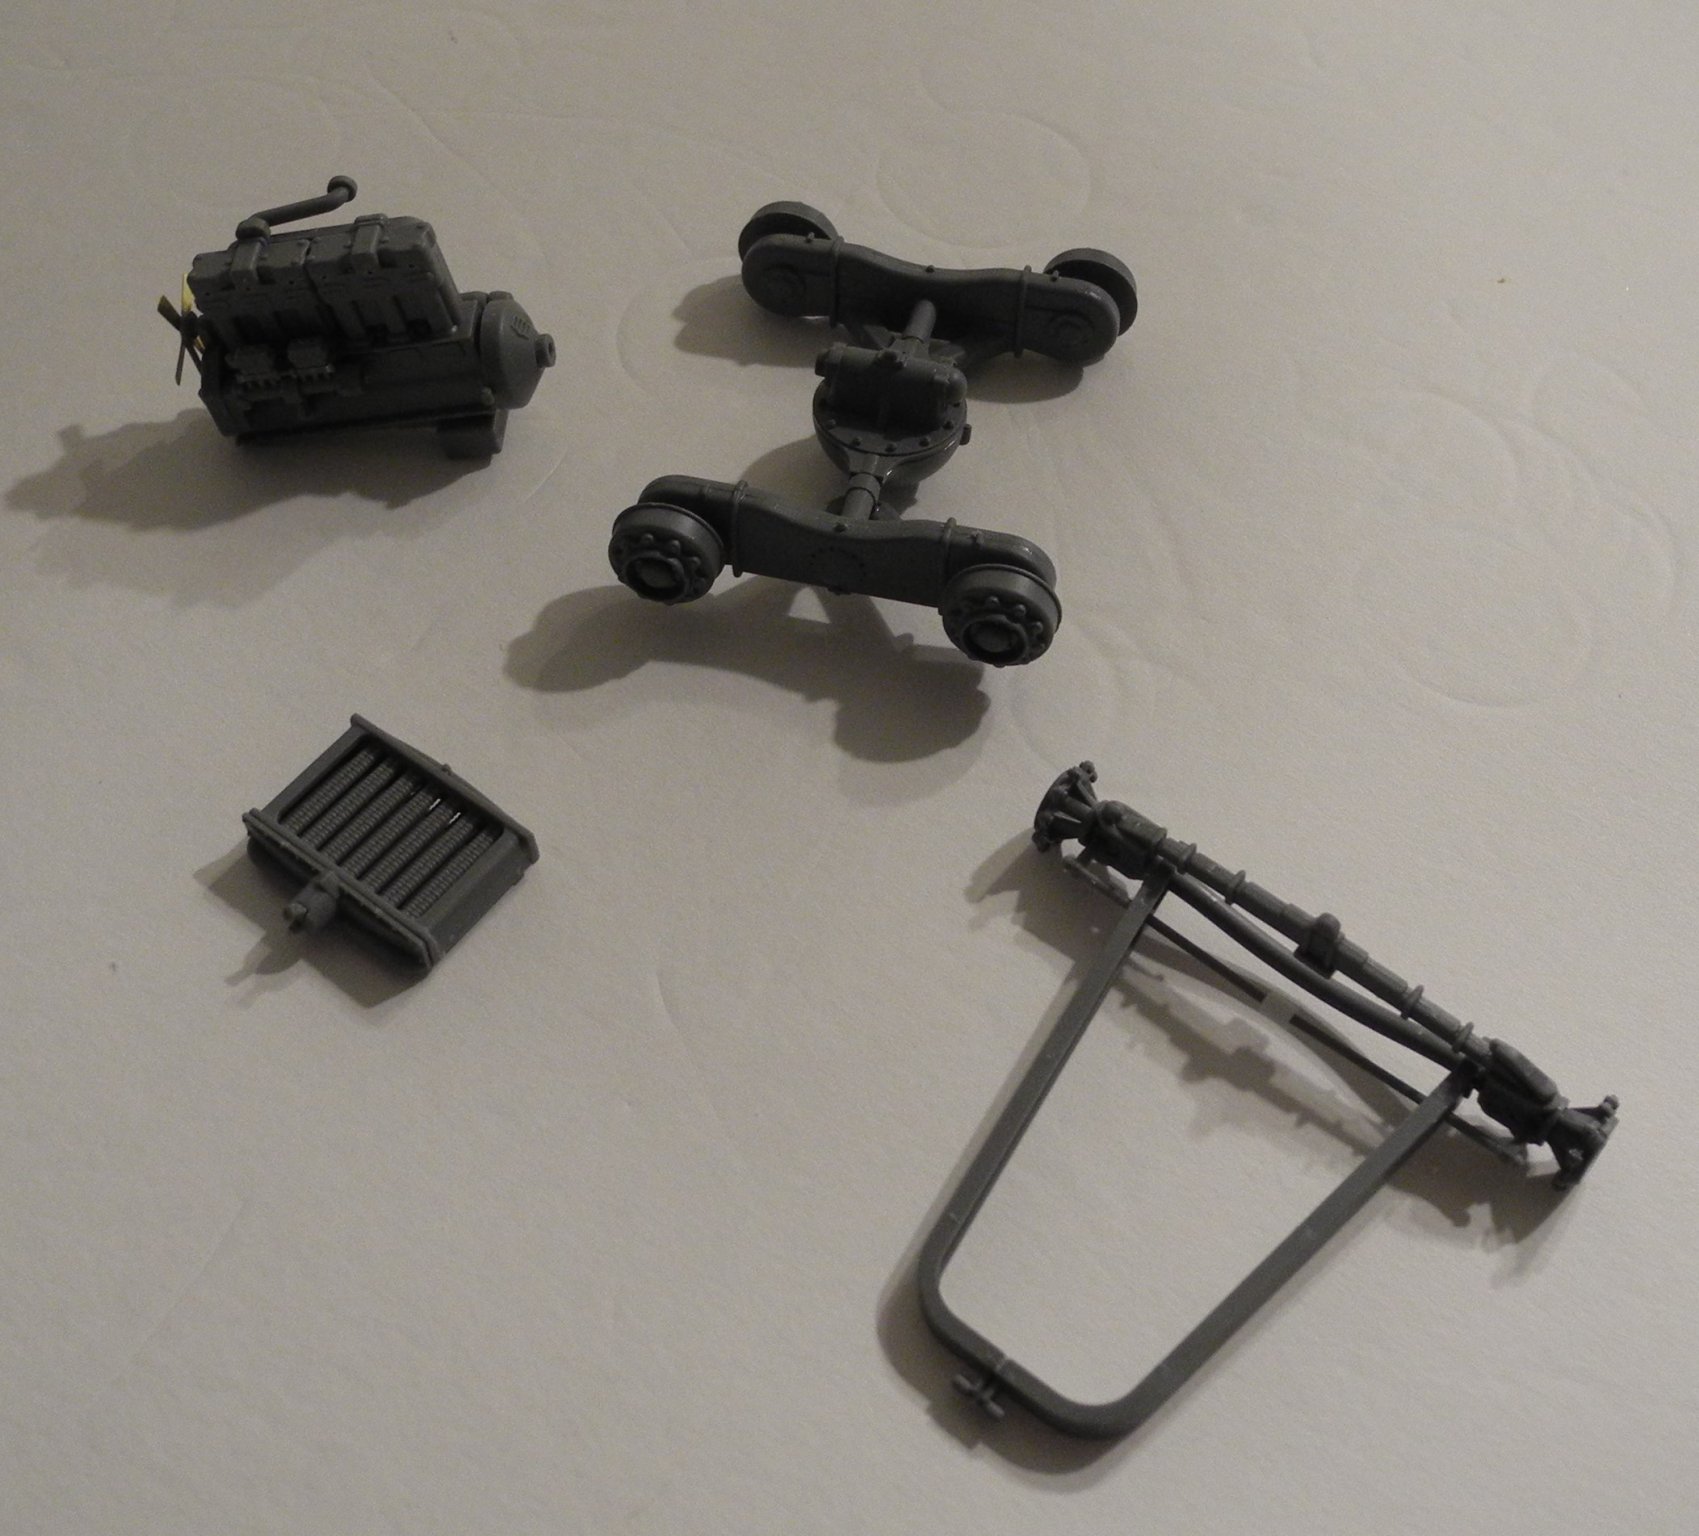
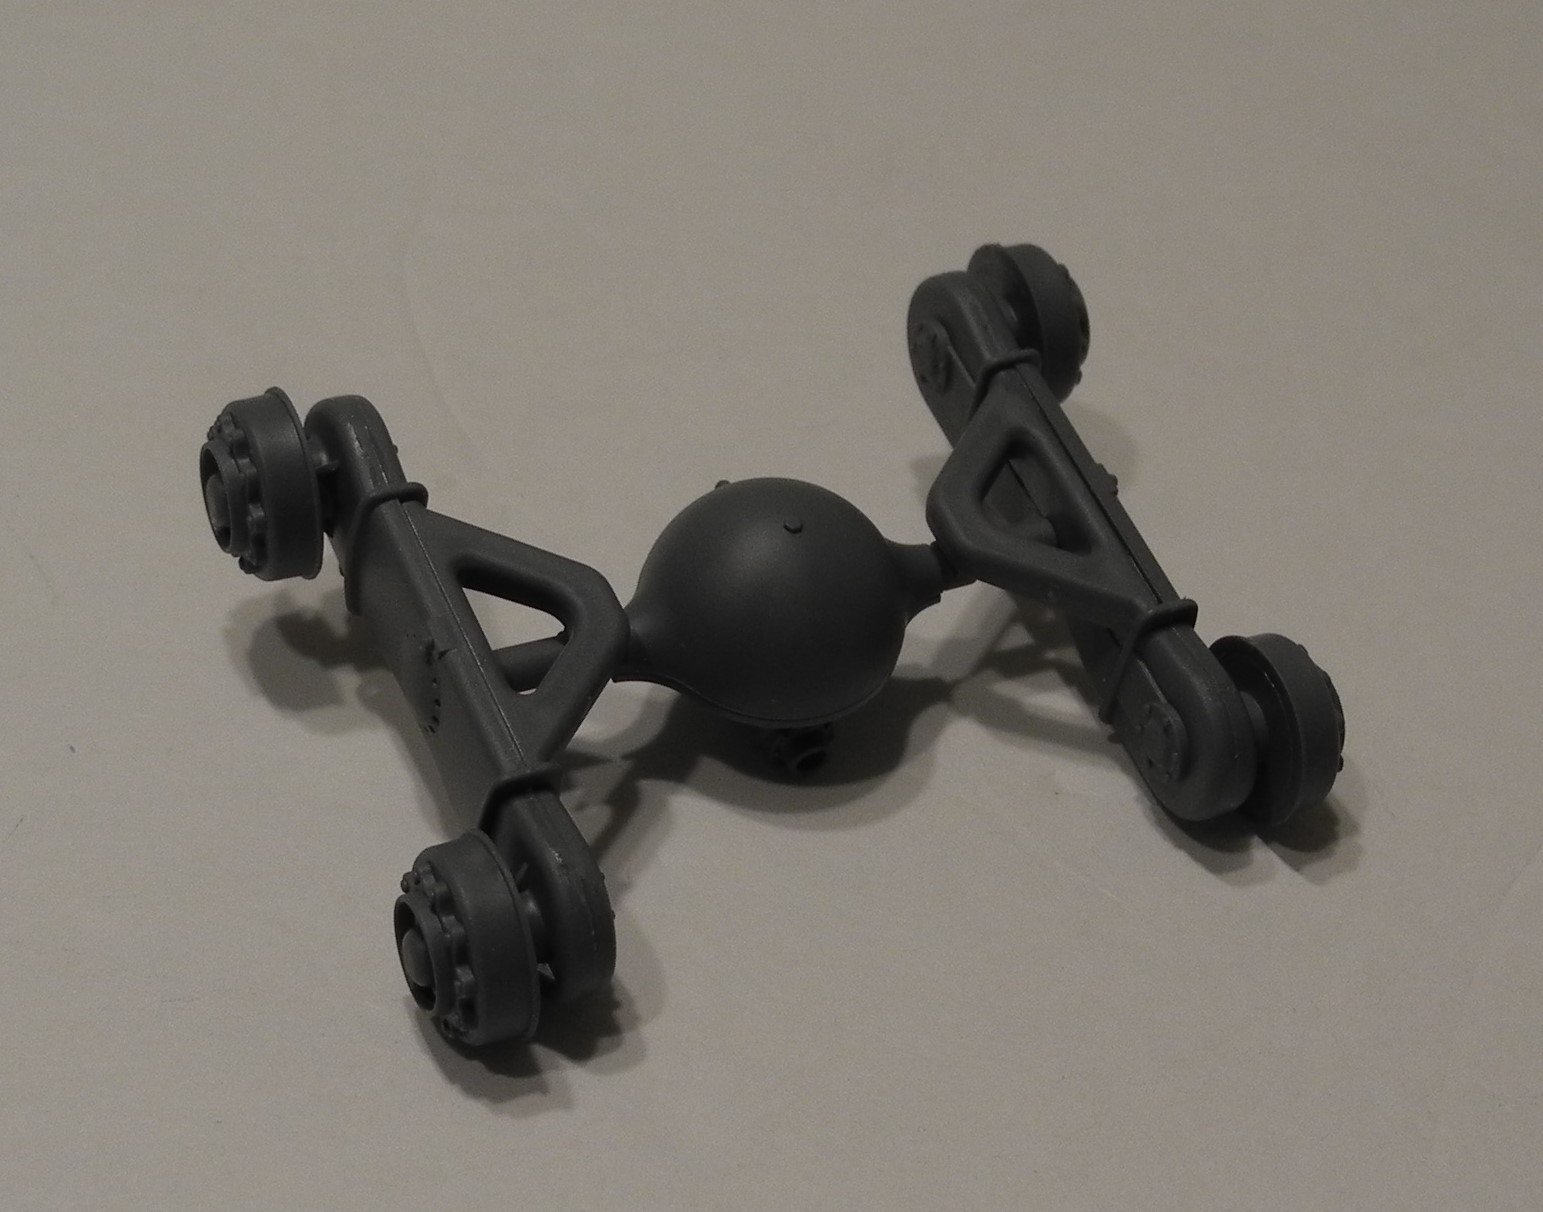
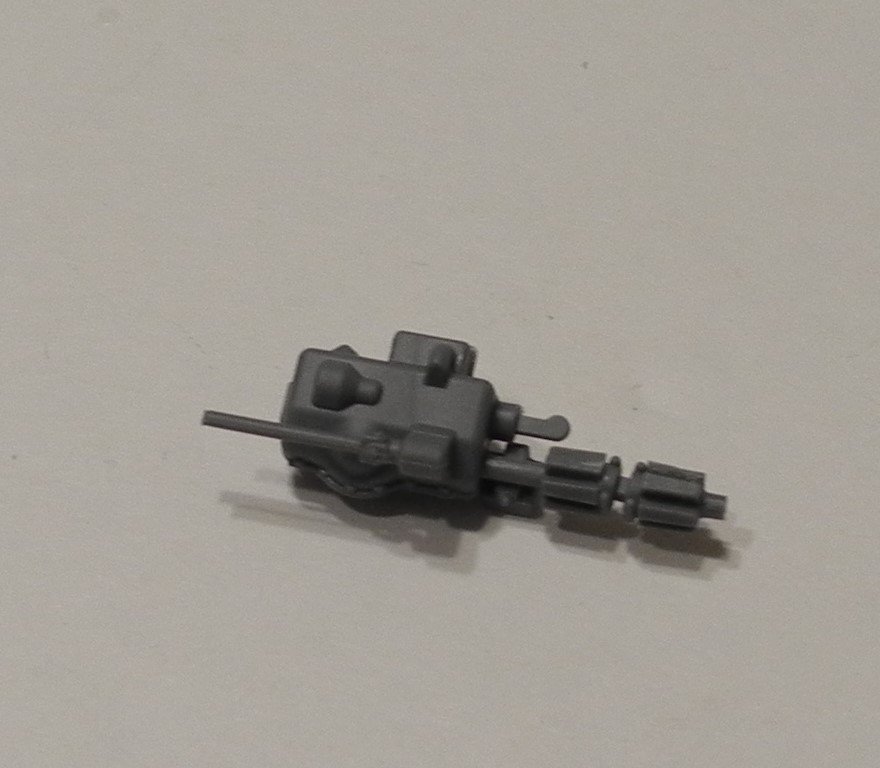
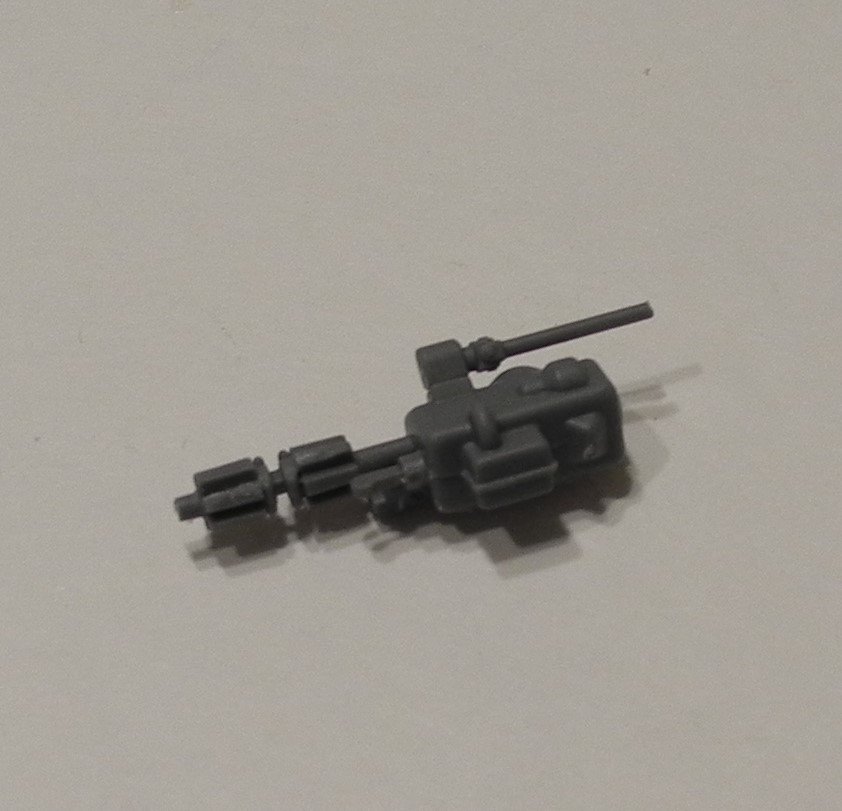
Steps 5 thru 8 yields a more detailed engine, a radiator, a differential with primary drives and hubs, and the front suspension/axle/hubs. The engine received more details including the fuel injectors and a photo etch fan. I have drilled out the injectors to add fuel lines (not included in kit). Will also add some scratch built linkage to the injectors. I have never built a model kit with a more detailed radiator, at any scale. This radiator was an assembly that even included the two separate radiator cores inside. Amazing. The massive differential with primary drive units and hubs The front suspension with hubs