CDW
-
Posts
7,755 -
Joined
-
Last visited
Content Type
Profiles
Forums
Gallery
Events
Everything posted by CDW
-

SBD-3 Dauntless 1:48 Hasegawa - Edwardkenway-FINISHED
CDW replied to Edwardkenway's topic in Non-ship/categorised builds
Congratulations Edward. Your Dauntless came out beautiful. You did quite a nice work after 40 years of non participation. You caught on quickly. -
1931 Cadillac by CDW - FINISHED - JoHan - 1:25 Scale - PLASTIC
CDW replied to CDW's topic in Non-ship/categorised builds
Lol - yep, it's all the same game. Gotta be careful with this gloss coat, it's not user friendly. But it is a mighty fine gloss clear coat, just stinks to high heaven. -
1931 Cadillac by CDW - FINISHED - JoHan - 1:25 Scale - PLASTIC
CDW replied to CDW's topic in Non-ship/categorised builds
Thanks OC. I seem to be having more difficulty concentrating on model building for all the news that's going on right now. Hard to do both things at once. -
1931 Cadillac by CDW - FINISHED - JoHan - 1:25 Scale - PLASTIC
CDW replied to CDW's topic in Non-ship/categorised builds
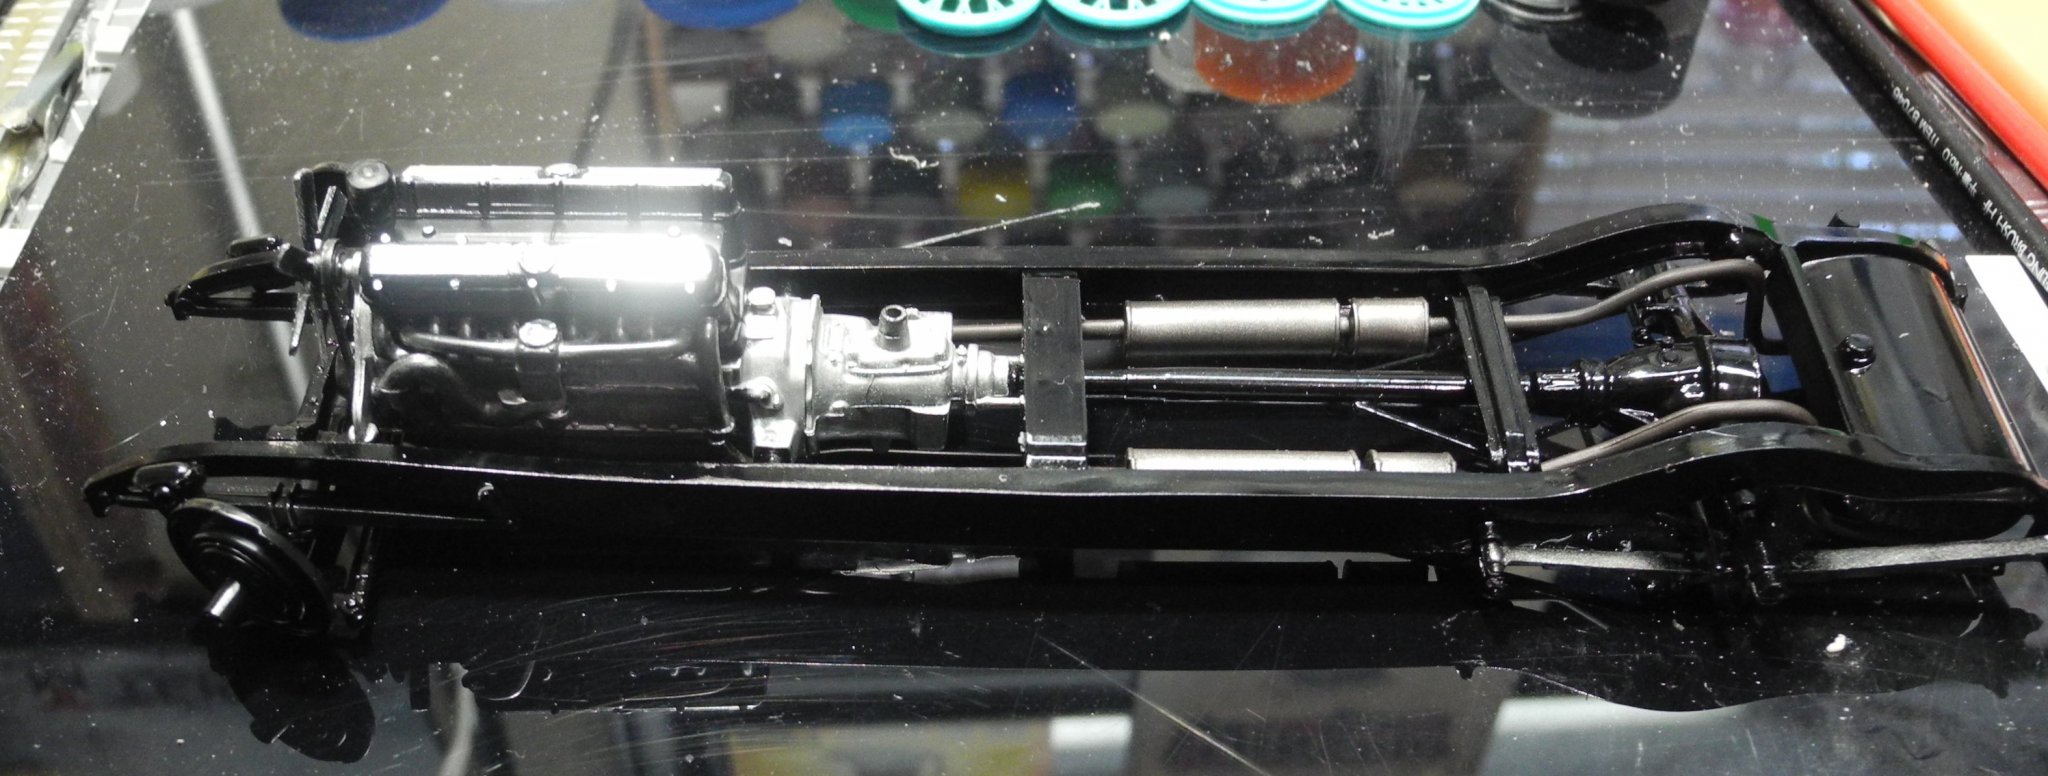
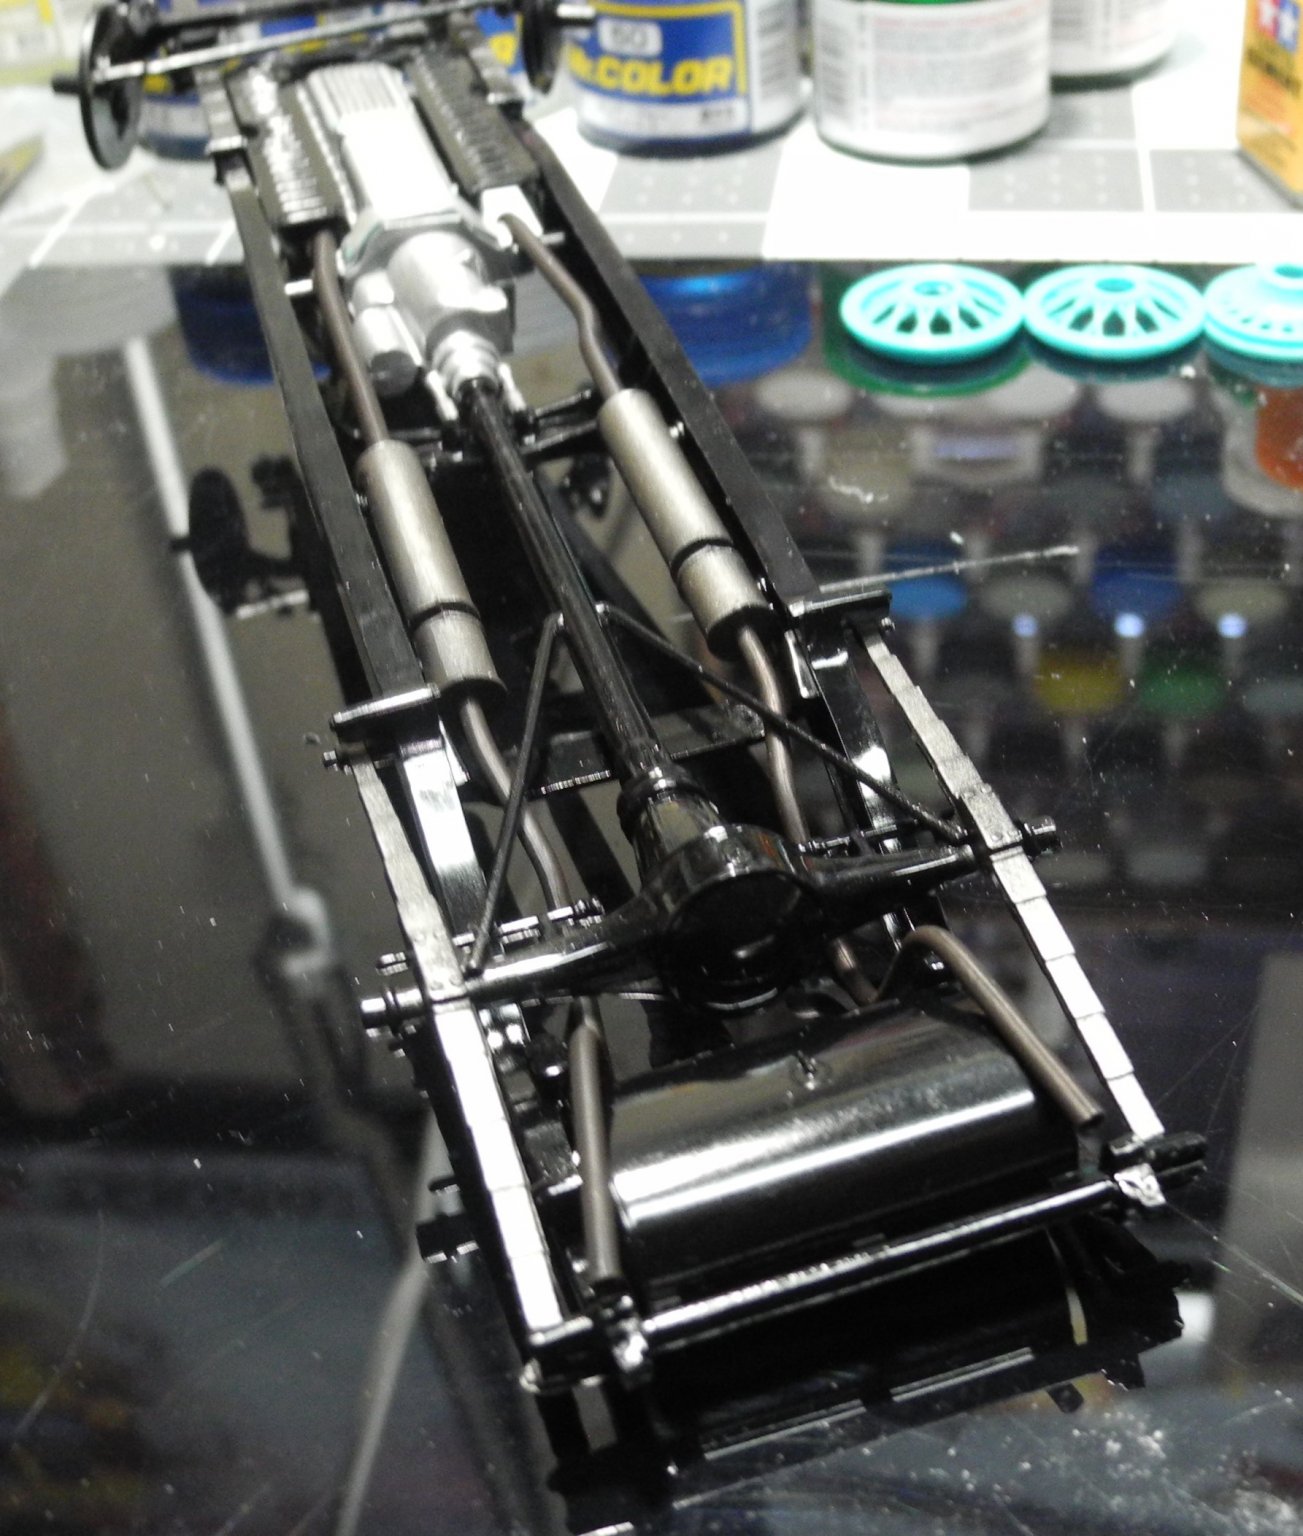
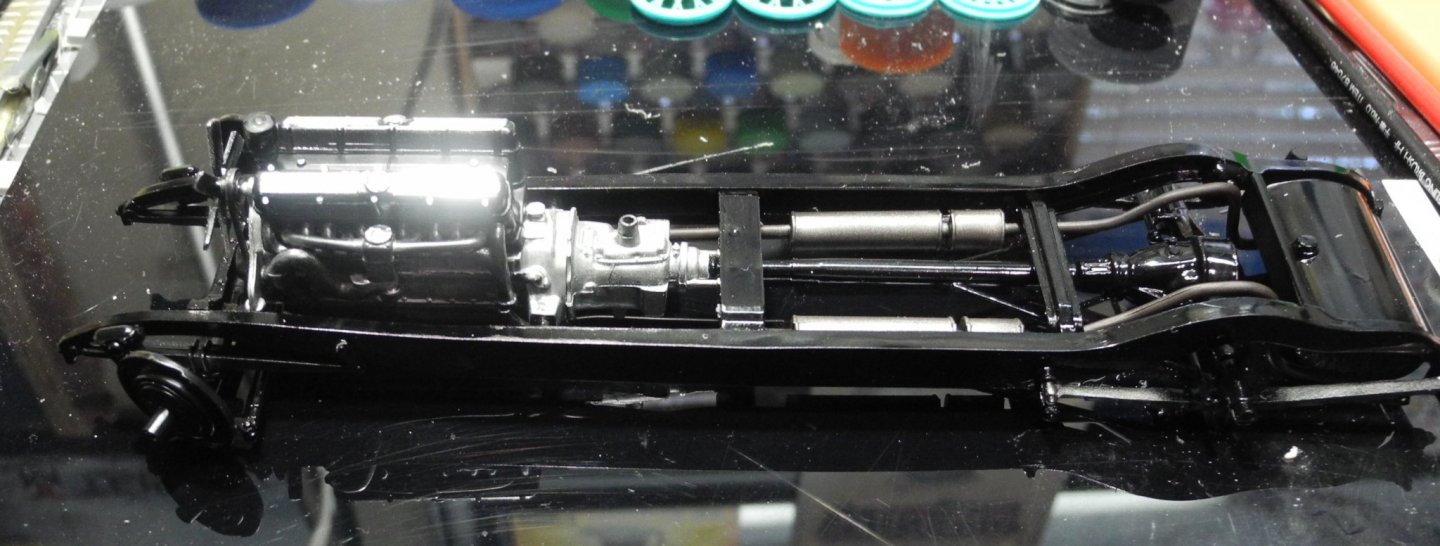
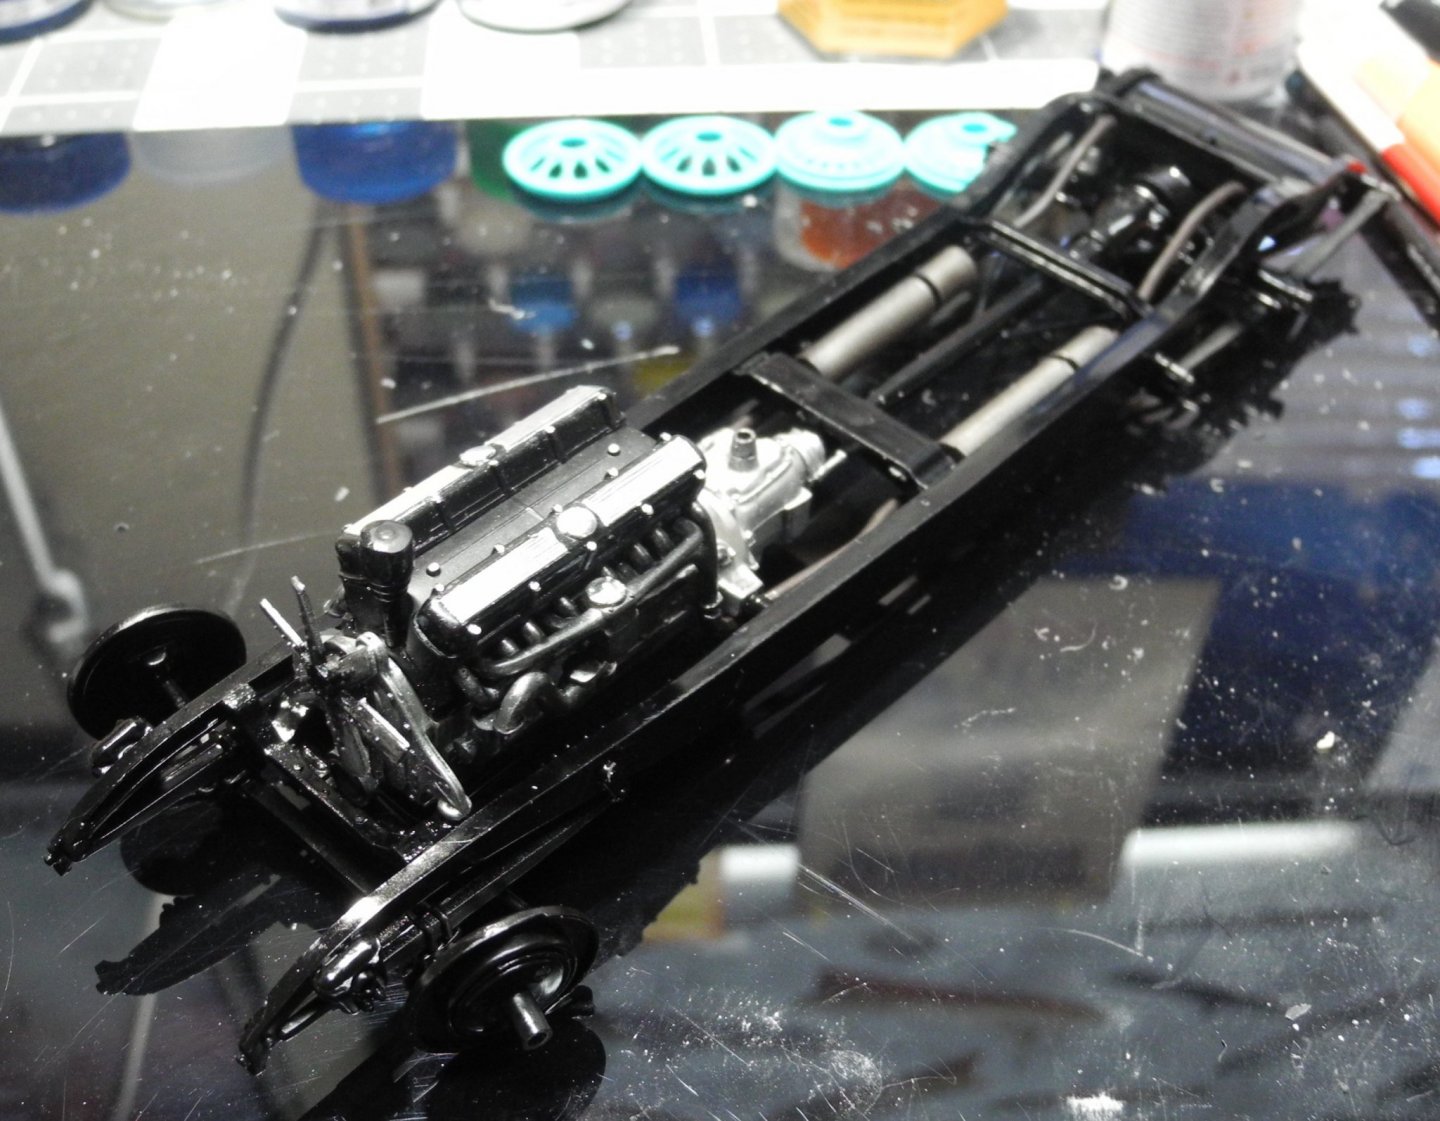
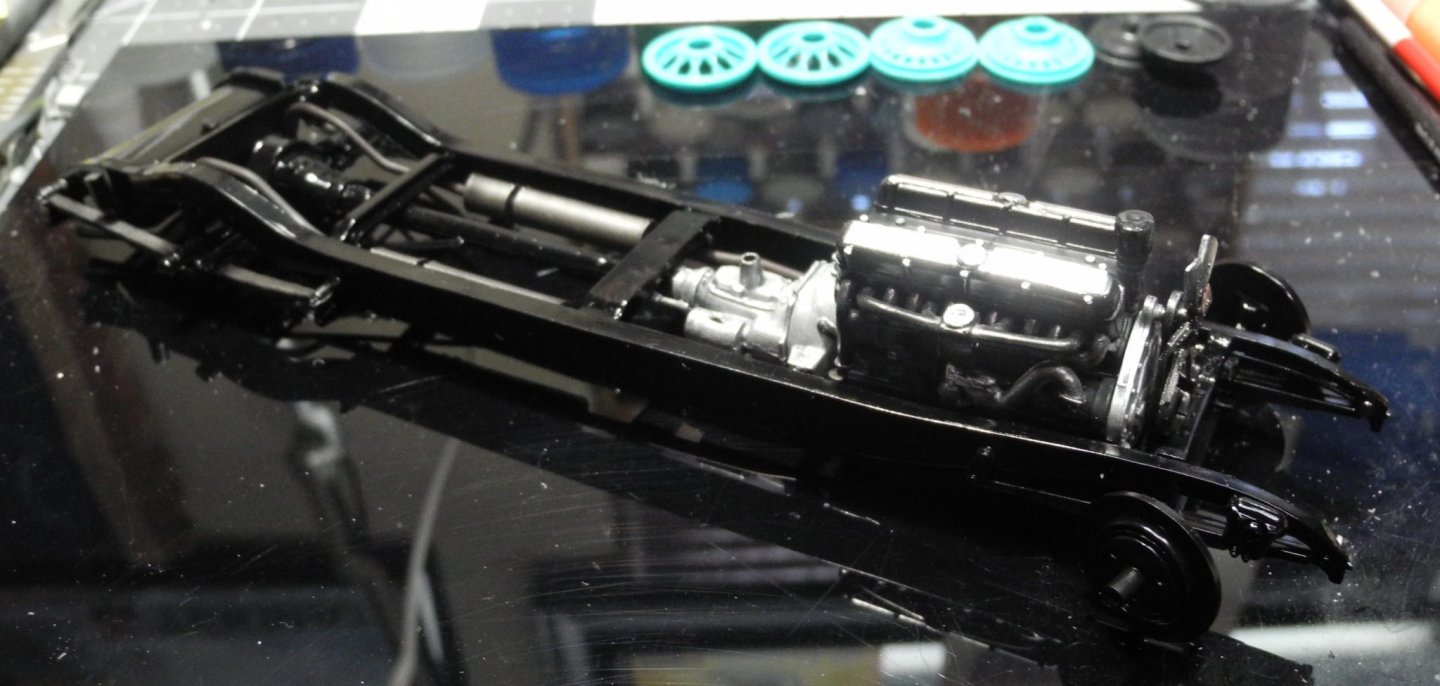
Thanks for the likes and comments. The frame is painted with Tamiya X-1, the exhaust pipes with AK burnt metal, the mufflers and leaf springs with AK gun metal. -
1931 Cadillac by CDW - FINISHED - JoHan - 1:25 Scale - PLASTIC
CDW replied to CDW's topic in Non-ship/categorised builds
Thanks Edward. Hope you and your family are doing well during this time of chaos. -
1931 Cadillac by CDW - FINISHED - JoHan - 1:25 Scale - PLASTIC
CDW replied to CDW's topic in Non-ship/categorised builds


- 175 replies
-
- 19
-

-
Curtiss P-40B Warhawk by Asat- Airfix- 1/48
CDW replied to ASAT's topic in Non-ship/categorised builds
There is at least one great youtube build video for the 1:24 Airfix Typhoon. Maybe more, but I watched most of the one, a great video. -
SBD-3 Dauntless 1:48 Hasegawa - Edwardkenway-FINISHED
CDW replied to Edwardkenway's topic in Non-ship/categorised builds
The white aircraft bottom is a brilliant display of your brush work. Would have never realized it was brushed on if you had not said so. Excellent. -
1931 Cadillac by CDW - FINISHED - JoHan - 1:25 Scale - PLASTIC
CDW replied to CDW's topic in Non-ship/categorised builds
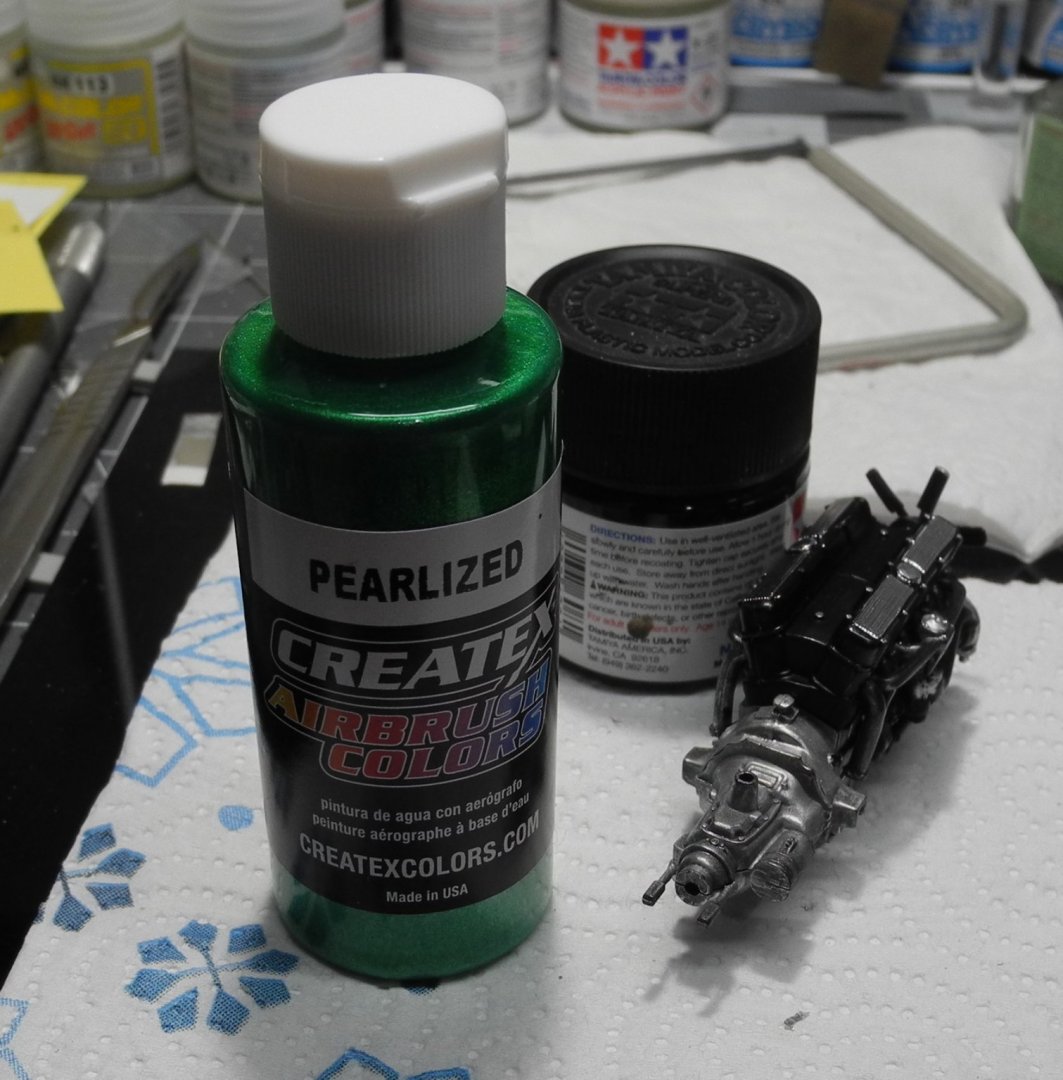
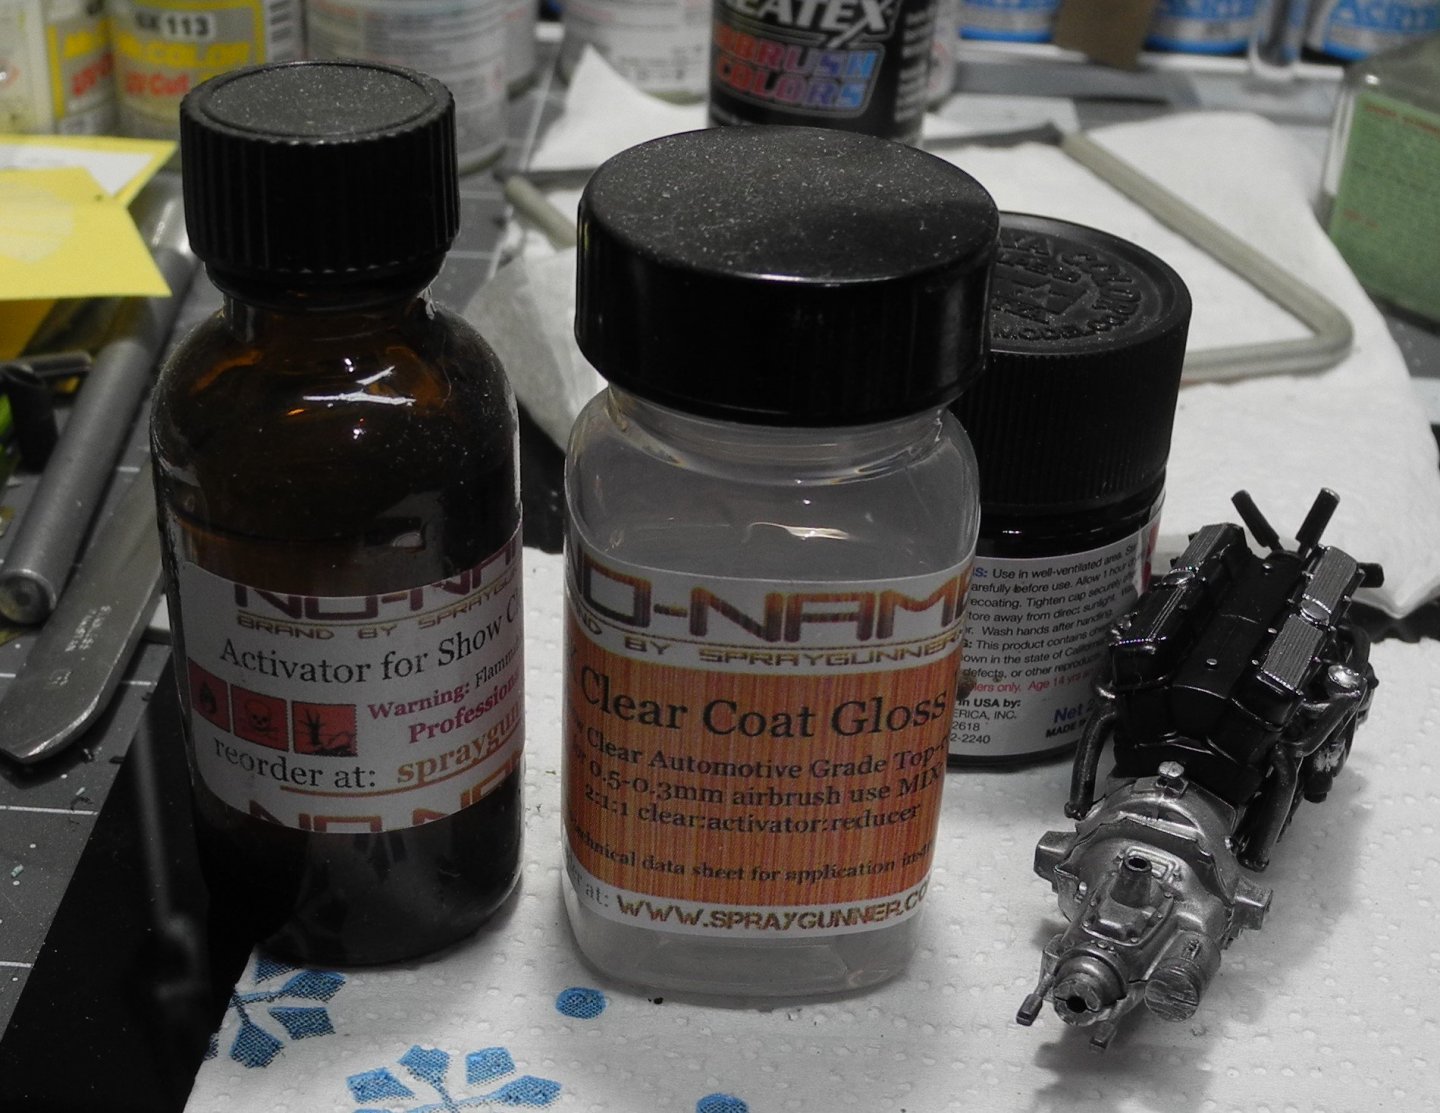
For this model finish, I will be using Mr Surfacer 1500, reduced at a ratio of 1 part paint to 8 parts reducer (Mr Color leveling thinner), applied in light coats and lightly wet sanded between coats until I am satisfied it is ready for finish paint. Createx Pearl Green for the main color on body, frame, and wheels. Createx Black for the running boards and fenders. Createx is an acrylic paint that must be applied in very light coats. It dries in a flat finish. It's reduced to a ratio of 10 parts paint to 1 part reducer. No Name Gloss Coat will be used to seal everything and give it a deep deep clear glossy shine. The clear coat is mixed 2 parts clear to 1 part hardener and 1 part reducer.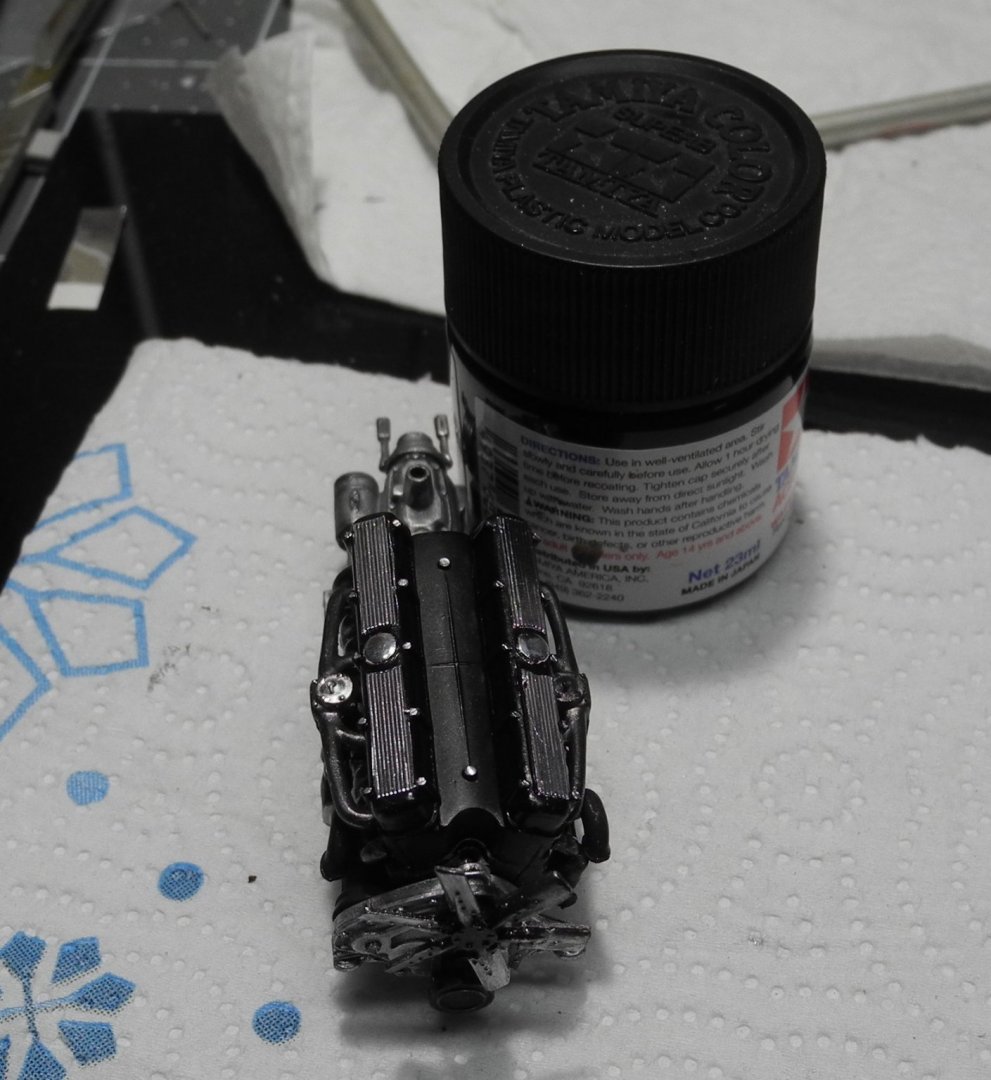
- 175 replies
-
- 15
-
-
The beauty of certain aircraft is timeless. I never tire of seeing them and they always look contemporary. The F-104 is one of those aircraft.
-
Curtiss P-40B Warhawk by Asat- Airfix- 1/48
CDW replied to ASAT's topic in Non-ship/categorised builds
First of all, you are doing a beautiful job on the P-40, Lou. I love the subject and am impressed with your model. And those new 1:24 scale Airfix kits are amazing. I think a lot of guys are hitting the models real hard during this virus shutdown. Seems like all the normal hobby sellers are backlogged everywhere I look. I'm glad to see a resurgence in the hobby. Take a few minutes to watch this little video. It may be the answer to you wing root gap problem. It will not damage the surrounding detail on your model and keep sanding to a bare minimum. -
1931 Cadillac by CDW - FINISHED - JoHan - 1:25 Scale - PLASTIC
CDW replied to CDW's topic in Non-ship/categorised builds
Considering the molds for this model were tooled in the sixties, the detail was great for that day and time. Even the way JoHan engineered the plastic sprues to fit inside the box was remarkable. If you took the part sprues out and couldn't remember how they were oriented, you could not possibly get everything back inside the box. It wouldn't fit. -
1931 Cadillac by CDW - FINISHED - JoHan - 1:25 Scale - PLASTIC
CDW replied to CDW's topic in Non-ship/categorised builds
Most of the metal treatments need a clear coat to protect them over time. It's better to wear a latex glove when handling the metal treated parts before the clear coat. On small items, I paint on the dull coat with a brush after the gloss coat and weathering has been done. Larger areas can be airbrushed. Even smaller areas can be airbrushed if you have gained that level of control with your airbrush. -
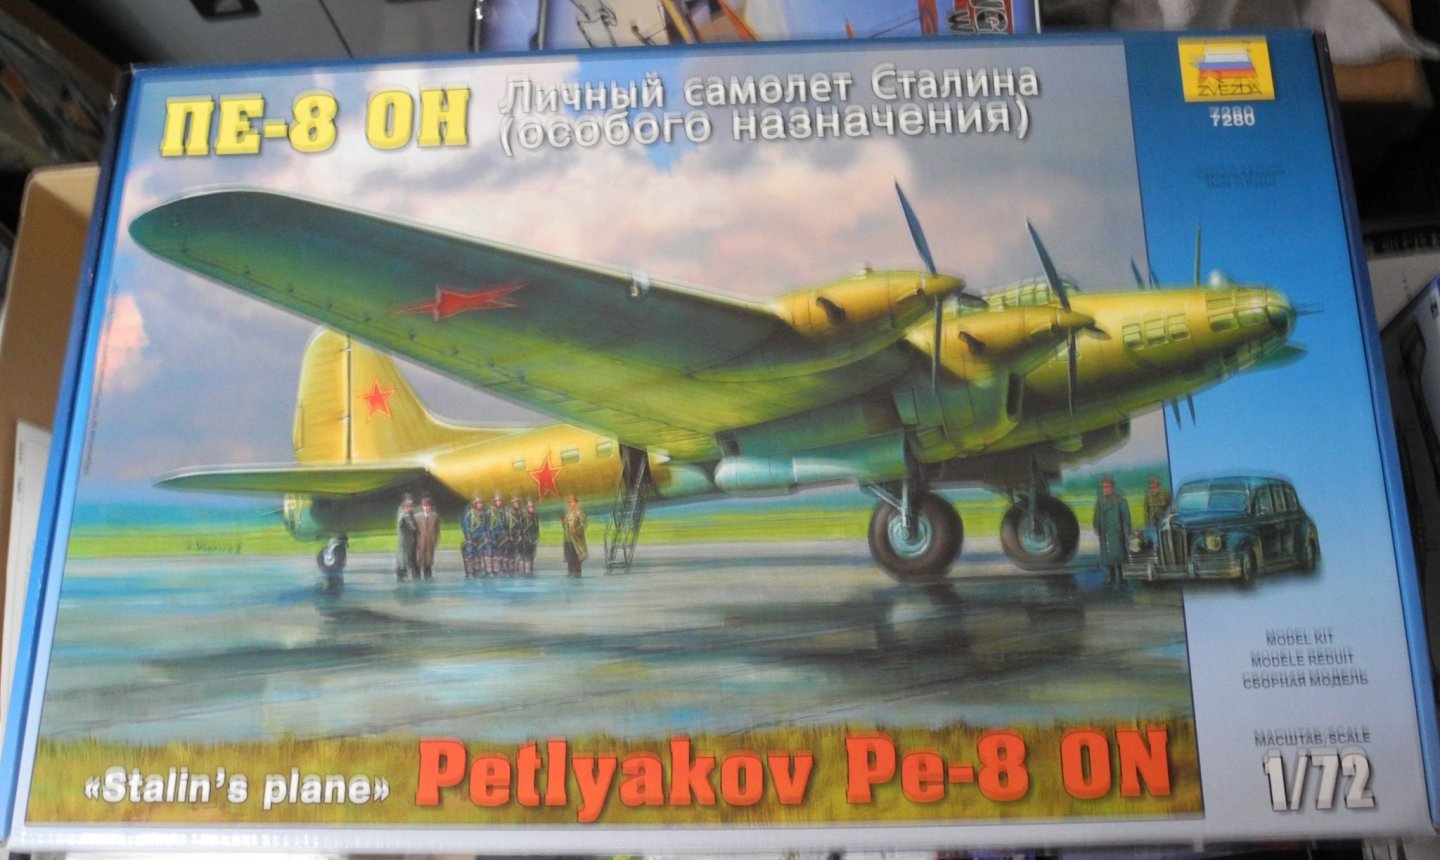
The Petlyakov PE-8
-
The Russians were well known for tearing down, examining, and making carbon copies of our aircraft. The B-29 I recall specifically as they couldn't get certain parts of it right even though they copied ours bolt for bolt. It's not widely known in the West, but the Russians had a four engine transport/bomber of their own that was capable of trans-Atlantic flight. Stalin flew in it to the USA for a conference in 1942. I have the model of it and will build it in the near future.
-
1931 Cadillac by CDW - FINISHED - JoHan - 1:25 Scale - PLASTIC
CDW replied to CDW's topic in Non-ship/categorised builds

- 175 replies
-
- 19
-
-
I've seen one of those flying around in my area. I'm in.
-
1931 Cadillac by CDW - FINISHED - JoHan - 1:25 Scale - PLASTIC
CDW replied to CDW's topic in Non-ship/categorised builds
No, unfortunately they do not. Here is their line of wax based metals: https://www.scalehobbyist.com/catagories/browse.php?kw=ak,true,metal But they do have a pale burnt metal in their enamel line of metal: https://www.scalehobbyist.com/catagories/browse.php?kw=ak,xtreme,metal -
1931 Cadillac by CDW - FINISHED - JoHan - 1:25 Scale - PLASTIC
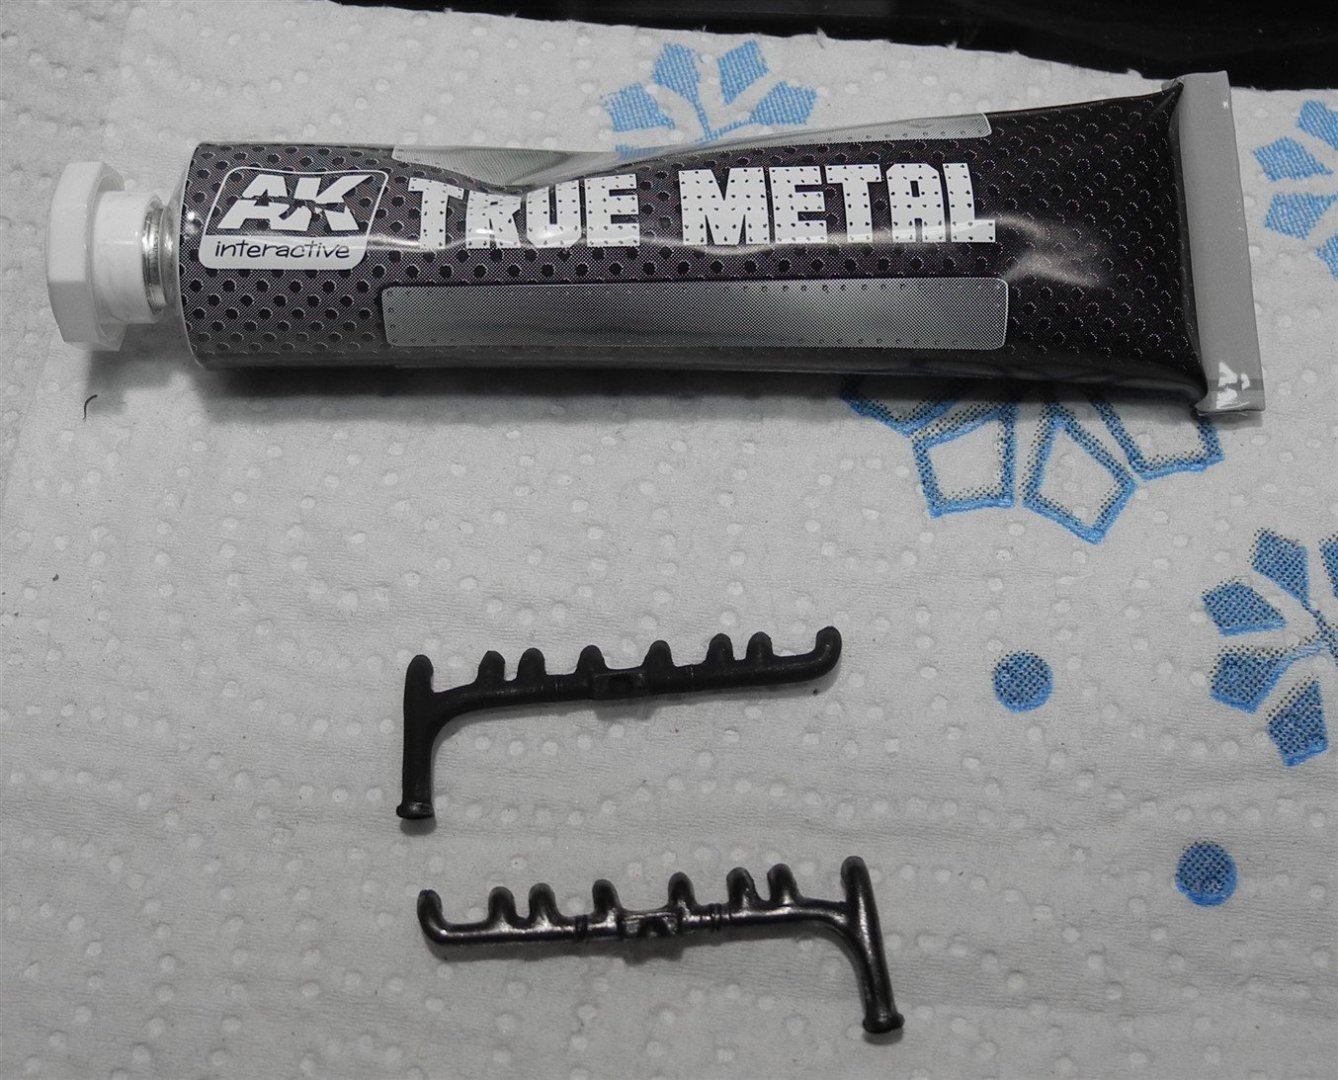
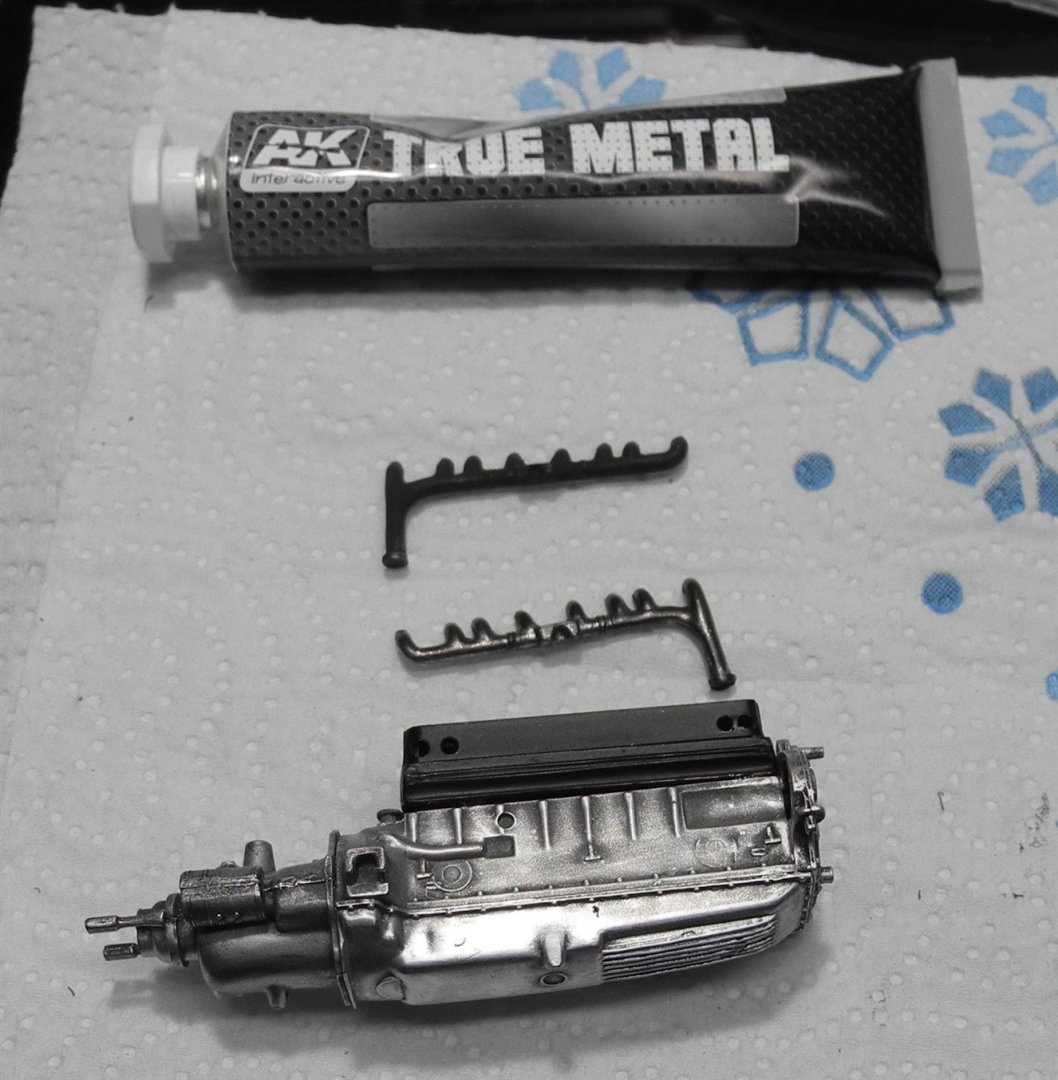
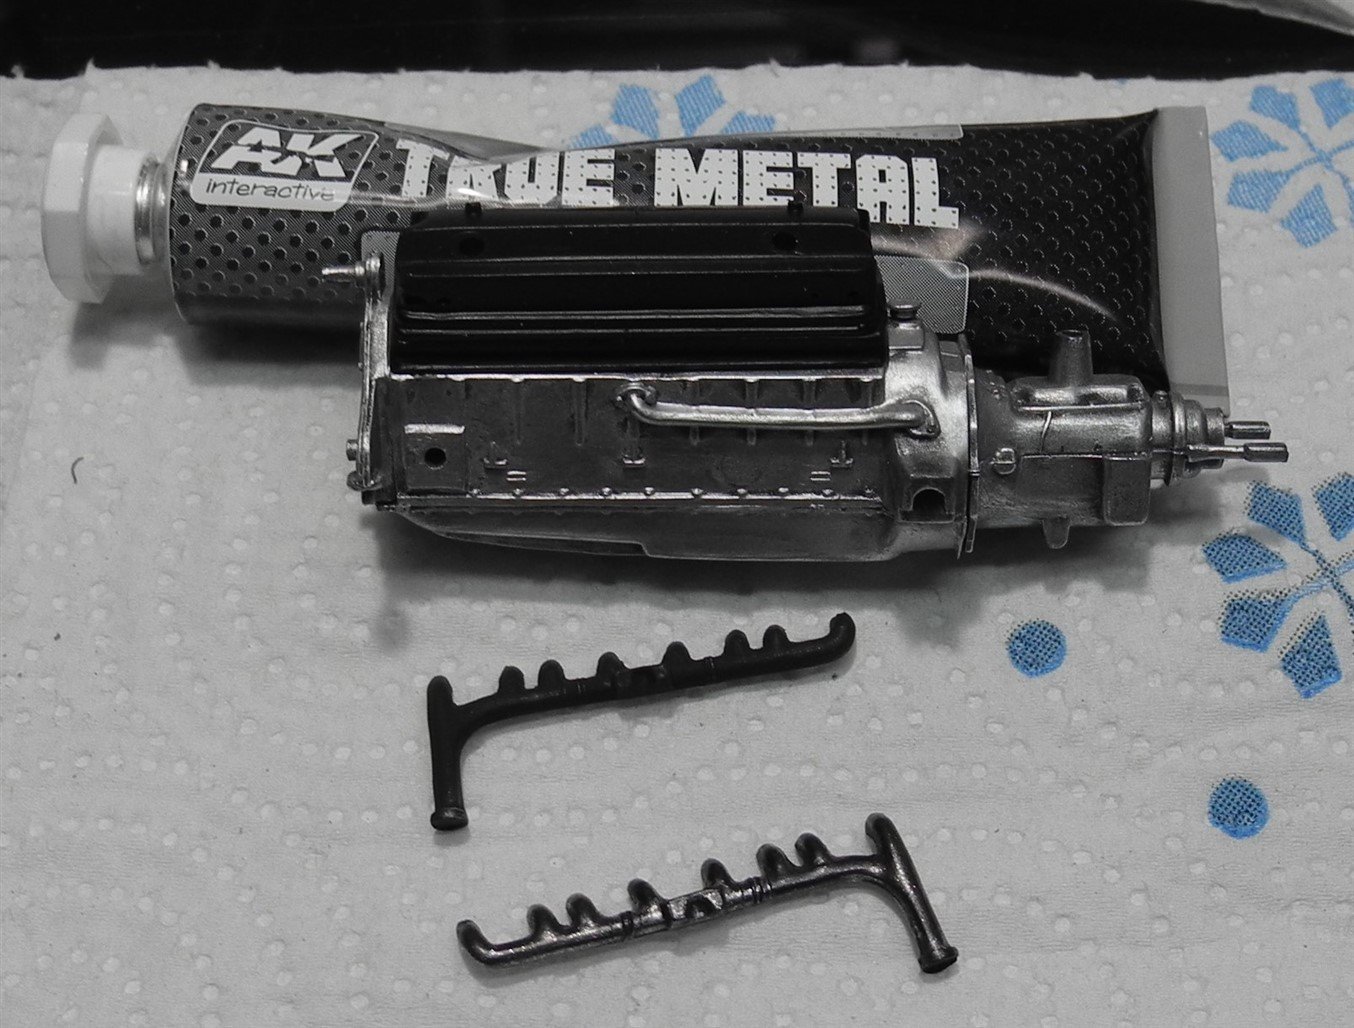
CDW replied to CDW's topic in Non-ship/categorised builds
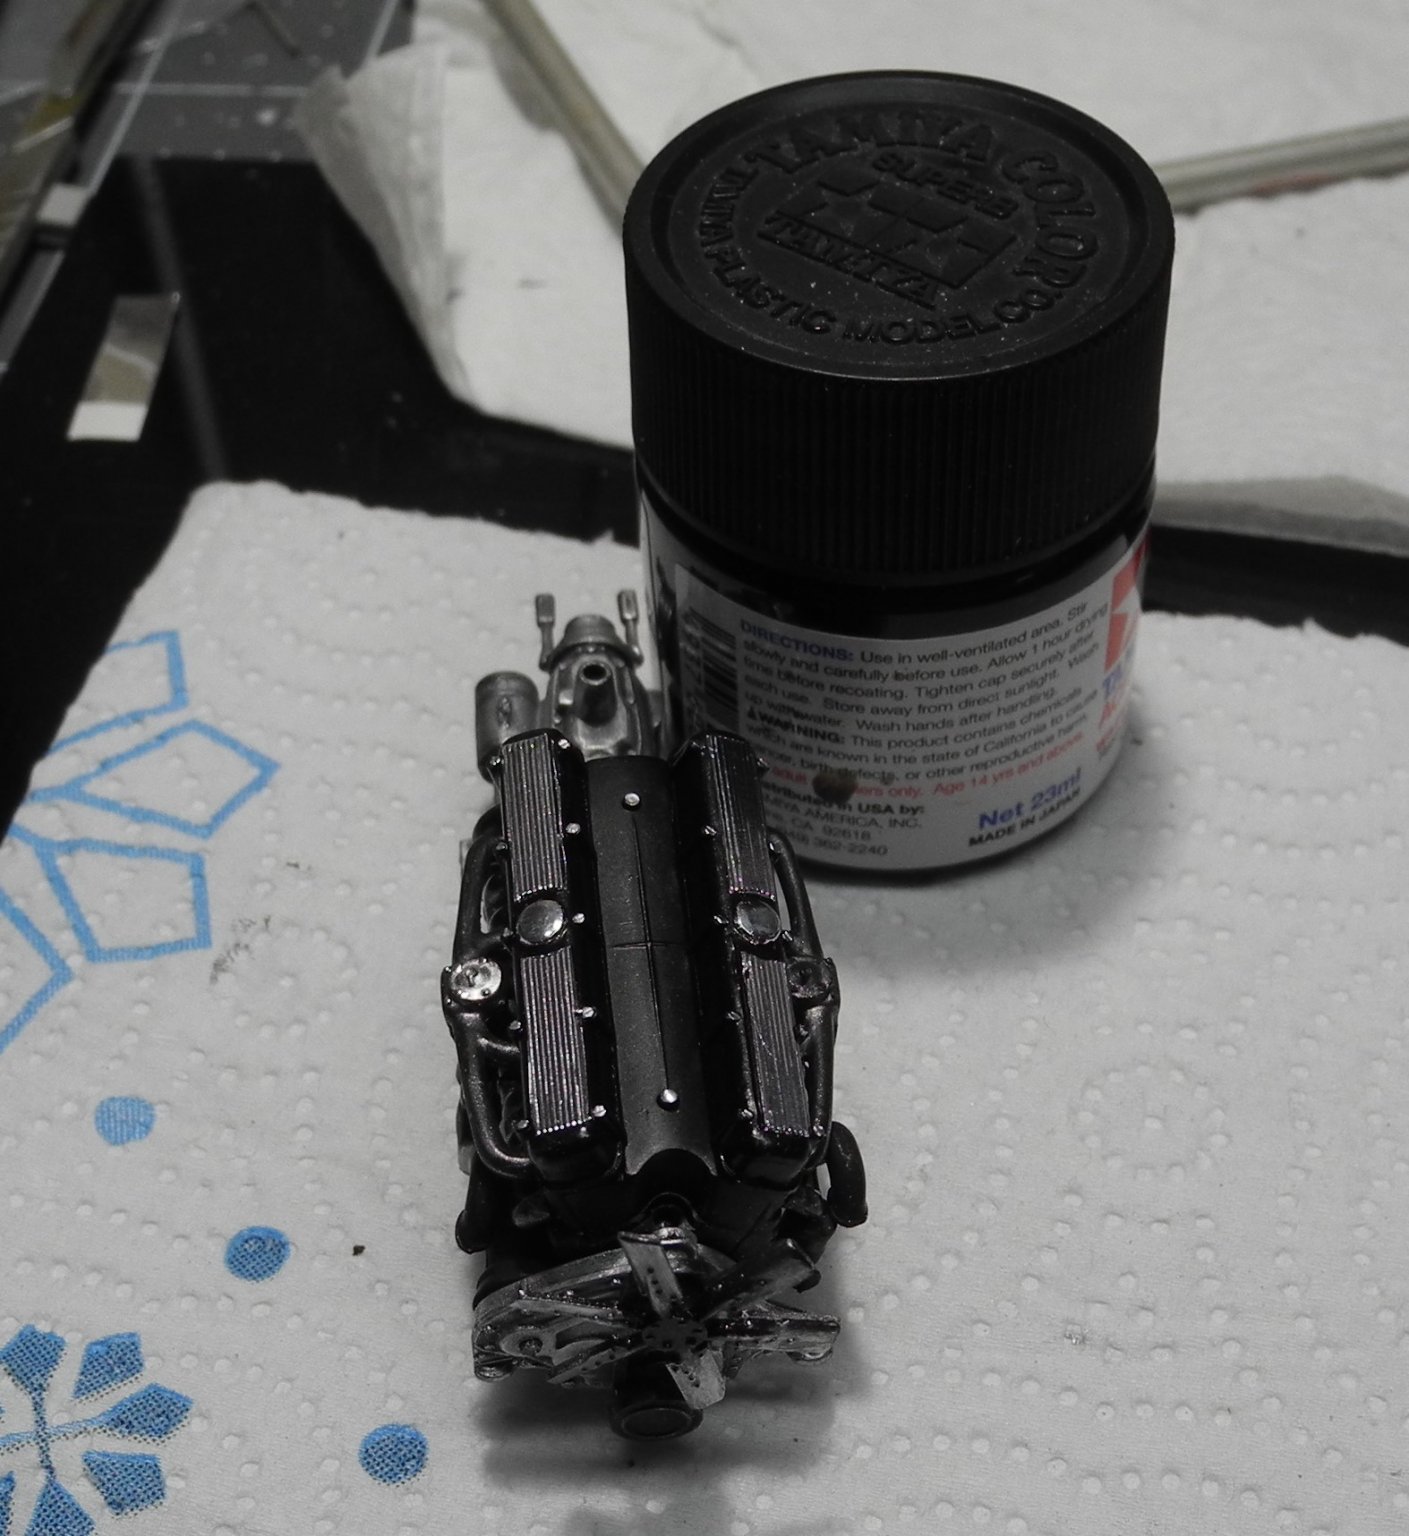
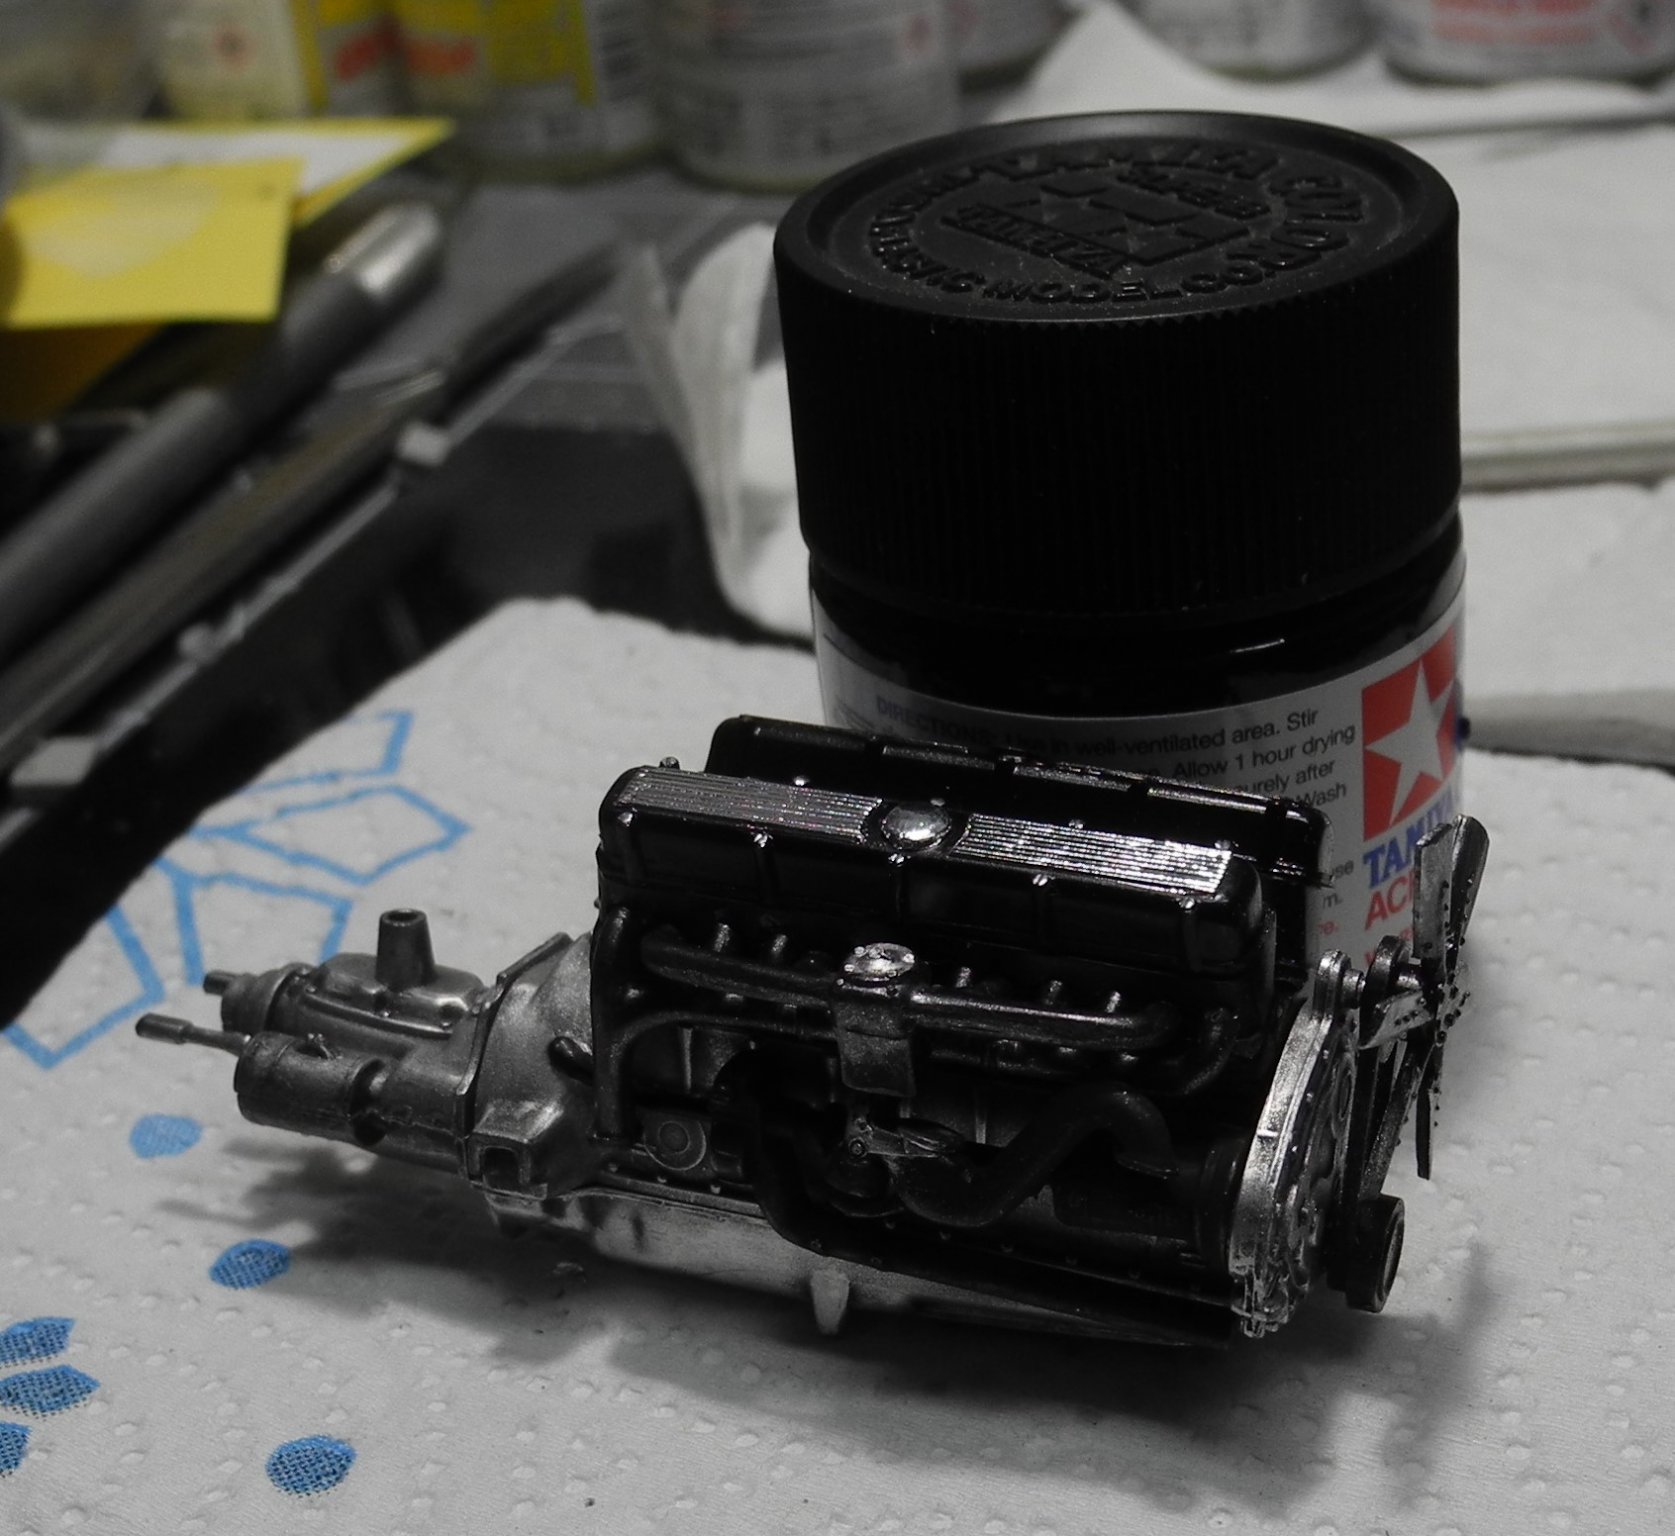
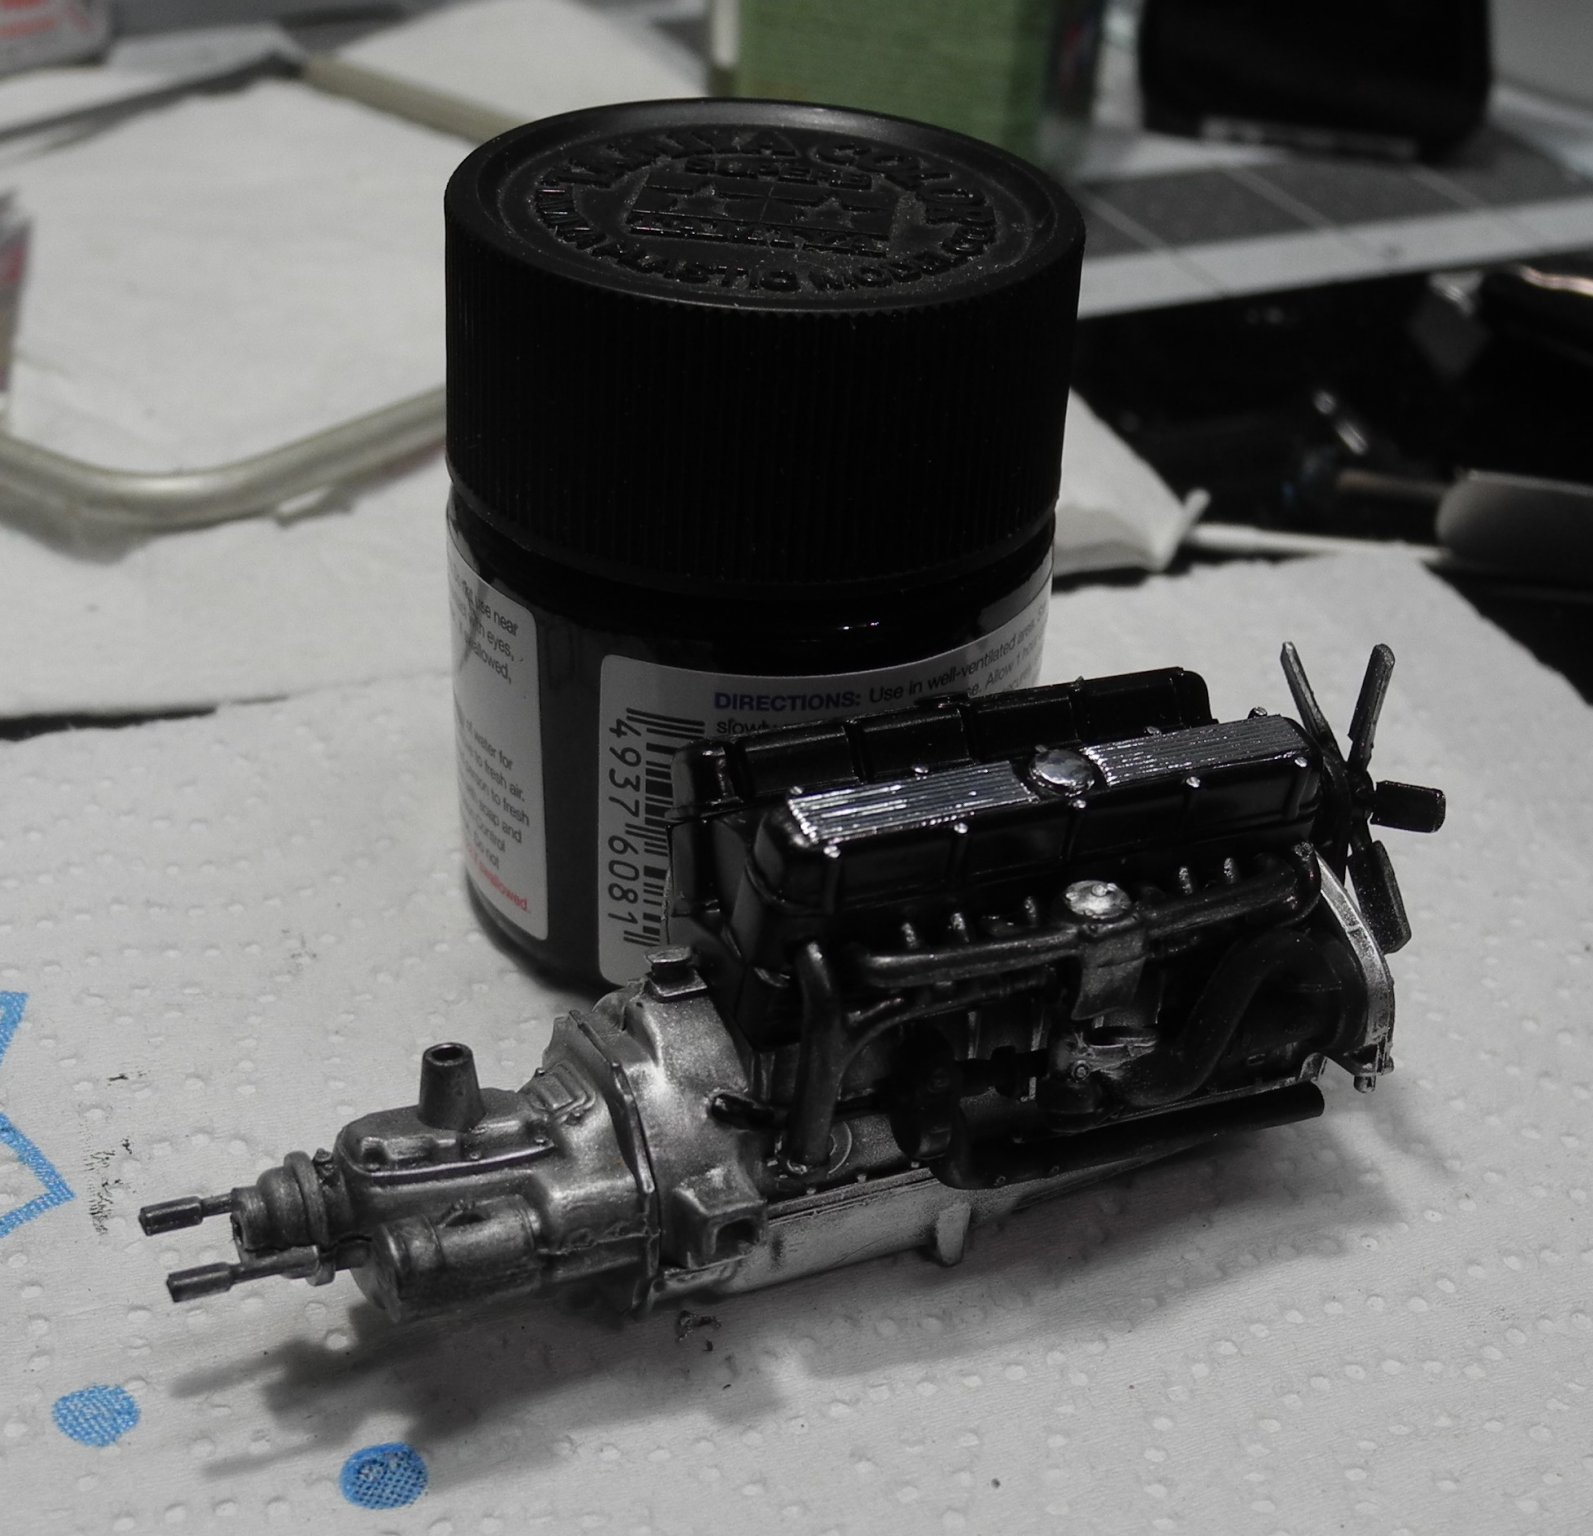
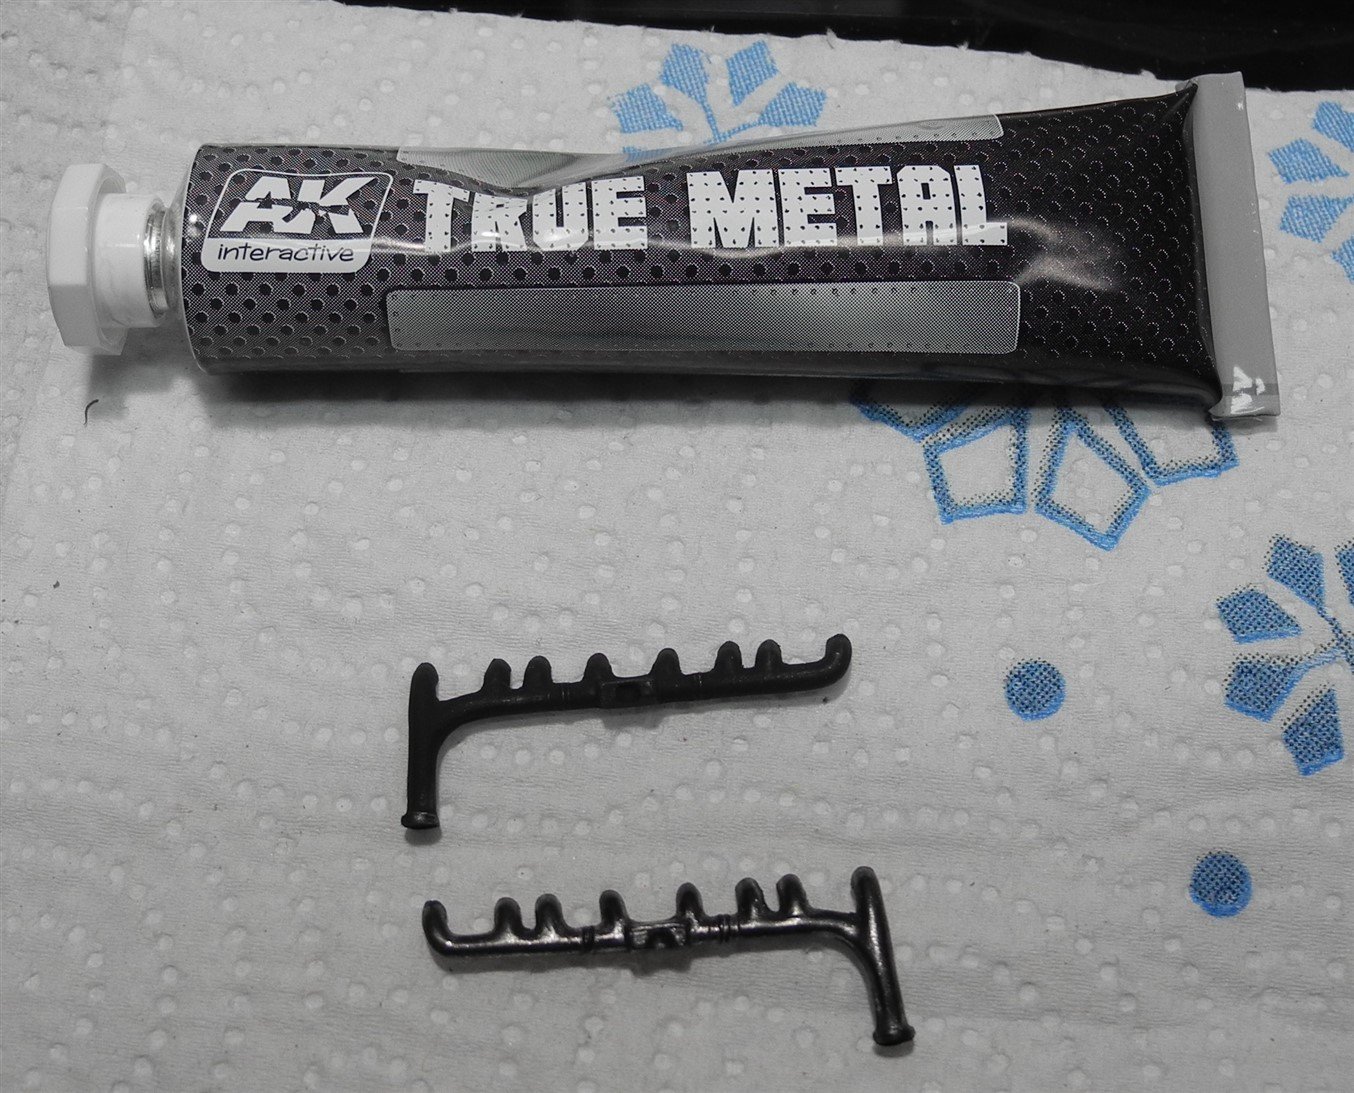
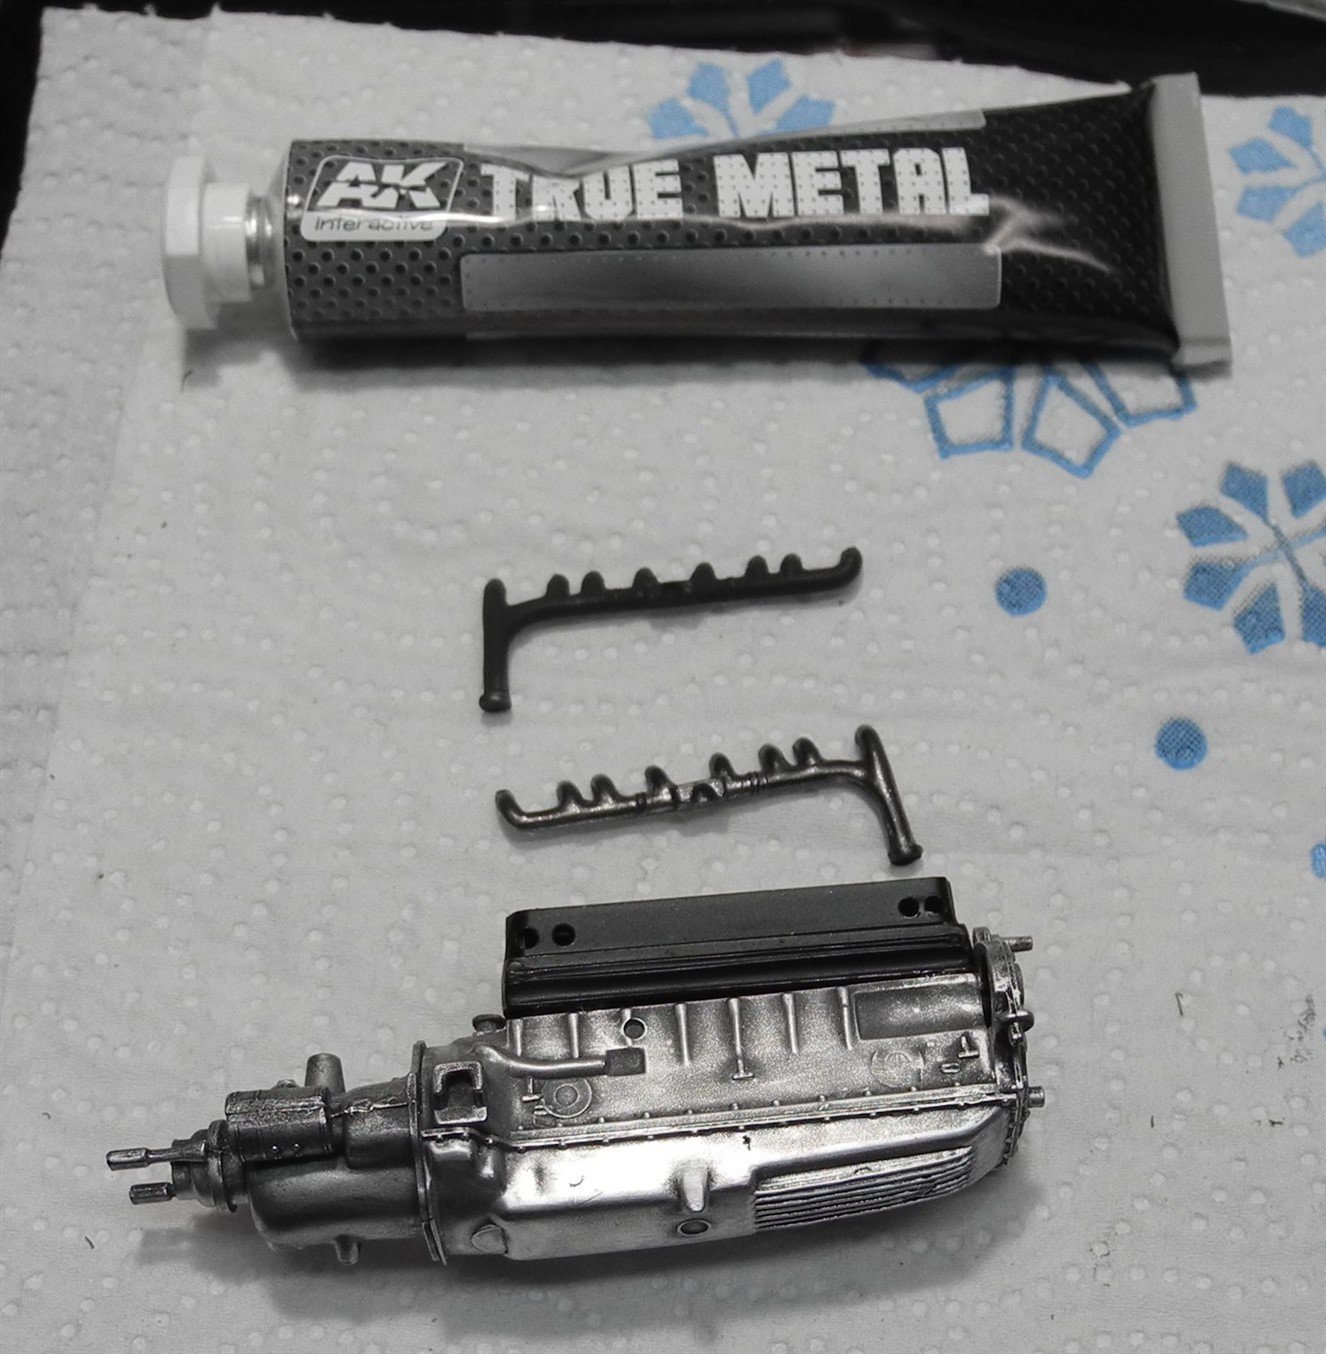
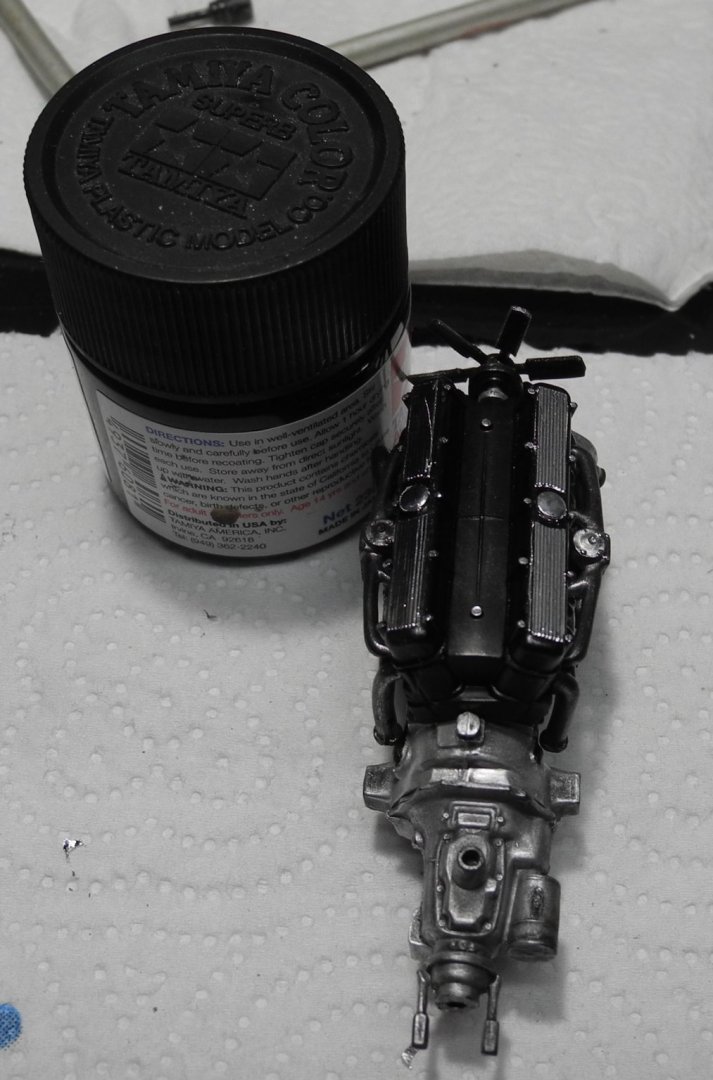
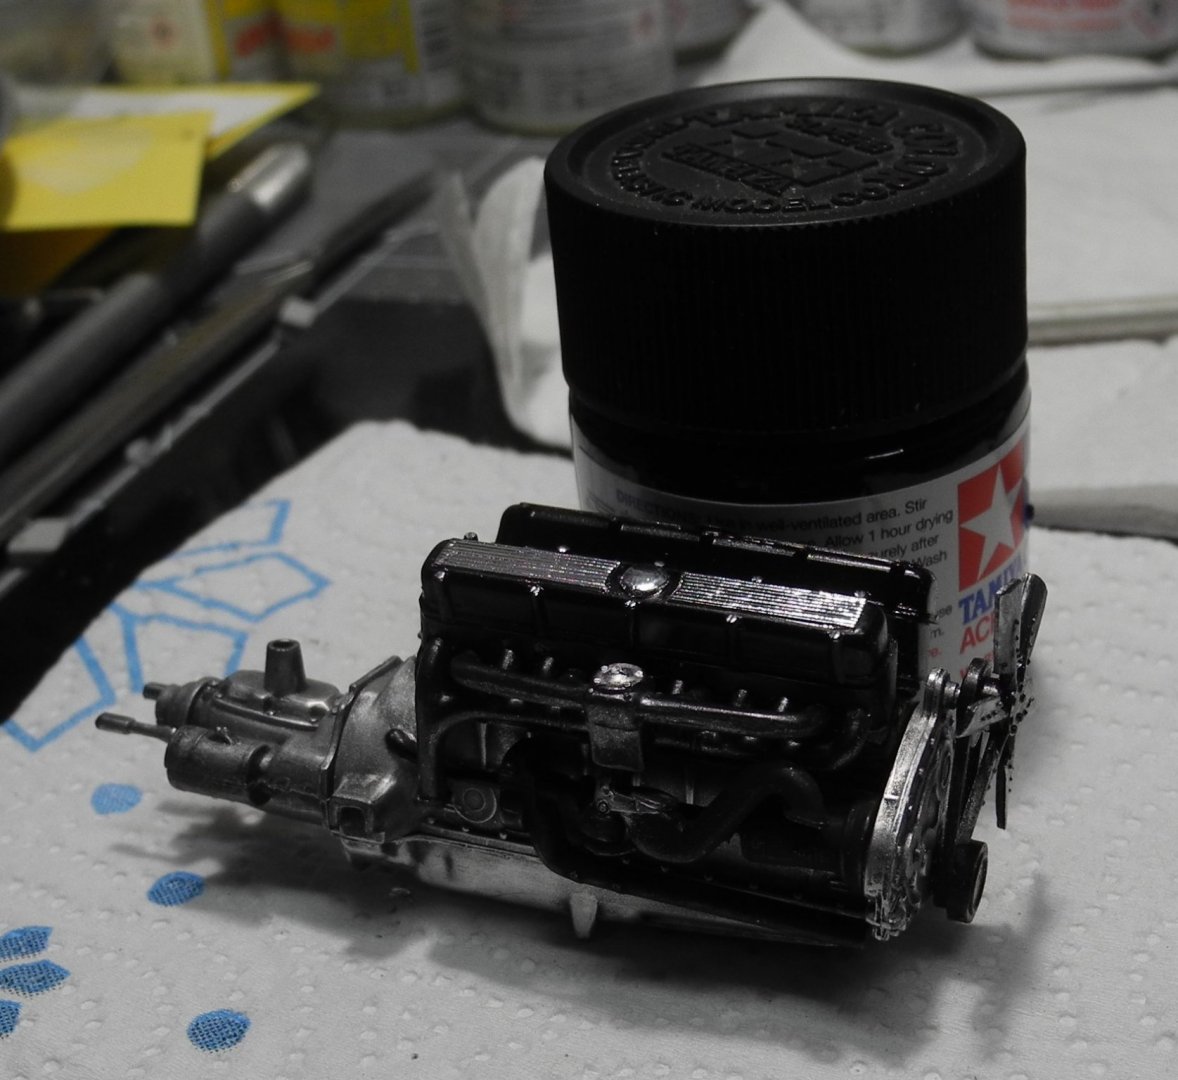
The engine parts were cut off the sprues, then the chrome parts were soaked in Super Clean to remove the chrome plating and clear lacquer. The engine block and transmission were painted with Tamiya flat black before dry brushing with Mr Color aluminum. The literature on the Cadillac V-16 indicates the intake and exhaust manifolds were ceramic coated, black. The cylinder heads were black. I've painted the cylinder heads with Tamiya semi-gloss black. The intake and exhaust manifolds were first painted with acrylic flat black, then a treatment of AK gun metal was applied. The AK metal colors in the tube come in various metal colors. They are in a wax base, applied with a brush. After application, they are buffed to achieve a glossy finish. This was the best way I knew of to try and capture the glossy, shiny, look of the manifolds as well as provide some contrast with the black cylinder heads.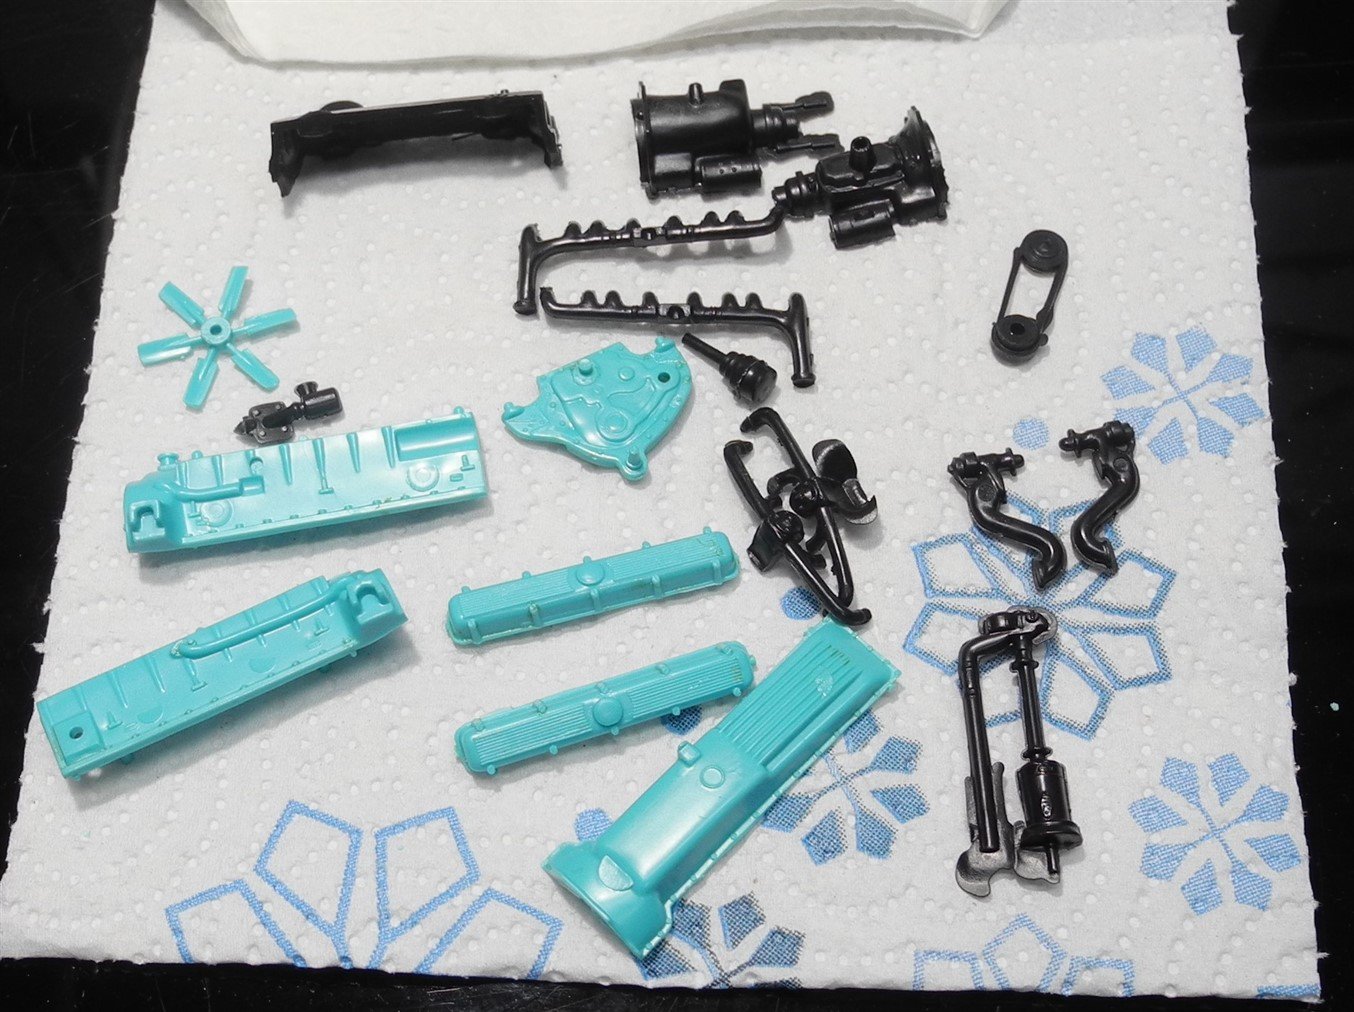
- 175 replies
-
- 18
-
-
1931 Cadillac by CDW - FINISHED - JoHan - 1:25 Scale - PLASTIC
CDW replied to CDW's topic in Non-ship/categorised builds
Don't feel bad at all...I love this kind of discussion. I learn a lot from it. I wish these guys didn't put their photos in photo bucket. It demands we turn off our ad blocker to view them and I don't like to do that. -
It's jumping ahead, but this boat is really going to pop once you start putting on all that beautiful hardware.
-
1931 Cadillac by CDW - FINISHED - JoHan - 1:25 Scale - PLASTIC
CDW replied to CDW's topic in Non-ship/categorised builds
Hi Mike No, I have not seen the video by Plasmo, but I will search for it now. It's always fun to see how others are doing it and learn from it. Thanks for looking in. -
They look perfect, very nicely done. One of these days, I'll start work on my Iowa. You are giving me a primer on what I'll be up against.