CDW
-
Posts
7,755 -
Joined
-
Last visited
Content Type
Profiles
Forums
Gallery
Events
Everything posted by CDW
-
 I'm debating whether to use the hairspray technique for the deck chafing or possibly to use a "windex" technique I saw on the net. It seems to me the windex method might give a more authentic look than the hairspray method which is a chipping look. I really want it to look chafed or scratched rather than chipped.
 -
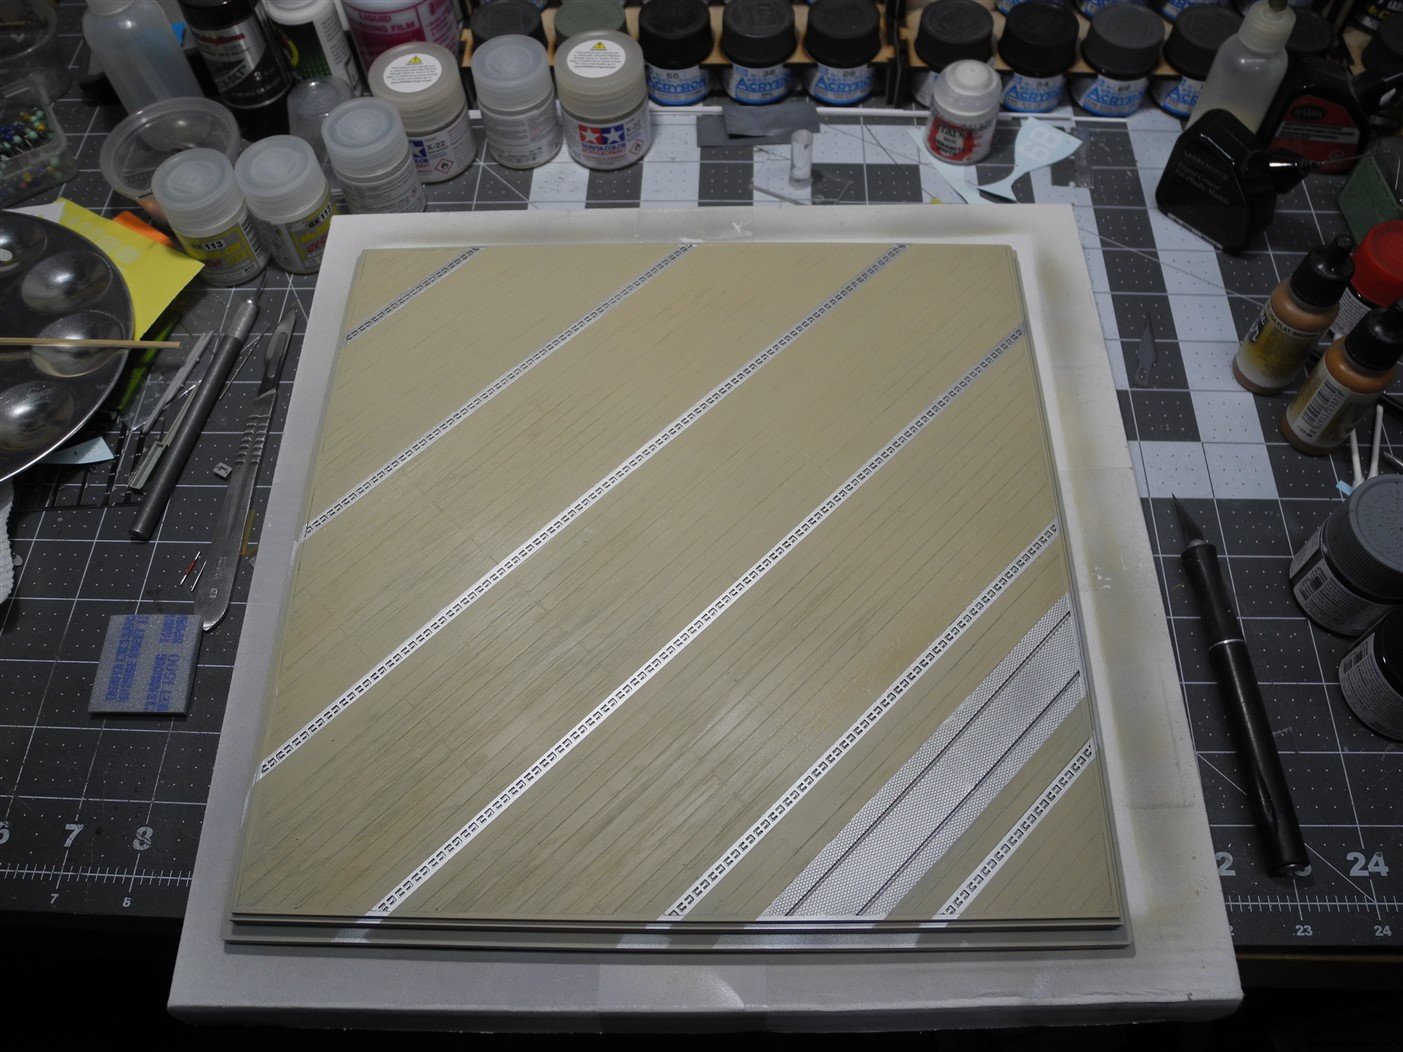
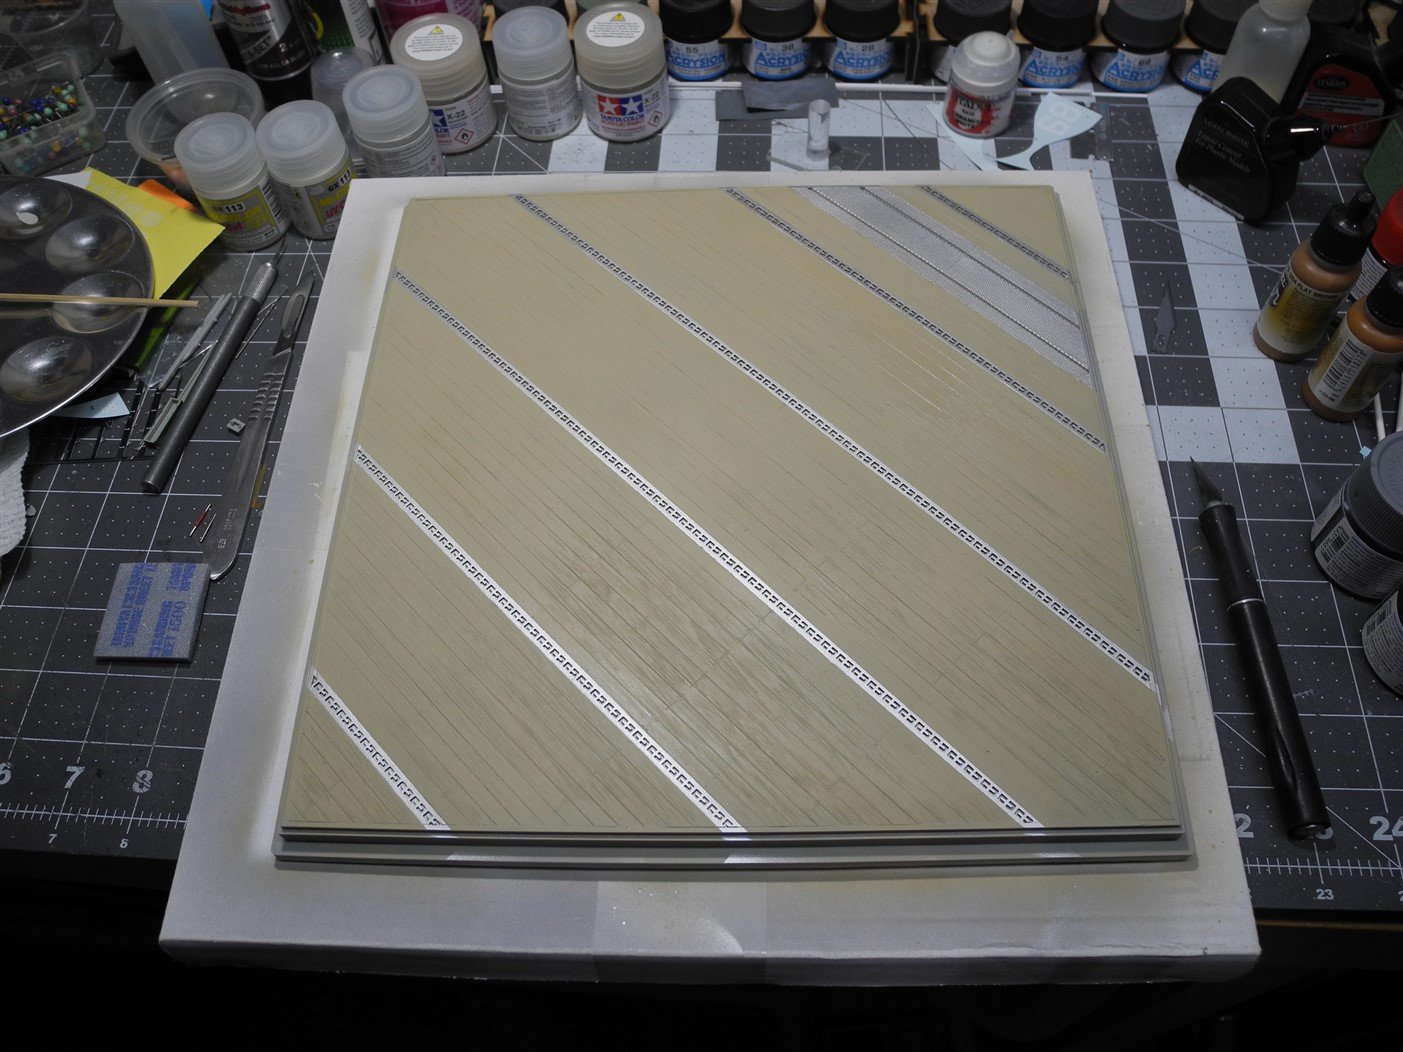
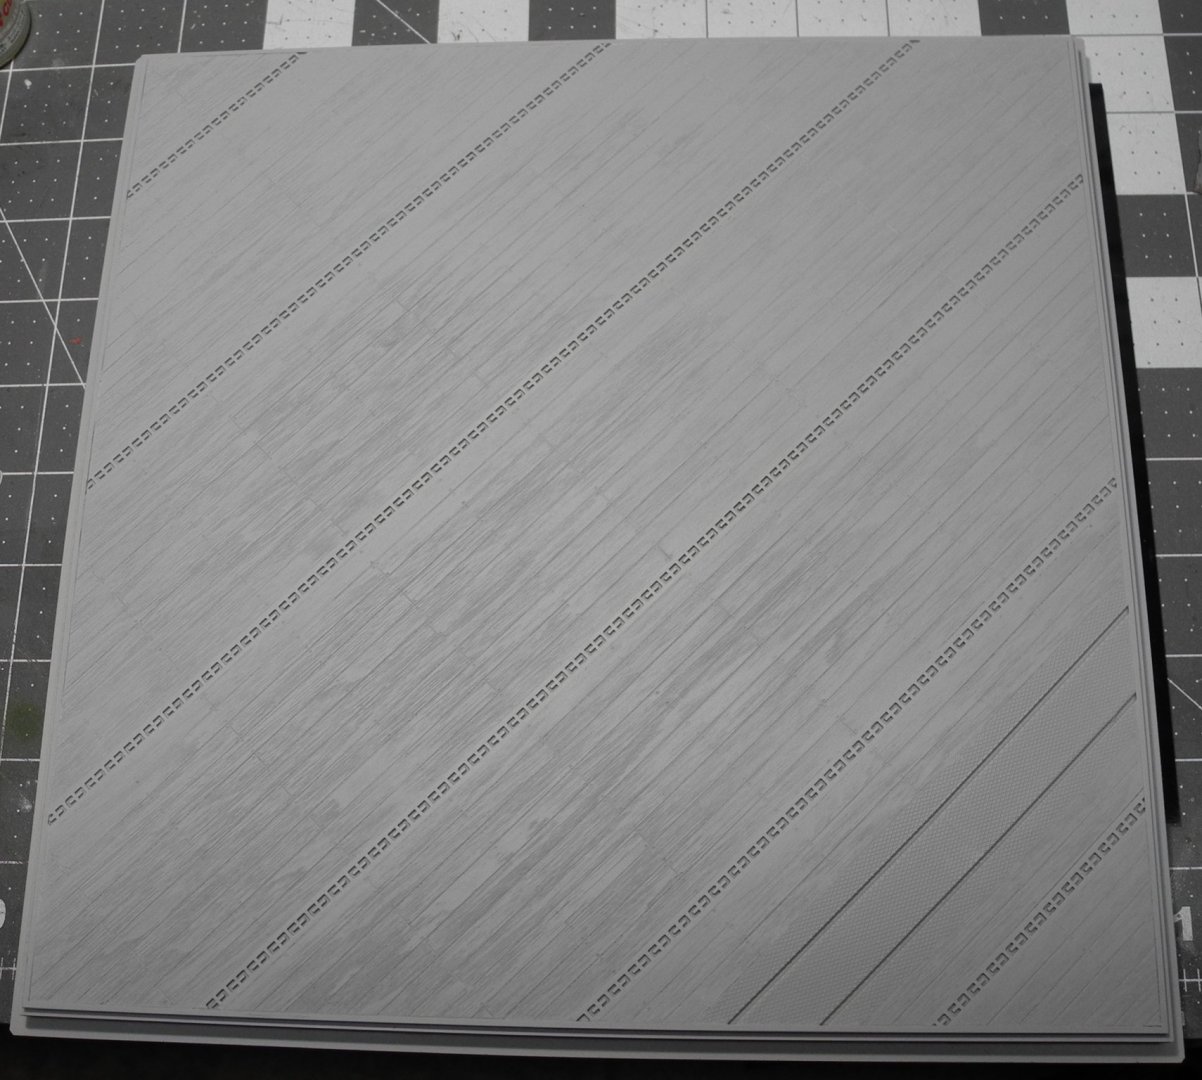
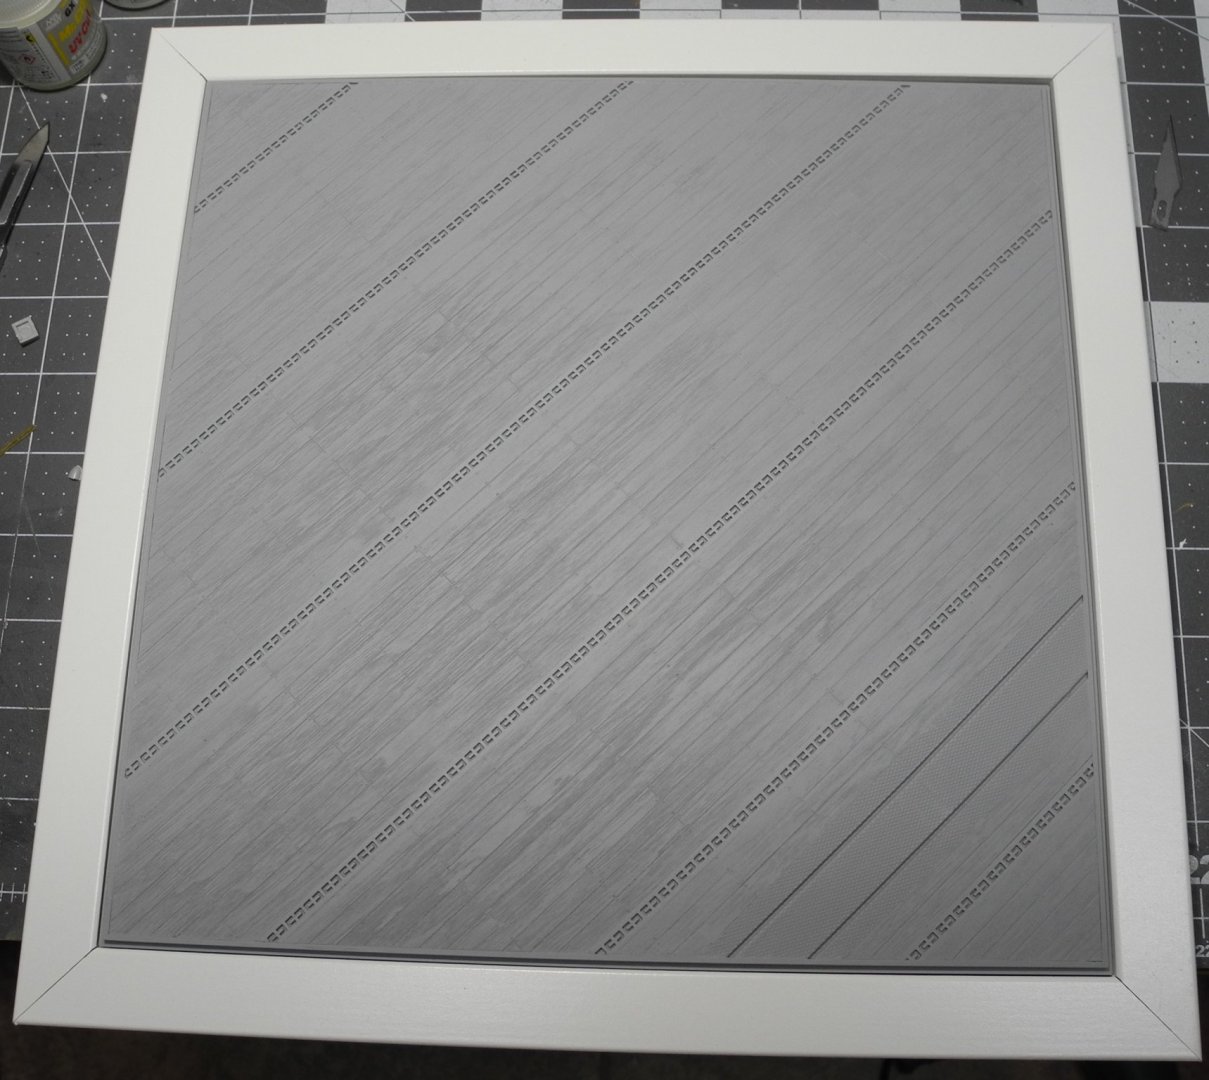
Here, the deck has been painted in a teak color, the deck drains painted in a steel color, then everything covered with a good coat of dull varnish. After the varnish has had a full day to dry, will apply hairspray then cover it all with a deck blue. Some chipping and abrasions will be made to simulate wear and tear on the deck, exposing small portions of the teak and steel colors.
- 267 replies
-
- 16
-

-
SBD-3 Dauntless 1:48 Hasegawa - Edwardkenway-FINISHED
CDW replied to Edwardkenway's topic in Non-ship/categorised builds
Shep Paine helped sell a lot of Monogram kits with the diorama/detailing instructions that came in their kits in the 70's. Made a huge impression on me. -
Bell UH-1H Huey By lmagna - Dragon - 1/35 - PLASTIC
CDW replied to lmagna's topic in Non-ship/categorised builds
Did you watch it to the end? It's heartbreaking really. Makes me in awe of the resilience of the US Marine. -
Bell UH-1H Huey By lmagna - Dragon - 1/35 - PLASTIC
CDW replied to lmagna's topic in Non-ship/categorised builds
This is the story of Al White, USMC. I can assure you, his story is not only captivating but authentic in a special way. -
B-25 Mitchell "Meet Miss Runyon" by Javlin-HK-1/32
CDW replied to Javlin's topic in Non-ship/categorised builds
Hoping nothing but the best for you Kevin. Make a speedy and full recovery then get back in here and dazzle us with a great finish on this model. Be well, brother. -
Hey Denis Is this what you are looking for? It's available online right there in New Hampshire from scalehobbyist.com https://www.scalehobbyist.com/catagories/Model_Cars/freightliner-flc-semi-tractor/AMT00001195/product.php?pr=1
-
Nice! Great info.
-
How did you know what to do to correct the suspension? Would have never guessed it was that far off from AMT.
-
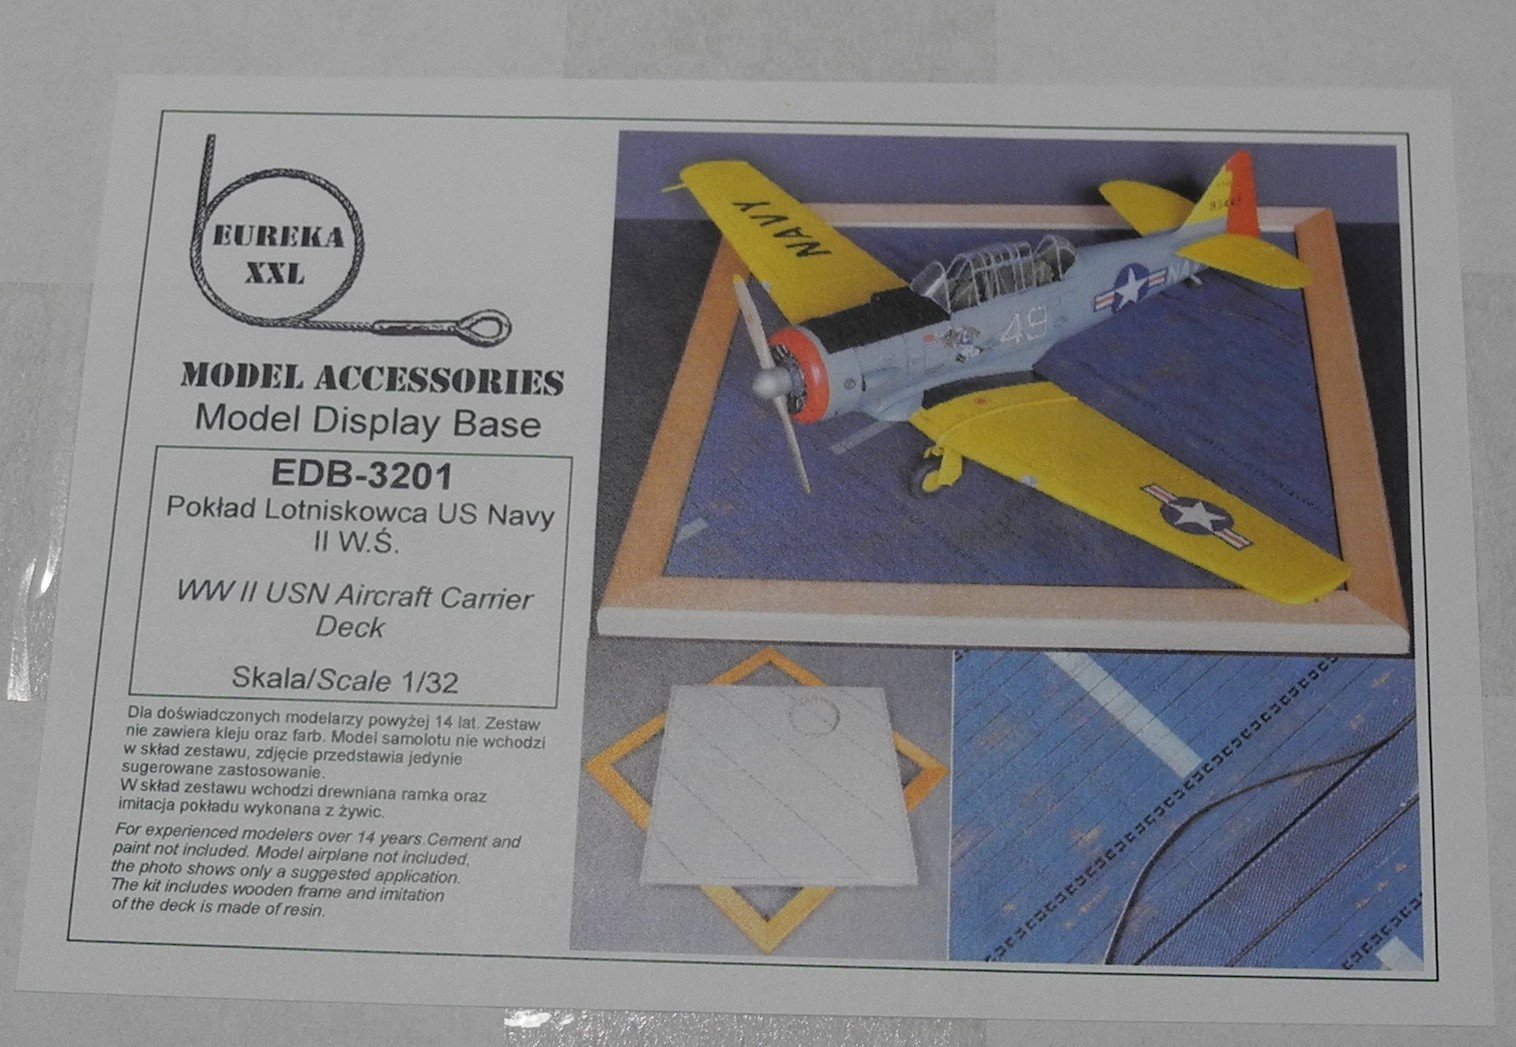
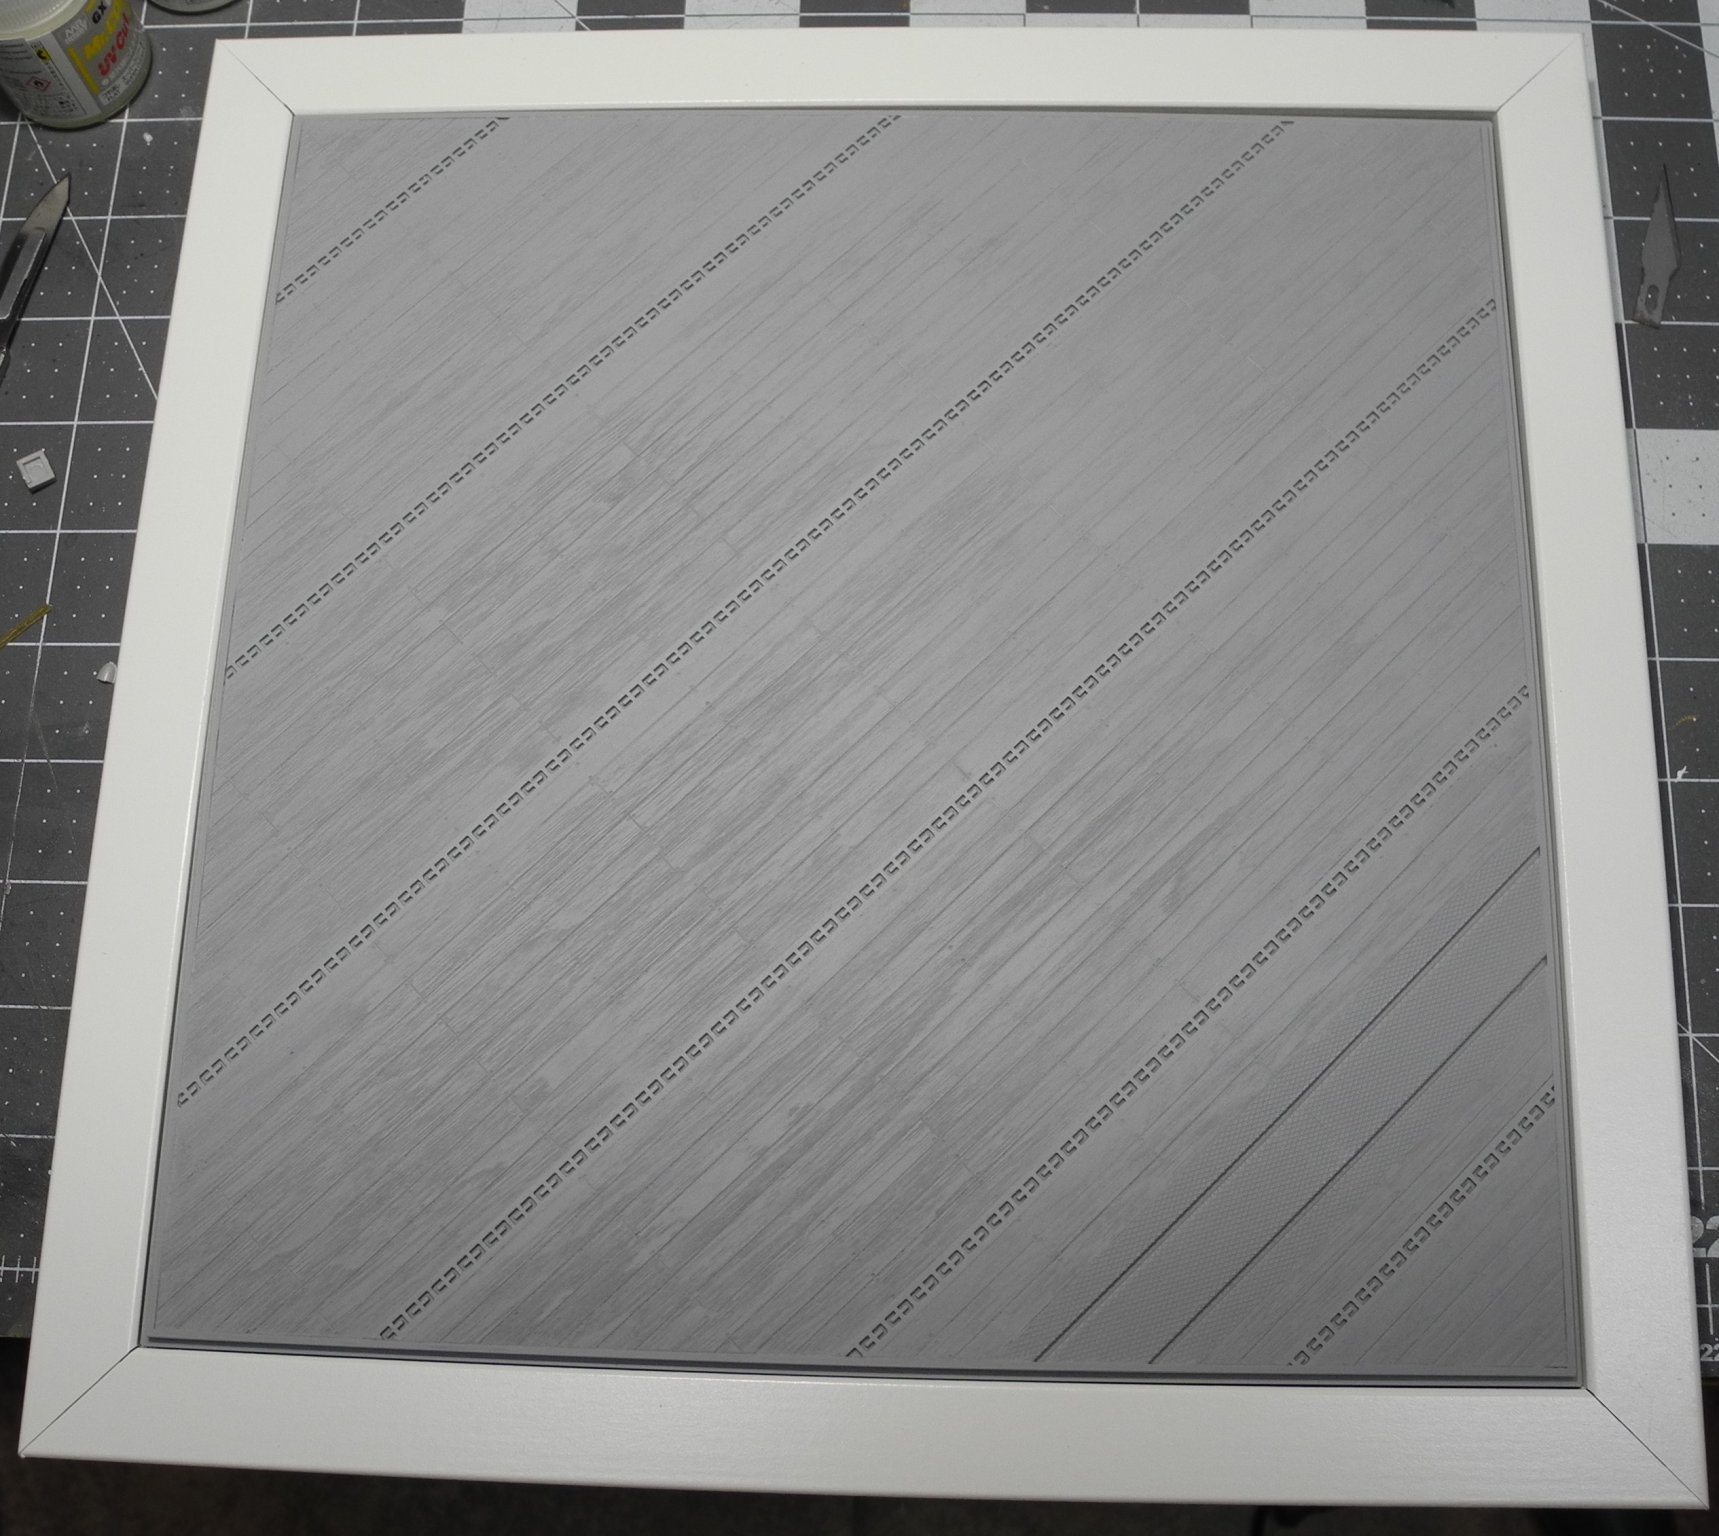
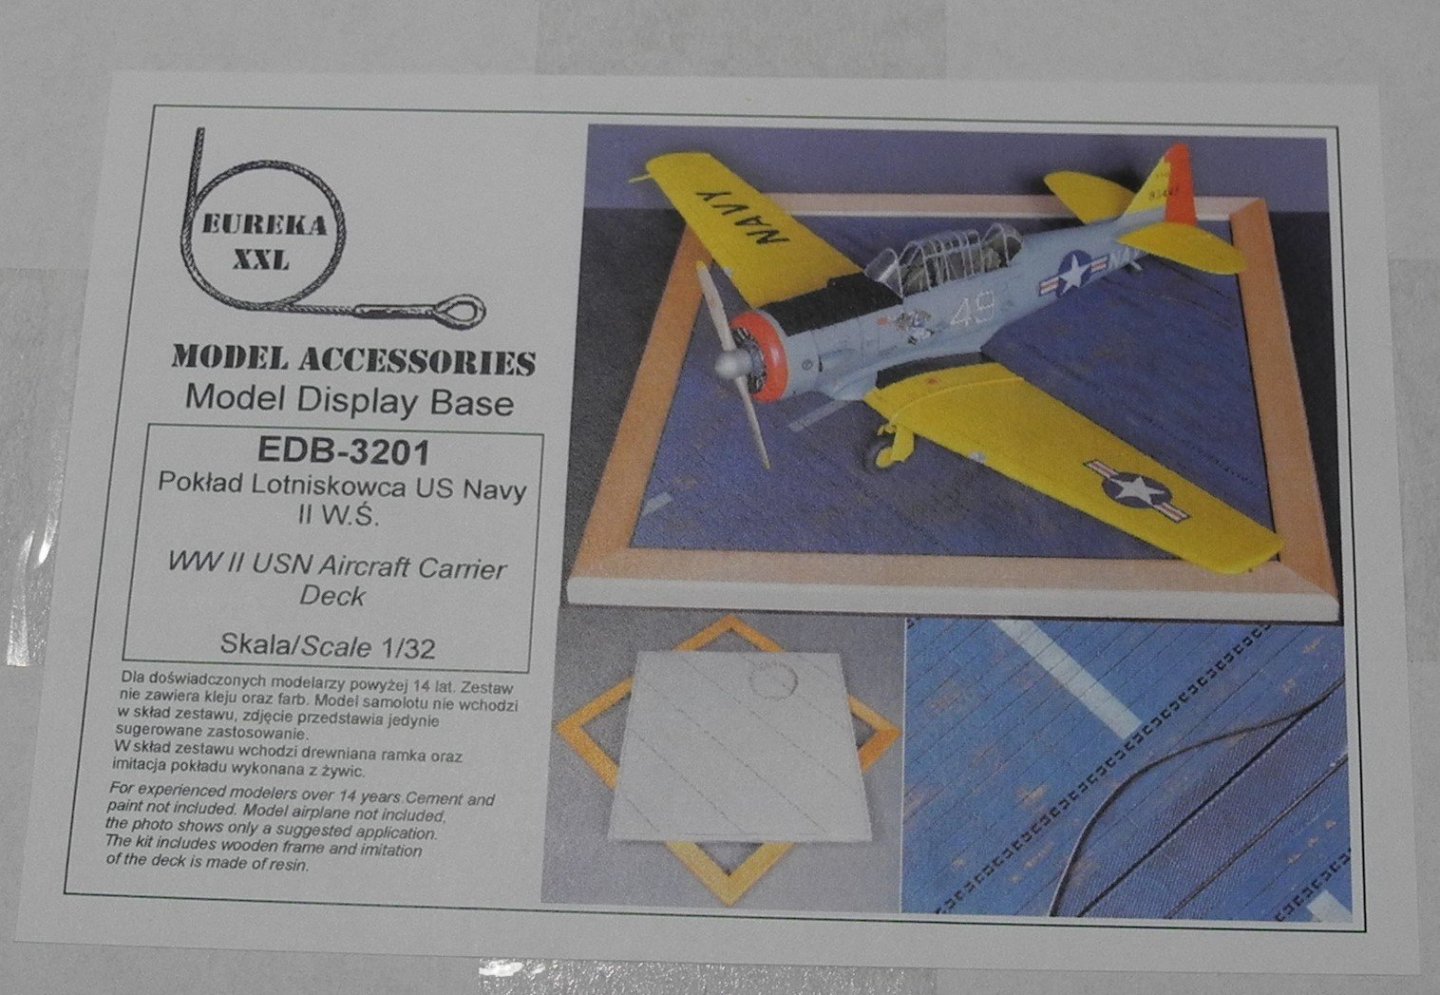
Eureka 1:32 WWII USN Aircraft Carrier Deck Pictured here is the Eureka 1:32 scale USN carrier deck kit. The deck is manufactured in Poland and sold by various shops in the USA. I found mine on Ebay. Very reasonably priced. The main deck is cast of lightweight resin. My copy looks perfect, no pinholes, no blemishes whatsoever. It comes with a pre made frame that fits around the resin carrier deck. It also comes with a braided wire to simulate the arrester wire. In my photos, I have first painted the deck with Mr Color 1000 primer/filler. Next will paint the deck in an acrylic teak color, apply chipping materials before covering it all with a deck blue. The chipping will reveal the teak deck boards beneath the blue. The deck drains will be painted in a steel color. Deck striping in a light gray. Will use a wood tone paint for the frame.
- 267 replies
-
- 13
-
-
Thanks for the comments gentlemen. Much appreciated. Thanks for the comments... I have no experience with 1:72 scale, but I believe there are several different manufacturers of the Avenger in that scale. In 1:48 scale, I am aware of three manufacturers. There is the venerable, old, Revell Monogram kit, the Accurate Miniatures kit (in several different versions), and (I believe) a Hobby Boss version. Of these three, I have experience with the Monogram and Accurate Miniatures kits. The Monogram kit is a very old tool, but is proportionally a good scale model. It has raised details and toy-like working features but I have seen some outstanding scale models built from this kit. The Accurate Miniatures kit is very good. Recessed panel lines and a much more modern tool than Monogram. Unfortunately, the manufacturer is out of business but there are other companies (Italeri?) who have packaged the model for sale. It came in several different versions. The Hobby Boss kit is the newest tool of the three, but I have no experience with it at all. Last, in 1:32 scale there is only Trumpeter. It comes in several different versions. Many modelers the world over called it the best 1:32 scale plastic aircraft model ever produced when it came out in 2005.
-
Many moons ago, I was a swamper for dozers working in the mountains doing gas and oil pipelines. Because of mud and clay sticking to the tracks, would have to clean and adjust the tracks daily, sometimes multiple times a day. Otherwise, the tracks would jump right off the drive sprockets. I'm certain military tracked vehicles would need the same kind of regular maintenance, which is why I believe they went to wheels/tires on some of these newer combat vehicles. Of course extremely heavy vehicles such as M-1's need the tracks to spread out the extreme weight of the vehicle over a larger surface area.
-
I'll bet this thing gave a bone jarring ride.
-
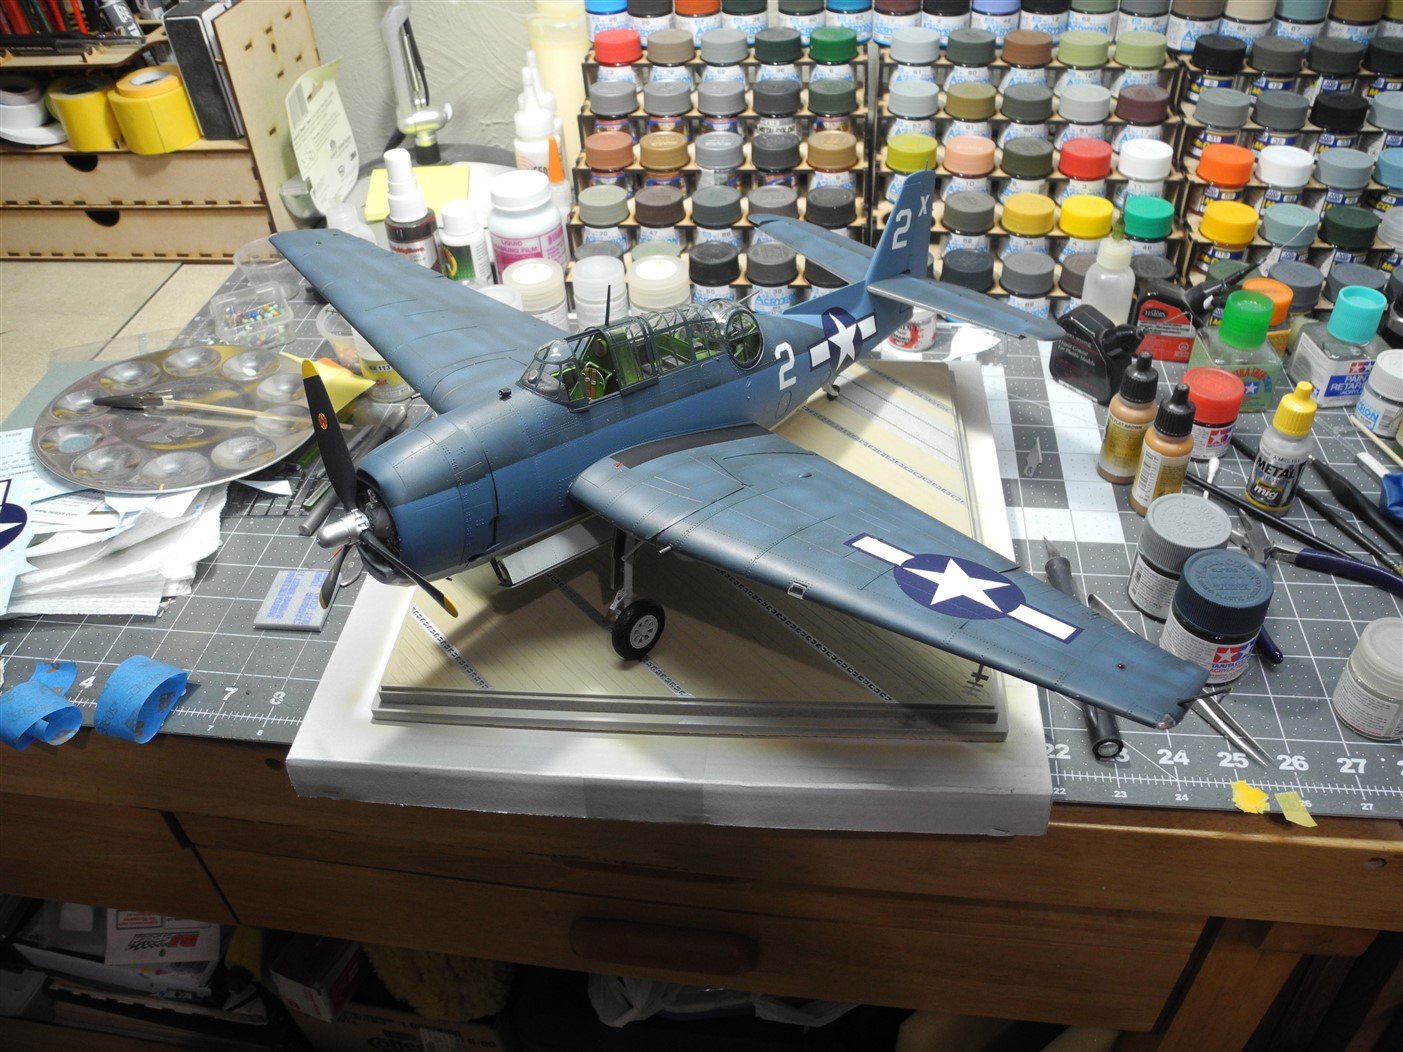
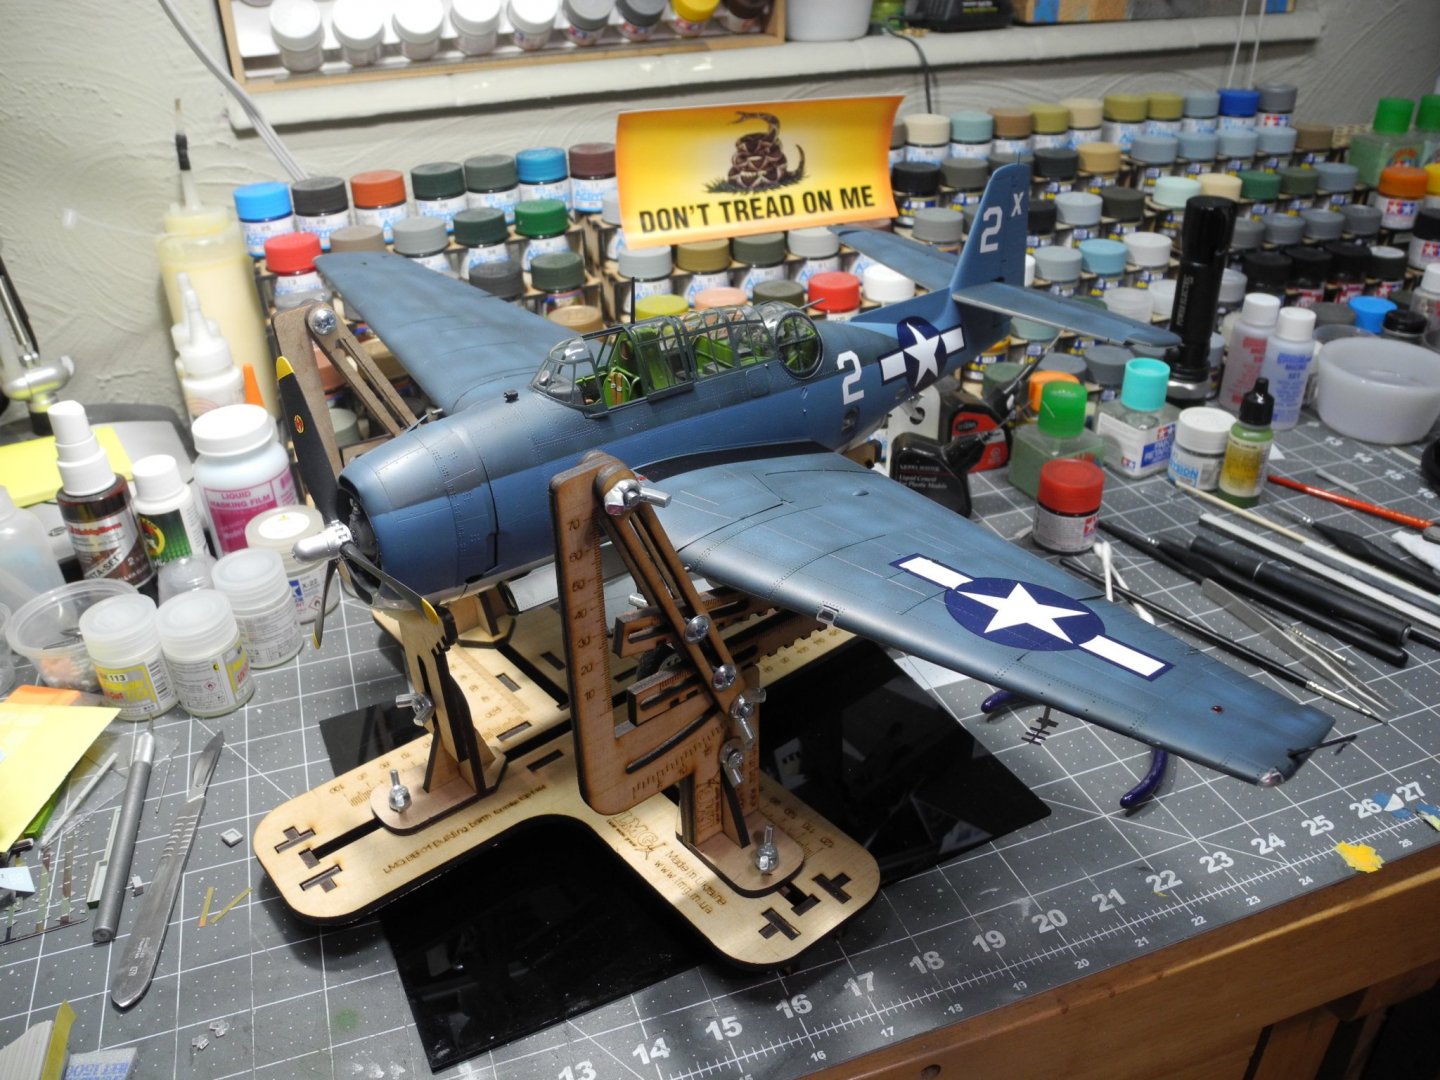
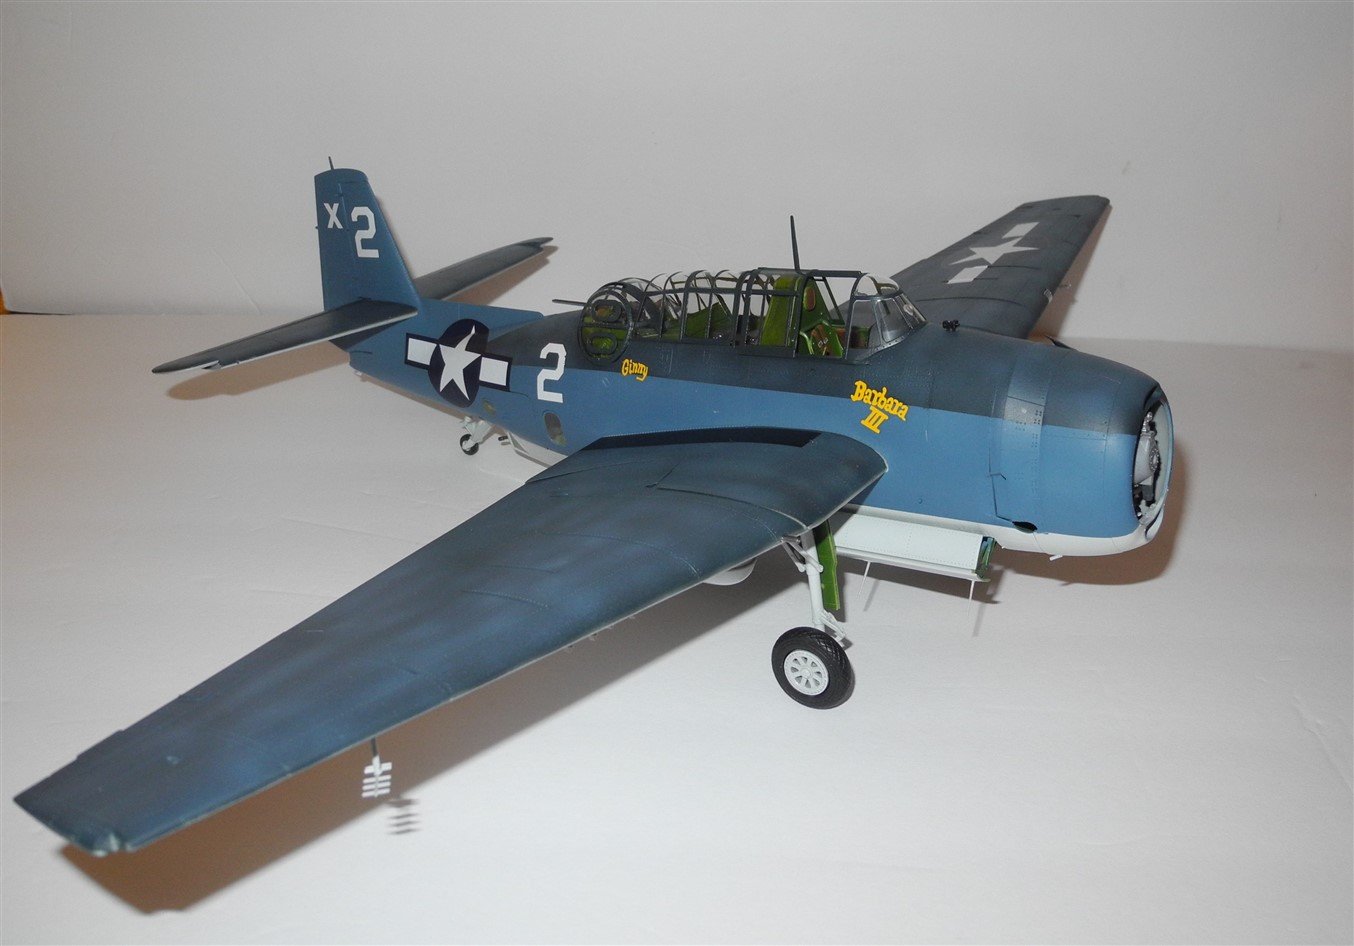
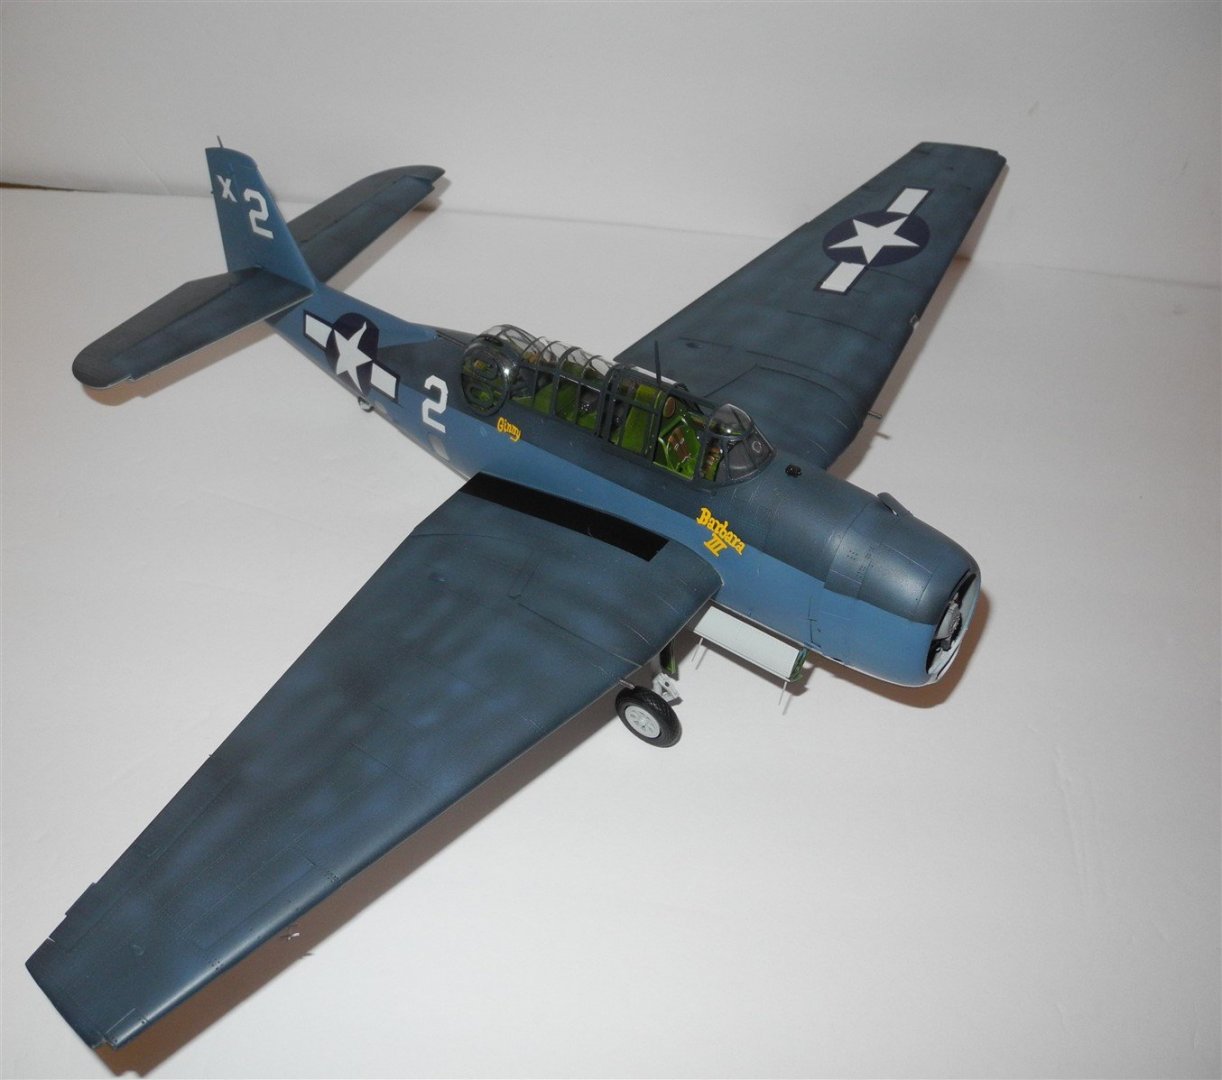
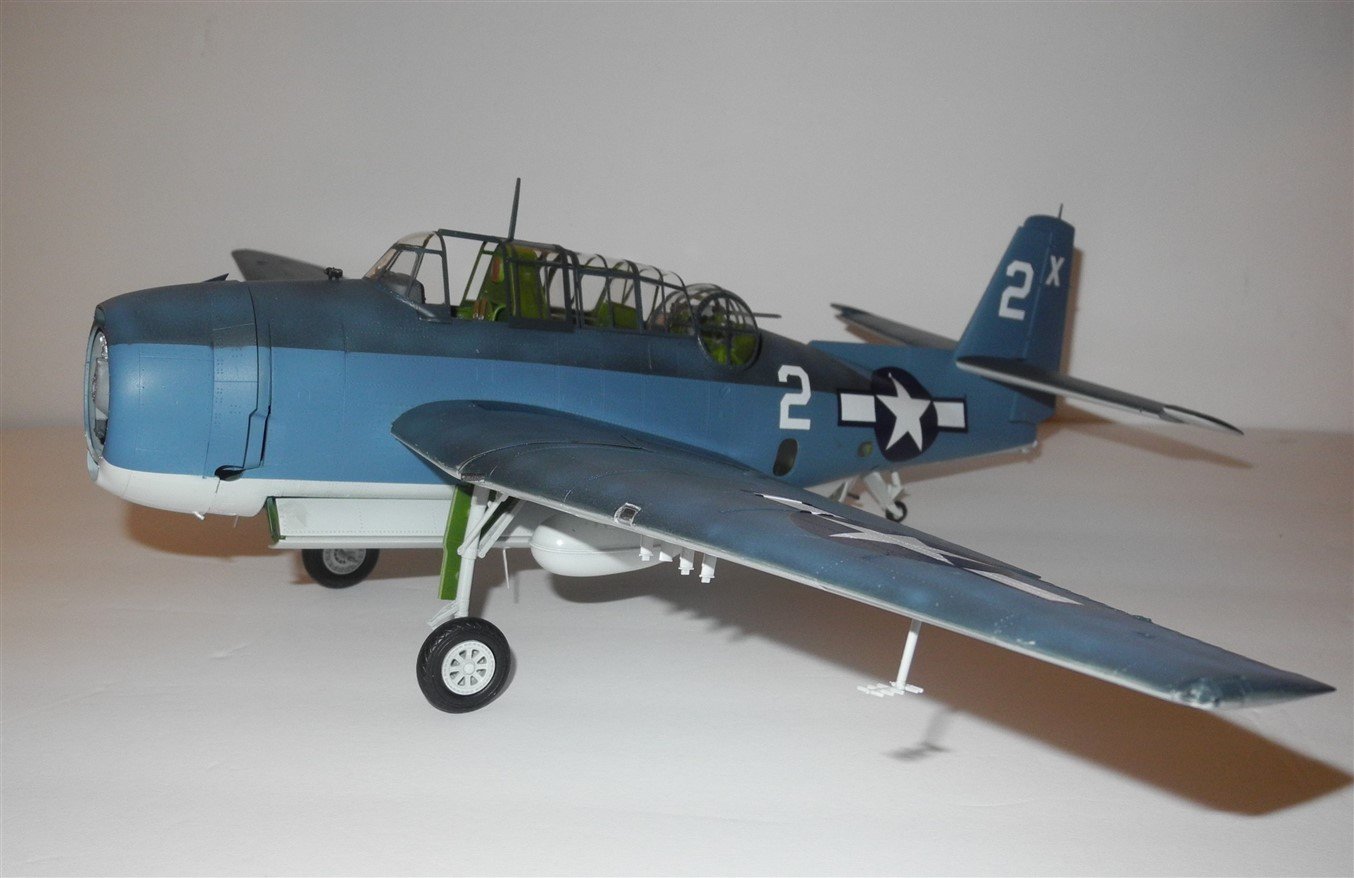
Prop installed, nav lights, most of the decals applied. A little more painting, then will start the carrier deck.
- 267 replies
-
- 18
-
-
When this model first came out around 2005, it was hailed by modelers all over the world to be the best 1:32 plastic aircraft kit ever made. Not sure it still takes that honor, but it is a very nice kit. Fits very well. Great detail, but not overly complex.
-
Yes, the 400 leveling thinner works well with both of their paint lines, Acrysion and Mr. Color lacquer. Slows down the drying time and allows the paints to self level.
-
Wow OC, your Mossie is coming along so quickly and looks great!
-
She looks awesome Phil!
-
Named Barbara III for President George Bush's wife. President Bush was shot down twice over the Pacific, this was his 3rd and final plane of the war.


- 267 replies
-
- 20
-
-
They did stop importing to the USA when they were Gunze. Once they became Mr. Hobby, imports to the USA resumed. Not sure of all the details of what happened and why, but it could be they had to reformulate to pass certain hazardous designations by the USA. I could be wrong on this, I'm not really sure and have only heard tales that I'm repeating here.
-
B-25 Mitchell "Meet Miss Runyon" by Javlin-HK-1/32
CDW replied to Javlin's topic in Non-ship/categorised builds
And it's often the case that sourcing the right materials is as much or more of a challenge than building it. -
GSI Creos / Mr. Hobby They were once called Gunze Sangyo
-
Thanks for asking Mike. I should have posted a photo of it:
-
I've been hoarding the 1:350 Roma and a few detail sets. Your Heavy Cruiser Zara is tempting me to build the Roma. Whether it's automobiles, ships, or even aircraft, (not to mention the beautiful women) the Italians make some sexy looking things.