CDW
-
Posts
7,755 -
Joined
-
Last visited
Content Type
Profiles
Forums
Gallery
Events
Everything posted by CDW
-

Bell UH-1H Huey By lmagna - Dragon - 1/35 - PLASTIC
CDW replied to lmagna's topic in Non-ship/categorised builds
Real nice photos OC. That is a beautiful bird. -
Bell UH-1H Huey By lmagna - Dragon - 1/35 - PLASTIC
CDW replied to lmagna's topic in Non-ship/categorised builds
I've seen that ace of spades insignia on the nose of Huey models before, but don't recall if there was a king of diamonds along with it. -
Bell UH-1H Huey By lmagna - Dragon - 1/35 - PLASTIC
CDW replied to lmagna's topic in Non-ship/categorised builds
When printing your own decals, something that helps solve the transparency issue is to print the decals on white decal paper, not clear. However, this can cause other issues, particularly if you don't want a white background. But it does take care of transparency. -
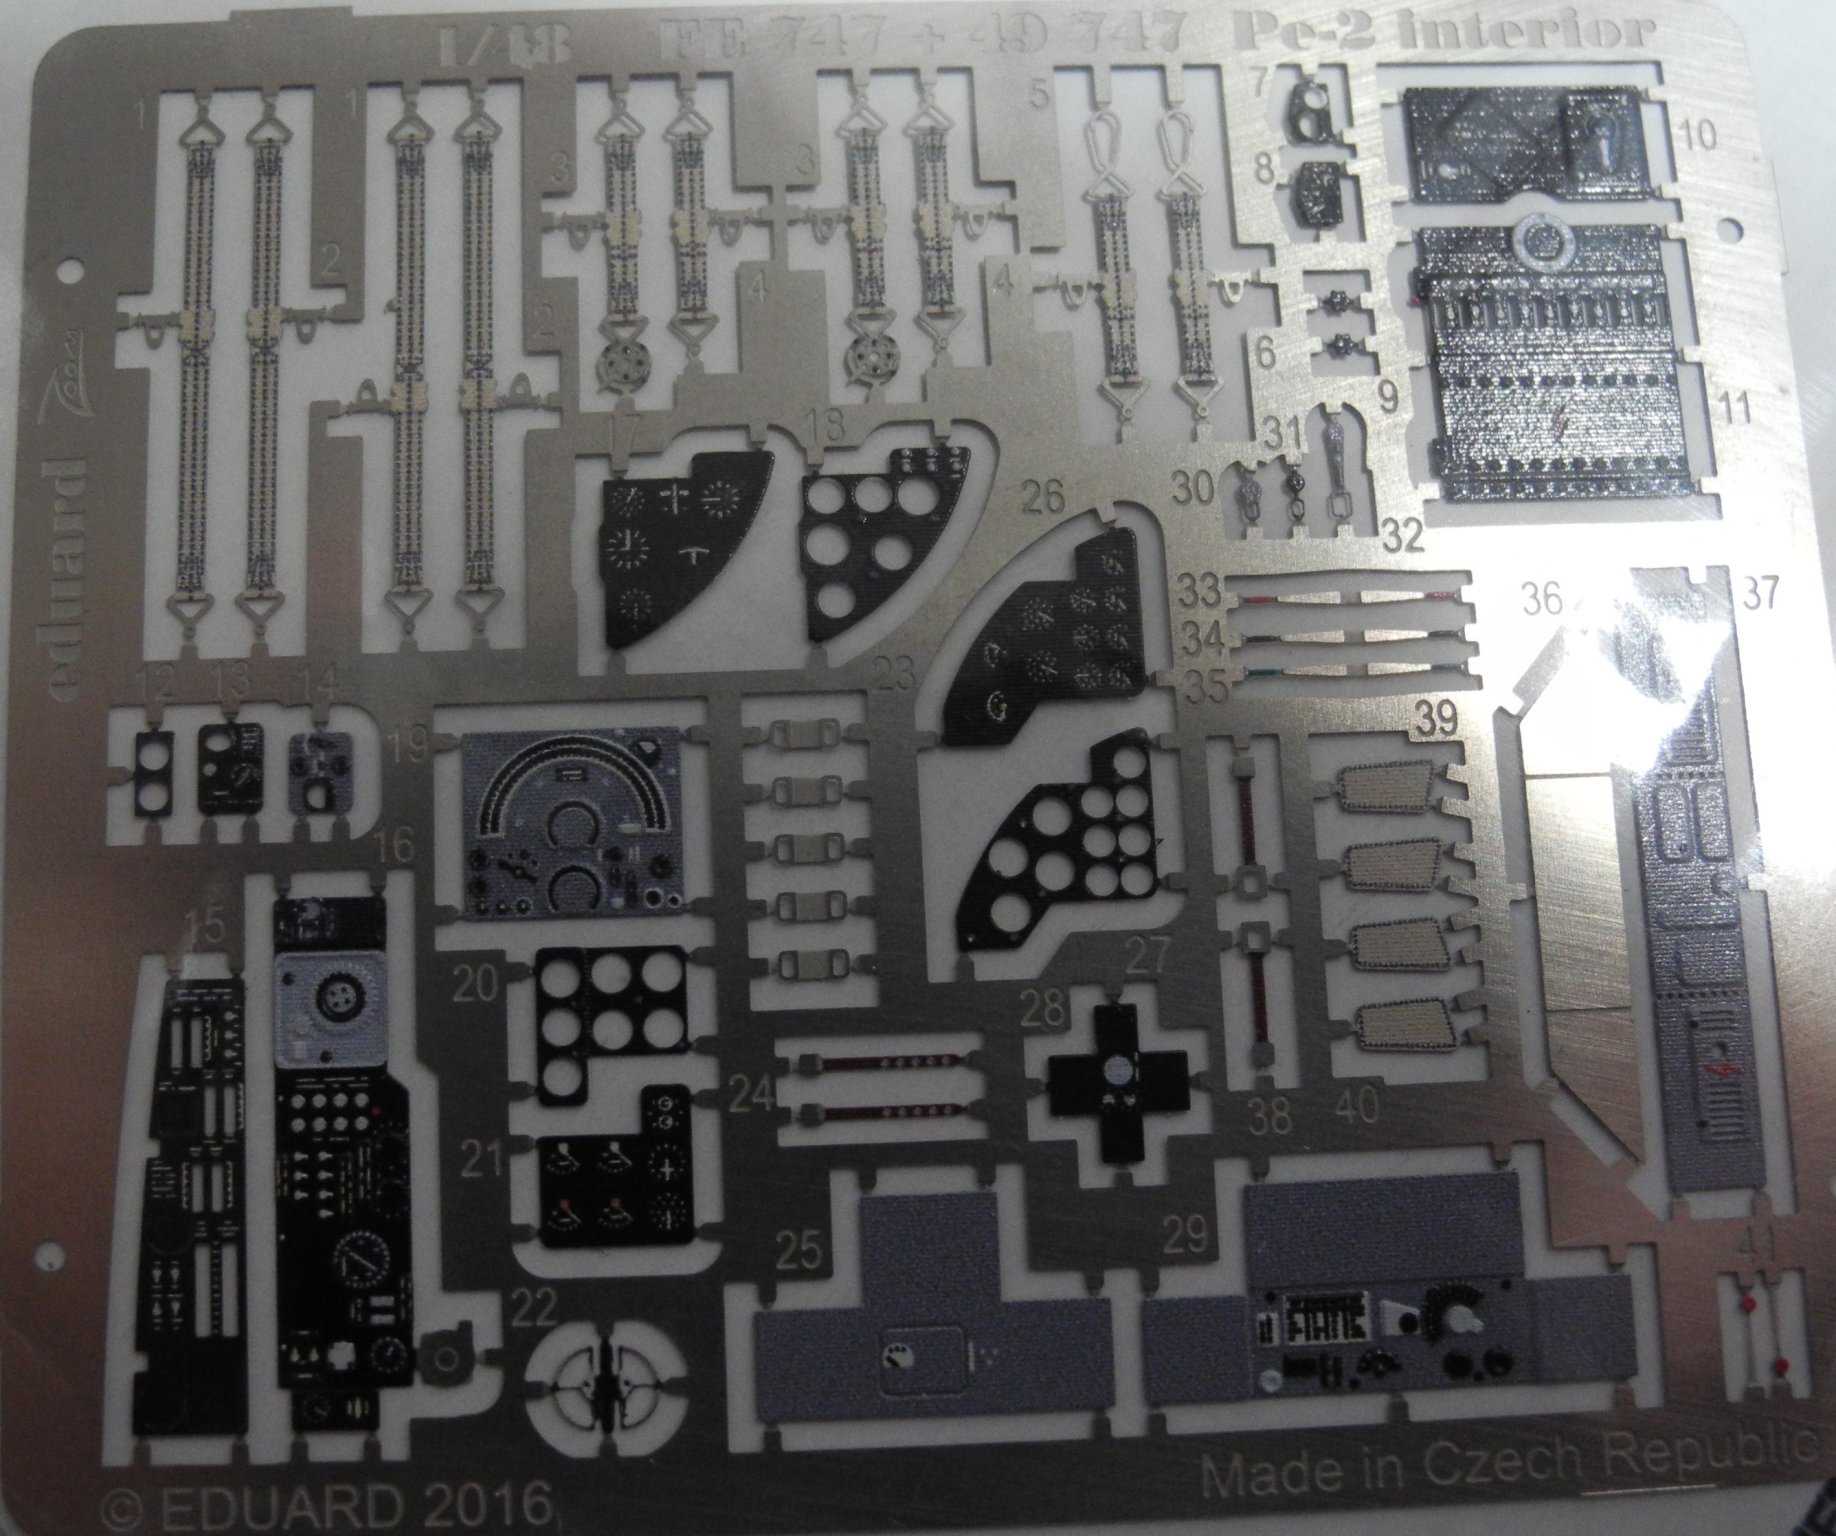
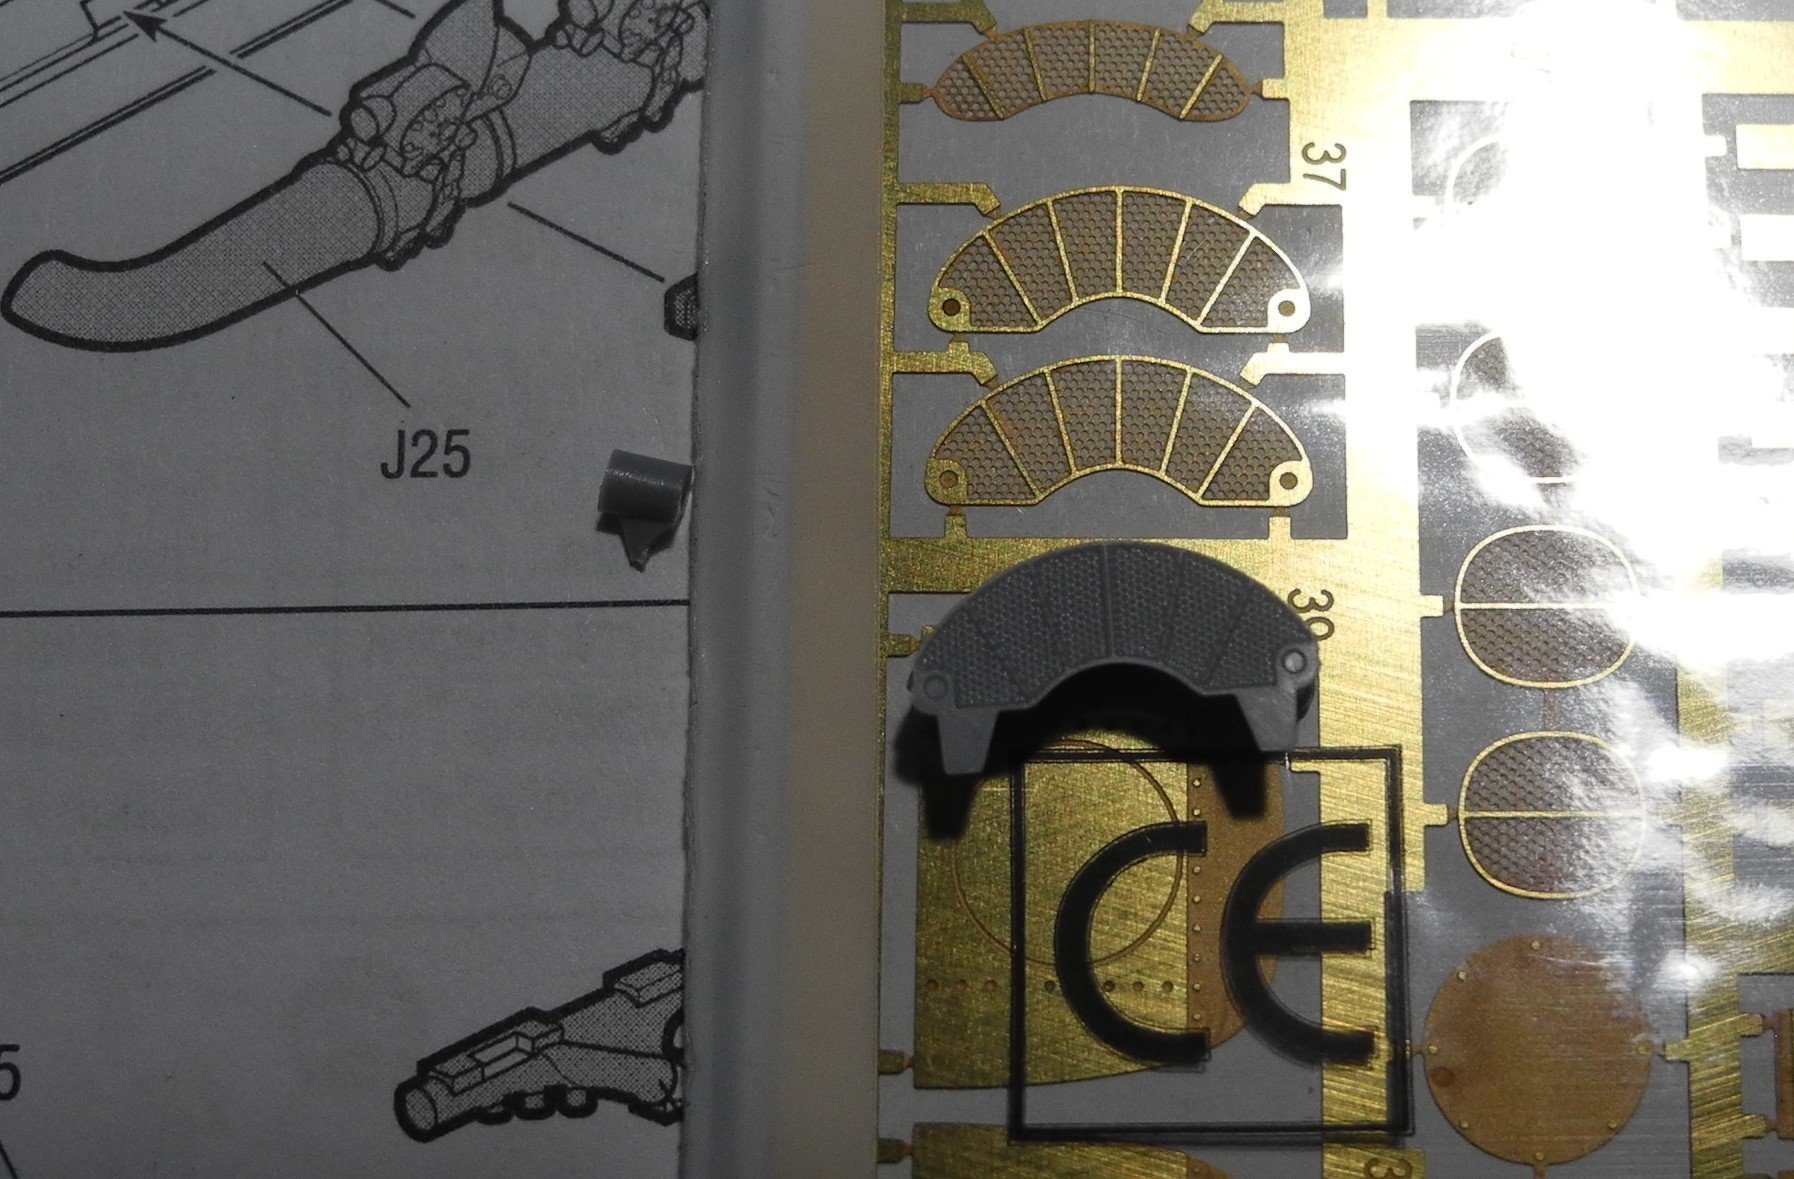
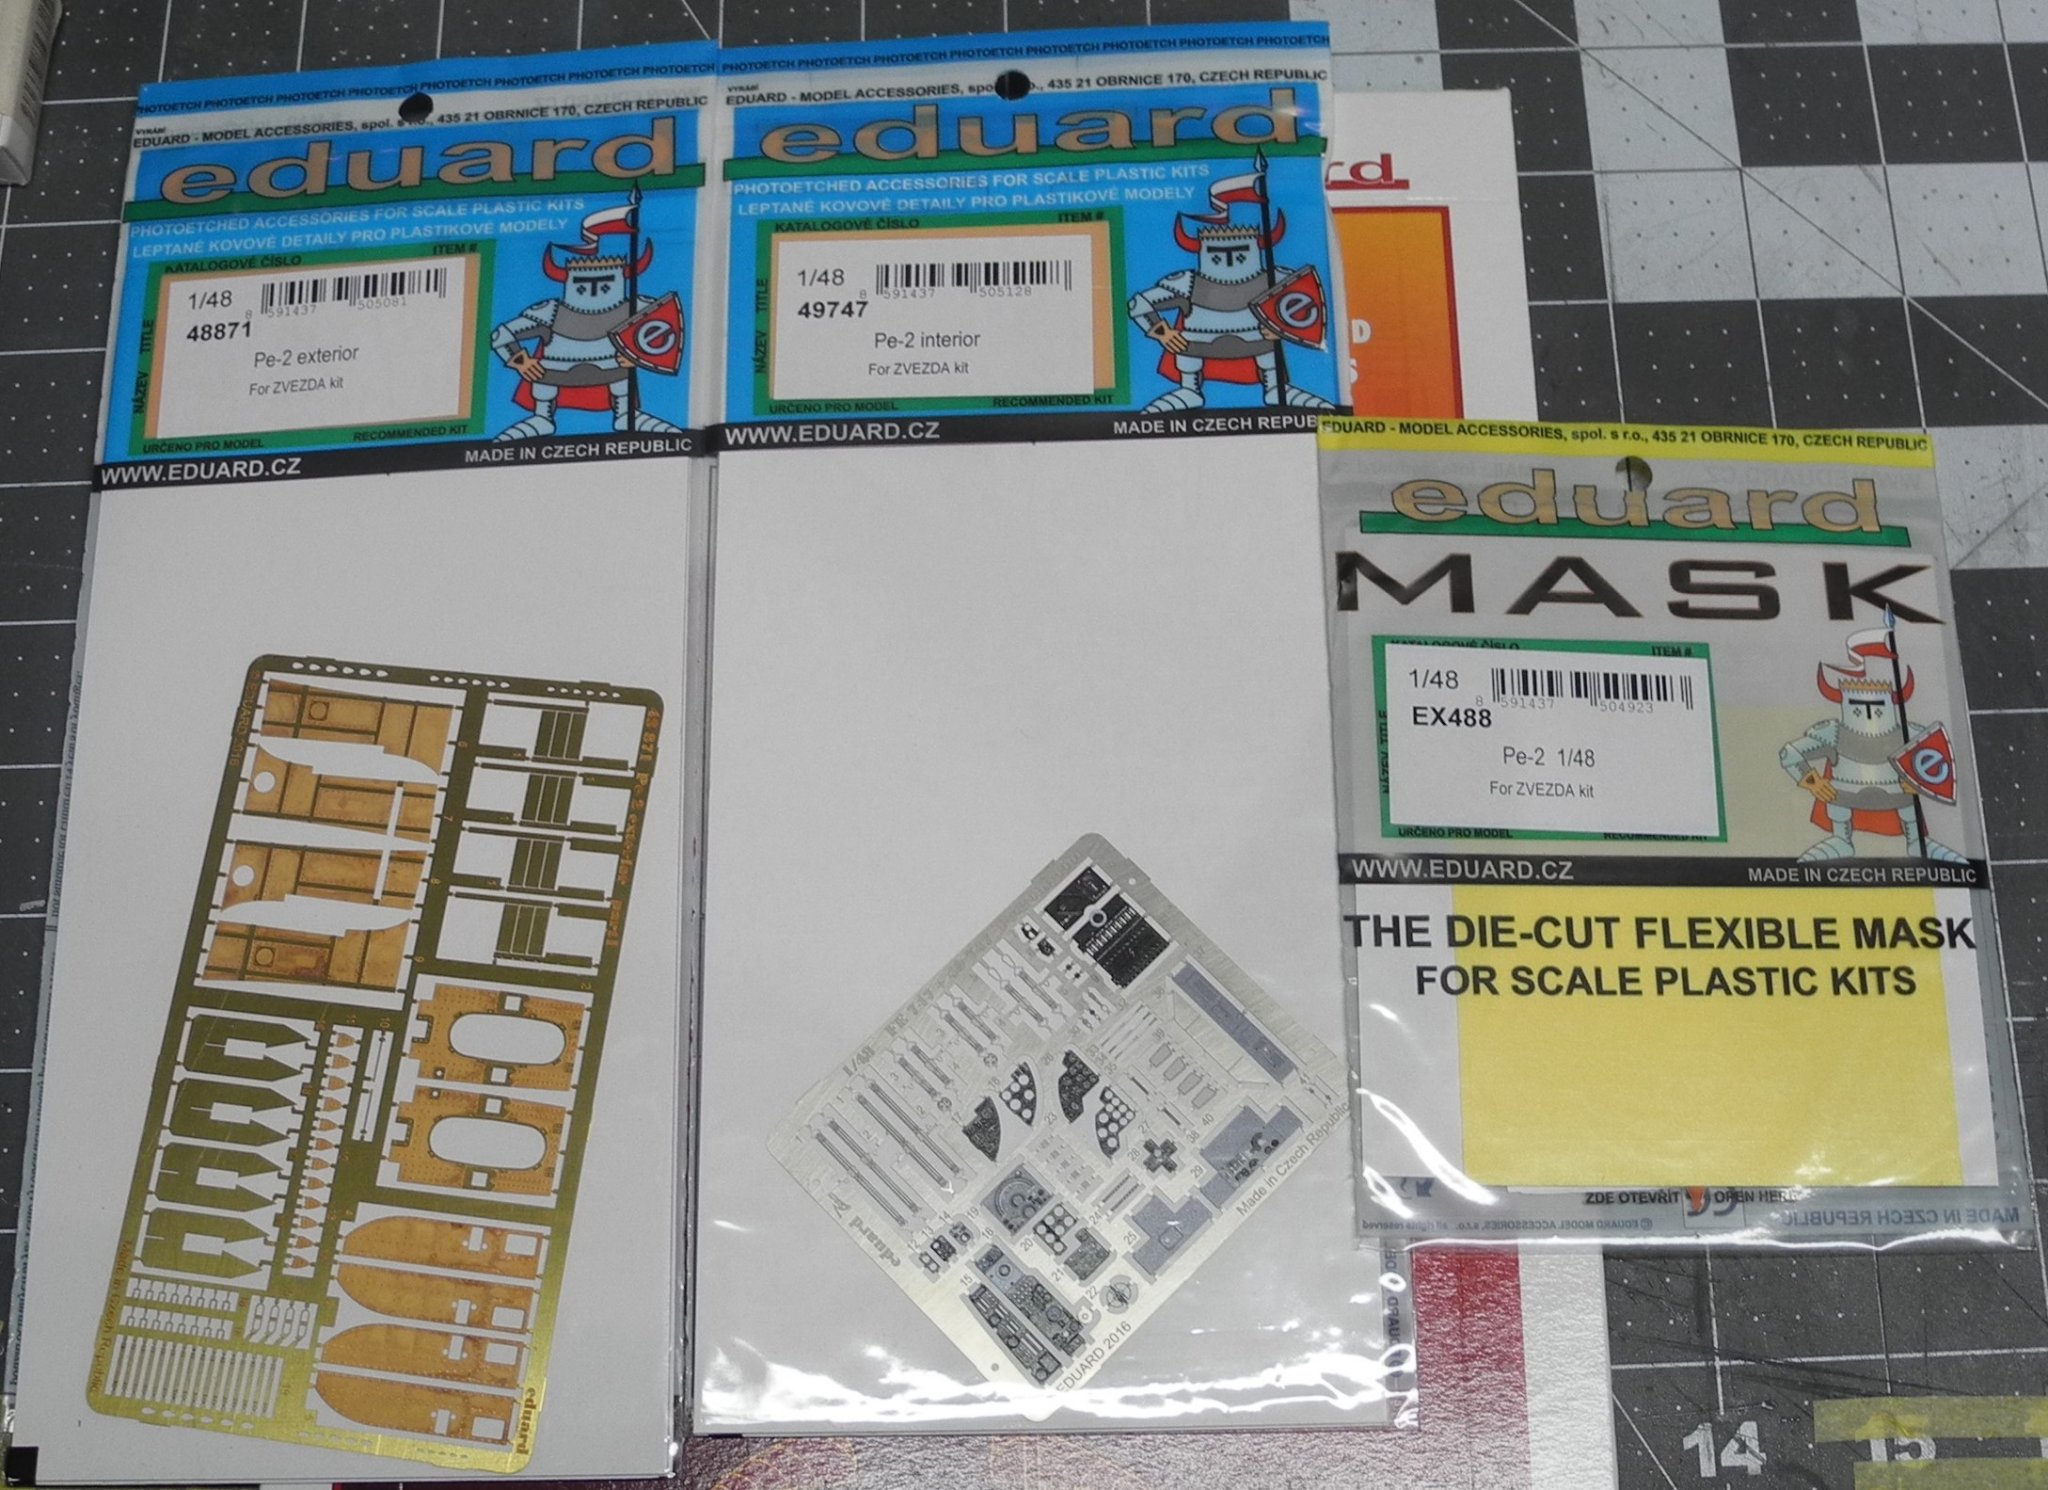
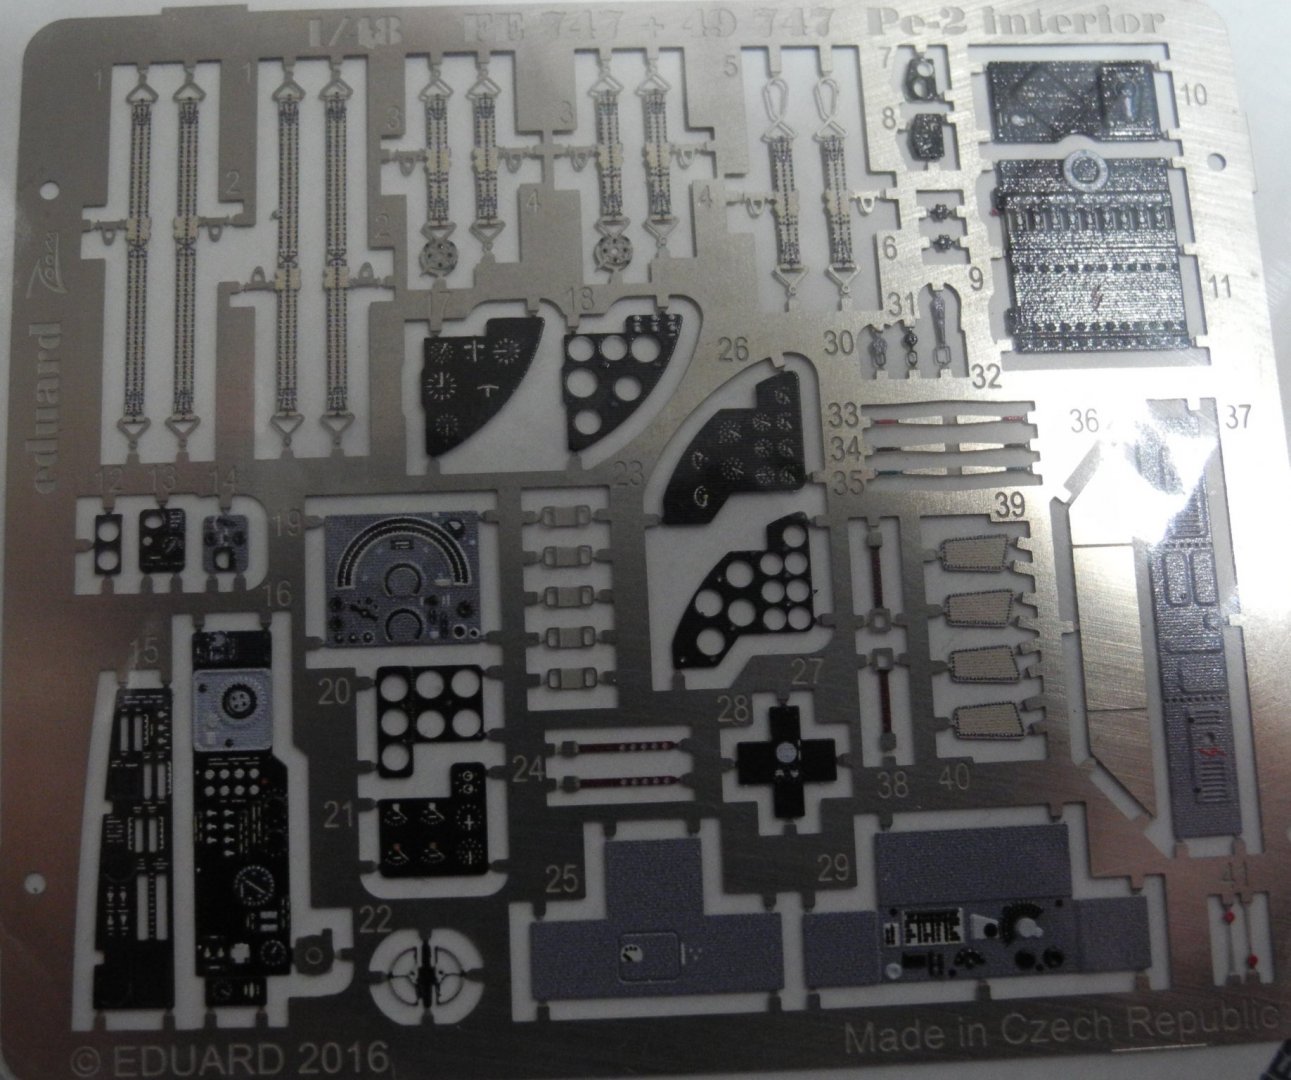
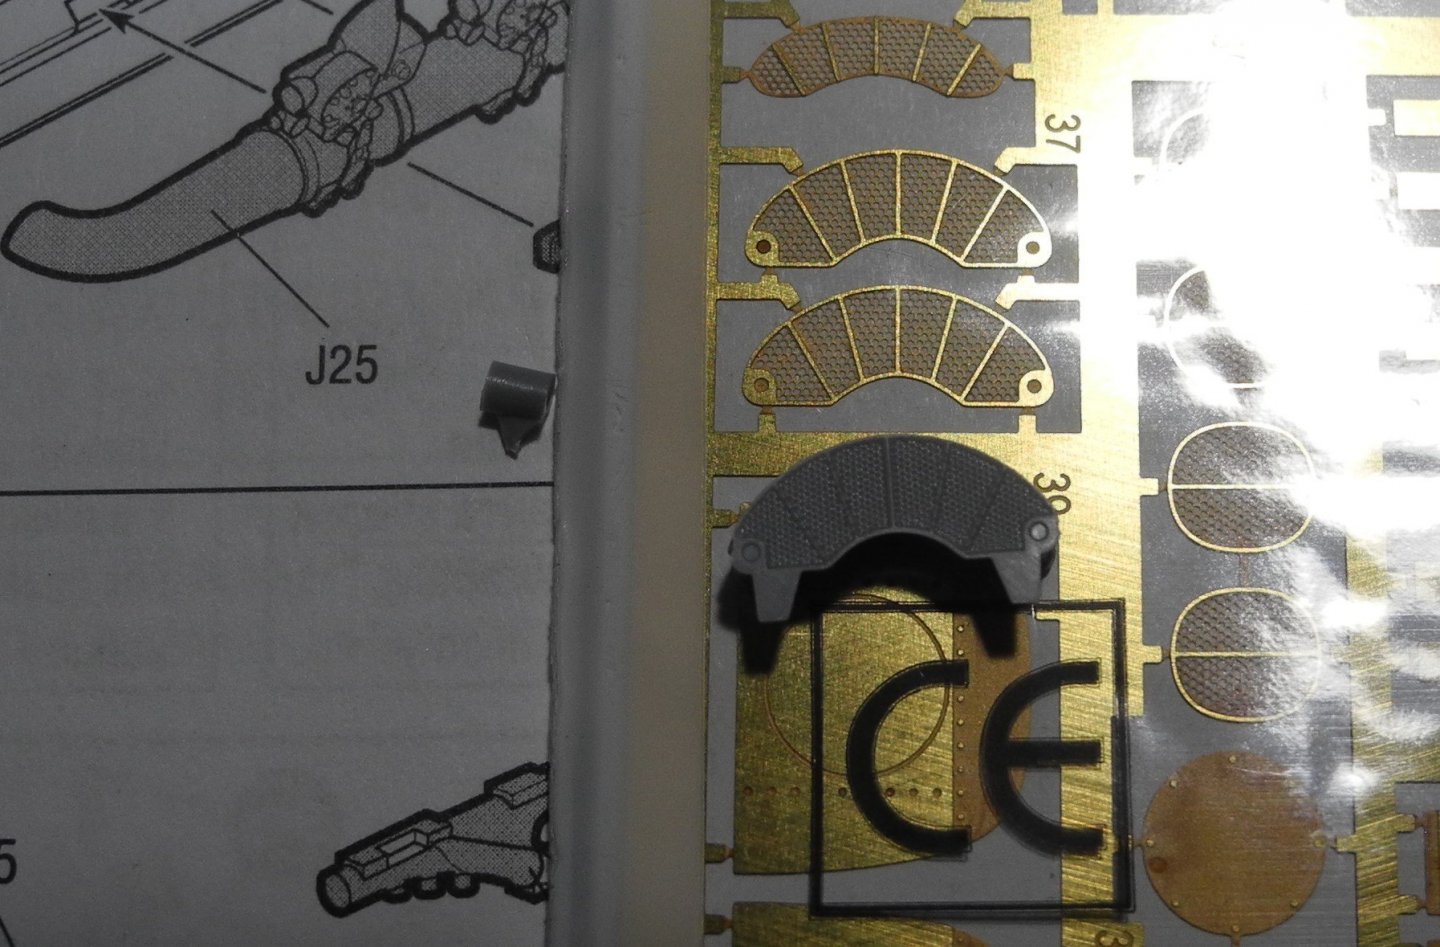
The answer is a resounding....yes and no 😁 Let me explain. There are three separate sets contained in the Big Ed photo etch set I've got. There is an exterior set, an interior set, and a set of canopy masks. In a perfect world, I would choose which of those three sets I needed and acquire them. However, I was unable to find the sets separately and had to buy all three together in the Big Ed set. Having said that, the exterior set is redundant in certain instances. For example, the exterior set provides radiator grills to replace the kit parts. A close examination of the parts shows me the kit part is just as well detailed as the photo etch part, so it's not needed in my opinion. Not worth the effort or time to install it. Photo of it: There are other parts associated with the exterior set that will provide detail the kit parts lack. In the case of the interior photo etch parts, it's a big yes, it's necessary to me as the photo etch parts provide a level of detail I can't achieve by hand painting the kit parts. The photo etch instrument panels are pre painted and look super nice. Photo: And besides the instrument panels, there are seat belts not found in the kit. On the other hand, if I used the pilot/crew figures provided in the kit, I would not need the photo etch seat belts. Last, the photo etch set contains a pre cut set of canopy masks. I don't know about you, but I hate cutting micro thin strips of masking tape to mask a canopy. It's time consuming, tedious, and generally a pain in the rear. So yeah, I think canopy masks are totally worth it. So the verdict? I am certain one could build a very nice model straight from the box. If I could buy things separately, I would buy the pre painted instrument panels/seat belts, and the canopy masks. And that's it, that's all. So there...it's a long answer but the short of it always is, do whatever you enjoy doing because in the end, you're the only one who has to be happy about it when it's finished.
-
Thanks Ken It's just a small bump in the road those decals. Replacements will be here soon.
-
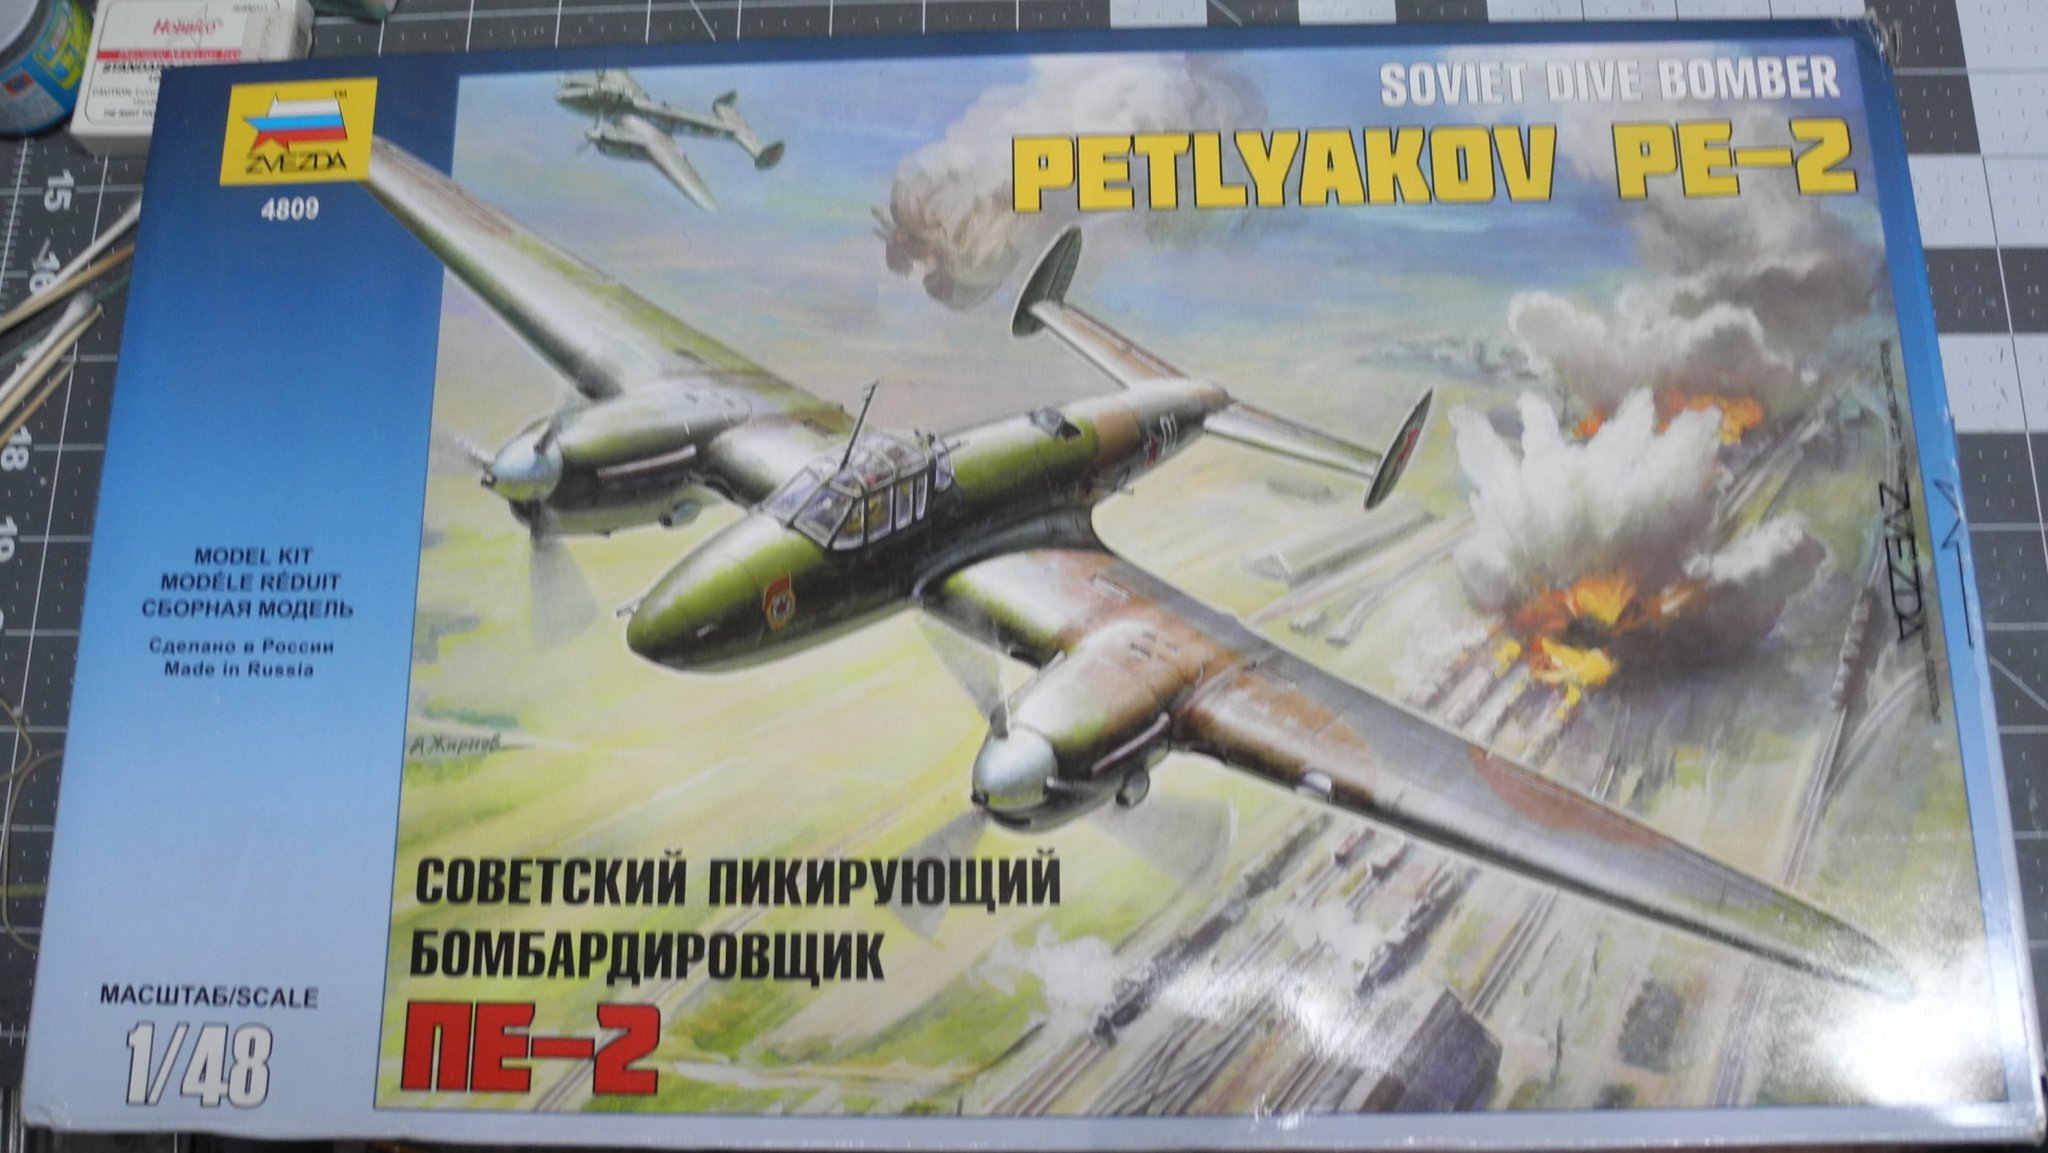
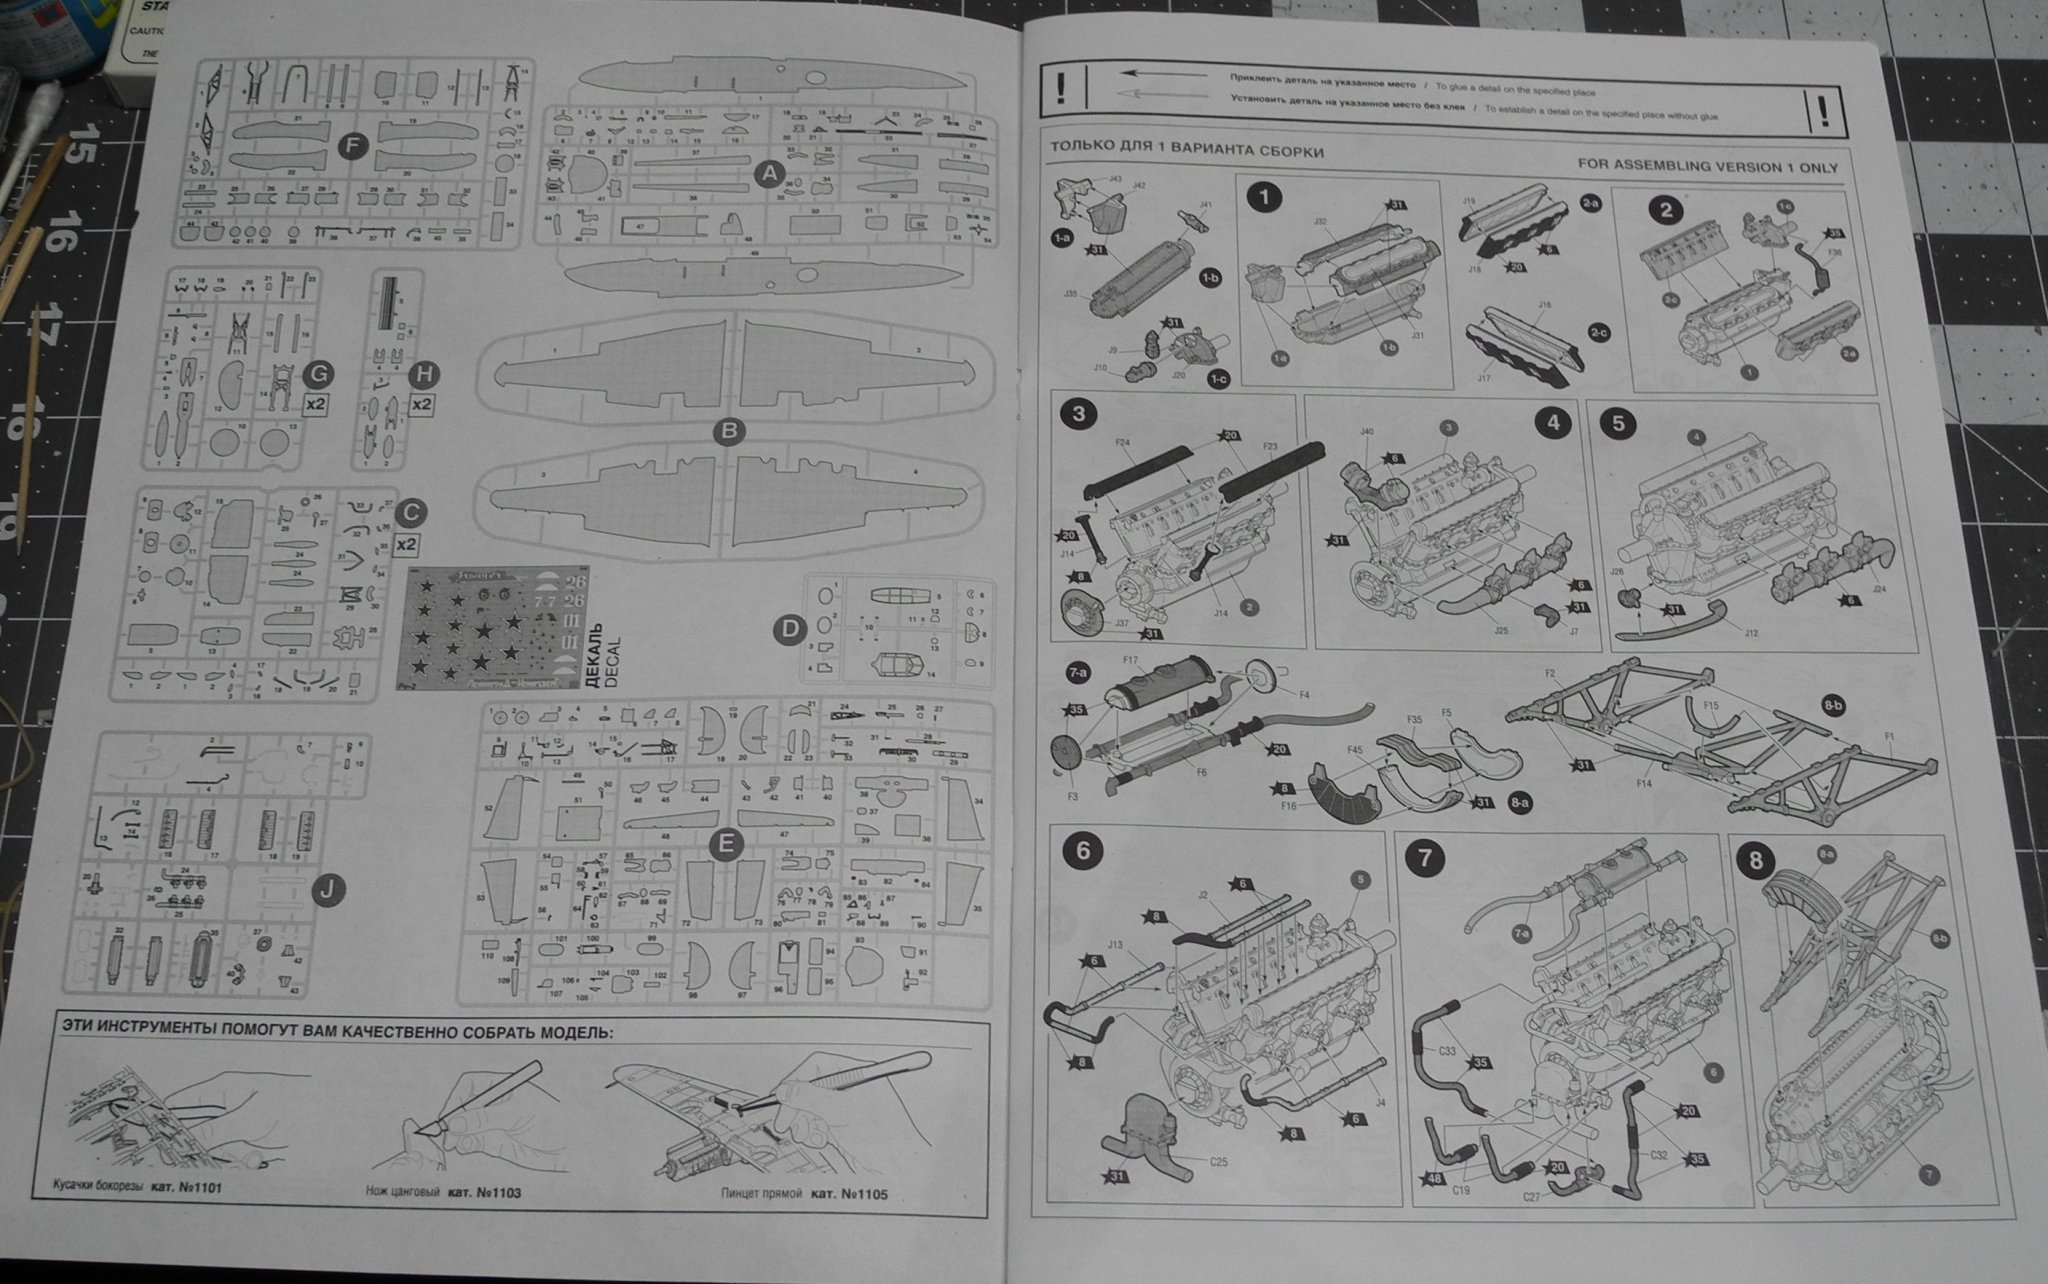
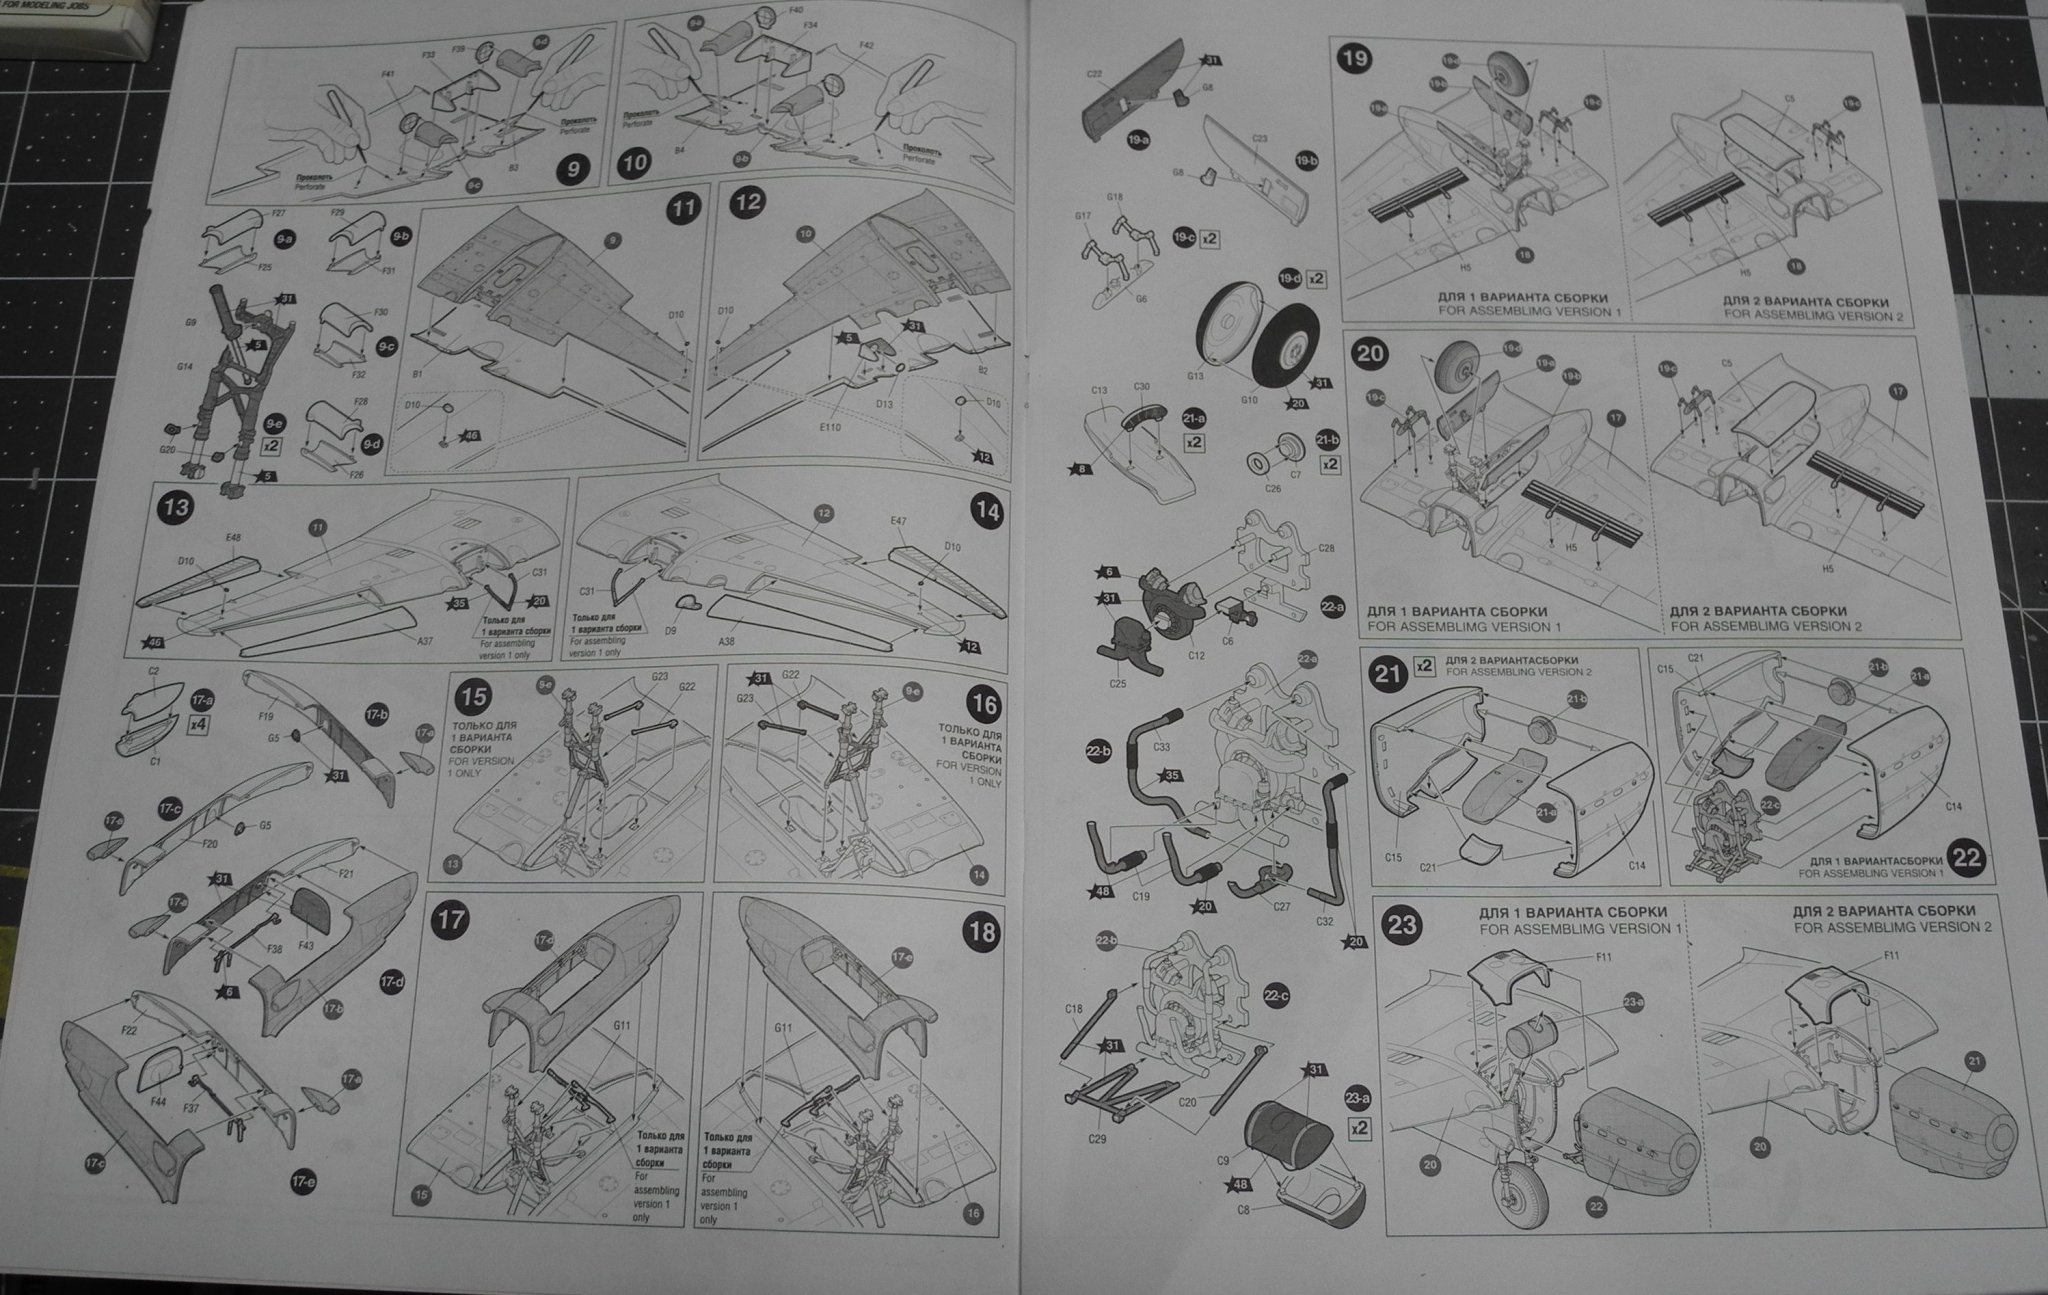
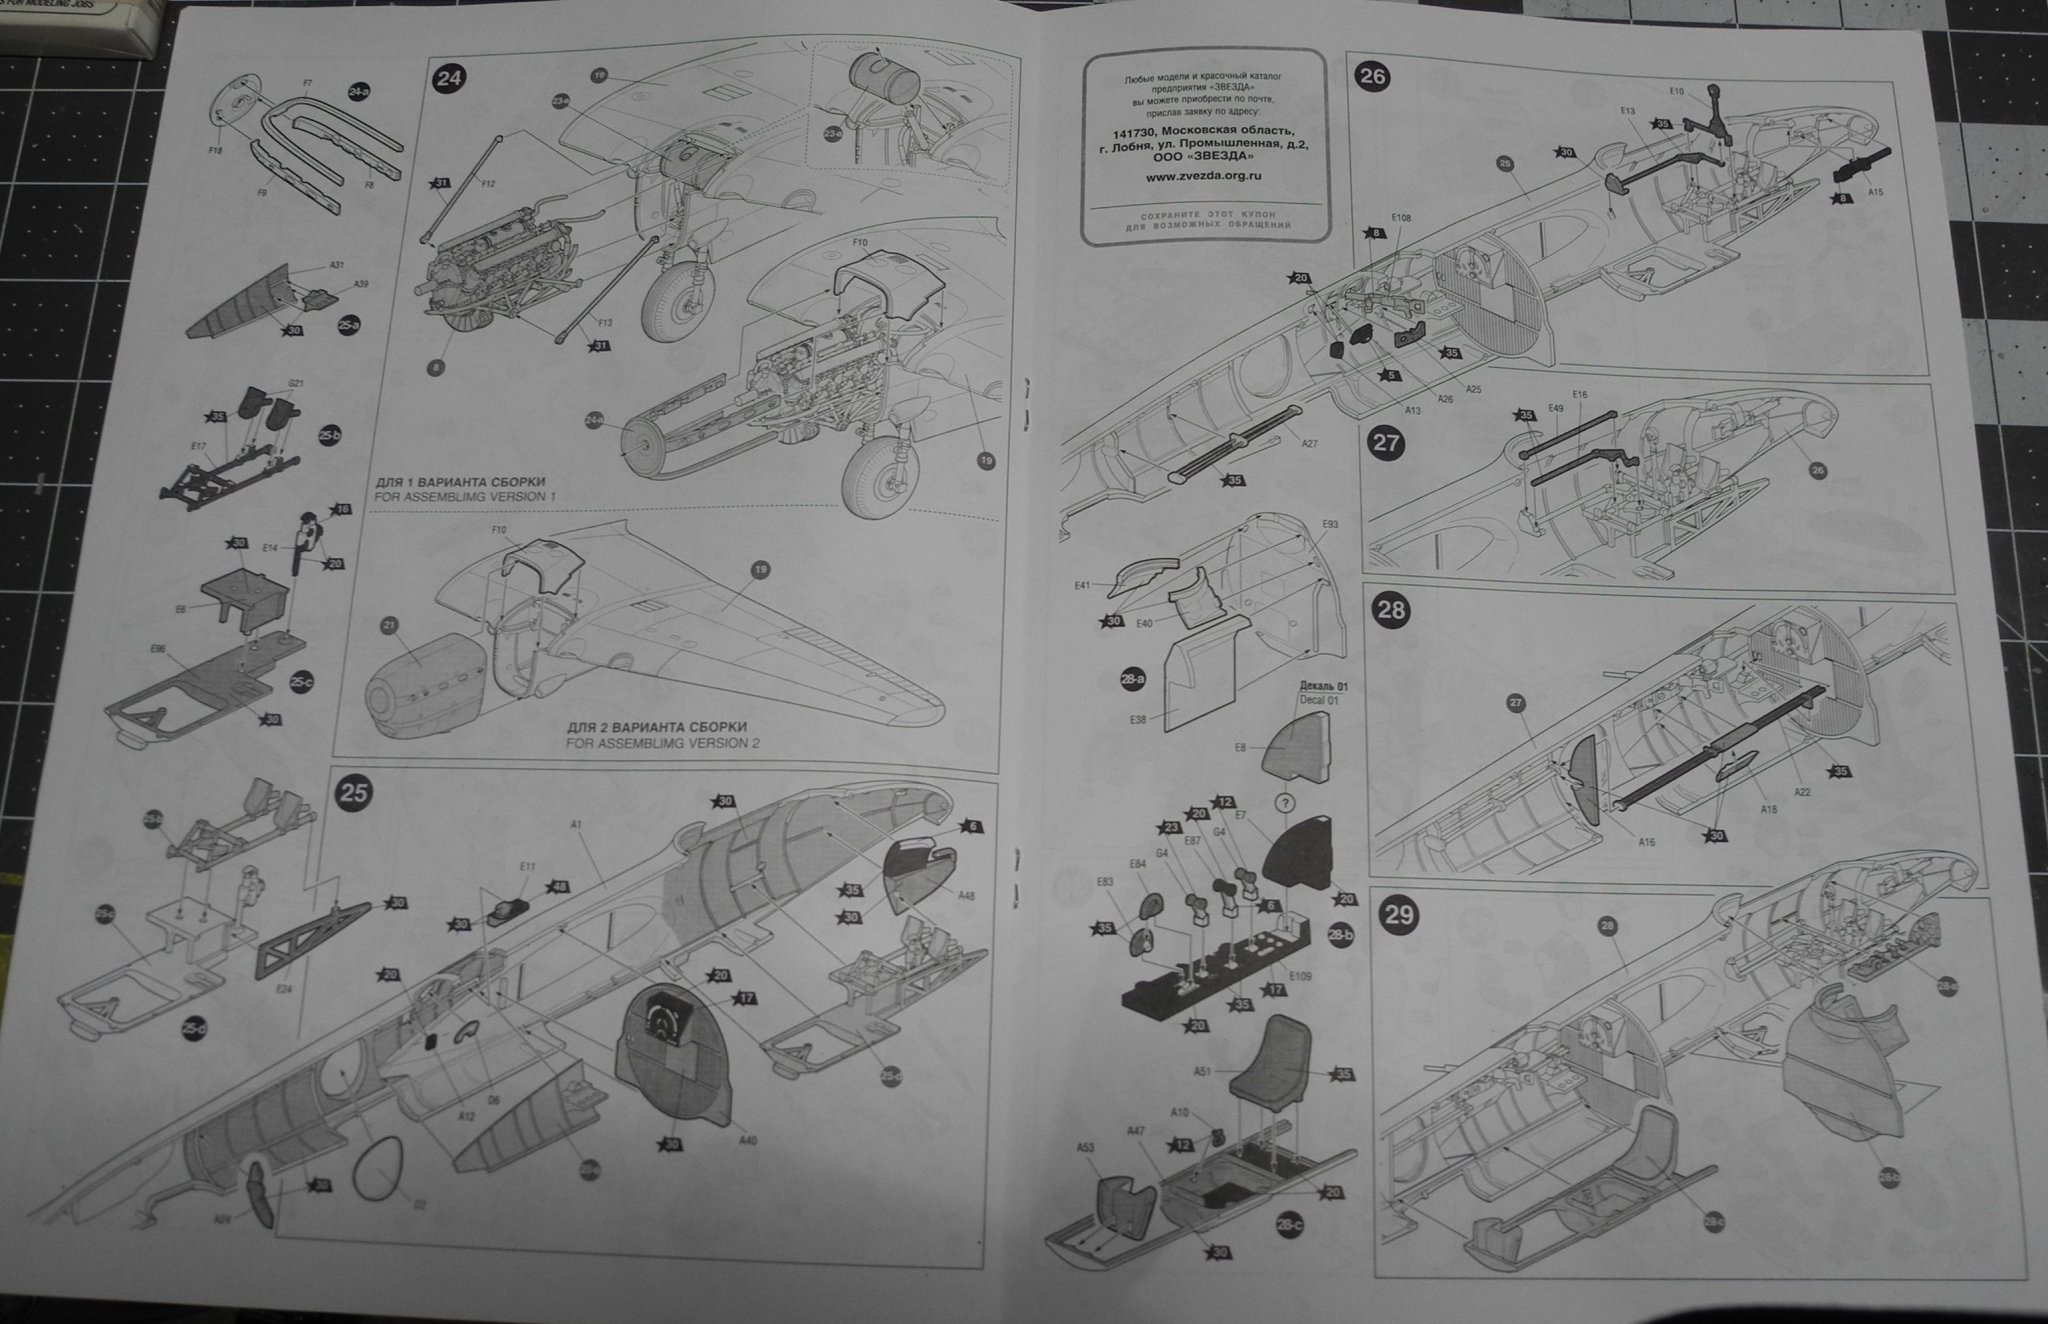
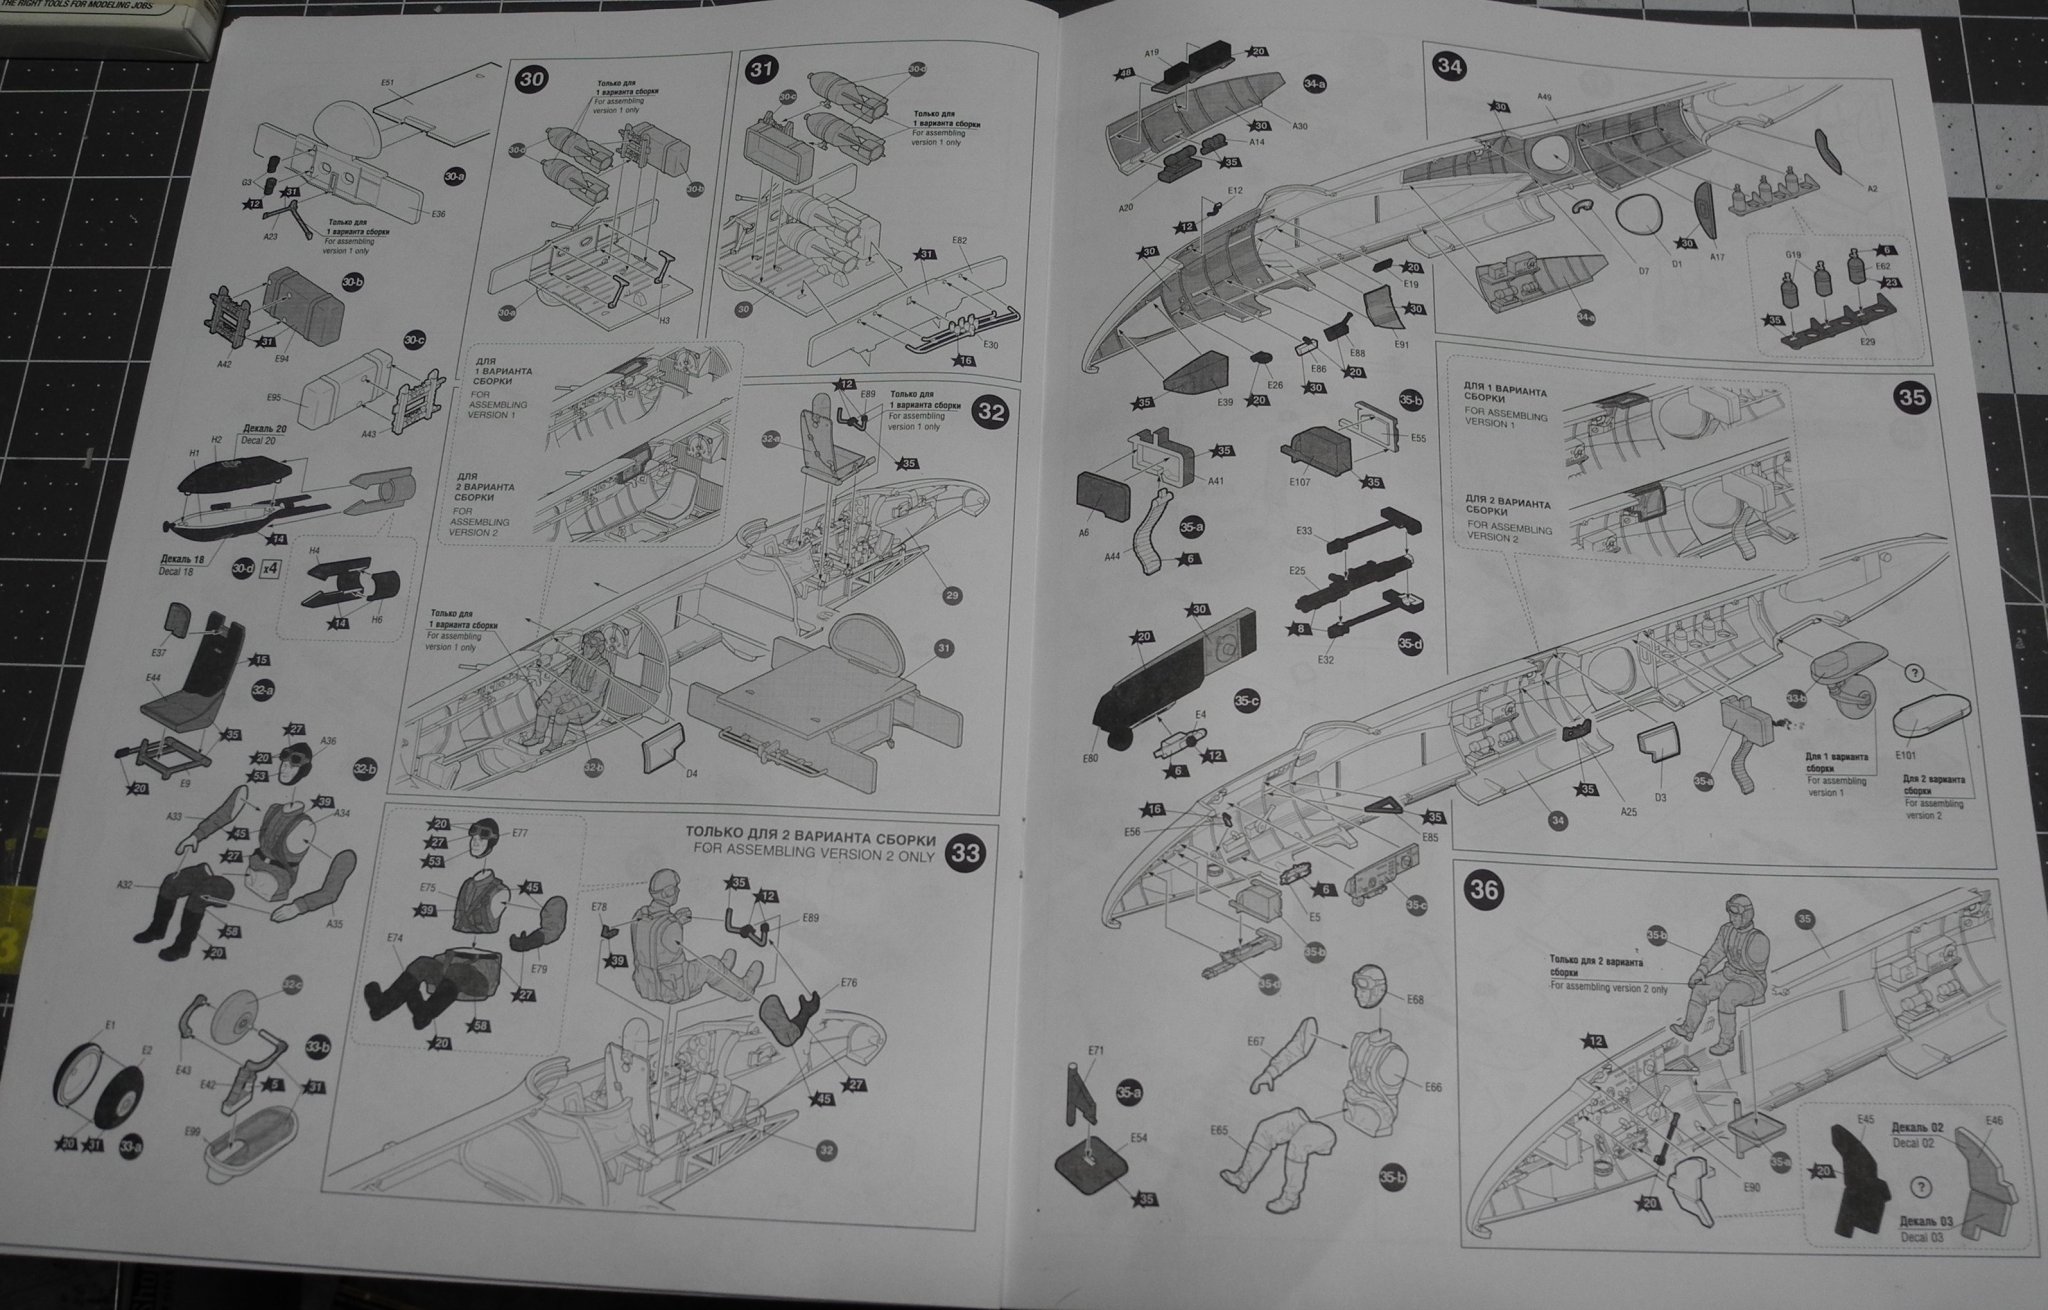
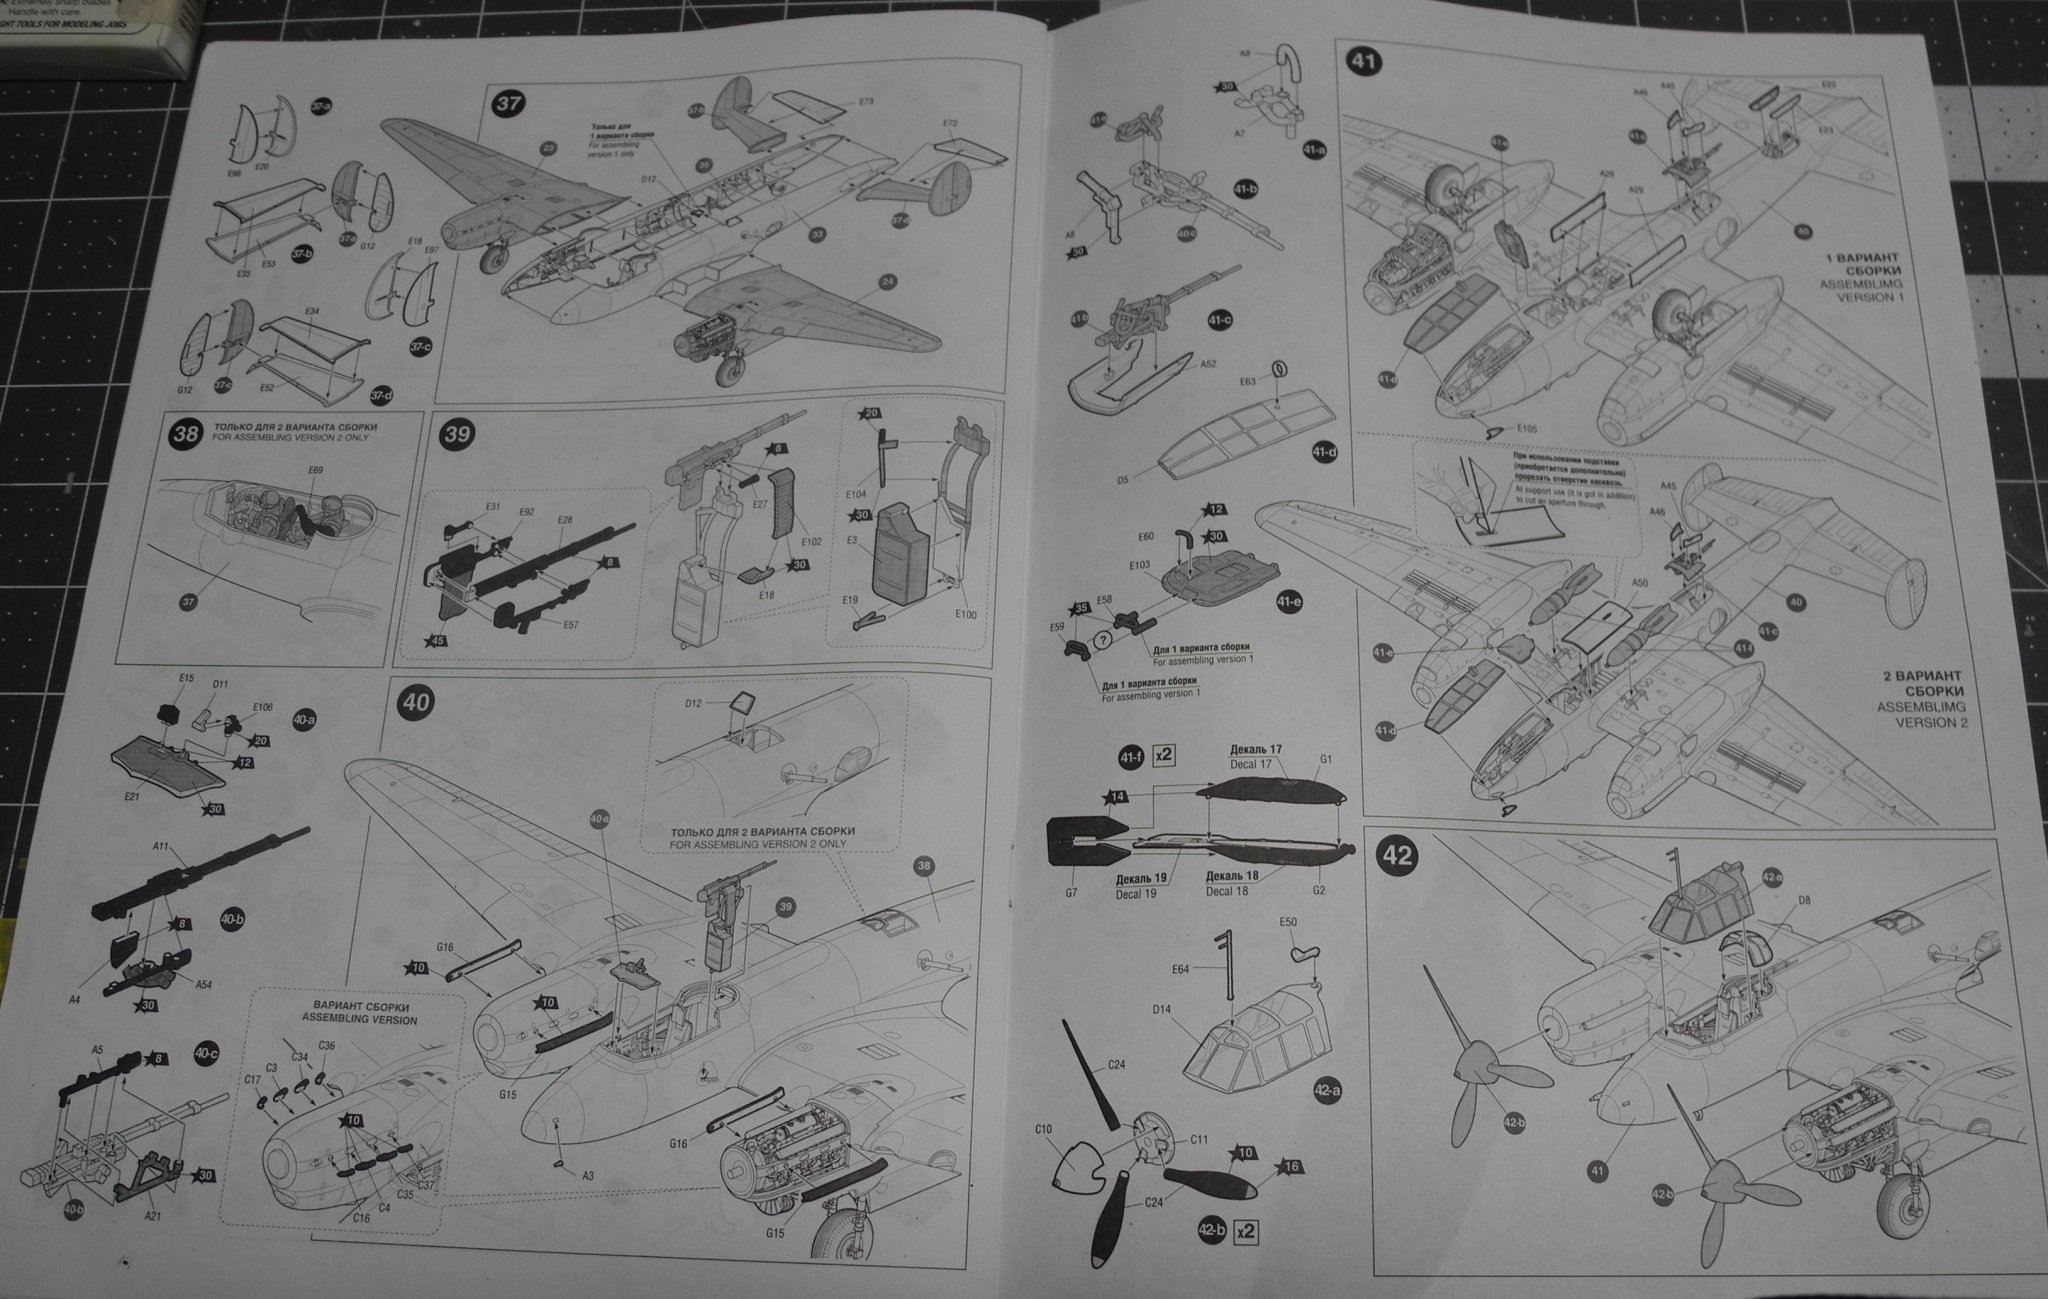
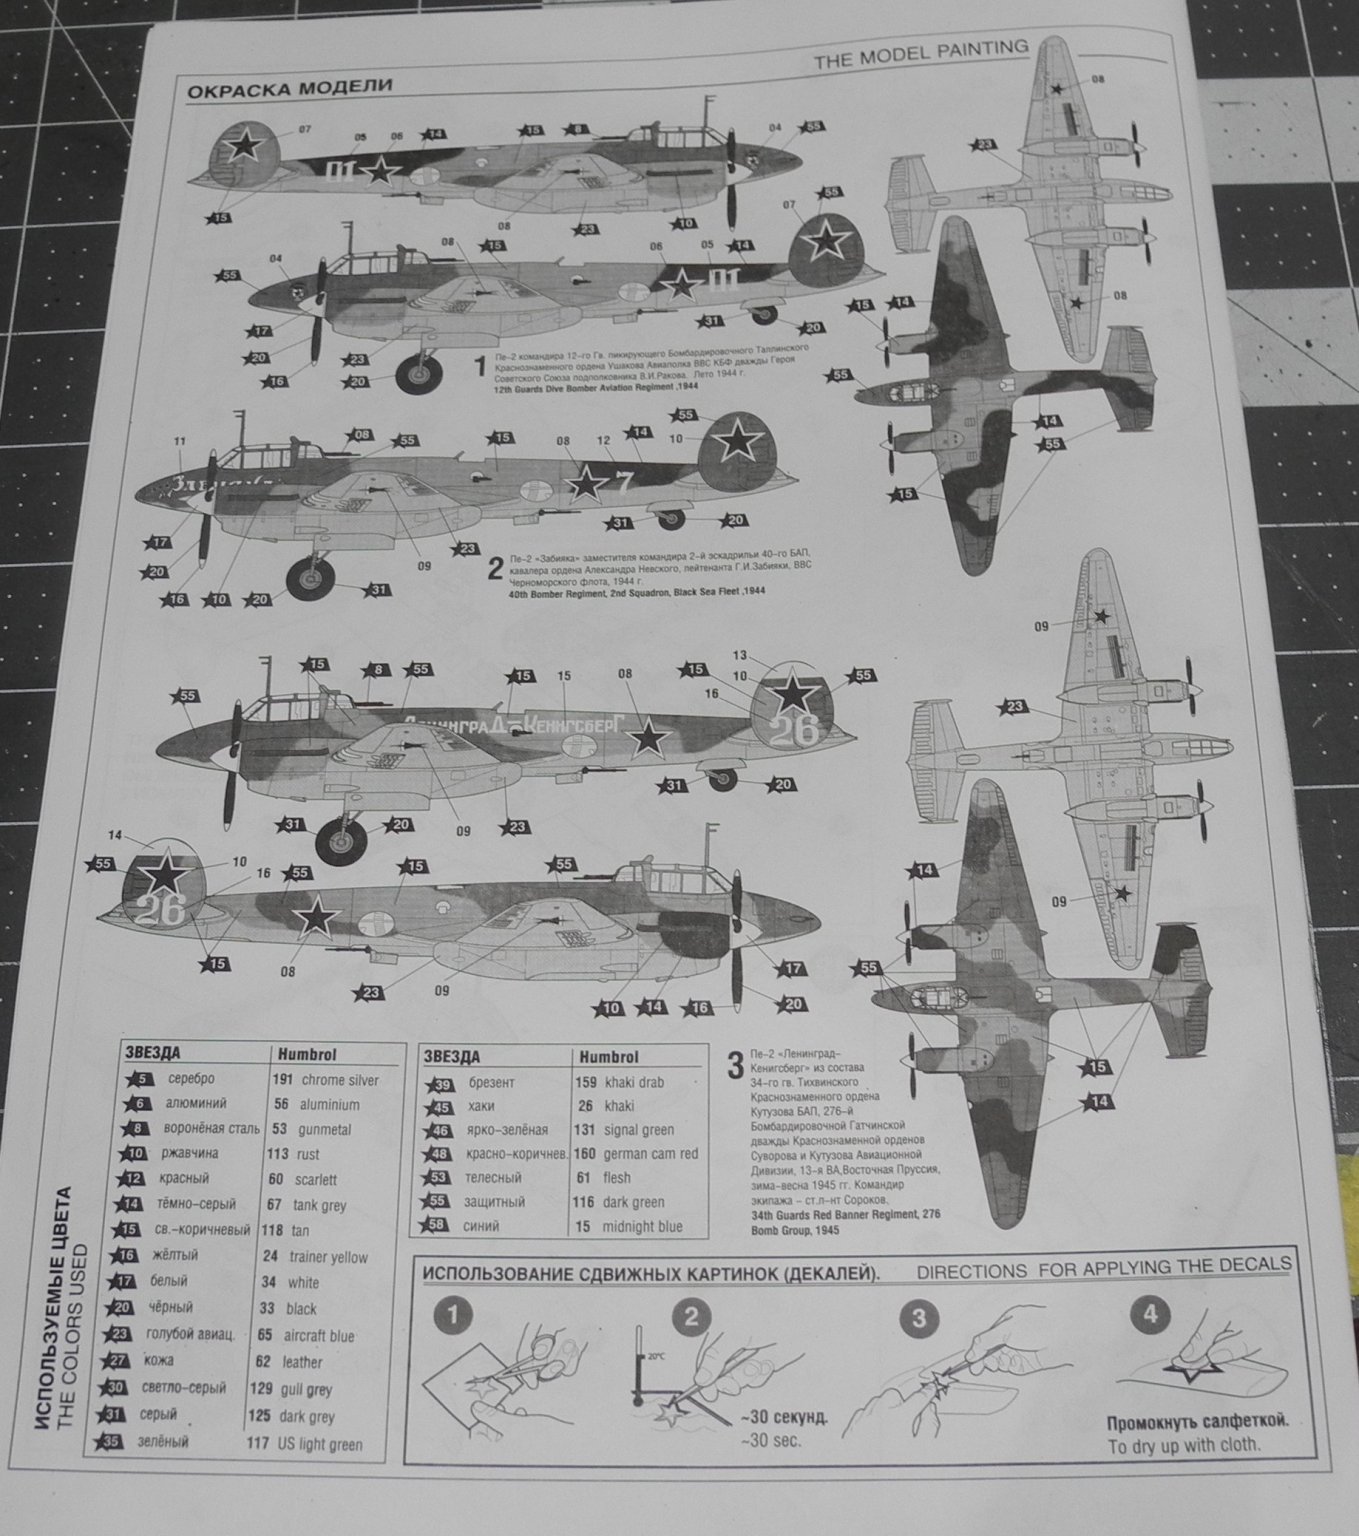
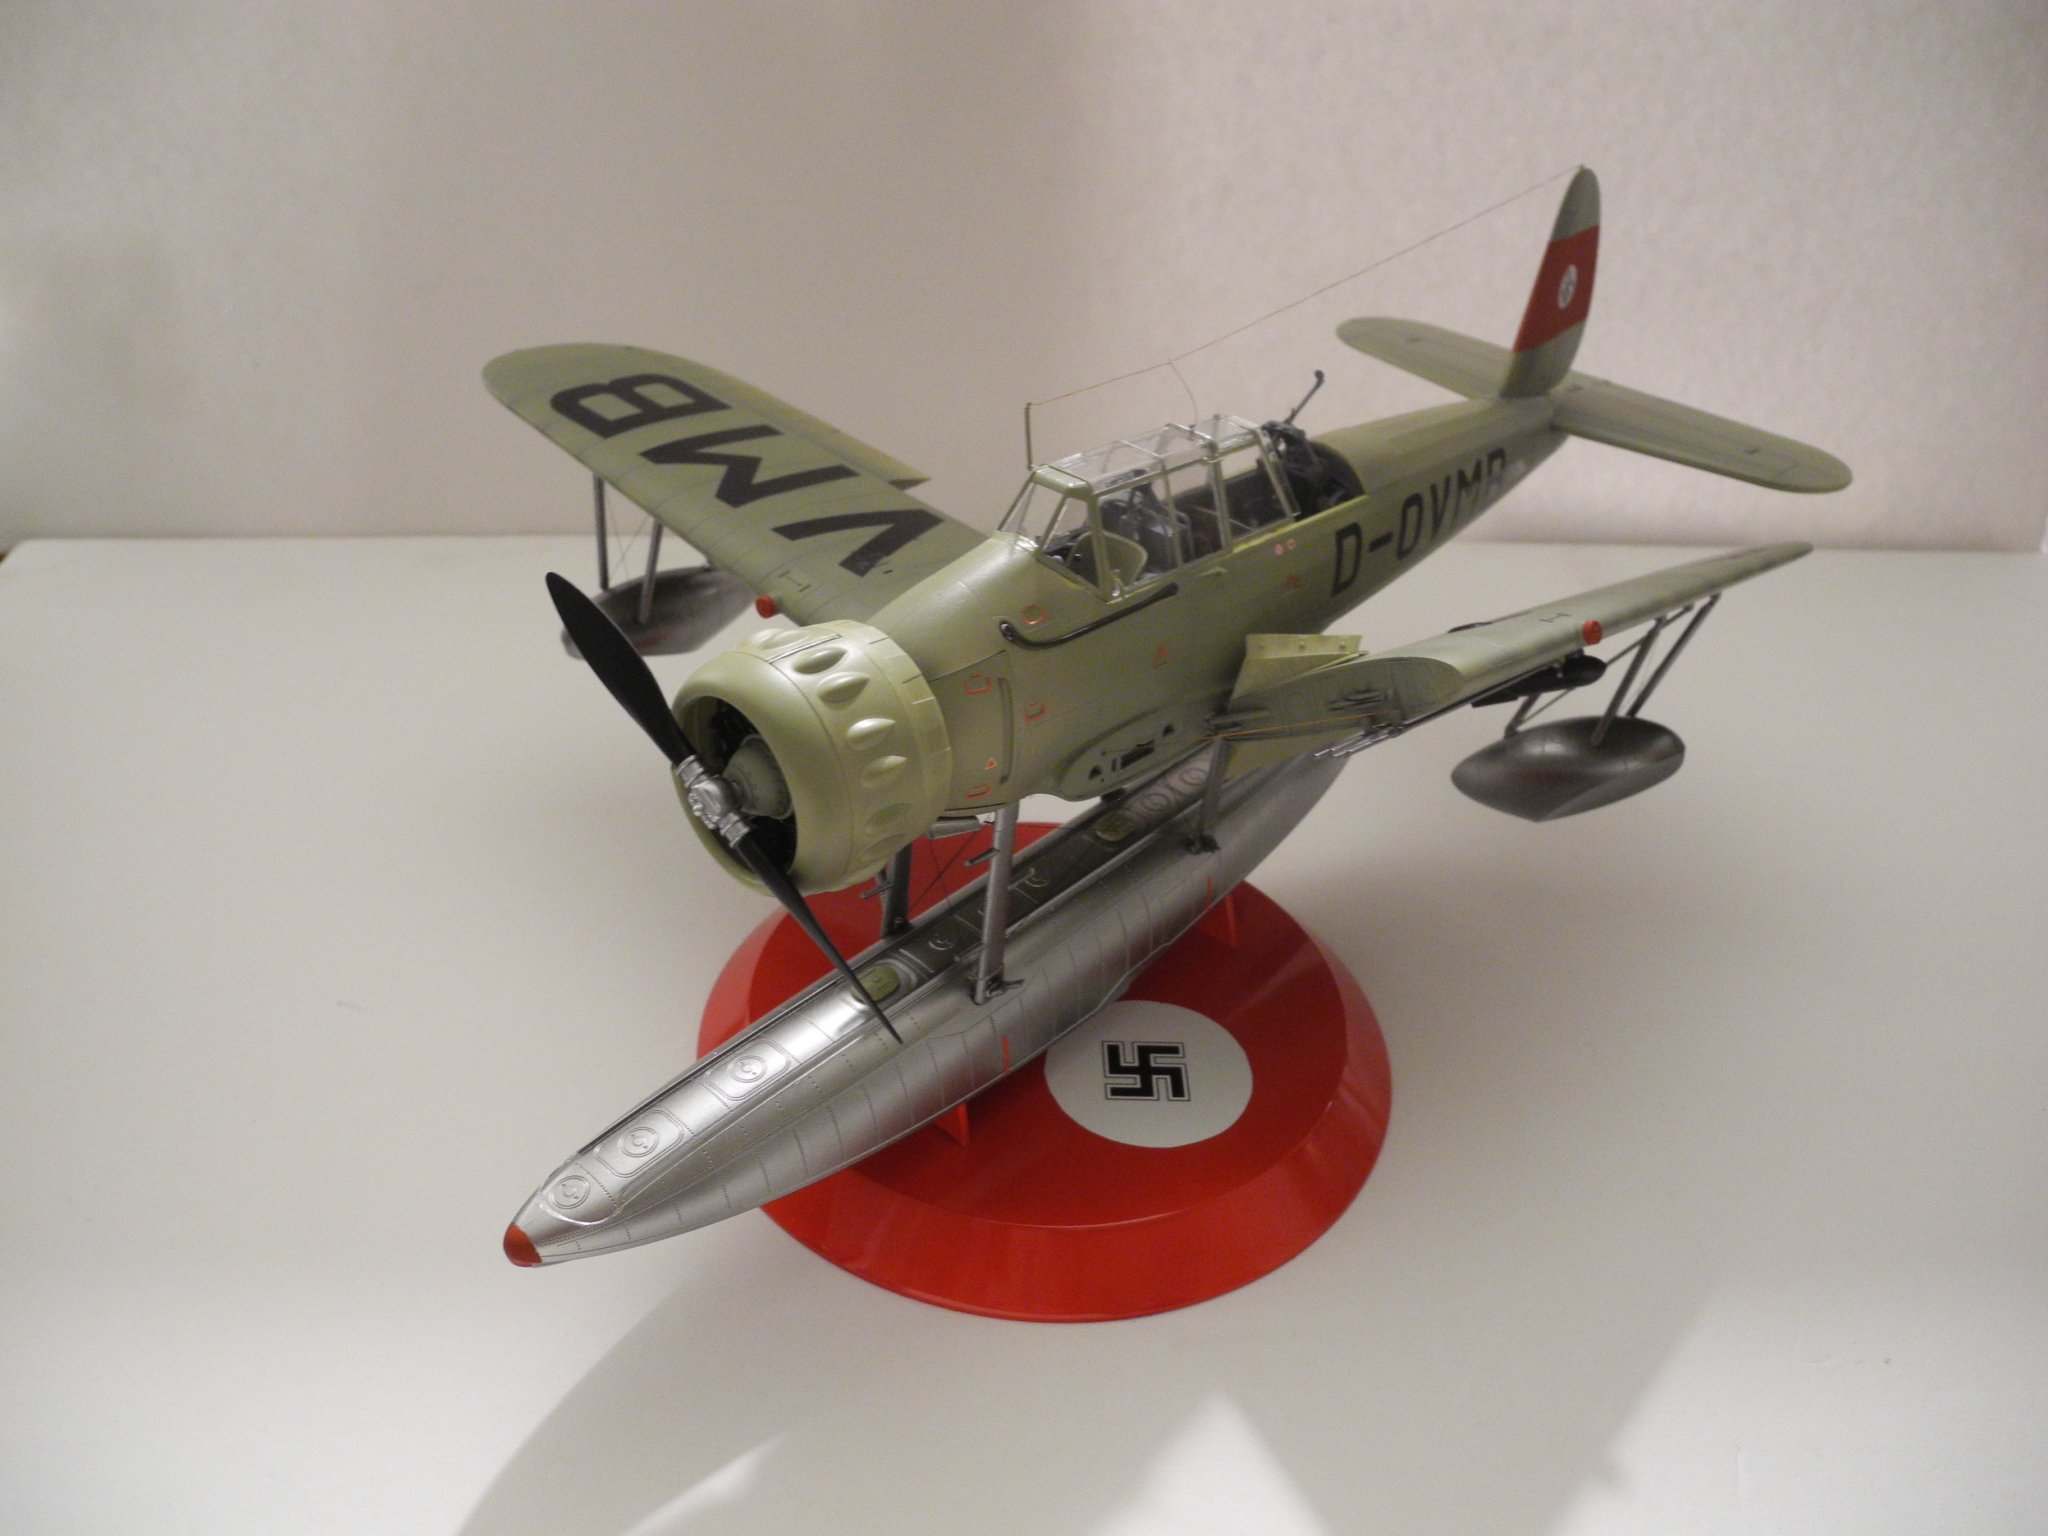
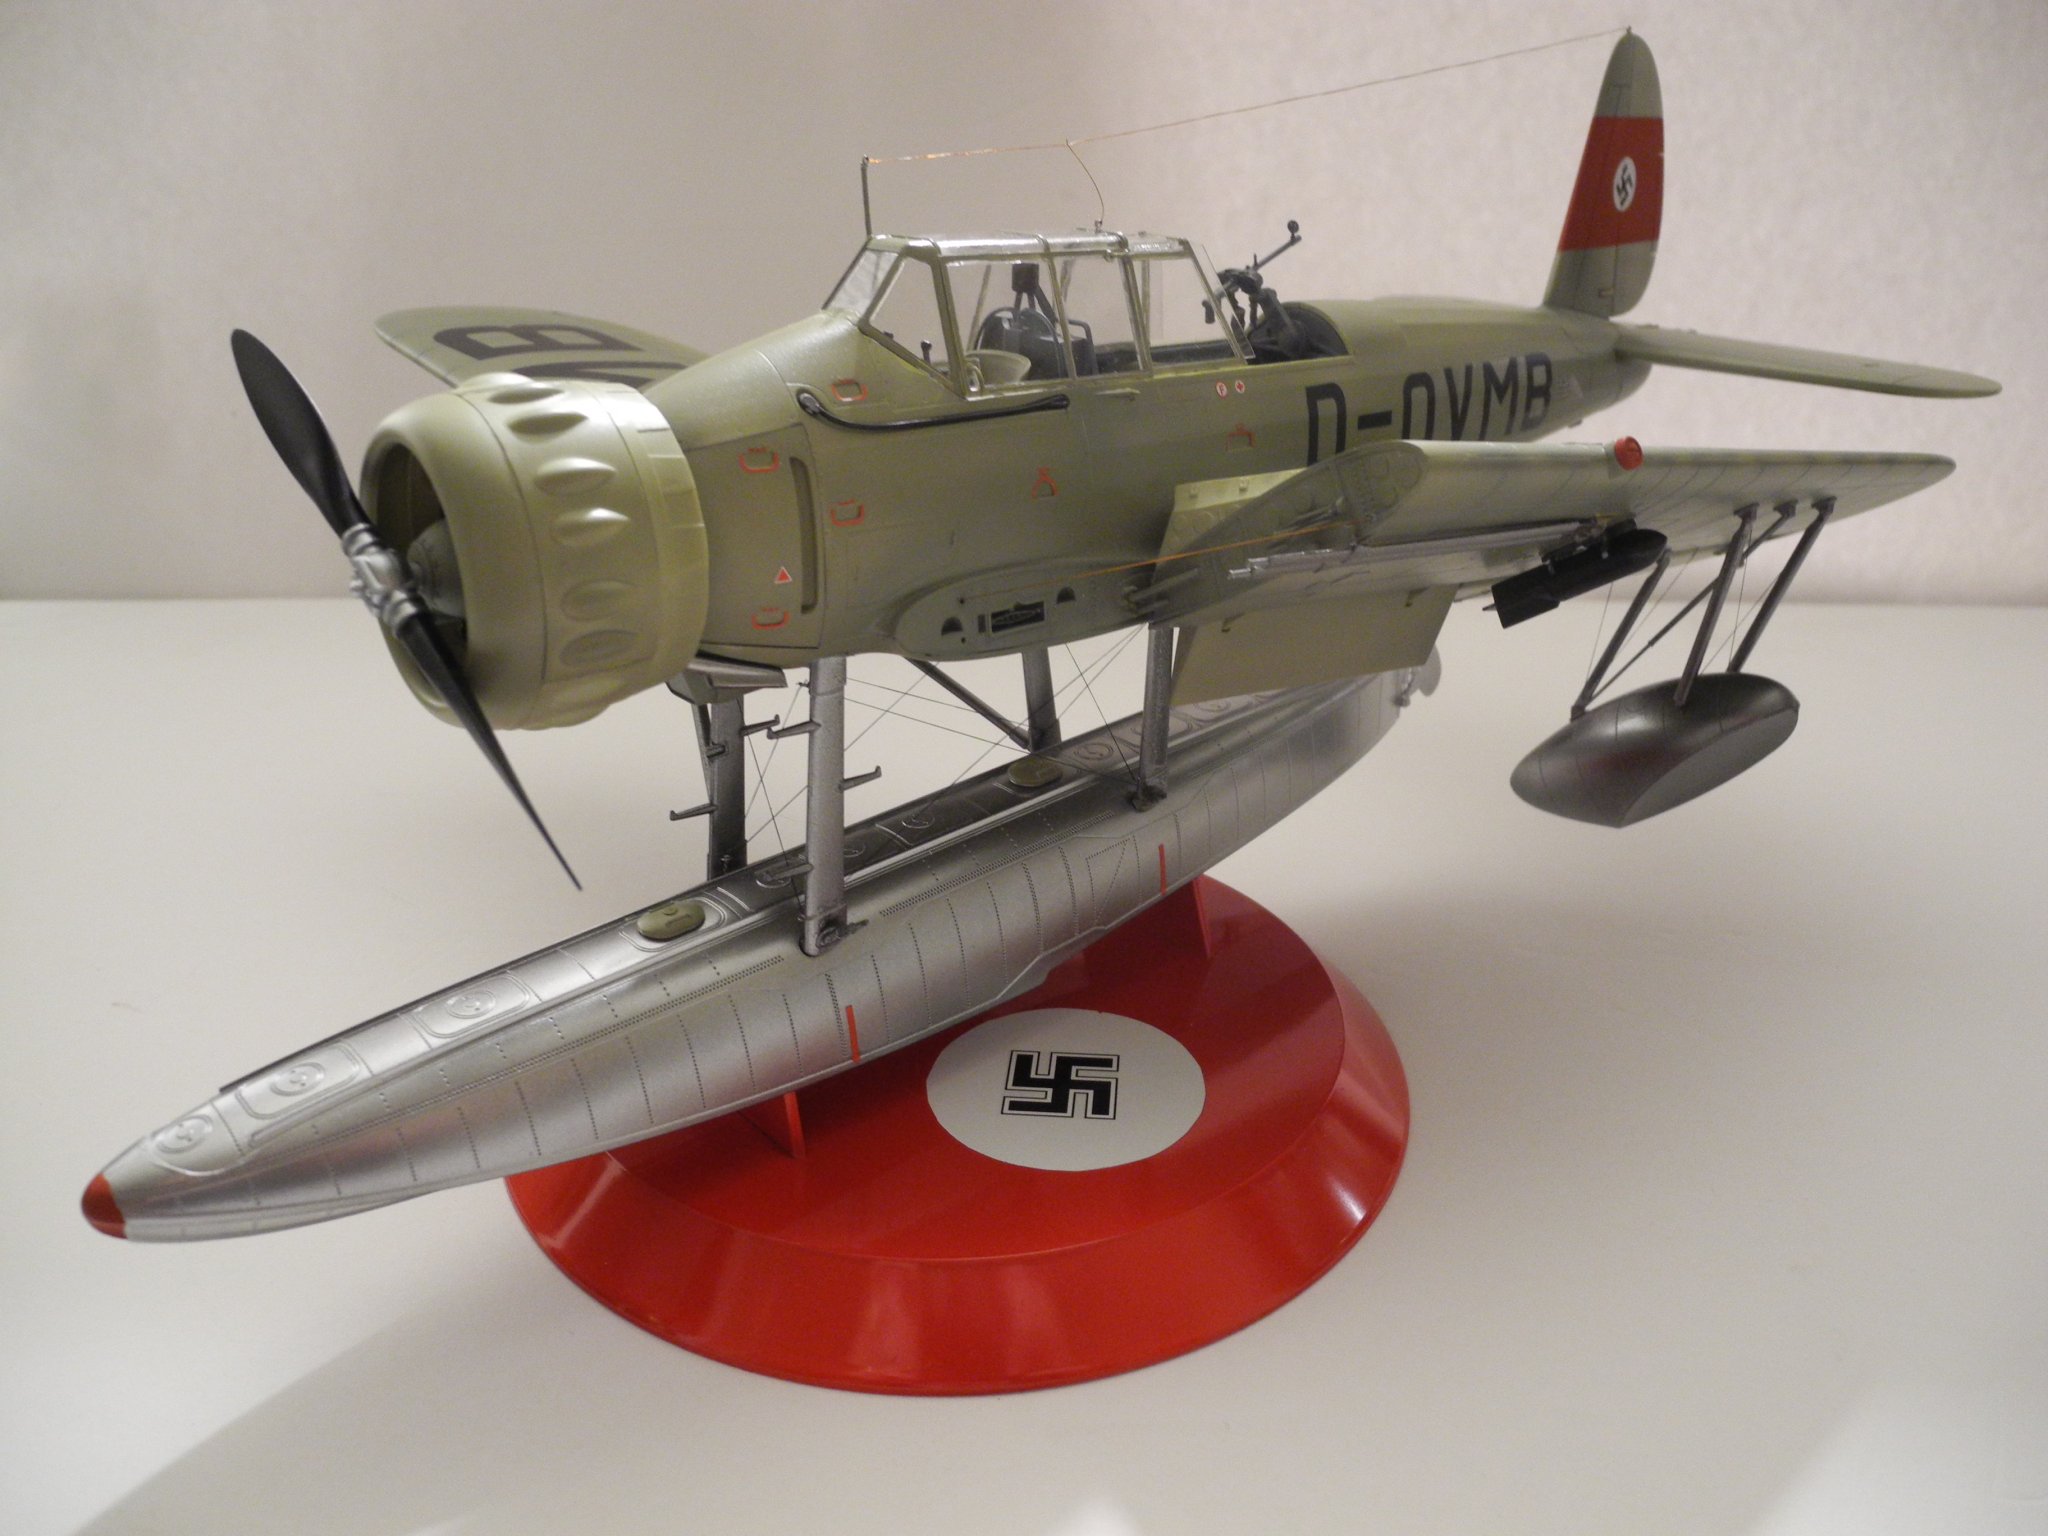
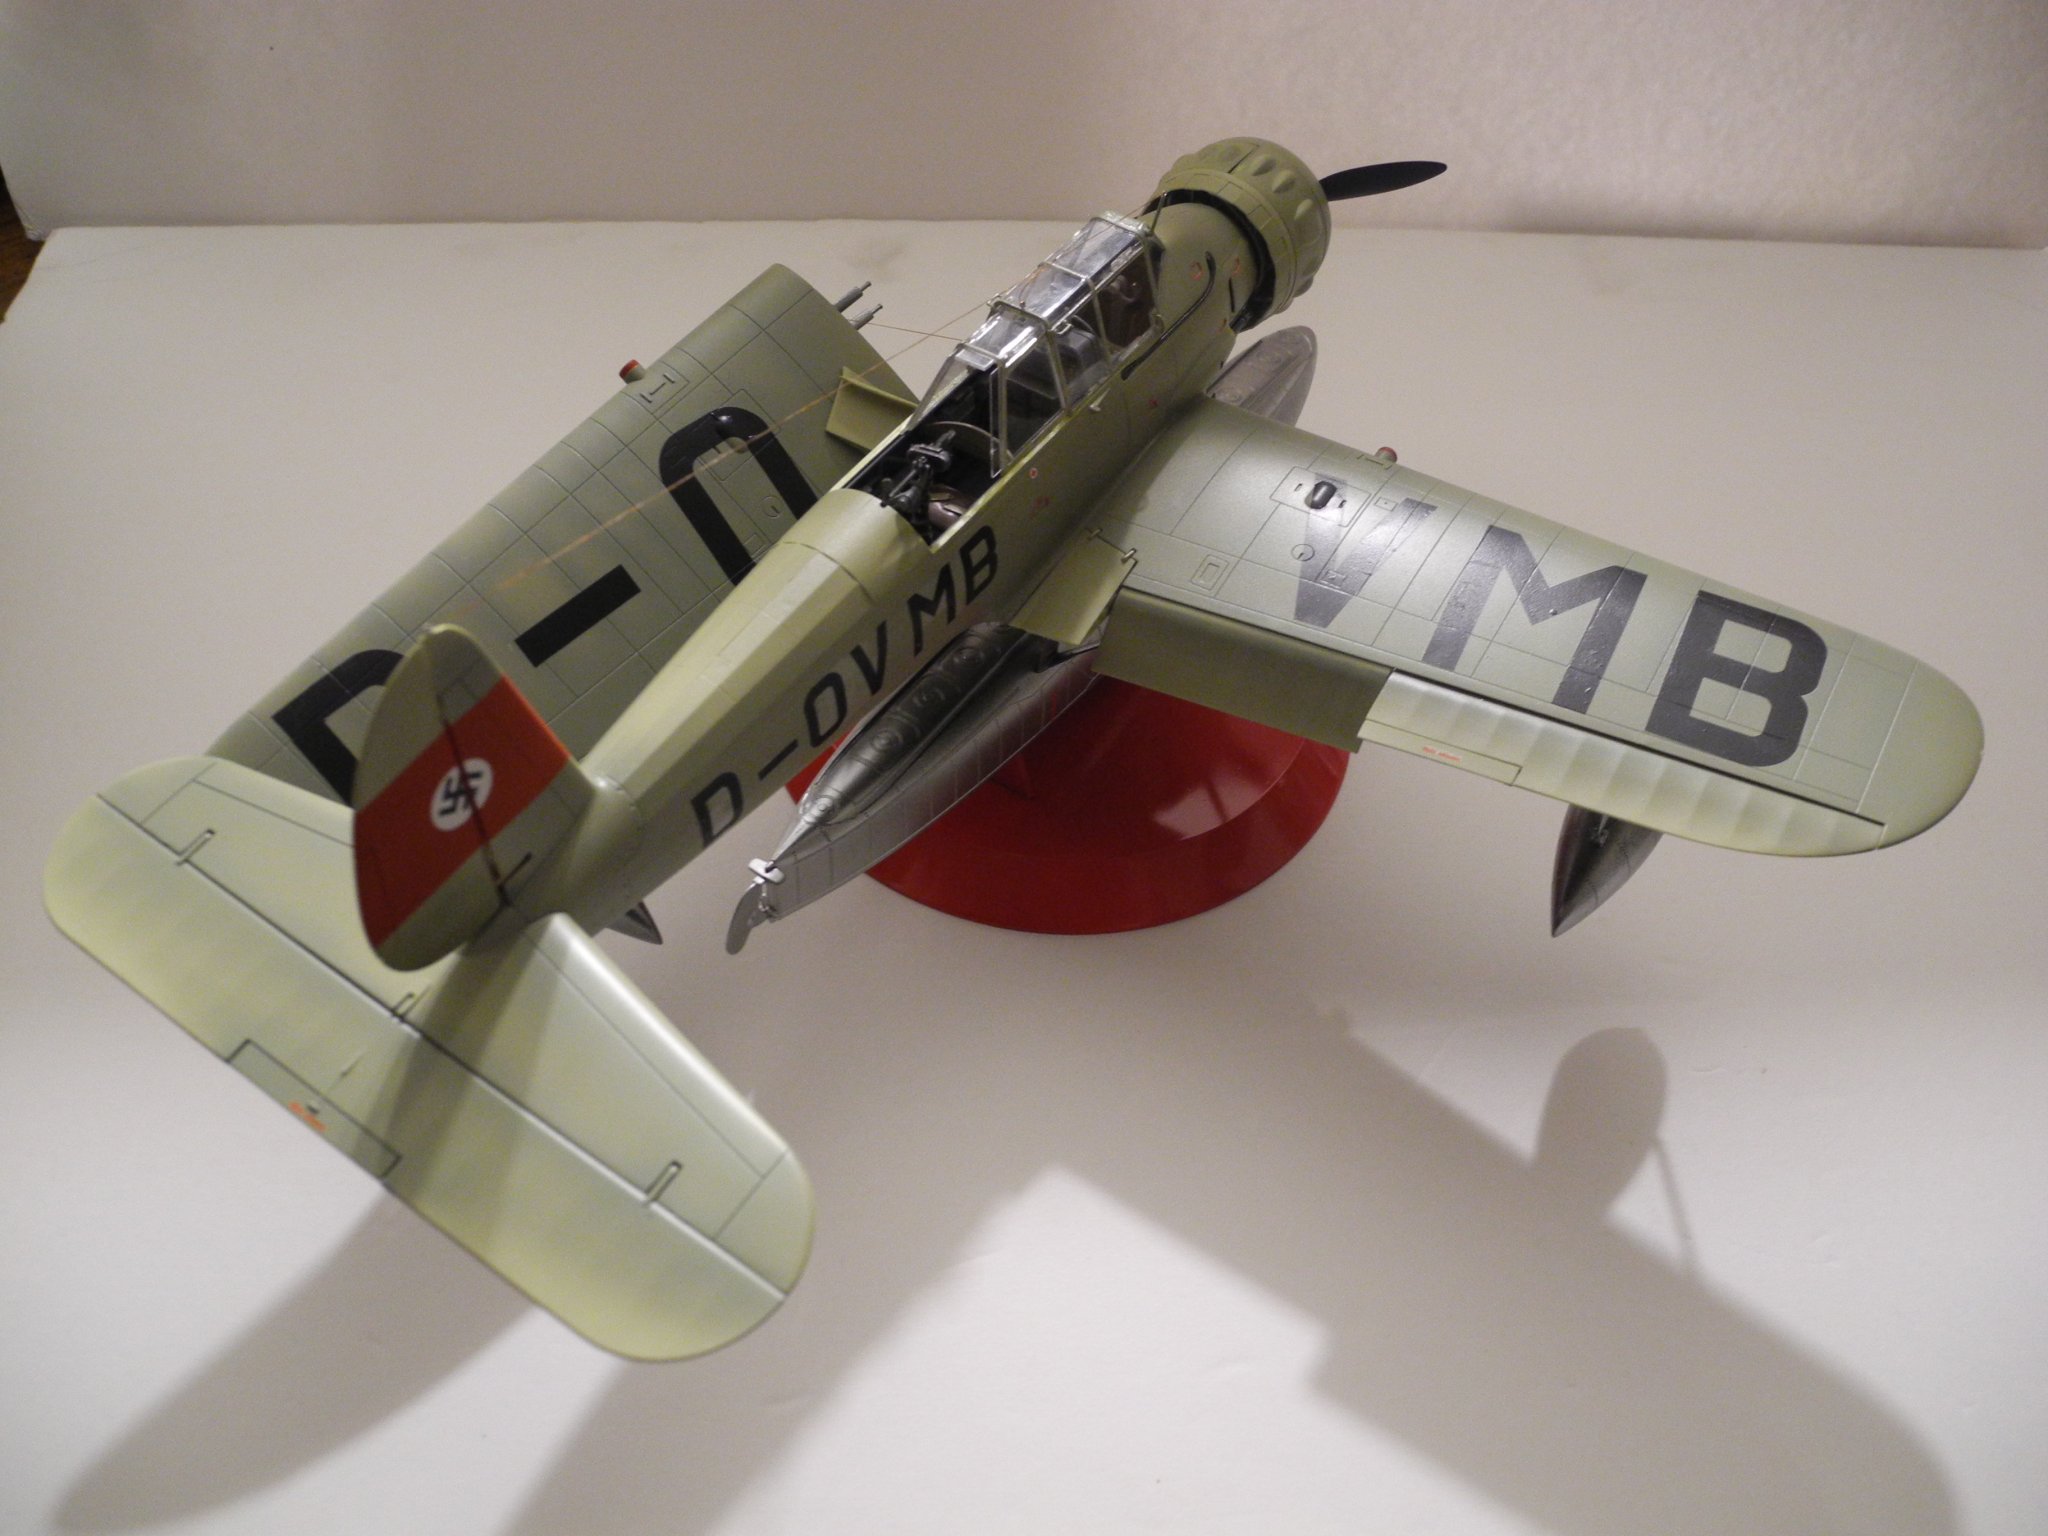
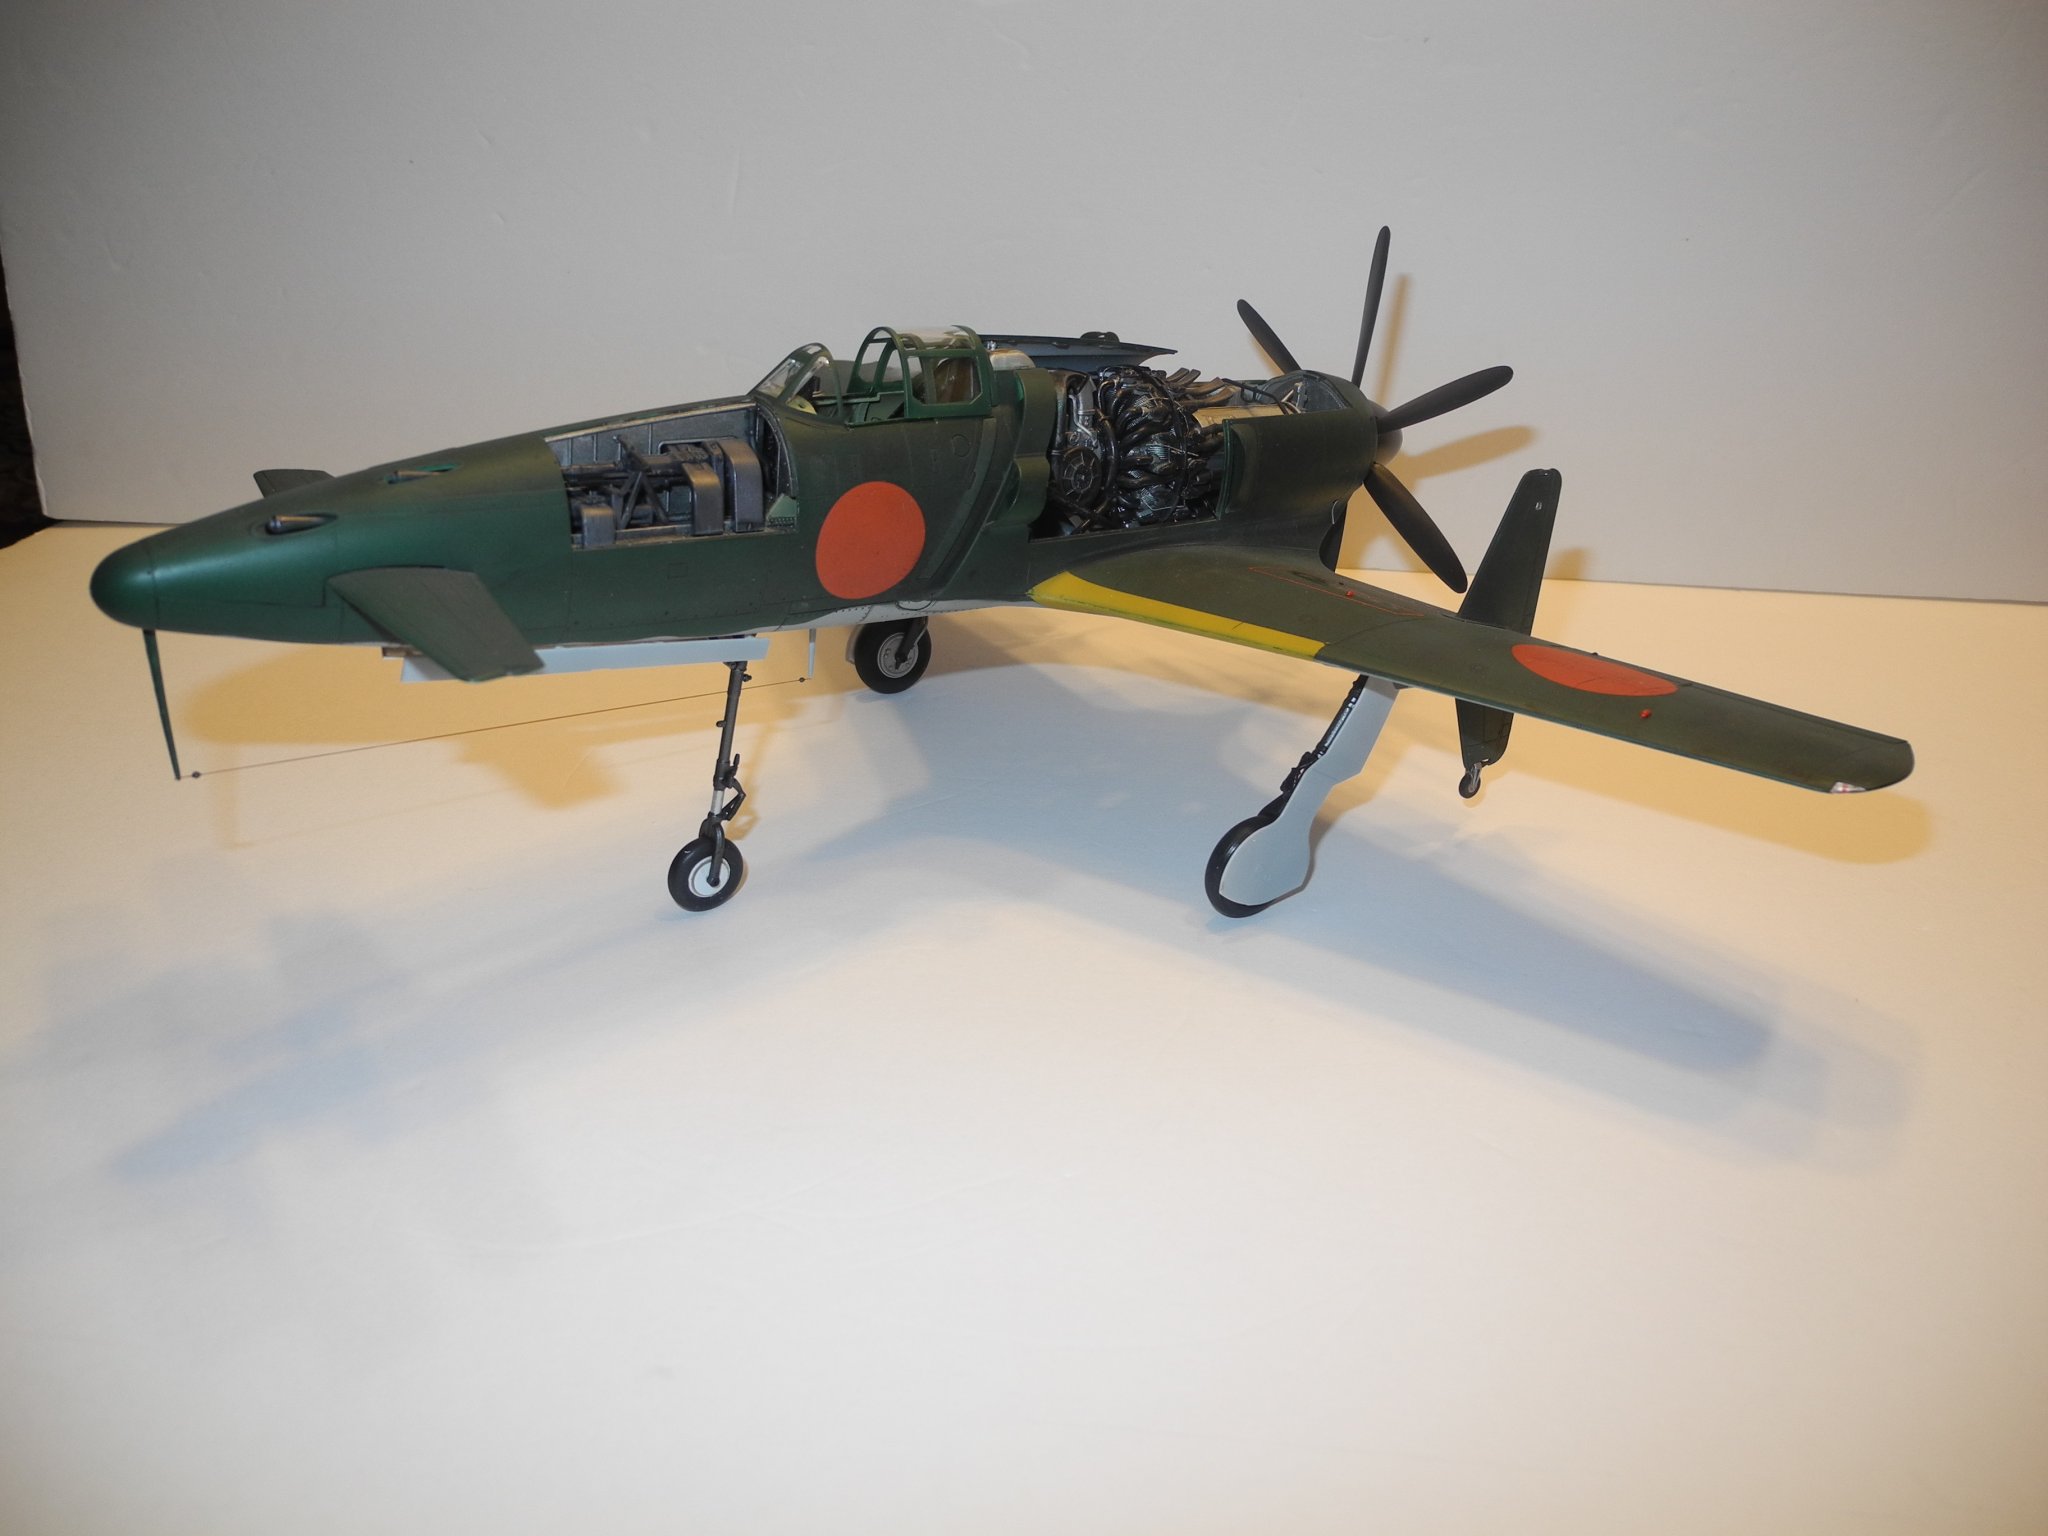
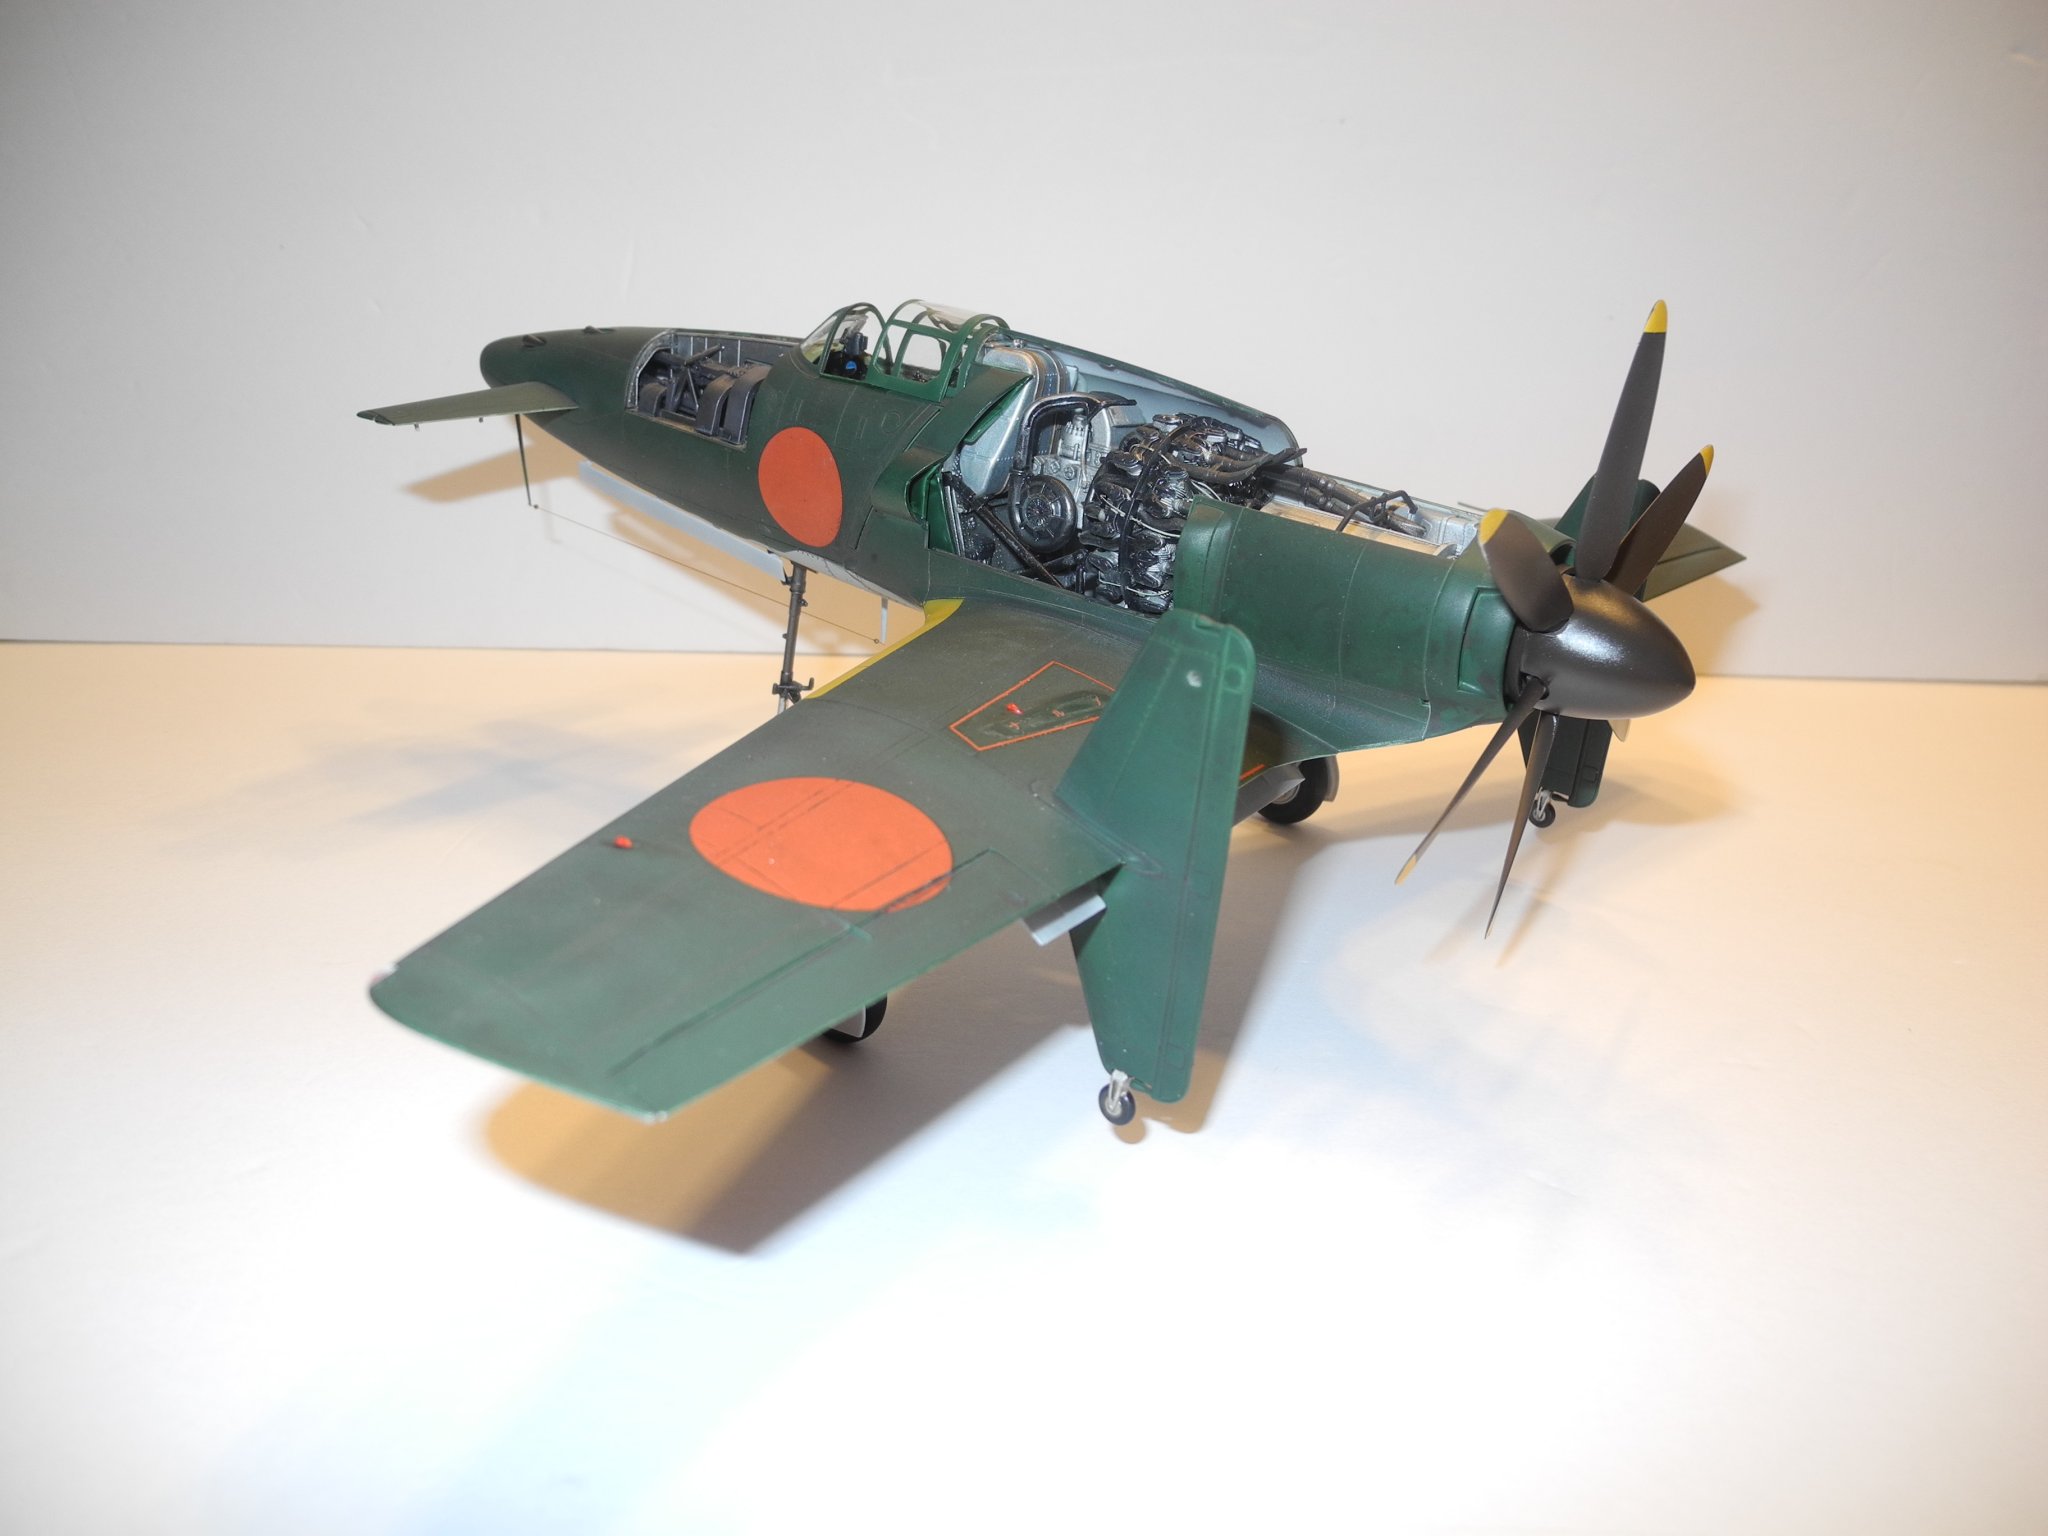
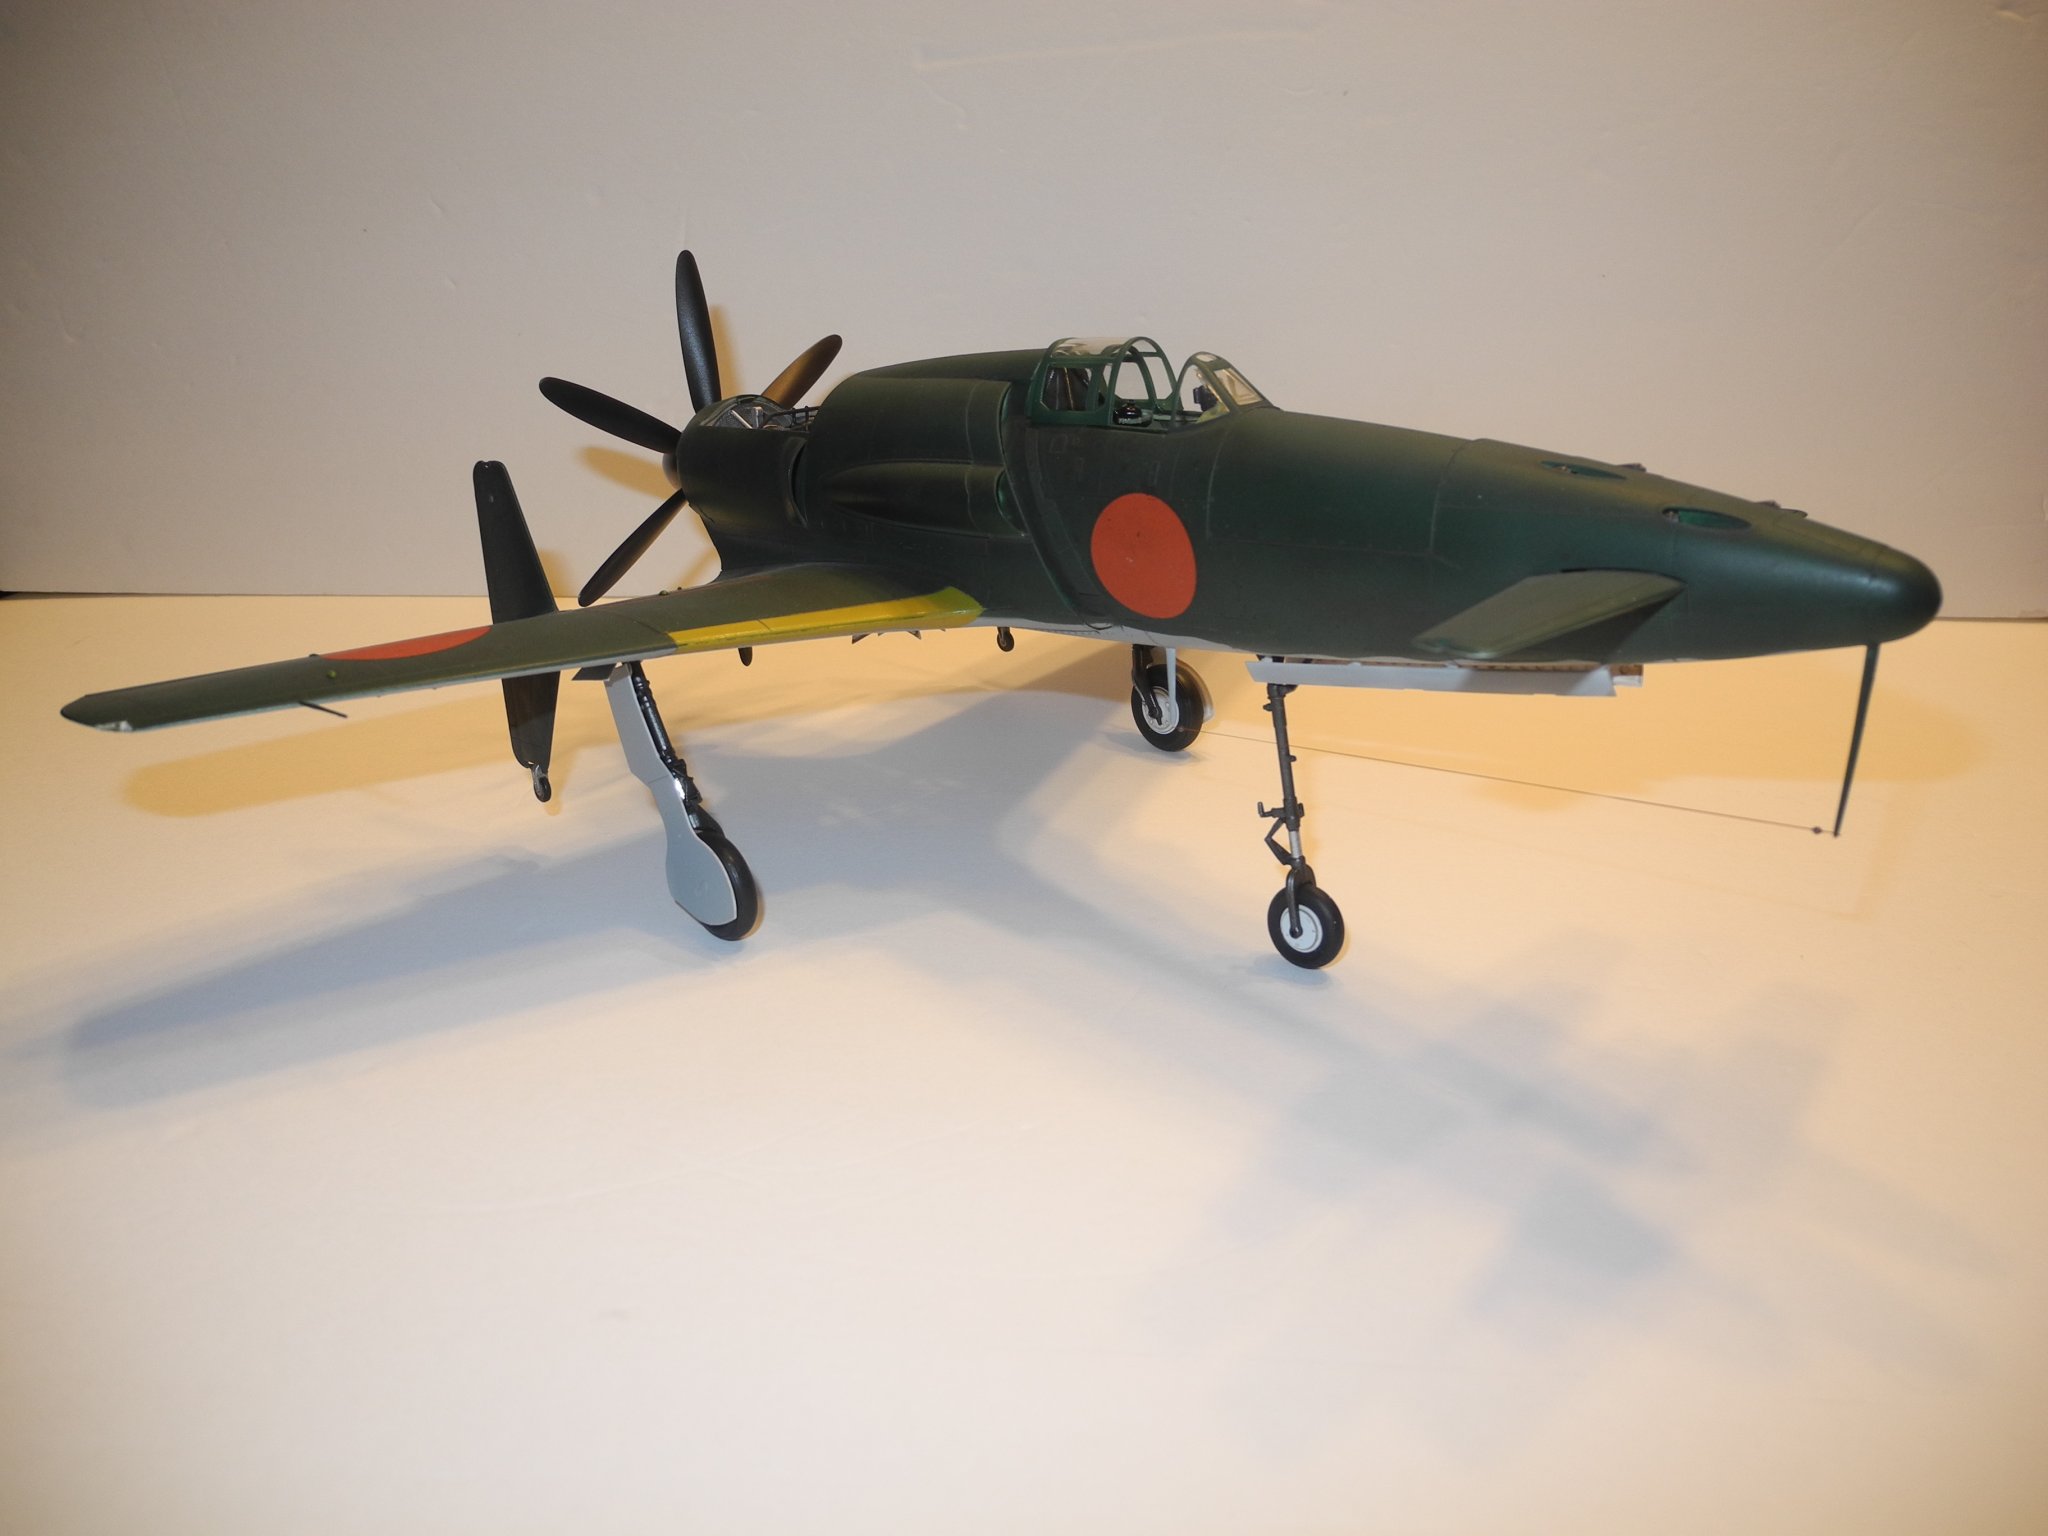
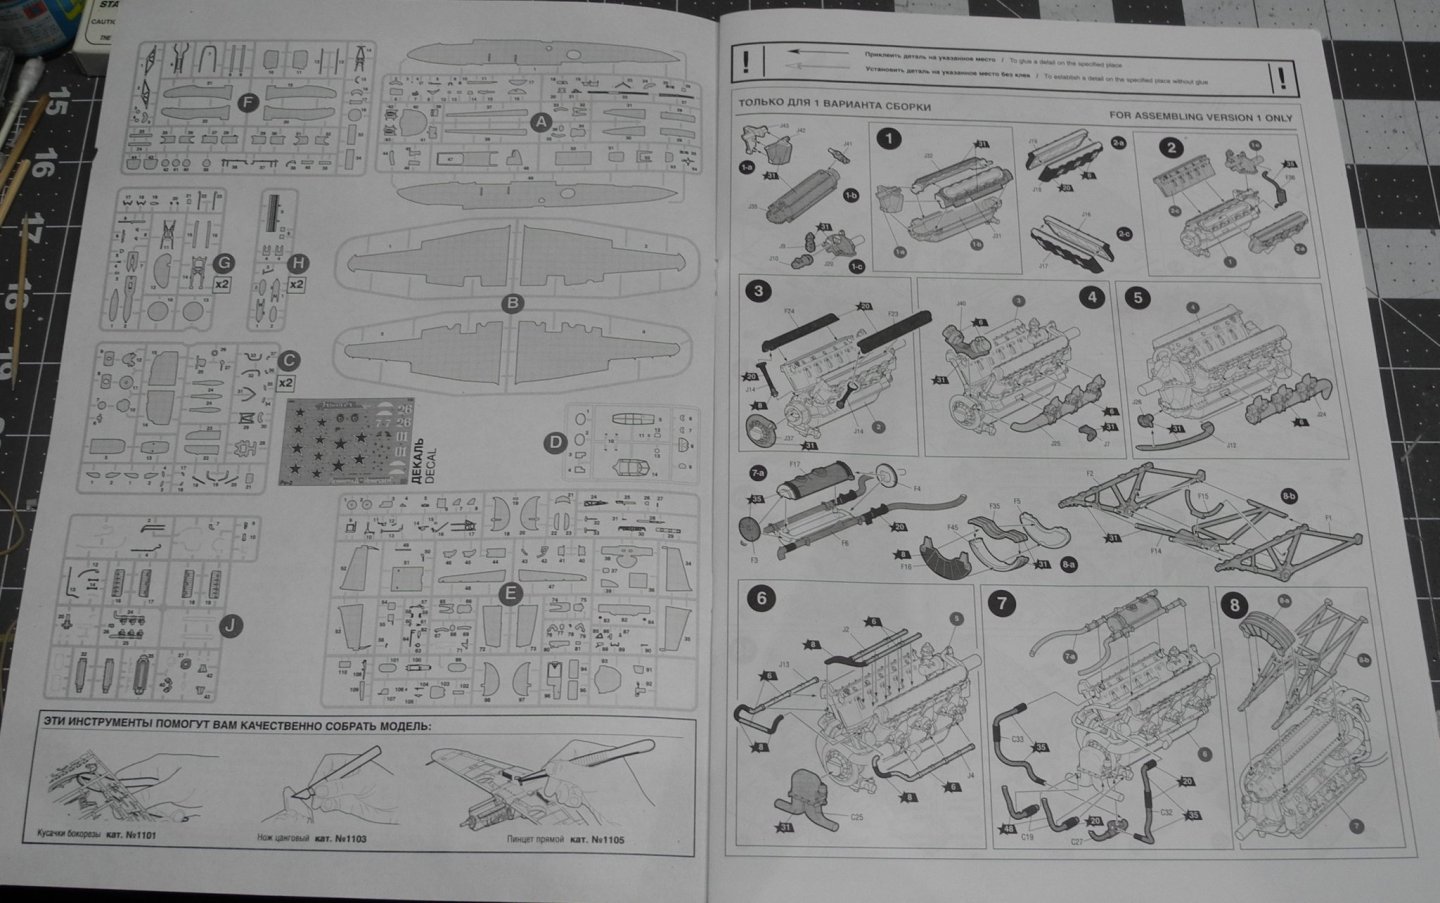
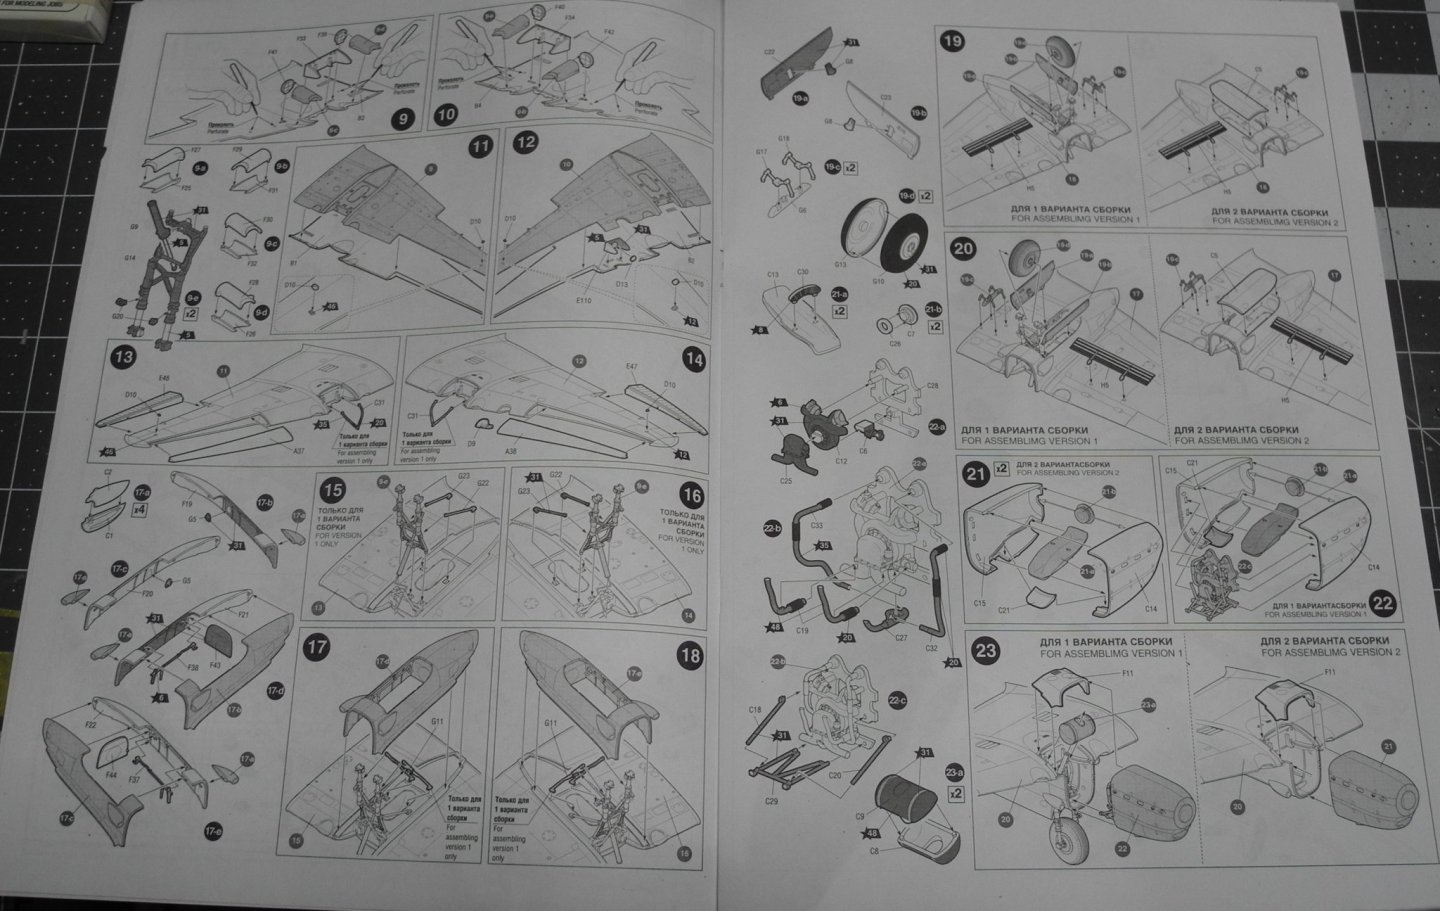
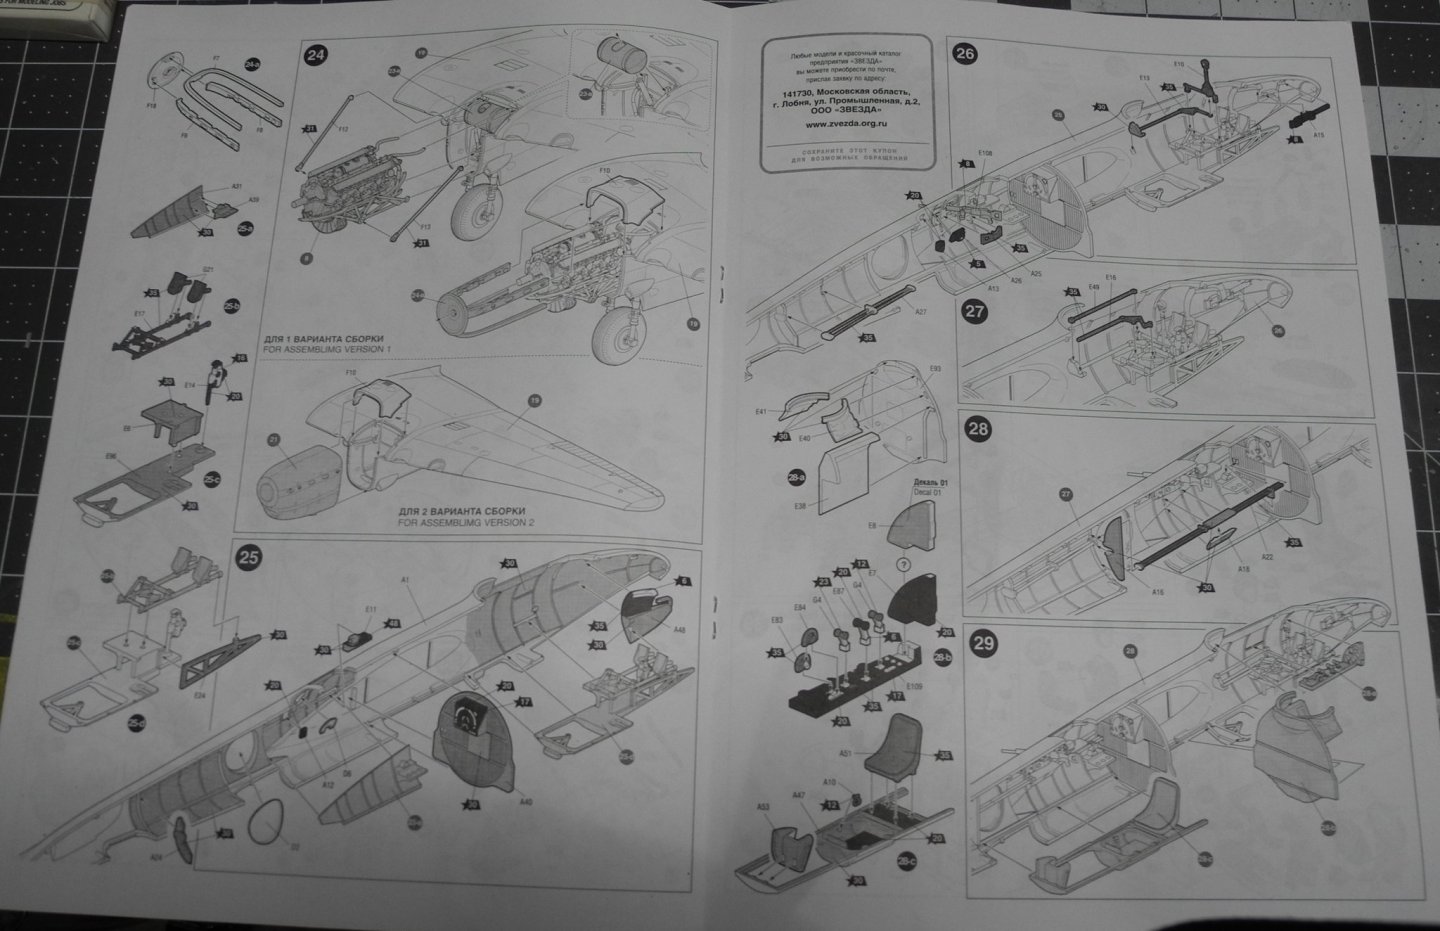
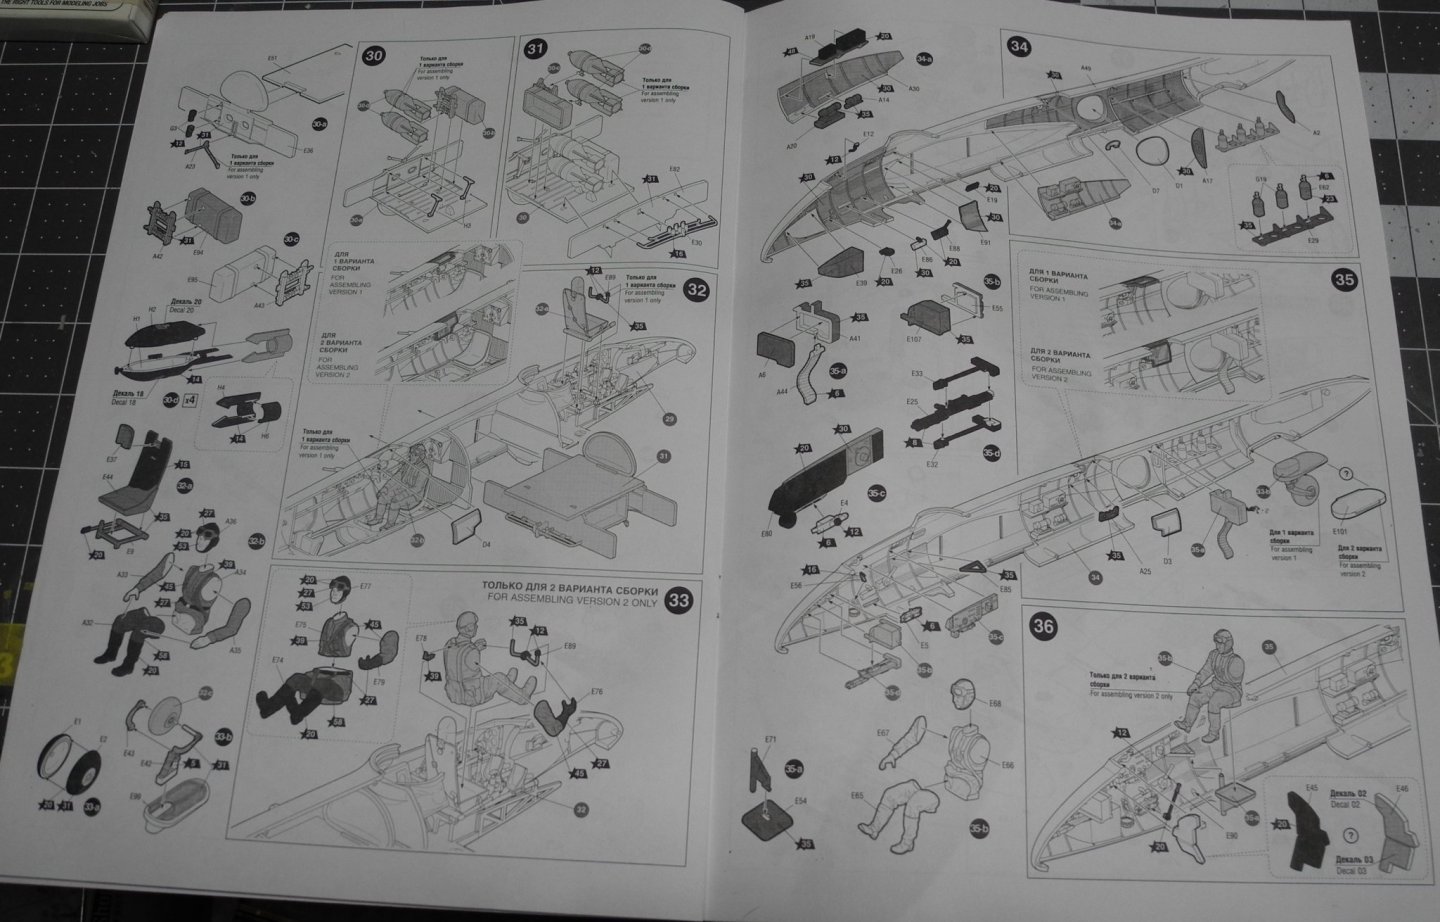
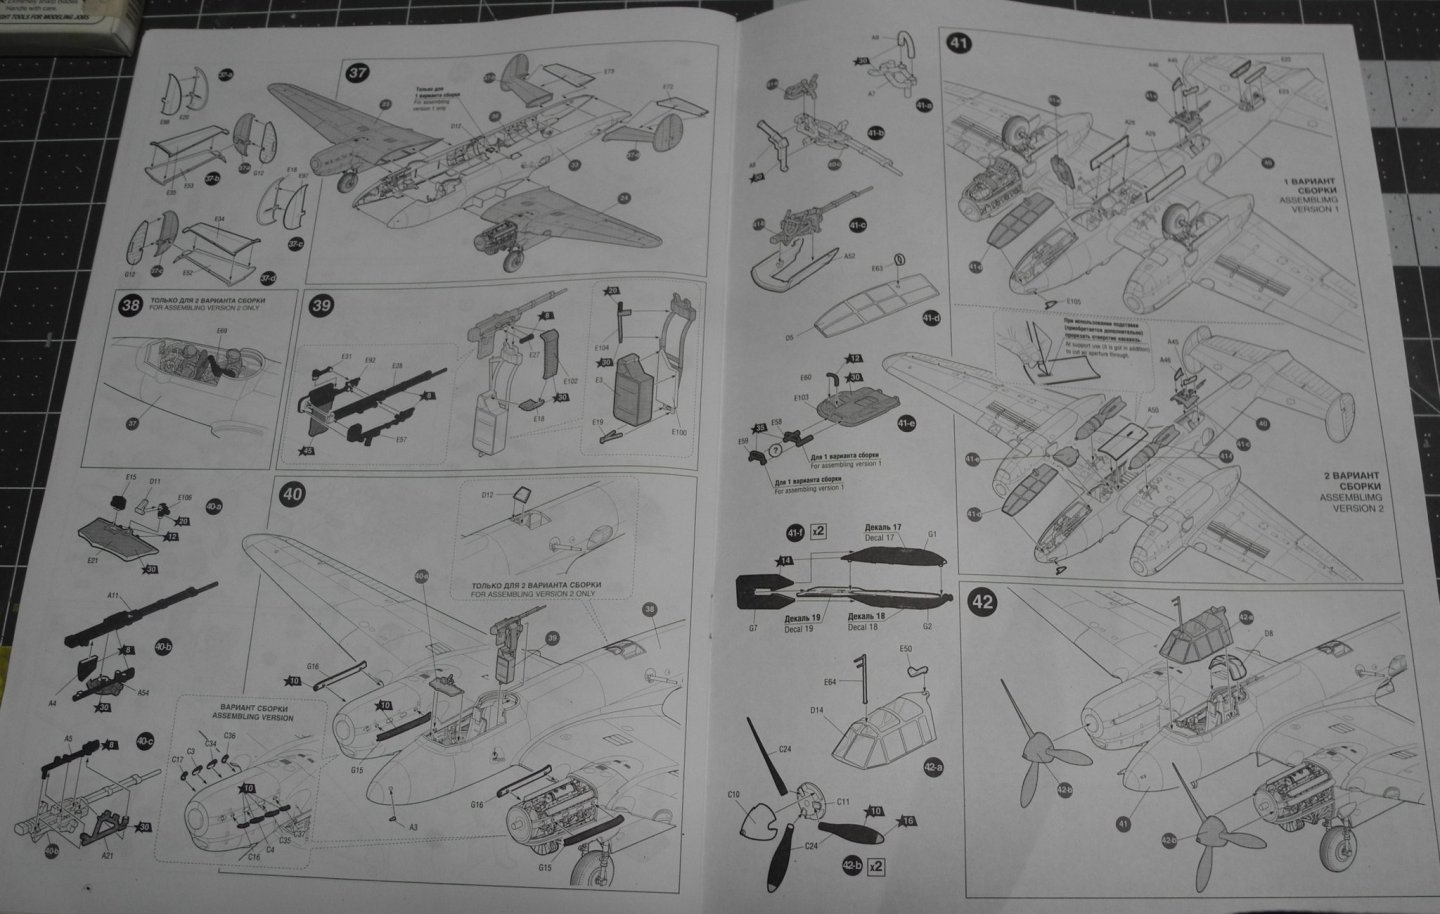
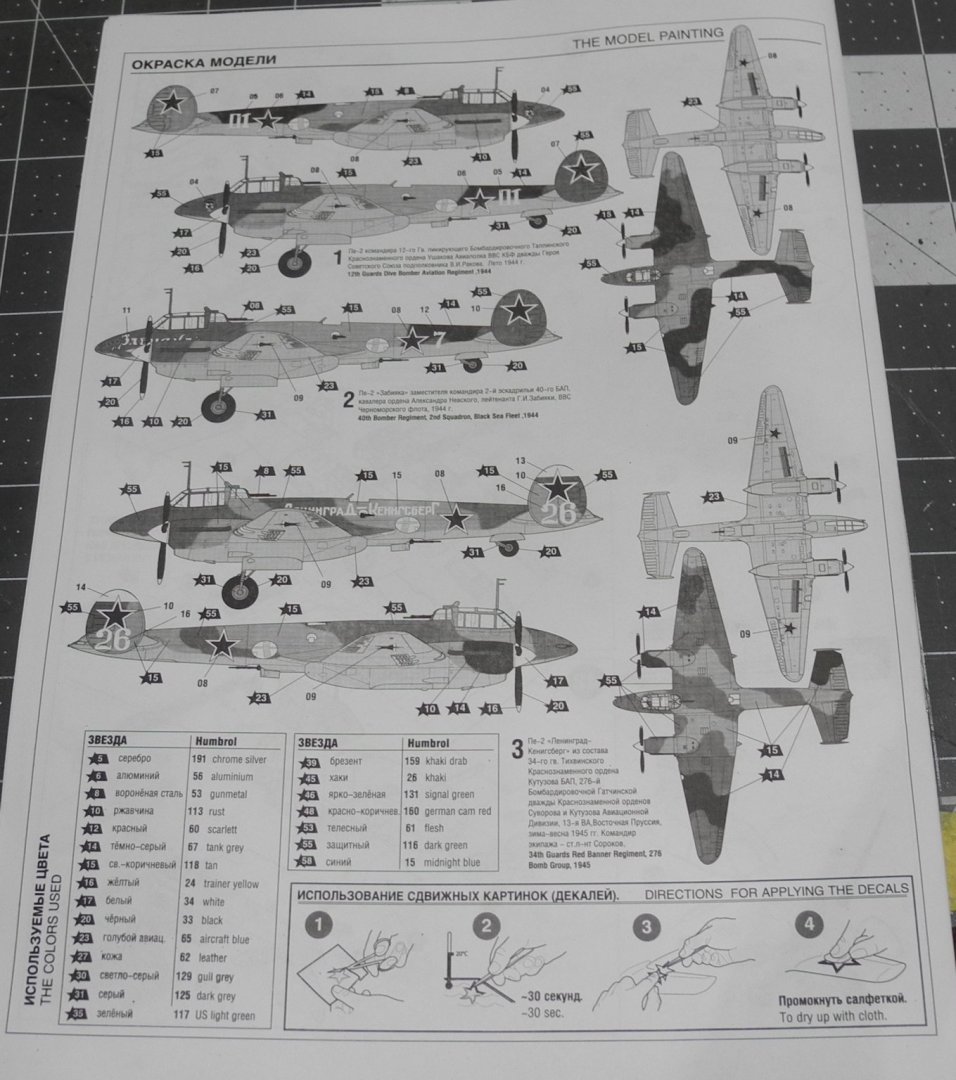
The Zvezda company out of Russia has morphed into one of the top kit producers, offering highly detailed scale models. At one time years ago, their products left a lot to be desired, but somebody put some money and talent into this company as they are now releasing some outstanding models of subjects not found elsewhere. Such as the example here of the WW2 vintage PE-2 Soviet Dive Bomber. I'll be building this model with the addition of an Eduard photo etch set for the interior and exterior, along with a set of canopy masks. In the following photos of the instruction pages, note the tons of detail provided for the engines and other internal details.


- 71 replies
-
- 11
-

-
Bell UH-1H Huey By lmagna - Dragon - 1/35 - PLASTIC
CDW replied to lmagna's topic in Non-ship/categorised builds
The time has arrived...looking forward to this, Lou. -
Sikorsky CH-53 by mtaylor - FINISHED - Revell - 1:48 - PLASTIC
CDW replied to mtaylor's topic in Non-ship/categorised builds
Great to see your start, Mike. Looking forward to it all. -
Who woulda thunk it?
-
I started to work on the decals tonight, but got bad news. My decals are shot. All of them, and I had two separate sets of aftermarket sets in addition to the kit set. Problem was, all the decals were stored inside the kit box and the kit stored in my garage which was not climate controlled. The heat got to them. I have fresh decals on order and will use those as I am not going to screw up the model with bad decals. So standby for a couple of weeks for me to finish this model. In the meantime, I intend to start another model.
-
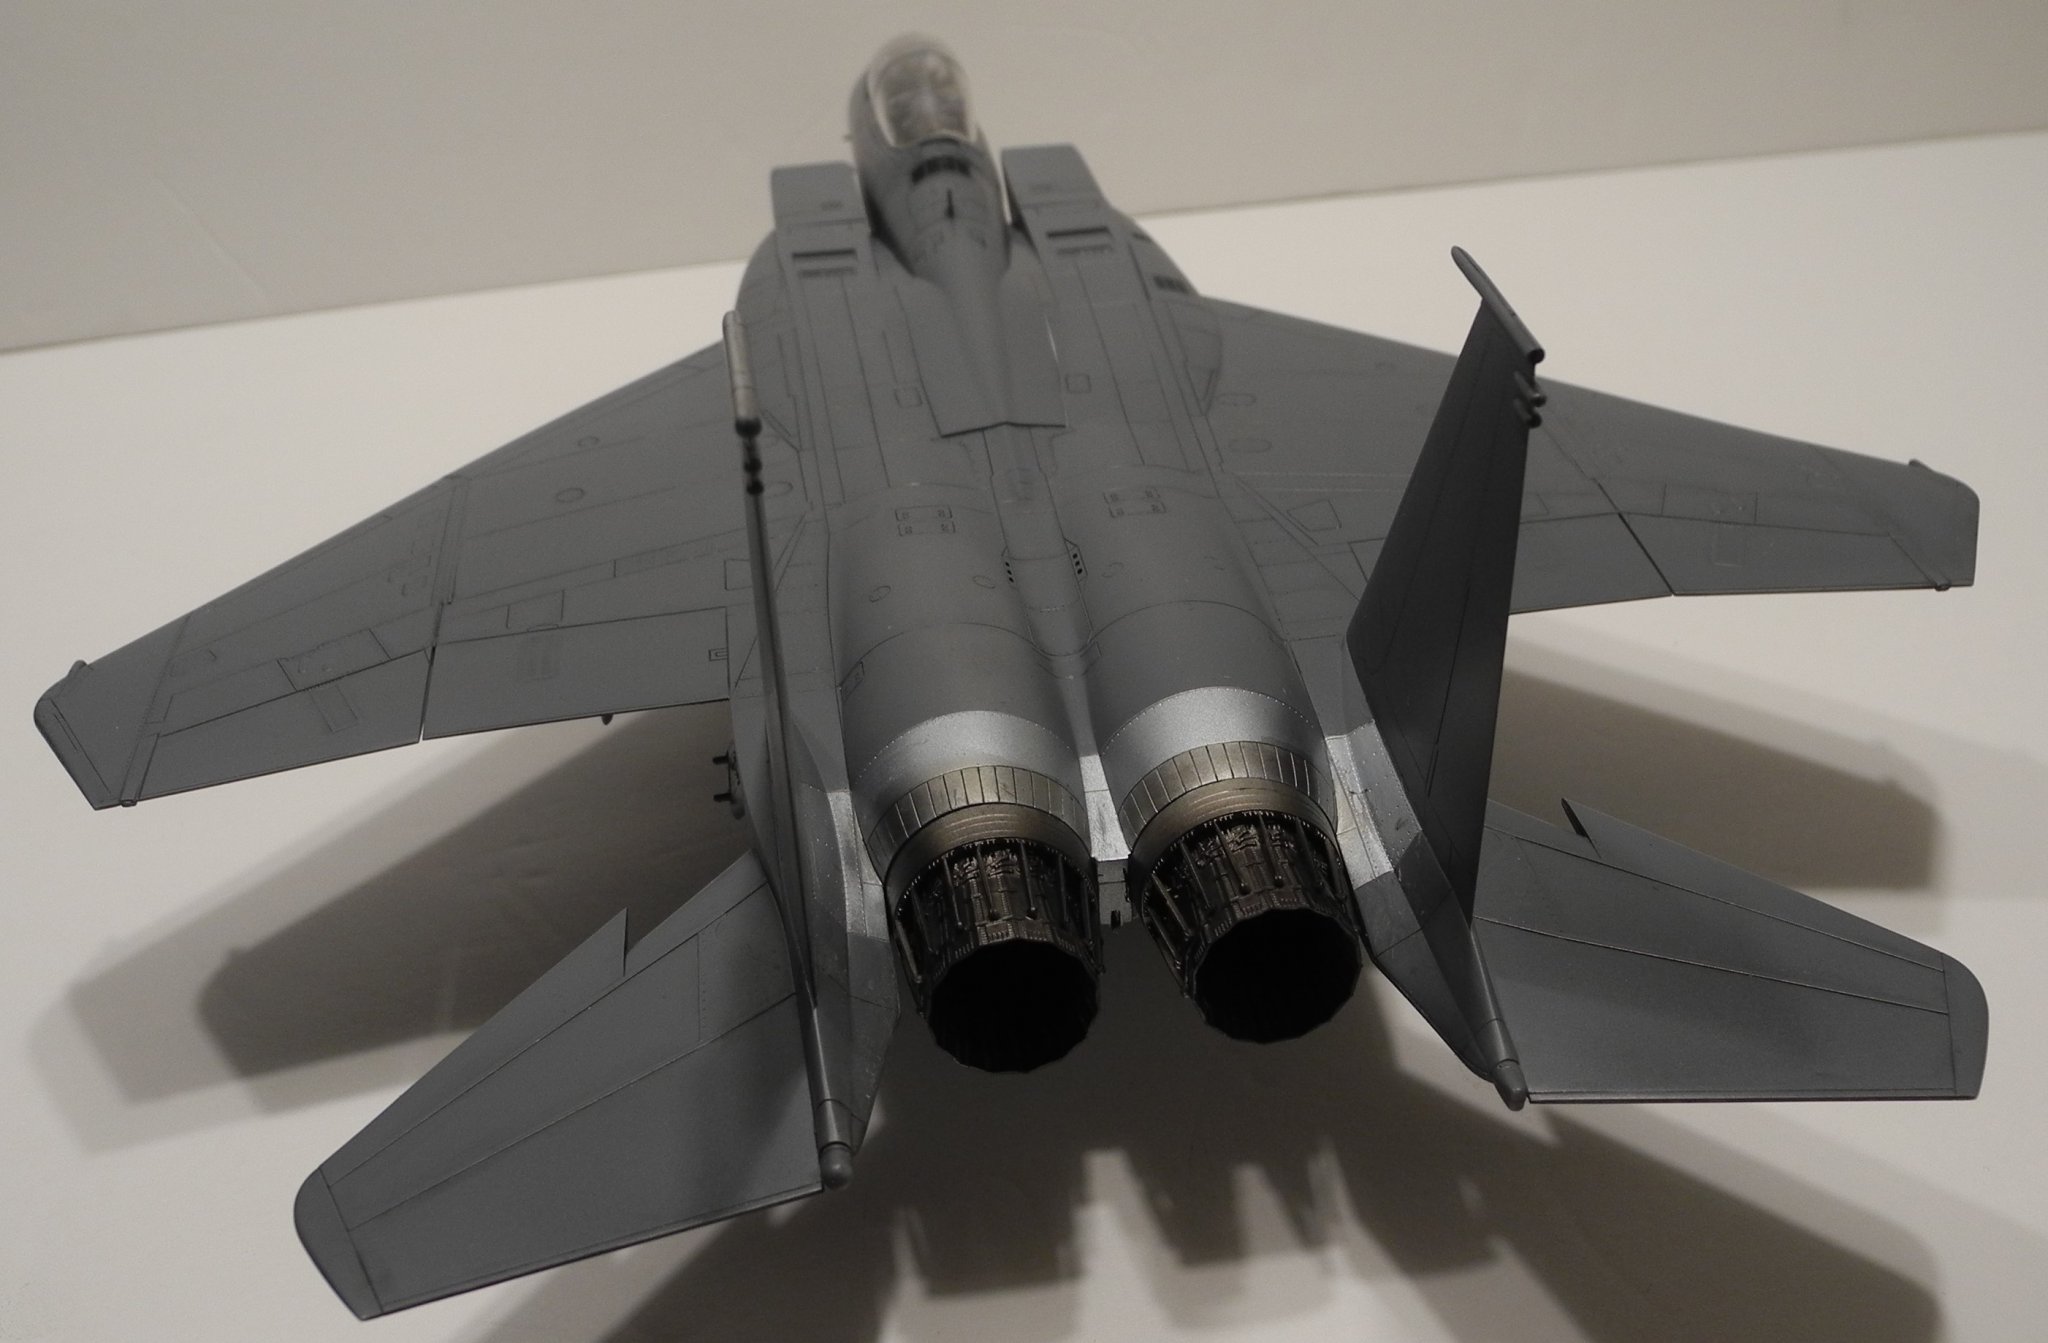
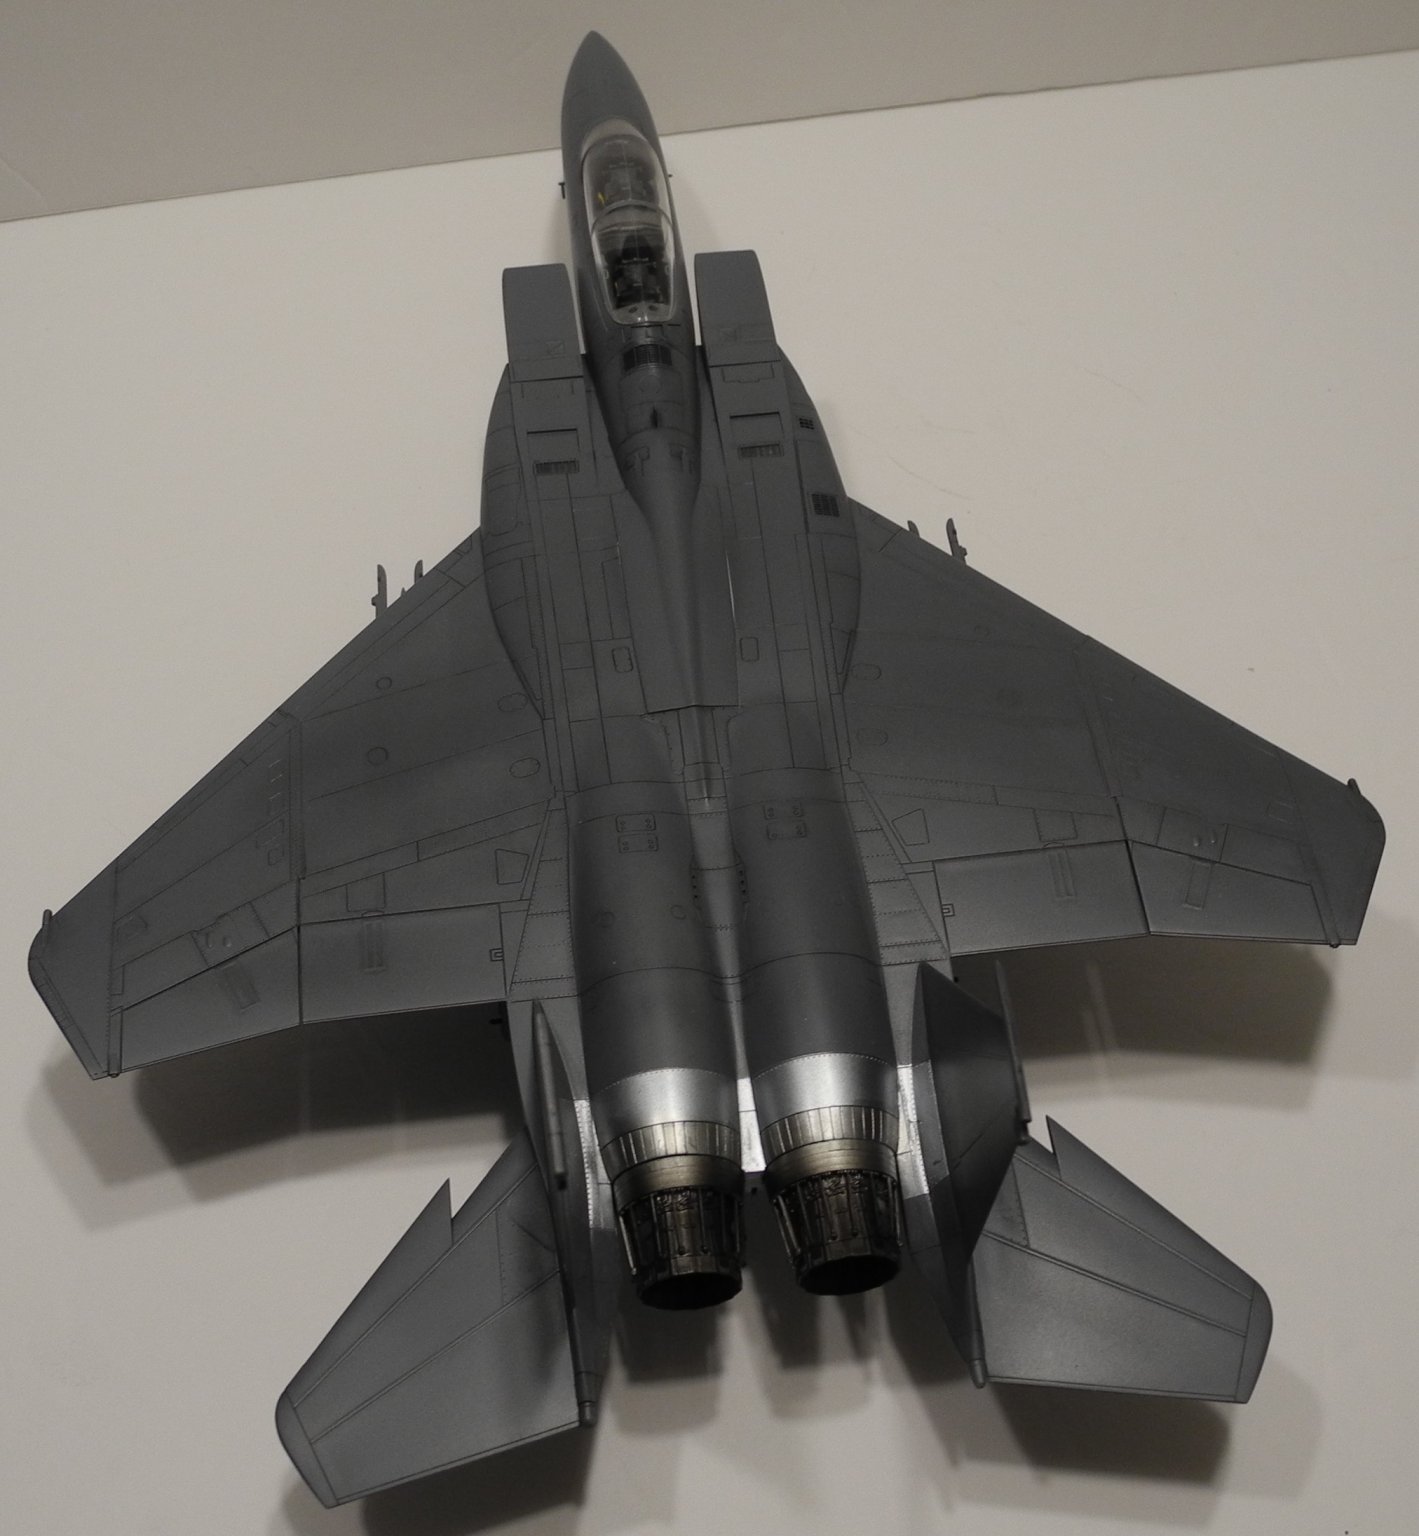
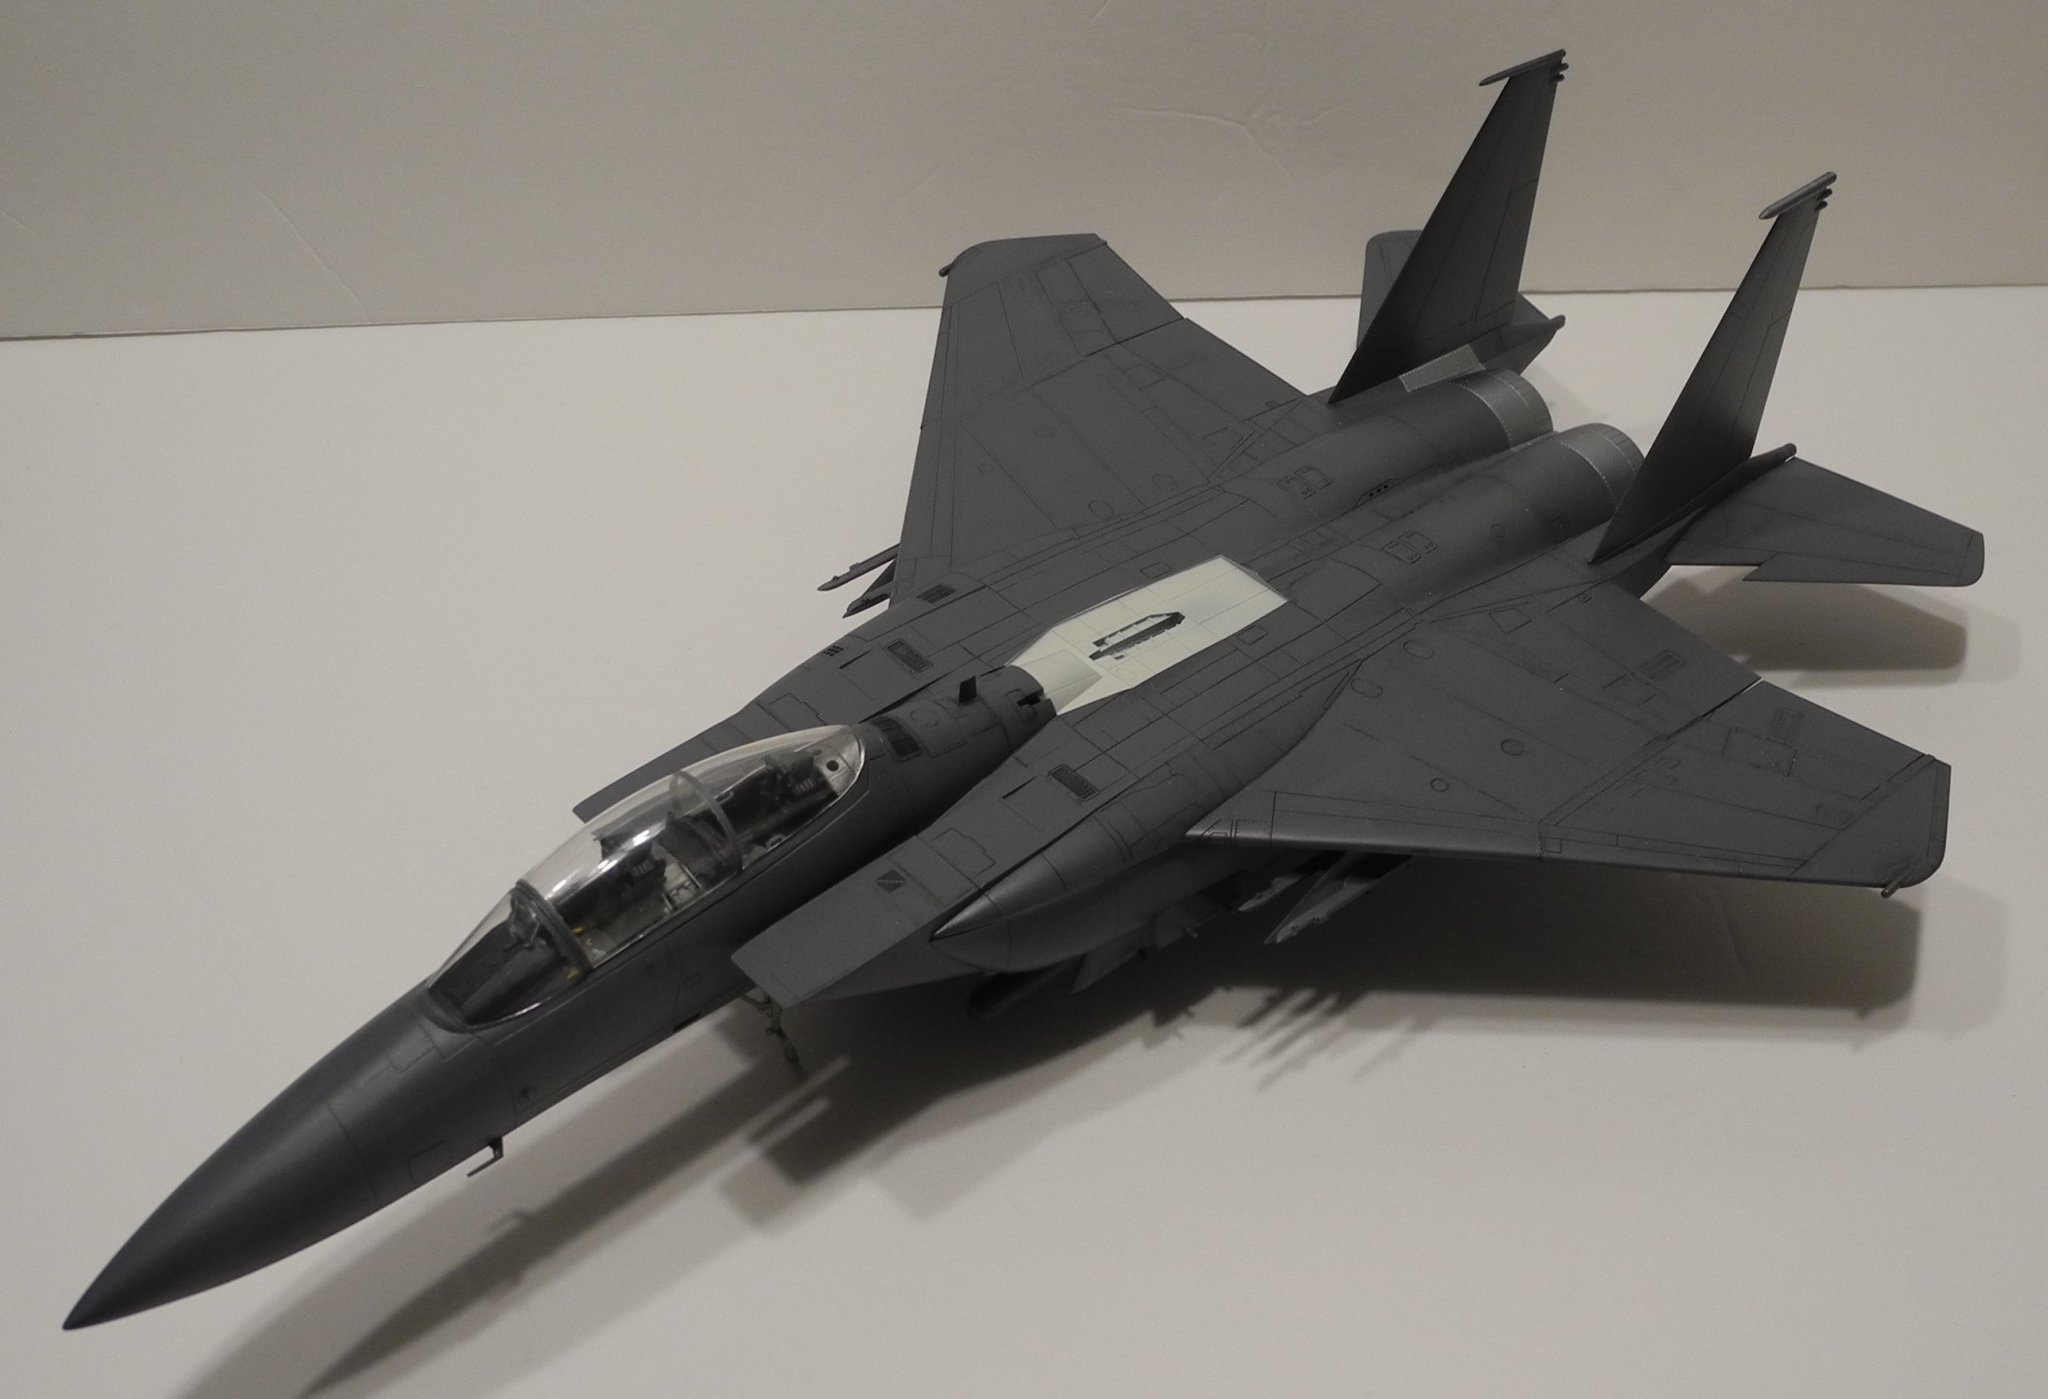
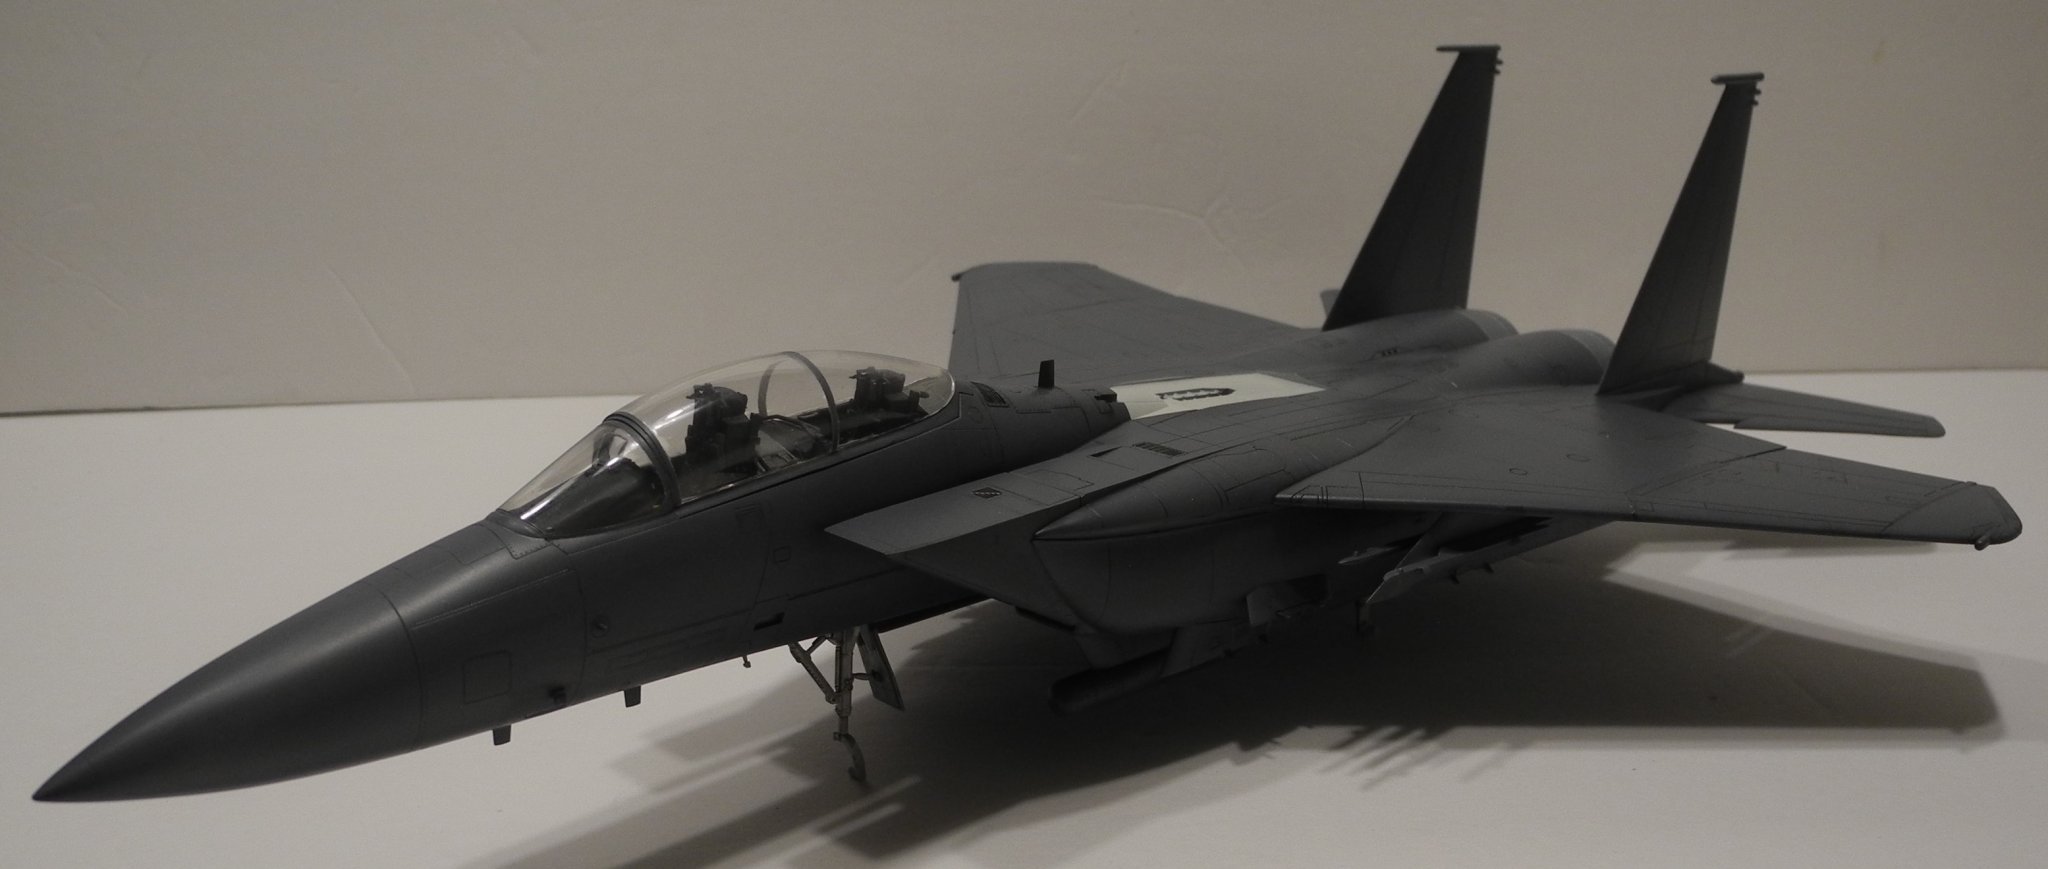
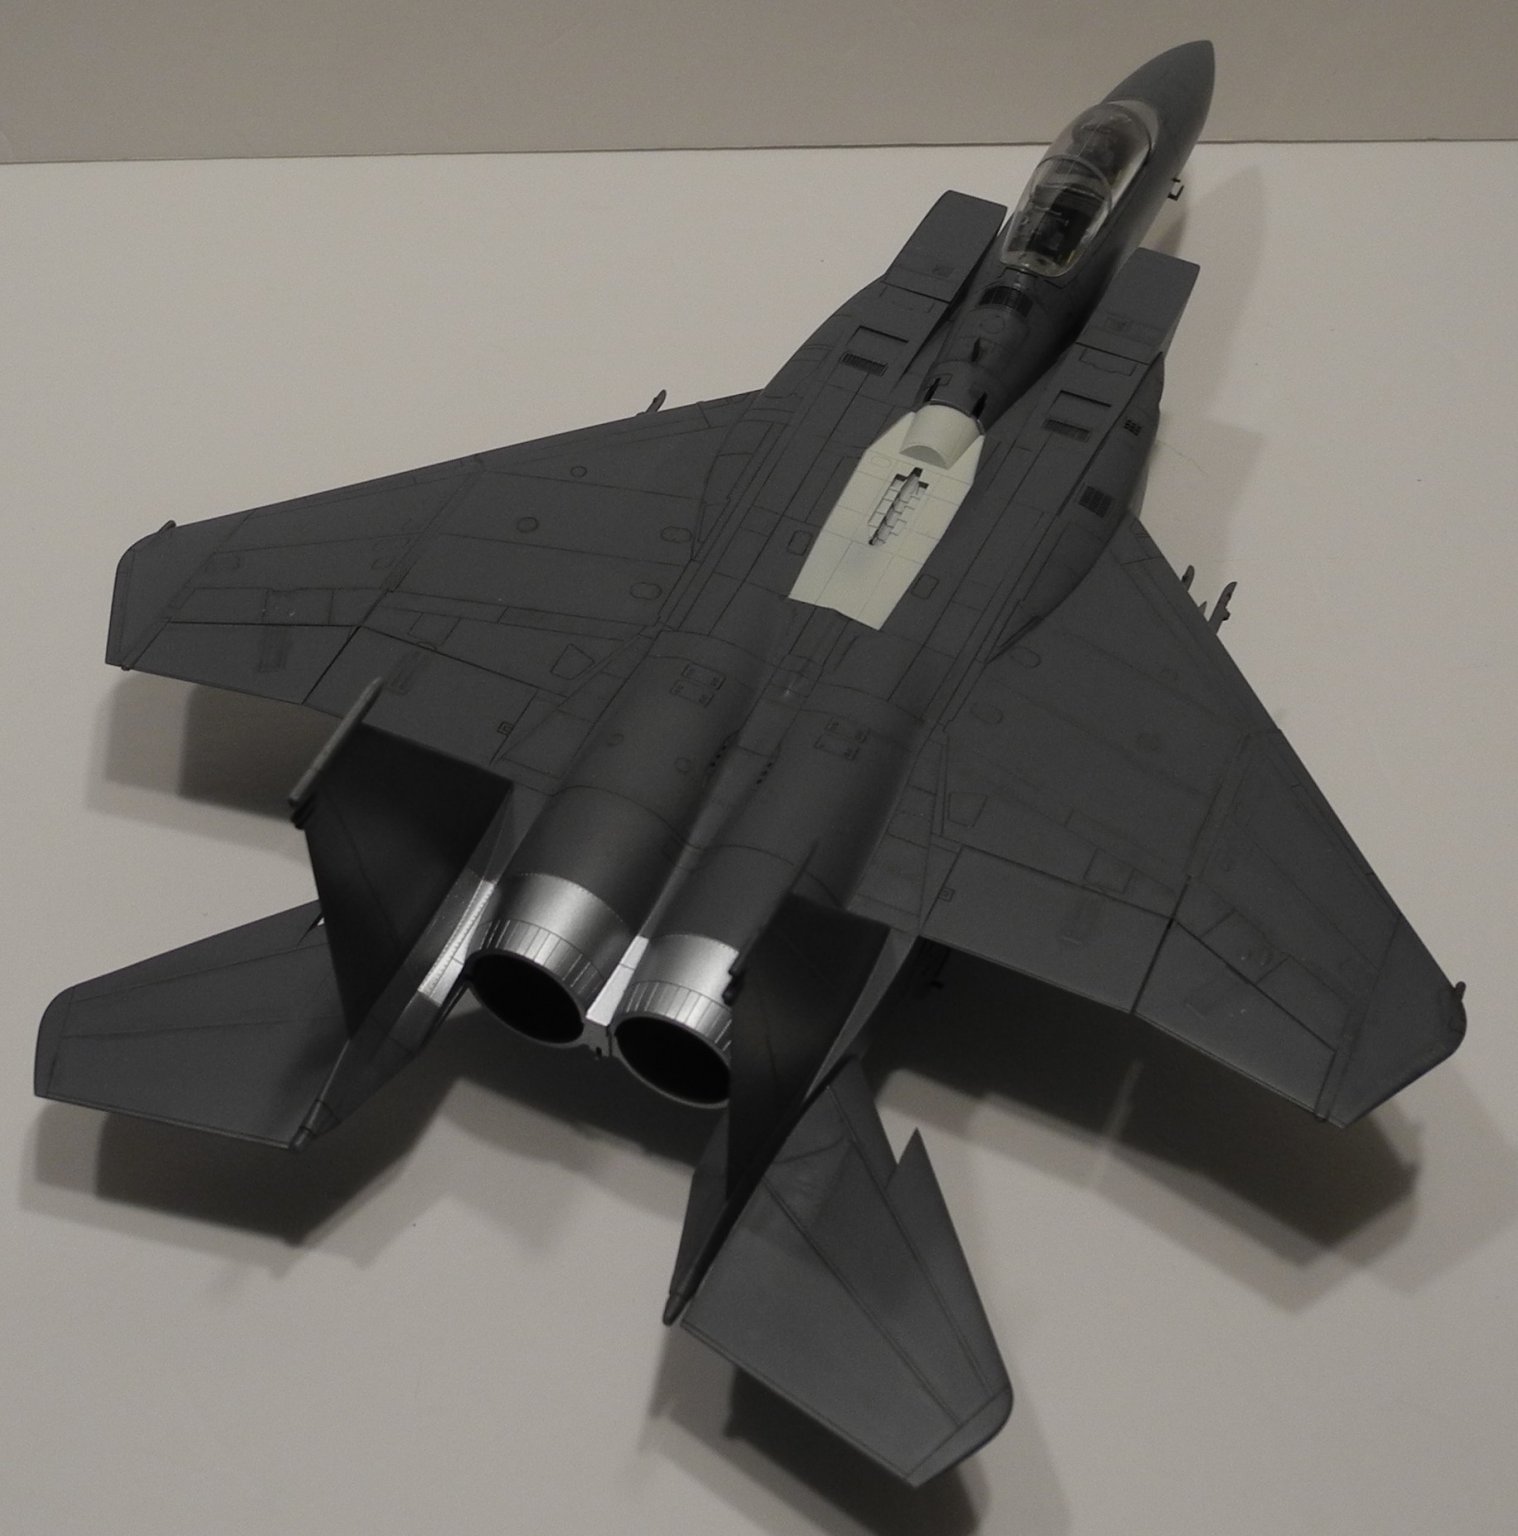
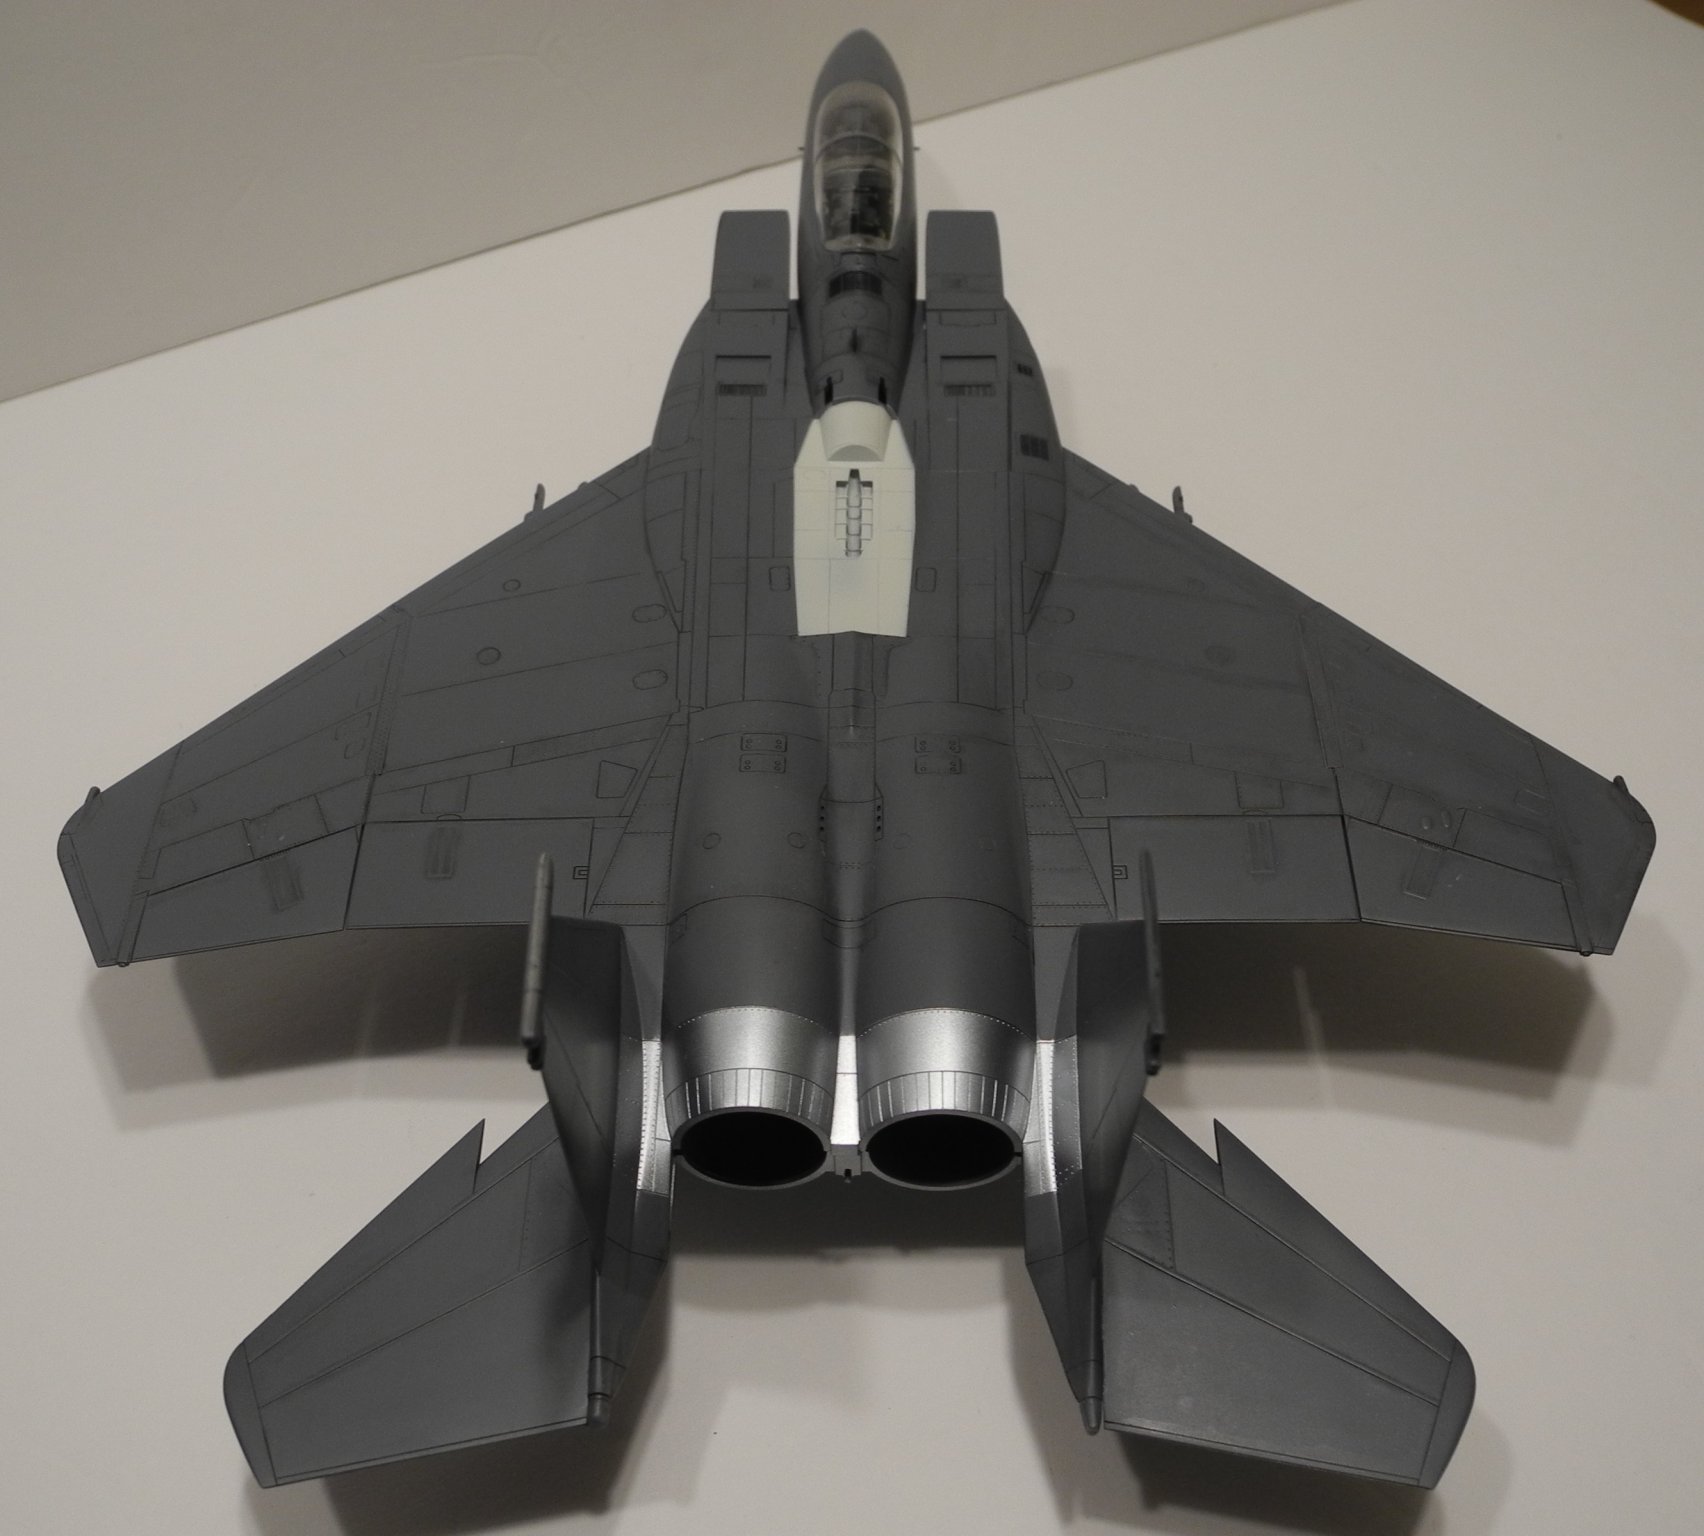
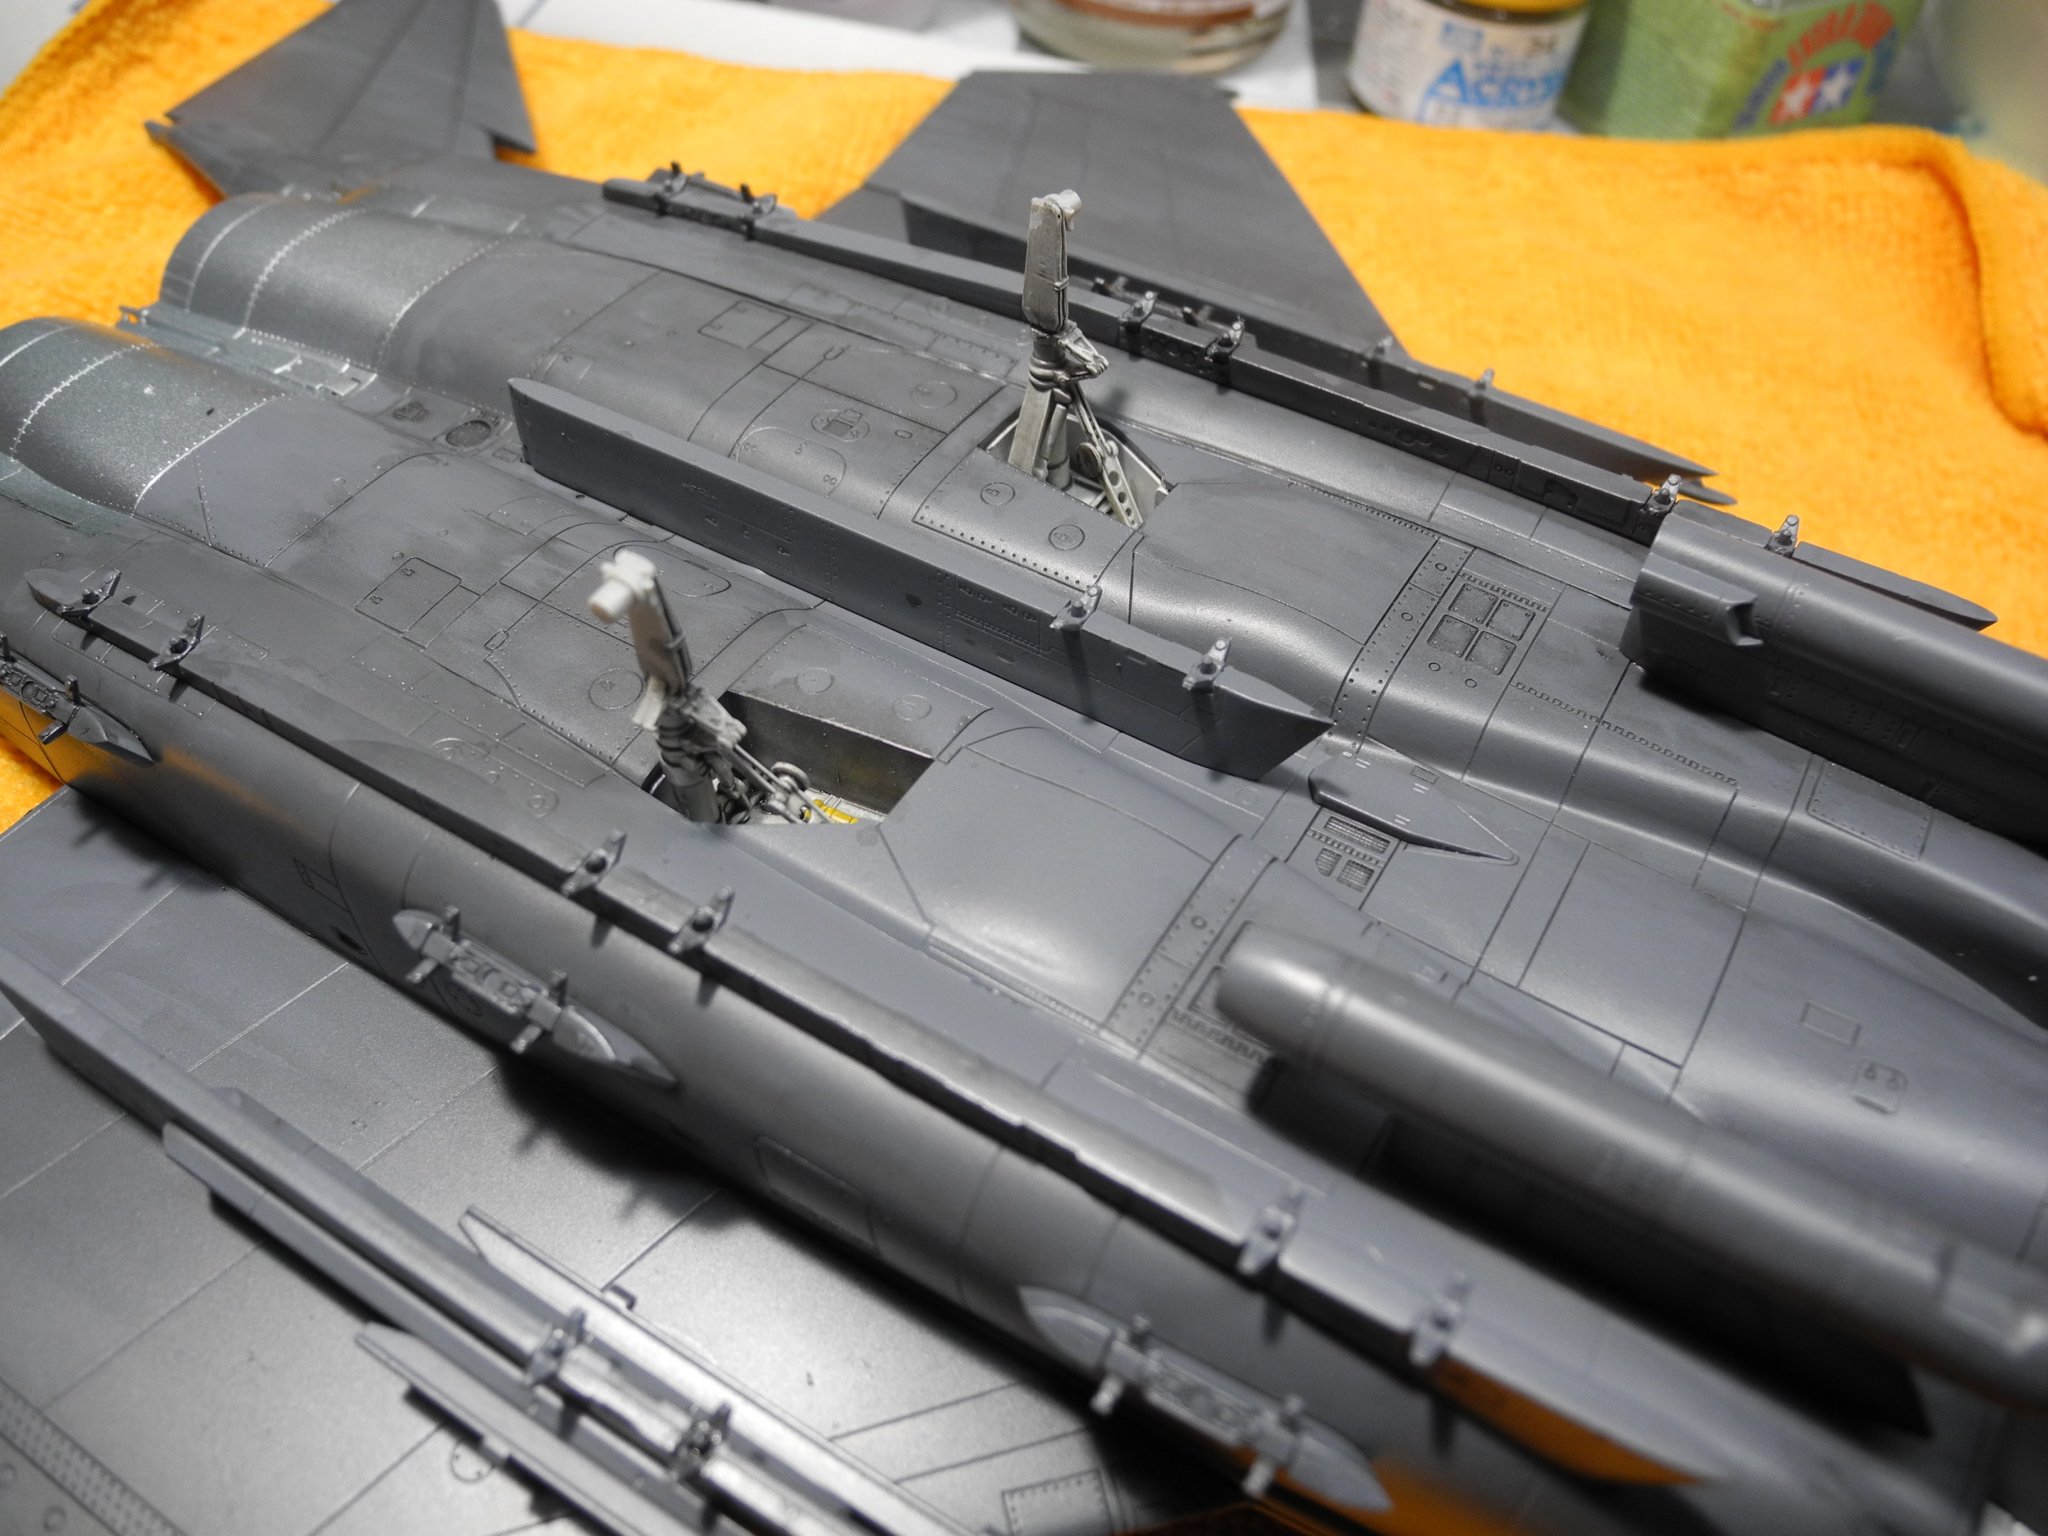
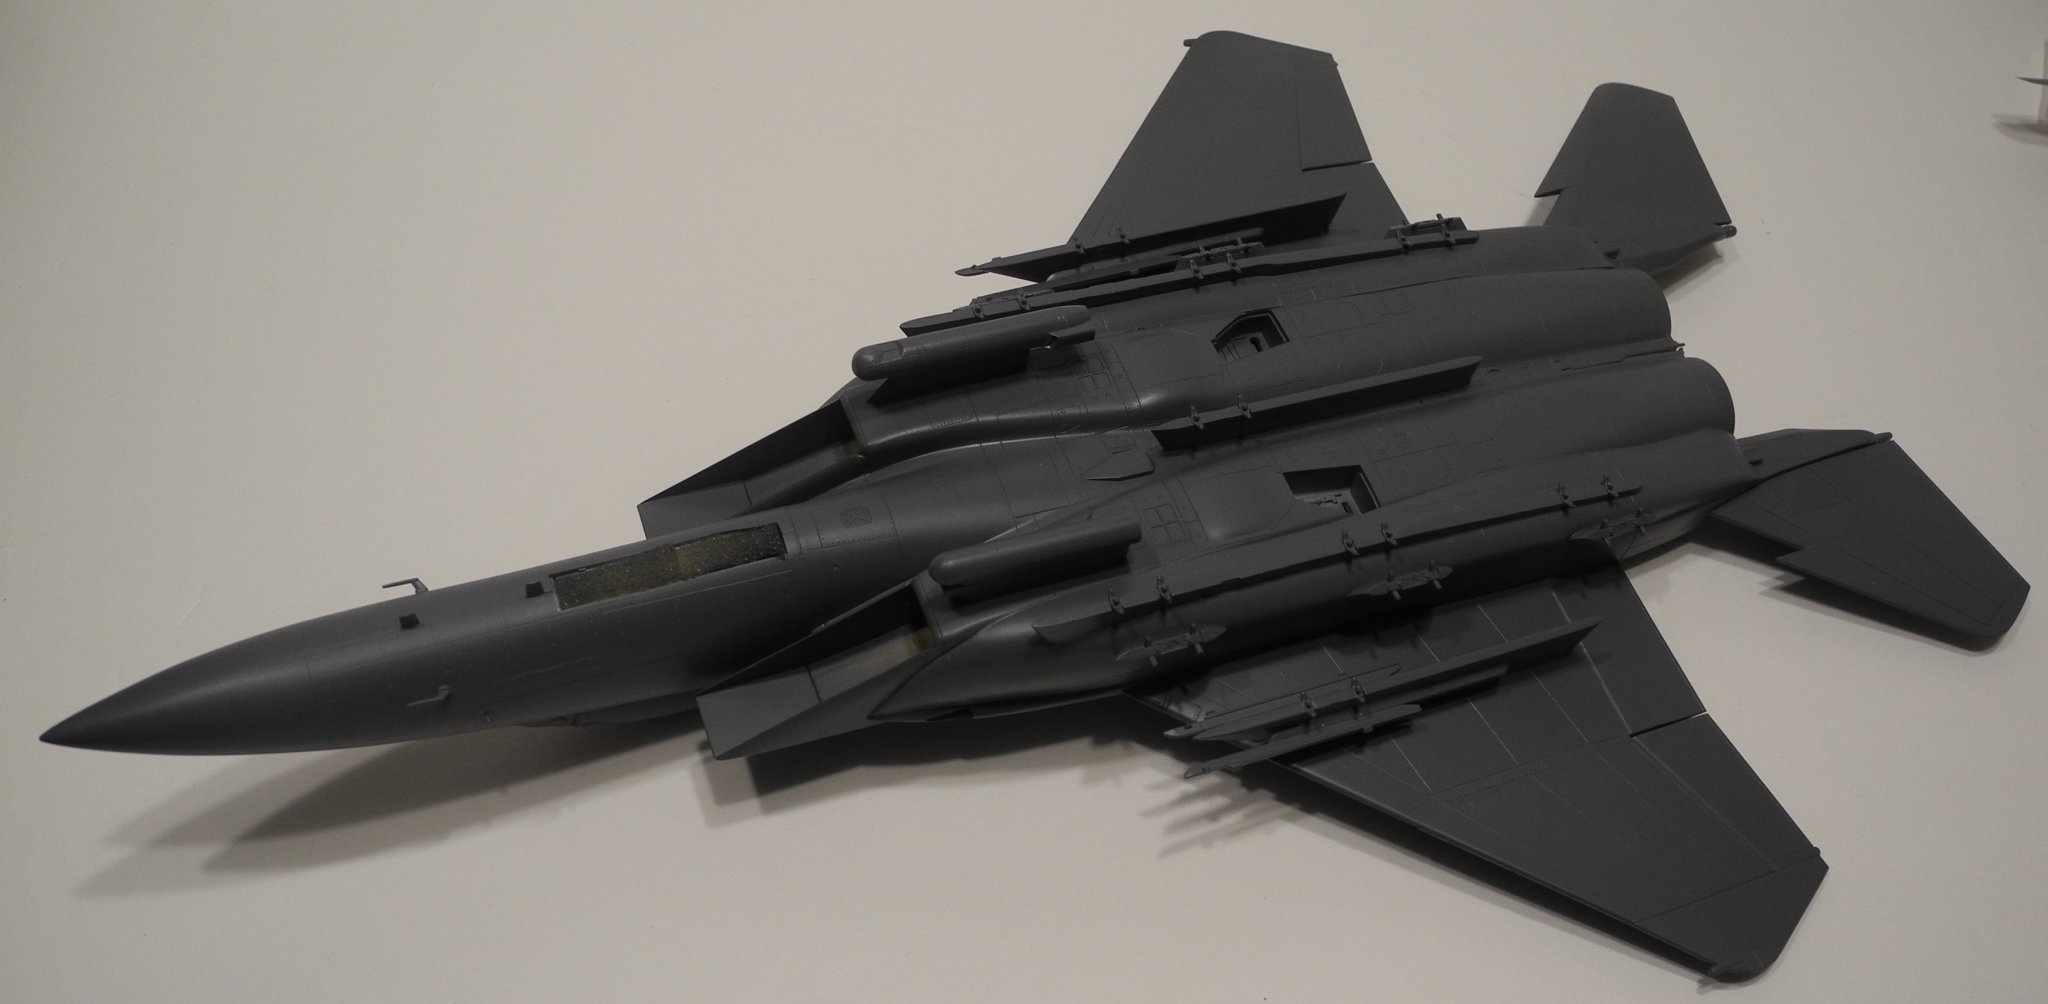
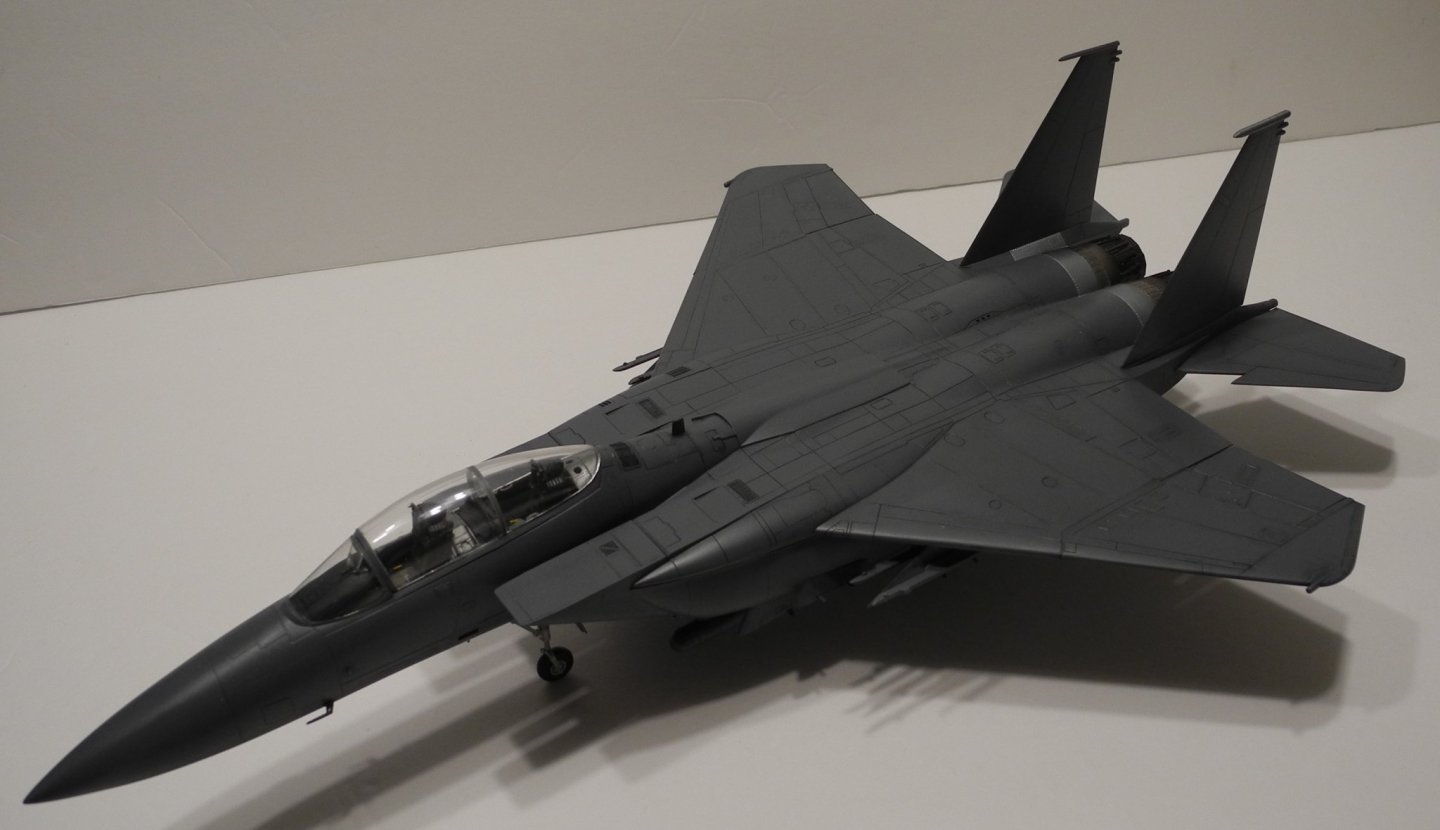
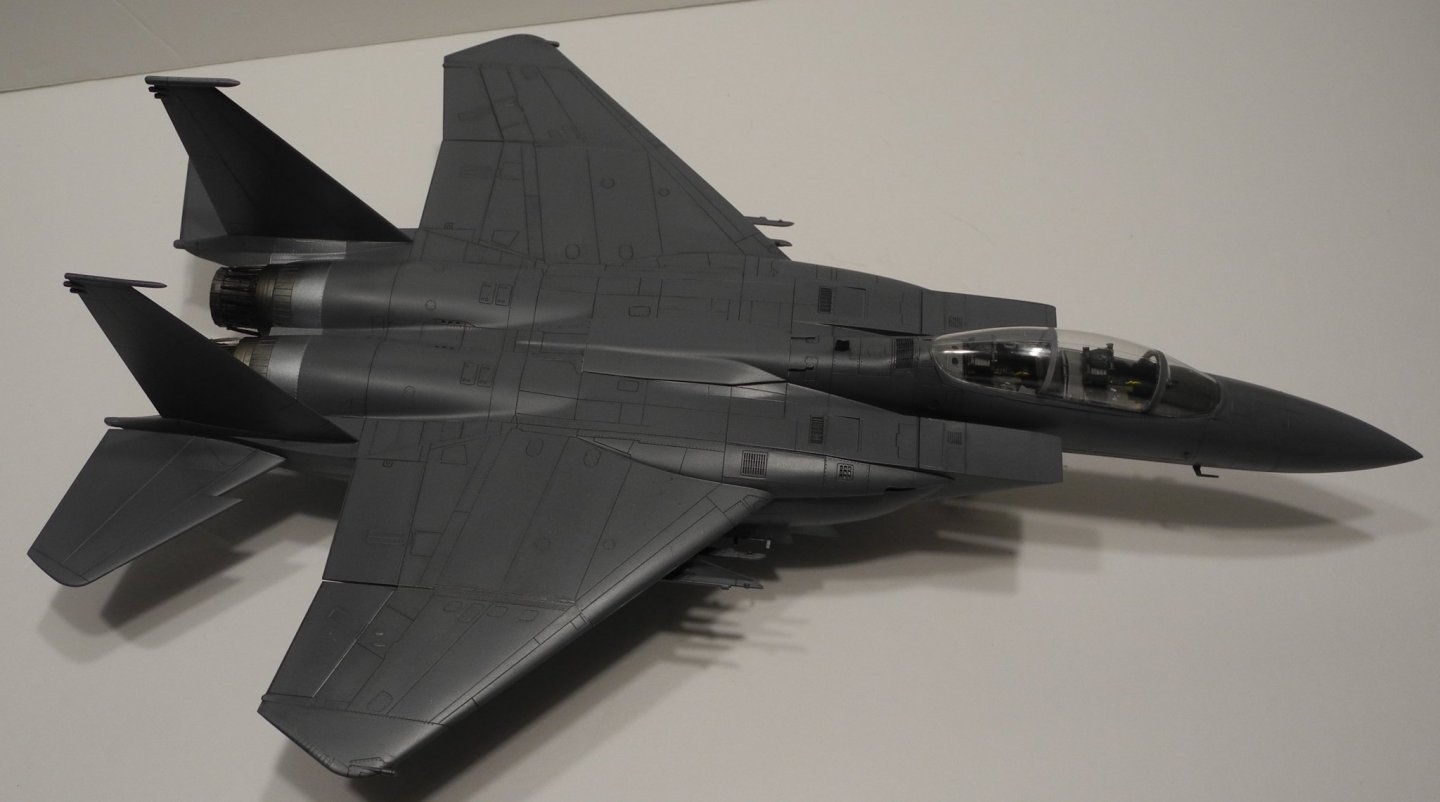
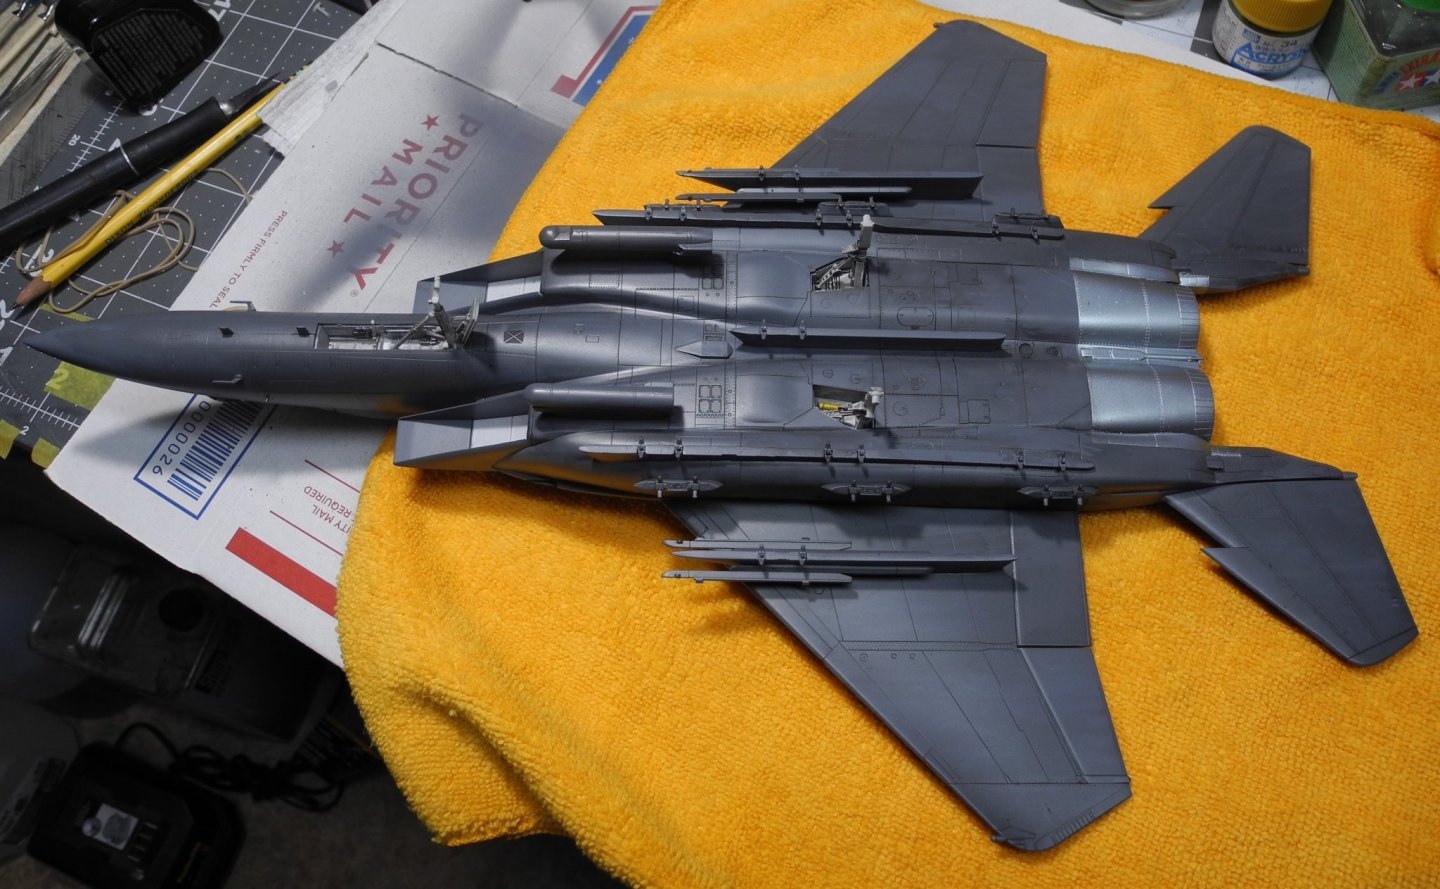
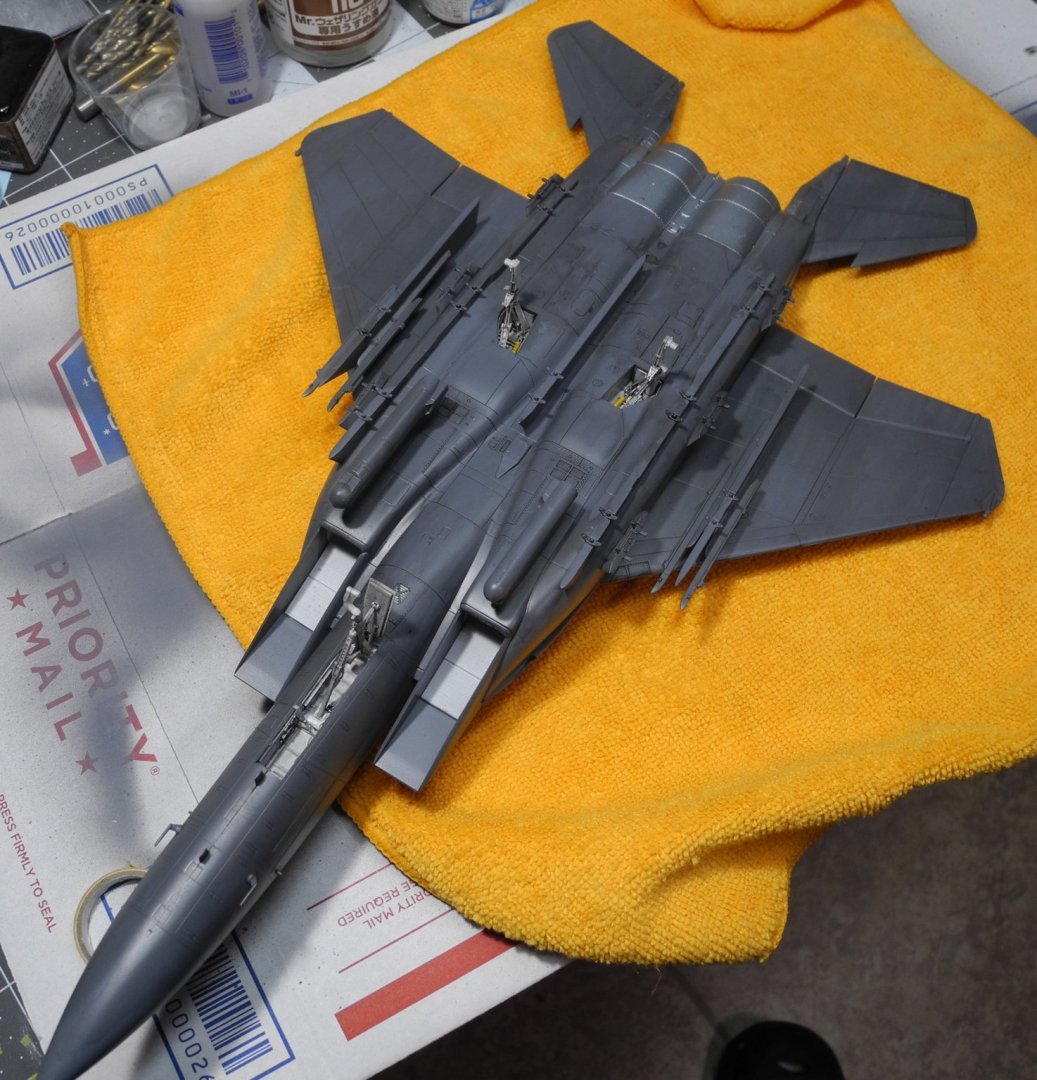
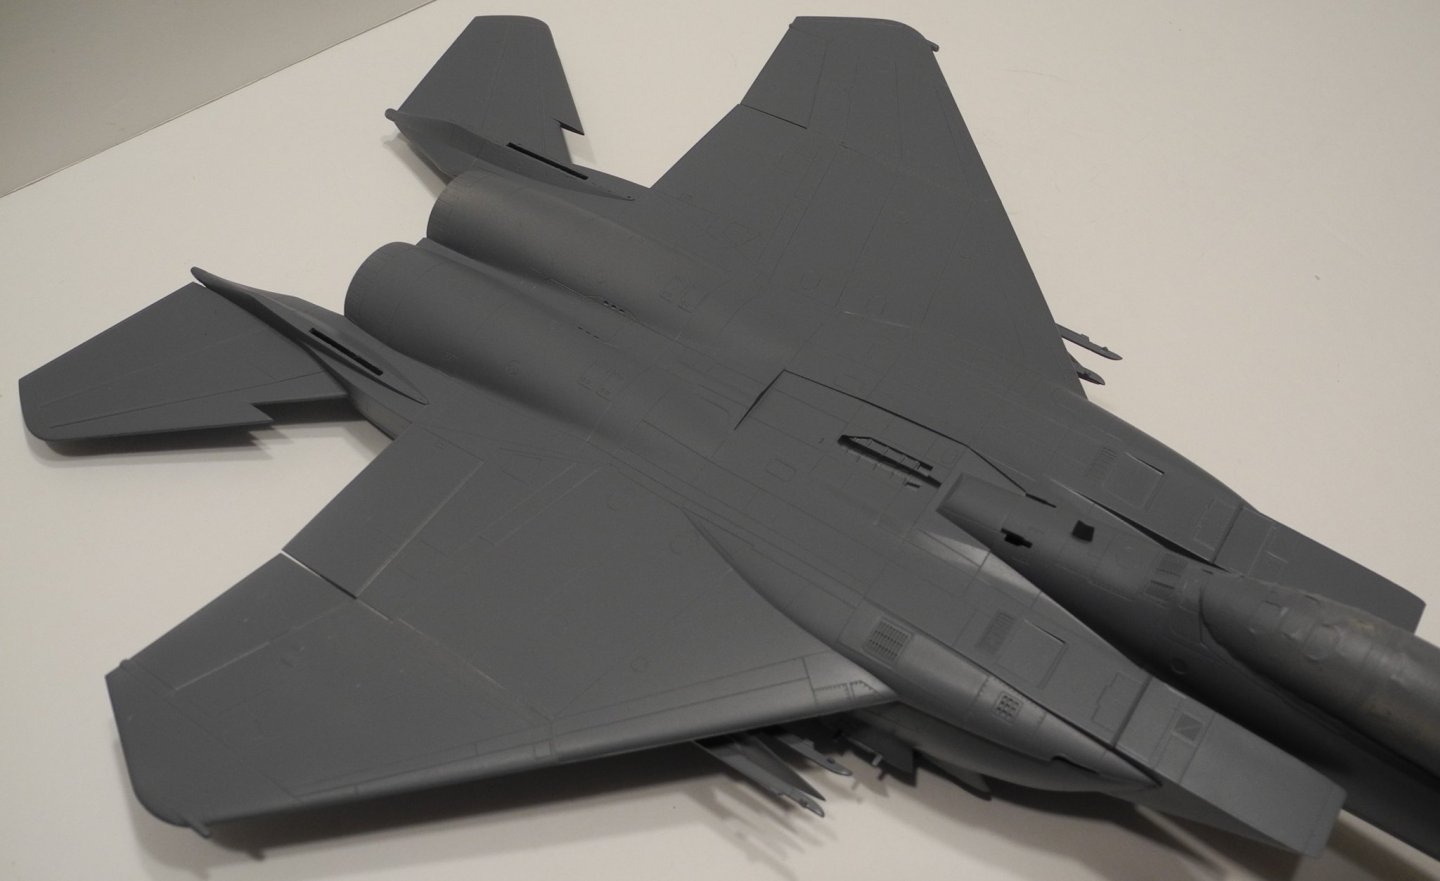
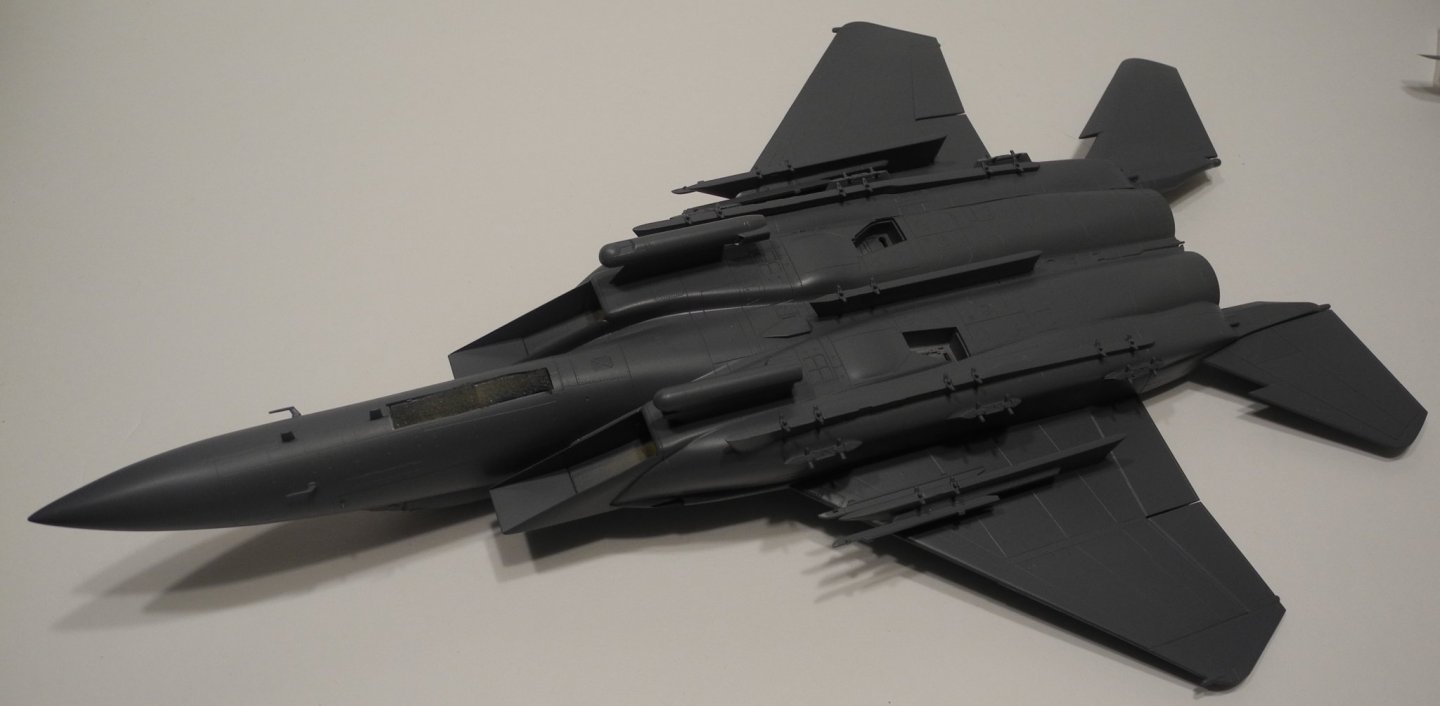
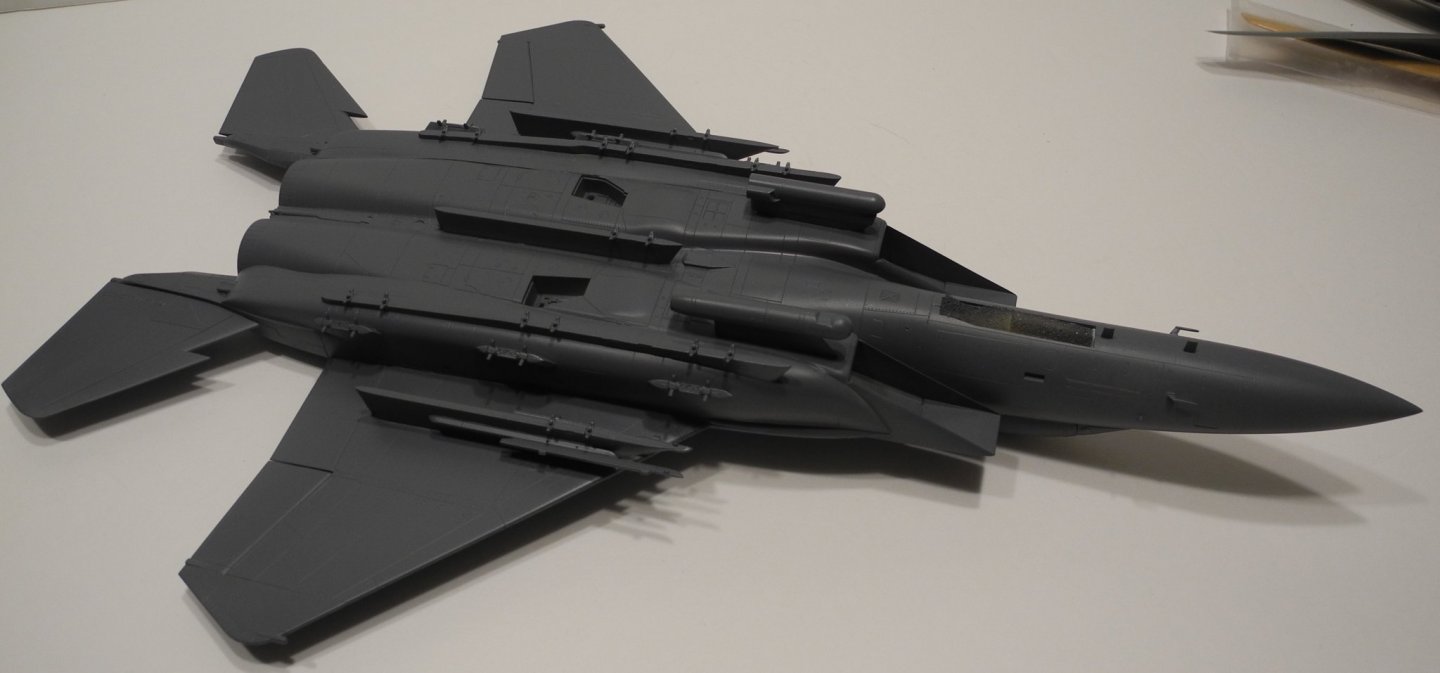
Added the afterburners and wheels. The speed brake on top of the fuselage is temporarily photoed in the closed position, but will be cemented in the open position along with an open canopy for final display. To add some nuance, I used a highly diluted (1 part paint : 4 parts reducer) lighter shade of gray (neutral gray) to shade between the panel lines of the entire aircraft. It's not intended to be highly noticeable, but if you compare this version, it should look slightly lighter in shade of gray than the previous set of photos. The afterburners are a multi colored affair, starting with stainless steel, then dark aluminum, then titanium, then burnt iron. All that got a black wash.


- 92 replies
-
- 10
-
-
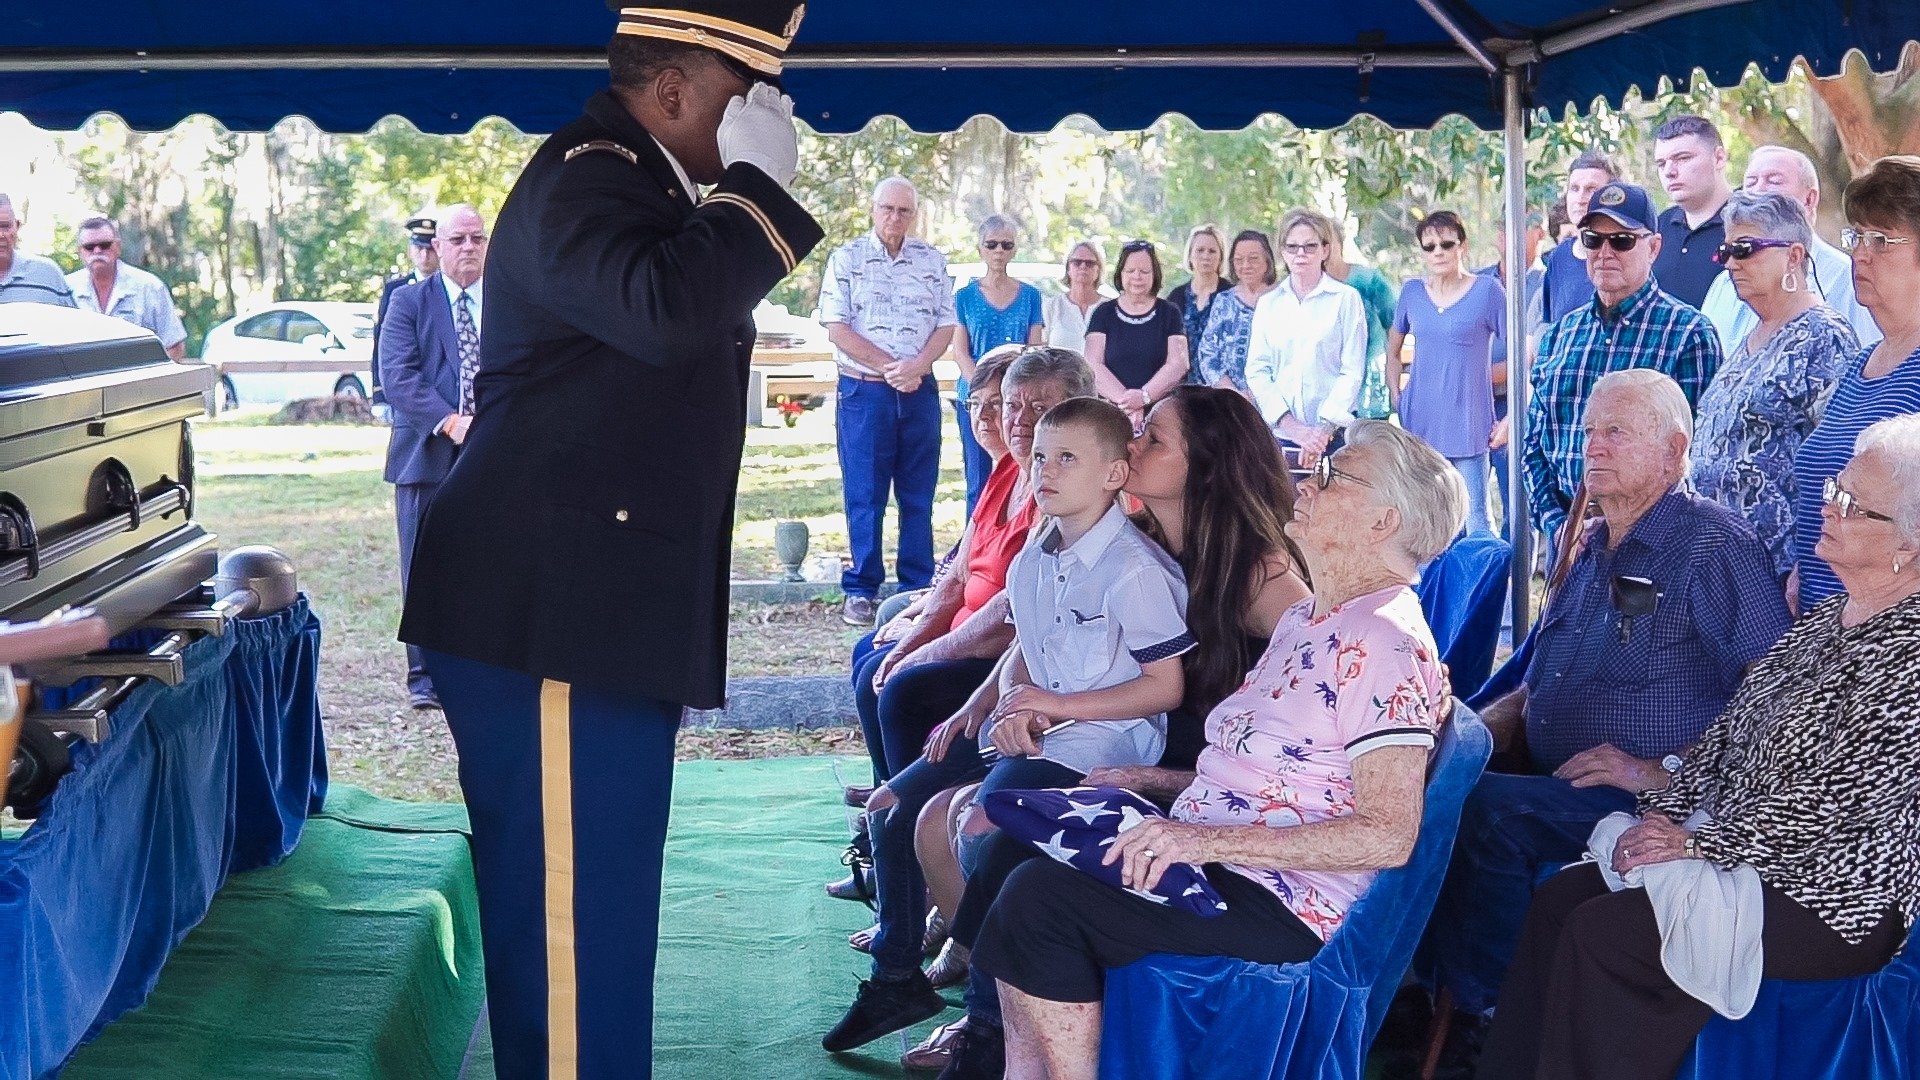
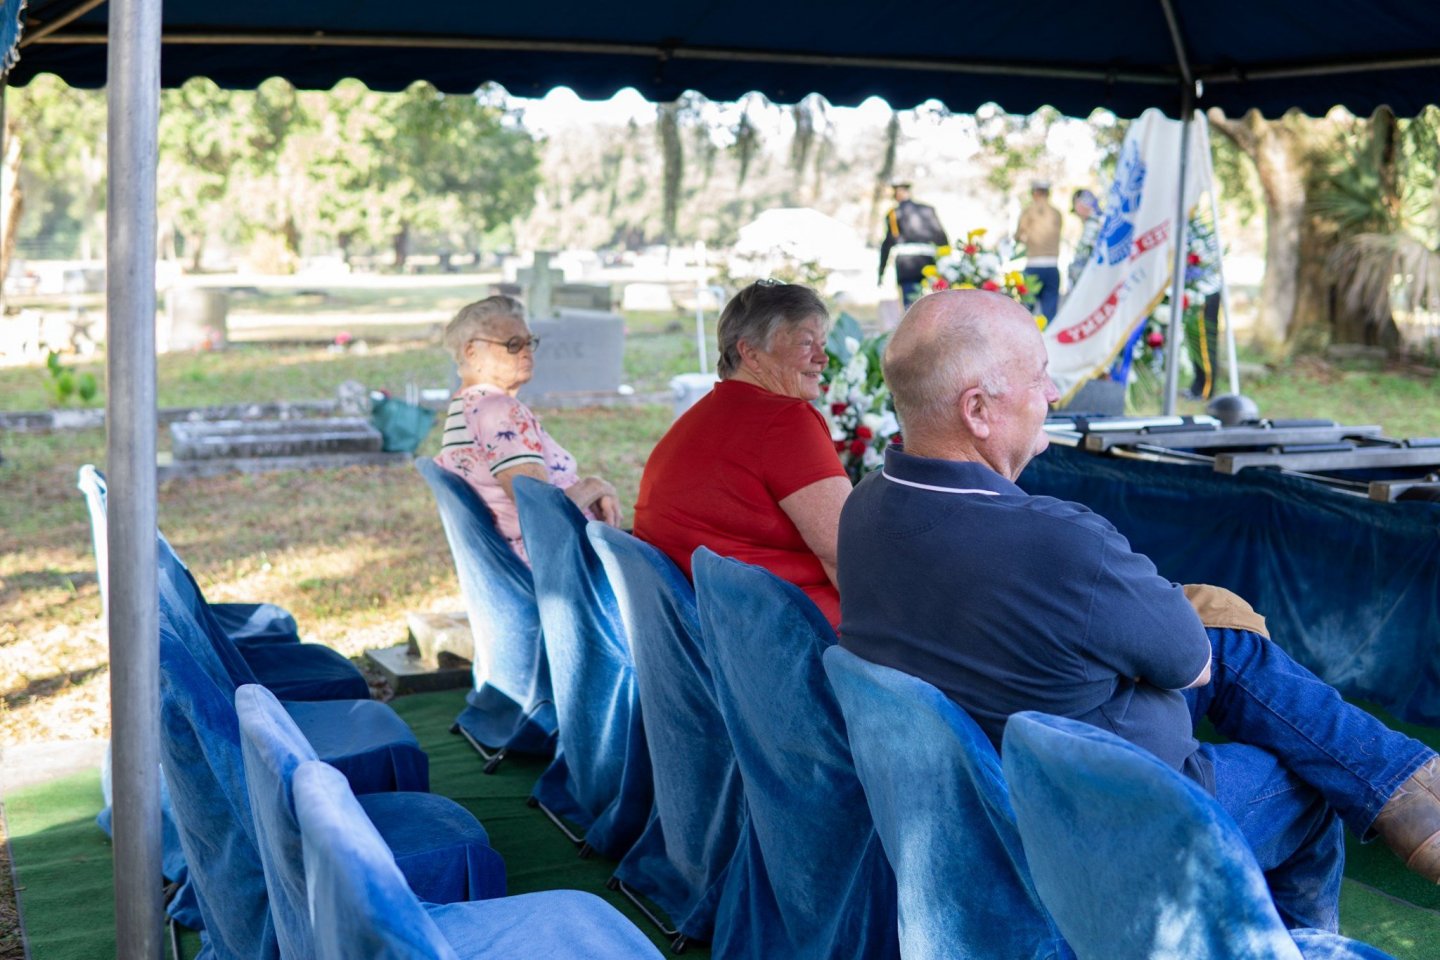
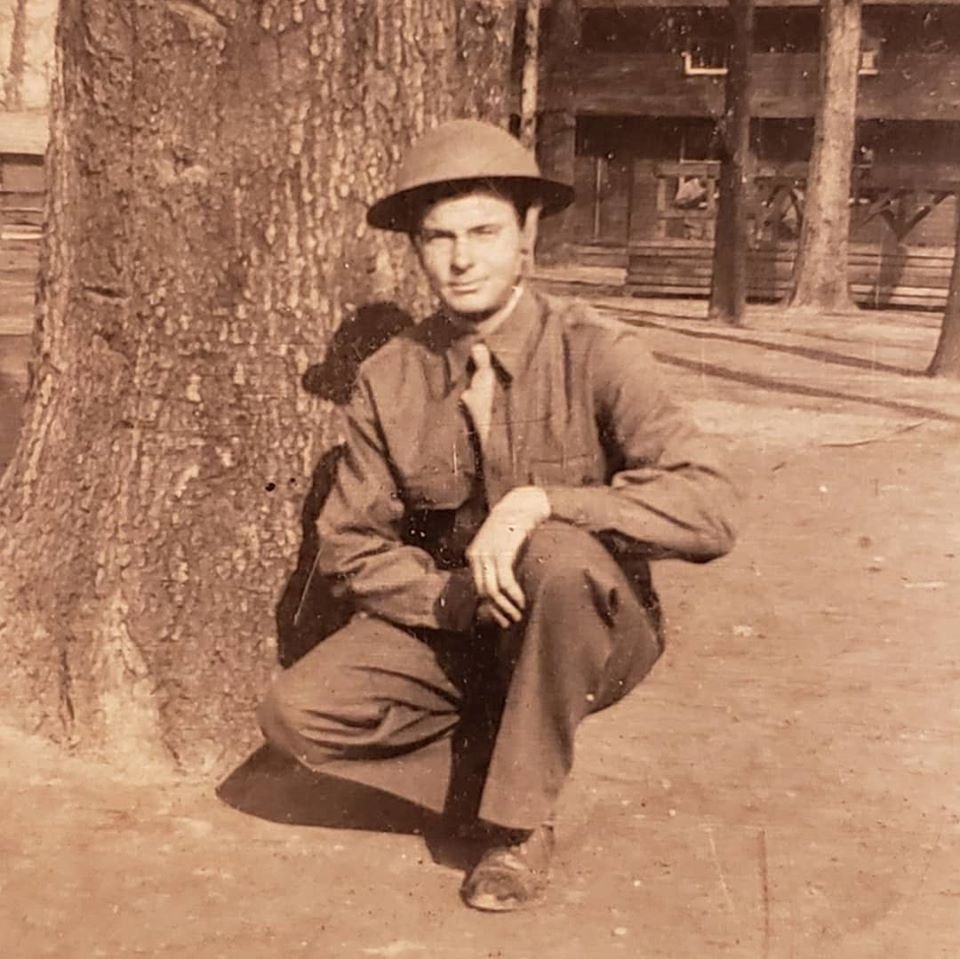
Semper Fi My cousins and brother. My cousin with the walking stick was an Army officer, a veteran of Korea now in his 90's.


-
Thanks guys for your kind words. Javlin, you'll be disappointed by my "collection" because I rarely ever keep a model once it's finished. I either give them away or sell them. My pleasure comes from building them. Once they're done, I'm done, and it's on to the next one.
-
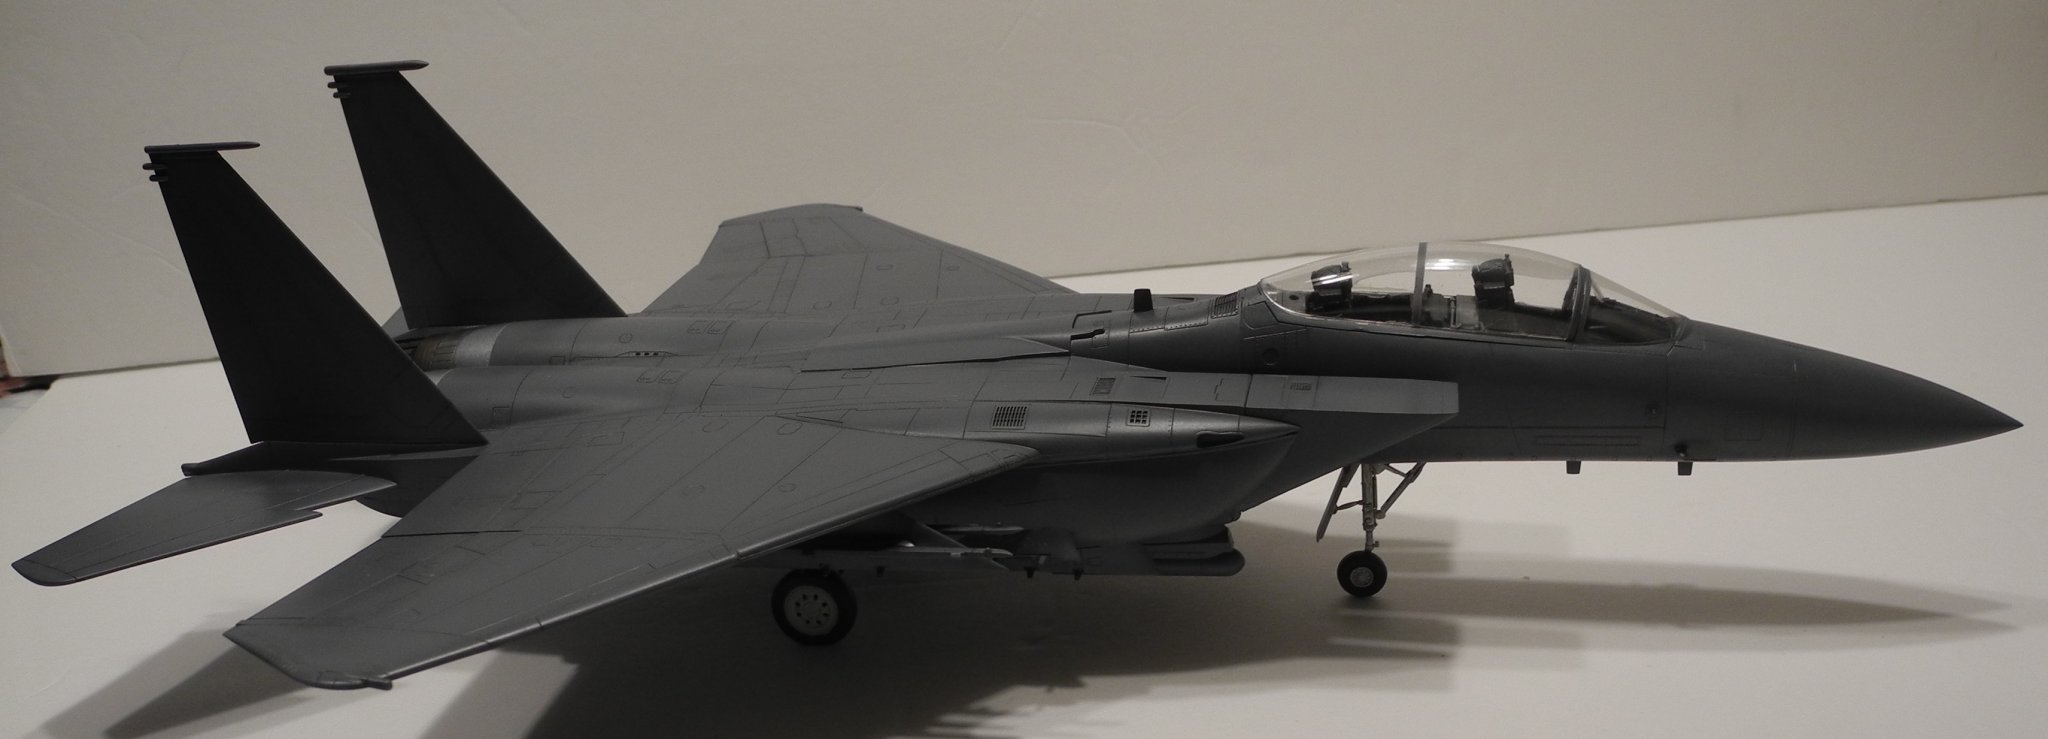
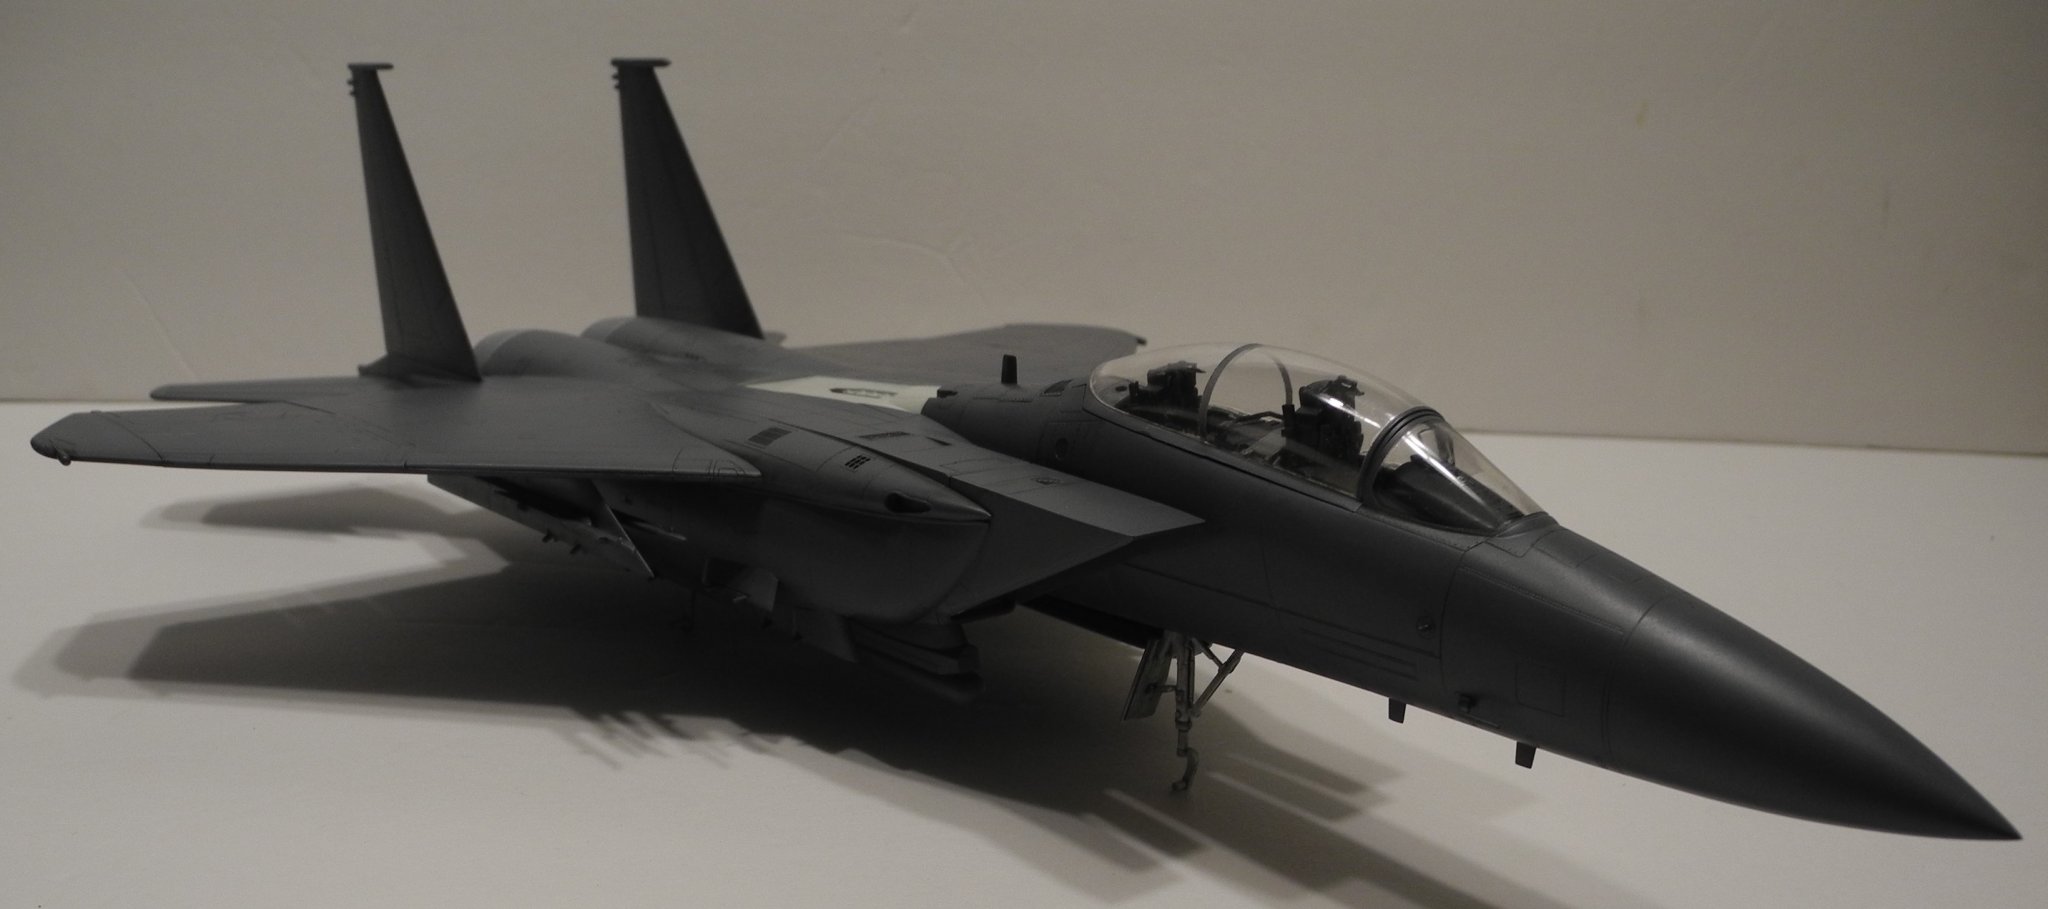
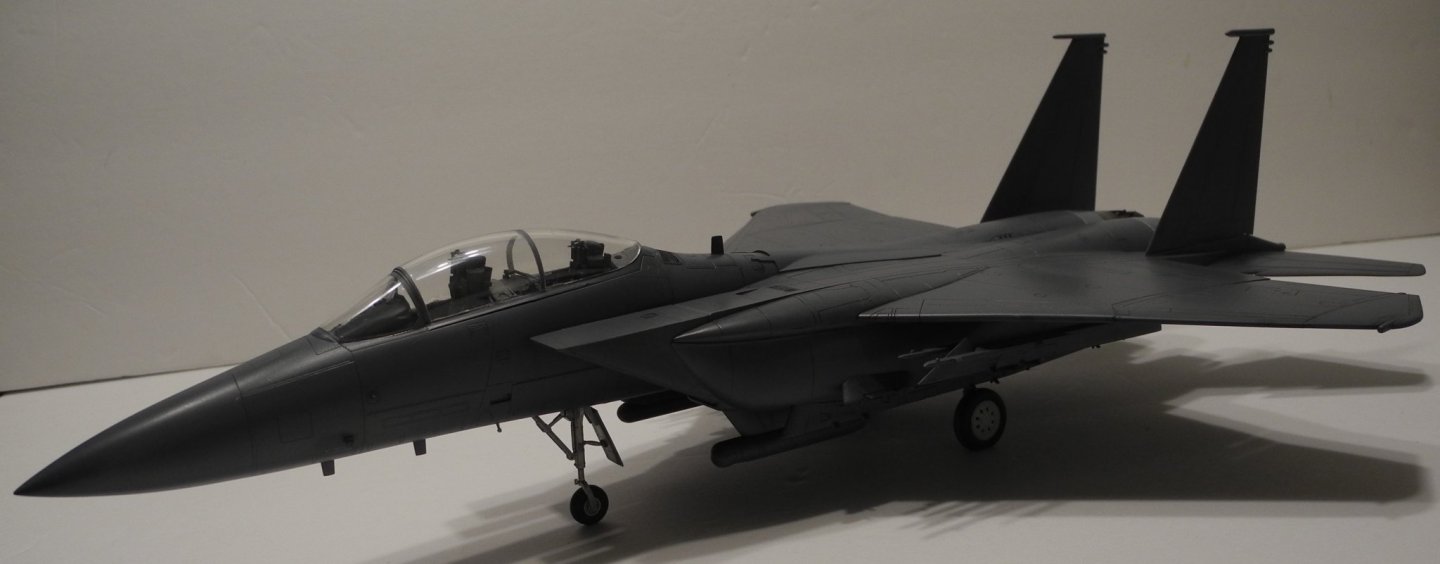
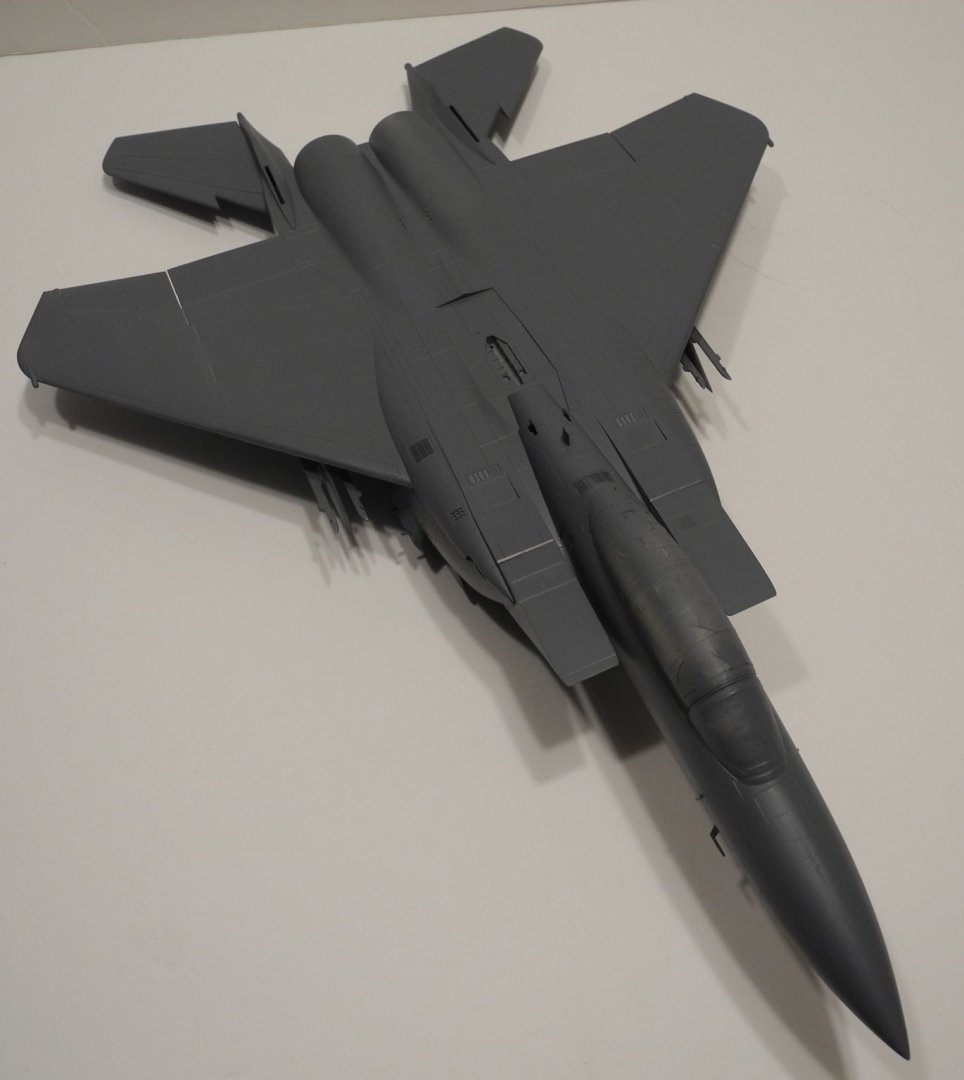
Thank you OC. Seriously, it's the paint. Mr. Color paint is THE BEST, period. Nothing else is like a good lacquer finish and Mr. Color gives that in spades. Plus, this old Monogram Pro Modeler F-15E was a really well fitting kit. Like I said before, an exceptional value for the money. Nowadays, you will have to settle for a Revell F-15E. It's the same kit with different ordnance and decals. The Revell of Germany release had the same Pro Modeler decals and ordnance but it's OOP right now.
-
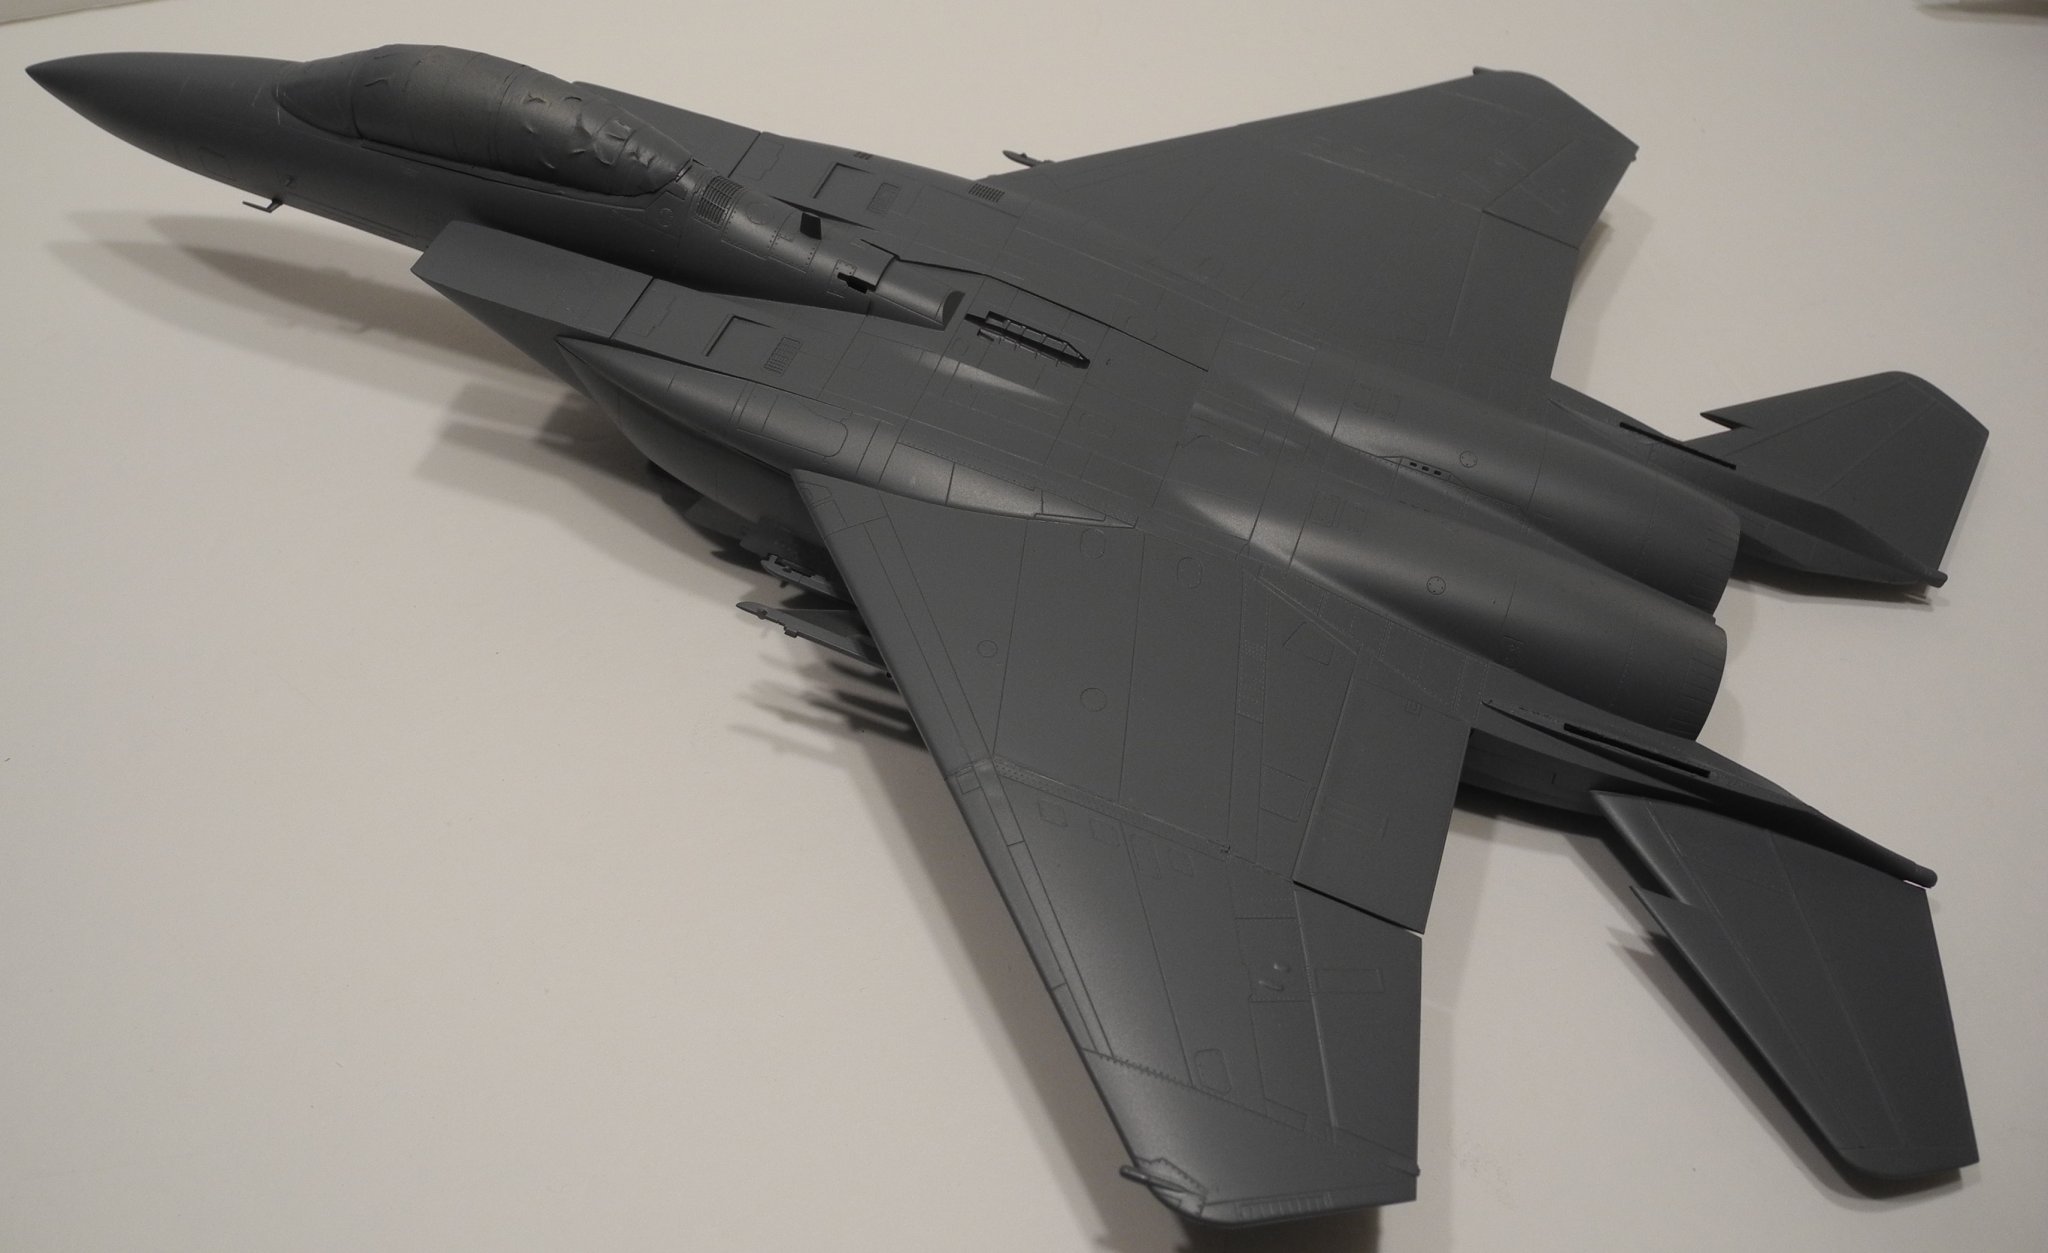
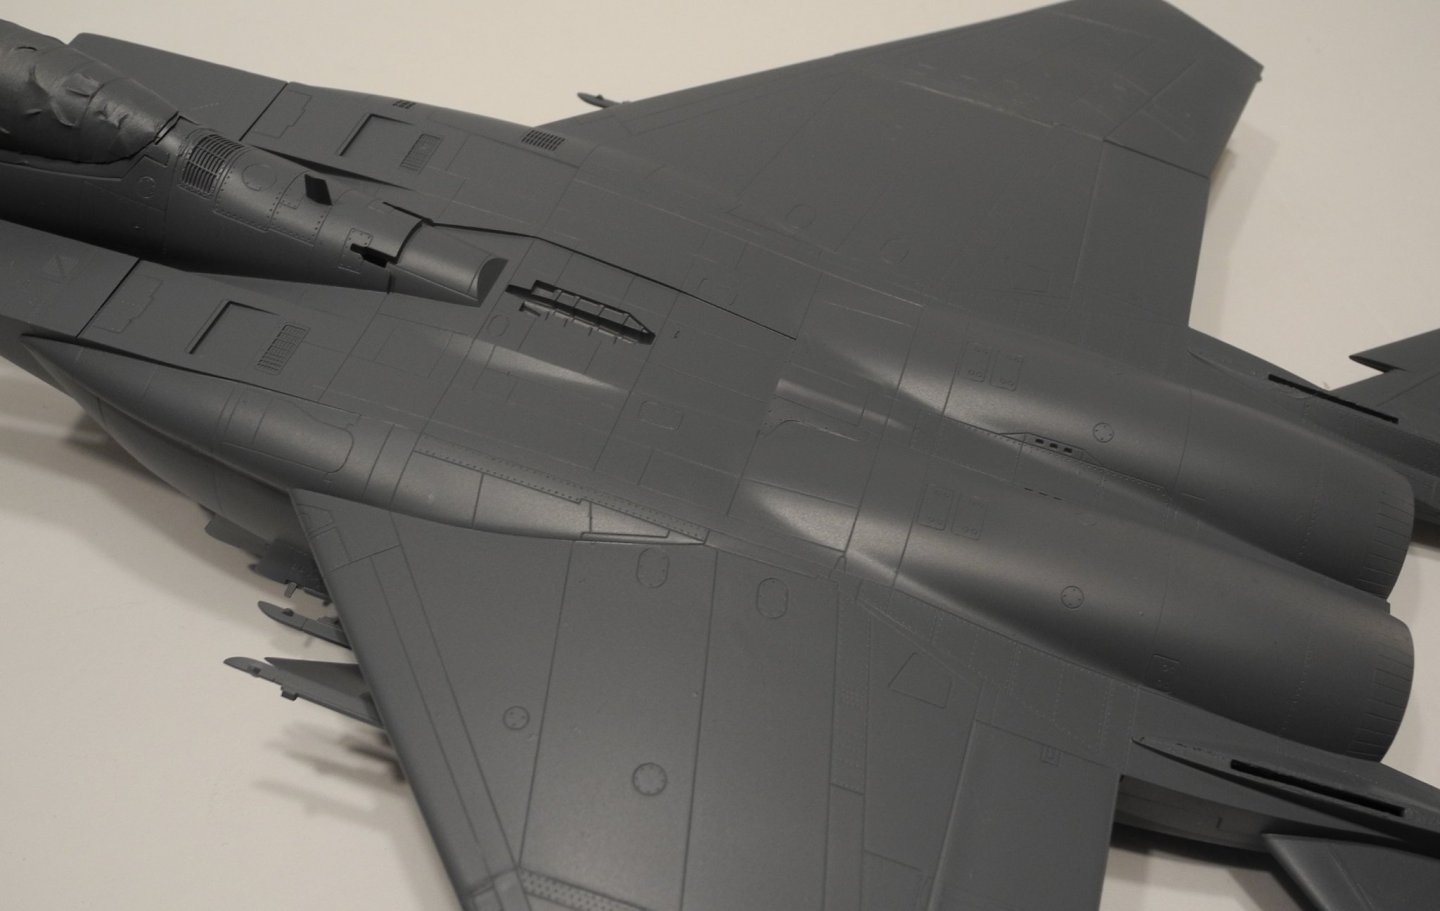
Top side received a treatment, now ready to start adding some details.


-
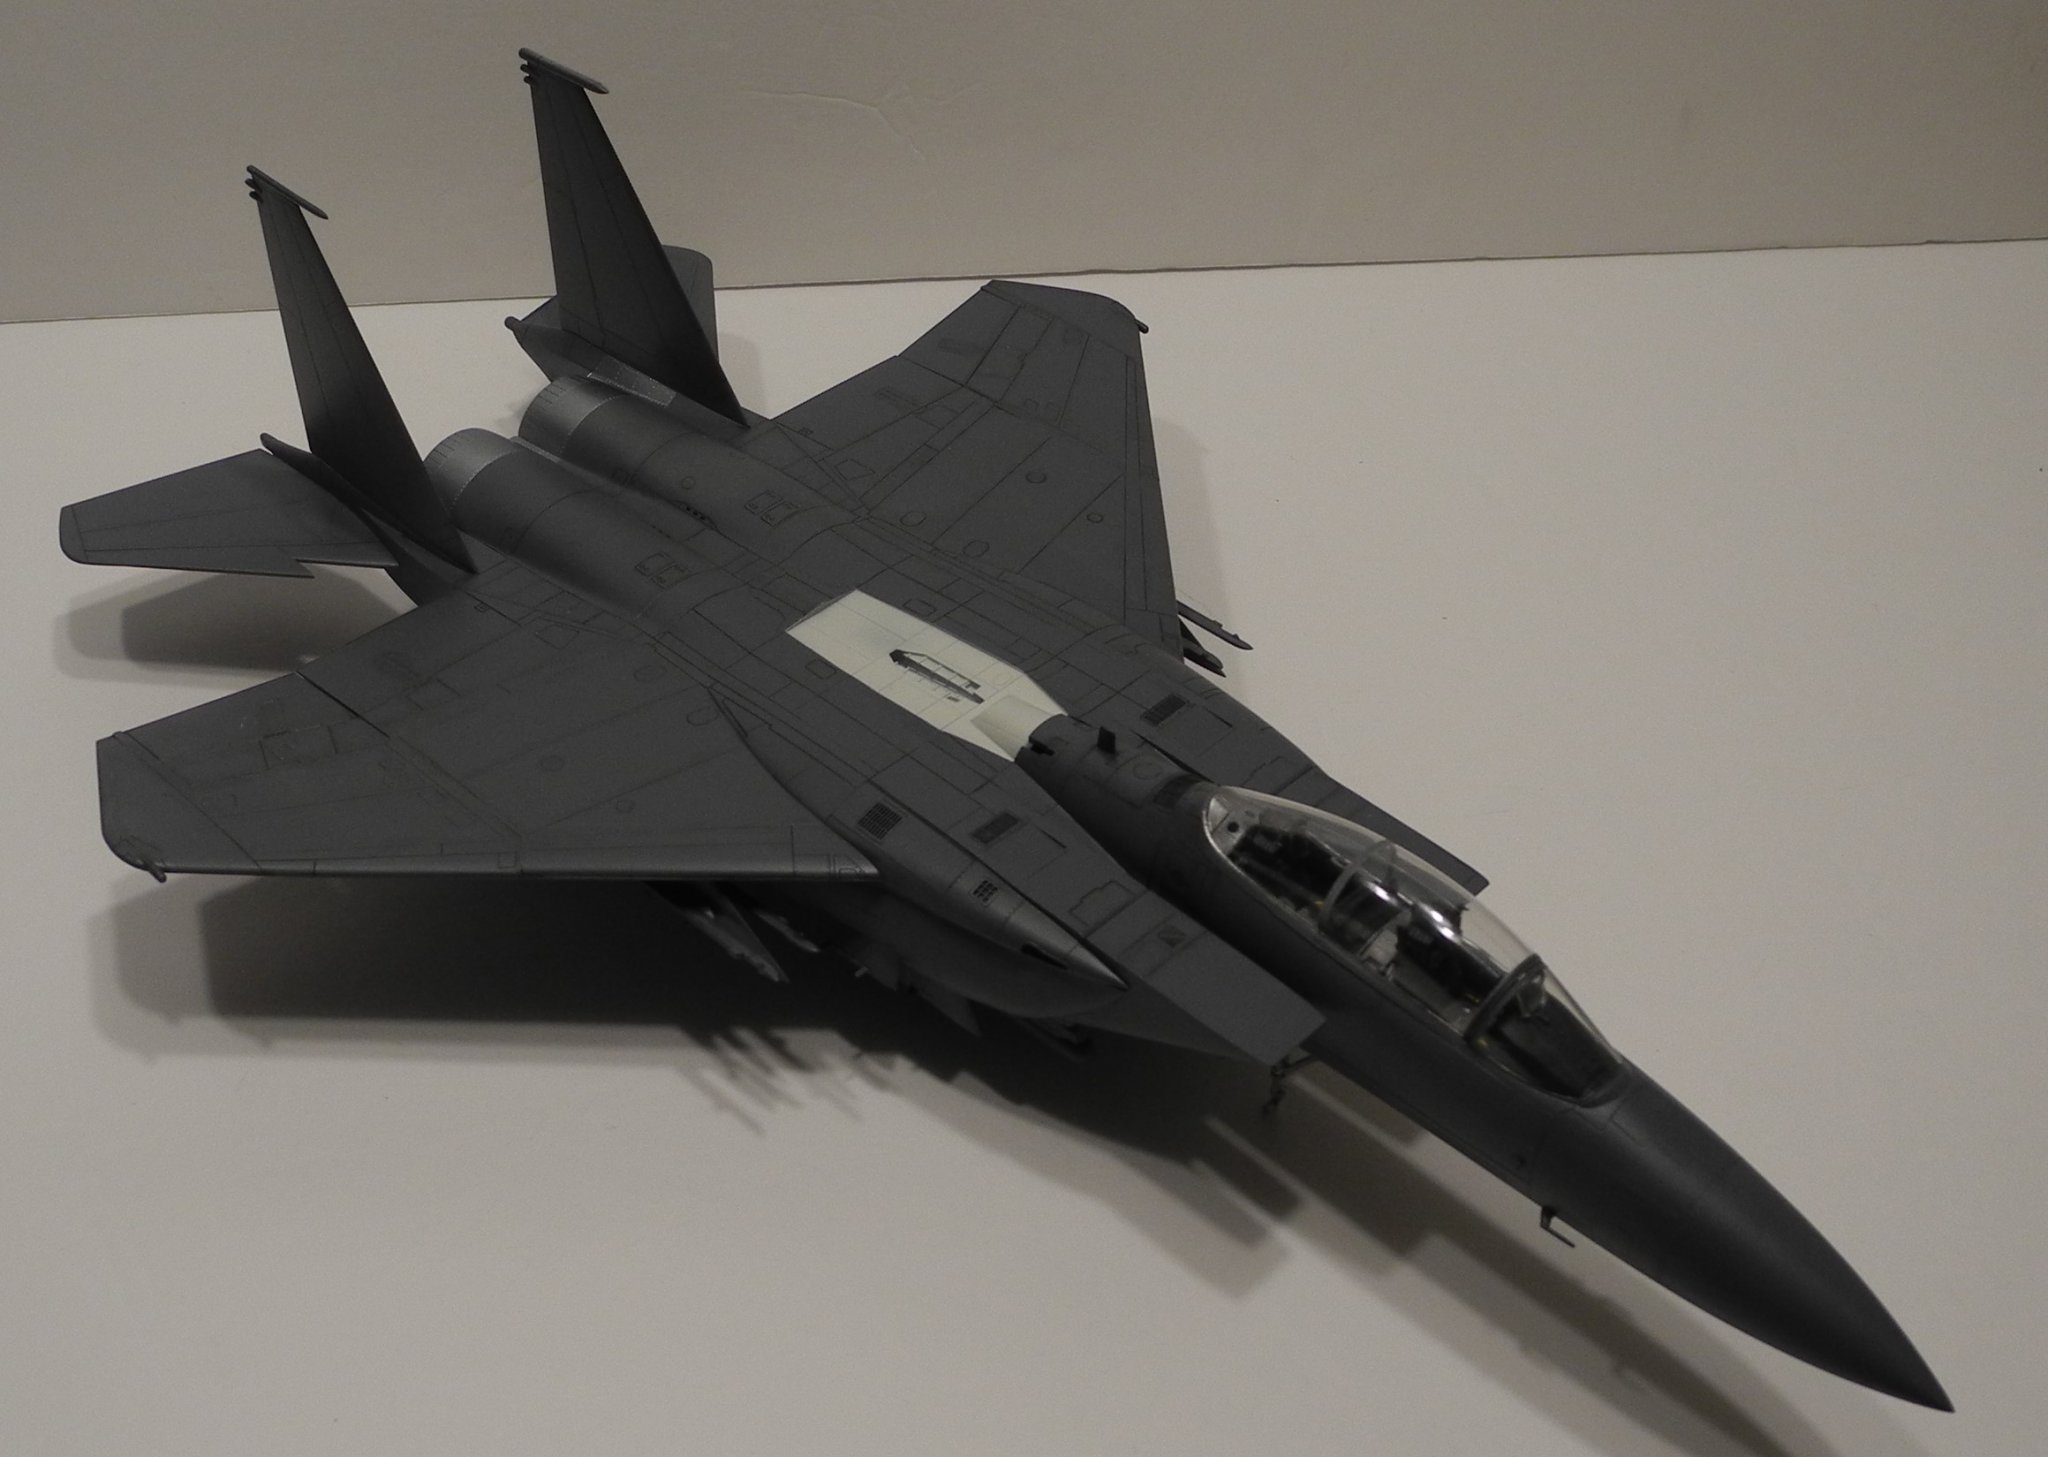
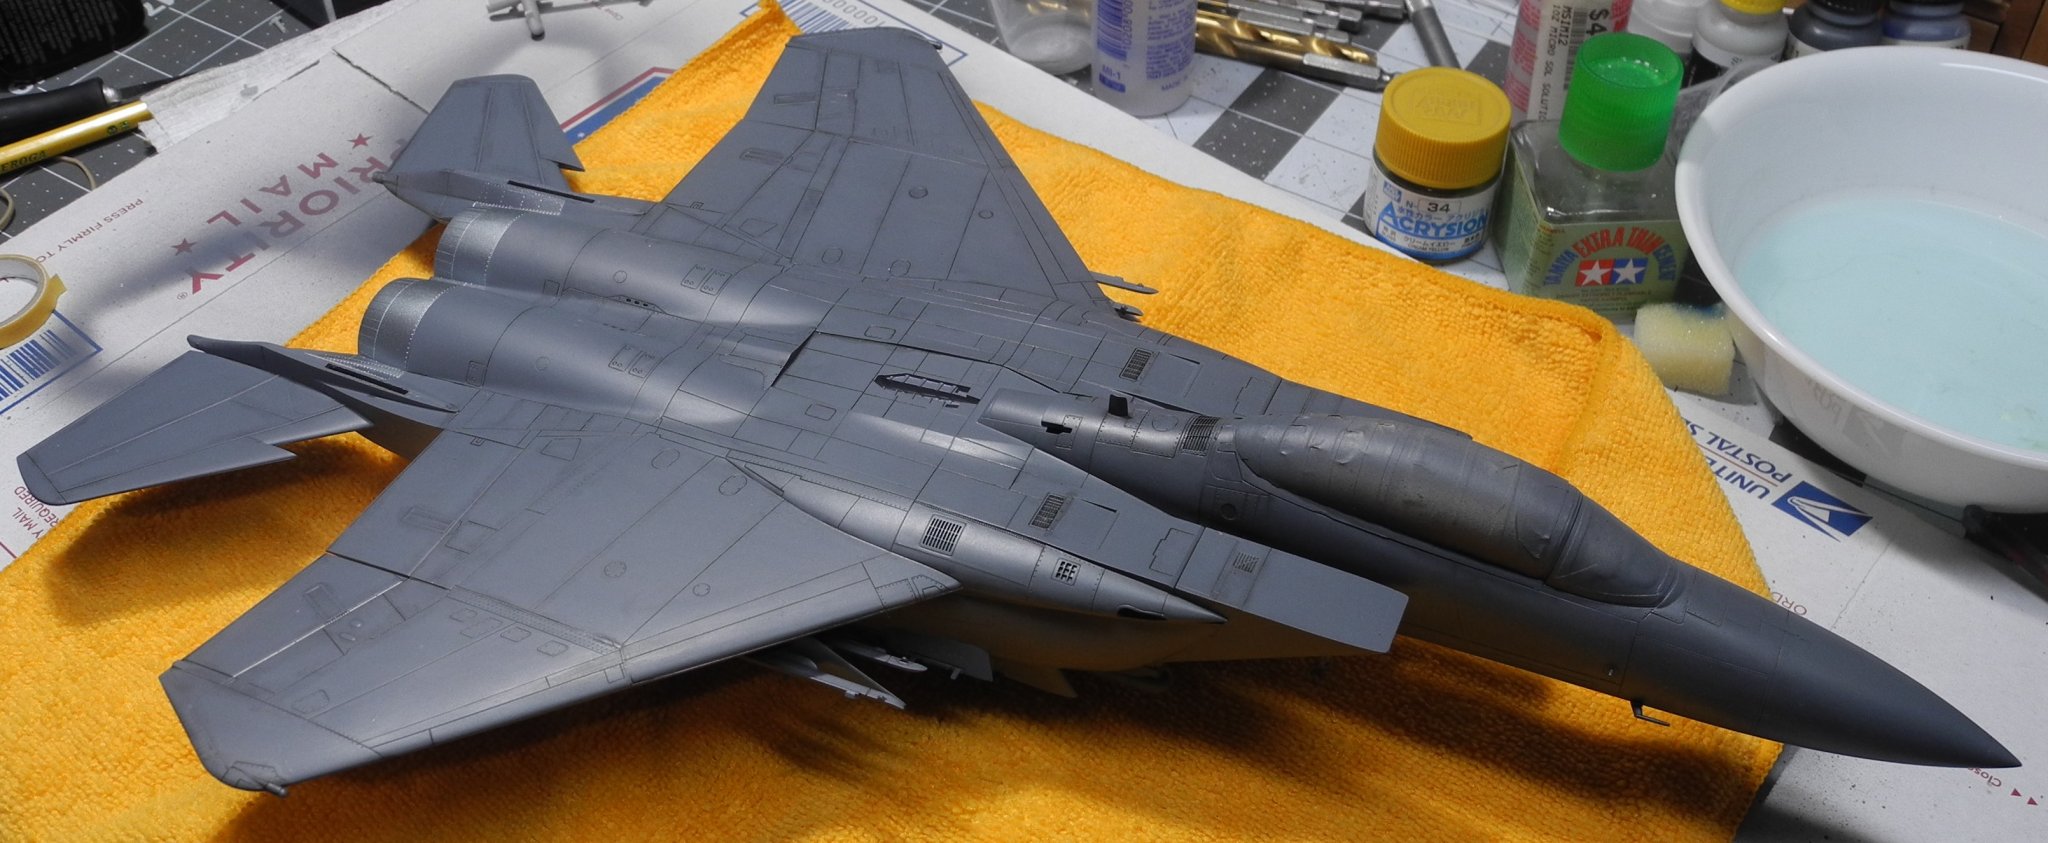
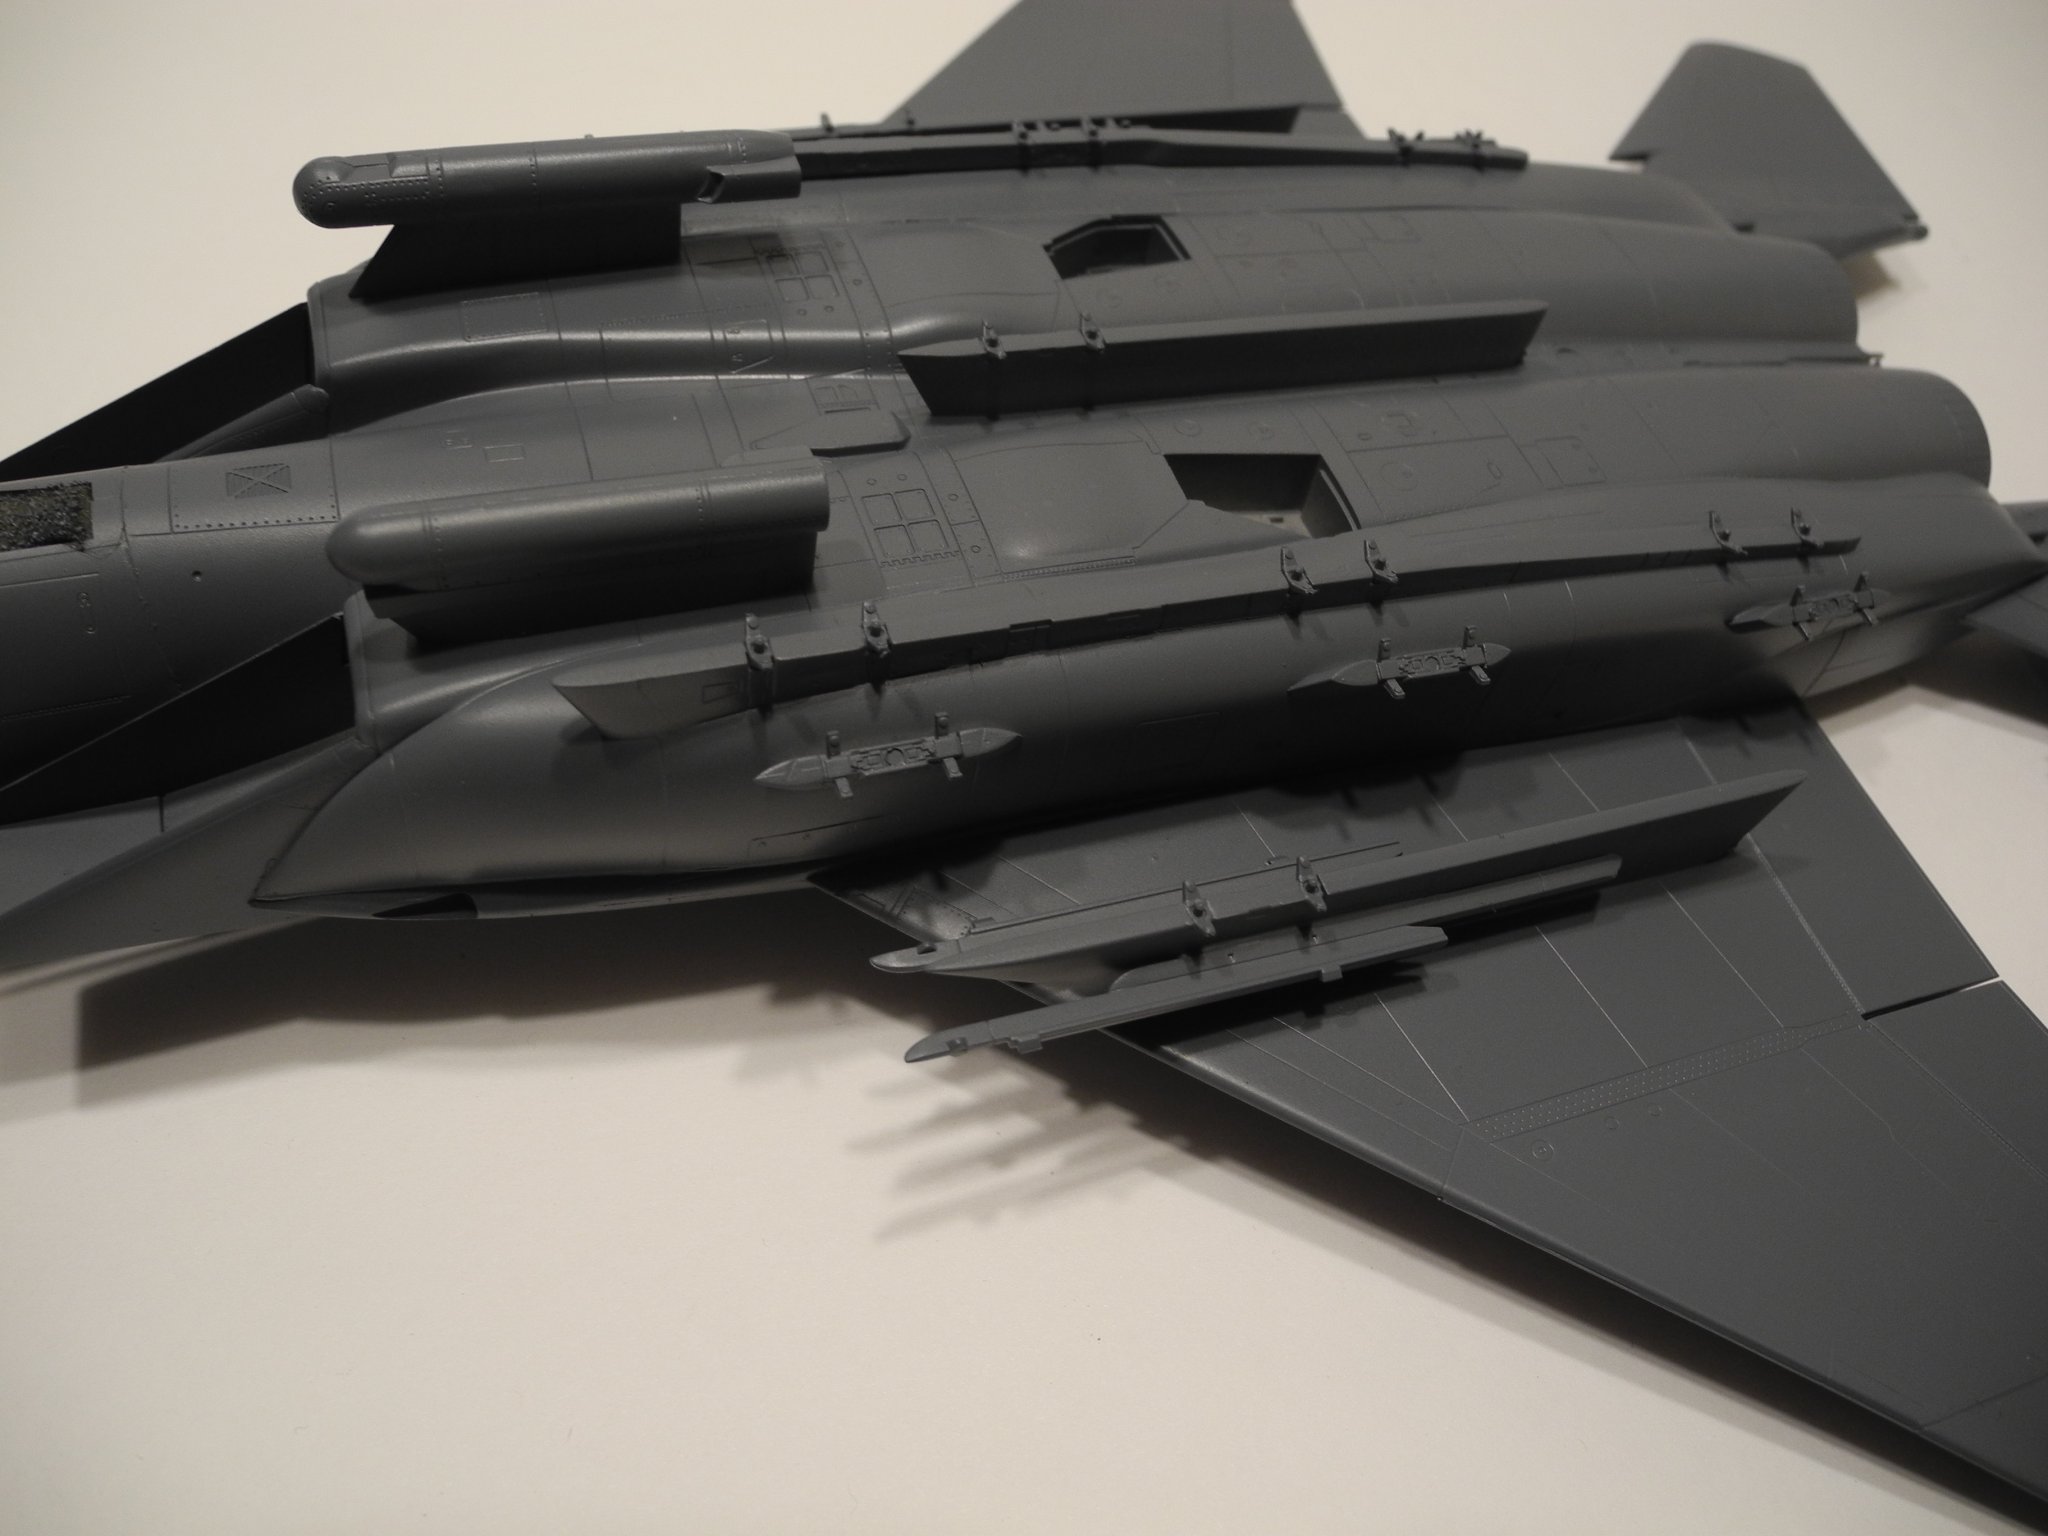
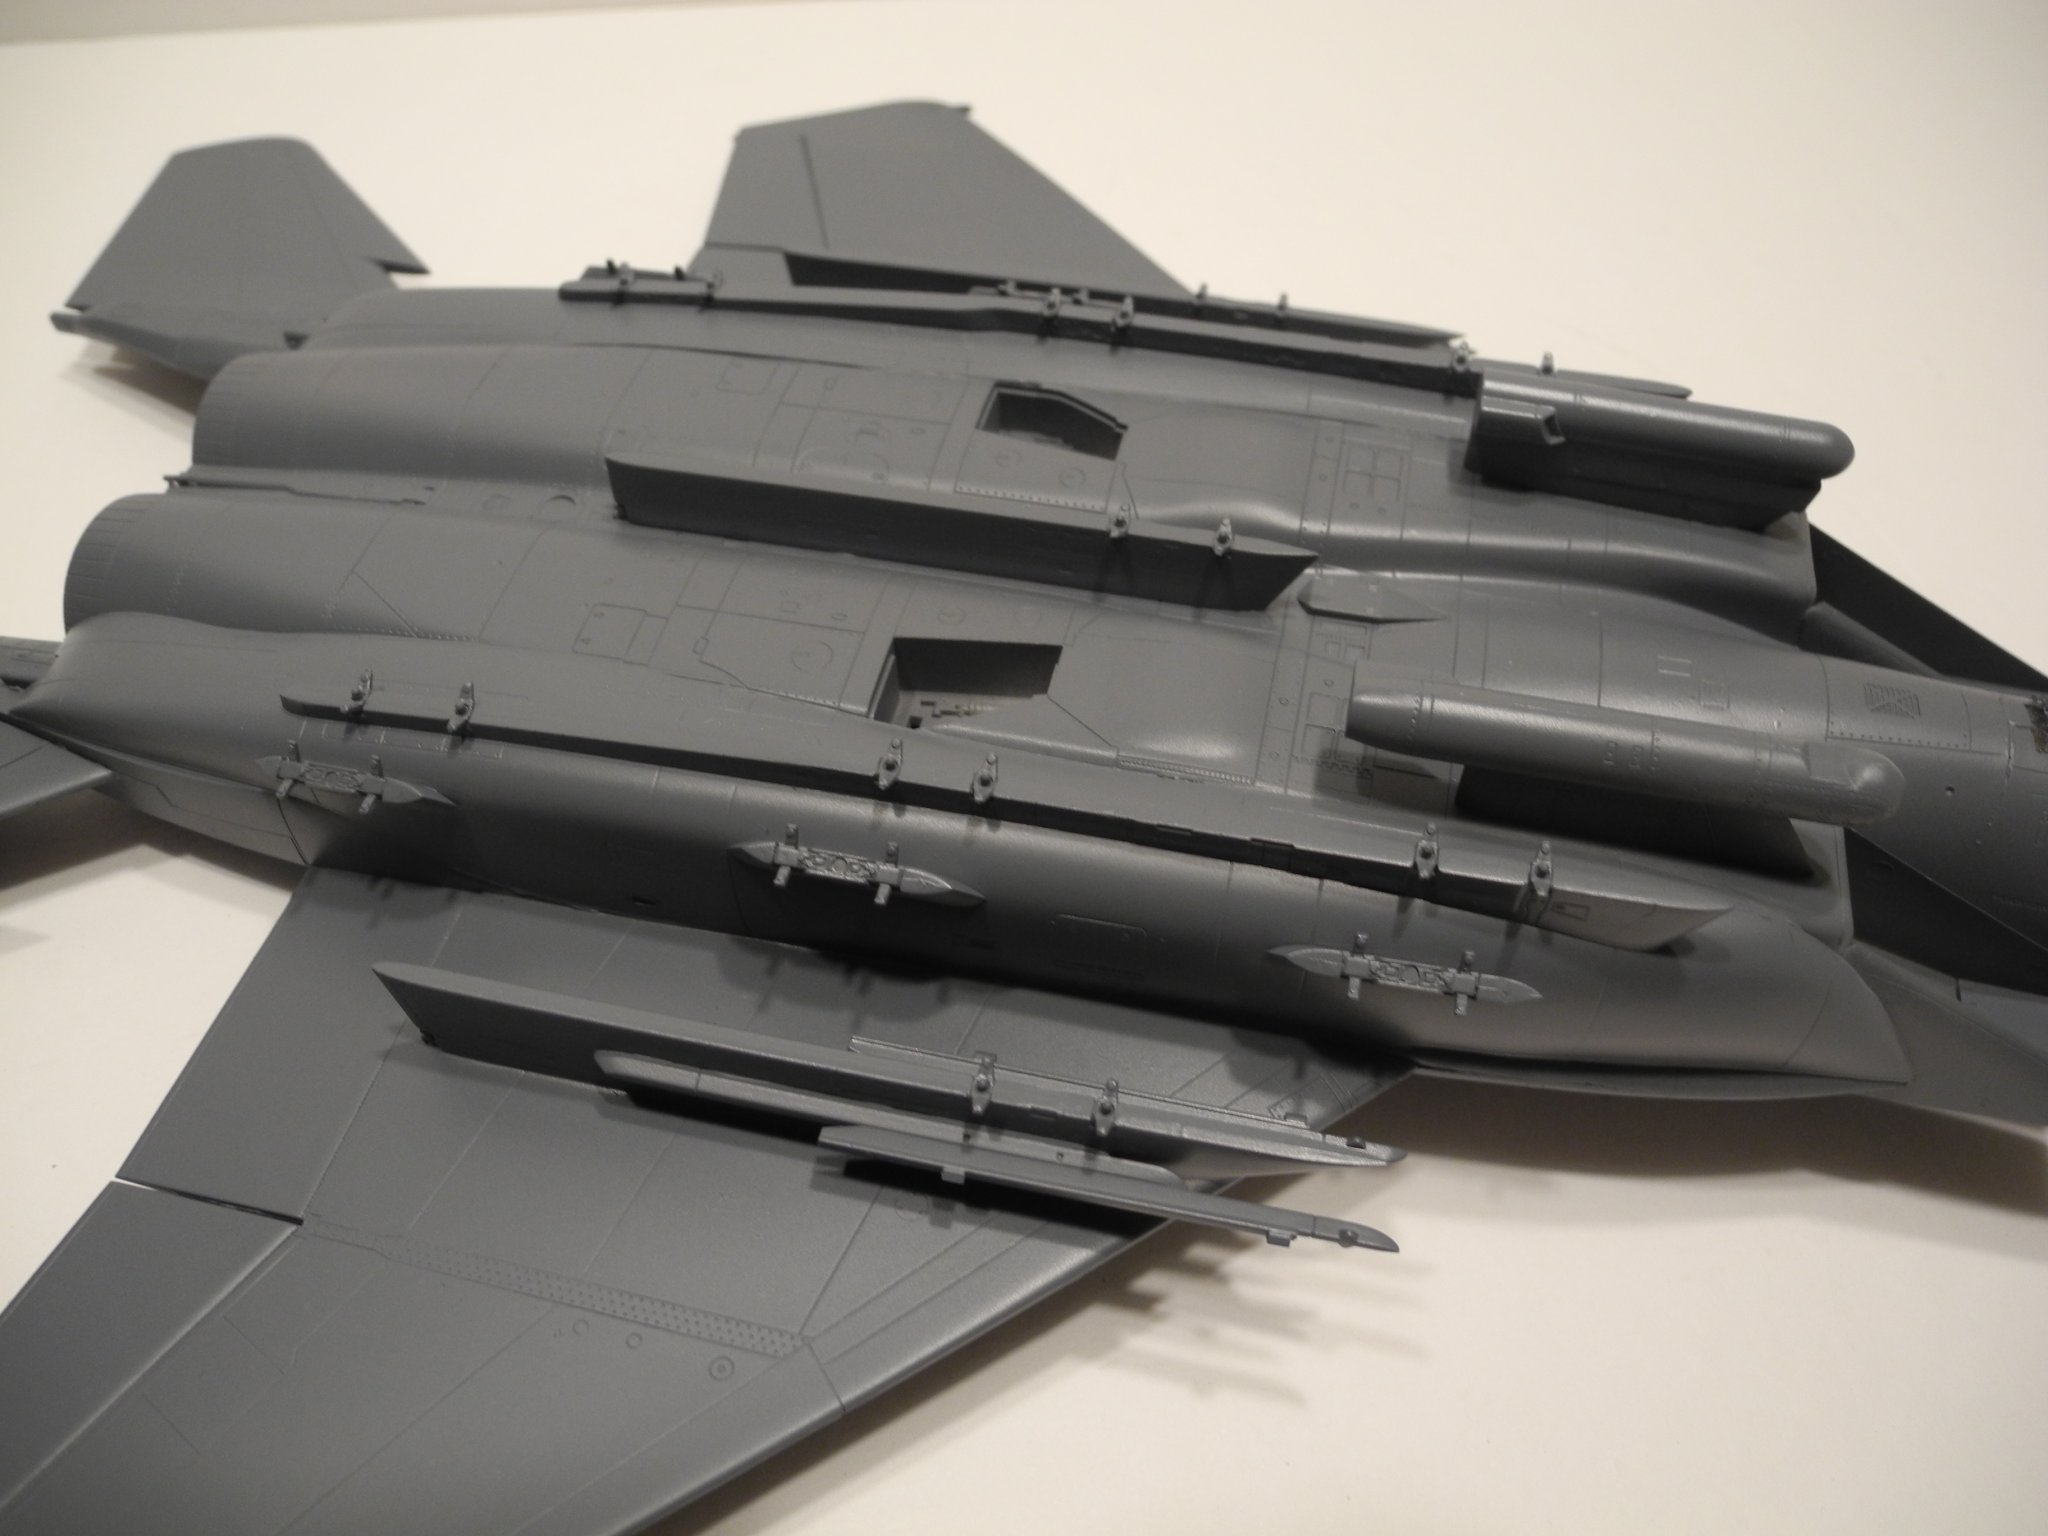
Because of all the fine engraved detail on this model, it lends itself well to a panel line wash. You can see where I've started washing away the excess wash in between the panel lines using a q-tip dampened with white spirits.


-
An interesting side story about my cousin Wallace...one time in the year+ while he was recovering in a field hospital in Italy, he watched from his hospital window while a crew of sea bees worked to build a runway. A flight of German bombers attacked the site as Wallace watched the sea bee workmen scramble from their equipment to reinforced shelter. After he had healed, the war had ended and everyone was home, he talked with his brother about his war experiences and told about the incident just described. Come to find out, one of the men he watched scramble to shelter was his very own brother. They had been at the same camp and never even found out until after the war had ended.
-
B-25 Mitchell "Meet Miss Runyon" by Javlin-HK-1/32
CDW replied to Javlin's topic in Non-ship/categorised builds
Great work, great photo. I never had an idea of how the ammunition was fed to the tail guns on this ship. This clearly illustrates it. The amount of available ammunition for each mission was probably rather small I would guess. Wouldn't take many bursts to blow through those two storage boxes. -
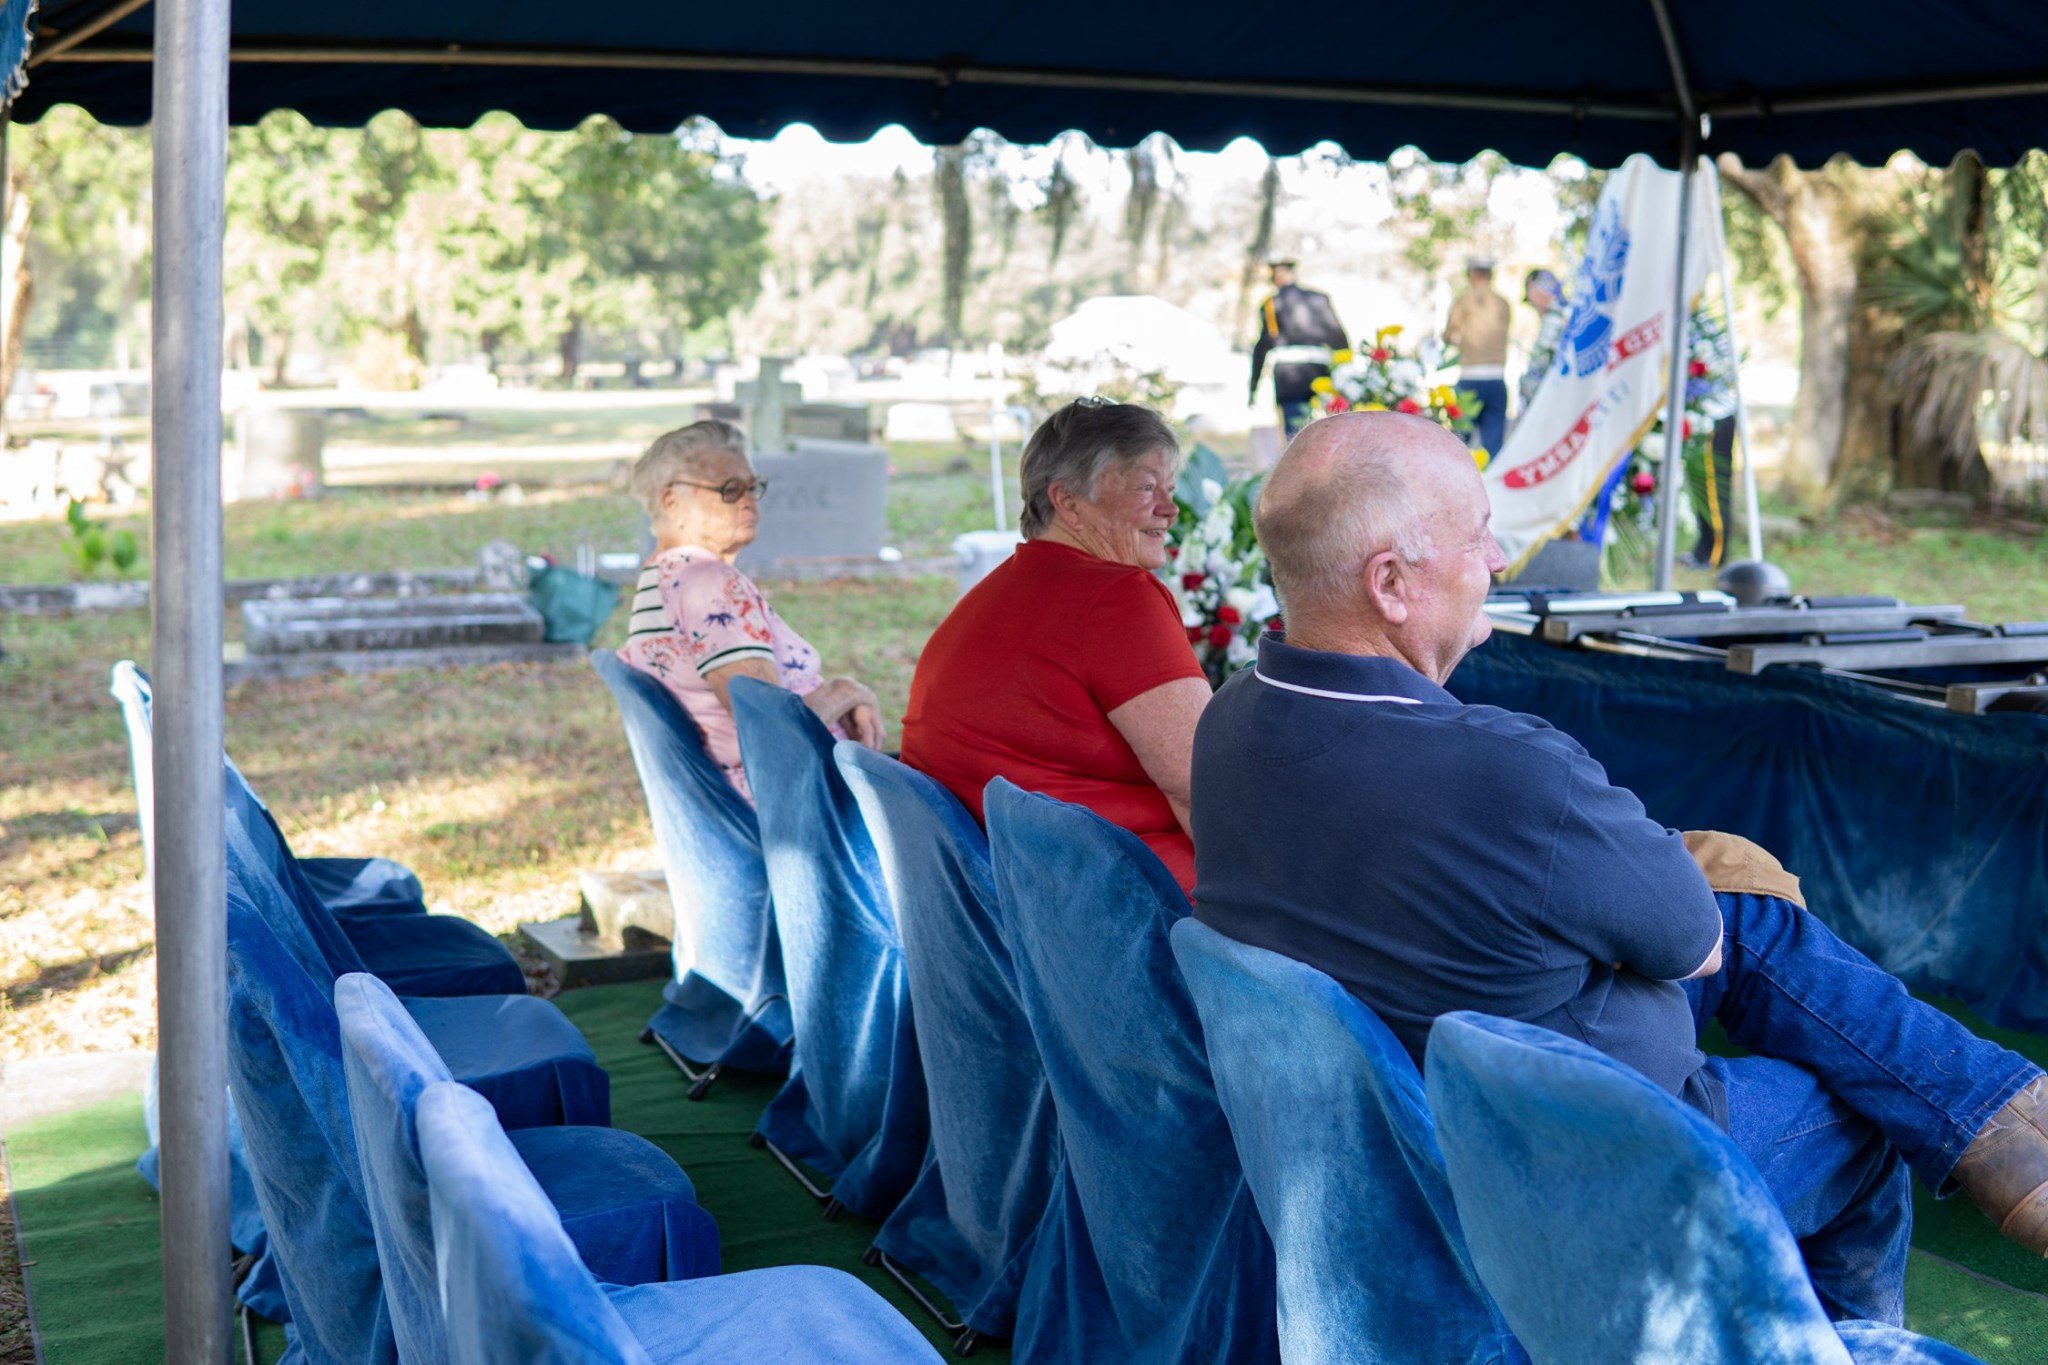
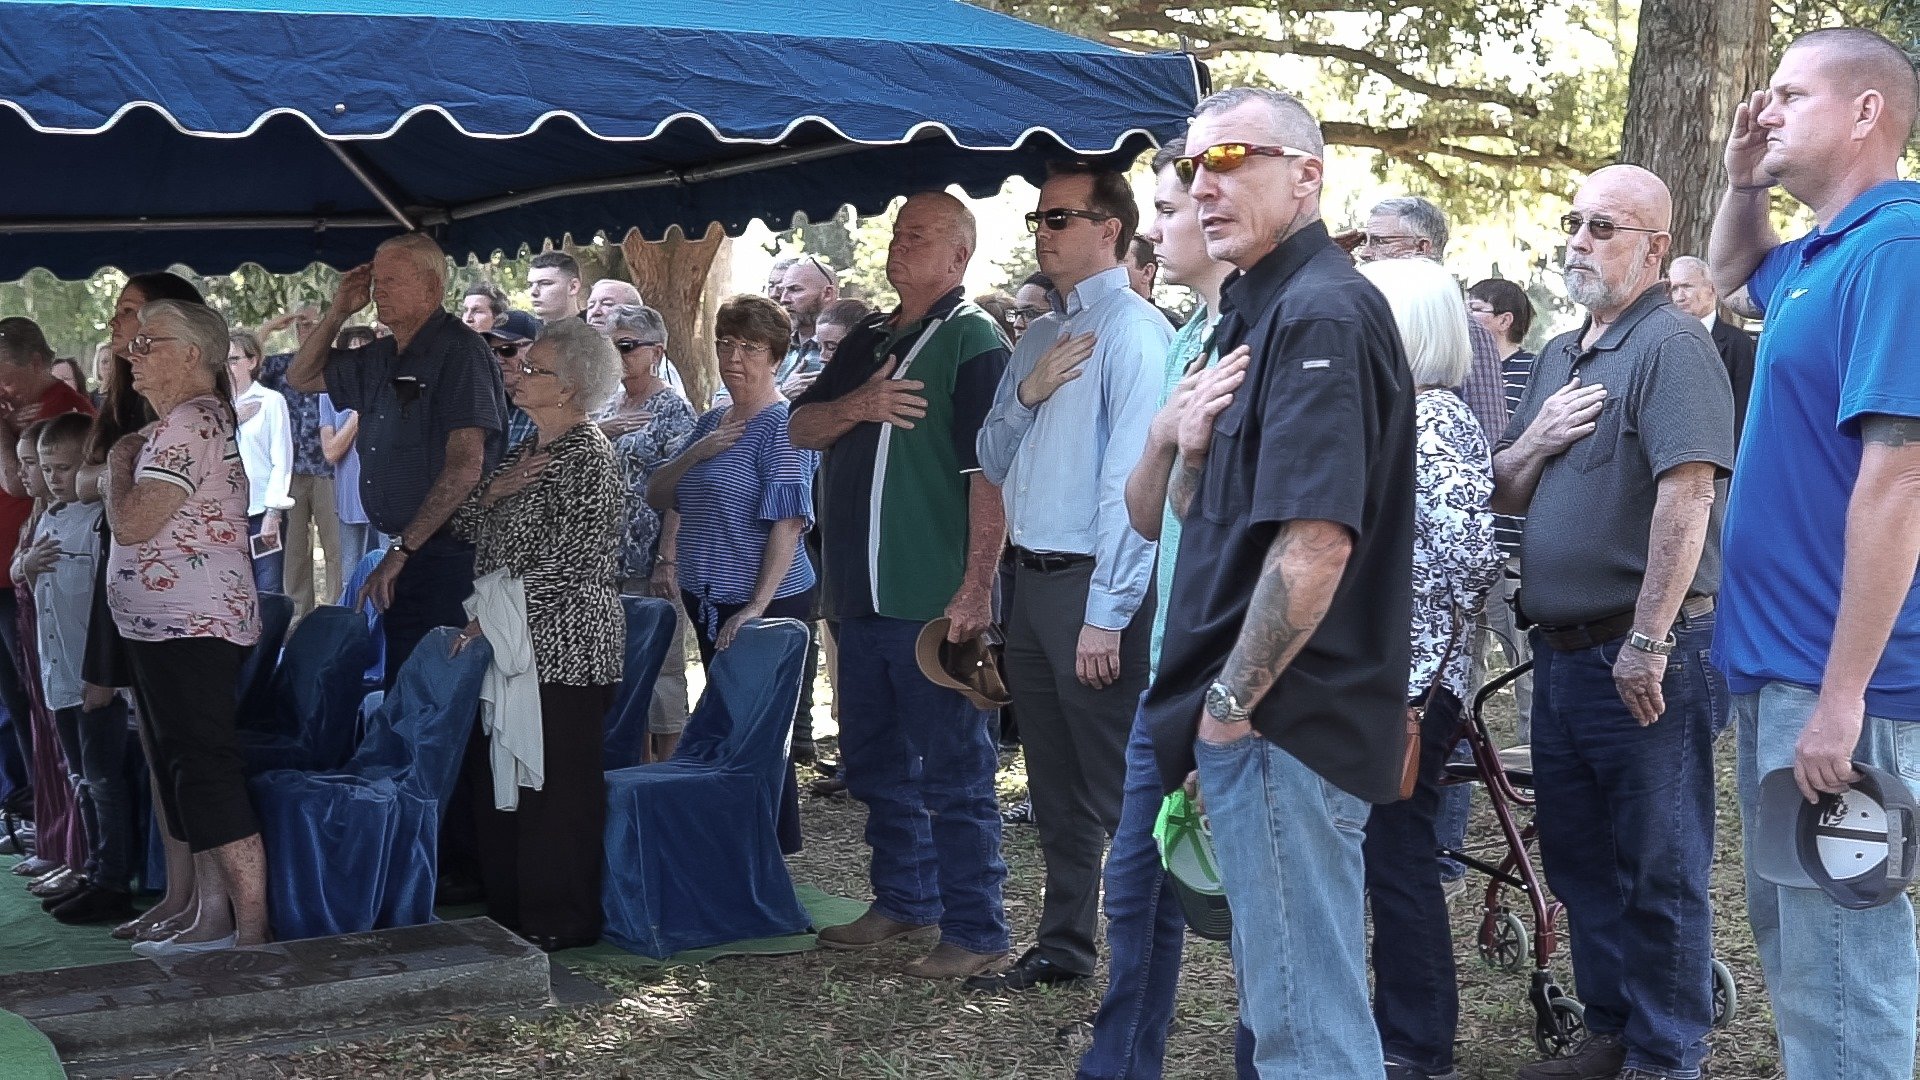
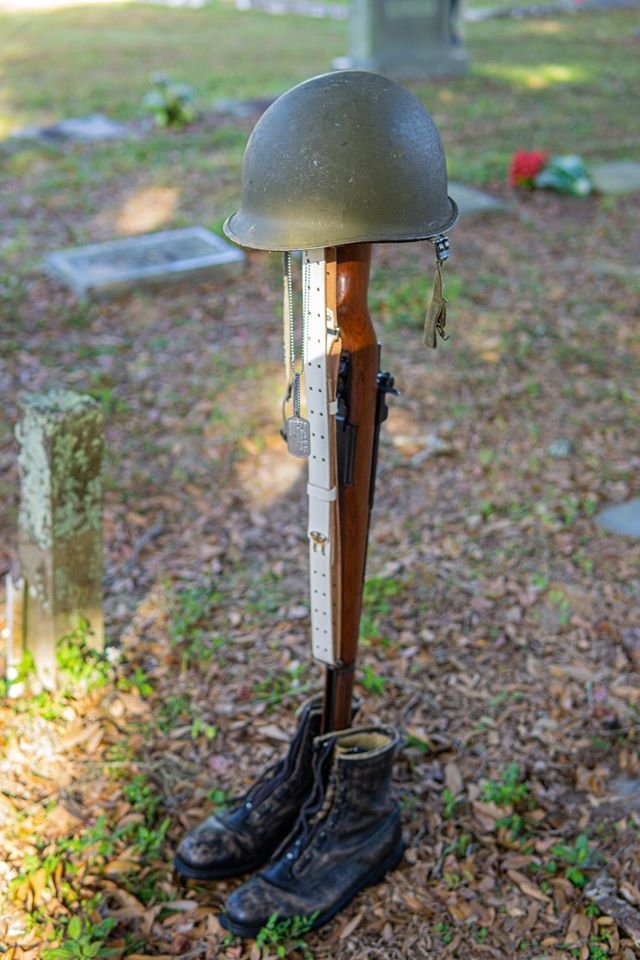
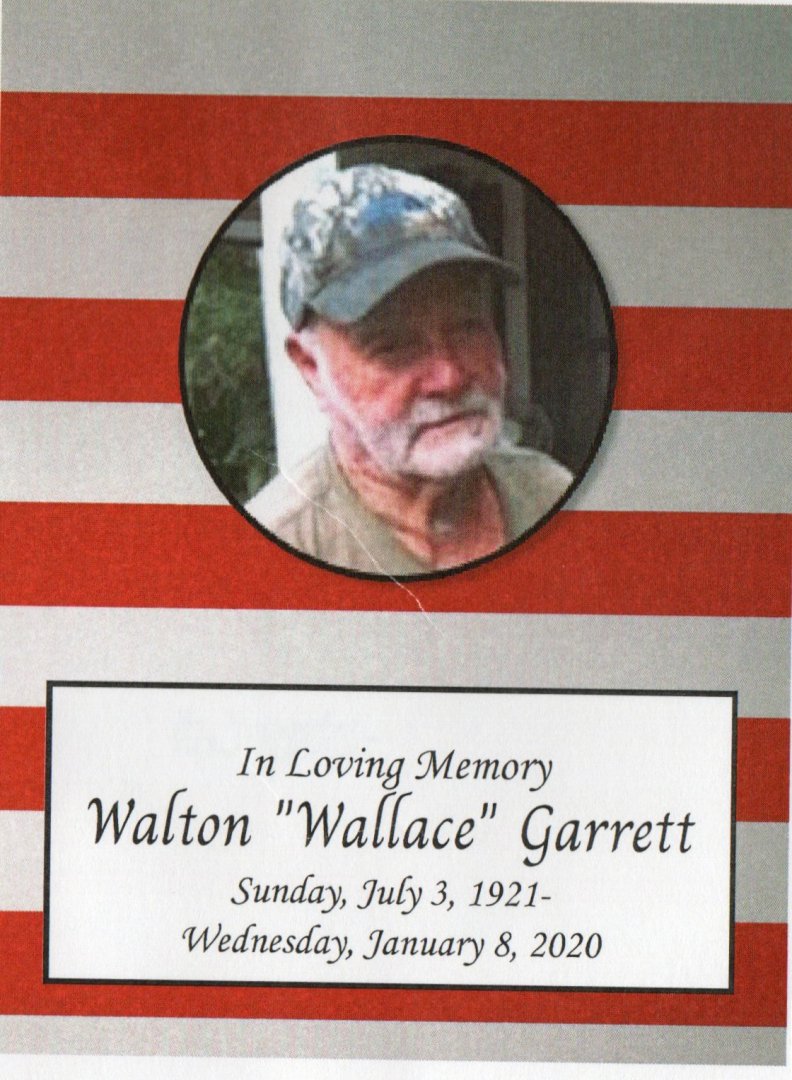
My dear cousin passed away this week. Today was his wake and tomorrow he will be laid to rest. Wallace was a wounded veteran of WW2 and one of the few such veterans remaining. He was severely wounded in action during the allied invasion of Italy when a German aerial bomb practically cut him in half at his torso. He pushed his own guts back into his abdominal cavity and waited until medics could carry him off to a mash hospital. When the medics arrived at his side, they covered him with a sheet thinking he was certainly dead for his injuries were so drastic, but Wallace fought for his own life by pulling the sheet down and yelling at the medics, "hey I'm alive!". He endured dozens of surgeries over time to patch him back together then lived out his life on his family farm in Oxford Florida. He was married to one wife for 70 years who is now widowed after his passing. He was a great man and a cousin who I looked up to all my life. He was a quiet man who was put together with steel. He will be greatly missed but always appreciated for the sacrifices he made for his country and our freedom. He was truly, one from"the Greatest Generation". Rest in peace my dear brother. The world is a better place because of men like you.
- 92 replies
-
- 11
-
-
A good friend was an F-16 pilot. He told me how in joint exercises, British Buccaneers would go supersonic on the deck. That's an aircraft I really love. I once built the Airfix 1:48 scale one and it came out great. Sold it for a couple hundred bucks on Ebay years ago. I had no place to display it and was going to throw it away. My wife scolded me and said to sell it on Ebay. I did not believe I would get anything for it and it came as quite a shock it bid up like it did. From that time on, I sell built models on Ebay. I enjoy the build, then sell them to buy some more. Get lots of practice that way. 🙂
-
Indeed, those are all large aircraft. Yes, I often see photos of the F-15E with drooped intakes. The model comes with FOD covers for the intakes, but none for the afterburners. I'll be using prepainted photo etch RBF tags. Thanks for dropping by and for your comments.
-
How close were you to this aircraft when you took the photo? I'll bet that sucker was loud. Nice photo, very nice.
-
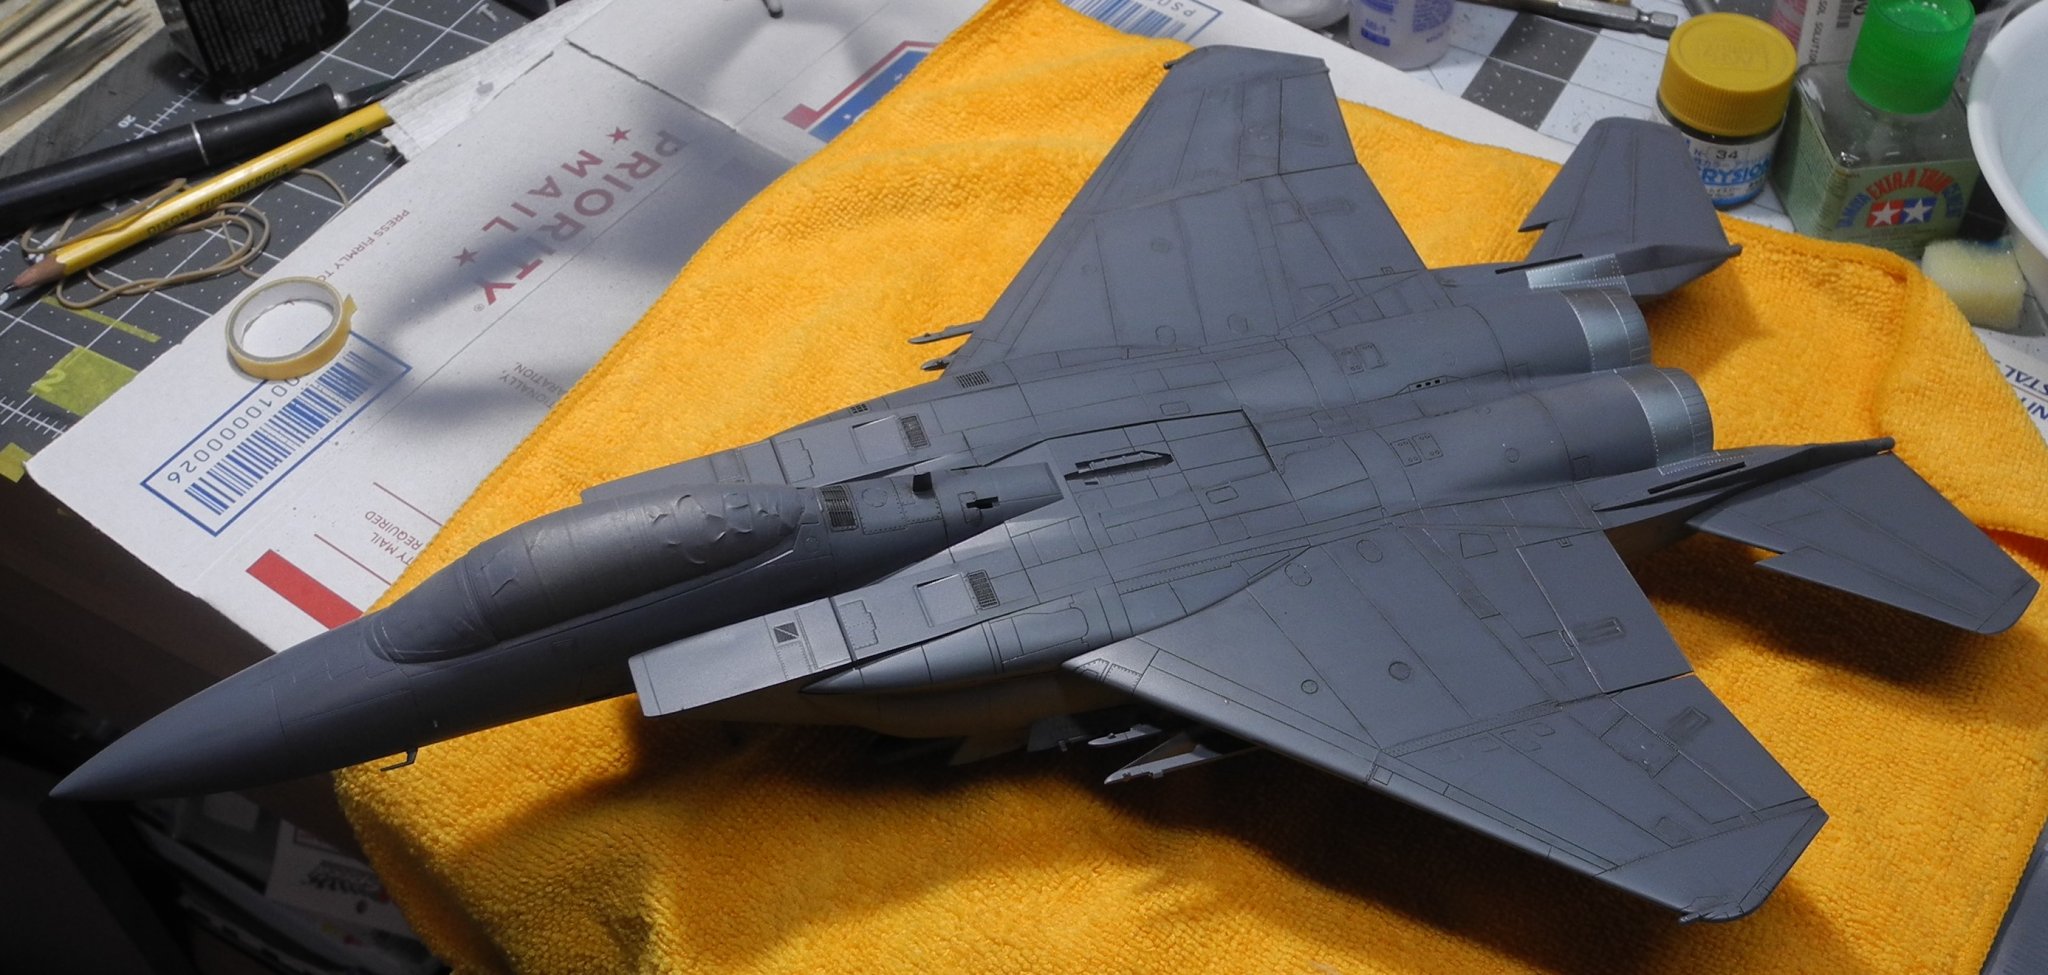
For the longest time, years and years, Mr. Color lacquer paints have not been available in the USA. Just recently, my local supplier has been able to reacquire the line, so today I stocked up on grays, some greens, and tans. The color used here is Mr. Color 305, FS 36118, the correct color for F-15E's. While gray is rather dull to look at, it really pumps me up to be using Mr. Color lacquer paints again. If you look closely at the photos, you'll see these paints go down without a flaw. They're very fast drying, cover extremely well, and come in practically all the correct colors for various aircraft. It's exciting to me to get a near flawless paint coverage, which is something I can rarely achieve with acrylics. Mixed/reduced with the Mr. Color Leveling thinner, the paint produces amazing results and will be a perfect base to lay down the detail paint/washes/shading that will go on later.


- 92 replies
-
- 10
-