CDW
-
Posts
7,760 -
Joined
-
Last visited
Content Type
Profiles
Forums
Gallery
Events
Everything posted by CDW
-
 I'm guessing you watched the video I posted? It talks about the testing NASA did on the planes using laminar airflow technology, and the fact it gave the F-16XL airframes the ability to fly supersonic without afterburner. Other than that, I haven't heard about further testing, but would be interested in more information. Will be on the lookout for more.
 -
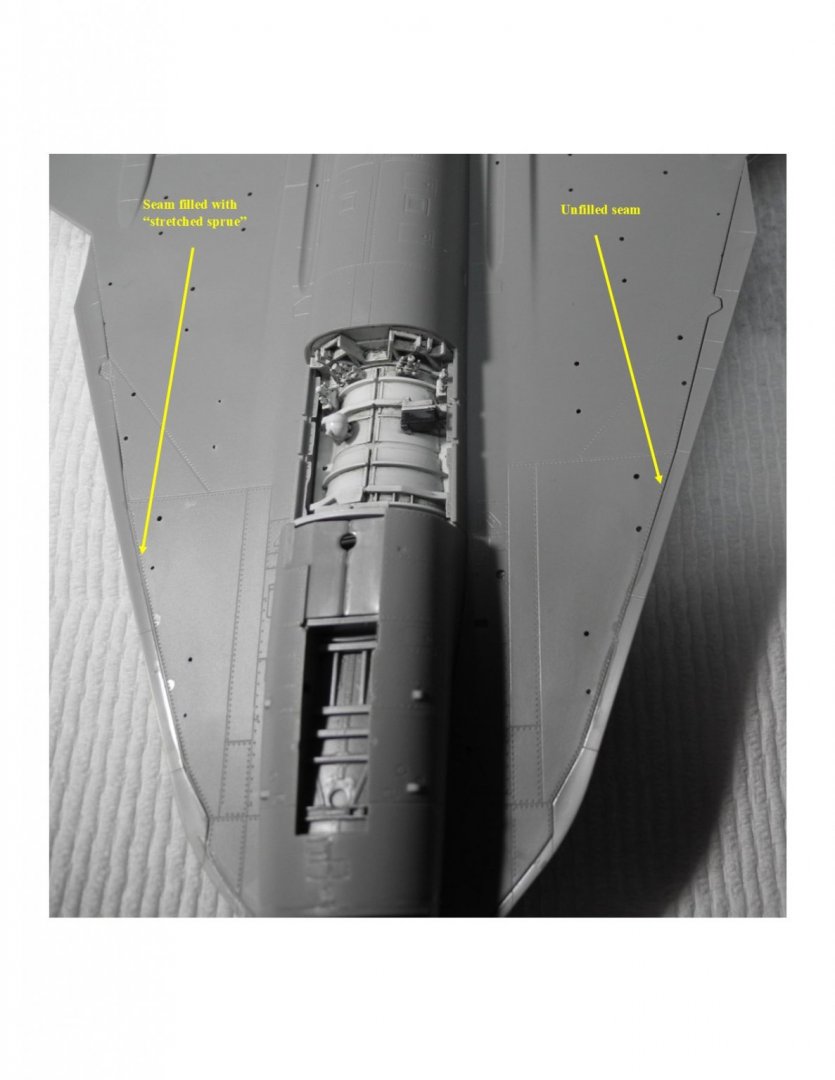
If you try it, use Tamiya liquid cement to fuse the streched sprue into the seam. It softens the plastic sprue material and you can push it down into the seamusing a tooth pick or similar tool of your choice. Much less hassle than putty and easy to clean up afterward without sanding away surrounding detail. PS: I should have added, back in the day, this was also a popular method of adding or re-establishing a raised panel line.
-
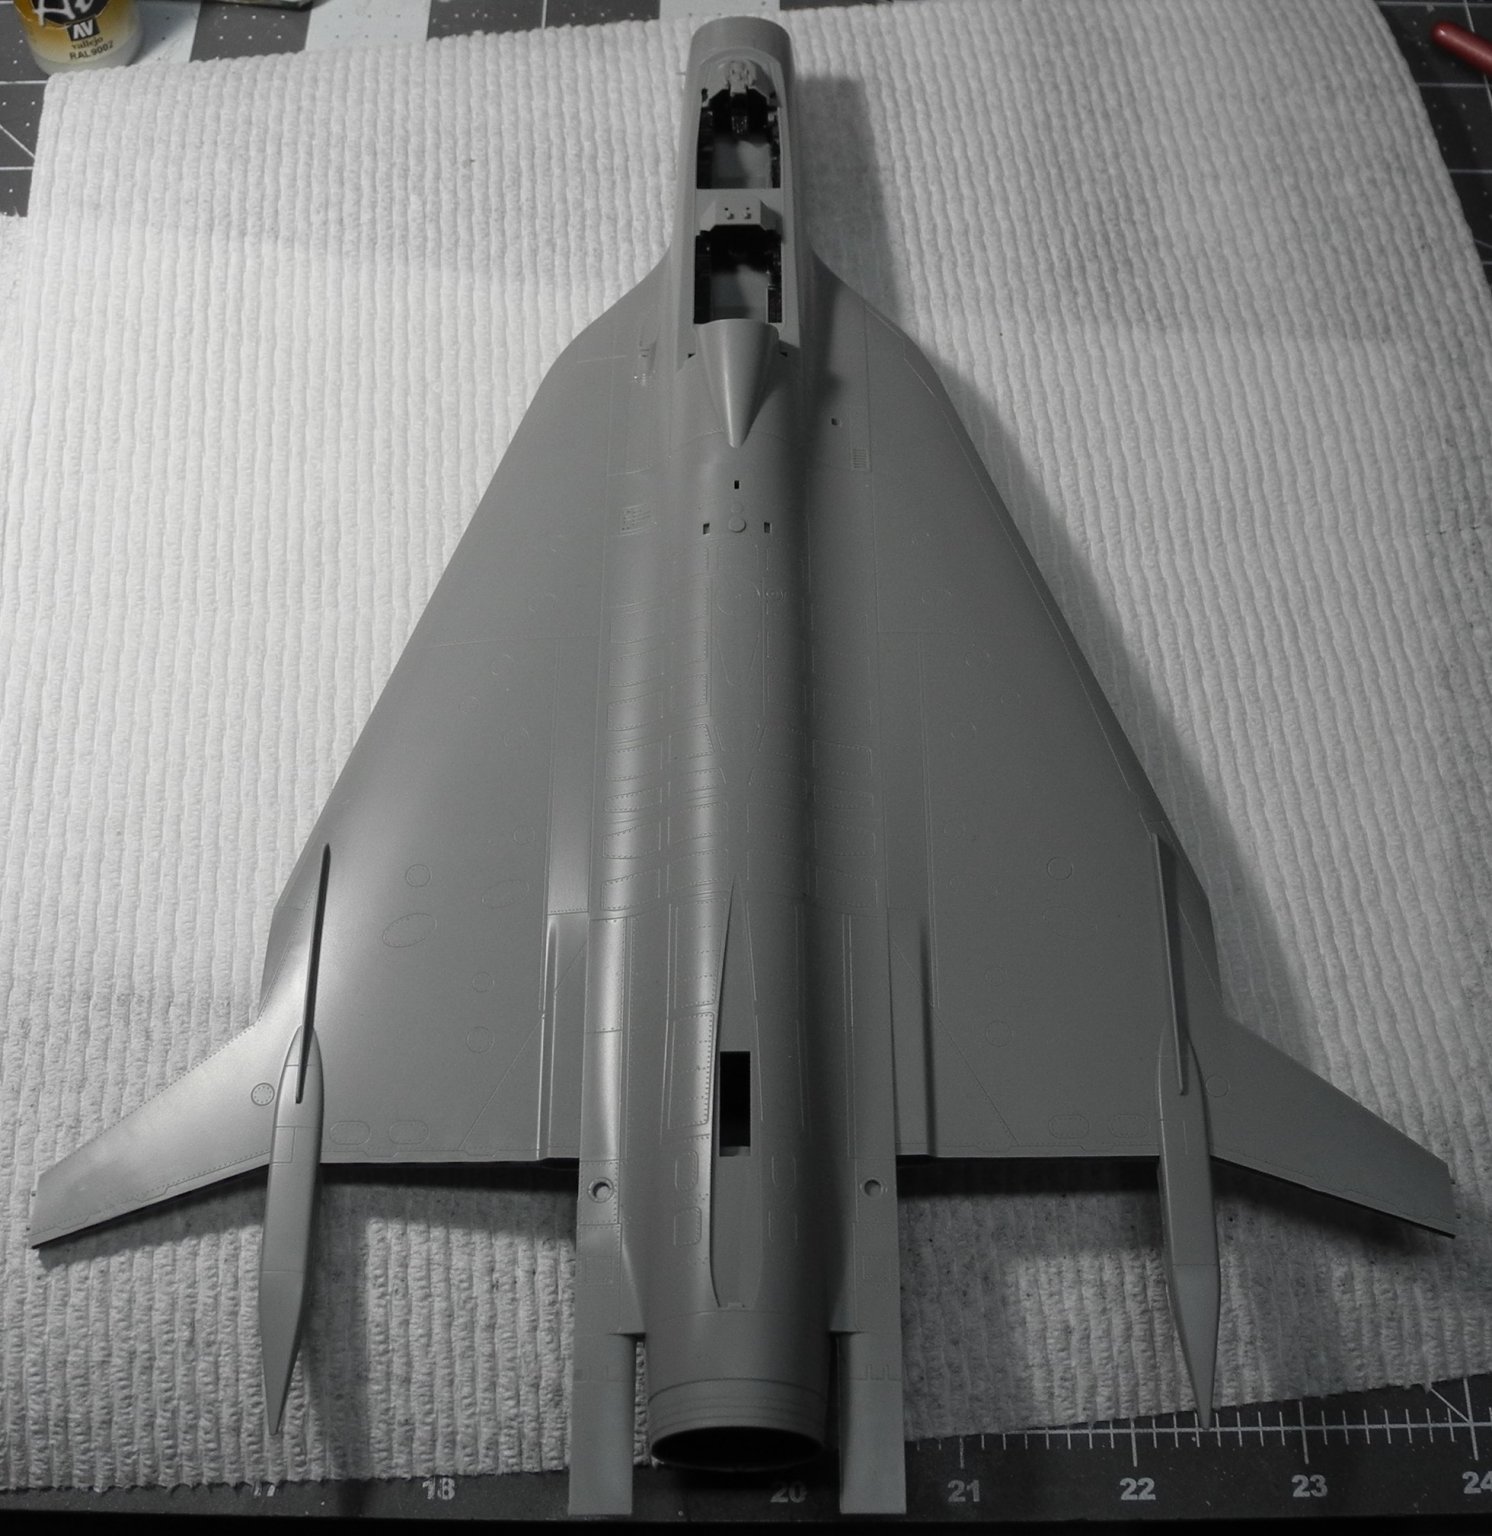
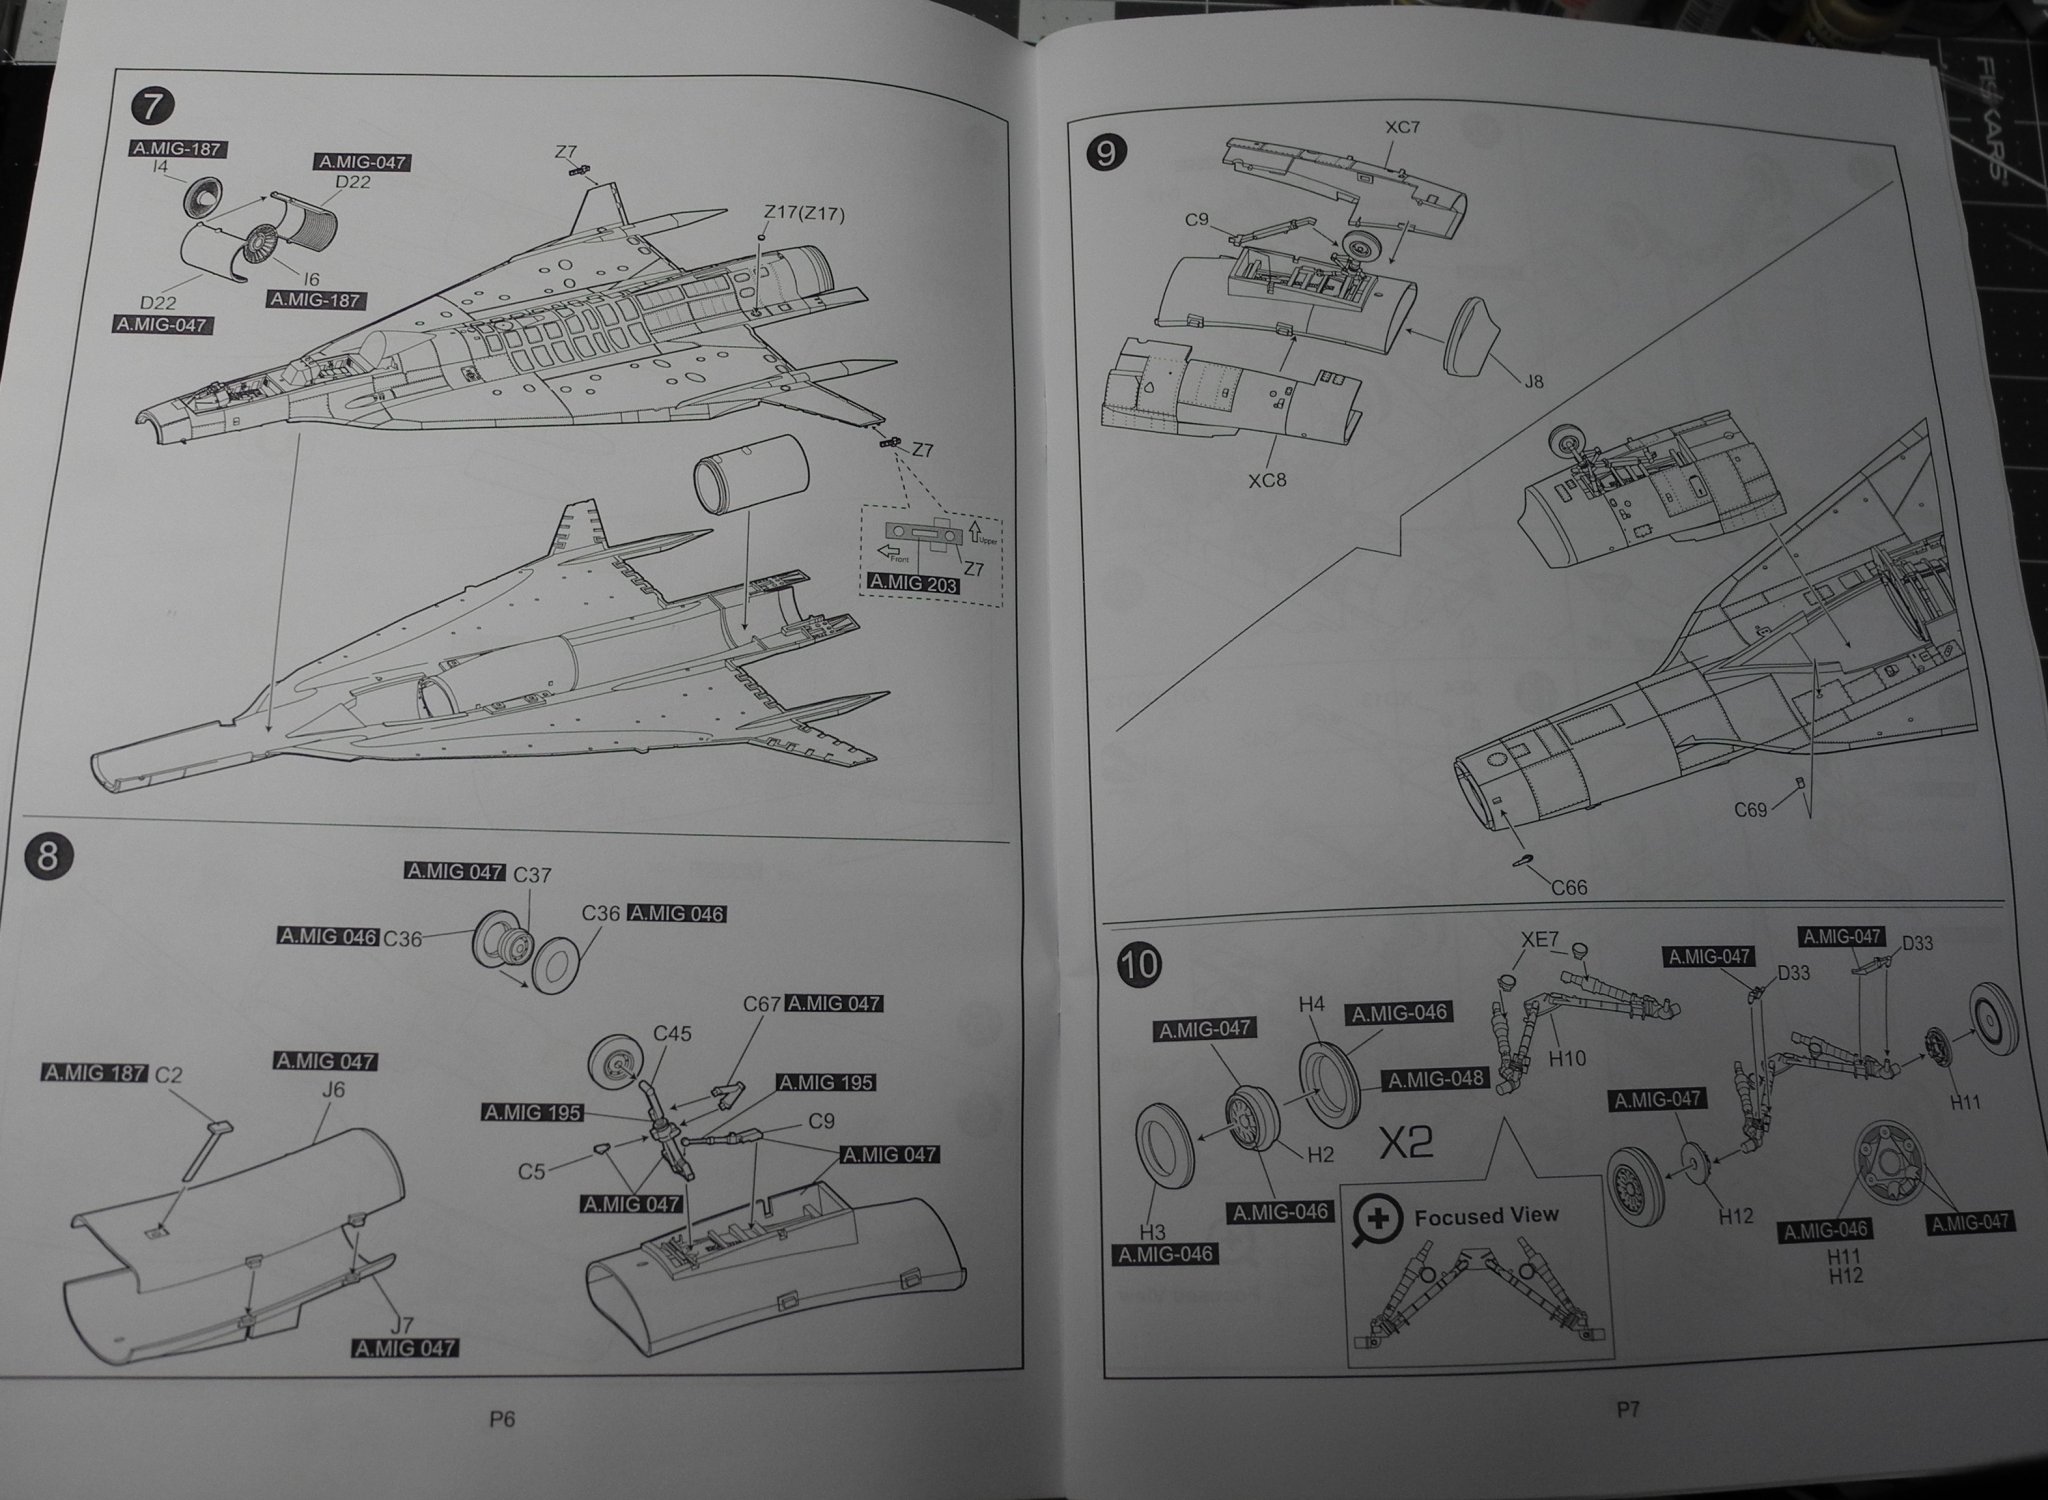
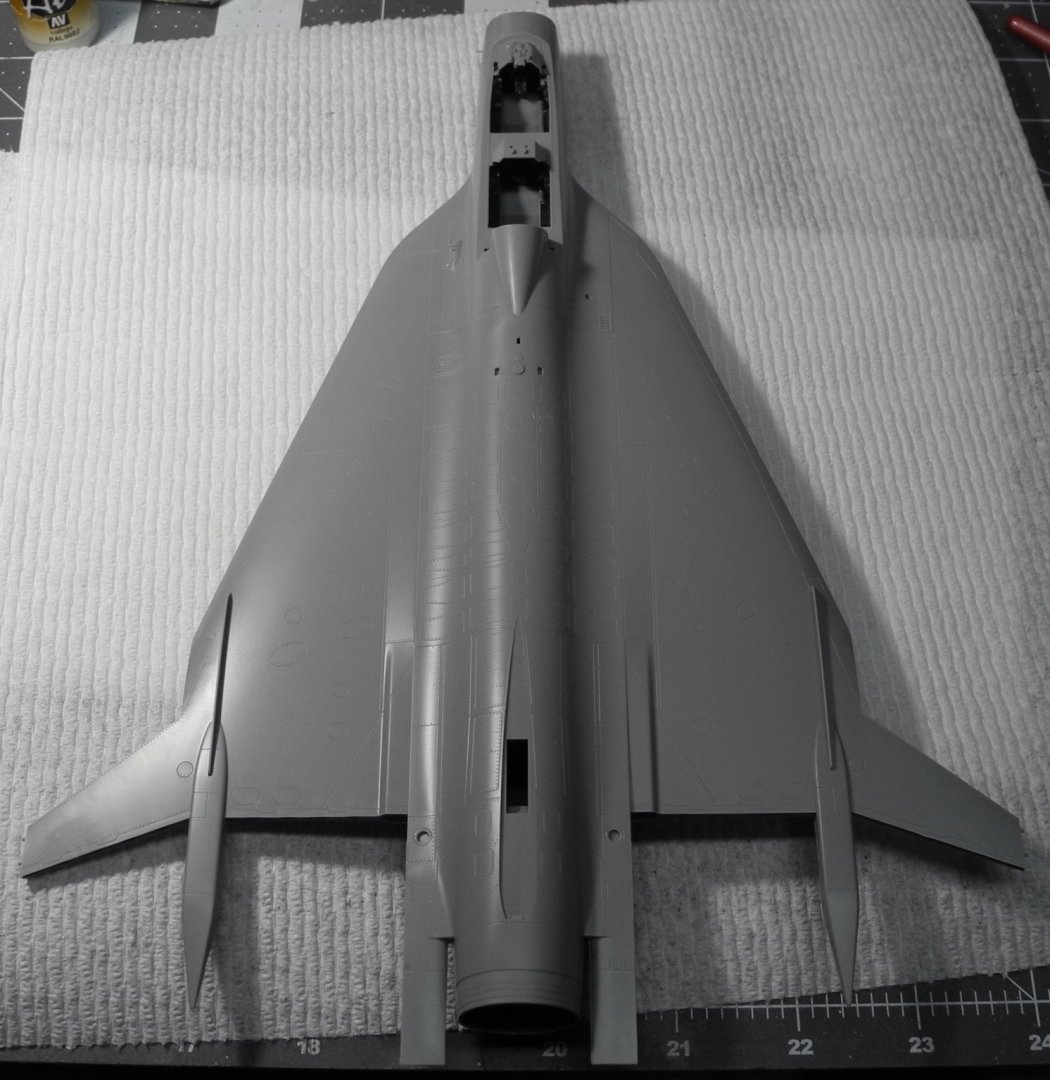
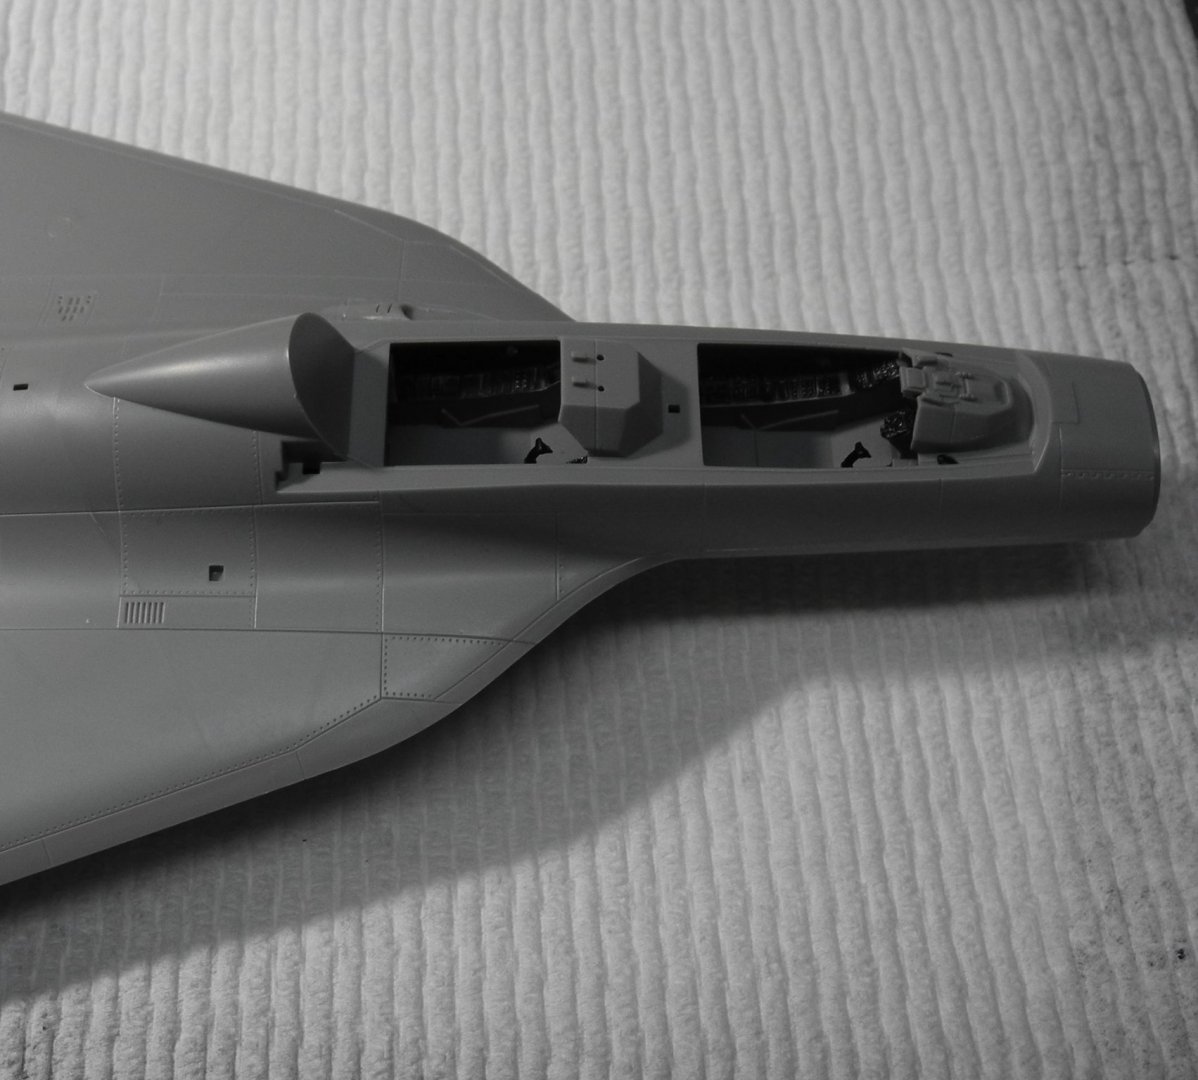
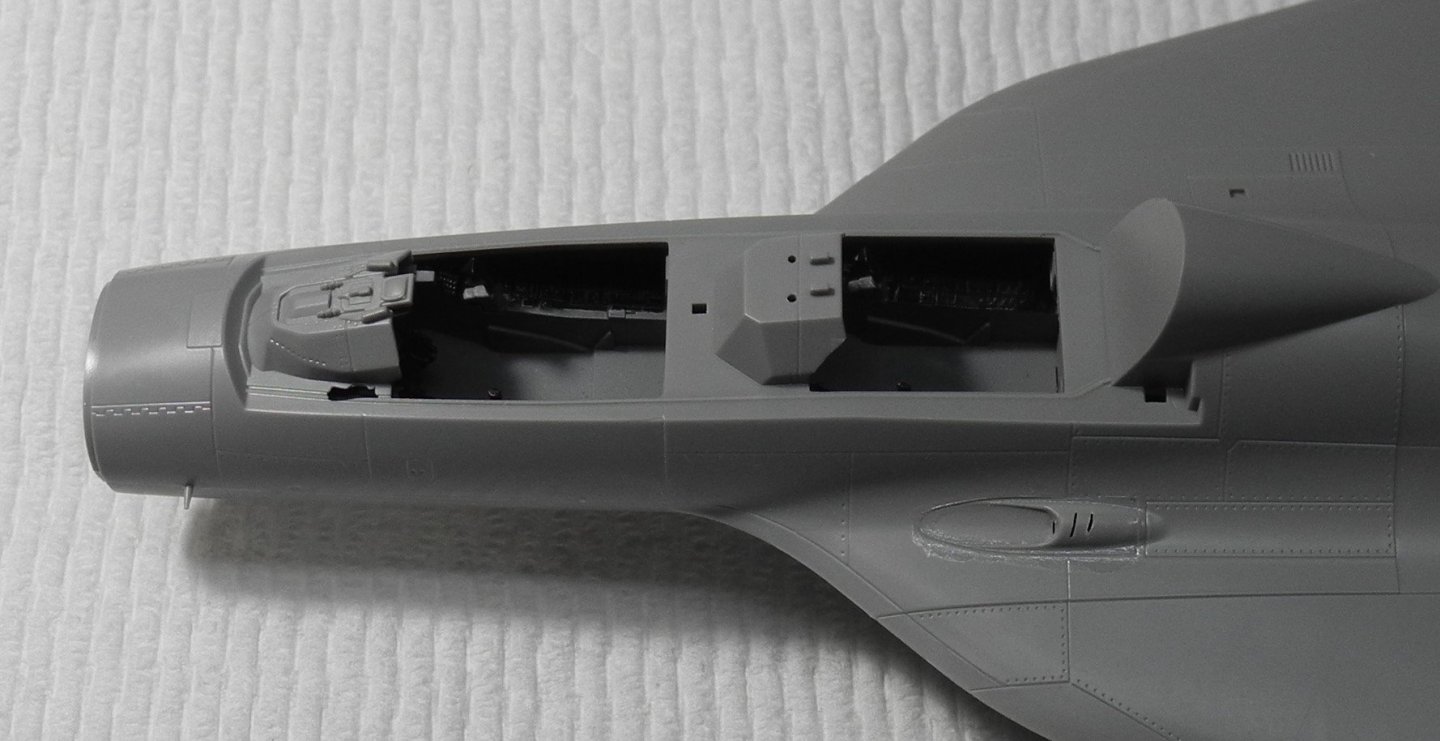
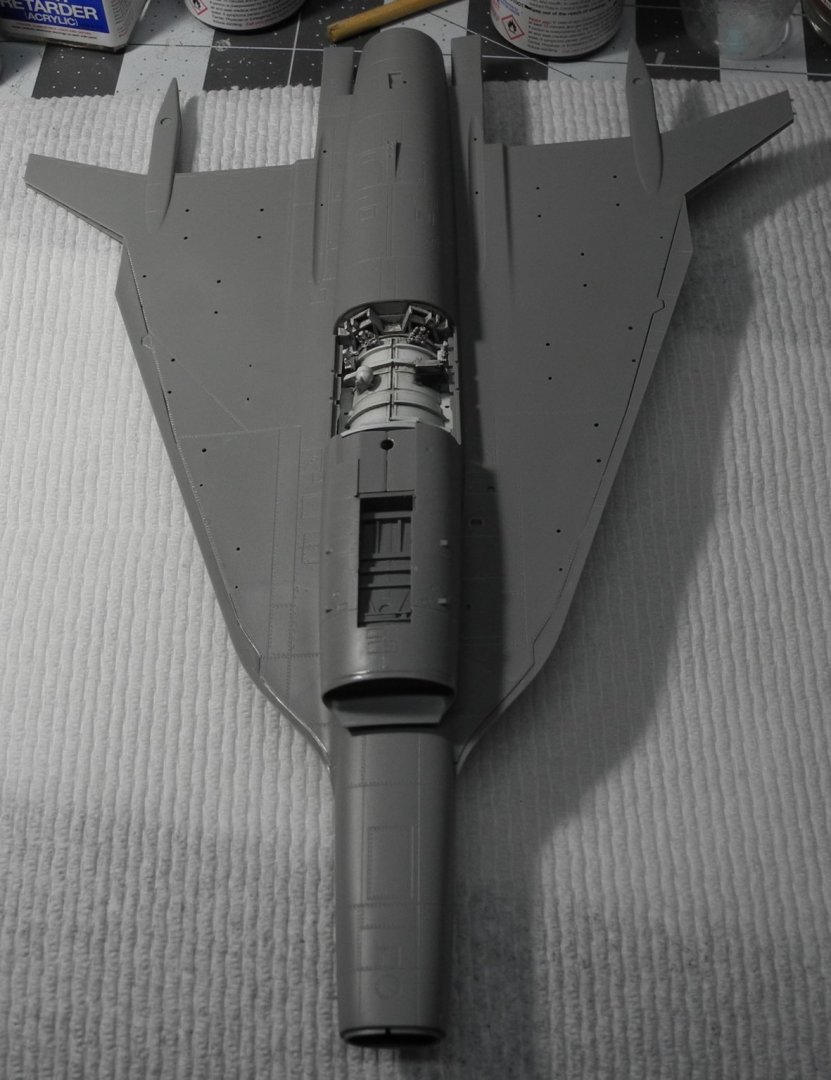
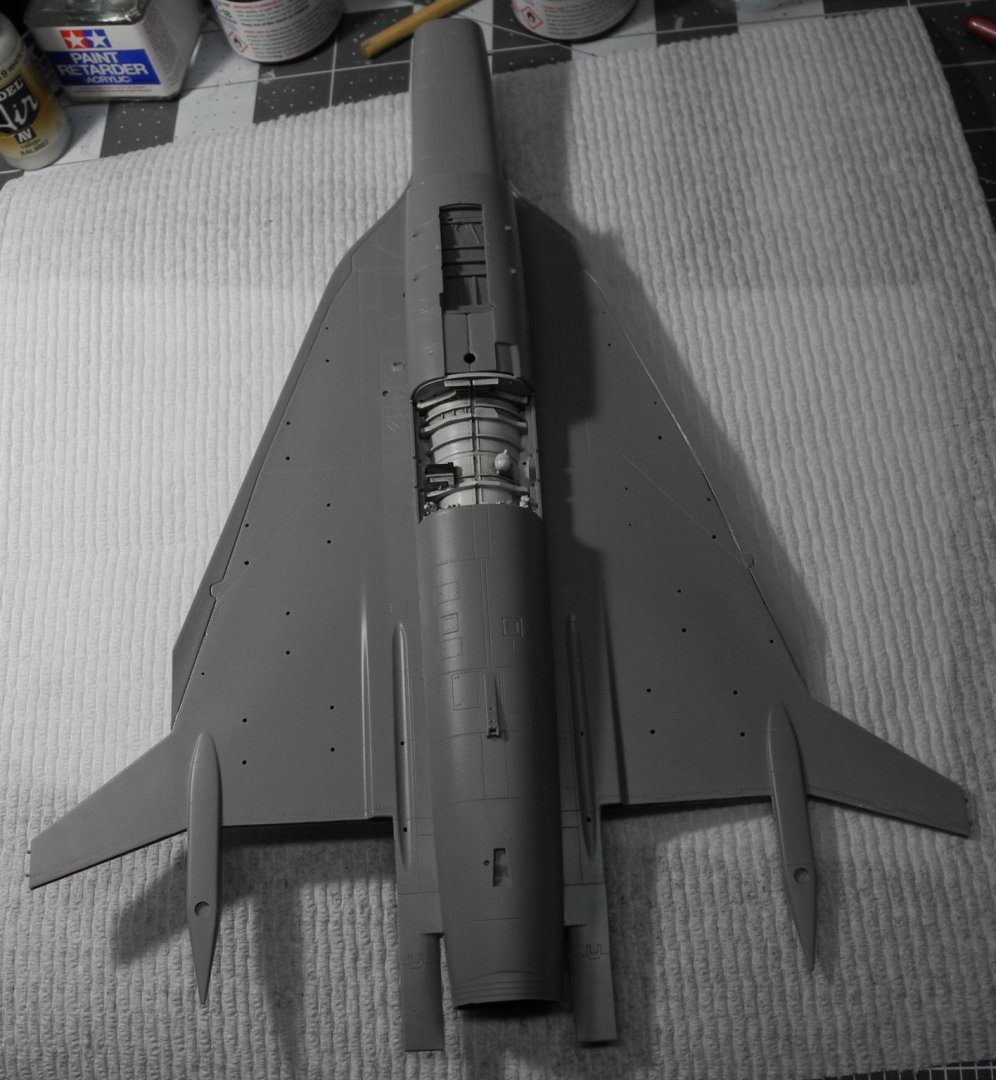
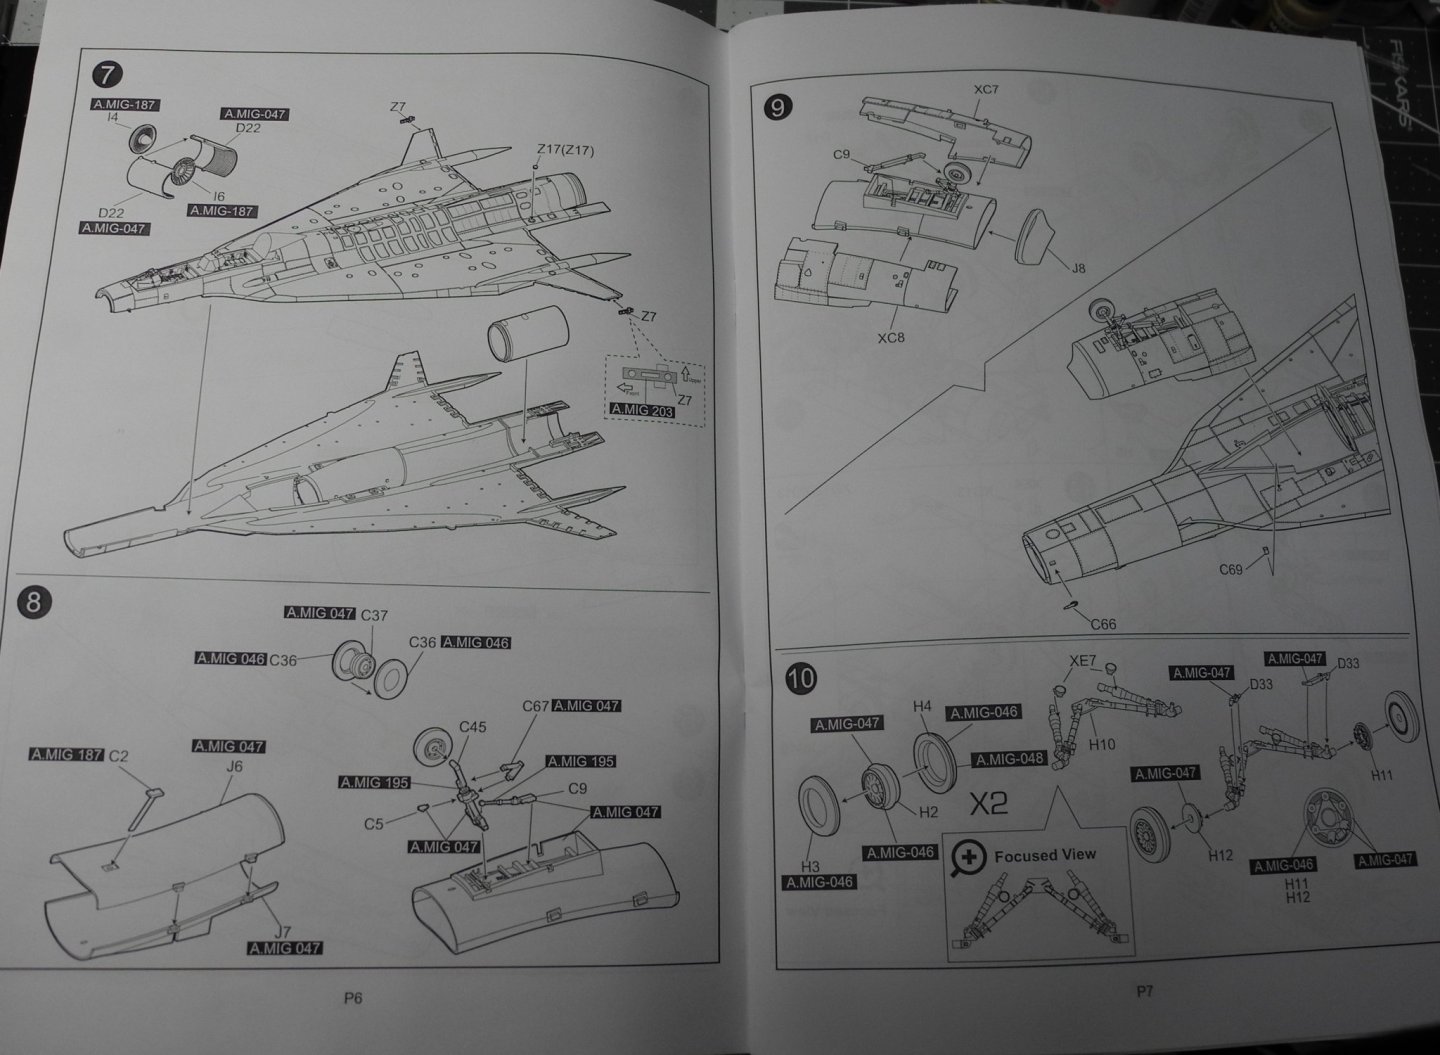
This is steps 1 through 8, and most of step 9. I prefer to leave the landing gear assemblies until later in the build as there is more construction, filling, priming, and painting to do first. On both left and right wings, there is an annoying gap at the leading edge. Other than that, the model parts have been a pretty good fit to this point. I'm using the "stretched sprue" technique to fill the gaps, as there is a row of fine rivet detail immediately adjacent to the gap that would be destroyed by filling with putty and sanding. After the stretched sprue, will carefully lay down some #500 Mr Surfacer with a small detail brush to finish off the seam. It should be almost invisible when finished and leave the rivet detail intact (as long as I don't fill them with Mr Surfacer).

-
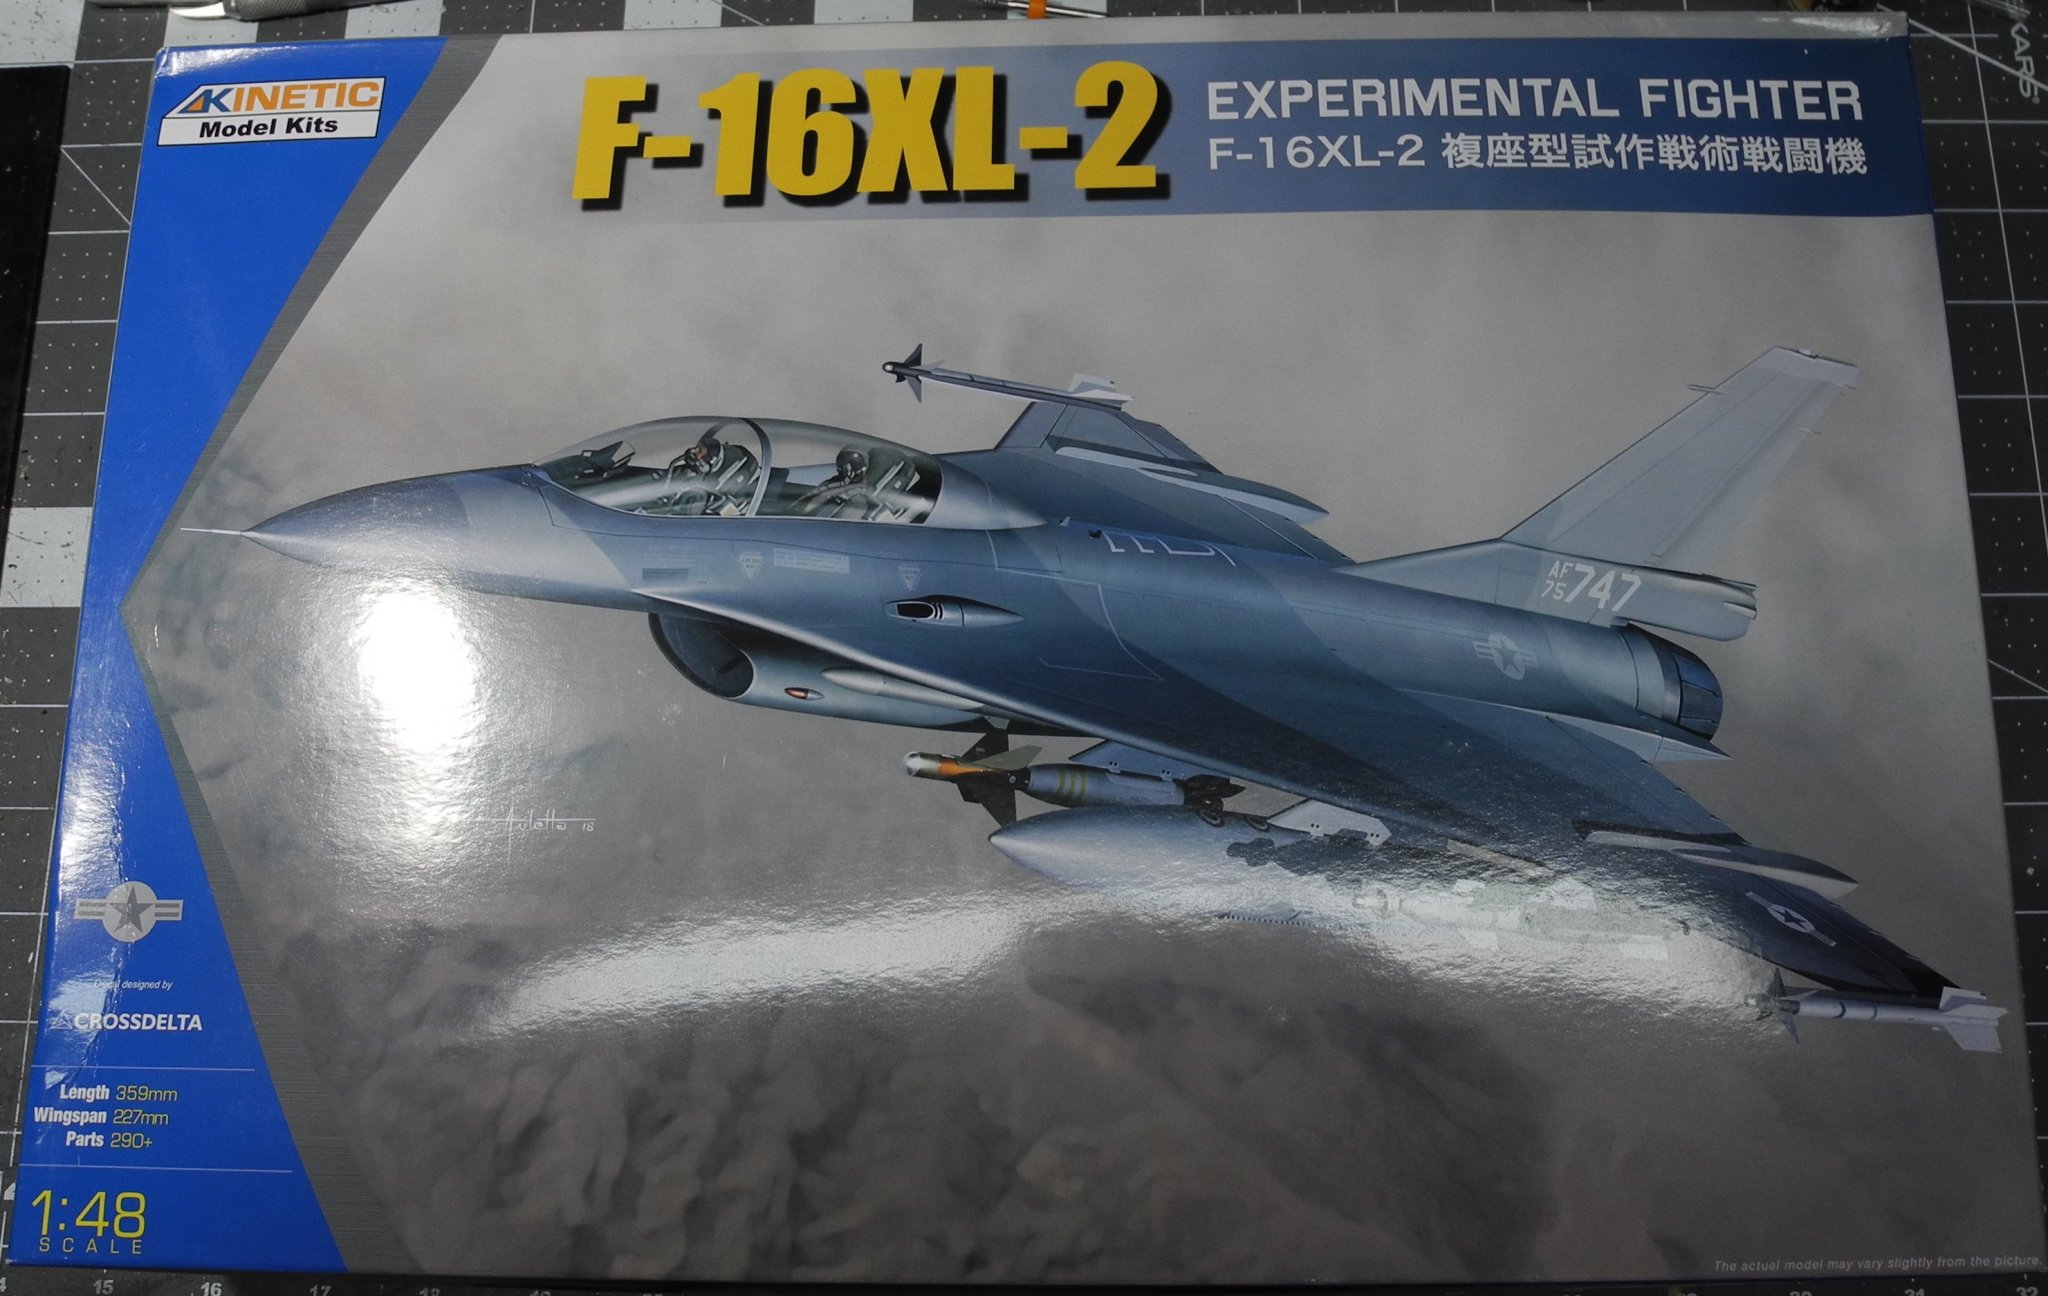
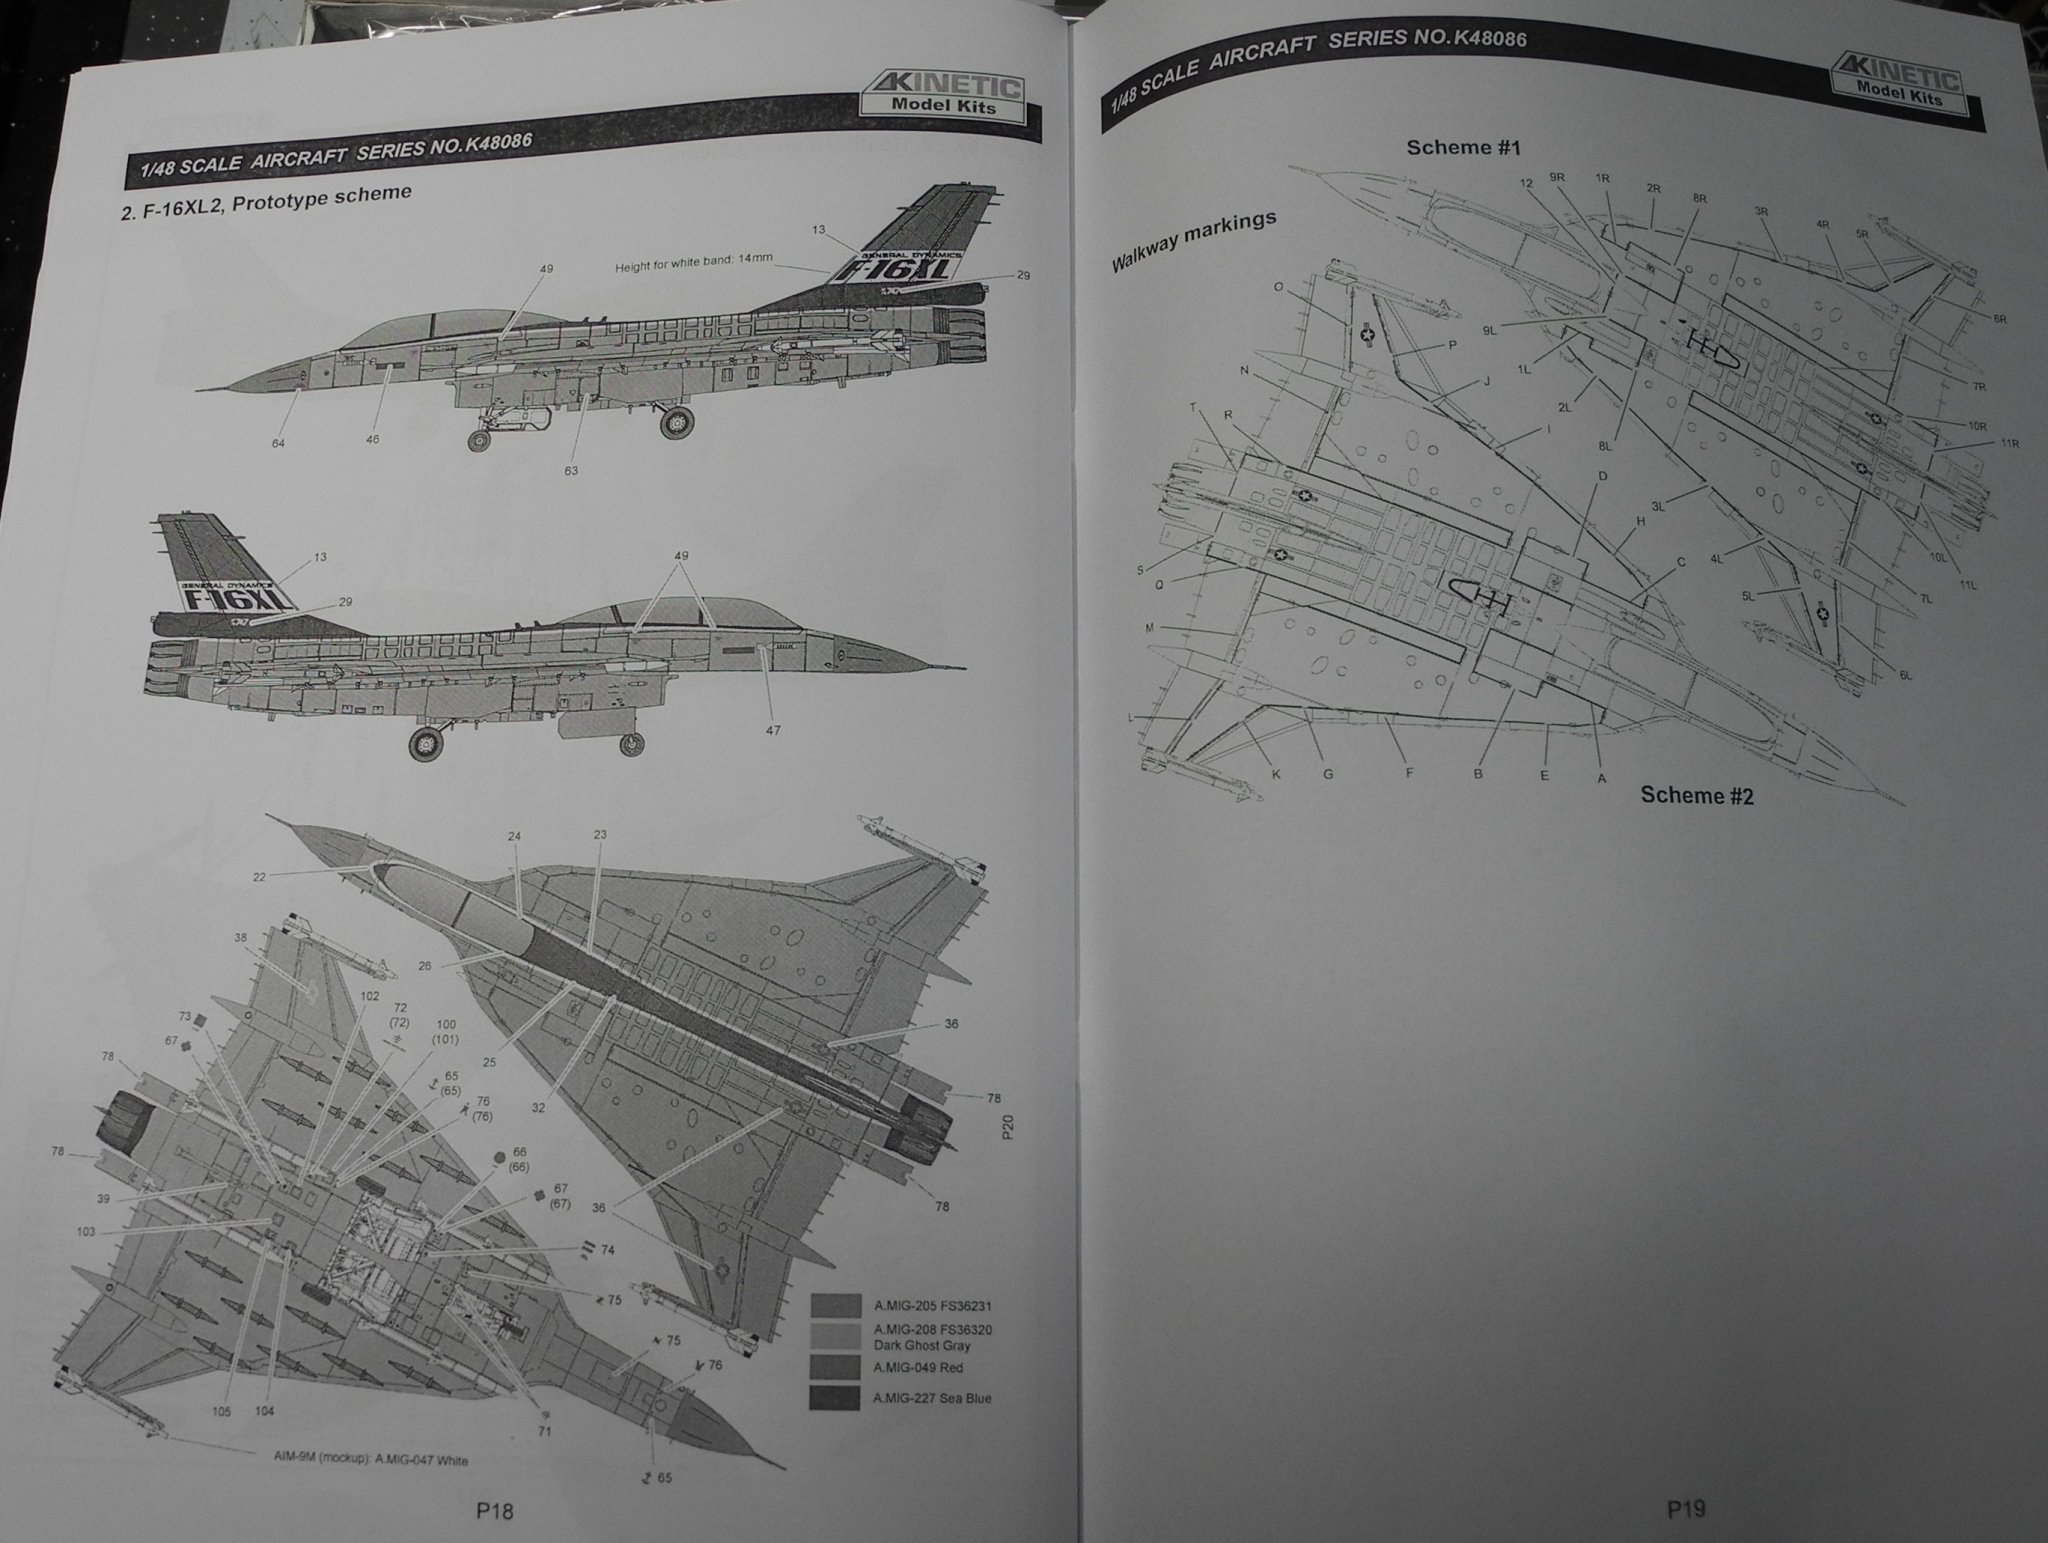
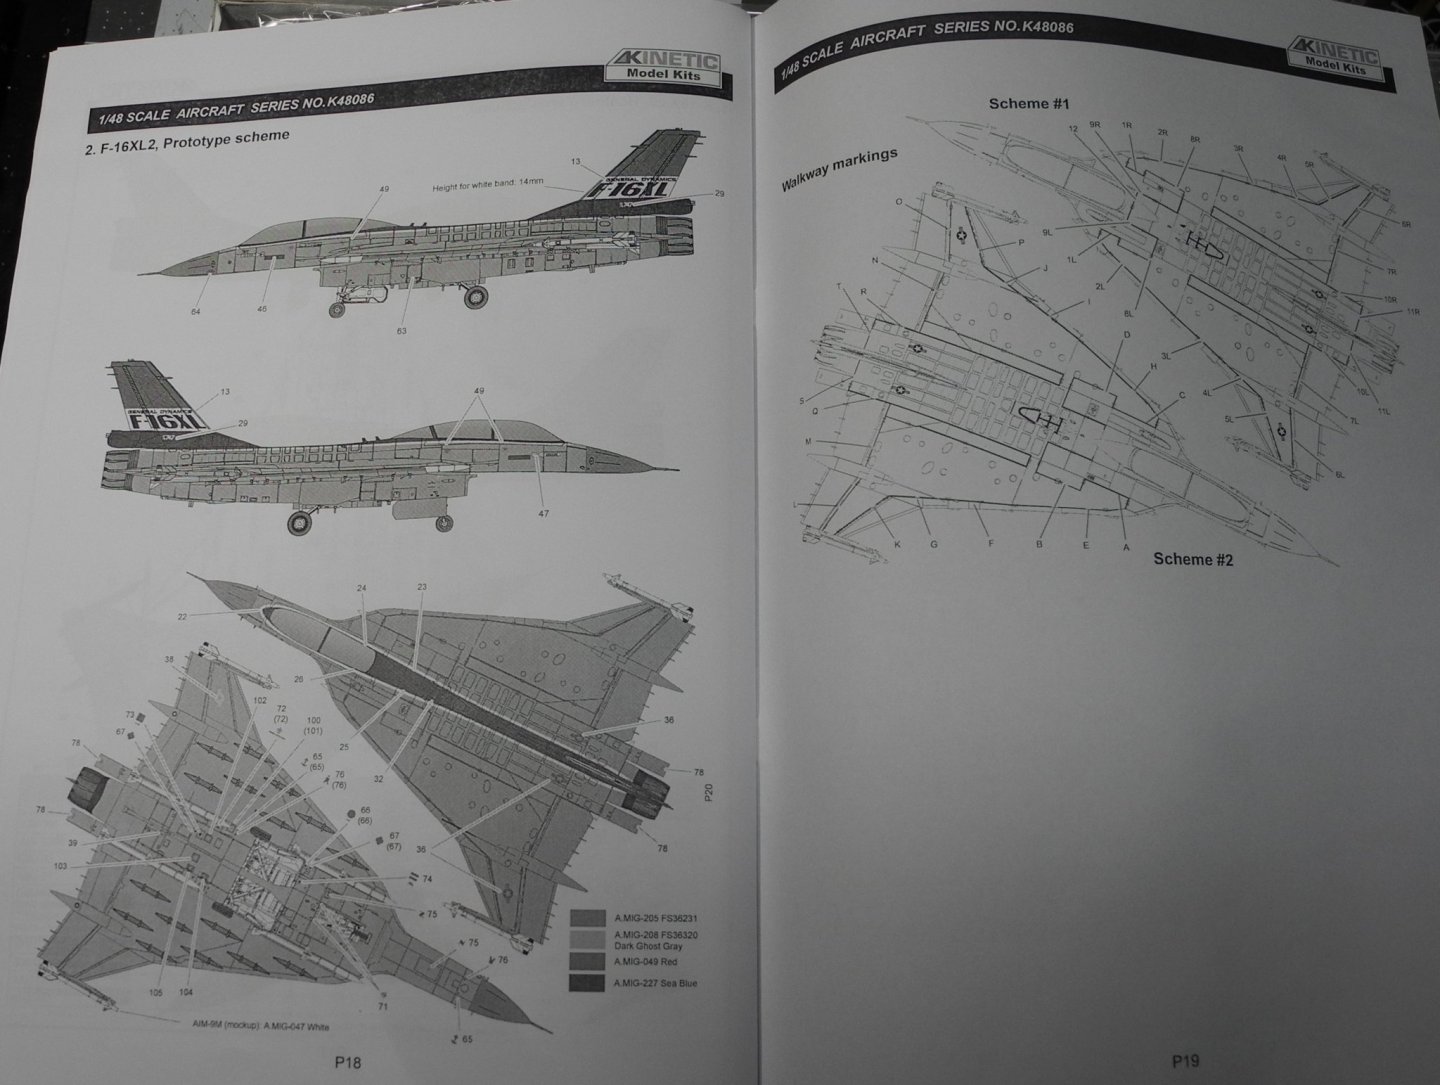
Heretofore, models of the F-16XL have been few and far between. Monogram did one in 1:72 scale a long time ago, then a company in Korea, Kangnam, did one in 1:32 scale in the 90's. According to experts (not I), neither kit was accurate and there was a massive resin correction set available for the 1:32 model that seemed cost prohibitive. Seems like Kinetic did a good job on their molds for the plane, again, that's according to experts and not me. I just think the molds look really nice. Engraving and detail looks super. I've read the four-color camouflage is hypothetical. That being the case, I may decide to fly by the seat of my pants and create my own hypothetical paint scheme. I've got some nice decal graphics that are begging to be used.
-
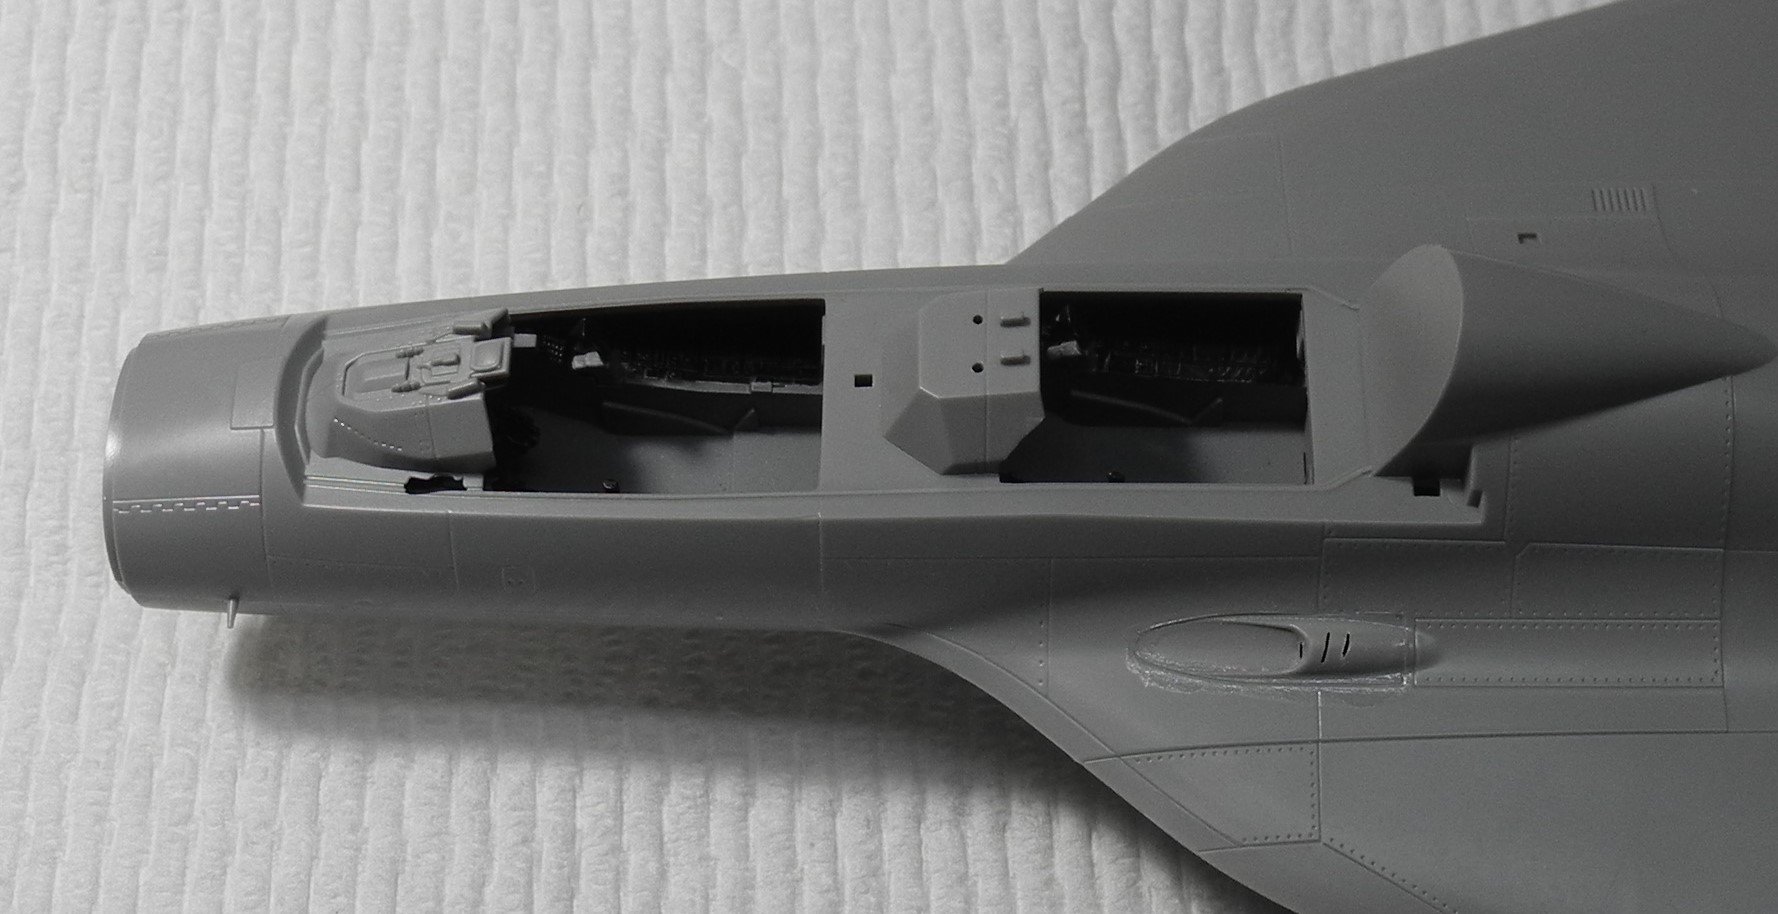
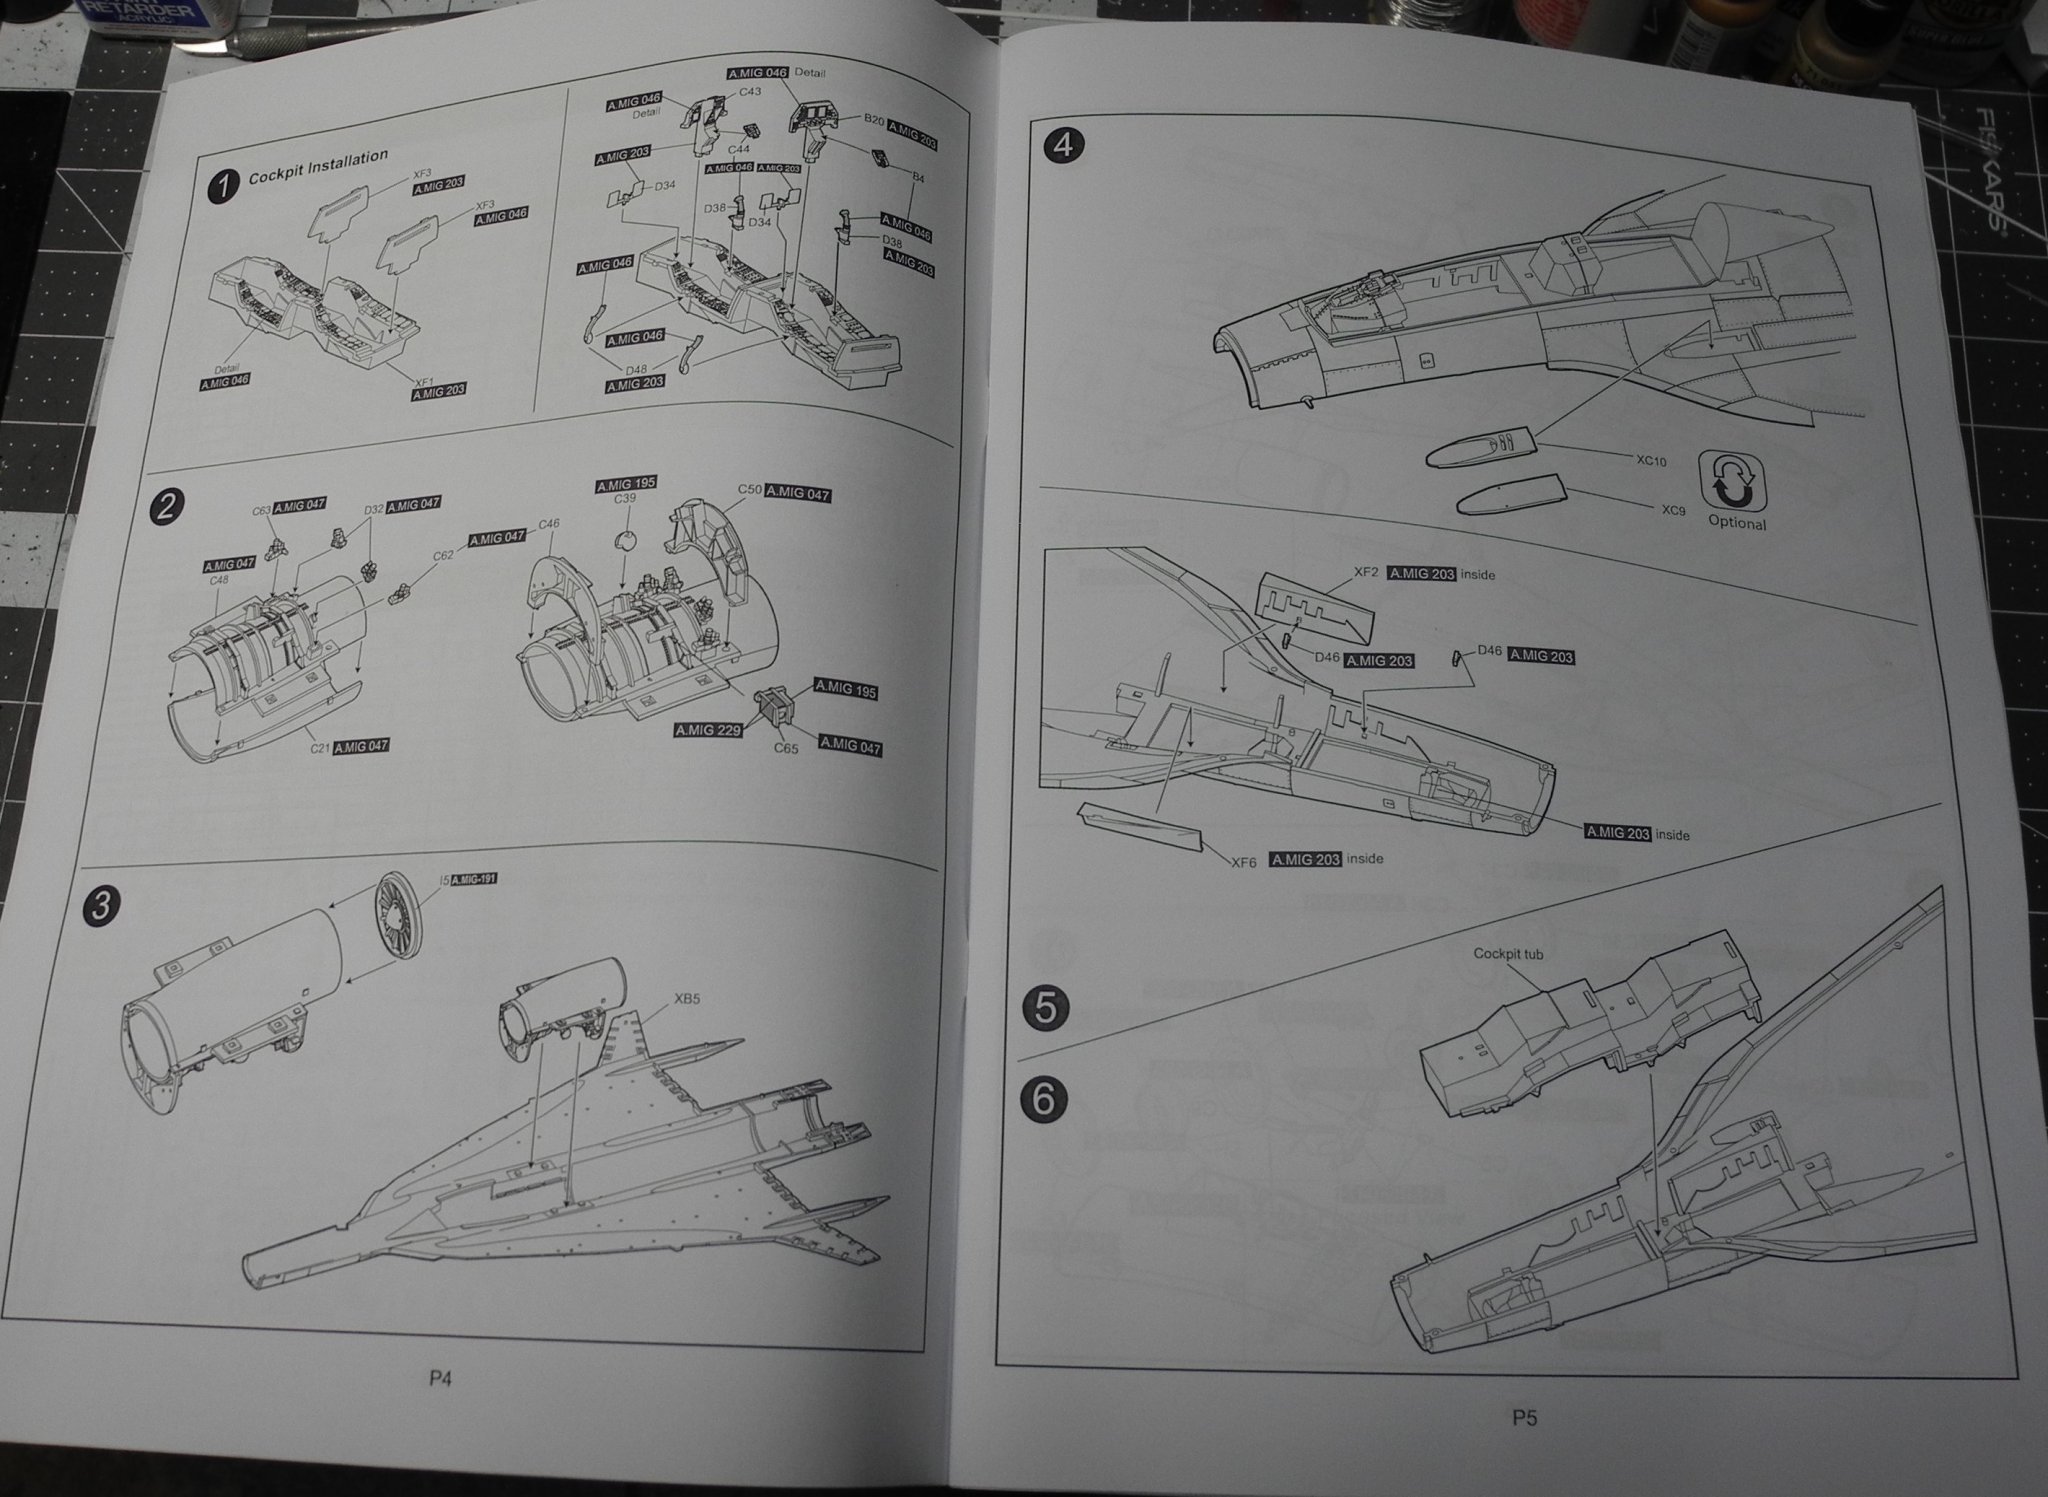
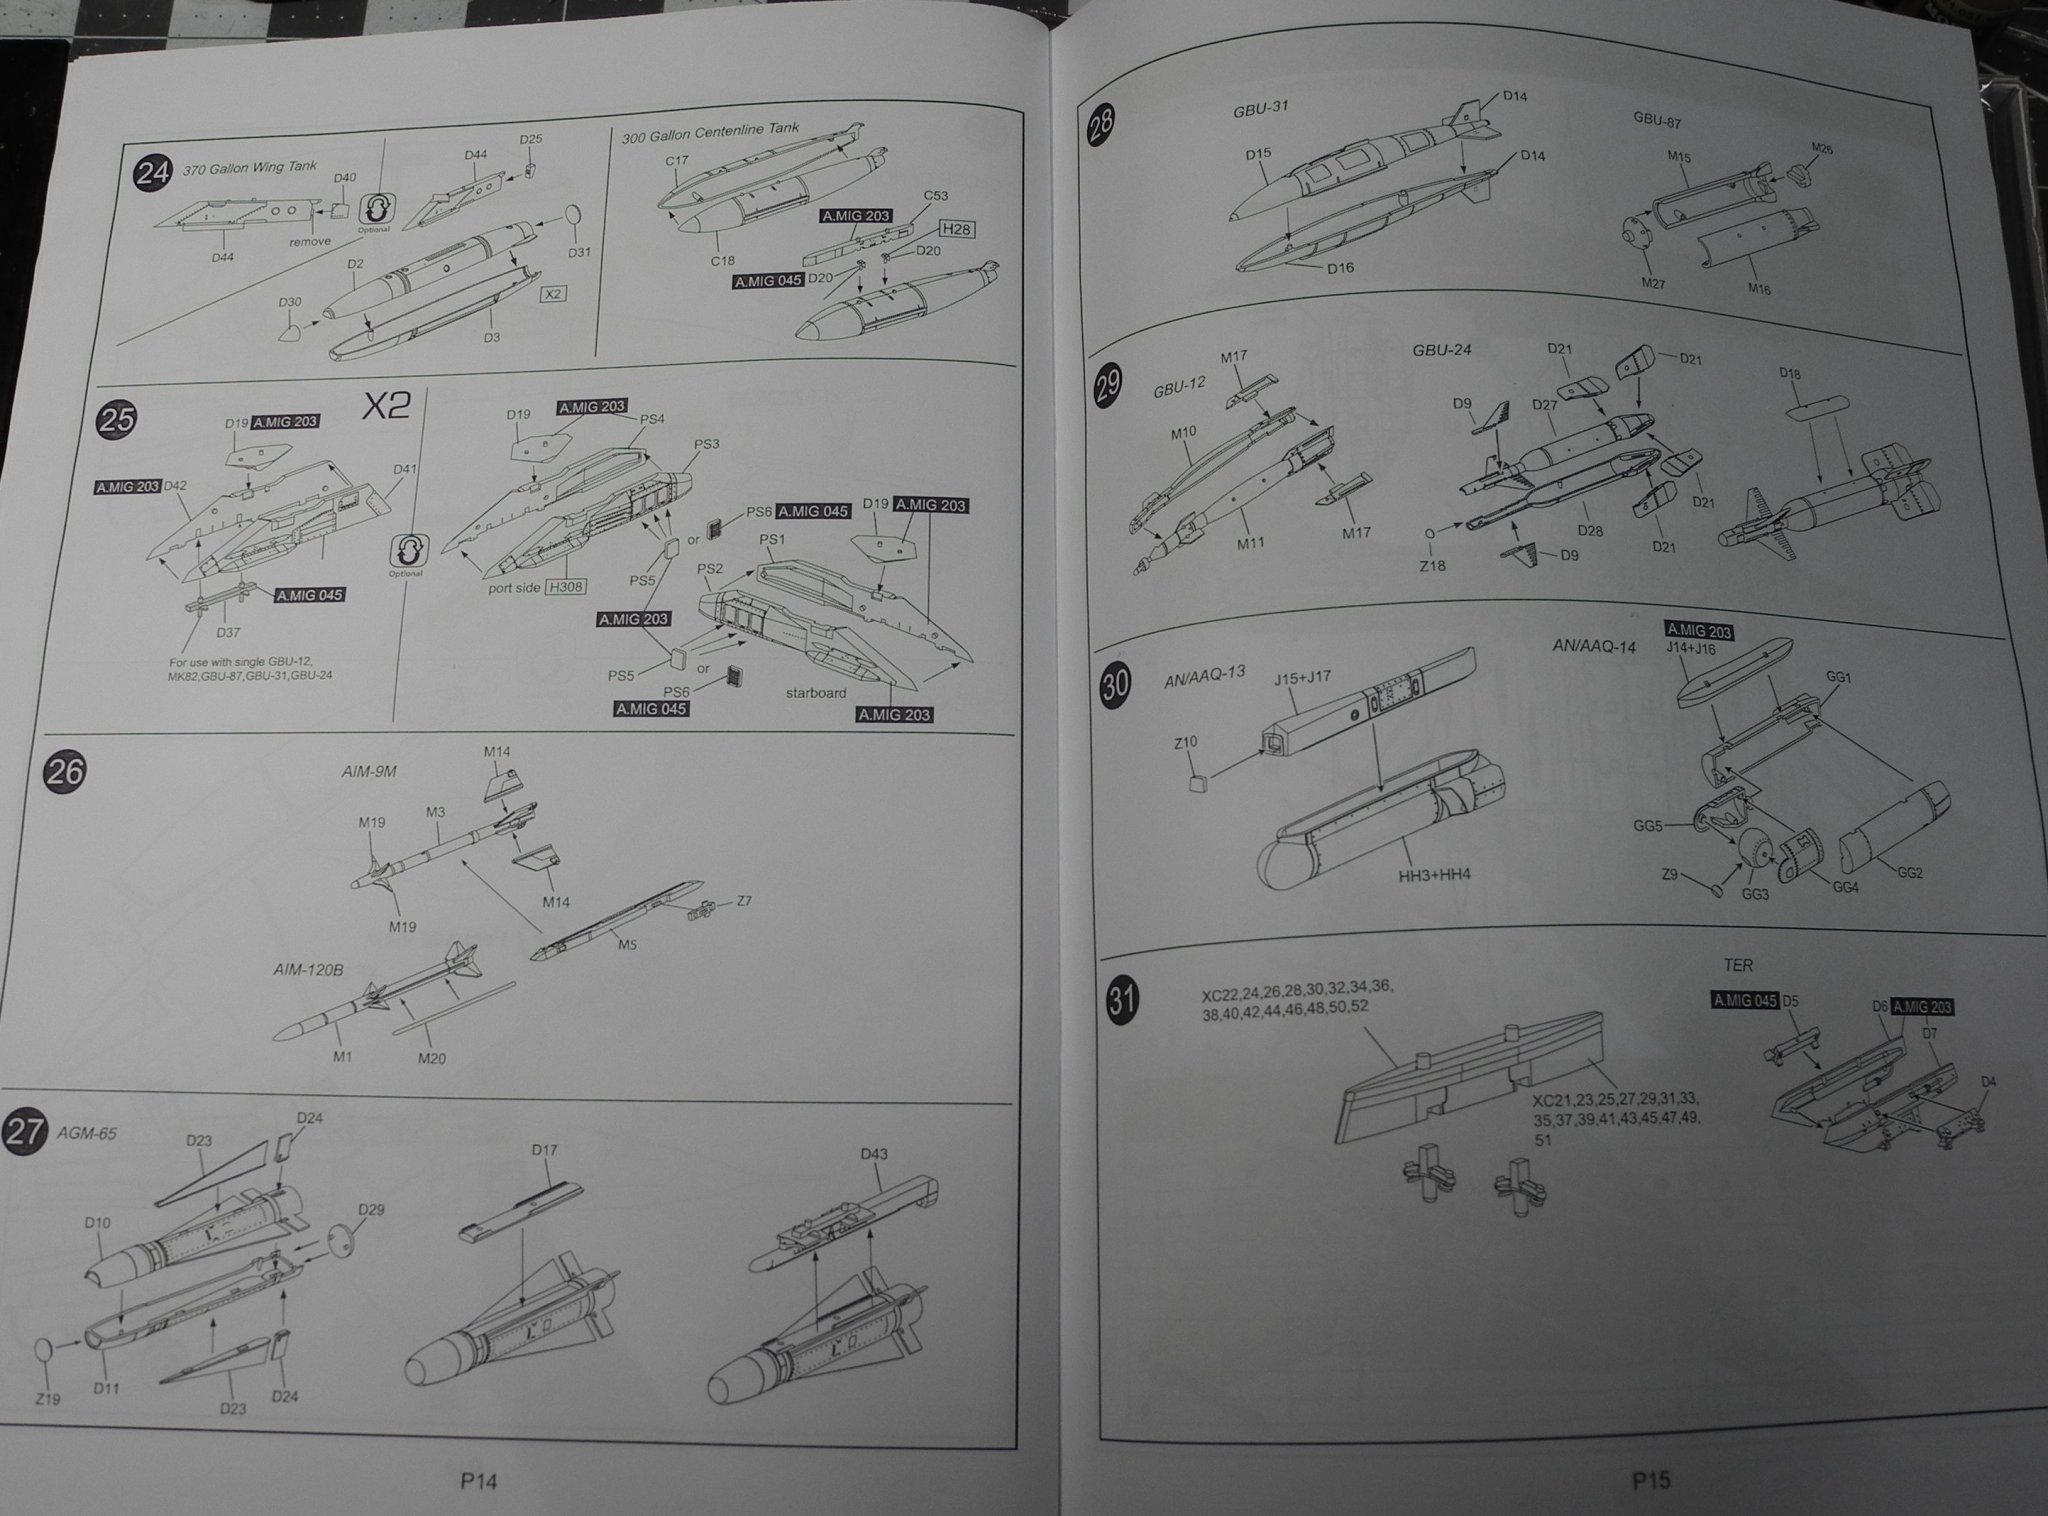
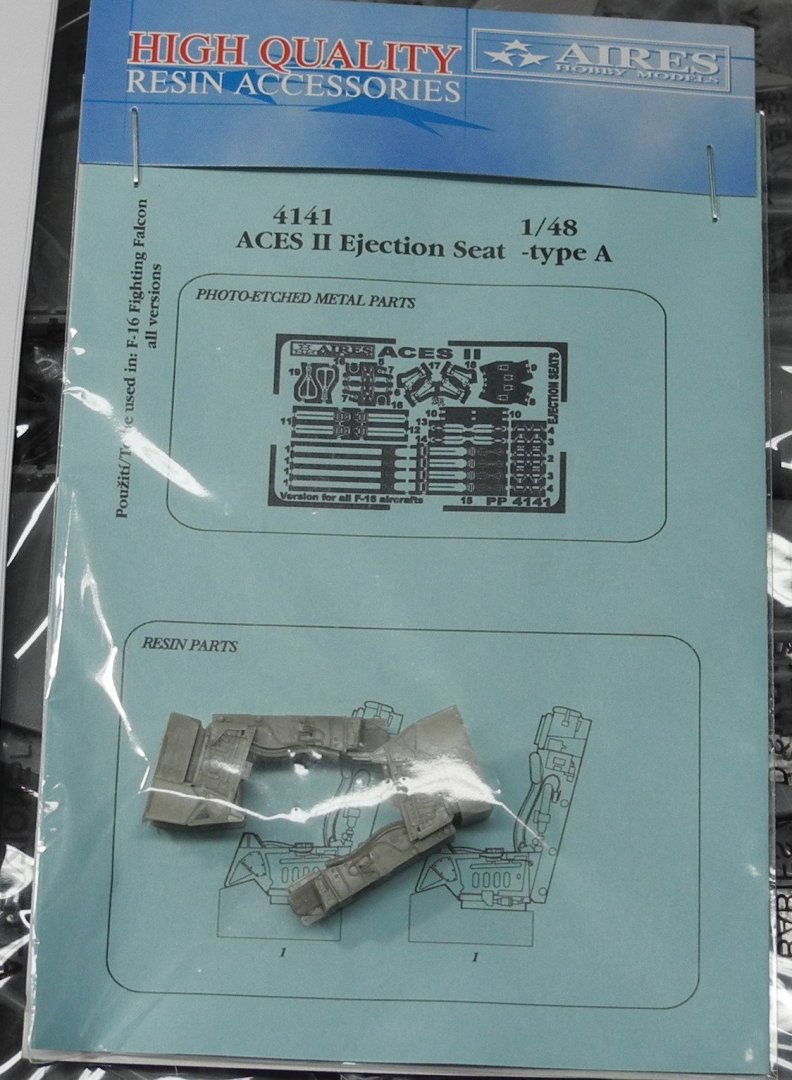
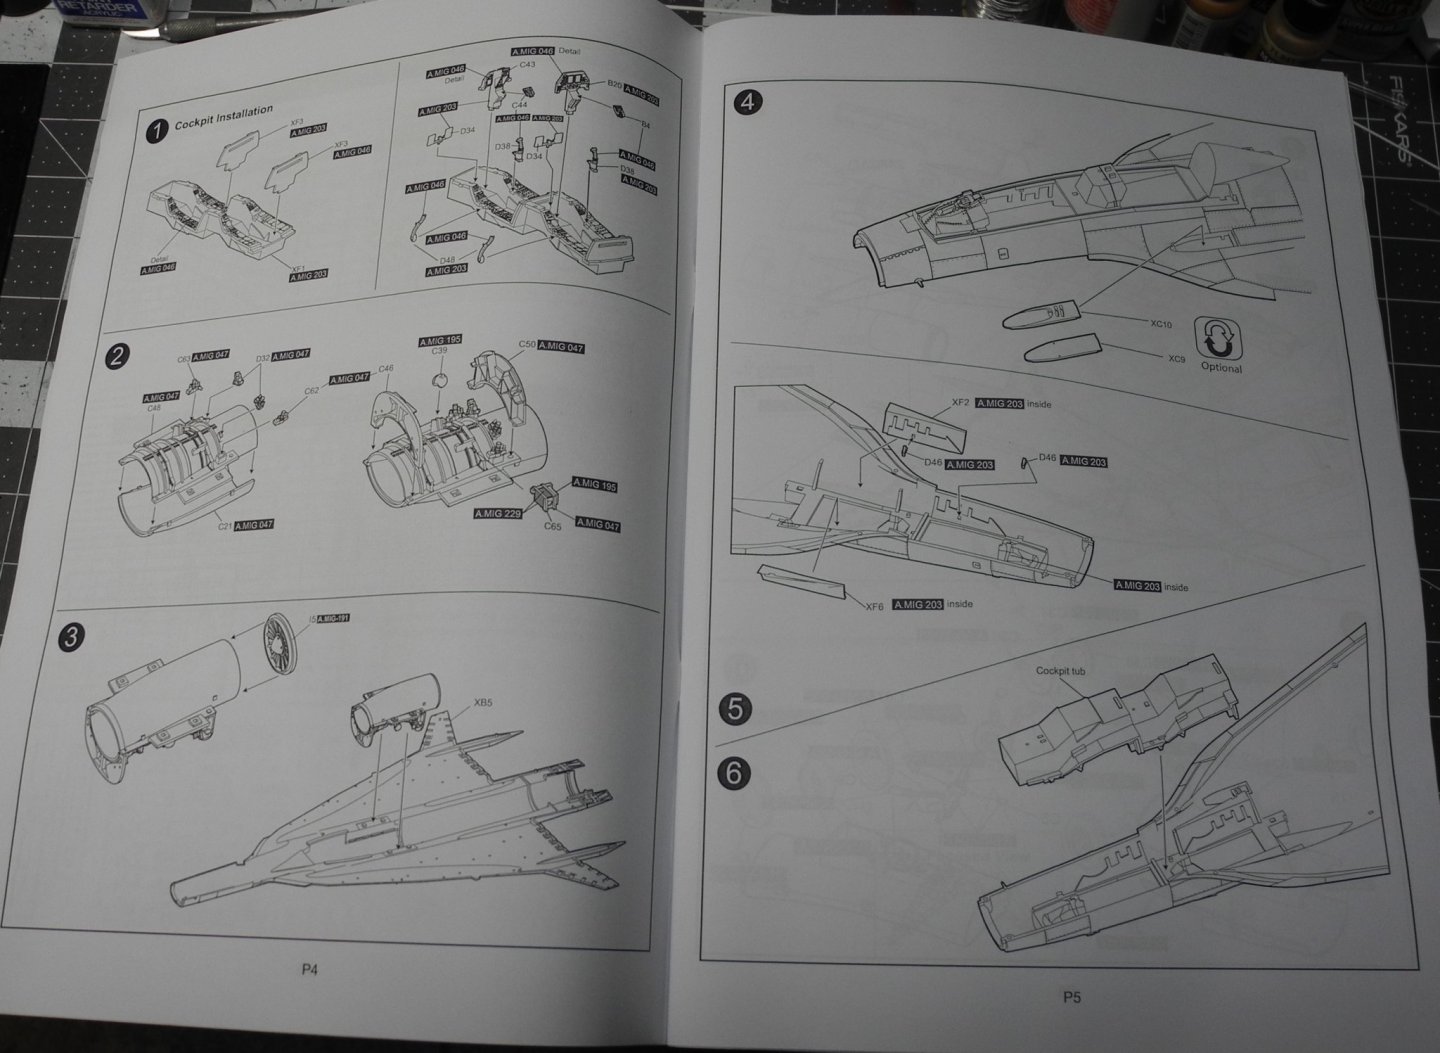
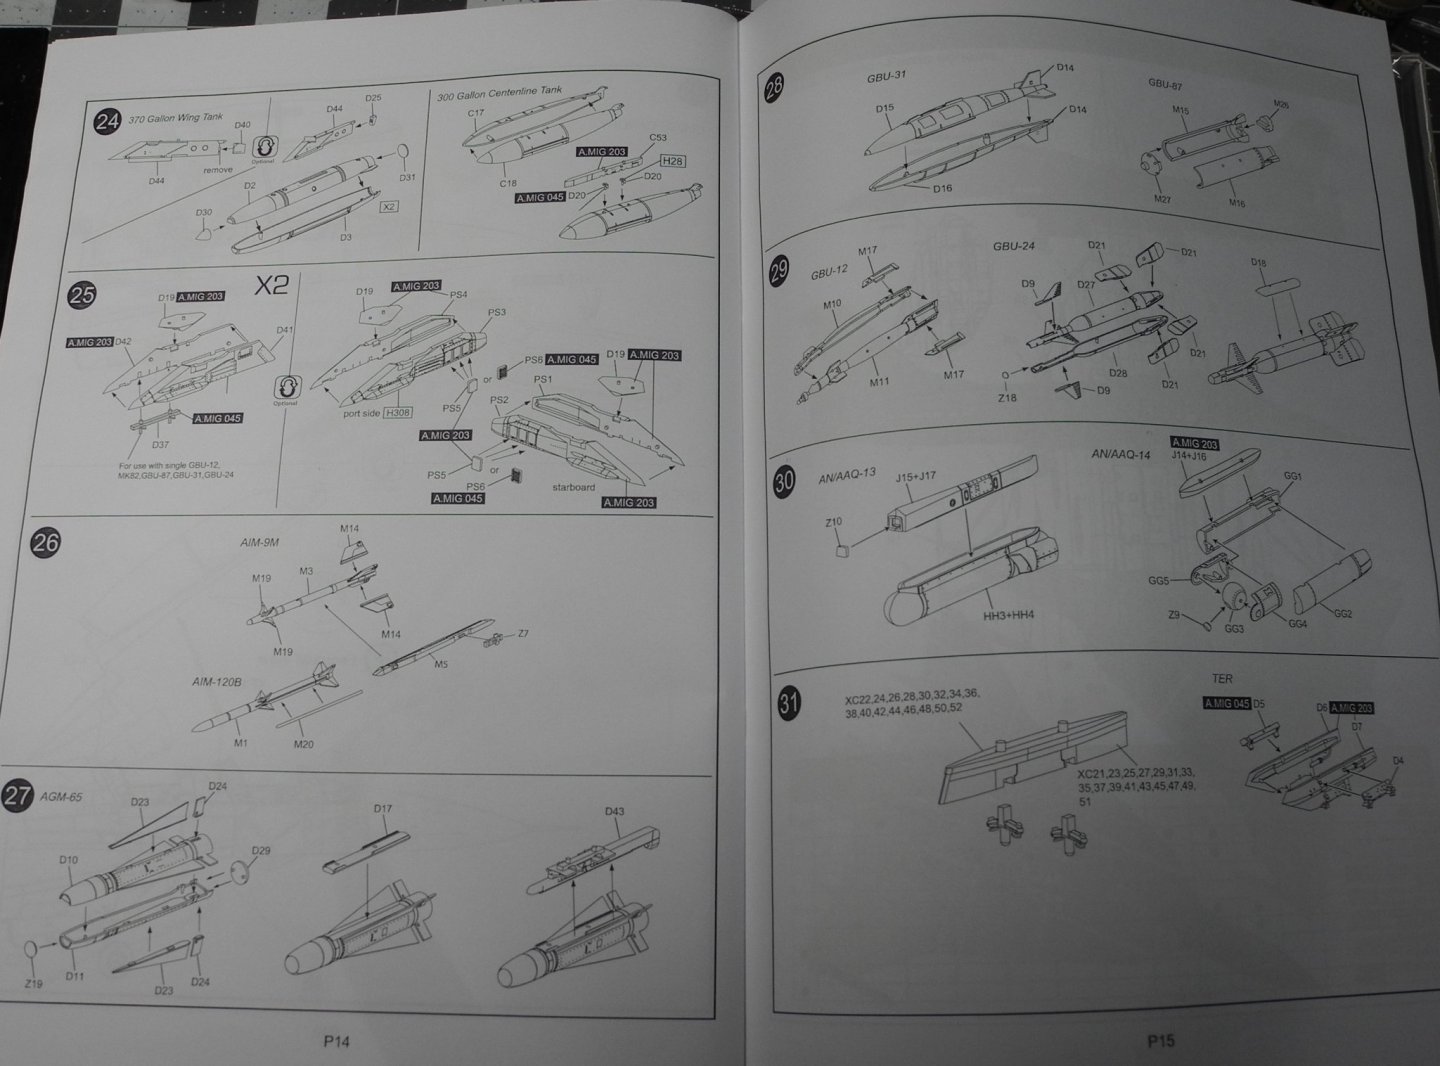
The F-16XL-2 is a derivative of the F-16, with a "cranked arrow" delta wing. This delta wing configuration allowed the F-16XL-2 to carry twice the ordnance load of the F-16 with a 40% greater range. The wing configuration provided 27 hard points for ordnance. The aircraft was entered into the United States Air Force Enhanced Technical Fighter (ETF) competition, but lost to the F-15E Strike Eagle. Subsequently, the two prototype models were turned over to NASA for research. Both aircraft were retired in 2009 and are stored at Edwards AFB. I plan to build this model pretty much box-stock. The only aftermarket items I have purchased for it are a pair of Aires Aces2 resin ejection seats. I may add some home made plumbing/wiring here and there to give the model an enhanced appearance but I don't want to go crazy with extra details that bog down the progress of the build. This is a project I would like to finish within 2 weeks, maybe 3. Provided here are photos of the kit box and the instruction pages. As I'm building the kit, I will refer to the step #'s I'm working on so you will have some point of reference.


-
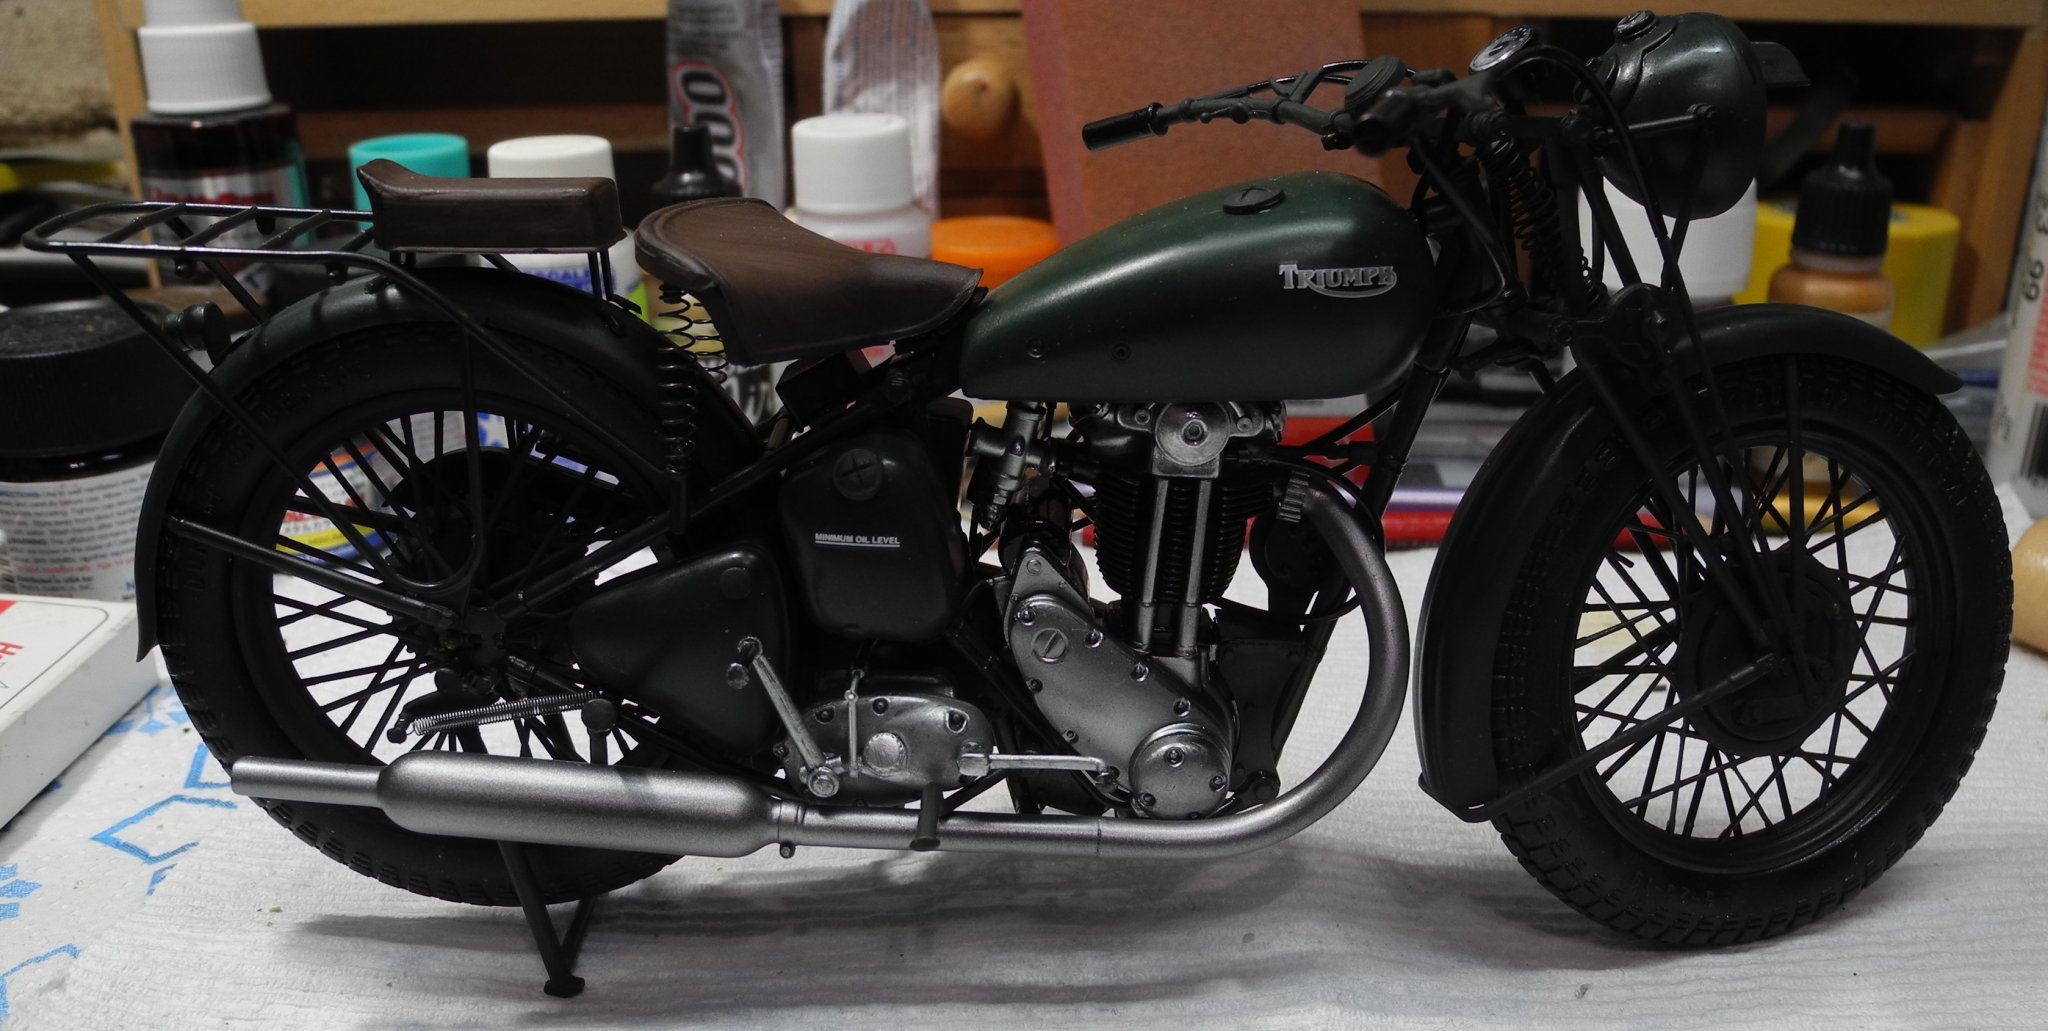
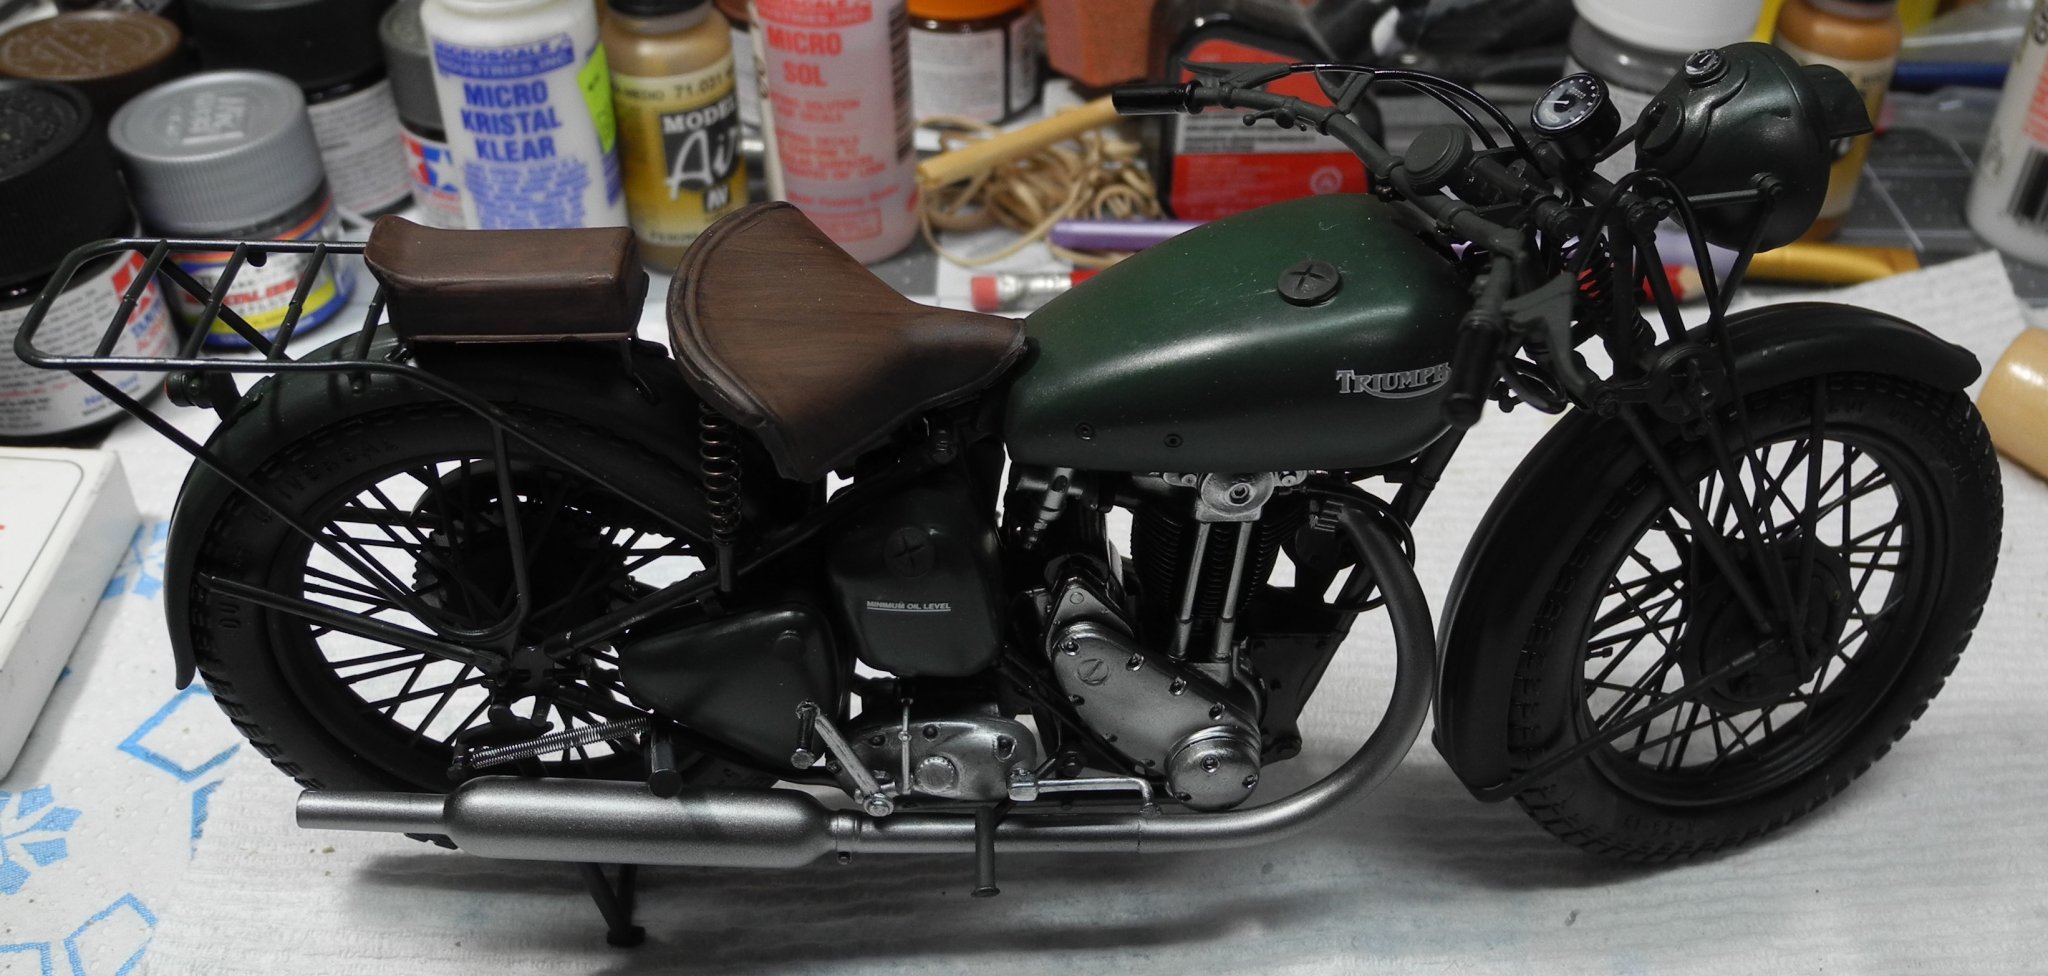
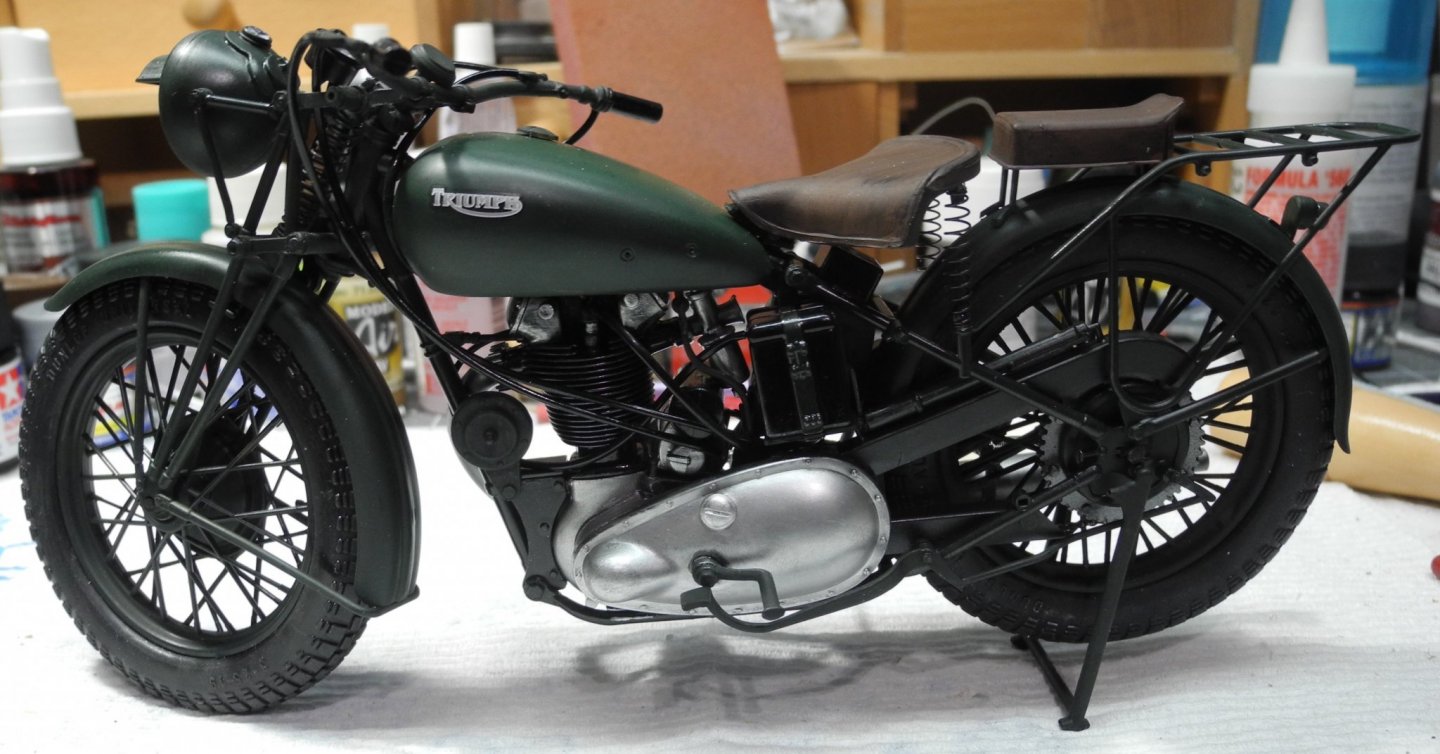
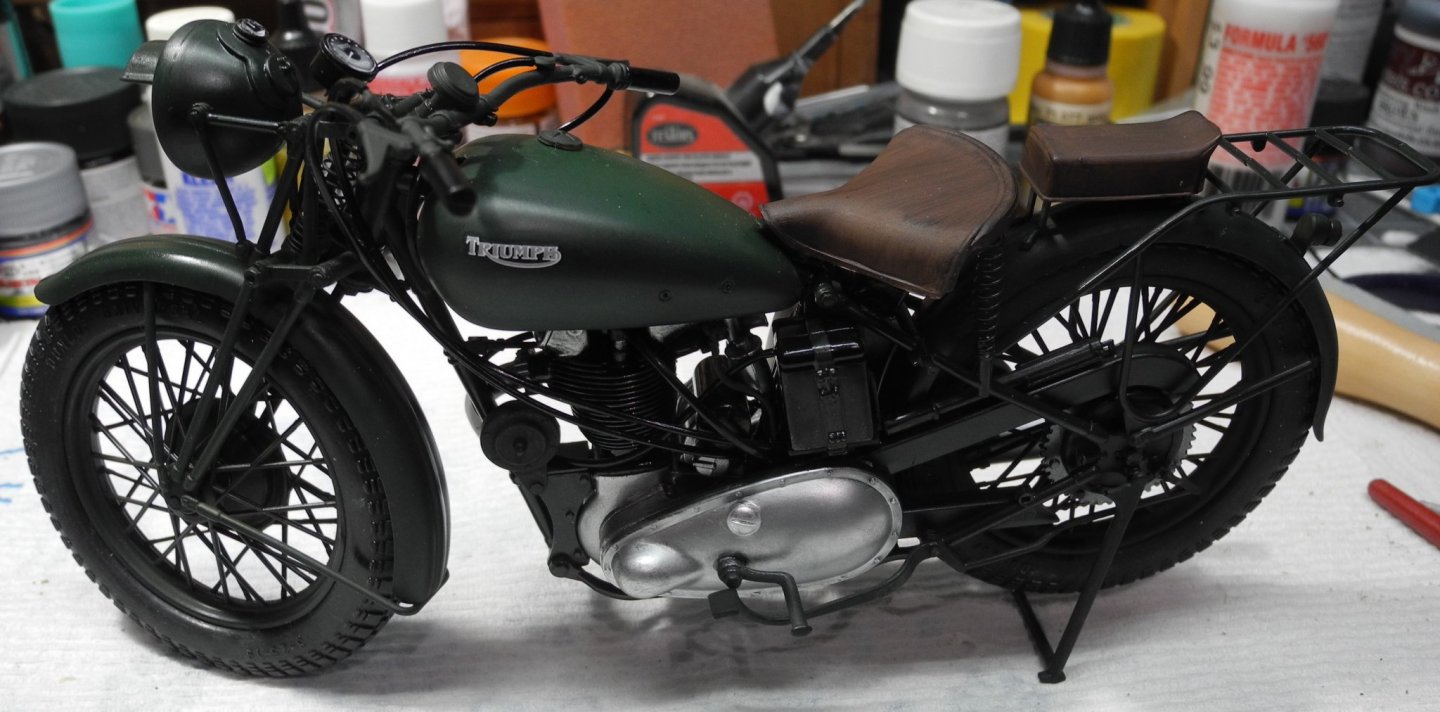
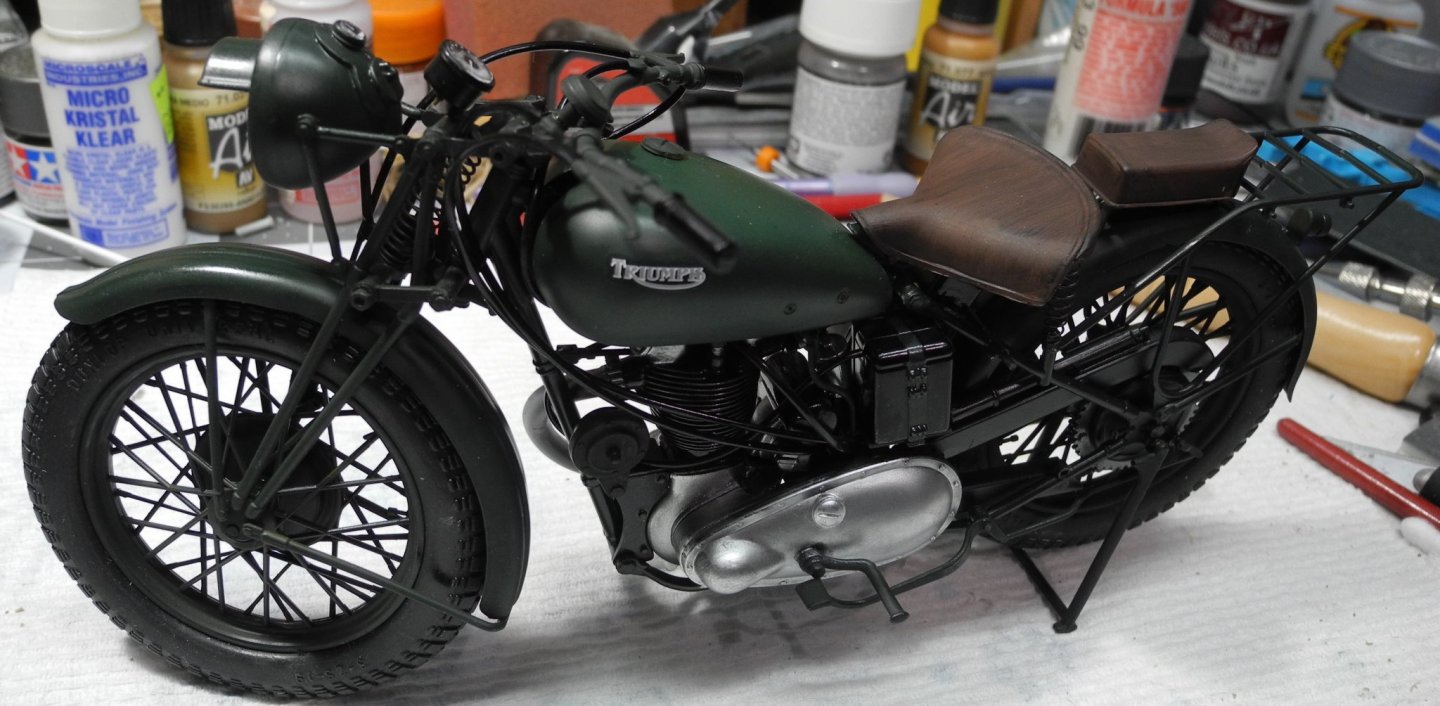
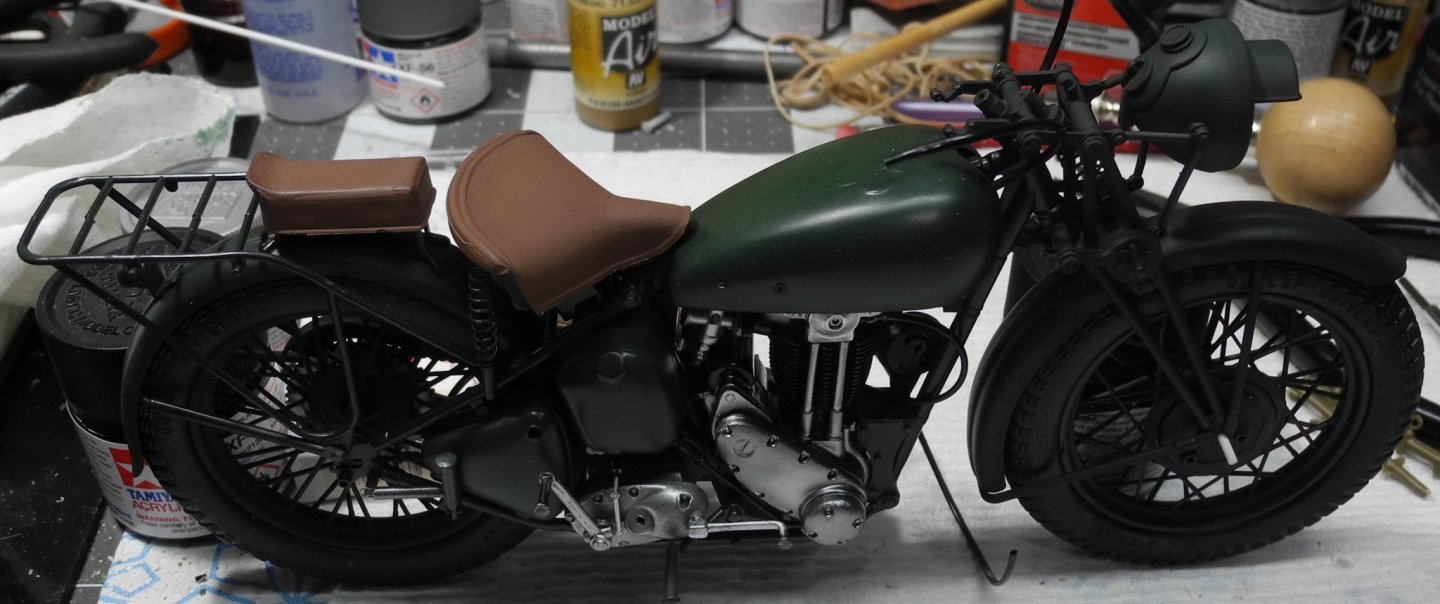
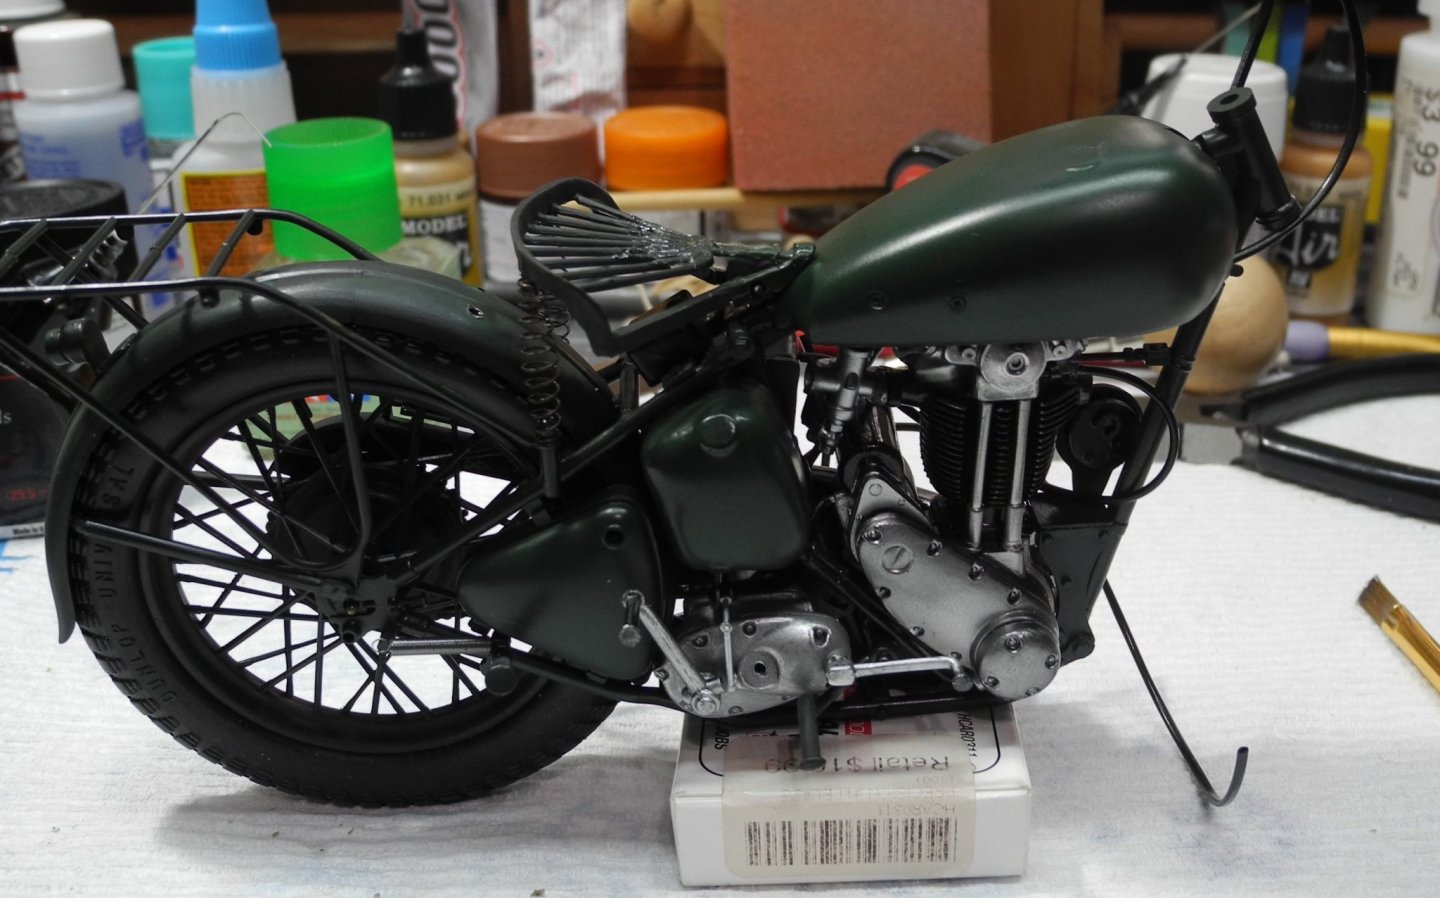
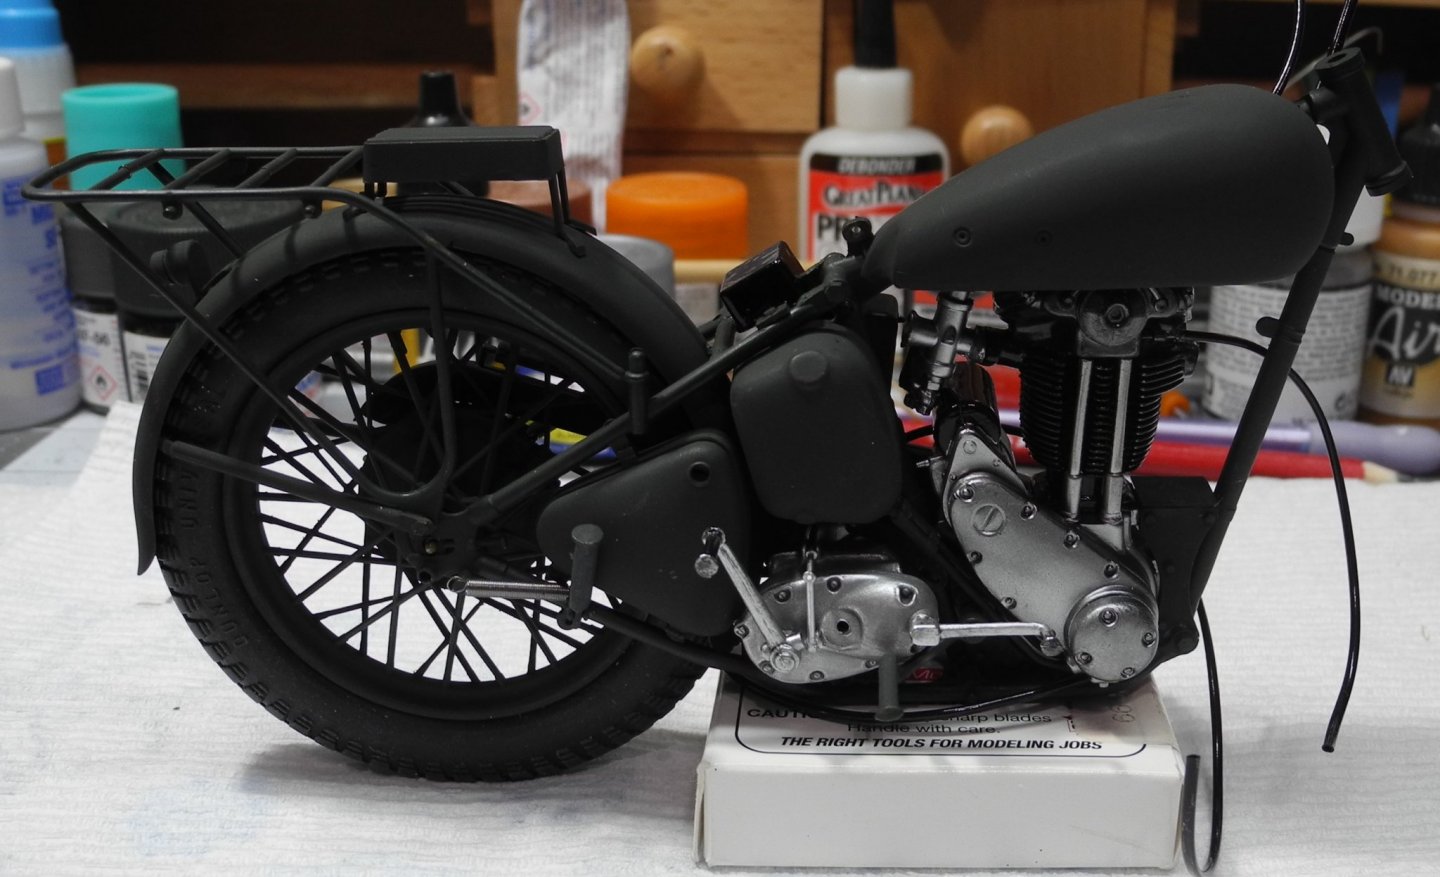
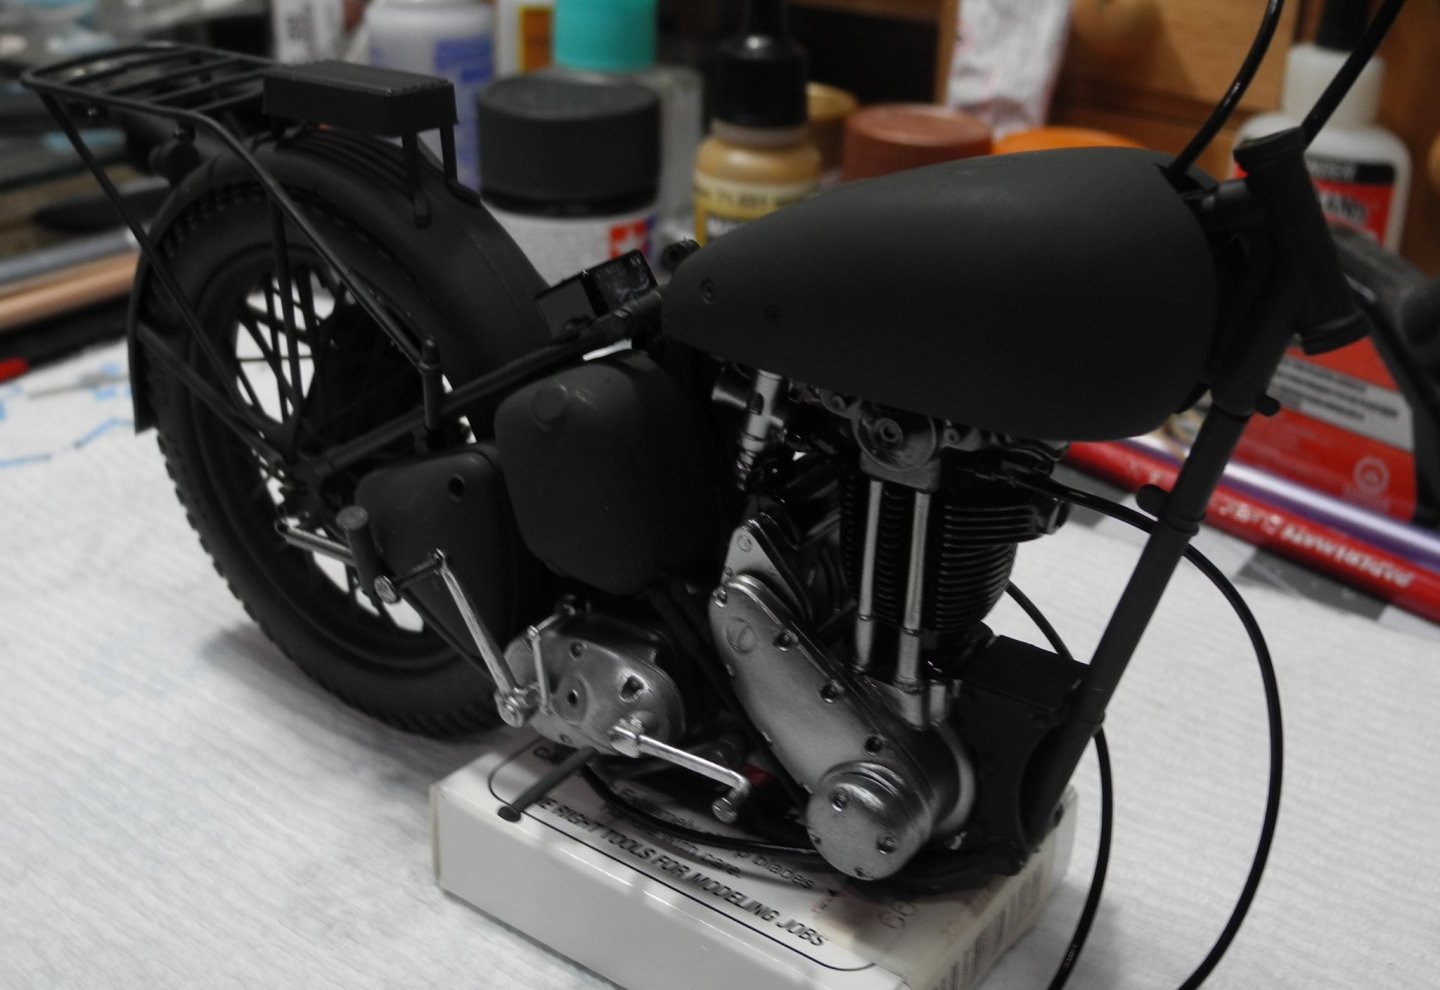
This may be the final photos I do for the Triumph. Just need to decide on whether or not to add the saddle bags and/or the helmet and sub machine gun. I kinda like it as it is and may leave it like this. Either way, it's been a fun little project and this is the way I like them...short and sweet but satisfying. This model filled the bill. Remarkable quality for a kit that's been around for so long, more than 40 years. Thanks to everyone who followed along, and especially for your likes and comments. See ya soon with something new.


- 59 replies
-
- 14
-

-
Thanks for the kind words Gary. I'm trying to put the finishing touches on the model today. Very close, but still some more to do.
-
Thanks OC. It was a great day today. All my children and grand children were here (and some are still here) to visit, talk, laugh, and eat the great food my wife and I prepare for these holidays. We got up real early this morning and I am now ready for some sleep.
-
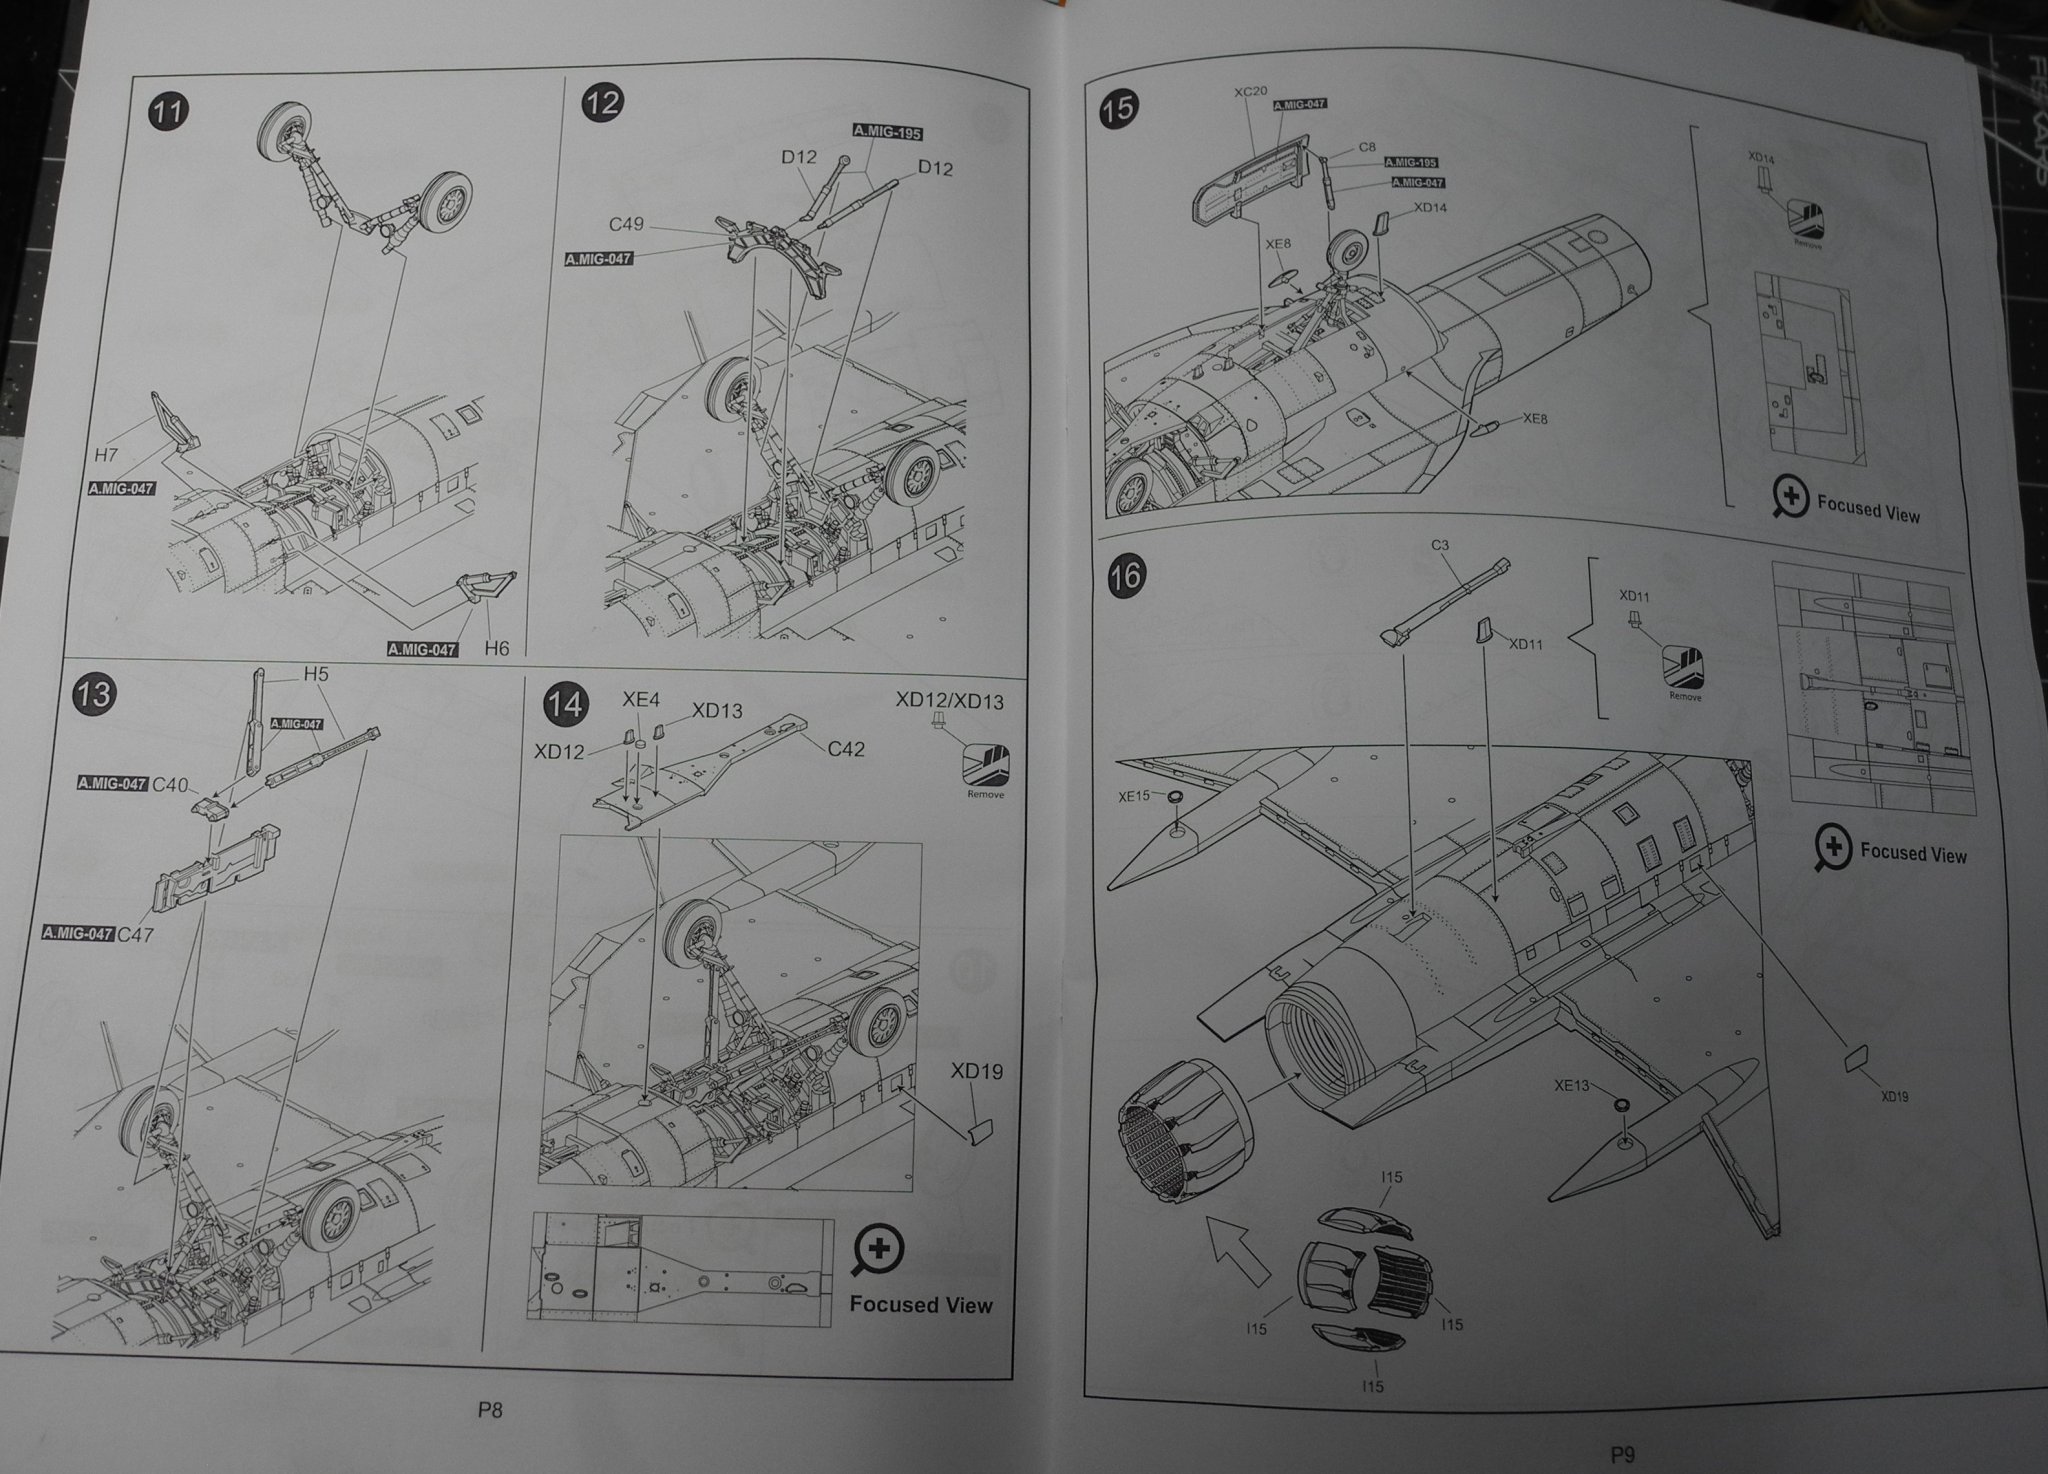
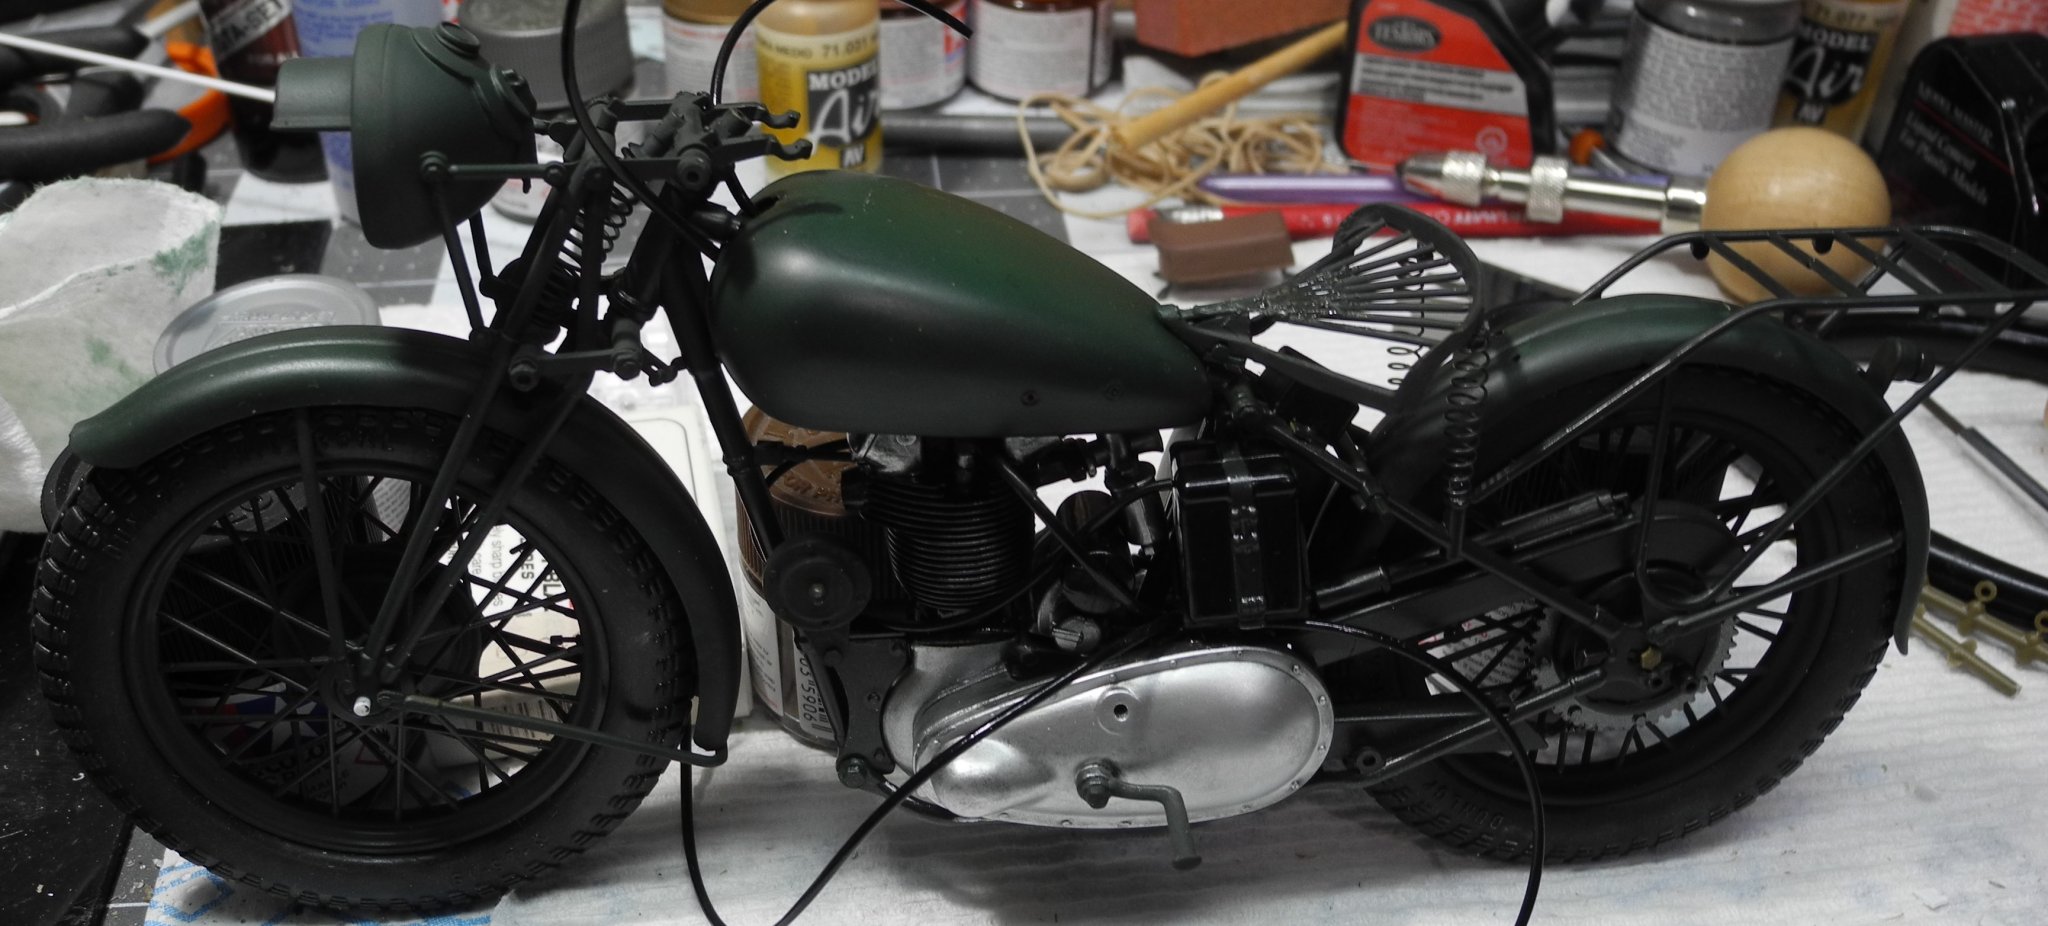
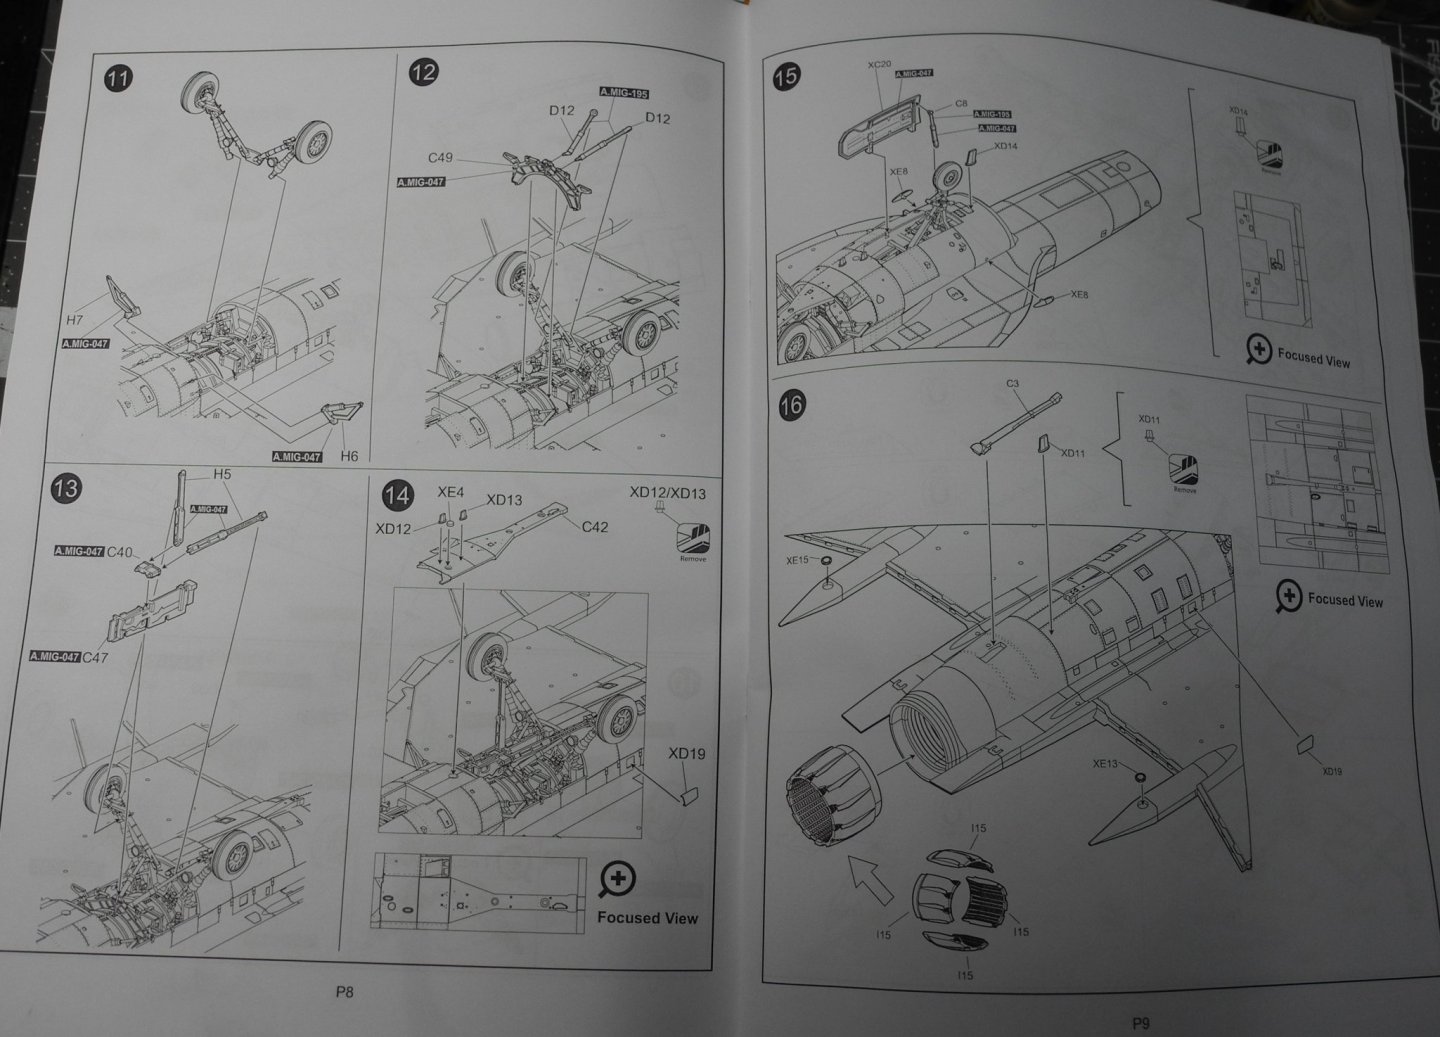
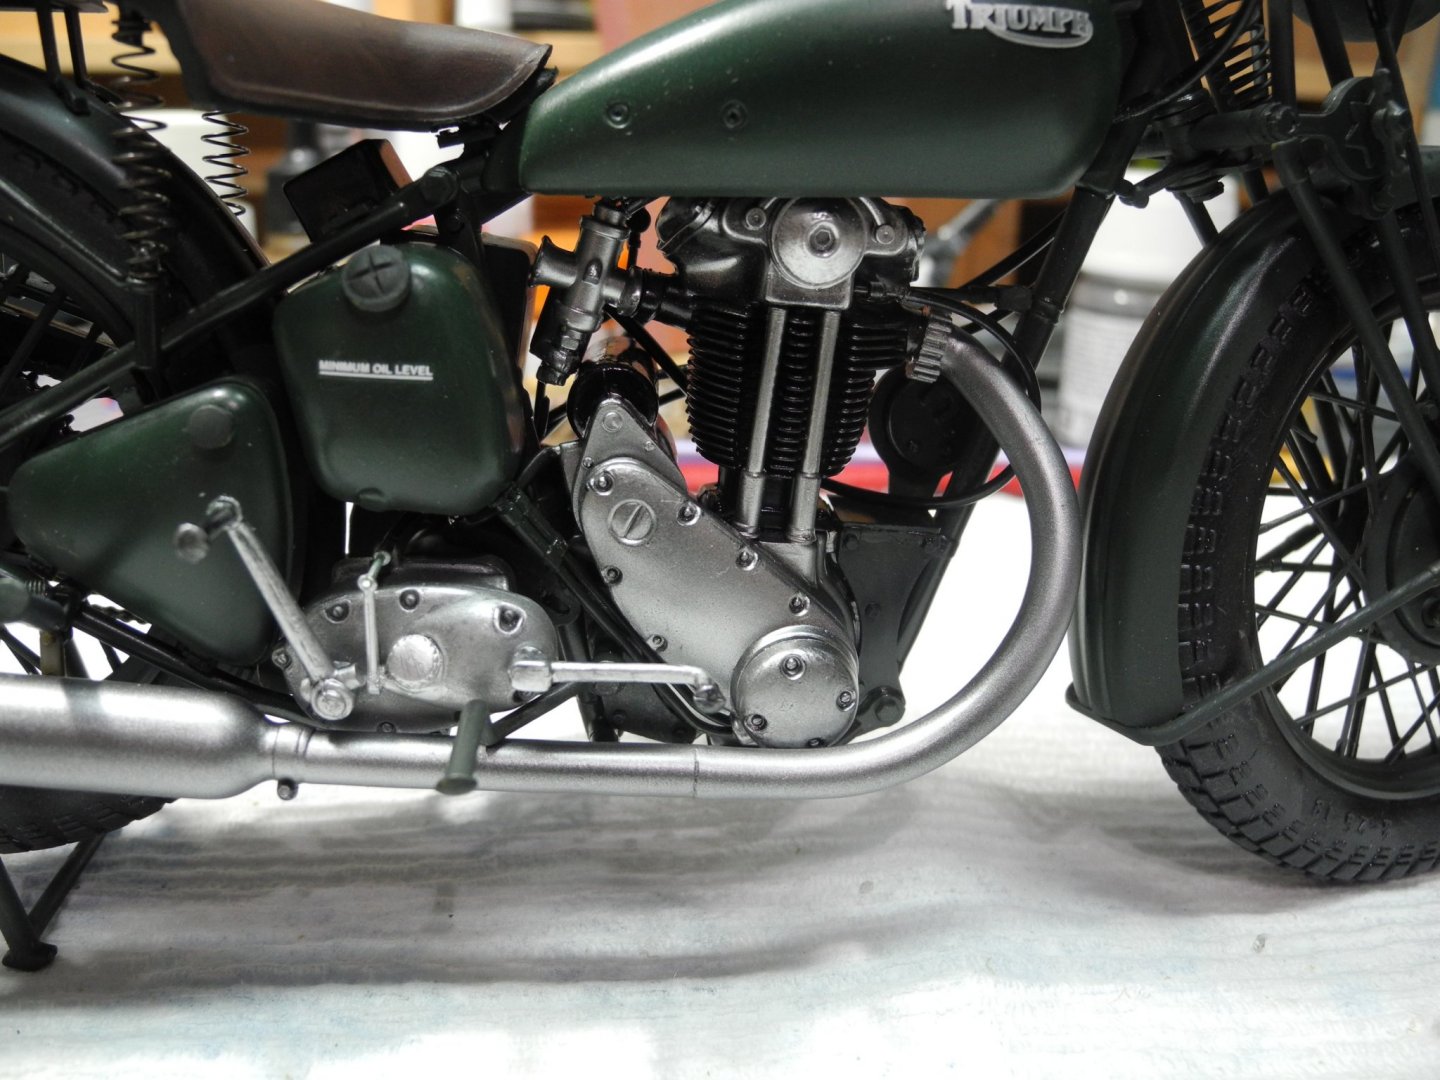
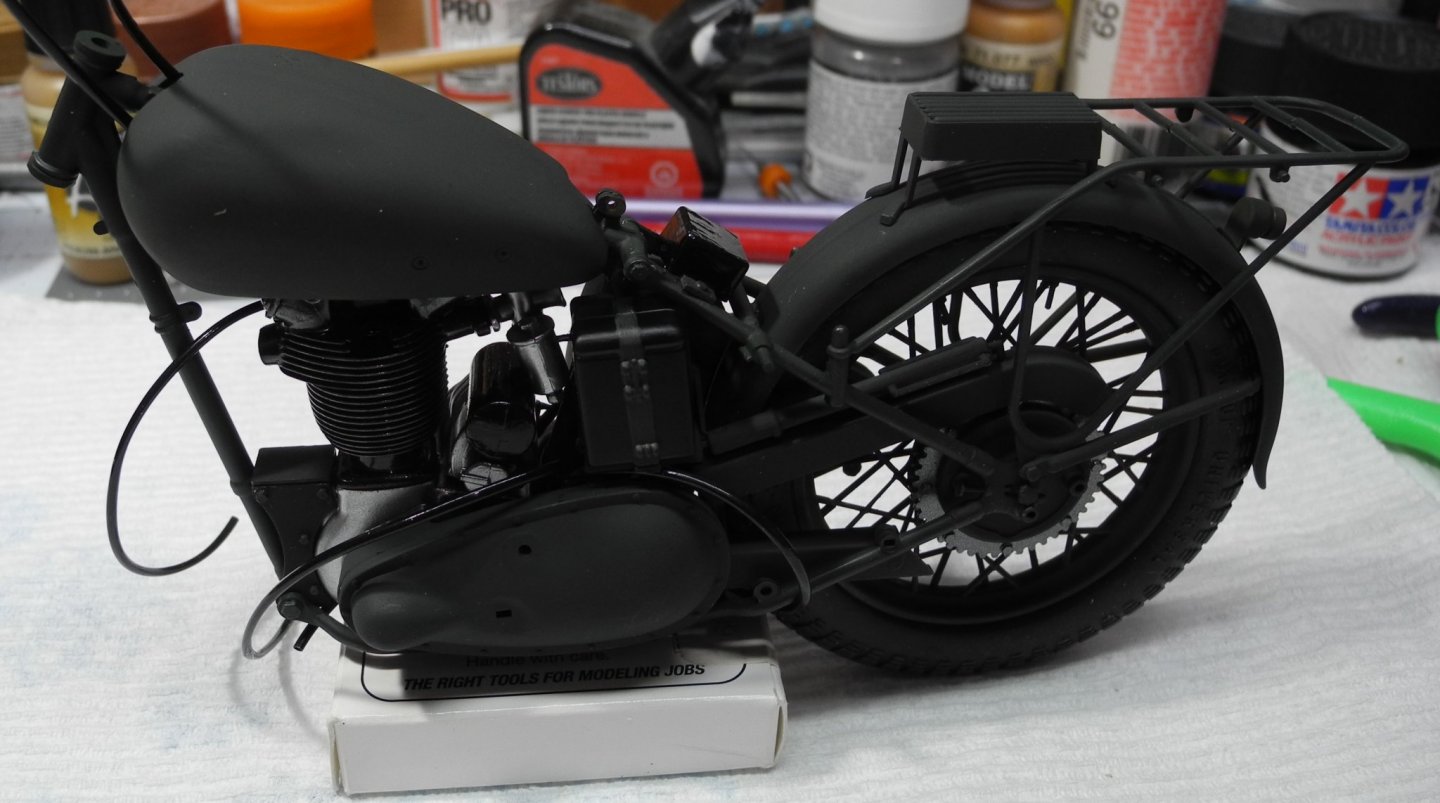
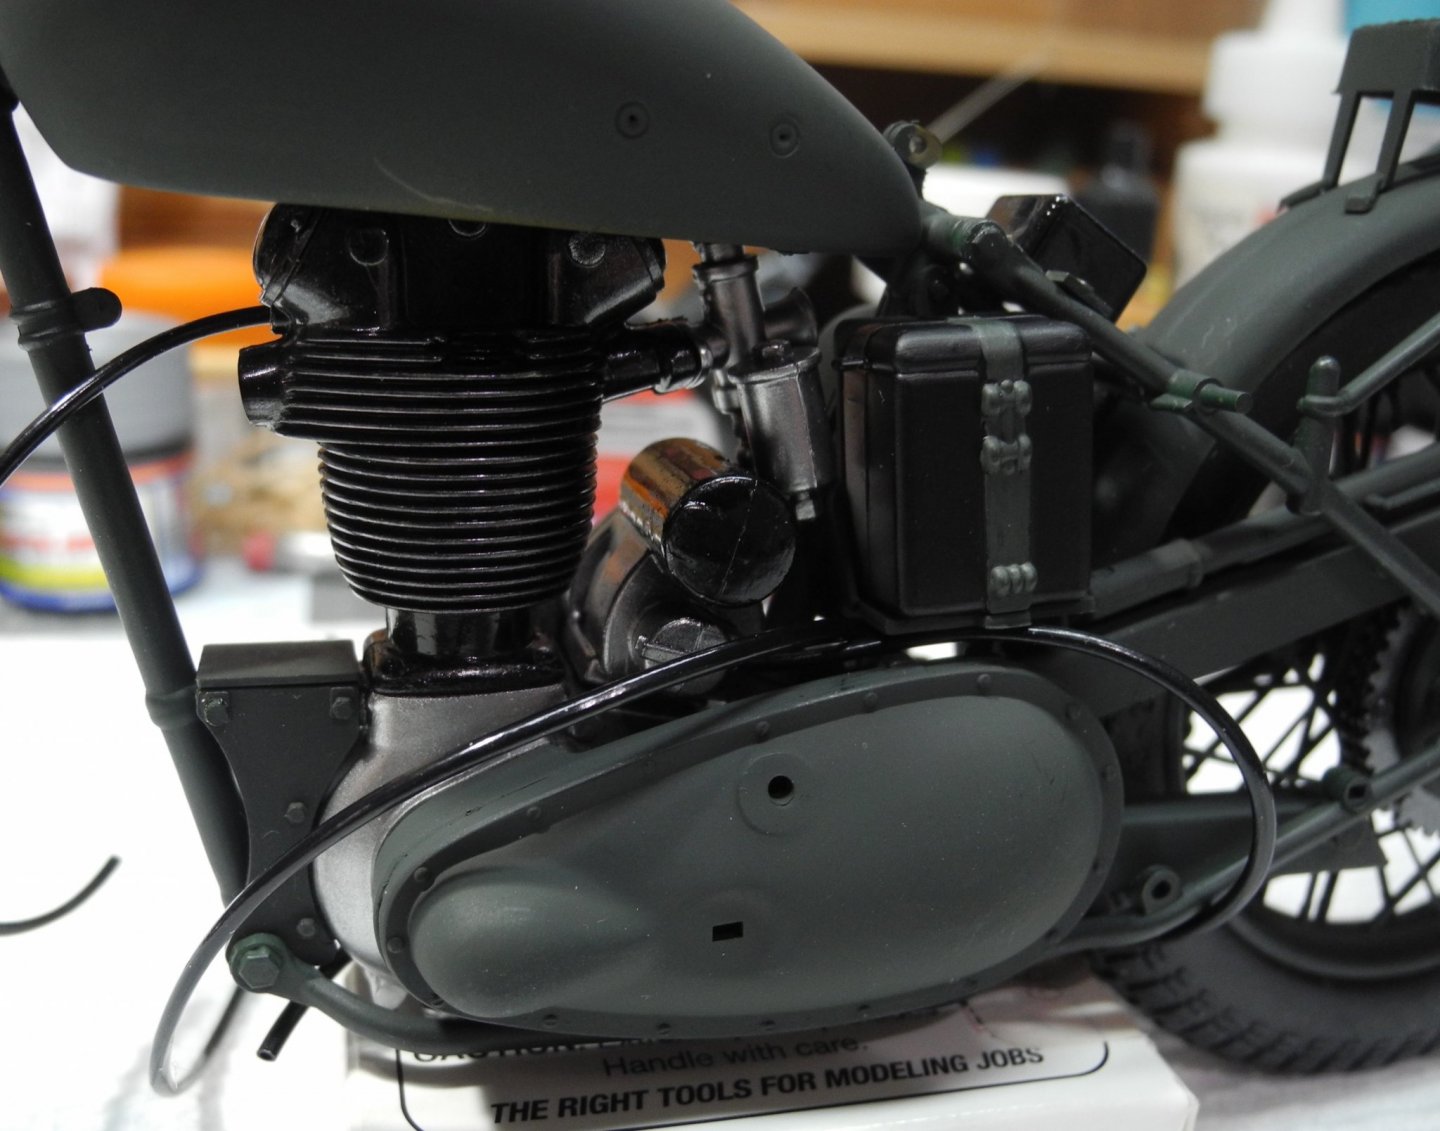
Made a little more progress while going through steps 12, 13, 14, and 15. Ran into a couple of issues with the front and rear axles. Seems as though the axle provided for the front wheel is a bit too short. Styrene rod to the rescue. Will transplant some hex head nuts on each end of the rod and it will be good to go. The green filter changes color a bit when viewed from different angles depending on the light source.

- 59 replies
-
- 12
-
-
Hatch on top totally makes sense to me. A hatch on the bottom of the hull? Wow, never heard of a deal like that before now, and I would do just like you, search for a more viable alternative. She's looking great! Can't remember where, but I once followed a complete build of this boat and that's what convinced me to buy one for myself. It is a stunning, beautiful boat when it's finished. The build I followed was a static model and not for R/C. I would like to build one with an engine bay and a mock-up of the engine. Static scale.
-
Wingnut Wings Albatros fighter by RustyNail123
CDW replied to RustyNail123's topic in Non-ship/categorised builds
Excellent! On the fuselage inside...did you use inks for that wood grain tone? -
Thanks Denis The tubing has not been a problem. The vinyl the chain was cast from was much different...a hard grade of vinyl and not very flexible. As for the paint, a little masking tape here and there; low air pressure on the airbrush, and paint reduced for better flow at low pressure. With some practice, you can get the airbrush to put paint where you want it without over spray issues. You just have to be aware of your angles when shooting the paint and use masking where over spray is definitely going to be an issue. My airbrush can spray a line of 1/16 of an inch if the air pressure is right and the paint reduced correctly. practice, practice, practice. experiment with air pressure and paint viscosity, then practice some more. 🙂
-
Cruising the internet, I ran across some very good photos of the stock Triumph Tiger 80. If I had seen those photos first, I may have built and painted this model as the civilian version instead of the military one. That is a gorgeous old vintage British motorcycle. https://www.tomcc.org/Triumph/Model/31
-
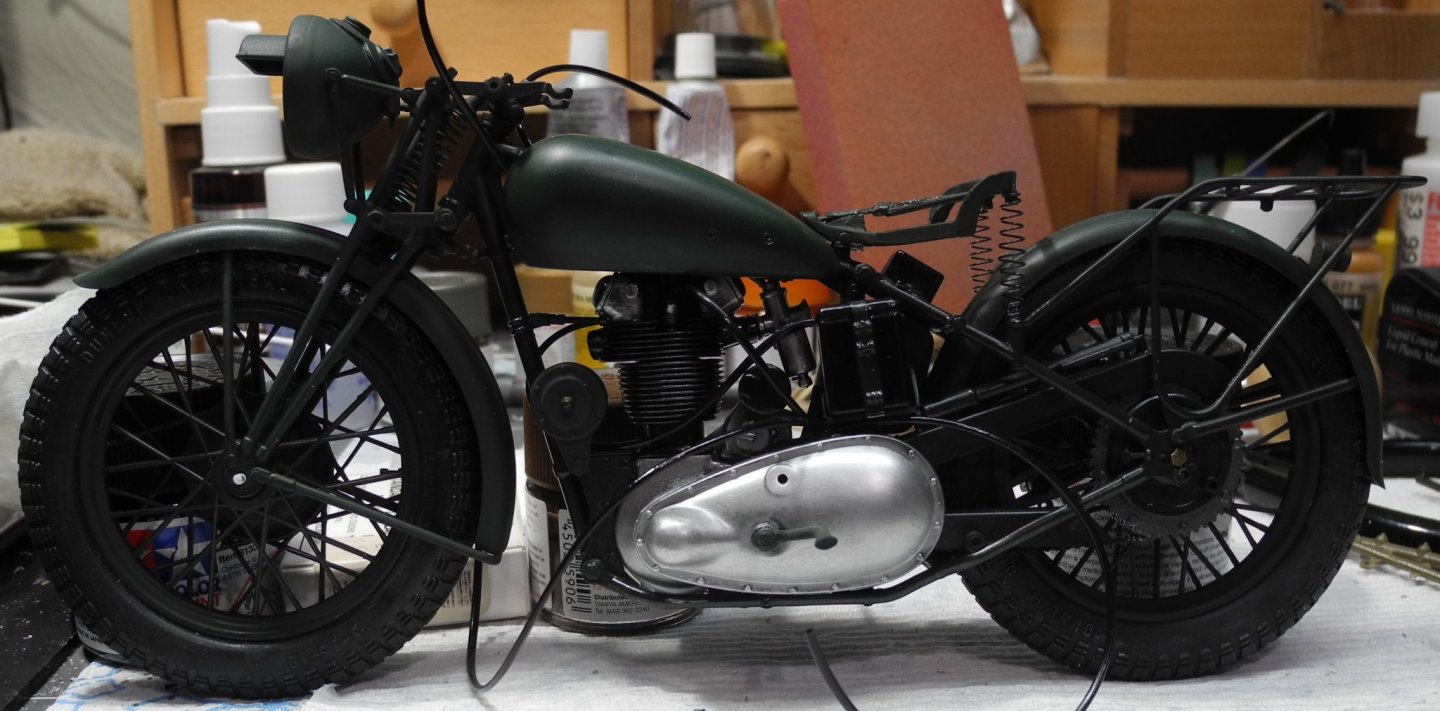
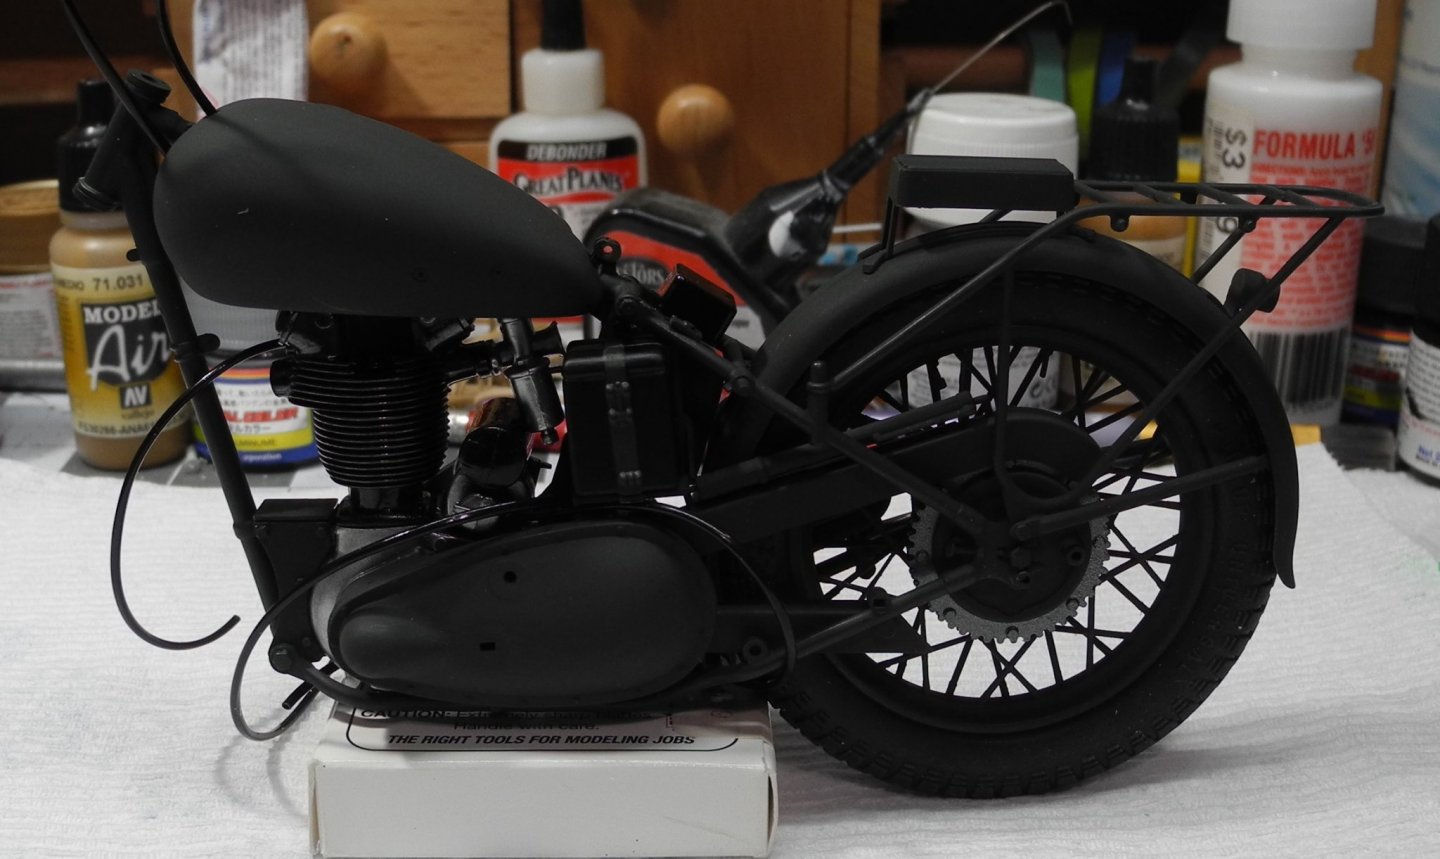
Here the green filter has been applied. The contrast between the parts that received the filter and those that didn't is very noticeable. For me, it gave what I wanted, a slightly lighter shade of green than what I started with.

-
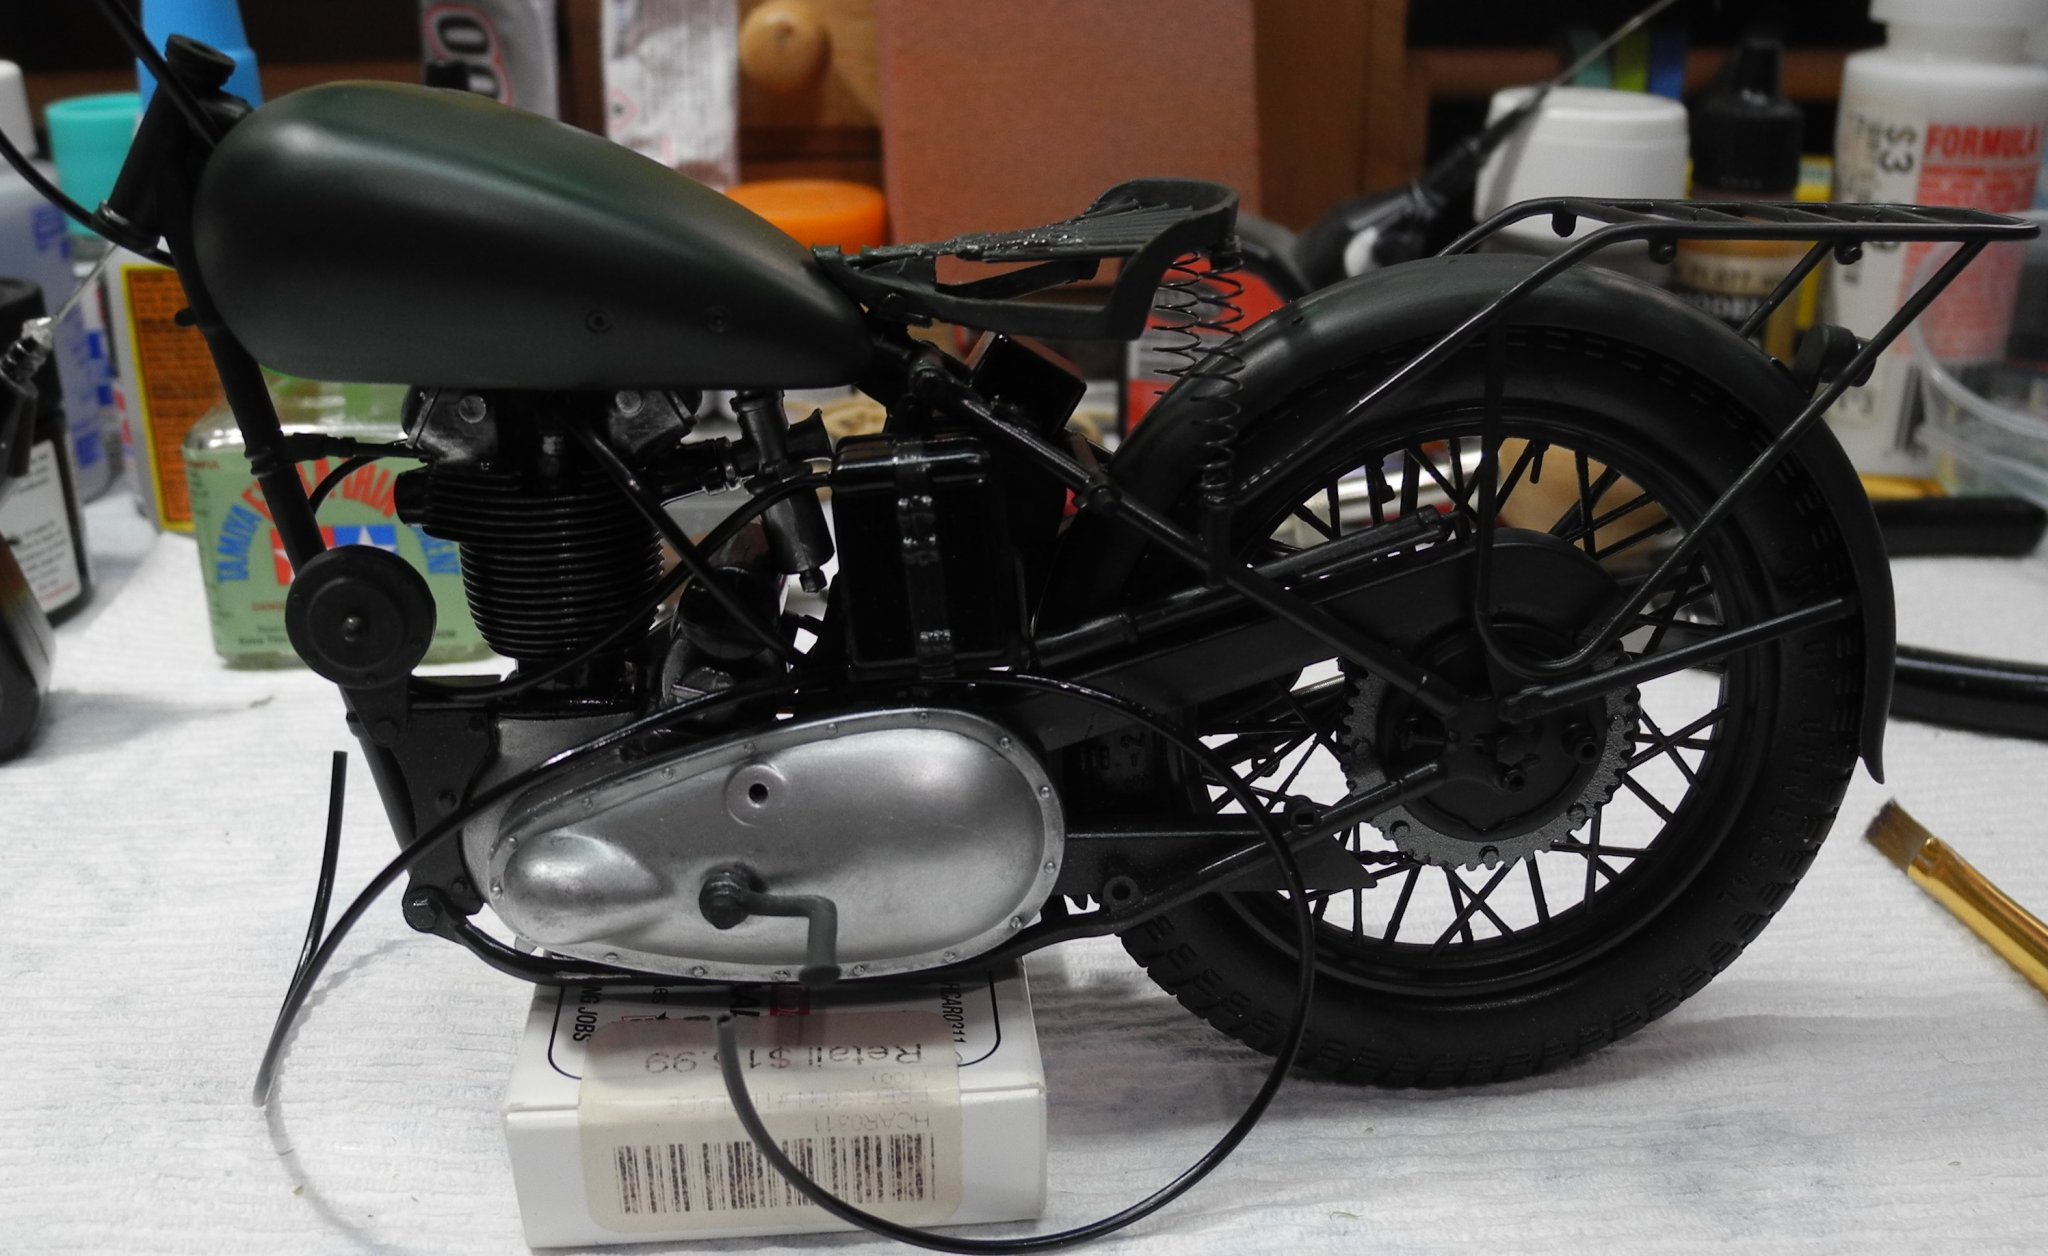
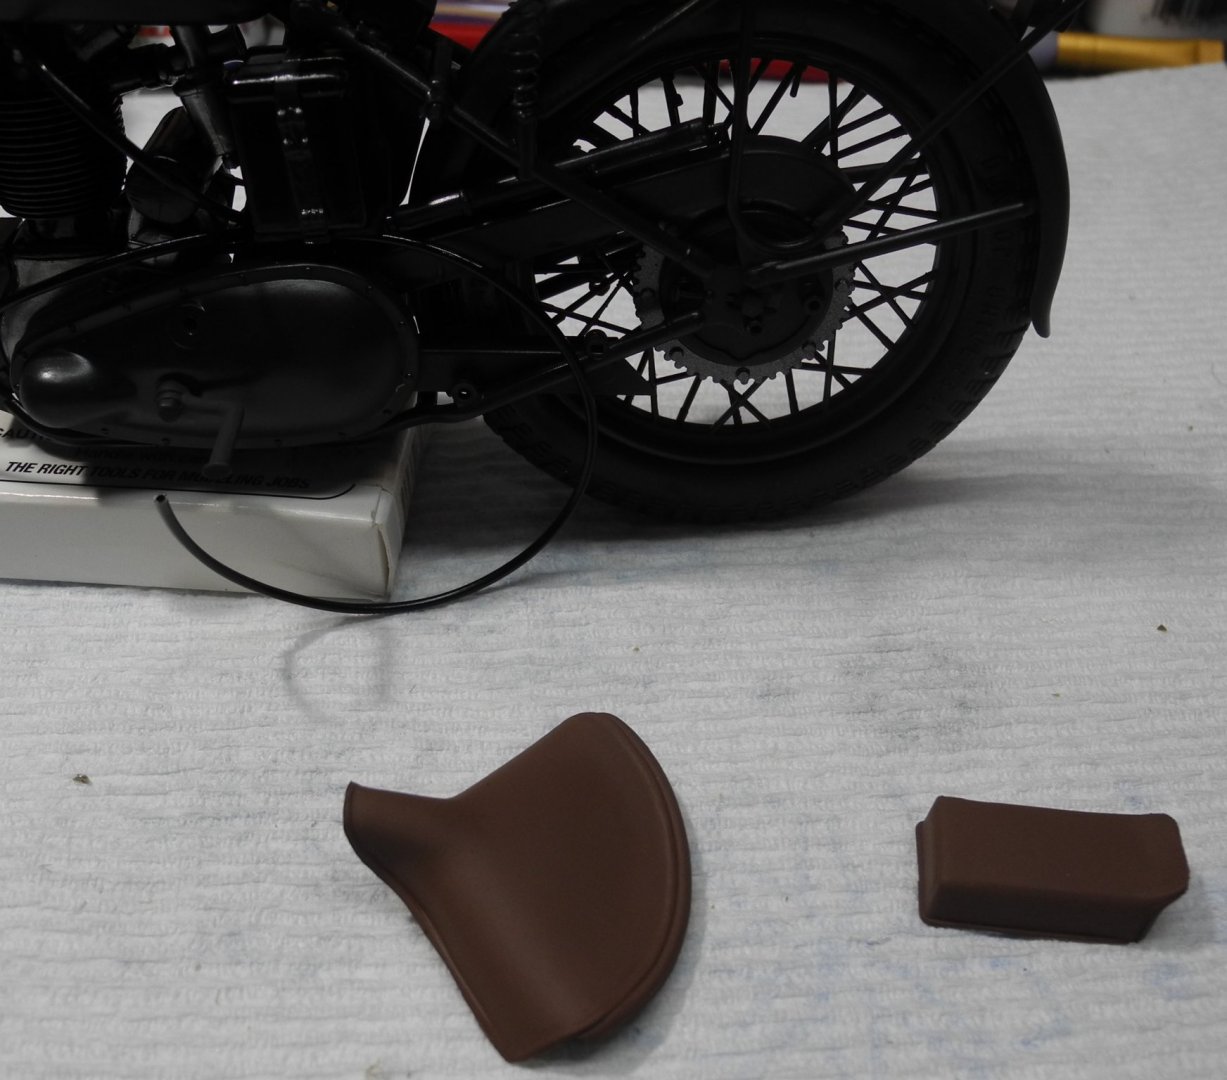
You get a gold star for this suggestion, Lou. I used a mandrel to properly shape the chain for the rear sprocket, then clamped some hemostats to the opposite end of the chain and let them hang down to give the chain a stretch and put it in a correct shape. Next I heated it up with a hair dryer and that did the trick. The vinyl chain held that shape.
-
Yeah, this stuff is not cheap, but dang, it's a really nice touch if someone is going all out to super detail a model. My Triumph is not worthy of this. I'm happy with out-of-the-box on this one.
-
Yes you can, but I don't know of any in this scale 1:9. I have some for my Tamiya motorcycle kits in 1:12 scale. They are a real challenge to assemble. Very small photo etch links and pins. It comes with a tool/jig to assemble the parts.
-
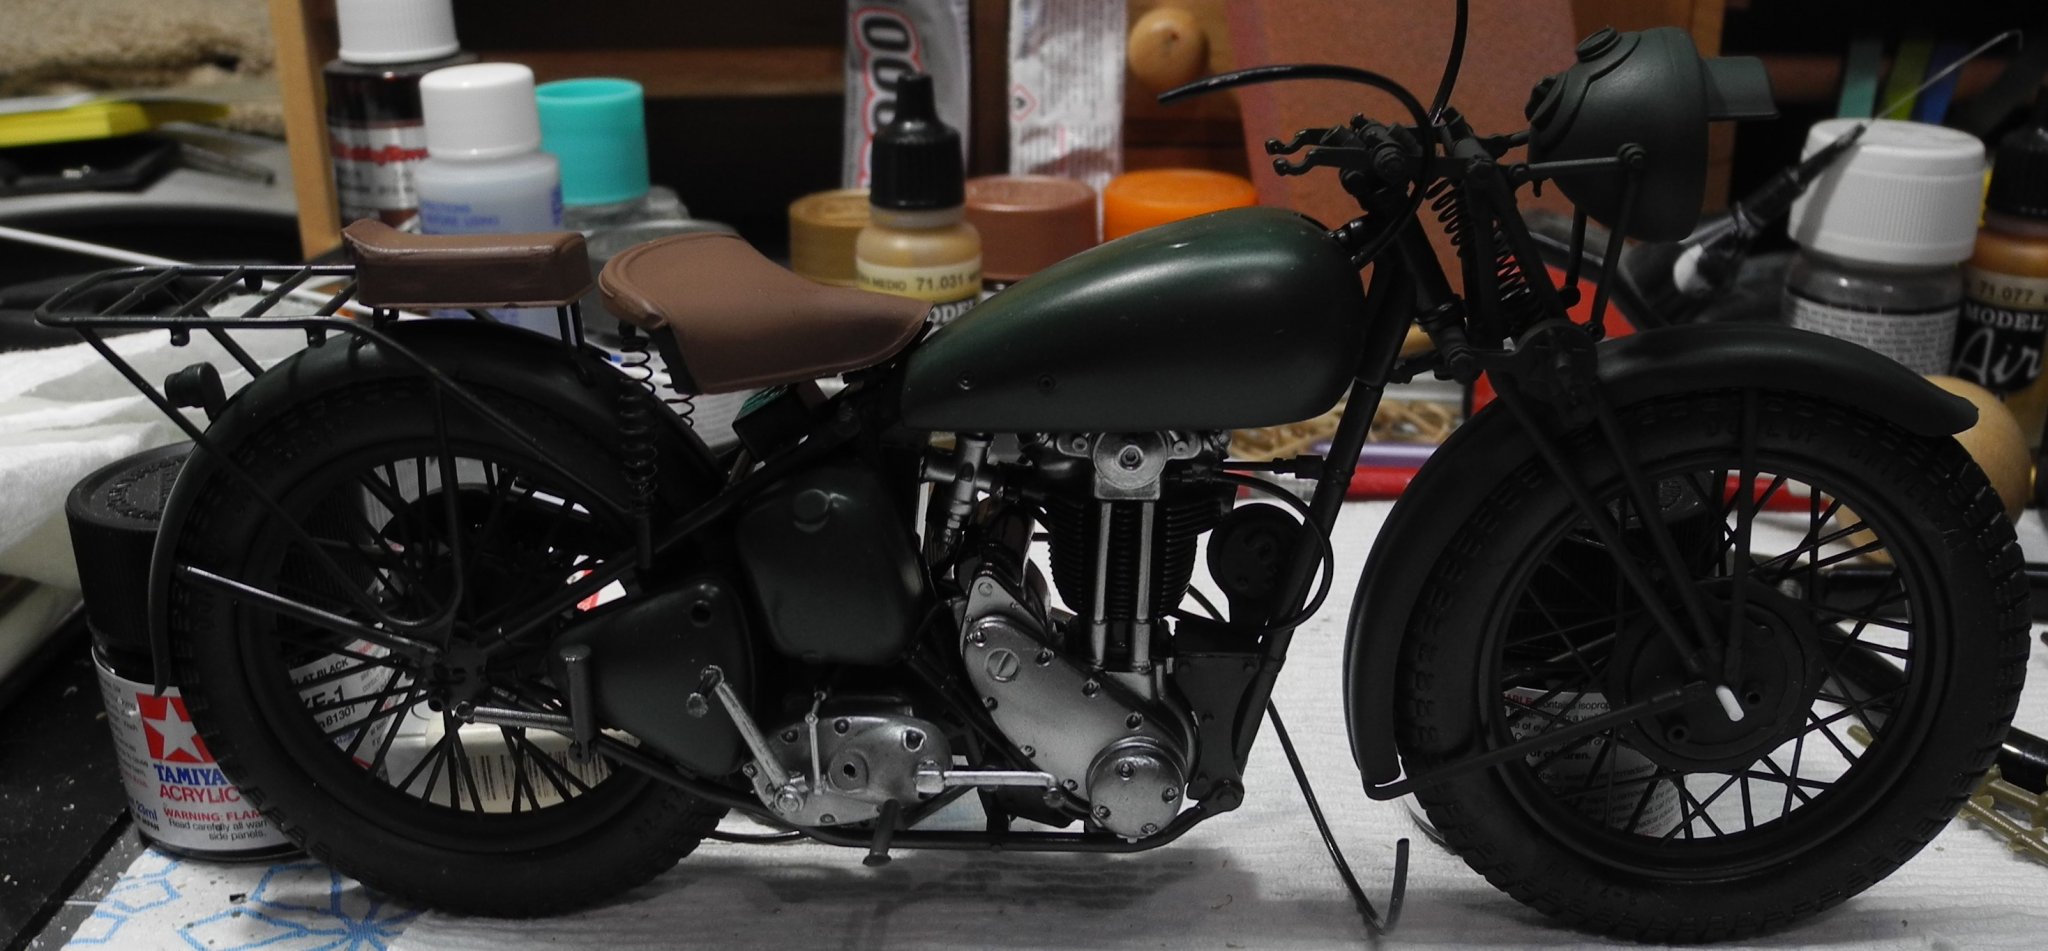
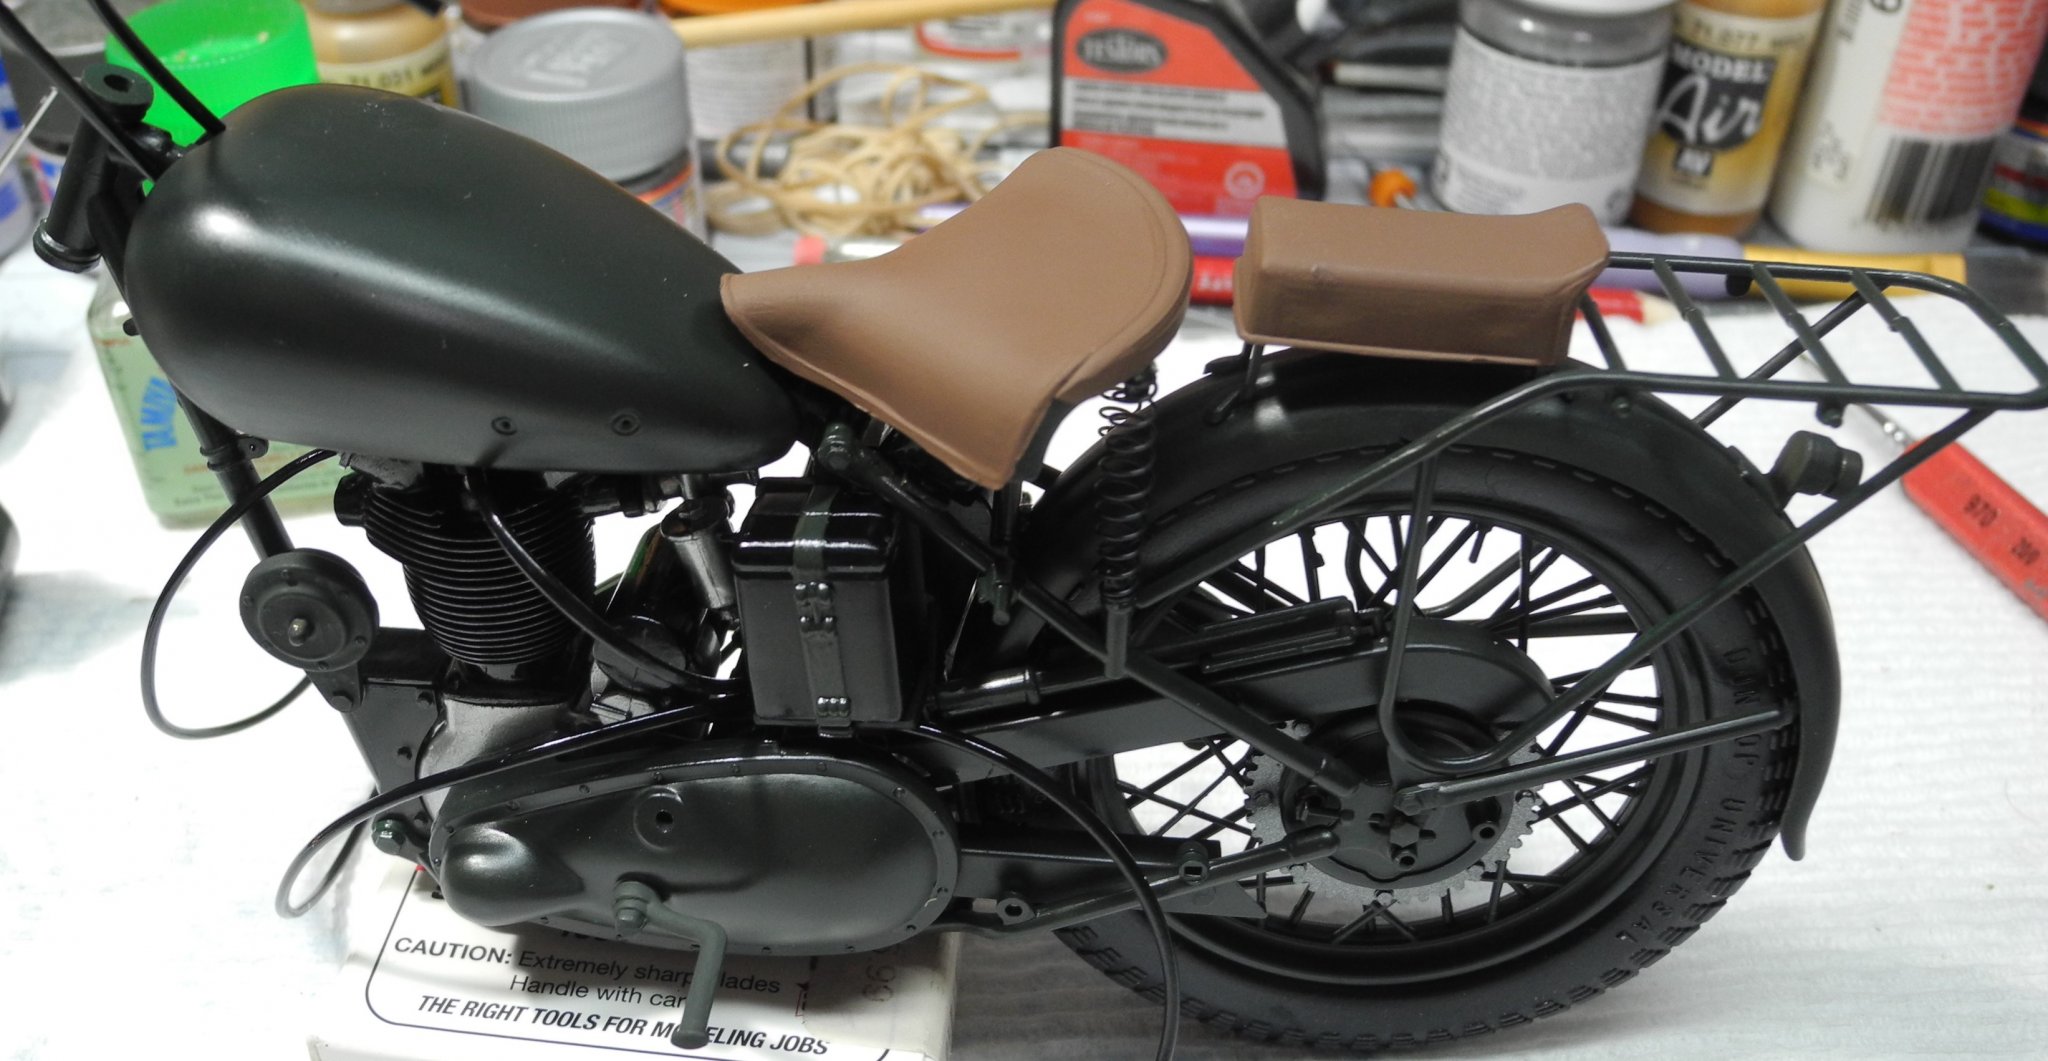
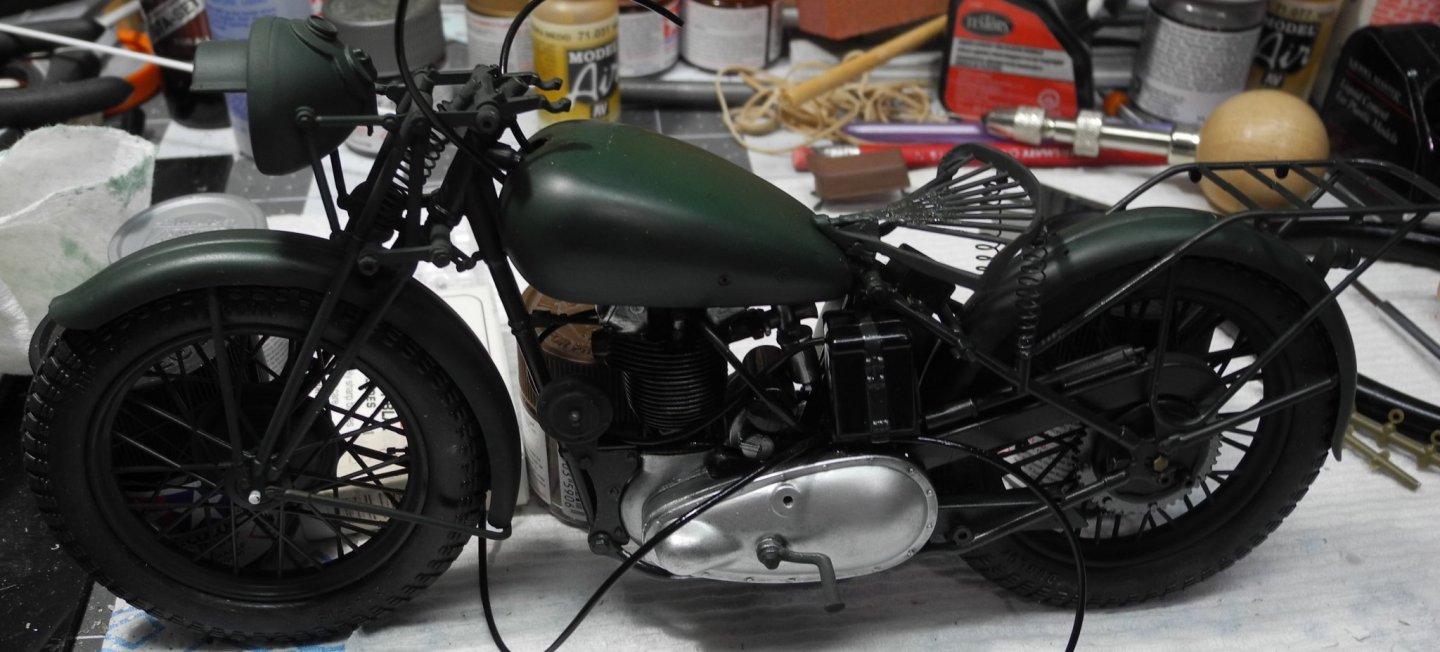
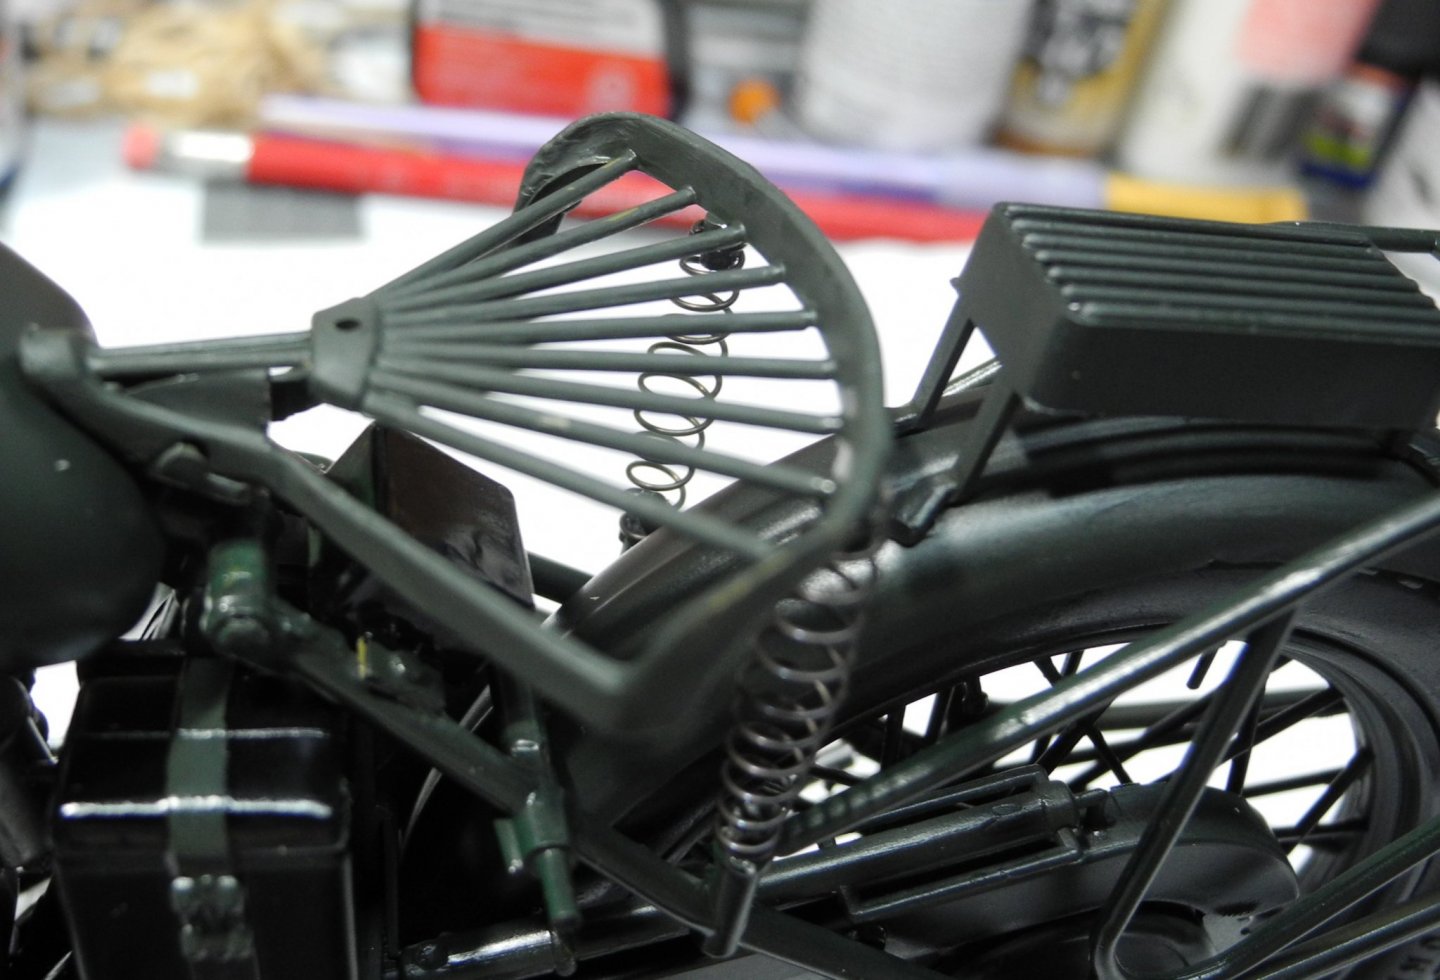
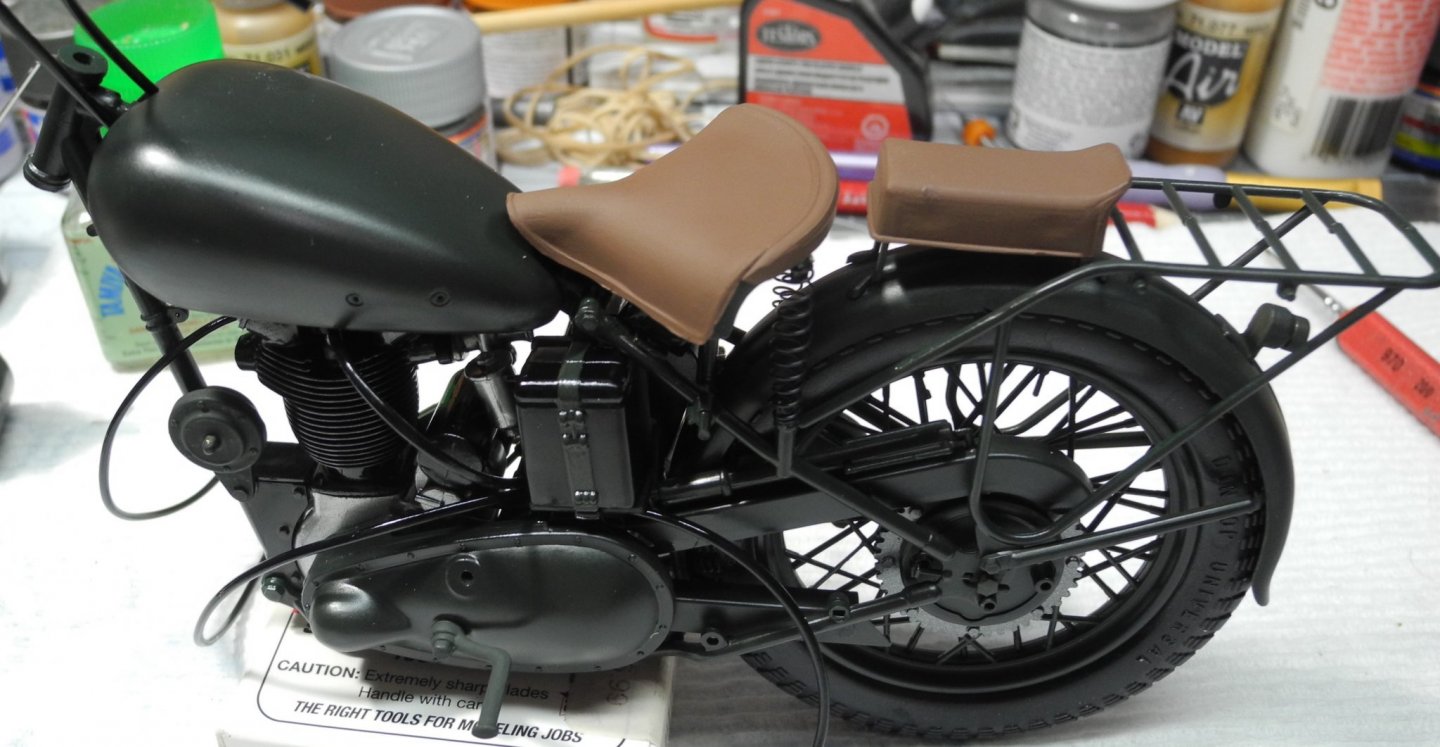
For a kit of this vintage (the molds, because this is a re-pop of the original), it's surprising the level of detail provided. Here we can see the seats, front and rear, seat frameworks with springs. The seat covers are molded in a soft vinyl. I've given the model a good coat of clear gloss sealer, an acrylic one that will provide the base for the enamel filter I will apply tomorrow. Without applying the sealer, the solvents in the enamel would damage the flat green acrylic and cause undesired results. A sealer like this needs a full 24 hours or more to cure before applying the enamel filter. Here we can see the painted vinyl seat covers installed over the seat frameworks.
- 59 replies
-
- 13
-
-
Good suggestions, thanks for that. I'm going to try warm/hot water first and then the hair dryer if the water doesn't work.
-
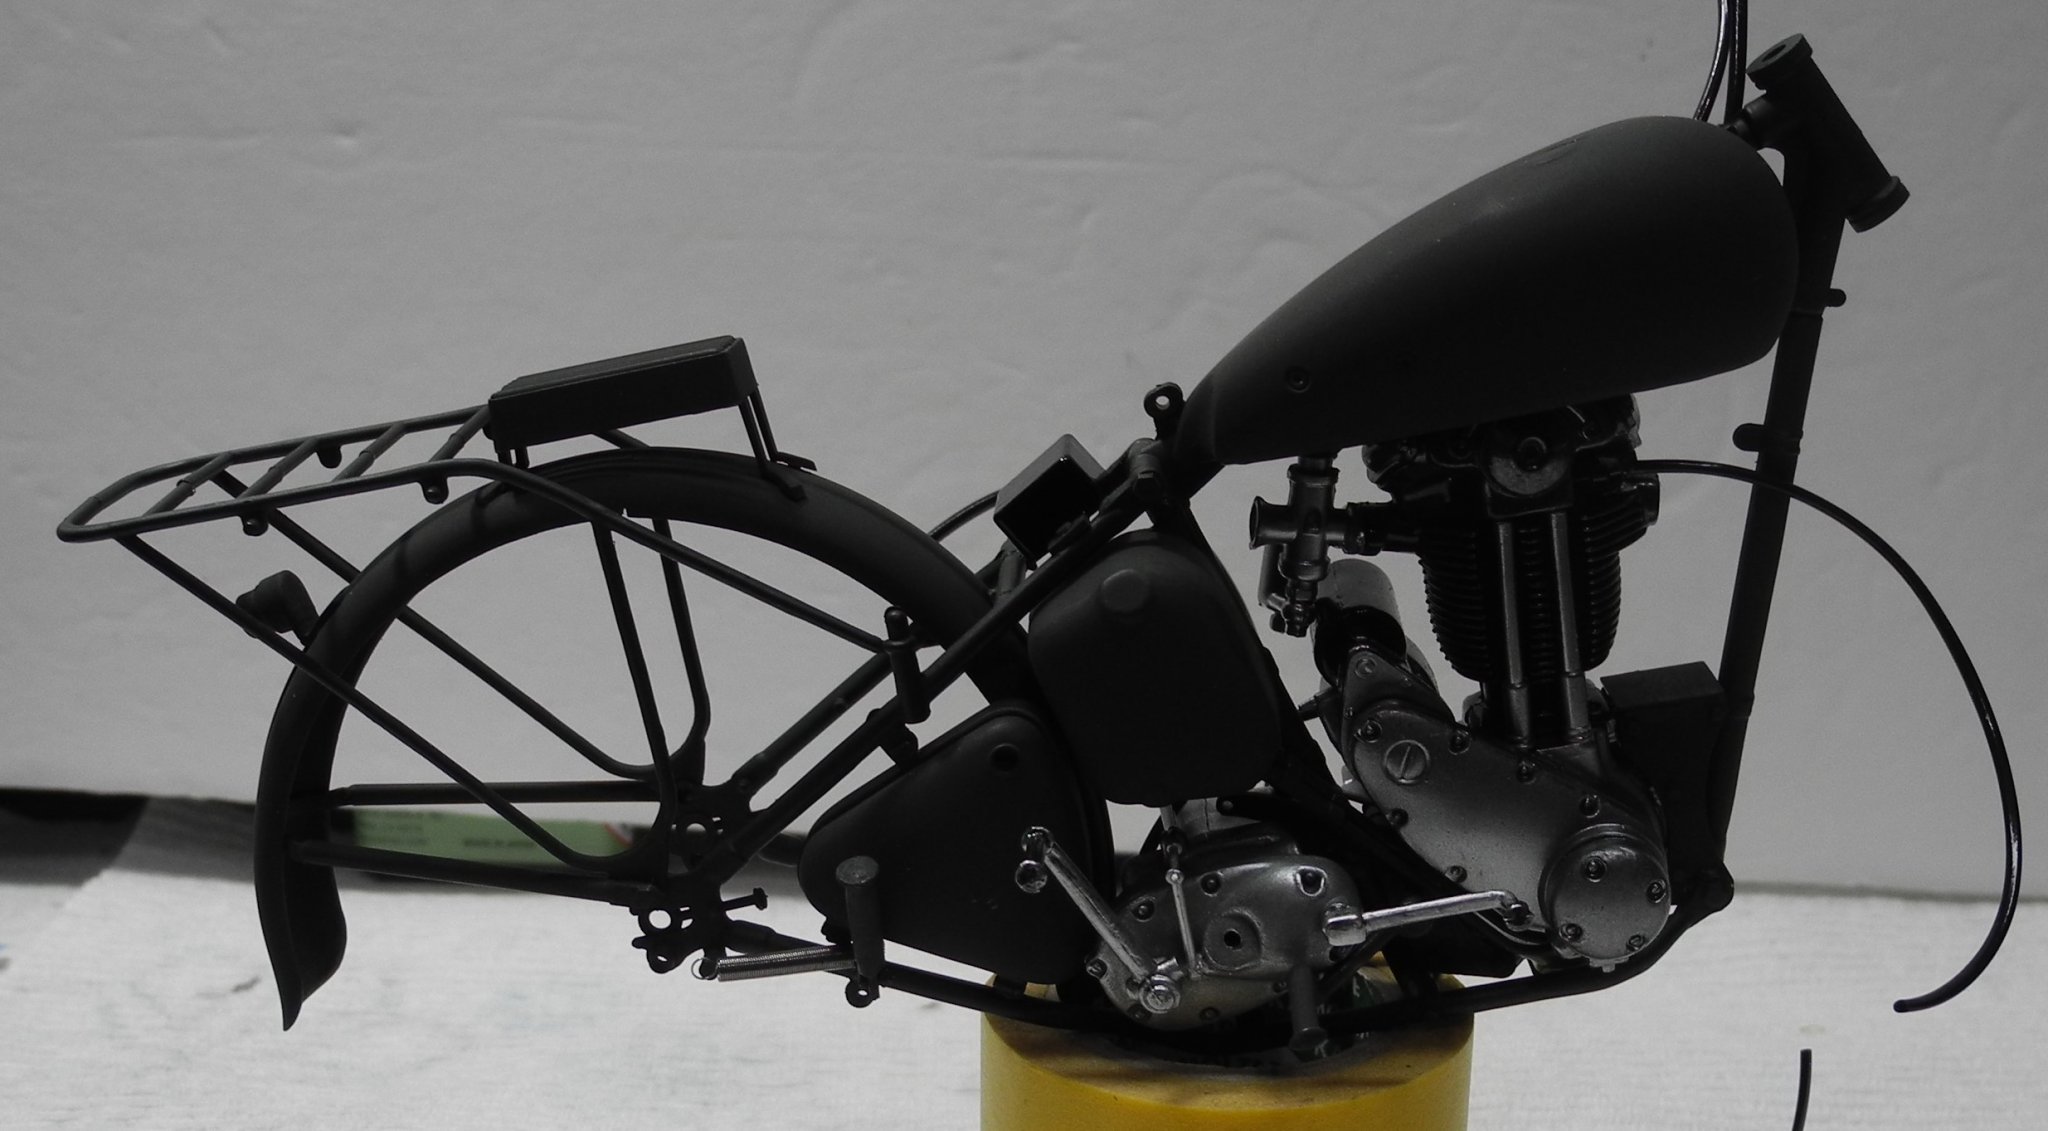
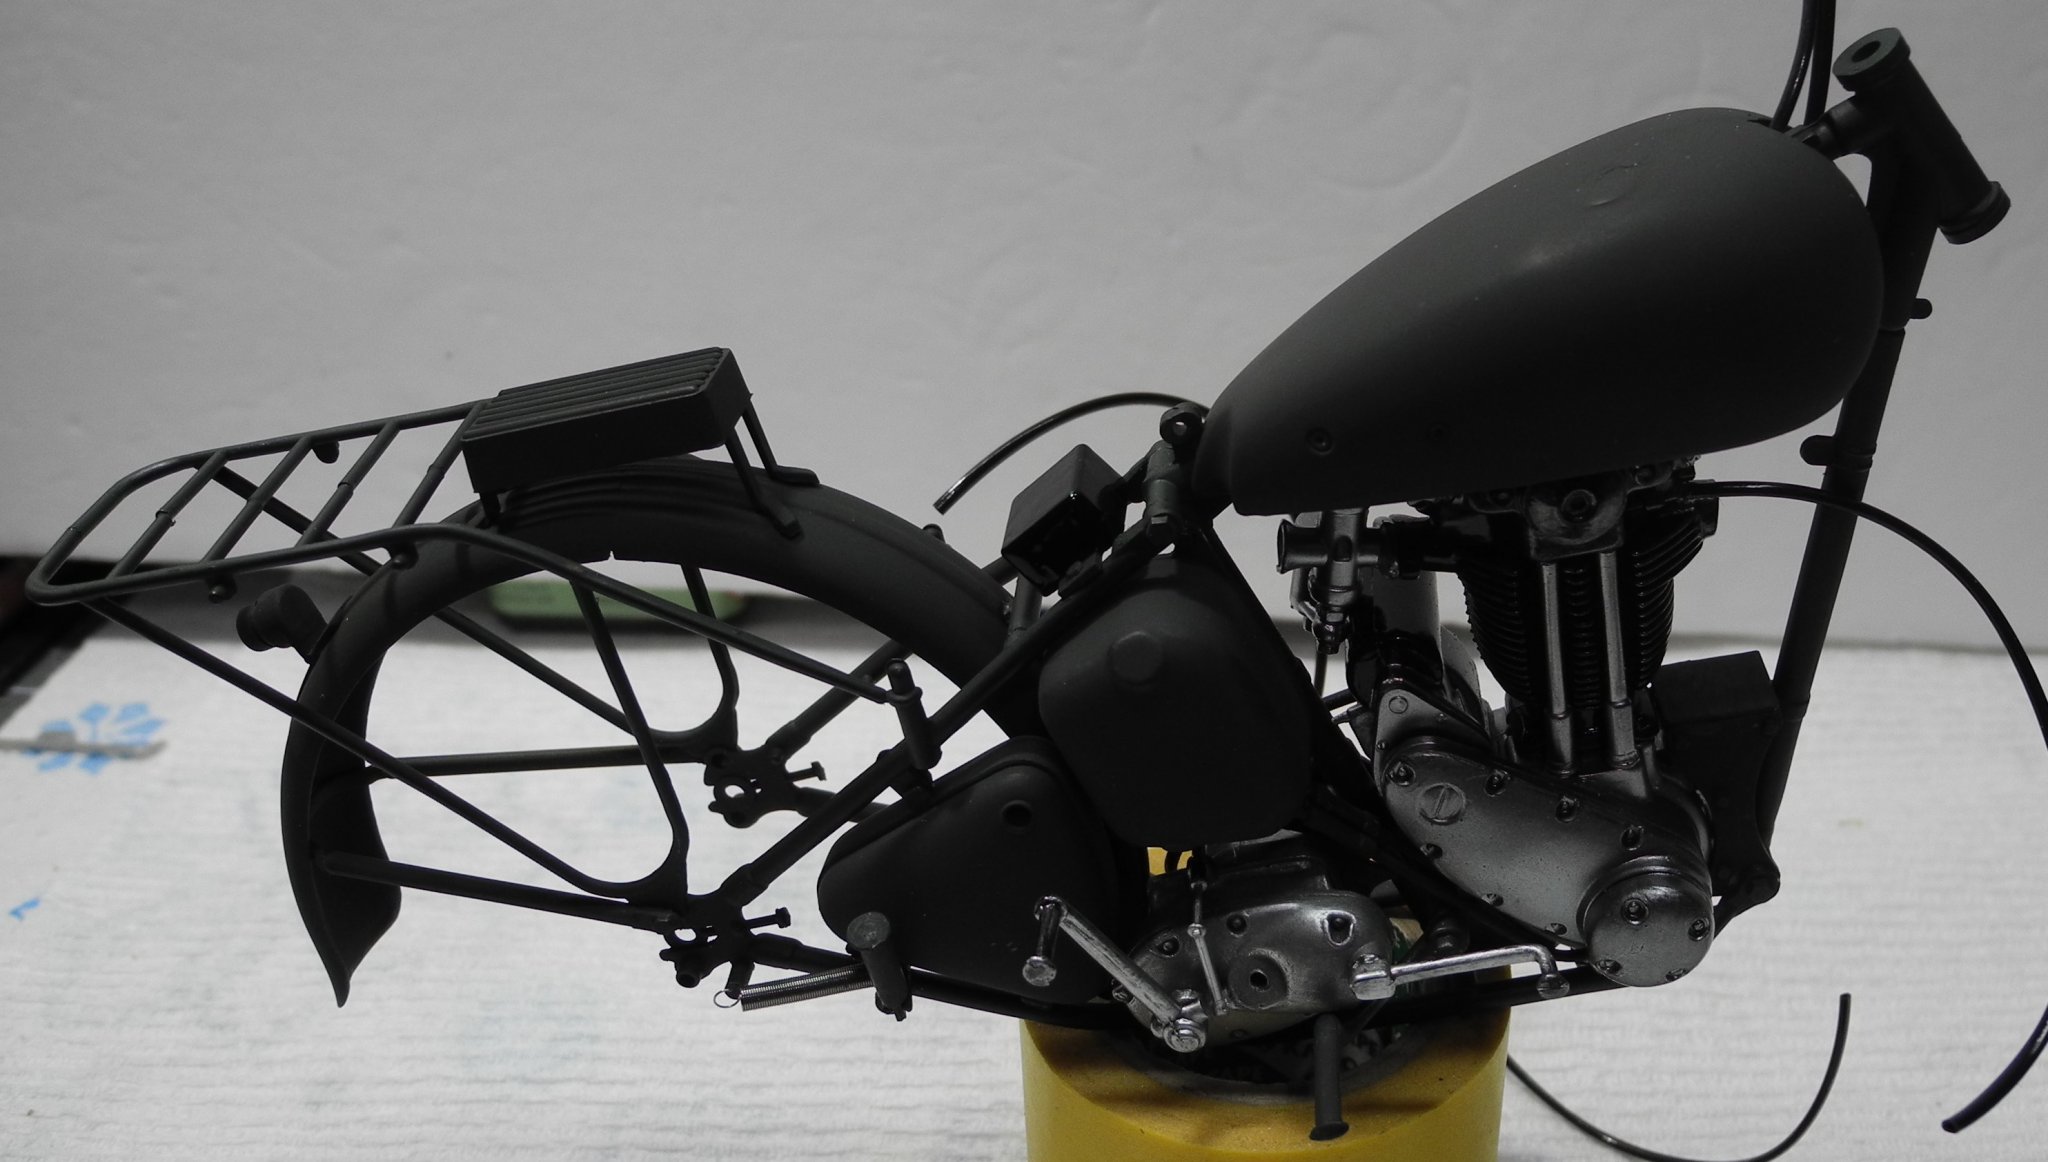
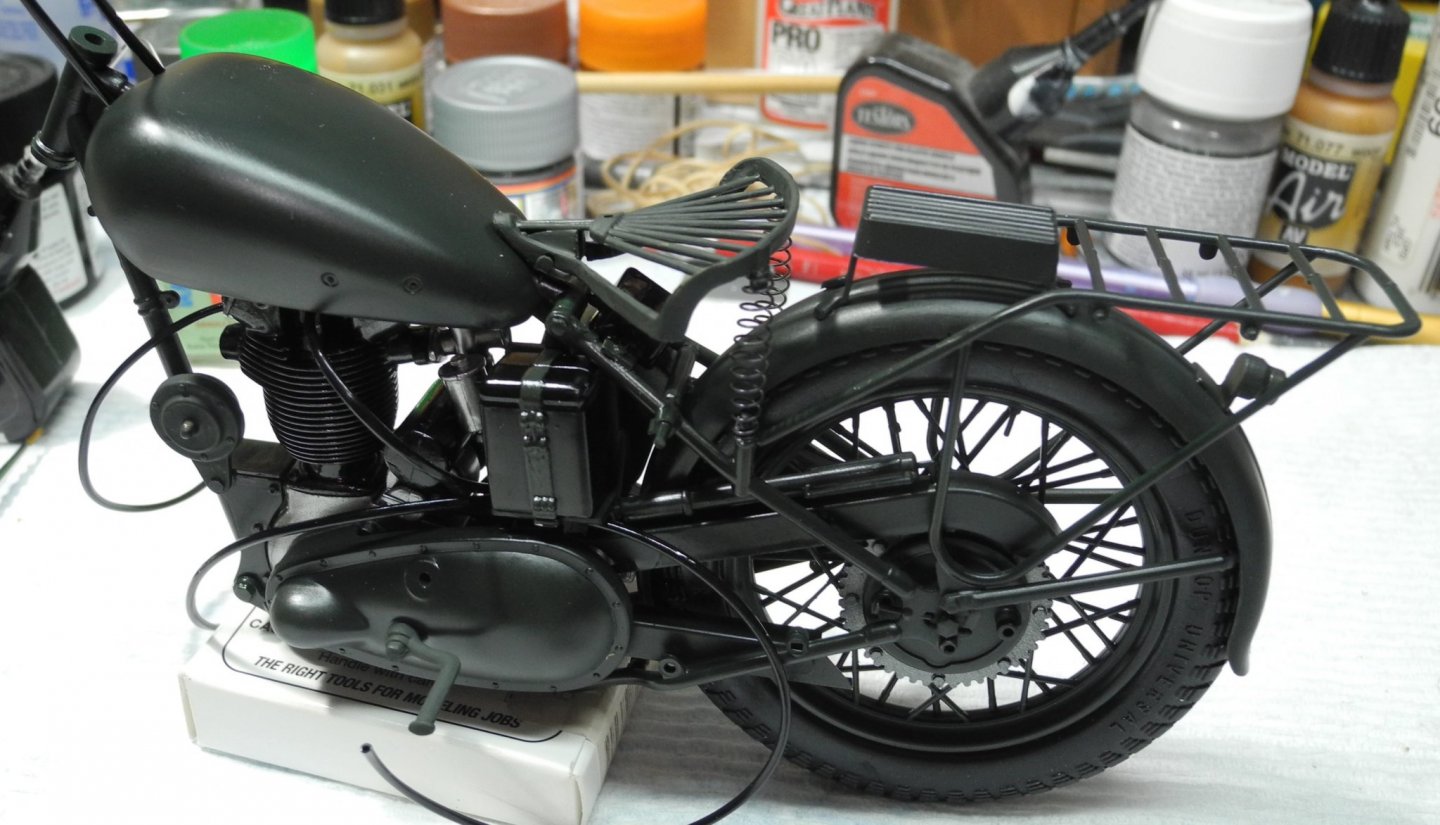
Step 10 provides one challenge; the kit provides a vinyl "chain" that was molded in a round shape. Because vinyl has memory, I can't get it to behave properly and lay down the way it should between the drive sprocket and main sprocket on the rear wheel. I'm going to need to play around with this chain a bit to figure out how I'm going to deal with it. Need to remove that memory from the vinyl somehow.
- 59 replies
-
- 14
-
-
Not a heck of a lot to show with step 9, but something is better than nothing. In any case, there was some fiddly work in this step.


- 59 replies
-
- 14
-