CDW
-
Posts
7,760 -
Joined
-
Last visited
Content Type
Profiles
Forums
Gallery
Events
Everything posted by CDW
-
 Very nice progress OC, and I like that Spitfire. Excellent detail. Your attention to detail on the bomb bay is paying off.
 -
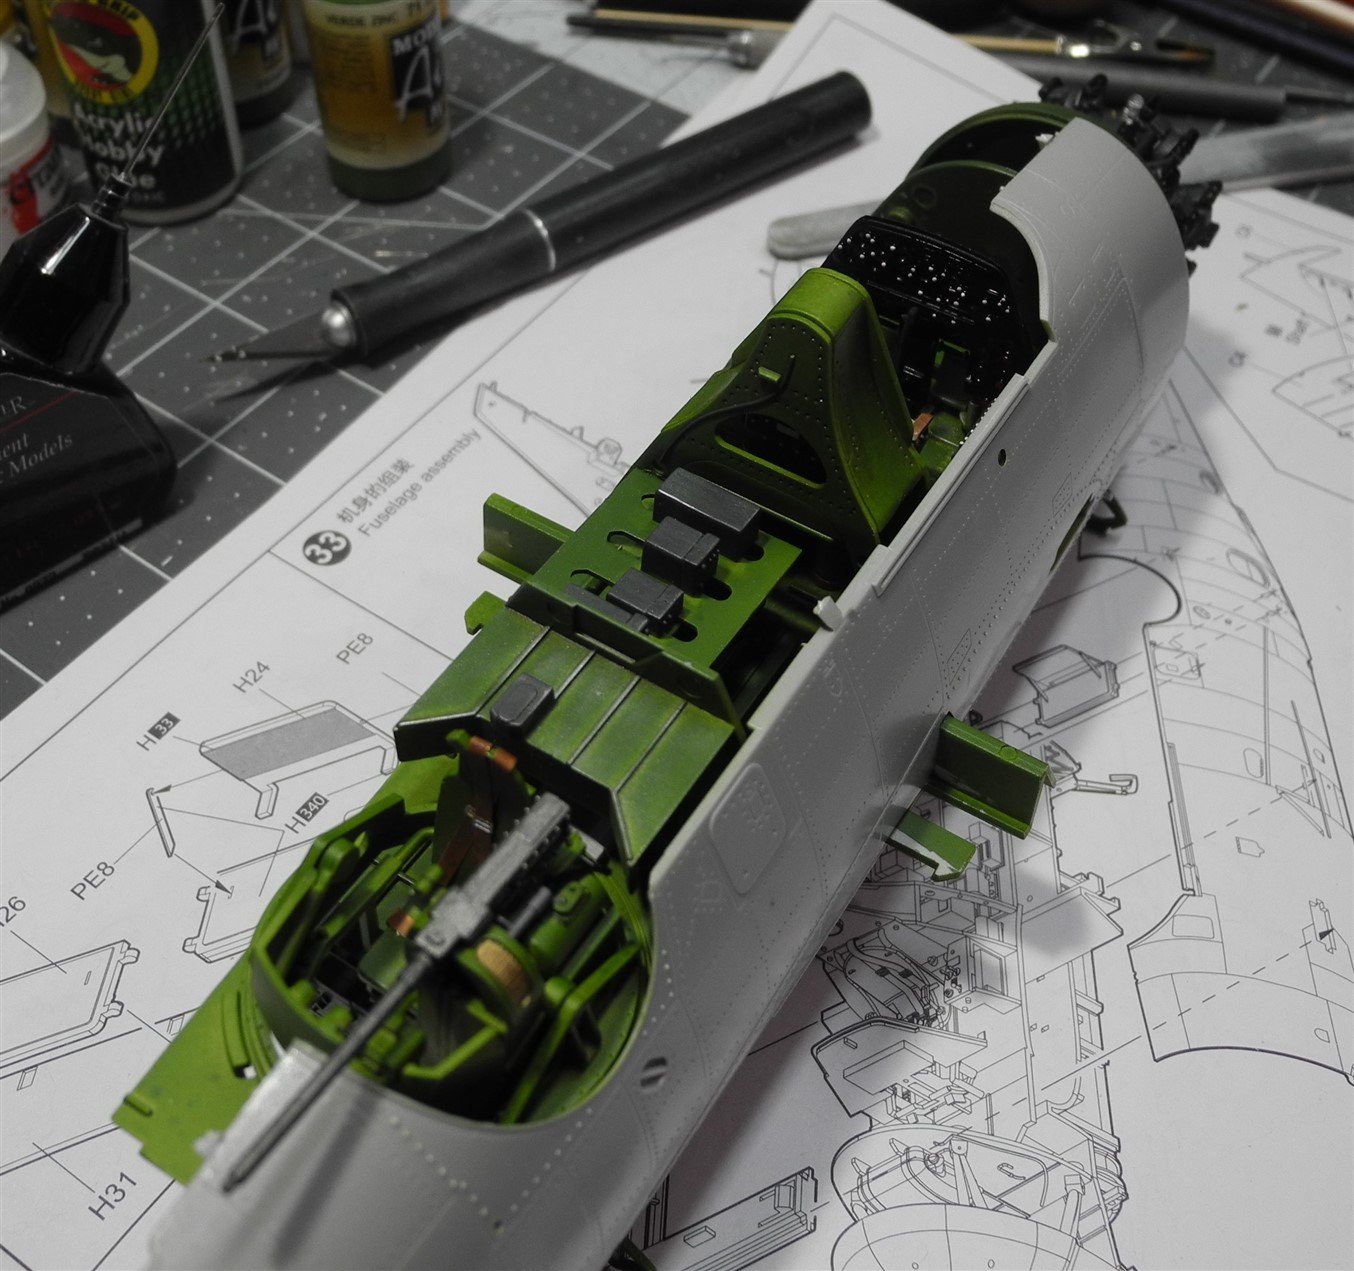
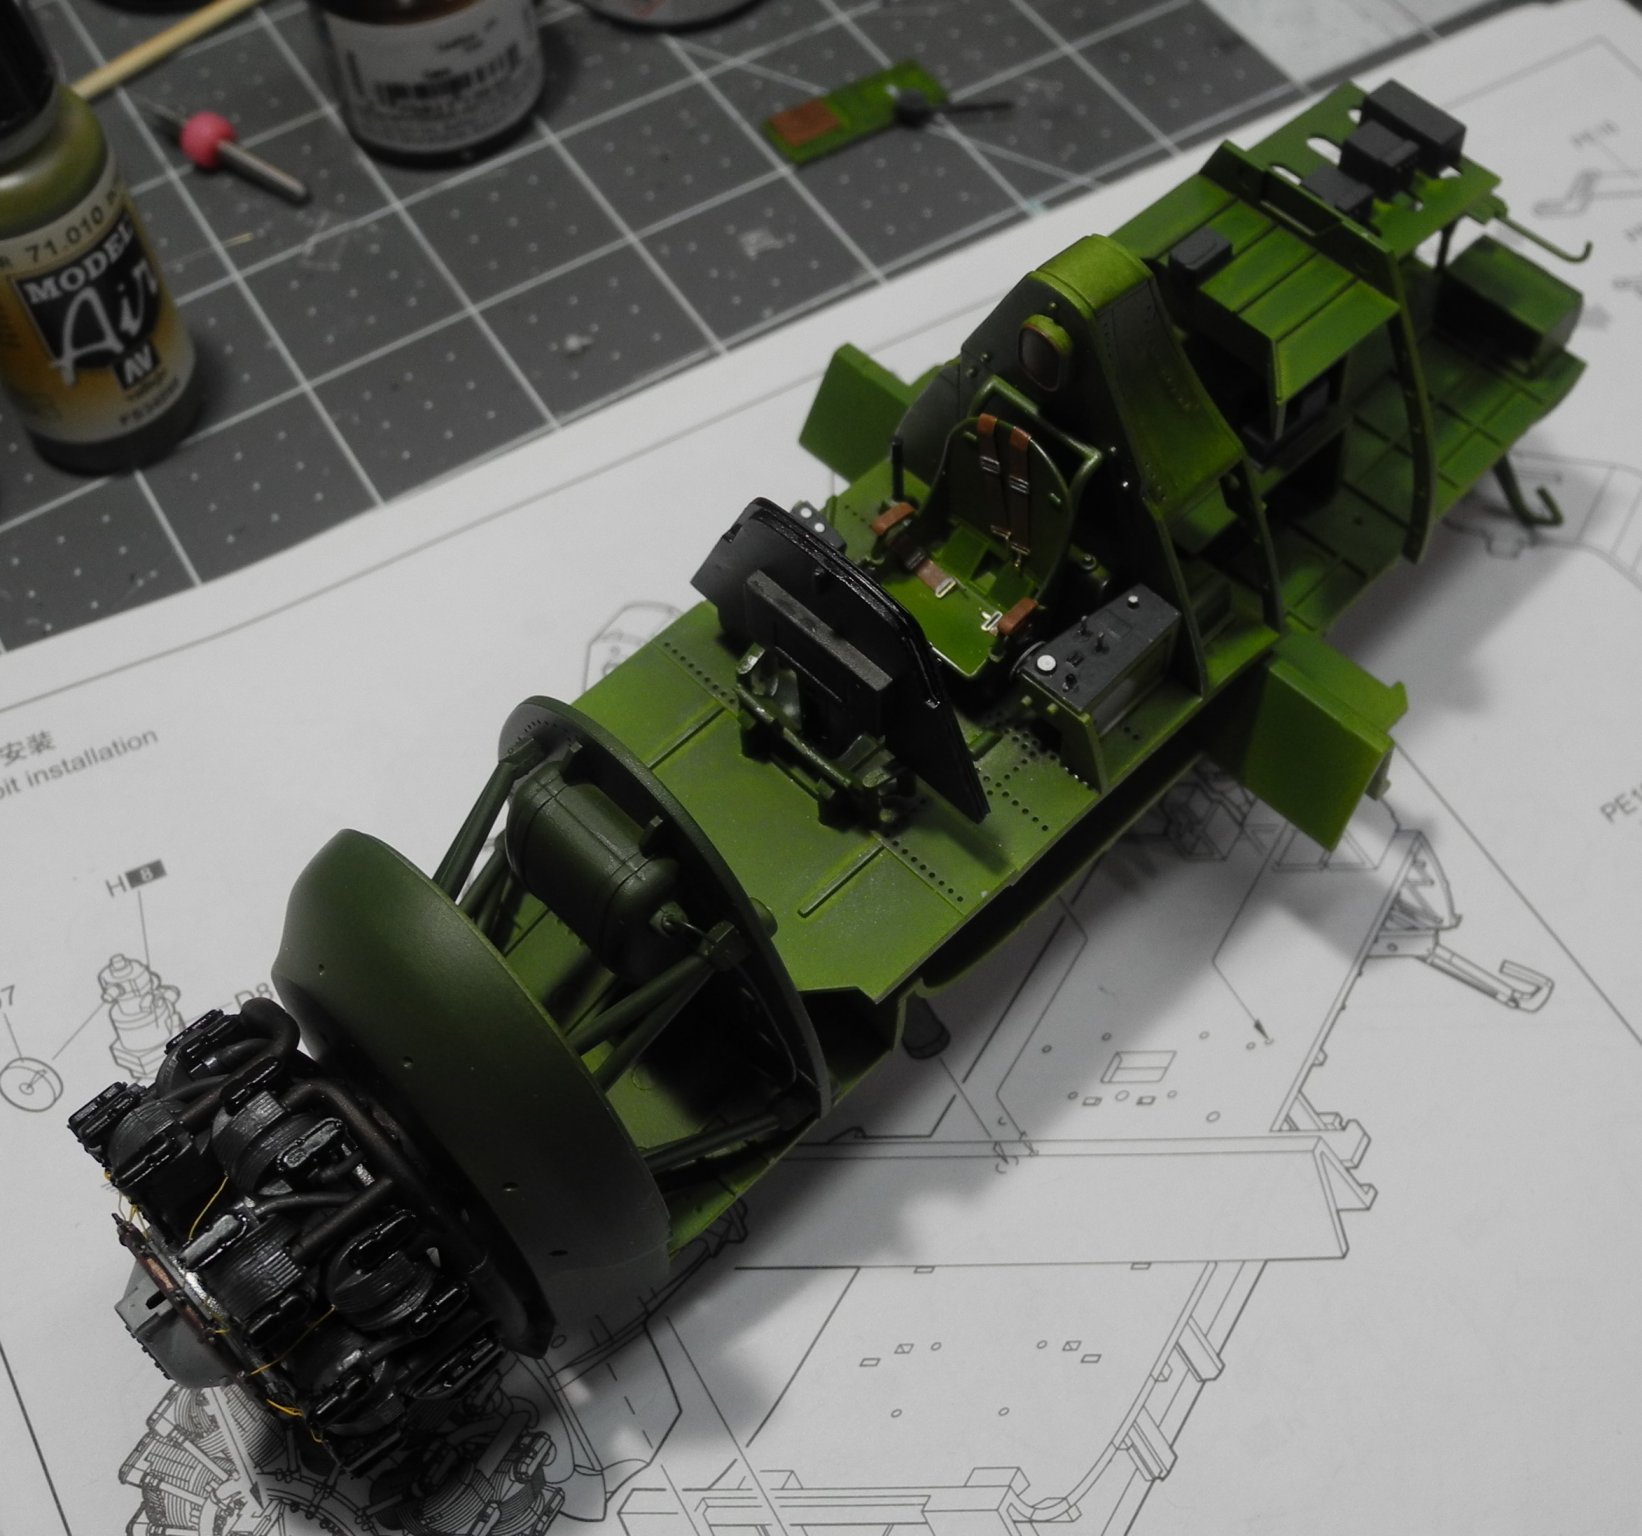
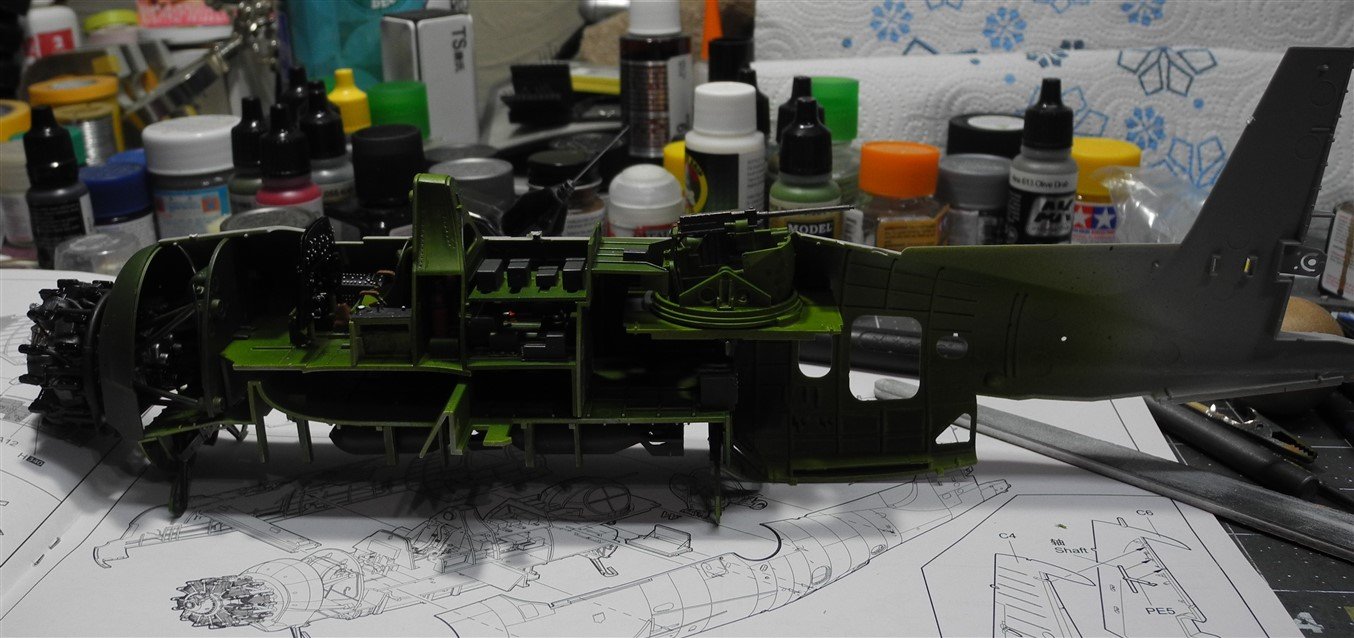
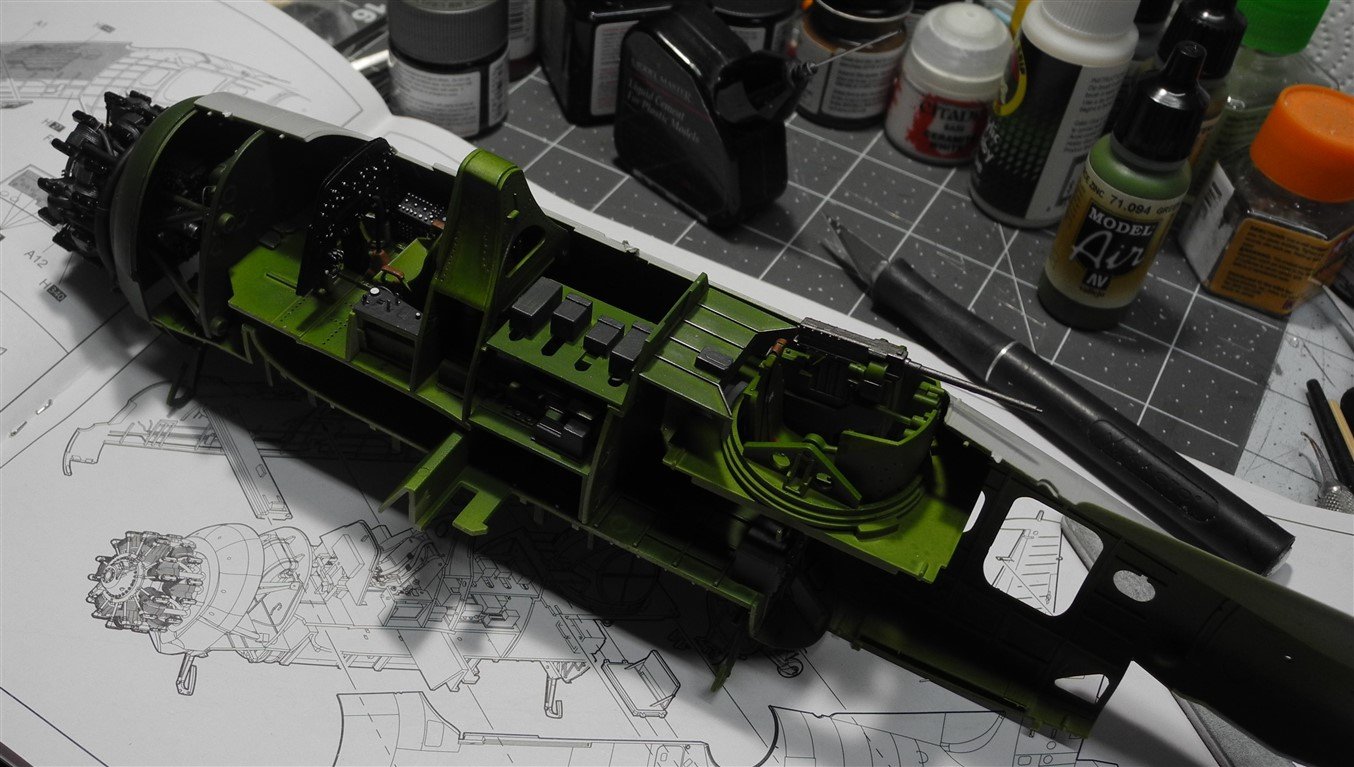
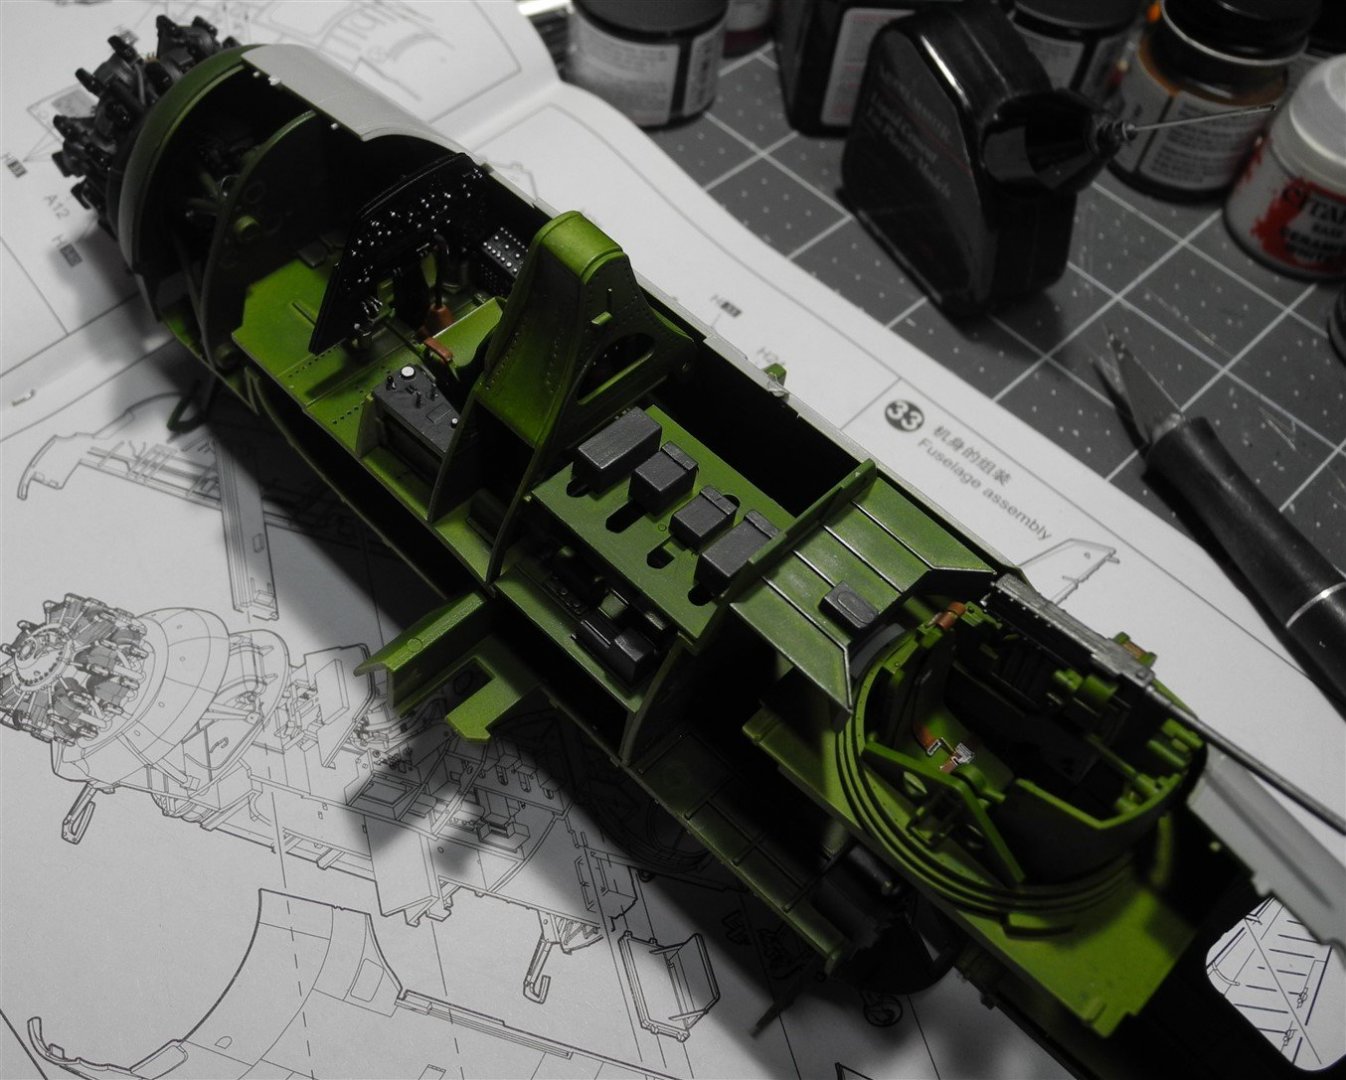
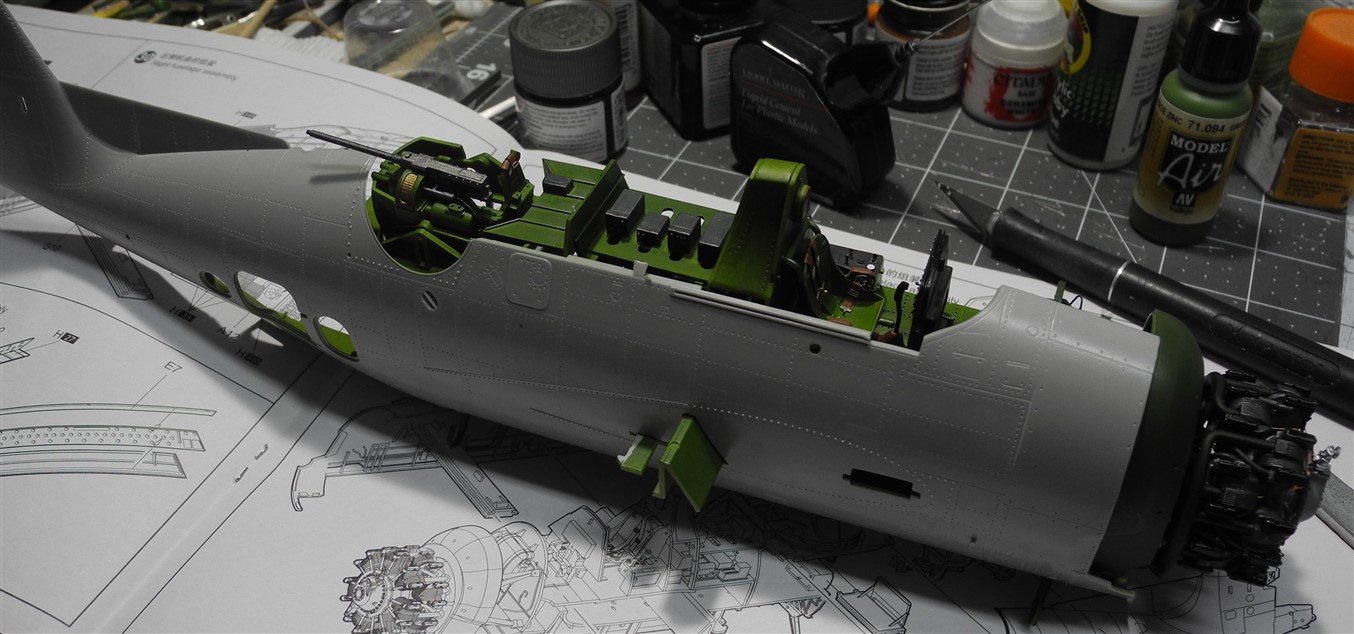
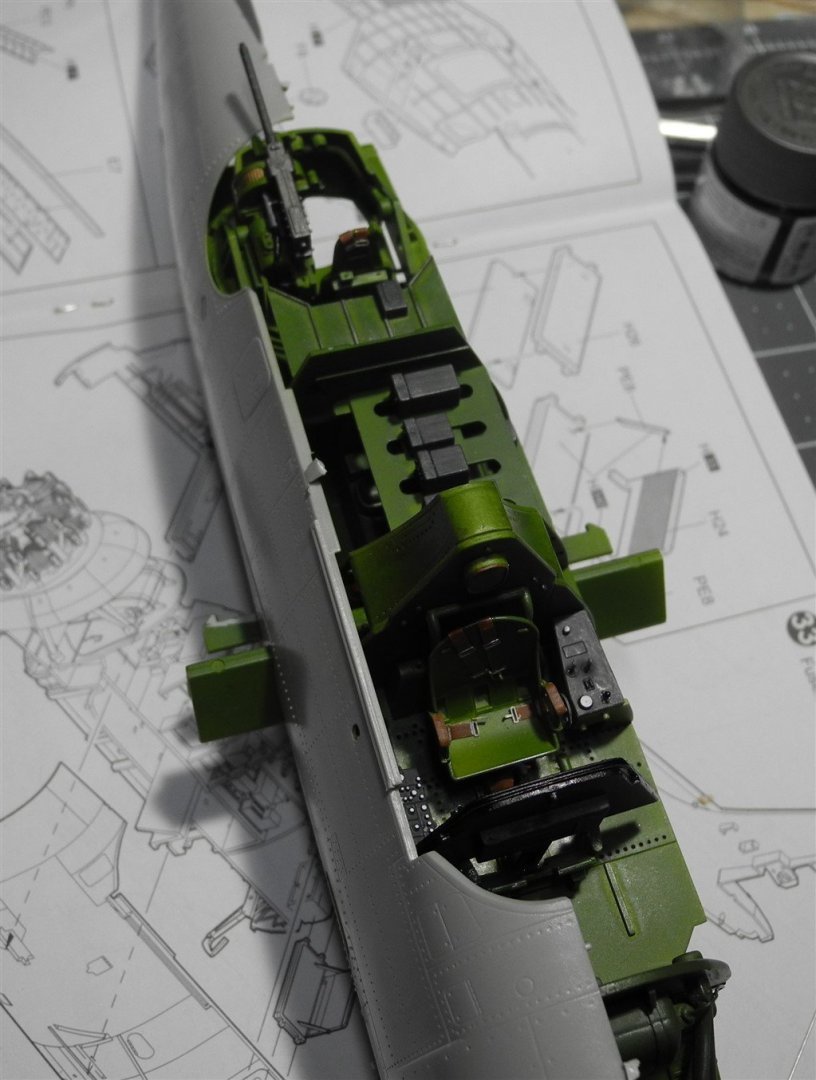
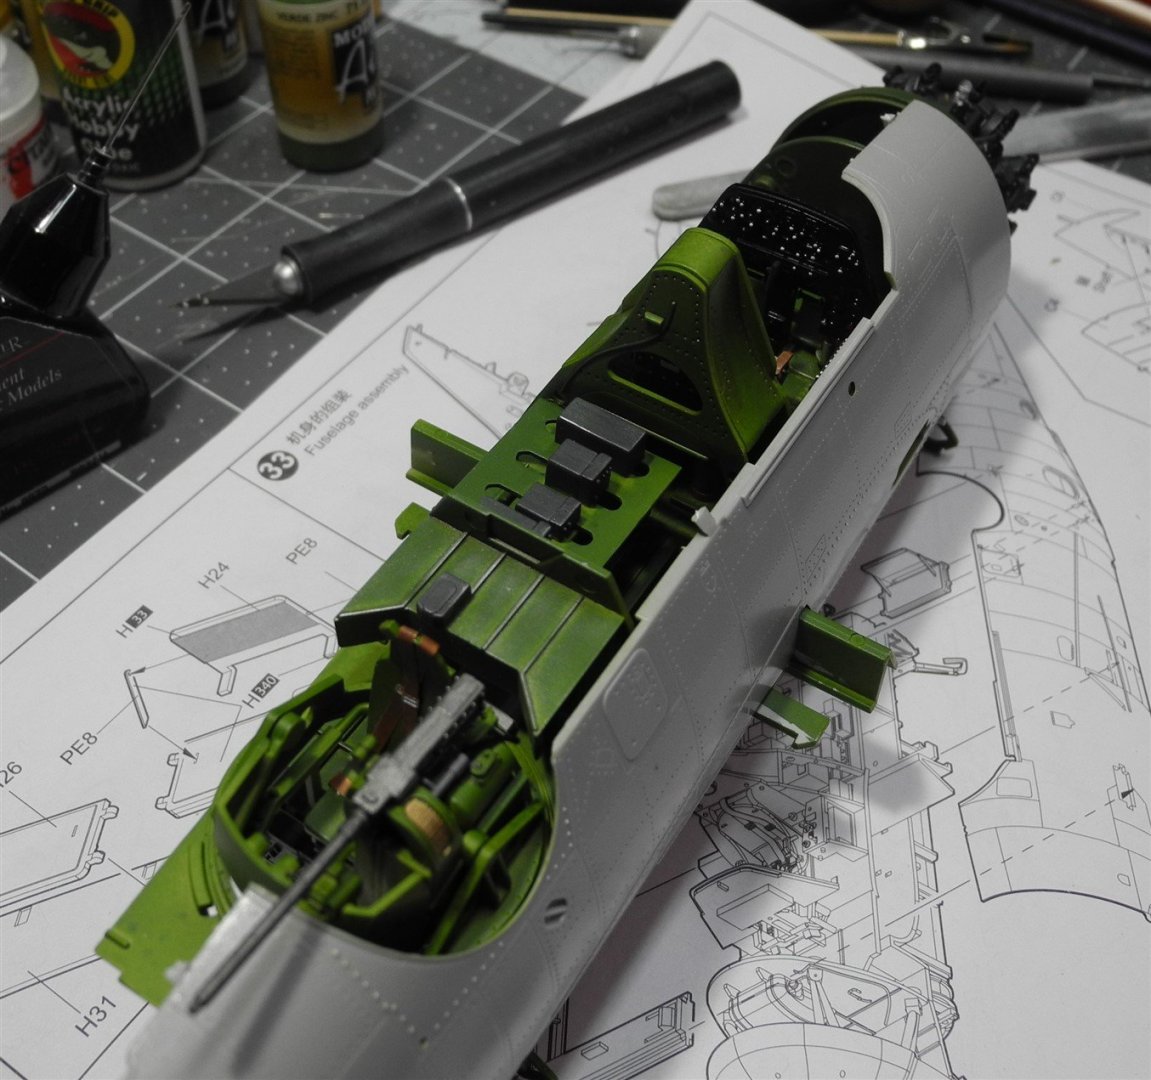
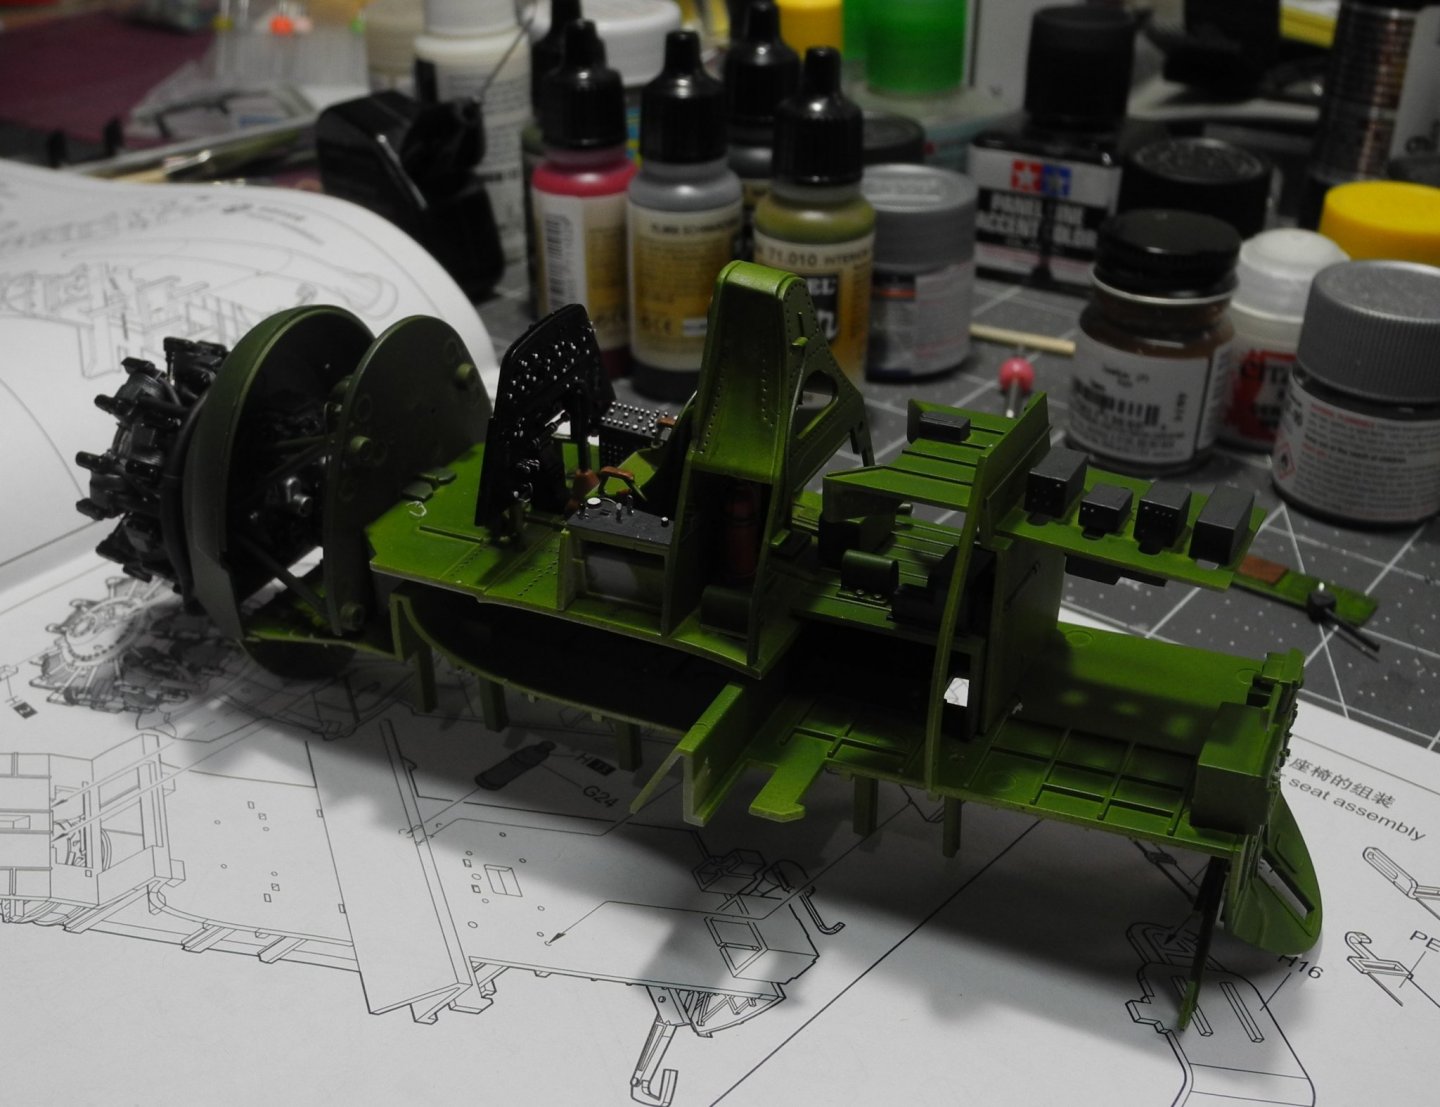
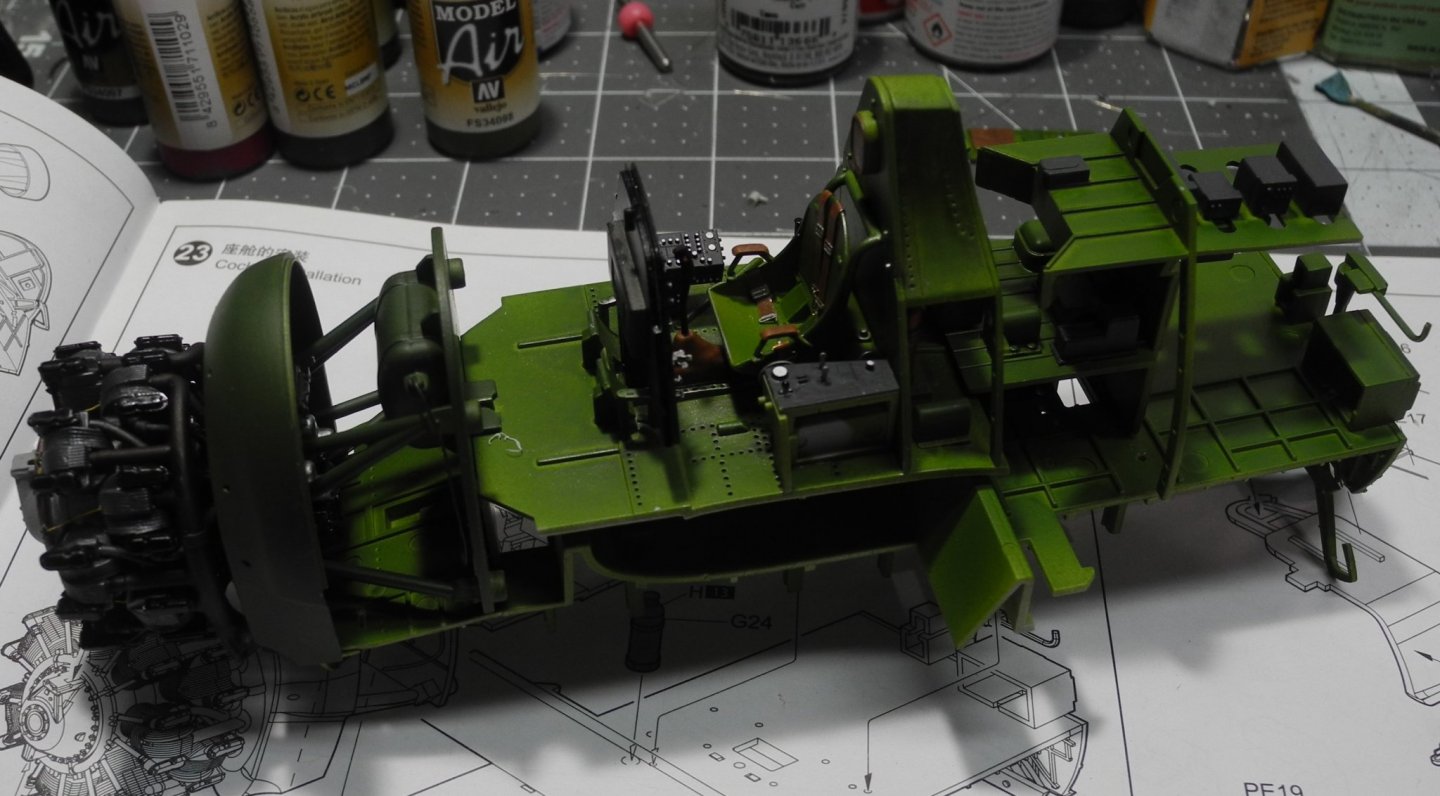
A dry run to see if the cockpit/bomb bay/gunner stations fit correctly into the fuselage halves. So far, so good. There remains the ventral gunner's station and tail wheel compartment before the fuselage halves can be closed up. No doubt, this is the best opportunity to see the internal details as I'm sure much of it will not be seen after the halves are closed.
- 267 replies
-
- 16
-

-
I thing the Spitfire Mk IX was their best looking Spitfire of all. Should be a real nice kit.
-
Thanks for the kind words Gary, but the Mr Metal Color paints are very easy to use. They excel at dry brushing as they contain very finely ground metal pigments. The more your use your (dry) brush, the metal color pops out. Very similar in some ways to the Testors Metalizer paints that were popular years ago (if you're familiar with those) but better.
-
my 3-0 paintbrush and Tamiya yellow
-
I meant to expound on this question, but almost forgot. Sorry about that. The old Gunze line of paints is now called Mr. Color. In the Mr. Color range are a set called Mr. Metal Color. For engines, I mainly use iron, aluminum, copper, and others from the range as necessary. I first paint the engine by spraying on a flat black base, then I dry brush using the appropriate Mr. Metal Colors. For the engine cylinders, iron. For the crankcase, aluminum. For the valve covers and push rods, I use Tamiya semi-gloss black. The ignition ring is Mr. Metal Color copper, while other parts are Tamiya acrylics. The exhaust manifolds are painted with Ammo Mig burnt exhaust. Most everything painted gets a wash of black and/or brown. The ignition wires are stripped scrap electrical wire painted with Tamiya acrylic. Hope this helps. If you think of something more specific, just ask and I'll do my best to answer.
-
Thanks Ken
-
Hmmmm...no I never bought that one. Airfix has come a long way in recent years, improving their products. At one time, buying an Airfix kit was hit or miss. Sometimes they released some real stinkers. Some of those 1:24 kits they produced didn't fit well at all and I didn't want to take a chance on the big Mossie. It could be a great kit but I just don't know. Big for sure!
-
Bell UH-1H Huey By lmagna - Dragon - 1/35 - PLASTIC
CDW replied to lmagna's topic in Non-ship/categorised builds
Really? Who woulda thunk it? 😁 -
I'm looking forward to that 1:32 Wingnut Wings Lancaster that's coming out sometime this year.The prototype looks amazing. No aftermarket needed for that bad boy but it will require a lot of space to display it. 🙂
-
Thanks OC. I have a lot of 1:32 kits to finish, including that big 1:32 Tamiya Mossie. They all come with a fair share of details right out of the box.
-
Thank you Mark.
-
Thanks Denis. At this scale, I feel like I'm cheating. 😁
-
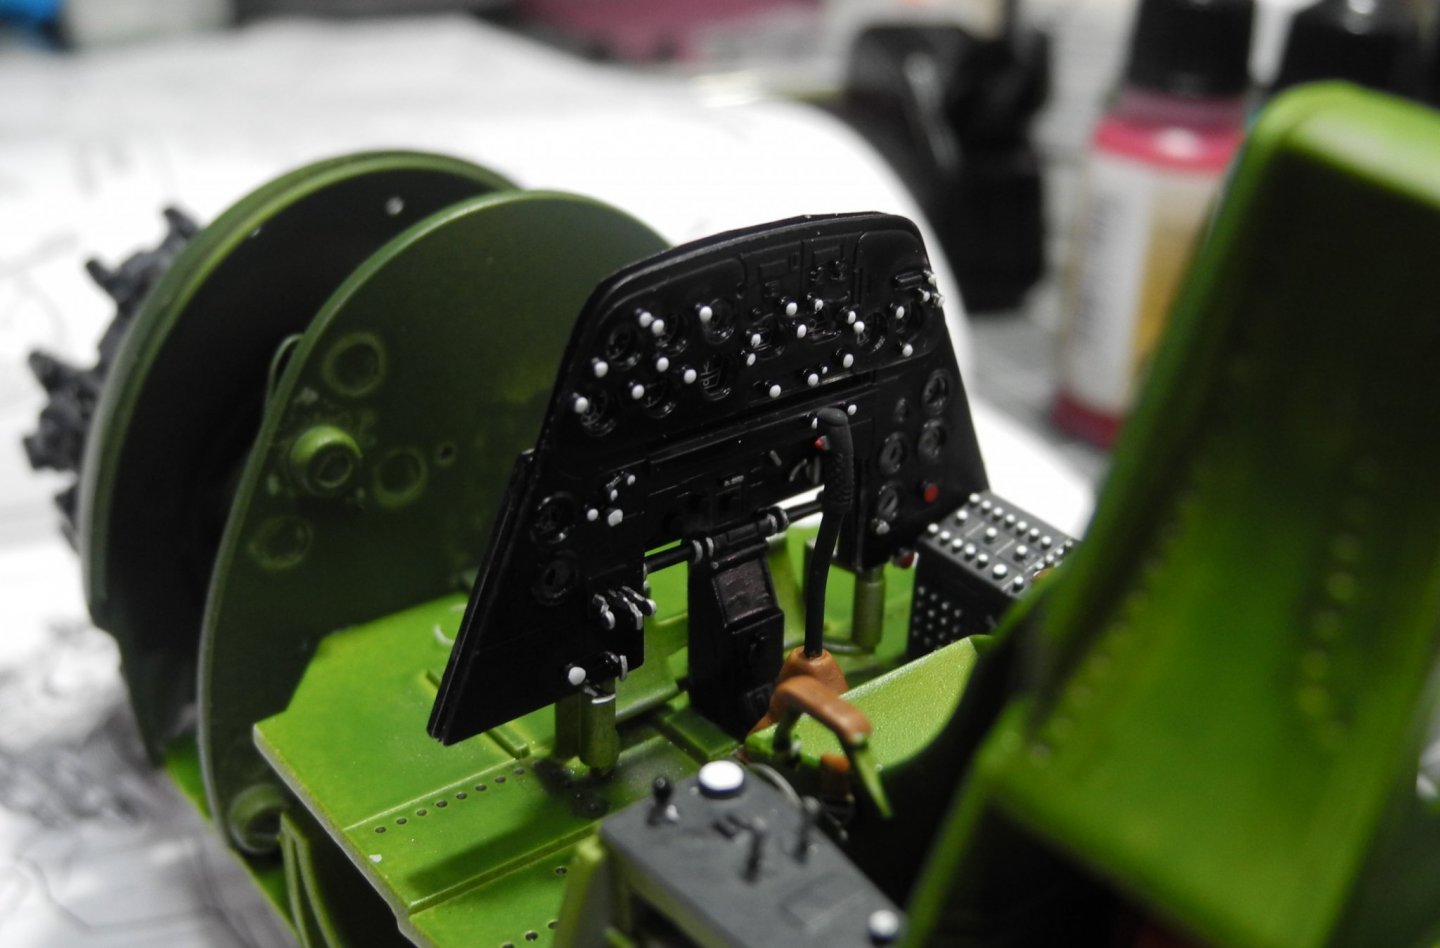
When you and I were talking, I thought that's what you were describing so yes, this is how to do it. Make sure to paint the back side of the acetate film white, or else the dials will not show up. Alternatively, you could paint the back panel white, but one way or the other, white needs to go on the back side of the acetate for it to come out right. PS: use either white glue (not the yellow wood glue) or acrylic glue to join the three instrument panels together. You can also use a drop of glue in each instrument so that when it dries, it will look like a lens.
-
Thanks Lou. The fact this model is BIG helps a lot to achieve detail. The kit uses a plastic dash with holes molded in where the instrument dials are located, an acetate panel that has dial details printed on, then a molded plastic panel backing. The acetate gets sandwiched between the two plastic panels giving it a realistic look for the gauges. You have to paint the back side of the acetate with white before joining the three pieces together, as the acetate looks very similar to undeveloped film and if not painted white on the backside, no dial detail would be seen.
-
Bell UH-1H Huey By lmagna - Dragon - 1/35 - PLASTIC
CDW replied to lmagna's topic in Non-ship/categorised builds
I suggest you acquire a bottle of Mr Color thinner, preferably the leveling thinner rather than the standard thinner, then use that to thin and paint the resin parts. Mix in 50:50 ratio for starters. Thin more if needed. It will stick much better than acrylic by far. The Mr. Color paints we talked about are solvent based paints and high quality as long as they have not deteriorated by age and/or extreme temperatures. Acrylic paints can be ruined if they are exposed to freezing temps. -
Love the pirate figures and what they add to the model. A great variety of poses in that set.
-
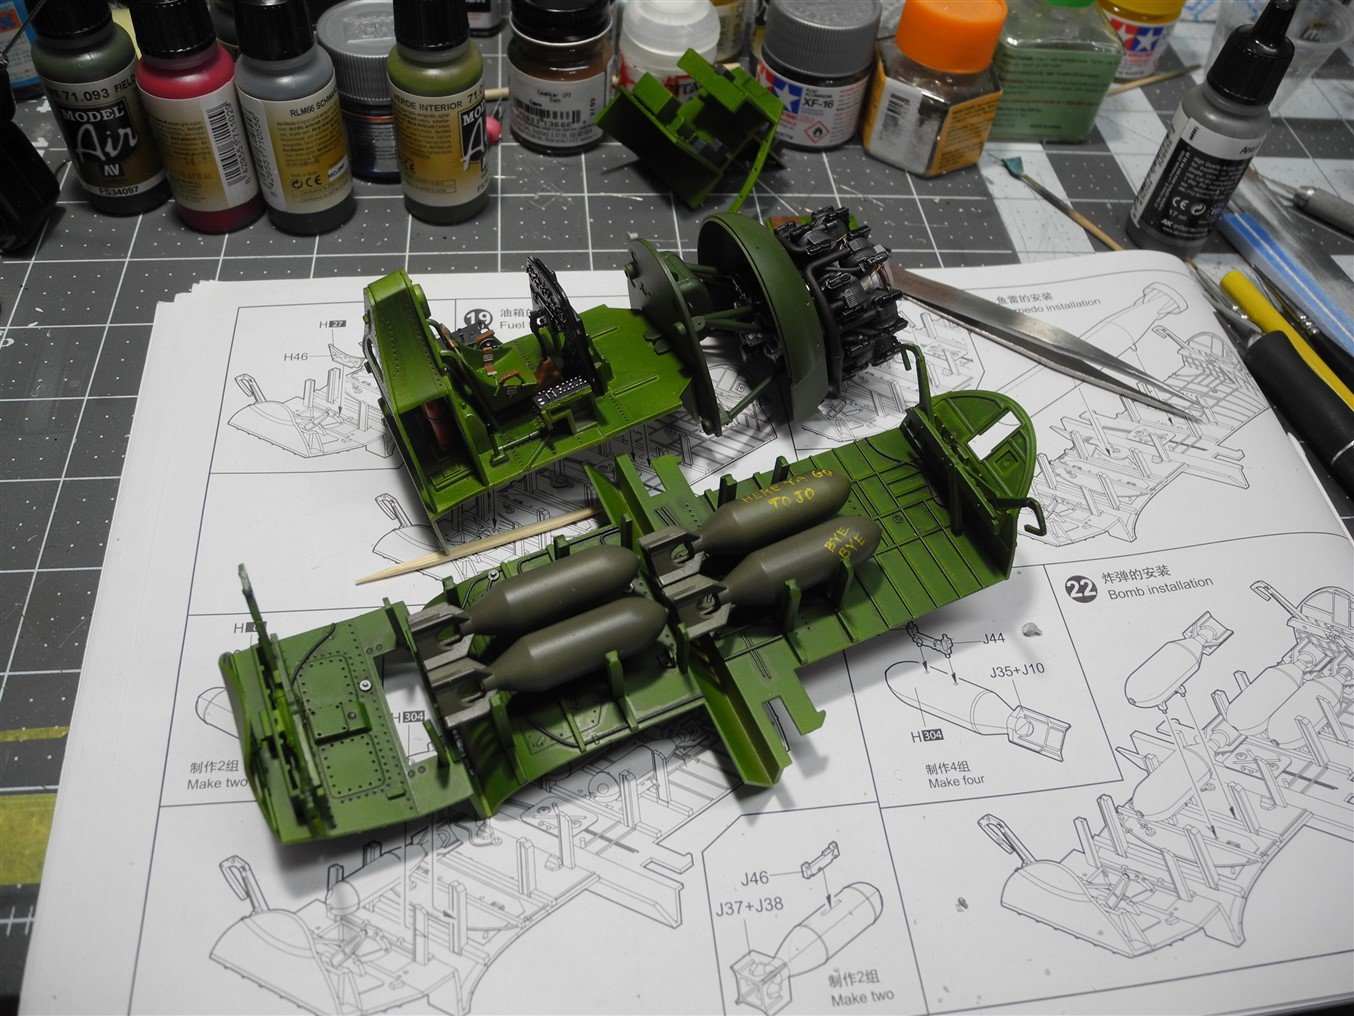
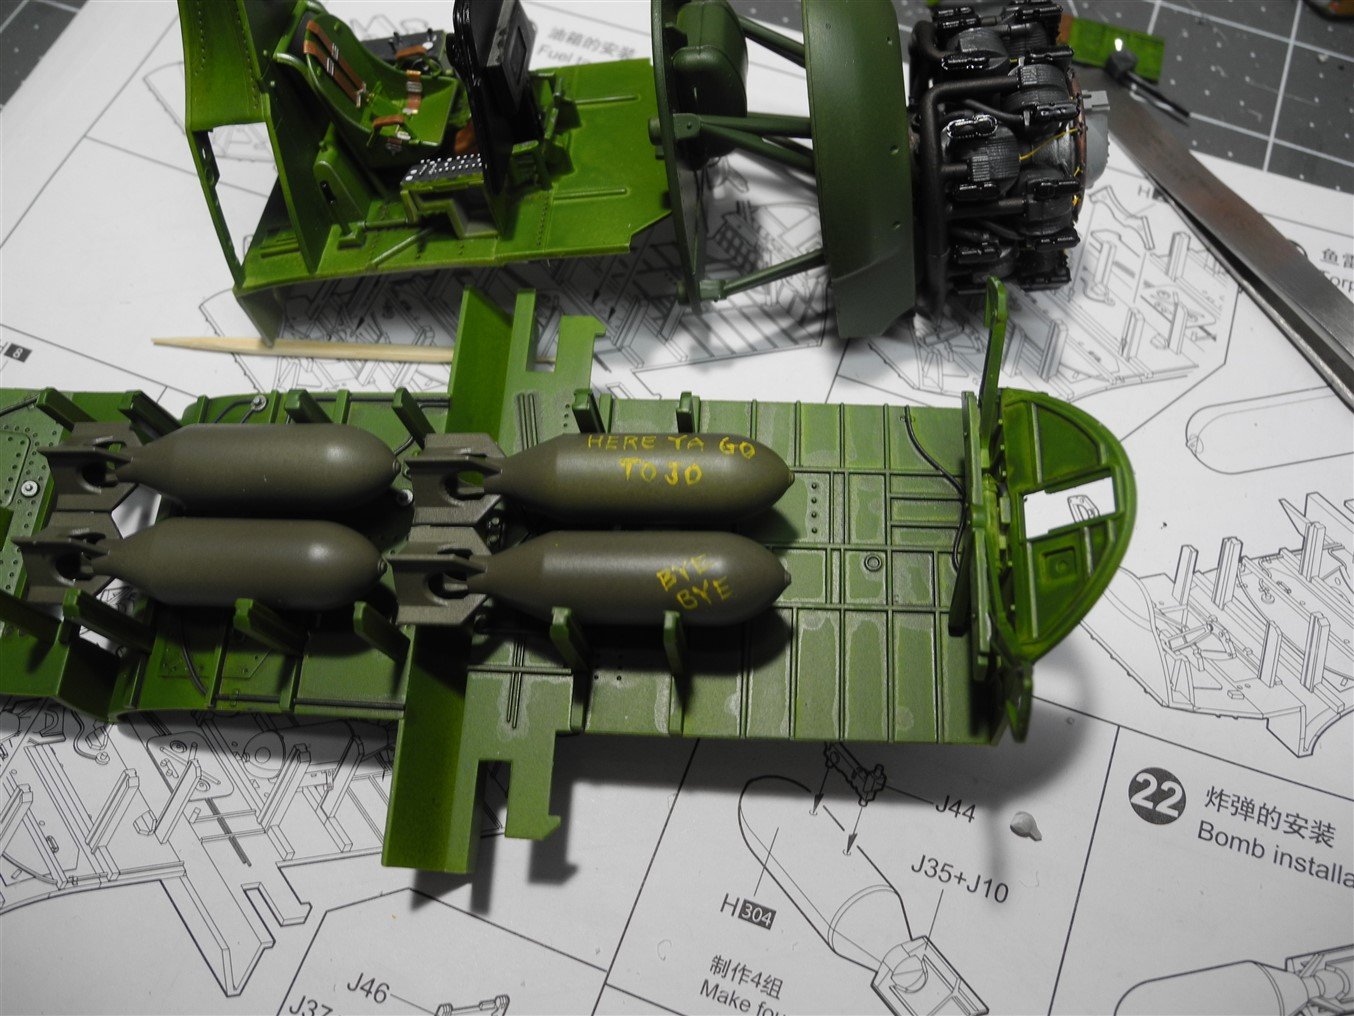
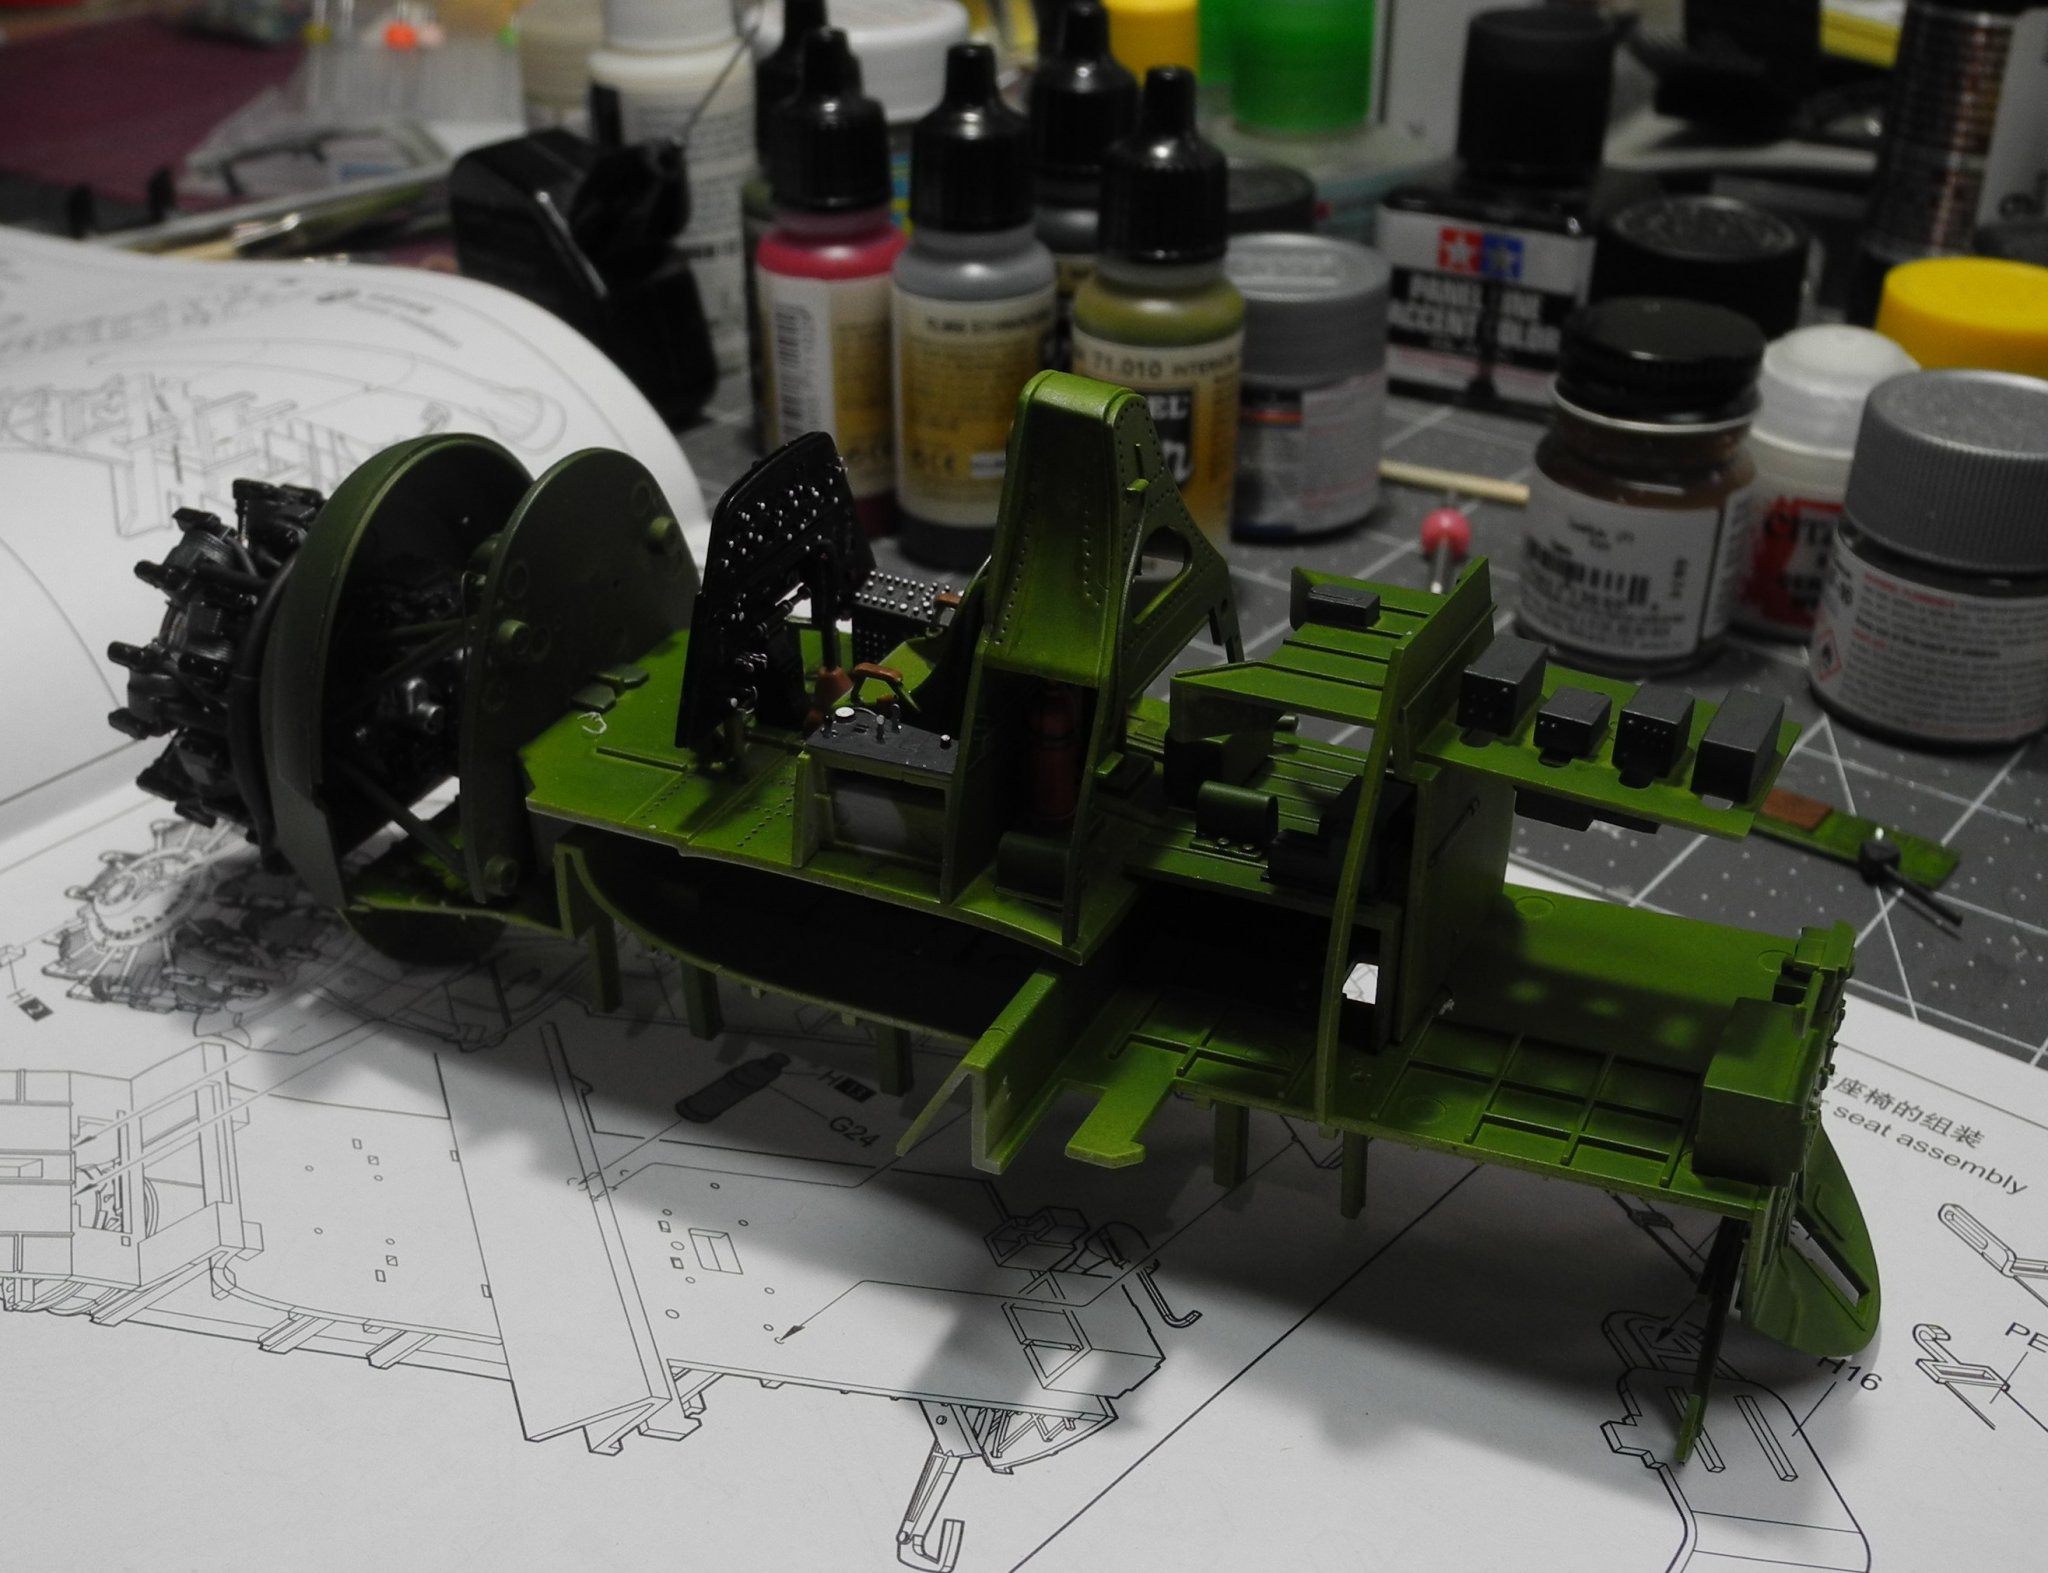
The focal point of this model are the interior components. Not sure how much of it will be seen once the fuselage halves go together, but it does have an open bomb bay, and open hatch for the gunner's station in the ventral position. While even now the interior parts look complex, this is only about 50% of what will be the sum of it, while I still must add a lot of detail including the gun turret, the ventral gun station, and options for an extra fuel tank, or a torpedo, or four bombs in the bomb bay.

- 267 replies
-
- 19
-
-
By any chance, was your visit to the Bounty in St. Petersburg, Fla? I visited the Bounty there in the 60's as well. I believe it was still there in the 70's.
-
Wow OC, your figures make a very real difference in the look of the entire ship. They look superb and all your effort is rewarded. I'll bet the wife is loving the model now that it's so close to finish.
-
Great choice Edward. I'm looking forward to following your build of it.
-
Indeed, President George HW Bush