CDW
-
Posts
7,755 -
Joined
-
Last visited
Content Type
Profiles
Forums
Gallery
Events
Everything posted by CDW
-
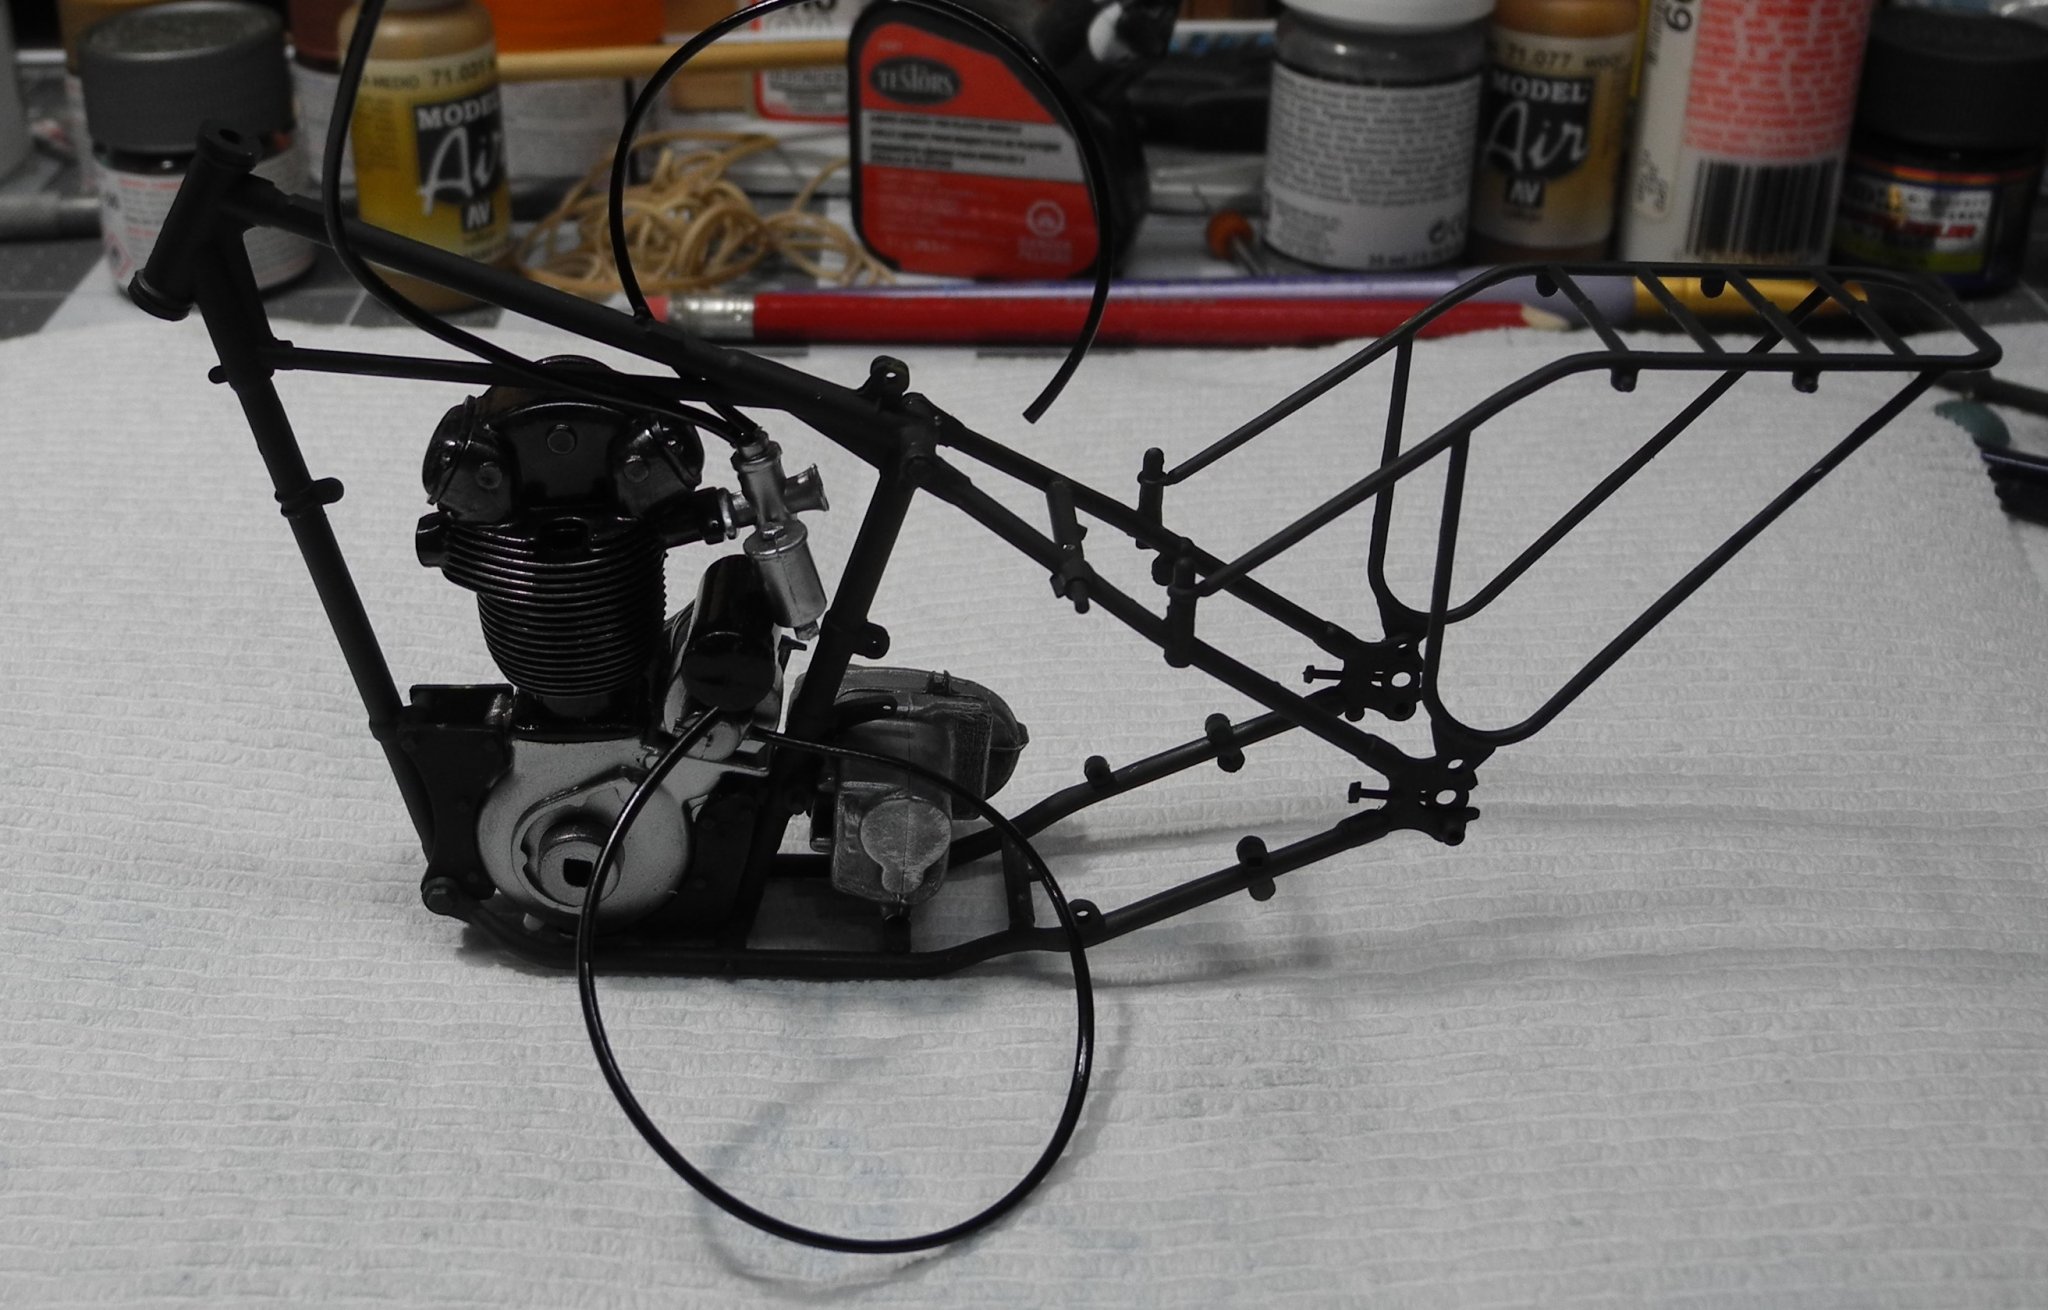
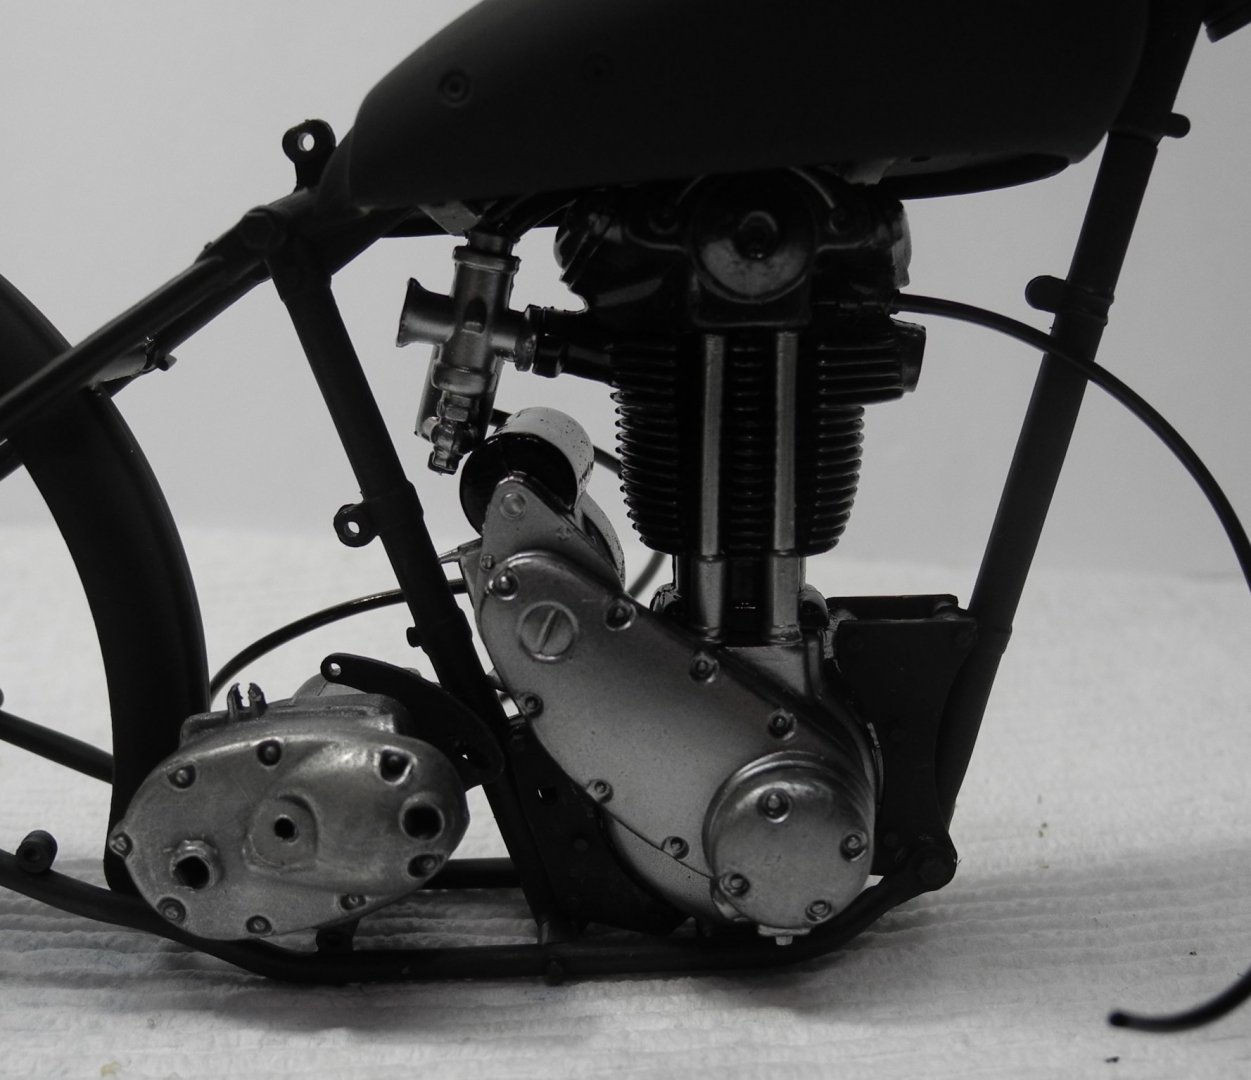
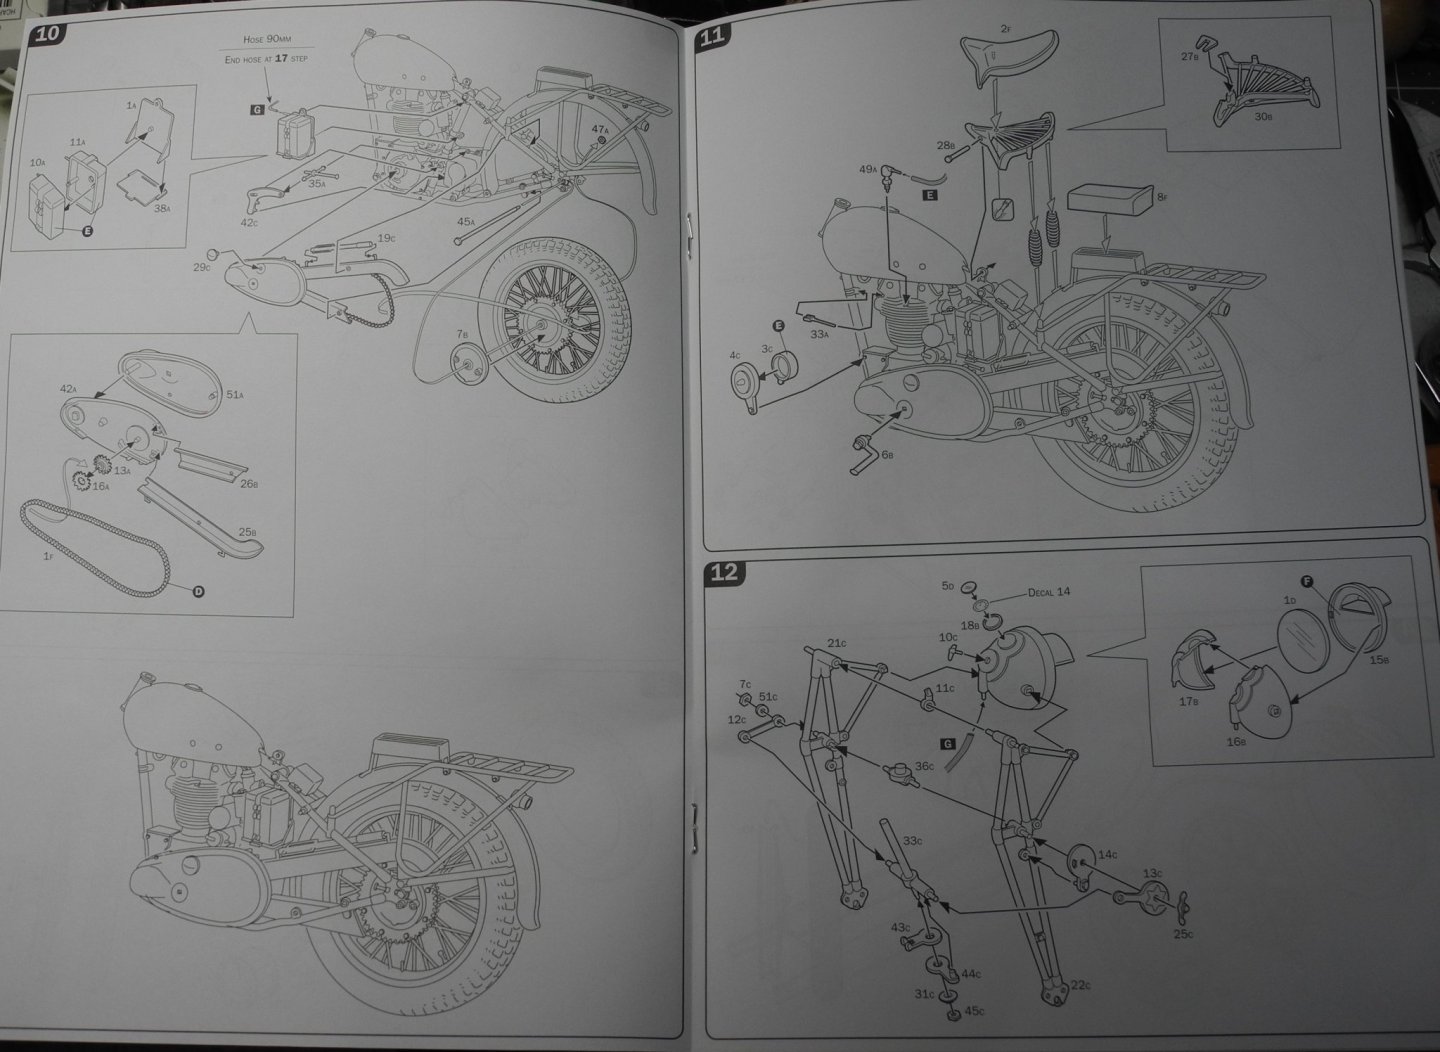
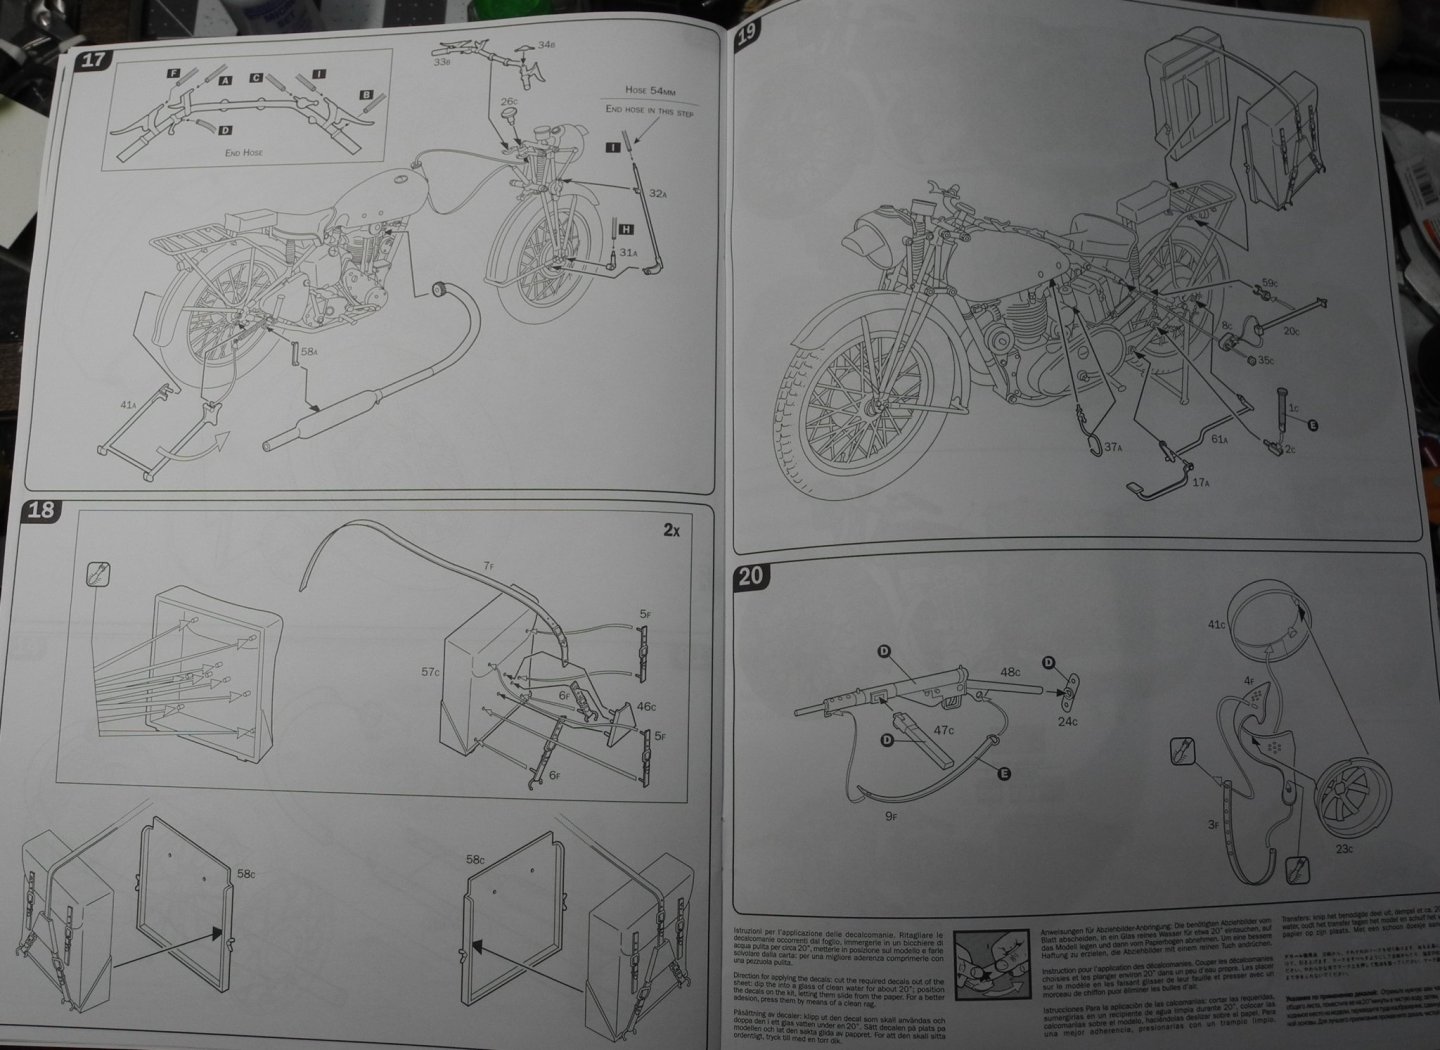
 No problem at all with the tubing fit here, unlike what we've experienced with other kits. I'm gluing the tubing to the pins with that E6000 glue. Works like a charm.
 -
Been a long long time since I heard that name, Matchless. Totally forgot about the Matchless.
-
What a cool project, Denis! Don't know how I managed to miss this until now. Glad I found your project.
-
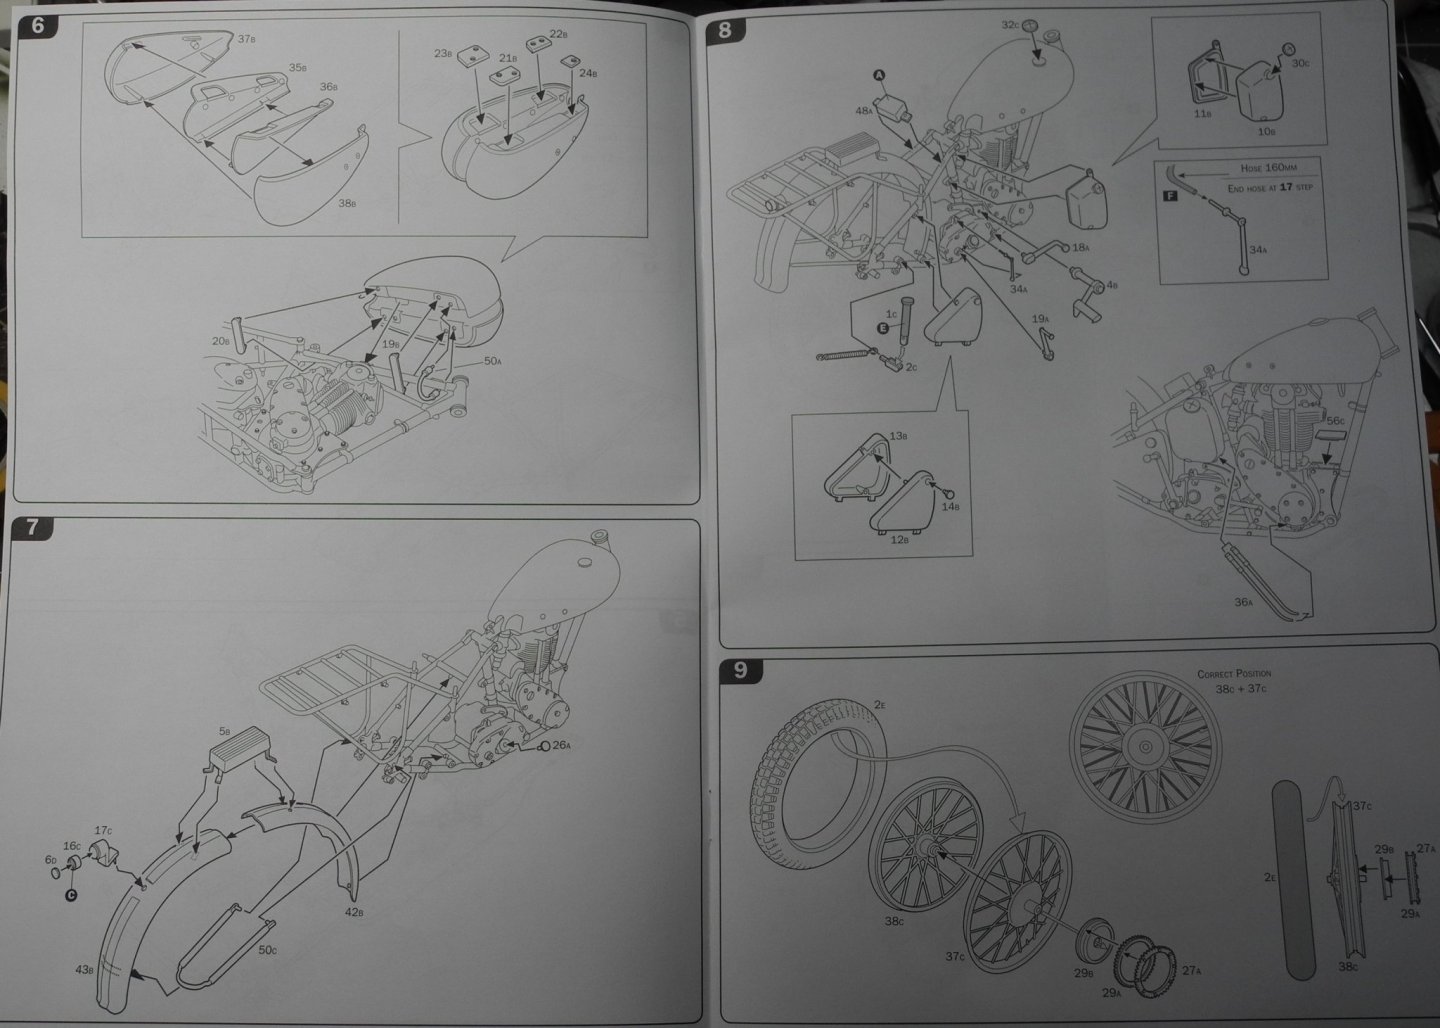
Steps 6 and 7. The "FS" number called for in the instructions equates to Tamiya Black-Green and that's what I'm using, along with Mr.Color leveling thinner. In the end, a dry brushing with a lighter shade of green will be used to lighten the whole thing us just a bit. The black-green should work well to accent the shadows.
- 59 replies
-
- 12
-

-
Thanks Patrick. I now realize they had a motorcycle helmet and it looks like the one in our model kit is right on the money. Up until now, I only had seen the Brodie helmets that are so distinctive in their look, and that's what threw me off when I saw the kit helmet.
-
Your Triumph came out super nice! Looks like the real thing. Something I was thinking about last night and your model reminded me of it...the helmet carried on the back of the motorcycle does not appear to be a standard British issue, or was it?
-
Very nicely executed technique with that black monofilament. In all my years around fishing, I don't recall ever seeing black monofilament. Is it hard to find?
- 263 replies
-
- 1
-
-
- Medway Longboat
- Syren Ship Model Company
- (and 1 more)
-
1:9 scale is an Italian thing. Back in the 70's, a company called ESCI came out with a series of WW2 service motorcycles, this Triumph being one of them. In addition, there were Harley Davidson's, BMW's, Zundap's, and even a Kettenkrad. Since then, several other companies have re-released these iconic machines. Also, there is an Italian company called Protar who produce 1:9 scale street and racing motorcycles.
-
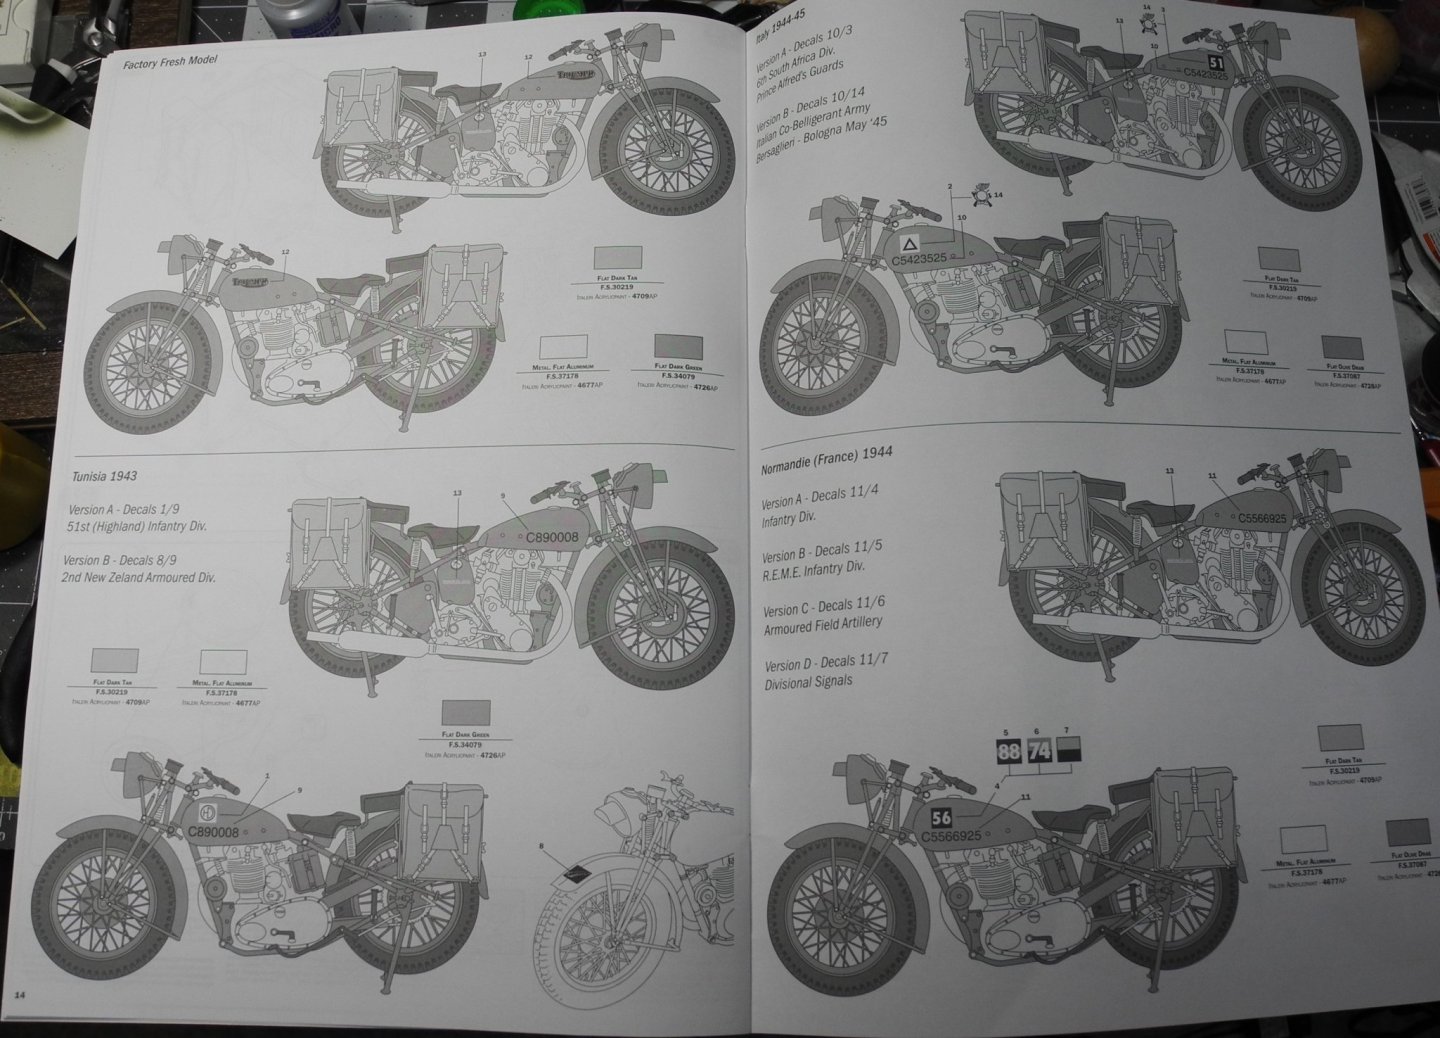
Thanks Denis. What's odd to me is that Eduard provided a stencil sheet/s in the Big Ed photo etch set, but it was only to mask the wheels. Why they didn't provide a mask for the camouflage seemed disappointing. If i had it to do all over again, I would save the money for the photo etch and buy a good reference book instead. The Trumpeter kit has about all the detail one needs IMHO.
-
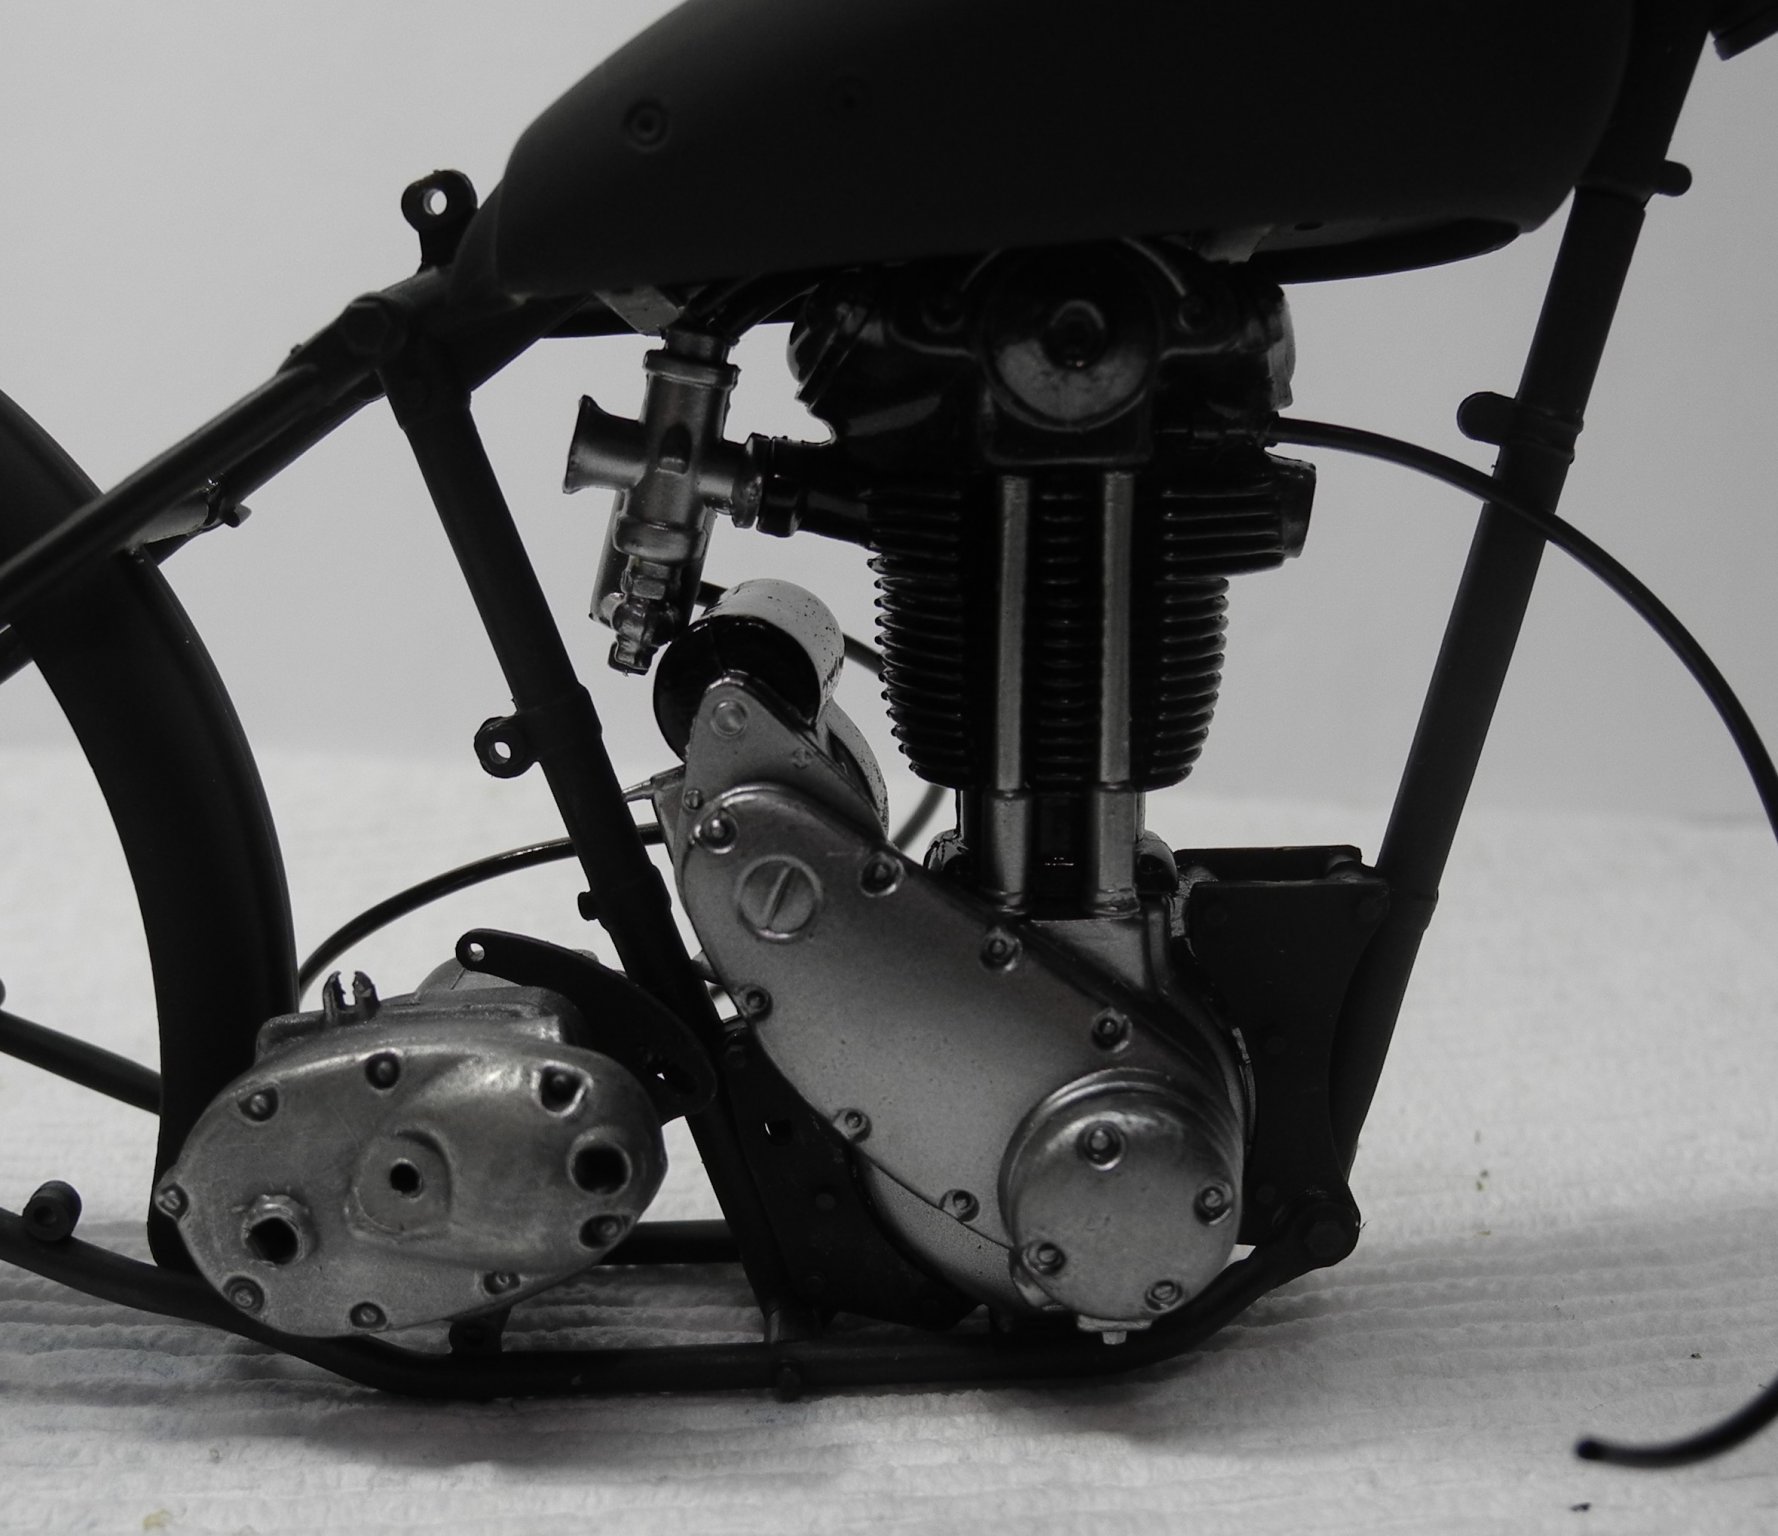
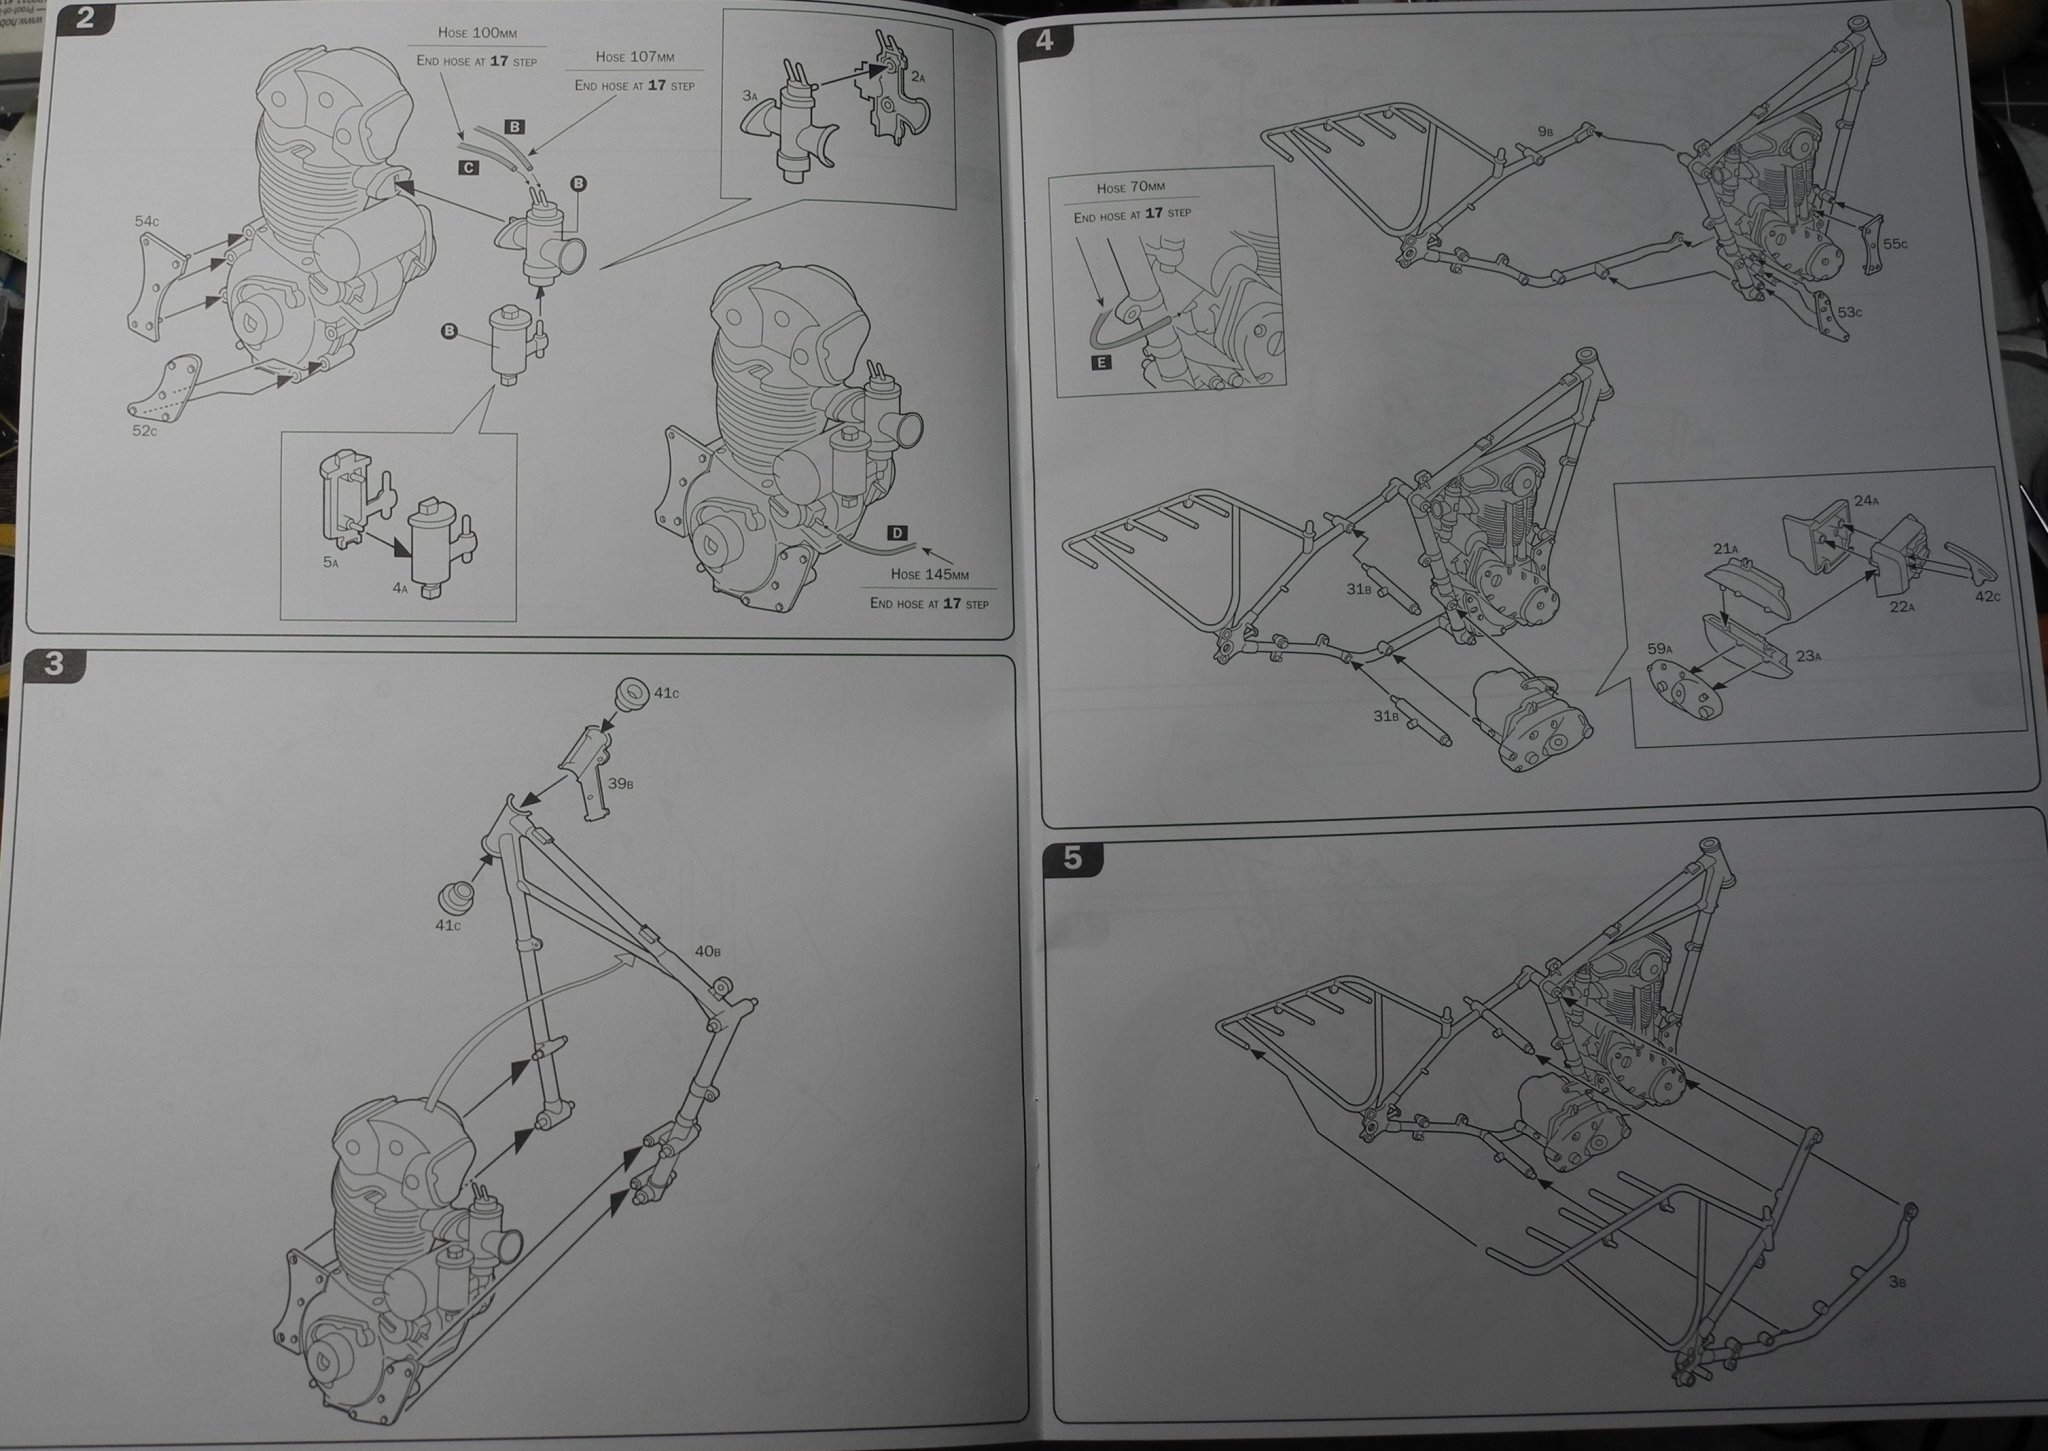
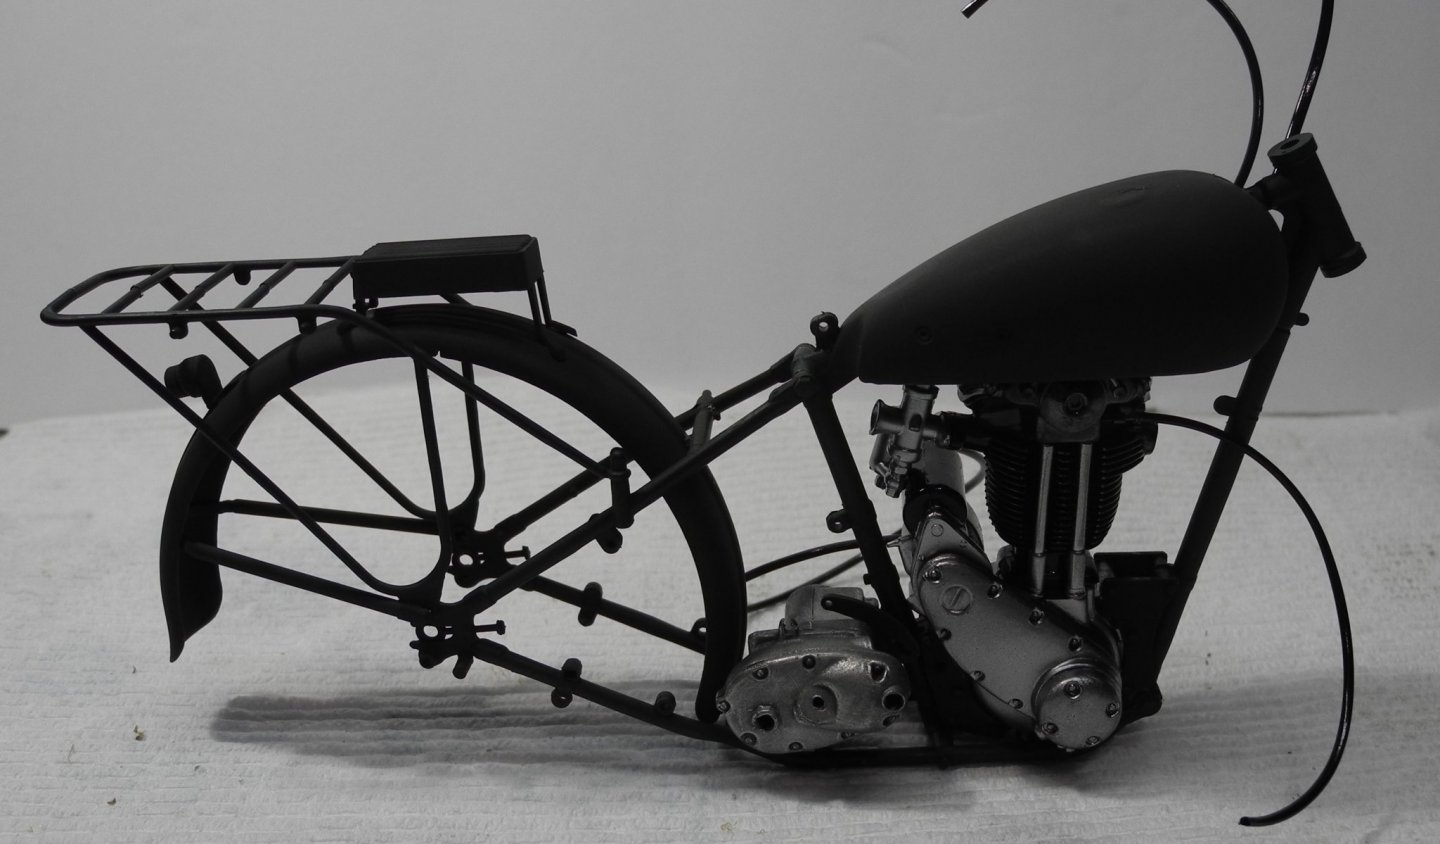
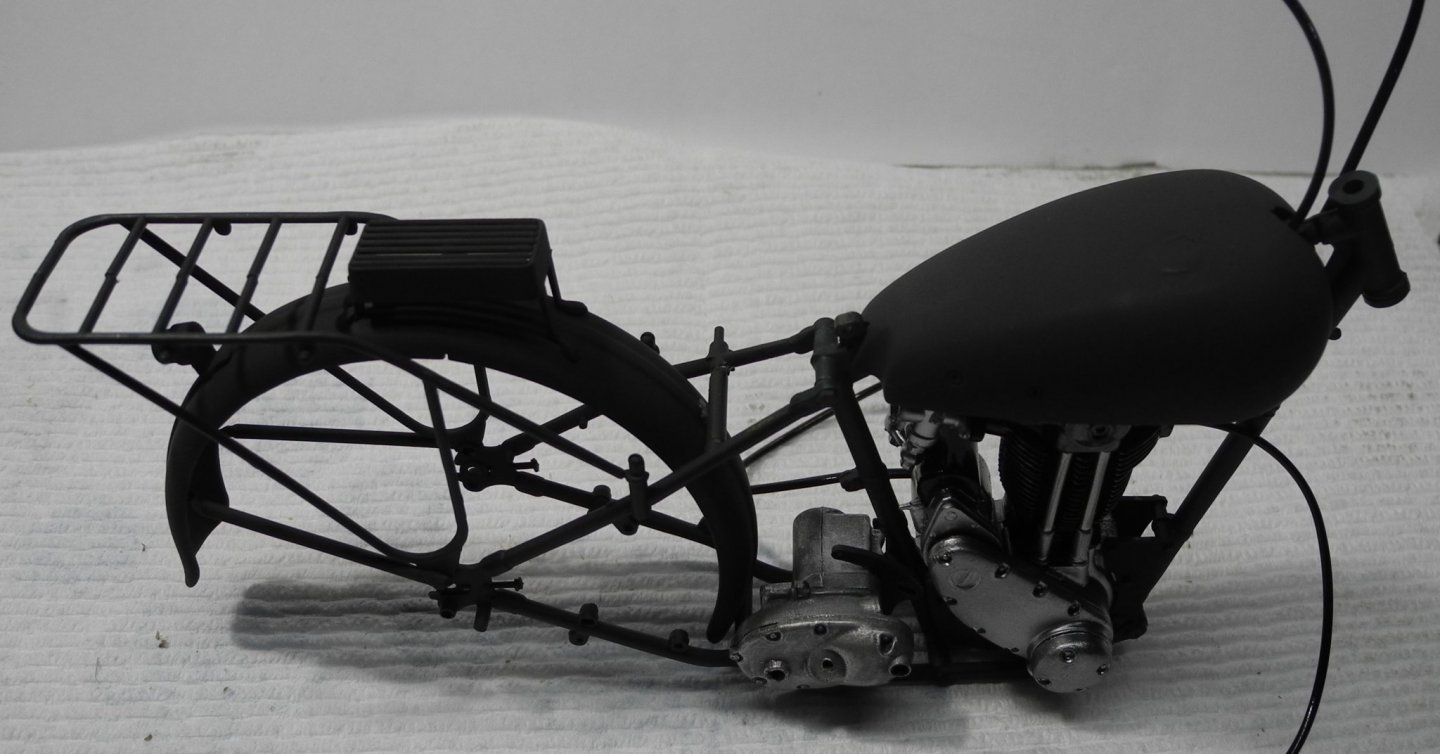
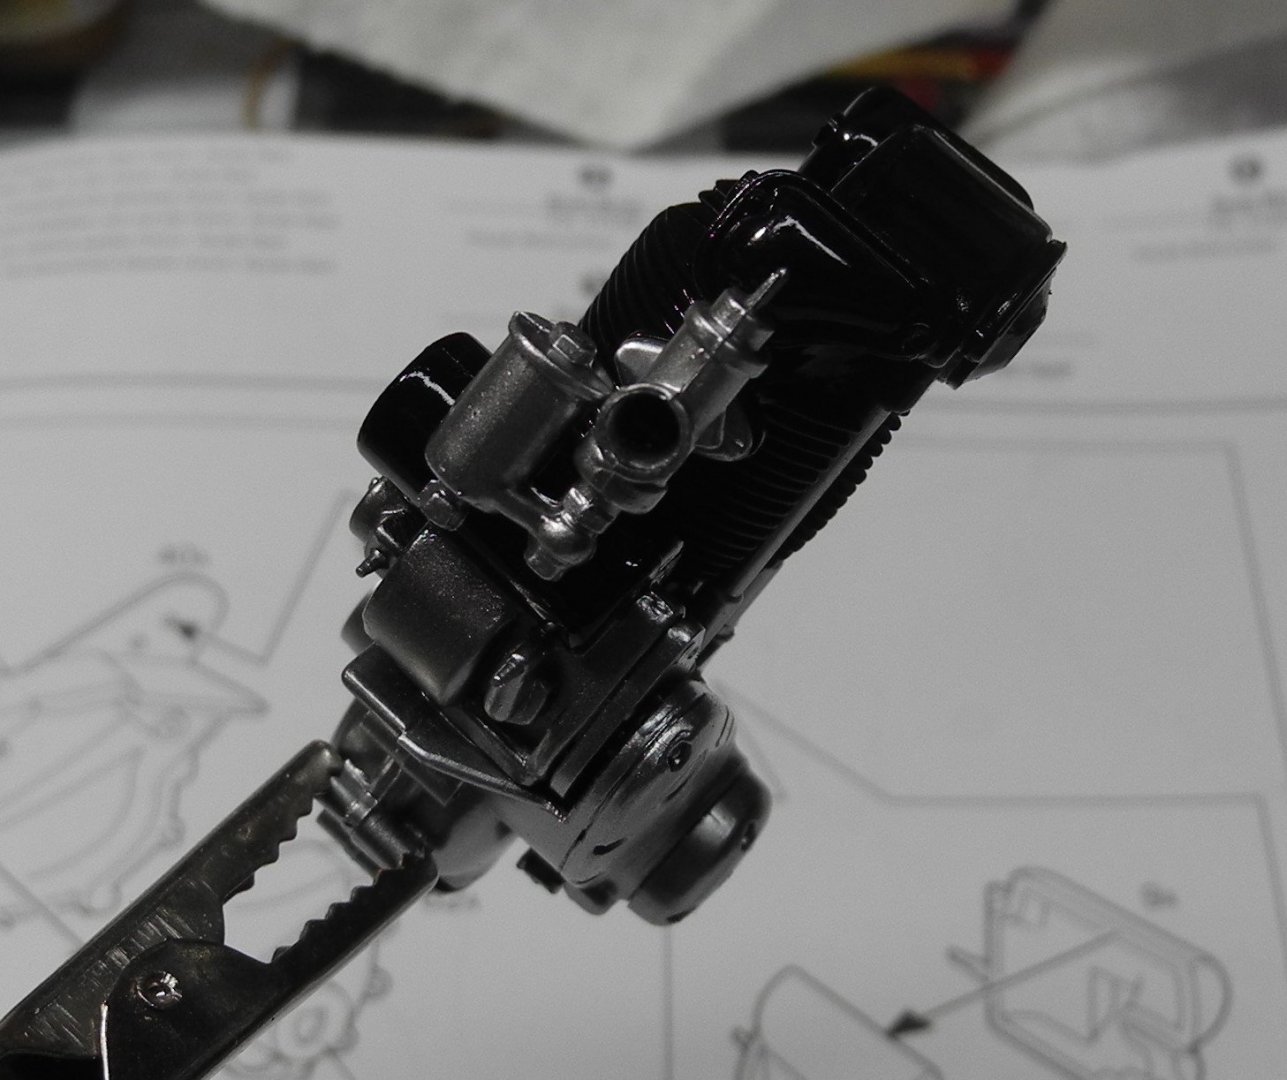
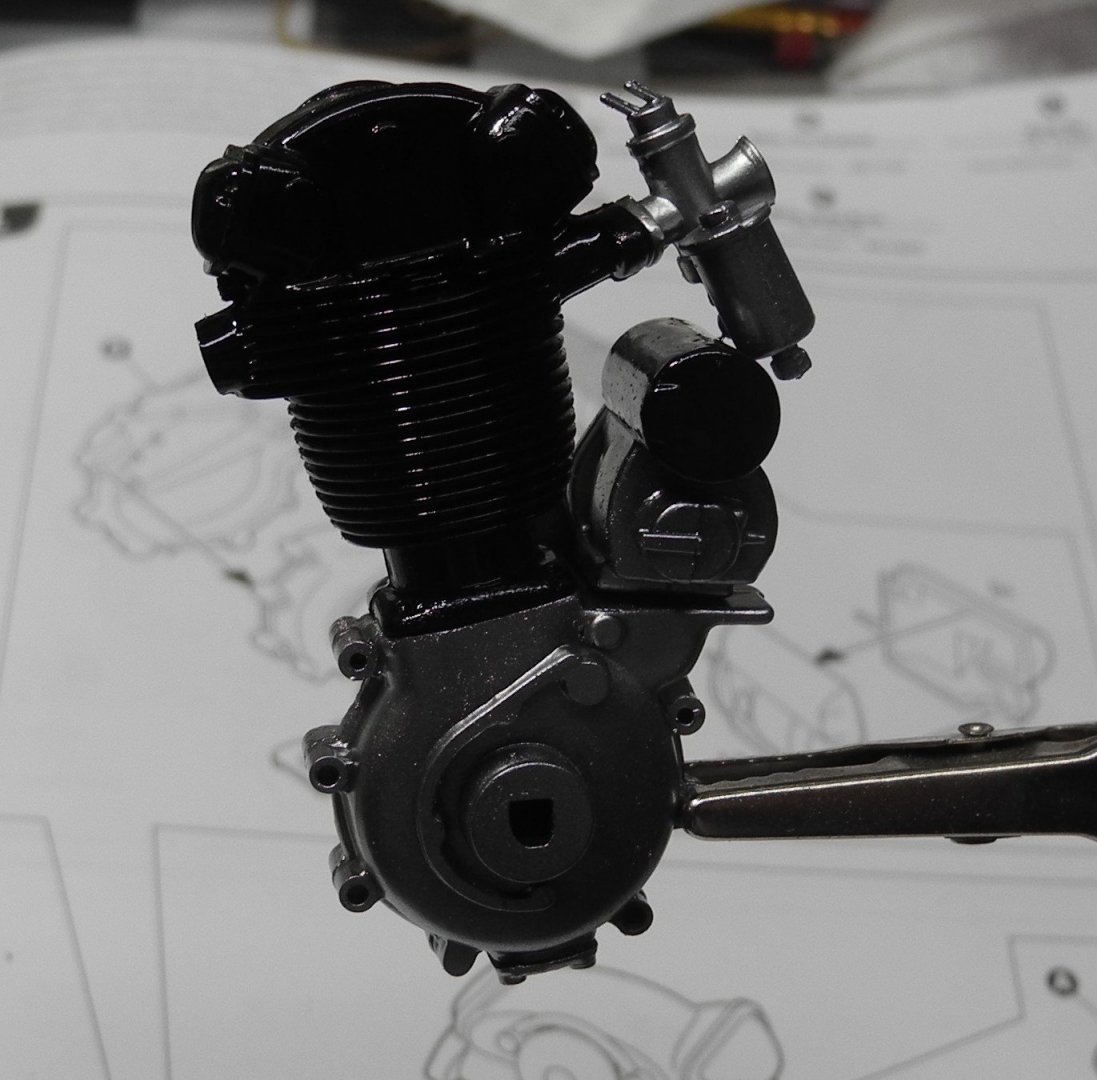
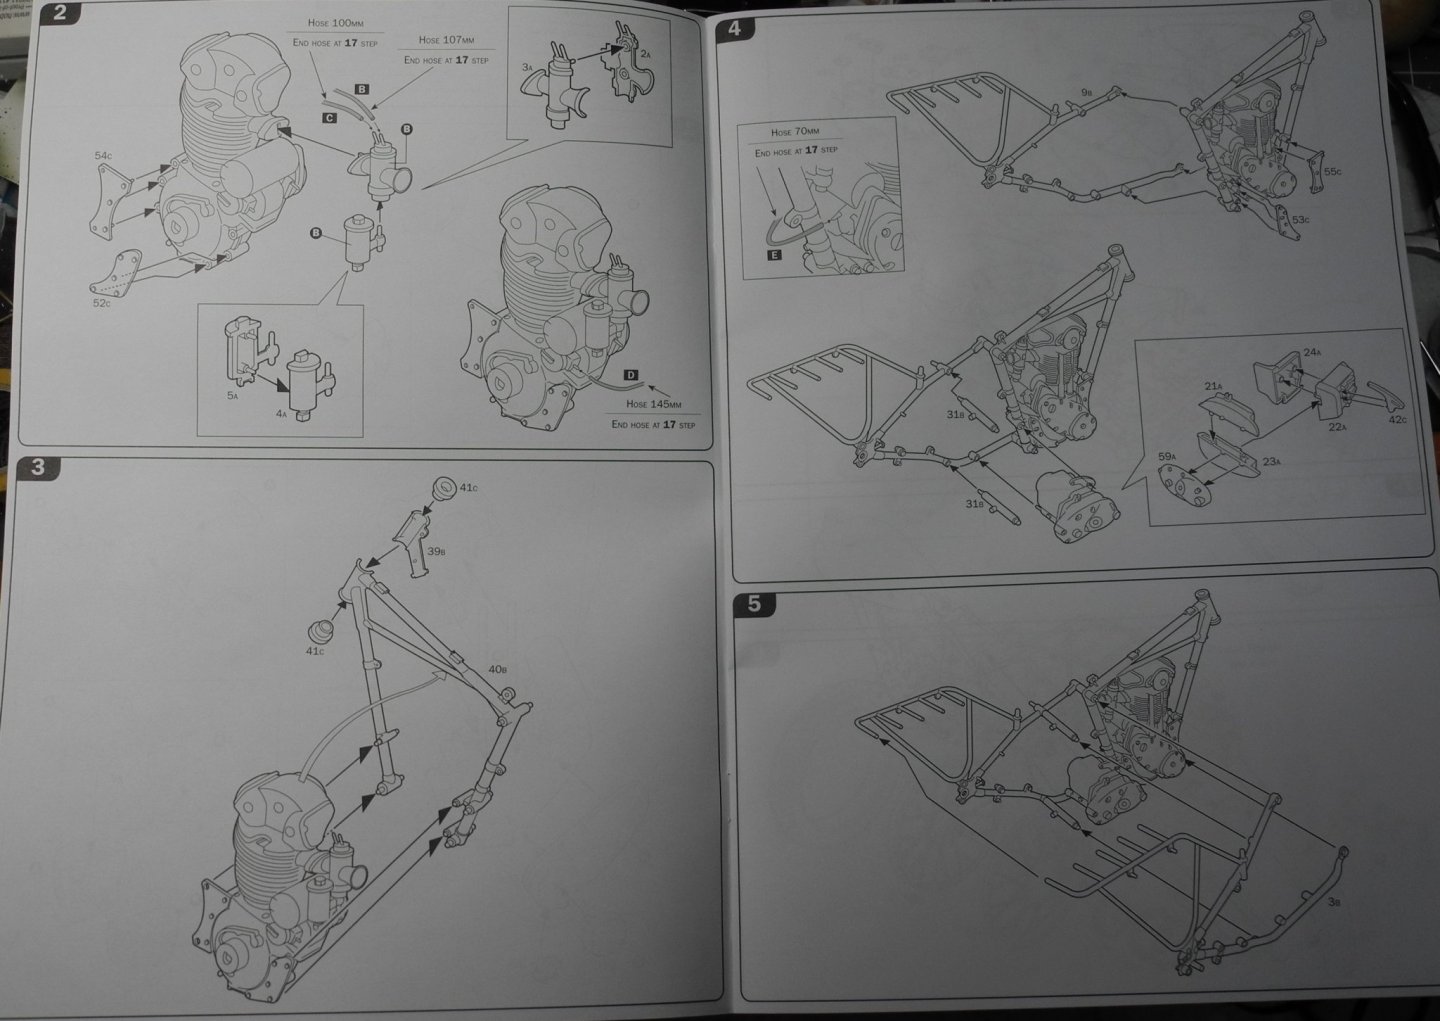
Here we go with step 1 and part of step 2, with assembly of the engine. Colors are Tamiya gloss black reduced with Mr Color leveling thinner, and AK Extreme Metal flat aluminum. Simple and straight forward.

- 59 replies
-
- 13
-
-
Thanks OC. I think that's a little later model Triumph than my kit version. Notice that the front forks on the reference photo are hydraulic where the kit version are the "springer" forks. Hydraulic front forks were a later development. The colors look like what the kit calls for and yes, that does help quite a bit. I believe that is the exact same engine and frame based on a cursory look at it.
-
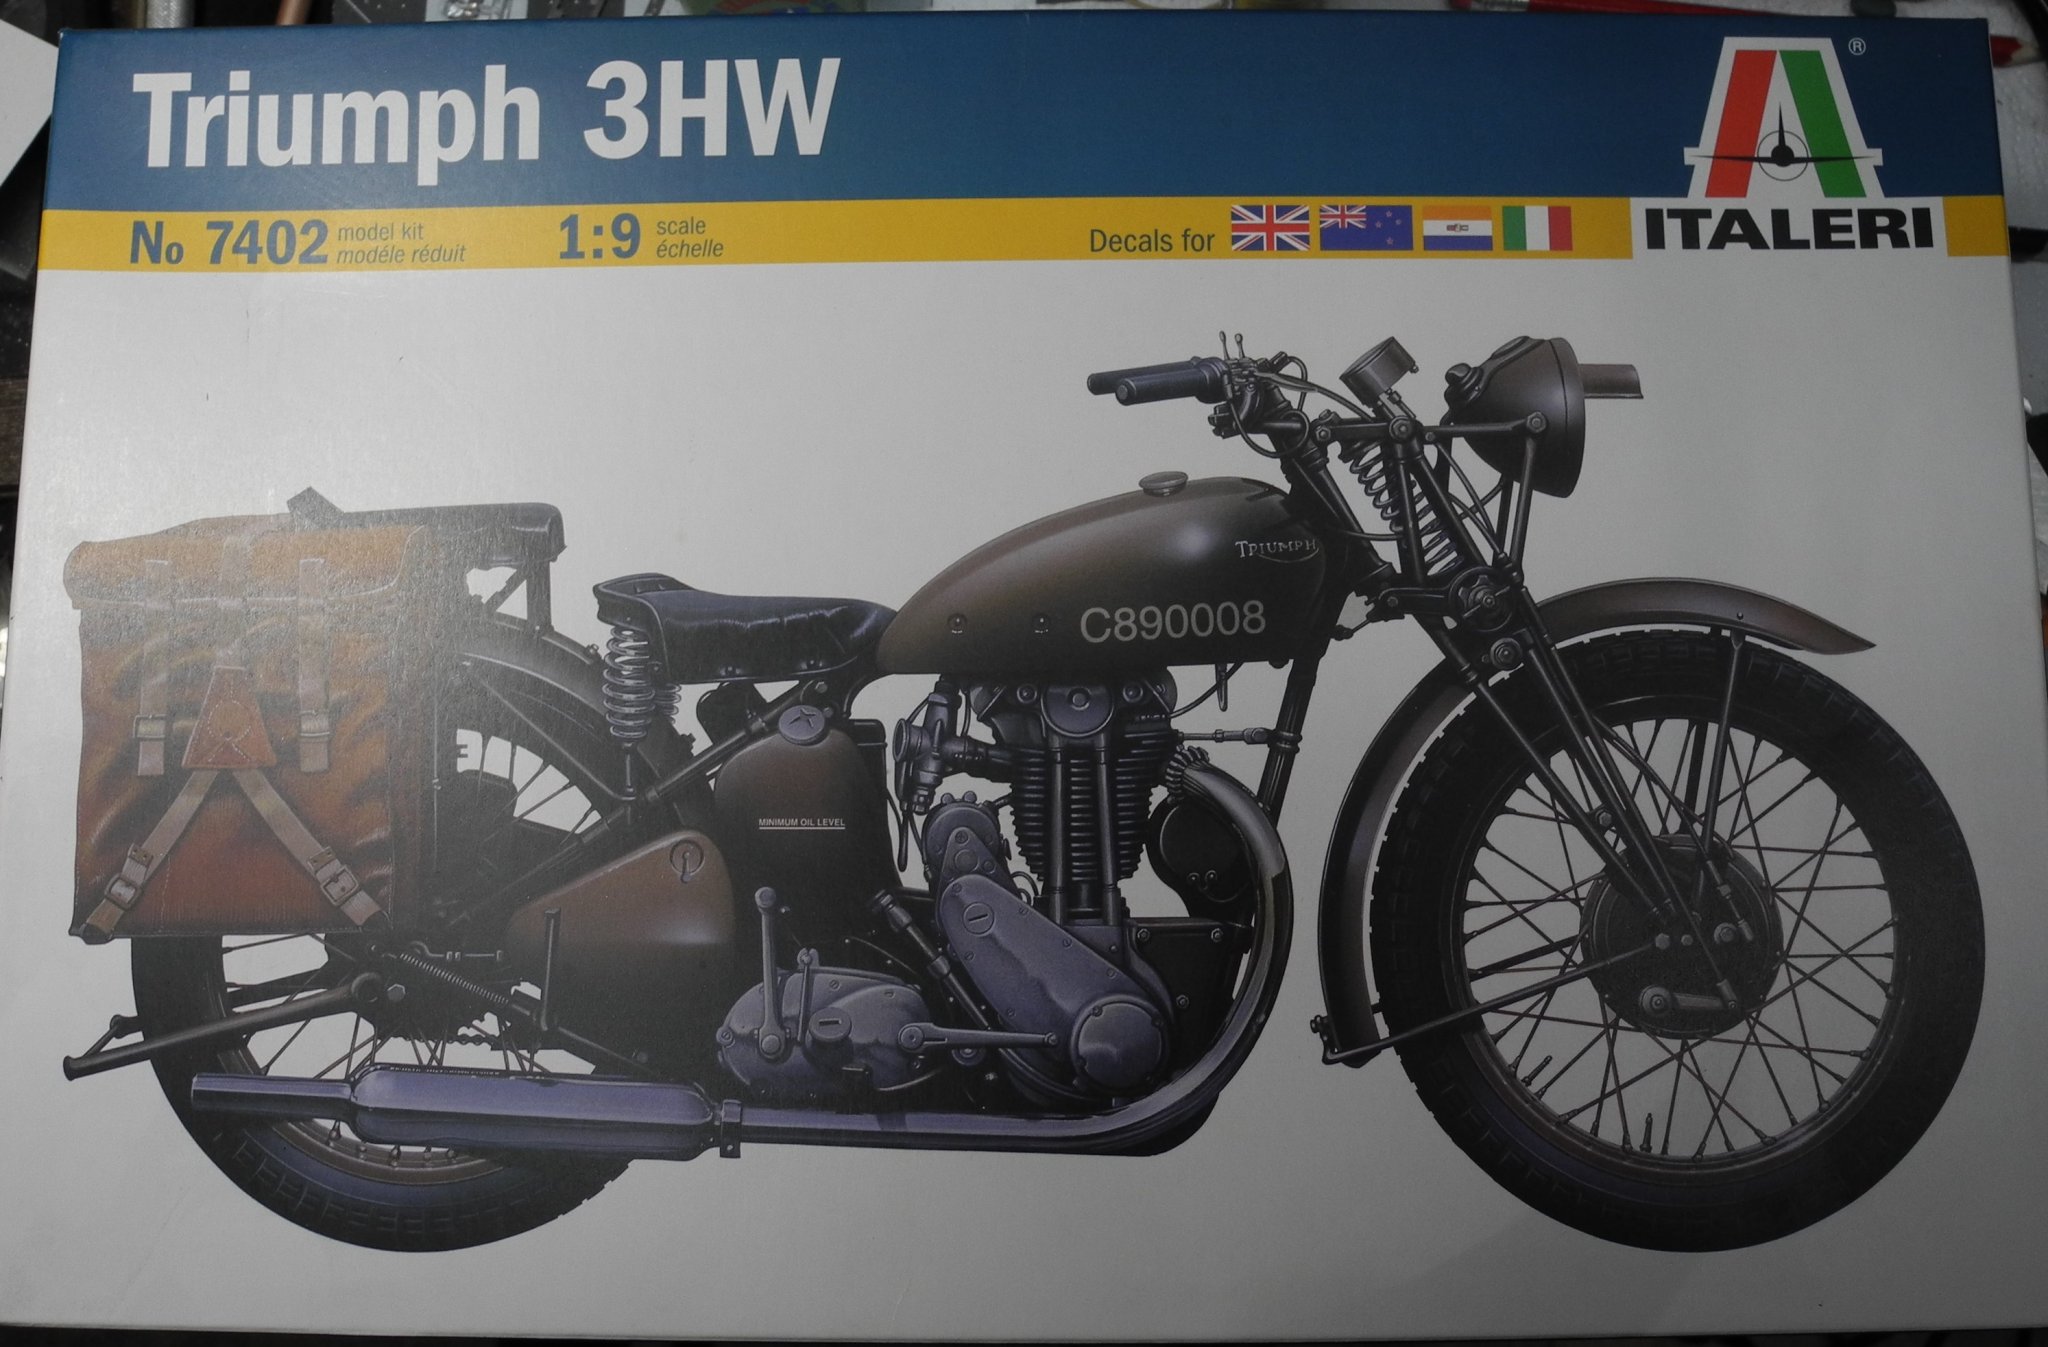
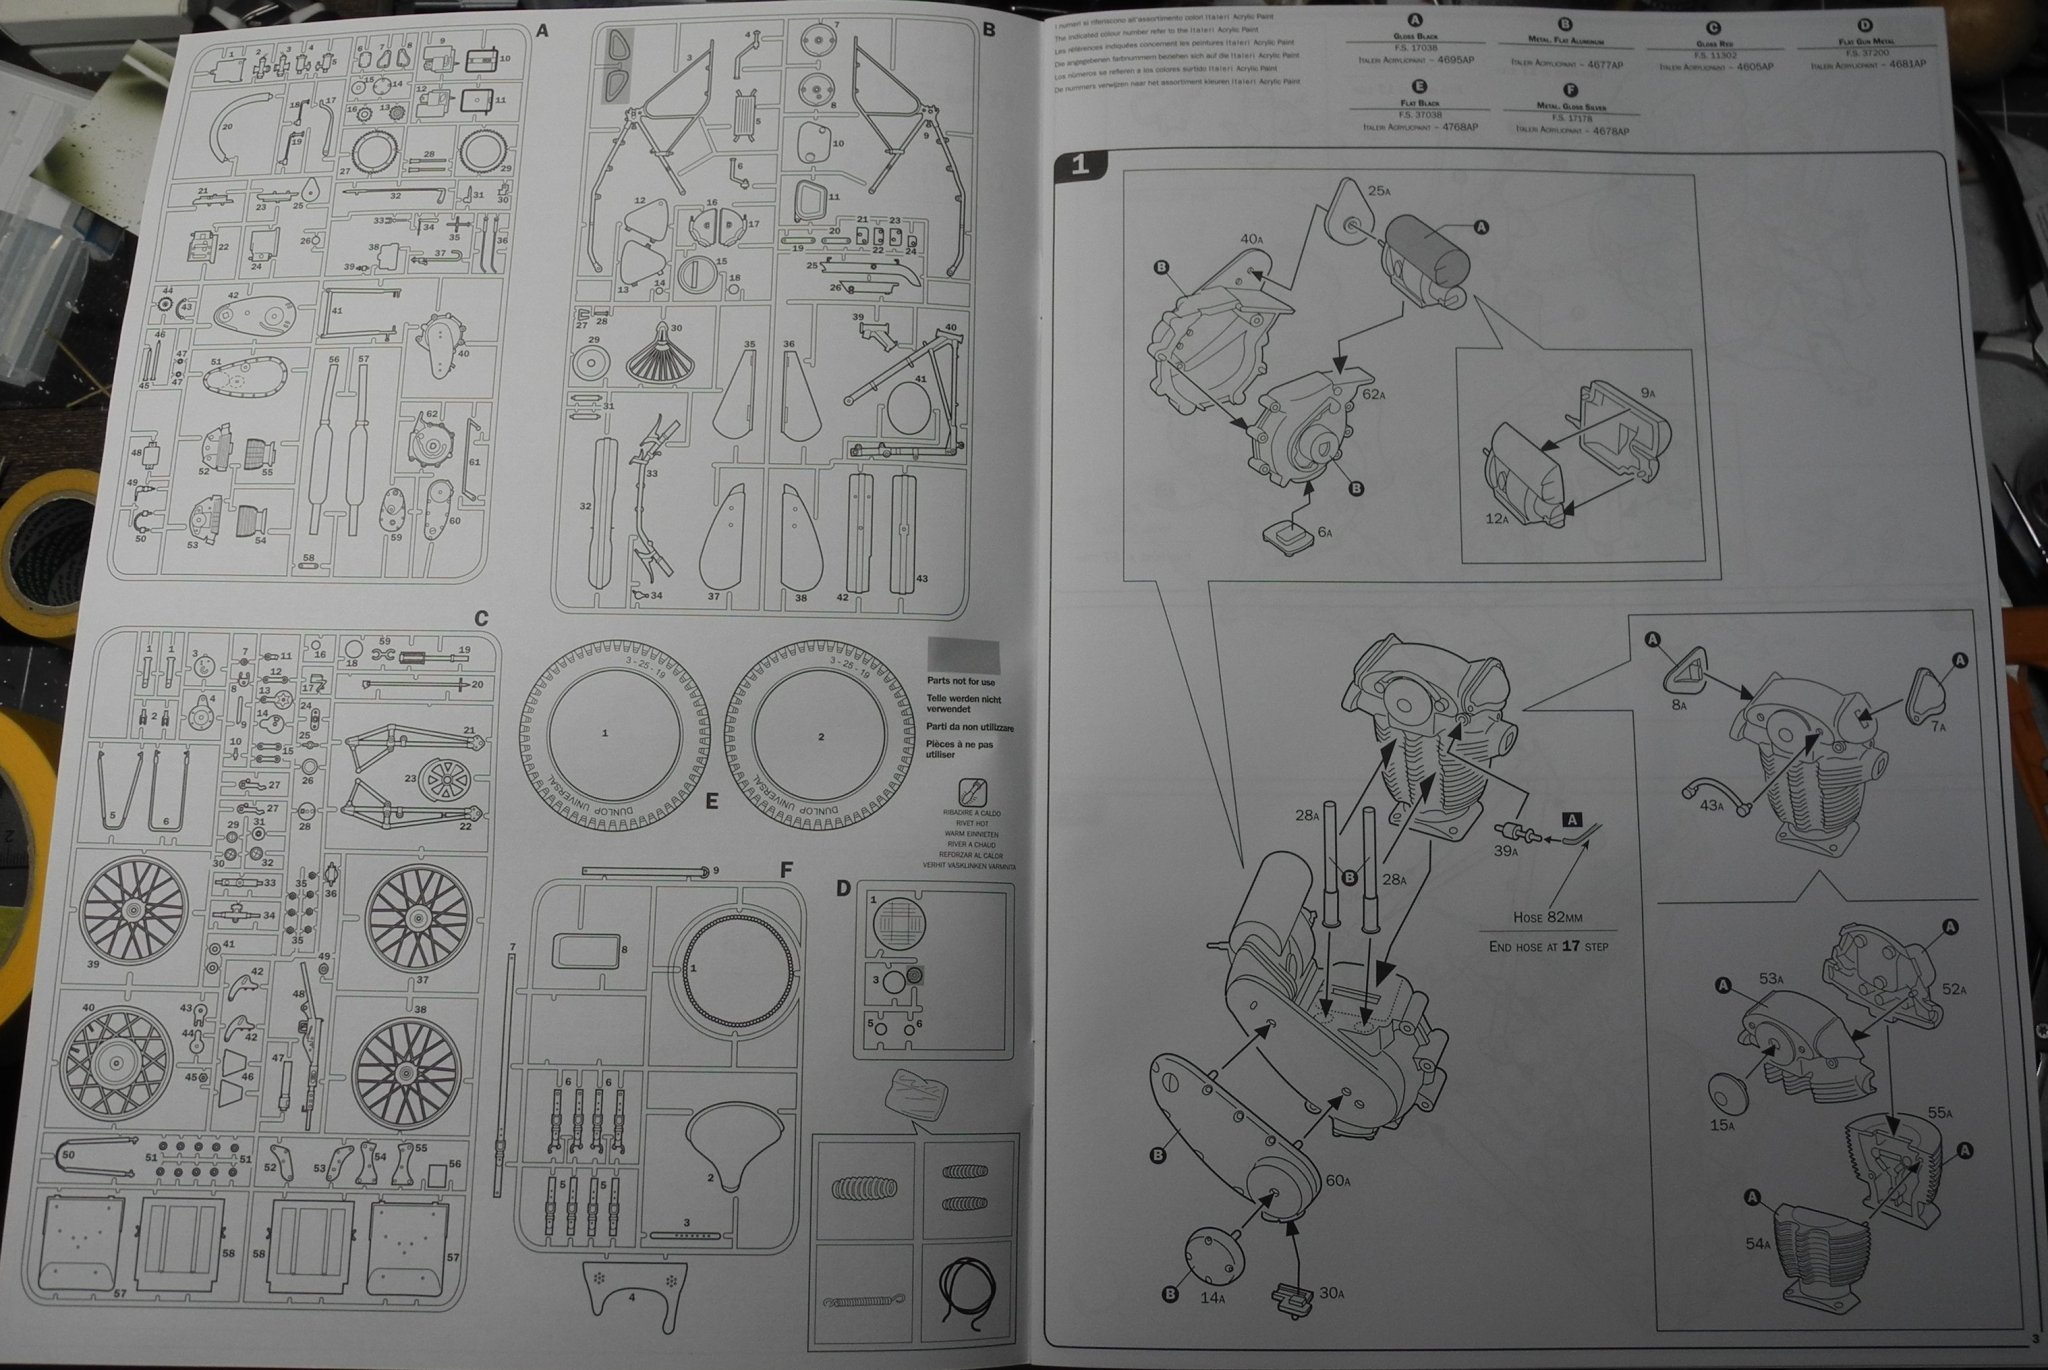
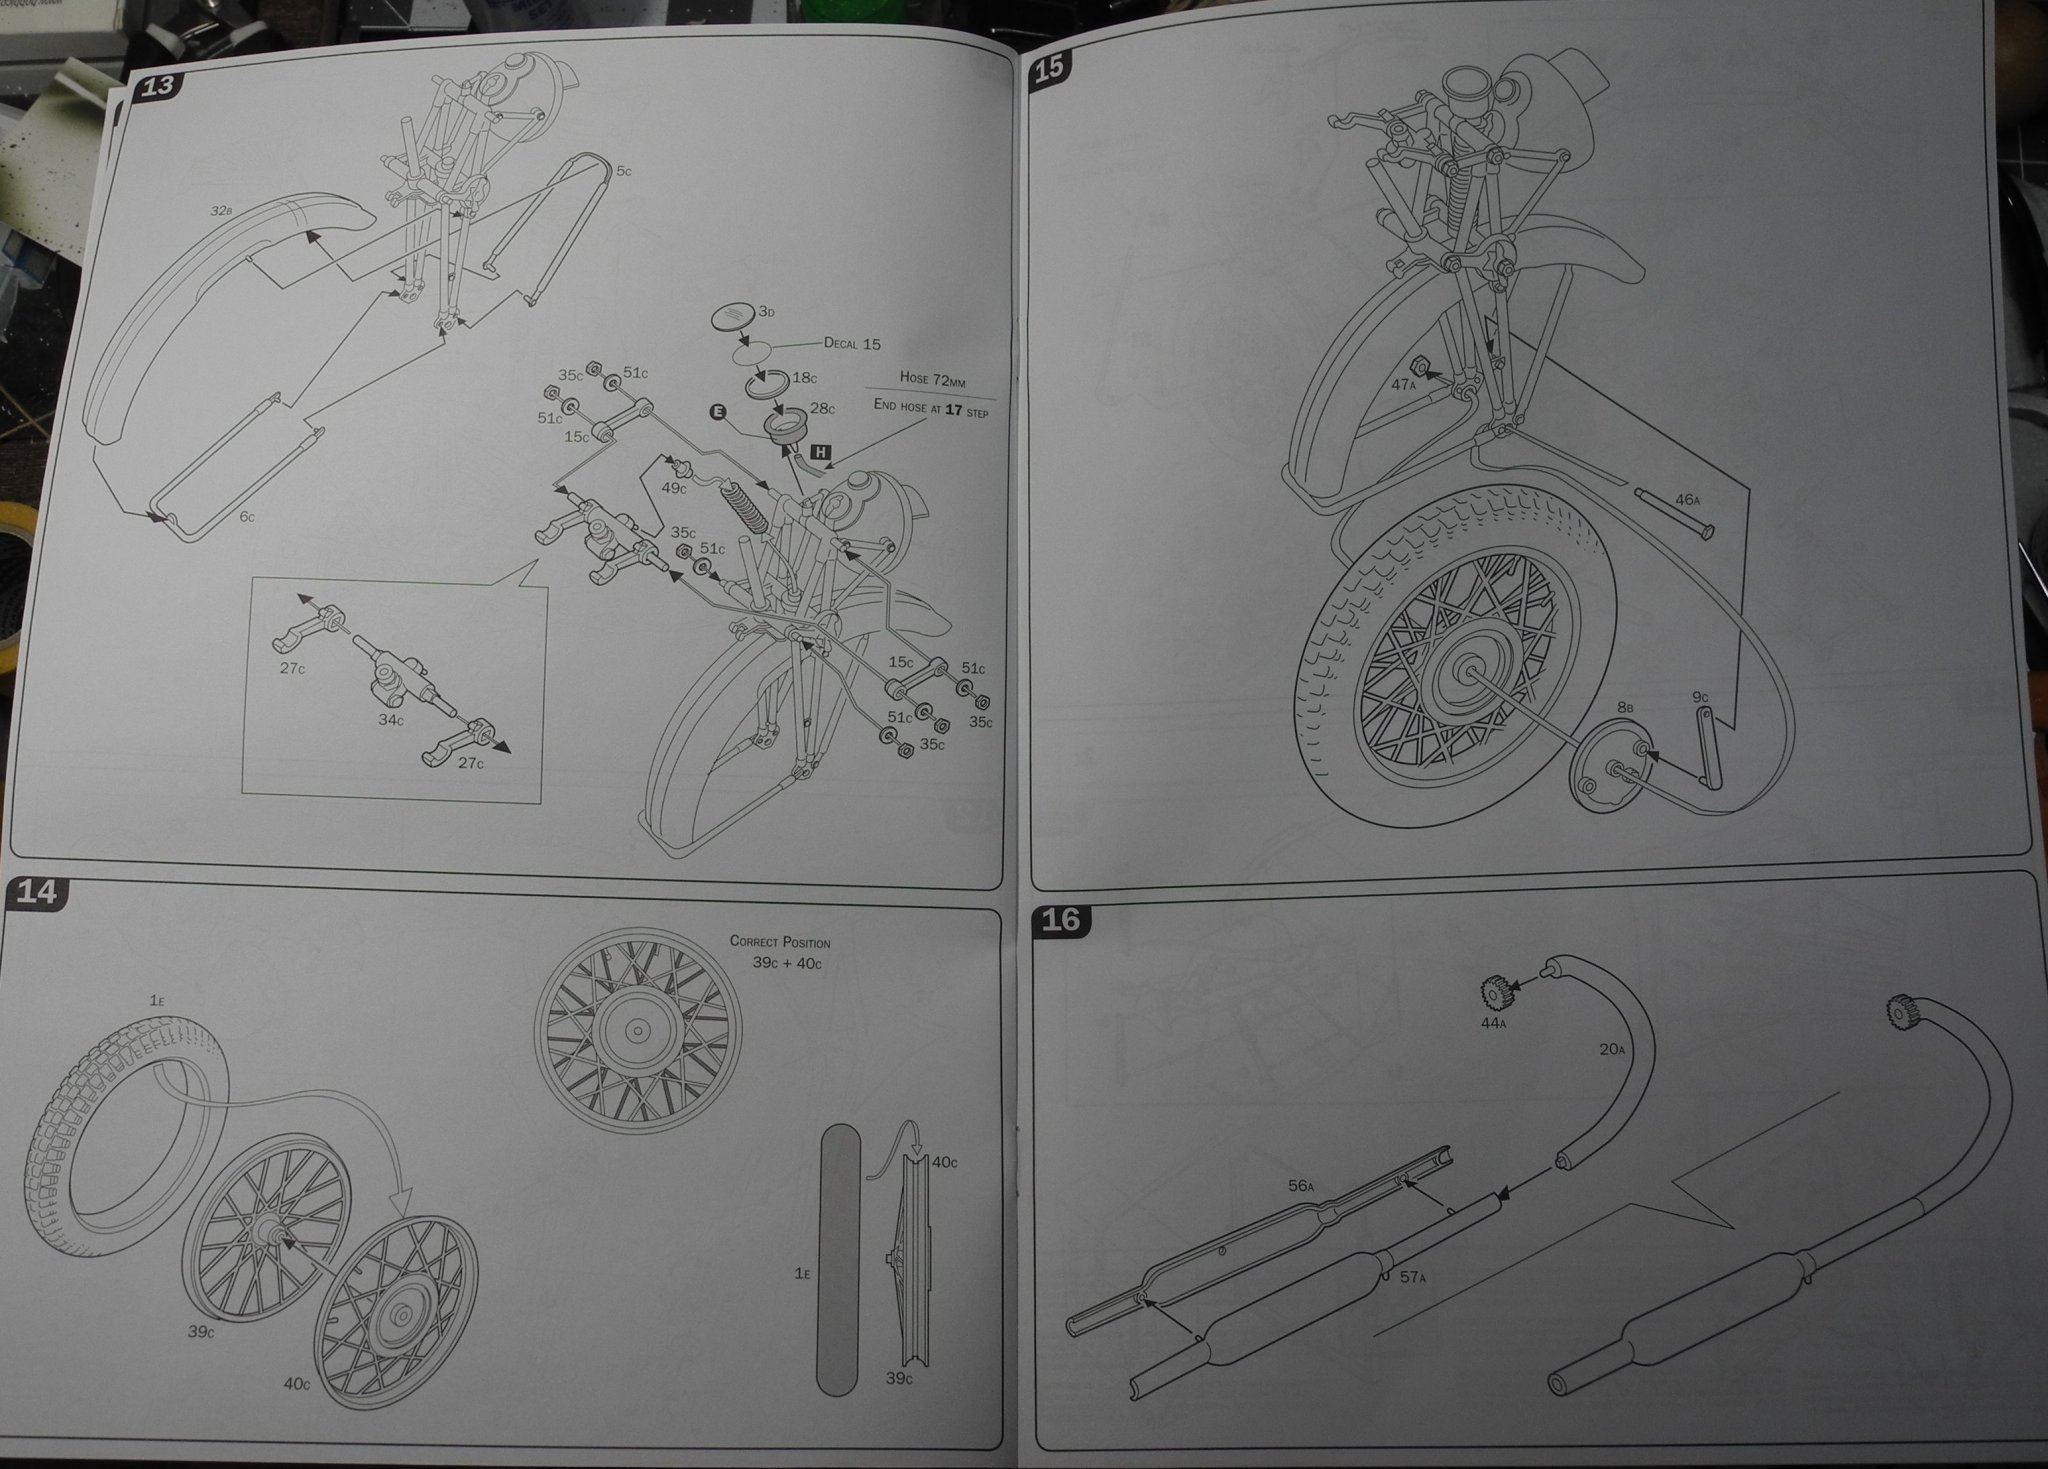
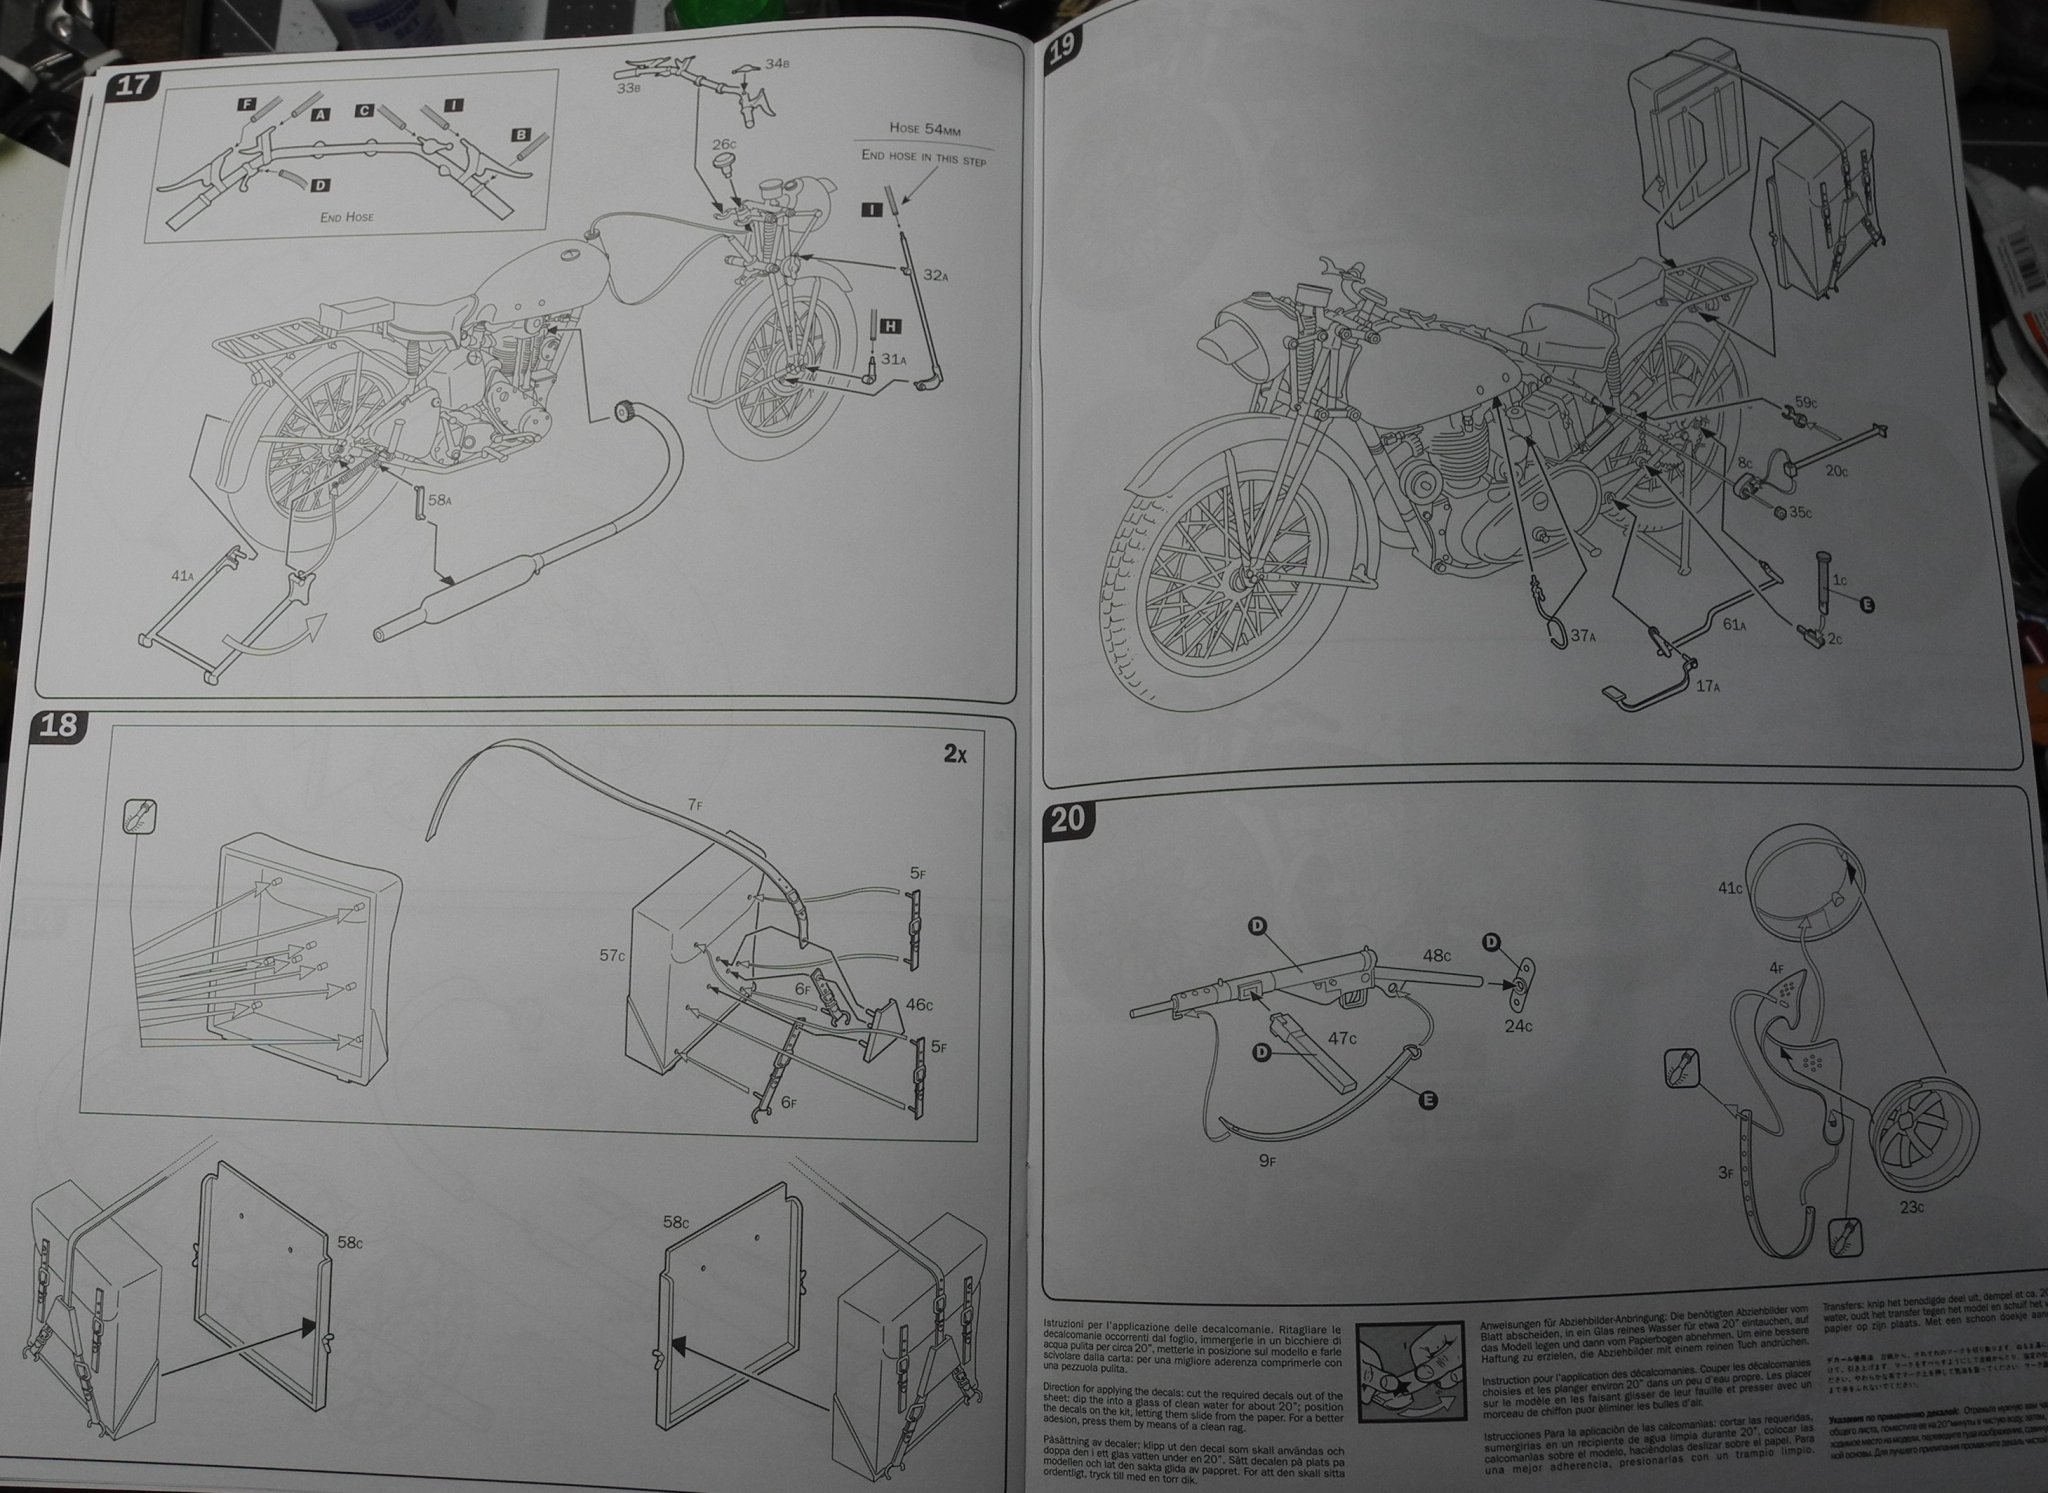
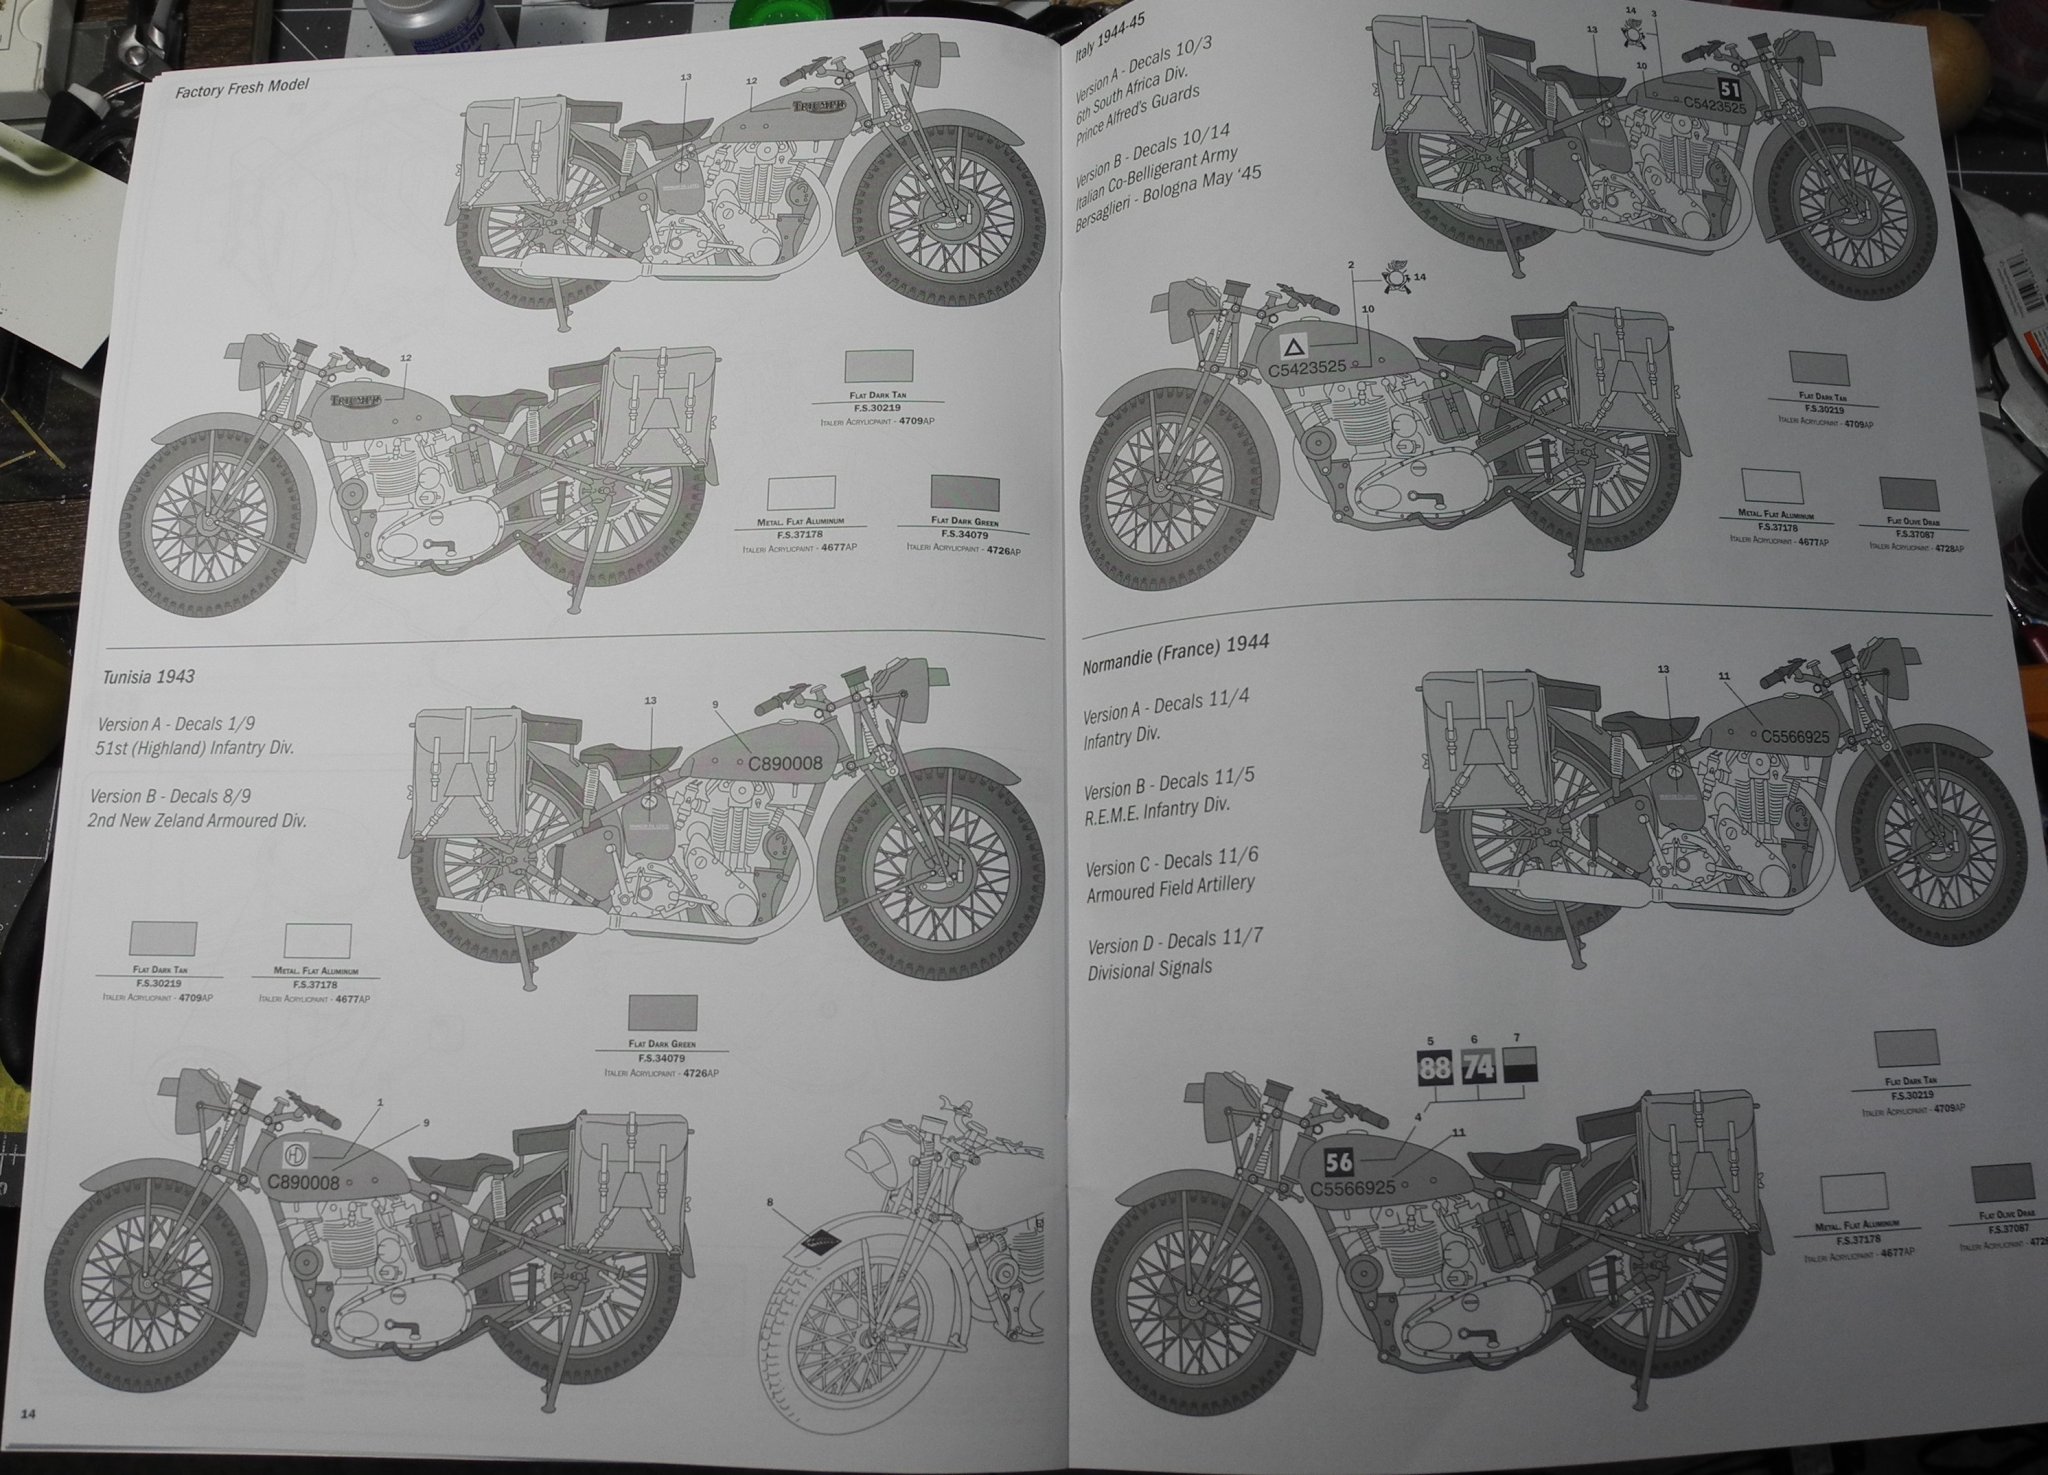
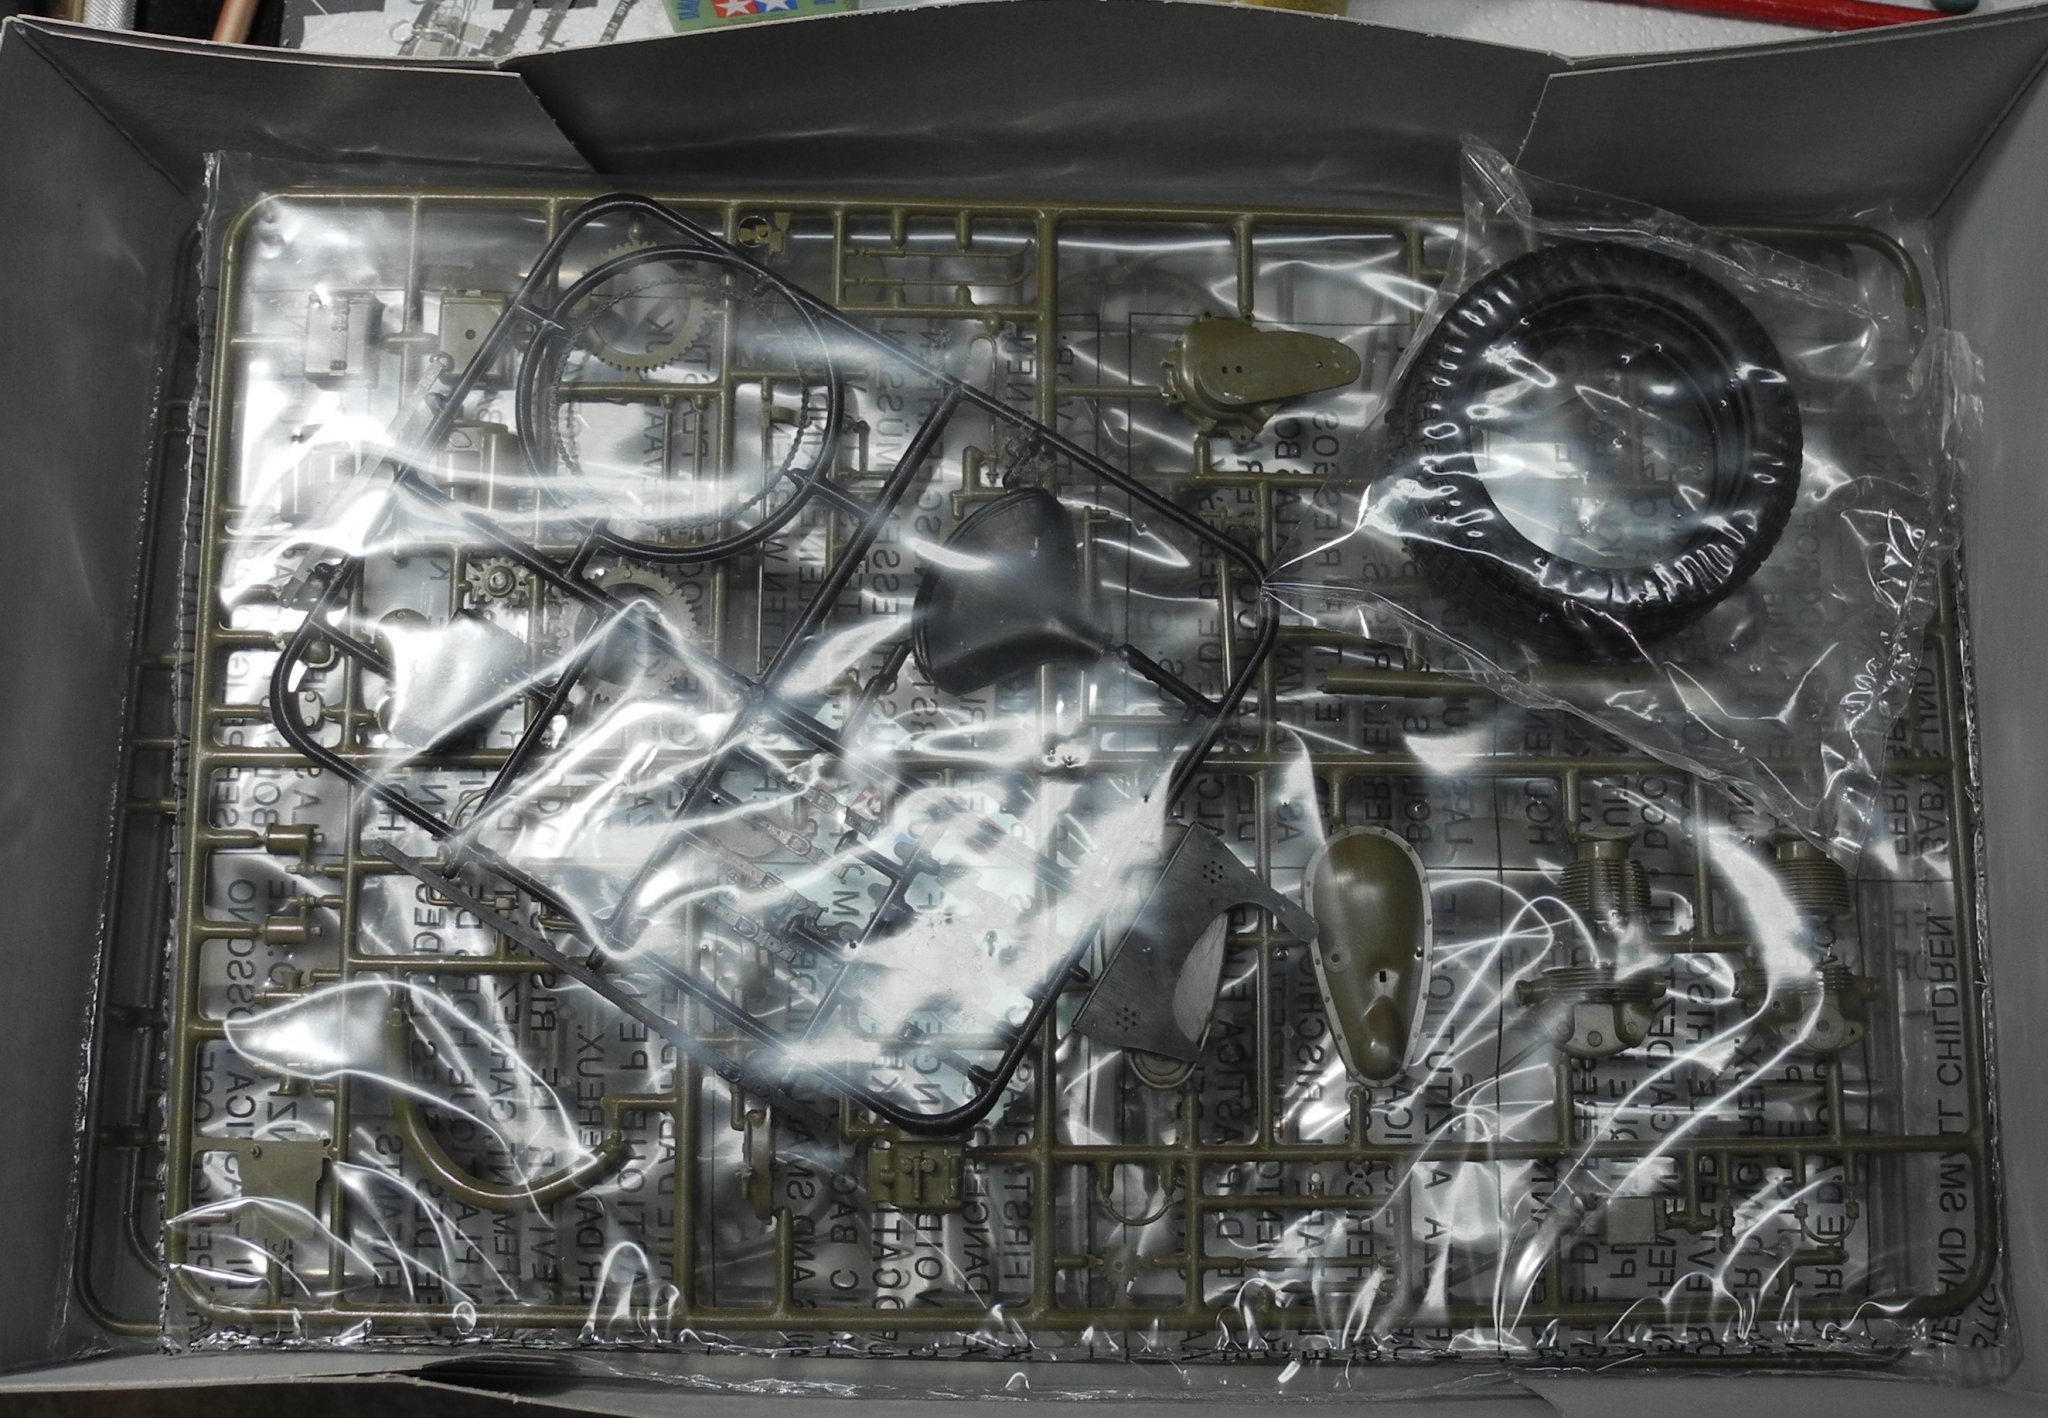
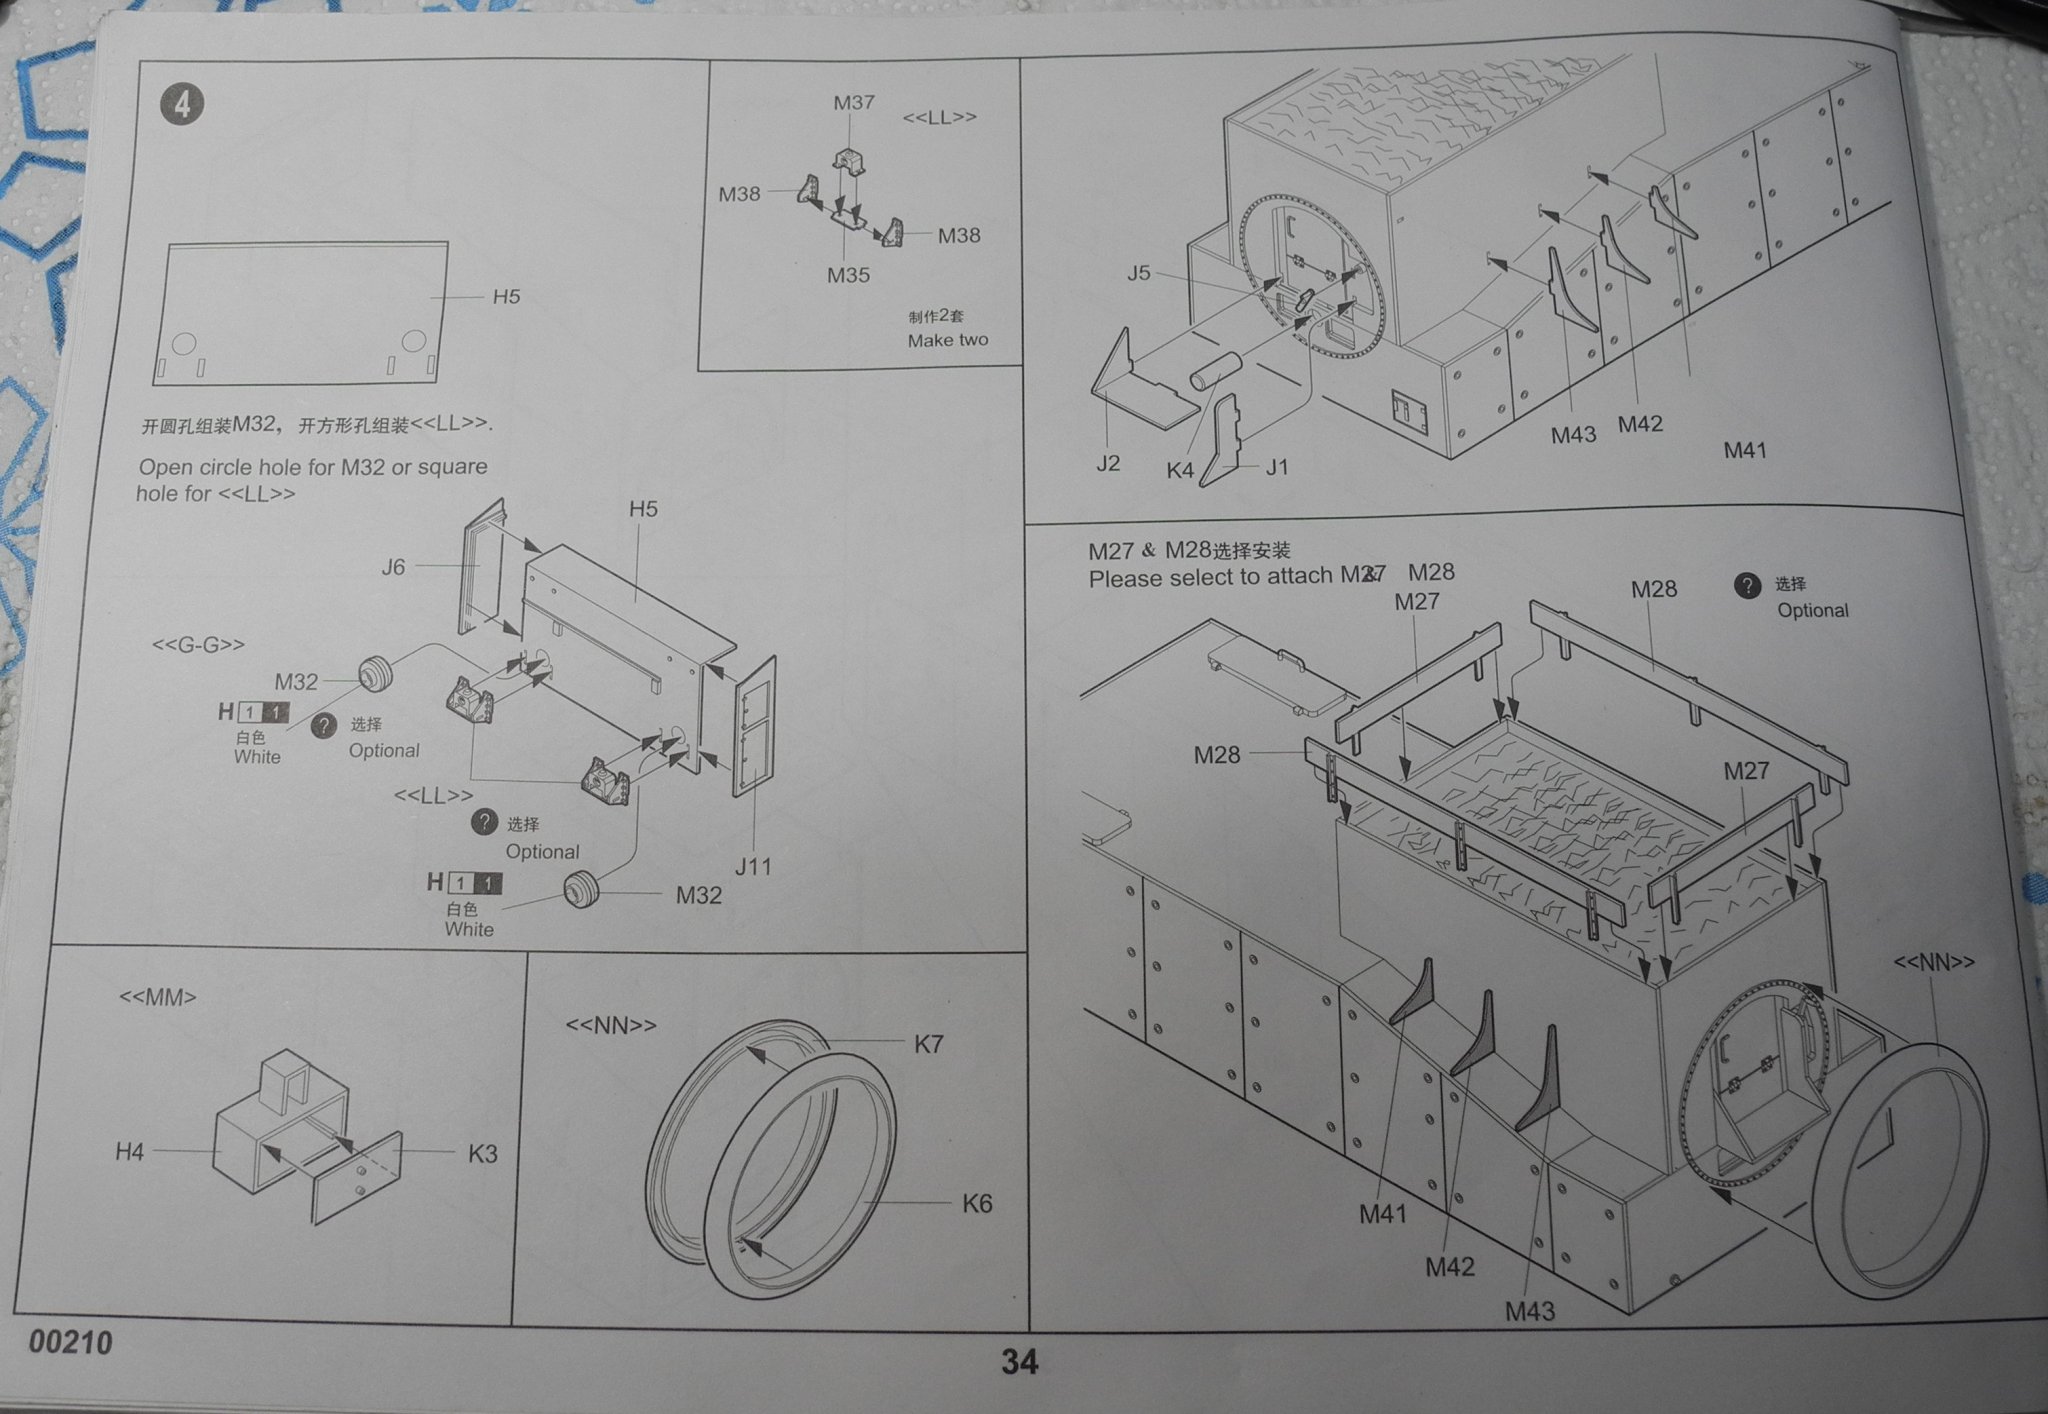
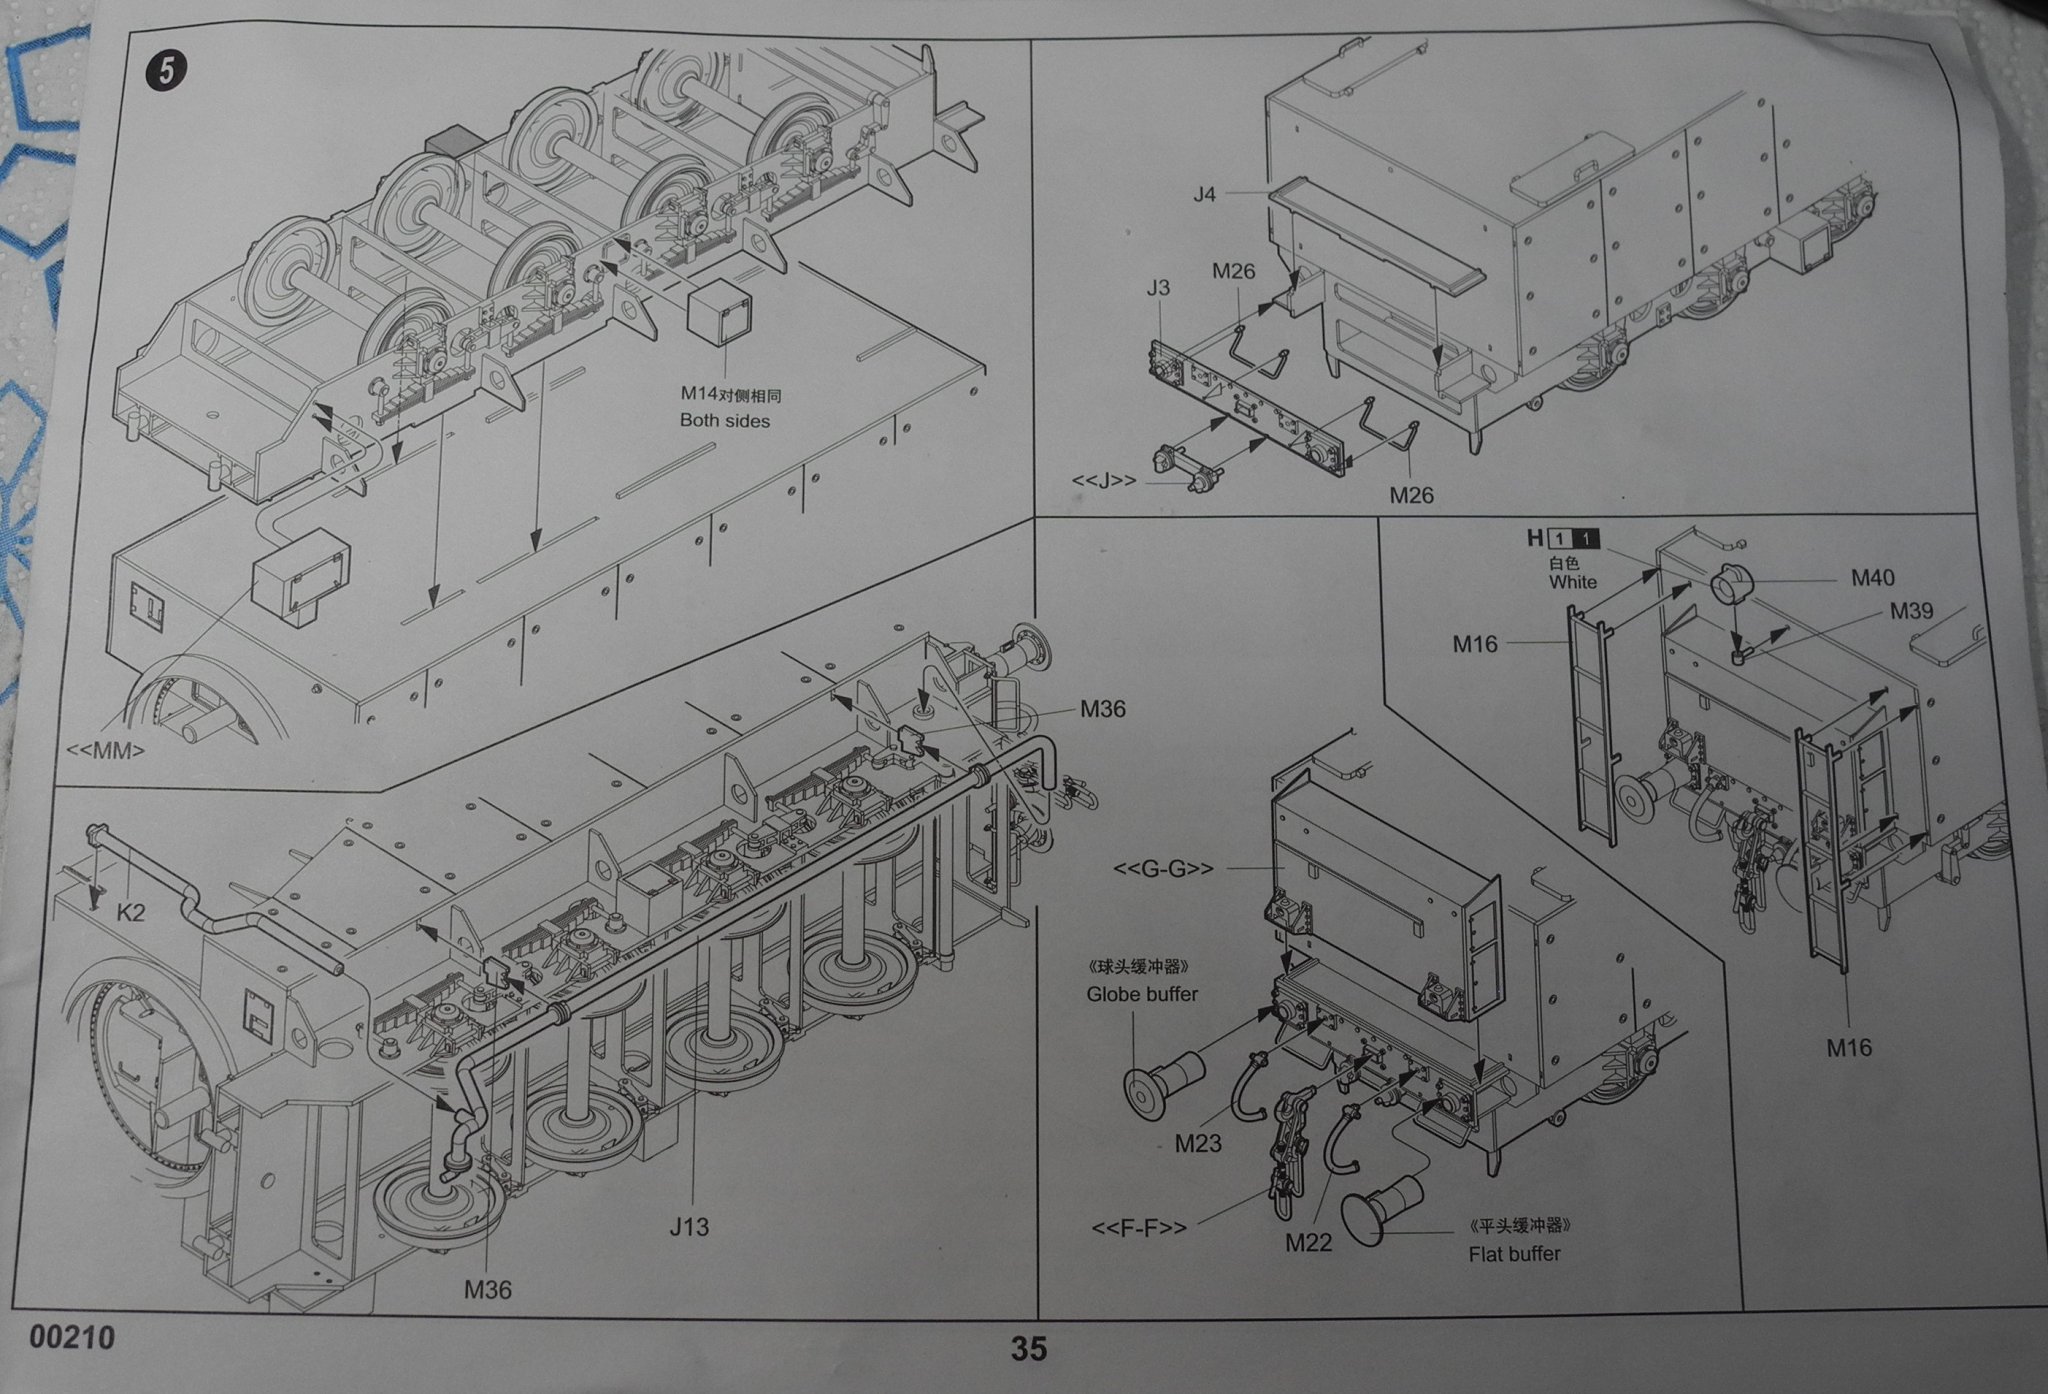
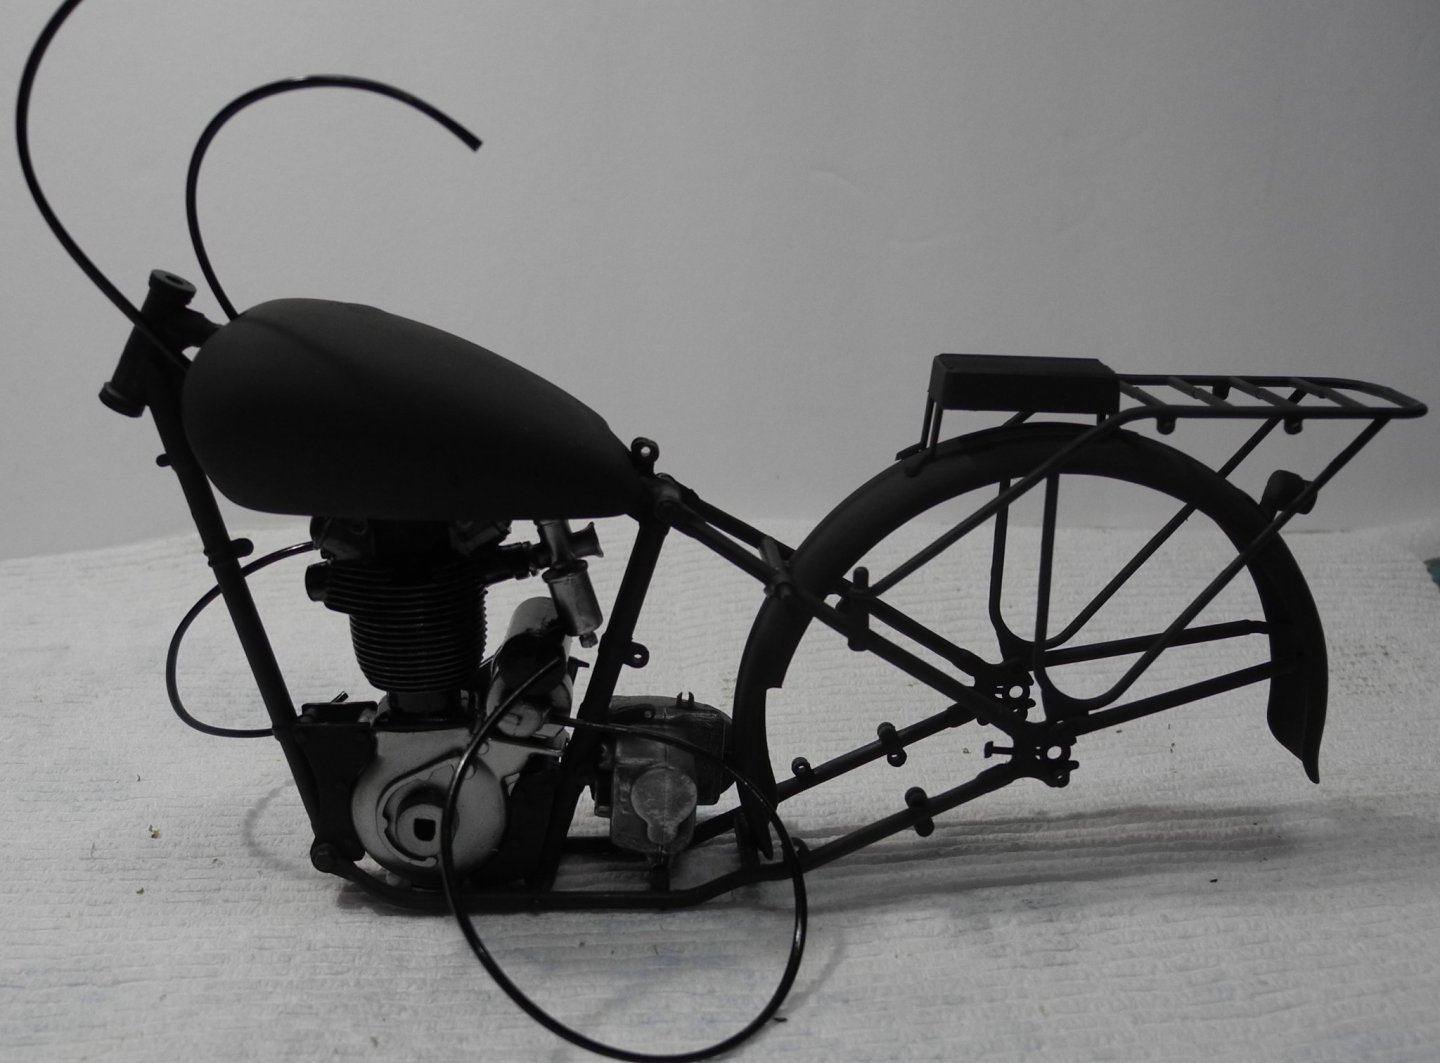
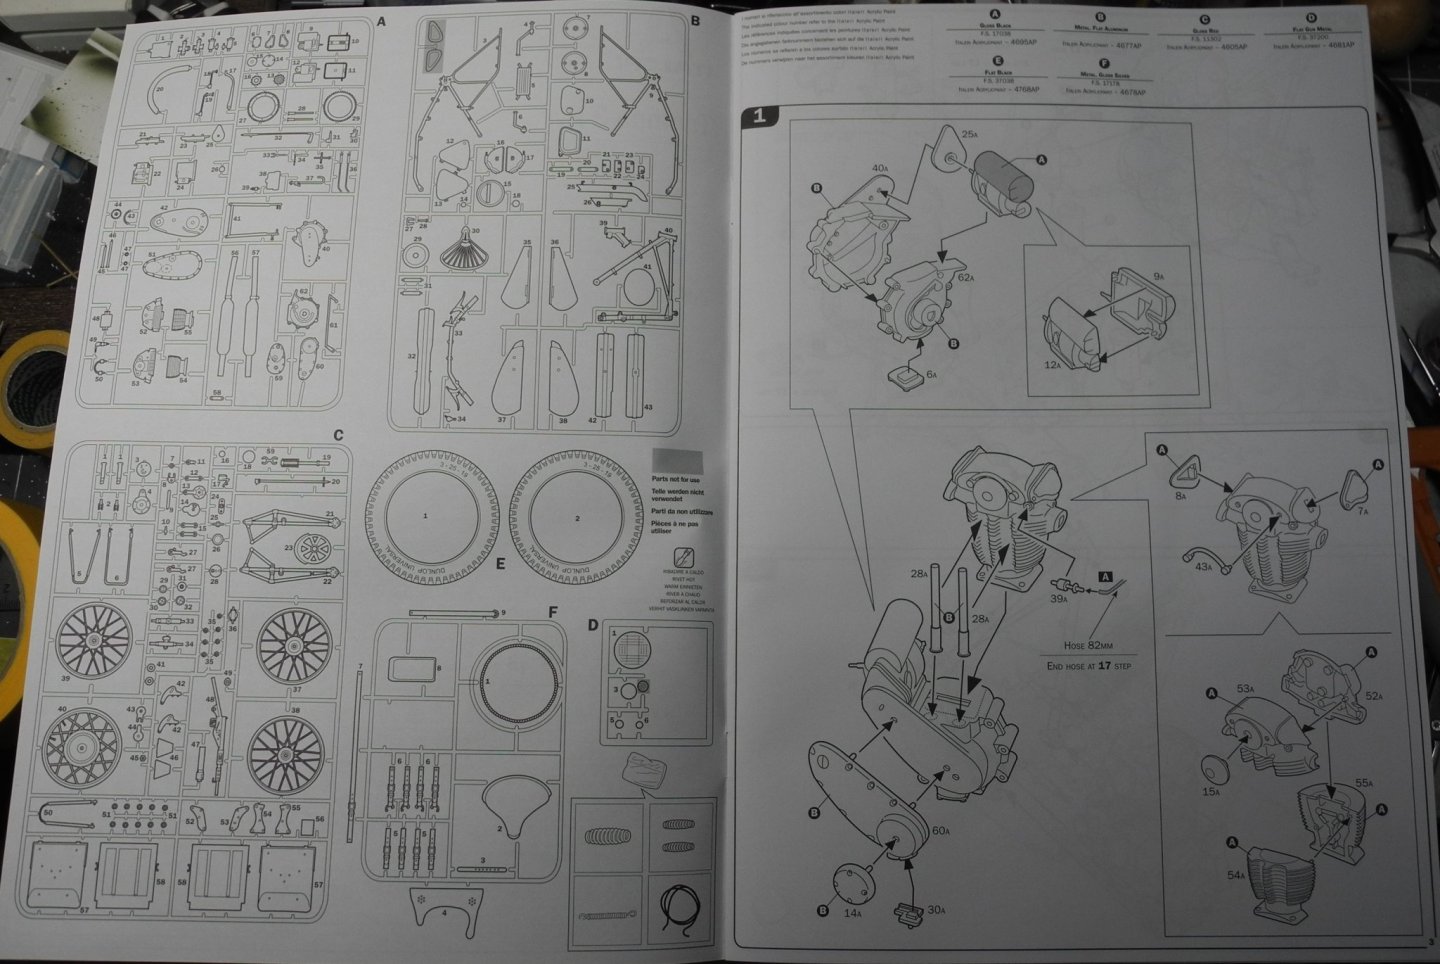
For my next project, I'll be building the WW2 vintage Triumph 3 HW motorcycle and taking a break from the railroad genre. At the start of WW2, Great Britain did not have all the technical equipment needed for such a conflict, therefore a lot of vehicles were ordered urgently. Motorcycles, mainly used by the well known DR "dispatch riders" for communication between different units, were converted from civilian bikes with small changes, like military colors and the addition of frames for canvas bags. Triumph proposed in short time the model 3 HW, based on the civilian Tiger 80, with an overhead valve engine and parallel forks. This model served on all fronts where the British Armed Forces fought, such as Africa, Europe and Asia. After WW2 these motorcycles were delivered to many other nations such as Italy and Greece where the Triumph served for a long time thanks to their reliability and robustness. Following are the instruction pages and a photo of the parts bag inside the box. I plan to finish mine as a "Factory Fresh Model" as seen on the upper left of the next-to-last photo page.


- 59 replies
-
- 15
-
-
Thanks OC.
-
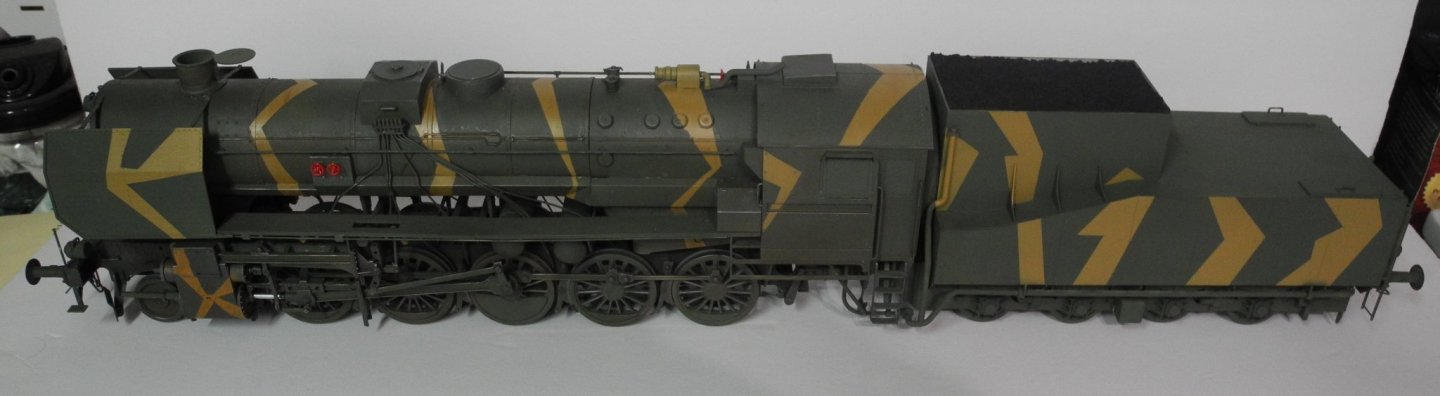
Thank you for looking in and the kind comments. It will eventually be based on rails and displayed with a Leopold rail gun and an anti aircraft gondola. Lots more construction to do.
-
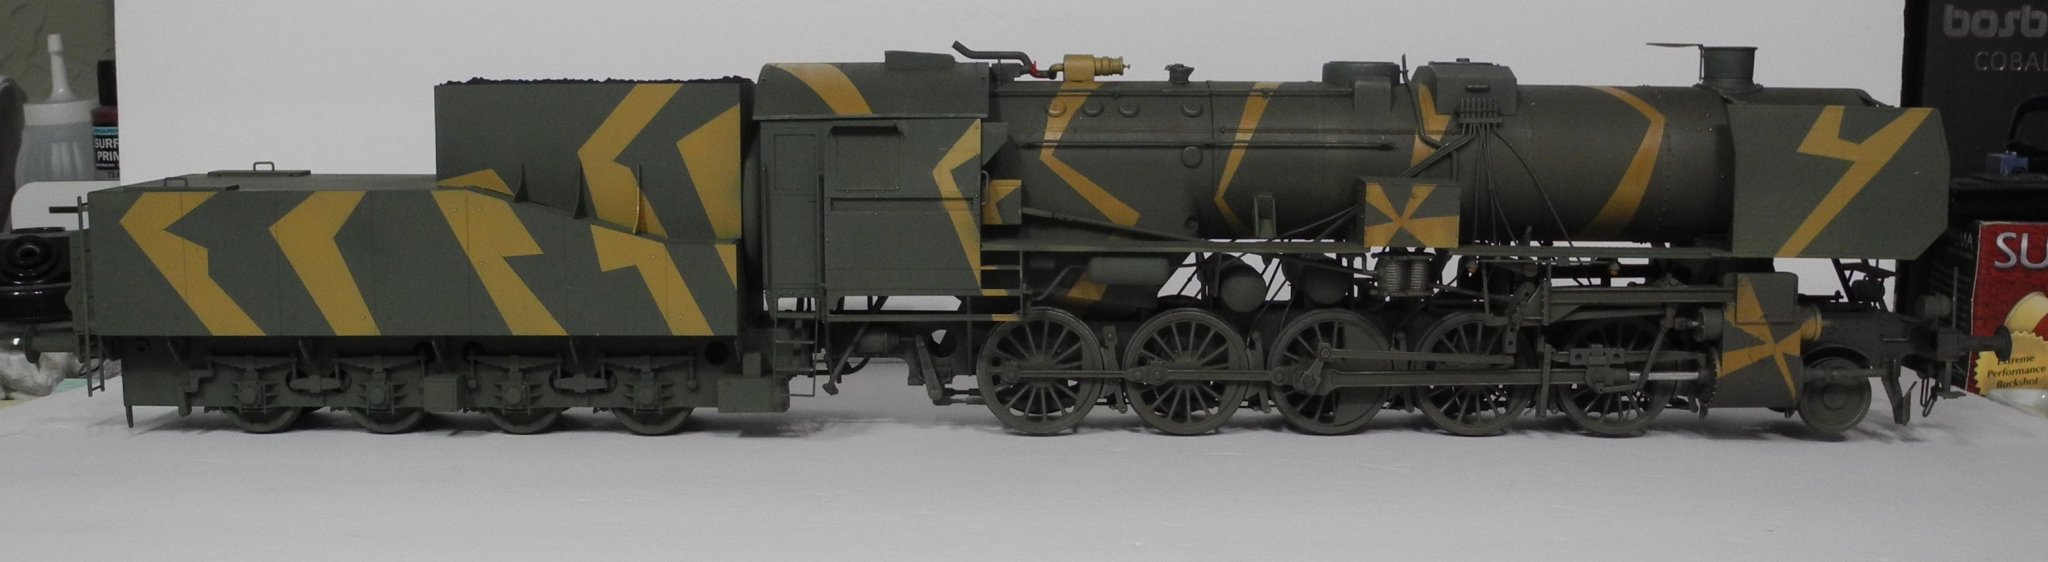
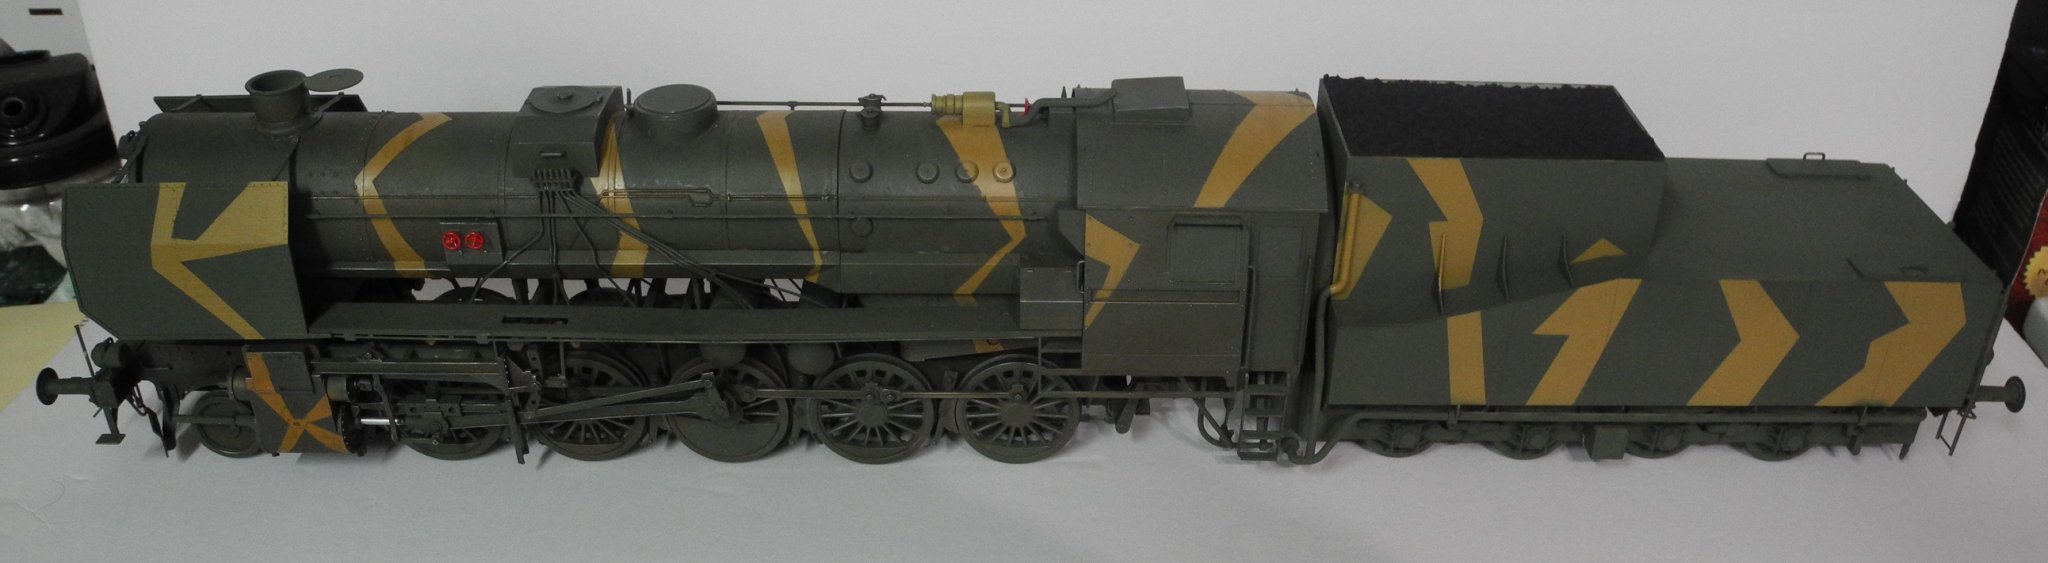
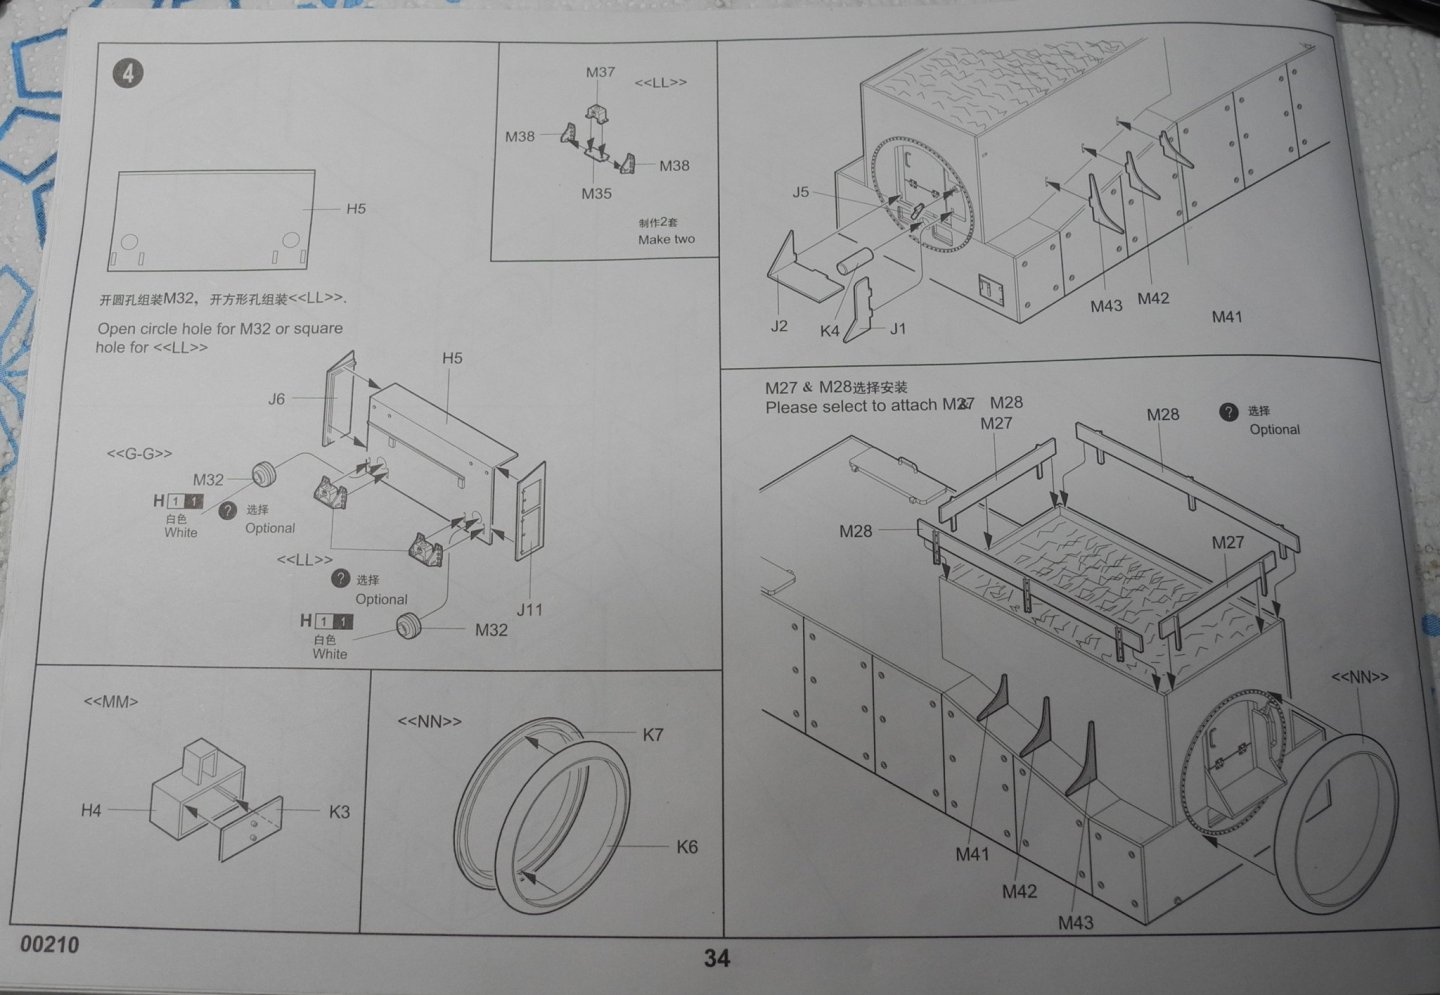
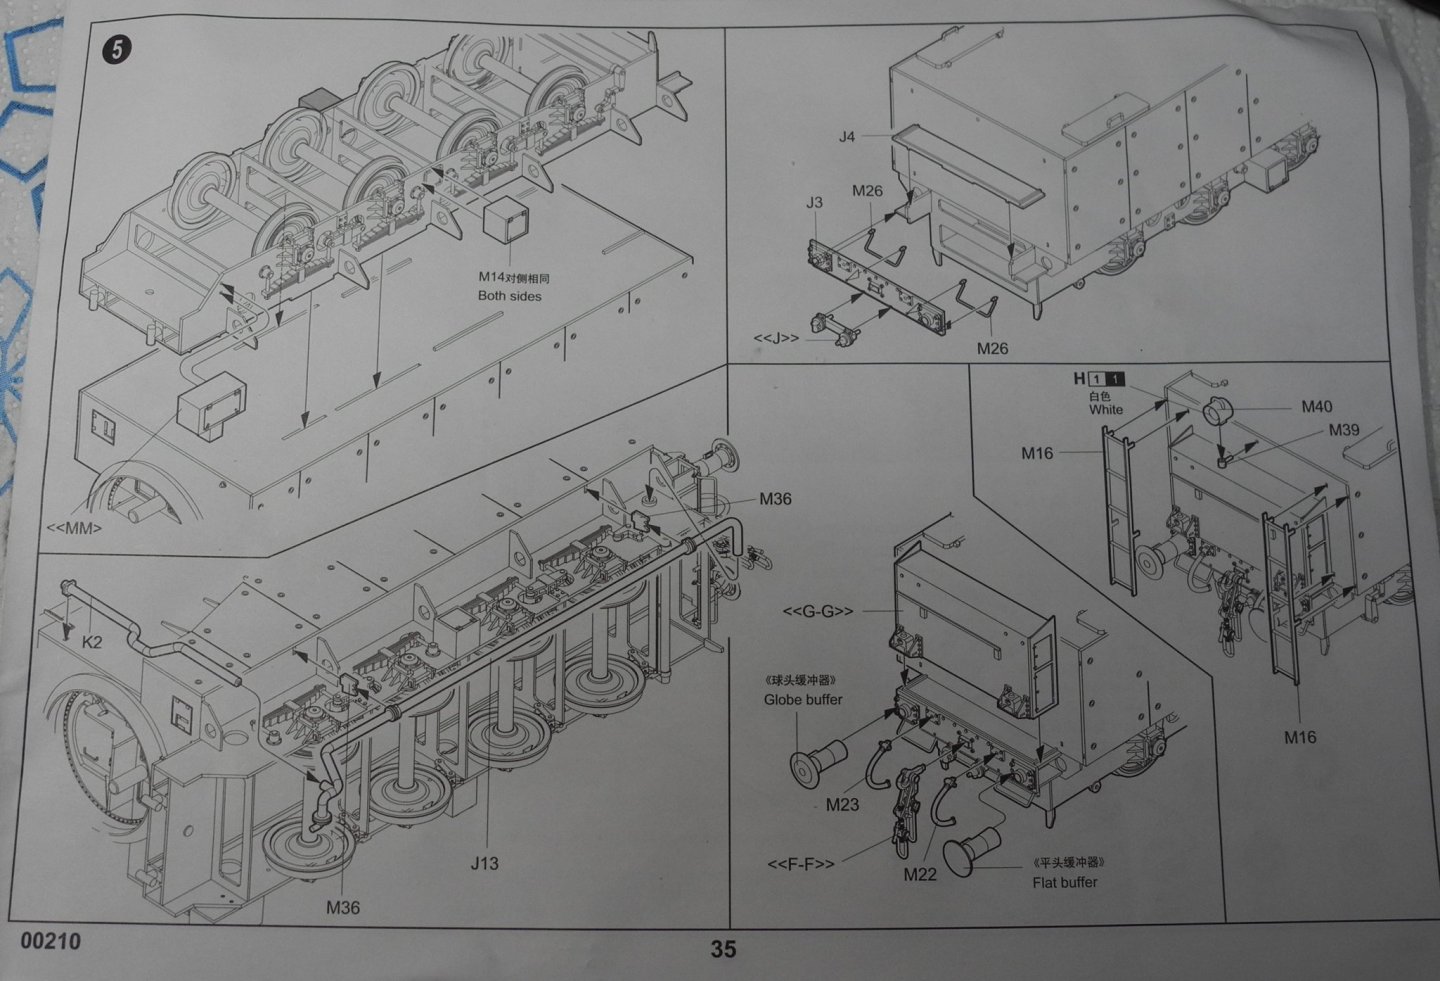
Steps 4 and 5 of the coal tender With steps 4 and 5 complete, all that's left are decals and some weathering of the coal tender. I'll get some decals and weathering in place, then present some final pictures of the locomotive and tender combination.


- 92 replies
-
- 13
-
-
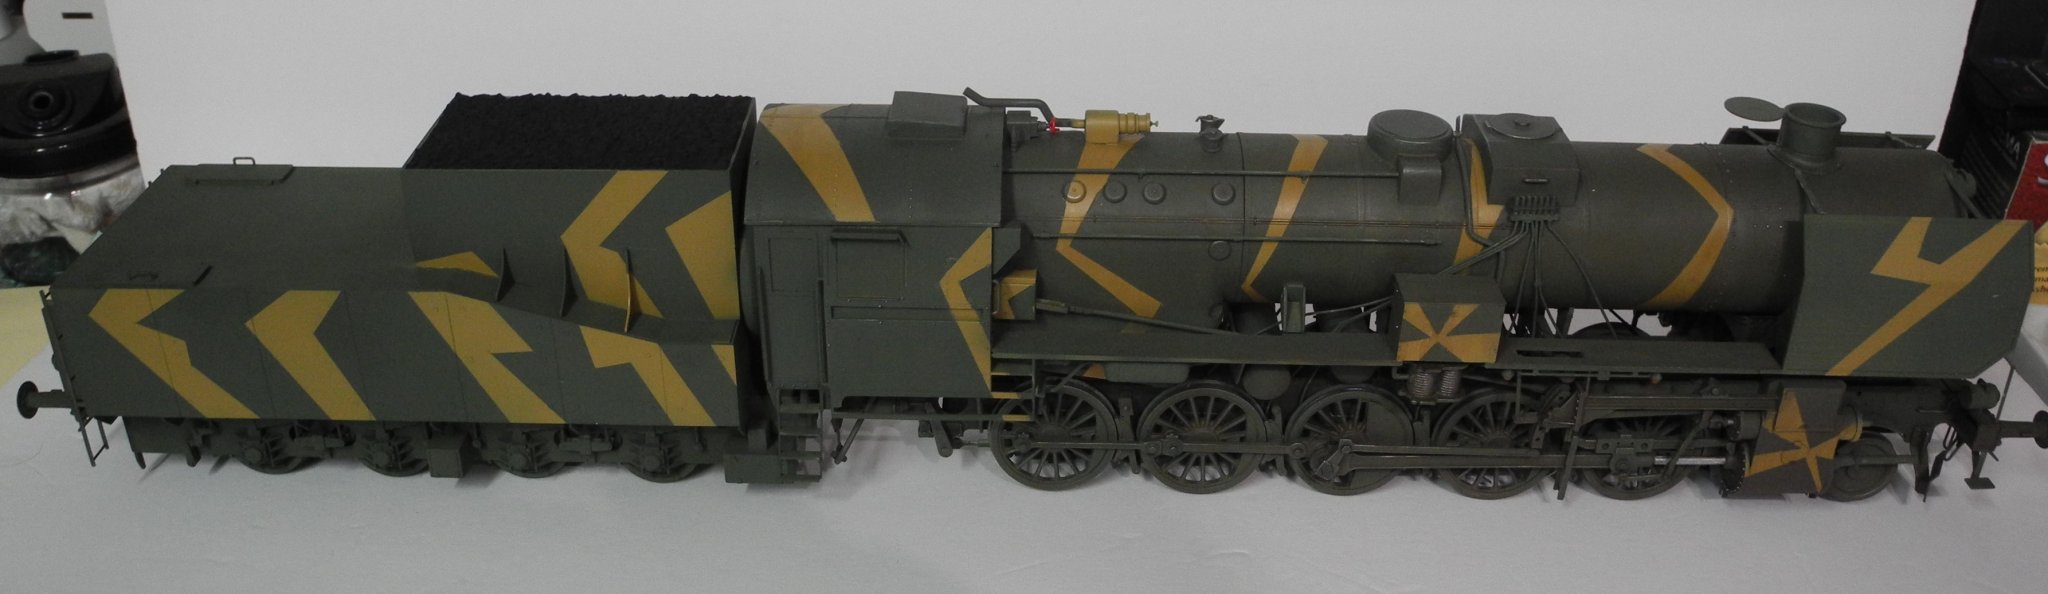
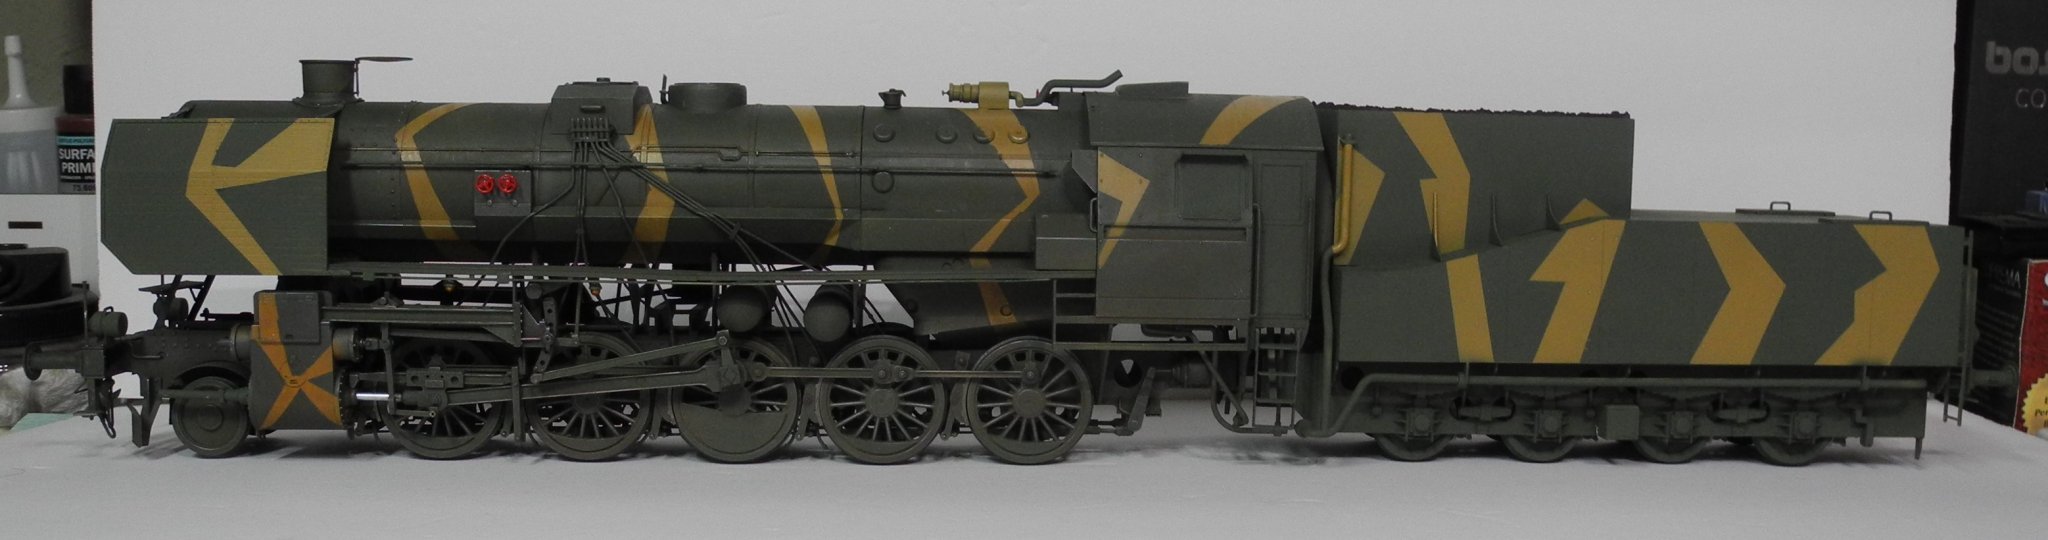
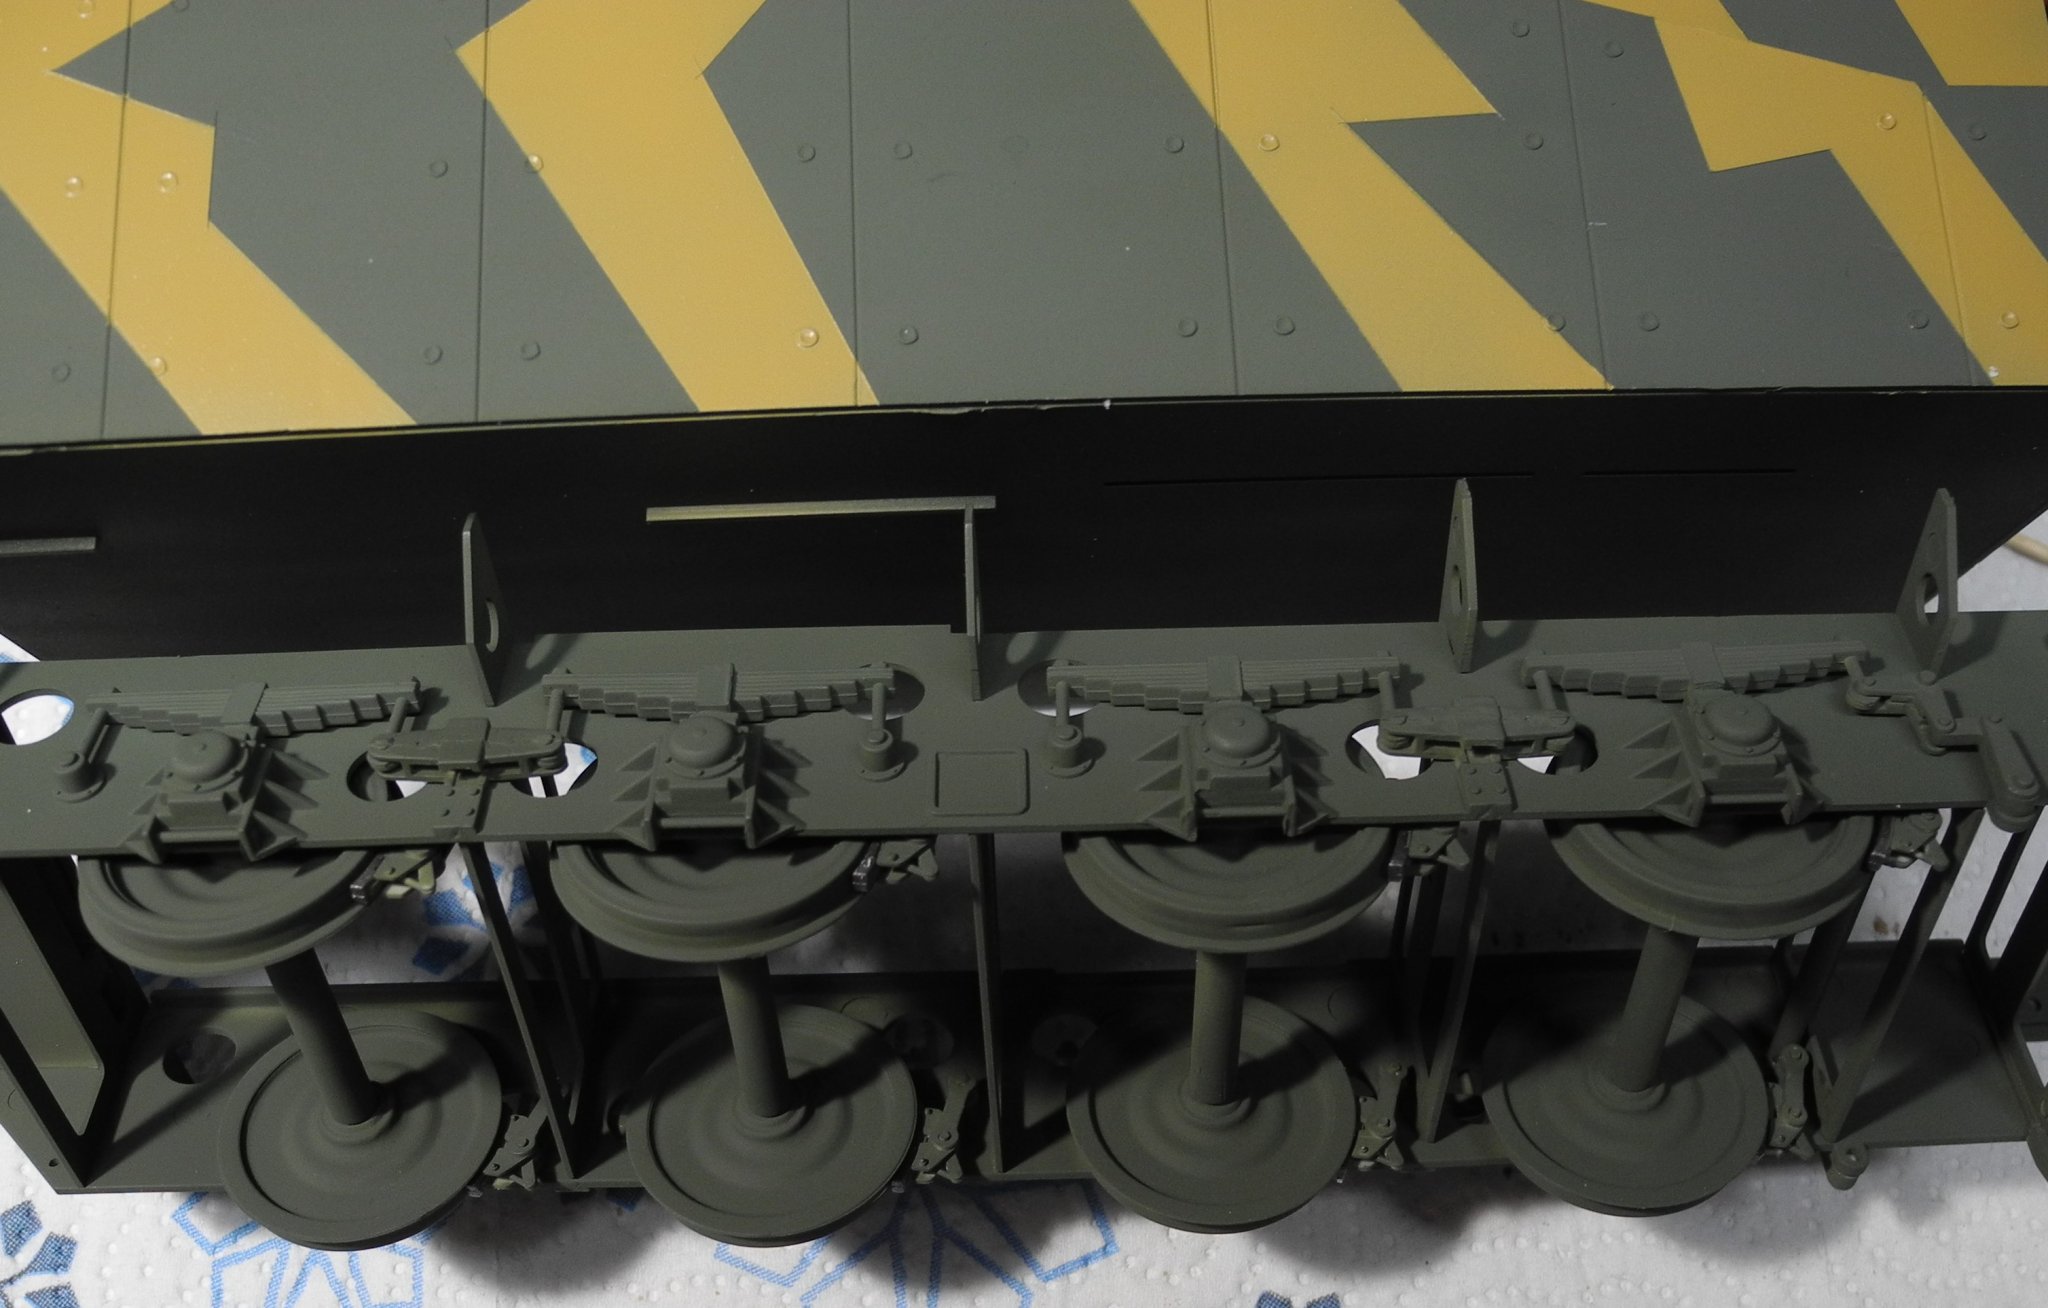
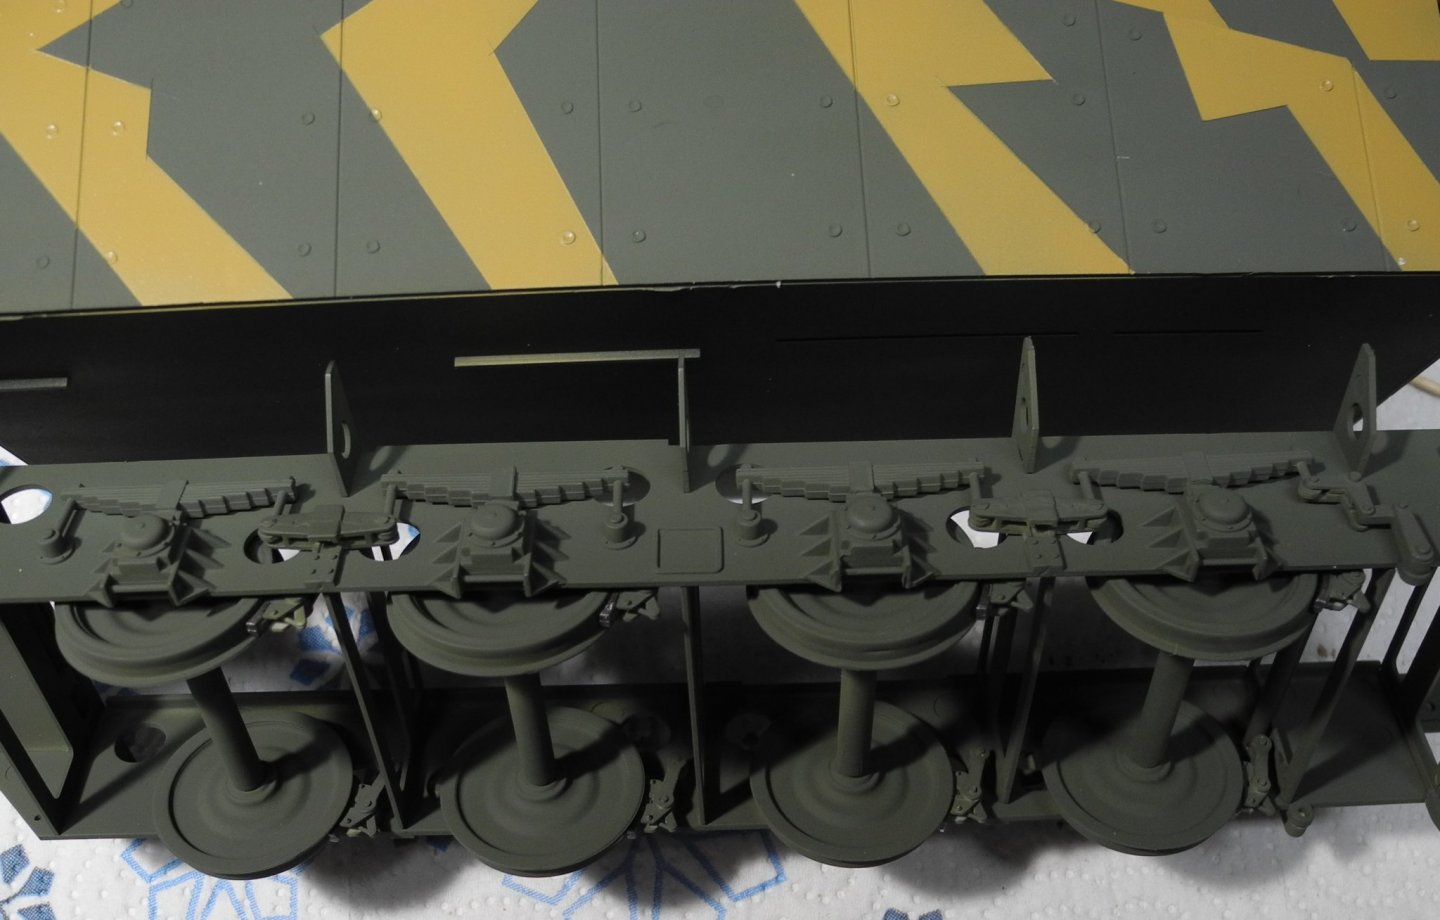
Not a heck of a lot to report, but I did apply the camouflage pattern to the coal tender. I like the Trumpeter attention to detail as can be seen in the coal tender suspension and brake system.

- 92 replies
-
- 12
-
-
I'll have to research it as I really don't know. I've seen illustrations of one quad mount, but maybe that's not accurate? The devil is always in the details.
-
Less than 30 minutes from Denis is Scale Hobbyist, one of the best online hobby shops on the planet, in Nashua New Hampshire. They are mail order only though. I order from them all the time and the products get here to me in Florida F-A-S-T. Great prices, great selection, excellent customer service.
-
1st rate work Dan, Really nice.
-
I'm thinking of doing an AA car to go in front of the locomotive...like this one: https://www.ebay.com/itm/Trumpeter-Models-1518-1-35-WWII-German-Army-Gondola-Railcar-Low-Sides/293161894052?ssPageName=STRK%3AMEBIDX%3AIT&_trksid=p2060353.m1438.l2649
-
Mine is no exception, I am entirely changing the colors. Do yourself a huge favor and first lay down a good primer coat like Zinser brand. Then buy a premium paint, one that will cover in one coat. You'll be darned glad you did. And it will last a long long time before you have to do it again. Seriously, as much work as this is, I don't know if I could do this again once some more years go by. It doesn't get any easier. Next time I'll just bite the bullet and hire someone to do it for me. In a weird sort of way I like doing things like this myself. Always have done things like this myself and have never hired this kind of work out to others.
-
Progress updates on the Br-52 will be fewer and farther between over the next couple of weeks. I'm prepping and painting our house, and this prep work is serious crap. Painting is a breeze compared to the prep, but ain't that always true whether we're decorating our scale models or painting a house, car, truck, or whatever. When I used to paint cars and trucks, prep work was 90% of the hard work and that's no joke.

-
Before I ever started work on this model, I spent a number of hours doing online research of the Br-52. So many times, information found on the internet is not reliable so I take it with a grain of salt. But it's quite true that my sum total knowledge of railroading could be held in a thimble compared to knowledgeable railroad folk.