CDW
-
Posts
7,755 -
Joined
-
Last visited
Content Type
Profiles
Forums
Gallery
Events
Everything posted by CDW
-
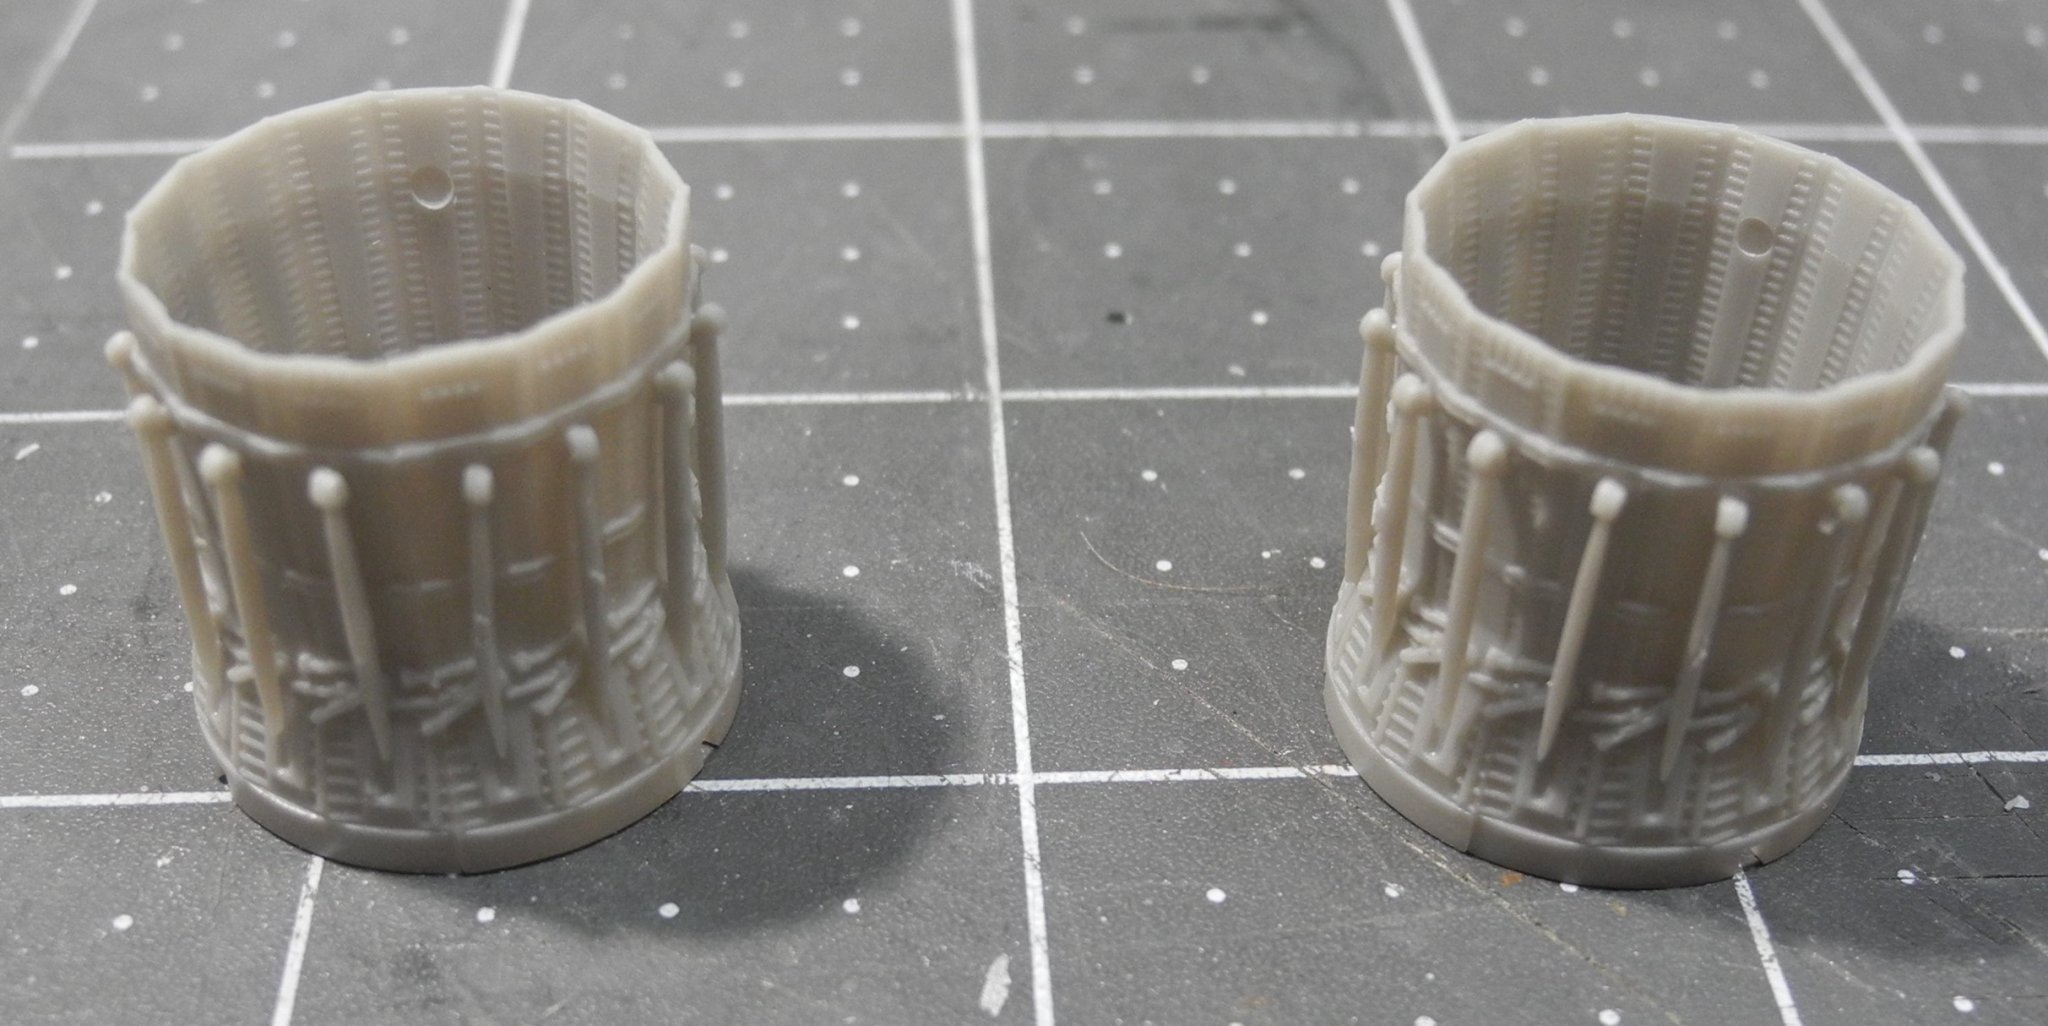
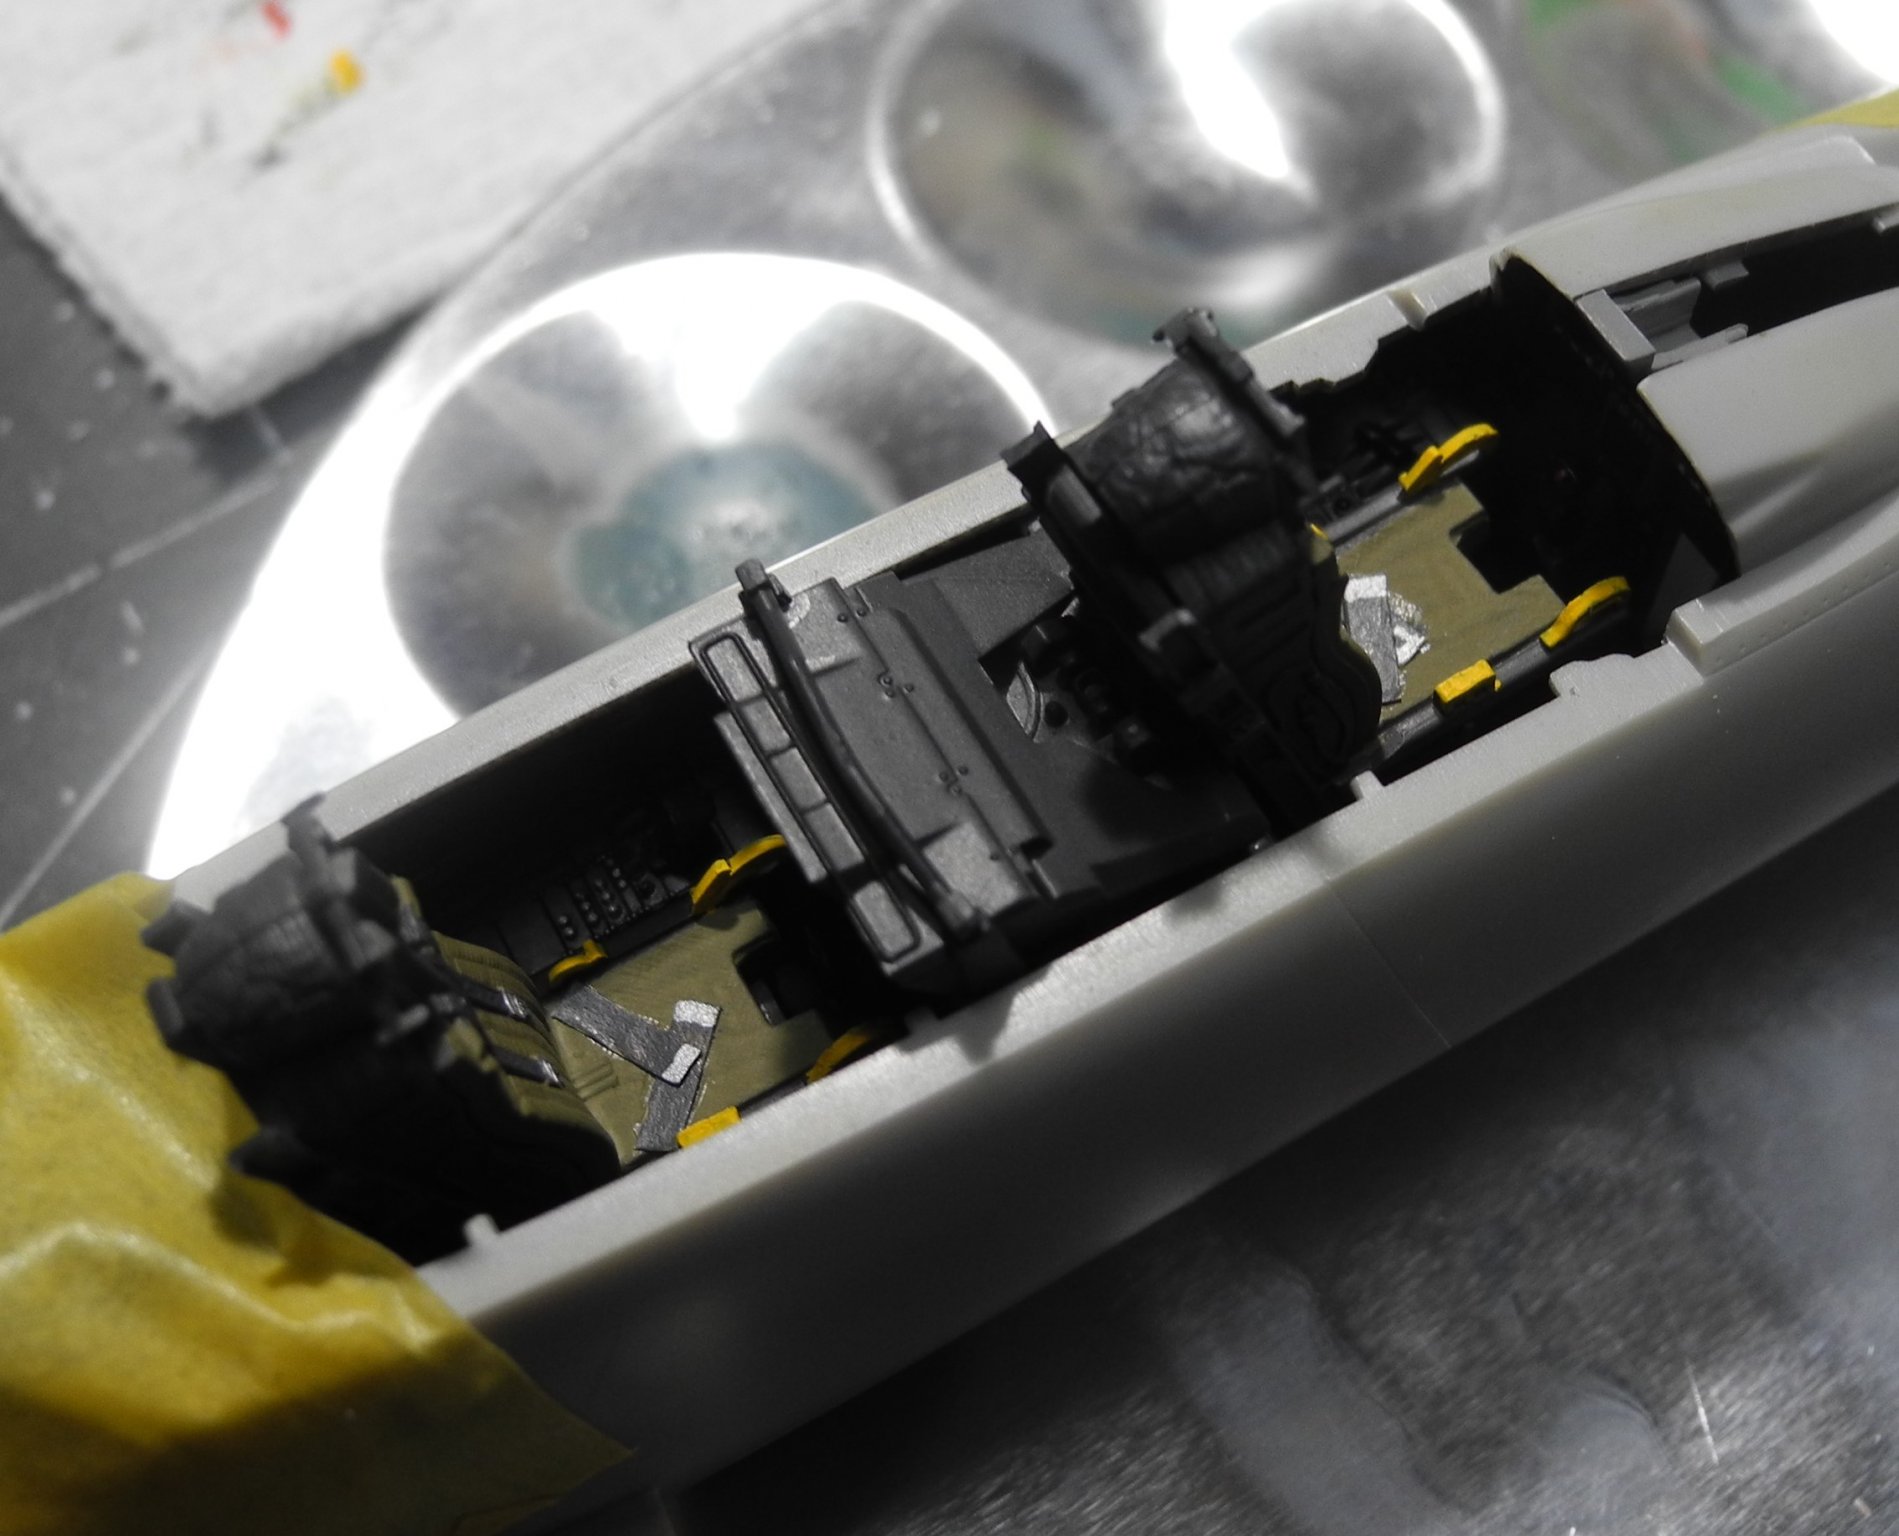
 For a kit of it's age (20 years), this one is particularly well detailed. Here are the kit afterburners. These are typically an item modelers will replace with an aftermarket set to enhance the kit ones. In this case, the kit afterburners are as well detailed as aftermarket sets.
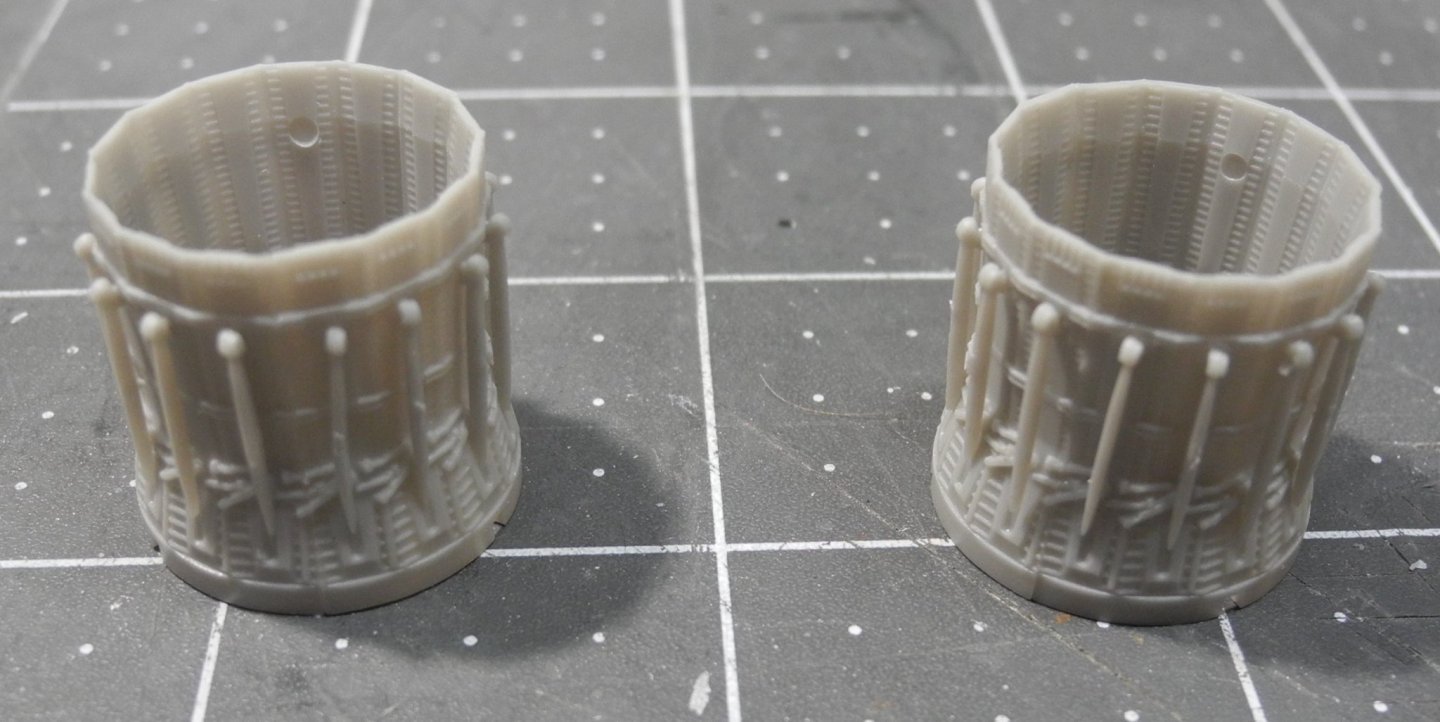
-
That came out great, Harley! Congrats. Gonna have to try that ocean base myself one day. It really enhances the model (which was already super), that's for sure.
-
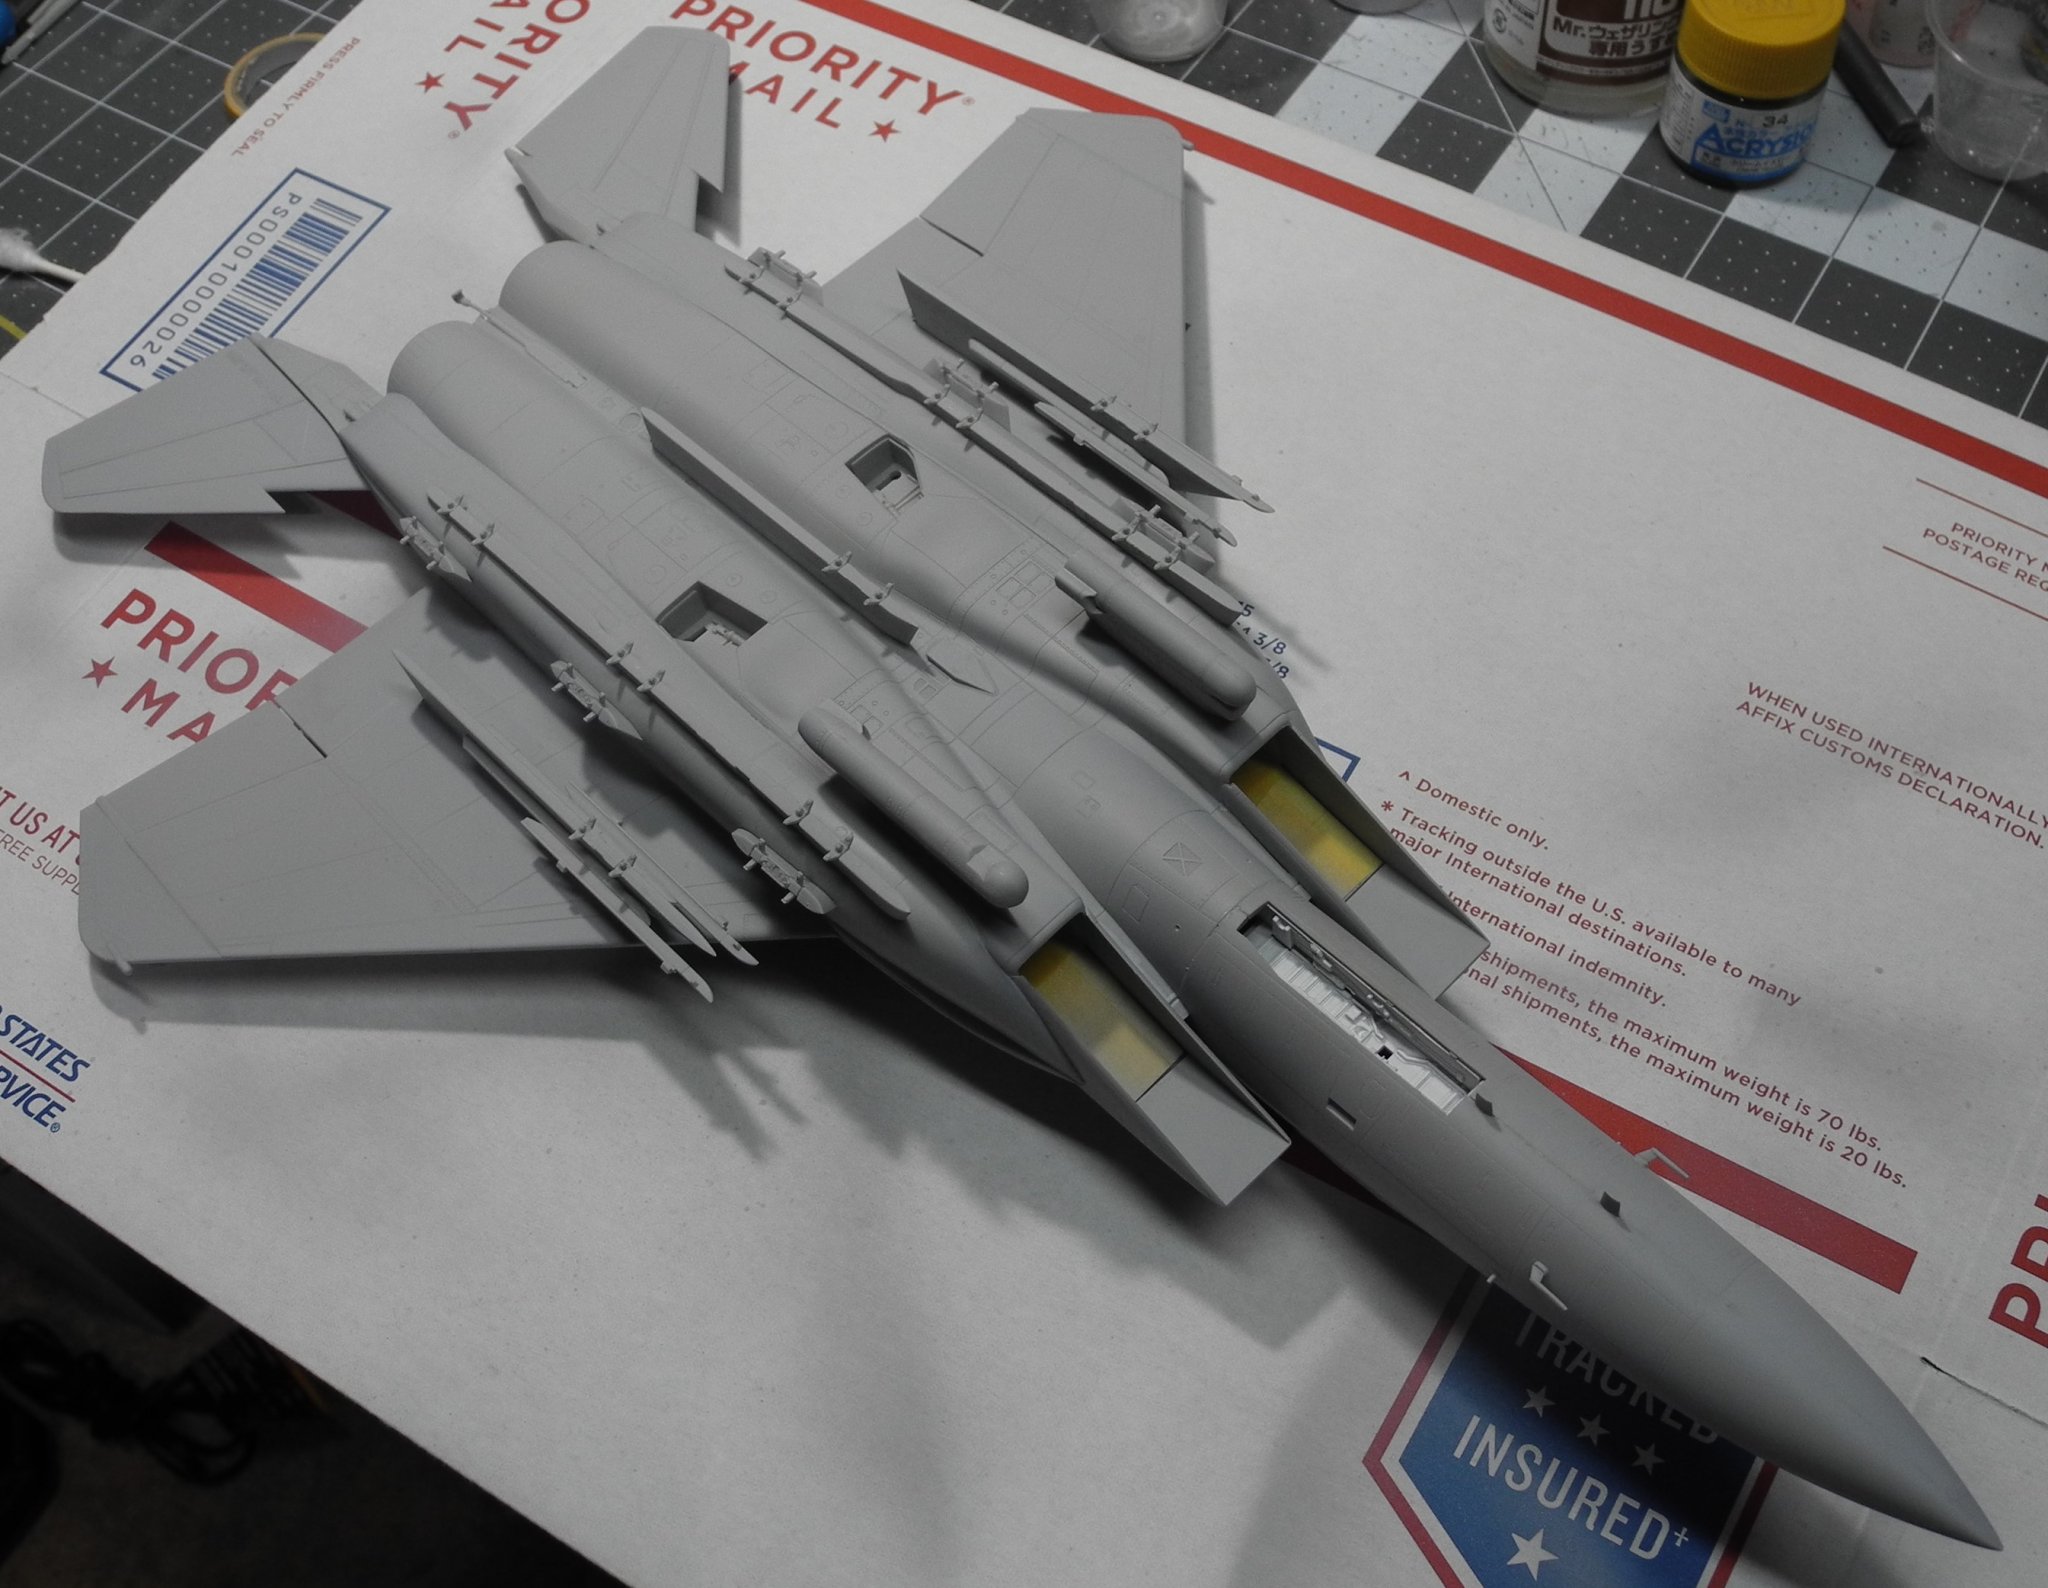
Primer is on. This is Mr Surfacer 1500 primer with Mr Color Leveling Thinner, mixed in a ratio of 1 part paint to 4 parts reducer.

-
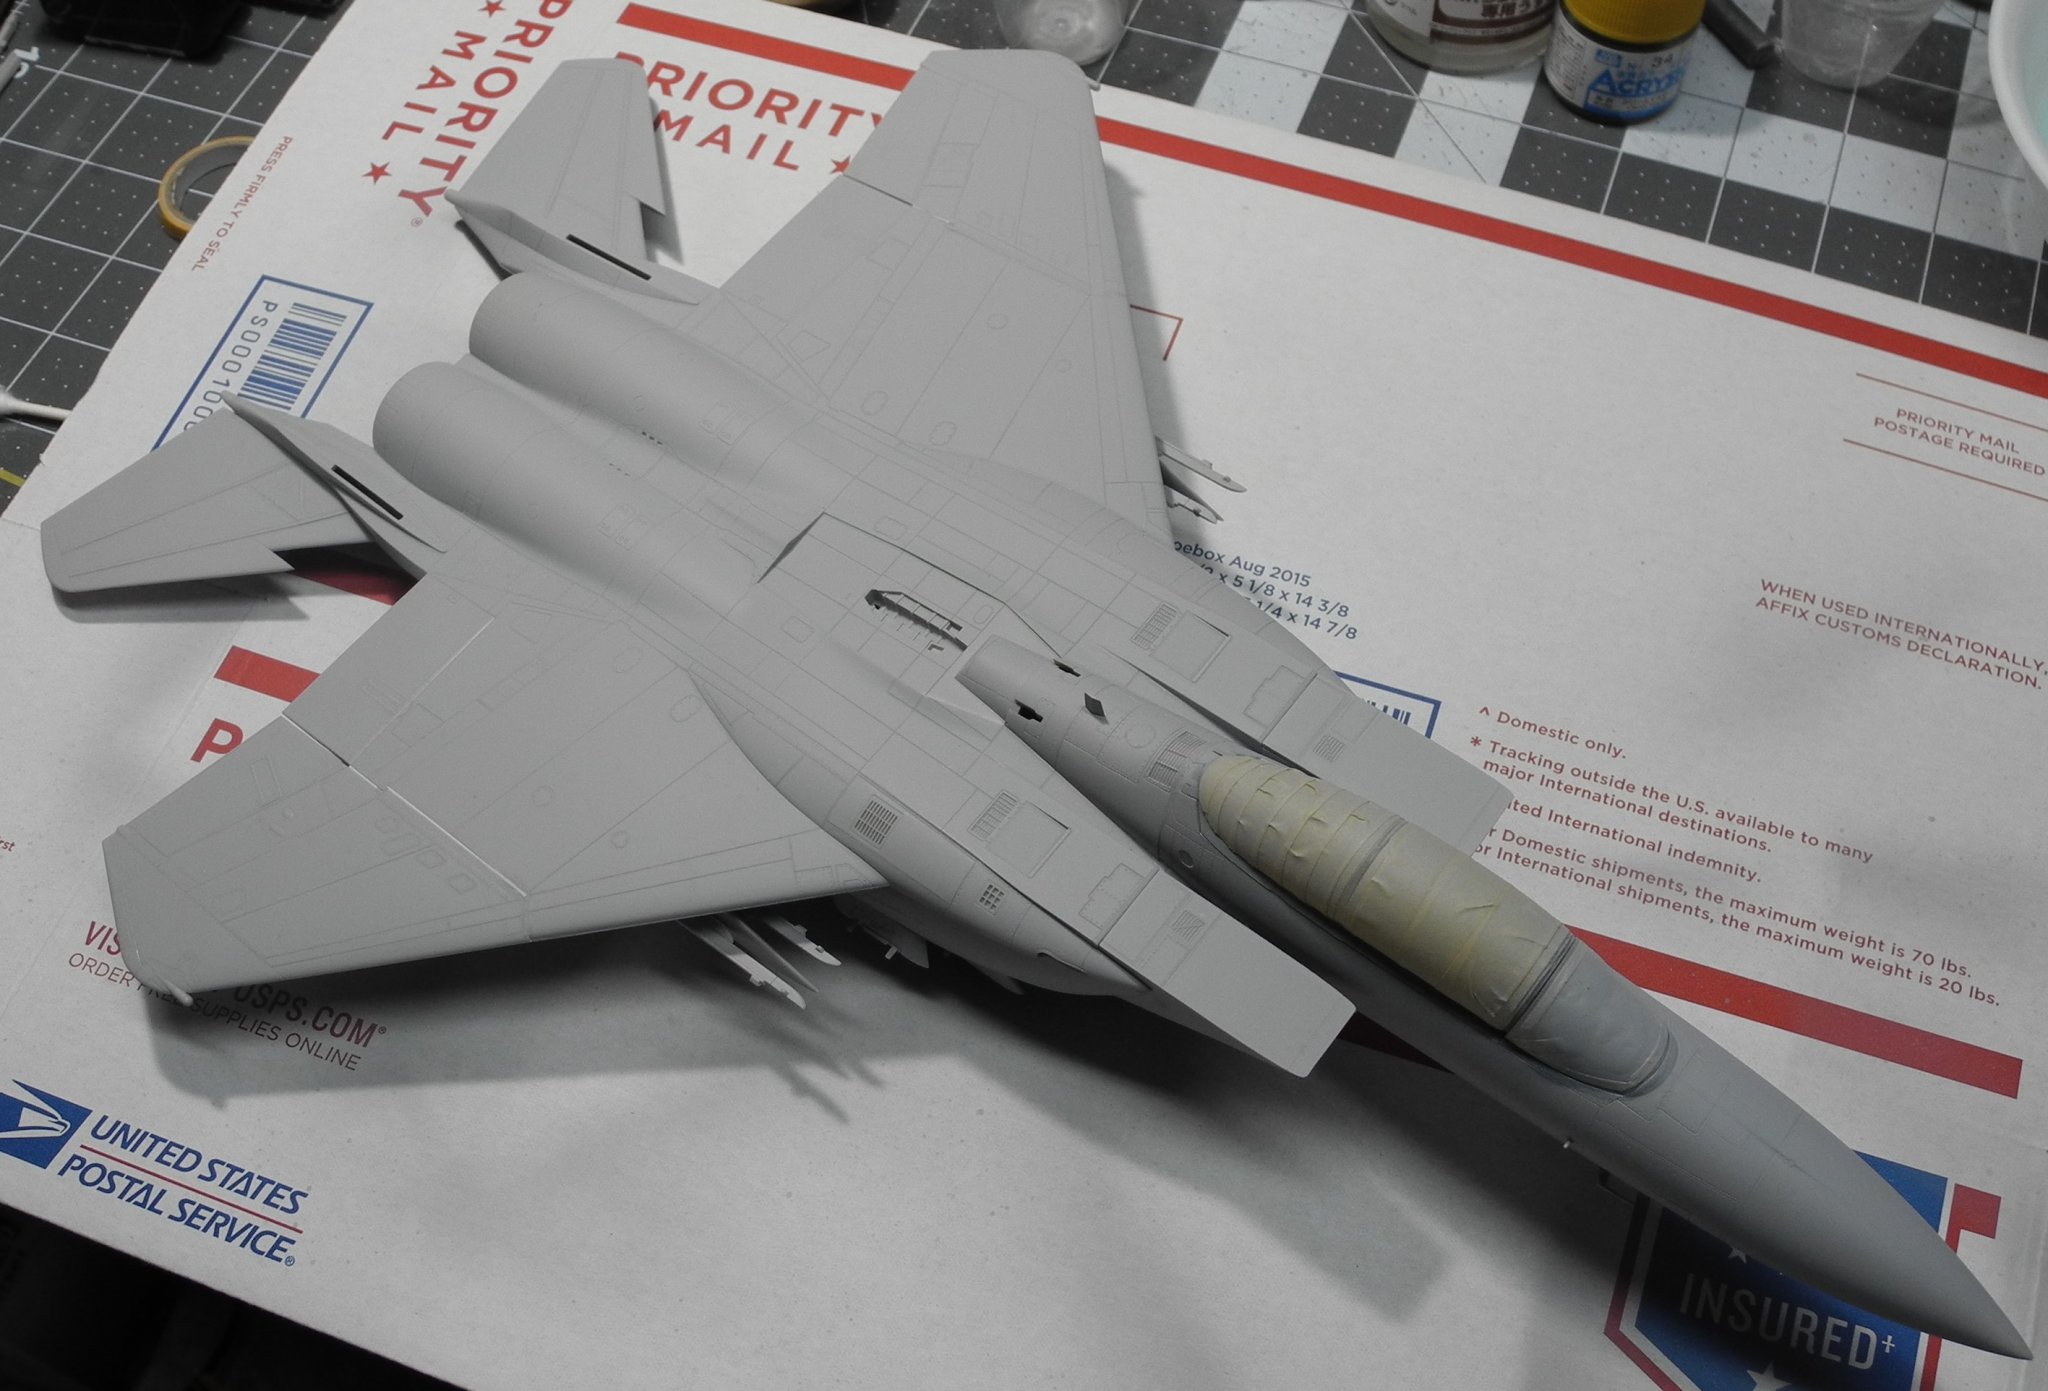
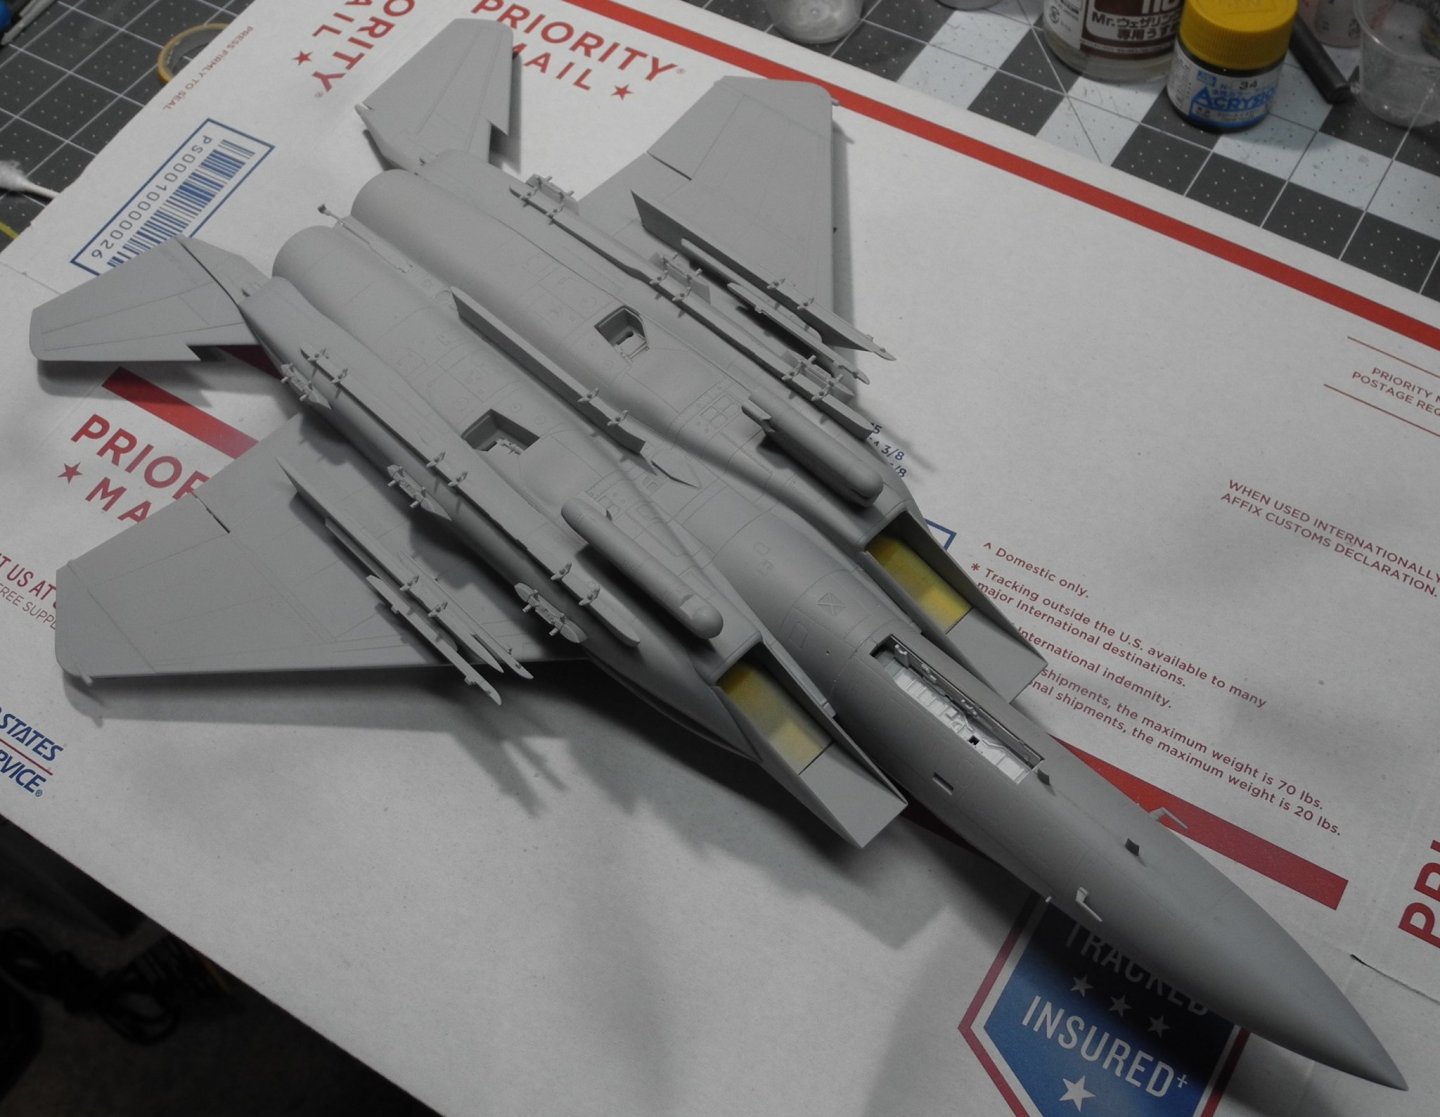
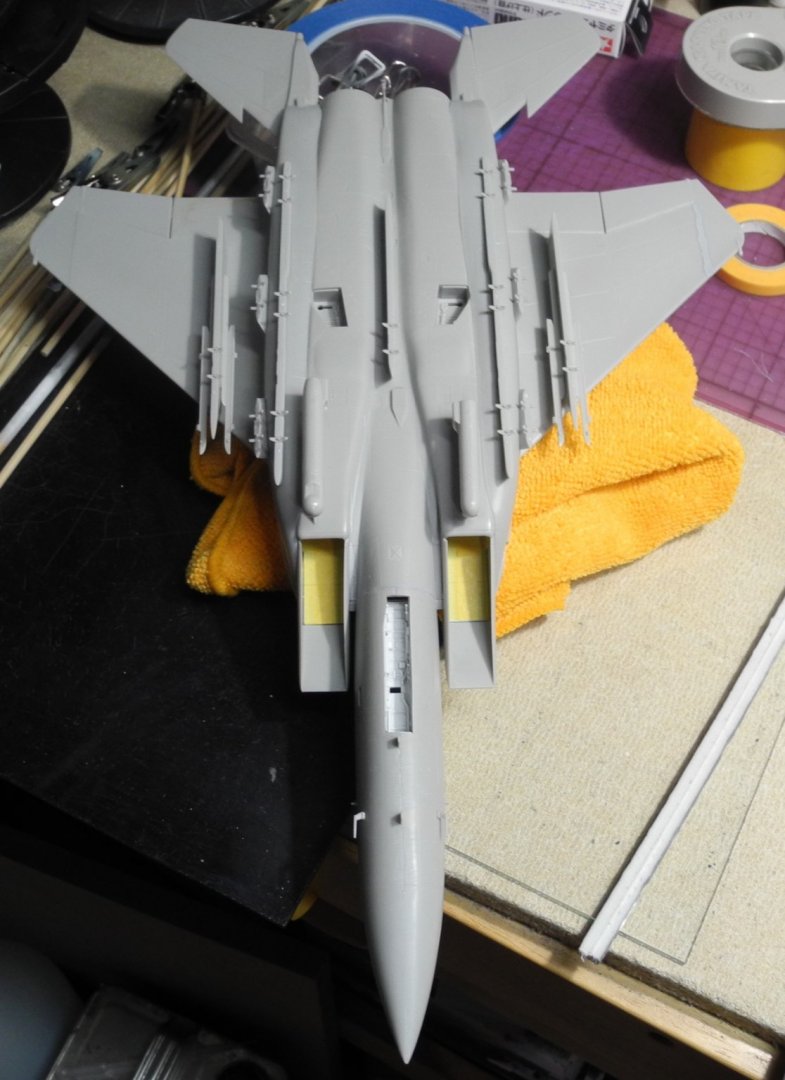
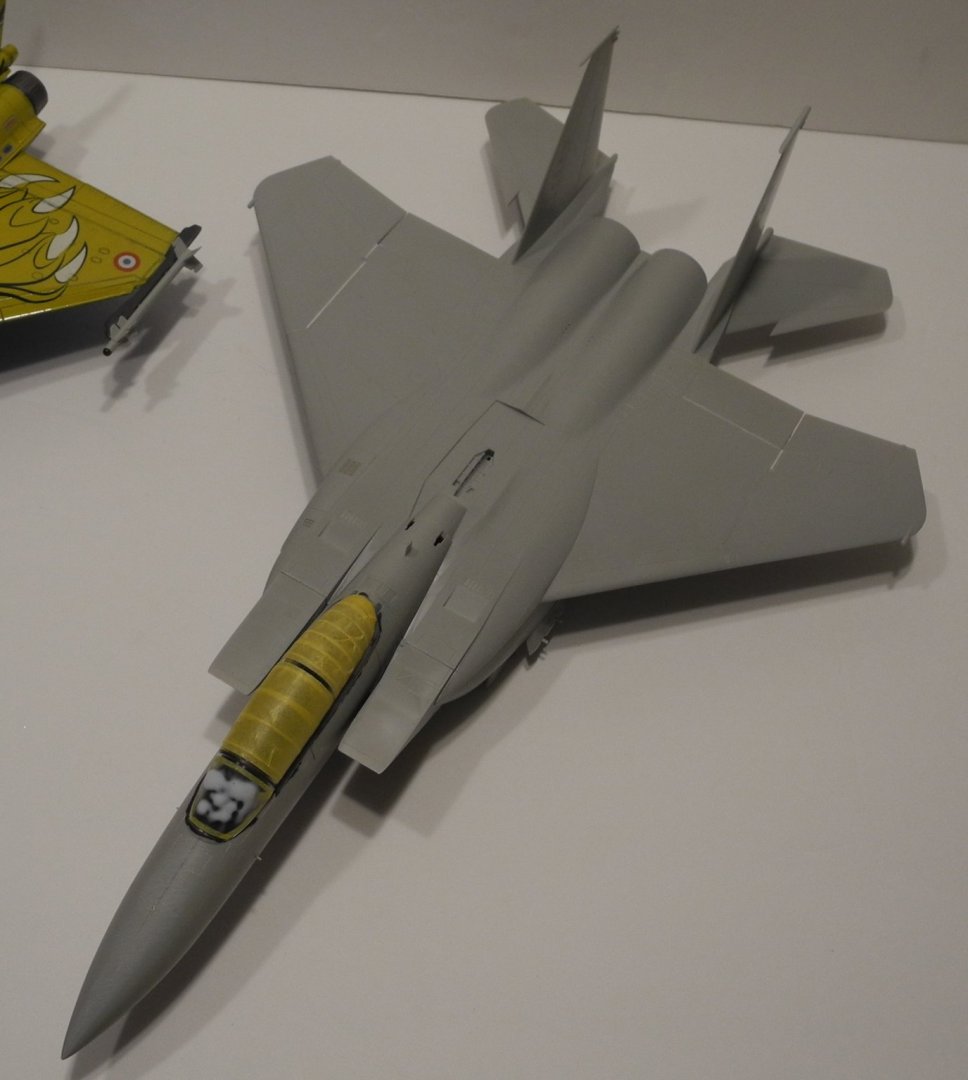
This beast has no less than 19 hard points for ordnance. If you recall, I mentioned in my F-16XL thread the F-15E competed with the F-16XL to win the contract with the USAF, but both planes could carry an impressive array of weapons. More than a WW2 B-17 or B-24 bomber could carry actually. This kit has a high rank in the list of next aircraft models to build. It's an amazing kit.
-
It's time to put some paint on this bad boy.
-
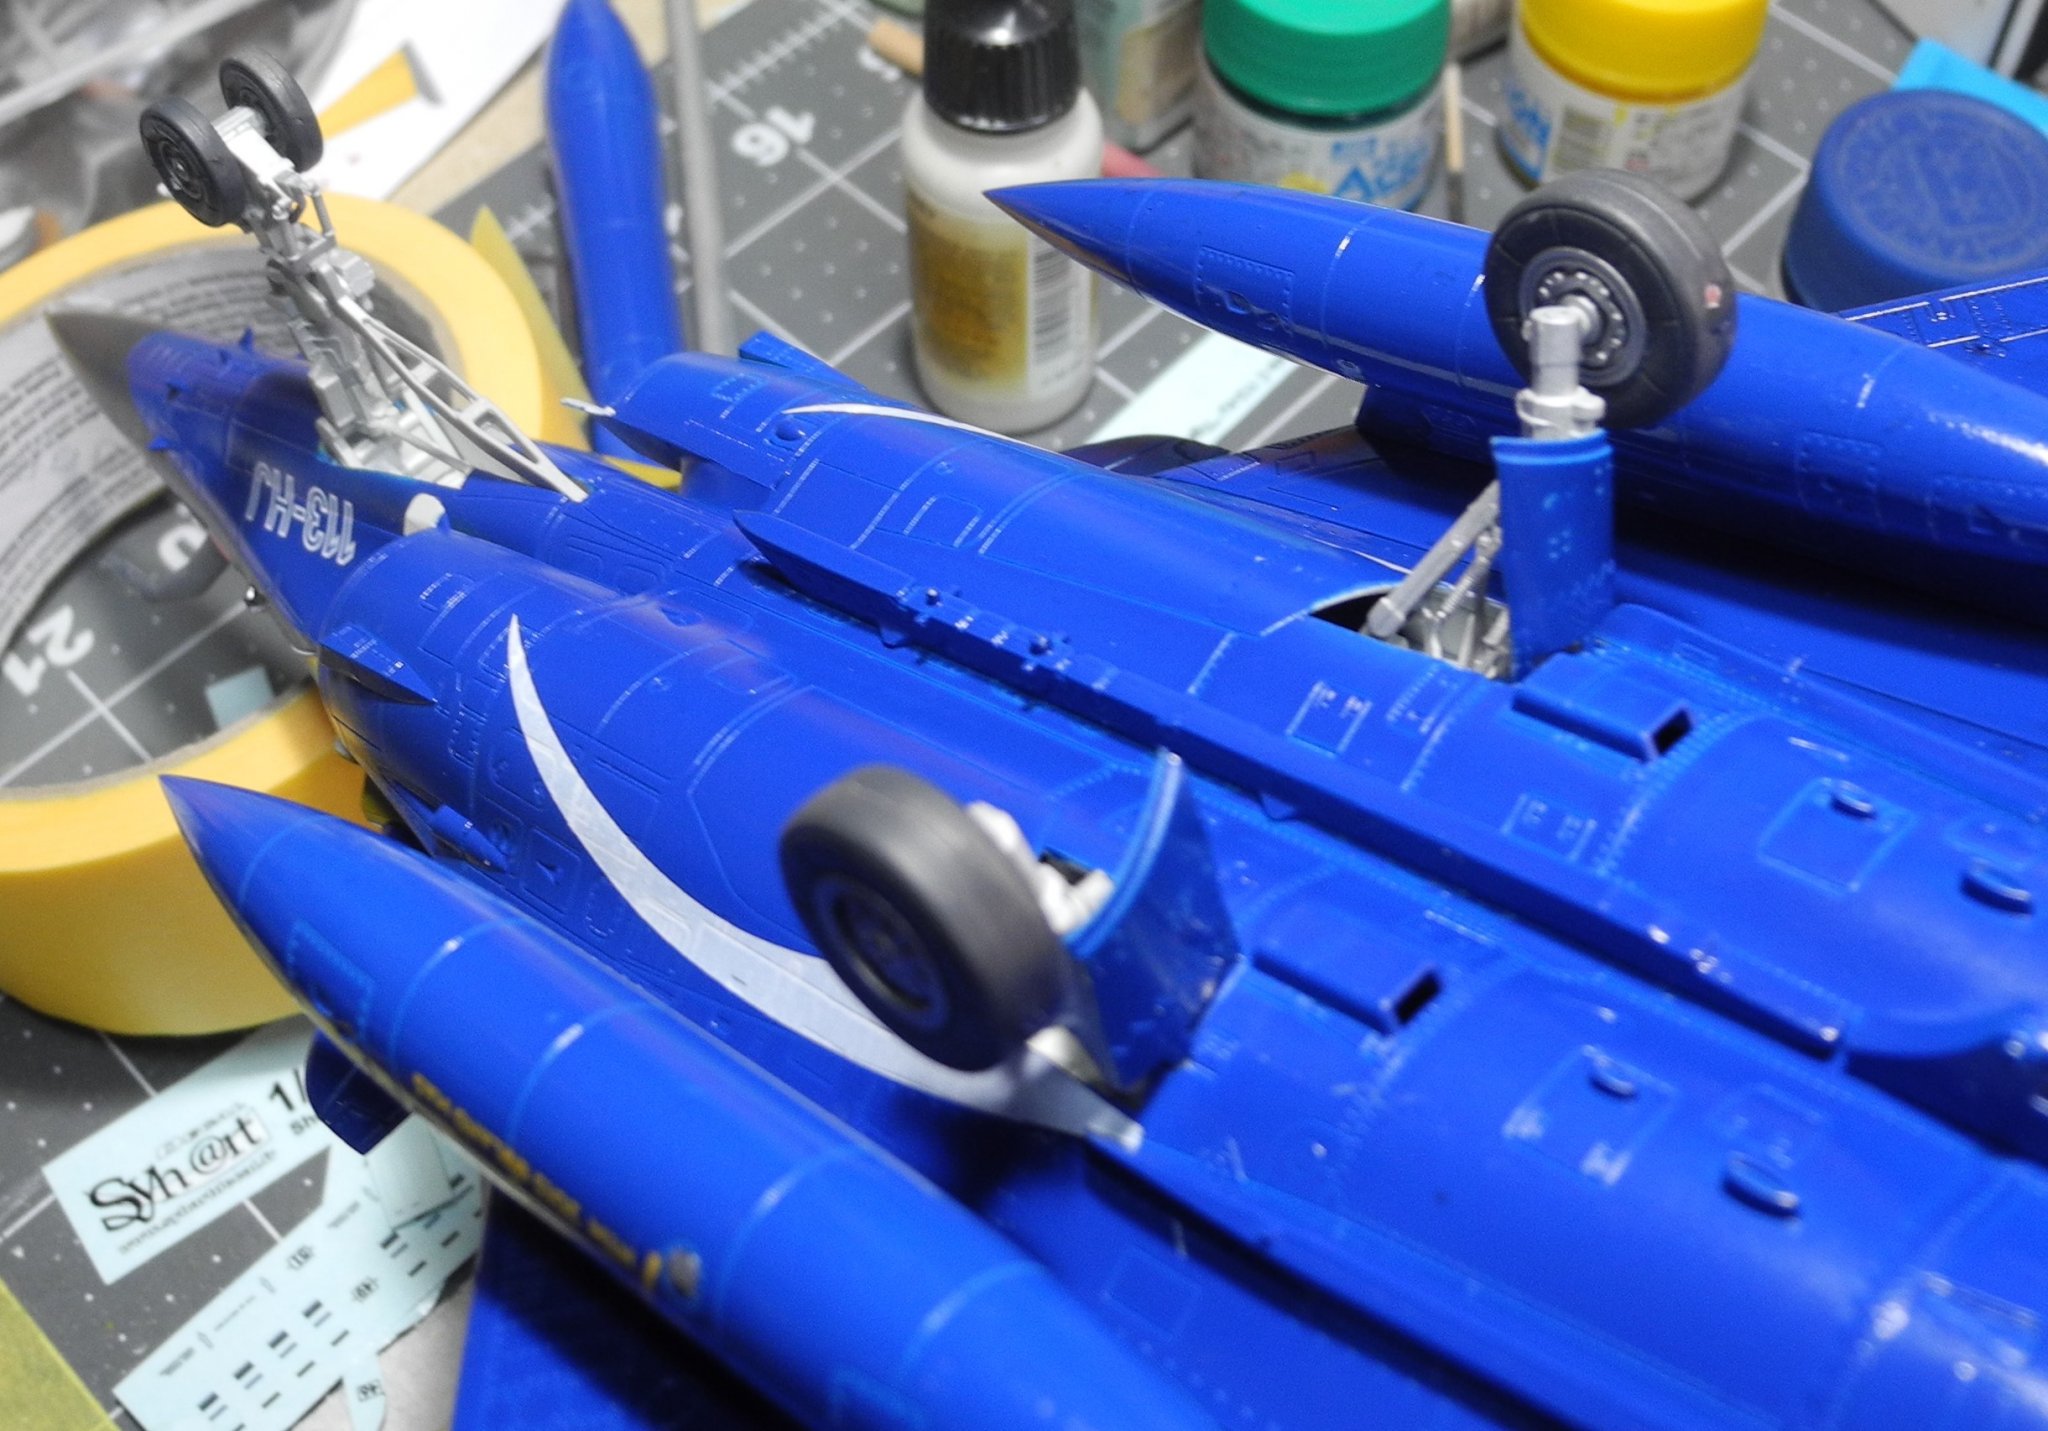
If you get tired of working on your model, build a mini-rocket. 😎
-
No, it's the Monogram Pro Modeler kit from 2000. It's now released under the Revell label, but I'm not sure it contains the same ordnance options and for sure, not the Cartograf decals.
-
Your planking looks excellent Edward.
-
Denis I have a number of decal options for the Mud Hen, including IDF markings, Mountain Home markings (the ones that carry the "remember 9-11 twin towers graphics), plus the ones that came with the kit are a 1998 Tiger Meet set and quite nice. Don't know which version you built, but this is the Pro Modeler version vs: the Revell version that's a more contemporary release. The Pro Modeler version came with the 1998 Tiger Meet decal set by Cartograf in Italy. Only problem is, the decals are suspect because of their age. I tested a small decal portion from the sheet and it worked okay, but there are extensive tiger markings that will need to stay intact if I can use this set. Keeping my fingers crossed, but ready with a backup plan if need be. Backup plan is the Mountain Home set. For guys that don't know, the Revell F-15E, which is fairly easy to find and budget priced, is an excellent kit. Modern tooling and very well molded. An exceptional value.
-
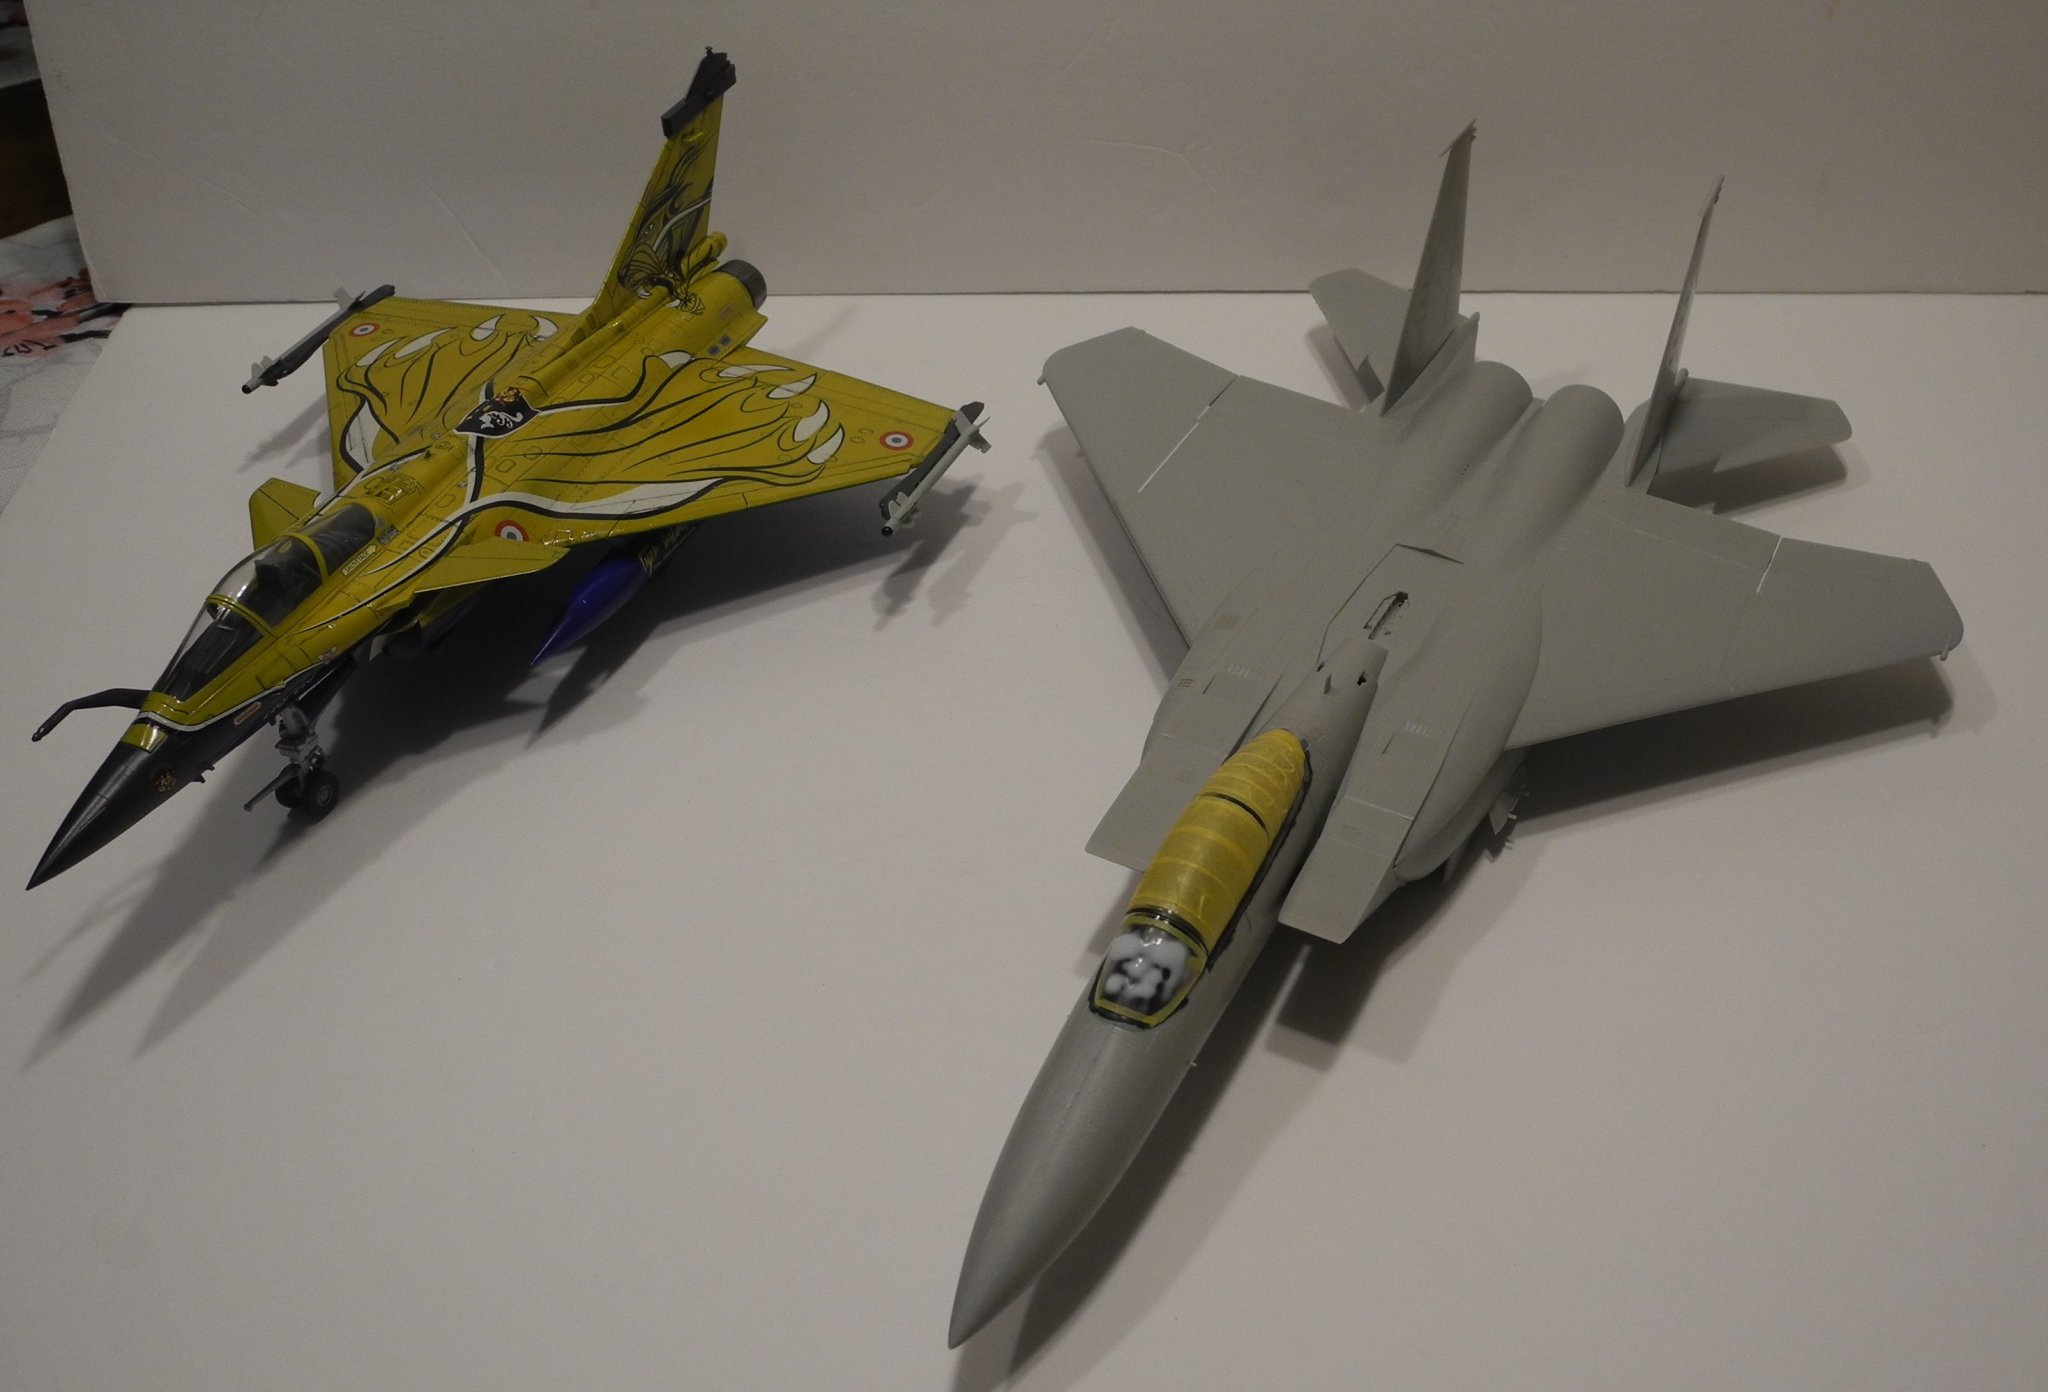
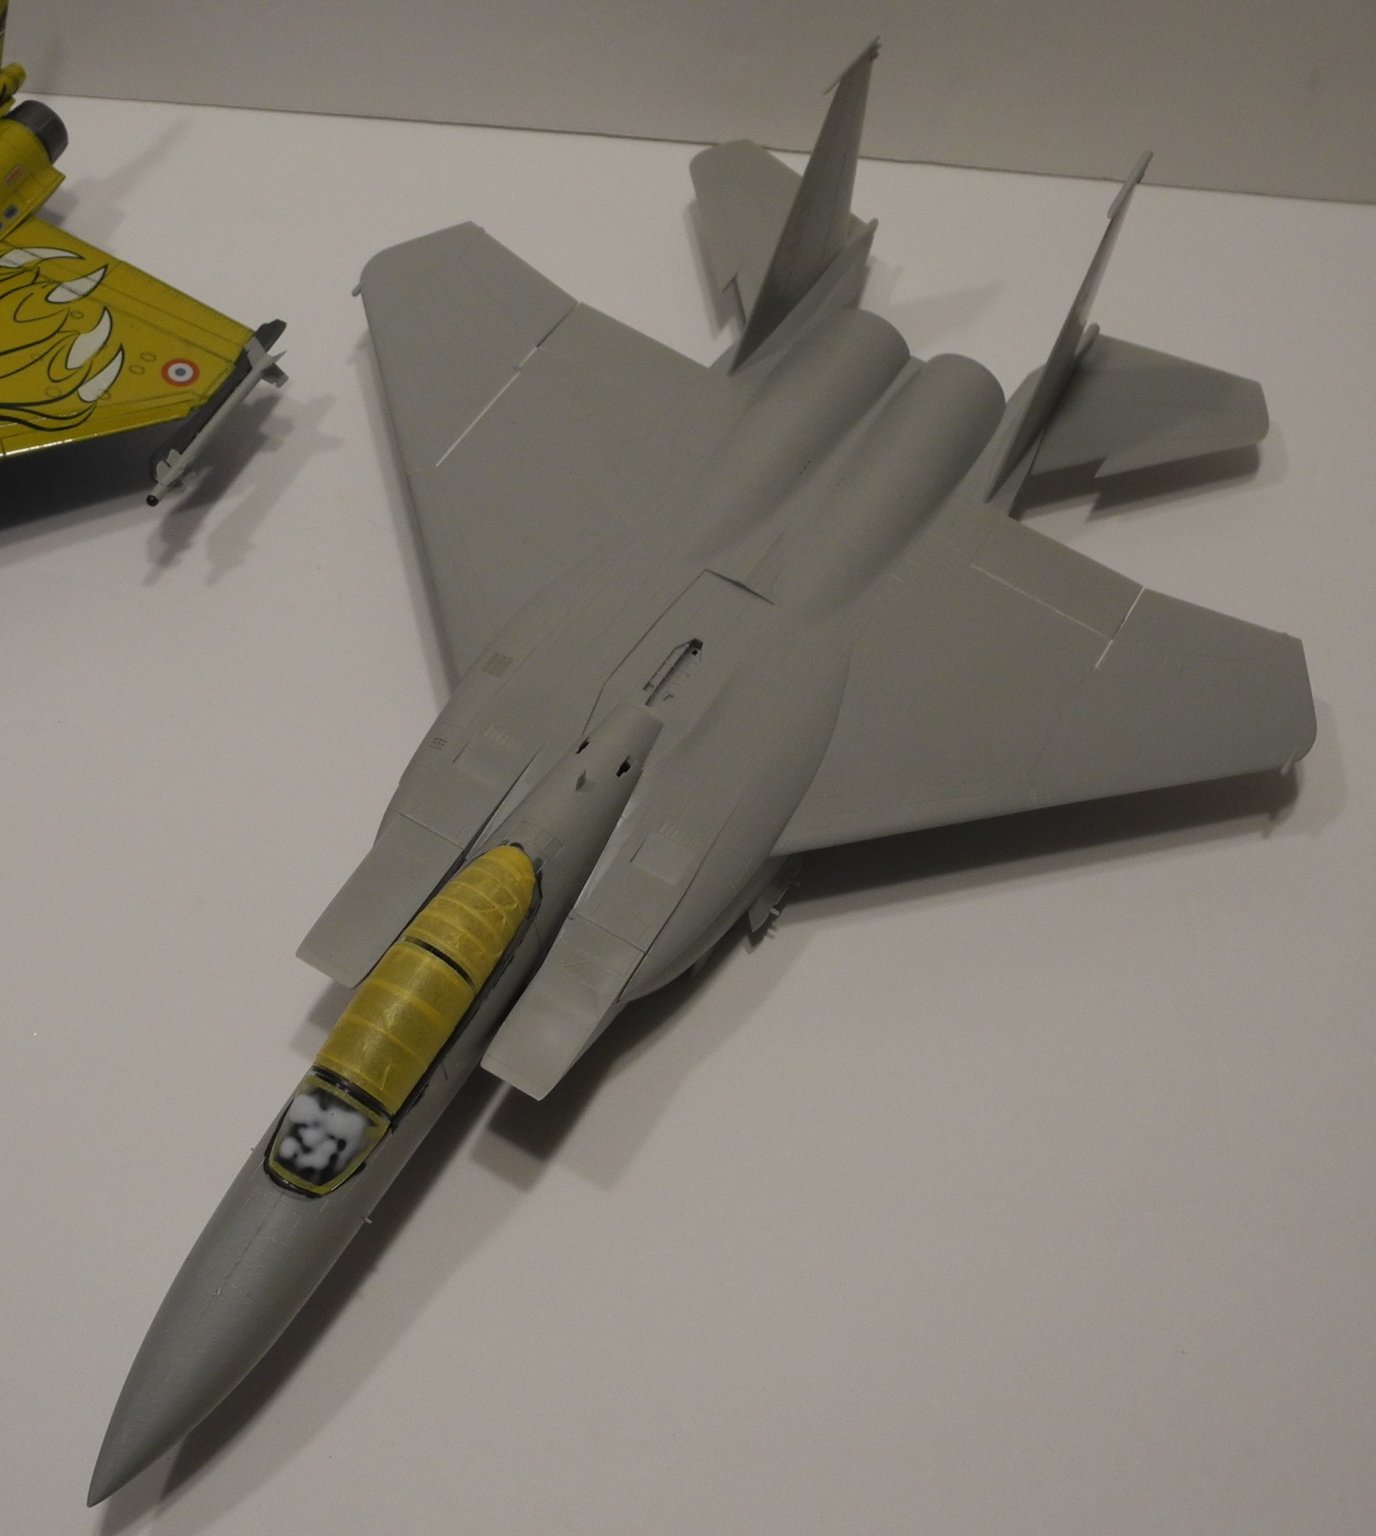
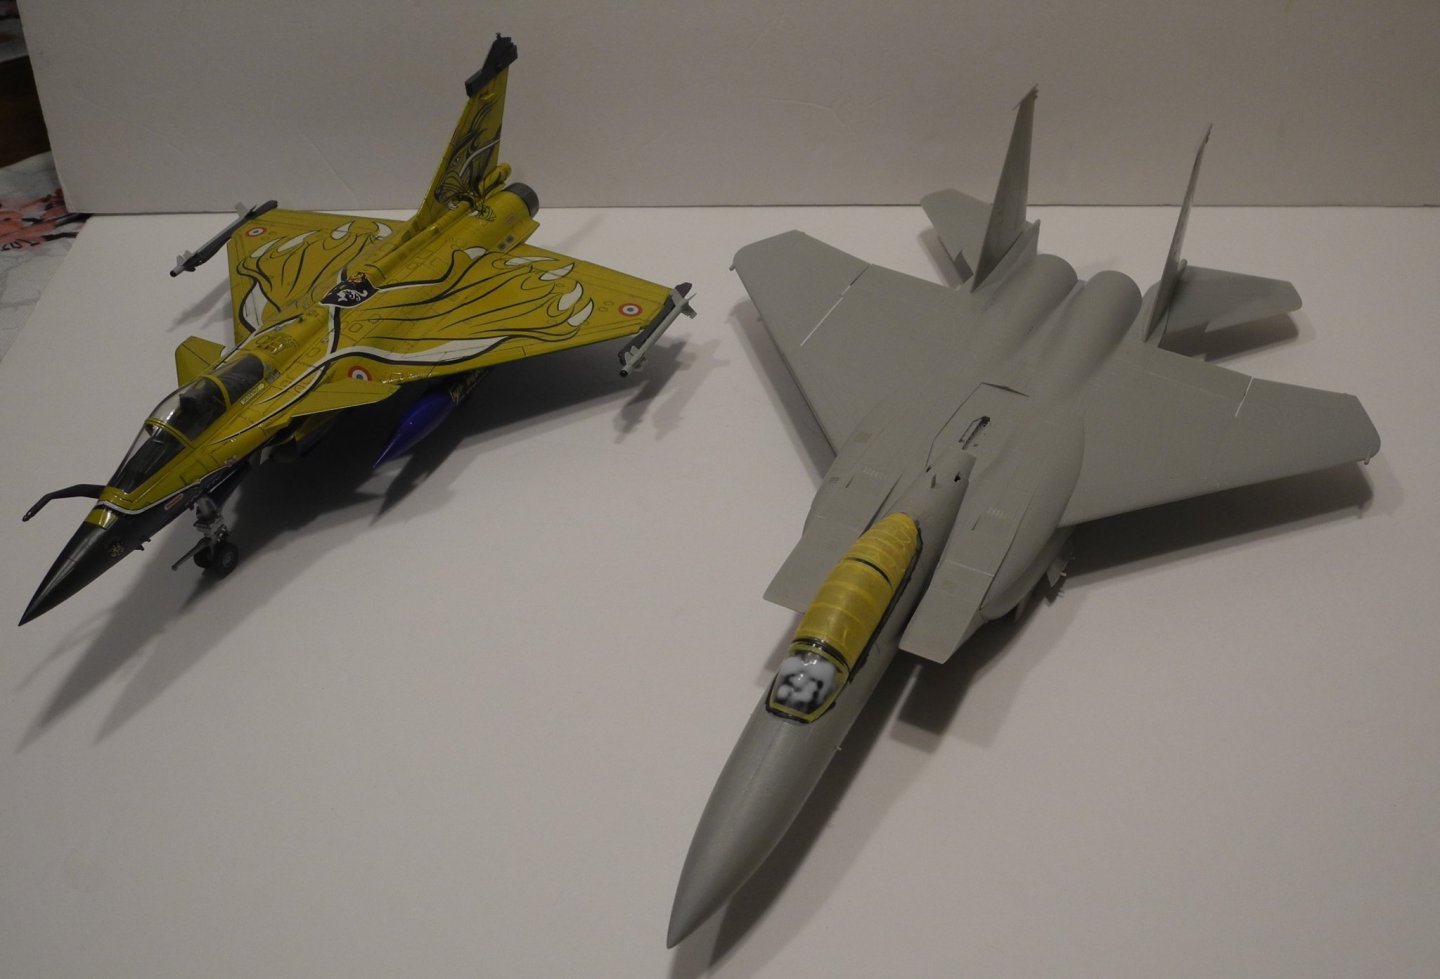
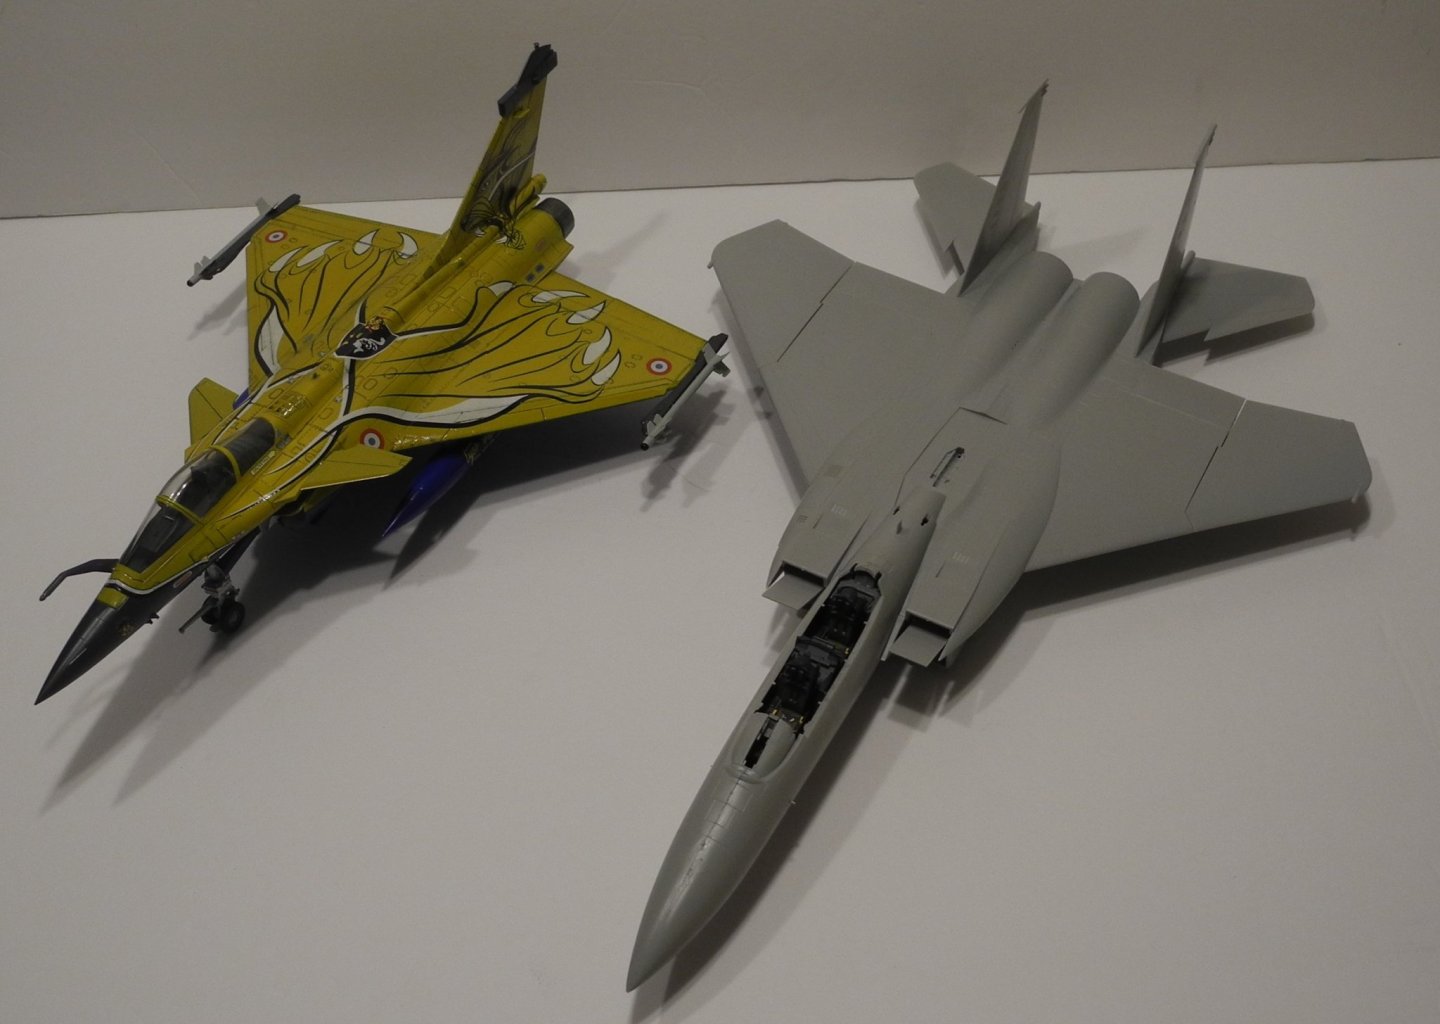
Seeing the F-15E along side of the Rafale gives a striking visual of the size of this aircraft...enormous.
- 92 replies
-
- 10
-

-
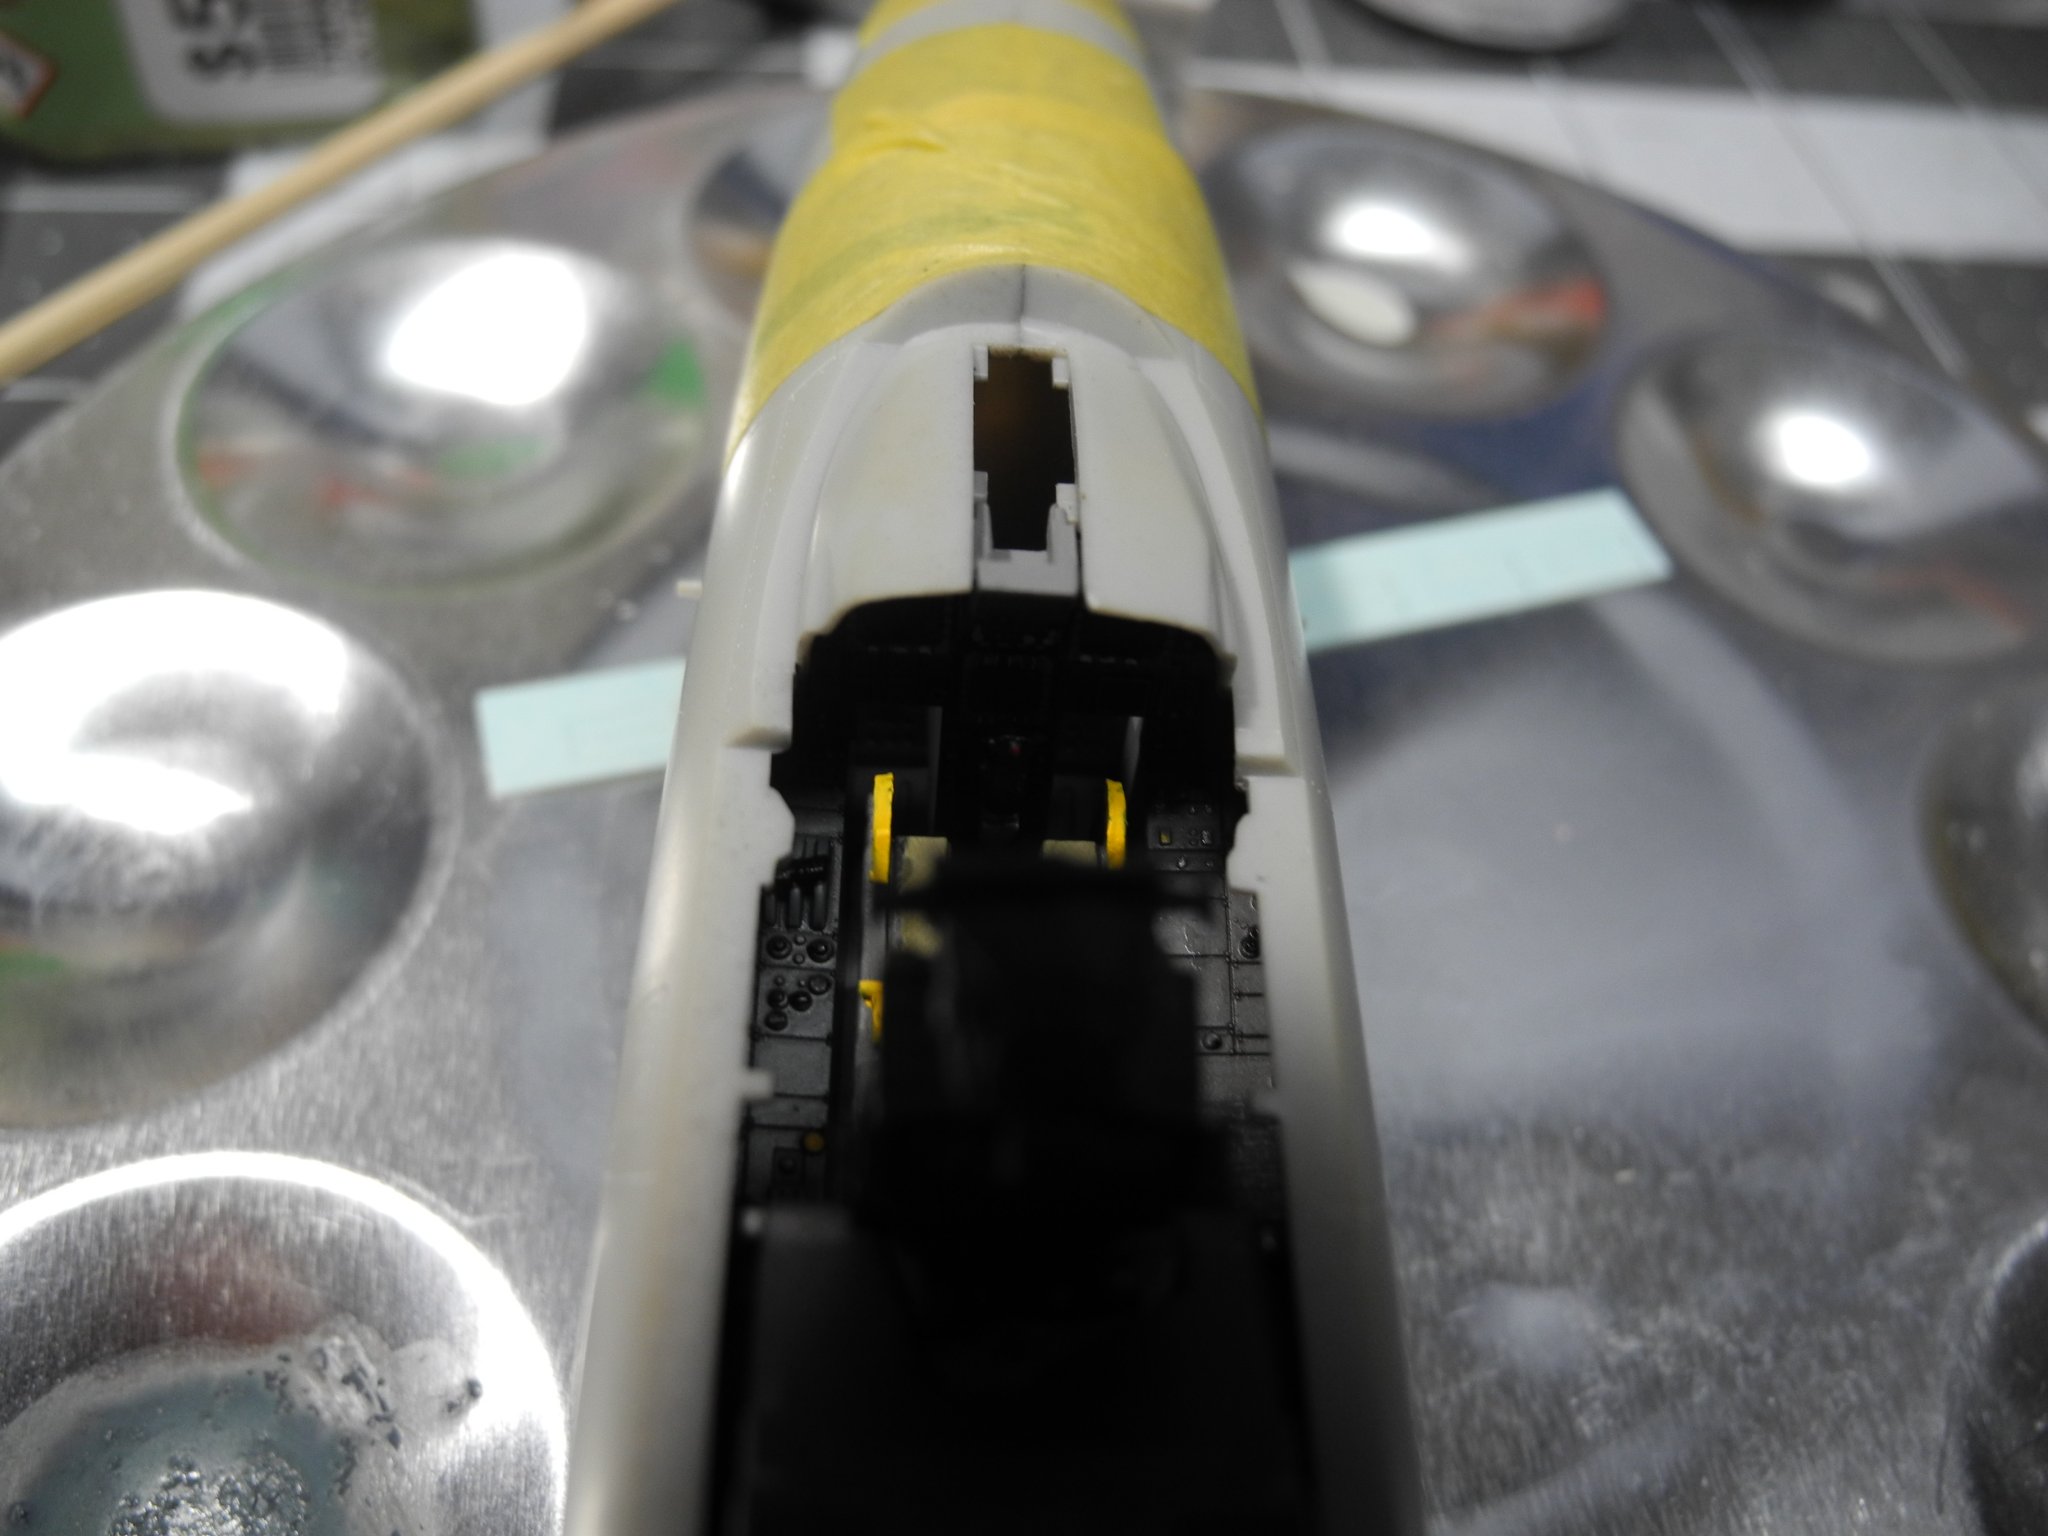
I've had this 1:48 Pro Modeler F-15E Strike Eagle stashed away in my garage for almost 20 years now. Decided it's about time I get this one built, so here it goes. As typical with most aircraft models, the work begins in the office, the cockpit area.


- 92 replies
-
- 11
-
-
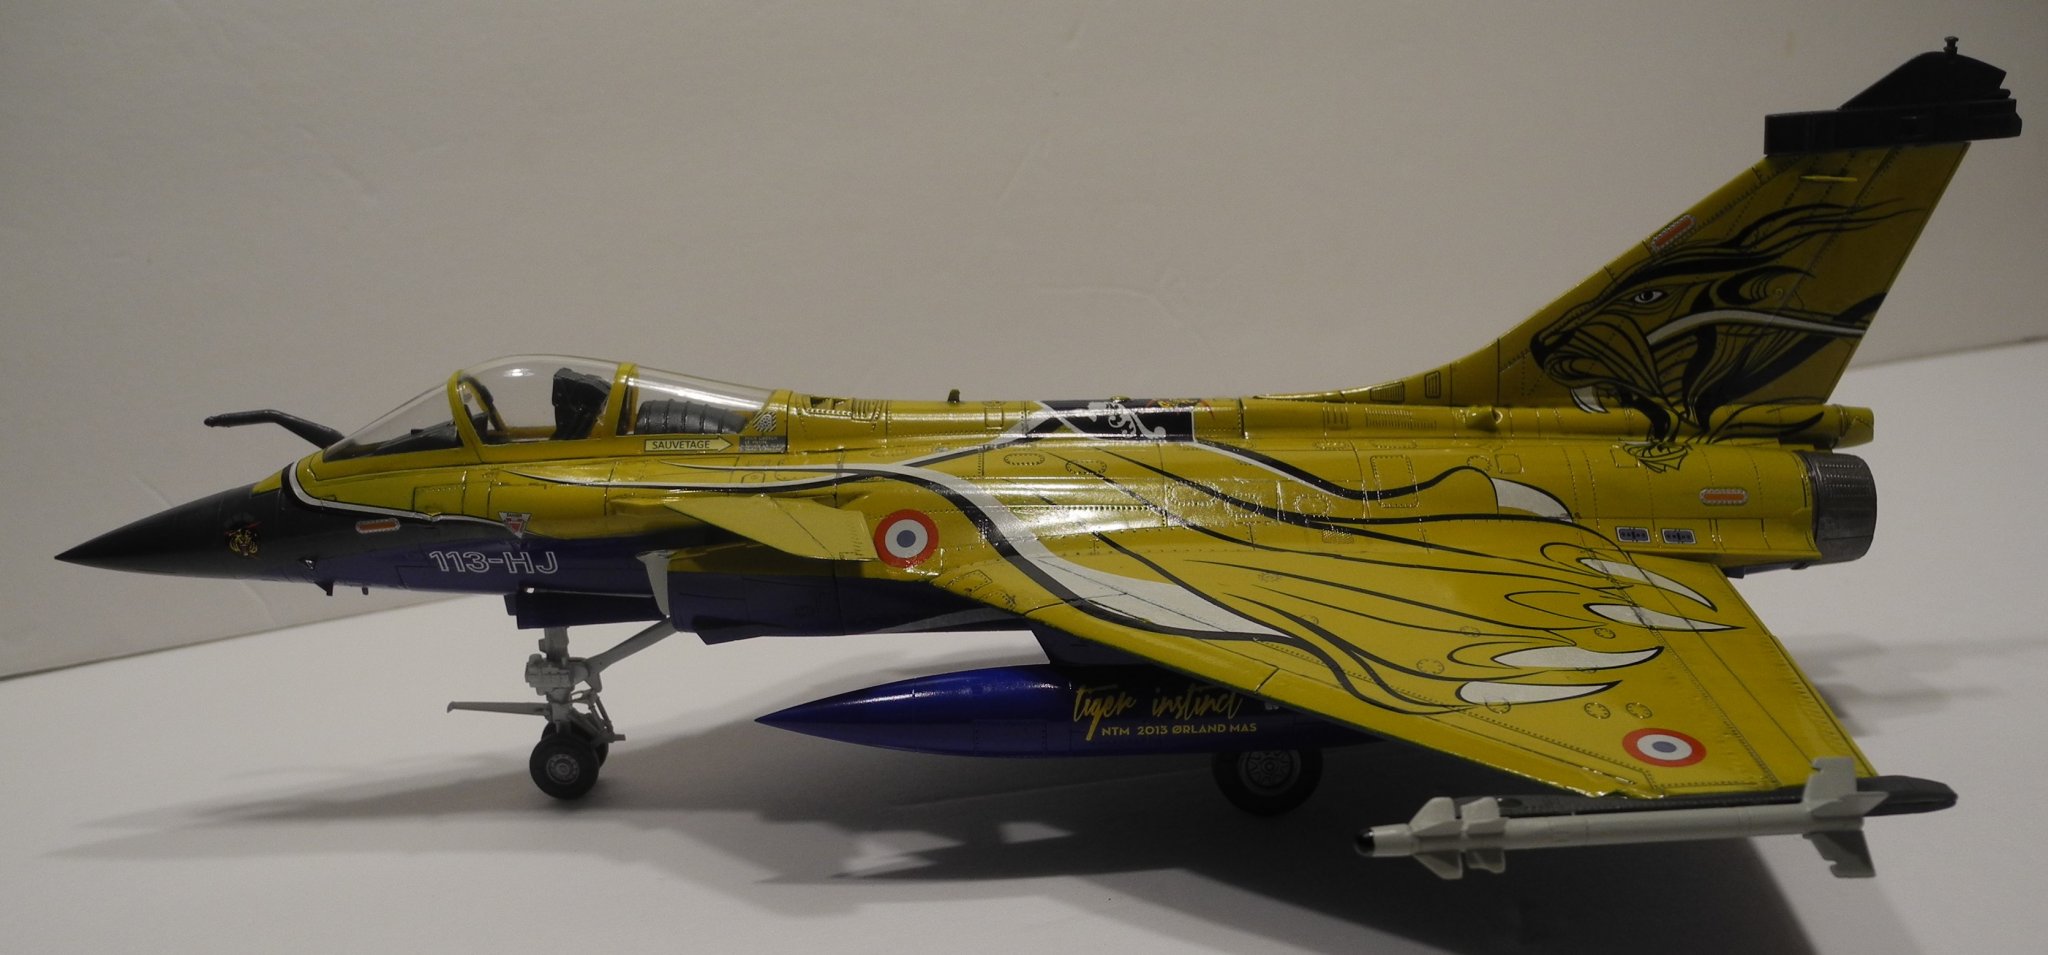
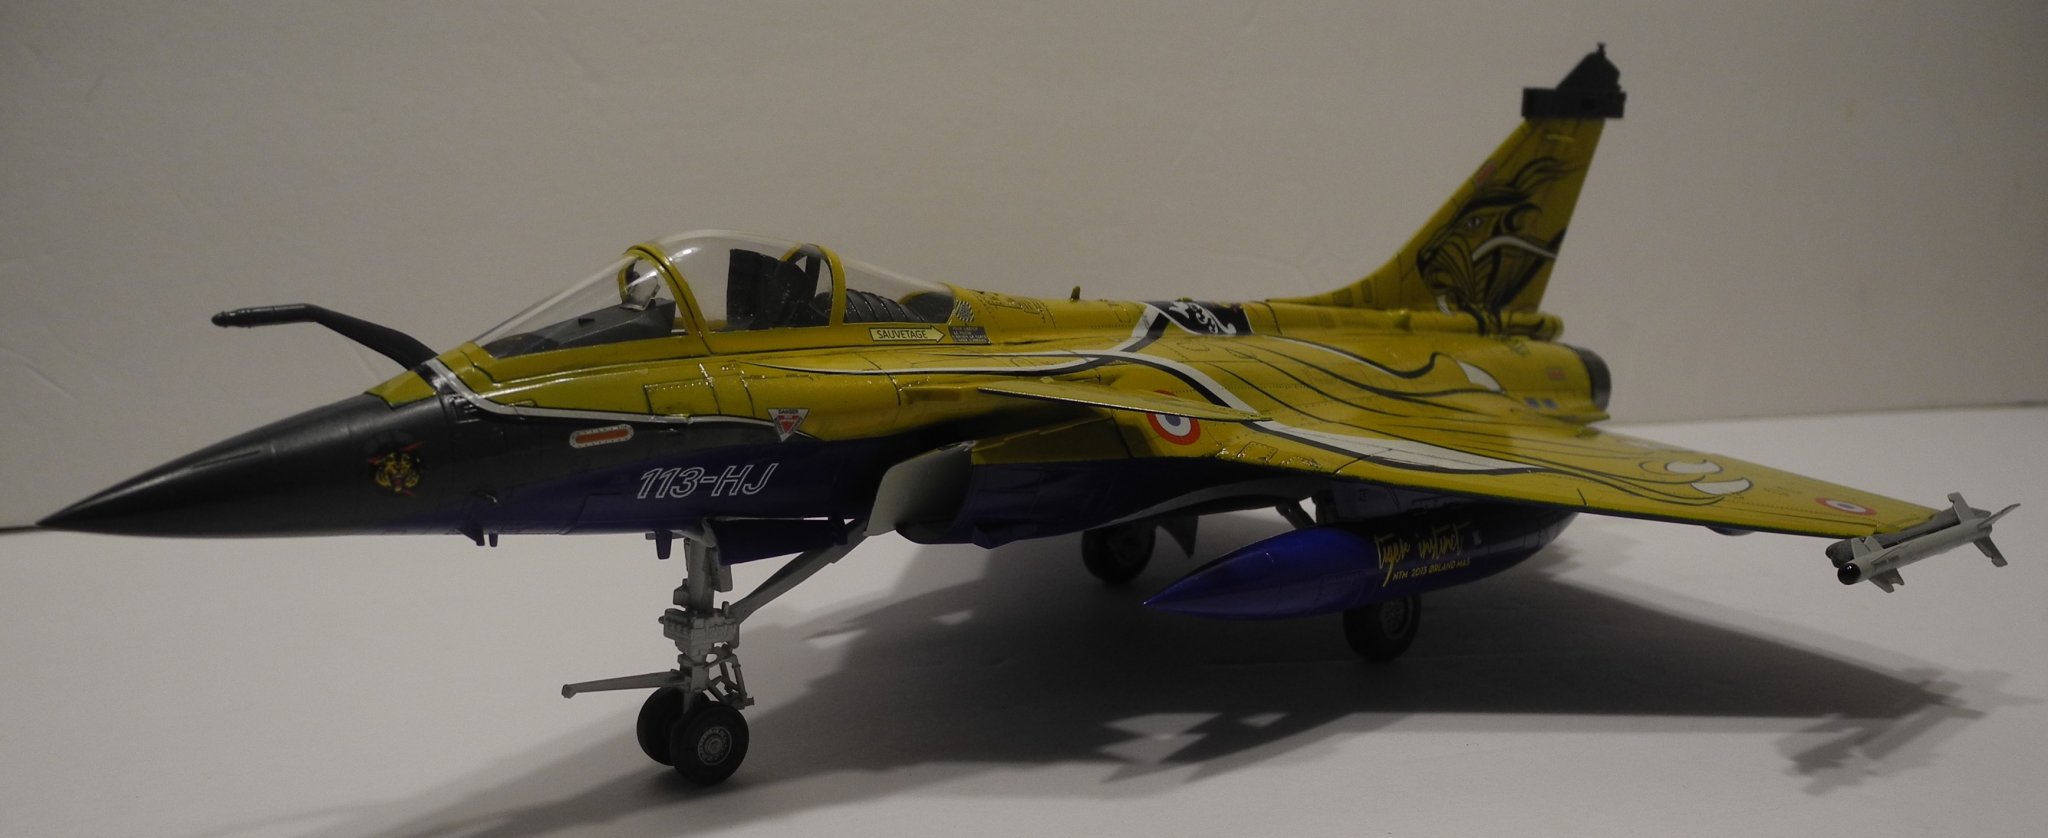
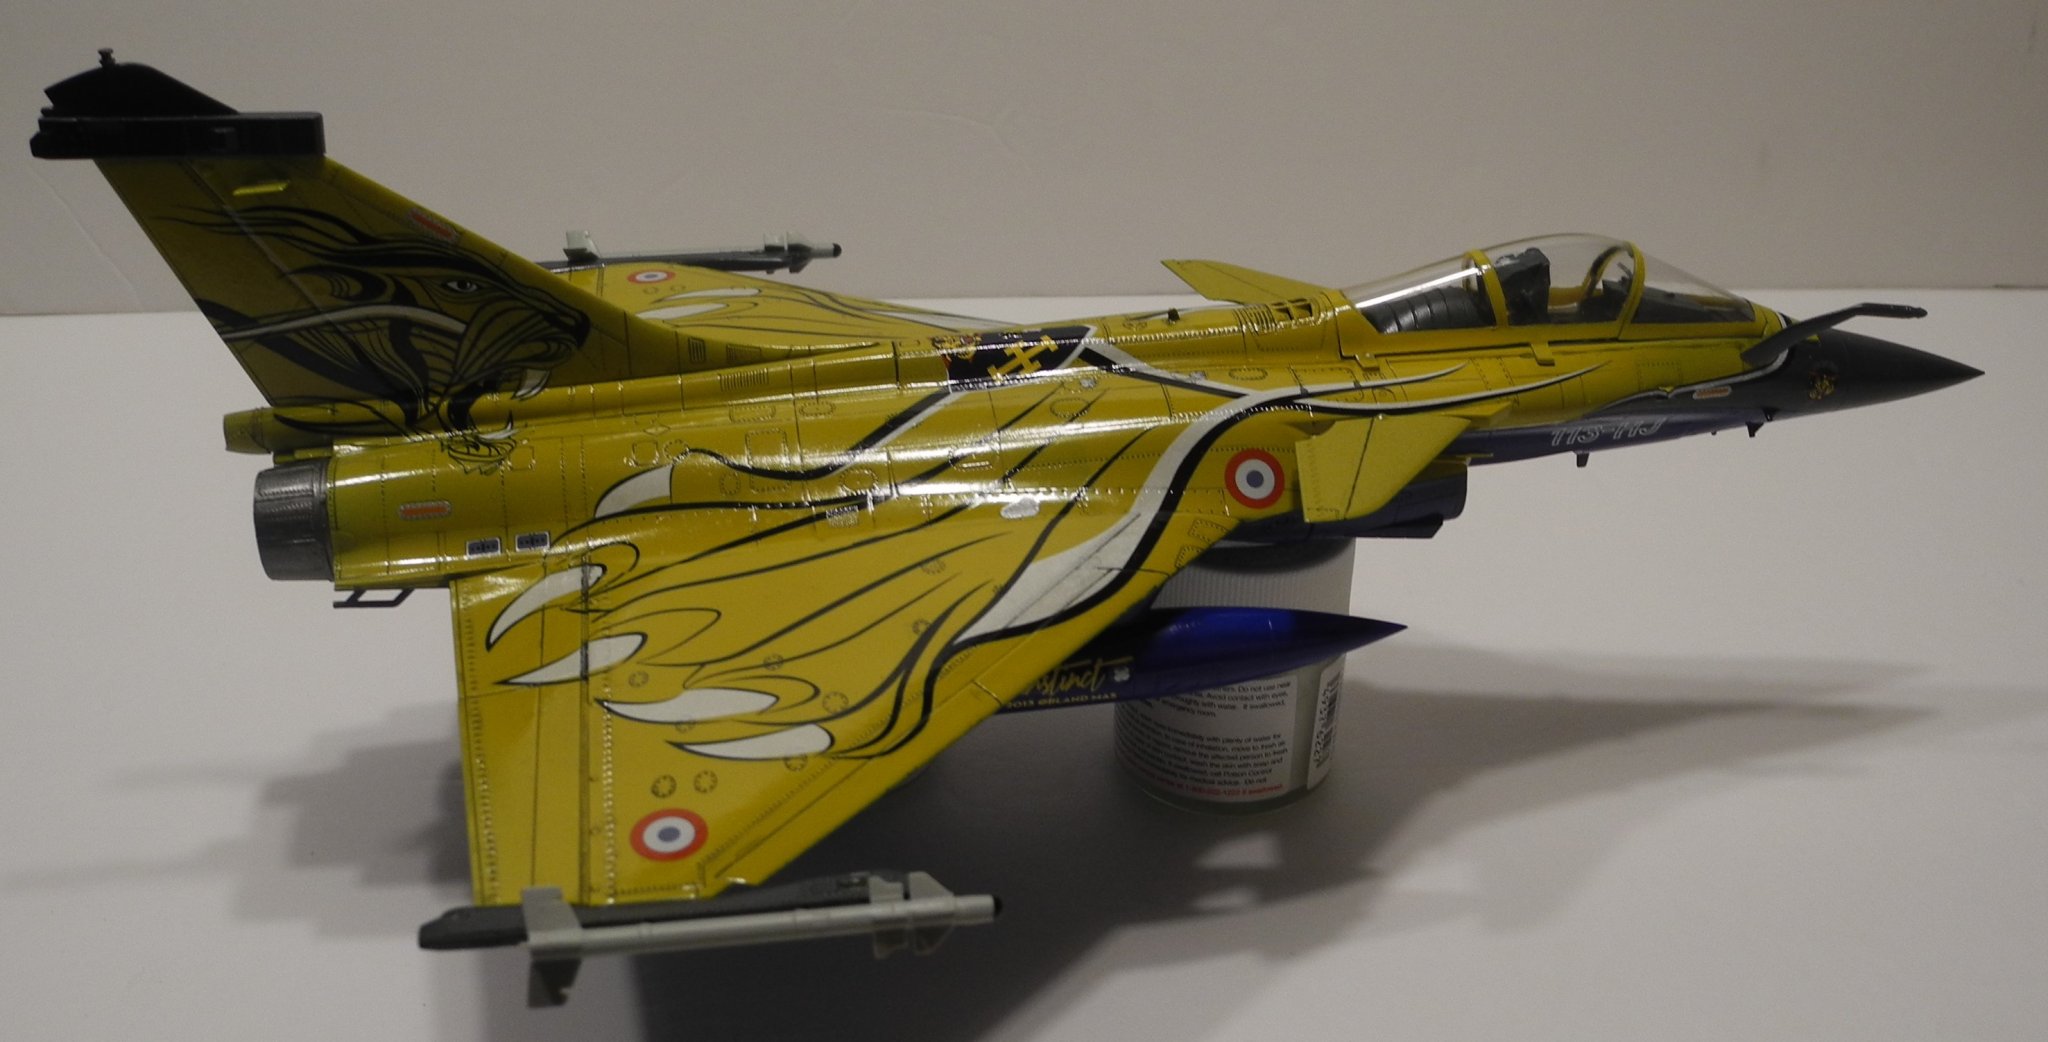
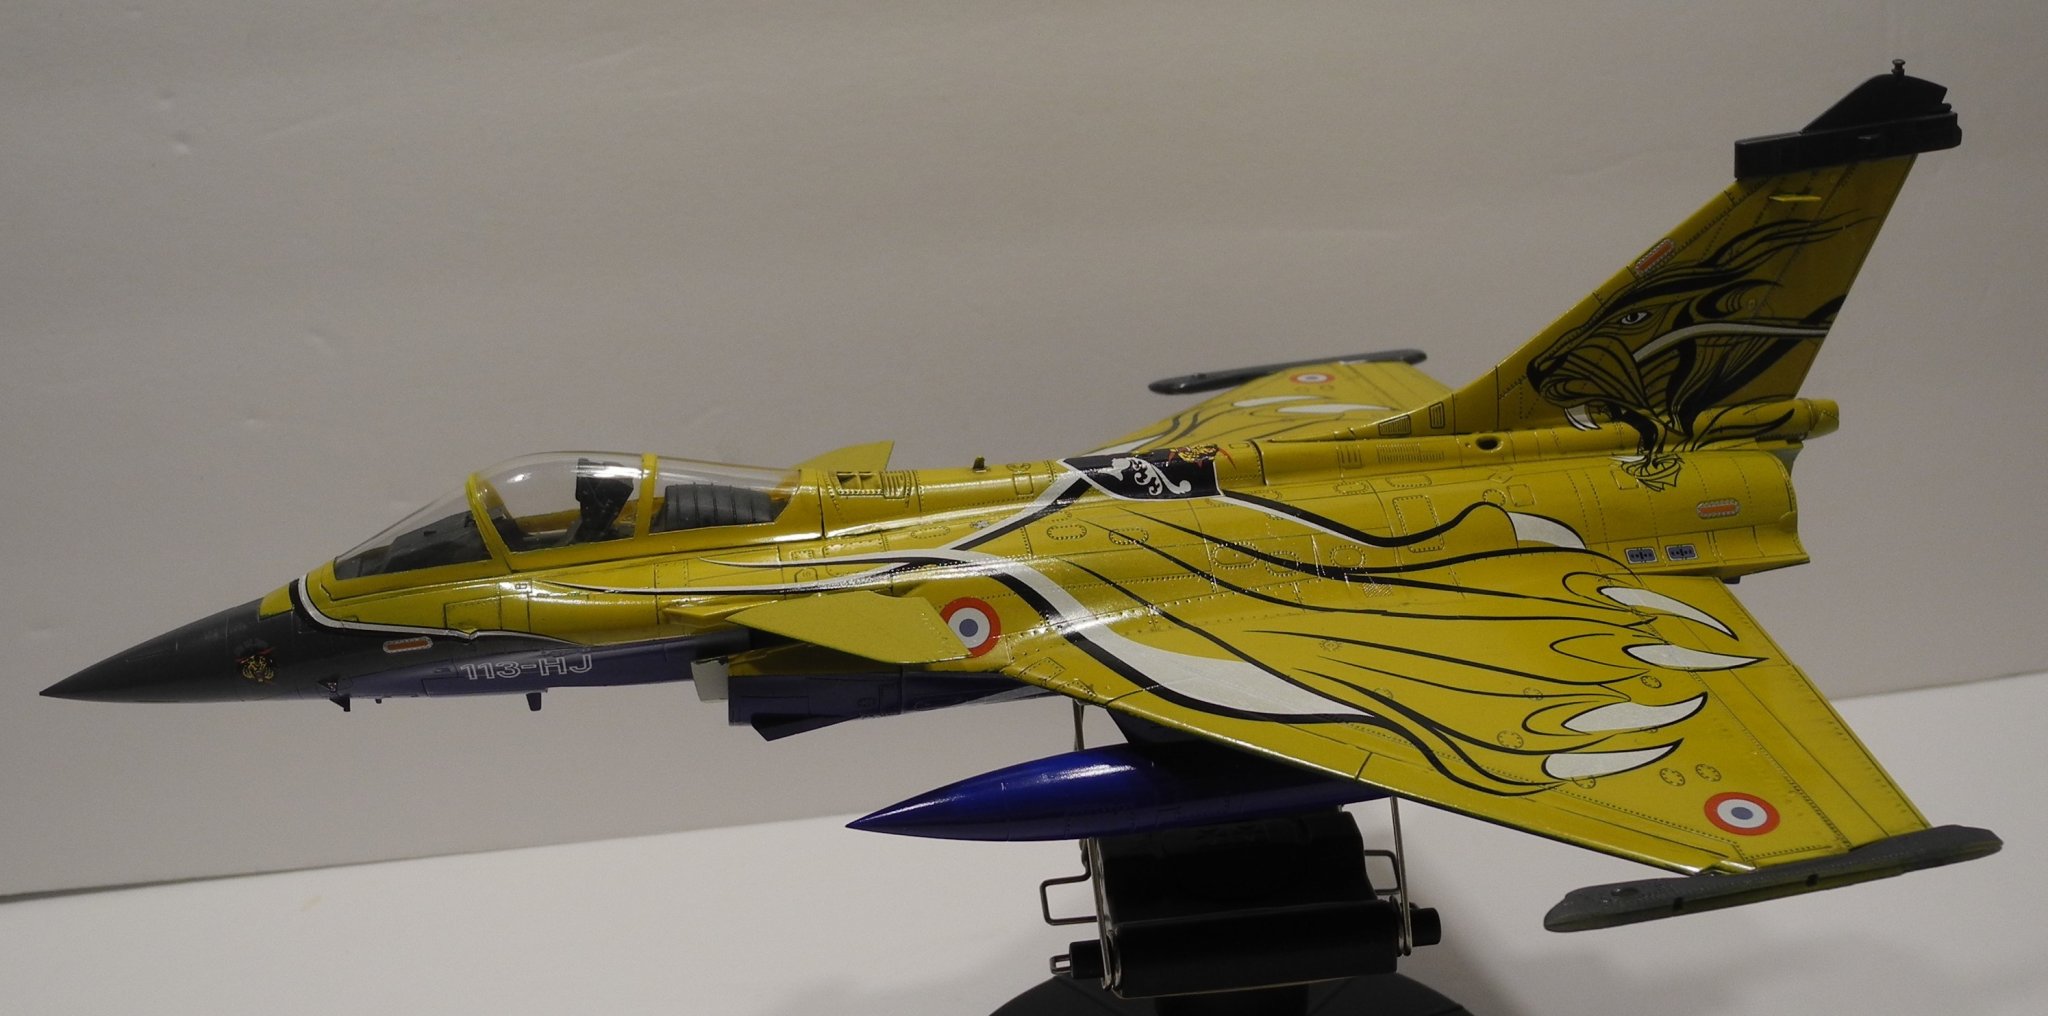
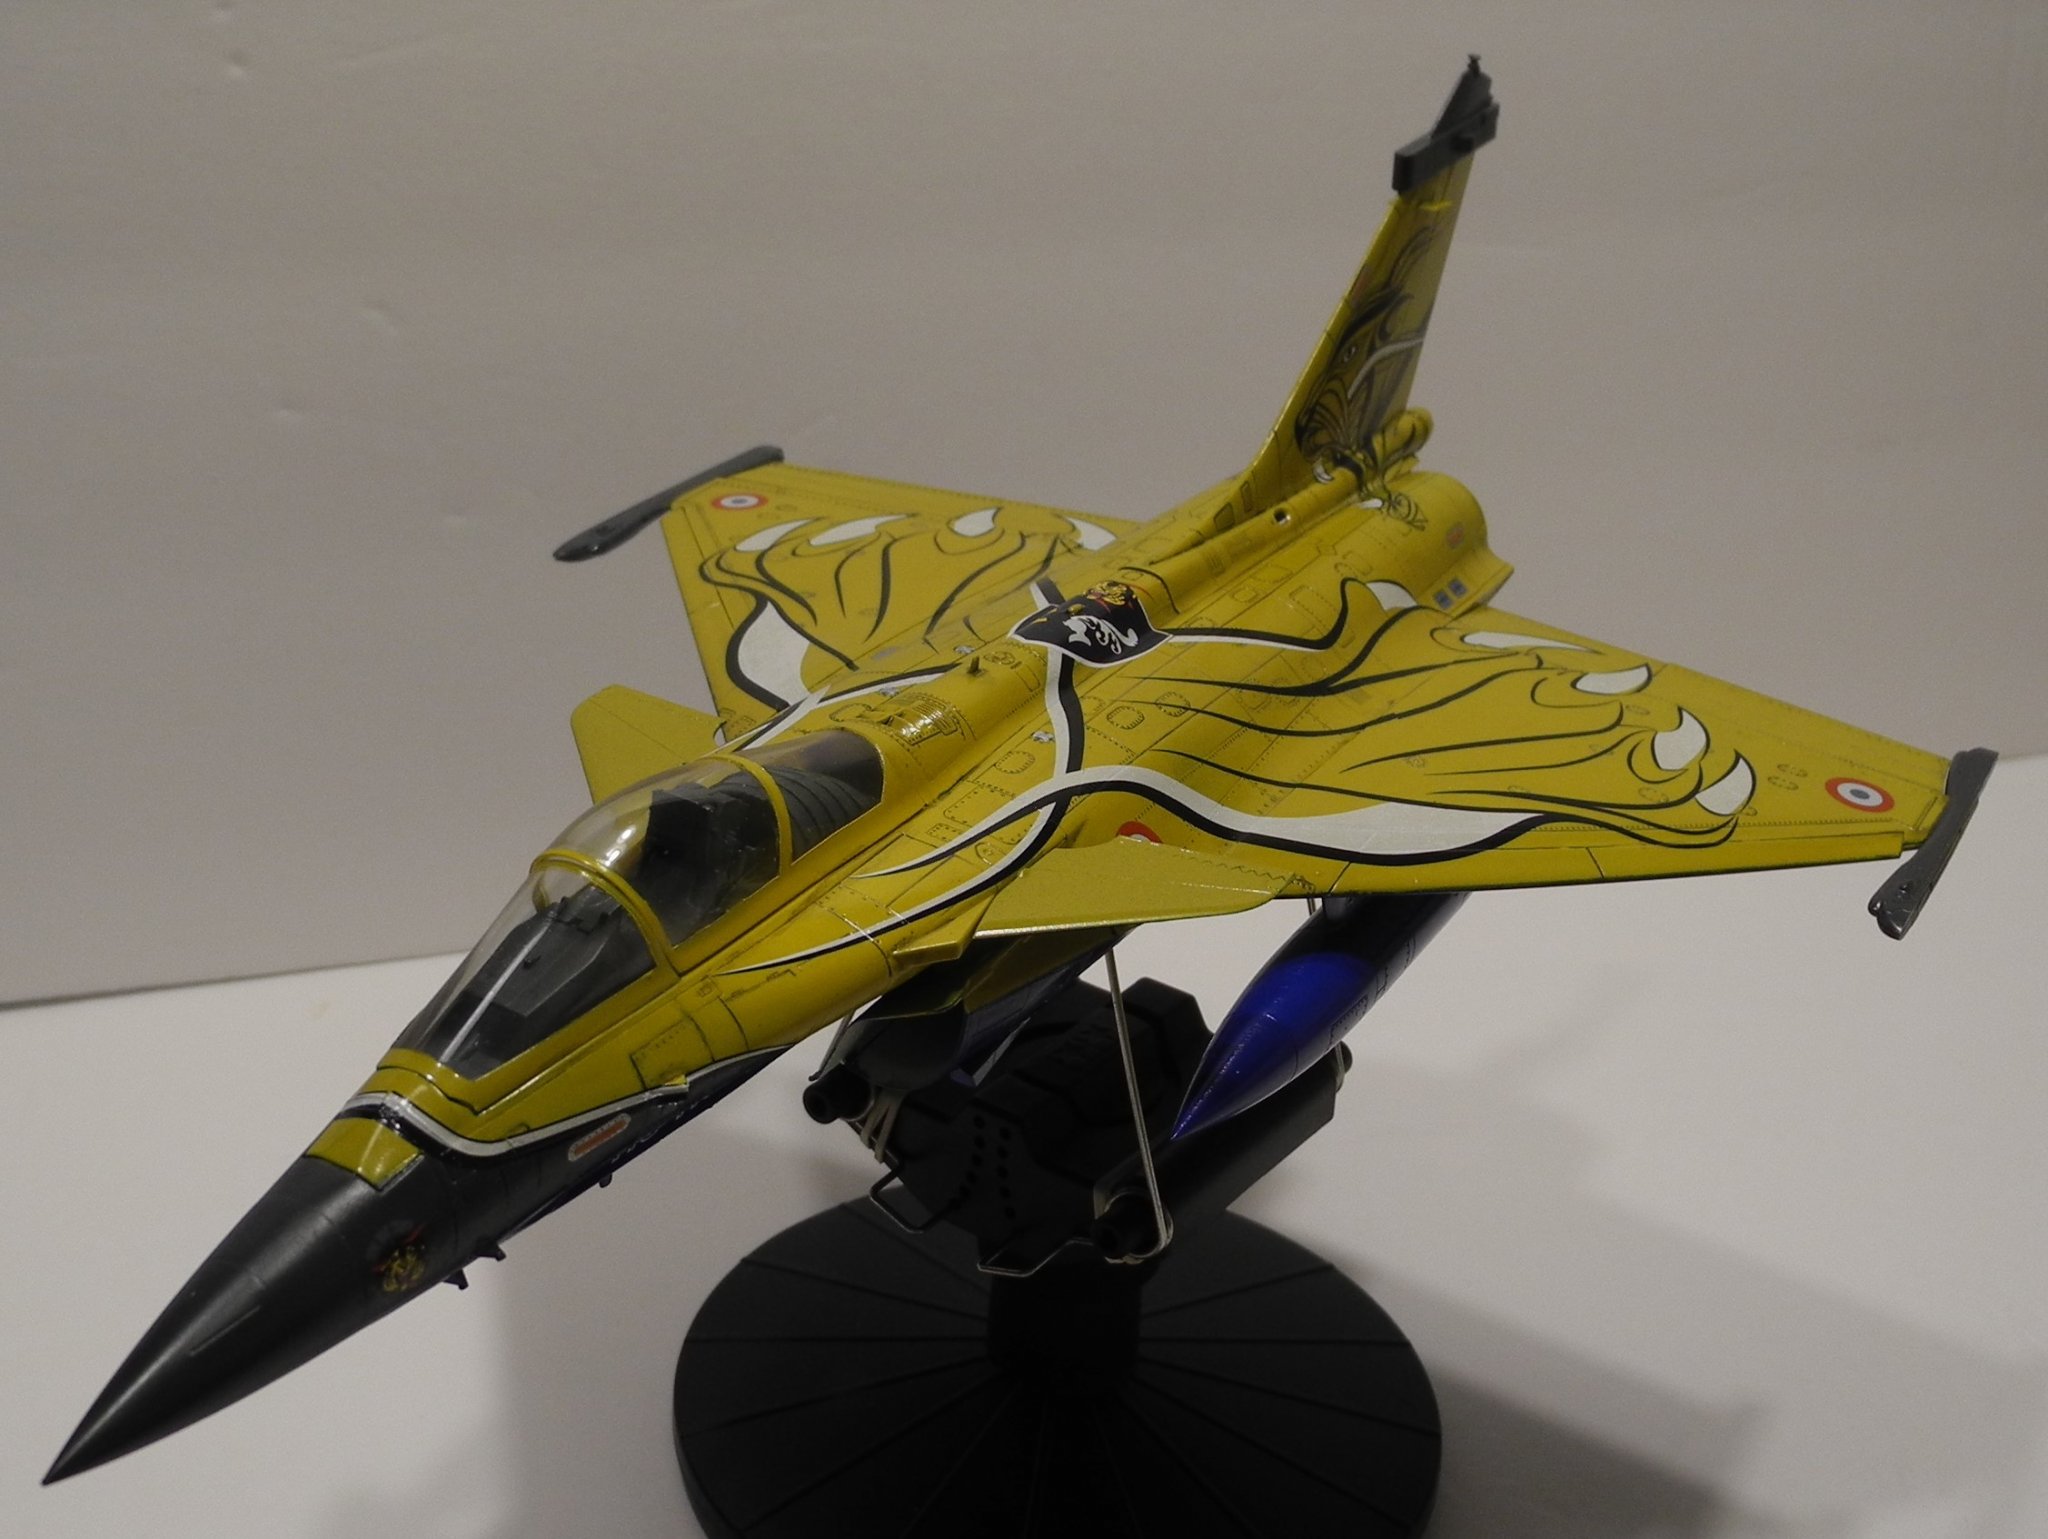
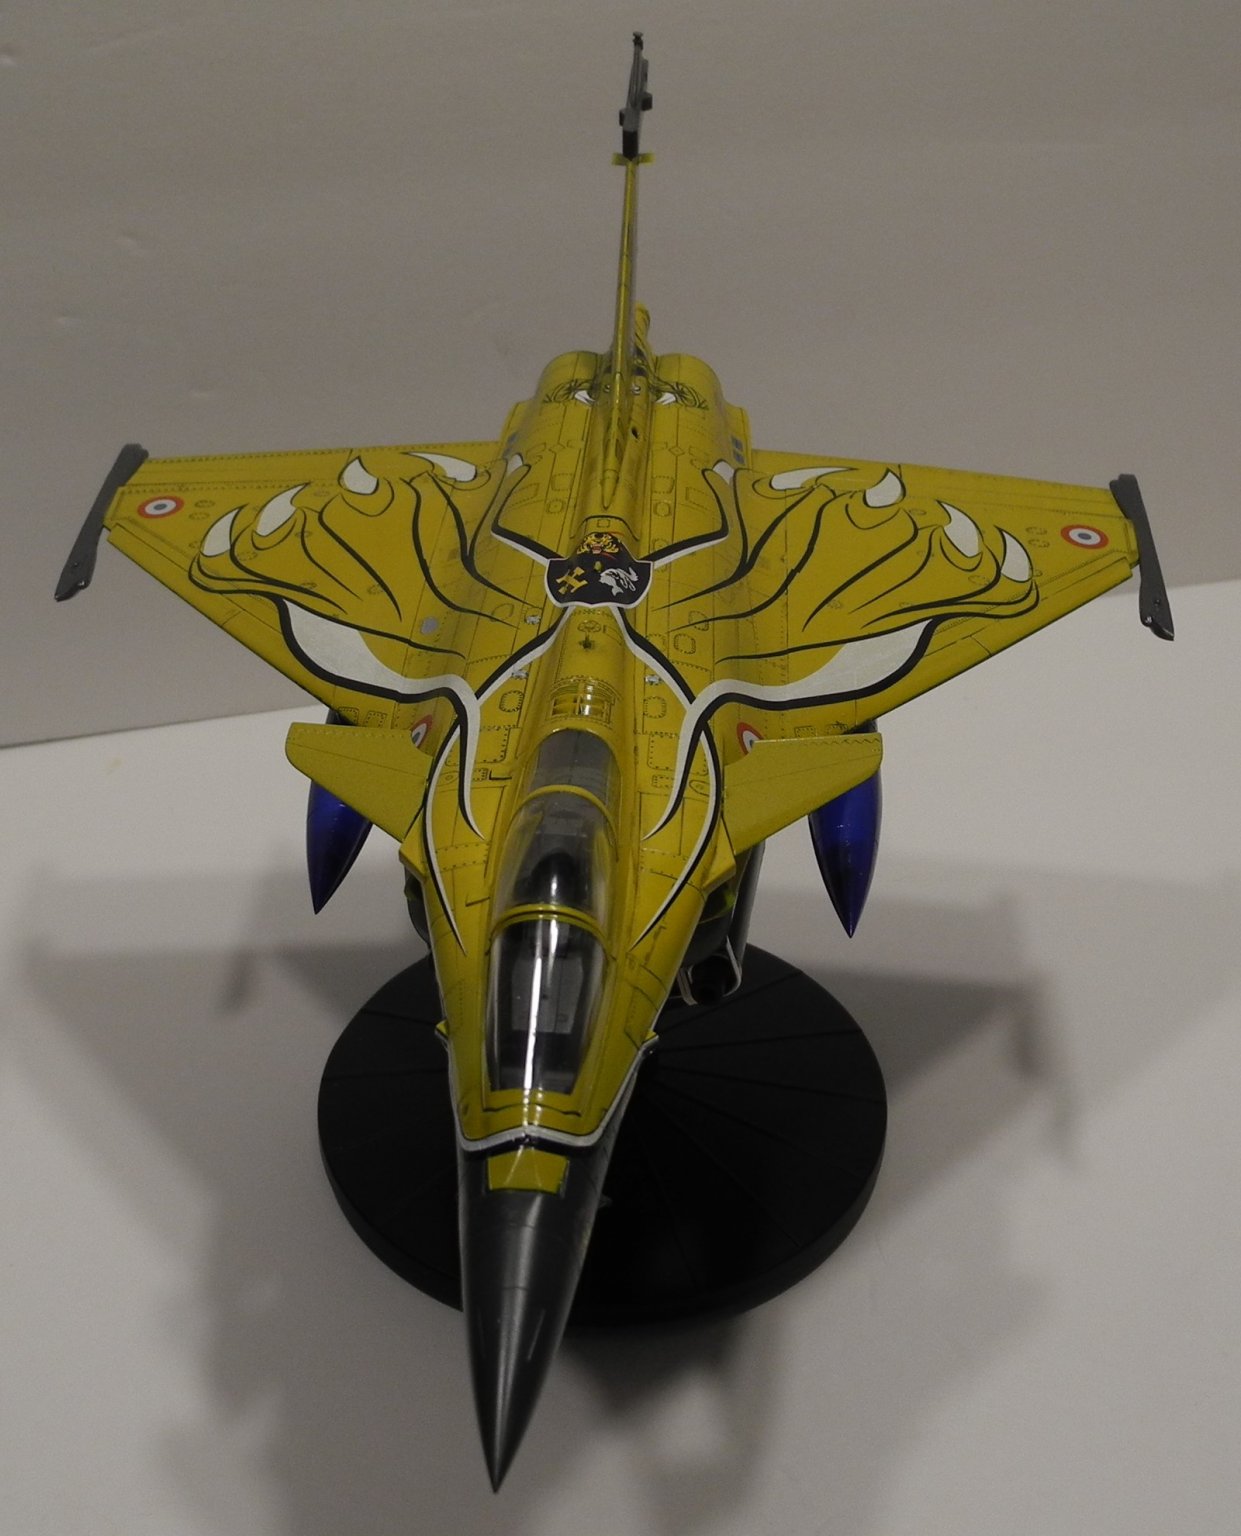
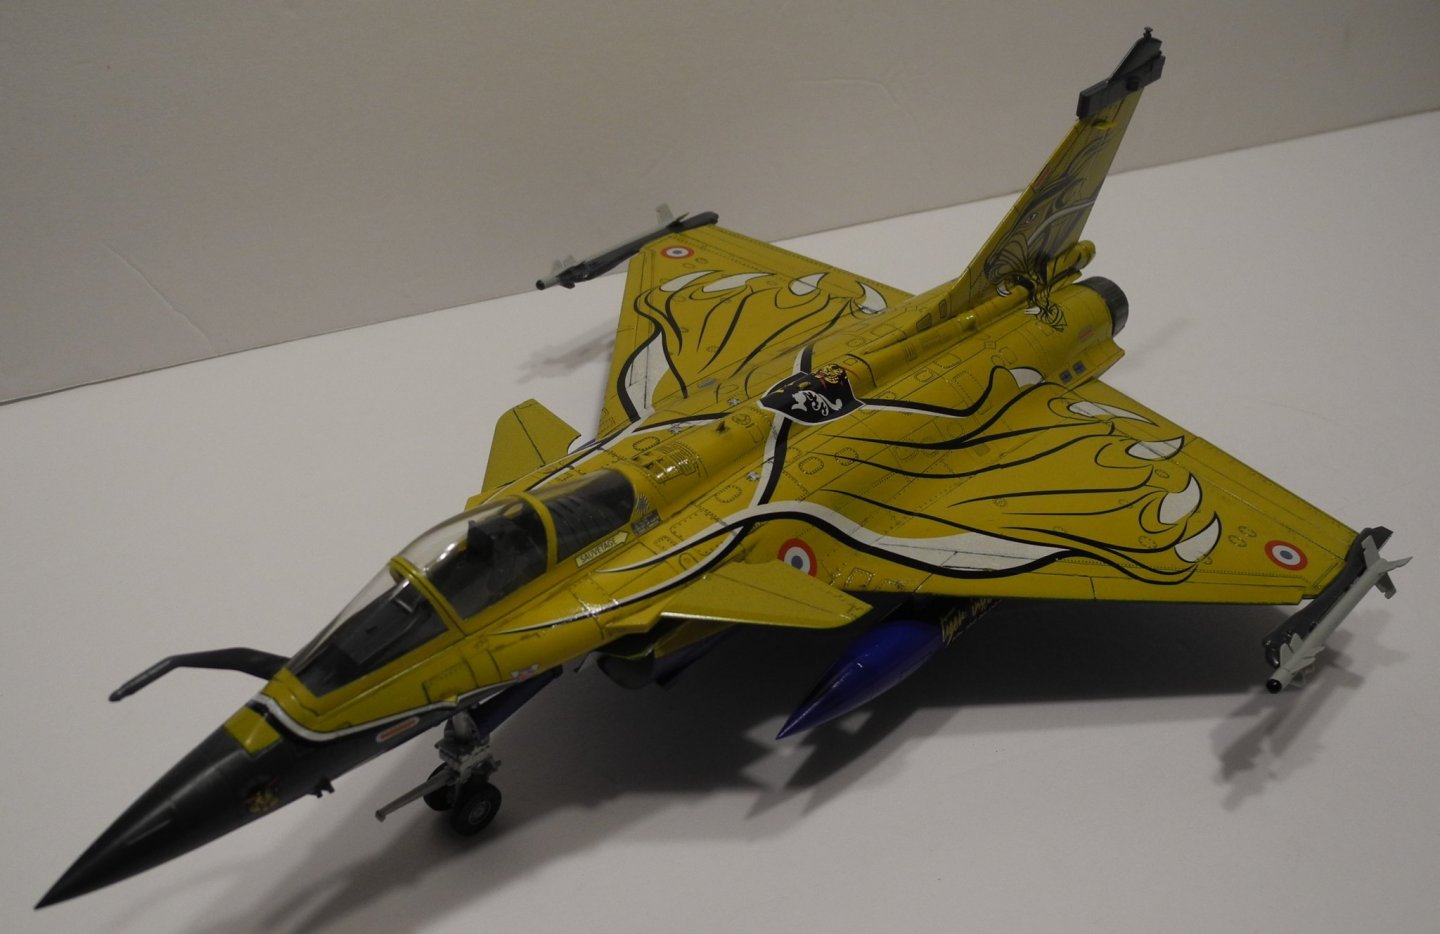
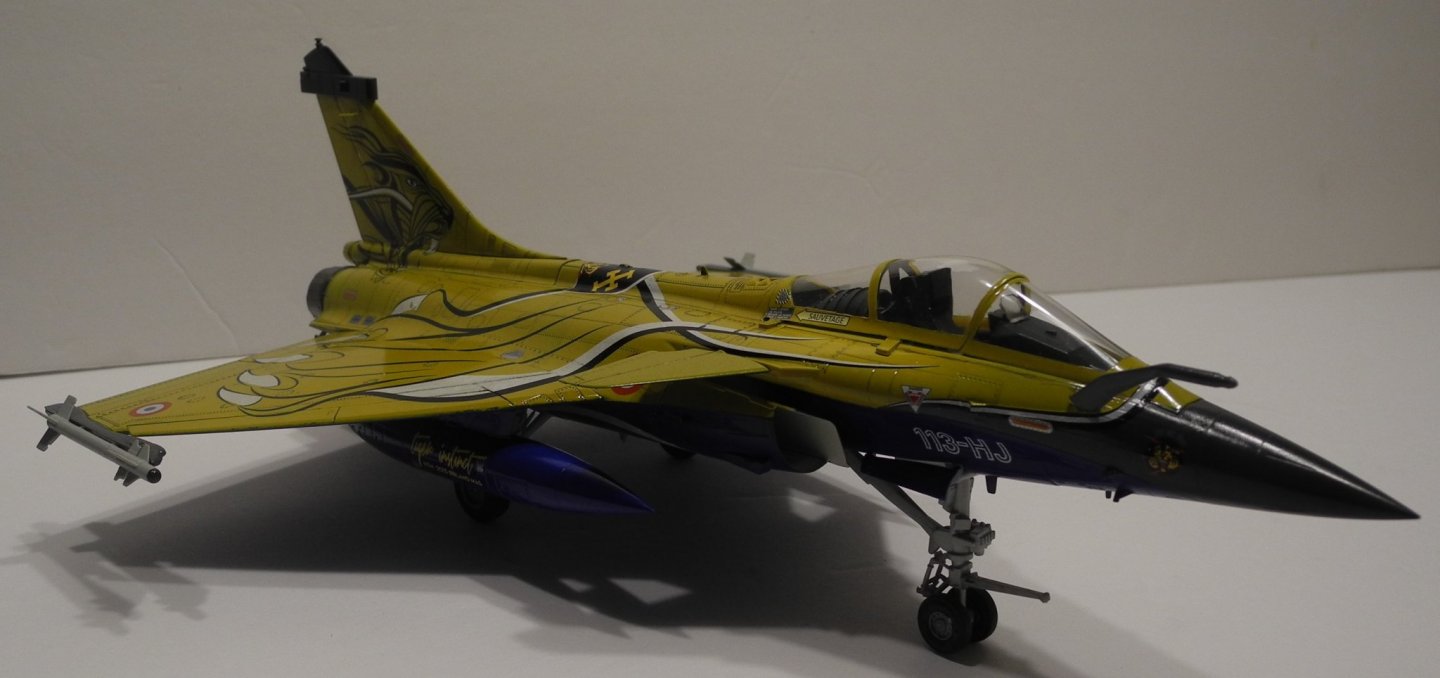
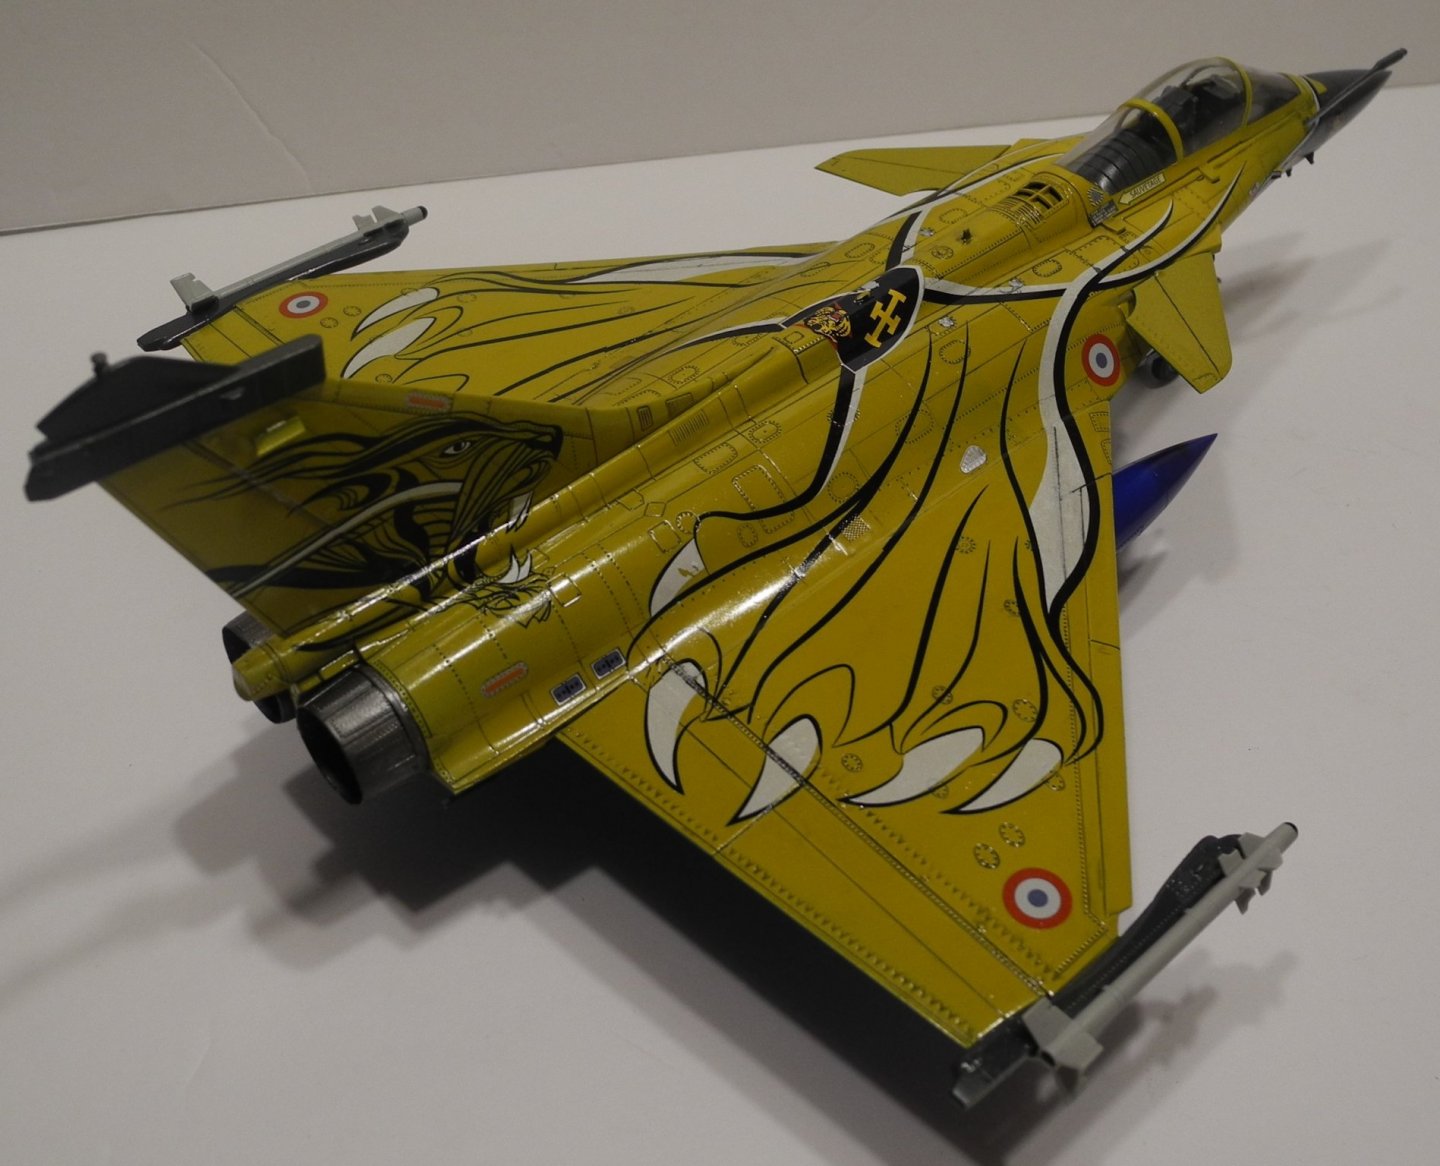
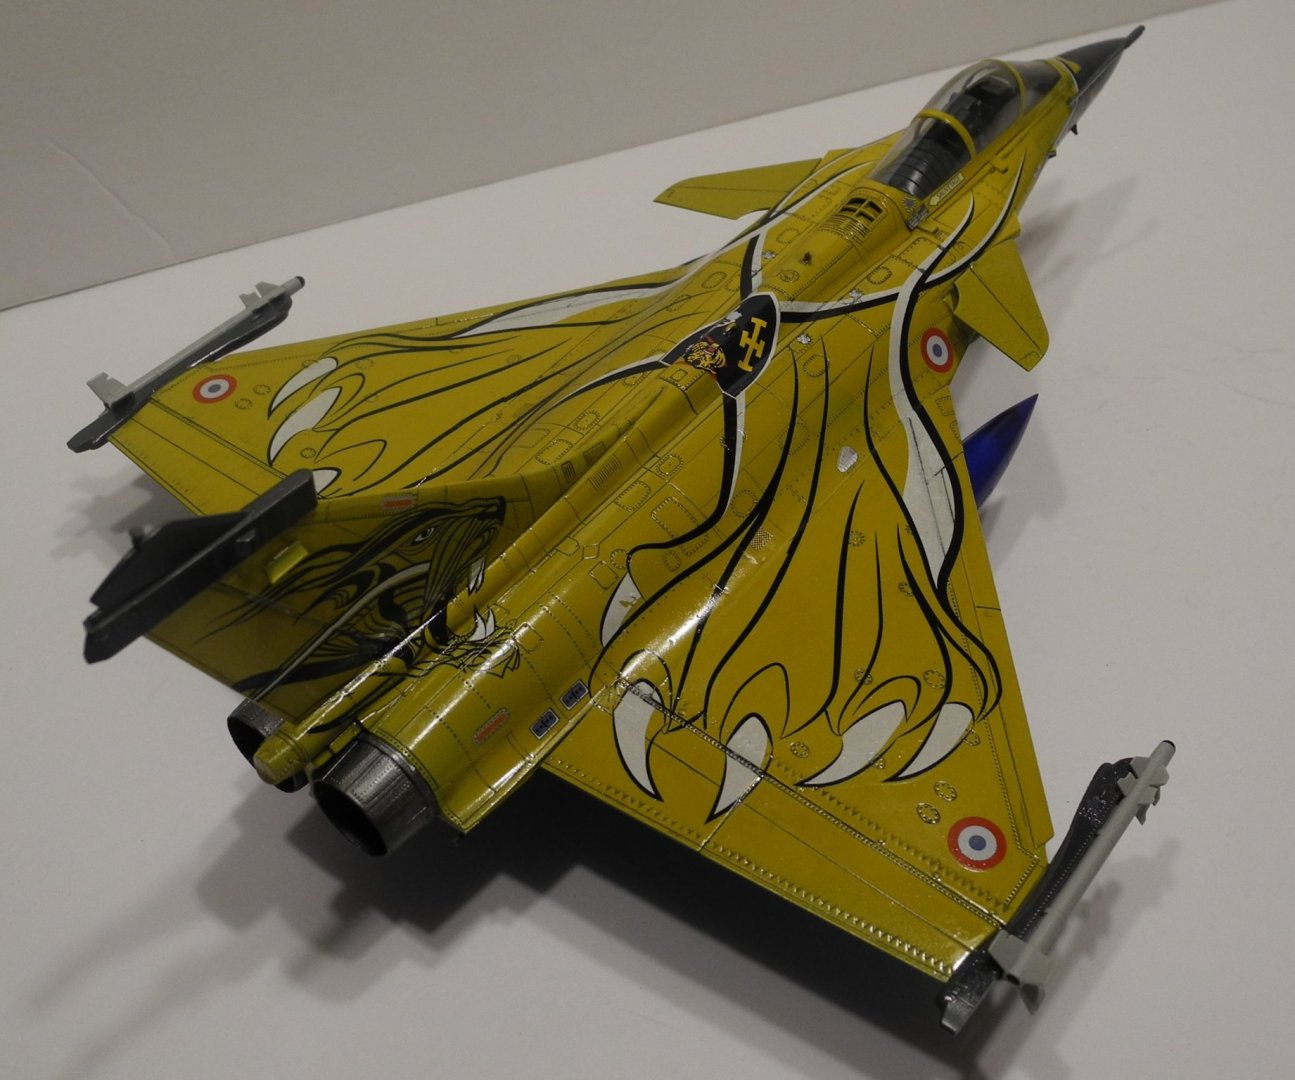
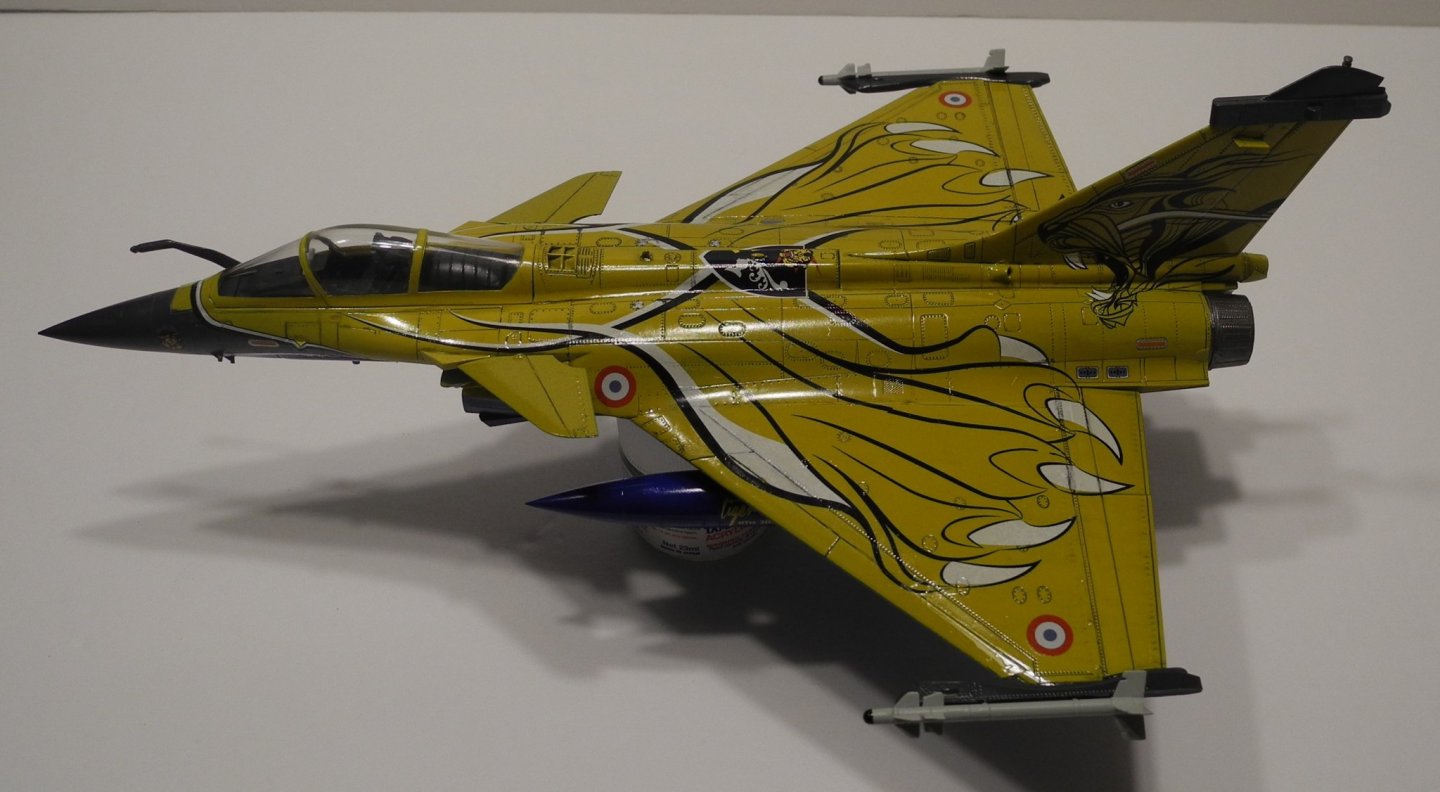
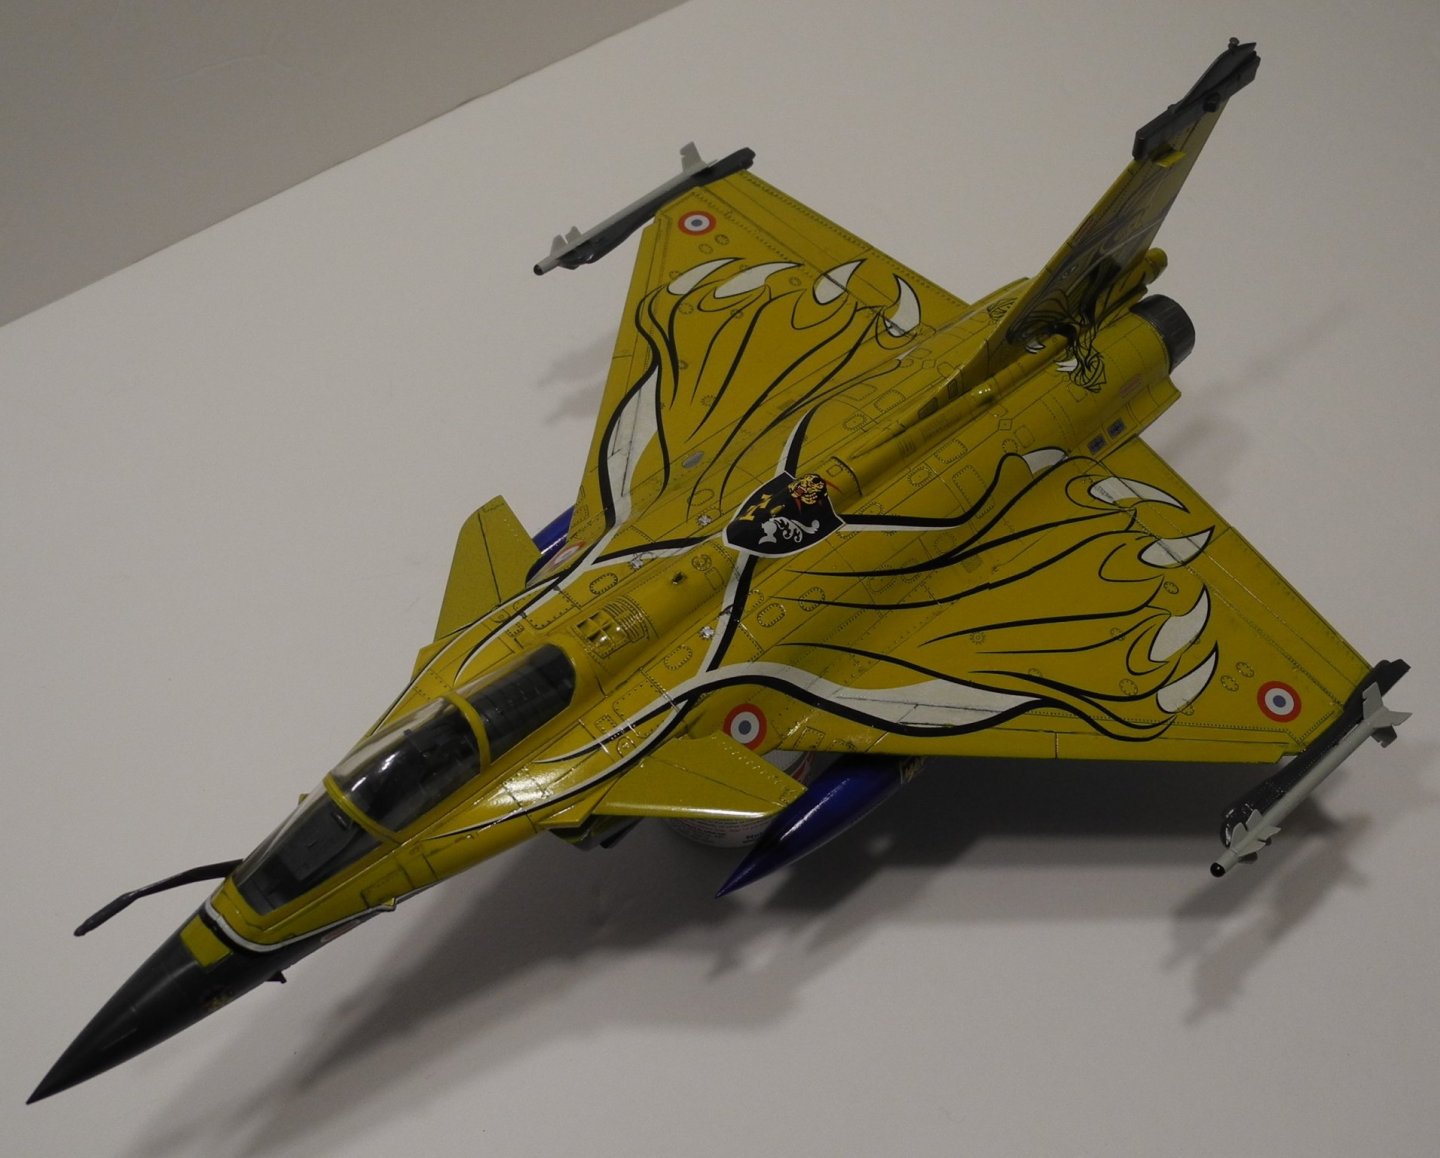
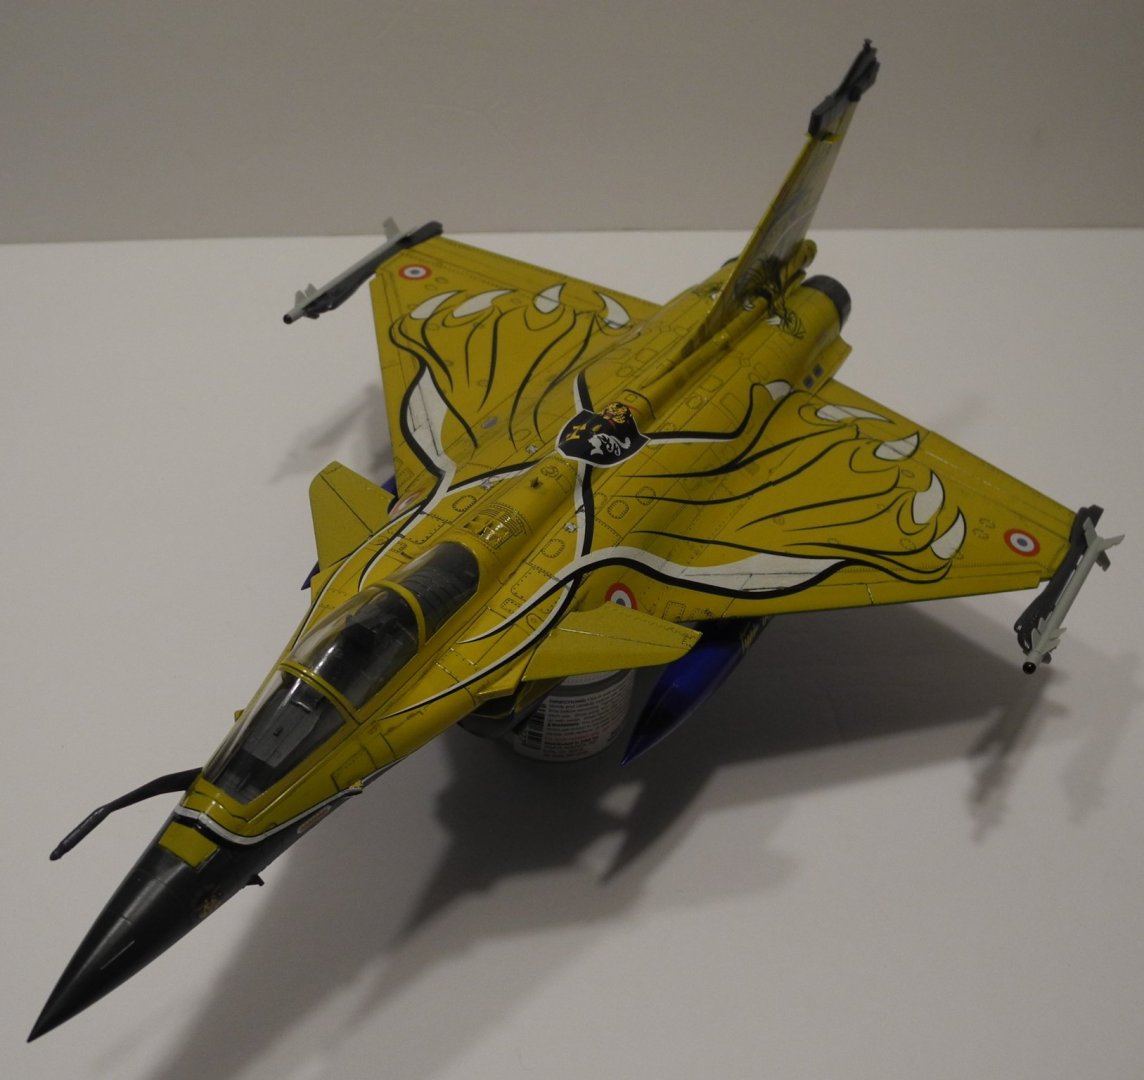
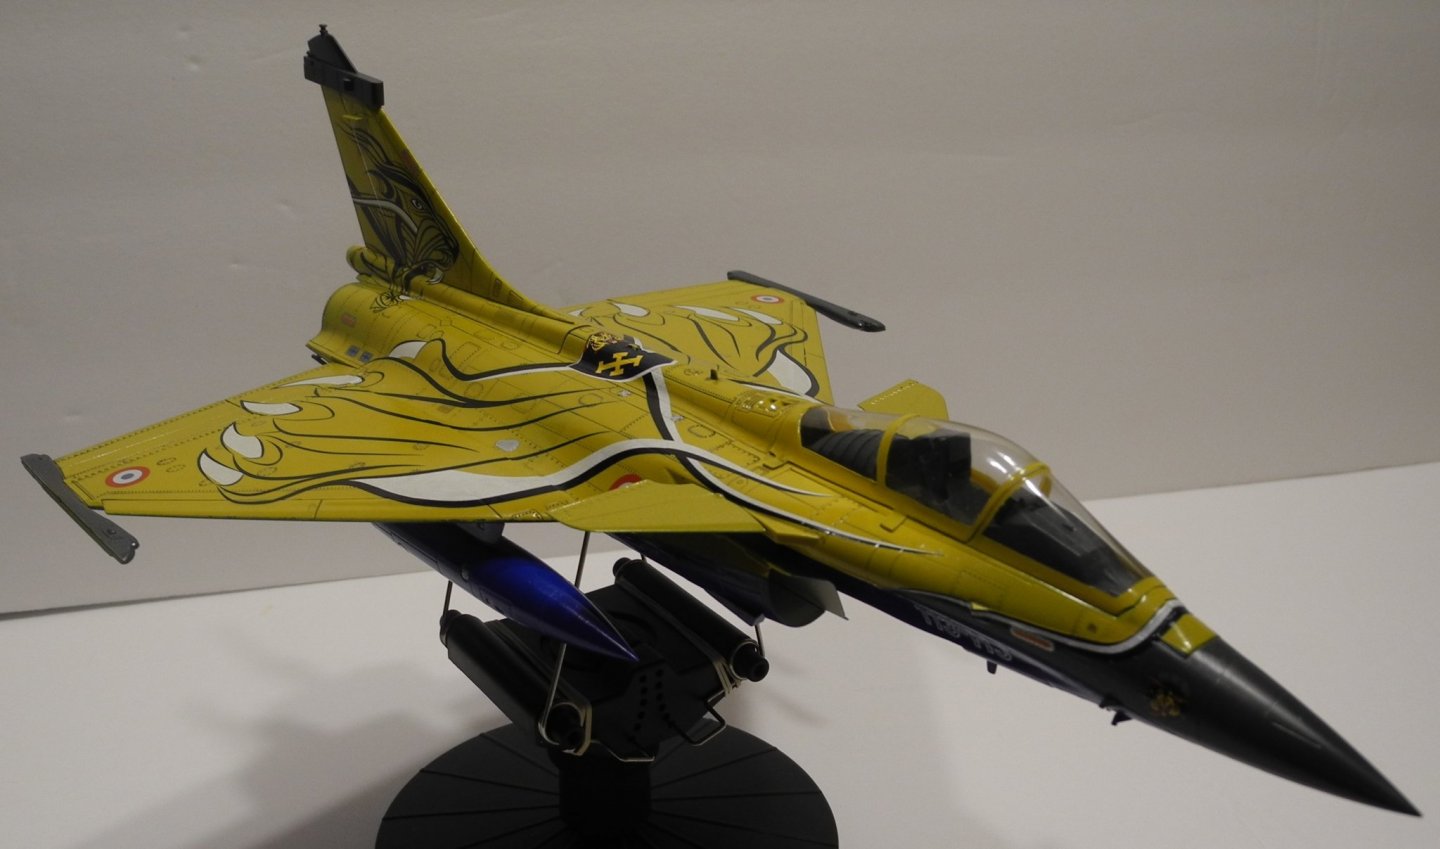
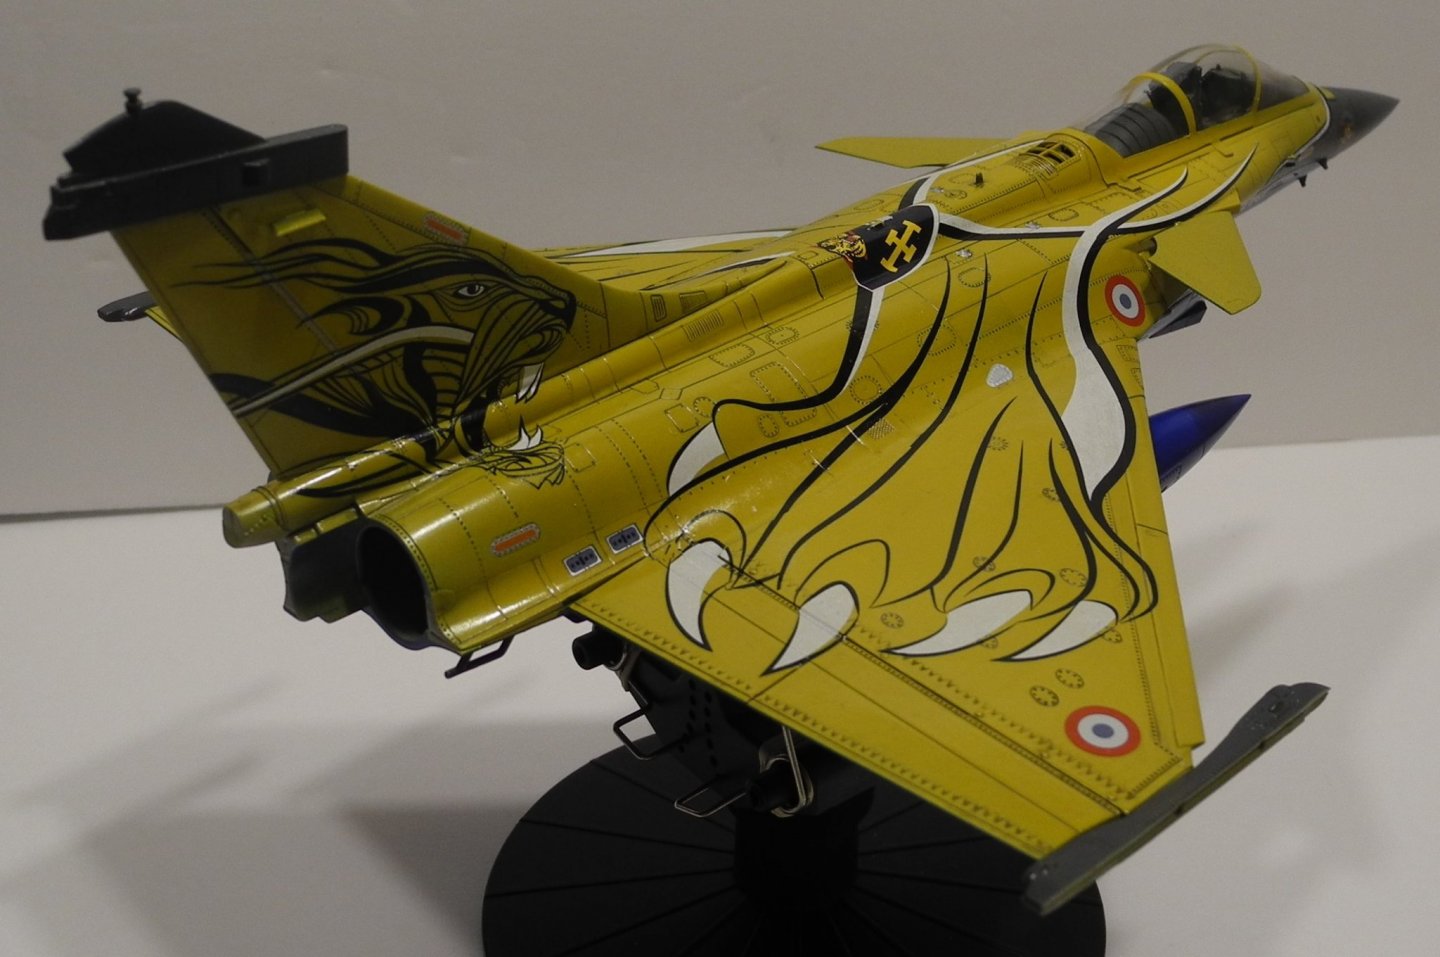
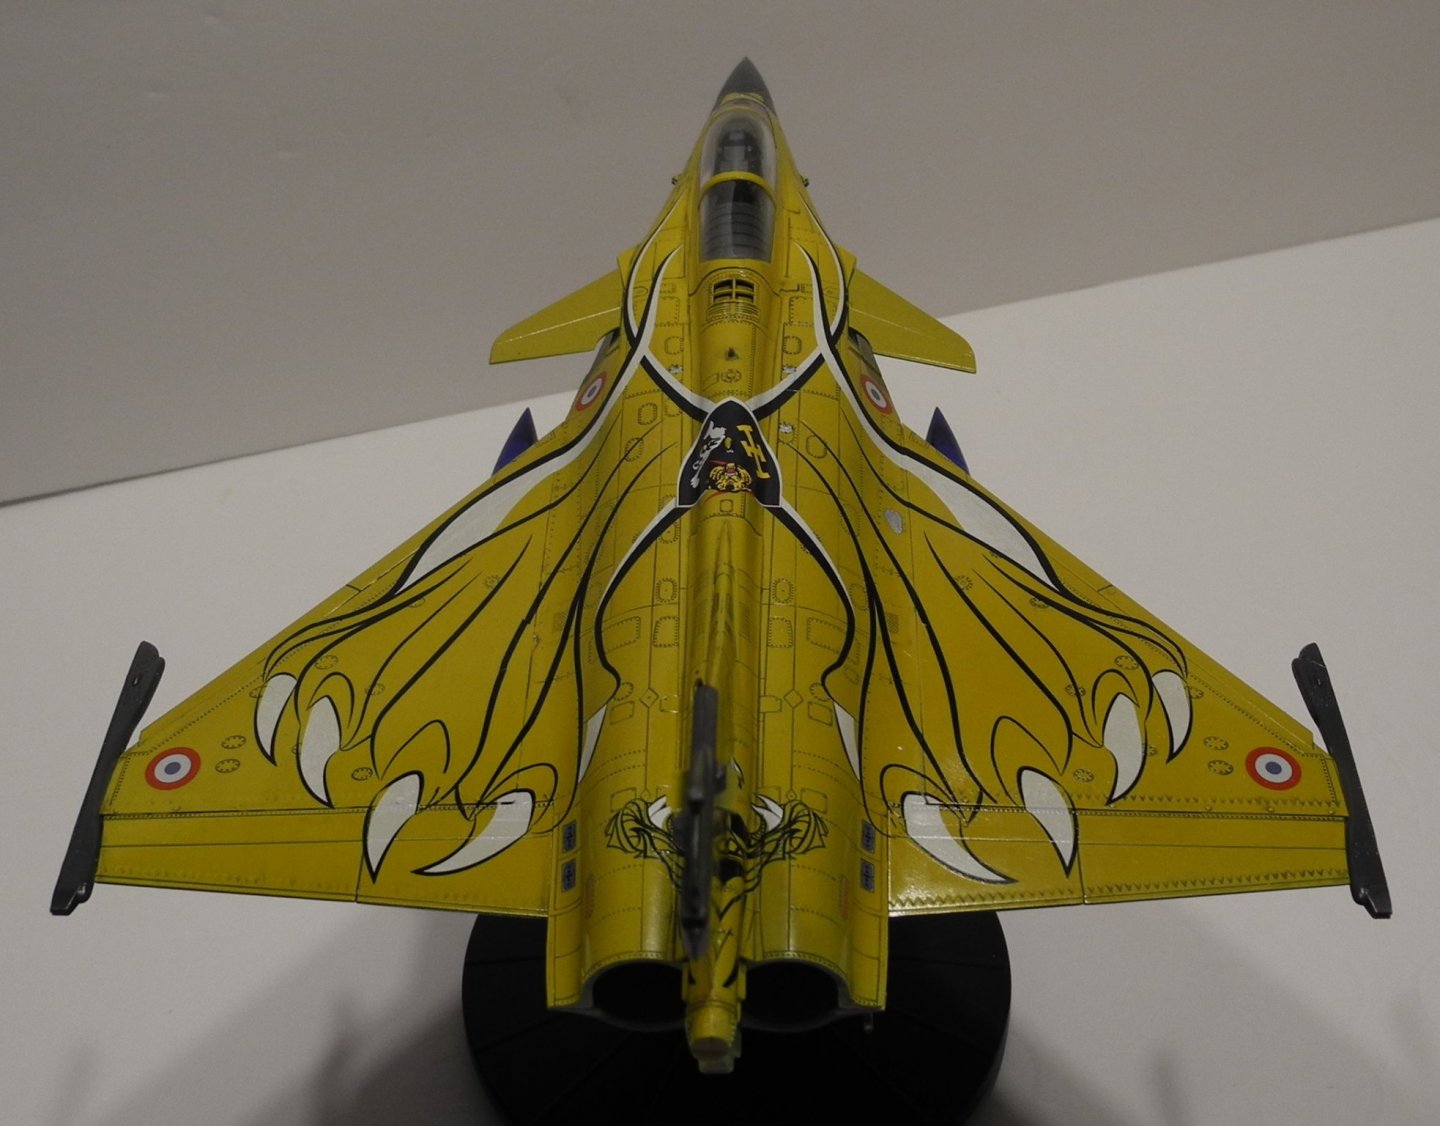
Rafale by CDW - FINISHED - Hobby Boss - 1:48 Scale
CDW replied to CDW's topic in Non-ship/categorised builds
Finished...on to the next project, stay tuned.


- 48 replies
-
- 16
-
-
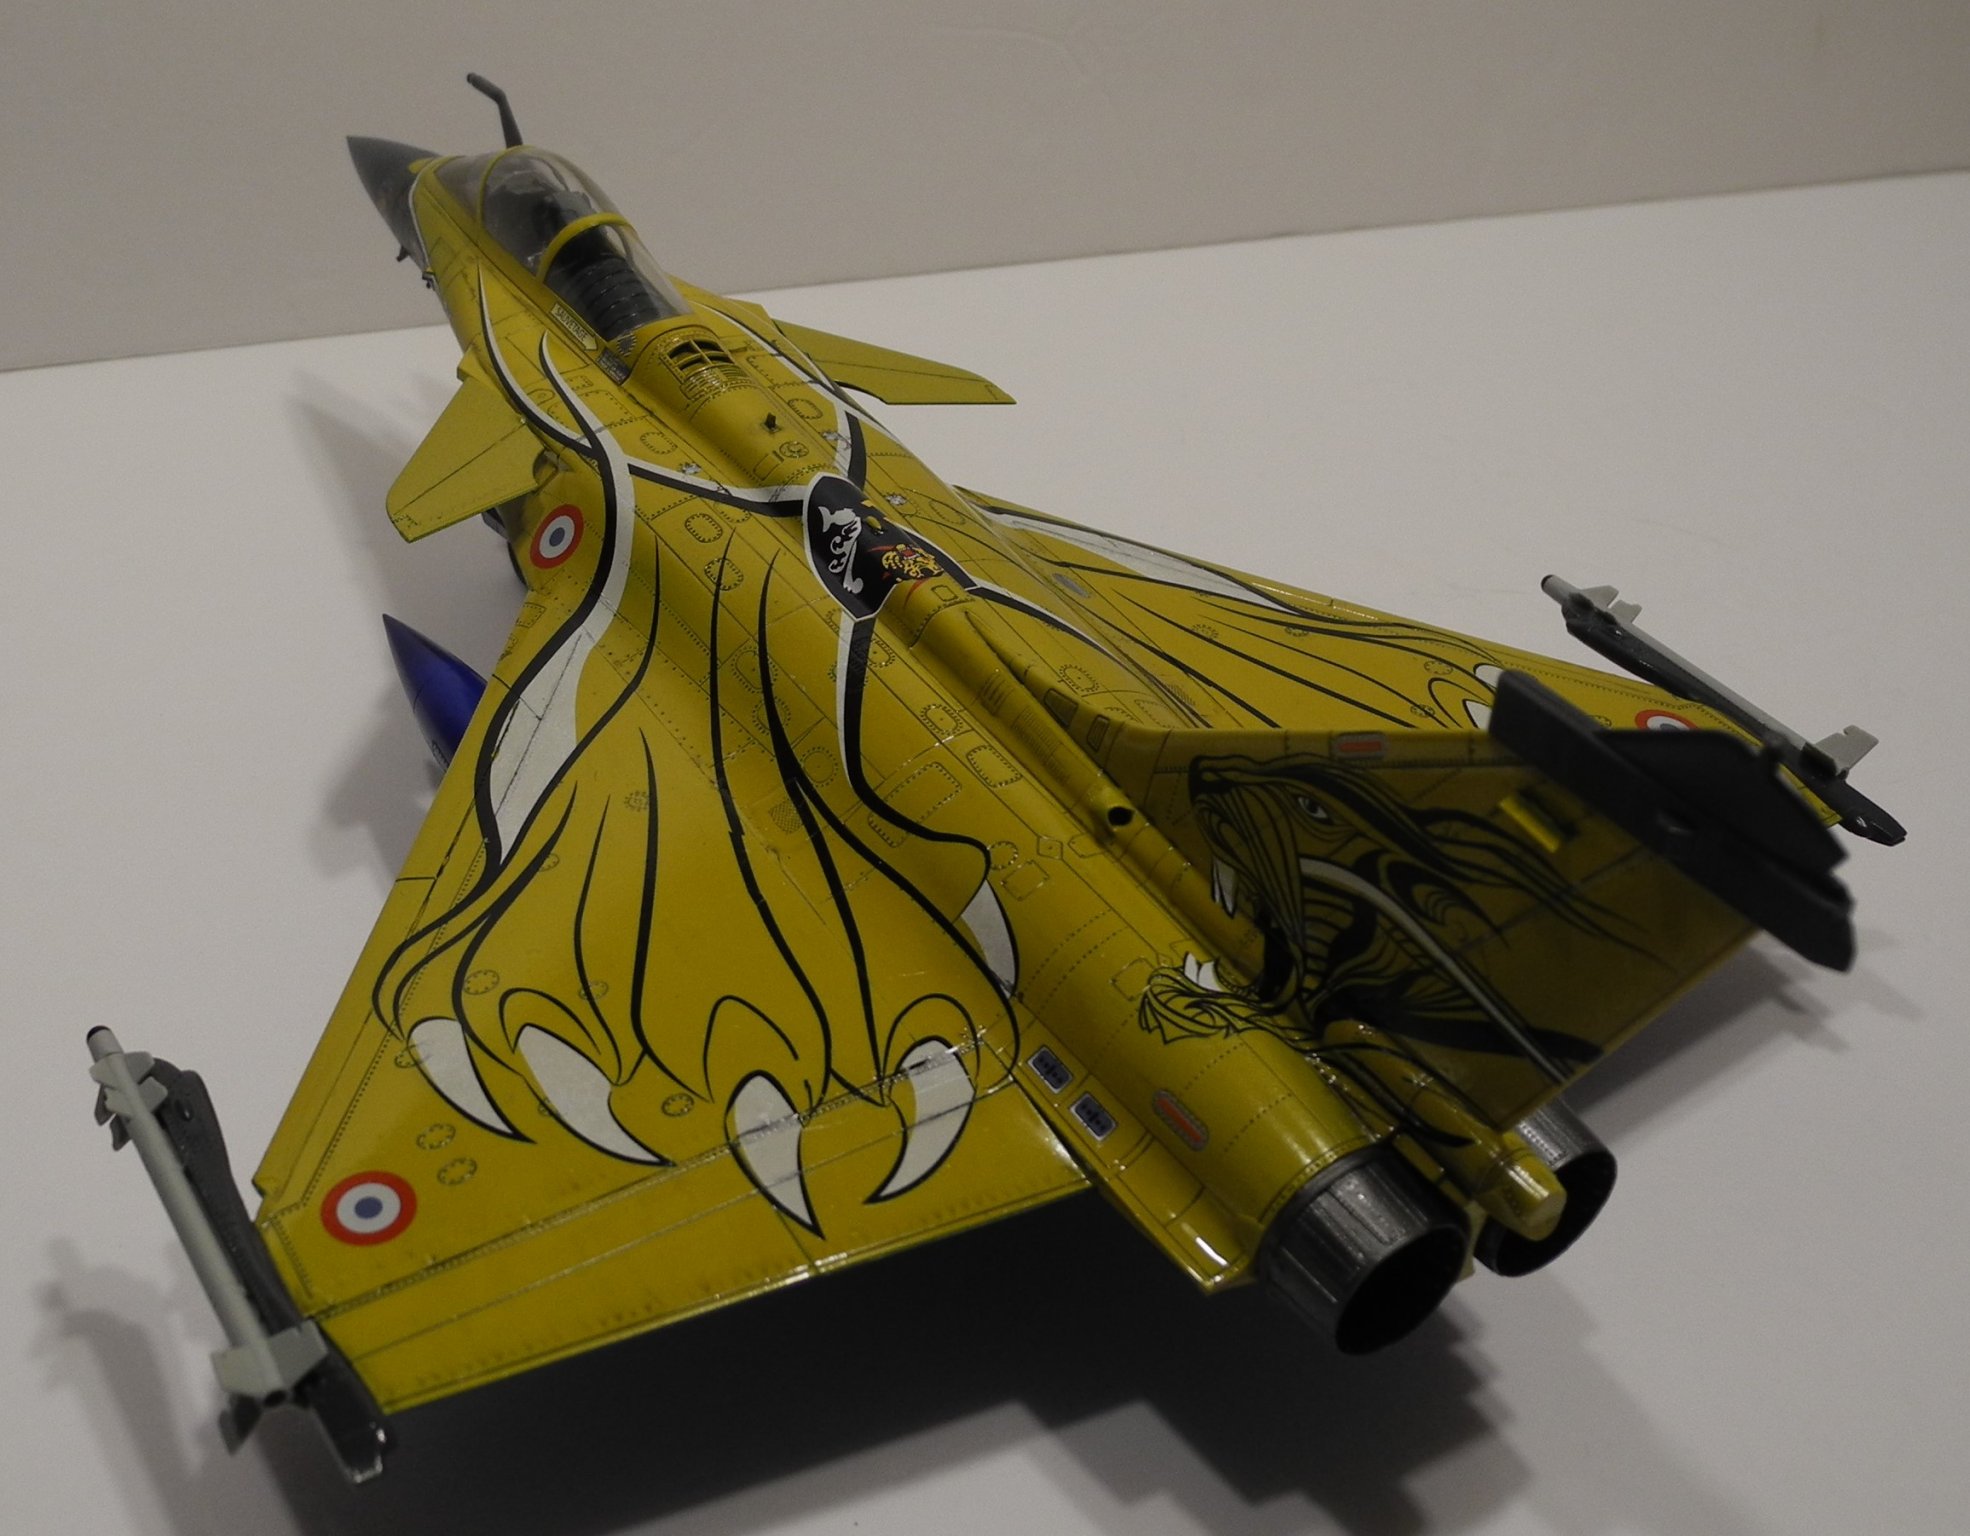
Rafale by CDW - FINISHED - Hobby Boss - 1:48 Scale
CDW replied to CDW's topic in Non-ship/categorised builds
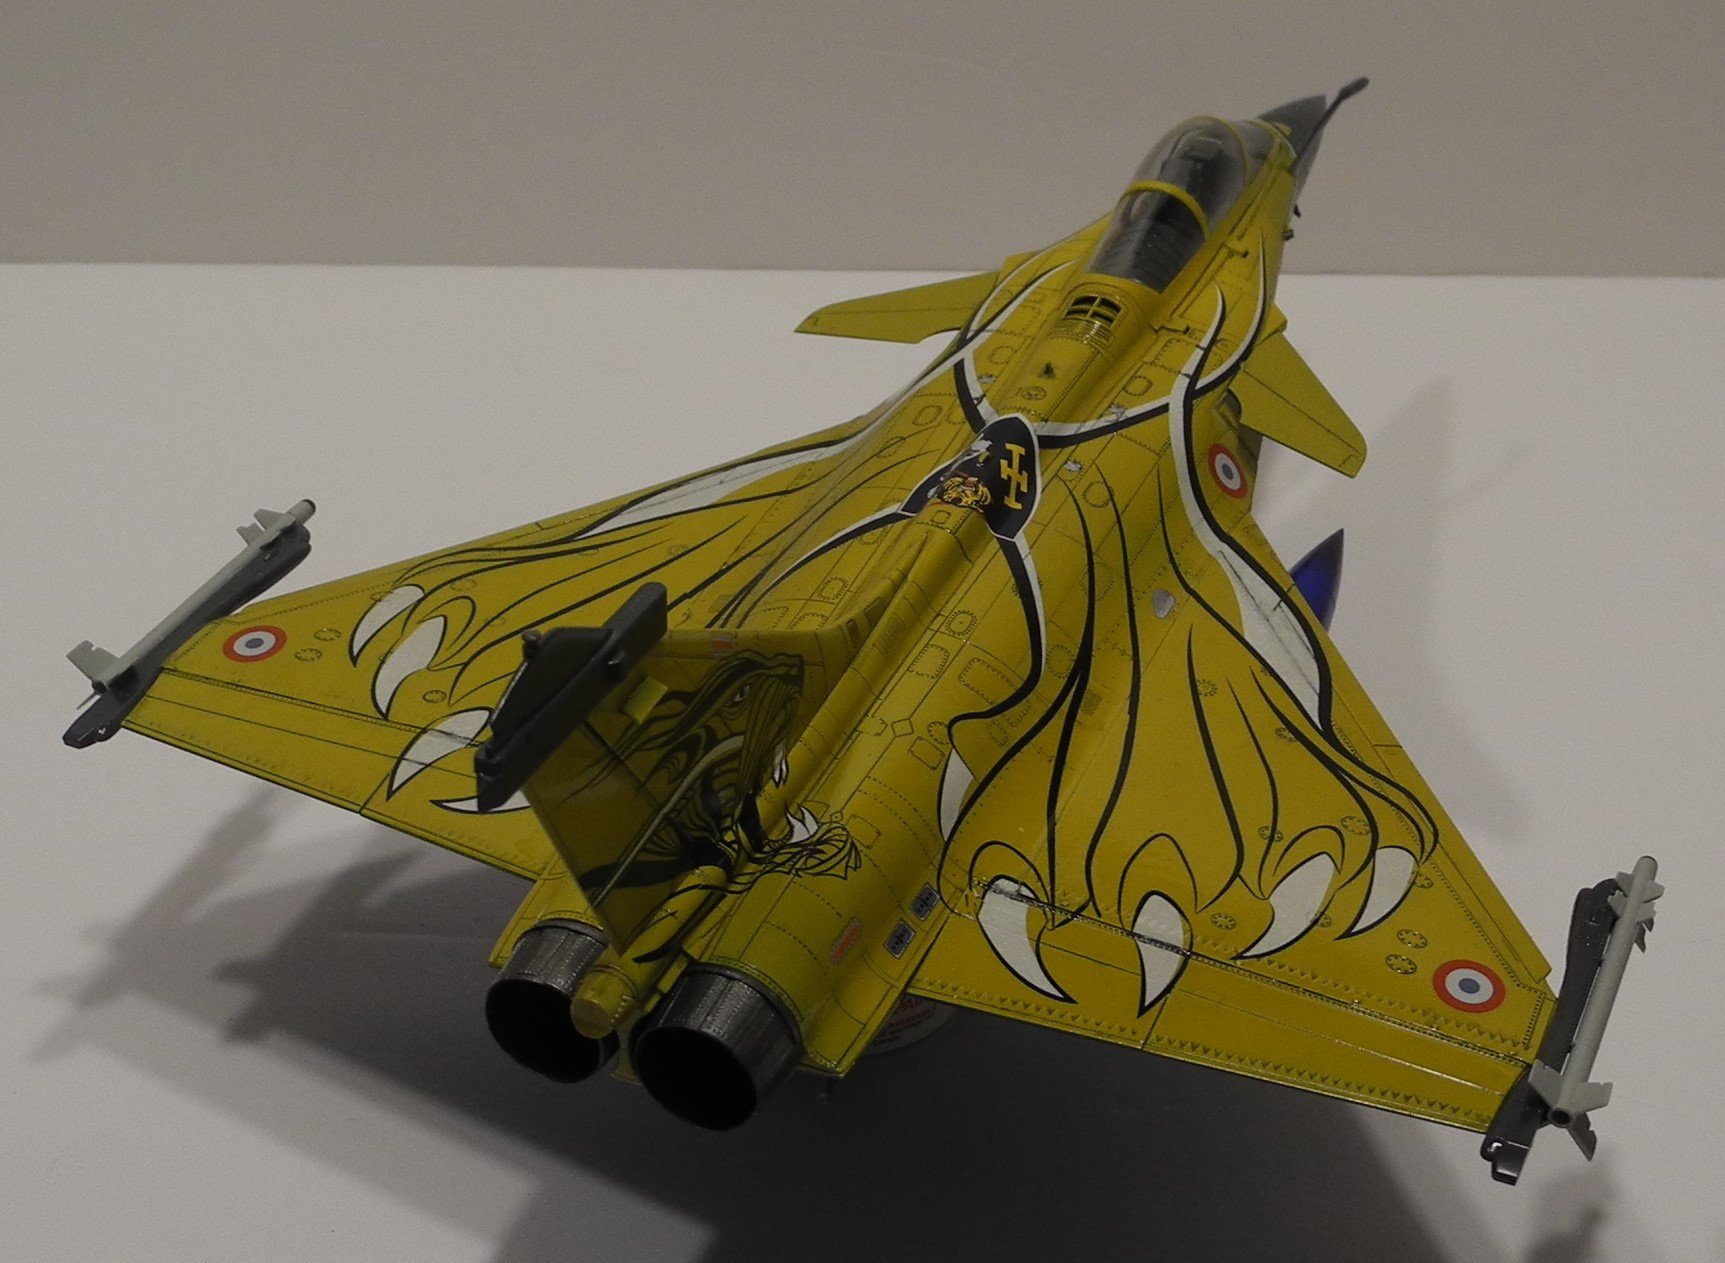
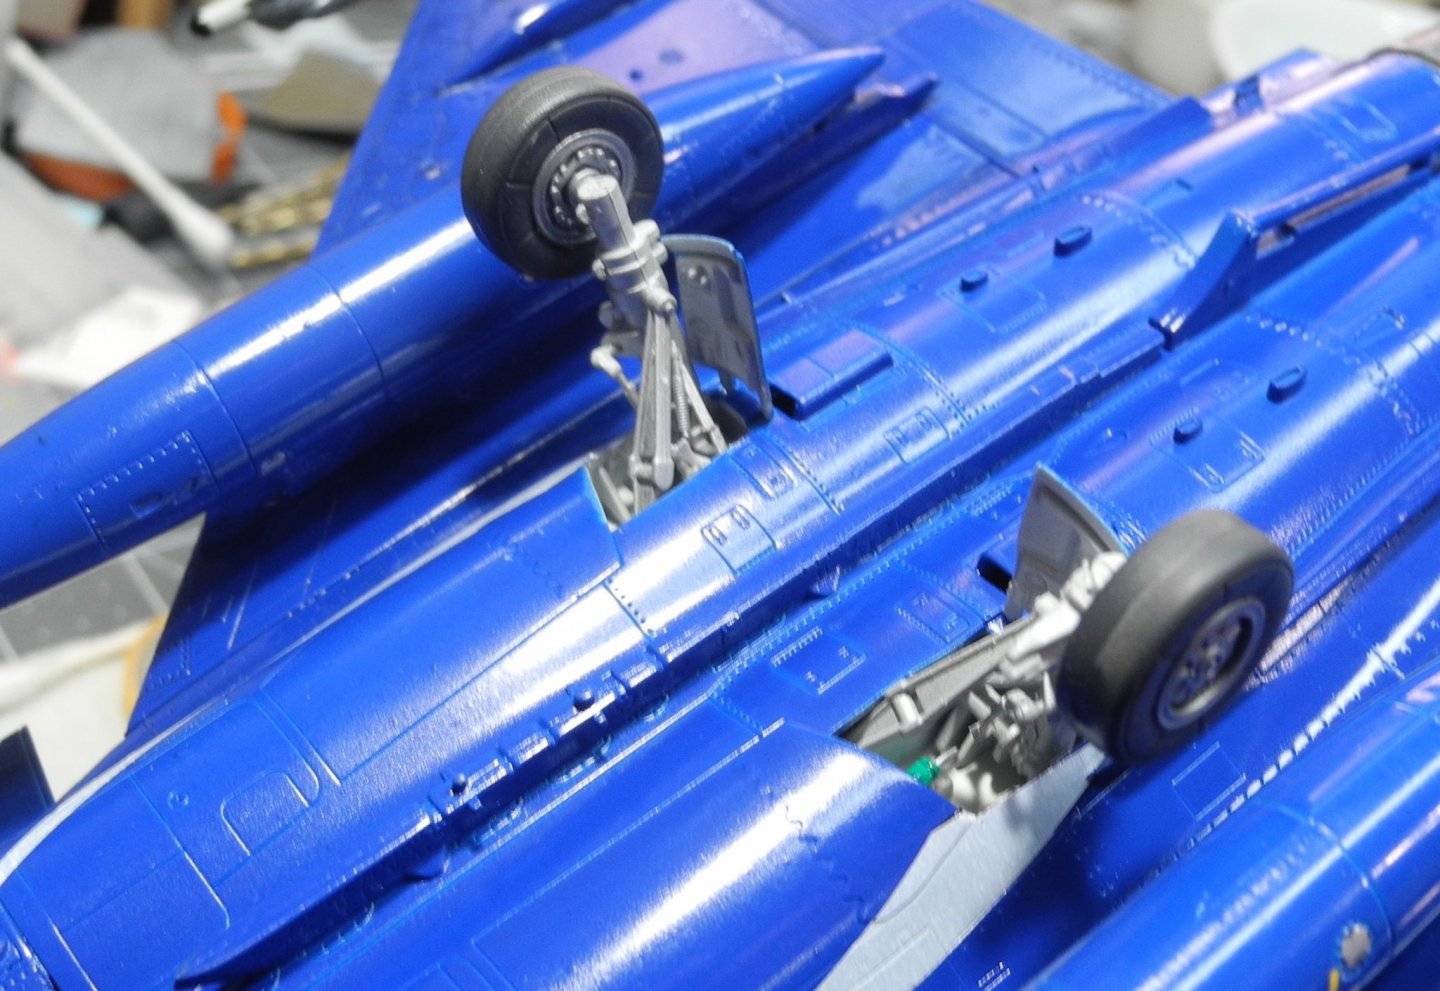
Rafale has a healthy set of legs. Seems they really made them beefy for their carrier role.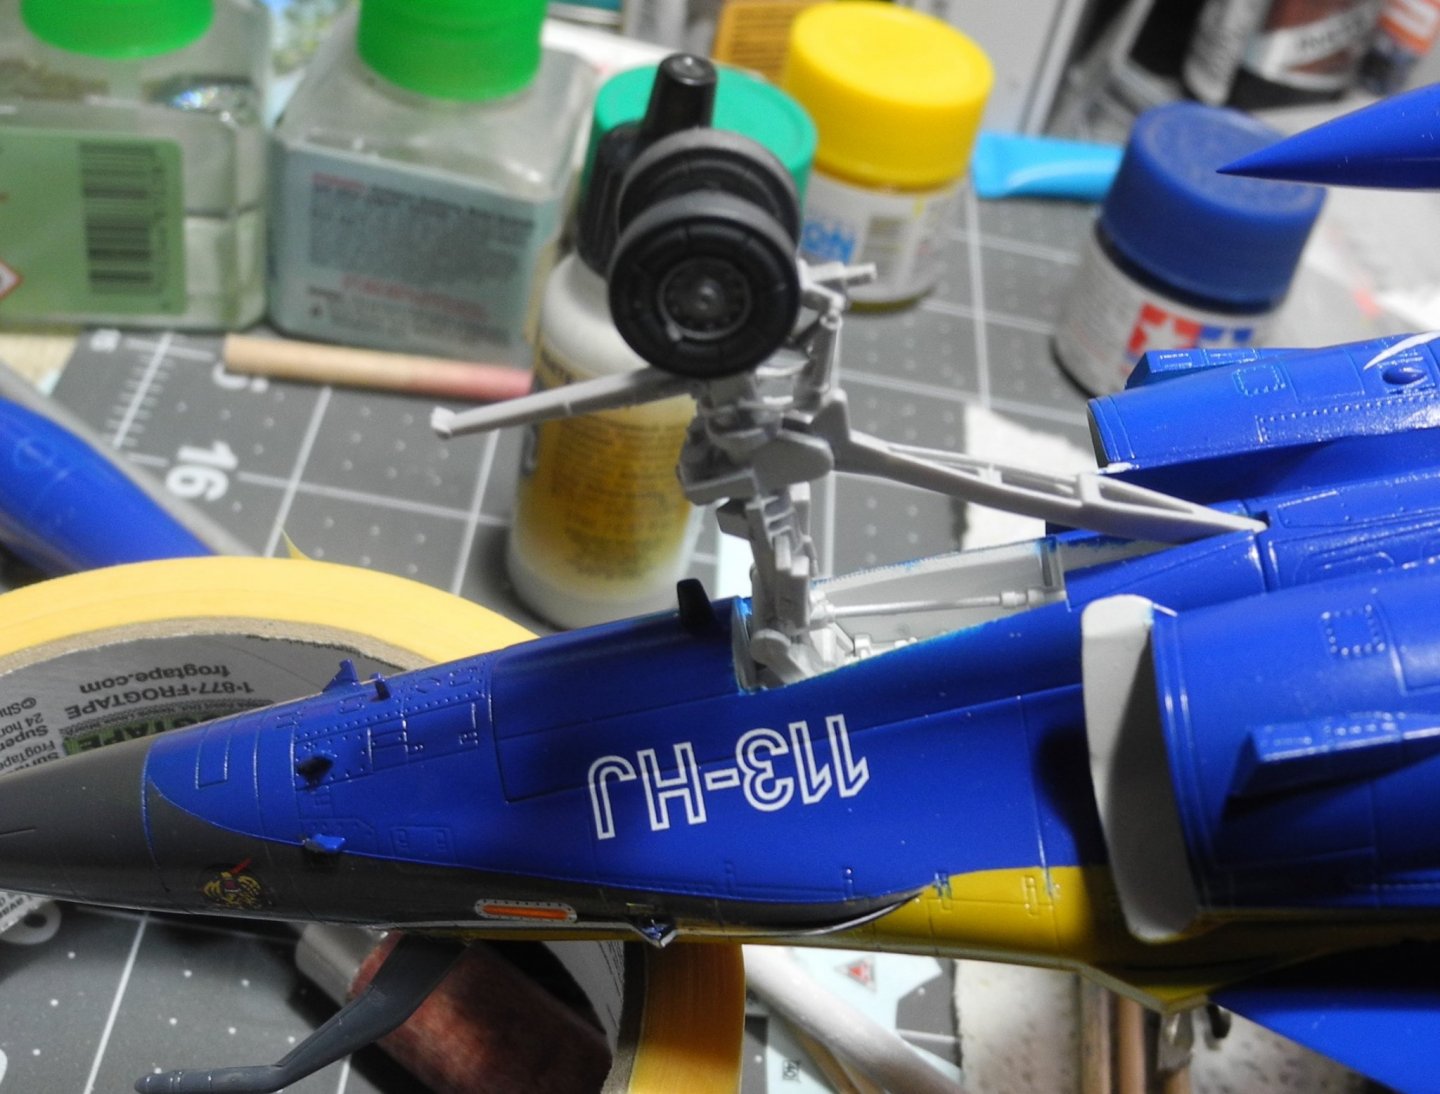

- 48 replies
-
- 10
-
-
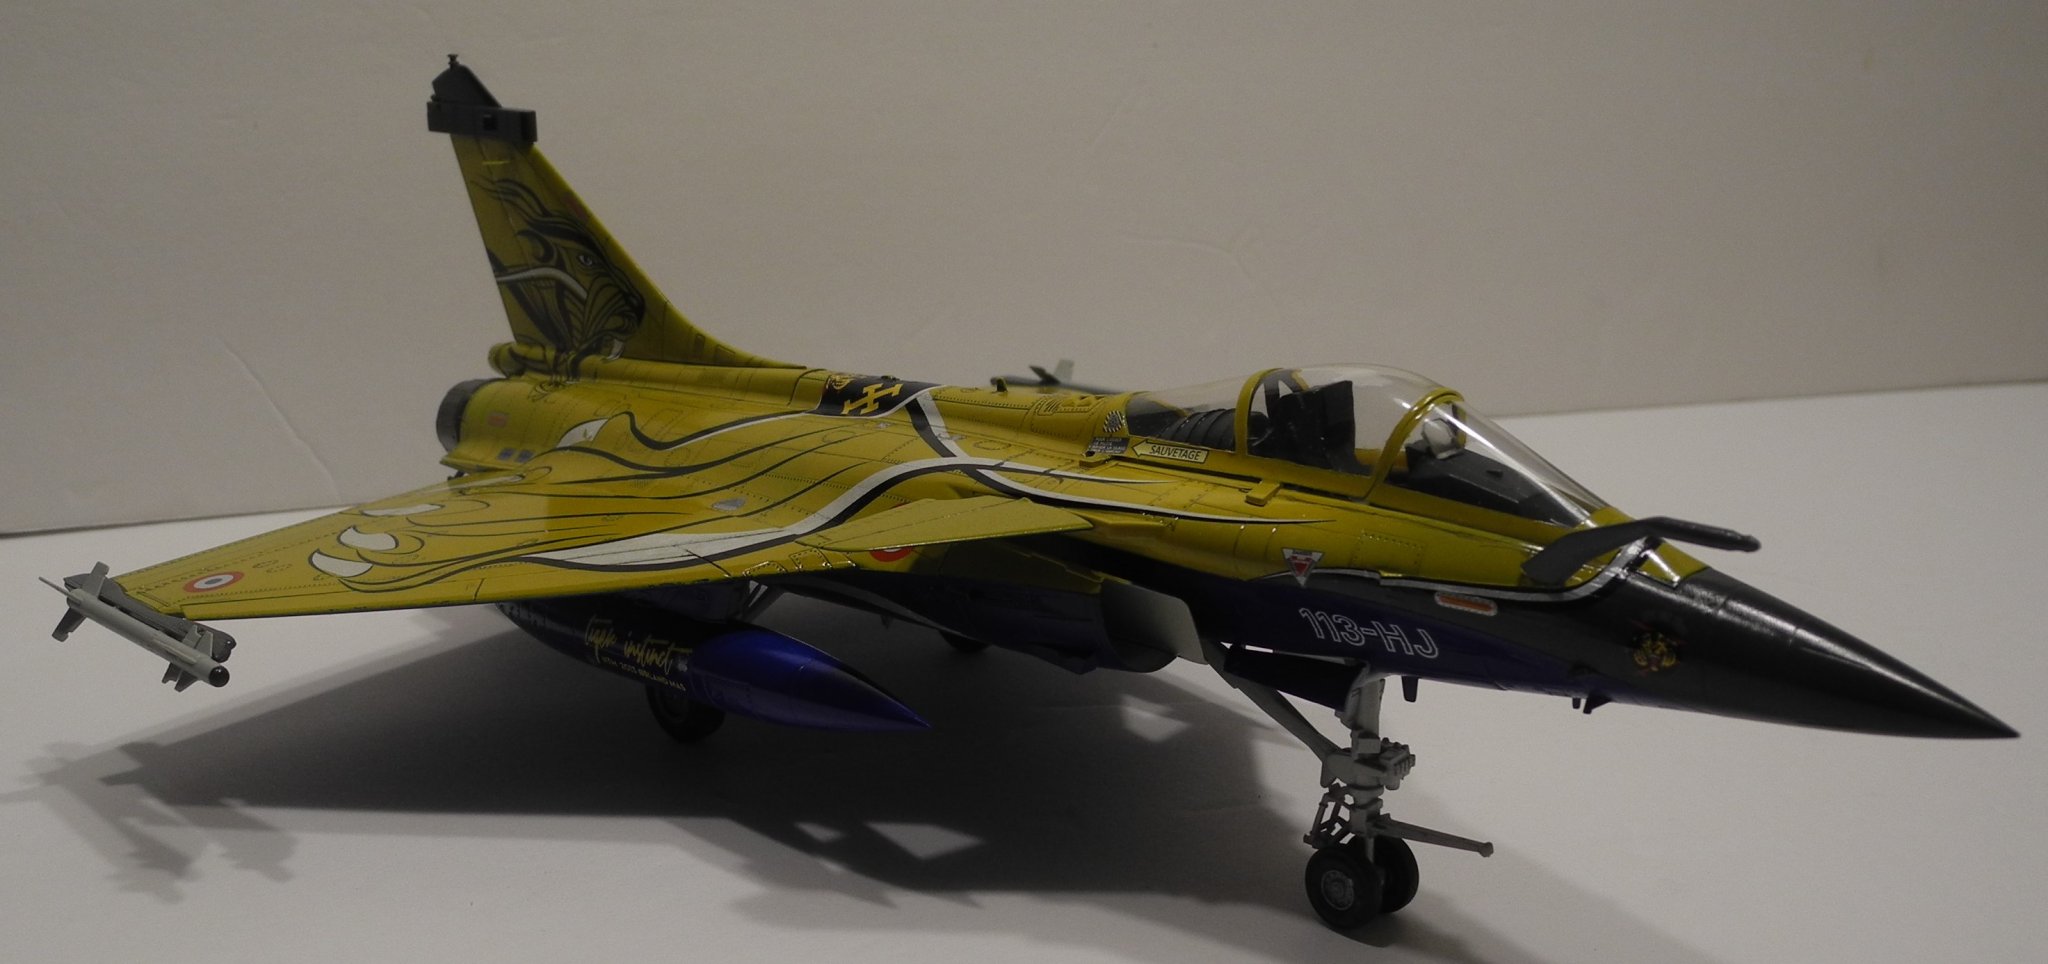
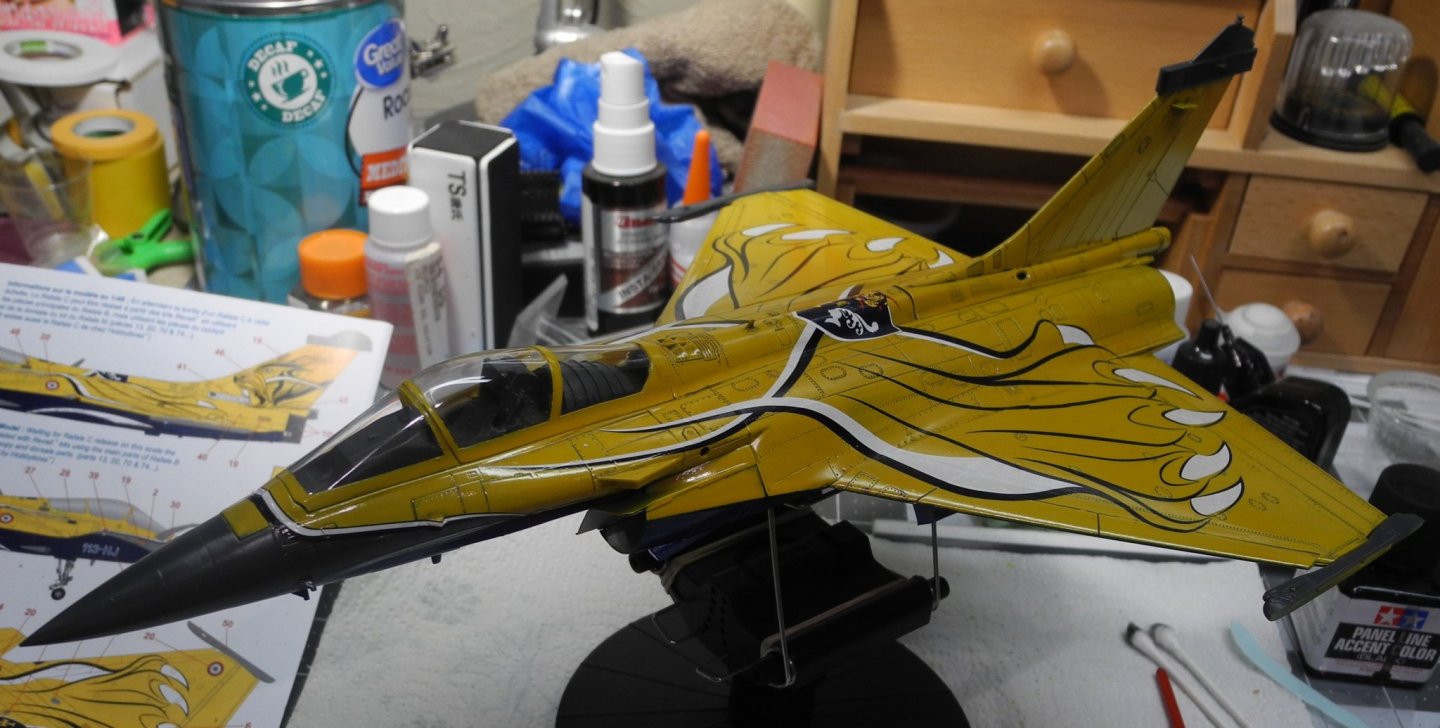
Rafale by CDW - FINISHED - Hobby Boss - 1:48 Scale
CDW replied to CDW's topic in Non-ship/categorised builds
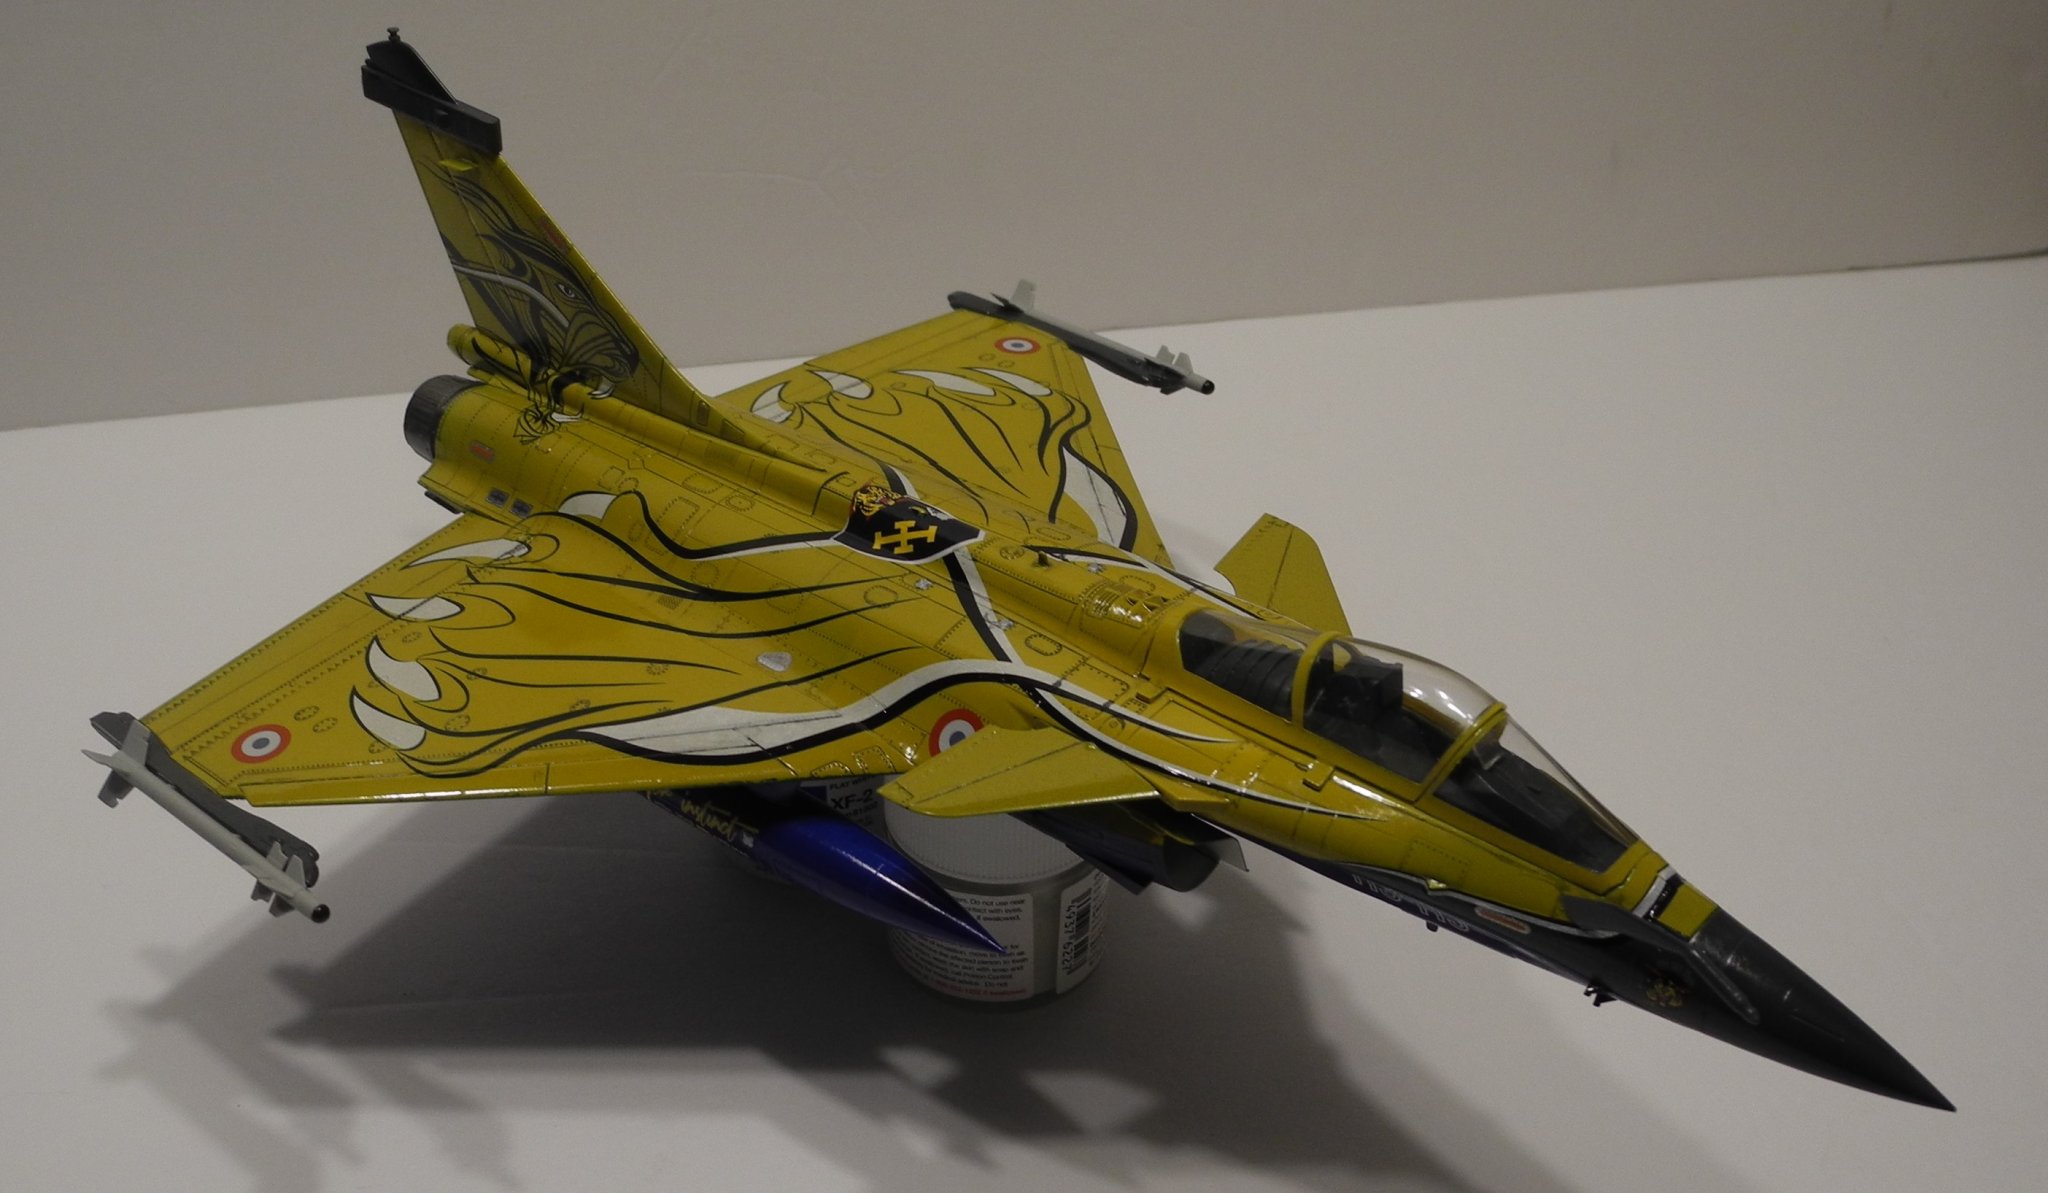
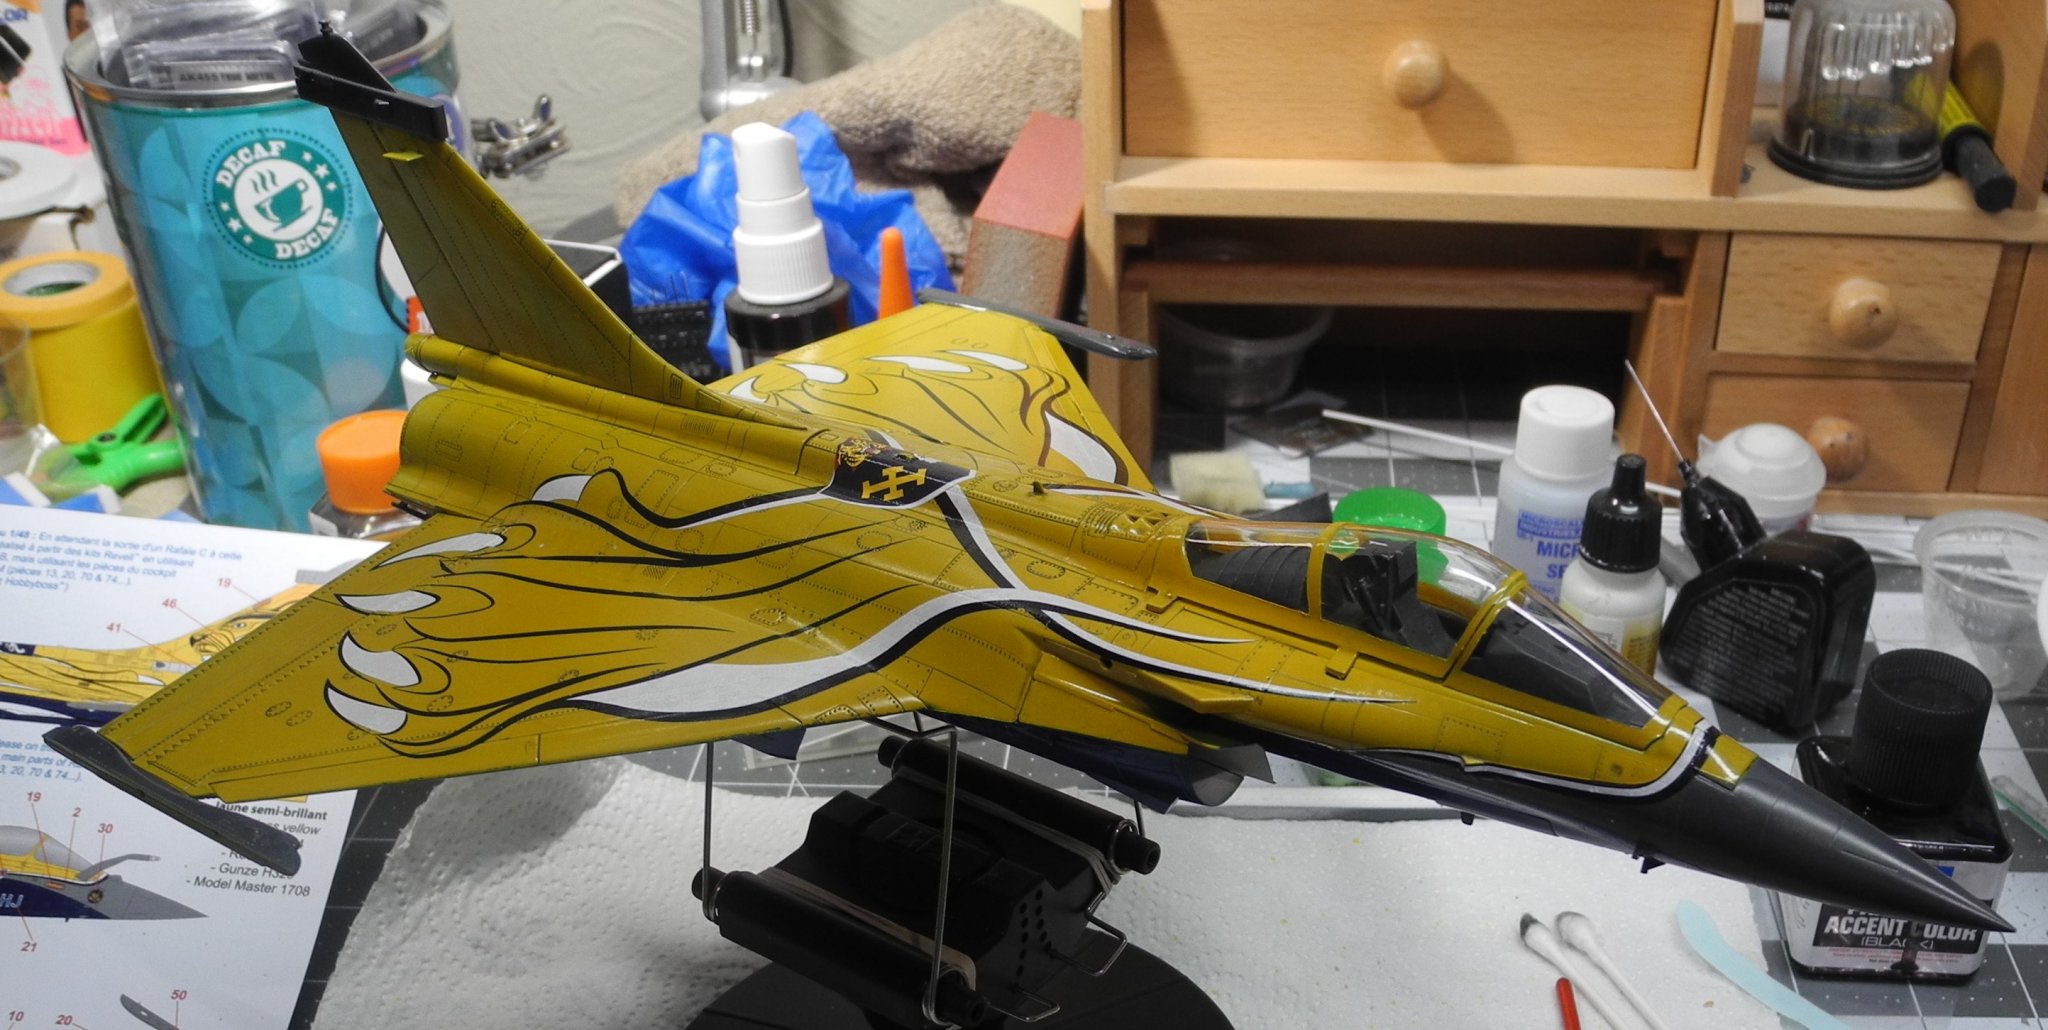
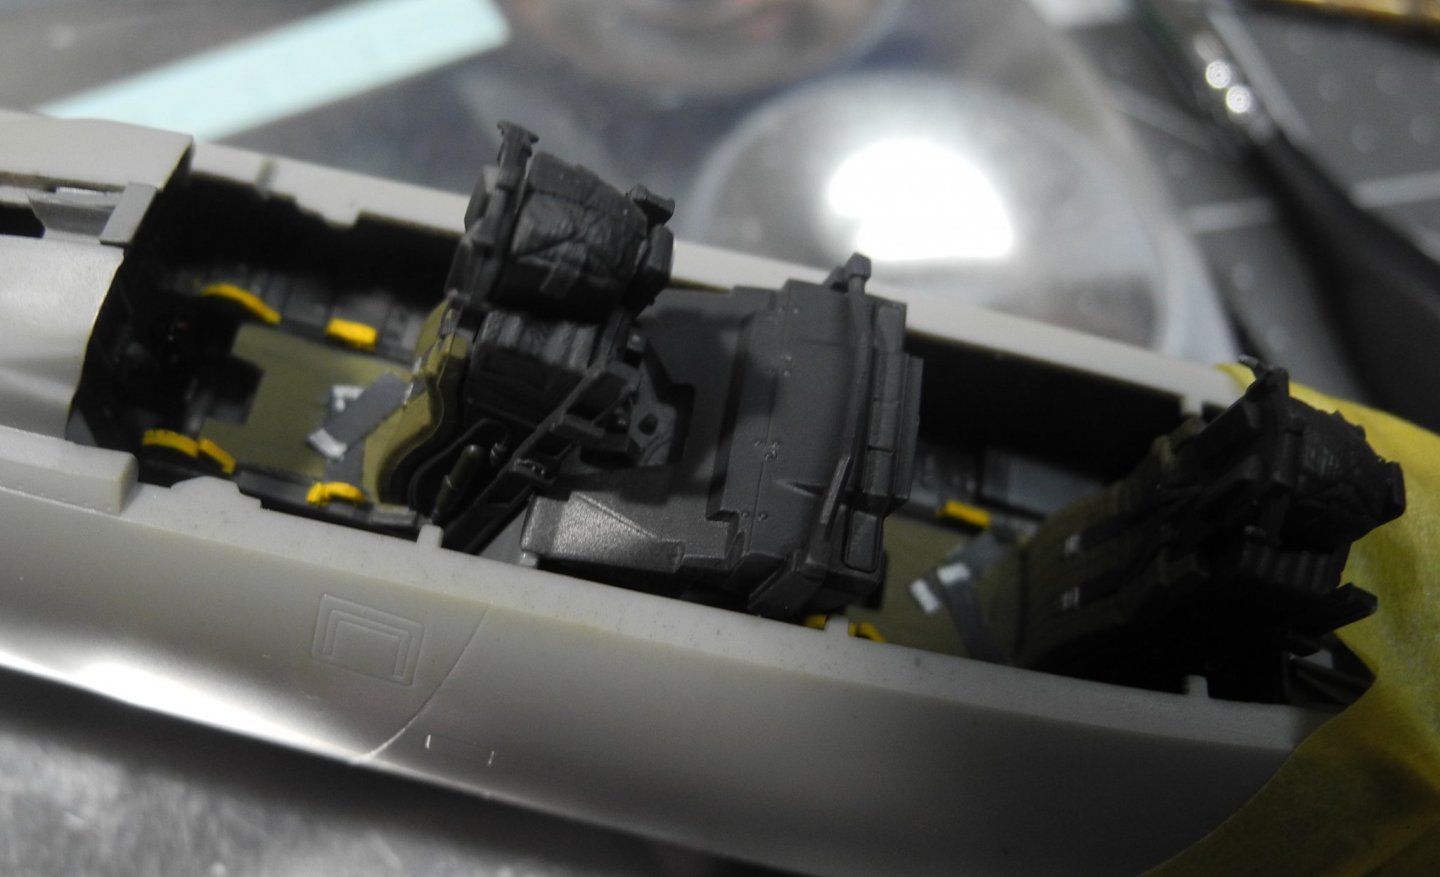
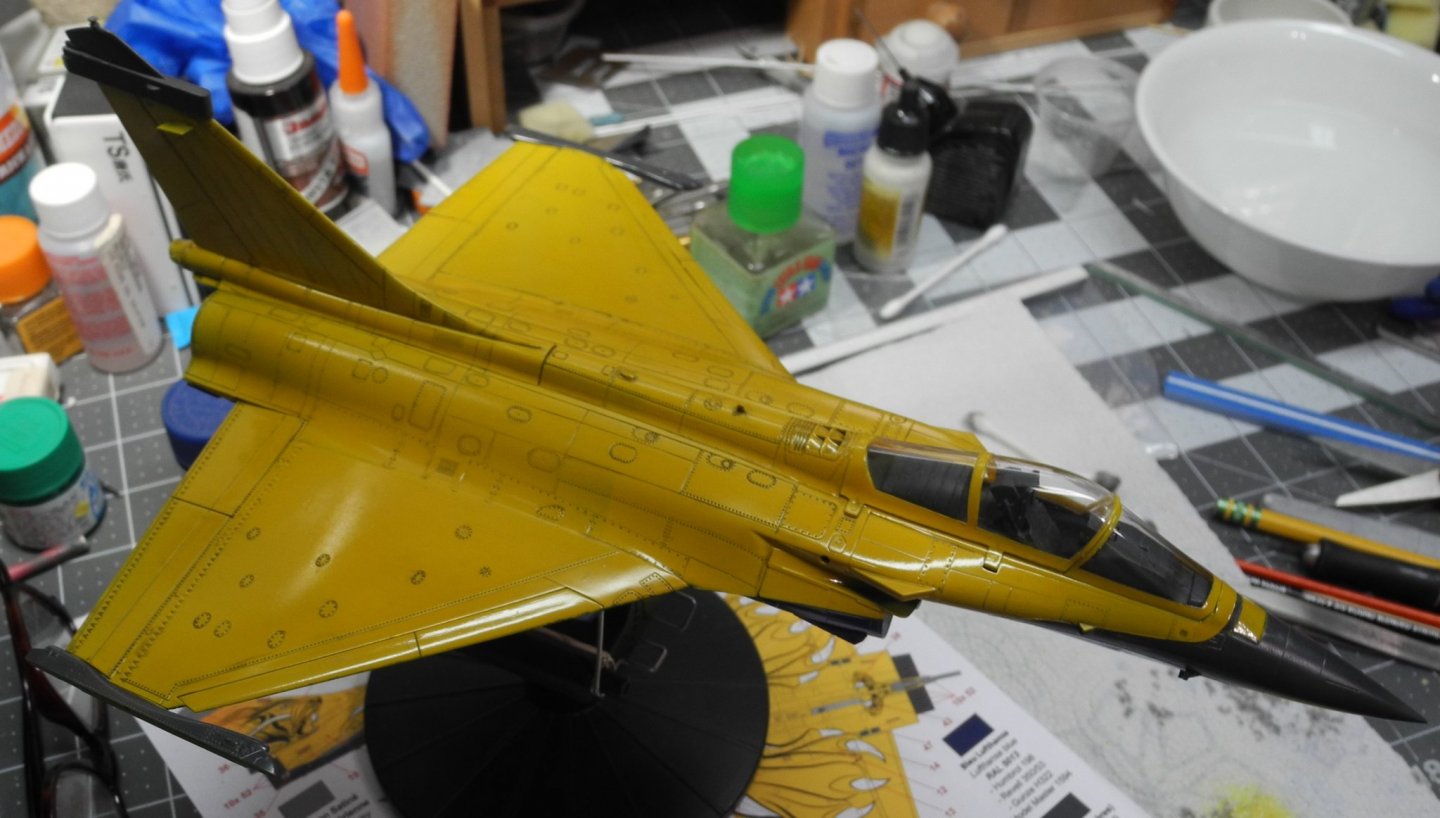
This is my last step before giving the model it's landing gear. Hallelujah ( I love finishing a model and the thrill of starting another). Since the last time, I've added the afterburners and a handful of other small details, given it a thorough coat of clear gloss to seal the decals and tweaked a few panel lines. I'm at the point of diminishing returns so going to soon call it "finished".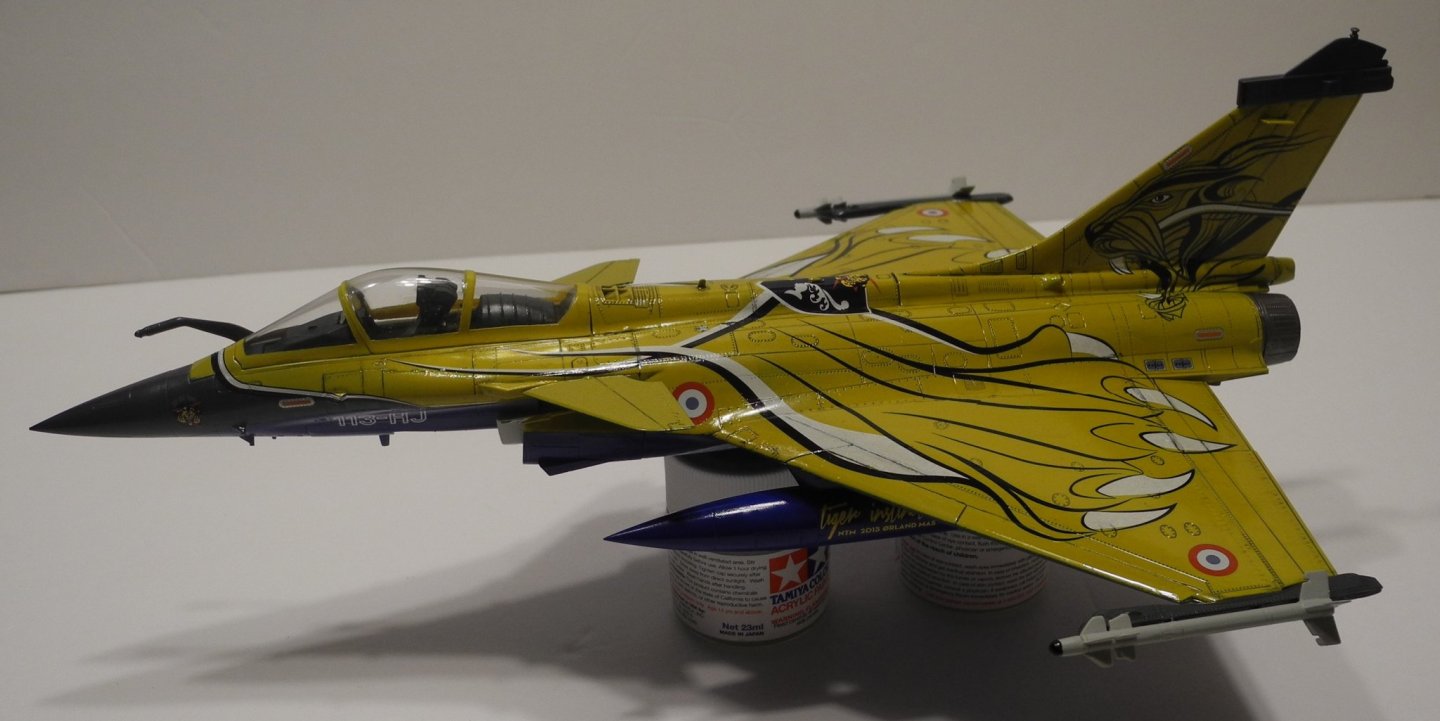


- 48 replies
-
- 14
-
-
B-25 Mitchell "Meet Miss Runyon" by Javlin-HK-1/32
CDW replied to Javlin's topic in Non-ship/categorised builds
Love this 1:32 scale and the detail. -
Rafale by CDW - FINISHED - Hobby Boss - 1:48 Scale
CDW replied to CDW's topic in Non-ship/categorised builds
Will first need to seal the decals then touch up panel lines. The canopy is not glued on so will remove it before seal, then glue in place last. -
Rafale by CDW - FINISHED - Hobby Boss - 1:48 Scale
CDW replied to CDW's topic in Non-ship/categorised builds
About 90% - 95% finished with the decals now.


- 48 replies
-
- 11
-
-
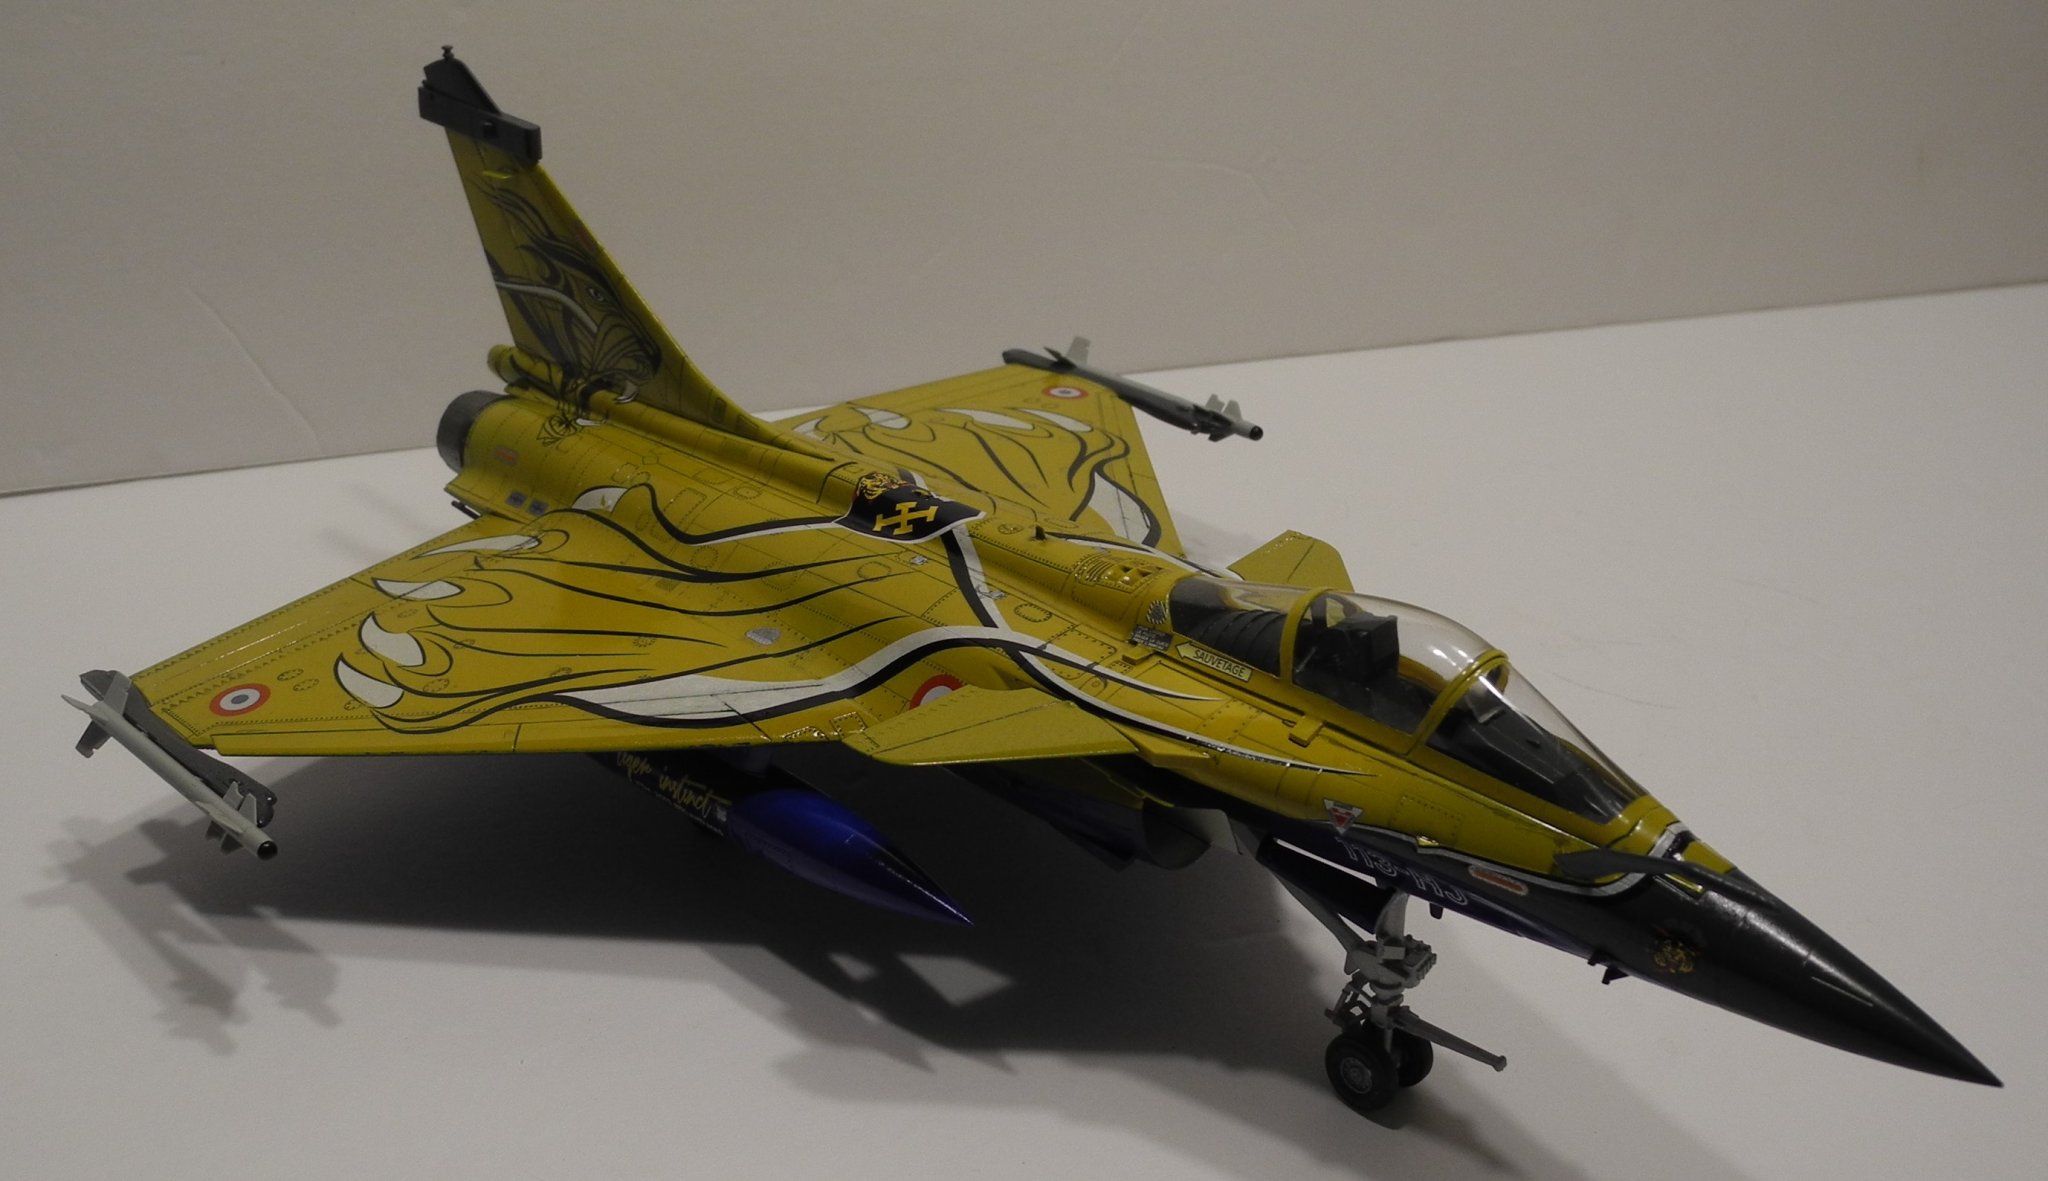
Rafale by CDW - FINISHED - Hobby Boss - 1:48 Scale
CDW replied to CDW's topic in Non-ship/categorised builds
Yes, the French do produce some spectacular aircraft. Somewhere on Youtube, there is a video of a team doing a paint job on a jet fighter aircraft similar to this one and it shows the precise techniques they use to mask and paint it. -
Rafale by CDW - FINISHED - Hobby Boss - 1:48 Scale
CDW replied to CDW's topic in Non-ship/categorised builds
I got this far tonight before deciding it's time to get some shut-eye. The decals will probably take several days to get them all done as there are quite a few to go. Tomorrow, my kids return from New Hampshire so I'll be picking them up from the airport. They sure did enjoy their time playing in the snow. My son in law took them to do a sleigh ride, and they went snow tubing several times. A huge adventure for them as snow is just not part of our Florida experience. 🙂

- 48 replies
-
- 10
-
-
Looking forward to the model AND the history. Great subject material.
-
Rafale by CDW - FINISHED - Hobby Boss - 1:48 Scale
CDW replied to CDW's topic in Non-ship/categorised builds
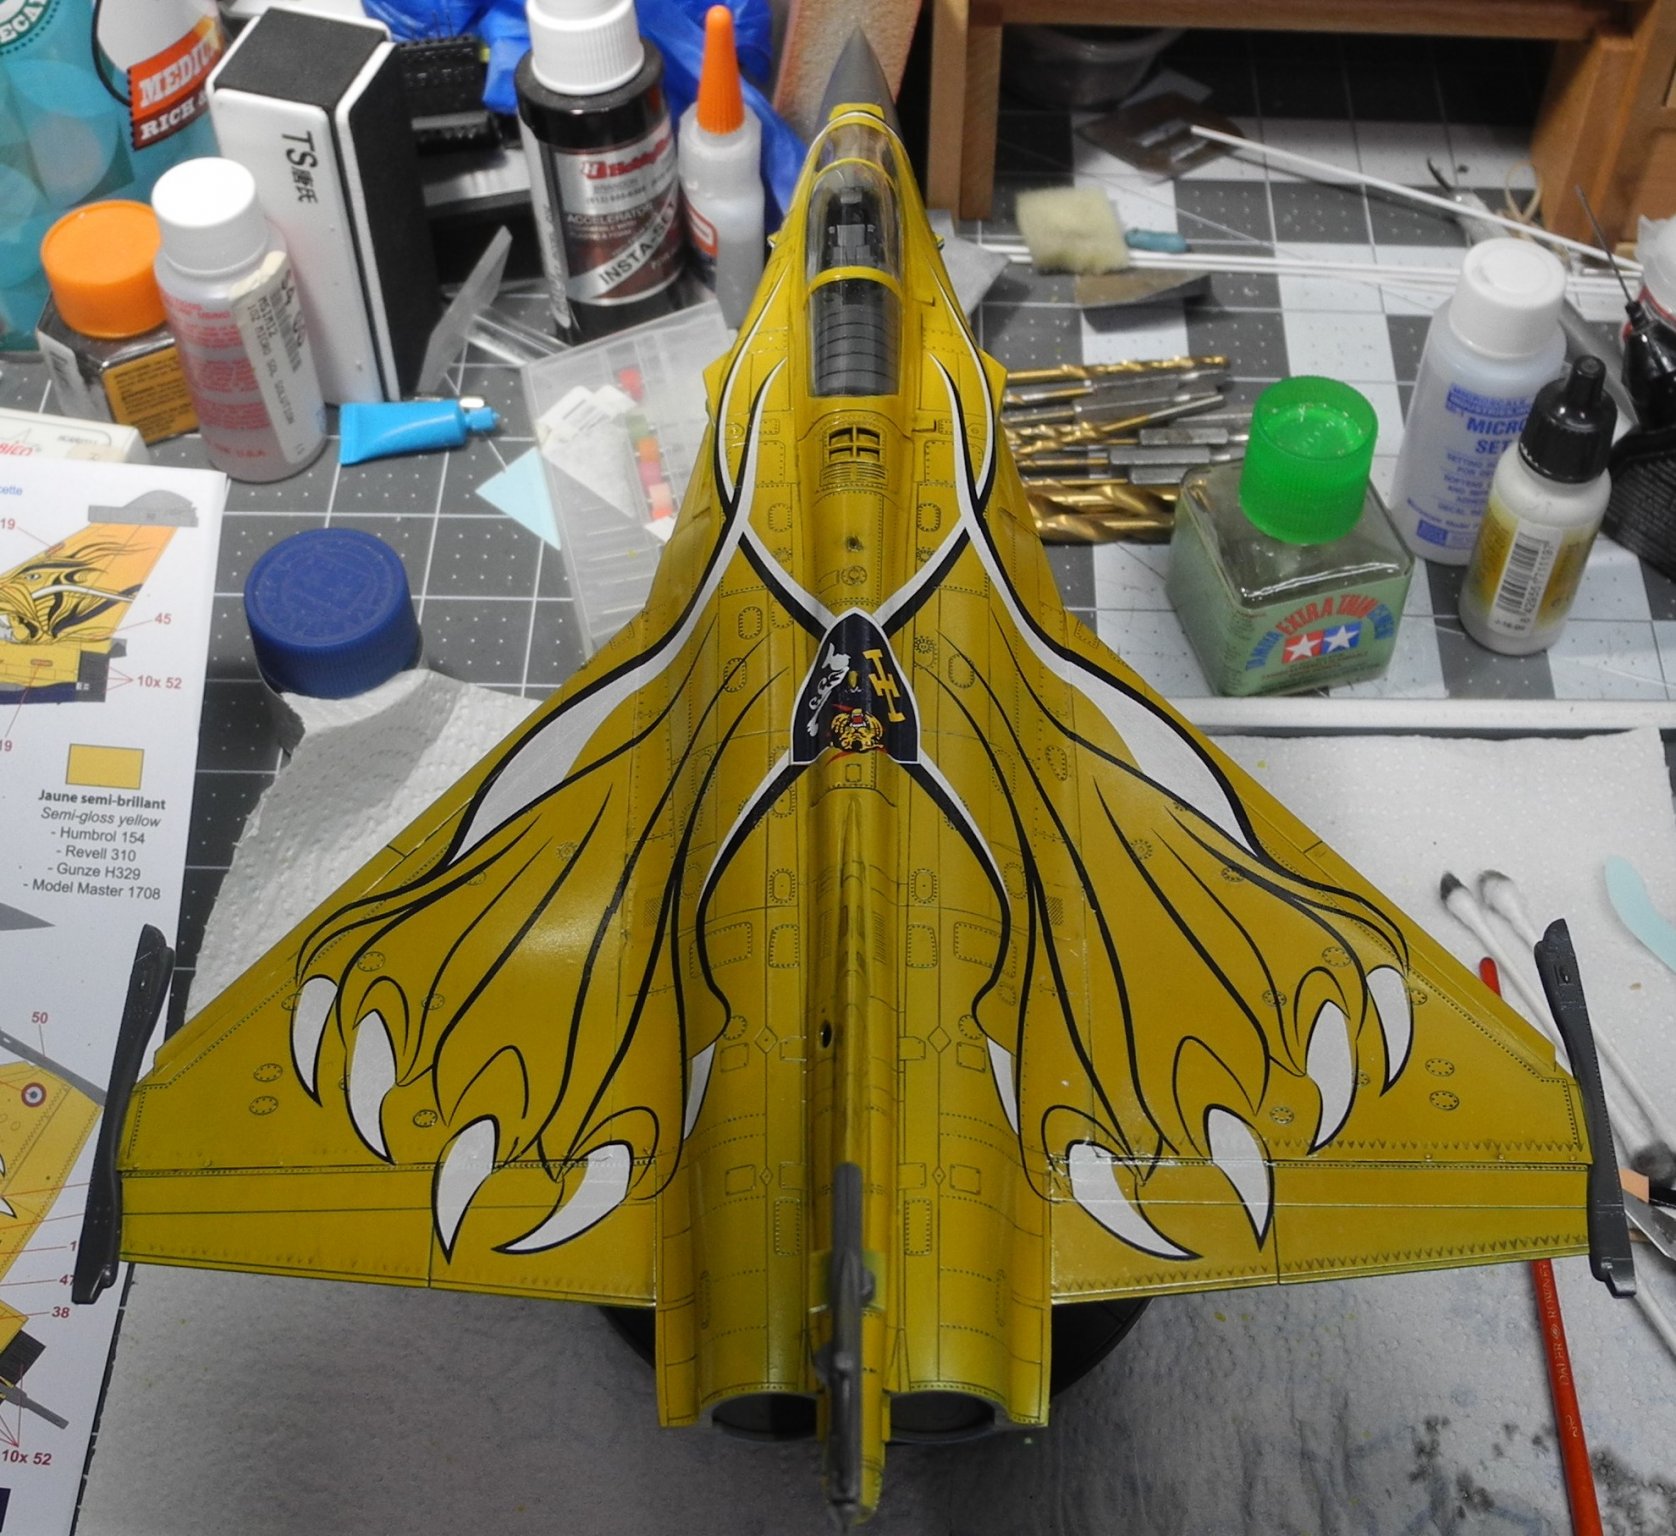
So far I'm real happy with the quality and work-ability of these Syhart decals. They are very thin and supple, laying down easily with no tendency to tear or any other ill habits. At the moment, I don't think they will require any decal solvent at all. That is very unusual and a pleasant surprise. Just a couple of decal update photos: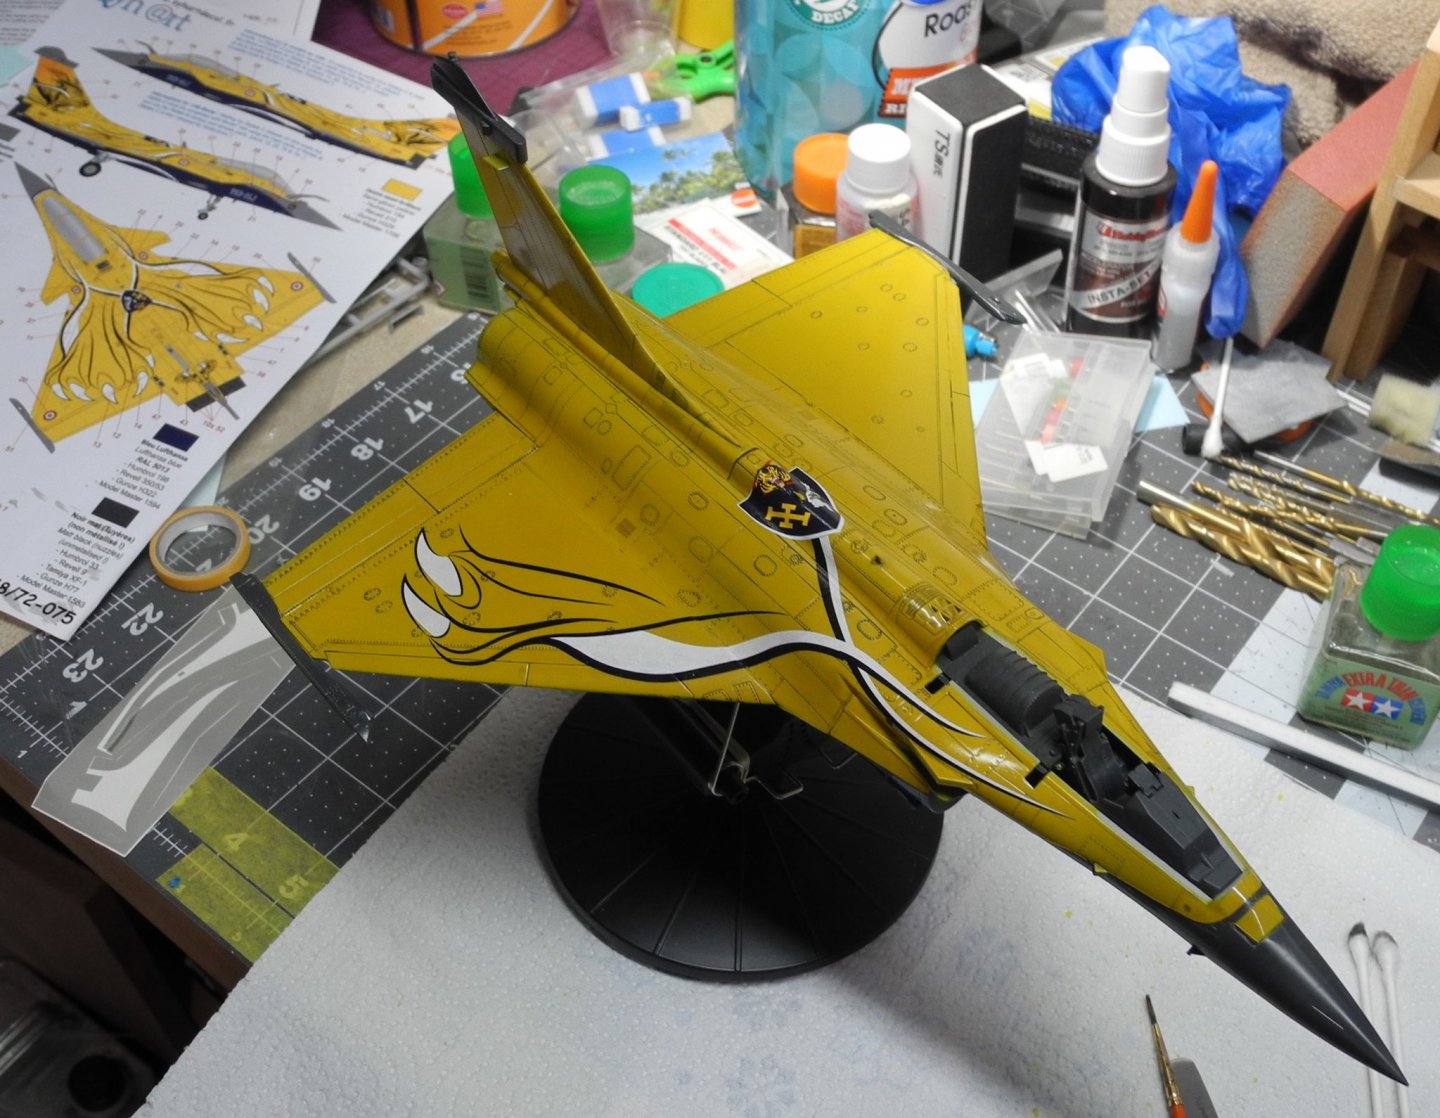
-
Rafale by CDW - FINISHED - Hobby Boss - 1:48 Scale
CDW replied to CDW's topic in Non-ship/categorised builds
Yes. That would work perfectly well. -
Rafale by CDW - FINISHED - Hobby Boss - 1:48 Scale
CDW replied to CDW's topic in Non-ship/categorised builds
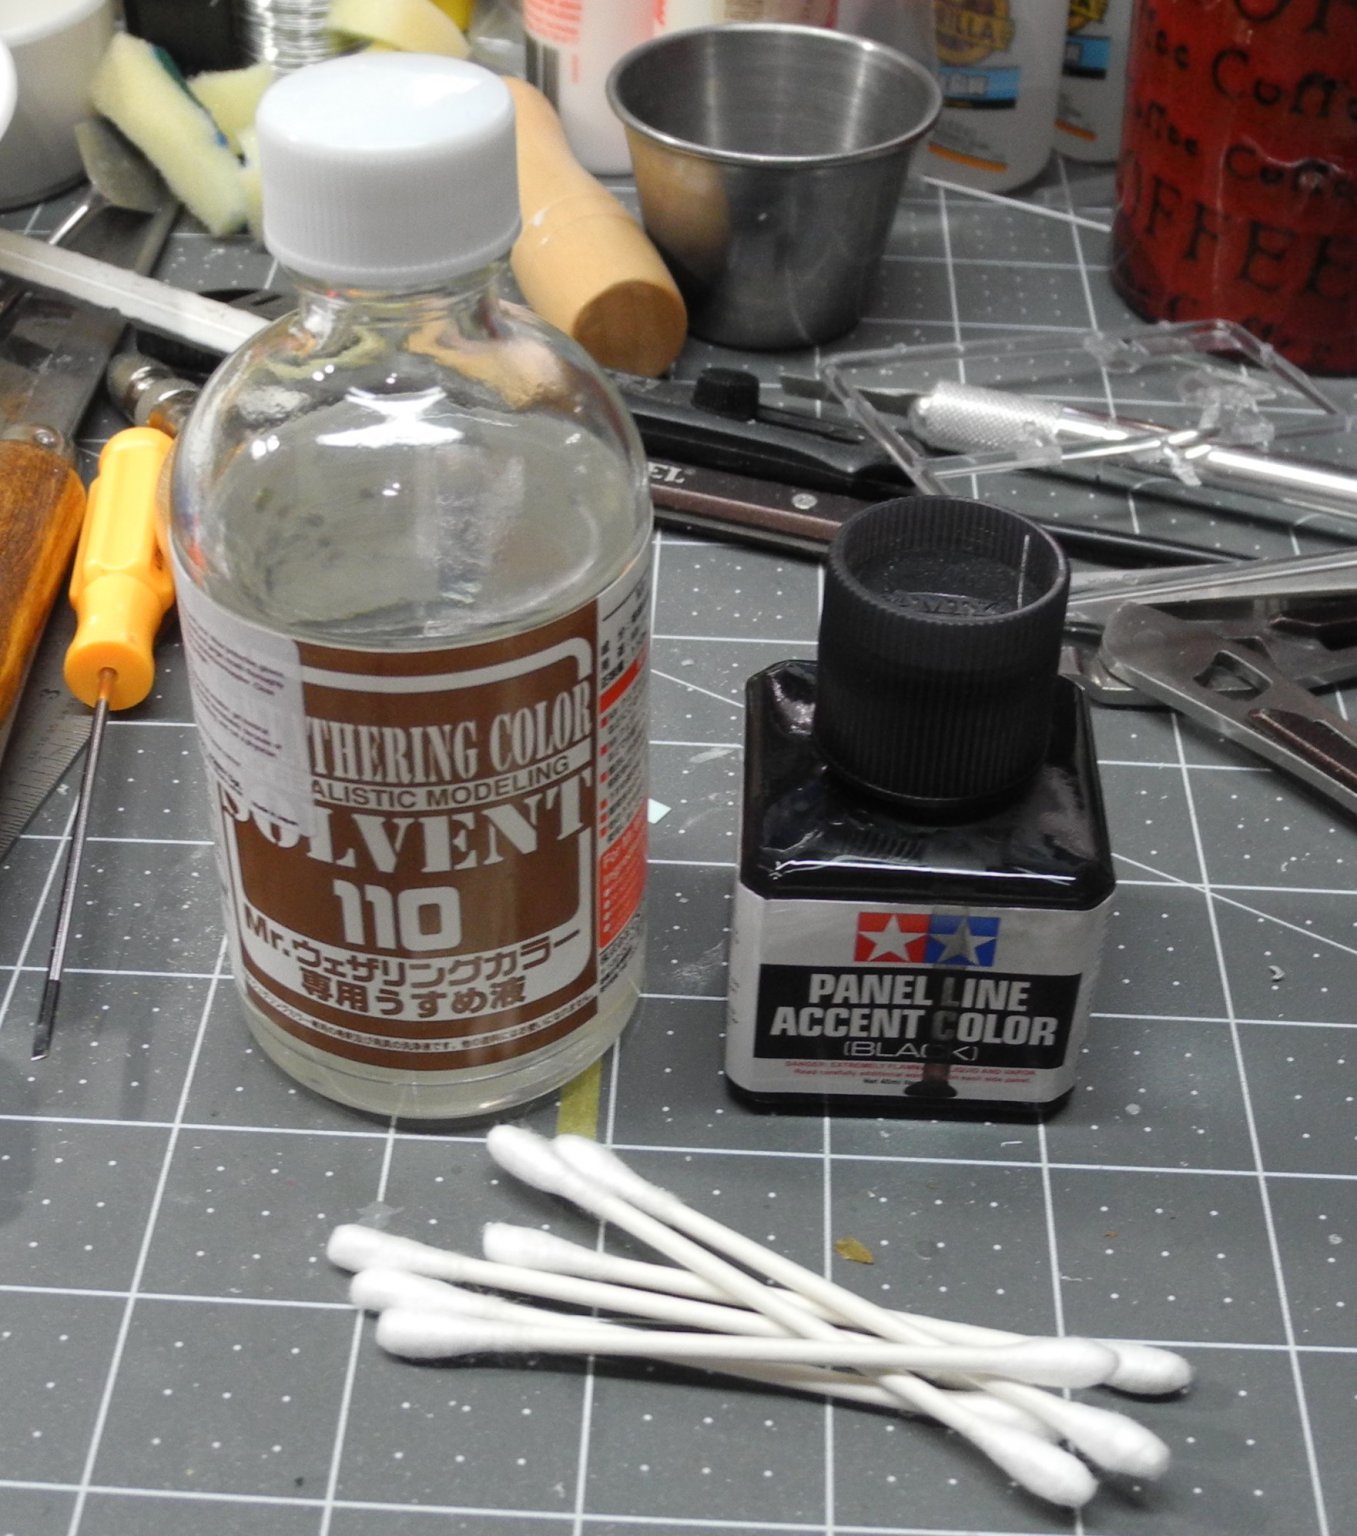
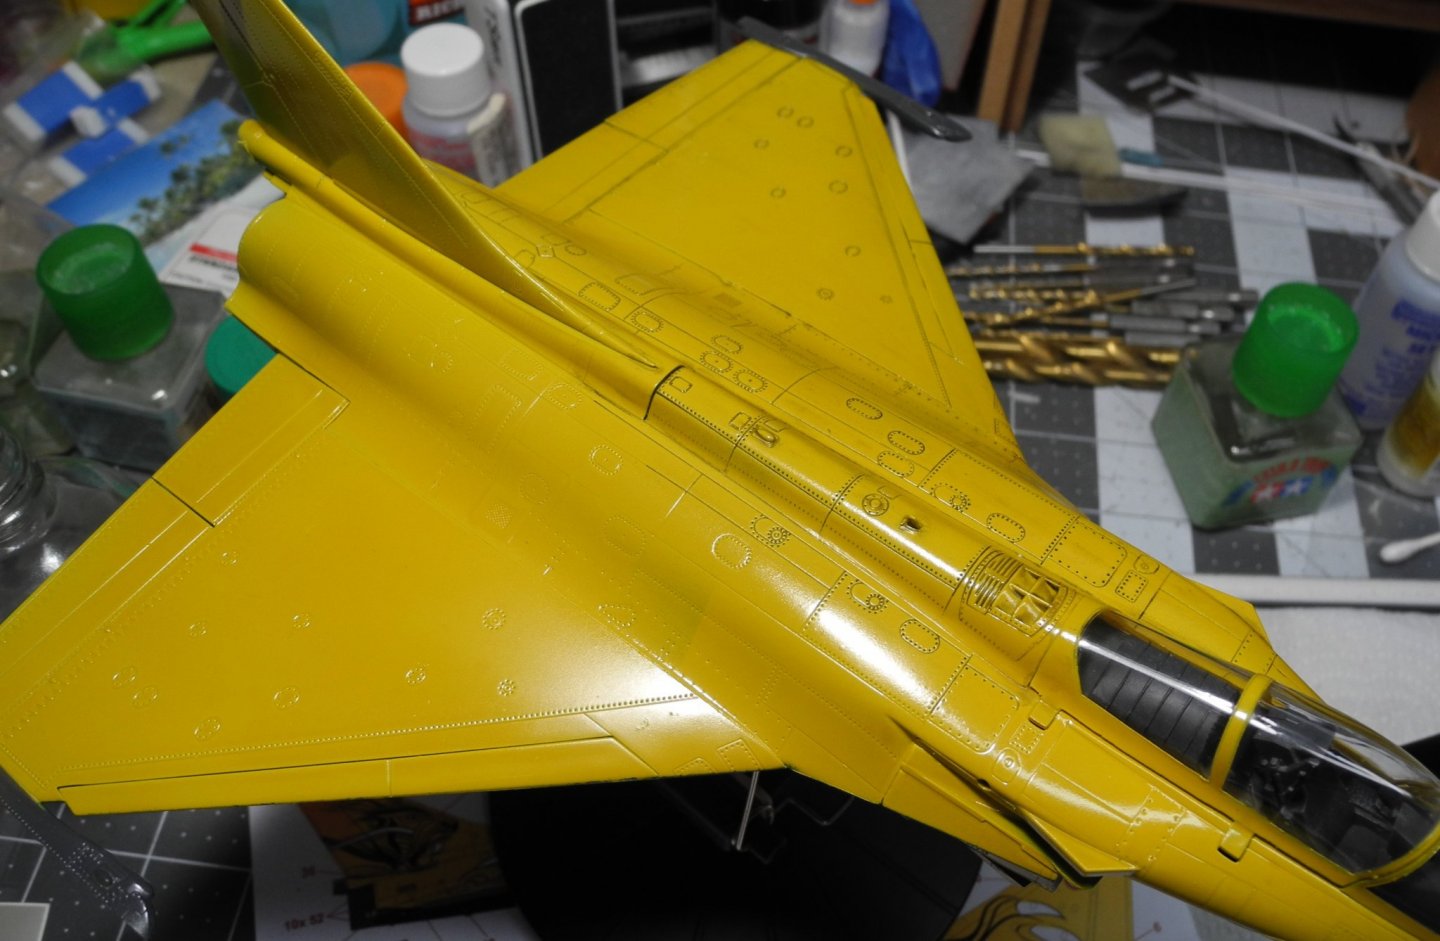
To accent the panel lines, I use these three items: Tamiya black panel line accent, Mr. Color 110 solvent, Q-tips For this method/materials, you need to begin with a glossy paint surface, either acrylic or lacquer. I'm not sure how enamel paint would react to the Mr. Color 110 solvent, but I would not try it on enamel paint unless it had a good clear coat of acrylic over it. Apply the Tamiya panel line accent over the panel lines and give it time to dry. After the panel line accent is dry, dampen a Q-tip with the Mr. Color 110 solvent and gently wipe the panel lines with the solvent. Once it's had a few minutes to do it's thing, resume a gentle wiping of the panel lines with the dampened Q-tip to remove the excess accent color and leave just the highlighted panel lines. If you rub too hard, it will remove the shading inside the panel lines. If this happens, it's easily fixed. Just repeat the process to achieve the level of panel line accent you want. The solvent will not harm a dry acrylic (nor a lacquer one) surface at all. But it's important the painted surface is glossy. if not, the panel line accent will become embedded in the pigment of a rough/flat surface giving undesirable results.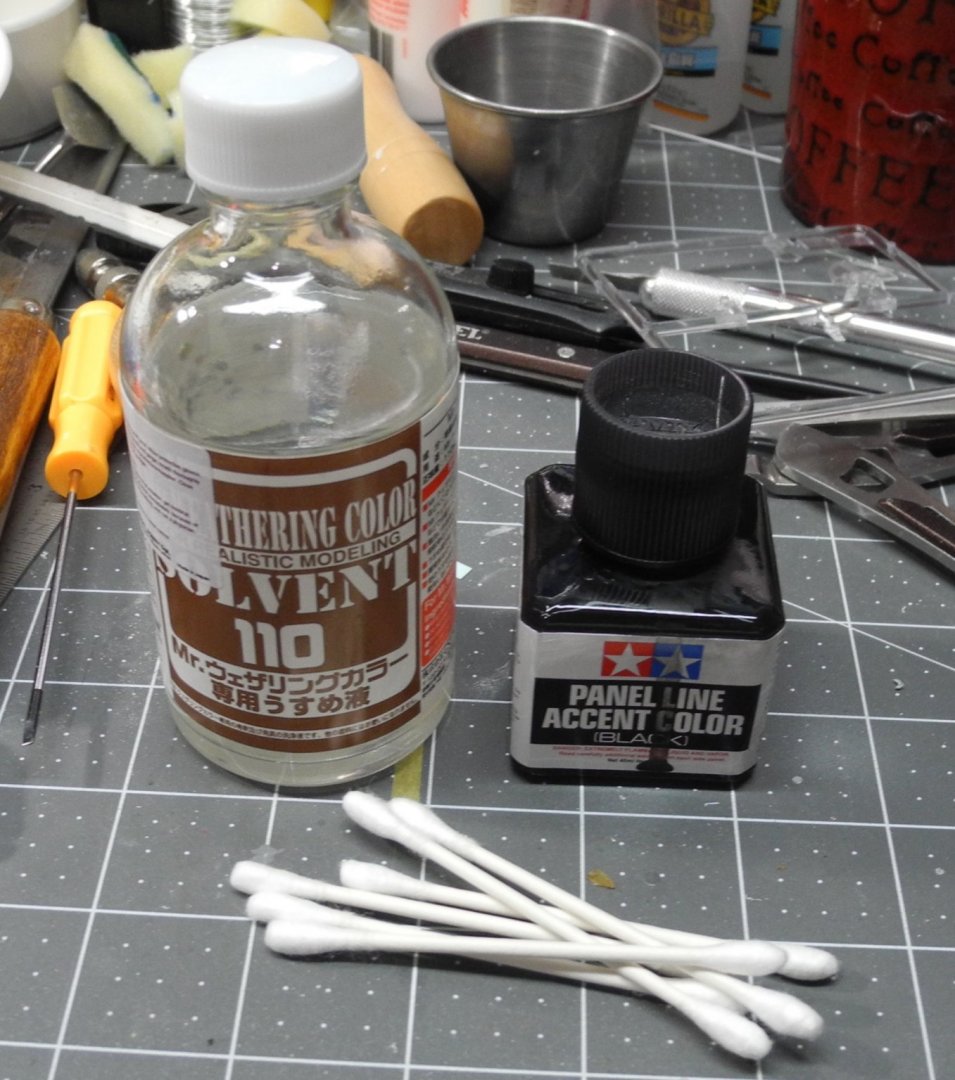
- 48 replies
-
- 10
-
-
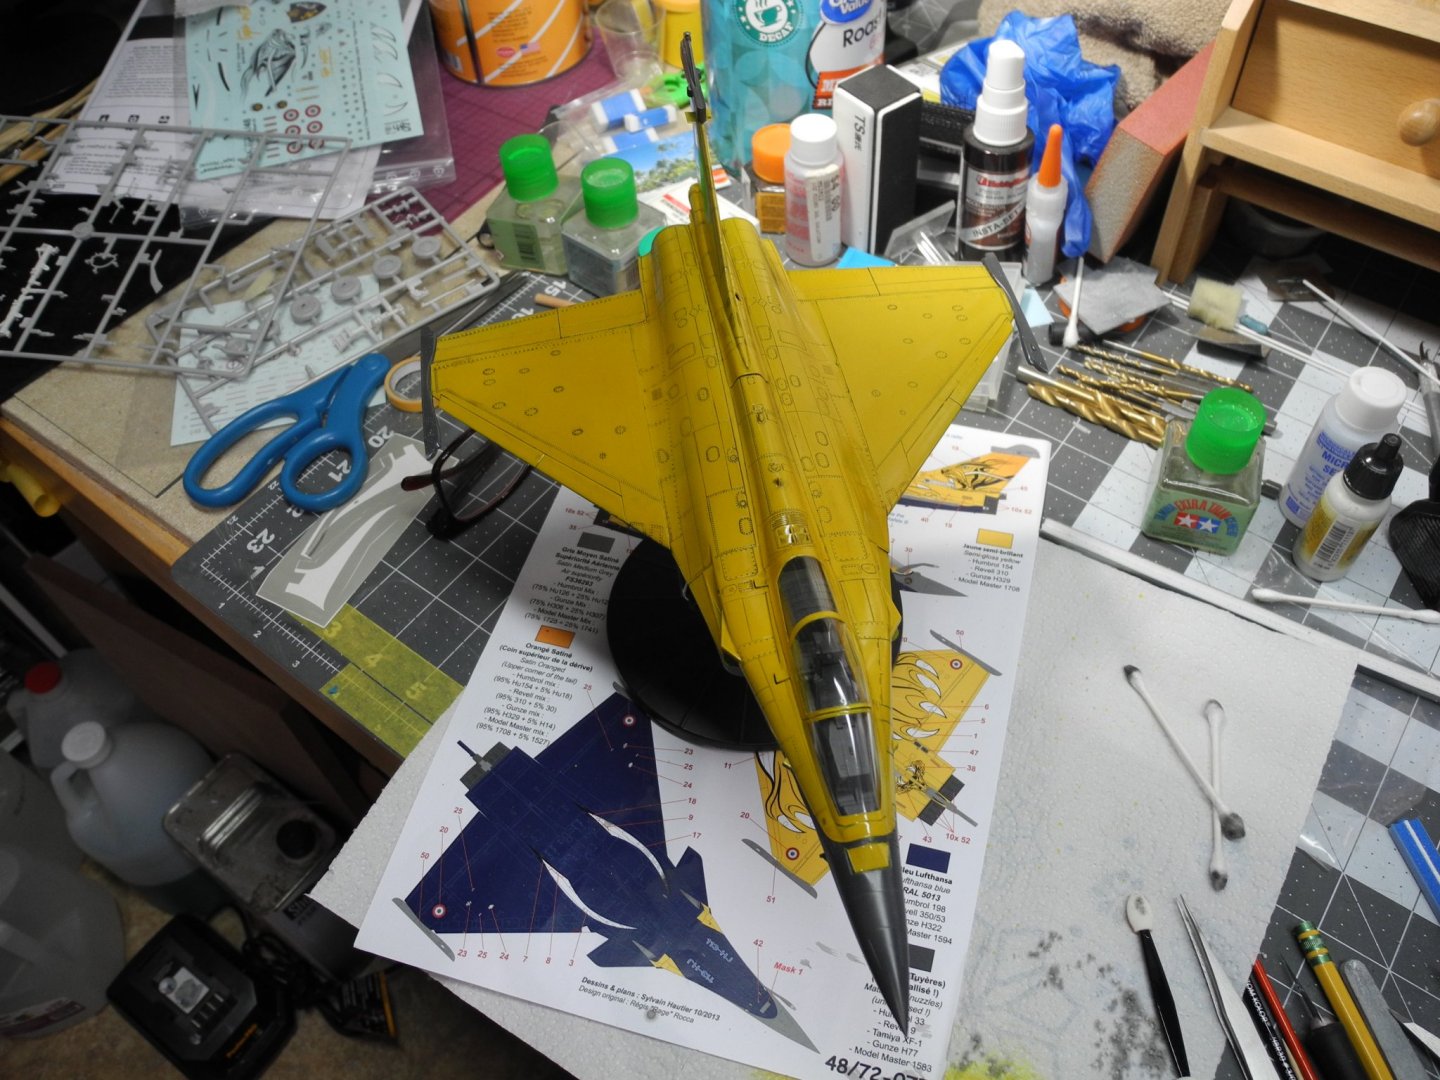
Rafale by CDW - FINISHED - Hobby Boss - 1:48 Scale
CDW replied to CDW's topic in Non-ship/categorised builds
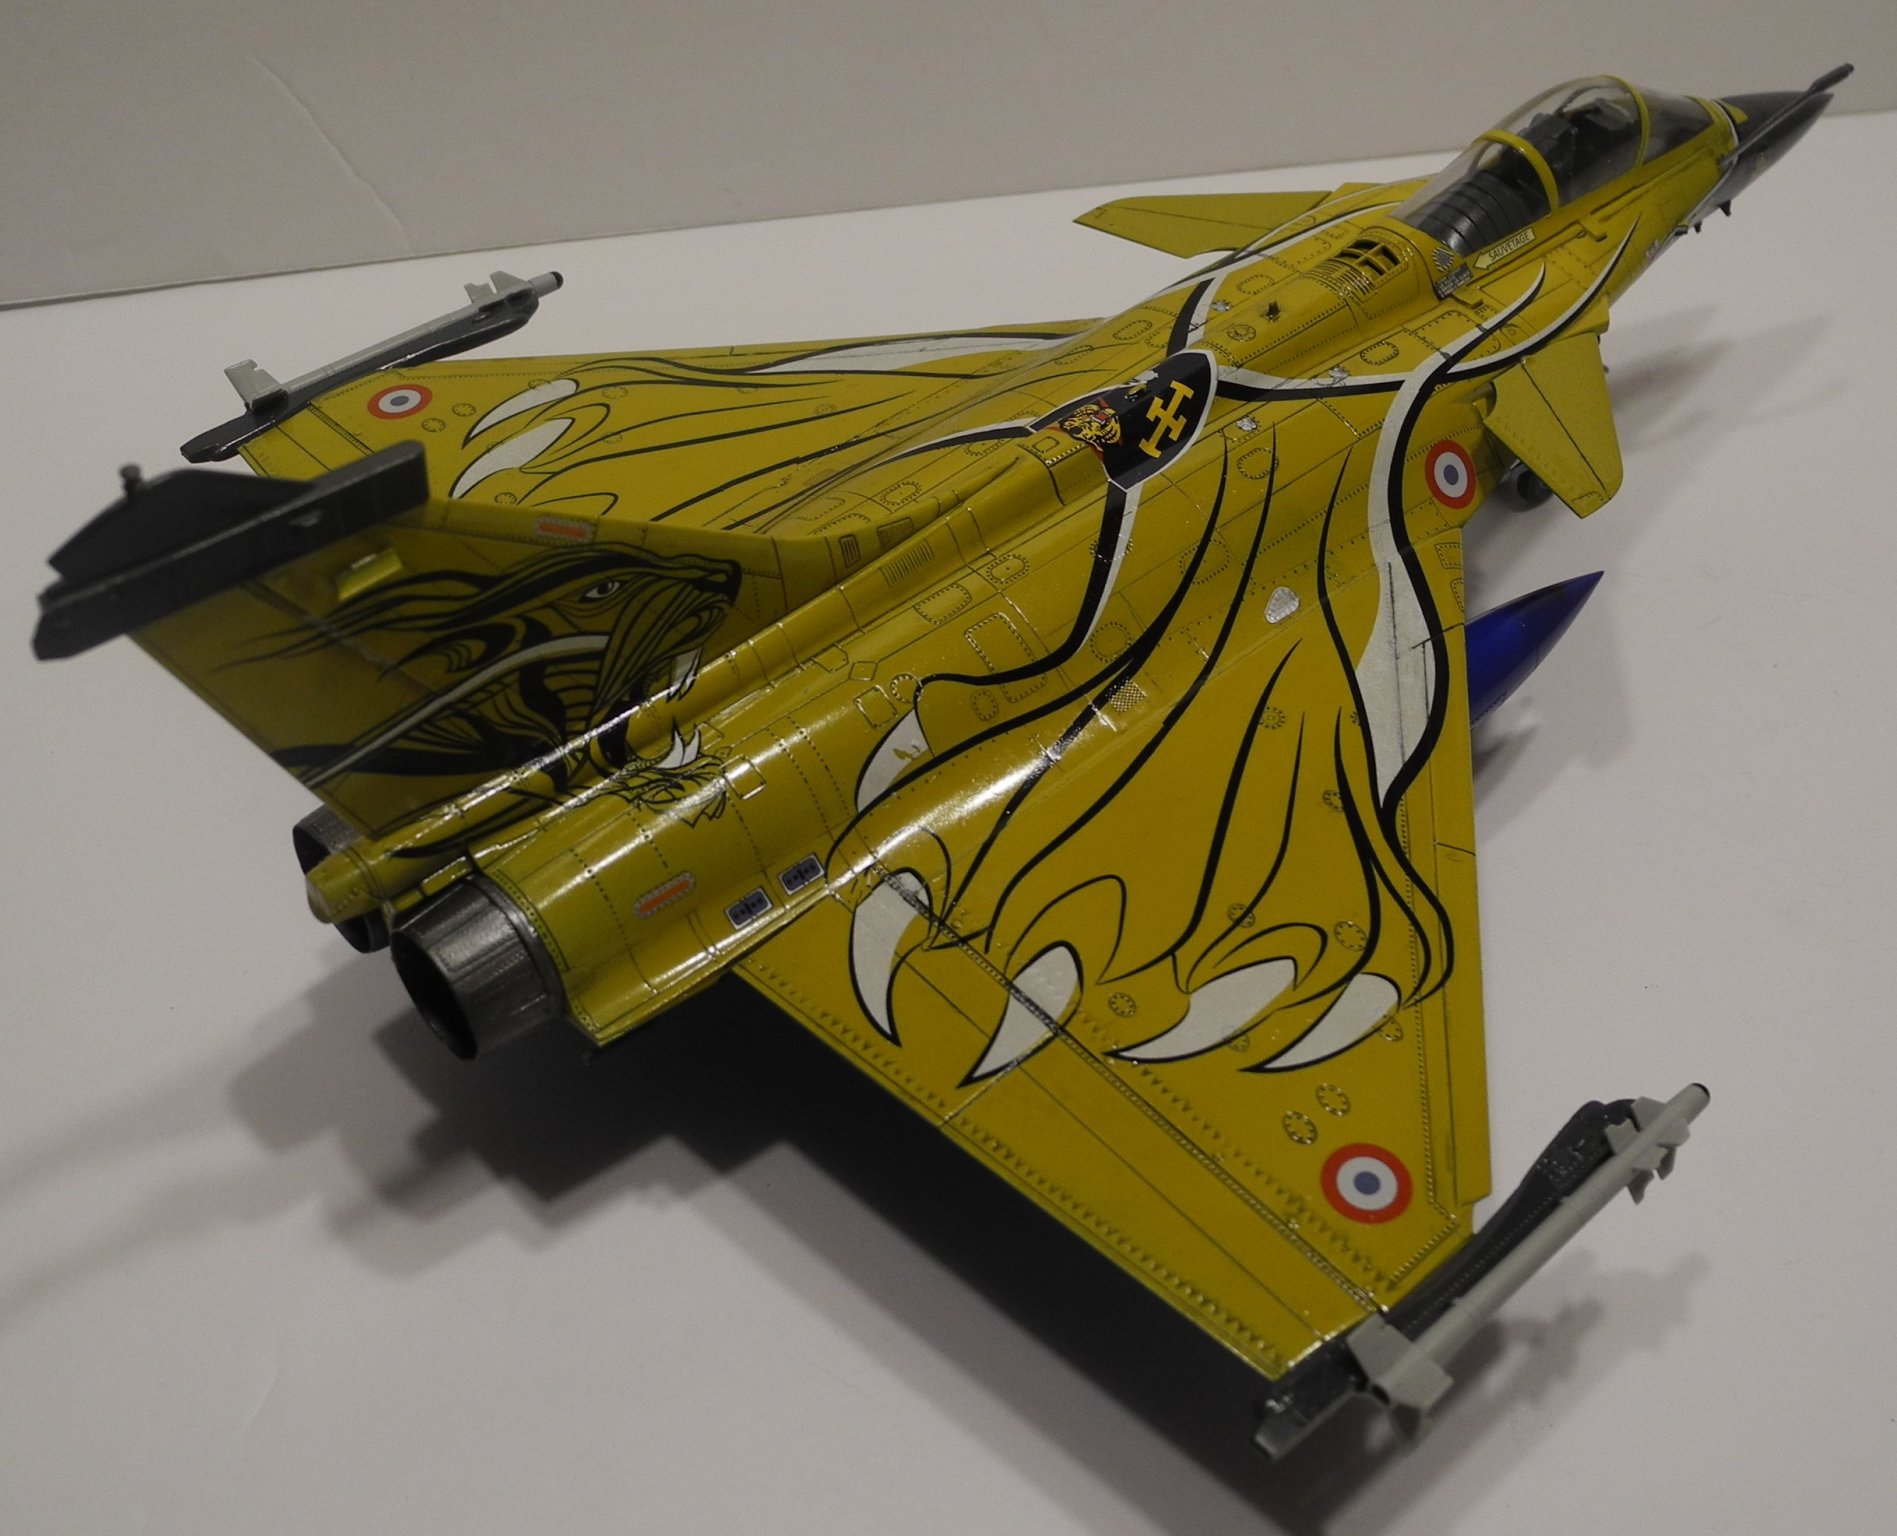
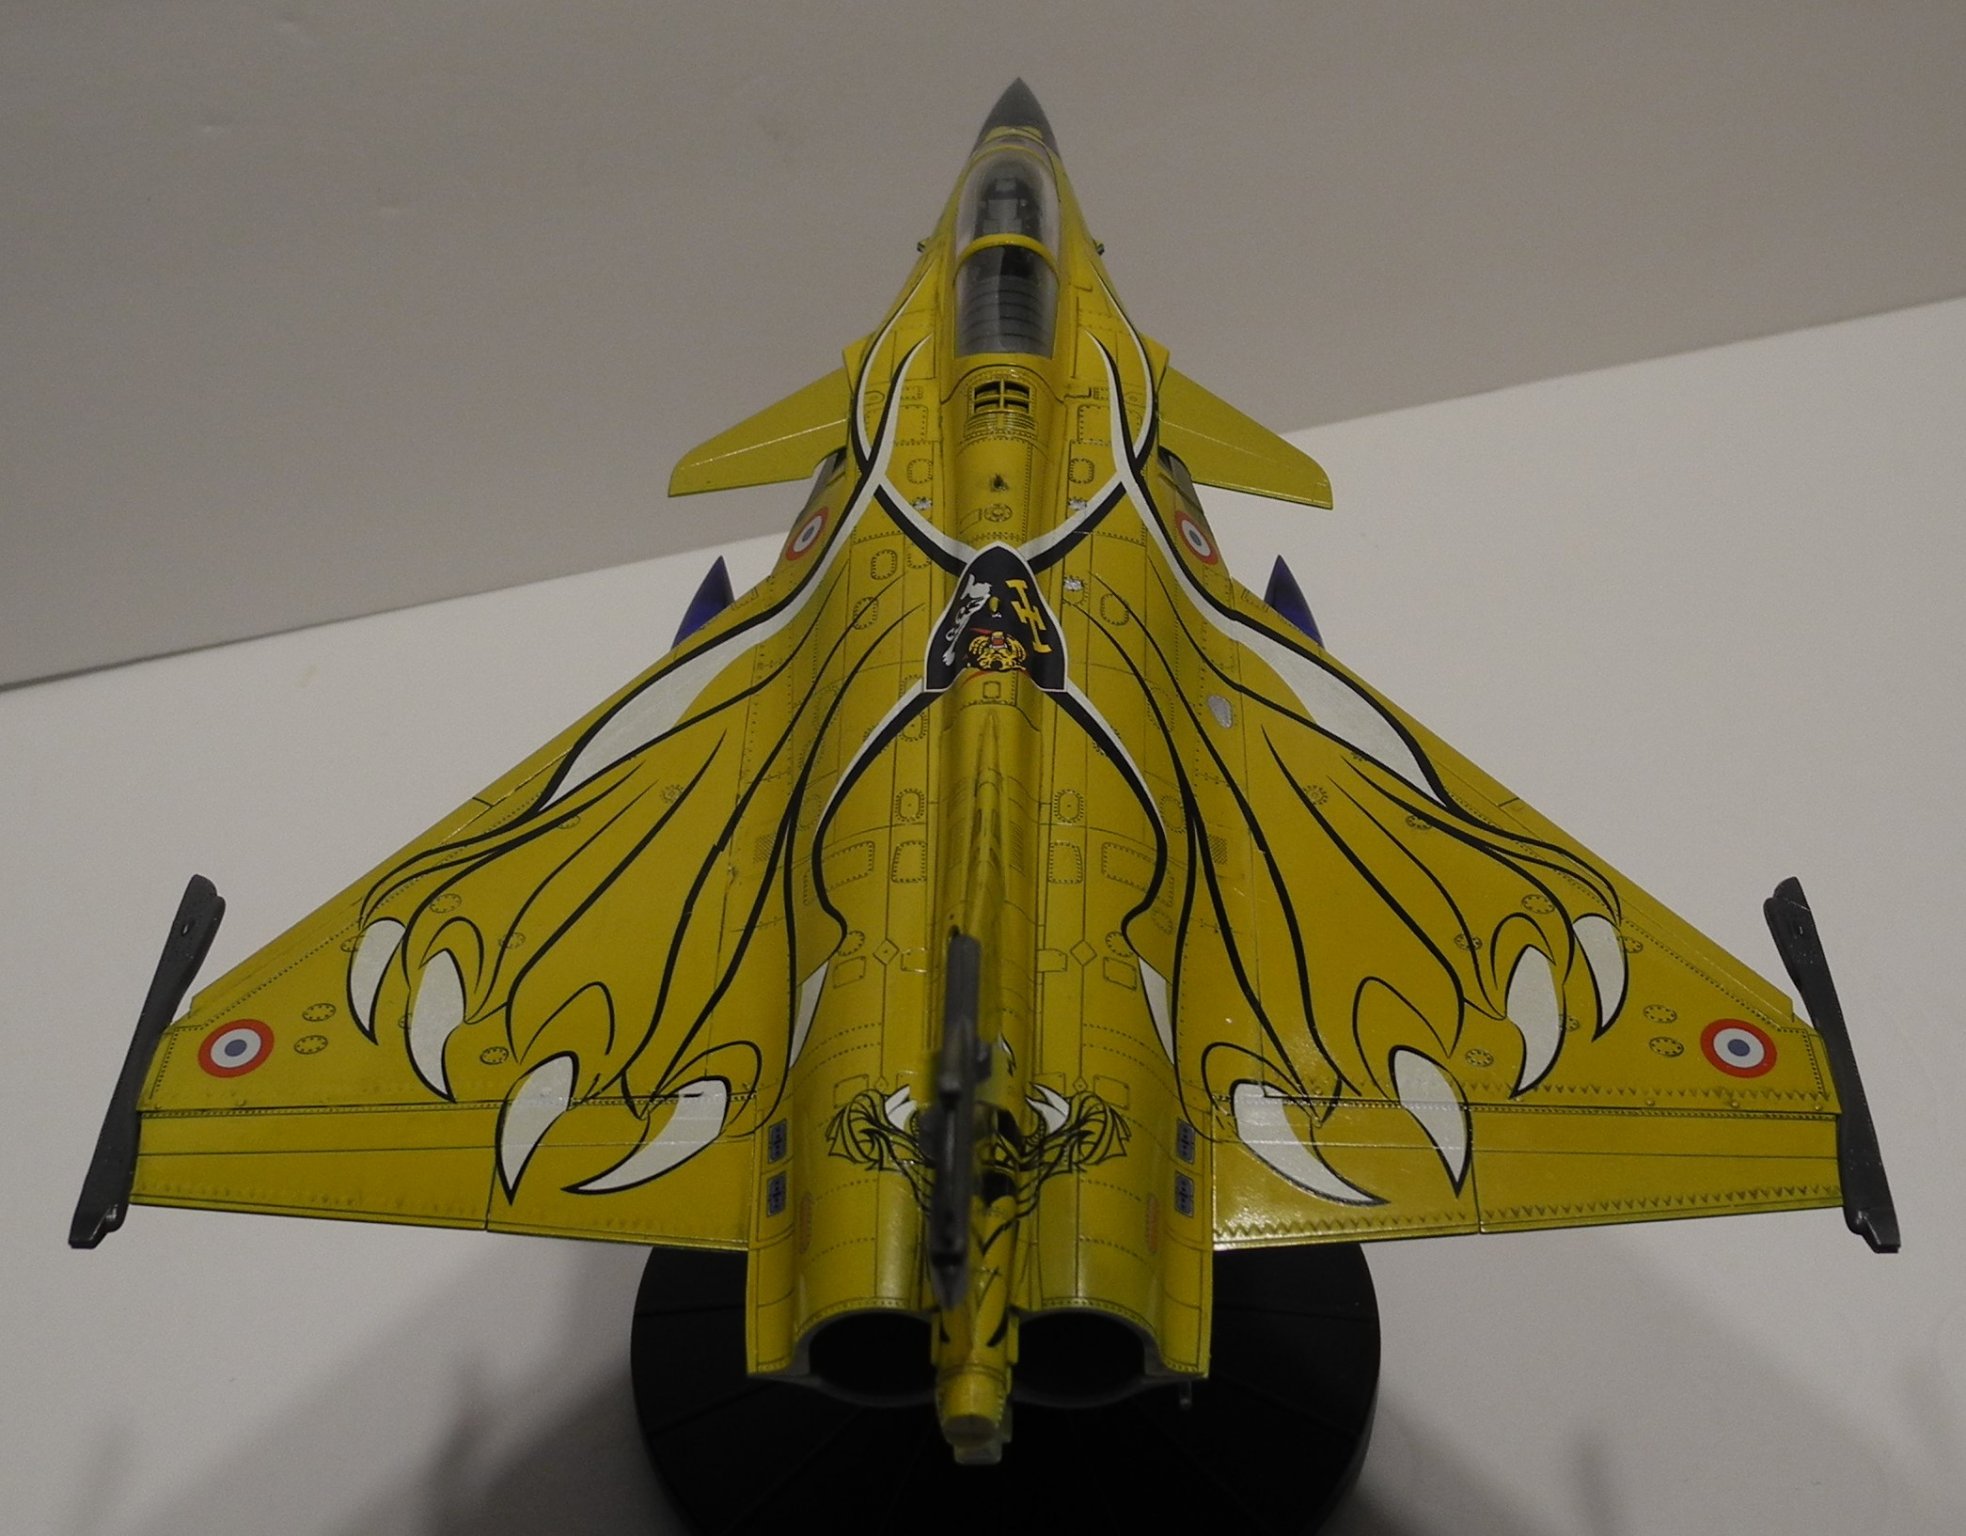
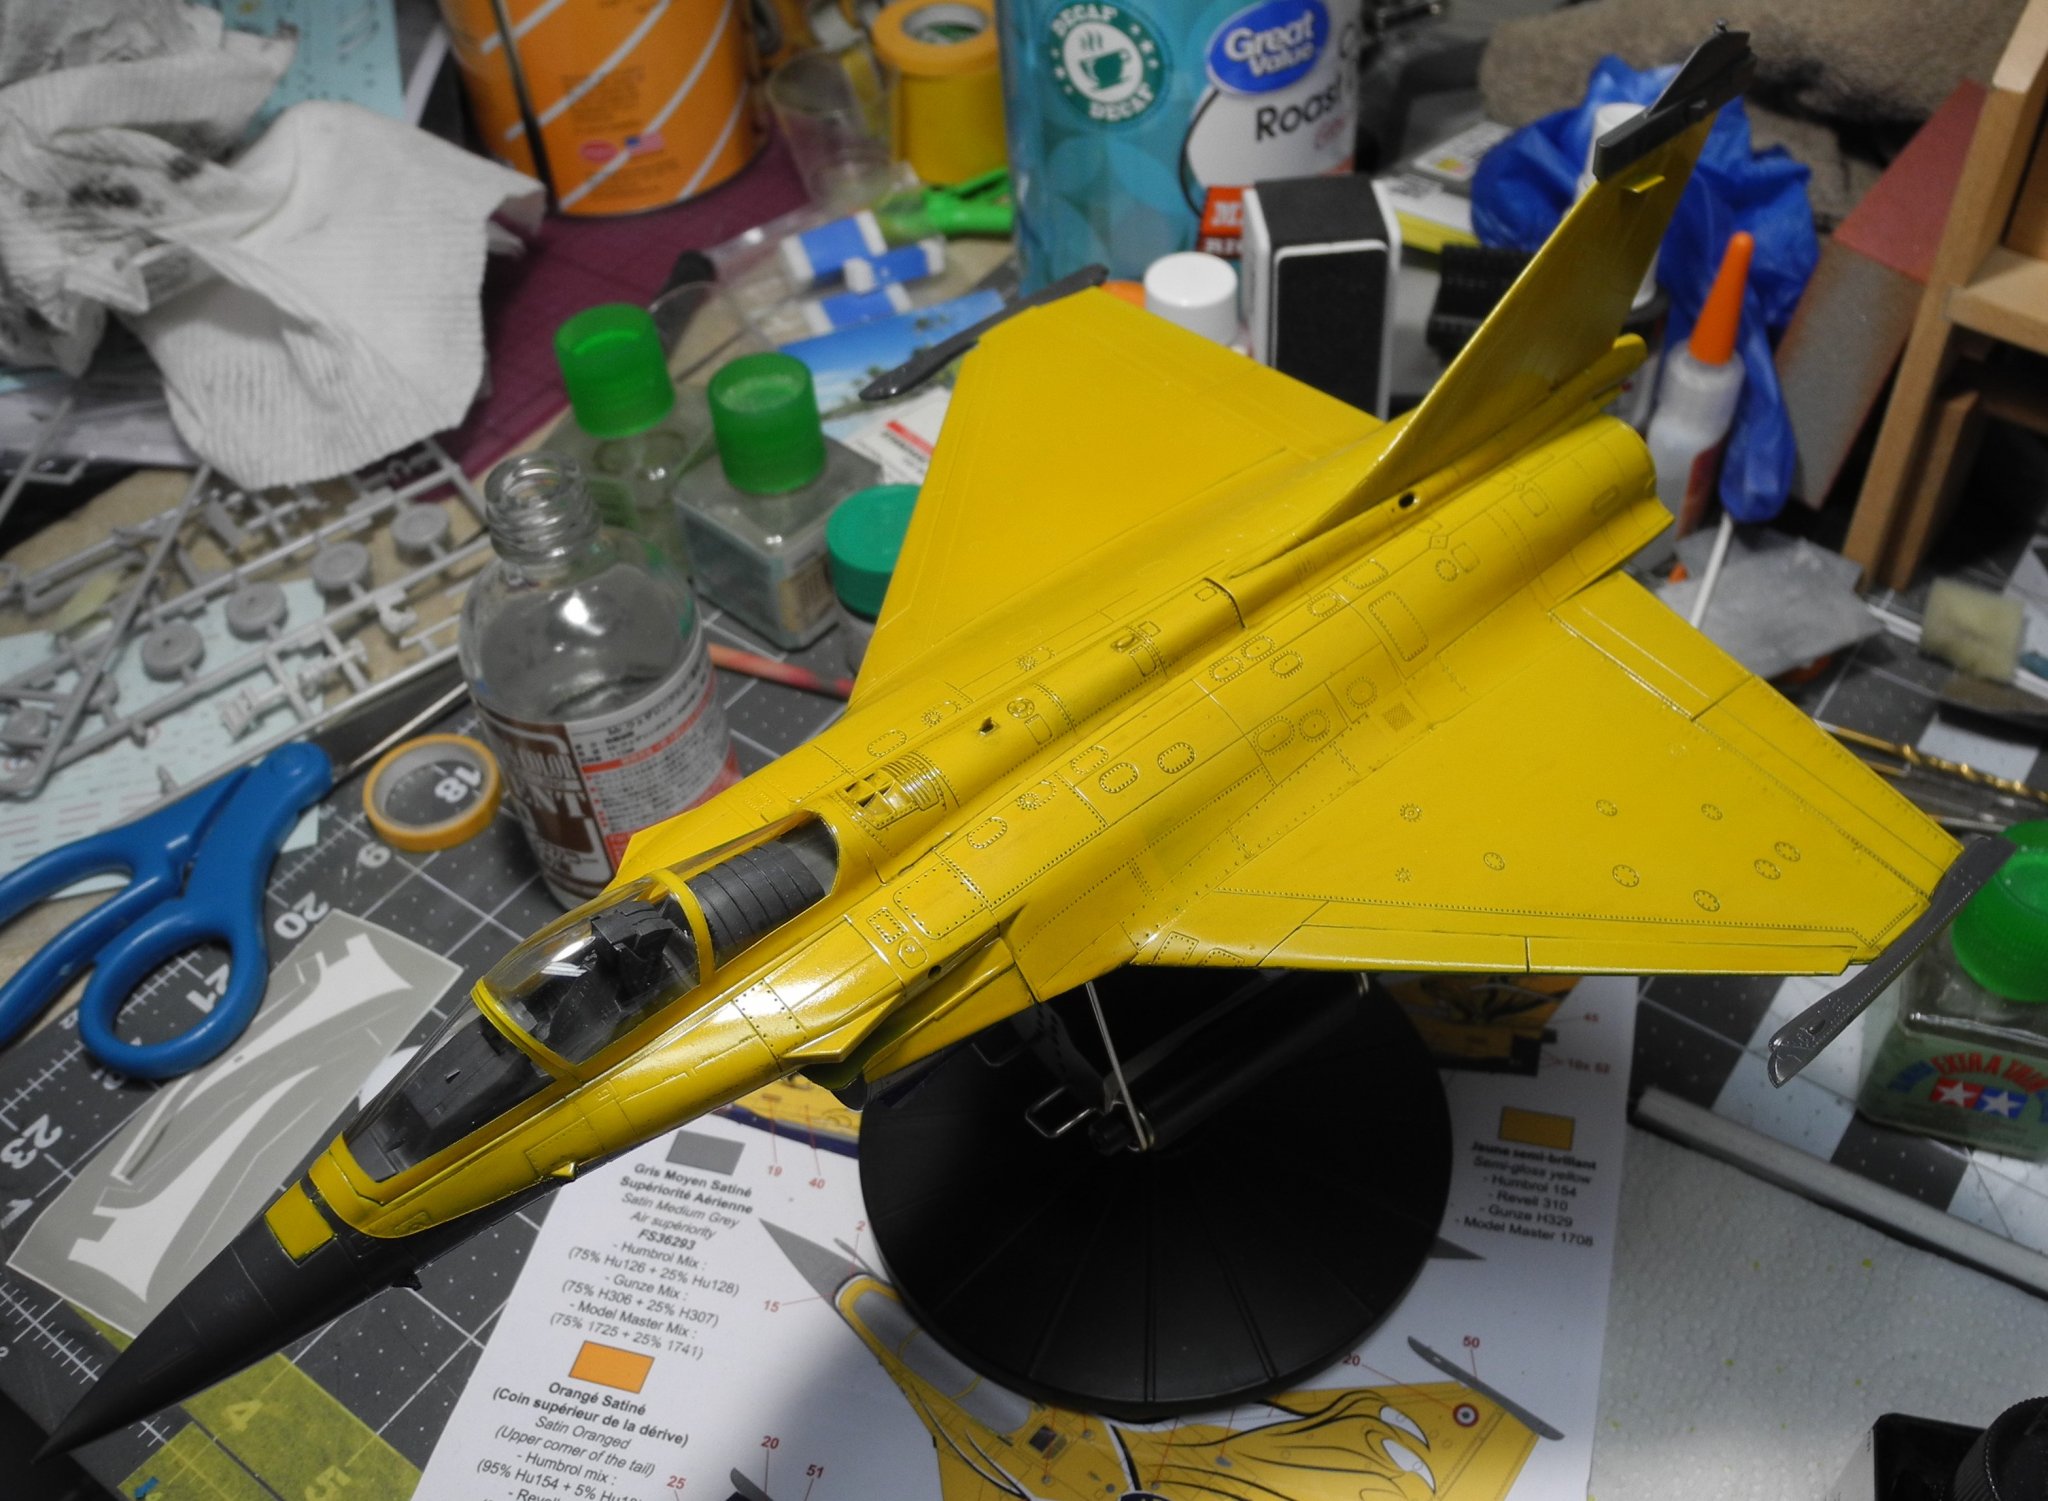
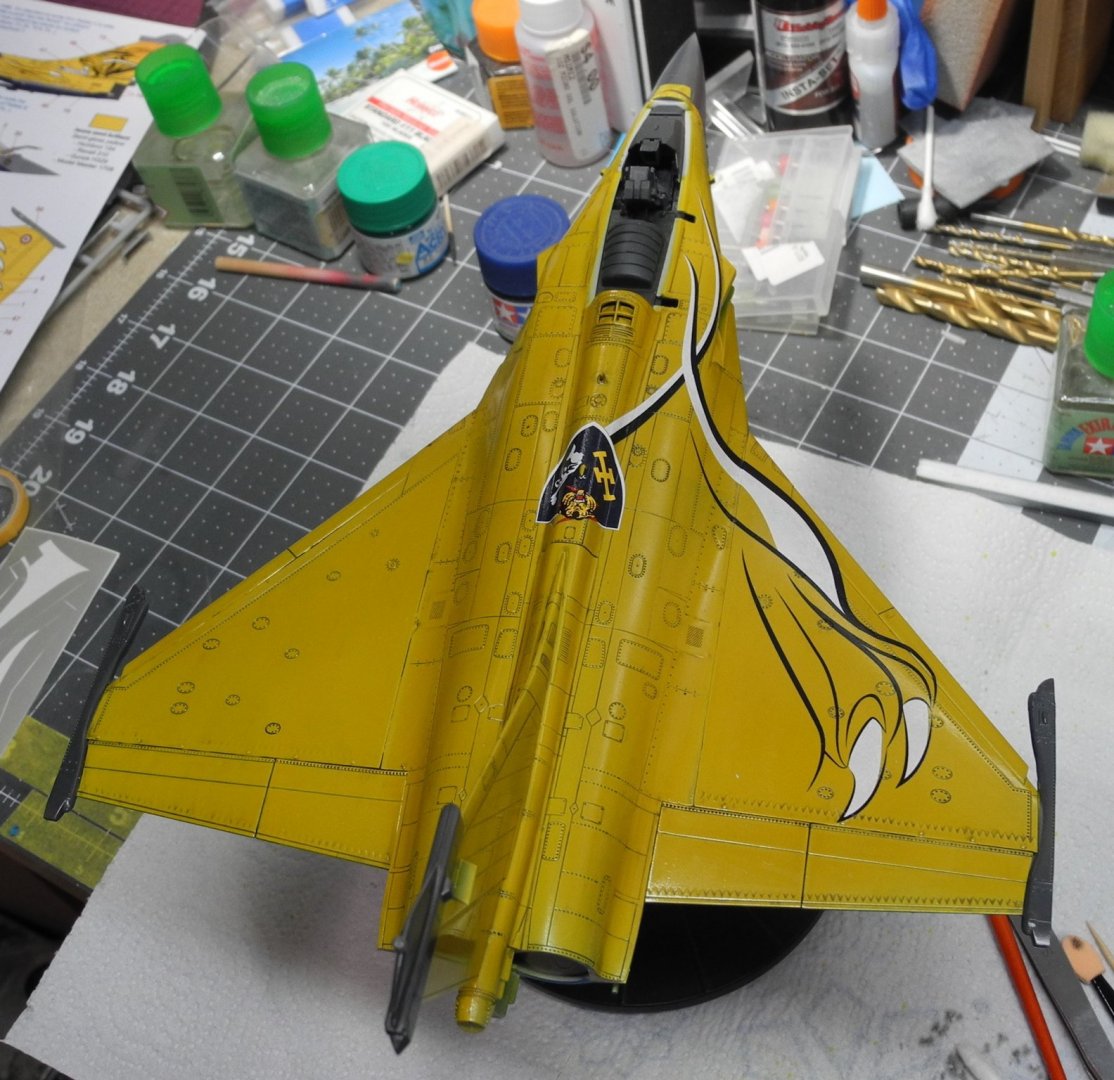
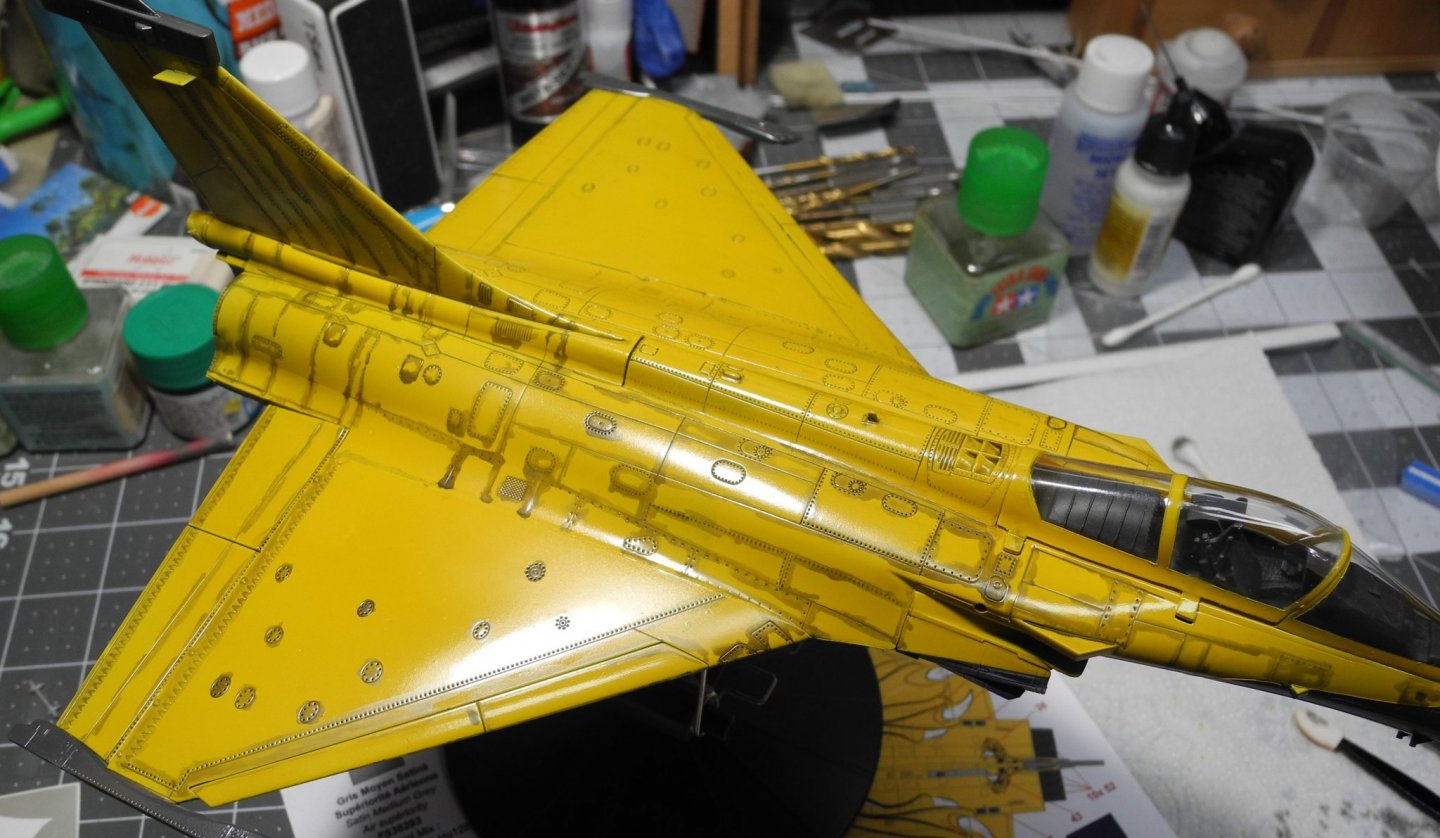
The wing/spine that's received a panel line treatment stands in stark contrast to the side that hasn't received the treatment.
- 48 replies
-
- 11
-