CDW
-
Posts
7,760 -
Joined
-
Last visited
Content Type
Profiles
Forums
Gallery
Events
Everything posted by CDW
-
This kit was first introduced a LONG time ago, sometime in the 70's I believe. The molds have a lot of mileage on them. I think you're doing a great job on this old kit. Keep up the good work.
-

Honda RC166 Grand Prix Racer by CDW - FINISHED - Tamiya - 1/12
CDW replied to CDW's topic in Non-ship/categorised builds
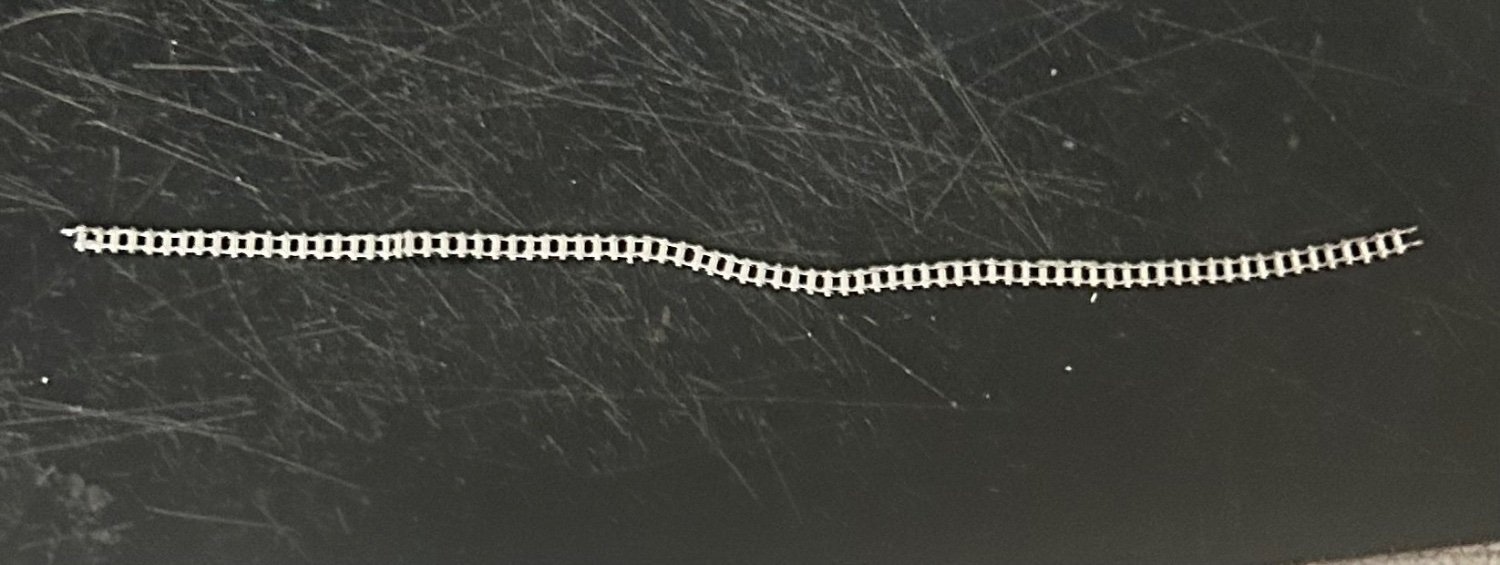
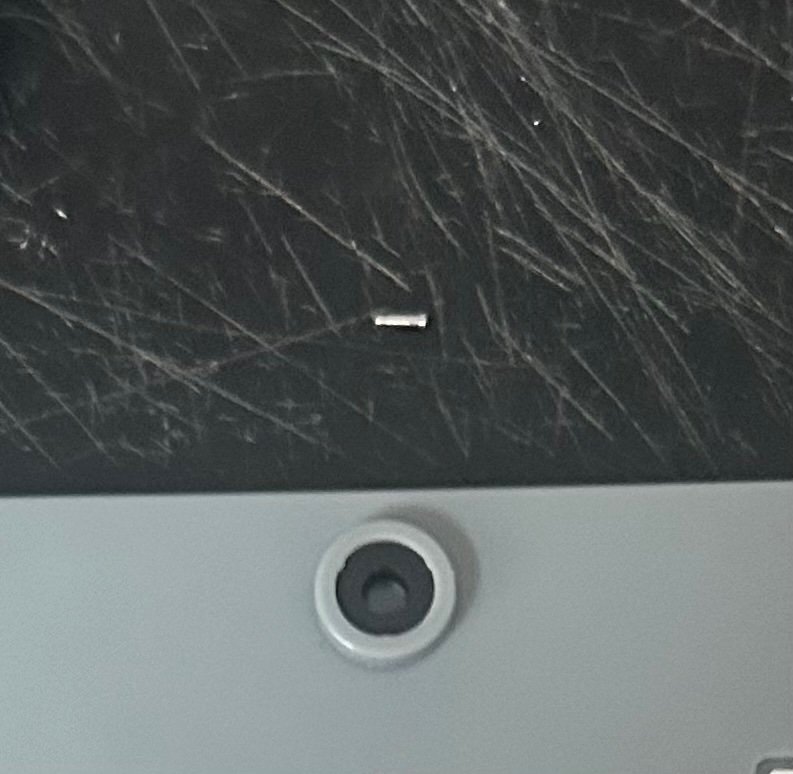
I am now at the stage where the ends of the chain are joined with a "master link". I kid you not, I have spent a couple of hours fiddling with that link this morning. So glad it's done now. -
Honda RC166 Grand Prix Racer by CDW - FINISHED - Tamiya - 1/12
CDW replied to CDW's topic in Non-ship/categorised builds
Rob The primary weakness with the Tamiya photo etch chain are the problems associated with cutting the links from the photo etch fret after the chain is assembled. Even careful cutting loosens the holding power of the "clips" that attach to the pins. Tamiya recommends gluing each pin/clip contact point with a thread locker glue (CA is what I used). But then you are left with rough spots that need filing down and smoothed out where the links have been cut from the frets. I am not going to attempt smoothing them out. I am certain it will cause the chain to fall apart in various places due to the stress from filing. Too fragile. In retrospect, that resin printed chain looks like a charm. If I had it all to do over again I would buy the resin printed parts but since you already have the photo etch set, give it a try. You may be more successful than I and figure out a better way of handling the issues I described. -
Honda RC166 Grand Prix Racer by CDW - FINISHED - Tamiya - 1/12
CDW replied to CDW's topic in Non-ship/categorised builds
That's a much more viable option for extra detail. Price is right, too. -
Honda RC166 Grand Prix Racer by CDW - FINISHED - Tamiya - 1/12
CDW replied to CDW's topic in Non-ship/categorised builds
All the things we put our parents through when we were kids come back to us with our own kids. I came home one day to find live fish in my swimming pool. My son thought it would be great to be able to go fishing in our back yard. 🤣 -
Honda RC166 Grand Prix Racer by CDW - FINISHED - Tamiya - 1/12
CDW replied to CDW's topic in Non-ship/categorised builds
Thanks for all the suggestions. Dug deep and found a pair in my stash that got the job done. Not interested in trying this again anytime soon.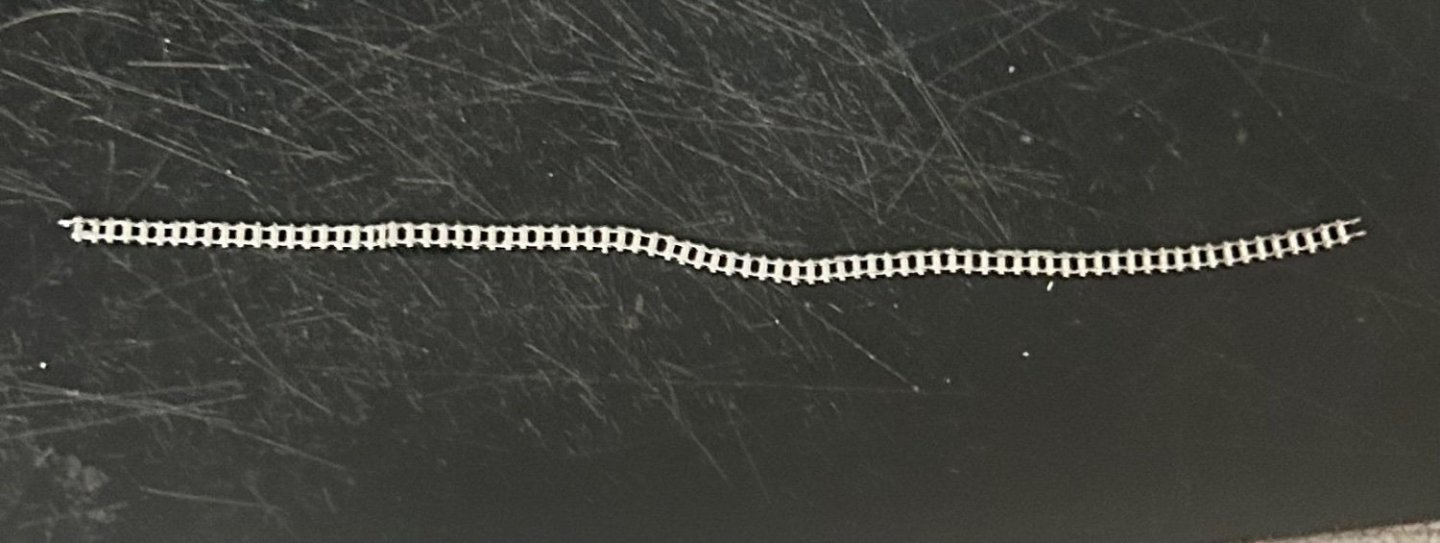
- 150 replies
-
- 11
-

-

-
Honda RC166 Grand Prix Racer by CDW - FINISHED - Tamiya - 1/12
CDW replied to CDW's topic in Non-ship/categorised builds
I may need to try and grind or file down a set of tweezers to a much finer tip to see if that might work. Obviously not the set pictured, as they are ceramic-tipped. 😄 -
Honda RC166 Grand Prix Racer by CDW - FINISHED - Tamiya - 1/12
CDW replied to CDW's topic in Non-ship/categorised builds
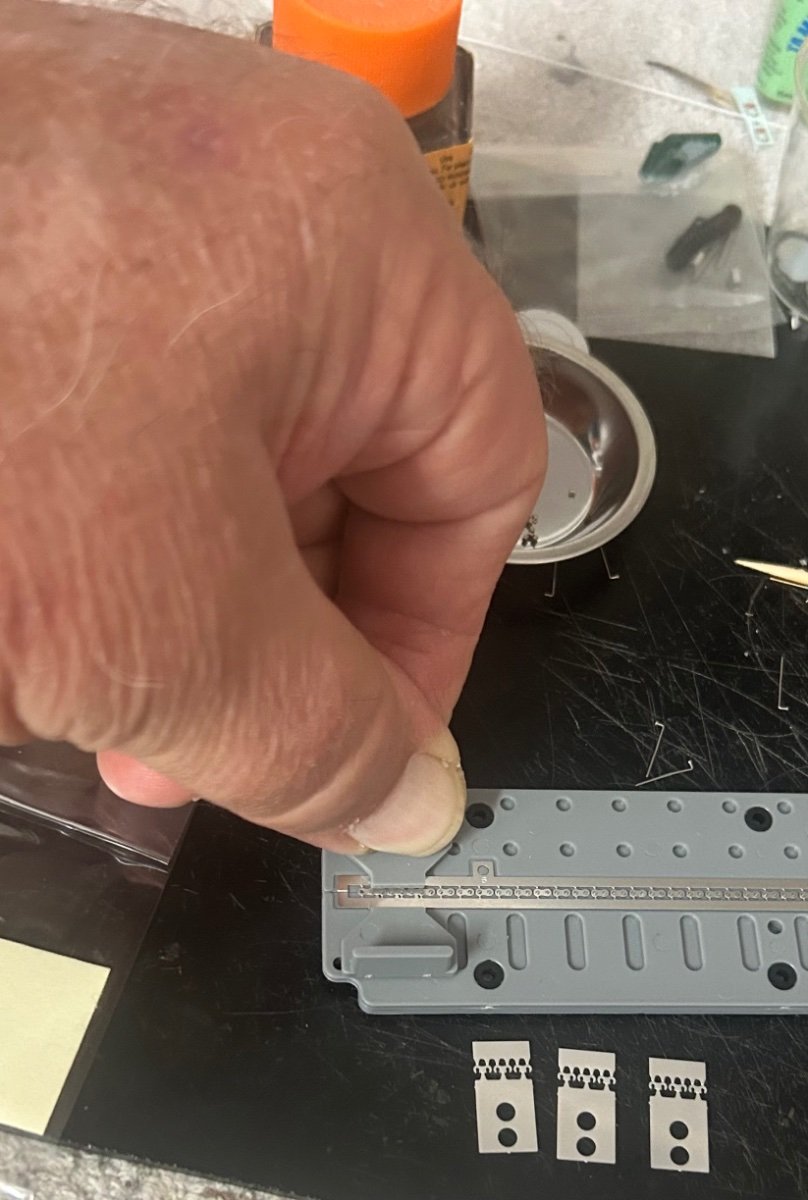
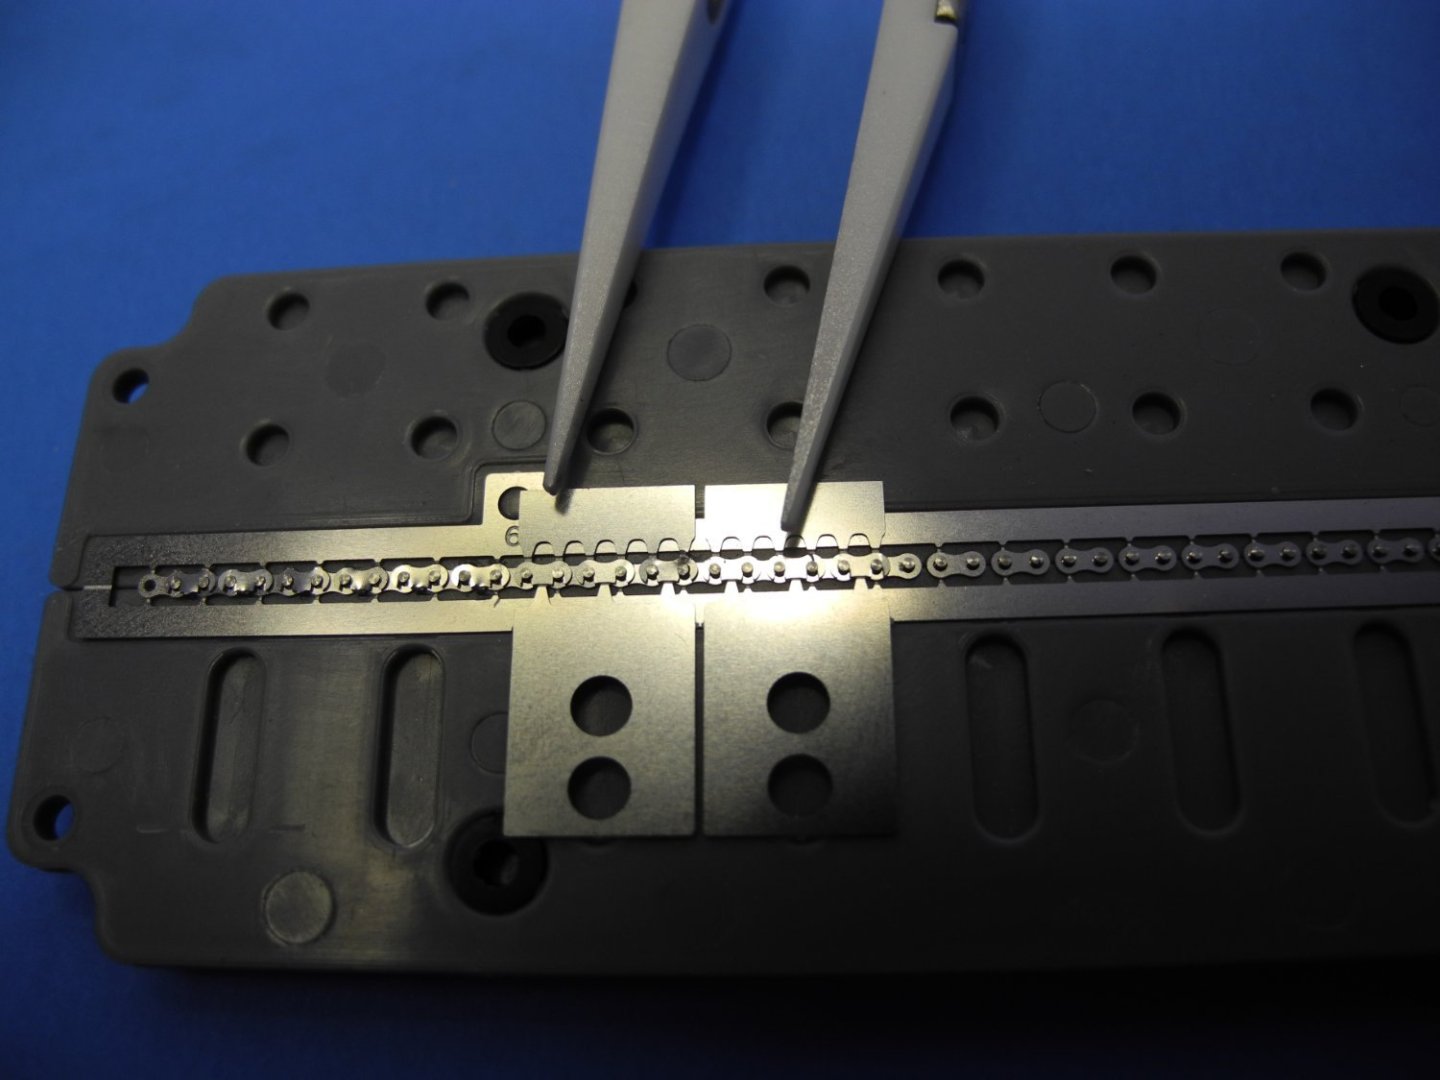
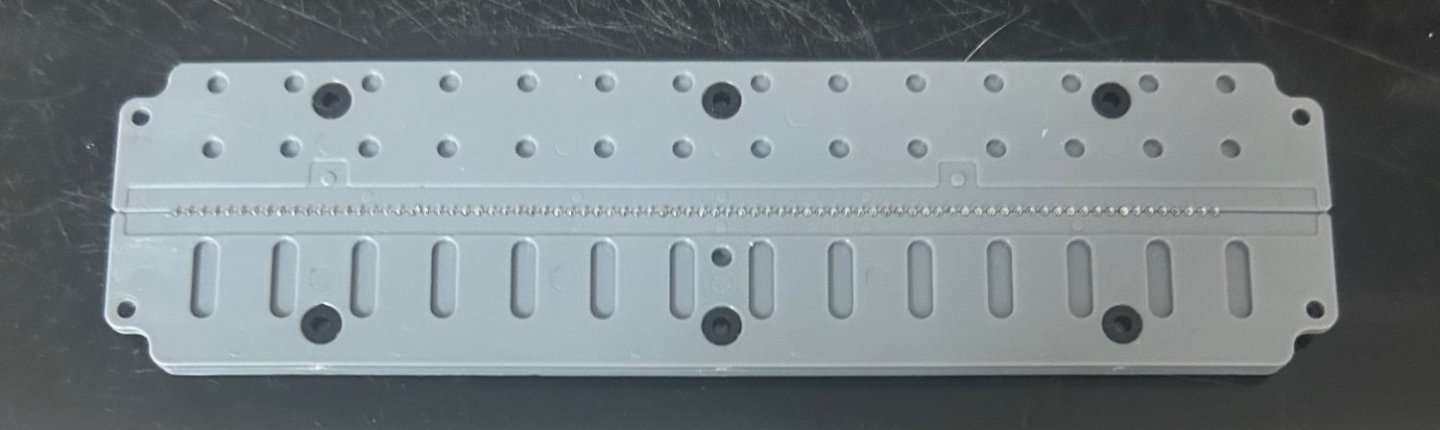
After taking a couple of days off from modeling, I'm back to take up where I left off on this photo etch chain building dilemma. On the left side of the jig are links I cut from the photo etch fret using a XActo blade. It distorted the shape of the links which Tamiya suggests using "something" (not specific) to pinch the links to tighten them against the roller pins. As you can see from the photos, my precision tweezers are no match for this small work. Got to find something to pinch those links and tighten them. To the right of the cut links are links yet to be cut. I will attempt to do this with a micro cutoff wheel in my dremel. I tried using my Xuron photo etch cutting scissors but those mangle the links as well. I am definitely open to suggestions if you have one.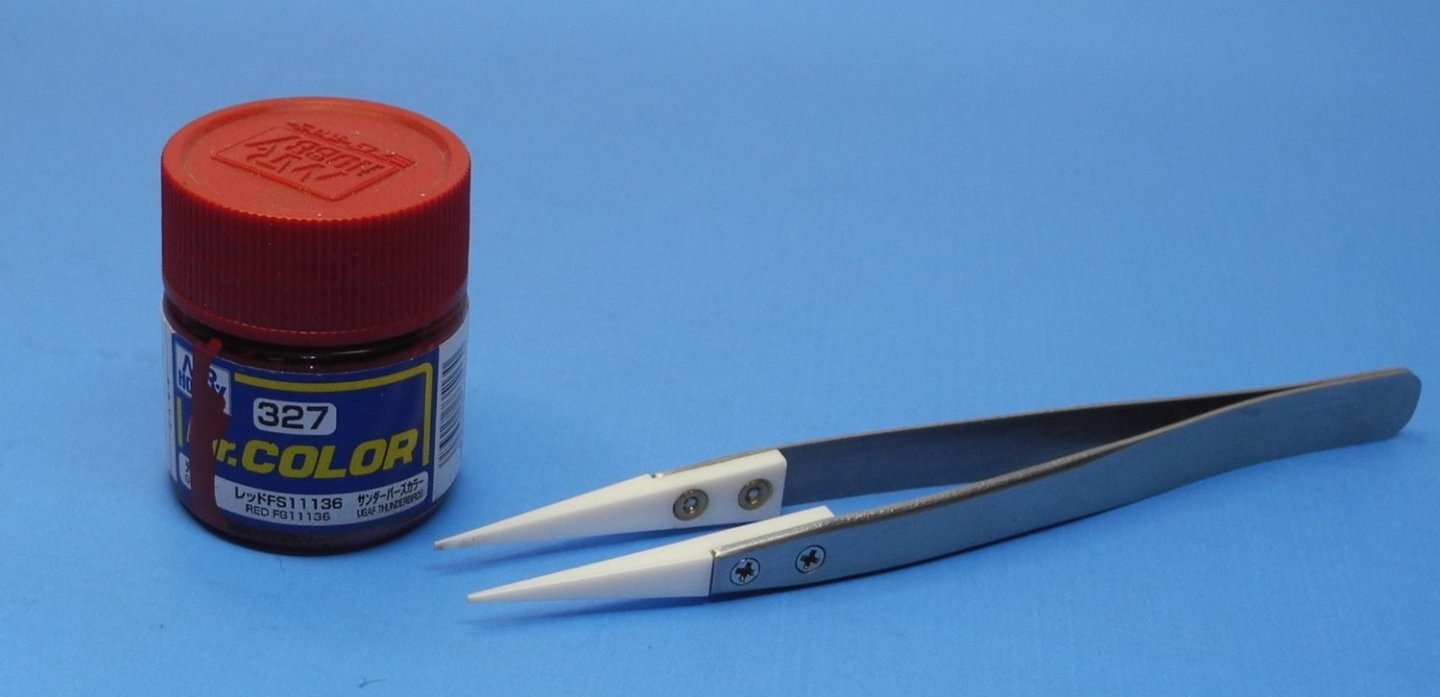

-
Must be raining over the entire continent. Raining here in Florida today too. Glad I found your build and will follow.
-
Honda RC166 Grand Prix Racer by CDW - FINISHED - Tamiya - 1/12
CDW replied to CDW's topic in Non-ship/categorised builds
Awesome videos. Could not believe how quick that 2 cylinder 50cc bike ran. Never knew there was such a thing. Who was the test rider? -
Honda RC166 Grand Prix Racer by CDW - FINISHED - Tamiya - 1/12
CDW replied to CDW's topic in Non-ship/categorised builds
It's odd seeing a racing engine like that in the first photo just lying in the grass. Would that be a maintenance photo taken during the course of a race? Great photos! Would have loved hearing that 5 cylinder 125cc engine rev up. -
Honda RC166 Grand Prix Racer by CDW - FINISHED - Tamiya - 1/12
CDW replied to CDW's topic in Non-ship/categorised builds
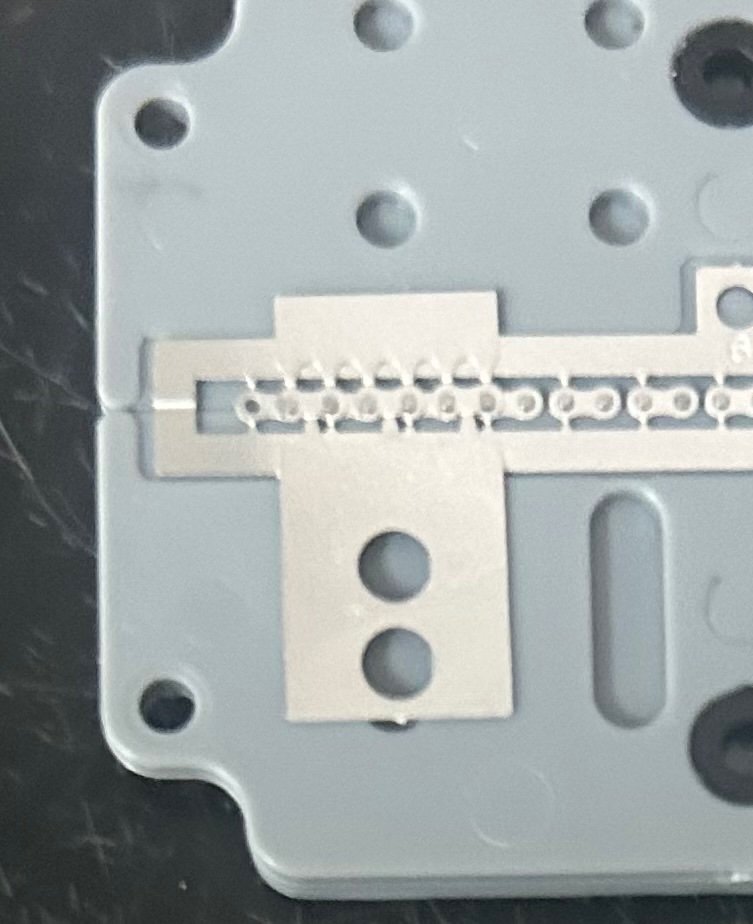
Next steps with the chain construction involve cutting the links from the photo etch fret. Since the fret is stainless steel rather than brass, it's harder to cut. I typically use a scalpel blade for this but I found it takes too much pressure to cut through, therefore bending (slightly) the links out of shape. As the fit between the links and the pins is so precise and small, Tamiya recommends "pinching" each "c" clip together to tighten-retighten the fit to pin after cutting. I found this to be beyond my capability with the tools I have, much too small for any forceps I own. Next I am going to try cutting the links from the fret using a micro abrasion wheel on my dremel. Hopefully this will prevent the distortion of the c clips and negate the need to pinch them. If that doesn't work, I'm going to need to find a much smaller set of forceps to maybe even tweezers. I could see this task ruining a set of precision tweezers in the process as the tips of tweezers are not generally used as a pinching type of tool. -
You are right, those stock seats look great. I wonder what other aircraft might have used the same seats? I’ve saved my stock ones since I used aftermarket seats in my model. In retrospect, coulda’ shoulda’ saved the money and went stock.
-
Cockpit looks awesome Andrew. About those tanks, is the fit issue where they join the wings or just with the tank halves themselves? Using aftermarket seats in my cockpit, I had a small amount of difficulty getting the front seat mounted to the floor with the rear instrument panel attached to it, but you probably will have no issues using the stock seats (which look very good by the way).
-
Honda RC166 Grand Prix Racer by CDW - FINISHED - Tamiya - 1/12
CDW replied to CDW's topic in Non-ship/categorised builds
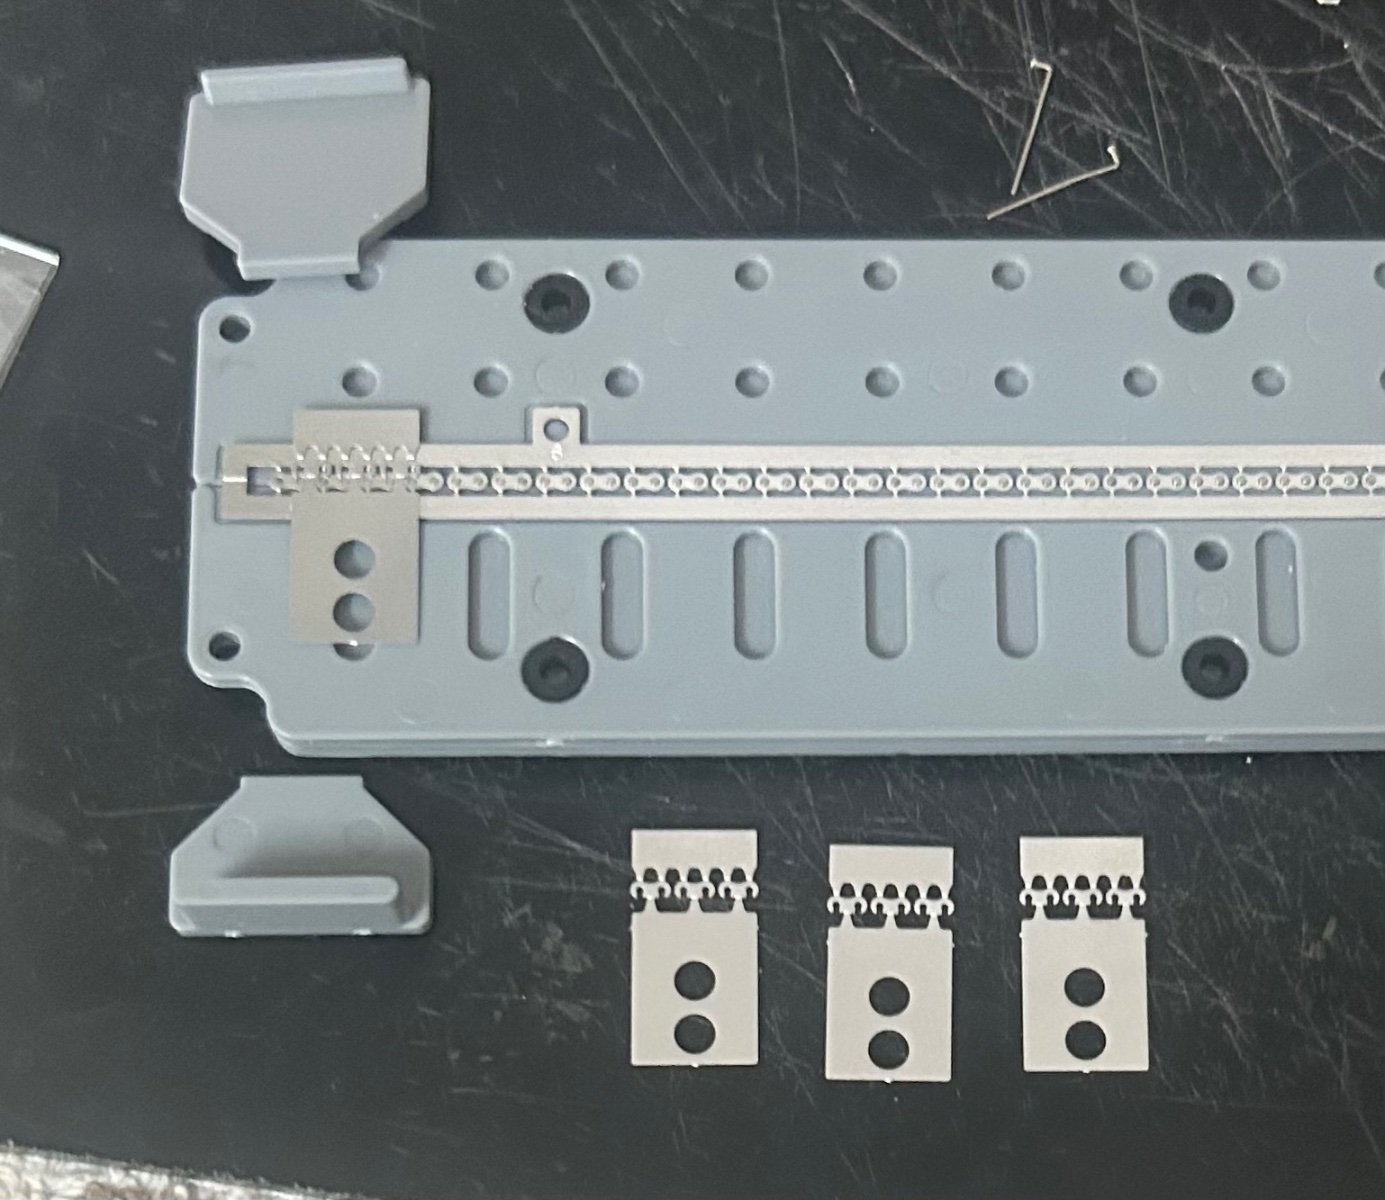
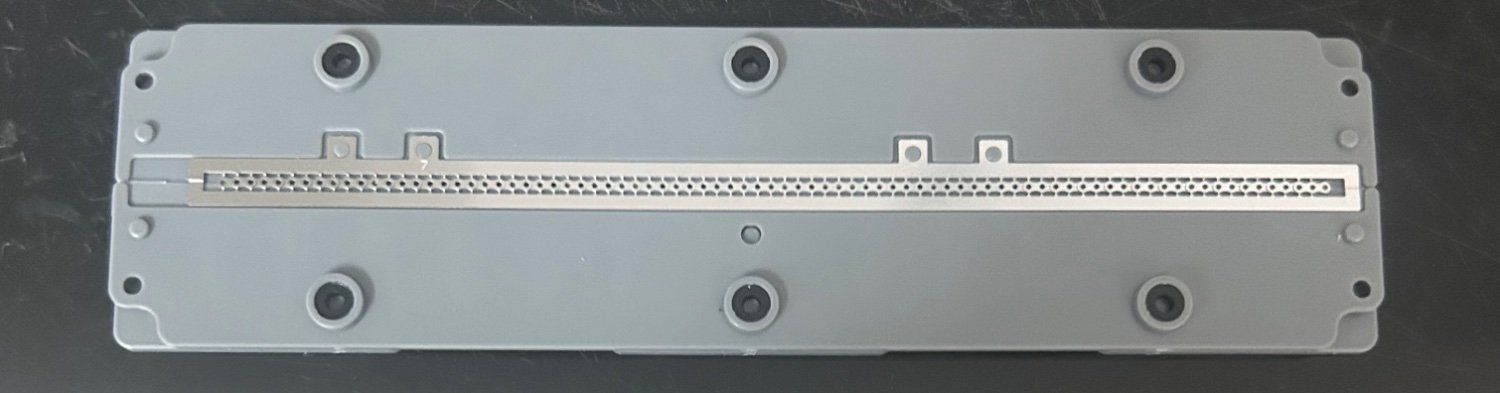
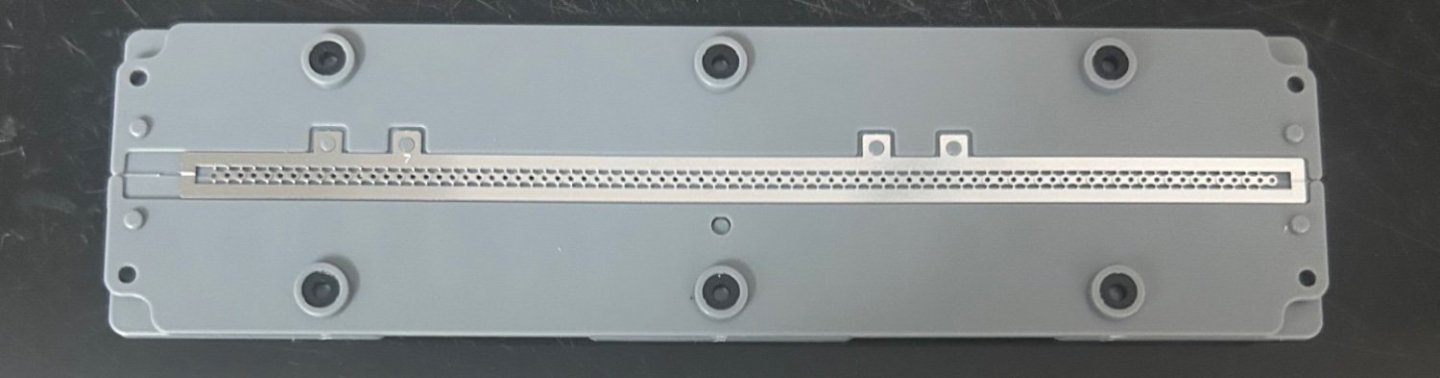
After seeing the way Tamiya engineers designed the tools to assemble this small delicate chain, you and I both will agree they are genius. A photo etch plate of links are placed over the roller pins exposed in the preceding steps. Additional smaller sections of chain links are provided, shaped like “c” clips to snap in place over the links and pins that lock it all together. Two plastic tools are provided to hold these small sections in place while they are pulled down, locking them into position. Very ingenious and well engineered.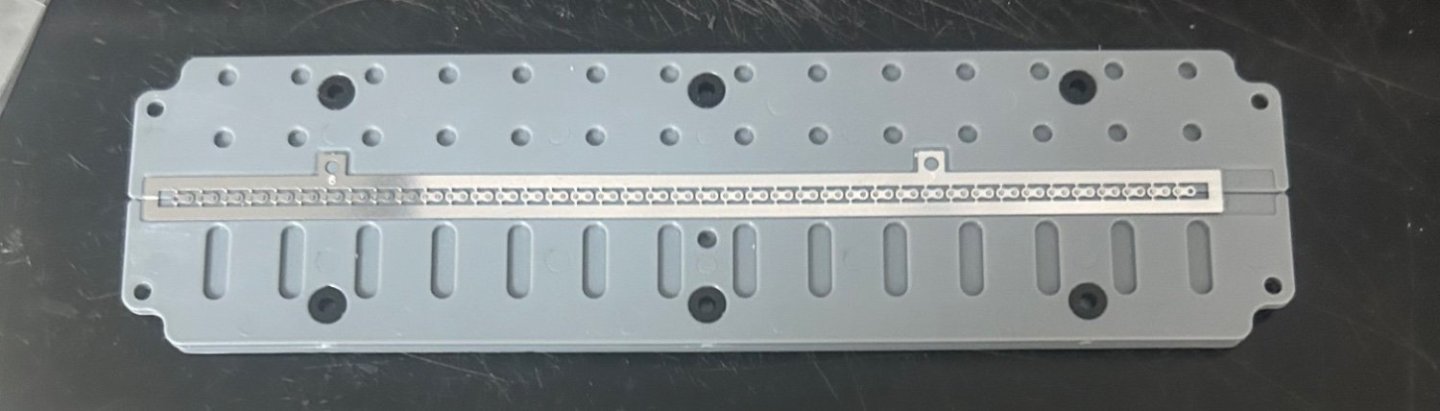


- 150 replies
-
- 10
-
-
Honda RC166 Grand Prix Racer by CDW - FINISHED - Tamiya - 1/12
CDW replied to CDW's topic in Non-ship/categorised builds
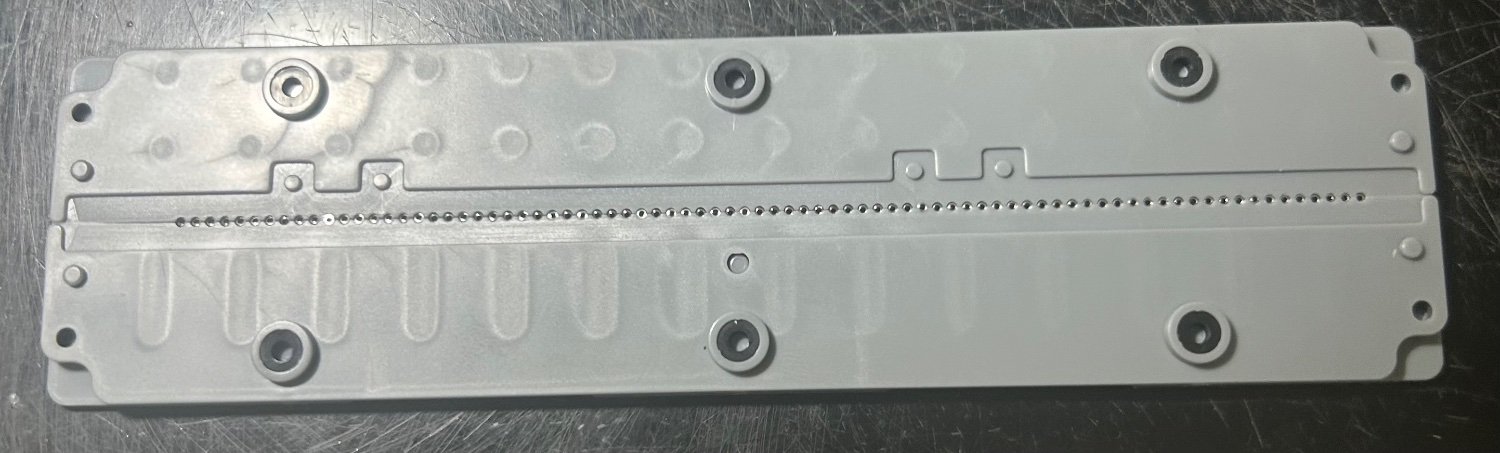
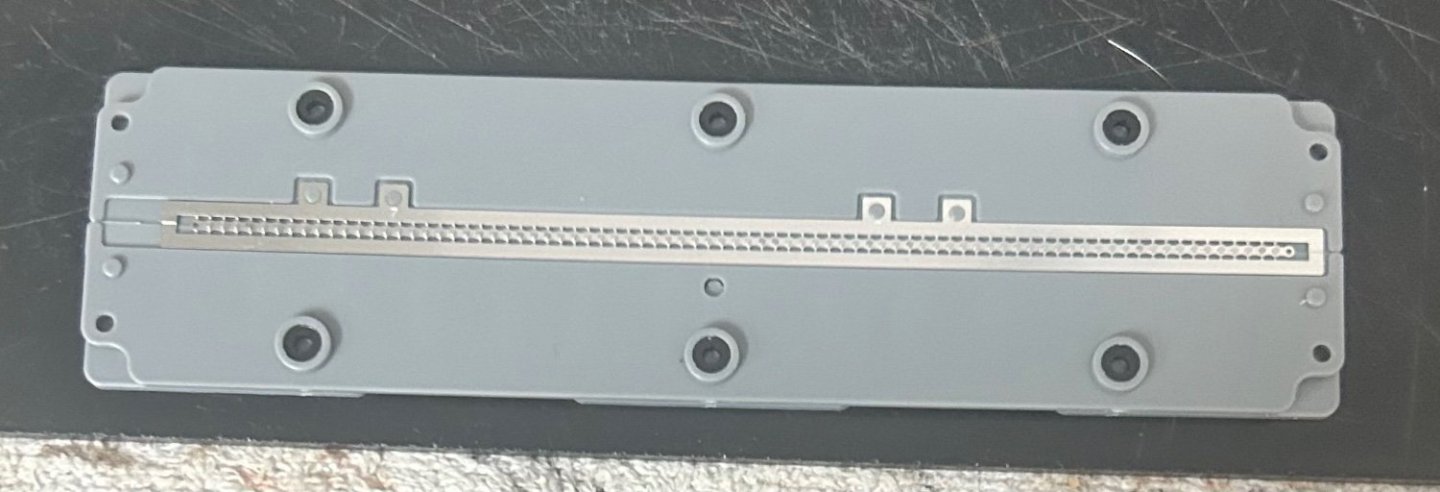
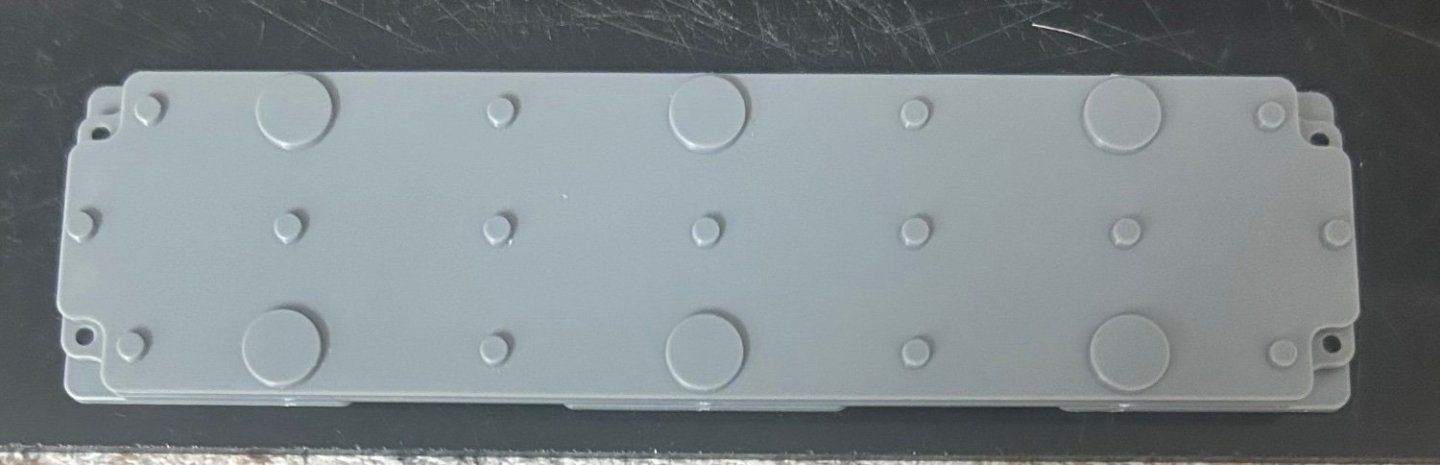
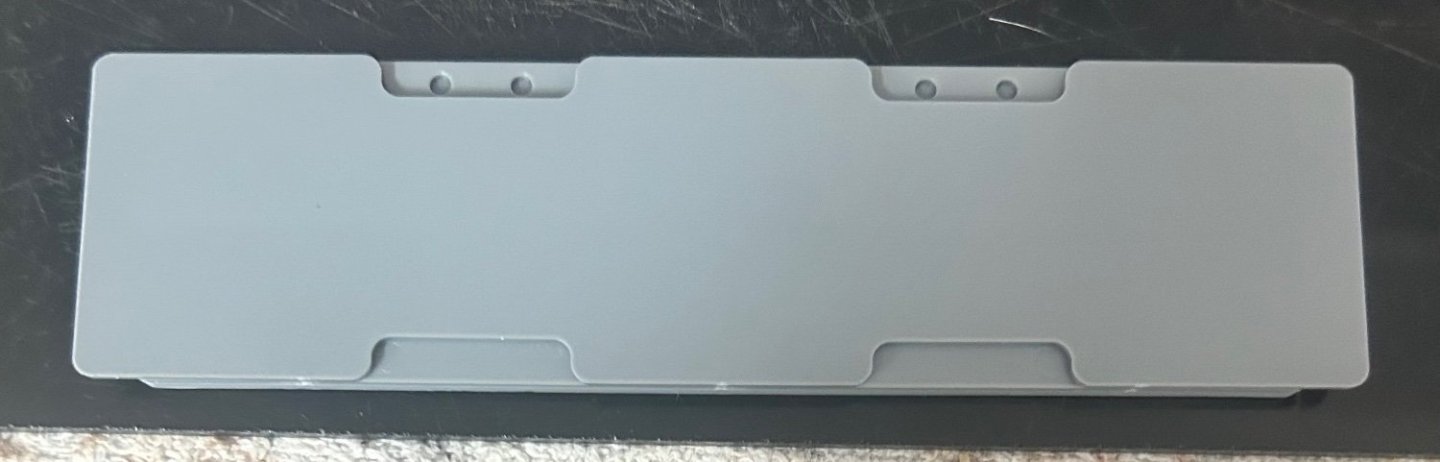
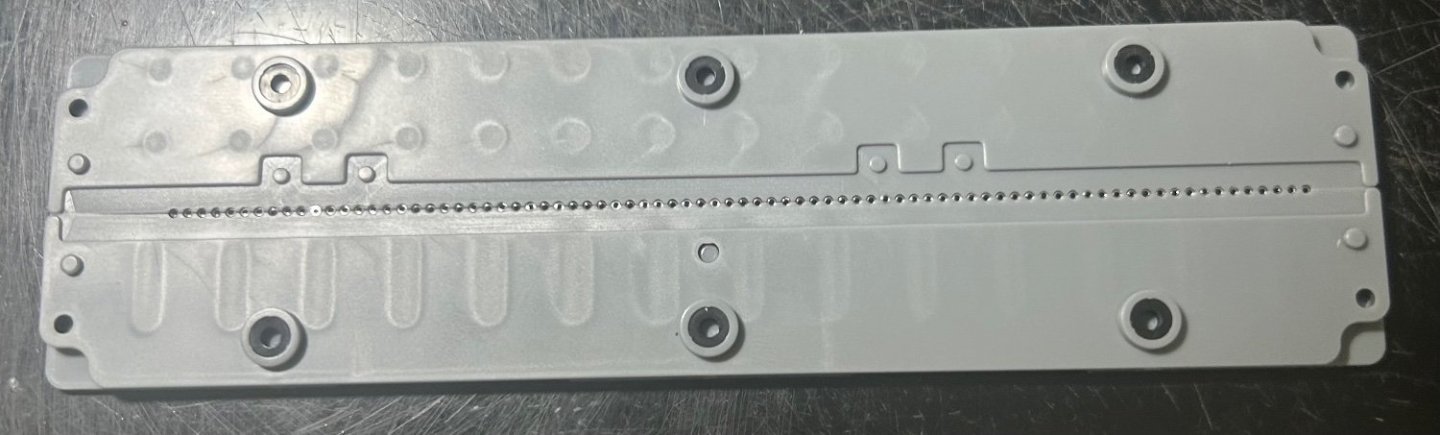
Next up the pins are placed inside each roller. You will note the pins have a specific shape on each end and can only slide into the rollers in one direction. A head on the end of each pin holds each link in place. After all pins are in place, a plastic molded cap is put in place that hold the pins in position. The jig is then flipped over so the bottom cap of the jig can be removed, exposing the opposite side of the roller pins.

-
Honda RC166 Grand Prix Racer by CDW - FINISHED - Tamiya - 1/12
CDW replied to CDW's topic in Non-ship/categorised builds
I noticed the chain kit comes with two different sizes of rear sprockets. I'm guessing maybe there were different size sprockets used on the real bike depending on the particular race event/track. -
Honda RC166 Grand Prix Racer by CDW - FINISHED - Tamiya - 1/12
CDW replied to CDW's topic in Non-ship/categorised builds
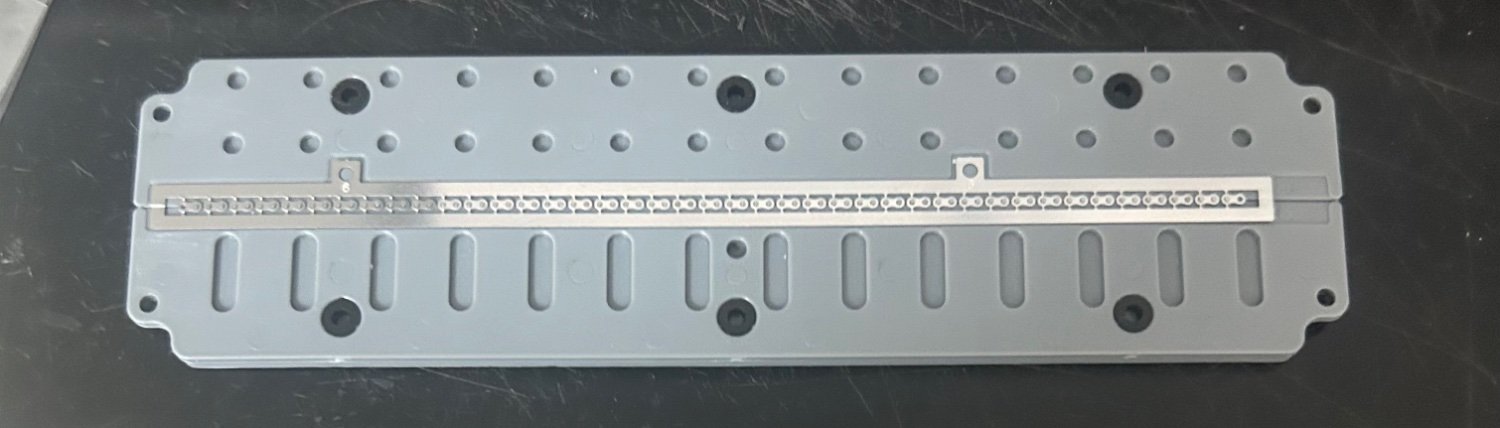
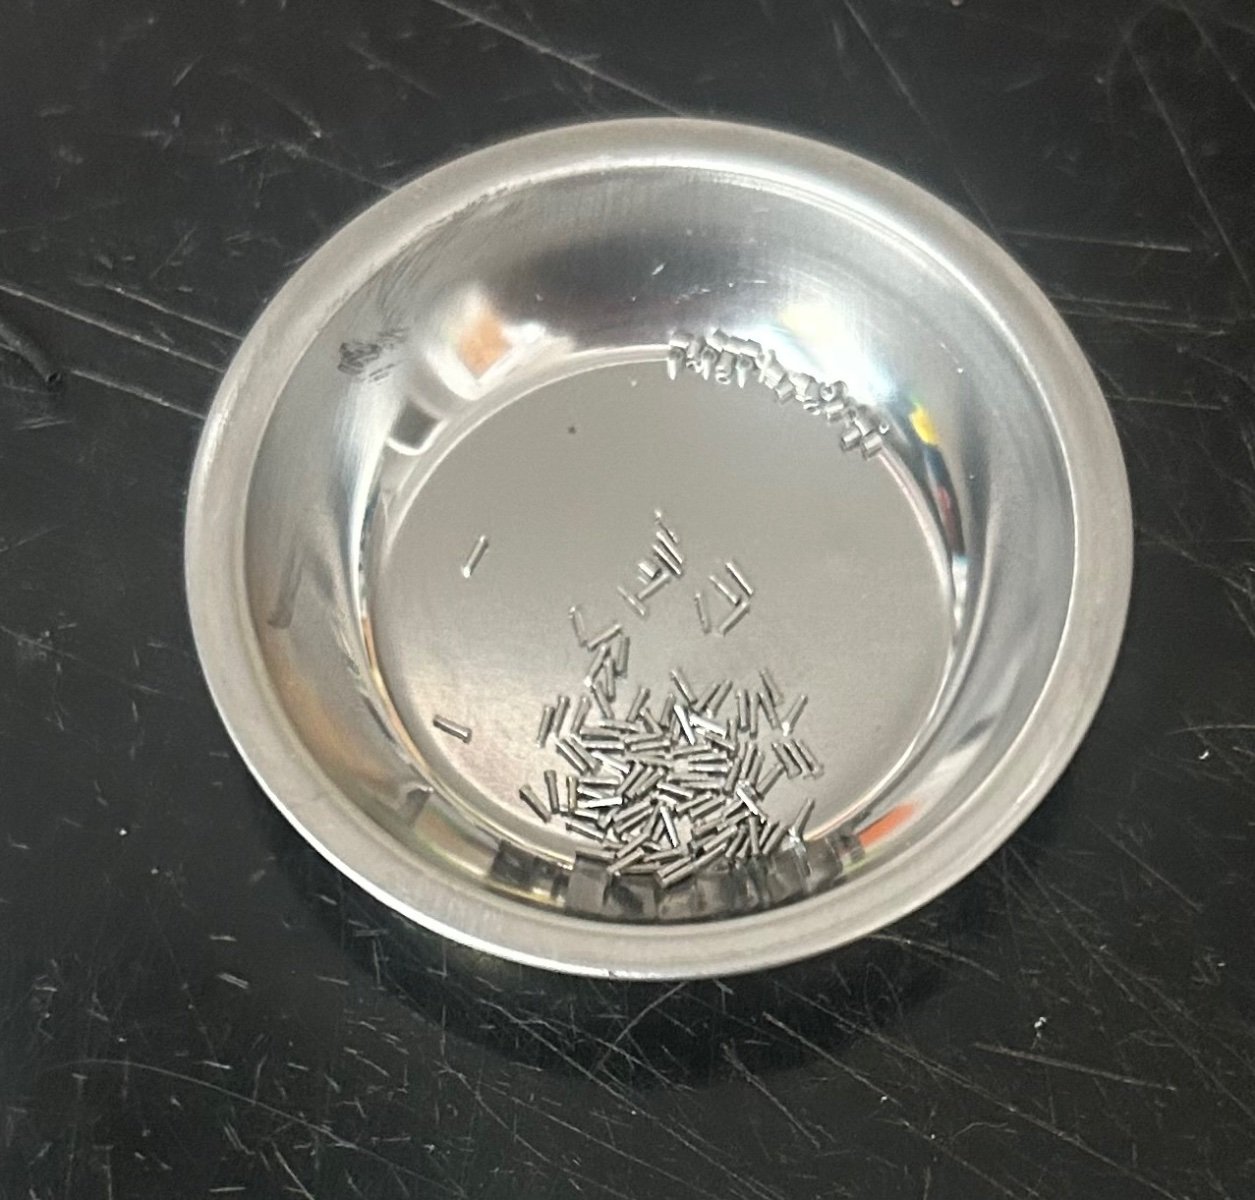
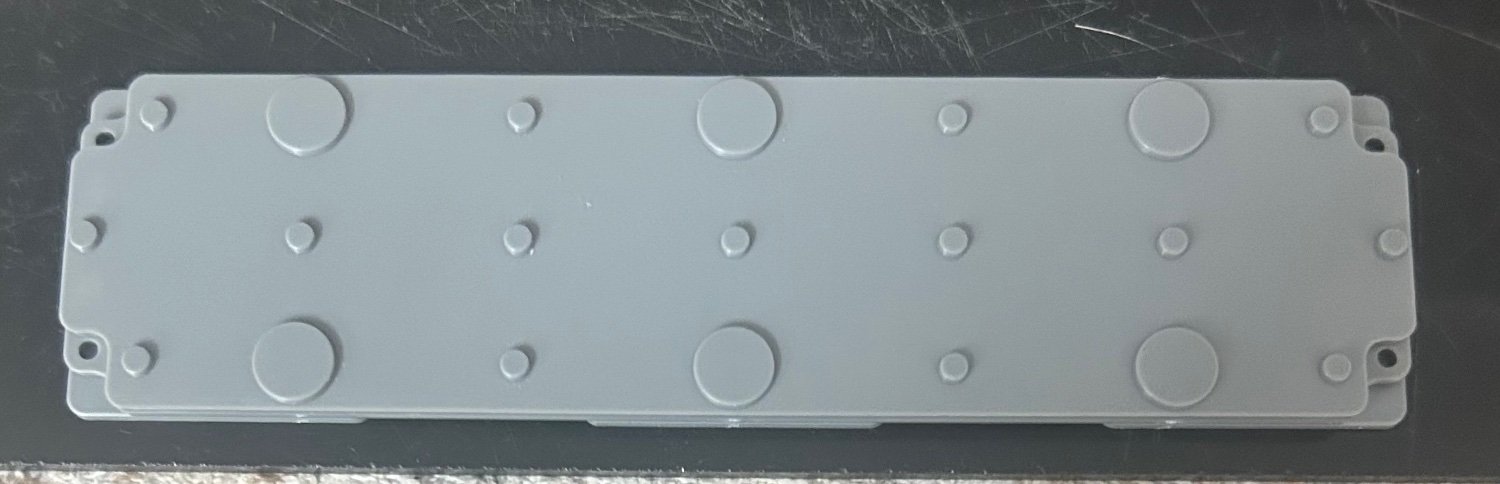
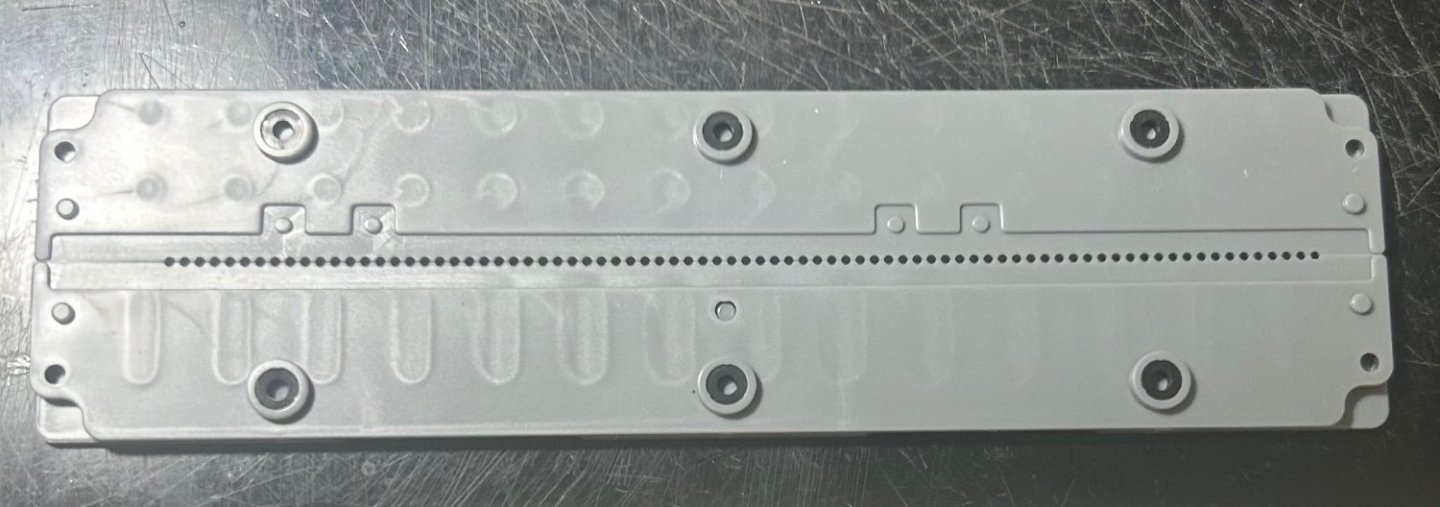
Break out the optivisor, it’s time to build the chain! The chain kit provides a plastic assembly jig. and a whole bunch of 1mm rollers the rollers are placed in each of the holes of the assembly jig then two sets of photo etched links are laid down more to come….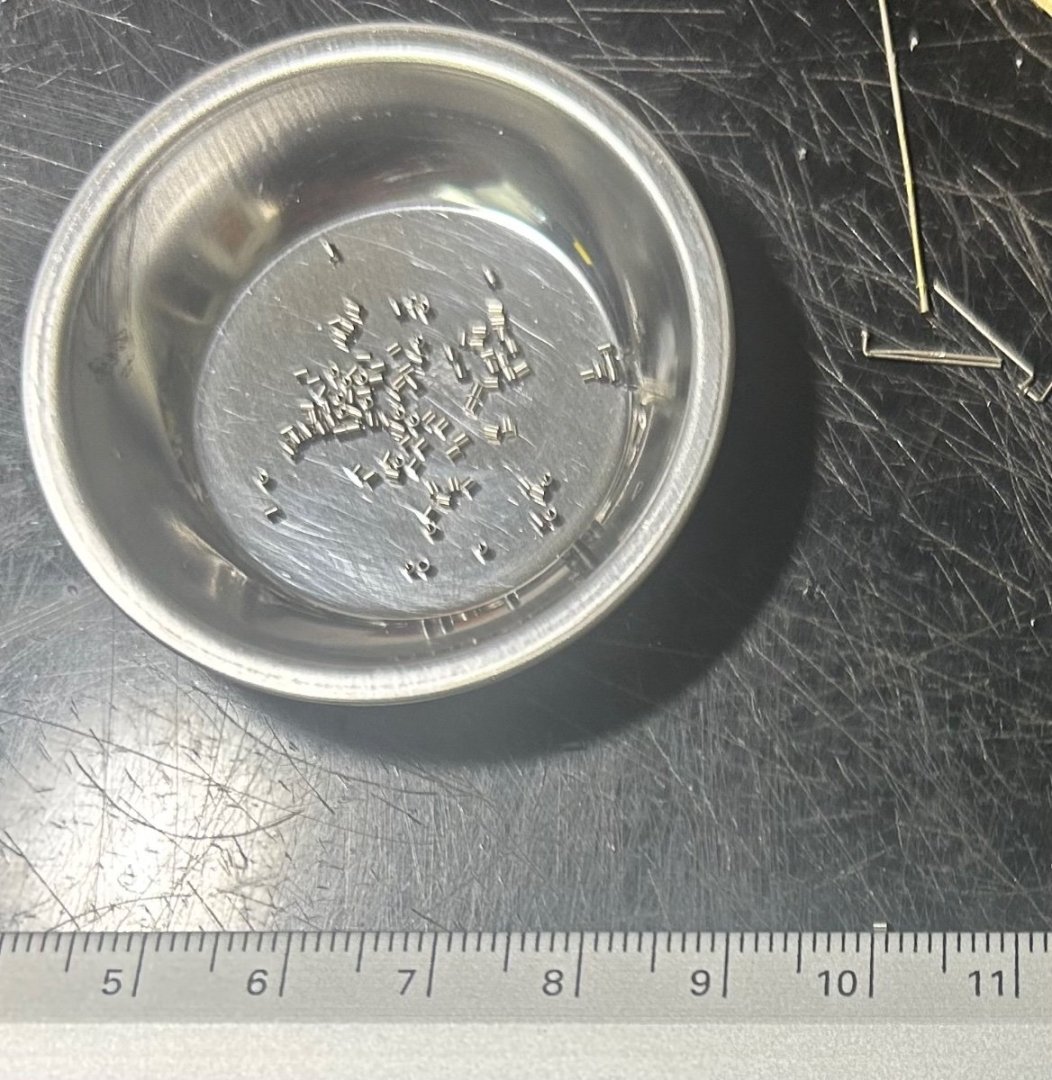
- 150 replies
-
- 10
-
-

-
Honda RC166 Grand Prix Racer by CDW - FINISHED - Tamiya - 1/12
CDW replied to CDW's topic in Non-ship/categorised builds
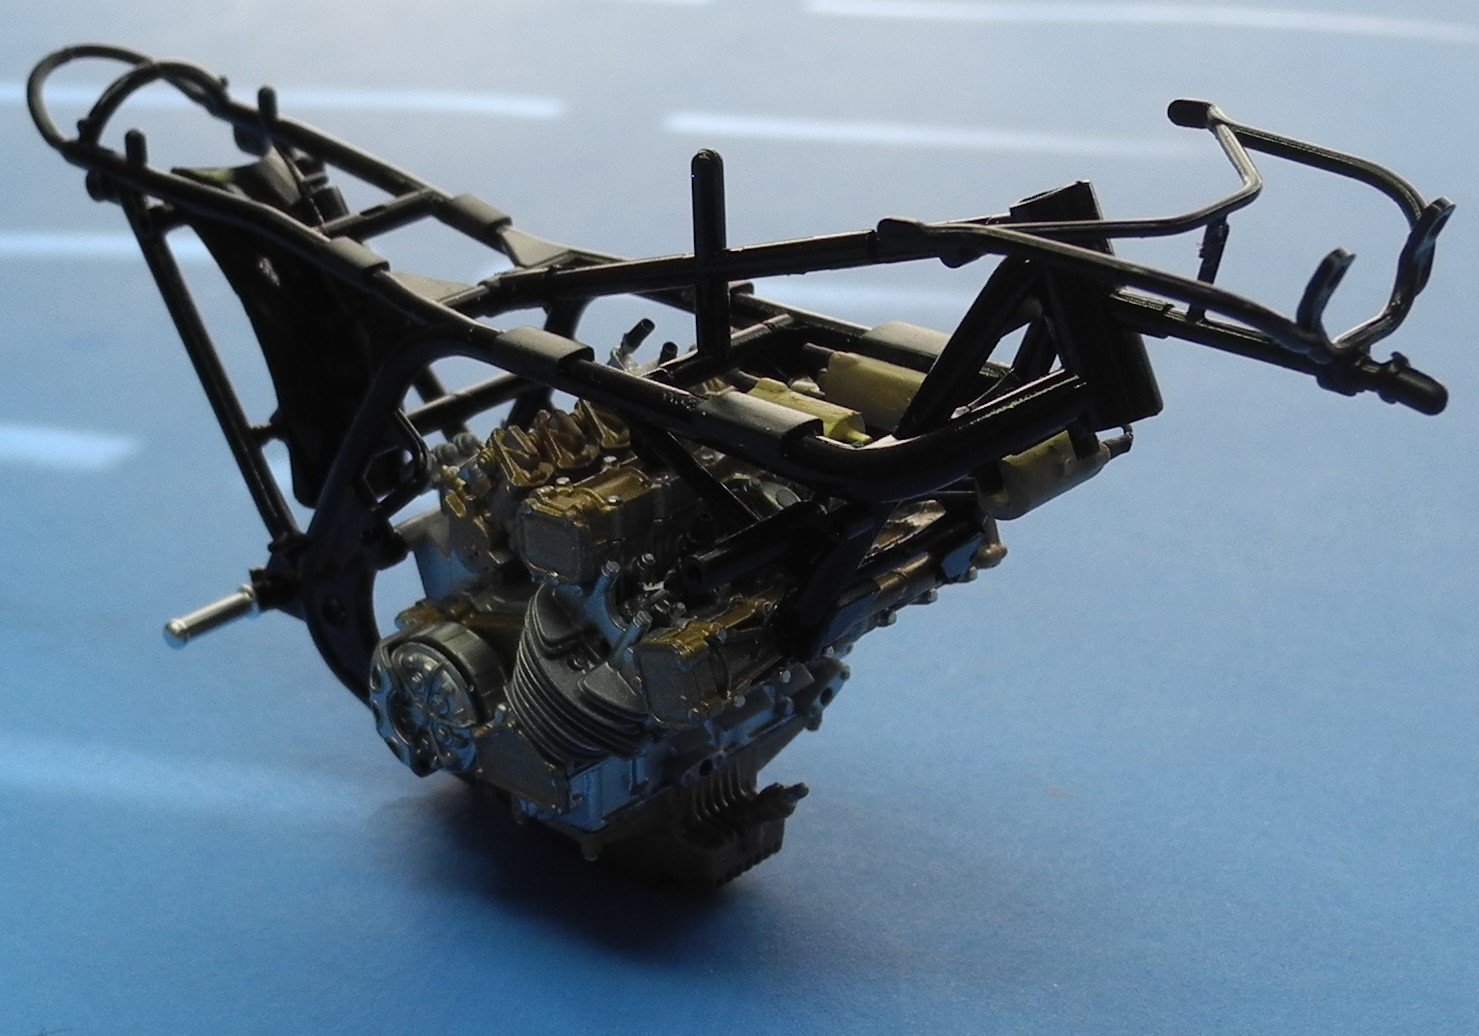
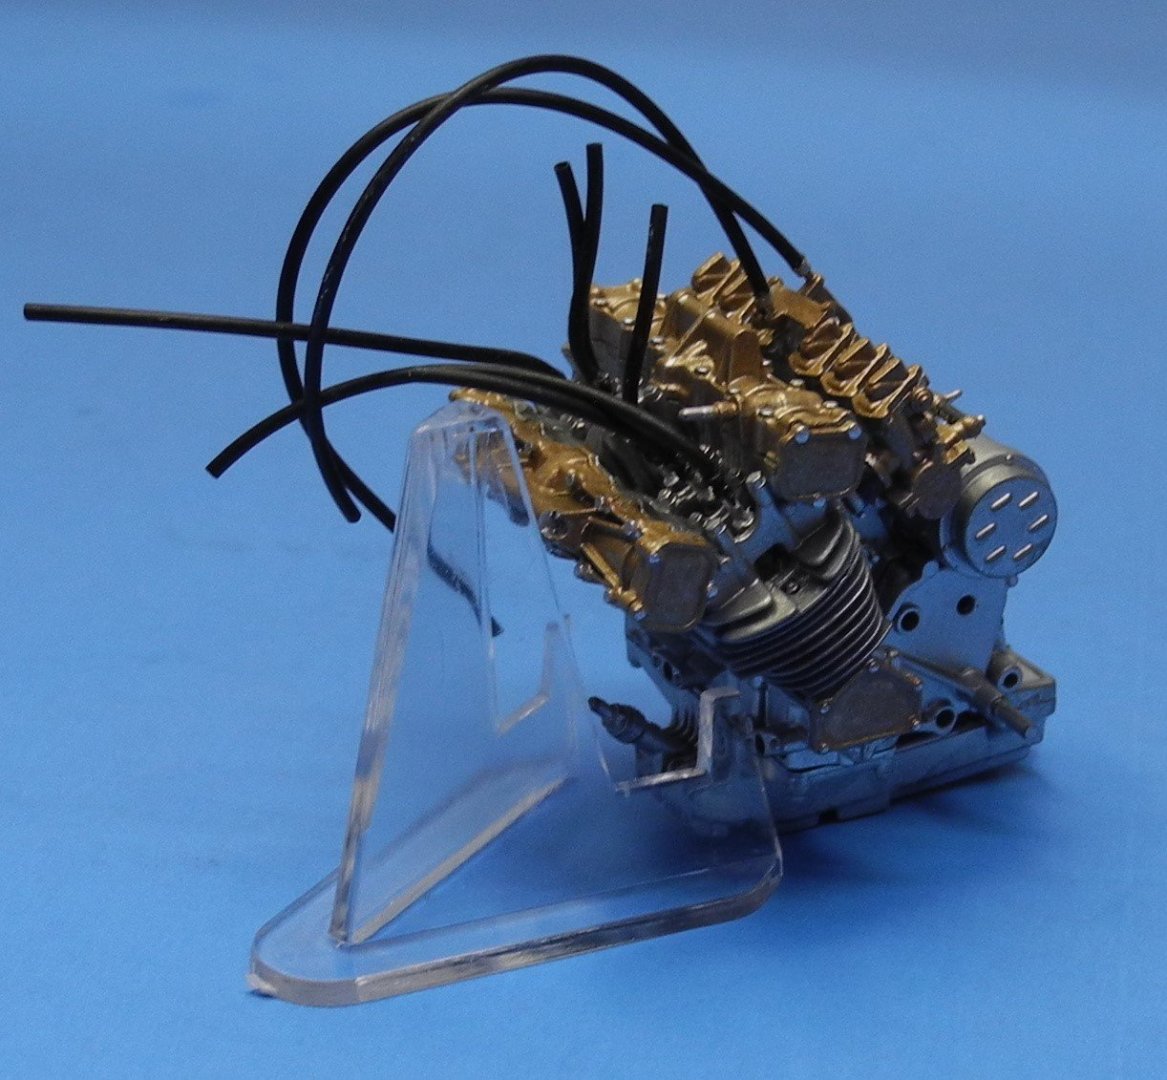
My thought was to improvise a ferule that would look like a spark plug boot where they attach to each plug and coil. And yes, micro drill will be perfect for the attachment of clutch, brake and throttle cables. My ignition wires are painted .5mm lead wire. They are hard to see but are attached to the number 1 and 6 cylinders now which are energized by the forward coil.


- 150 replies
-
- 11
-
-
Honda RC166 Grand Prix Racer by CDW - FINISHED - Tamiya - 1/12
CDW replied to CDW's topic in Non-ship/categorised builds
Agree 100% What makes the tubing useful is to snip off all but about 2mm at each connection point and use that short section as a connection (like a ferrule) for lead wire or other more scale diameter wire. I have a large selection of lead wire in .1mm graduated diameters to use for detailing. That's my intent here. As you said, old telephone wire often has a more scale appearance as well. -
How did the pilot see anything looking forward while inside the cockpit? Must have been quite a task on landing and takeoff and flying around the pylons for that matter though I guess when rolled to one side the pilot would gain some forward vision that way.
-
Honda RC166 Grand Prix Racer by CDW - FINISHED - Tamiya - 1/12
CDW replied to CDW's topic in Non-ship/categorised builds
Tamiya recommends mixing 4 parts Titanium Gold with 1 part Flat Red Brown to achieve the engine color see in the reference photos., Carbs, various engine covers and plates. Looks like a good match to me.
- 150 replies
-
- 10
-
-
-
Great start. I love those slipper tanks seen on the version you’re doing. A distinct feature of the Buc.
-
Honda RC166 Grand Prix Racer by CDW - FINISHED - Tamiya - 1/12
CDW replied to CDW's topic in Non-ship/categorised builds
It's going to be interesting and tedious building the chain, link by link. Those pins are even smaller than the wheel parts. I hope the count is right. -
Honda RC166 Grand Prix Racer by CDW - FINISHED - Tamiya - 1/12
CDW replied to CDW's topic in Non-ship/categorised builds
With the front wheel finished, will next move on to other challenges. By the way, as it turns out there was no extra nipple. Tamiya supplied the exact number needed with no spares whatsoever. So if you take on this build for yourself, be forewarned. If you lose one it’s going to be a problem.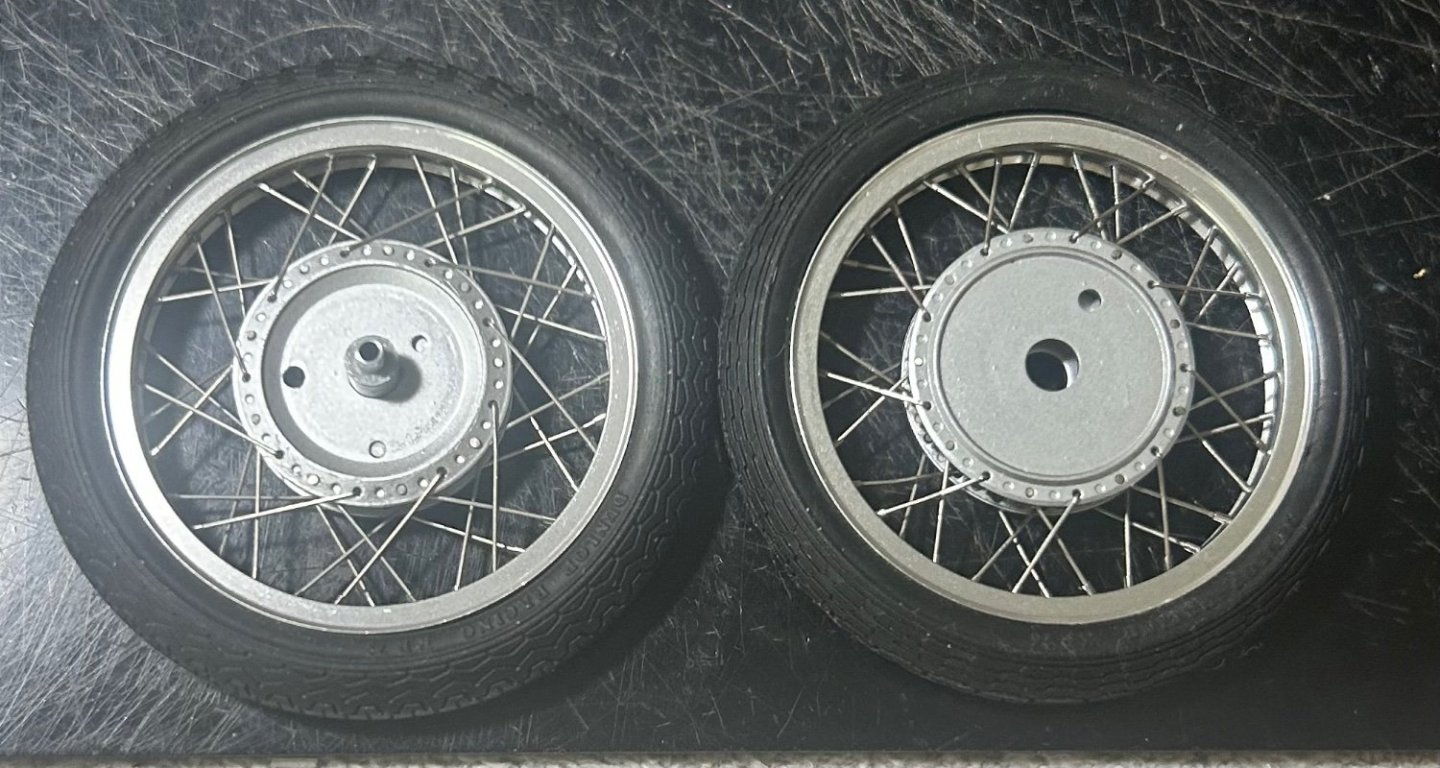
- 150 replies
-
- 10
-
-