CDW
-
Posts
7,760 -
Joined
-
Last visited
Content Type
Profiles
Forums
Gallery
Events
Everything posted by CDW
-
 That's a very good move on Airfix part. I remember the days when their decals were infamously bad but then again, so were just about everyone else's decals too.
 -
Huge decal sheet, measures over 9 x 13 inches. Not sure who makes the decals but the quality of the sheet is “Cartograf”-like. Very nice.

- 332 replies
-
- 11
-

-
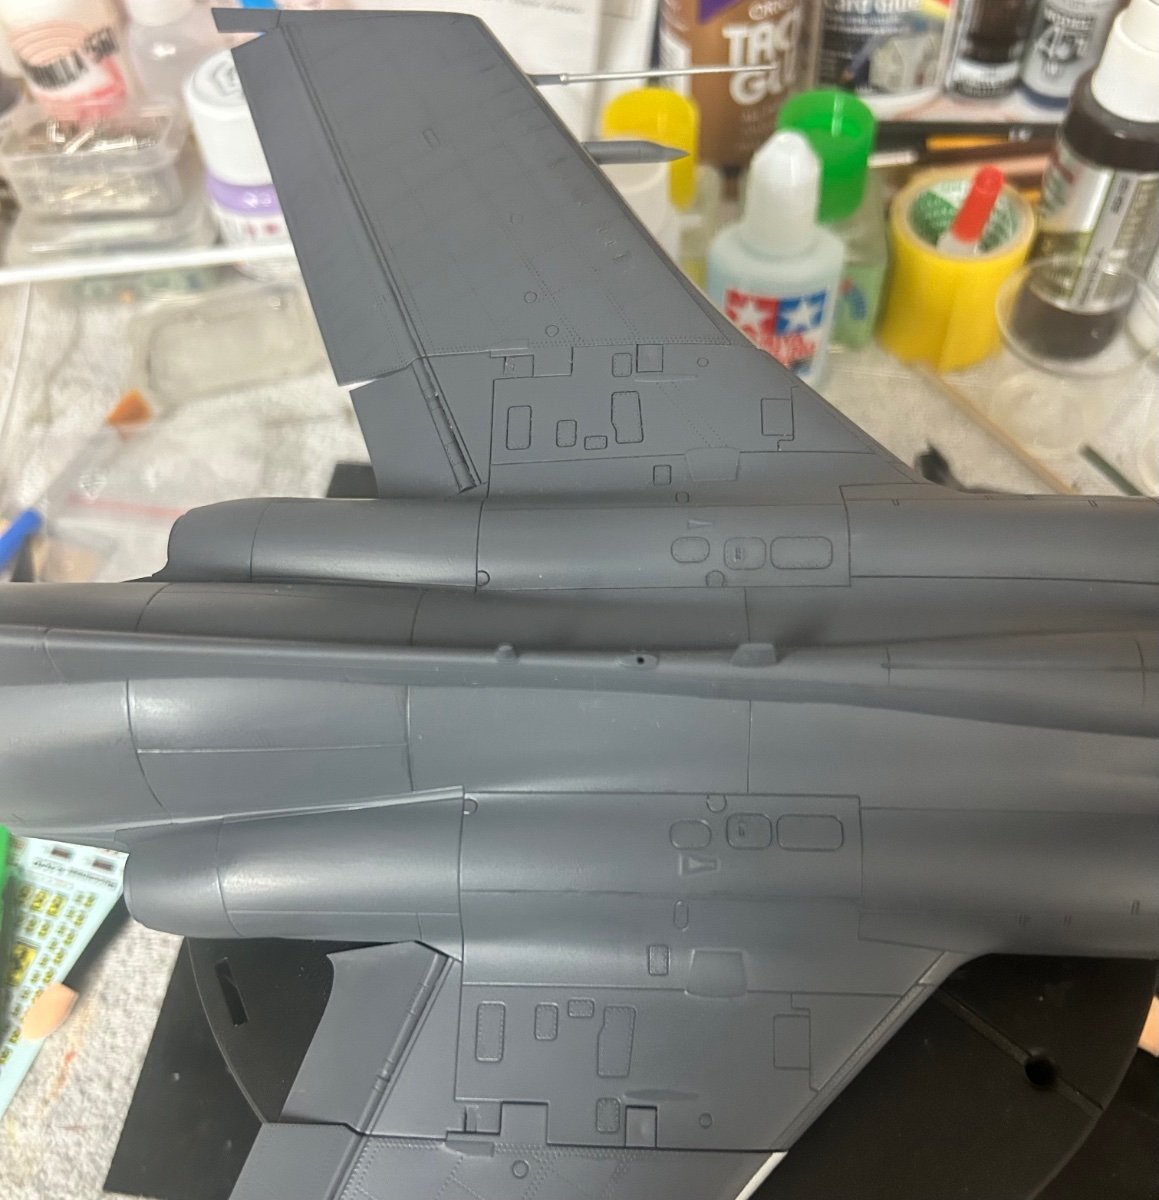
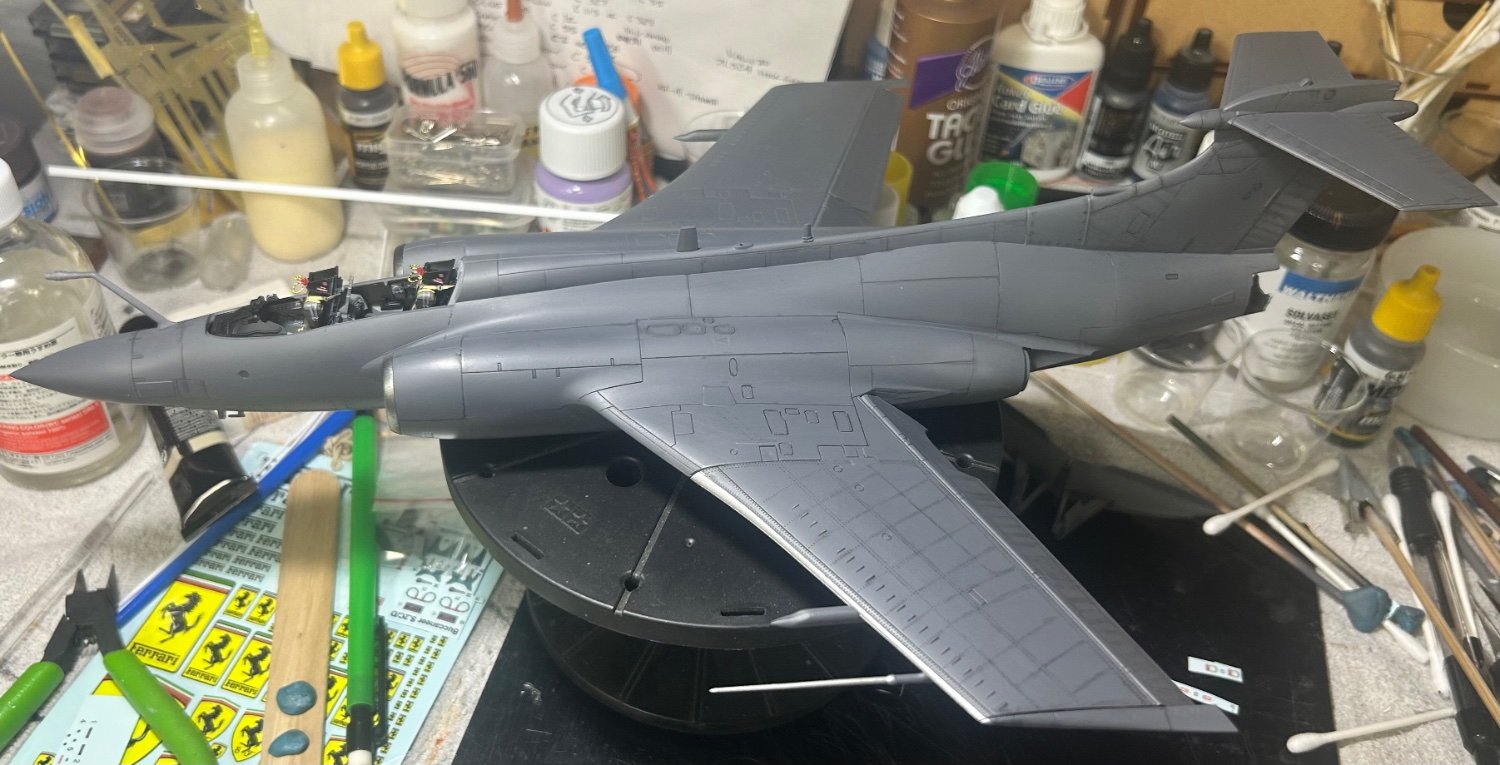
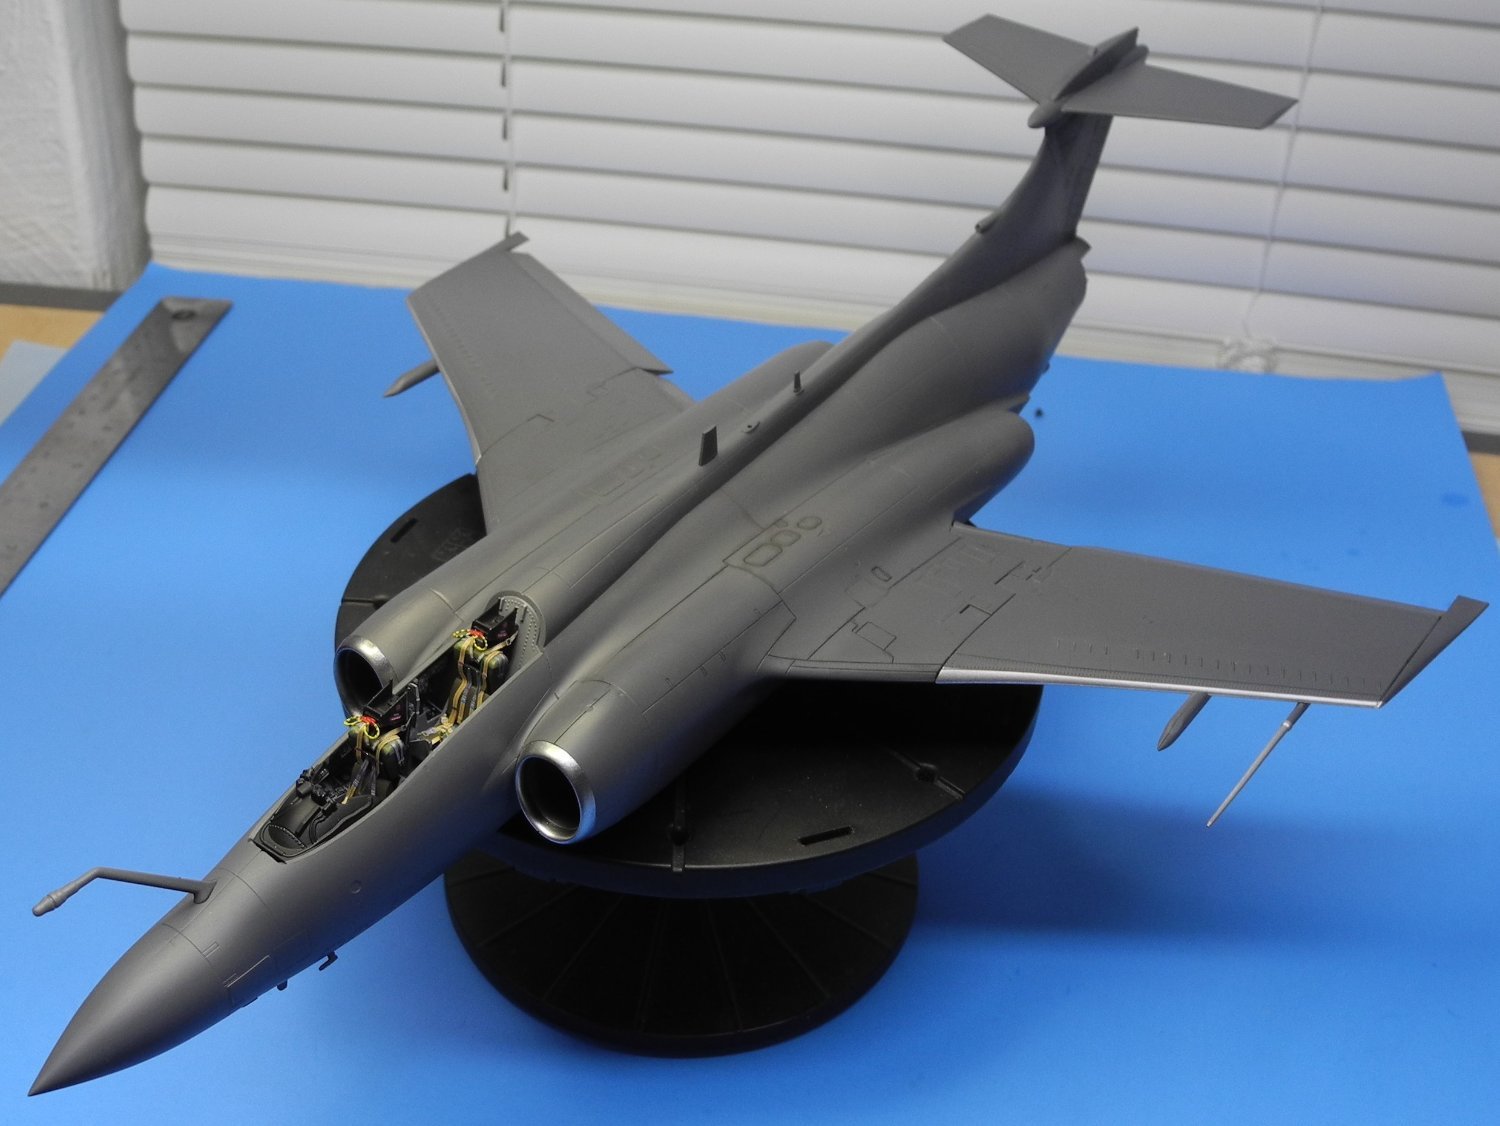
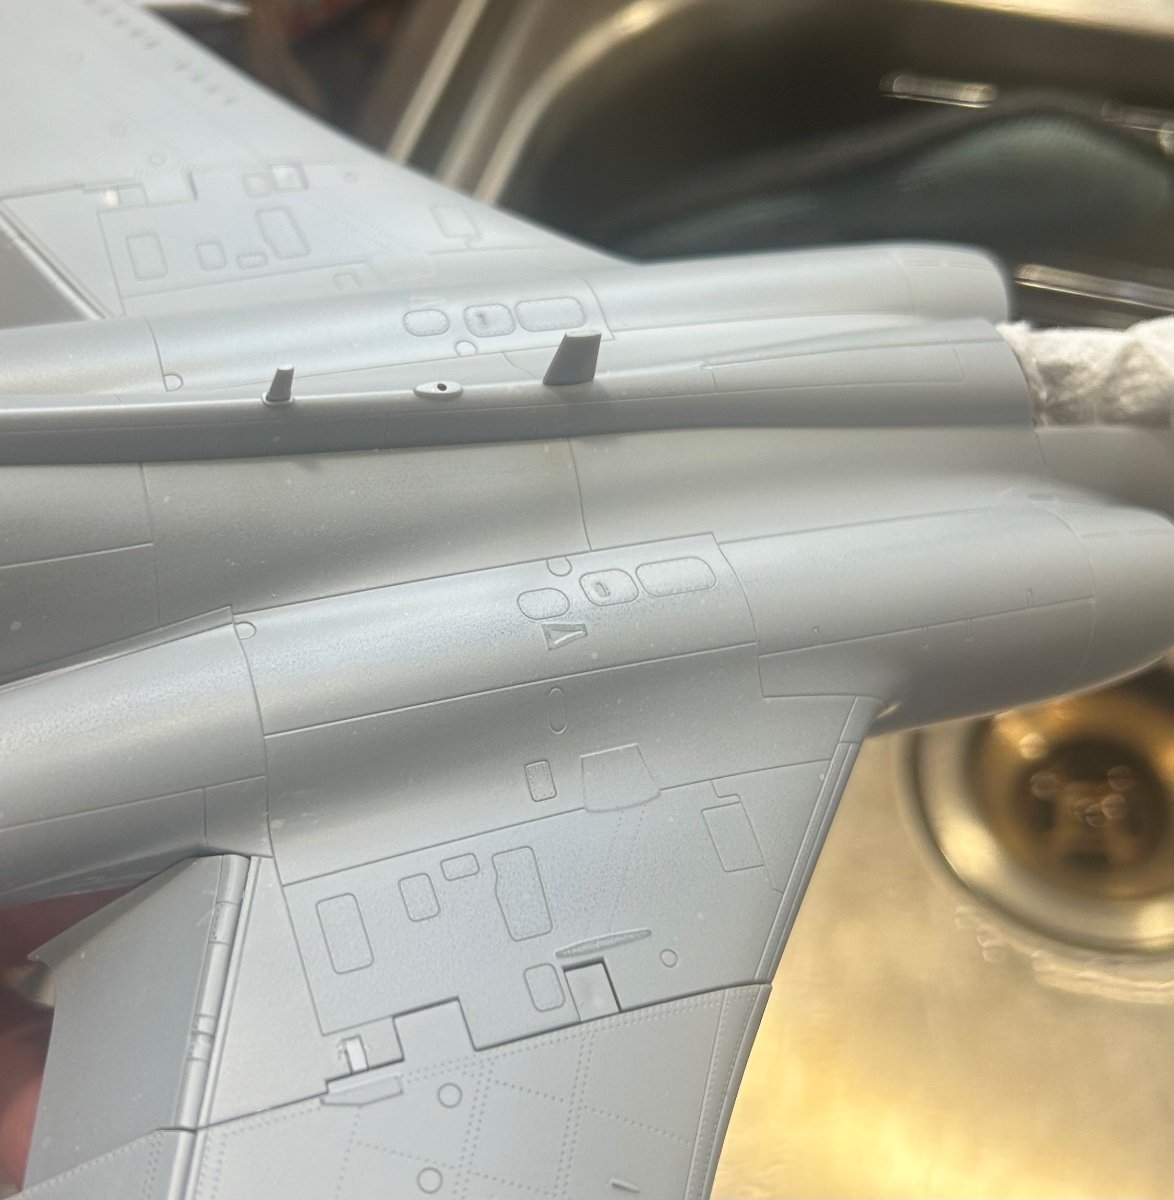
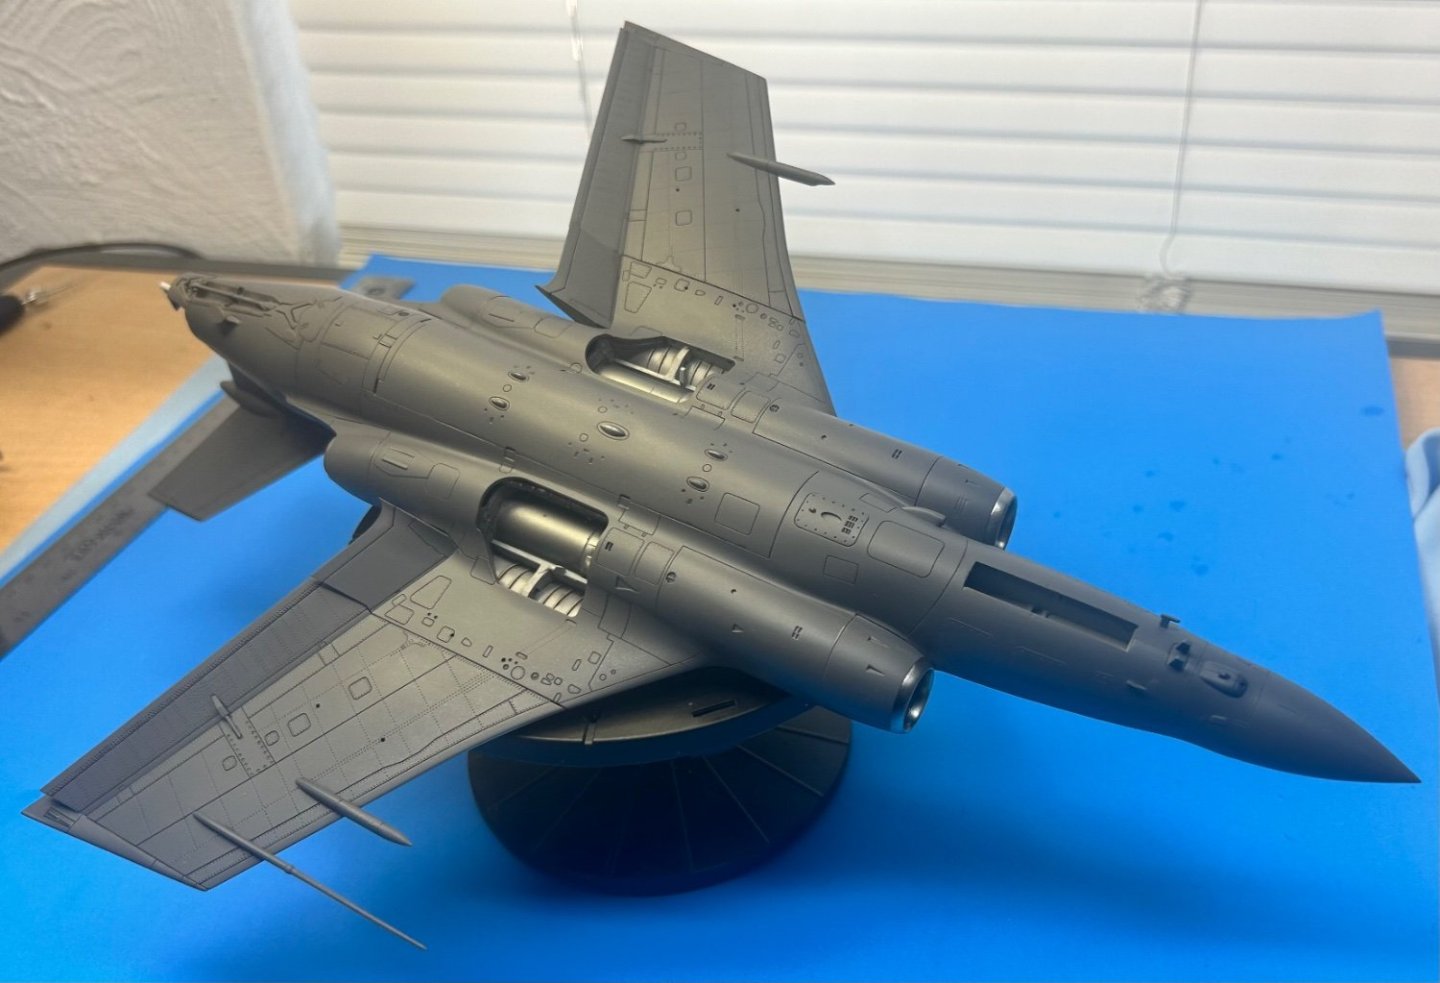
A few more small bits to mask and paint before I can begin decals. On a separate note, another added beauty of doing a wet sanding of the paint is that the decals go down so much better. Wet sanding is something I only do when using either Tamiya or Mr Color paints (lacquer). Doesn’t work for acrylic.
-
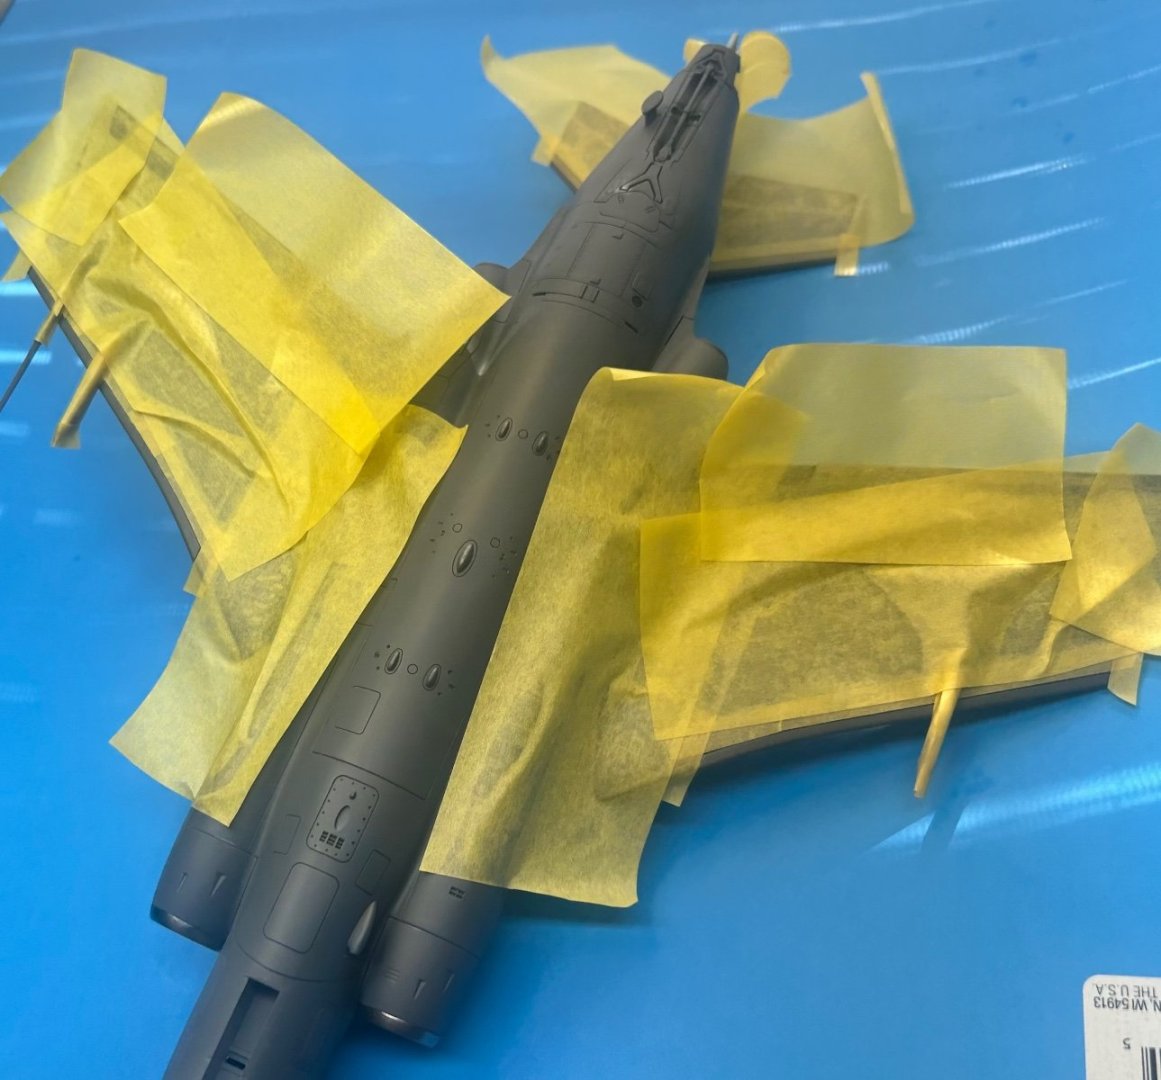
All this masking just for the small areas of the leading edges of the wings and stabilators. Ditto for the top side. You’re going to be there soon Arthur. 😀
- 332 replies
-
- 10
-
-
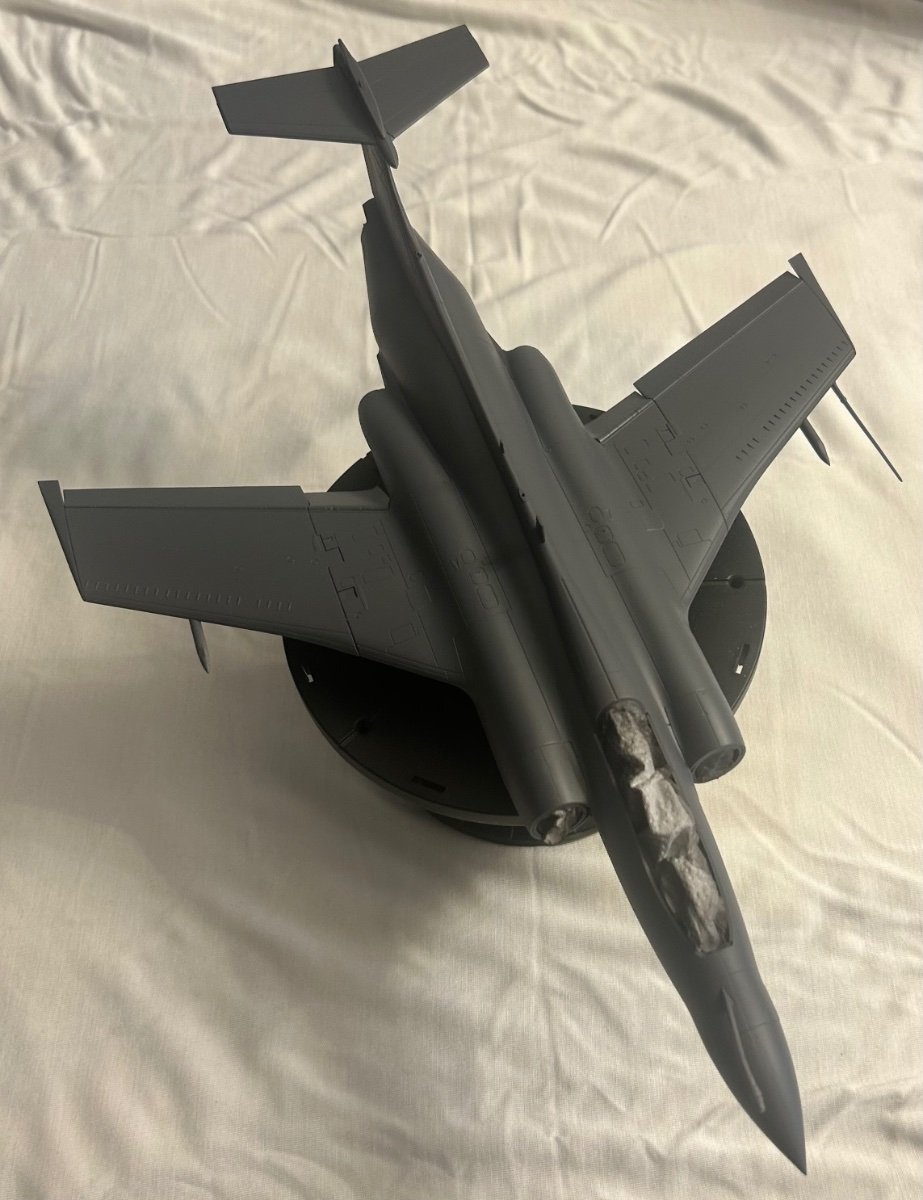
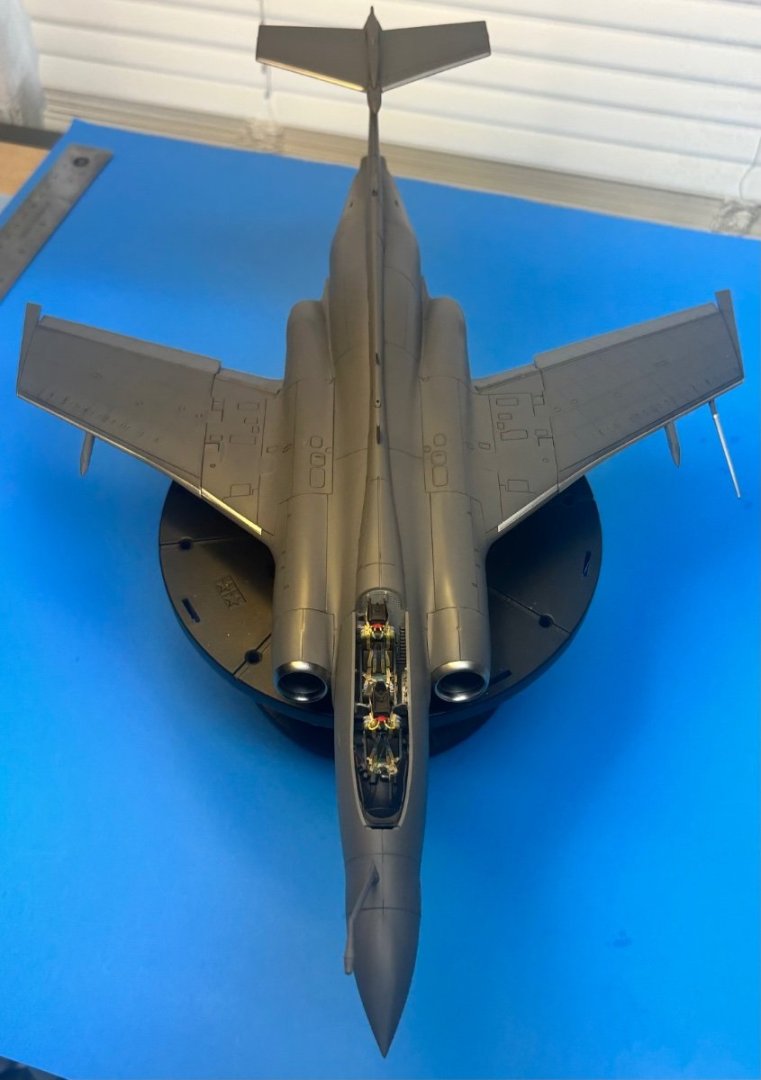
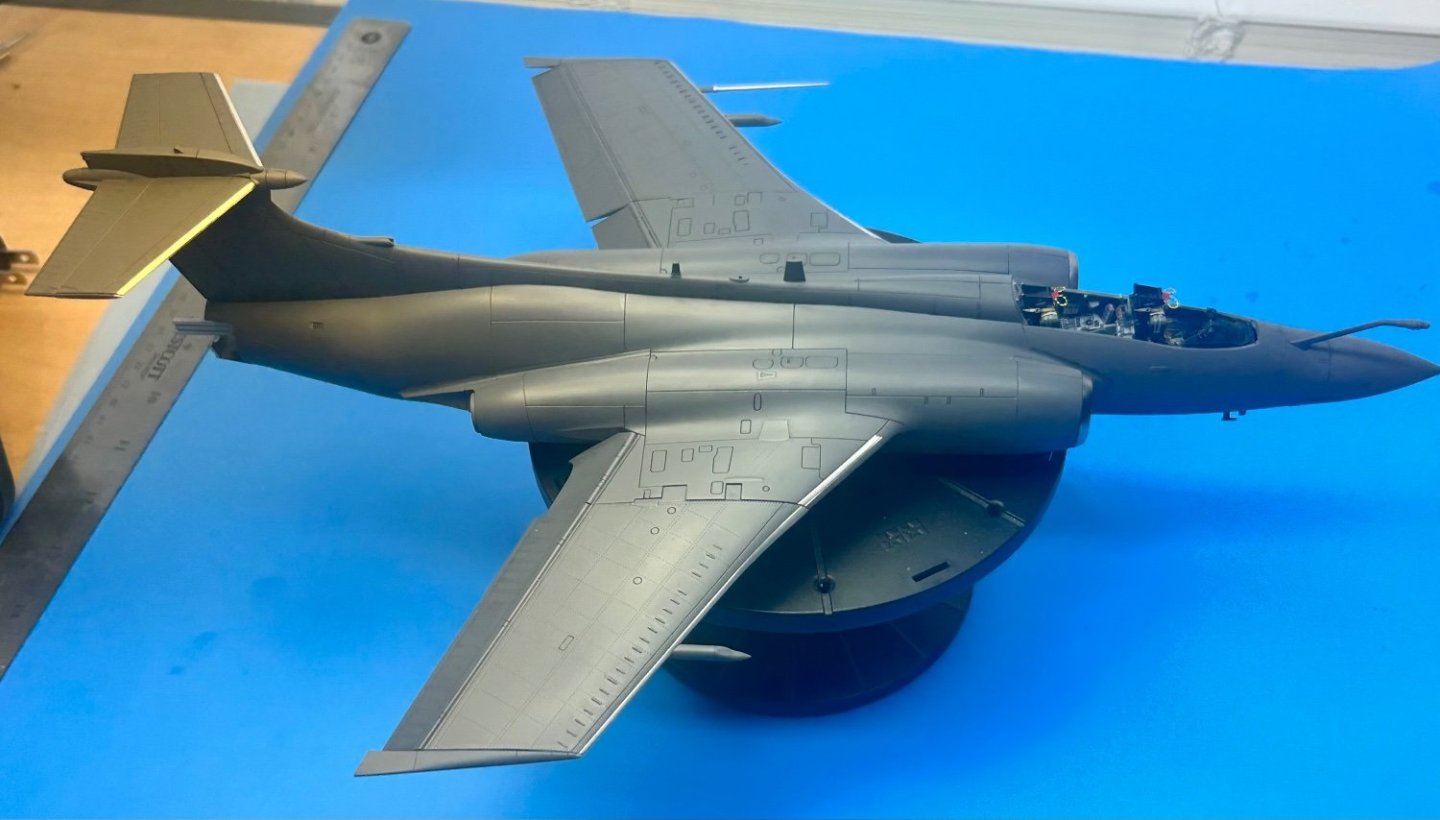
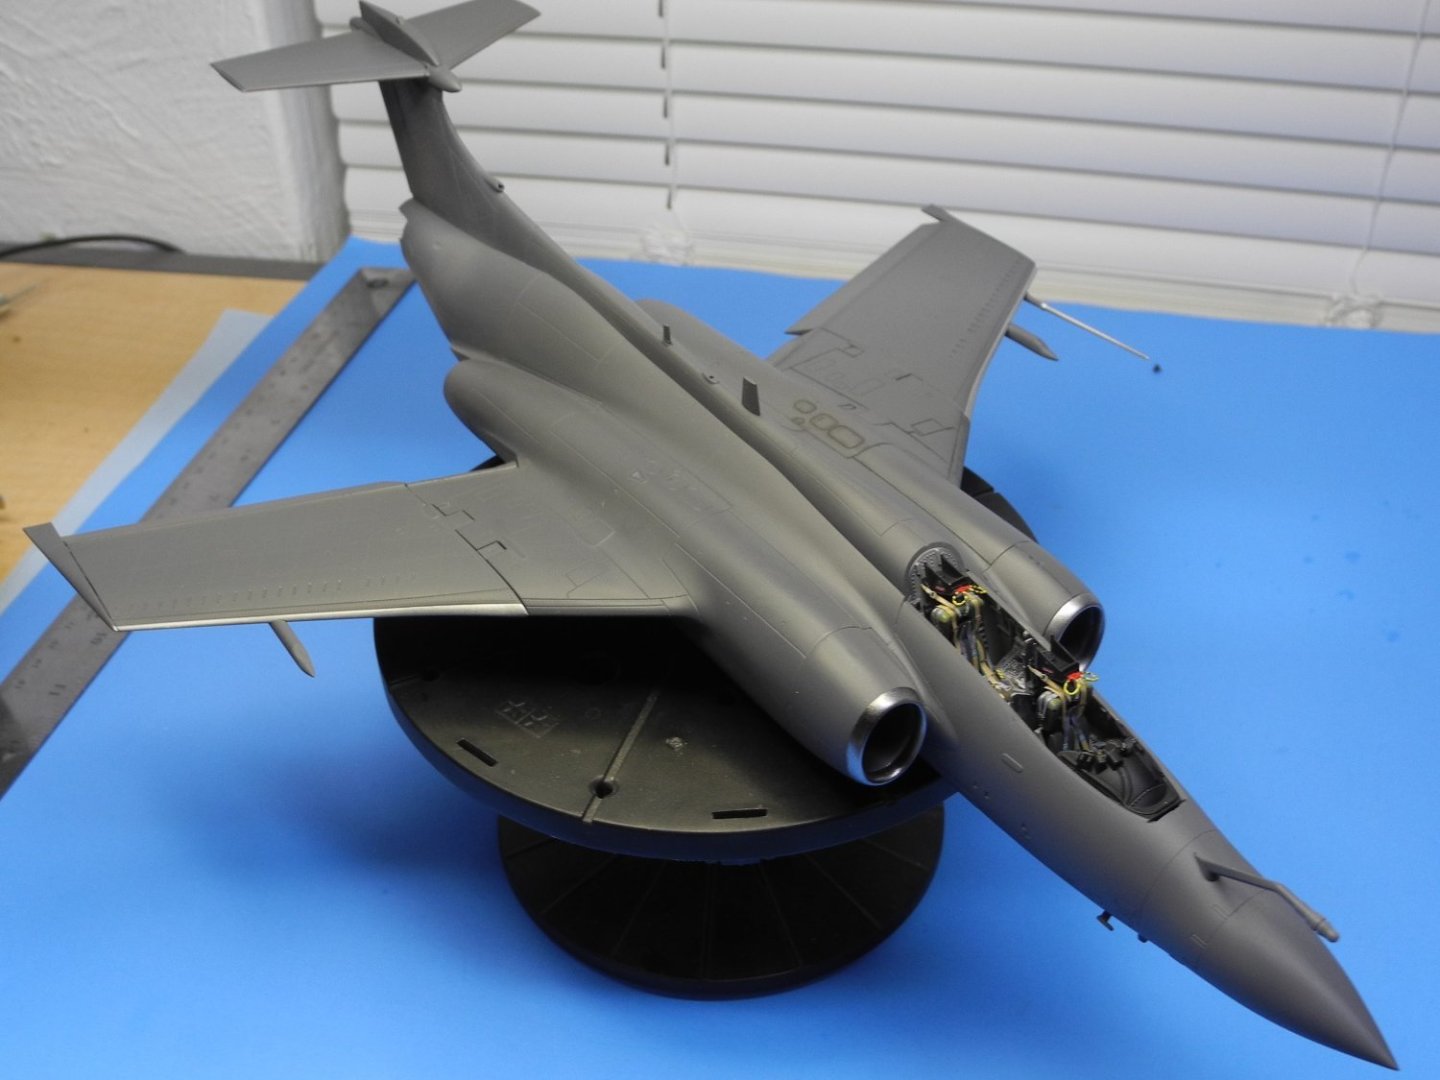
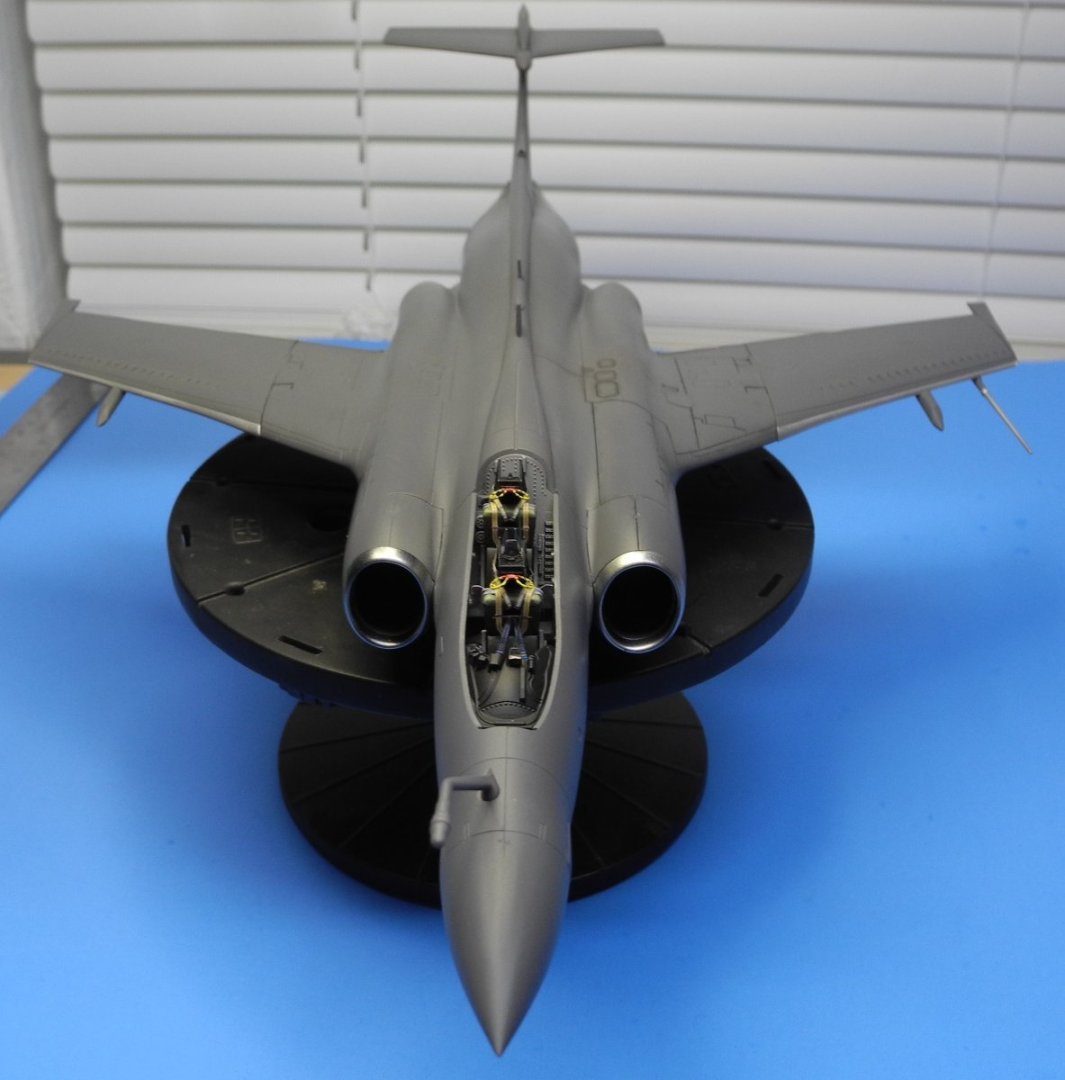
Got all the wash done to my satisfaction, now adding a few places where NMF appears. Exhaust areas get burnt metal. There are a few places that will get a Radom tan color then will begin applying decals before adding LG, doors, pylons and ordnance. Some light weathering will follow all that.
- 332 replies
-
- 11
-
-
B-25 C/D by Javlin - Airfix - 1/72 - PLASTIC
CDW replied to Javlin's topic in Completed non-ship models
Love that B-25 and the way you’ve displayed it remarkable. Beautiful! -
The fellow featured in the video passed away, the oil company exec.? That’s sad to learn.
-
This lucky guy was able to buy his very own Blackburn Buccaneer. Wow!
-
In this short video of an obviously out of service Buccaneer, probably on display somewhere, the maintenance panels and panel lines stand out rather proud. One can presume this is at least in part due to weathering as it sits out in the open. Other than photos of engine maintenance where the panels around the intakes are removed, I have not yet been able to find photos of other panels opened for maintenance. I will just use my imagination to show some wear on various random panels for this model.
-
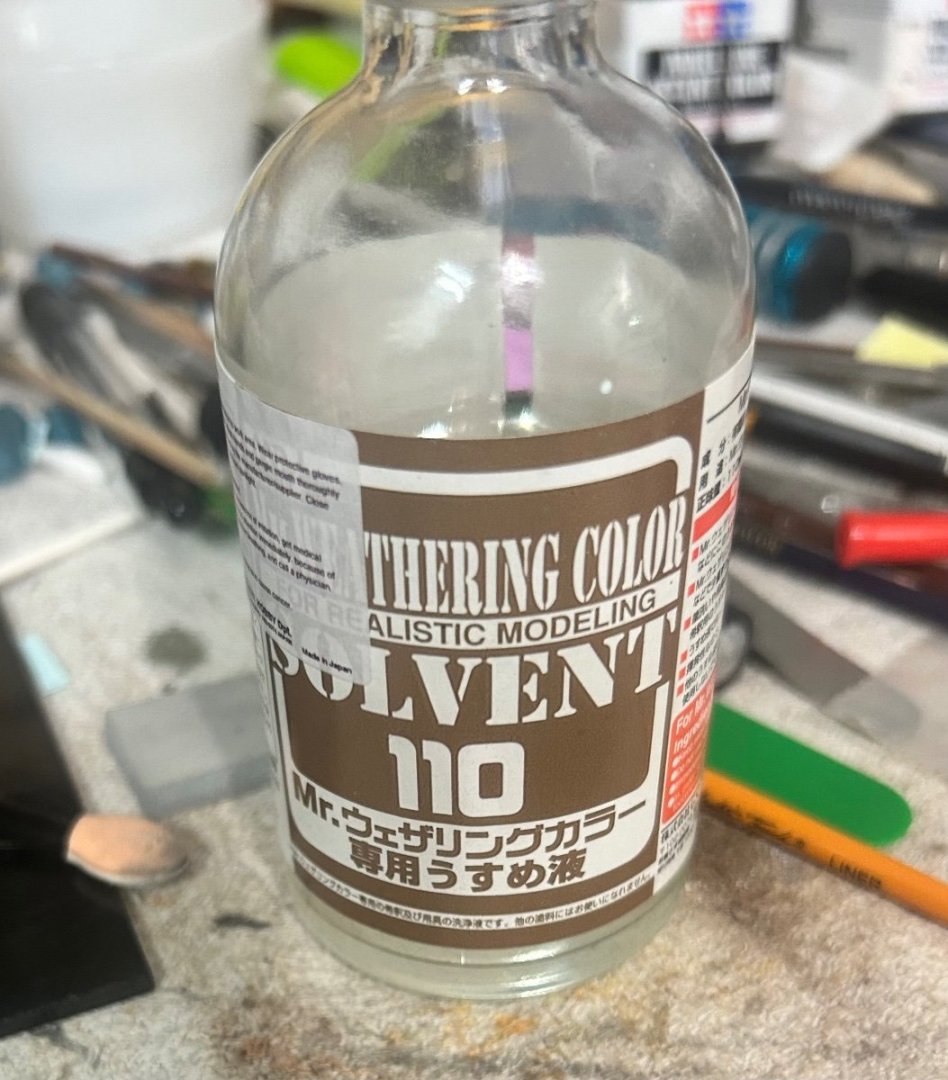
To achieve a more subdued look, simply remove some of the panel line wash using Solvent 110. It seems this product is a refined, odorless white spirits but I have not experimented to find a generic equivalent of it. What I do know is that it works well to remove excess Tamiya or Mr Color wash that’s been applied over Mr Color lacquer paint without harming the paint in any way. Your results may vary over different paint types. On the opposite side of the model I used a dark gray panel line wash to compare to the black wash used on the first side. A slightly different look but not much different. I’ll end up using the black on both sides to keep everything consistent. The key is how vigorous the cleanup after application. im going to try and find some photos that show the commonly used access panels so I can show some light wear around those. If you’ve run across any photos like this please share them with me.

- 332 replies
-
- 12
-
-
Thanks Arthur. You could also use a lighter shade for the panel line wash. I used black. I’ll be using some oils and pastels for various highlights on the model later on.
-
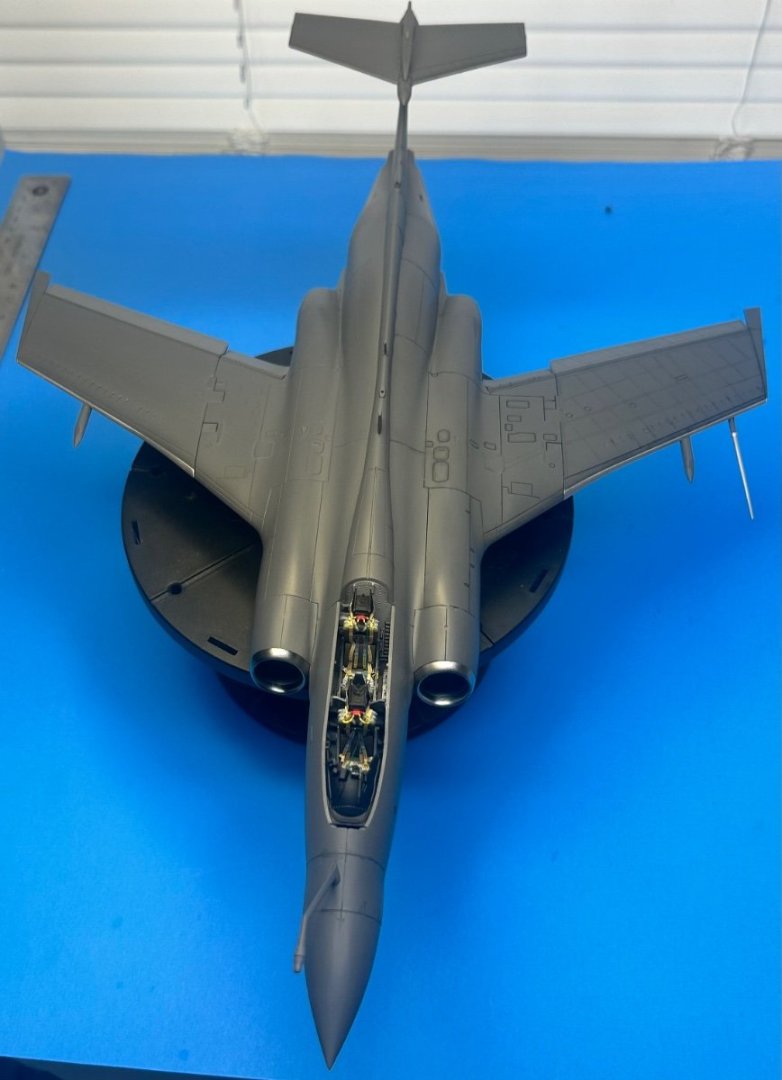
First a pin wash, second a cleanup of the pin wash excess, then last a side by side comparison of with and without the pin wash that captures panel line/rivet detail. Some like it, some don’t. Suit yourself. This gives an idea of what to expect with or without it.

- 332 replies
-
- 10
-
-
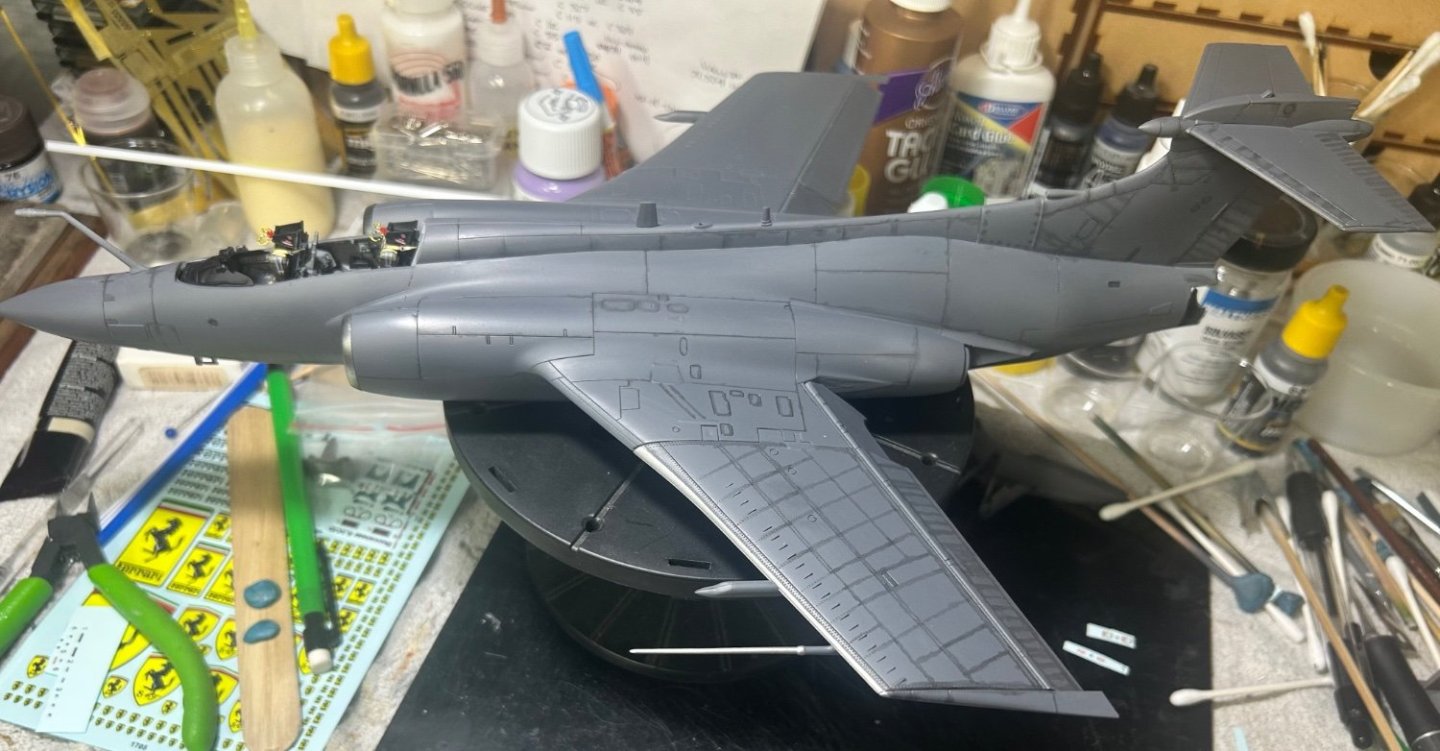
With Easter weekend finished got a few more things done on the Buccaneer. Lots of small details to pull together now.

- 332 replies
-
- 14
-
-
Other than the minor fit issues you described the overall molding of the parts is superb. What riveting tool are you using? Rosie the Riveter tool has become almost impossible to find now. I guess the company went out of business?
-
US 6” gun by RGL - FINISHED - Panzer Concepts
CDW replied to RGL's topic in Non-ship/categorised builds
Awesome! -
Don't worry about a thing. I still enjoyed the photos very much. Beautiful work, Jeff.
-
I think maybe it’s time to break out the new lighting systems my son gave me for photographs. Two bright LED light banks that sit atop adjustable tripods. Each one has a sort of diffuser that softens the light and something like adjustable blinders that help focus the light. Gray seems to be a color that’s hard to photograph to me. I’m thinking that light is the issue.

-
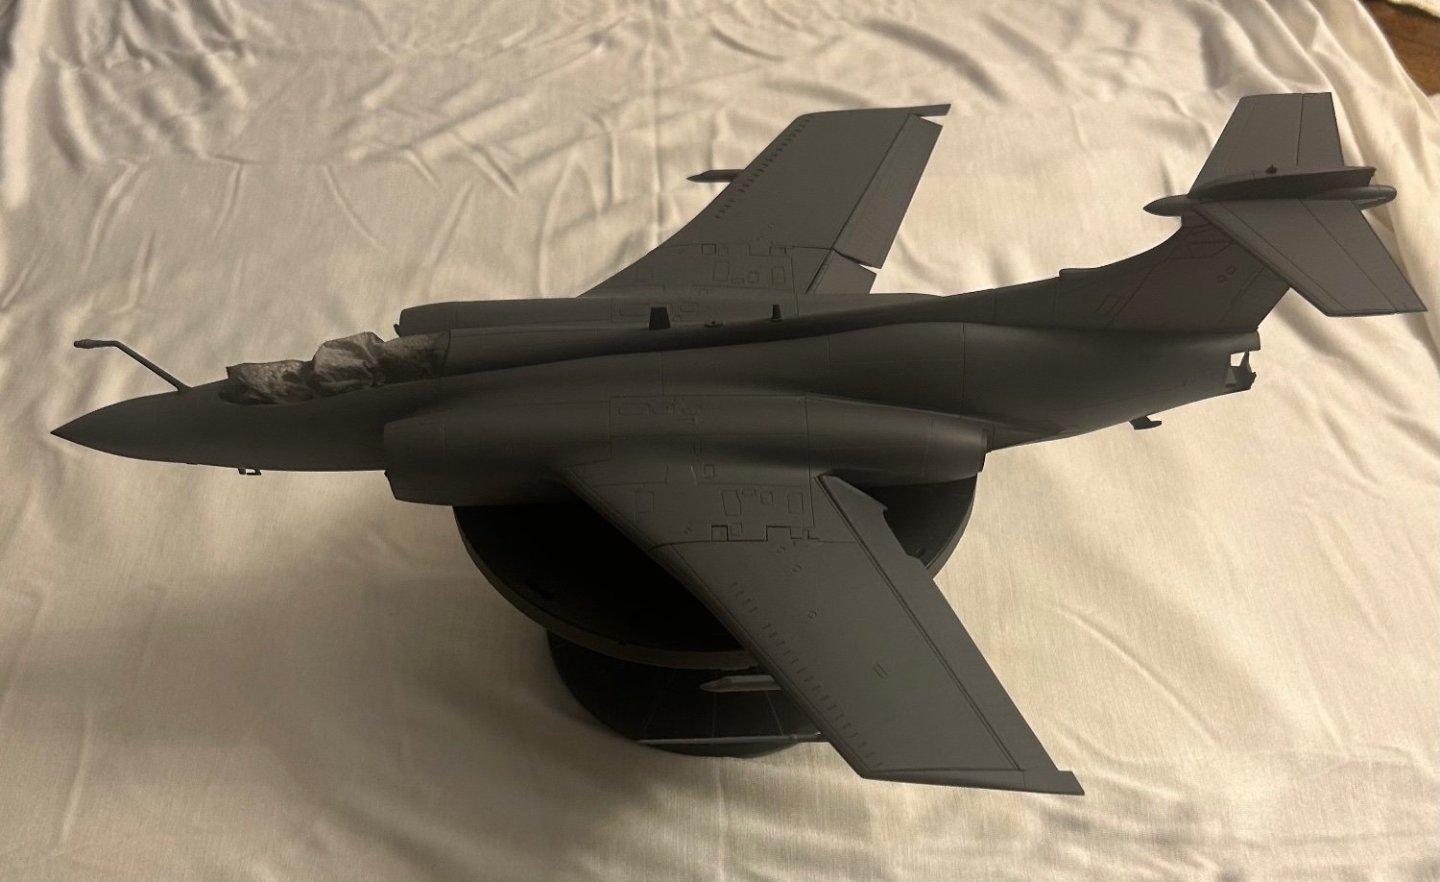
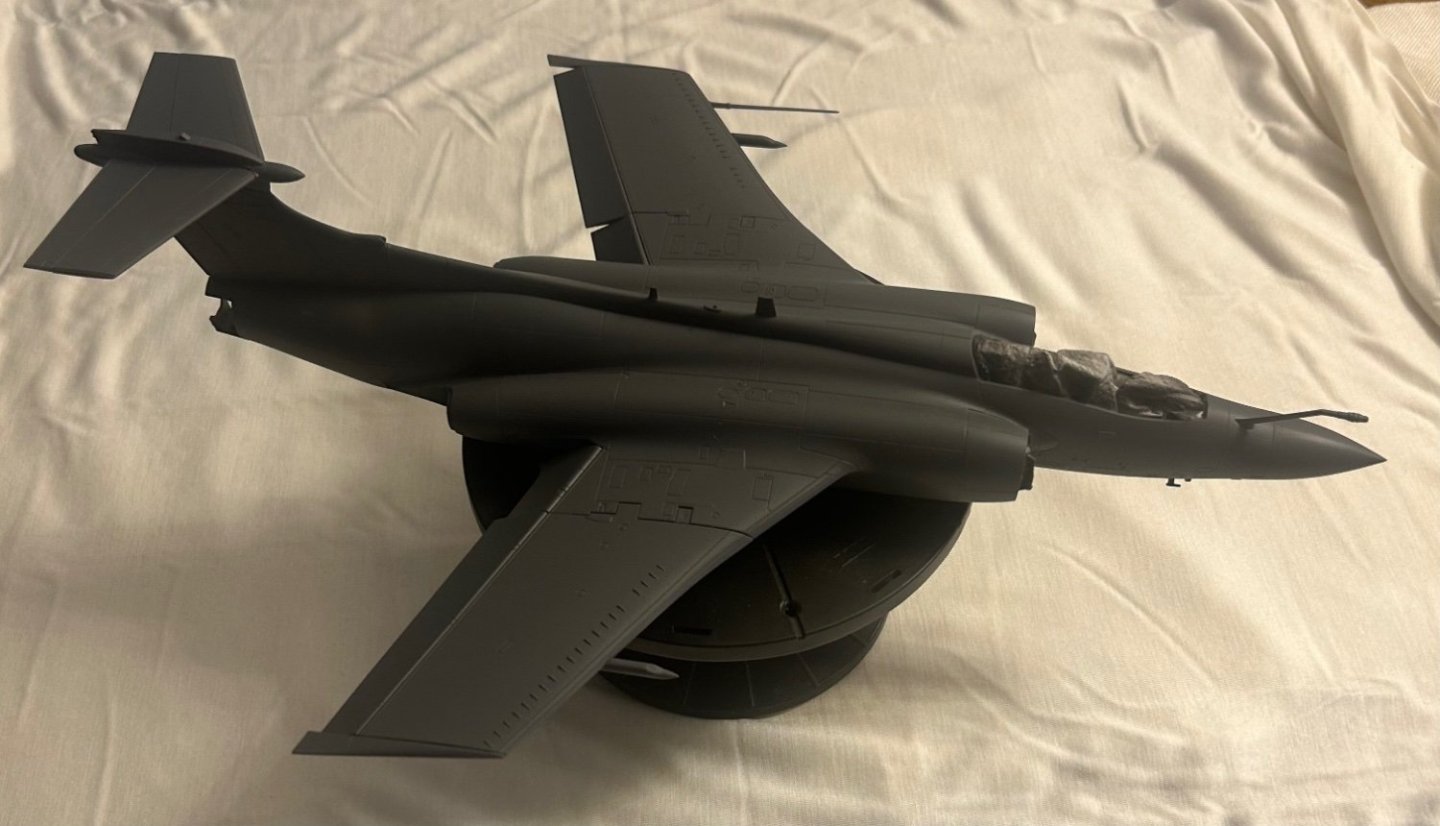
Here’s the model with both shades of gray applied, the top one being the finish color. Next will wet sand to lightly expose some of the lighter shade of gray underneath and hopefully achieve the lightly weathered effect I want.

- 332 replies
-
- 10
-
-
US 6” gun by RGL - FINISHED - Panzer Concepts
CDW replied to RGL's topic in Non-ship/categorised builds
Love that paint work, RGL! -
US 6” gun by RGL - FINISHED - Panzer Concepts
CDW replied to RGL's topic in Non-ship/categorised builds
Did the kit advise how many links were required per side to fit the sprockets and wheels? I lay all the links down on a flat surface using a straight edge to keep alignment, then glue each link together with Tamiya thin cement. Before the cement completely sets and is still soft, shape the track links around each side then reapply cement if/as necessary to each link. It's a real pain in the **** for sure. -
Never taste tested any of the three but I have heard from reliable sources that Iguanas are truly good tasting meat. In a tight spot, I can survive but as long as I am able, opt for more traditional domestic food sources. Peacocks are a smelly bird. If they tasted anything like they smell, it would be awful. There used to be (maybe still is) a Rattlesnake Festival near where I live each year. Rattlesnake is on the menu, I've tried it but was not overly impressed with it. Same with Alligator. Ever tried fried frog legs? Alligator tastes a lot like that, a cross between chicken and fish. Gopher tortoises and snapping turtle are absolutely delicious when prepared correctly. 😄 Nowadays gopher tortoises are a protected species. When my forefathers came to Florida in the early 1800's, it was completely uncivilized, a wilderness. They learned to eat/survive on native game and found creative ways to prepare it so it was good to eat. Time changes everything, food along with it.
-
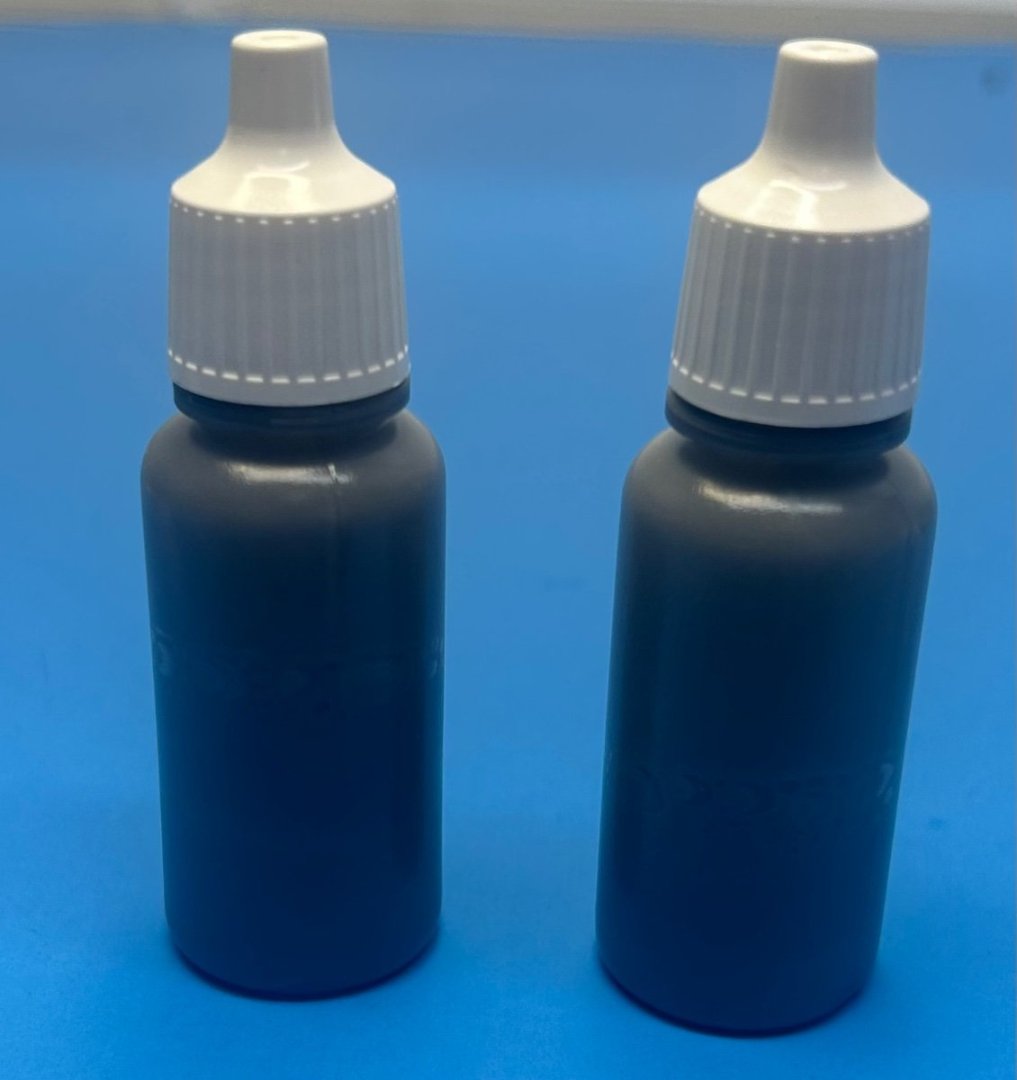
With a light wet sanding, the Mr Surfacer primer becomes smooth like glass. Not sure how well it will show up in the photo but the bottle on the left is Mr Color Dark Sea Gray which will be my top coat. Under it will be the color on the right which is the top color knocked down a few notches with a lighter shade of gray. The combination of the two colors will be to help achieve a slightly worn/weathered look. I will lightly wet sand the top coat until a little of the lighter gray shows through in random places.

- 332 replies
-
- 10
-