DONATION DRIVE - SUPPORT MSW - DO YOUR PART TO KEEP THIS GREAT FORUM GOING!
×

CDW
-
Posts
7,749 -
Joined
-
Last visited
Content Type
Profiles
Forums
Gallery
Events
Everything posted by CDW
-
 Be still my heart.
 -
Here's a way to get a RN Phantom done without searching everywhere for the old Hasegawa kit: Hasegawa / Revell FG-1 Phantom Royal Navy 1:48 - build review - Scale Modelling Now Check out these super-nice landing gear for it: F-4 Phantom FG.1 Landing Gear For 1/48th Scale British Model SAC 48081 810121972687 | eBay
-
Trumpeter does a 1:48 Sea Vixen too. Not sure how it compares with the Airfix kit. Would need to read up on it. Yeah, I was thinking the Hasegawa RN Phantom is the only one I've seen in 1:48 and that was a LONG time ago.
-
Thanks OC. I love those RN Phantoms.
-
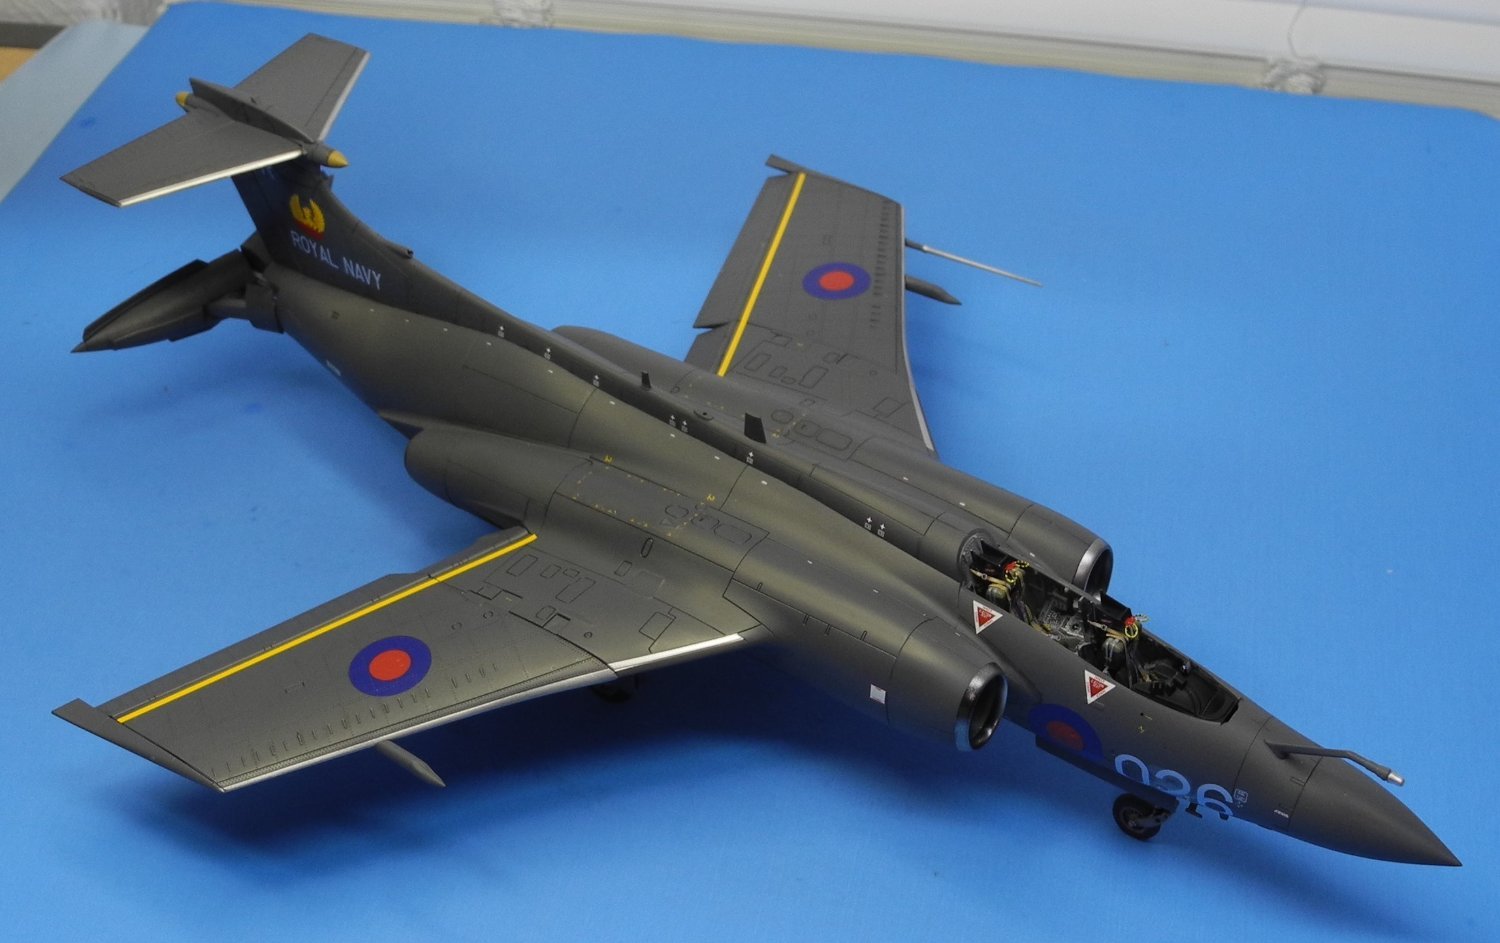
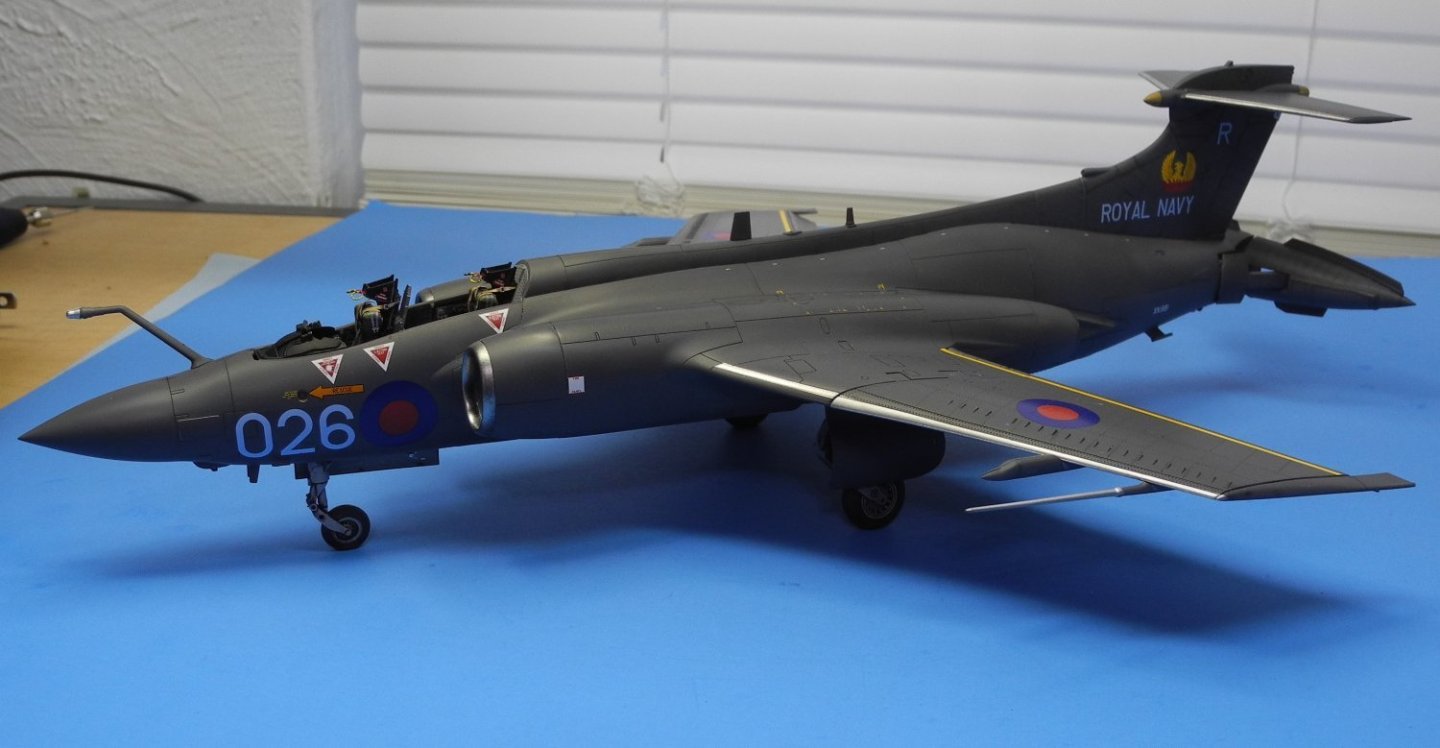
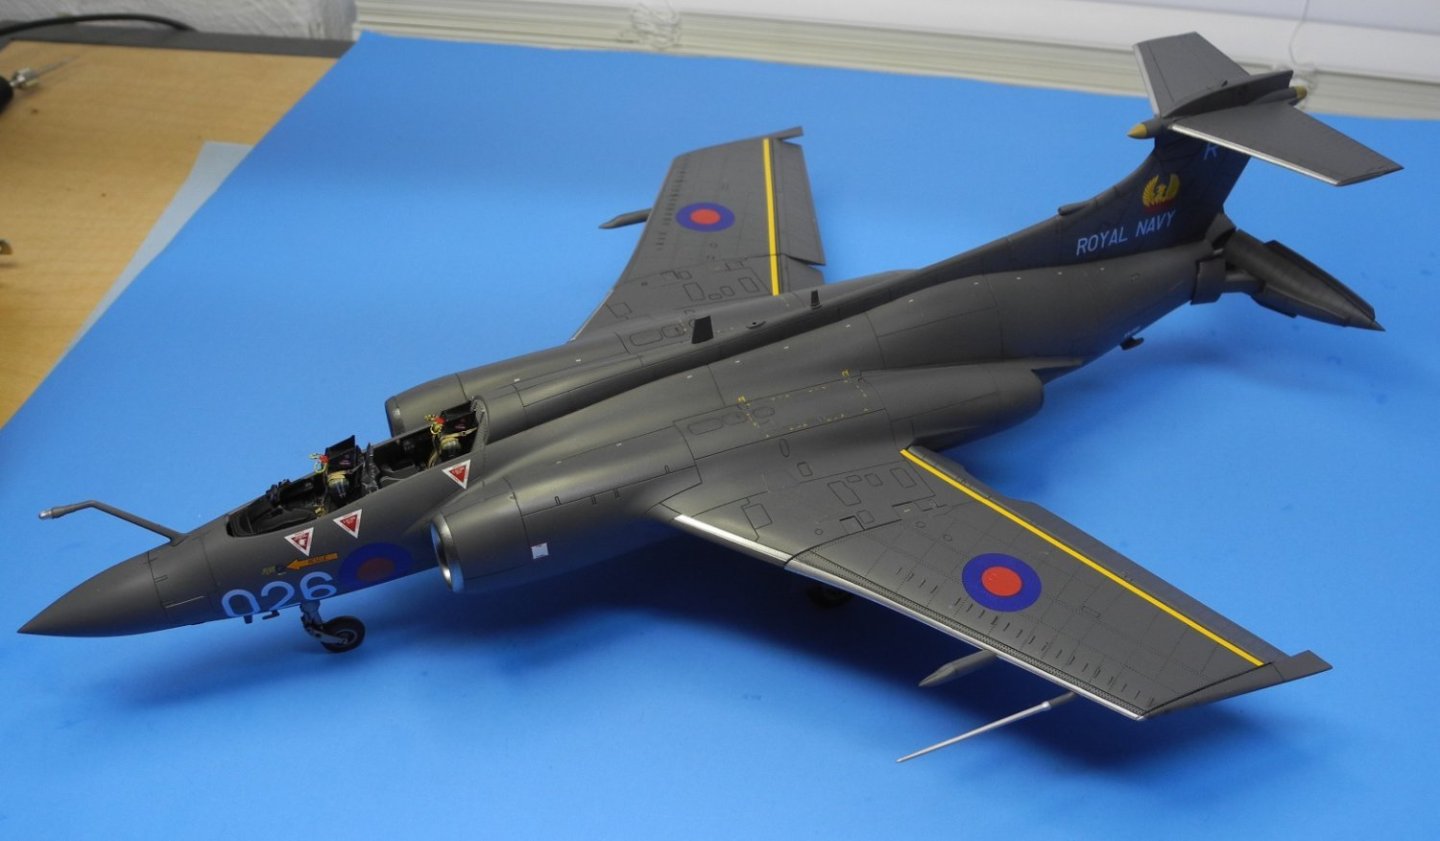
I may have finished the decals today had it not been for an errand or two as well as a visit to the eye doctor for a yearly exam. She's beginning to look very Royal Navy to me now. Need to finish my canopy (and some decals on it), pylons and weapons (decals on these too) before I can call it done. Will put a protective coat of satin varnish over everything before putting on the canopy.
- 332 replies
-
- 12
-

-
Honda RC166 Grand Prix Racer by CDW - FINISHED - Tamiya - 1/12
CDW replied to CDW's topic in Non-ship/categorised builds
I agree. Seems a shame covering up all that detail with a fairing. -
Climbing aboard
-
Honda RC166 Grand Prix Racer by CDW - FINISHED - Tamiya - 1/12
CDW replied to CDW's topic in Non-ship/categorised builds
It’s only been seven years since I last worked on it but I plan to resurrect this build to finish it once my Buccaneer (current project) is completed. 😀- 150 replies
-
- 10
-
-
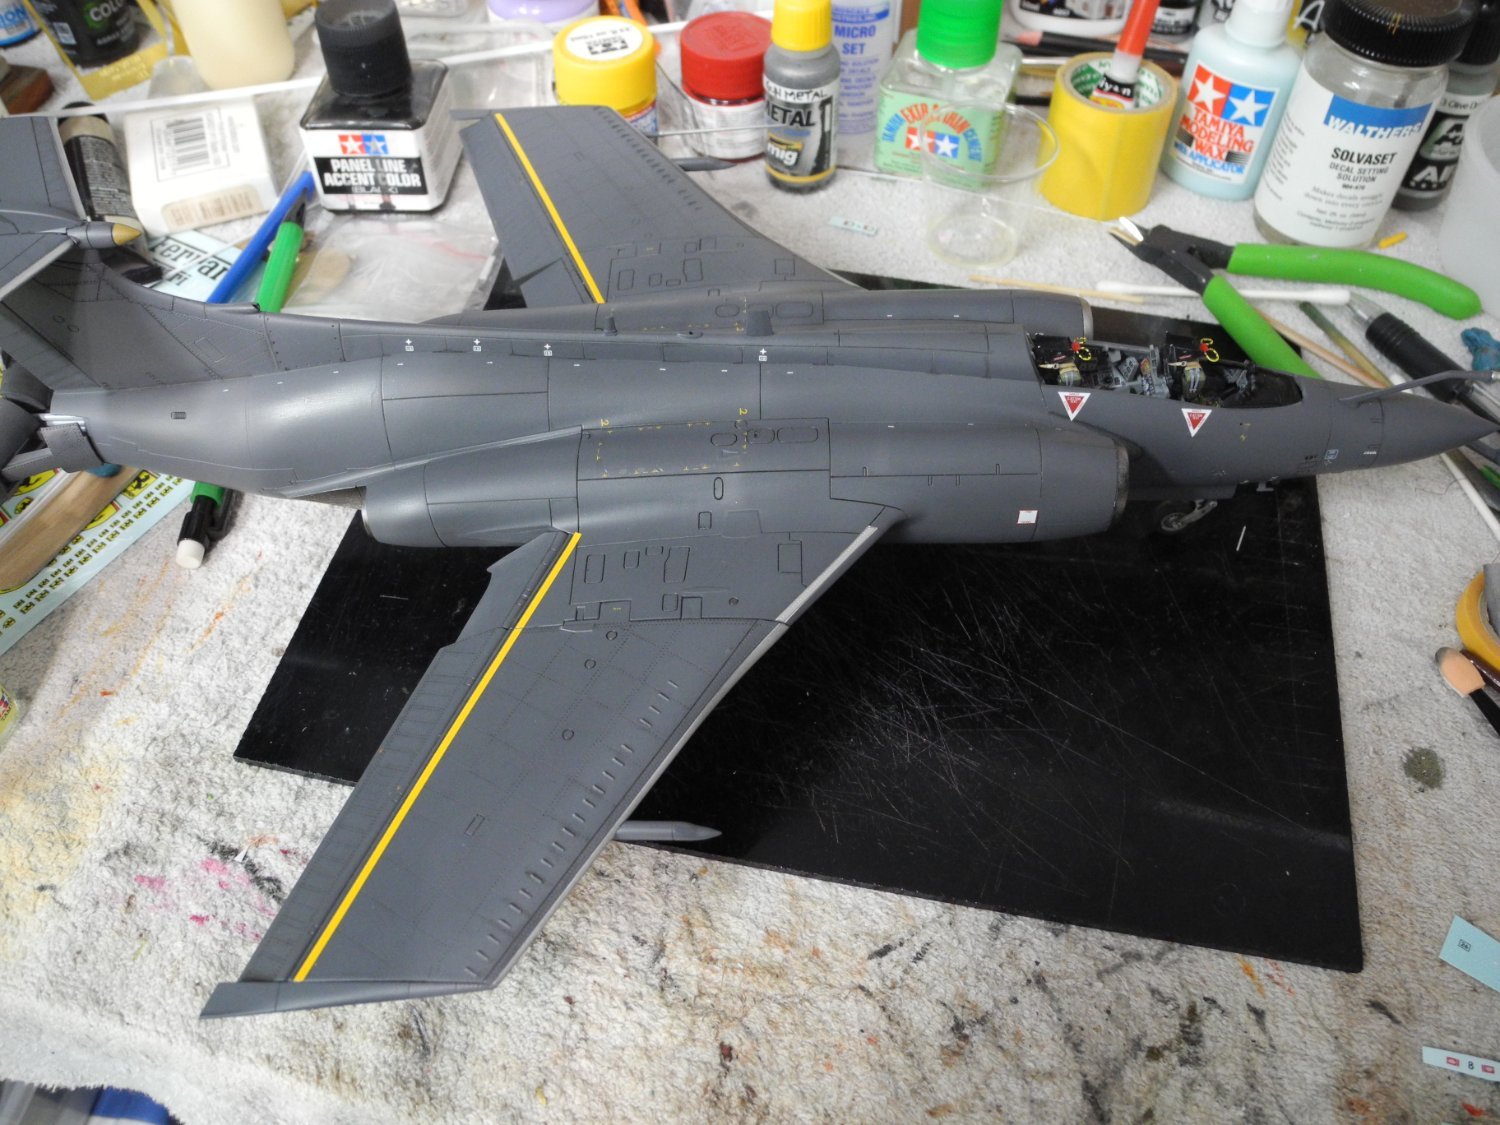
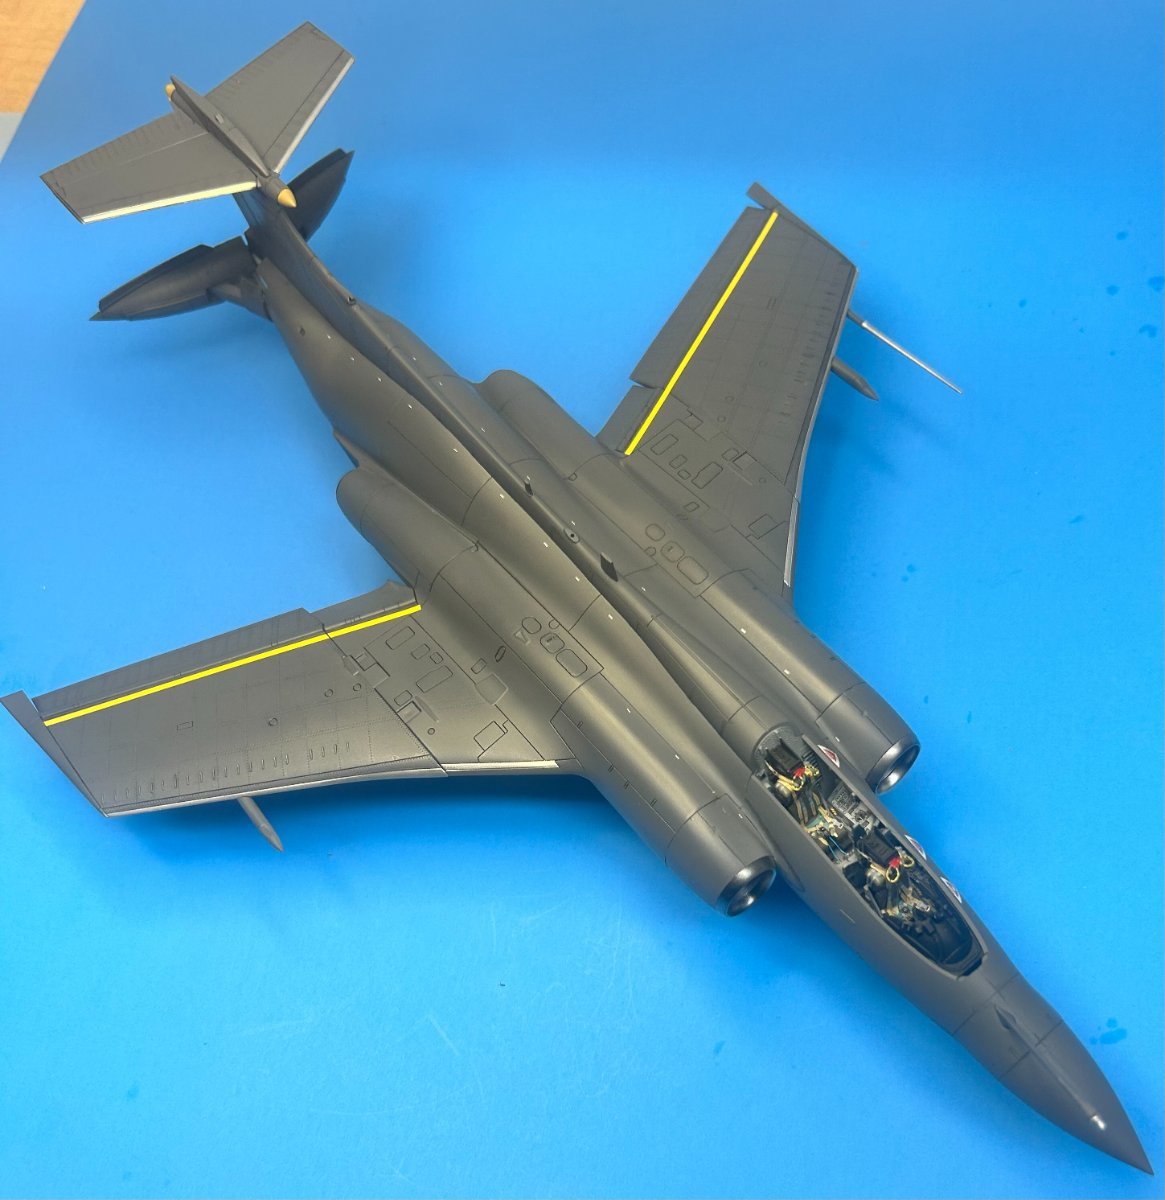
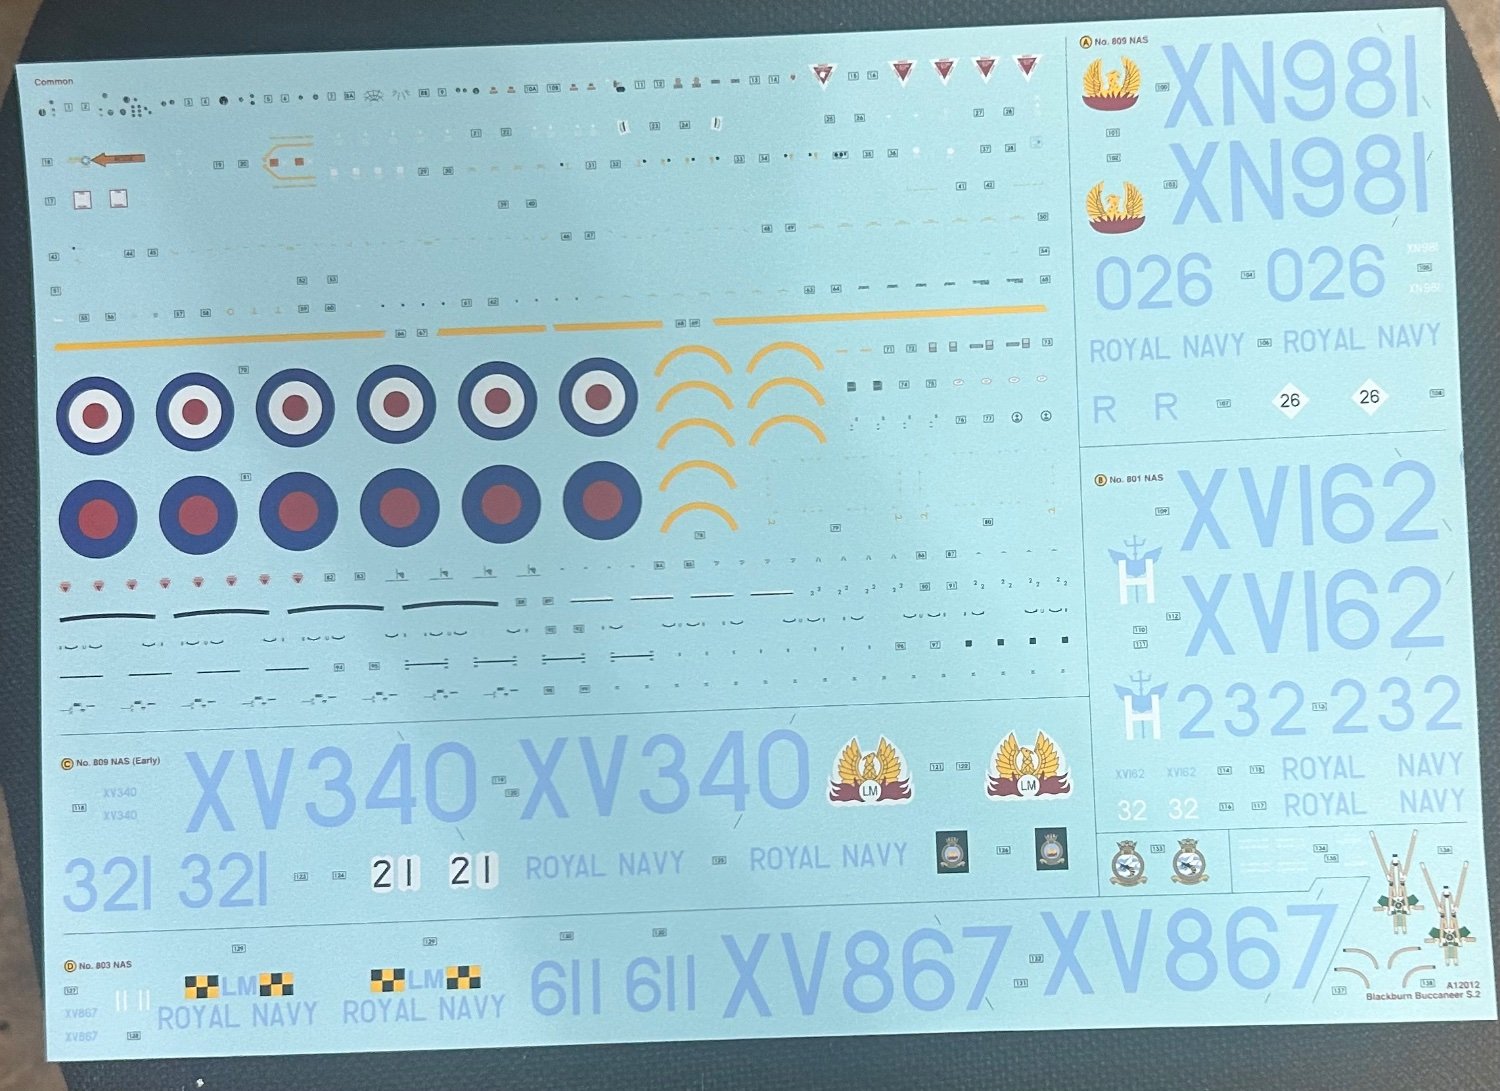
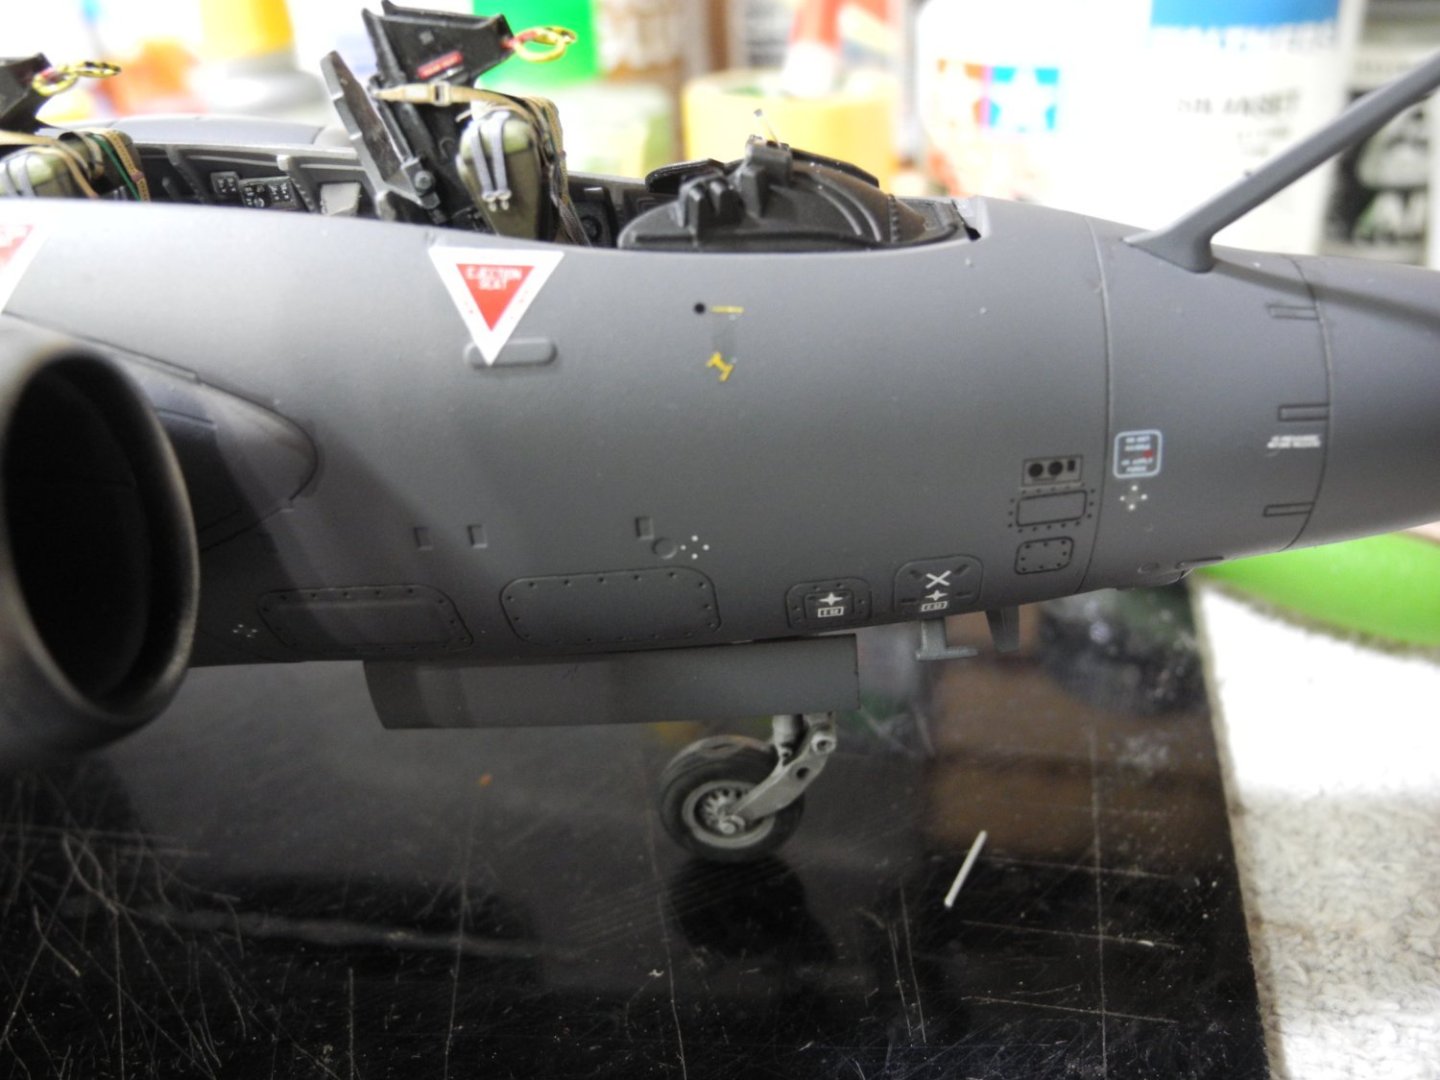
You are a veritable walking encyclopedia when it comes to cameras, Jack. Thanks! Alot of times, I'm being pragmatic and just use my iPhone to snap a photo, other times my Nikon but I need to take the time to study my Nikon camera and practice with it following your directions. There are tons of features and settings on this camera I have never used before. Reading the fine print...here are less than half the data decals that go on this model, probably closer to a third of them. Just going to need to exercise patience to get them all down.


- 332 replies
-
- 13
-
-
Thanks! Will you be applying all those small decals? I'm trying to do them all and they are very small to work with. It's a tedious challenge to be sure.
-
Background color and lighting make a huge difference in how gray appears in photographs. Doesn't look like the same color at all.

- 332 replies
-
- 12
-
-
That's a very good move on Airfix part. I remember the days when their decals were infamously bad but then again, so were just about everyone else's decals too.
-
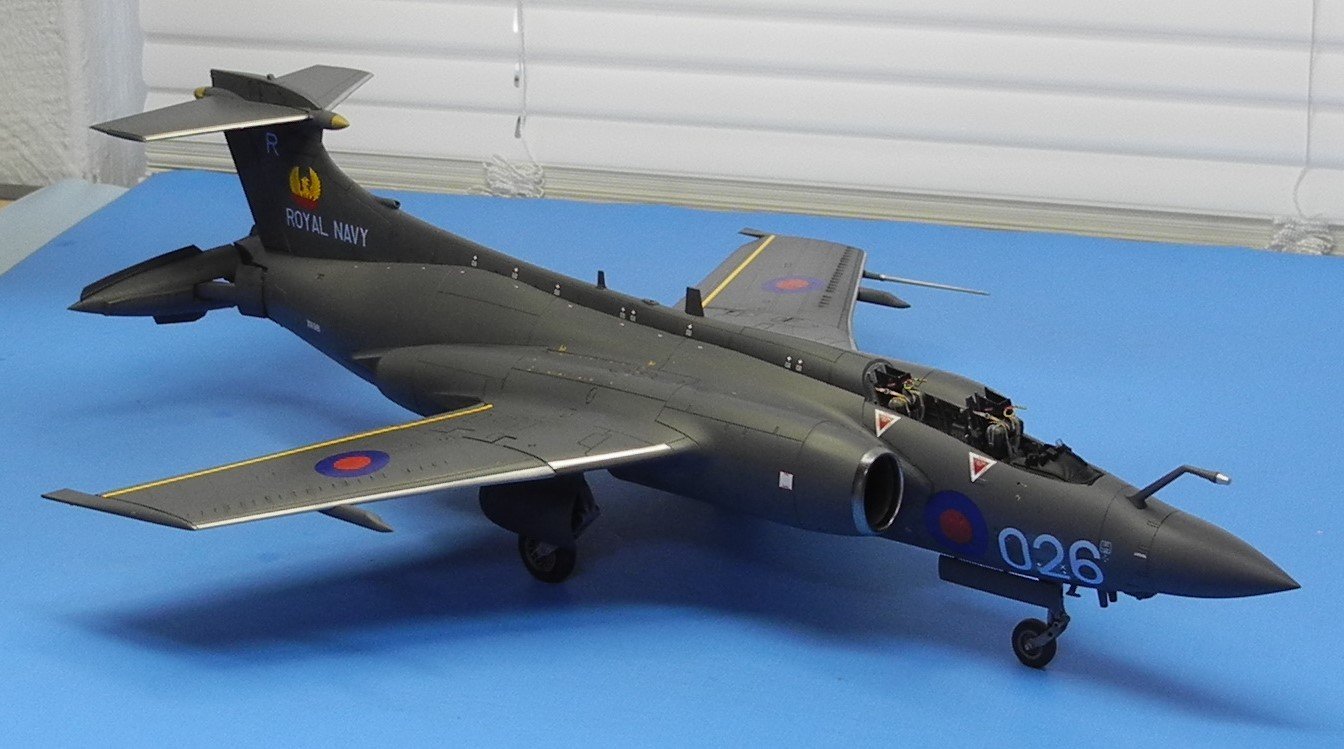
Huge decal sheet, measures over 9 x 13 inches. Not sure who makes the decals but the quality of the sheet is “Cartograf”-like. Very nice.

- 332 replies
-
- 11
-
-
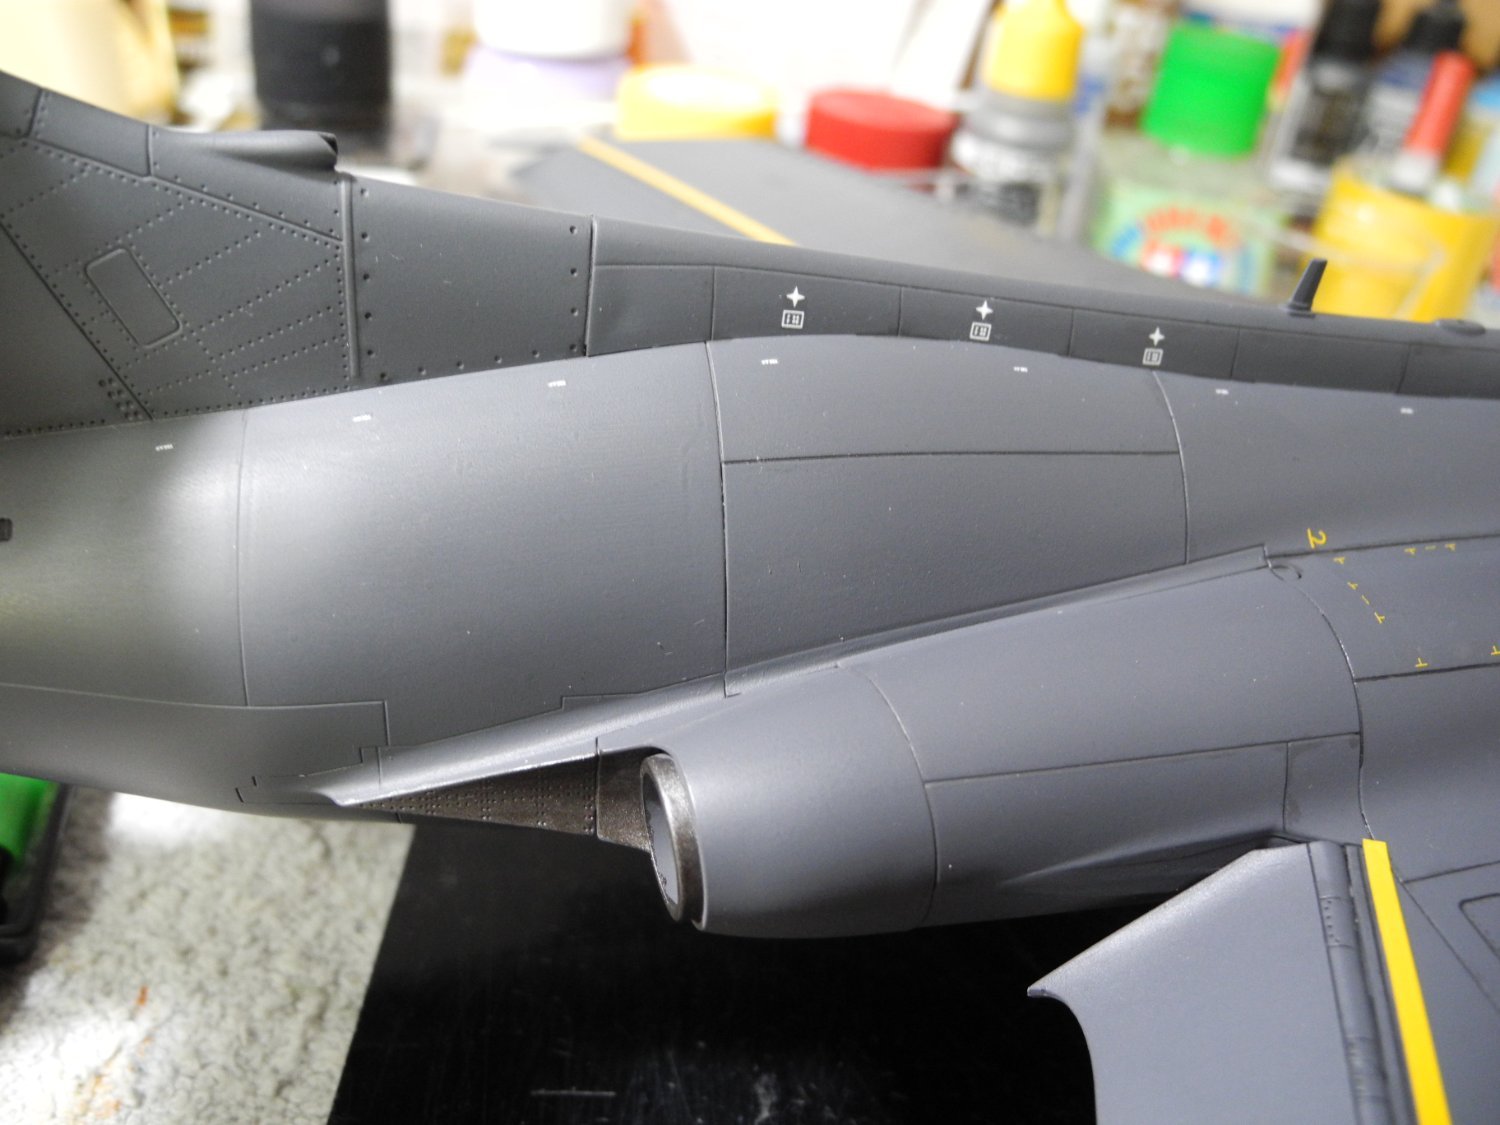
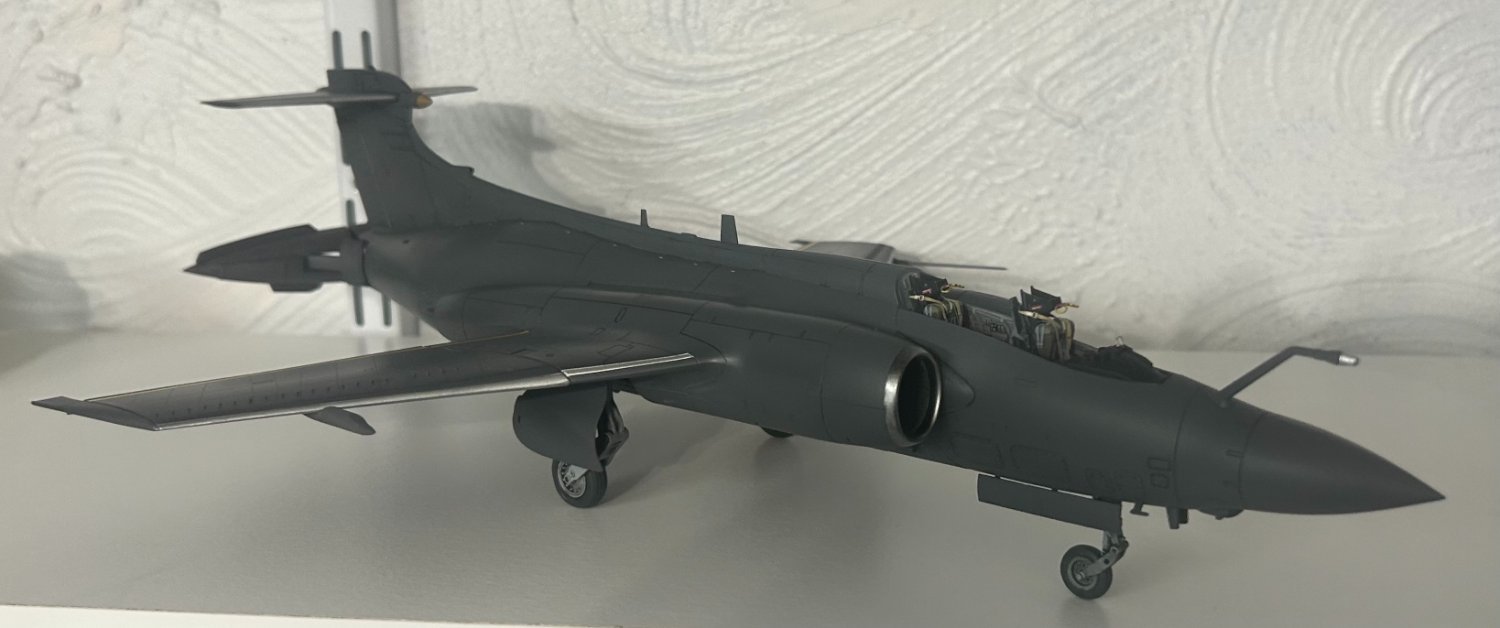
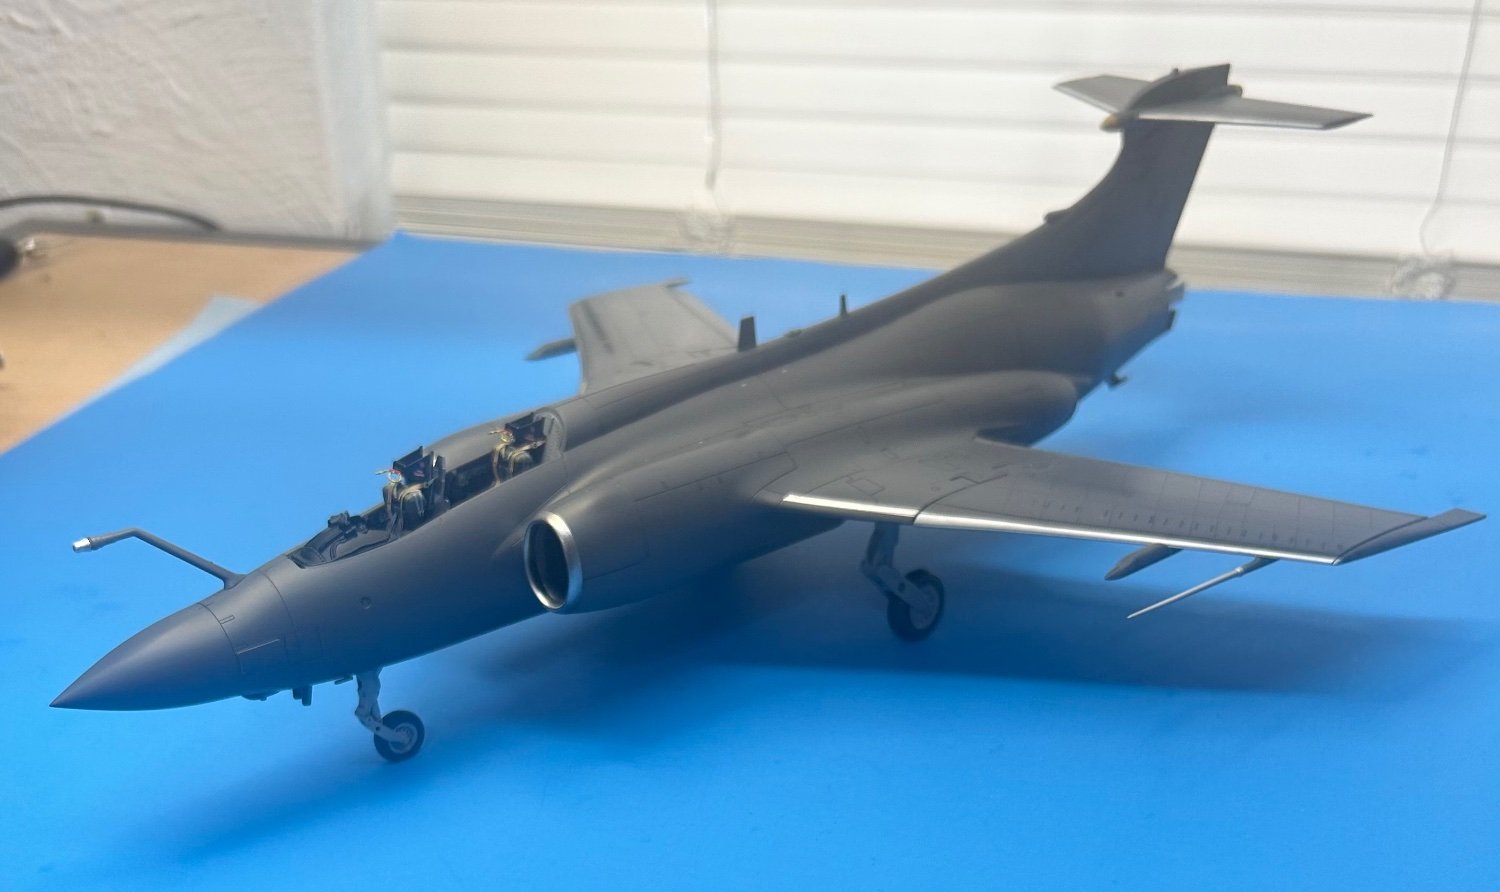
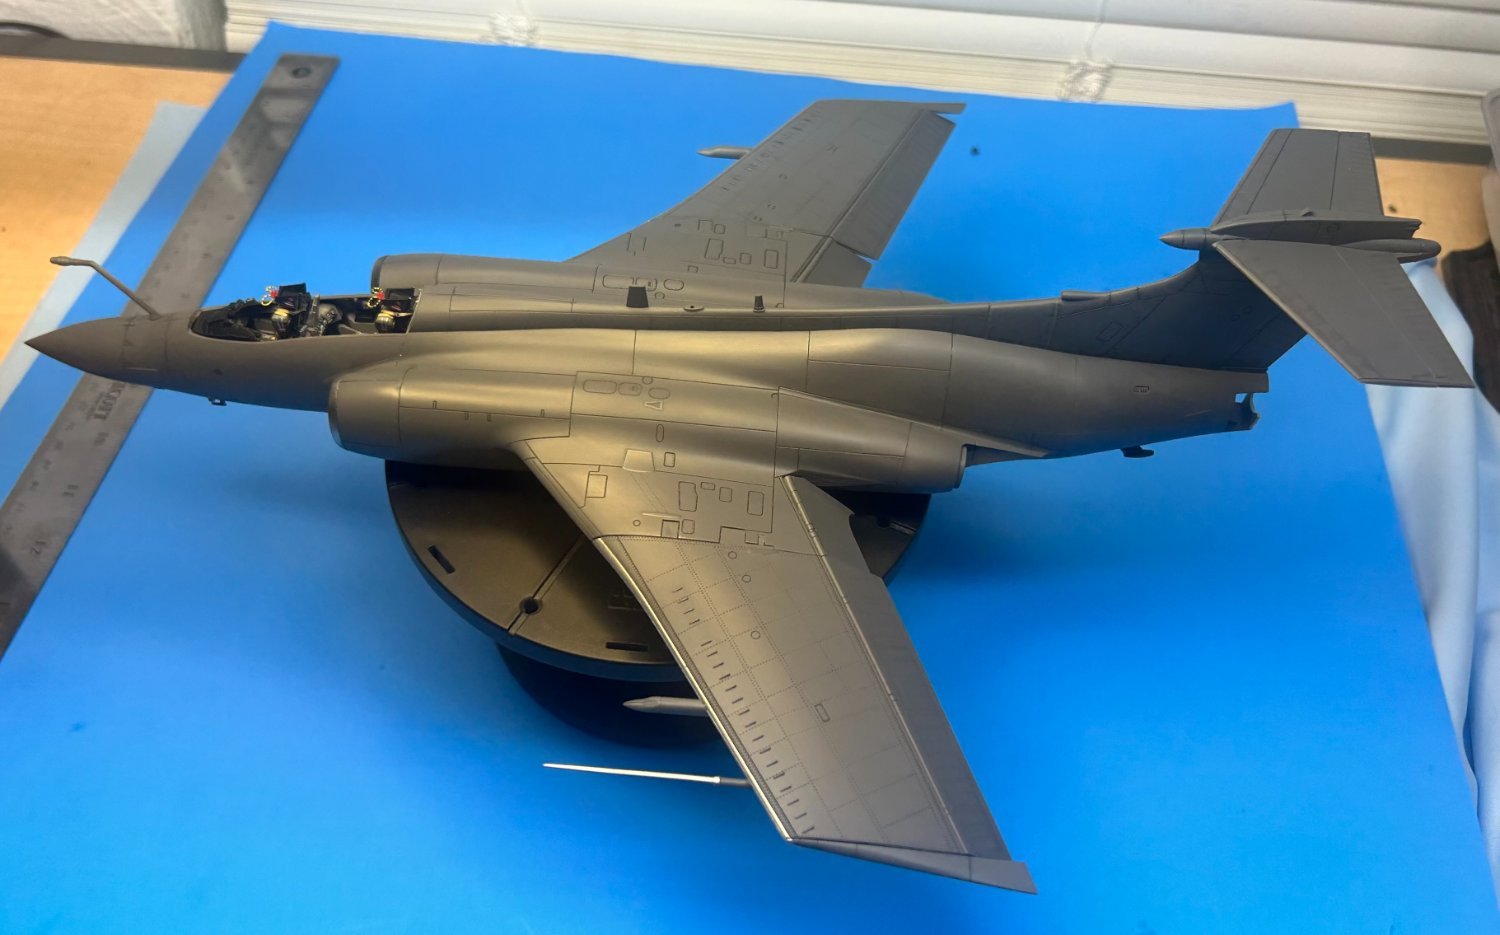
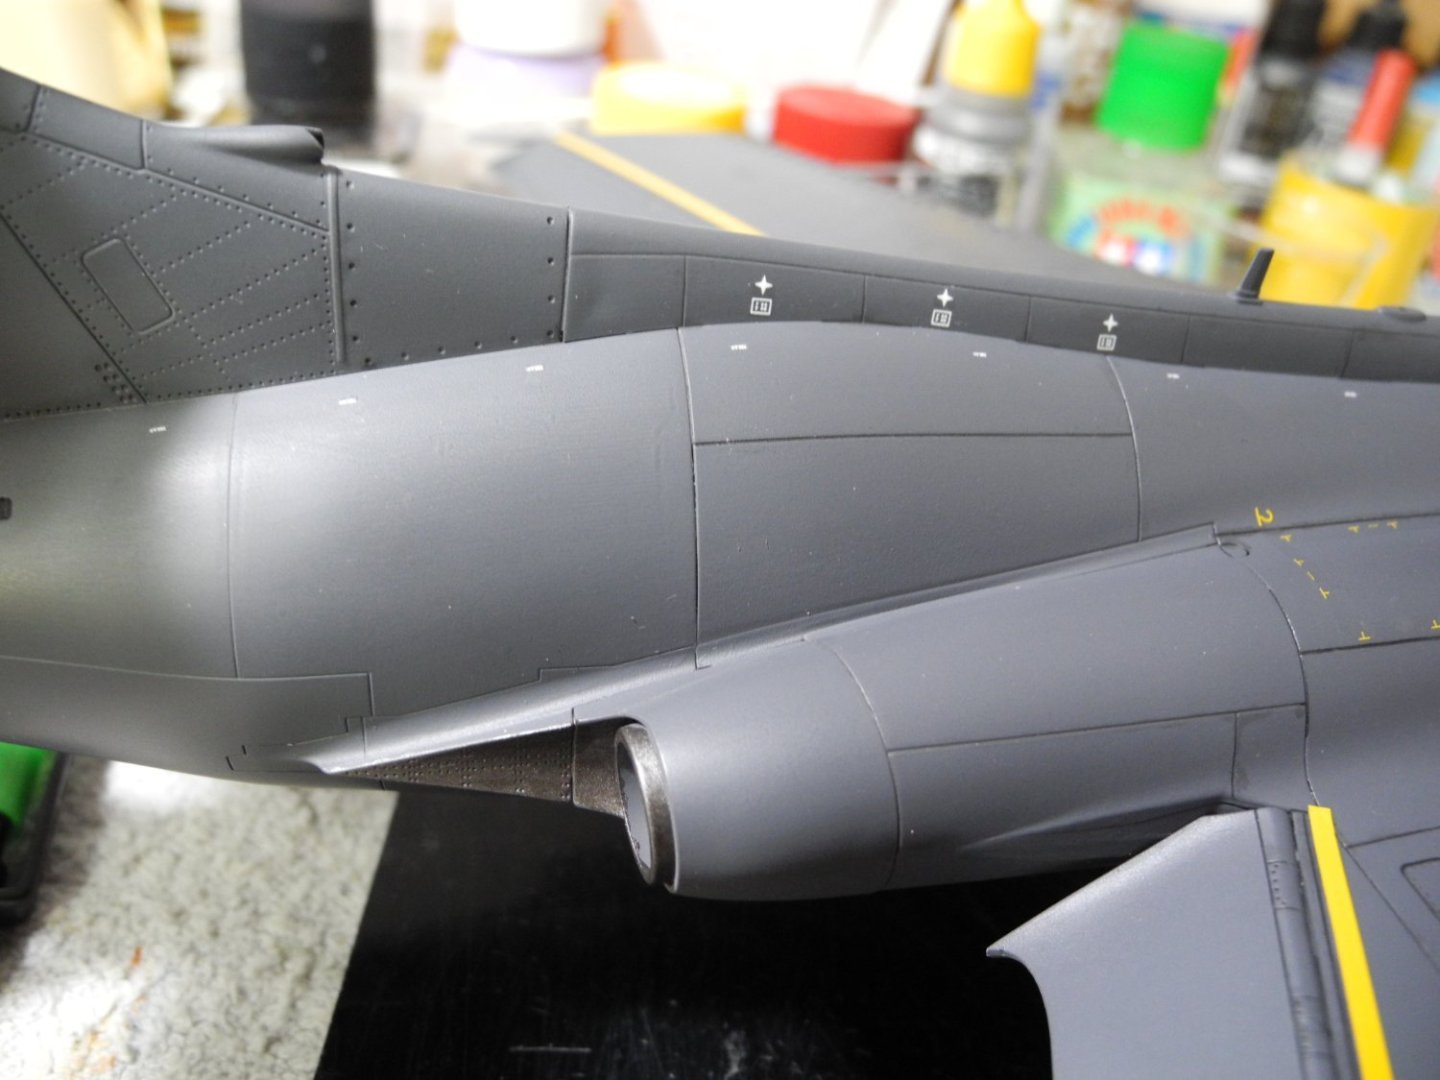
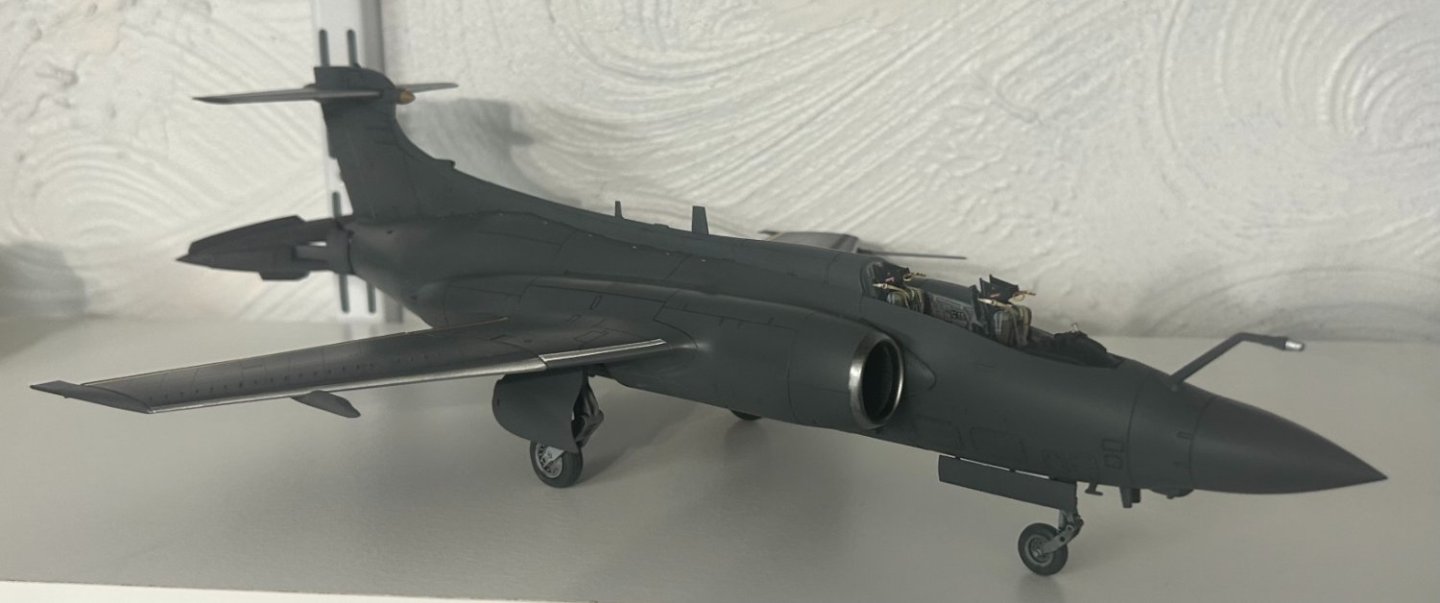
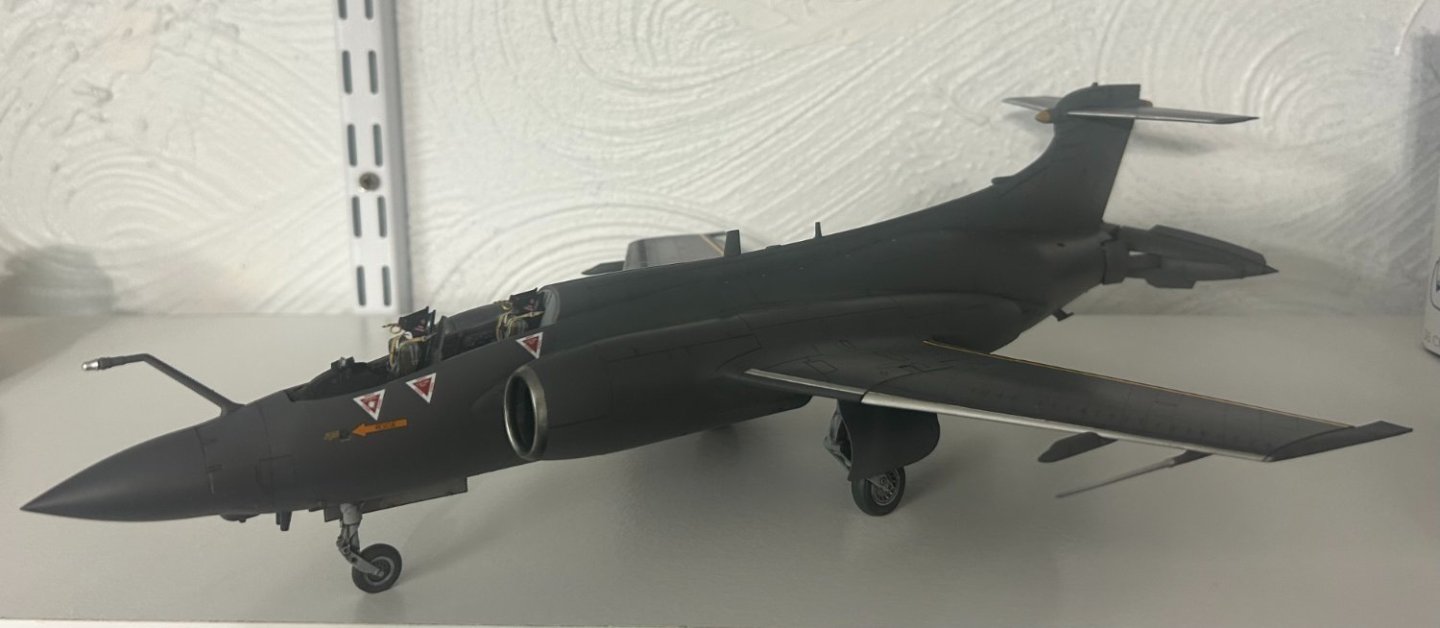
A few more small bits to mask and paint before I can begin decals. On a separate note, another added beauty of doing a wet sanding of the paint is that the decals go down so much better. Wet sanding is something I only do when using either Tamiya or Mr Color paints (lacquer). Doesn’t work for acrylic.
-
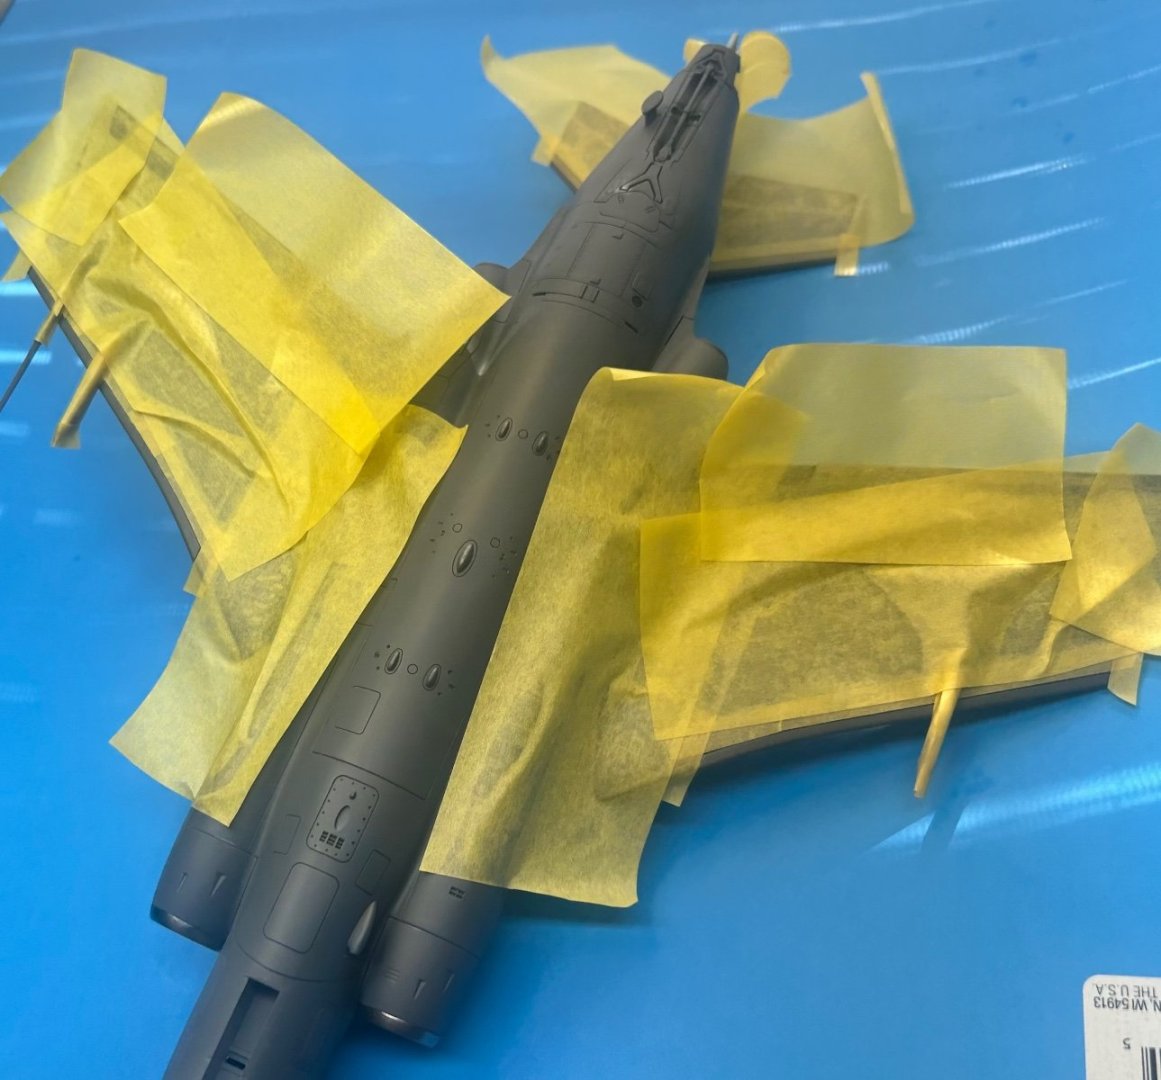
All this masking just for the small areas of the leading edges of the wings and stabilators. Ditto for the top side. You’re going to be there soon Arthur. 😀
- 332 replies
-
- 10
-
-
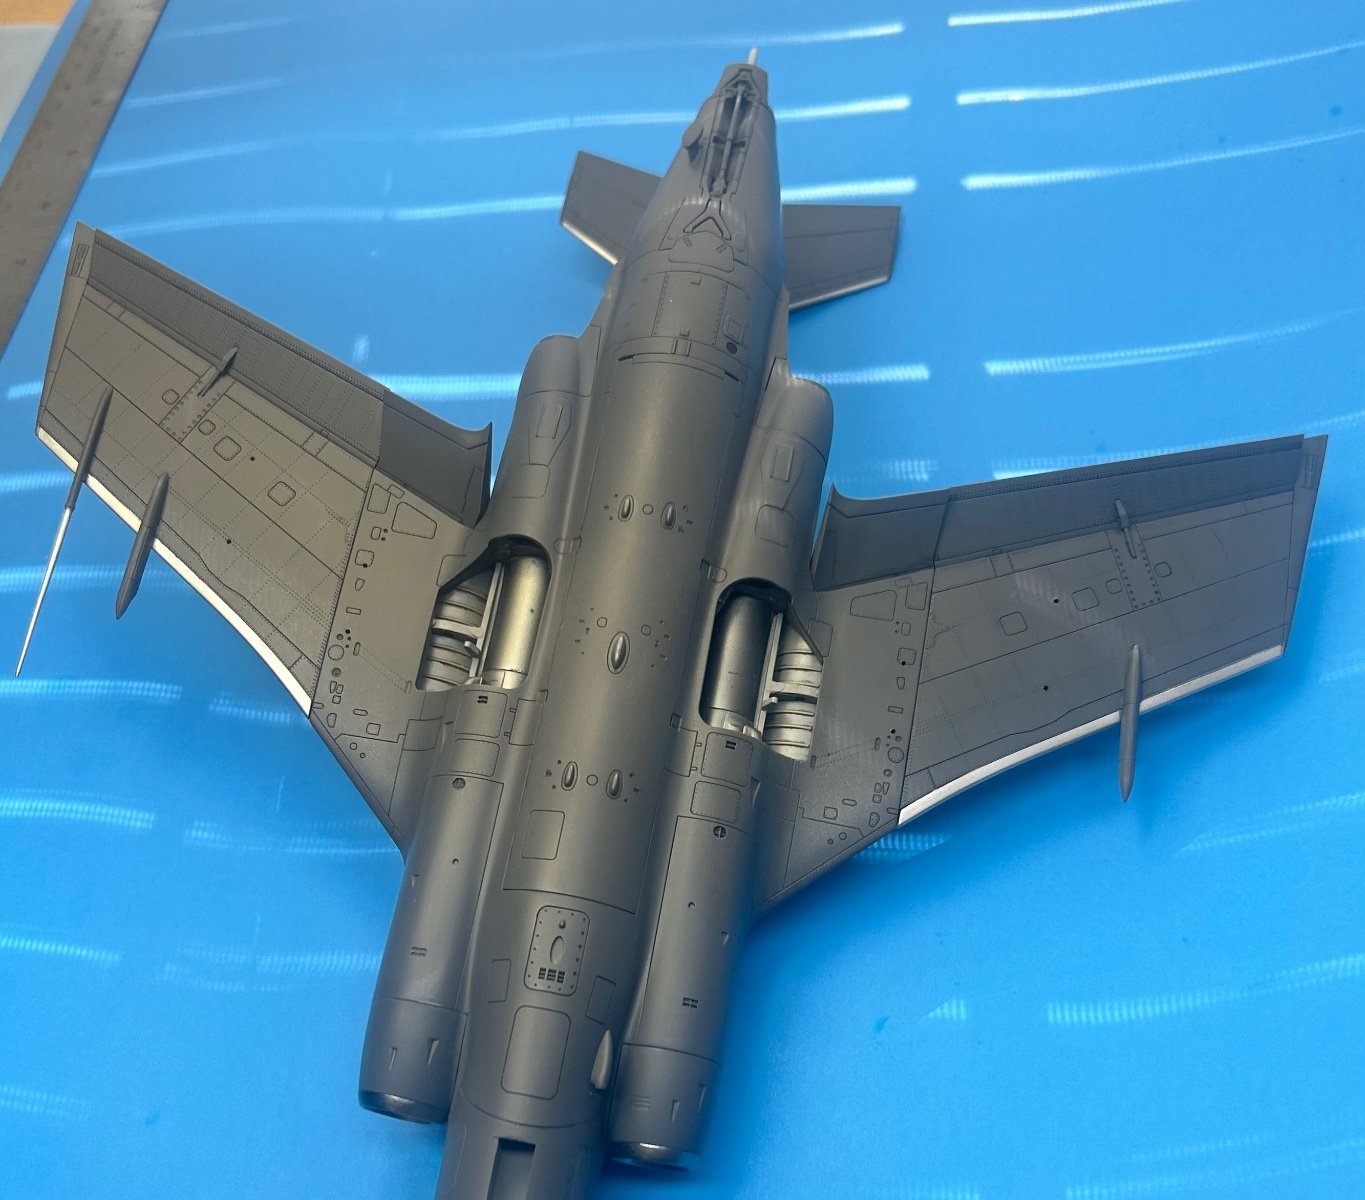
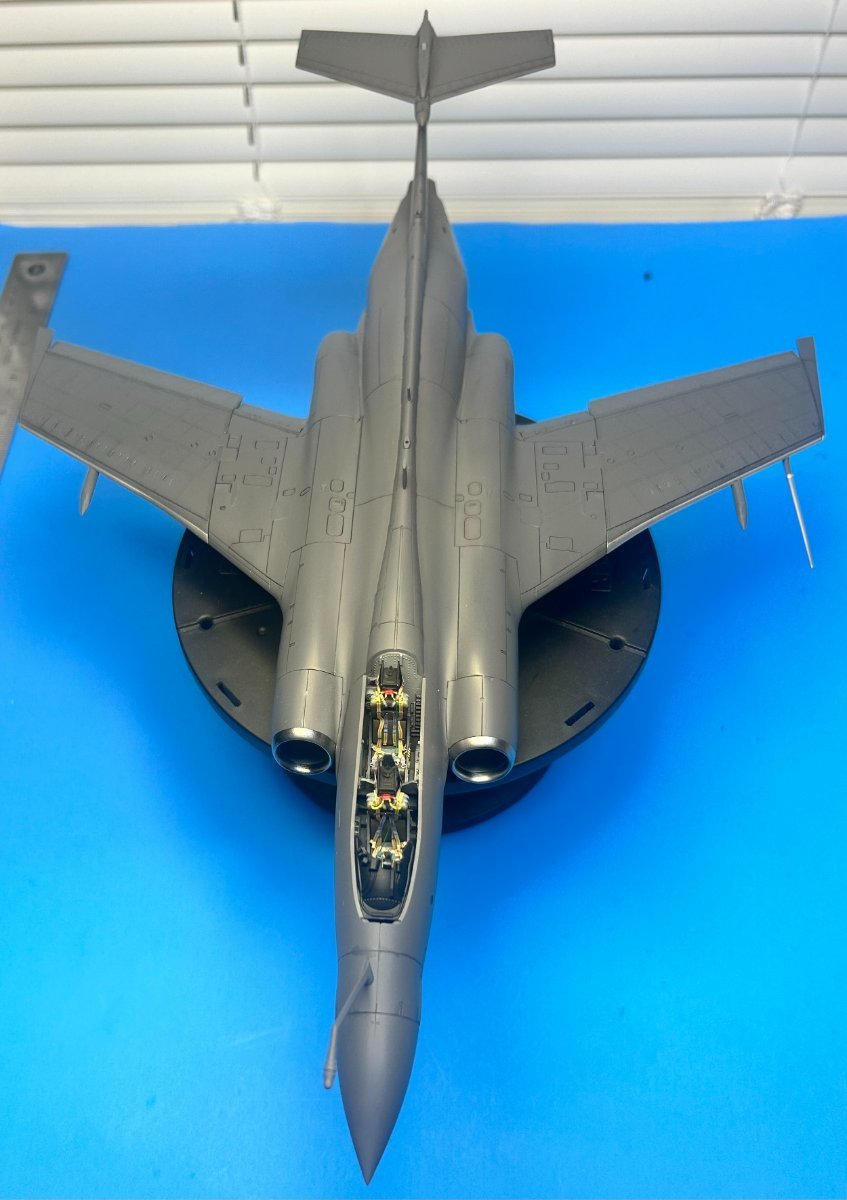
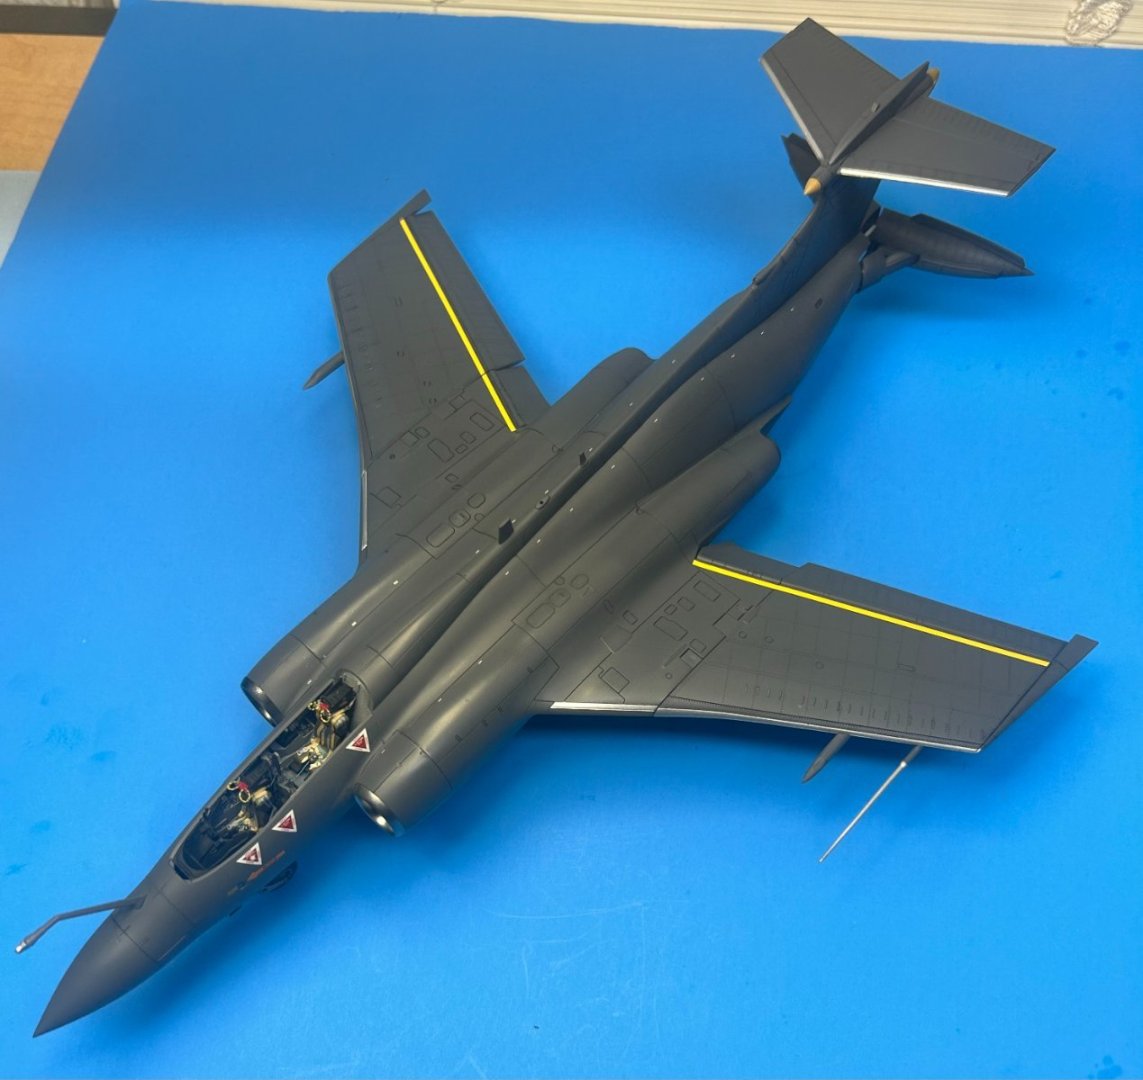
Got all the wash done to my satisfaction, now adding a few places where NMF appears. Exhaust areas get burnt metal. There are a few places that will get a Radom tan color then will begin applying decals before adding LG, doors, pylons and ordnance. Some light weathering will follow all that.
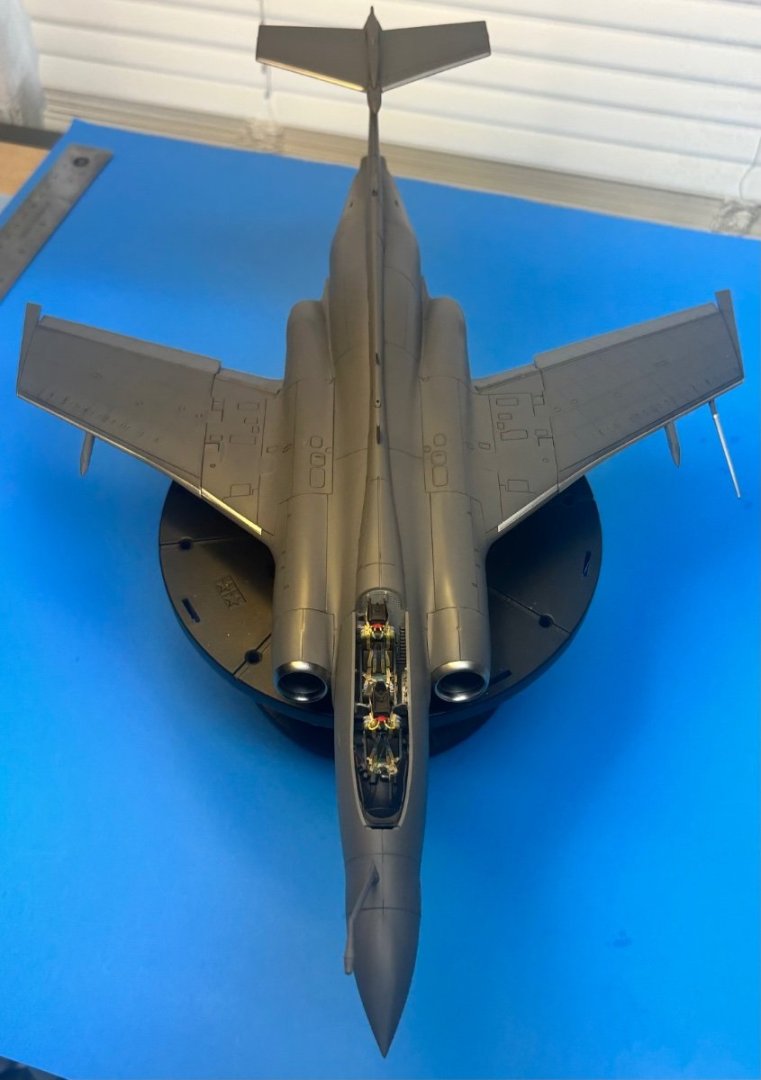
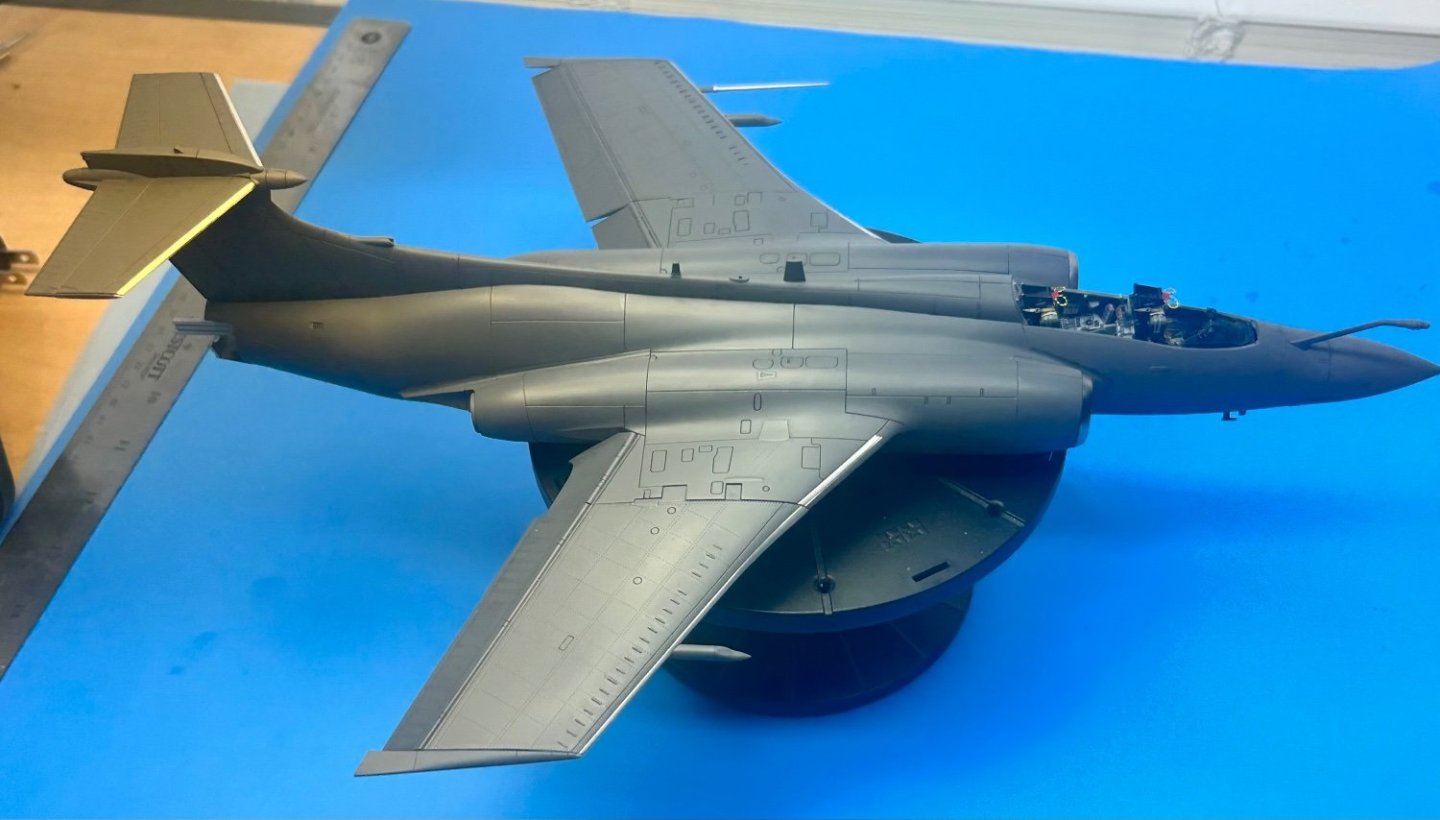
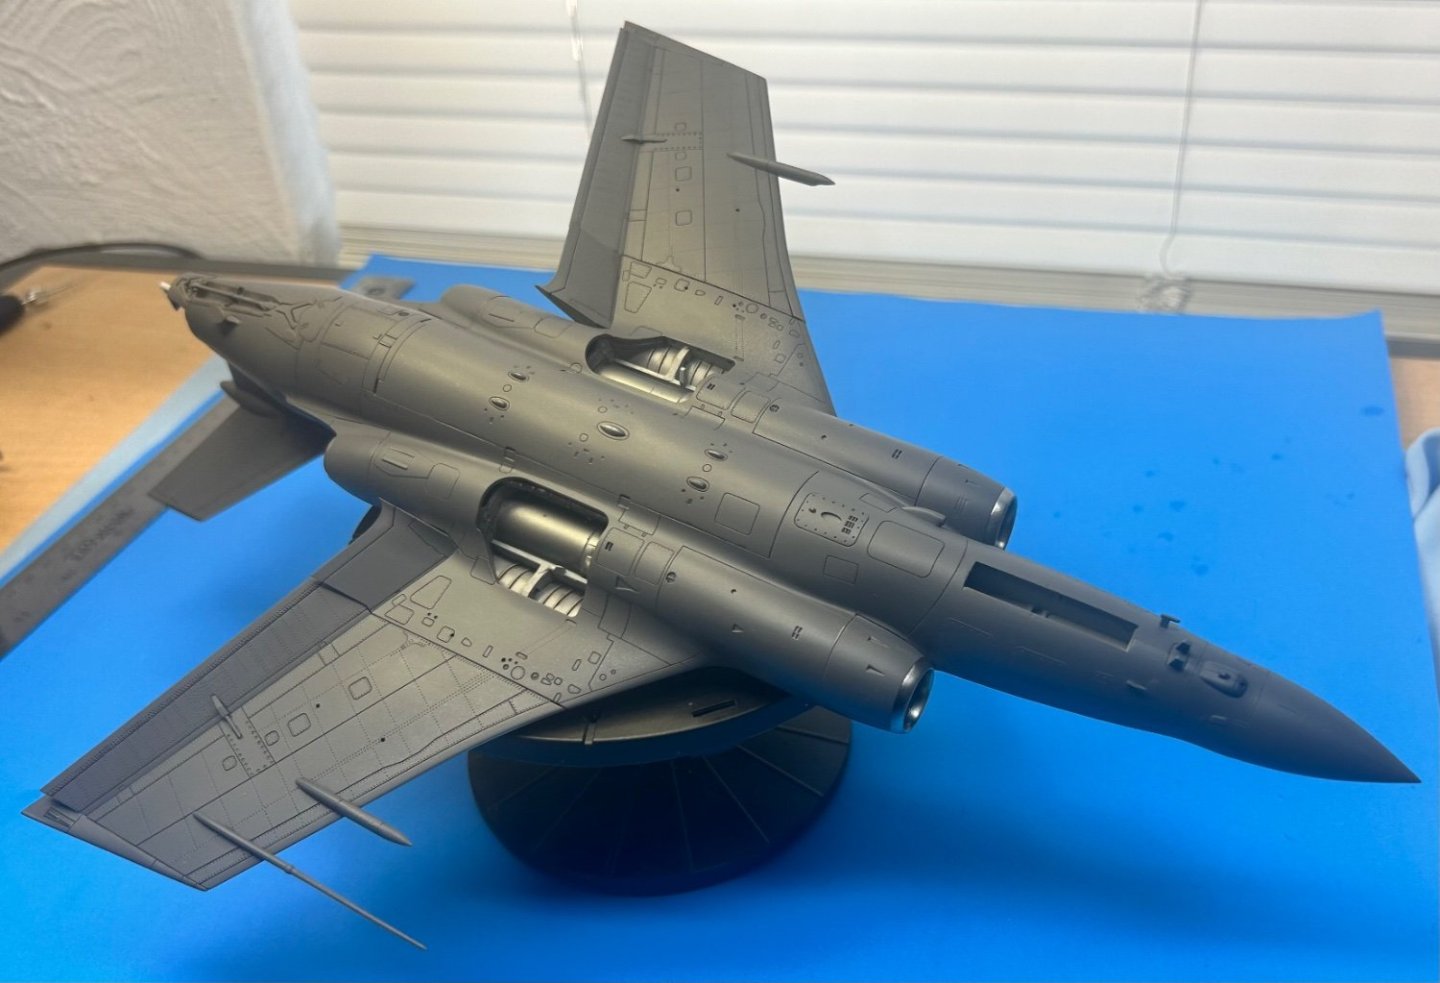
- 332 replies
-
- 11
-
-
B-25 C/D by Javlin - Airfix - 1/72 - PLASTIC
CDW replied to Javlin's topic in Completed non-ship models
Love that B-25 and the way you’ve displayed it remarkable. Beautiful! -
The fellow featured in the video passed away, the oil company exec.? That’s sad to learn.
-
This lucky guy was able to buy his very own Blackburn Buccaneer. Wow!
-
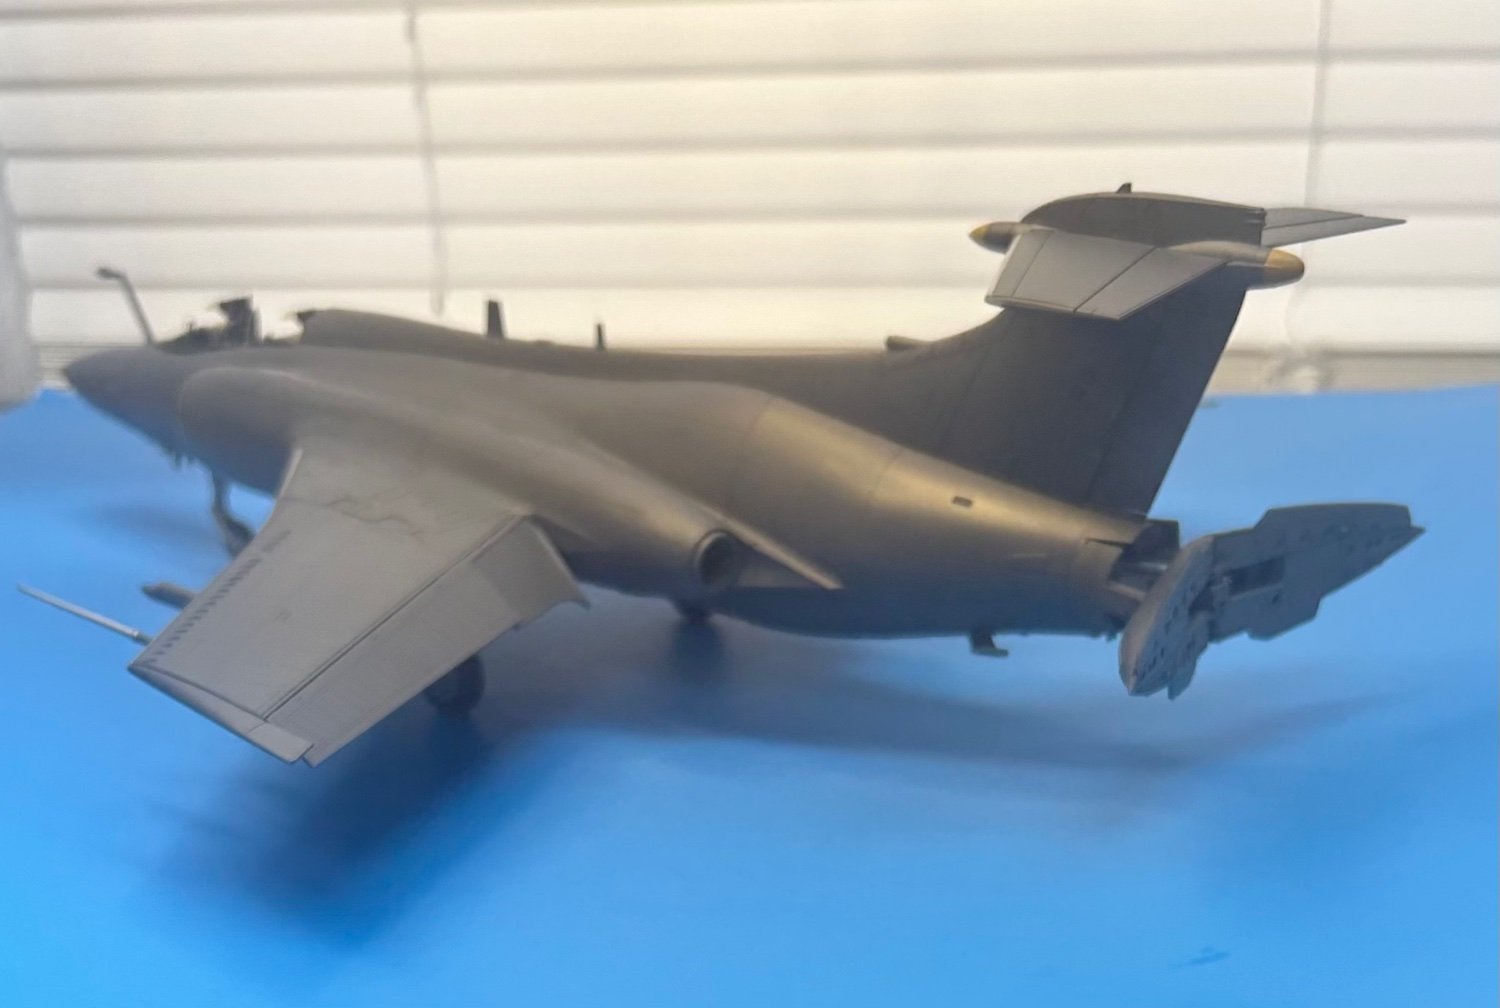
In this short video of an obviously out of service Buccaneer, probably on display somewhere, the maintenance panels and panel lines stand out rather proud. One can presume this is at least in part due to weathering as it sits out in the open. Other than photos of engine maintenance where the panels around the intakes are removed, I have not yet been able to find photos of other panels opened for maintenance. I will just use my imagination to show some wear on various random panels for this model.