CDW
-
Posts
7,756 -
Joined
-
Last visited
Content Type
Profiles
Forums
Gallery
Events
Everything posted by CDW
-

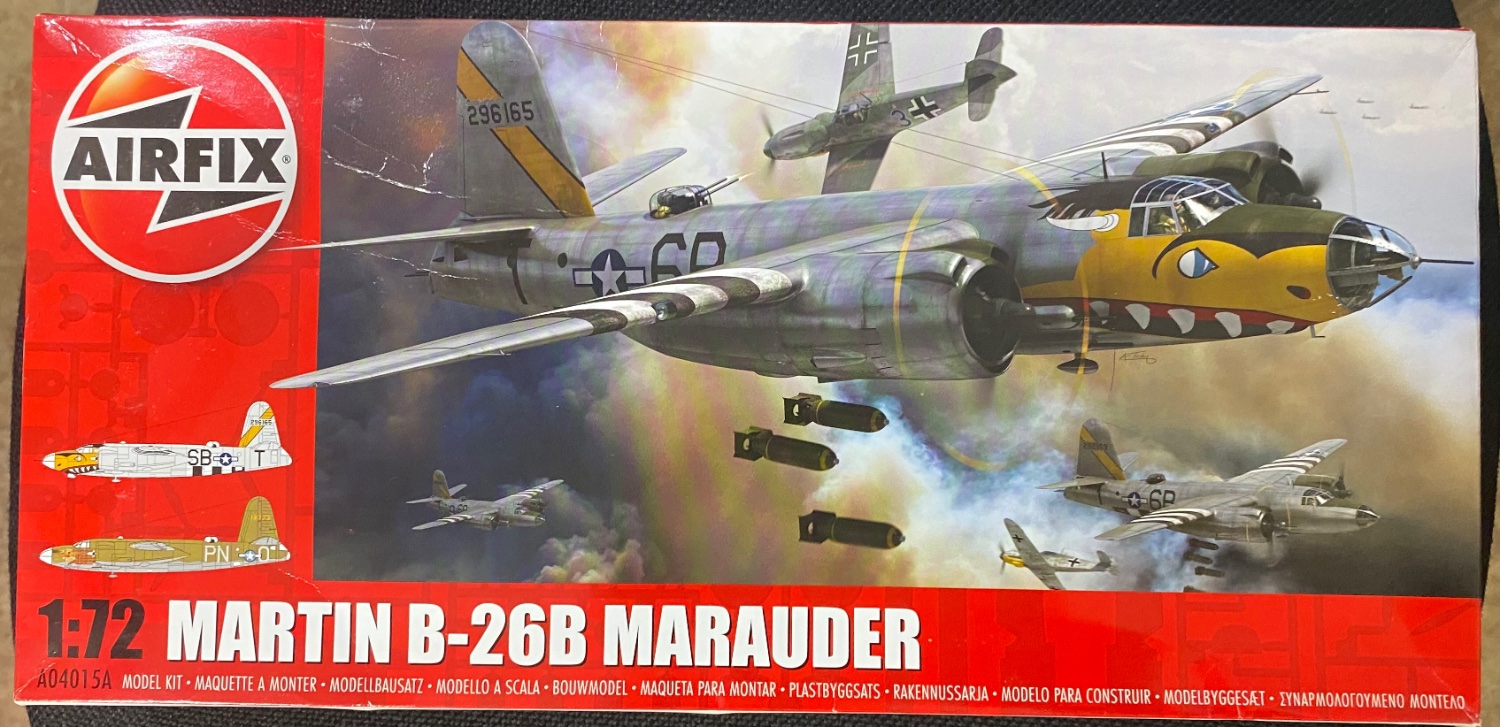
Martin B-26B Marauder by CDW - FINISHED - Airfix - 1:72 Scale
CDW replied to CDW's topic in Non-ship/categorised builds
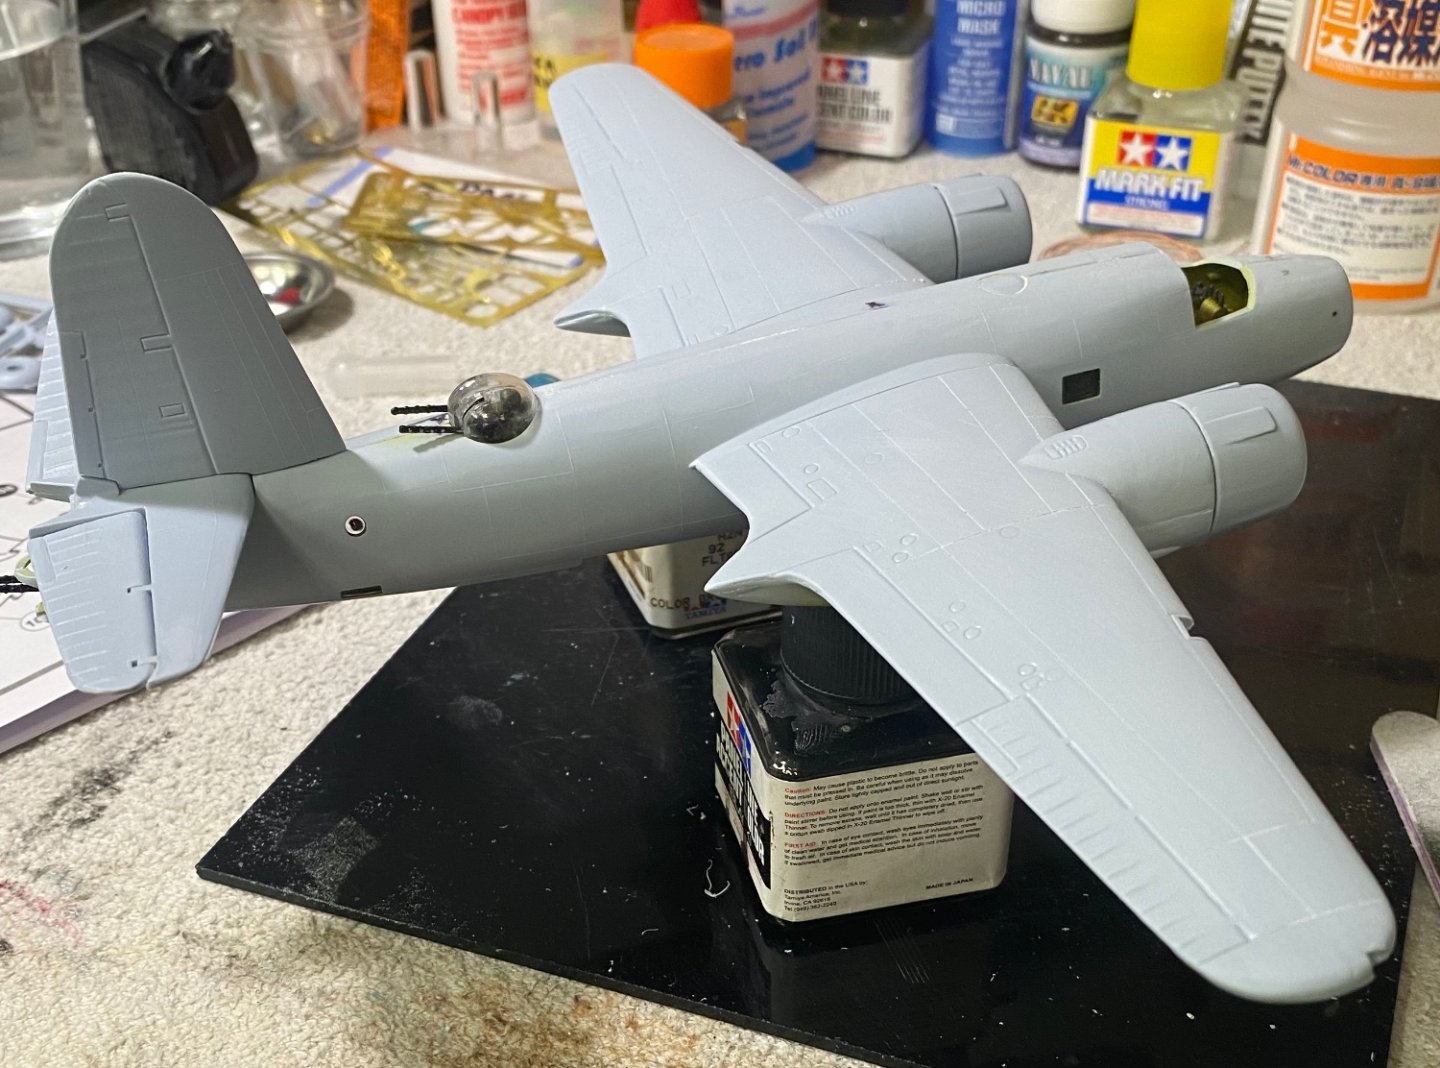
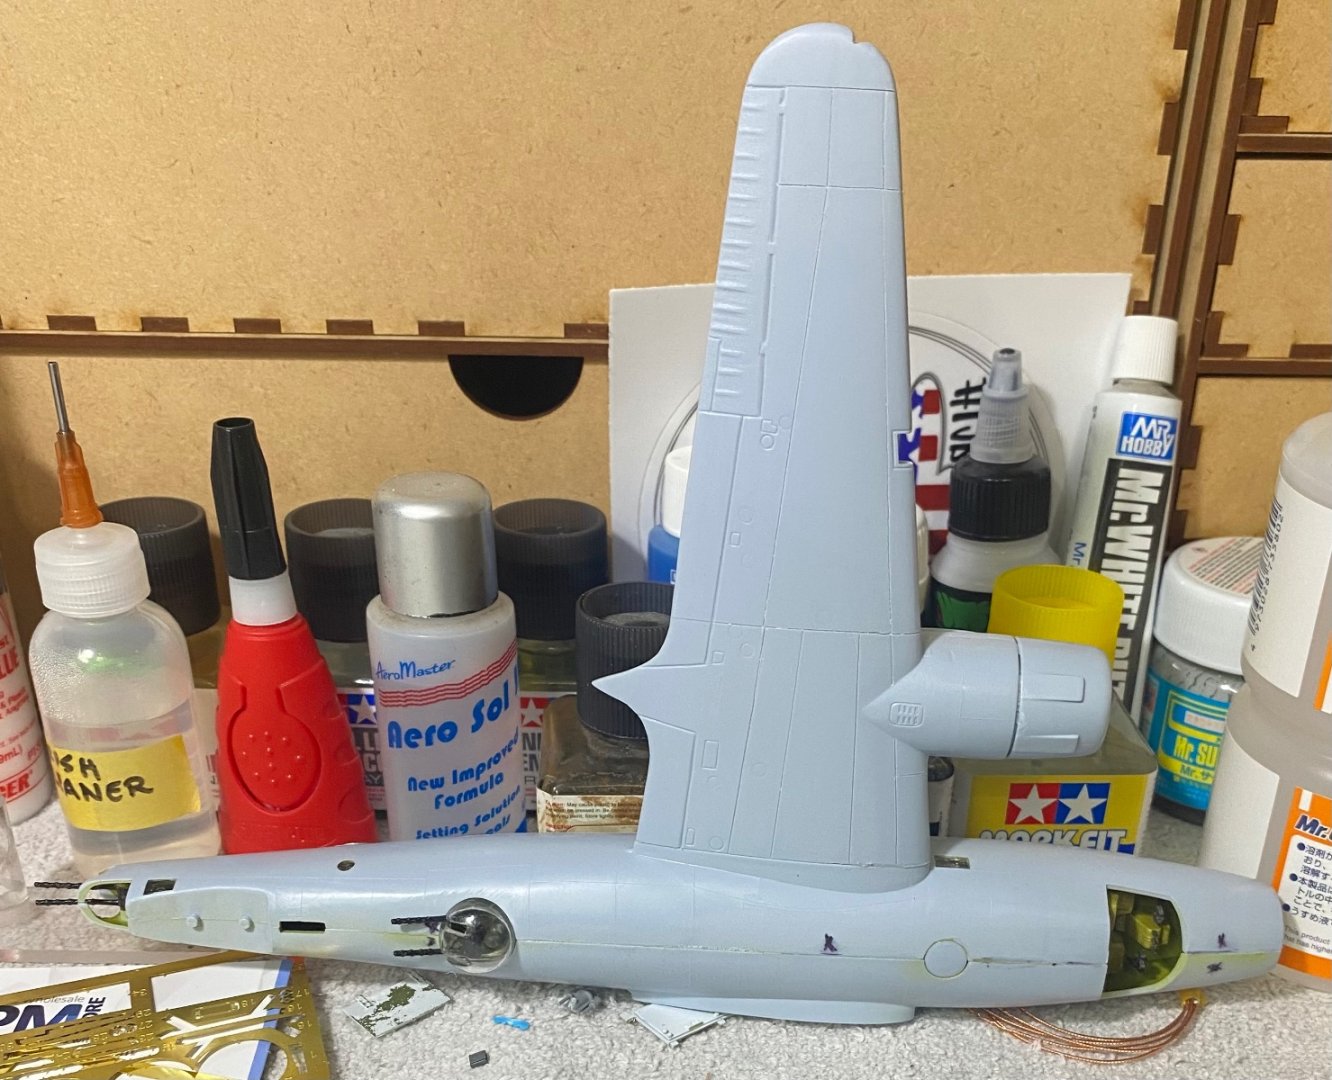
A little putty, a little sanding, add a few details then commence with primer and paint.
- 97 replies
-
- 13
-

-
Wow Alan, she came out beautiful! Such a testament to your modeler's spirit to have endured through a project of this magnitude. Congratulations, you have produced a very fine model.
- 460 replies
-
- 5
-
-
- Finished
- Flower-class
- (and 1 more)
-
I'll follow your progress on the Skeeter!
-
Martin B-26B Marauder by CDW - FINISHED - Airfix - 1:72 Scale
CDW replied to CDW's topic in Non-ship/categorised builds
None of it makes any difference when you finish the model, punch a hole in the tip of the wing, tie a string to the wing tip then whip fly that thing round and round. Remember those days? -
Martin B-26B Marauder by CDW - FINISHED - Airfix - 1:72 Scale
CDW replied to CDW's topic in Non-ship/categorised builds
Tip: When you wear down one of your filing sticks, save it to cut into small sections and glue them to your plastic clamps' jaws. They will keep the clamp from sliding on the plastic which can be frustrating when trying to clamp a surface with curves such as the wing-to-cowl fit.- 97 replies
-
- 11
-
-

-
Martin B-26B Marauder by CDW - FINISHED - Airfix - 1:72 Scale
CDW replied to CDW's topic in Non-ship/categorised builds
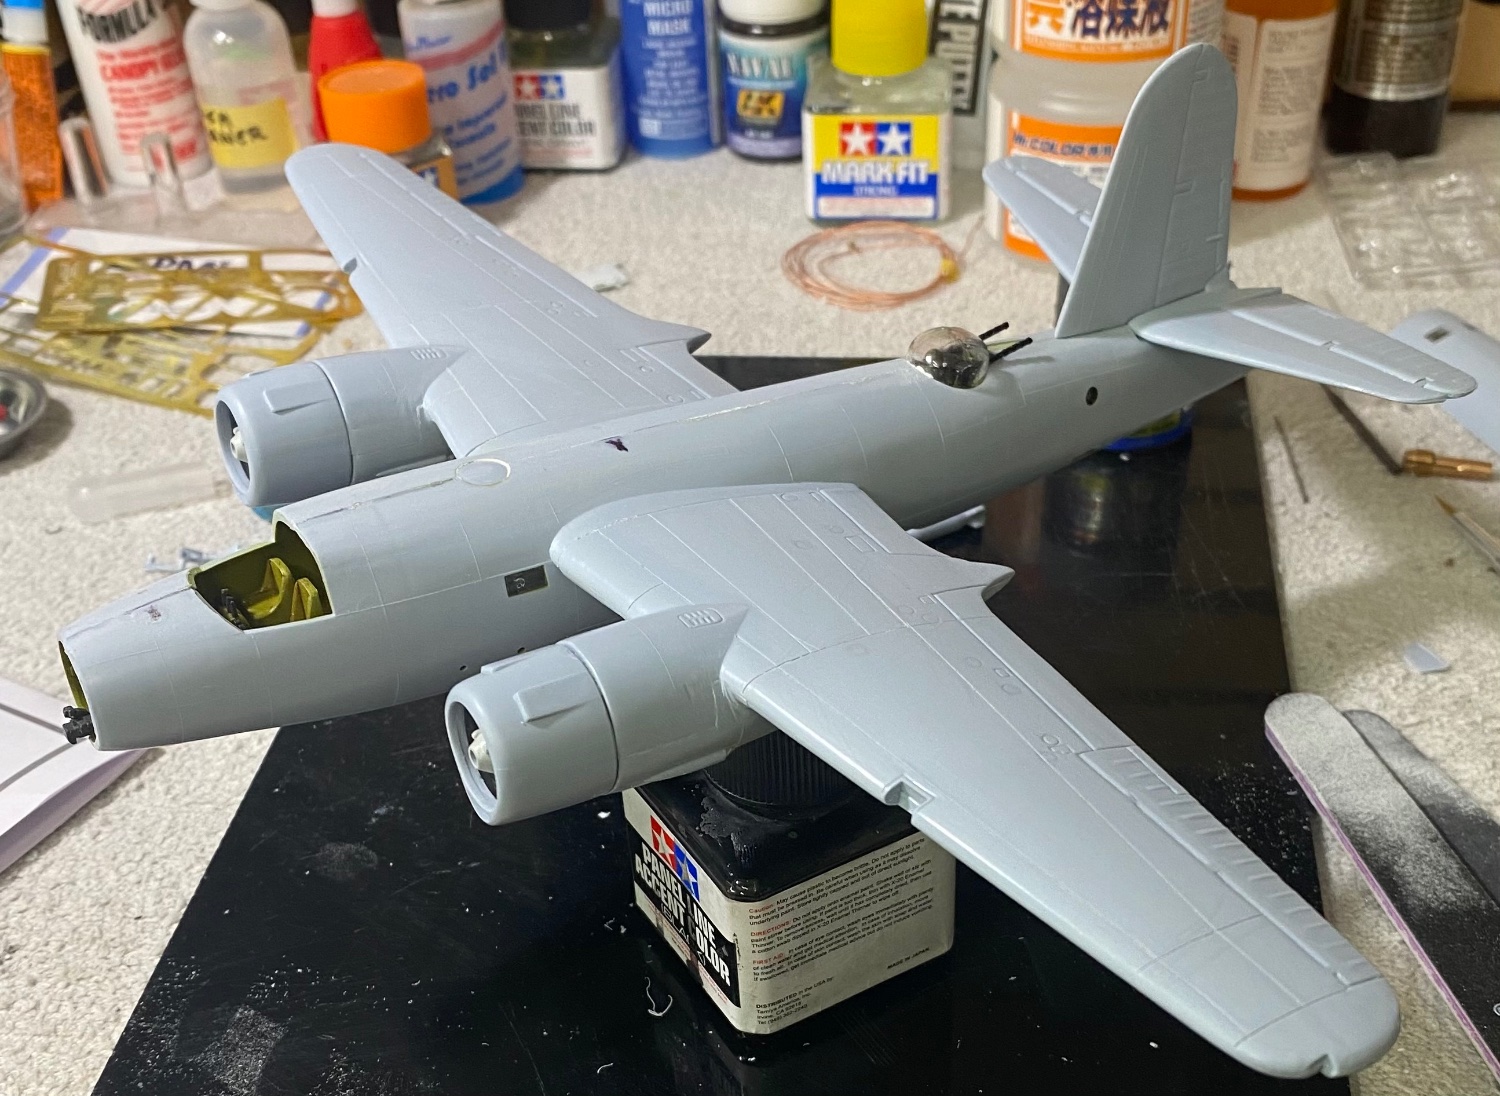
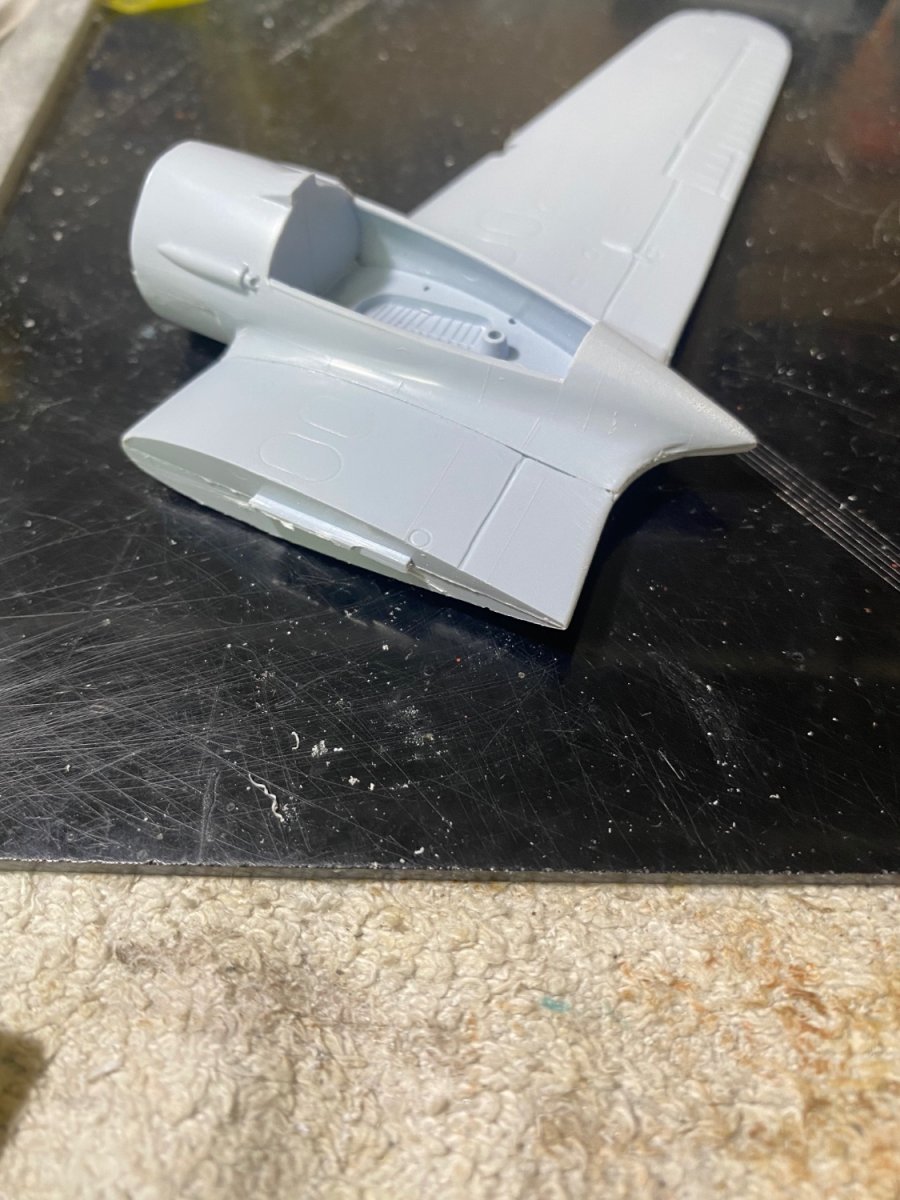
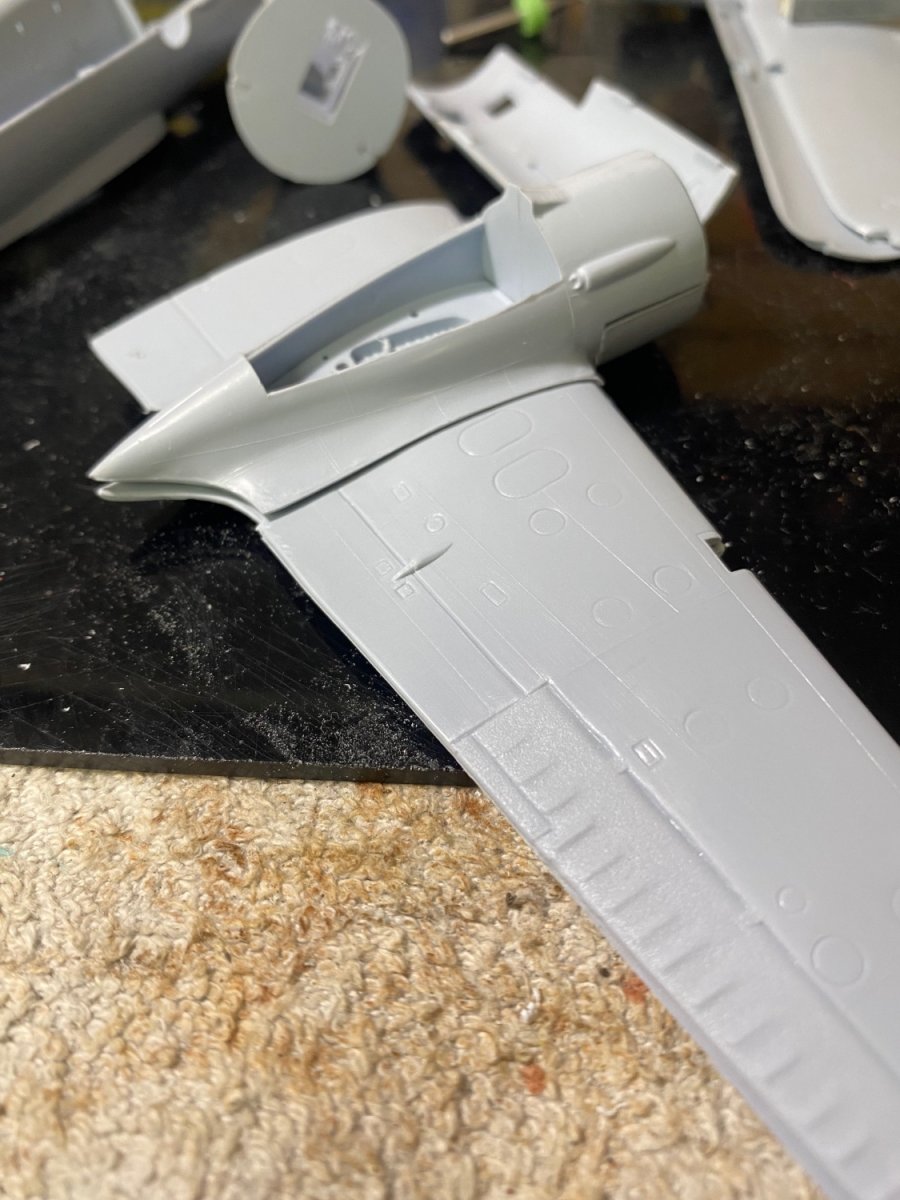
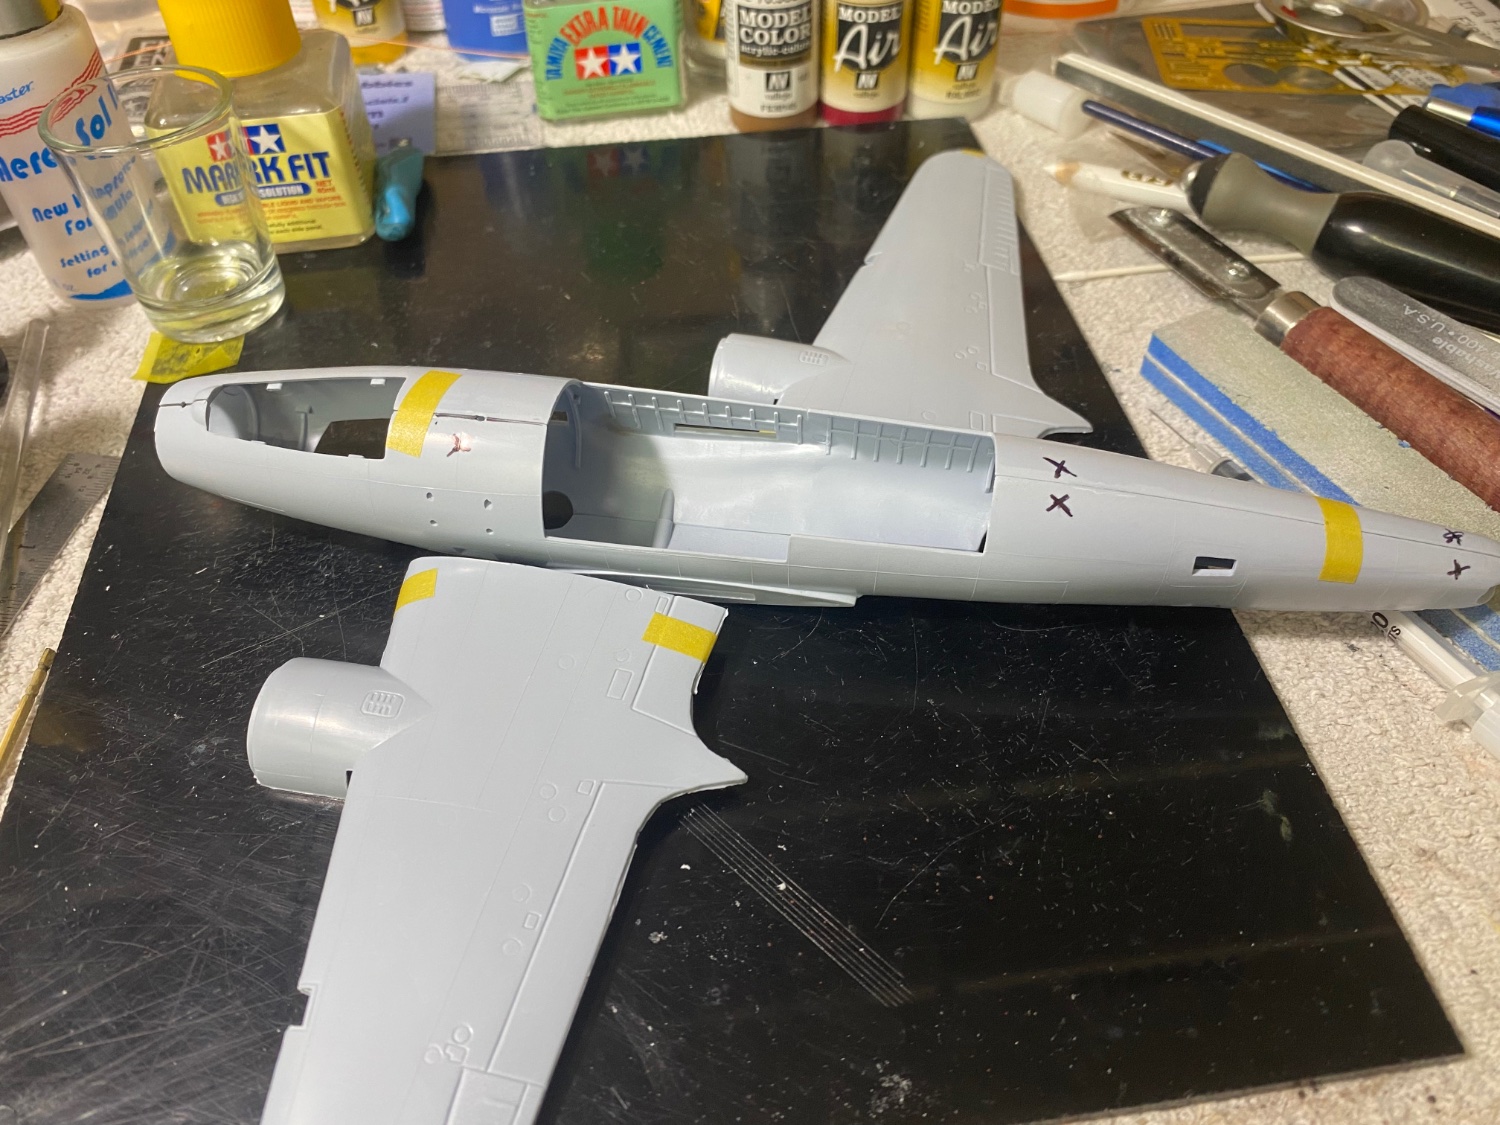
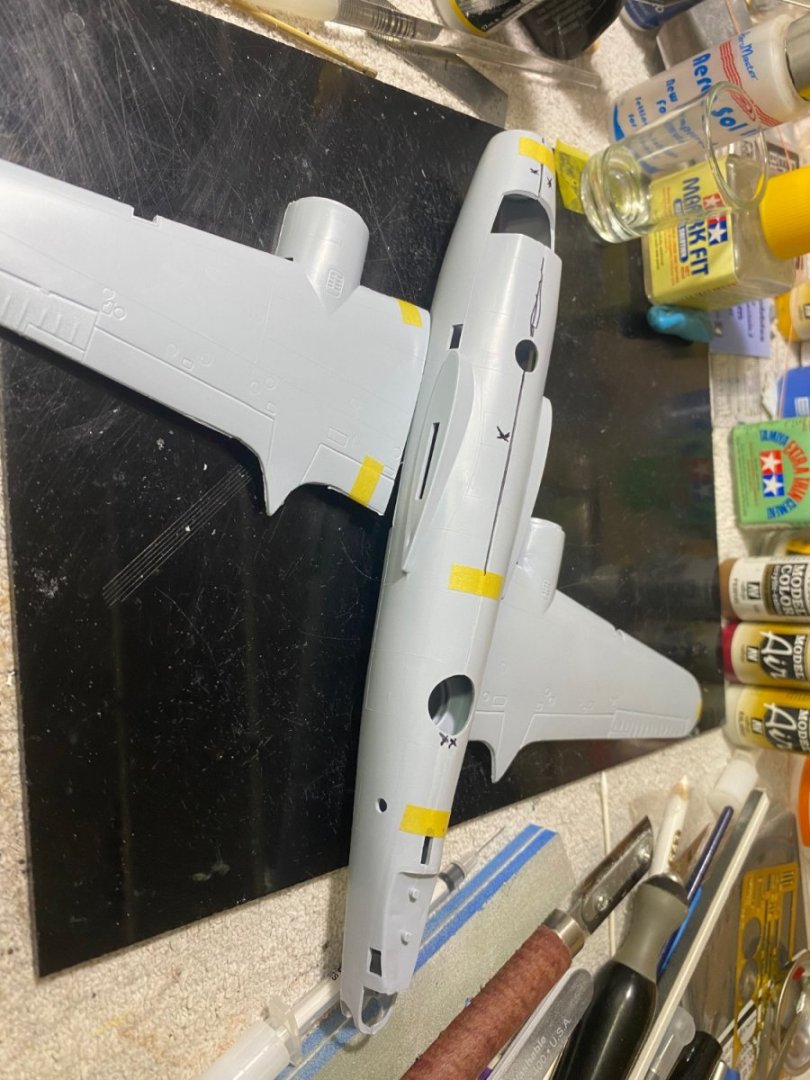
Laid down some zink chromate green inside the fuselage halves and on the inner bulkhead assemblies. Filled in the sink marks on the fuselage and sanded them down. Then got out my clamps and dealt with the cowl to wing fit. Once it dried, sanded down the worst high spots then scribed some panel lines on the wings before giving them a once-over with sandpaper. Onward and upward.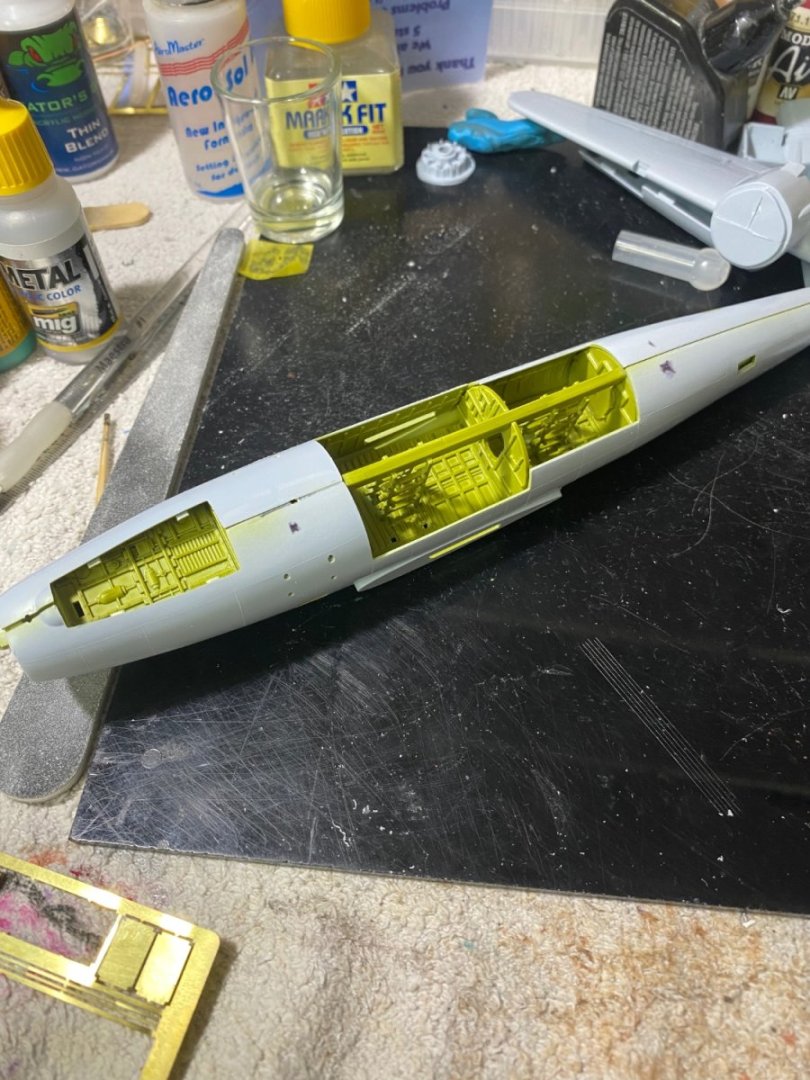


- 97 replies
-
- 11
-
-
Martin B-26B Marauder by CDW - FINISHED - Airfix - 1:72 Scale
CDW replied to CDW's topic in Non-ship/categorised builds
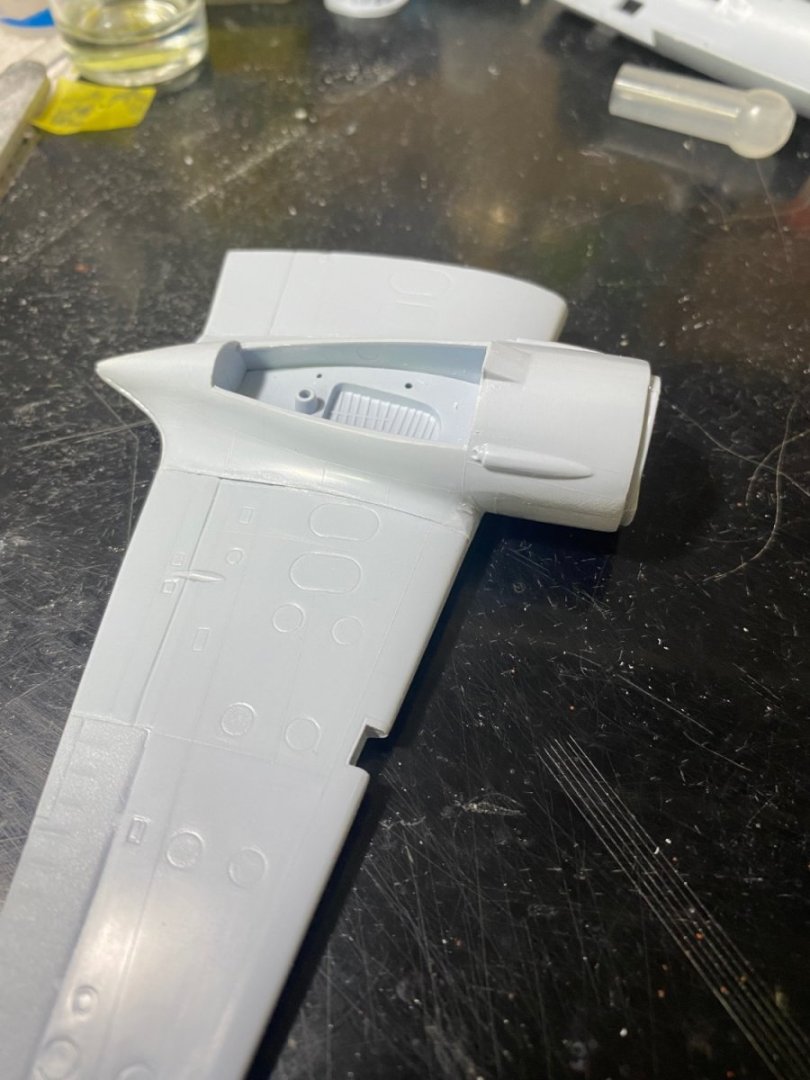
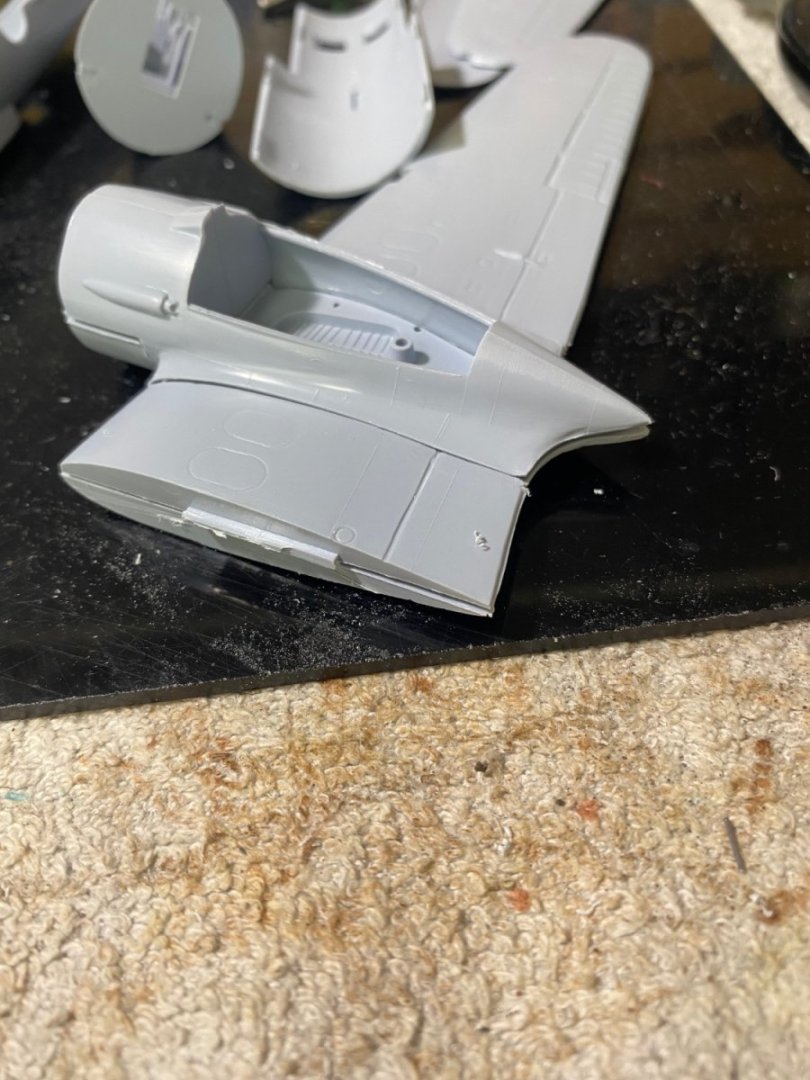
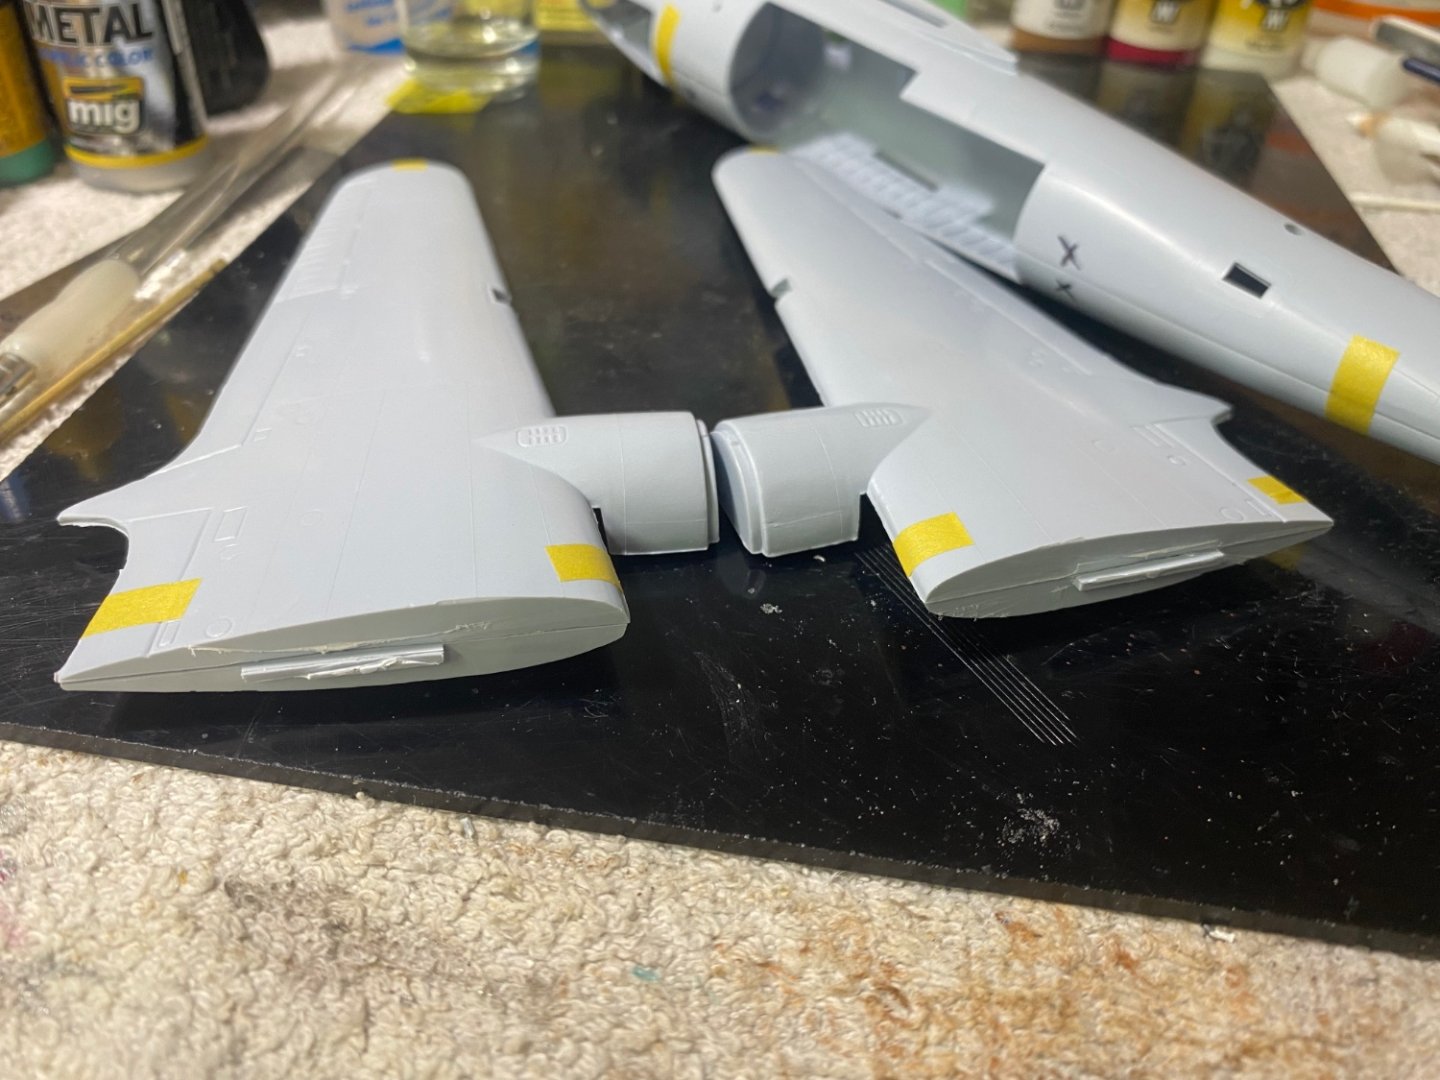
The worst fit issue I have found so far is the engine cowl to wing fit. It’s atrocious.
-
Martin B-26B Marauder by CDW - FINISHED - Airfix - 1:72 Scale
CDW replied to CDW's topic in Non-ship/categorised builds
I can imagine earning about 300 dollars a month on active duty as well. Way different times. -
Martin B-26B Marauder by CDW - FINISHED - Airfix - 1:72 Scale
CDW replied to CDW's topic in Non-ship/categorised builds
Forget about what I said earlier about closed bomb bay doors. I just realized the kit comes with a closed door option. This makes things simpler for me.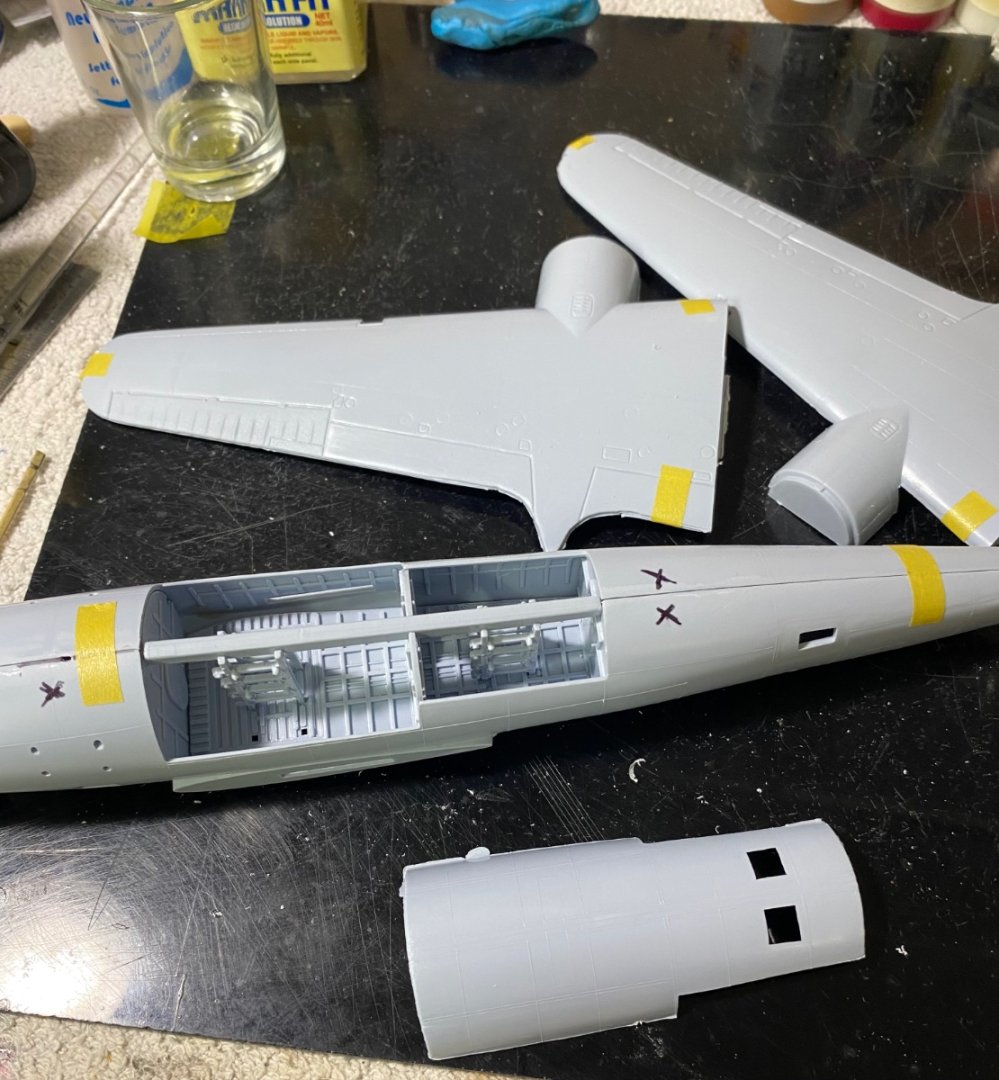
-
Martin B-26B Marauder by CDW - FINISHED - Airfix - 1:72 Scale
CDW replied to CDW's topic in Non-ship/categorised builds
In the early 70’s, it was common to pay between 2 or 3 dollars for a kit like this. In the late 70’s, probably closer to 3 or 4 dollars as I recall. -
Martin B-26B Marauder by CDW - FINISHED - Airfix - 1:72 Scale
CDW replied to CDW's topic in Non-ship/categorised builds
A dry fit of the bomb bay and wheel well bulkhead assemblies into the fuselage looks okay. At this time, I don’t want to leave the bomb bay doors opened. After I dry fit them closed, I may change my mind if they don’t fit well.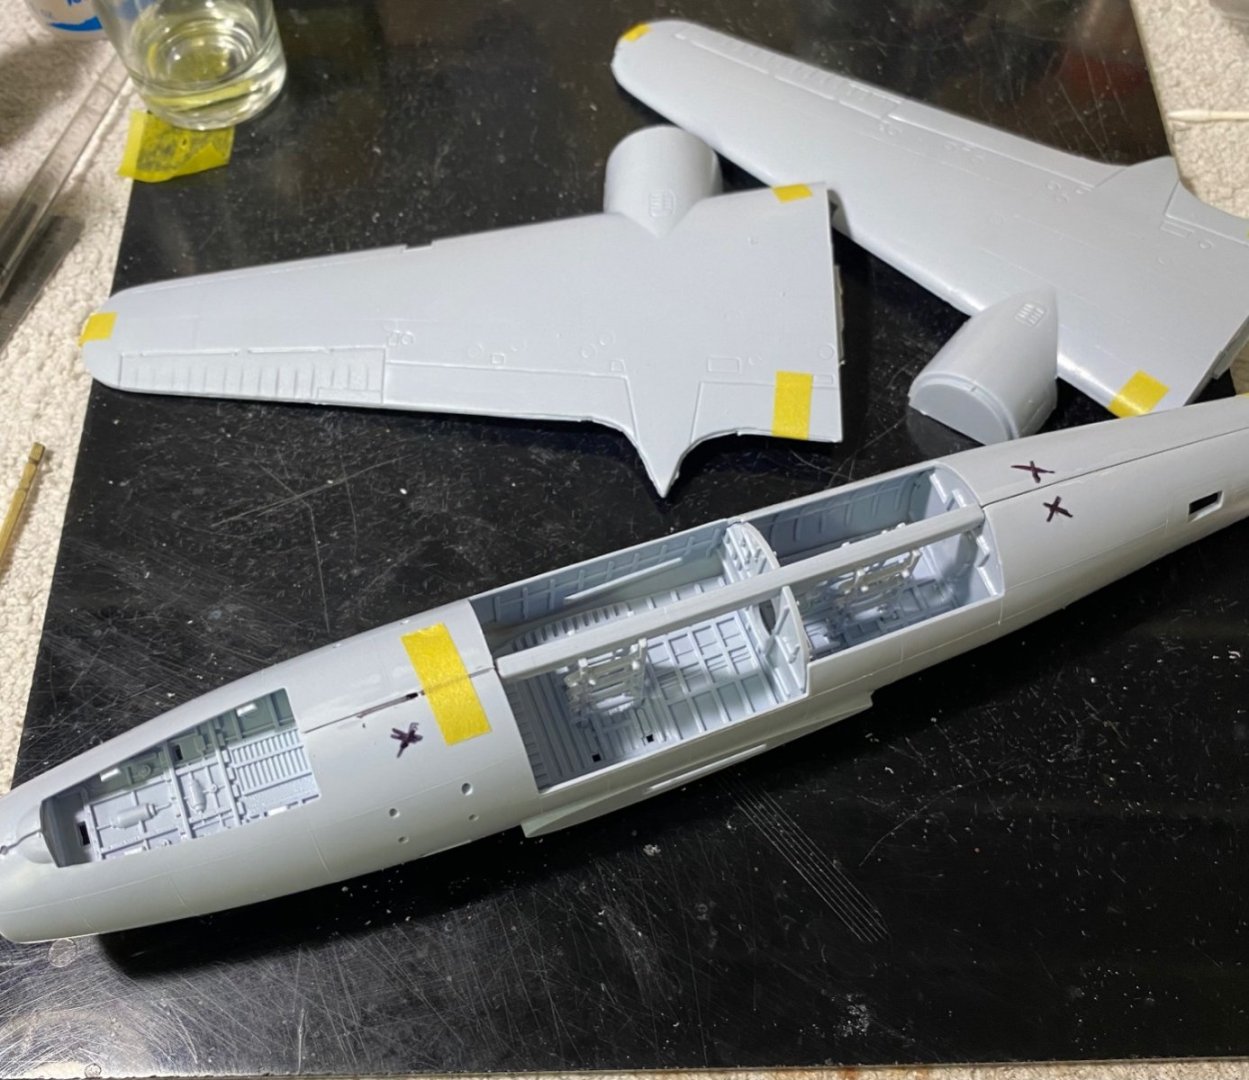
- 97 replies
-
- 10
-
-
Martin B-26B Marauder by CDW - FINISHED - Airfix - 1:72 Scale
CDW replied to CDW's topic in Non-ship/categorised builds
What was the price of this kit in the 70's. Do you recall? -
Martin B-26B Marauder by CDW - FINISHED - Airfix - 1:72 Scale
CDW replied to CDW's topic in Non-ship/categorised builds
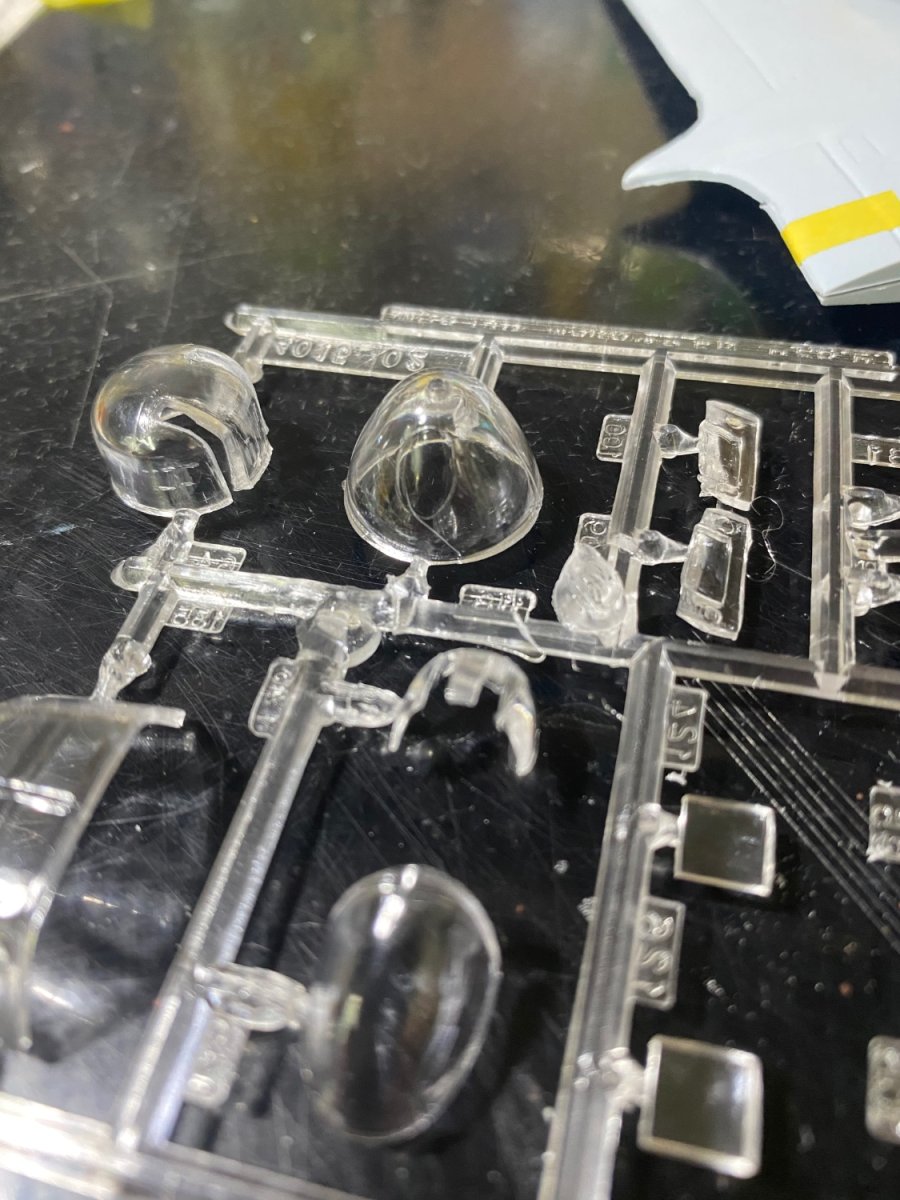
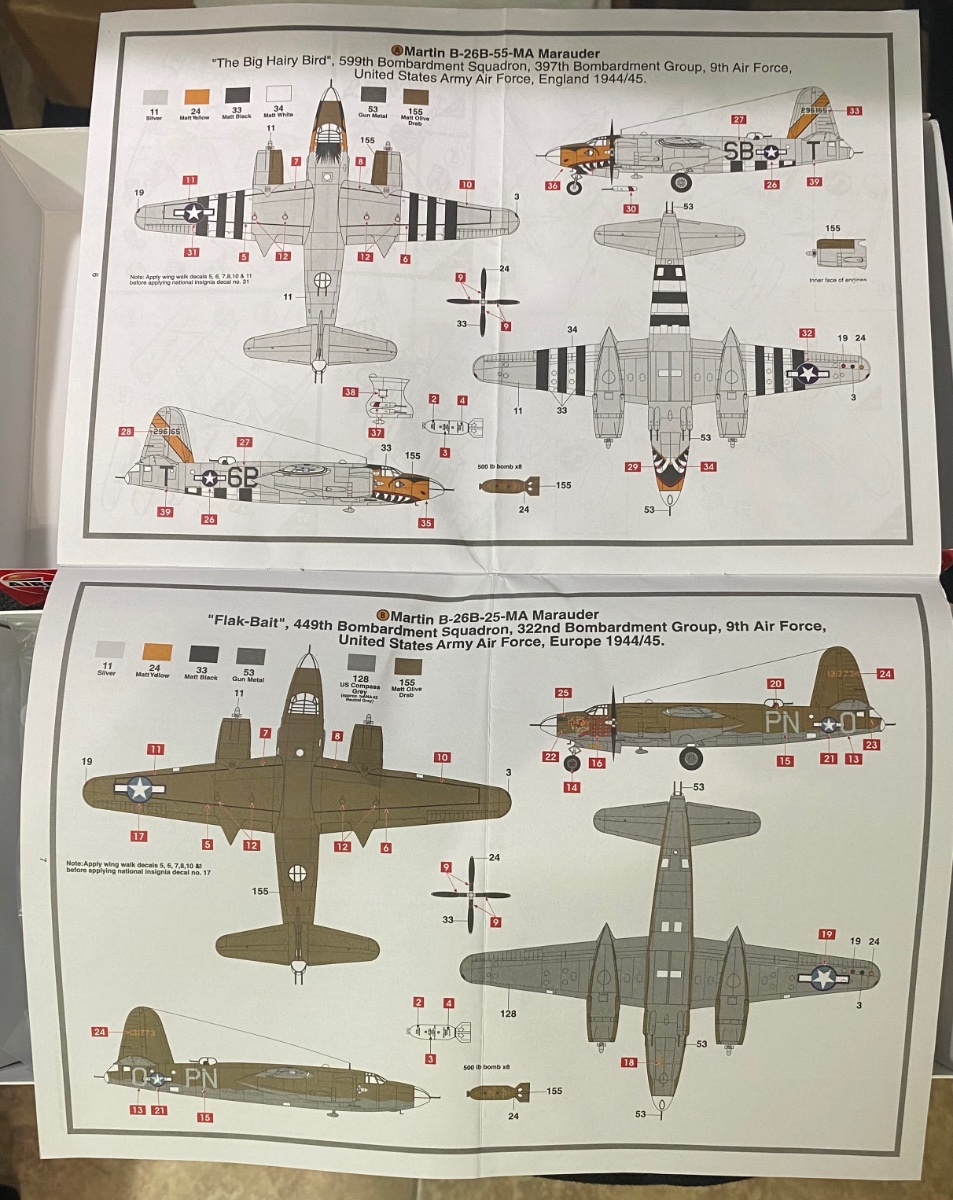
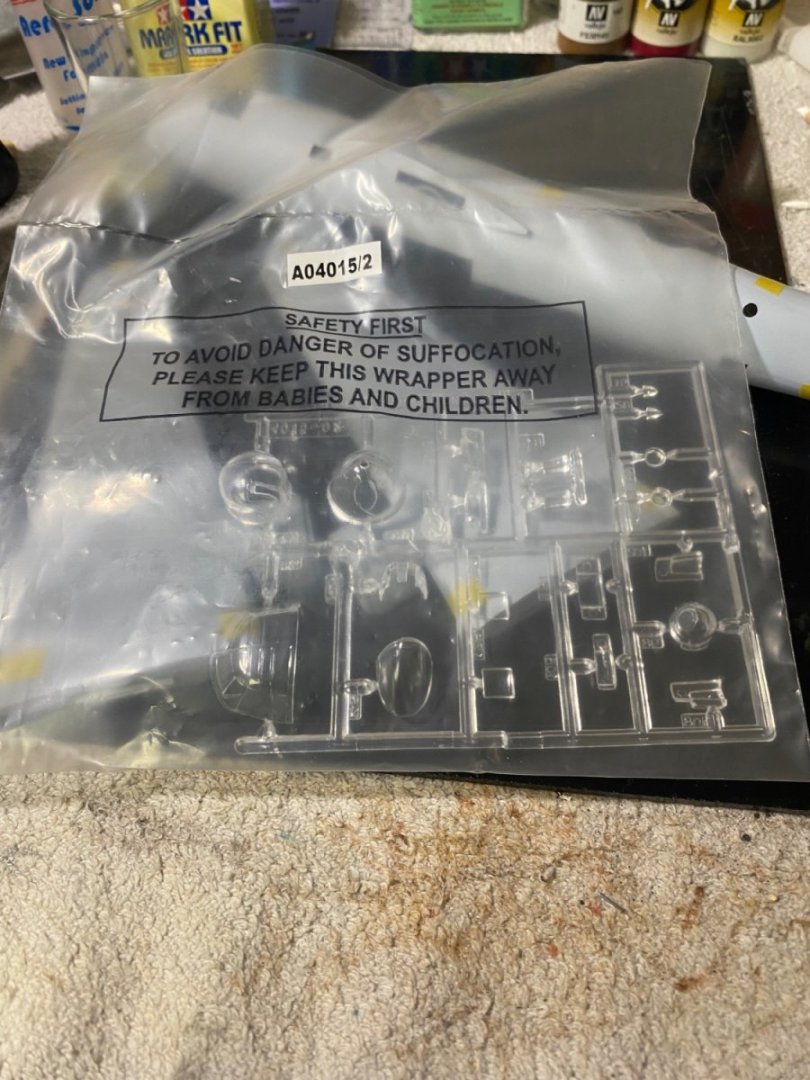
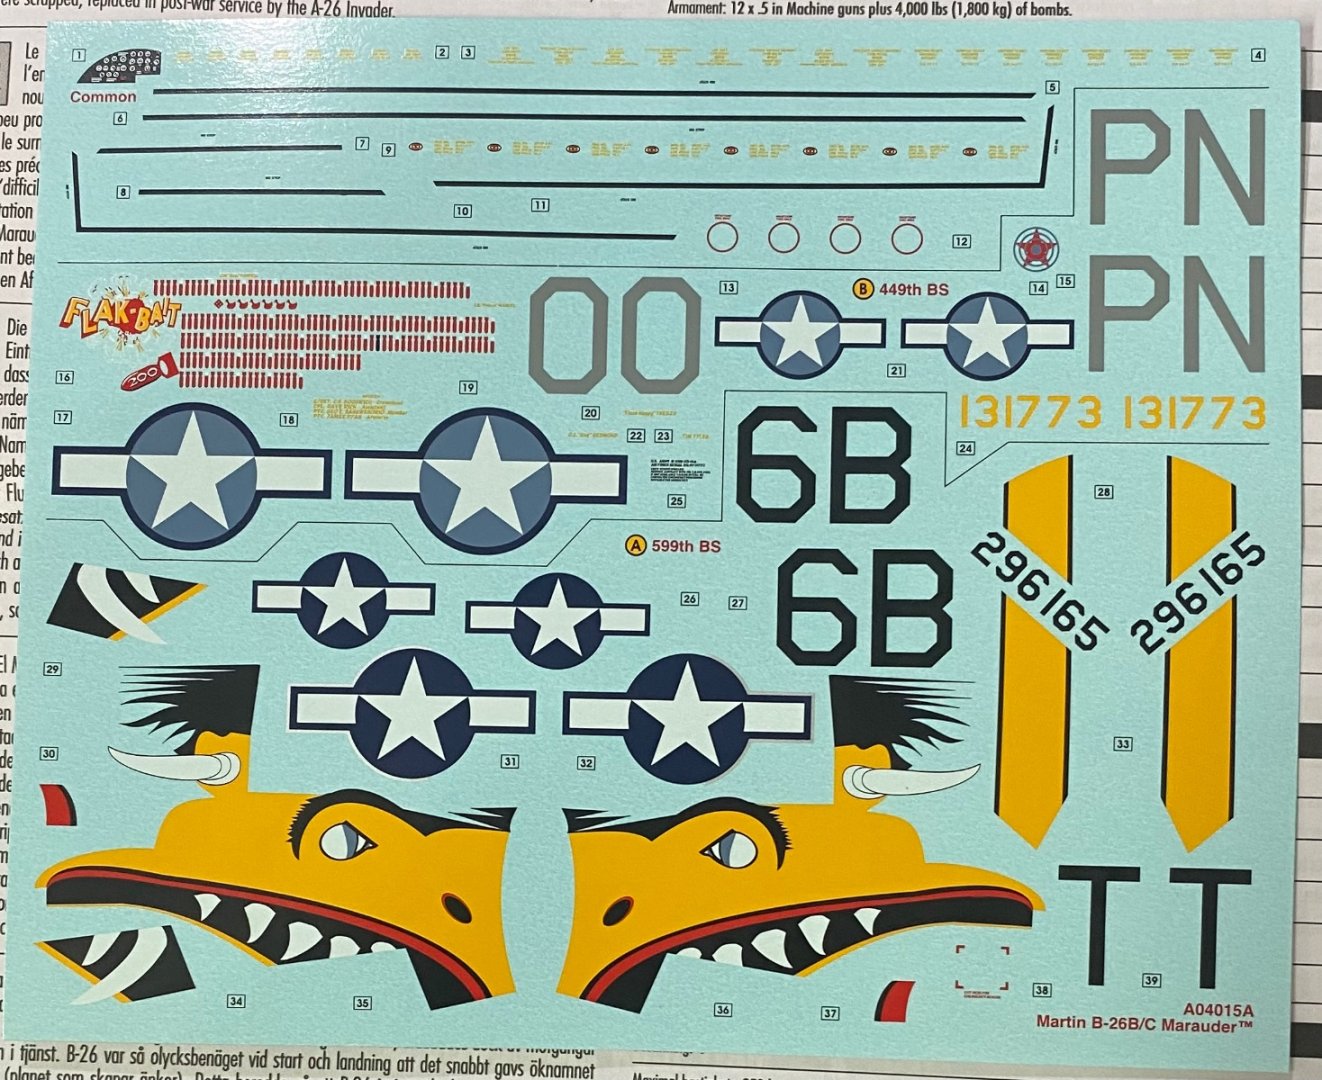
I think I’ll choose The Big Hairy Bird option as for one, Flak Bait is most often modeled, and two, my choice has the best looking paint scheme IMO. It will be a bit tricky as there are a lot of little sink marks to clean up and silver will show up every imperfection. The X marks are sinks that need to be filled. The horizontal black lines down the center of the dorsal and ventral parts of the fuselage are steps created from misplaced locator pins. We can fix all that I believe. I need to decide whether to scribe the raised panel lines as the raised lines will be obliterated while cleaning up the sink marks. Yhe clear parts were bagged separately, but the nose glass still managed to have a nasty scratch.

- 97 replies
-
- 13
-
-
Martin B-26B Marauder by CDW - FINISHED - Airfix - 1:72 Scale
CDW replied to CDW's topic in Non-ship/categorised builds
"One a day in Tampa Bay" The B-26B was known for a string of constant crashes into Tampa Bay by pilots in training at a large AFB here in my hometown of Tampa. The article in the following website tells the story. An interesting read: One a Day in Tampa Bay - HistoricWings.com :: A Magazine for Aviators, Pilots and Adventurers -
Martin B-26B Marauder by CDW - FINISHED - Airfix - 1:72 Scale
CDW replied to CDW's topic in Non-ship/categorised builds
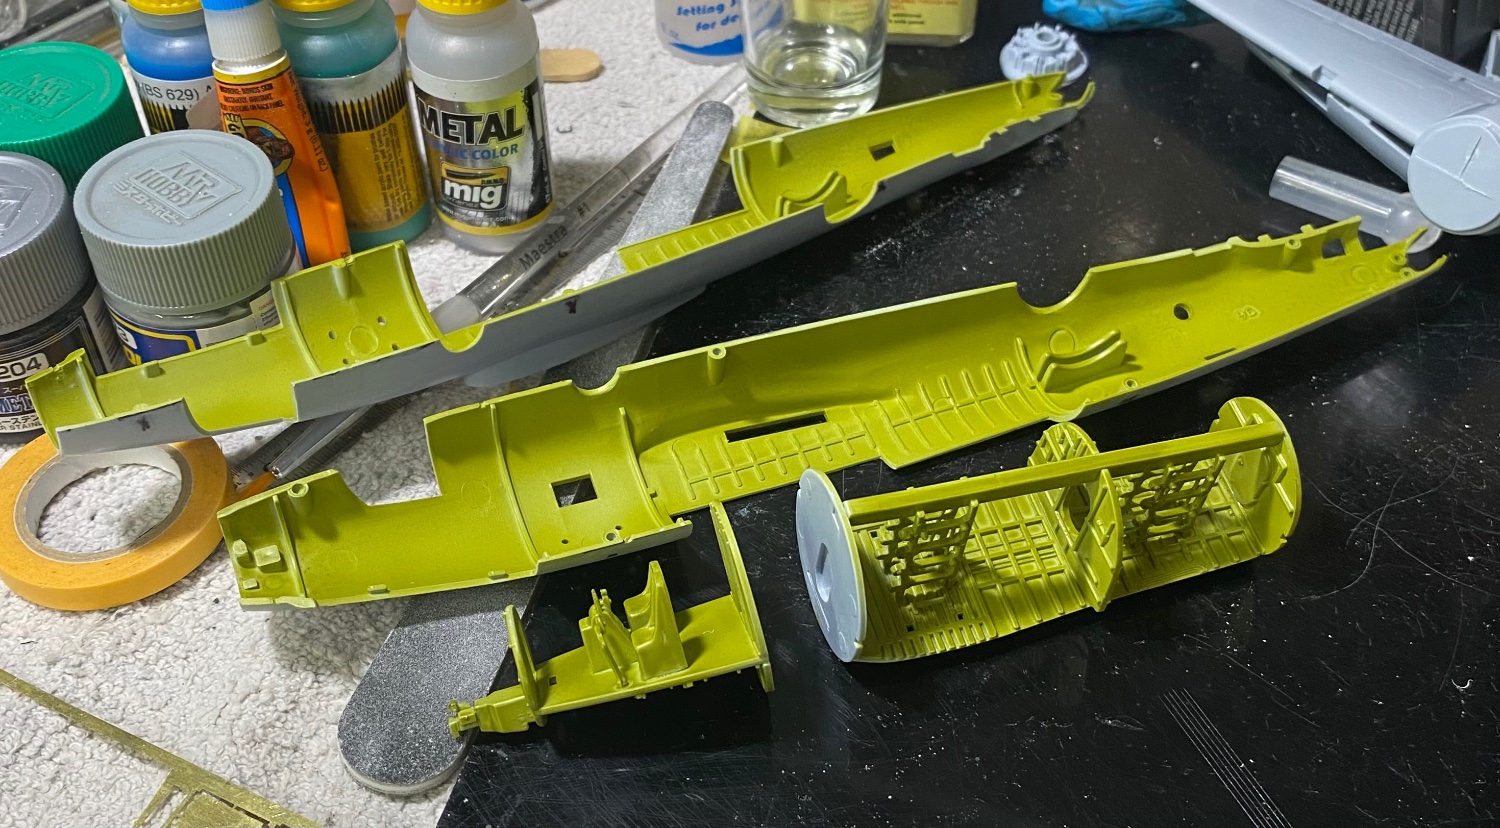
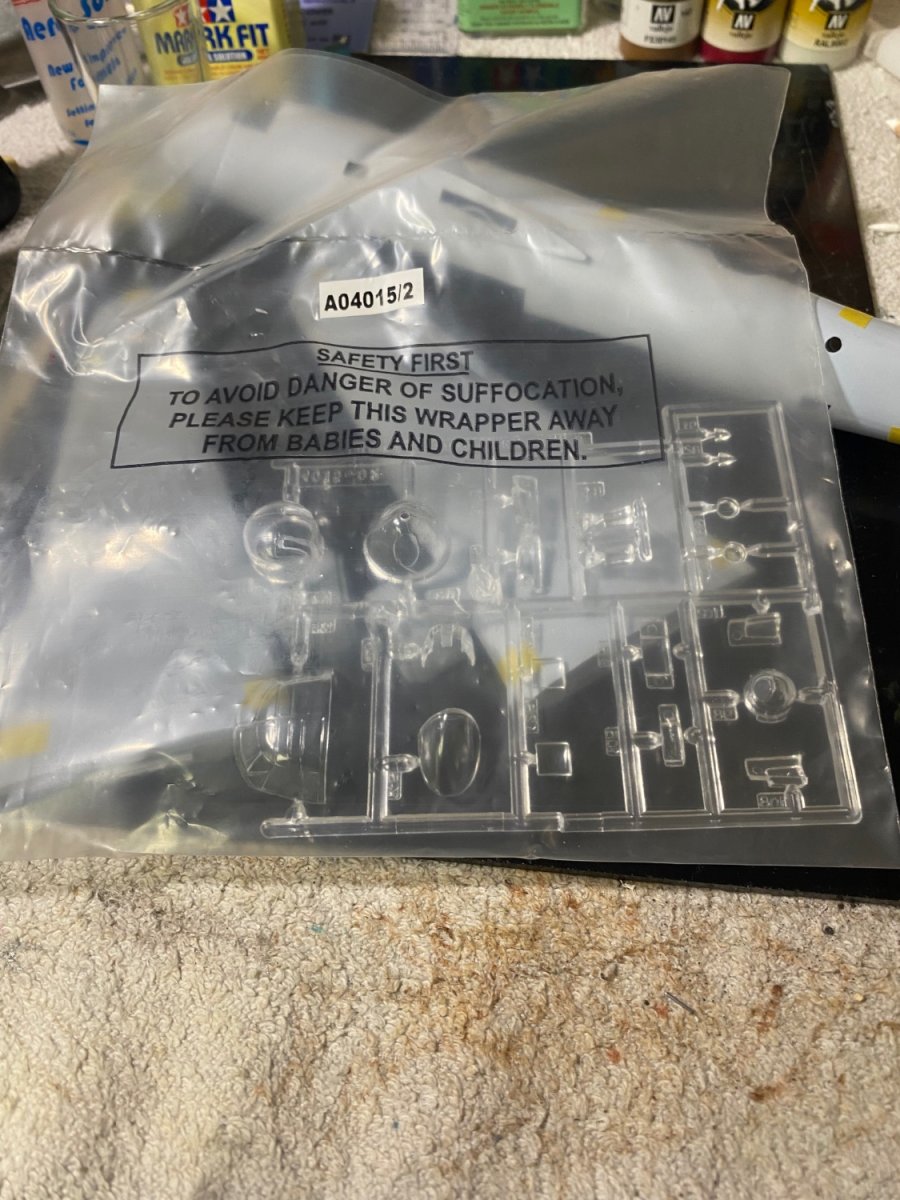
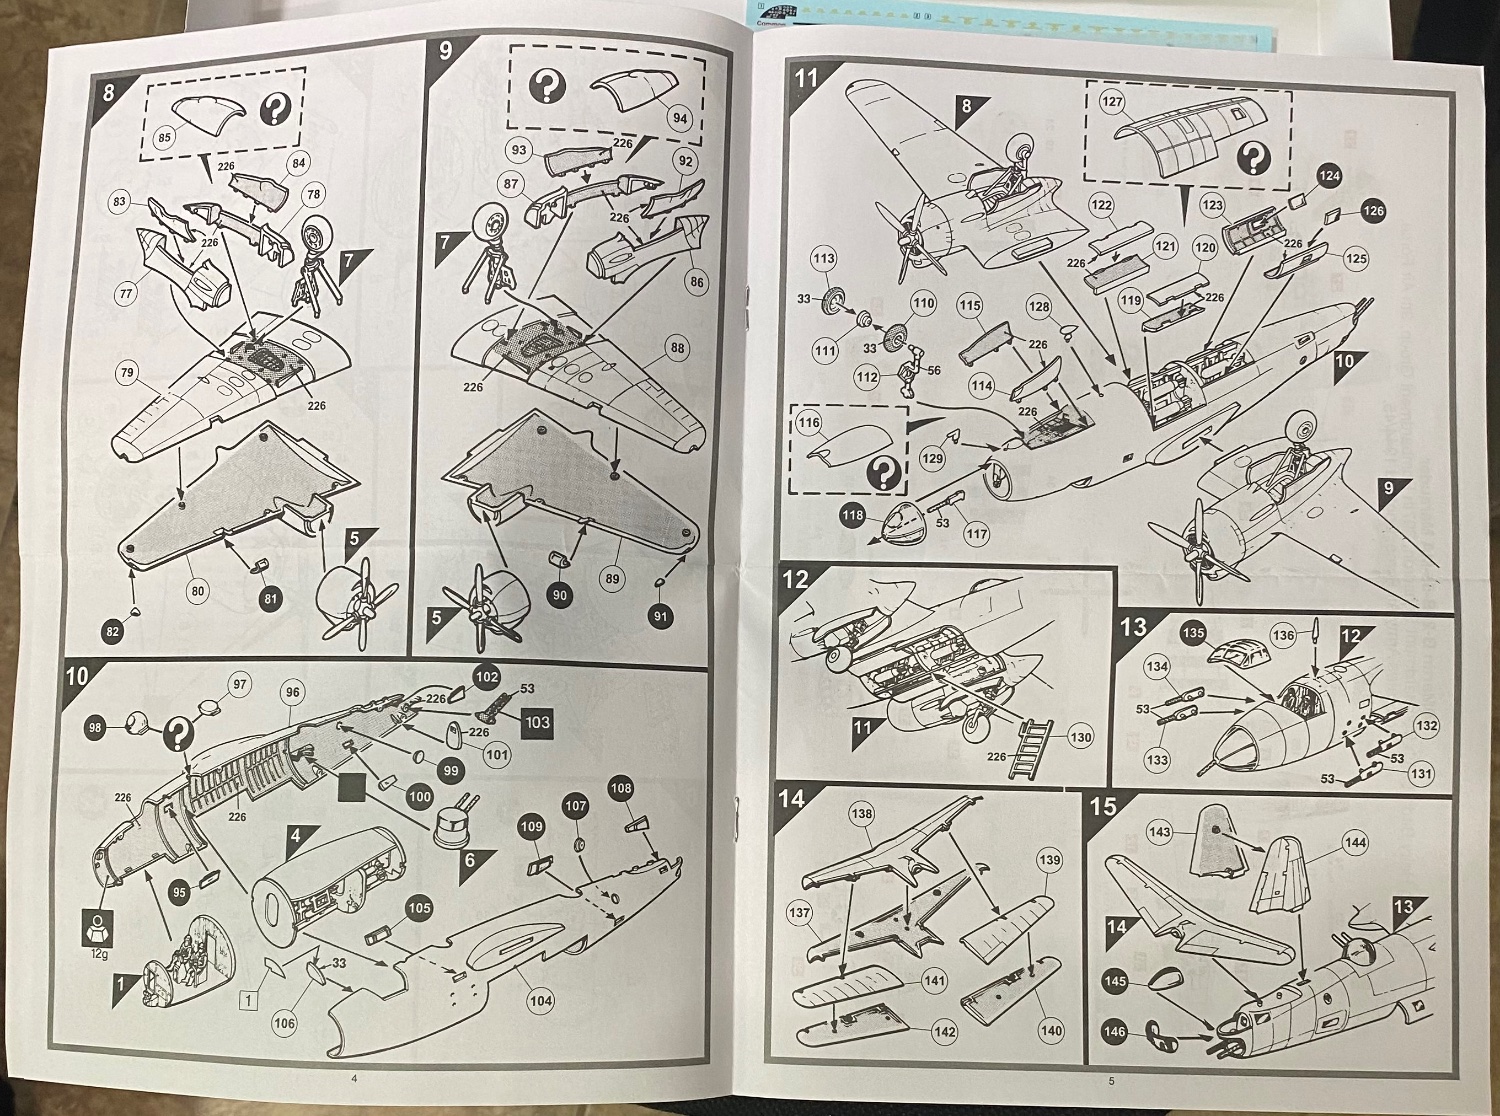
The parts trees were all crammed into one bag with many loose parts. I see a mix of recessed and raised panel lines and lots of flash here and there with a few sink marks sprinkled in. This definitely is not a new tool kit. No guarantees on outcome with this one. We shall see what we shall see.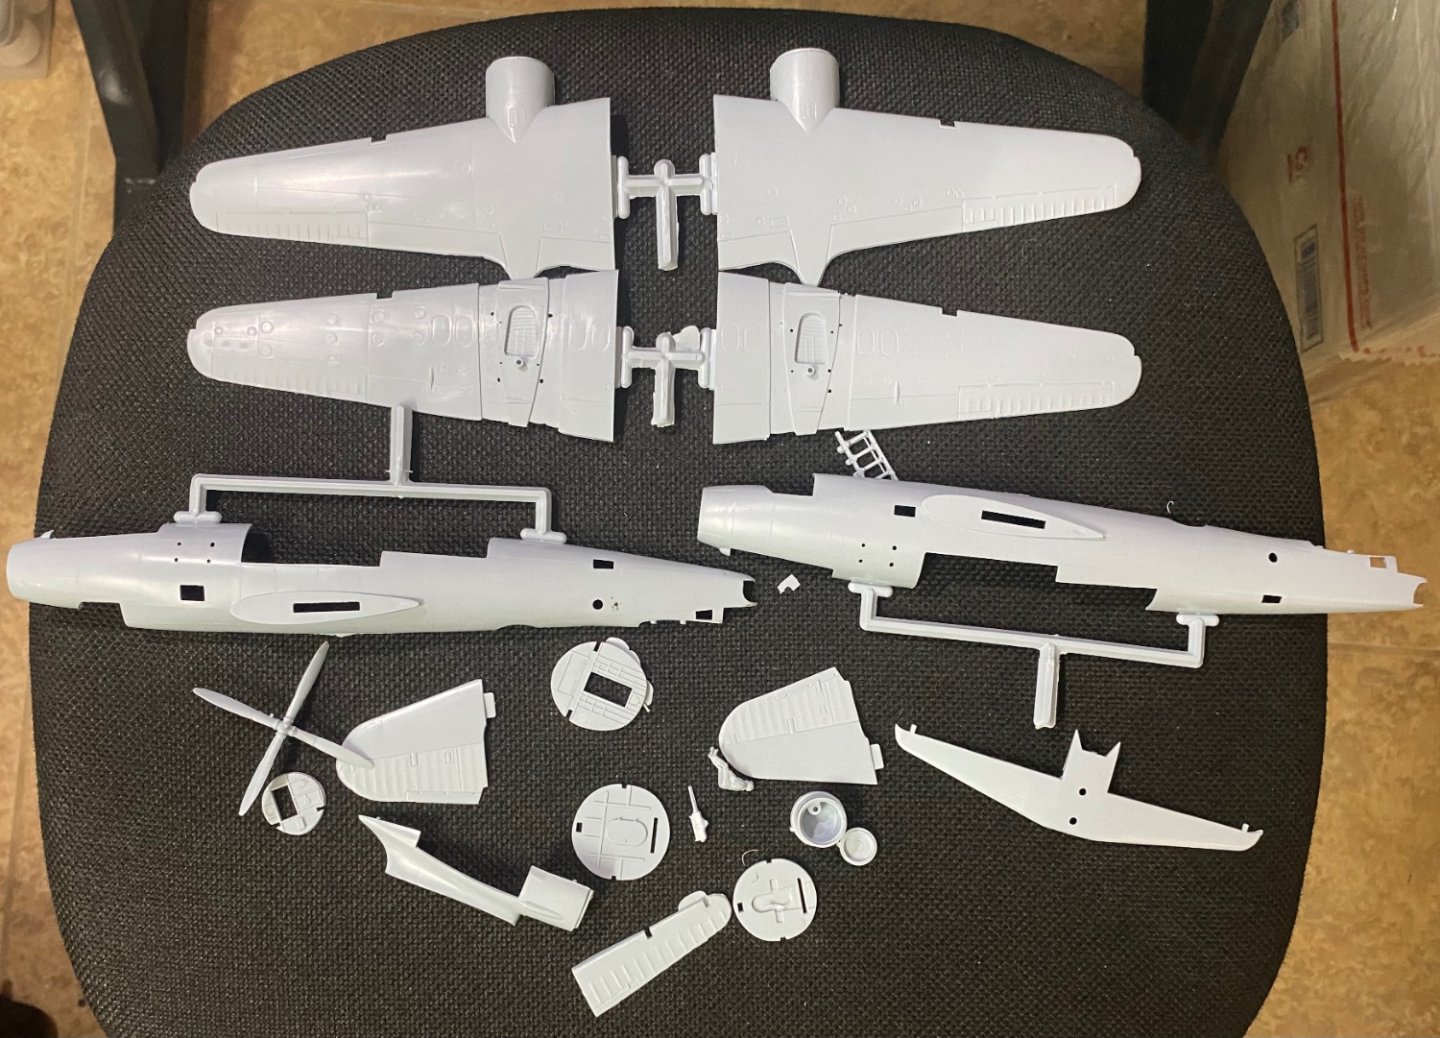
- 97 replies
-
- 15
-
-
Martin B-26B Marauder by CDW - FINISHED - Airfix - 1:72 Scale
CDW replied to CDW's topic in Non-ship/categorised builds
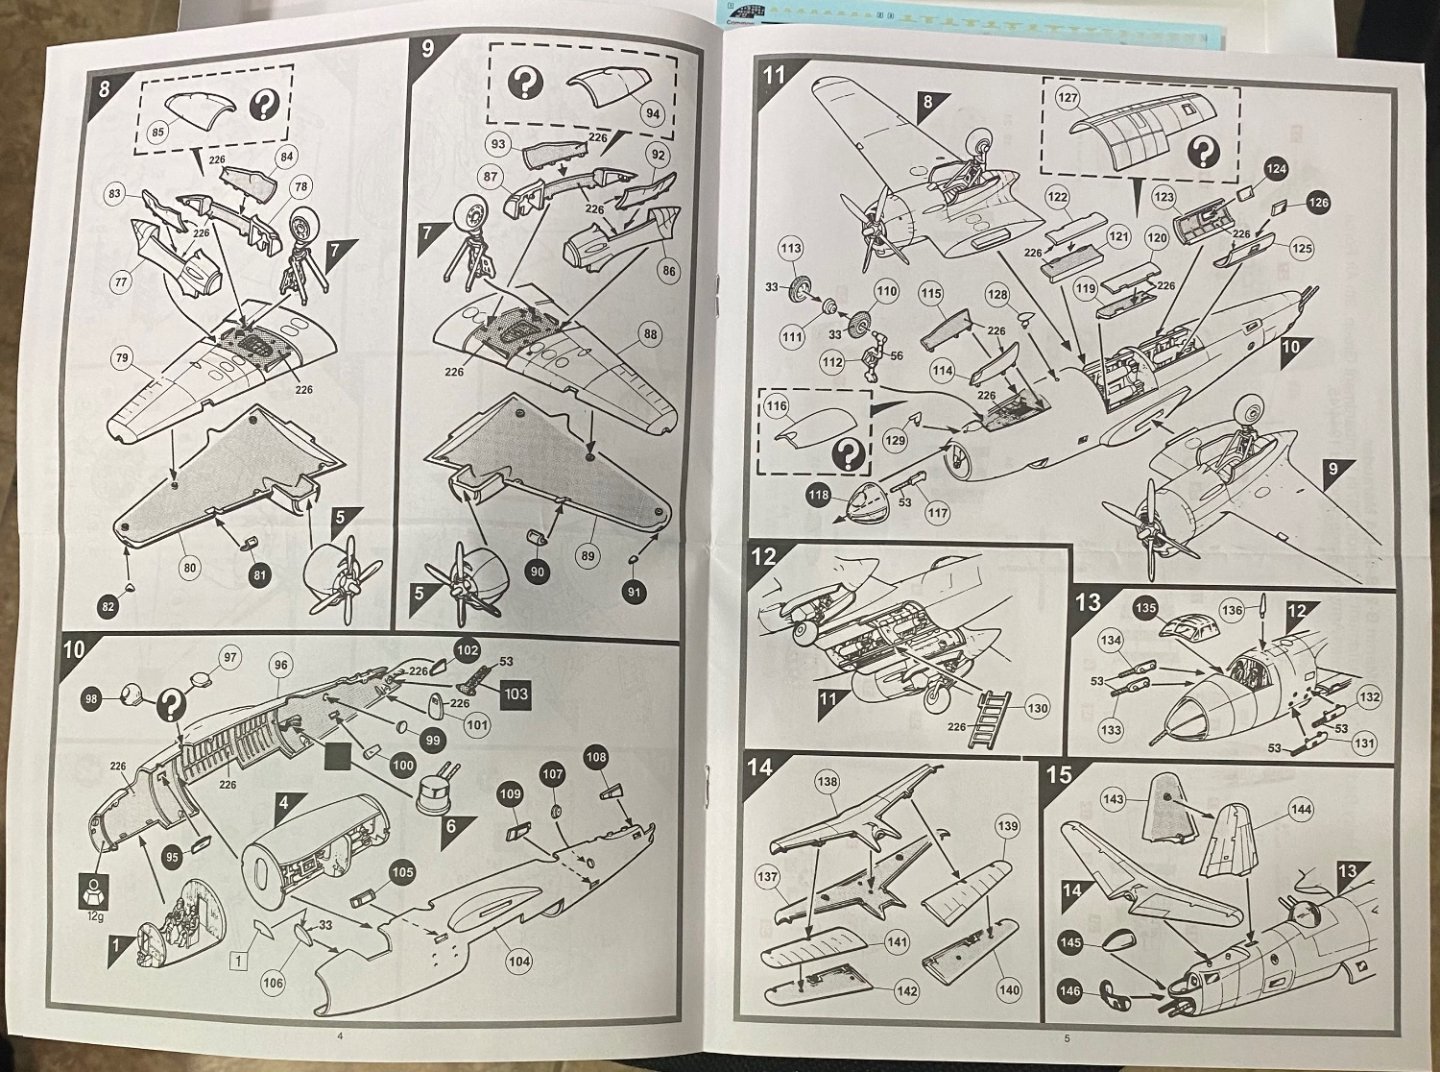
Typical old school Airfix instruction sheets The decal sheet looks very decent

- 97 replies
-
- 12
-
-
Completely on a whim, I bought this kit from a seller on EBay. Since buying it, the reviews I read say it’s a real dog of a kit. Let’s give it a try and see what happens. It’s taking up shelf space as it is and it needs to either transform into a shelf model or ho into the garbage bin. You will help me decide her fate.

- 97 replies
-
- 10
-
-
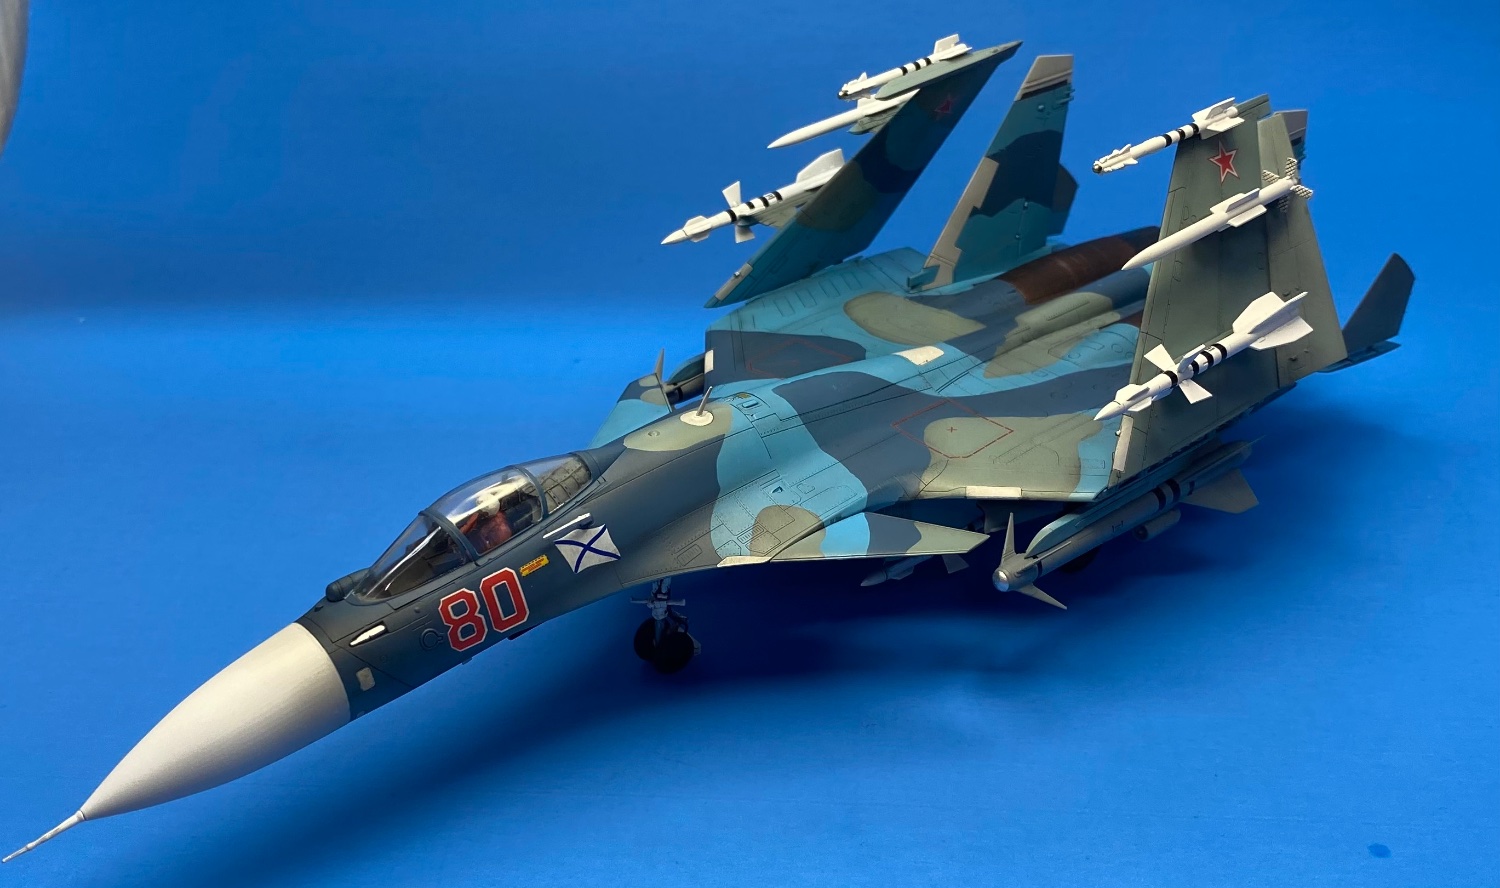
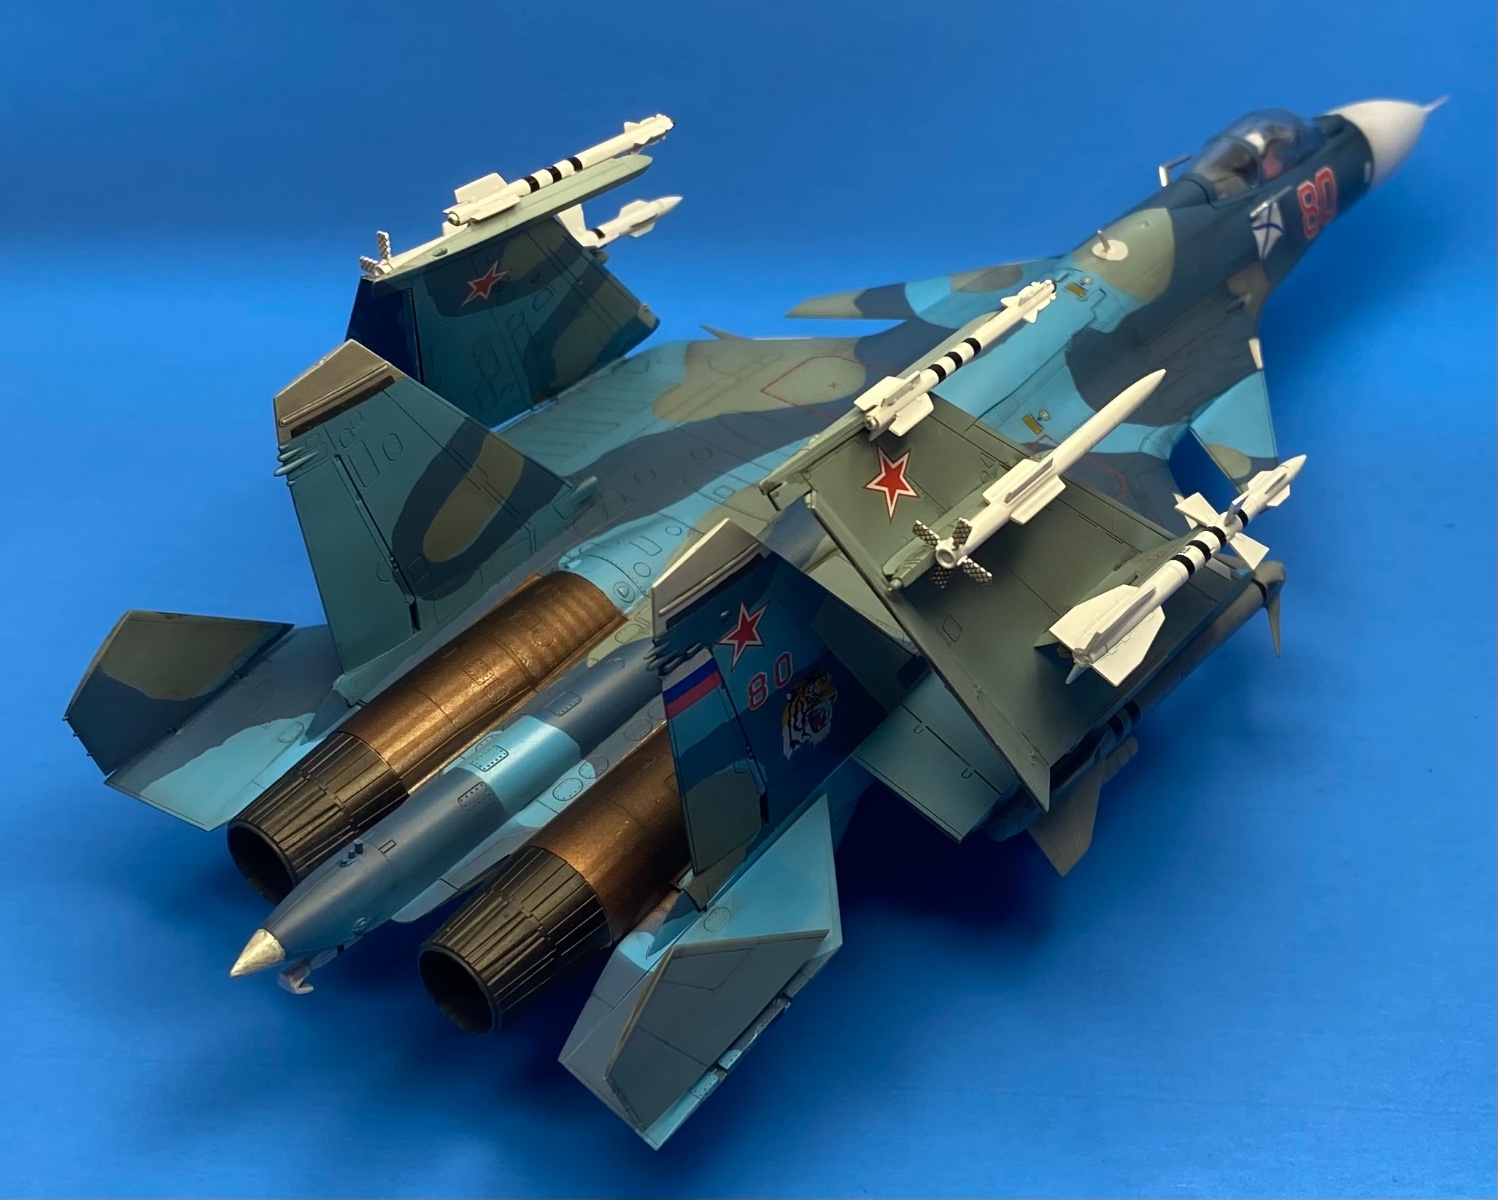
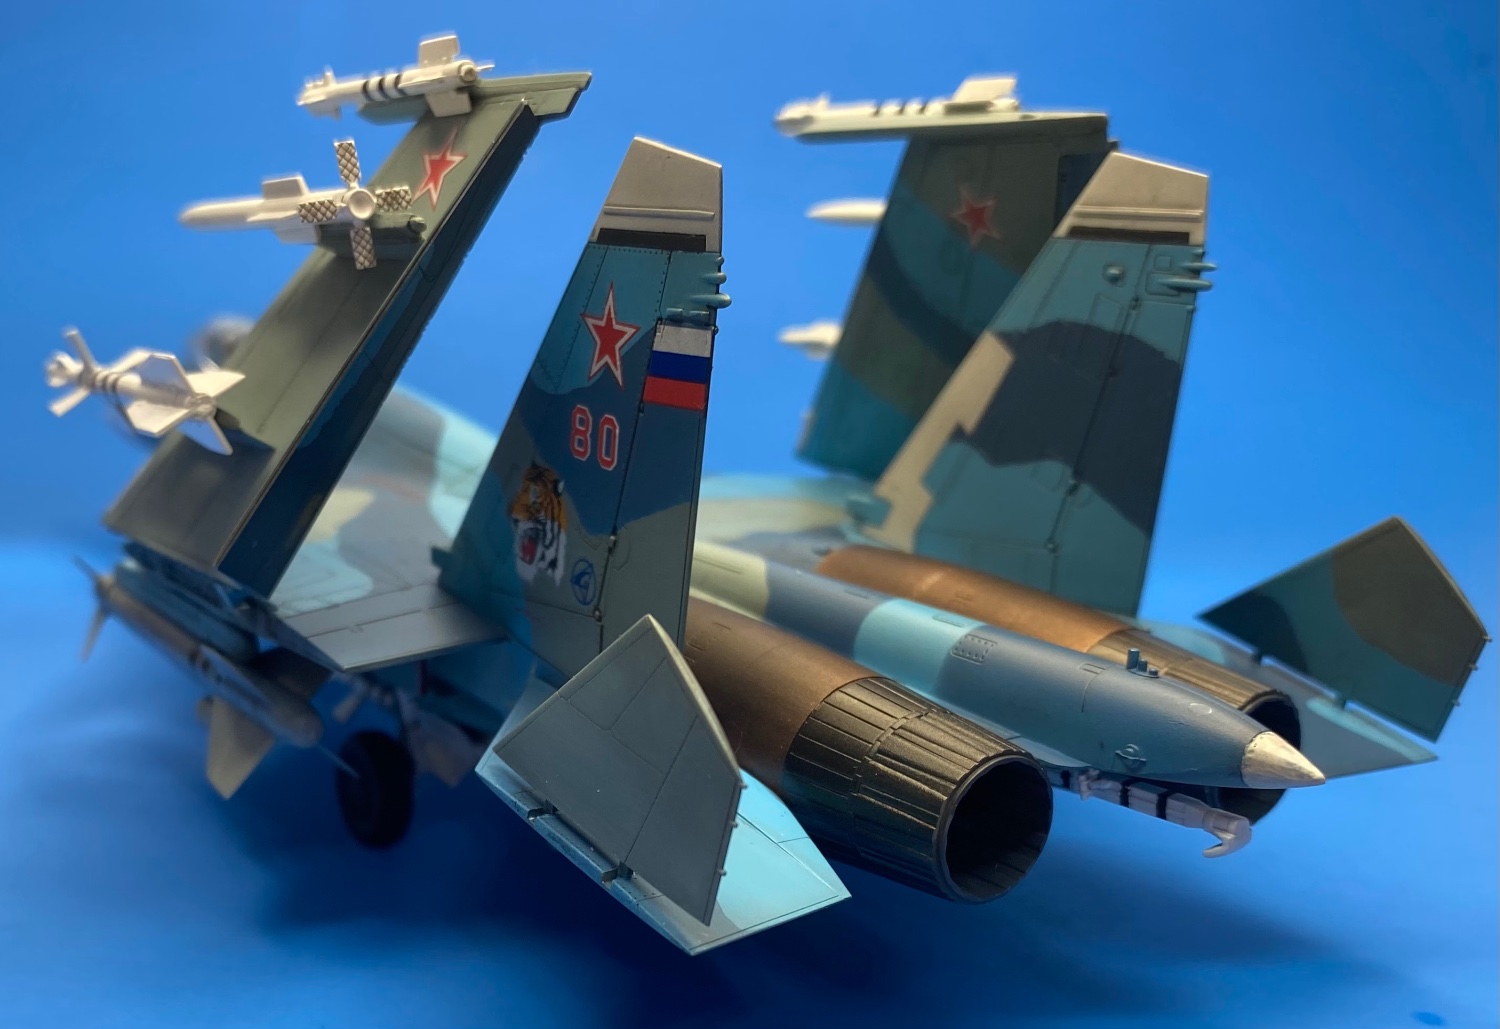
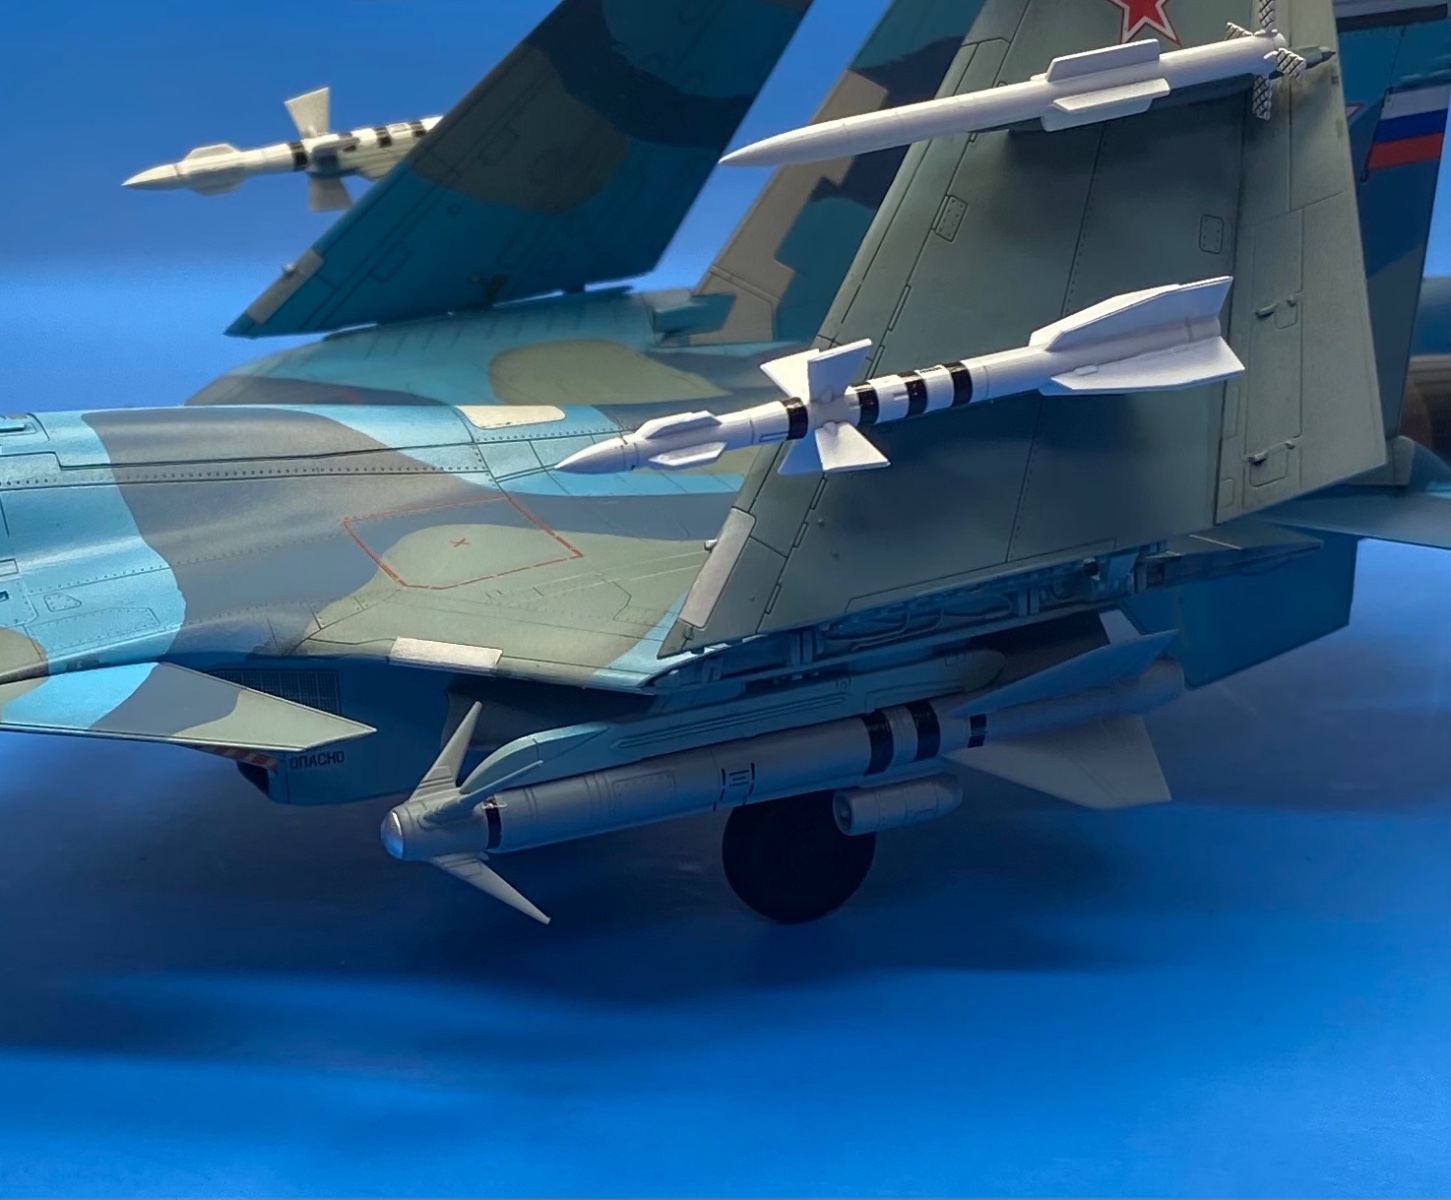
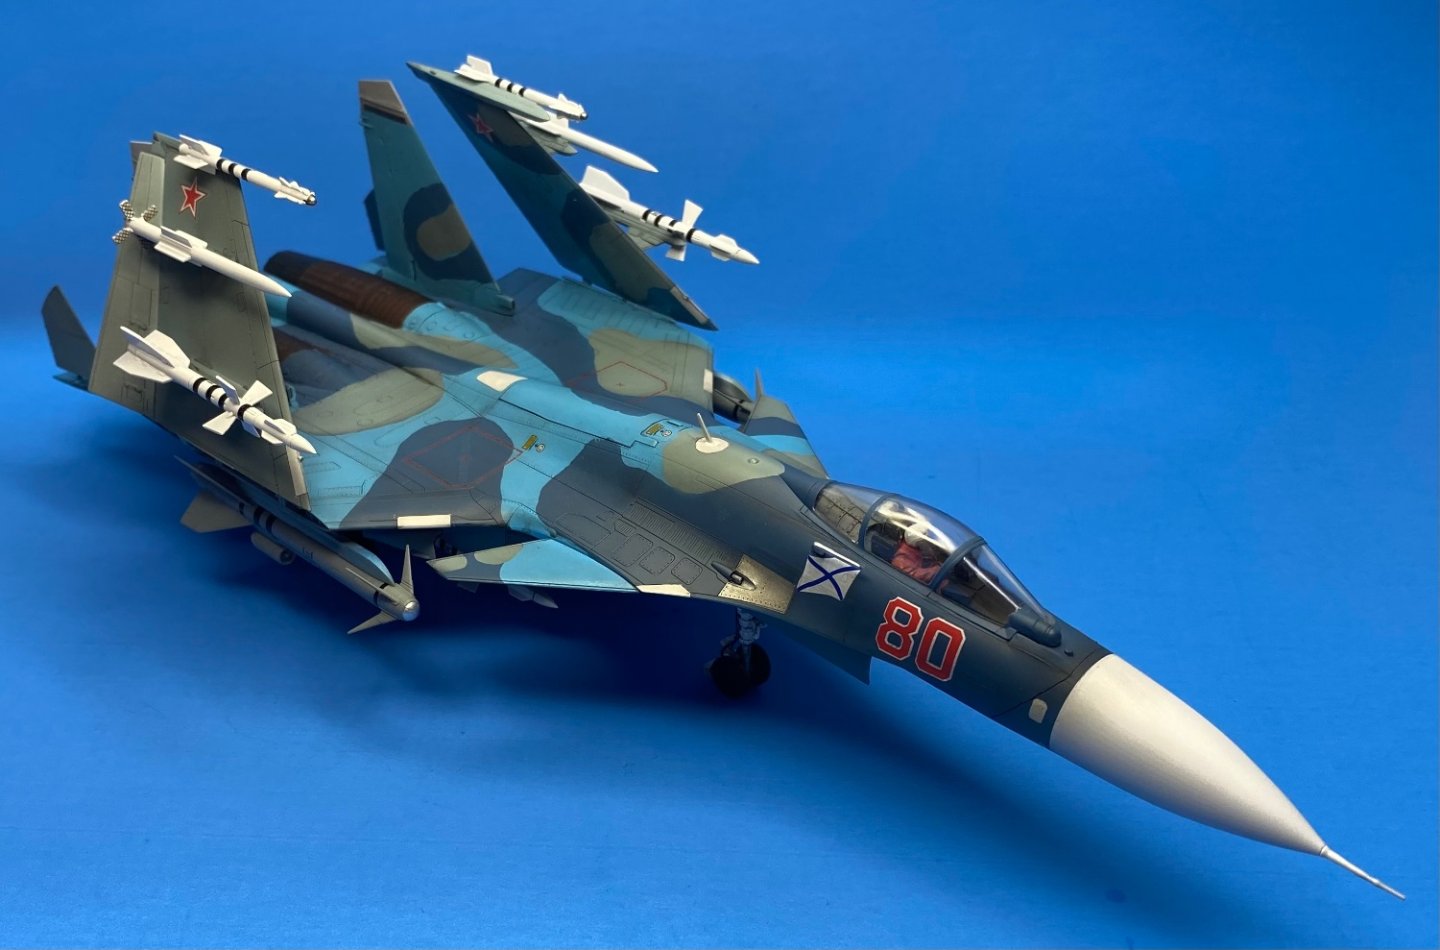
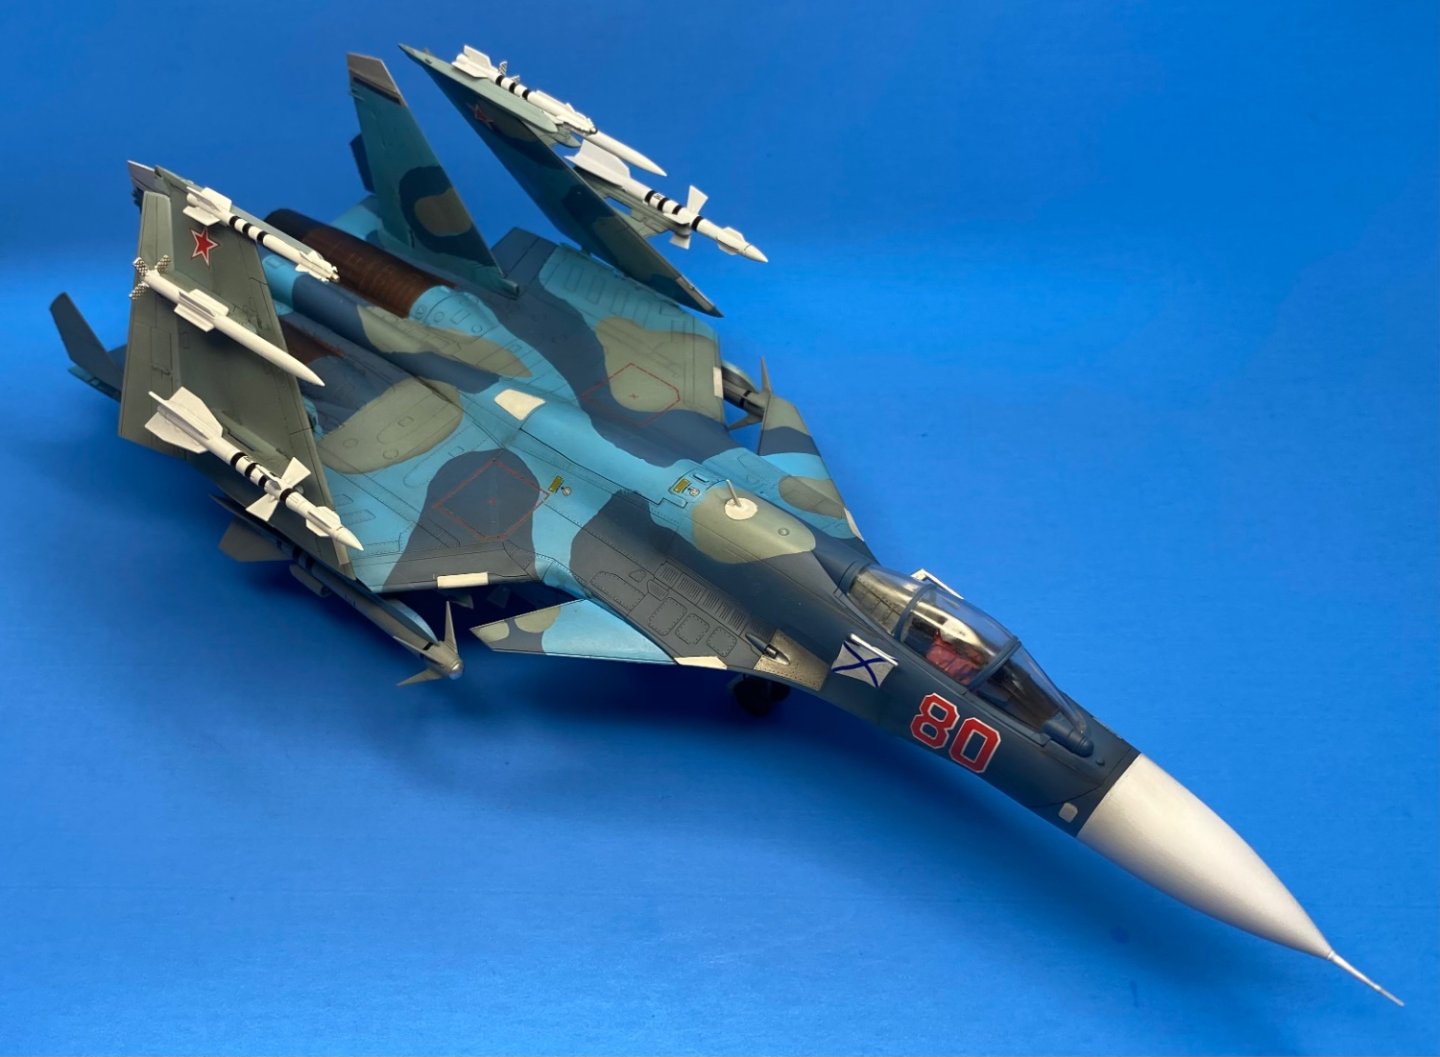
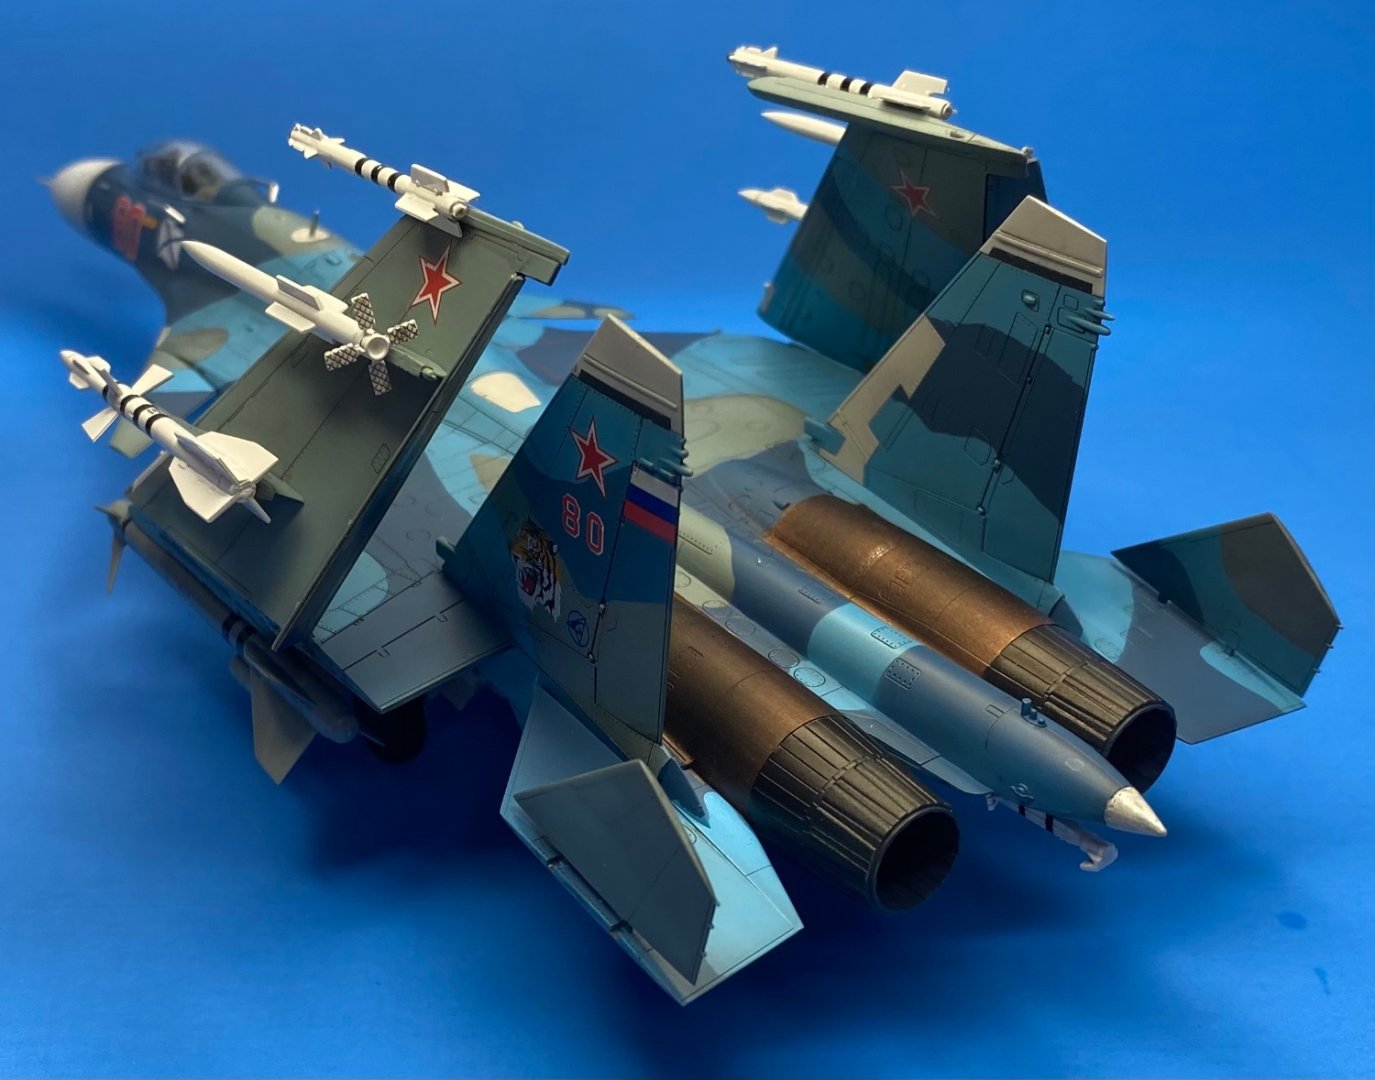
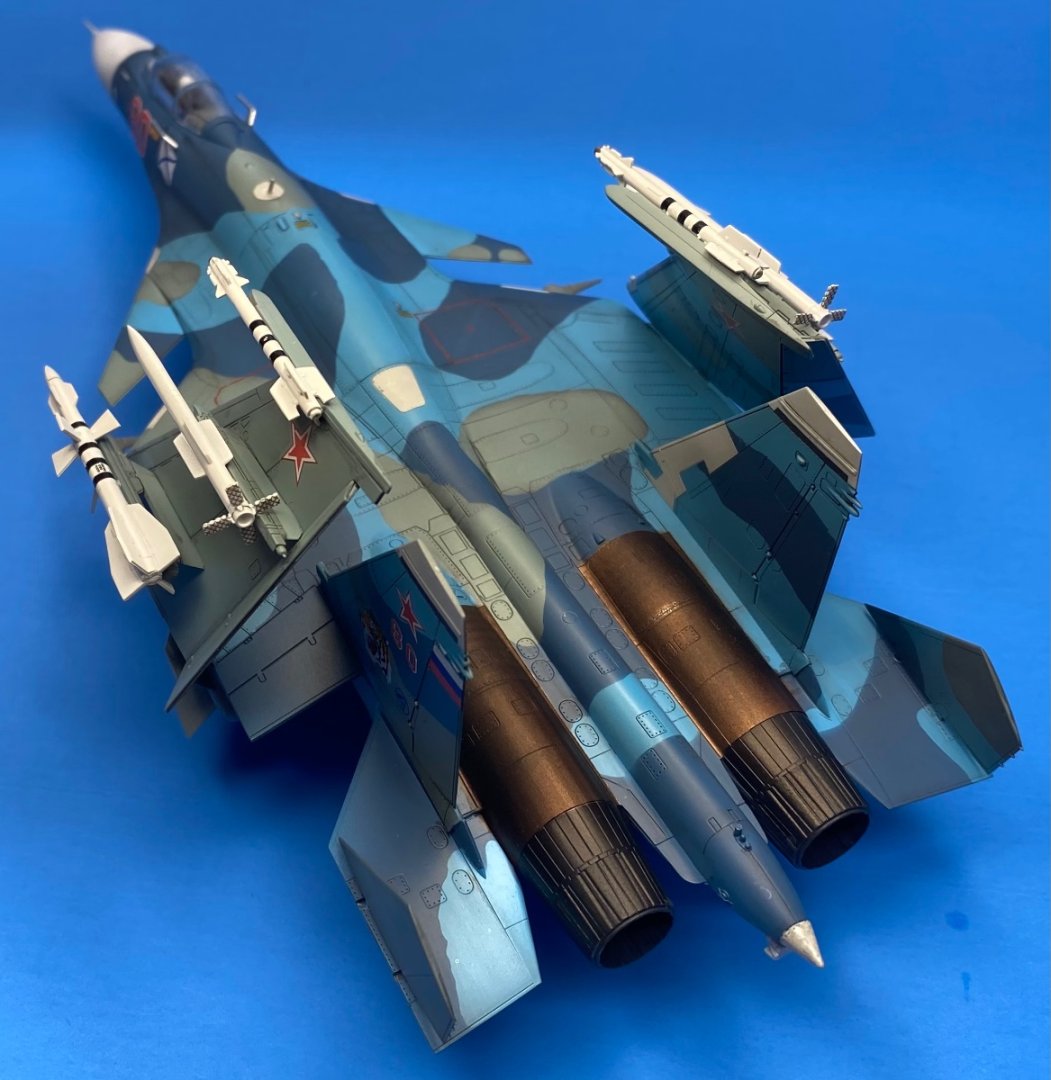
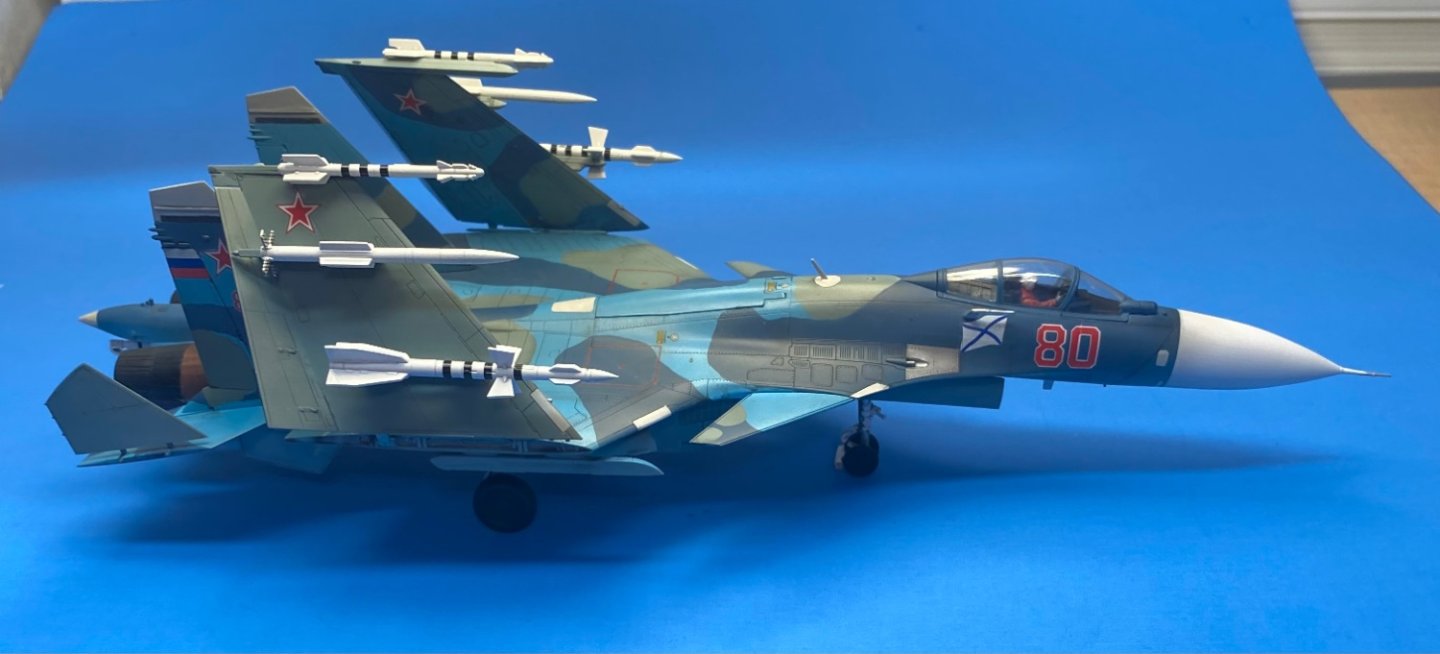
Russian Su-33 Flanker D by CDW - FINISHED - Trumpeter - 1:72 Scale
CDW replied to CDW's topic in Non-ship/categorised builds
Thanks EG! The kit came with a big section of the carrier deck to use as a display base, but I just decided not to finish it at this time. Maybe later I'll change my mind and finish it, too. -
Russian Su-33 Flanker D by CDW - FINISHED - Trumpeter - 1:72 Scale
CDW replied to CDW's topic in Non-ship/categorised builds
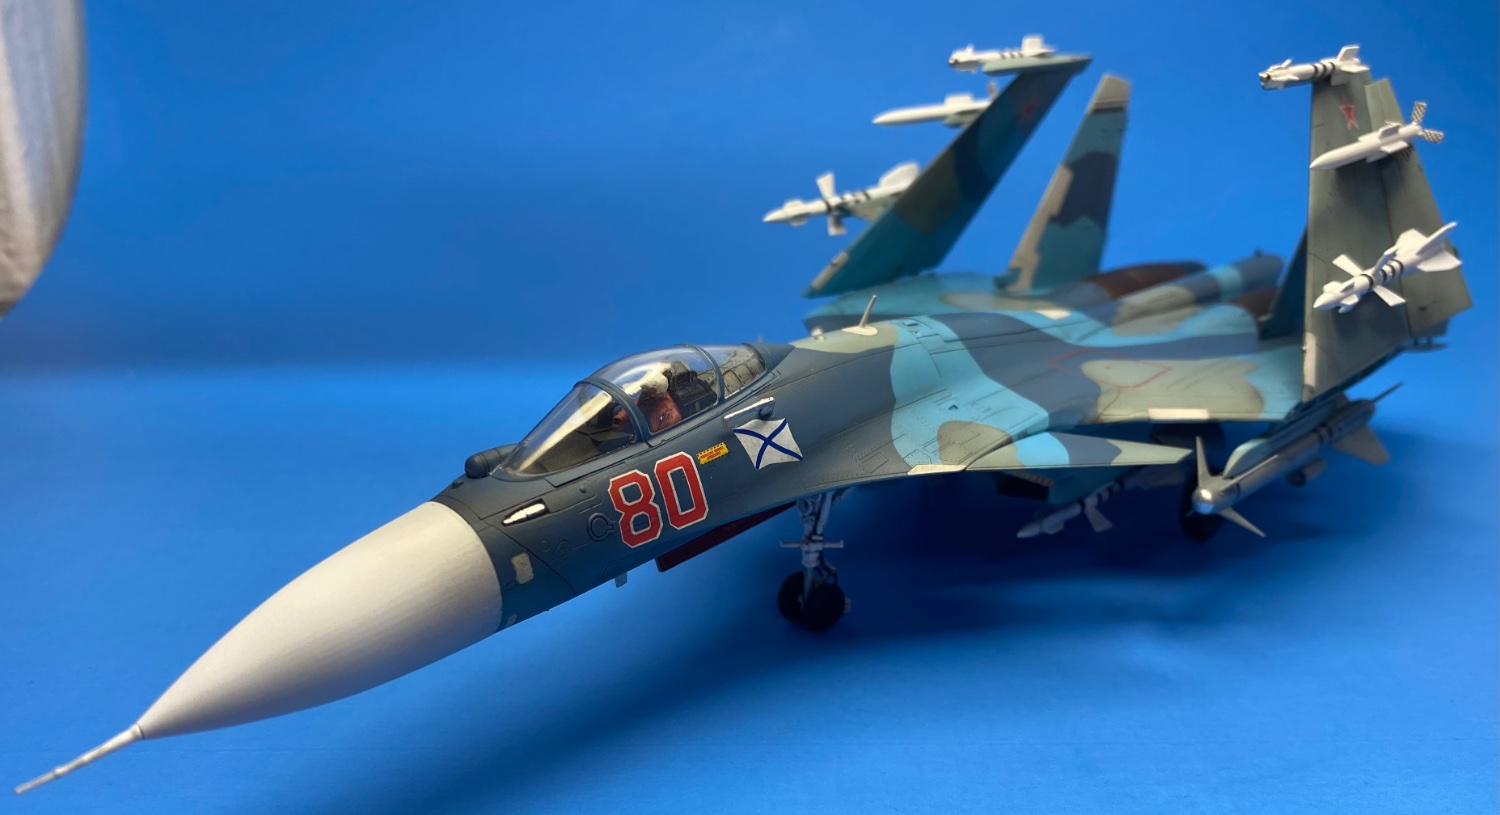
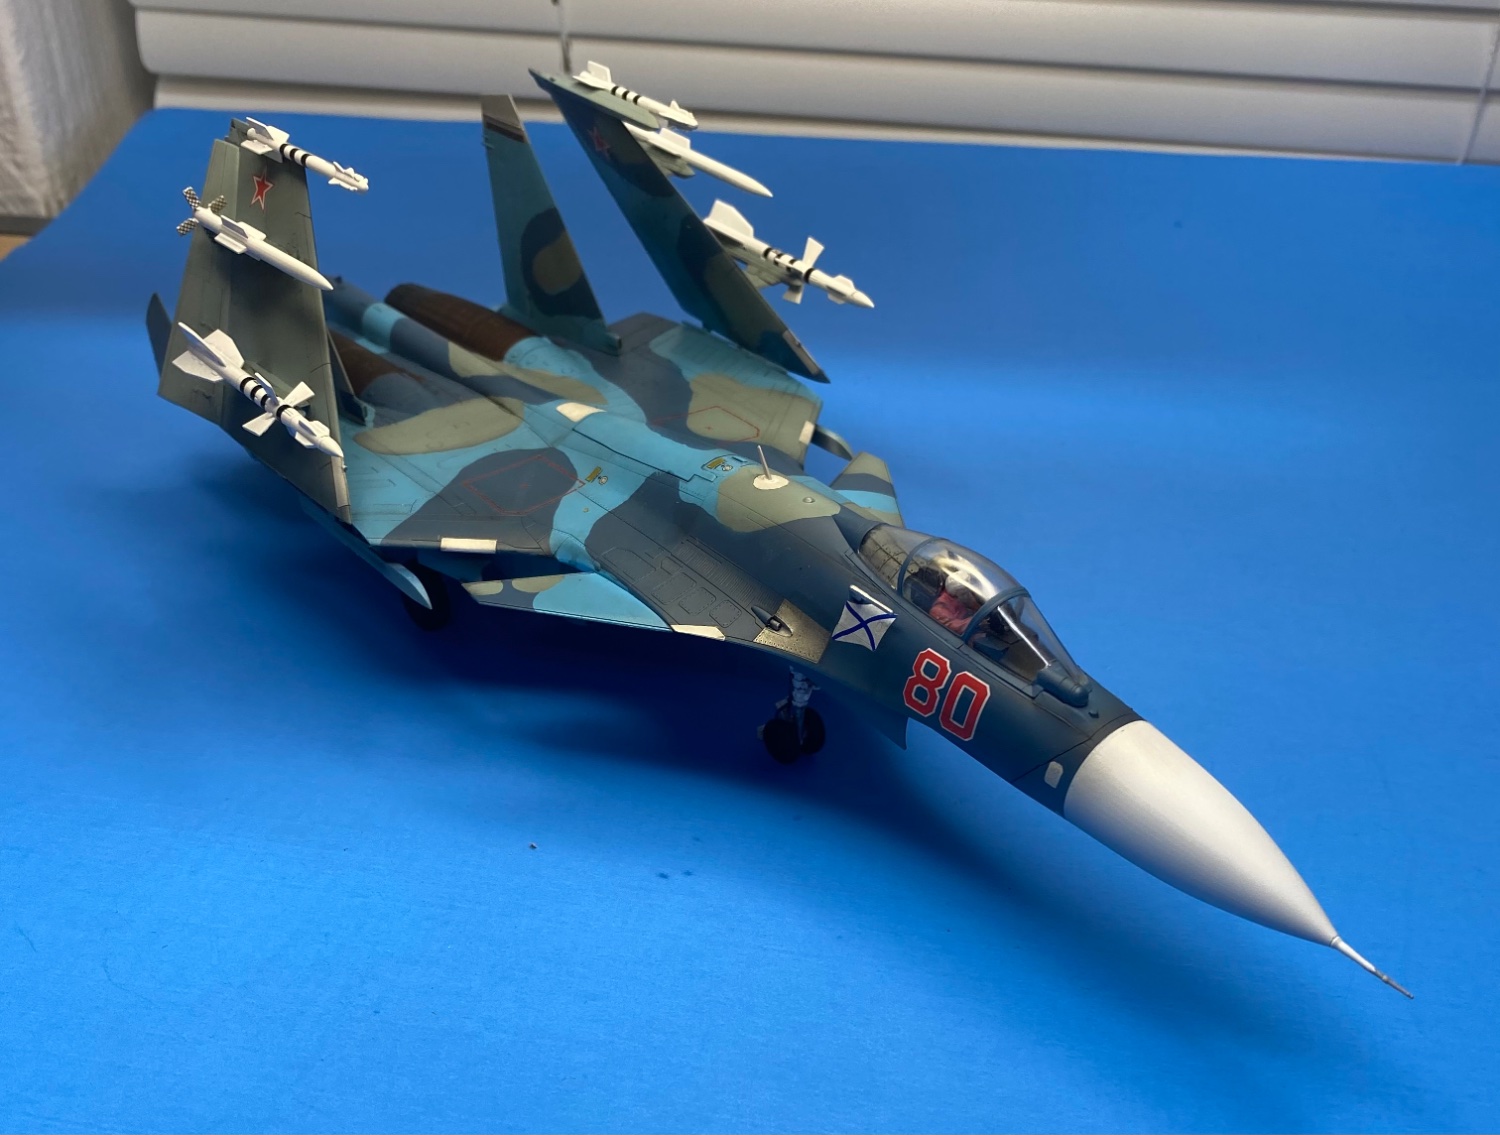
It’s been a ton of fun. I appreciate all who have followed along on this build, for all your likes and comments. It’s now time to close this one out. Stay tuned to my channel for the next action packed, swift moving build of another model kit!


- 148 replies
-
- 15
-
-

-
Russian Su-33 Flanker D by CDW - FINISHED - Trumpeter - 1:72 Scale
CDW replied to CDW's topic in Non-ship/categorised builds
- 148 replies
-
- 11
-
-
-
Russian Su-33 Flanker D by CDW - FINISHED - Trumpeter - 1:72 Scale
CDW replied to CDW's topic in Non-ship/categorised builds
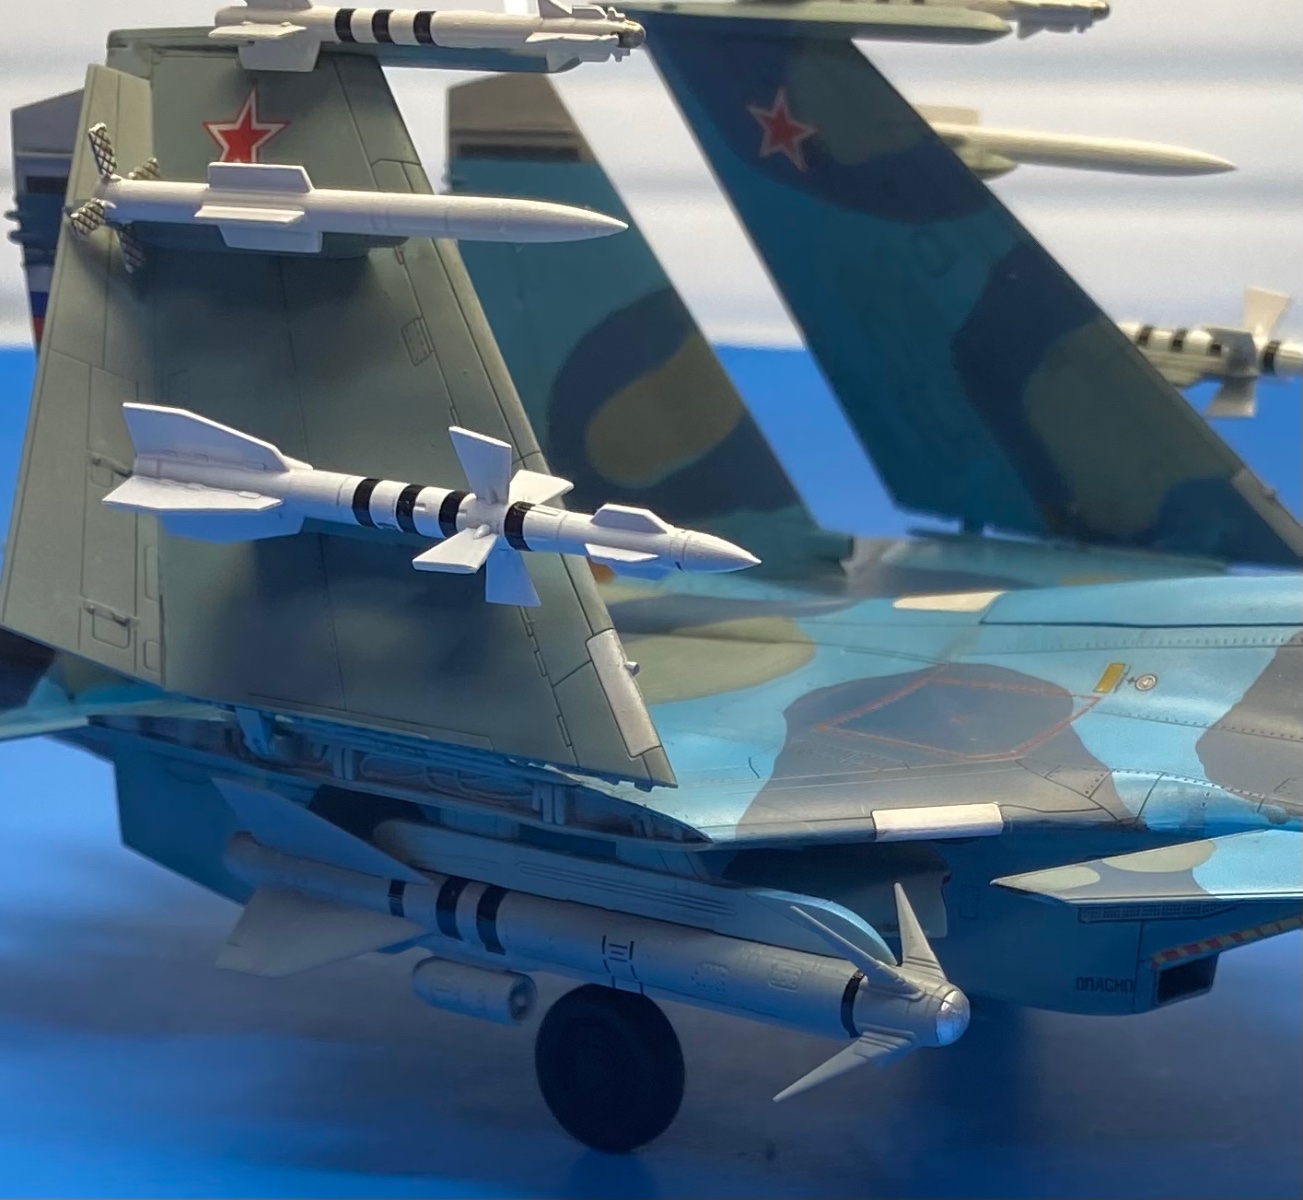
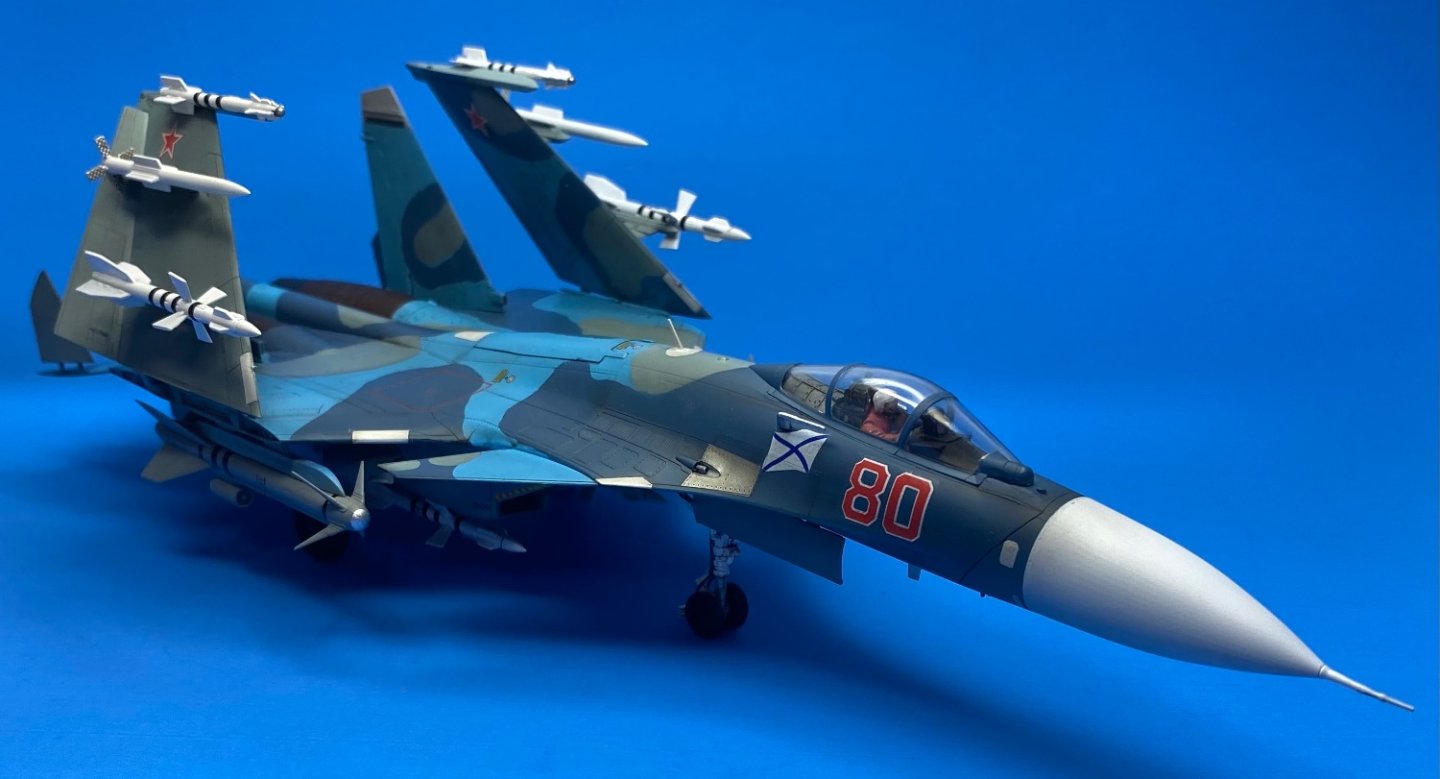
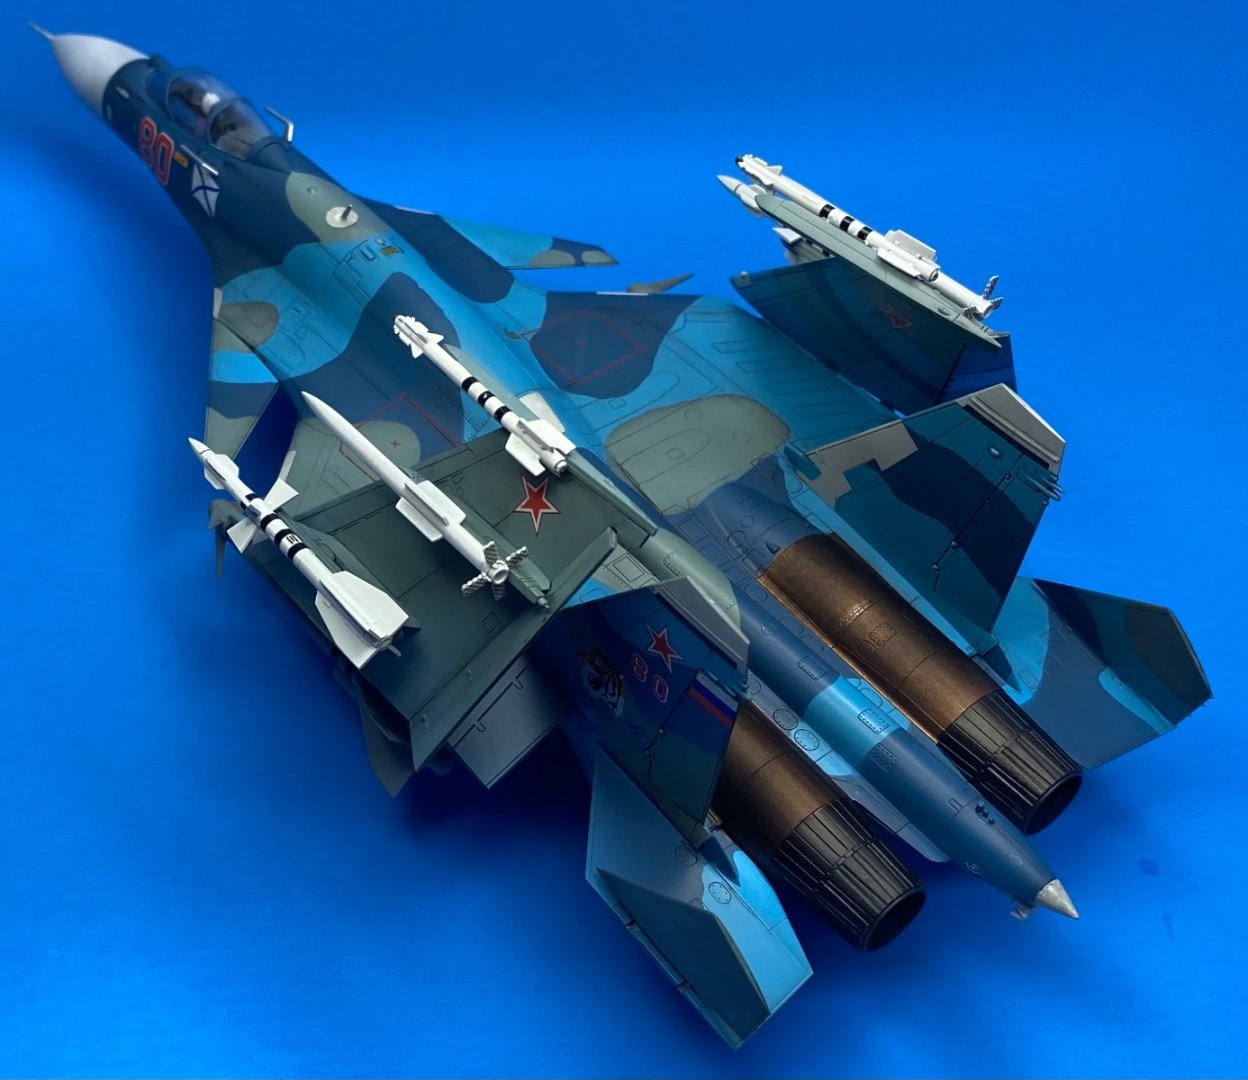
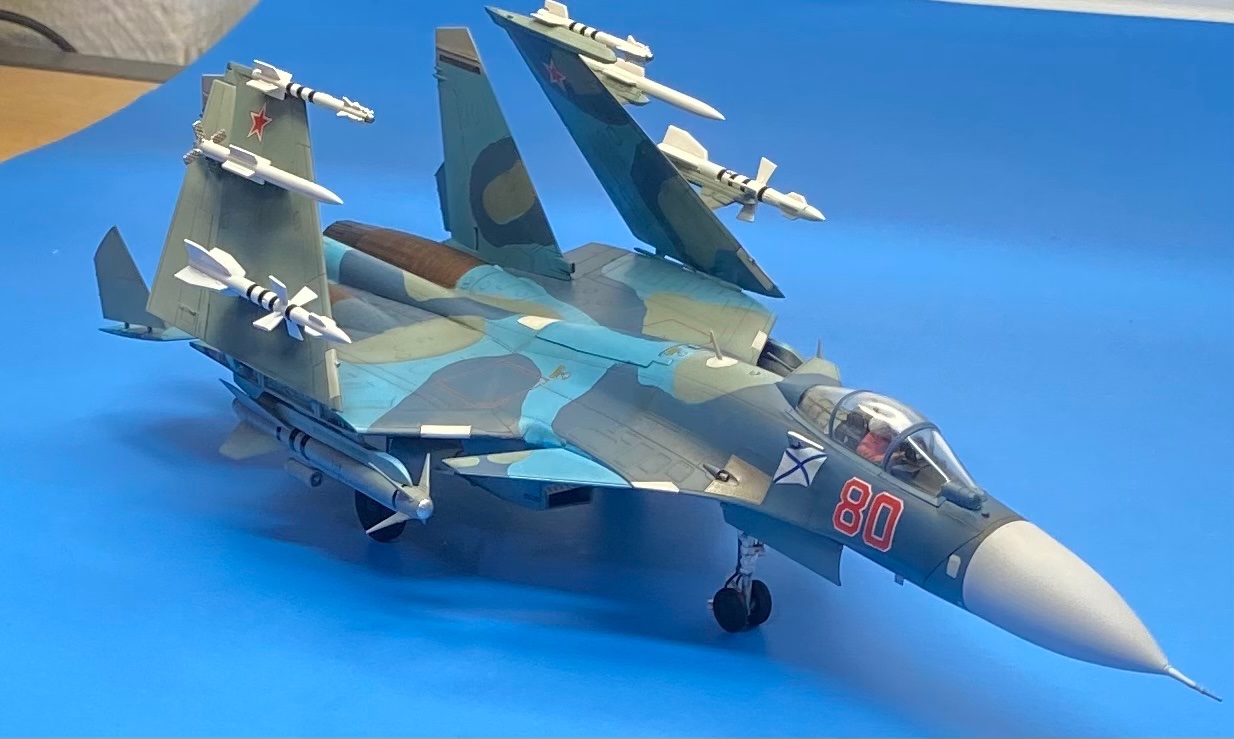
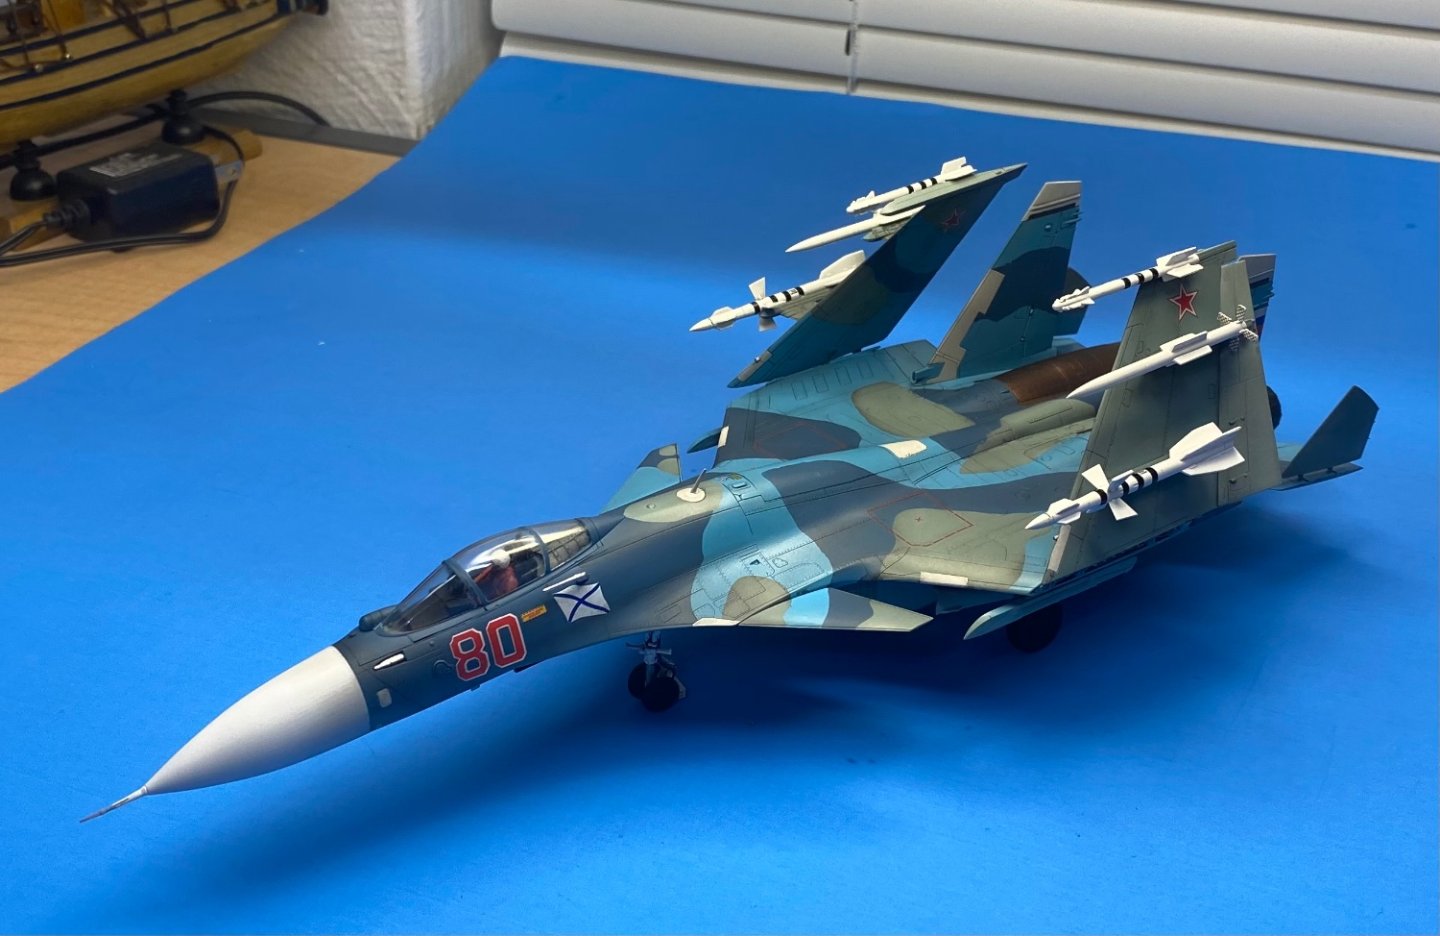
KH-59 cruise missiles

-
Russian Su-33 Flanker D by CDW - FINISHED - Trumpeter - 1:72 Scale
CDW replied to CDW's topic in Non-ship/categorised builds
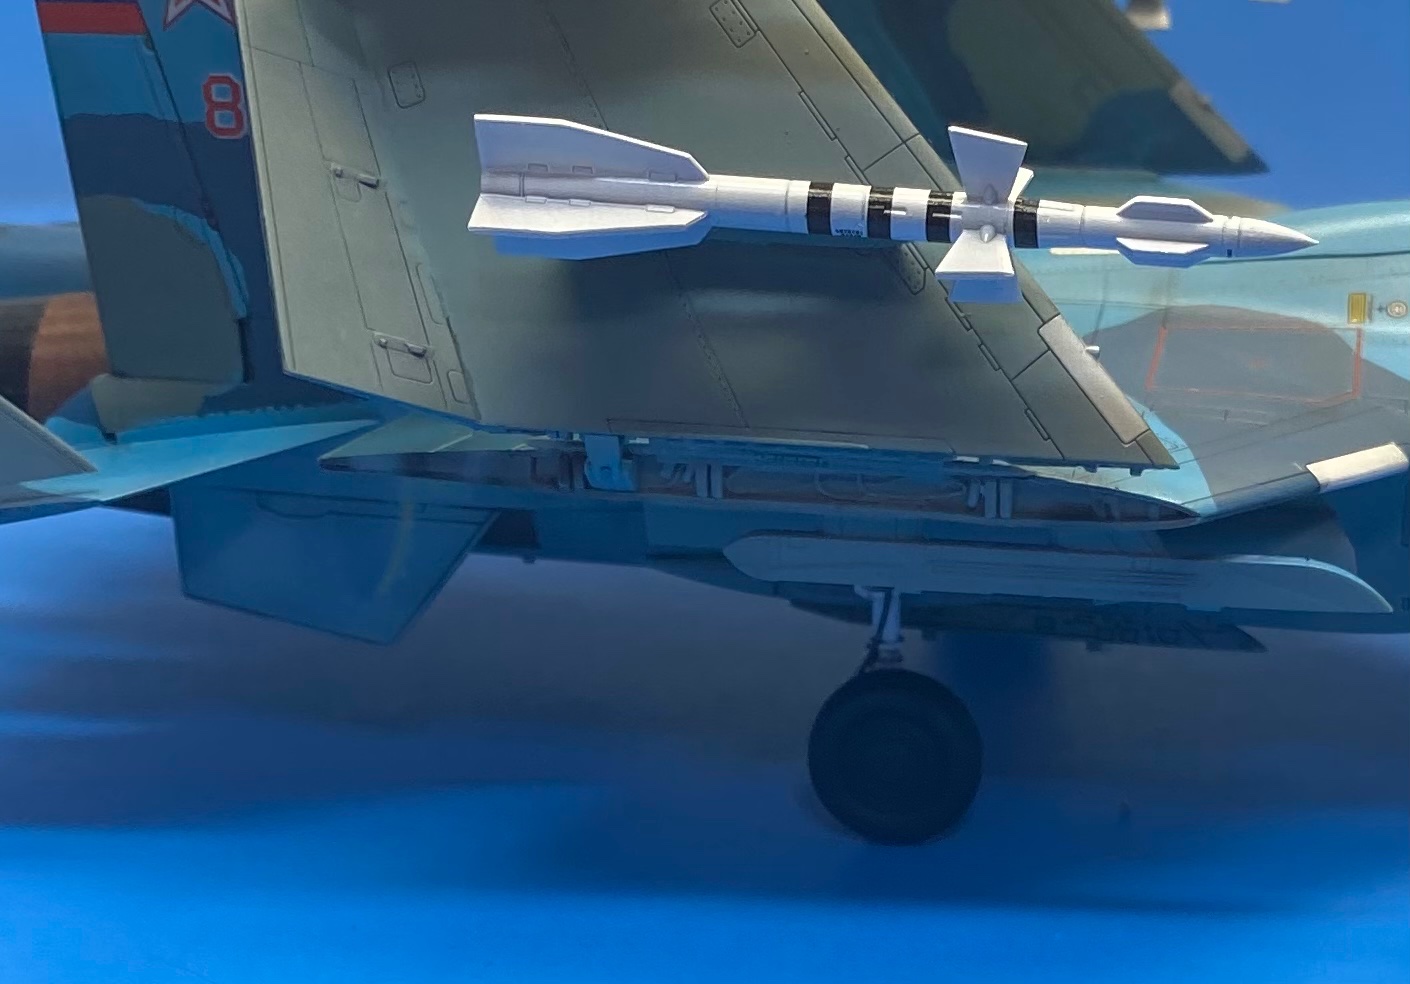
The R-27 missiles were introduced around 1990, and have a range of 100+ miles. Radar guided, the ER version is equipped with the latest guidance head. The R-77 is newer and more advanced than the R-27. It will eventually replace the R-27 in the Russian inventory while the R-27 continues to be sold to air forces around the world. The R-73 is a short range heat seeker, similar to our sidewinders. -
Russian Su-33 Flanker D by CDW - FINISHED - Trumpeter - 1:72 Scale
CDW replied to CDW's topic in Non-ship/categorised builds
Thanks Dave -
Russian Su-33 Flanker D by CDW - FINISHED - Trumpeter - 1:72 Scale
CDW replied to CDW's topic in Non-ship/categorised builds
Starting from the wingtip and working toward the inside are R-73E’s, R-77’s, and R-27ER’s. All these are A2A missiles. Yes, behind the figure is an A2G, the KH-35. The other is the R-27ER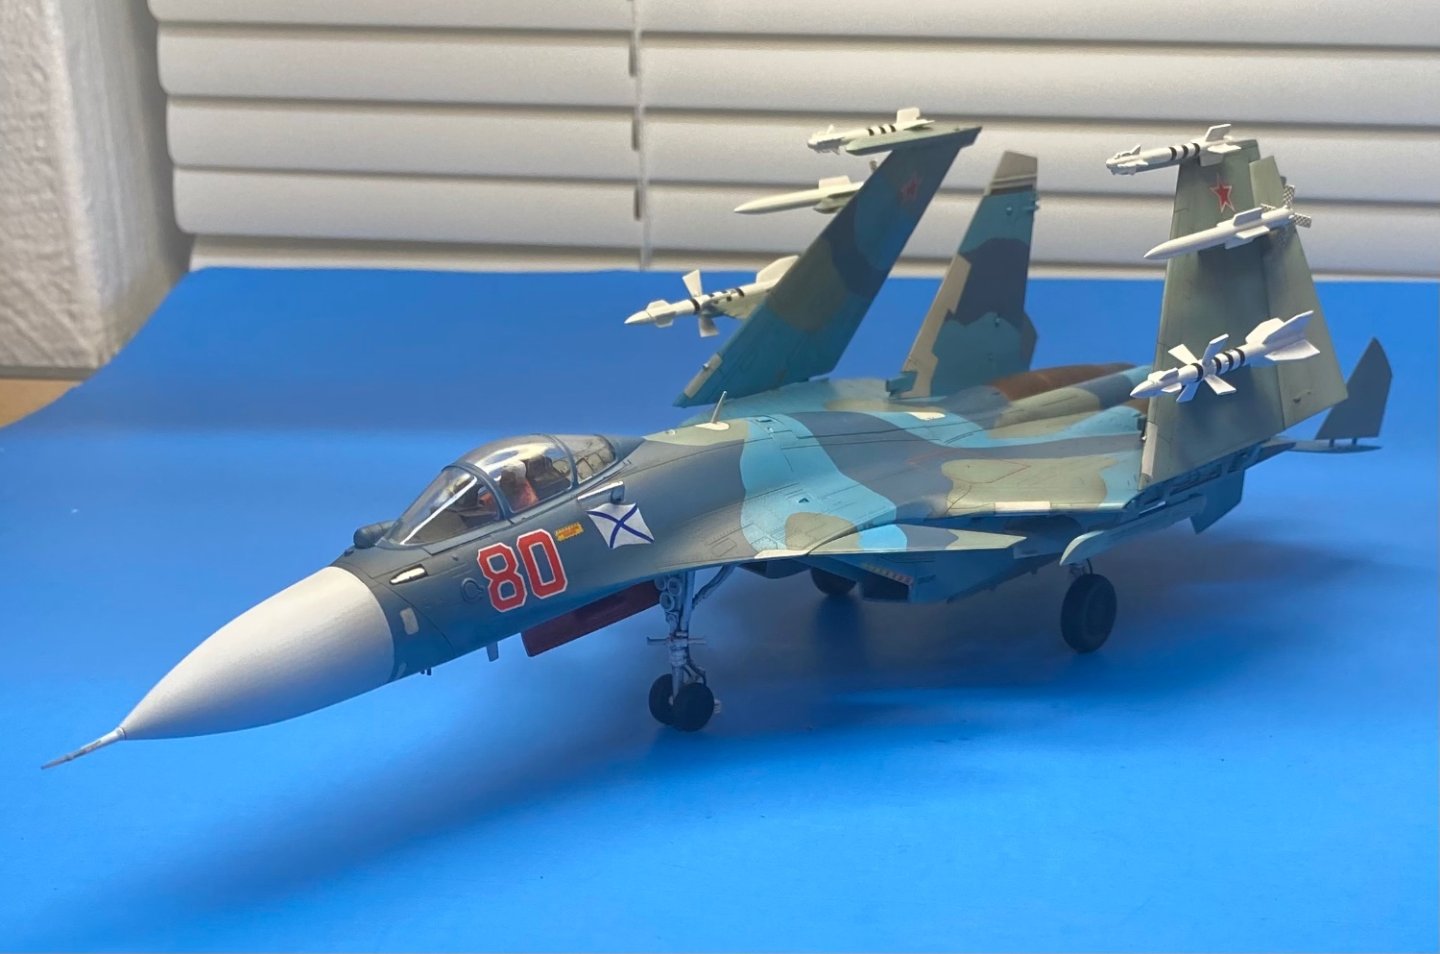

- 148 replies
-
- 15
-
-
-
Russian Su-33 Flanker D by CDW - FINISHED - Trumpeter - 1:72 Scale
CDW replied to CDW's topic in Non-ship/categorised builds
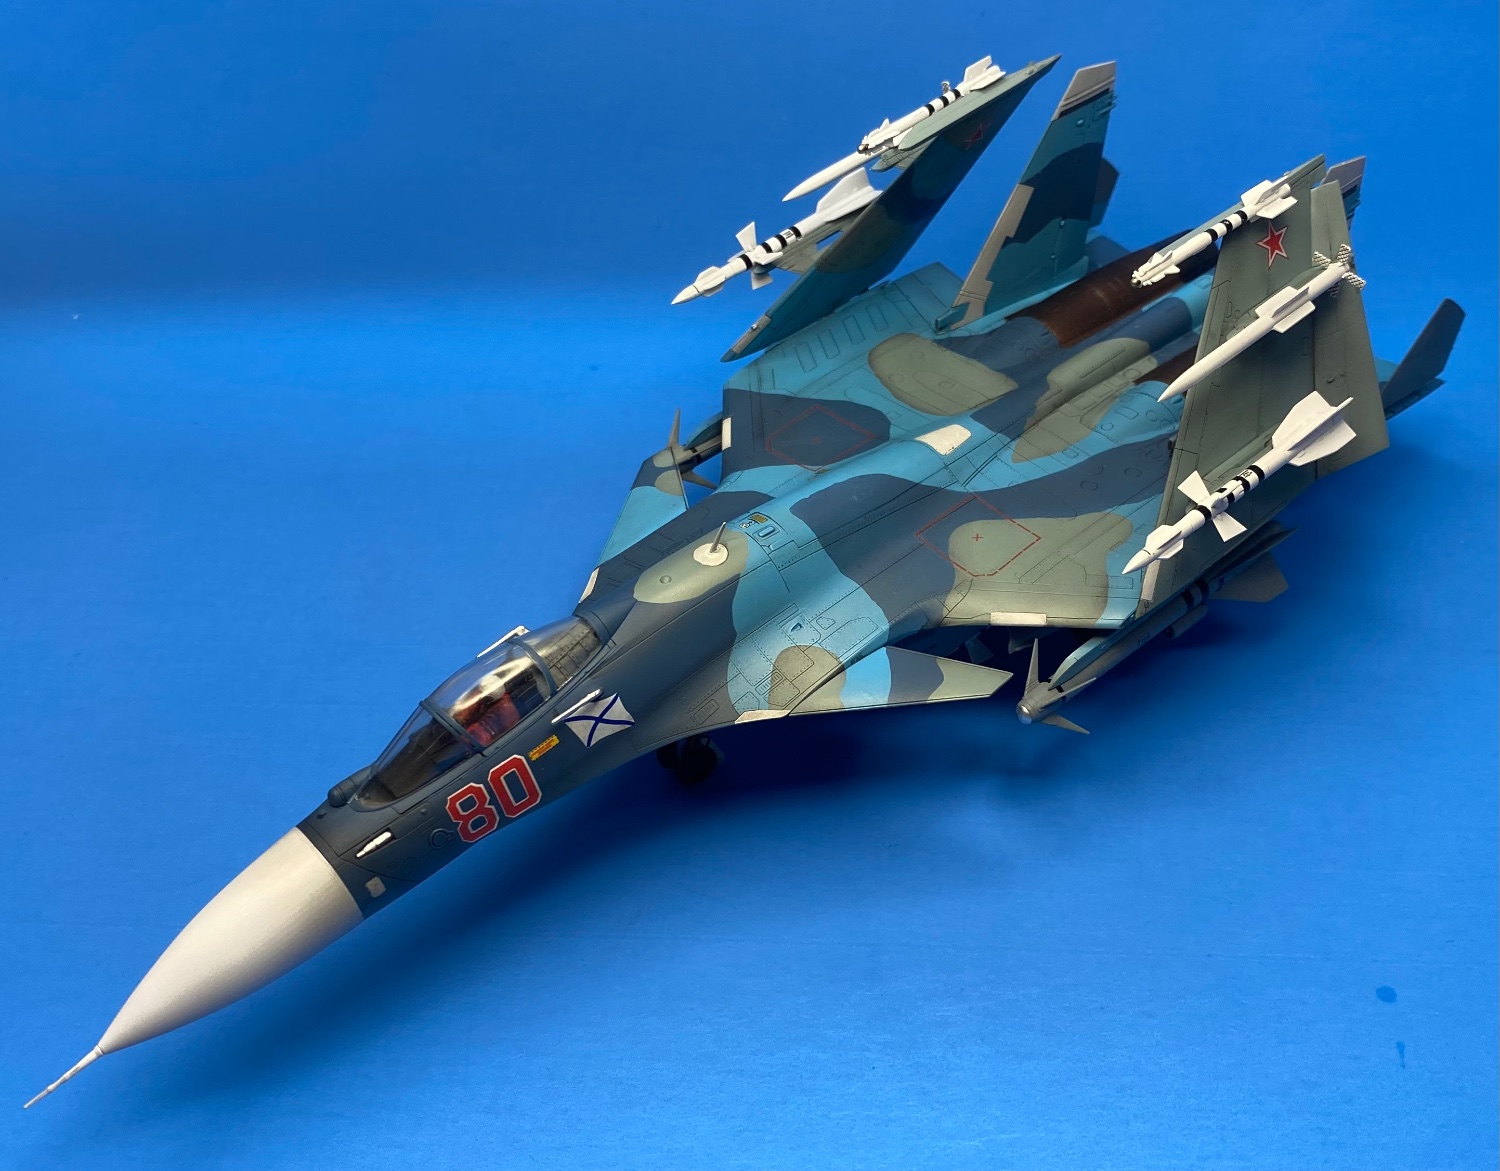
A 1:72 scale deck crew figure gives a good idea of the scale of these weapons. Not small.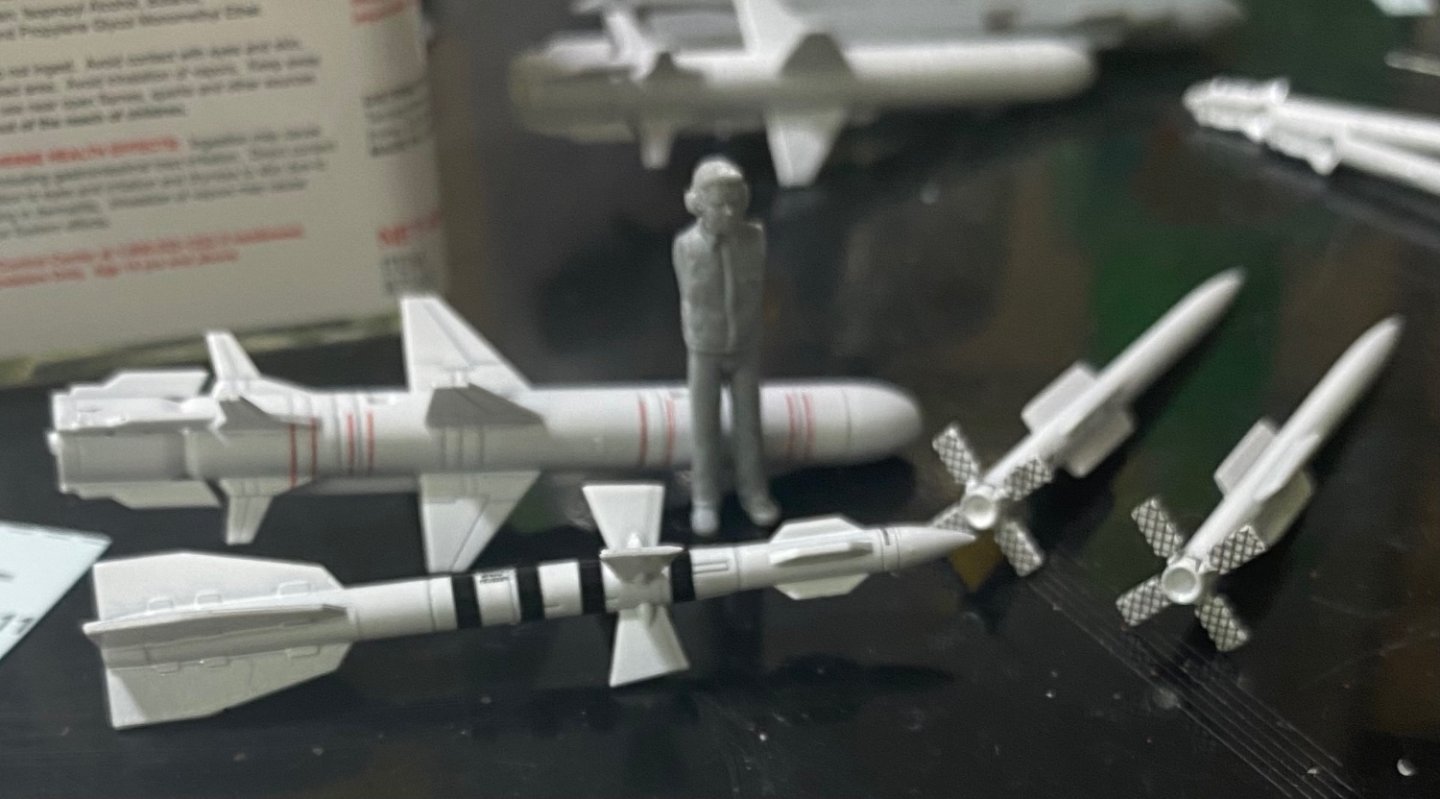
- 148 replies
-
- 12
-