CDW
-
Posts
7,756 -
Joined
-
Last visited
Content Type
Profiles
Forums
Gallery
Events
Everything posted by CDW
-

U.S. Tractor D7 “Tow Cat” by CDW - FINISHED - MiniArt - 1:35 Scale
CDW replied to CDW's topic in Non-ship/categorised builds
Thanks Lou -
Russian Su-33 Flanker D by CDW - FINISHED - Trumpeter - 1:72 Scale
CDW replied to CDW's topic in Non-ship/categorised builds
Mr. Color has a huge line of colors, hundreds. It would be nice if I knew how to mix my own for the various shades, but I take the more expensive (and lazy) way out by buying the individual shades I want. My vendor charges 2.50 per bottle. Postage varies with quantity, but I just bought 15 bottles where shipping was 9.95. I could have bought as many bottles as I wanted, and it still would have been 9.95, max. scalehobbyist dot com -
Russian Su-33 Flanker D by CDW - FINISHED - Trumpeter - 1:72 Scale
CDW replied to CDW's topic in Non-ship/categorised builds
They are just as volatile as they ever were as far as I can tell, but the thinner I use has a retarder built in that allows the paint to level out before it completely dries, and that leaves a beautiful level finish. You need a paint booth with an exhaust fan as well as a respirator. Since you've used Floquil, you'll know exactly what I'm talking about. -
U.S. Tractor D7 “Tow Cat” by CDW - FINISHED - MiniArt - 1:35 Scale
CDW replied to CDW's topic in Non-ship/categorised builds
Thanks Chris -
Russian Su-33 Flanker D by CDW - FINISHED - Trumpeter - 1:72 Scale
CDW replied to CDW's topic in Non-ship/categorised builds
Not much is worse than building a nice model then getting a bad paint job on top of it. My success ratio is much higher with lacquer. This trend goes all the way back to my days of painting 1 :1 cars and trucks. I have always got better, consistent results with lacquer. -
Russian Su-33 Flanker D by CDW - FINISHED - Trumpeter - 1:72 Scale
CDW replied to CDW's topic in Non-ship/categorised builds
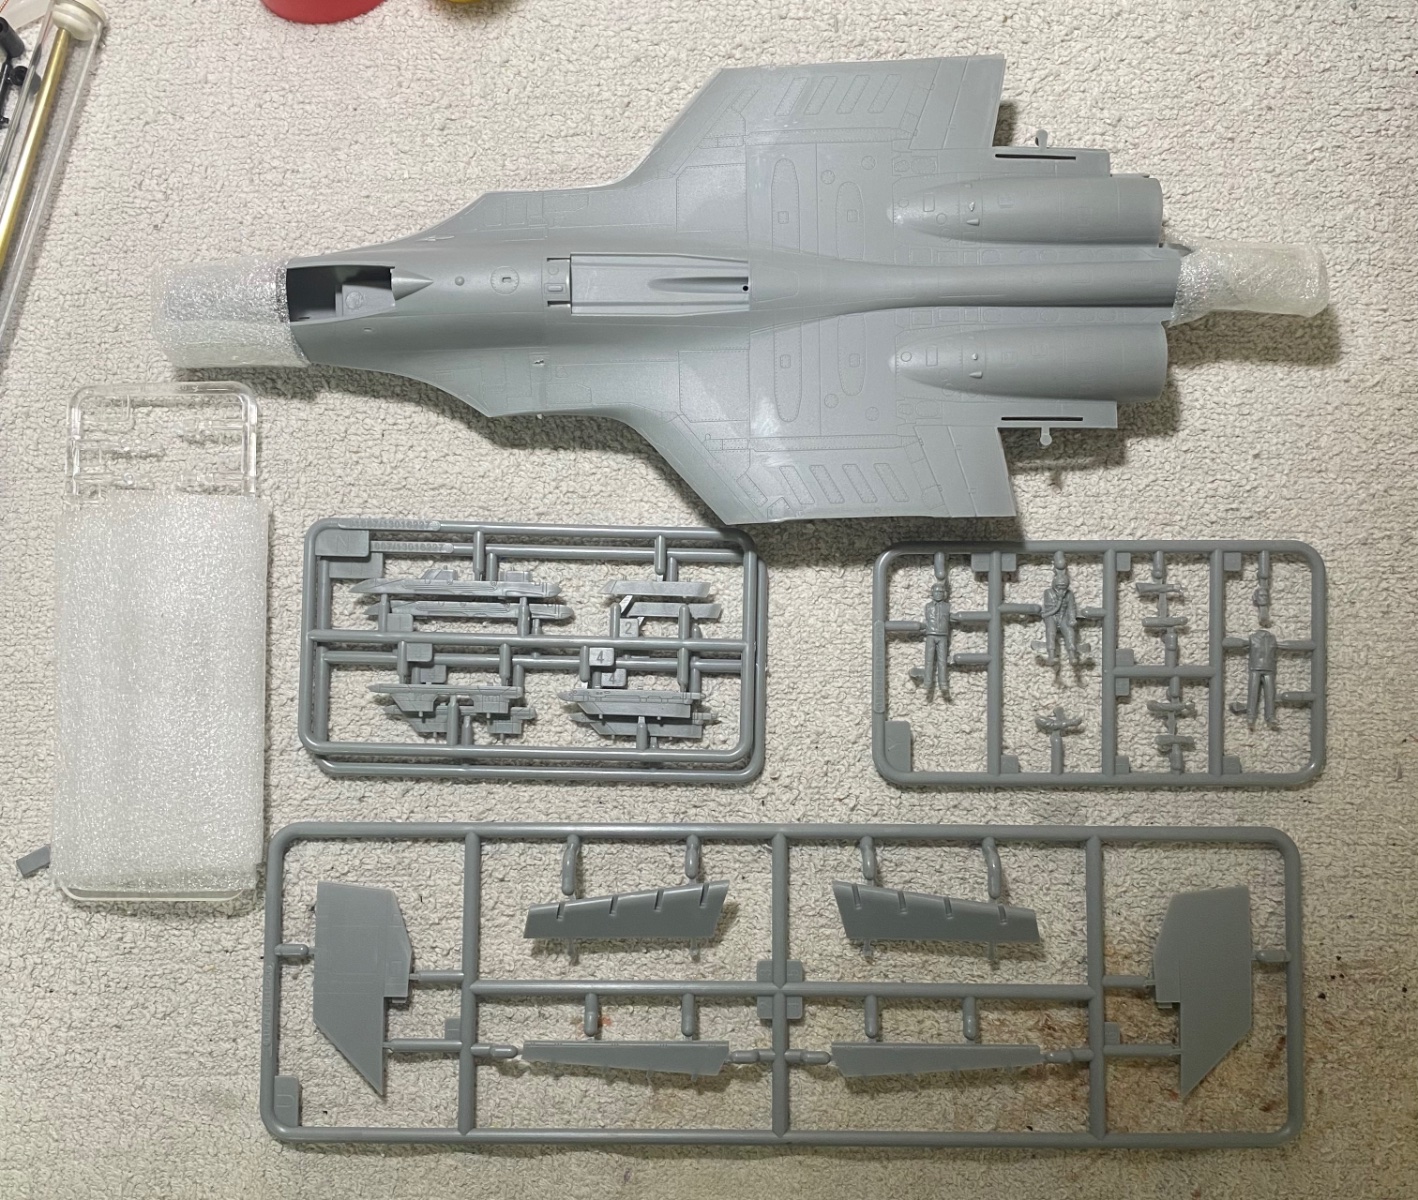
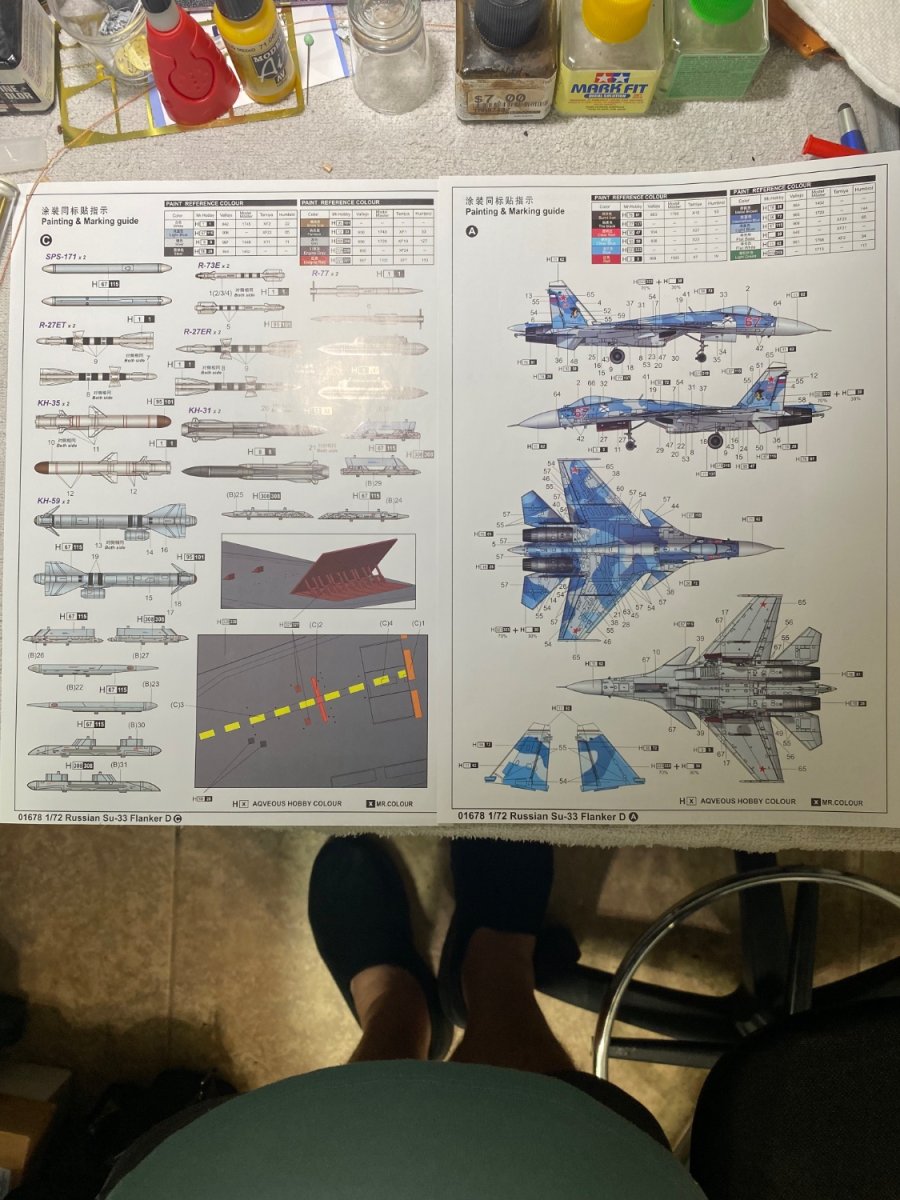
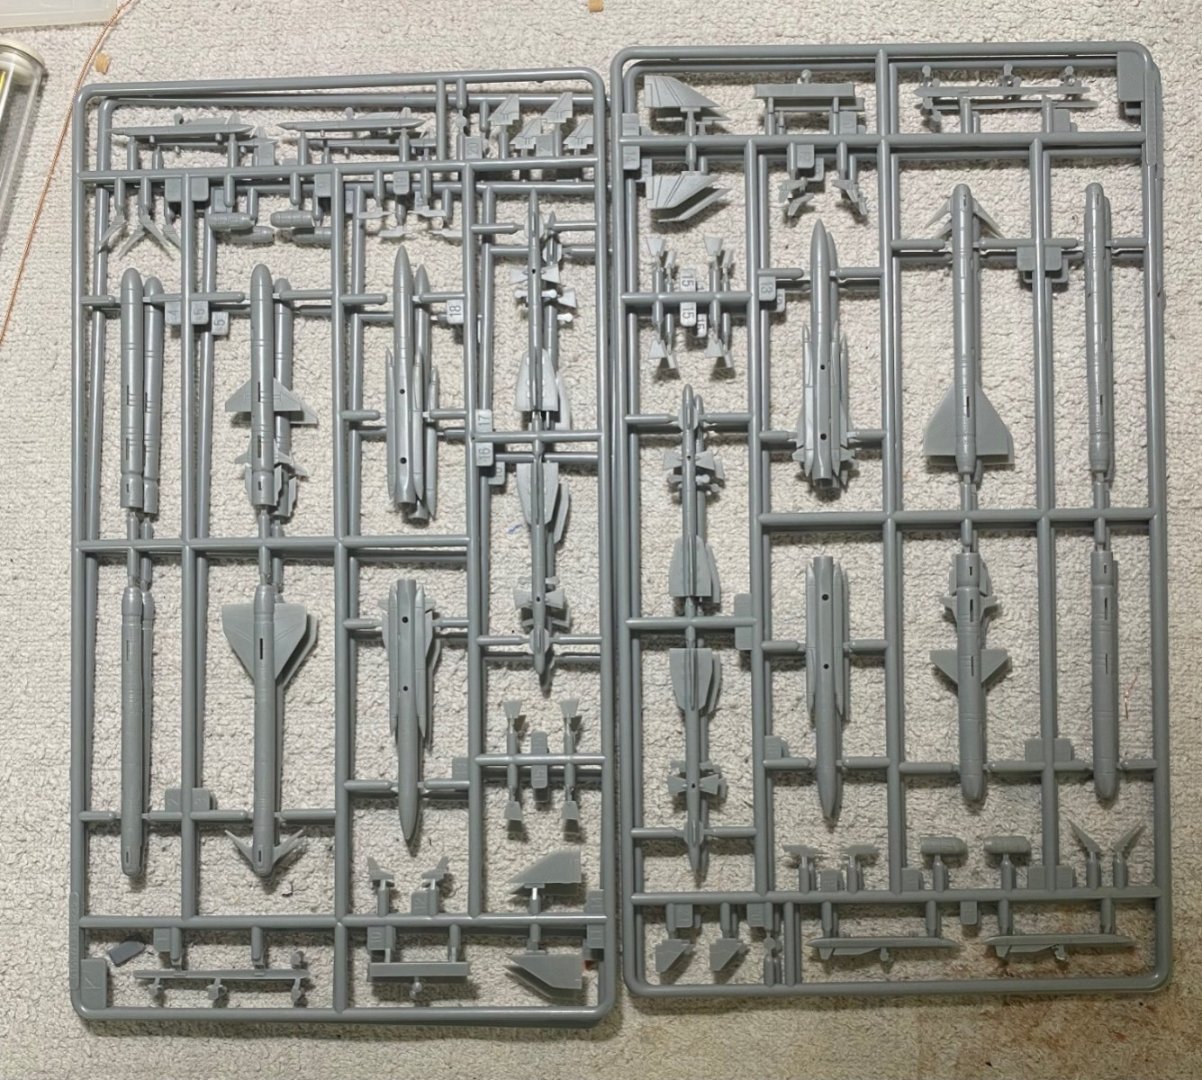
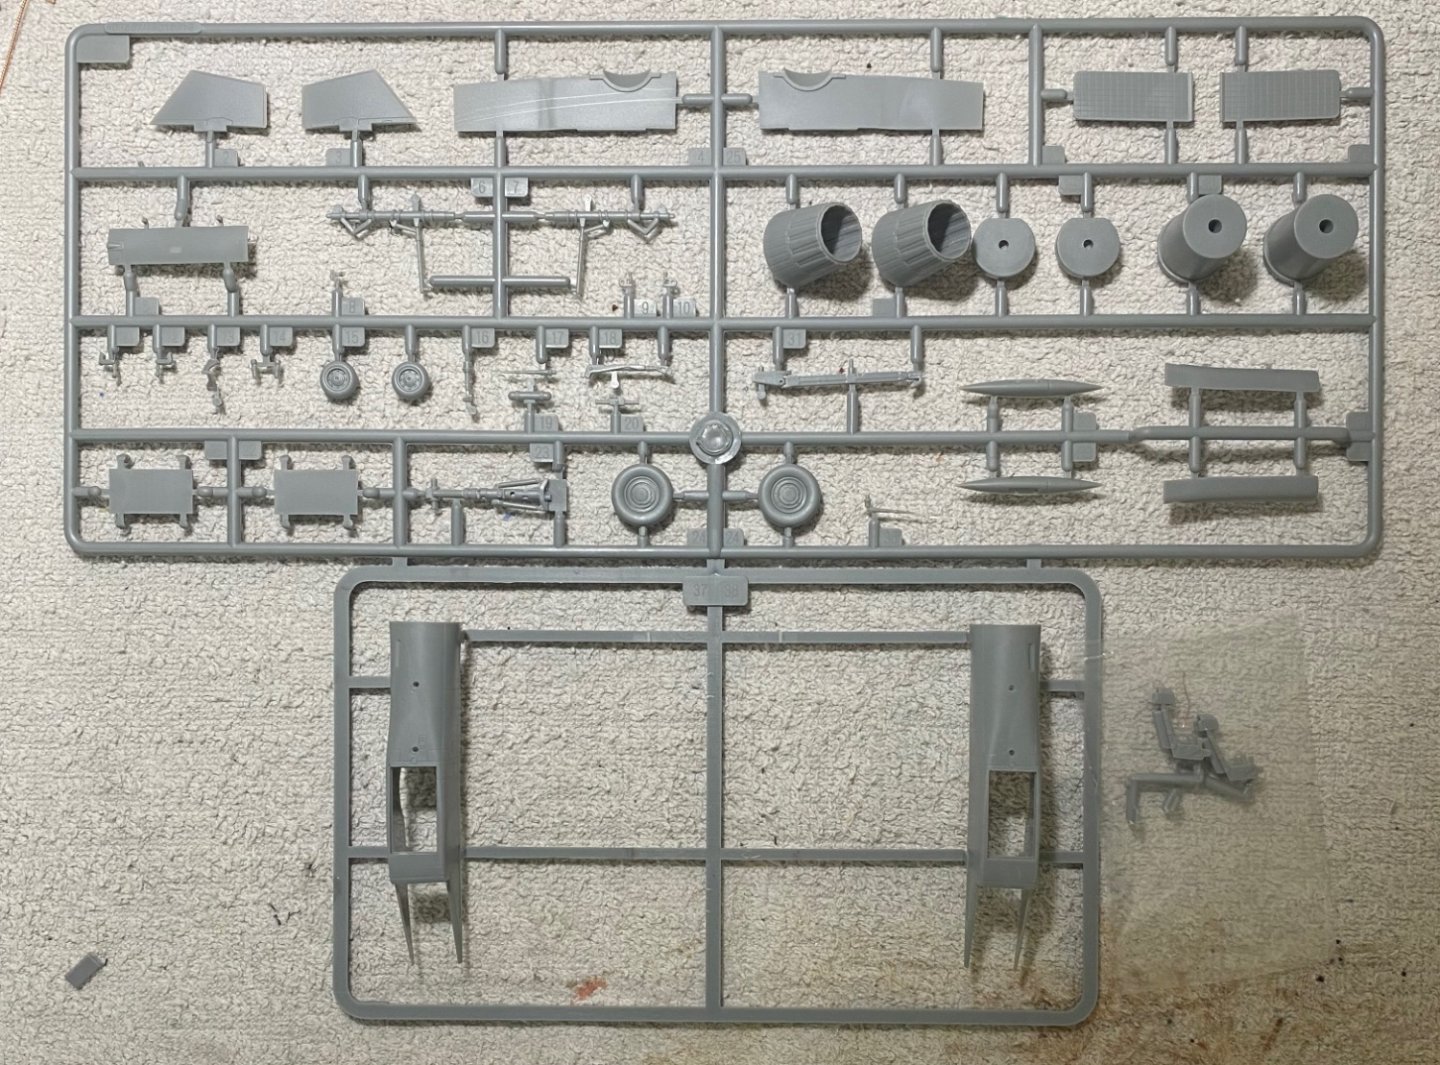
I thought I had them in my personal stock, but realized I needed to order the correct Mr. Color finishing paints to match the camo scheme. With that order behind me (and waiting for the products) my journey will begin with the cockpit as usual and then some detail work on the wheel wells and intake trunks. Hopefully by then, my paints will have arrived. When you take out the copious munition trees, the parts count for this model is no huge. At least half or more of the 300+ part count is for ordnance! And much of that ordnance will not be used in this build but will go in the spares box. One of the things I ordered ahead of time is a pre-cut paint mask for this model from a shop in Australia. It's in hand so once the paints arrive, I can go to town. Standby, will soon be posting some photos of the cockpit pieces, albeit small and basic. I am very partial to the Mr Color line of lacquer finishing paints. For me they just go down so much easier, are more consistent, and well behaved in the way they lay down on the model then level out without obliterating detail. I do have all the correct colors in Mig Ammo acrylics, but don't have the confidence I can do an equal job laying them down the way I want for this model. I need more practice with acrylic paints and each brand seems to have their own peculiar need for a correct amount of thinner to reduce them to an appropriate level for airbrushing.- 148 replies
-
- 10
-

-
Russian Su-33 Flanker D by CDW - FINISHED - Trumpeter - 1:72 Scale
CDW replied to CDW's topic in Non-ship/categorised builds
Welcome aboard gentlemen! -
U.S. Tractor D7 “Tow Cat” by CDW - FINISHED - MiniArt - 1:35 Scale
CDW replied to CDW's topic in Non-ship/categorised builds
Thank you gents. This was a fun little build. -
F-86F-30 Sabre by Egilman - Kinetic - 1/32nd scale
CDW replied to Egilman's topic in Non-ship/categorised builds
Very happy to see how well the Rub n Buff turned out for you on this model. The Sabre is such a gorgeous airplane, and your model really does it justice. -
Russian Su-33 Flanker D by CDW - FINISHED - Trumpeter - 1:72 Scale
CDW replied to CDW's topic in Non-ship/categorised builds
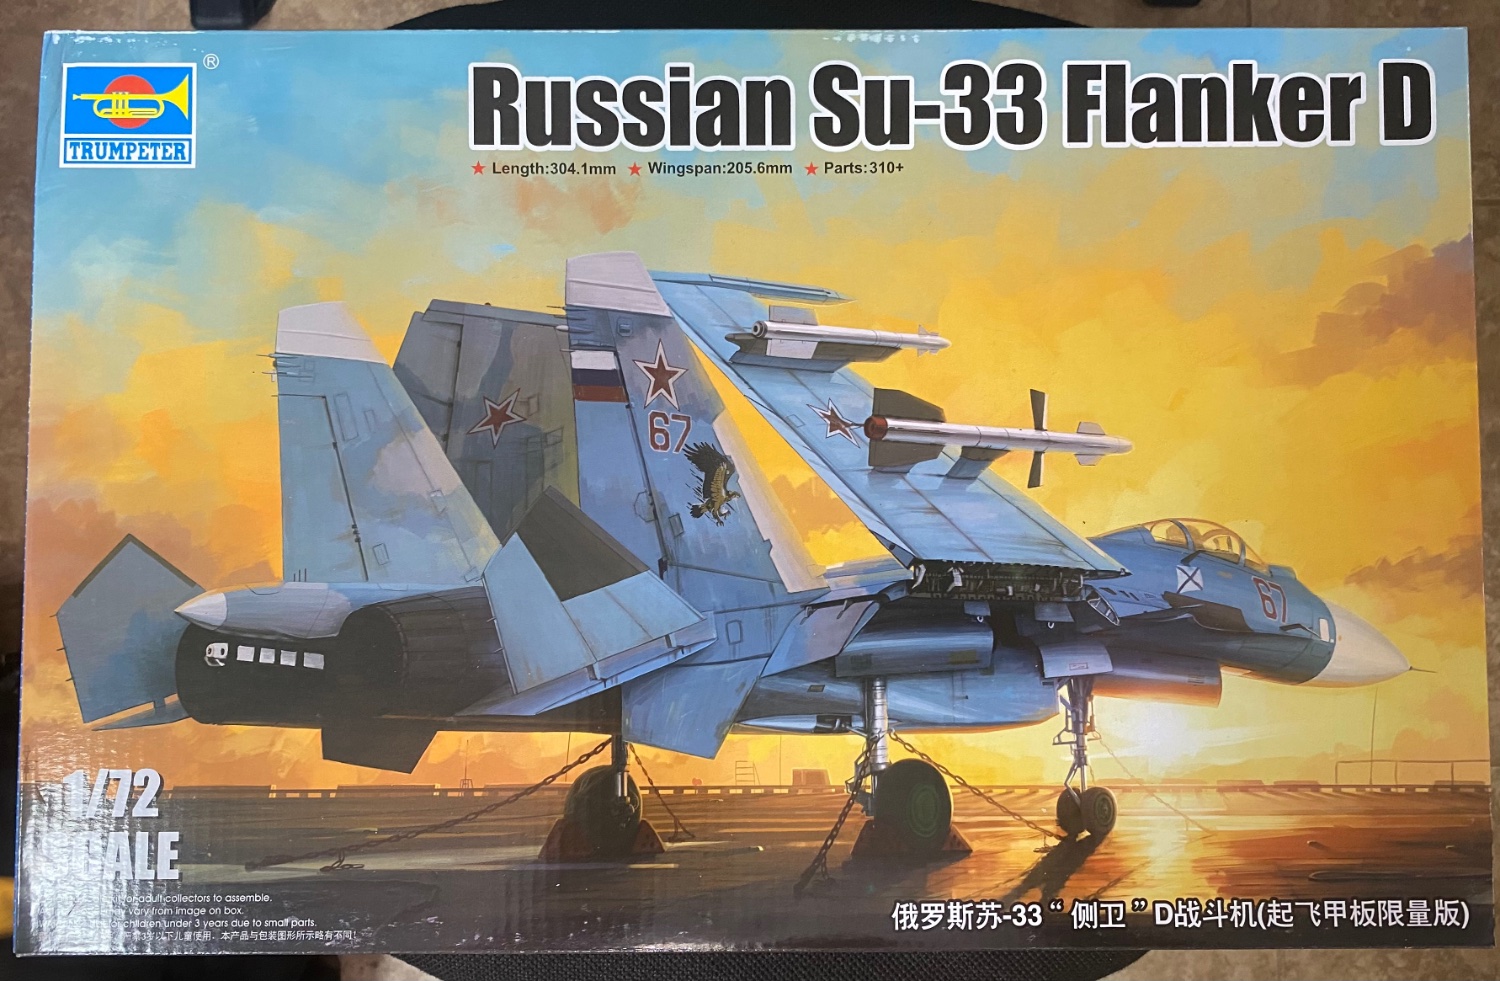
Welcome! Su-33 is about the same dimensions as the F-15, yes, a large airframe. It’s nice they include most everything to give a good out-of-box experience. 1:72 scale aircraft kits are much better detailed now than they were not too many years ago. Hasegawa always drove the modeler to buy weapons sets. -
Russian Su-33 Flanker D by CDW - FINISHED - Trumpeter - 1:72 Scale
CDW replied to CDW's topic in Non-ship/categorised builds
Not sure I understand the question, but I will use the base, yes. -
Russian Su-33 Flanker D by CDW - FINISHED - Trumpeter - 1:72 Scale
CDW replied to CDW's topic in Non-ship/categorised builds
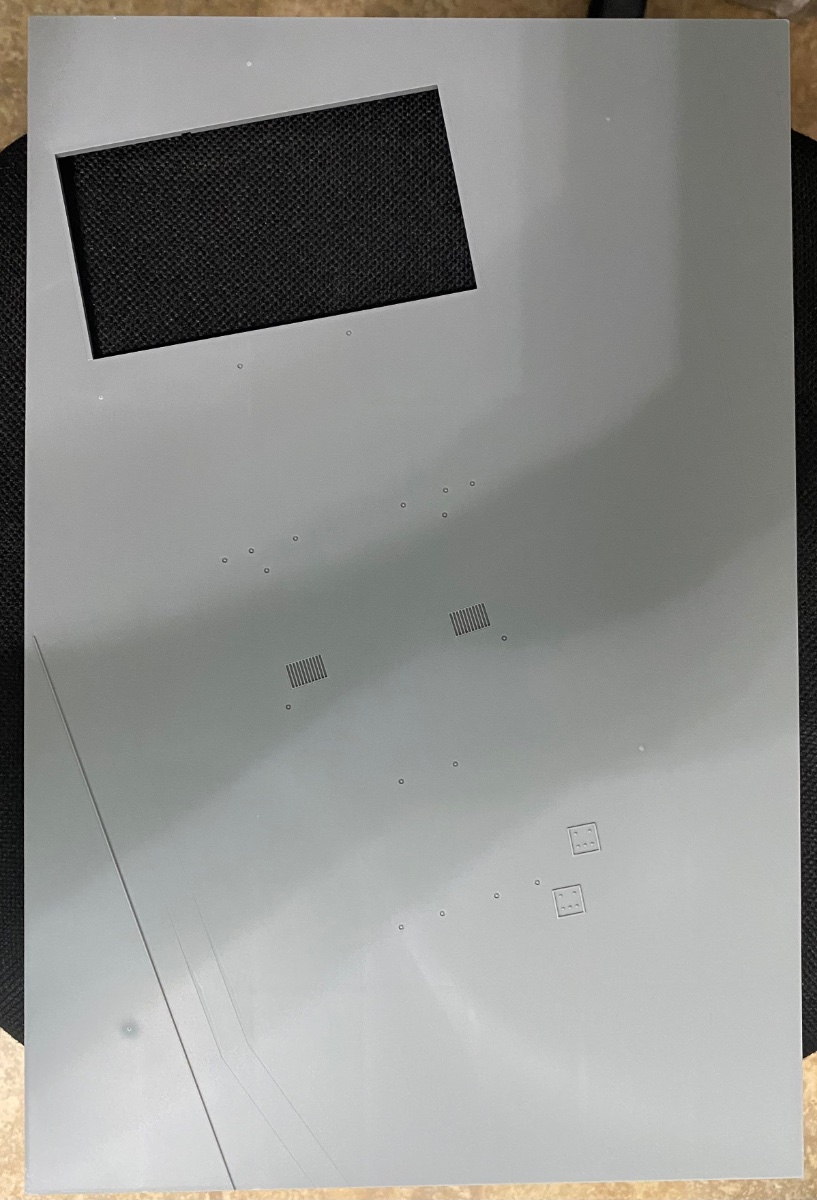
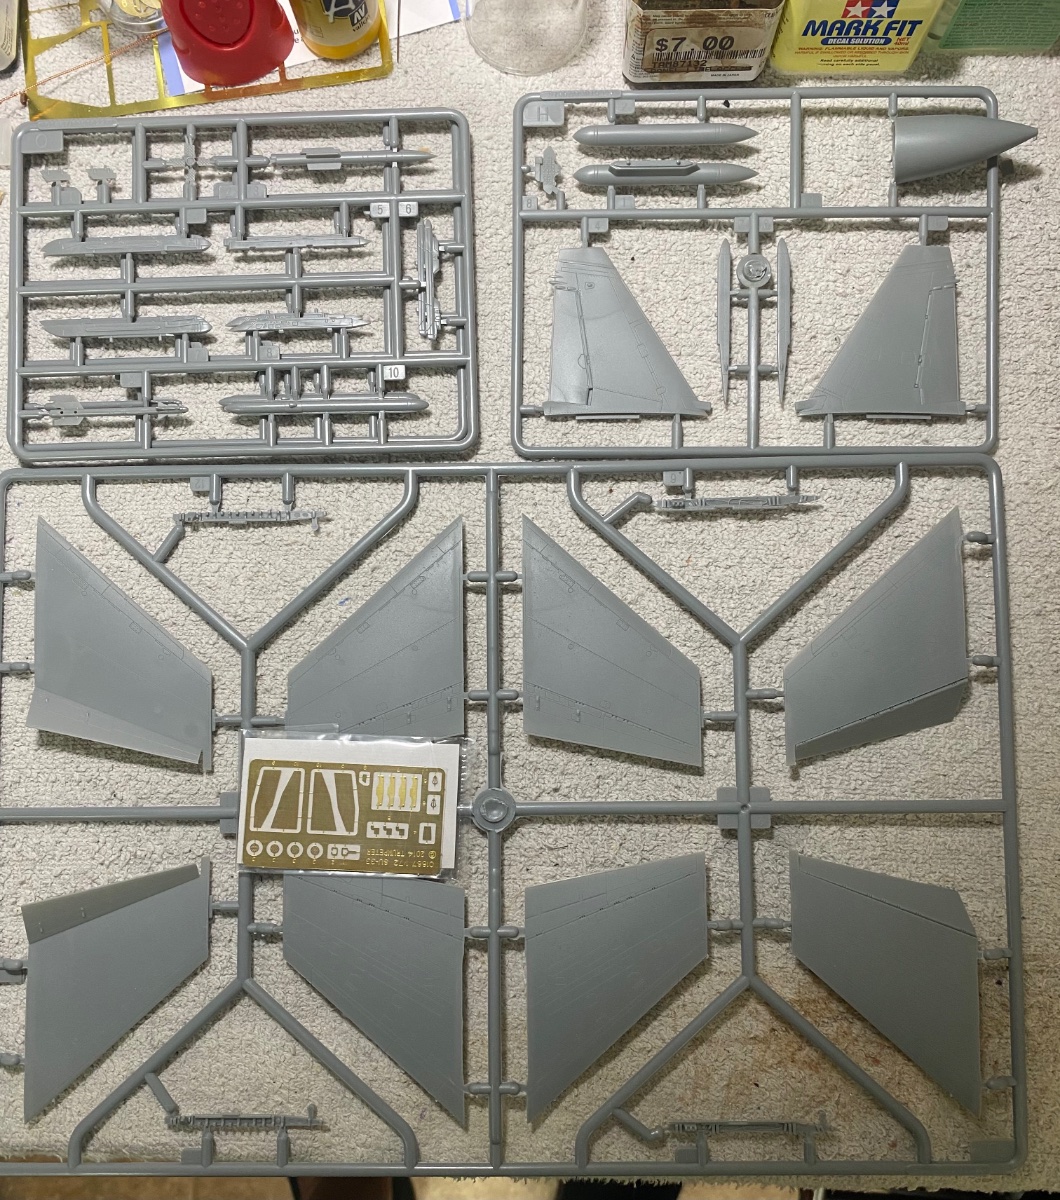
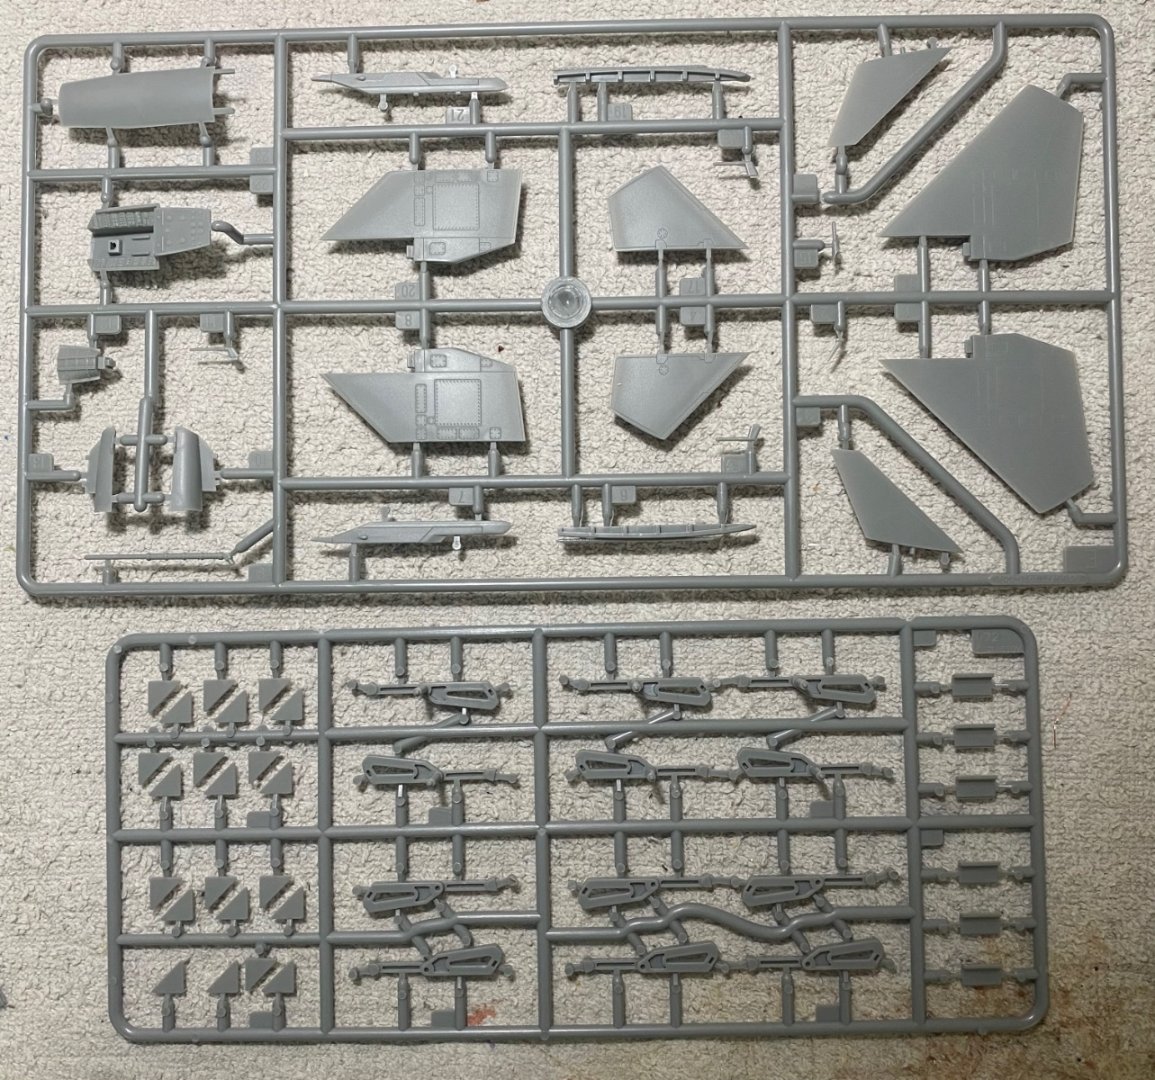
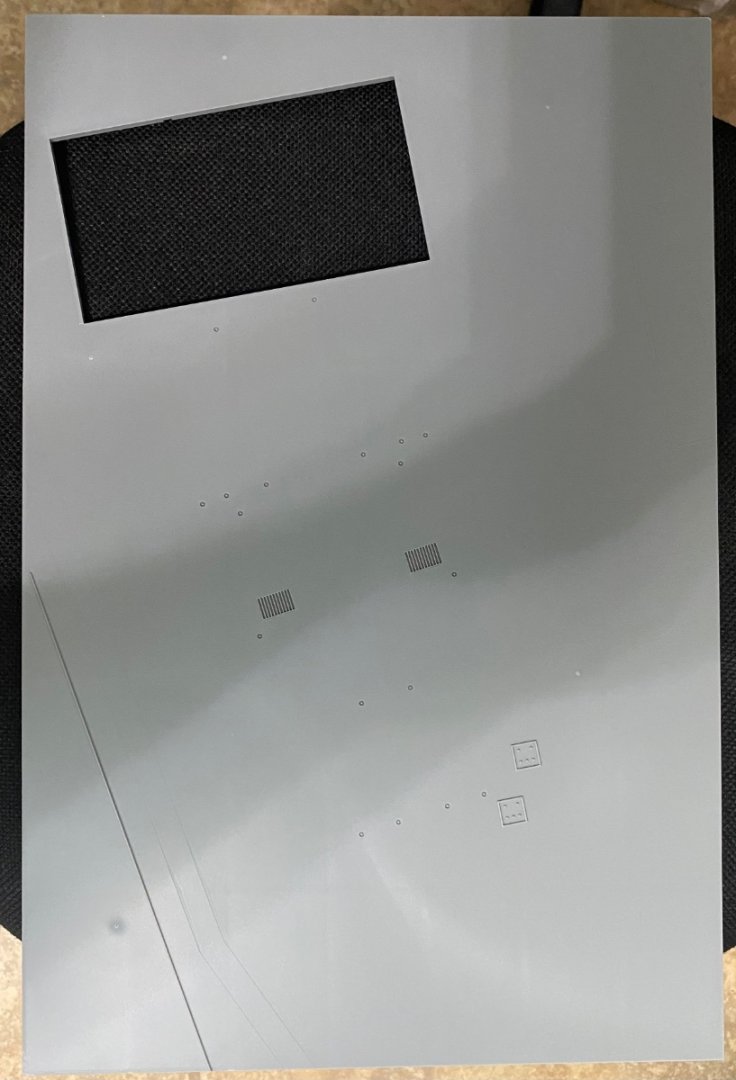
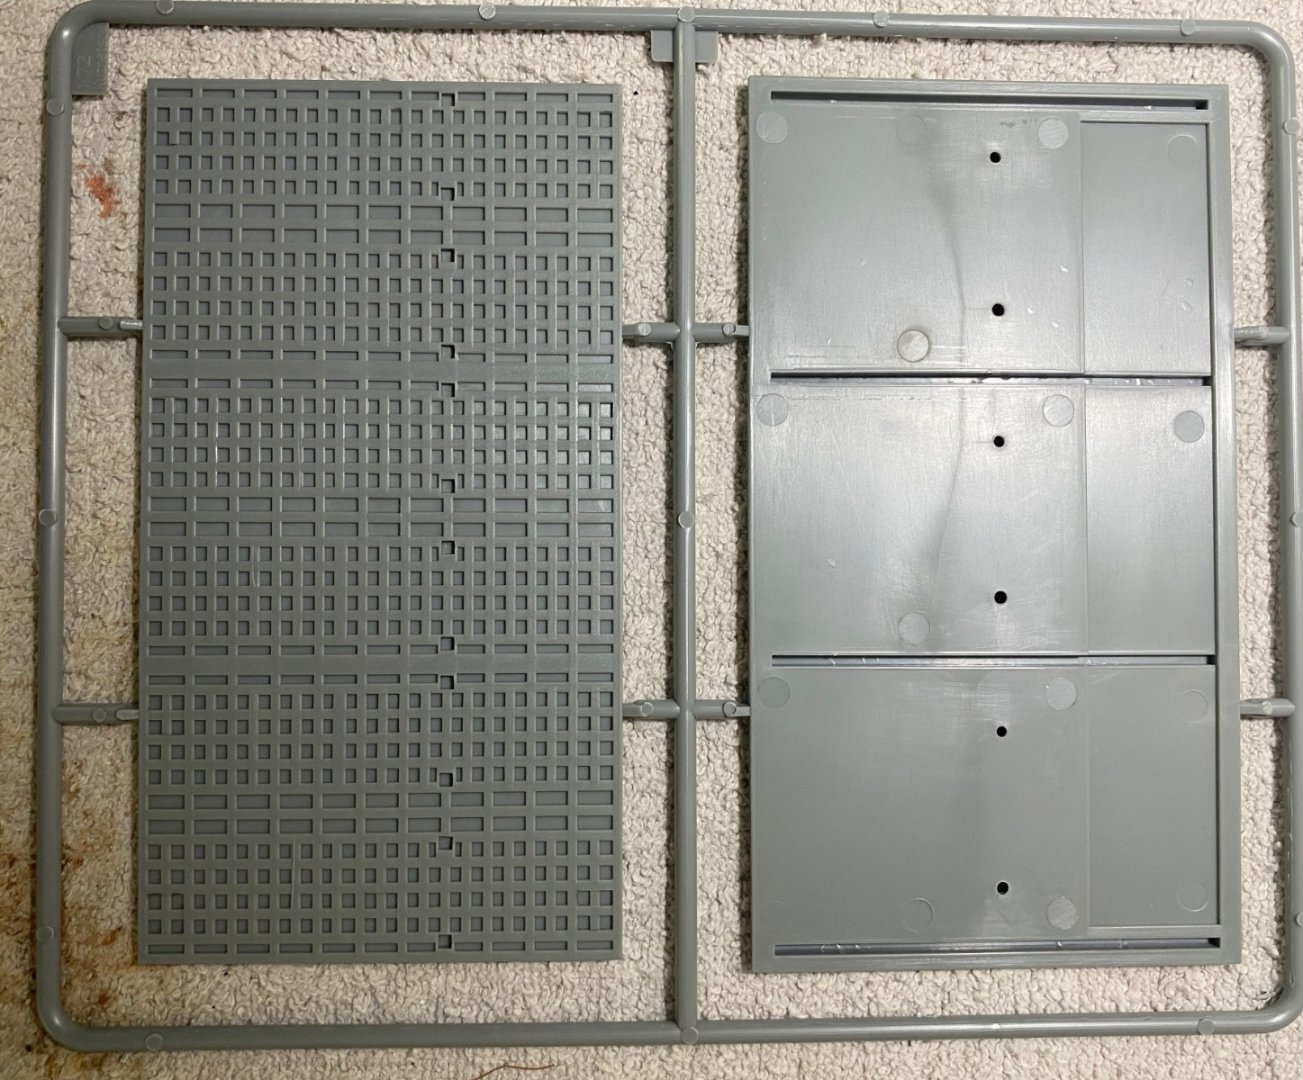
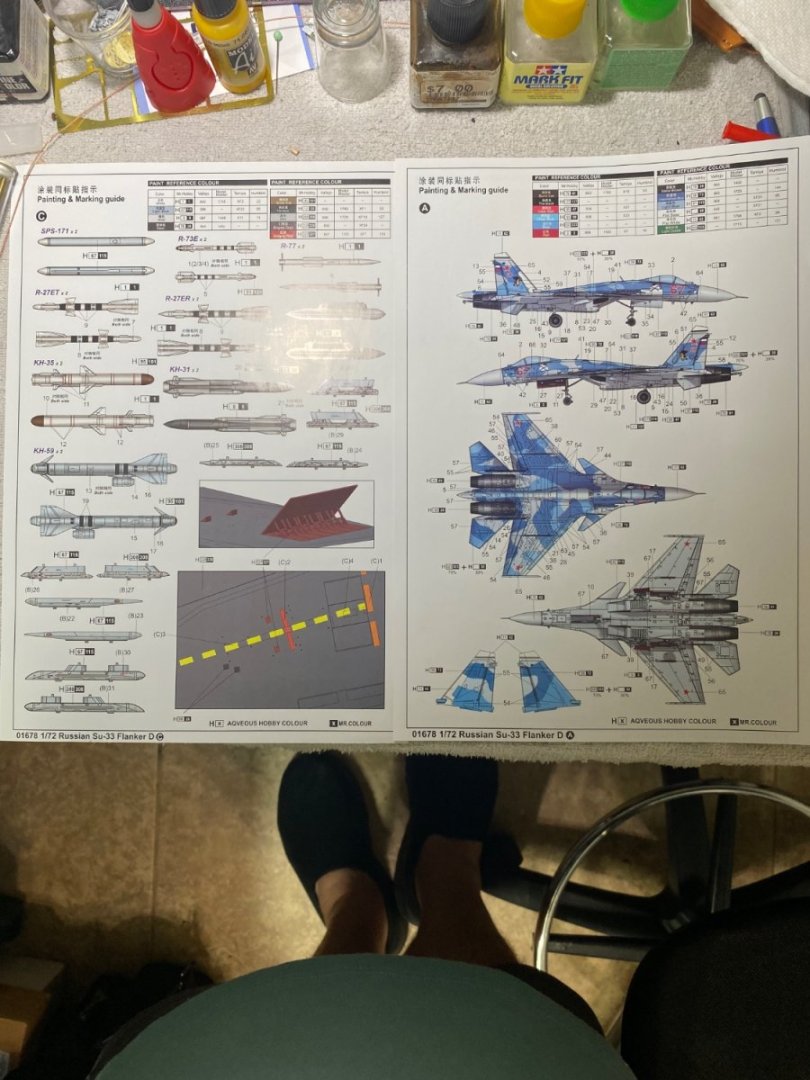
Welcome aboard gents! A preview of the parts trees and color call out sheets. Trumpeter provides every munition in the Russian arsenal in every aircraft kit. The huge piece of plastic at the end is a carrier deck and blast shield. Nice touch.


- 148 replies
-
- 11
-
-

-
U.S. Tractor D7 “Tow Cat” by CDW - FINISHED - MiniArt - 1:35 Scale
CDW replied to CDW's topic in Non-ship/categorised builds
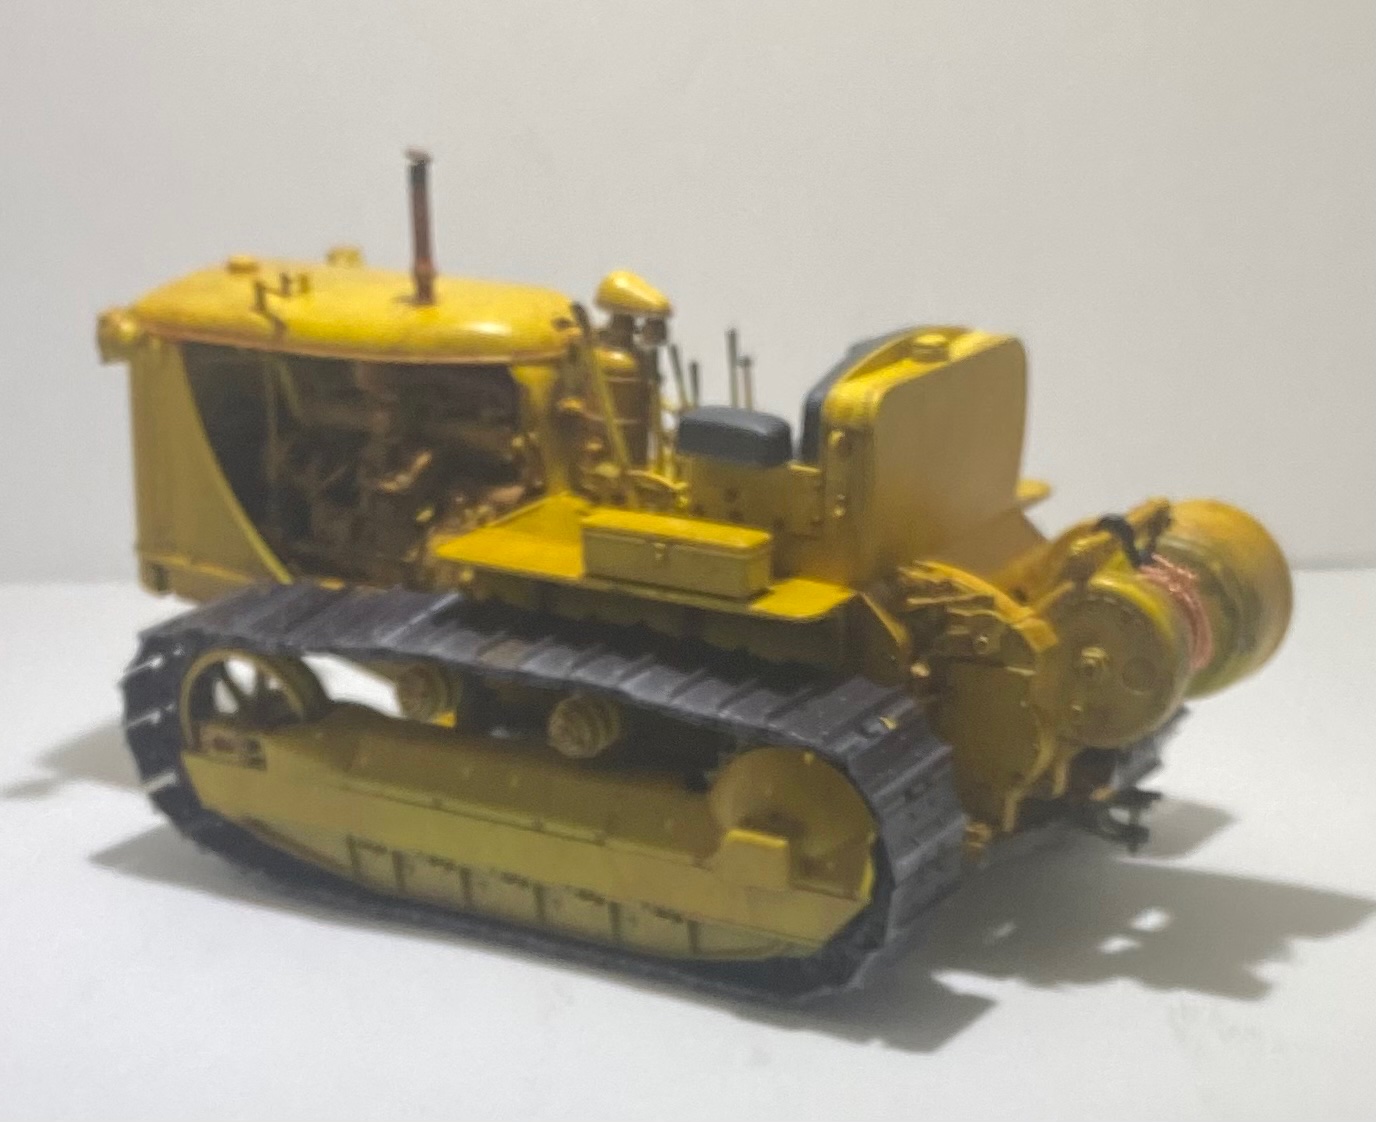
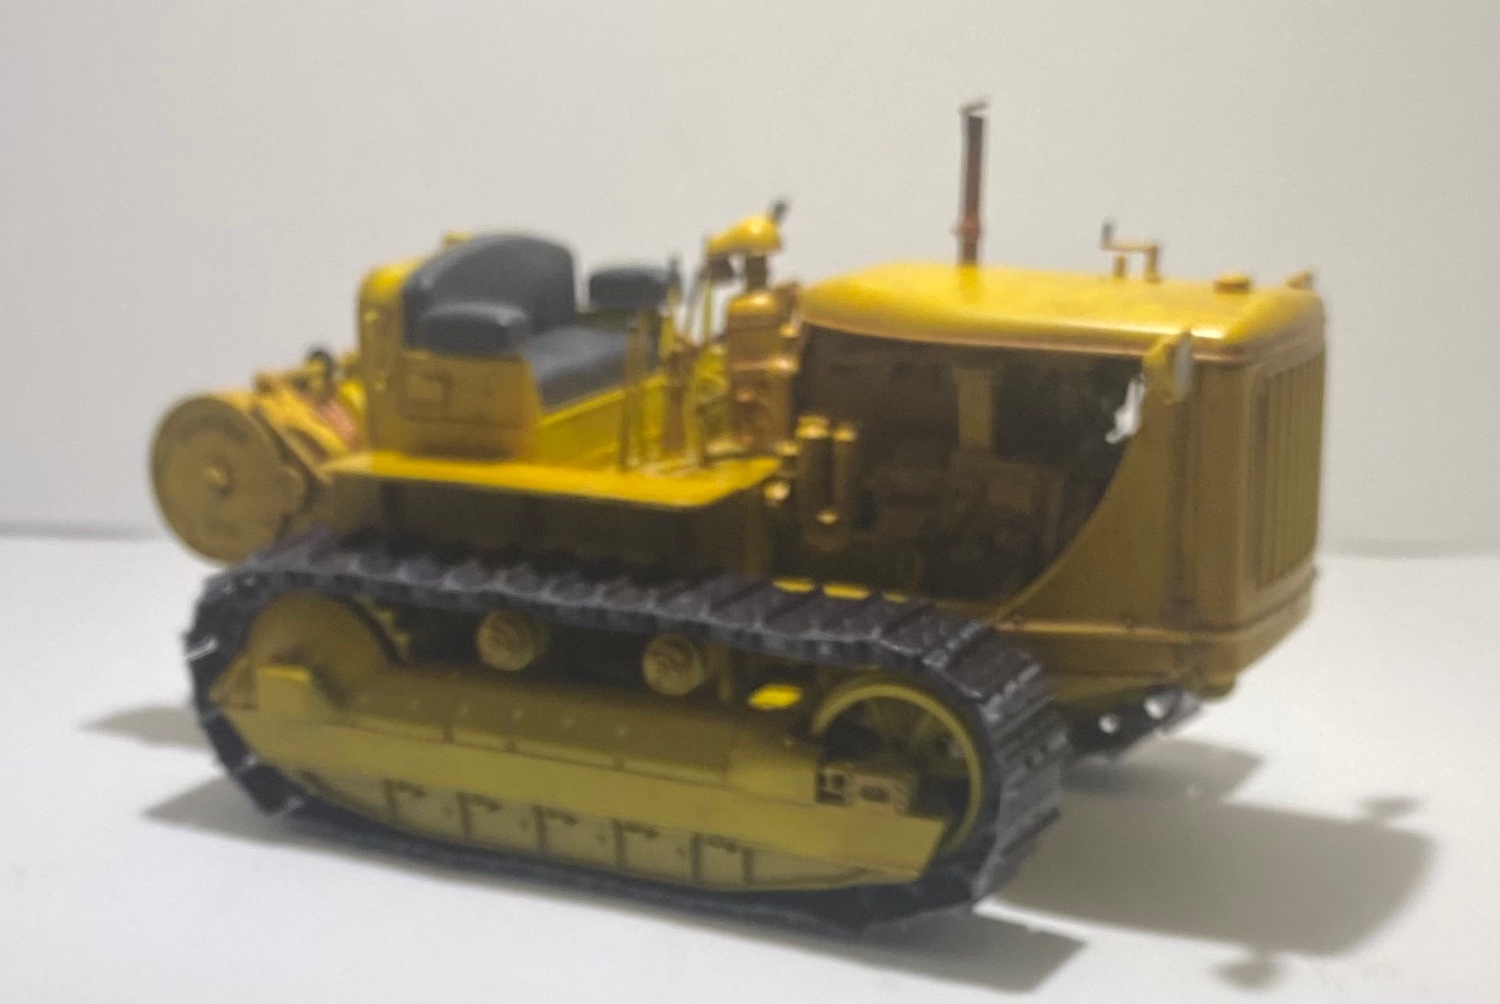
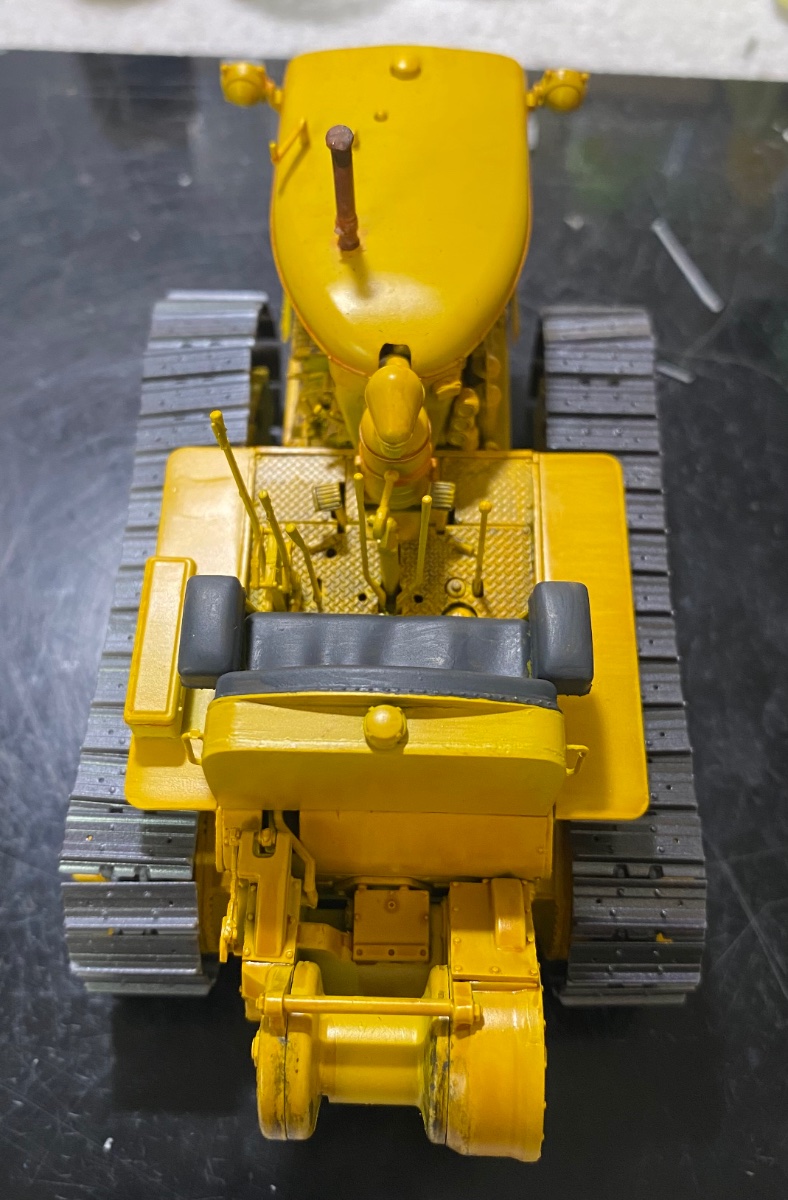
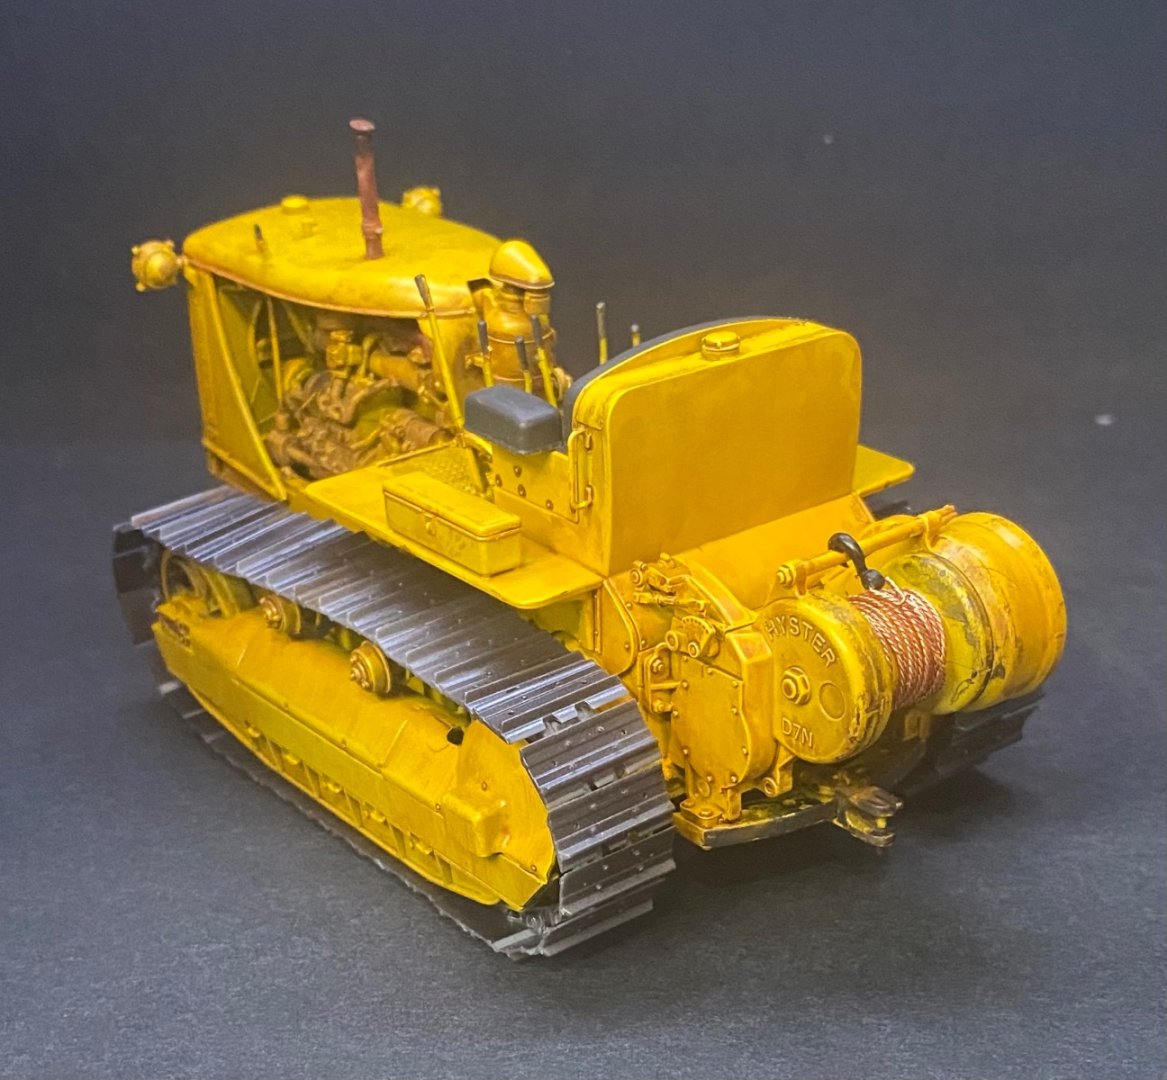
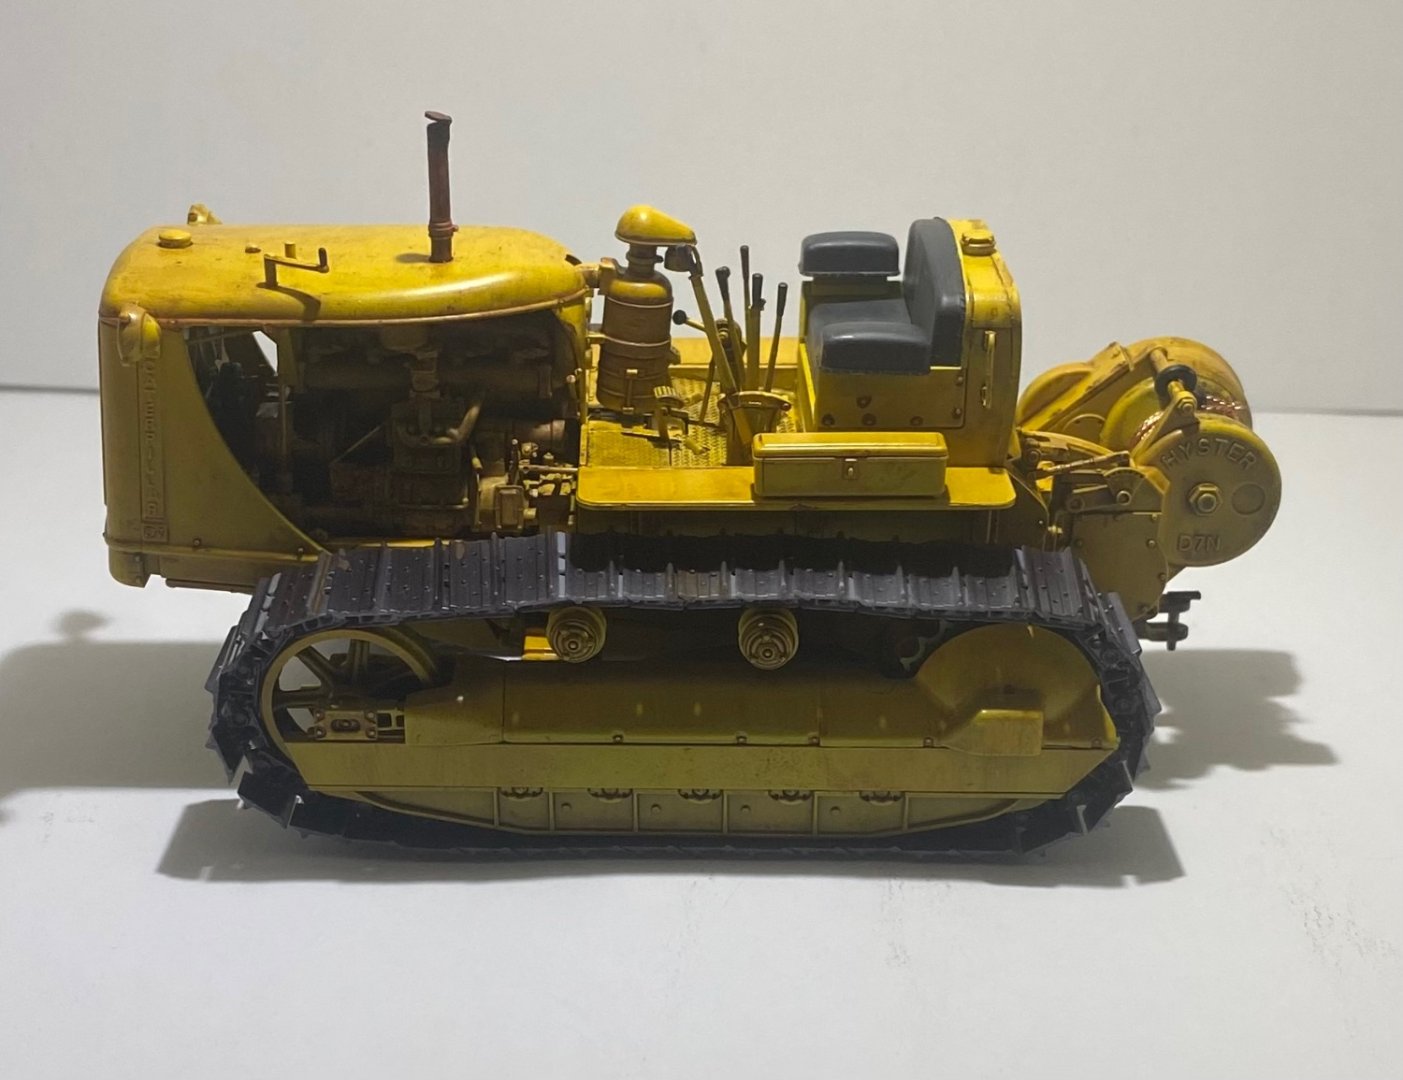
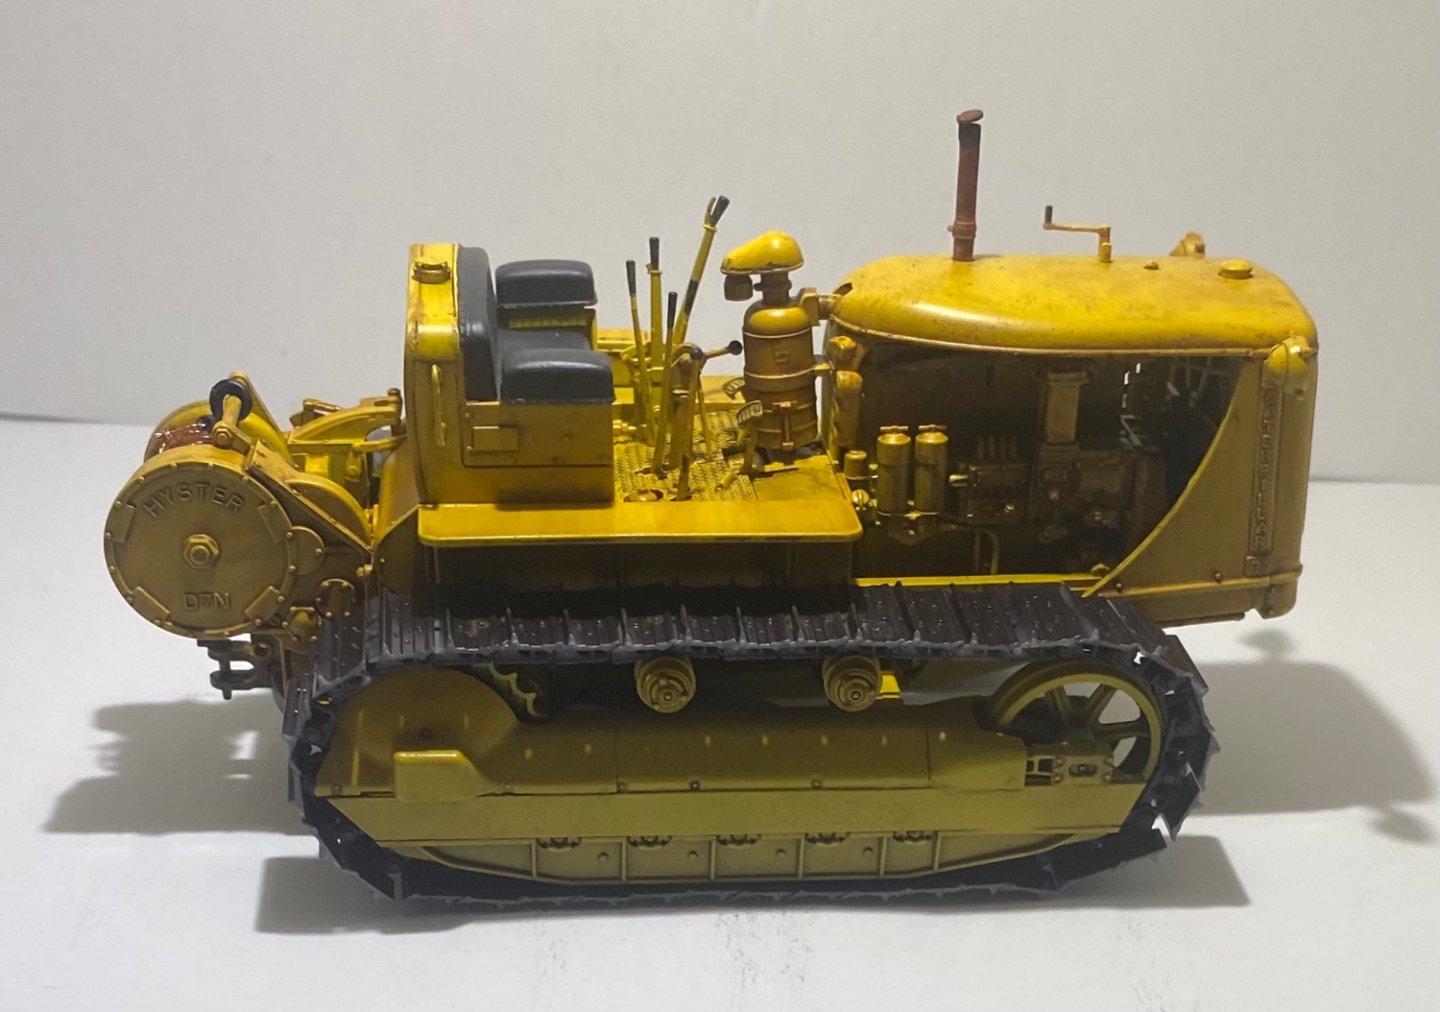
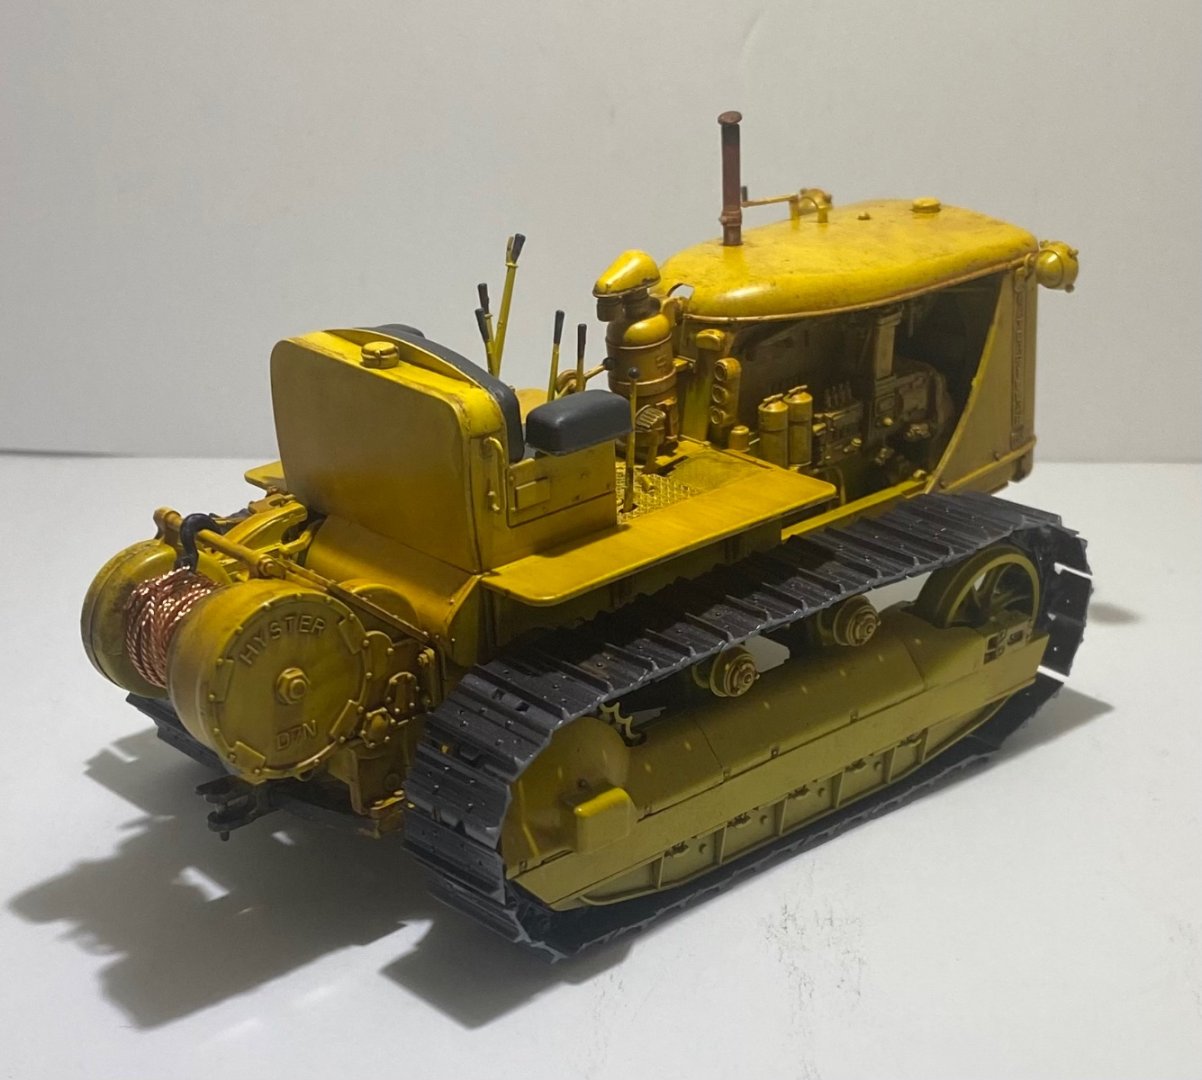
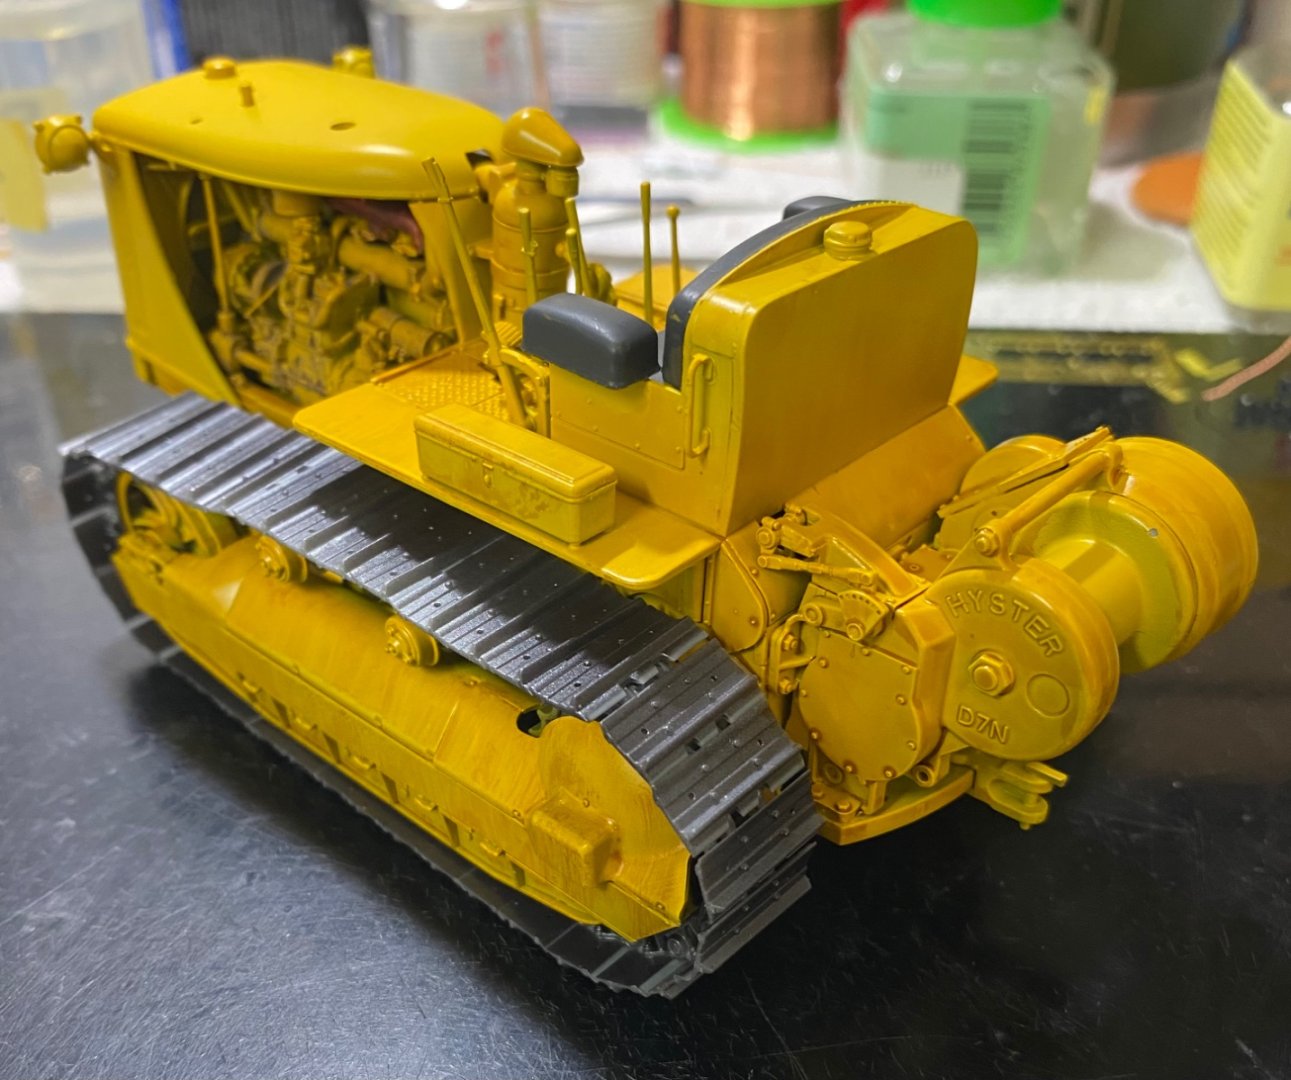
Final photos ”Let’s go to work!”


- 110 replies
-
- 15
-
-
-
U.S. Tractor D7 “Tow Cat” by CDW - FINISHED - MiniArt - 1:35 Scale
CDW replied to CDW's topic in Non-ship/categorised builds
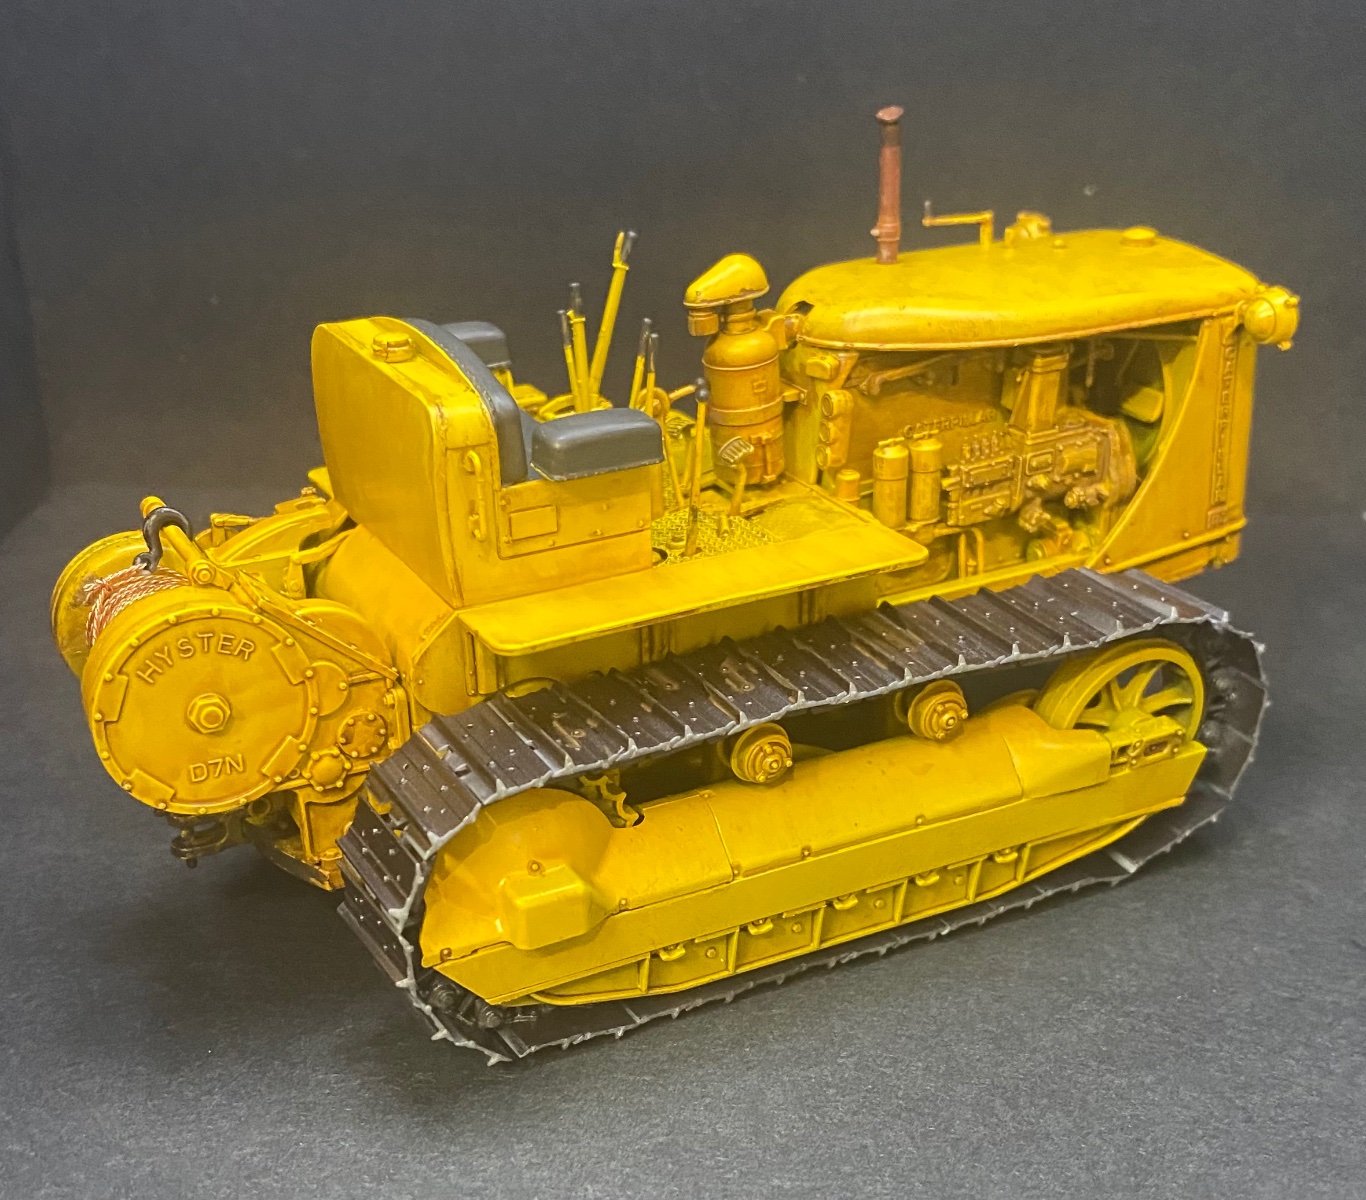
Sitting next to a German staff car in the same scale gives an impression of the size of the D7, a big machine, close to 40 tons gross weight.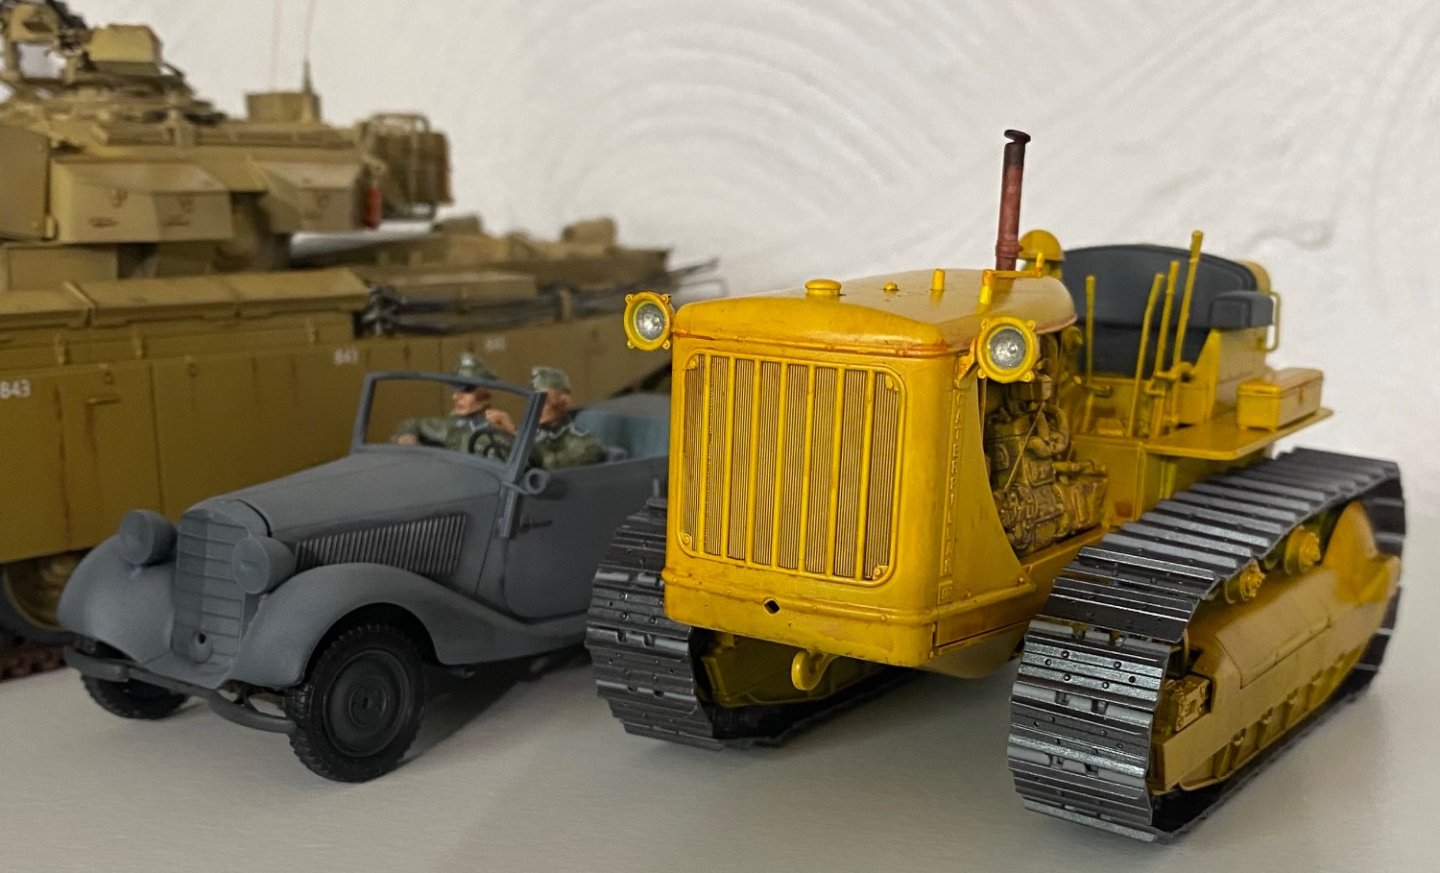
- 110 replies
-
- 12
-
-
U.S. Tractor D7 “Tow Cat” by CDW - FINISHED - MiniArt - 1:35 Scale
CDW replied to CDW's topic in Non-ship/categorised builds
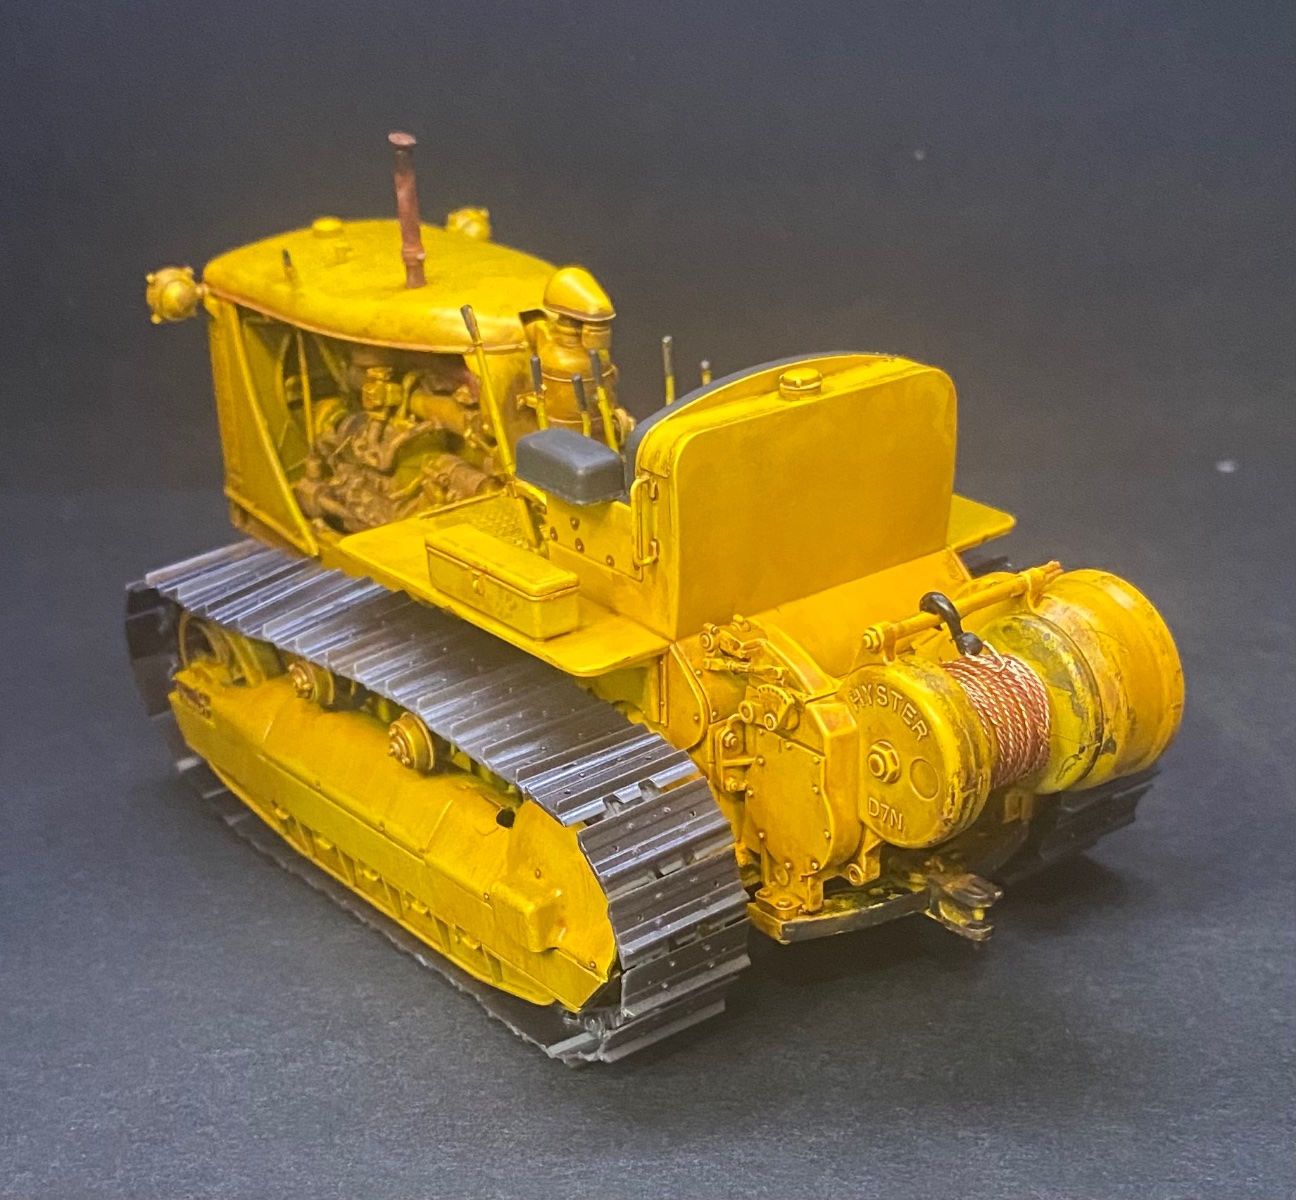
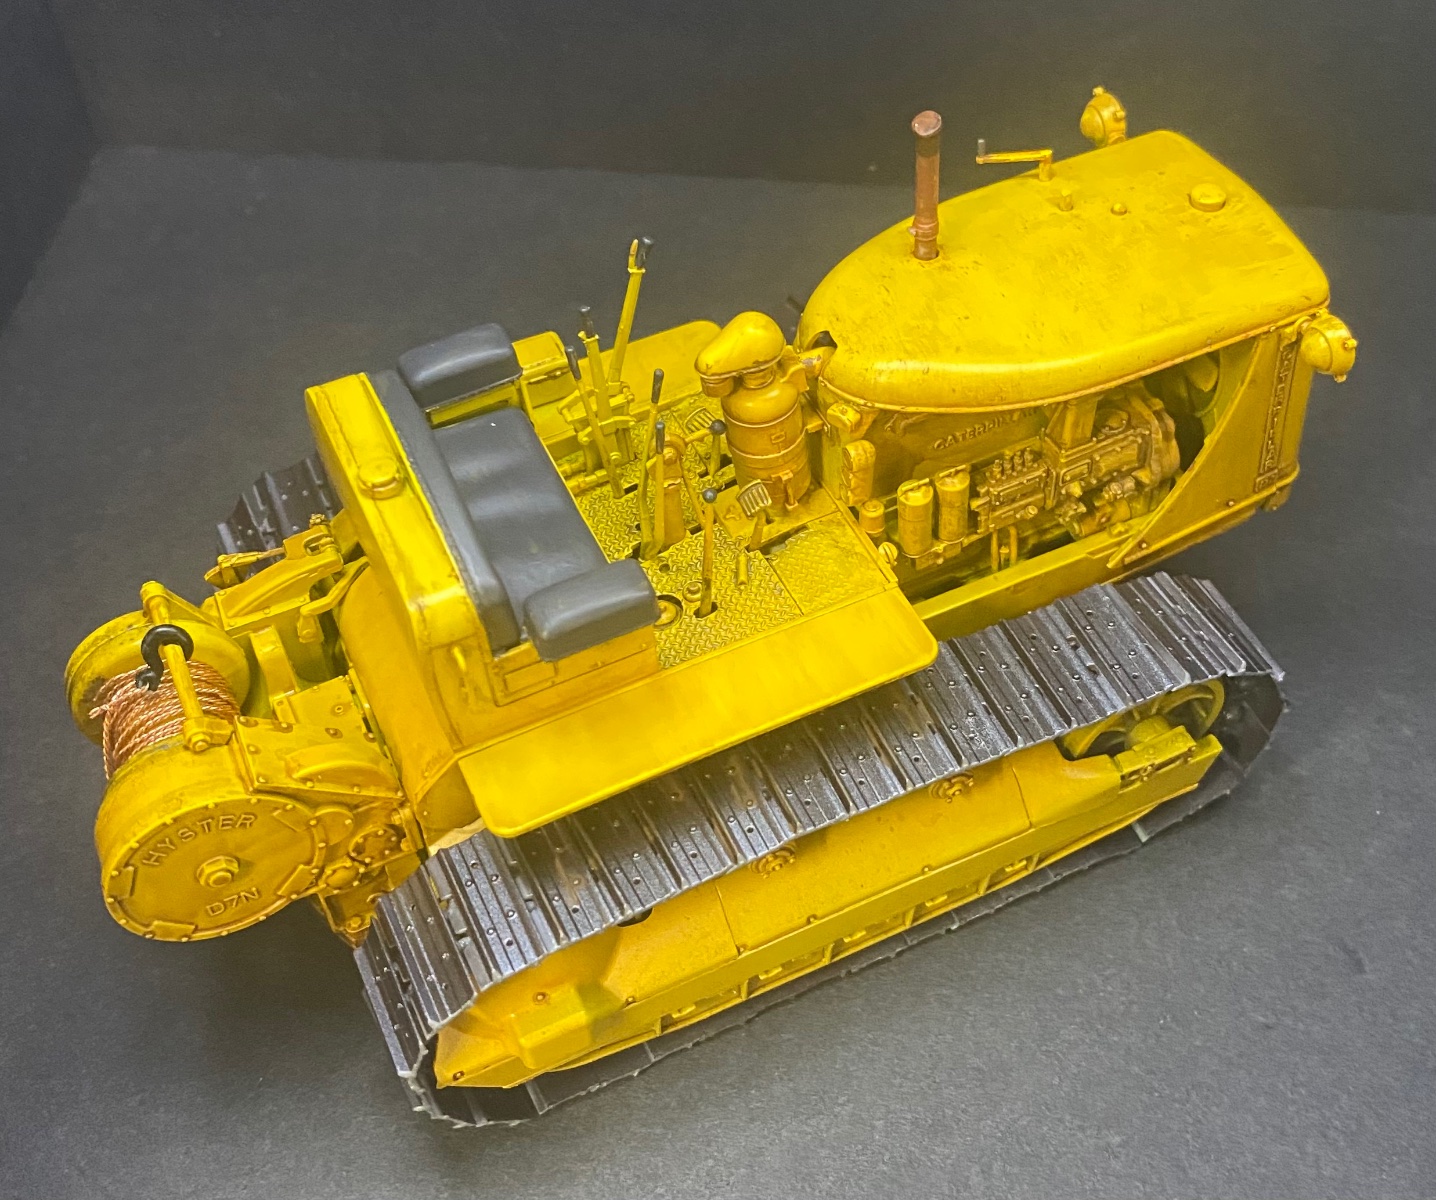
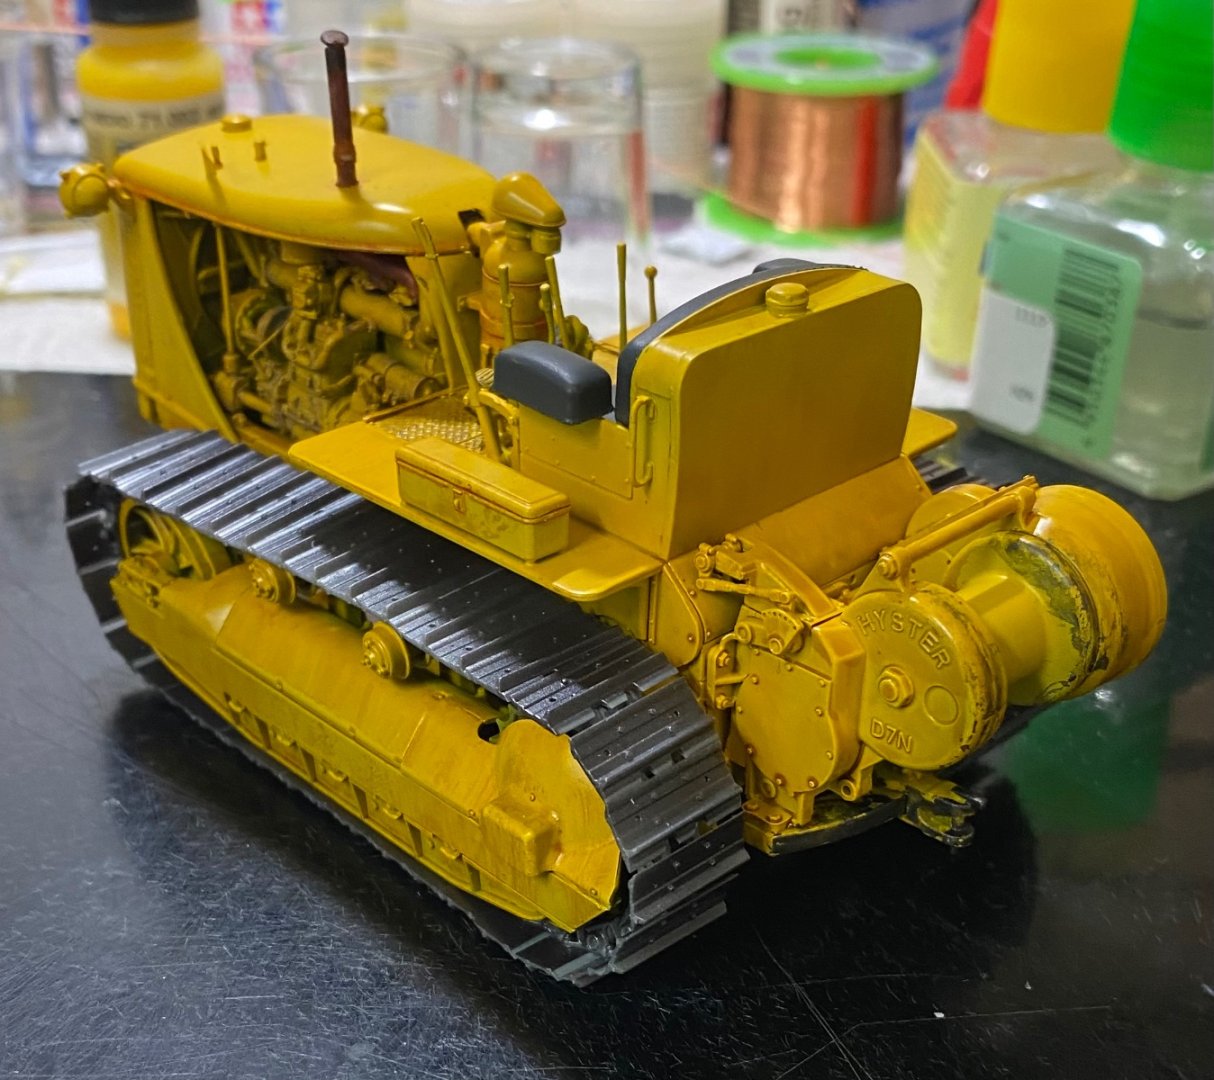
Thanks Javlin Will add some more weathering, detail painting, winch cable, headlight lenses, then call this one done.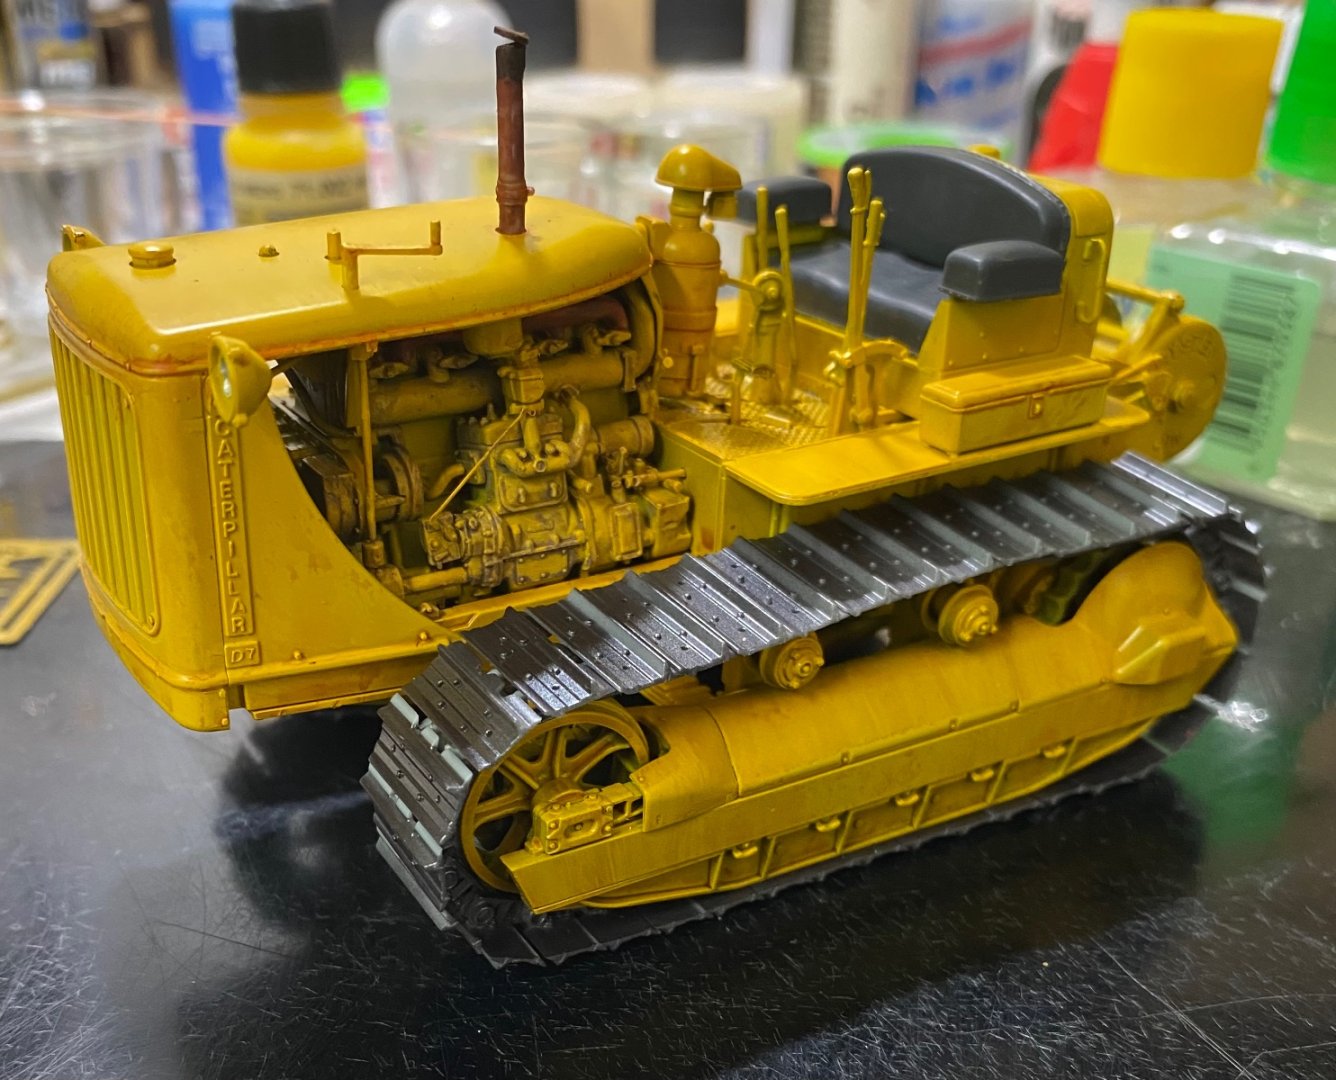

-
U.S. Tractor D7 “Tow Cat” by CDW - FINISHED - MiniArt - 1:35 Scale
CDW replied to CDW's topic in Non-ship/categorised builds
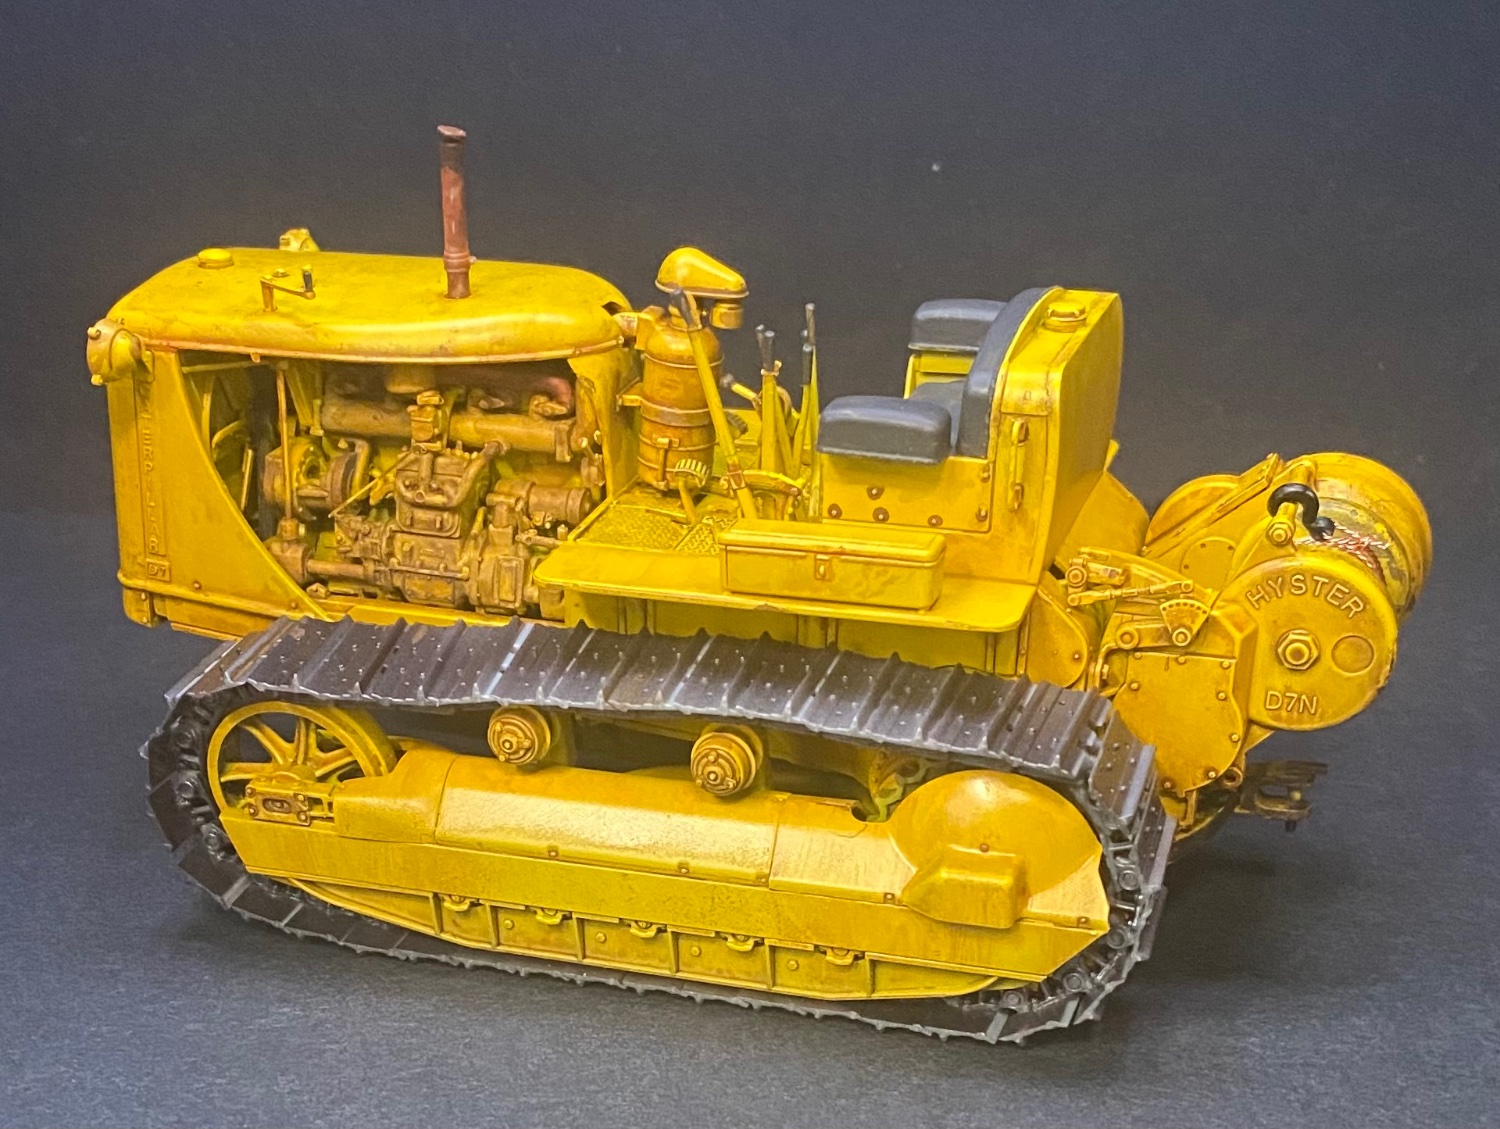
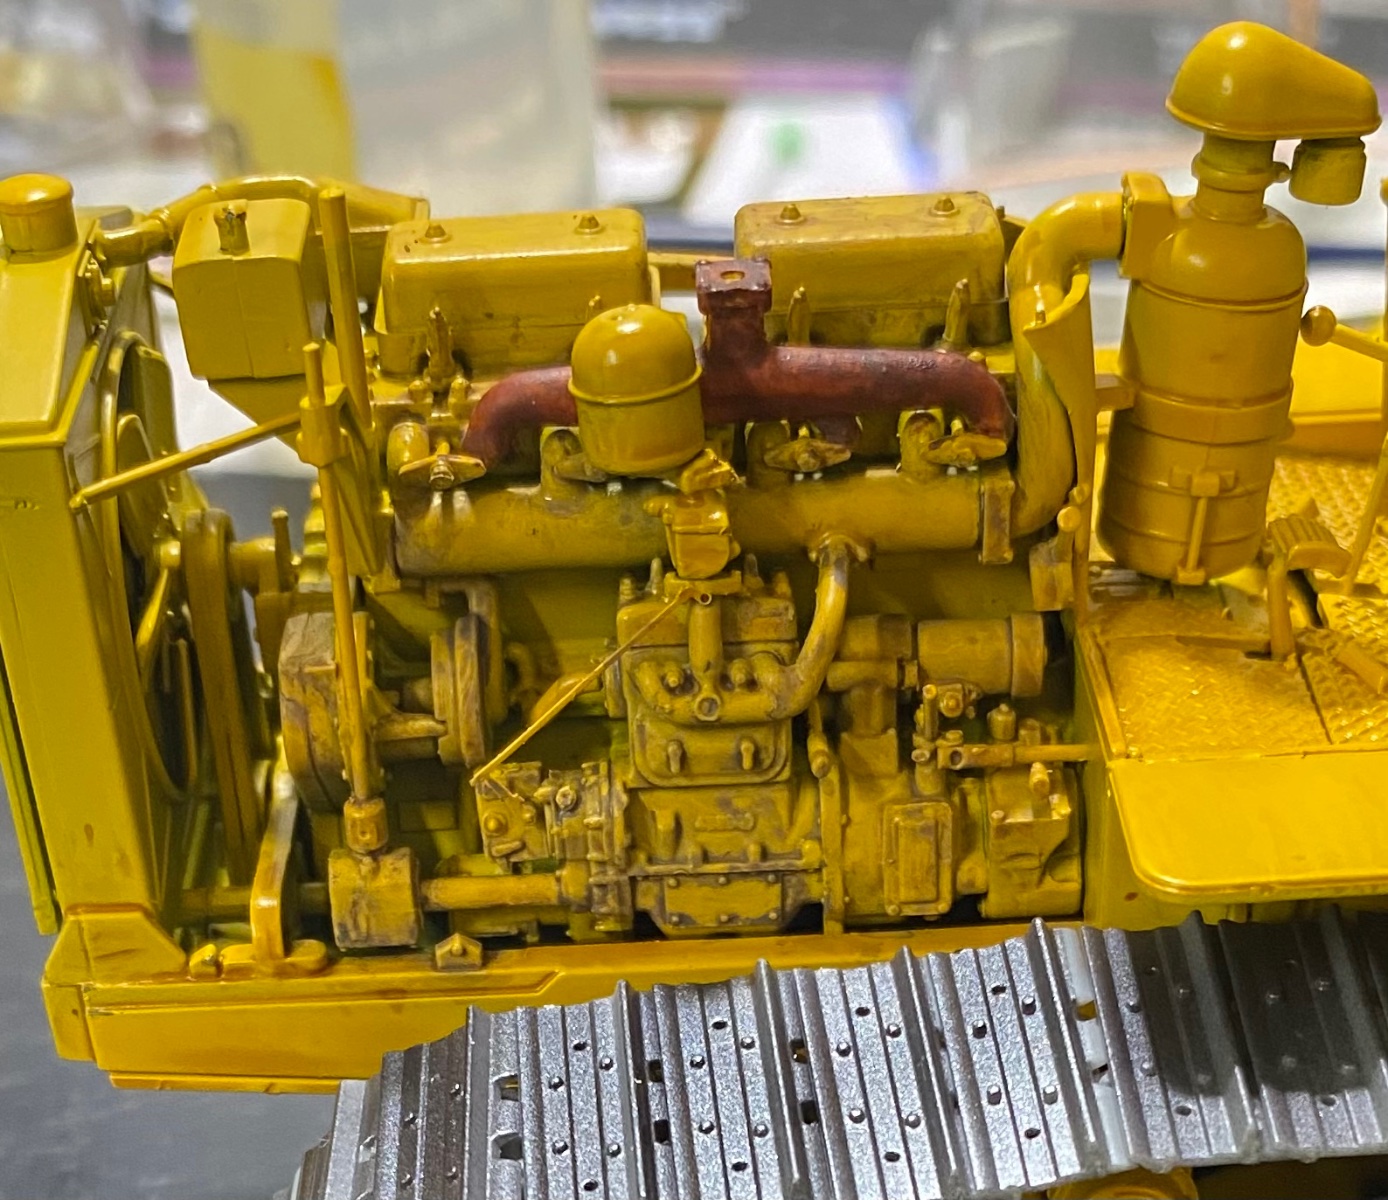
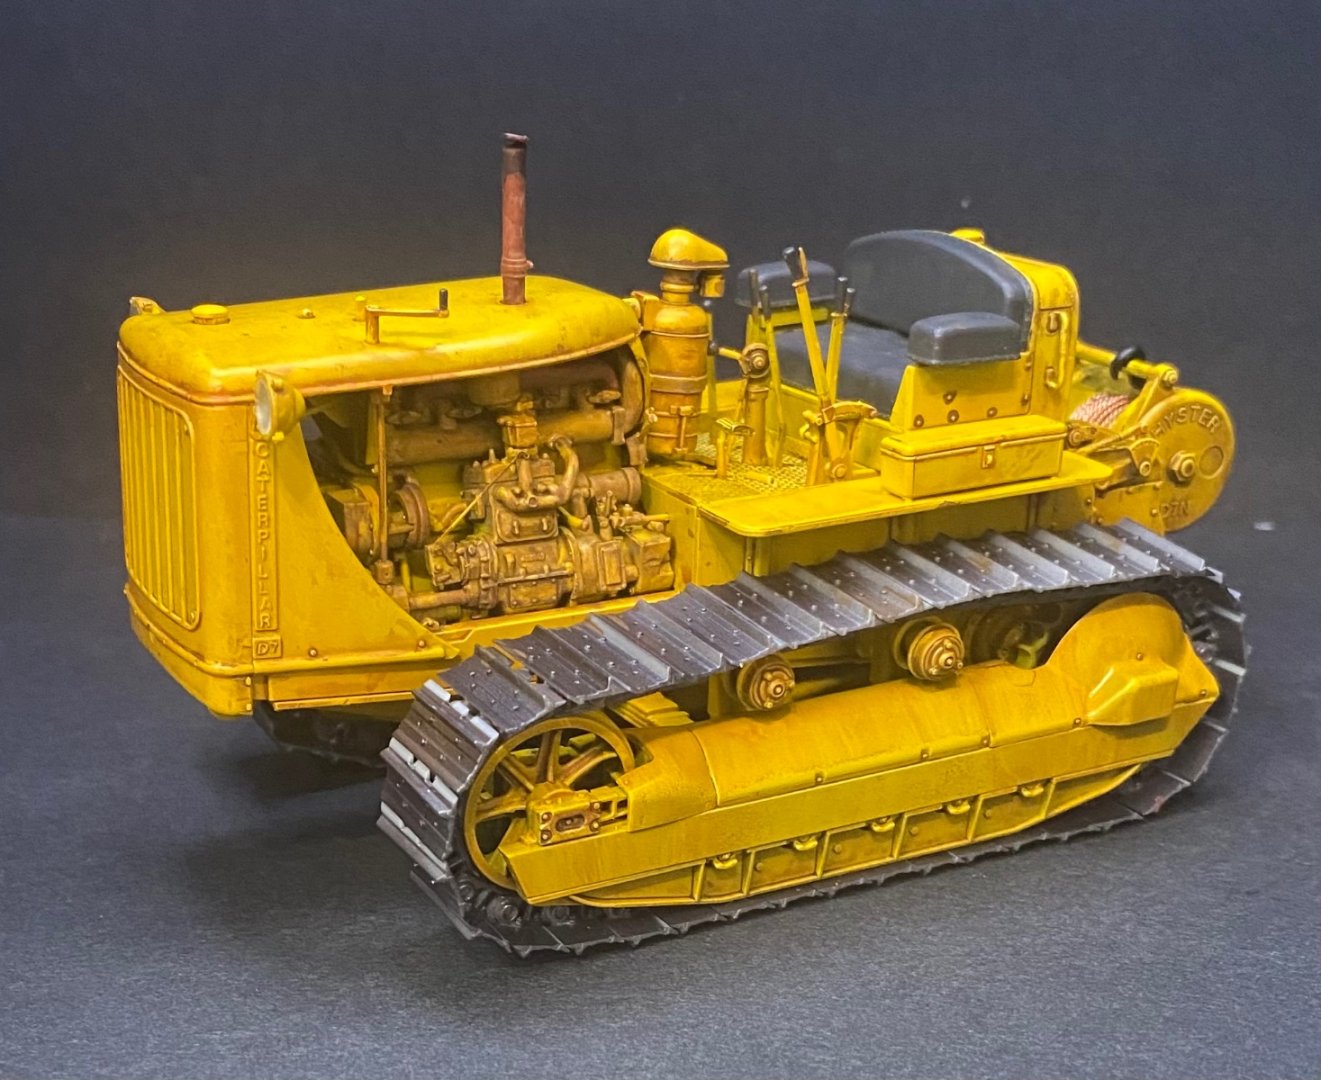
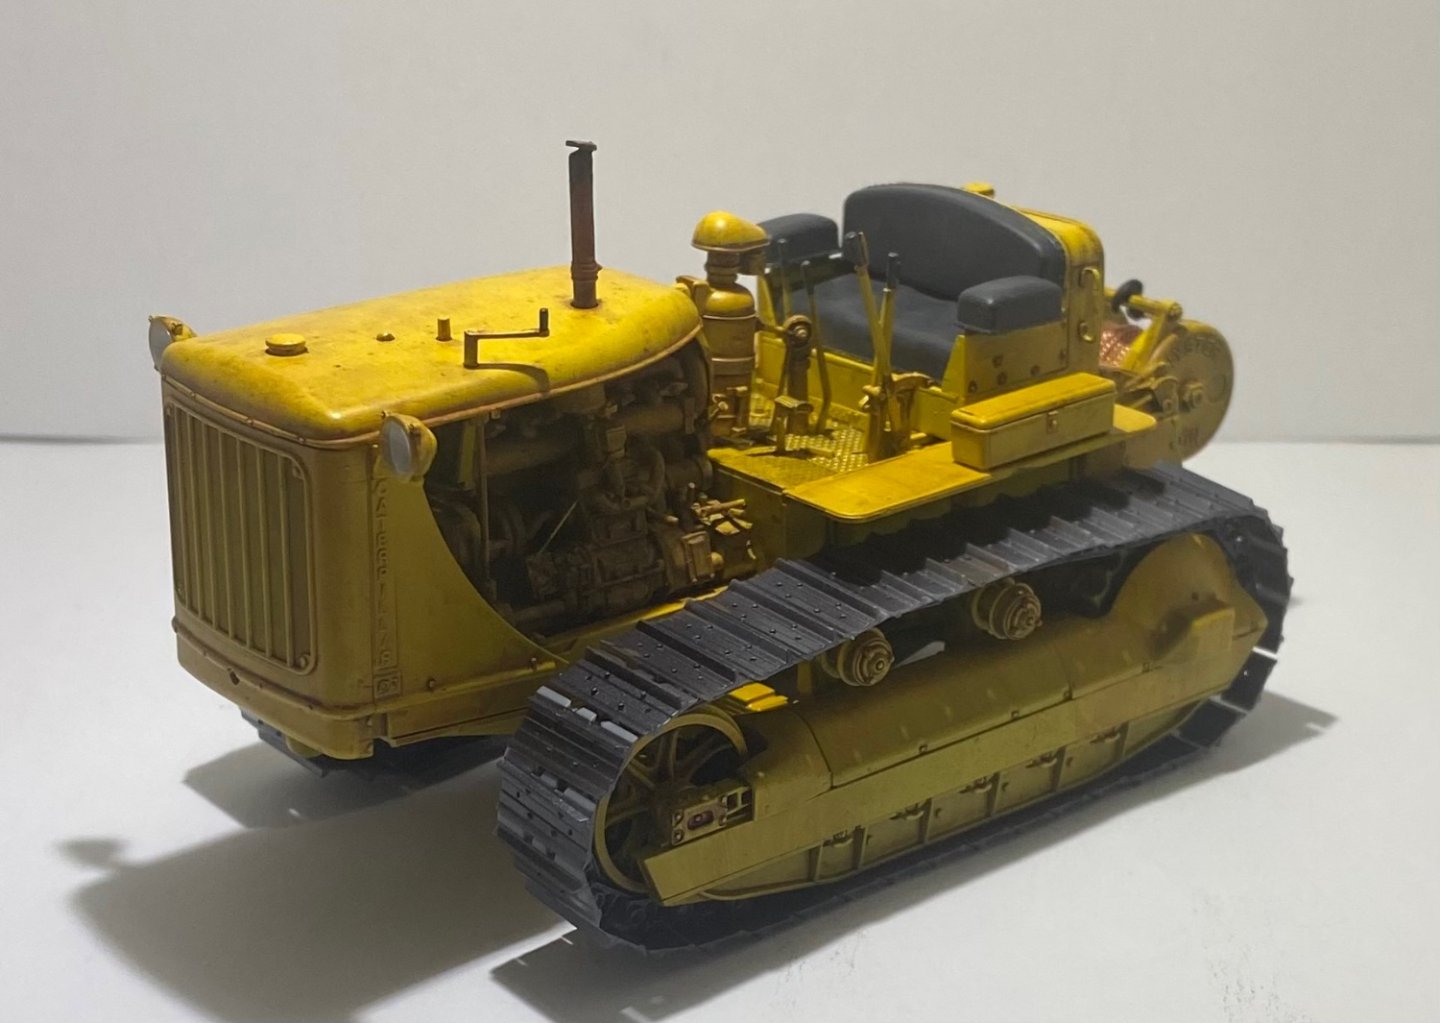
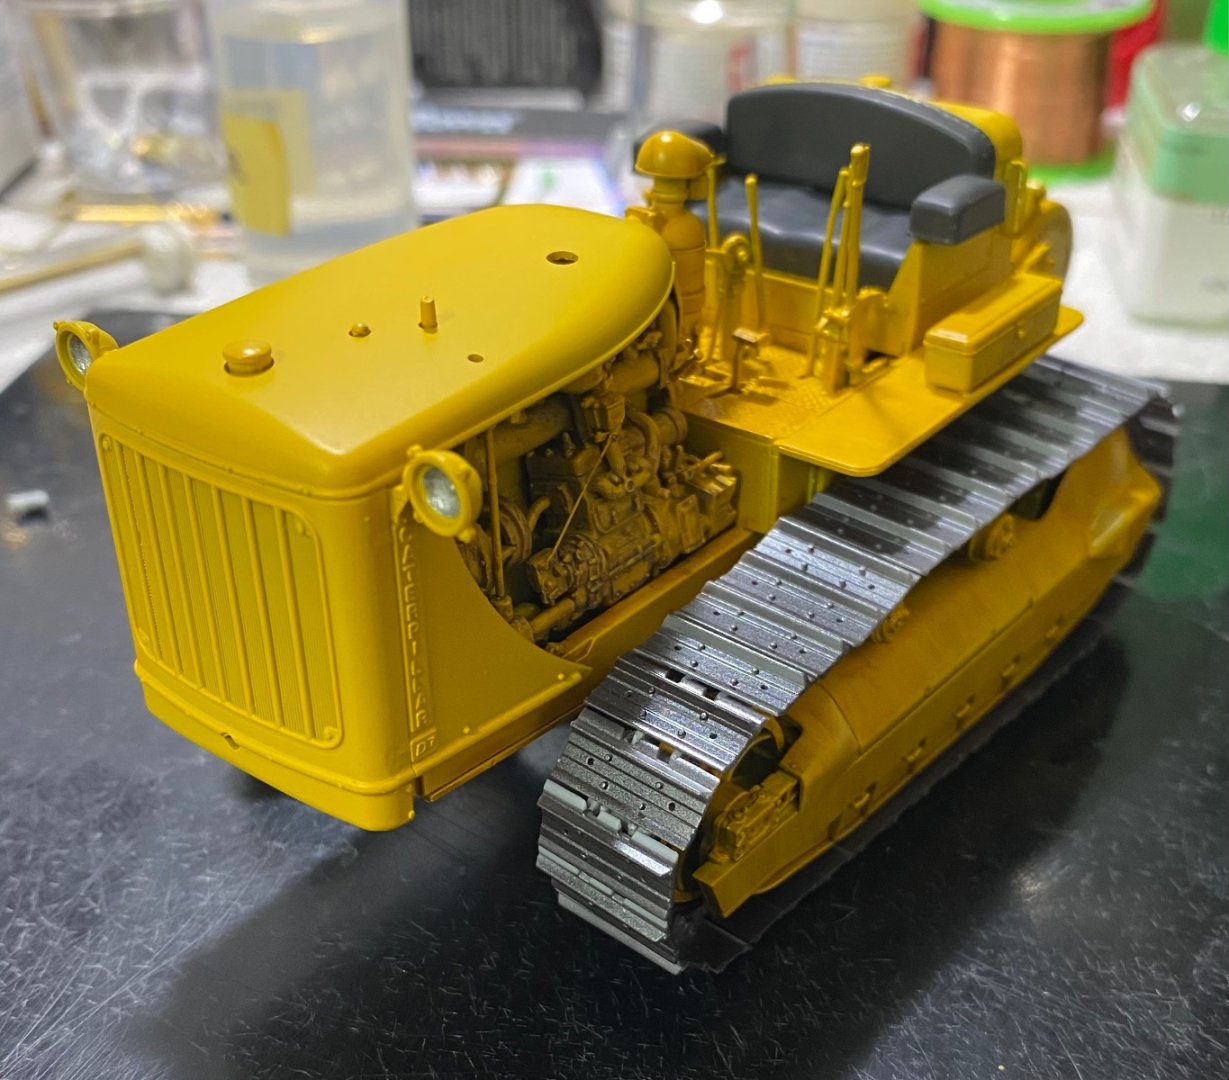
Observe the hand crank on top of the engine cover. The crank is connected to a vertical shaft that makes a 90 degree turn toward an object on the side of the engine. The hand crank is used to start the engine vis a vis a “pony motor”. The object on the side of the engine is the pony motor. When the pony motor is started using the hand crank, this auxiliary motor actually is the starter for the Diesel engine. Not an electric start. As a matter of fact, one of the first things we are taught when working on a gas pipeline is to quickly throw a rag over top of the air breather in the event we ever strike and rupture a live gas pipeline. Unless choked for air, a Diesel engine will rev up uncontrollably once it starts breathing in natural gas.
- 110 replies
-
- 10
-
-
-
U.S. Tractor D7 “Tow Cat” by CDW - FINISHED - MiniArt - 1:35 Scale
CDW replied to CDW's topic in Non-ship/categorised builds
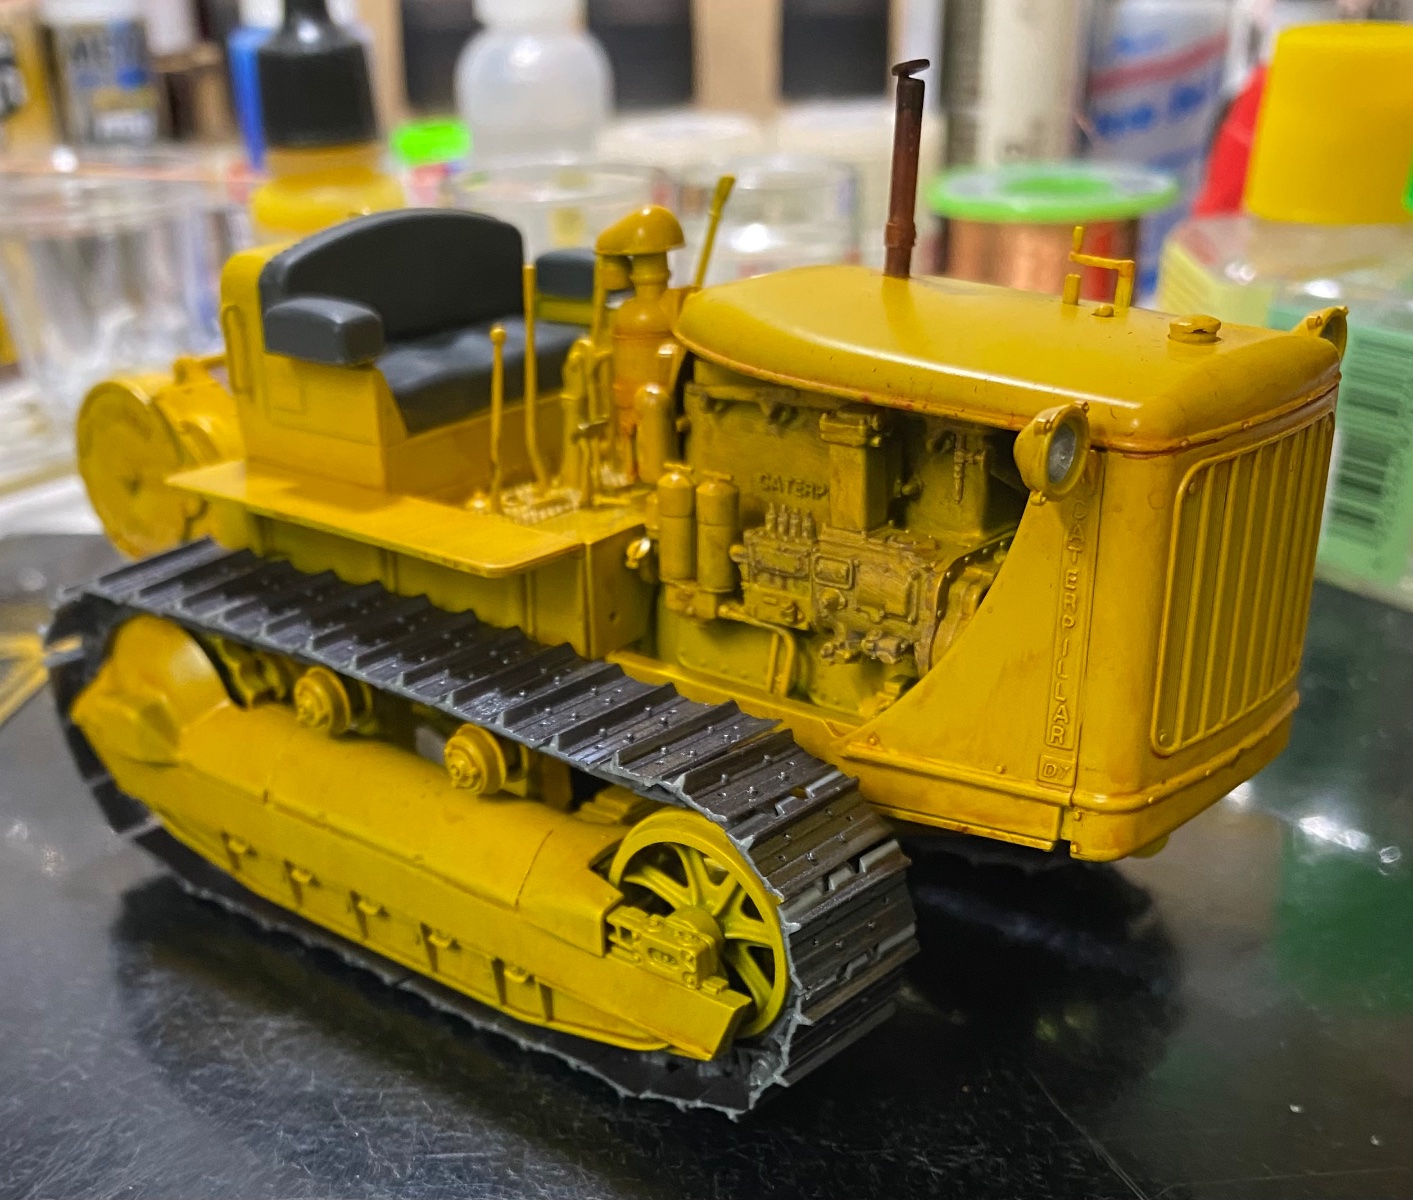
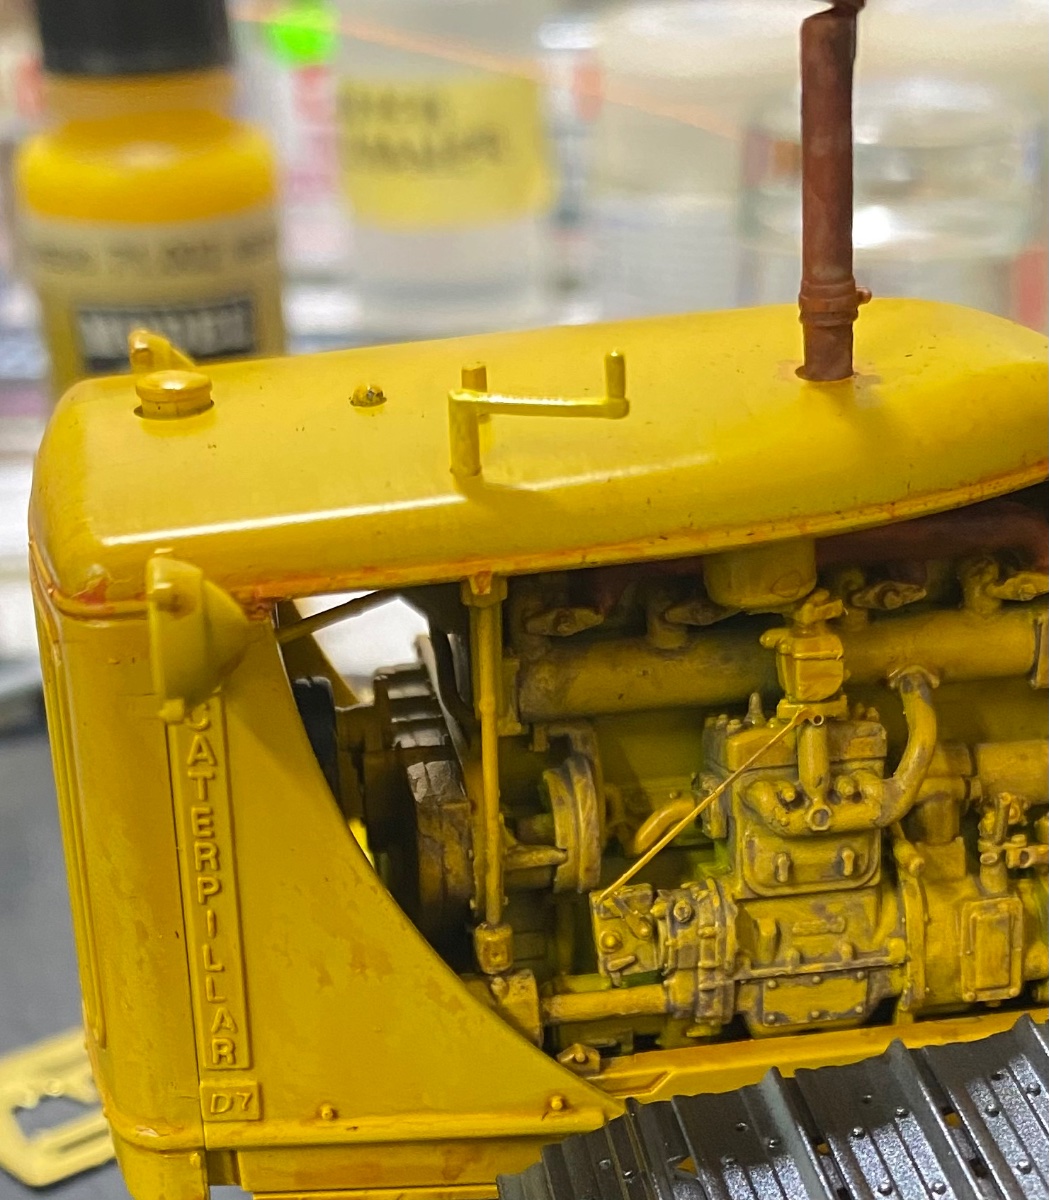
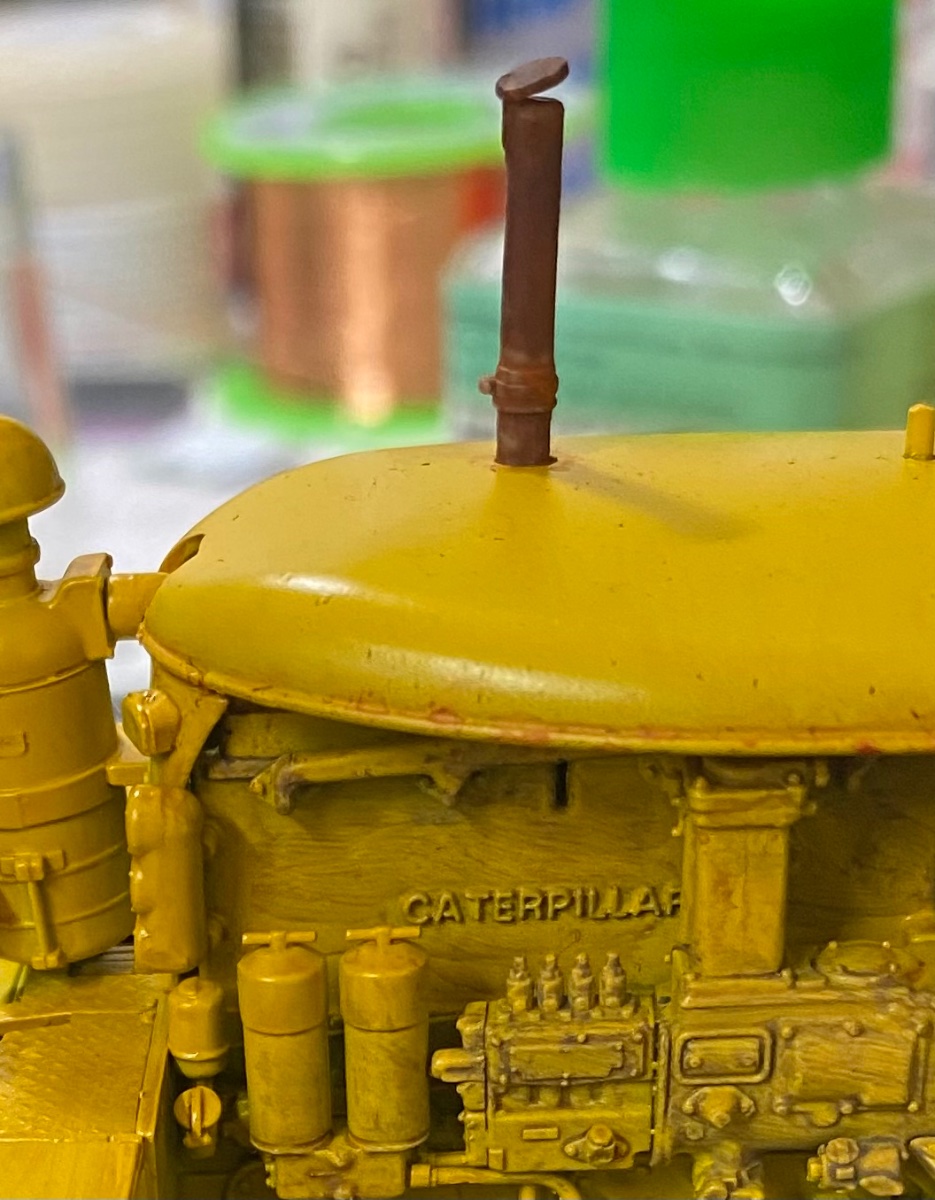
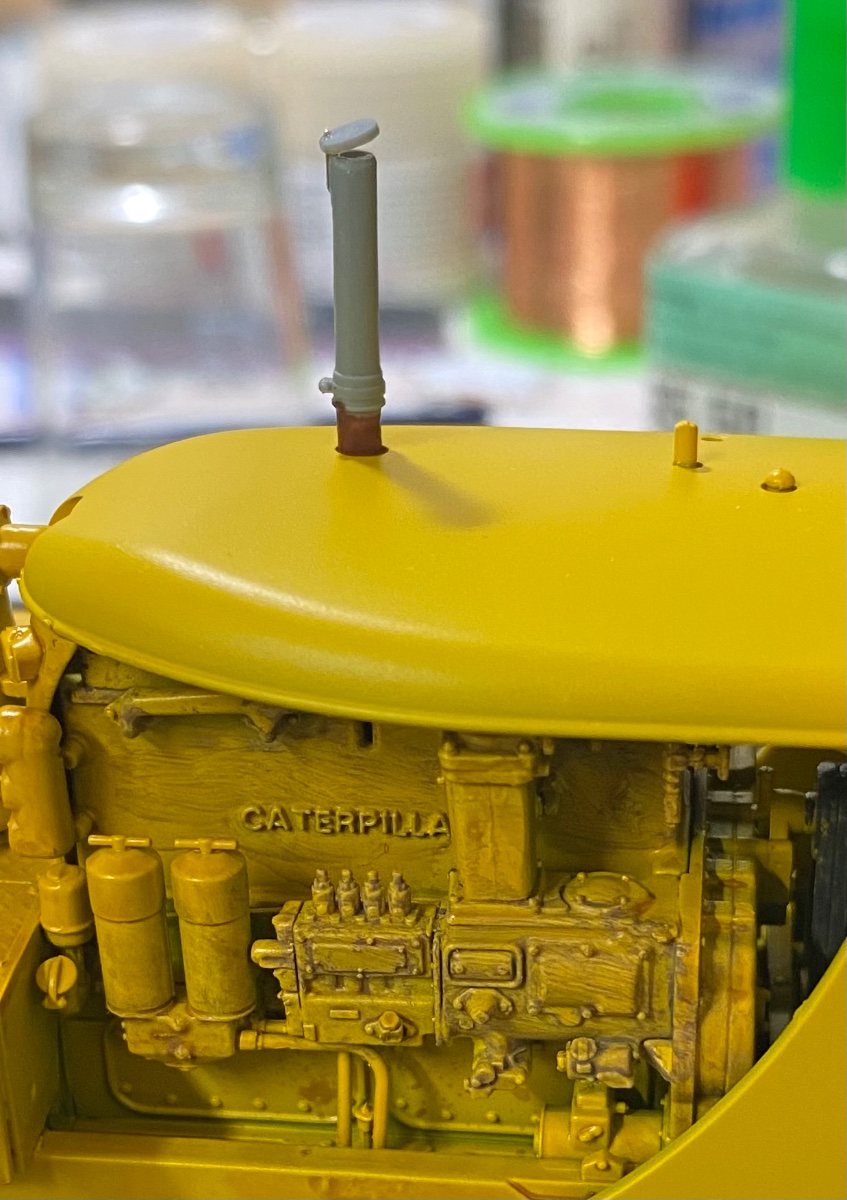
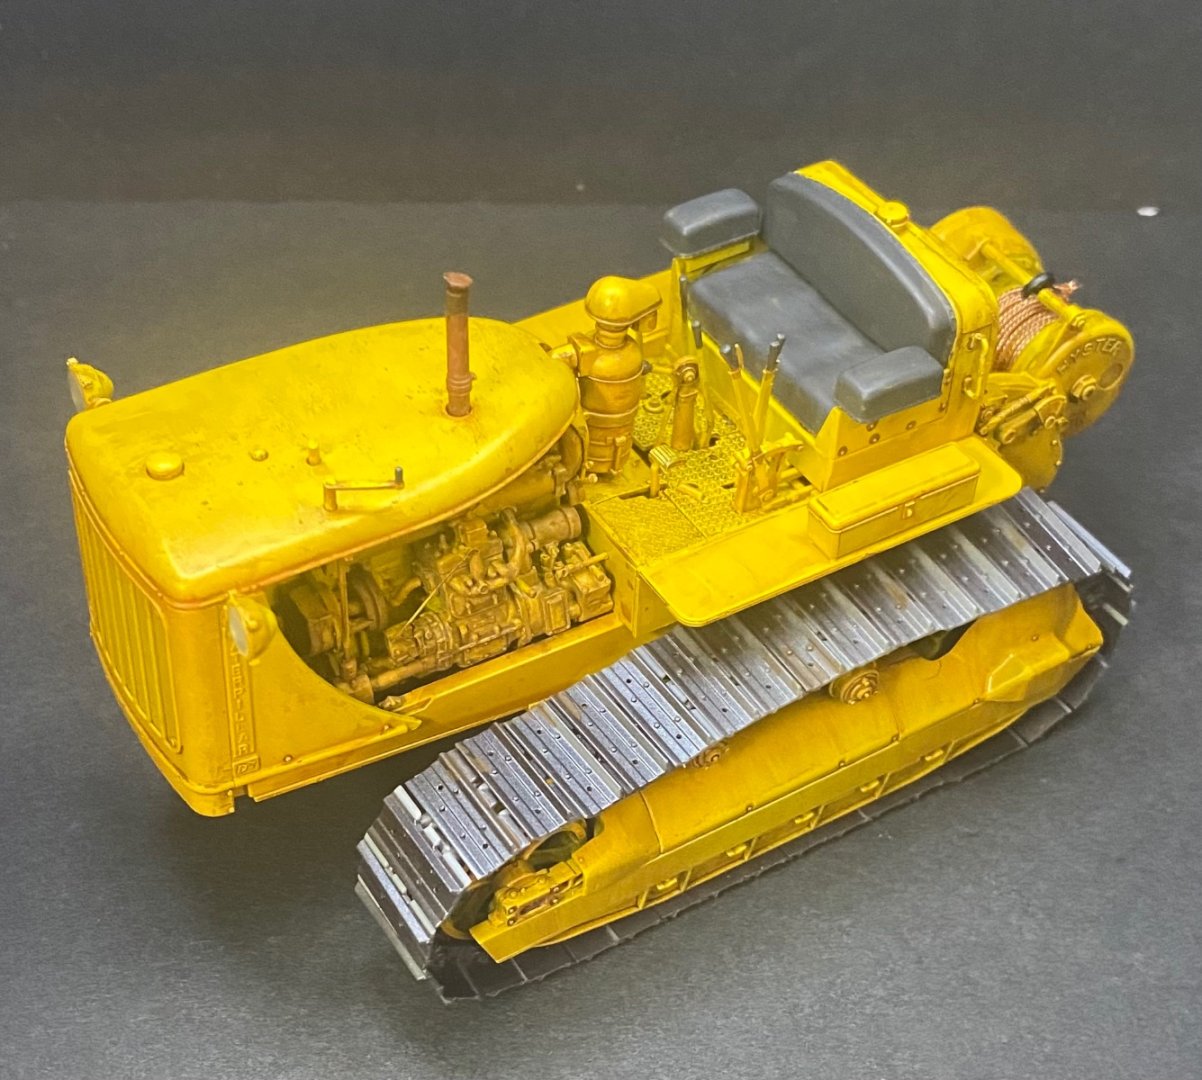
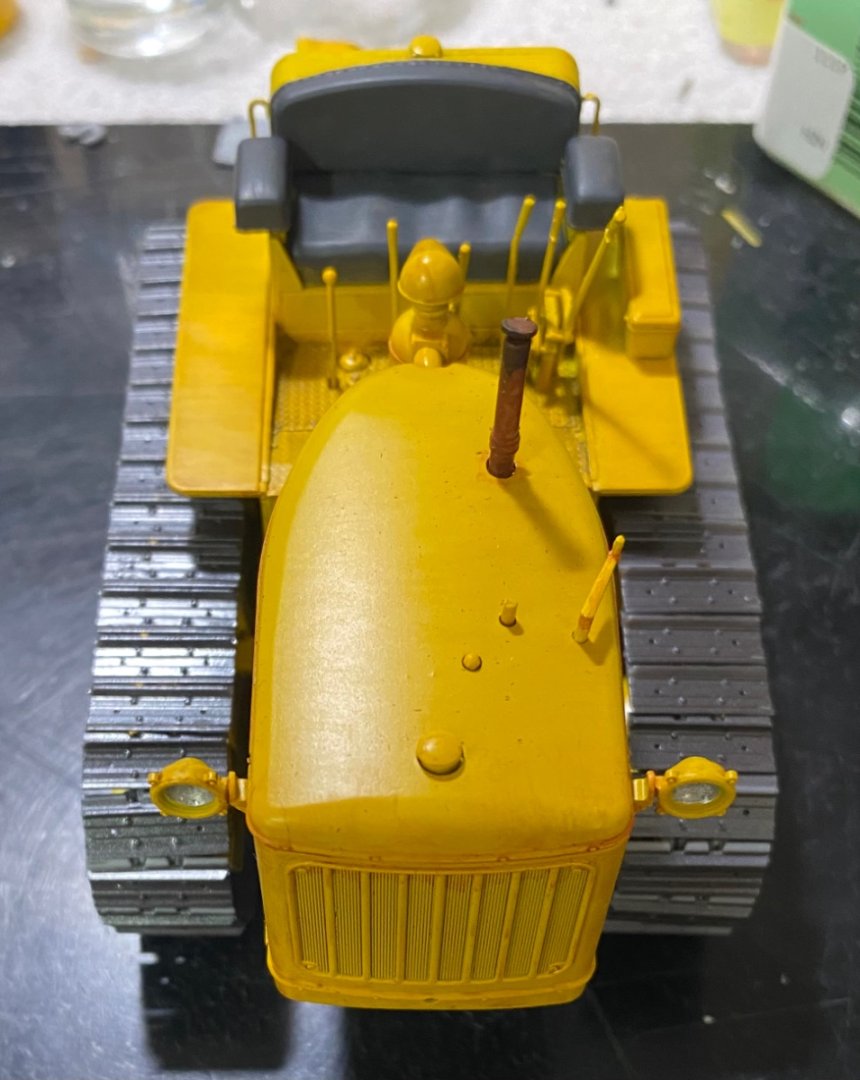
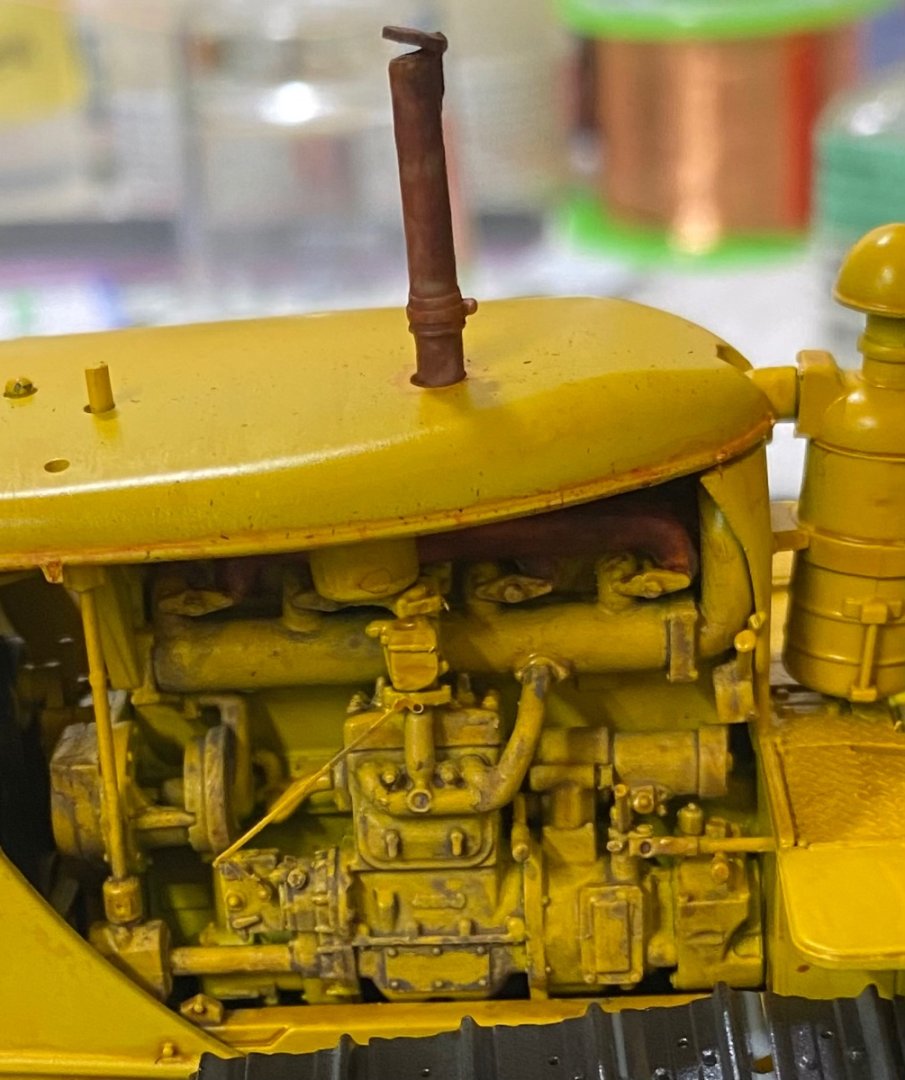
Anatomy of a rusty exhaust stack
-
U.S. Tractor D7 “Tow Cat” by CDW - FINISHED - MiniArt - 1:35 Scale
CDW replied to CDW's topic in Non-ship/categorised builds
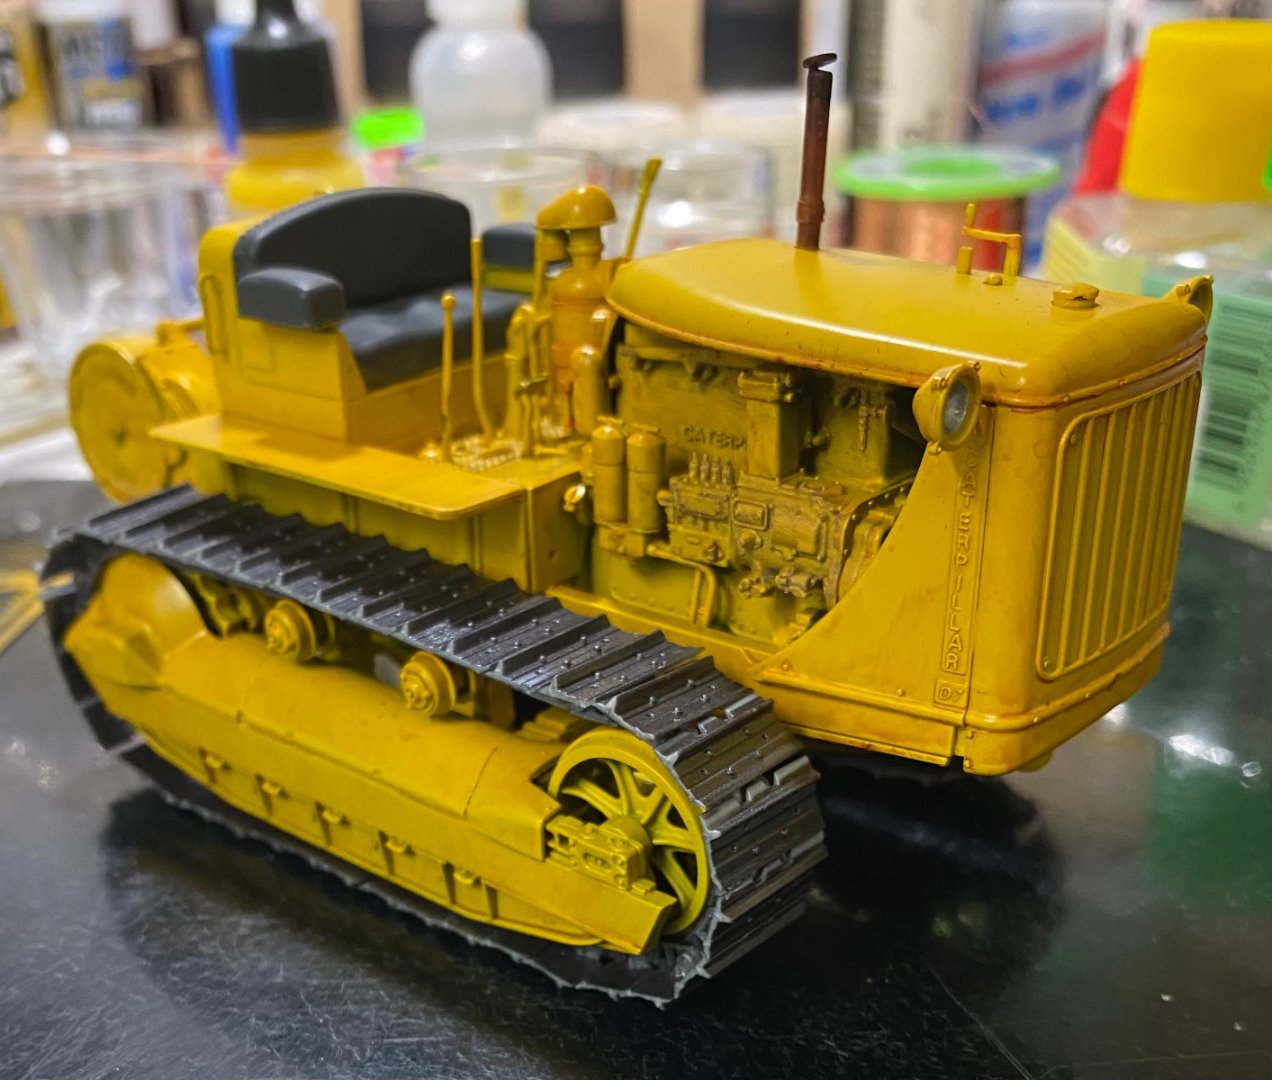
Thanks for the comments. Every Cat dozer I ever worked around had a hinged flap on top of the exhaust stack to keep rain and debris out. The kit did not include one, but it’s easy enough to scratch one from scrap styrene and photo etch tree material.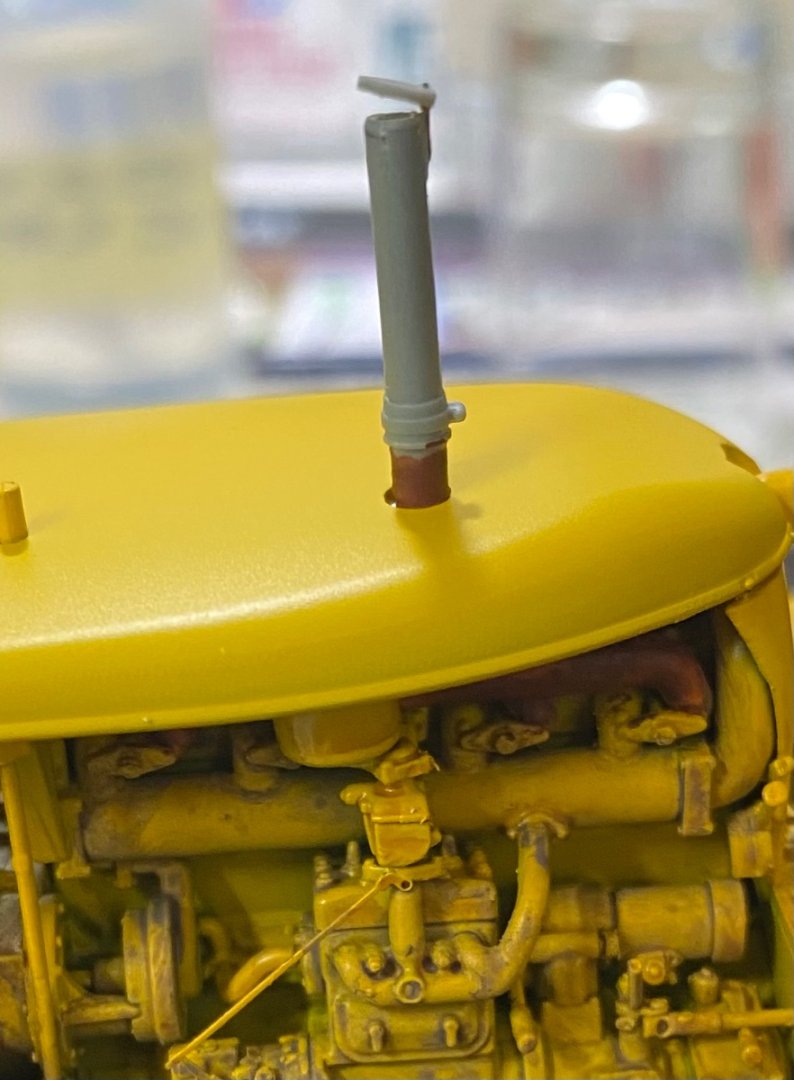

-
U.S. Tractor D7 “Tow Cat” by CDW - FINISHED - MiniArt - 1:35 Scale
CDW replied to CDW's topic in Non-ship/categorised builds
- 110 replies
-
- 13
-
-
U.S. Tractor D7 “Tow Cat” by CDW - FINISHED - MiniArt - 1:35 Scale
CDW replied to CDW's topic in Non-ship/categorised builds
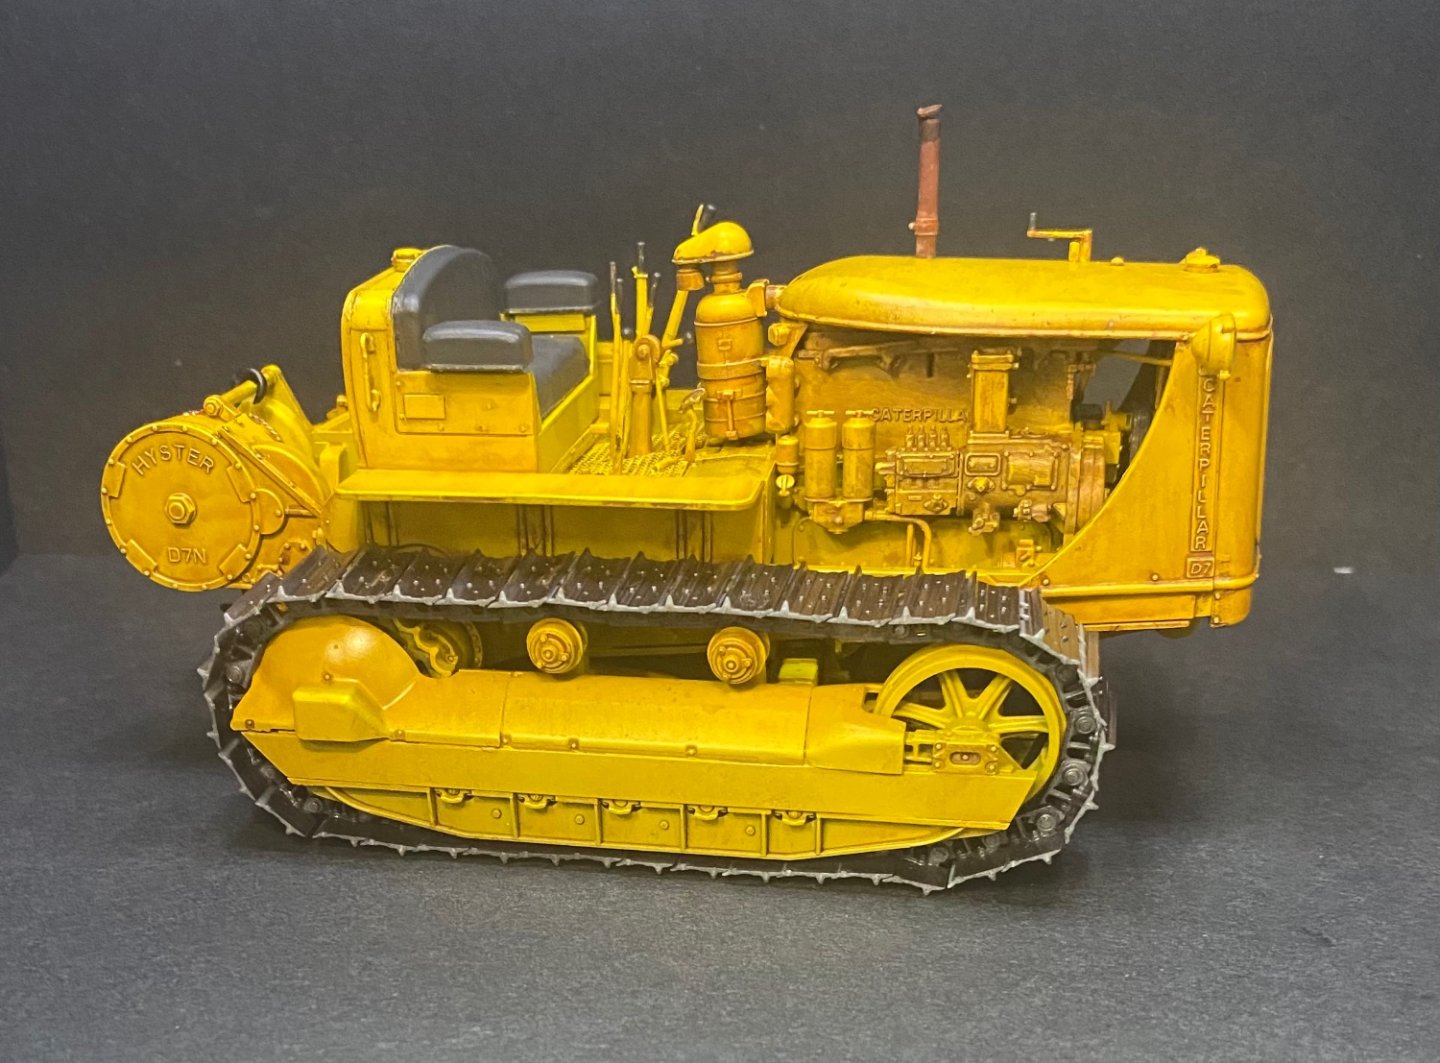
Engine grime wash

- 110 replies
-
- 10
-
-
U.S. Tractor D7 “Tow Cat” by CDW - FINISHED - MiniArt - 1:35 Scale
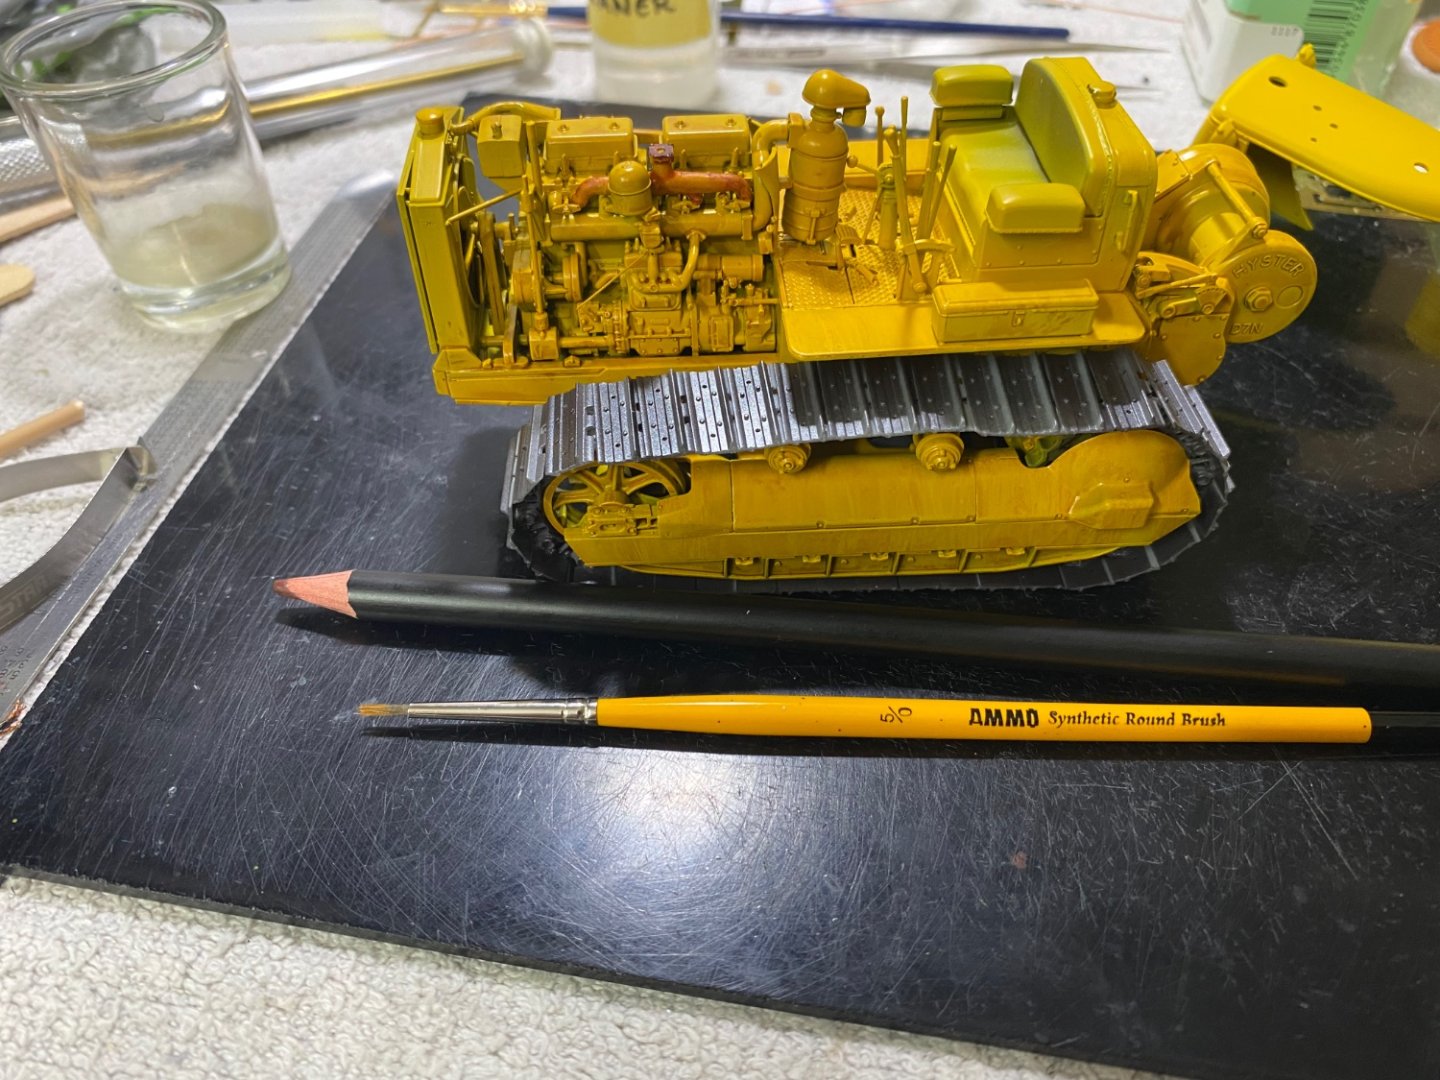
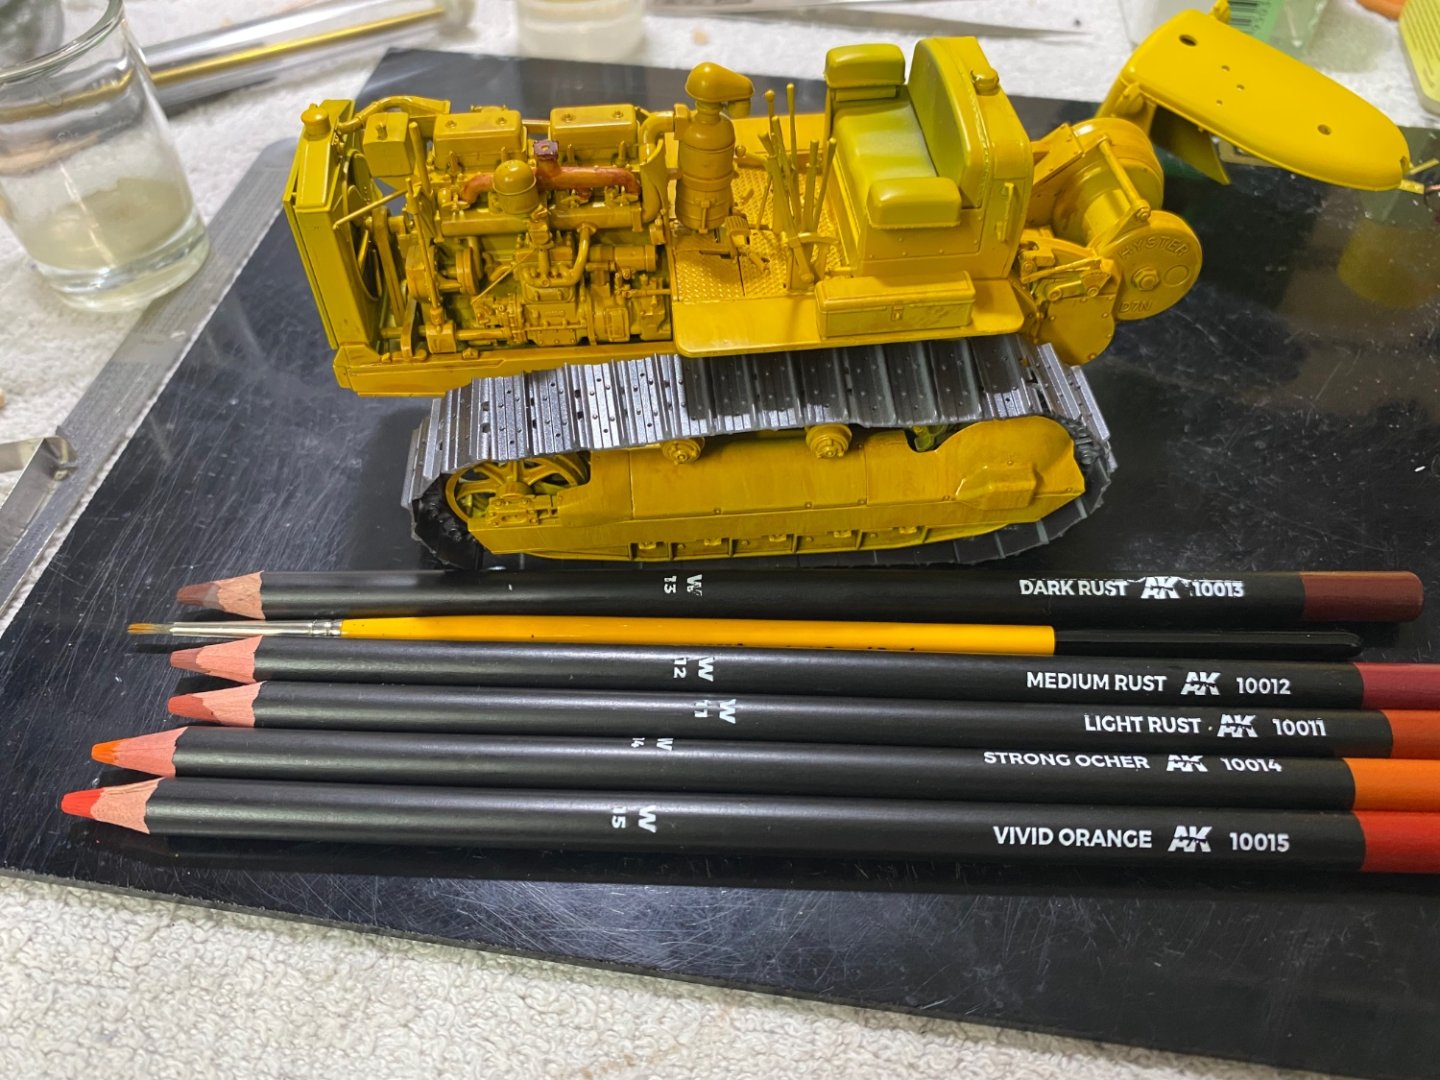
CDW replied to CDW's topic in Non-ship/categorised builds
Using AK Weathering pencils to do some rust items here and there. Started off with the exhaust manifold in dark rust. Subsequent colors will be applied to achieve the effect desired.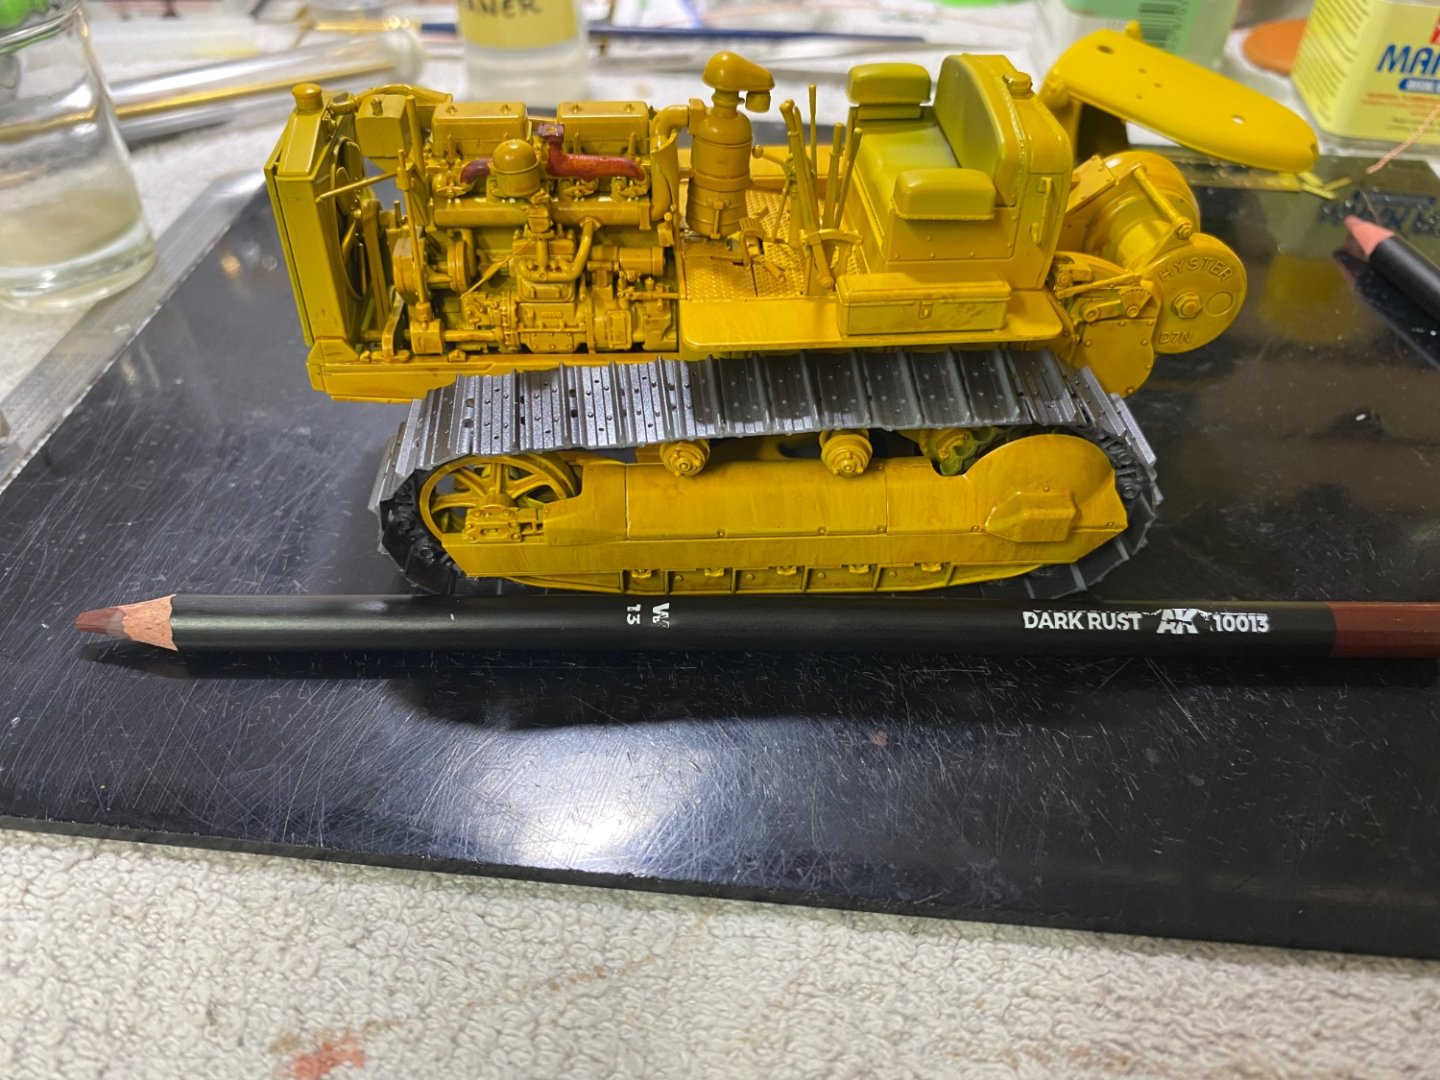
- 110 replies
-
- 11
-
-
U.S. Tractor D7 “Tow Cat” by CDW - FINISHED - MiniArt - 1:35 Scale
CDW replied to CDW's topic in Non-ship/categorised builds
Acrylics, water based, but there must be something added that slows the drying time. It's to allow some self-leveling tendencies, I think. Kinda neat how the shader left what looks like a handprint on the toolbox. Totally unanticipated. -
U.S. Tractor D7 “Tow Cat” by CDW - FINISHED - MiniArt - 1:35 Scale
CDW replied to CDW's topic in Non-ship/categorised builds
24 hour drying time on the shaders