HOLIDAY DONATION DRIVE - SUPPORT MSW - DO YOUR PART TO KEEP THIS GREAT FORUM GOING! (Only 13 donations so far - C'mon guys!)
×


mikiek
-
Posts
2,276 -
Joined
-
Last visited
Content Type
Profiles
Forums
Gallery
Events
Everything posted by mikiek
-
 Thanks Darrell. Actually the styrene saved me twice. I had lost one of the trucks for a gun base. I happened to have a black styrene sheet 1/16" thick. So I cut out a thin chunk and filed it down to look like the others. The stuff files really well. Congrats on the rudder parts. That will be a tough one for me and coming up soon. Drilling that hole for the rudder in the stern was stressful. And it turns out it wasn't big enough so I am going to have to do it again.
- 843 replies
-
- 3
-

-
- niagara
- model shipways
- (and 2 more)
-
Could not agree more Brian. Well said. Early on in this log I stated "I leave my ego at the door" . That's a big reason I come to this site - honest opinions and answers.
- 843 replies
-
- 3
-
-
- niagara
- model shipways
- (and 2 more)
-
Hey everyone - I'm on my first build (Model Shipways Niagara) and actually haven't got to general rigging yet. Well sort of, I am actually rigging the tackles for guns right now. The plans called for quite a few eyebolts to be installed along the waterway which I have done. But now that I am installing the guns and tackle some of those eyebolts may get pretty hard to access. So if possible I want to do something with them before the gun goes in. In most cases the rigging plans call for a block coming off the eyebolt. What it doesn't say (or I'm too slow to get it) is how the block is fastened. It shows a circle for the block with a note on size, an eyebolt and a solid line in between them. So would that be a block stropped to an eyebolt? A hook stropped to a block that hooks to an eyebolt? Something else?
-
Thank you Brian. I appreciate your honest opinion! We can't improve without them.
- 843 replies
-
- 3
-
-
- niagara
- model shipways
- (and 2 more)
-
Brian - it was absolutely the look. I tried to frap the .012 but when I got a nice tight wind, it kind of blurred together. It was difficult to see any detail in the winding. I wanted to go with all .018 but the finished tackle looked a little big. Sizewise, I know I'm right on the edge even now, but I can live with it. My first trials were using the free end, but I was having difficulty keeping it from crossing over the double block when I started to wind it up. In hindsight I suppose I could have glued it down right as it came out of the double, but there is already a lot of glue slathered over the blocks. This was kind of a take on another post here somewhere, in which someone described a 'zip frapping' technique. Actually doing the frap with my serving machine was very easy.
- 843 replies
-
- 2
-
-
- niagara
- model shipways
- (and 2 more)
-
As a side note, there are several eyebolts fastened into the waterway very close to the eyebolts for the gun tackles. I think I need to figure out what those are for and possibly run some line or blocks or whatever through them before doing the guns. I think they will be darned near impossible to get at once the gun tackles are in place.
- 843 replies
-
- 2
-
-
- niagara
- model shipways
- (and 2 more)
-
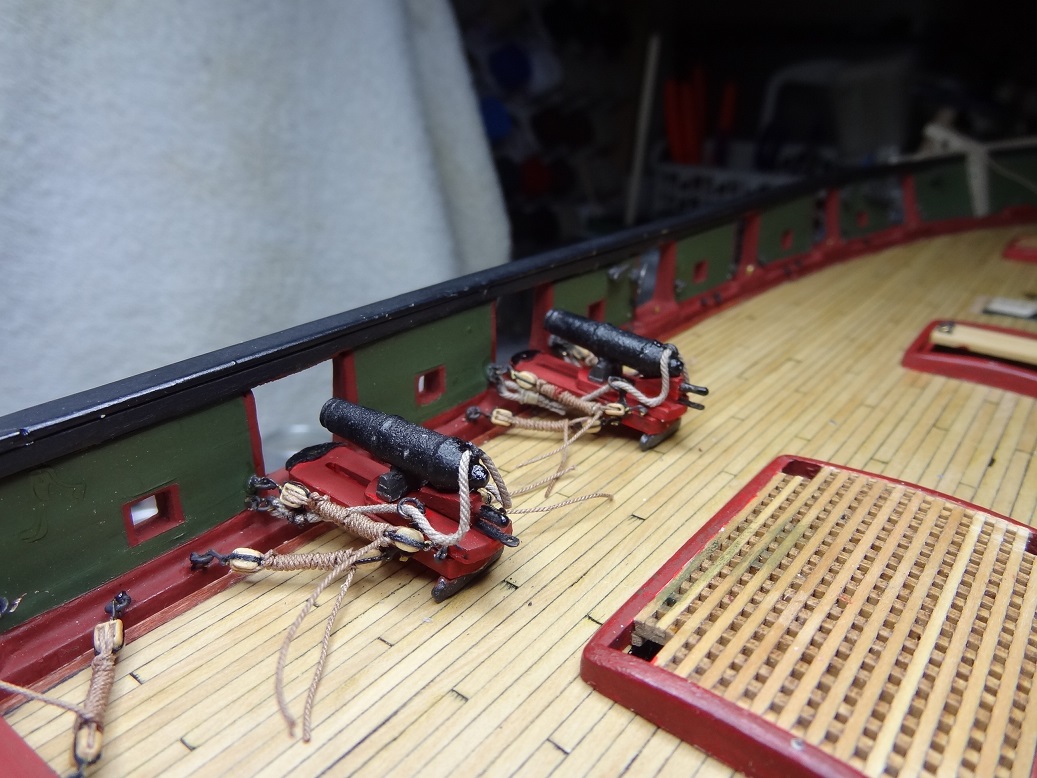
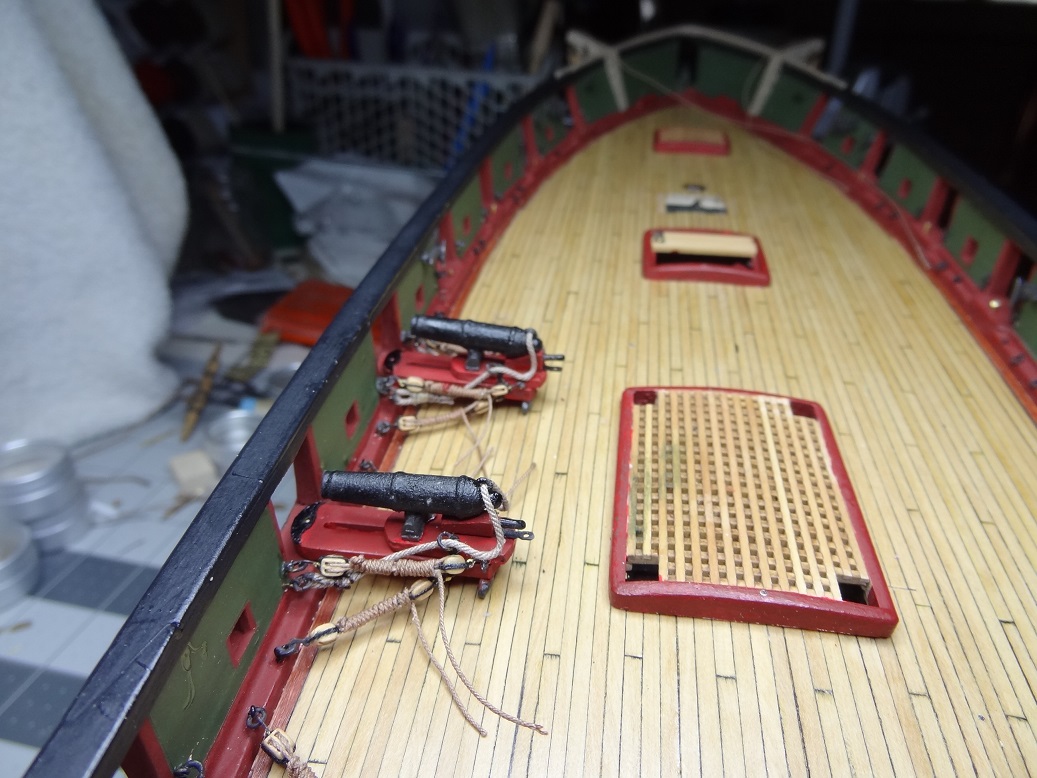
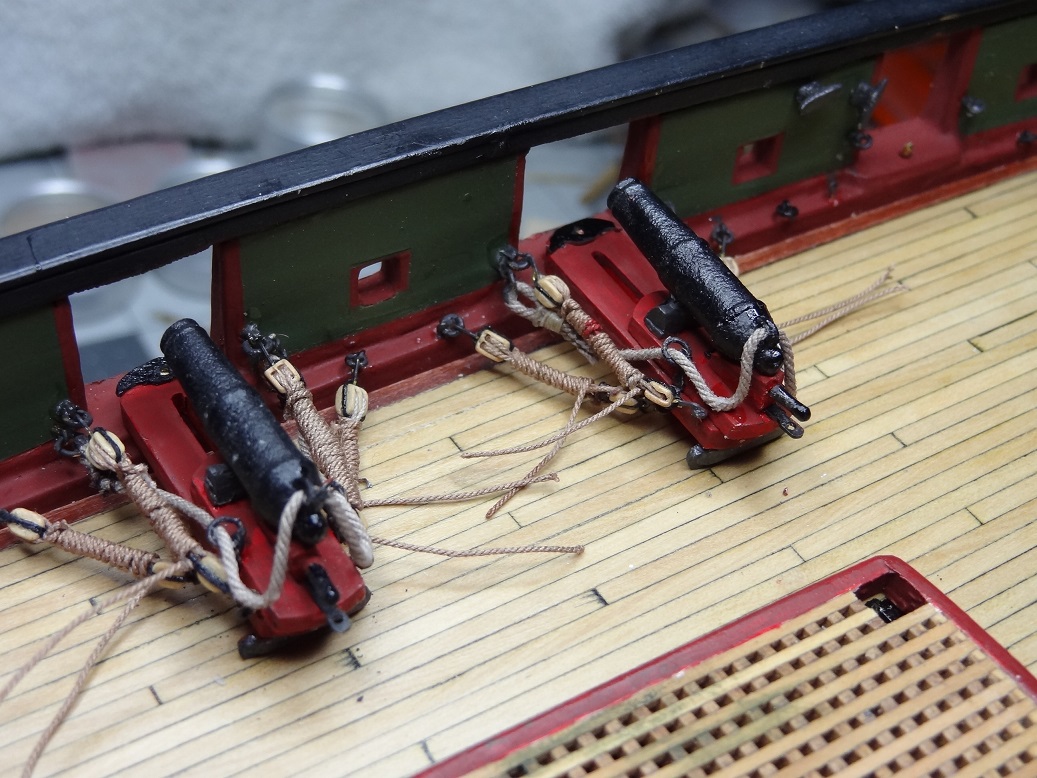
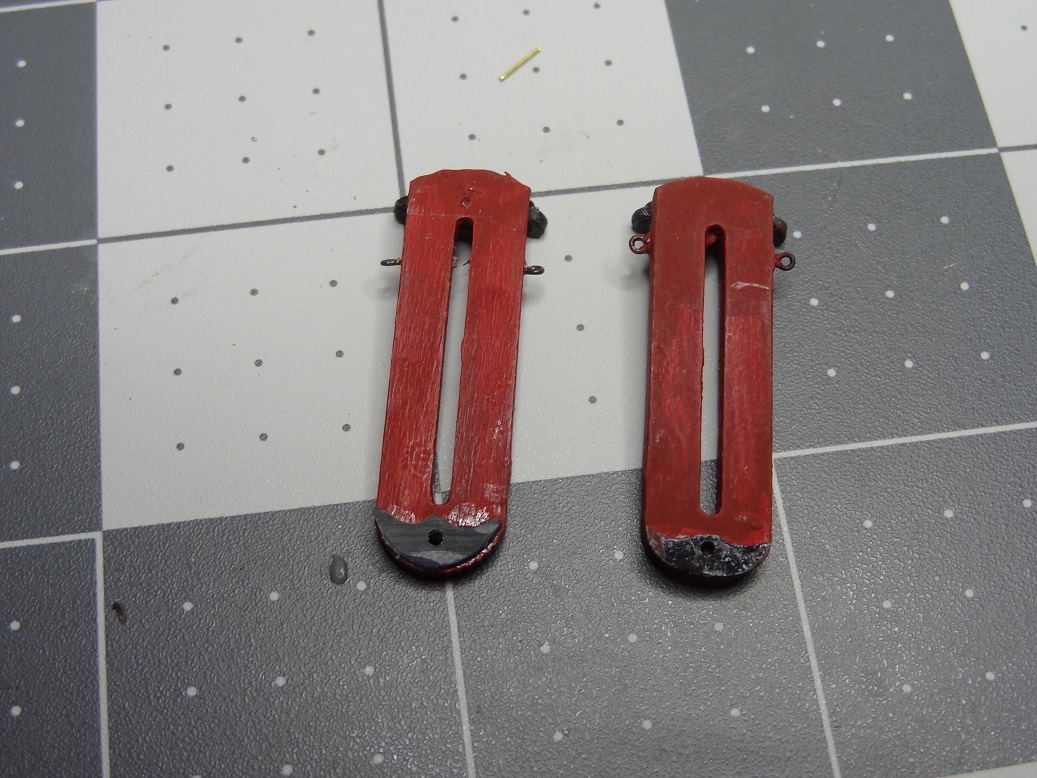
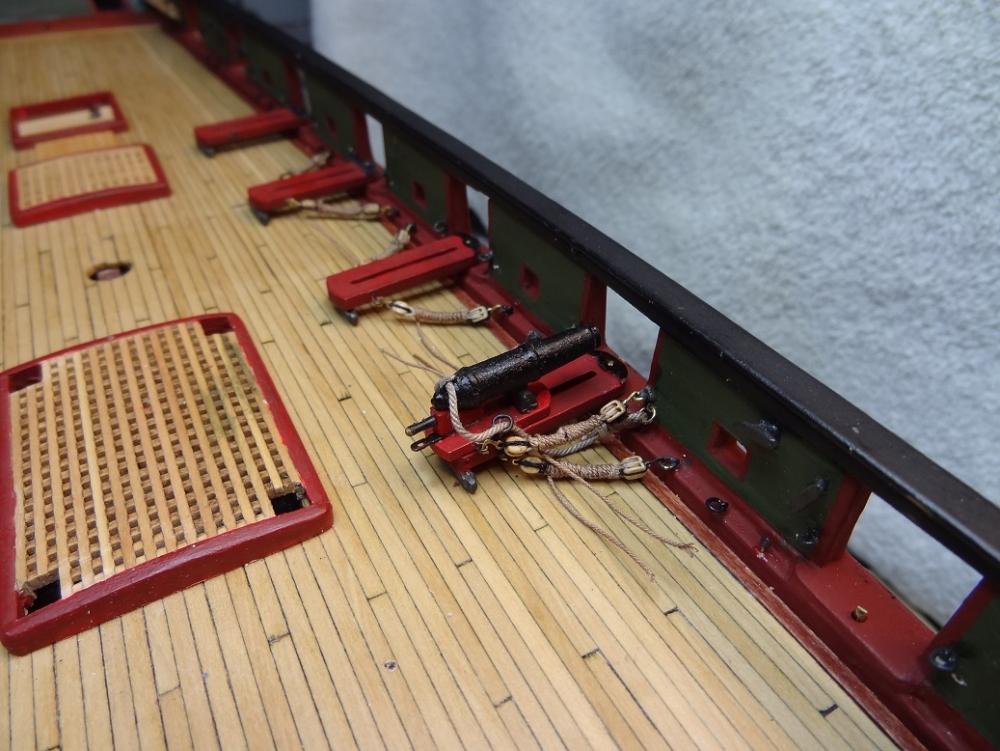
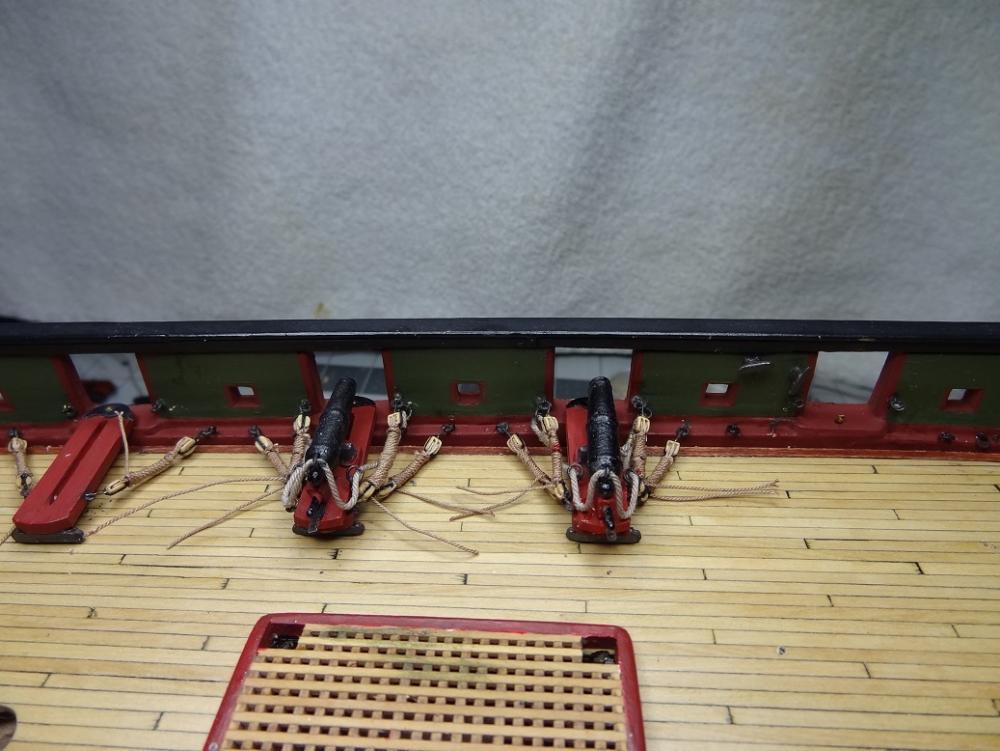
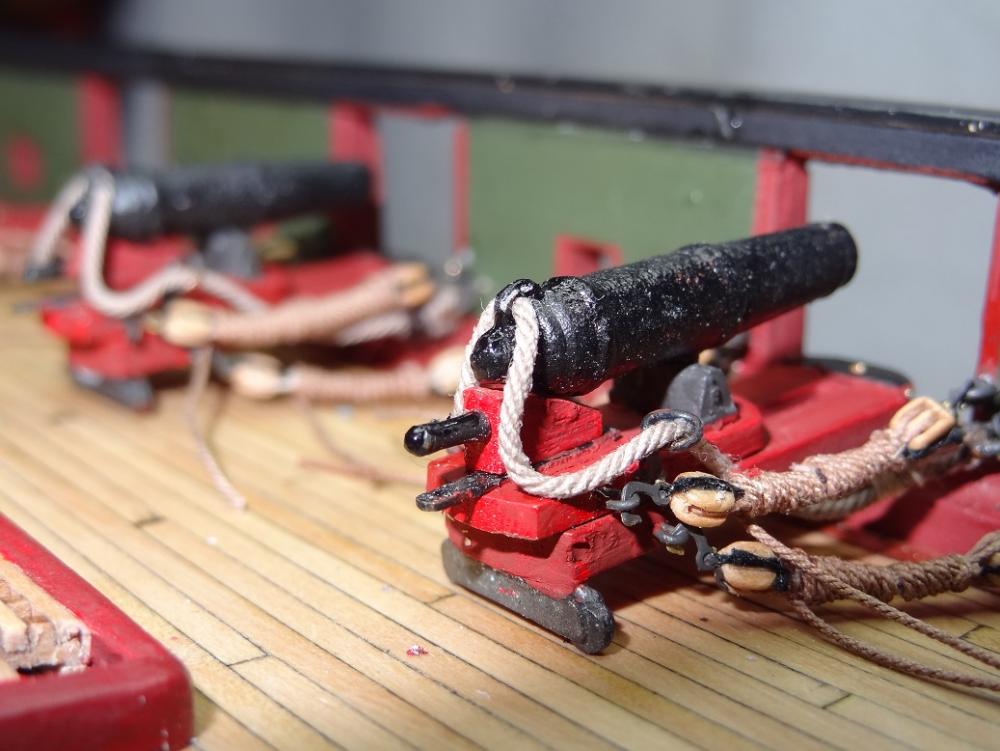
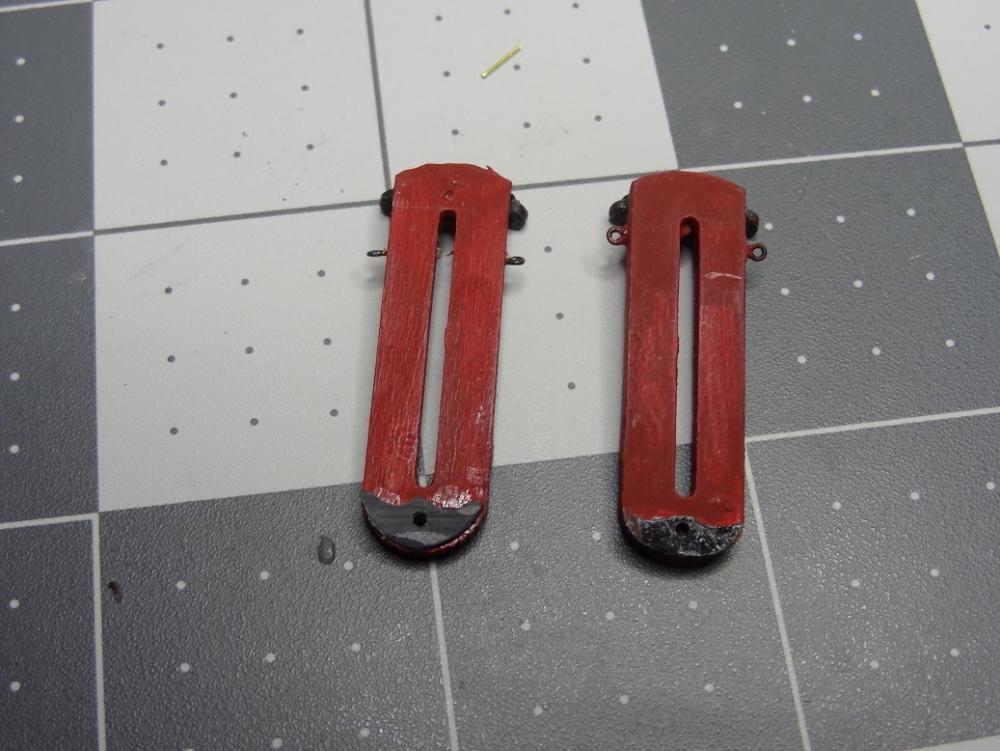
OK - my head is on the chopping block tonite. I have finished a couple of carronades with the frapped line. Put out tonite for your viewing pleasure. I think this is the route I am going to follow. The only thing I didn't do yet was trim the last inch of free rope (I want about 1/2") and glue the end to the deck. One disappointing discovery, I thought I had a lot more carronades finished than I did. There were 4 but 2 had a piece knocked off and lost. So today was spent making the brass & styrene parts - yes I said styrene. I also seem to be missing 9 of the bases. Serious problem! Oh, styrene - the crescent moon shaped plates at the lead of the bases. I made the first few from brass strip many months back. It was pretty time consuming, although it was also my first metalworking attempt. I made the rest today from a sheet of black styrene. Less that 60 seconds per piece vs about 5 minutes for the brass version and they are already colored black. Brass is on the right. The gun tackles were actually pretty easy. I hooked up the blocks to the appropriate eyebolts tightened up the line and glued the free part to one of the other lines. Then I removed the rig and re-hooked it on my serving machine. With a separate piece of rope, I tied a half hitch around the lines just inside the block. Then just ran the serving machine until the line reached the other block. A dot of glue, cut the line, done. Most of you know I have struggled with rope sizes on this effort. I wanted to go .018 as I feel it looks the best in the winding. However the final product was a tad too big - plans call for .016. So I ended up using .012 for reaving the blocks, then .018 to do the frap on the serving machine. I feel like the size proportions came out pretty good, although some may argue with that. So I installed the 2 good guns, and did a lot of picture taking and reviewing over a few days. I had done 1 in my mock up gun station and was happy with that, but had no idea what multiples might look like. Here's how they ended up. Hopefully will have all the gun pieces made tomorrow and can add a few more to the ship.


- 843 replies
-
- 4
-
-
- niagara
- model shipways
- (and 2 more)
-
Well I'm going to be boring on this choice and go with a sort of red ochre. Was rethinking the natural look (stained) but everything is primed already. This plywood is soooo porous. It's going to take quite a few coats to make it look good.
-
Had not considered that Joel. Is that about the same 'Dijon Yellow' as the Niagara bulwark?
-
Thought since I had to semi-assemble a cannon I would go ahead and finish it. Need to prime and paint but there are a few pieces that I can't tell the proper color. The horizontal flat piece the quoin sits on and the squares that the axle dowels fit into. I'm guessing red?
-
Joel ain't joking. All that stuff hanging on or about the hull is a prime candidate to get torn off. You're entering a whole new level of handling the hull.
- 648 replies
-
- 2
-
-
- niagara
- model shipways
- (and 1 more)
-
You could add a motorized winch to replace the capstan Seriously, it looks great Darrell. That raw cherry really stands out! Something that worked for me as I am fitting the guns, to tame the breech line (and any other rope) give it a good dab of flat lacquer then shape it or weight it and let it dry.
- 648 replies
-
- 2
-
-
- niagara
- model shipways
- (and 1 more)
-
Heck of a lot easier to put a hook on those than the little ones from the kit.......
- 648 replies
-
- 3
-
-
- niagara
- model shipways
- (and 1 more)
-
What? You're not taking something with you to work on? Can't get over how good that wood looks.
- 701 replies
-
- 4
-
-
- phantom
- model shipways
- (and 1 more)
-
So size wise, how does the eye hole compare to the 2 sizes of kit supplied eyebolts?
- 648 replies
-
- 2
-
-
- niagara
- model shipways
- (and 1 more)
-
Hey Darrell - I was reviewing your pix again and wondered what eyebolts you used on the sleds. Maybe just because the the pix are close up but they look bigger than the small eyebolts in the kit.
- 648 replies
-
- 3
-
-
- niagara
- model shipways
- (and 1 more)
-
I think you are doing great Julie. I have never really taken a close look at the yacht-style kits. The hull design appears very challenging indeed.
-
Darrell - keep those opinions coming. I believe, we need to be frank with each other on this site. I learn more when I hear a "great job, but...." rather than just the "great job". I am going to make a go of it with the .018. I will, however alter my plans based on your observation. I have been working an 'assembly line' process to get all the rigging prep work done - blocks reamed, hook stropped, etc. I was going to have that all completely done before reaving up the blocks and frapping and all that. Instead, I am going to go ahead and completely rig up and install 3-4 guns and see what that looks like. At least that way I will not have wasted all the time and effort if the look is not what I expected. I'll post some pix at that point. Thanks again....
- 843 replies
-
- 3
-
-
- niagara
- model shipways
- (and 2 more)
-
I appreciate all the positive feedback. Bob, Mr. Pucko, Paul - Thank You! I am going to go with the 'not quite square' approach to finish out the port area. I laid some plank pieces on the exterior frames - 2 more strakes and then the 3x3 strip - and I just barely noticed the port shape. And I was looking for it. The only thing I wish I had done differently was to use a solid 3x3 strip all the way across instead of pieces. And then inlayed a piece between them to fill out the port sill. Roughing out that gun reminded me that I still need to dig out my scroll saw and cut those laser cut wheels (term used loosely) from the plywood.
-
Good points Frankie. I'm considering frapping the lines on my Niagara guns. Just wondered what the other method was. While frapping looks pretty good at smaller scales I suspect the cowhitch thing would not. Too hard to get the lines to lay right.
-
You've got them all? Wow! That has to be a big relief. Not sure what the bigger milestone is - deck planked, hull planked or guns rigged. And we haven't even given much thought to general rigging yet. Congratulations on getting that completed!
- 648 replies
-
- 3
-
-
- niagara
- model shipways
- (and 1 more)
-
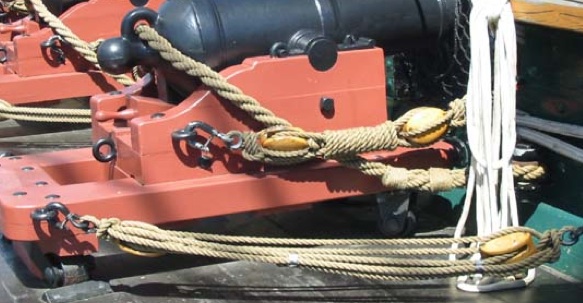
The upper tackle is frapped. What is the technique for the lower tackle? How is it done?