HOLIDAY DONATION DRIVE - SUPPORT MSW - DO YOUR PART TO KEEP THIS GREAT FORUM GOING! (Only 36 donations so far out of 49,000 members - C'mon guys!)
×


mikiek
-
Posts
2,276 -
Joined
-
Last visited
Content Type
Profiles
Forums
Gallery
Events
Everything posted by mikiek
-
 Just started reading about ships boats in Lavery's A & F last nite but fell asleep. I'll check Harland too. Those 2 books are such a wealth of information. I'll take a look and maybe go the route you describe on the quarter davits. I don't like those curved things.
- 843 replies
-
- 2
-

-
- niagara
- model shipways
- (and 2 more)
-
Your boat just got almost twice as long. I'm dreading that. My workbench has room side to side but not near enough front to back I didn't realize all those bullseyes were needed at the bow. One question for you - I can't see this in your pix. Did the bowsprit fit into the opening between the port and starboard bulwarks? I had to take a couple of cleats off for mine to pass thru. Wondering if I need to open that space up a little. I envy your woodworking skills. I've had a couple of problems I know could be resolved with a machined part but I have no idea how to do it. I'm also curious about your reasoning for doing the bowsprit first. Not that there is a right or wrong way - just wondering.
- 648 replies
-
- 3
-
-
- niagara
- model shipways
- (and 1 more)
-
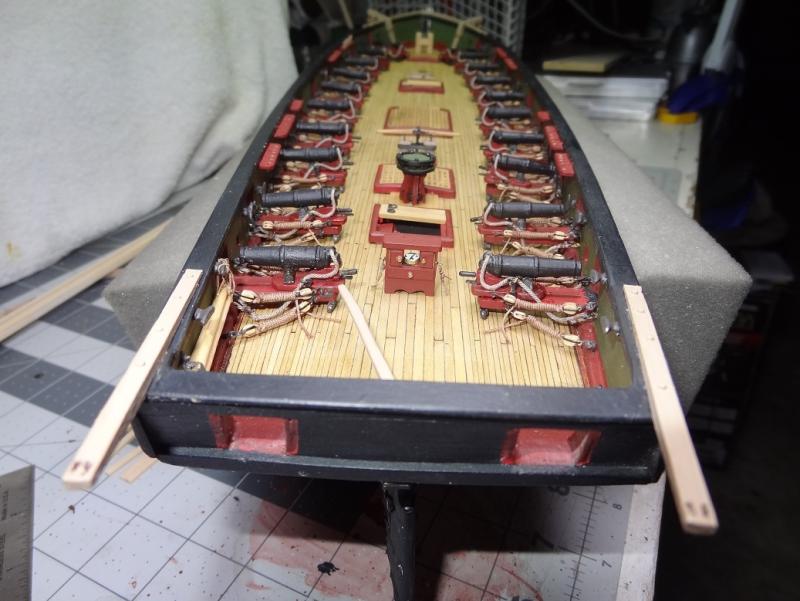
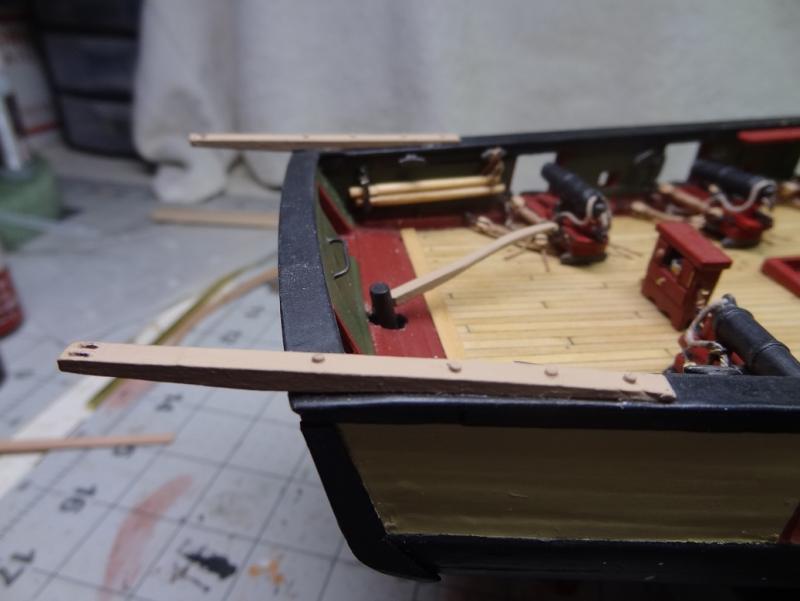
Binnacle is now a permanent fixture and davit bolts a la jbshan Next up, the bitts and fife rails.
- 843 replies
-
- 5
-
-
- niagara
- model shipways
- (and 2 more)
-
Got it. Thank you. Cool idea with the bolt heads in the rear davits.That adds a lot. I may steal that idea from you. I believe I am going to follow your lead with the boats - one hanging at the stern and one on blocks or something, probably over the main hatch. I wonder about those quarter davits. It seems like there are very few period illustrations that show a ship with boats hanging off the sides. Maybe they are something a little more contemporary? I would imagine on larger ships it would be pretty tough to even launch a boat if the water was 10'-12' below.
- 843 replies
-
- 2
-
-
- niagara
- model shipways
- (and 2 more)
-
So I'm stumped. Lashing - seize eyebolts to both ends of a piece of rope? Surely something more elegant.
- 843 replies
-
- 2
-
-
- niagara
- model shipways
- (and 2 more)
-
Cobr@ nailed it Elijah. The reasoning is it's easier to get the mast (and your drill) into a known position - perfectly vertical - and then make adjustments to the hull position for the angle.
- 701 replies
-
- 7
-
-
- phantom
- model shipways
- (and 1 more)
-
You can do it backwards. Use a plumb line (you can make one) that will be your mast alignment. Hang it somewhere so that the end is about an inch or two above the boat. Then slide you boat under the hanging end of the plumb. You can then raise the stern ever so slightly until the keel is at the angle you want. Your drill should then line up with the plumb. For future reference, it is usually easier to cut the mast steps in the false keel at the start of your project. Some kits, like my Niagara already had the cuts so all I had to do was mark holes in the deck as I was planking it.
- 701 replies
-
- 5
-
-
- phantom
- model shipways
- (and 1 more)
-
Looking great! Was there a fitting for the hawse opening or did you make that?
- 701 replies
-
- 4
-
-
- phantom
- model shipways
- (and 1 more)
-
Glad to see you back in business! Show us how it's done.....
-
Julie - as I was becoming more familiar with sailing ships and how they worked I was surprised to find that even the big ships with steering wheels were doing nothing more than manipulating a tiller located a deck or two below.
- 843 replies
-
- 2
-
-
- niagara
- model shipways
- (and 2 more)
-
Back to your frames for a sec. I am building the Model Shipways English Pinnace kit on the side. The design is an interesting idea. The frame goes in as part of a solid bulkhead piece. The bulkhead fits to the keel like many kits. You then plank the bulkheads. Afterwards, the center part of the bulkhead knocks out leaving you with a frame. A poor description on my part but you can see what I am talking about here (documents tab). The bulkhead pieces are only 1/16" thick. In the kit, the knockouts are laser cut but given the sheet is only 1/16" it could be done with a knife fairly easily. If you want some better pix let me know,
-
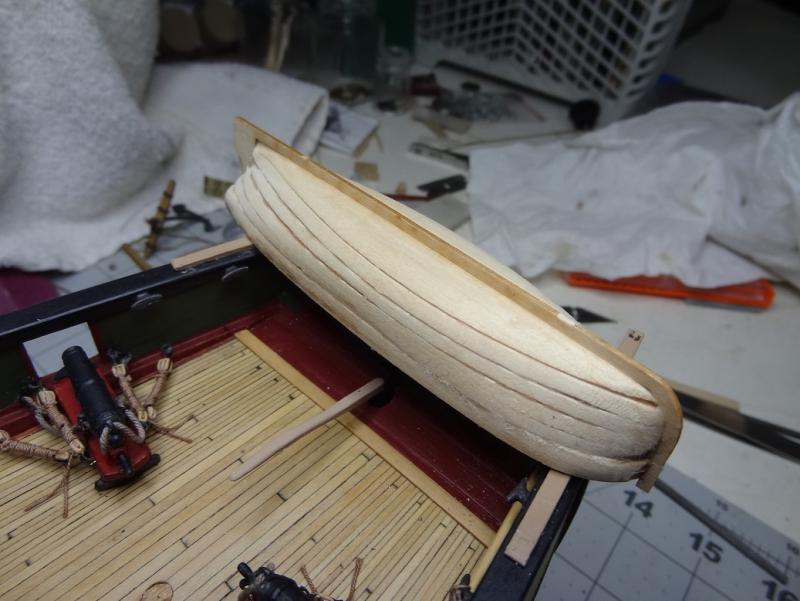
A good point Joel. That will also save me from doing the rigging on the rudder. Good thing I didn't glue the tiller. re: the boats, a Dremel made short work of the sanding. The exterior will be planked so all the nastiness seen in the pix will be covered. The interior has quite a bit of stuff in it - frames, floorboards, seats - so very little of the hull shell shows there. The boat in the pix is actually a cutter (1 of 2) and would be hung from the side davits. The yawl (made that months back) will hang from the stern. A poor choice on my part to pose the cutter on the stern davits. Got to wondering whether the real Niagara (and Lawrence) would have had boats. I guess there was at least one or Perry would have been stuck on Lawrence. Seems like boats, hanging or otherwise would have been a safety problem in battle.
- 843 replies
-
- 2
-
-
- niagara
- model shipways
- (and 2 more)
-
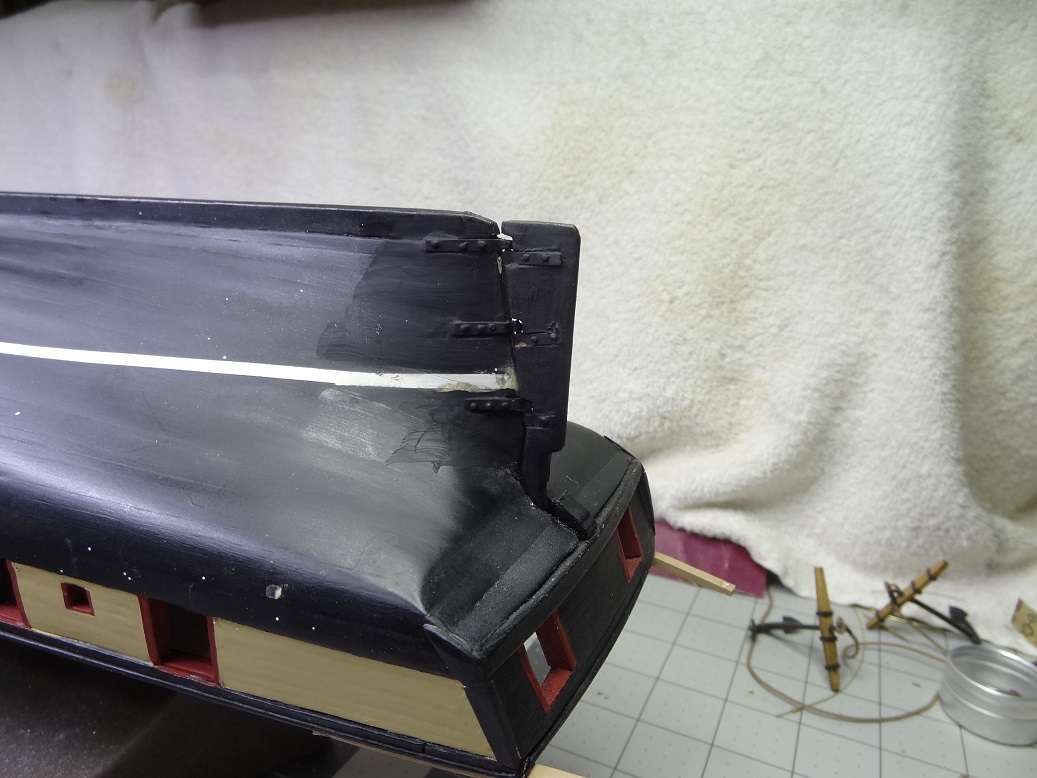
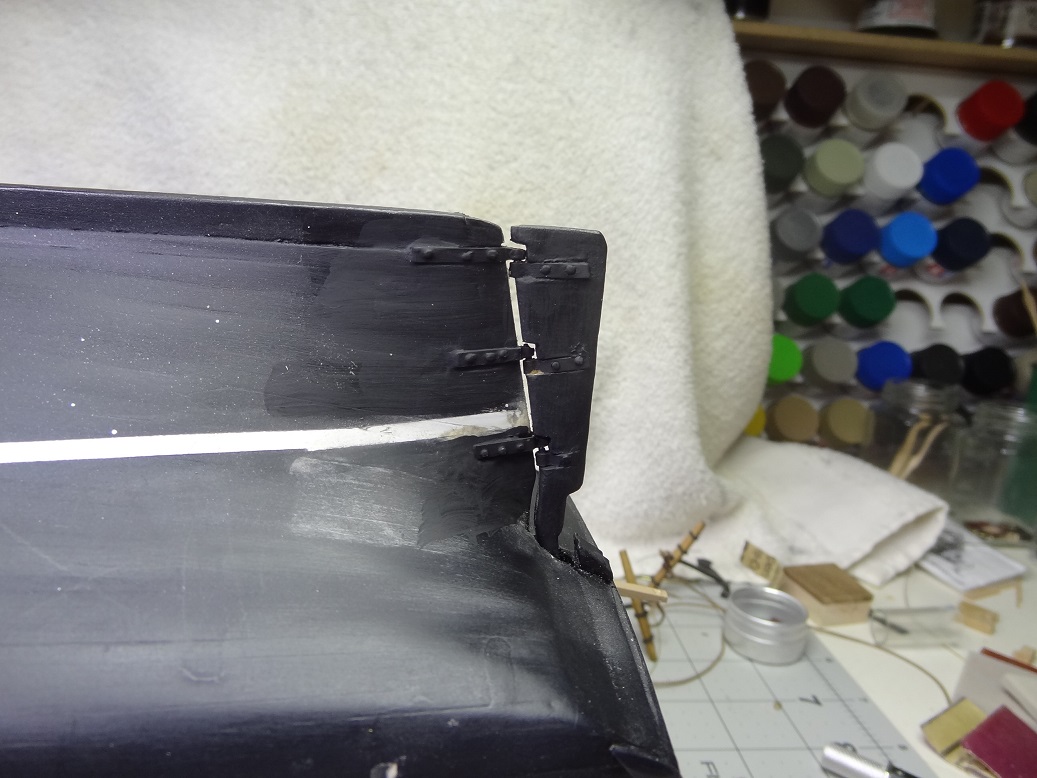
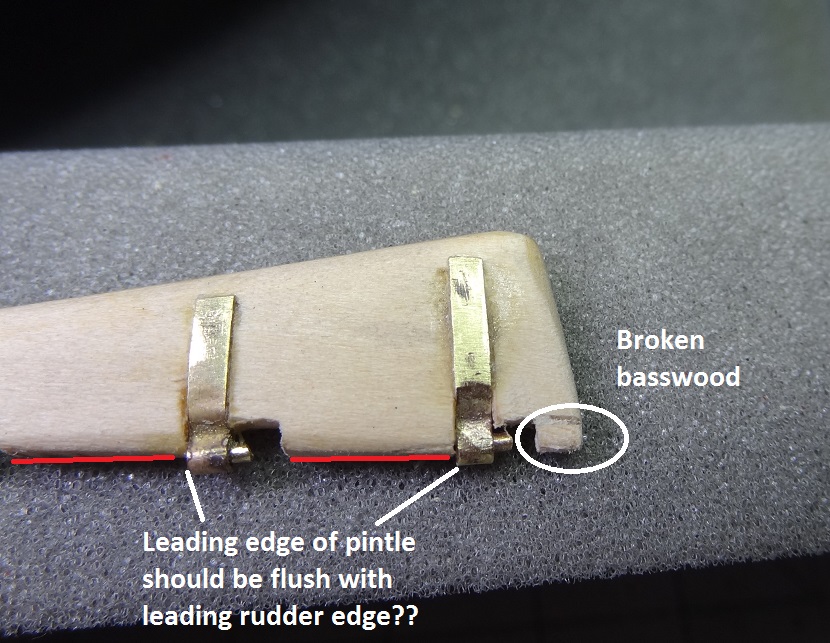
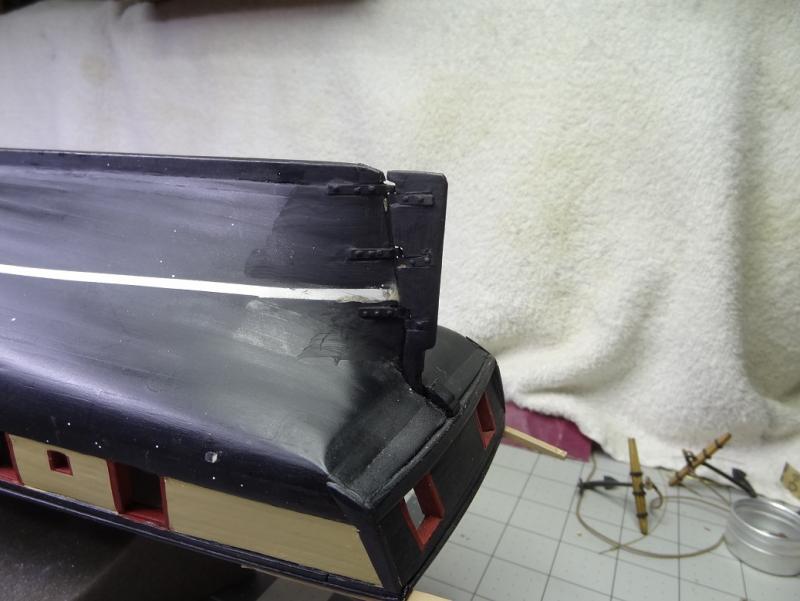
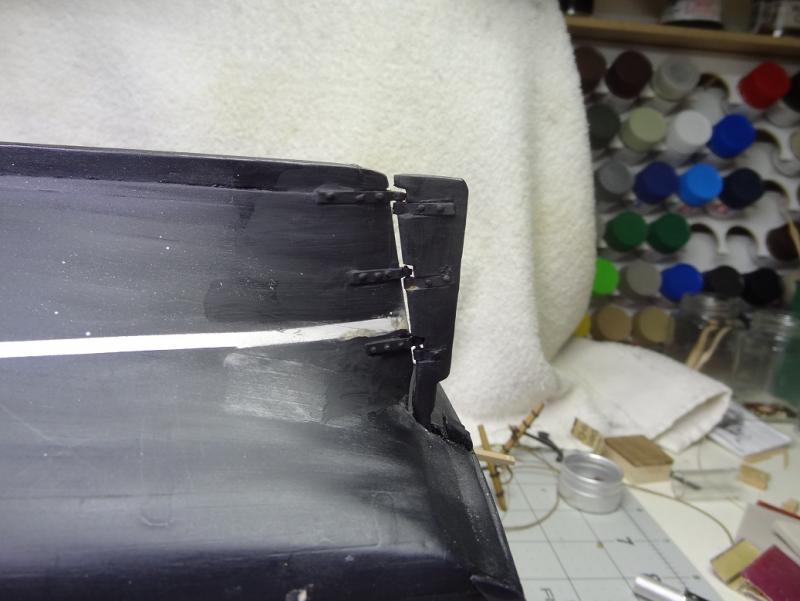
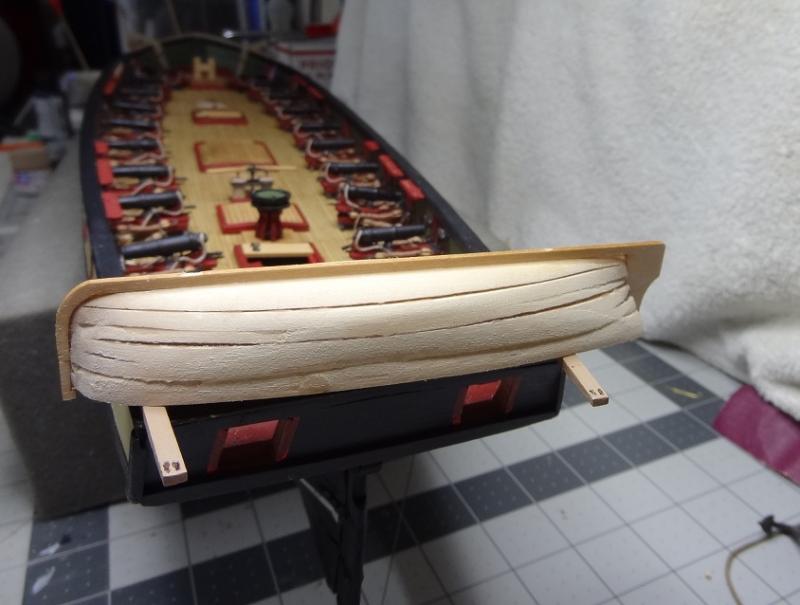
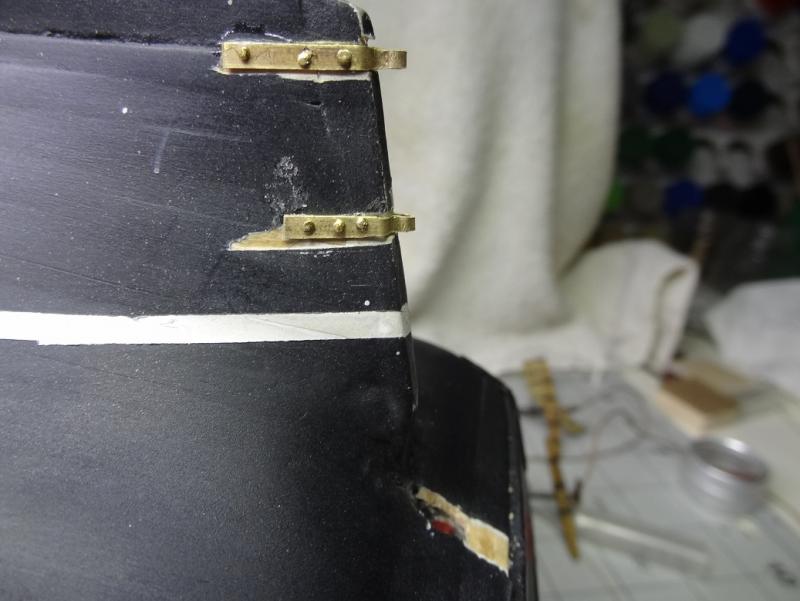
I've redone the pintles on the rudder after making the notches a little deeper. I feel like that's cheating a little but it is done. Pardon the paint job, that's just some brushed on primer. Probably won't repaint until the final hull repaint - however the stern looked a little rough with the filler and scratched up surfaces. I was able to salvage the basswood kit rudder but I had to make 2 new pintles with shorter straps. Both pintles and gudgeons are attached with nails from the kit. I think that is a better idea than trying to simulate bolt heads. I can already tell I'm going to end up breaking the rudder off as I handle the hull. It is right where I grab it. Speaking of broken somehow the pump handle was cracked right at the pivot. Heaven help me when I start adding parts that protrude above the hand rail. Also working on the first of 2 long boats. The 7 laser cut parts are supposed to be glued together then sanded down. I found it was easier to glue the top 2 as one piece the middle 3 as another and the bottom 2 as another. These individual pieces can then be sanded out easily. The 3 pieces are then glued together and final sanding will smooth where they join. This one is ready for planking.

- 843 replies
-
- 3
-
-
- niagara
- model shipways
- (and 2 more)
-
Cool Scott!! Must be nice to see some ropes on the sticks. How did you keep the top mast straight and aligned with the fore mast?
- 287 replies
-
- 2
-
-
- niagara
- Model Shipways
- (and 1 more)
-
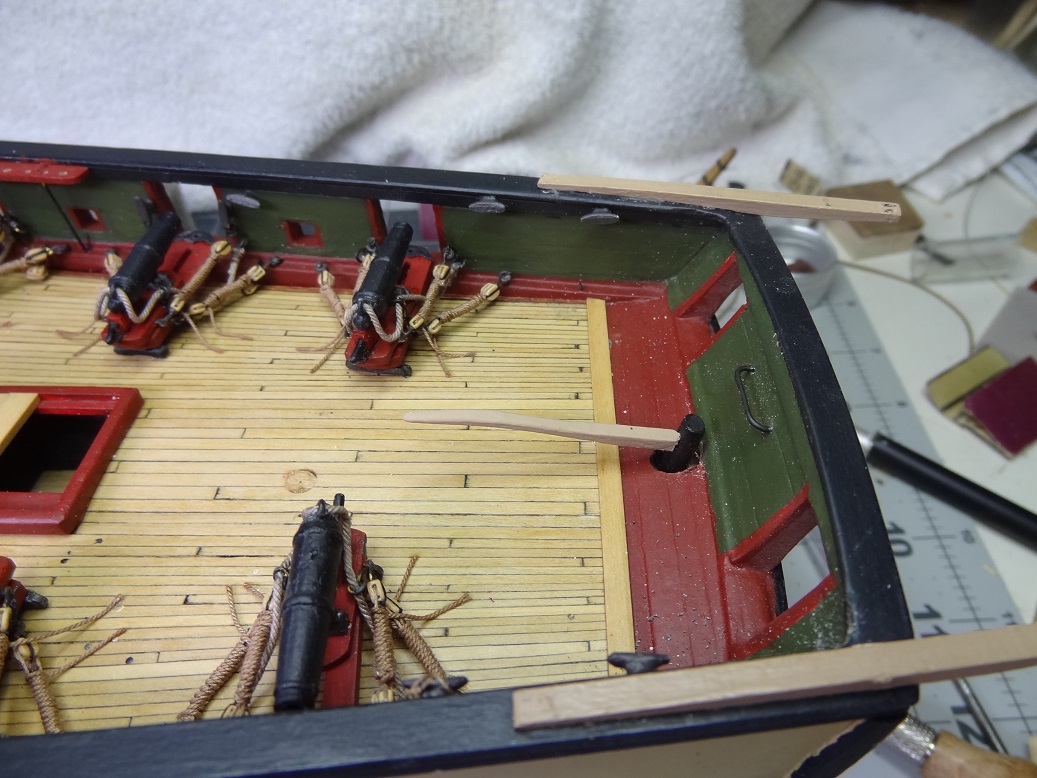
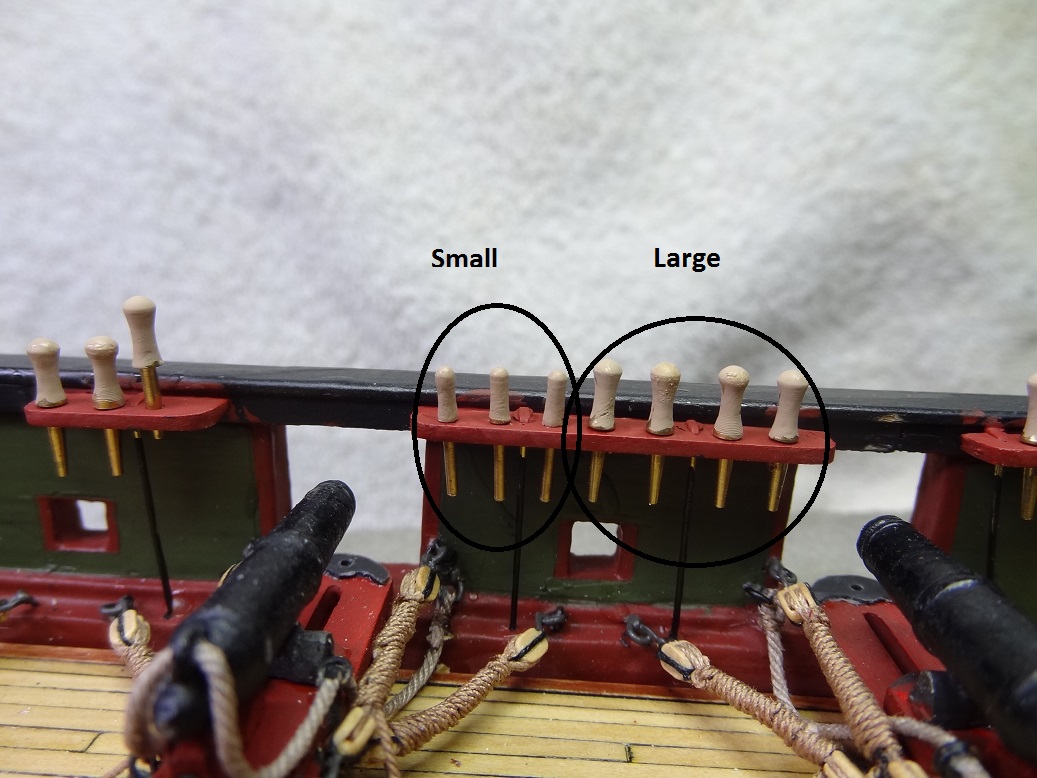
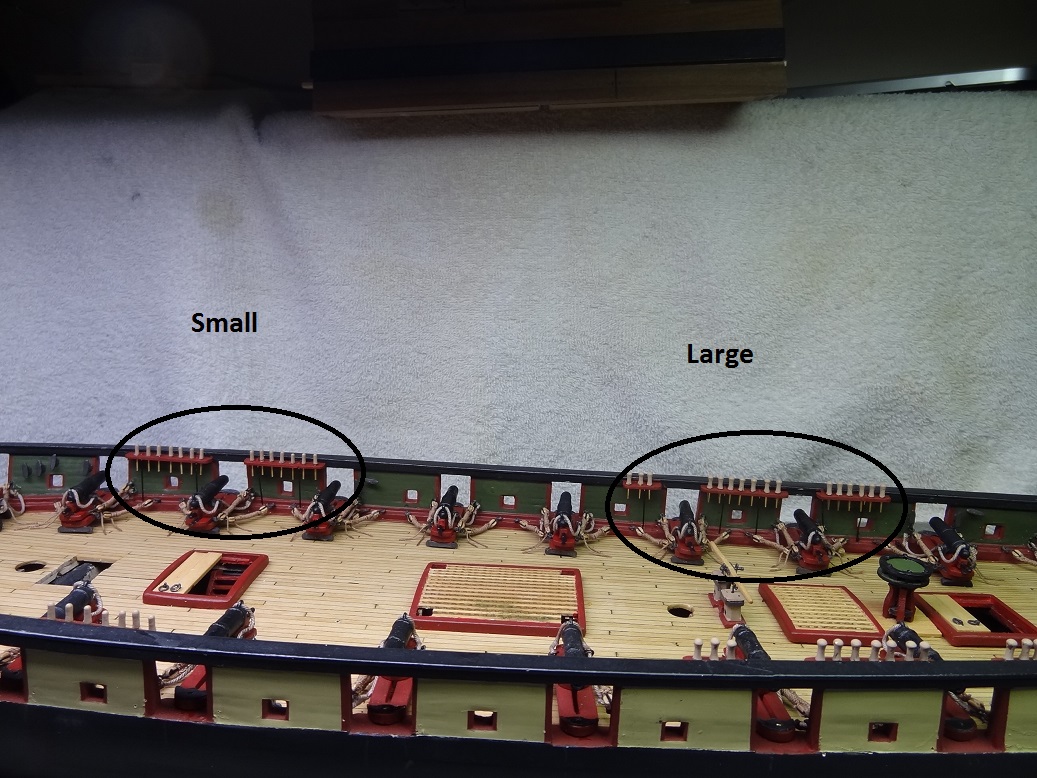
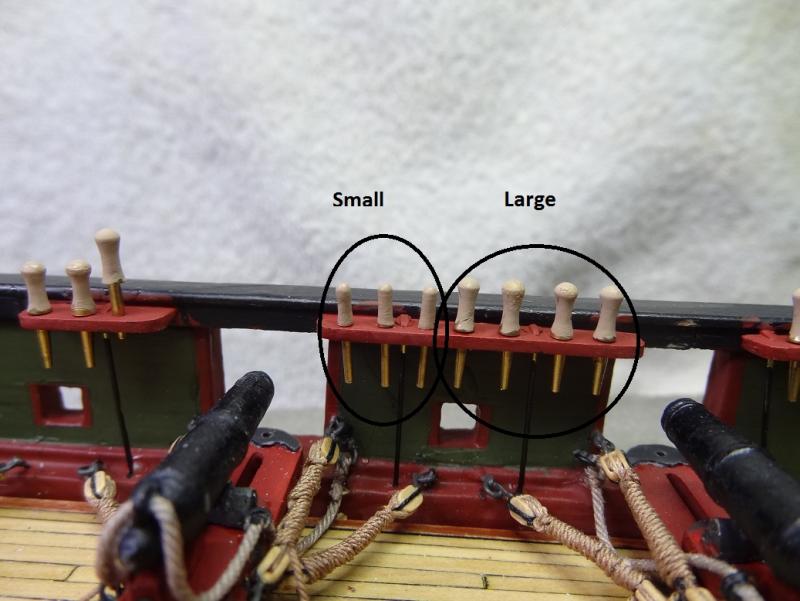
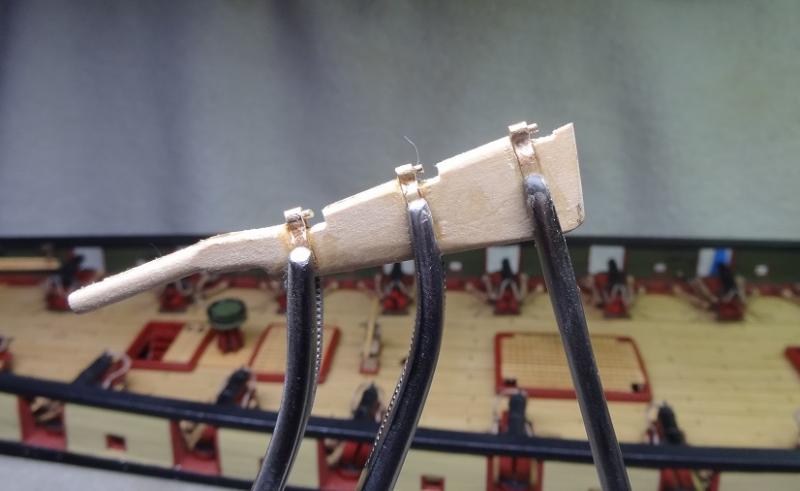
Problem of the day. Have been installing the rail belay pin strips - another one of those items that has been sitting around forever. They went in OK but I've realized that there are not enough of the kit supplied pins. Actually I discovered this a while back and ordered what I thought were the same pins from Model Expo.What I got are pins slightly bigger than the originals. So what I have to decide now is whether to use the larger pins, if so how to mix them with the smaller ones. What I mean by that is maybe something like bigger pins on the rail strips and smaller ones on the fife rails. Of course another question is do I even care? They will most likely be covered with rope coils. Here's what I'm talking about A few side by side just to compare the size One possible mix Thought I was wrapping up the rudder assembly, however further adjustments will be required as the gap between rudder and sternpost is a little more that I would like. The ring on the gudgeons is causing this. They extend out from the sternpost more than they need to. I could deepen the notch in the sternpost allowing the gudgeons to recess a little more. Or reinstall the pintles, deepening the notches in the rudder and recessing the pintles more. The latter is probably the better idea but I'm not sure how much more abuse the basswood rudder will take. It's already broken once. Of course making a new rudder from boxwood is an option as well.


- 843 replies
-
- 3
-
-
- niagara
- model shipways
- (and 2 more)
-
ME does have a pretty good rep. Glad they are living up to it.
- 129 replies
-
- 2
-
-
- finished
- model shipways
- (and 1 more)
-
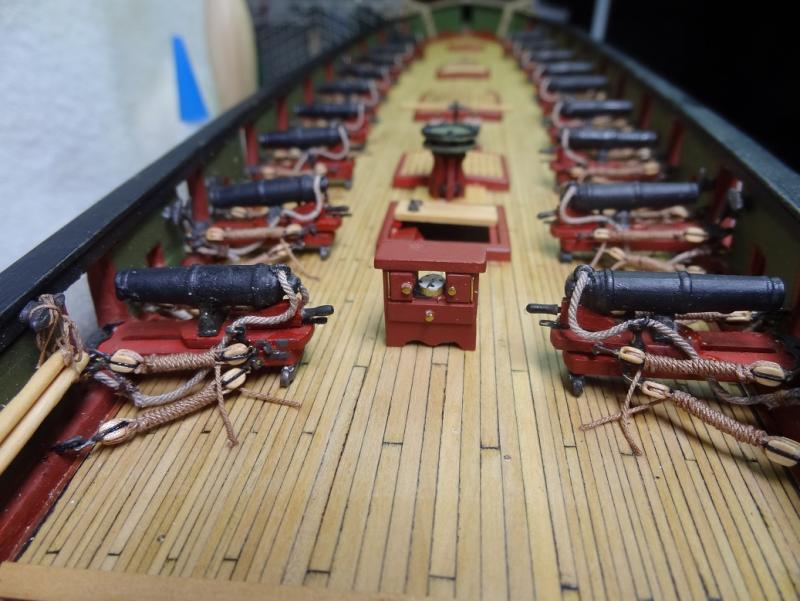
Thanks Julie - I was really struck when I began realizing that Niagara was nothing but a bunch of guns - carronades. Giant shotguns that they would load with almost anything. I've read some accounts of the devastation that could be done - both to boat and personnel. And everyone was expected to stand there and take it. I've mentioned before that while the percentage of injured was usually not that high compared to other warfare, the damage that was done was brutal by any standards.
- 843 replies
-
- 3
-
-
- niagara
- model shipways
- (and 2 more)
-
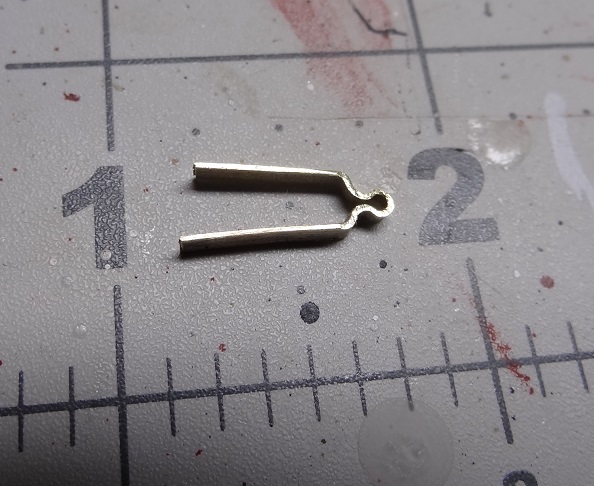
Thanks Elijah. I used a brass rod (don't recall the diameter) wrapped a brass strap around it and hard soldered. I'll try to post more details when I finish the rudder
- 843 replies
-
- 2
-
-
- niagara
- model shipways
- (and 2 more)
-
Joel - re: binnacle fasteners, I have been trying to use brass wire between the eyebolts. It's been a struggle to get it taught without breaking the wire or pulling an eyebolt out. By 'lashing' I assume you mean with rope? Sure would be easier. Good idea on the thicker planking under the capstan. Do they do that to add strength or is there some other reason? re: the rudder, I was going to try to temporarily fasten the gudgeons to the pintles and then insert the rudder in place. The hope being that the gudgeons would land on the stern post right where they need to be. re: the butt spacing, so full plank in between grates or structures. This would seem to apply at the centerline and outwards a bit. Would they pick up the regular butt pattern after the last structure at the bow and stern? Don - Thank you. It was a long time coming!
- 843 replies
-
- 2
-
-
- niagara
- model shipways
- (and 2 more)
-
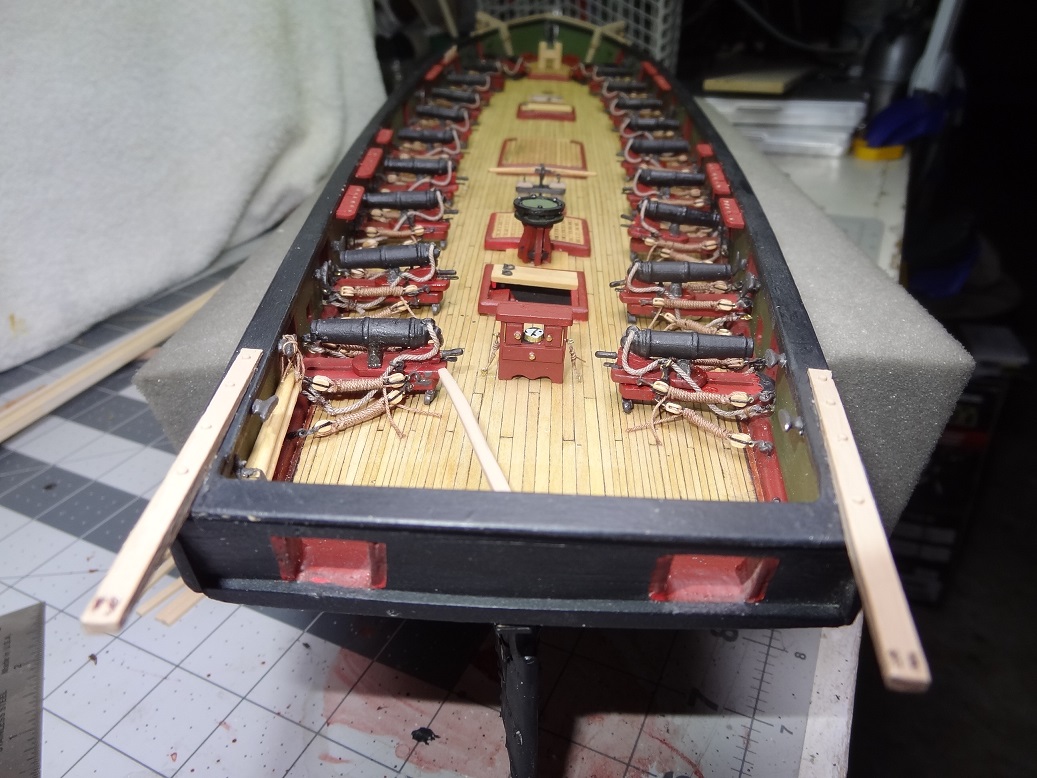
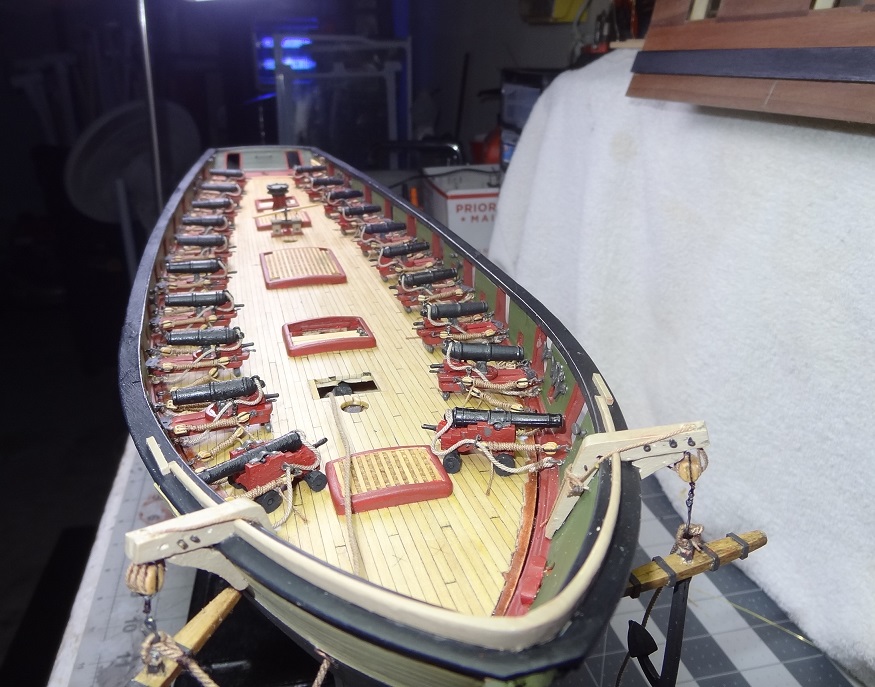
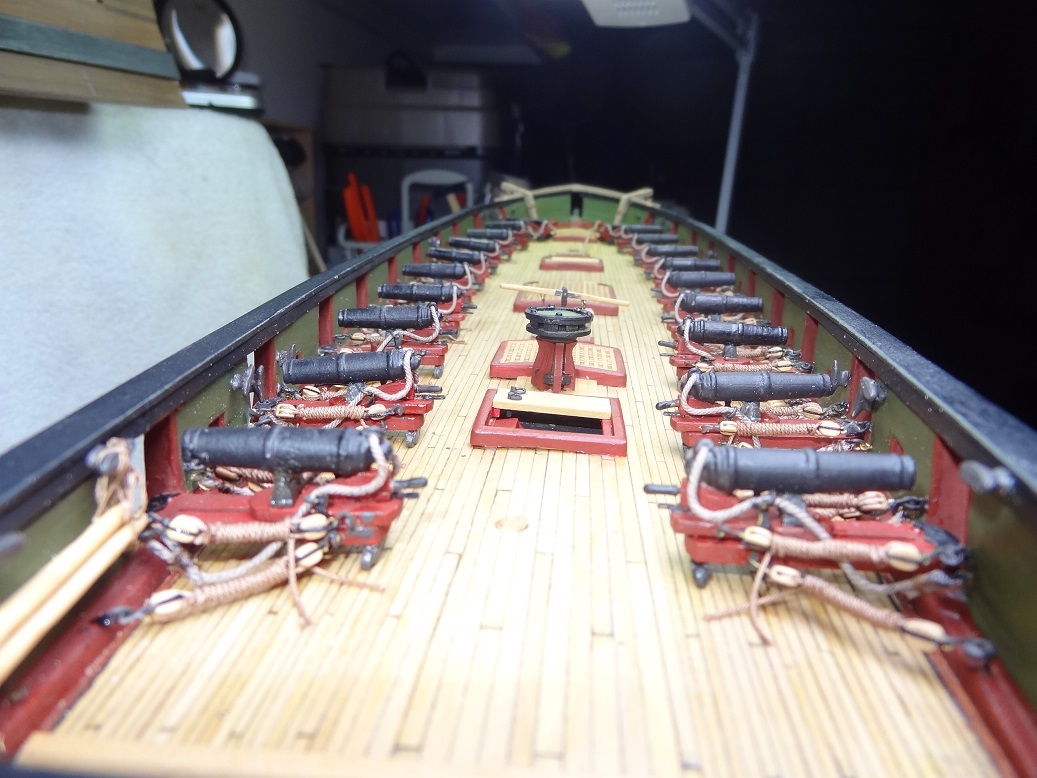
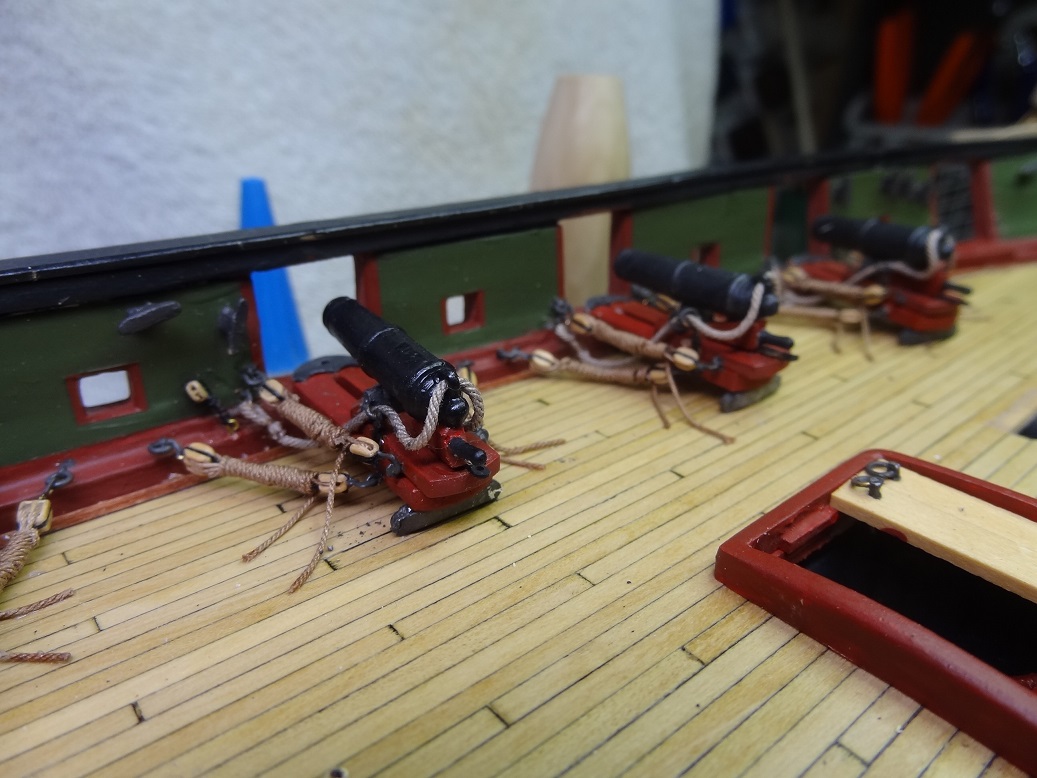
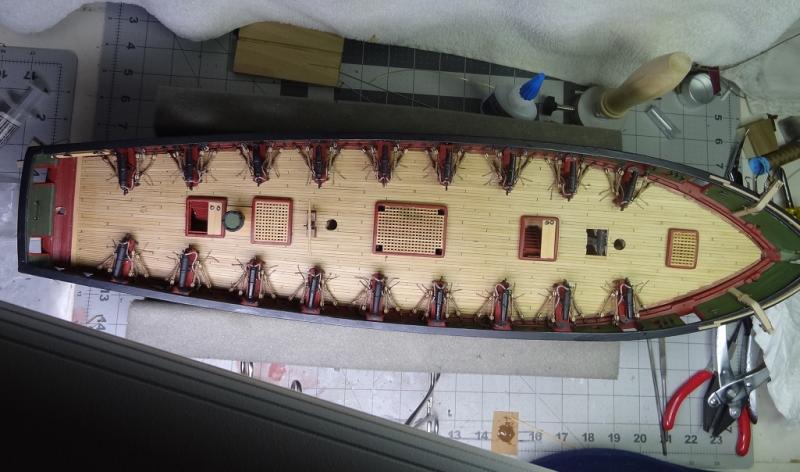
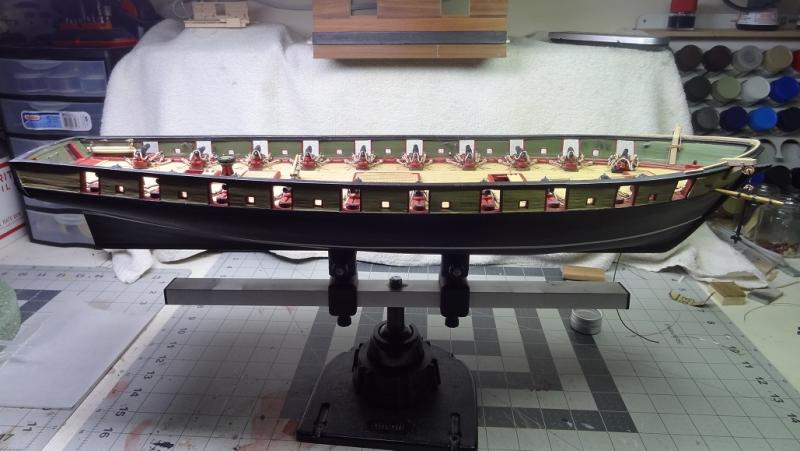
Free at last! Free at last! With the exception of a couple of minor alterations I believe I have completed arming Niagara. What a journey! It's hard to believe that I began drilling eyebolt holes in the bulwarks back in early JUNE. Then close to a month with that mock up gun station. Debating with myself over the part sizes - what I liked vs conventional wisdom. Then getting down to it. I seriously doubt if general rigging will be anywhere near as tough. Overall I like the frapped tackles. I'm glad I went down that path. In hindsight, I should have spent a little more time with the windings. I think they could have been a little looser. Each tackle was tightly wound with almost 5" of rope which would work out to something like 75' which is ridiculous. I imagine the loose end of the rope coming out of the double block would not have been more 10'-12'. Not enough to wind from one block to the other. I've been thru how I did the tackles so no more on that. I did realize late in the game, while slathering lacquer on the breech ropes for shaping, that I never applied any finish to the deck or insides. So I did my best to paint around the guns and got a coat of matte varnish on things. May do one more before everything gets even less accessible. Also installed are some of the deck items. Many of those pieces have been laying around for months in small containers - nice to get that cleaned up. Was able to put away all the ropes and blocks and rigging tools and rigging jigs - the workbench is almost visible. I was hoping to include the rudder & steering with this but that is turning into it's own adventure. Parts are made but not totally fitted out yet. And on to the deck. Minor catastrophe when drilling the hole for the capstan shaft. I guess I was using too large of a bit - when it contacted the deck it ripped off the secondary capstan decking and the grate on either side. I can see here that I did not get the grate reinstalled flush with the deck. Still working on the fasteners (brass) for the binnacle.


- 843 replies
-
- 6
-
-
- niagara
- model shipways
- (and 2 more)
-
Nice work Elijah. One suggestion - not on your work but on your photography. When you shoot small pieces like that, it can help to put a coin (or something) by them so we can get an idea of the scale you are dealing with. Those cleats look pretty small.
- 701 replies
-
- 5
-
-
- phantom
- model shipways
- (and 1 more)
-
Julie - for all the trouble you are going thru, did you ever consider cutting the frames from a sheet? Solid or ply. No bending required. You could either cut one entire frame piece or strategically make pieces that join to make the final piece. A scroll saw, jig saw or maybe a jewelers saw should make short work of it.
-
I'm flattered. Actually there are 3 others in progress. A gun deck section, Colonial Schooner Enterprise and an English Pinnnace. They are good to have around - all quite different. My temper gets such that I have to put Niagara away from time to time. No rigging on the Pinnace and the gun deck scale is quite large so easy to work with. I can work on either with little chance of aggravation. The next major project will be either Xebec Cazador or Row Galley Arrow. Two REALLY different styles of boat. Leaning towards Arrow. I've learned a whole lot of the history of the Great Lakes portion of the War of 1812 with this build. Very interesting what went on and how/why they built Niagara like they did. The row galley played a part in all that. HOWEVER Cazador looks like a very nice kit. Got a coin? Maybe both?
- 843 replies
-
- 4
-
-
- niagara
- model shipways
- (and 2 more)