HOLIDAY DONATION DRIVE - SUPPORT MSW - DO YOUR PART TO KEEP THIS GREAT FORUM GOING! (Only 72 donations so far out of 49,000 members - Can we at least get 100? C'mon guys!)
×


mikiek
-
Posts
2,276 -
Joined
-
Last visited
Content Type
Profiles
Forums
Gallery
Events
Everything posted by mikiek
-
 Search long enough and ye shall discover. Probably a newbie excitation - frapping. That is how I will be dealing with the excess rope on the gun tackles. I've seen the pix but didn't know the term for it.
- 843 replies
-
- 2
-

-
- niagara
- model shipways
- (and 2 more)
-
Nice idea Don. If I cut the dowel at an angle I will get the oval shape I need.
- 843 replies
-
- 3
-
-
- niagara
- model shipways
- (and 2 more)
-
That is actually the more flexible approach. Because if I look at the hole or really the edge of the hole at the hull, it will need to be an oval shape, not a round one. Besides, I feel like beating on something
- 843 replies
-
- 3
-
-
- niagara
- model shipways
- (and 2 more)
-
Yup - single to single. Did the plans say single to double? Can't believe I would have missed that.
- 648 replies
-
- 2
-
-
- niagara
- model shipways
- (and 1 more)
-
Right Bob - I'm looking around the house for something before I order something. Wish I was a little better at metalworking. Couldn't be that hard to make something
- 843 replies
-
- 2
-
-
- niagara
- model shipways
- (and 2 more)
-
Thanks Darrell - for your CA puddle, try squirting on wax paper. It's good for a 20-30 minutes there. I was able to get back into it last nite - at least better. I am making half the blocks with only a hook and the other half with a hook on one end and a seized rope (to reave thru another block) on the other. So it looks like the block that hooks to the bulwark should be the one with the rope coming off and the rope reaves thru the block hooked to the gun and back up to the bulwark block. When in your process did you seize the rope to the block?
- 648 replies
-
- 2
-
-
- niagara
- model shipways
- (and 1 more)
-
Bob, Don - the look of those eyelets is exactly what I am looking for. I'm afraid there may be a problem with the angle of my hawse hole "shaft" and the hull surface. Rightly or wrongly, at the hull the hole goes up at about 80 degree angle. So I would need to bend the eyelet. Or I suppose another option would be to cut off everything behind the circular opening of the eyelet and just glue that.
- 843 replies
-
- 3
-
-
- niagara
- model shipways
- (and 2 more)
-
I thank you all for pointing out the kit supplied caulk strips. If you hadn't I would have breezed right by them. I'm still undecided as to what to use. Both the strips and the styrene have pros and cons. I will do a little more testing tonite and let you know what I come up with. BTW - It's good to see even more builders of this kit jumping in to help. I appreciate all input and feedback!
-
Paul - I was planning on the styrene based on Cobr@s notes regarding the 0.5x2 strips. That said, I glossed right over the step in the instructions - the plan makes no mention of it. I do like the idea that the strips are already cut to fit. So I dug them out and fit one between two deck planks. They are hardly visible, mostly due to the color. So I took out the old Marks-a-Lot and colored the strip black. This is a little more appealing. However, when it comes time to stain I would be a little nervous as to whether the black ink would get absorbed by the limewood planks. So the decision may get down to how much of a caulk strip do I want? The 0,5 is not bad. I don't think I would go as wide as Cobr@ did. I have some 1.0 styrene which I find to be the most pleasing for my eye. The downside is having to cut the strips. But I know it won't run at stain time. FWIW....
-
Darrell - the cable is .045. Maybe I missed what you are referring to on the plans. I like what Cobr@ is suggesting, I just wonder how it might fit because the surface where the hole exits is not perpendicular to the hole.
- 843 replies
-
- 2
-
-
- niagara
- model shipways
- (and 2 more)
-
Cobr@ - have you used these? The concern I have is while my actual hole is round, the hole "surface" or "edge" is more of an oval due to the way the hole exits the hull.
- 843 replies
-
- 2
-
-
- niagara
- model shipways
- (and 2 more)
-
And who was just saying that they screwed the hull up? Well done indeed.
- 653 replies
-
- 5
-
-
- trabakul
- marisstella
- (and 1 more)
-
That's where I was leaning too Don. Otherwise epoxy. I don't think wood glue would bond well as styrene is not very porous.
-
About ready to do some deck planking. Per Cobr@s suggestion I picked up some black styrene to simulate caulking. I may go with a thinner sheet than Cobr@ used. I have almost no experience with styrene. What is the best glue to use for styrene to wood?
-
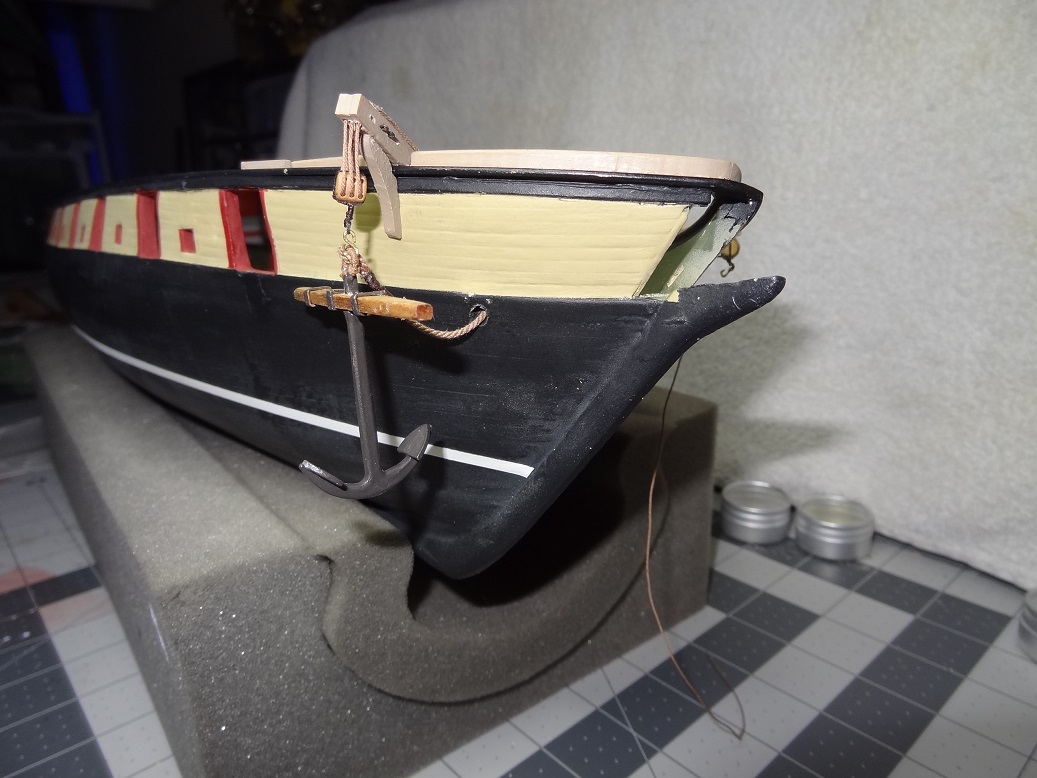
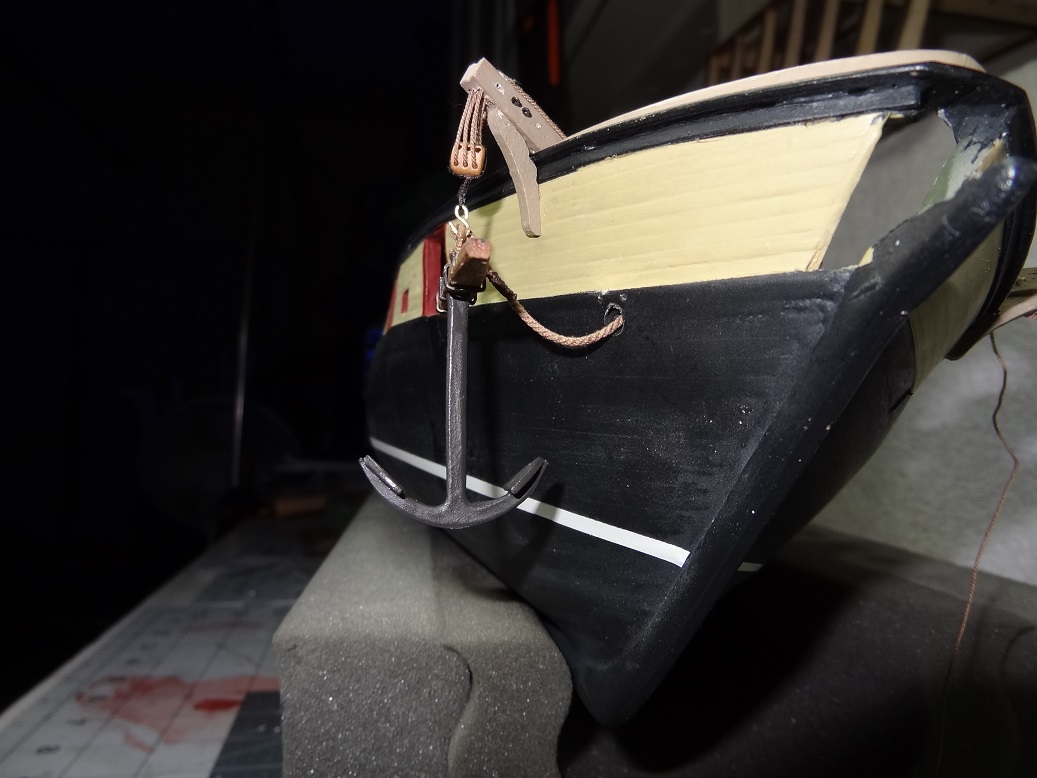
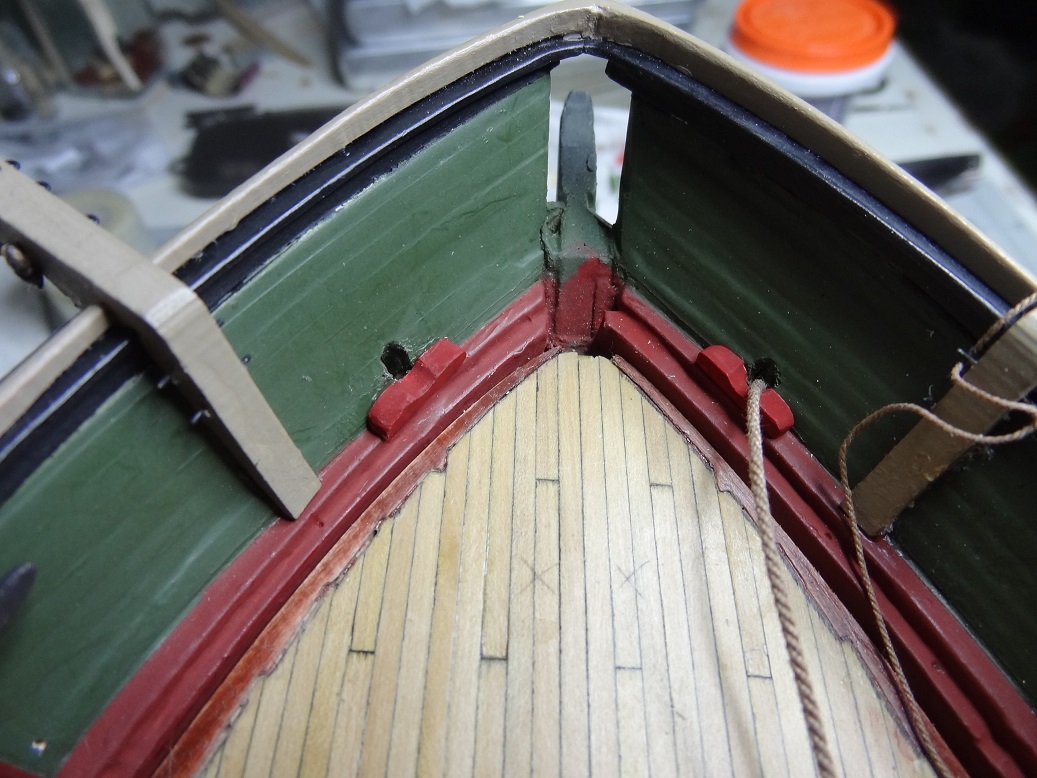
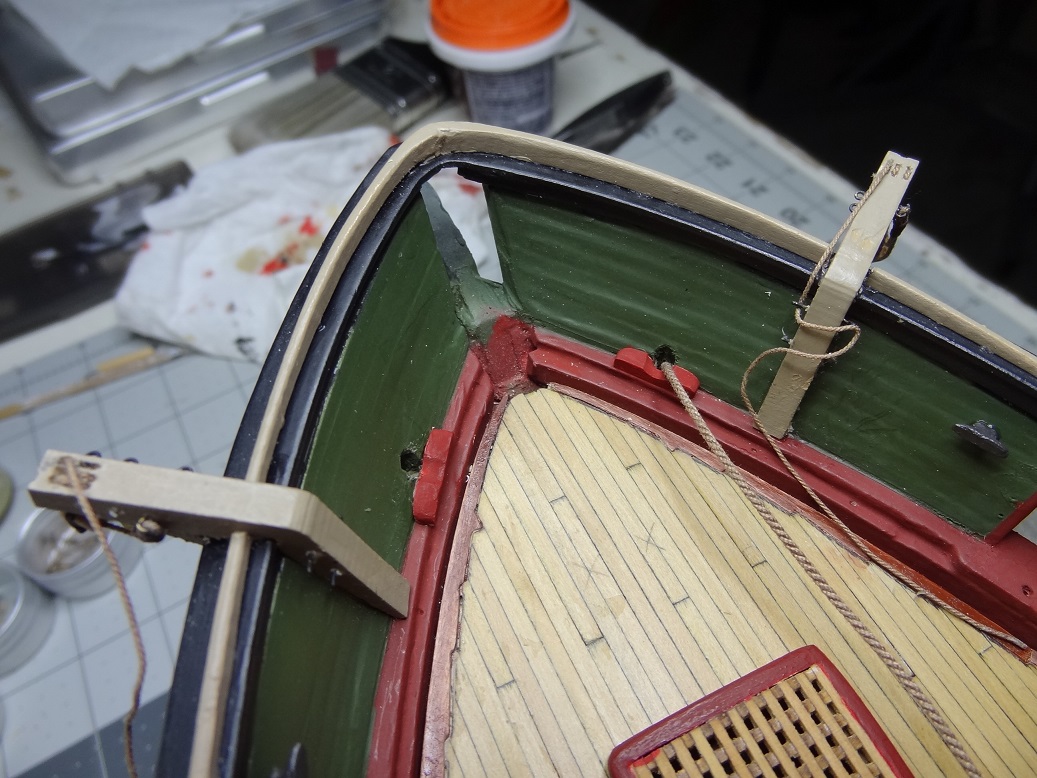
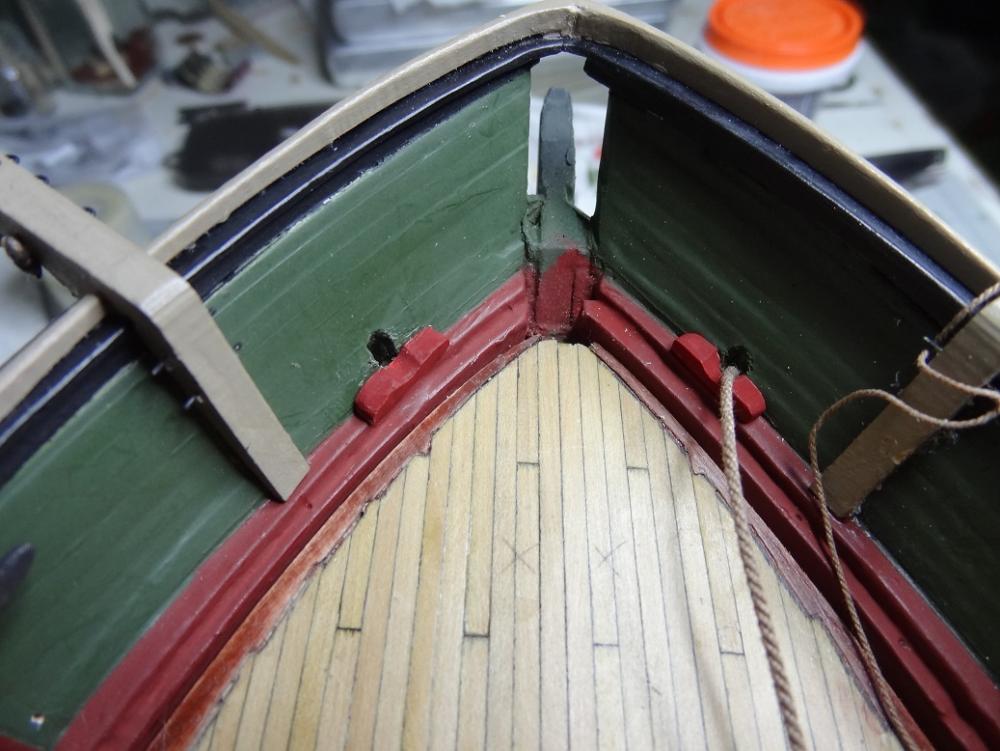
Why would you drill holes in a perfectly good hull? Hawse holes are finished as is the anchor assembly. Finding the proper location for these holes - both inboard and out - was not too difficult. Once again, the dividers were a big help. I just stretched them out on the plans between the hole and bottom fore corner of the foremost gun port. Then moved that to the hull. Worked out OK. Next following Joel's advice, I drilled starter holes in the inner and outer bulwark - being careful not to go any further than the planking. I started with a #61 bit in the pin vise and gradually increased bit size about 1/32" each time. The idea is that eventually you should see the light from the hole on the other side. This did happen but only after the 4th increase of the bit size. At this point I could drill from one side all the way thru. The plans say the final hole should be 1/8" but that bit did not fit in a pin vise so I stopped at 7/64". Close enough I think. A few of the particulars. The inner hole was started in the bulwark about 3/32" above the waterway. The outer hole was started at the joint between the lower gunwale plank and the first hull plank. The drilling angle surprised me a bit - I was drilling almost straight down and a little outward. If 90 degrees is straight down then probably 75-80 degrees. Try as I might, it was purely a guess at first. The inclination was to go more horizontal, but that was wrong. This was made more difficult because there was material between the inner and outer planks so I had to drill thru that without going thru the planks on the opposite side. The final hole is much more vertical than horizontal. The chafing blocks on the waterway started from a 1/8"x3/32" strip. It needed some shaping in several directions, most notably the side that faces the bulwark needs to be angled to fit the angle of the bulwark. A last observation, if I had it to do again I probably would have used a variable speed drill instead of the pin vise. I suspect the drilling surface was hardened by all the primer and paint layers. There was some chipping damage to this right at the edges of the hole. Turning the pin vise by hand seemed to grind thru the paint rather than cut thru. Of course it could have been a dull bit. I think also some masking tape placed over the hole site would be a good idea. Well it's done, I'm still thinking about some sort of fitting to go over the outside hole. To me it looks odd having the anchor cable coming out from the wood. However I have no idea what would be appropriate.


- 843 replies
-
- 4
-
-
- niagara
- model shipways
- (and 2 more)
-
Thanks for stopping by Don. I'm kinda going back & forth between this kit and Niagara. I'm seeing that progress (and log entries) are becoming less frequent. This is my first attempt at having 2 projects going on together, so I will have to learn to juggle more efficiently.
-
Thanks for that. And great answer. I happen to have a corners cut out of the grating in the forward hatch. I guess I can let it dangle into nowhere.
- 843 replies
-
- 3
-
-
- niagara
- model shipways
- (and 2 more)
-
Back to Niagara. I had tried to put everything off and focus on stropping all those blocks. Ain't hapnen. I am hitting a wall right now. Took almost 30 minutes to do 1 hook last nite. Eyes and hands are not working together. In an effort to 'walk away' I can go ahead and drill out the hawse holes. Have also started another kit. My signature has the log link. I'll do the holes tonite. "Scotty, we're going in" I am still wondering what happens to the other end of the anchor cable.
- 843 replies
-
- 3
-
-
- niagara
- model shipways
- (and 2 more)
-
Hello Antony - good to have you along. Cobr@s log was what pushed me to take this kit off the shelf. I feel like I am in good company with all you guys looking in. I'm liking the build more and more. It allows for a level of detail that I just can't do on my Niagara build. So far, I'm pleased with the quality of the materials as well.
-
It's really disconcerting Ken. If you have followed my Niagara log I was cranking out quite a few gun tackles just a few weeks back while I was in experimentation mode. I had a decent process for stropping those hooks. The last 2 nights have been a disaster - hooks fall off, lines won't pull tight, etc. I'm still a rookie in this hobby, but I know enough to know when to walk away for a while. I am fortunate to have this kit as a diversion for times like this
-
Just keeps looking better and better Bob. Was that hammock material in the kit? I don't remember seeing it.
- 206 replies
-
- 4
-
-
- battle station
- panart
- (and 1 more)
-
I may be spending more time on this than I anticipated. At least for the moment. I am desperately struggling with gun tackles on my Niagara build. Almost 30 minutes trying to strop a 3mm hook to a 3/32" block. Had to put it away before something went airborn. Not sure if it was just a bad nite or I am really having some eye/hand issues. At any rate with 1:23 there is no problem handling parts. Yet! Today on this guy was mostly sanding. While doing that I noticed that the additional 'frame' pieces that are glued in are a little out of alignment. A little odd as I had cut a couple of sticks to use as battens when I glued the frame pieces. I slid the frame pieces in until they came in contact with the batten so I would have expected them to all be flush. At least with each other. Will have to do a little faring before planking.
-
That is a great idea doing just the carriage first. I was thinking the whole unit at once. Your method will keep the clutter down. Are your ropes loose in the blocks? If yes, will you leave them that way? What did you end using for the carriage pin?
- 648 replies
-
- 3
-
-
- niagara
- model shipways
- (and 1 more)
-
It's good to have you guys on board for this! Any and all comments are welcome, be they positive or negative. I will get after some sanding. I needed to get a few parts a little more flush and can do some of the chard at that time (this evening). Nirvana it didn't take this kid long to see that gluing with a combo of CA and white glue is the way to go. I use CA for my 'nails' and white between plank edges and the like. Interesting for this build is the nails in the hull planks that appear to be left in rather than just for temporary holding. I like that look. Cobr@, I am about to take one of your suggestions regarding support for the deck planks. Haven't decided whether to use a full sheet or just a few strategically placed beams. Besides the general support, I would like to cut deck planks rather than cutting the notch to simulate plank butts. The additional cross beams give me some extra places to tack down a plank butt. I noticed you used a 6 plank spacing between butts. Was this a personal choice? I don't recall seeing anything about this in the plans. Just a general question regarding this kit - for anyone in the know. I know this is not a particular ship, but does anyone have an idea as to the time period?