mikiek
-
Posts
2,276 -
Joined
-
Last visited
Content Type
Profiles
Forums
Gallery
Events
Everything posted by mikiek
-
 Hey Darrell - actually it was just one tackle. If I go the 7 eyebolt route there will be 5 tackles per gun. I will try that first. However if you check some of the other Niagara logs (probably other 1:64 scale builds as well) there ends up being a lot of "stuff" at each gun. IMO in some cases it is a distraction. I'm hoping the small scale of parts I am using will keep the clutter down. Got to get a system for those tackles. That one took almost 30 minutes. Those tiny blocks don't thread well, even with the skinniest rope. Tried beeswax and dipping the end in CA - it still took a lot of attempts. Lots of loud vocals last nite. Will check your log for the bolt holes. I only drilled the port side the other nite.
- 843 replies
-
- 2
-

-
- niagara
- model shipways
- (and 2 more)
-
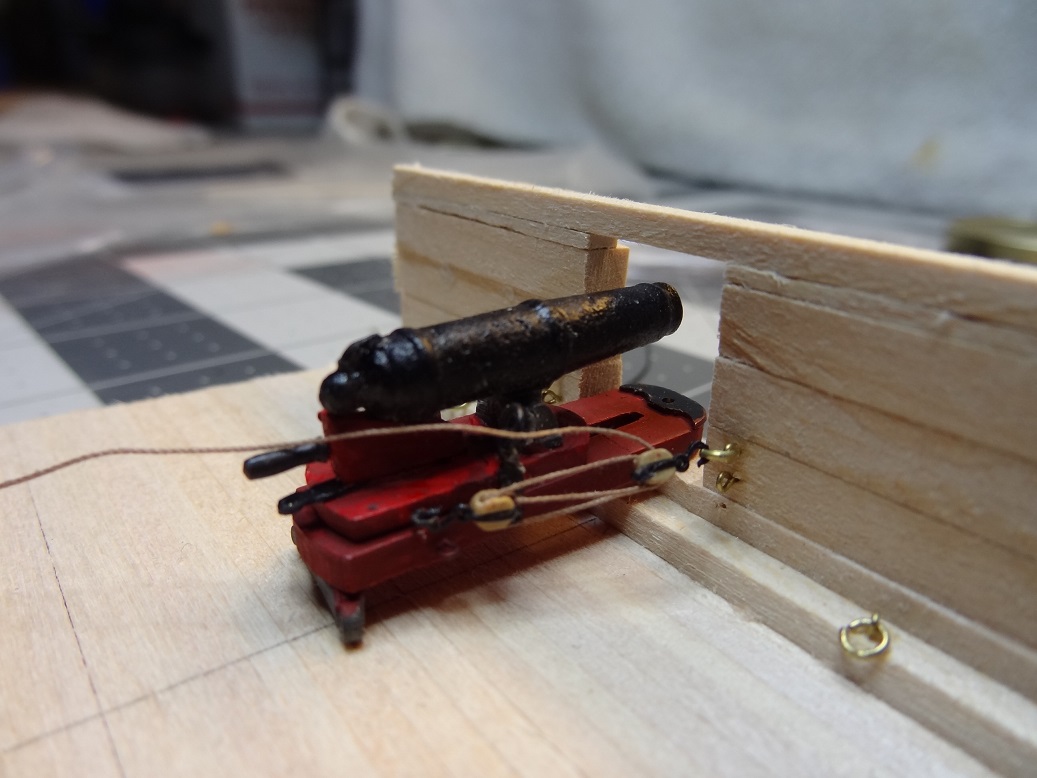
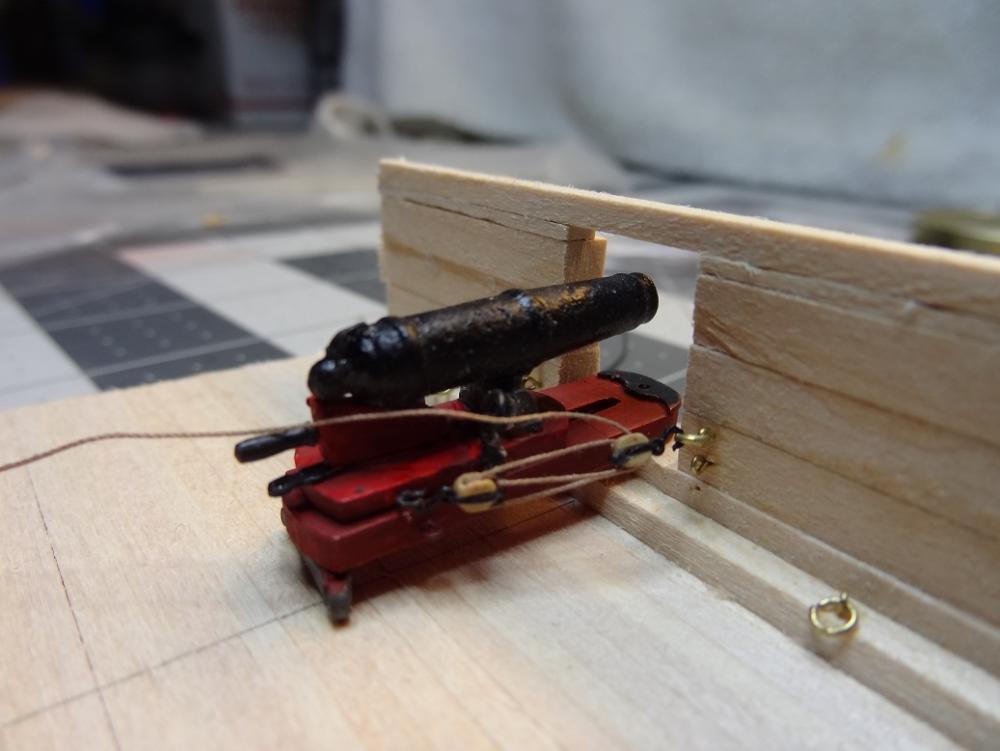
Well, first decision to make. The laser etched hooks are rather weak. I had the tackle hooked up as in the previous pix, gave the loose end of the rope a pull to tighten and the hook gave way and broke. This is my first experience with anything laser etched so I don't know if this would be a common thing. It is a concern, not just for the carronades but for use in general rigging. If I can't pull a rope tight without breaking a hook they don't help no matter how good they look. I know I can strop a block with wire and make a hook with the end but with a 3/32" block the wire would have to be so thin I doubt the hook would hold up any better. I'm wondering if there is anything that can be done to strengthen the laser etched parts? HELP!!!!
- 843 replies
-
- 2
-
-
- niagara
- model shipways
- (and 2 more)
-
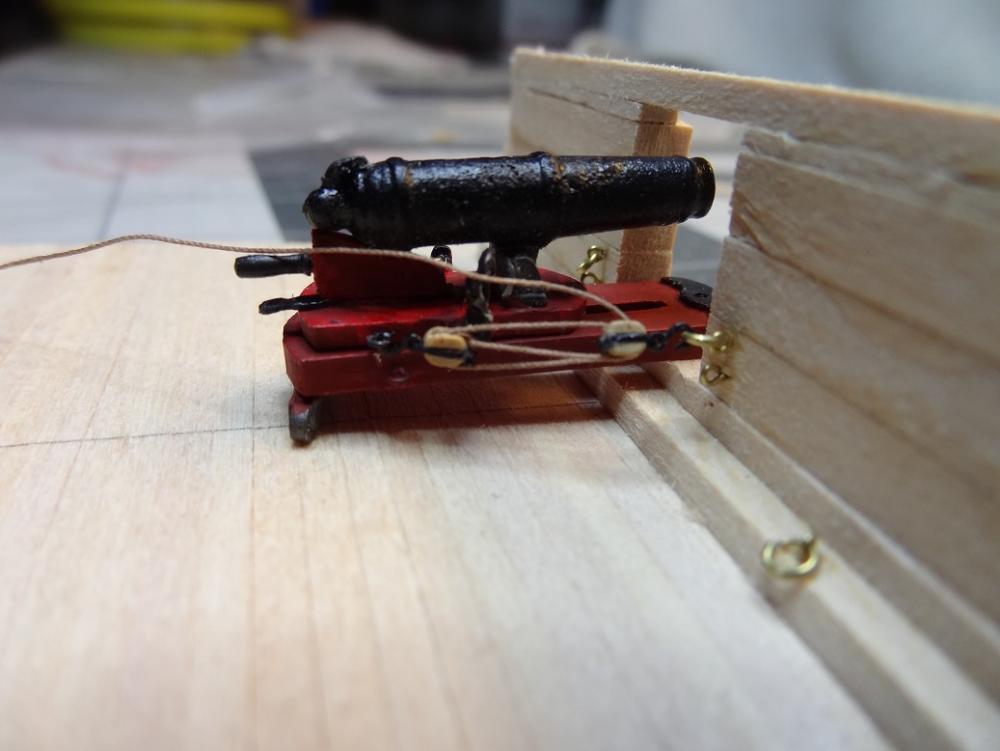
Elijah - I would say Yes. As a matter of fact here is my first tackle (ever). I think size and color may work. Rope = .008 light brown Block = 3/32" single Hook = 3mm You guys be honest, tell me what you see. Too big? Too small? Just right? Darn camera will not get close enough.....
- 843 replies
-
- 1
-
-
- niagara
- model shipways
- (and 2 more)
-
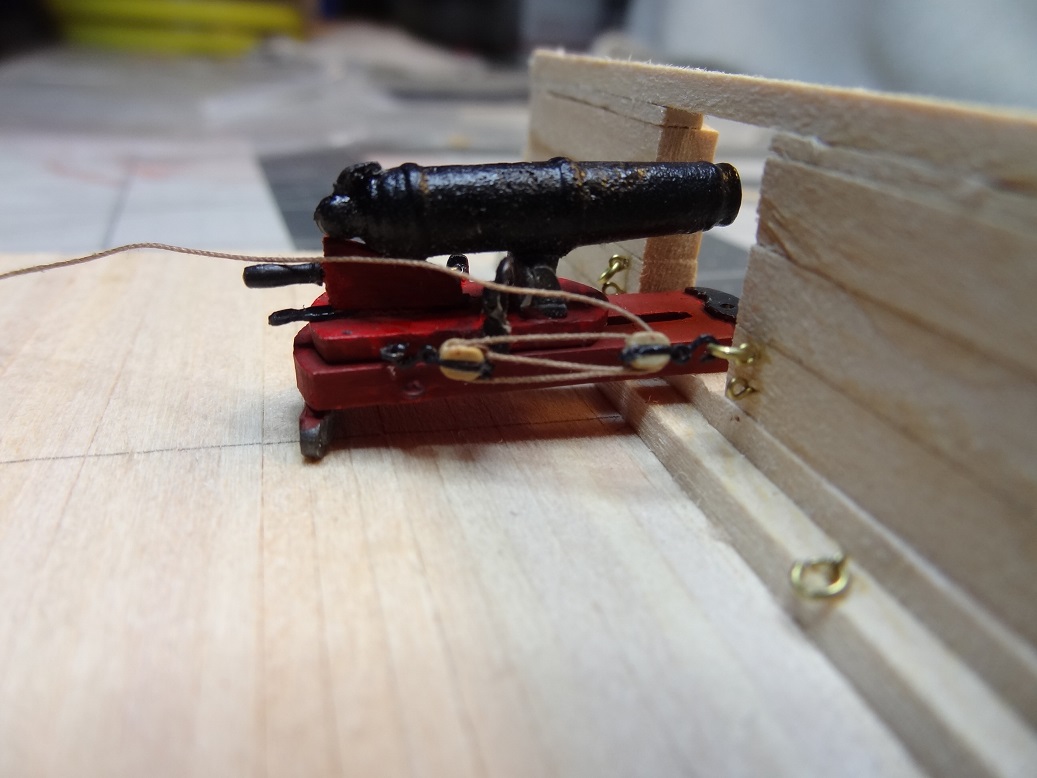
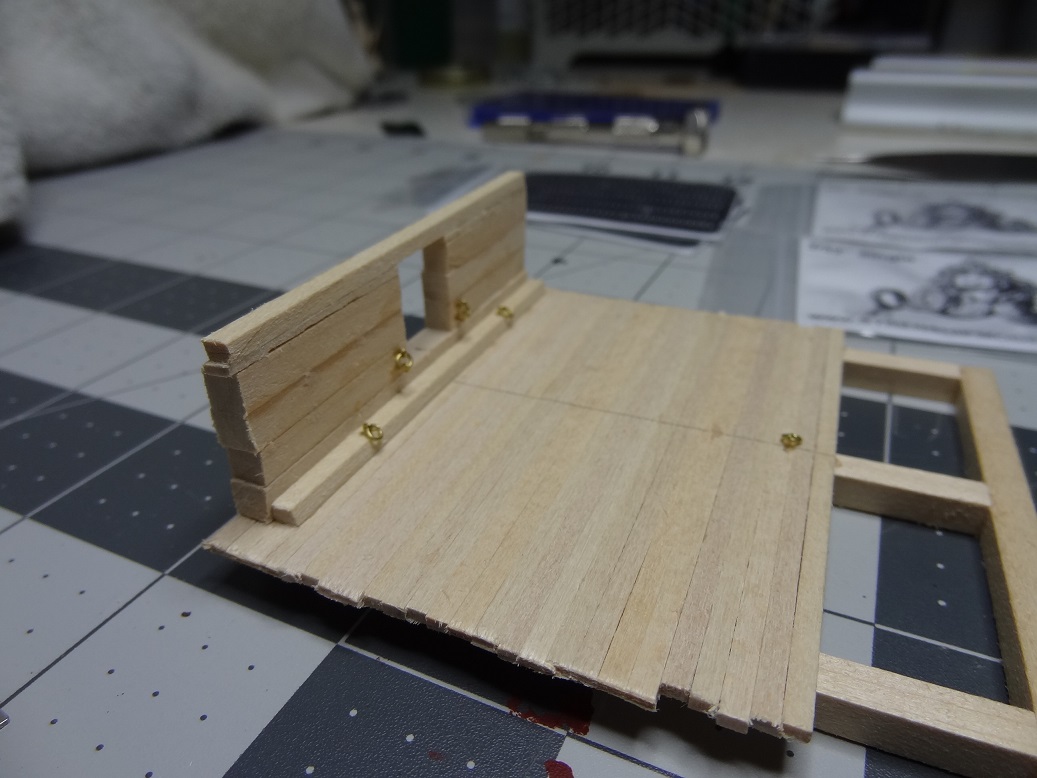
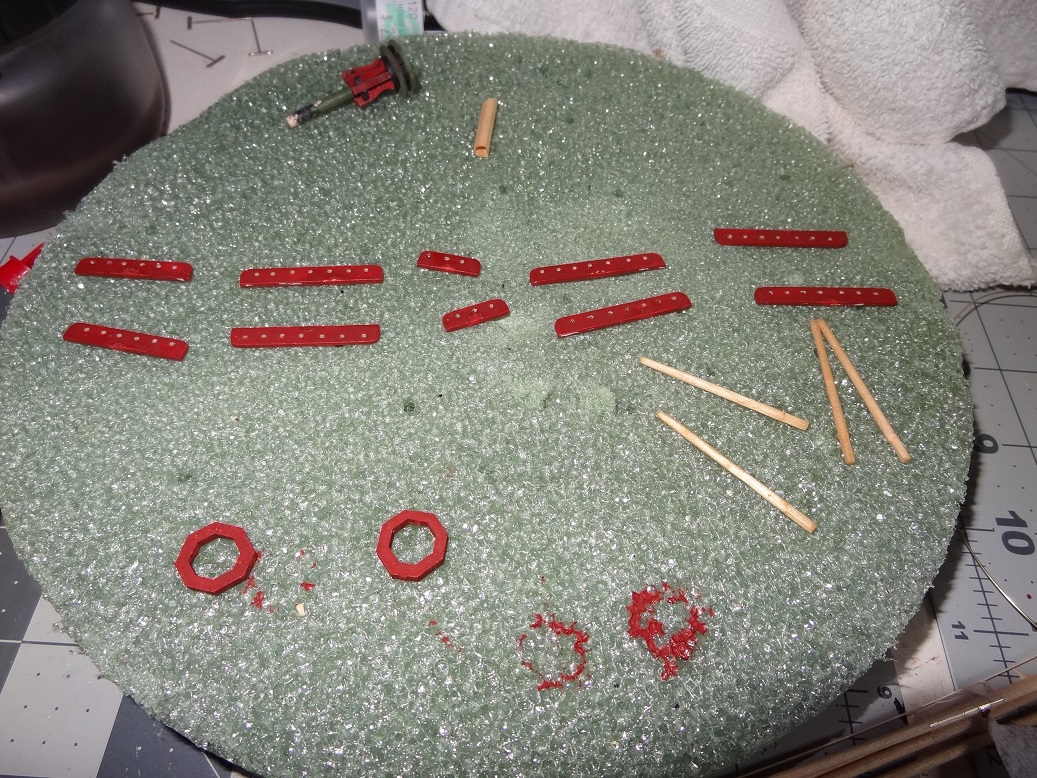
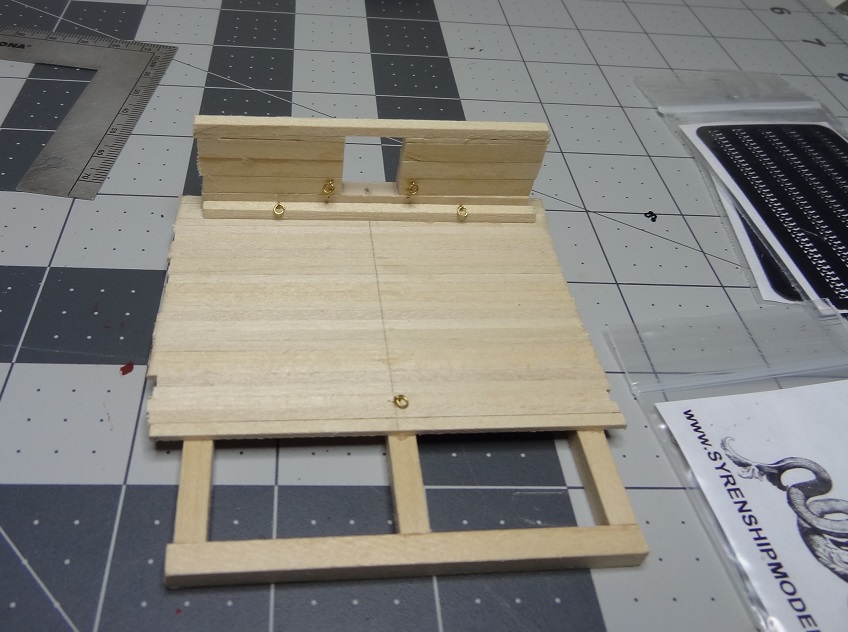
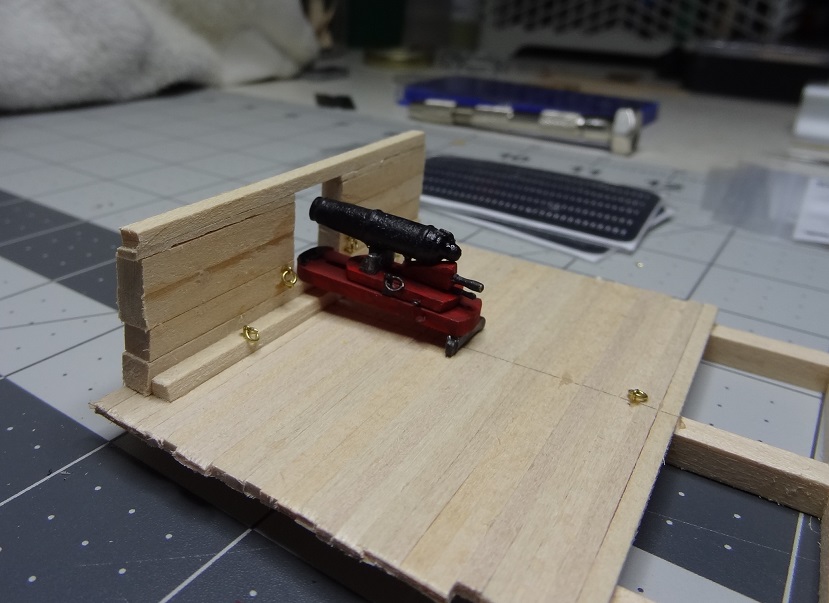
In prep for carronade rigging I made a separate "station" with eyebolts and rings in the proper places. I was planning 7 eyebolts per gun but I am seeing several logs that did only 5 or 4. The 7 I was seeing are - 1 in deck behind; 1 in plankshear on each side (2); 2 on each side at port edge (4). When people go with 5 they eliminate 1 on each side of port and those that do 4 drop the eyebolt behind. Some of the builds with 7 look kinda busy so I imagine the thought was to reduce some of that. Some of those with 7 look to have used some awfully big rope & blocks. I think it may take a bit of work to figure out the right combination - rope size, rope color, block size, block type (a few used doubles), hooks. At least now I have a place to play with it all with no worries about beating up the hull: Still have a lot of guns to make too.

- 843 replies
-
- 2
-
-
- niagara
- model shipways
- (and 2 more)
-
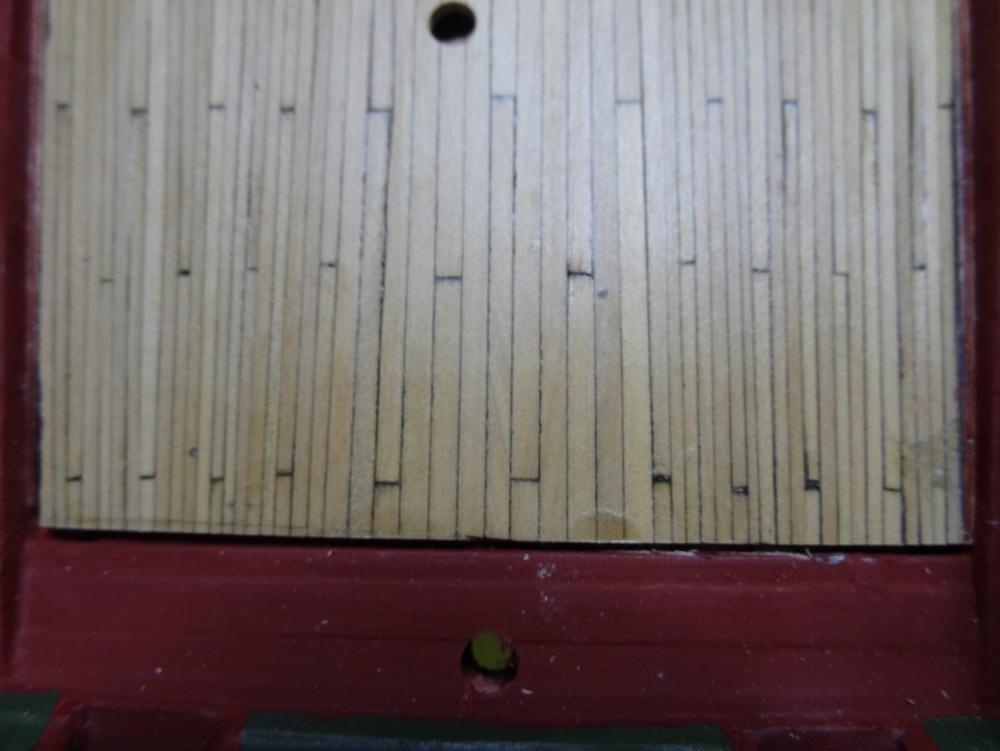
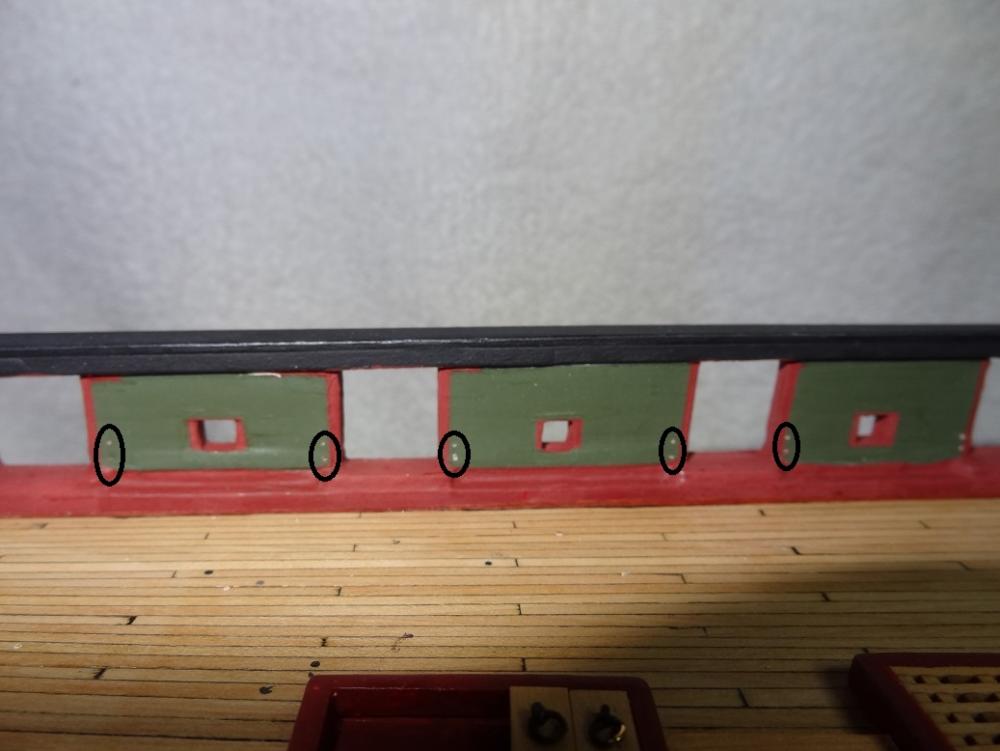
The pinholes are off by a little but not that much. I think for the carronade they are probably fine. However they were throwing off my template for the eyebolt holes. Even that might not have been too noticeable except that my trim around the ports (those 1/32" square strips) is painted red. Using the template some of the holes were going into the part of the bulwark painted green and some into the trim painted red so it showed up. Had everything been green I don't think it would have been noticeable. Regarding pins for the carronade, I was going to use belaying pins but I'm not set on that notion. While weeding thru the kit pins I noticed mine have 2 sizes. 20 of them are a tad longer and about twice as thick. 20 pins - 20 holes The materials list doesn't seem to differentiate it just says Belaying - 120. BTW I have wood belay pins replacements on order, but someone suggested painting the brass pins a wood color. I've tried that and they are not too bad. The wood pins would probably look better but several have commented that they break easily. I'm thinking under large coils of rope neither will be visible very much. As far as eyebolts, I had planned to use the ones in the kit, however after rigging a few of the mast yards I'm pretty sure there are not enough left. Each carronade requires 7 eybolts x 18 guns. I assume the 2 long guns will need some as well. Making eyebolts would be an option although not one I would relish. I have that decision to make pretty soon. I don't want half of one type and half of another. I have replaced all my blocks and deadeyes with those from Syren Models. Chuck's products are first rate. I also replaced the kit ropes with Chucks rope. Chuck also offers some laser etched hooks which really should be used with the carronade rigging. All are a worthwhile upgrade to consider.. I am considering doing the carronades pretty soon. I just wanted to get any other small pieces - cleats, eyebolts, etc - installed on the bulwarks. I think access will be quite limited after the carronades are installed. That is one nice thing about using those hooks I mentioned. Those are on the end of all the rigging that goes to the eyebolts. That should make the carronades removable. A goal for this weekend is to make a false deck with bulwark, port cutout, eyebolts and the like - a carronade station. All rigging will be done there.
- 843 replies
-
- 2
-
-
- niagara
- model shipways
- (and 2 more)
-
Best Paint Brush?
mikiek replied to mikiek's topic in Painting, finishing and weathering products and techniques
I ended up getting a brush set made with taklon bristles and a filbert cut. They seem to be well regarded for acrylics and wider coverage. -
Darrell - I started with a jig for the holes - just a small sheet with 4 holes drilled from the plan specs. The idea was to set the sheet edge on the waterway, line up a port midway point and then drill thru the holes into the bulwark. I quickly found several problems: 1. The hole in the waterway inside the ports (where you are supposed to pin the carronade) were not always well centered 2. The waterway has some slope in it from bow to stern so my template wasn't always square with the port edges. In the end, I used the template to drill the top 2 holes after I had centered them by eye. That gave me a uniform spacing at each port. The bottom holes I did by eye. I hindsight a template would be best as it holds the drill bit right where it needs to be. I got burned a few times on the lower holes (where I drilled freehand) becuase the bit wandered a little as it was first cutting the wood. That acrylic paint is harder than you think. Drilling was a little difficult because the pin vise barely fit between the bulwarks. That puts your vise and hands in an awkward position to drill. I broke 2 bits in the process. Coming up pretty soon is drilling the holes for the hawse pipes. That's supposed to be a 1/8" hole drilled at a slight angle thru inner and outer bulwark. Trying to figure out how to hold the hull and drill and then get the bit to come out on the back side right where I want it.
- 843 replies
-
- 2
-
-
- niagara
- model shipways
- (and 2 more)
-
Darrell -The classic method has you cutting a V shaped groove into a sheet of wood that's maybe about 1" thick. If you are starting your mast from square you drop the square into the groove and sand the corner that is exposed. Then you rotate your square 90 degrees and sand the next corner. This can work well however you end up needing several grooves cut a various depths for different sized squares. I didn't like having all the grooves so I made a jig to help sand/file octagons in a mast. I have 2, one for larger squares and one for smaller. I posted it here at MSW With the ability to adjust the ends you can actually do a tapered octagon, just close one end a little more than the other. A big improvement would be to get the adjustments metered somehow. I just did everything by eye, but my masts came out OK.
- 648 replies
-
- 2
-
-
- niagara
- model shipways
- (and 1 more)
-
I admire your precision on the small bowsprit pieces. Very uniform, good sharp edges!
- 648 replies
-
- 3
-
-
- niagara
- model shipways
- (and 1 more)
-
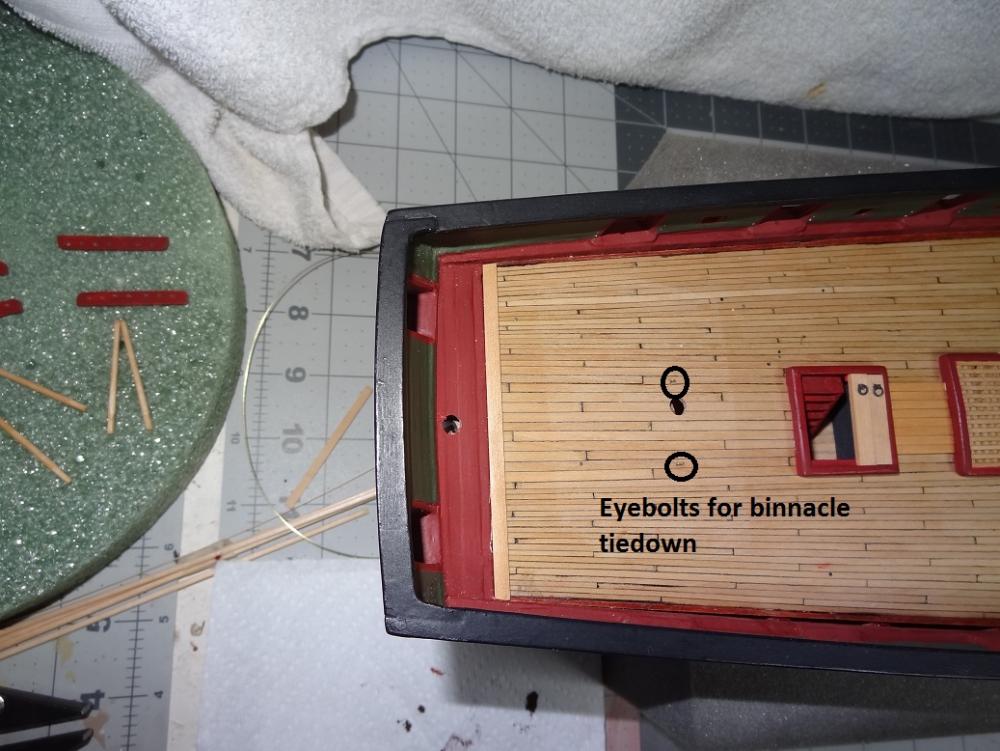
Lots of little things going on now and I imagine that's the way it's going to be for a while. Getting the deck fitted out with items from the honey do list. I did decide one thing this evening. Obviously the most bang for my builders buck would be to install the binnacle, pump, fife rails, etc. But I think all that would get in the way of fitting all the pieces on the bulwarks. So I will do the bulwarks first starting at the waterway and working up. So with that in mind I am starting tasks like eyebolts for carronades, cleats, etc. There's more stuff fastened to the bulwarks then you first realize. I even had pinrails ready to install but decided to get everything underneath them done first. Pics will be somewhat boring but they are a record for me down the road. I did finally glue the chock rails. They have been lying around forever. Since my handrails were a little crooked (see earlier post) the chock rails didn't lay very well at first. It took some reshaping to get the flush Also, the tail end of the deck did not seat flush against the planks on top of the transom (don't know the proper term) so I pulled out the Byrnes and shaved a strip and used that to cover the gap. Some odds and ends Eyebolt holes


- 843 replies
-
- 2
-
-
- niagara
- model shipways
- (and 2 more)
-
Trial side, Display side - 1st, 2nd . There were some times I even did 3 strakes on the trial side before doing the display. Always be thinking ahead. Not just next plank, but next strake, even the one after that.
- 701 replies
-
- 5
-
-
- phantom
- model shipways
- (and 1 more)
-
I did order some but I will try painting as well. Tamiya has a Deck Tan that would probably look pretty good. The thing I haven't figured out yet is it appears the kit supplied brass pins are 2 sizes. Both about 12mm in length but a few are quite a bit thicker. The materials list didn't differentiate so I don't know if there are really supposed to be 2 sizes or if it is just poor manufacturing tolerances.
-
Thanks David - that site was helpful. I imagine pins from various sellers are pretty much the same, but it is reassuring to see all the dimensions. I made the order with them.
-
Doesn't sound corny in the least. I had the same experience, made a few comments to that effect. She felt heavier and looked bigger. I too use the Eclipse airbrush and agree, out of the box the .35 needle is purposed more for detail than coverage and I really didn't want to change that. . Iwata does offer a crown tip that helps give a wider pattern.
- 648 replies
-
- 3
-
-
- niagara
- model shipways
- (and 1 more)
-
I do not want to use the brass belaying pins that came with the Niagara kit. I see wooden ones available on several retail sites being sold as something like "Wood Belaying Pins - 6mm" . I am assuming the 6mm is length? There doesn't appear to be any options regarding diameter and just from the site photo most of the offerings appear to be a lot thicker than the brass pins I have now. I do realize it's probably just a generic photo, but I am wondering about the diameter. Is it just understood that you will need to sand the pins down to whatever thickness is required?
-
I imagine the flattening technique requires some practice. However, it could be a big improvement over what I did for the few carronades I have completed. I was cutting a wide strip to a rough shape with metal shears and then grinding it down. The pieces came out OK but no 2 look the same. Your woodworking skills are already shining. I'm excited for that and look forward to seeing what you do as you progress. I know at least a few of Team Niagara have very little (or in my case no) woodworking skills. Any tips you can provide in that area will be well received. Keep it up.......
- 648 replies
-
- 3
-
-
- niagara
- model shipways
- (and 1 more)
-
Darrell - it looks fantastic! I like your idea of doing the margin plank first in your planking. Also the plywood base. I used a frame and it caused me some additional work. I'm sure you got a much better fit than I did when you finally dropped it in. Also, what a great idea for the carronade front bumpers. I need to look into that. Flattening wire is a technique that has been used for years. We have a good fleet of Niagaras in various stages. I'm sure we'll be able to help each other out.
- 648 replies
-
- 3
-
-
- niagara
- model shipways
- (and 1 more)
-
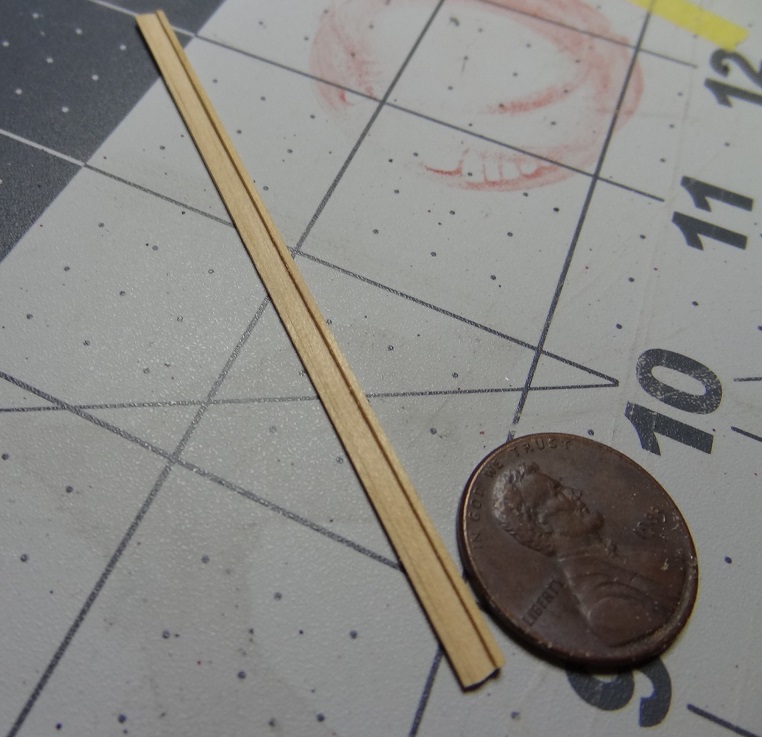
You are always welcome Darrell! I still like doing the deck outside of the hull. The big caviat - not all hull designs let you do it. Working the bulwarks, hull and rails was MUCH easier. So many times during hull planking I was able to reach down and grab the hull from the top of the frame. Very easy and accessible. In fact the day after I glued the deck I still found myself reaching down to grab by the top. Fortunately, the deck is boxwood. A lot harder than basswood. I made the switch early on. What you see now is about 20-30% basswood and the rest boxwood. It would be hard to ever use basswood again for anything that needed to be sanded or shaped. Last nite I needed an odd piece of strip to make pinrails. I had the basswood strip from the kit but could not find a similar one in boxwood. The basswood looked a little shabby so I put it back and decided to cut a boxwood strip to size. I have seen the wood belay pins at several sites. Thank you for the warning about size. I will measure twice. I will check out your build. We can all learn from each other.
- 843 replies
-
- 2
-
-
- niagara
- model shipways
- (and 2 more)
-
How cool is that? Just need to find my Natural color. Perfect! Argh! They don't make one in Natural I think I can apply with one of my detail brushes or a Q-Tip.
- 843 replies
-
- 2
-
-
- niagara
- model shipways
- (and 2 more)
-
I started making the pin rails last nite. No big deal there, but I am wondering about the actual pins. The materials list states Belaying - 120. I had apparently opened the packet and dumped the pins into a small container. Looking at them now, it appears there are 2 sizes. The majority are small. The larger pins are maybe 1/32" longer with a slightly fatter grip. I'm having difficulty trying to determine if there are truly 2 sizes (with 2 different purposes) or if it is just poor manufacturing. Also, the pins are brass. Not sure if those would be left that way, blackened or should I find some replacement wood pins? Edited: Now from the historical perspective I would think it likely that wood was used. Seems like in general that was the case. Also, I imagine metal and metalworkers were at a premium in Erie. Probably easier and cheaper to set a couple of guys in a corner somewhere with a pile of scrap branches and let them whittle away.
- 843 replies
-
- 2
-
-
- niagara
- model shipways
- (and 2 more)
-
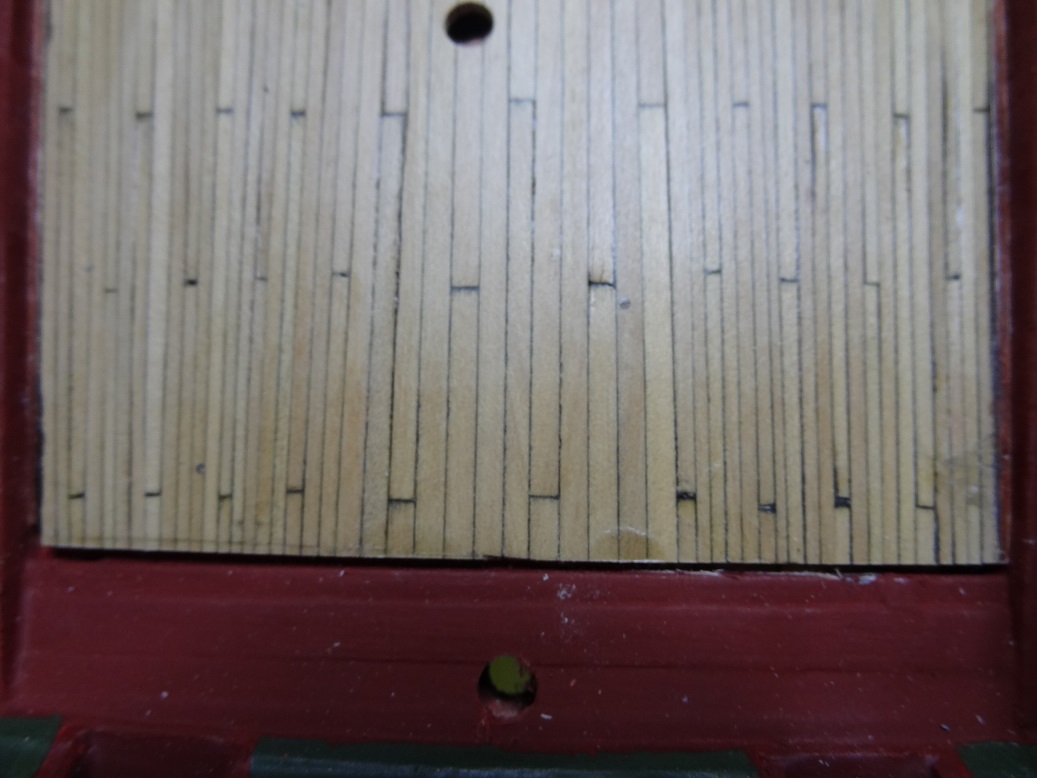
The alignment tip is a great idea. I really like the decks I've seen that showed color variation in the planks. What I was concerned with was having to sand thru the existing stain in spots to remove some small spots of paint. Then when I spot stained, the "bald" spot gets it's single layer back but any surrounding area would get it's 2nd coat. So I end up with a darker circle around where I sanded. Sounds like at places where the paint spots are I need to sand the entire plank not just the spot. It also sounds like I better make up a little bit of decking and try on that before the real deck. The Natural stain didn't seem to darken much the first time so hopefully it won't be a big problem now.
- 843 replies
-
- 2
-
-
- niagara
- model shipways
- (and 2 more)
-
Good to hear from you! As Bill says, the first one is the killer. And it is the one you MUST get right because everything else follows that. Here's a thought for when you start spilling or try other tough tasks. A practicum I have states "choose your display side" and then do all your experimenting on the opposite side. For most displays you'll have one side facing the viewer. Put the experimental side to the rear. Do your first spile on the experimental side. Learn from that and then do the display side.
- 701 replies
-
- 6
-
-
- phantom
- model shipways
- (and 1 more)
-
Thanks to all for the kind words. Yes there is a paint spot on the deck. Actually one of many. I'm having a little bit of deck installer's remorse. Thinking I should have sanded it down and varnished before installing. Would have been a heck of a lot easier then. Speaking of that, if anyone knows, the deck has been stained but not finished. If I do some spot sanding can I then "spot stain"? I thought I read somewhere that multiple coats of stain keep darkening the wood. If I sand some spots and have to go all the way to the wood will restaining the area look good? Or will I end up with stained spots?
- 843 replies
-
- 2
-
-
- niagara
- model shipways
- (and 2 more)
-
That would be annoying. Oh the things we come up with! Just so I have something to look forward to, how many bazillion of those blocks do we have to make? Seriously, a good start. Is that Domanics serving machine?
- 287 replies
-
- 3
-
-
- niagara
- Model Shipways
- (and 1 more)
-
Thank you Don & Joel. She is beginning to look more ship-like. Joel, yes I will be painting them. Just having a hard time deciding between neon green or orange Seriously, I am already creating a lot of touch up work - the bow rail, fashion pieces, I'm sure there will be more. Should probably start a list of items so I don't overlook something.
- 843 replies
-
- 3
-
-
- niagara
- model shipways
- (and 2 more)