PopJack
-
Posts
256 -
Joined
-
Last visited
Content Type
Profiles
Forums
Gallery
Events
Everything posted by PopJack
-
 Just bought this kit. Found the original receipt in the box, sold at Karl's Toys and Stationary in 1975 for $24.97. I paid $25.00. Kit appears intact. Molded parts have great detail, but will need paint. Plans have everything labeled in German and the English. Instructions are... well, they appear to be lacking, but I haven't started yet. This is going on my shelf for right now- but any comments or ideas on this old kit would be appreciated.
 -
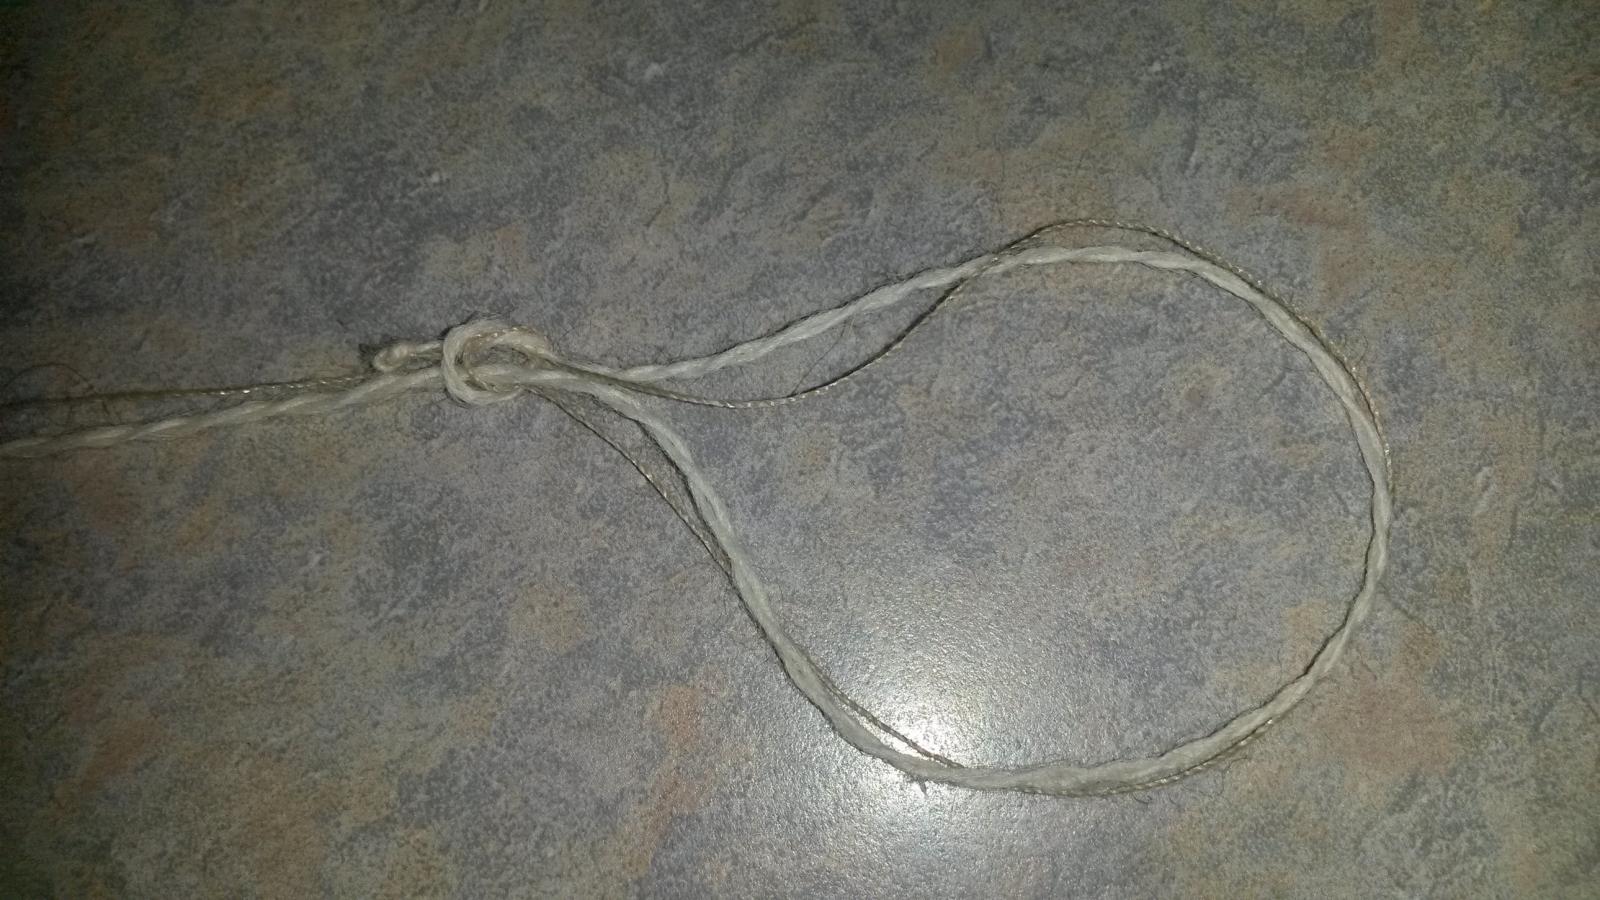
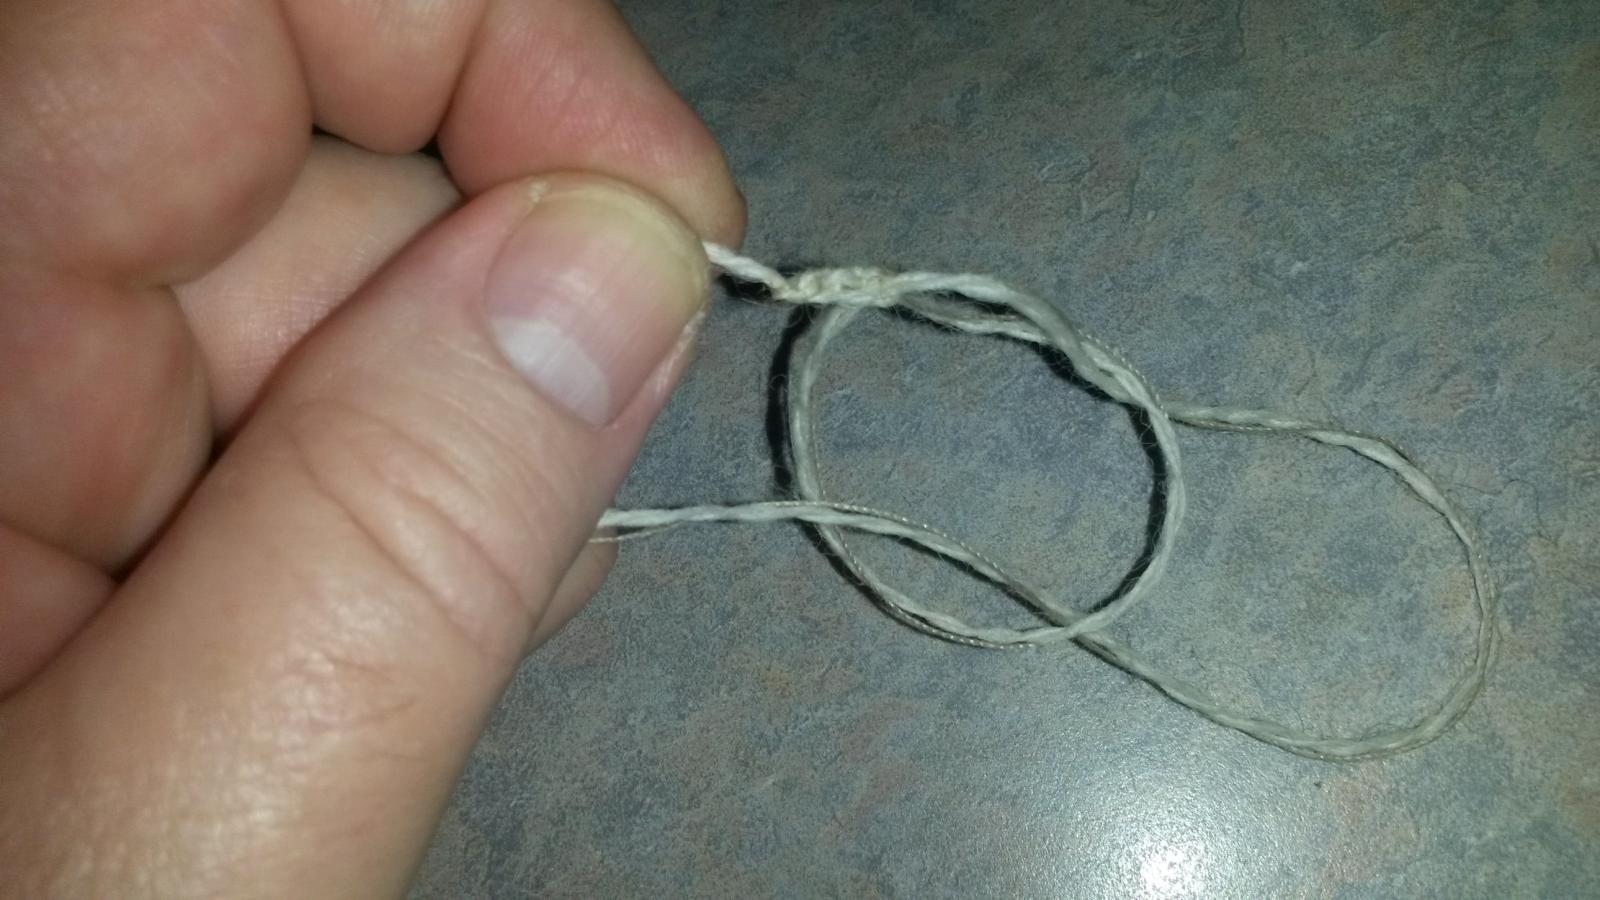
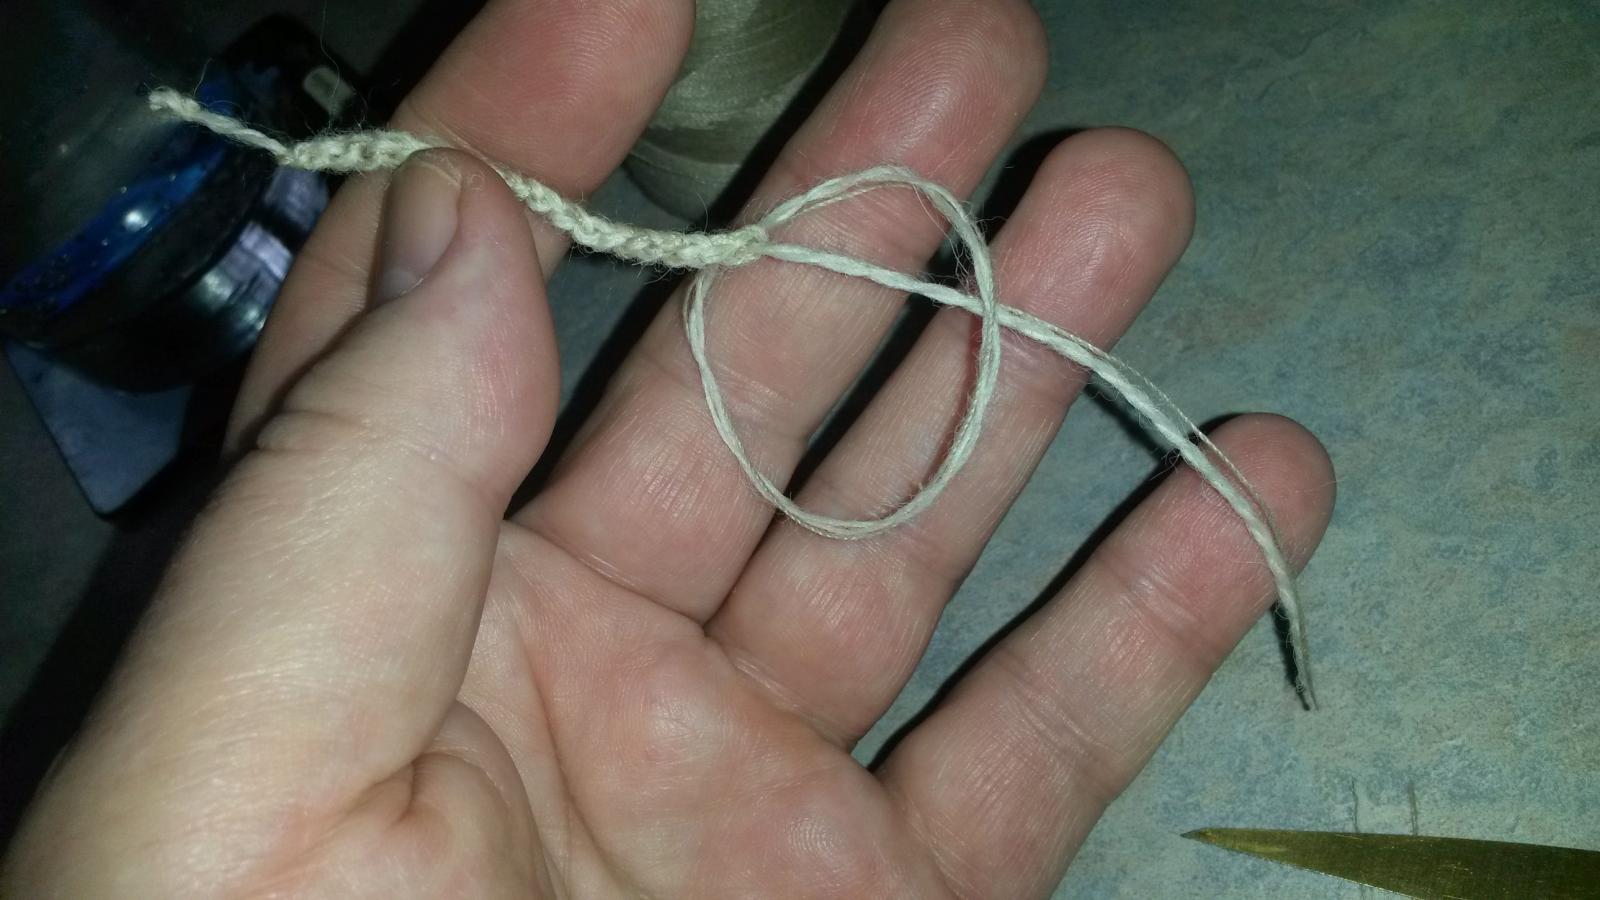
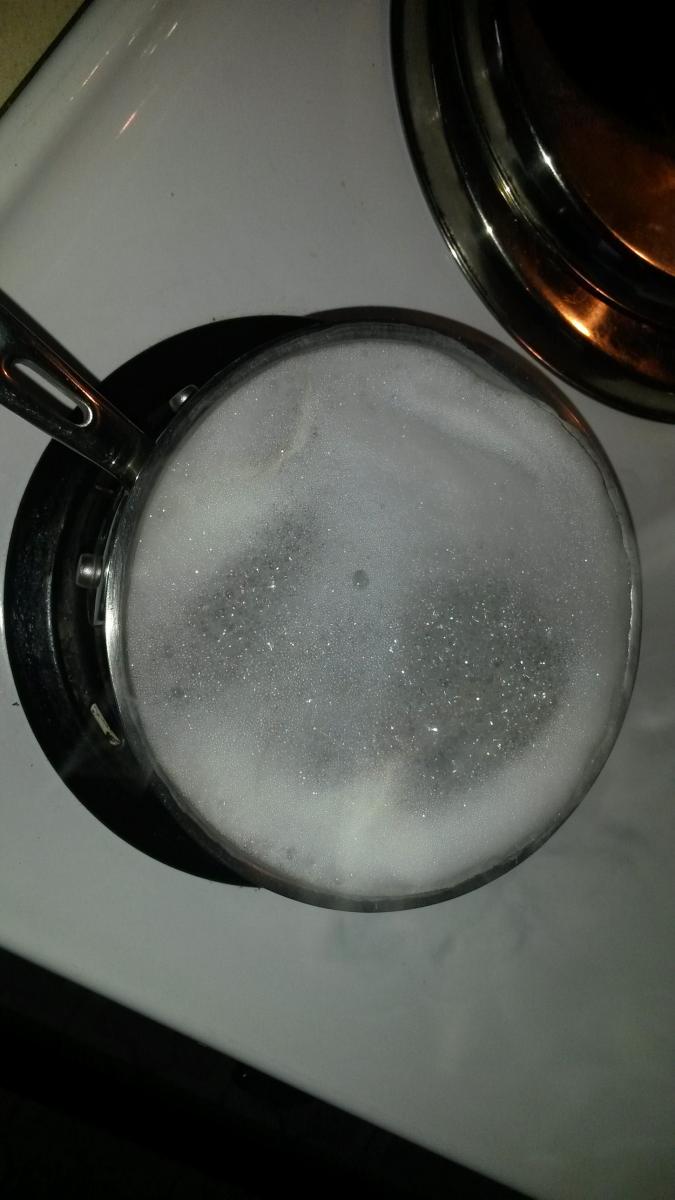
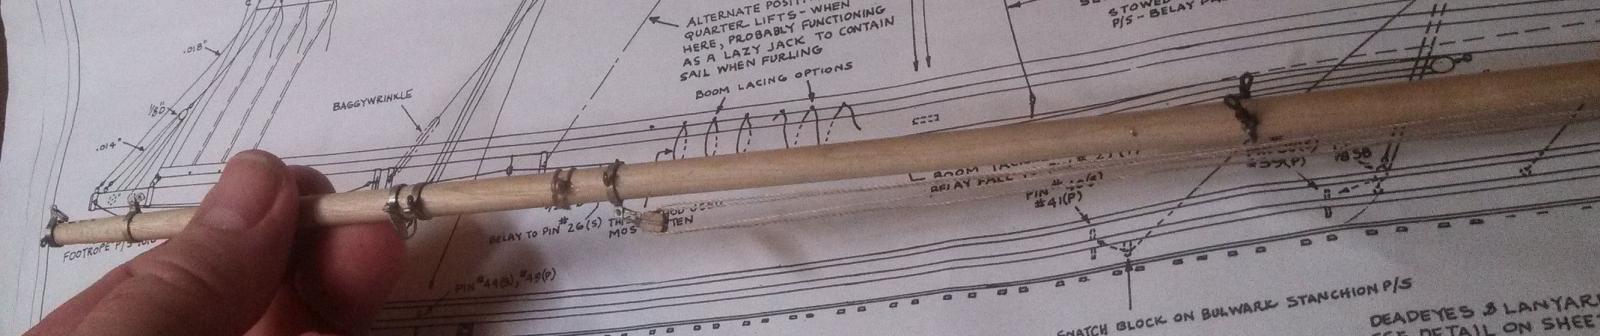
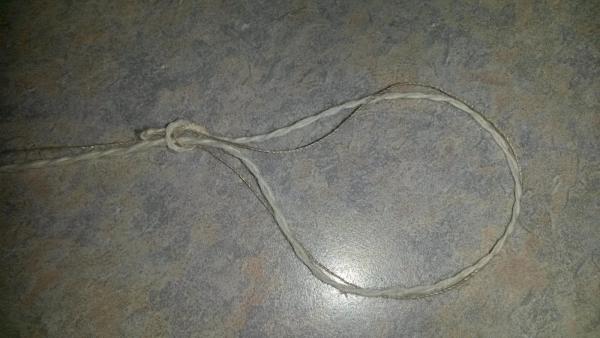
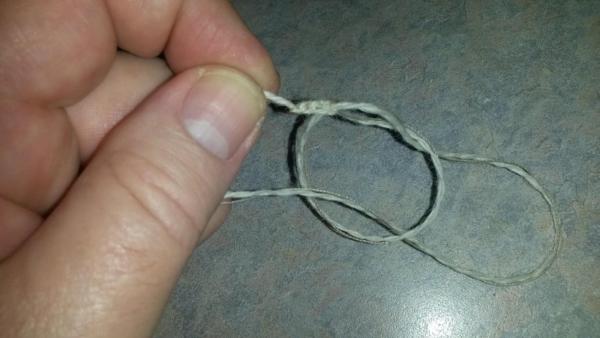
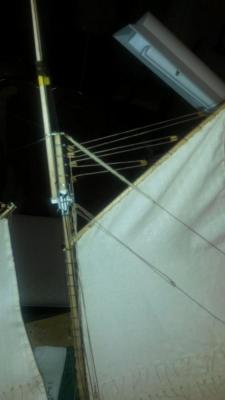
Making a bit of progress again. So I was experimenting with a way to make baggywrinkles that were somewhat realistic for the scale and not impossible to make. I looked at pipe cleaners and a couple of other options but nothing struck me. The idea came when my wife talked about "felting" wool knitted items. To felt something, you knit it first from wool and then wash it in hot water in the washing machine. The problem is that wool yarn isn't strong enough to support the weight of the rigging, I therefore laid a thread along the yarn I had chosen and made a series of running stitches (where you make a loop and pull another loop through it over and over again). Instead of washing, I boiled the yard in a soapy mixture into which I had added some baking soda. This, of course, had to be done when SWMBO was not at home. After boiling for 45 minutes I hung the yarns to dry overnight. I then tied them on regular rigging. The yarn I used didn't "felt" as well as I had hoped. I think it wasn't actually wool. The idea seems reasonable though, so I thought I would go ahead and post it with some photos of how well I did. Current Boat Progress: Tieing thread and yarn. And how she looks. Not bad for the first experiment. I think there is potential here.


-
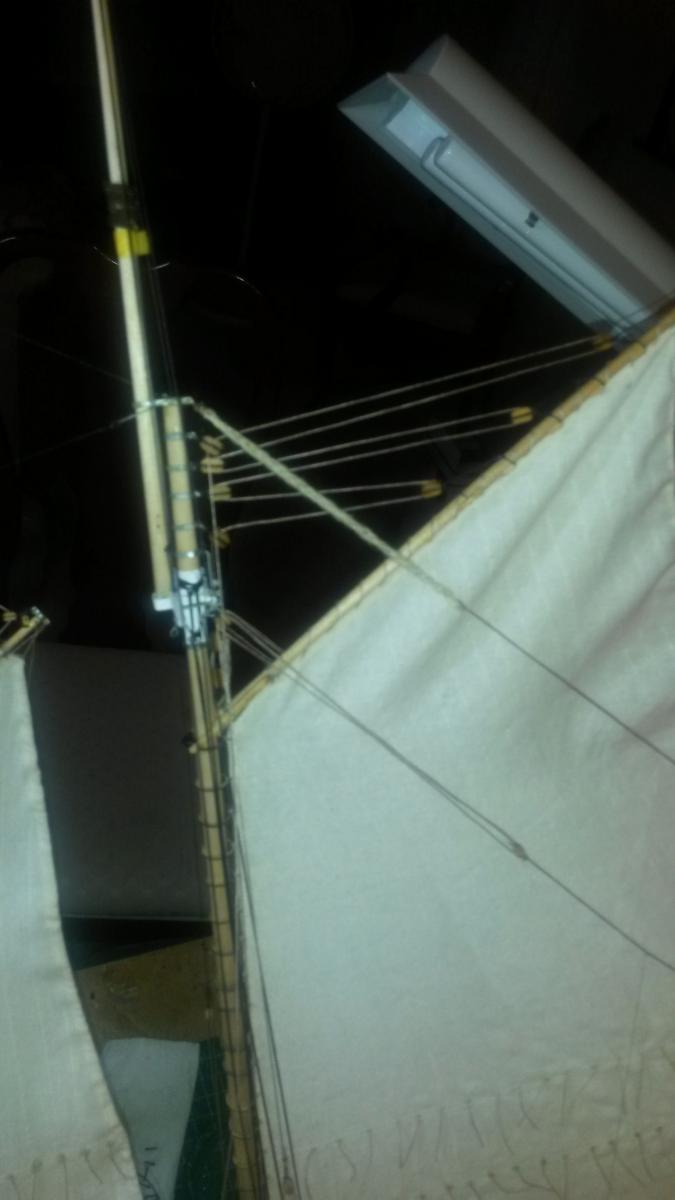
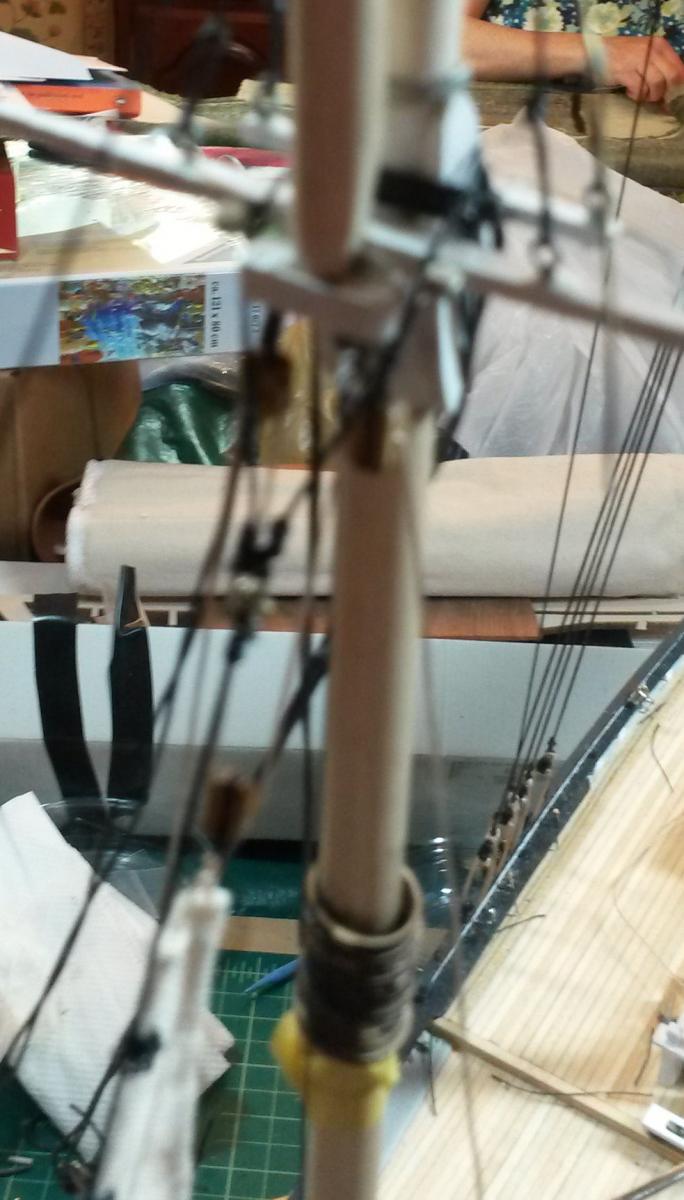
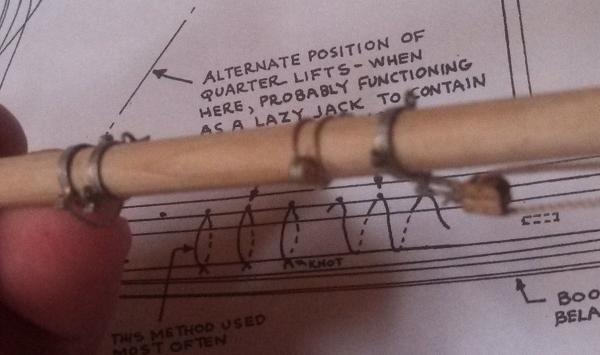
Just a note to say this project isn't dead. Life just got in the way. I am putting the sails and rigging on and its a slow process. I also tried to use the rigging to hold the booms and gaffs in places. This turned out badly when my hooks straightened out, imagine chaos. I now drill a small hole and put a pin in the mask and in the clapper on the boom. I used a brass pin to take the stress of tight sails and ropes and it is working much better. I made some baggy wrinkles which look okay from a distance. Photos in a few days.
-
I've been thinking about trying my hand at an RC boat. A tug- not a speed boat. Problem is, I am completely ignorant of where to start- from hull sealing to hull penetrations for the prop shaft. Is there a book that I could read to get into this? My google searches are not being productive. Thanks
-
Not following you. If you could post some photos, I might be able to pitch in. I don't think I used the great beam in my kit- if I remember correctly I got a better fit by making it from scratch. Sorry.
-
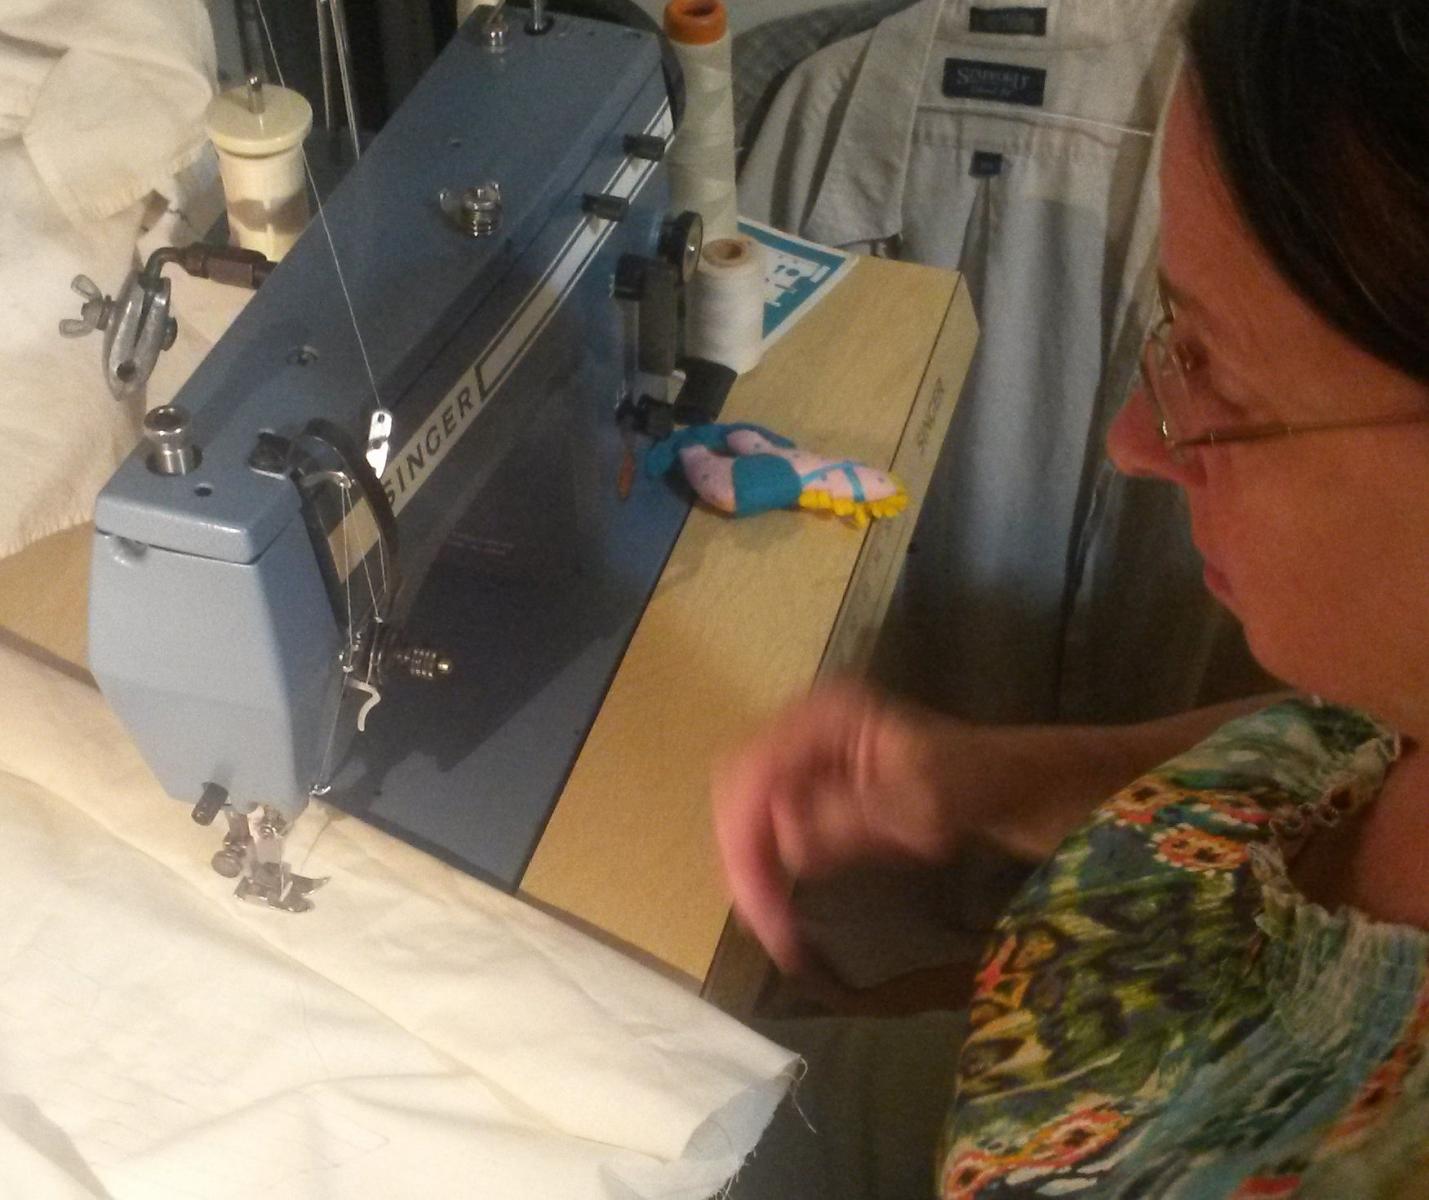
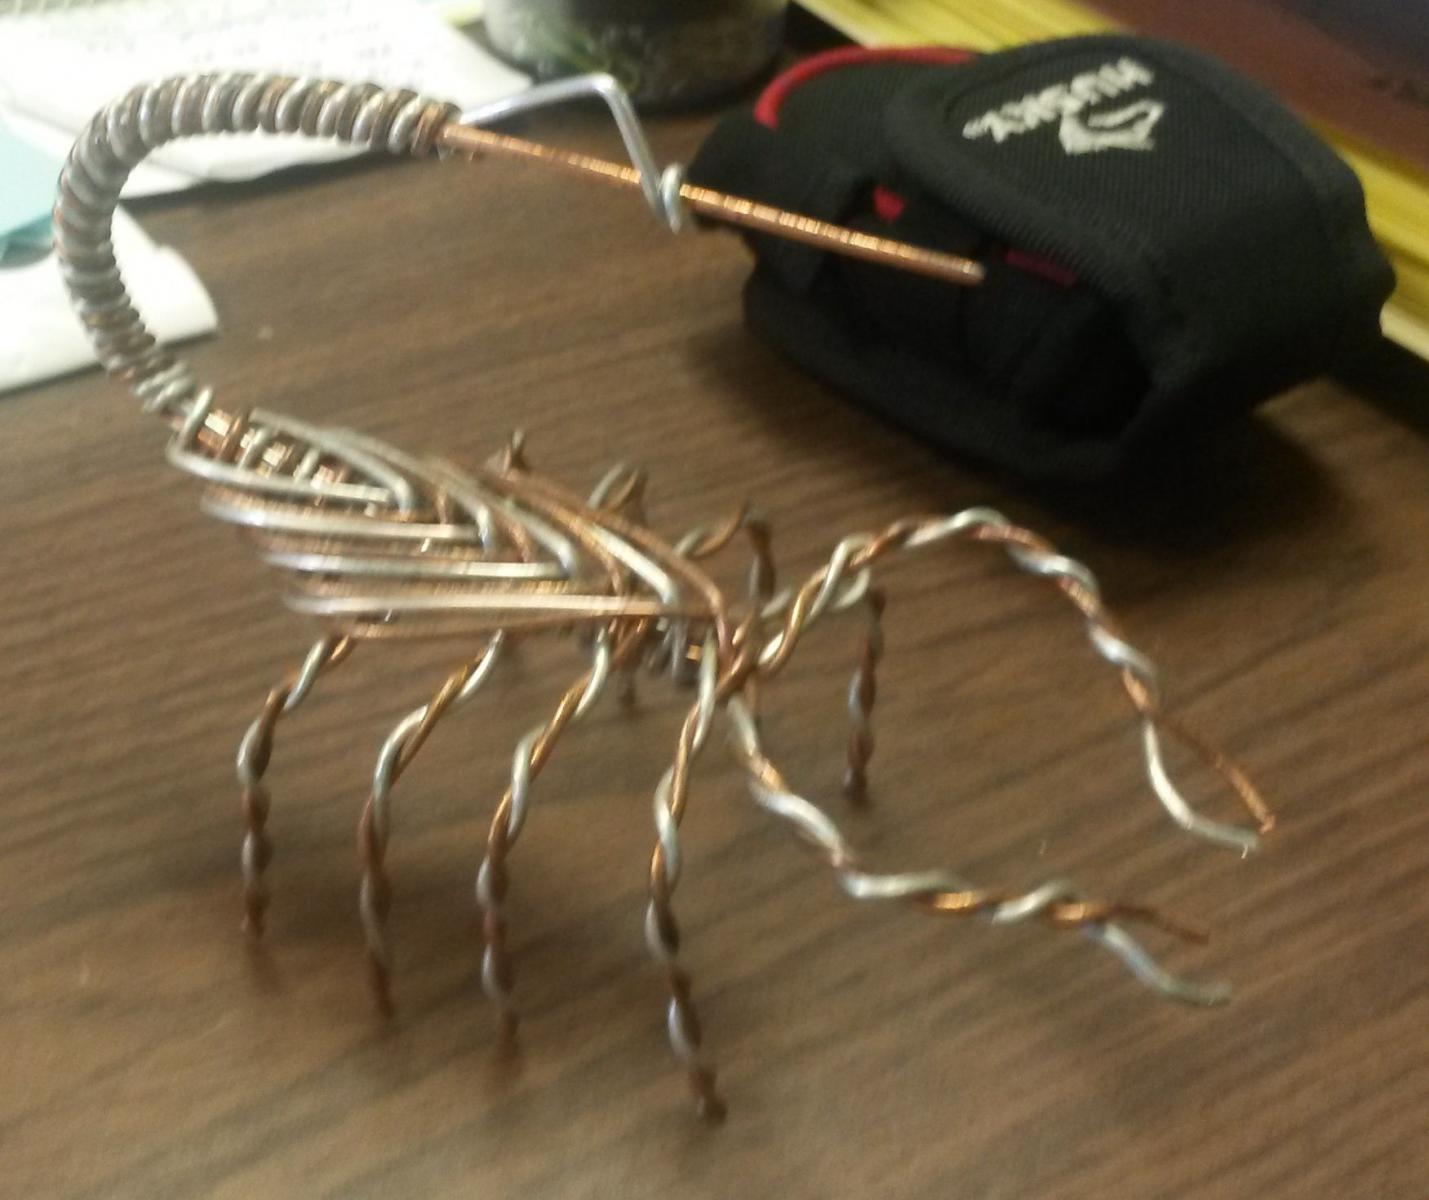
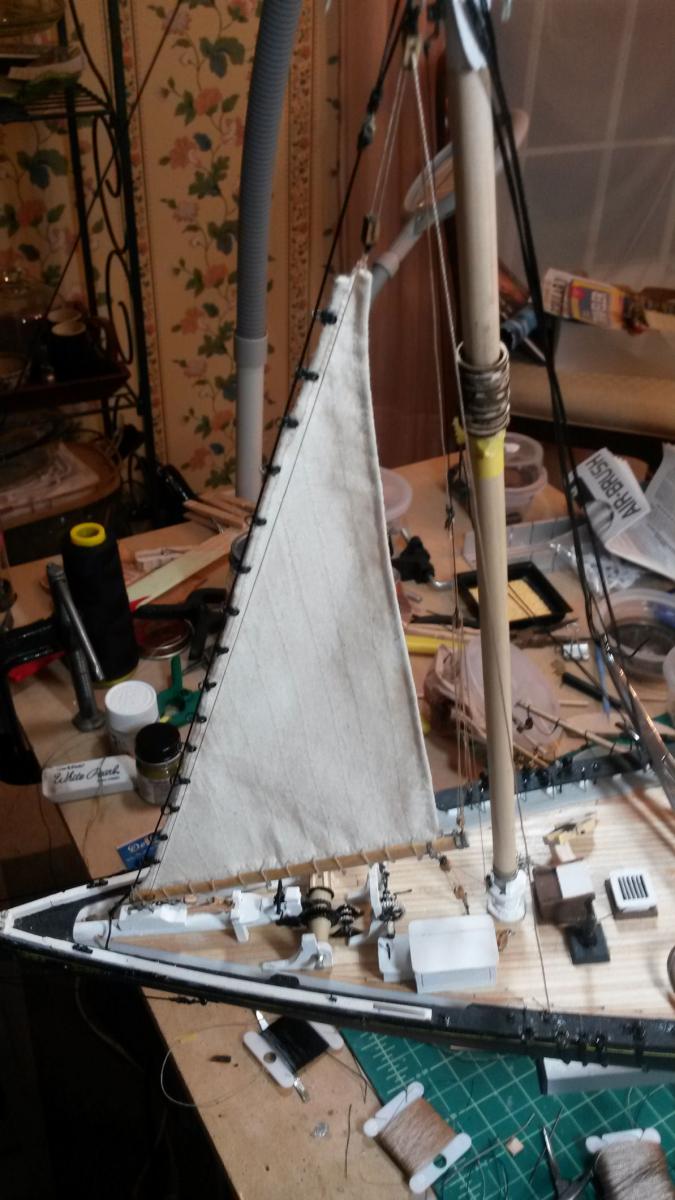
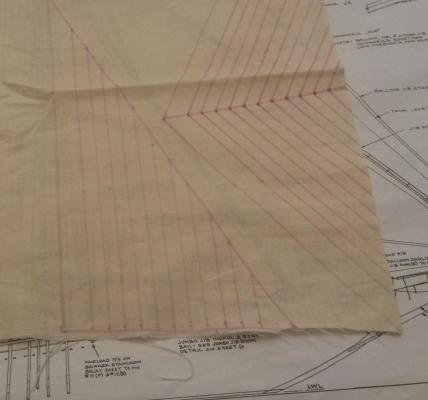
Wow- two months with no update. Before starting, I recall that I read about sailors creating crafts in their spare time. They took scraps of rope and made decorative macrame, made ship models, etc etc. I work with linemen and I discovered that some take the scrap clippings from skinning and trimming wires and make things out of them. This scorpion was made from one underground transformer installation's clipped ground wire. On to my toy boat. I have finished all of the metal work. I decided against trying to form hooks on all of the blocks, but have made them for a few of the bigger more prominent ones. The others I'm tying on. I started making sails. This is how I did it. I wanted 1/4" extra materials on all sides to that I could make a 1/8" casing for the cue lines. (The casing is folded twice). So, I carefully measured on the plans and marked the intersections of the 1/4" extended lines. Then I laid the fabric on the plans and using a disappearing fabric marker and drafting techniques laid out the sail on the fabric. Then, it was off to the sail making department where skilled craftswoman turned my sketches into reality. (SWMBO or Admirable). I installed the first sail and am generally happy. I plan on using glue water and gravity to finish it up after the others are installed.


-
Good luck with the move and finding a great rewarding position.
-
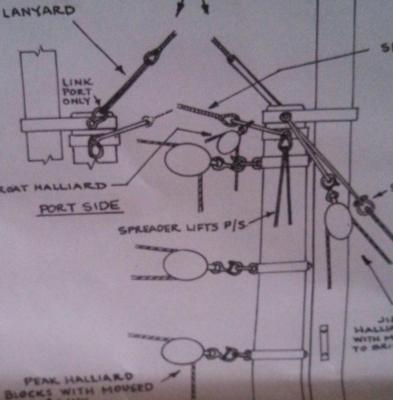
Can anyone direct me to some hints on Baggywrinkle? I tried a couple of searches but came up dry. For all I know there is another word for them.
-
That is how it was done on the real ships I looked at, each deadeyes had carves channels for the ropes. In this case, however, the rope supplied with the kit is rather stiff (very stiff when scale is considered... hum "scale stiffness"). Even with some substantial tension it doesn't want to bend sharply. In other words, I don't think it would follow the carved channels unless you glued it in. I kept hoping that sustained tension would 'shape' the rope, but so far, no joy. I'm sure I'll be able to address it with some glue and judicious use of hemostats.
-
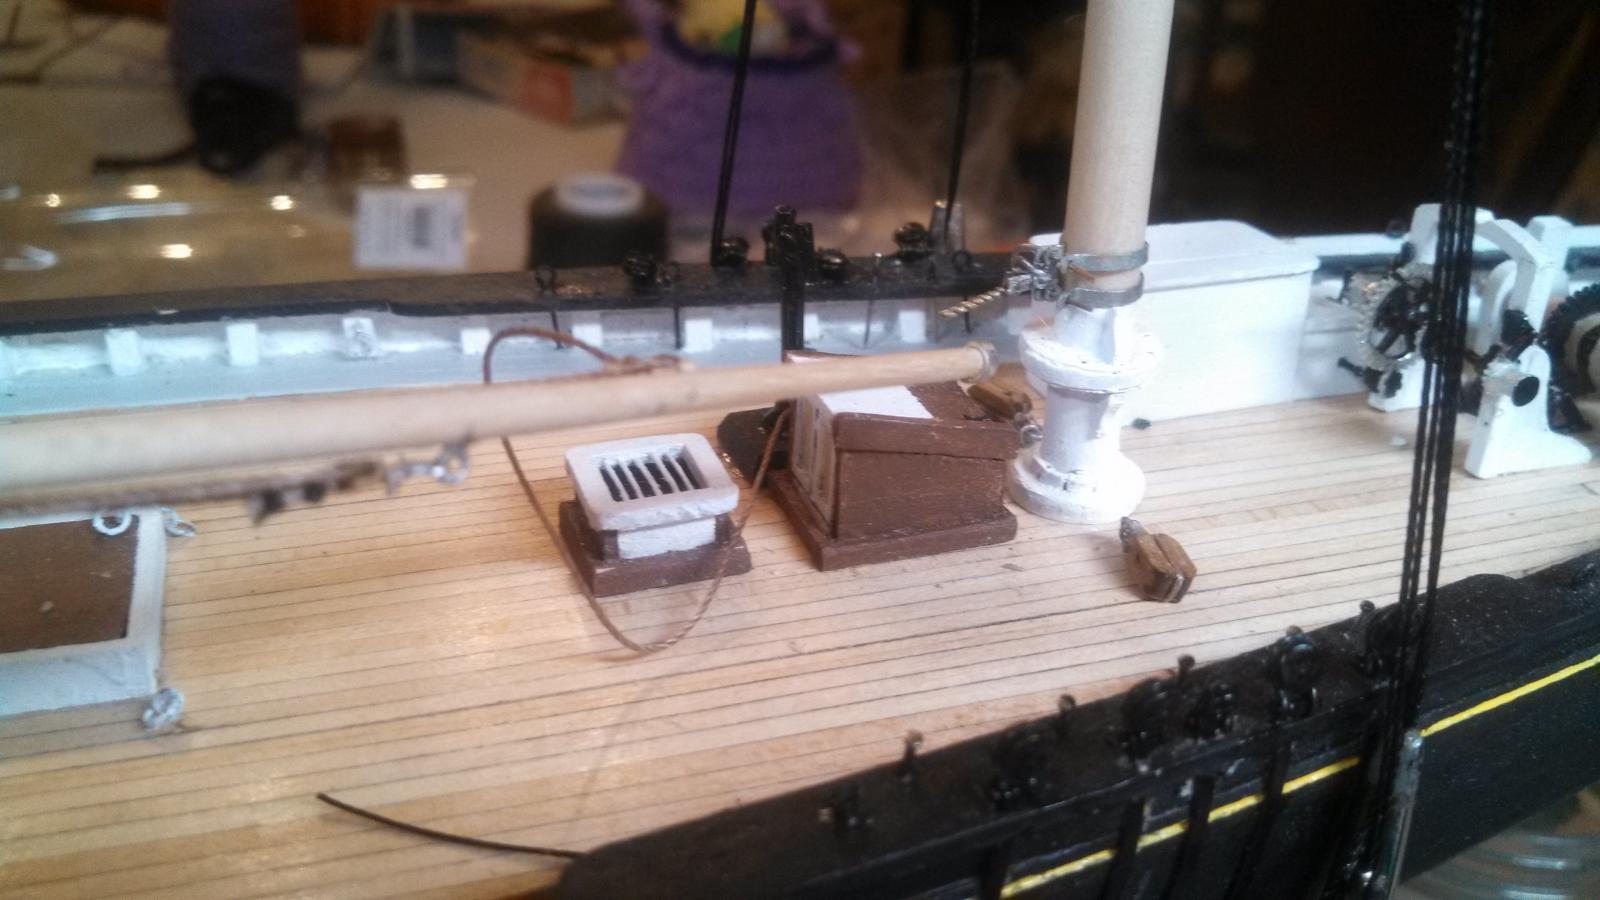
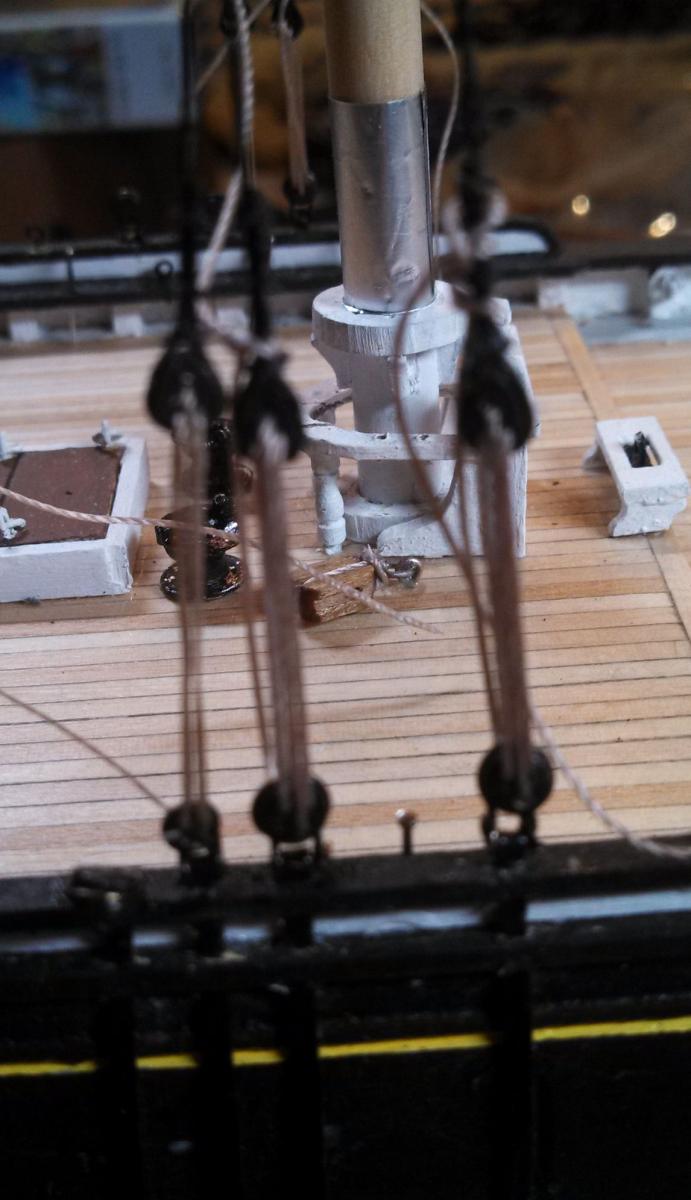
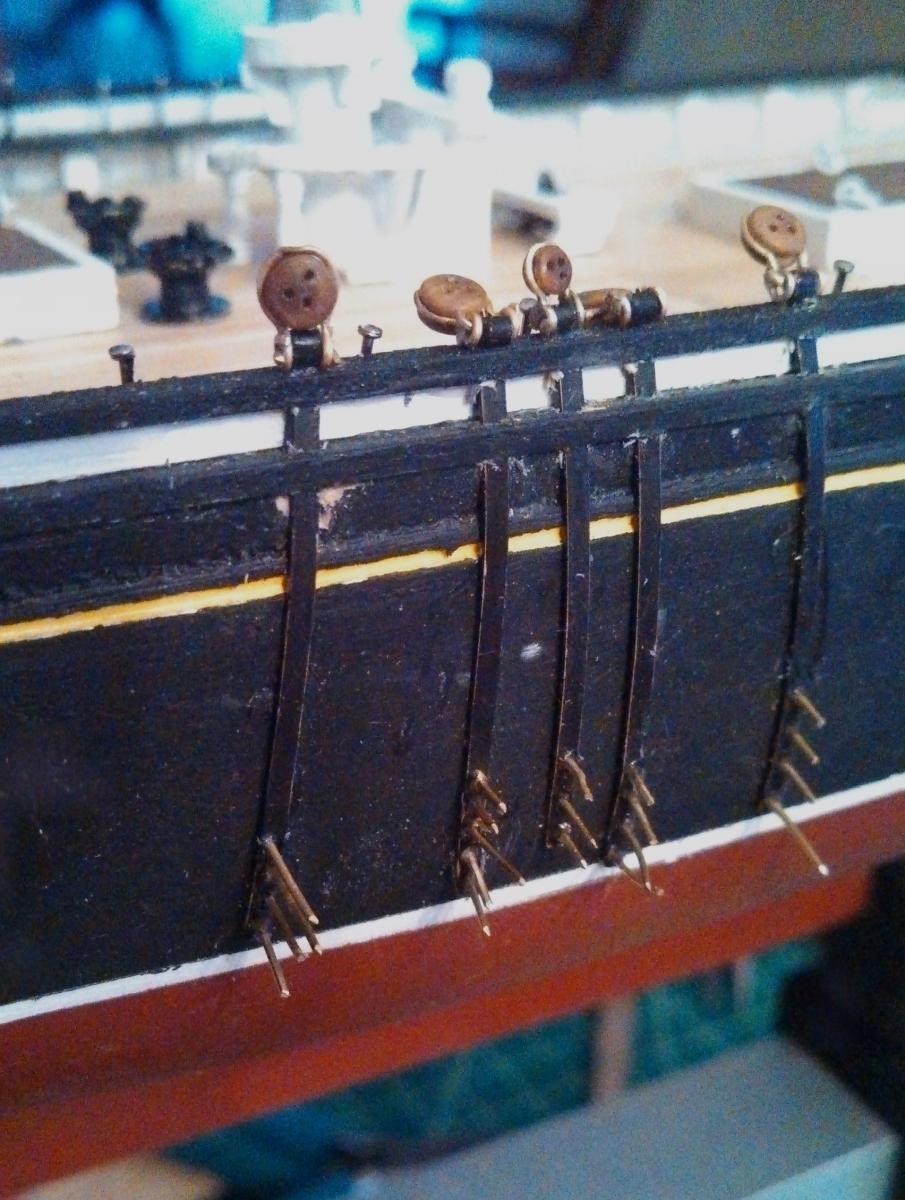
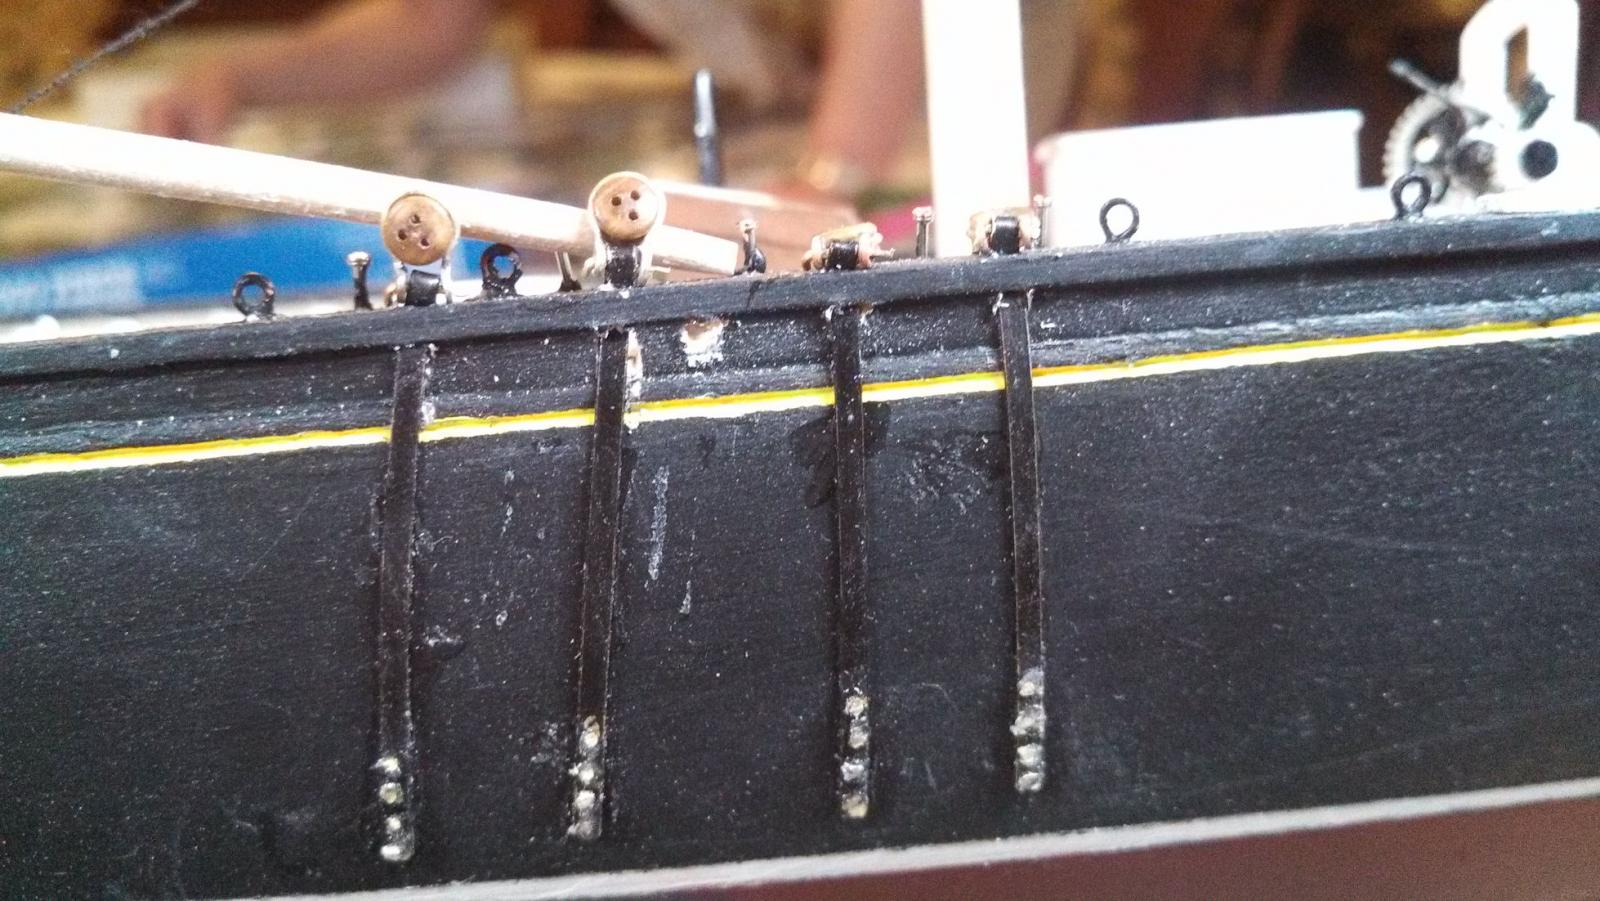
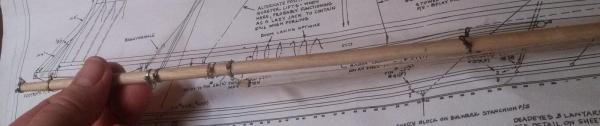
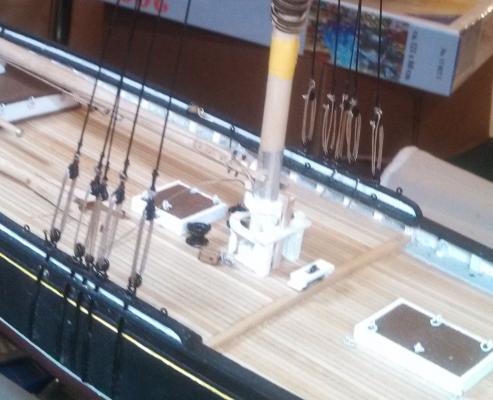
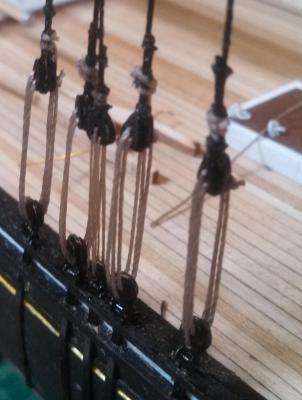
A bit of catching up. First, I have completed the metal work on the two booms. I'm particularly tickled with the "drilled toothpick fairleads." Turns out this ship has a lot of fairleads, and this technique has worked well. I was finished up the shrouds for the main mast- minus the ratlines. I am not happy with the "puffy" look of the lanyards at the bottom of the shrouds. Since the lines are tight I thought at first they might stretch out, but so far no luck. I'm thinking of putting CA glue on the lines at the deadeyes and then using hemostats to hold the lines against the deadeyes until they stick. Ideas welcome, of course. Finally I followed advice found here and diluted the brass black stuff and tried it on my belaying pins. It worked much better. I'm actually going to dilute it more so that the blackening takes even longer and will hopefully be more consistent.


-
I tried several things to bend those planks. After soaking them for a while, I found a curling iron worked pretty well to shape them. I also used a steam iron - but be careful, you're holding really close to the iron and you can get "steamed." In the end I bought one of the electric tools that looks like a soldering iron with a round head on it. That way I could bend planks when SWMBO was home. I have a crimper and it works, but I had a lot of issues not being able to control it and cutting planks in half. Other people have excellent luck with them.
-
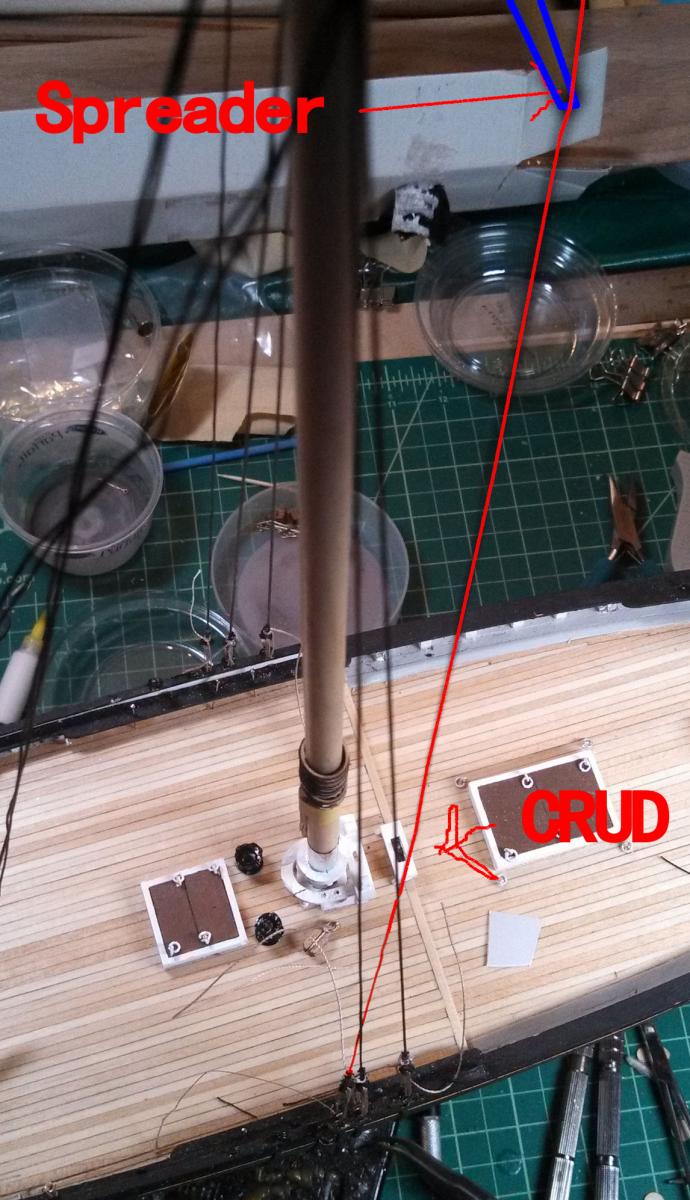
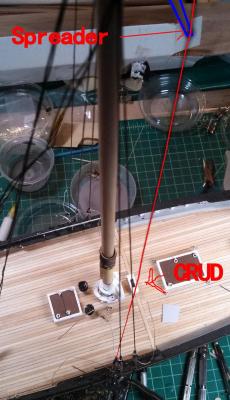
Here's a funny one. The way I figure it, the only person I can safely laugh at is myself, so why not share the mirth? So, I'm happily working along today with my magnifiers on and my tweezers making lanyards. I'm thinking, these look pretty good! The left most in the photo is the top mast shroud that I'm working on. It goes to a smaller deadeye and when it's tightened up, should pull just about perfect! SWMBO comes in and I start showing here what I was working on when I realize that stepping back is sometimes a good thing. The Main Top Mast Shroud on this side passed from near the top of the mast, through the end of a spreader and then .... ooops.... wraps around and then passes BEHIND the other shrouds before coming to its dead eye. DANG.

-
I moved to installing the shrouds today. There is a lot to do before I had to go there, but i enjoy standing up some- so its all good. I had a lot of trouble getting the specified thread through the holes in the deadeyes. I tried drilling the holes out and ended up breaking two of the teardrop ones. In the end I discovered that using a smaller drill bit I could enlarge the holes SLIGHTLY without destroying them. After a lot of experimentation I discovered (or, perhaps I should say "rediscovered" since I'm sure many have done this) that if I twist the rope between my fingers so as to tighten the winding as much as possible, and then while holding it, dip it in CA it will freeze in its compact shape. There is a certain amount of wiping the excess off, which is why I'm nervous that I may mistakenly glue my index finger to the "h" key on my keyboard.
-
Thanks to both for the replies. Please leave the photos- I am sure they will be helpful not only to me but to others who may follow. I have never used galvanized wire- so off to the hobby shop tomorrow to pick some up to play with. I told SWMBO last night that the next ship I modeled was going to have all brass hardware because of I was tired of having to paint or treat every piece of metal. Perhaps I spoke too soon.
-
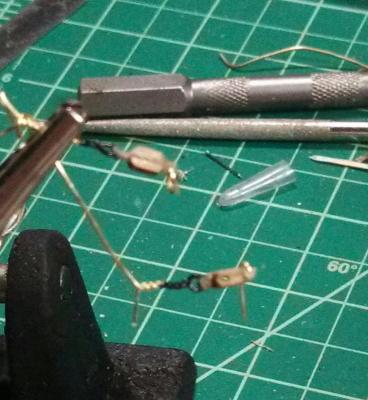
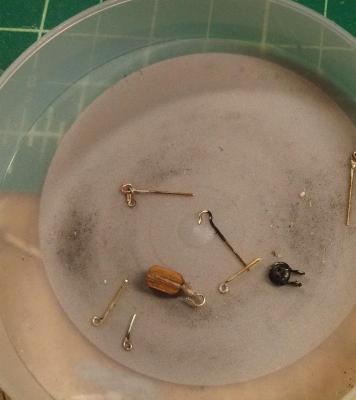
Question: Am I a hooker or not? I realize that the bluenose had internal iron work on its blocks, but I've been playing with using ropes to tie the hooks on anyway. I've debated drilling, but the small single blocks are a bit of a challenge for me. Read that "I'm scared." I made several small hooks and tied one on to a triple. Here it is near its location and then "hooked on." To stay in place, this hooks is supposed to be moused. That makes me wonder if there is going to be anything visible except a big blob of string. These block mount to the rail inside the monkey rail and I didn't want to fool with hooks on them, so I tied them directly onto the pins I made. I'm wondering if they don't actually look less bulky and better. (The brass wire is just scrap holding the becket open while he glue that forms it dries. So the question is, do I tie on hooks, skip the hooks, drill the ones that are big enough? Mouse or just glue? I'm thinking about these things and your recommendations would be helpful. Thanks.

-
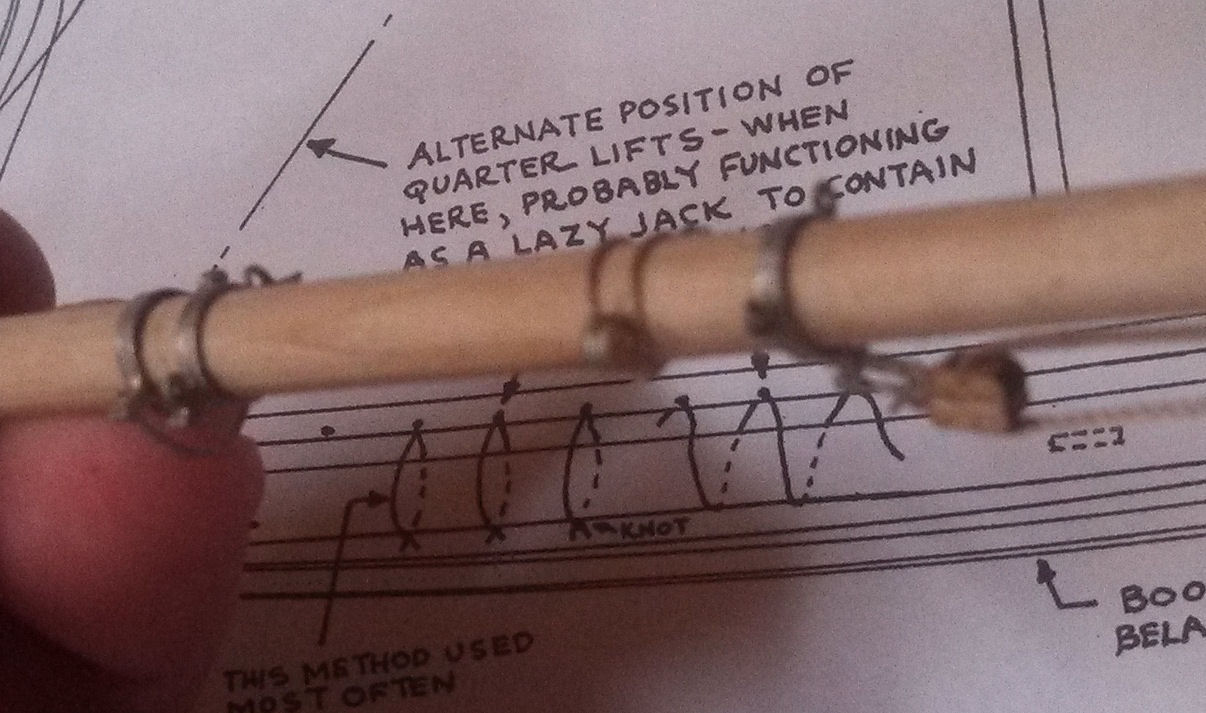
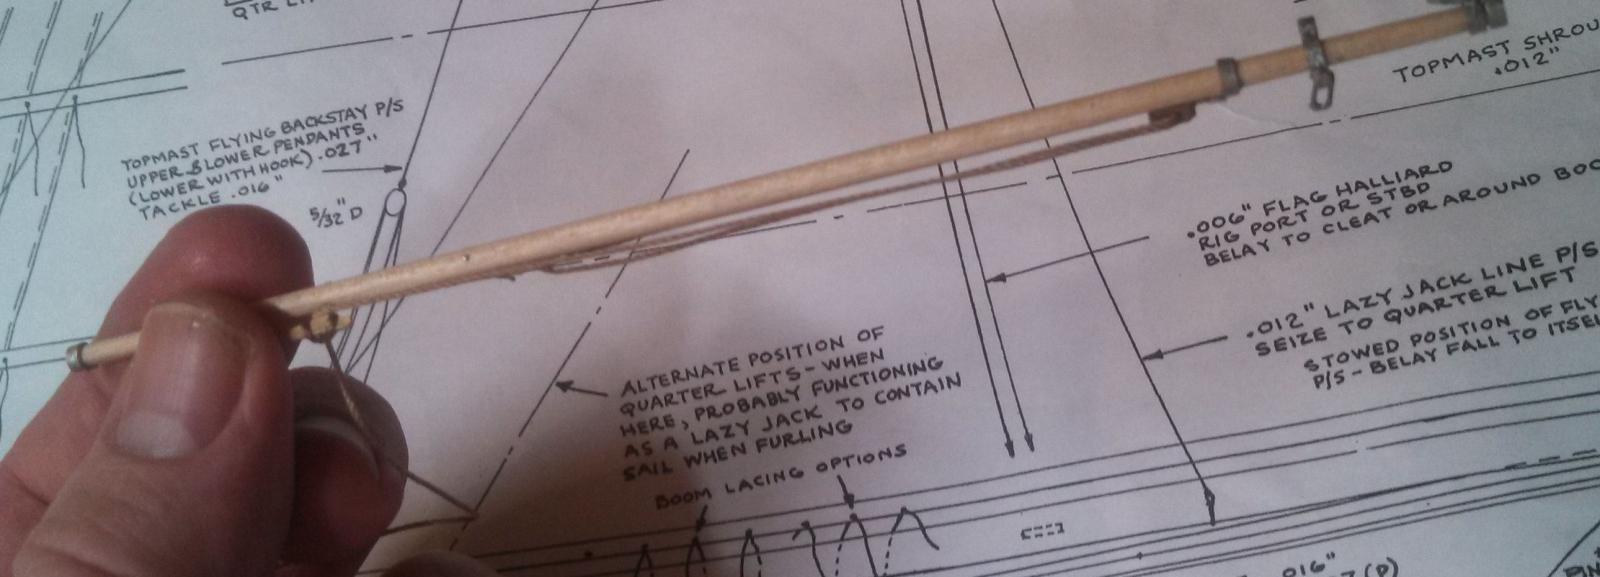
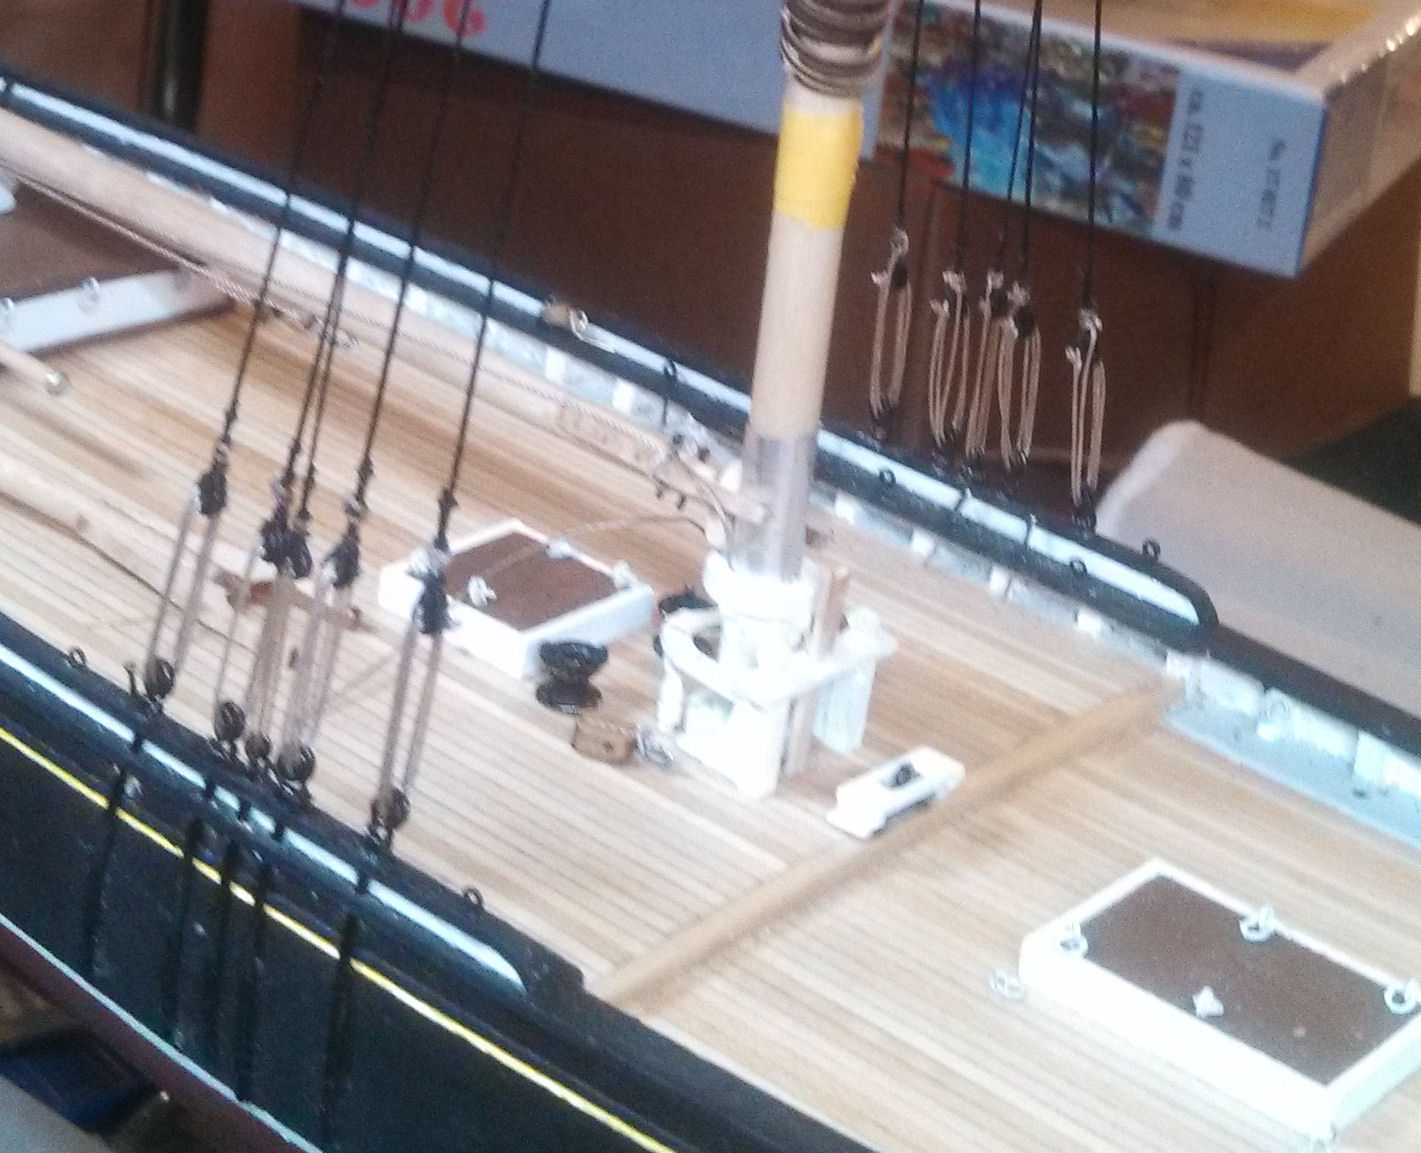
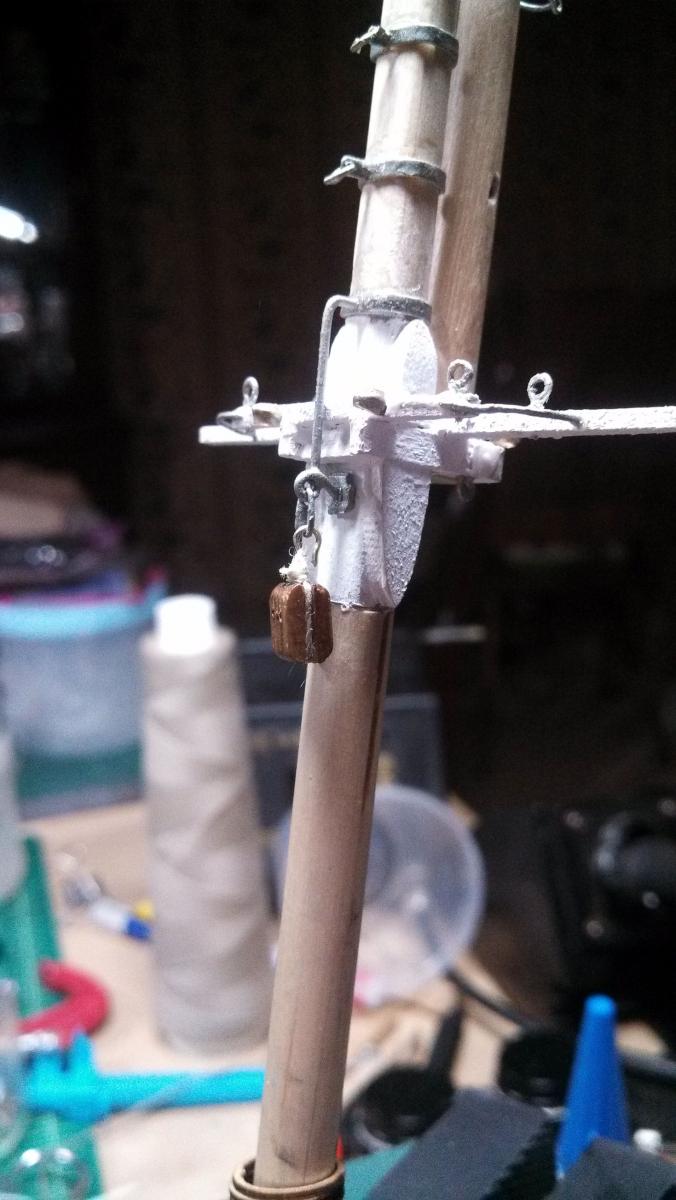
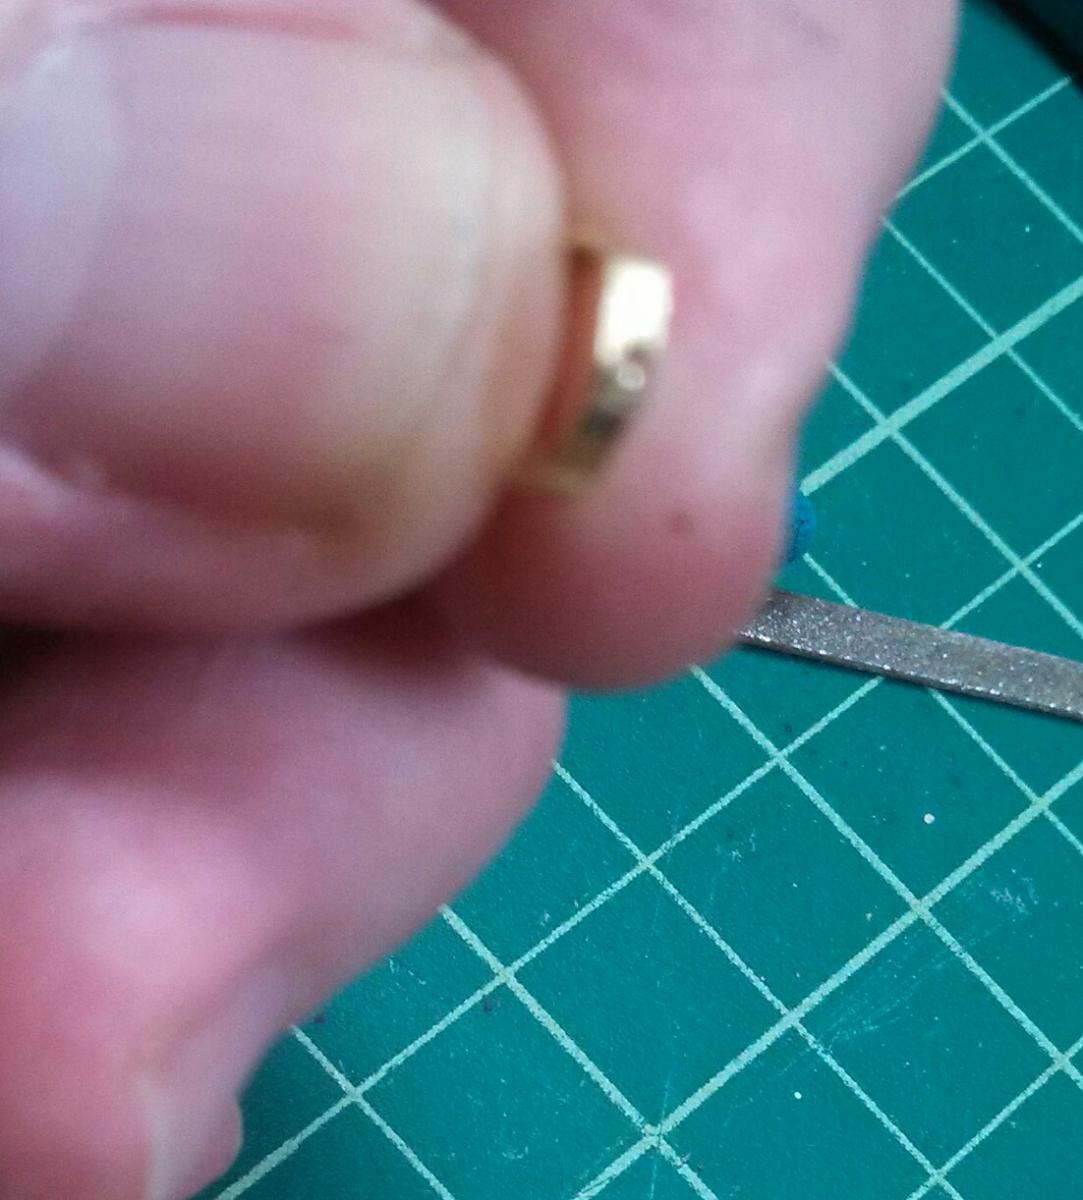
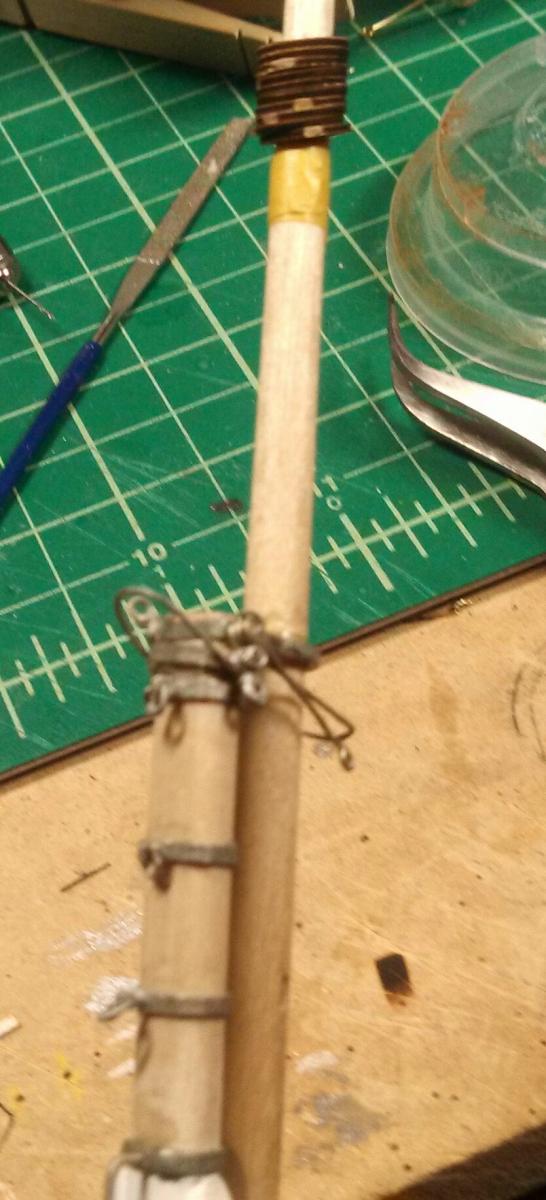
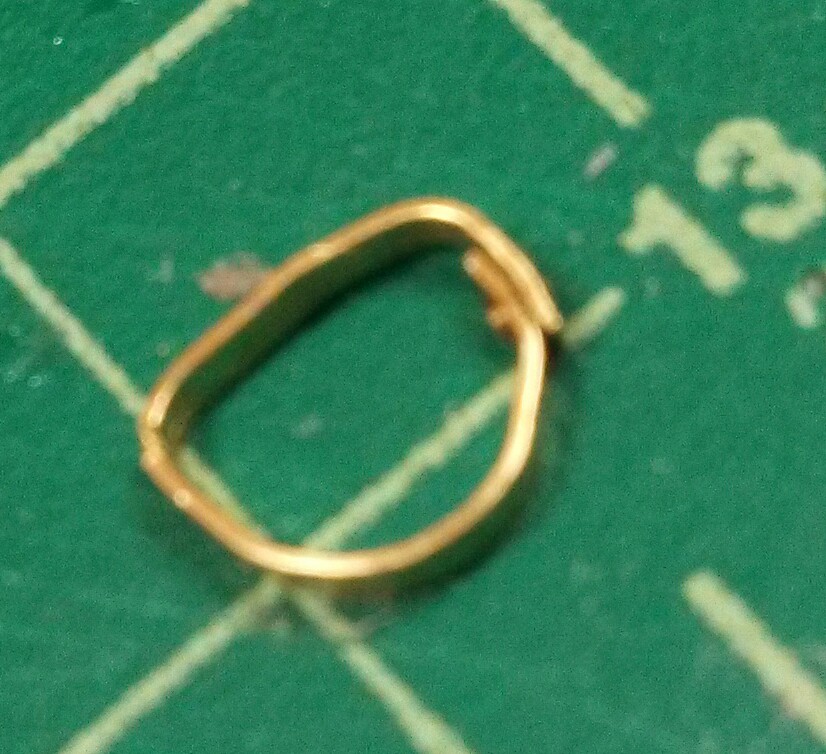
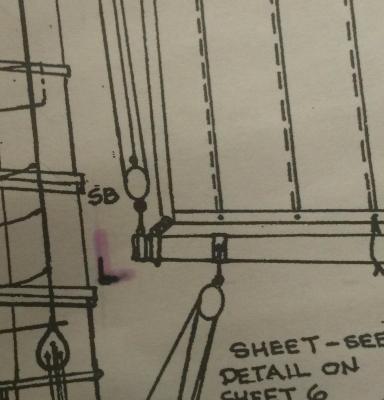
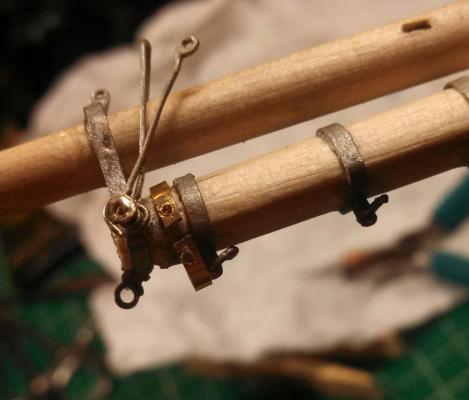
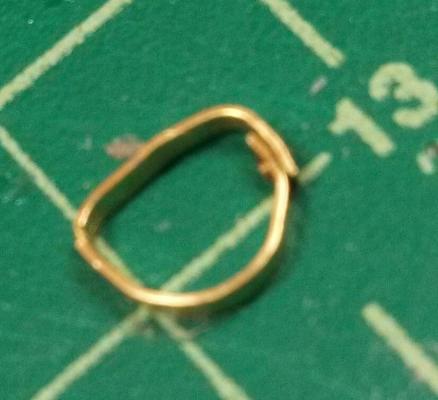
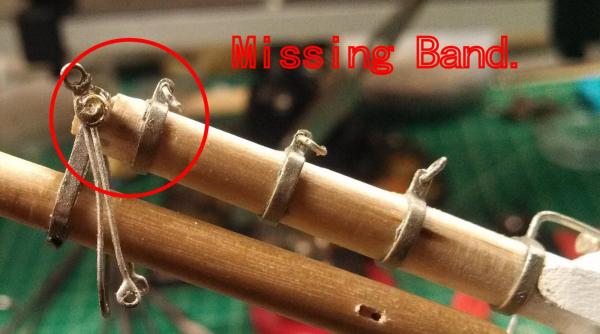
WELLLLLL, I have uttered some unkind words. So, I was looking at the plans today, trying to figure out how I was going to do the rigging blocks when I got studying this particular segment: When this caught my eye. And then, I started looking at this: And behold, I noticed that something was a bit different. Which led quickly to the famous "expletive deleted," Note that the band below the "coupling band" is missing. I completely overlooked it. (It isn't on the main mast, which I did first). Not only is it a band, but it has a hoop and two "eyes" in it! Since there are pins running all the way through the mast and glue and such, I decided to make a ring an bend around the mast. I just didn't think I'd be able to take it apart without destroying the mast. Although I know its only wood and some wire, I just didn't want to do that again. I knew that I wouldn't be able to solder it on, but I put the overlap in so that I could drill through the overlap and have the "pin" hold it closed and tight. I made all new parts and go this: After making the missing parts, drilling, painting, making the parts and everything, it came out in the "there will be ropes all over it anyway" category. Honestly, it isn't perfect and there is a seam that is unsightly. But I can live with it!


-
It looks like it is coming along quite well with a lovely line. I think when you fair the bulkheads all will be right with the world. I suppose that I need to just "get over it" but I can't figure out why, if you go to the trouble to laser cut a piece, can't it be done to the right size and shape? I guess it is a challenge to make it all work together when things aren't "quite right" but, to me its frustrating. In any event, your frame and bulkheads look nice and I'm sure the lines of the ship will reflect your efforts. I can't wait to see the next steps.
-
Although many people no longer recognize the history, James Bond's destructive wheel spinners were actually based on a tactic developed by the Bluenose who used "nails of death" to rip the shrouds and chainplates off competitor's ships! Okay, it has been a really long day.

-
Surface mount or flush mount- that WAS ... but no longer is .... the question. I considered pinning them temporarily and then running a blade down and around the chainplates to score the hull, removing the chainplate and then using a sharpened micro screw driver or something to try and cut between the scores the 1/64 inch, but in the end, honestly I didn't think it would turn out as well as just top mounting them. Maybe in another life. The deadeyes rotate freely in their brackets, by the way, which is the reason they are not all facing the same way. I'll take care of that when the time comes.
-
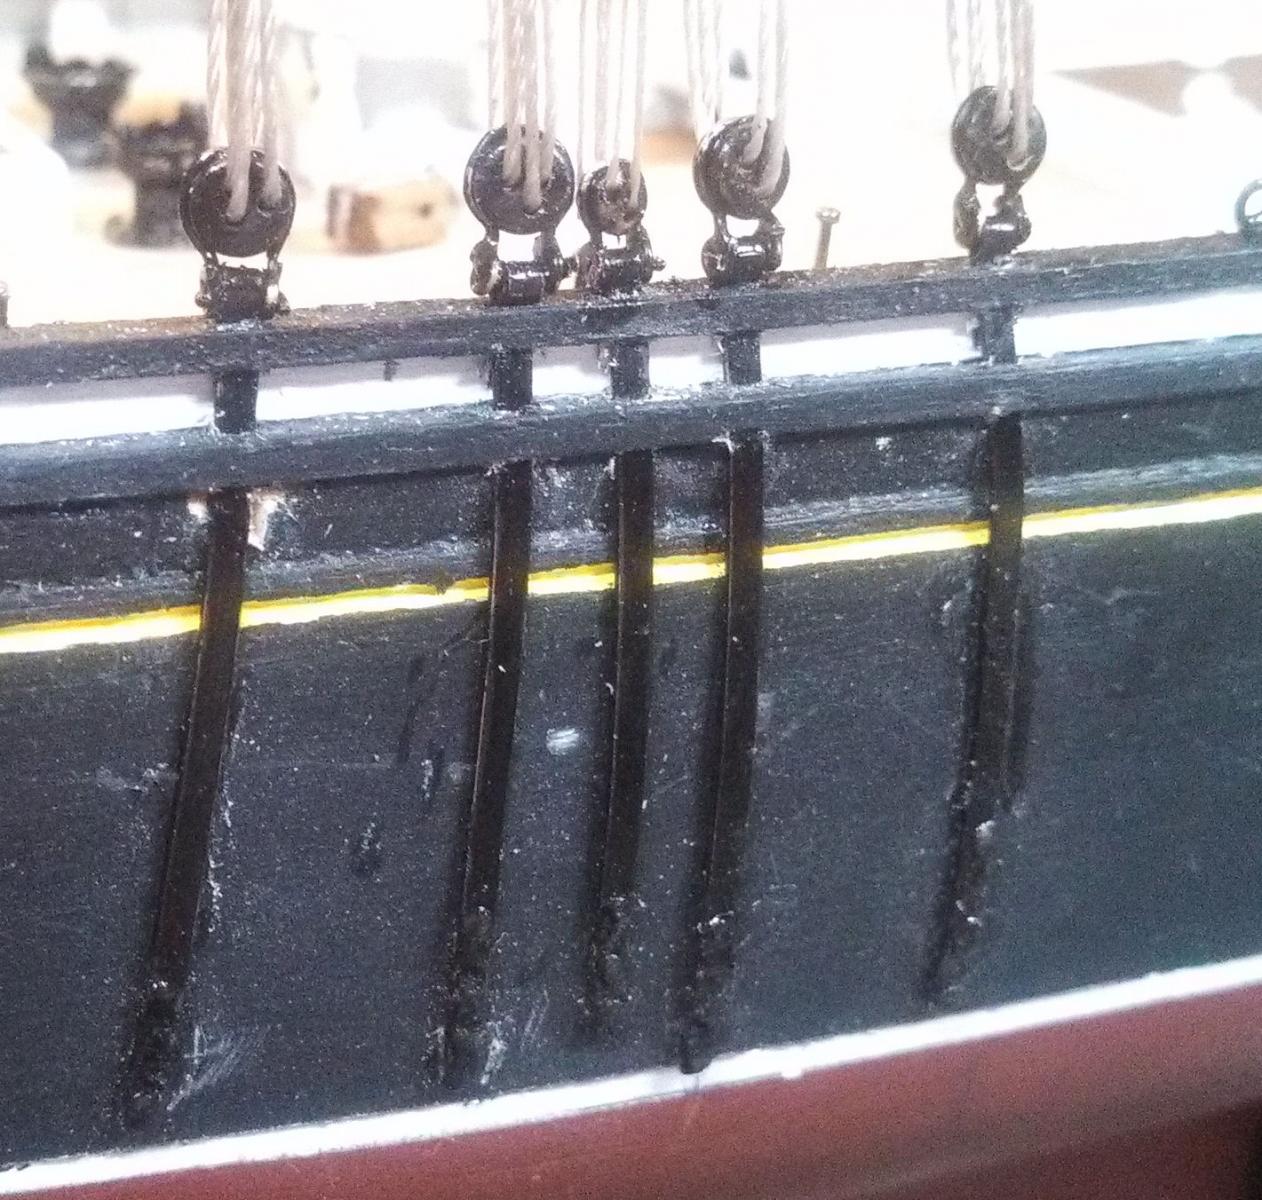
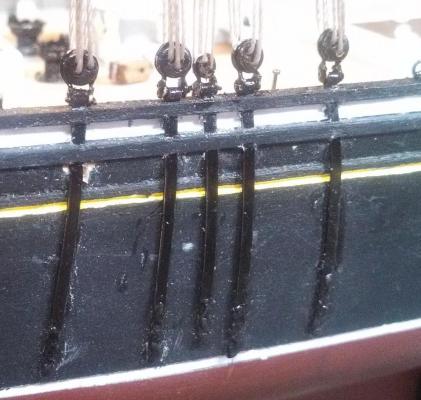
I installed the chain plates for the front starboard shrouds today. I used a rope from the temporarily placed mast to get the angles like I think they ought to me. The angle of the shot plus the curvature of the ship hull makes it look funny, but its actually pretty close. Note three things: 1) The small deadeye isn't in place yet, although the slot is bored for it. 2) I'm not sure how I would go about trying to set the chainplates flush with the hull. I'm not going to try, I think this will make a nice model. 3) I SWEAR it doesn't look as bad in person as it does in this photo- although I have a lot of cleaning an touch up to do. The brass and the deadeyes will be painted black. I also calculated and then built a jig for the wire that goes around the small deadeyes. The distance between centers of holes is 8.2mm. This provides a nice wrap, but the brass strips used for the chainplates have to be filed down to give a nice looking fit.

-
That's pretty much what I had in mind, yes. I read todayof some builders soaking or steaming parts and then pressing them flat in various ways- I've never tried it.
-
My first boat was the Mare Nostrum. It was an interesting build, quick and simple- yet I had to learn a LOT!
-
Always a shame when you don't have minions to assign the drudgery to while you're away.
- 1,755 replies
-
- 1
-

-
- constitution
- constructo
- (and 1 more)
-
I have been asked about a class of ship called a pinisi. My quick look over the web indicates there were (and still are) two classes, Lamba (also Lambo) and Parali. The person's enthusiasm and stories make this ship seem interesting. I was wondering if anyone had ever seen plans or models of such a vessel? I have this empty space on one of my shelves....