PopJack
-
Posts
256 -
Joined
-
Last visited
Content Type
Profiles
Forums
Gallery
Events
Everything posted by PopJack
-
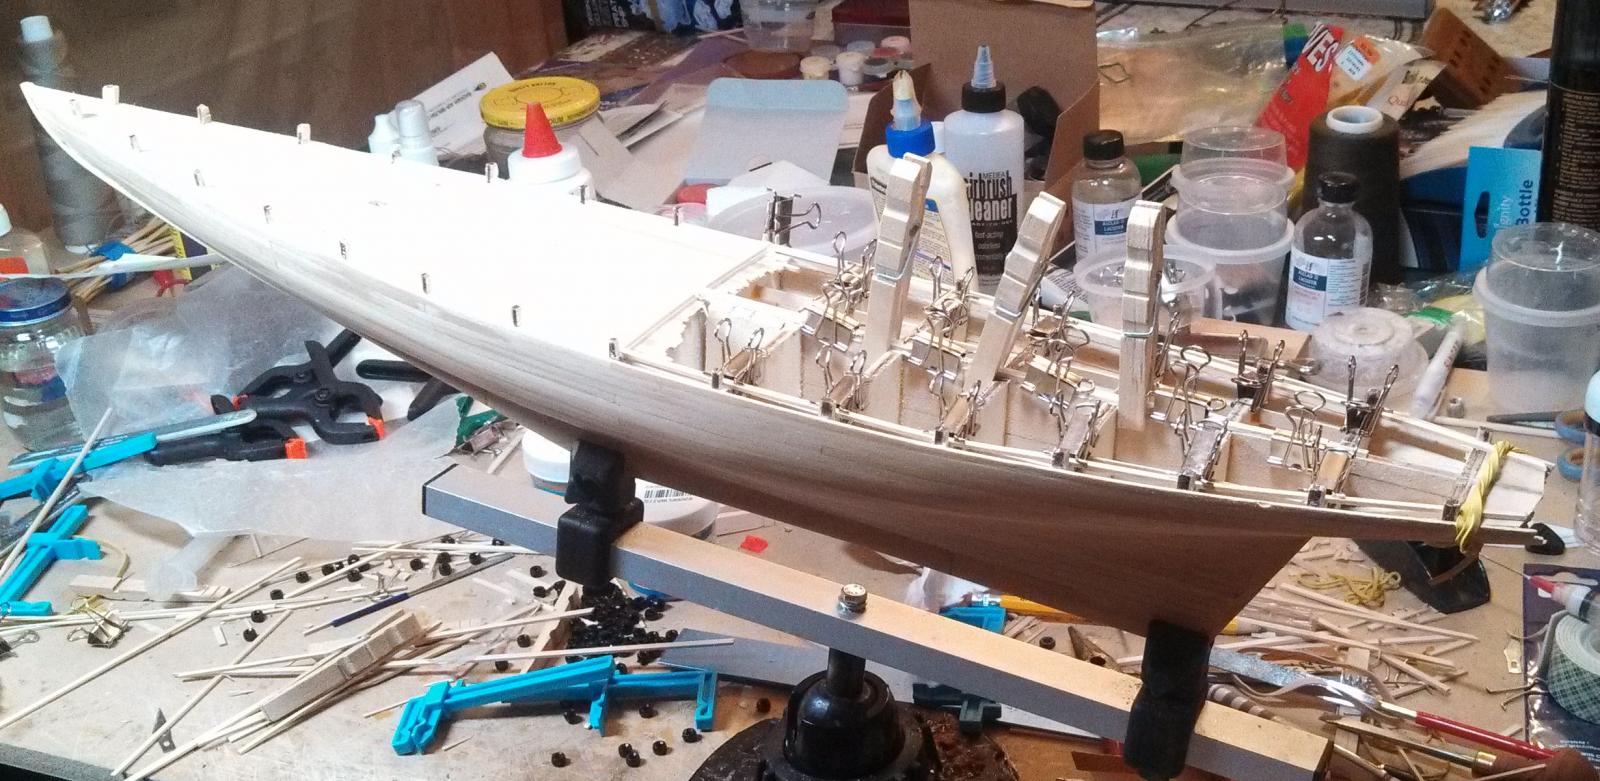
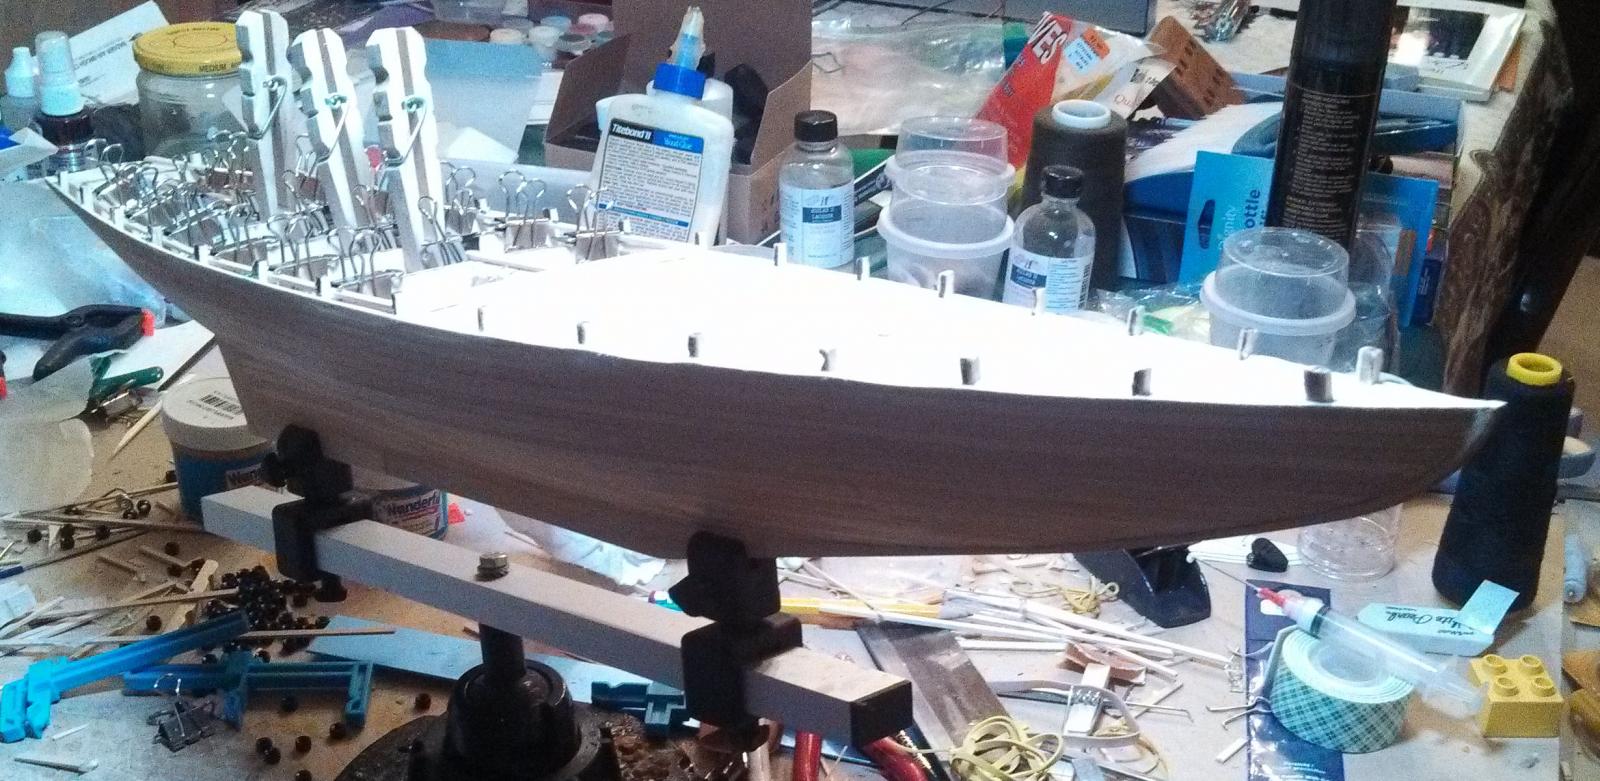
 Well, I haven't posted anything in a while, so I thought I'd catch up a bit. <BLAH BLAH> I've whined enough for a lifetime about this simple little build. I think most of the early stages of the build logs on this ship were lost in the great crash. I couldn't find enough to help me get going. After a lot of thought I went ahead and purchased Hunt's practicum. It was a lot of coin and it hurt to do it, but frankly I found myself not enjoying the build. I was considering just junking it. Hunt's techniques are quite a bit different than the directions and so far much more understandable. There are still a few issues with the kit, but I am a much happier camper than I had been. I am back to enjoying myself, which is what this is all about. So, was the cost of the practicum worth it? For me, yes. That said, I'm not following his instructions exactly. This keeps me from feeling good about using his forum for advice (I think its only fair that if you ask questions about how to do things that you be doing what he said to do), but I'm HAVING FUN! I think I had overly high expectations for the quality of this kit. I'm not saying its bad- just that I had expected quite a lot. I had built a couple of AS kits and thought by moving to this manufacturer that all of the wood inaccuracies, lack of consistency in stated thickness, bad laser cuts, were going to disappear. I was wrong. For those of you who have read other my other logs, you may be surprised that I actually did some re-work. Amazing but true. I found myself trying to cover up an error and then figured- heck "It's only wood!" </BLAH BLAH> So, the hull is planked. This is the easiest of the three kits I have built to plank. I only used a bender on maybe six planks and that was to induce an accurate twist. The main deck is planked and I'm starting on the quarter deck. The decks are a fun challenge with the nibbing straits and the taper of planks on the quarter deck. Fun, but not too hard. I had intended to install tree nails, but the scale is so small I think they would look funny. Still considering this. Has anyone put in tree nails on this ship?
-
very nice.
-
Sure. It's called an Amati Keel Clamp. I got mine from Hobbyworldinc.com, but I've seen them other place since then. I really like the way I can swivel the ship around to work on different things. It has a good enough grip to hold onto the false keels of the ships I have built so I use it all the way thought he rigging
-
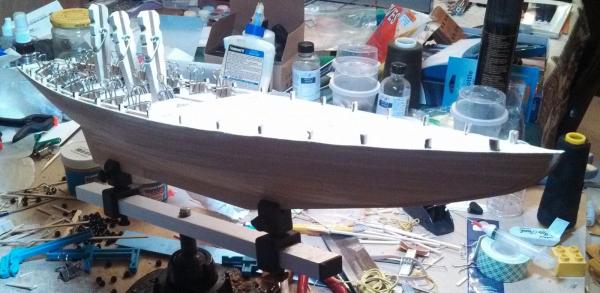
Partially installed the water ways and have started planking. This is my first ship at this scale- geeh, there are a LOT of planks!
-
Question: Is is common for plywood in model kits to de-laminate? This is my third model ship (the other two were smaller boats) and this is the first time I've ever had this problem.
-
Thank you for the photos. Someone once told me, sometimes you just have to get up and walk away. This ship is extremely frustrating to me. I ran into another case tonight where the laser cut plywood isn't nearly the right size and doesn't match the plans. It is going to very difficult to shape. When I try to shape it, the plywood de-laminates and breaks apart. (Layers of the plywood are not glued together well). I don't know if this is typical of model style plywood or not. So, I'm going to get up, gripe on the computer for a while, have a glass or two of wine and forget about it for a day or two. Step 1: Move away from the model. CHECK Step 2: Gripe on the computer. CHECK Step 3: Have a glass of wine. WORKING. Step 4: Forget about it for a day or two. PENDING I'm actually considering boxing this one up and going to another model...but I'm not quite there yet.
-
Thanks for the comments. Jake: I feel your pain. In preview, I found that part of the instructions confusing as well. I will be working on her sometime this weekend. I will post whatever I come up with, but one option I was considering was skipping what I could safely skip until more of that portion of the shop was complete. That way I might understand better where it was headed. I'll let you know. Floyd has also suggested he might have some photos of the early stages which would be helpful.
-
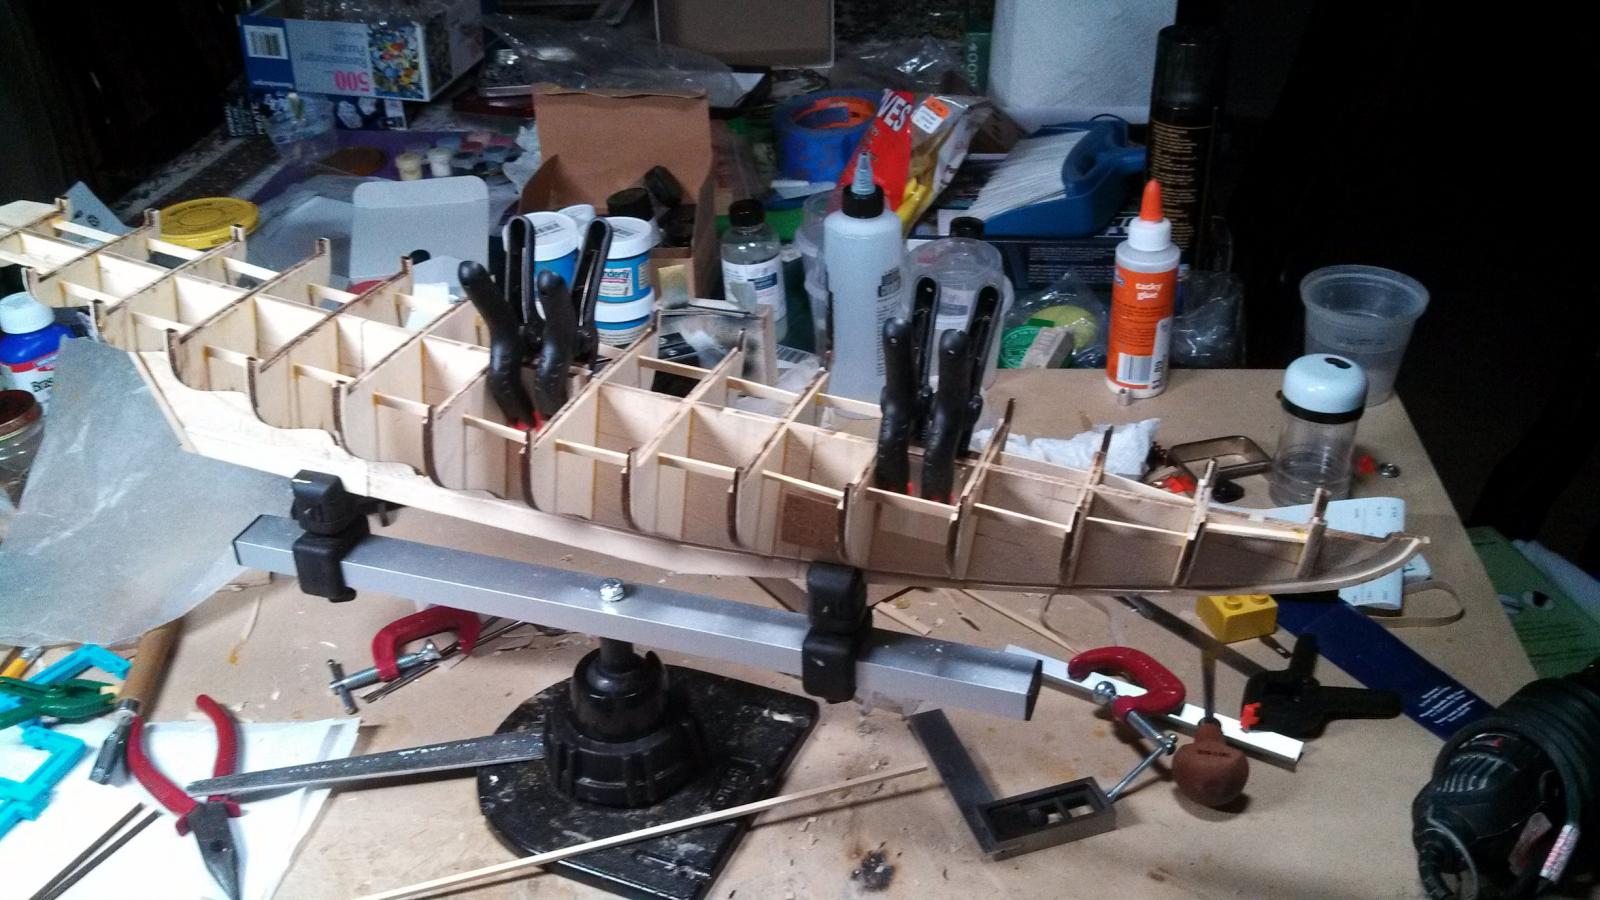
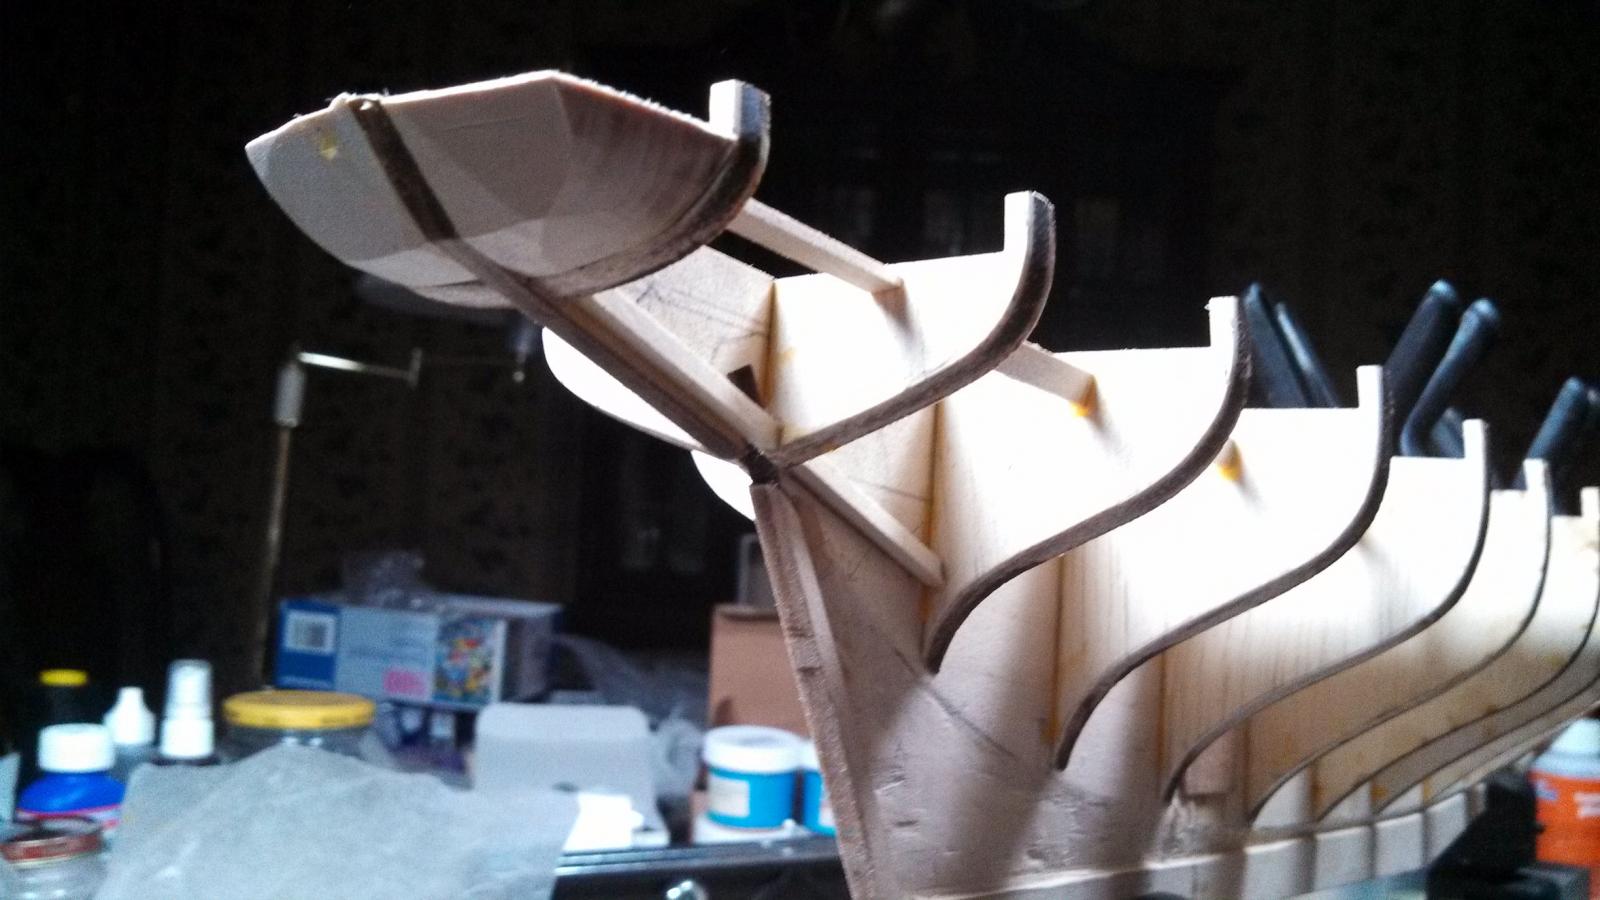
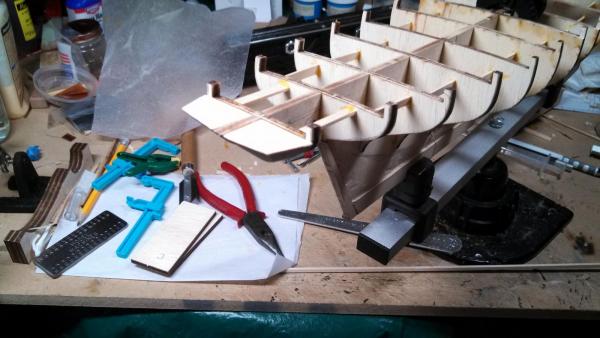
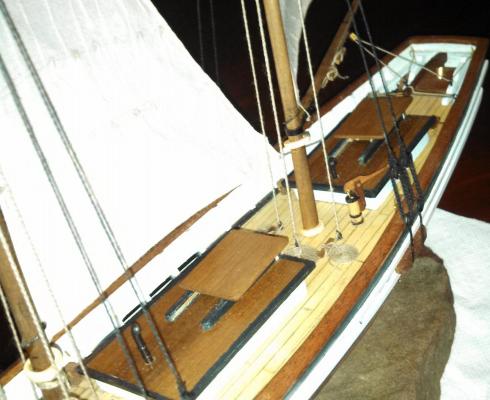
Did a bit of work on her this weekend- just a few hours. The frames have been braced and glued, mast holes reinforced and the stern blocks and timbers glued in. The stern block was a bit for a challenge for me both from the perspective of trying to make sure that symmetry was maintained as well as trying to understand exactly what was needed. The photos were taken before final sanding. I'm not sure its right, but I have faith in my ability to make it fit when the time comes. I seem to be overly critical of this kit. This is a habit I have to break. A few photos:


-
I have been doing some writing as of late and so the build has suffered. That said, the bulkheads glued in along with some bracing to eliminate the "banana boat" shape. I'm having a lot of trouble understanding the drawing of the stern blocks. If anyone happens to have a good photo of the stern before planking, I'd appreciate a glance at it. Dave B's photo above is helpful, but one from the stern would be a real benefit to me.
-
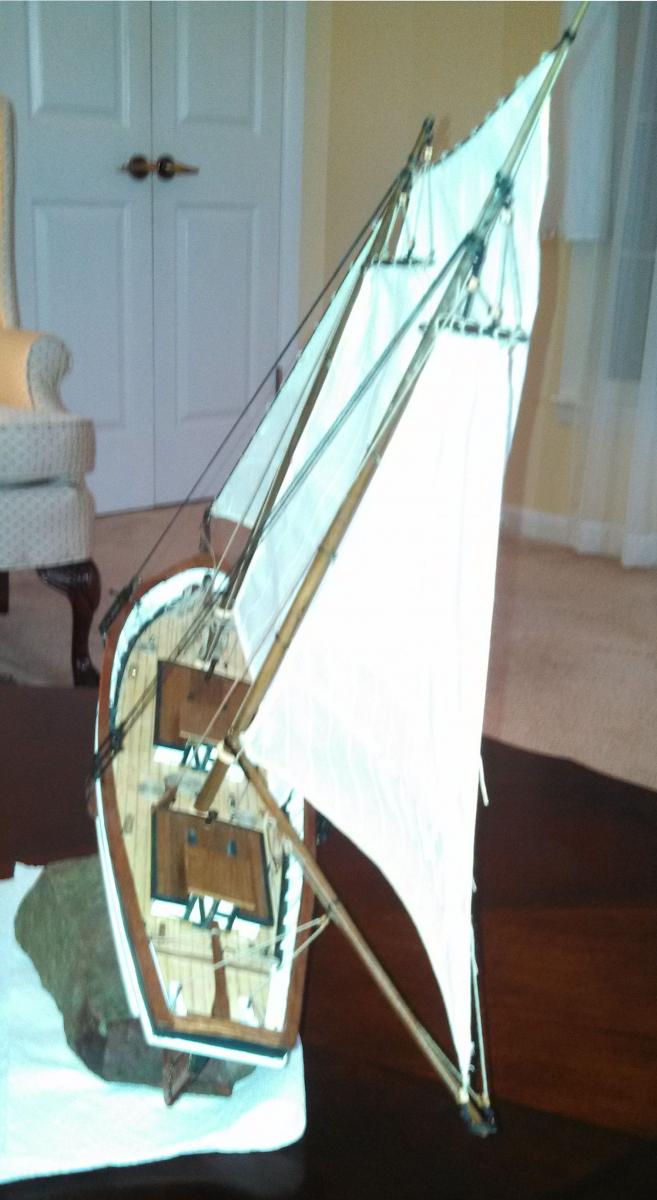
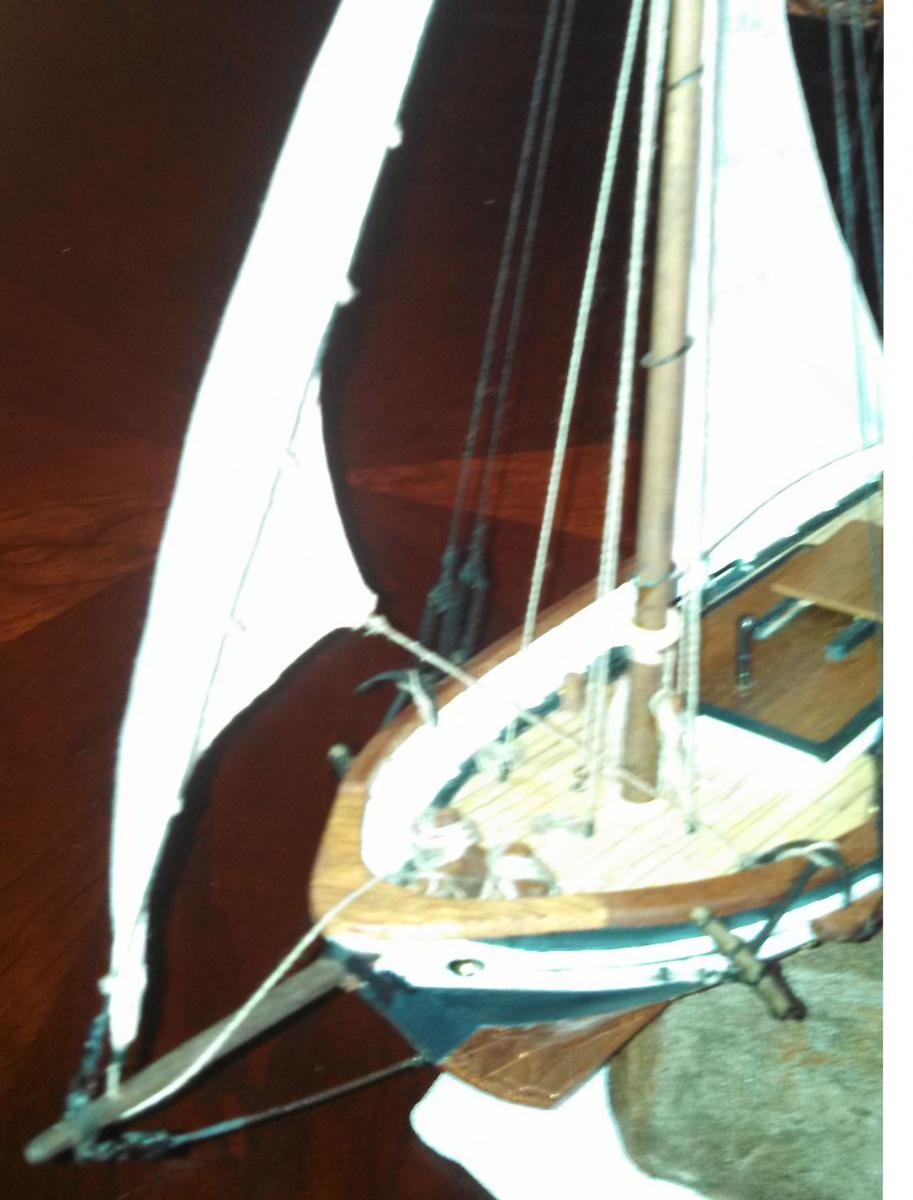
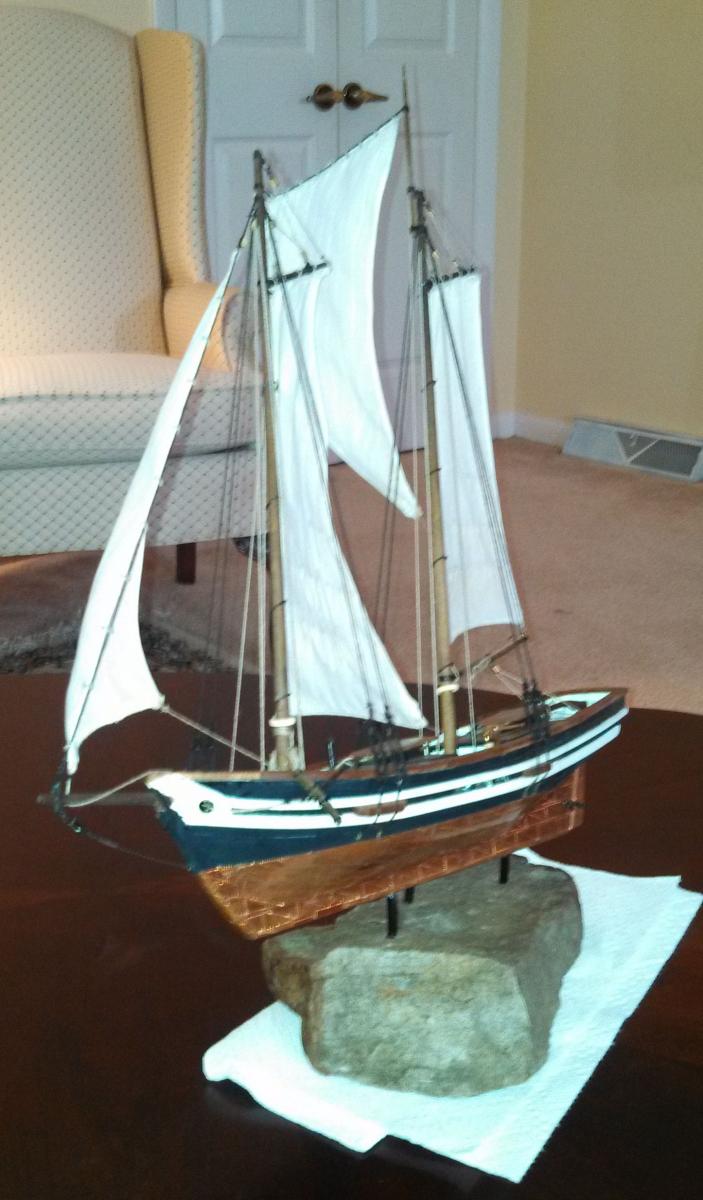
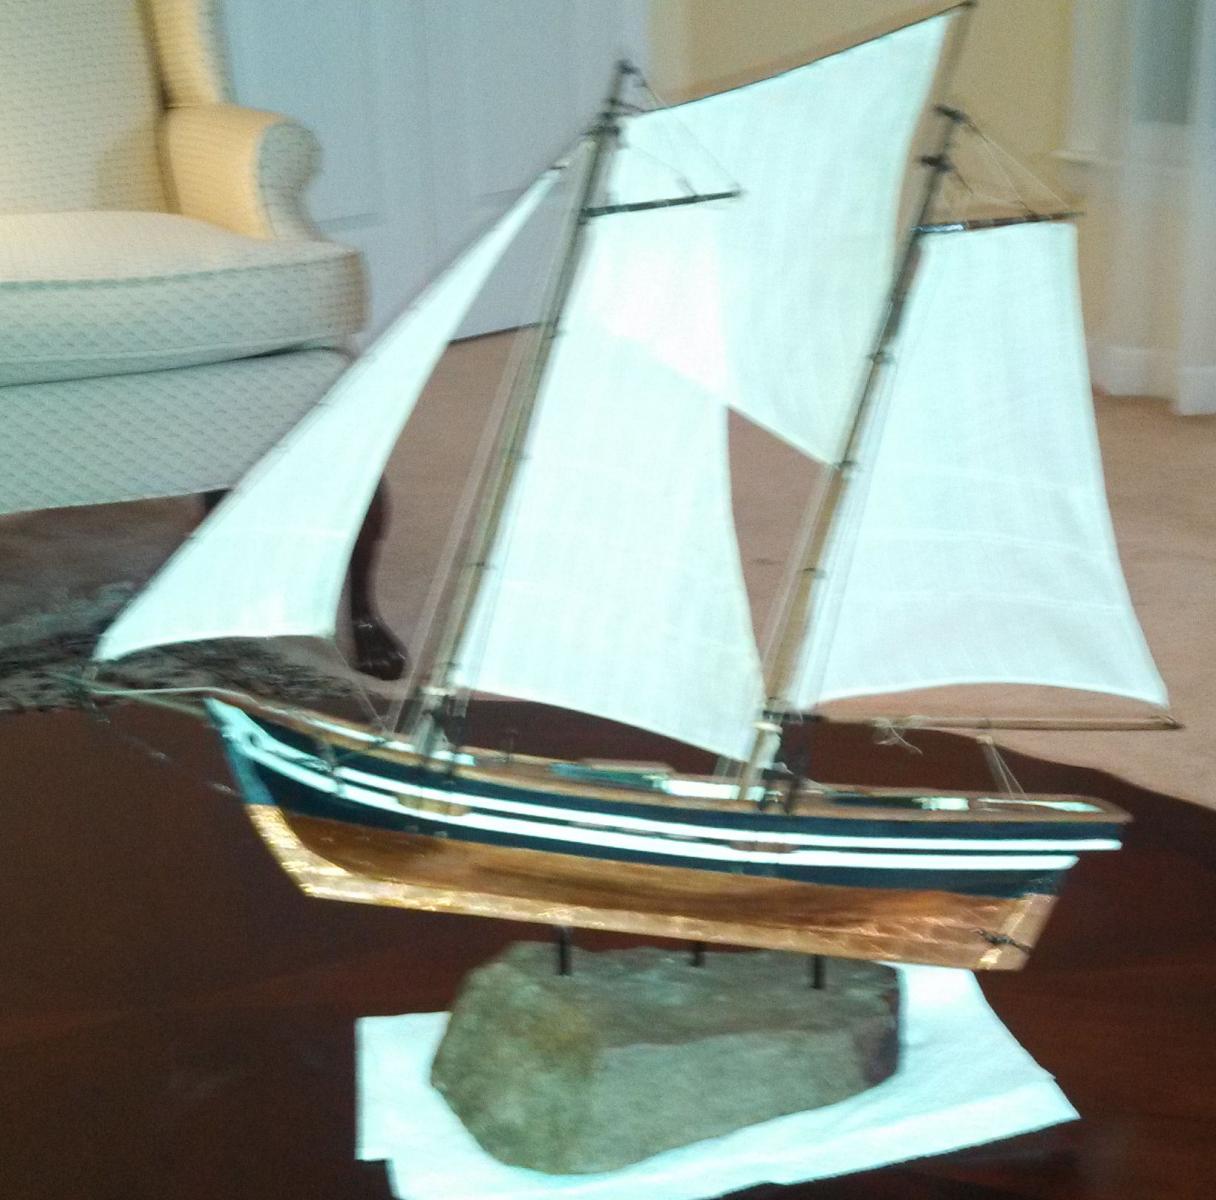
Thank you for your kind comments. I was looking at the photos and may try and take some more- the effect of the mounting is actually better than what I see when I look at the photo. The other night my adult son was visiting and gave me the ultimate compliment. "Wow," he says,"it makes me want to get my sail boat out and get in the water- I love to sail when the boat feels like you've got it mounted."
-
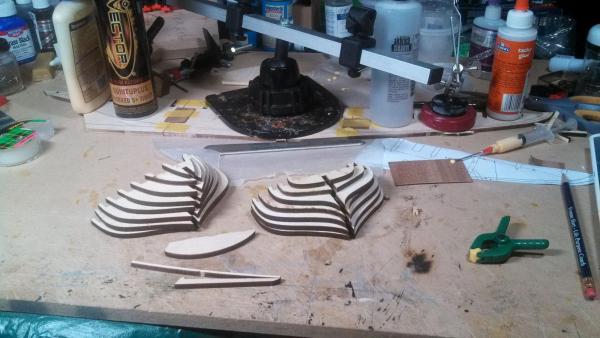
A little progress update. 1) The Rabbit is cut. I tried to use a standard wood chisel. Although I know how to sharpen one razor sharp (seriously, you can shave with my chisel when its sharp), I found the bevel angle of the blade too steep to make smooth cuts. I bought a palm chisel with a much narrower blade and with it the rabbit was really no trouble. 2) I have tapered the bulkheads in the fashion of a "pre-faring" I guess. It was suggested to do this with a knife, but I'm not that good. I used a 1" bench mounted belt sander and just carefully shaped the things. 3) I started on trimming the bulkhead supports to 1/8 inch. I am BAD at this and have really cocked them up good. So far I've broken two that are glued back together. I have learned that cutting a stop cut flush with the deck mounting surface and then cutting toward it with a razor knife seems to work best. This ship is taking a lot more preliminary work than the boats I had been working on. I'm glad I started small, as I have some understanding of what I'm shooting for.
-
I believe in posting every mistake I make IF I think other people will learn. Here is one. When cutting the rabbit, the instructions suggest that you can cut the rear rabbit either before or after you glue on the stem post. For some reason I thought it would be better to cut it before I put the stem post on. I left "tabs" of original wood to use for judging depth. This was not a good idea. When everything was done, despite my "tabs" I cut this way too deep. I have now glued the stem post on and will take some thin wood slats and rebuild the wood I cut away before proceeding. So, I strongly suggest you glue the stem post on before working on the rabbit.

-
Thank you for the great answers.. That is a great hand made tool, I suspect I'll have a similar one soon!
-
A "Bob Hope" moon! Cool.
-
Hi Bob. I really admire your build. I wonder if you could talk to me about the brass metal work. The brass looks very nice bent around the mast and fixed. Did you glue it or solder it to fix it? If you soldered it, how did you prevent discoloration from the heat? Simply crimped?
-
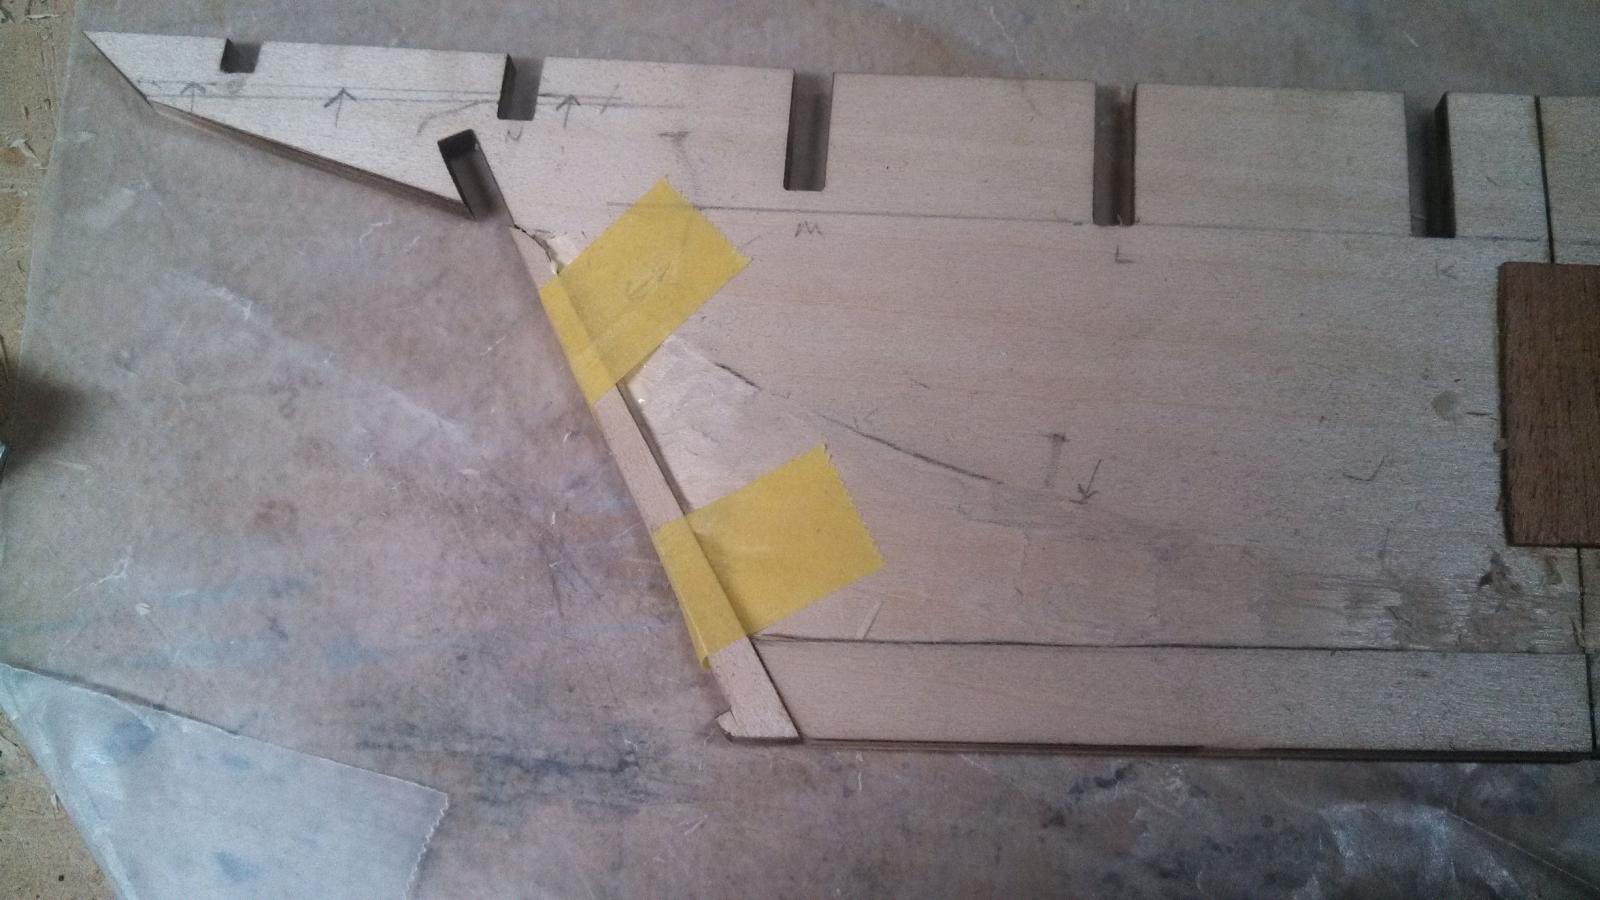
As Luke and Yoda stand studying the rabbit joint, a wet fog clings to their robes and Luke's razor knife shaped light saber hangs at his side, buzzing quietly, Luke: "I am not afraid." Yoda: "You should be." Yes, I started on the joint. The tape helps a lot. I marked the blade at a comfortable angle for me. Not enough progress to comment on yet. Bob and Brad, thanks for your comments and encouragement.
-
Worked on her a bit last night. Several observations that contribute to sorting out every one of Yambo's "little problems." First, the joints for the keel pieces are terrible. When everything is lined up and the glue has set there is so little contact area that the Keel remains unstable. It is obvious that you need to glue scabs across the joint, but in doing so the hull becomes unstable for the holding and cutting that will be required for the rabbit. So solve this I have glued in scabs, but only from wood where I have enough to make a complete support system during the cutting of the rabbit. In other words, I won't use scraps or small pieces. I was also surprised at how badly the slots in and for the bulkheads are made. This isn't a big deal, it only took an hour with a file to fix everything, but still- I mean these are laser cut... wouldn't be just as easy to cut them right? Don't know. I am really nervous about cutting the rabbit. It will be first time for me to do something like this. I'm thinking I'll pt tape on the blade of my knife to mark the depth. Hey what could go wrong?
-
She was my first build as well. A nice fun Kit. I really like how yours is looking with her paint. Great job on the planking and furniture
-
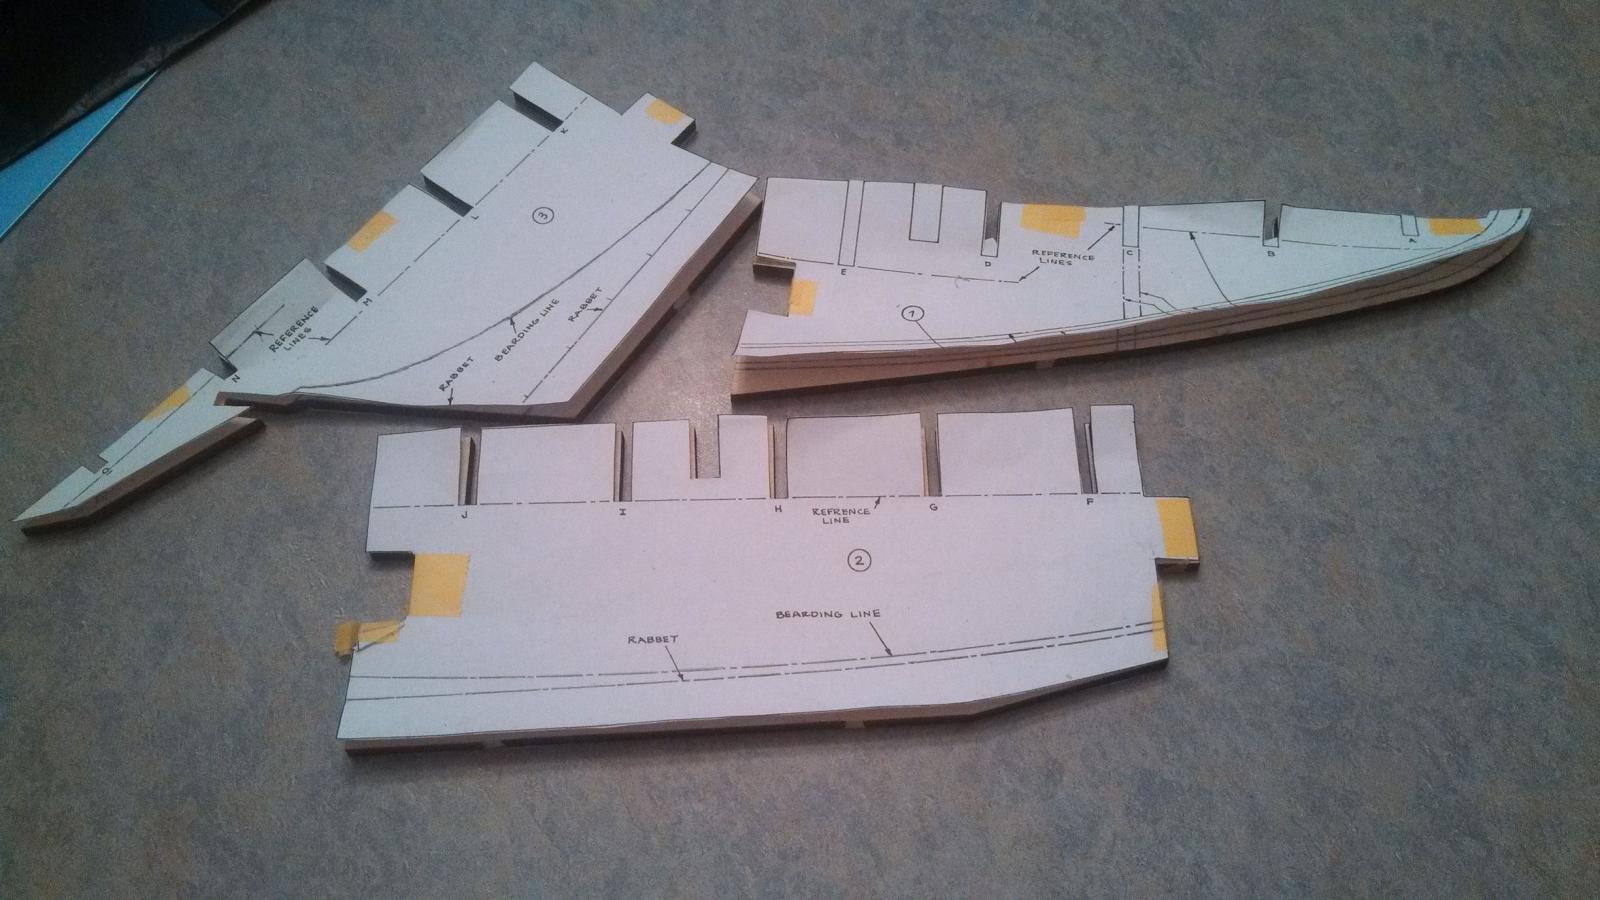
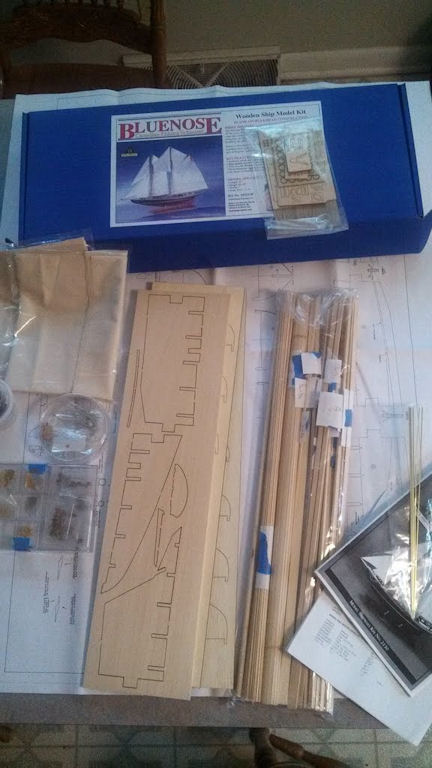
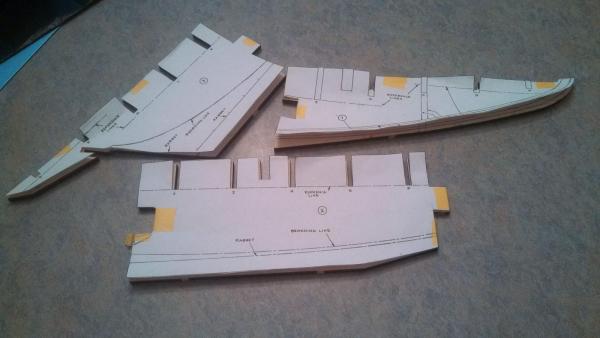
Calling it a weekend. Starting the Bluenose was a difficult choice for me. She is a beautiful ship, but I have another kit waiting that keeps calling as well. I would like to do two at once- but there are few hours I can work on a ship. I think you're supposed to have an "open box" photo. As mentioned, I made photo copies of the plans at 100% and used carbon paper to transfer the lines. Here is that in process. I got the keel cleaned up and glued up. Itis hidden under all the objects being used as beanbag weights. I also got all of the bulkheads out. I broke one of the extensions which I glued back on. Looking forward to this build. Should be a lot of fun. For all my friends in Canada, the UK and other parts of the civilized world, gosh I miss metric. Everything in the kit is in fractional inches- so I'm always trying to figure out, Okay, if this piece is 7/32's and I need to go 1/32 bigger, that would be 8/32's but... but that's 4/16s and that's 2/8's and that's 1/4 inch! I do have a caliper that read in fractional inches- which is helpful, but you still have to go through the above exercise all the time. Funny, I clearly remember trying to convince my Mom when I was a kid that Metric would be better and loosing the argument with her. She threatened to just "throw away" all her recipies that weren't metric- starting with her Lasagna and Dutch Chocolate cake! I relented.

-
Starting on the Bluenose. There are several Bluenose logs around, and I considered not doing a log. However I find myself agreeing 100% with bhermann when he wrote in his log: I couldn't have said it better, so I didn't try. I notice also that most of the logs are pre-crash and have little about the front end, so perhaps this will be helpful to someone. I have constructed two model ships from kits. The Mare Nostrum, by AL and the 1980's version of the Swift, also by AL. Opening the box, one can immediately see the differences. It took me 1 1/2 hours to do a complete inventory, admittedly bundling the "sticks" and labeling the bundles to save me time later. I have considered buying the practicum offered by Bob Hunt, but have not done so. If I get in trouble, or feel like I want to add detail, I may very well do that. I have heard is stuff is worth the investment, but money is always an issue. Just waiting to see what happens. The first thing I notice is that the wood parts are thicker and heavier than the AL kits. Of course, this is a much larger build, so the comparison could be unfair. The instructions appear good, but I have to admit I get lost sometimes. We'll see if they make more sense as I go. After separating the hull pieces from the board, I transferred the rabbit and bearding line, along with reference lines, to the keel. This is NOT a trivial task (for me anyway). I ended up going to a store and making 100% size copies of parts of the plans which I then cut out with scissors and used carbon paper to transfer. This process actually took me about four hours. I'm not sure why I had so much trouble, but if these lines are not absolutely correct, the hull will be malformed, so I took a lot of time with them. I will be gluing the keel together today and calling it a weekend. This thing may take a while.
-
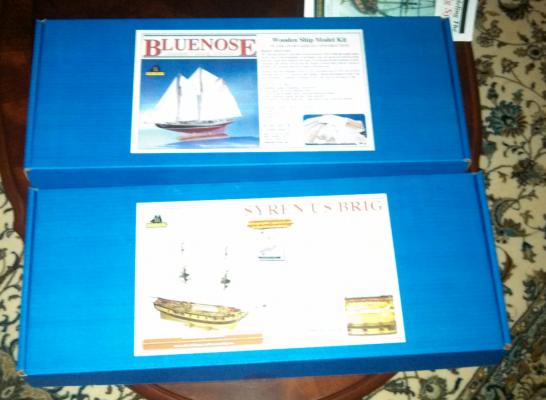
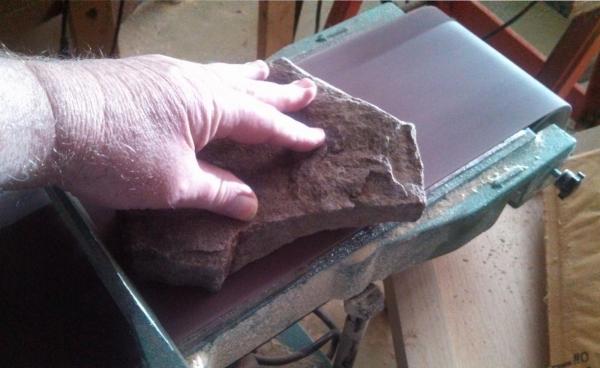
Themadchemist: Thanks so much for the praise. The boat has been a lot of fun and I too have enjoyed comparing our nearly opposite approaches to it. Your approach has taken more time and will result in a very unique work of art- I consider my boat for "workman like." I will continue to follow your work, as I find a lot of inspiration and I learn a lot. Your memory is flawless. This boat will be a gift to my brother on the occasion of his wedding. I am writing an allegory comparing marriage to owning a wooden boat. Its not as much of a stretch as you might think at first blush. I have a Bluenose and a Syren in a box. I am thinking the Bluenose will be next. You are correct in that my build of the Mare Nostrum was lost. I didn't think there was enough information there to justify trying to rebuild the log. There is a photo of the rock mounting here: http://modelshipworld.com/index.php?/topic/1725-mounting-on-rock/# I'm beginning to think I have a thing for rocks! Seriously, they appealed to me on these two builds. I bought some slate the other day and put on a shelf.... If I stay with these more "informal" style mountings, I know what it will be used for.
-
I am really enjoying following your work. Being a complete novice, the techniques are new to me. It is very nice work on something I would have never considered. Now that I've seeing it done, I may have to get away from those sticks and strings for a bit some day! I've been around furniture wood a long, long time and without giving it any consideration, I thought it was maple also, or maybe beech. I was wondering how many blades you went through though. On the positive side, if you ever did get it right, you wouldn't have to worry about it getting "dinged up" much.
-
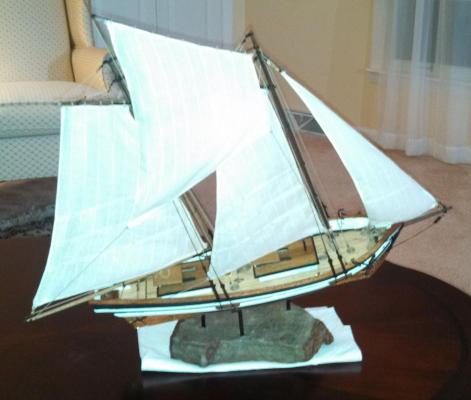
Well, I guess the fat lady has sung. I am have smoothed the bottom of the rock and will glue felt on it to protect furniture. I may- or may not create a label for the rear transom showing the home port. The allegory I'm writing to go with it doesn't have anything to do with anything, so.... I guess this is it. I've enjoyed doing this little boat and I have learned a lot and gotten better at some things. Thanks for those who came along for the ride. Id be happy to comment on why or how I did anything that anyone is interested in- and, as most always, welcome any comments or criticism or ideas for "next time."


- 125 replies
-
- 1
-

-
- swift
- artesania latina
- (and 1 more)