PopJack
-
Posts
256 -
Joined
-
Last visited
Content Type
Profiles
Forums
Gallery
Events
Everything posted by PopJack
-
 I've been stealing admiring some of your construction techniques. I especially like the shackles you used to connect the rings on the bow sprint to the lines. I'm wondering on your shackles how you attach the pin that is normally threaded and screws in. I was thinking that I should bend one end marginally, insert, trim and then superglue the pin in place. Thoughts?
 -
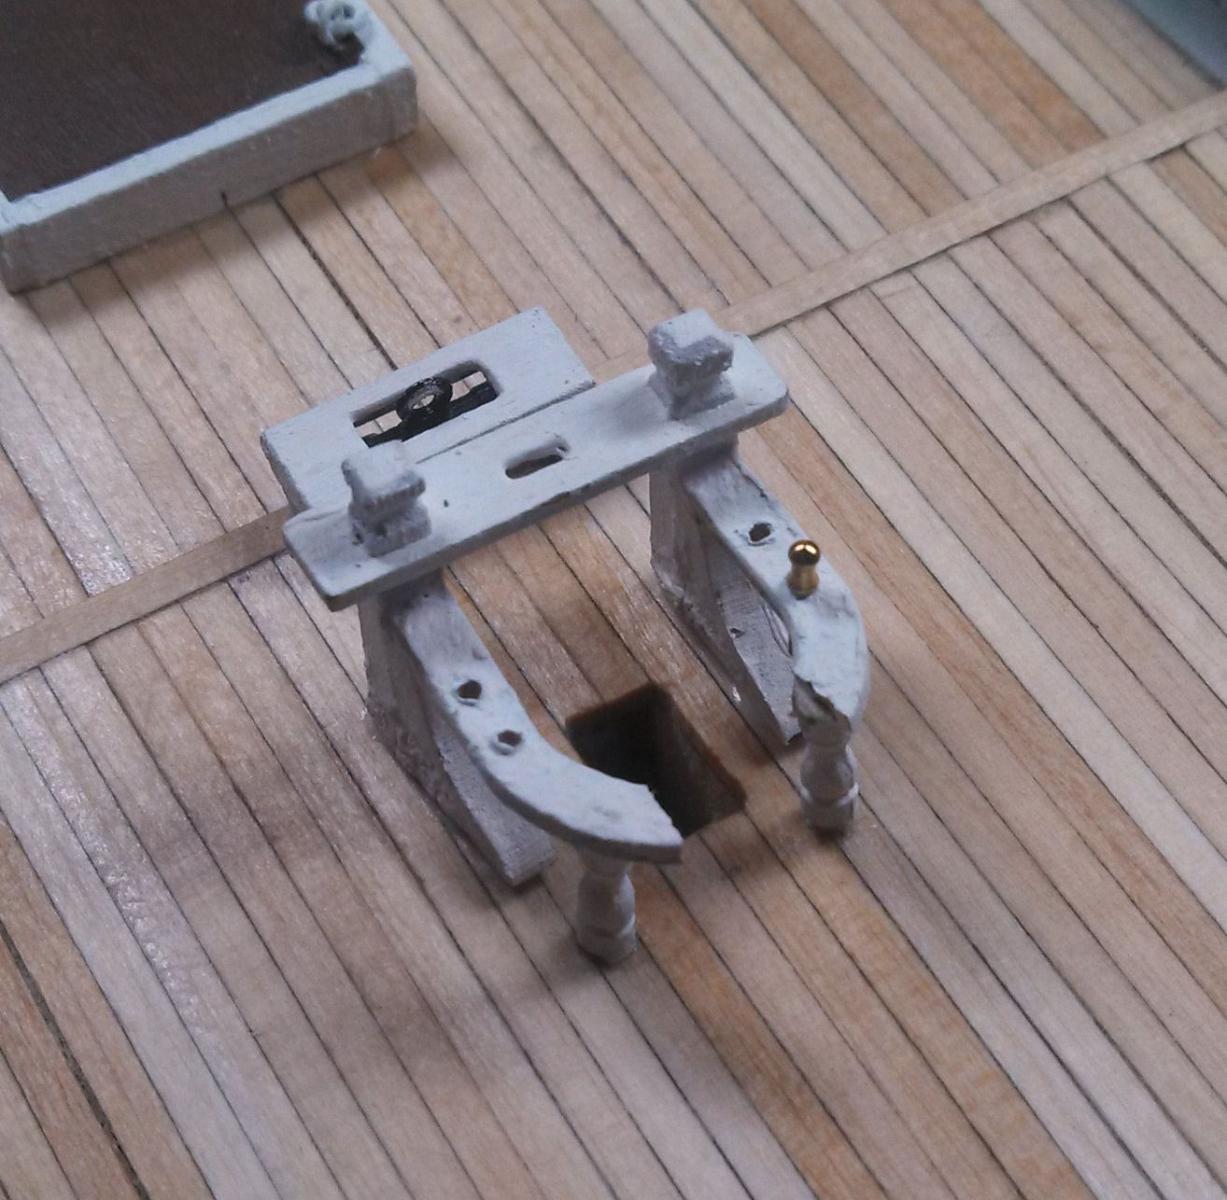
I started putting the deck furniture and fittings on today. I discovered, after much detailed and secret research into hidden archives, that the bluenose actually had a "step through" fife rail. Obviously, I had to model such a discovery, to wit: I also worked on a paint scheme for the oars. I haven't found anything I like yet. BTW, there are a BOATLOAD of oars! I did a little research today and found that oars used in deep water were held in place by various types of horns or stops, but not circular oar locks. Circular or ring oar locks were too dangerous in open water. I also found that some oars were/are protected by leather. Who knew? I still am not sure how to paint them, though. Anyhow, this is how it looks right now. Anyone who has good eyes can see where I repaired the fife rail. I don't think it will ever look "right" but perhaps I can make it acceptable. I am thinking about following Jack Tar's example and adding a rack of barrels. I noticed the ones in the old photo are scuttled on top (if I grabbed the right nautical term). I'm wondering what was held in them.


-
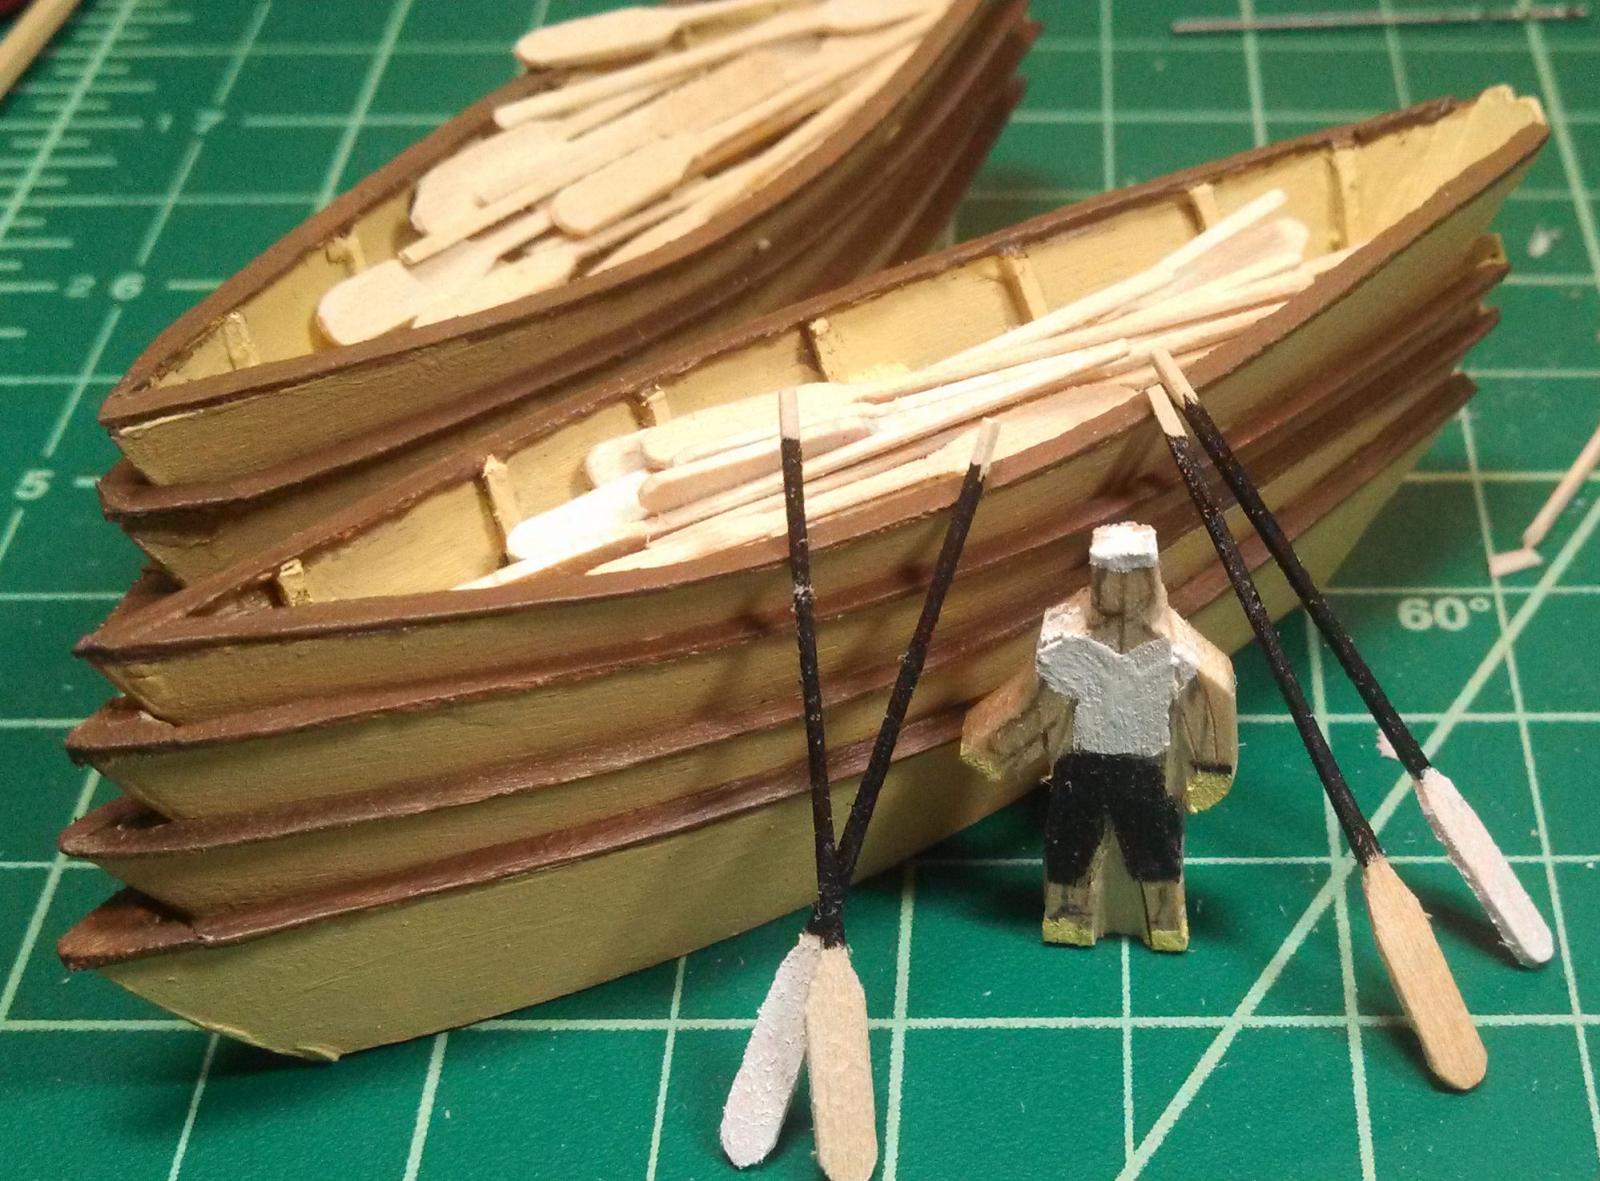
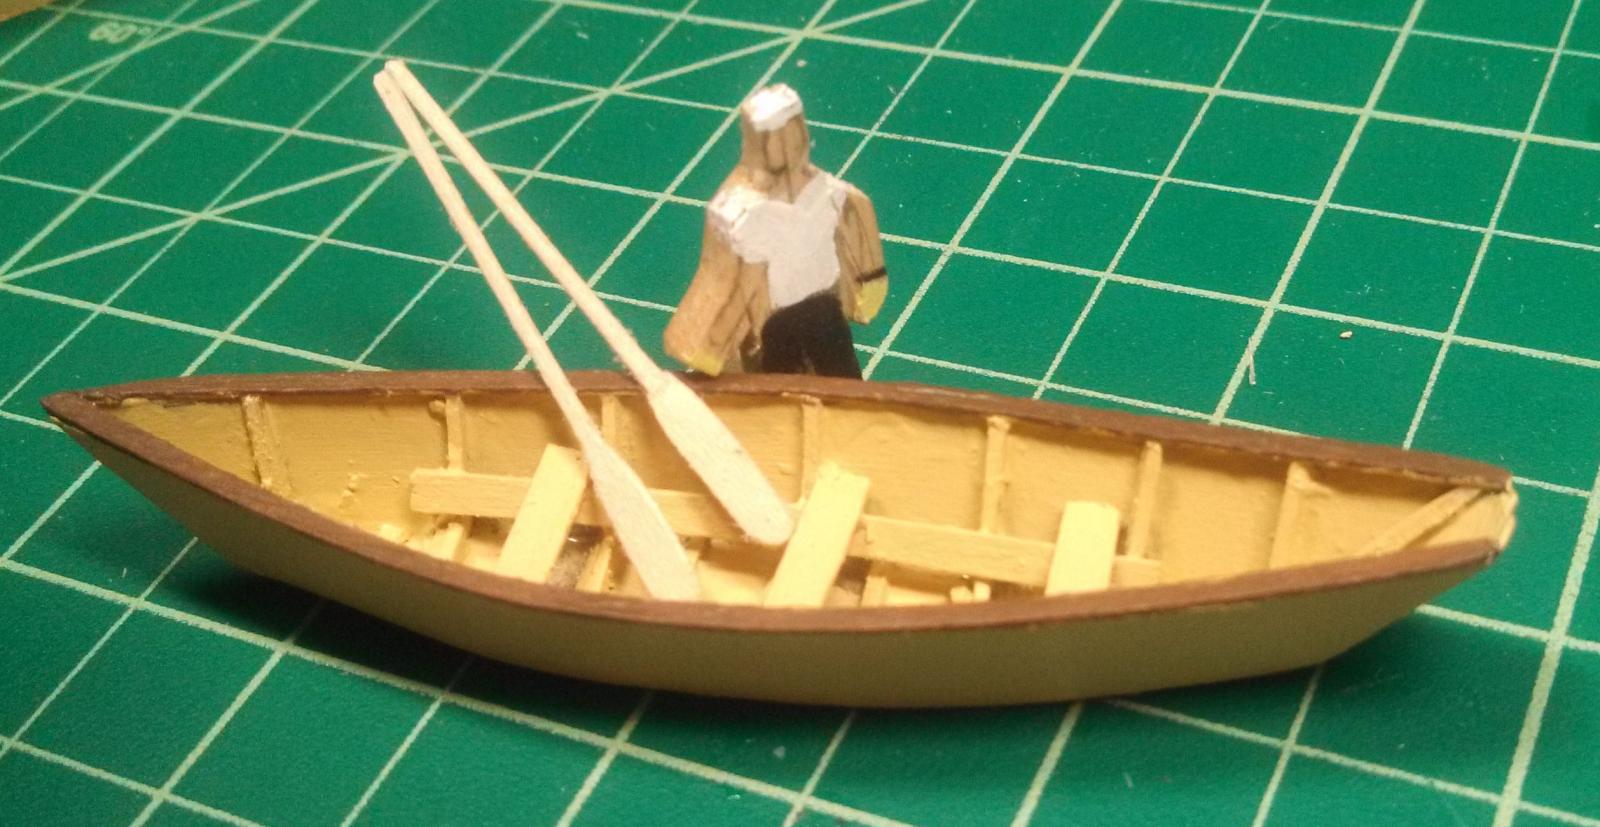
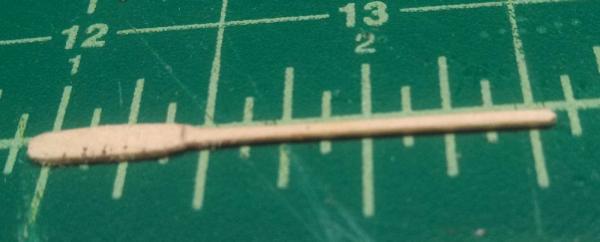
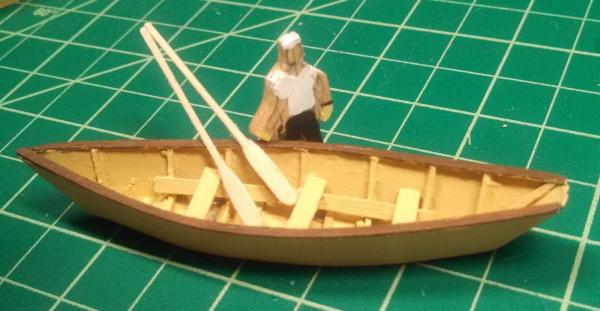
Well, I've either finished the dories or gotten tired of them. I'm finished with all the painting I plan on doing and started making the oars. Apparently, the oars were stored in the top boat of the nested stack- at two sets per boat, and four boats per stack, that's 2X2X4=16 oars per stack or 32 oars I've got to carve! I've already decided that since this was the early part of the 20th century, it is unrealistic to assume that the oars (or sweeps, if you prefer) were identical. That's my story and I'm sticking to it. I need some ideas on painting the oars. Any ideas? I'm thinking the "handles" black and the "blades natural" or perhaps white. I'd appreciate input. My first oar. I'm a proud papa. My first set setting by a stack of boats. Woody the sailor looking things over. The handles are thick for his hands. If I get brave, I'll try and sand them down a bit further. Oh, one more small point. I followed the practicum on the benches in the dory, but the placement is incorrect. They should have cutouts that capture the bracing on the sides to keep them from moving. They were removable after all and it would have been foolish to mount them any other way. Not a big thing, but one of those things I wish I had noticed earlier.

-
Great project and great work. I kind of smiled when you mentioned the forward rake of the turret. To a non-expert like me, I'd probably see the slope and figure your guide on the sander wasn't square! I've lived in the "South" for a while. The lack of experience the drivers here have in any form of white stuff is startling. Today I just closed my offices for non-essentials until the roads had a bit of time to clear. The risk to these folks when they are forced to be on the road is just "to terrible to contemplate."
-
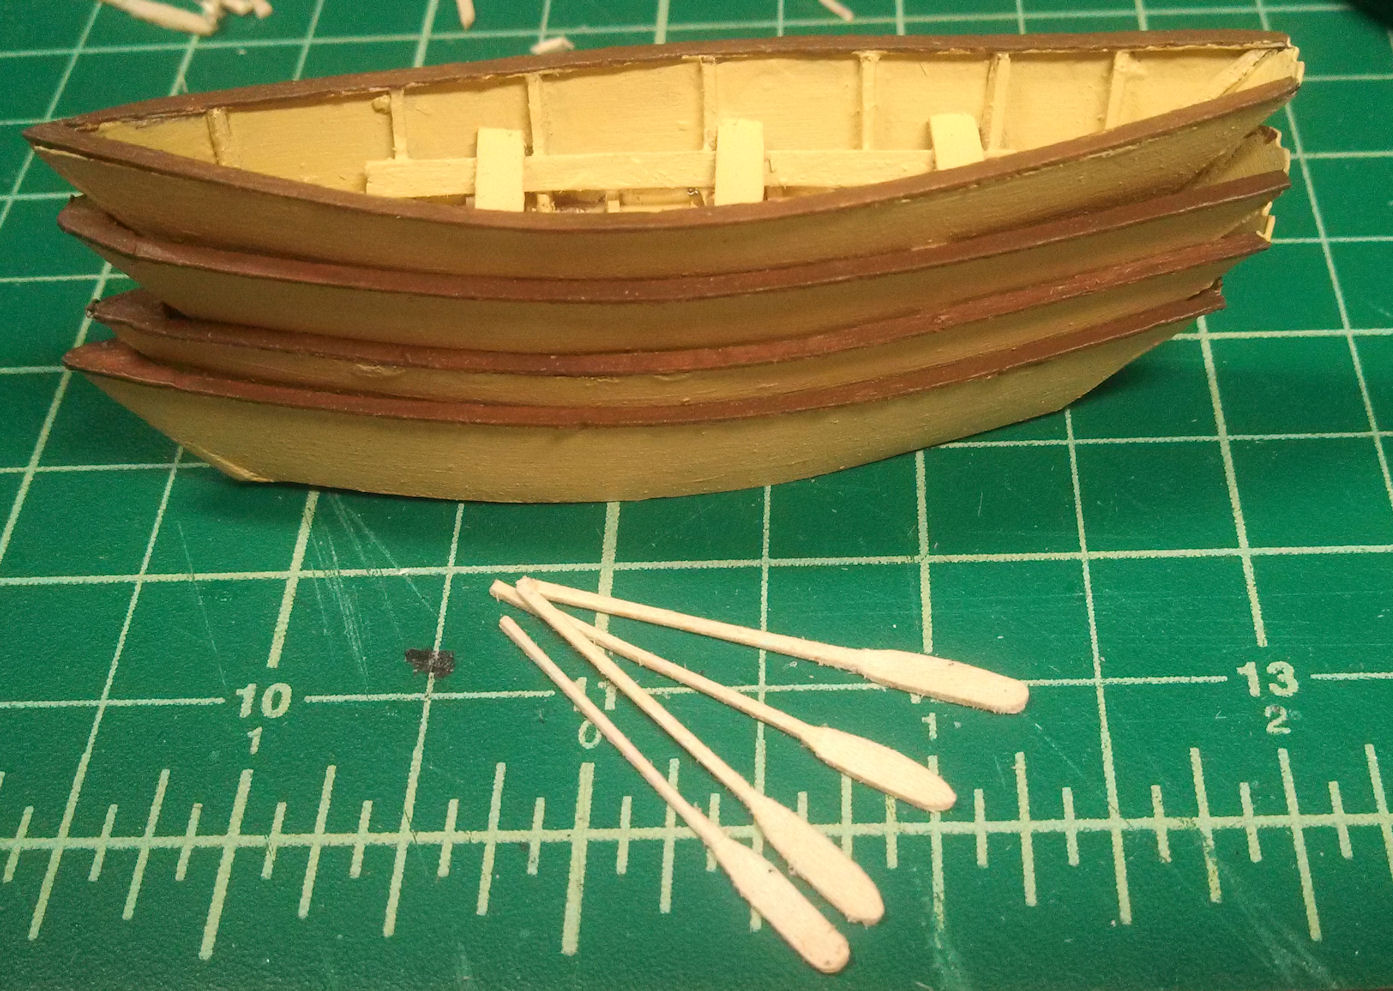
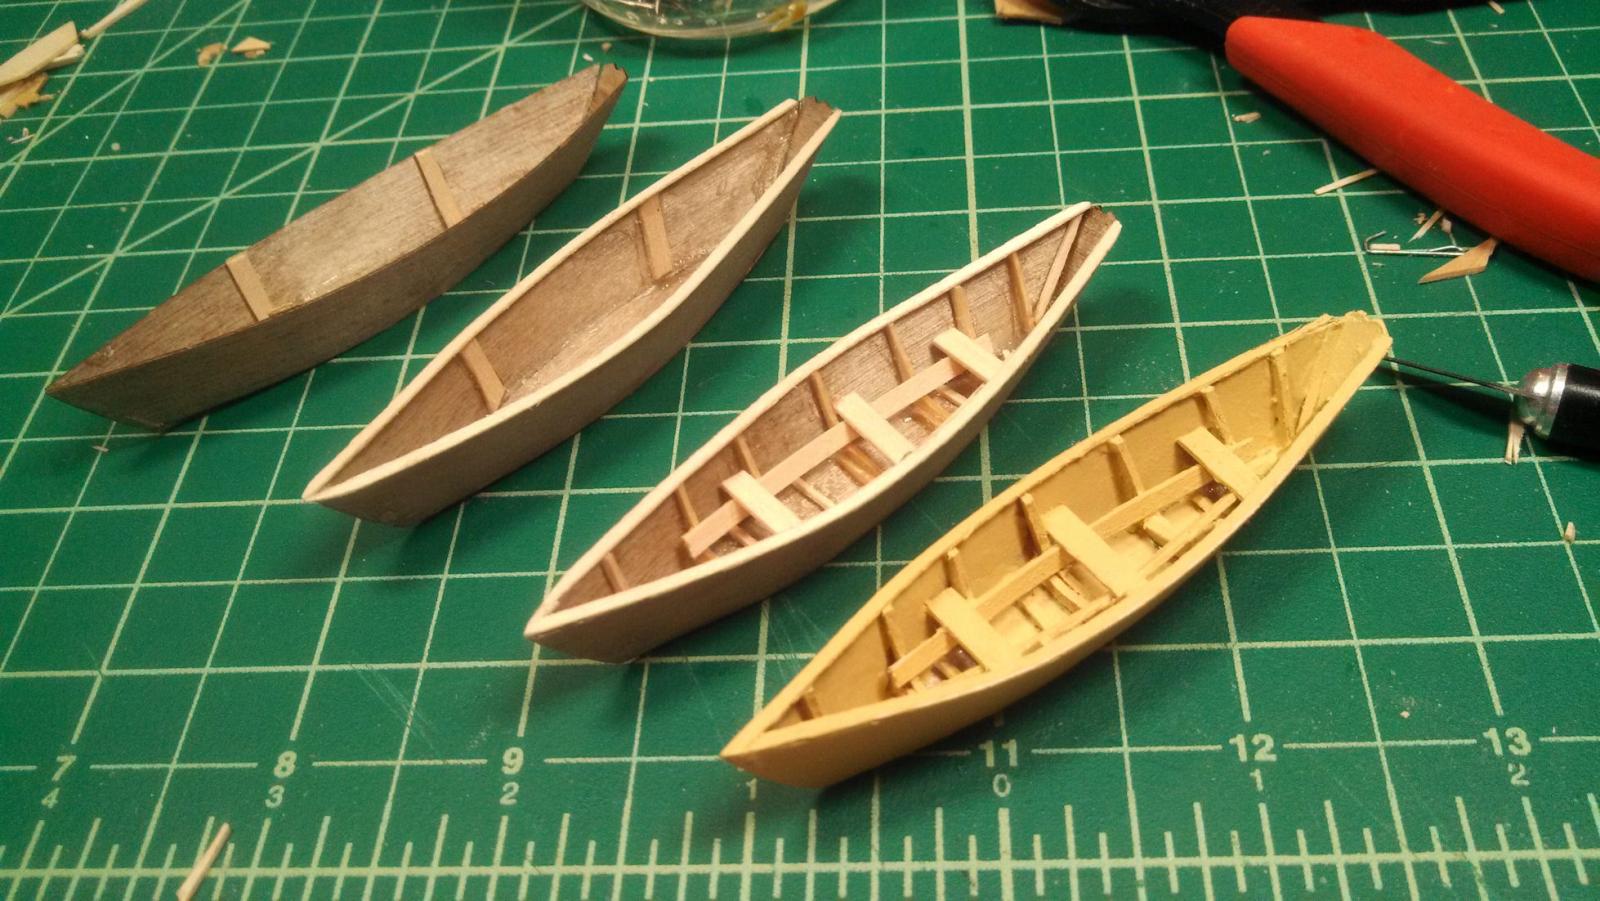
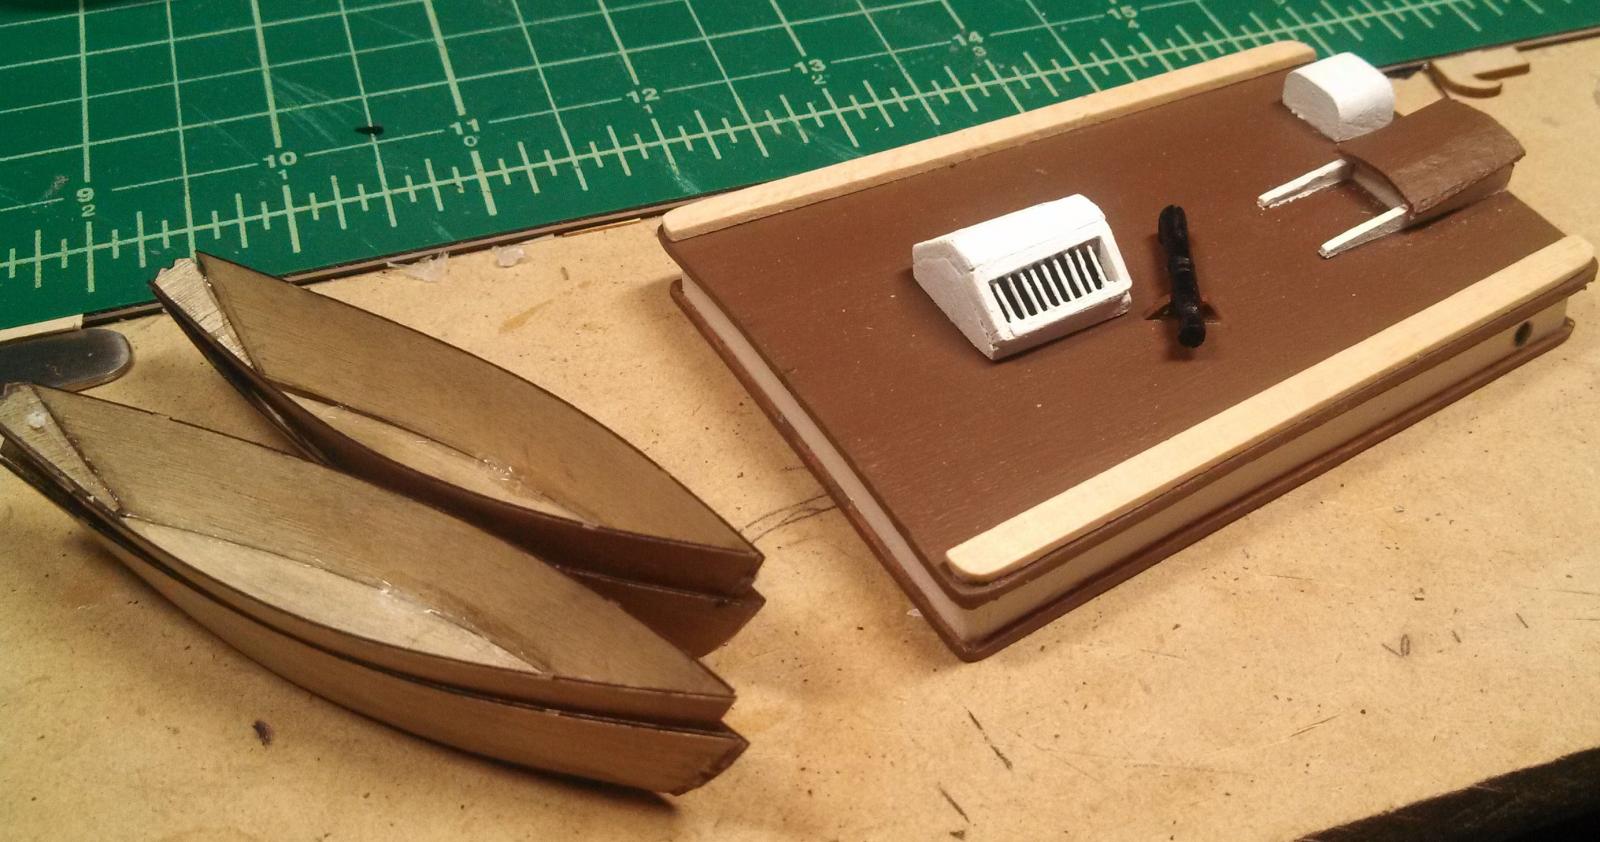
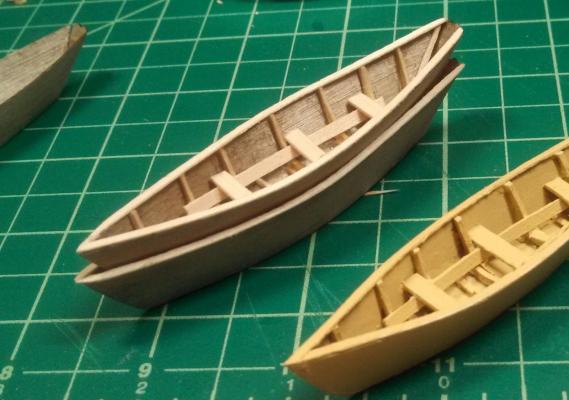
Been working a bit on Dorries. They are fun to make, but I have advised my wife if I don't come to bed to check and see if I have superglued myself to the little work bench. First, I made the braces and such, then I bent some narrow wood for the rails. After everything was assembled, I painted the boat a beige. I'm considering going back and painting the rail a contrasting color. Don't know. In any event, in this photo you can see what I plan on doing with the nested boats. The supports really just make the rail easier to attach. This shows what the boats look like nested. I'm thinking they are Okay- I'm not sure how much space there should be. I am assuming the benches came out and laid on the floor to allow closer nesting. As always, suggestions and comments welcome. And remember, I"m taking the excellent advice of the club member in Knoxville. He advised I "drink more" when working on the boat!

-
Just realized I hadn't uploaded the photo of my cabin. I think the sky light came out pretty good. I saw some photos of the real ship after it was done and would do it a bit differently if I did it over. The small dorries are "interesting" to make. I have kept faith with the idea that only two of them have to turn out really well. The rest I can stack under the good ones. Obviously, I have not added rails, or interior framing to any of them yet.


-
The deck furniture is coming to a close. I've been working on rings. I had soldered several rings before I asked my question and decided to continue on. I'm using soldering paste, so its not a big deal. More difficult is the painting. I've decided to paint the rings and then install them in a manner that allows me to do a bit of touch up (since I'm basically too impatient to allow them to dry for a few days). So, below you can see freshly painted rings stuck in the tops of yogurt cups (the plastic grips the brass very nicely) and a few installed through some tape that ask as masking. I'm really wishing I had "toned down" the white paint before painting everything, but I'm not willing to redo. Lesson learned for next model!


-
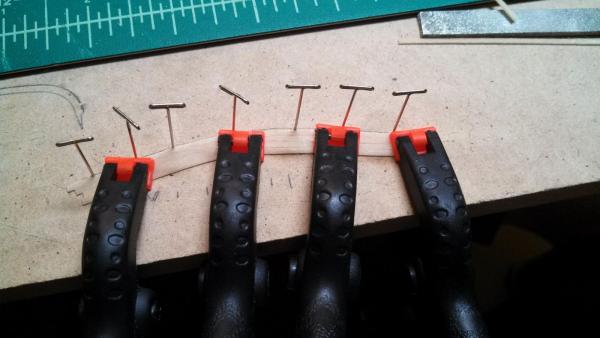
Thank you for the reply. I am familiar with the fife rail. I strengthened mine by gluing some paper to the bottom. It's reassuring to know that others worry about this as well. In this model there are extensions to the main rail amidships and toward the bow that also hold belaying pins. If there is some other name for belaying pins when they are not used in the fife rail, I just need to be educated. Anyway, here is a photo of the forward portion of the ship where you can see these extensions. I have nails in the drilled holes right now to keep them open when I paint. After the paint is dry, I will remove the nails and re-drill the holes for a nice fit. I was concerned that the edge wouldn't hold, hence my "pins" to strengthen the bond. Concerning the soldering, I don't really mind doing it (Its kind of fun to play with fire), but the heated brass and solder don't take the darkening solution and I have to paint everything. This is just annoying.

-
Making a bit more progress this weekend. I'm trying to finish the deck fixtures, but don't think I'll make it. I decided to put "pins" in the deck extensions for extra strength. I don't know if this is necessary, but it was recommended in one of the books I read. You can see the tops of the nail heads in the background from which the pins were made. QUESTION: Do folks normally solder the rings and pins closed? I have been doing this so that rigging won't loosen, but I can't convince myself its necessary or not. What about rings that will have no load? Solder them for consistency or let them go?


-
Photos of process and results I obtained. Stage 1: I sanded down to remove several mistakes after various failed tries with traditional masking tape. I then painted the inside of the cove yellow and sanded off any yellow that was thick enough to cause problems later. Stage 2: I filled the cover over the yellow paint with the liquid mask material and let it dry. The mask is blue. I also trimmed and removed (frequently by scraping) excess mask where it crept out of the cove. This didn't happen much. Stage 3: I painted the area black with a brush. (Spray would have been better for finish). Stage 4: I pealed off the liquid mask using dental tools and tweezers. This is how it looks (furniture is not attached, just setting there. My conclusion is that you can get a better line using the tape, and perhaps other methods, but this is what I'm staying with for now. There will be a lot of hull repair from all the handling.


-
Thank you for the great references. Based on the photos, it appears that the cabin was in fact painted, not some kind of exotic wood. It was also suggested to me that it was common to cover these with waxed fabric of somekind, but I don't think that is the case here. I have made a bit of progress, photos will follow over next day or so. Concerning the darned stripe: Since the cove was already in place I tried another technique which I will share for the stripe. It doesn't look great, but I think the technique has promise for one of you guys. What I did was to paint the cove interior yellow, then fill the cove with liquid mask. Since it was a "cove" the liquid pretty well stayed in the grove. I then trimmed the obvious boo- boos of the mask, painted the hull black and pulled the liquid mask out with a dental tool. I also attended a model ship club in Knoxville where I met some great fellows and had a good time comparing progress. My conclusion is that I do okay after all. While showing what I considered to be a problem to the group, one member gave me advise which I shall ALWAYS treasure. "Jack," he says, "you need to drink more."
-
Question: Does anyone know or know how I can find out if the top of the cabin on the real bluenose was painted wood or just some kind of natural dark wood? I'm getting ready to make the roof and the plans indicate the planking was tapered similar to the deck. I am thinking about doing this- and redoing the other dark woodwork in walnut or something, but if the real ship had a painted roof, I'll just follow the advice in the practicum. Throughts appreciated. Came up with an interesting approach for the stripe in the cove. IF it works, I'll post photos. If it doesn't work, I'll still post photos, but it will be of a sanded hull.
-
Well, I worked on the yellow stripe today.. I had thought that I would paint the cove yellow and then take black and fill up to the edge of the cover- using the indentation as a mask of sorts. Didn't work. I have a real mess on my hands. At this point, I am considering what to do. Thinking about sanding all the paint off this section, filling the cove with putty, re-sanding and painting it black with the air brush. Then I can abandon the cove, cut the scuppers and use pin stripping tape. On the other hand, I saw small paint pen with a very narrow tip. I may try using ti to establish the strpe inside the cove. Ideas?
-
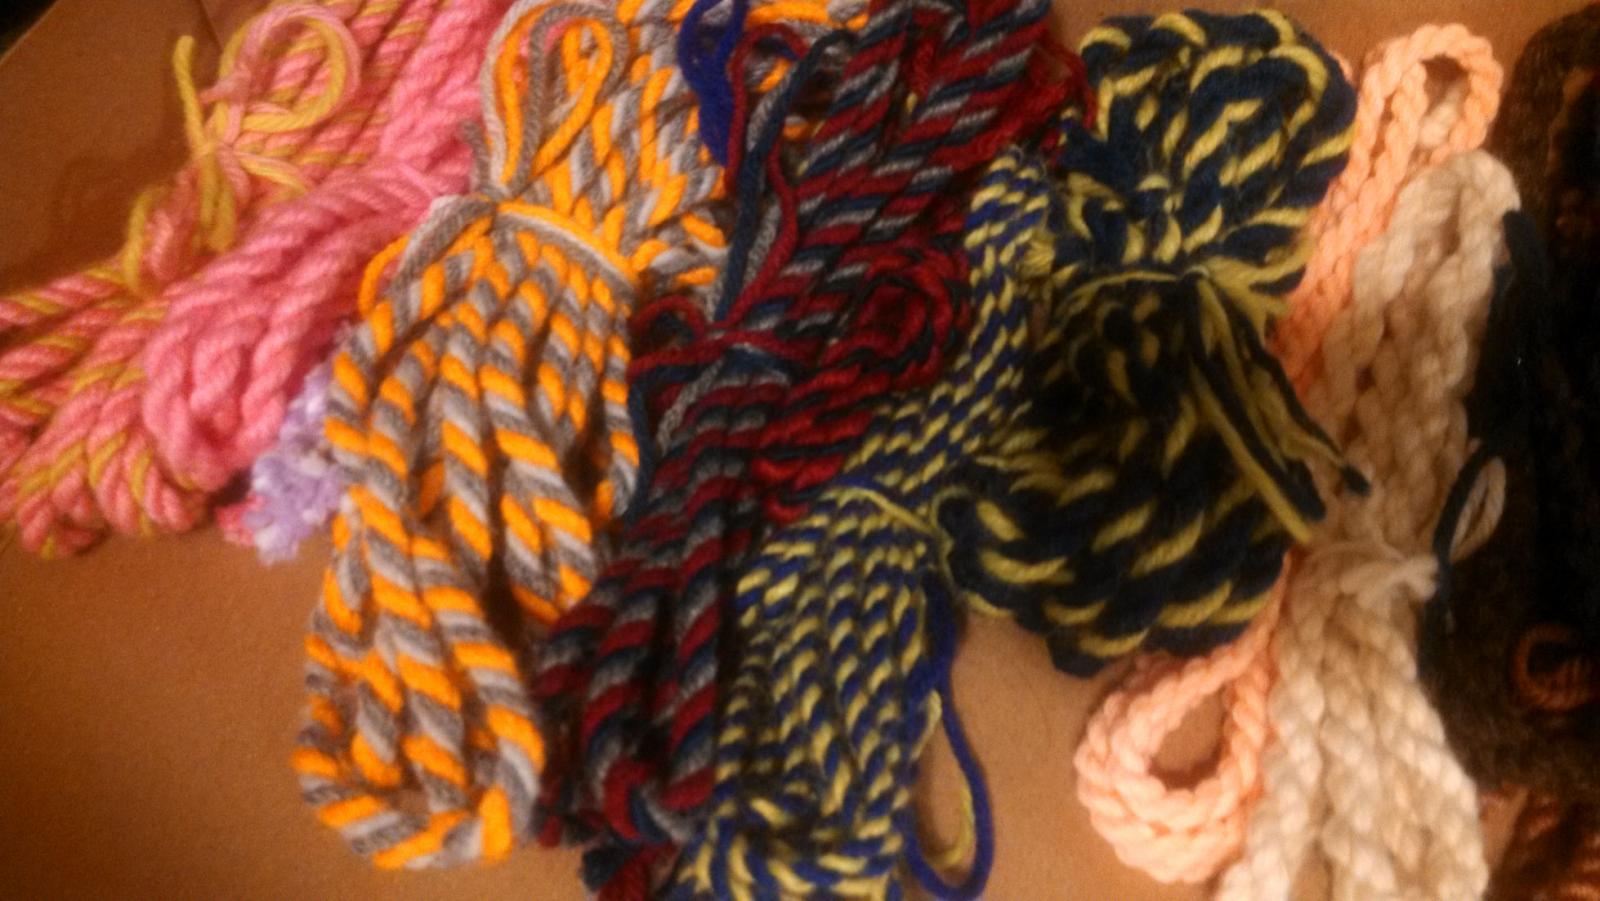
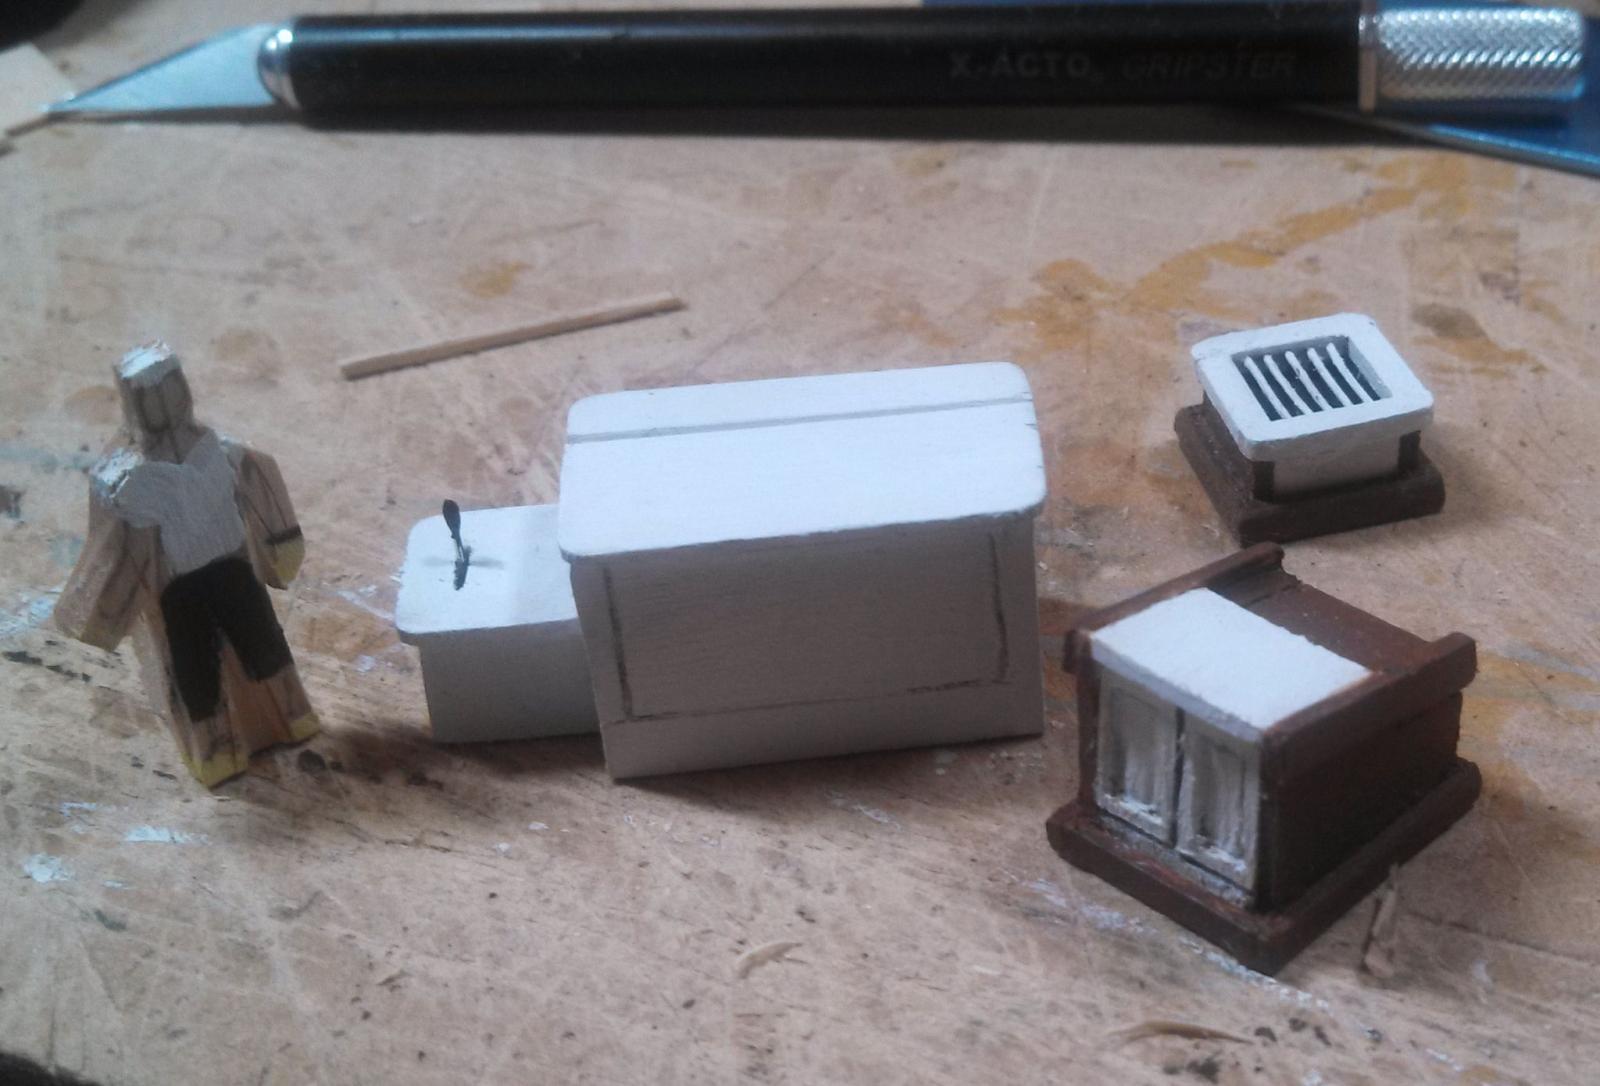
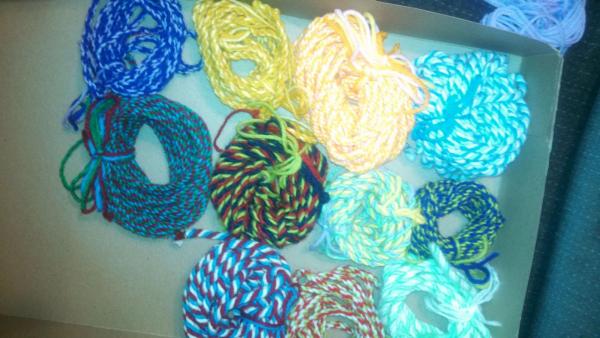
Worked on her a bit today. Was having an issue visualizing the proper scale for a few items, so I created "Woody the Sailor." Woody is a fine six foot high sailor ready to do what needs done! Seriously, after taking the time, things looked pretty good scale wise. I noted the bluenose has (according to the plans) two different sliding clutches. I'm not sure why that is, but perhaps I'll understand more after I look at it. I also note that the engine box is huge compared to the one I saw at Mystic Seaport. Probably just a different engine, since this box has a removable front panel to facilitate working on the engine where the engine at Mystic was so small as to not need one. I customized a bit- not really happy withe the quality of my product, but I'm getting better. IN other news, I made a lot of "yarn rope" with my wife for a Christmas project of hers. I'm thinking that if I ever make a holiday themed boat, I know how I'll be doing the rigging!


-
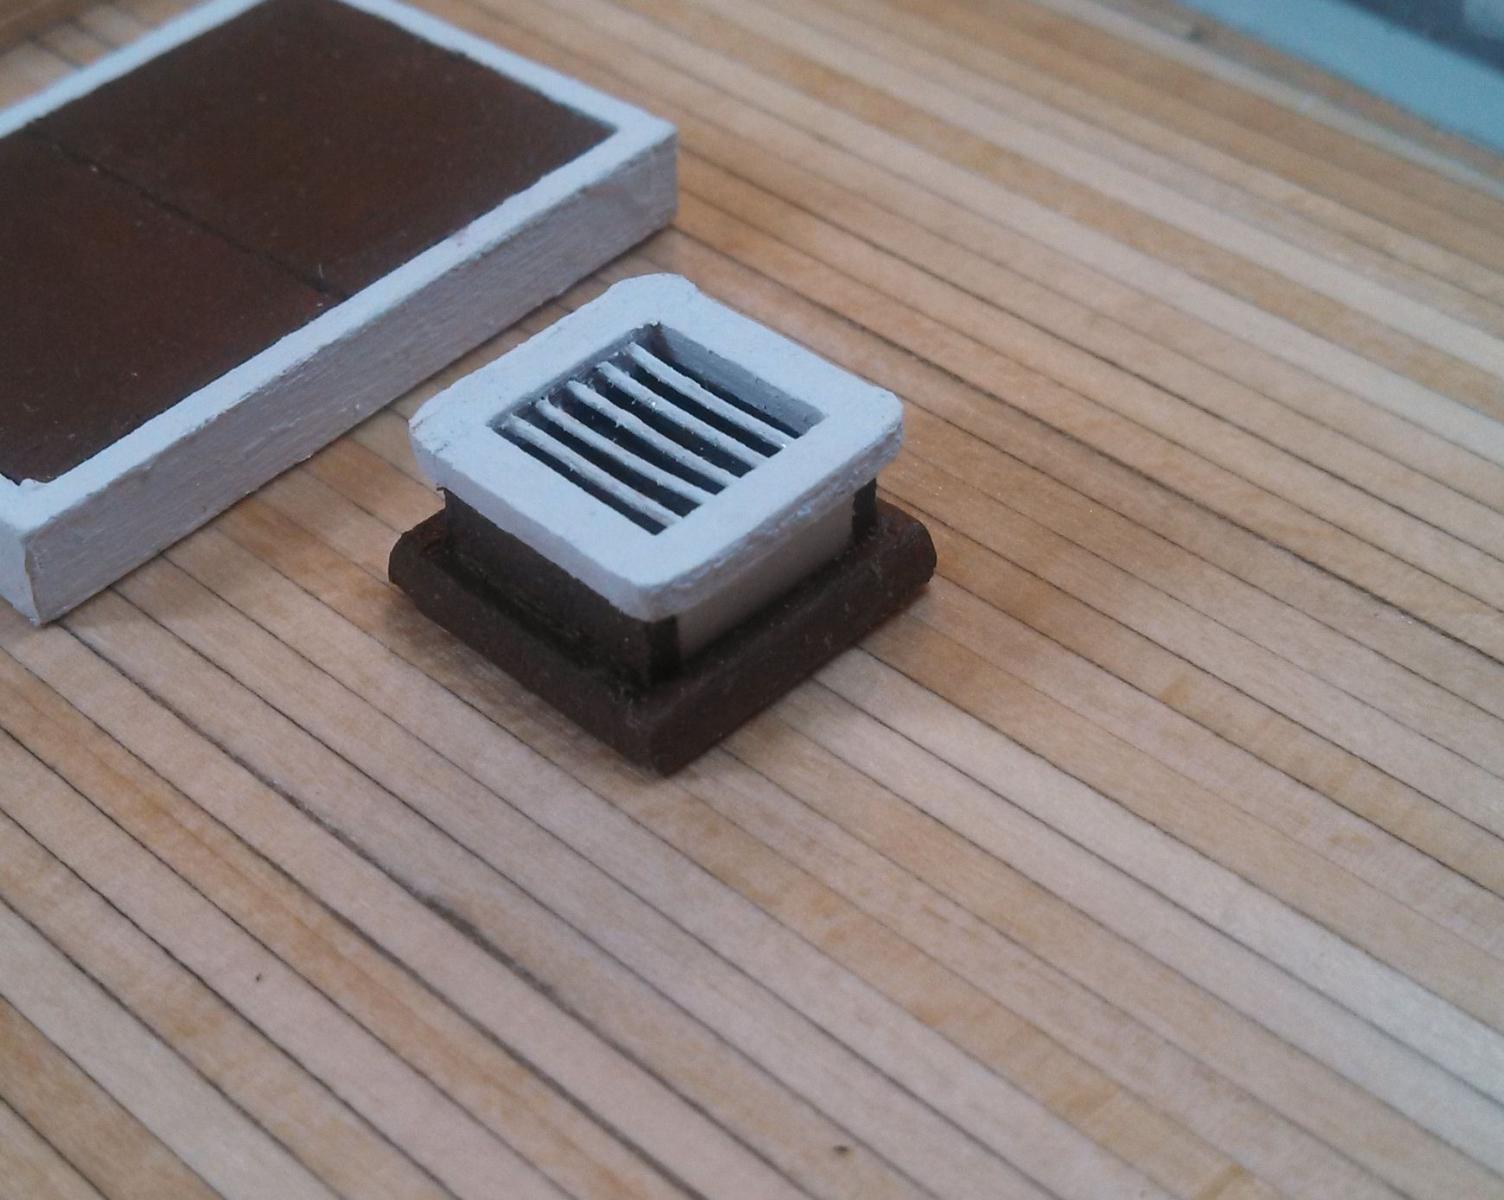
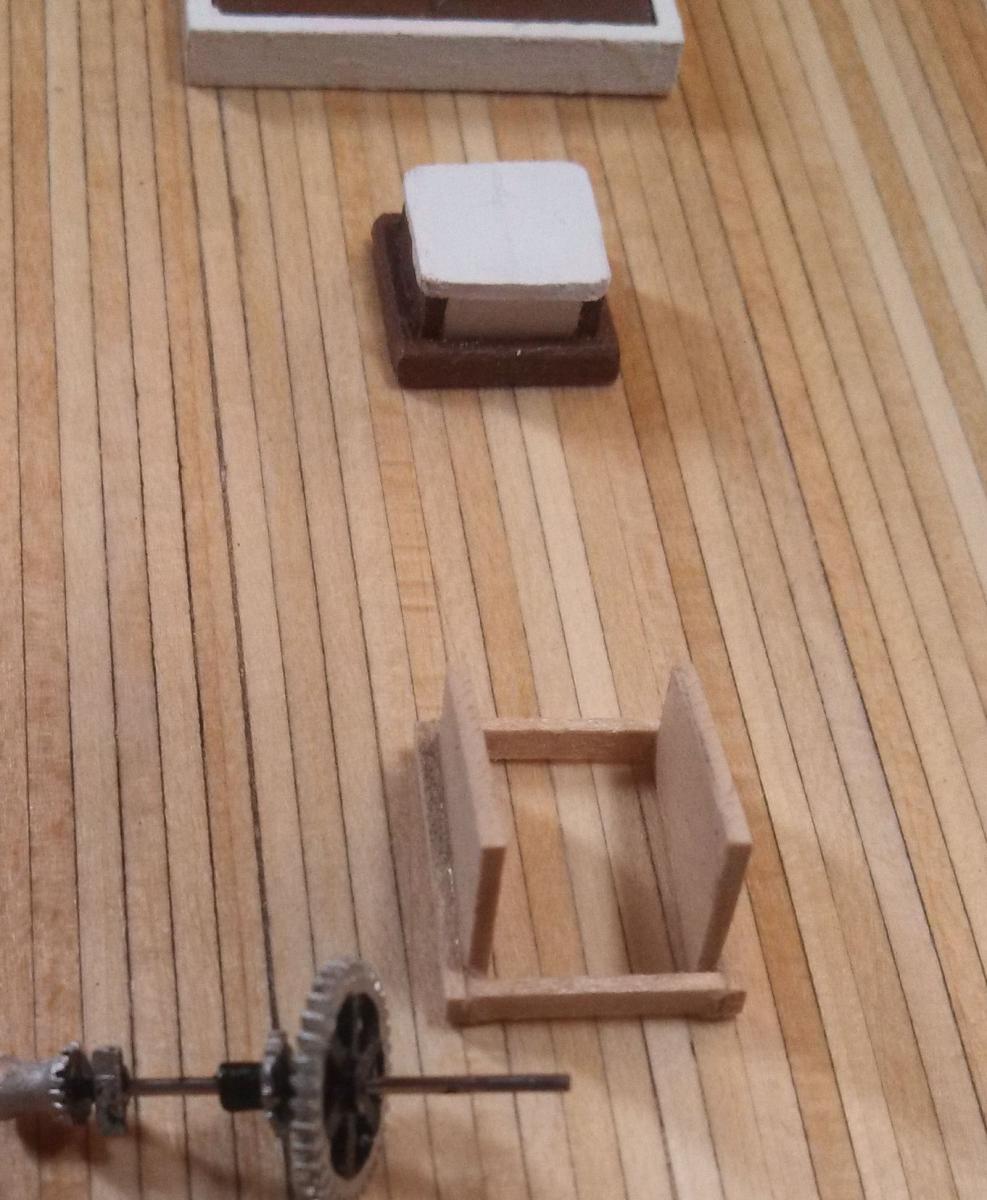
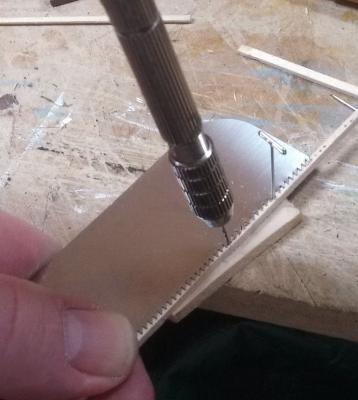
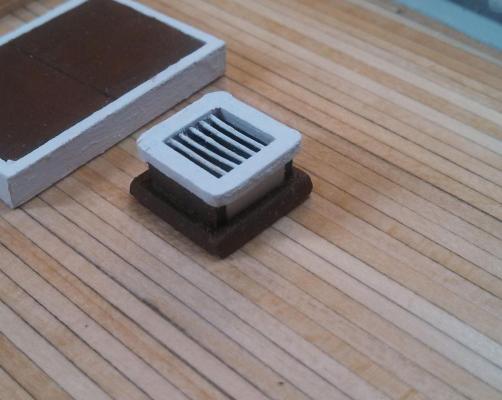
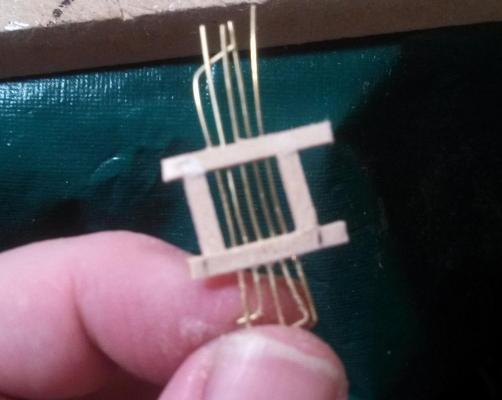
Thanks for the comments and observations. My paint scheme is basically following the practicum. Worked on the sky light. I studied the way the light looked on the main cabinet and studied some books on historic construction. So, I decided to make a frame and put "bars" in it. The first part was to develop a way to get good spacing. After a couple of failures, I figured out that the teeth on my flush cut off saw were about the right spacing- so... Then I put in really long wires and used them to guide the sides into place. I painted the inside of the "box" black and the frame and bars white and set it in place just to see how it looks.
-
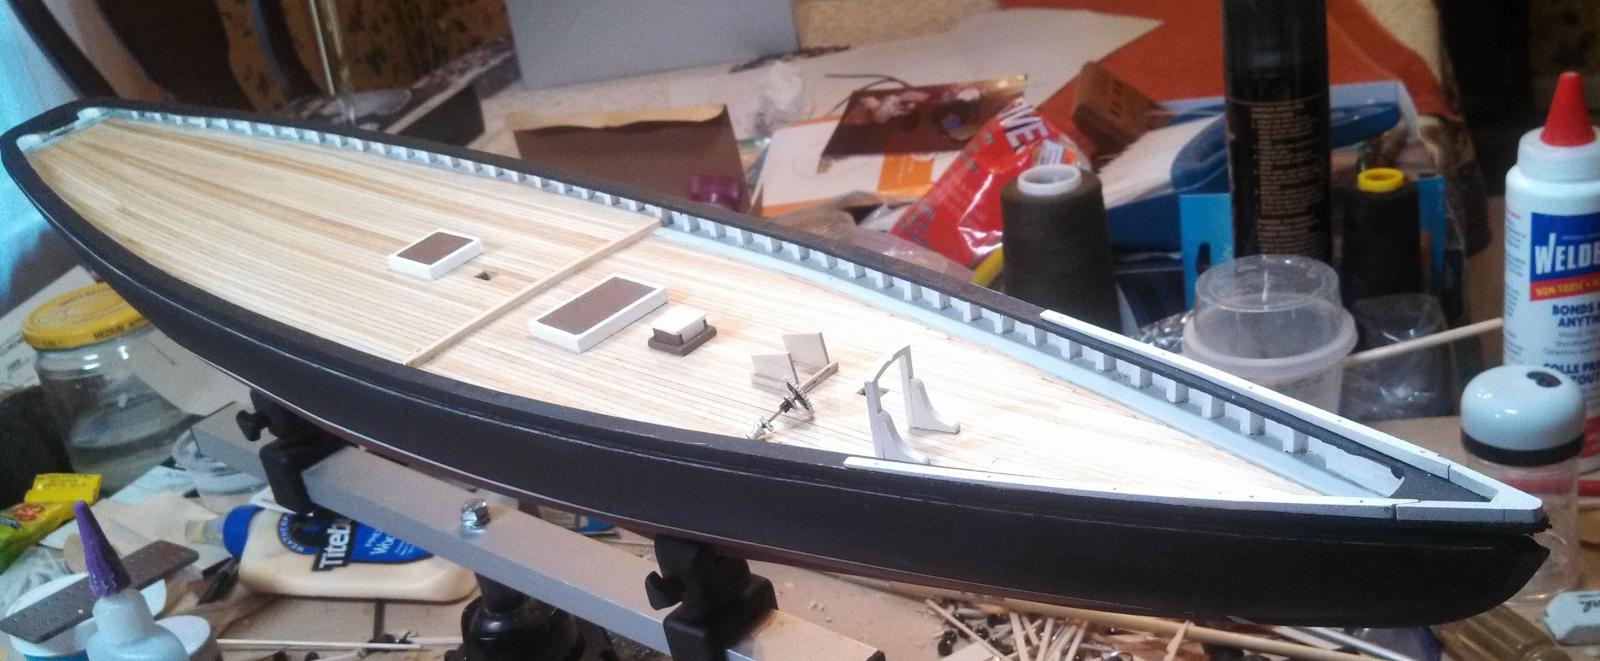
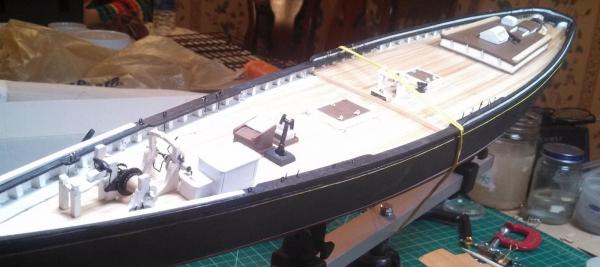
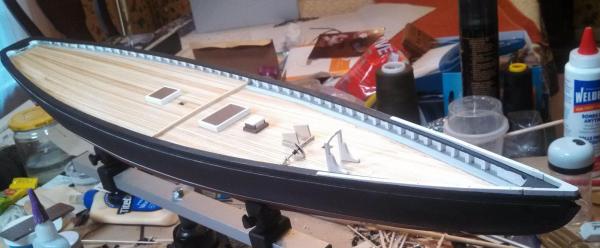
Couple of photos and random comments. First, the paint looks Okay to me. The waterline isn't straight to a uneducated line and I notice that the praticum actually has it wrong. I did it right, but the slope is unexpected. Second, the deck furniture is coming along. I have found a few photos on this site that have led me to believe that there are three ways to complete this model: 1) As shown in the instructions 2) As on the real ship 3) Some combination of the two that looks good. The sky lights on the model look really bad to me. I'm searching for a photo of the one on the fore deck- so far with little success. I've found one photo of the skylight on the main cabin. I think I'm going to toss the one I have now (I could use the kindling anyway) and rebuild it similar to the one on the main cabin- that is with bars. Thoughts appreciated. (I just set the stuff on the boat- nothing is glued down in the photos)

-
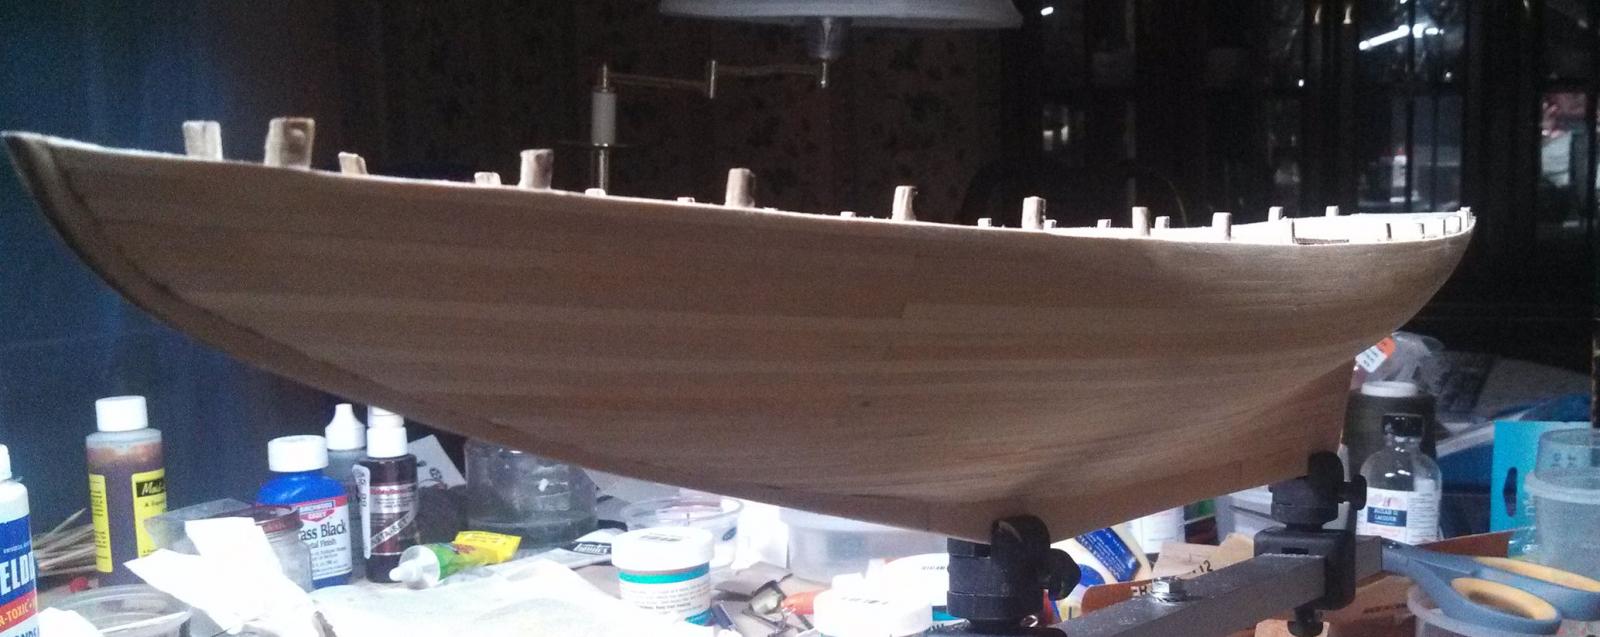
Spent a few minutes with her today. Painted the hull with the copper red and black- leaving the white stripe showing. There will be some touch up, but overall I'm happy. I painted the water line according to plans, but because she road low in the stern (I know there is a proper name, but don't know what it is), it looks funny to me. Still, held properly it is very accurate. The cove on the hull that is intended to be yellow has become somewhat of an issue. I cut it rather deep and then found a thin wire from my electronics cabinet which I pressed into the cover when painting. This wire effectively masked the cove to allow for easier painting hopefully with an extra fine paint pen. I had decided to cut the scuppers at this point in the build, but it appears that the scuppers on the main deck if cut properly will intersect with the cove. In other words, I cut the cove too high.Still considering. I've been playing with the winch on the front. The plans call for a chain drive, but I haven't seen this train in other ships. If there is a handy link, I would appreciate a post.
-
Thanks Popeye, will do.
-
Short version: Built some deck furniture. Started painting the hull. LONG VERSION: Well it was a "bad paint day." (But at least my hair looked good). Over the last couple of days, I have shot the hull with grey primer (AlClAD II) from my air brush. I sanded between coats and have ... oh... maybe four full coats. Today, I decided to shoot a strip of white about where the white stripe will go. I thinned the Model Expo white with alcohol and put on a nice coat. I let it set a bit (30 minutes) and then re-coated. Yesterday I picked up some stuff called "air brush cleaner" from a big box hobby store because it was cheaper than the ALCLAD stuff. It claimed to be good for "water base" paints. I dumped the remainder of the white paint and filled the bottle with this cleaner. I then started just washing the fluid through the brush preparatory to taking it apart.. It was about that time that I noticed that there were white cheese curds in my glass paint bottle on the gun. I pulled the gun out of the device into which I spray it to clean it and there was NO SPRAY coming out at all. Taking the little gun apart I discovered that the "air brush cleaner" had solidified the pigment into the consistency of cheese curds which had then immediately clogged up the gun. It took nearly two hours to get the gun clean using a combination of lacquer thinner, mineral spirits and alcohol. The gun seems to be working well now. I'm not sure why this "cleaner" did this to my gun. When I smelled the stuff, it smells like maybe alcohol diluted with water-- not sure. Anyway I set everything aside to dry and made the front hatch and started the ventilator. light. I just went back to look at it. The white paint has allowed the primer to bleed through and now I have a nice "battleship grey" boat. Maybe I'll install some cannons and call it good.
-
I made a scraper out of a single edged razor blade using the cut off wheel and a dremmel. I paid very close attention to THEMADCHEMIST remarks about the groove in the razor blade fitting the wood exactly. The first one had too big a groove and made a bad line. The second made a great line- straight as an arrow, in maybe six passes. I'm not celebrating yet because when I glued the piece on it became apparent there will be a lot of sanding- which will unfortunately make the depth of the groove uneven. I'm leaving town on business for a while, so I will be back on it in a week or so.
-
I've ordered a needle file small enough to cut scuppers. I've decided on a technique- we'll see what happens. I notice that the strake than contains the scuppers also has a cove cut into it. I am assuming that this is best cut with a scraper, probably fashioned from a razor blade. Any thoughts on that are appreciated.
-
Guys: Thanks for all the excellent advise. I really appreciate the input. I haven't looked at the dowels yet, but I'll be extra careful. I also haven't decided how to do the scuppers. With any luck I'll get home this weekend and get to give it a try. Great idea. I should have done that. Next time I'll know.
-
Scupper Question: As best I can figure, the scuppers in the excellent build logs were cut by combining a 1/16" X 1/16" and a 1/16" X 1/8" strip of basswood to make the 1/16"X3/16" size that matched the hull planking. (The scuppers being cut on one edge of the 1/16"X 1/8" strip with the other strip glued either to the top or bottom.) Question: Was this wood taken from wood that came with the kit? (If so, was it missed later) or was it purchased from a supplier. I'm a bit nervous about running out of wood in various sizes later on. Thanks.
-
I like the idea of the scuppers. I skimmed one post about doing them, but came away without really understanding it. I'm going to go back and re-read before I do any work on the bulwarks. I thing they look good and need to be there. BTW, if I was doing another one of these, I would get a different wood for the deck. The inherent color changes in the supplied bass distract from the boat. I thought about doing "book match" and actually started to, then decided I was making a problem area even worse. I've heard of people using other woods- is it Lime wood that preferred?
-
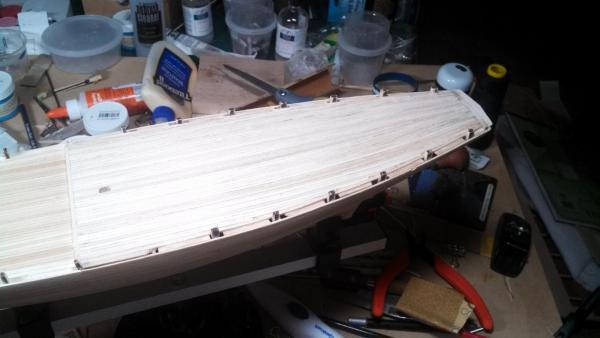
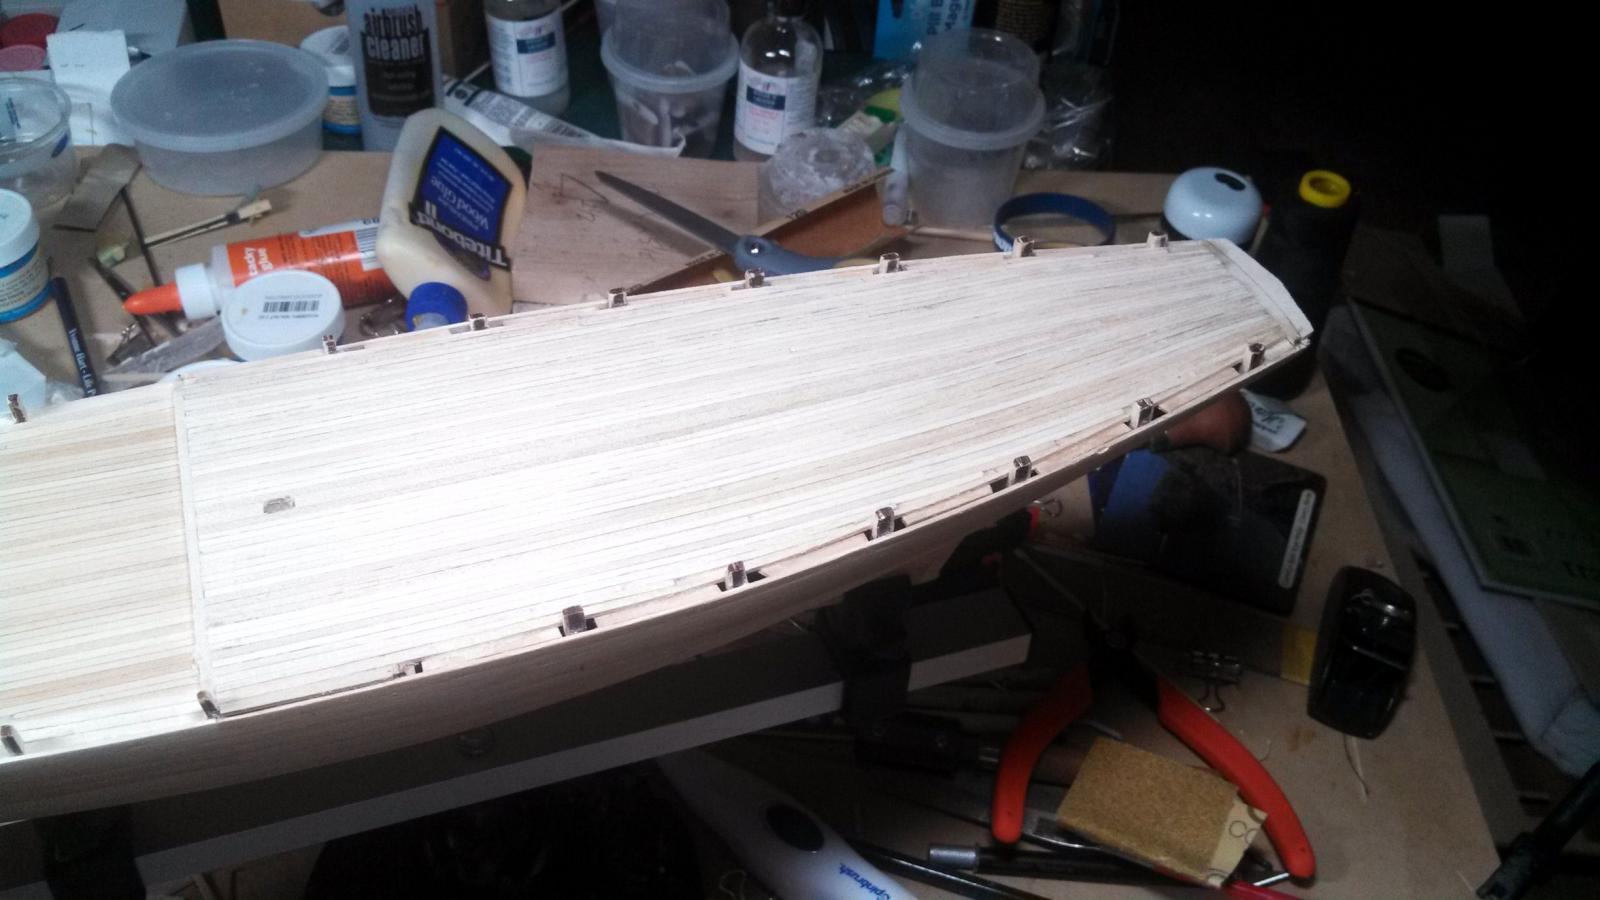
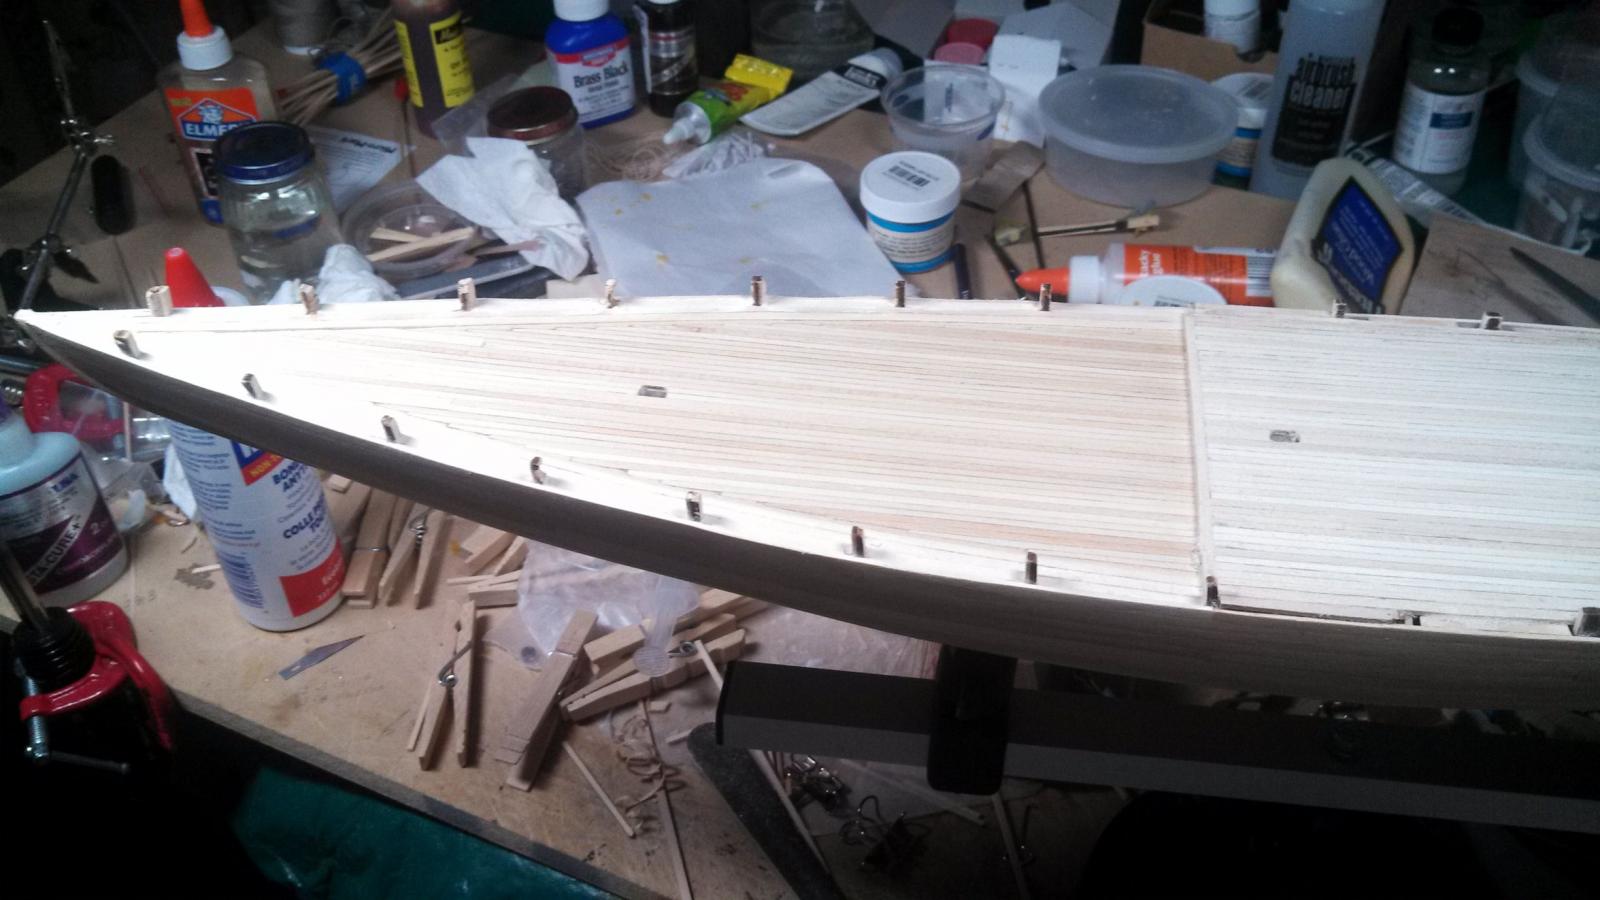
completed decking the quarterdeck today. I did not leave cutouts for the cabins, which will be just shortened and placed on top of the deck boards. Started some rough sanding and managed to hit and break off a couple of the fame members with my sanding block. I kept the pieces in case I decide to try and glue them back on. I did give up sanding for the day though. I made a micro-sander out of an electric toothbrush. Works, but is slow. I'm thinking about getting a unit from Micromark. Would appreciate any thoughts. I put some scrap under the nibbing strake so that when I get around to filling the space the pieces won't be falling through. Obviously a lot more cleanup and sanding to do.