PopJack
-
Posts
256 -
Joined
-
Last visited
Content Type
Profiles
Forums
Gallery
Events
Everything posted by PopJack
-
 Warps are the pits. There a lot more old hands than me on this board, but I would make a couple of suggestions. Please insert "In my humble opinion" and "You might try" in front of anything I type. I've worked with some warped pieces and ended up with reasonable boats. First, make yourself a mount that will help straighten and hold the backbone straight. You can do this by tacking/ gluing a couple of wood strips on a flat piece of board with just enough space between them for the false keel. This will get you started in holding everything straight (and be a handy mount while you're working). Next, I would carefully mark and pre-drill the false deck that comes with the kit. You can mark on the bottom of the false deck where the bulkheads go as well. Pin this in place while installing the bulkheads so you can make sure they are perpendicular to the straightened and pinned "backbone." The deck can act as a straightener when you pin/glue it on. I build the old version of this little boat. The deck has a pronounced double bend, across and longways (sorry, I was raised in west texas and cool nautical terms don't come easily to me). Be thinking now about how you will clamp the in place. You don't want to rethink how to attach it once glue is in place. DAMHIK!
 -
Model Shipways is known for replacing parts easily- even if they were fine and you just broke them. Now, they are not notorious for good communication. I sent them the part number I had messed up and didn't hear anything until about a week later when the parts landed in my mailbox. If you sent them a part number I would fully expect that you will get a replacement, no questions asked.
-
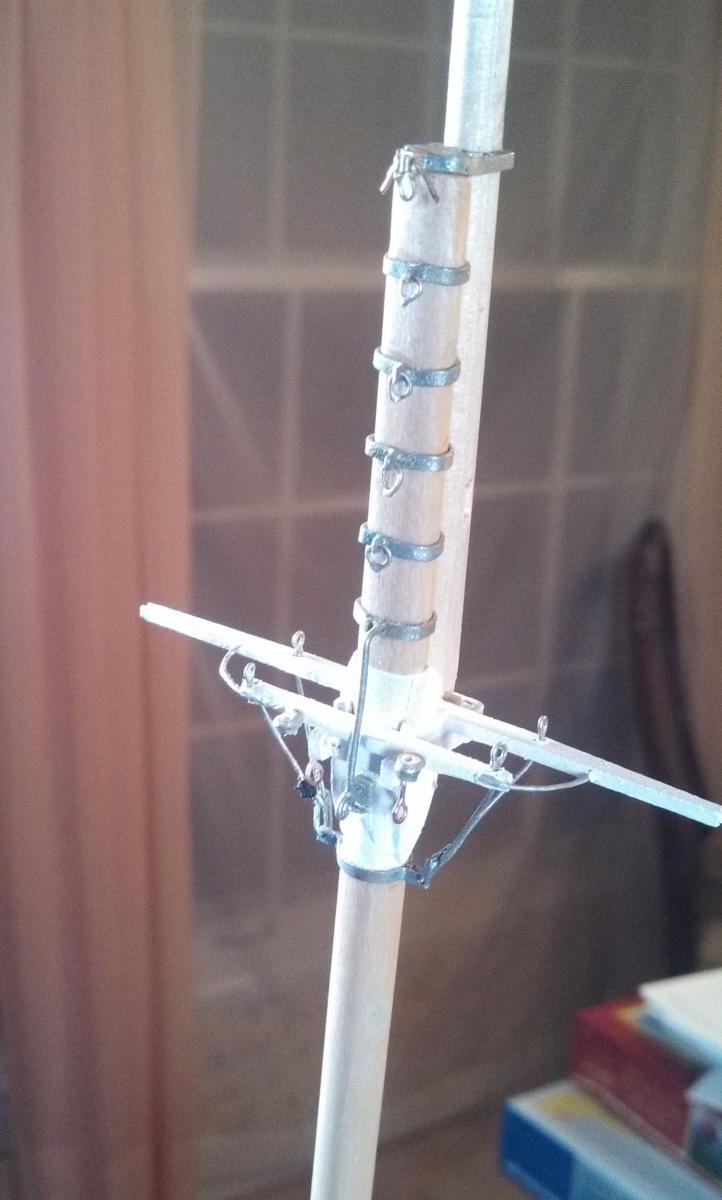
The bands for the foremast are now complete and are in the process of drying. The top band was the only tough one. Now on to the spars. I've been working on and off to find the size of the hoops that capture the deadeyes. Center to center of the holes is 1.2 cm in case anyone needs to know - for the larger dead eyes. Don't know about the smaller ones yet. I hate to paint the deadeyes, as I think they are pretty in contrast to the black bands. Oh well. On all the ships I have visited in my MANY MANY minutes of travel, they are all painted. EDIT: Changed 12 cm to 1.2 cm. Americans aren't that good with the meteric system!
-
On my bluenose, I broke several stanchions and chipped others while trying to shape them. I glued them back on as best I could and left them on until the bulwark planks were attached. AFTER all the planks were all installed and everything was nice and solid, I installed the fake stanchions (I'm assuming your kit will have some) gluing them to the deck and the bulwark. After those had dried, I carefully cut off the damaged stanchions (breaking the glue joint to the bulwark) and replaced them with fake ones that match. I'm not familiar with your build to know for sure this will work, but it might. can send you some photos if you like.
-
Curiosity killed the PopJack. I couldn't help myself, I checked the parts list for you on this ship. It reads (in part): "The center keel, keel, stem, sternpost, and rudder each are supplied in two 1/8” thick pieces. Glue these together to form the required 1/4” thickness." So, I guess you are good! (But now that I've done that, I realize how easy it is for anyone to check and see that I don't always follow directions!) Can't wait to watch the build. The ship is a great one to model.
-
My 2 cents: Cutting the rabbit is a bit tedious, but if you are careful not too hard to do. I built two models without cutting one (instructions didn't call for one and I didn't know how hard or easy it would be) and one with. It is easy to "over-cut" so you need to be careful. When you do over cut you may have to remove and replace some wood with scrap. I over cut a bit on one and it worked out fine without doing anything. When you don't cut the rabbit you can make a joint that looks good, but it is more difficult. When you cut the rabbit the joint nearly makes itself. My advice: Cut the rabbit.
-
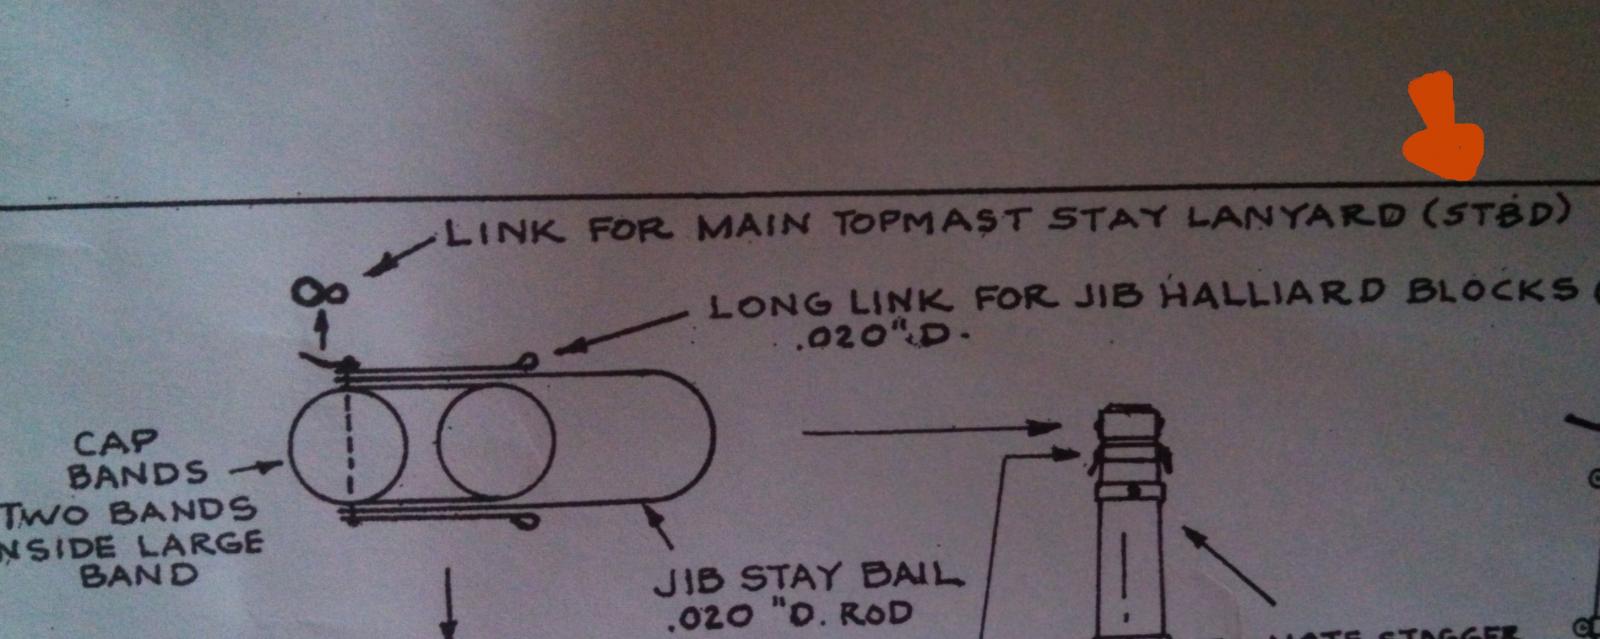
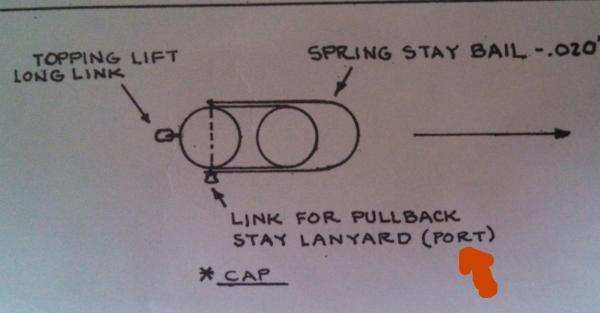
Never mind, I just got it. I though the arrow was saying that the link was installed on the "port side" of the bracket. Could you tell me more about "Chapelle"?
-
Paint the hoops: The sail hoops? I 'm not sure, wasn't really planning on it. Advice welcome. Okay, am I looking at this wrong? I know I probably am not getting enough sleep recently, but this just doesn't make sense to me.

-
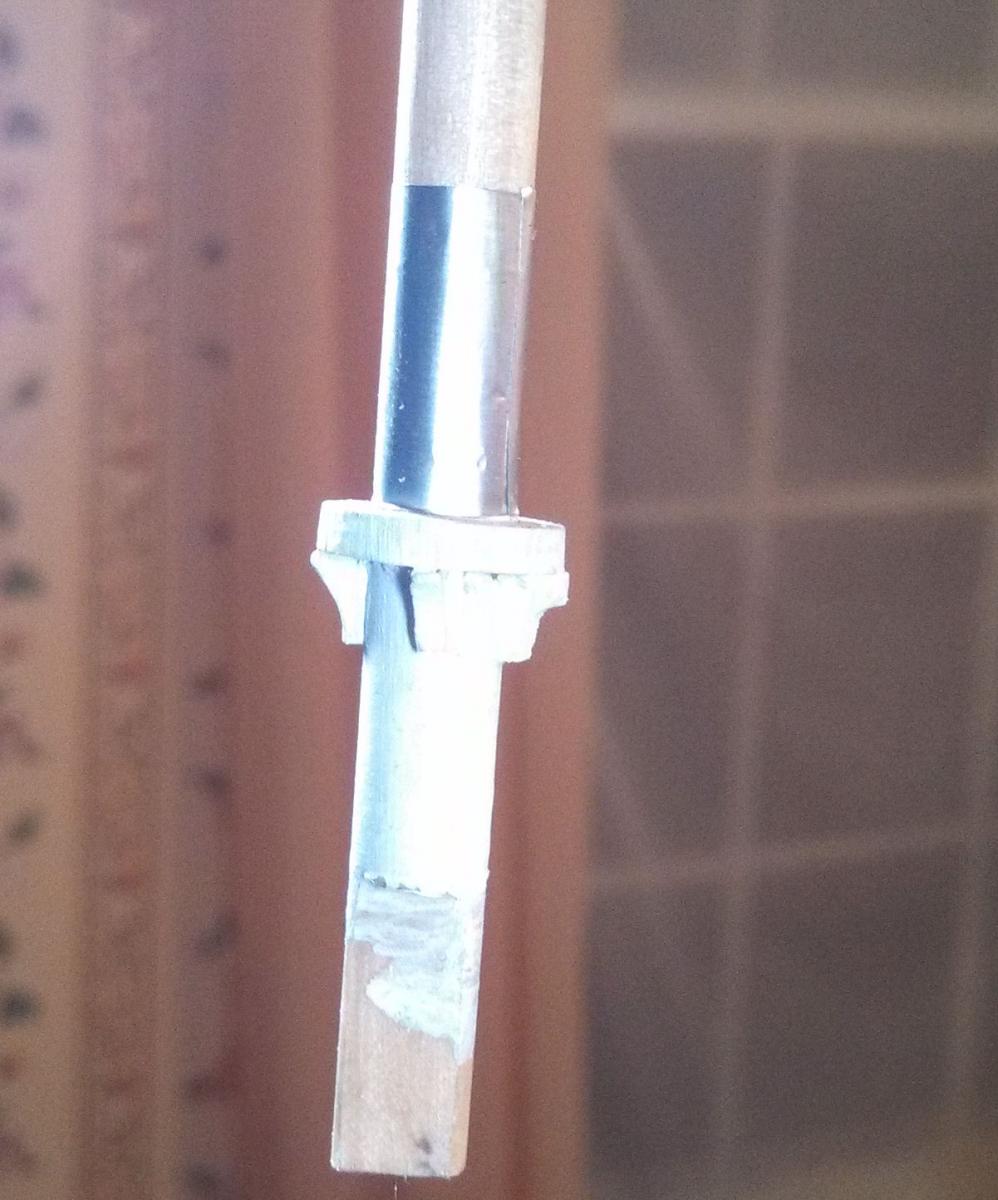
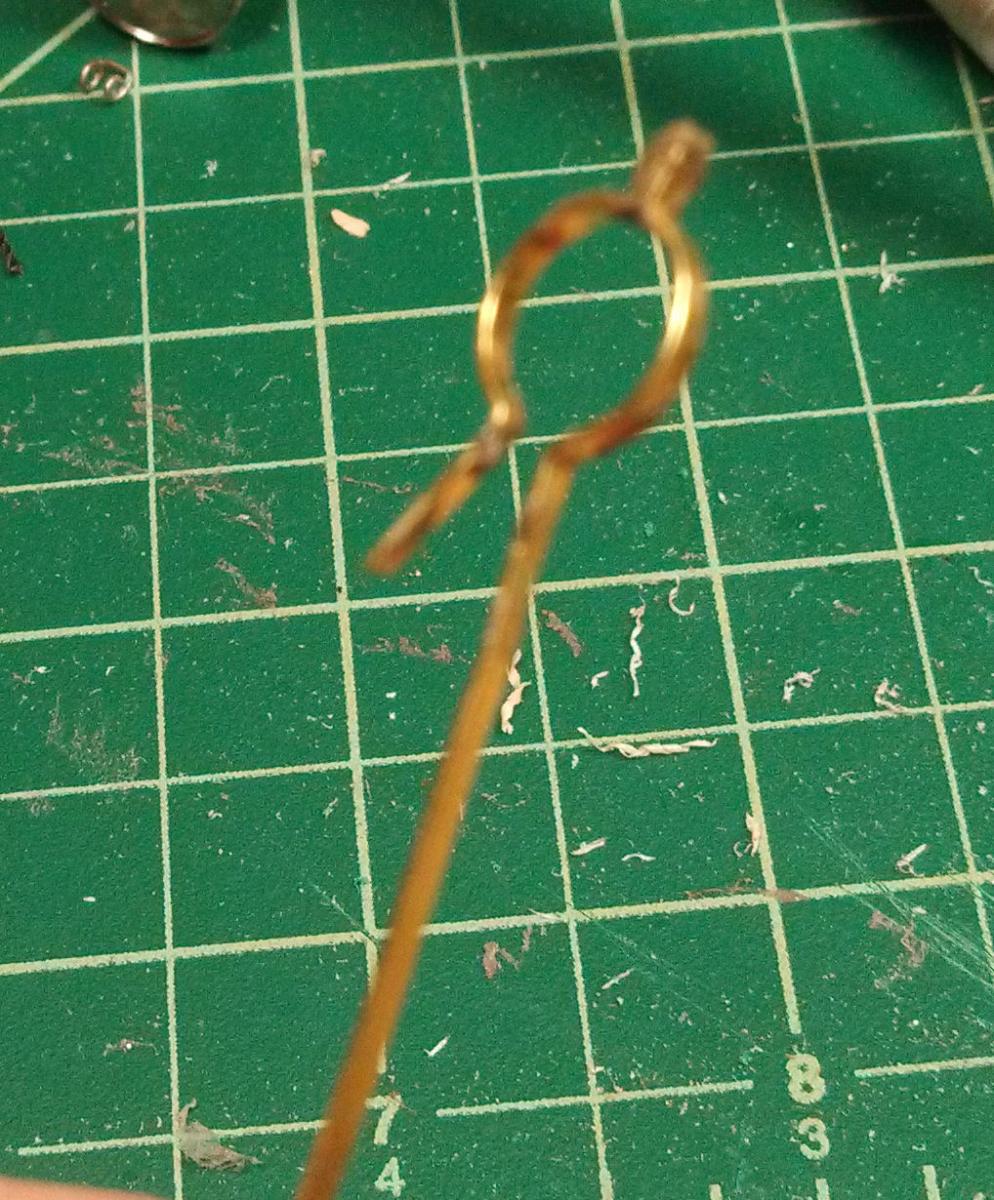
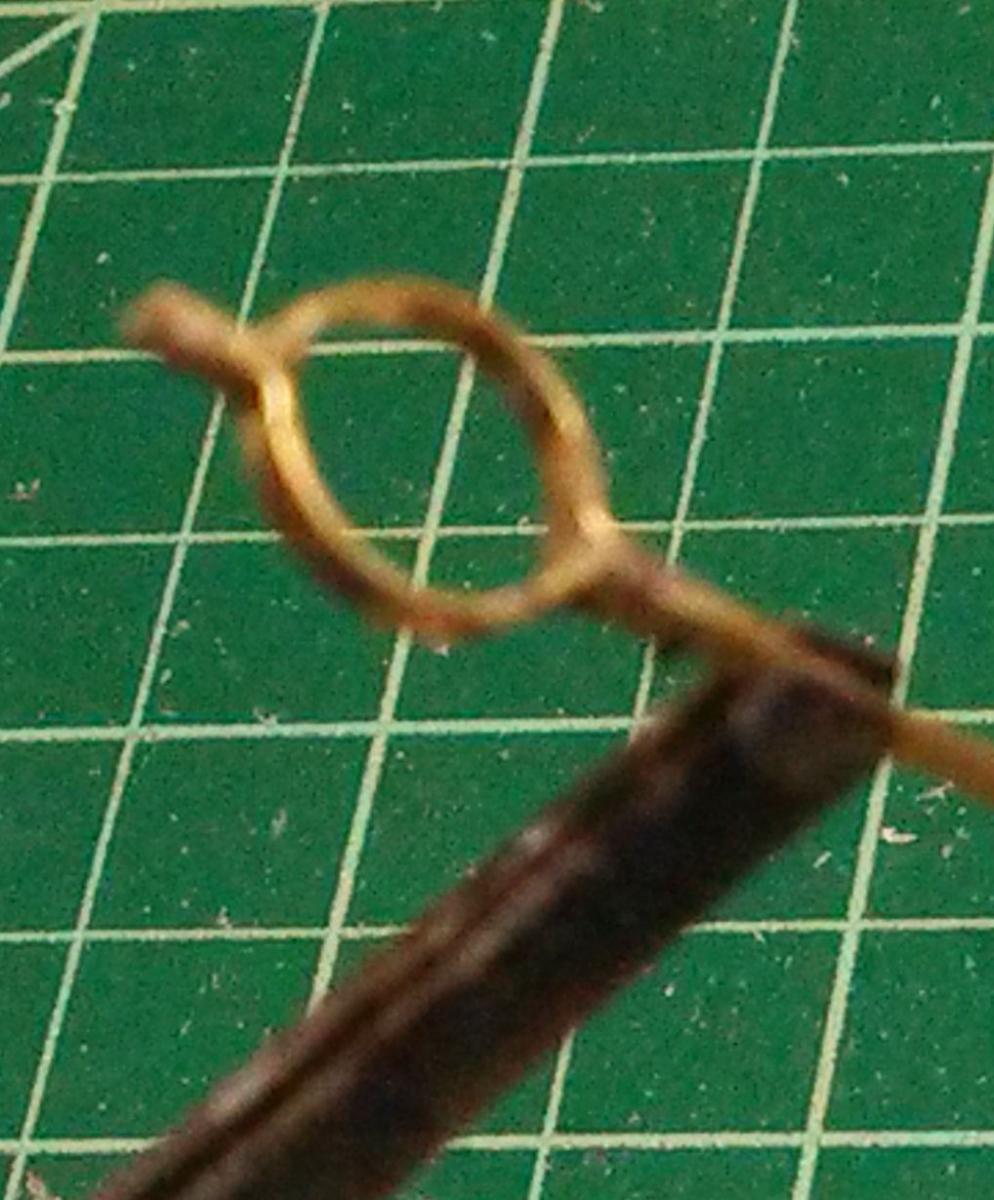
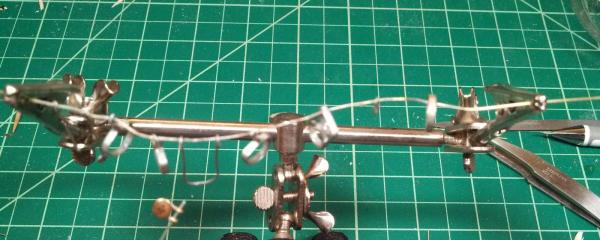
Well, I nearly finished the main mast. The plans indicate the hardware was either painted white or galvanized. I opted for galvanized on the masts various other topside items. I'm following a theory here that on the ships I have seen the hardware was not specially painted to show. Rather, if painted it was painted the same color (and probably same paint) as surrounding areas. For the top of the main top mast, I decided against trying to make a brass strip look right, so I just twisted some wire and soldered it up. For the area of abrasion around the boom rest I used the dull side of aluminum foil. The last thing to do is the spring wire loop and the small ring. Then on to the foremast where I suppose most things will be done the same.


-
I've used yellow wood glue (Titebond 2) and Weldbond along with CCA. The only issue with yellow wood glue I had was.... wait for it... it's yellow. Sometimes on a messy application it shows. The Weldbond dries clear. I've never used Gorilla Glue except for the original messy foaming formula, so I can't comment
-
First, thanks for the video. I am a true novice at this stuff and everything helps. I wonder if I might pose a beginner's question? I am wondering about hooks. I need to add them onto blocks, but I am wondering if they will straighten when I put tension on the rigging. Is there a special stiffer wire I should use to keep them from straightening after they are made? Or do you do mouse them or something? OR; and this is probably correct: Am I just worrying about nothing.
-
Thanks Russ. I guess I had it figured wrong. Well, live and learn. I suppose that I will just have to finish this ship and try again on another one! Would either of you (or anyone else for that matter) know if the low temperature past bond as well or are as strong at the higher temperature brazing paste?
-
David B: I did some research on silver solder and silver brazing. The jewelry stuff you talk about melts at around 430 degrees. The stuff I have been using melts at over 1200 degrees. So, when I have used the silver brazing paste, the brass must exceed 1200 degrees and therefore it undergoes changes. I don't know if they are oxidation related or some other property. This prevents it from being chemically treated. I have ordered some silver solder to play with and see if I can learn to use it. At that temperature, the brass doesn't really change much and will probably still blacken fine. If nothing else, It will be great for soldering shut an eyebolt that needs to be attached to a previously soldered part without loosening the original joint. Thanks for the heads up that lead to this research.
-
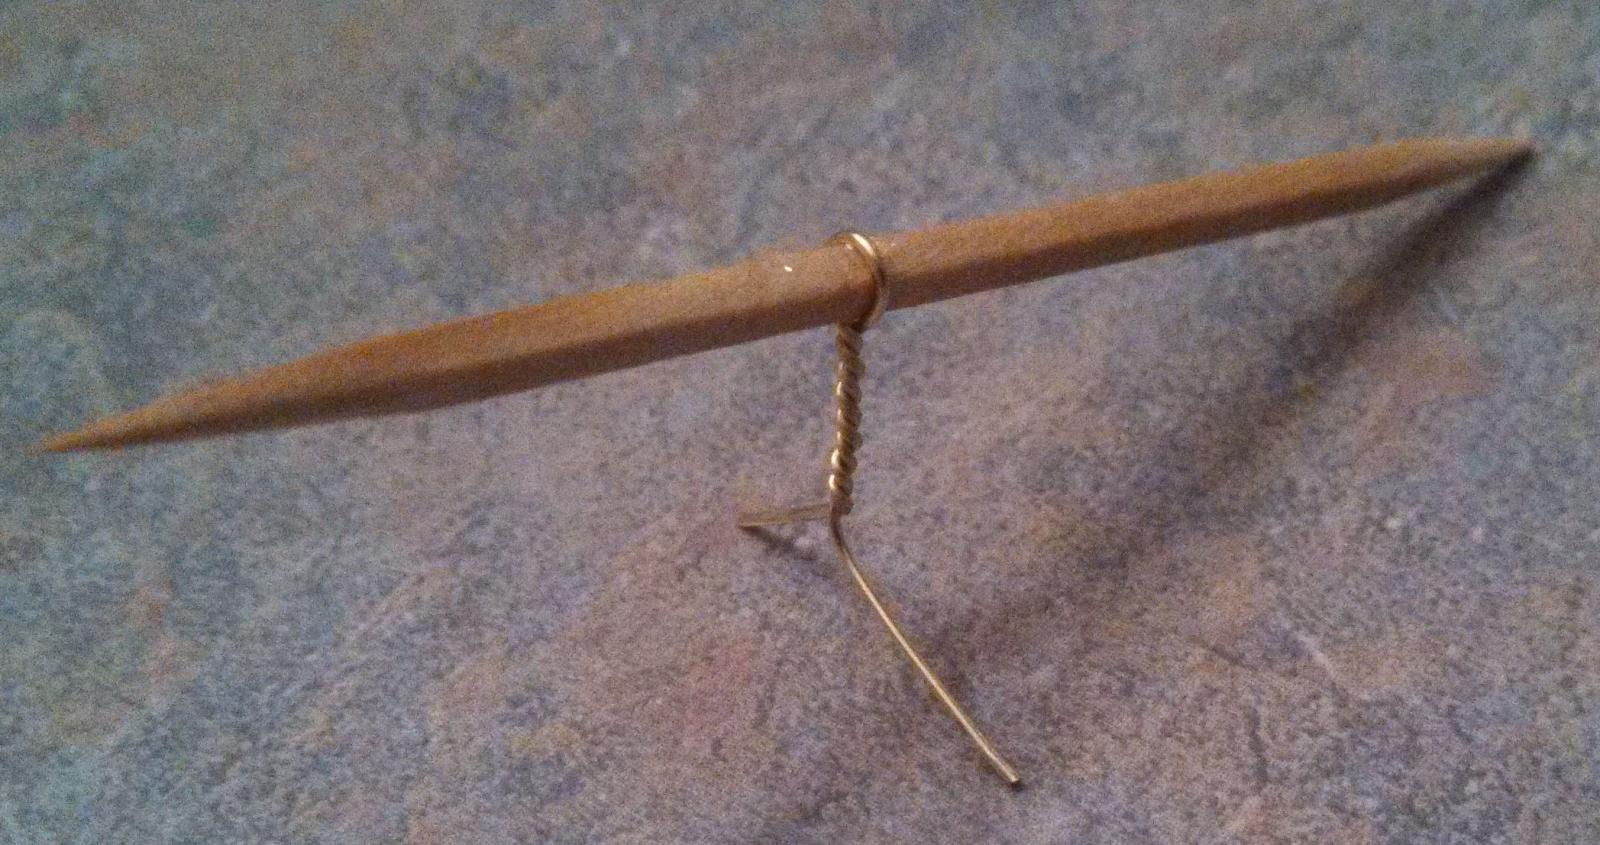
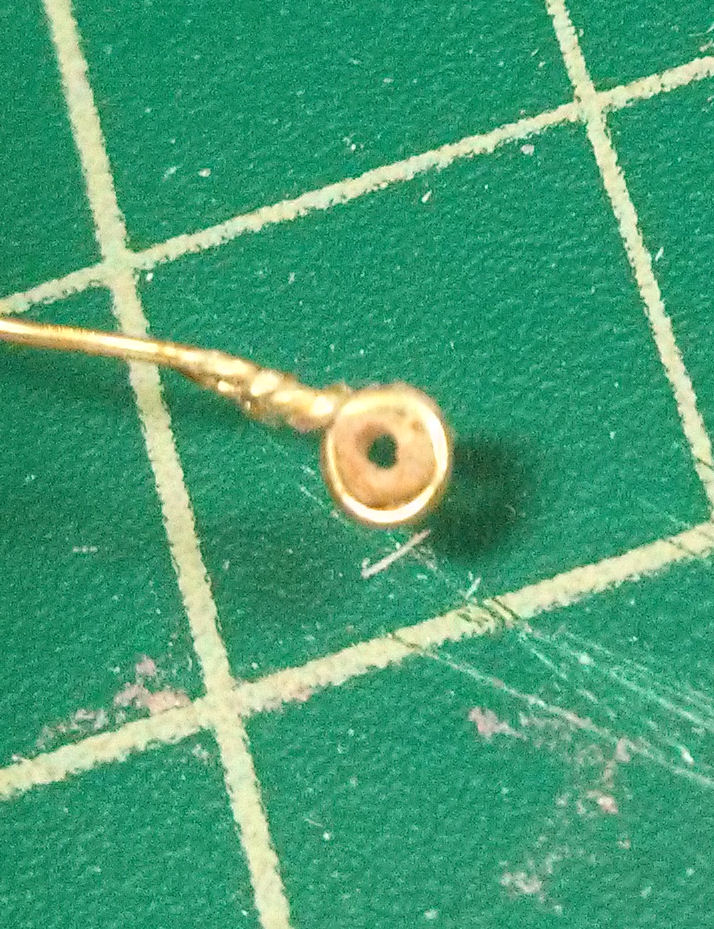
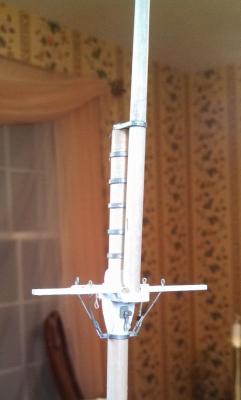
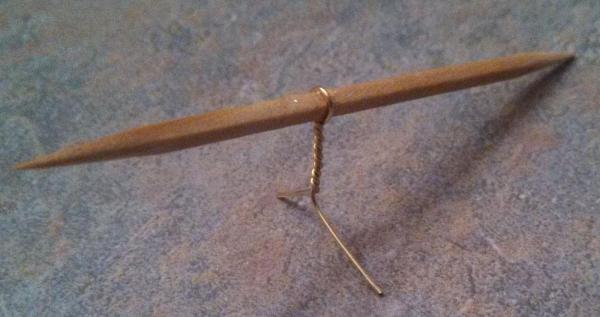
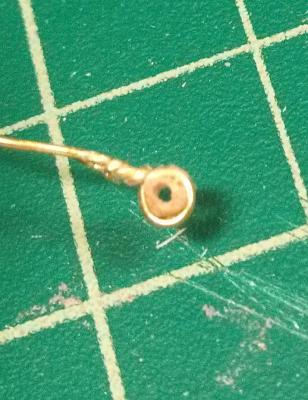
So, I've been thinking about fairleads on the mast around the spreaders. The scale is small and I want to make something that looks good, but isn't too far out. I came up with the idea of wrapping wire around toothpick, then coating it with superglue and letting it dry well. Then I took a razor saw and cut the toothpick close on both sides, filed it a bit and drilled a hole in it. This is what I go. Held up the spreaders, it looks like this. I would paint it before installing it. You may also notice on this last photo that I attached the brace to the forward spreader by drilling a hole in the spreader. I didn't think I could make anything else look good. Comments or better methods appreciated- Especially what you know about the scale. I'm a flatlander and have no idea what these things looked like on real wooden ships.
-
Sorry to back up (perhaps there is a way to post this properly in place- but I don't know it). I was looking at the fairleads near the spreaders. I keep wanting to model these, perhaps with a bead or something. May I ask what you did here?
-
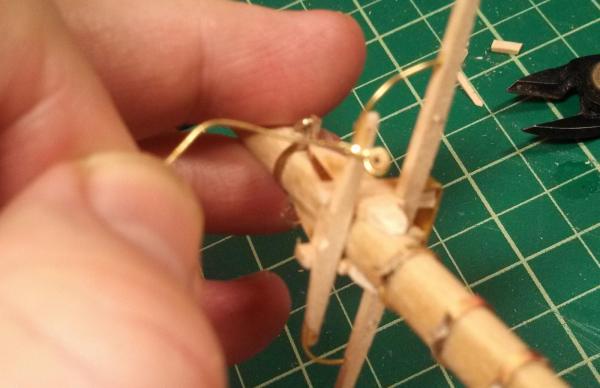
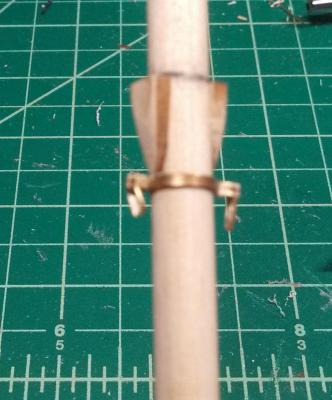
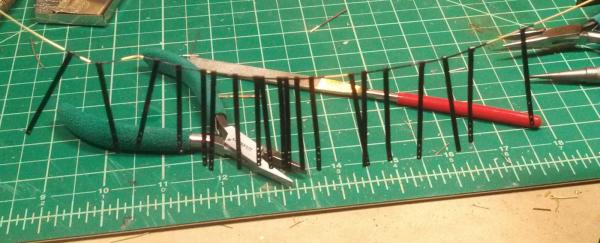
Worked on main mast a bit this afternoon. I understand that the practicum I bought would produce a nice model, but I have been bitten by the "real detailed real metal" bug. As such, I started working on the main mast band for the futtock shrouds. First, I used the mast to form the loose metal, then I soldered it up and finally added some elongated rings. I'm not sure how accurate historically this is. I think once painted it will be great. The instructions say either white or galvanized. I'm thiking galvanized or black. If all else fails, I'm creating a story where the ship's blacksmith had kidney stones the day these were made and an apprentice was pressed into service. BTW, Two thoughts, 1) I notice this isn't the normal way to make rings. I hope it works out. 2) Am I supposed to clean my work area before making photos?


-
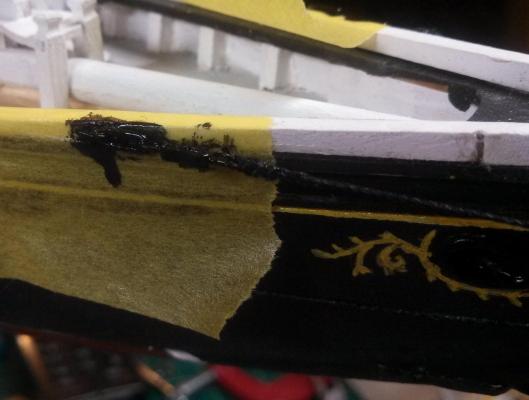
As indicated, I am painting my metal fixtures with a sem-gloss enamel. This is because #1, I have had very poor luck with chemicals I have tried, and #2 I think that the semigloss with give them a nice look on the finsihed model. Here are a few straps drying before installation. After they dry it will be easy to touch up. Woody examines the foot ropes on the bow sprint. I suspect he would like to be sure they are VERY secure.
-
I used an airbrush for painting the hull and major items. I am painting the hardware with a brush. I am using a enamel paint which is not water base- semi-gloss. For the wood, I use a flat acrylic. I thought this would provide some contrast. I have tried using brass blacken chemicals. Although I am perfectly fine admitting I don't know what I'm doing, I have very poor success working with brass that has been soldered. The brass that is brass colored turns quickly (albeit, it takes several short treatments to get a good coat) but the brass that has been heated does not take the color. I have also tried blackener for copper- and it stinks, but works. It may that I am using the wrong kind of solder, I don't know. I find painting looks just as good to my unsophisticated eye and is a lot quicker and easier. If you have a specific chemical you are using, I'd appreciate know which one. I can try it on a future project.
-
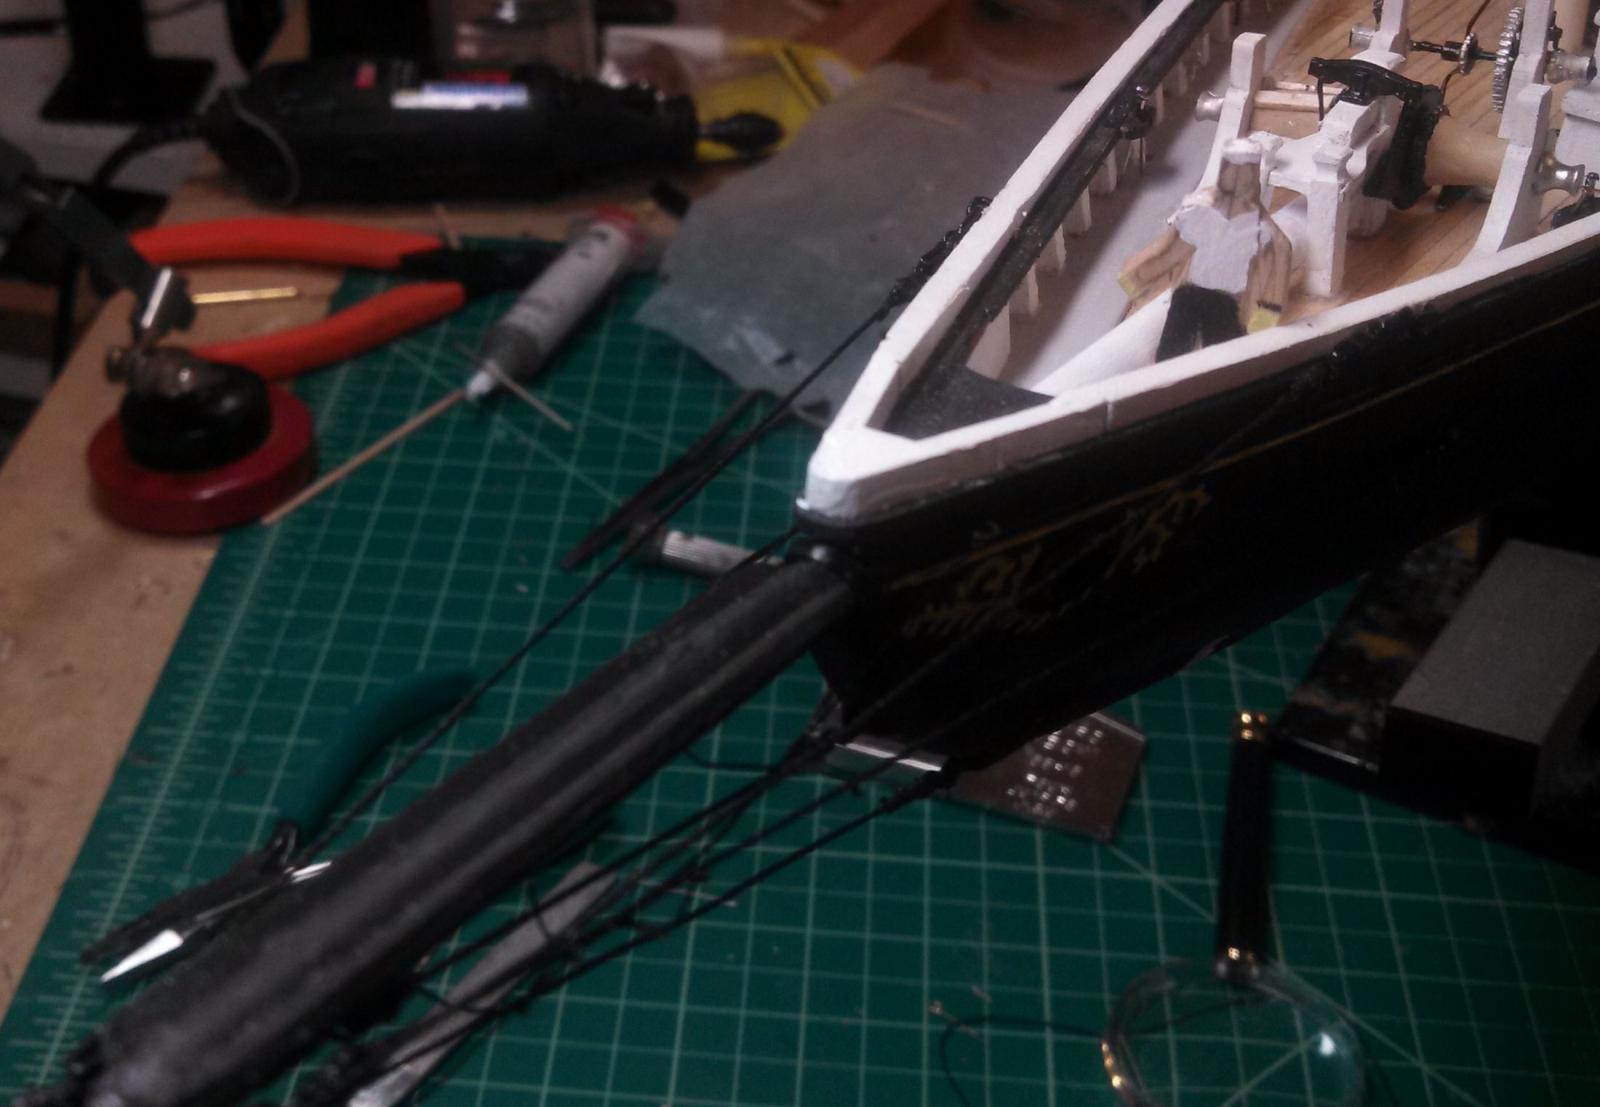
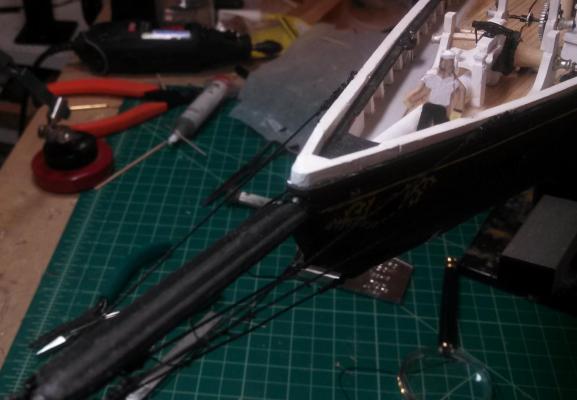
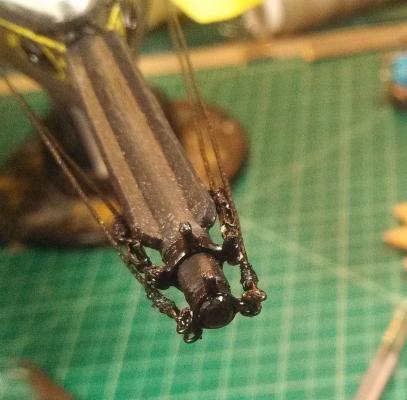
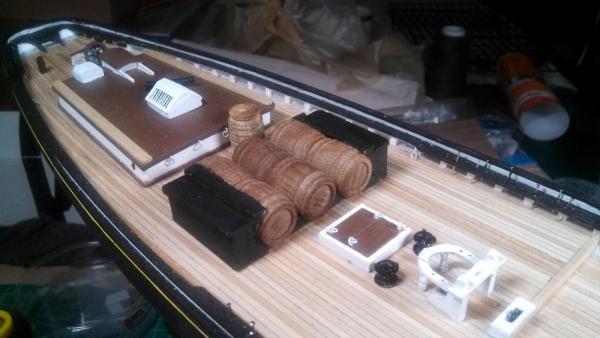
Thanks for the information. The advantage of what I have now, of course, is that I have it. I really don't know the difference between "silver solder" and what I am using. I have noticed I have to get this stuff really hot to work- sometimes if I'm not careful, I end up melting the brass. Anyway, I had a chance to play with the ship a bit more today. First, I tried re-painting my barrel boxes and I added ropes. I think it looks better and I will probably leave it on the boat. Second I continued rigging the bow sprint. You will notice how my idea of painting everything black really destroys the detail. As an aside, the dowell for the bow sprint supplied was poplar- a nice straight grained wood, but green in color. I thought it looked ugly so I painted it black. Looking back, I would recommend just buying another dowel and leaving it natural color. That way the details would look better. I also shaped the base of the mast so they will fit.
-
Fusion brazing paste
-
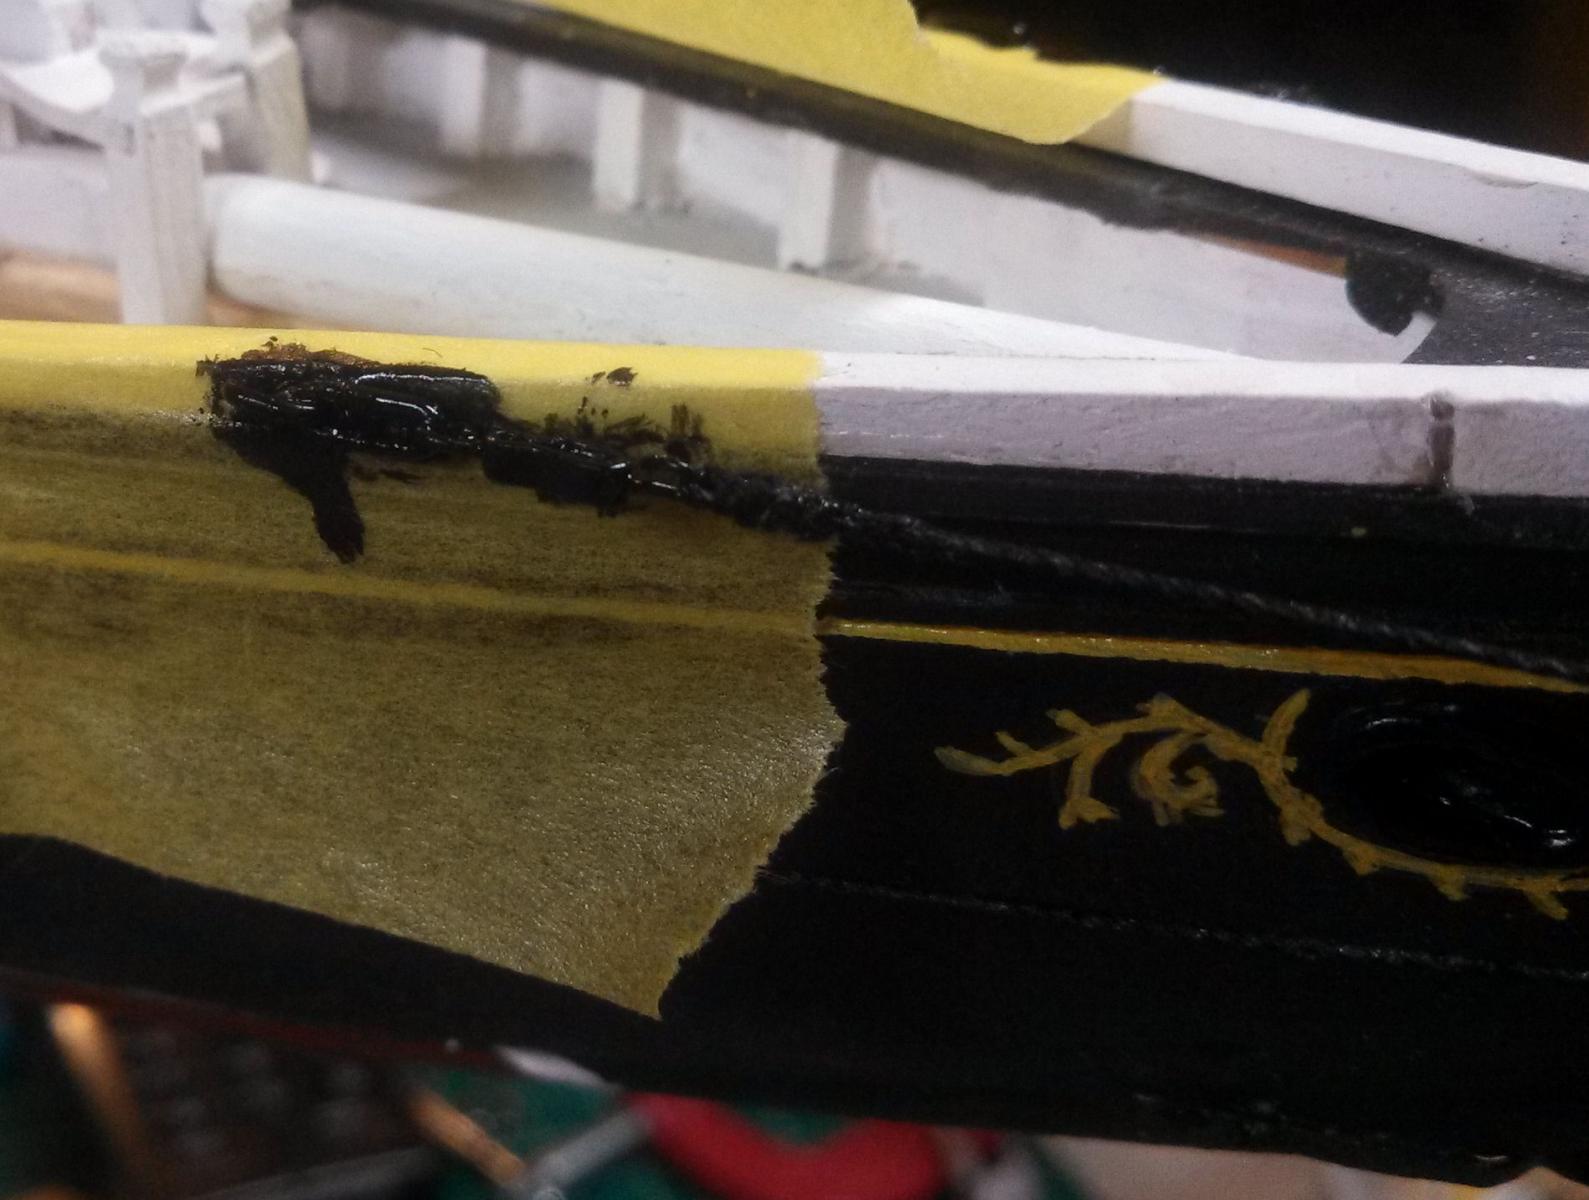
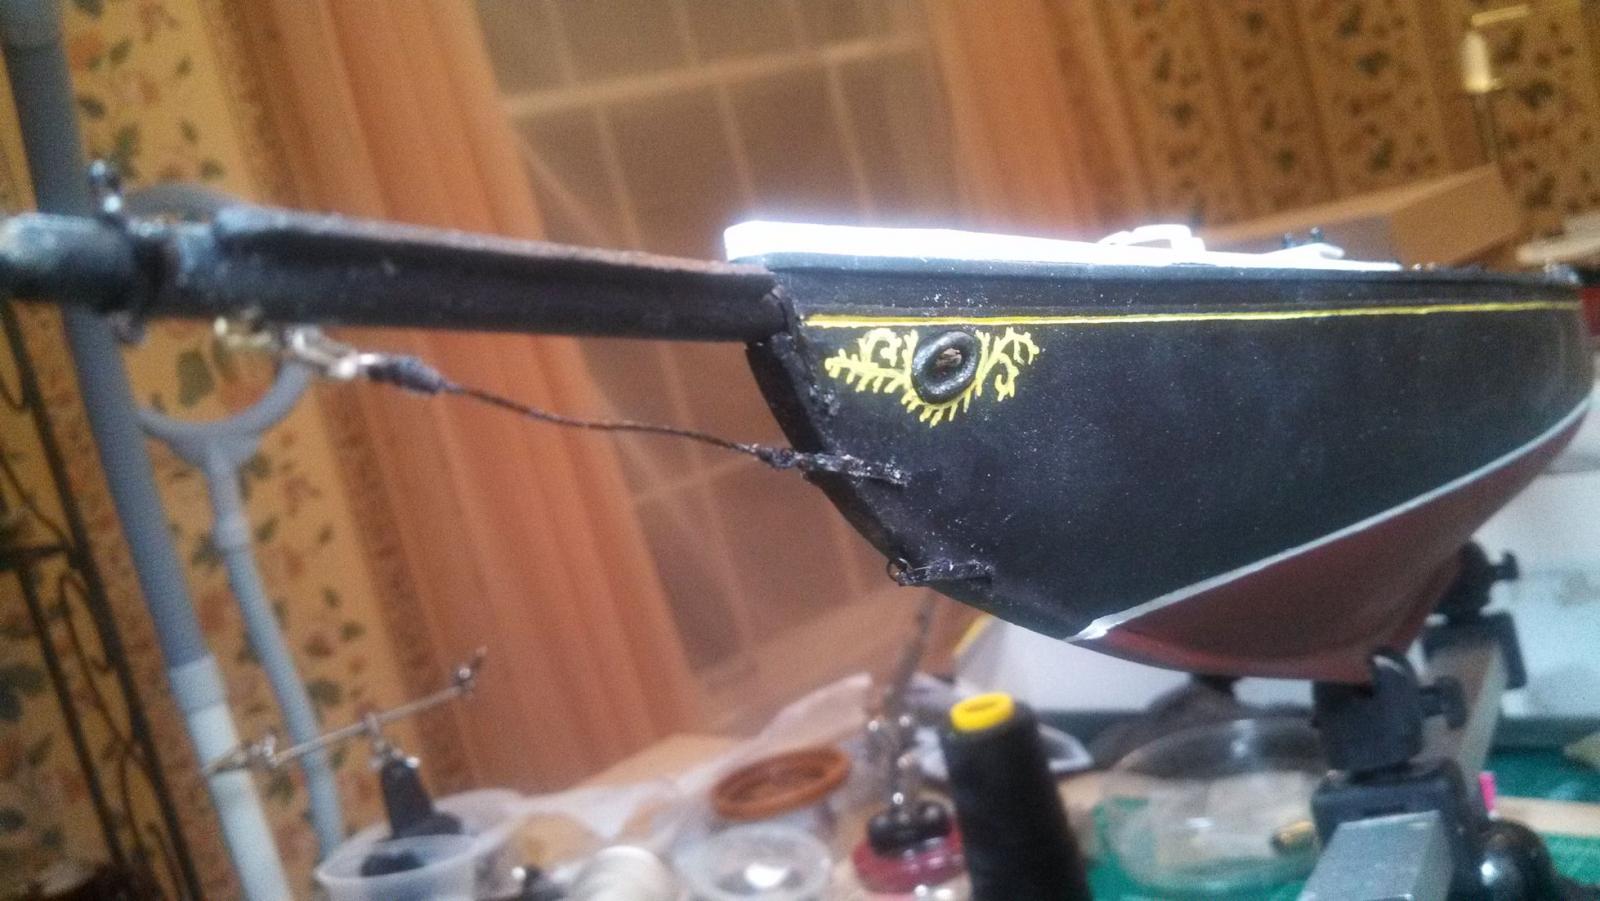
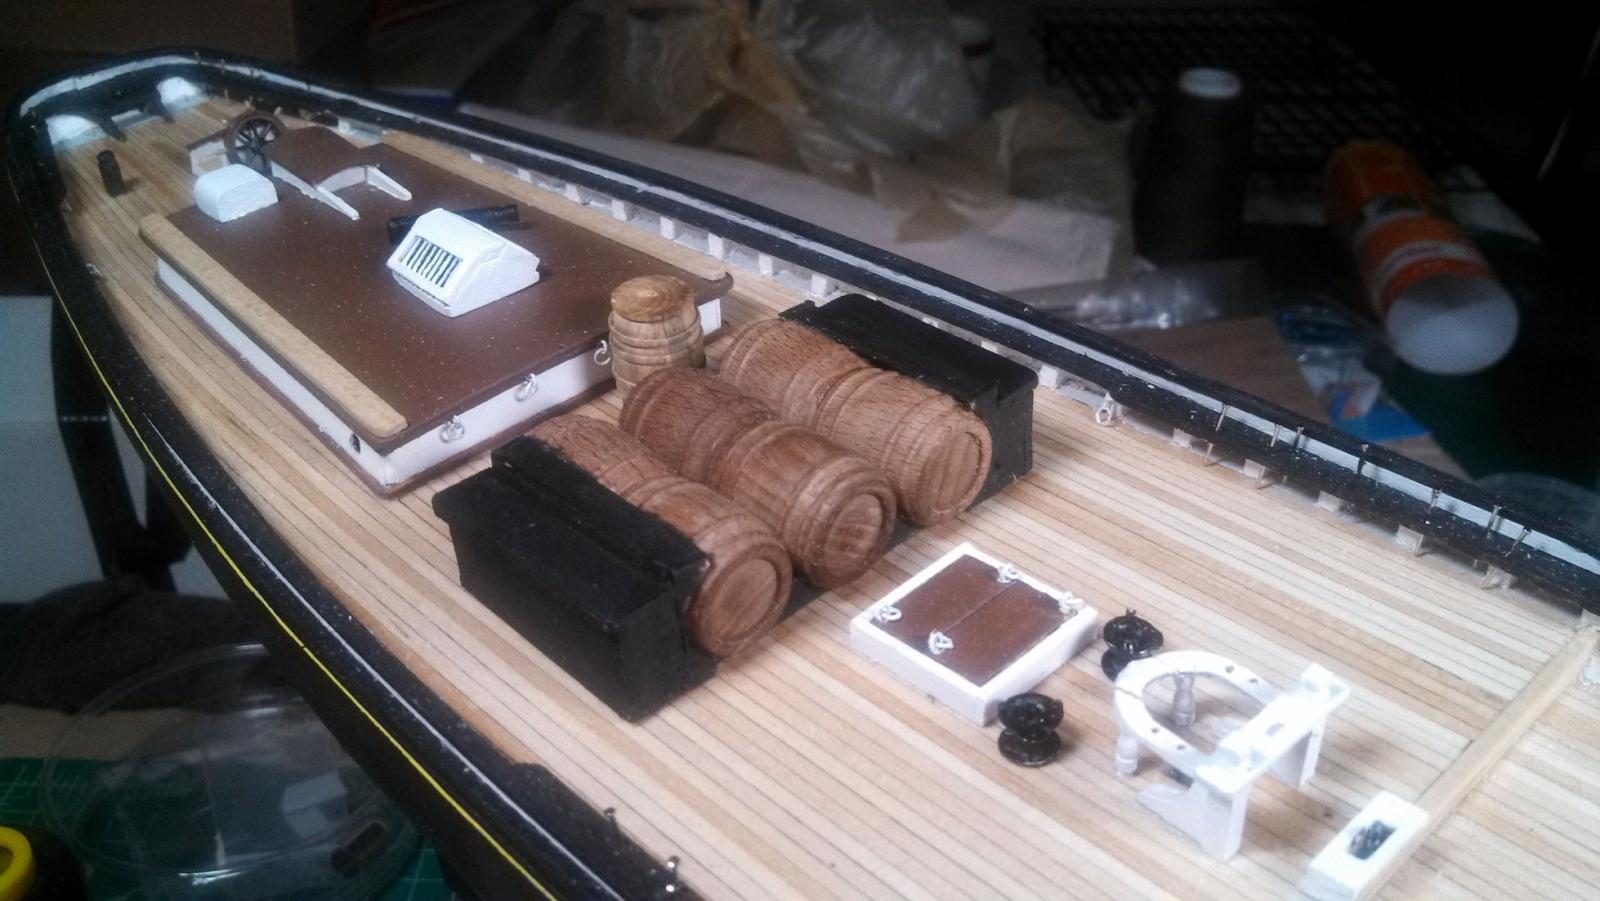
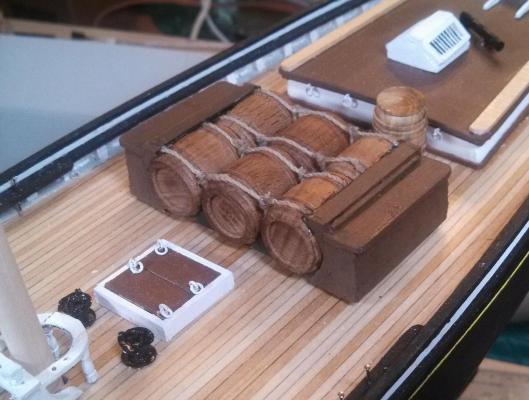
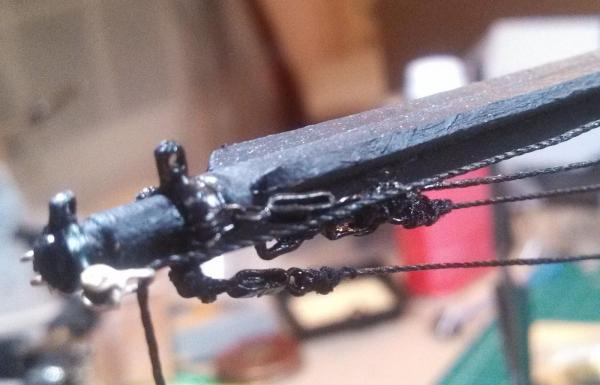
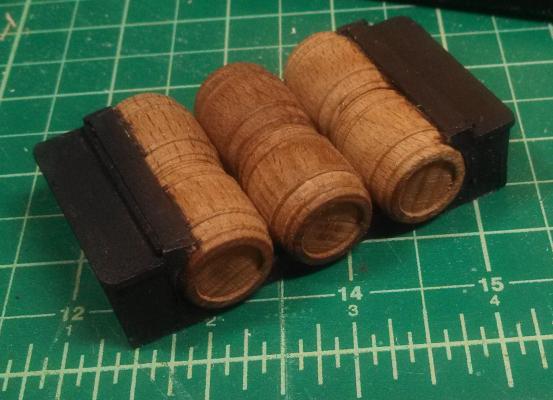
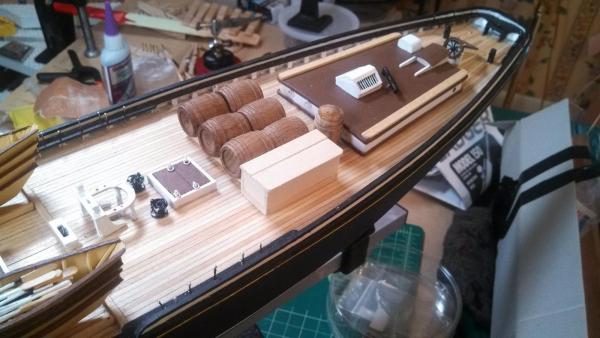
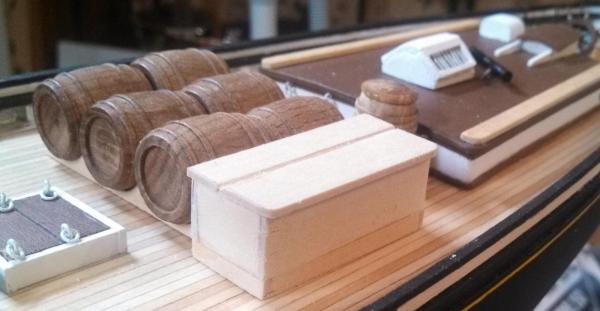
After studying the photos, I decided I didn't have the barrels right. So I did some rework and came up with this: On the ship it looks a bit large scale wise. I'm trying to decide if it adds to the ship or should be 'chucked.' I also worked on the bow sprint, but ended up with a limp guy (wire). I cut if off and started over. In the process I accidently cut the ring I had soldered shut at the cut water, so the new one will not be soldered. I'm also beginning to regret my decision to paint all of the metal black. It just doesn't show as much as I'd like for all the work that it is.

-
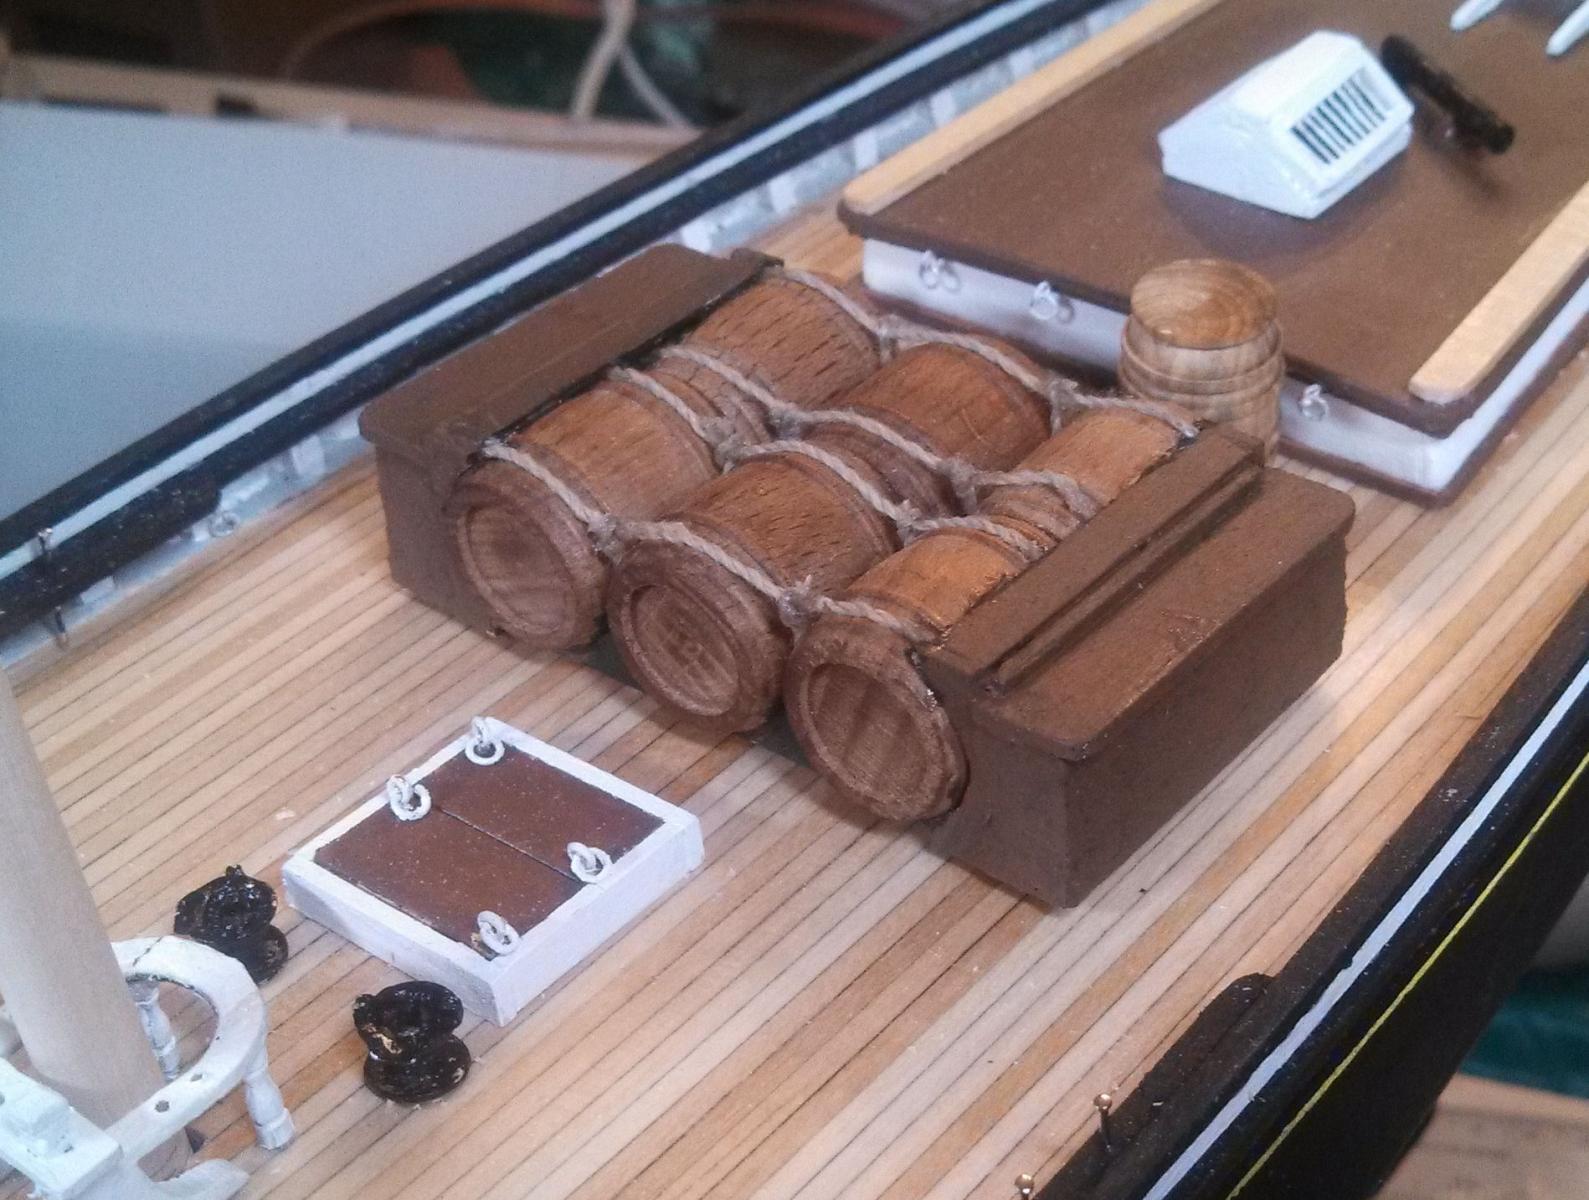
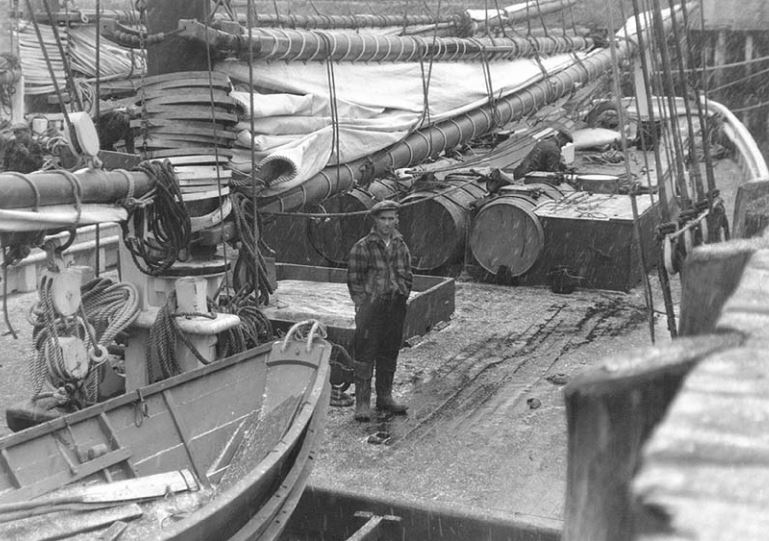
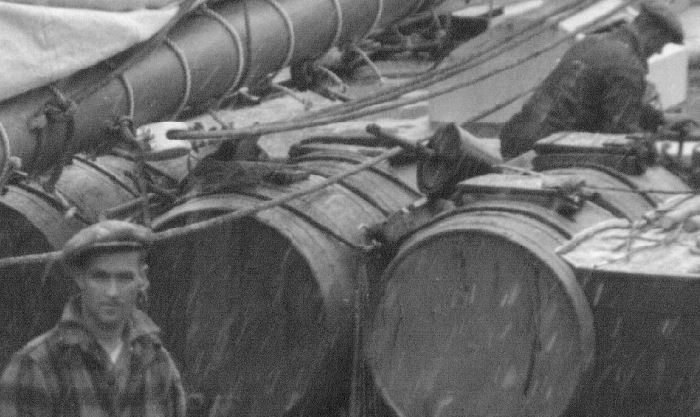
I don't know really. Here is a snip of the old photo. Here is a bit closer. It shows the lids on the barrels and how they were tied down. I wonder about that young sailor standing so calmly in the photo. Here is one more where you can see the lids on the barrels.


-
The photos in the Nova Scotia archives of the Bluenose show a number of barrels and a storage box which are not part of the build. Like some others, this bothered me, so I obtained some keg shaped large barrels and created something. There are two parts left, first, I the barrels in the photo are scuttled, so I will have to add this. Second, I'm going to have to decide about paint. I suspect these barrels held salt, but I would really appreciate any input on what else might have been in them.
-
Thank you both for the answer. I'm going to go online now and cancel the order for the 0.4 mm tap and die set.