DONATION DRIVE - SUPPORT MSW - DO YOUR PART TO KEEP THIS GREAT FORUM GOING!
×


PopJack
-
Posts
256 -
Joined
-
Last visited
Content Type
Profiles
Forums
Gallery
Events
Everything posted by PopJack
-
 I was reading your log and have a question. In the beginning, you said that the keel was warped or twisted. I never saw how you fixed this. What did you do?
 -
Thanks for being so complete on your log. Although I'm not building this ship, I'm learning a lot by reading.
-
Dang, I was getting excited about your realistic blocks! I wanted to send you a handful to fix for me!
-
I am going to have to go back and read more history. I read the other day that George Washington hated Privateers, and worked actively to keep US ships from being recruited- for the French if I recall. I had understood that he tried to stop the practice. Obviously, I have missed something. Sorry to disapoint, but Jean-Luc was fictional. Kirk, however (the real captain) is- or rather will be- real. Here is a monument in Riverside, Iowa, USA where the mark the place of his birth. (Seriously, I've always loved the nod to the Picard name. It's a line of real heroes) I have a friend who is a Trekkie. He had never heard of Riverside, so while on a motorcycle tour of the US, we stopped by. They have a little museum and everything.

-
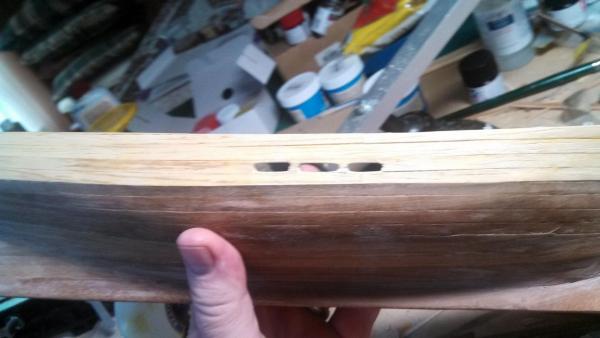
Crud. I just figured out that at scale, the end of my tiller is 8 feet in the air. Probably not what I would have ordered, unless people were taller in the early 1800s.
-
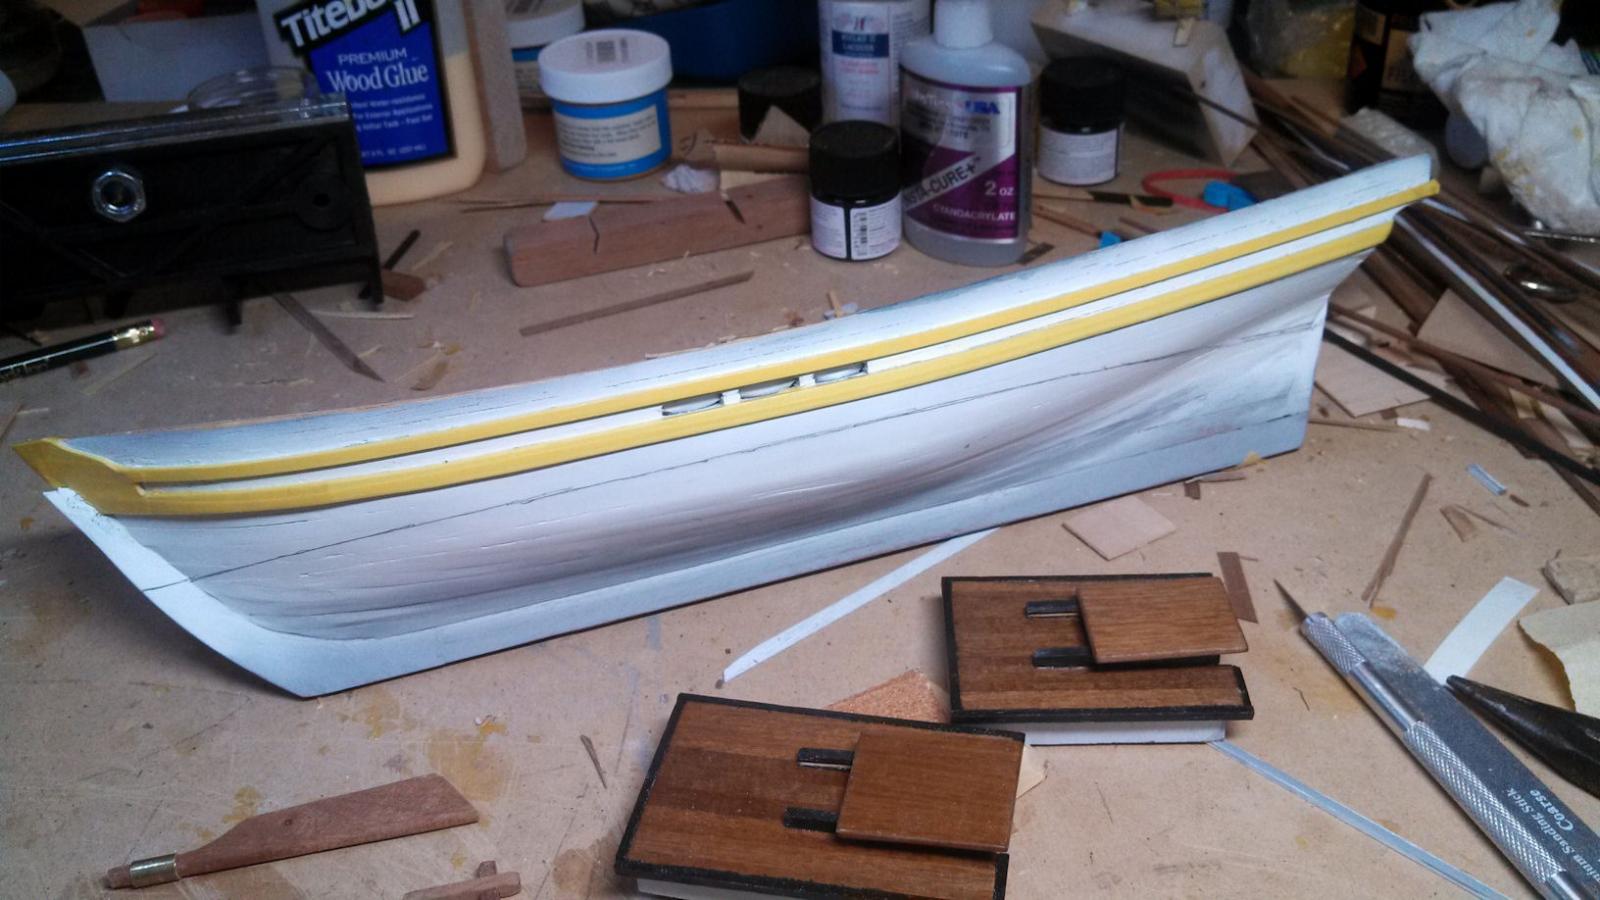
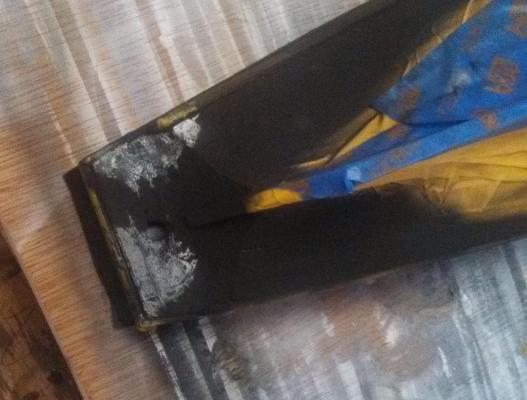
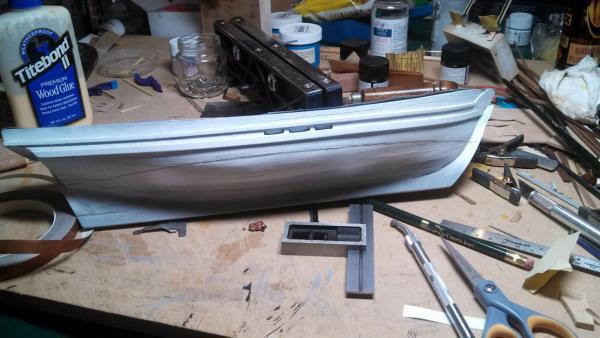
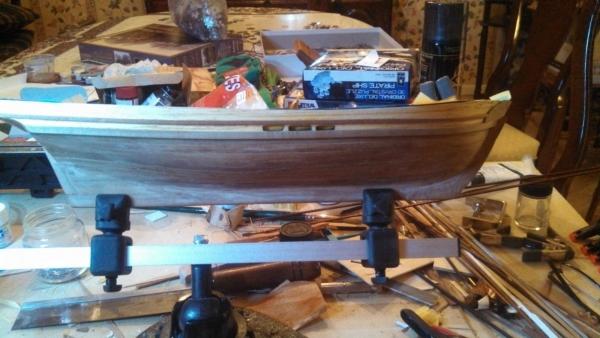
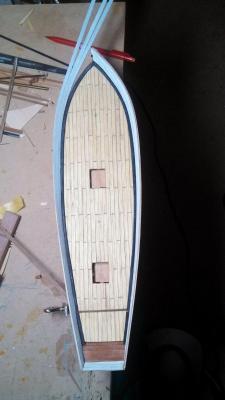
i pulled the tape off and set everything in place (nothing is glued on). She don't look too bad! I'm glad I dropped the white band at the water line.
- 125 replies
-
- 1
-

-
- swift
- artesania latina
- (and 1 more)
-
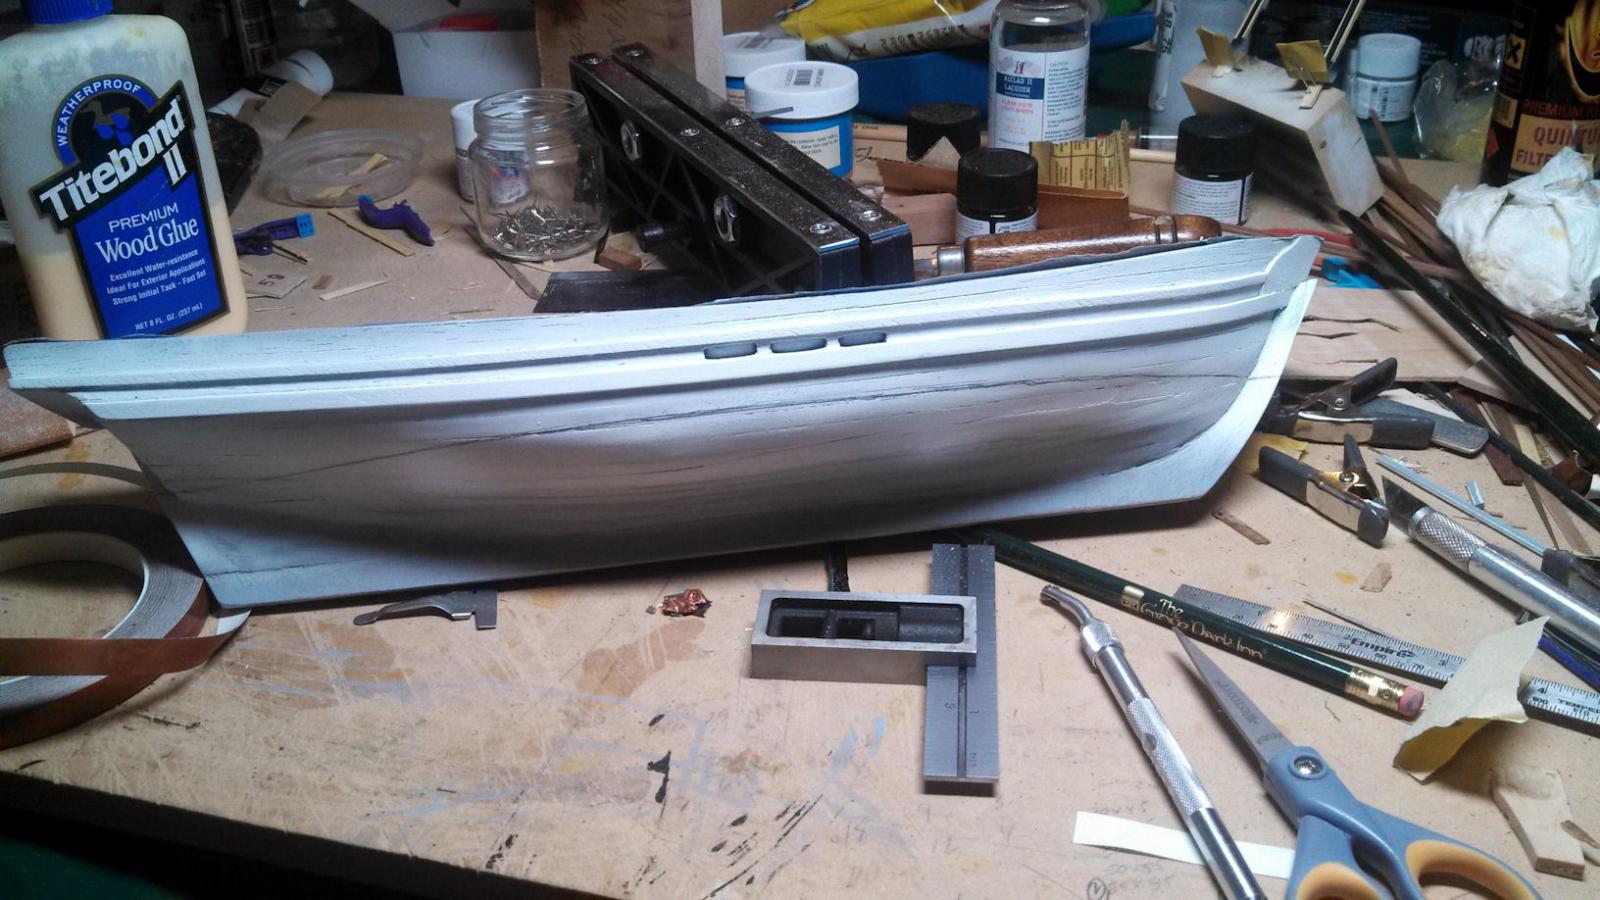
Okay, worked on the little boat a bit today. But first I made some frames for large items out of some mahogany I had laying around. Every time I make something that has a rabbit, I end up with sticks that I throw away. After building these little models, however, I am now thinking that sooner or later there has to be a place for some .025" X 0.25" X 40" mahogany pieces. The down side is that they multiply like rats and if we don't have a cold winter where I can burn them, I think I will be over run! I masked the boat as best I could and shot it with the deep sea blue. It looks like a whimpy black- which I read is what you want. Originally I was going to leave a thin white stripe between the copper water line and the black paint. The water line is so close to the bumpers that I gave up on this idea. So, I hope the masking tape doesn't destroy the copper! Here she is all dressed up. Recalling that this boat is all about learning and doing things I haven't done, I have to say I had a learning experience when I learned what happens when you spill air brush cleaner on a freshly painted boat. Not good. The paint coats from the air brush are so thin, though, that repair was easy. Finally, I spent lot of time making a tiller that I could be proud of. This is the kind of thing no one will ever notice, but mine has a square hole for the top of the rudder. After the boat dried, I thought it looked dead with the flat paint. I understand that I was "supposed" to leave the boat flat- but just "flat didn't like it" (so to speak). So I shot it with a coat of semi-gloss lacquer. No photo, but it looks a lot better to me. Of course, this will make touch up harder, but, what can I say? I don't do ugly well (except in person). So, all in all a lot of fun was had today.


-
I knew there was a Chemist around! Thanks for the explanation. I know that copper "in the wild" eventually is coated with CuCO3, but I didn't know where the Carbon came from. It must have quite an affinity to pull in the CO2. (At this point, I have to admit that ti never occurred to me that anyone would use the subscript format enough for it to be on the easy access format bar). I'll make up a little chunk of fake hull with extra tape and try a few things on it. I have some 10 year old tape that has made the CuO stage that is just what I'm looking for. Concerning the pattern, I've read a lot on the subject and just decided to try it when I saw it was done. I like the way it looks, and so I did it. Which at some level is amusing, given how much time I spent trying to find realistic depictions of paint jobs. Oh well, I never claimed consistency. I found a couple of different approaches to the copper bands- most referred to finding the banding used in the particular ship. This wasn't likely in this case, so I just followed the technique of starting at the bottom back and moving forward.
-
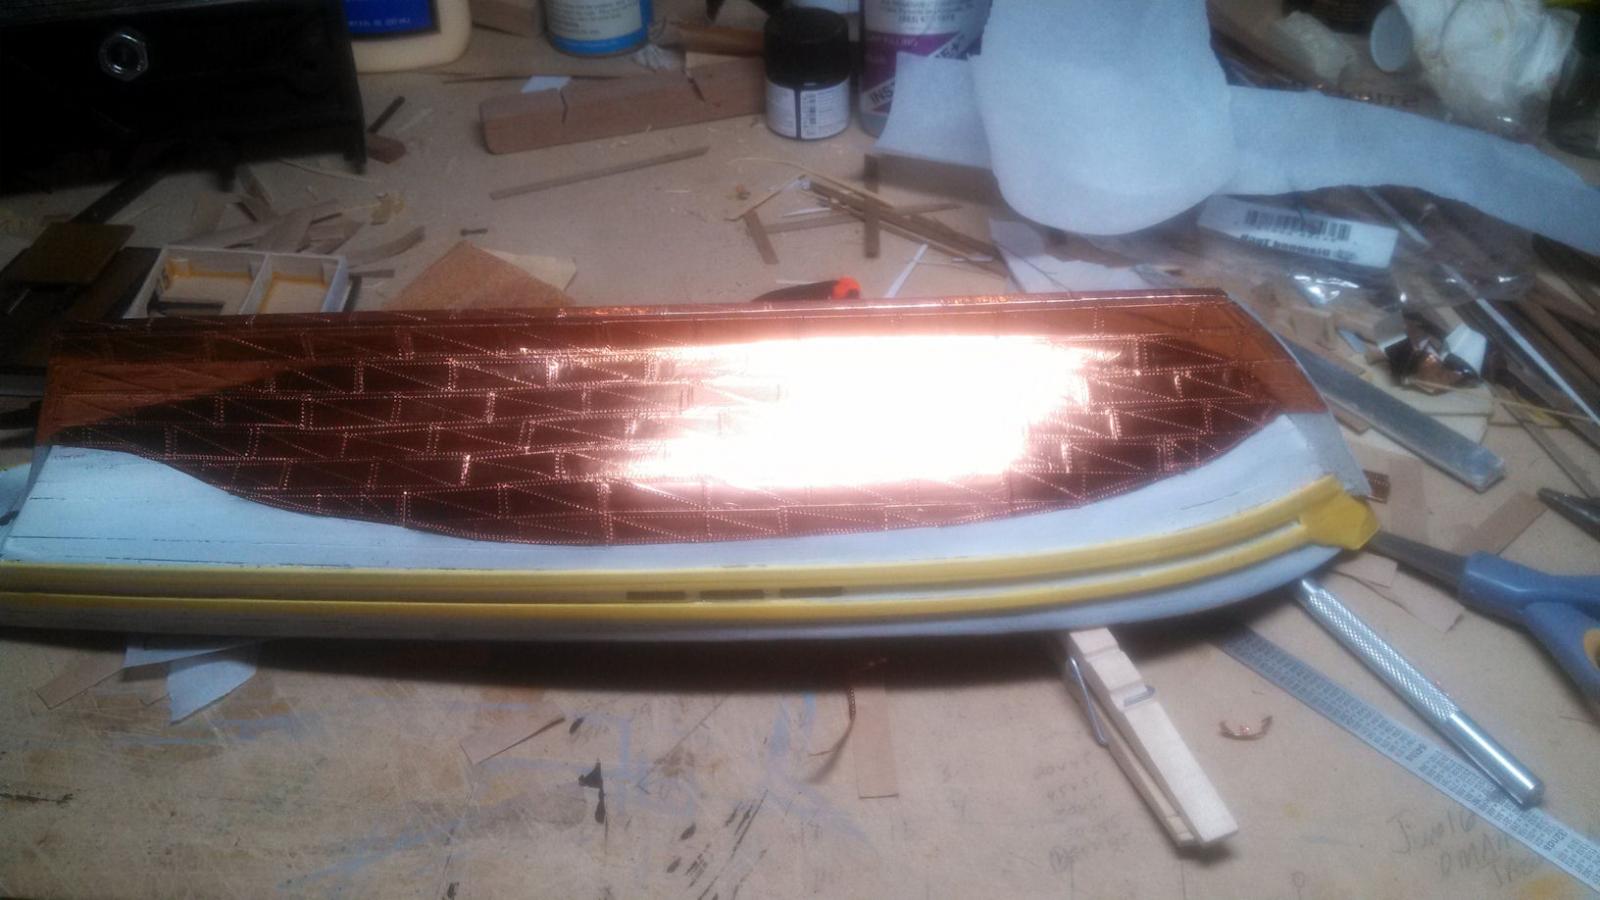
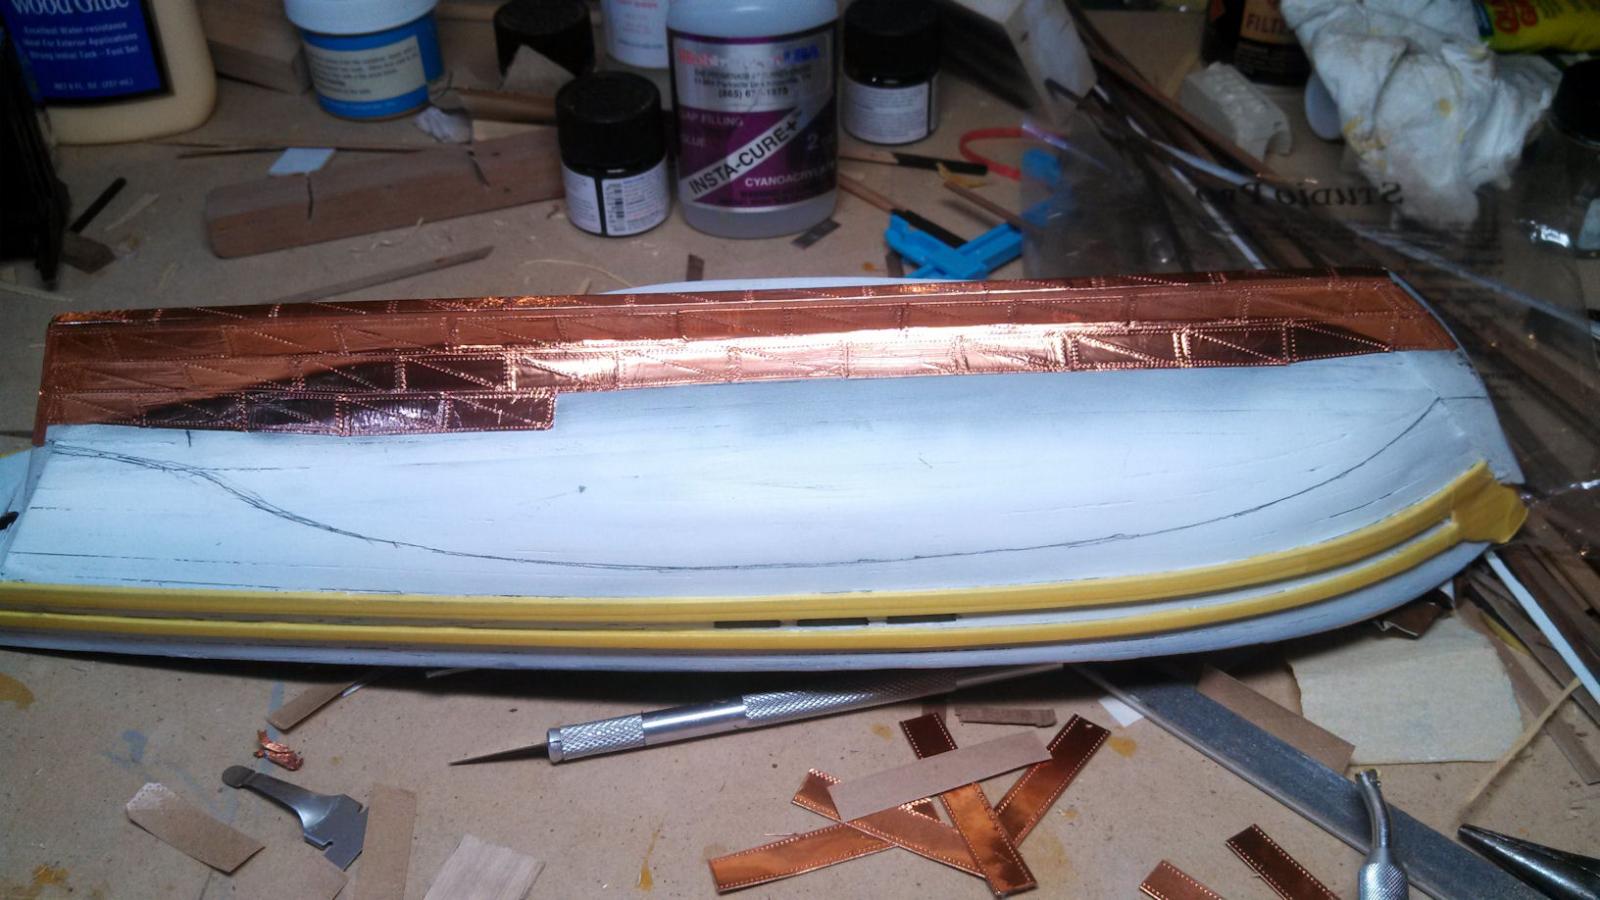
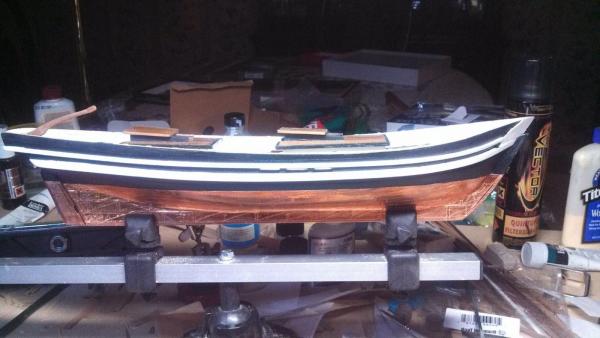
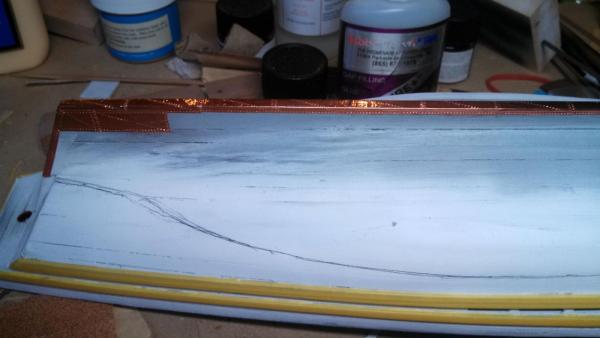
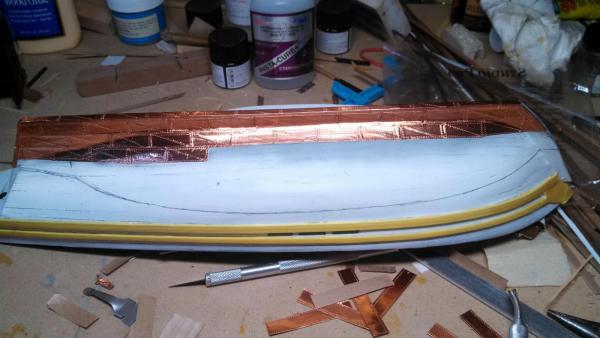
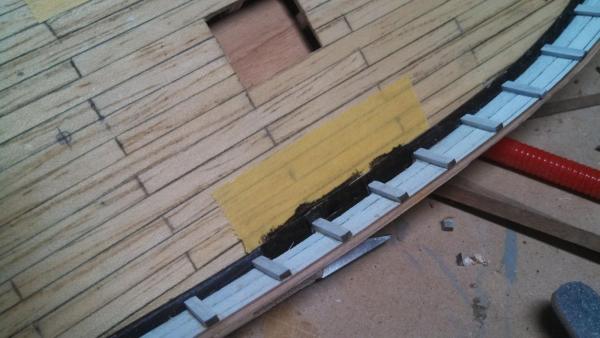
Copper coating is continuing. I have one side finished and am about two thirds through the other. For the top edge, I saw one good solution which was to put a plank for the copper to butt up against. I didn't want to do that- primarily because I'm lazy and didn't want to go through the painting process (since it wasn't already on, I would have started with primer, etc). Instead, I used a piece of tracing paper to copy both the edge of the copper and the water line. I then taped the individual pieces of copper to the tracing paper and cut it out with scissors. The results were fair, although there is one error which is bothering me. Since boats were coppered from the bottom up and from the stern forward (to eliminate any joint where water would be forced in by the boat moving forward), to fix this I would have to redo most of a row. As of yet, it doesn't bother me enough. Besides, the boat's hull has a funny curve right were the error occured, and I'd hate to find out that its going to happen everytime. We'll see. A couple of photos. The abnormality can be clearly seen on the first photo. I'm liking the pattern I put on the copper- kind of a nice effect for the fish to admire.


-
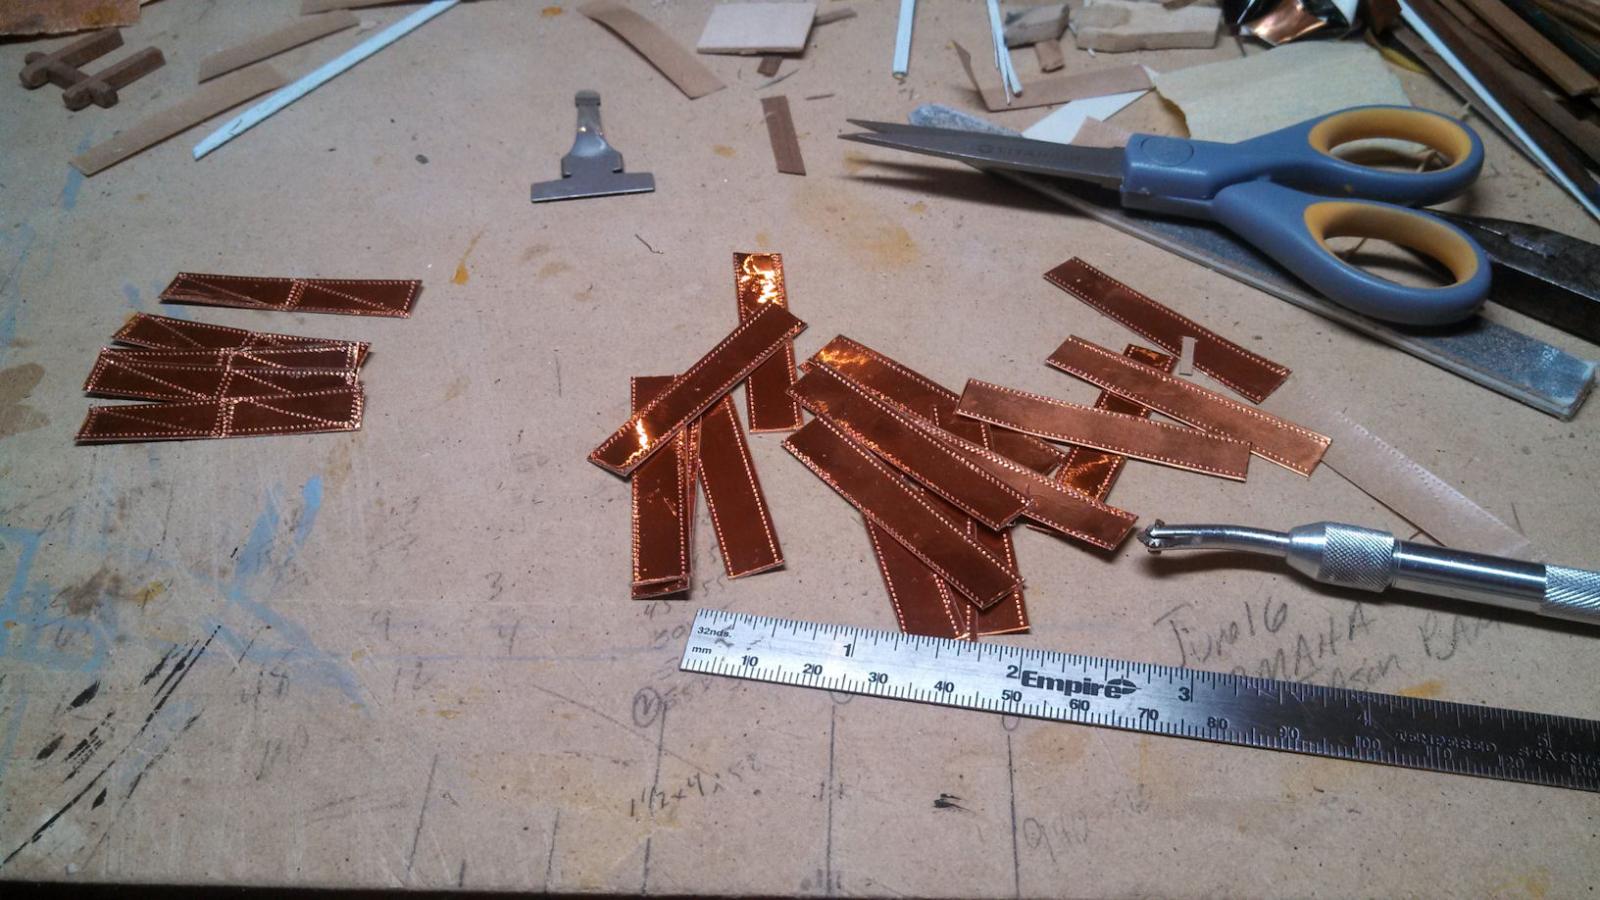
Started playing with the copper tonight. Got a little done. Regarding questions:Yes, I soaked the planks for 10 minutes before the ironing. The scuppers are masked right now to prevent paint from the hull from hitting the deck. I'll post a few photos when I get the masking tape off. First, I made up some copper "plates" from tape. I just made up a pattern that pleased me- since I've only seen one photo and I couldn't tell much from it. Then I just started. I don't really have a plan, I want to see how it lays in. The only thing I'm really worried about it how I'm going to accurately cut and shape the copper at the water line. I've been looking around for advice on this- if anyone knows where to look, I would appreciate a link. I had planned to letting it dull naturally over time, but frankly, I didn't realize how BRIGHT it was going to be. I'm thinking I may think about finding a way to start the natural oxidation process slowly. IF only I could find a CHEMIST that I could ask.....

-
I spent a few minutes tonight masking off some of the bumpers. I'm painting the majority of the upper boat dark blue (nearly black), but wanted the bumpers to be white. This is historically not a bad choice based on the photos and paintings I have seen. The only problem is, after I trimmed the tape, YELLOW looks pretty good. I can just imagine her black with yellow highlights now.

- 125 replies
-
- 1
-
-
- swift
- artesania latina
- (and 1 more)
-
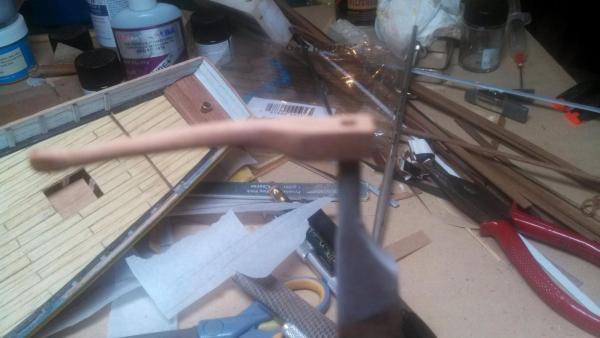
Big news! I actually found a photo of a pilot boat similar to the "Swift" that had a copper bottom. The photo is black and white, so you can't tell anything about the color debate, but - and this is important to me- the plates were not well installed. Even given the scale, I'm thinking that no matter how bad a job I do, it won't be much worse than the one in the photo. The photo is located in the book: Tidewater Triumph: The Development and Worldwide Success of the Chesapeake Bay Pilot Schooner. If interested you can view parts of it on Google Books. Anyhow, some days you don't get much done. The little piece of wood that looks like a splinter is actually lying behind the knightshead on the work surface.
-
Well, on with the learning. I decided early on to paint this boat and to give it a copper bottom. Although the kit says nothing about it, and pilot boats themselves were probably not given copper bottoms, I did find evidence that high end boats (in addition to war ships, of course) were given copper bottoms by their owners during the time period this boat was in use. If they operated in cold water this might well have been only a sign of status- I don't know. In any event, I wanted to practice several things on this small boat before trying a bigger one and copper and painting are two of them. To that end I shot the boat today with my little air brush. First with primer and then with a flat white overcoat basically along the water line. Since this wasn't marked, I made a wide swath. I also hit the bumpers- which I plan on leaving white, although the rest of the boat will be a dark sea blue. After it was dry, I sanded it lightly, wiped it down and then tried applying the copper tape. My copper tape was left over from a project some years ago, and it will not stick. I guess the glue has cured or dried out. So, Il be ordering more. I did mark the water line, and although this was easy to do, it emphasized to me just how shallow the draft of these little boats really was. I know they had to operate in waters near the pilot's homes, but it must have really taken courage to take these out on the open water. By the way, I hate painting wood- it shows every flaw. That is certainly true in this case. Since I am using flat paint, repairs should be easy. I will be doing quite a bit of filling and sanding to give me a distraction while I wait from more tape.
-
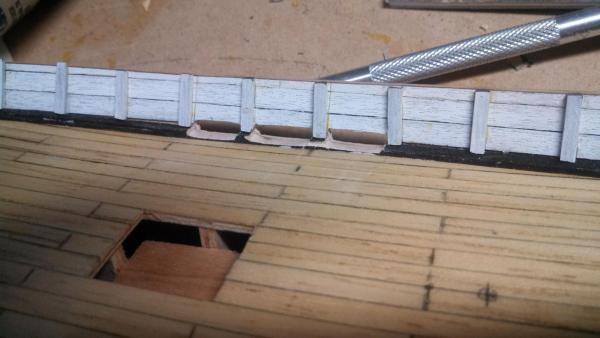
I started working on my scuppers today. I didn't like the way the plans indicate the scuppers were on top of the waterways- it looks like it would never drain. So, I cut into the waterways to make troughs for the water to drain out. From the outside, the scuppers (not square up as of yet) look good and are in a reasonable position. After doing as much work as I planned, I masked and then repainted the remaining waterway. The result is rather not worth the trouble. At least painted. I added the main "bumper" strakes (for lack of a better word at present) and everything appears to fit well together. I'm more or less pleased, but really don't think it was worth the effort. EDIT: LONG AFTER THIS WAS DONE: I visited Mystic Sea Port and looked at the Morgan, which was getting ready to be launched after a re-build. I was surprised to see that her spar deck contained waterways that were above the level of the scuppers- just like this kit showed. To prevent water from standing a series of 1 inch or so drains were drilled in the waterway that drain to the outside. In essence, heavy water (like waves) go through the large scuppers, but minor water and pools go through the small holes. SO, I don't know that I did this right at all. I am still happy with what I did, but can no longer say that the water would not drain off the deck as shown- unless I wanted some VERY Tiny water drains.
- 125 replies
-
- 1
-
-
- swift
- artesania latina
- (and 1 more)
-
While saying "I agree with everyone else" seems to contribute very little, well... I agree with everyone else. I would add however a couple of small points. First, I don't think I can overemphasize the need for the build to move quickly. As a beginner I really had no concept of what I was creating. I needed to see it develop. If the ship took a year to complete, I would have never had the vision to finish it. Like Probablynot, my first boat was a POB and I would recommend them to a beginner, but like him I have a fair amount of wood working experience. I can cut a straighter line with my tablesaw than I can with a razor and a straight edge. (Unfortunately, I grew up where there was no water and except for fiberglass canoes, have never worked on or even seen any real boat/ship worked on.) Second, access to a site like this plus the Internet plus books is, in my mind essential. A good friend of mine confessed that he tried boats several years ago and turned two kits into kindling- because he never got past the planking. I can't convince him to try again- he's that discouraged. So a simple boat that you can find a build log on- that would, to me, be essential. Finally, I think you have to find a simple boat that is interesting to you. I build the Mare Nostrum and am working on the Swift. The MS is a pretty piece of work, she has interesting lines and nice details. Even though I understand that she is a simple boat, I proudly display her in my home. On the Swift I am doing a lot of experimenting and technique refining. Even so, I plan on presenting her to my brother as a wedding gift. After these two builds I plan a real ship- and I have two, so I'm thinking of setting up two work benches so I can switch from one to the other!
-
A question on working mizzen lateen sails
PopJack replied to Stevinne's topic in Masting, rigging and sails
I did a bit of research on this interesting question. As I have pointed out, I was raised in West Texas, so an expert on boats I am not. That said, what I found was that Lateen sails were used without moving from side to side if they were large. When tacking, the turn where the sail rubbed the mast was called a "bad tack." If you Google "bad tack" and then click the images tab, you will see a couple of examples of this type of situation-- along with photos of some stupid sailors. On larger boats, this didn't affect their handling much, but on smaller boats, the distortion on the sail could cause quite a loss of air flow. For that reason, on the smaller boats, the yard was hinged or tied to that the sail could be gathered and then the tall end of the yard stuck straight up and then swiveled to the other side of the mast. Although I have no defensible basis for my opinion, I developed a belief that for a short tack, the sailor would put up with the sail rubbing and just live with it. If you were in a situation where the wind direction was going to be bad for an extended period of time then you would swap it over. The advantages of the sail type (ease of set up, ability to rapidly reduce clearance under bridges, etc) made up for this problem. Anyway, that was what I gathered from my research. -
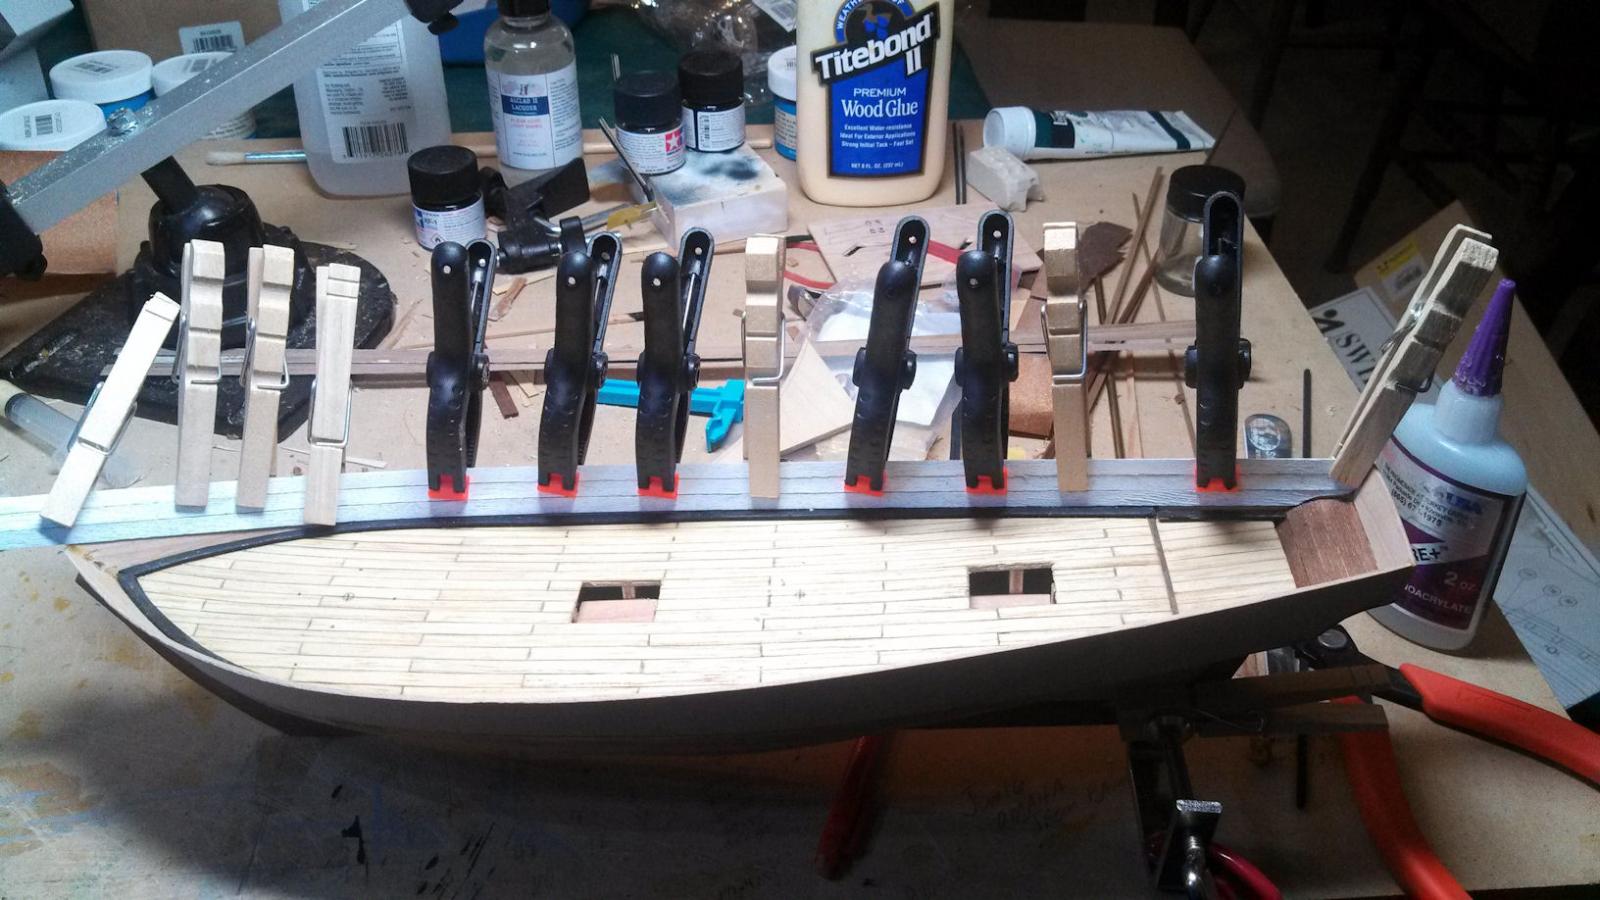
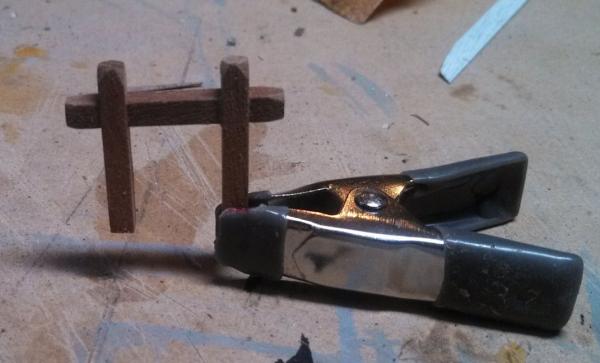
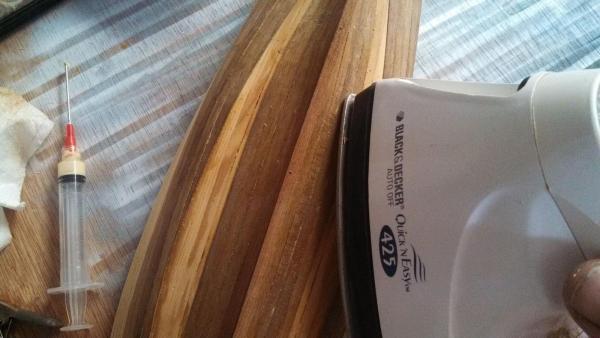
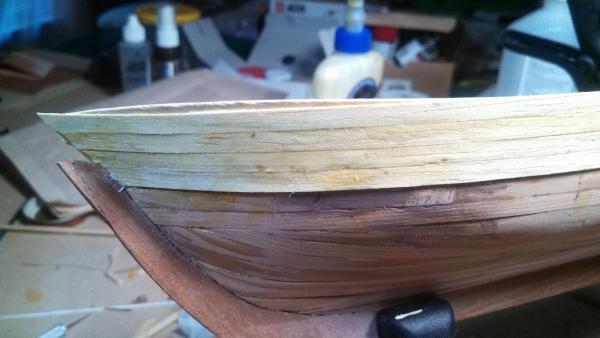
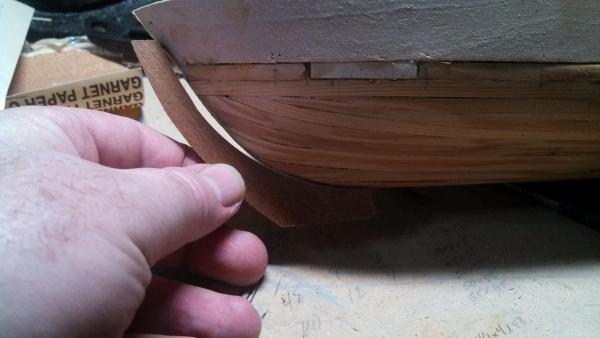
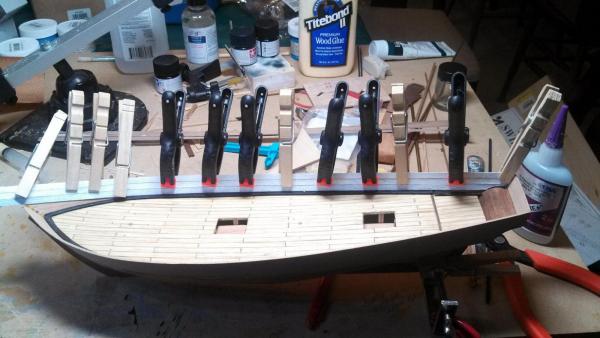
My wonderful clamping technique doesn't work when you can't reach with the clamps. SO, I decided to use an iron to steam and heat the planks. The iron worked well and I finished the second planking. Not great, but I am going to paint.

- 125 replies
-
- 1
-
-
- swift
- artesania latina
- (and 1 more)
-
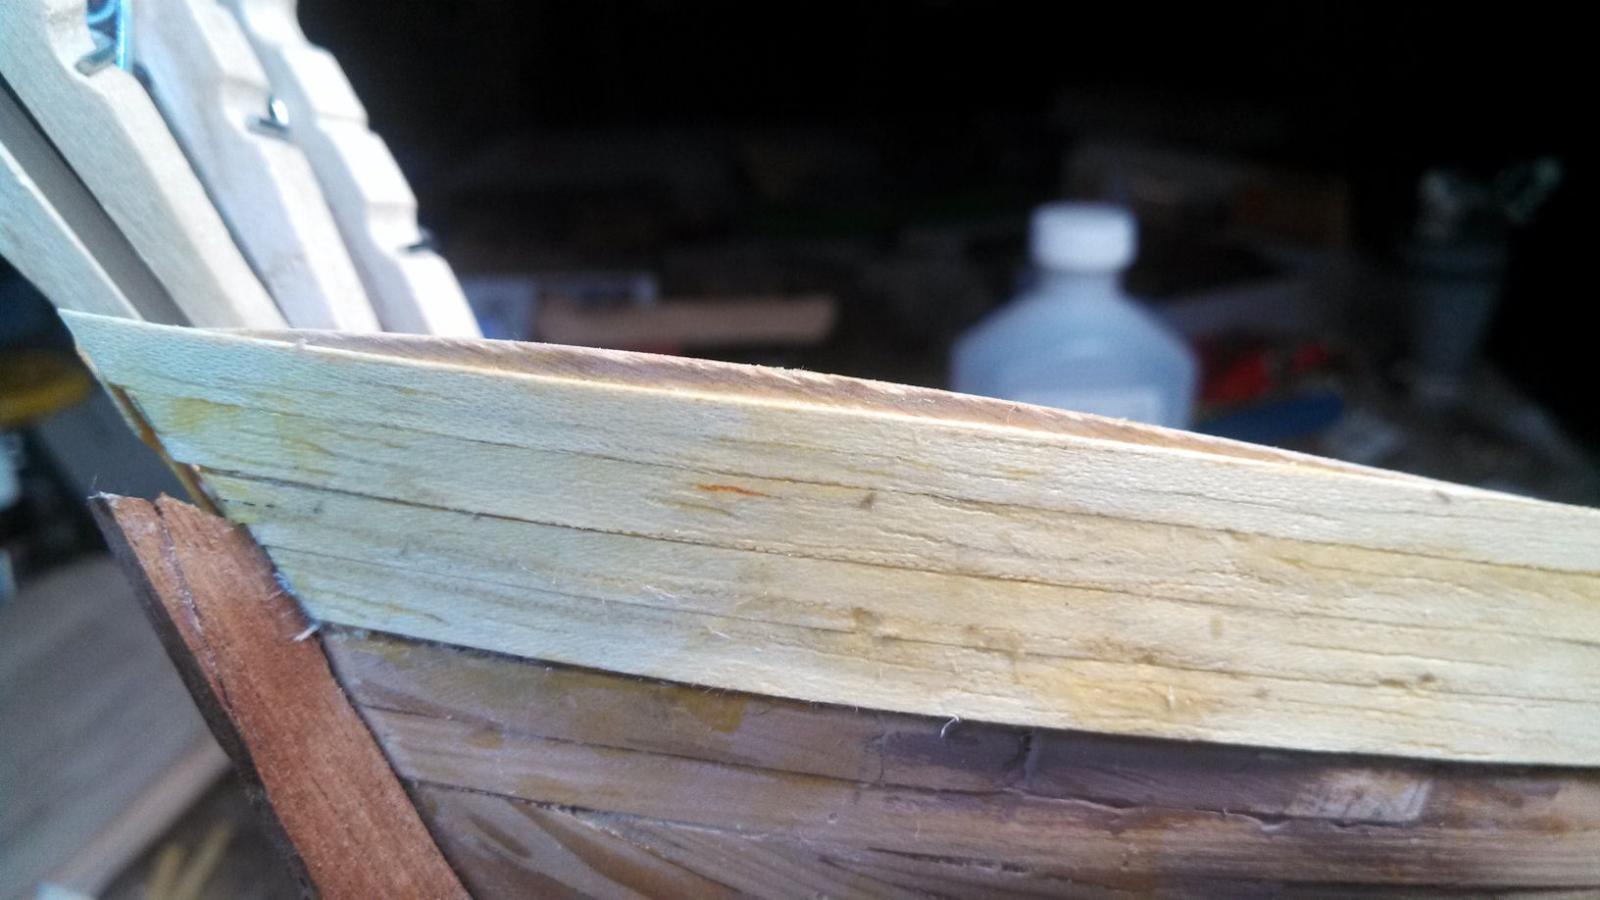
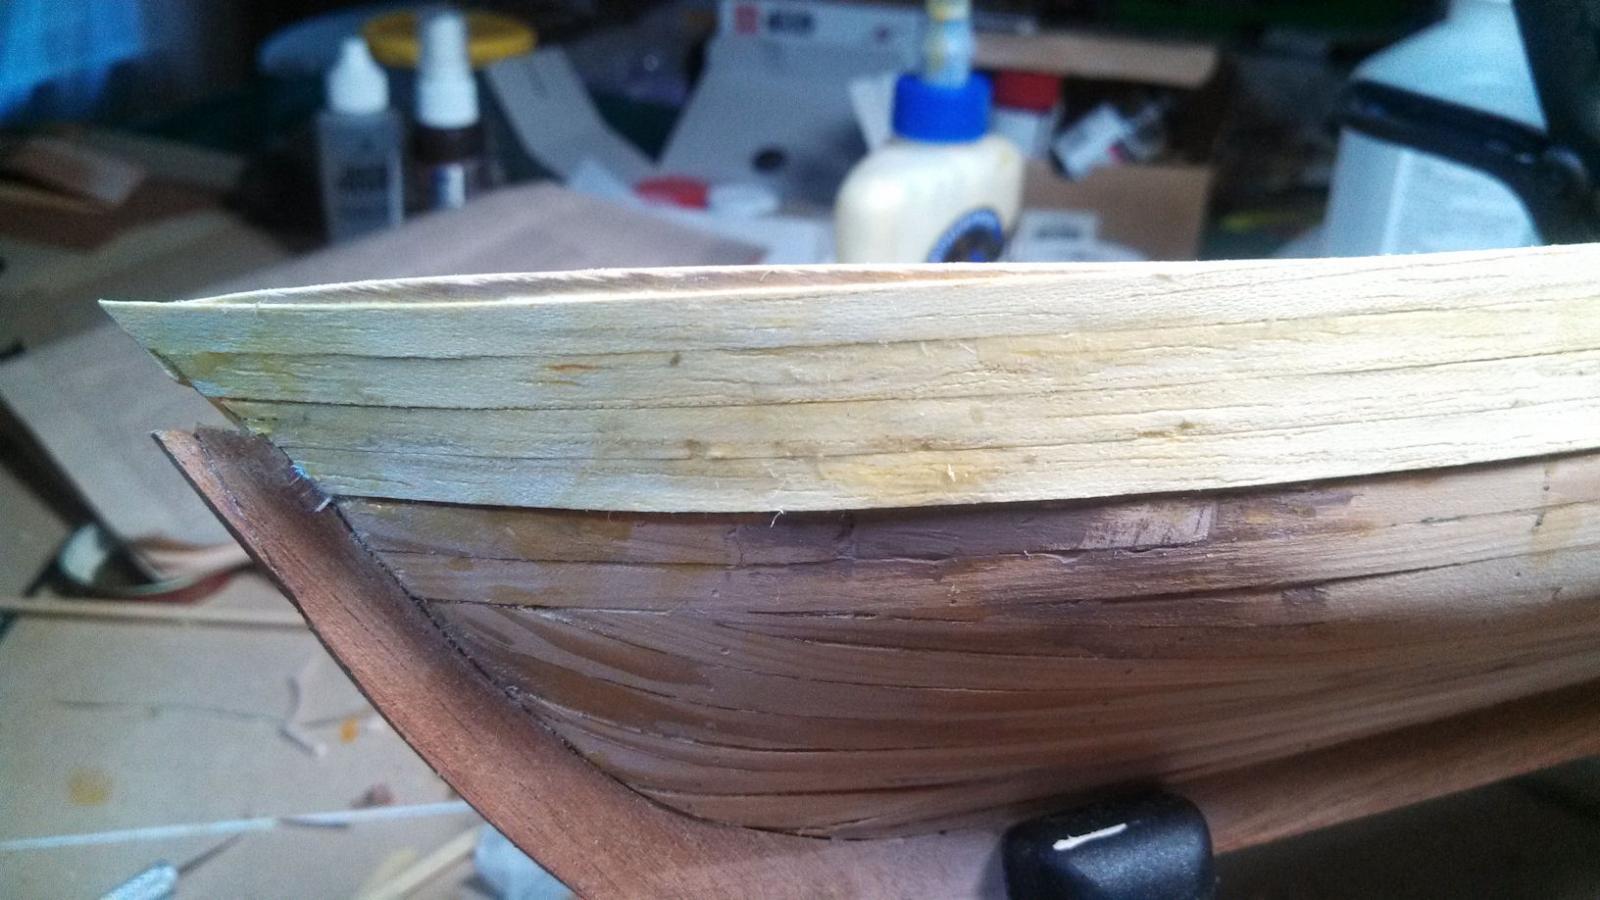
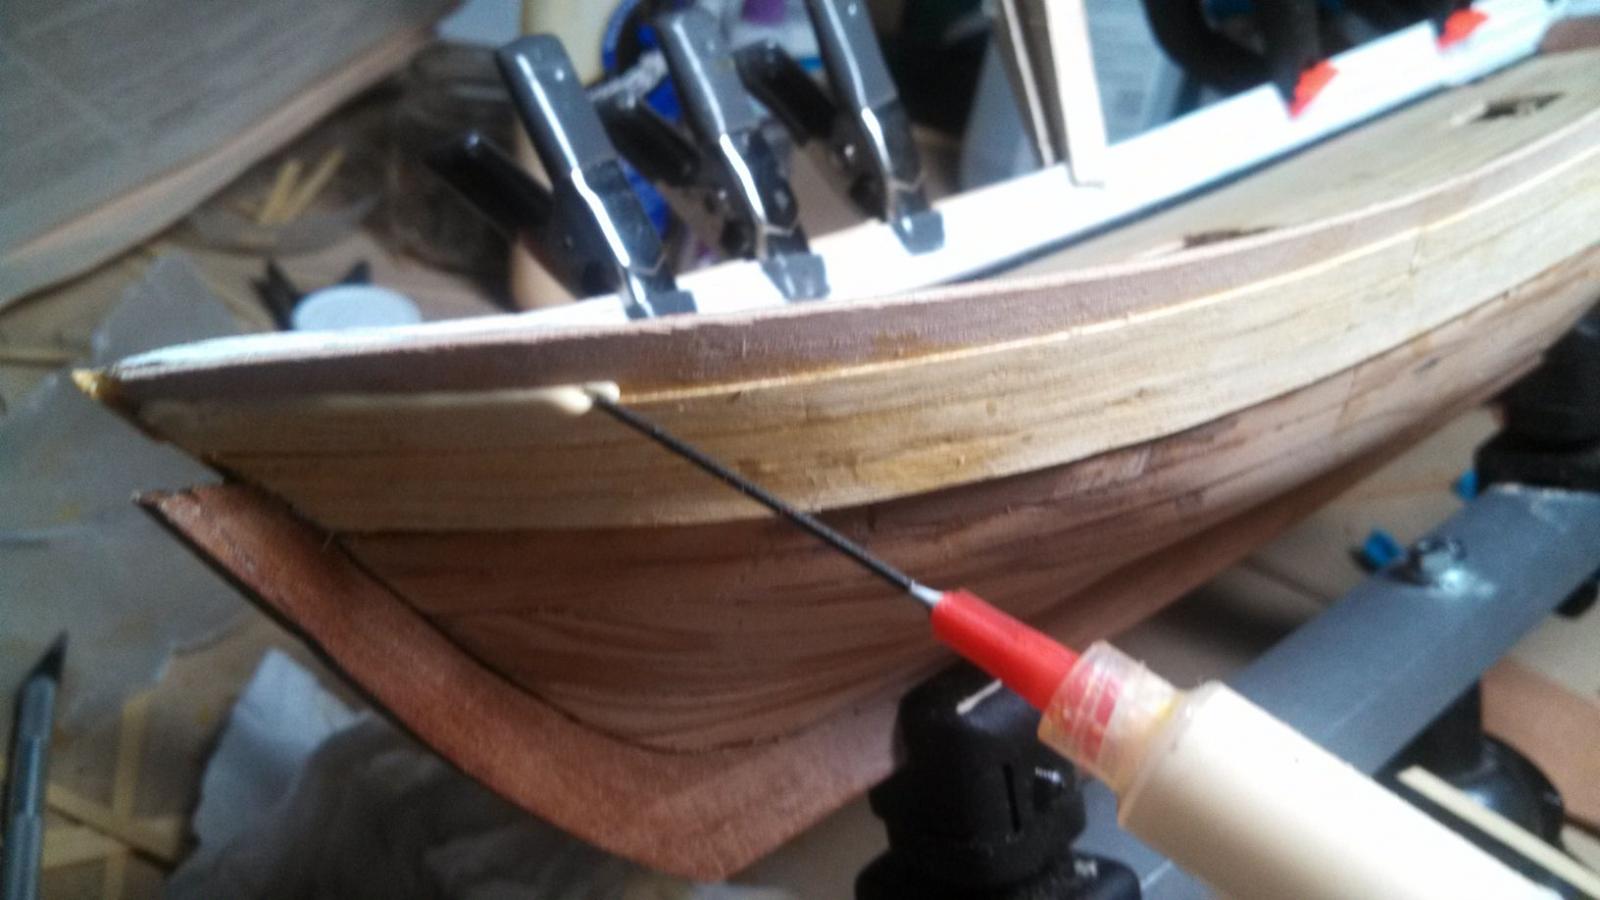
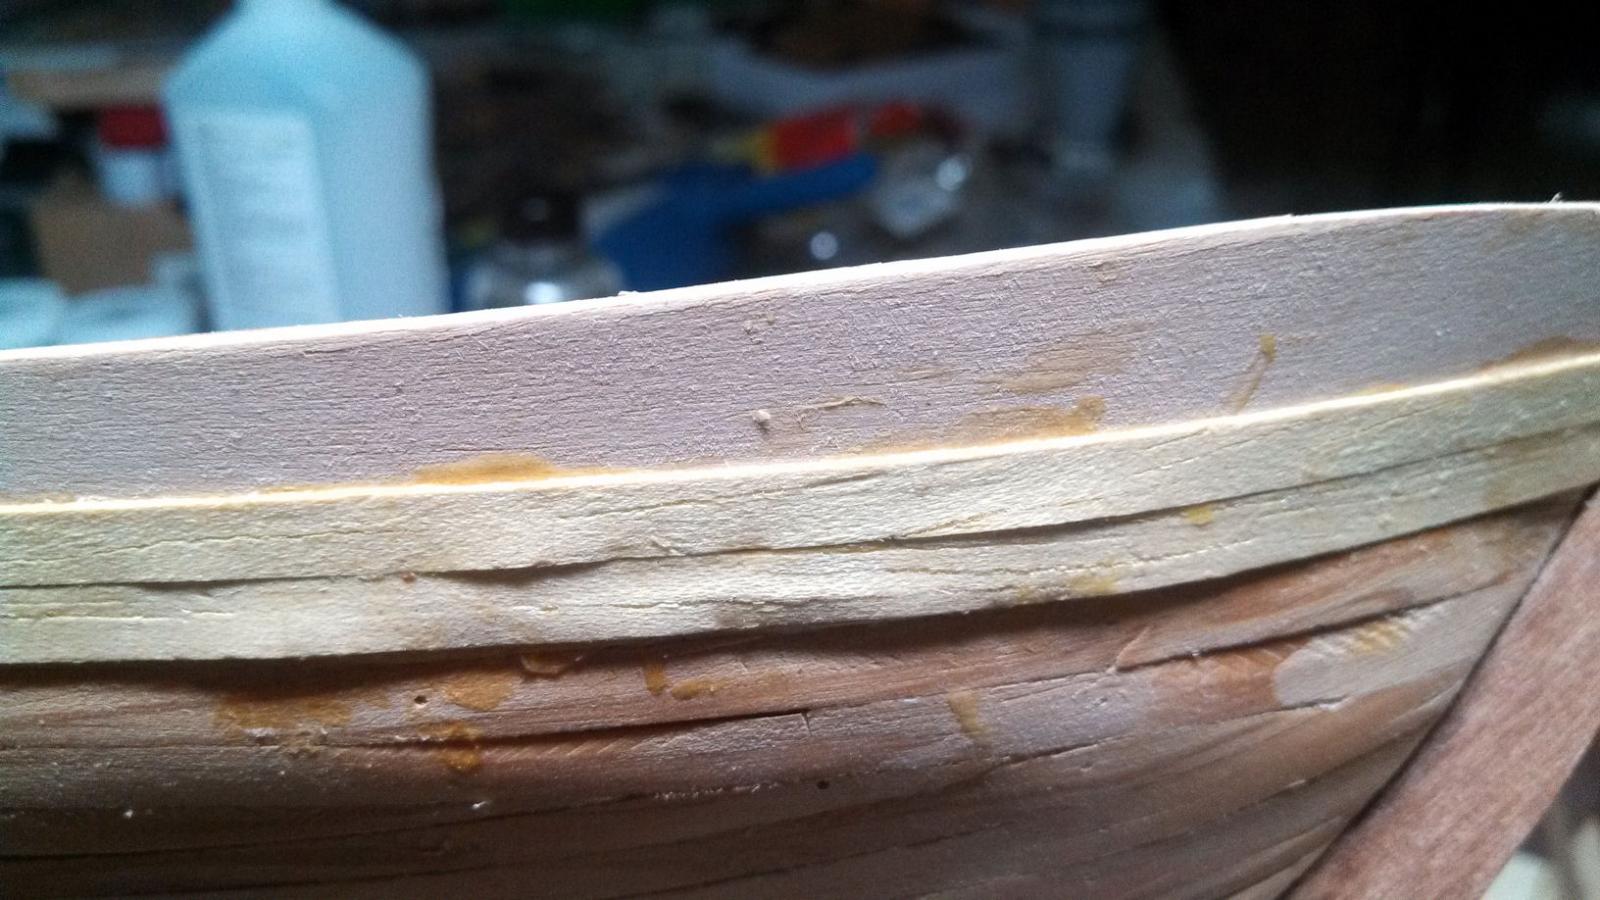
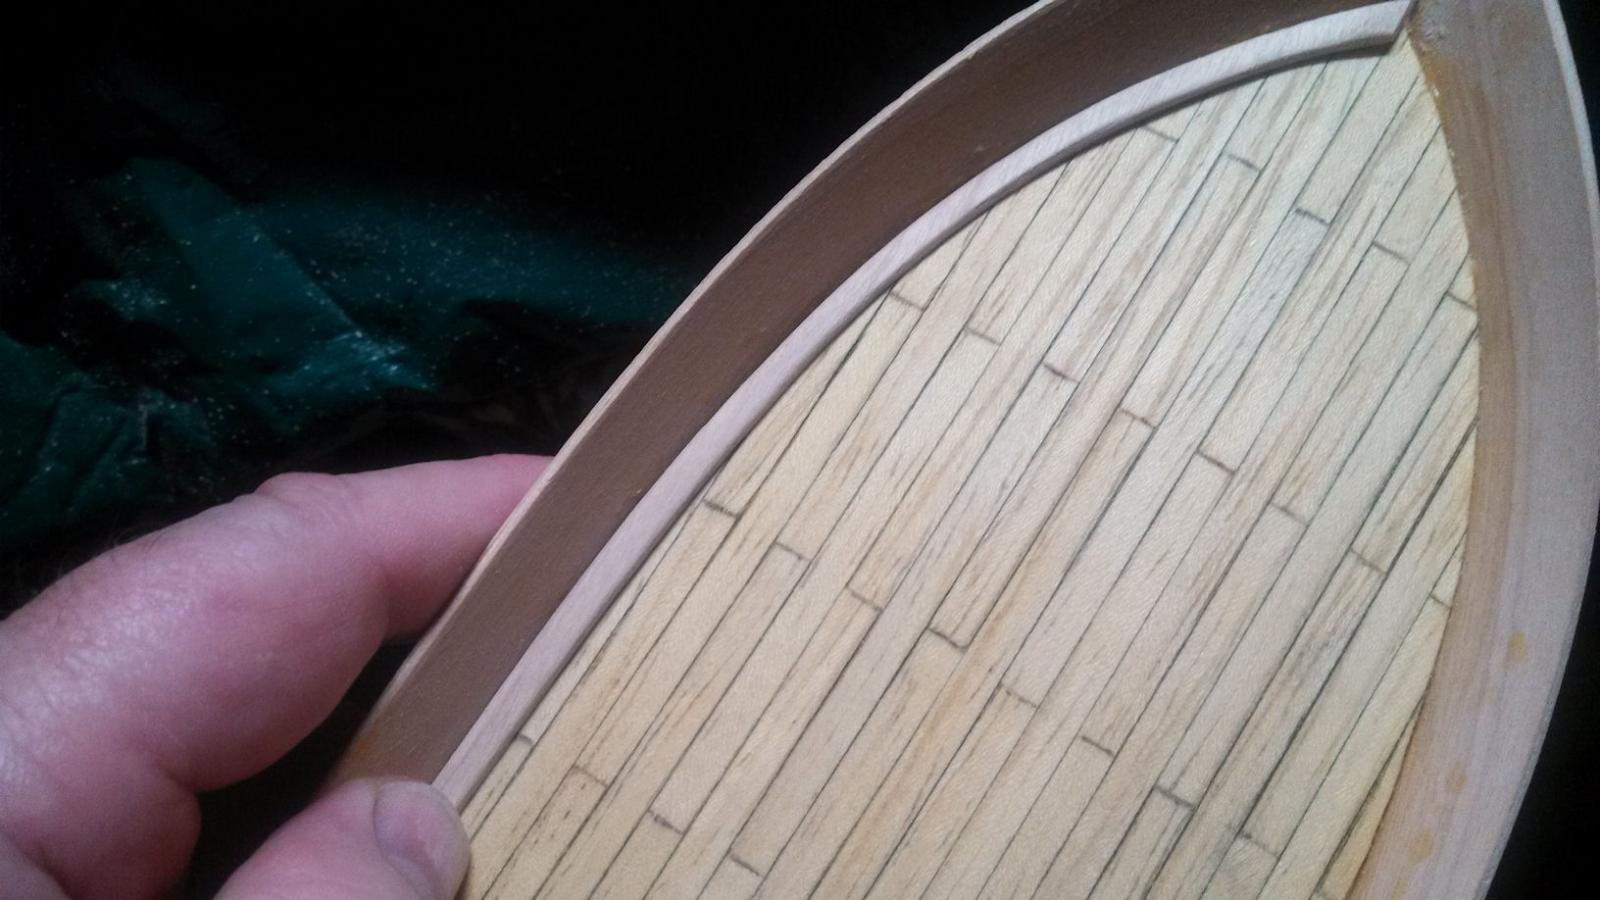
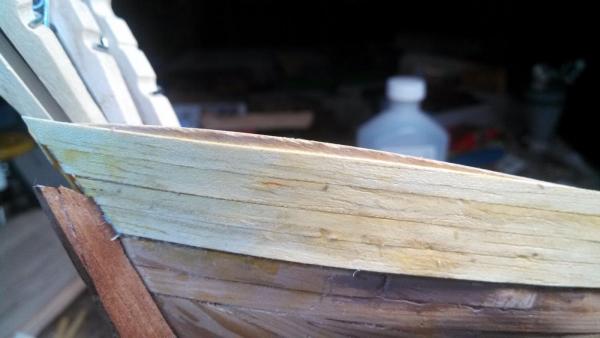
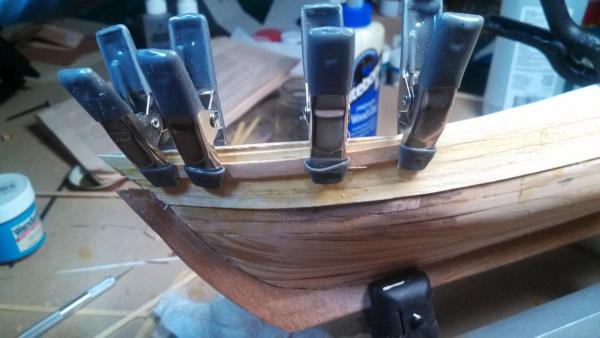
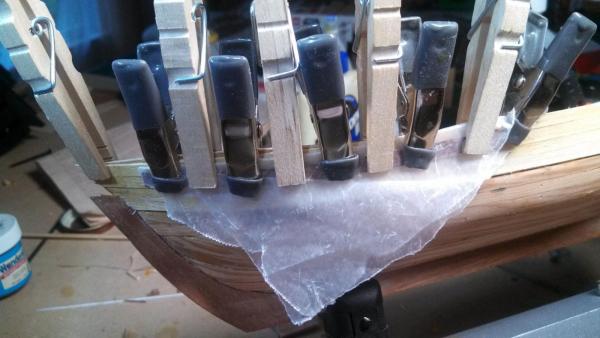
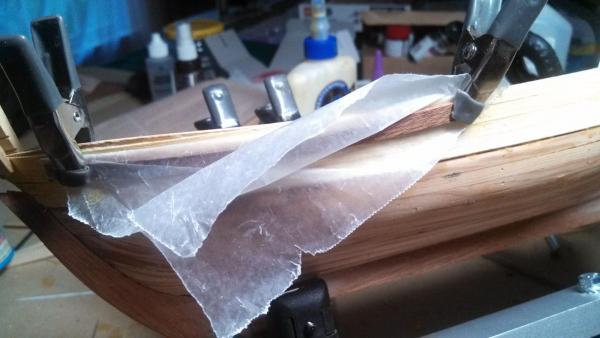
I want to discuss what I did on the planks. I am only a beginner and it may be all wrong. I understand that such a small kit is of little interest to experienced builders, but if anyone ever reads this who knows the negative consequences of my actions, I hope they will let me know. First, a lot of the ripples that were evident in the above photographs were apparently due to the moisture in the wood. I don't know if it was from the glue or the damp rag that I used to clean up the glue. After a couple of days, the boards were nearly flat by themselves. To complete the process, I used a fine blade to open up the cavity between the board and the hull and squirted some glue in with a syringe and clamped. For the remaining planks, I developed a technique that appears to work. Note that I want these particular planks to follow the shape of the hull. I plan on making the planks visible through the finish- and I want the flowing lines. First, I applied glue heavily, more heavily that normal, concentrating on the edge of the previous board. Then I clamped one end of the plank and rough positioned the board, working out where it would want to buckle on its own. Once I understood what the board wanted to do, I clamped the other end. I took a scrap of stiff wood about 3cm X 1.5 cm and wrapped it in wax paper. The scrap was as stiff as I felt I could use that wouldn't acturally break when forced into the curve. I clamped it carefully to make sure that it covered the seam. Once I knew I had it positioned correctly, I put all the clamps I could fit on it. I let this set for about ten minutes- enough time for the glue to grab, but not until everything was dry. Then I removed it and found that there were a couple of small ripples where the board didn't extend far enough. I clamped these in a similar manner, but because I had cleaned up the glue thoroughly, I did not bother with the wax paper. Note that the wood was quite damp from all the wiping. After about five minutes I removed these clamps and it looks Okay. Note this is with NO sanding at all. I ran over it with some rough paper and as you can see, it should clean up quite well and the boat progresses.

- 125 replies
-
- 1
-
-
- swift
- artesania latina
- (and 1 more)
-
I feel better. I posted a plea for help a few days ago and then left town on business. I could read emails (as in notifications of replies) but received none. I finally went back and... there was no plea. I suppose I did all kind of editing and photo insertion and forgot to press the post button as well.
- 377 replies
-
- 1
-
-
- america
- billing boats
- (and 1 more)
-
I need some advice on how to avoid "puckering" or "buckling" of the finish planks. As you can tell from the photos above, I clamped the fool out of the final wood, but still got puckers. I suspect I can use a hypdermic to inject glue into each buckle and clamp them individually, but I must be doing something wrong for them to show up in the first place. Advise would really be appreciated. BTW, the need for filling in the hull is obvious- I will be doing that before I do any planking lower on.
-
I want to just chime in on a couple of things. I'm building the older Swift- and have finished another similar boat. I know a lot less than most people on the site- so take it with a grain of salt. The faring of the bulkheads. It is really, really important. It will make planking the hull produce a good result. If you don't do a good job here, you will see it later- and its hard to fix. This is experience talking! When its time to plank (and you're close), I read someone who said, "treat each plank like its an individual project." This mindset is really a good one. Don't think of it as planking the hull- that will make you want to rush. Try not to force the boards around, let them follow their own path and pre-bend them so that you aren't stuck trying to hold them and force them in position while getting CA glue all over you. Also I've tried a variety of things in bending wood. The easiest for this beginner was soaking and using a hair curling iron. Finally, like others, I would not recommend plastic wood- it drys too hard. (Not that it doesn't have uses!) There are some excellent water based fillers on the market- you can get in small amounts from either Rockler or Woodcraft- and probably other places as well. The stuff I use is called "Wunderfil" from Rockler. Once you have this stuff shaped and sanded, you will need to coat it with either a sanding sealer or primer or similar before adding glue. Have fun.
-
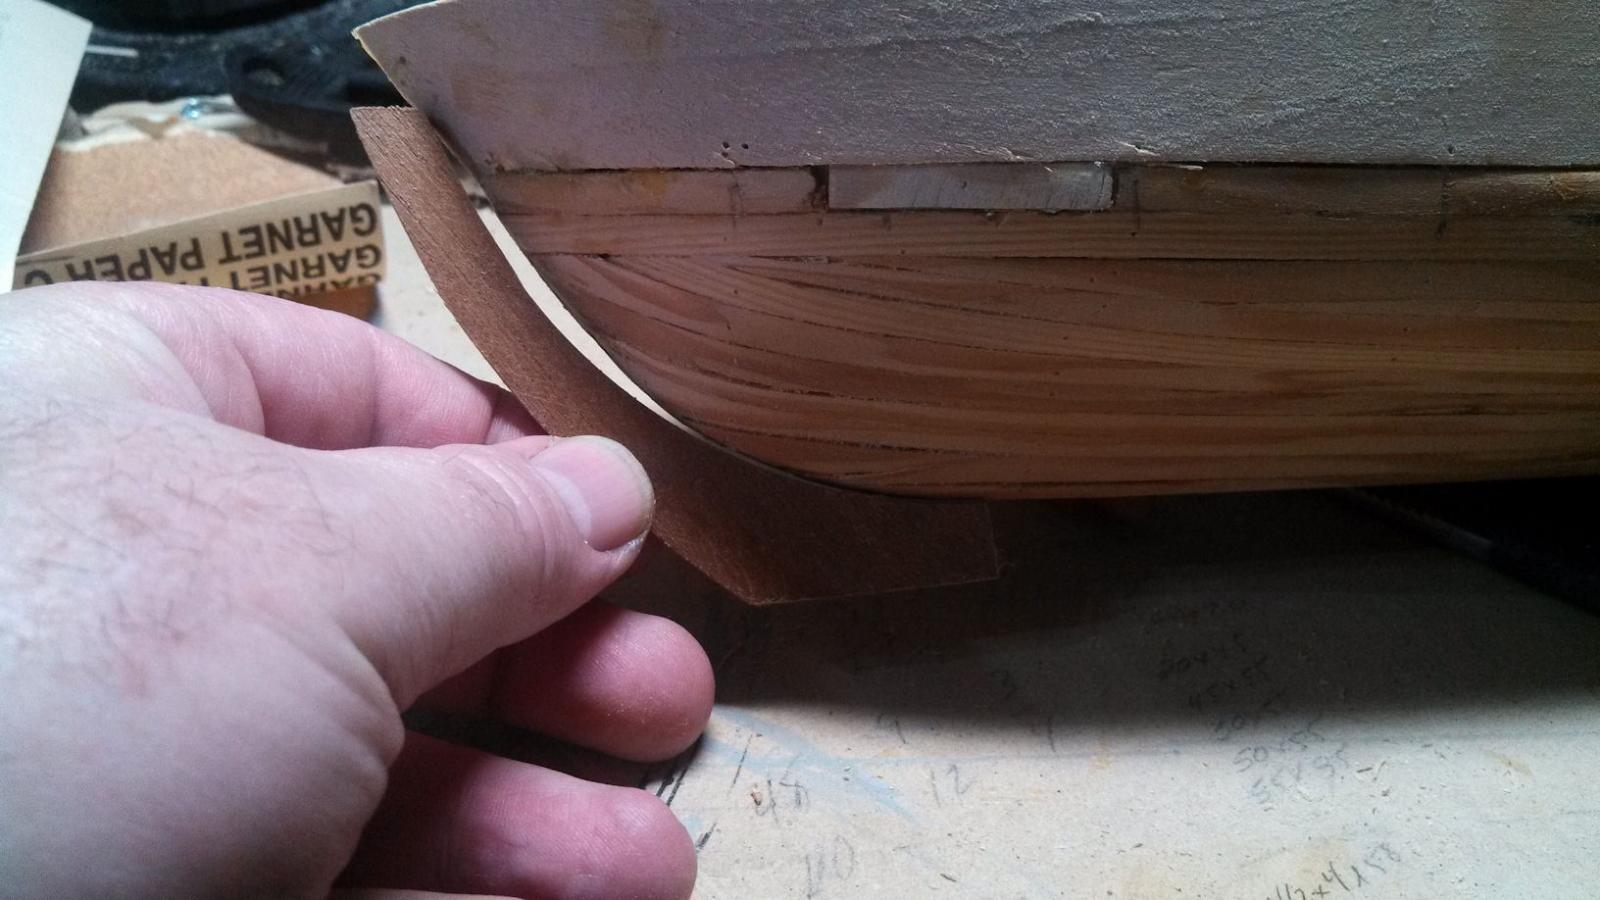
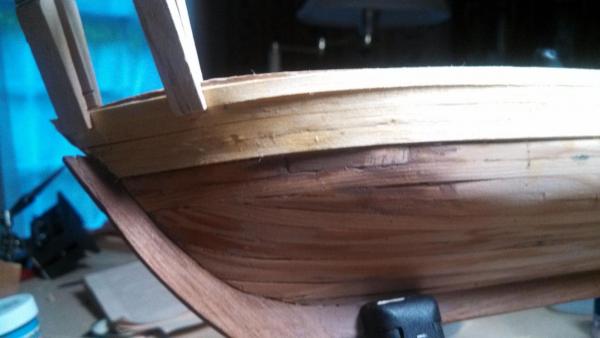
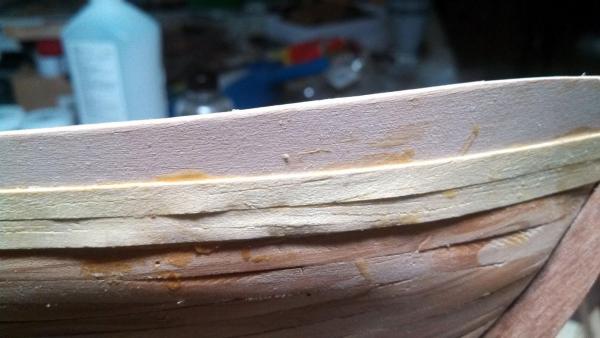
An update as to where I am. First, the waterways. The instructions indicate that what I call the waterways (that is the board on top of the deck at the intersection of the bullwark and the deck) should be installed before the bullwarks. While this would give more glue surface, I was afraid I wouldn't get a nice closed fit. So I first installed the bullwarks, then shaped the waterways to fit up against them and then test fit. I thought they came out OK, so I painted them and installed. Next, the plans do not seem to indicate that the inside of the bullwark gets planked. I didn't like this, so I painted some extra wood and installed. I wanted the fact that this was planked wood to show. Since it will be hard to see, I left the final coat of paint rather light and didn't do a lot of sanding. I think that the Chemist did a better job than I did on this, Post 349 shows his excellent work. In any event, I did not want to try and force the wood to the full shape, so I allowed it to follow its natural bend. I then added pieces as fillers. Finnally, I guess that I was right to be worried, as the provided bow didn't fit well at all. I ended up making a new one and then reshaping. Note the patch where I had t crisis that resulted from a broken plank. The patch should be fine once I put a bit of putty and do some sanding. I have a couple of tricks up my sleeves for the next day or so. Remember, for me this boat has two purposes: 1) For me to learn. 2) As a gift for a non-modeler Next I'll finish the inside the bullwark and then add the vertical supports.

-
A while back a gentleman advised me regarding building these models. He said, "when it gets tense, you just have to get up and get away for a while- or it won't stay fun." While my history isn't in ship modeling (on my second small build to learn how its done), After reading several of your excellent builds, I can't help but think that if I were to take over another section of the house so that I could start another build or two, instead of walking away I could just decide what I felt like doing that day. Additionally, when the paint says "wait so and so hours" I might actually learn to do that. Love watching your quality work!
-
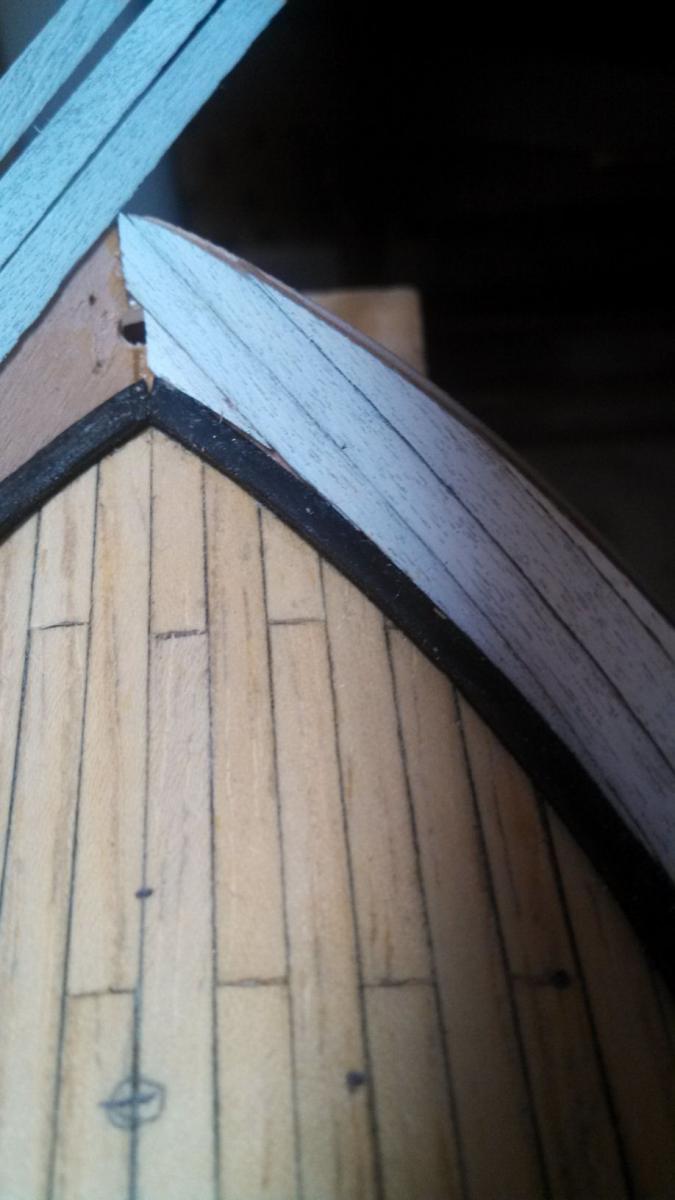
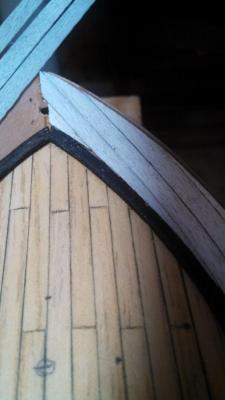
Okay, the stitch and glue for the bow worked great. As a review, I couldn't get the bow to close nicely, so I drilled hole and then threaded sewing thread through them. I tightened the thread and tied it and then applied glue. After a couple of days, I sanded off the thread. That was today. It came off fine- no problems. I also have the cabins rebuilt properly. They look pretty good. As noted, I did not install what I will call the waterways before I put on the bulwarks. I did that because I wasn't sure I could get a good fit between the bulwark and the deck. This also turned out to be a pretty good idea for me. The waterways are primed and will be painted and installed tomorrow (with any luck).
-
Nice looking boat. I have never really worked bass wood at all- just carved it a bit. I'll see about getting a few sheets and see how it works. Yes, I plan on adding the stiffiners (if I know what you are talking about). Being Mother's Day, I'm having a bit of trouble getting to work on the little boat. Oh well (shrug).