bartley
-
Posts
424 -
Joined
-
Last visited
Content Type
Profiles
Forums
Gallery
Events
Everything posted by bartley
-
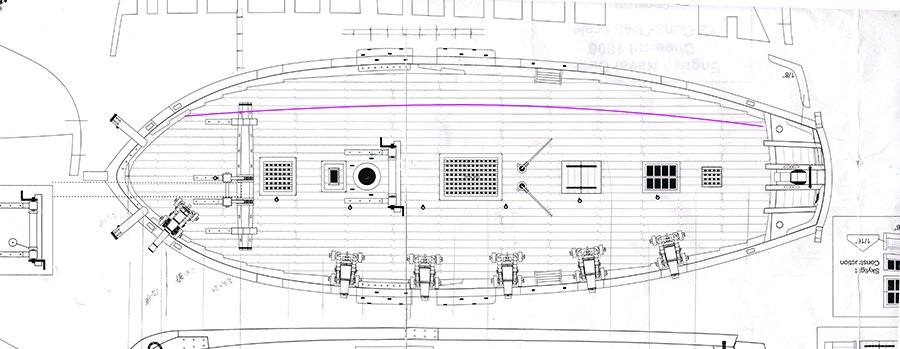
Chuck, On the side view of the plans there is something marked on the wale between the firs two deadeyes and also between the second two. Is this am eye bolt?? Of course it is not shown on the plan view because it is under the chain plate so I can't work it out. John
- 160 replies
-
- 1
-

-
- cheerful
- Syren Ship Model Company
- (and 1 more)
-
Glenn, I placed an order with Cornwall Model Boats recently and paid the second level of shipping costs. This gave me a tracking number. CMB said they shipped it on 7 th May but the royal mail did not pick it up until 13th. It has been at HWDC ( Heathrow Worldwide Distribution Centre) since 14th May. So things are certainly moving slowly so maybe there is hope for your parcel still. John
- 778 replies
-
- 2
-
-
- cheerful
- Syren Ship Model Company
- (and 1 more)
-
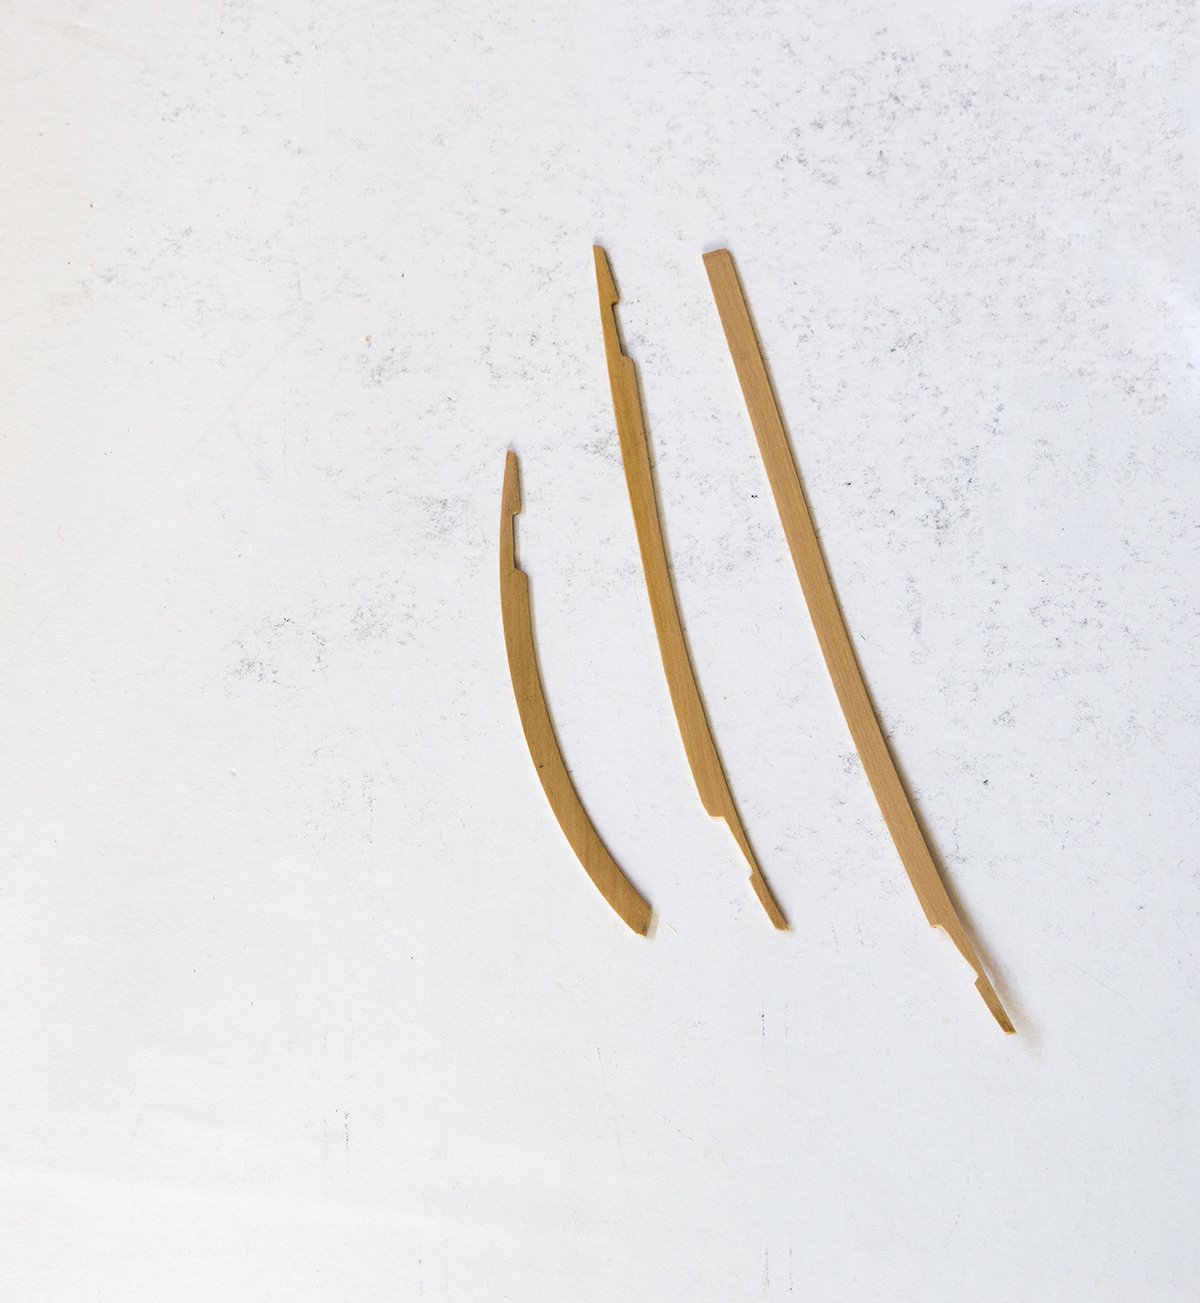
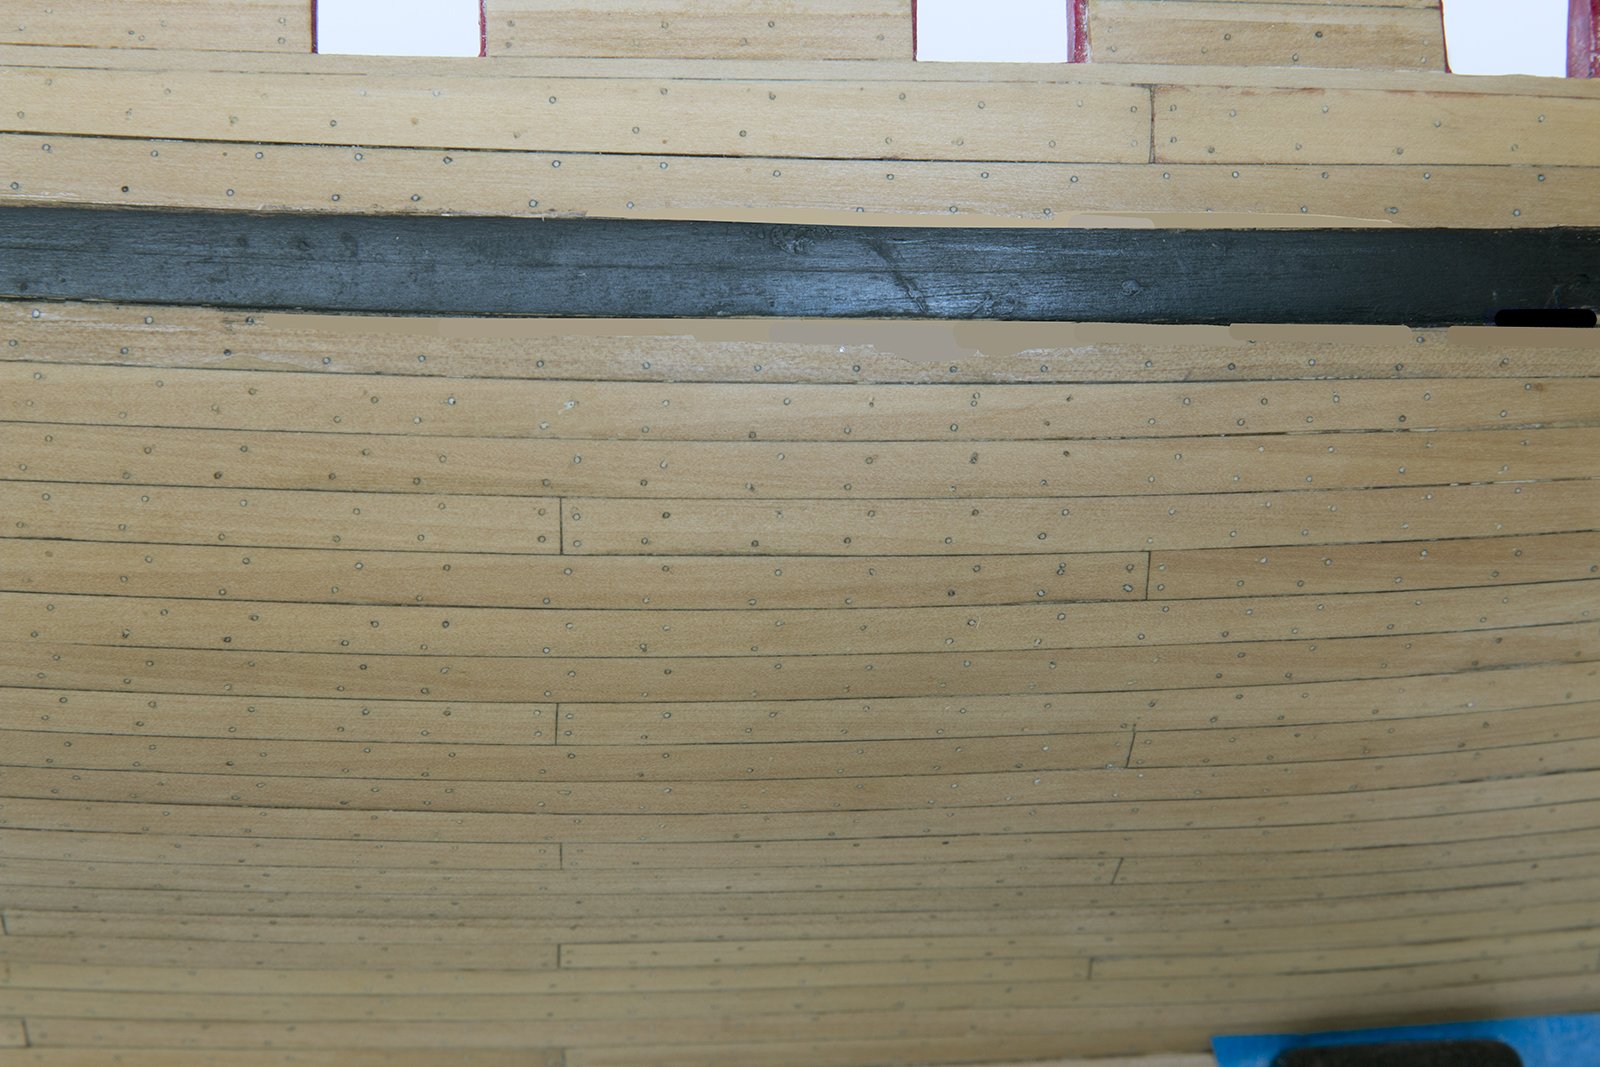
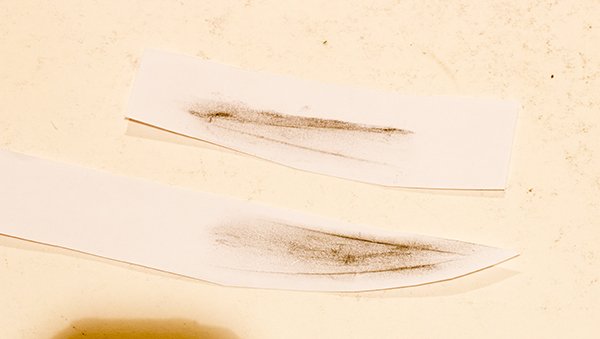
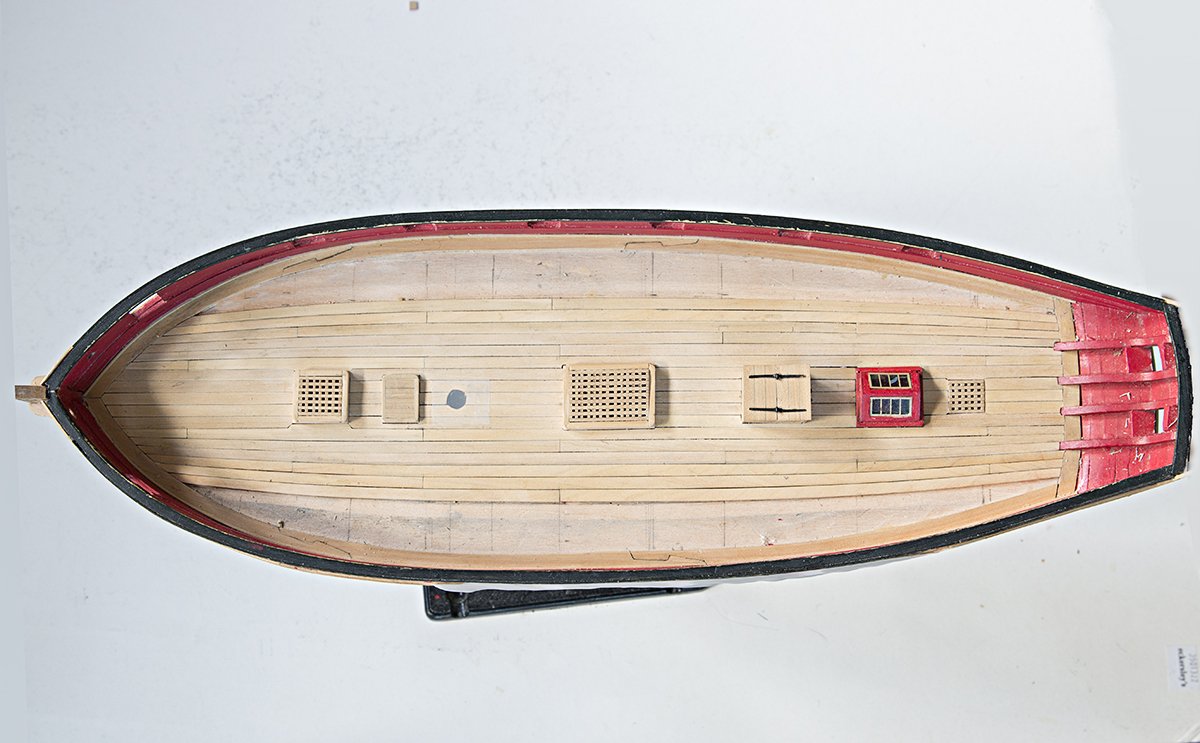
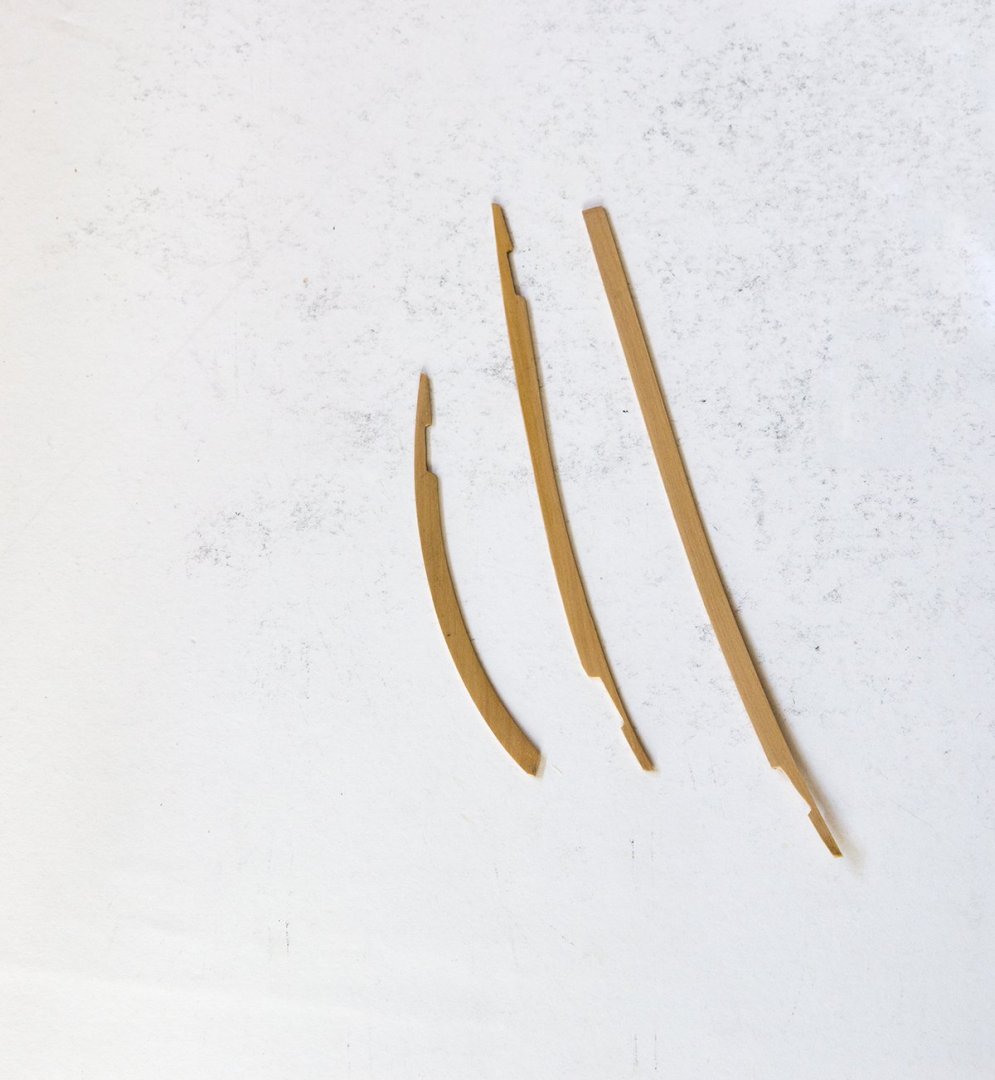
Post 25 : Deck Planking. The deck planking is now complete. The scaphs were a bit of a challenging but interesting to do. I first made paper patterns by the age old technique of rubbing over with graphite like this: Here is the completed decking: Chuck: Your deck looks very flat. Did you scrape it after it was laid?

- 160 replies
-
- 12
-
-
- cheerful
- Syren Ship Model Company
- (and 1 more)
-
OK bruce d, I understand now. I thought you were worried about safety but you are absolutely correct about the effect of silicone on surfaces to be painted or varnished. That is one of its purposees of course - to repel things, particularly moisture. So I am like you I avoid it for the reasons you state not because it is hazardous. John
-
bruce d wrote: "Silicon is banned in my work area, old bad experience. I would be interested to know if it is in the product." Bruce we need to distinguish here between- silicon, silica and silicone. Silicon is a chemical element which we don't see much commercially although it is used in the production of transistors. Silica is another matter. This a compound of silicon and oxygen. It is a mineral and is the main component of sand but it can be produced as a fine powder and is also present in bricks tiles etc, It is certainly dangerous as is any fine powder. Silicone is a polymer made from a substance called siloxane which is related to silica but is a liquid not a powder. Silicone should not contain any silica and no free silicon. It is inert and stable and should be safe in this application. It has of course been used in breast implants and in this application there is certainly a problem. Silica and silicones are both based on the element silicon but not in its free form.
-
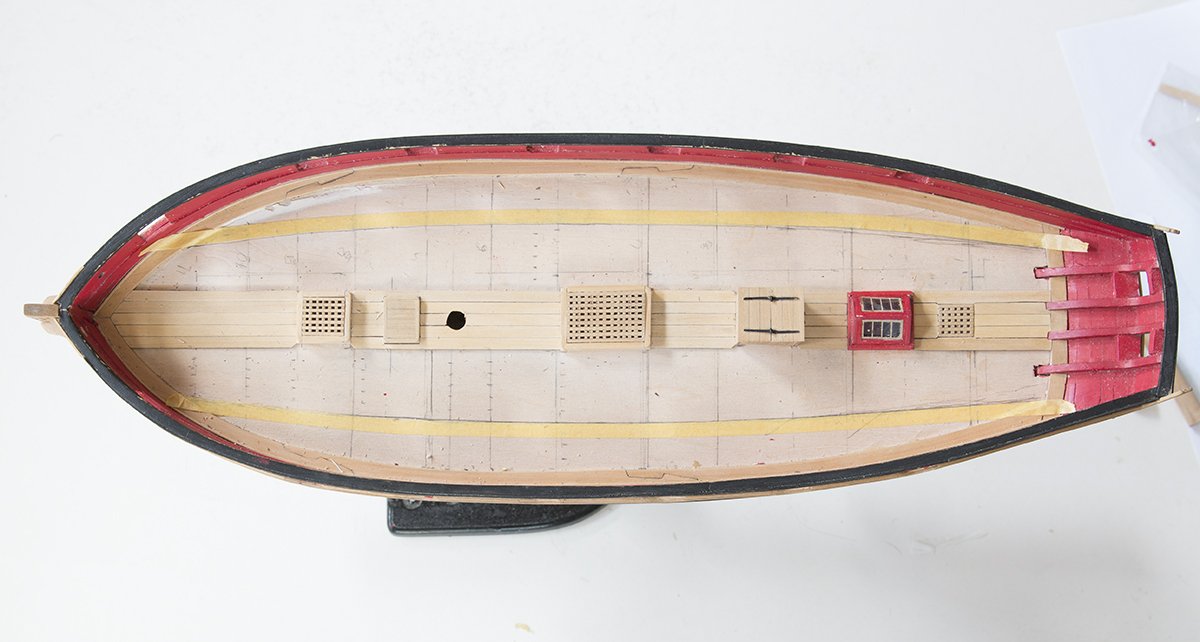
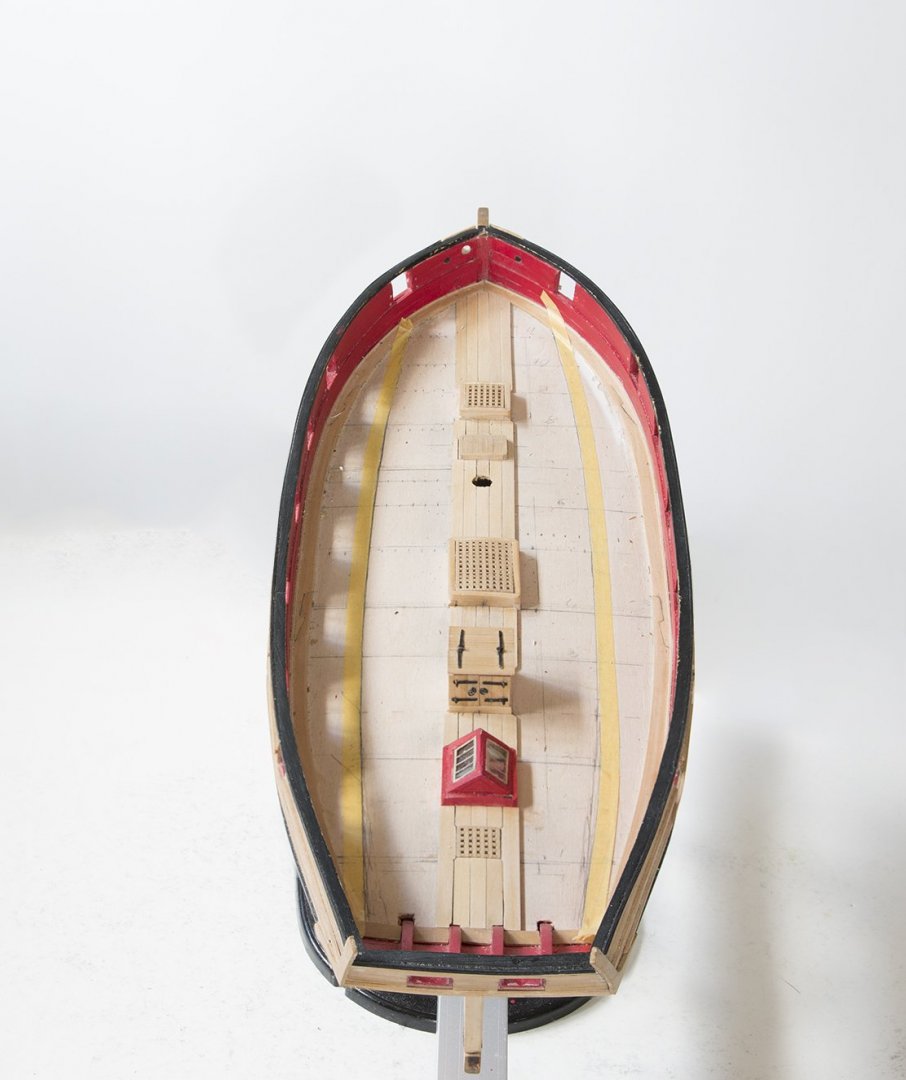
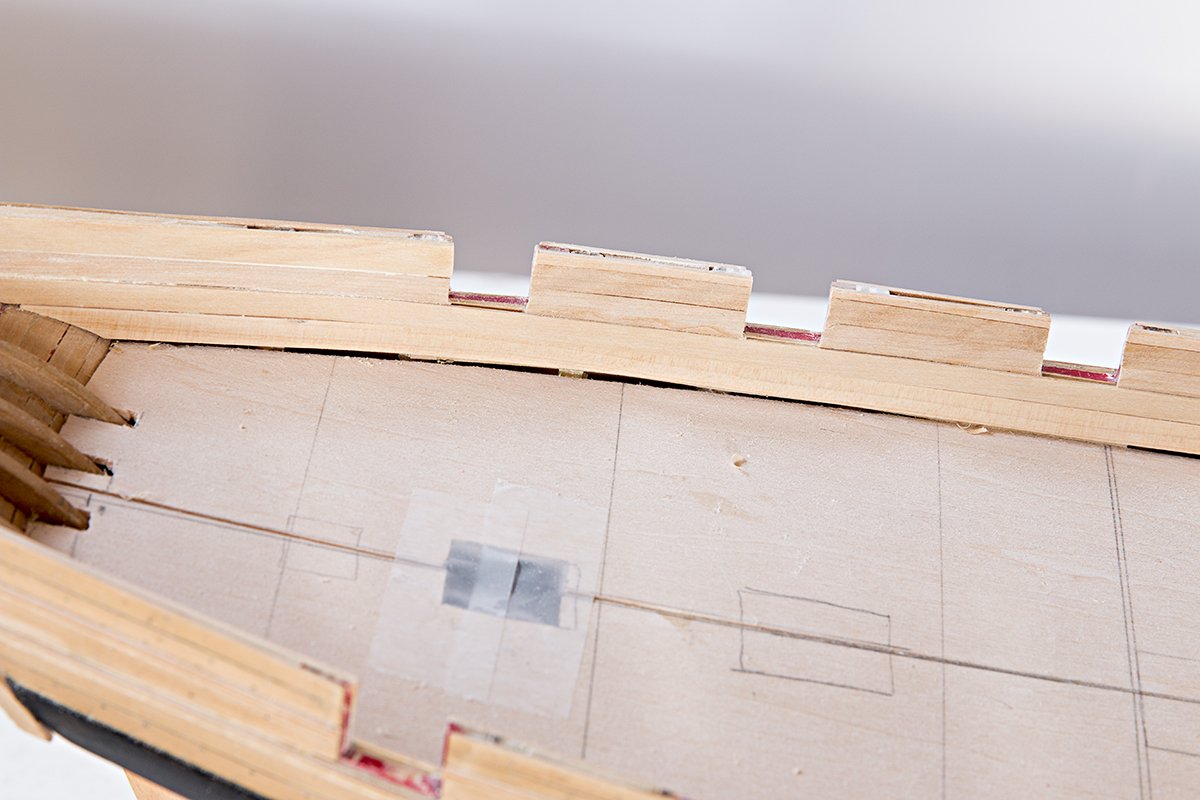
Post 24: First Belt of deck Planking The first six planks either side of the central five are now laid. Reasonably straight forward once the once the deck is lined out properly. Now comes the more difficult part of cutting the hooked scarphs while at the same time maintaining the correct taper. It will be a challenge. But that is the fun part of the hobby, John
- 160 replies
-
- 13
-
-
- cheerful
- Syren Ship Model Company
- (and 1 more)
-
OK Glenn, First of al I have to say that mine are not as good as some others on this site. Probably everybody is going to find their own way to do this. First, I suggest you practice on some scrap. I didn't do this but I should have as I started to run out of timber! Chuck outlines the pattern in his log so I first drew up what looked like a symmetrical scarph on card and then scribed that on the timber. Then I cut outside the lines with an Exacto blade and then filed up to the line with a needle file. It is important that each of the long sides is really flat. If it is even slightly curved you will never match that curve when you cut. the matching scarph. So for the matching one I put the first plank (with its scarph cut) on top of the next plank and scribed its pattern on that plank. Then cut the next scarph in the same way. As I say this is only one way. You have to really find a way which works for you. I think the main thing is to use the same method for each scaph otherwise they are unlikely to match. I hope this helps. Incidentally, years ago a watched a guy who built wooden fishing trawlers do this. He left a gap in the center. Then he drove wedges into that gap to tighten the scarph. No glue!! John
- 160 replies
-
- 6
-
-
- cheerful
- Syren Ship Model Company
- (and 1 more)
-
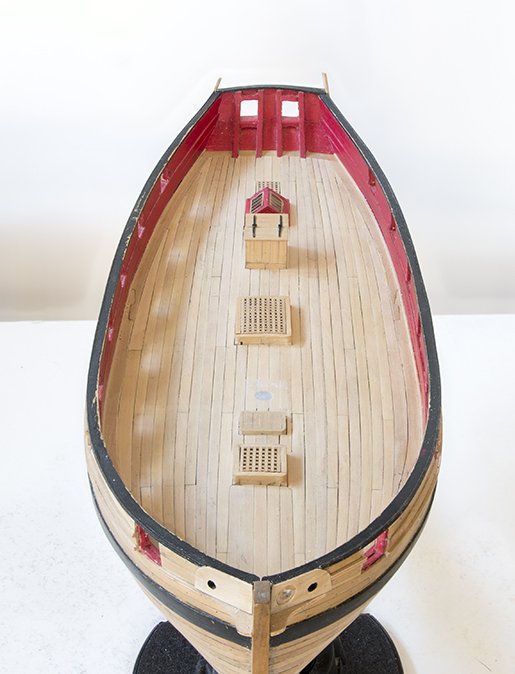
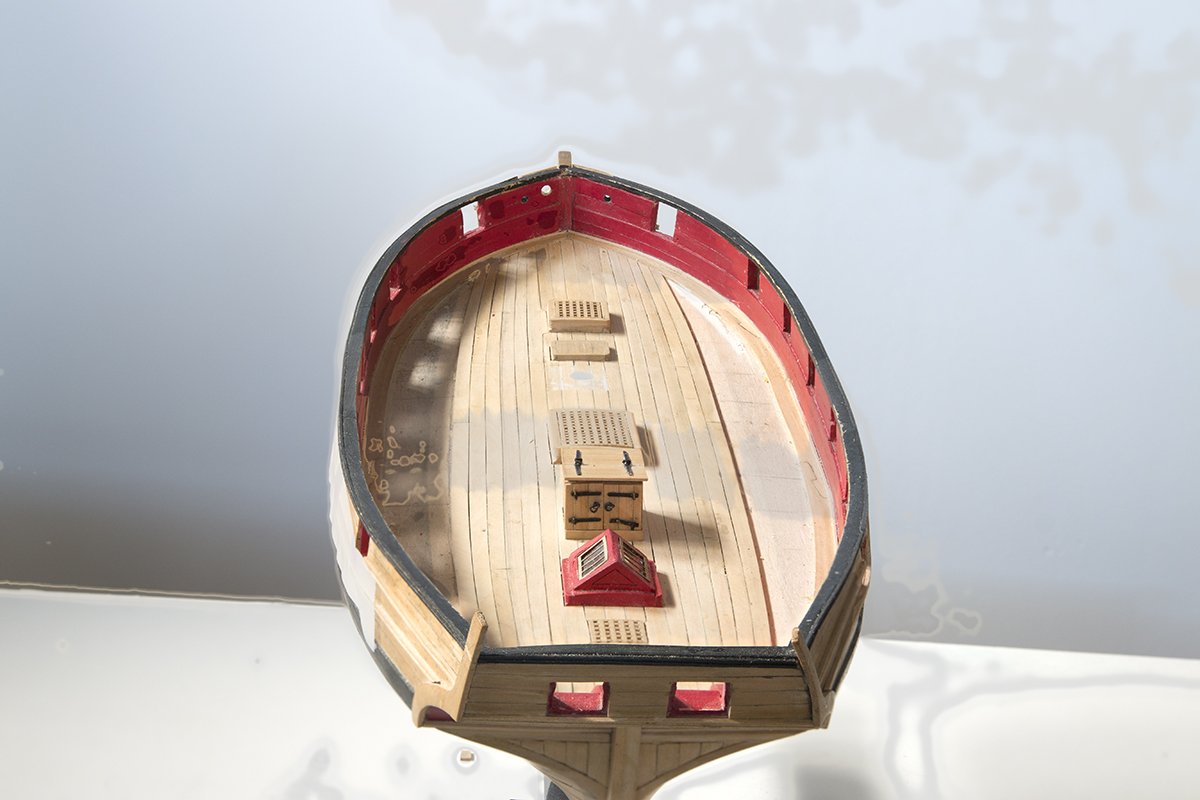
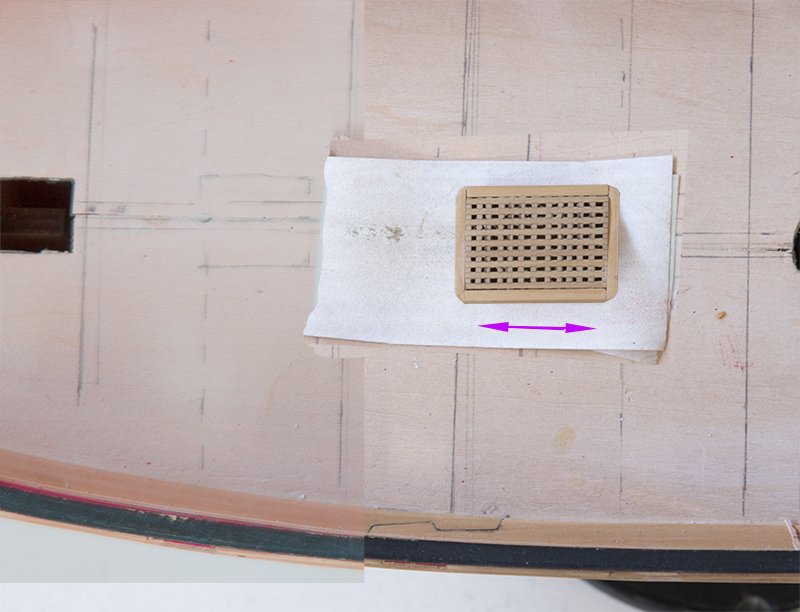
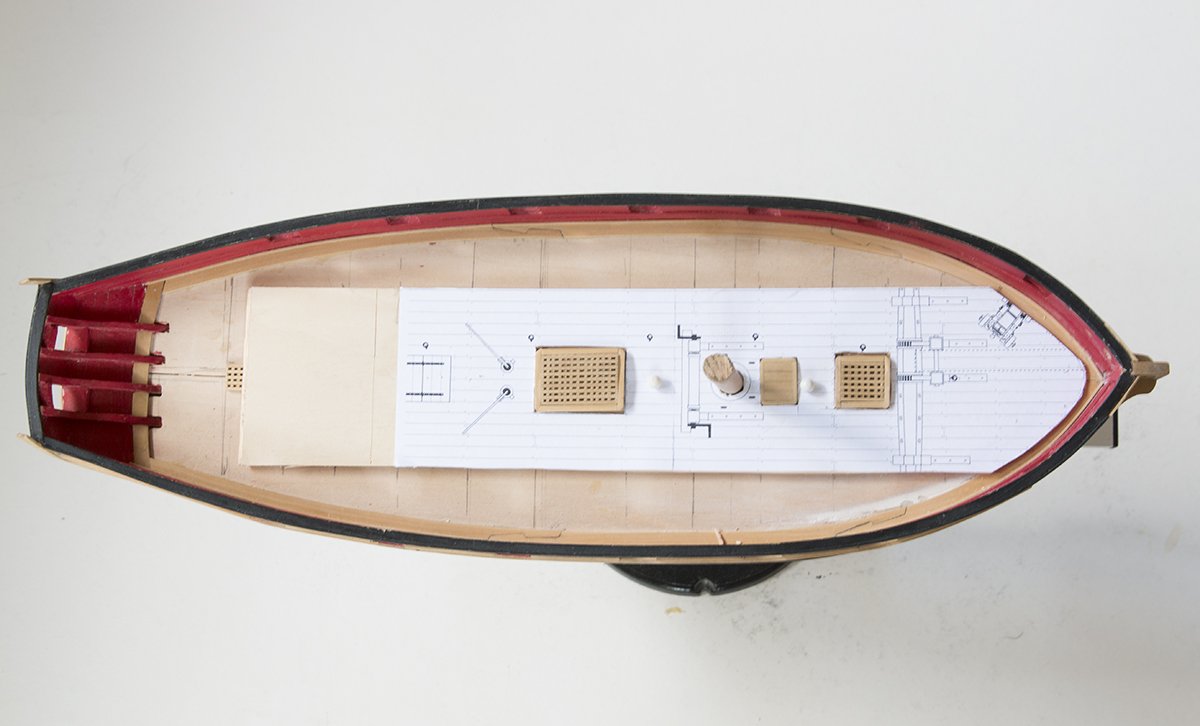
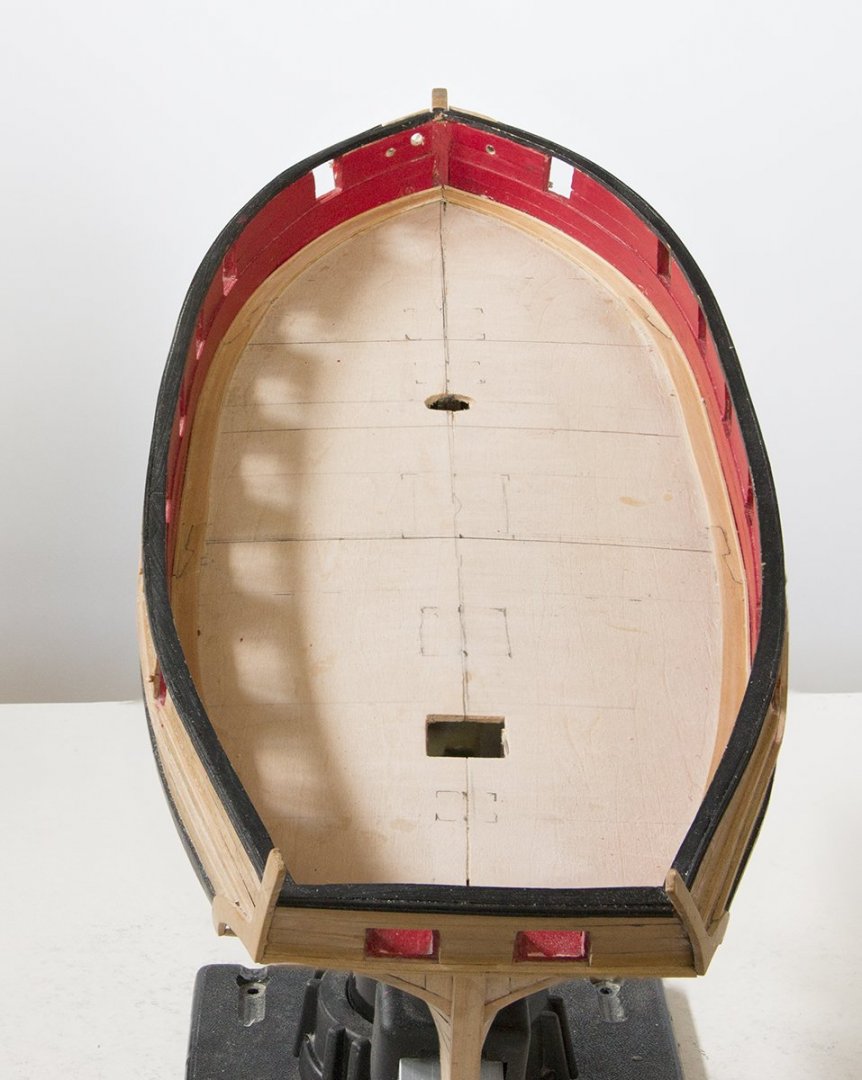
Post 23 : Central Planking I have now completed the installation of the Deck furniture and the central planking. I made sure that the various units matched the deck camber by attaching a piece of sandpaper to the deck and moving the item back and forth: I made sure that he items were correctly placed by using a jig made from thick card: The planking around these items took some time but seems to be OK now:
- 160 replies
-
- 15
-
-
- cheerful
- Syren Ship Model Company
- (and 1 more)
-
Chuck, Another question if I may. Looking ahead, I notice that the plan for the forward hatch has 7X7 but in your log looks like 8X8. This makes it fit close to five planks but I guess if I have mine 7 X 7 then I just need to use a wider plank after the first five to allow for the notch. There seems to be a butt join just after that hatch so it shouldn't be too bad. It looks like I am going to need to use wider planks for the hooked scarphs as well. Is this correct? I have plenty of 3/16 now but not much wider stuff so I mustn't wast it if I don't need to. John
- 160 replies
-
- 2
-
-
- cheerful
- Syren Ship Model Company
- (and 1 more)
-
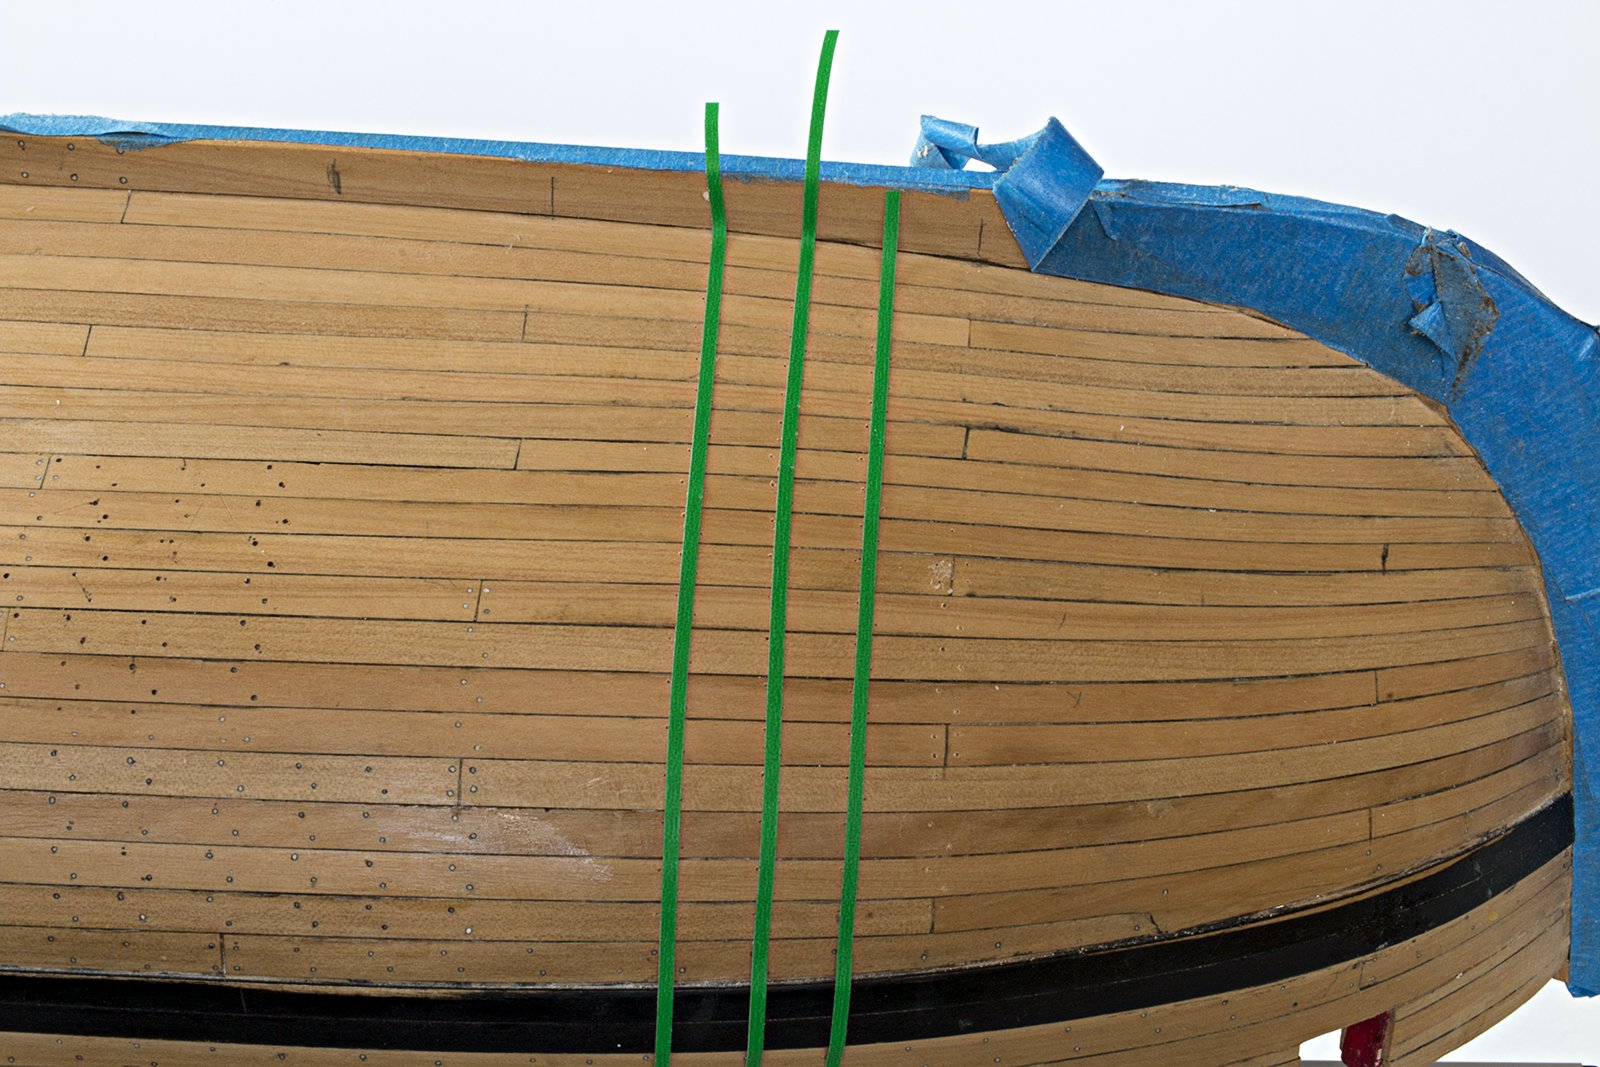
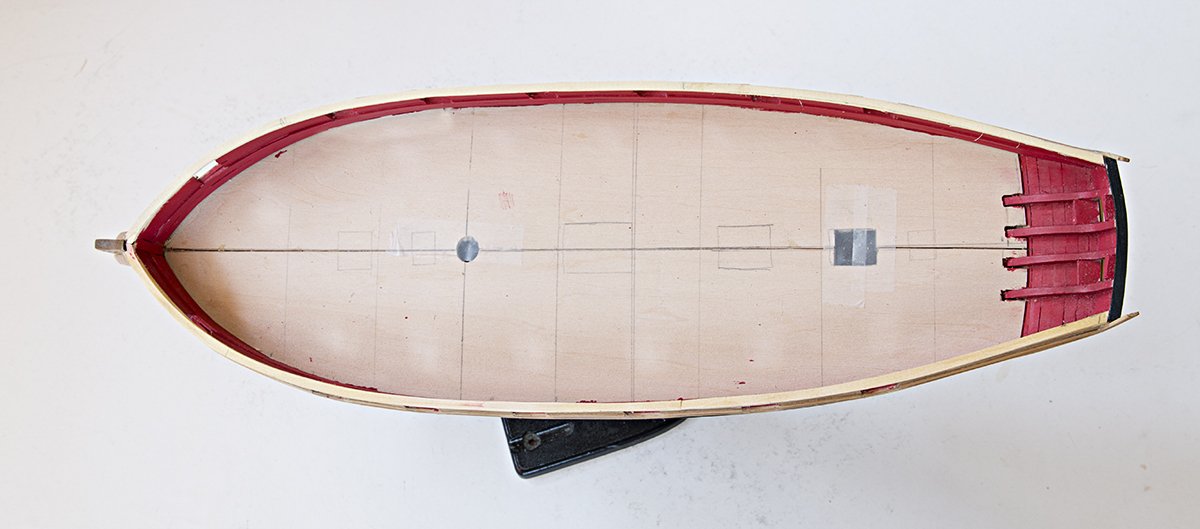
Chuck, Thank you for your kind words. I am preparing for deck planking now. Does this curve look about right. I have not done curved planking before and am looking forward to it. John
- 160 replies
-
- 5
-
-
- cheerful
- Syren Ship Model Company
- (and 1 more)
-
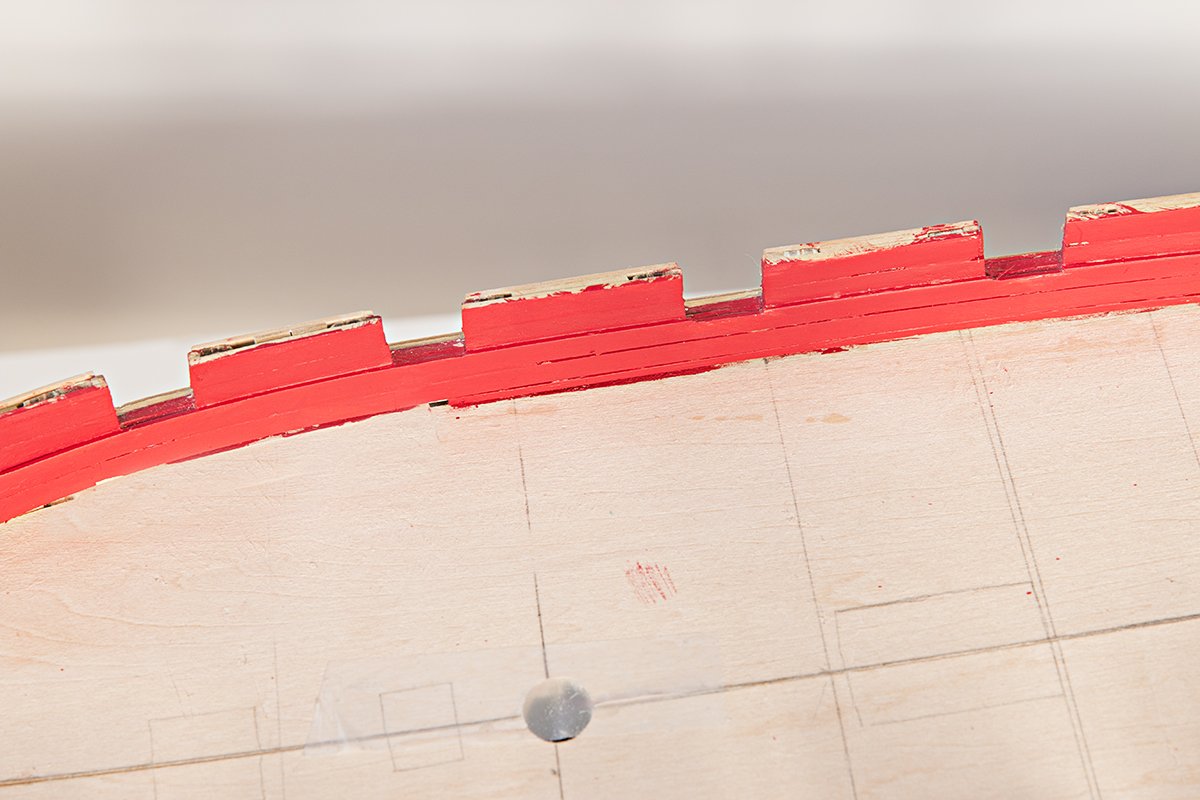
Post 22: Margin Planks I have been away from the workshop for a bit but the caprails and margin planks are now complete. The margin planks were difficult until I established a technique for fabricating these. several attempts ended up in the bin. They are not in Chuck's league but are as good as I could get them. John

- 160 replies
-
- 16
-
-
- cheerful
- Syren Ship Model Company
- (and 1 more)
-
Brass plaque etching
bartley replied to Murcia 66's topic in Metal Work, Soldering and Metal Fittings
There is a thread about this type of etching under the heading "Photo Etching - do it yourself" John -
OK, ASAT, I see what's happening now. I hadn't read the thread properly to see it was double planked. So if he cuts longer planks it should look OK. The only issue that toward the keel there will be a big difference between the first and second planking. so it looks like this need replacing as well unless he were to fill the disrepancny in some way. Kalakukko, we have all made mistakes some are more easily corrected than others. John
-
When you redo this you could adjust a couple of other things apart from the length of the planks. I notice that you also have a "pointed" plank. This would never be done in practice s it would be a source of leakage. Planks should never be tapered to more than half of their full width. This is caused largely because your last six planks could be tapered a bit more but also because your garboard finishes a bit too far forward. If you finish it a bit further aft that will avoid crowding of the next four planks. The ones after that look OK ( except of course they need to be extended into the rabbet). You could probably finis the garboard not far forward of that join between the stem and the keel. John
-
Brass plaque etching
bartley replied to Murcia 66's topic in Metal Work, Soldering and Metal Fittings
Here is an example. My shop can produce a variety of effects. for example the negative of this (brass writing on a black background) John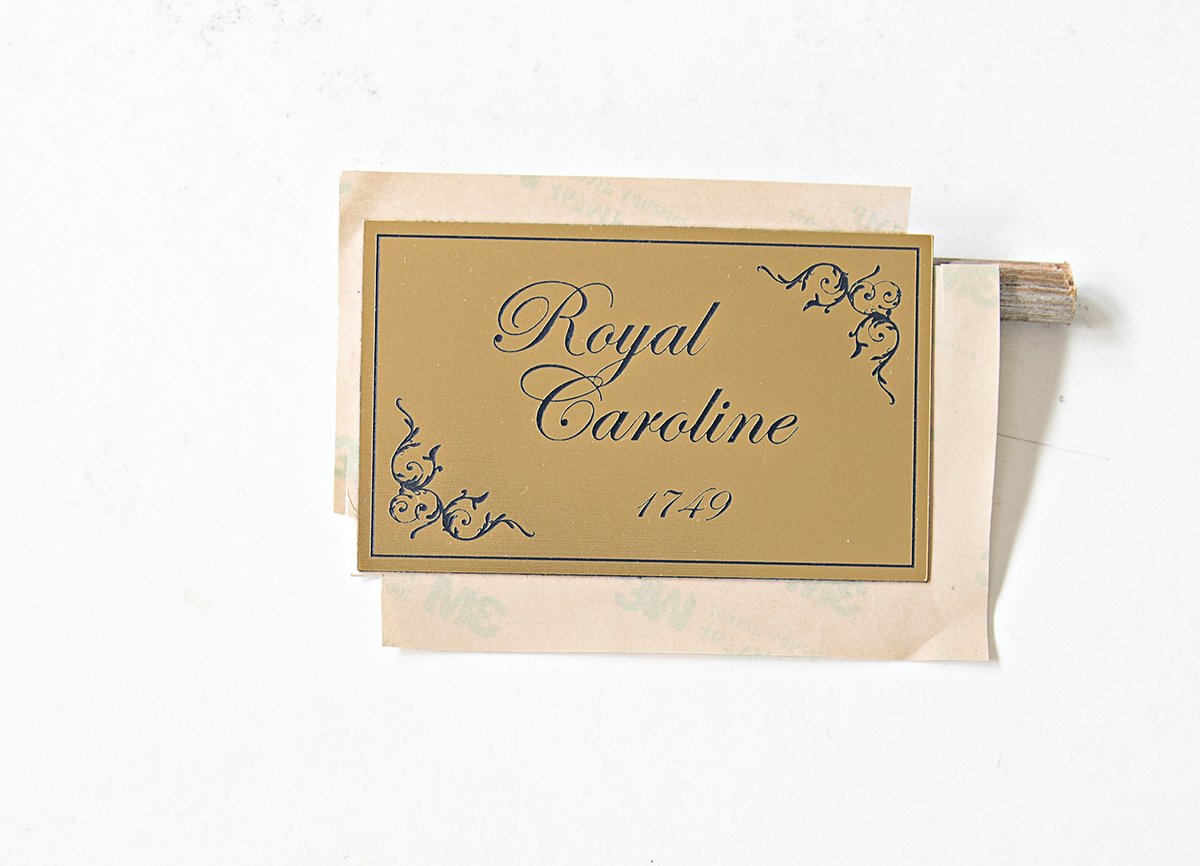
-
Brass plaque etching
bartley replied to Murcia 66's topic in Metal Work, Soldering and Metal Fittings
Yes, Reklein, this is exactly what I do. I draw up the plaque in Illustrator, save it as an eps file and the sports trophy shop etches it on a brass plate for about A$20. John -
I used to buy these sample pots as well but eventually I found that the coarse pigments in house paint resulted in a "grainy finish". I now bite the bullet and pay the money for model paints such as Valejo and I believe the finish is superior. John
-
Straightening aftermarket rigging line
bartley replied to DonInAZ's topic in Masting, rigging and sails
There seems to be a bit of confusion here with the chemistry. It is a bit pedantic but I think it helps in trying to classify these products. PVA stands for poly vinyl acetate (not acrylate) Titebond, Elmers and book binders glue are all PVA's but the exact formulation gives rise to different or pH's or acidity. The significant thing about Bookbinders glue and some other "craft" glues is that they are neutral (pH 7). CA is cyano acrylate. This is a very different animal as we know from its properties. Note it is not a polymer in the bottle but polymerizes on contact with moisture. Many acrylates are lachrymatory ((they make us cry) However, Perspex and the polymer in water based paints are also acrylates but they have a different chemical structure and are less harmful, largely because they are already polymerized and so are relatively stable although hey do degrade with time. CA is what we call a monomer ie it is a small molecule and so has some rather dangerous properties. Once it has polymerized or "set" it is much less harmful. Hope this iis not too confusing, John -
Straightening aftermarket rigging line
bartley replied to DonInAZ's topic in Masting, rigging and sails
Alan, The pH of the faster setting PVA's like Tightbond is around 2.5. This is very acidic and I believe that there is a chance that it will damage natural fiber line over time. You have to ask yourself why bookbinders use neutral PVA. Books are cellulose just like natural fiber line is. Synthetic line might be OK. but I always use neutral PVA on my rigging to be on the safe side. It does take longer to set of course. John -
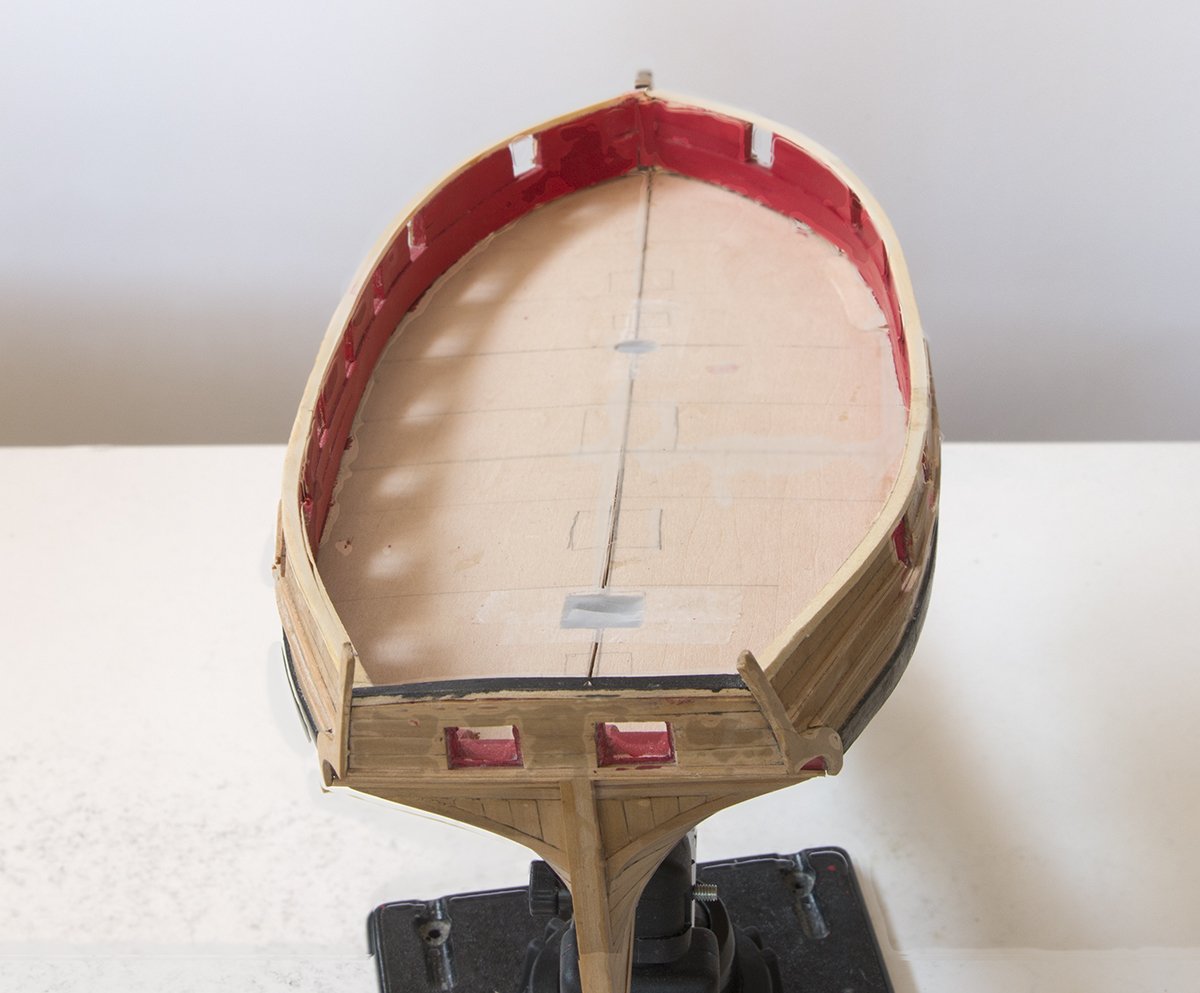
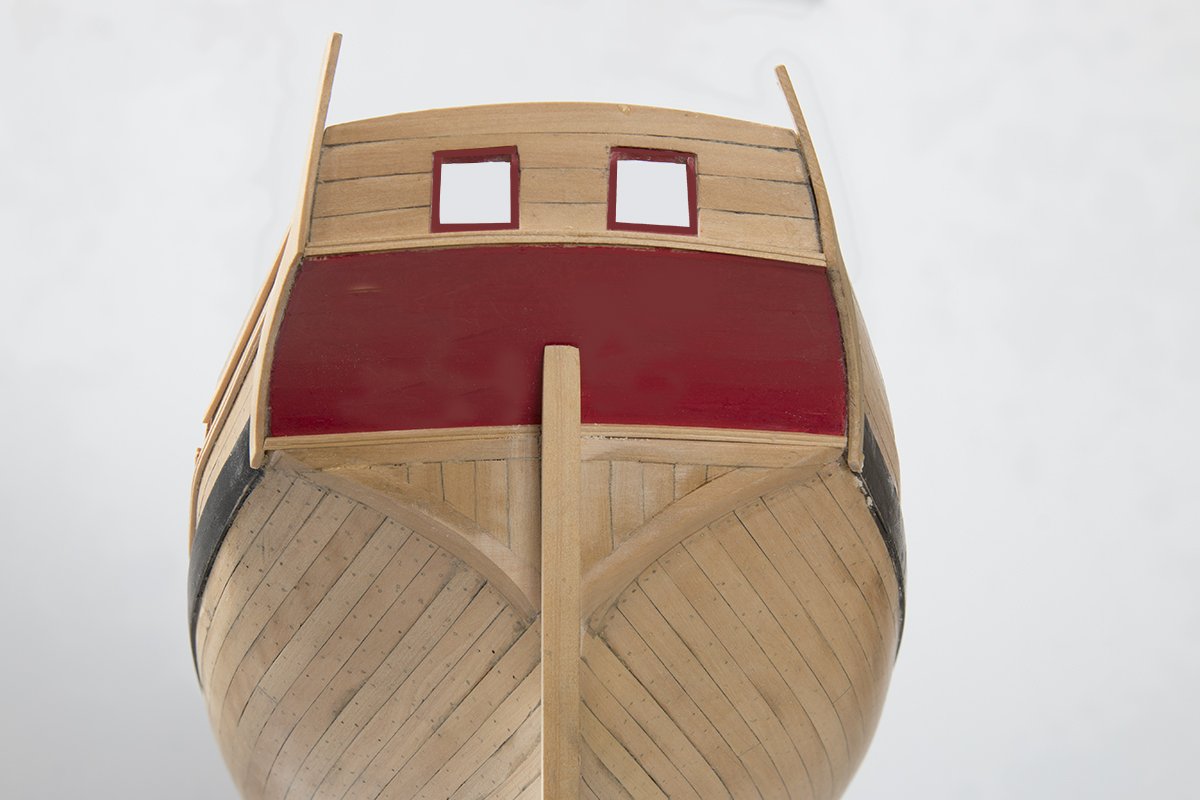
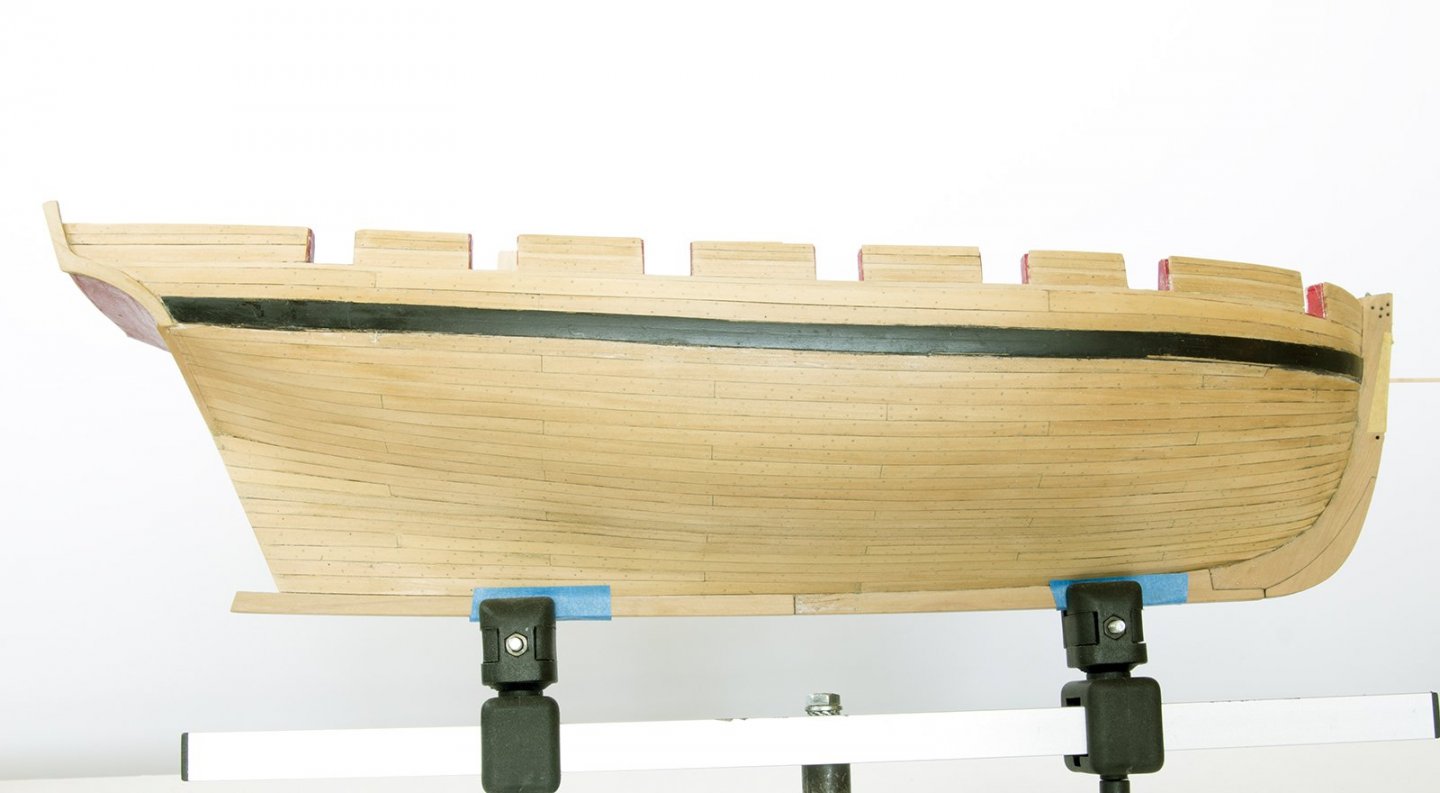
Post 21 False Deck and Caprails It took me a couple of goes to get a reasonable fit for the false deck Then the bulwarks were planked and painted And finally the caprails added in three pieces I am not sure why the stern here looks so dirty. This must be something to do with the lighting I used because it is quite clean in fact. John
- 160 replies
-
- 14
-
-
- cheerful
- Syren Ship Model Company
- (and 1 more)
-
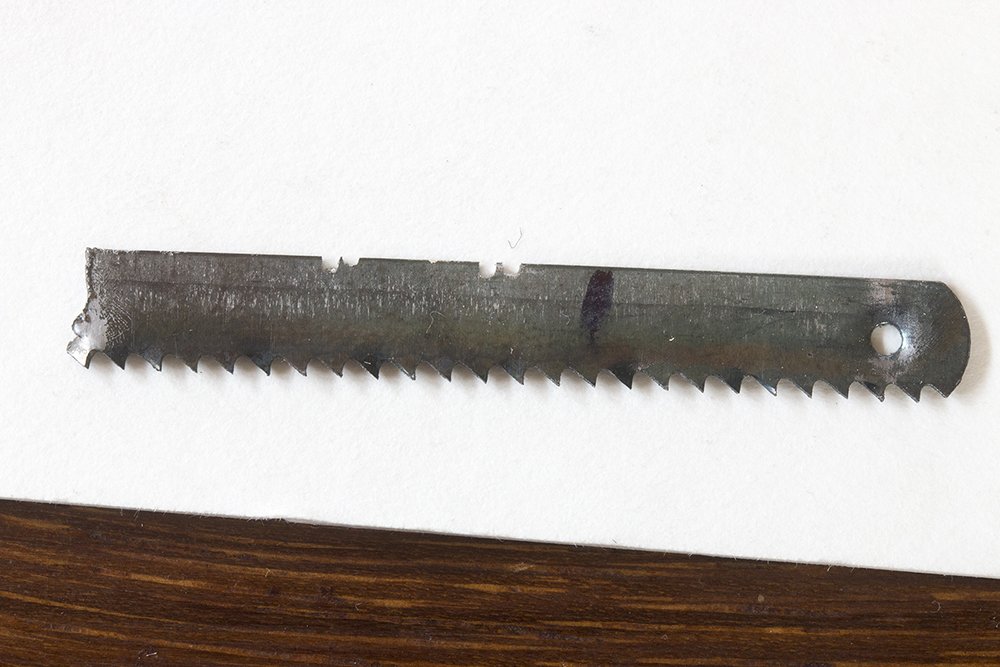
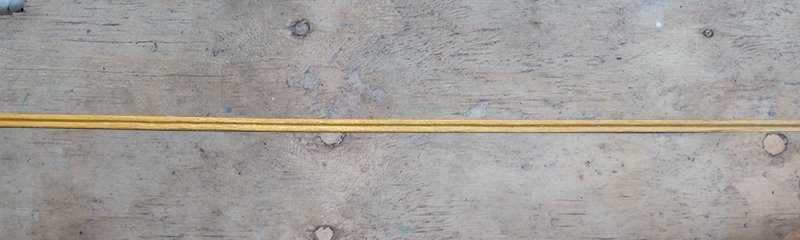
Post 20 Fancy Molding I made a scraper (several in fact) by cutting into an old hacksaw blade using a Dremel with a thin cutting blade. I found the production of these moldings quite challenging. Because I have only a limited supply of boxwood I made some initial tests with yellow cedar. However, this gave very indistinct results and it was only when I used boxwood that I could obtain a satisfactory profile. I also stuck the strip to my bench with double sided tape to stop it moving. I found that several light strokes were best until the profile was established and then I could be more aggressive.
- 160 replies
-
- 18
-
-
- cheerful
- Syren Ship Model Company
- (and 1 more)
-
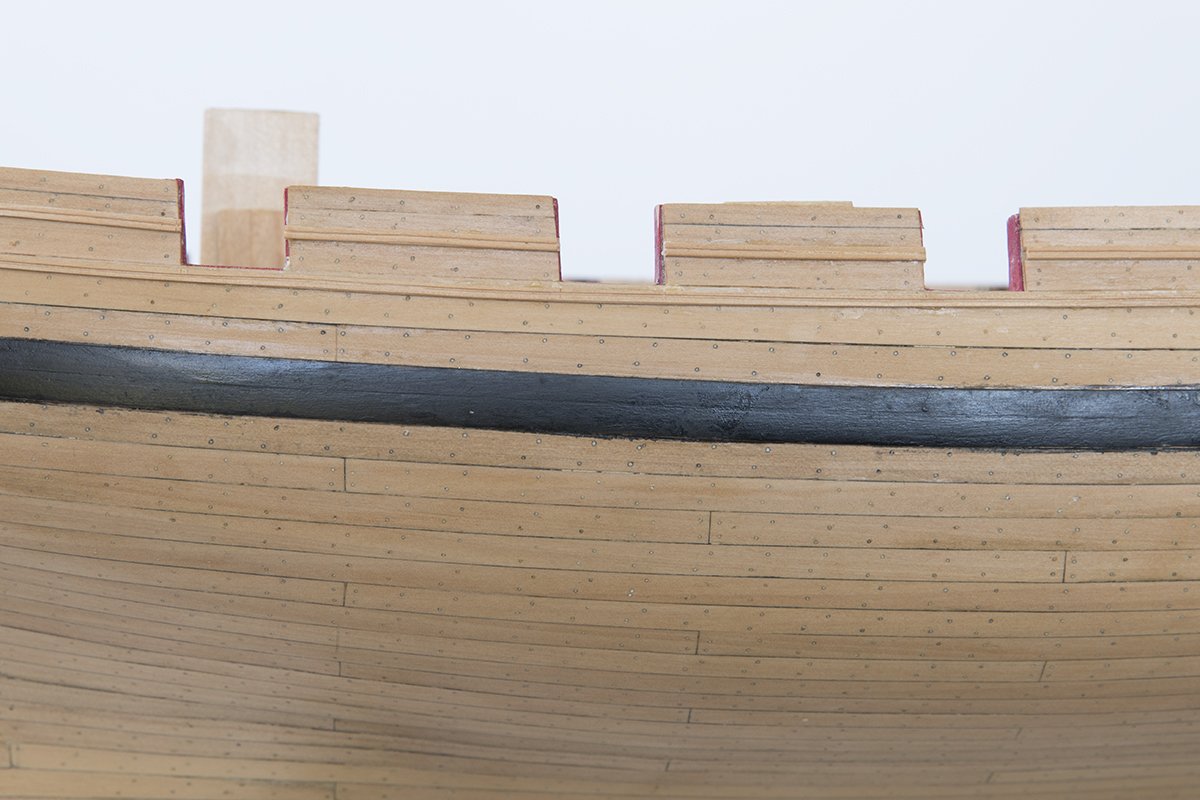
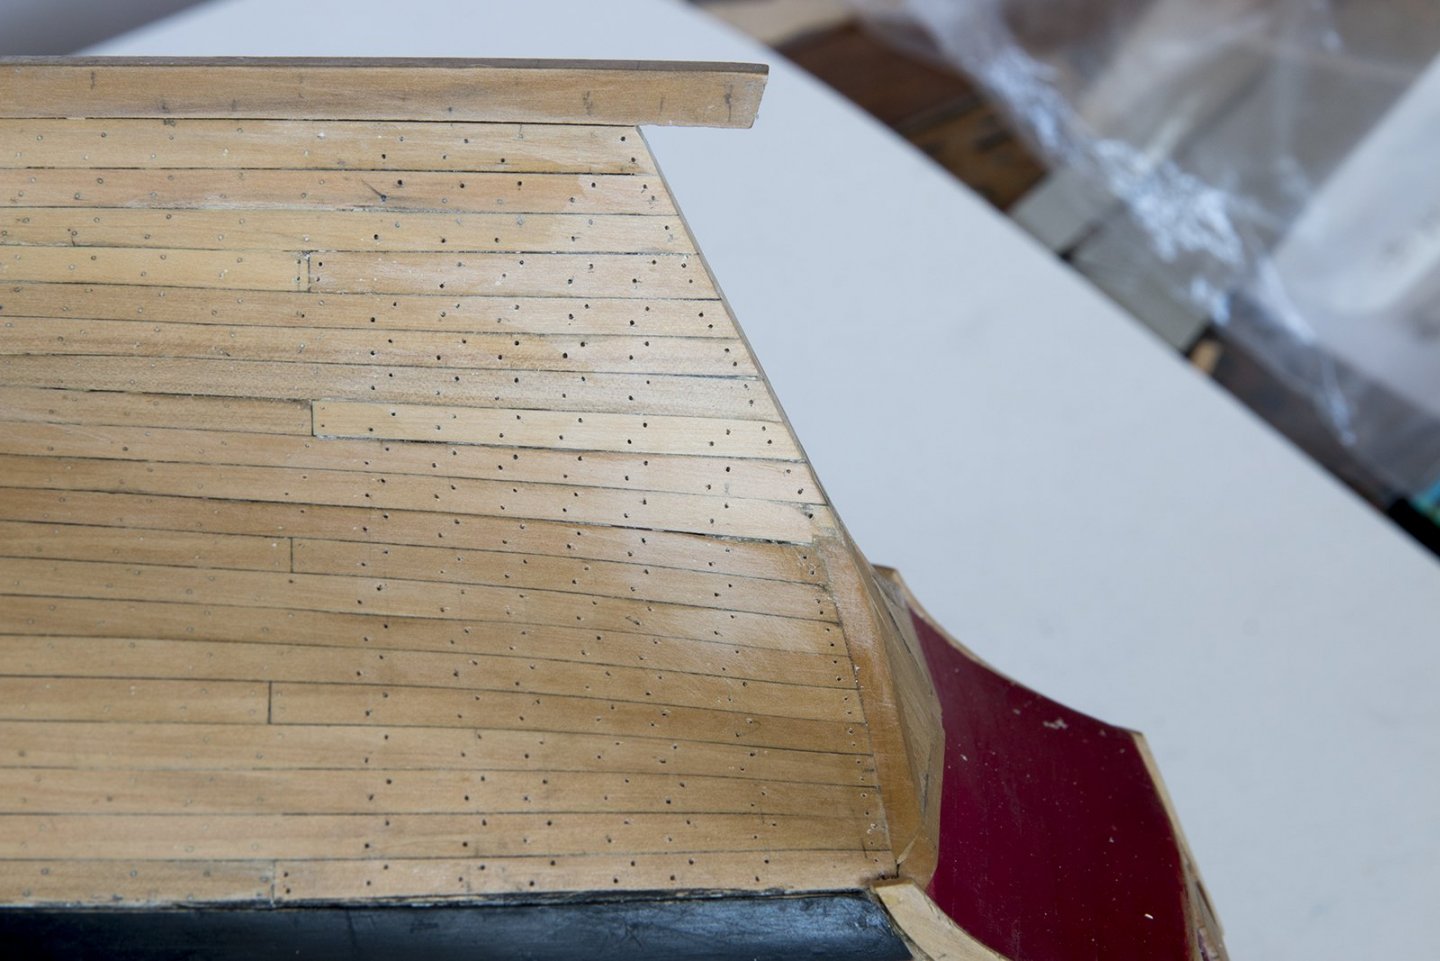
Post 19 - Treenails I used Chuck's method of drilling and filling. I used 1.3 mm tape to ensure that the holes were in line and corresponded to bulkheads and predicted positions of frames I then used a sharp HB pencil to line the holes ans simulate tar. I found that care was needed here. If I was too aggressive there was excess graphite around the hole which made the filler darker resulting in a variation in the colour of the treenails The result is quite subtle - as I believe it should be. The treenails can only really be seen from up close When I was a boy two Dutch children arrived at my school - no English, but it didn't take long After a year or so their father built a house for the family. This house was unique for two reasons: 1. It was varnished - in those days all houses in our town were painted. 2. It was claimed that he used no nails. It turned out that all of the external weather-boards were attached to the studs with wooden pegs - treenails! (although I didn't Know the term then) When I visited the house after getting to know the Dutch children I found that from the road there was no evidence of any pegs.. It was only when one approached within a meter or so that the begs became obvious, I don't know if he had worked in the ship building industry but the point was that the effect of the wooden pegs was quite subtle. John


- 160 replies
-
- 19
-
-
- cheerful
- Syren Ship Model Company
- (and 1 more)
-
Chuck, You are very kind. There are a few defiencies in places that I am not happy with but fo my first go at single planking it is not too bad. I cannot find on yje plans the profile for the small ear that crosses the molding over to the stem. Am I missing something? John
- 160 replies
-
- 1
-
-
- cheerful
- Syren Ship Model Company
- (and 1 more)
-
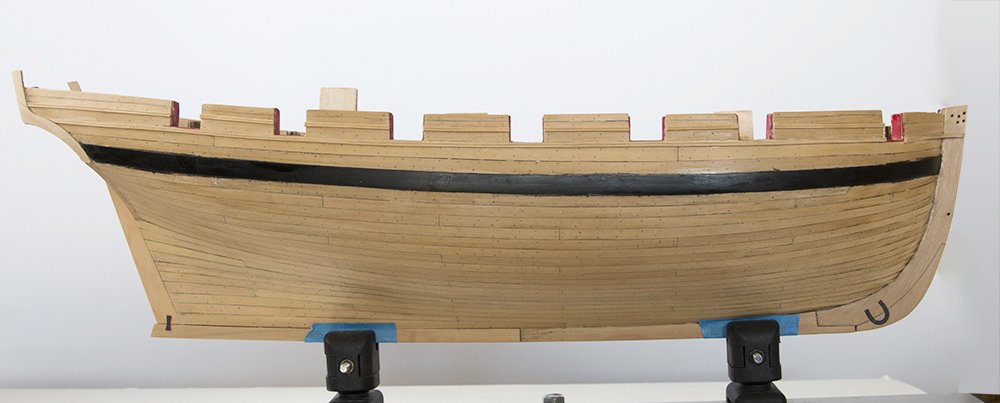
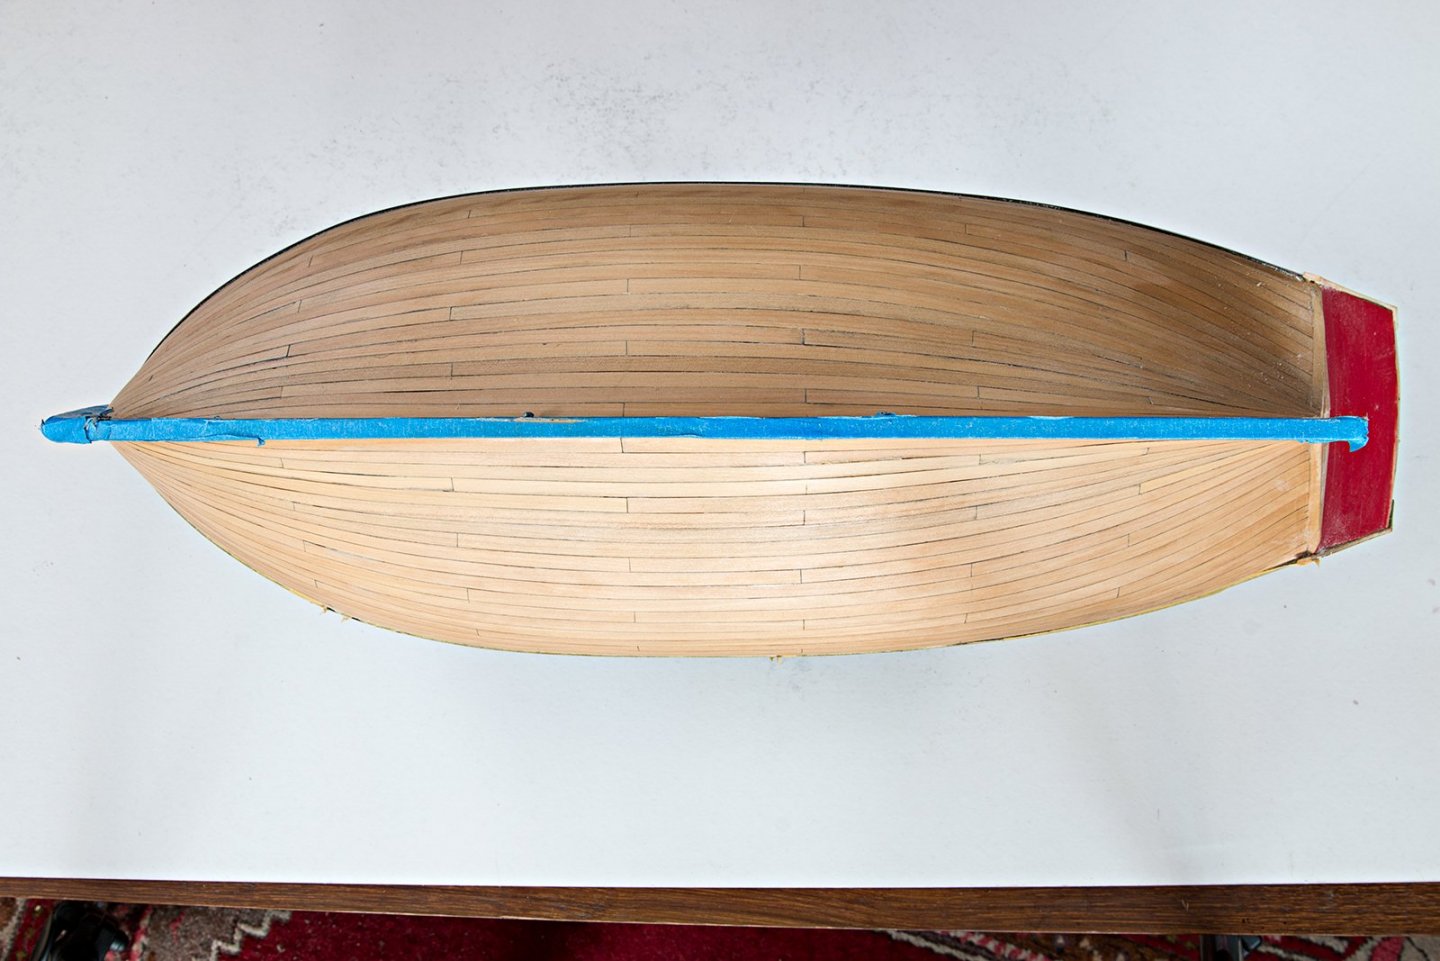
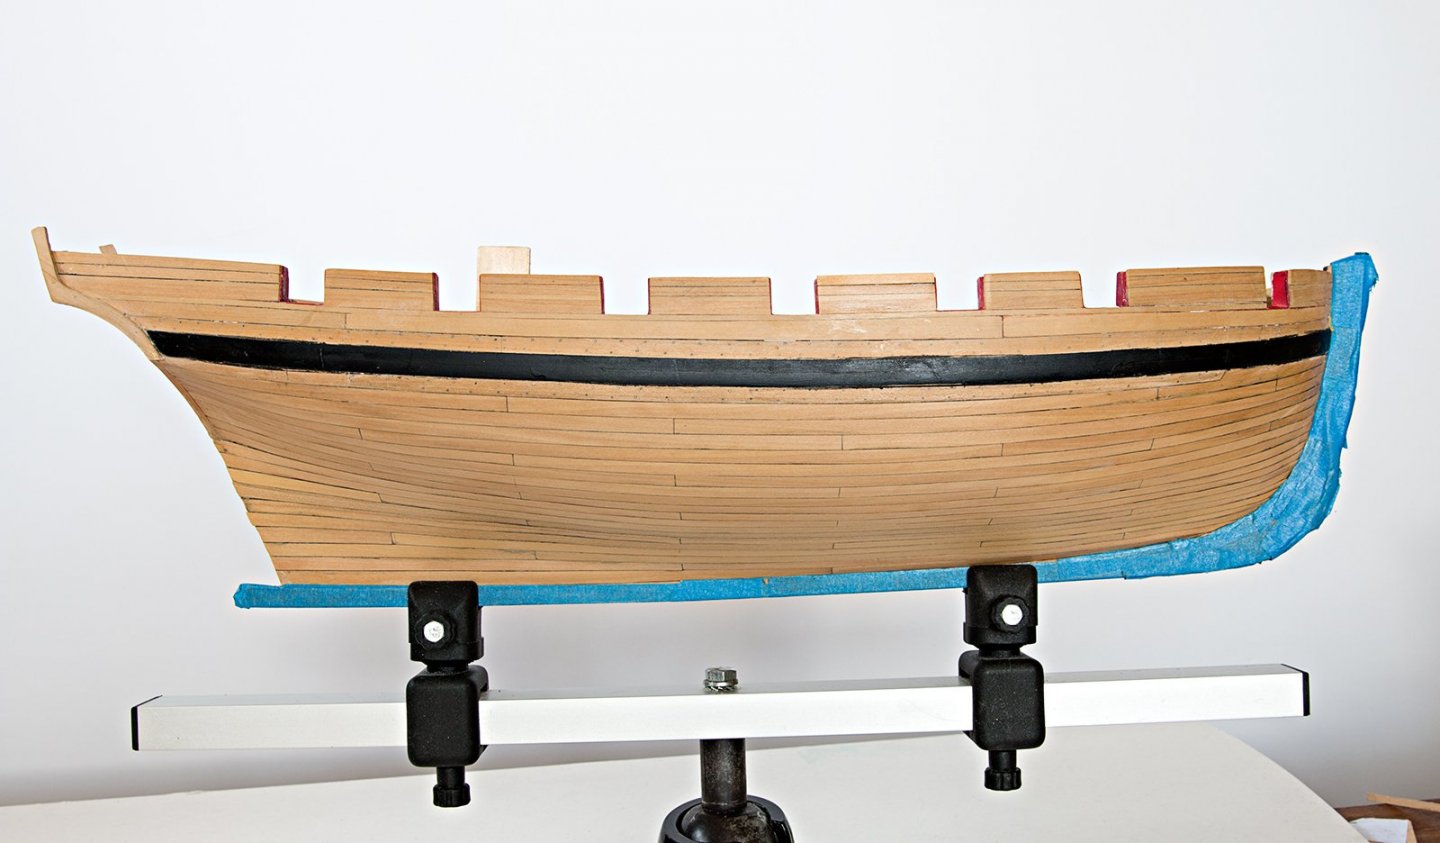
Post 18 I have now completed the planking. Not in Chuck's league by any means - there are a few places where the planks could be tighter but on the whole it looks OK. Its all a learning exercise for me. Time to move on to the treenails now
- 160 replies
-
- 22
-
-
- cheerful
- Syren Ship Model Company
- (and 1 more)
-
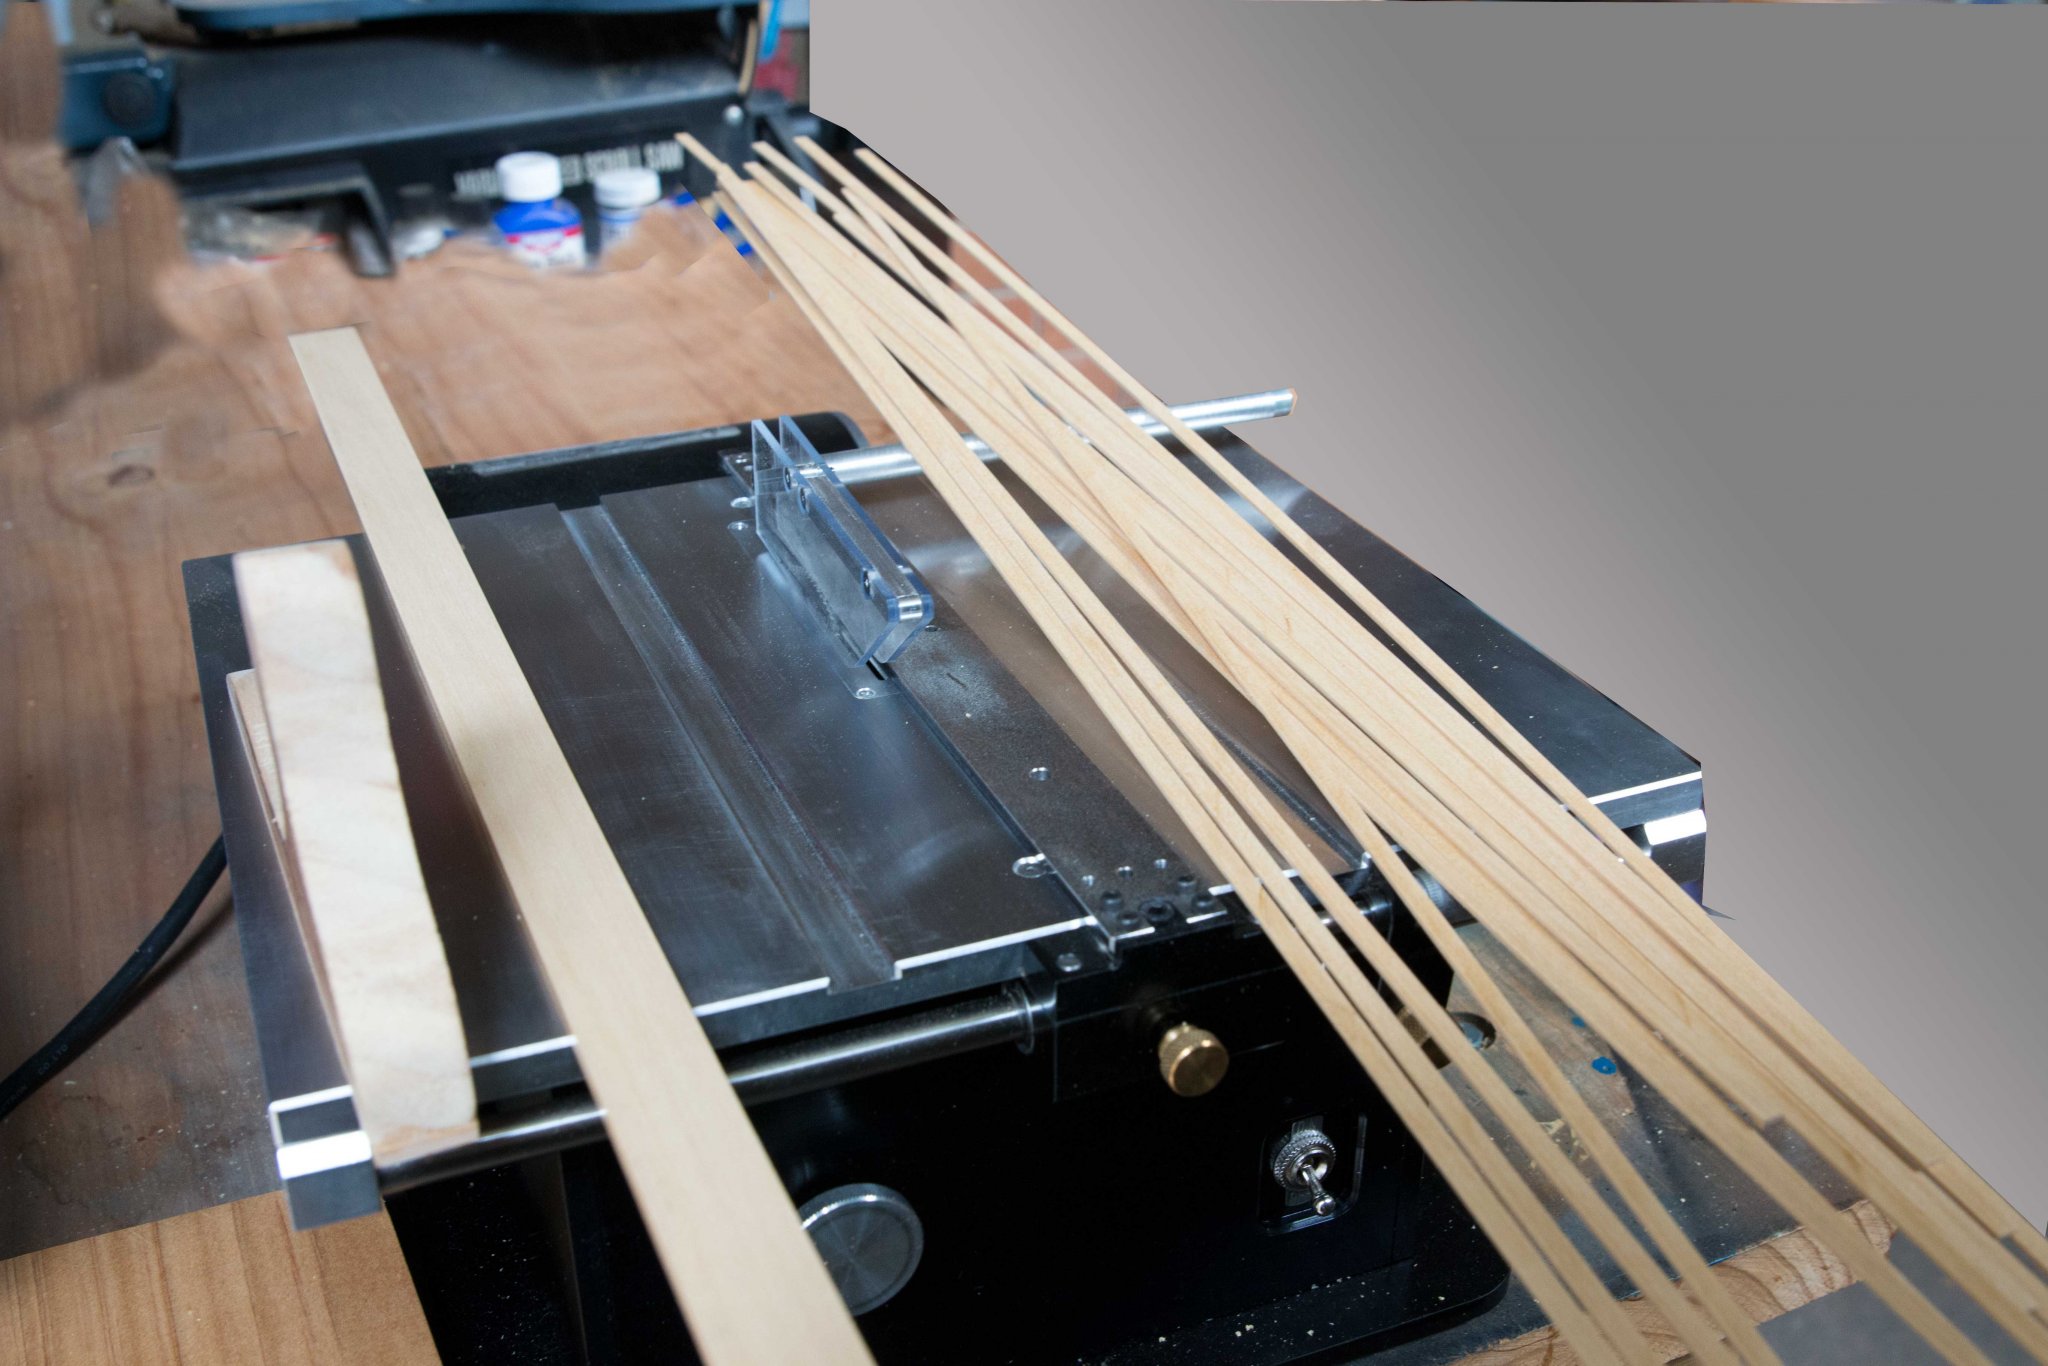
I have now obtained some boxwood and ripped some planks so I can now move ahead:-

- 160 replies
-
- 6
-
-
- cheerful
- Syren Ship Model Company
- (and 1 more)