bartley
-
Posts
424 -
Joined
-
Last visited
Content Type
Profiles
Forums
Gallery
Events
Everything posted by bartley
-
There will be a bit of delay on this build while I try to source some more boxwood. Although I did originally buy enough strips from Jason to complete the planking, I discovered that a significant number of strips had a rather ugly cross grain and they were also a couple of shades darker in colour. I may yet have to use them but I will first try to source some better quality material. I can now rip my own planks on my Byrnes but finished Boxwood sheets are becoming difficult to obtain. John
- 160 replies
-
- 2
-

-
- cheerful
- Syren Ship Model Company
- (and 1 more)
-
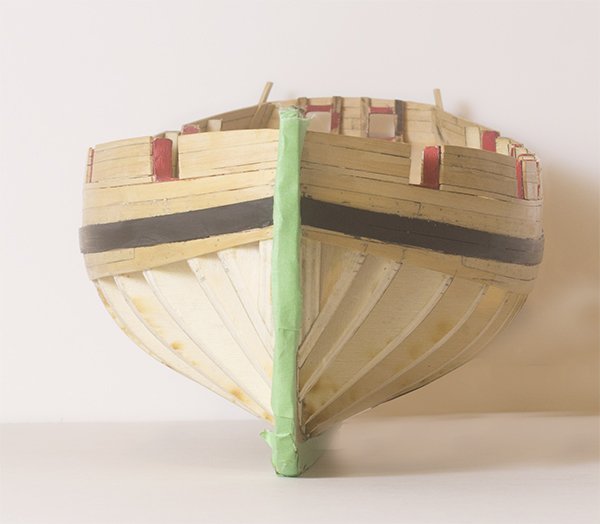
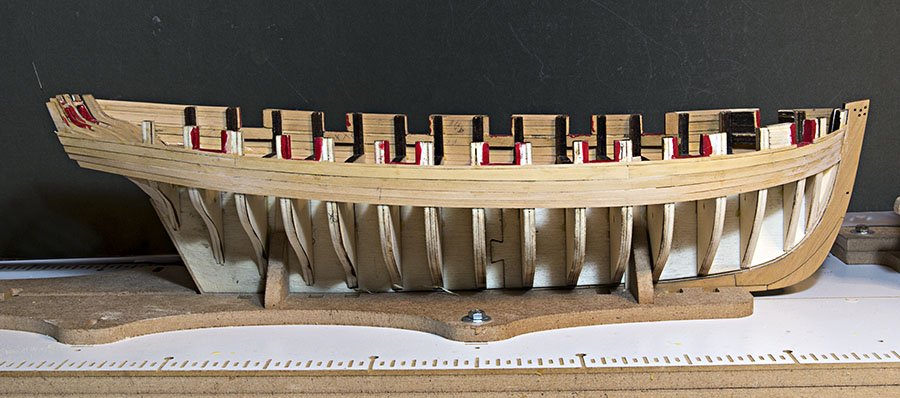
Post 16 A few minor illnesses and a bit of much needed work on the yard have kept me out of the shipyard for a while but have made a bit more progress lately. The first ten strakes are on each side now. And I have completed the square tuck now as well
- 160 replies
-
- 14
-
-
- cheerful
- Syren Ship Model Company
- (and 1 more)
-
Photo Etching - do it yourself
bartley replied to Dziadeczek's topic in Metal Work, Soldering and Metal Fittings
Thomas, I agree entirely with Bruce's comments about registration. As I said above I have not used the MicroMark system which uses photo resist on both sides of the plate but I did recently try to print some flags by printing one image on the "front side" side and a mirror image on the other side. I expperienced a real problem with registration. My printer did not even produce the same sized image when it printed a mirror image! In the end I got close by using four registration marks on an image in photoshop then flipping it in photoshop and making sure that the registration marks lined up in photoshop before printing. Regards, John -
Photo Etching - do it yourself
bartley replied to Dziadeczek's topic in Metal Work, Soldering and Metal Fittings
Thomas, I have done a bit of this but only for small parts. A couple of points that I would make: 1. It is going to take a long time to etch a large sheet of the dimensions you give. You may be better off to etch several smaller sheets as things do not always go to plan and you could more easily repeat smaller sheets. than having to repeat a large sheet. 2. One of the problems with thick sheets is "undercutting" where the etchant leeks under the image. 3. MicroMark partly deal with this by having an image on either side of the plate but registration might be a problem. I have not used their system. 4. What I did was attach a block of polystyrene to the back of the plate so that the plate floated and only the image side was in the etchant. Hope this helps. John -
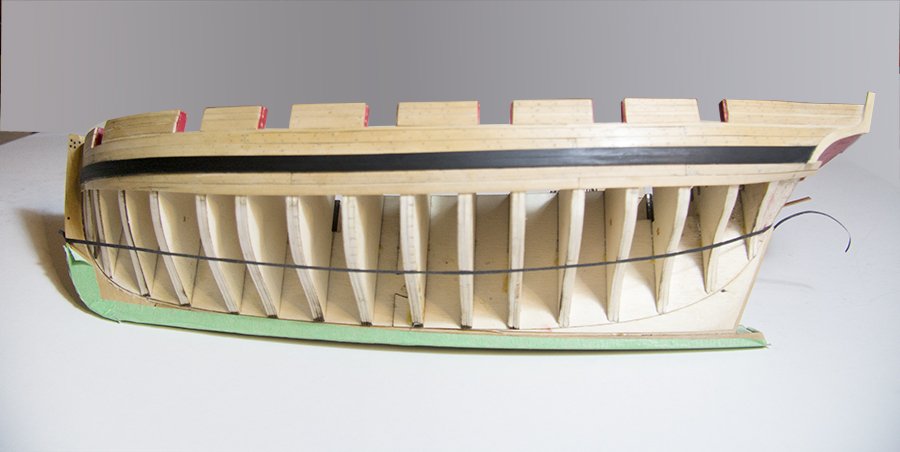
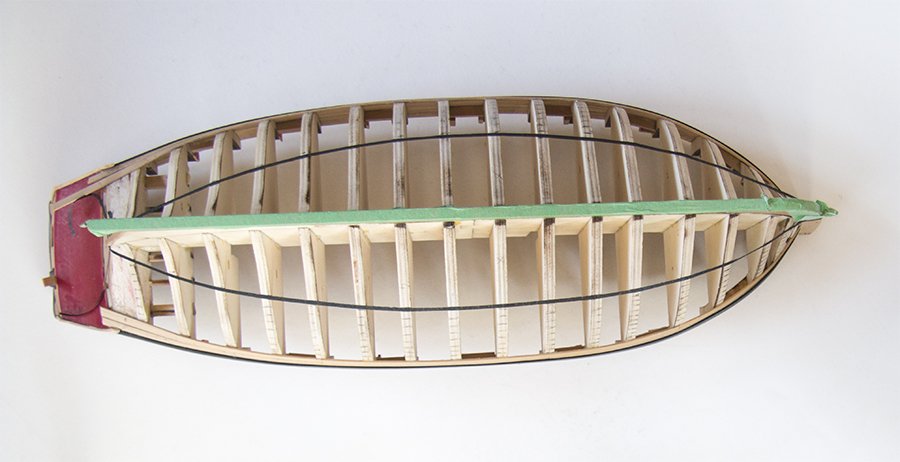
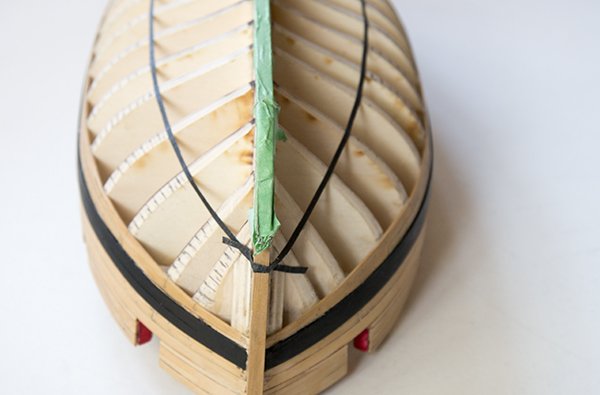
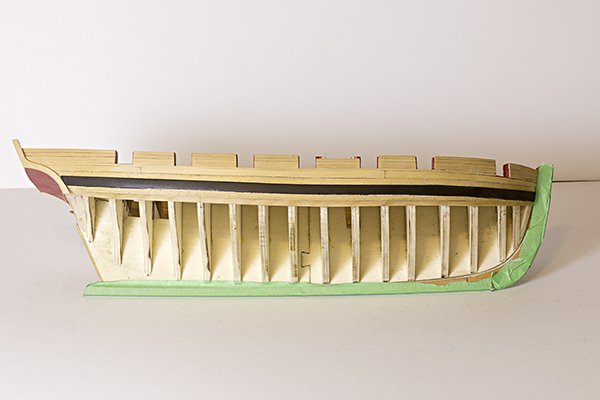
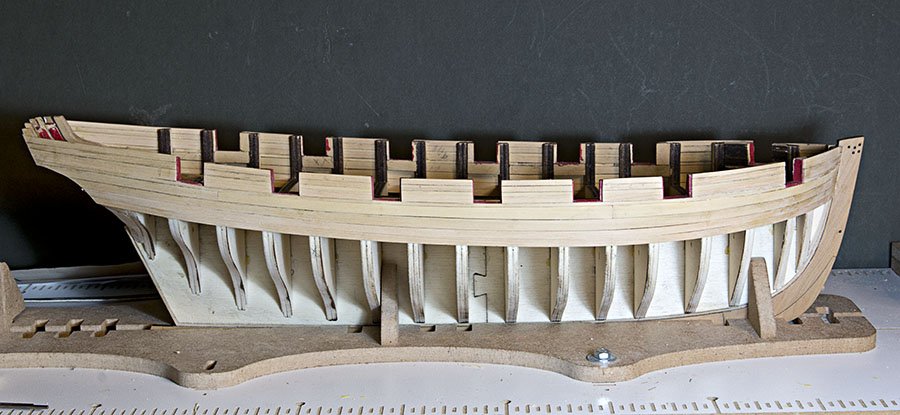
Post 15 Lining out the hull. I did this several times but in the end the difference between the various versions was only around 0.5mm. There seems to be no tapering required aft of about bulkhead B. I hope this is correct!

- 160 replies
-
- 15
-
-
- cheerful
- Syren Ship Model Company
- (and 1 more)
-
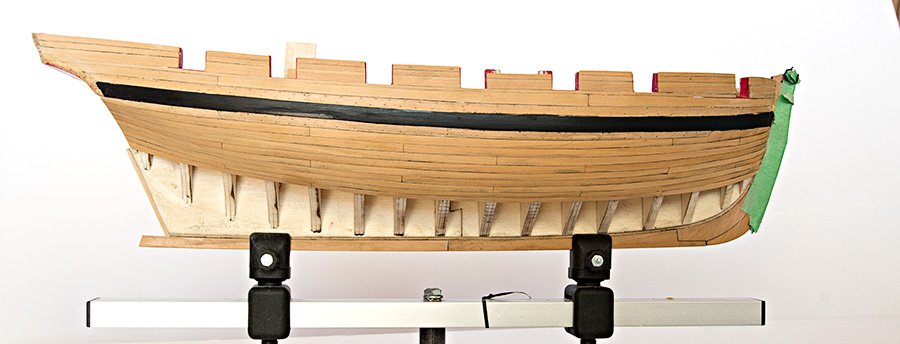
Post 14 Finishing the wales. The second layer of the wales was added and painted black. I painted the edges first as I was not confident that I could do this afterwards and not get paint on the planking.
- 160 replies
-
- 7
-
-
- cheerful
- Syren Ship Model Company
- (and 1 more)
-
Dave, I live in Brisbane as well and am interested in who you bought your molded acrylic from. A very nice build incidentally. John
-
Post 13 Chuck suggests adding the second layer to the Wales at this stage. However, others on the site have suggesting added the next two layers of planking first and so I adopted this course of action. I found the drop plank a bit tricky to fit but after several paper patterns I developed a better understanding of what the shape should and I am now satisfied with the fit.


- 160 replies
-
- 12
-
-
- cheerful
- Syren Ship Model Company
- (and 1 more)
-
Post 12 Fashion Pieces added. Some tweaking was needed to fit them to the shape of my transom
- 160 replies
-
- 9
-
-
- cheerful
- Syren Ship Model Company
- (and 1 more)
-
Paul, I have just received a catalogue from Record Power. They seem to have evolved from the original Sheffield based company which I know as a manufacturer of hand tools. They claim a 100 year history. Their hand tools were OK but not a patch on a company such as Veritas. Record Power seems to market only power tools . Their Scroll Saw looks identical to mine which is called a 909 Scroll Saw, However, Record Power say that theirs is made in Germany so perhaps mine is a Chinese copy of the Record one!!. Out here it sells for 3 X the price I paid so perhaps it is of better quality. John
-
I believe that these are probably Chinese. They are sold all around the world under different badges. Even Ryobi sell what looks like exactly the same saw. I own one which I bought some time ago for A$80. It is OK for basic curve cutting but not very precise compared to a quality band saw It has no fence so straight cuts are difficult. You get what you pay for. John
-
Chuck, I have been experimenting with some treenailing above the wales. I have a couple of questions> Between the bulkheads I find I am drilling right thru the plank. Presumably this is Ok since it will be covered by the bulwark planking? Secondly: How do you avoid filling the caulking line between the planks?
-
We are heading "state-side" next week so this build will be on hold for a while.
-
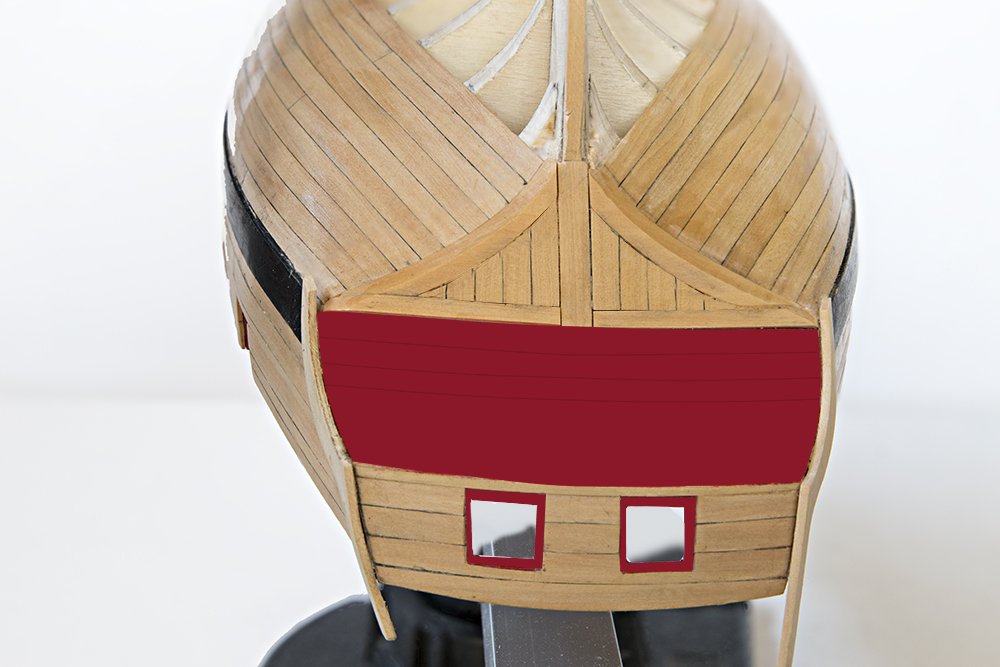
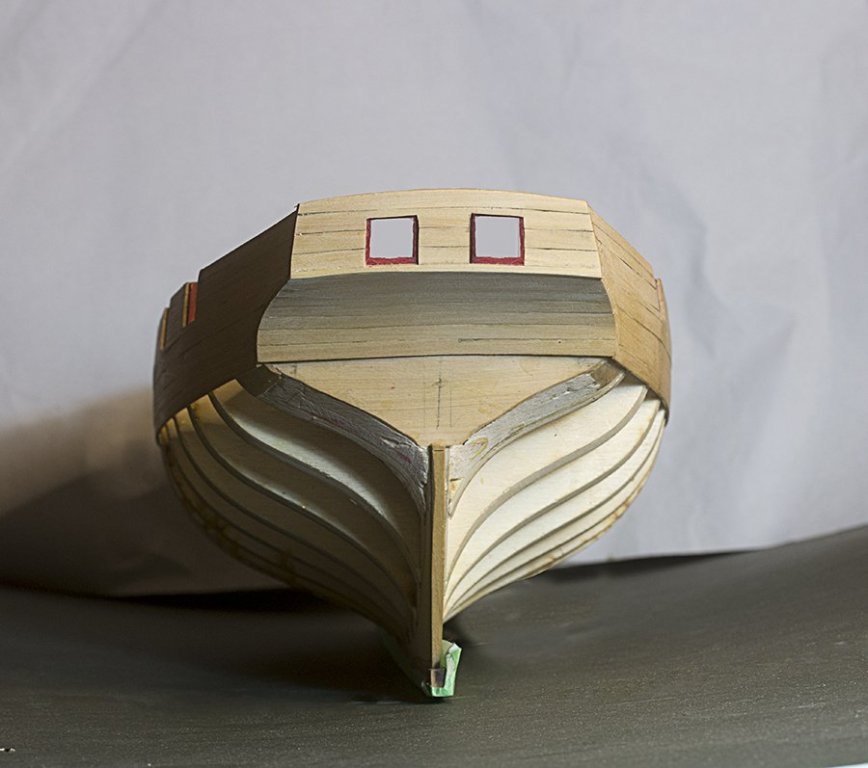
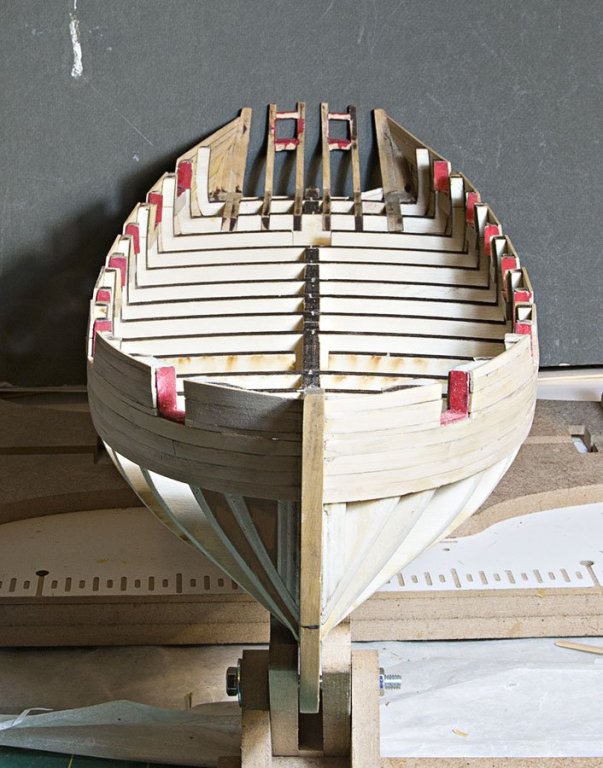
Post 11 Planking the Stern First the outer frames had to be thinned down. Pretty scary this! Then the actual planking. Planking the counter was OK. I had more trouble with the transom.
- 160 replies
-
- 12
-
-
- cheerful
- Syren Ship Model Company
- (and 1 more)
-
Chuck, I obviously need to sand this back quite a bit to level up the planks but I am not sure how aggressive I can be here. I am used to double planking where a bit of bog can be used to help but this is a new world. I guess 3/64 is quite thick and any deviations are only a few thou. John
- 160 replies
-
- 3
-
-
- cheerful
- Syren Ship Model Company
- (and 1 more)
-
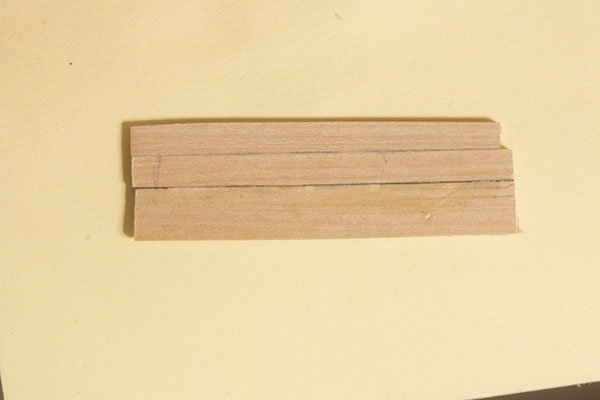
Post 10 Planking above the wales Planking up to the Molding strip was straight forward: However planking around the gun-ports was tricky (for me at least) and took some time. However it is a nice little feature once done Previous builds have involved continuous planking up to the sheer and then cutting the gunports into those planks an lining afterwards, Chuck suggest that the rabbet should be 1/64 ‘’. This is 0.39 mm. I was not confident I could do this consistently so I made mine 0.5 mm. I also found that for the fairly constant gaps amidships pre-making a set of planks helped me to get the rabbet parallel to the port. This is not my idea and I must thank Rafine for the suggestion: So here is the result:
- 160 replies
-
- 16
-
-
- cheerful
- Syren Ship Model Company
- (and 1 more)
-
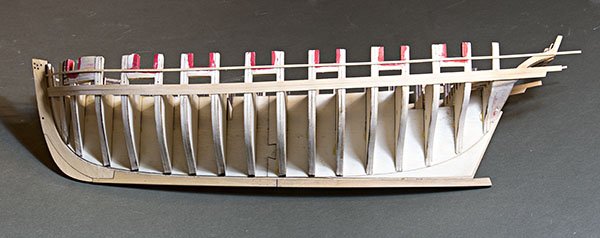
Post 9 Wales and Molding Strip The red that I am using here is Vallejo Flat Red. . Synthetic dies and bright colours were not developed until 1856 and even then they were expensive. So the paint at this stage would have been red lead - cheap but effective. I feel that this colour is close to the red lead paint we used on our barns when I lived on a farm as a boy. I dilute the paint down considerably with 50:50 Vallejo thinners and deionized water and then apply about seven coats. John


- 160 replies
-
- 8
-
-
- cheerful
- Syren Ship Model Company
- (and 1 more)
-
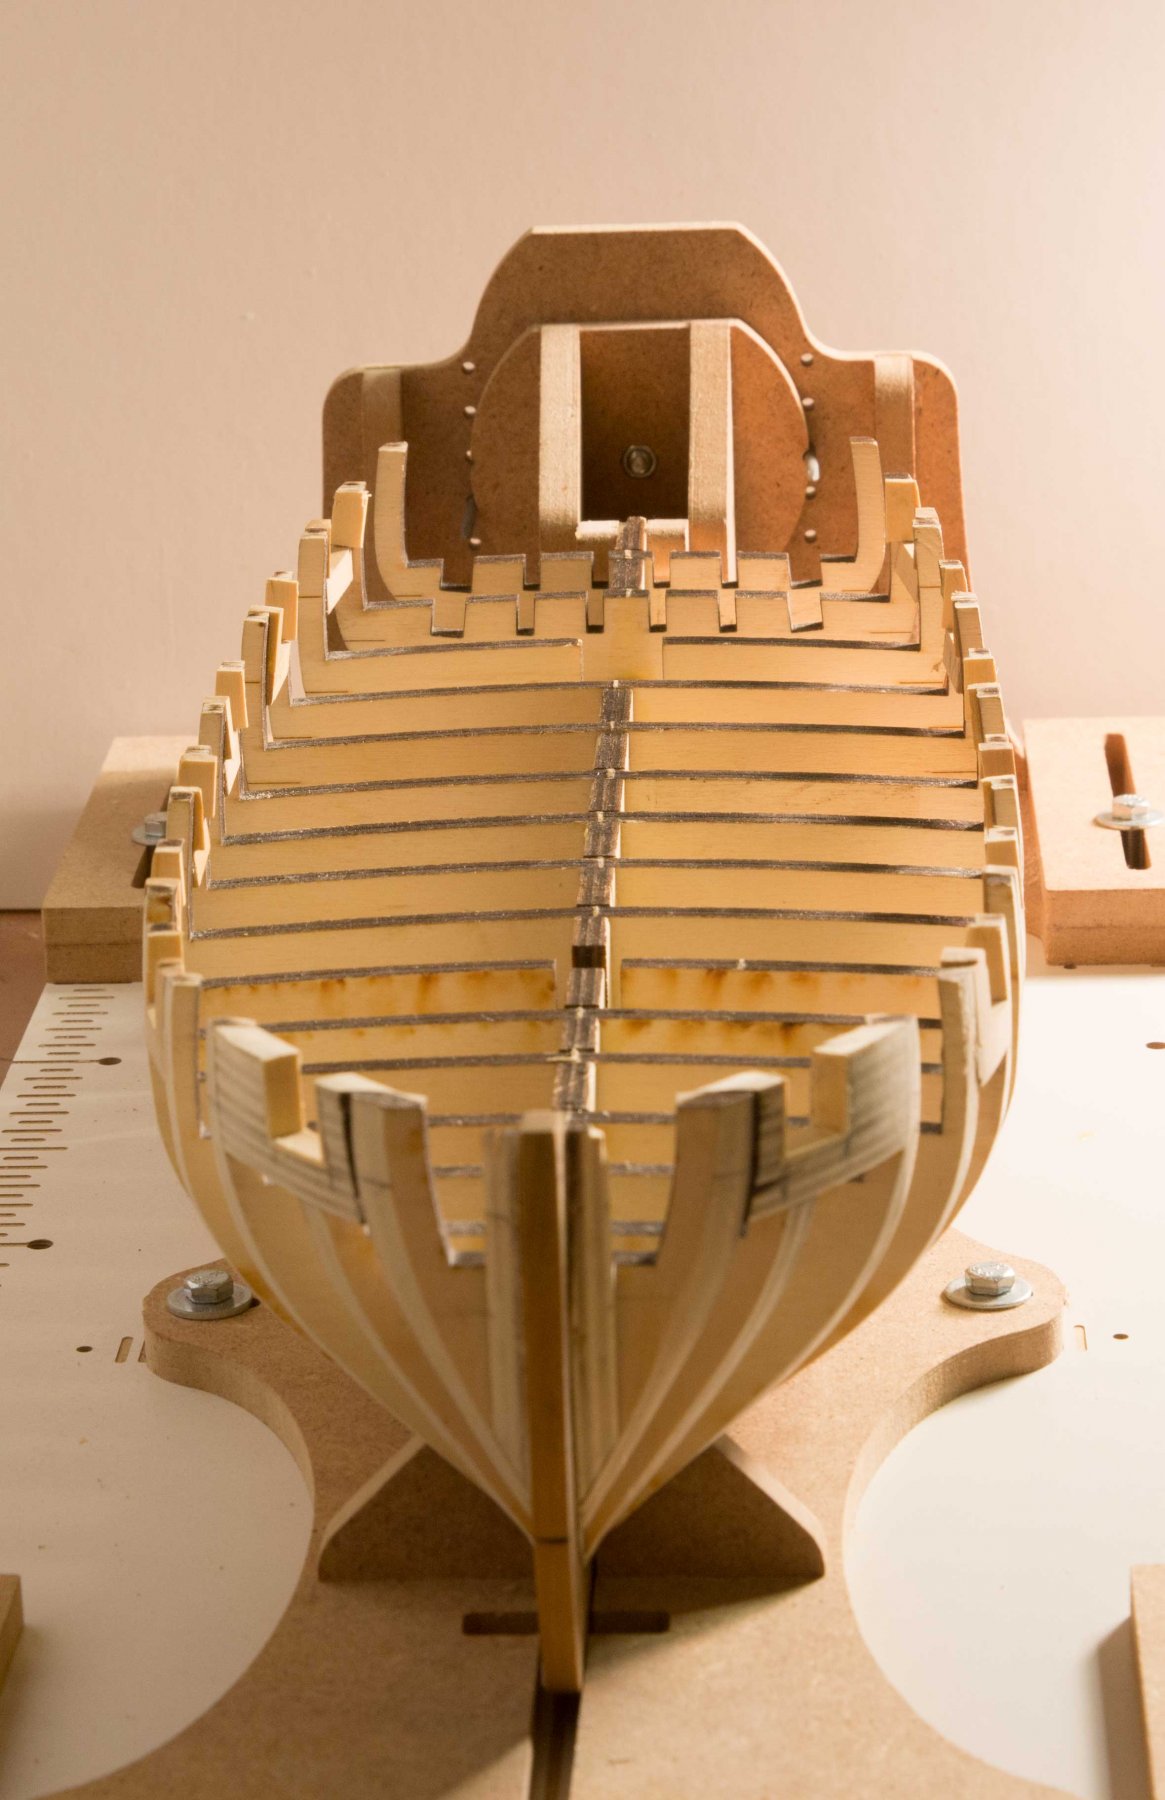
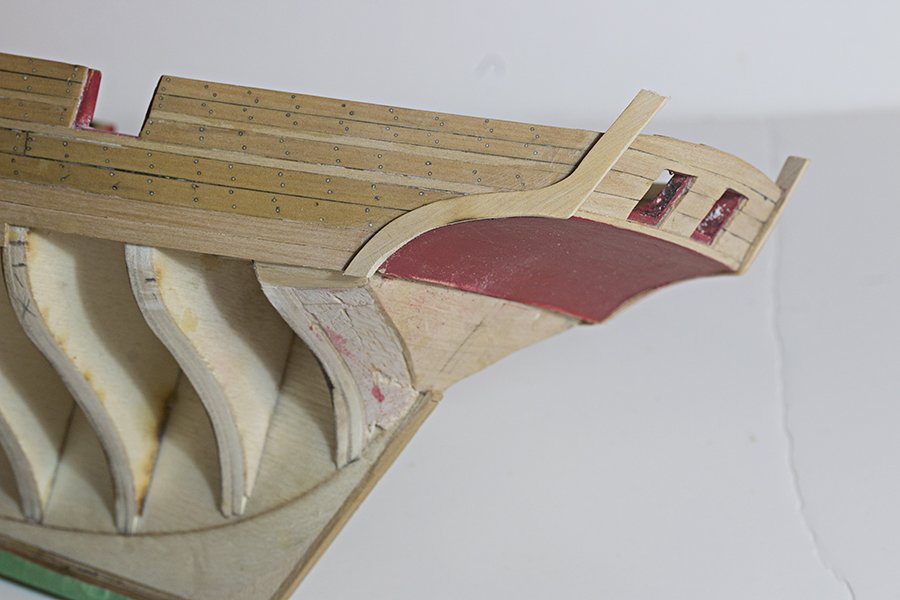
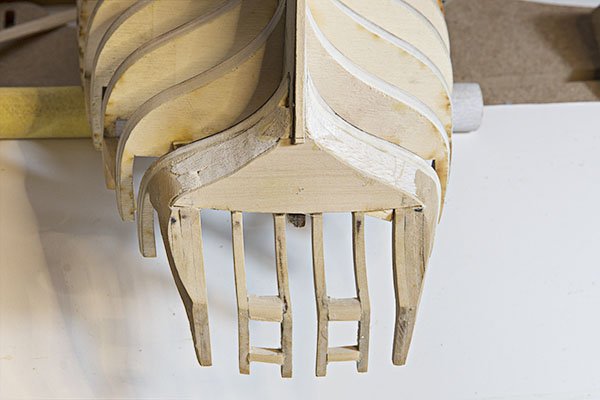
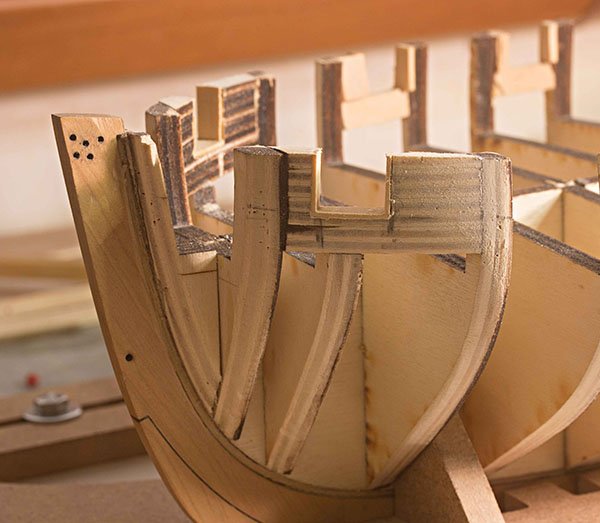
Post 7 And now the stern filler blocks. A bit rough but I think faired well enough to serve the purpose
- 160 replies
-
- 9
-
-
- cheerful
- Syren Ship Model Company
- (and 1 more)
-
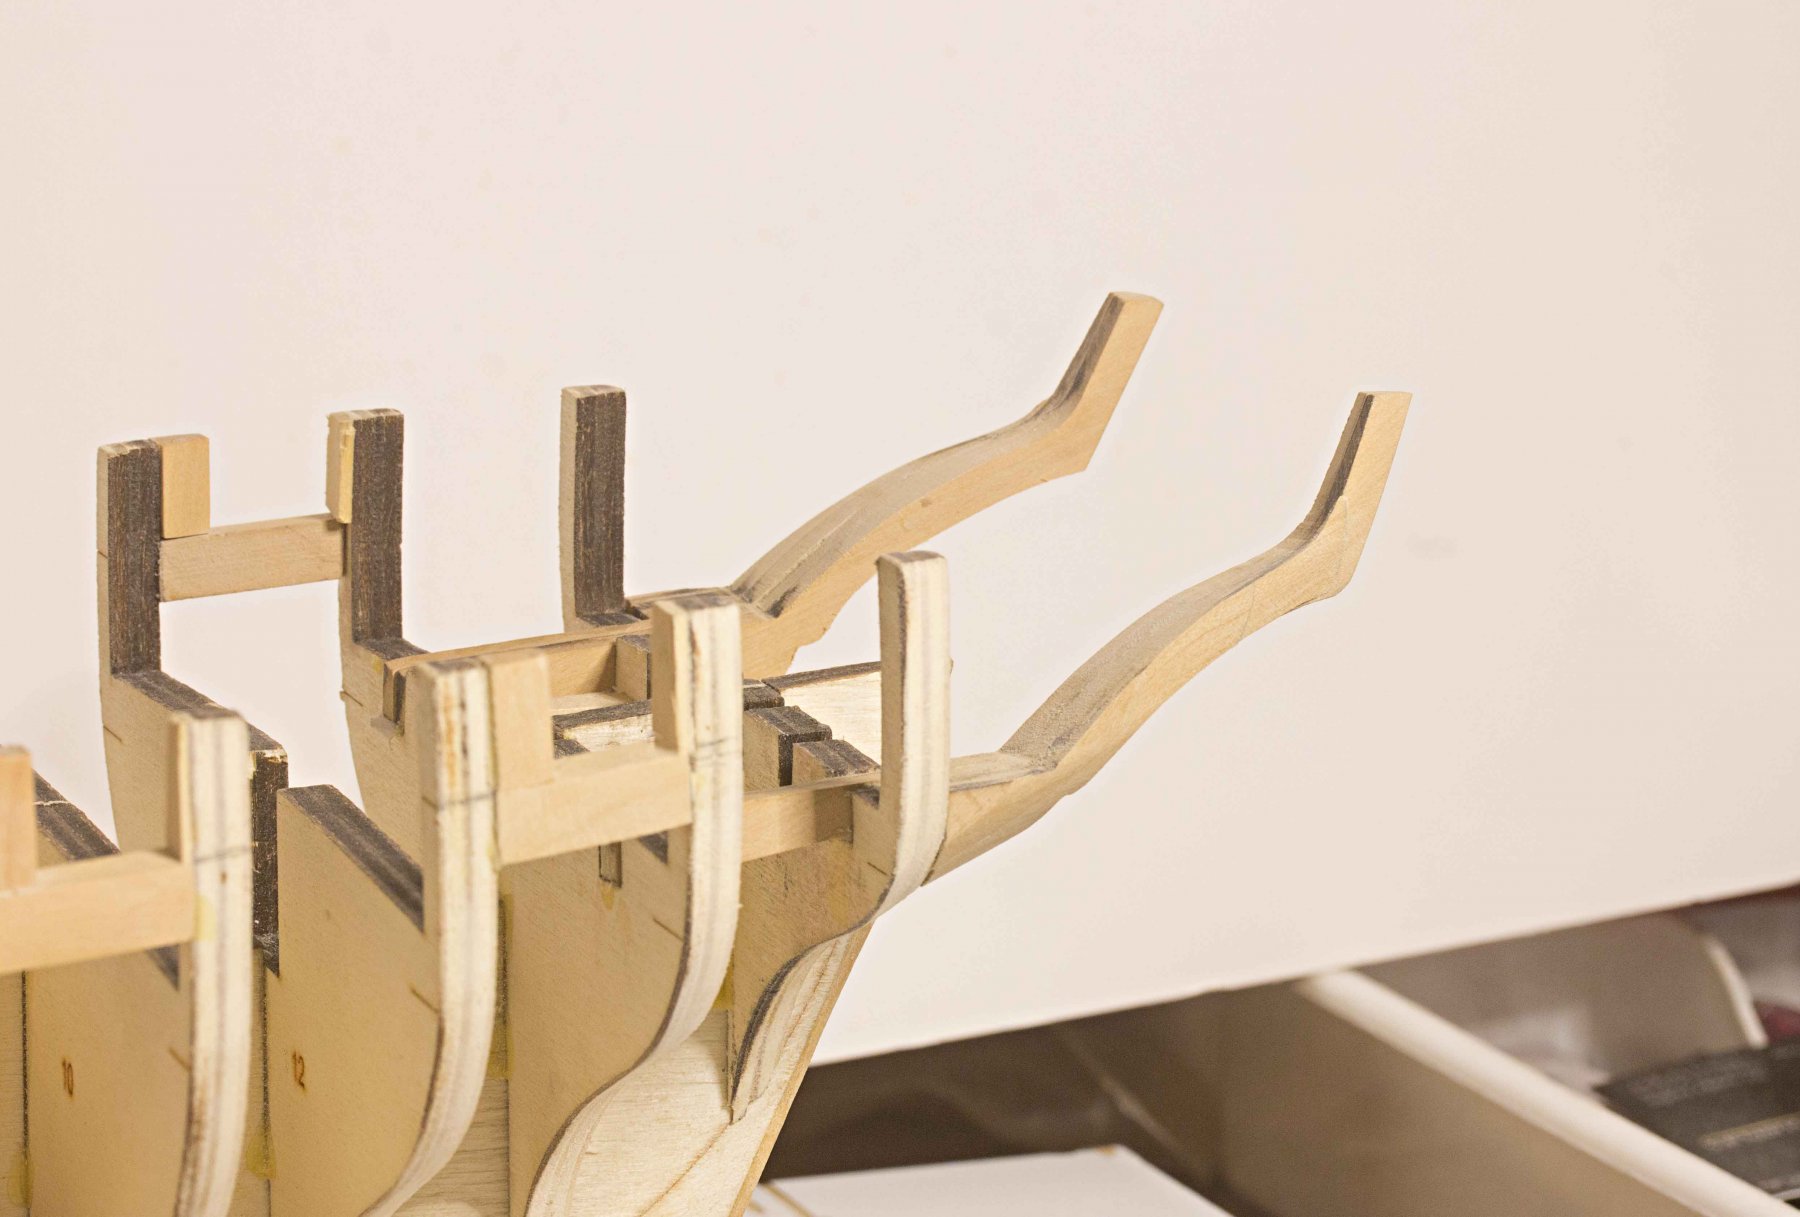
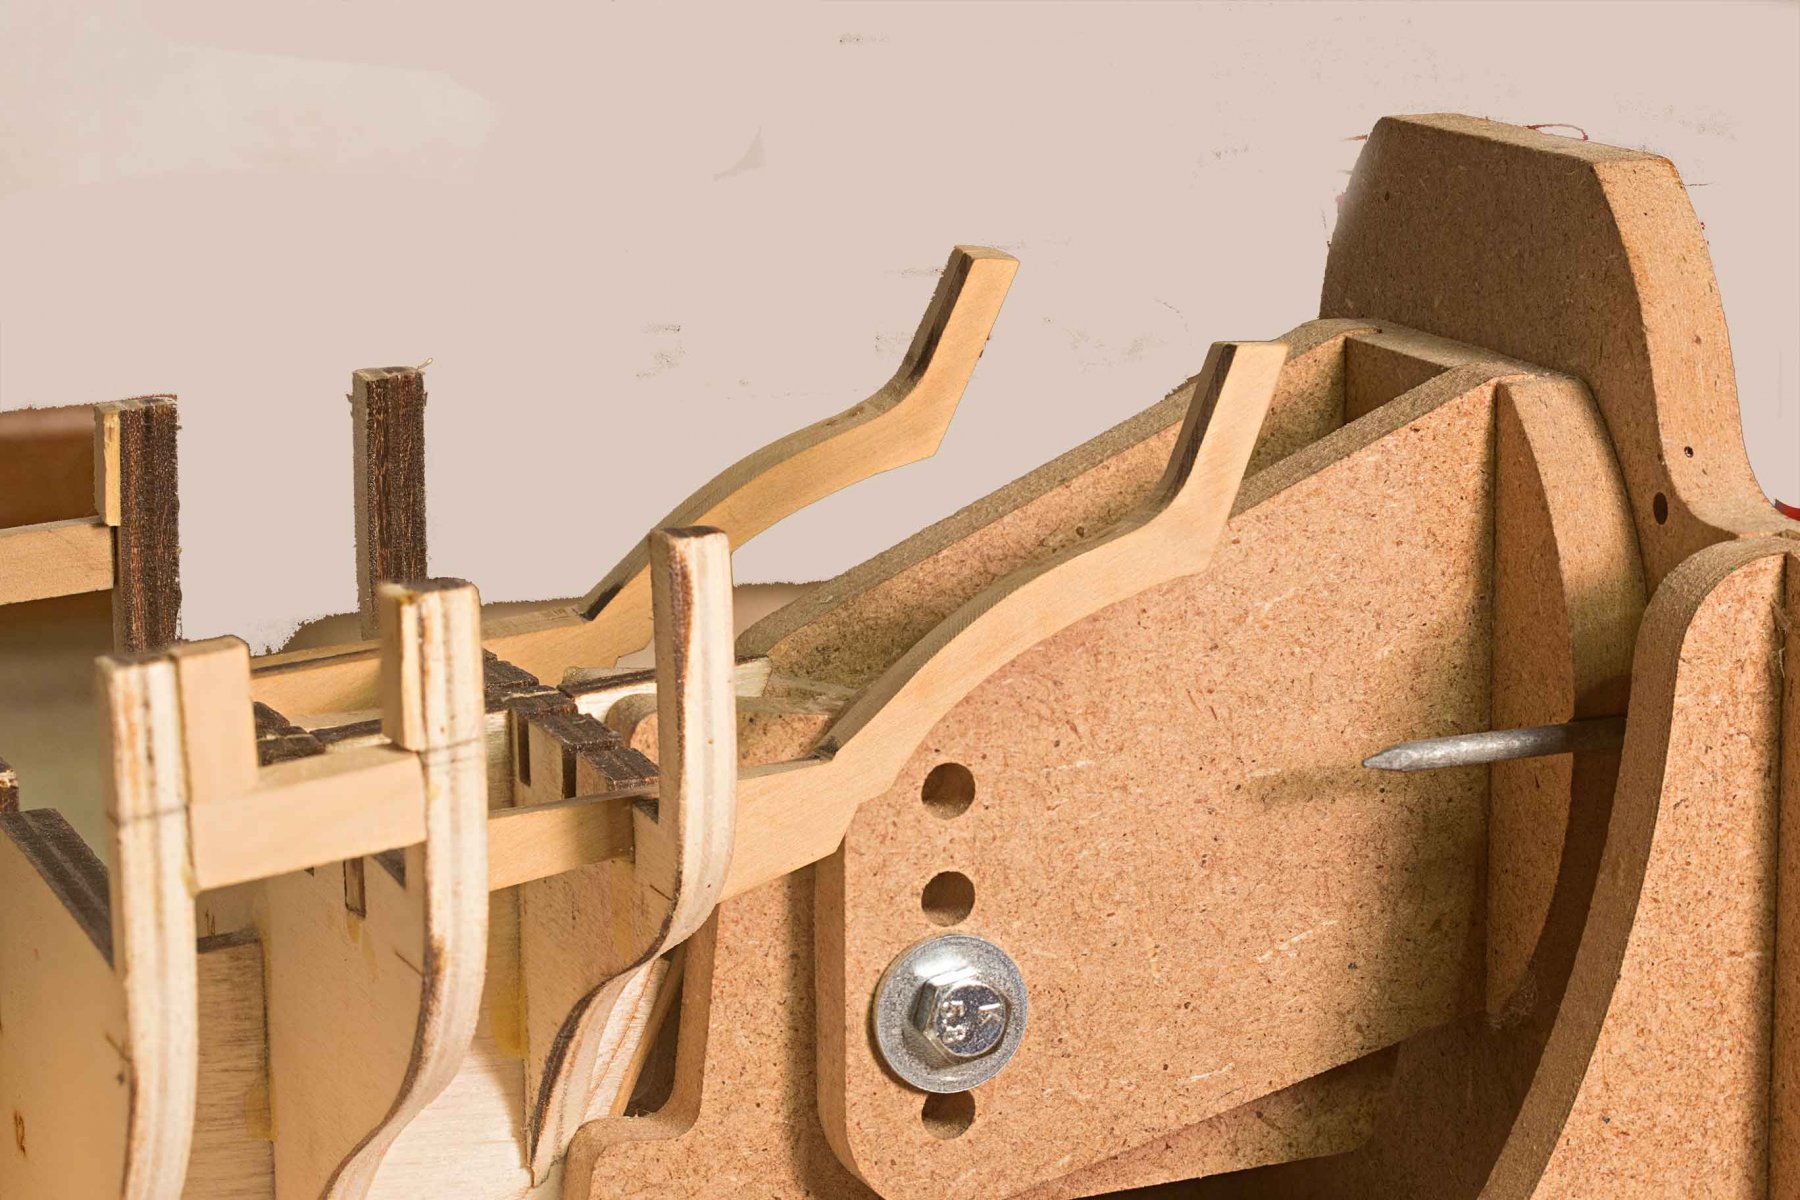
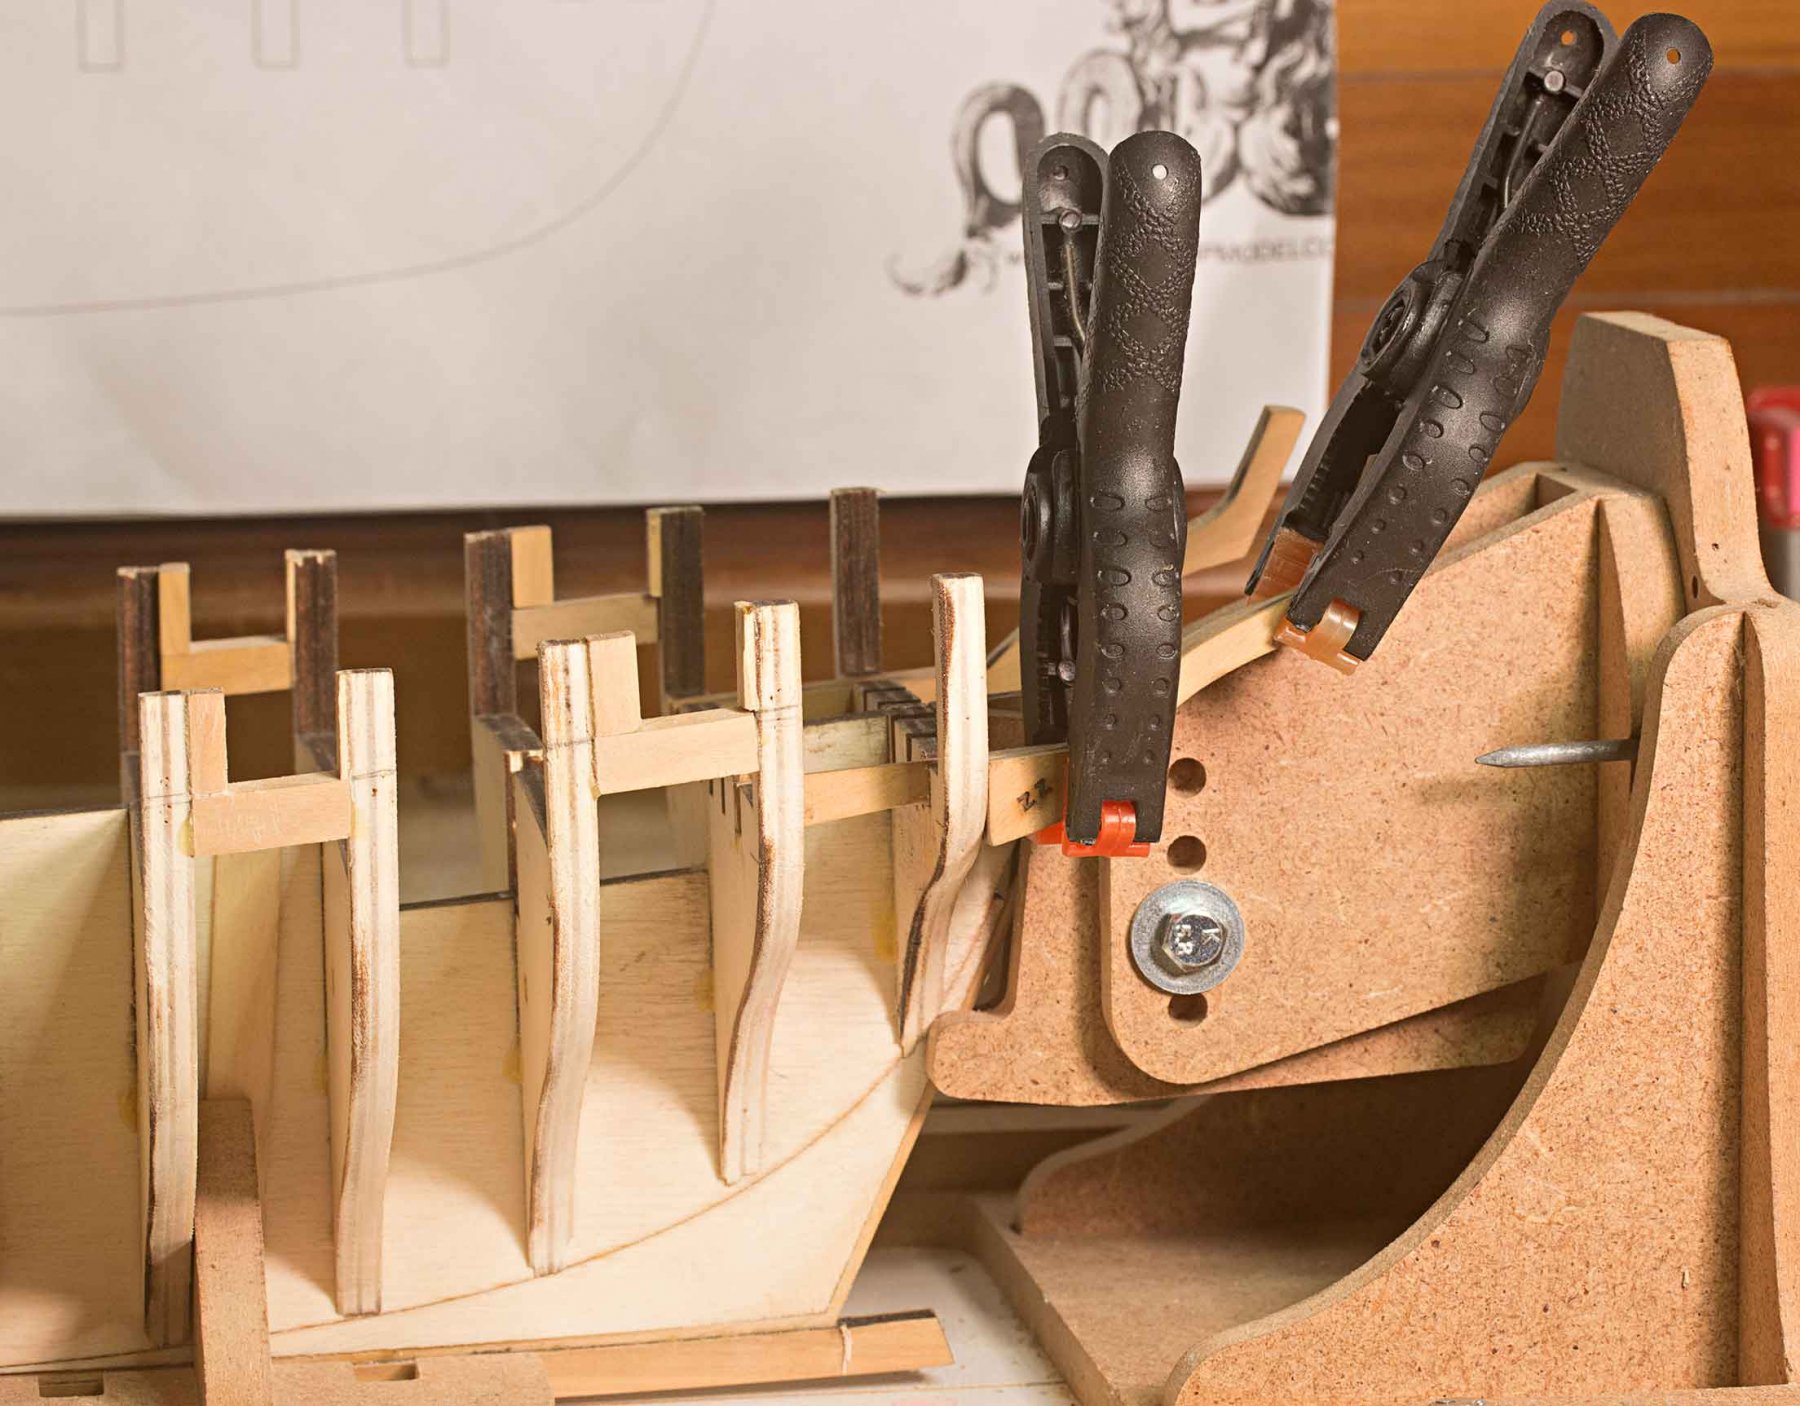
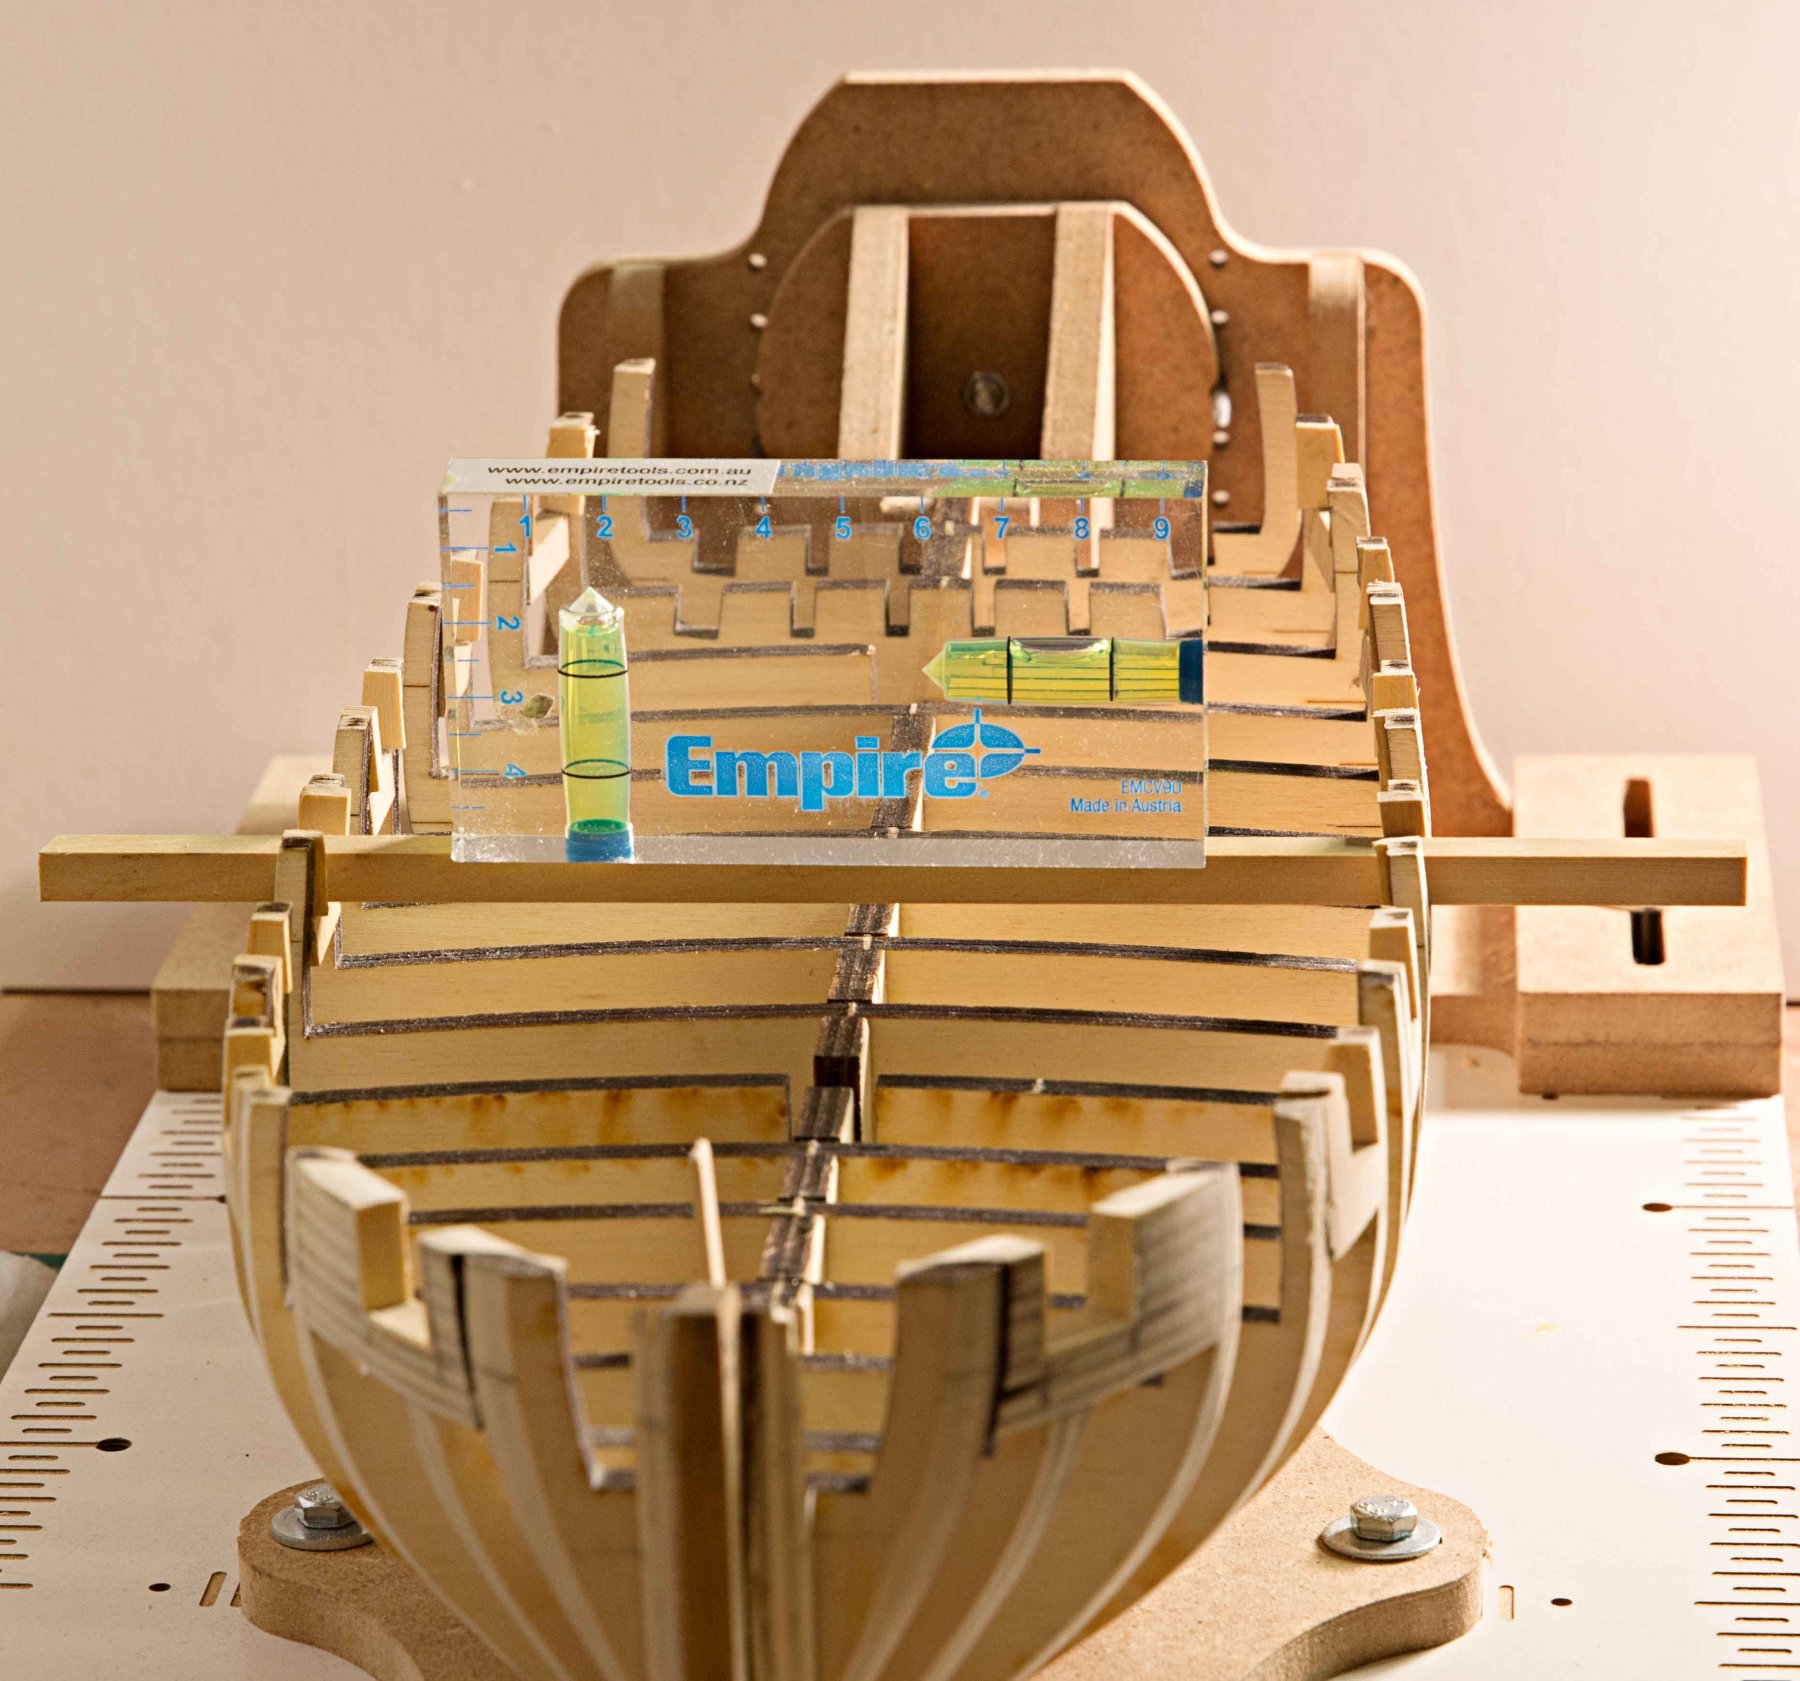
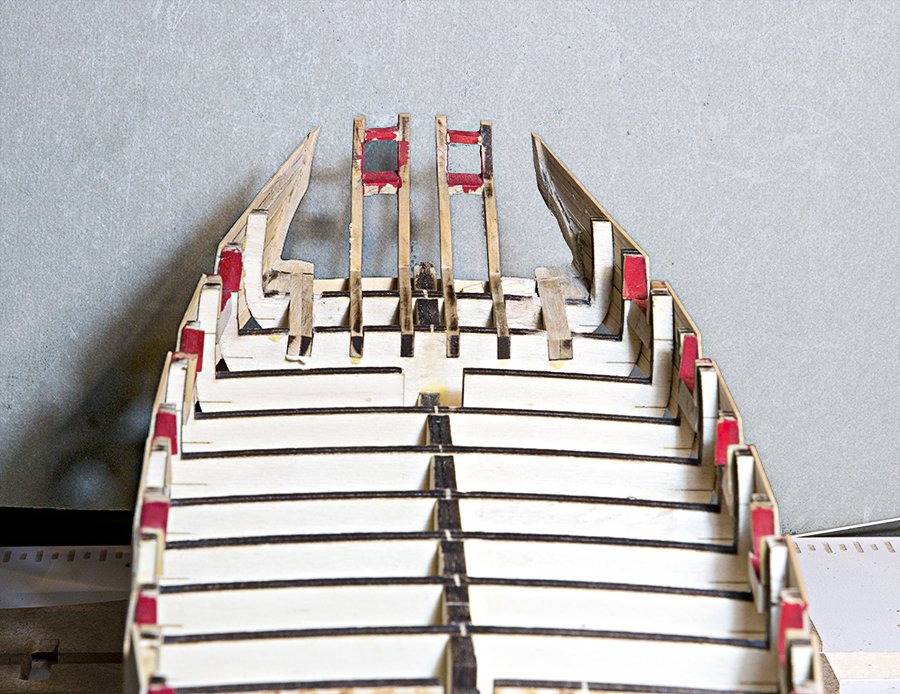
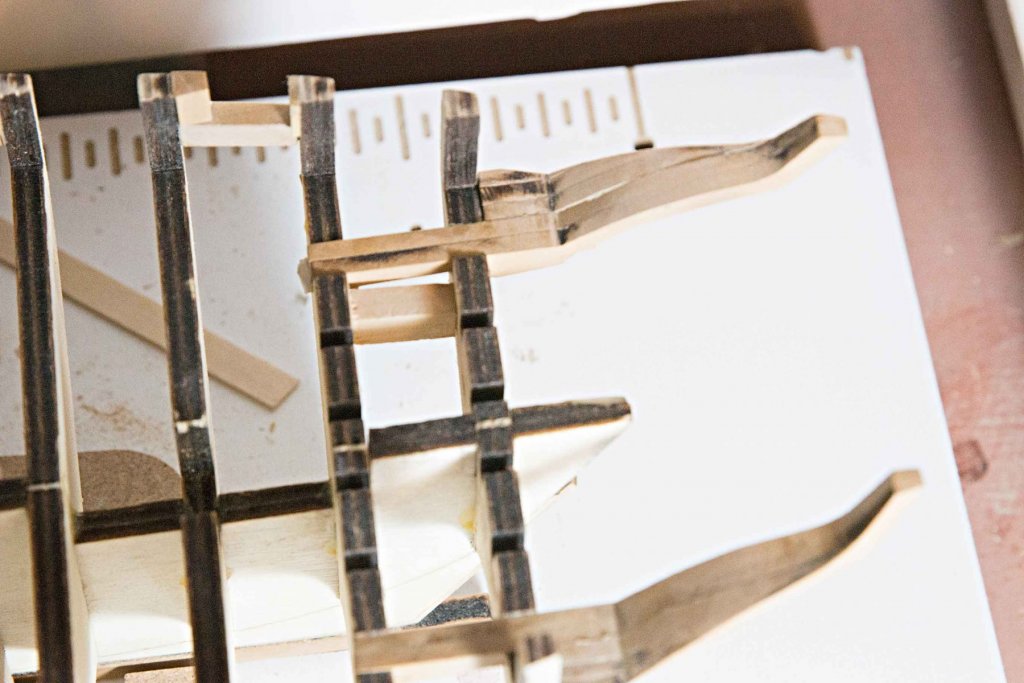
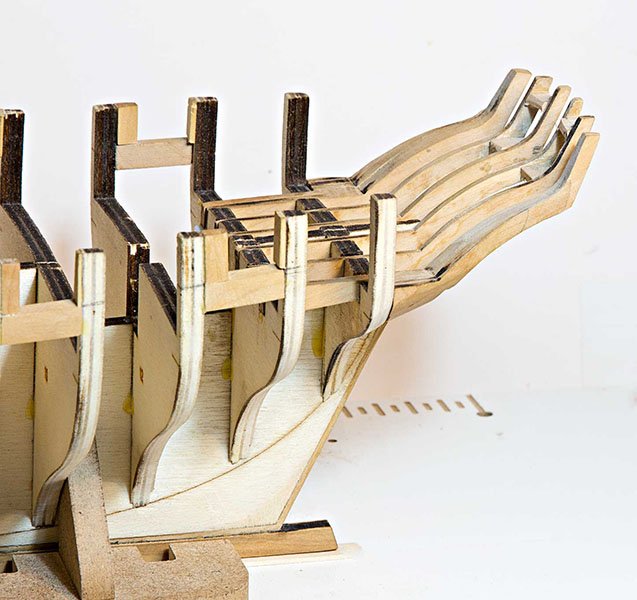
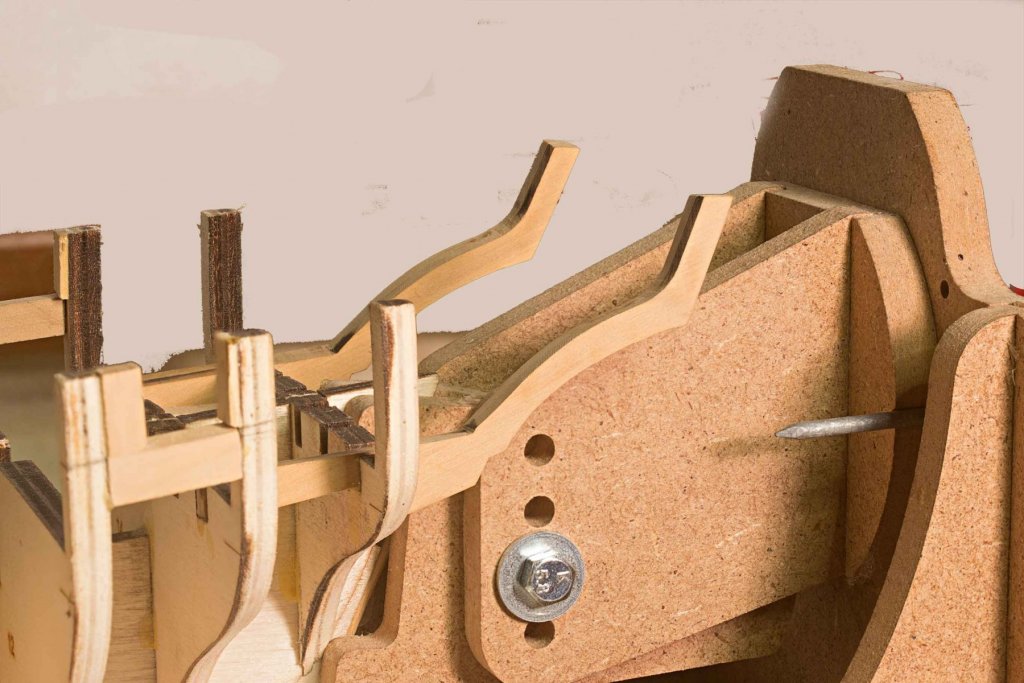
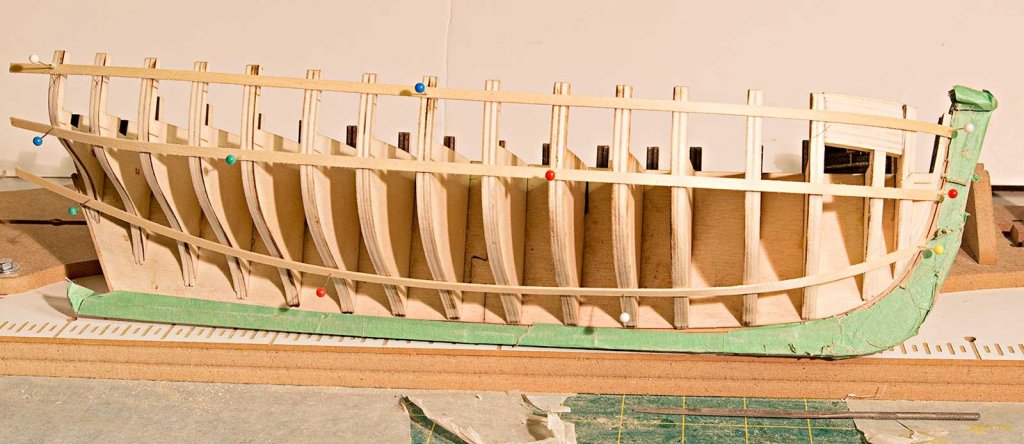
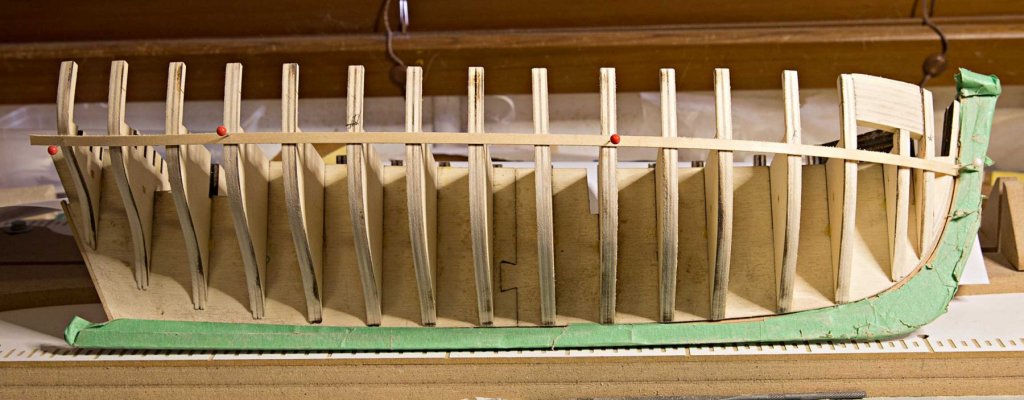
Post 5 Framing the Stern Following Chuck's suggestions, I first glued in the main outer frames (z) Then the outer frames themselves (zz) are glued to these: And the whole assembly faired to match the hull: After installing the central frames, the gun-port sills and lintels were installed. As reported by others, I found this step surprisingly tricky and I had to un-glue and reinstall several times! I used a level and a sized block to ensure that each was level with the waterline and sized the same: Here is the result

- 160 replies
-
- 12
-
-
- cheerful
- Syren Ship Model Company
- (and 1 more)
-
BE, You mentioned above that the Birchwood Casey stuff seems "nasty stuff". Yes indeed! All of these products contain selenous acid ( and selinic acid once used. These a both poisonous chemicals and also carcigenic. Avoid skin contact. Wear gloves. and if any gests on your skin wash with copious amounts of water. Good work though. John
- 574 replies
-
- 3
-
-
- cheerful
- Syren Ship Model Company
- (and 1 more)
-
A word of warning. Chuck warns about this later with respect to the stern ports but it is also important to make sure that all the gun-port sills fit snugly. If they are a fraction long they will push the bulkheads out of square and negate all of your careful fairing because it changes the angle. This happened on a couple of mine but fortunately I noticed the bulkhead move and so took a little off the sill in question. It doesn't take much. John
- 160 replies
-
- 3
-
-
- cheerful
- Syren Ship Model Company
- (and 1 more)
-
Here are some further images of the result I also lined the chase ports as others have done on this forum (BE and Mike)


- 160 replies
-
- 12
-
-
- cheerful
- Syren Ship Model Company
- (and 1 more)
-
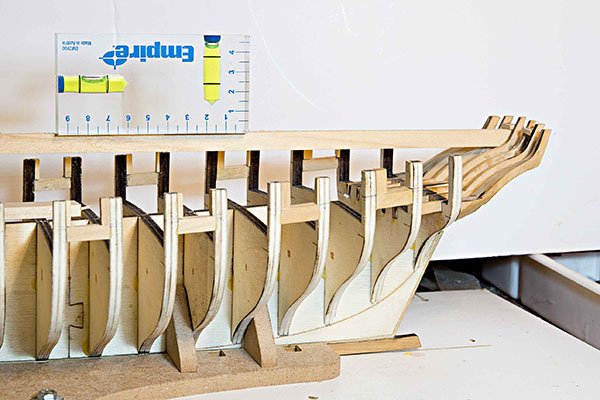
Post 4 I have now finished the Gun-port linings. I used the method recommended by Chuck using a batten to obtain smooth curve. Although I eyeballed the port and starboard battens to make sure they were the same. I also double checked by using a level as here:

- 160 replies
-
- 9
-
-
- cheerful
- Syren Ship Model Company
- (and 1 more)
-
Although it is difficult to see in a photo, I think its done now. Time to move on.
- 160 replies
-
- 7
-
-
- cheerful
- Syren Ship Model Company
- (and 1 more)
-
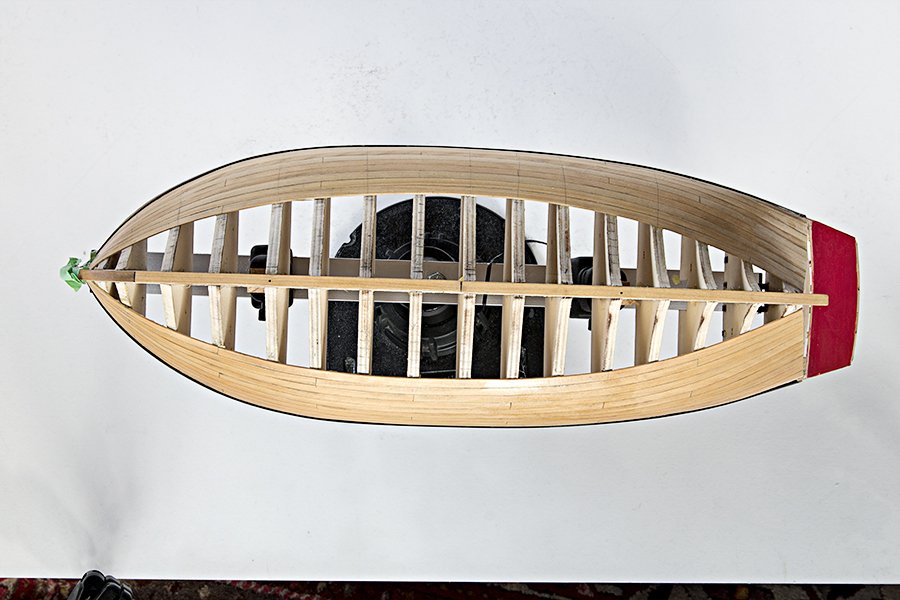
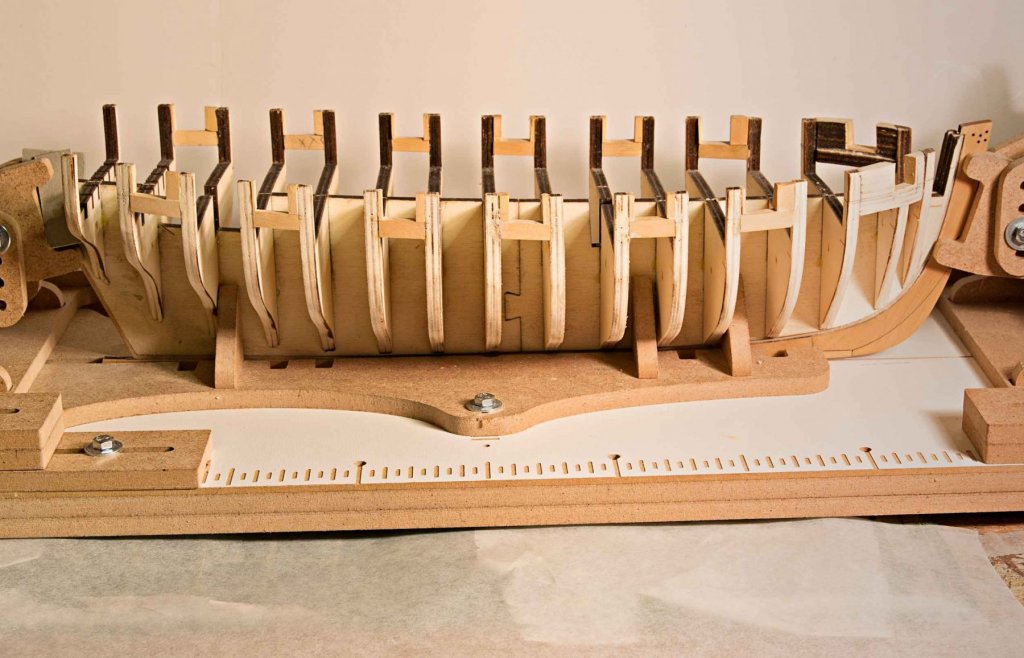
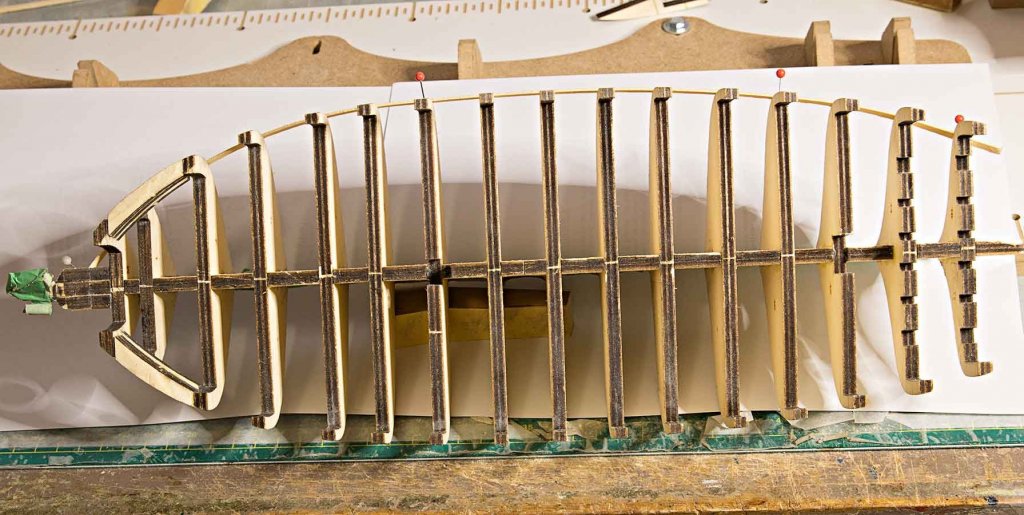
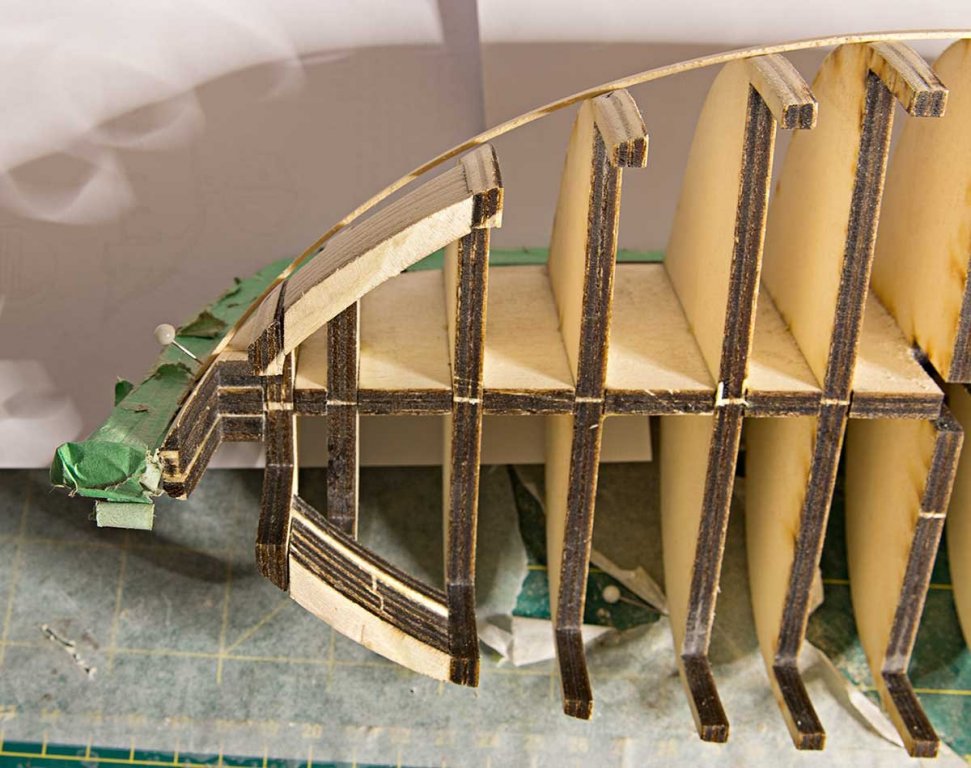
Unfortunately there are lots of photos of this step but obviously good planking depends on this step being correct. Test battens seem to sit flat on most bulkheads but it is a bit proud at the bow. So I thought I needed to take bit more of the marked bulkheads. Obviously it is difficult to see how good (or bad) this is without seeing the actual model but this is the best I can do at this distance
- 160 replies
-
- 6
-
-
- cheerful
- Syren Ship Model Company
- (and 1 more)