


Baker
-
Posts
4,294 -
Joined
-
Last visited
Content Type
Profiles
Forums
Gallery
Events
Posts posted by Baker
-
-
Again, thank you all for comments, following, and likes.
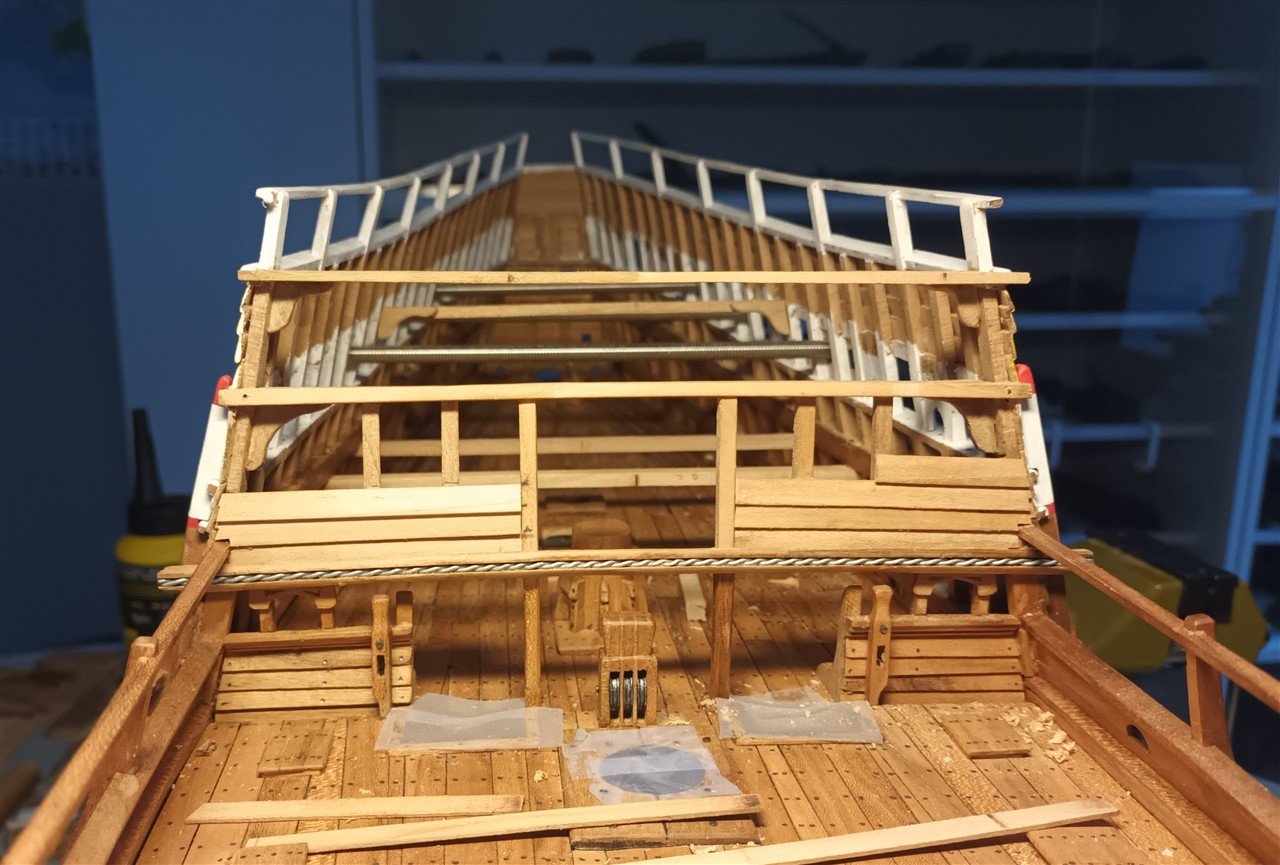
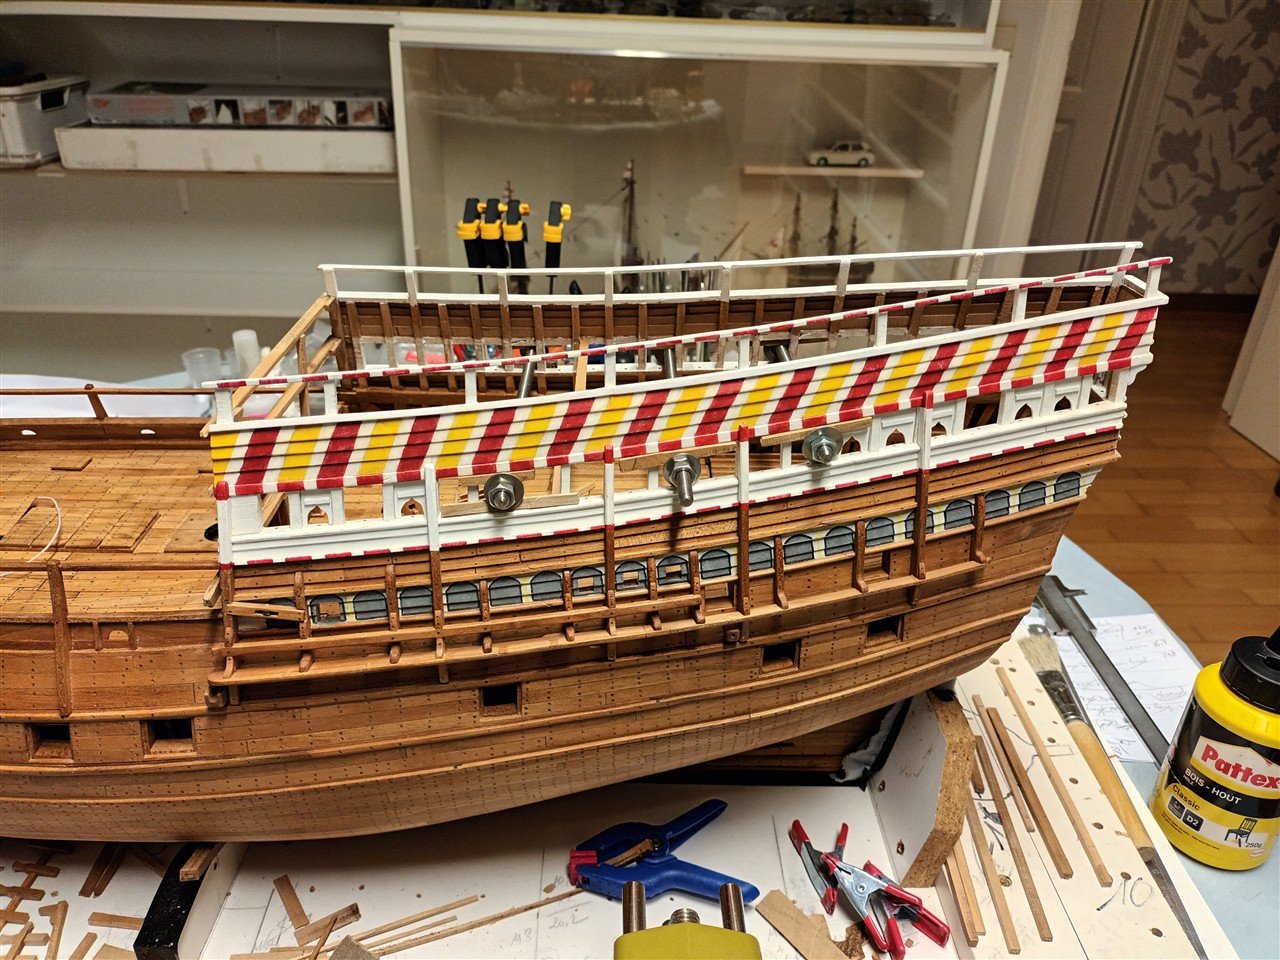
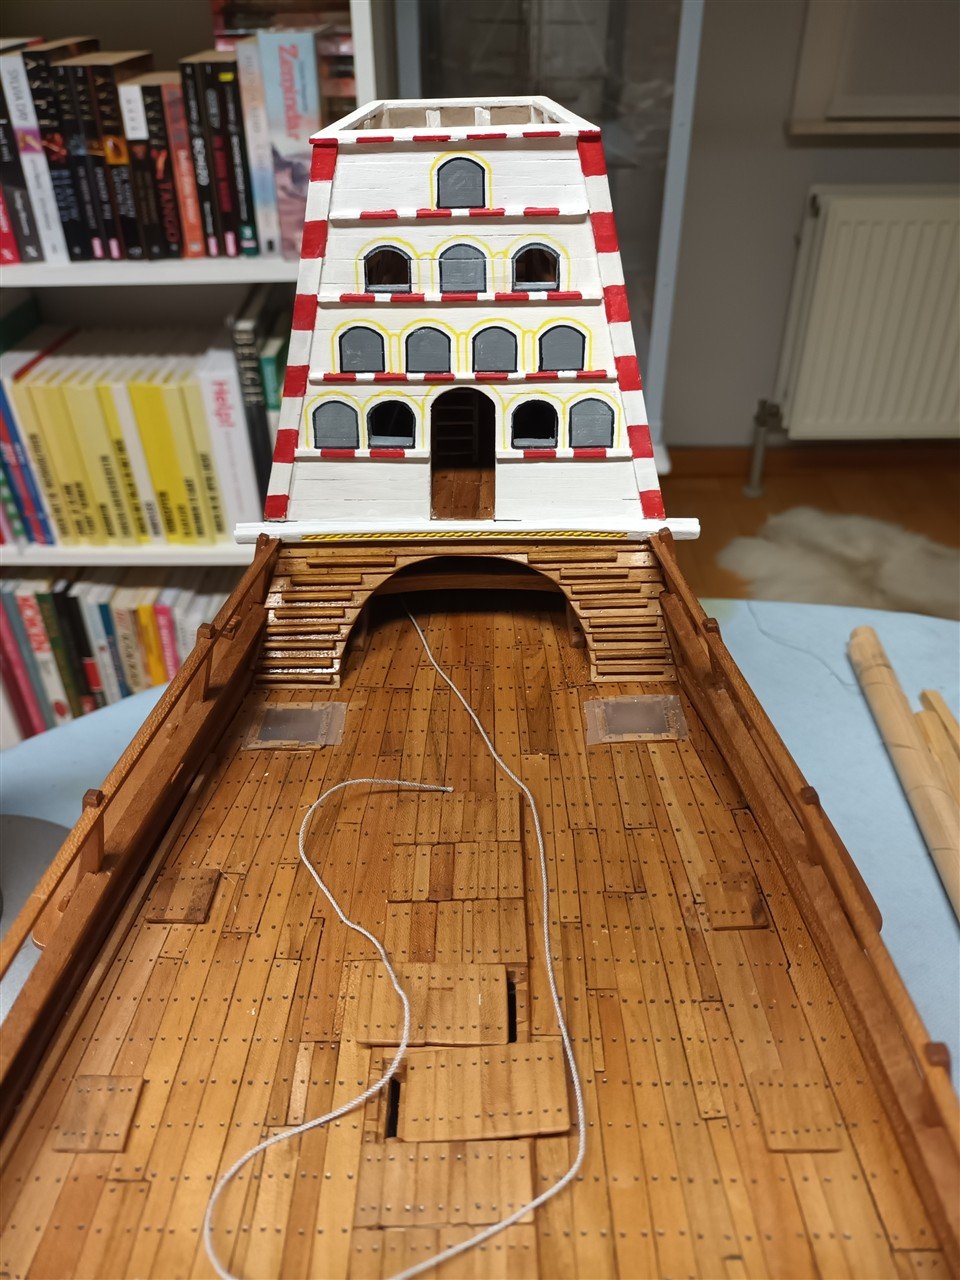
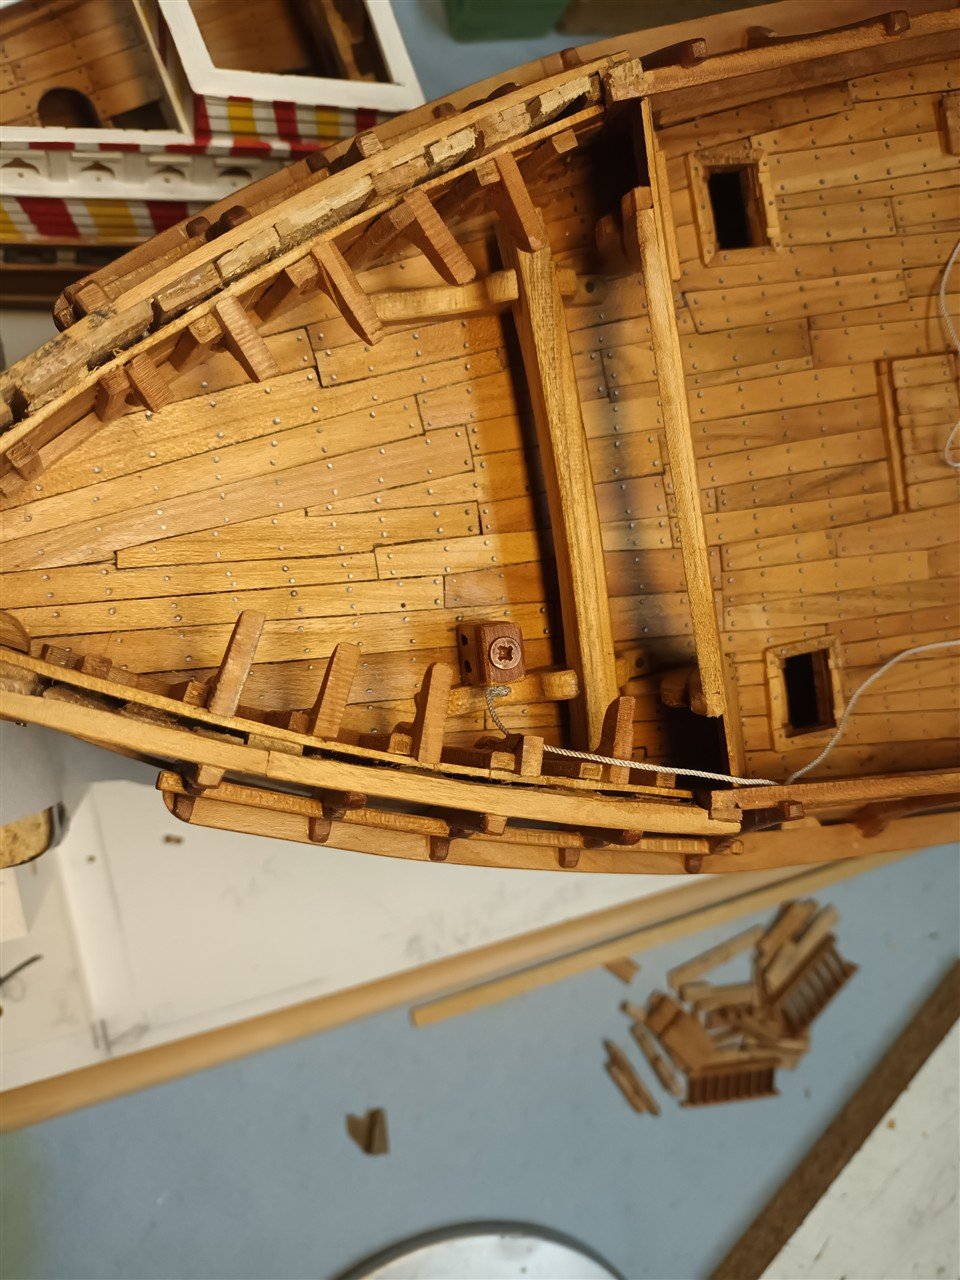
Back to the rear castle.
As already earlier discovered, the top is too wide and will therefore get in the way of the standing rigging.
Cause: Used (incomplete) drawings and the builder's oversight. Notworries, there's a solution for everything.
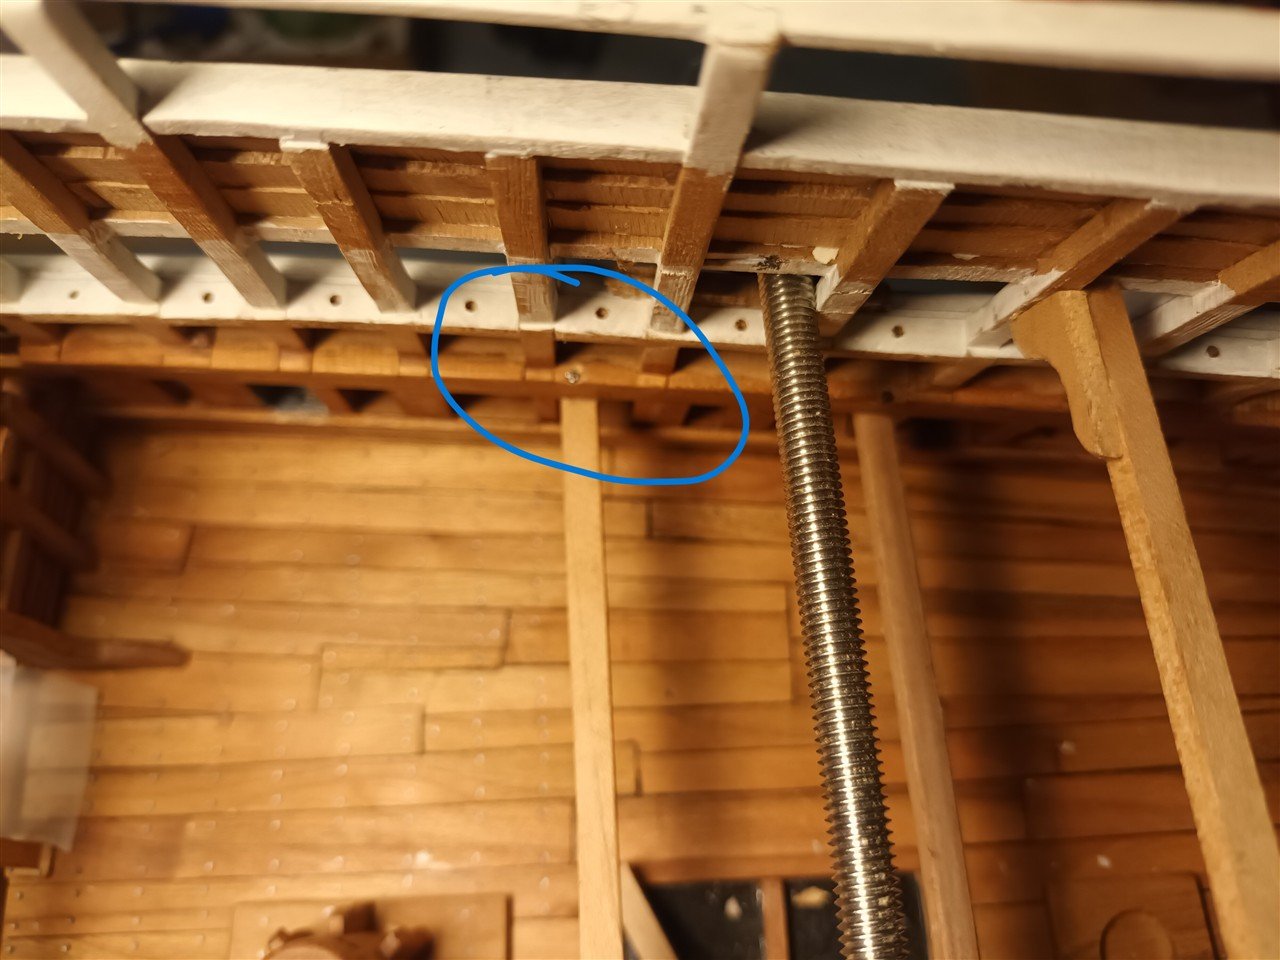
Threaded rods..
Tightening the threaded rods brings the top closer together
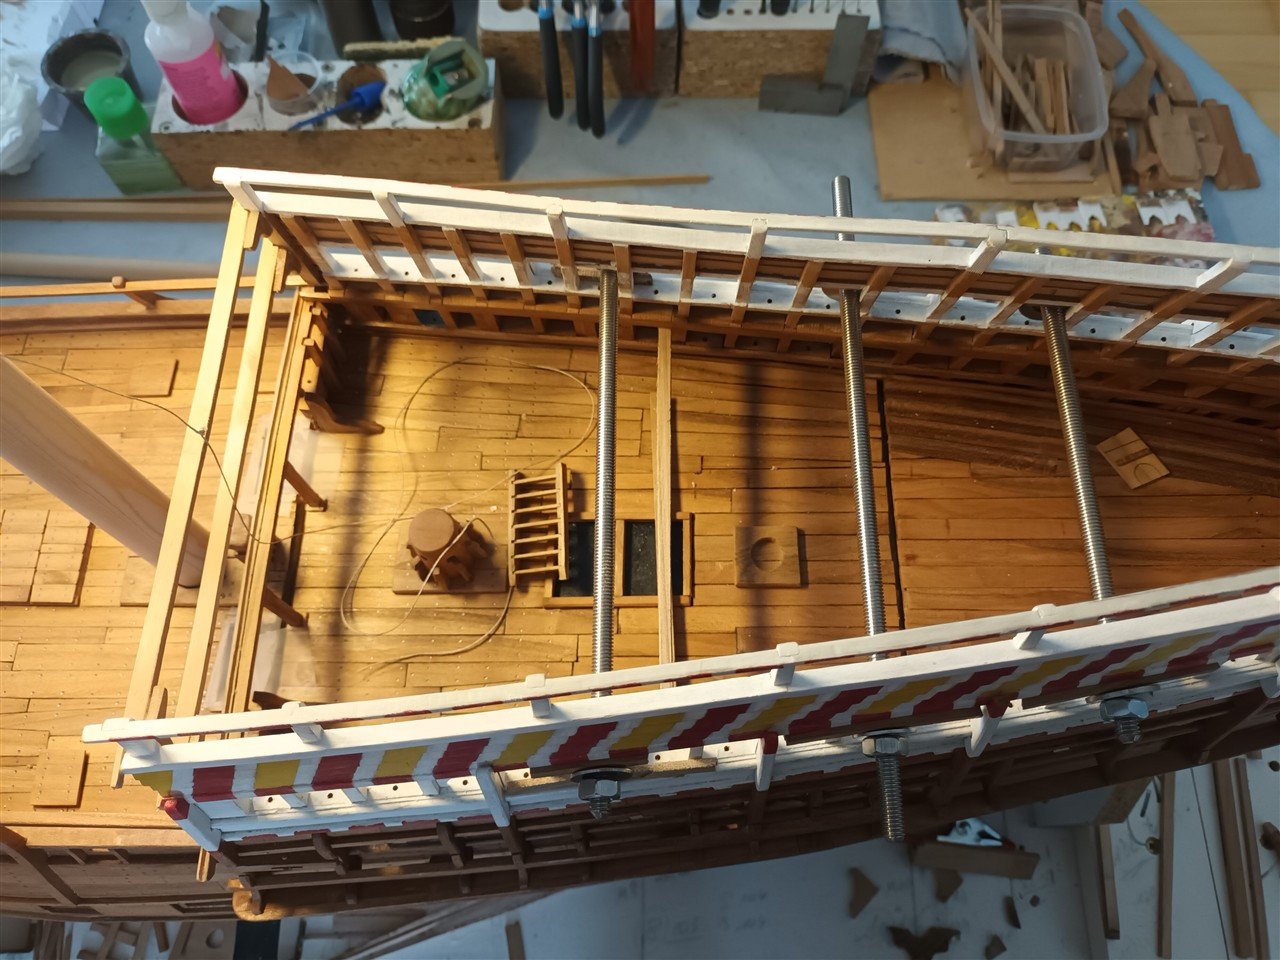
Beams and knees are then glued
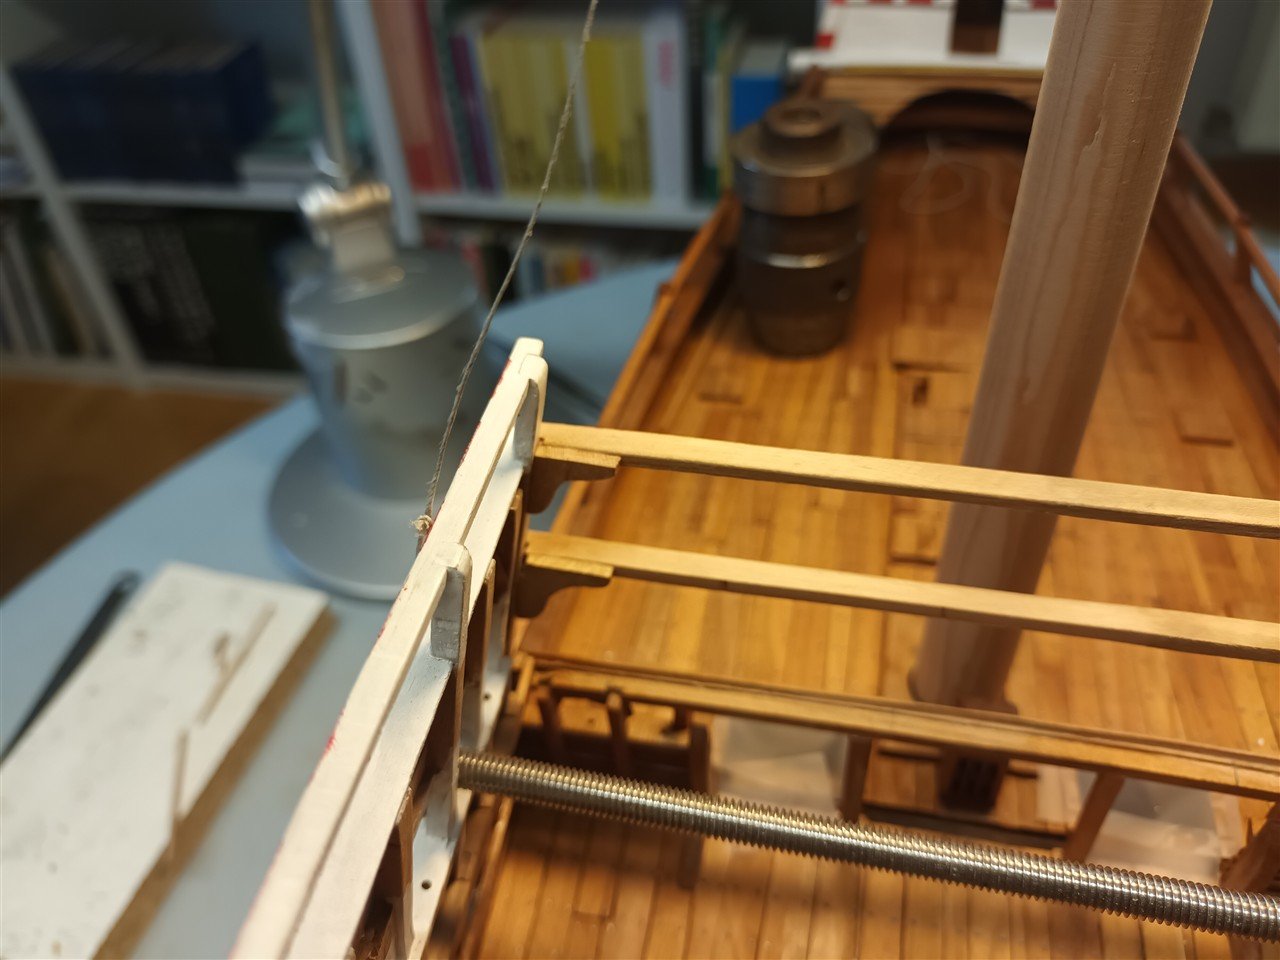
Or beams and nails (bad photo)
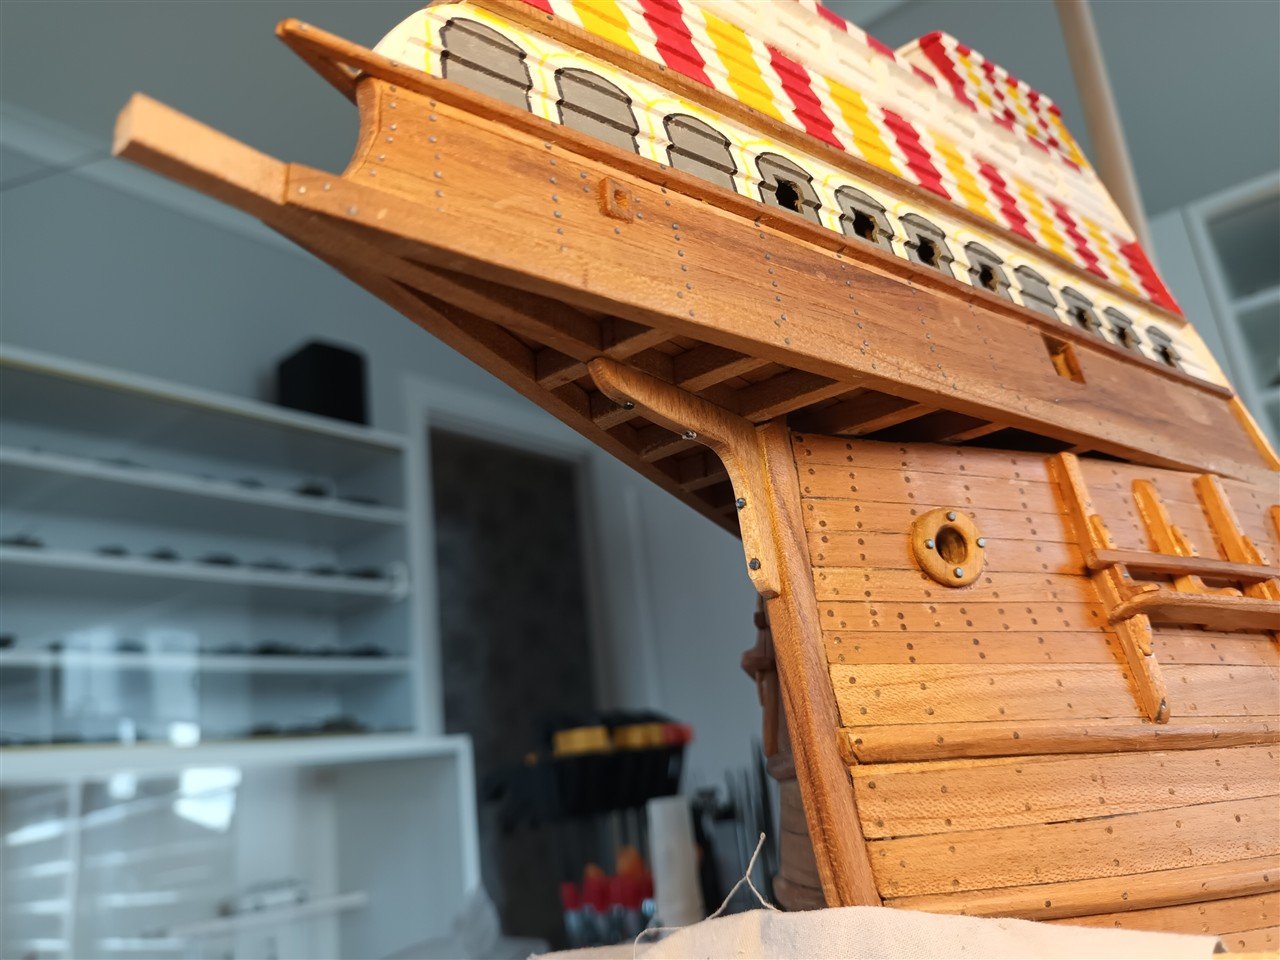
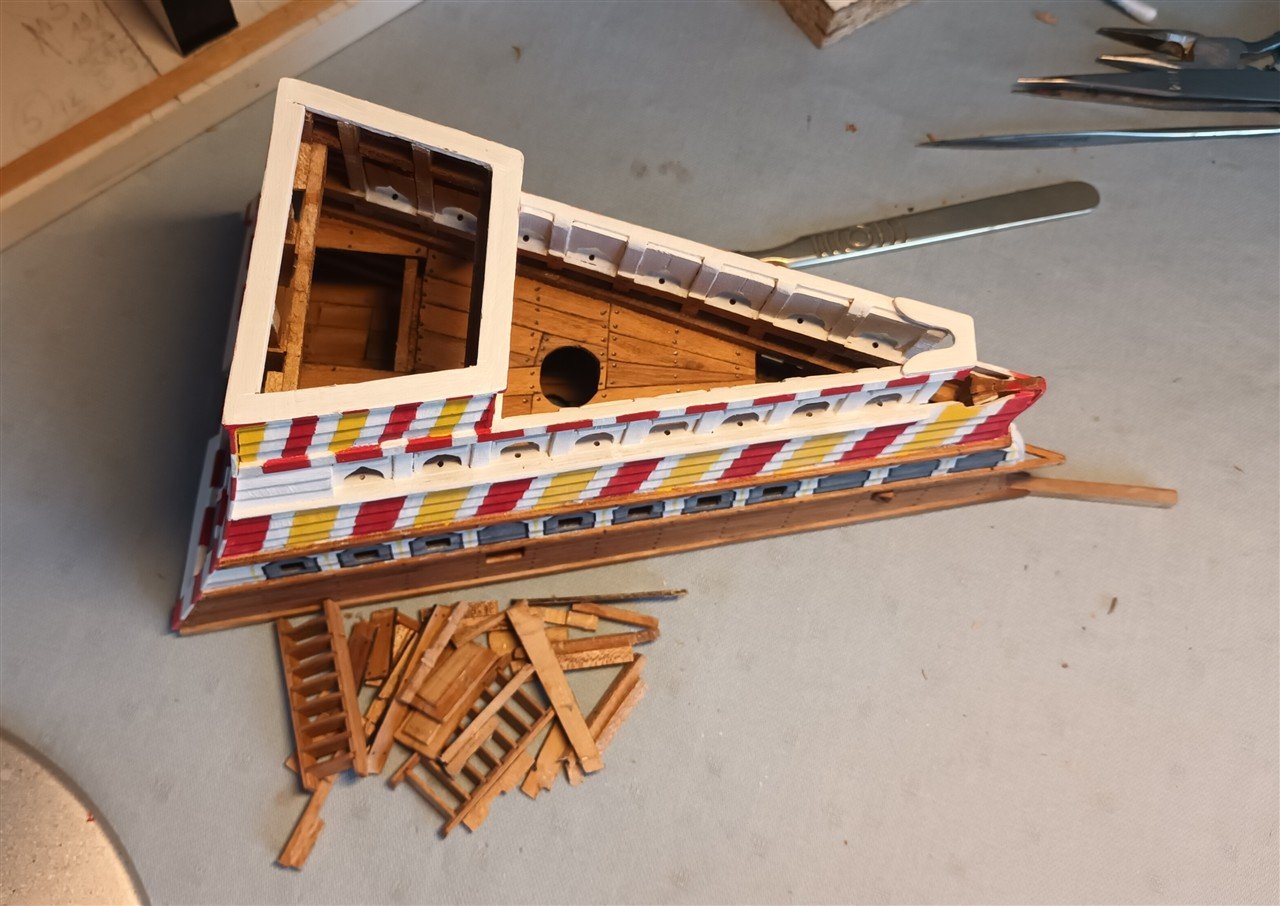
The front of the rear castle, work in progress
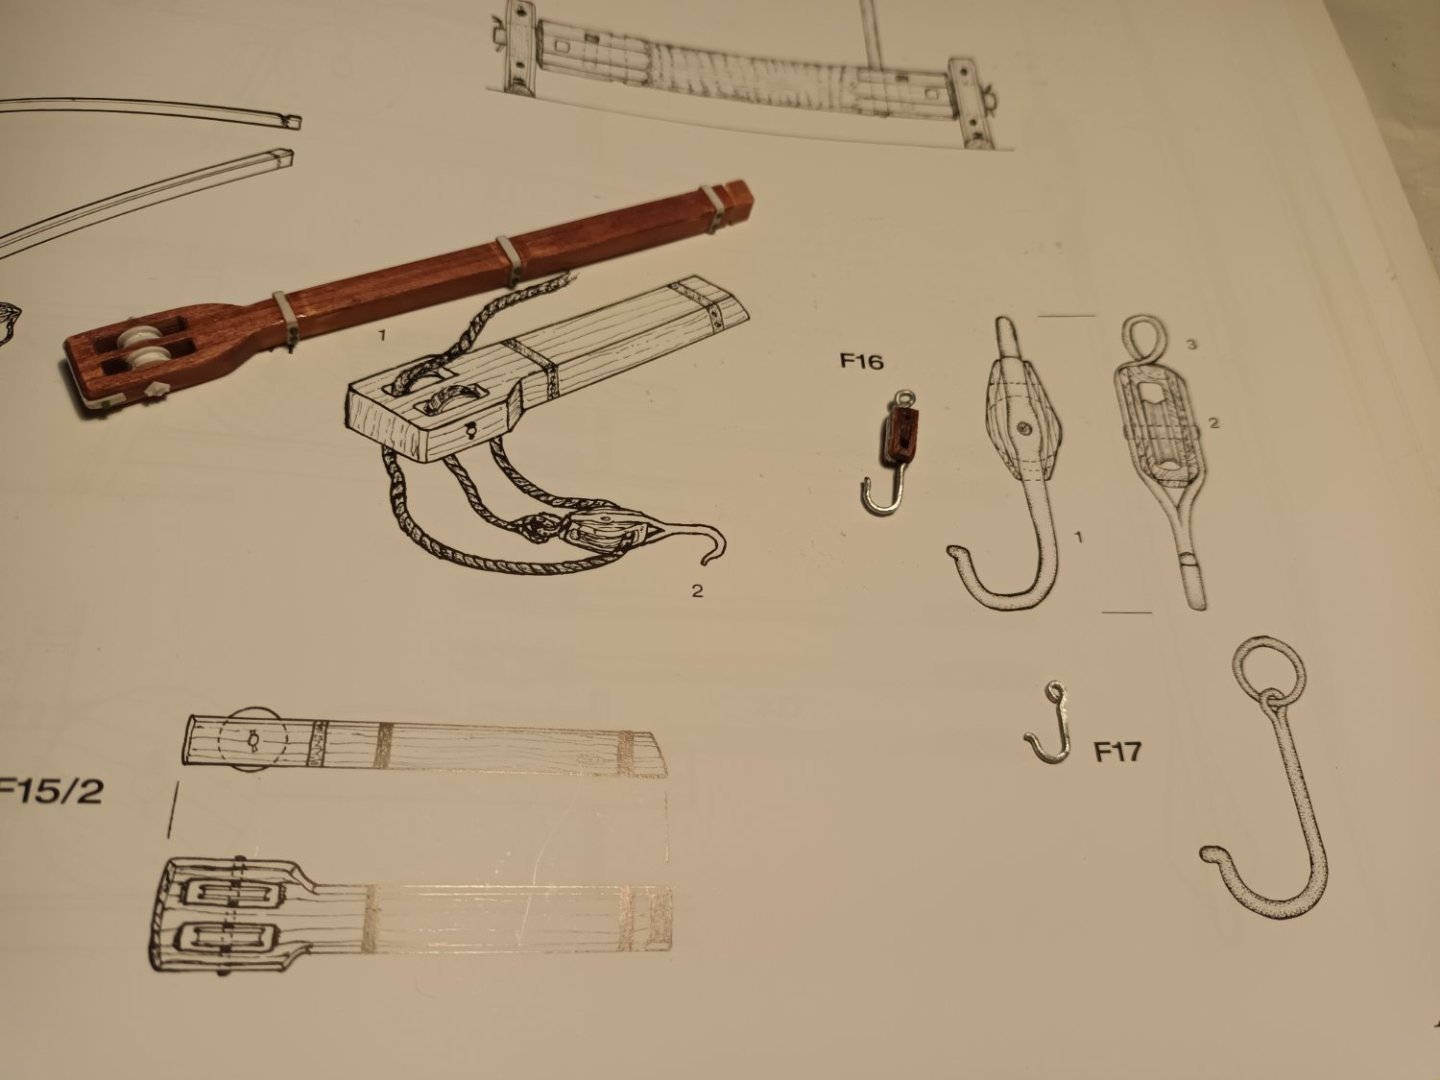
And (40) shields for the swivels. All different sizes.
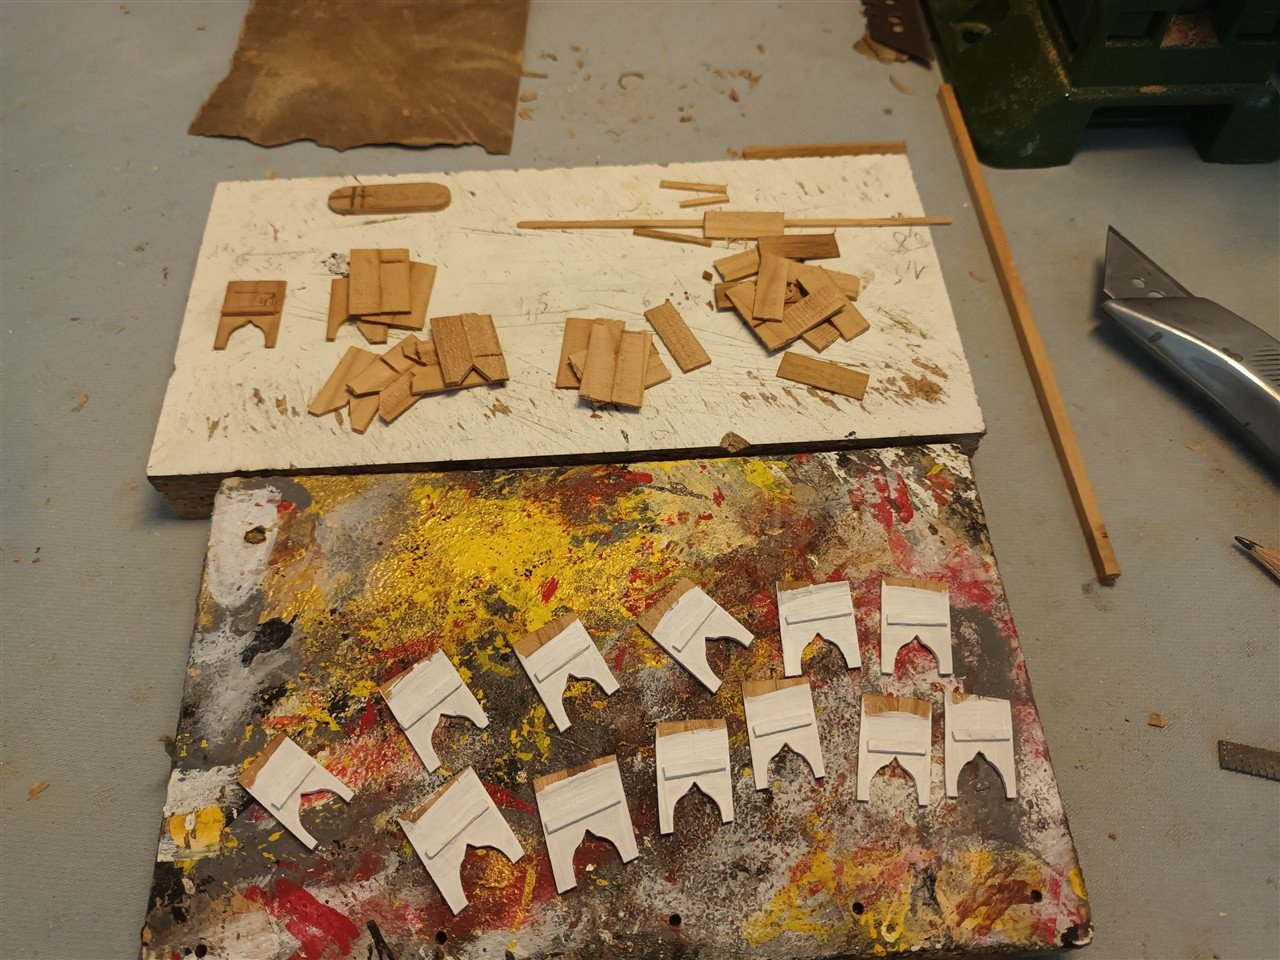
and with a few of this shields installed.
-
-
Congratulations, a beautiful model.
-
Congratulations, a beautiful model.
-
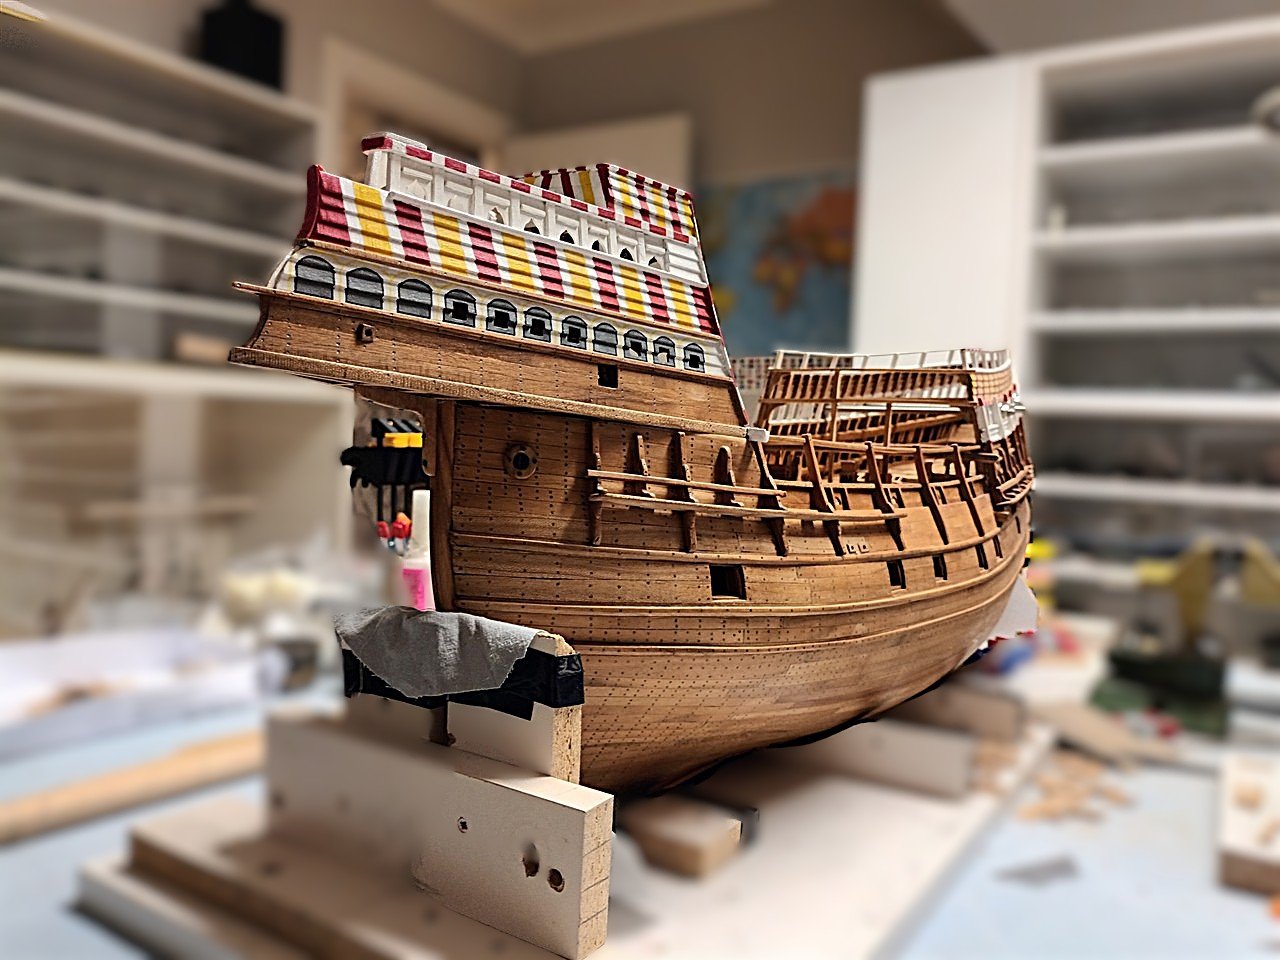
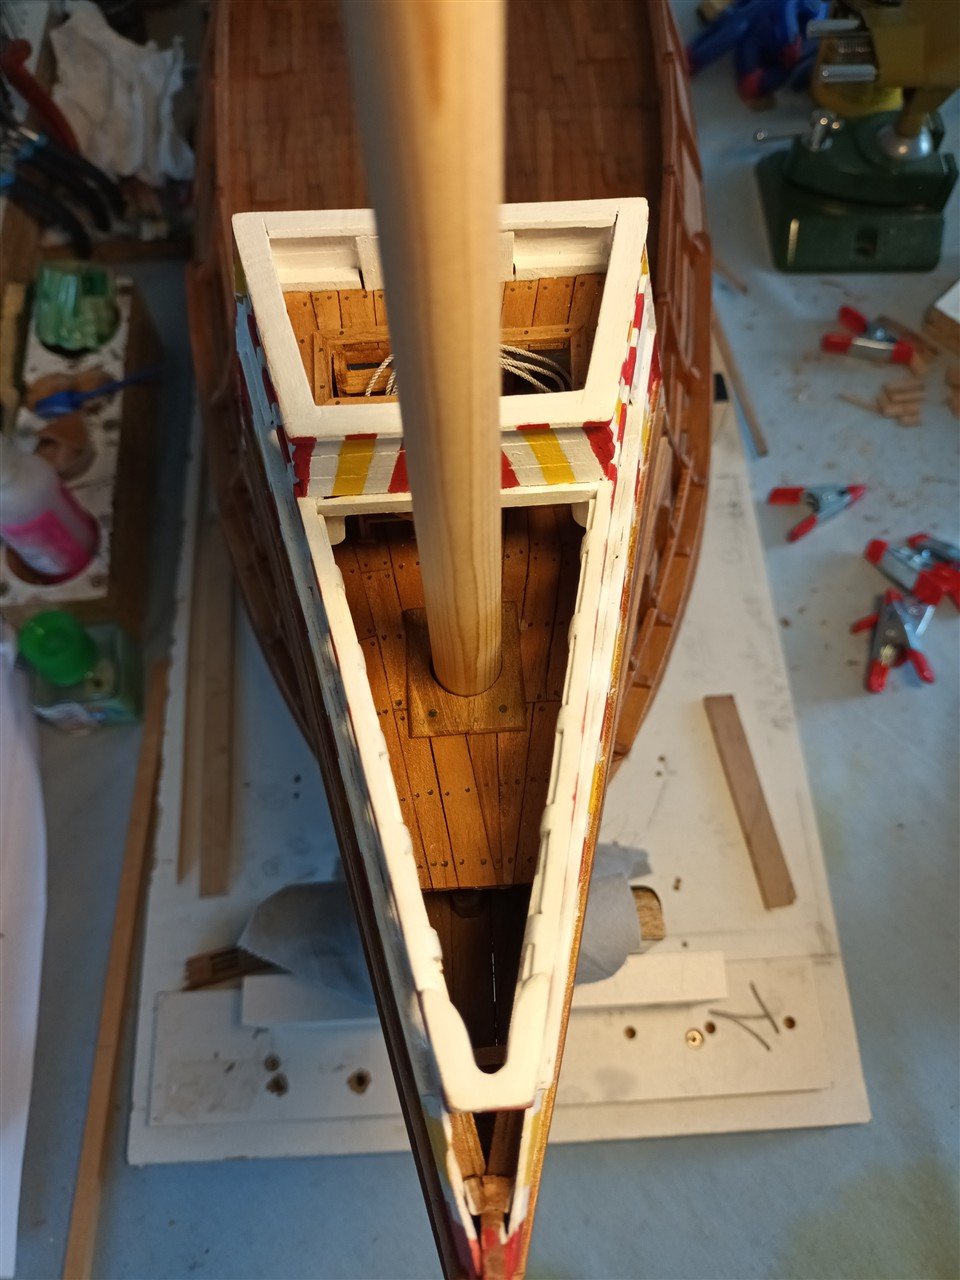
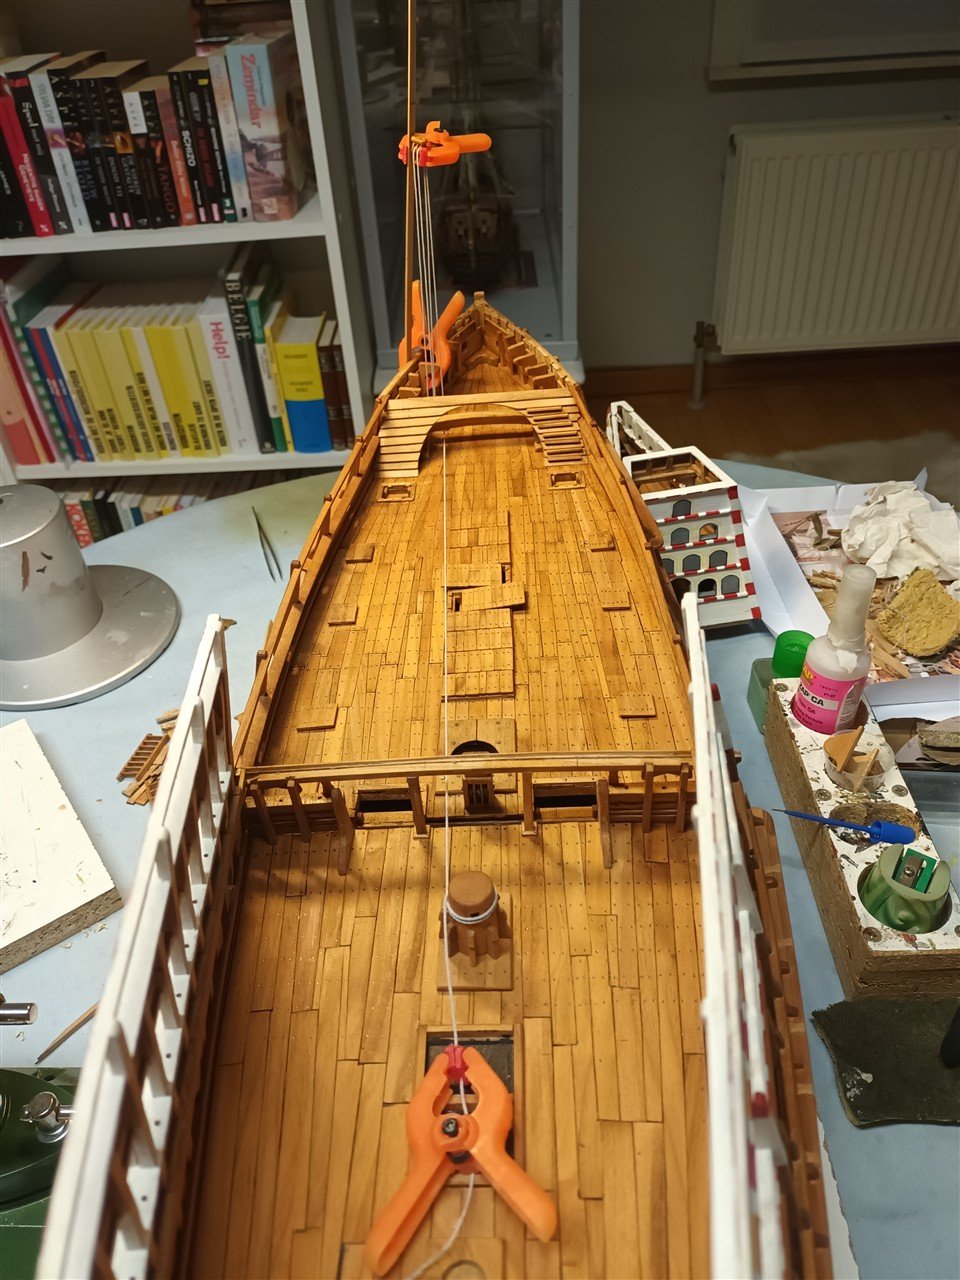
The fore mast has a base
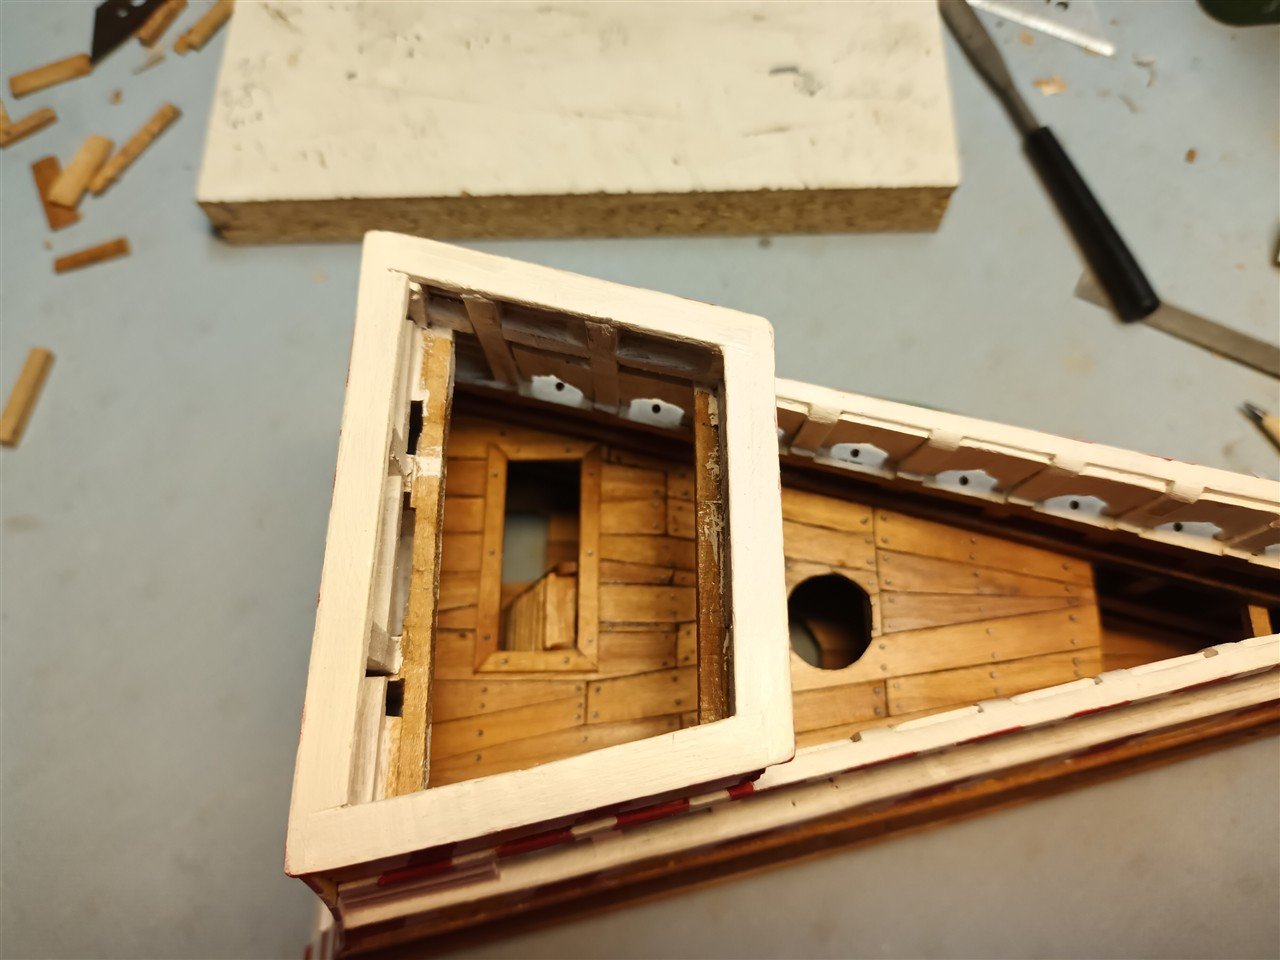
The fore castle is finally glued on to the hull
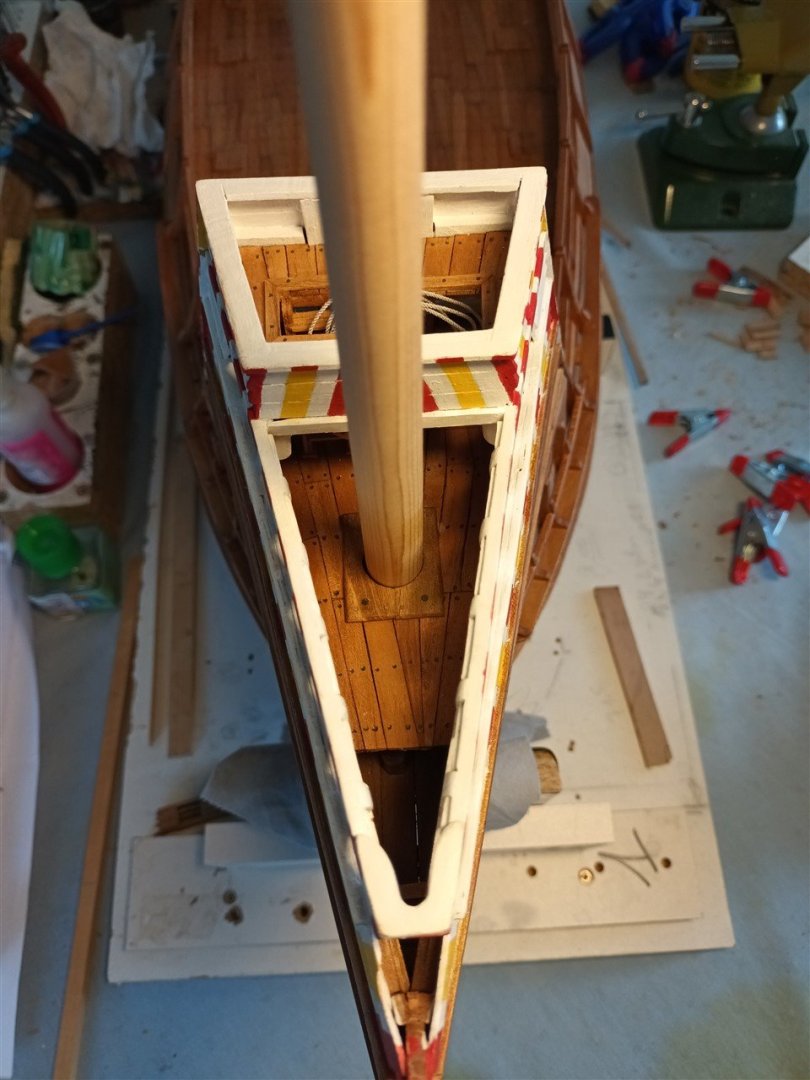
A new drain has been made, in accordance with the one at the rear castle
And painted and glued in place

Current status
- BLACK VIKING, ccoyle, Thukydides and 20 others
-
 21
21
-
 2
2
-
-
-
11 hours ago, petervisser said:
Beautiful work! So much intricate detail to admire. Looks like a real labour of love. Congratulations on such a fine build!
Peter
11 hours ago, md1400cs said:Patrick,
Can't believe that I missed this one - very excellent indeed. and sails are just about perfect especially using your grandmother's Singer. 😘
===============
I think that my English mom had one of those similar looking old black Singers as well. She married my French dad - they met in London in 1945
Cheers,
Thank you for the nice comments
-
There was an anchor david found.
Something like this will be build later
- druxey, JacquesCousteau, vvvjames and 11 others
-
14
-
Very nice work.
A shipmodel on a shipmodel 😉
- md1400cs and BLACK VIKING
-
2
-
10 hours ago, Veszett Roka said:
Your cat is really adorable. Good, you don't have to made catheads
7 hours ago, Louie da fly said:Beautifully done, Patrick. And a superb solution to the problem.
Steven
5 hours ago, druxey said:An elegant solution to the problem indeed! Well done, Patrick. And tell the ship's cat to jump to it!
Thanks all
Cats : no jumping allowed in the hobby room (he loves this rule)🤣
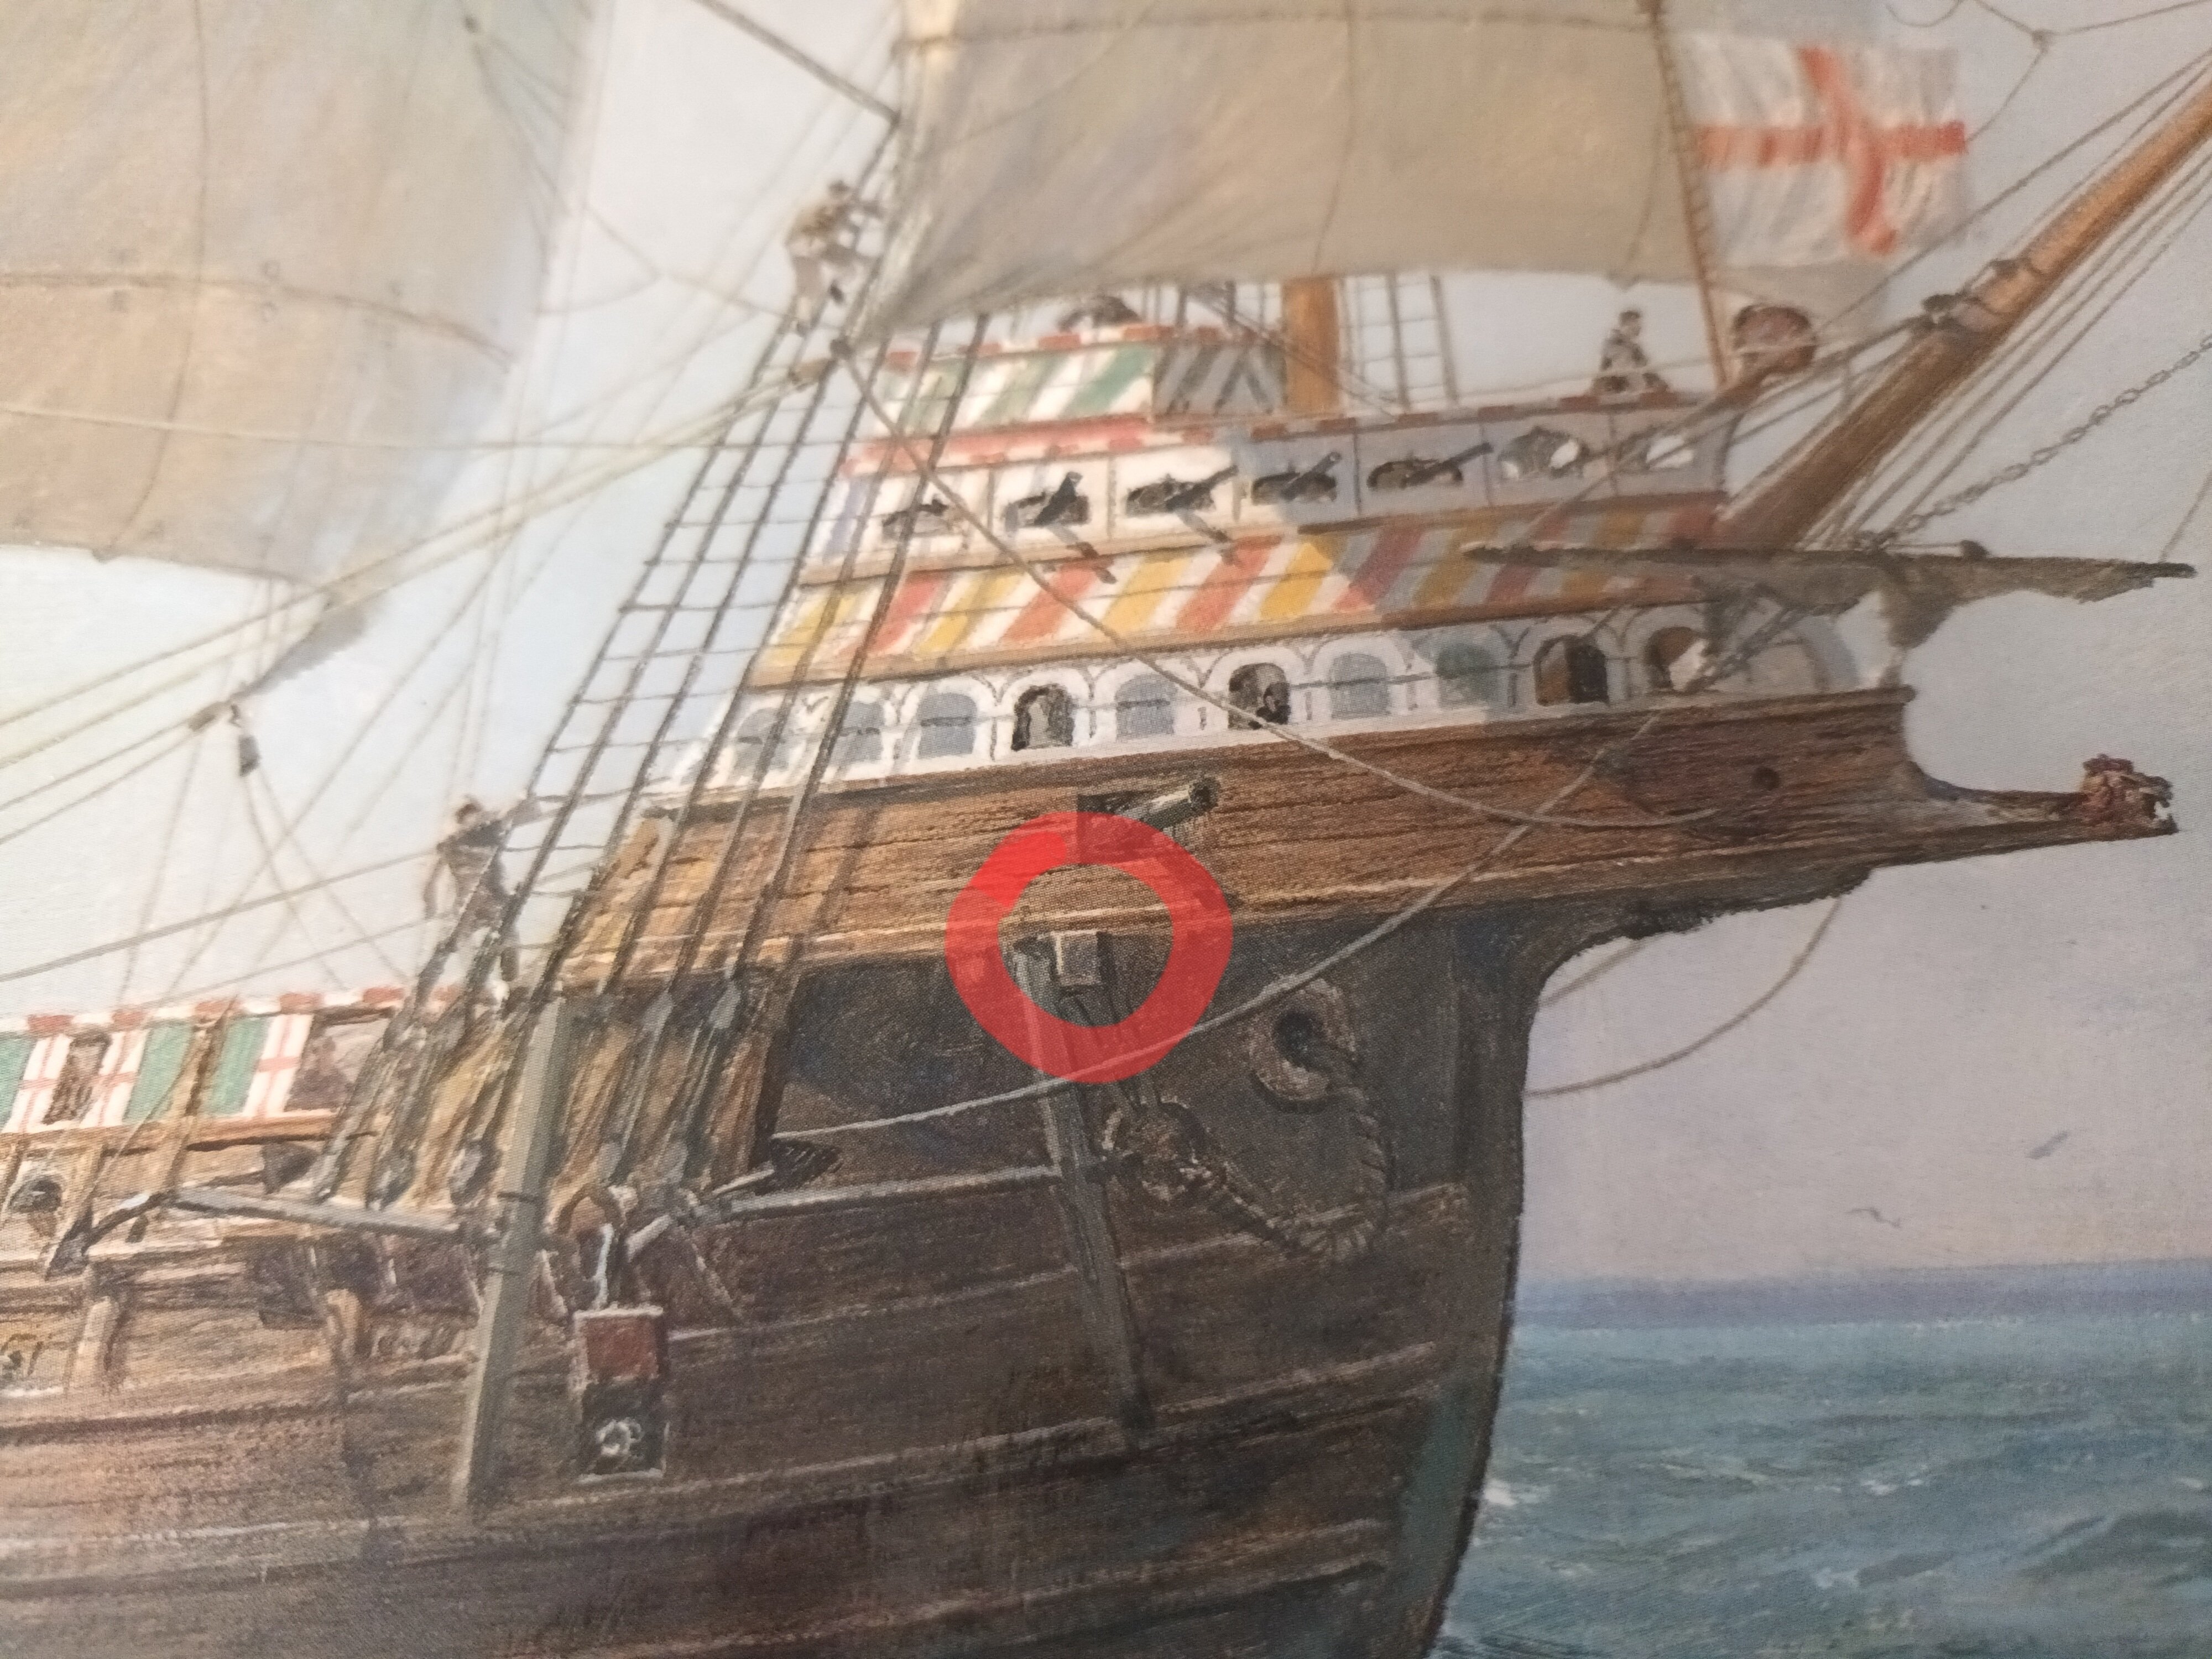
And catheads.
The only cathead i can find on drawings, etc is on a 21st century drawing. Not on older drawings. So no cathead for Mary

And also thanks for the likes
- GrandpaPhil, vvvjames, Knocklouder and 1 other
-
4
-
Welcome back,
The Corel yacht is finished (learned a lot of new things) and the problem with the foresail knight is solved.
2026 started with "demolition work".
And overtired staff (again).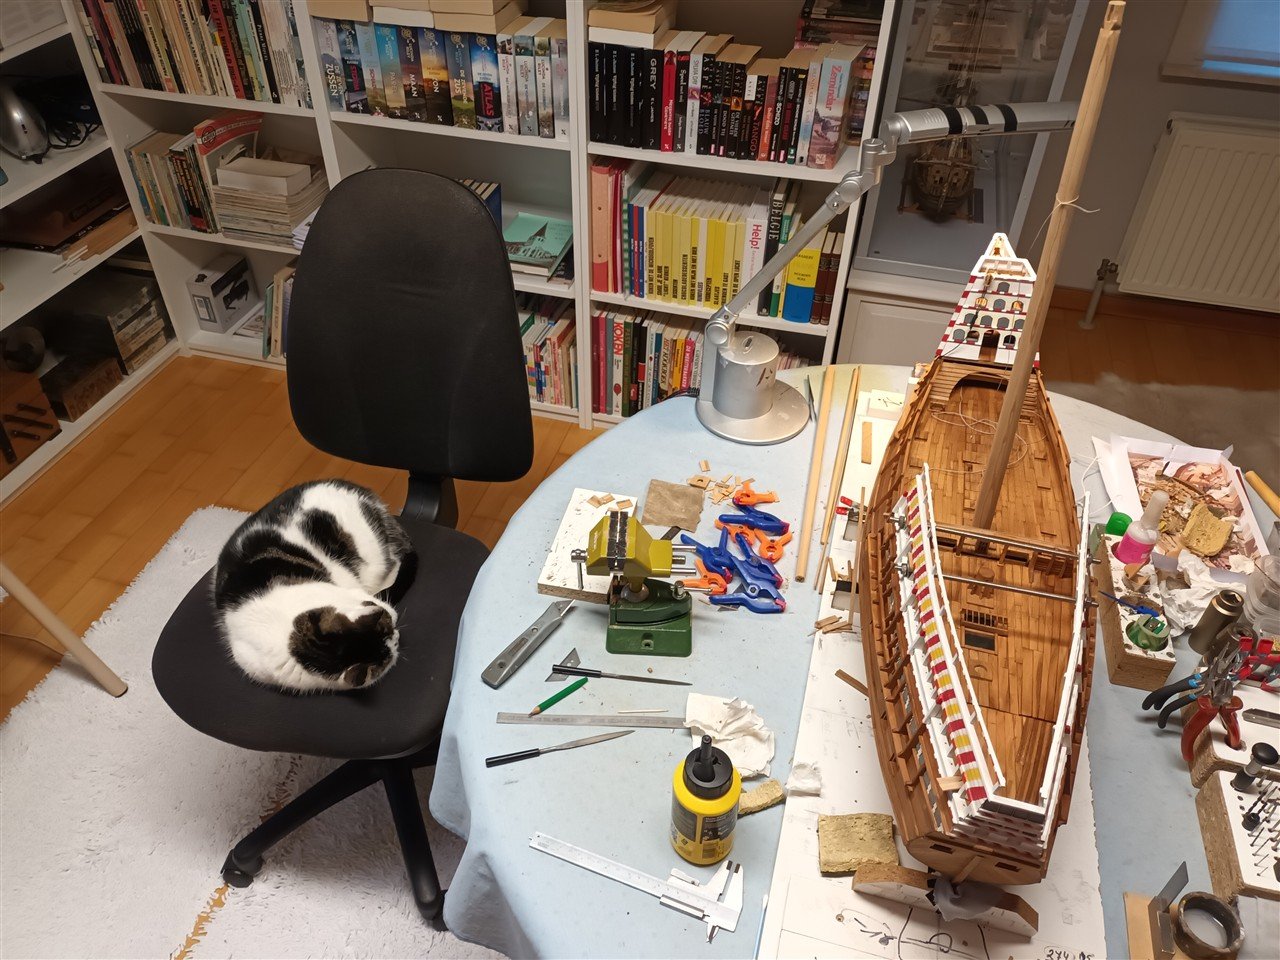
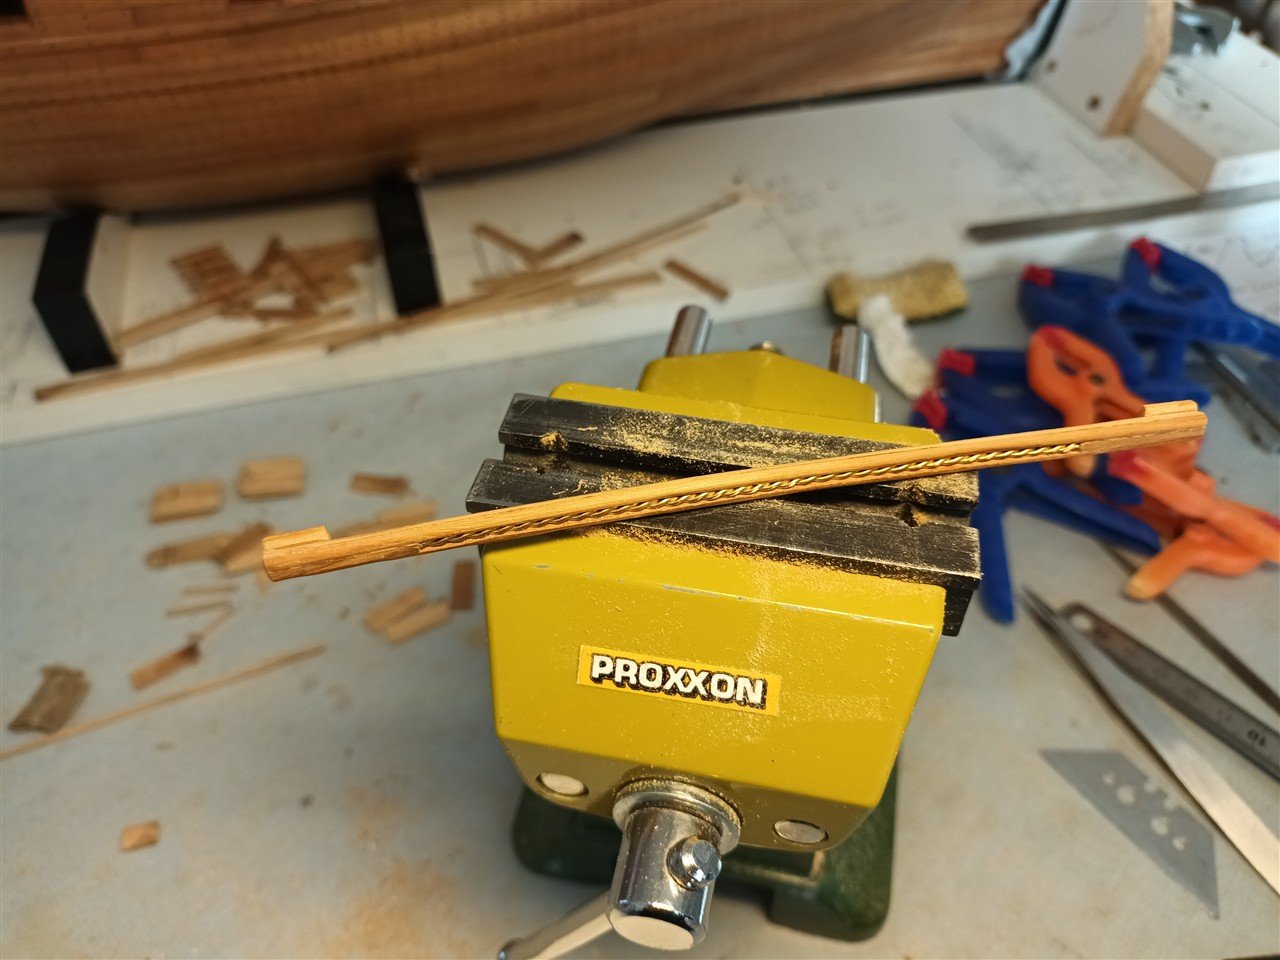
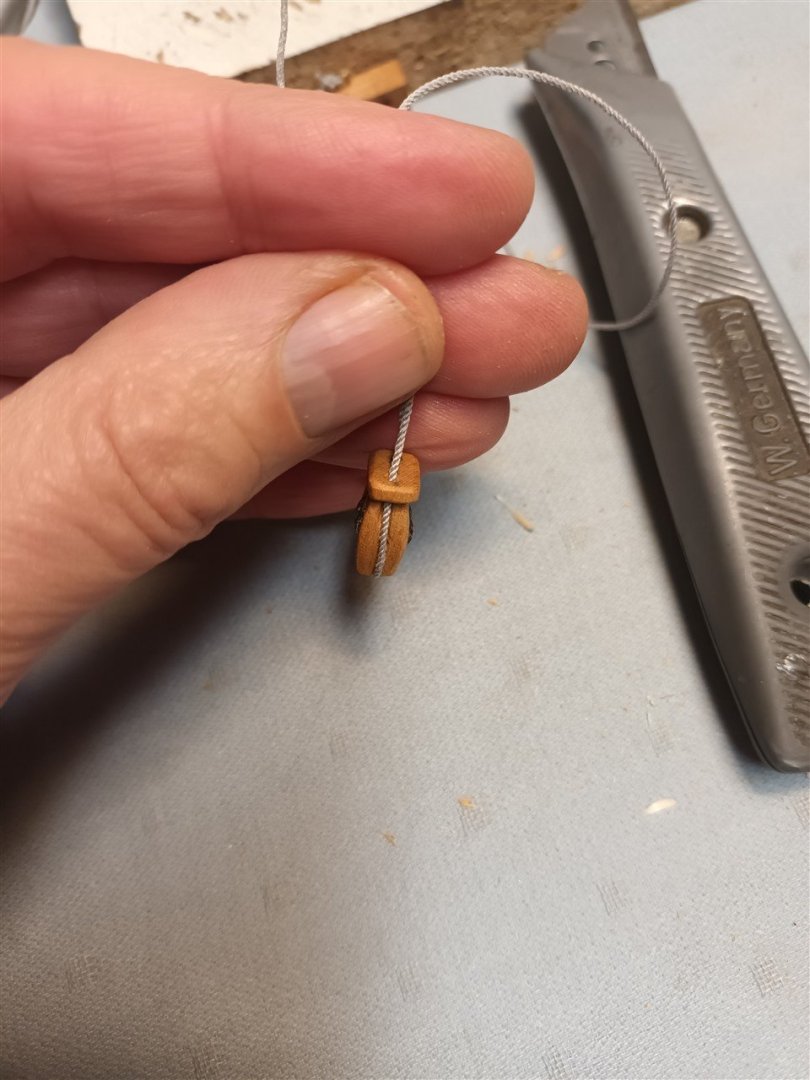
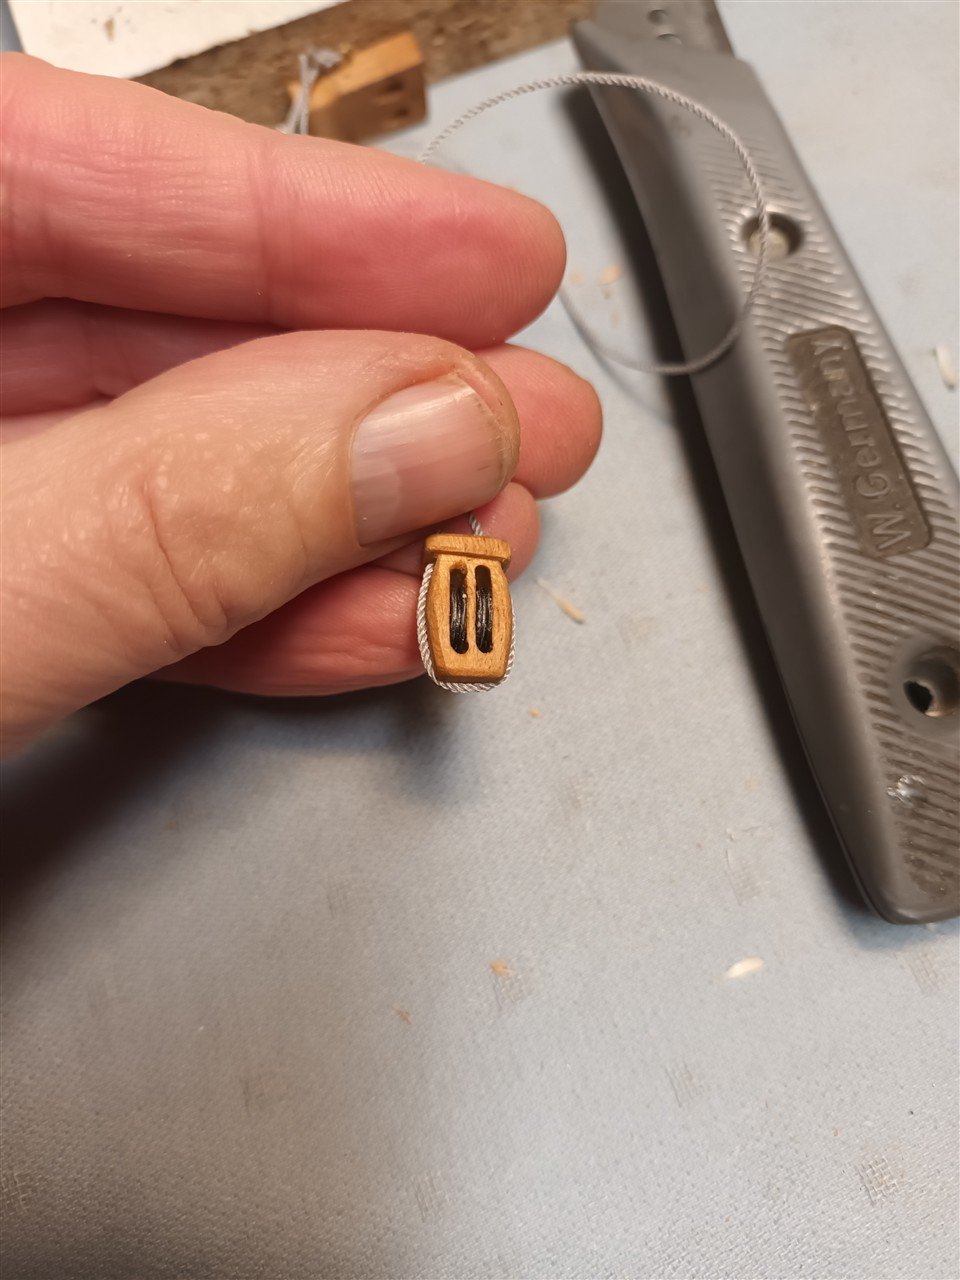
But, a knight (basic), a block and rope was made.
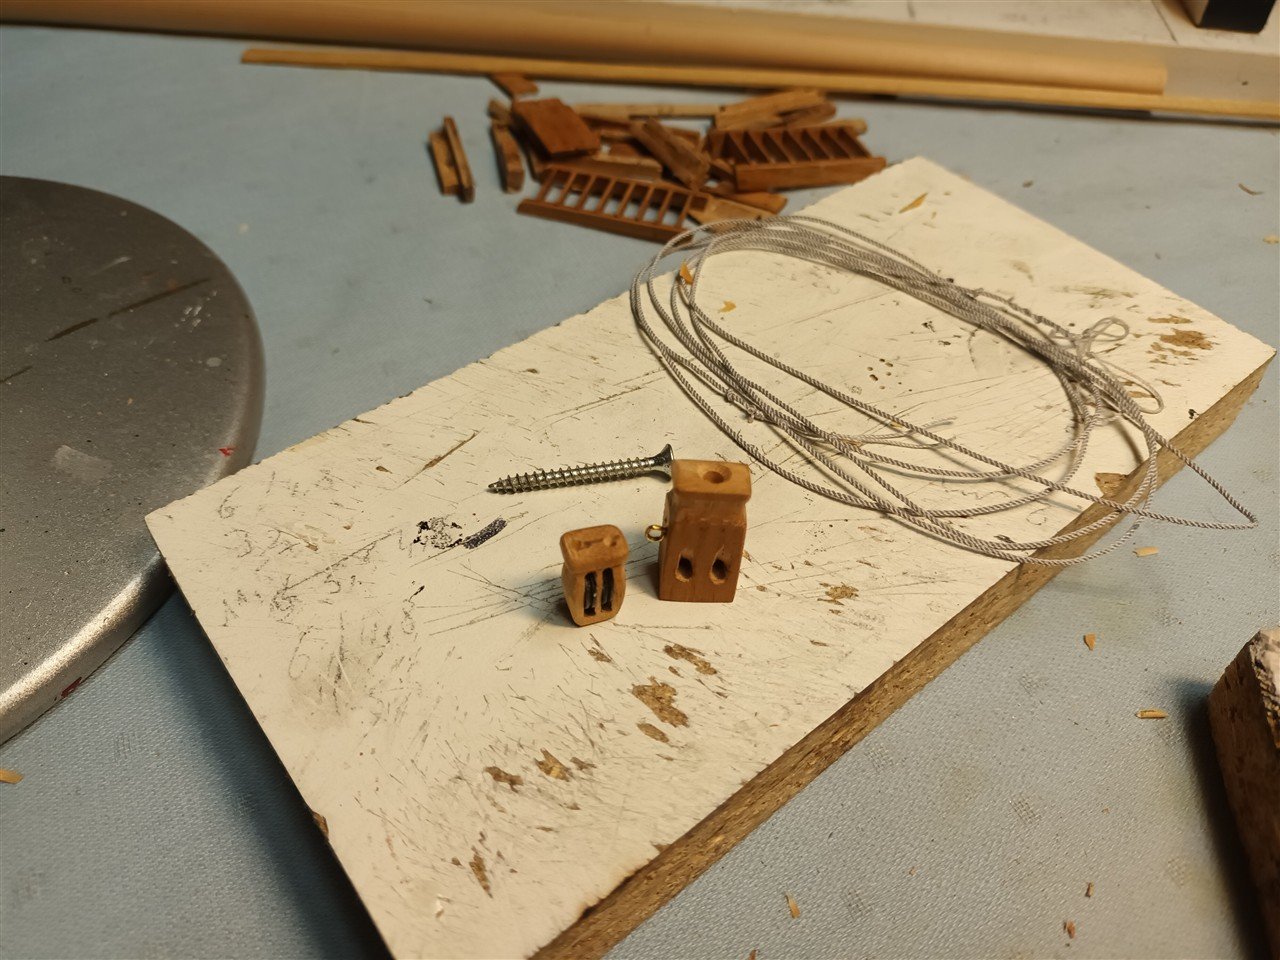
Early 16yh century blocks are "special" and complicated to build.

Knight in place (with the screw)

Test.
This setup can be operated with the capstan.


Deck one back in place
Deck two also

Mary Rose is back on track
-
-
-
Your first model looks very good.
Good luck with the next one.

- druxey, Keith Black, Ronald-V and 2 others
-
5
-
Very nice model
And
-
Good luck, i follow.
Billings Vasa was my first wooden ship
- Canute, Keith Black and Knocklouder
-
3
-
-
Narrow base or not
Looks 👍to me
- Canute, king derelict, mikegr and 1 other
-
4
-
-
18 minutes ago, mrcc said:
Magnificent result!
Thank you very much.
-
2 hours ago, Ronald-V said:
What's the plan now? Working further on your beautiful Mary Rose? Or do you have new projects in the pipeline?
First Mary Rose.
And, starting maybe next winter, a "kannoneerboot"

-
5 hours ago, JacquesCousteau said:
Very nice work!
Thank you
-
11 hours ago, ccoyle said:
Congratulations on completing a very colorful and visually engaging model!
6 hours ago, Mark Pearse said:a great job & a very interesting ship, & I found your improvements also very interesting
4 hours ago, MikkiC said:Beautiful work as always.
Thank you all, for following and nice comments


Seguin by Phil B - FINISHED - BlueJacket Shipcrafters - 1:48
in - Kit build logs for subjects built from 1851 - 1900
Posted
Congratulations, a beautiful model