ejgray52
-
Posts
33 -
Joined
-
Last visited
Content Type
Profiles
Forums
Gallery
Events
Everything posted by ejgray52
-
Another tale was on the first RAF Beverley flight, the co-pilot turned to the captain on take off and said, "My side's airborne sir, what about yours?" I lived not far from a Beverley base as a child; the local newspaper would detail when night flying was taking place. I remember looking out of my bedroom window at their navigation lights crossing the sky and hearing the engines droning...
-
There was a story told to me back in my RAF days, that the Argosys won a competition while in the Middle East; their rival squadron who flew Beverleys, ( who could go further and carry more), sent the message, 'OK, so you won the trophy, but how are you going to get it home?'
-
Have a look at the ‘World of Wayne’ channel on YouTube, he has been building it for a while; as he says, “I make mistakes, so you don’t have to!” Some of the parts are small and fiddly, there’s a lot of wiring too, but it seems quite straightforward. Enjoy!
-
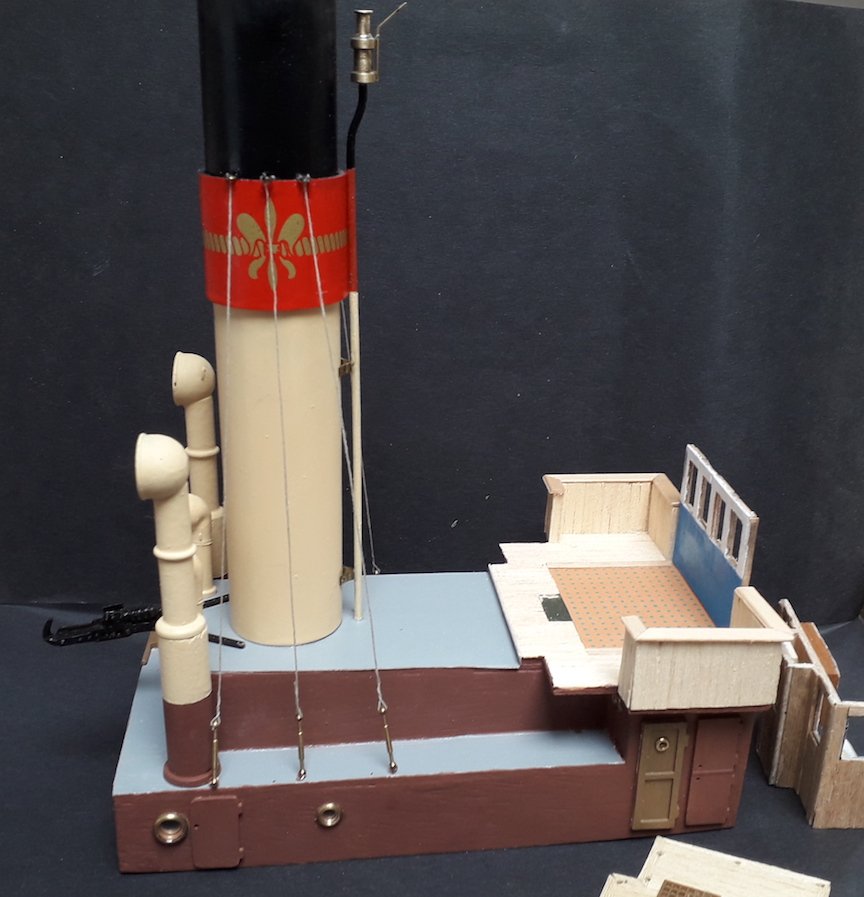
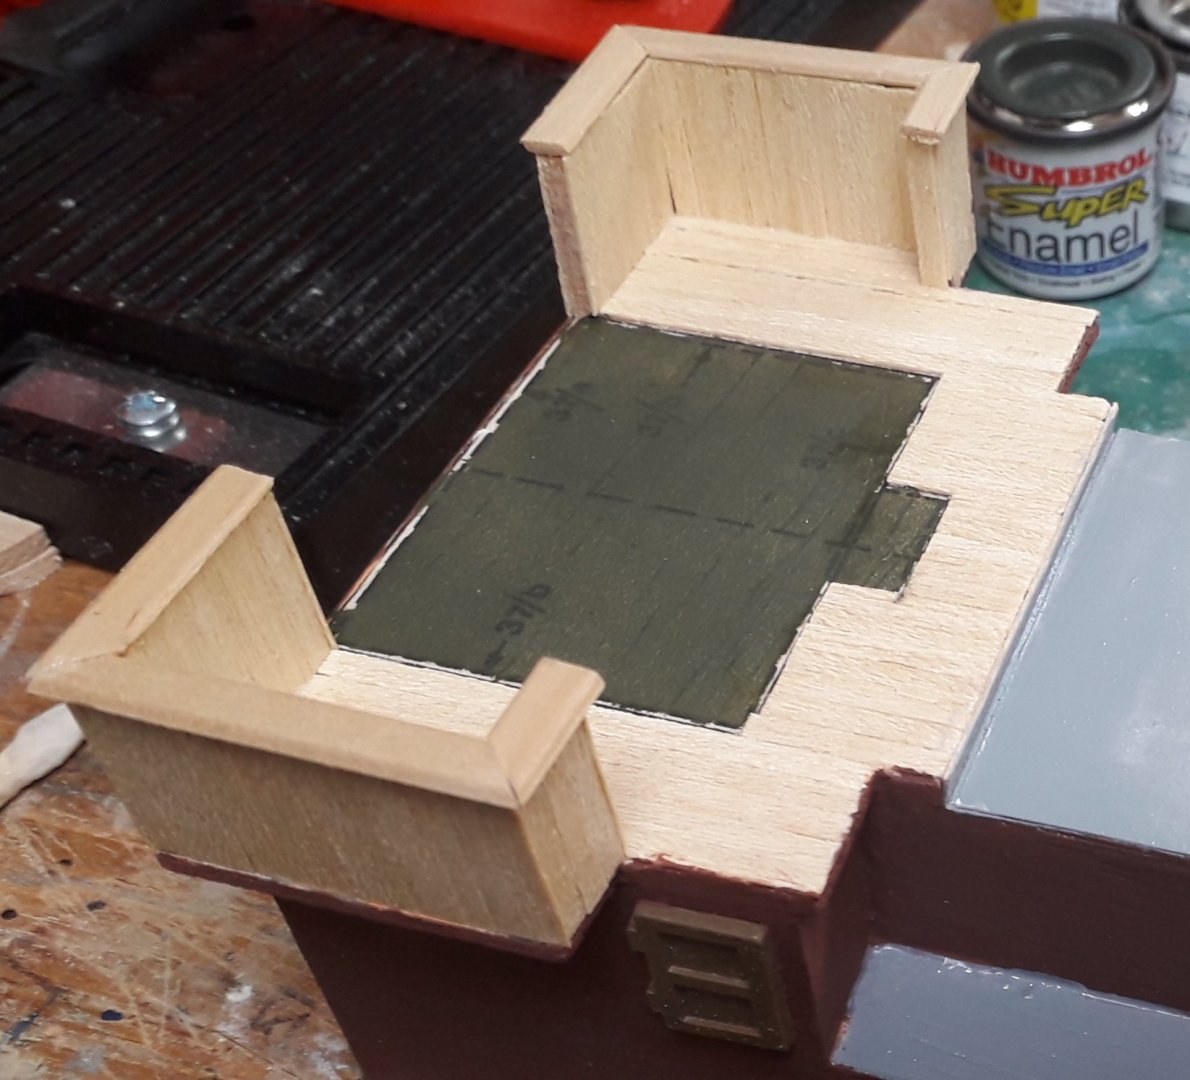
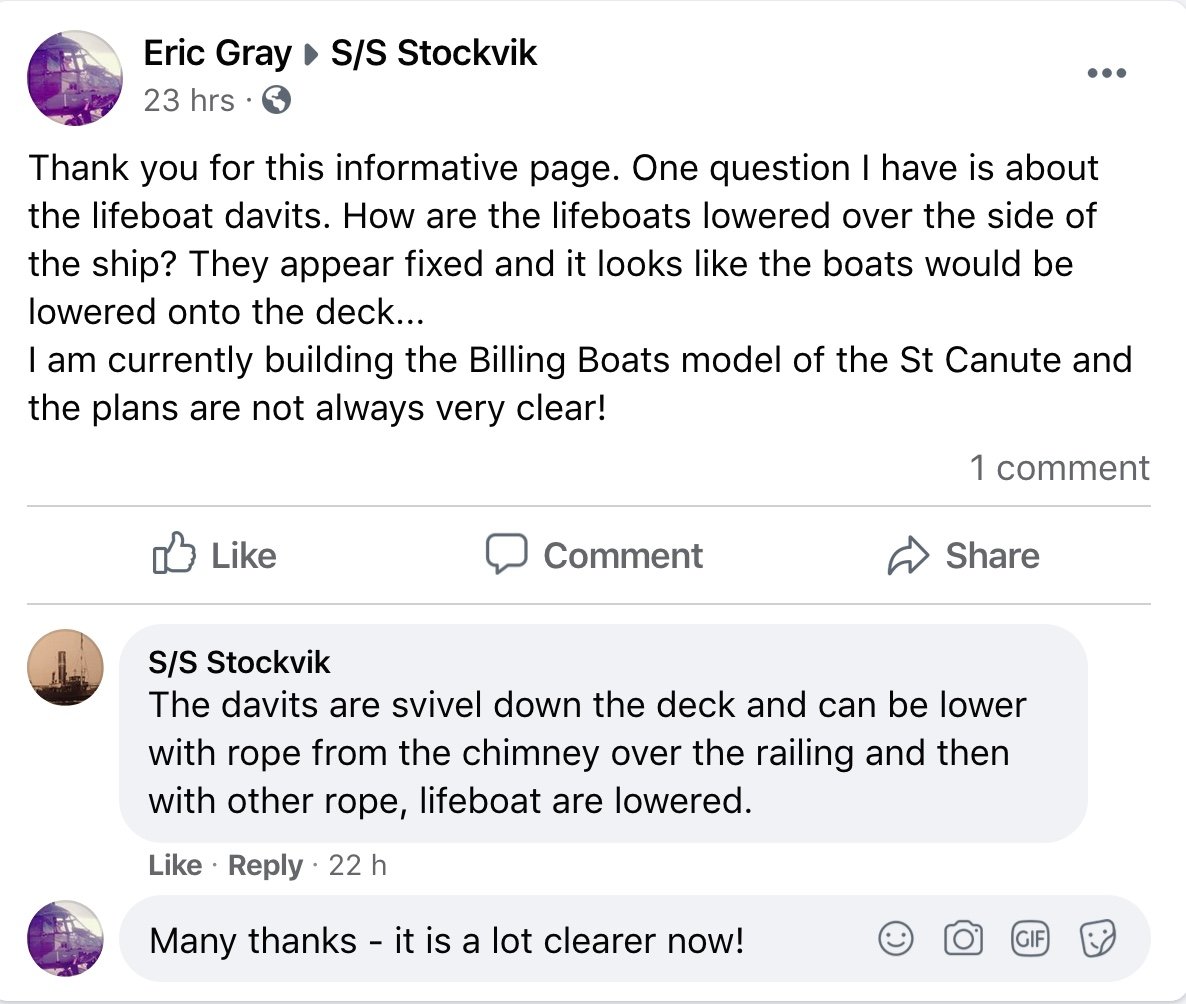
Been a while since I posted any updates; life got in the way... Still working on the deckhouses and fittings; the wheelhouse is still an on going project, the photos show up areas which need to be redone etc.I can see why people take years to complete projects! The funnel is complete with just the ladder to go, the capstan area has been remodelled to represent what is actually there, instead of the rectangle of wood supplied. I've had a go at weathering it, just needs the colour added back to tone it down - the photo makes it look a lot rustier than it is. Working at the moment on the davits, building a plausible method of hoisting the boat in and out. I am thinking of a double block at the davit end and a single block at the boat end with the line going from double to single back to the double and then to boat, so that it is lowered by the occupants of the boat. My logic being if the crew needed to abandon ship, they would all want to be in the boat! However I am happy to have advice on this.


-
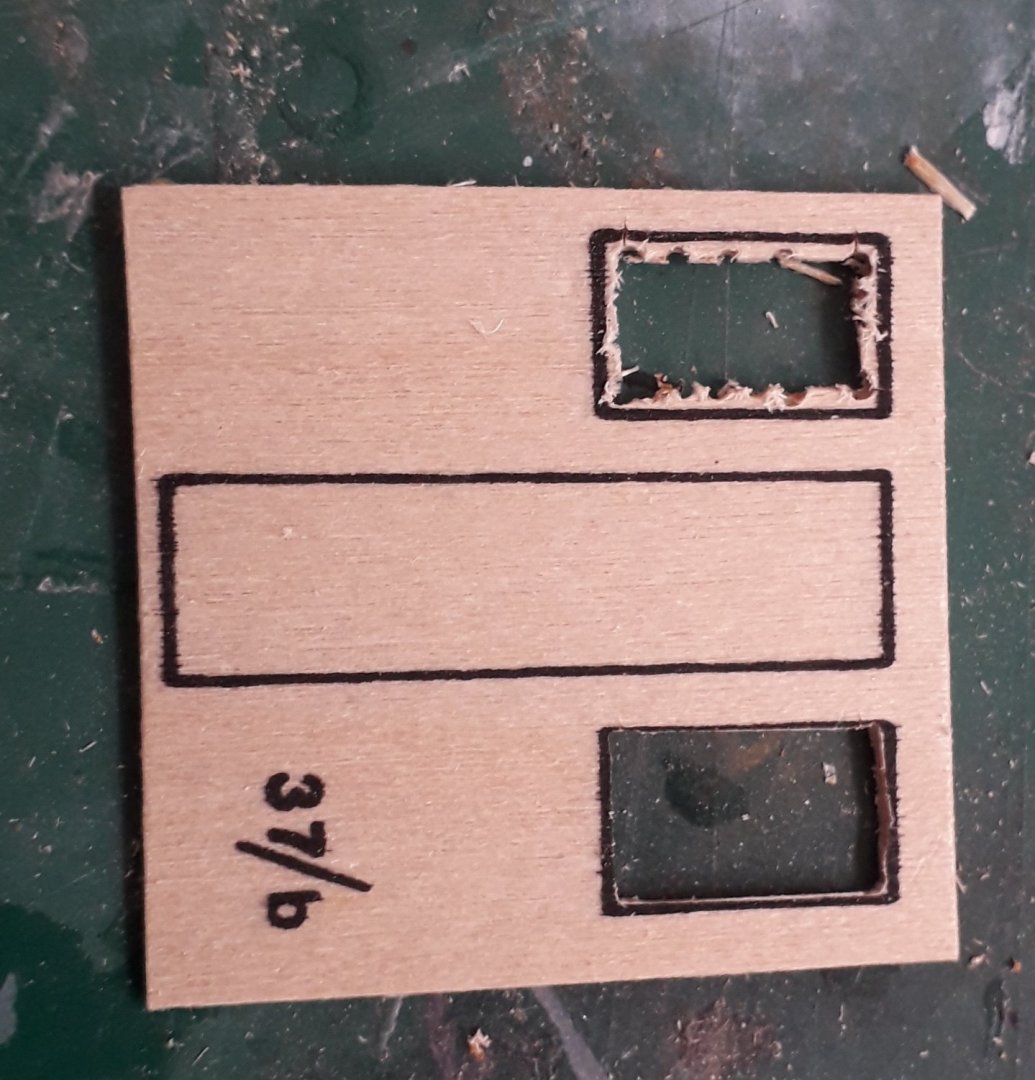
I had backed the wheelhouse walls with cartridge paper as suggested in the instructions, to prevent the wood from splitting as the openings were cut out (It didn't work!). As you can see in the previous photos, it reacted with the paint I applied. So it was time to remove what I could and start the walls again... I've added some more details, which are based on the original, so looking through the windows will not reveal an empty space. Other equipment such as the wheel, binnacle etc. will be sourced from the spares box and fitted. I'll modify the kit provided fittings for the duplicate wheel etc. on the wheelhouse roof. The rest of the work so far has been second coats of paint, filling odd gaps and improving the capstan area, where a rectangular wood block represents a box with a cylinder either side with various pipes connected.
-
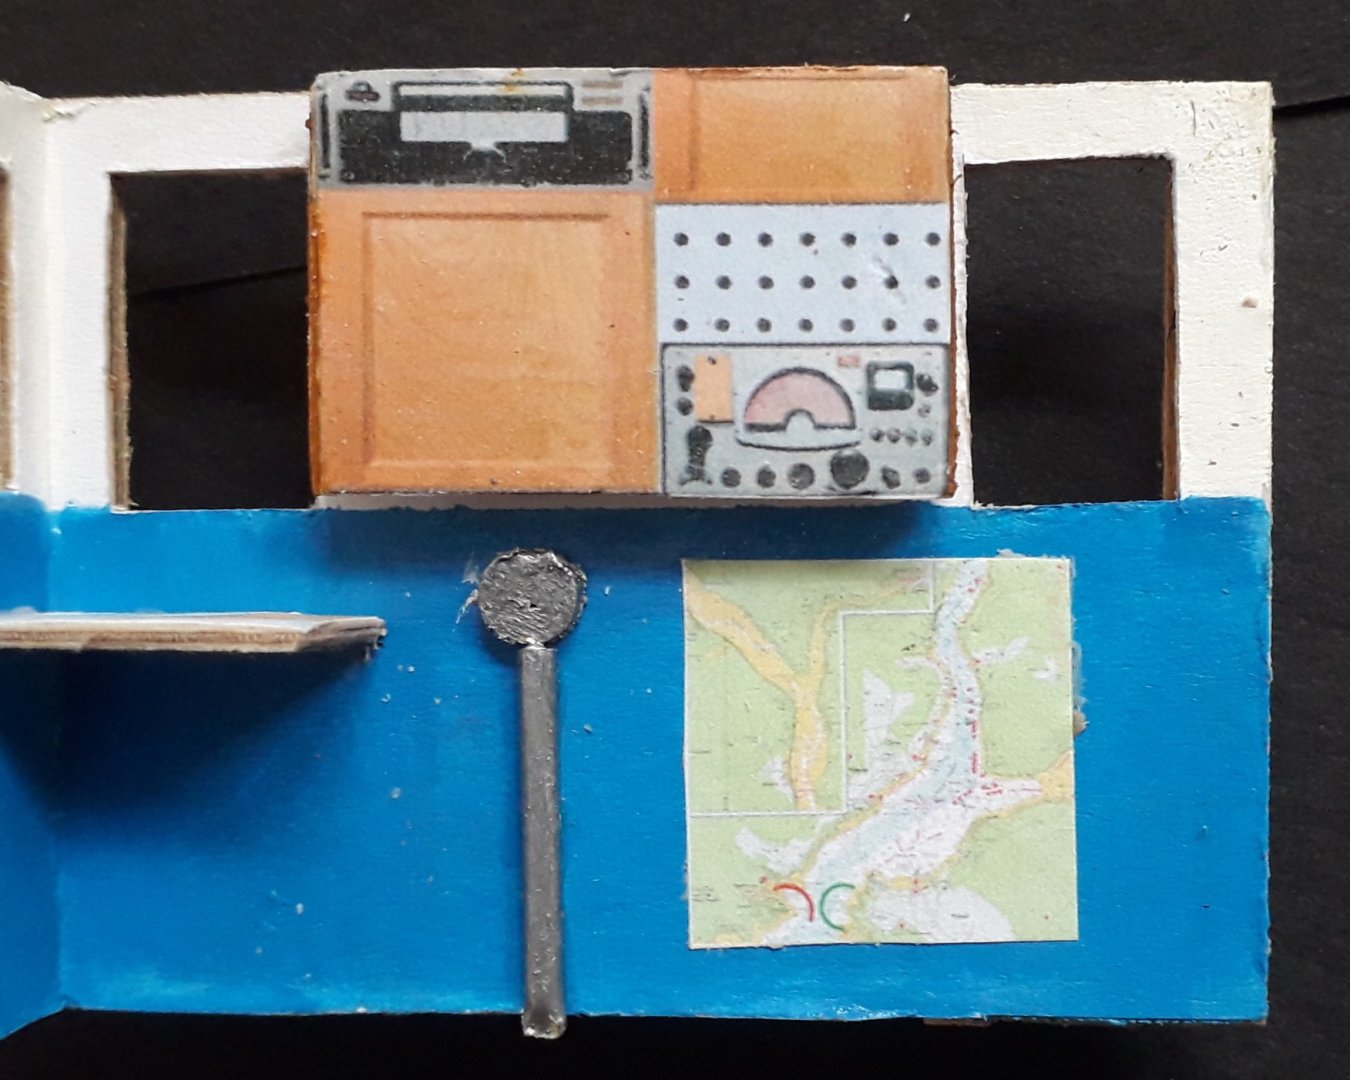
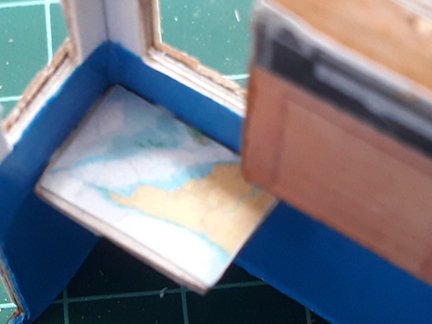
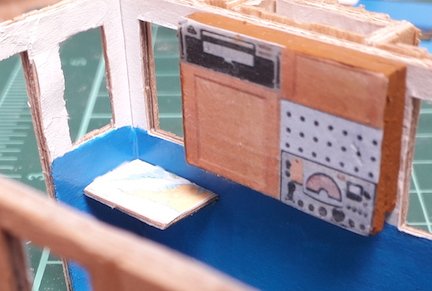
Not had much time in the workshop, what with the family and a couple of days when it was too hot in there... Been pressing on with the deck houses and fittings, using the various resources to add additional details. Just added some bits and pieces to the wheelhouse using photo images generated on Photoshop; looked for similar items on the web and then arranged them and reduced the finished item to the right scale. The chart is actually the area where I volunteer as a Coastwatcher - well it is my model, after all!
-
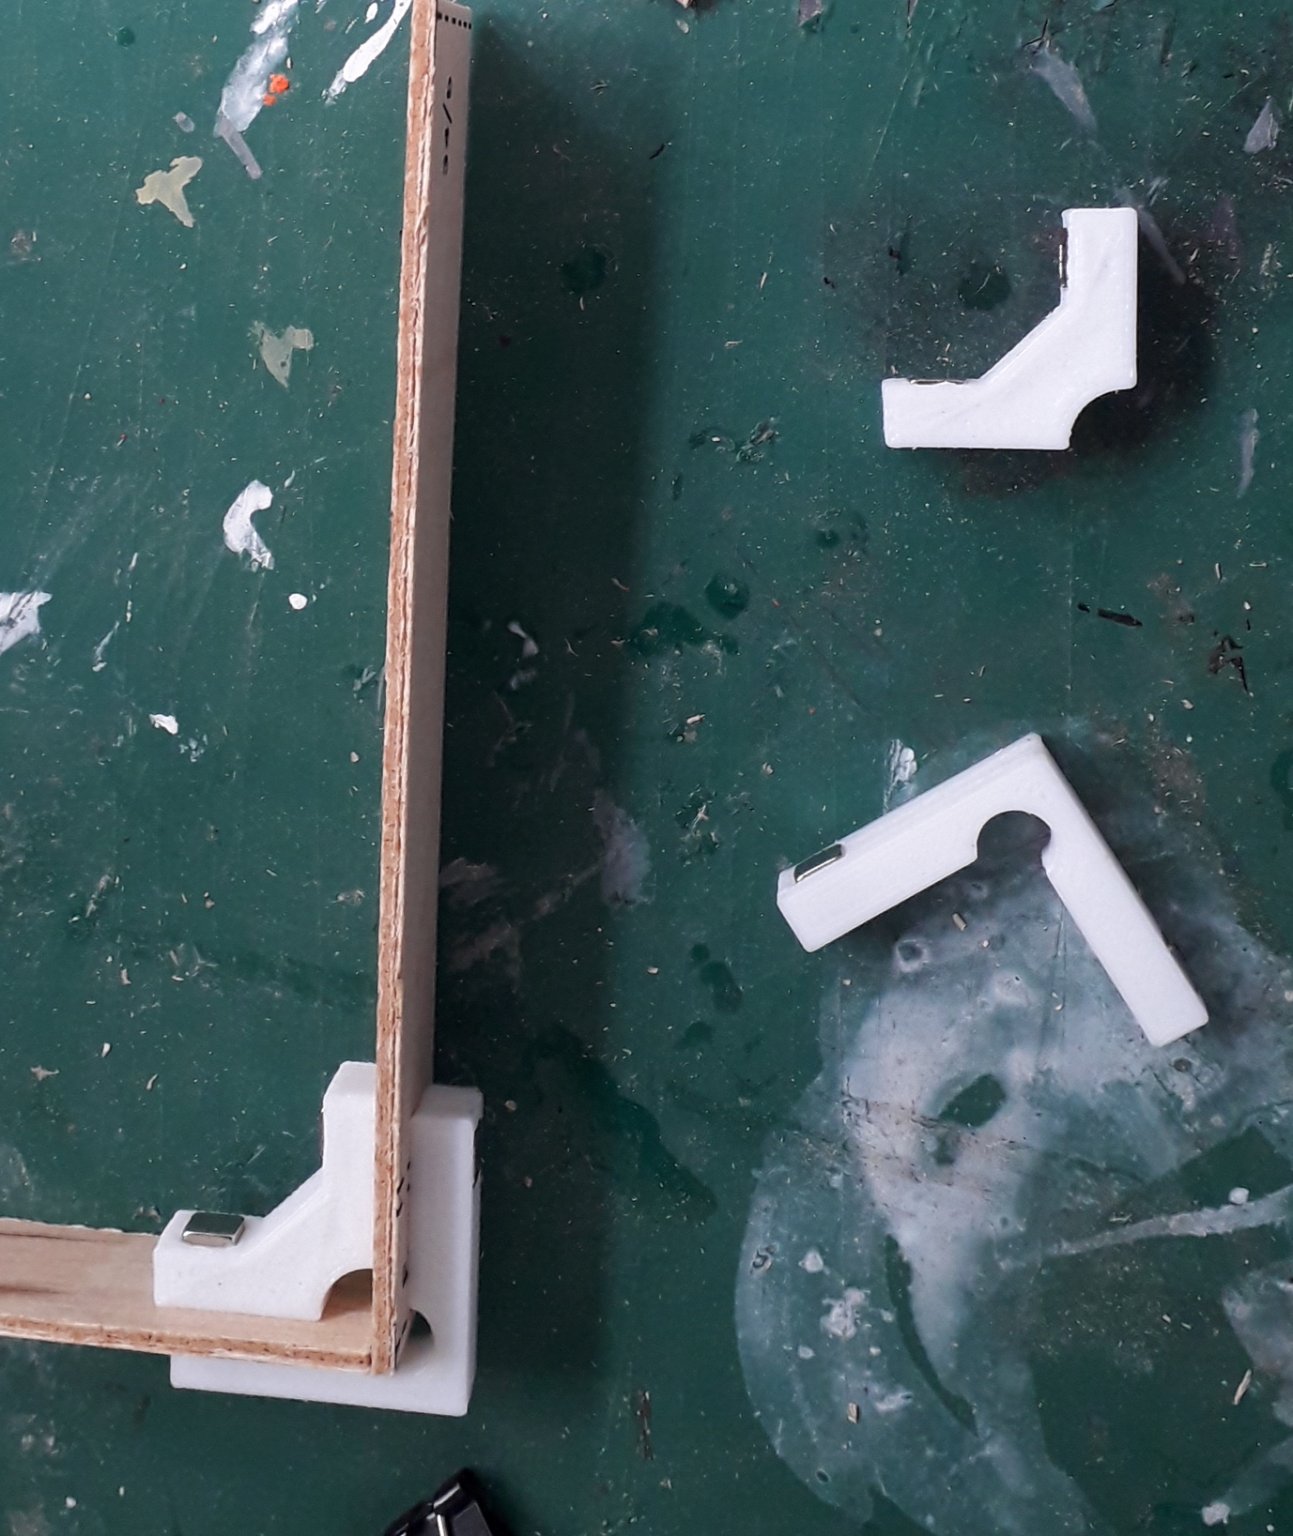
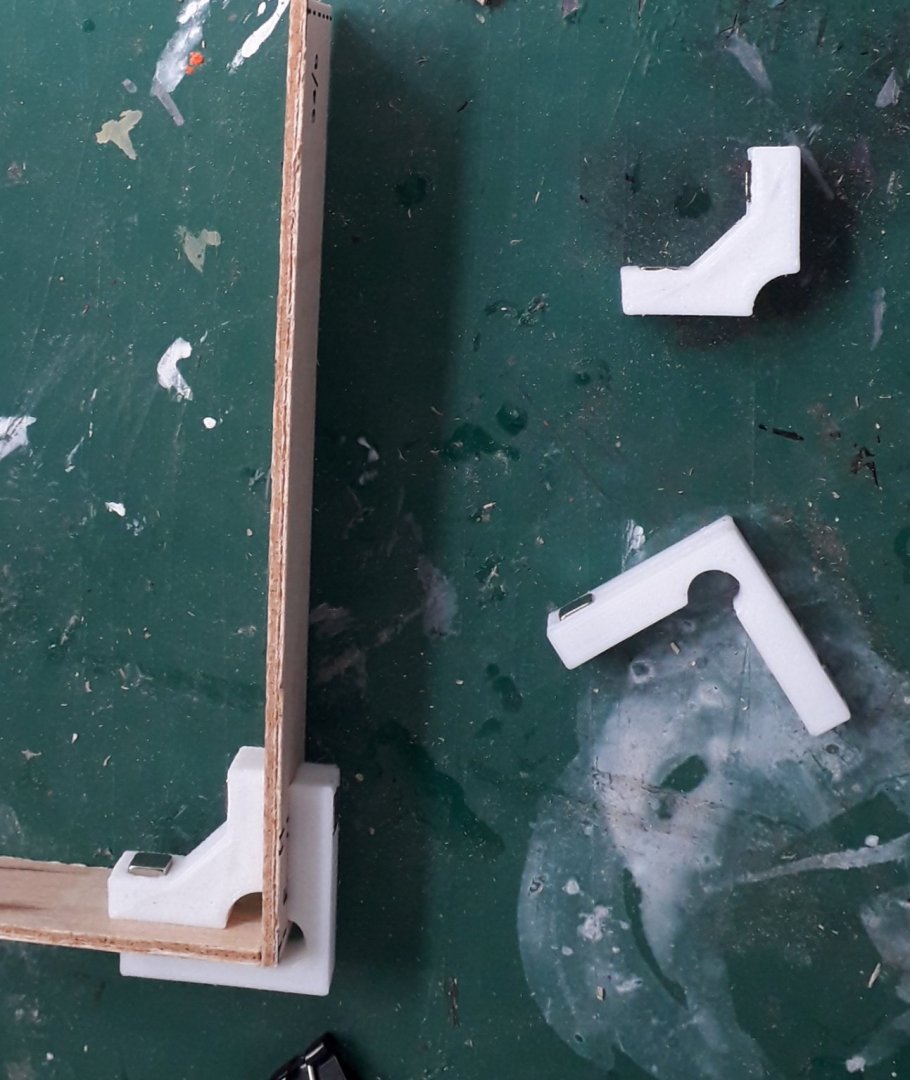
You could use 3D printed clamps as I do, available from an on-line model railway building supplier. They have small powerful magnets built in and are really good. See the photo.

-
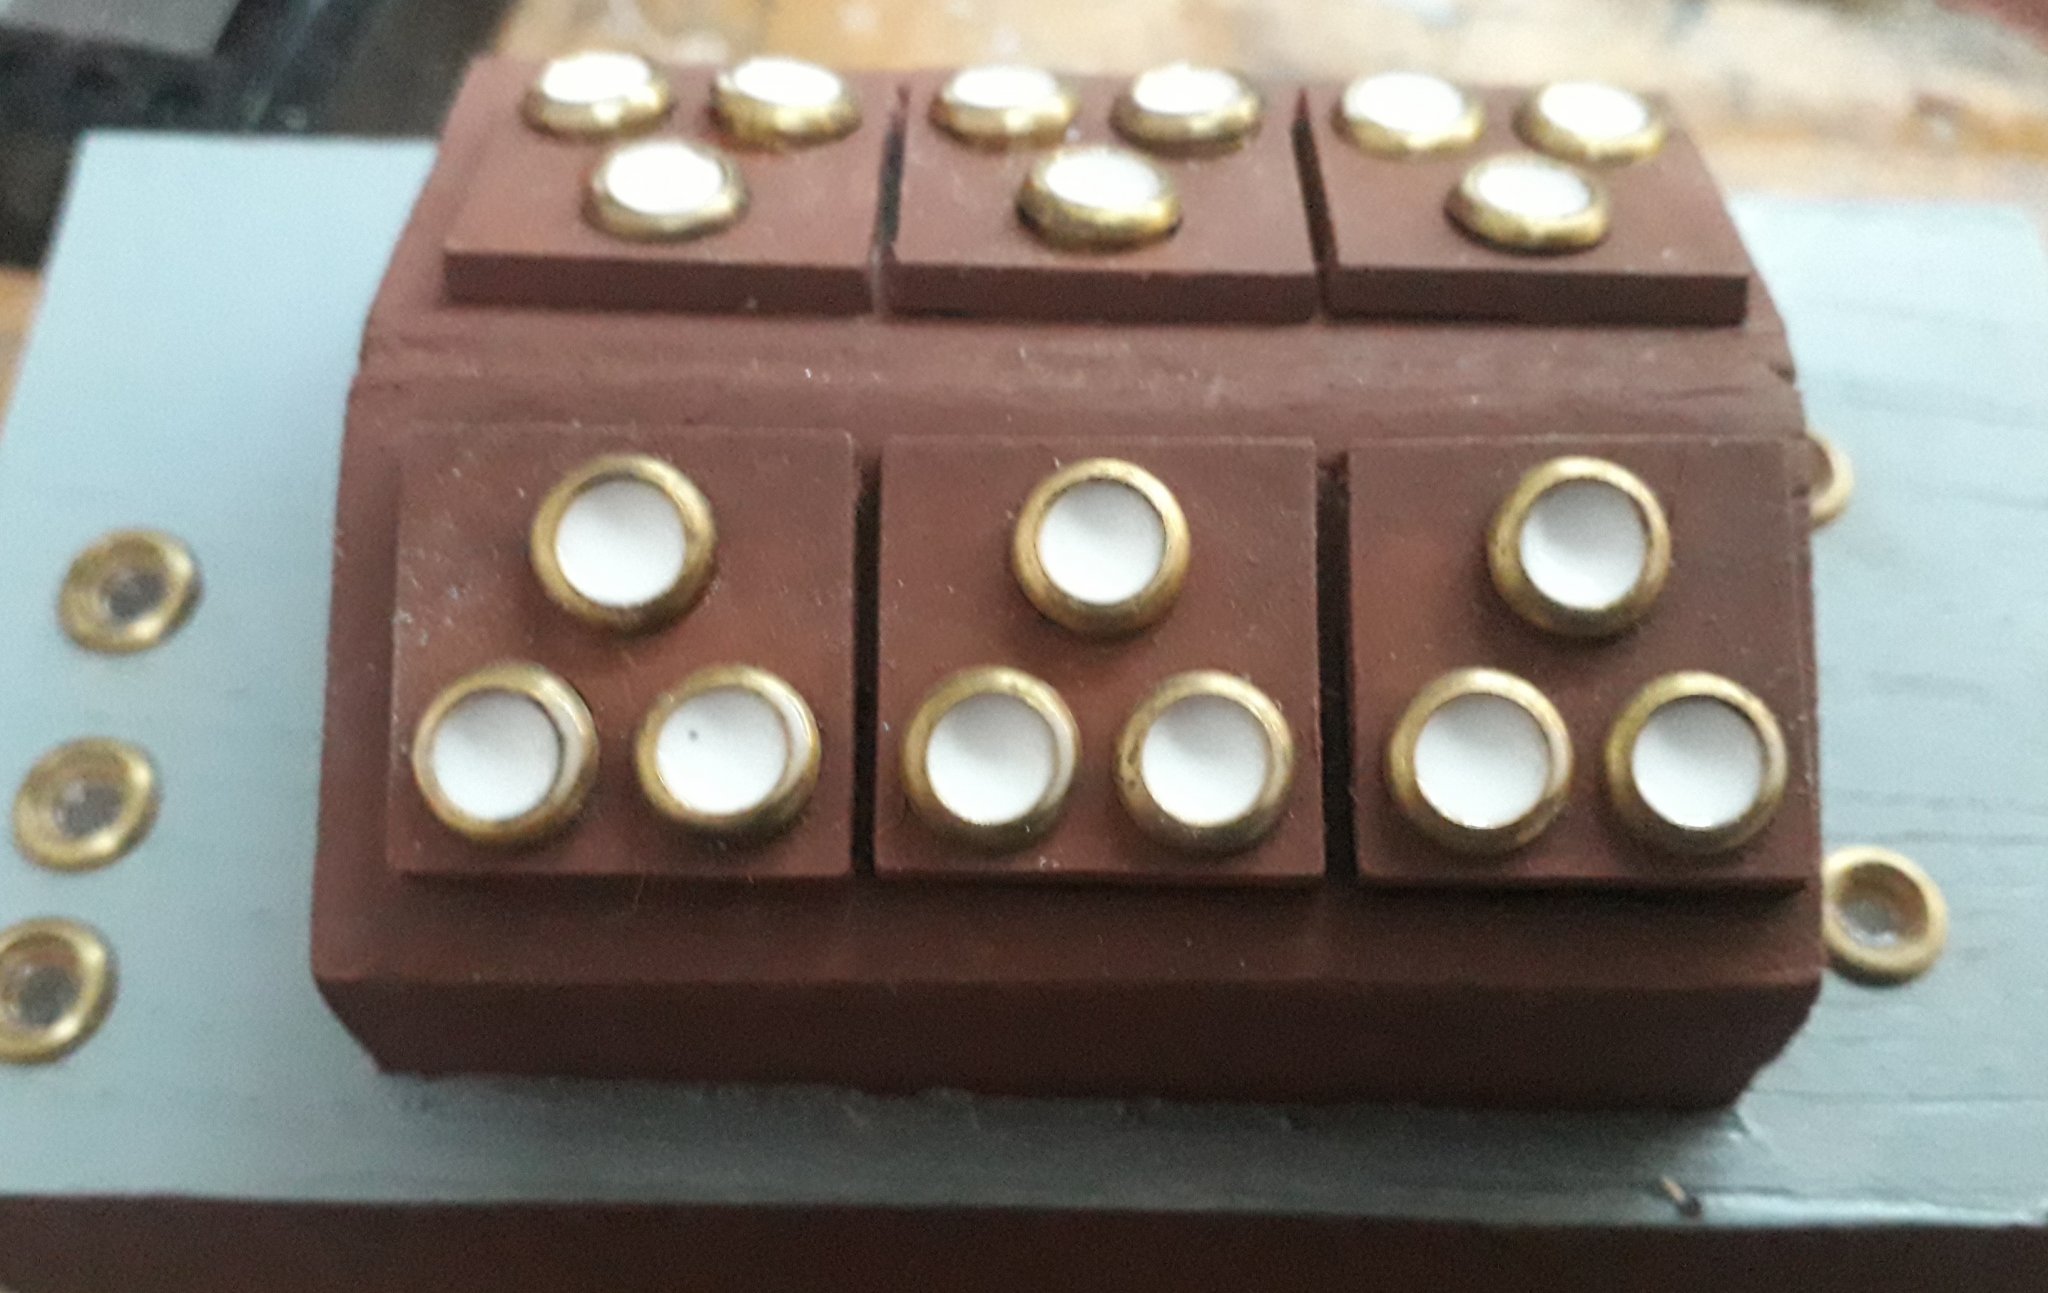
Here's the portholes after the PVA has dried. For me it's a lot easier than trying to cut them out from plastic sheet to fit and better looking than backing them with plastic. These particular ones are only as deep as the plastic squares they sit in; the wood behind them is painted black. However, the photo does show up some flaws which I need to sort out!
-
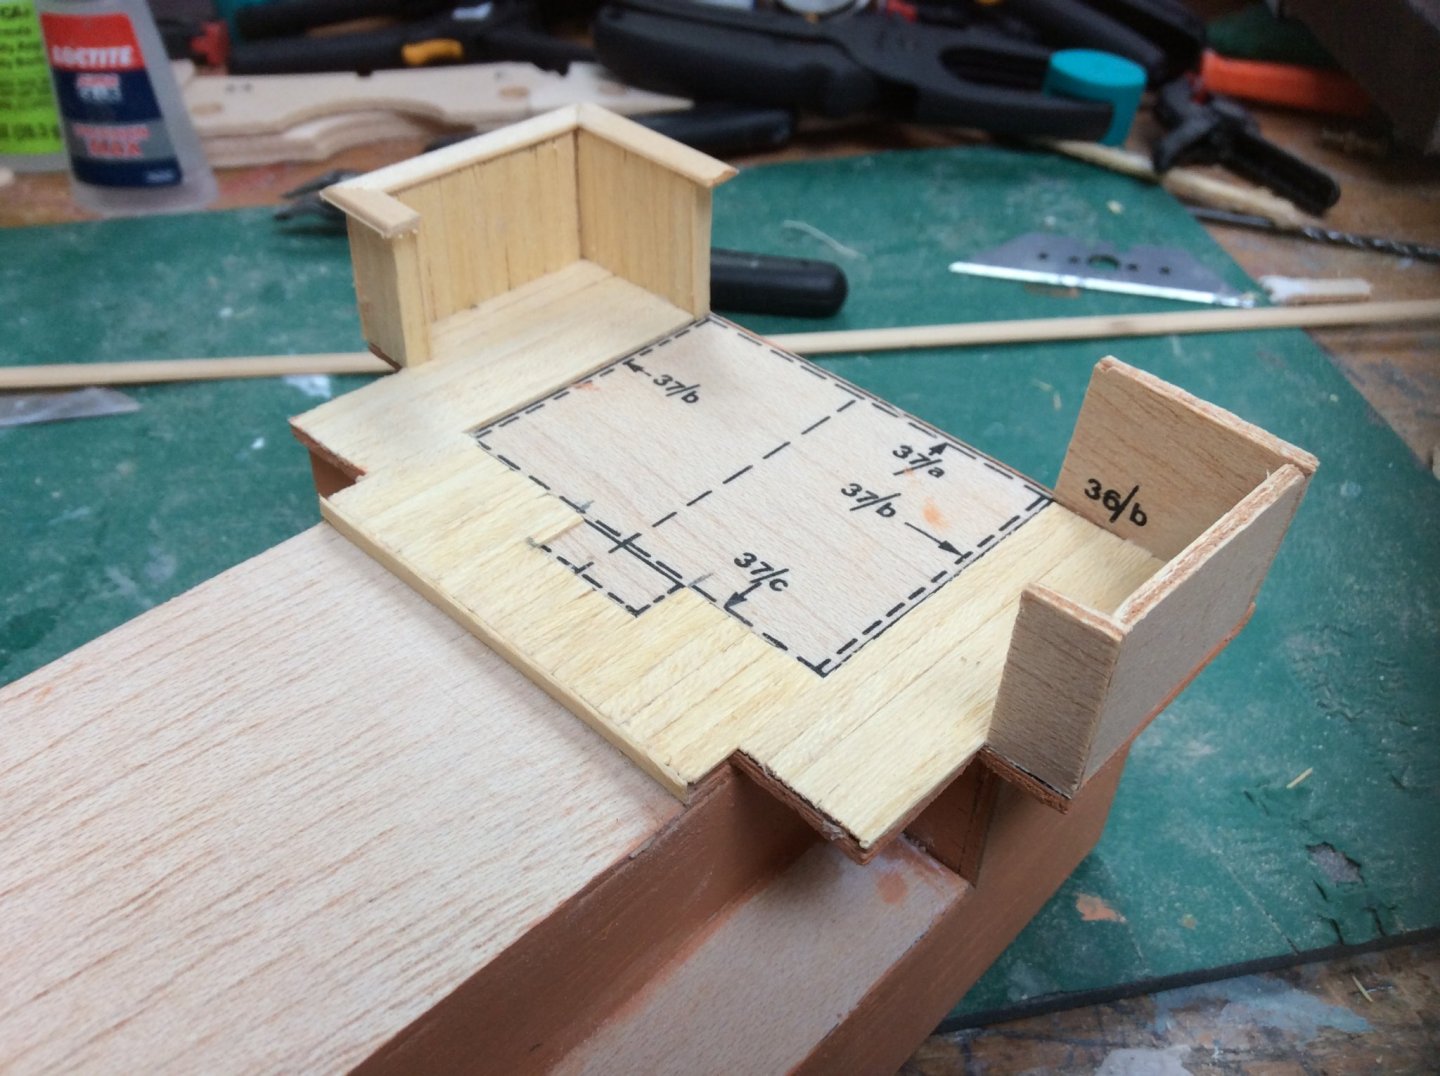
Progress has been slow the last week or so; planking the hull is taking longer than I expected, so I am pressing on with the deckhouses. I have a spare set of some of the St Canute fittings, so should be able to furnish the wheelhouse with a wheel, binnacle and telegraph as well as the open bridge. Finished the planking on the bridge wings and added a capping rail to them. Also realised my workbench was getting untidy, so build a tool workstation out of some spare pieces of wood that were lying around. It's a 'work in progress', as I have left space to add/rearrange things if I need to. completed the engine skylight; the white substance in the portholes is 'Glue 'n Glaze', a type of PVA used in plastic and card modelling to glue clear parts or make small windows. It dries perfectly clear and is ideal for small portholes. Might even try it for the wheelhouse windows later.

-
You have given me some inspiration for the St Canute I am building, many thanks.
- 337 replies
-
- 3
-

-
- finished
- mountfleet models
- (and 1 more)
-
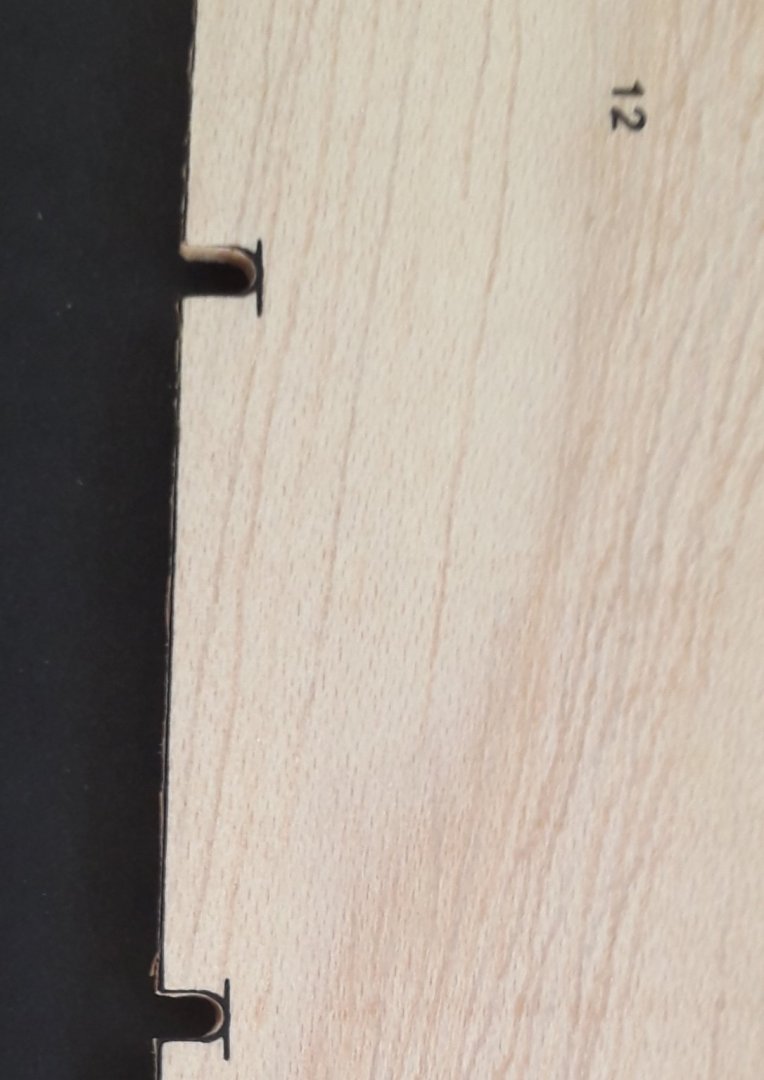
Started on the superstructure, as the hull was damaged; one of the frames broke when I used a little too much force with the pin pusher. I have repaired it, but decided to have some time away from it. The material used is very lightweight and resembles balsa wood; also on the deck houses I've noticed what look like deep scratches after painting a primer coat, which are the grain showing through. Any ideas what the wood might be? The kit is an original version I think, judging by the die-cutting of the major parts.
-
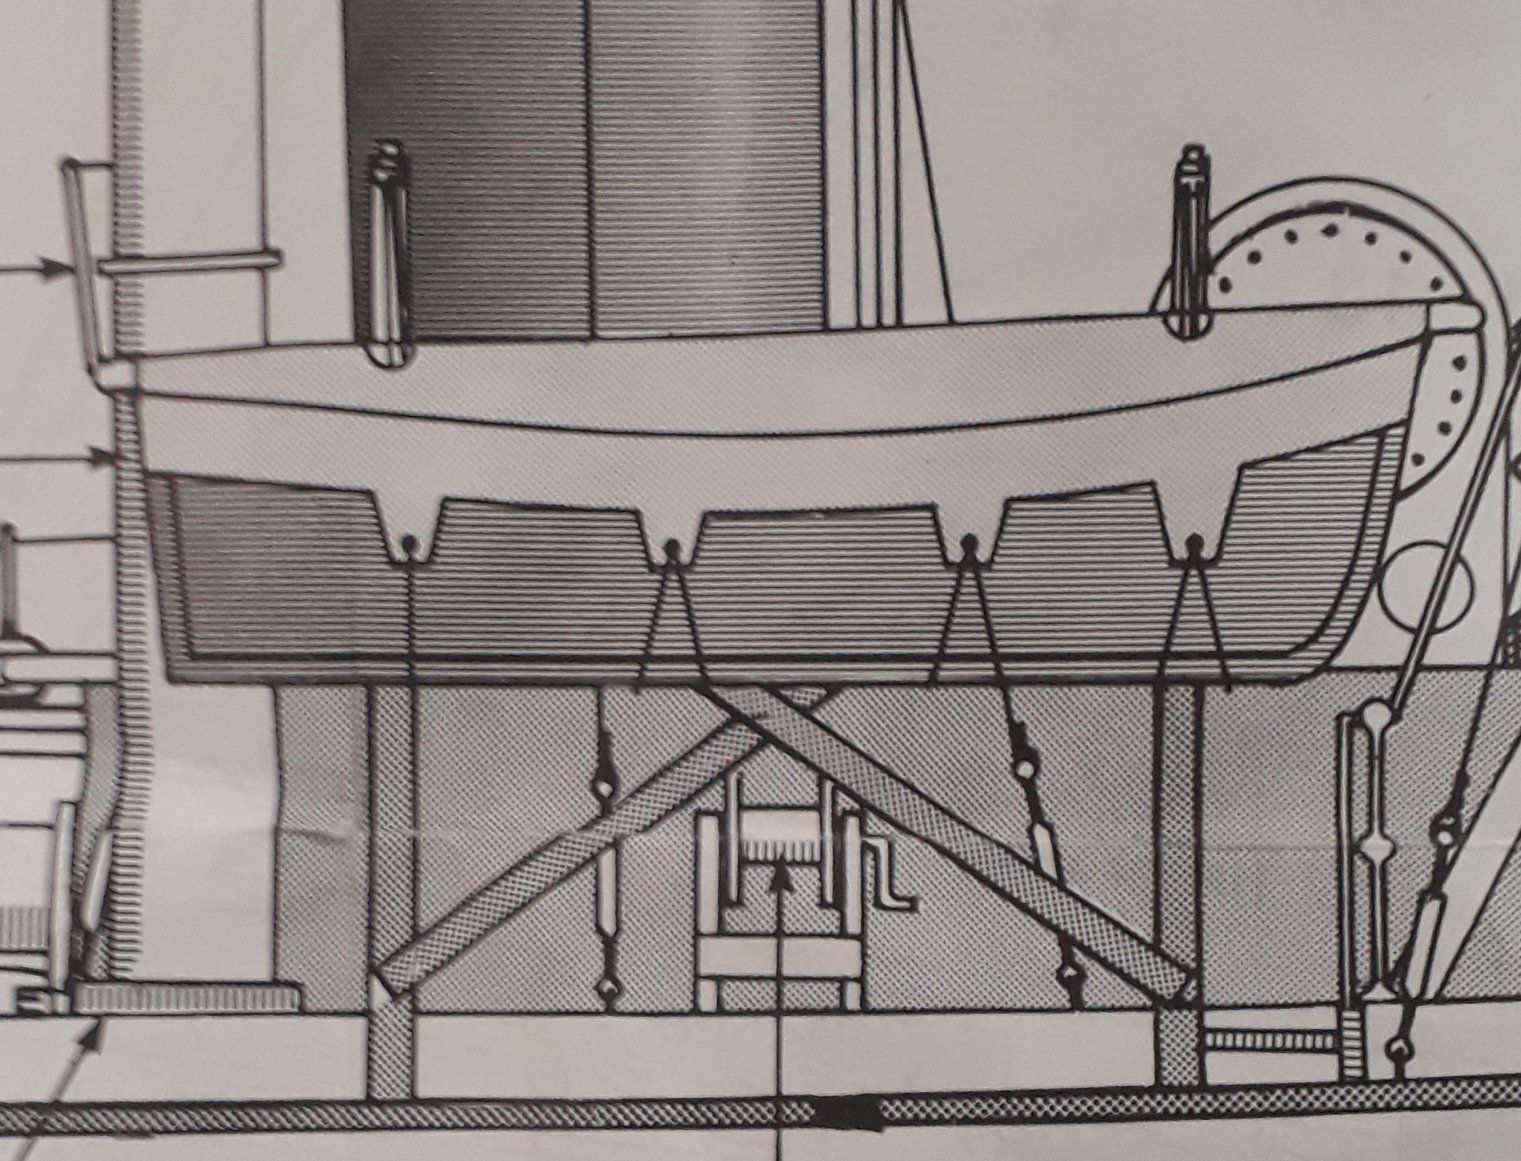
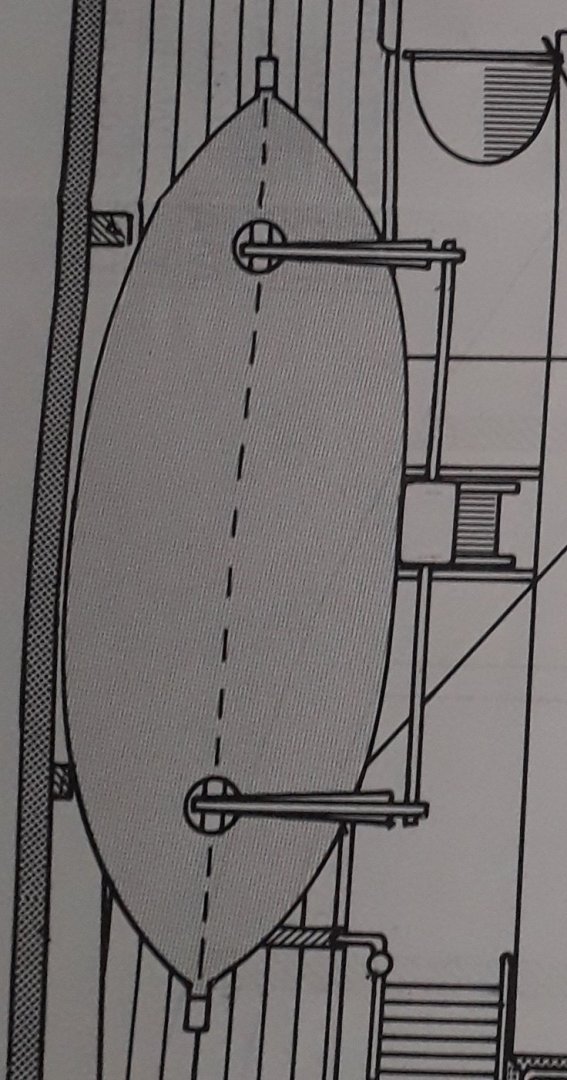
I decided to ask the current owners about the boat davits; I received a reply this morning - at last the mystery is solved! I'll put a small length of brass rod at the base of the davit and connect the winch to part F622.
-
Many thanks for the references, the Fowey ones are new to me; surprising how much is available. I was thinking of inserting a small piece of brass rod across each davit towards the base to simulate a hinge, then connect the winch to the tube marked as F622 in the drawing. Looking at the photos of it at Fowey, it didn’t have any davits or boats, so there is another option 😊
-
Thank you for your encouragement, I will do my best to finish it! Began building the deckhouses today and found some clamps I had bought for making card buildings very useful. They are supplied by a company that produces online card kits for model railway buildings and are 3D printed; they contain small magnets and make sure you have a 90 degree angle at the corners. Due to the age of the kit there is a lot more work to do compared to a more recent products, with printed parts for example. Some of the die-cutting has gone out of alignment, so will have to be corrected. Quite easy as it only needs some redrawing. Some research is required regarding the ship's boats. The davits are glued to the sides of the deckhouse according to the plan, which means they would be lowered straight onto the main deck. On the deck above between the davits is a hand operated winch, with no information about it's purpose - although form it's position it must have something to do with the boats. The photos show all the information supplied. Time for the crystal ball! Eric


-
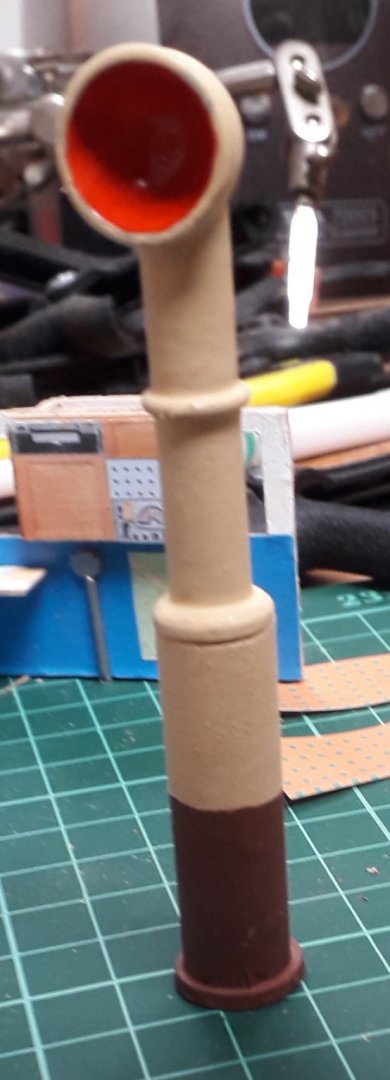
Anyone spot I used the wrong dowel on those tall ventilators? I think I need to research a bit more!
-
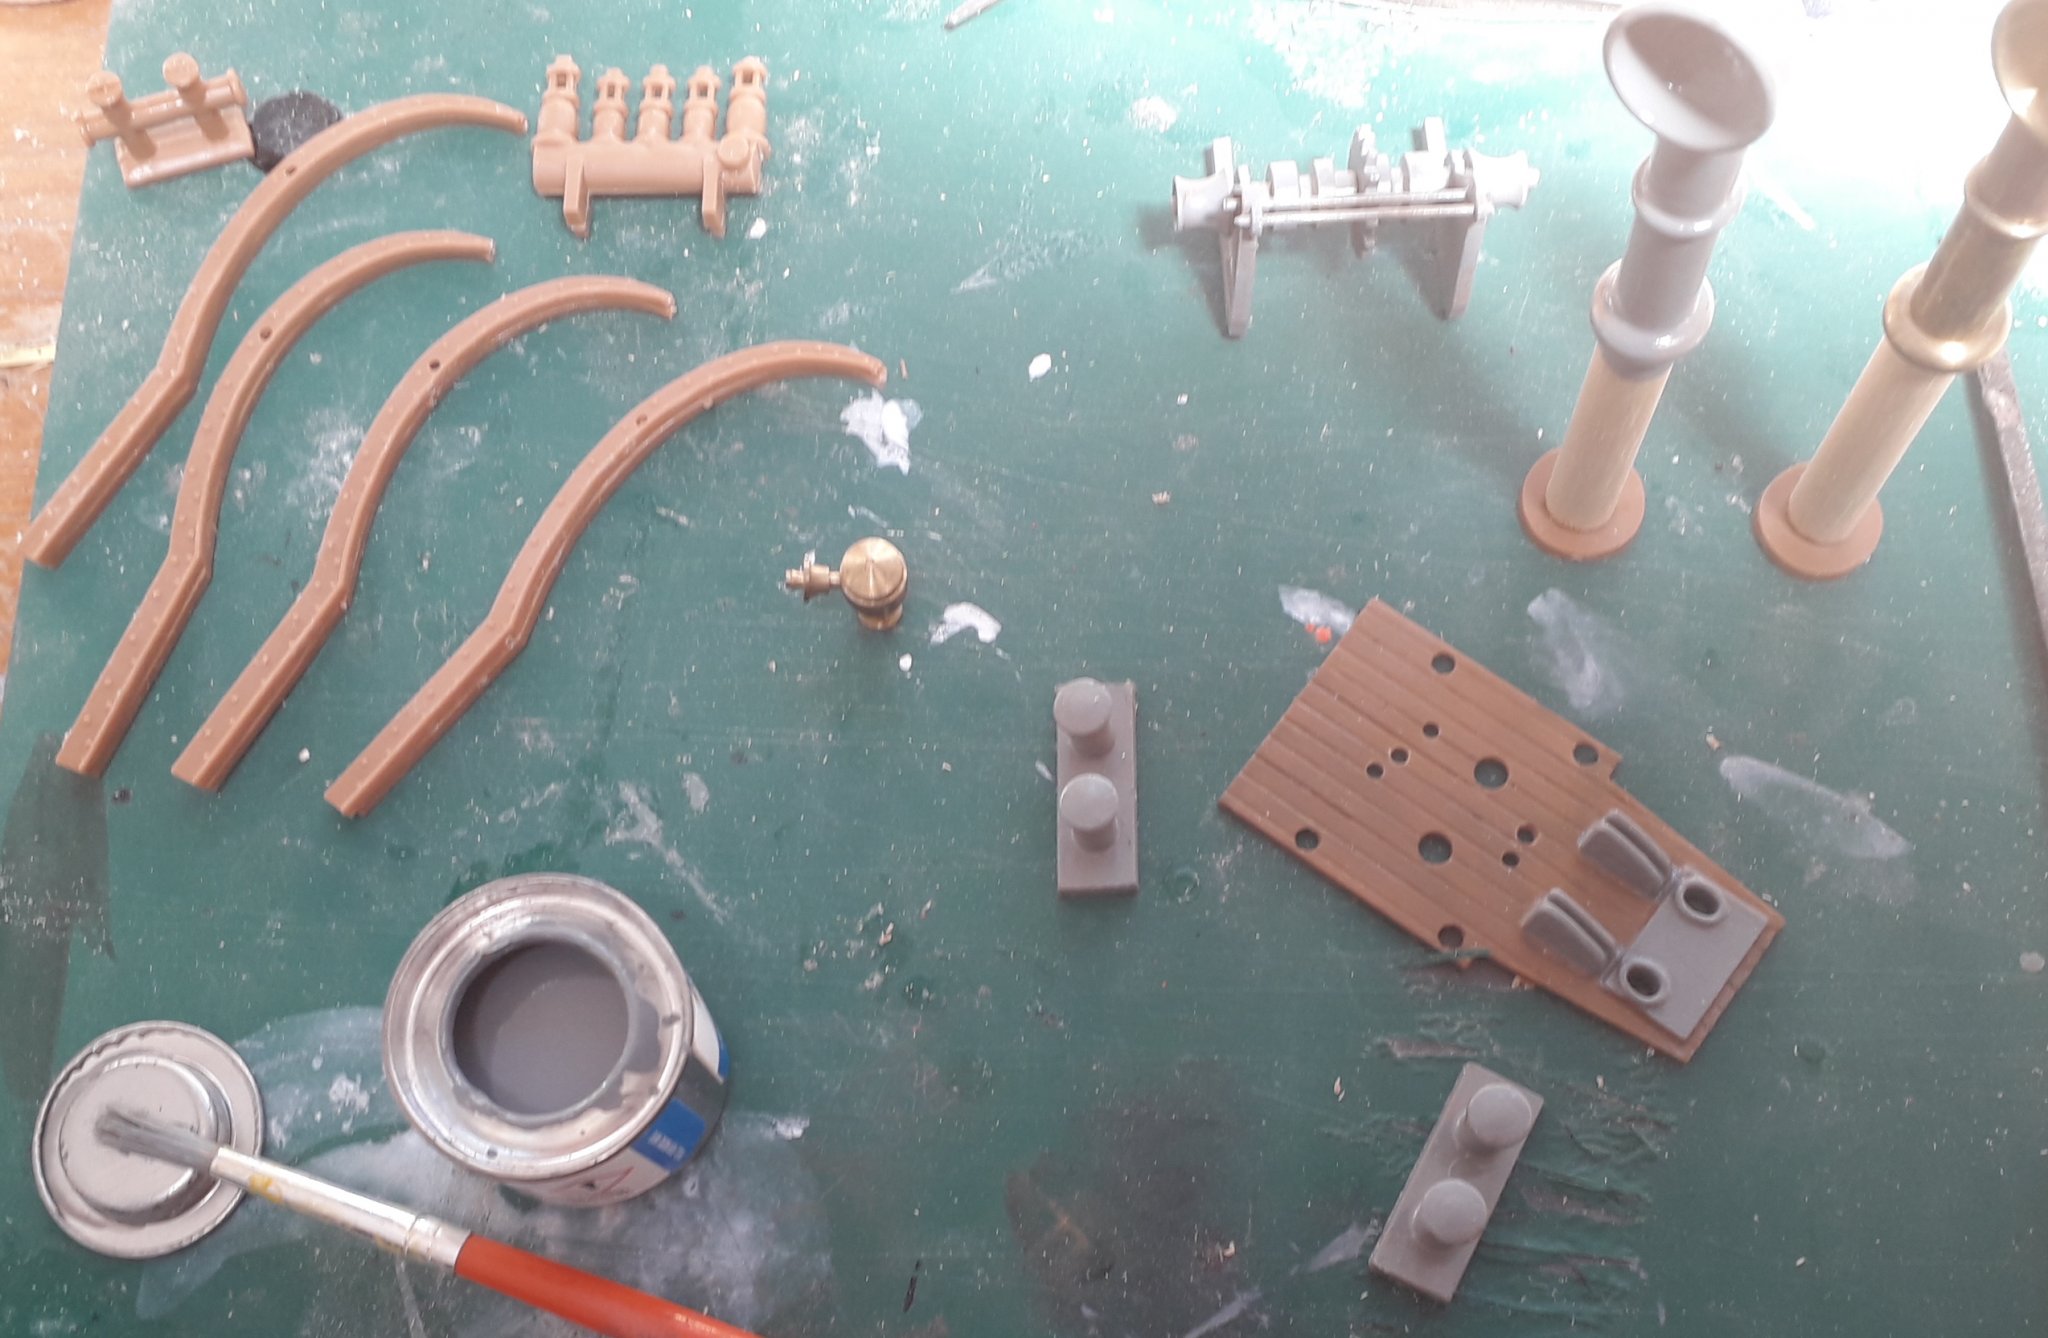
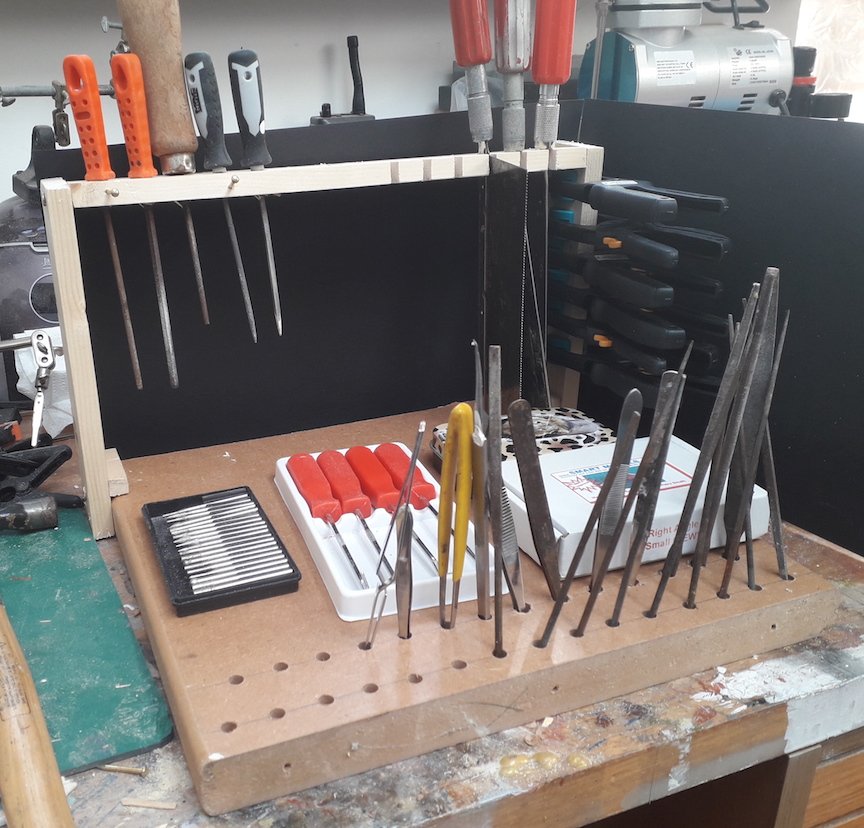
Explained to the Admiral, that although my workshop seems full of tools, there is always a need for others.... Waiting now for a pin pusher and a new set of razor saws, so I will take a break from the hull and start on the various fittings and deckhouses etc. It is interesting how Billing uses a variety of materials to create them; for example there are two tall ventilators, made up of a brass tube, cowl, ring and base, a piece of wooden dowel and a plastic base. The plastic items for those who haven't built any of their kits are one sided mouldings; some require assembling to make a 3D item - for example the davits, towing hook, etc. The parts are identified by photos of the individual frames in the manual. However, you then have to search the instruction manual and the plans to find them.... Parts F 837f look like they are for the capstan, but so far I have failed to find them anywhere on the drawings... I have also downloaded the manual and plan from their website, which appears to be a later version. It's a challenge, but an enjoyable one so far; certainly not like a 'shake and bake' modern plastic kit!


-
I noticed the photo made that last frame look detached from the keel - I will look at it tomorrow and put it right!
-
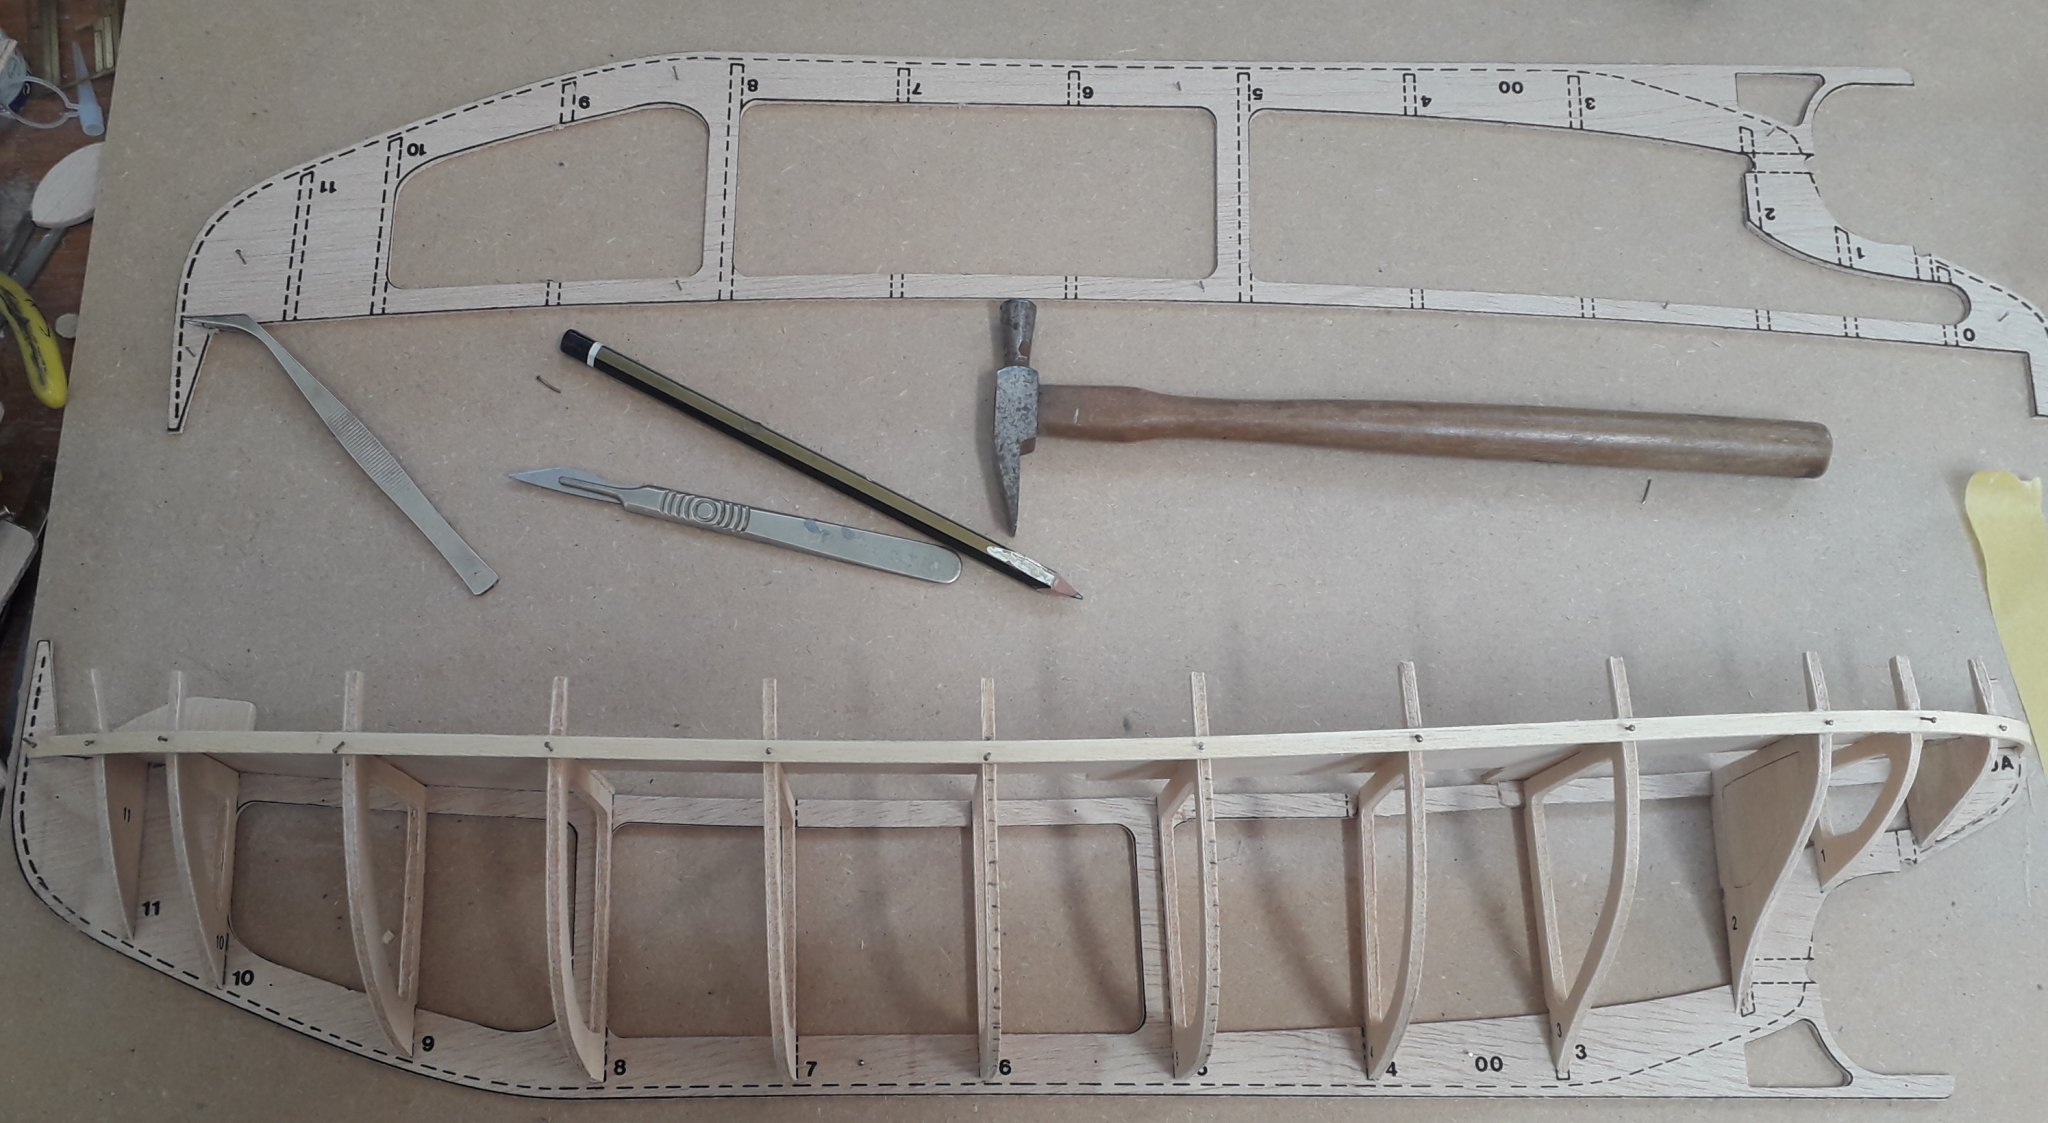
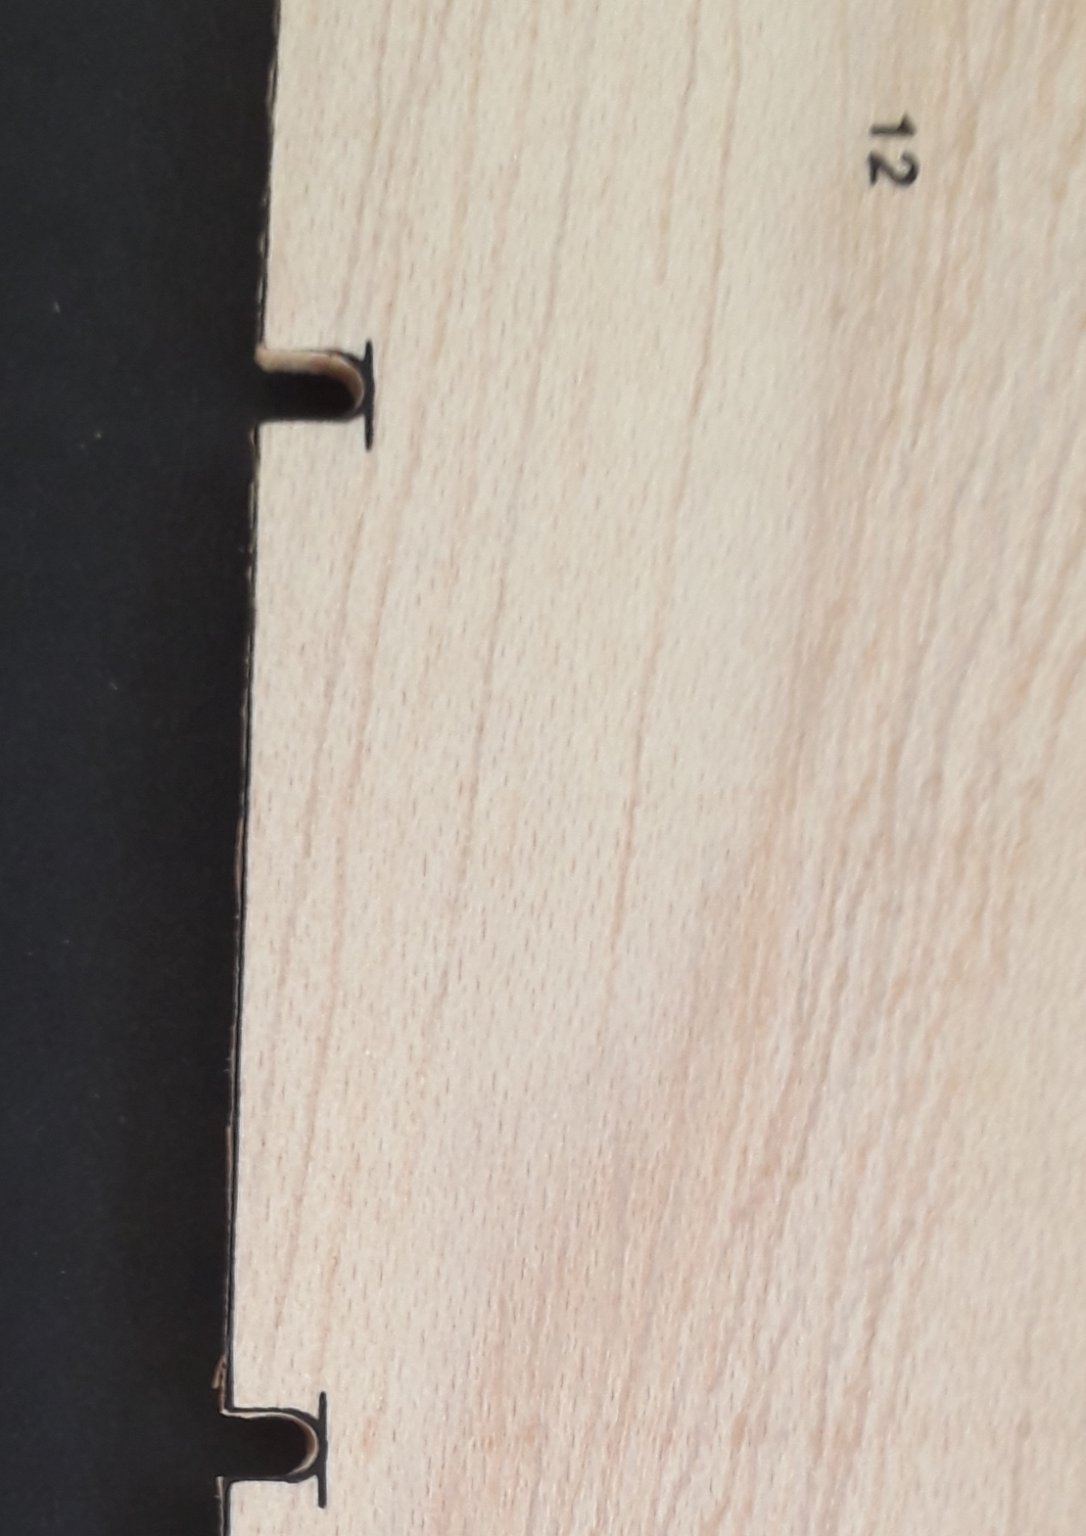
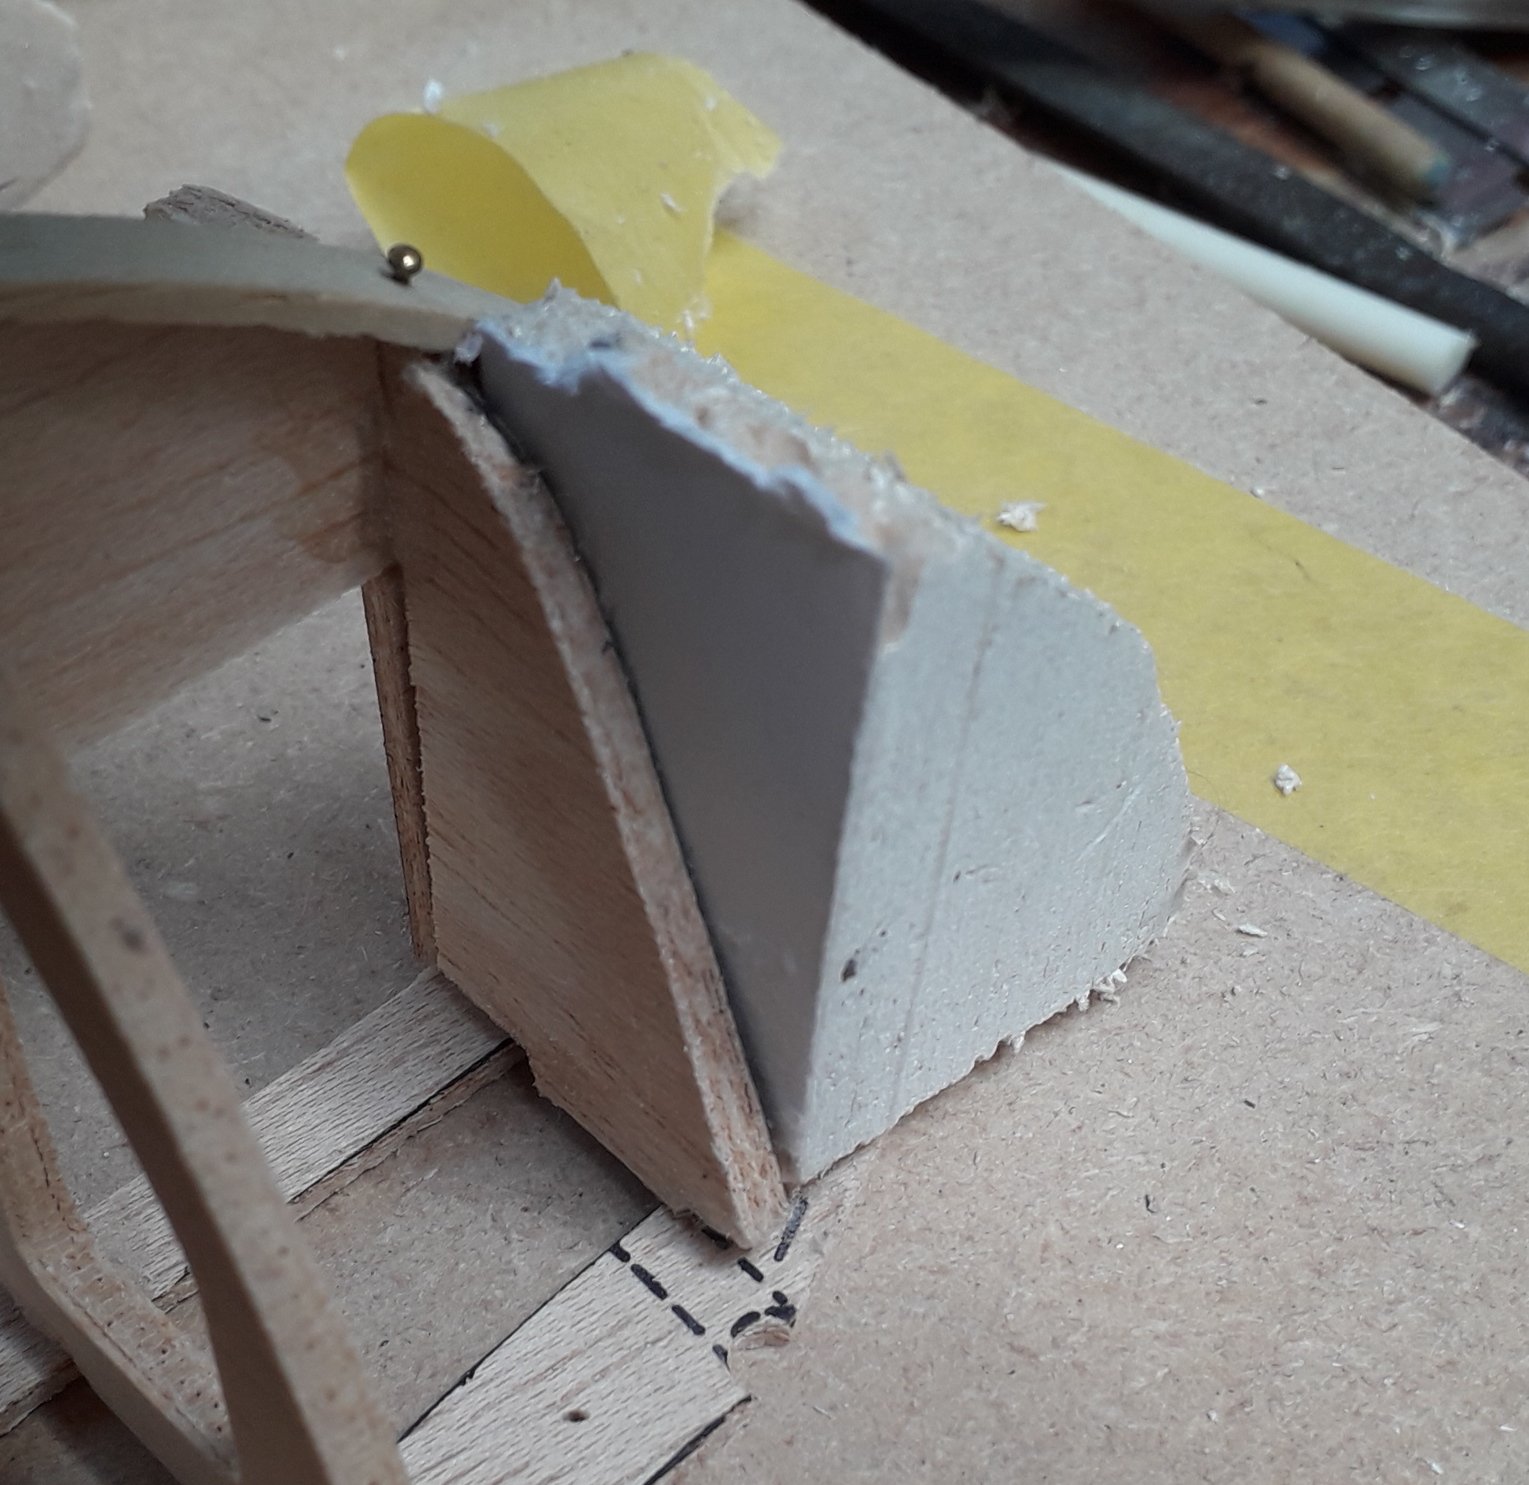
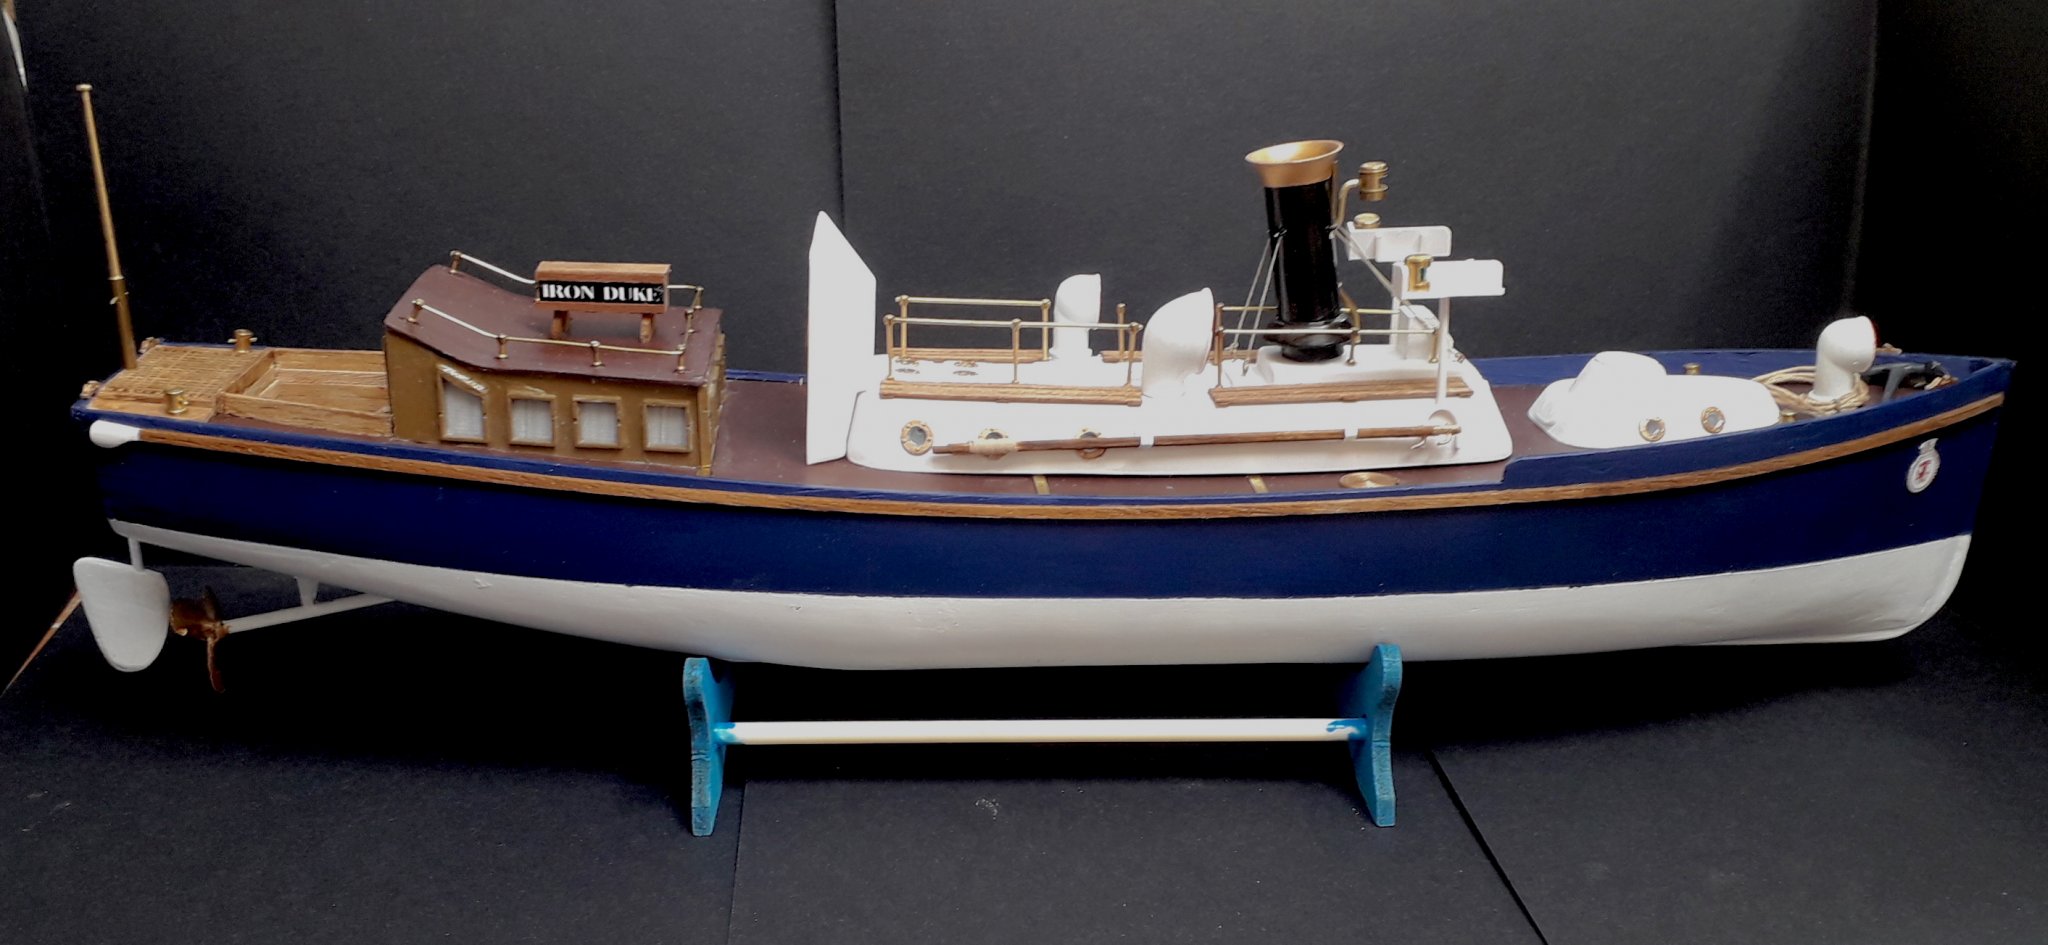
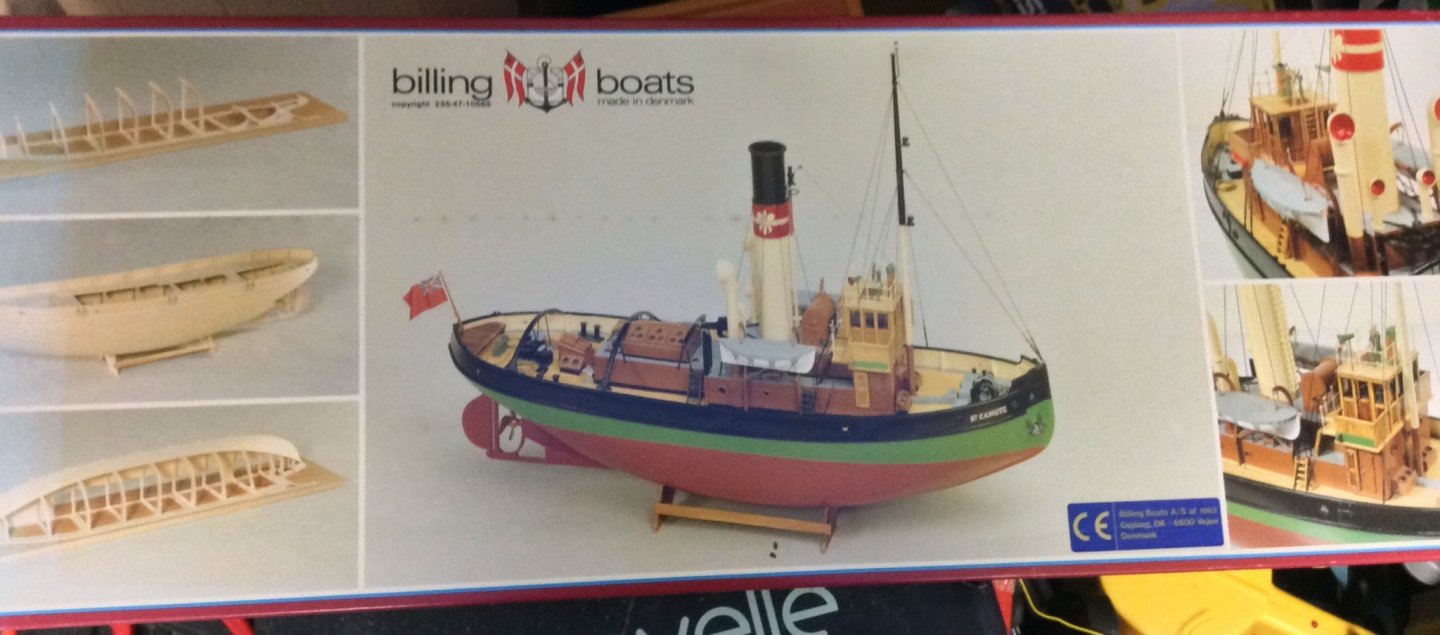
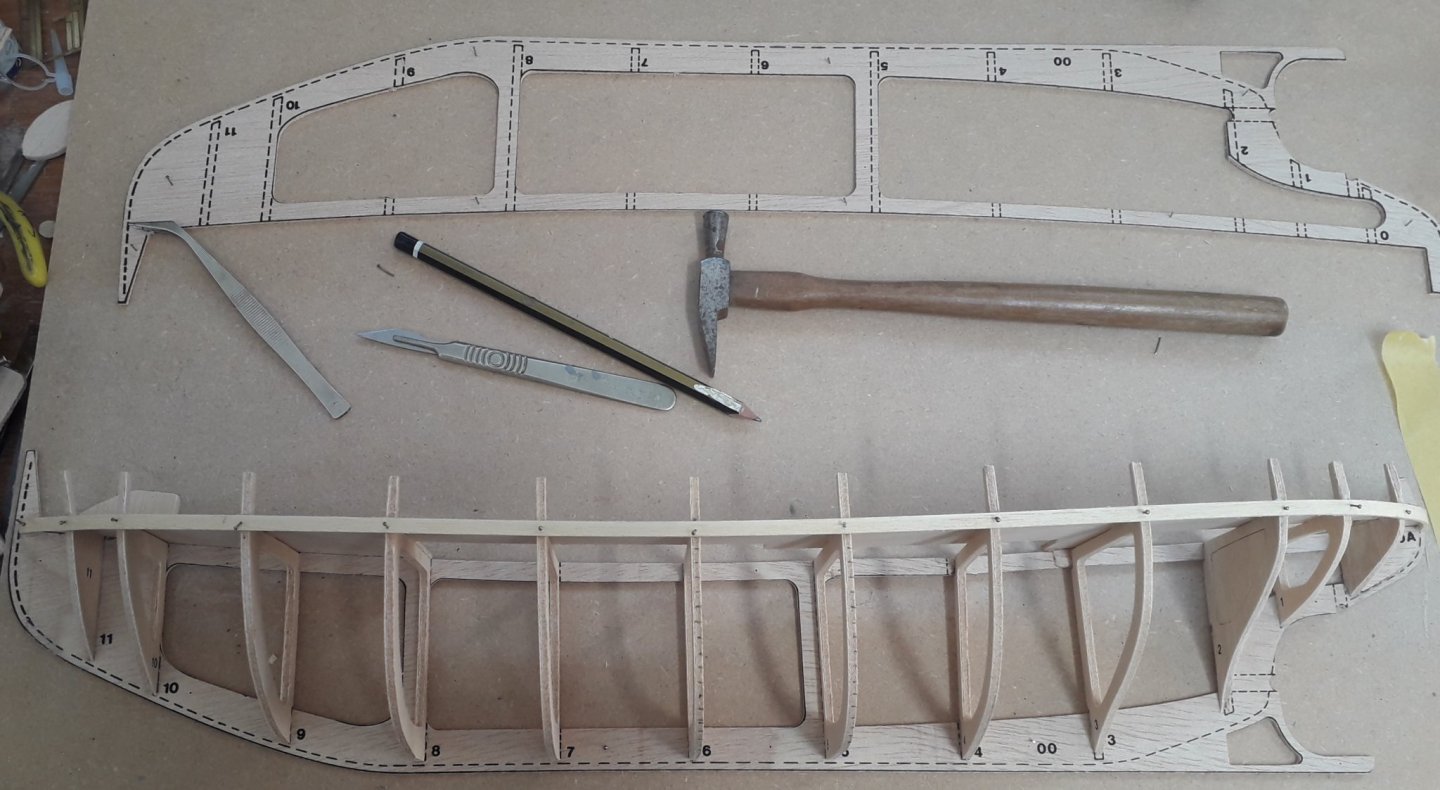
I have recently completed Billing Boat’s 50ft Steam Pinnace, (listed as HMS Renown). It was quite a steep learning curve, as it has been many years since I attempted a similar build. I found it much more involved and more satisfying than the average plastic kit. The result is maybe not the most accurate rendering of one of the boats, or up with the efforts of many of the boats on this site, but it’s a start. I purchased a few of their kits whilst working in Saudi Arabia in the 90’s, where I discovered a model shop in the town where I lived. They were a little more expensive than they would have been back home, but, (a) it saved them from the ravages of Saudi Customs bringing them in and (b) the shopkeeper had decided to include the fittings packs with the basic kit, making them actually cheaper! The Admiral liked my first attempt and helped me choose the next one from my stash, Billing’s St Canute. It is one of their 700 series where the hull is built in two separate halves and then bought together. With the Pinnace I glued the two halves together before I planked it, but with this one I will follow the manufacturers method. So the first job, find a suitable board and pin the skeleton keels down and then mount the frames. I also added the deck at this stage. The kit is die-cut as opposed to laser and it shows on the slots cut in the deck’s edge. Billing usually provides just one planking layer and those provided were quite thick – not too bad on most of the hull, but a problem at the stern which has tight compound curves. I decided to make an infill block with some balsawood, recycled from an earlier project. The first attempt was not particularly good, as I tried to make allowances for the planks to cover it, so I scrapped that and make one that the planks butted up to, as the hull will be filled and painted anyway. (You will notice that I had already put the first plank on before I had thought of it…) The rest of the planking I am doing in sections, as I am still experimenting with the best way to do it for me.

-
I agree with all the comments so far. I recently finished (for the first time) a wooden boat kit, the 50ft Steam Pinnace (HMS Renown) from Billing Boats. The planking of the hull was a real learning curve and along the way were exercises in working out where things go, how to fit the small details, working with three different materials etc. Plus the usual Billing 'instructions' and plan. I have a couple of their bigger kits which I'd love to have a go at; but even with my experience of model making in other fields I am realistic enough to know I'd be running before I walked with them... Go small and simple and work your way up - there's a reason why those beautiful ready made models are so expensive! The Pinnace, by the way took me ten weeks at a rate of one to two hours a day, sometimes more.

- 14 replies
-
- 4
-
-
- hours
- build time
- (and 4 more)
-
Steam Pinnace colours
ejgray52 replied to ejgray52's topic in Painting, finishing and weathering products and techniques
Finished it ( I think...); not 100% accurate, but it has been a good learning experience. Changed the hull colour as it looked a little light, so went for Revell’s Lufthansa Blue. Added a few things, a believable steering system, secured the anchor (Billing’s version would lose it if you threw it overboard...), etc. Quite pleased, but the next build will be better - and I will do a build log as well.
-
I’ve noticed that many printed decks do not follow prototype ship building rules regarding margin planks/joggling, so maybe they should be planked as a matter of course? I am building Billings H.M.S. Renown’s Pinnace and used it as my first attempt at margin planks etc. (Only to find out the deck was covered in Corticene - I must spend more time on research next time!)
-
I have this particular kit, made by a government sponsored firm in the 1980’s. All of the parts are there along with the instruction book, however the 4 sheets of plans are missing. Has anyone got a spare copy or can copy them? It appears to be a superb large scale project, but I don’t want to start it without the plans.
-
Steam Pinnace colours
ejgray52 replied to ejgray52's topic in Painting, finishing and weathering products and techniques
Covered up the planking with some good quality white card and gave it a coat of Tamiya 'Hull Red'. Looks a bit dark, may just change it to Brick Red... Found some Humbrol Dark blue (No25) for the hull. The learning curve continues.... In the photo the bulwarks are just placed on the model to see the effect of the colours together; the deck does need another coat and the seating area to finish off.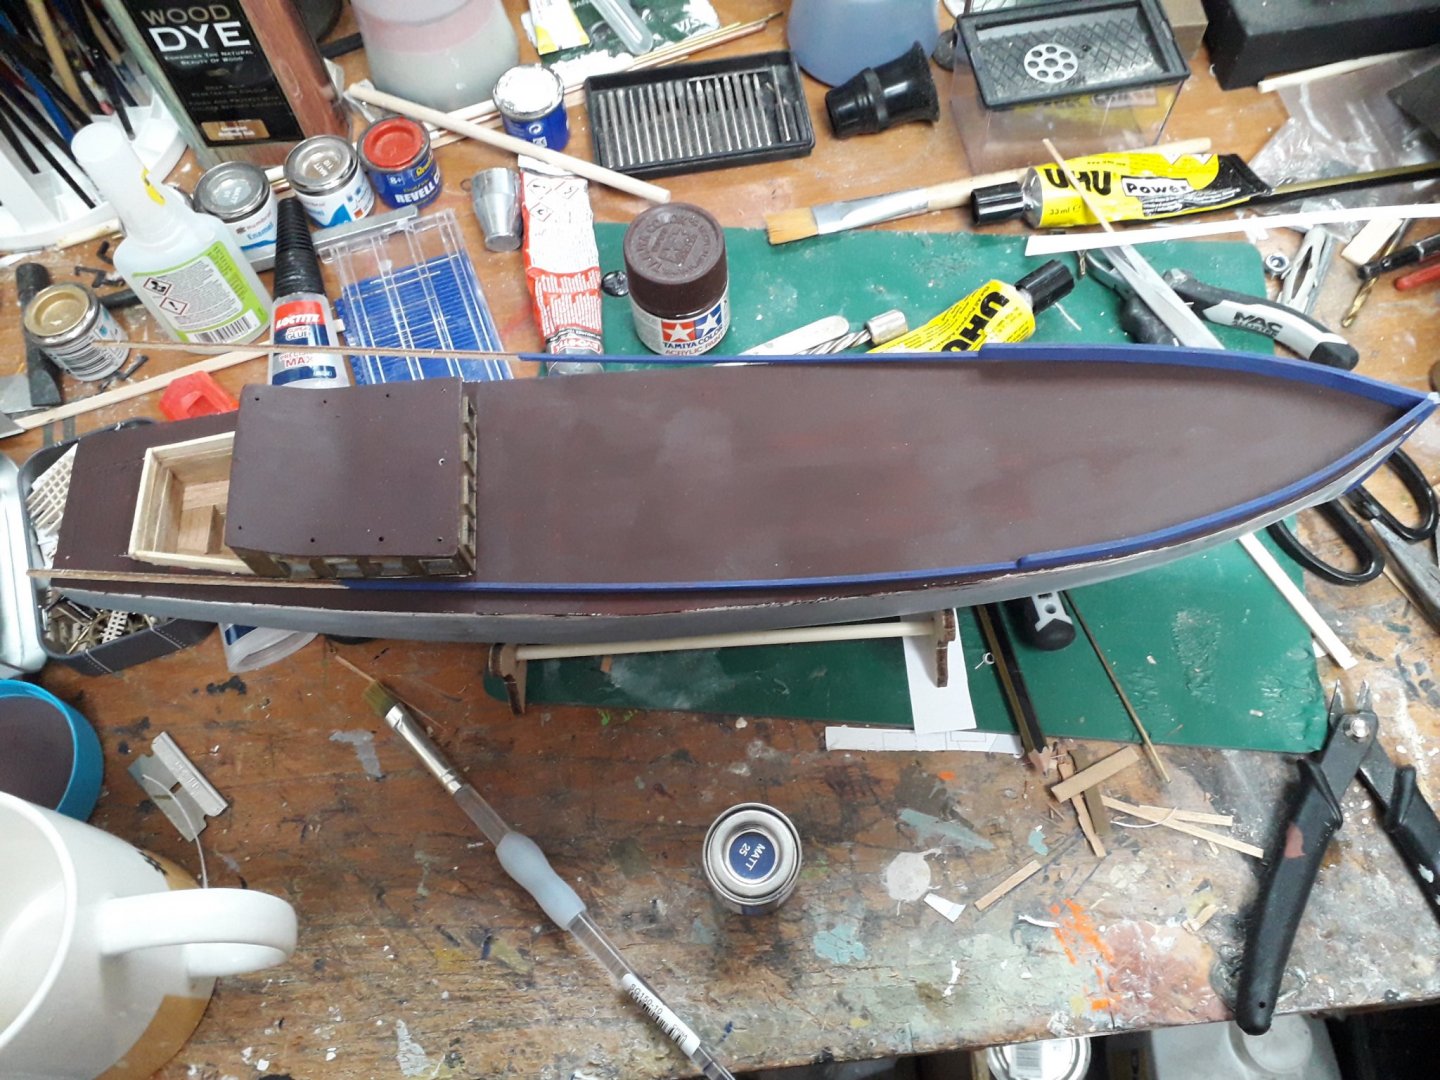
-
Steam Pinnace colours
ejgray52 replied to ejgray52's topic in Painting, finishing and weathering products and techniques
Thank you Roger. Looking at what few photos I have found, they seem to confirm the Corcetine covered deck. I missed that when deciding how to do the deck and scratched my head for a while as to how I was going to plank it. I decided to abandon the curved planks as used on the restored RN pinnace and went with using a margin plank and joggling the rest. As I lack experience building wooden boats, I found that I had sanded one side of the hull more than the other by a few mm, so the plank layout was asymmetric! At least converting it to Corcetine will eliminate that error... The photos of the real thing I have found online also show the brass strips which I will fit. Colours will be dark blue and white for the hull; as for the funnel, it would appear that two of the photos show Admiral's barges and have light coloured, possibly brass ones and the standard pinnace has a dark, possibly black or dark blue, one. I suspect that the standard one is finished in grey; if the hull was dark blue it would be close in tone the the sailor's uniform, but appears very light. It depends on the type of film that was used (orthochromatic or panchromatic). I remember researching the squadron I was on in the RAF and finding it was difficult to determine the colour of the markings as the colours appear to be reversed depending on which type of film was used. As for the funnel, I think I will go with black. Basically this model is acting as a learning exercise, so may not be 100% accurate, but the lessons I learn will be used in the next build. So far it has been enjoyable building it and solving problems, as well as understanding Billings instructions (not so much what they say, as what they don't say!). It has kept me sane in a house full of family during this lock-down... I hope everything is going well with you and your family in these difficult times. Eric -
I am building the Billings 50ft Steam Pinnace, which I am finishing as one from HMS Iron Duke, on which my grandfather served during the 1920’s. Does anyone know what colours it would be painted? Just a normal working boat, not the Admiral’s Barge. There doesn’t seem to be a lot of info on the famous internet...