-
Posts
3,045 -
Joined
-
Last visited
About bruce d

Profile Information
-
Location
UK
Recent Profile Visitors
-
 bruce d reacted to a post in a topic:
Wood Suppliers in UK
-
 bruce d reacted to a post in a topic:
Wood Suppliers in UK
-
 bruce d reacted to a post in a topic:
Wood Suppliers in UK
-
 bruce d reacted to a post in a topic:
NRG Capstan Project by JacquesCousteau - 1:32
-
 bruce d reacted to a post in a topic:
HMS Victory 1805 by kiwiron - Caldercraft - 1:72
-
 bruce d reacted to a post in a topic:
Index of French plans from the Danish archive
-
 bruce d reacted to a post in a topic:
Index of French plans from the Danish archive
-
 Pitan reacted to a post in a topic:
Fregat and Snau: Small Cruisers in the Danish Navy 1650-1750
-
 bruce d reacted to a post in a topic:
Recommended First Machine
-
 aaronc reacted to a post in a topic:
How it was done in 1950
-
 Haliburton reacted to a post in a topic:
Work area pictures only
-
 ERS Rich reacted to a post in a topic:
Looking for a guide in cutting wood strips with mini saw (Byrnes)
-
 davyboy reacted to a post in a topic:
Looking for a guide in cutting wood strips with mini saw (Byrnes)
-
If you use the right blade and feed rate the results from the saw are splendid. I keep a very fine sanding block (the sponge type) by the saw and as a habit passed each plank gently across it. Any tiny burrs are dealt with this way, but I have not found it necessary to do further surface finishing. HTH Bruce
-
 BANYAN reacted to a post in a topic:
HMCSS Victoria 1855 by BANYAN - 1:72
-
 JohnOz reacted to a post in a topic:
HMCSS Victoria 1855 by BANYAN - 1:72
-
 Glen McGuire reacted to a post in a topic:
HMCSS Victoria 1855 by BANYAN - 1:72
-

HMCSS Victoria 1855 by BANYAN - 1:72
bruce d replied to BANYAN's topic in - Build logs for subjects built 1851 - 1900
Pat, great to hear your 'all clear' news.- 1,013 replies
-
- gun dispatch vessel
- victoria
-
(and 2 more)
Tagged with:
-

Good 'Hobby Quality' Metal Lathes
bruce d replied to tmj's topic in Modeling tools and Workshop Equipment
SL = M12x1 Unimat 3&4 = M14x1 BTW, some Sherline lathes had M12x1 but most (the later ones) had M12.25 x 1 Bruce -
 Bomber_County reacted to a post in a topic:
Work area pictures only
-

Work area pictures only
bruce d replied to Johnny Mike's topic in Modeling tools and Workshop Equipment
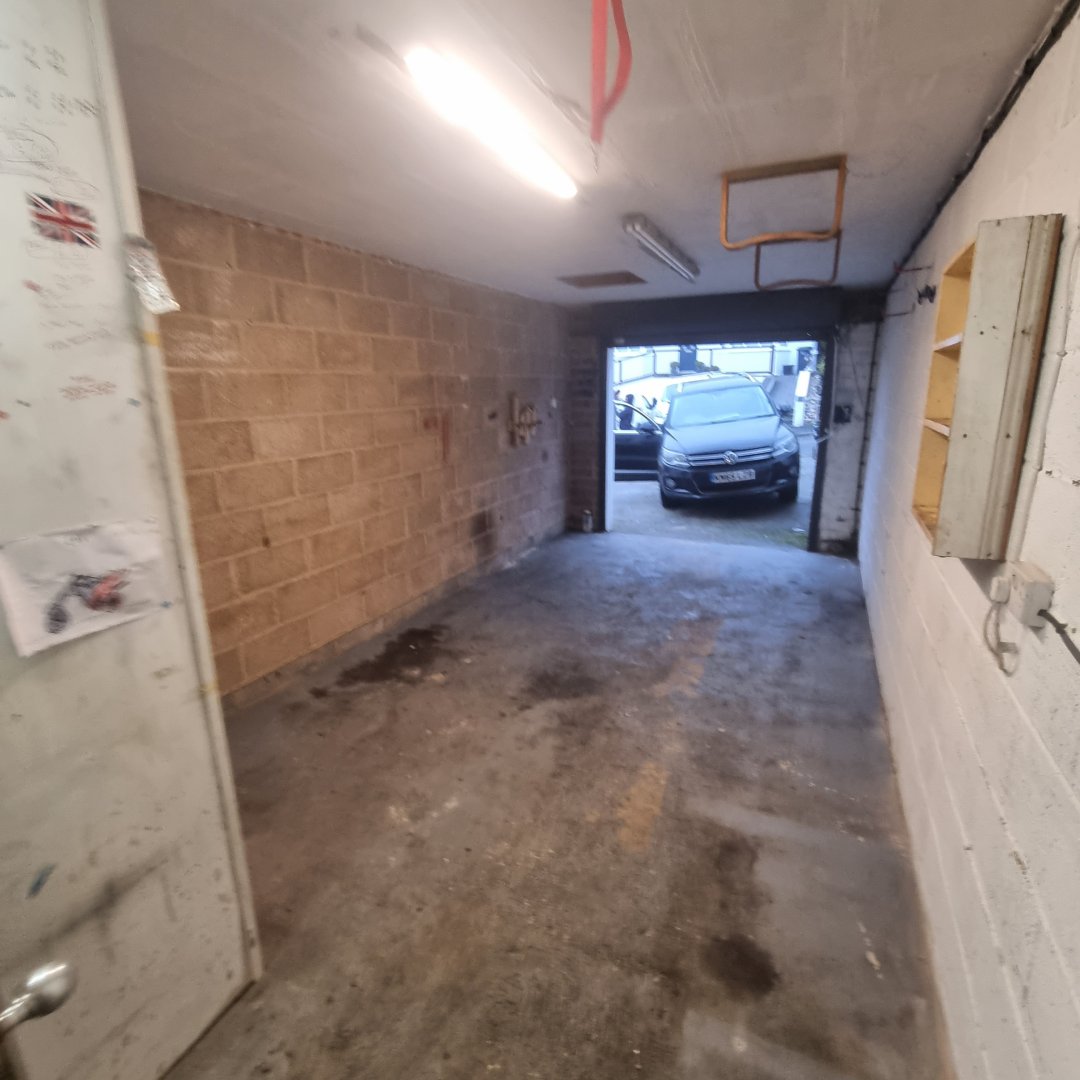
Just moved house and this is destined to be my new workshop. It will be dual purpose: the outer (street) end is for general woodworking and stuff with modelmaking taking up the back half. It's been dubbed 'the fiddleyard'. -
Andy, both of the crew went into the Aegean trapped in the wreckage.
-
In the 1915 shelling of Kavalla by RN monitors the Farman biplane acting as spotter was torn apart by turbulence from passing shells without actually having been hit.
-
Hello Francois, There are several other drawings in the Dansk archive as well. They are all together, numbers G2343 to G2390. Here is the link to G2343: Arkivalieronline Use the control on the top bar and the list on the left side to view the rest of the series. Here is the link to the library index cards, the process is the same. Arkivalieronline Have fun, there are thousands of images! Bruce
-
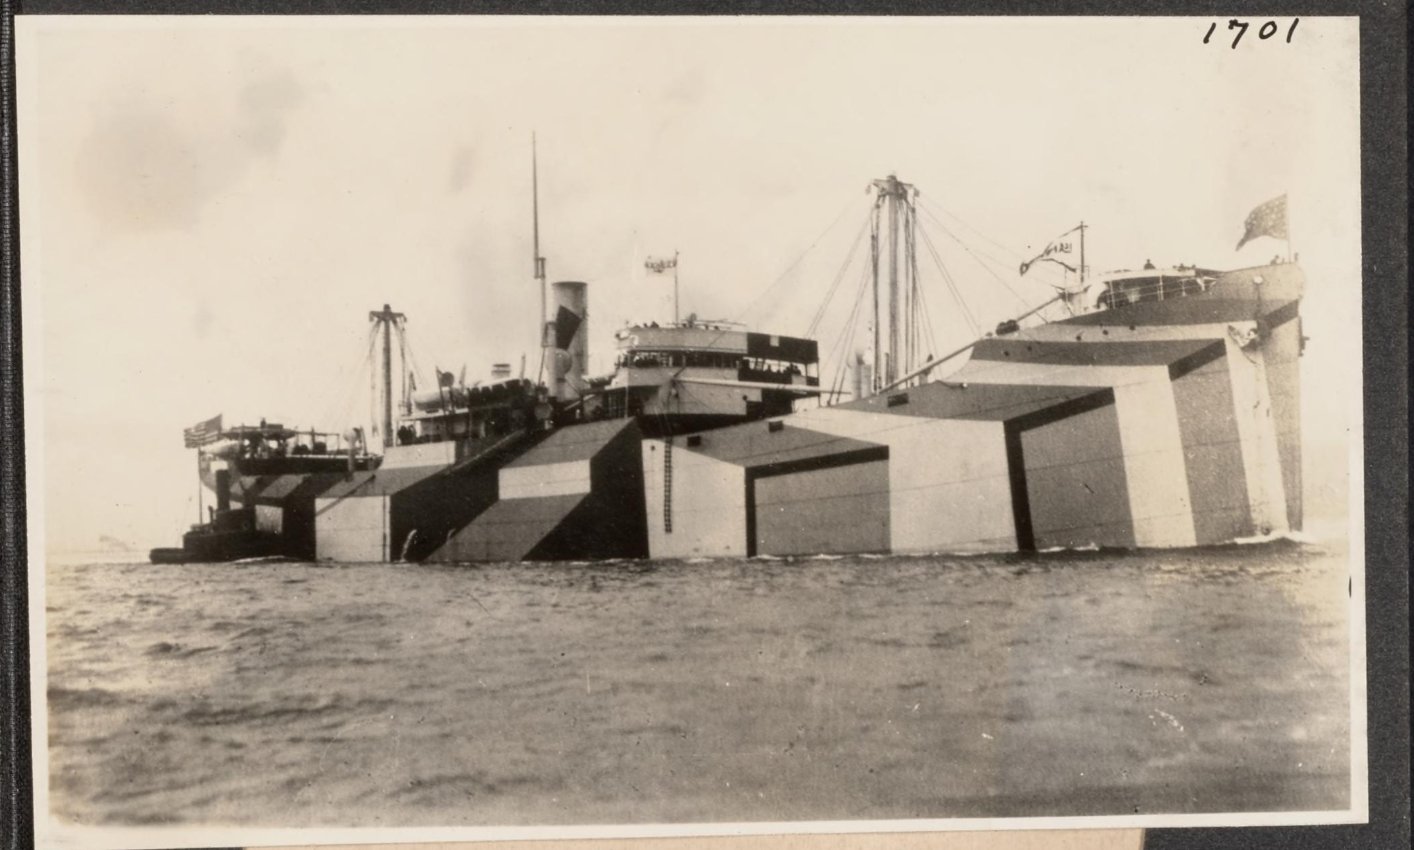
Found this unidentified vessel in an online collection of photograph albums ( [Photograph Album] : Eppler, Arthur O., 1873 - : Free Borrow & Streaming : Internet Archive ) Staring at this, I almost sympathise with the U-boat commander.
-
"ON NAVAL TIMBER AND ARBORICULTURE; WITH CRITICAL NOTES ON AUTHORS WHO HAVE RECENTLY TREATED THE SUBJECT OF PLANTING" 1831, by Patrick Matthew The story behind the scenes of the techniques devised to keep the fleet afloat including the shipwright's methods. This book is in the public domain. Another scan which may be easier to read is viewable here: On Naval Timber and Arboriculture - Google Books On_Naval_Timber_and_Arboriculture.pdf
About us
Modelshipworld - Advancing Ship Modeling through Research
SSL Secured
Your security is important for us so this Website is SSL-Secured
NRG Mailing Address
Nautical Research Guild
237 South Lincoln Street
Westmont IL, 60559-1917
Model Ship World ® and the MSW logo are Registered Trademarks, and belong to the Nautical Research Guild (United States Patent and Trademark Office: No. 6,929,264 & No. 6,929,274, registered Dec. 20, 2022)
Helpful Links
About the NRG
If you enjoy building ship models that are historically accurate as well as beautiful, then The Nautical Research Guild (NRG) is just right for you.
The Guild is a non-profit educational organization whose mission is to “Advance Ship Modeling Through Research”. We provide support to our members in their efforts to raise the quality of their model ships.
The Nautical Research Guild has published our world-renowned quarterly magazine, The Nautical Research Journal, since 1955. The pages of the Journal are full of articles by accomplished ship modelers who show you how they create those exquisite details on their models, and by maritime historians who show you the correct details to build. The Journal is available in both print and digital editions. Go to the NRG web site (www.thenrg.org) to download a complimentary digital copy of the Journal. The NRG also publishes plan sets, books and compilations of back issues of the Journal and the former Ships in Scale and Model Ship Builder magazines.

.thumb.jpeg.fc5d633a7b34428fcf19419a73d56d55.jpeg)


