

Blighty
-
Posts
316 -
Joined
-
Last visited
Content Type
Profiles
Forums
Gallery
Events
Posts posted by Blighty
-
-
-
You can simulate bags of grain or bales of cotton using a modelers clay, such as Sculptey brand, shape it by hand to the size and shape desired, then wrap it in tissue, such as Kleenex brand, or gauze, such as Band-Aid brand. Use a 50-50 mixture of white glue and water with 1-2 drops of dish detergent (again "wet" water) to set the tissue/gauze in place. The tissue will give a finer weave while the gauze will give it a more coarse weave similar to burlap. Once set it can be brush or spray painted and weather to get the appearance desired. A trip to your local pharmacy will get you a good supply at a reasonably cheap price. For this purpose I'd use the "no-name" brands.
I used this technique to make simulated folded tarps, sacks and other "bundles" for my 1:35 scale armor vehicles.
Jack, my savior, great idea I will try it out, I just replied to Kishmul that I would prefer to make my own cargo for the fun factor but failed at every attempt to date, this looks a gem. Sculptey! does that have to be baked or is it like Playdough?
-
Yep, the cost would be high, but a few items scattered about can enhance a model at a reasonable cost.
I am about to start a 1:24 scale model which includes a galley and dining saloon, visible if I leave the doors open and through the windows.
I can buy crockery and copper pots from 1:24 scale dolls' house suppliers, not particularly cheap, but I am sorely tempted!
I did see a cut-away model of the "Cutty Sark" once complete with cargo of tea, hundreds of boxes true to scale of which the maker was very proud. Another viewer pointed out that the maker could have reduced his workload by only creating those that we could see and placing them around blocks.
But then we frequently spend hour fashioning pieces that will never be seen.
Whatever, yours is a great build.
Once again, thx Ken. I am going to try to make as many cargo items as possible, mainly because it is kinda fun to do. I'm about to put the boier deck in place and glue it down so inside will not be accessible after that.l
I settled for the boxes and cut off broom handle slices to fill the visible openings, it has a reasonable effect if you look closely.
Good luck with your build, that's a great scale to work with for detailing.
-
Try taking a look at the suppliers of accessories (in 1:48 scale) for the plastic military modelling diorama scene.
A quick look brings up oil barrels and much else, some nice clutter to enhance your model.
(No cotton bales that I have found yet!)
Ken
Hi Ken, Thx for the follow up. I checked out a military site and as you mention oil cans and buckets are available but the amount I was looking for works out cost prohibitive. I may just stick with boxes, they are basically offcuts of scrap wood.
The vinegar solution I'm using to stain the wood is working really well now. It has been sitting for approx a week and has taken a brown tinge colour, I'm applying it more and more.
-
-
-
Good morning all,
Well! I'm a little frustrated with my efforts today, I have been working on the cargo and planned to make some cotton bales.So, after several material changes, several process changes, several shape and size changes I finally settled on a bale to be proud of. That took approx 10 hrs, the second bale only took 2 hours. Unfortunately, when I glued the 2 together there was an unsavory reaction and the bales melted before my very eyes.
#@$*happens right? so all I have to do is find an alternate glue and if I can do that, I should be able to produce the 300 bales required in about 1 year so it might be a while before I post again.
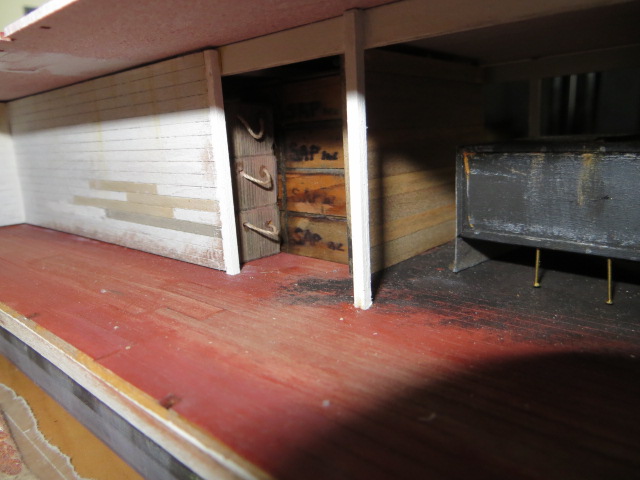
Alternatively I could fill the openings with boxes, which I decided to do. I'm not sure what's in them.

 . BTW, the OTHER wall is in.!
Can anyone help me with a dealer who stocks 1:48 scale cotton bales, or any other stock that would be shipped on a steam boat. Thx.
Len
-
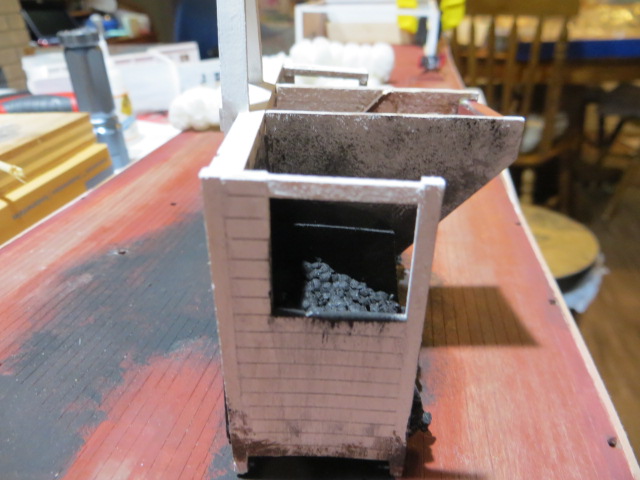
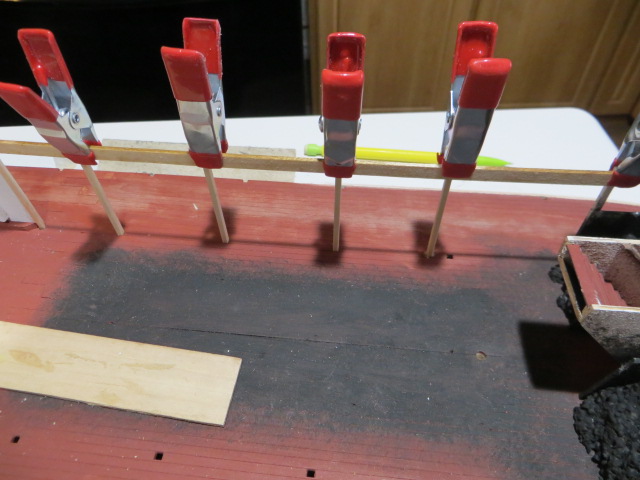
One small change today. The rear post on the frt side opening above the coal bunkers is now unsupported due to the shortening of the side support rail to clear the smoke stack. So I added a rail across the top.
Final clean up in the joints and dry fit, will be gluing her up today.
- Ryland Craze, Jack12477, mtaylor and 3 others
-
 6
6
-
-
Hi,
First off, thx to all who are looking in on my log, it is very rewarding to see other modellers keeping an eye on what's going on.
I've been practicing with the pastels I bought from Michael's, I was recommended the Artist's Loft brand, it's Michael's own brand so I was told. Great deal 40% off, only cost eight bucks, they work great. I'm starting to use more and more on the model but I've still got a lot of practice to get confident with them. On scrap wood I have tried all the options except the wet water technique, I need bigger pieces of scrap wood to fully check that out. .........coming soon!
A fair amount of updates done since my last post;-
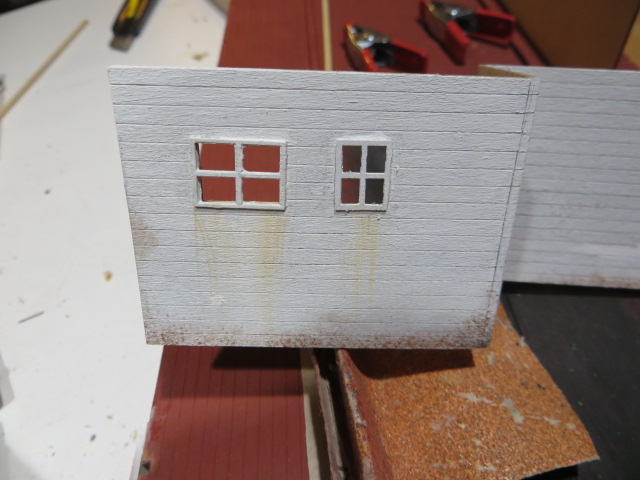
Painted the interiors white.
95% completed the deck with touch ups, vinegar wash, sanded bare spots of wood in heavy traffic areas.
Added mud line to one side of hull, repainted the detail after sanding off my first attempt.
Upon reflection, I would not have painted the hull so early on in my build, I think I have learned a lot on aging/weathering a boat on other smaller parts that were easier to paint over and redo. The hull is to important a part to showcase my shortcoming. Adding chalking effect, I like it.
Added the rubbing strips on both sides.
That's about it.
My son, Rossi46 is on his way over to check it out so I have to go and hide my beers.
Sorry I was going to add some pics but my battery is flat, be loaded shortly.
Len
-
-
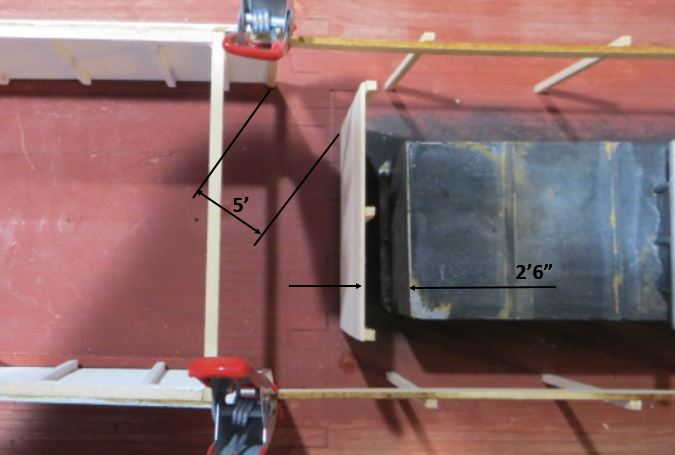
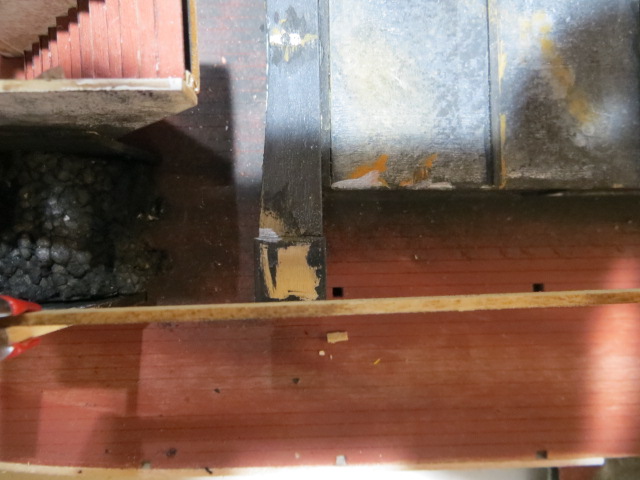
Hi Cathead,
You 'nailed' the 2 concerns I have also. The clearance from back of boiler to rear face of the division wall at true scale is 2'6" and opening through to cargo area is 5'. Considering the plentiful manual labour available, I figured 5' was plenty wide enough for hand loading cargo.
Ideally I would have liked to reduce the boiler length by an inch (4')to push the wall forward and increase the gap between the wall and the back of boiler but doing a comparison of boiler volume between Chaperon's 3 boilers and a similar ship I found 'the Evansville, which had a 2 boiler system, the volumes were the same, 500 cubic feet. Hence the reduced width of the wall to maximize opening.
The other thing is, I think it looks cool, but I'm still on the fence as to whether include it or not.
-
Just about finished the stack clearance issue, looks ok.
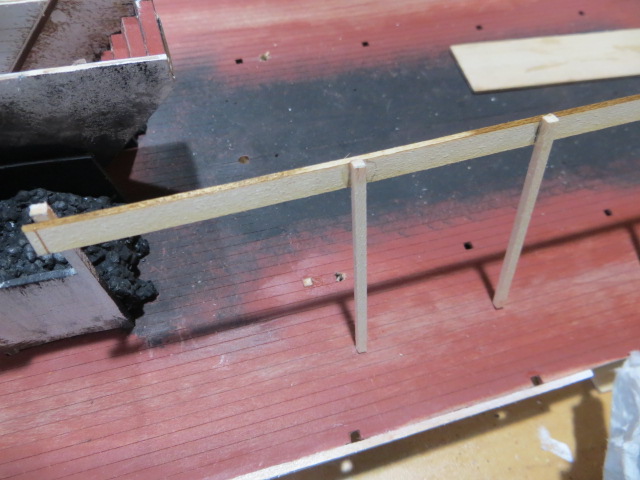
I also added a division wall at the back of the boiler. I imagined this would be a useful, REMOVABLE option dependant on cargo carrying requirements.
Note, the division wall is not the full width of the boiler house, it is meant to protect the cargo from the bulk of coal dust, heat etc. but maximizing the opening into the forward compartment as well as offering a solid backup for 'stuff' to be stacked against.
Could this be a real world option, if not I'll likely remove it, but if I was the boat operator I would want to maximize flexibility of cargo capacity/security.
I will not paint this panel, I'll give it the vinegar treatment, which incidently I did as a top coat on the deck, I think it stained down well.
-
My mod is a variation on Kurt's fix.
I clipped 39A into position and used that as a template to mark up the relocated vertical pole at the front.
Drilled new holes and glued the posts to 39 only, not to the deck as I do not need that part asm'd at this time.
I then plugged the original hole.
The front portion of the 39A rail will be removed after I have glued into the deck the posts as I can use the rail for correct height location.
See pics below.
-
-
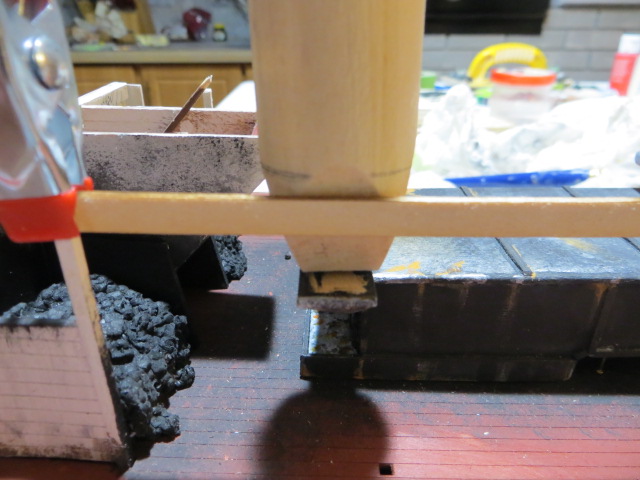
Hi, I was just checking fits for the next stage of the build and I came across an issue with the location of the smoke stacks contacting the longitudinal rail that spans the boiler room.
I think the only way round this is to cut away the contact area of the stack to clear the rail.
This issue must have come up on all builds unless I have some thing completely wrong, Kurt, did you come across this?
Comments very welcome.


-
-
I'll play with these techniques tomorrow, surely one of them will suit my heavy hand. Thx all for the info, will be fun toying with these proposals.
I have no problem hosting the discussion on pastels on this log, trouble is I have nothing to contribute...............yet!!!
-
-
Thx Jack, to be honest, that's about the only type of pastel I've ever tried and that was a long, long time ago. I'll call in model and art shop tomorrow. I didn't realize that oil pastel was different to any other pastel. I'll check it out tomorrow nd get some good brand name pastels. I'm excited to try it out.
Does anyone know what colors were used on the inside walls? I'm assuming white, any advise would be greatly appreciated.
Len
-
Cathead, Canute, thx for info on the pastels. I went to the local Dollar Store and picked up some OIL PASTELS to try out. These were similar to wax crayons and they didn't go down on the model very well at all. I had not looked at the pics Ken sent prior to picking these 'crayons' up, or I wouldn't have bothered. I'll go down the model shop tomorrow an get some good soft colors, looks a very effective way of adding detail. I'm looking forward to trying that method out. Thx for the info.
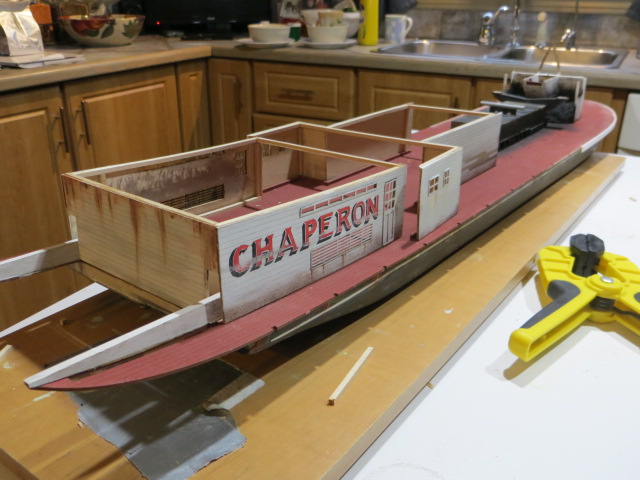
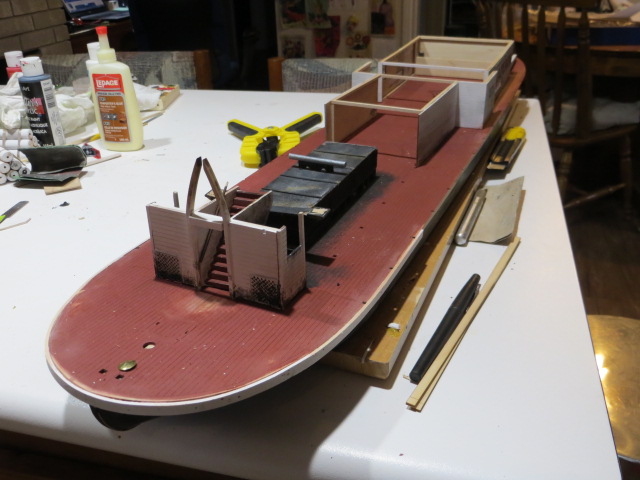
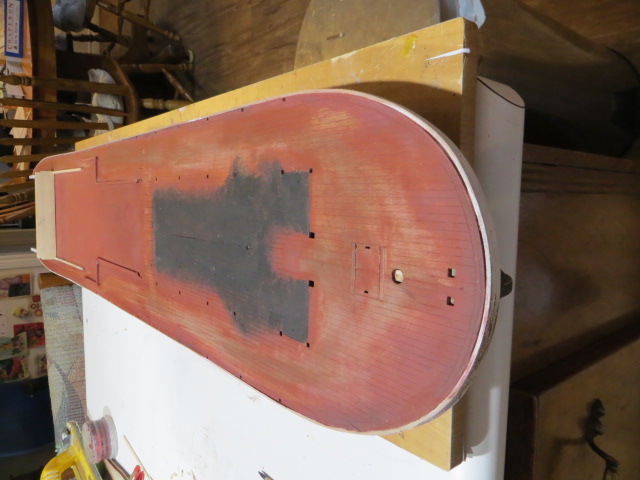
I'm close to gluing all the parts down to the deck, I just need to detail the deck, here are a couple of picks of latest status, getting close to sheet 2!!!!
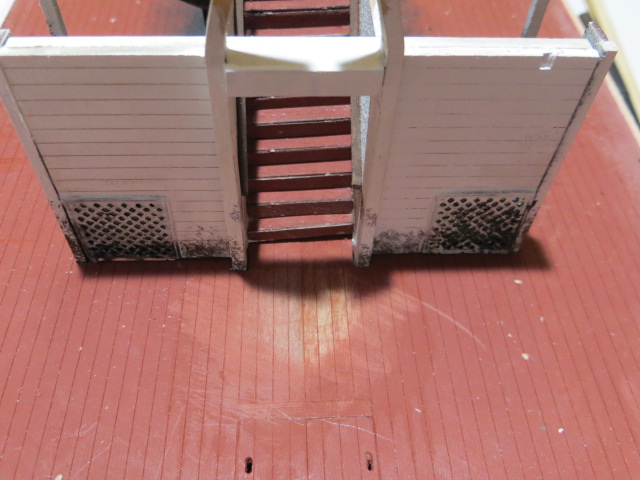
I've rubbed the deck paint off at the stair rail to represent heavy ware, I will clean up the scratches soon.
Thx for checking out my log.

- mtaylor, Ryland Craze, GemmaJF and 3 others
-
6
-
-
Ken, I've been practicing different 'chalking' techniques on some scraps of wood, I think I found an easy method, the secret is subtlety of color use I think. I settled for this:-)
In fact, I am so pleased with the results, I'm going to redo the hull.
The devil is in the detail!!! Great tip Ken.
- Cathead, jct, Ryland Craze and 6 others
-
9
-
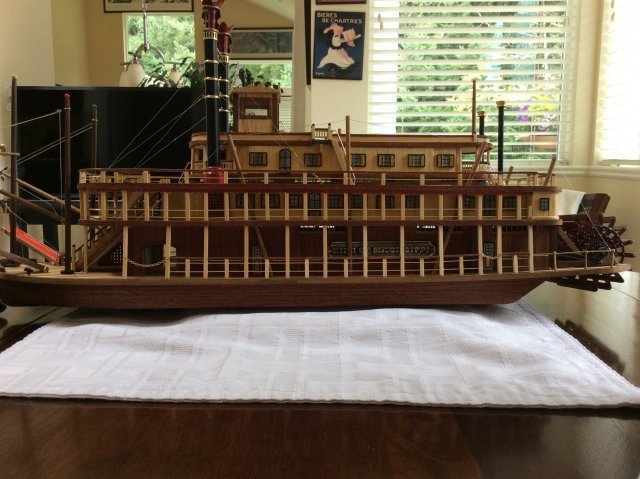
Chaperon by Blighty - FINISHED - Model Shipways - Weathered and aged - My first build log
in - Kit build logs for subjects built from 1851 - 1900
Posted
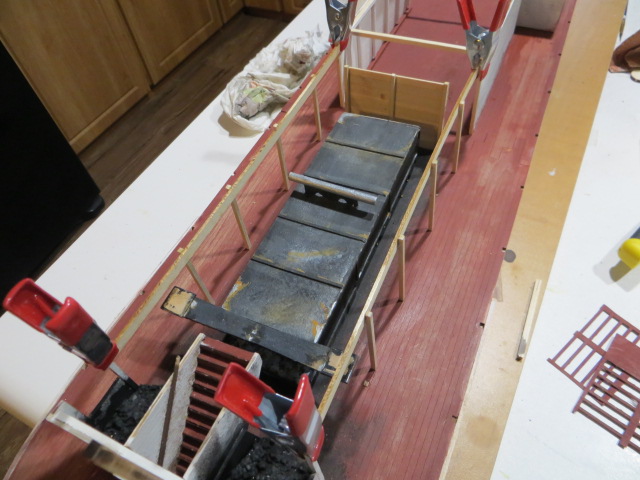
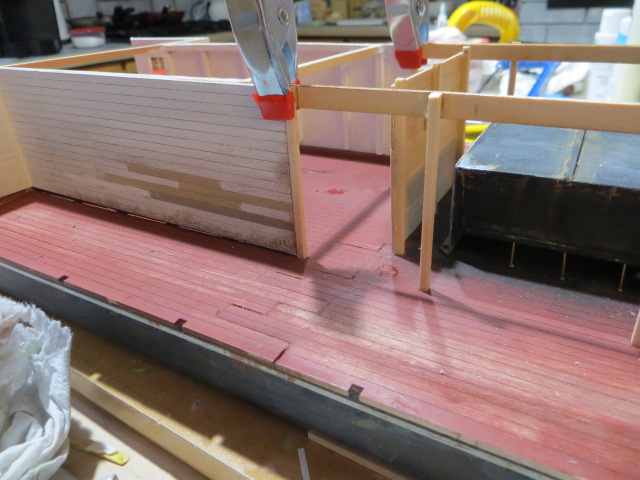
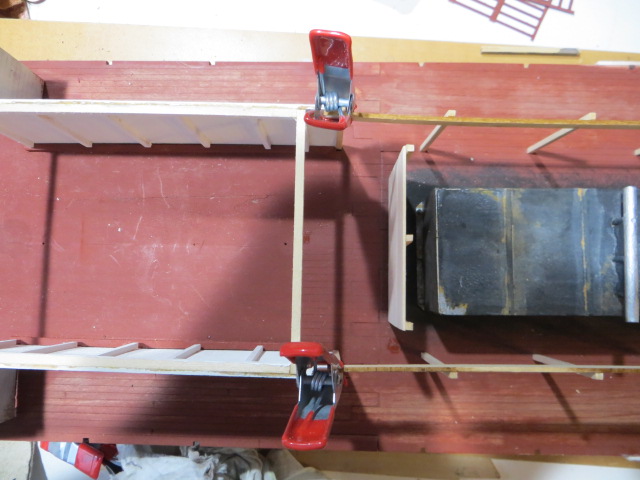
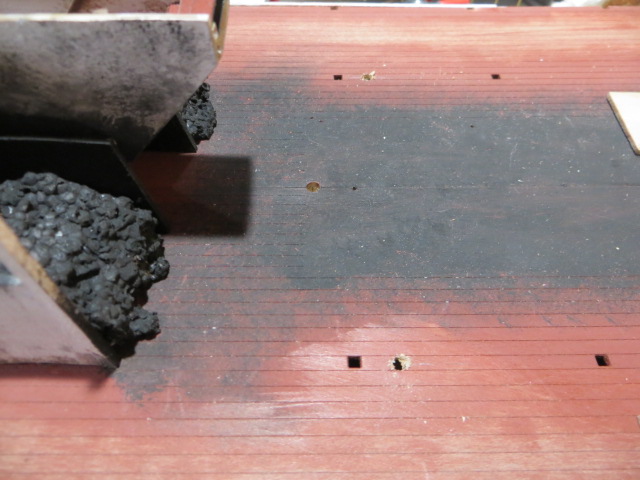
The boiler deck is now glued up, the only ware/weathering so far is at the top of the steps, I sanded the red oxide off to expose the wood. I've added the vertical support posts to starboard side and did a little weathering to the posts, more to do yet.
I moved the fencing that is shown hung on the boiler posts in the instructions to the cabin wall rear of the boiler. I did this purely for appearance, the detail of the boiler is now more exposed for viewing and the plain (little bit boring walls) are now adorned with the fence which adds a bit of interest. Spacers were added to rear surface of the fence to pull it away from the wall to make it show up better.