

Blighty
-
Posts
316 -
Joined
-
Last visited
Content Type
Profiles
Forums
Gallery
Events
Posts posted by Blighty
-
-
-
Hi,
I am progressing with the hull planking, all going well so far, not to much to discuss on that point but I do have another interesting quandary I need some advice on.
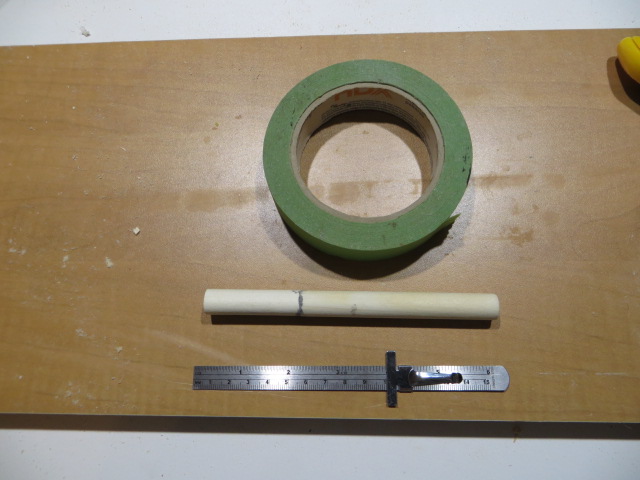
I started looking at the boiler asm as my next sub project to construct and decided to show individual boilers as opposed to the 'box set' the kit provides. However, if the rectangular box is filled with 3 boilers the ratio of Dia. X length would be 10:1.................. Max Dia is 15mm, maximum length 150mm, of each boiler.
The normal ratio is approx. 4:1 to 5:1 based on scaled screen shots I have found on line so I'm assuming this is likely best guide line.
Therefore my options are:
1. Leave as is!
2. Increase Dia, to max of 20mm, this would increase the width and height of the boiler asm, however real scale would be over 3 ' Dia. and the length would still need to be reduced.
3. Maybe 2 boilers not 3?
Based on the dowel I have for the boiler that I planned to use, this is what it looks like.
13mm Dia. x 148mm.
Any advise would be greatly appreciated.
Len
-
-
-
-
Hi Cathead,
Regarding tapering the ends, I will do so on next rows I do, makes sense to me! I will send an updated pic of same area from same angle.
Regarding the binder clip method, I'm not sure what the third handle does, I only have one size right now so I'm struggling to understand what it does. I will investigate further. I can see the extra part in your pics but not clear how to use.
When the penny drops, I'll get back to you.
With regard to asking you to lay off, No chance, I joined this forum for this purpose, share build experience and gain knowledge. I can't wait for some one to like and adapt one of my ideas, (we might be waiting along time )
 :rolleyes:
 The first build I did without a build log, never again....
Thx so much for input, it will always be appreciated.
Len
-
-
Hi Cathead,
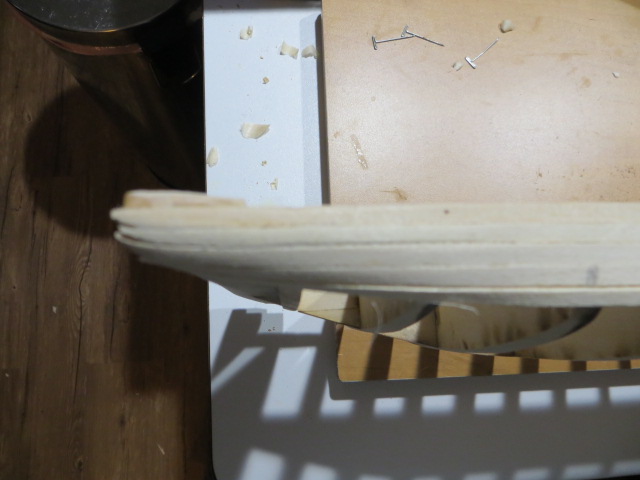
Yep, getting lazy, did you notice there are no pin holes in that plank, the planks have been laying really flat but this plank pulled off when the glue was not fully set. Lesson learned. However, not sure if this is a good idea or not but I use CA glue at the first joints and hold the joint tight until the glue has taken, pin the planks then revert to carpenters glue mainly along the flat side.
For bending I dip the plank in warm water for about 5 seconds then bend it round the body of a just boiled kettle. With finger pressure applied to required bend you can feel when the wood is ready to fold around the curvature of the kettle, works really well. I just measured the dia of kettle 4 inches at the smallest point and I can bend a hull plank tight to the circumference in a full circle. There is some spring back and I think that is what happened.
I will be more careful, its those hurry up demons!!
-
-
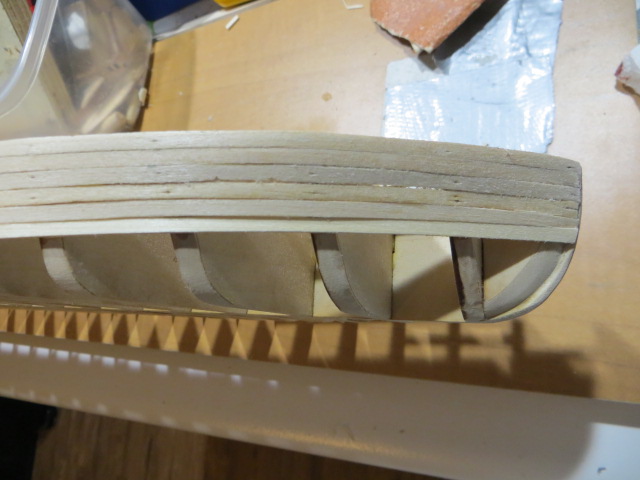
I have started installing the bulkheads per instructions, self locating and little effort required to align. Whilst that assembly is set to the side to dry.
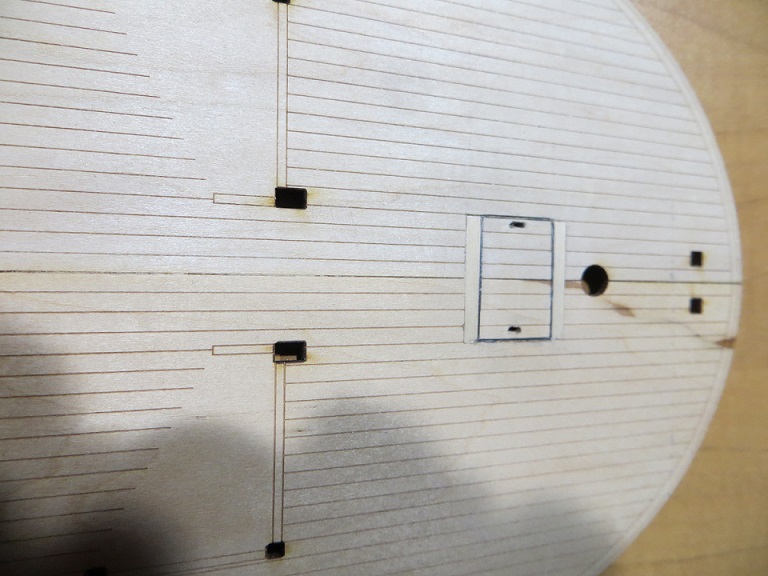
I have started work on the deck. I've elected to assemble the 4 piece deck off the hull and on my flat work top, having read that a few matchup issues were found in past builds when trying to piece together the deck on the hull, this would be a result of the curved deck surface of the hull I assume.
With the deck laid out flat it was an opportune time to add my first mod, an access hole to service below deck hardware, namely the capstan. Scaled size is approx. 4 x 3 feet.
-
.............and so it begins, I'm checking out the model on the kitchen island. Packaging was good, double boxed with paper packing between the boxes. Delving in, the box is crammed full of goodies, I just had a quick check over to ensure that everything was there, that looked fine and the quality of the laser cut parts appeared fine too. I did cut the keel and bulkheads out to check the fit and parts went together snugly, exactly as expected.
The instruction sheets were primarily Isometric exploded views supported with true views of most sub assemblies. Reminiscent of plastic build model instructions, they do not look difficult to follow.This looks a great model and does not appear too intimidating to a relative rooky like me.
I cleaned the joints of char from the 3 piece keel butt joints and glued and clamped it for tomorrow. There are no pics worth posting right now but as the build develops I'm sure there will be plenty to show and discuss.
Hope you can make the trip.
Len
-
Me again,
Still waiting for my parcel to arrive, I did a quick check on tracking status last night, it's cleared customs in Toronto and must surely be steaming along North shore of Lake Eerie about now, maybe even in Detroit River.
Meanwhile, I've been collecting ideas and reading up on turn of the century river boats, it's not difficult to see why there are so many avid fans of these awesome ships.
But for now, I have to kick the cat off the window sill, take up his spot and lookout for the USPS van.
Len
-
-
Hi Cathead, I have been studying with great interest Mike Dowling's build, he did a great job and he certainly enjoyed his efforts and the obvious success of his build log, it was a major factor in my decision to choose the Chaperon. (Thx Mike, where ever you are).
I also checked out your amazing scratch build of the Bertrand, beautiful craftsmanship, beautiful model. I'm inspired.
-
-
Hello one and all,
I'm one model in from a brand new newbie, I have just completed the Emma C. Berry and now waiting anxiously for Model Shipways Chaperon Sternwheel 1:48 scale to arrive. The Emma was a pleasure to build from opening the box to cleaning my brushes and packing away my paints.
I'm also new to boats so I'll be looking for some advise to help me along.
I have a plan as too how I want it to look but like all good plans things change if the bar was set a little to high. My intent is to do the following:-
Build the kit as is 'out the box' with the well documented modifications to the pilot house windows and a few other changes that are still tbd. I plan to add more detailing and hopefully some suitable cargo, I'll see how it goes.
Aging and weathering the Chaperon will also be a fun task. This is something else I have never tackled however I used to paint oil on canvas pictures many years ago so I hope I still have a modest flair with a brush.
Last but not least I hope to identify the pitfalls and issues for other new builders to heed and hopefully there may be a few out there with a similar build to bounce ideas around. I obviously welcome any and all hints and tips from anyone who graciously follows this build log and sincerely hope it is useful and fun to follow.
Special thanks to Kurt Van Dahm for getting me kicked off in the right direction, very much appreciated.
Finally, all I need now is a model it was shipped on the 3rd Jan so likely steaming it's way up the Green River as I type.
Thanks for reading, hope to cross paths soon.
Len aka Blighty.
-
Hiya all,
I signed up for NRG a couple of months ago, I was already 70% complete on my first wooden model, (Emma C. Berry, Model Shipways), hence no build log. I went in at the deep end after 6 months of plastic super hero figure modelling needing something more challenging. I had no idea how valuable the knowledge base was on this forum, but I am now a firm believer it is the only way to go. The latter portion of the Emma build was so much more fulfilling having such good reference logs to pour over.
Being recently retired time is not an issue so I have just purchased my second model, the Chaperon, again from Model Shipways, I really like the service I have received from those guys.
A build log will follow as soon as Mr. Mailman has delivered my blue box, very excited for that.
Great hobby, great site, great modelling to all.
All the best, Len.............
P.S. to Anja,
Rossi46 a.k.a. Emerson, I'm the one to blame for the weird name, I'm his dad!
-

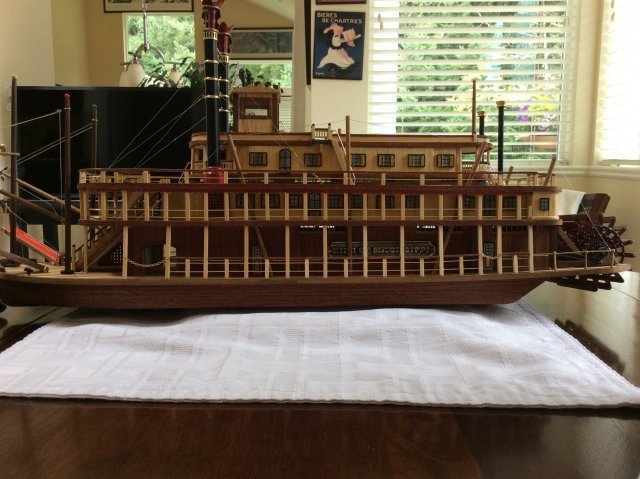
Chaperon by Blighty - FINISHED - Model Shipways - Weathered and aged - My first build log
in - Kit build logs for subjects built from 1851 - 1900
Posted
Hi Kurt,
I agree with you, package restraints don't work for accurate scaling.
I can add flanges, ash pan, doors to fire box,not sure of anything else but that will be fun to do.
P.S. Maybe a psychedelic paint job like John Lennon's Rolls Royce would work... ;)
;) 