mtbediz
-
Posts
1,339 -
Joined
-
Last visited
Content Type
Profiles
Forums
Gallery
Events
Everything posted by mtbediz
-

USS Constitution by mtbediz - 1:76
mtbediz replied to mtbediz's topic in - Build logs for subjects built 1751 - 1800
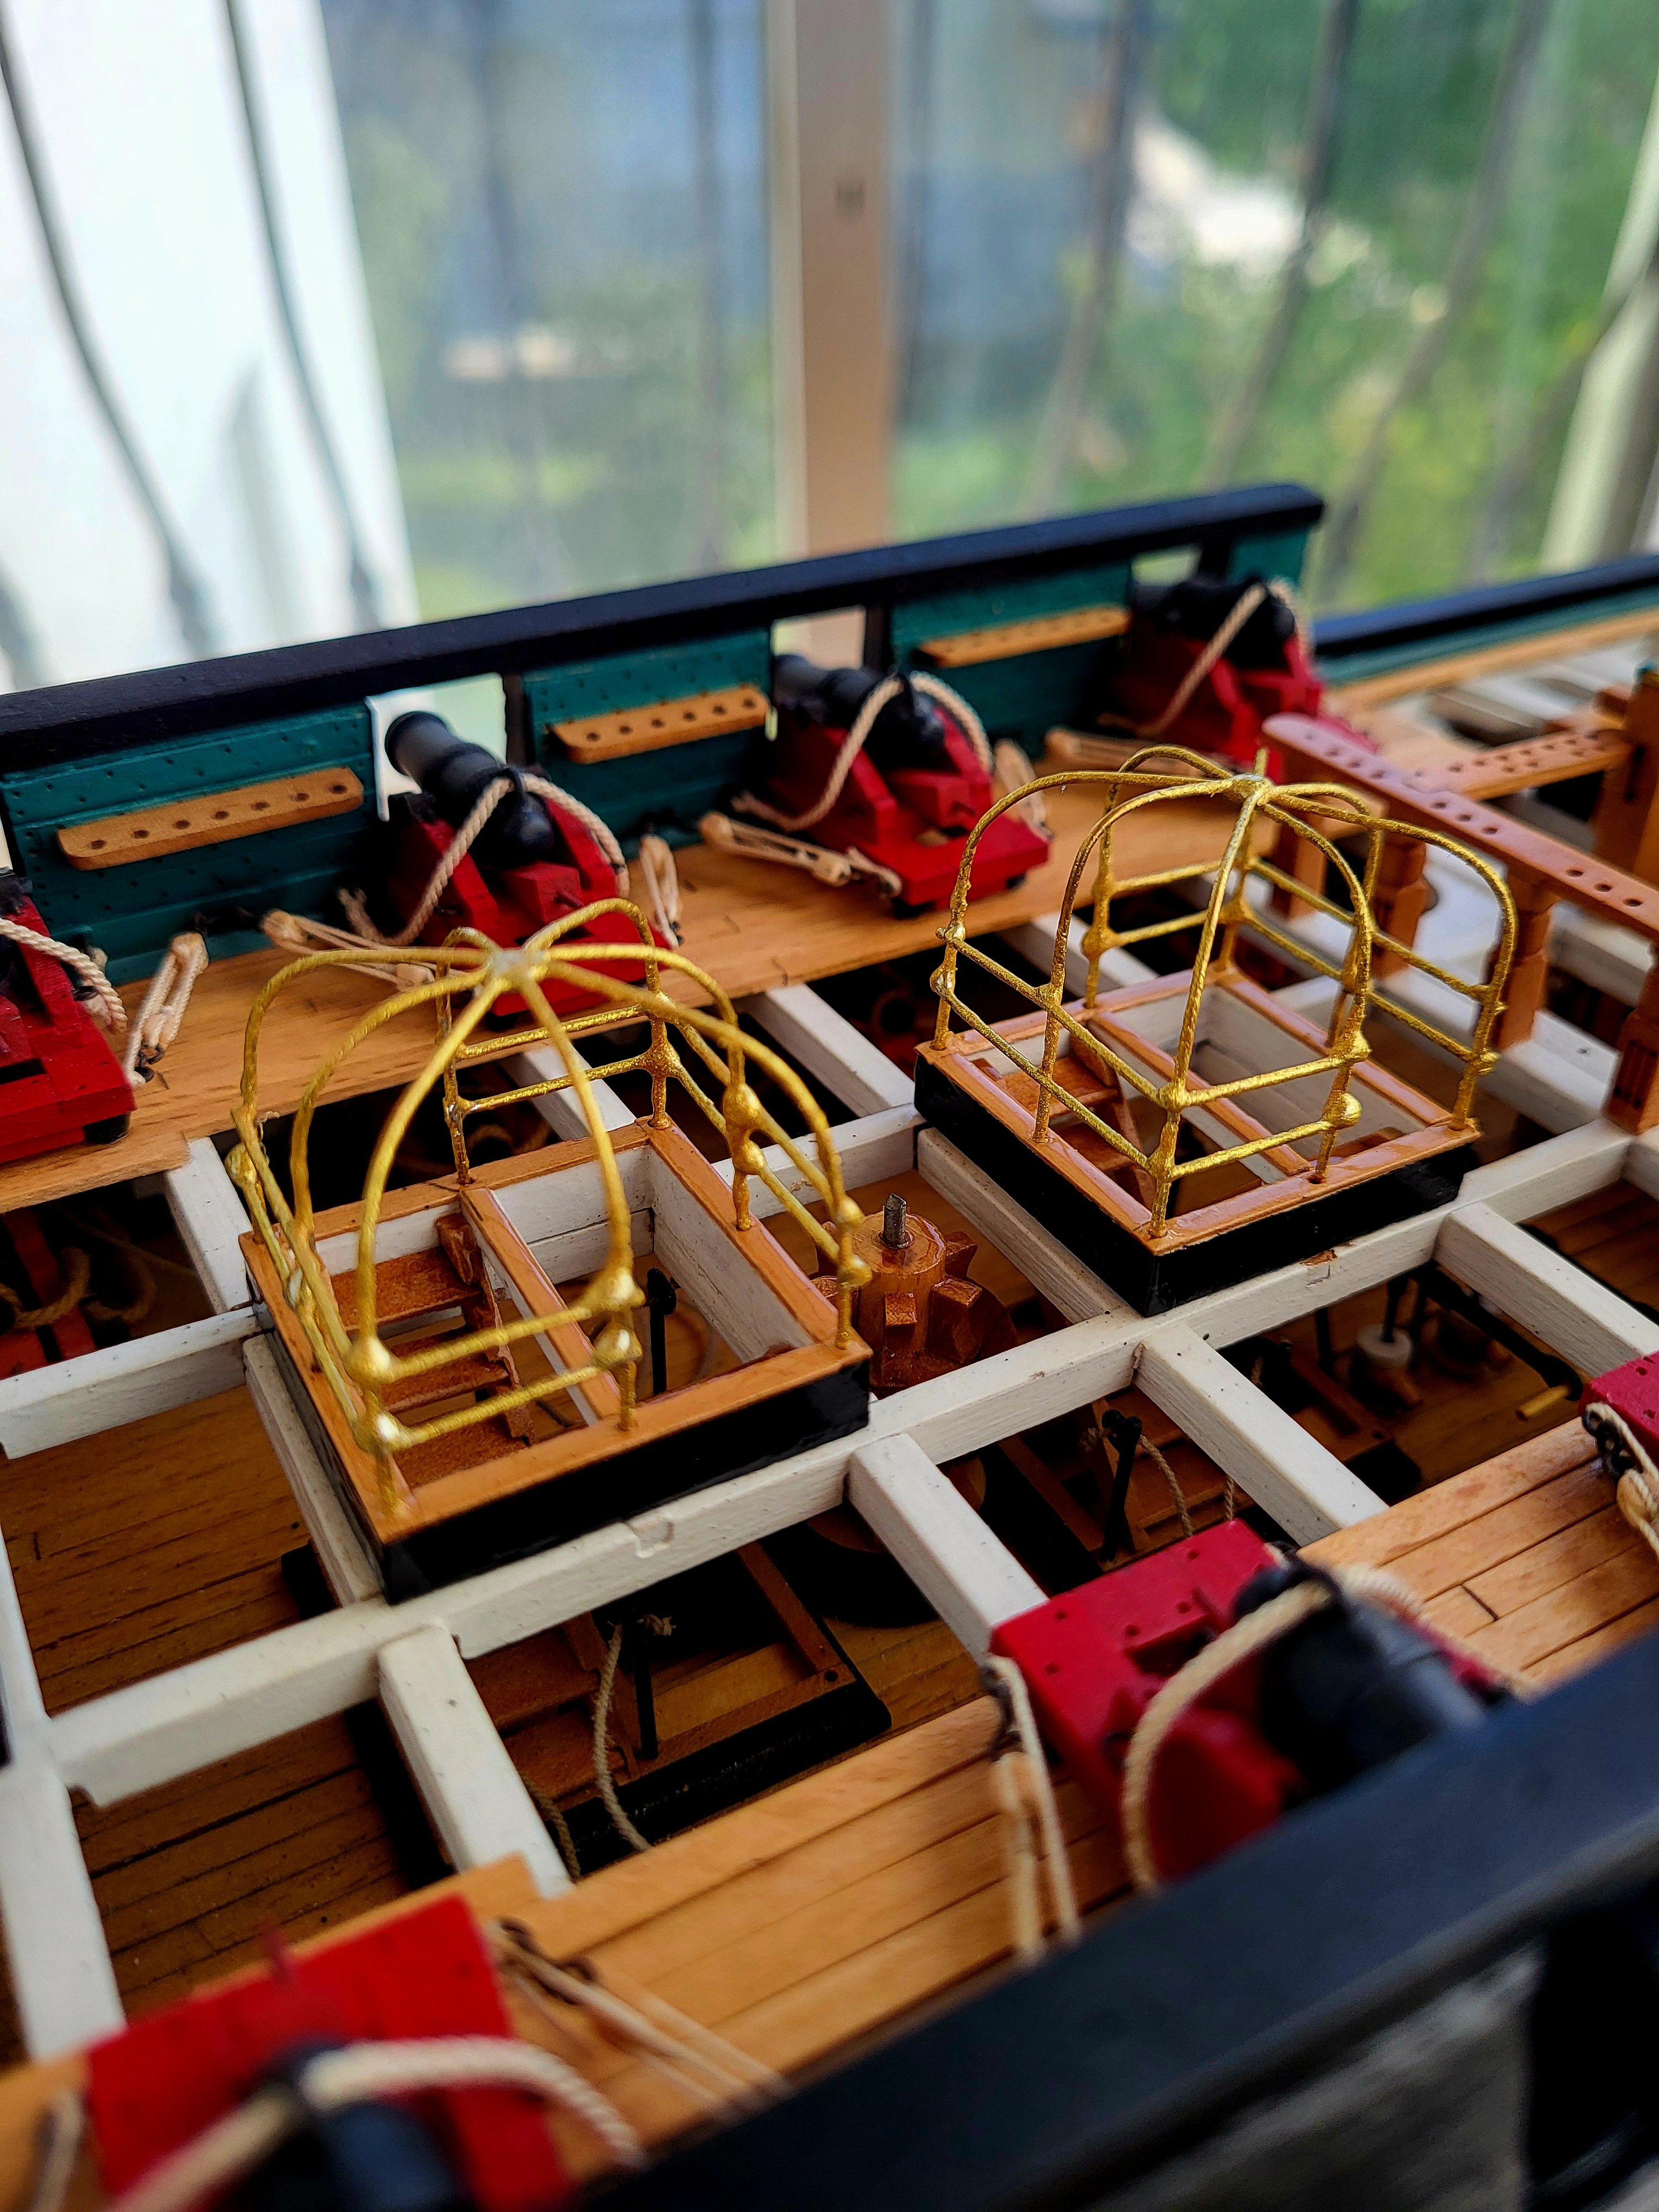
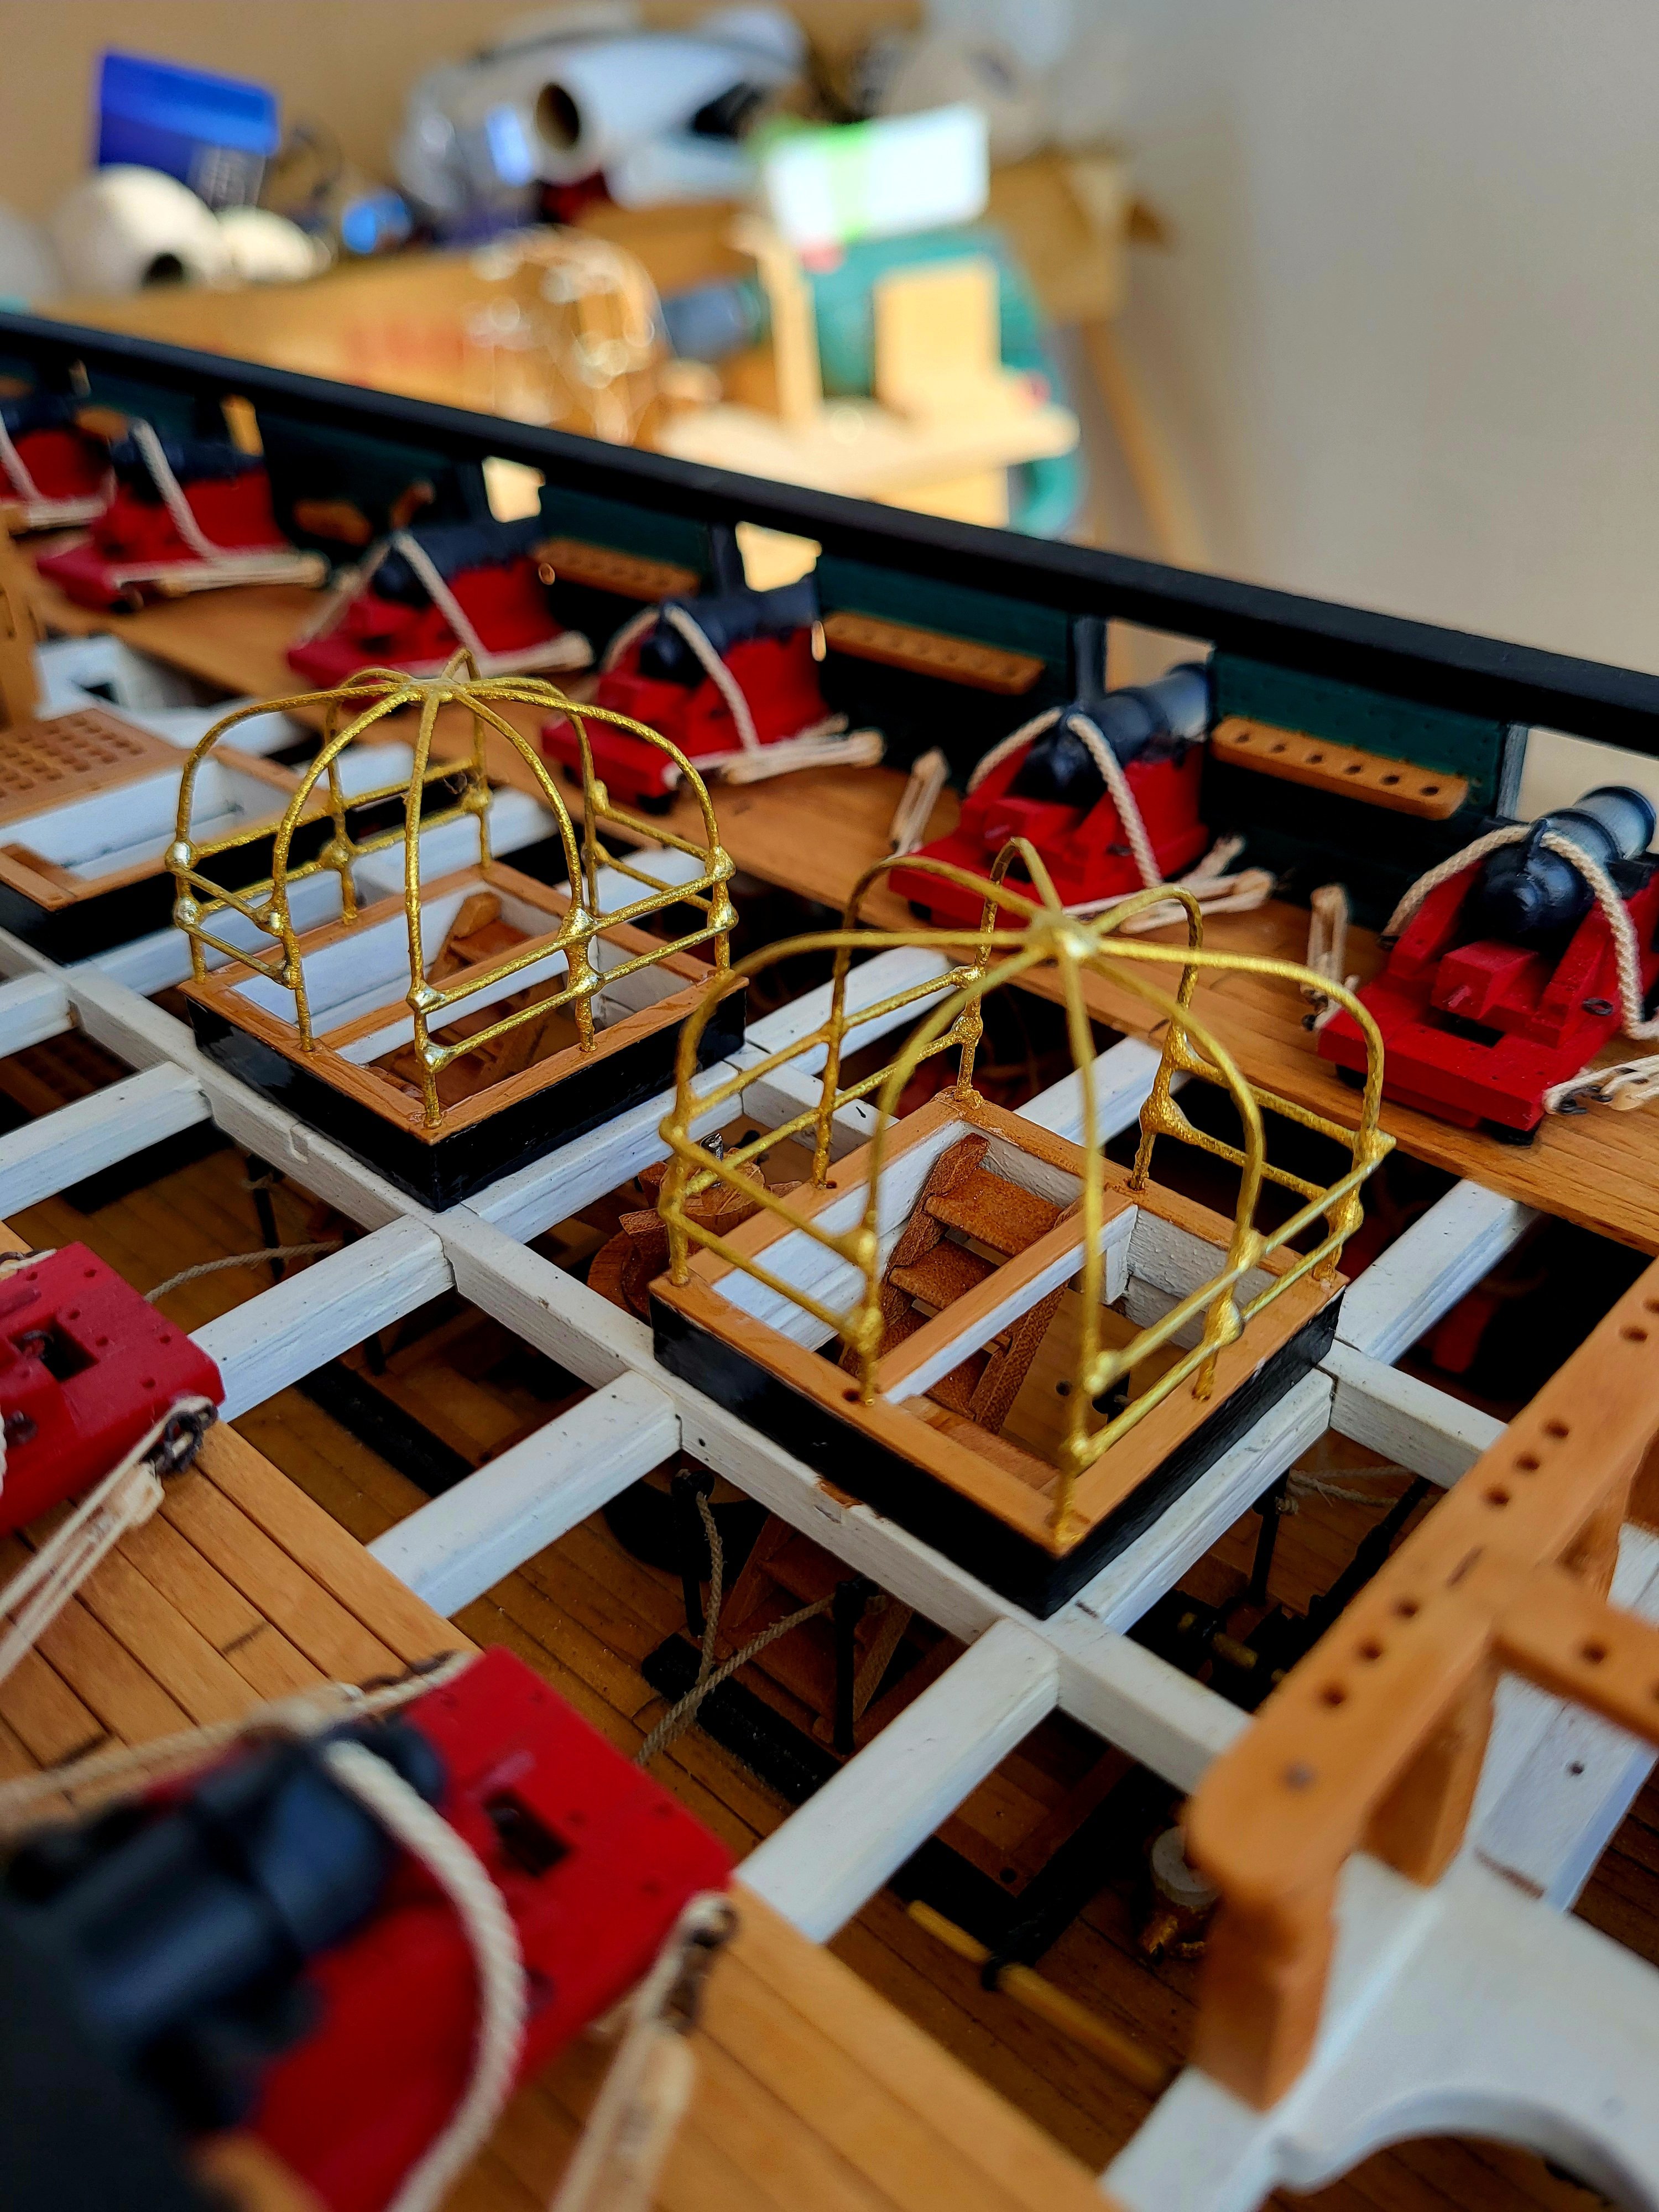
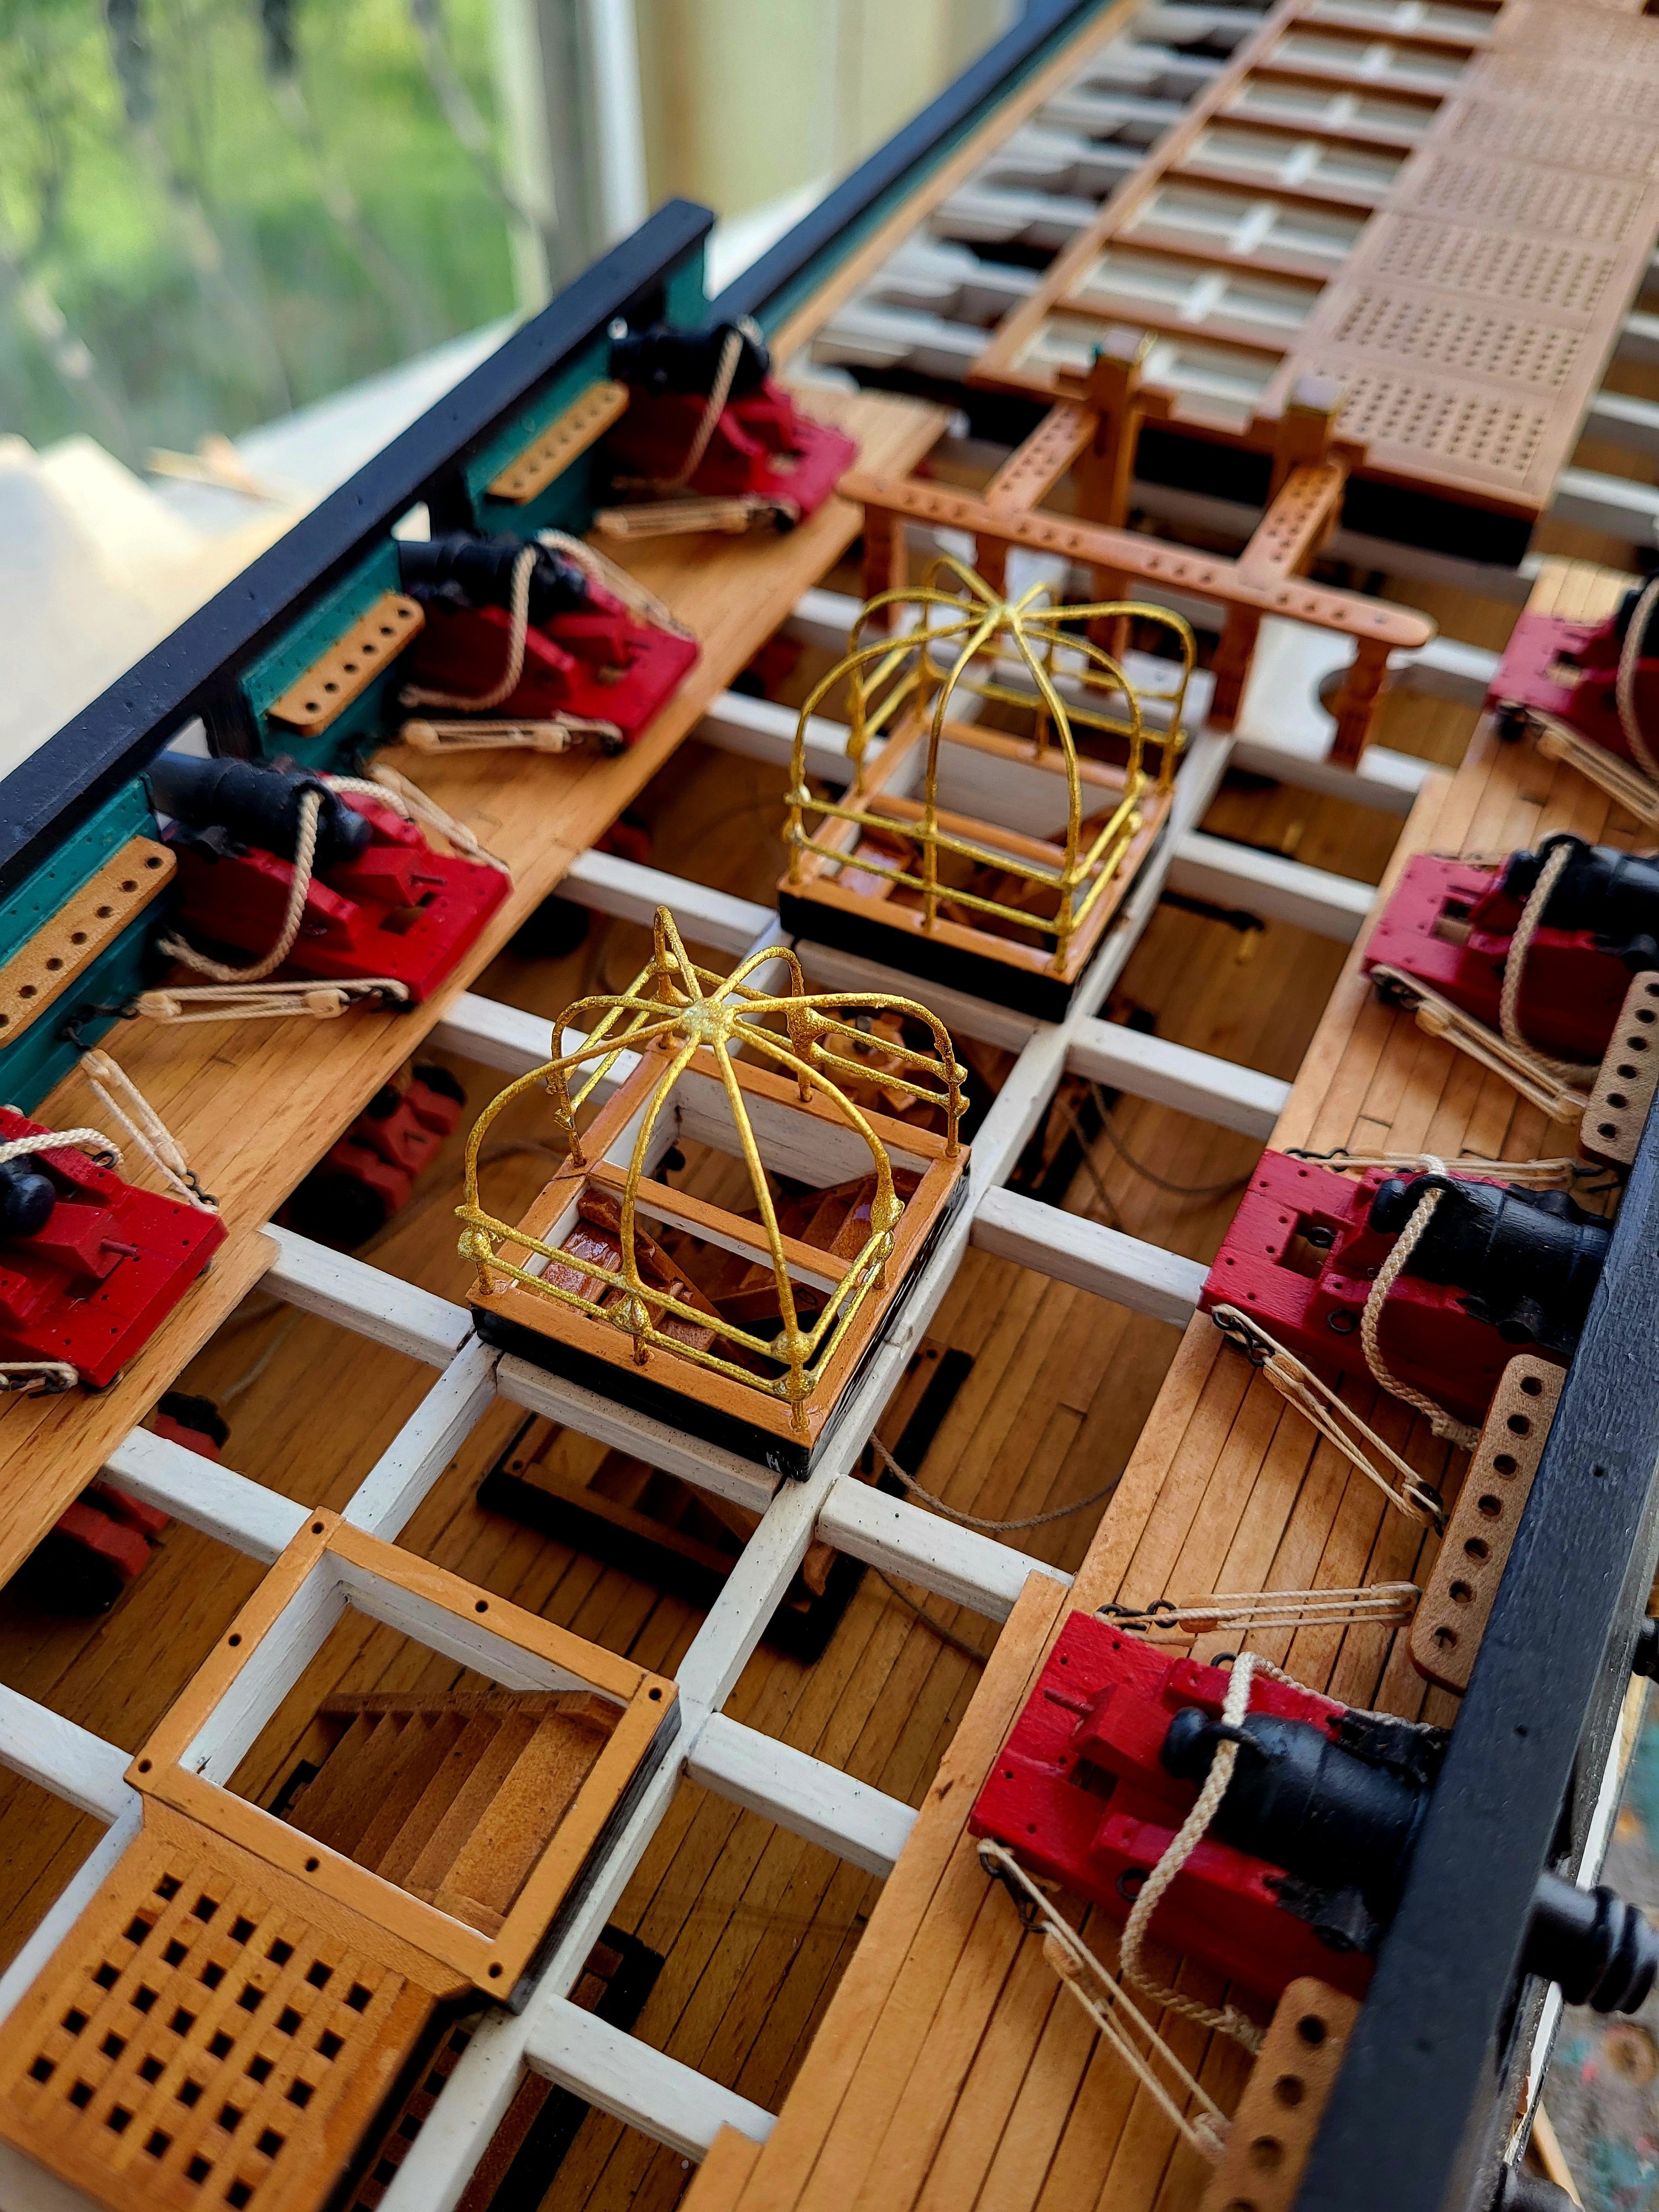
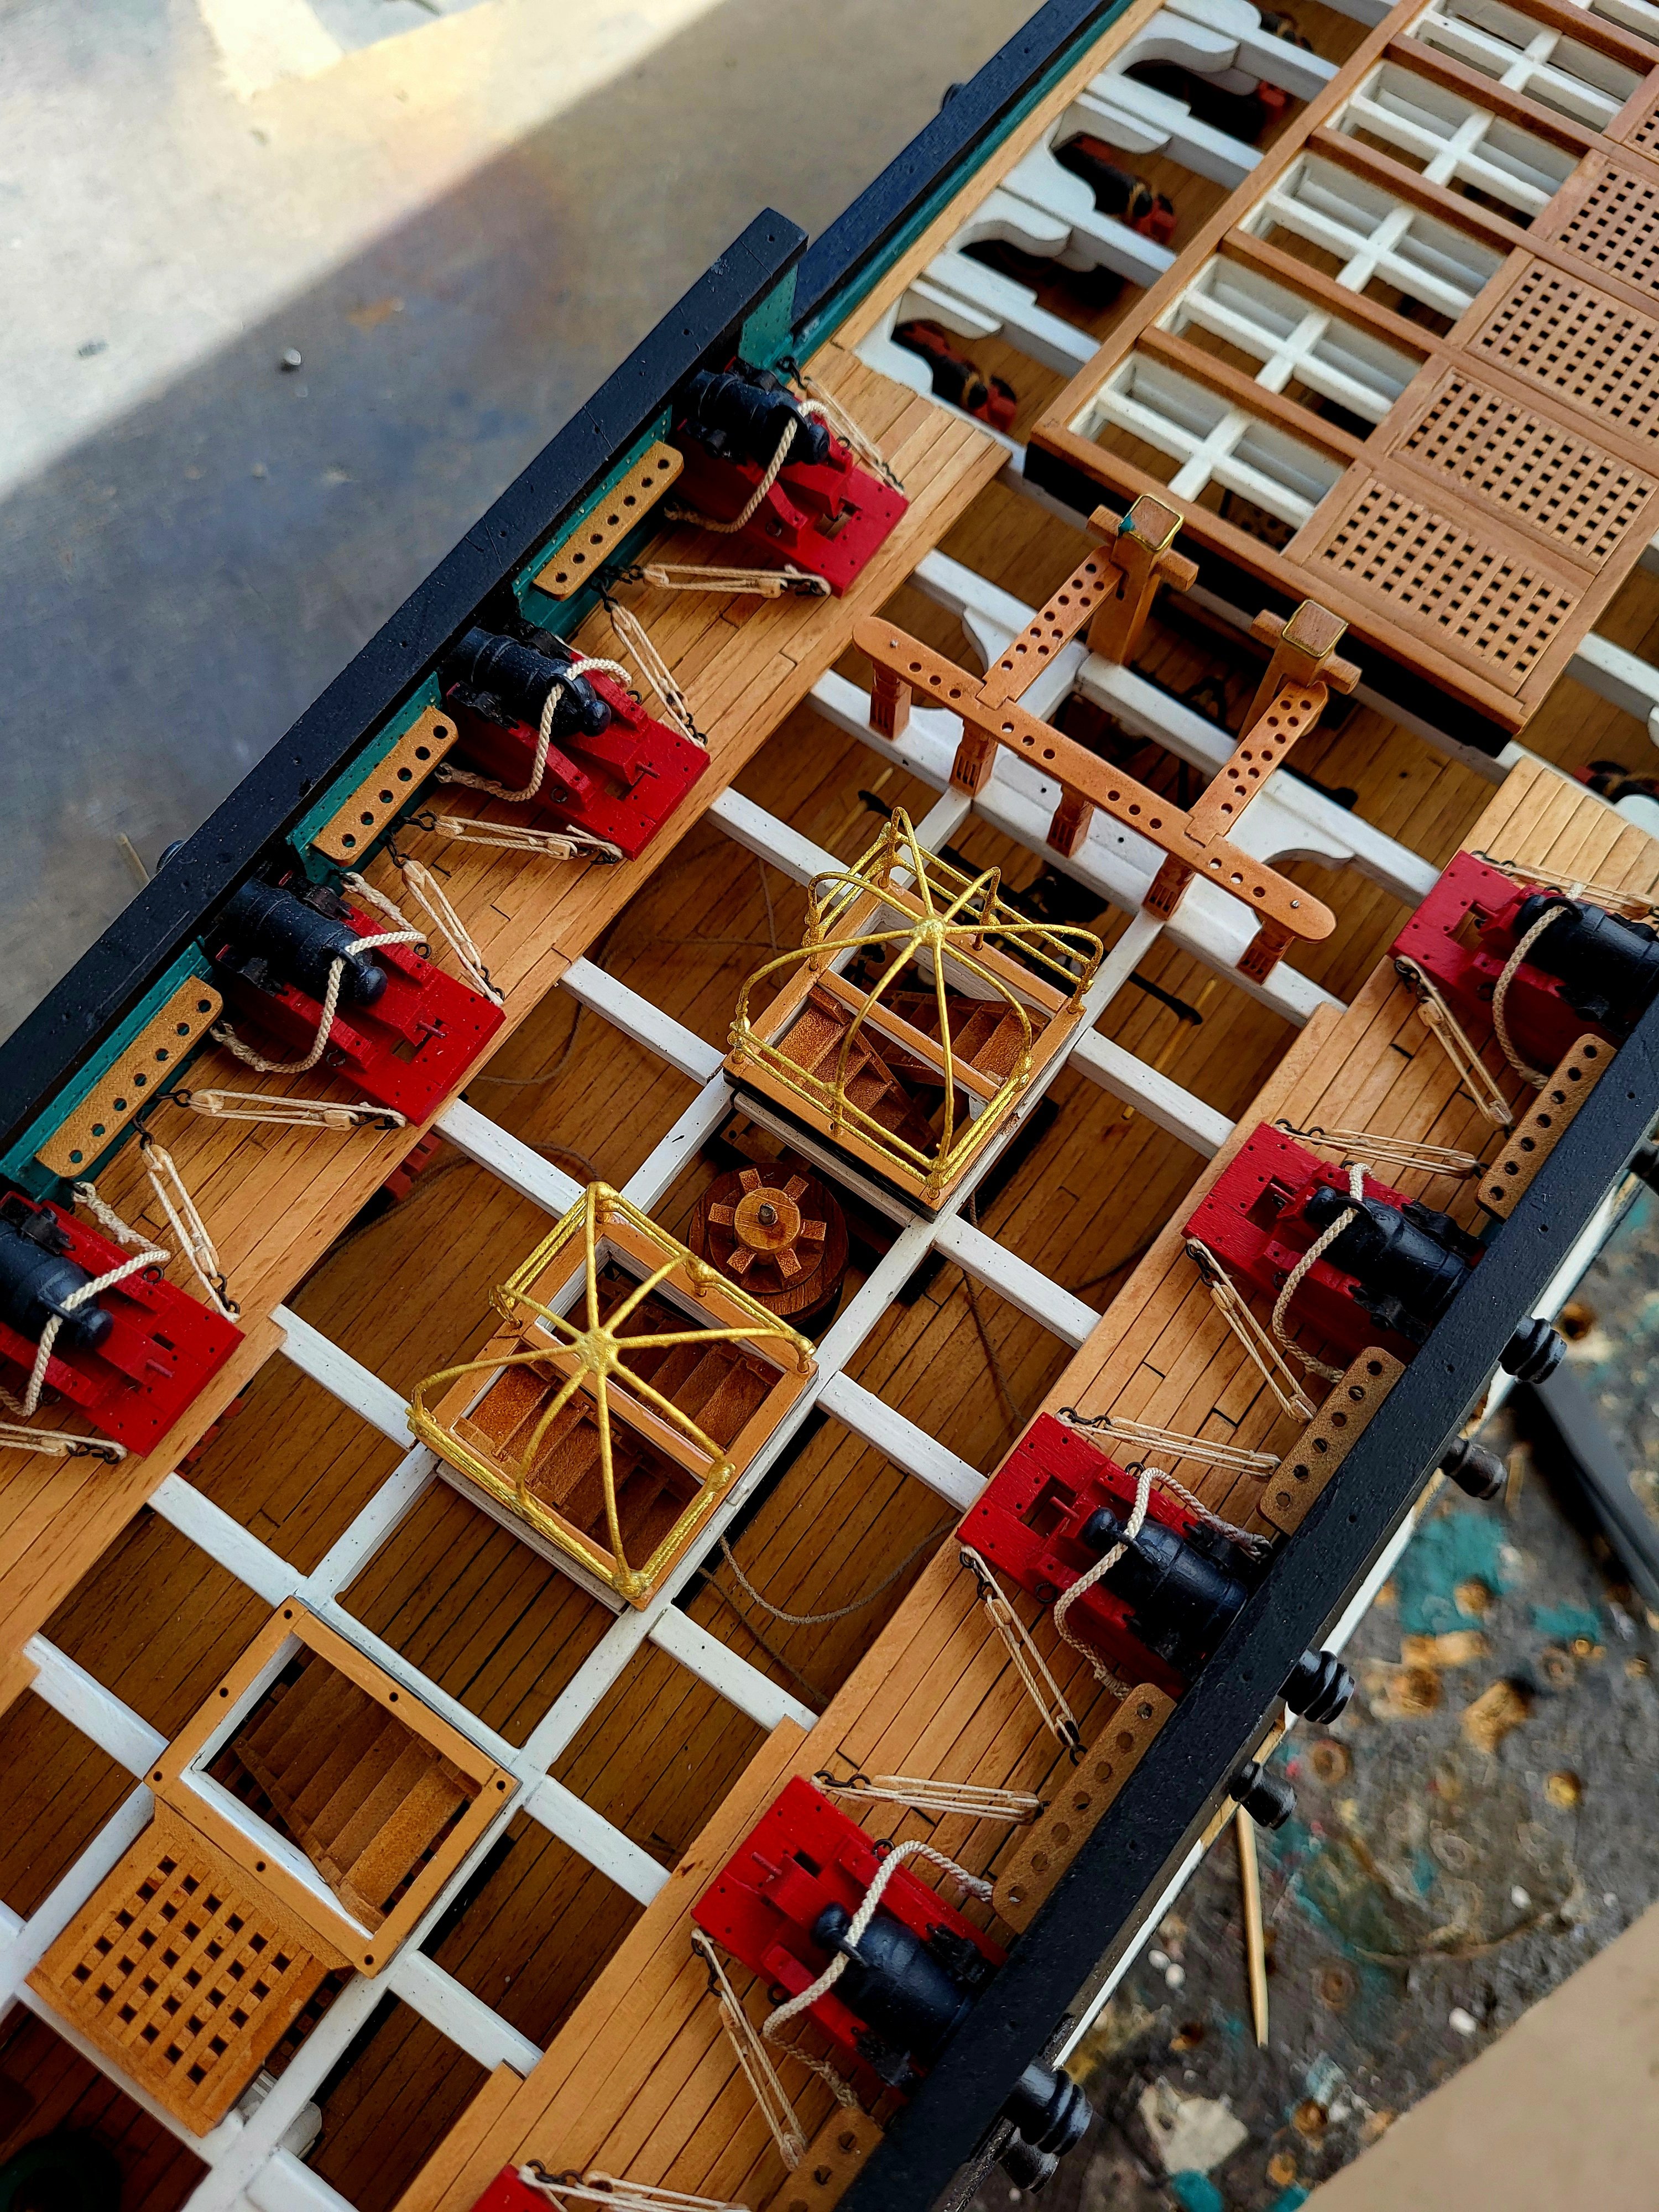
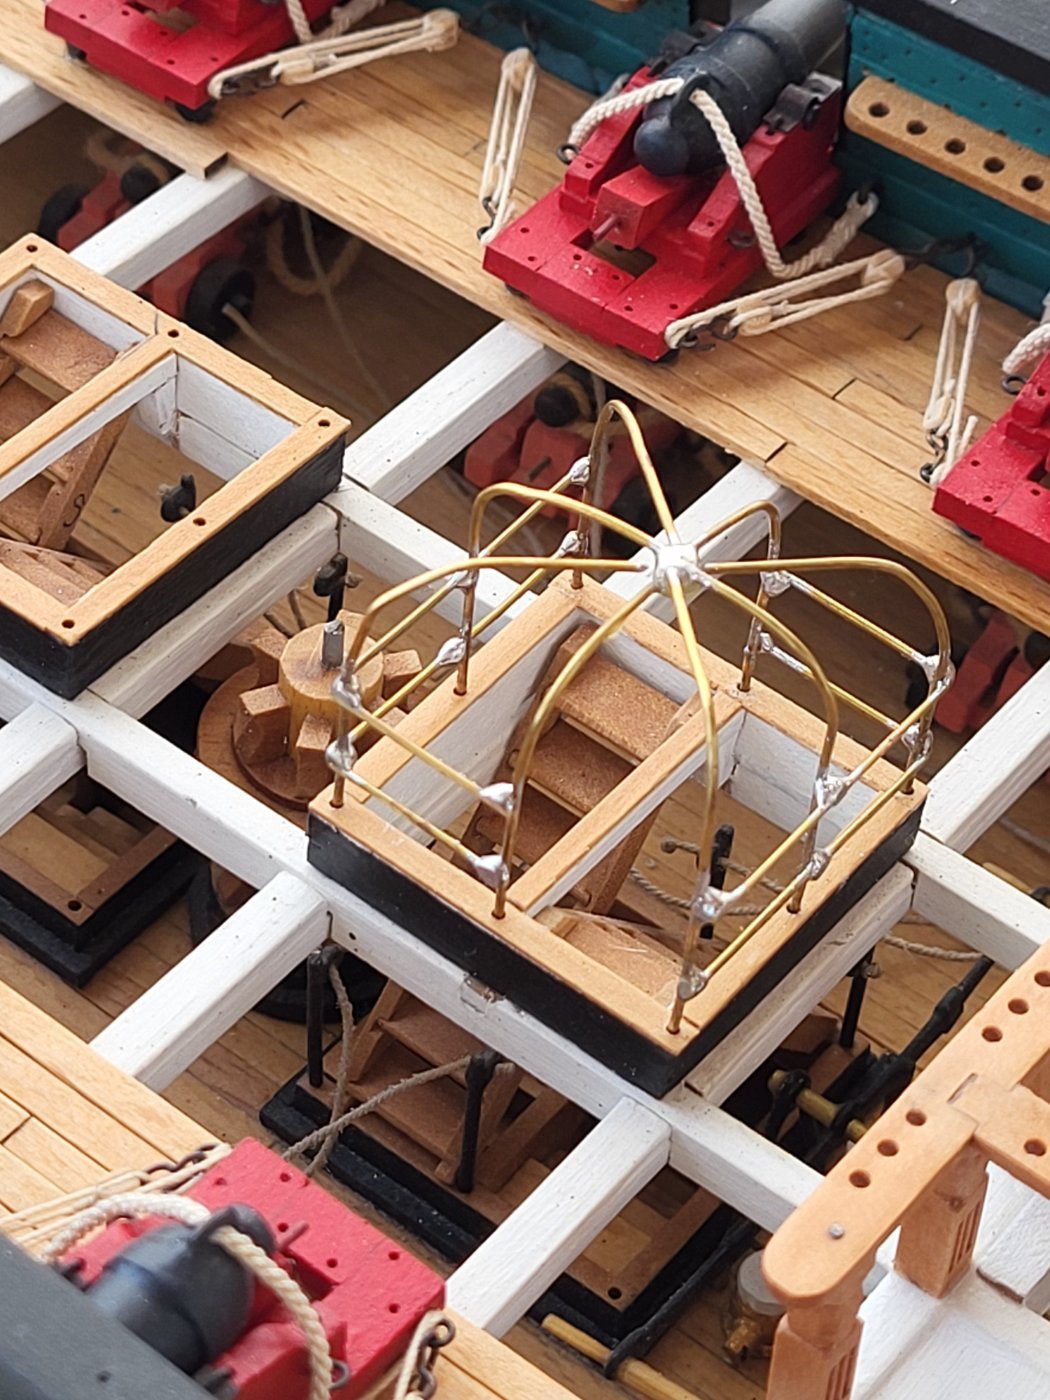
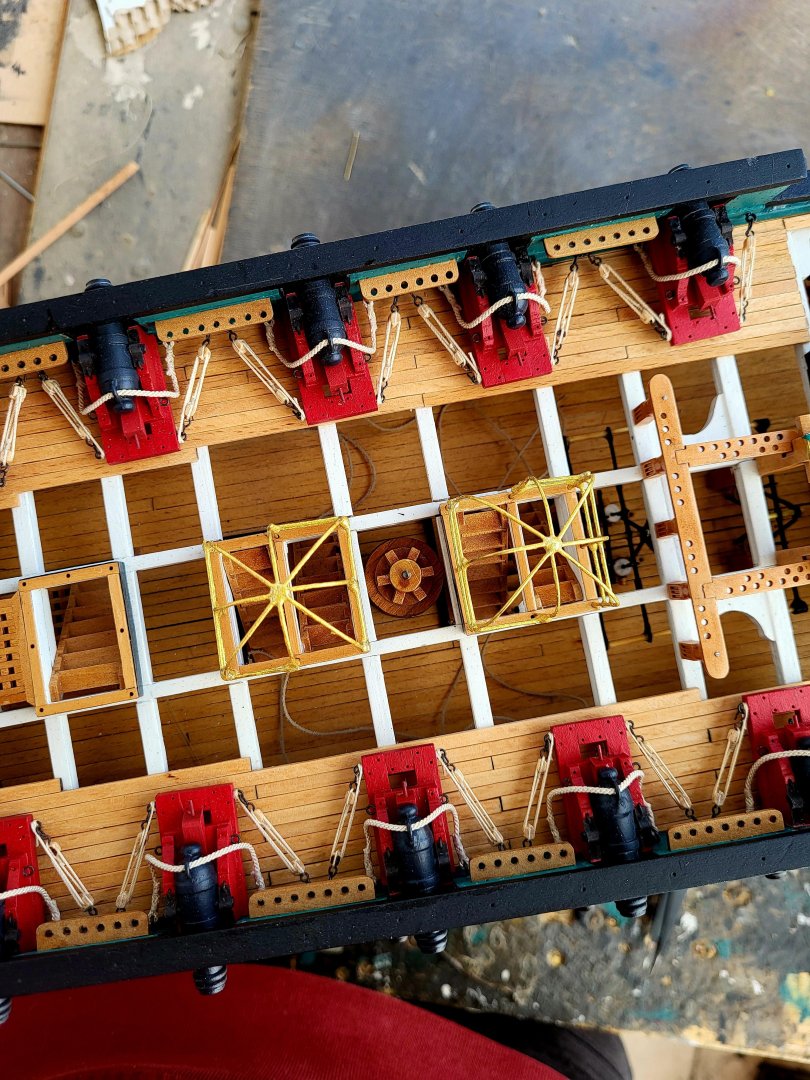
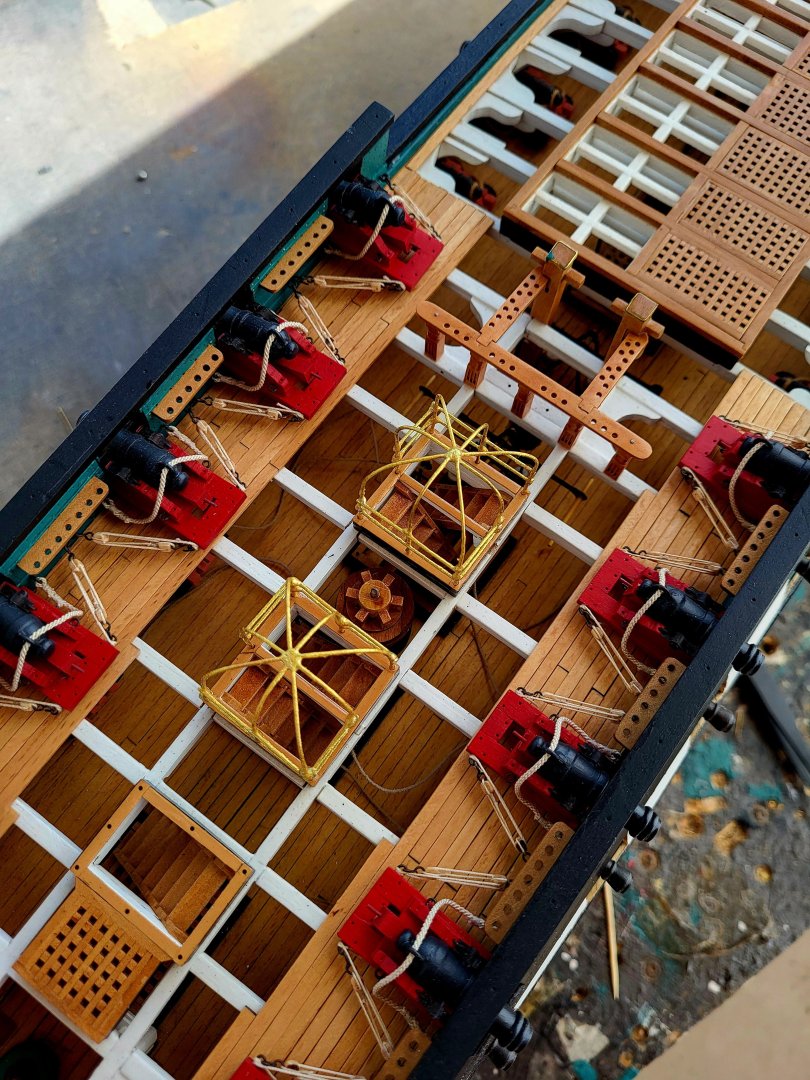
I completed two of the canopies.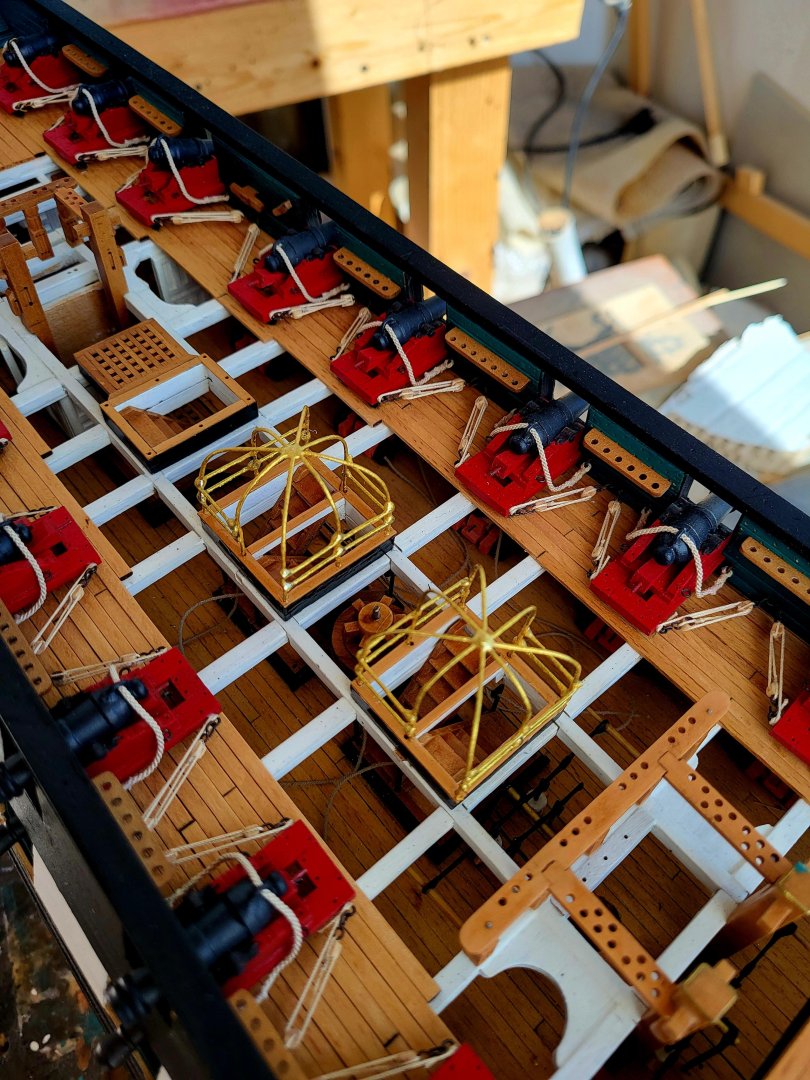


-
USS Constitution by mtbediz - 1:76
mtbediz replied to mtbediz's topic in - Build logs for subjects built 1751 - 1800
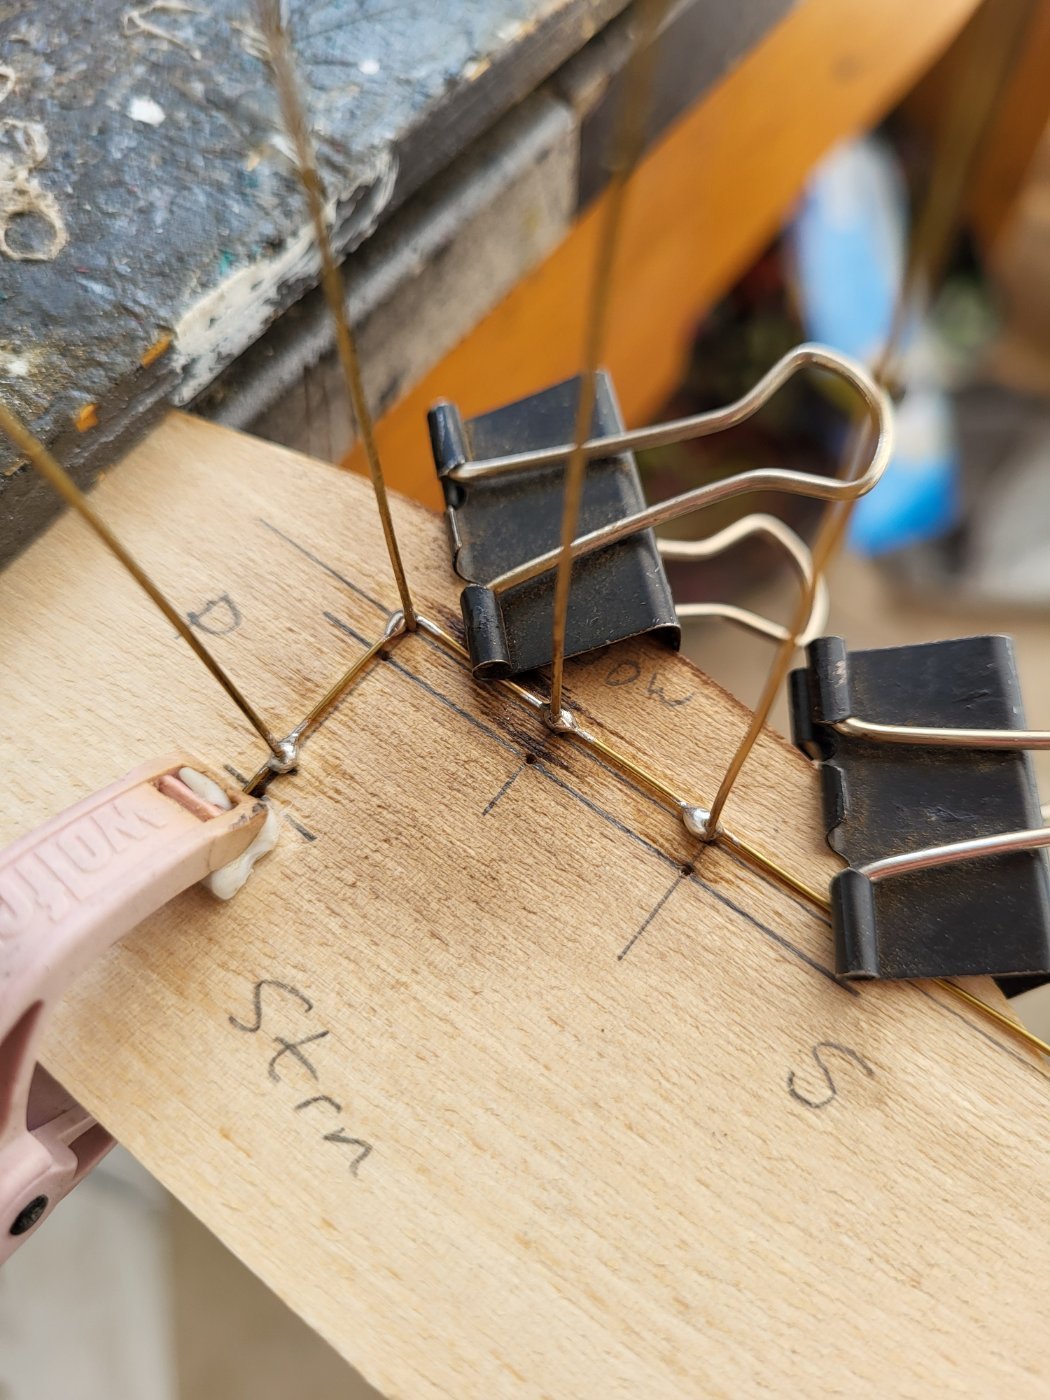
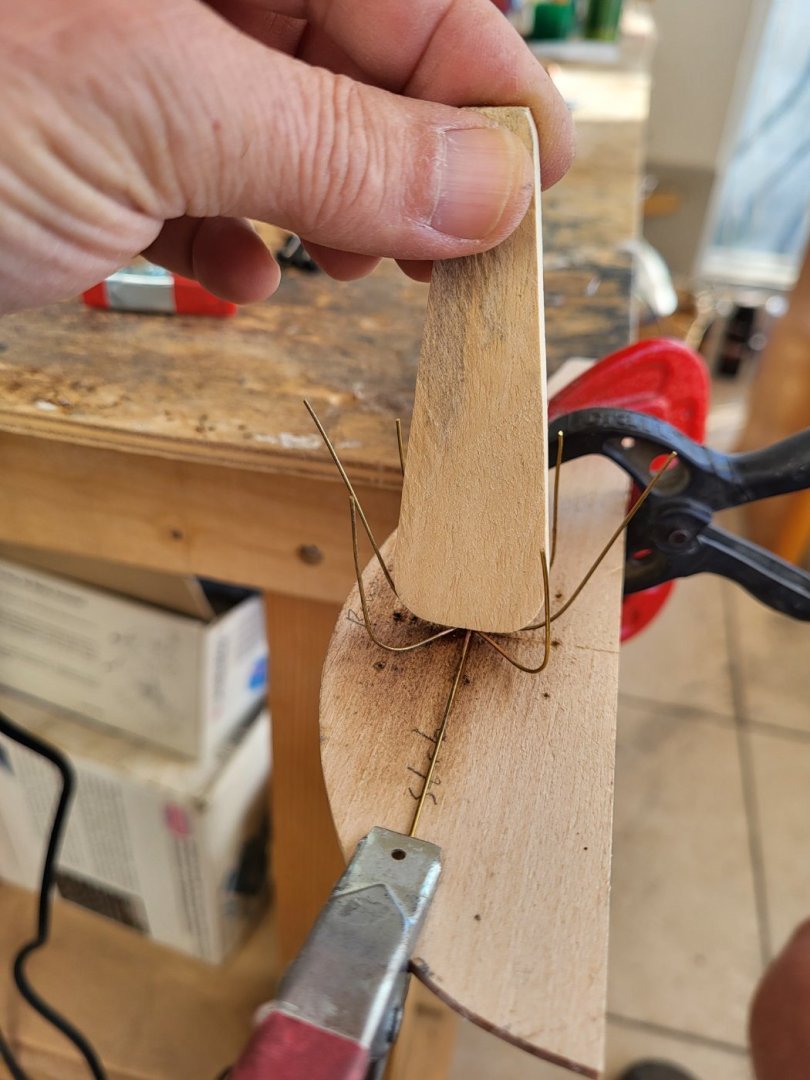
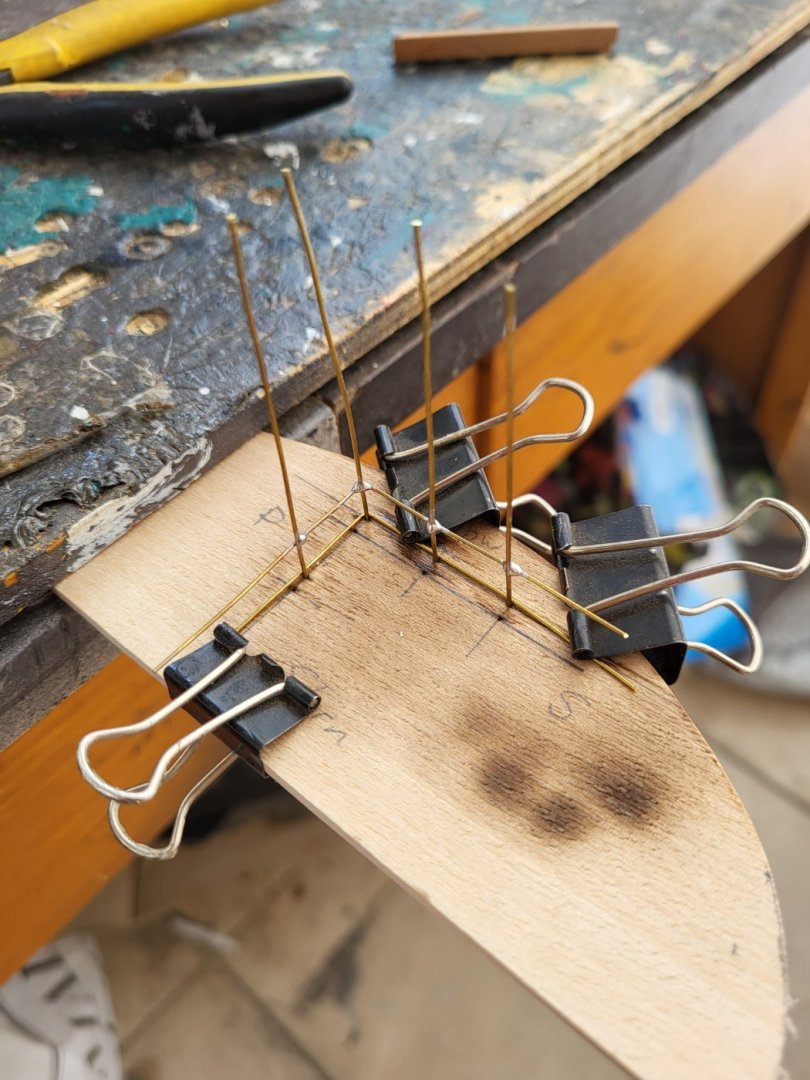
I admire Xken's metalwork, but there's no way I'll ever reach that level. I didn't try to join the rods together by making a central hub, I concentrated on joining them together by soldering neatly in the centre. Because I couldn't convince myself that I could make such a hub to scale. After a few unsuccessful attempts I found a method that gave me a satisfactory result. As can be seen in the photos I fixed the 0,7 mm diameter rods on a flat surface and soldered them all together in the centre. Here only the diagonal rods are in single piece, the other four are separate pieces. I then bent the rods using a jig and fixed it to a jig to solder the horizontal rods. I find the result satisfactory but the excess solders still need to be filed down.


-
USS Constitution by mtbediz - 1:76
mtbediz replied to mtbediz's topic in - Build logs for subjects built 1751 - 1800
Yes Peter, that's the plan. -
USS Constitution by mtbediz - 1:76
mtbediz replied to mtbediz's topic in - Build logs for subjects built 1751 - 1800
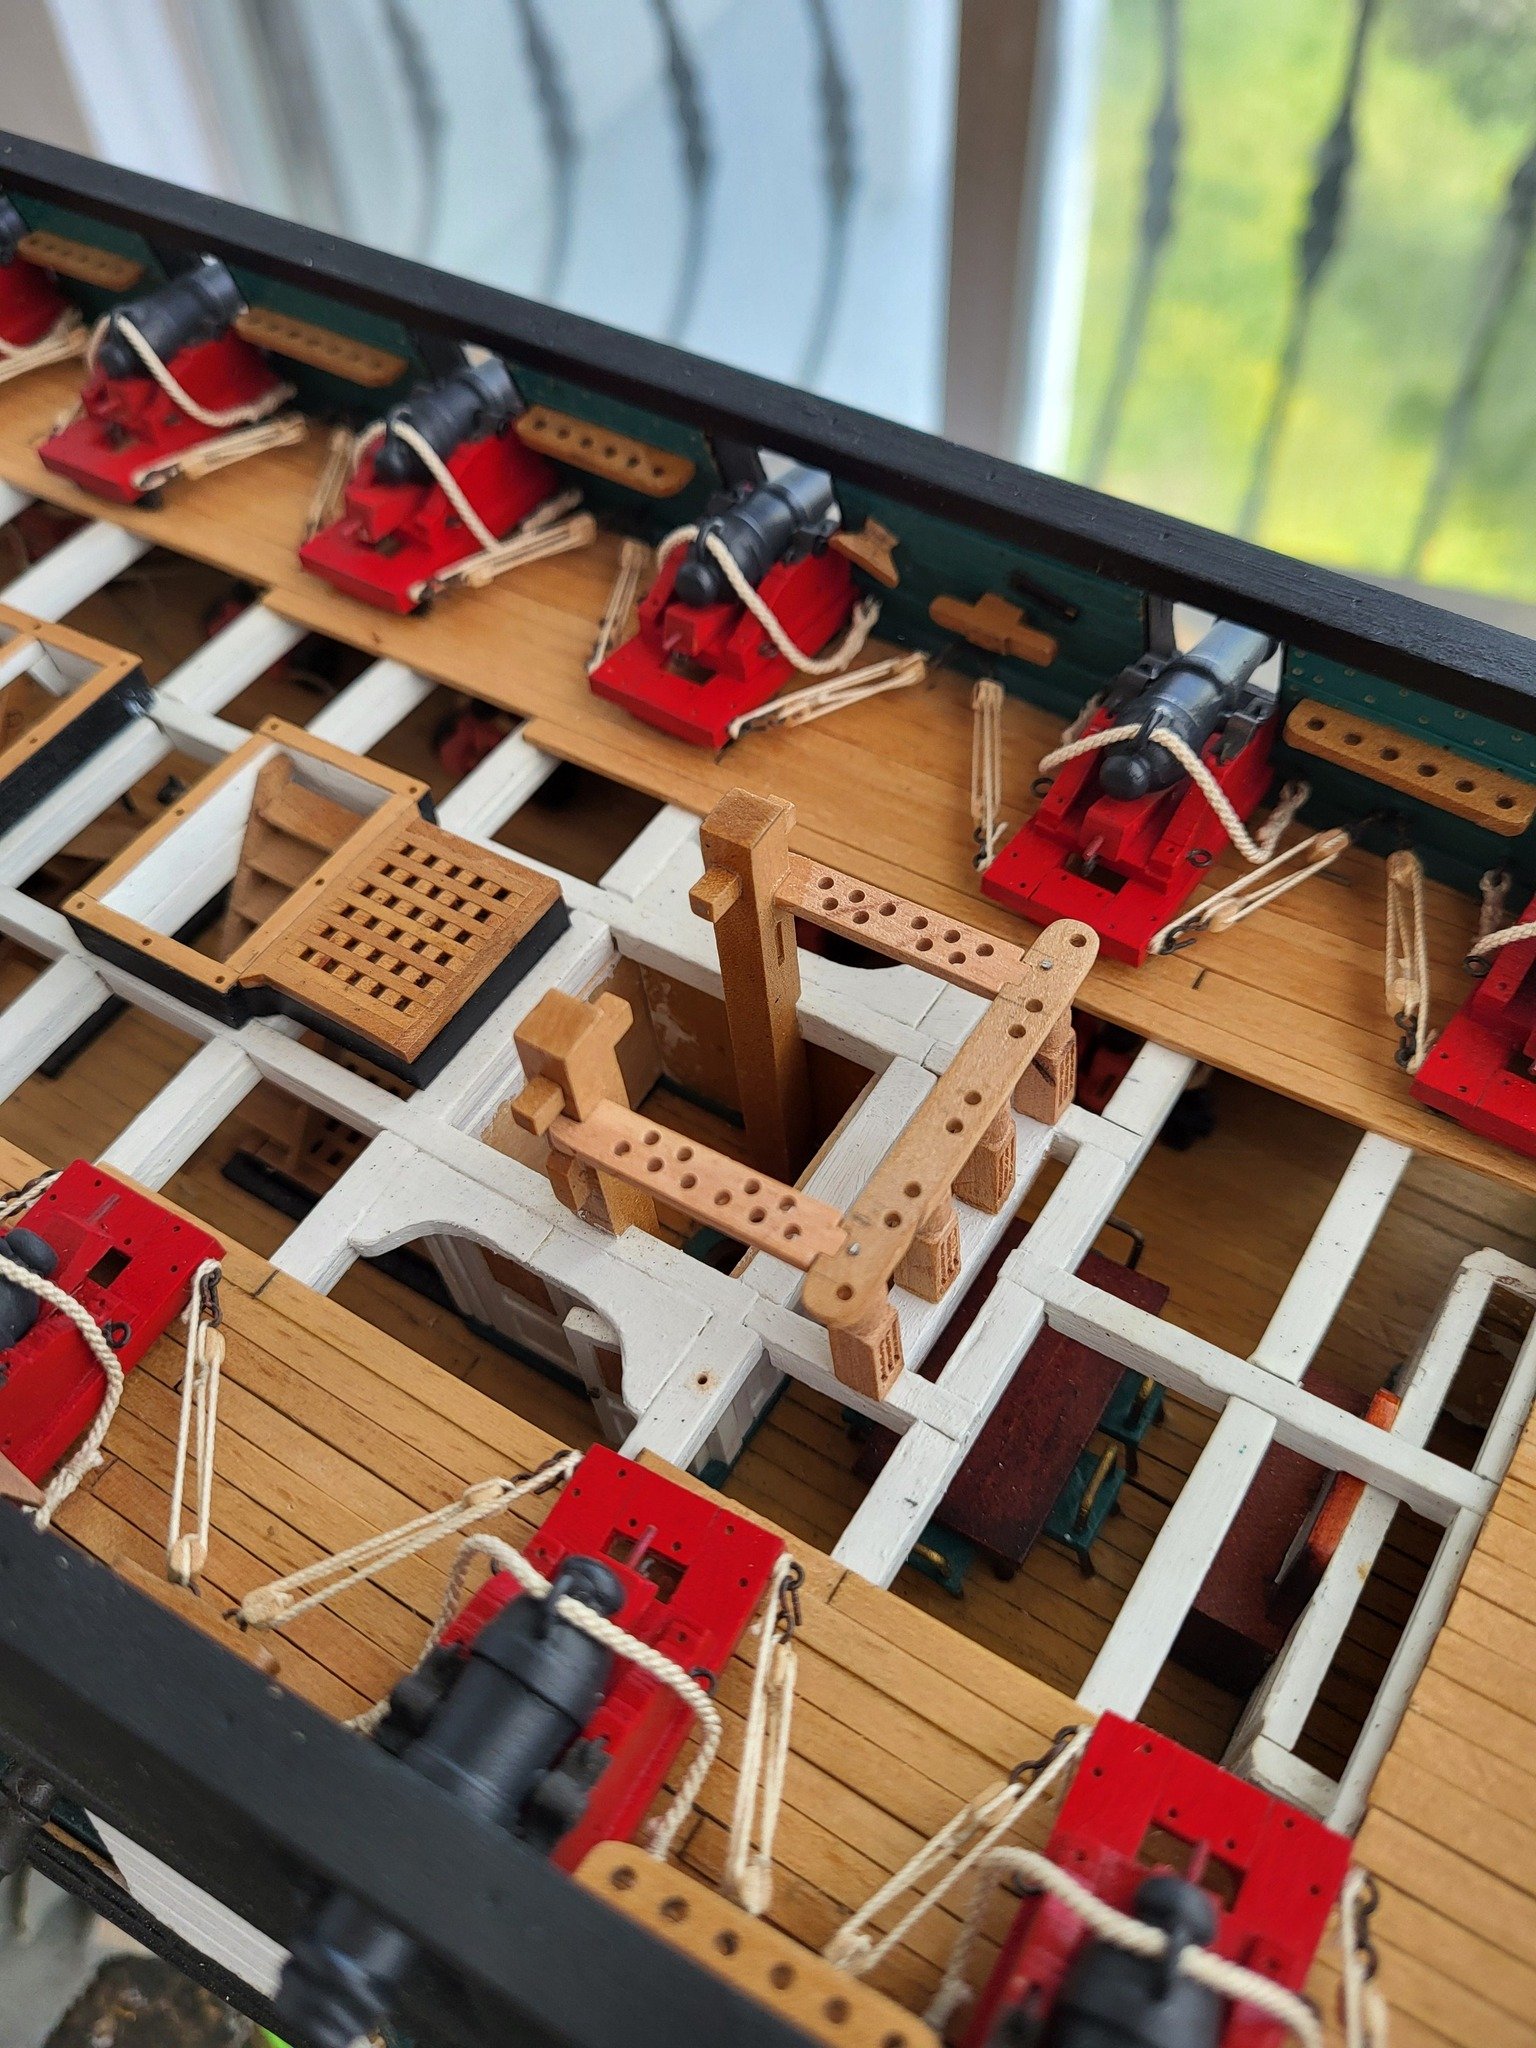
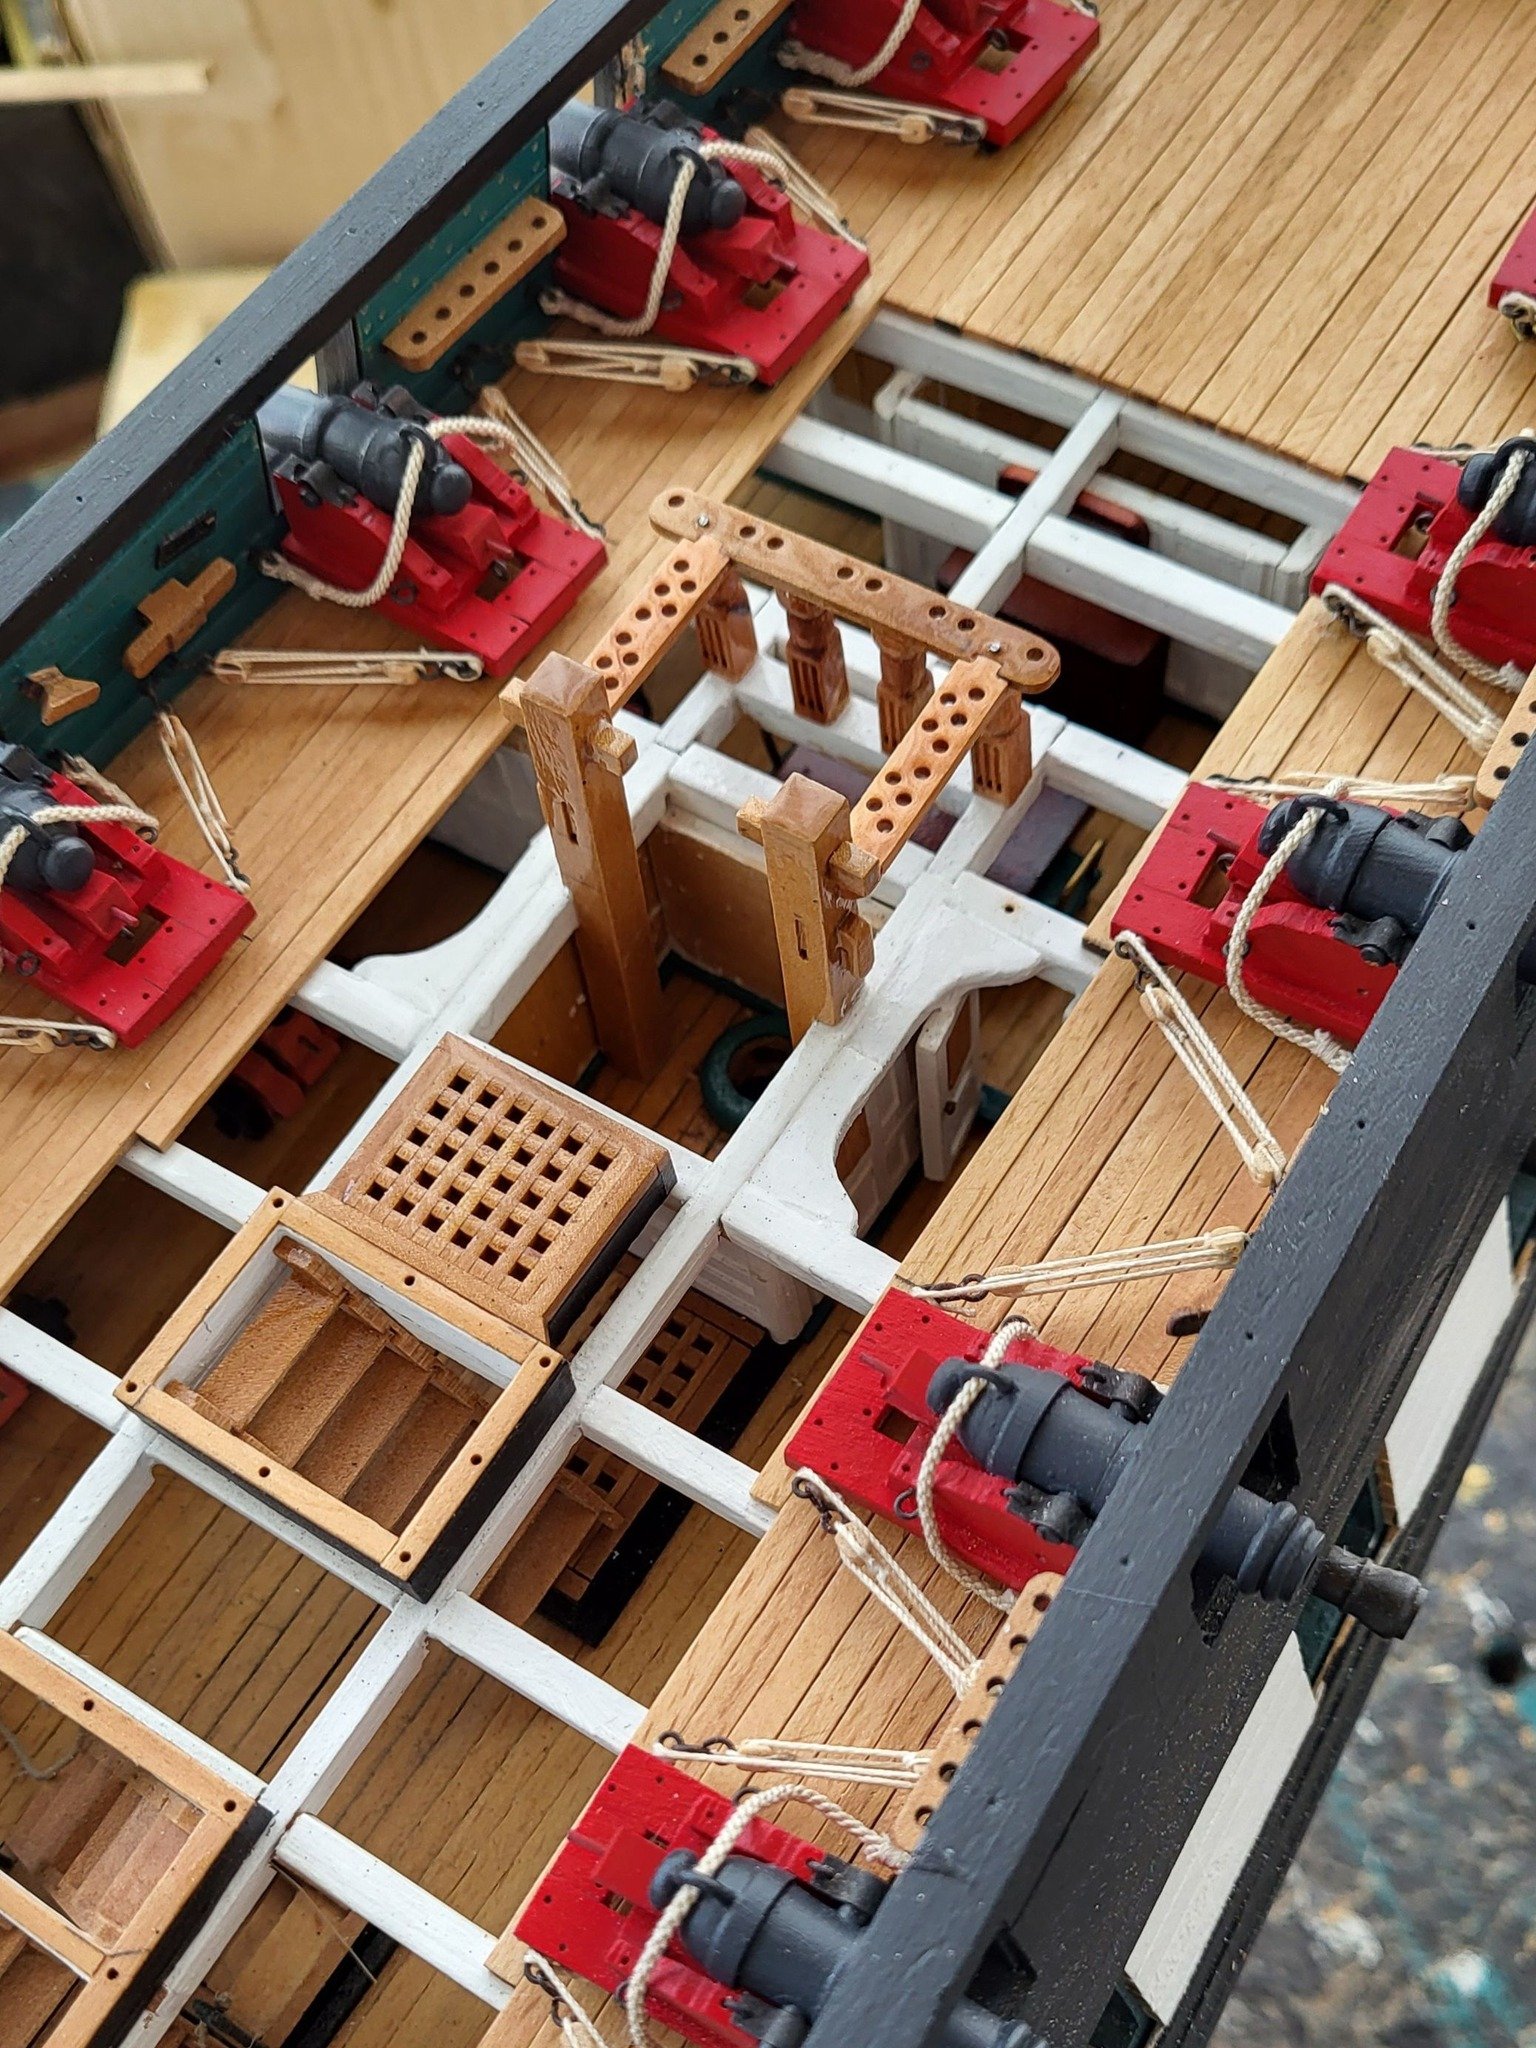
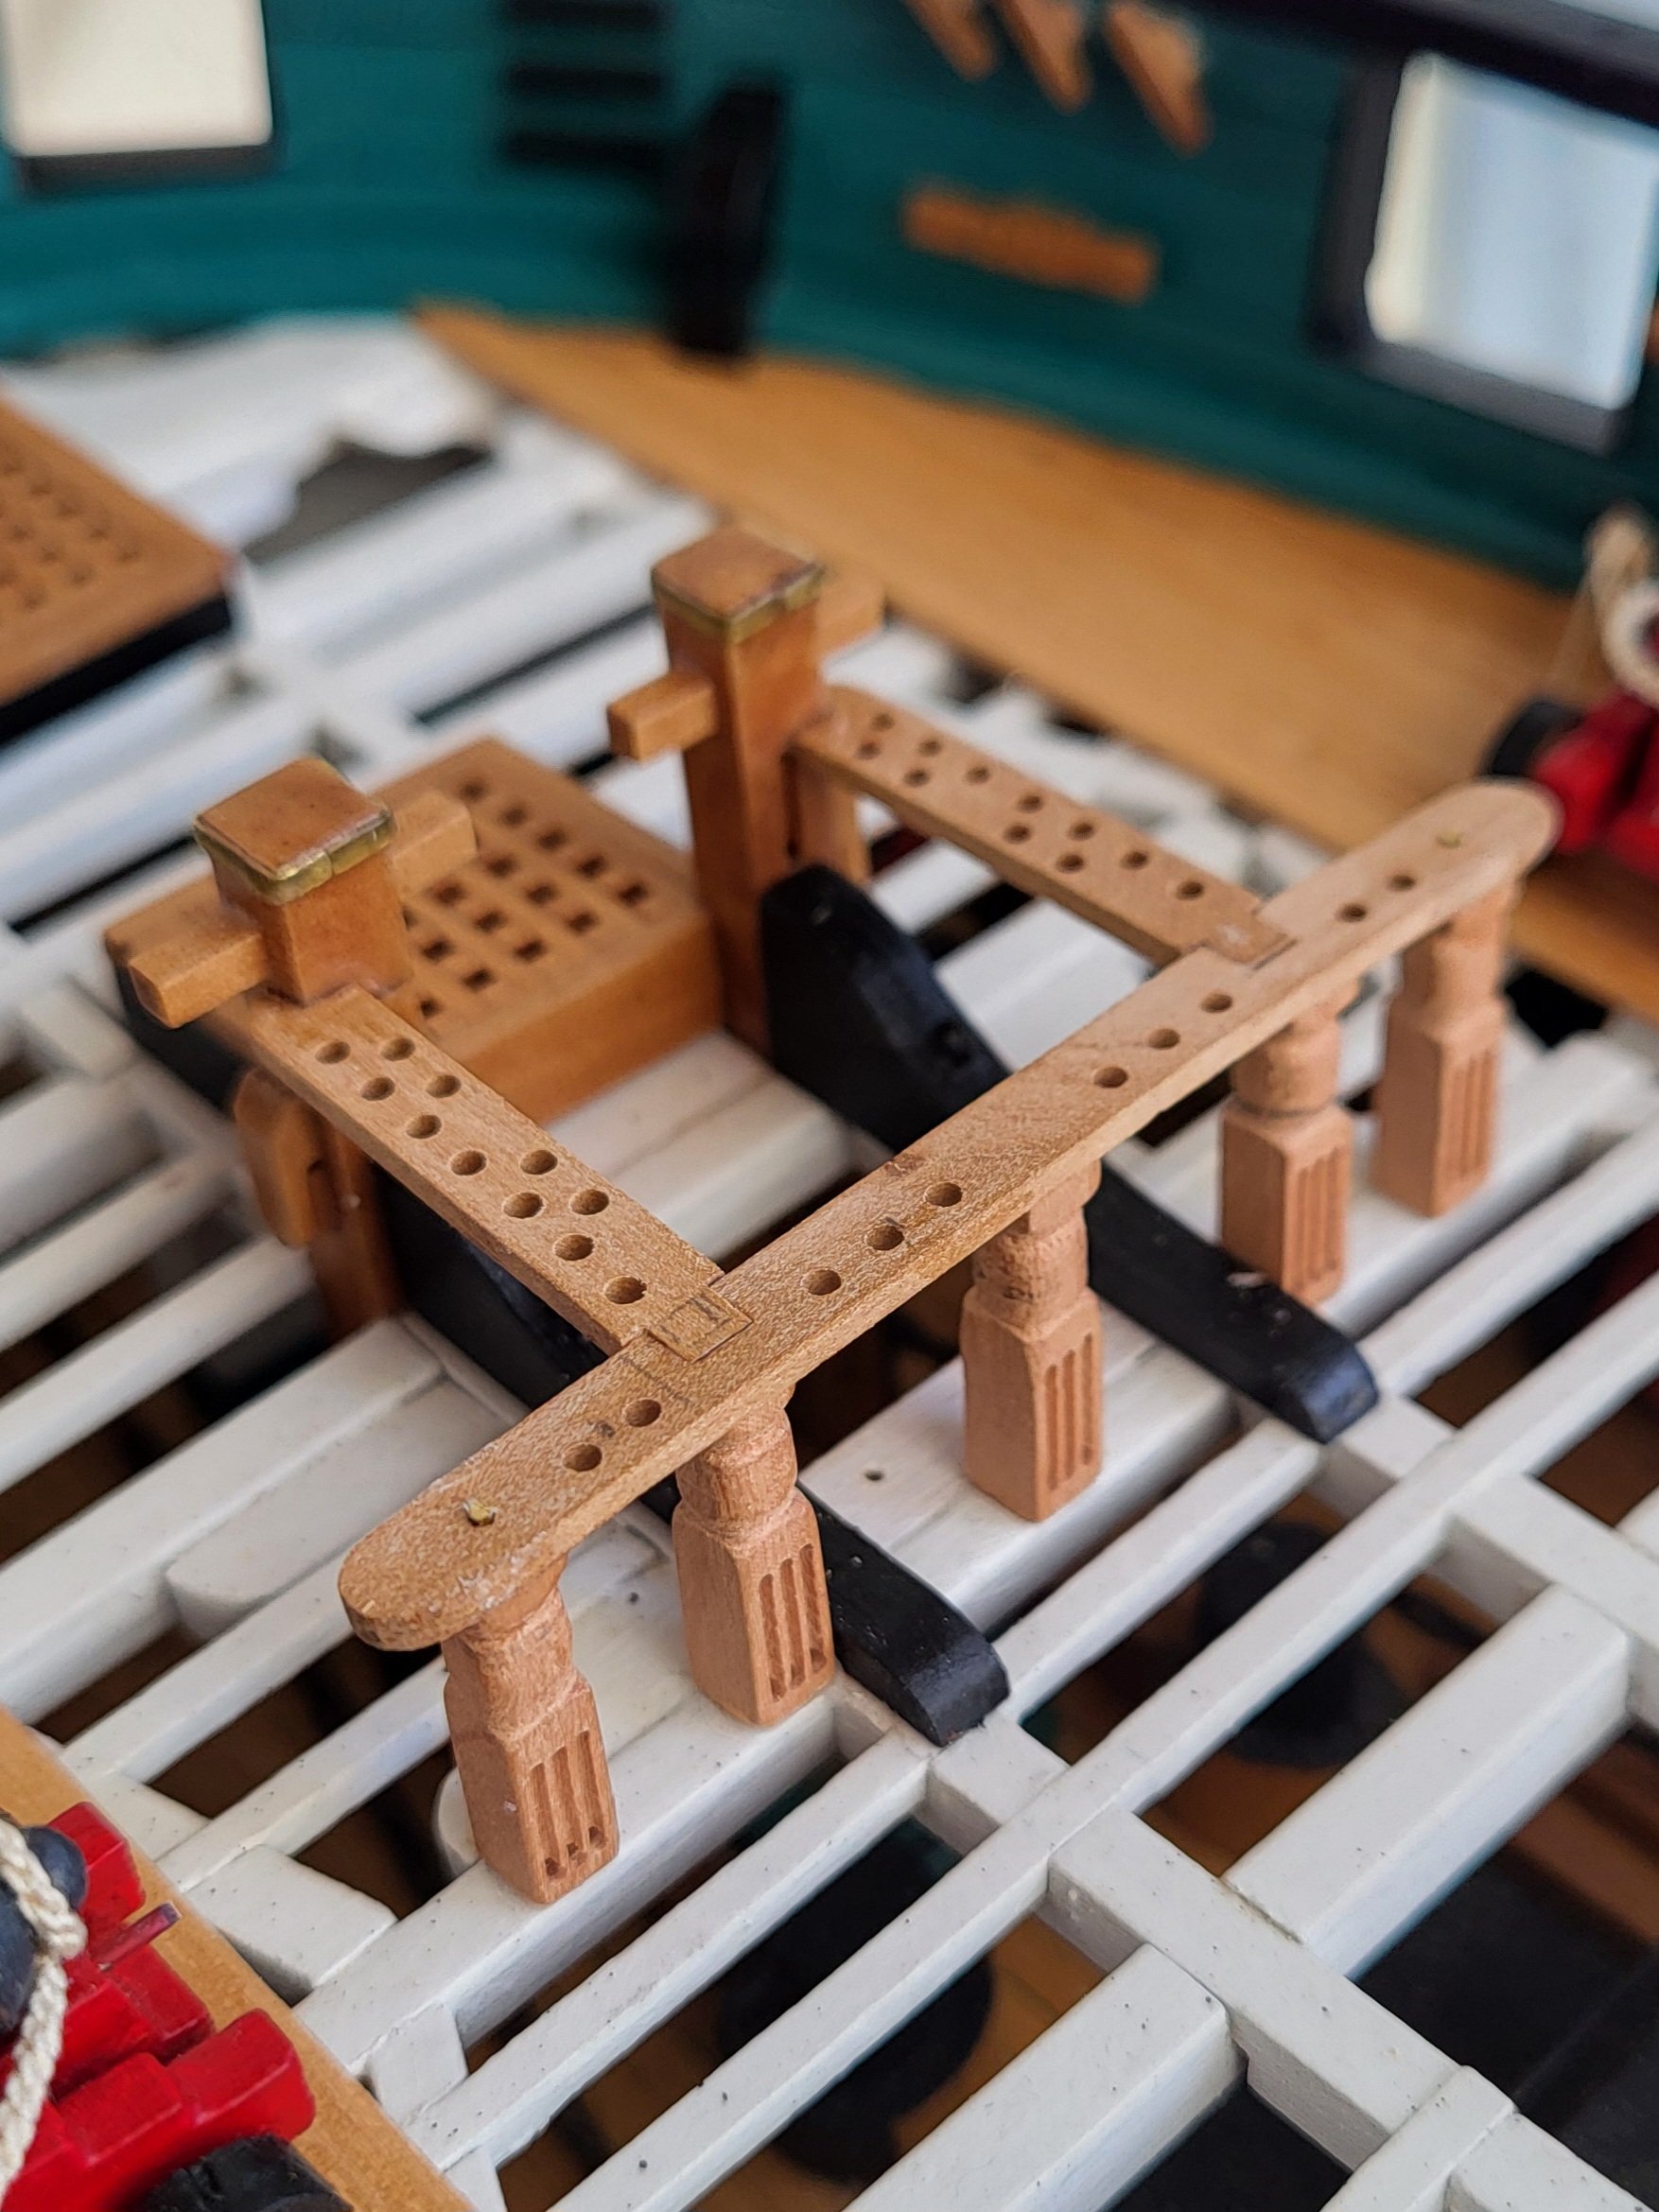
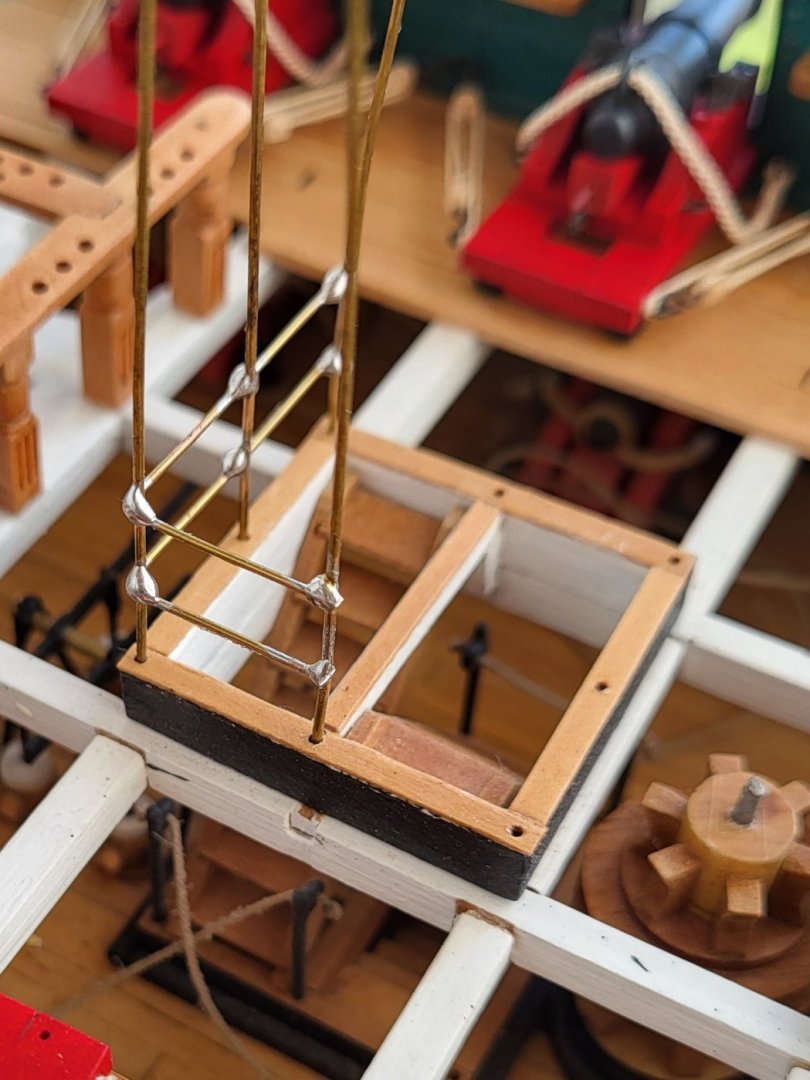
All fife rails are complete. At this stage I decided to make the canopies. While making the canopies I will solder the connection points. I will not be able to make the cube shaped elements in the connection points on the real ship in this scale. The canopy in the photo is a prototype I made to design how to do the job. I will not use it. Now I am working on a jig that will do this job properly.


-
USS Constitution by mtbediz - 1:76
mtbediz replied to mtbediz's topic in - Build logs for subjects built 1751 - 1800
Yes Peter, I exactly drilled them with a 1 mm diameter drill bit. -
USS Constitution by mtbediz - 1:76
mtbediz replied to mtbediz's topic in - Build logs for subjects built 1751 - 1800
Thank you Phil. Pickle was a great rest stop for me after Essex. -
USS Constitution by mtbediz - 1:76
mtbediz replied to mtbediz's topic in - Build logs for subjects built 1751 - 1800
I answered because I knew it would be difficult for you to find the answer you were looking for in my log. I didn't want you to get tired -
USS Constitution by mtbediz - 1:76
mtbediz replied to mtbediz's topic in - Build logs for subjects built 1751 - 1800
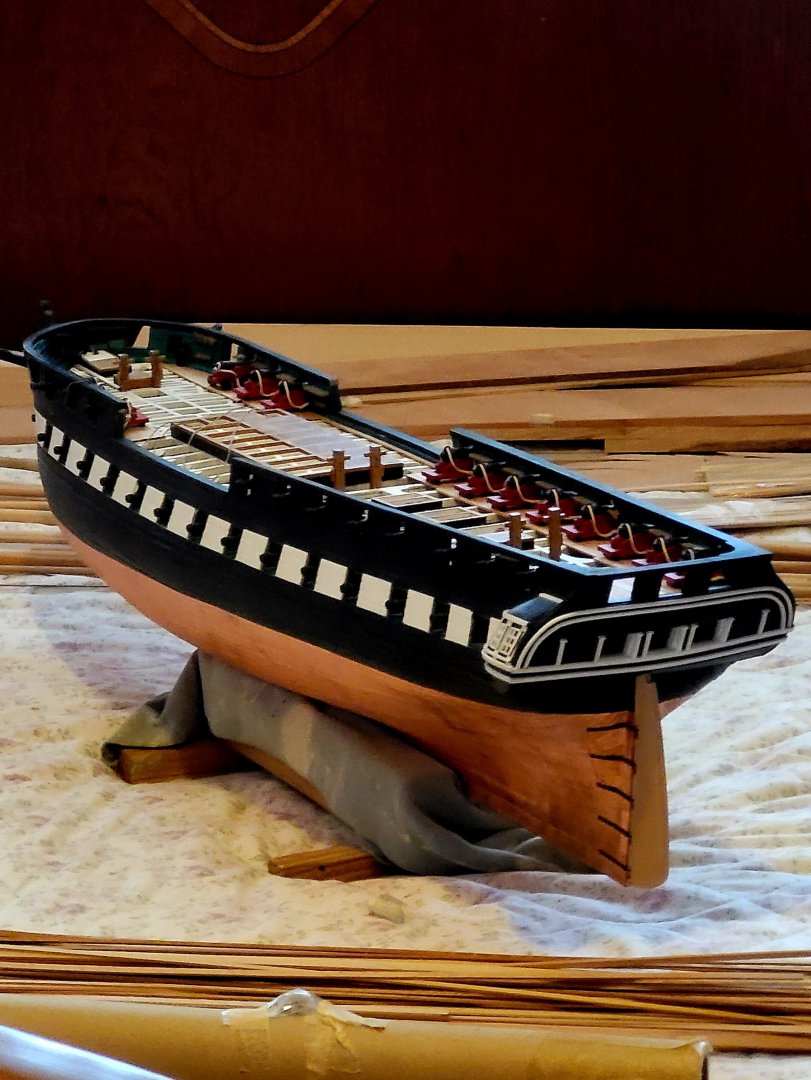
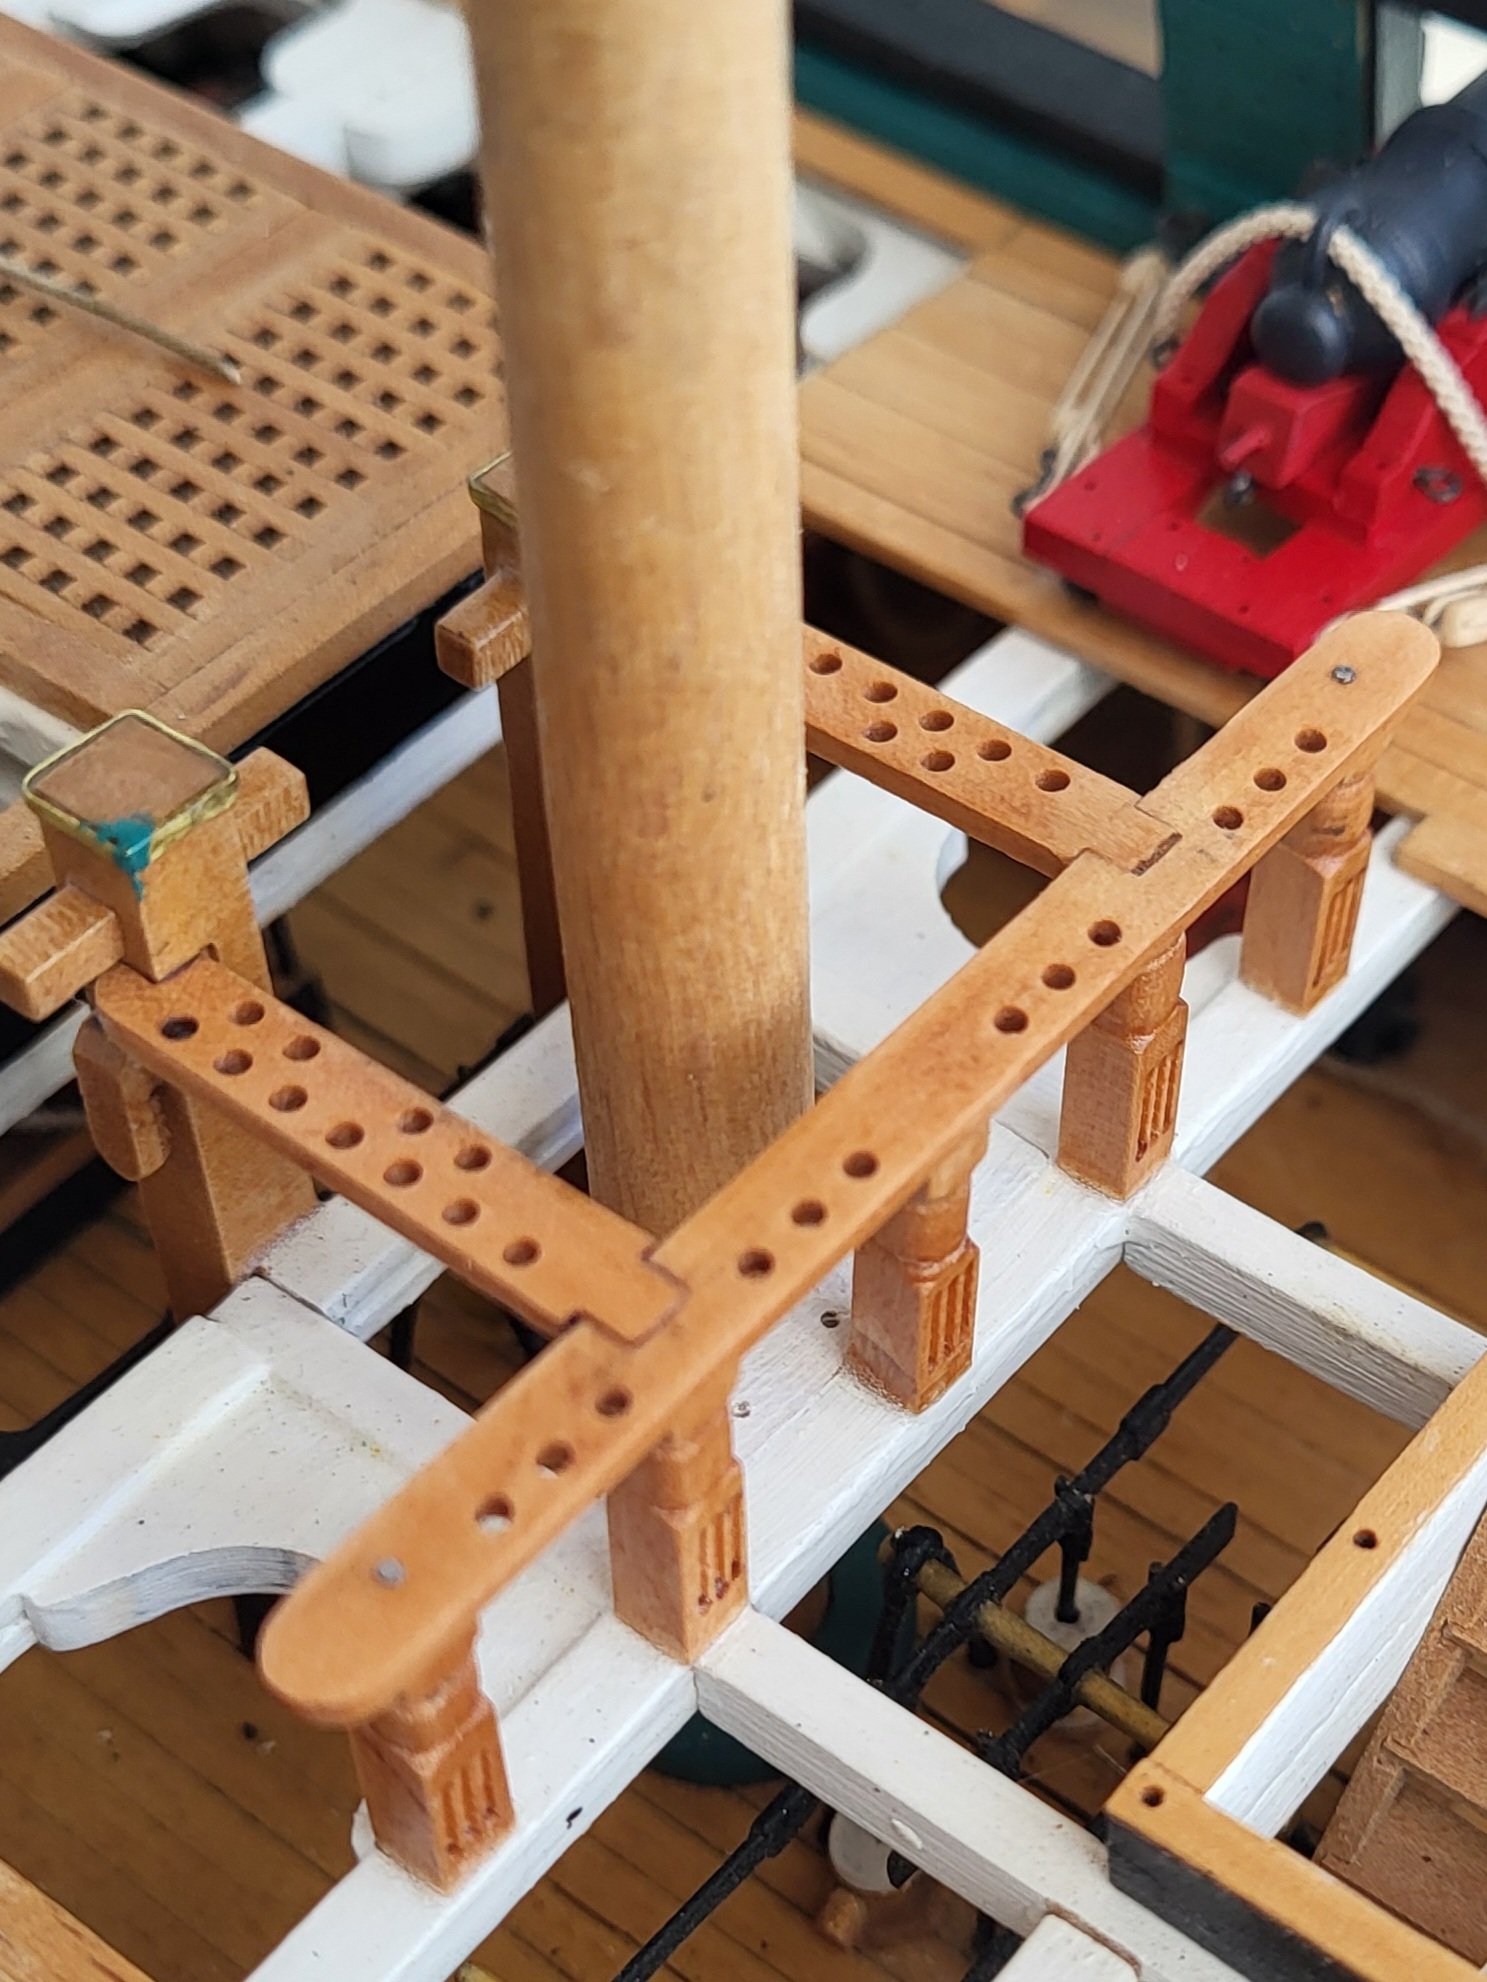
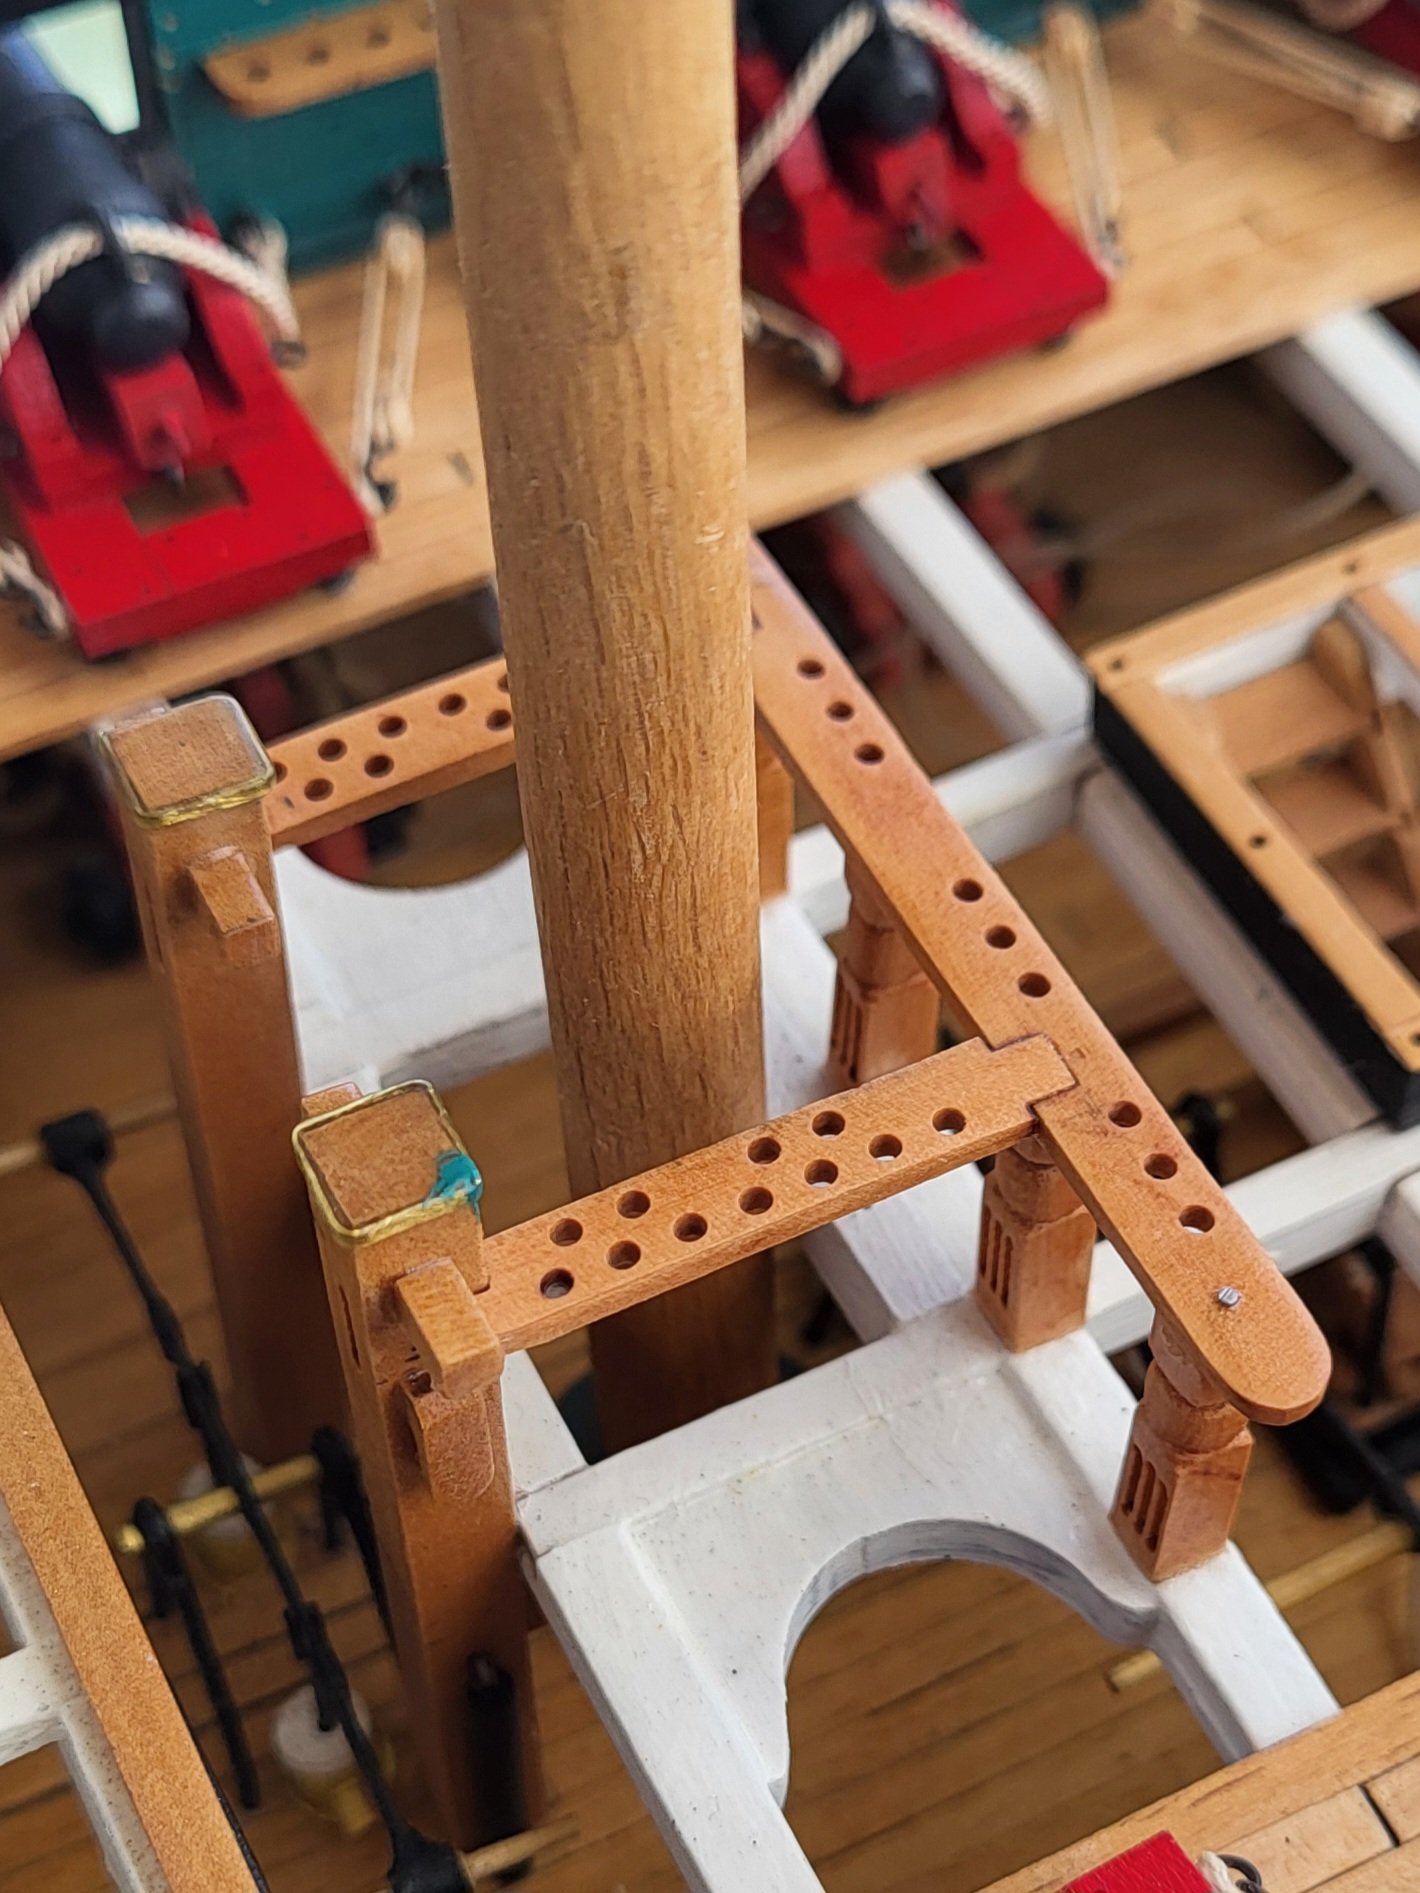
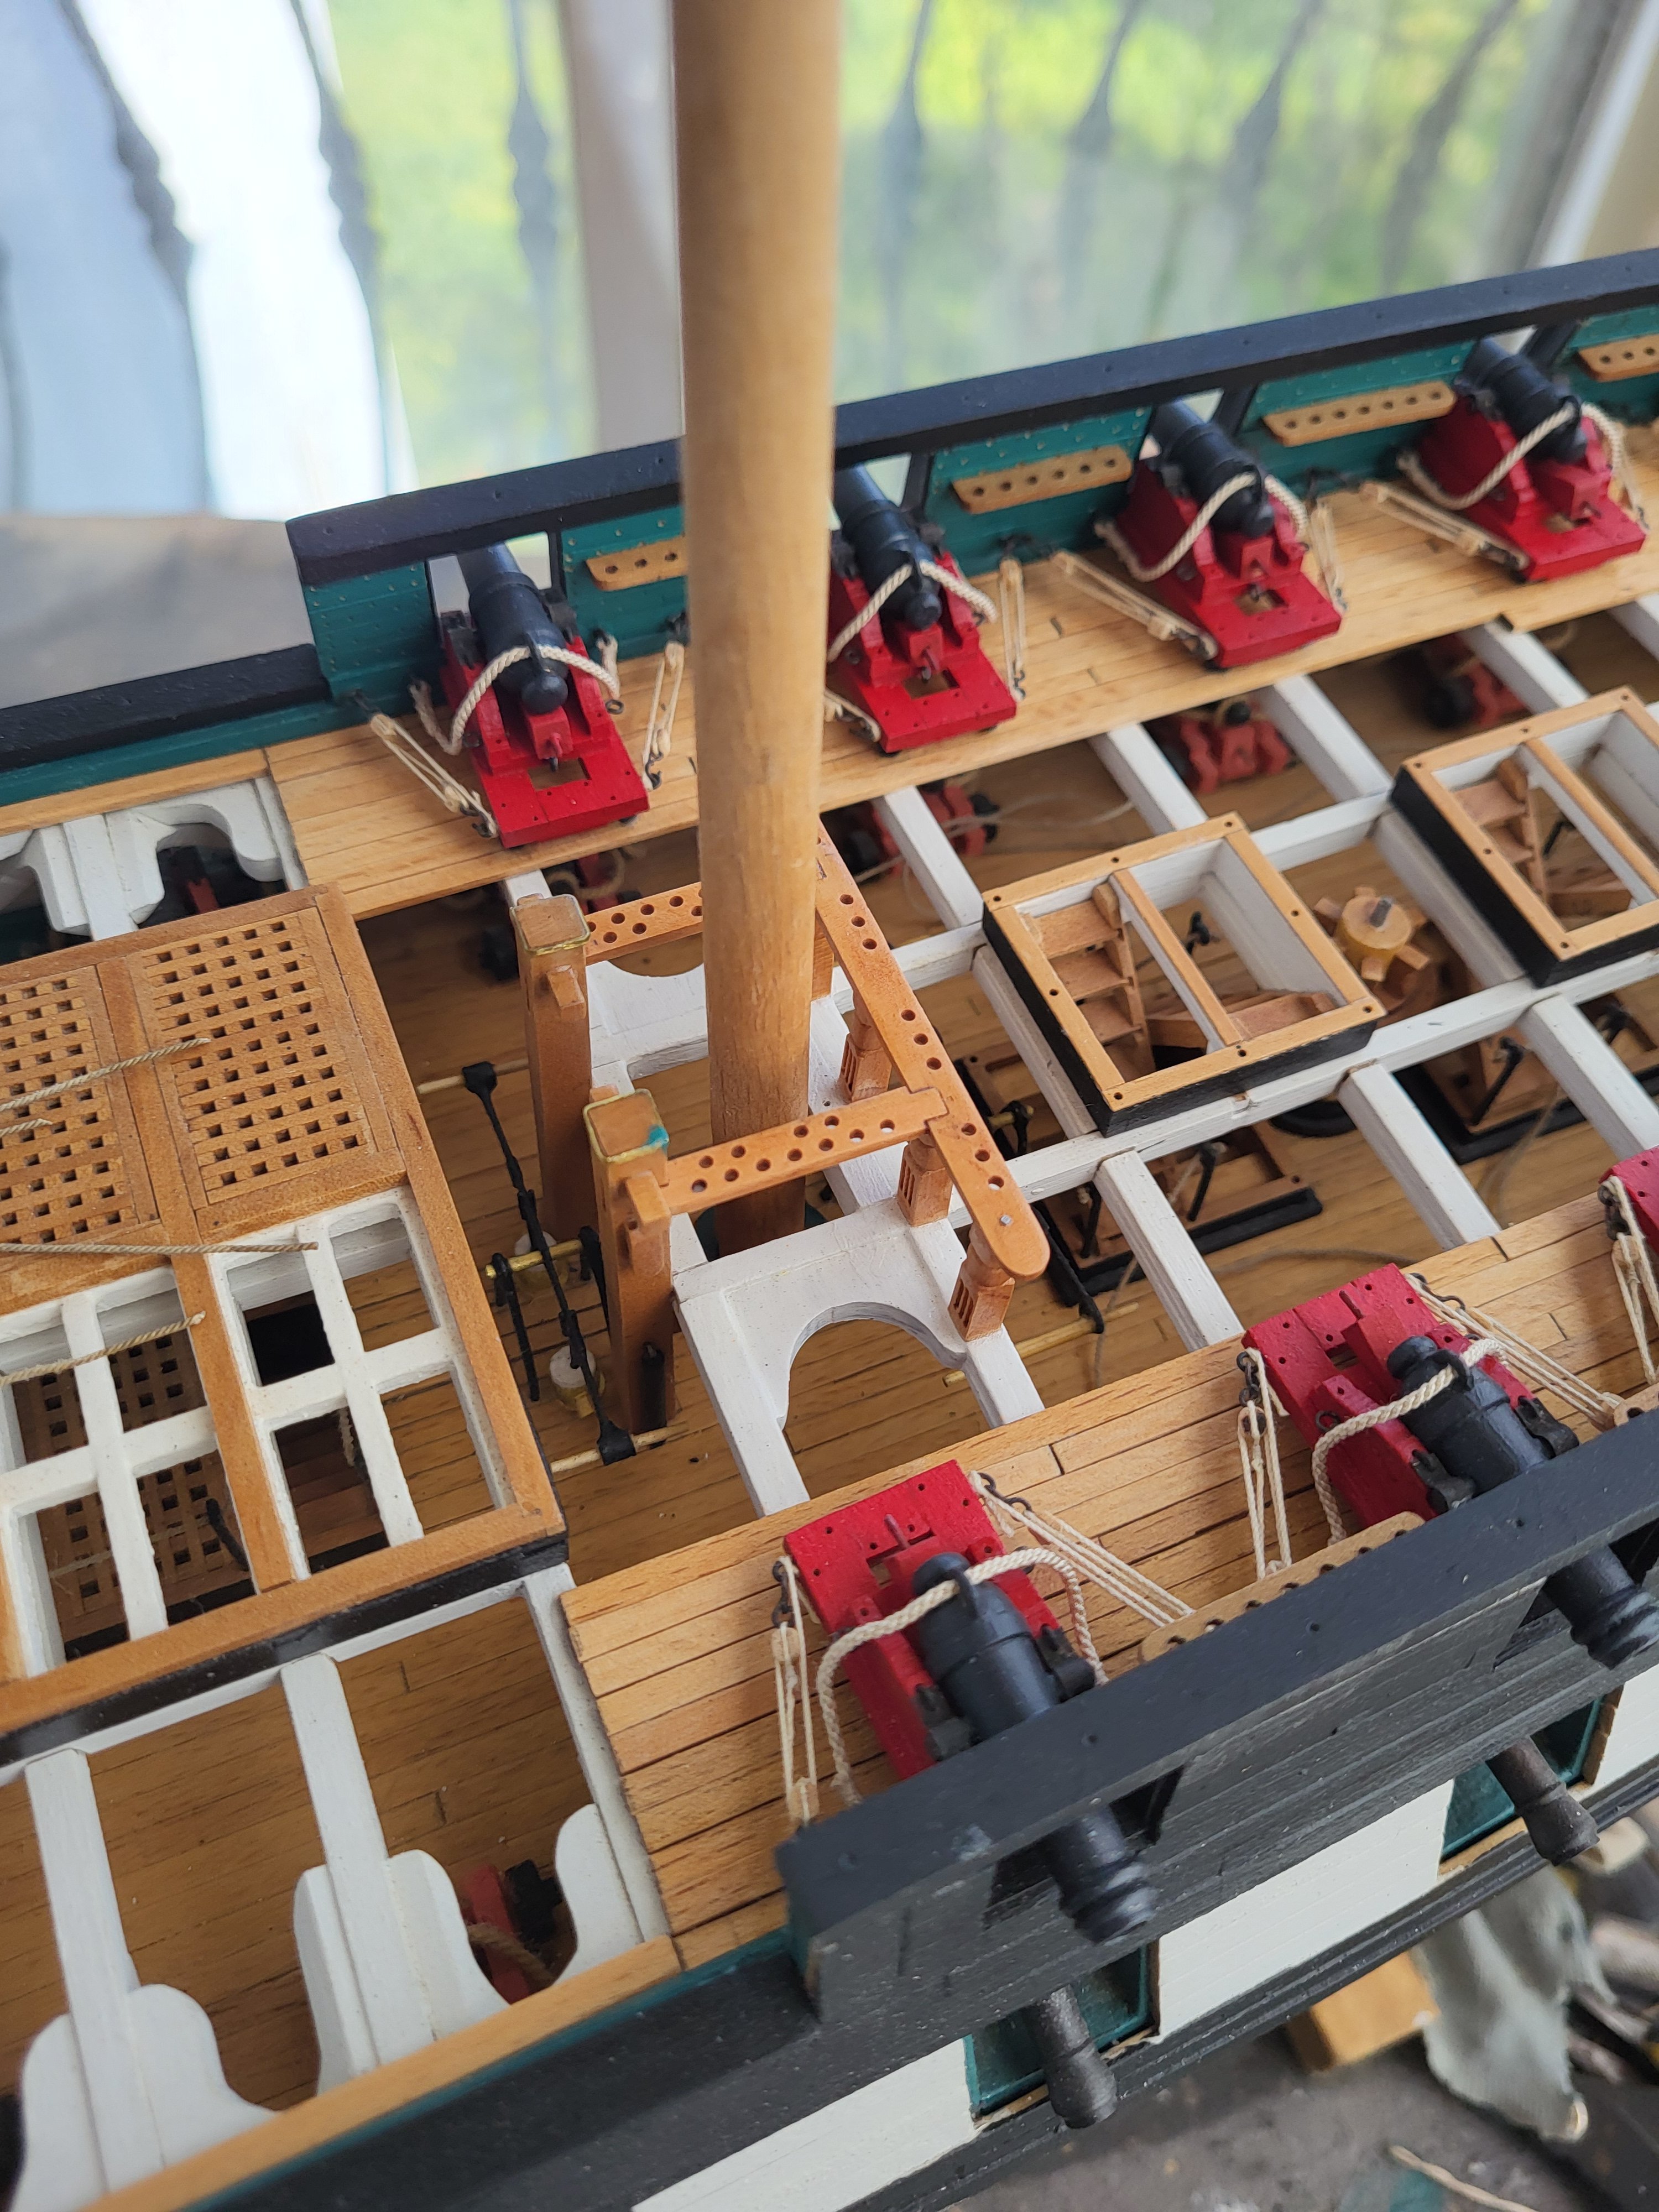
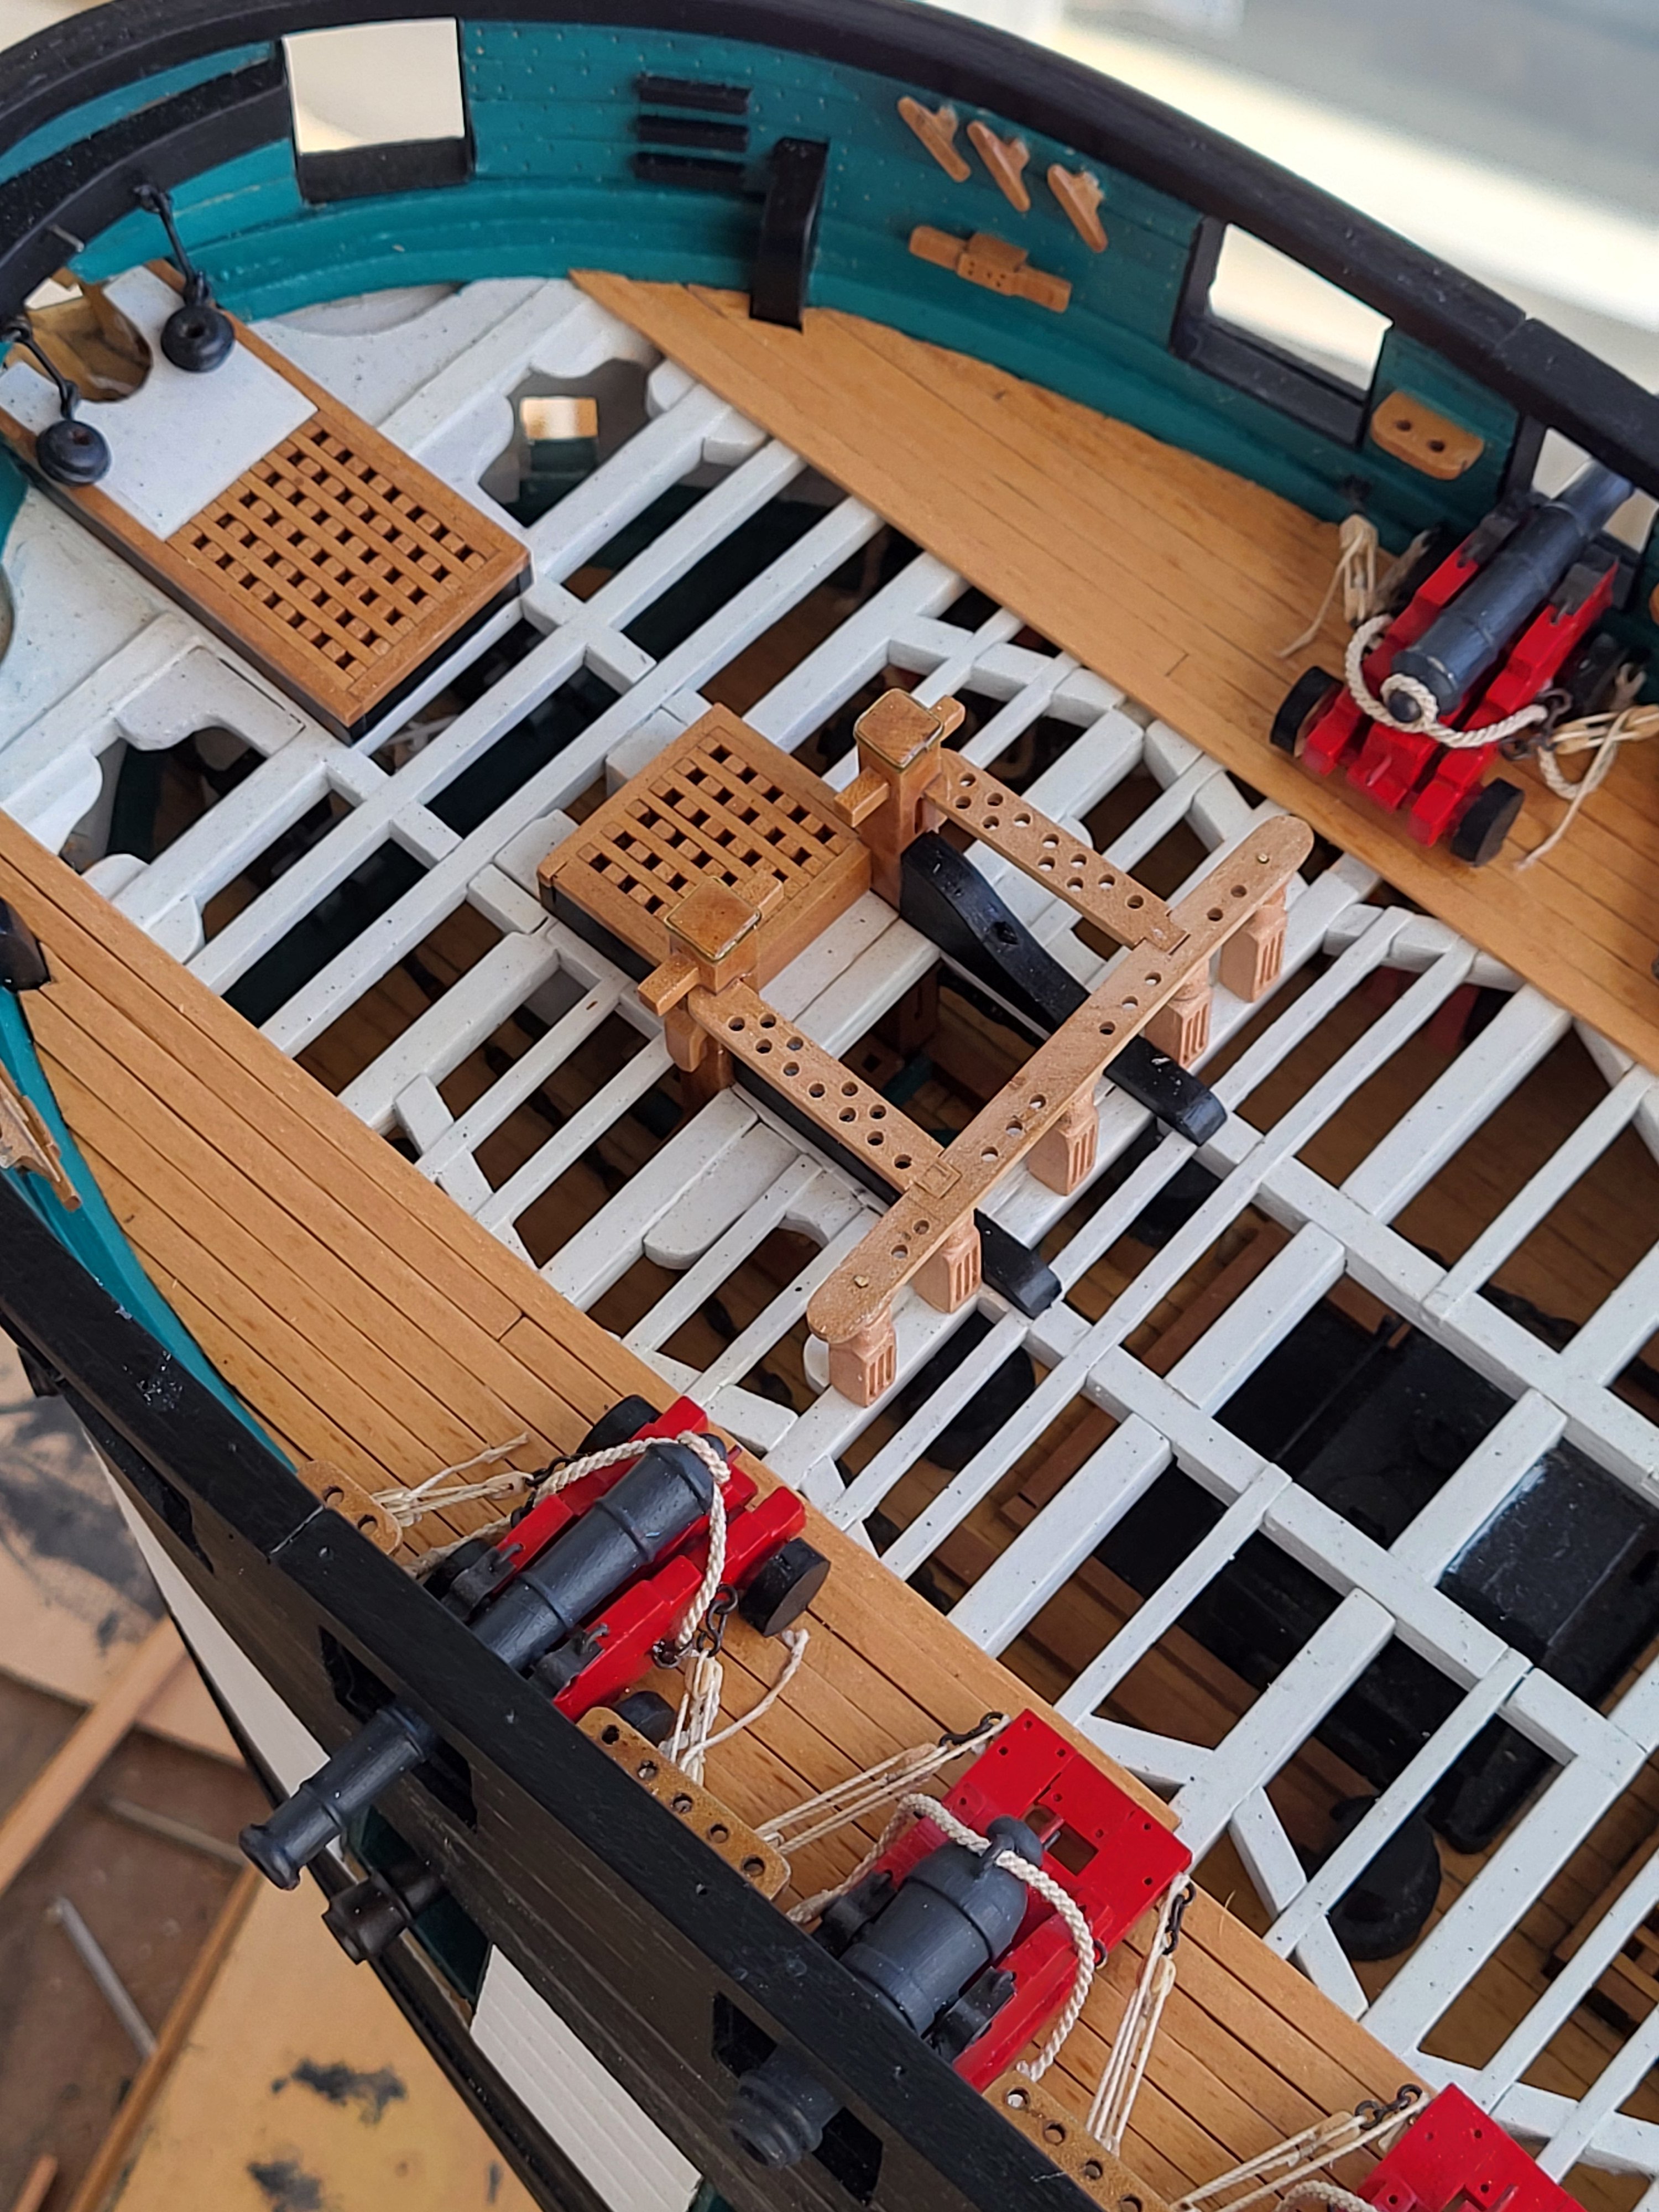
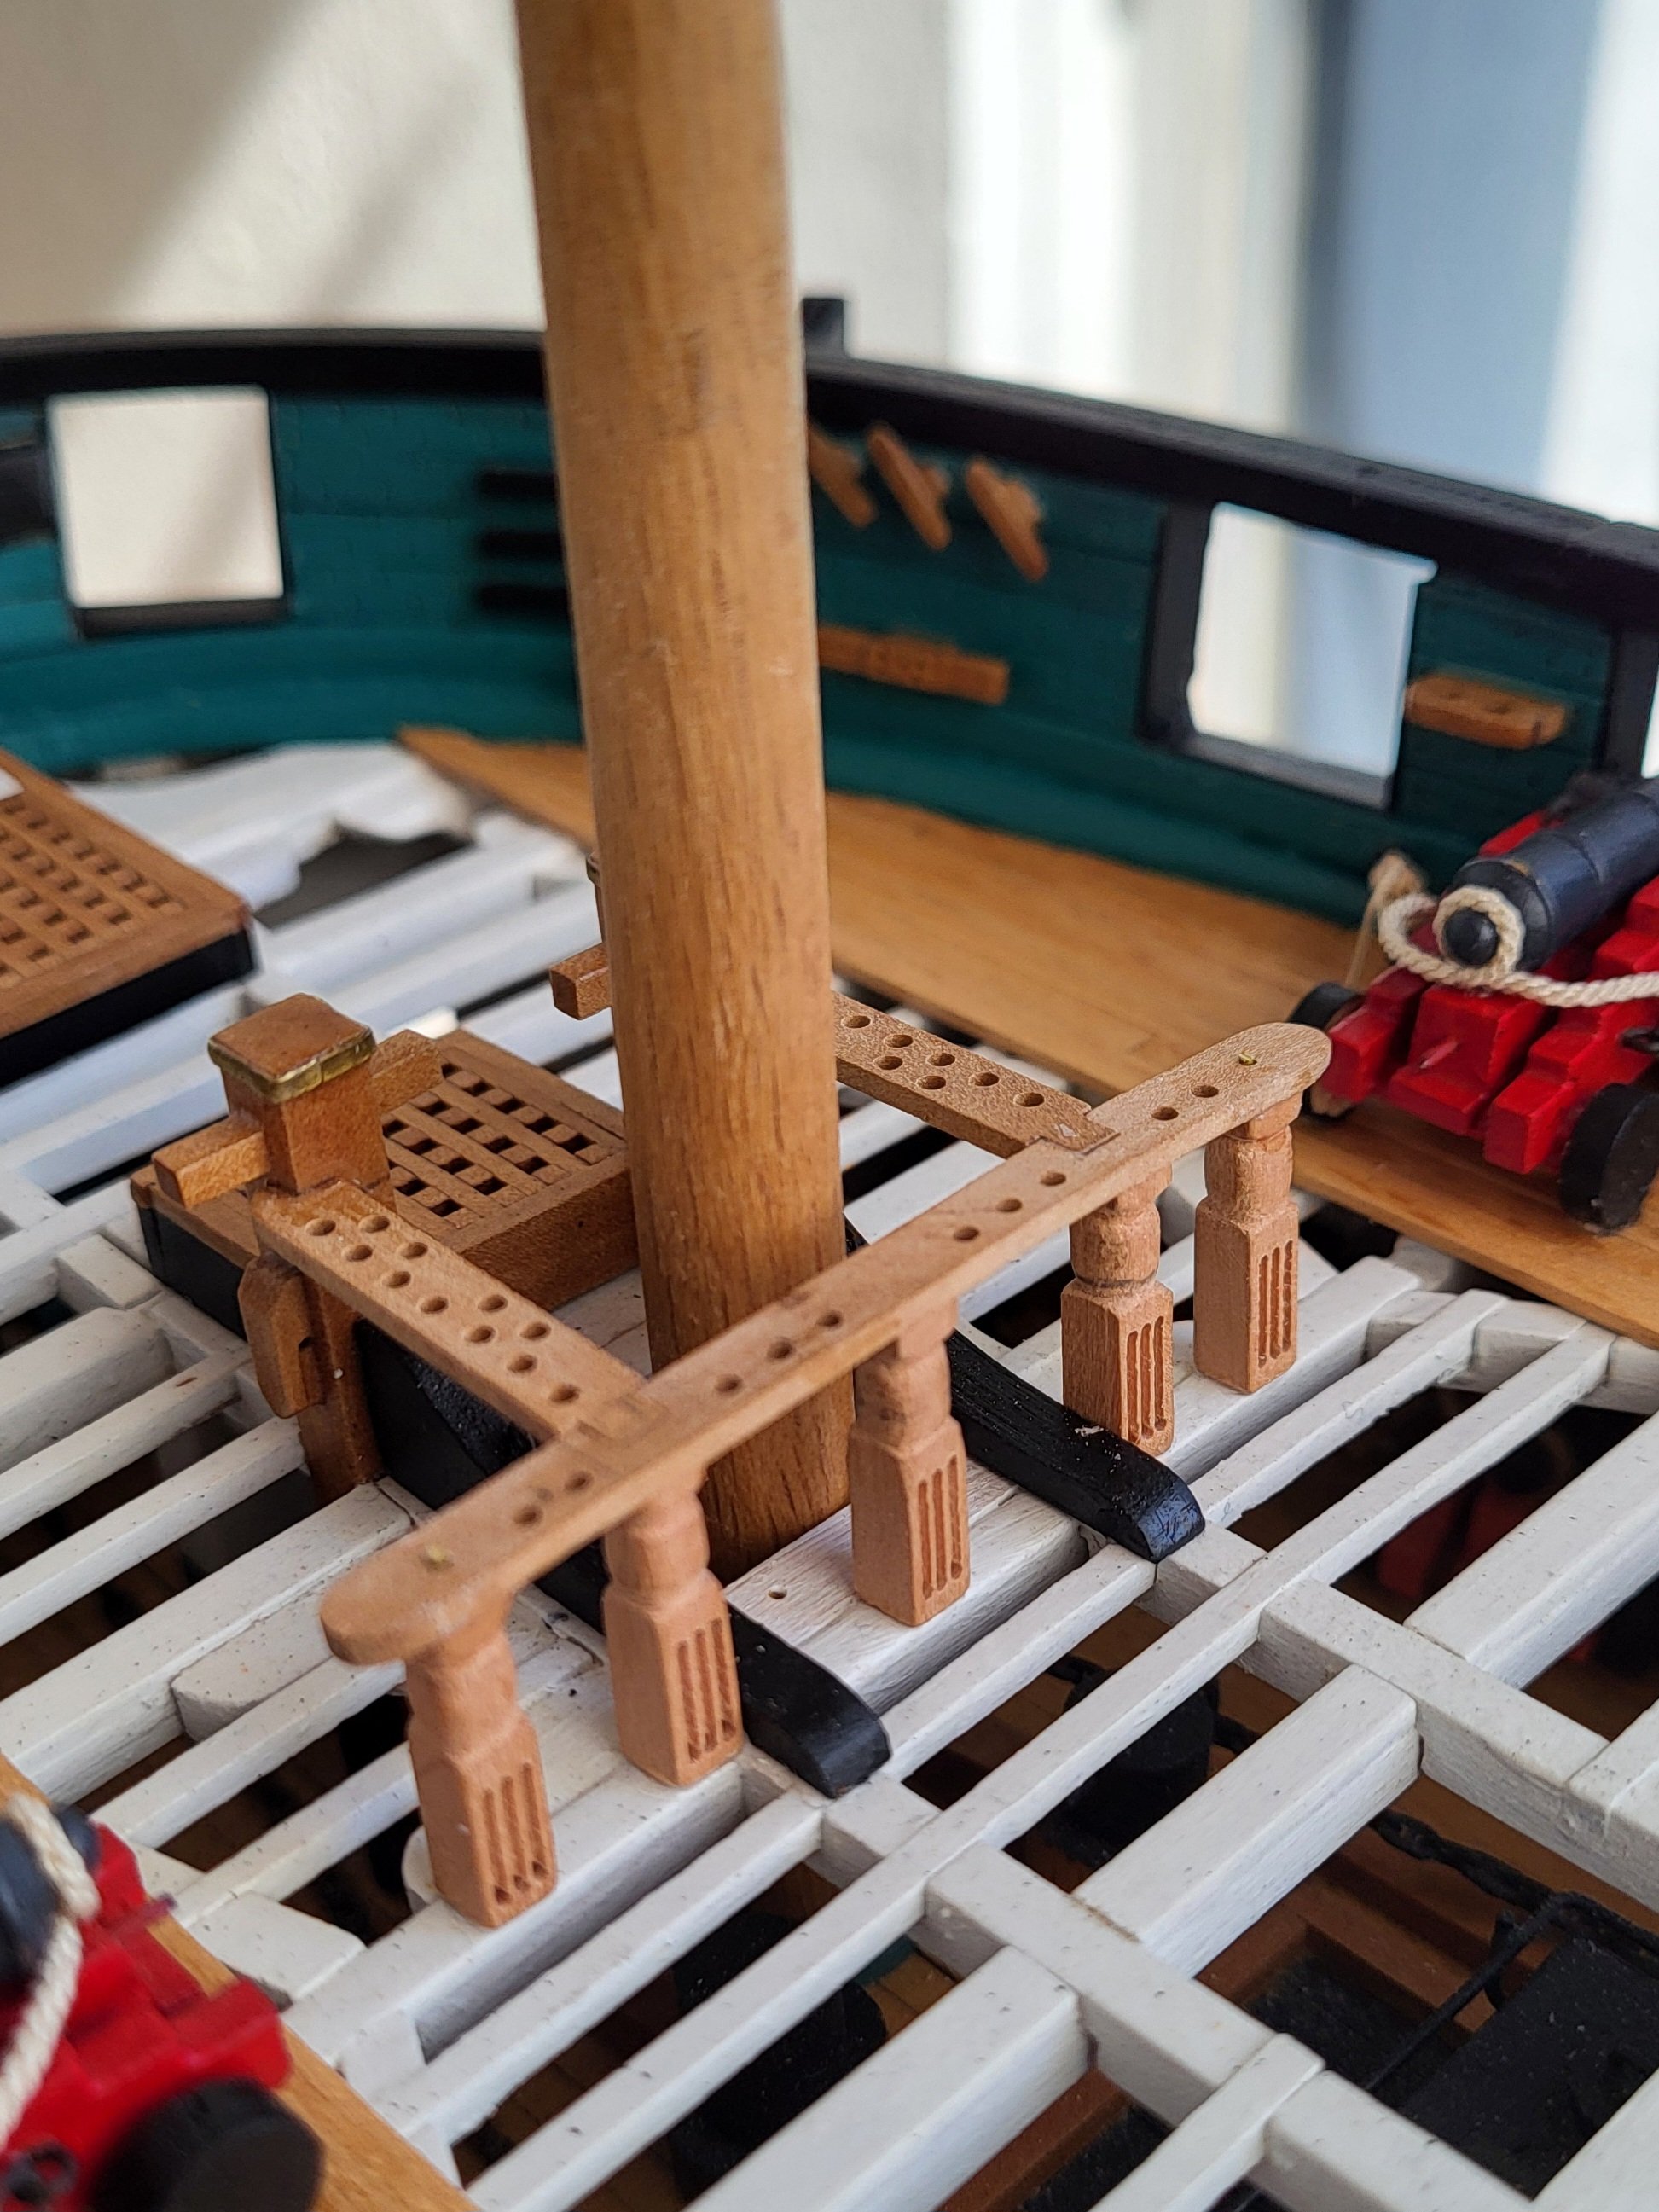
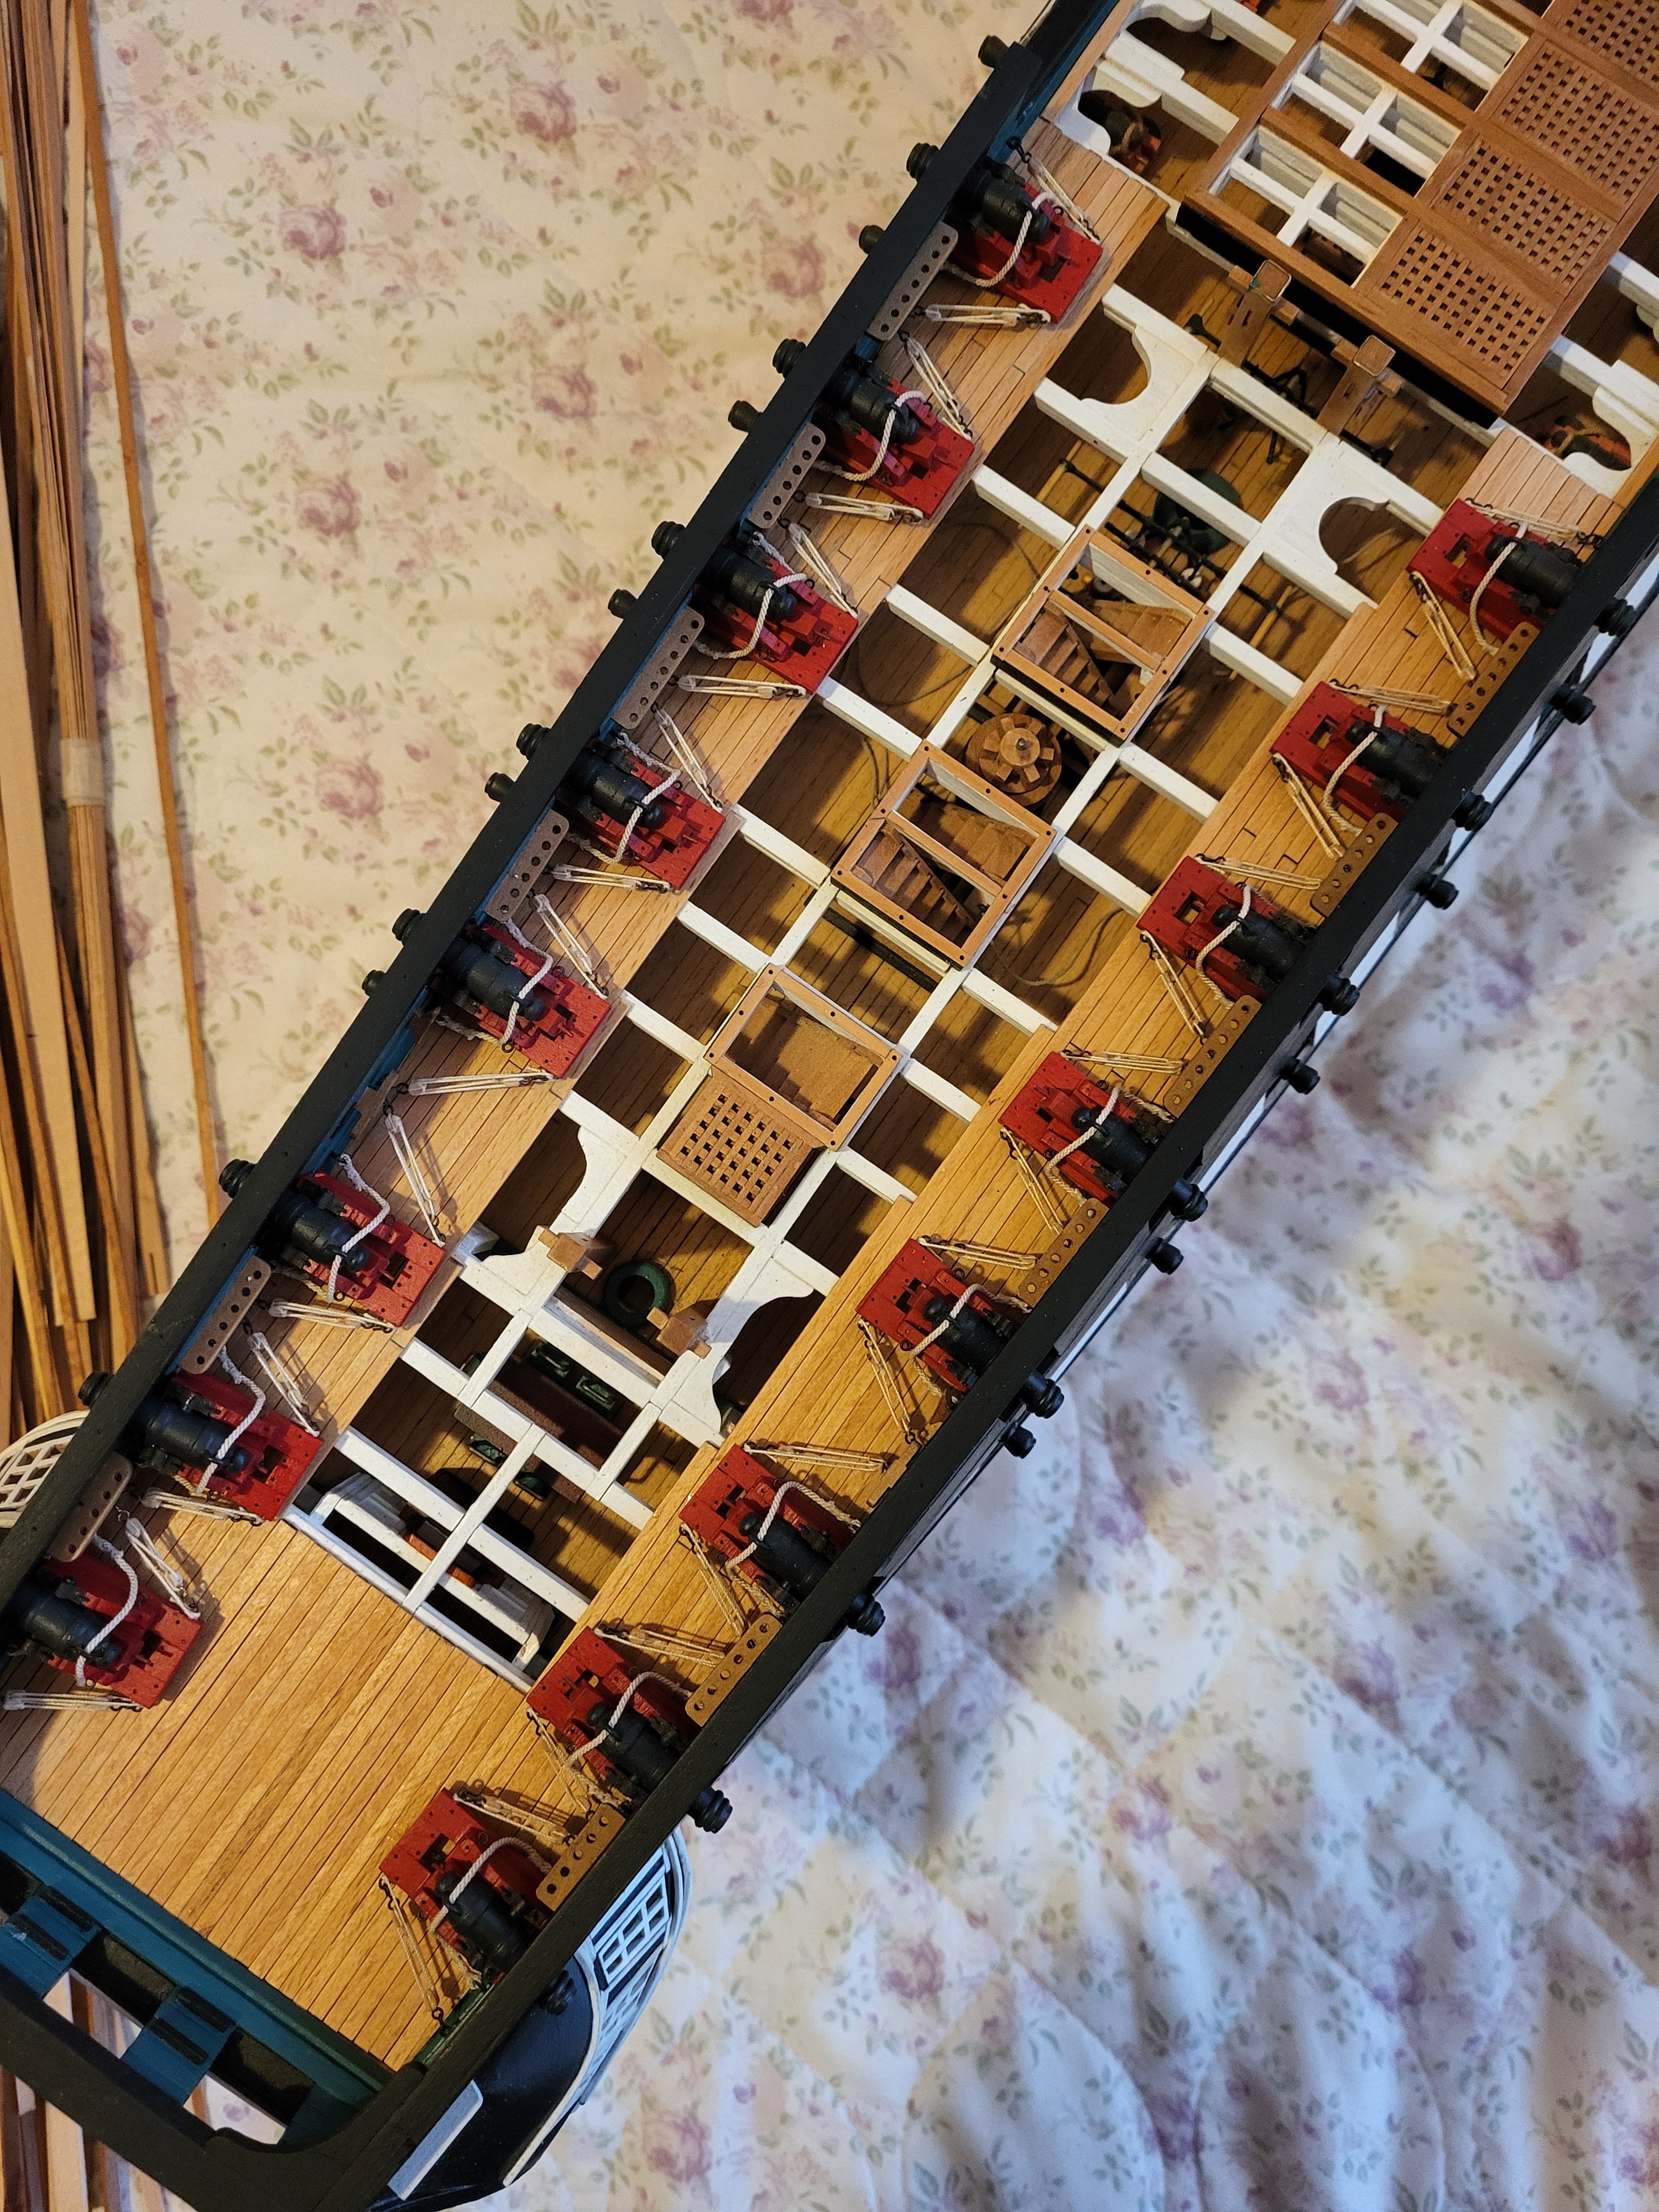
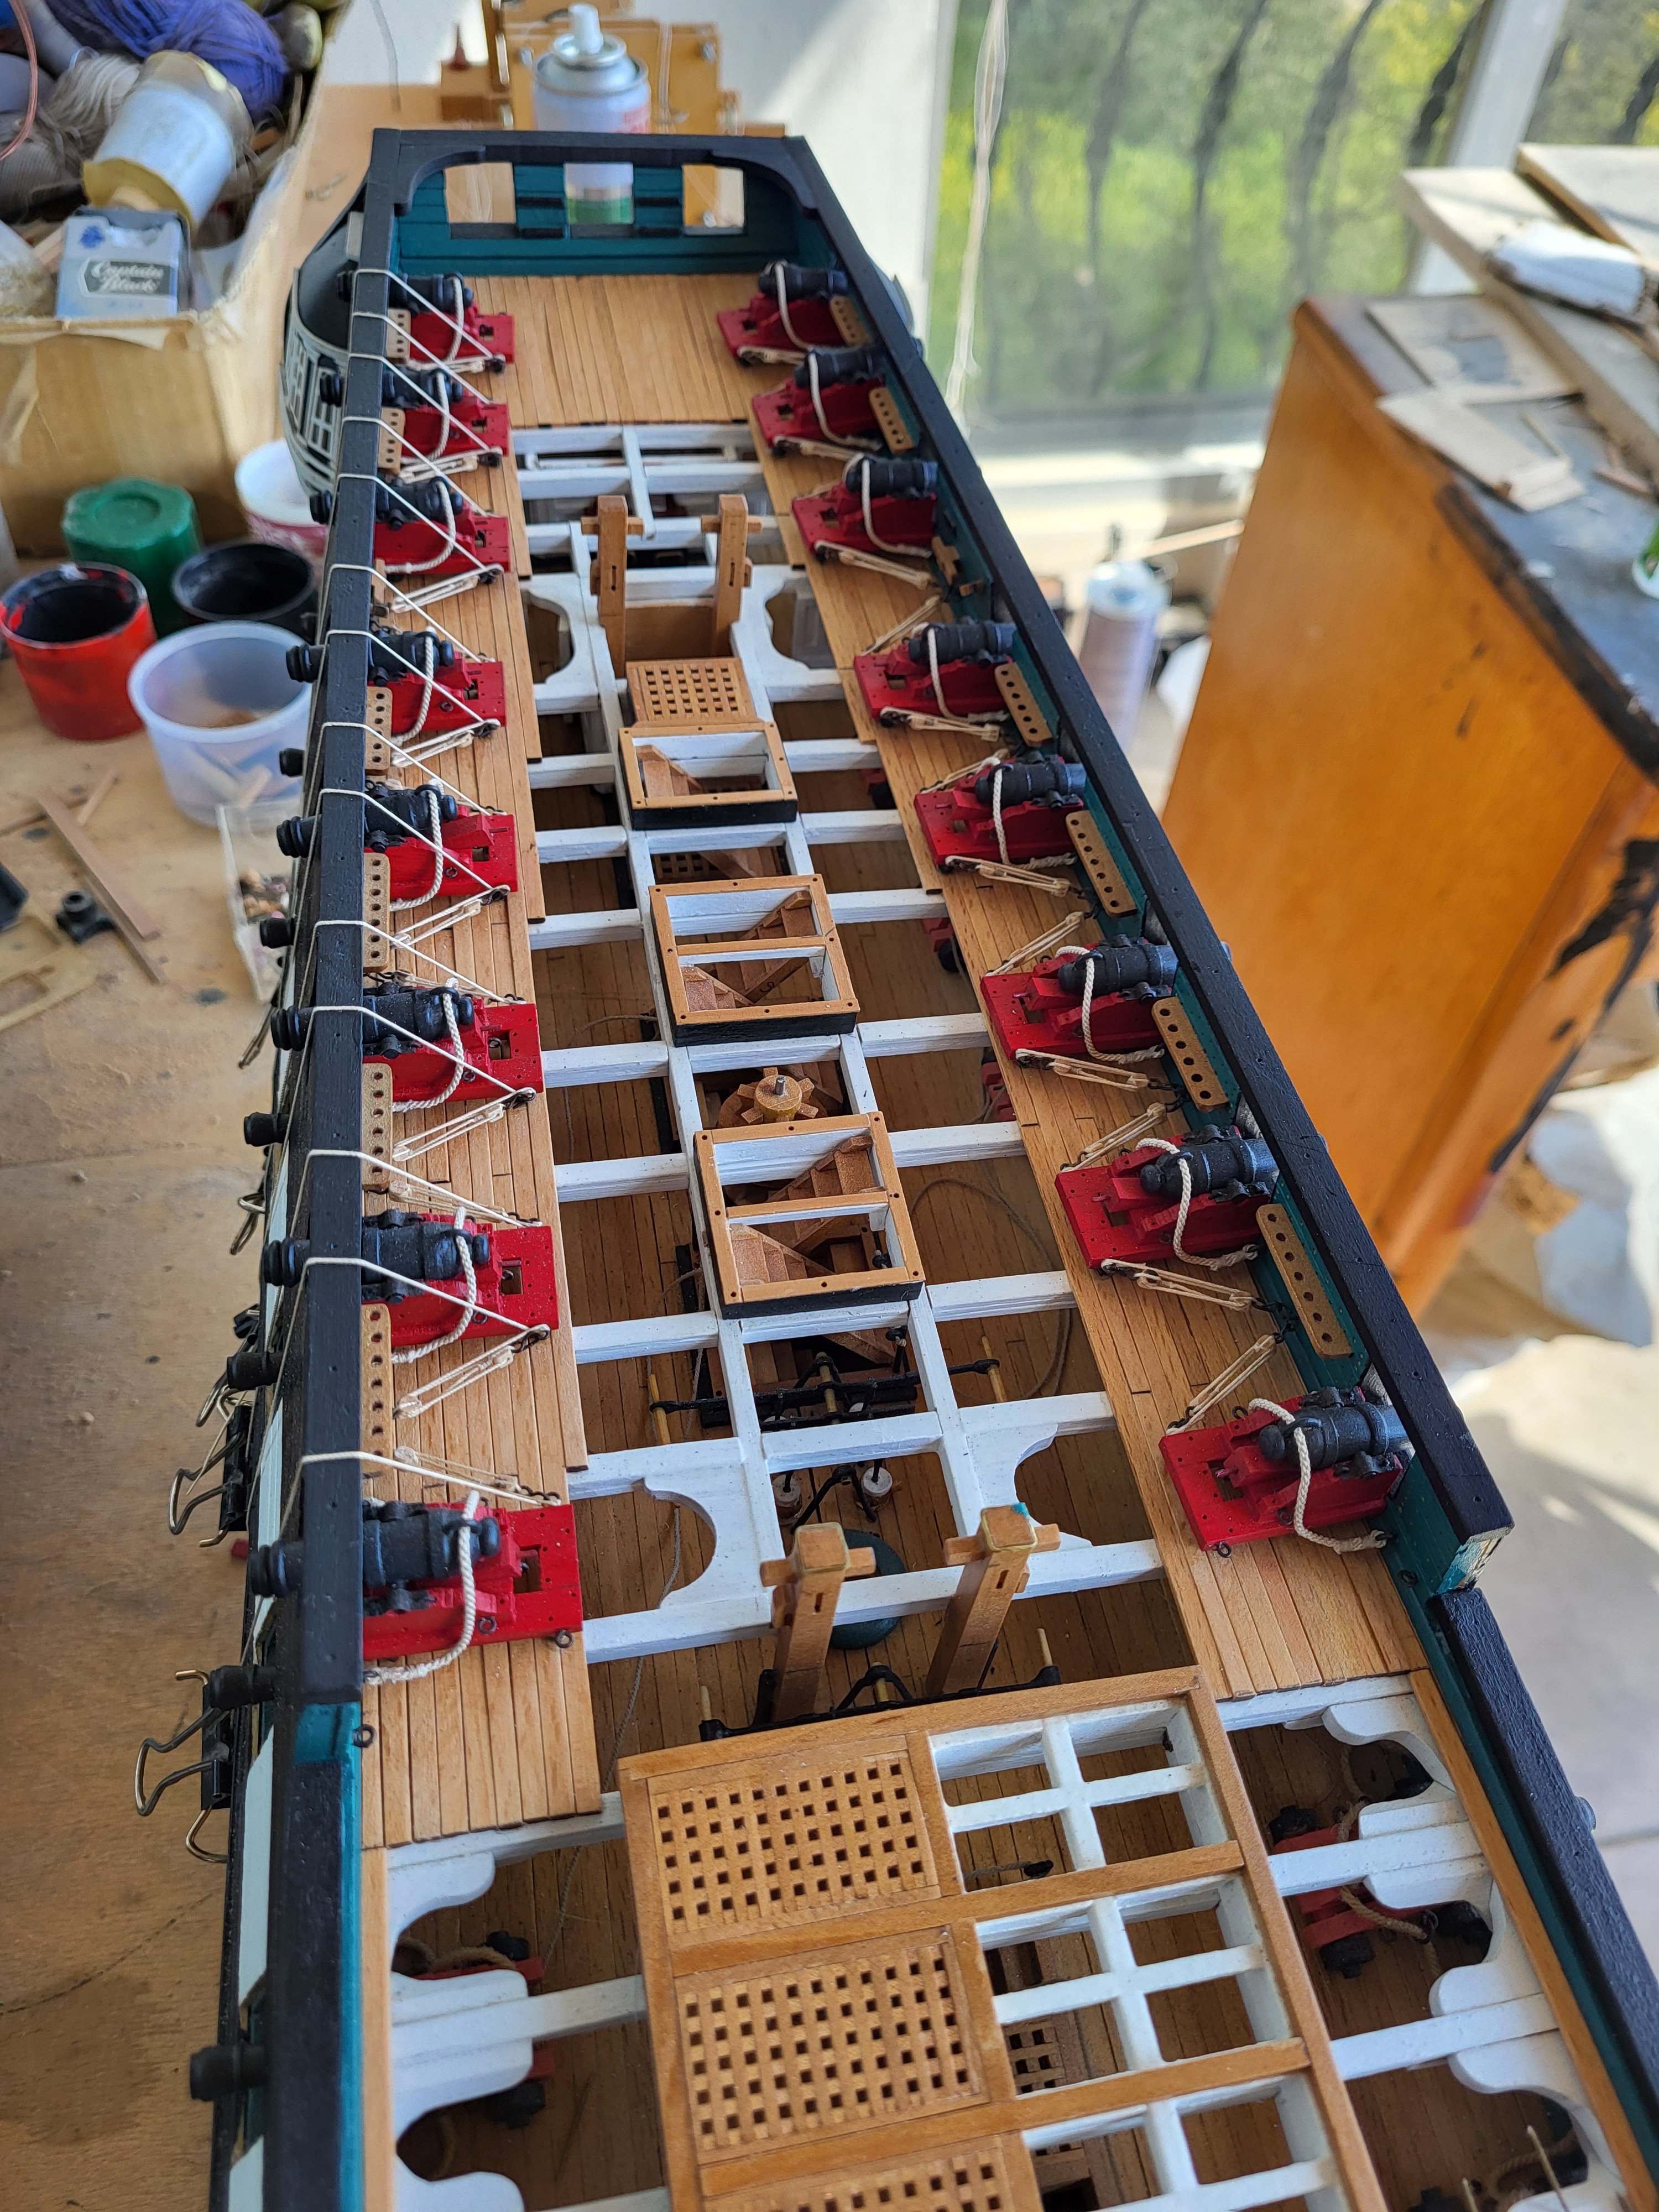
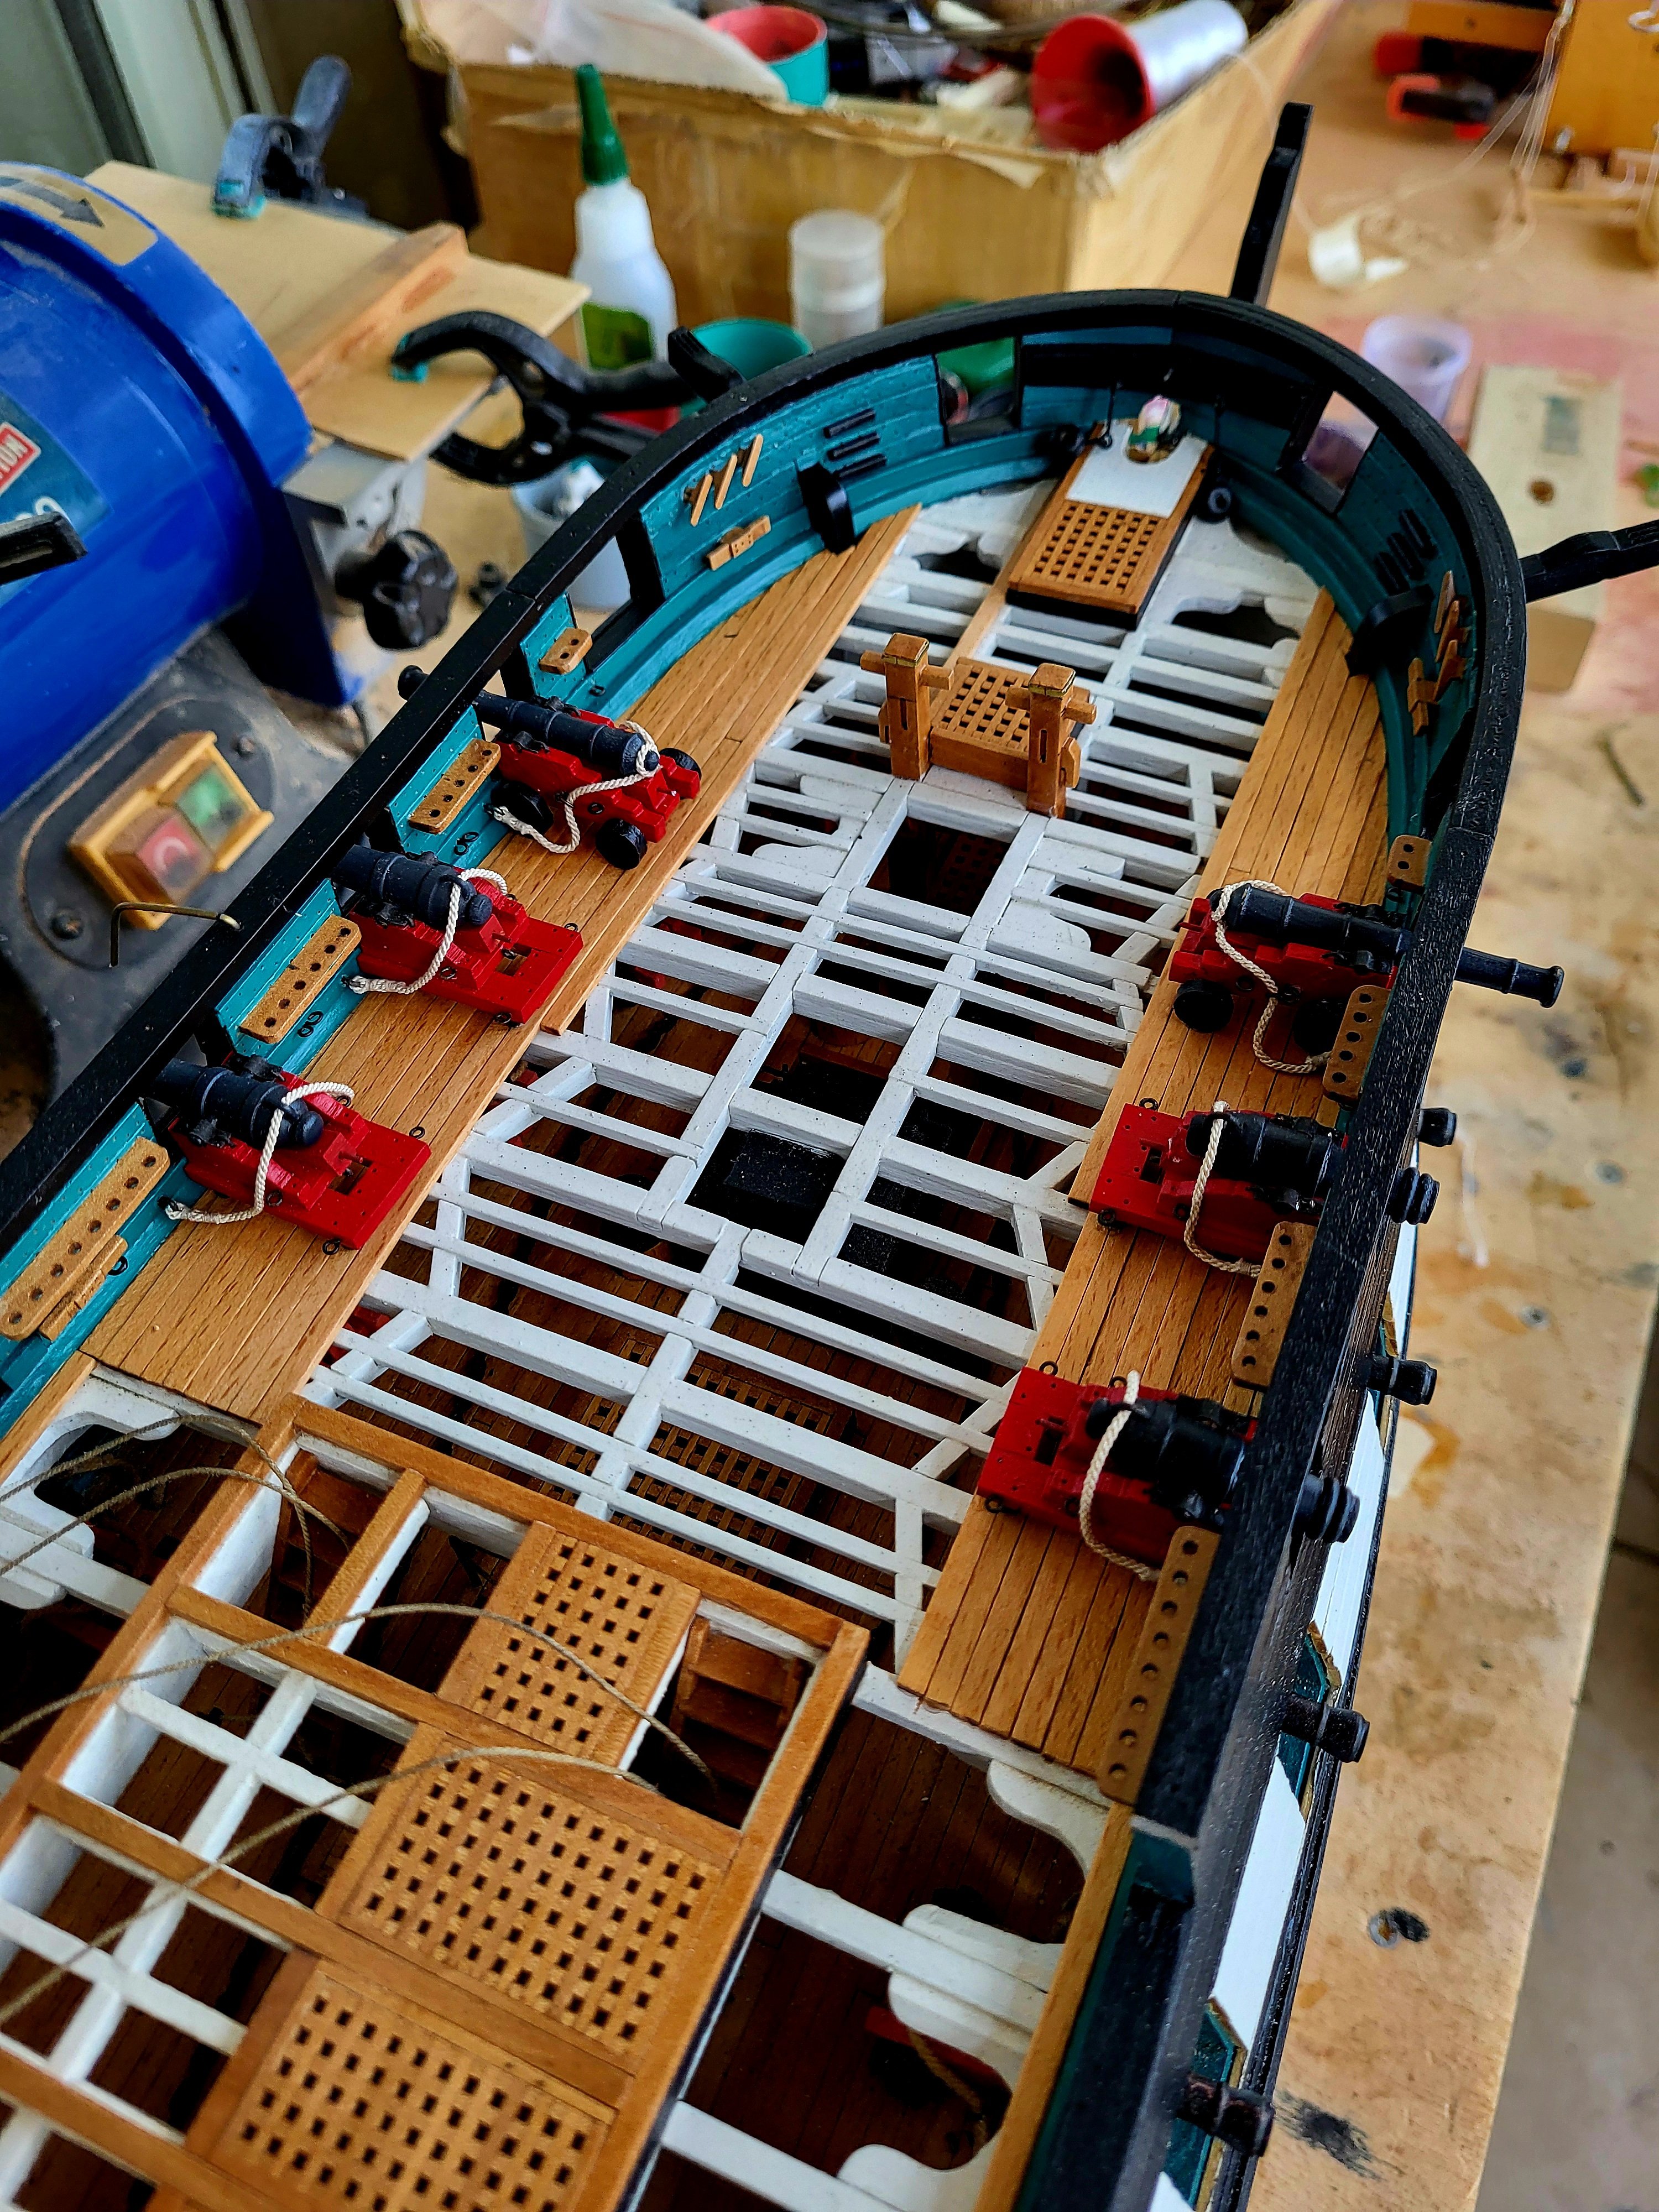
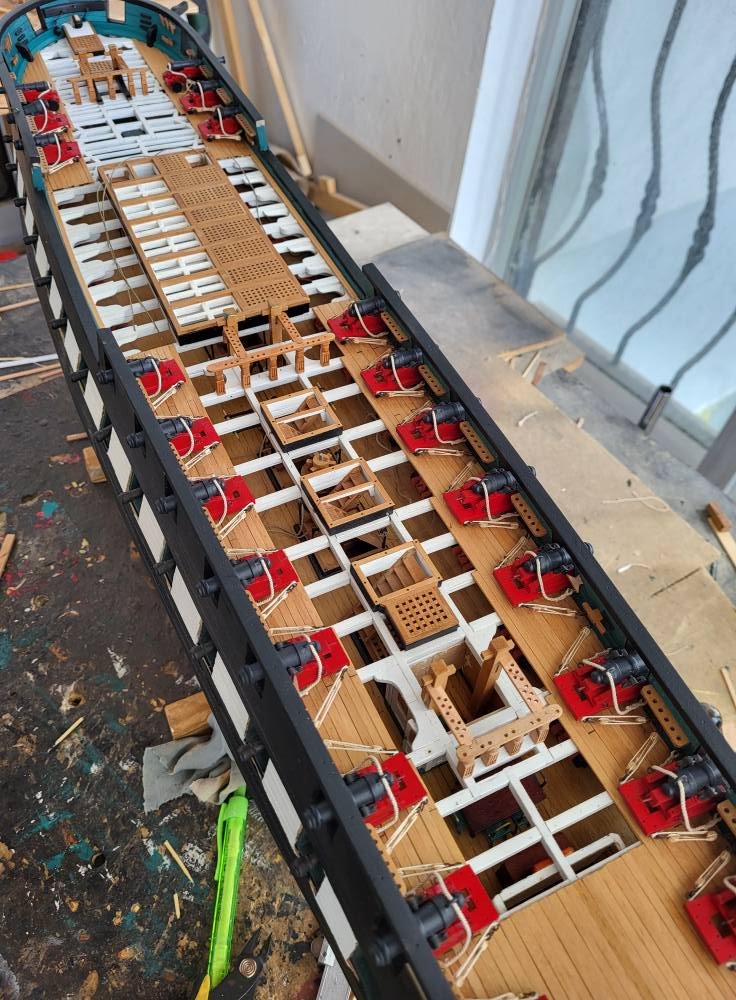
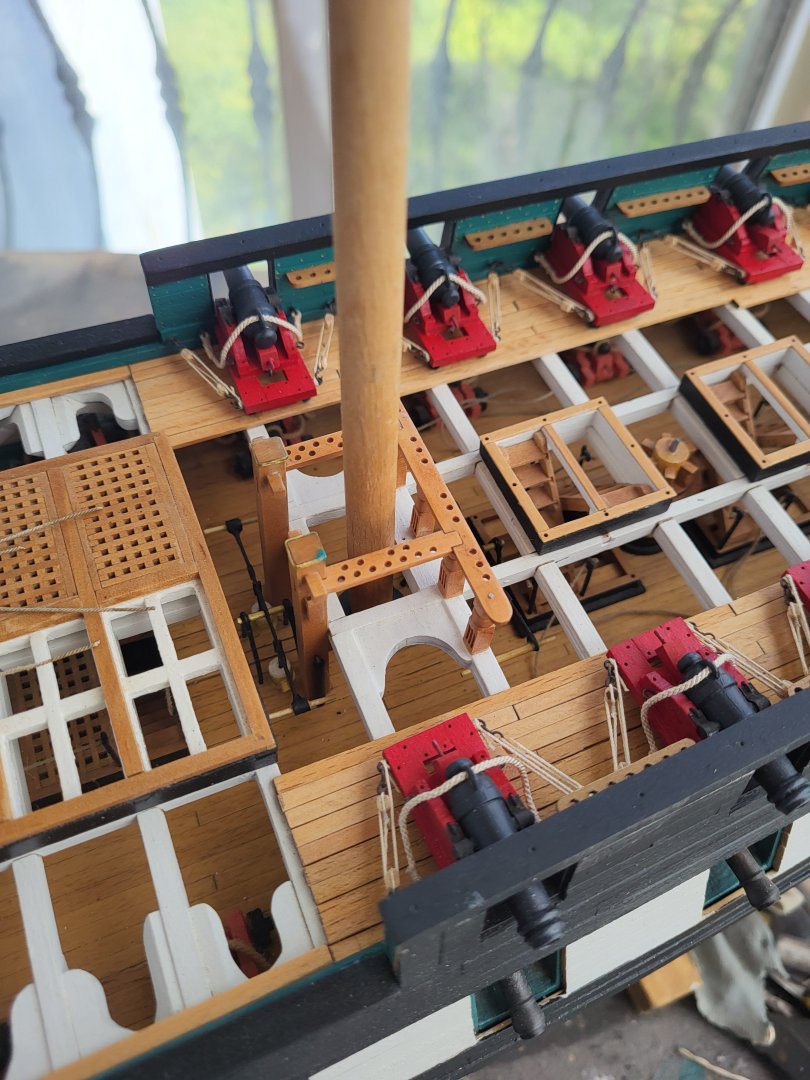
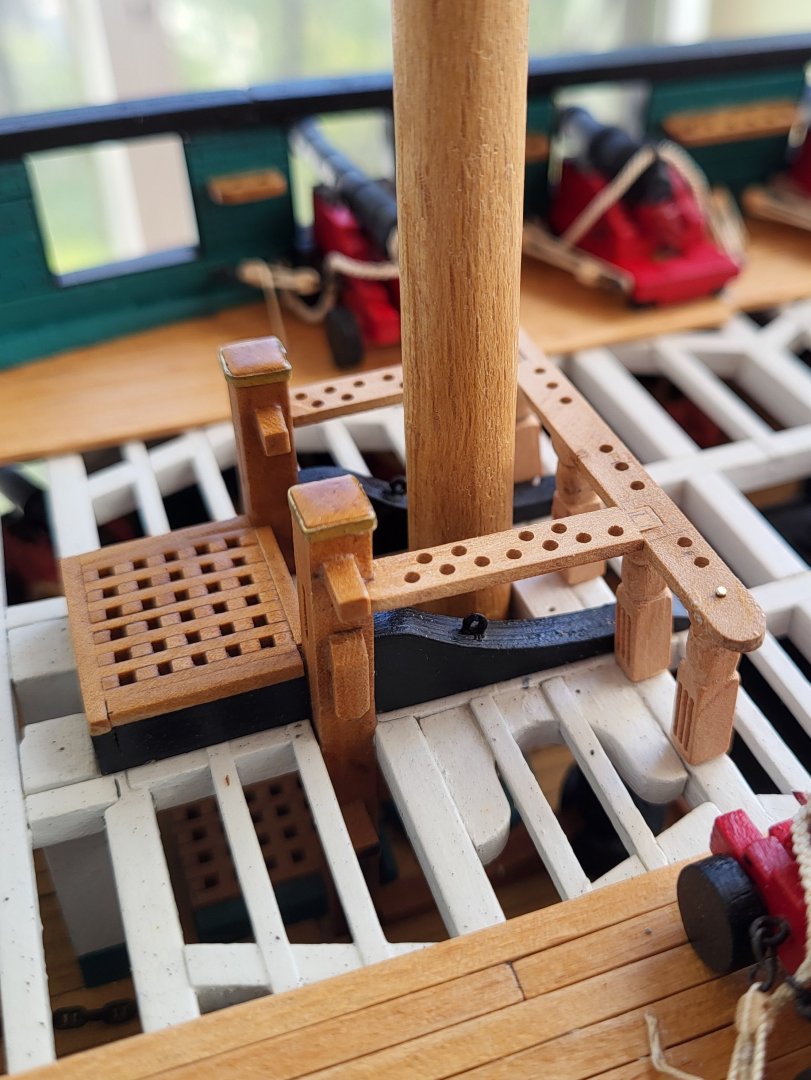
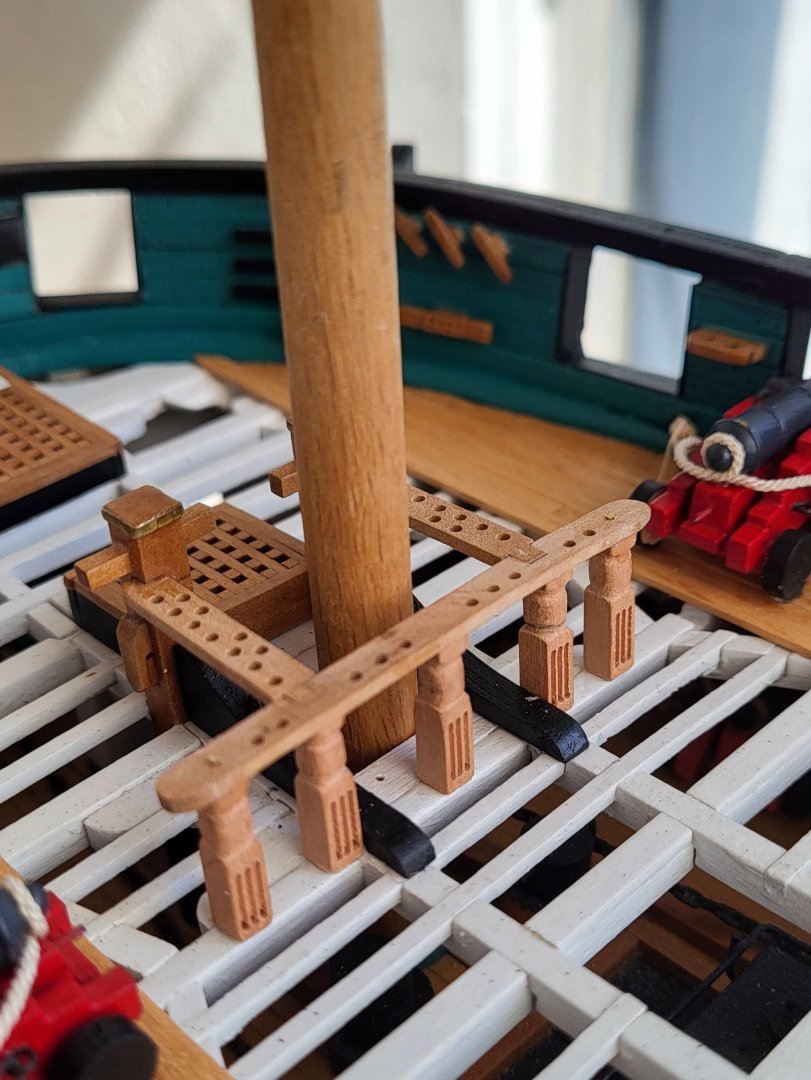
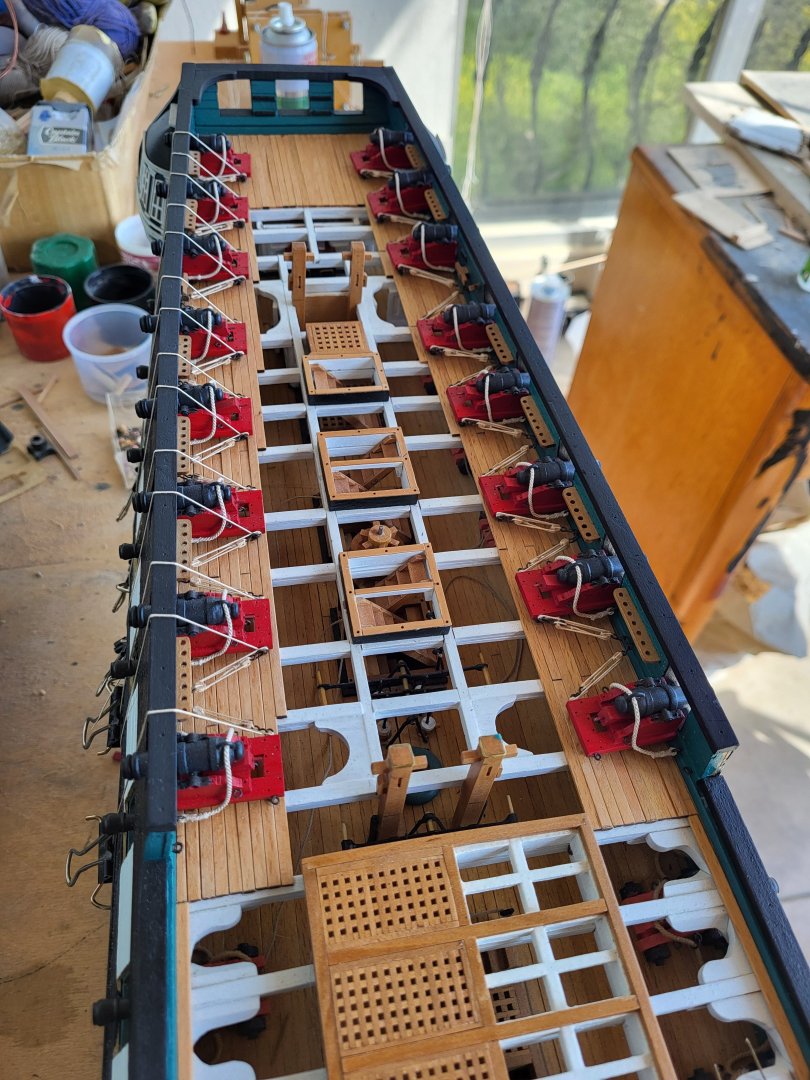
Thanks Greg. Yes, the masts go under the gun deck and fit into slots in the false keel. You can see these slots in the MS kit plan. You can also see the mast holes in the gun deck in the photo.
-
USS Constitution by mtbediz - 1:76
mtbediz replied to mtbediz's topic in - Build logs for subjects built 1751 - 1800
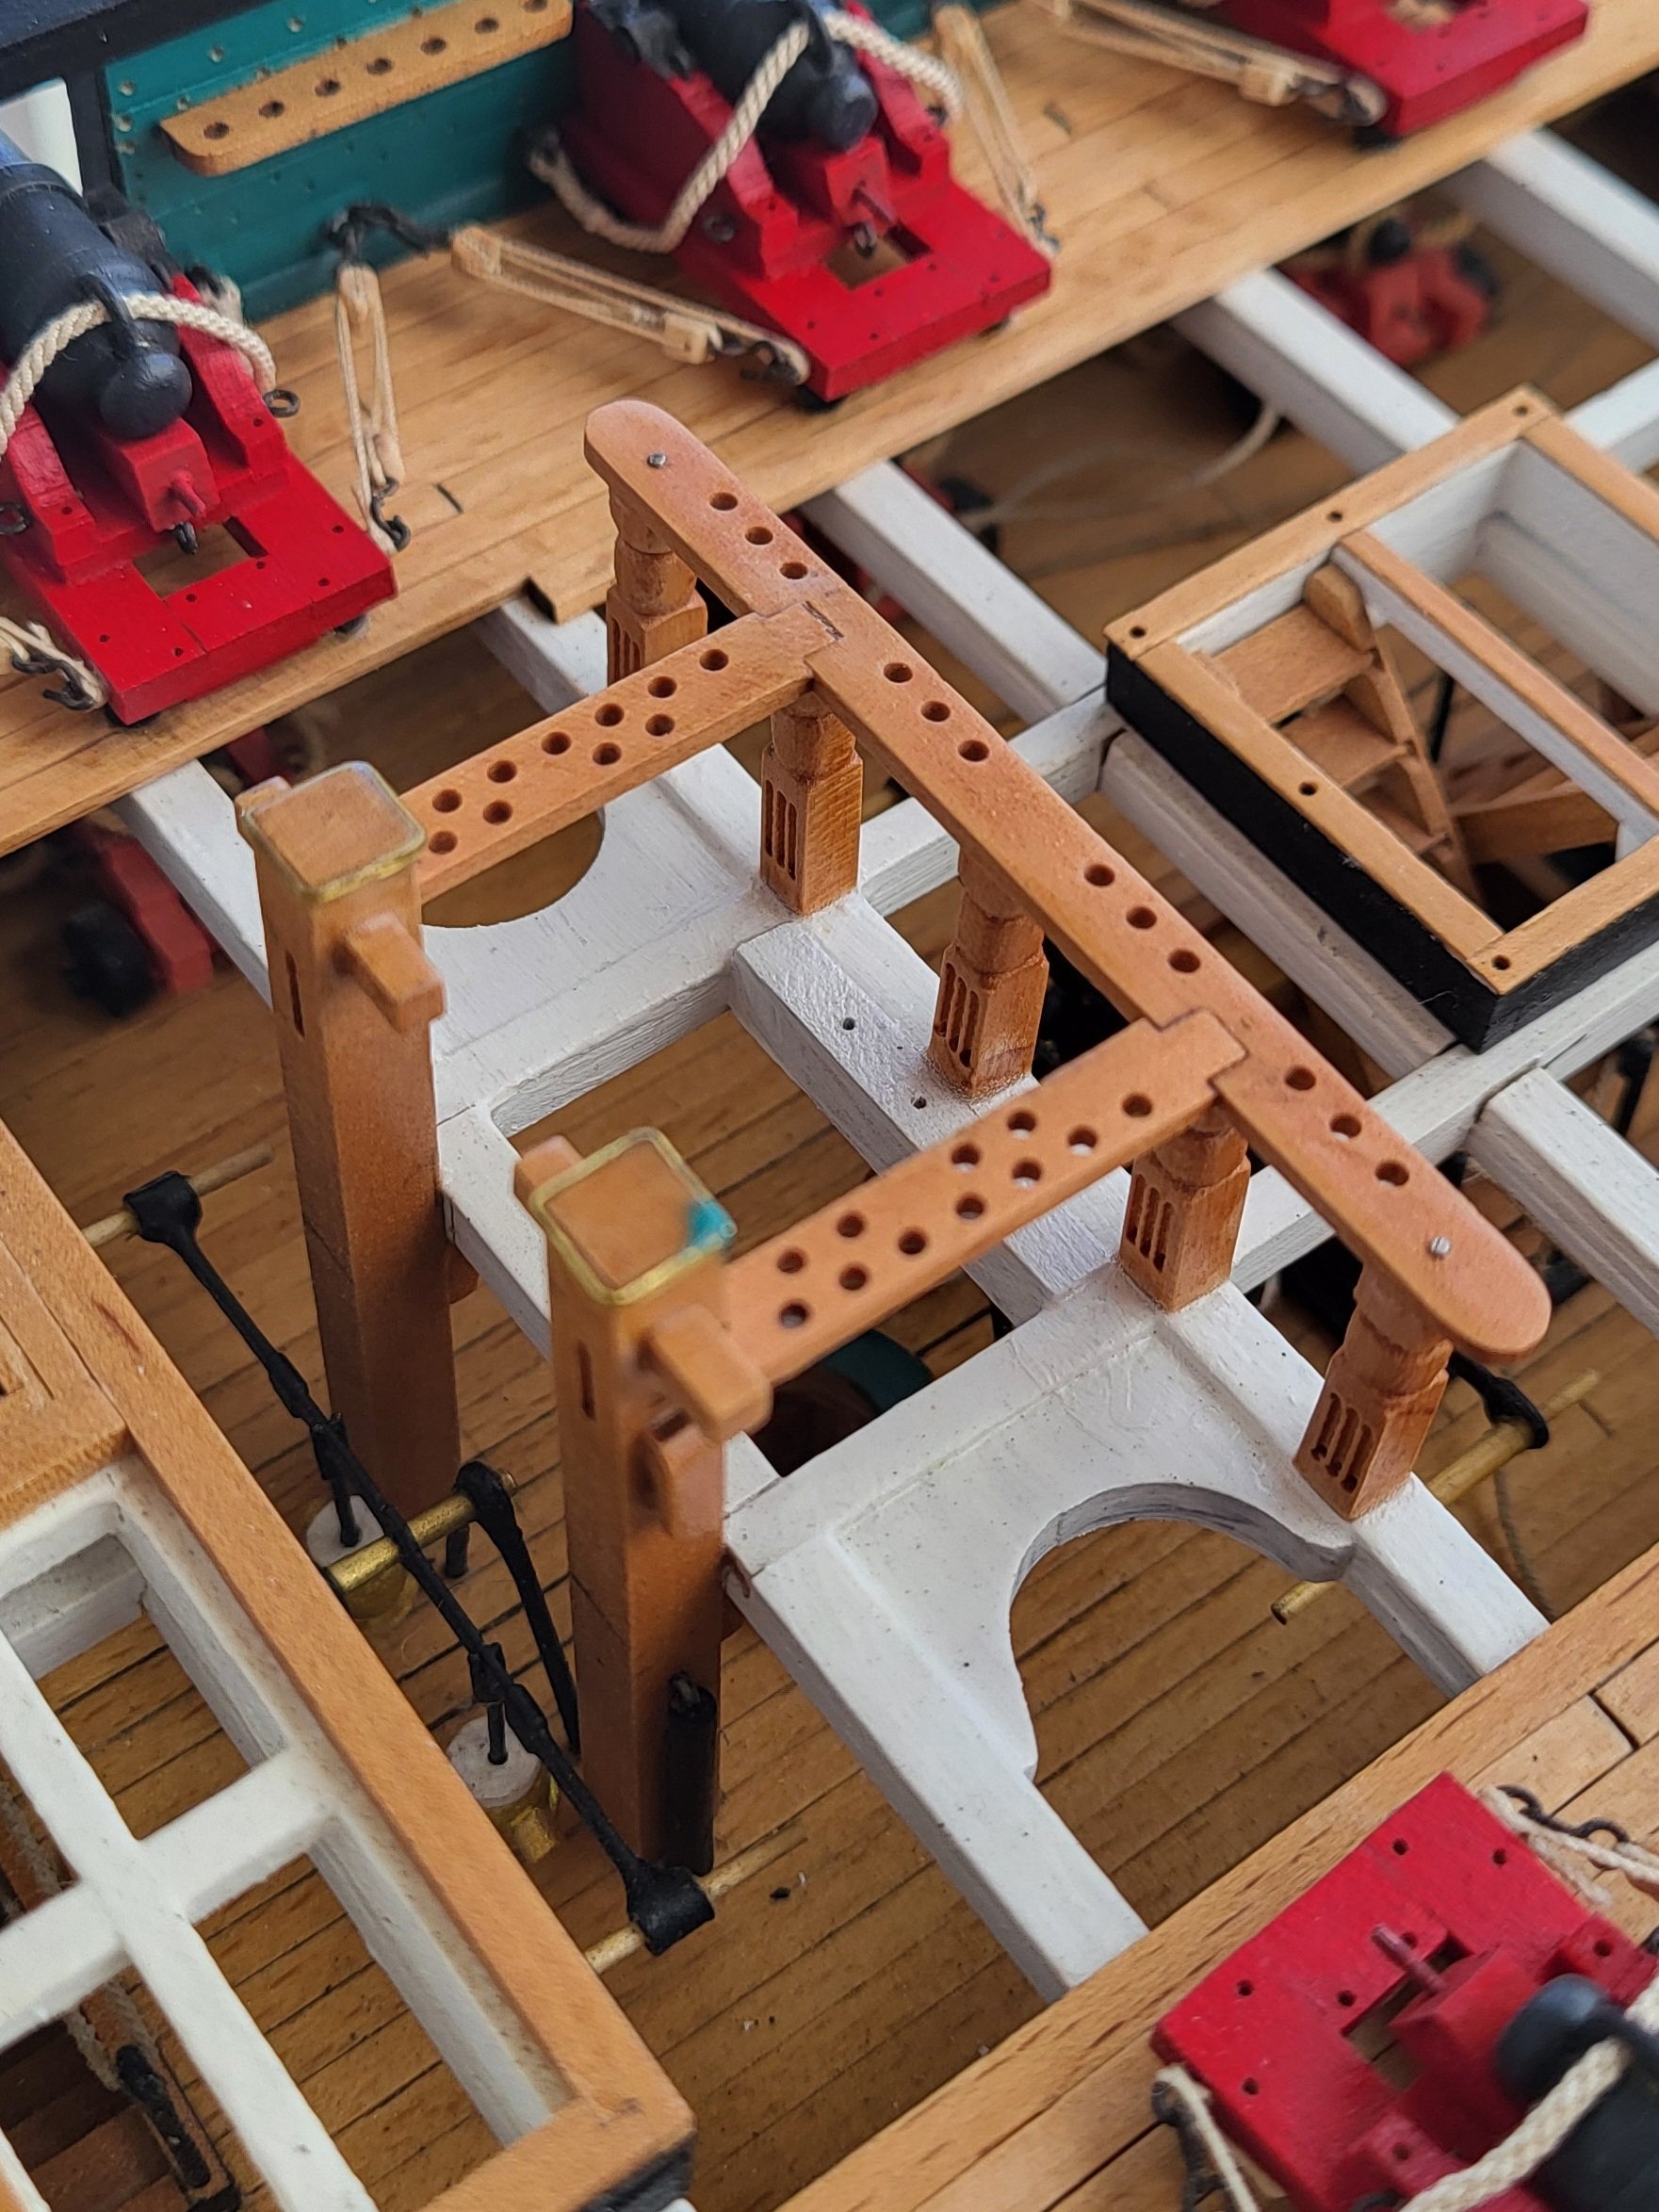
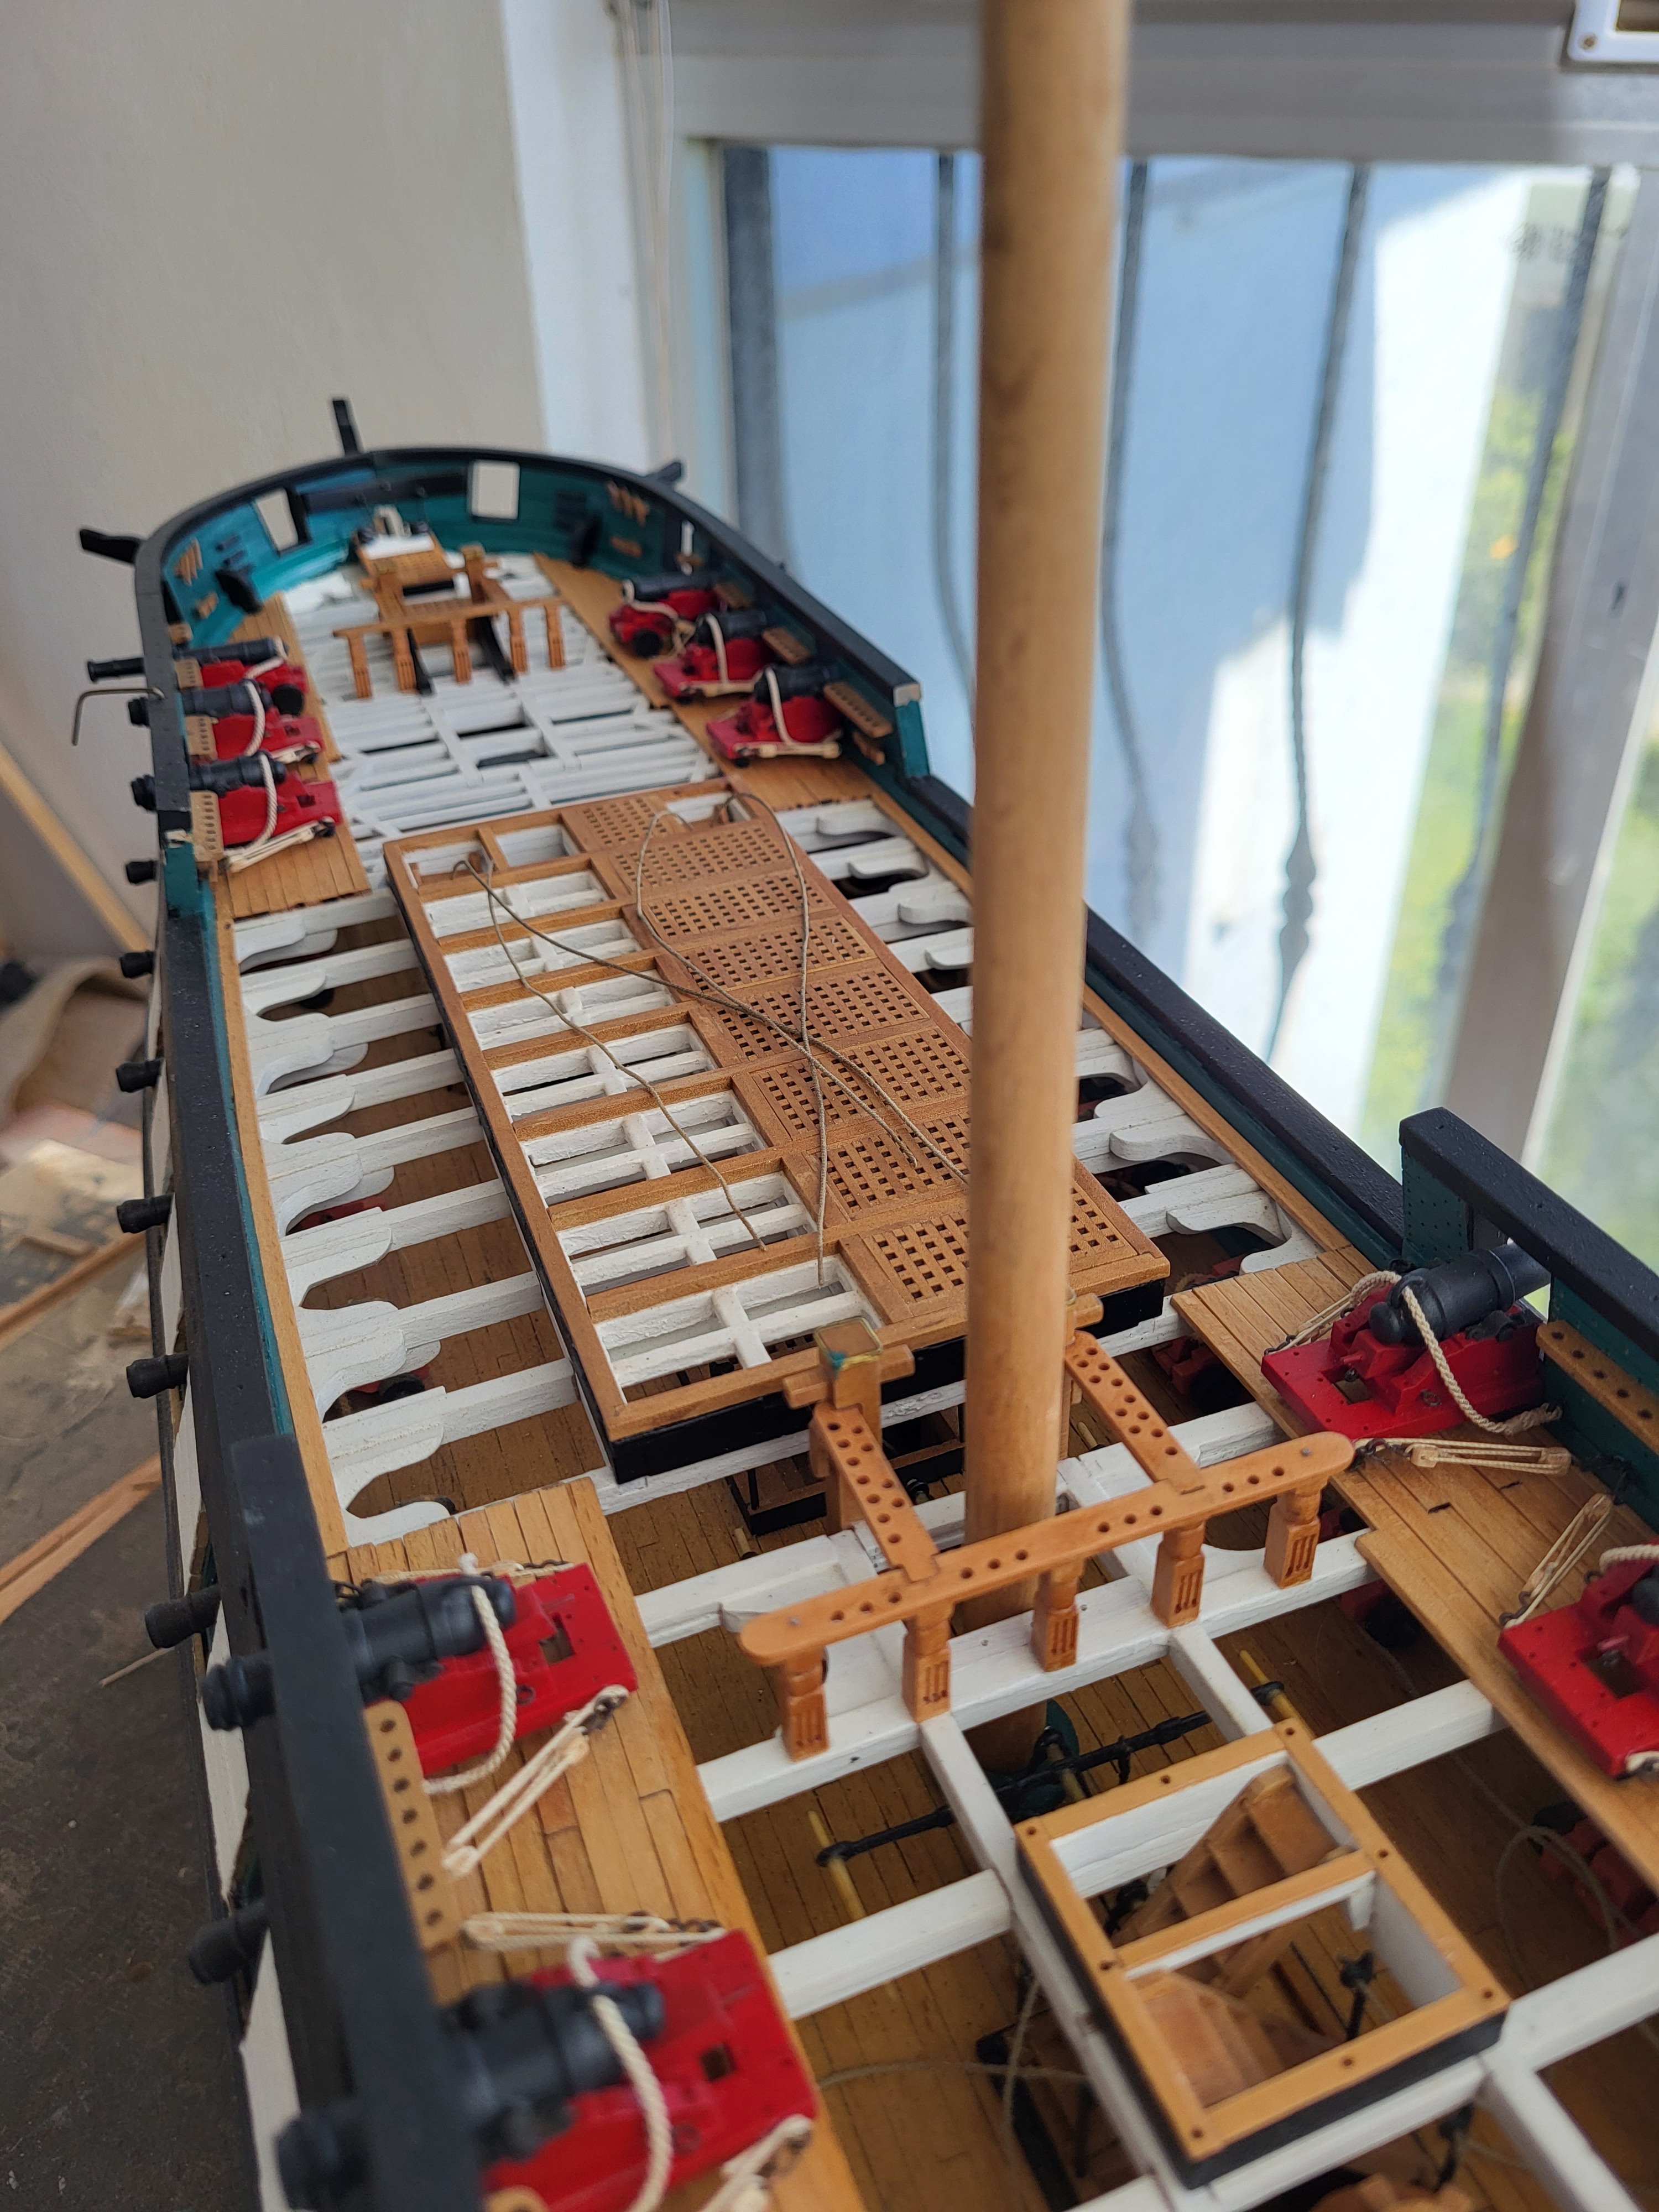
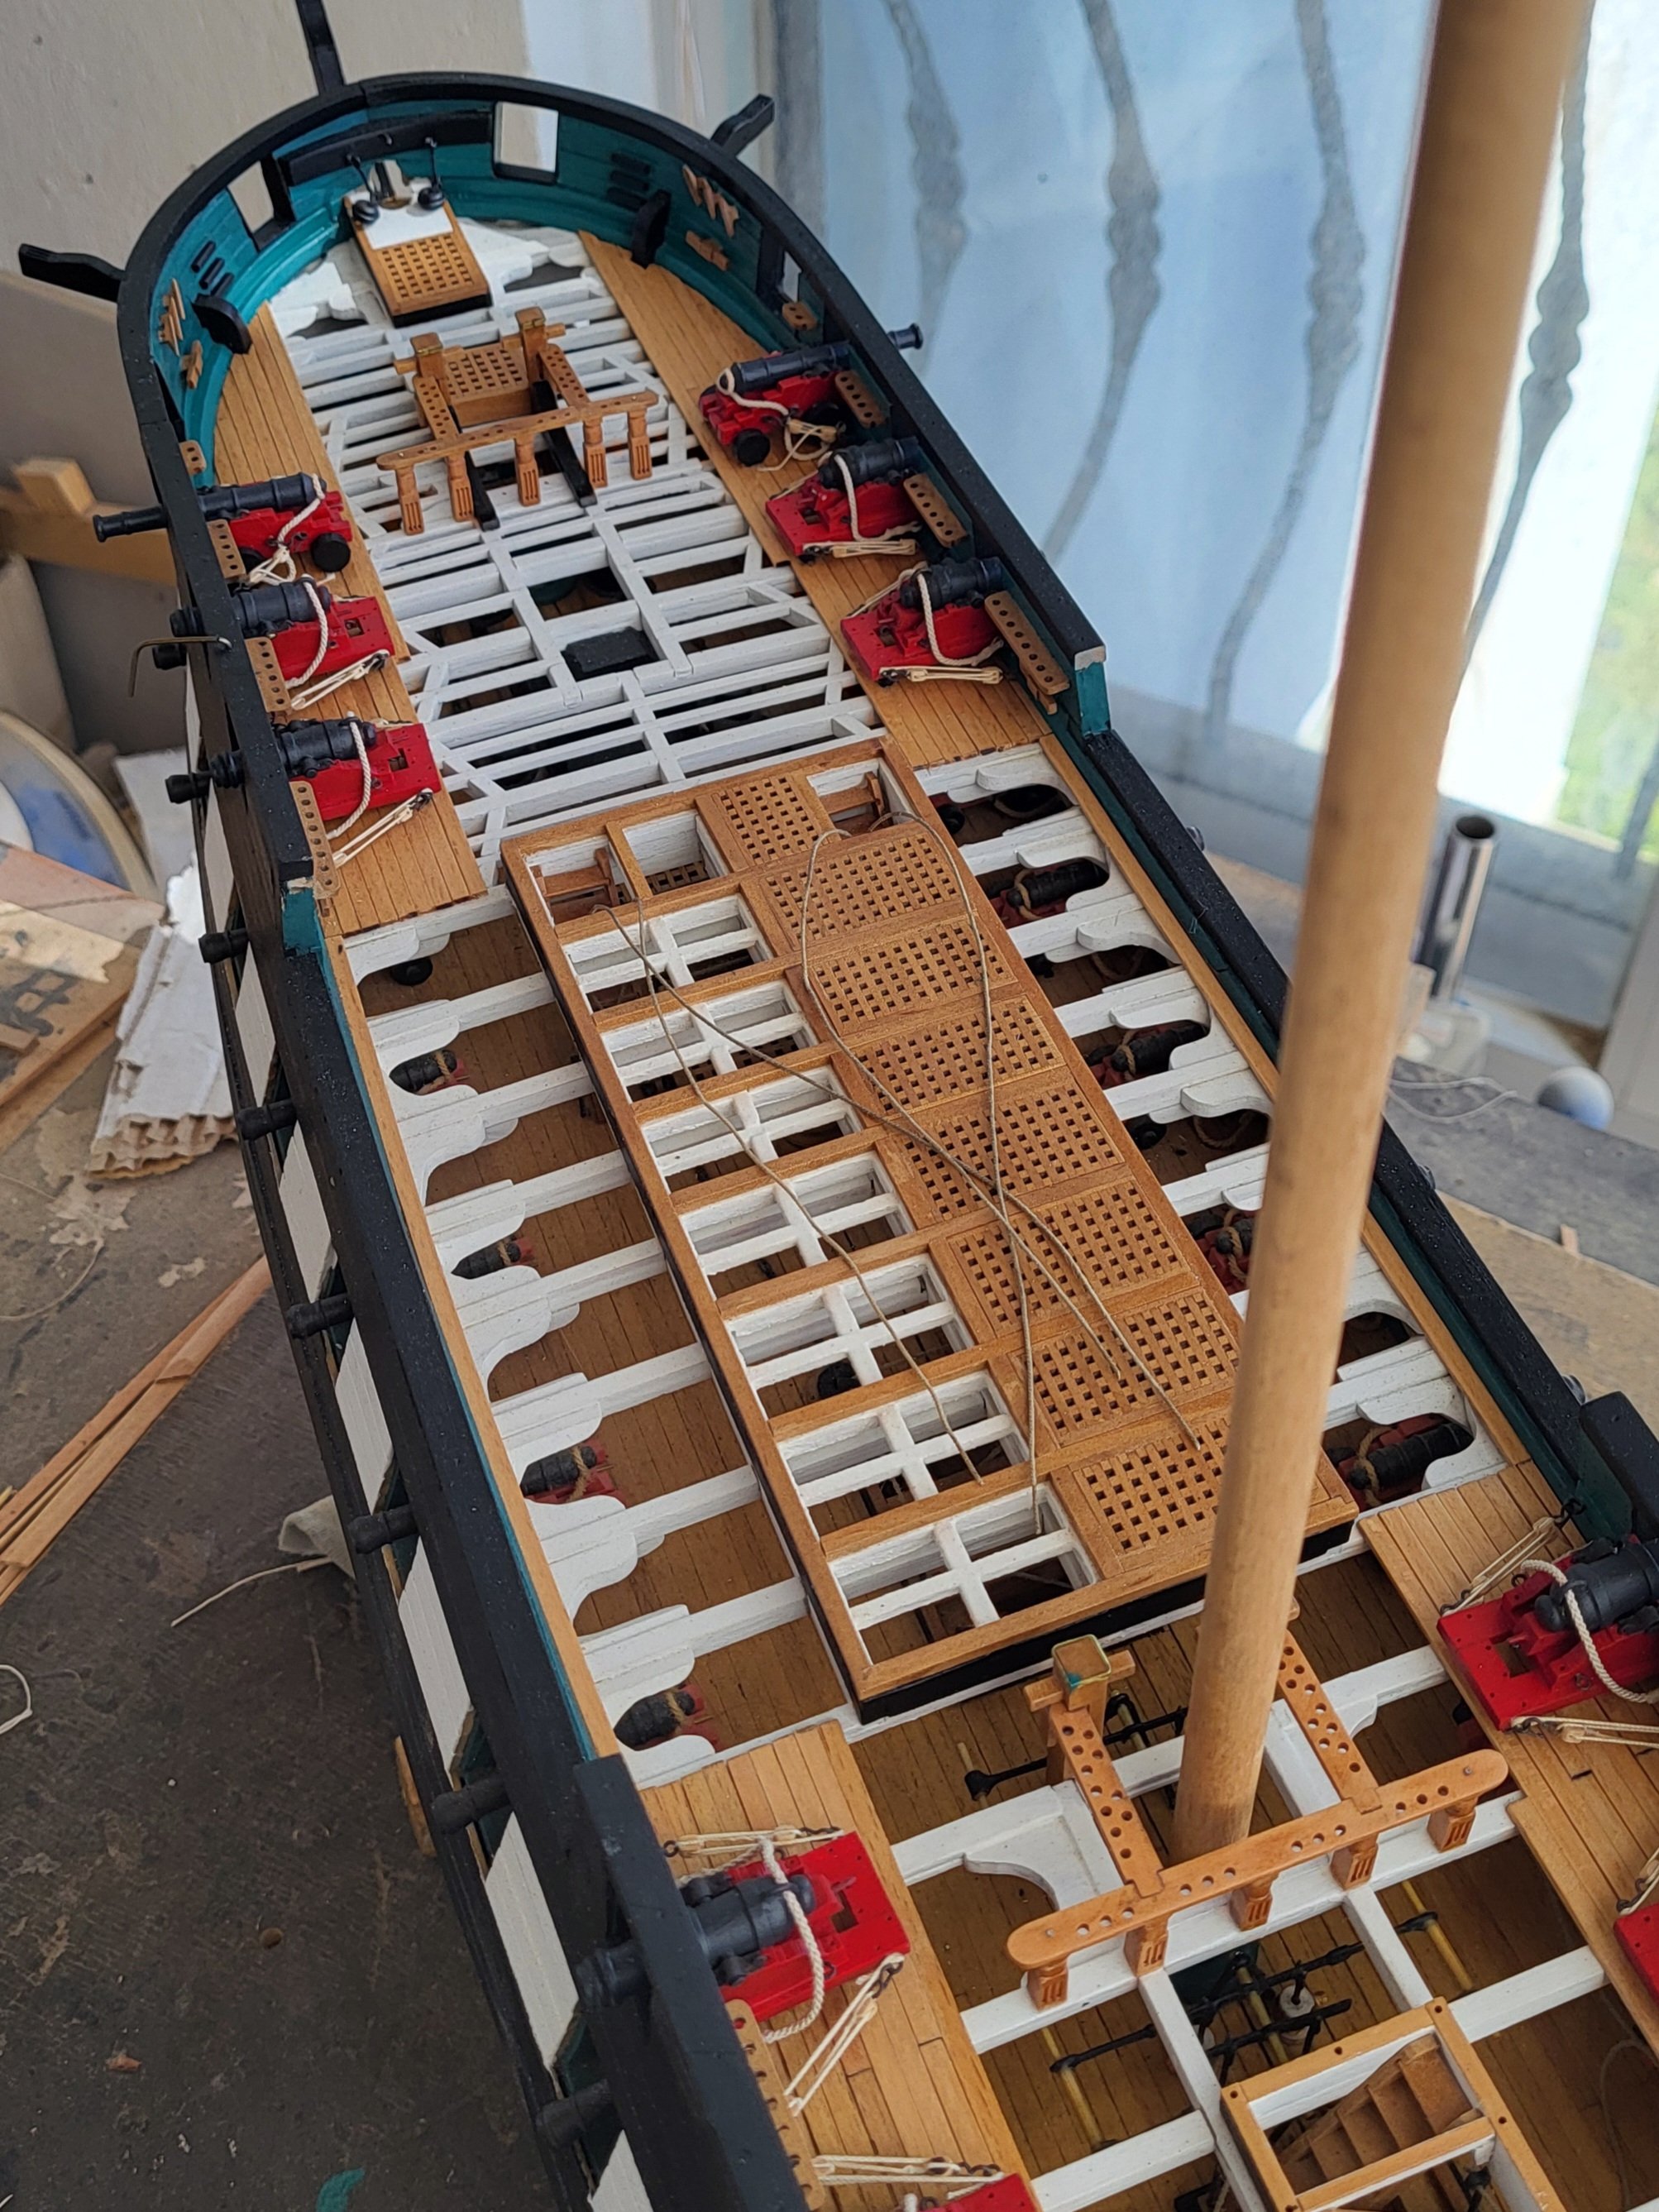
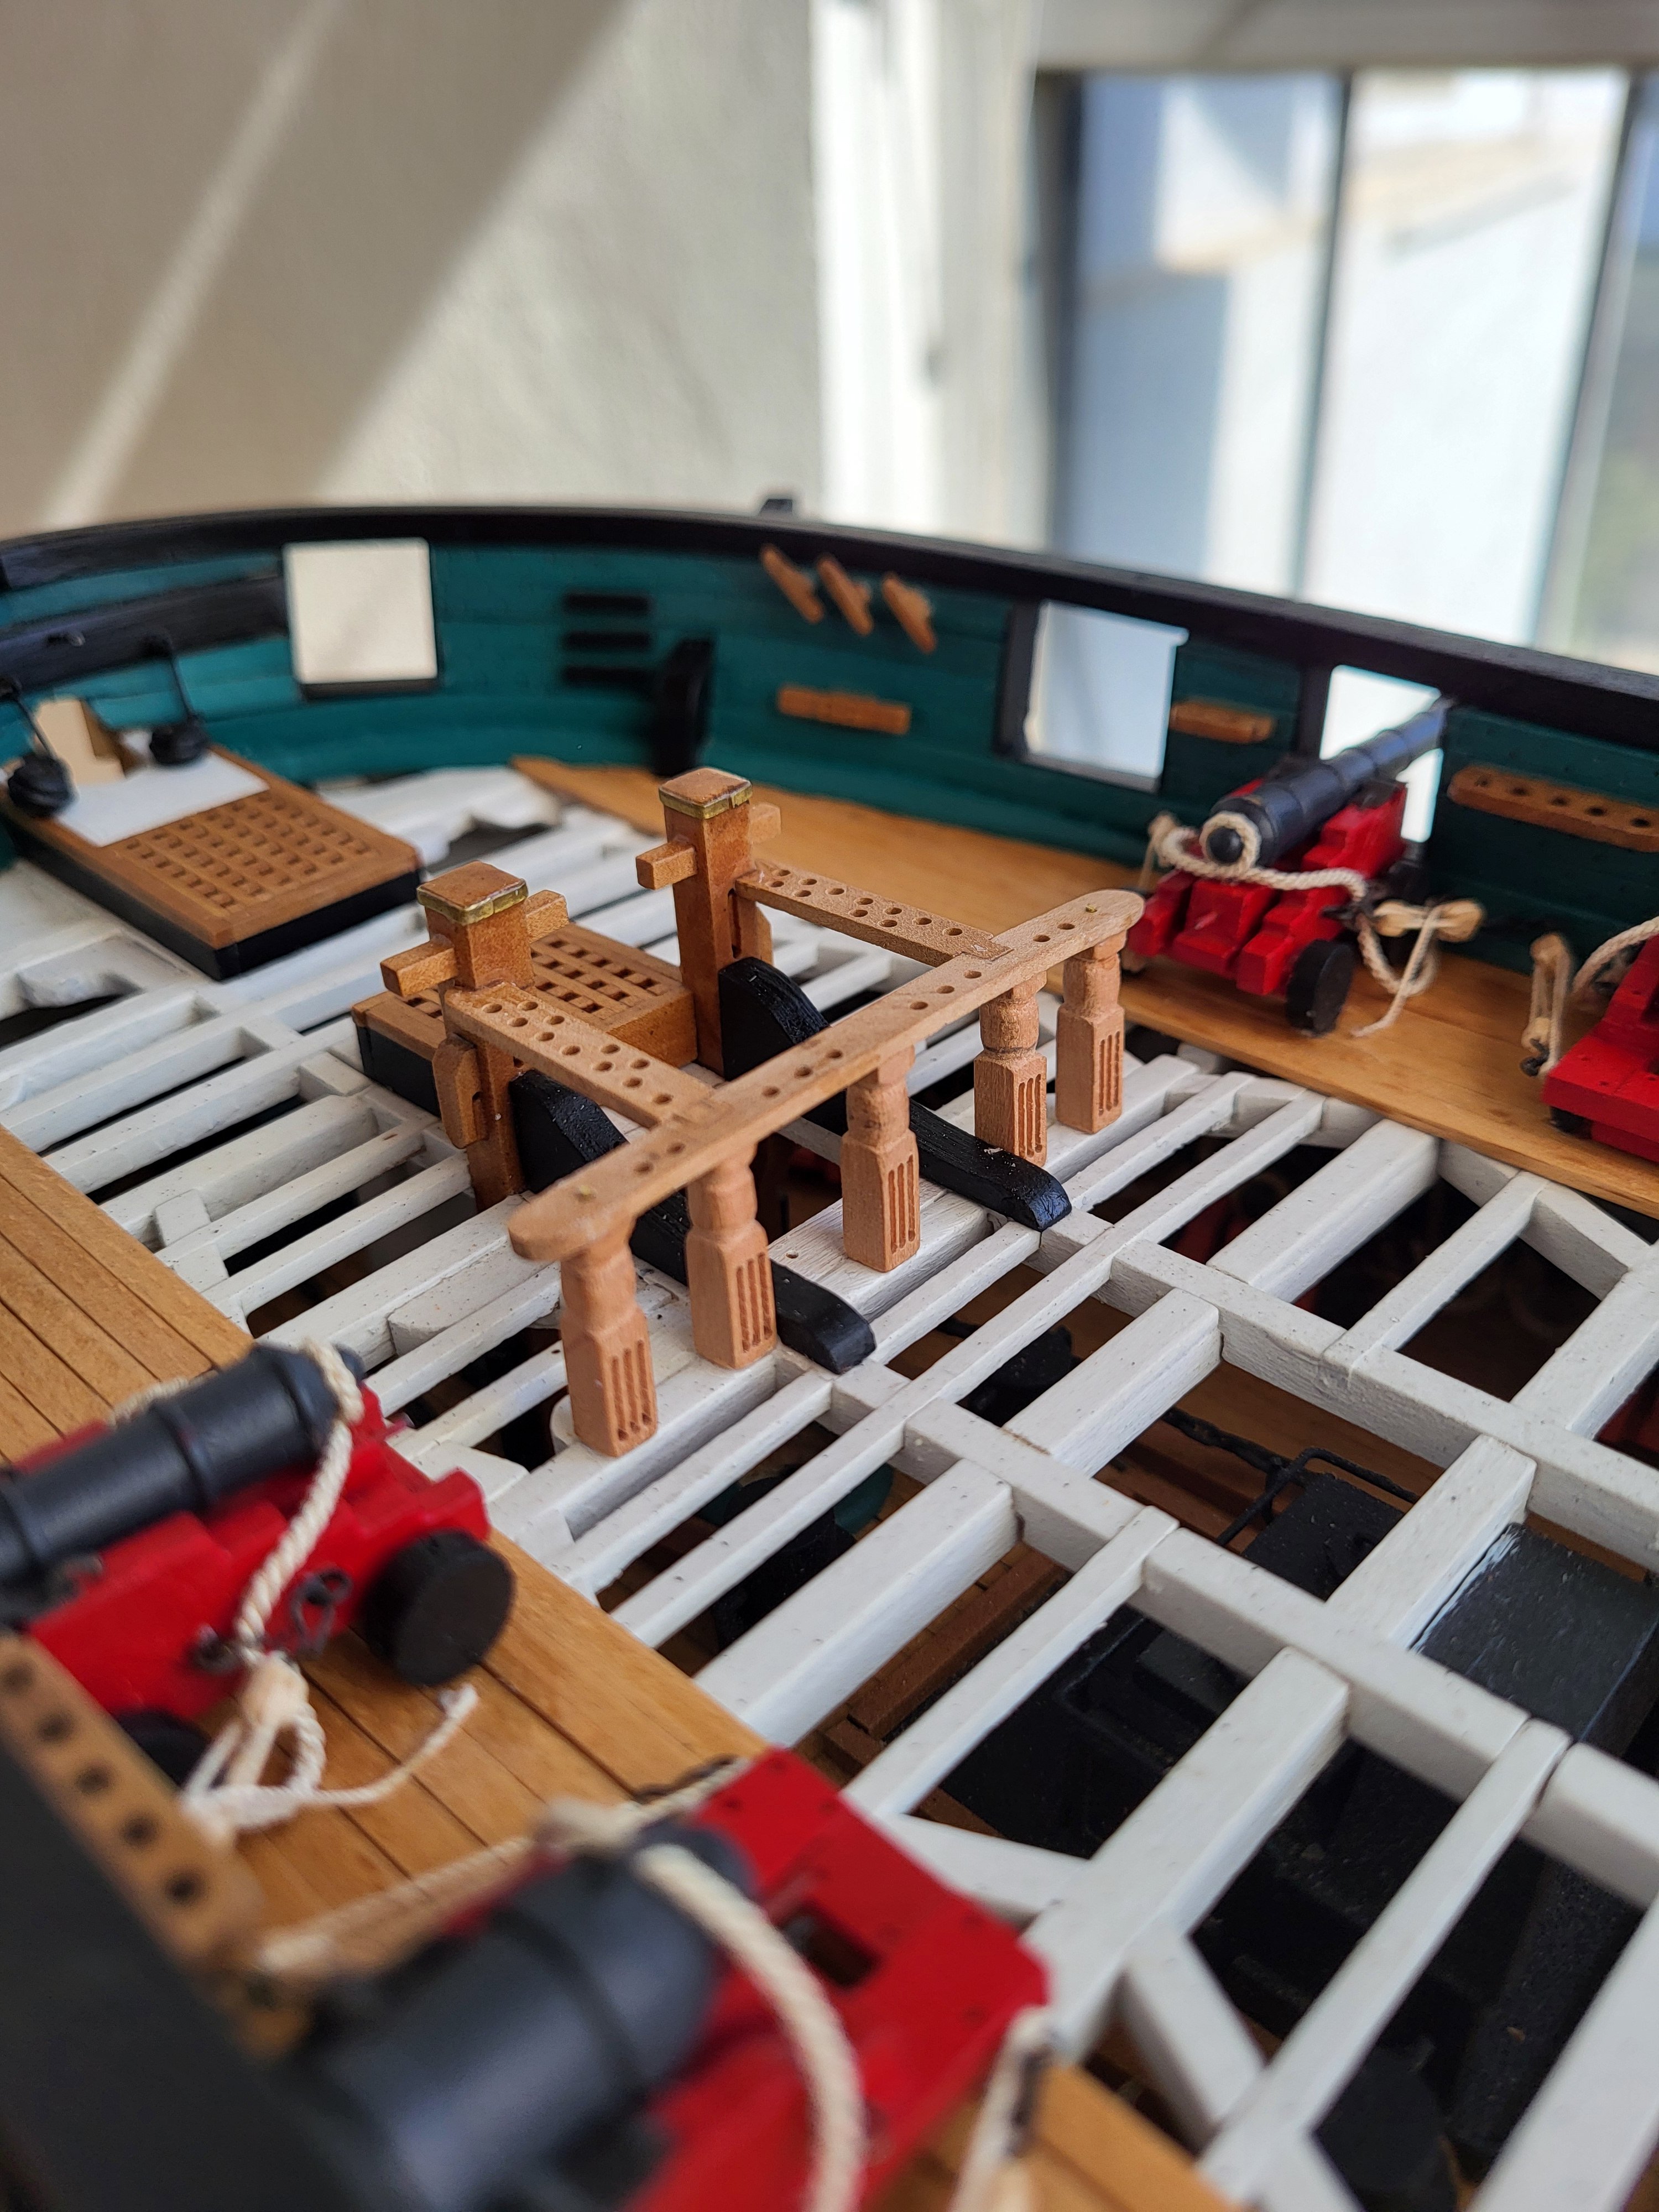
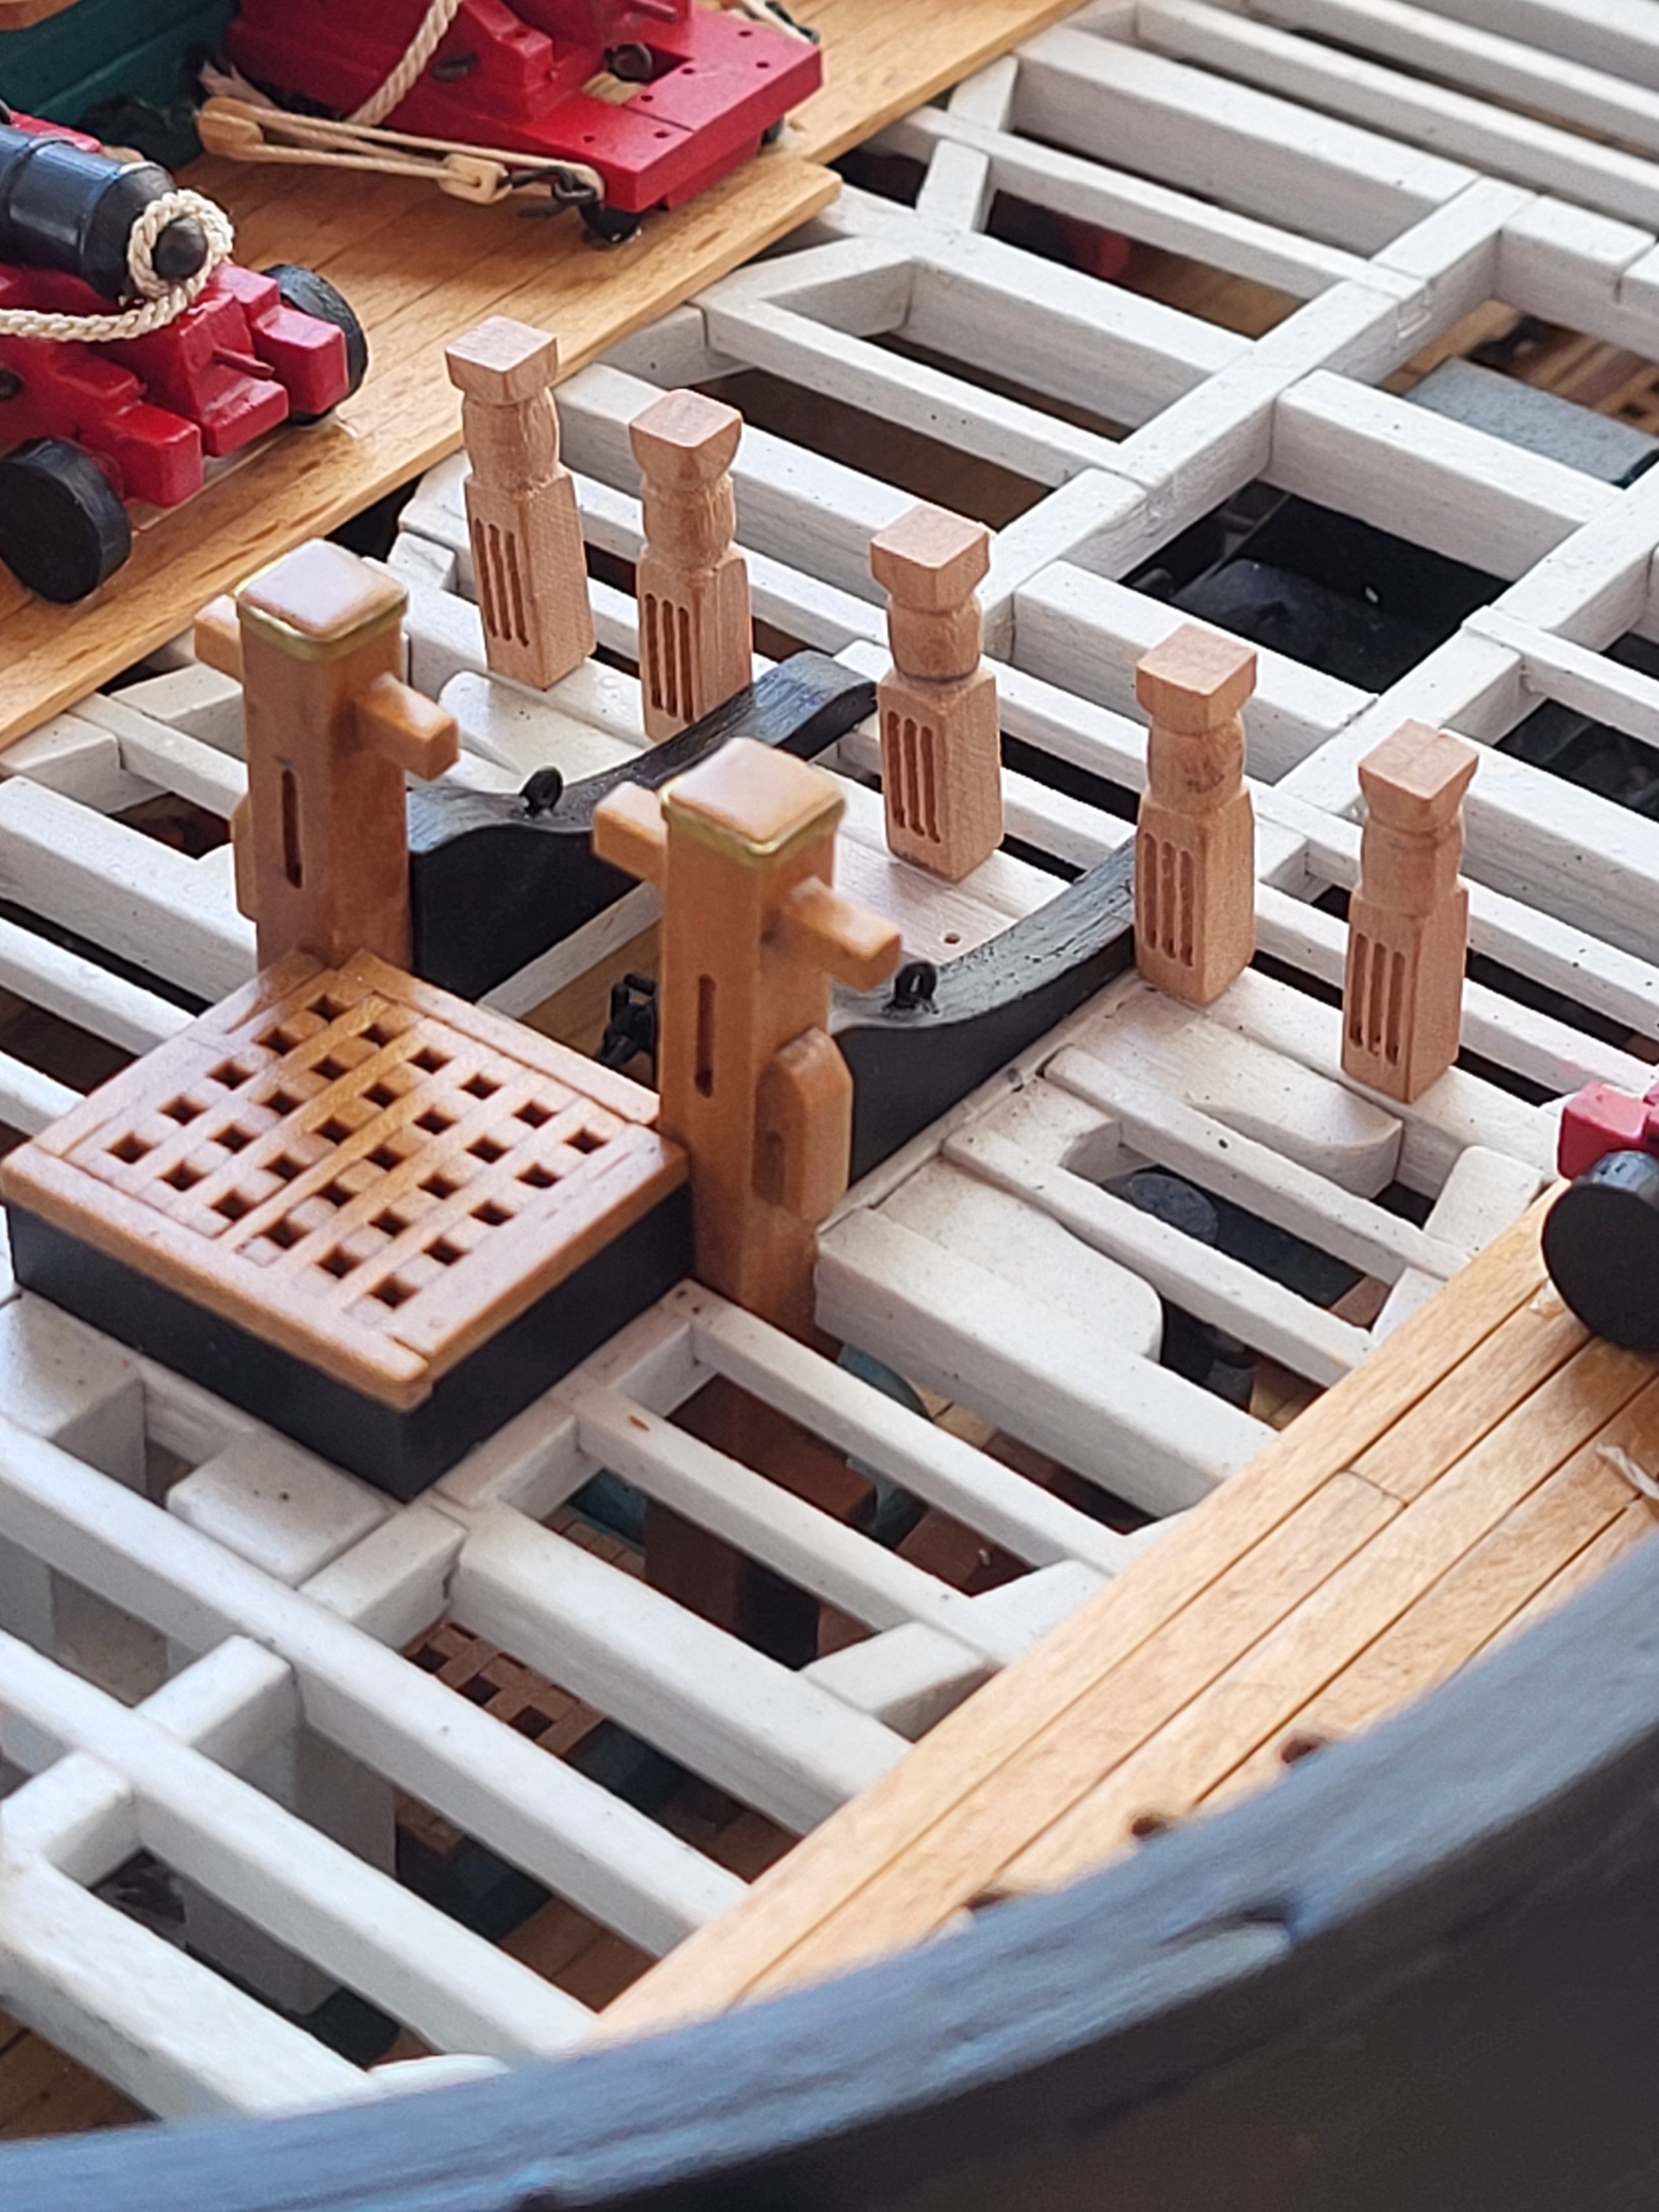
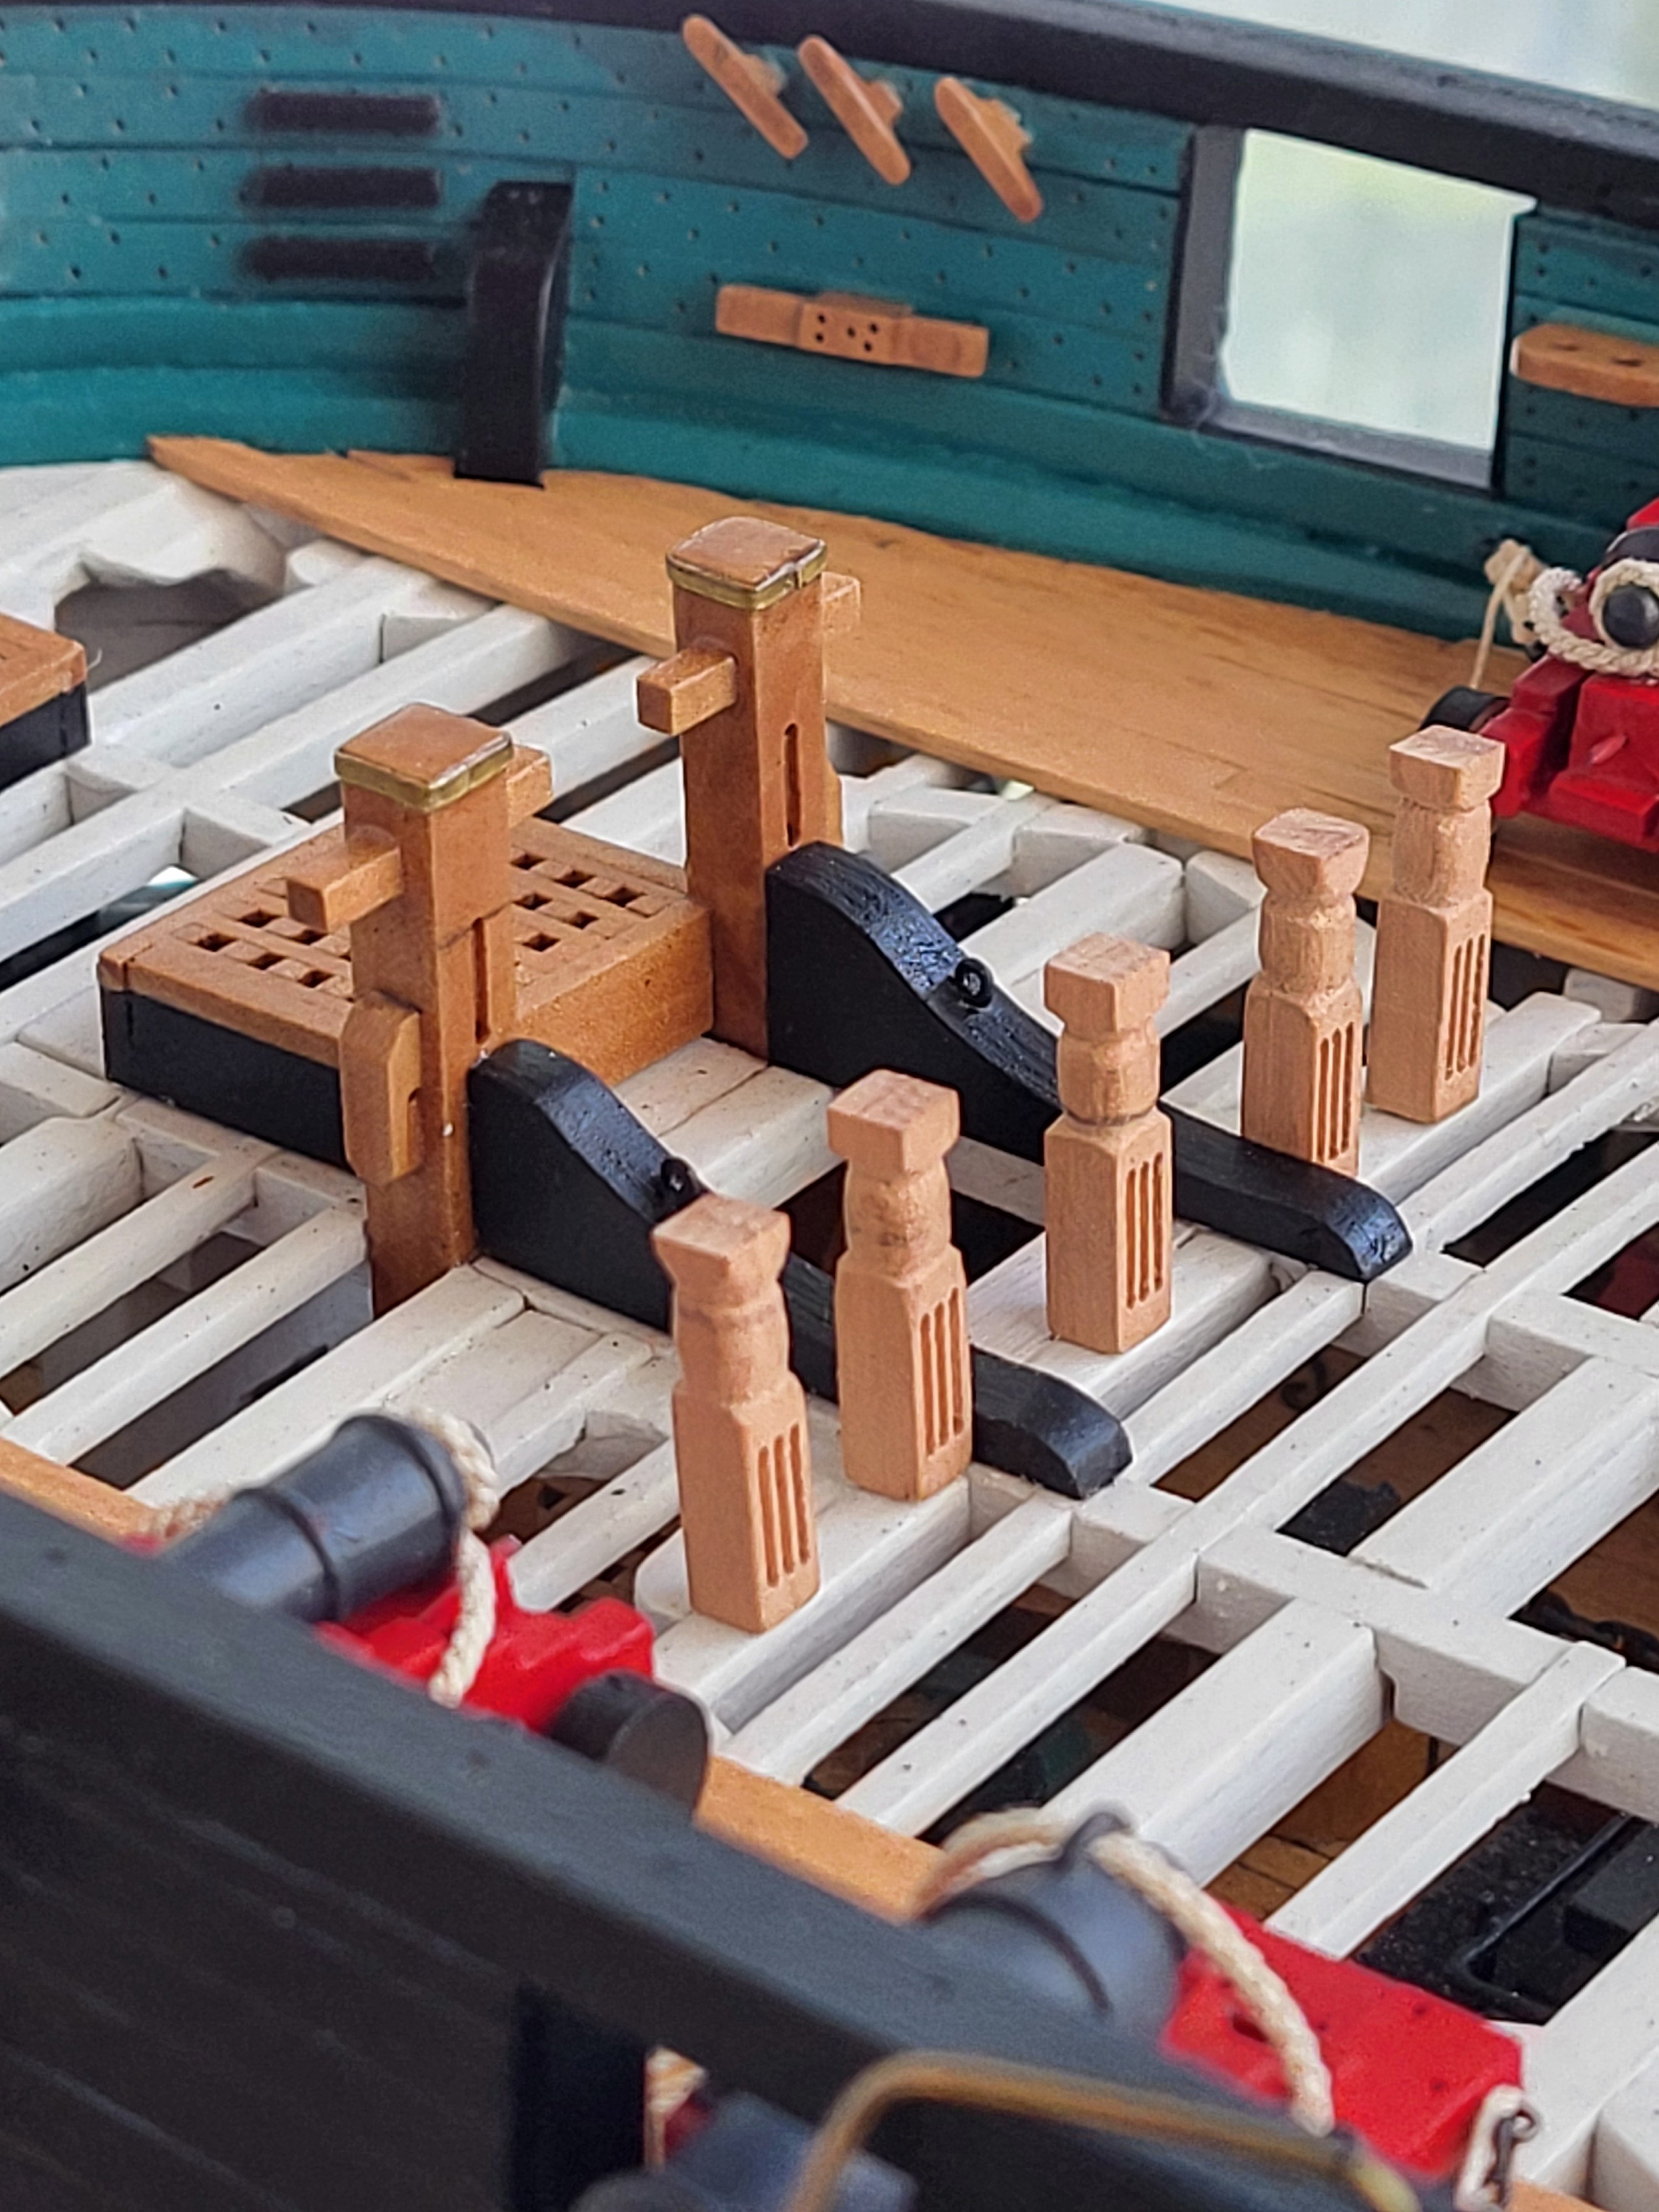
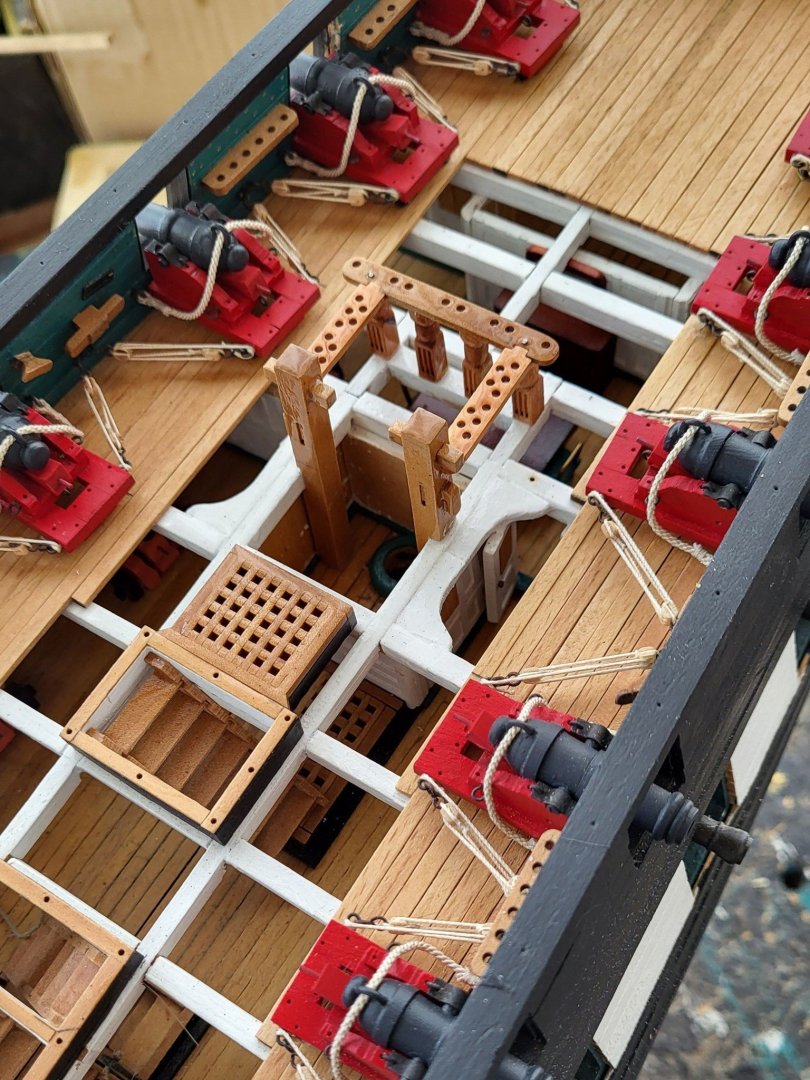
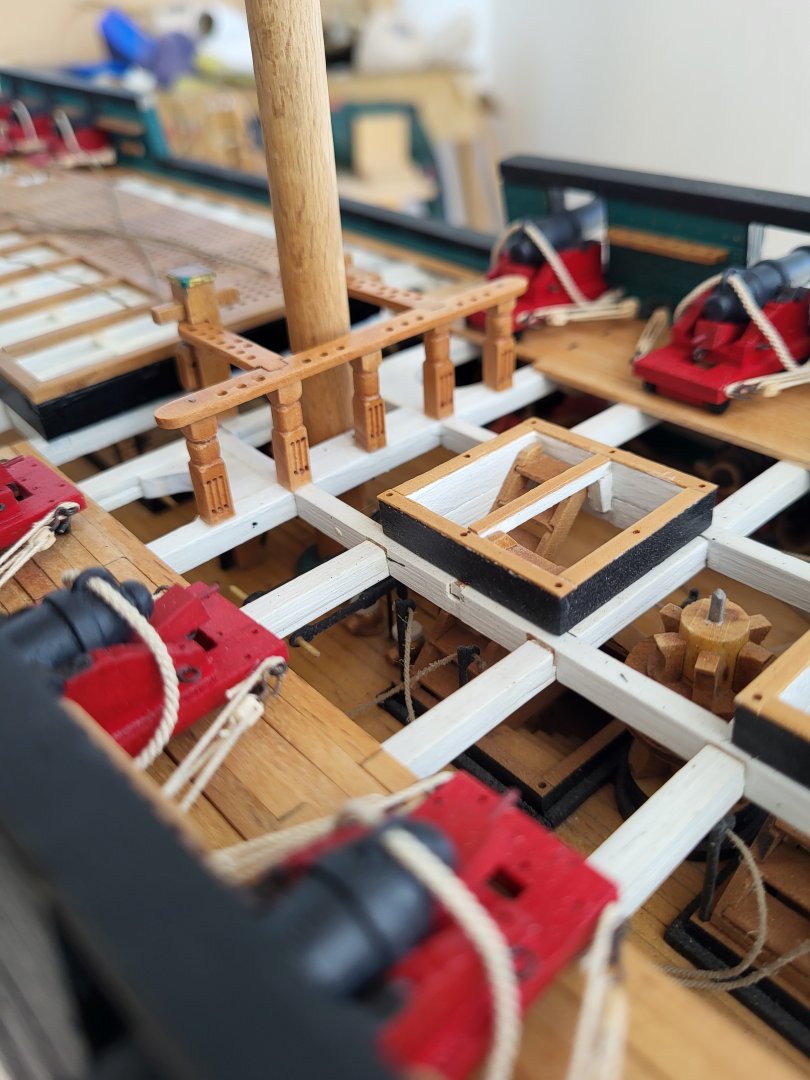
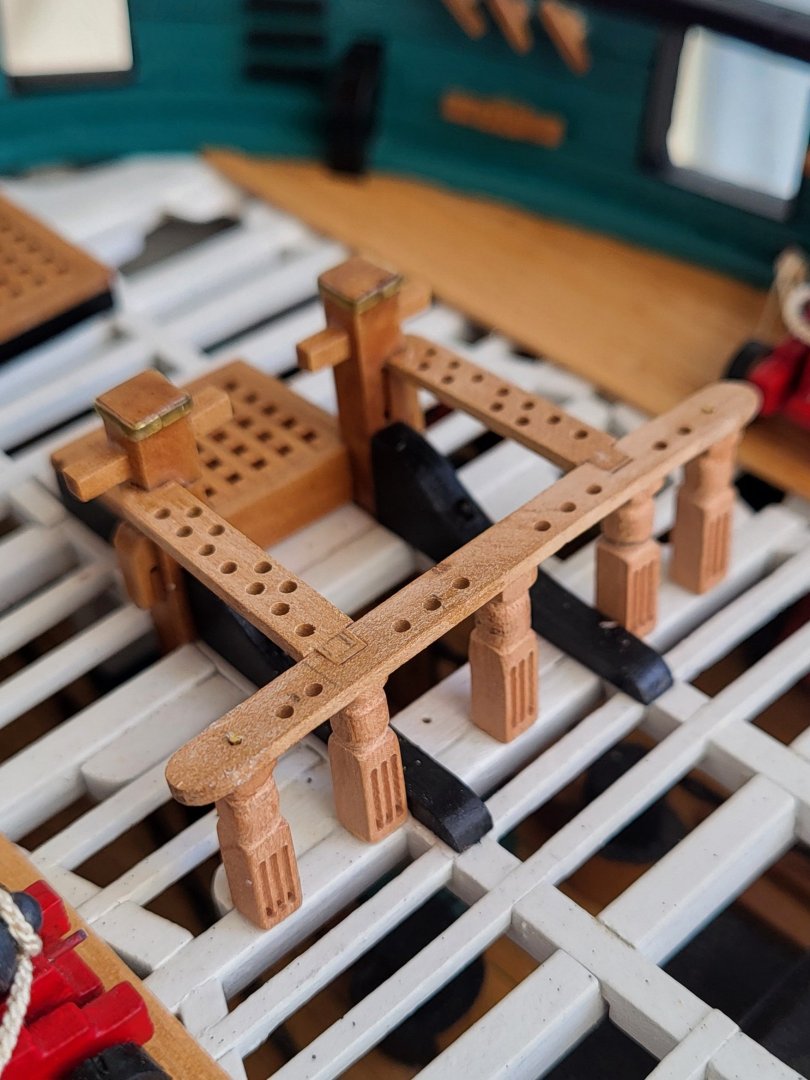
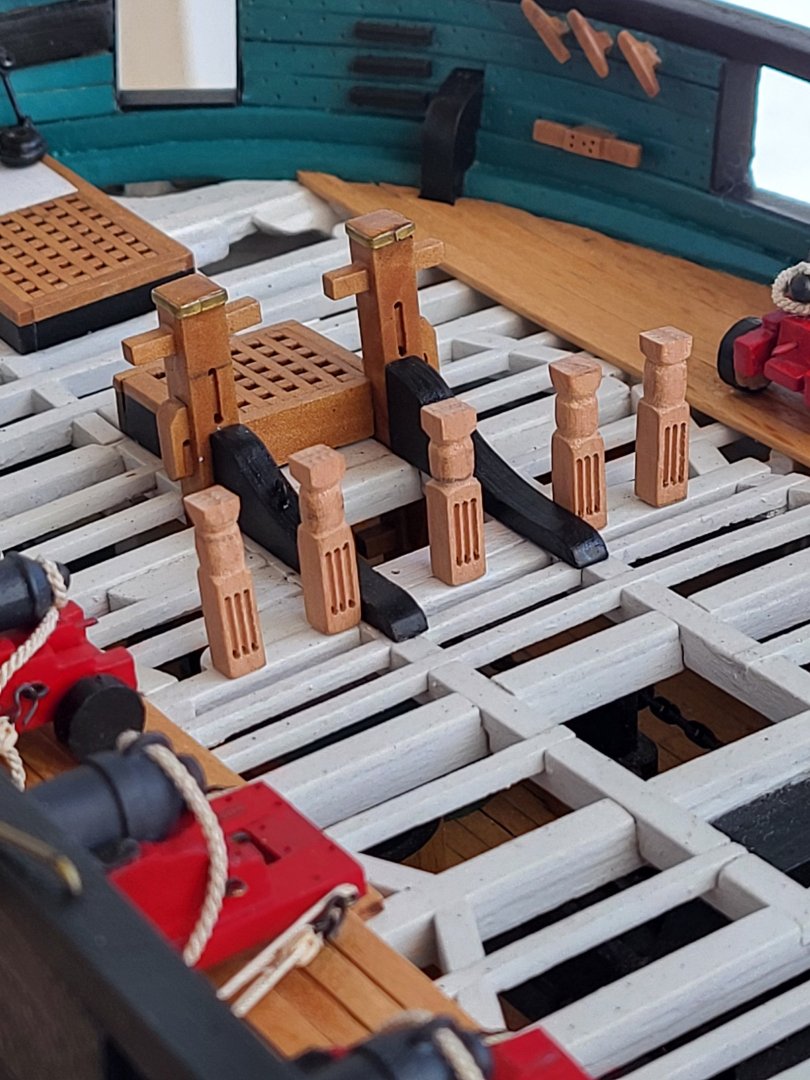
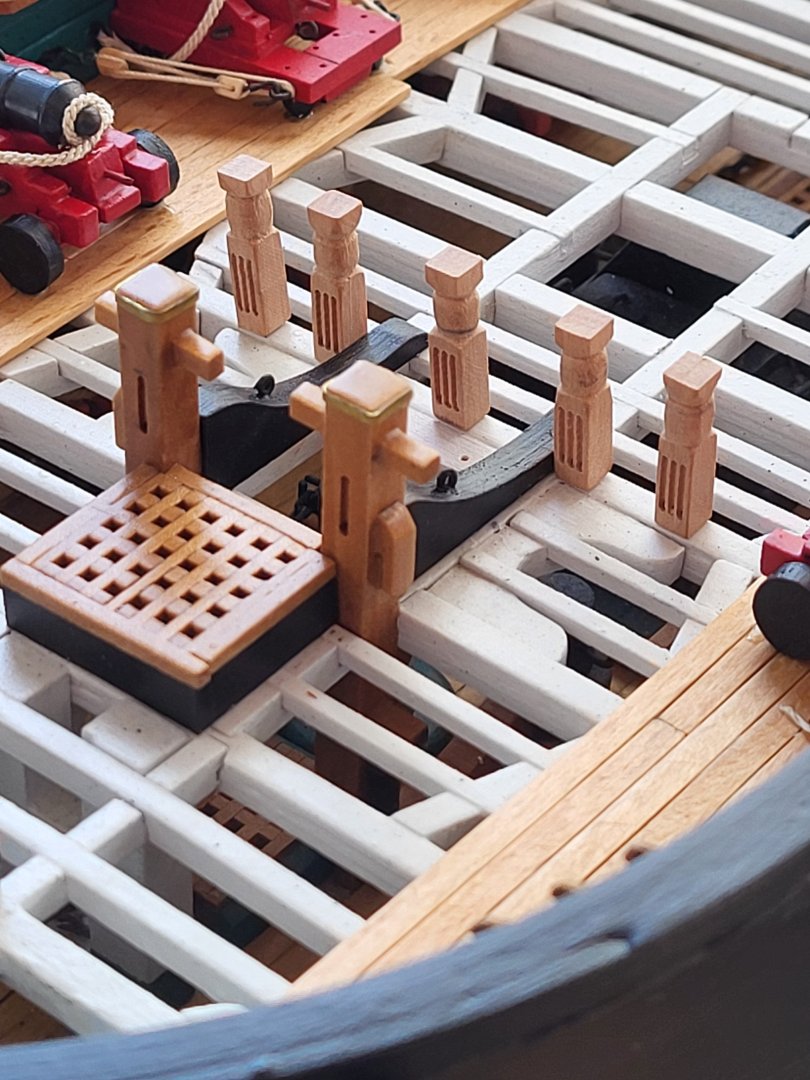
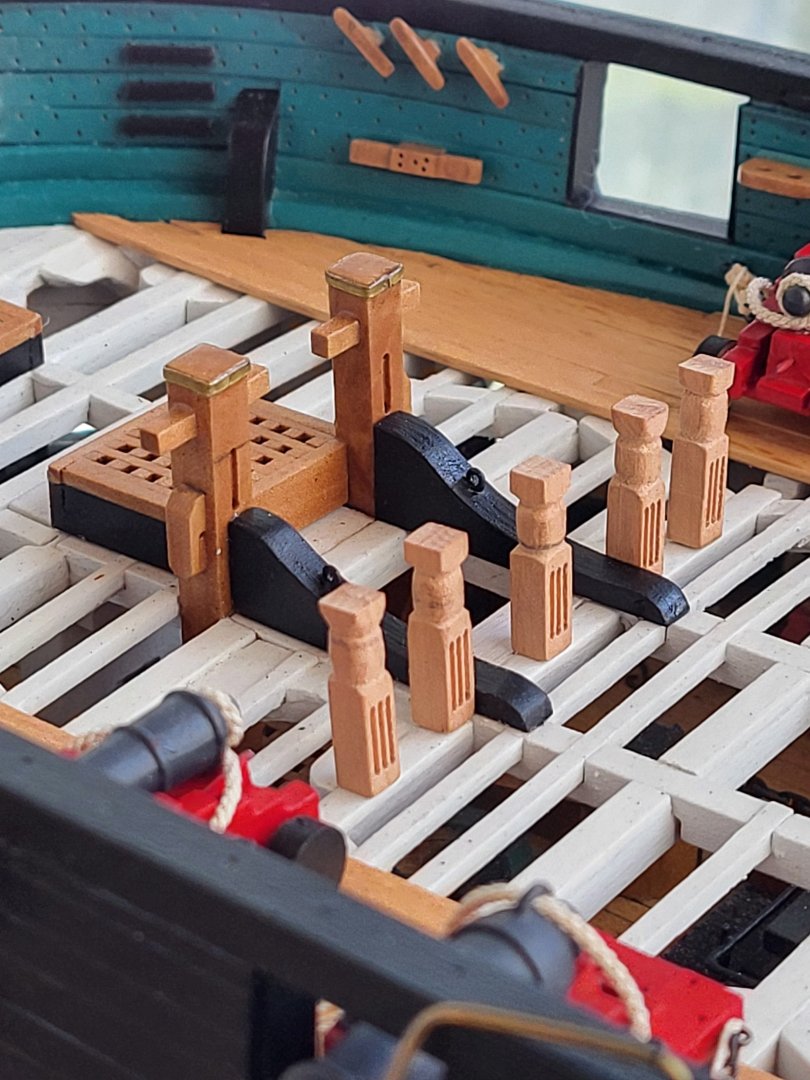
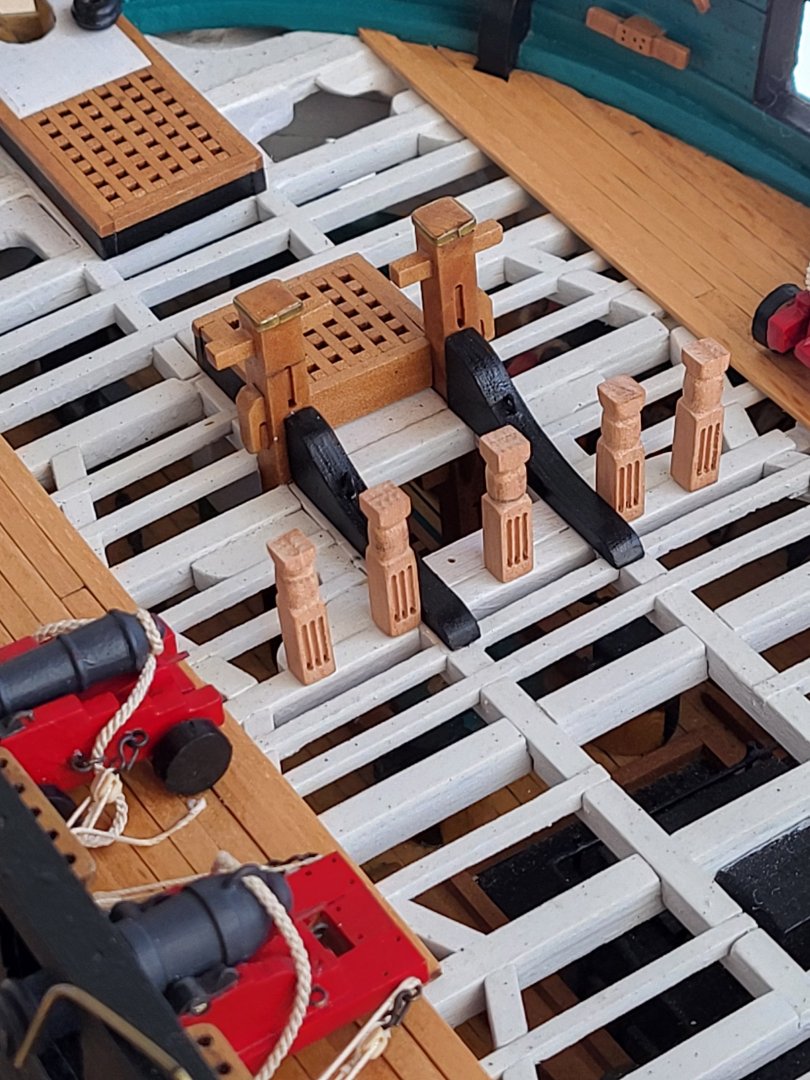
Main fife rail completed. There is one more fife rail to be built for the mizzen.


-
USS Constitution by mtbediz - 1:76
mtbediz replied to mtbediz's topic in - Build logs for subjects built 1751 - 1800
Thank you Jon. I was very inspired by your work when I started building this model and I still benefit from it. I would be happy if I could help others too. -
USS Constitution by mtbediz - 1:76
mtbediz replied to mtbediz's topic in - Build logs for subjects built 1751 - 1800
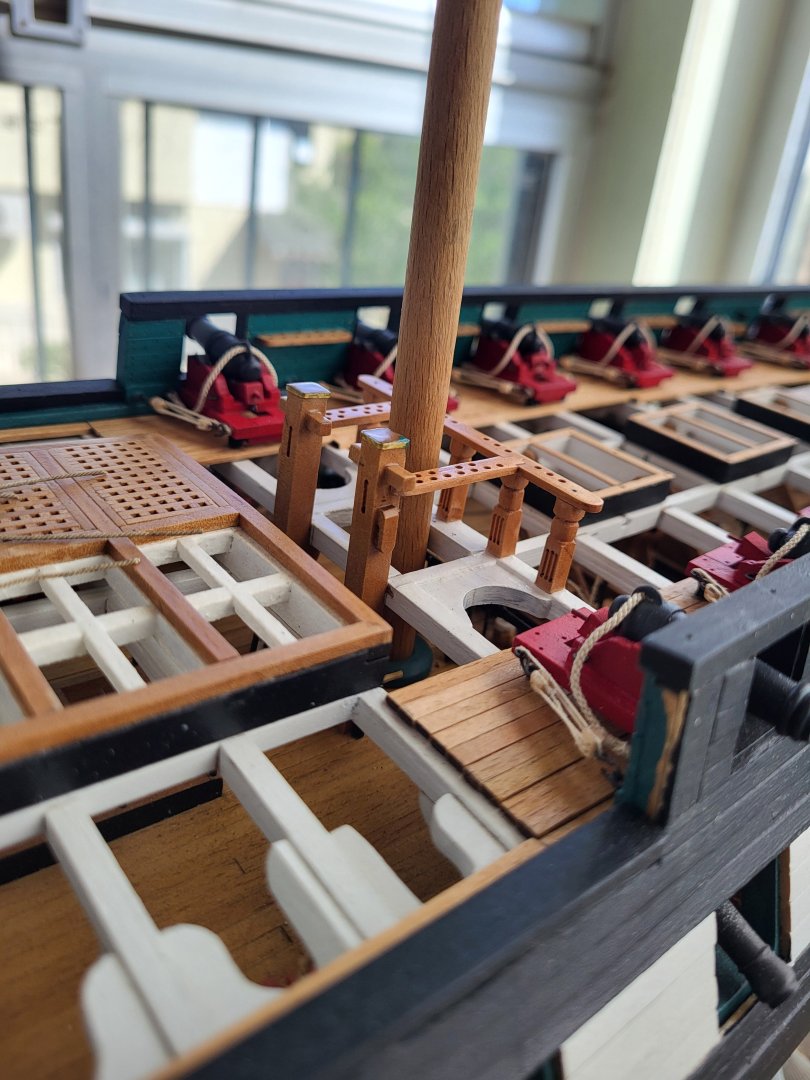
Fore fife rail completed.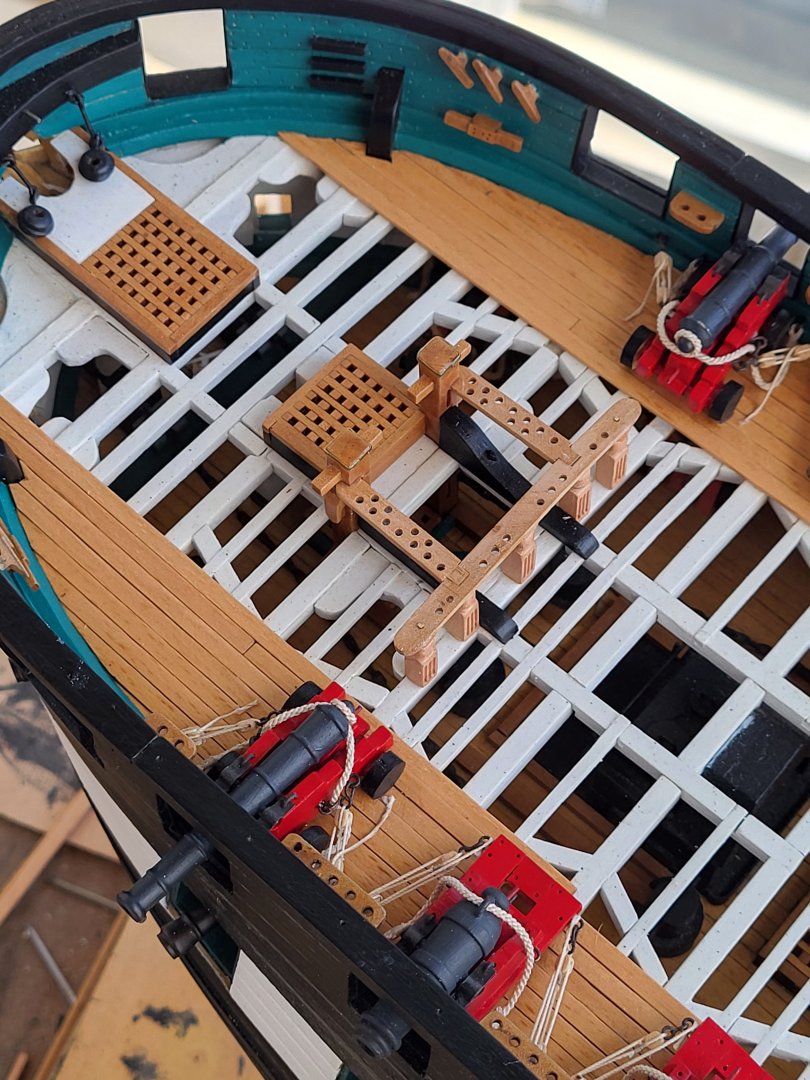

-
USS Constitution by mtbediz - 1:76
mtbediz replied to mtbediz's topic in - Build logs for subjects built 1751 - 1800
Thanks Greg. I have a basic DB250 and a FD150 lathe. I don't have a PD250. I used the DB250 when I made the fife rail stanchions. You can work soft metals like brass, aluminum and copper with all three lathes. I bought the FD150 about two years ago and haven't had much use for it. The FD150 and PD250 are lathes that require a bit more skill. If you are thinking of buying a lathe, I would recommend getting the basic DB250 first. If I had my thoughts back then I would reconsider buying the FD150. They are quite expensive machines and I still don't know how much use I will get out of them. If I had to choose between the FD150 and the PD250 right now I would choose the PD250 because the FD150 is a very short lathe and a bit of a pain to work with. -
USS Constitution by mtbediz - 1:76
mtbediz replied to mtbediz's topic in - Build logs for subjects built 1751 - 1800
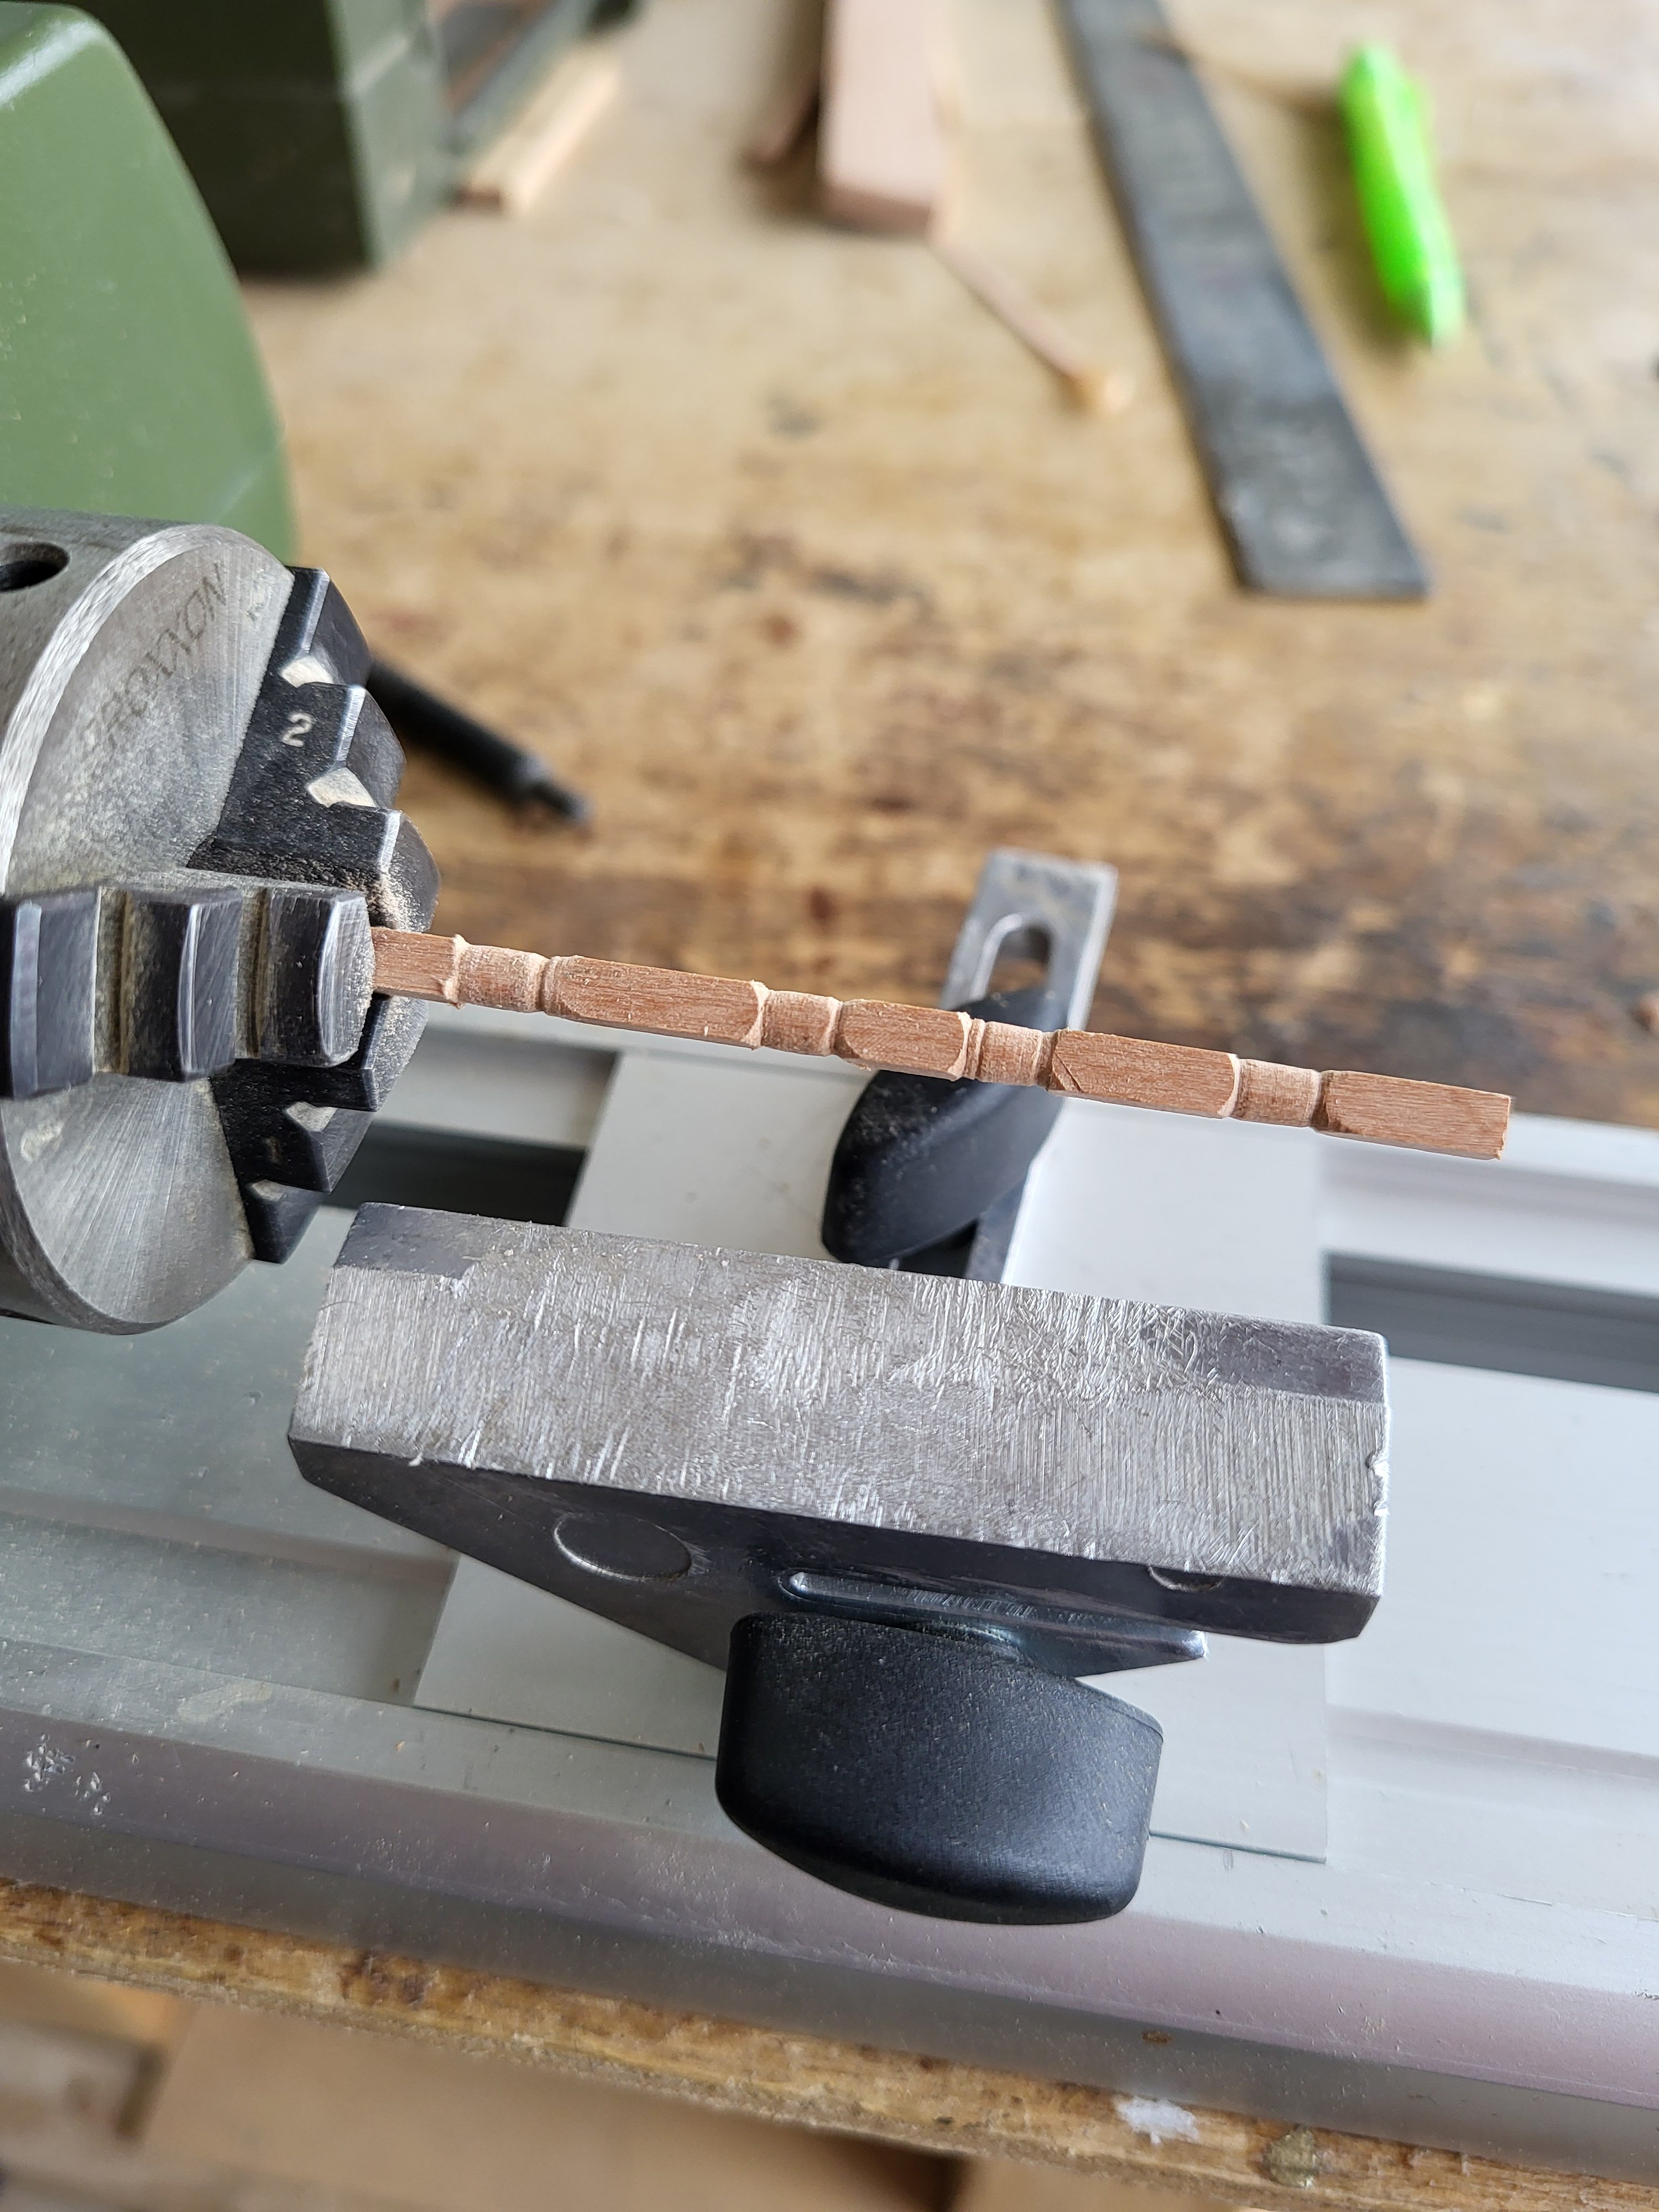
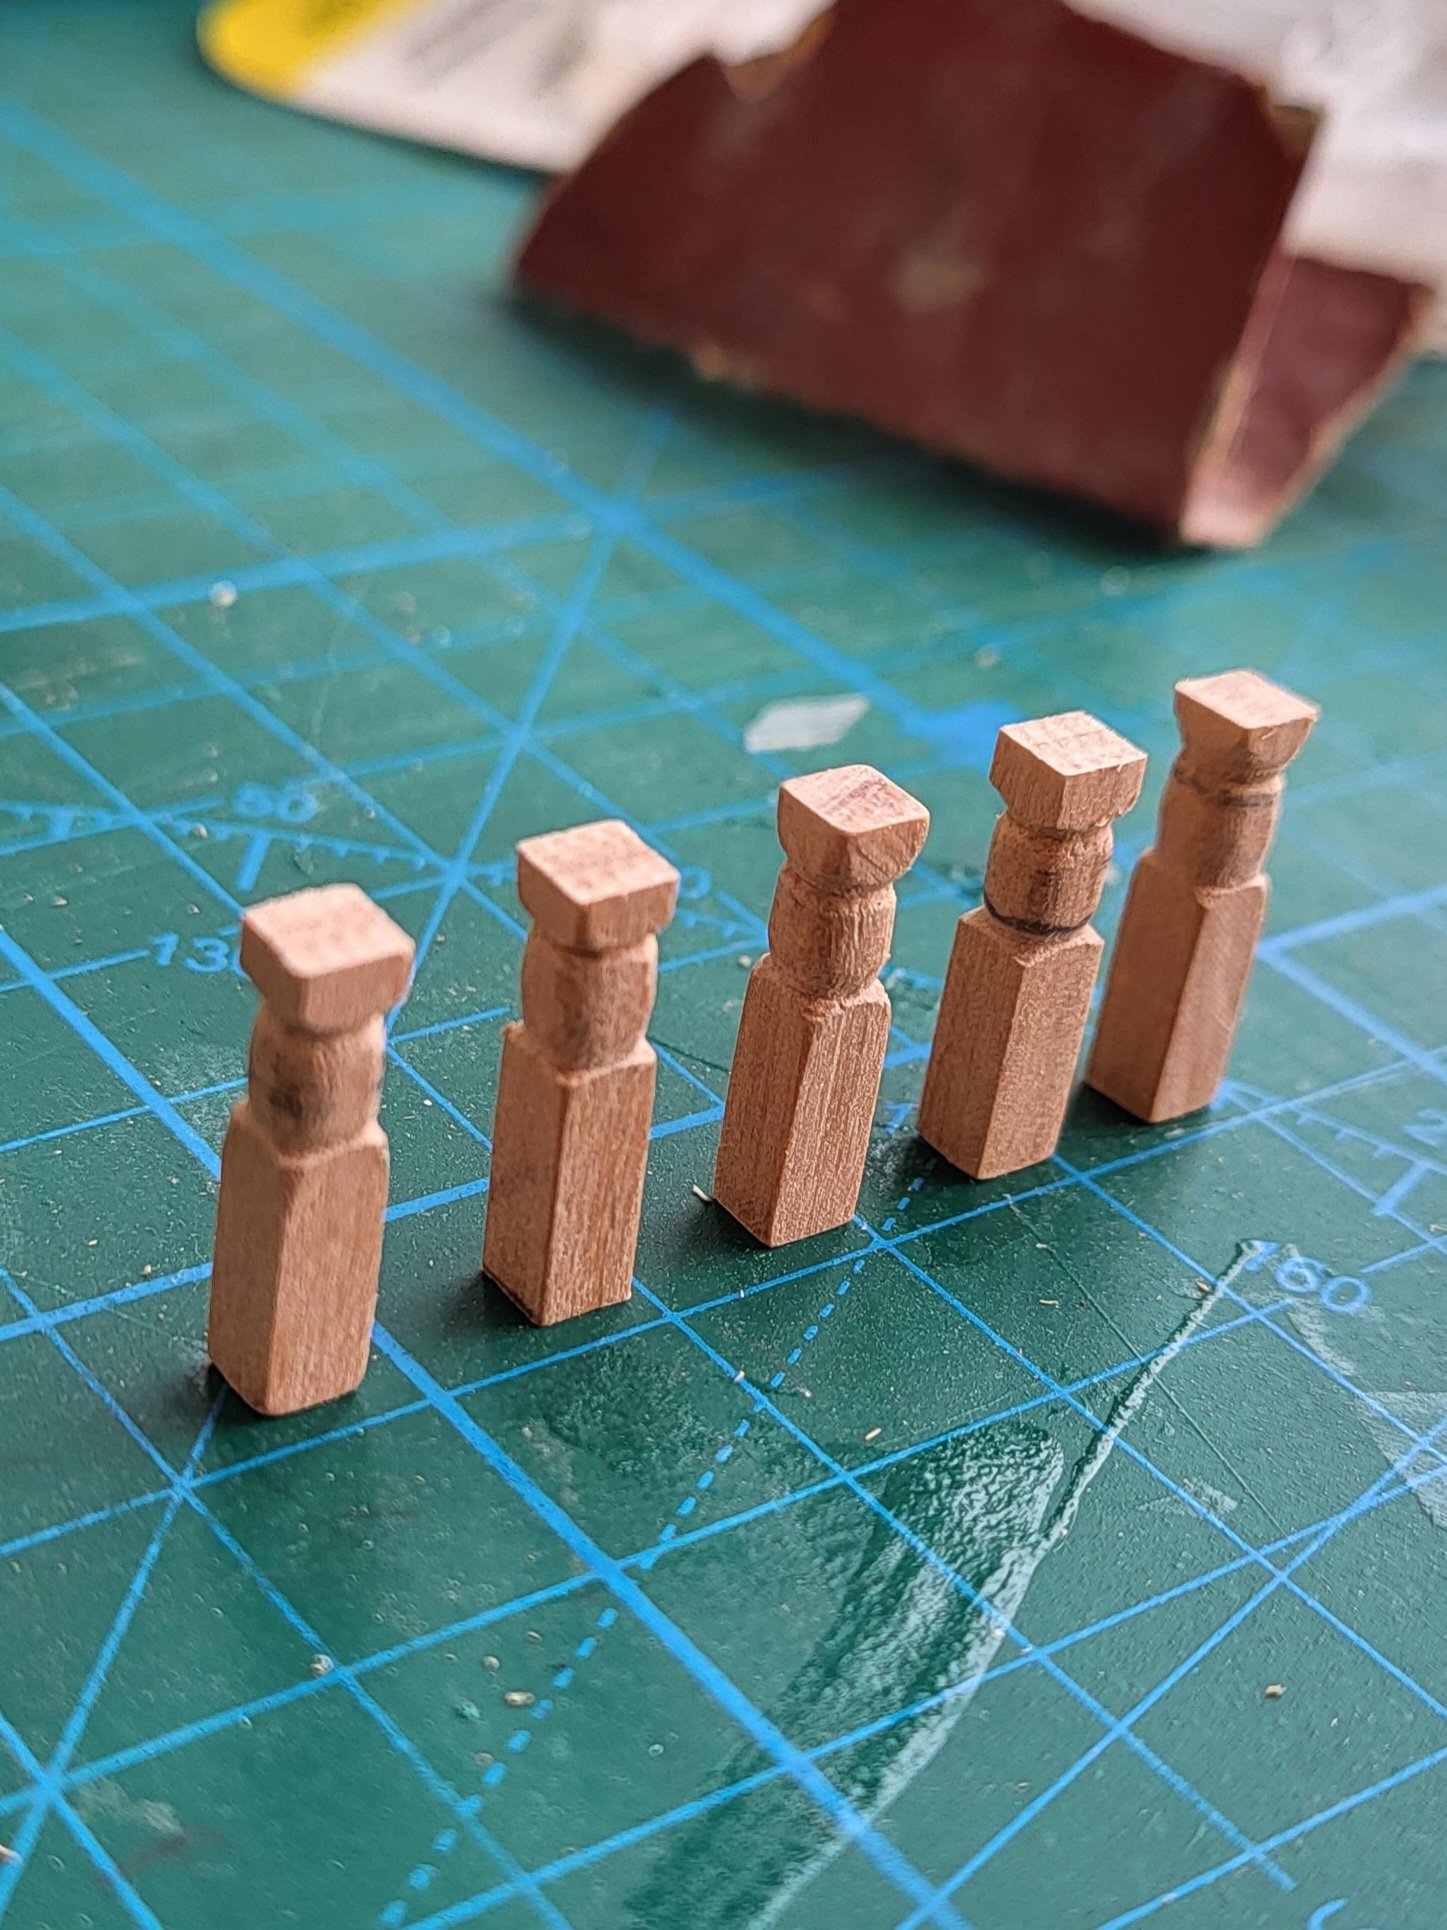
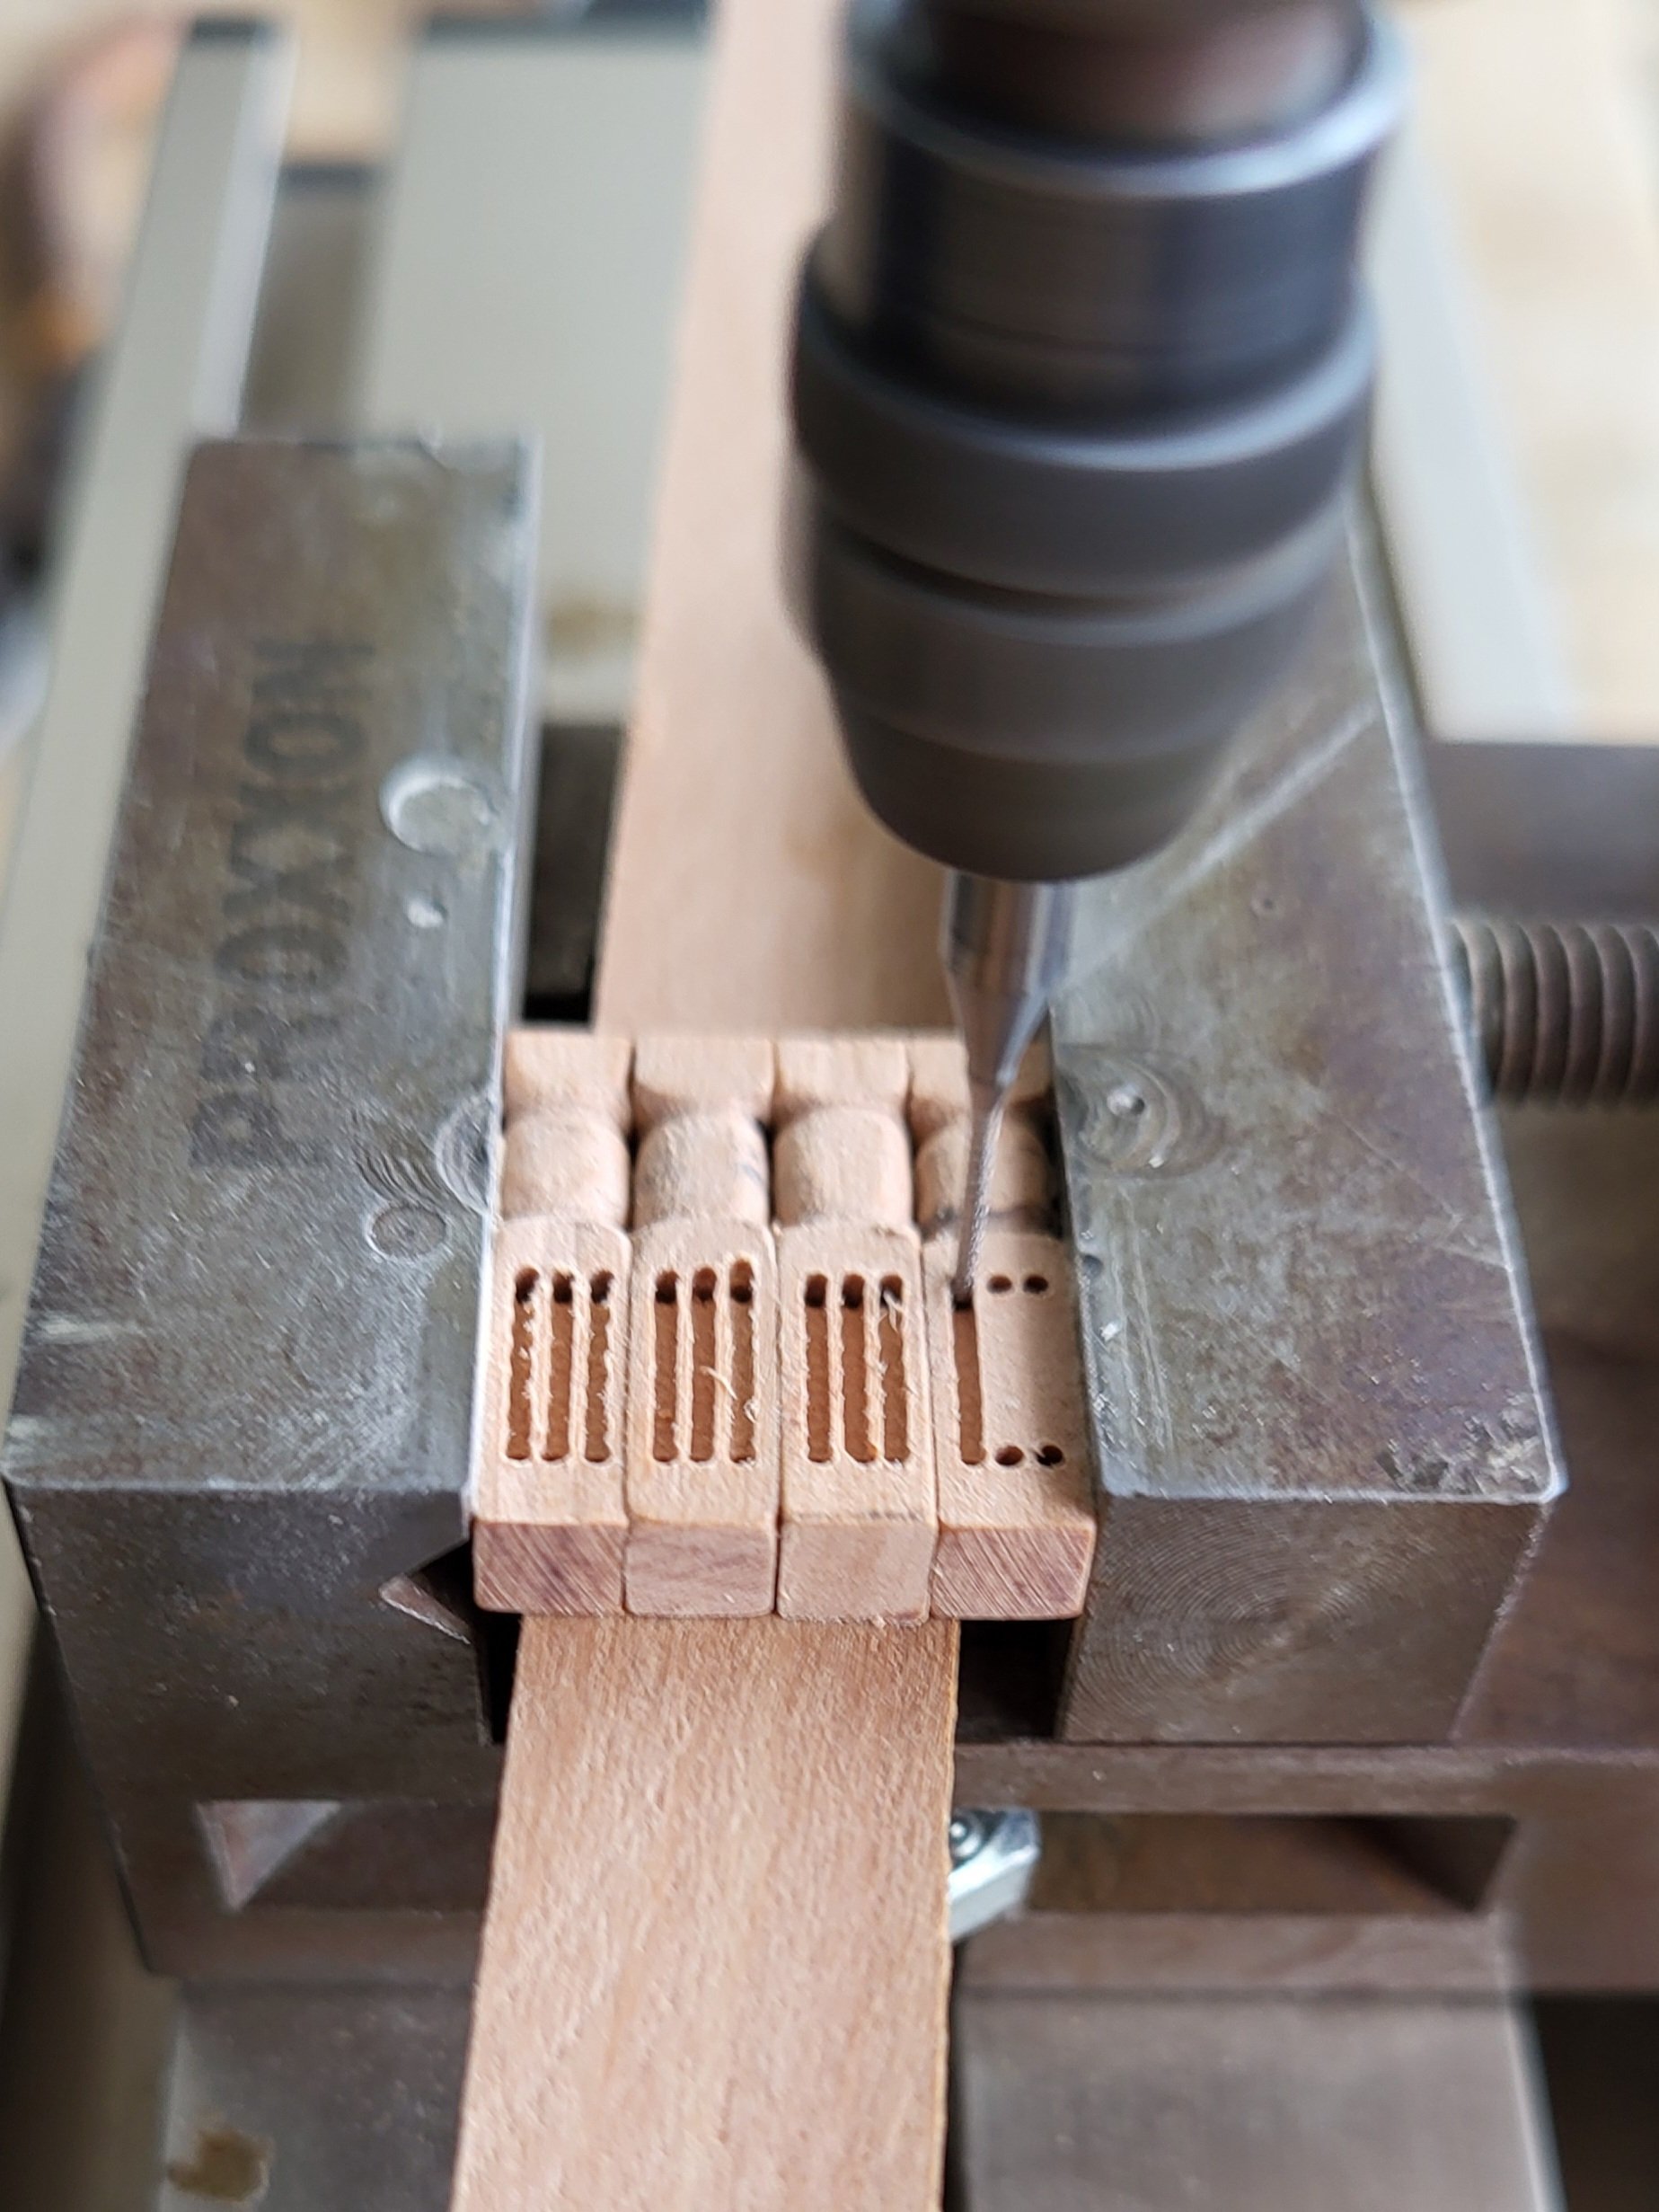
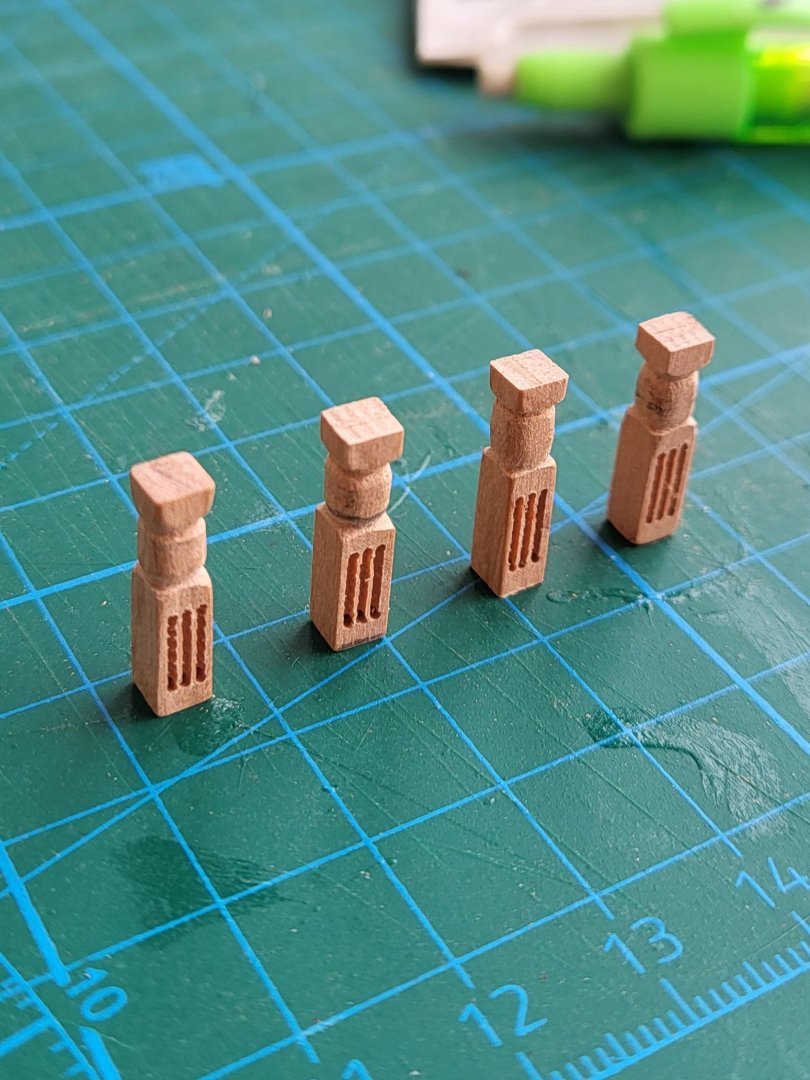
The rigging of all the guns are complete and I started making the fife rails. First I fabricated ridding bitt knees. To make the stancions I shaped the 4x4 mm pear bar with a file on the lathe then I opened holes and channels to represent the sheaves.


-
If you used CA when gluing the carriage parts, you can try using pure acetone to separate them without damaging the parts. Pure acetone has the ability to dissolve dried CA. I have done this from time to time. But you should use pure acetone, that is, the diluted acetone that women use to remove nail polish does not work.
-
USS Constitution by mtbediz - 1:76
mtbediz replied to mtbediz's topic in - Build logs for subjects built 1751 - 1800
Thank you Greg. Now that I think about it, it would have been better if I had stained the blocks, but I just applied matte varnish. -
USS Constitution by mtbediz - 1:76
mtbediz replied to mtbediz's topic in - Build logs for subjects built 1751 - 1800
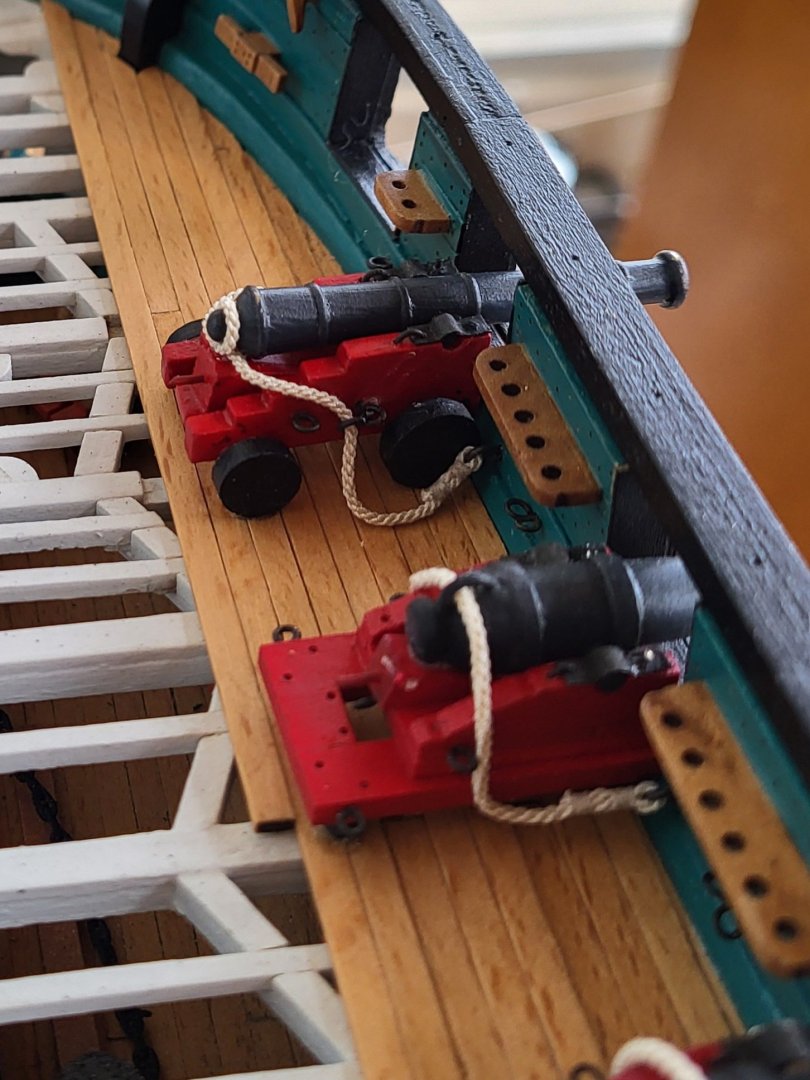
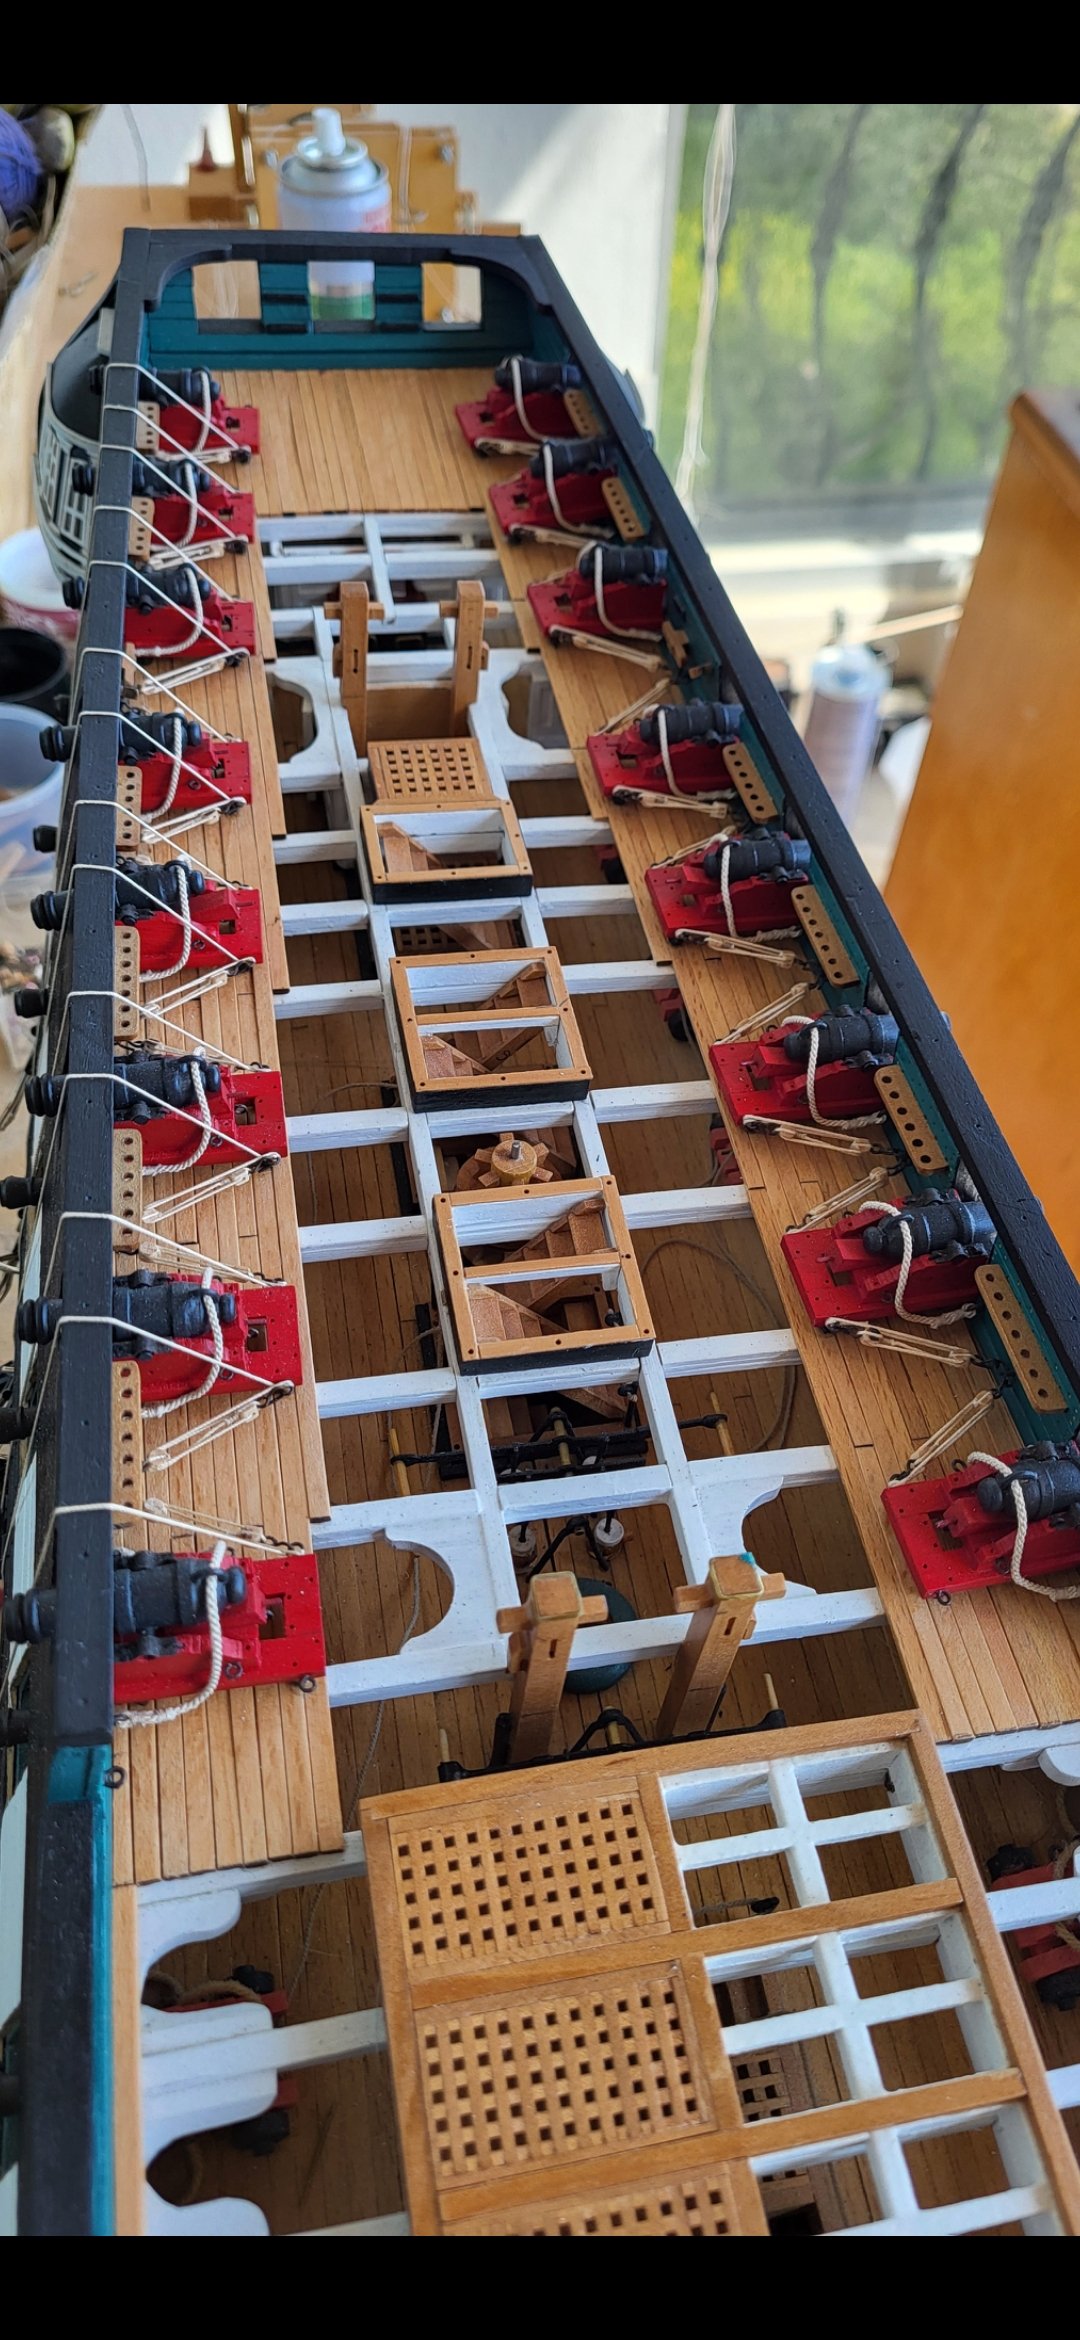
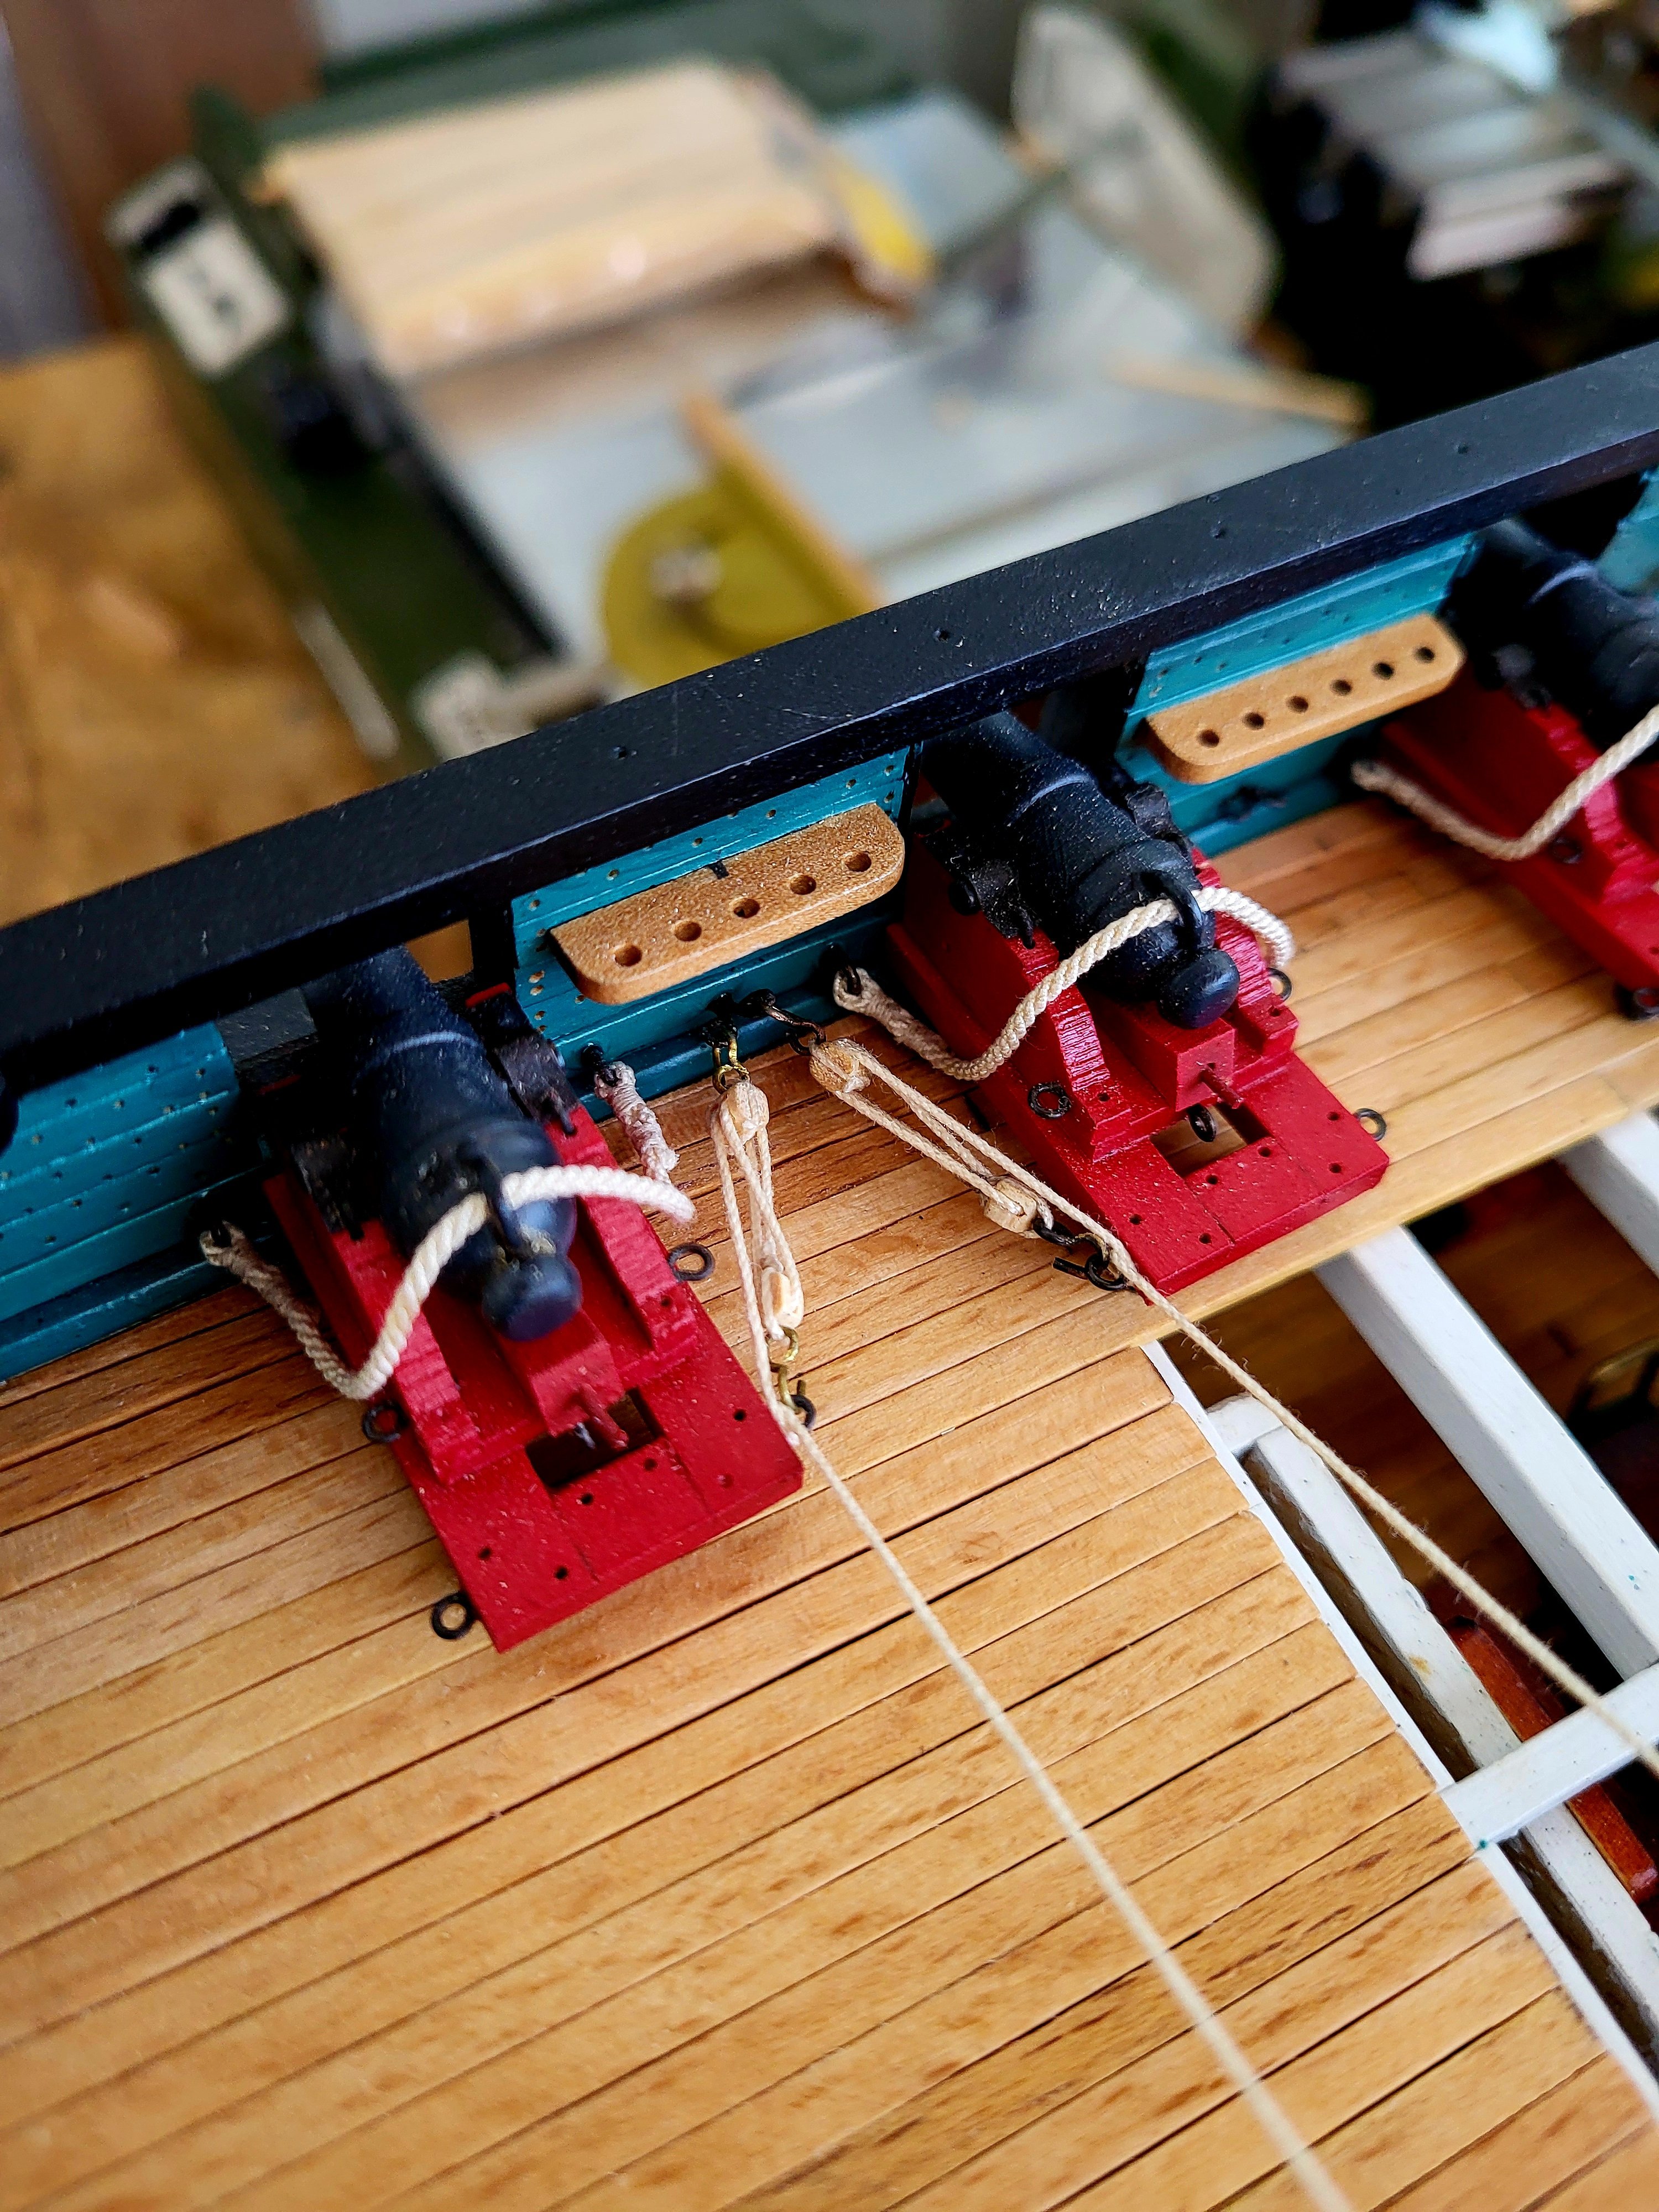
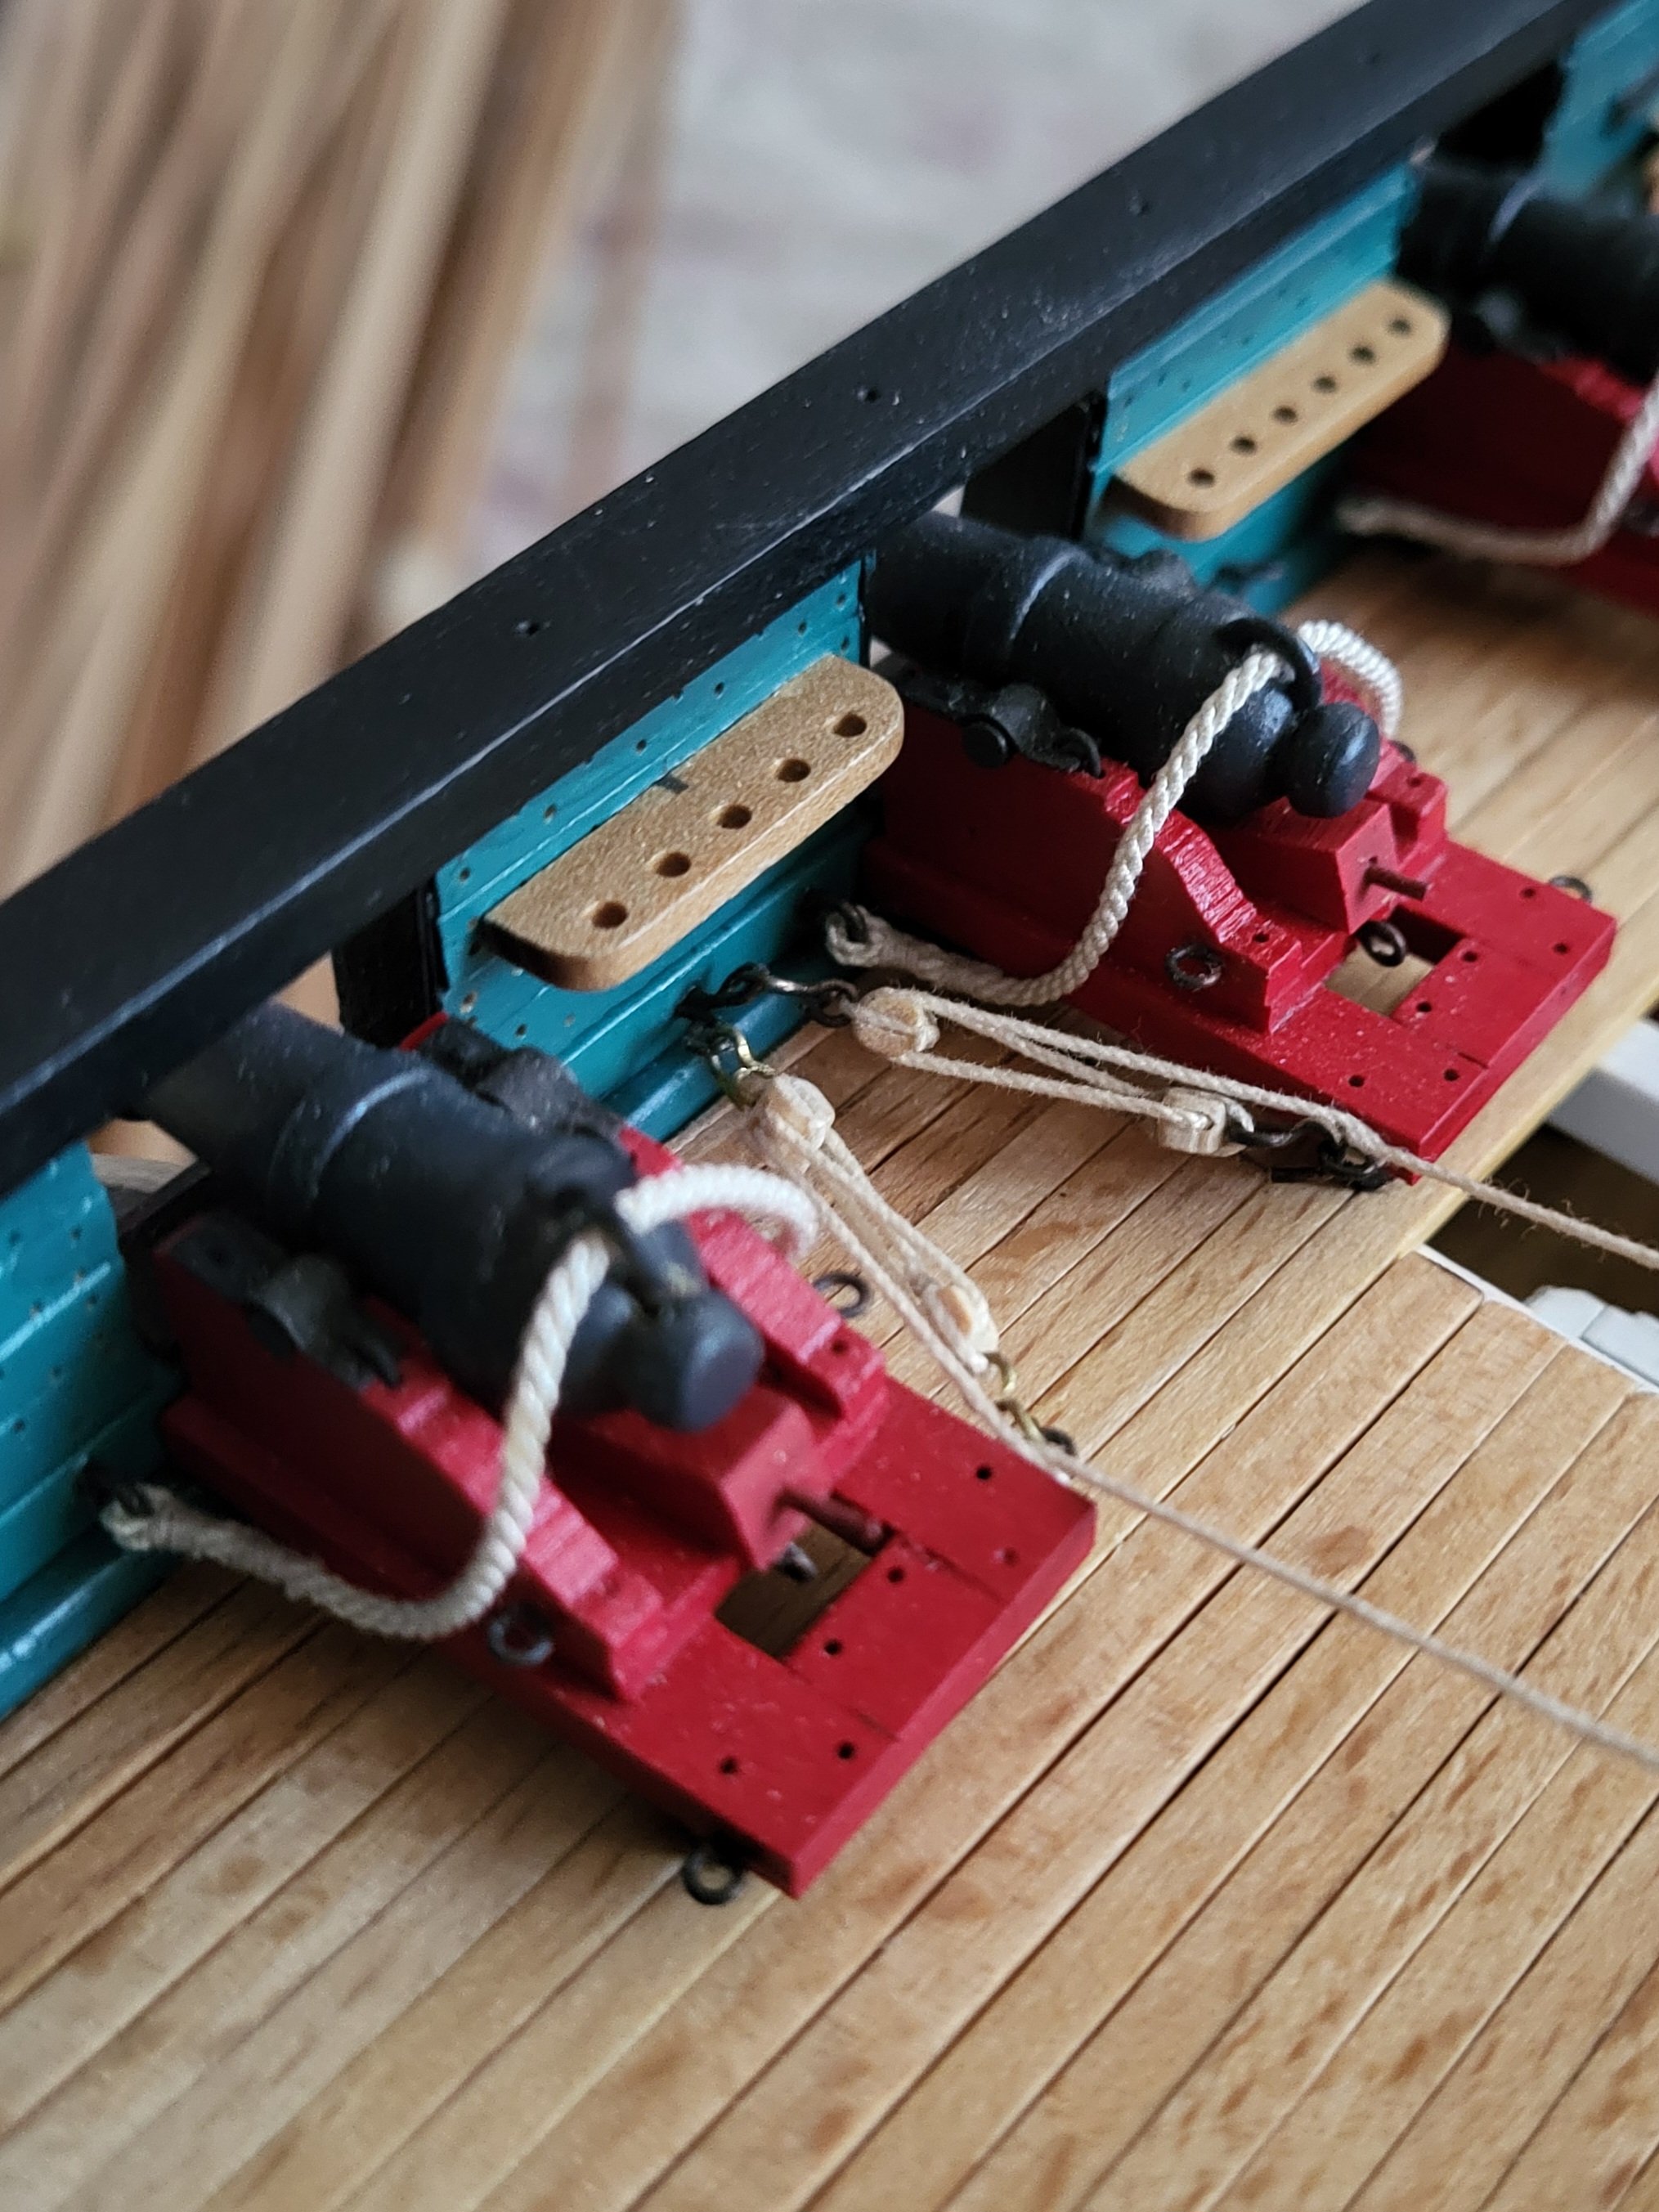
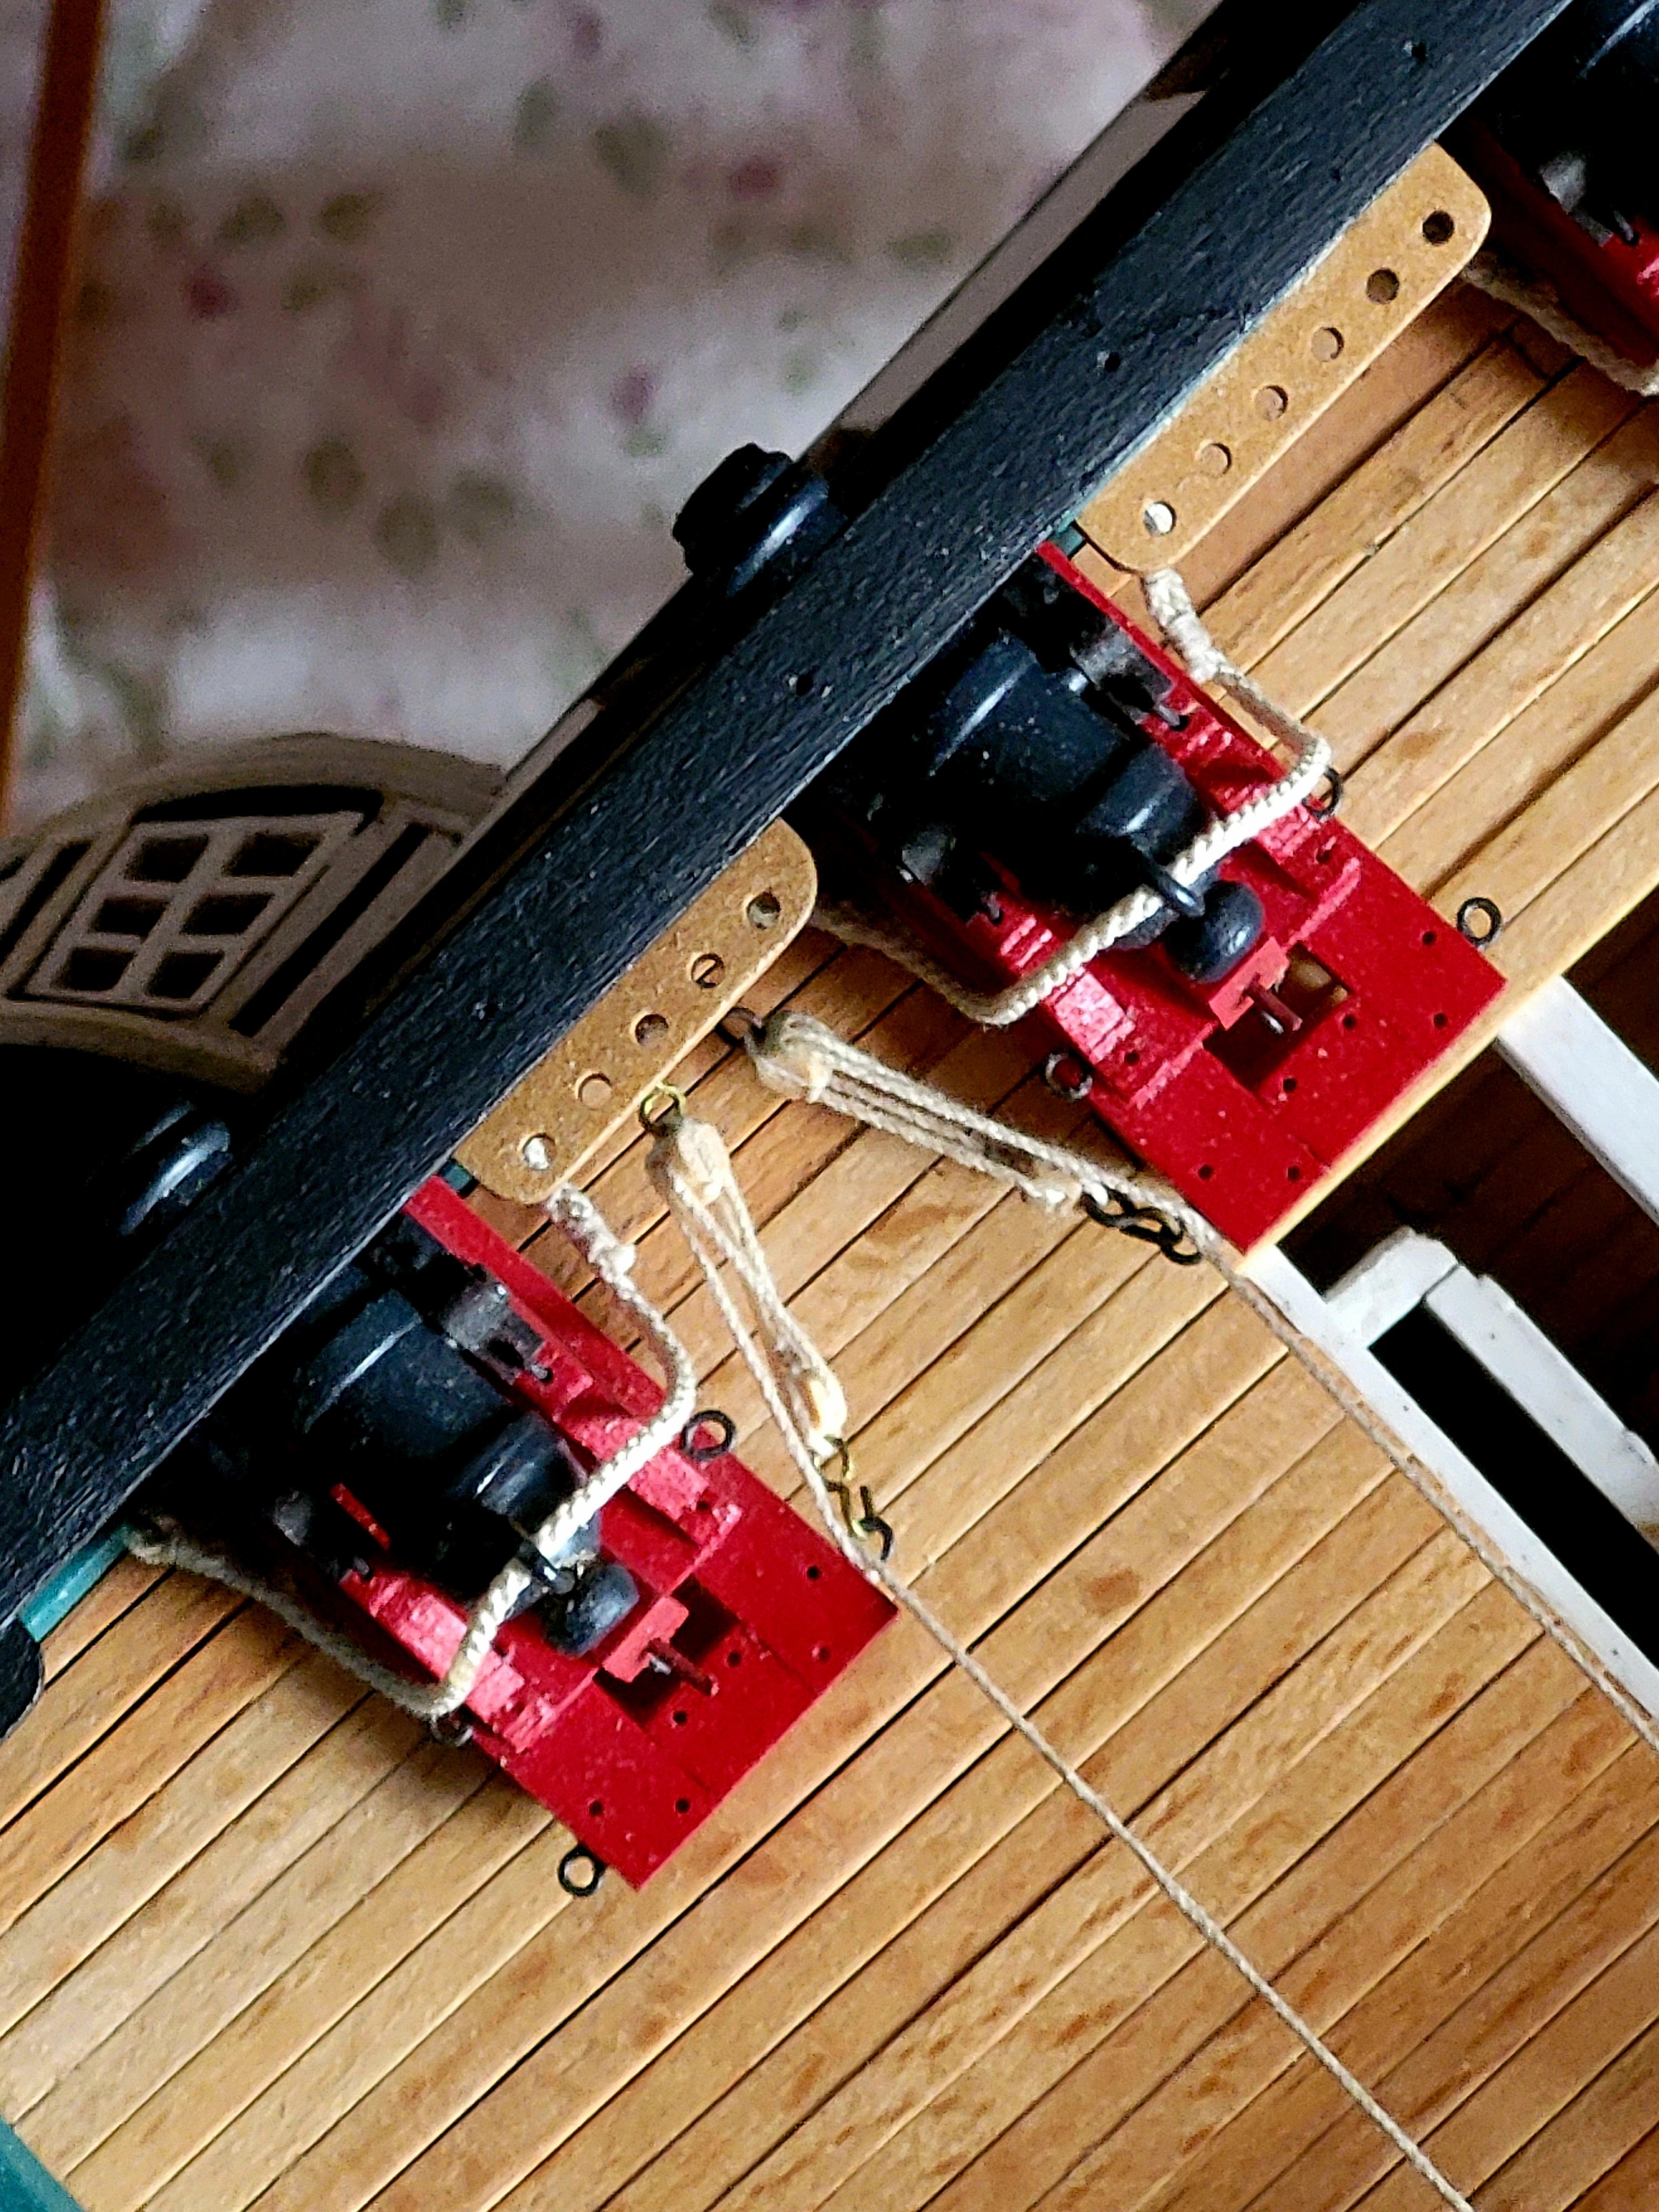
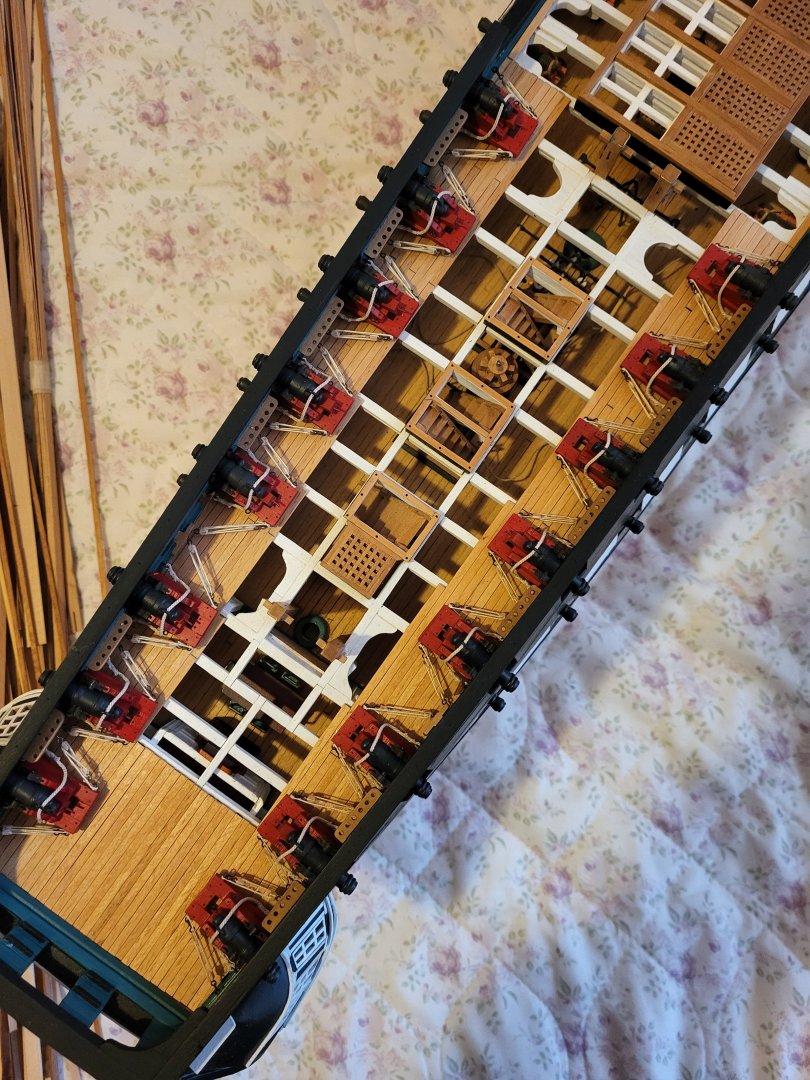
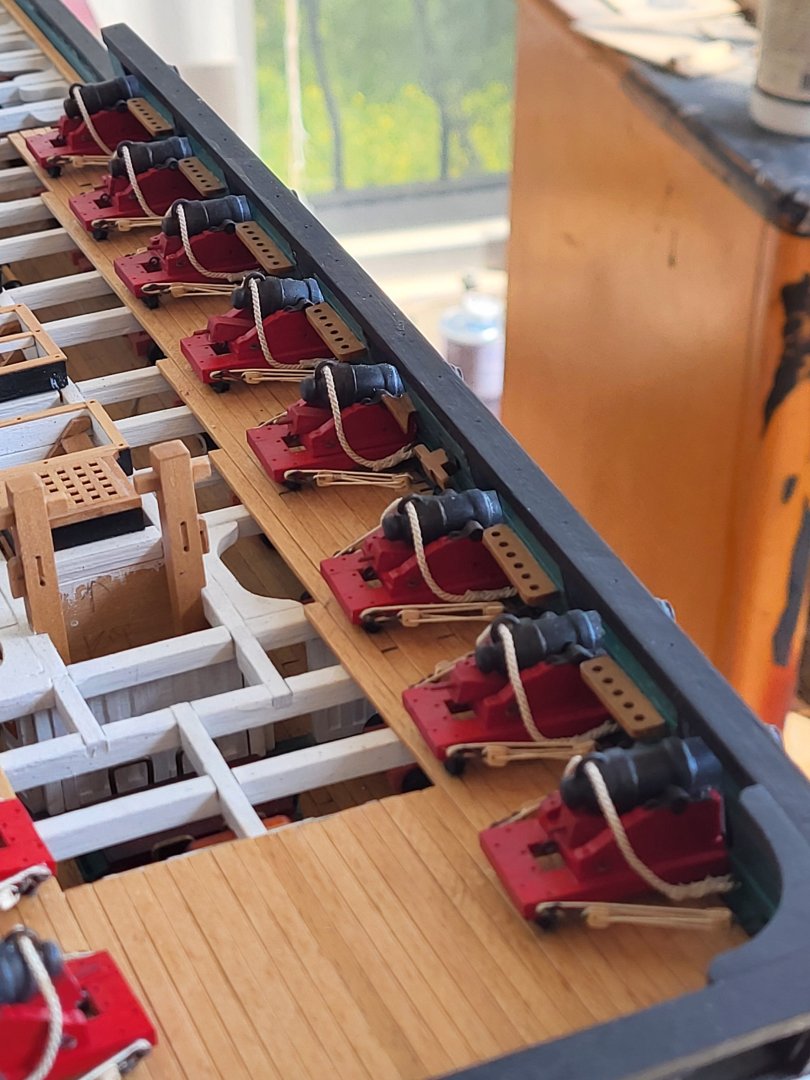
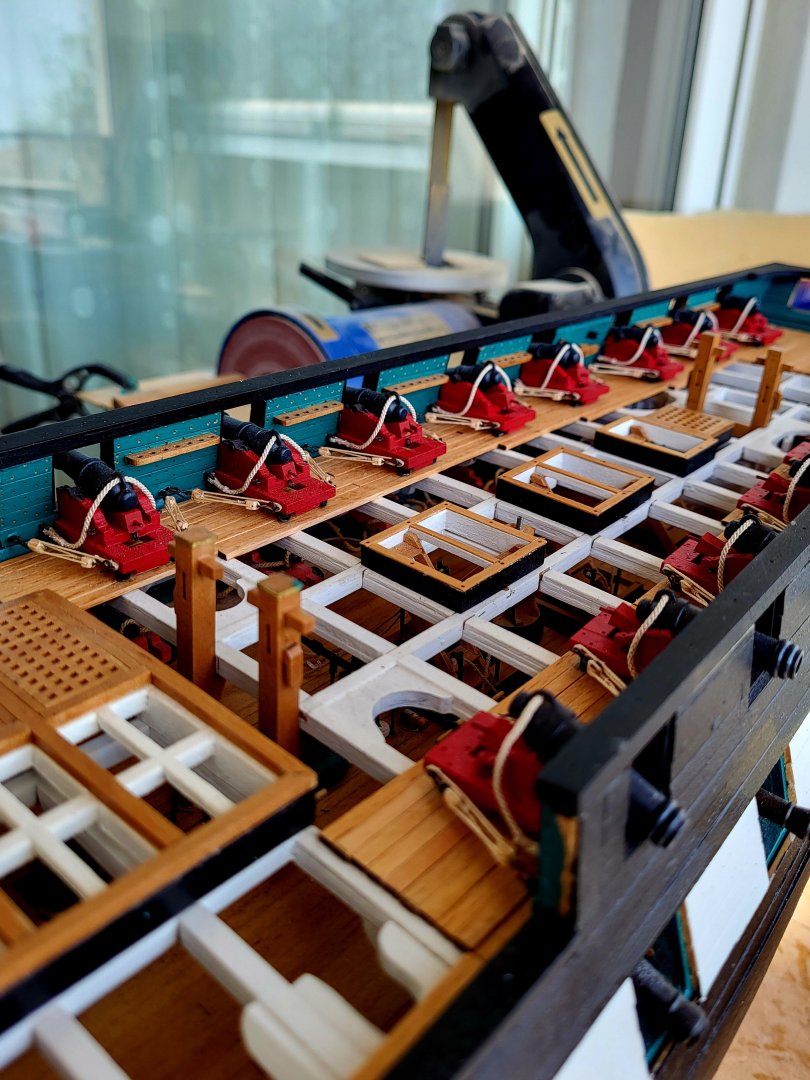
Rigging of the carronades at the rear of the ship has been completed.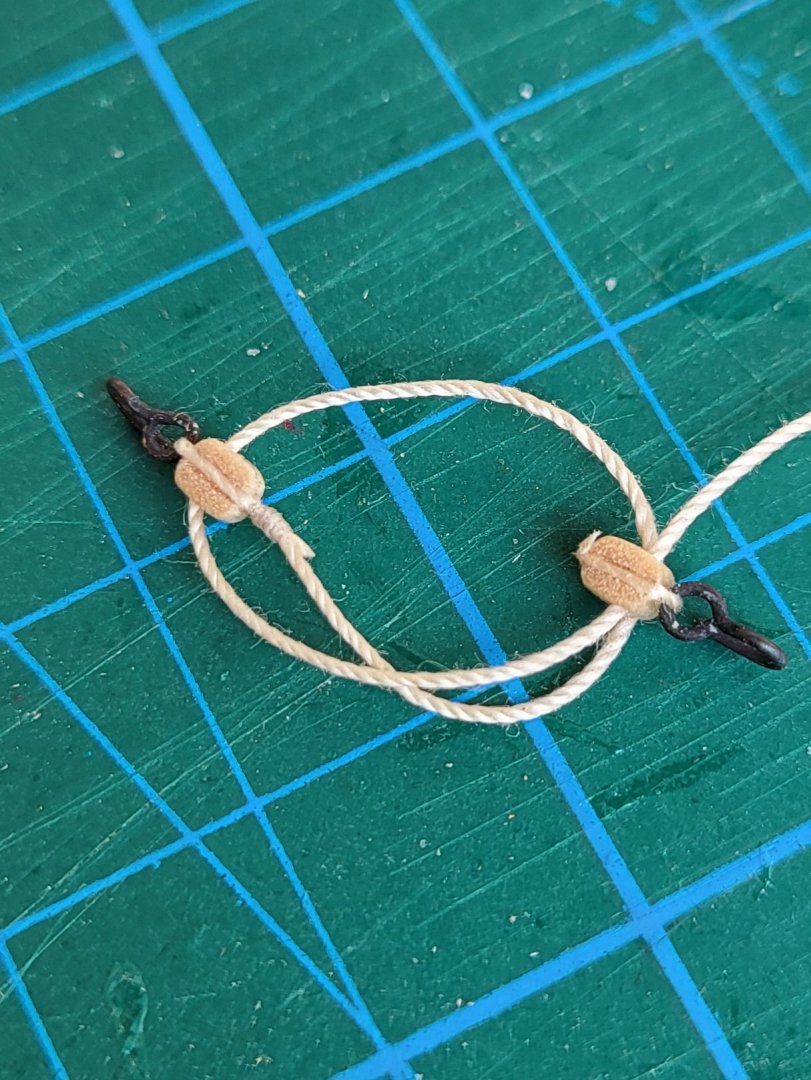


-
Yes, the waterways shown in the kit instructions are too wide, I made them narrower. By the way, I agree with Bthoe but it can be difficult to separate the parts you glued.
-
USS Constitution by mtbediz - 1:76
mtbediz replied to mtbediz's topic in - Build logs for subjects built 1751 - 1800
Thank you so much. -
Absolutely beautiful work on the canopy frame Jon!
-
USS Constitution by mtbediz - 1:76
mtbediz replied to mtbediz's topic in - Build logs for subjects built 1751 - 1800
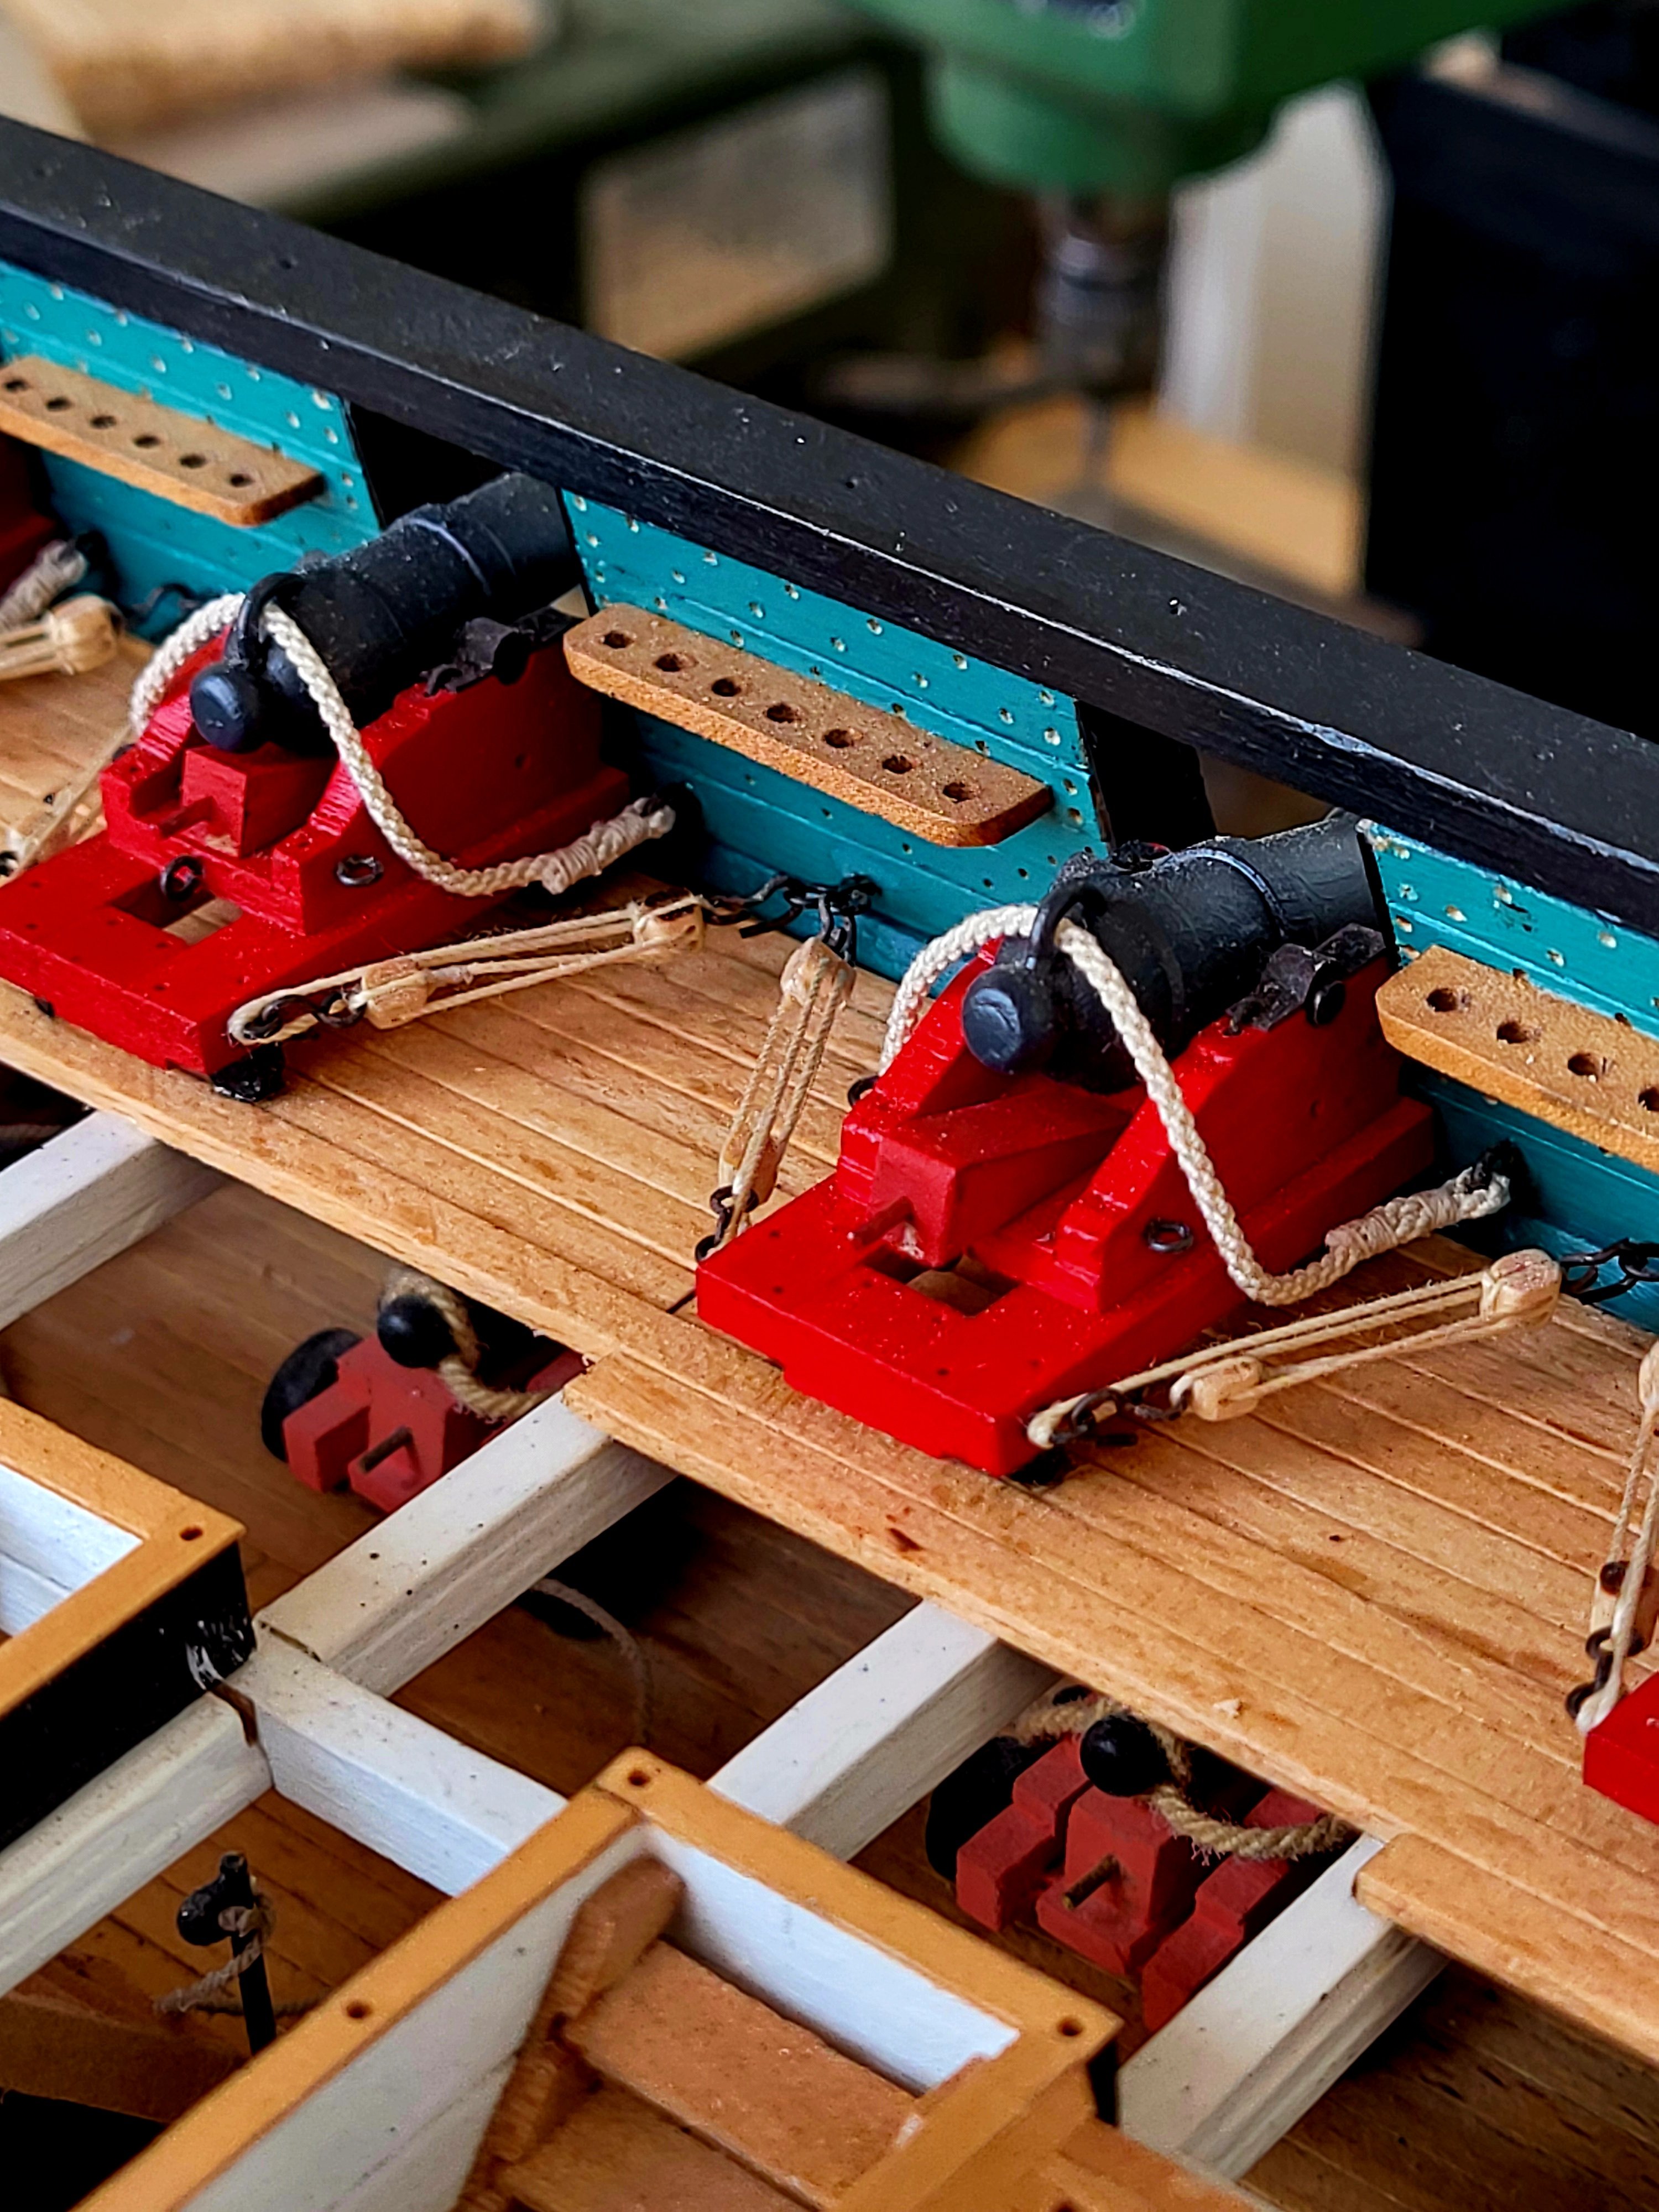
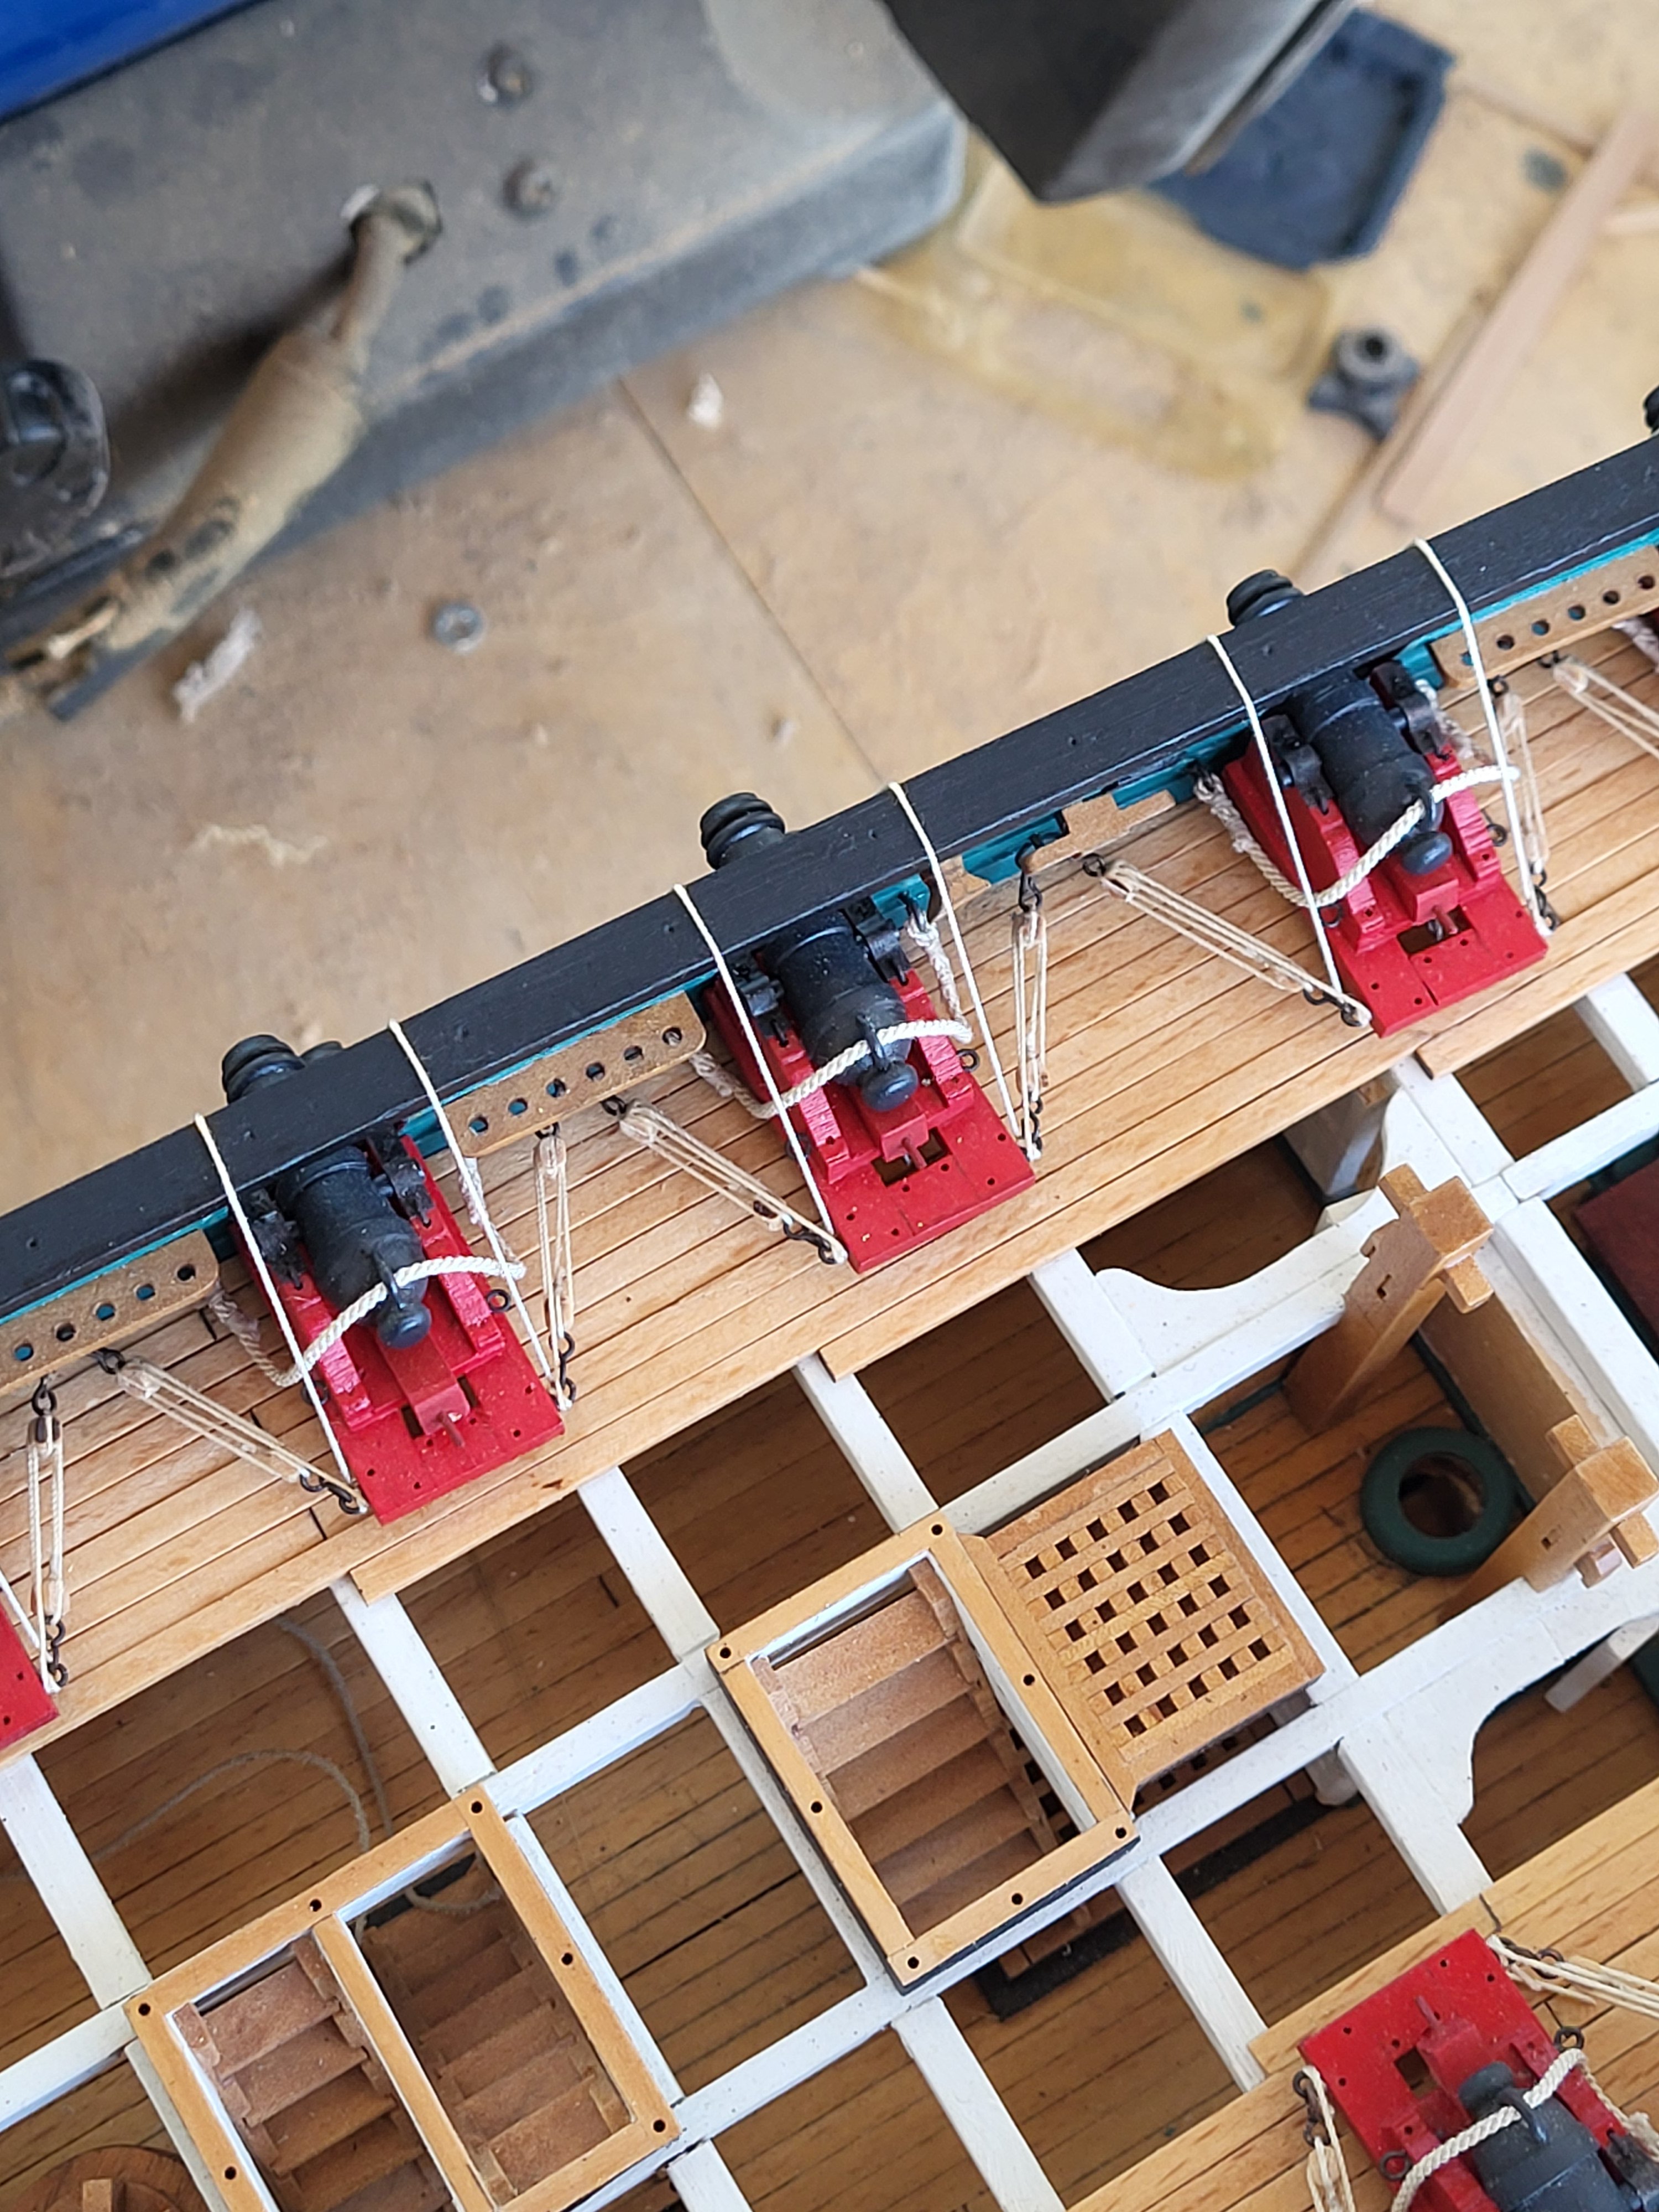
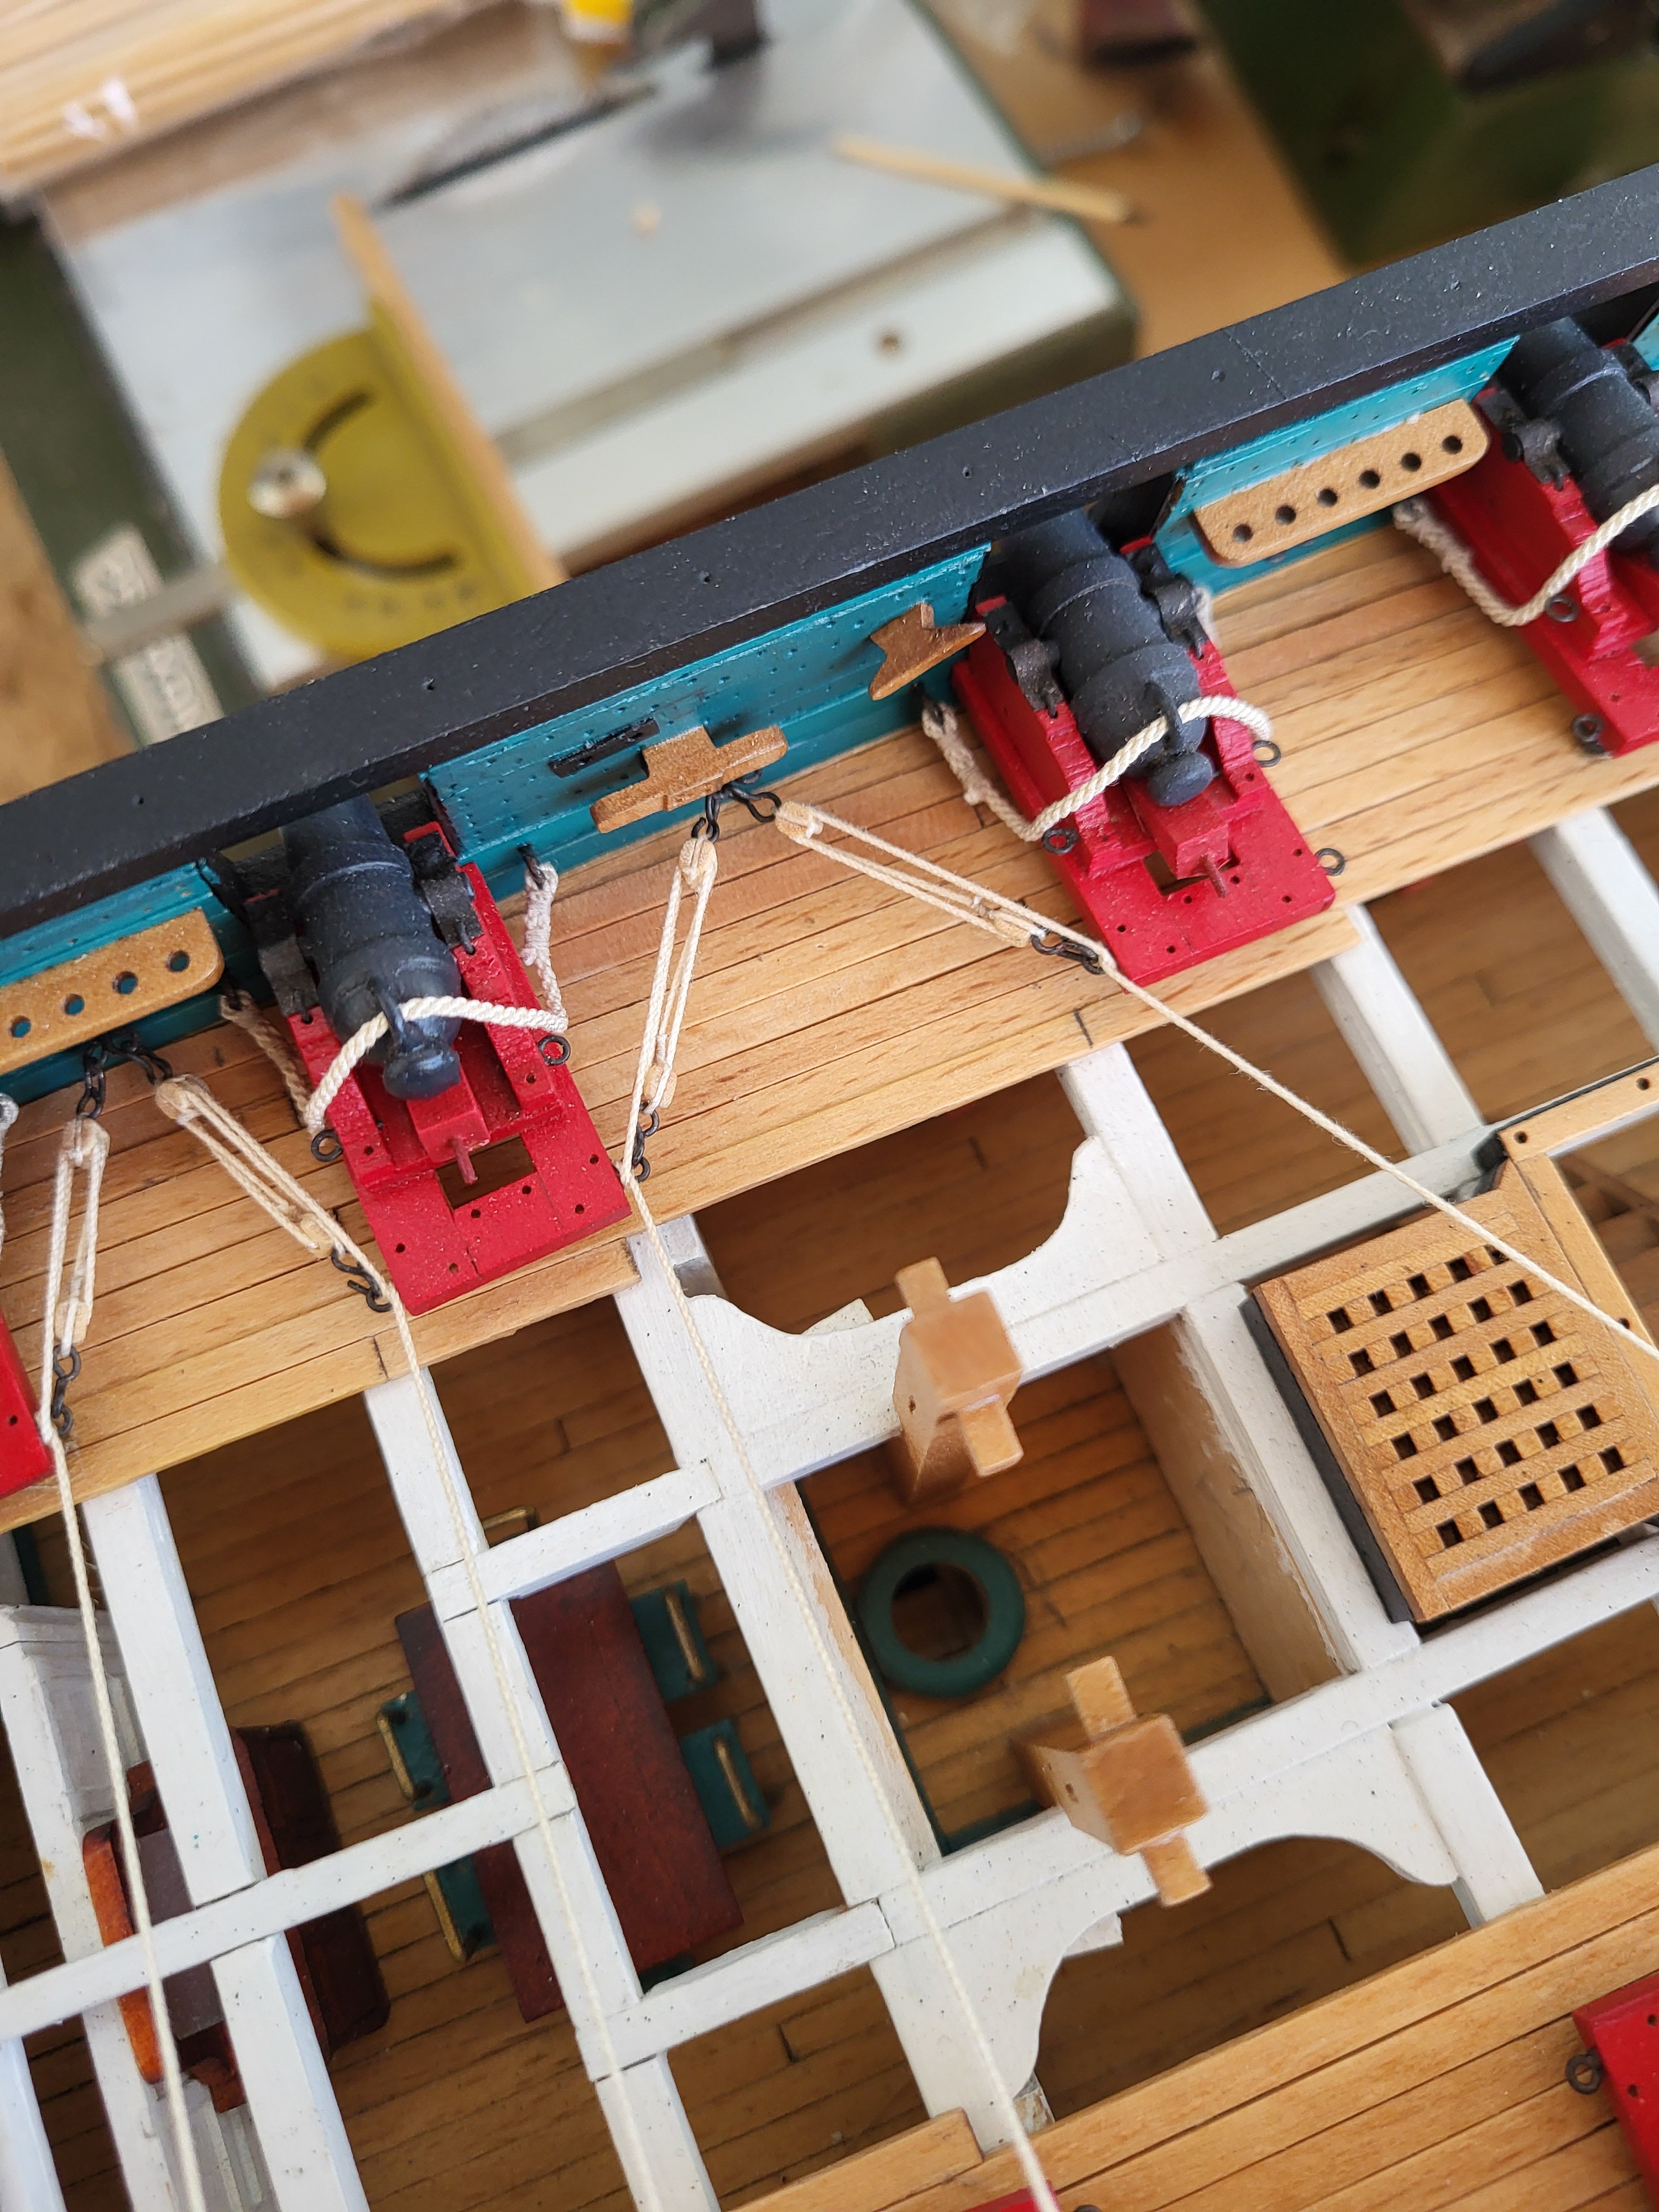
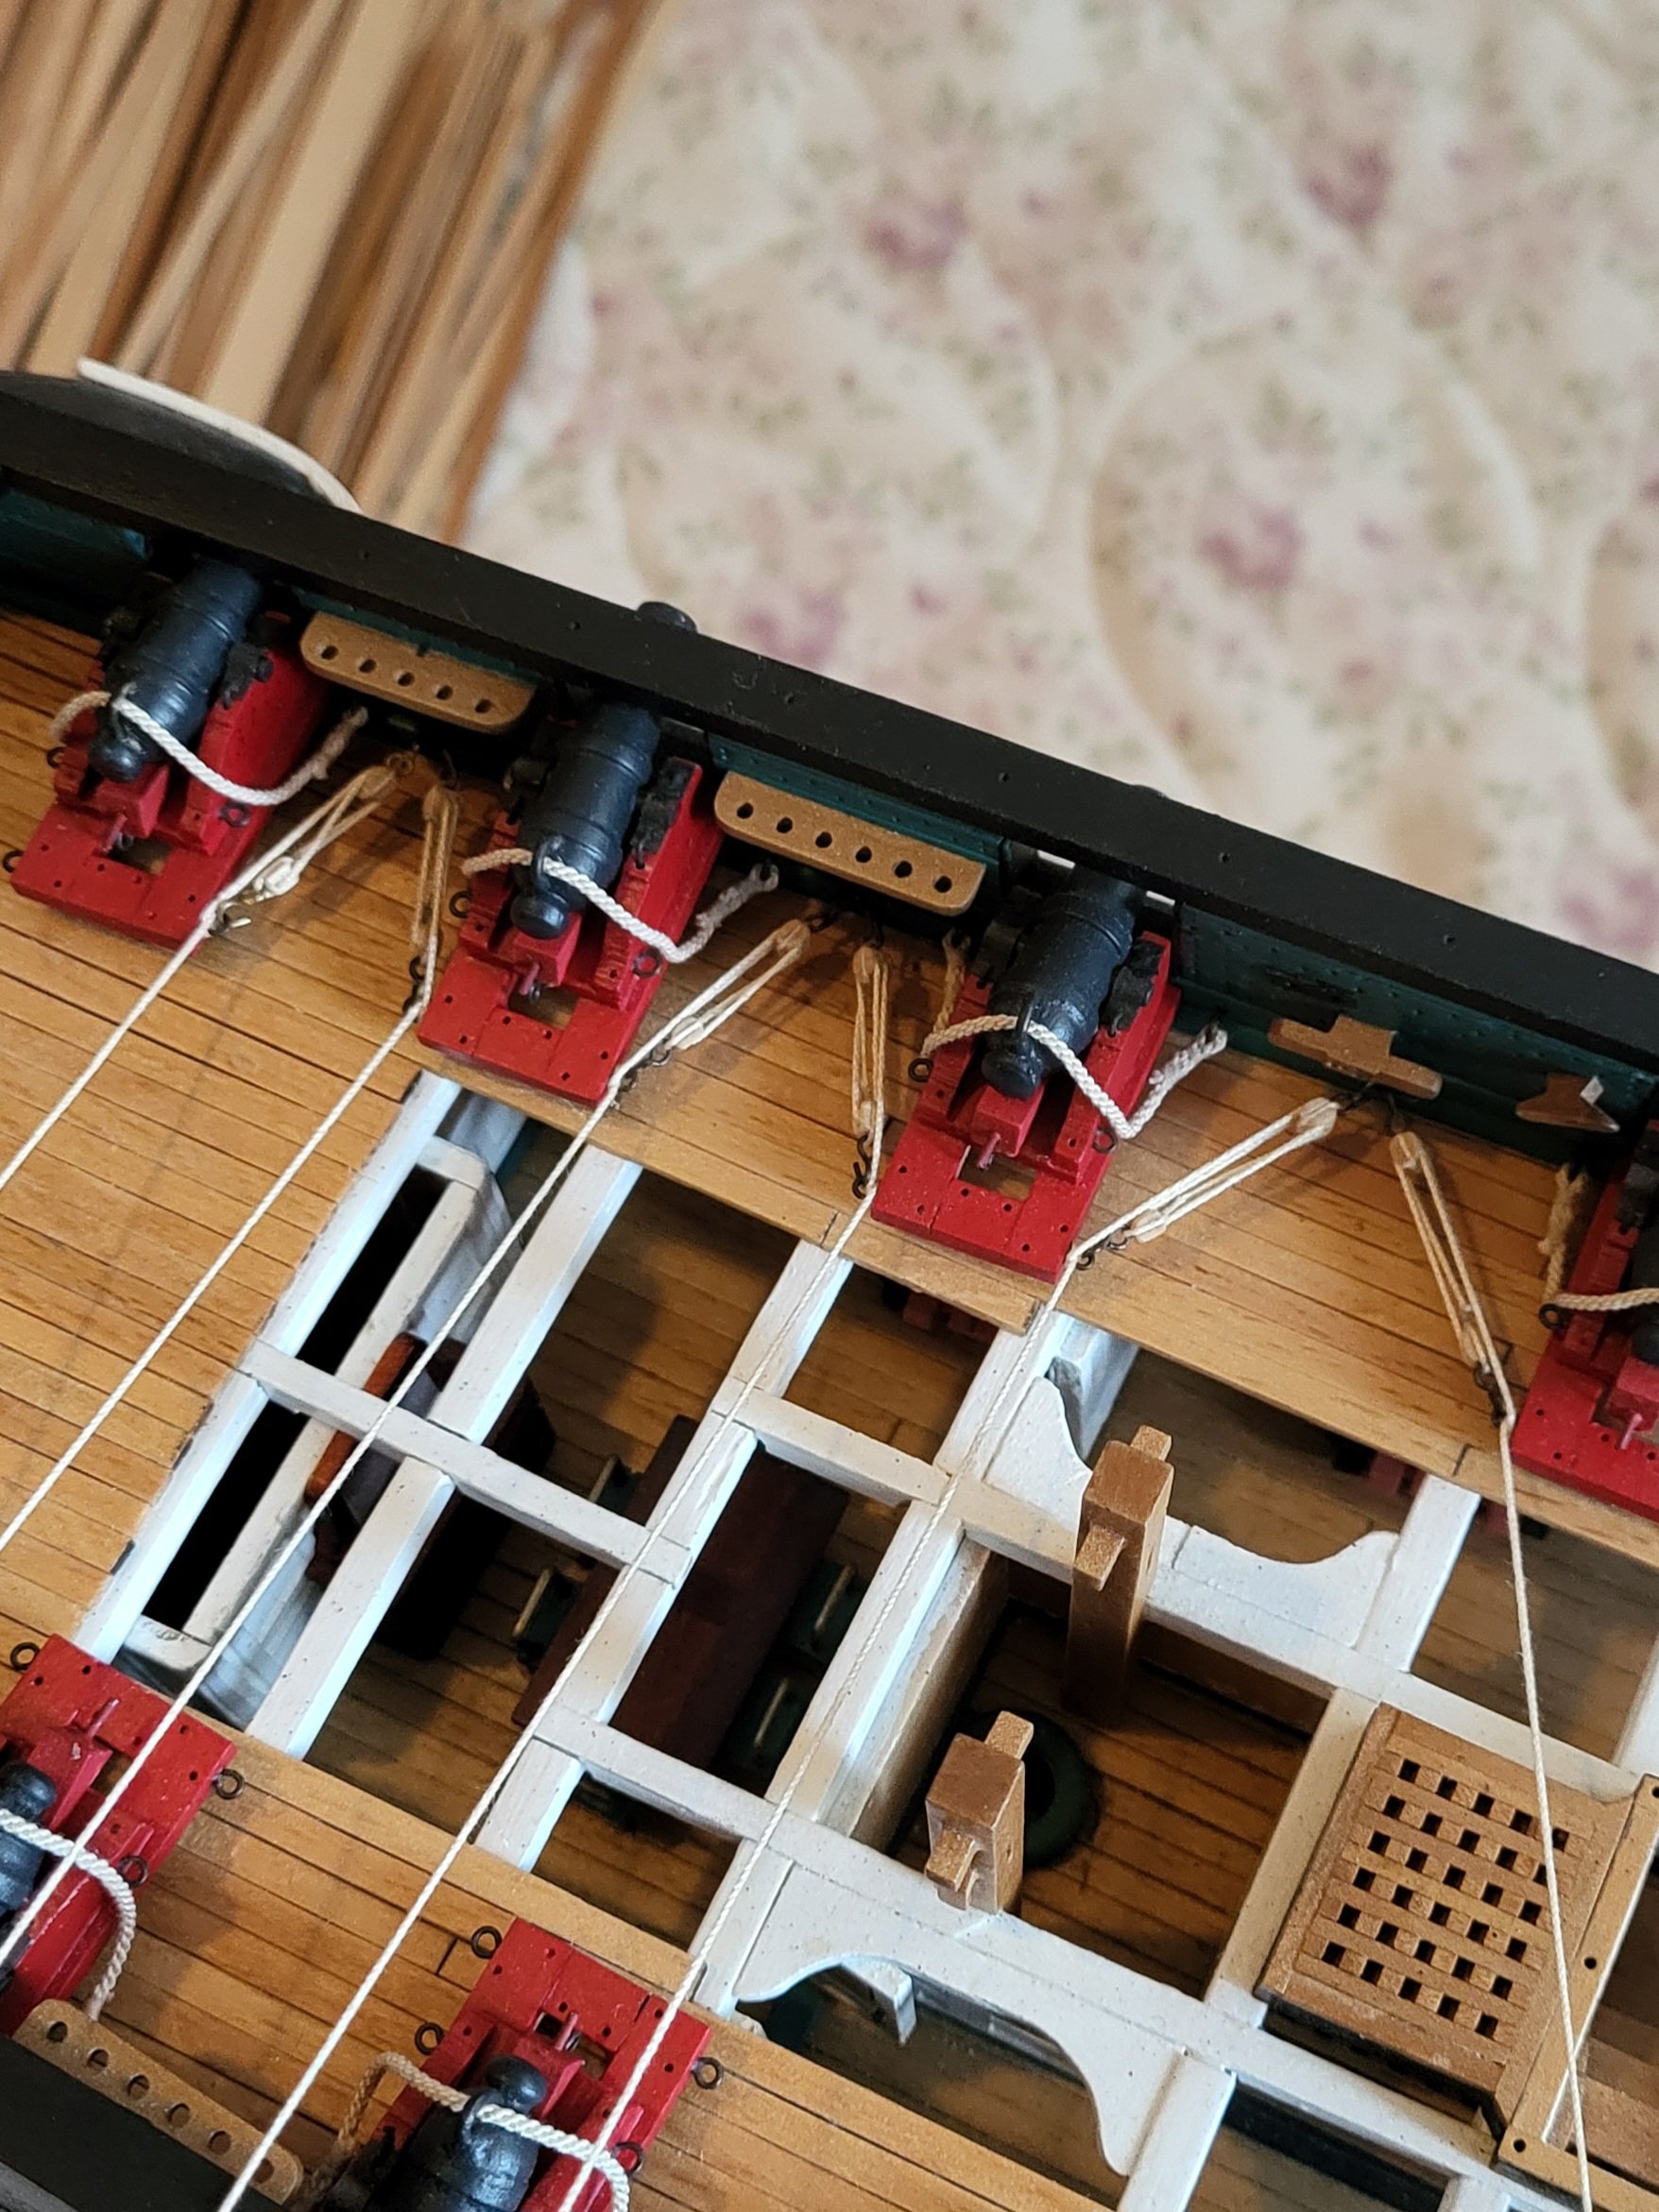
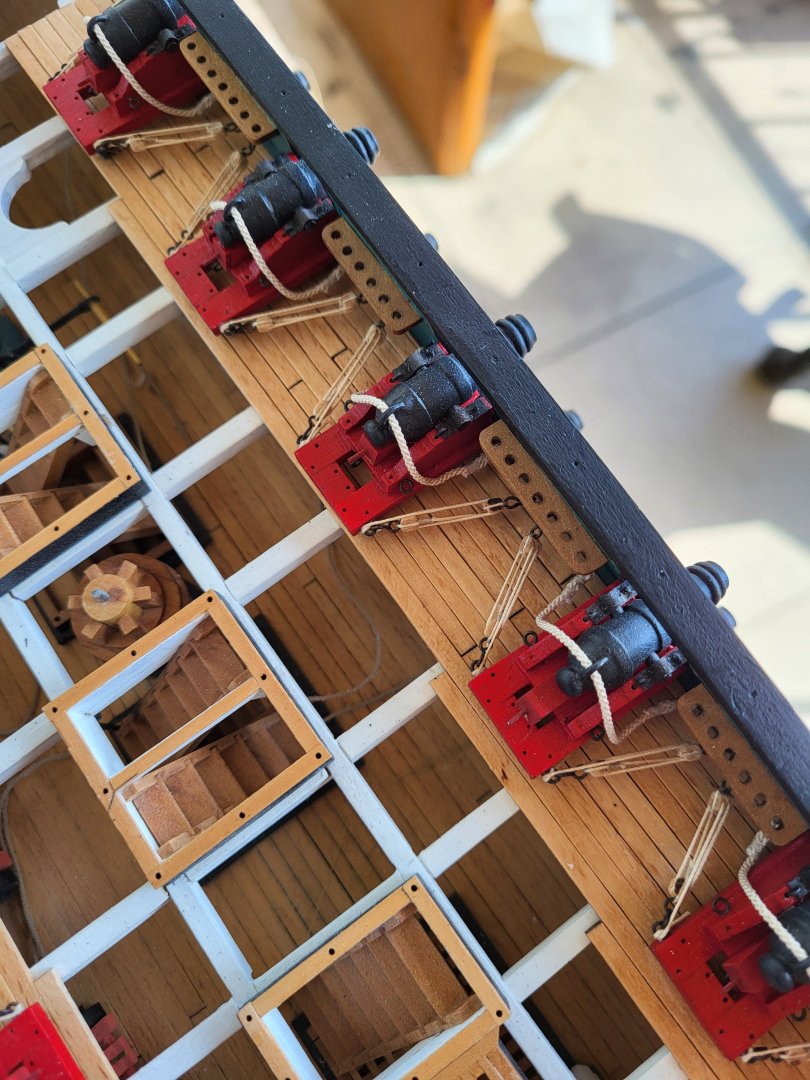
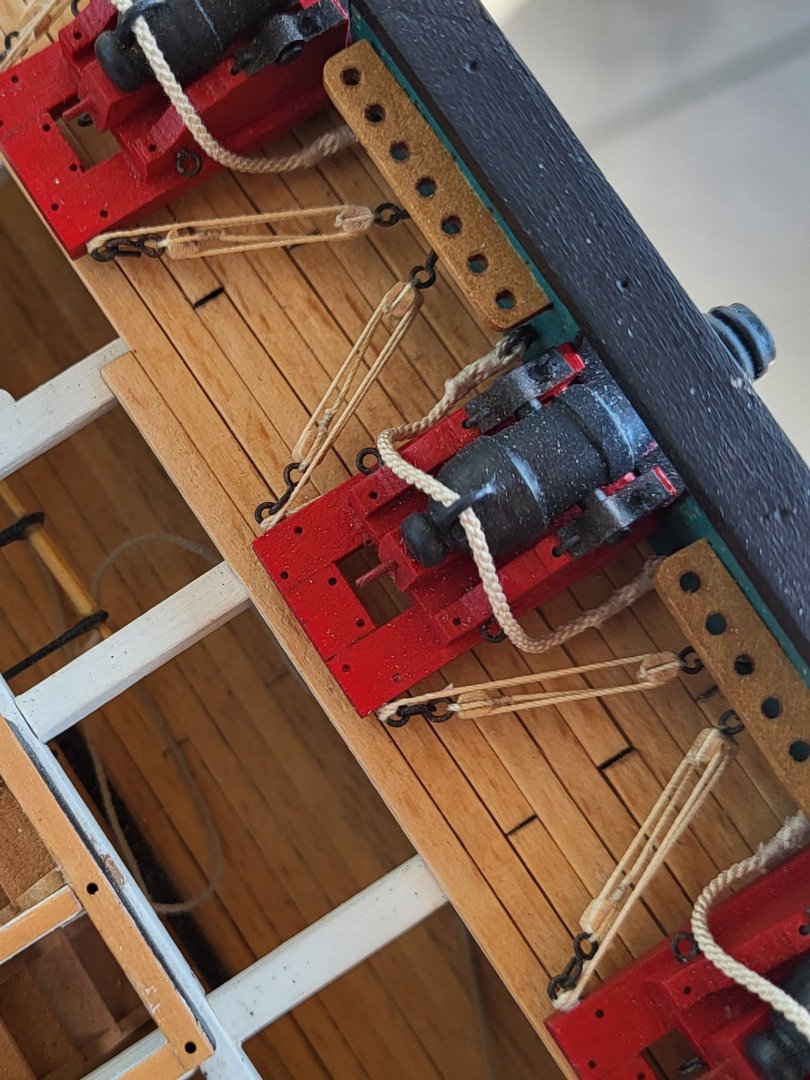
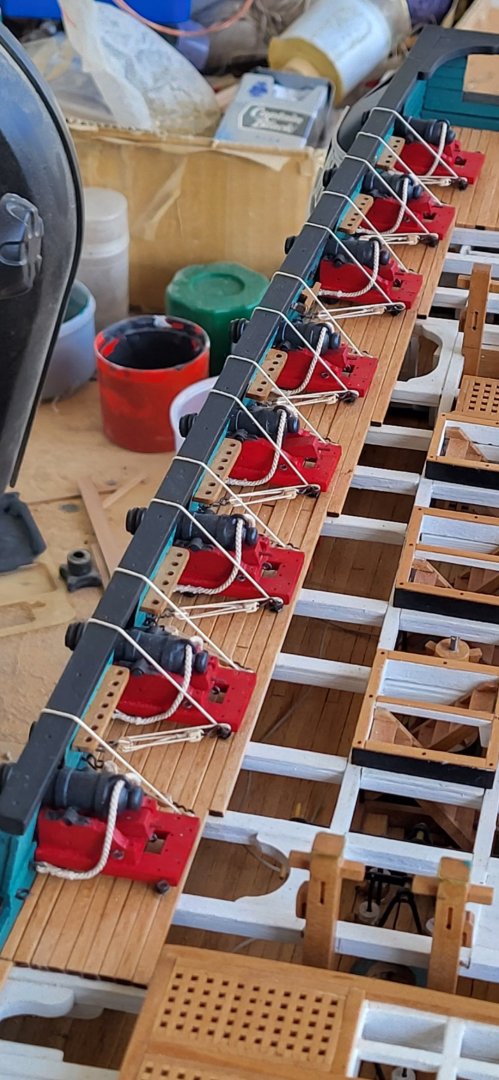
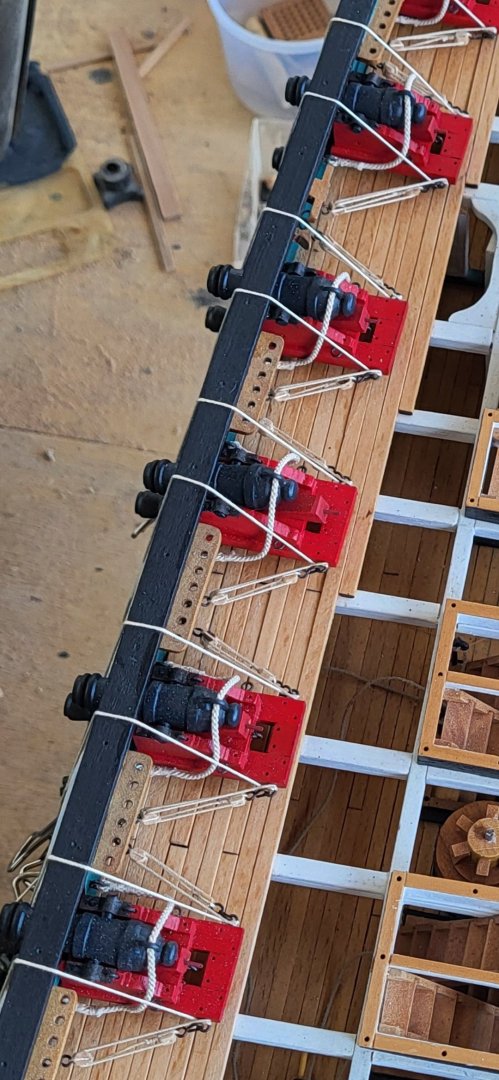
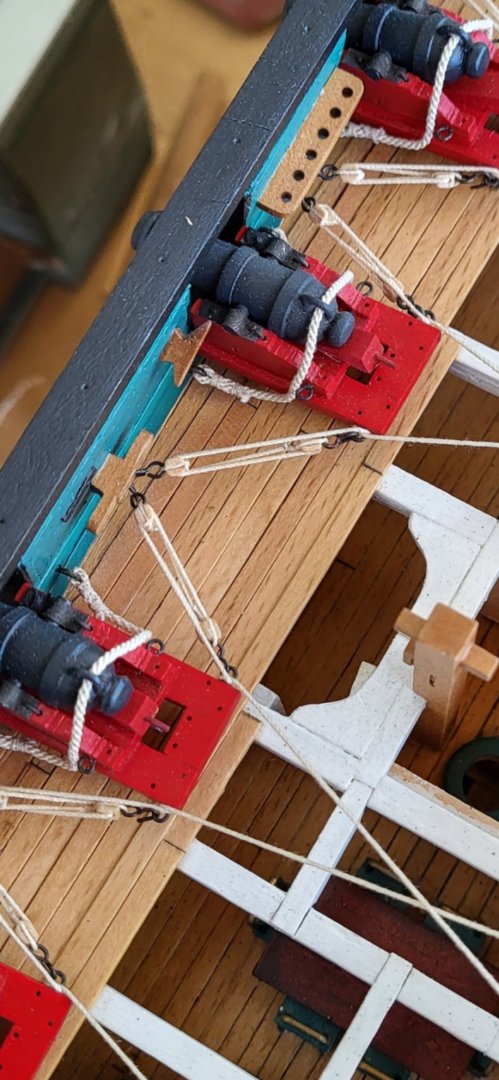
Rigging of the carronades on the spar deck continues. In the photos the tackle ropes look thicker than they are. I think this happens because the resolution of the photos is reduced when uploading photos to this site.

-
USS Constitution by mtbediz - 1:76
mtbediz replied to mtbediz's topic in - Build logs for subjects built 1751 - 1800
Thanks Greg. You spent bunch of money and bought a milling machine. You no longer need to purchase anything. We expect you to produce everything yourself. Enjoy your own work! -
USS Constitution by mtbediz - 1:76
mtbediz replied to mtbediz's topic in - Build logs for subjects built 1751 - 1800
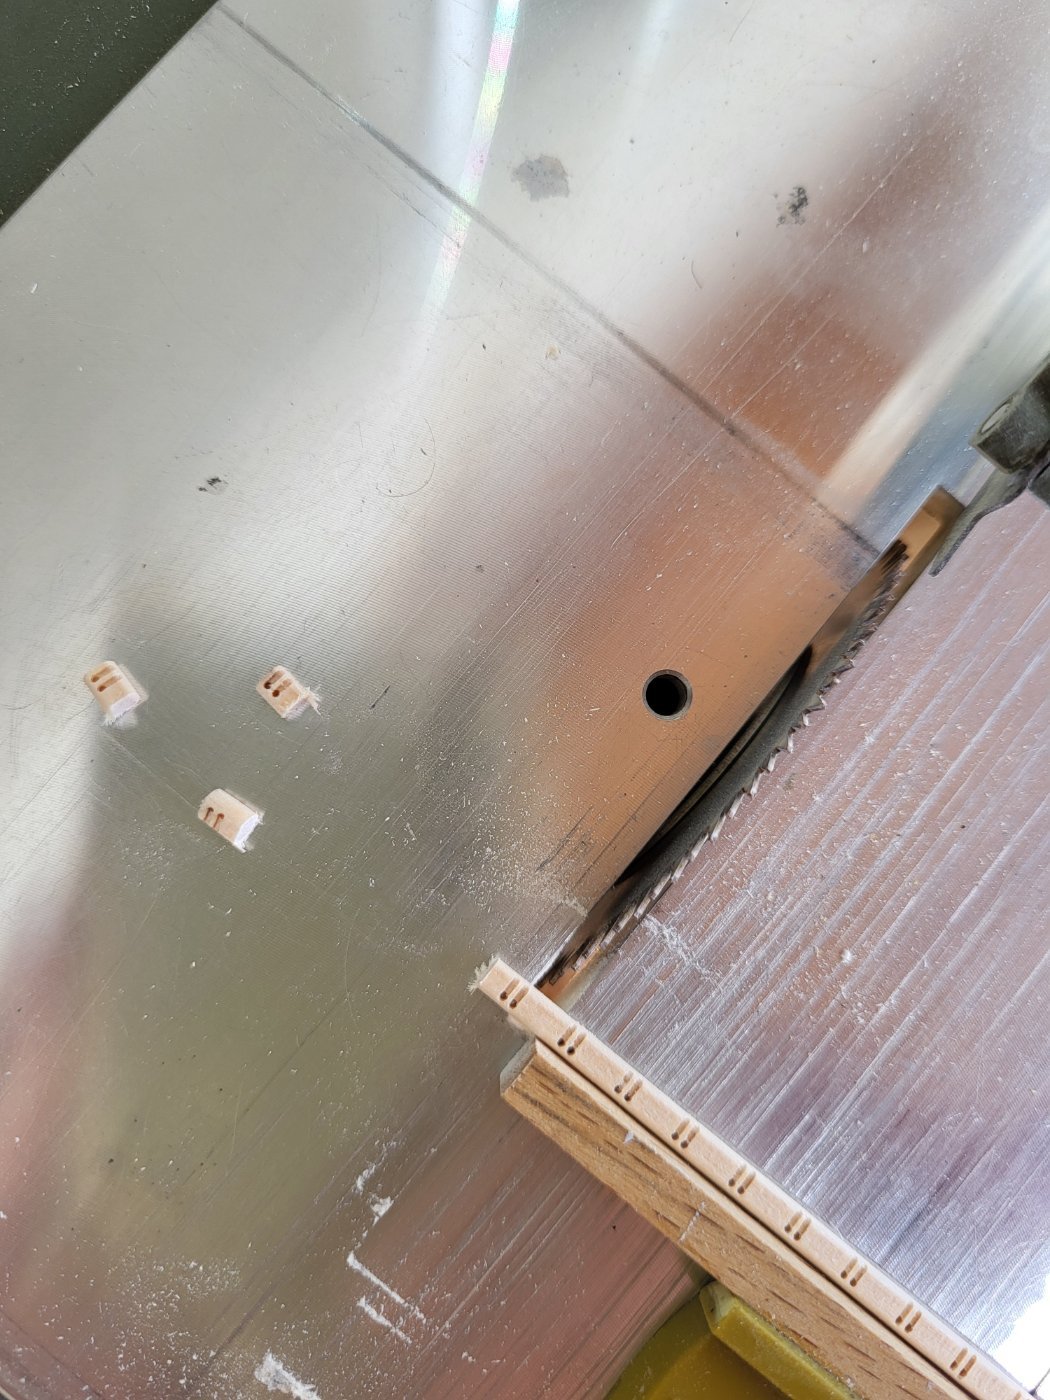
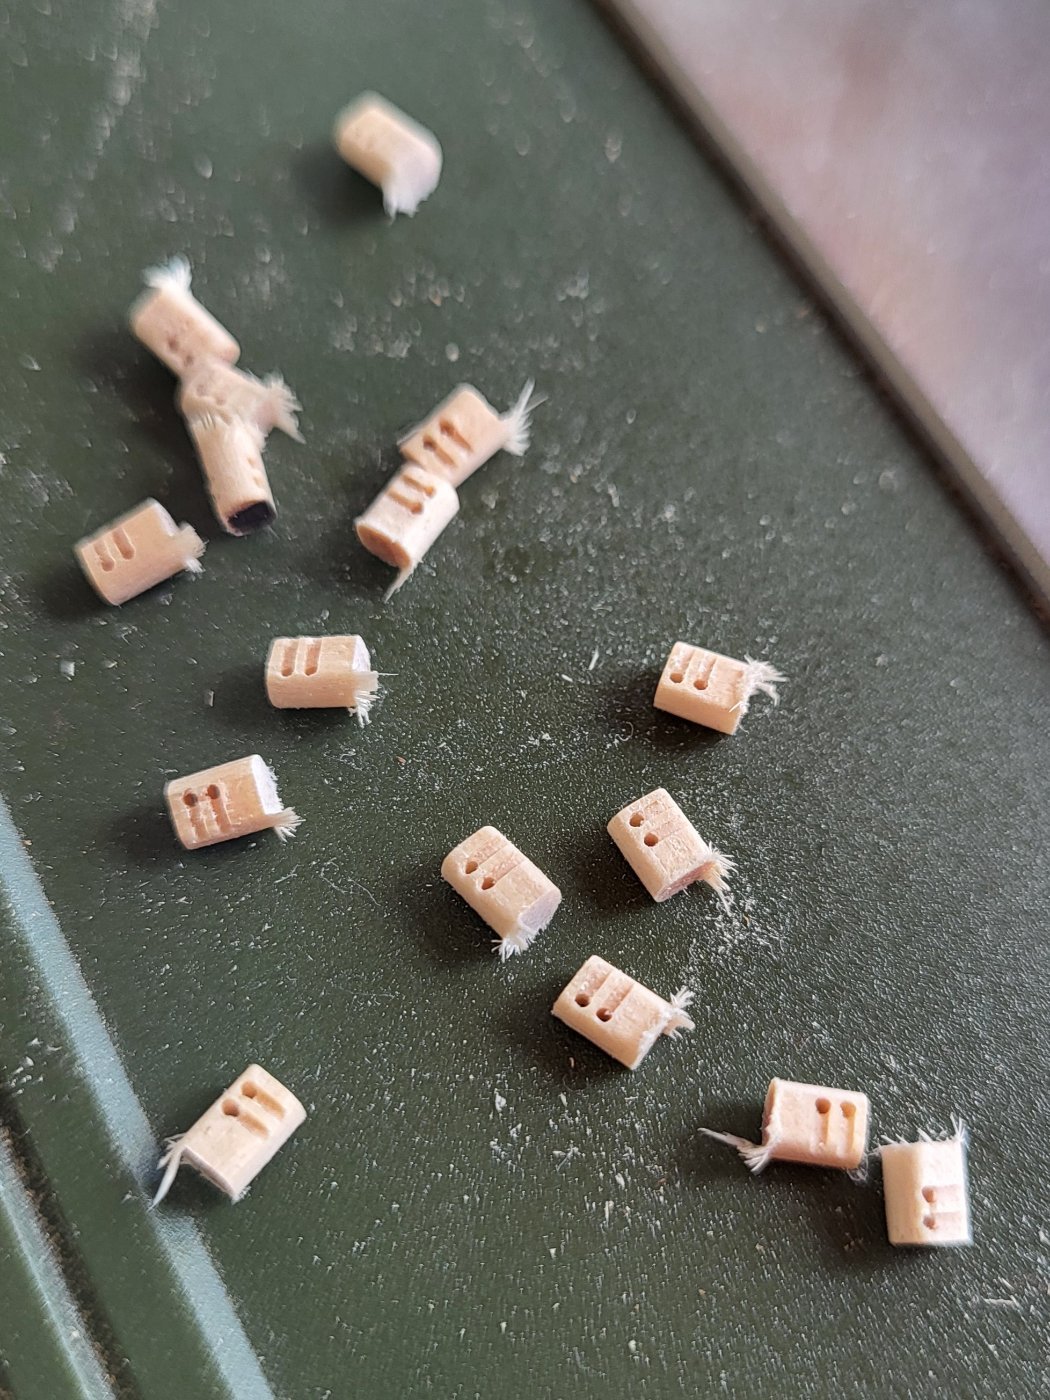
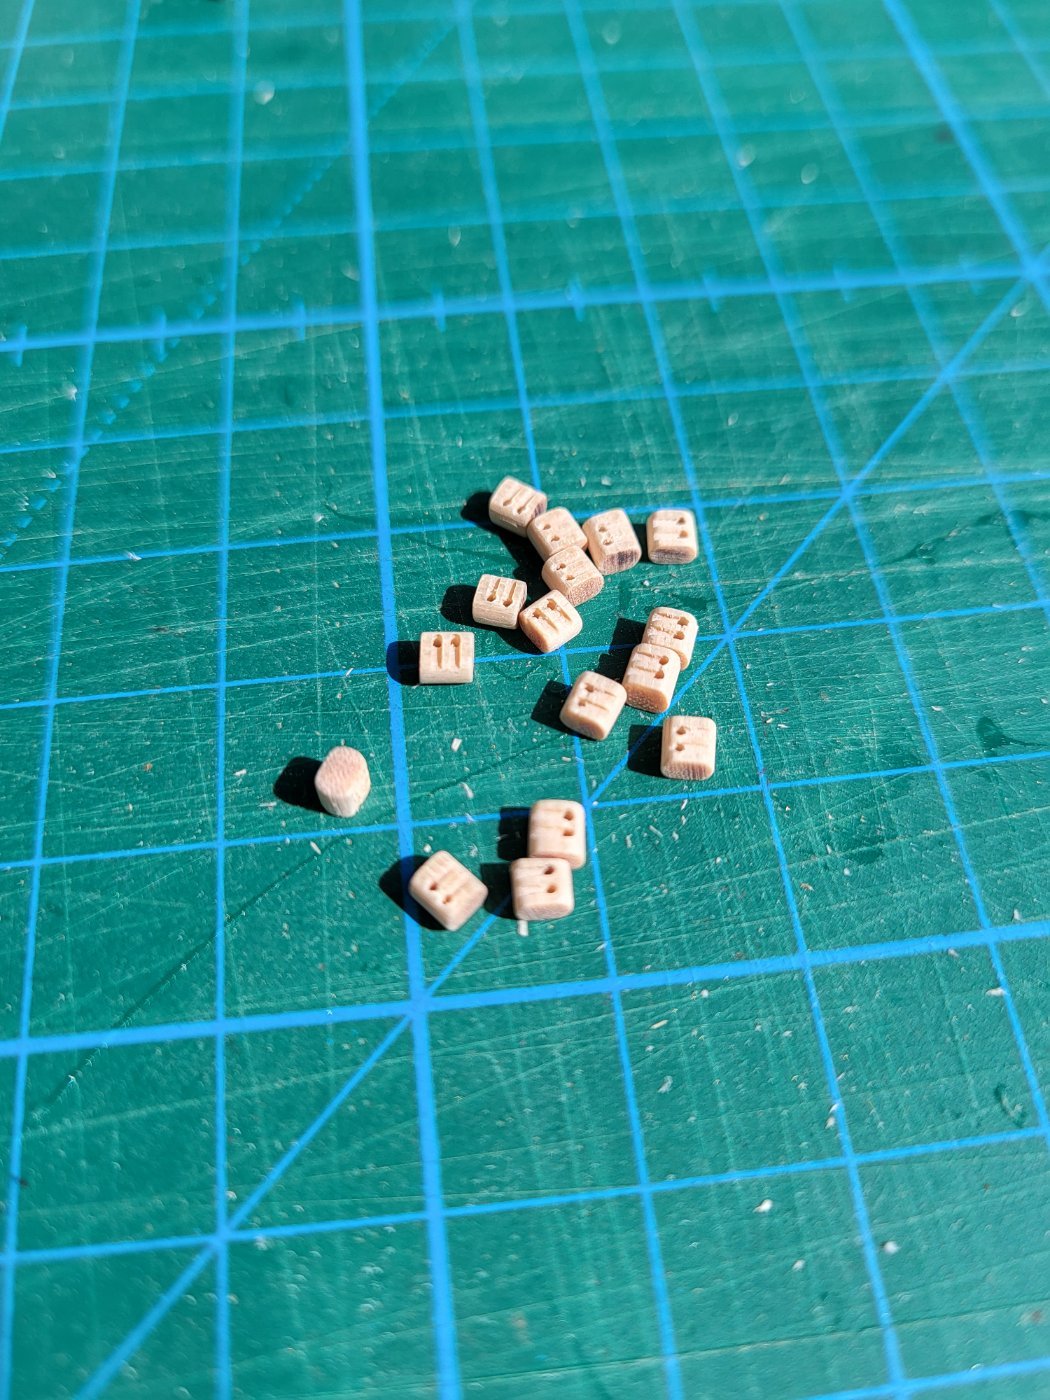
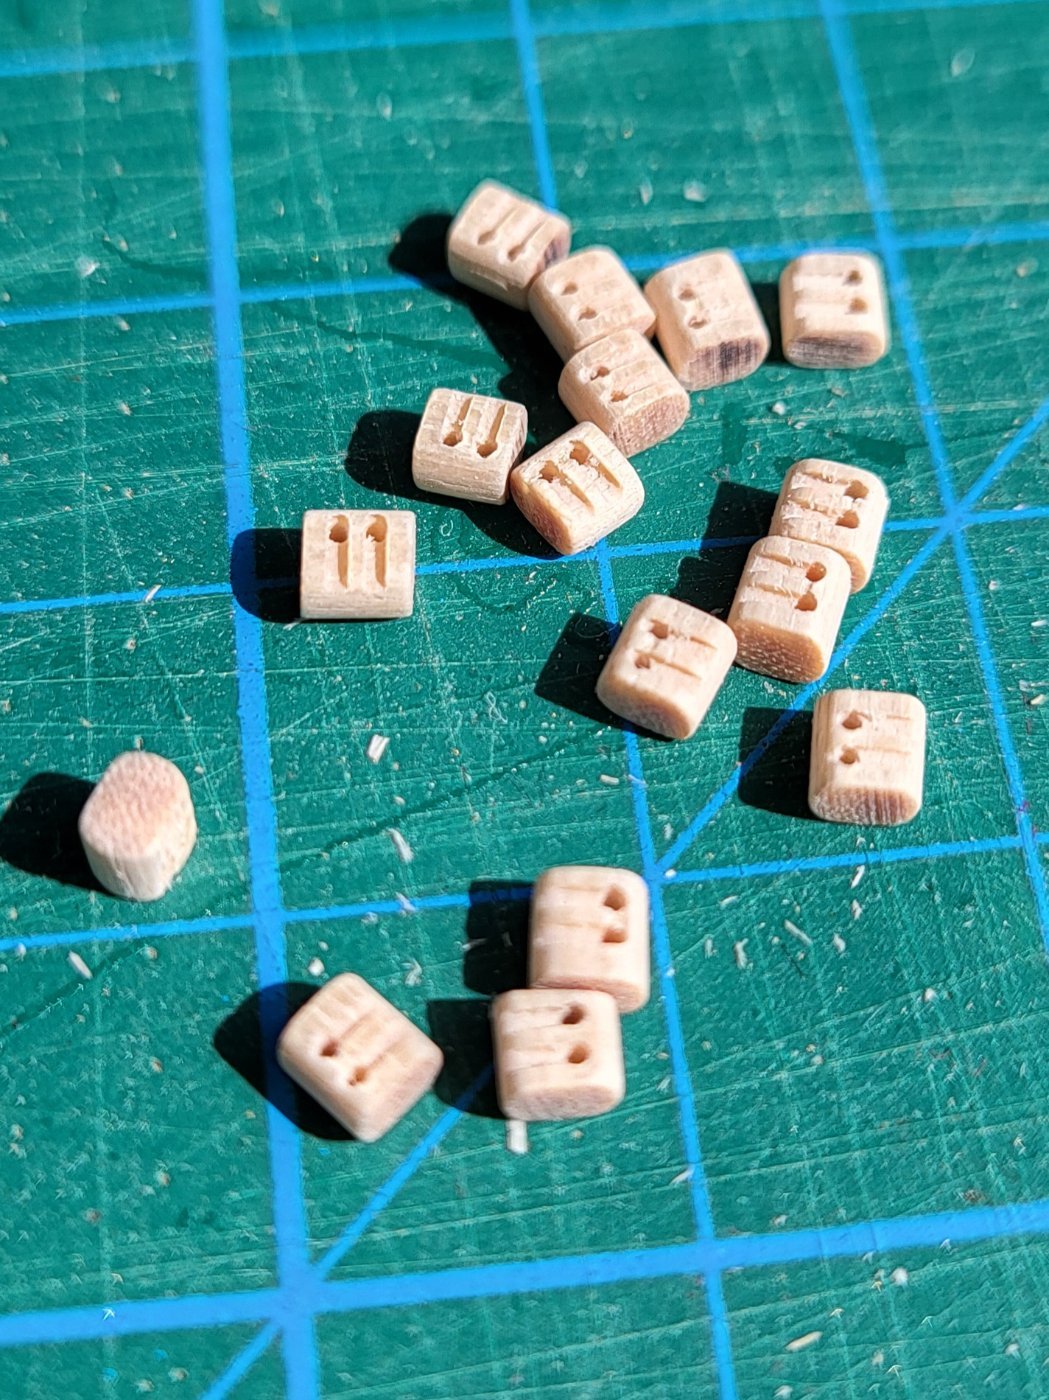
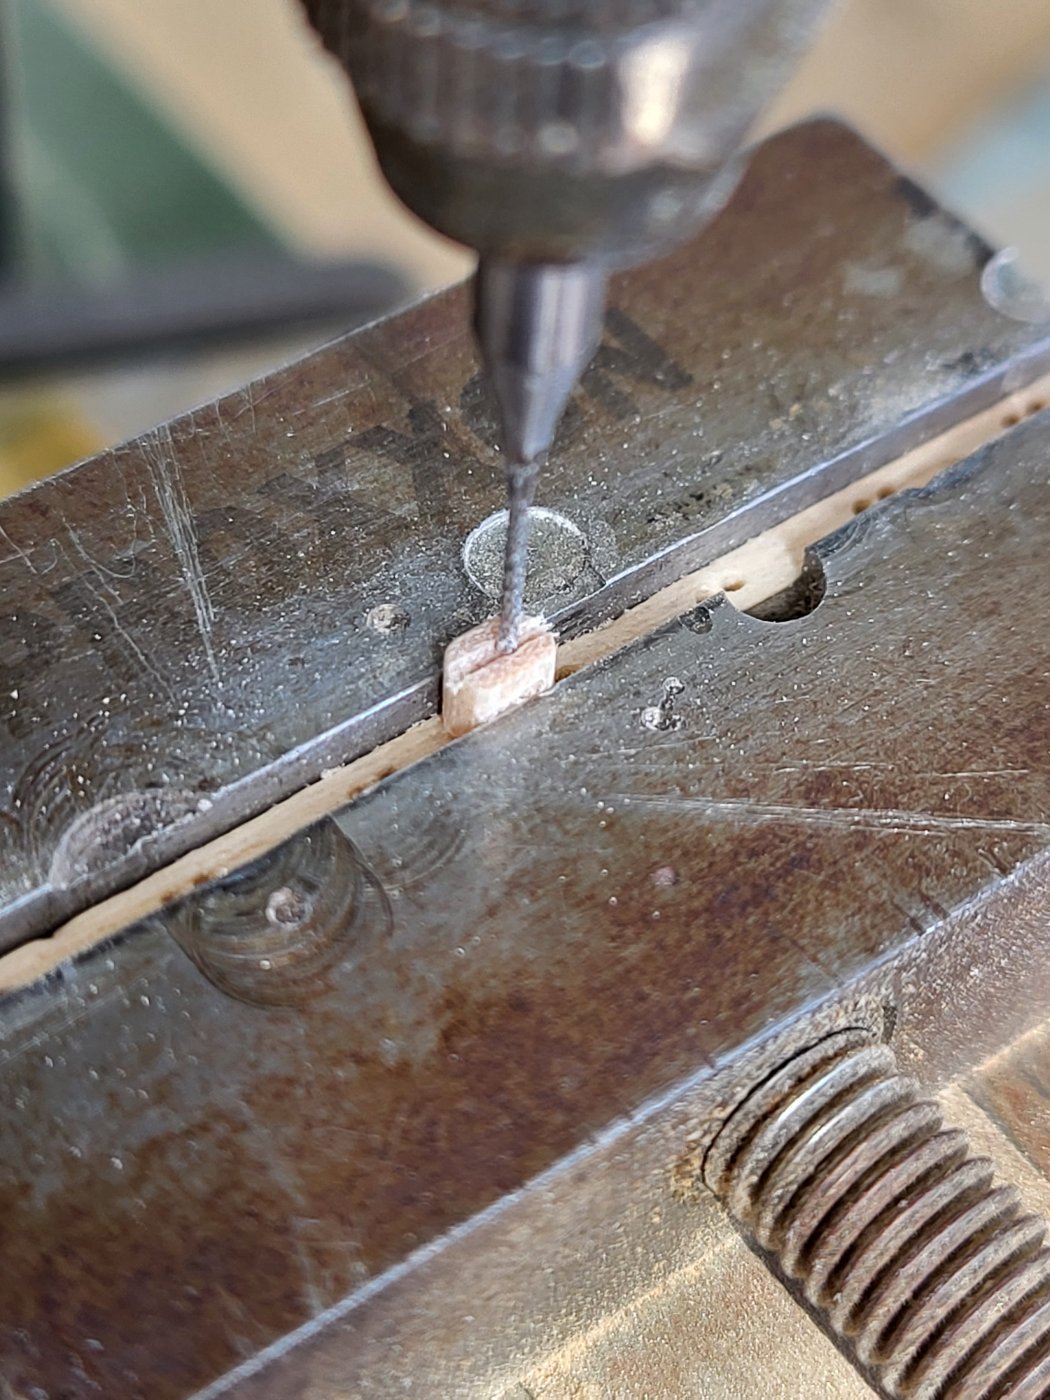
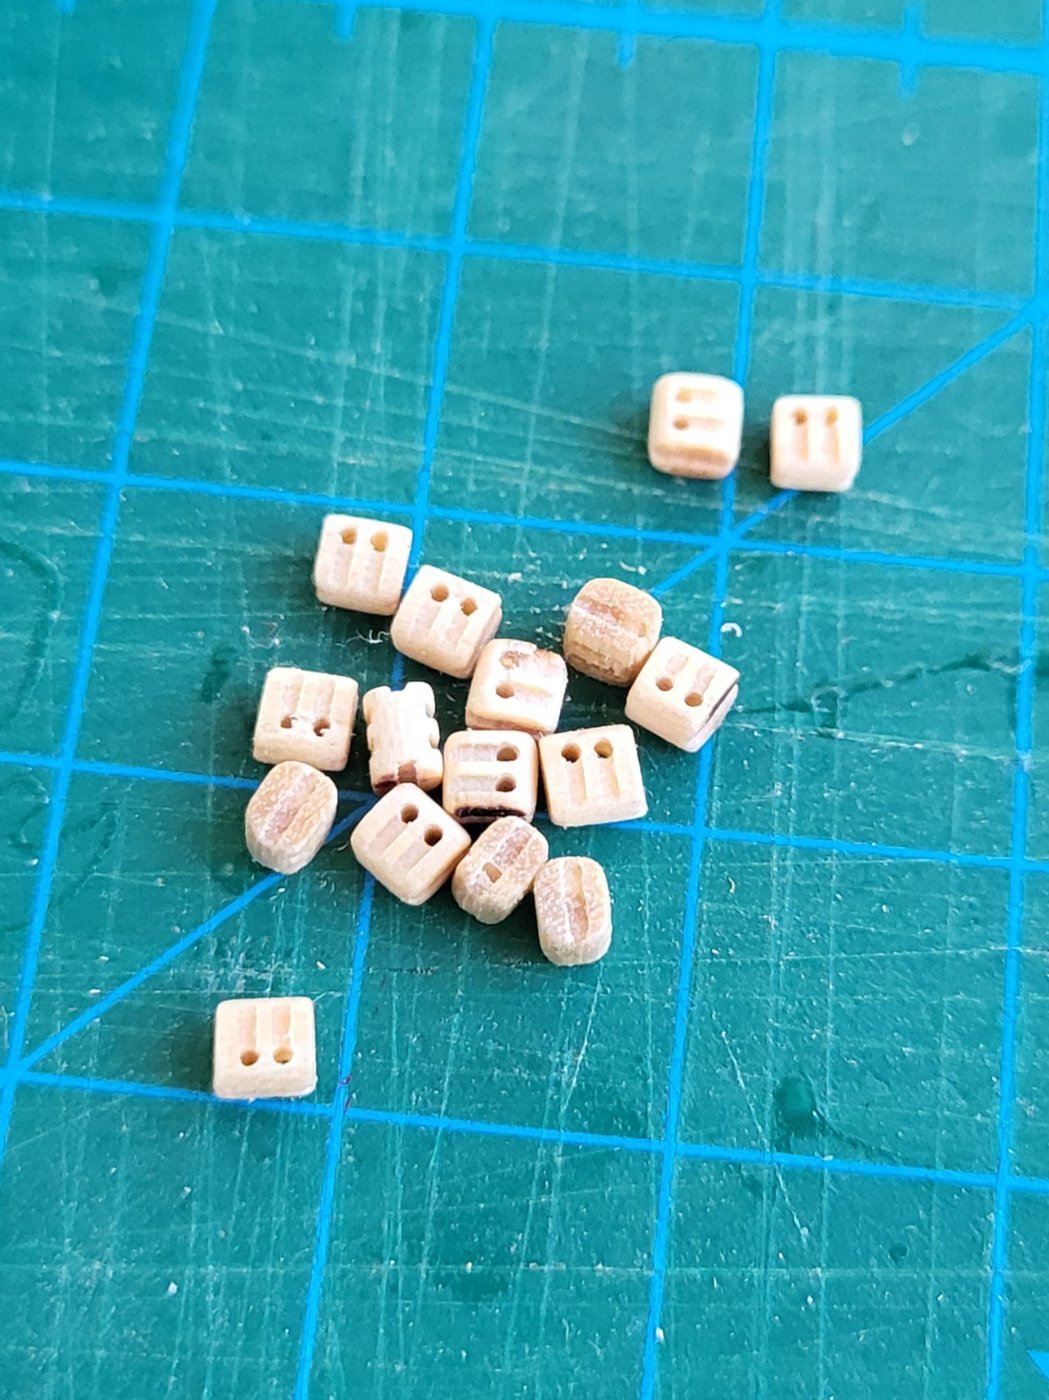
I would like to show how I produce these 3 mm blocks for those who are interested. I have shared this method before, but I wanted to share it again for friends who do not know. First, I turned the wooden dowel with a diameter of 3 mm into an ellipse bar with my milling machine. Again, using my milling machine, I drilled holes with a diameter of 0.6 mm on this elliptical rod and then cut slots to represent the pulleys. After these procedures, I separated the blocks from each other by cutting them with my circular saw. I got rid of the excess with my sanding machine and cut slots on both sides of the blocks with my milling machine.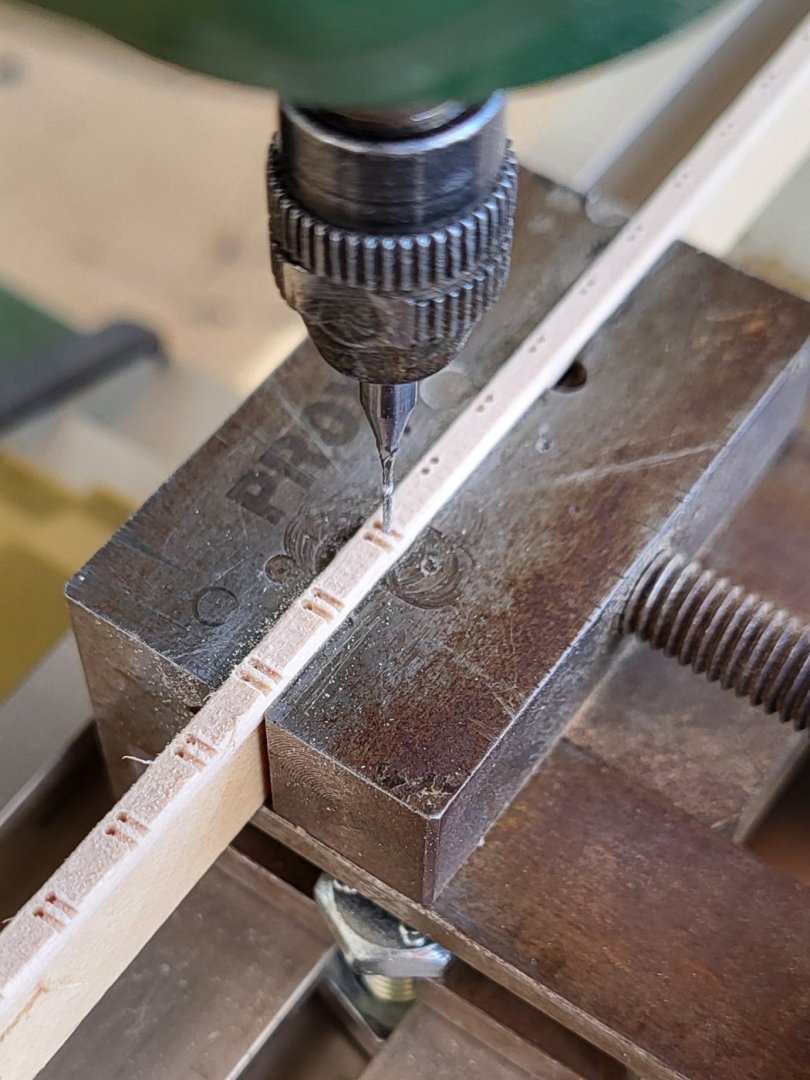


-
USS Constitution by mtbediz - 1:76
mtbediz replied to mtbediz's topic in - Build logs for subjects built 1751 - 1800
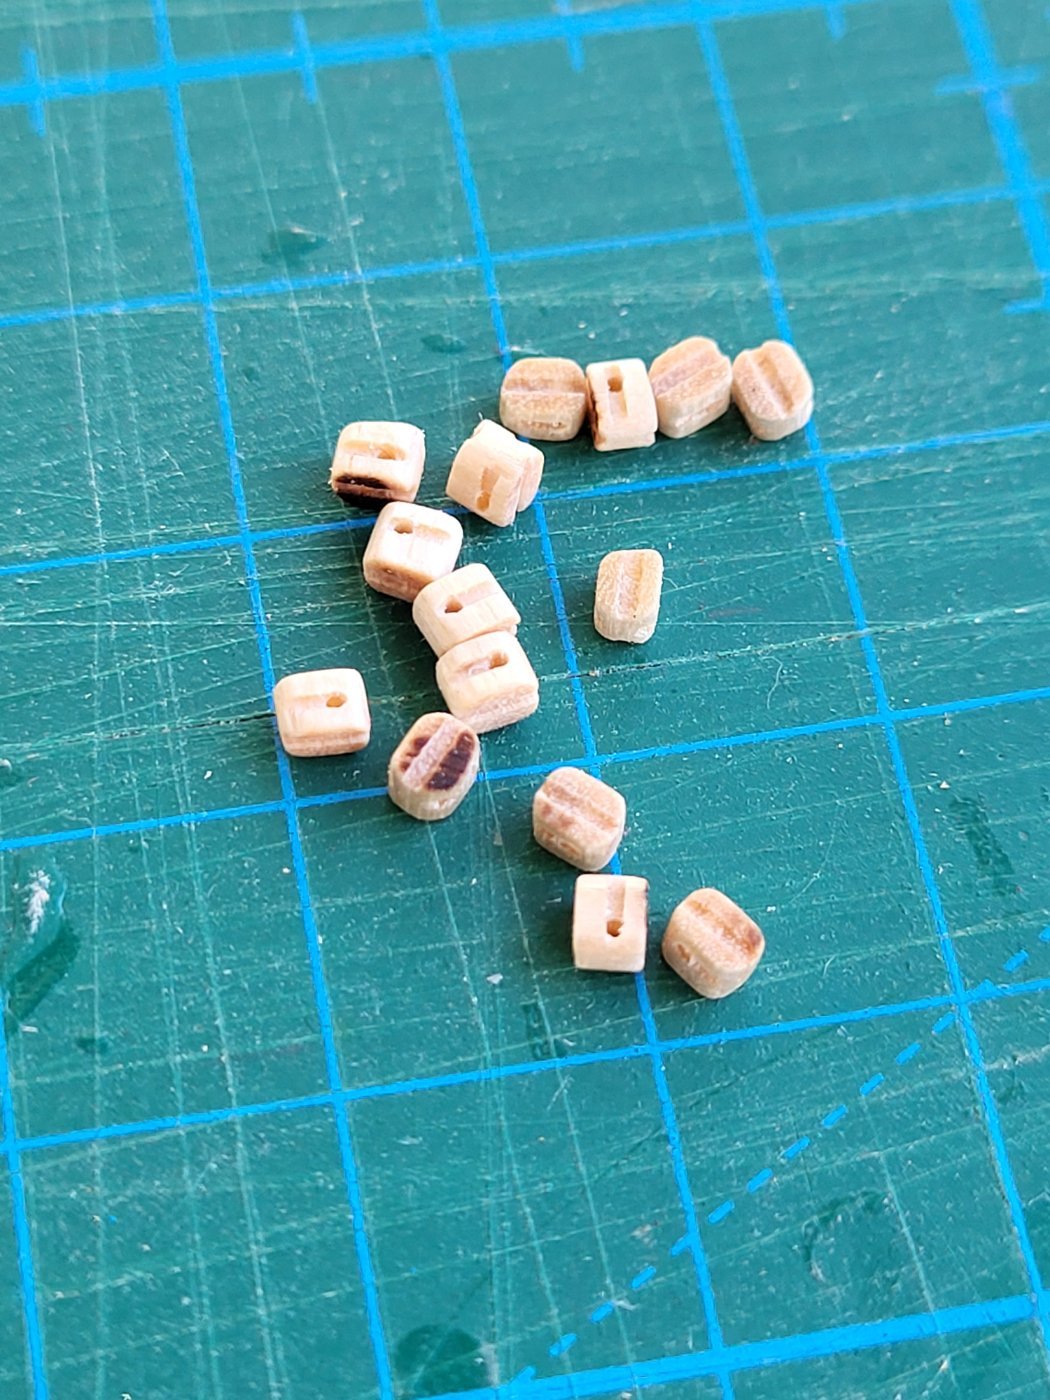
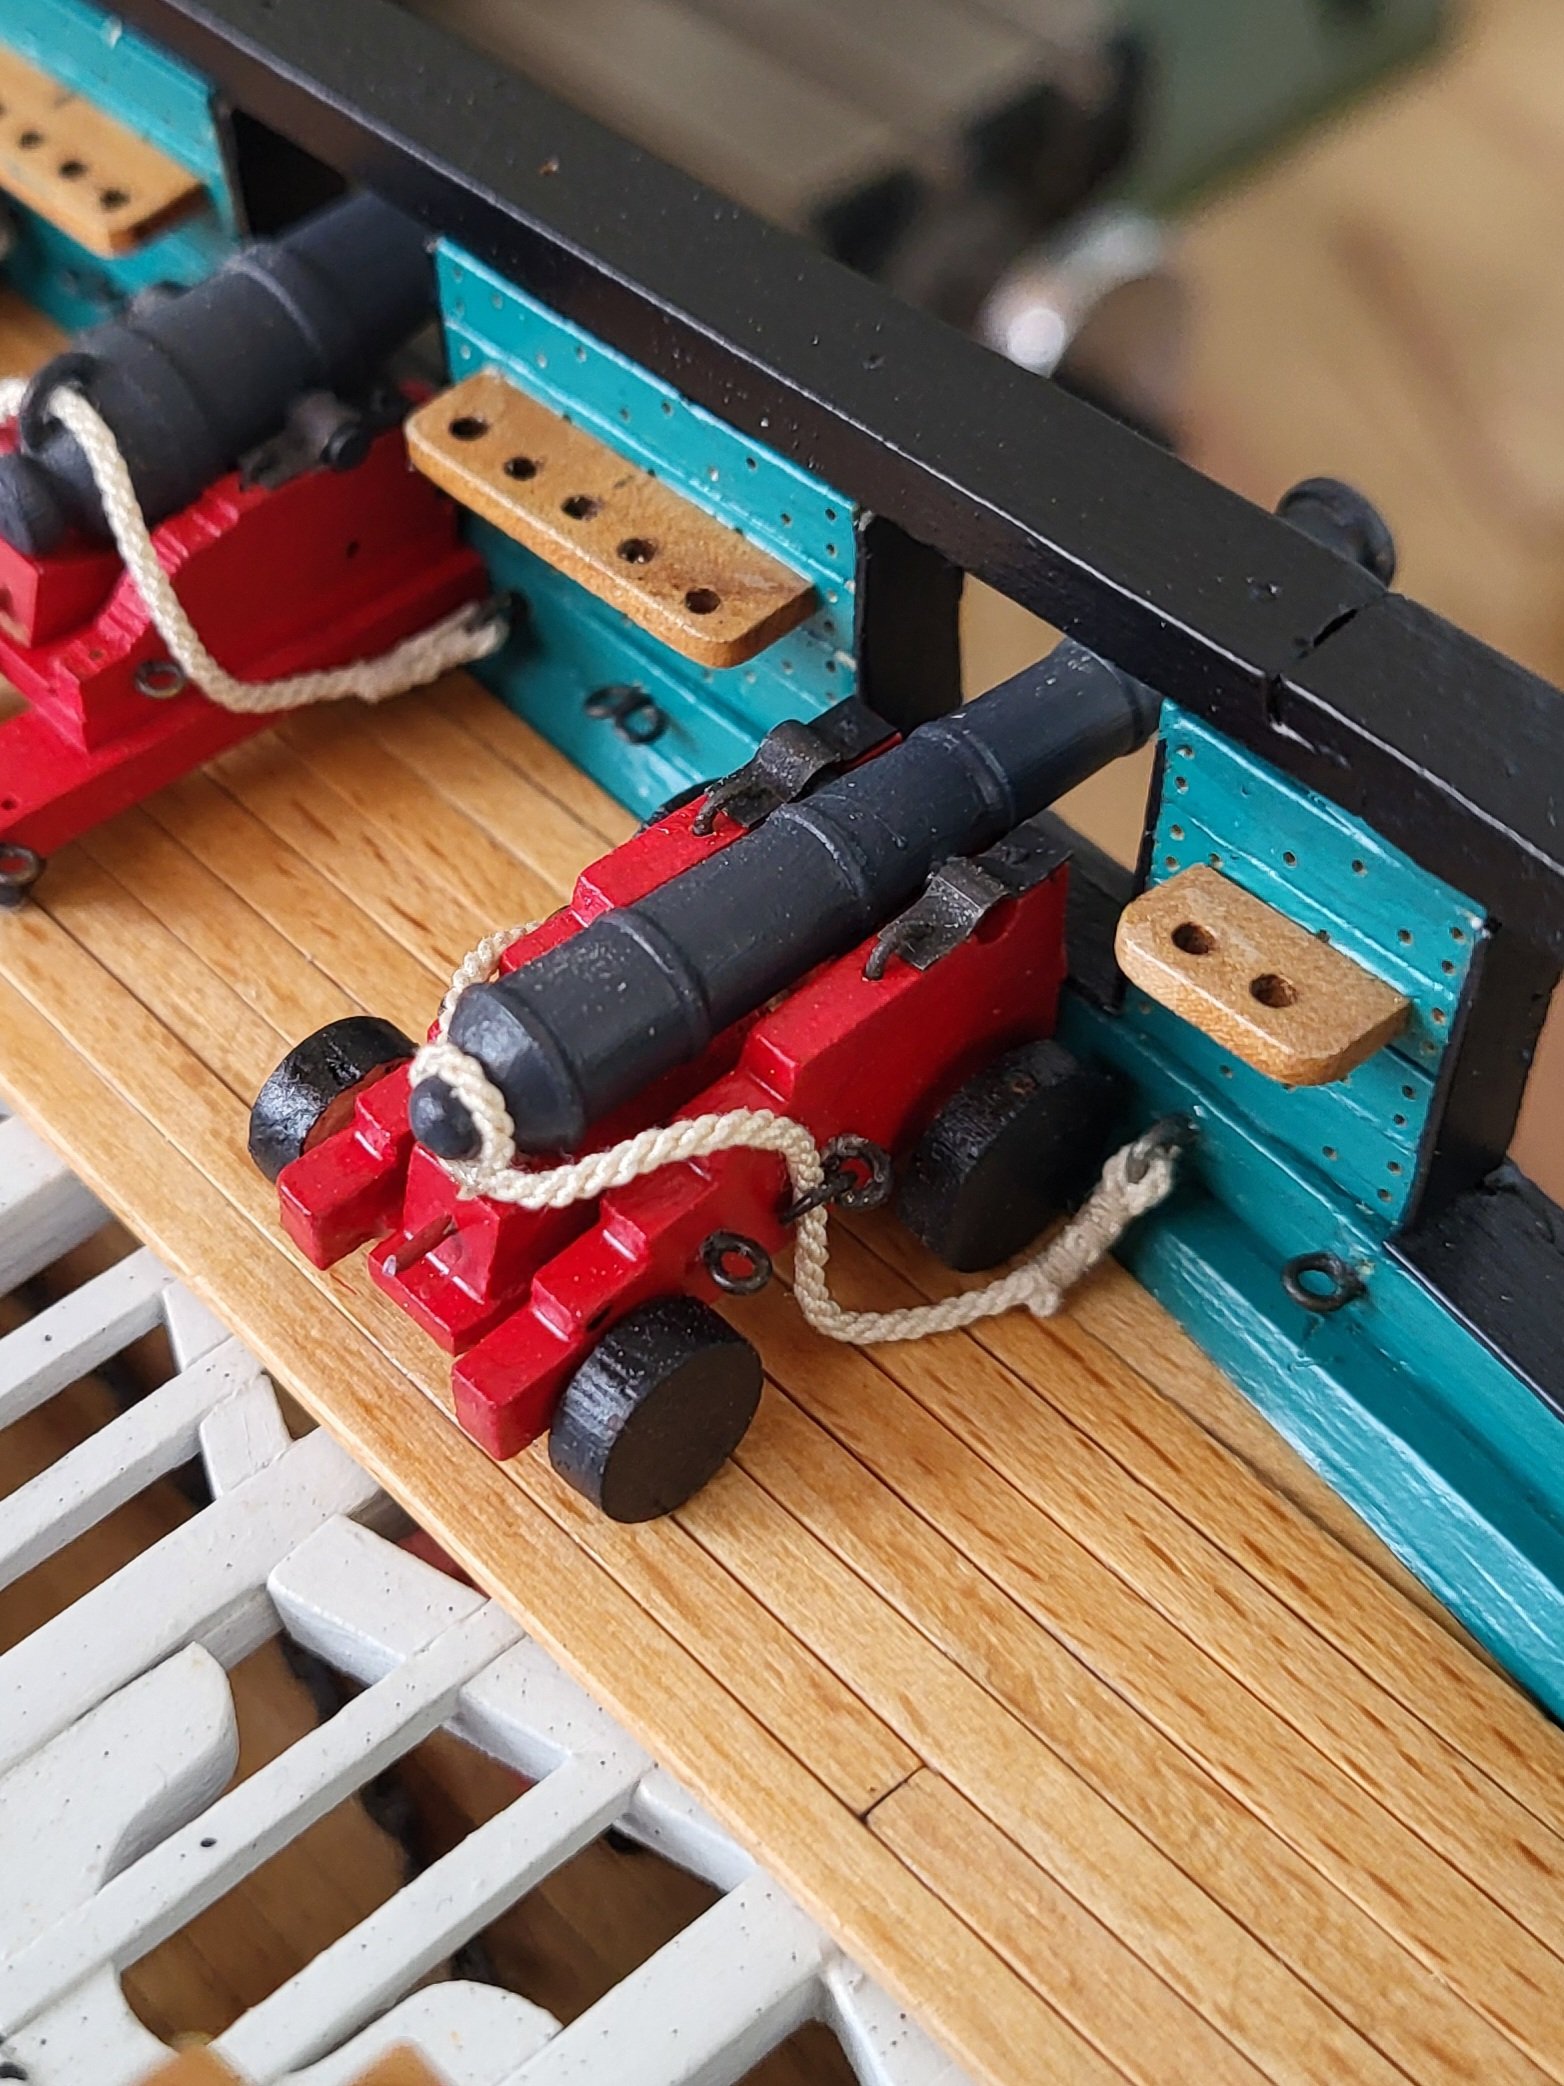
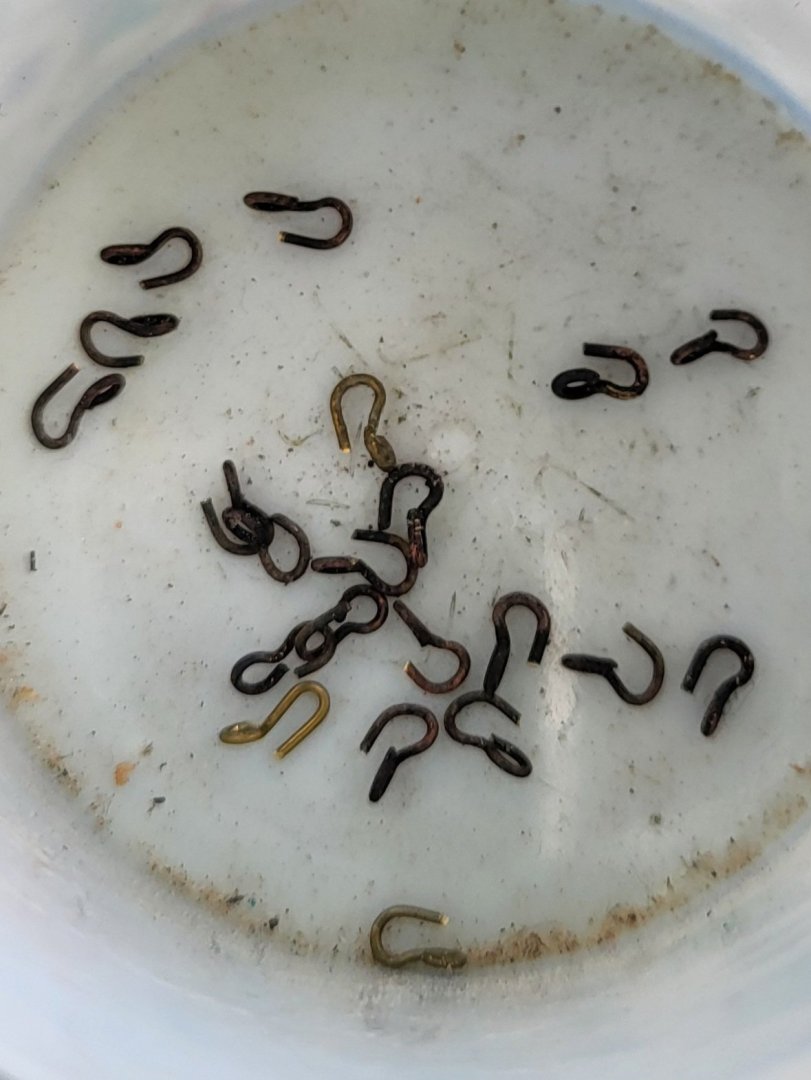
Gun tackles will look like this, the smallest blocks I can make are this size. Now I need to make lots of blocks and hooks.


-
USS Constitution by mtbediz - 1:76
mtbediz replied to mtbediz's topic in - Build logs for subjects built 1751 - 1800
Thank you Greg. If I understand correctly what you mean; I prepare the gun tackles outside the ship. It remains only to attach them to the eyebolts on the carronades and bulwark. -
USS Constitution by mtbediz - 1:76
mtbediz replied to mtbediz's topic in - Build logs for subjects built 1751 - 1800
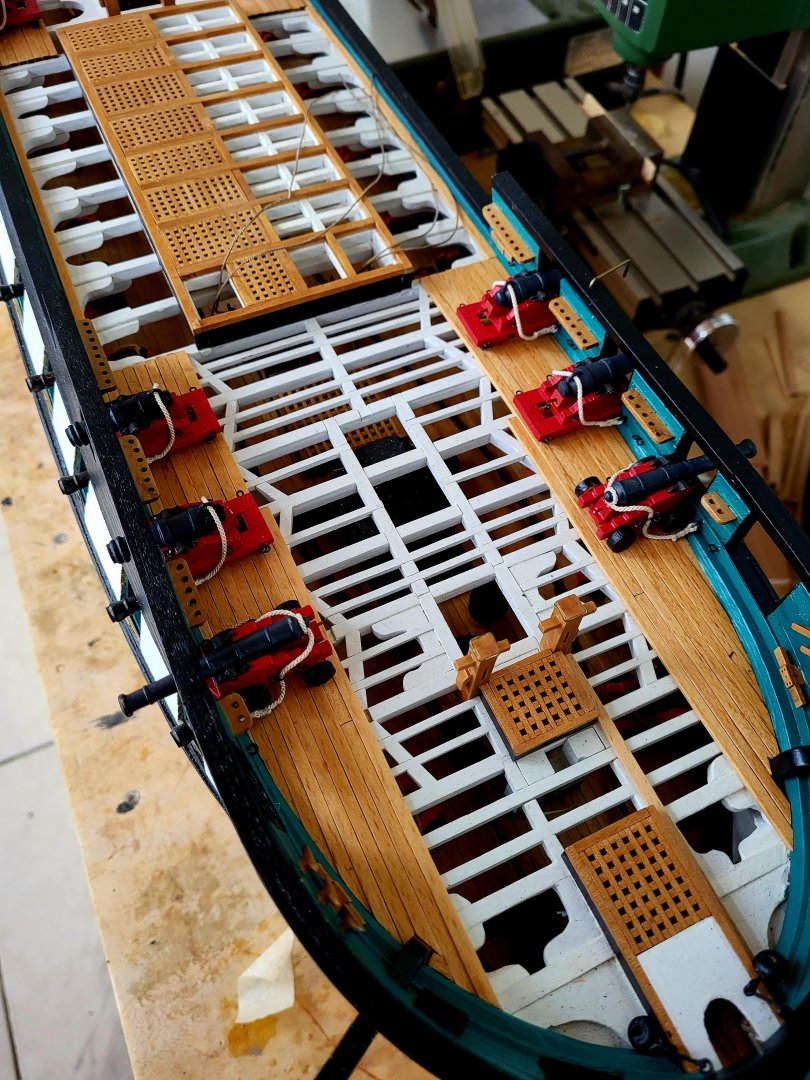
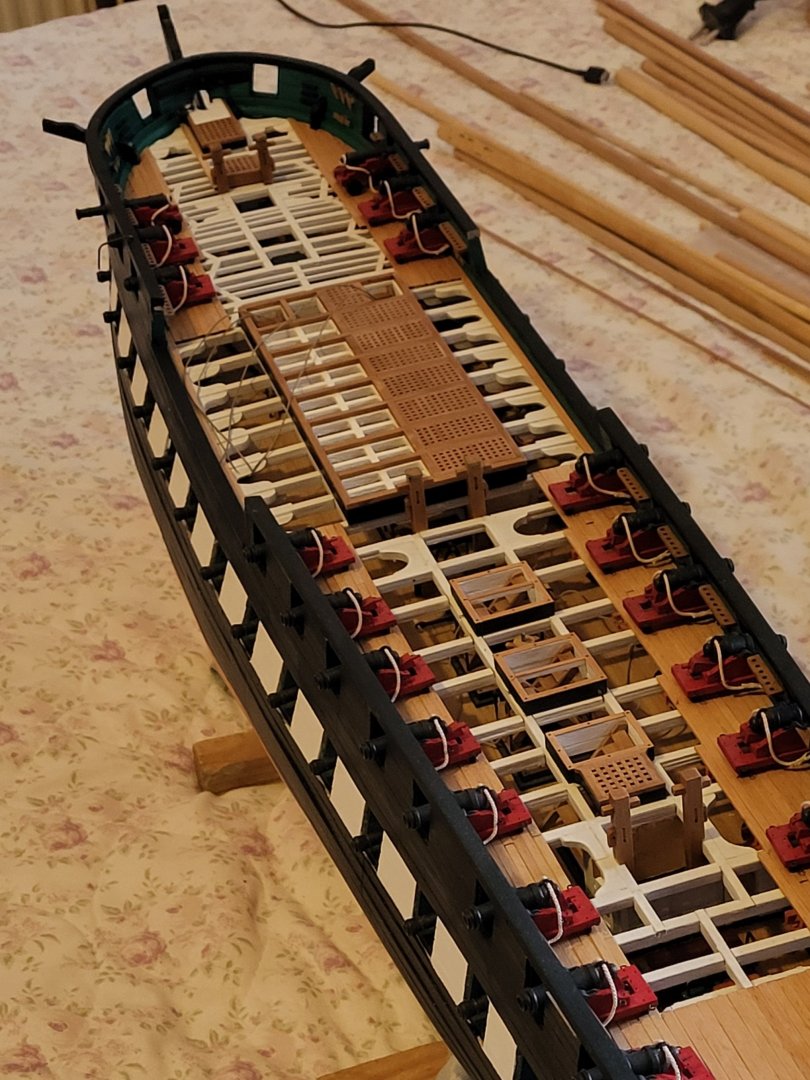
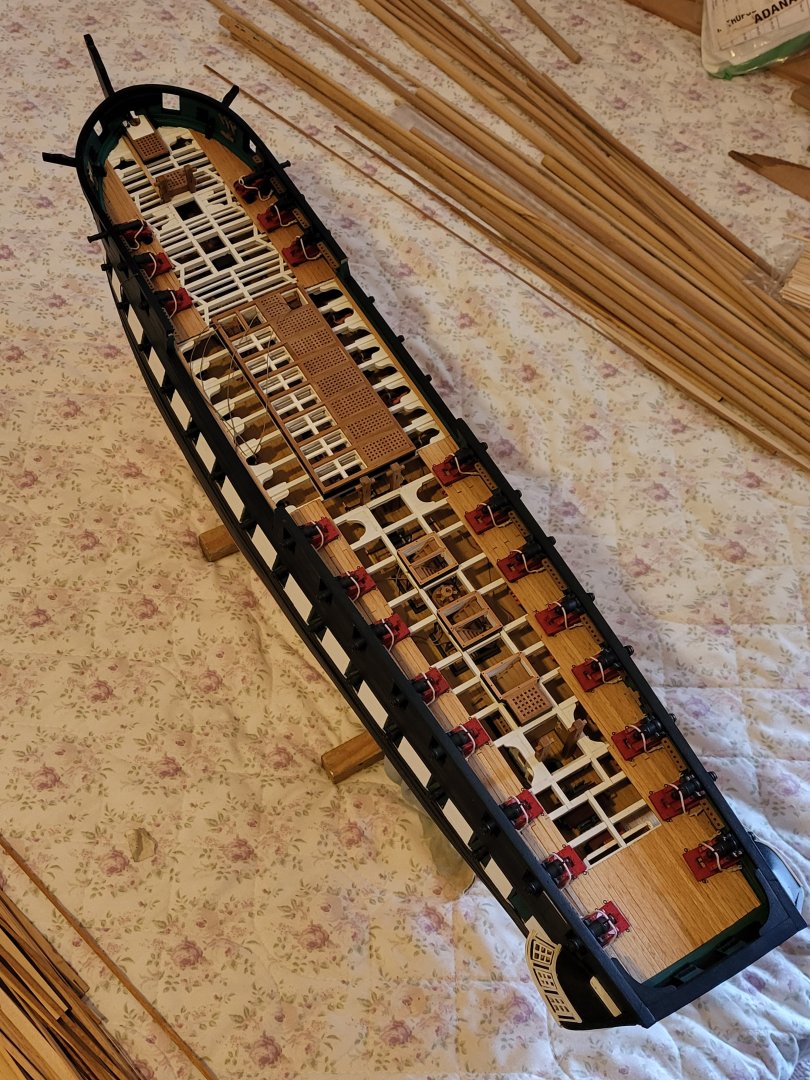
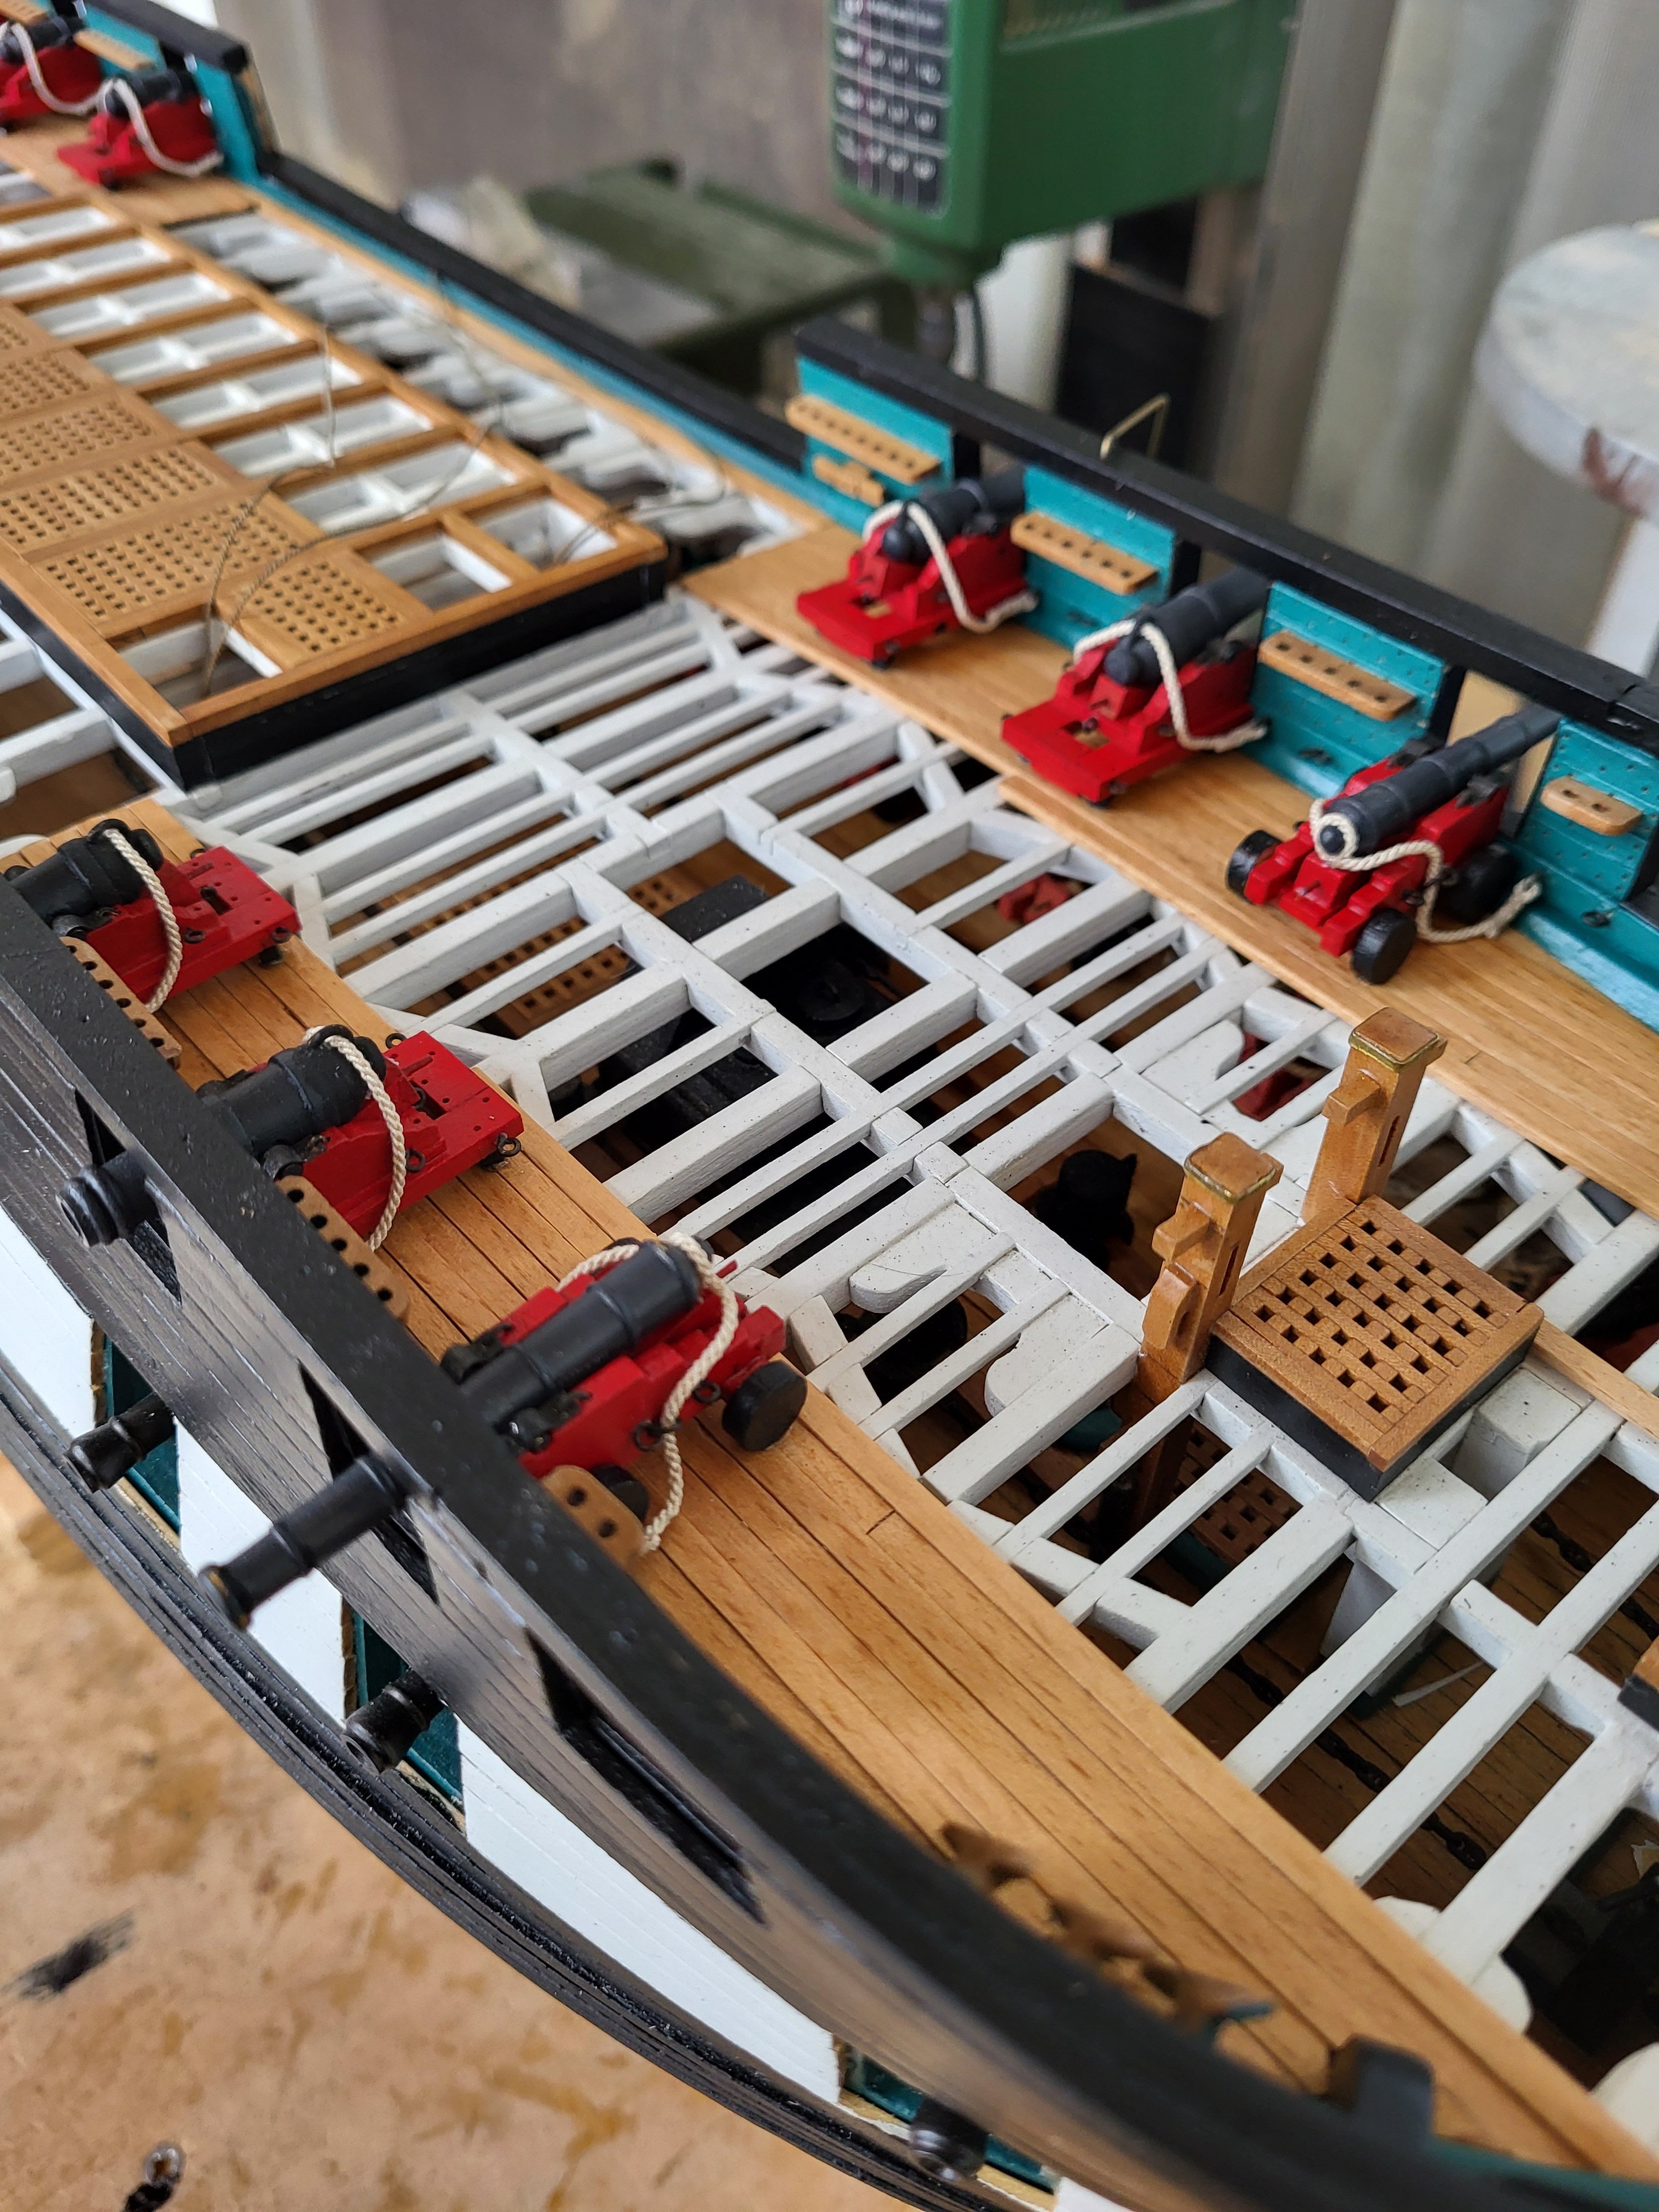
All the guns on the spar deck are now in place. I'm now going to start making blocks for the gun tackles. Since the blocks will be quite small in size, a tough challenge awaits me. The blocks will be 3x2 mm in size, let's see if I can make it.