mtbediz
-
Posts
1,344 -
Joined
-
Last visited
Content Type
Profiles
Forums
Gallery
Events
Everything posted by mtbediz
-
 She looks awesome!
 -
USS Constitution by mtbediz - 1:76
mtbediz replied to mtbediz's topic in - Build logs for subjects built 1751 - 1800
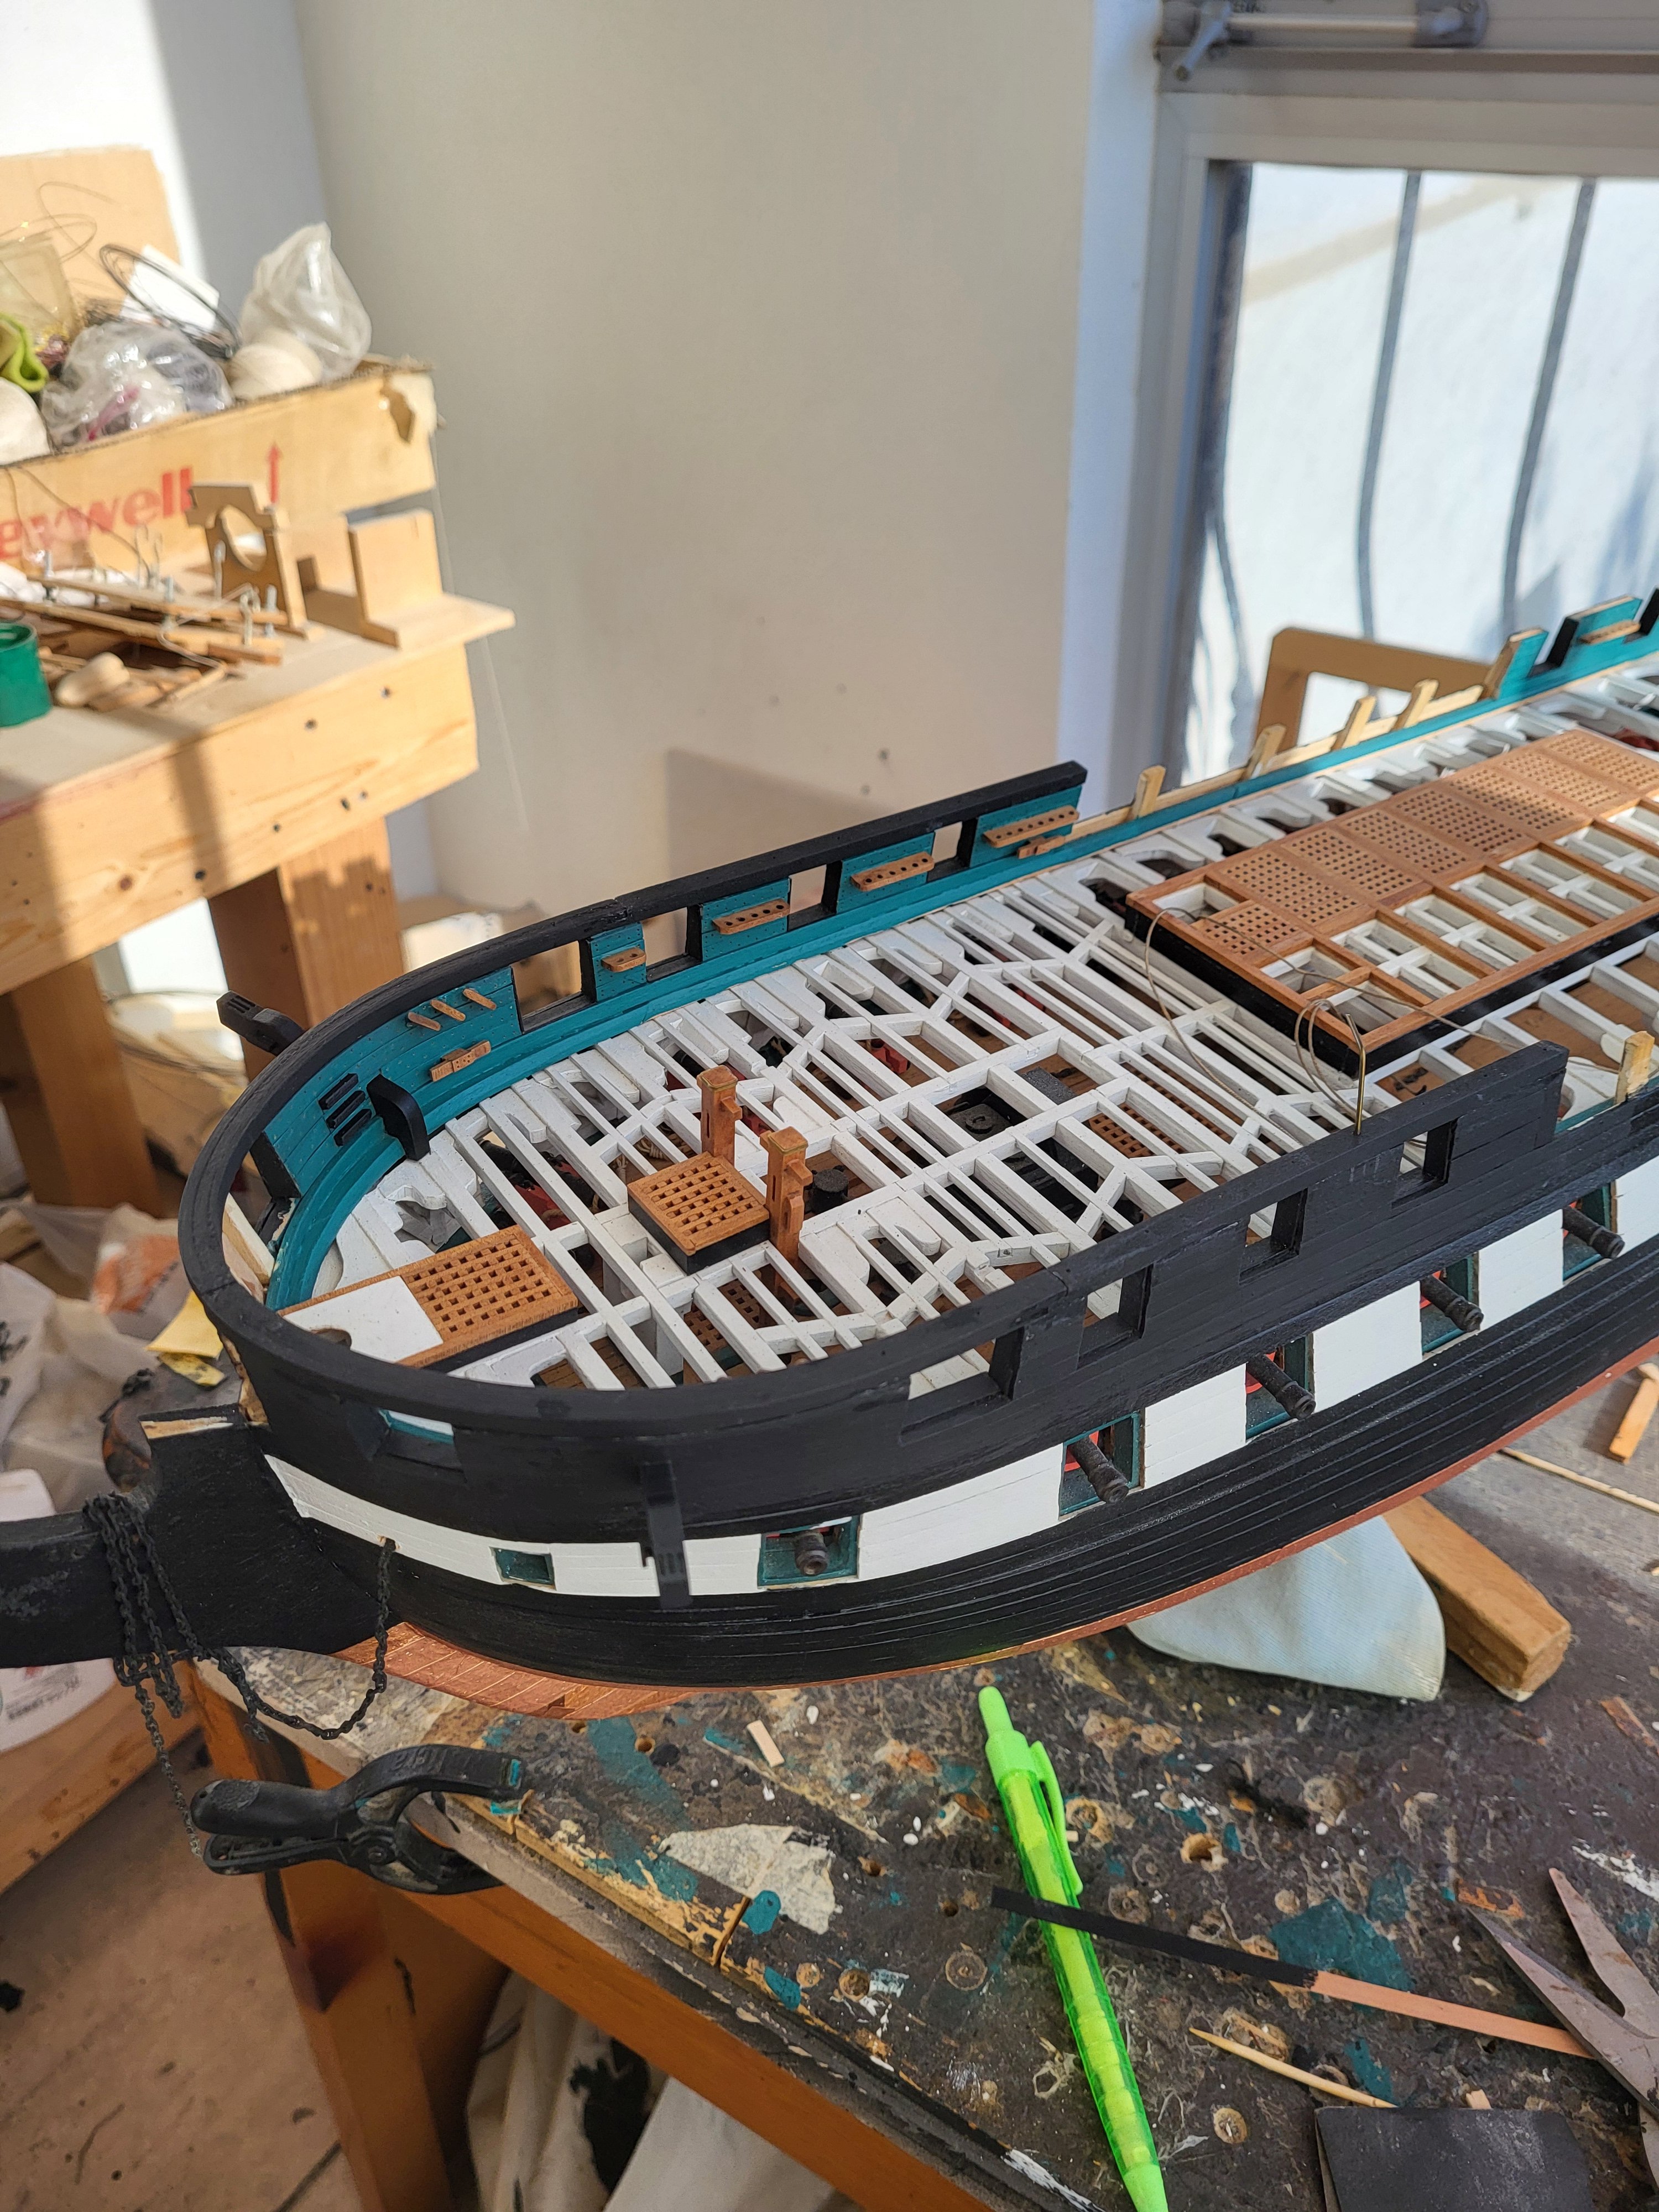
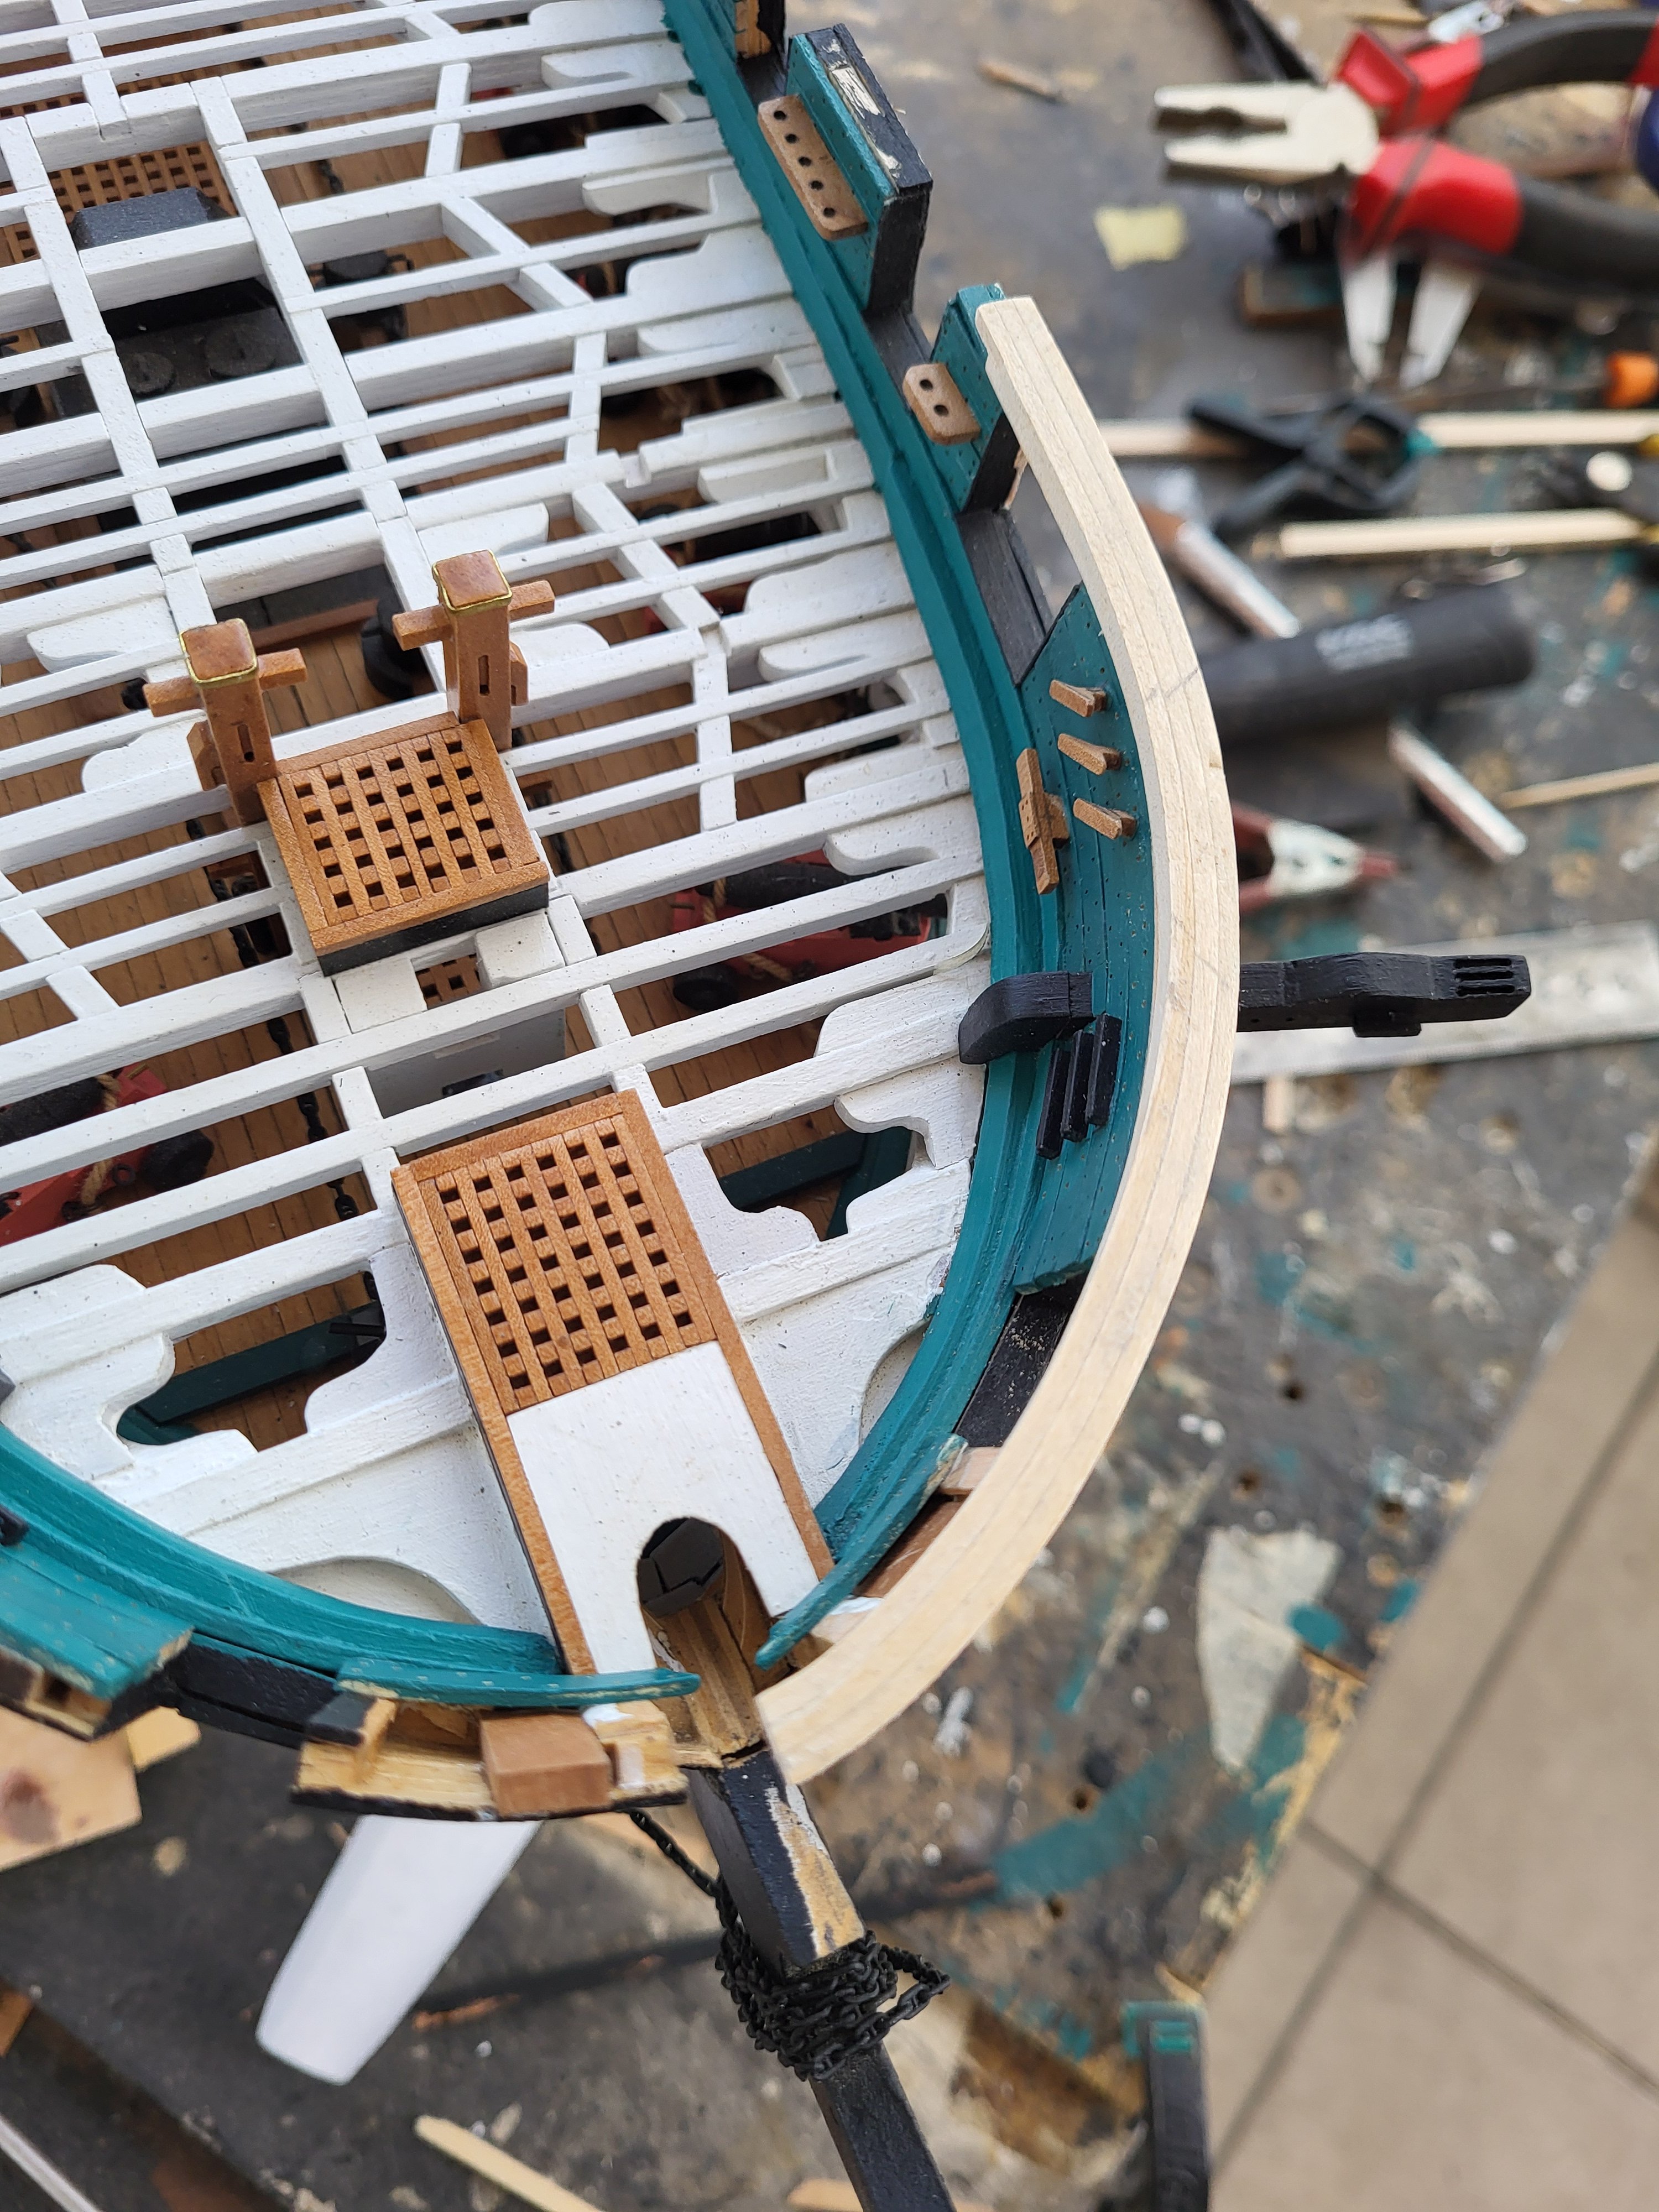
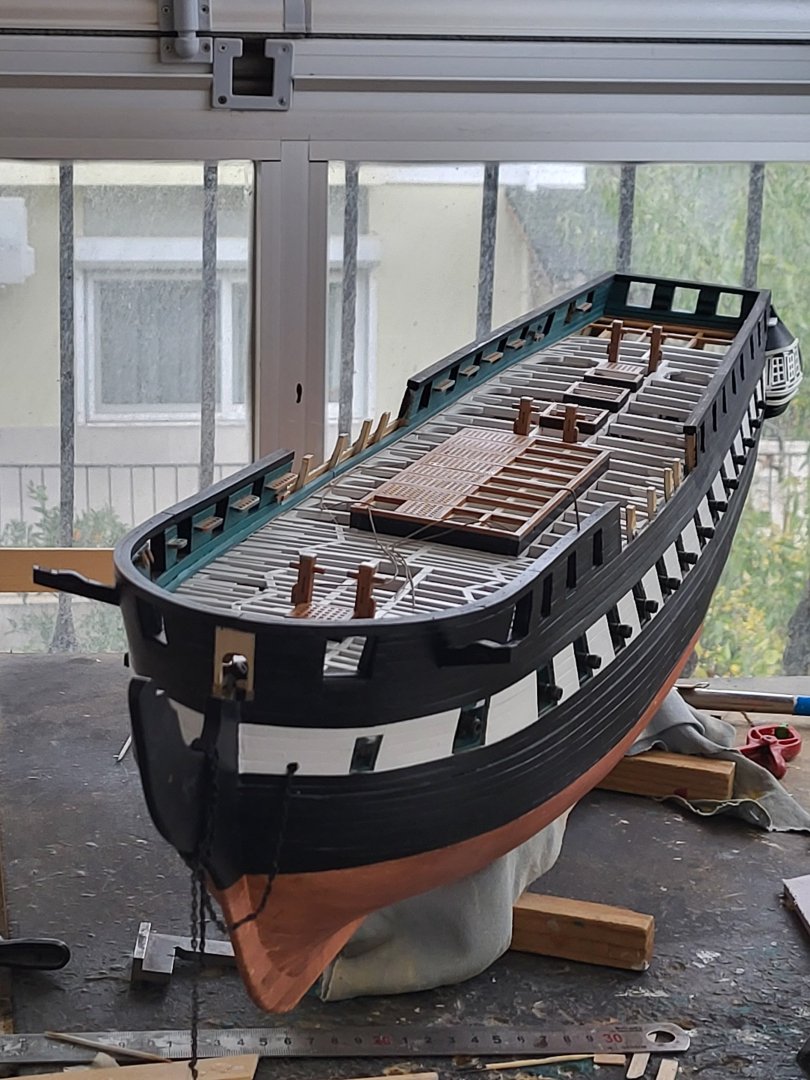
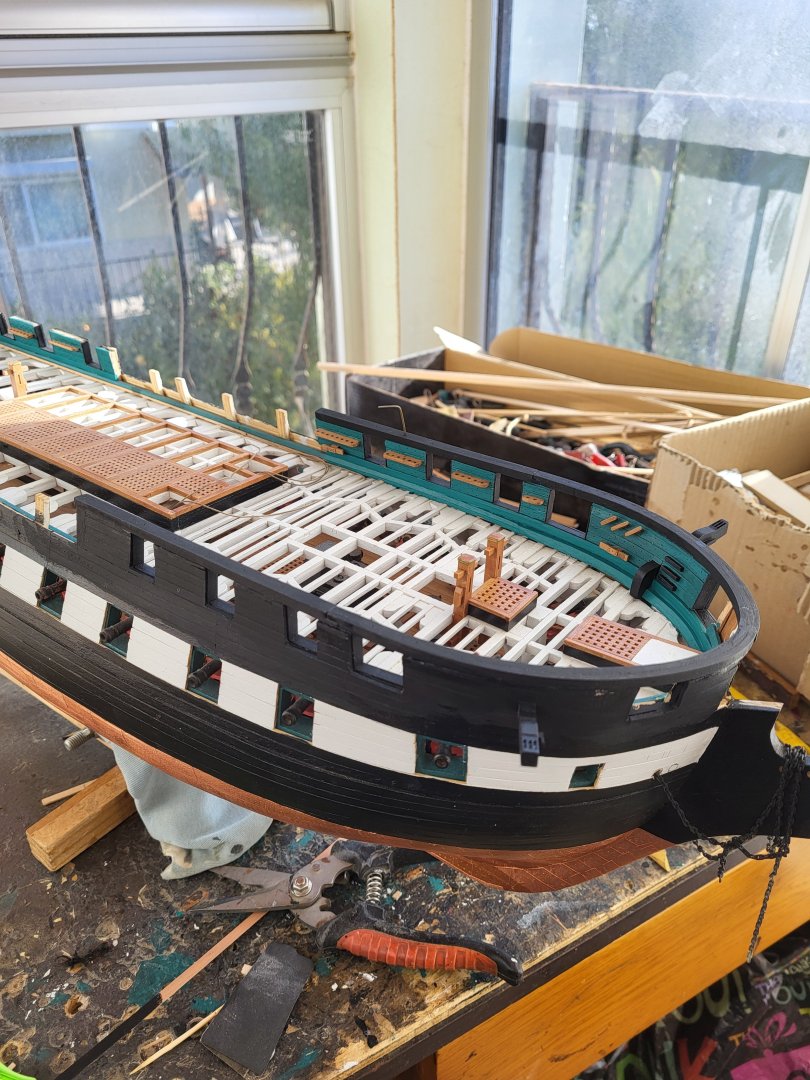
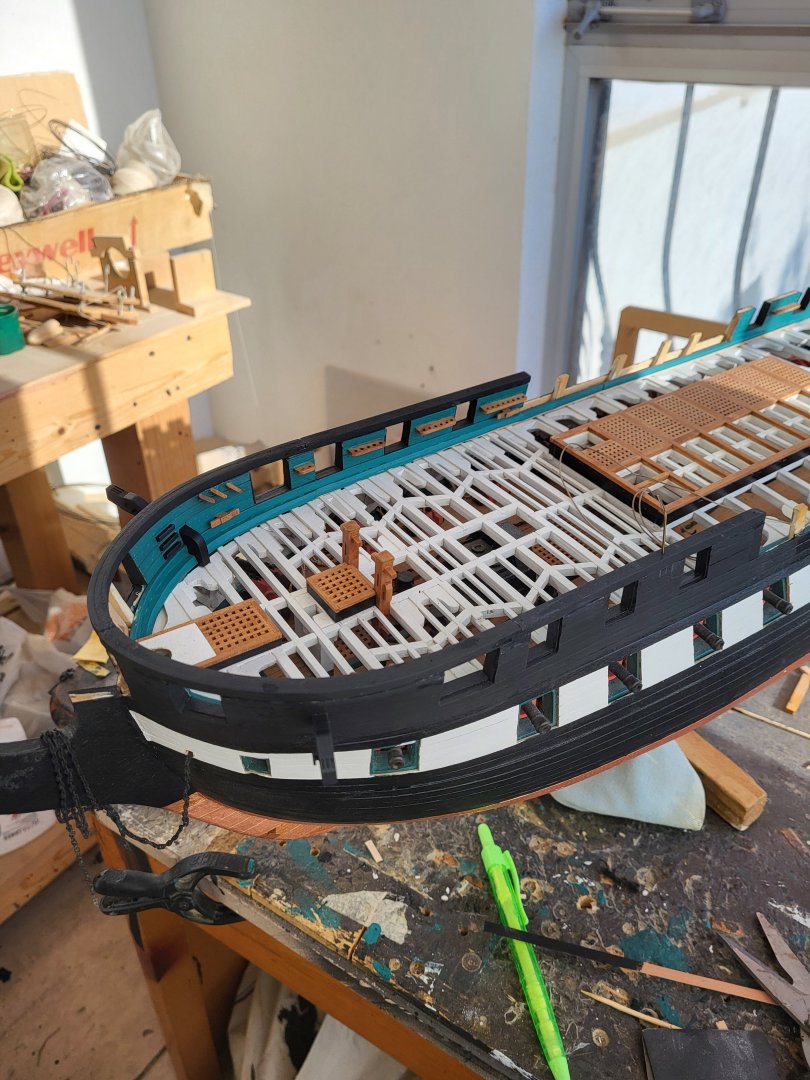
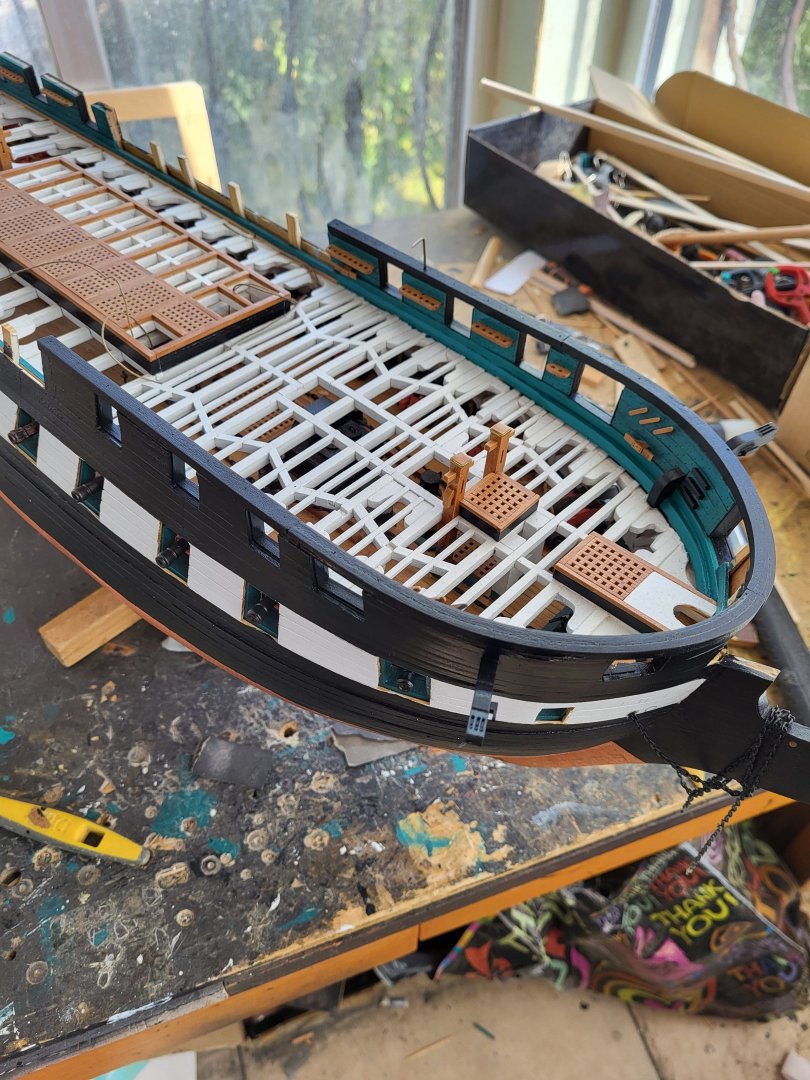
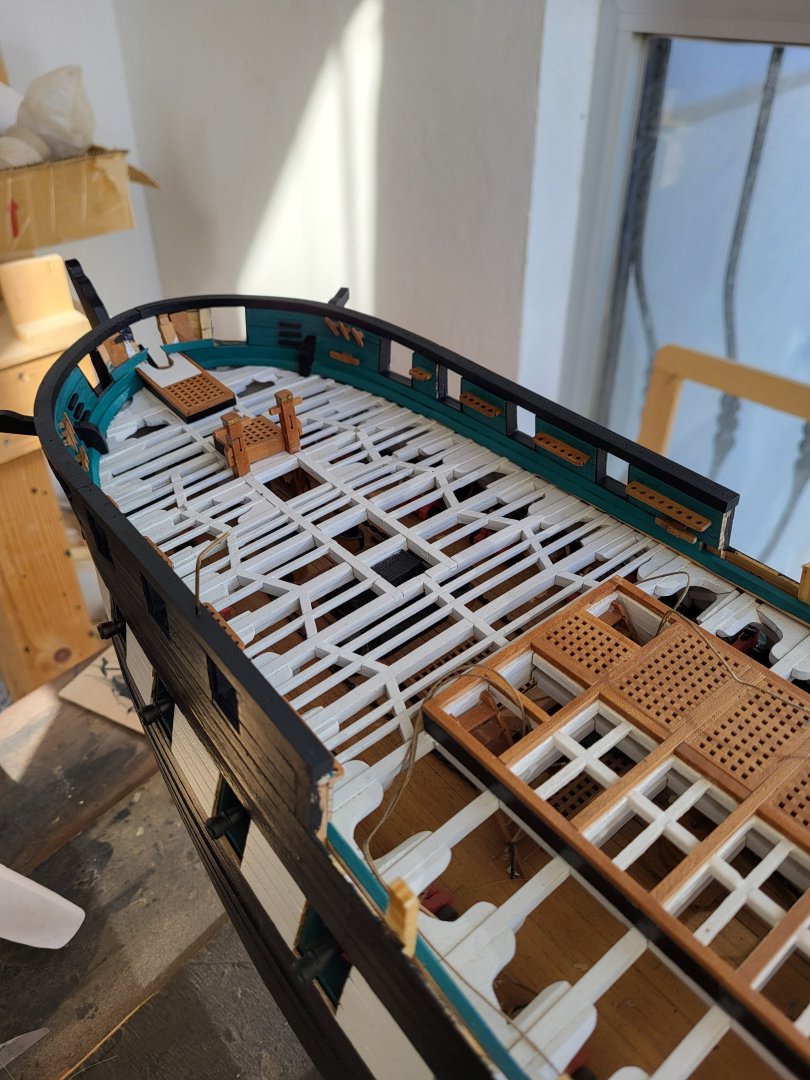
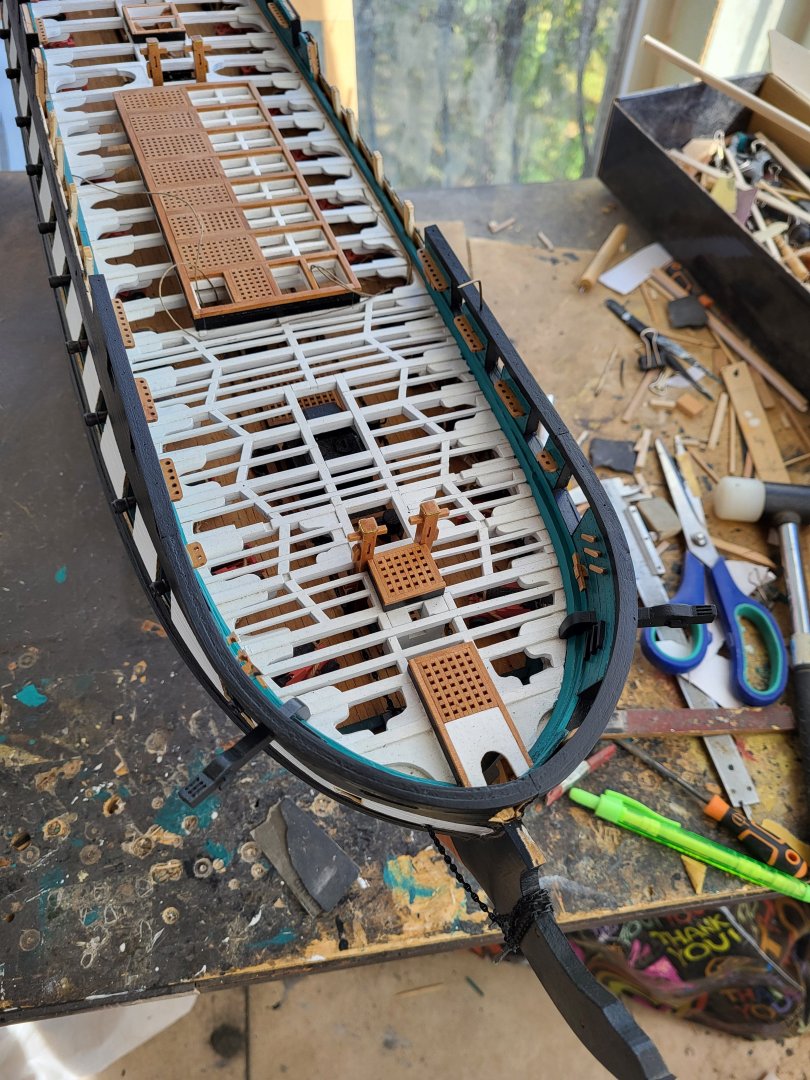
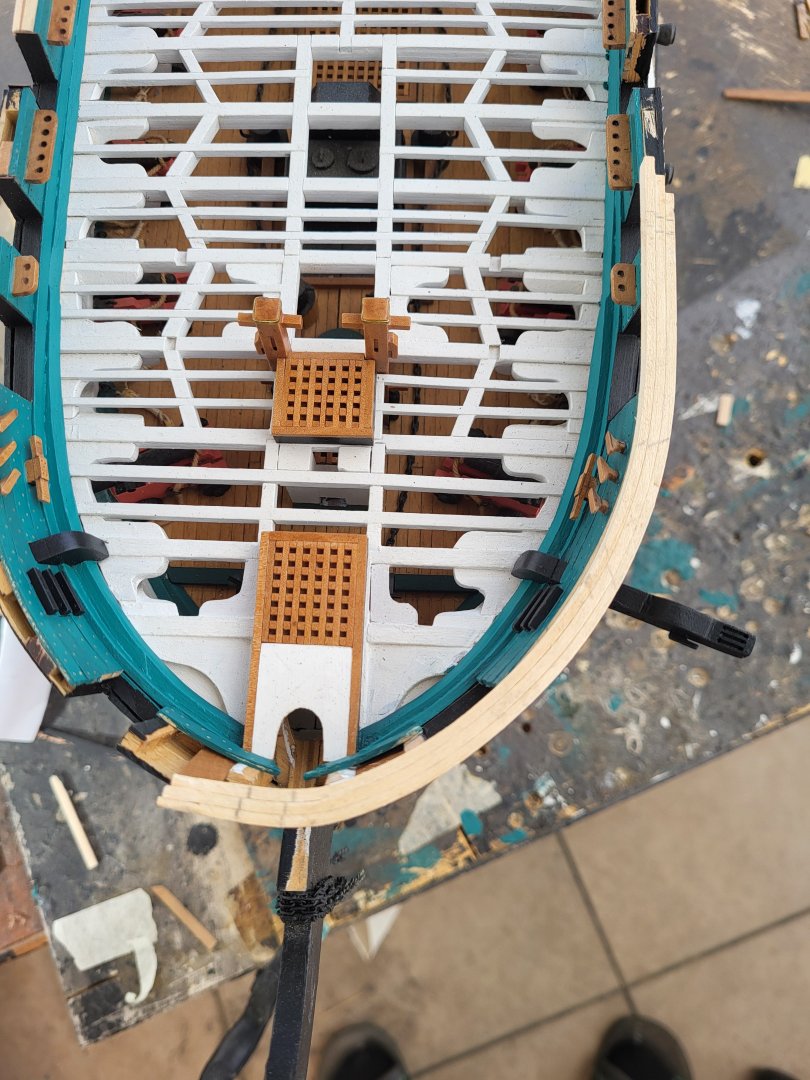
Midship rails completed.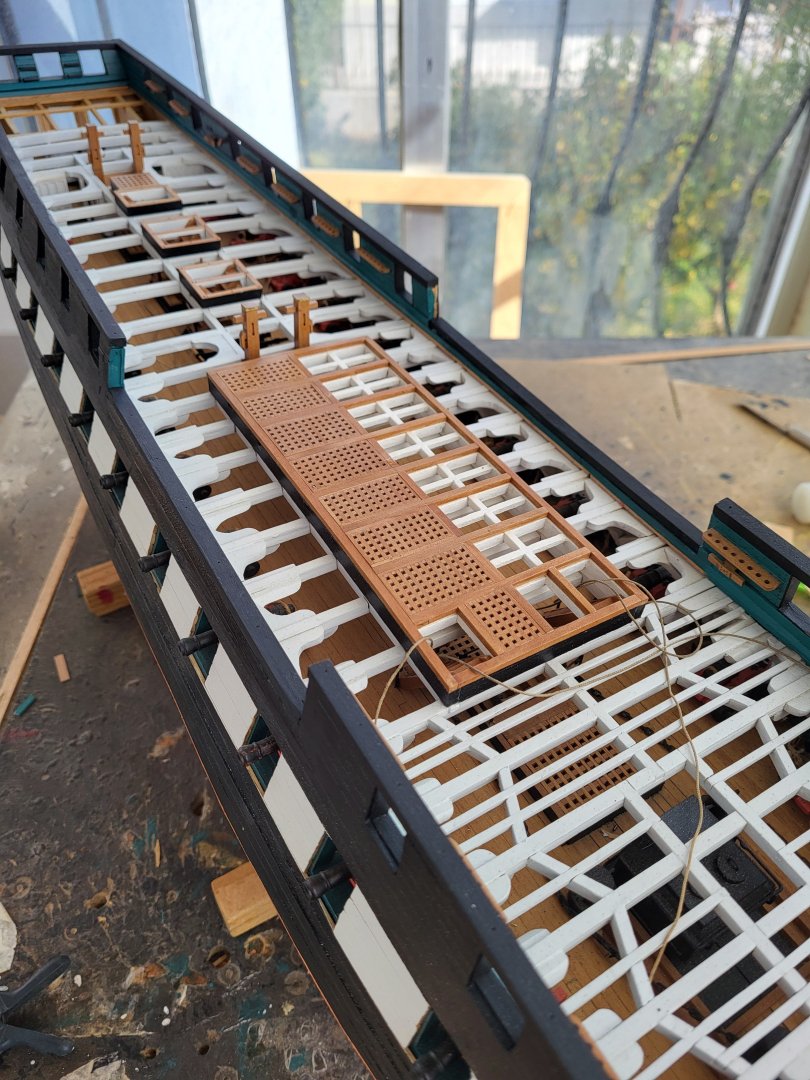

-
USS Constitution by mtbediz - 1:76
mtbediz replied to mtbediz's topic in - Build logs for subjects built 1751 - 1800
Thank you so much Peter. Since I was not initially focused on making such a detailed model, there are some minor mistakes that is due to lack of planning and which the viewers may not notice however, overall I am happy with the appearance of the model. -
USS Constitution by mtbediz - 1:76
mtbediz replied to mtbediz's topic in - Build logs for subjects built 1751 - 1800
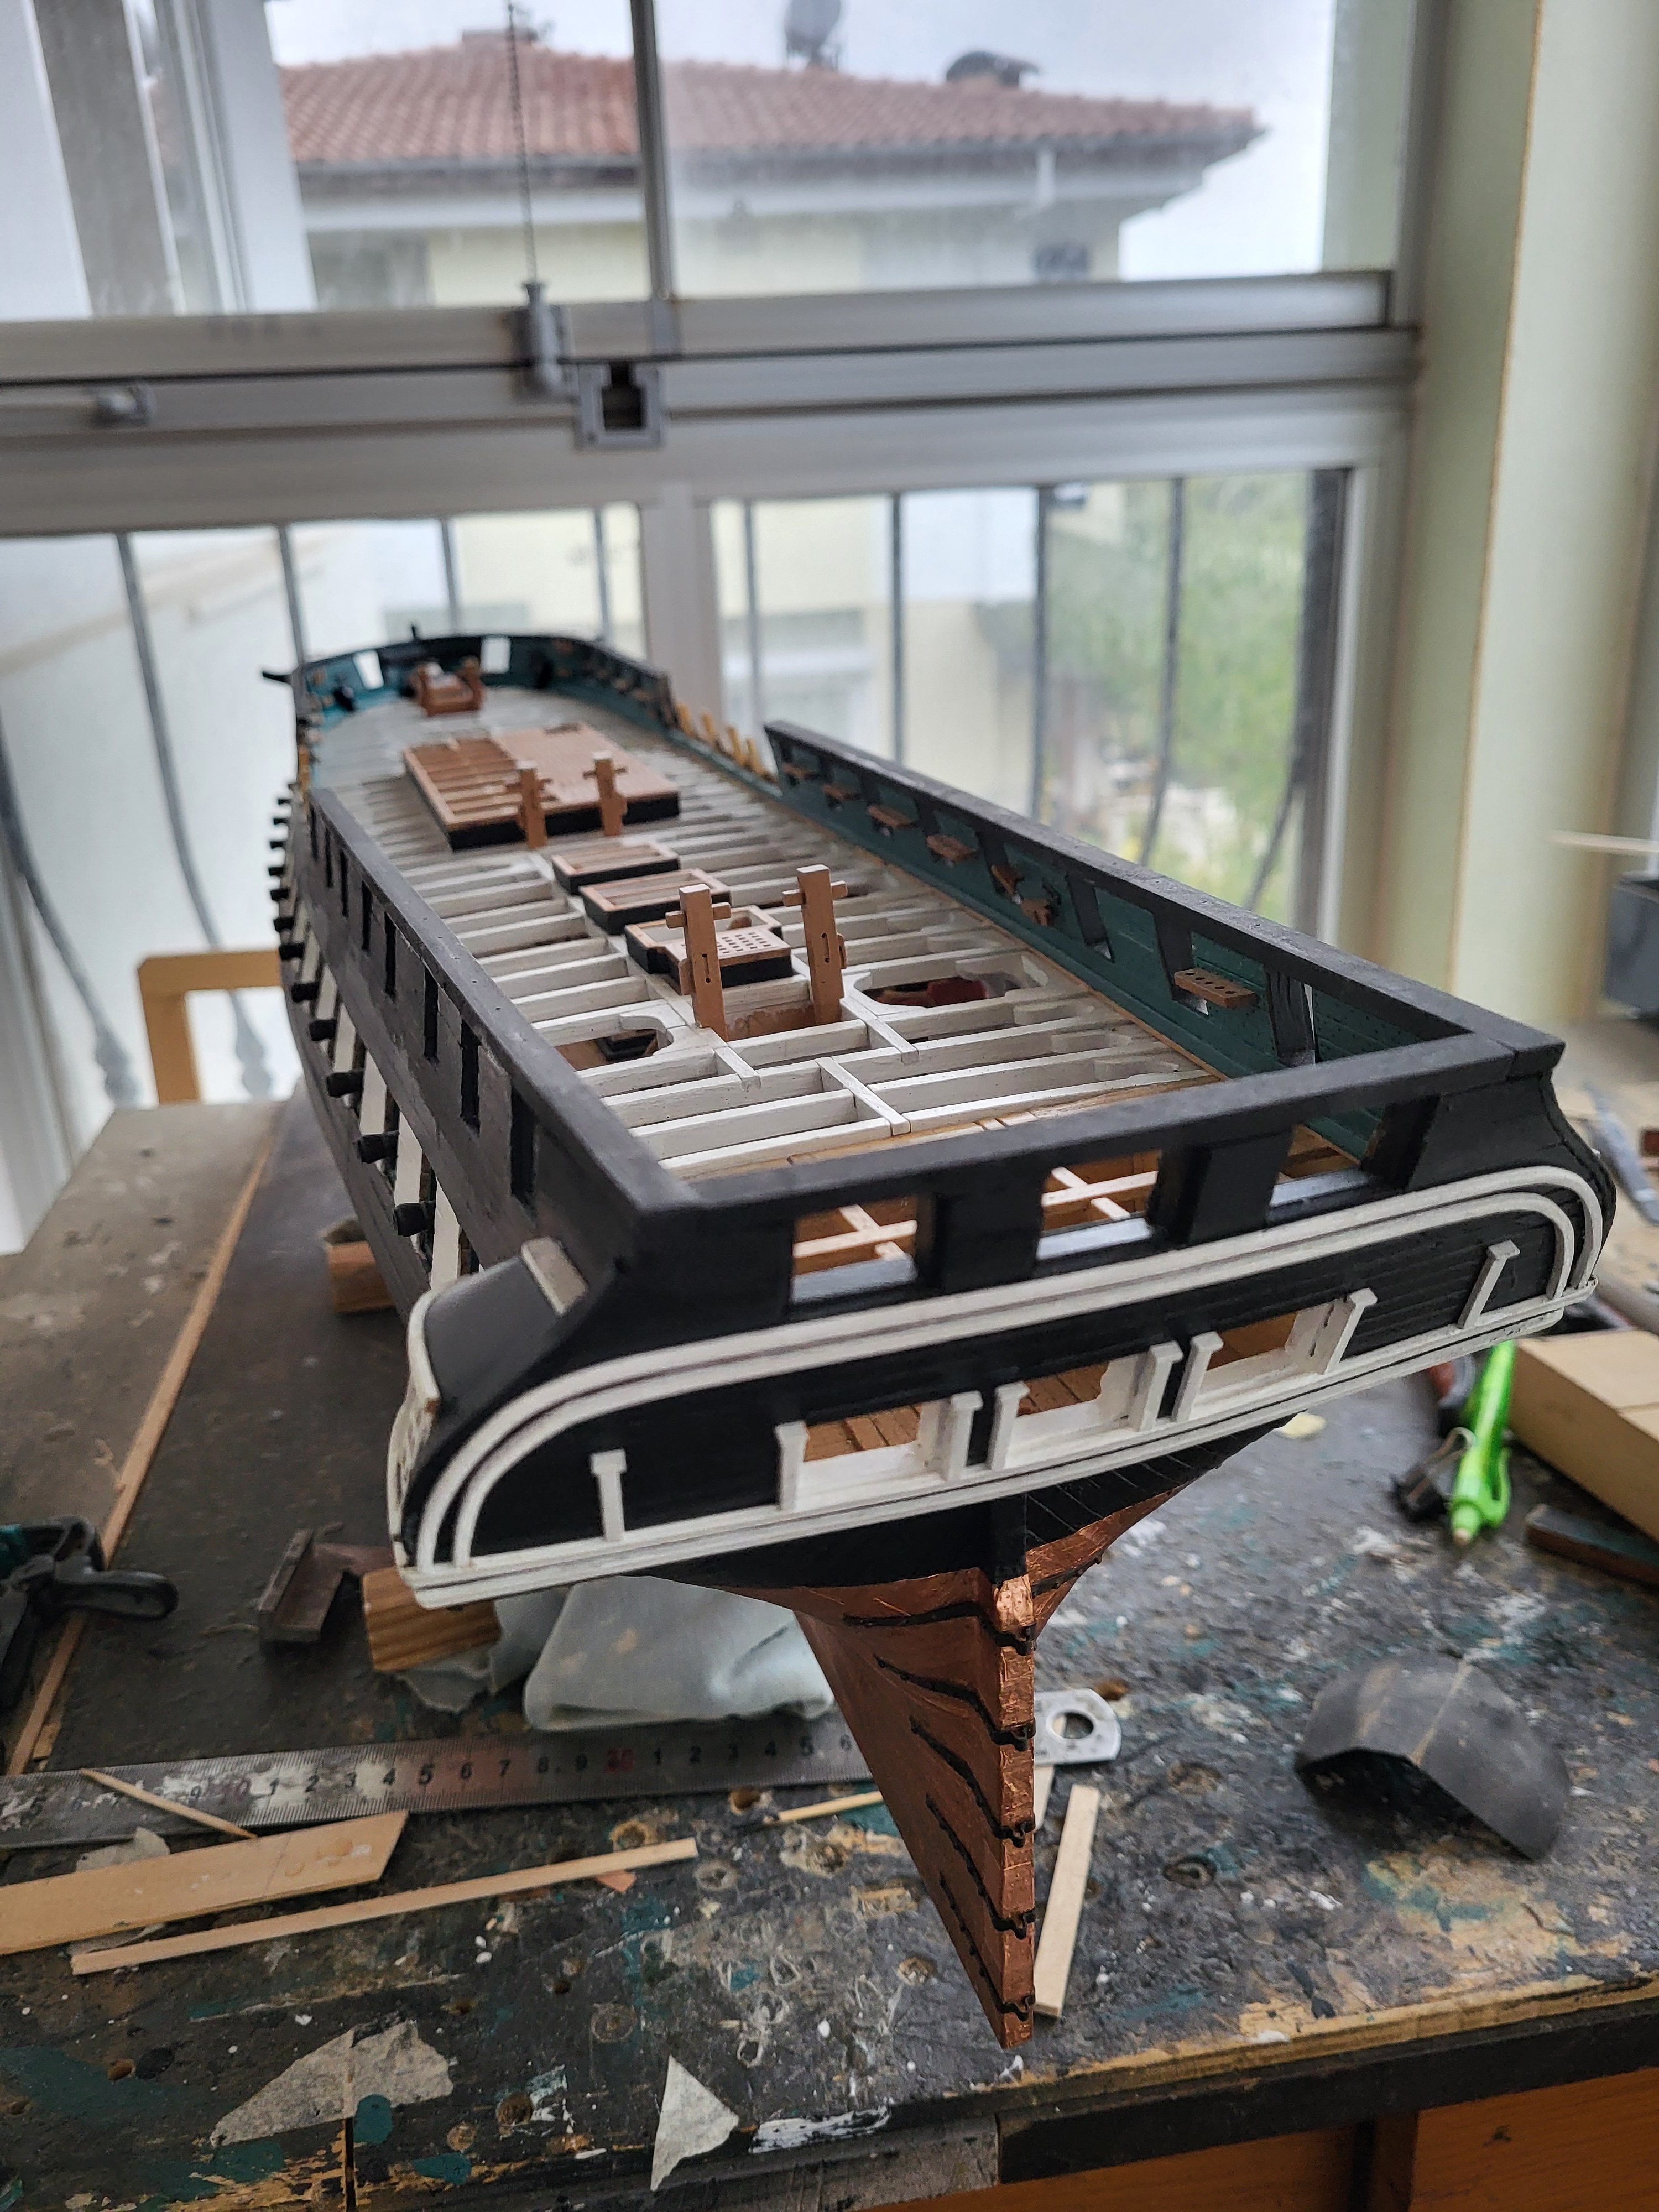
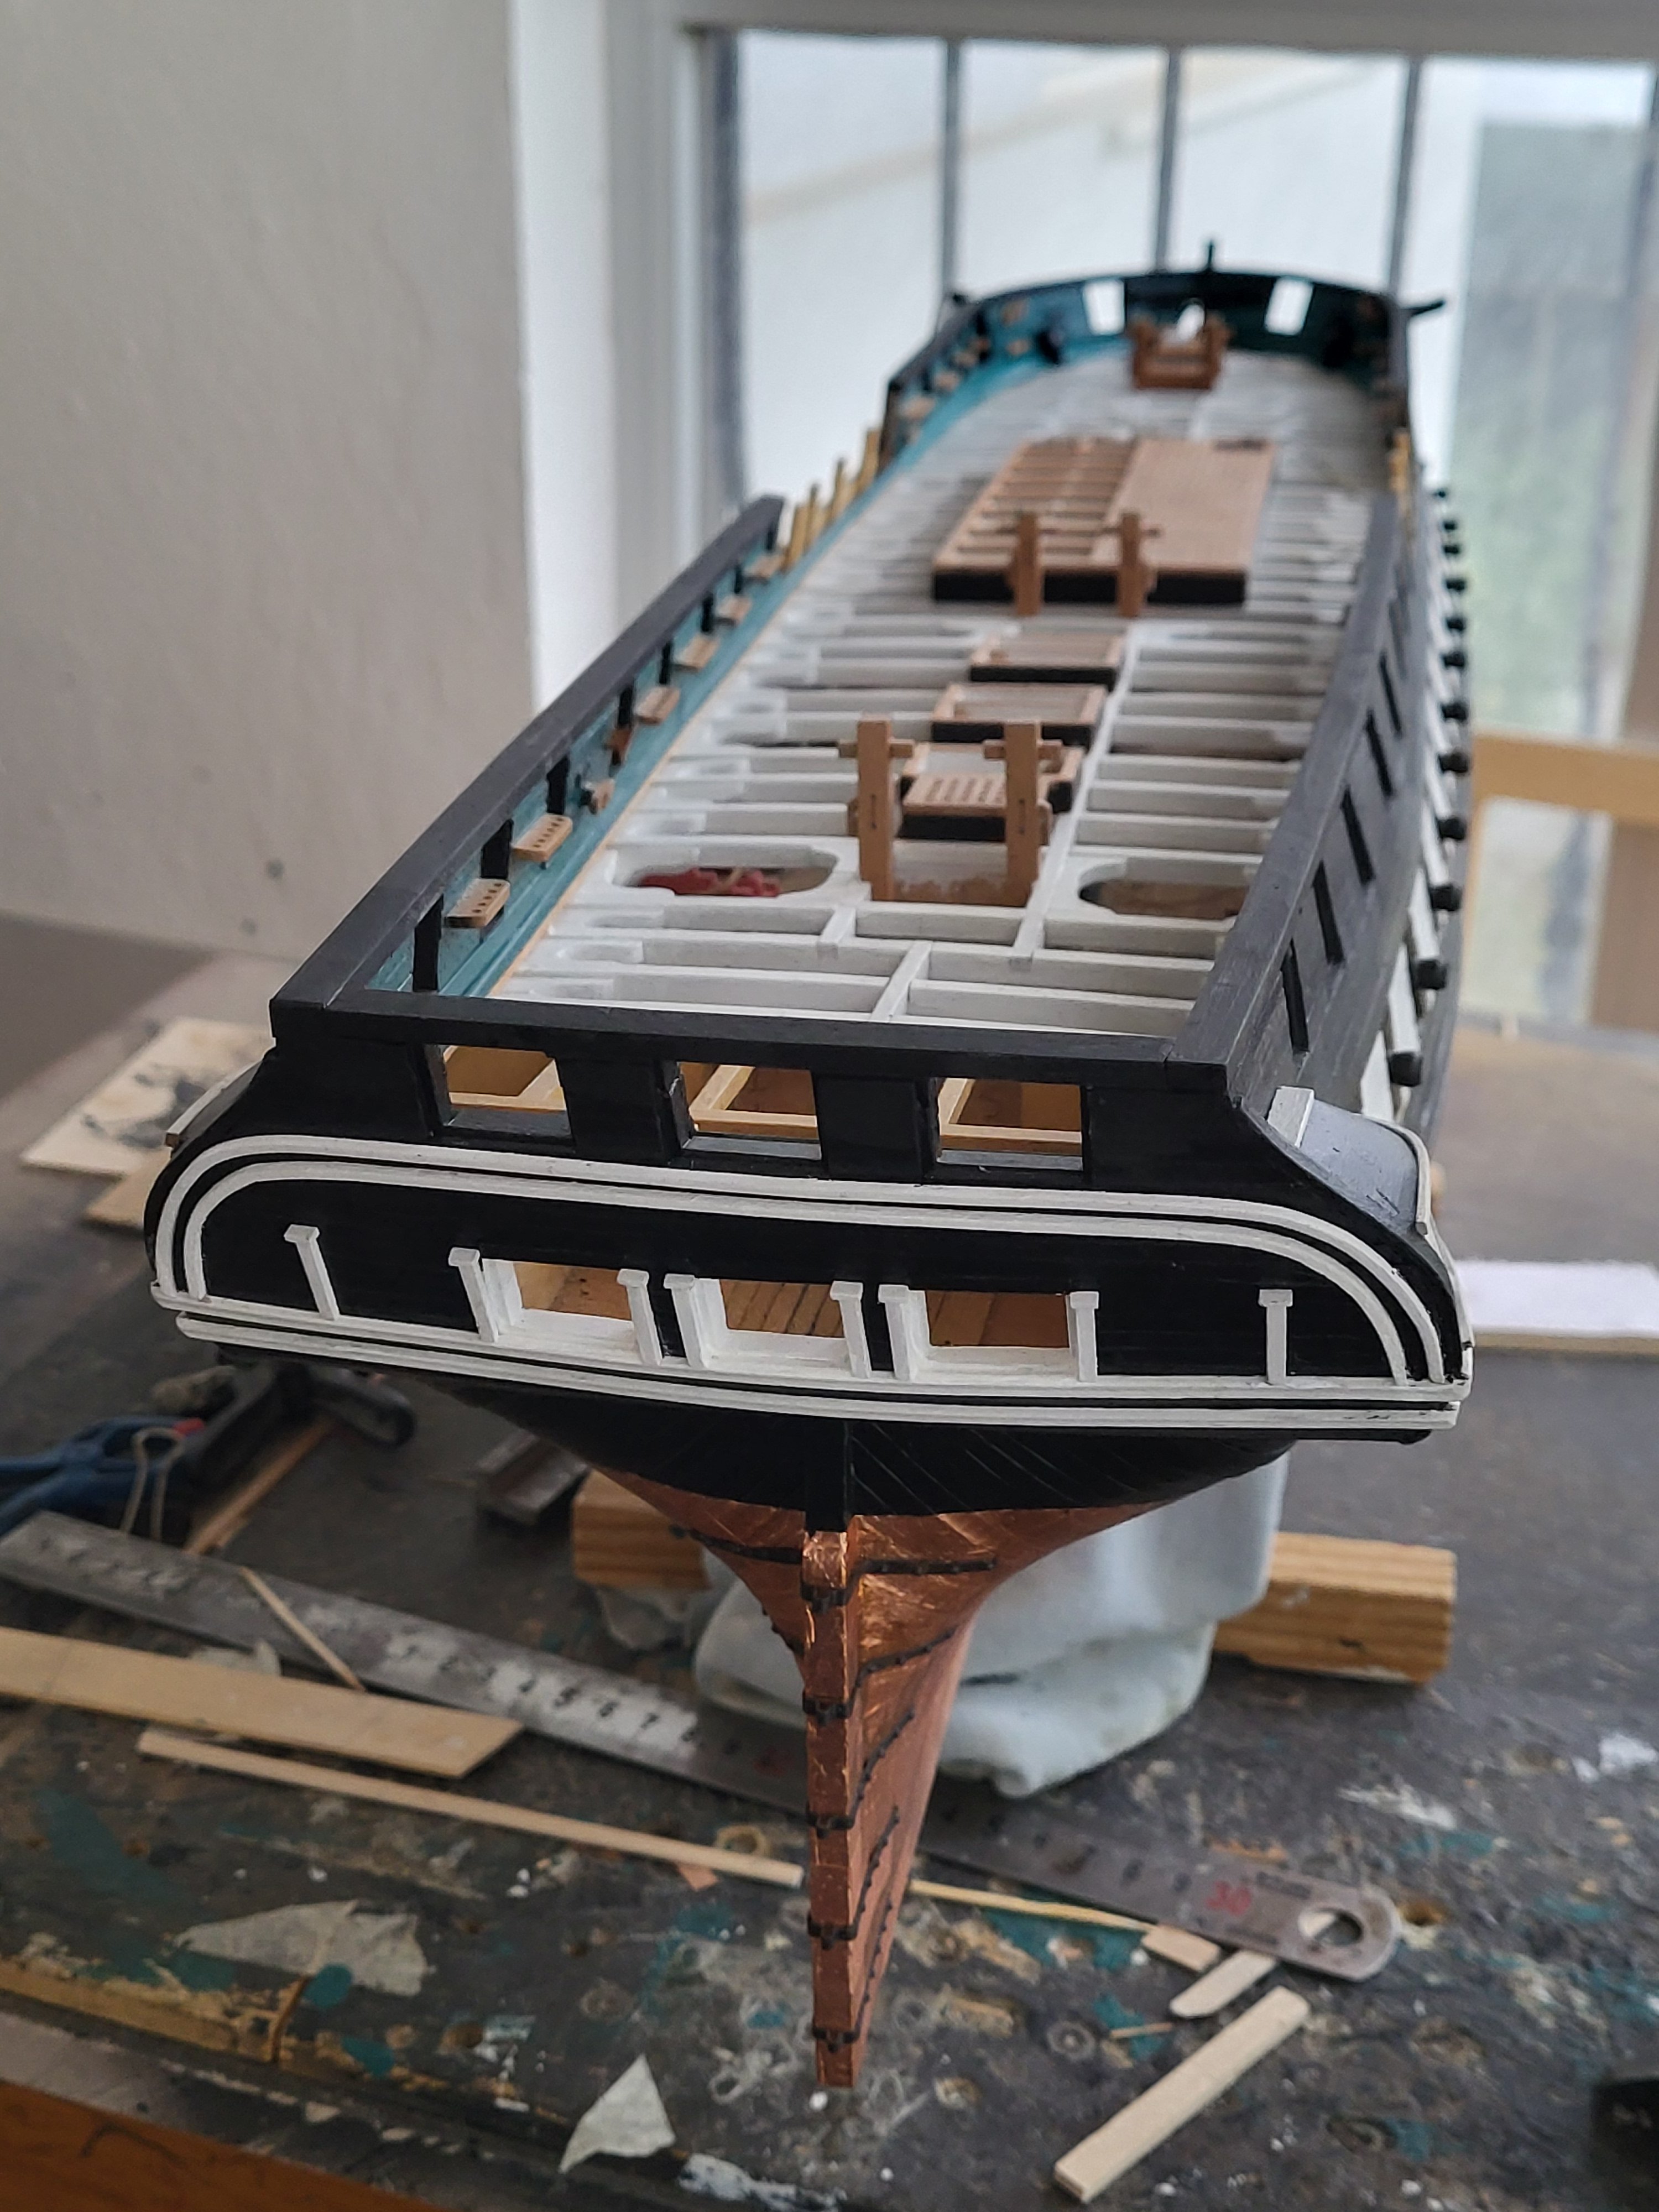
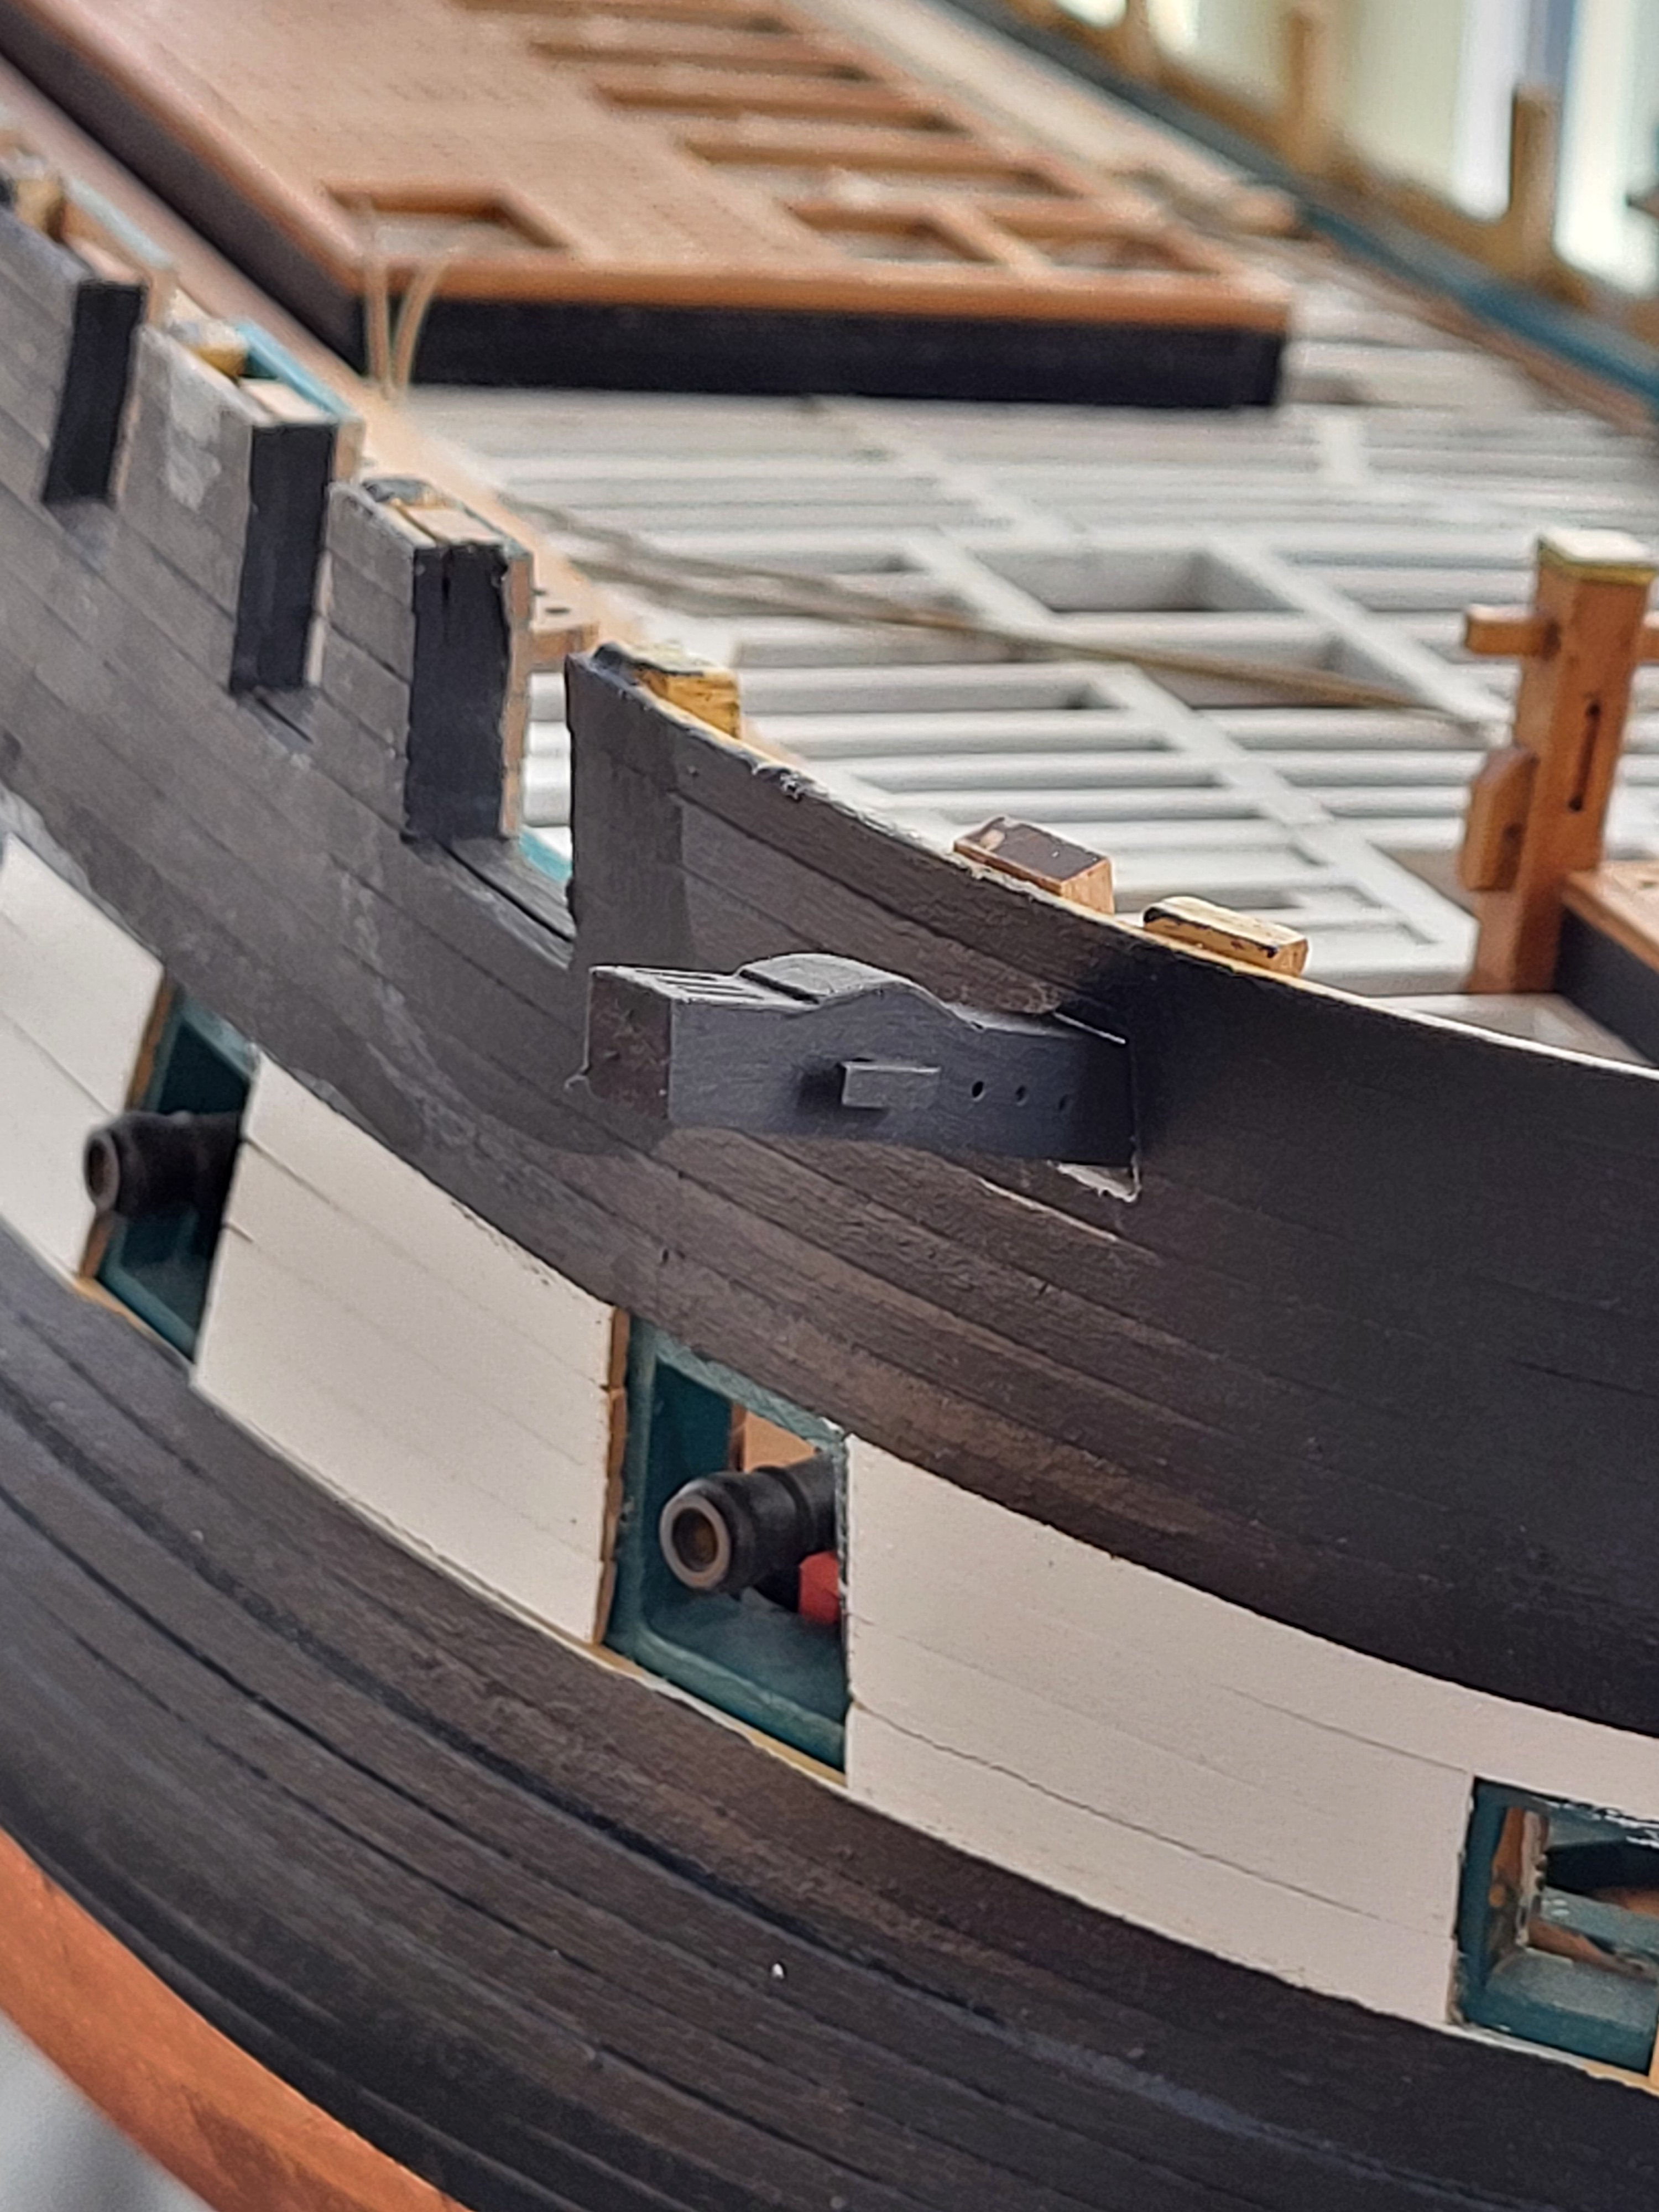
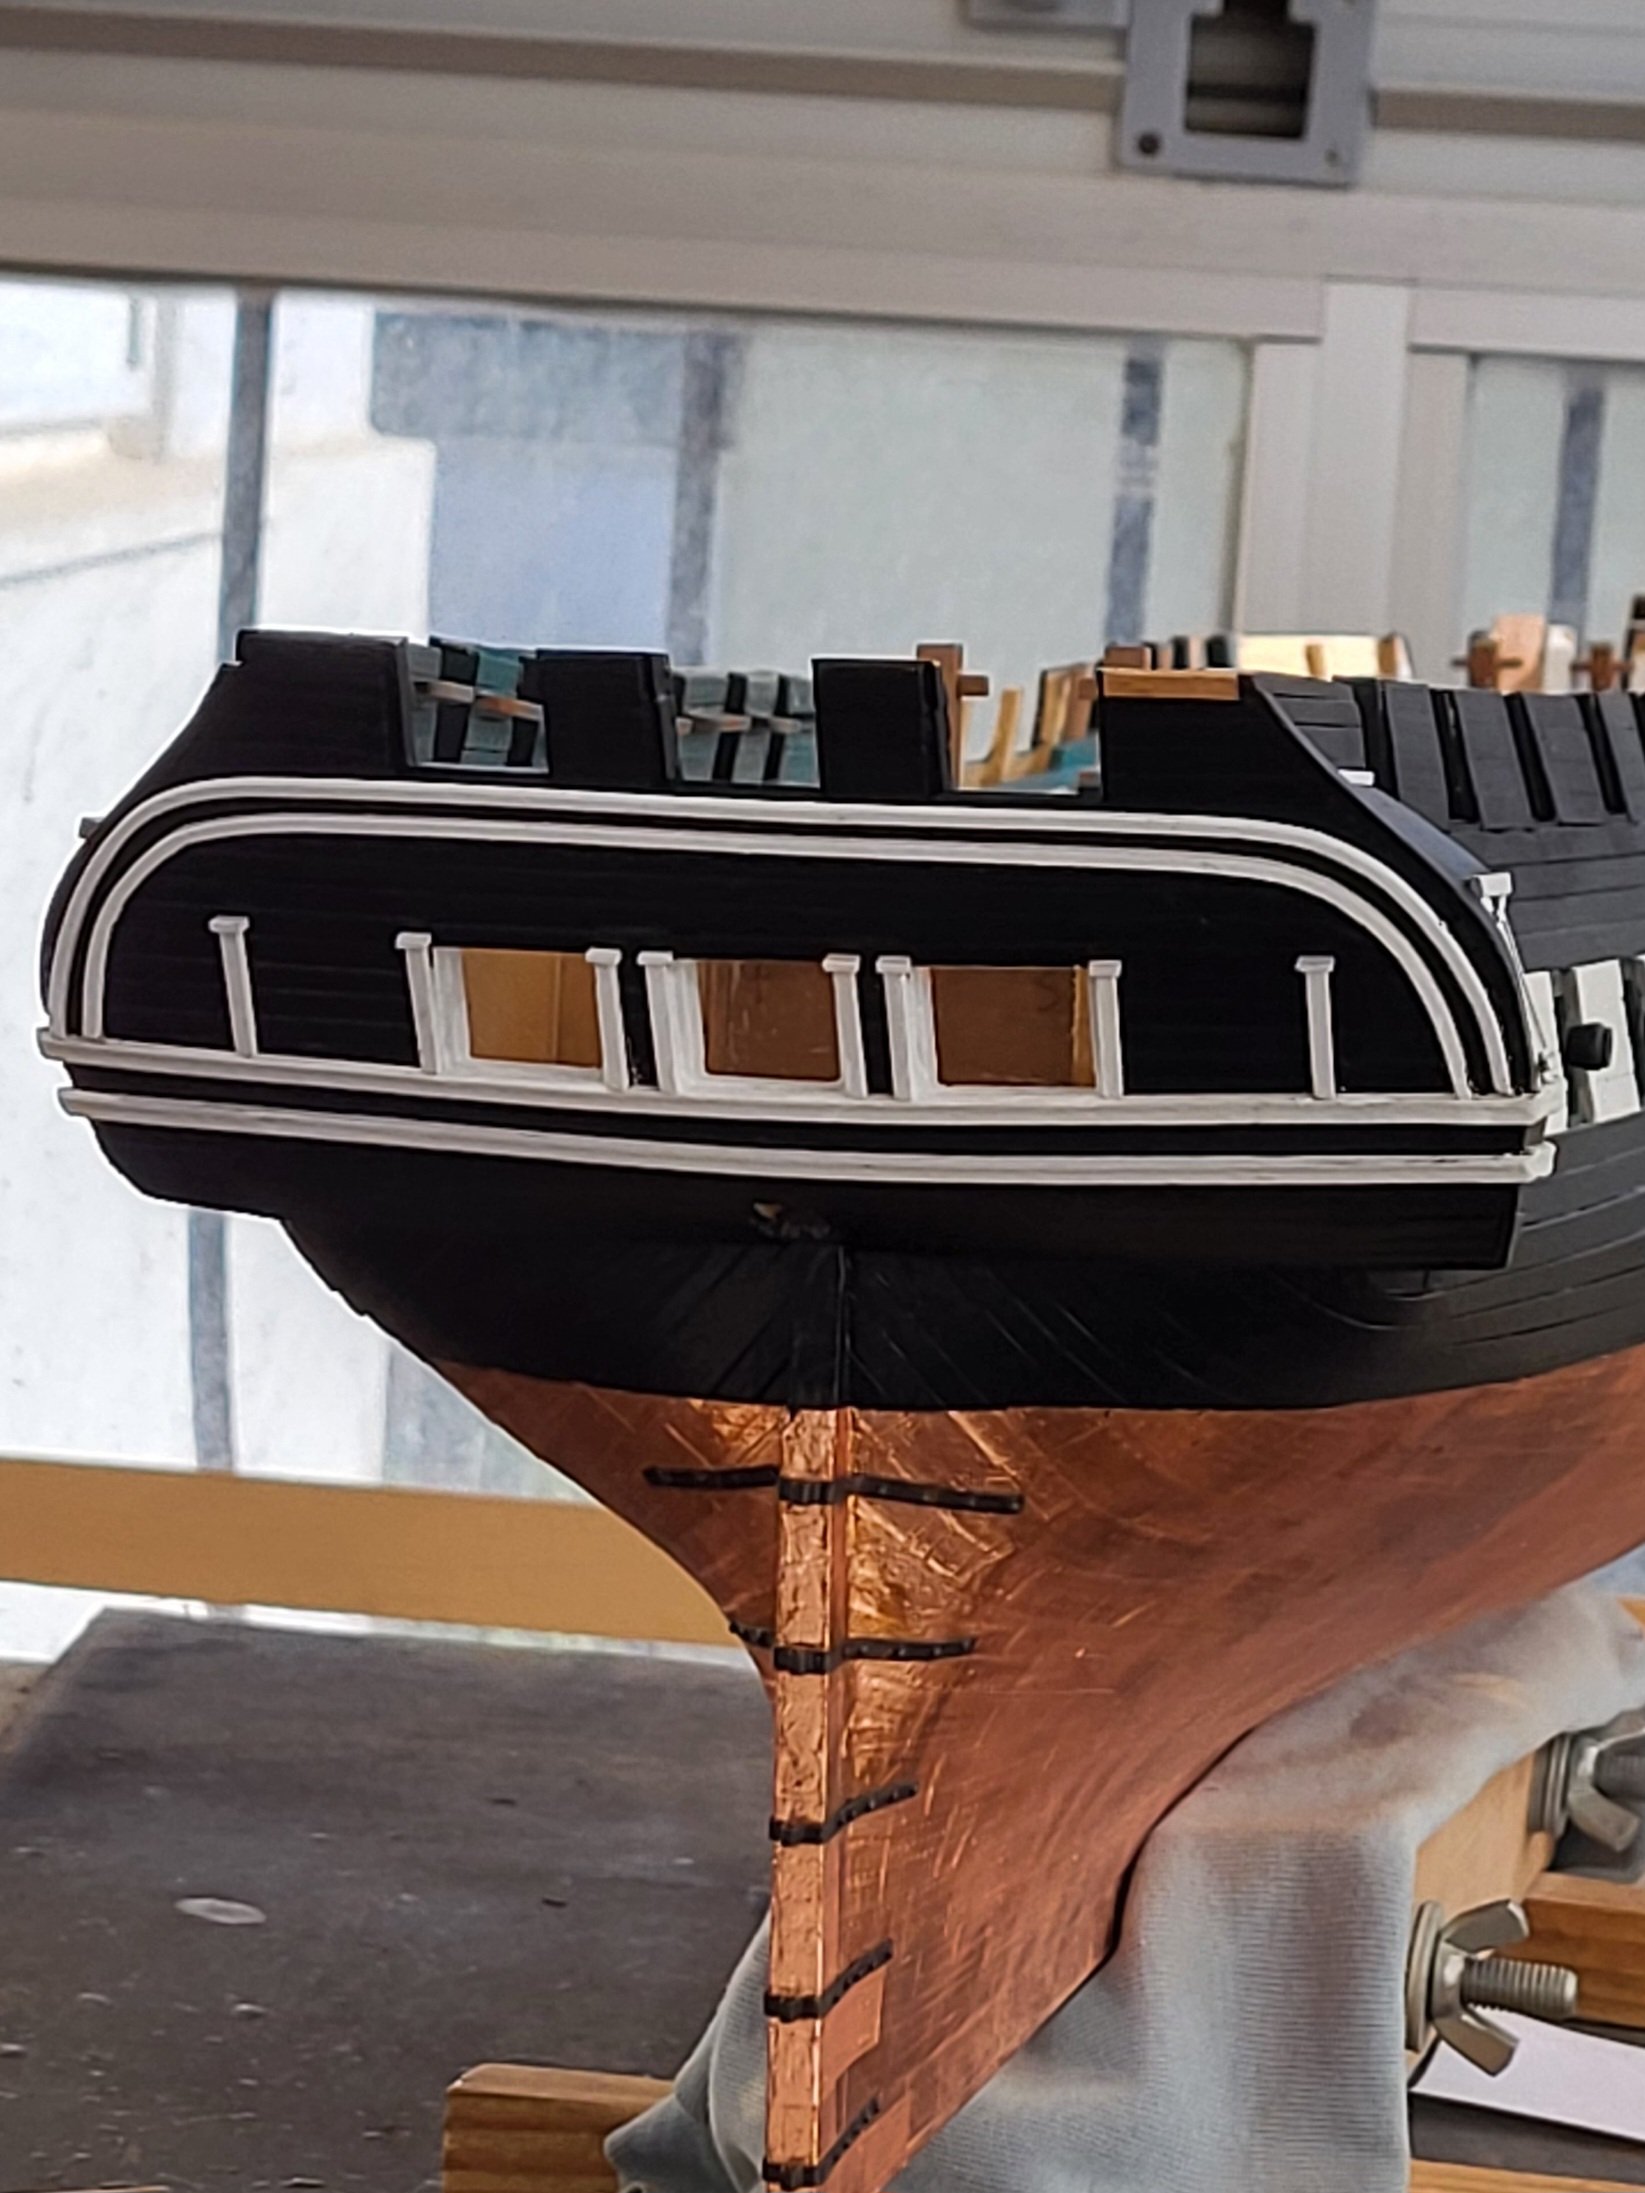
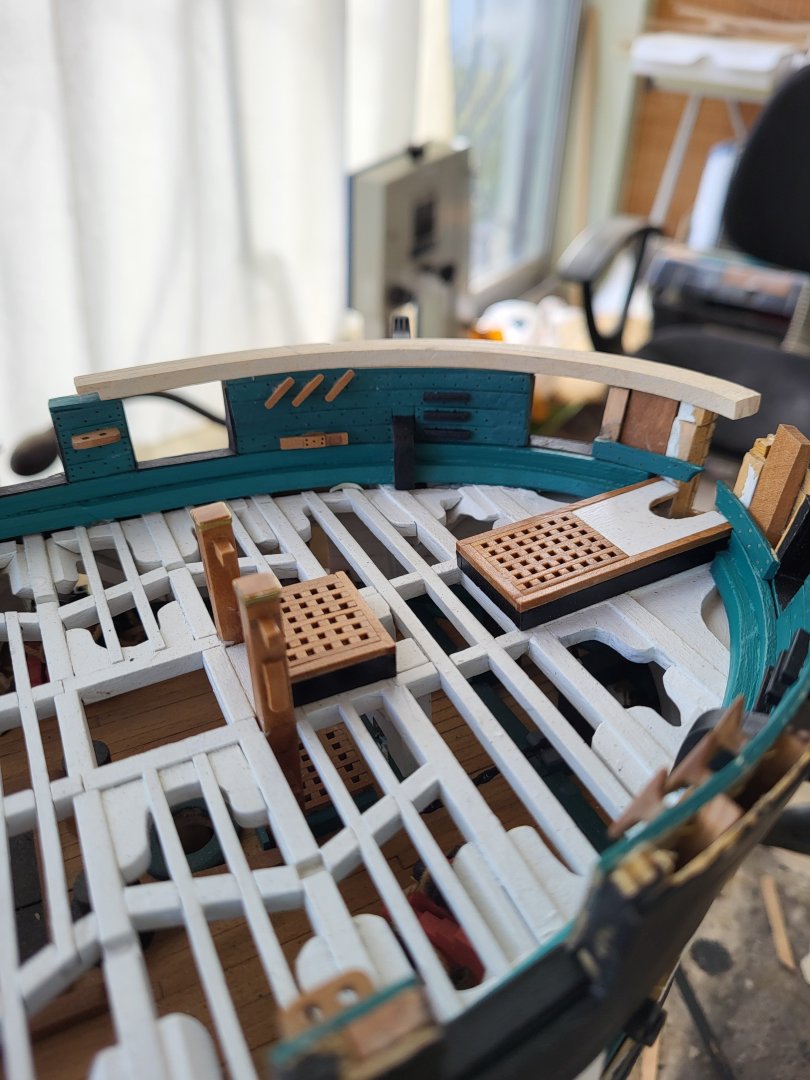
The main rails at the stern of the ship have also been completed.


-
USS Constitution by mtbediz - 1:76
mtbediz replied to mtbediz's topic in - Build logs for subjects built 1751 - 1800
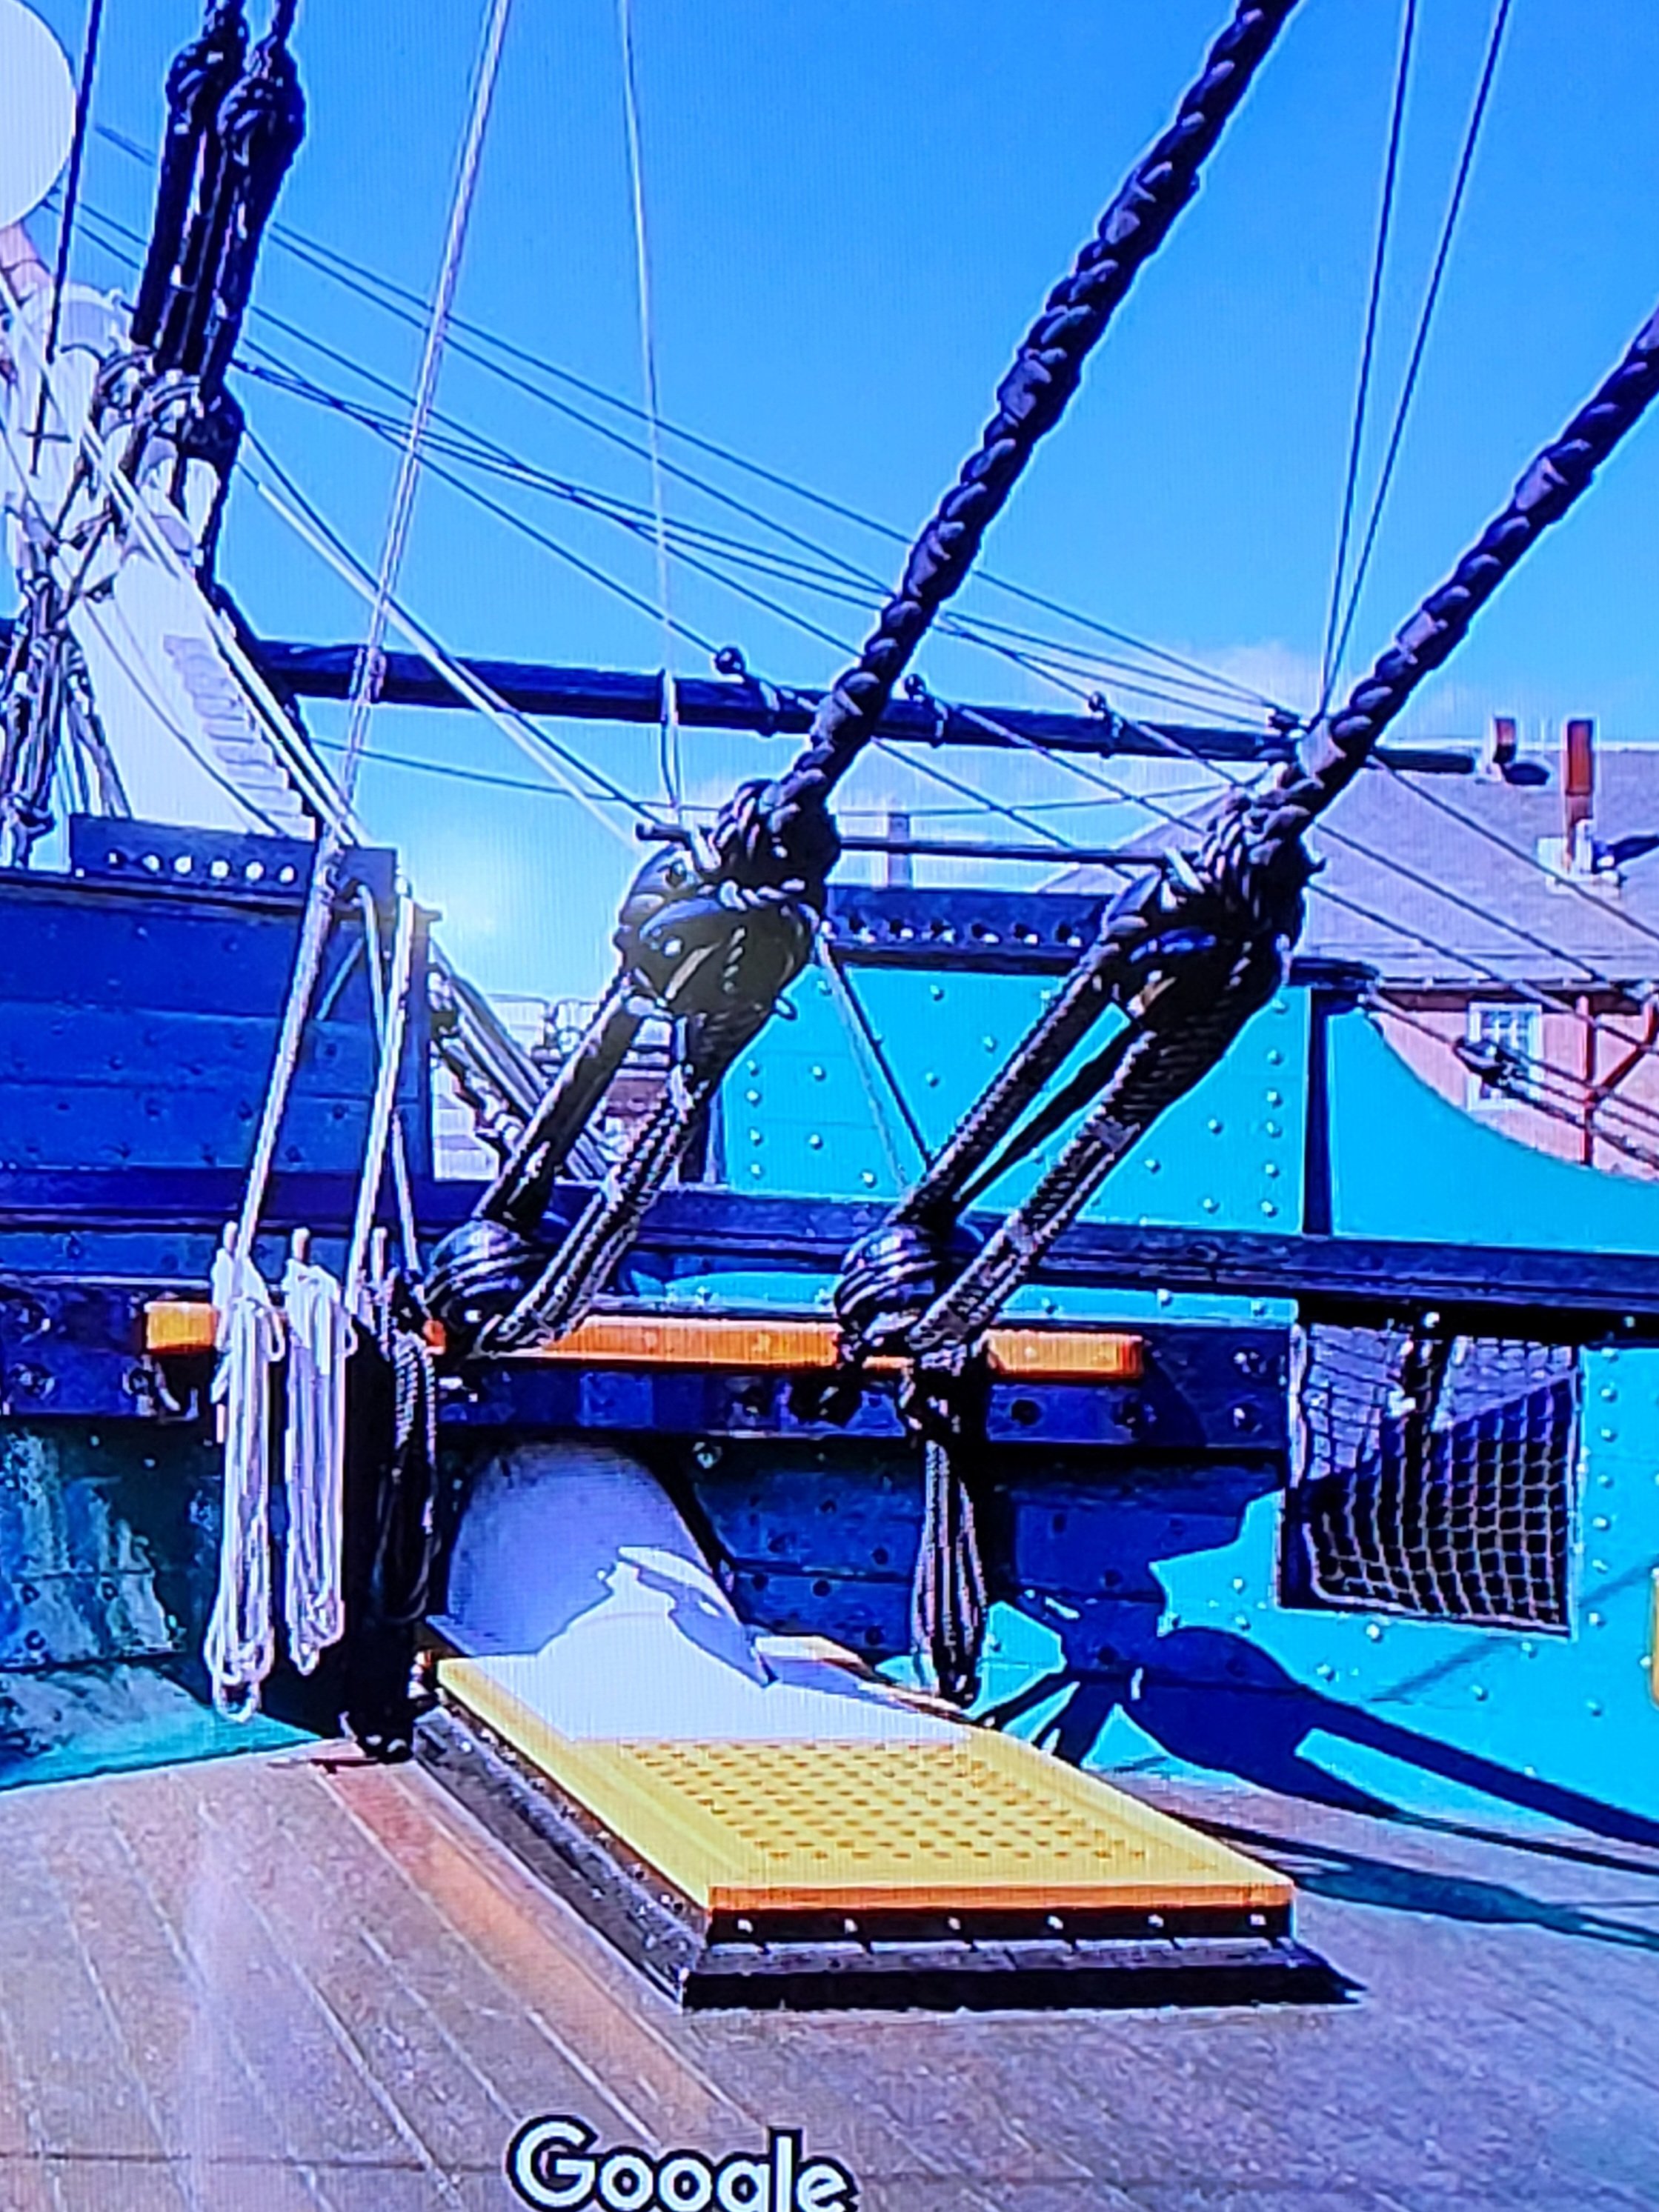
Since, at this scale, it was not within my abilities to make the equipment in the images sent by friends, I settled for making it as in the photo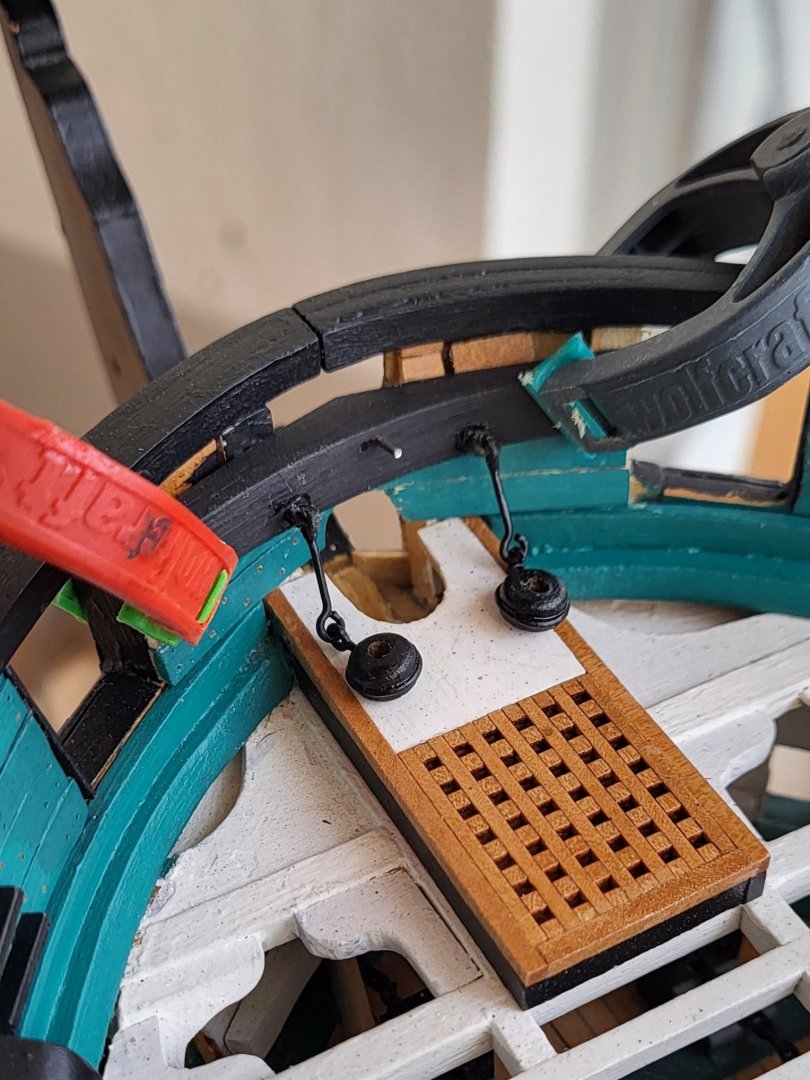

-
USS Constitution by mtbediz - 1:76
mtbediz replied to mtbediz's topic in - Build logs for subjects built 1751 - 1800
Thank you very much, friends. These are wonderful pictures and drawing. Everything looks very clear, it will be very helpful. -
USS Constitution by mtbediz - 1:76
mtbediz replied to mtbediz's topic in - Build logs for subjects built 1751 - 1800
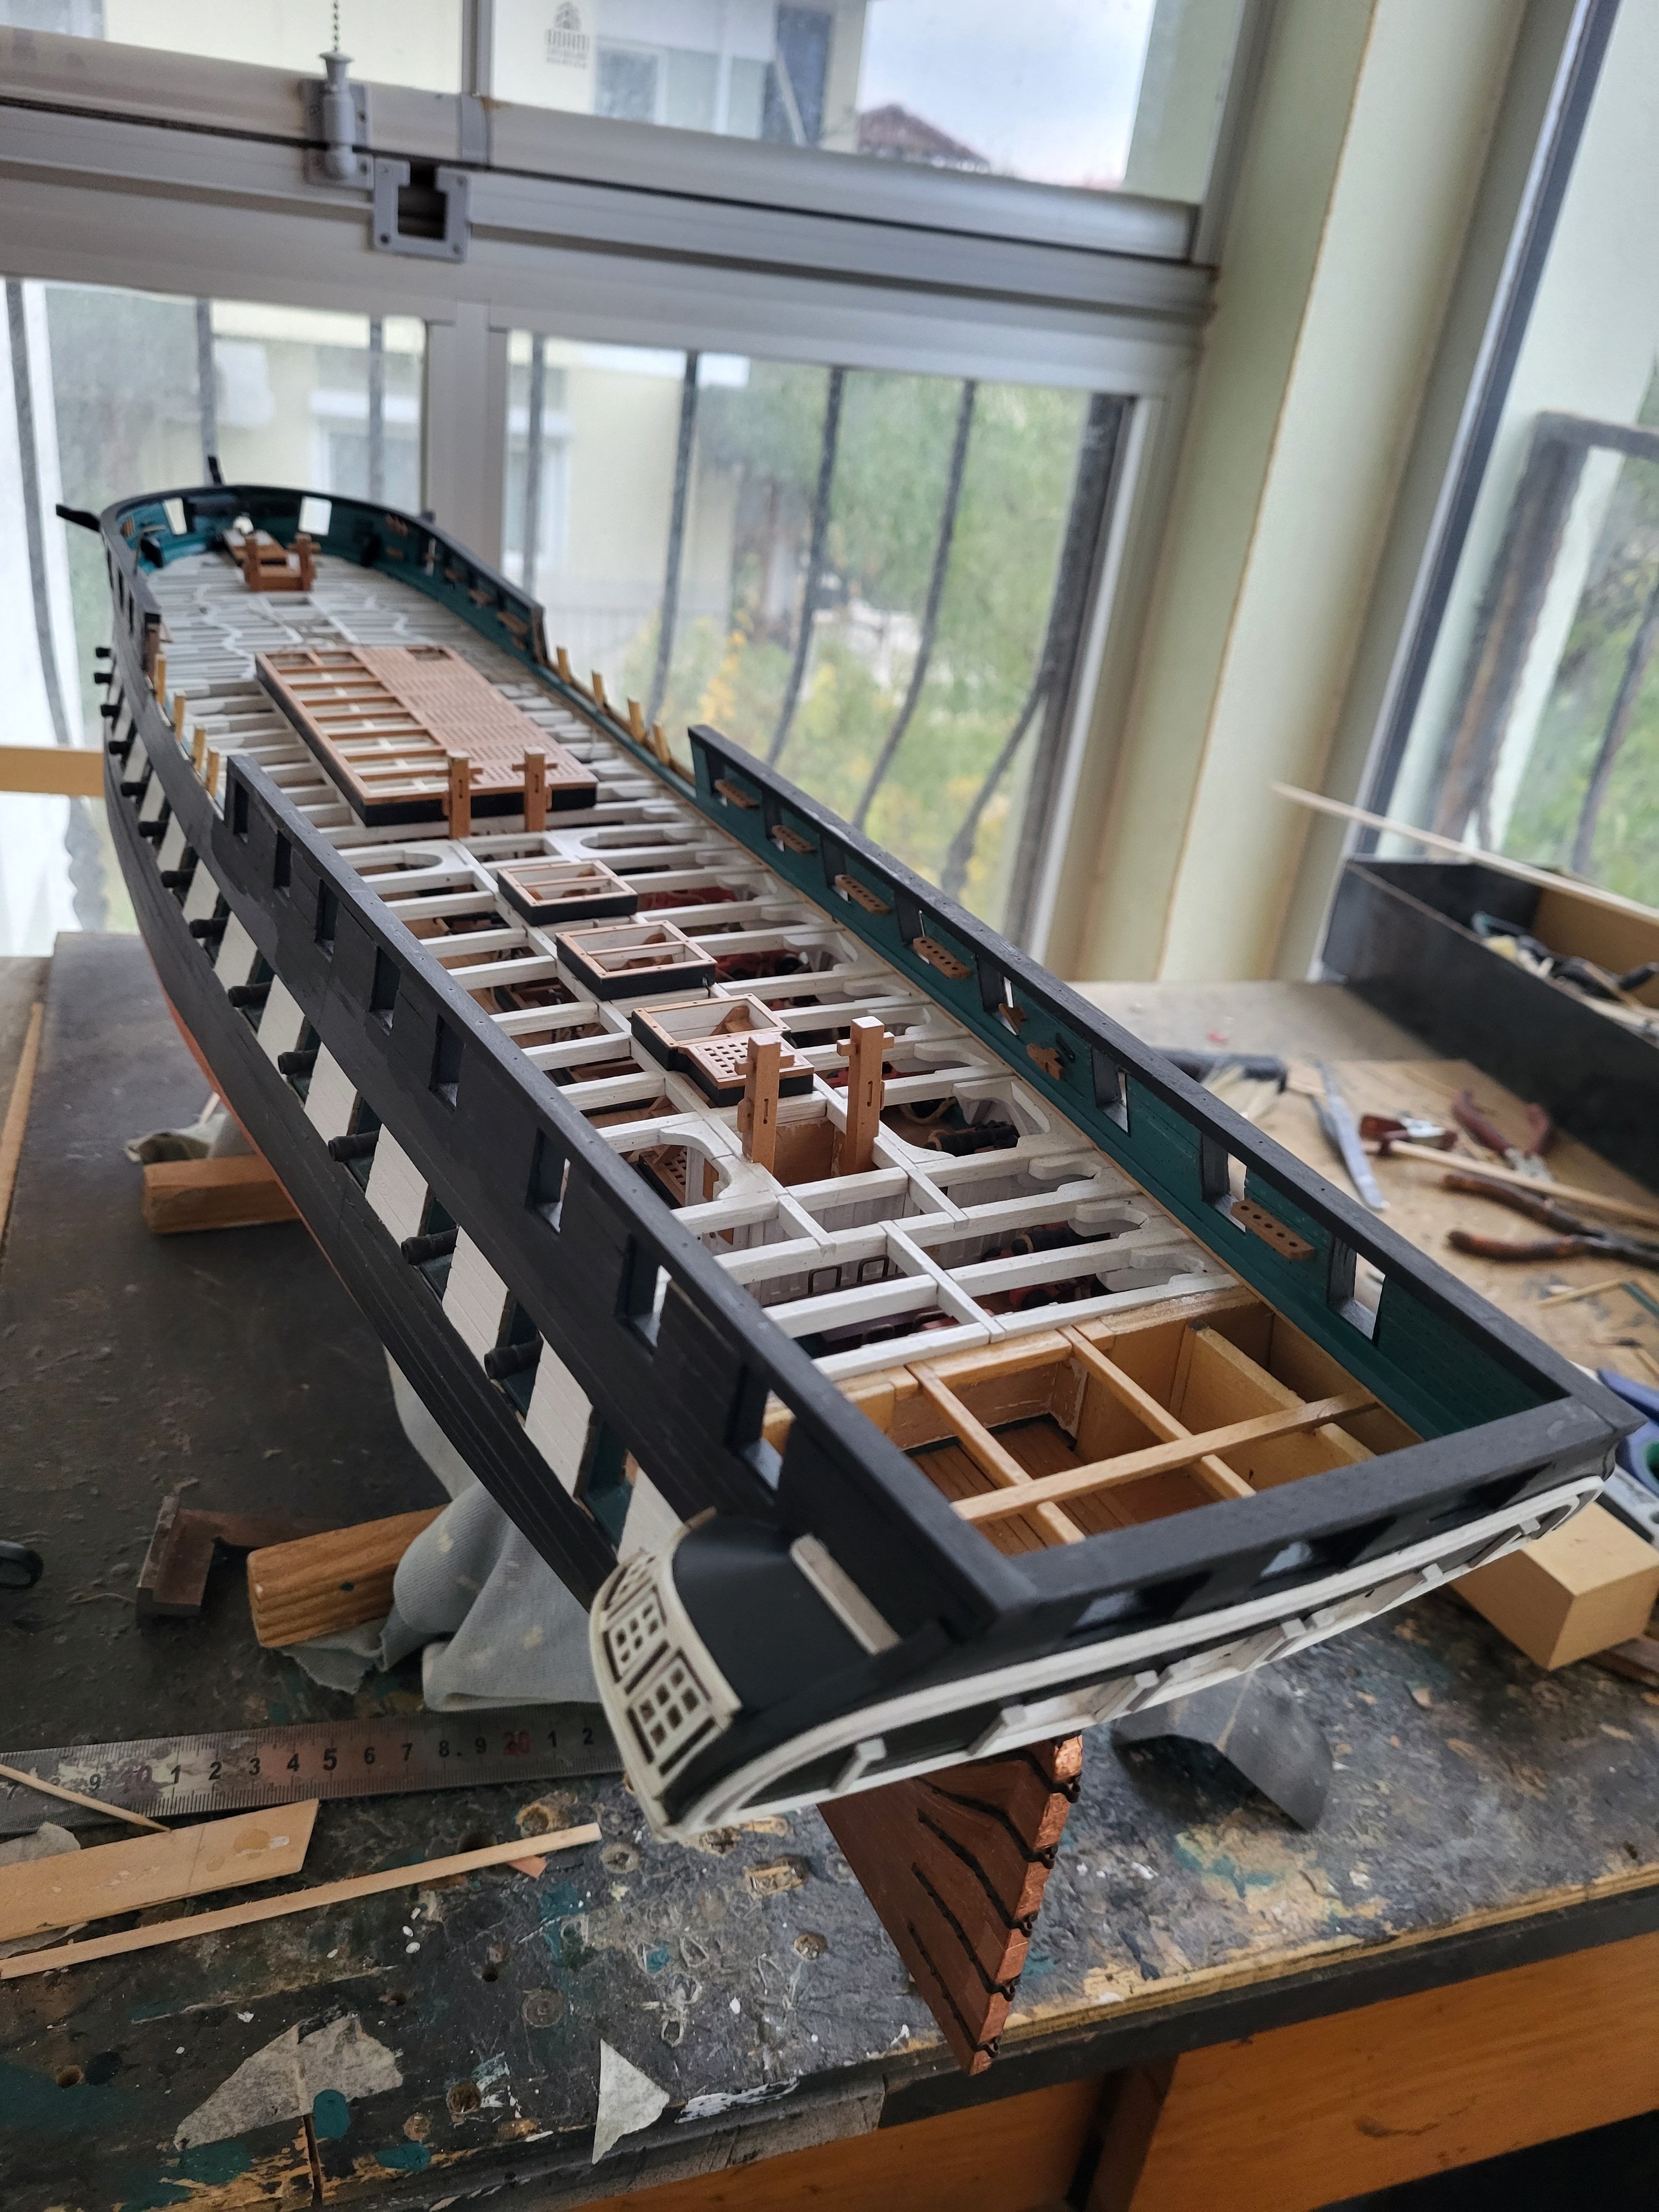
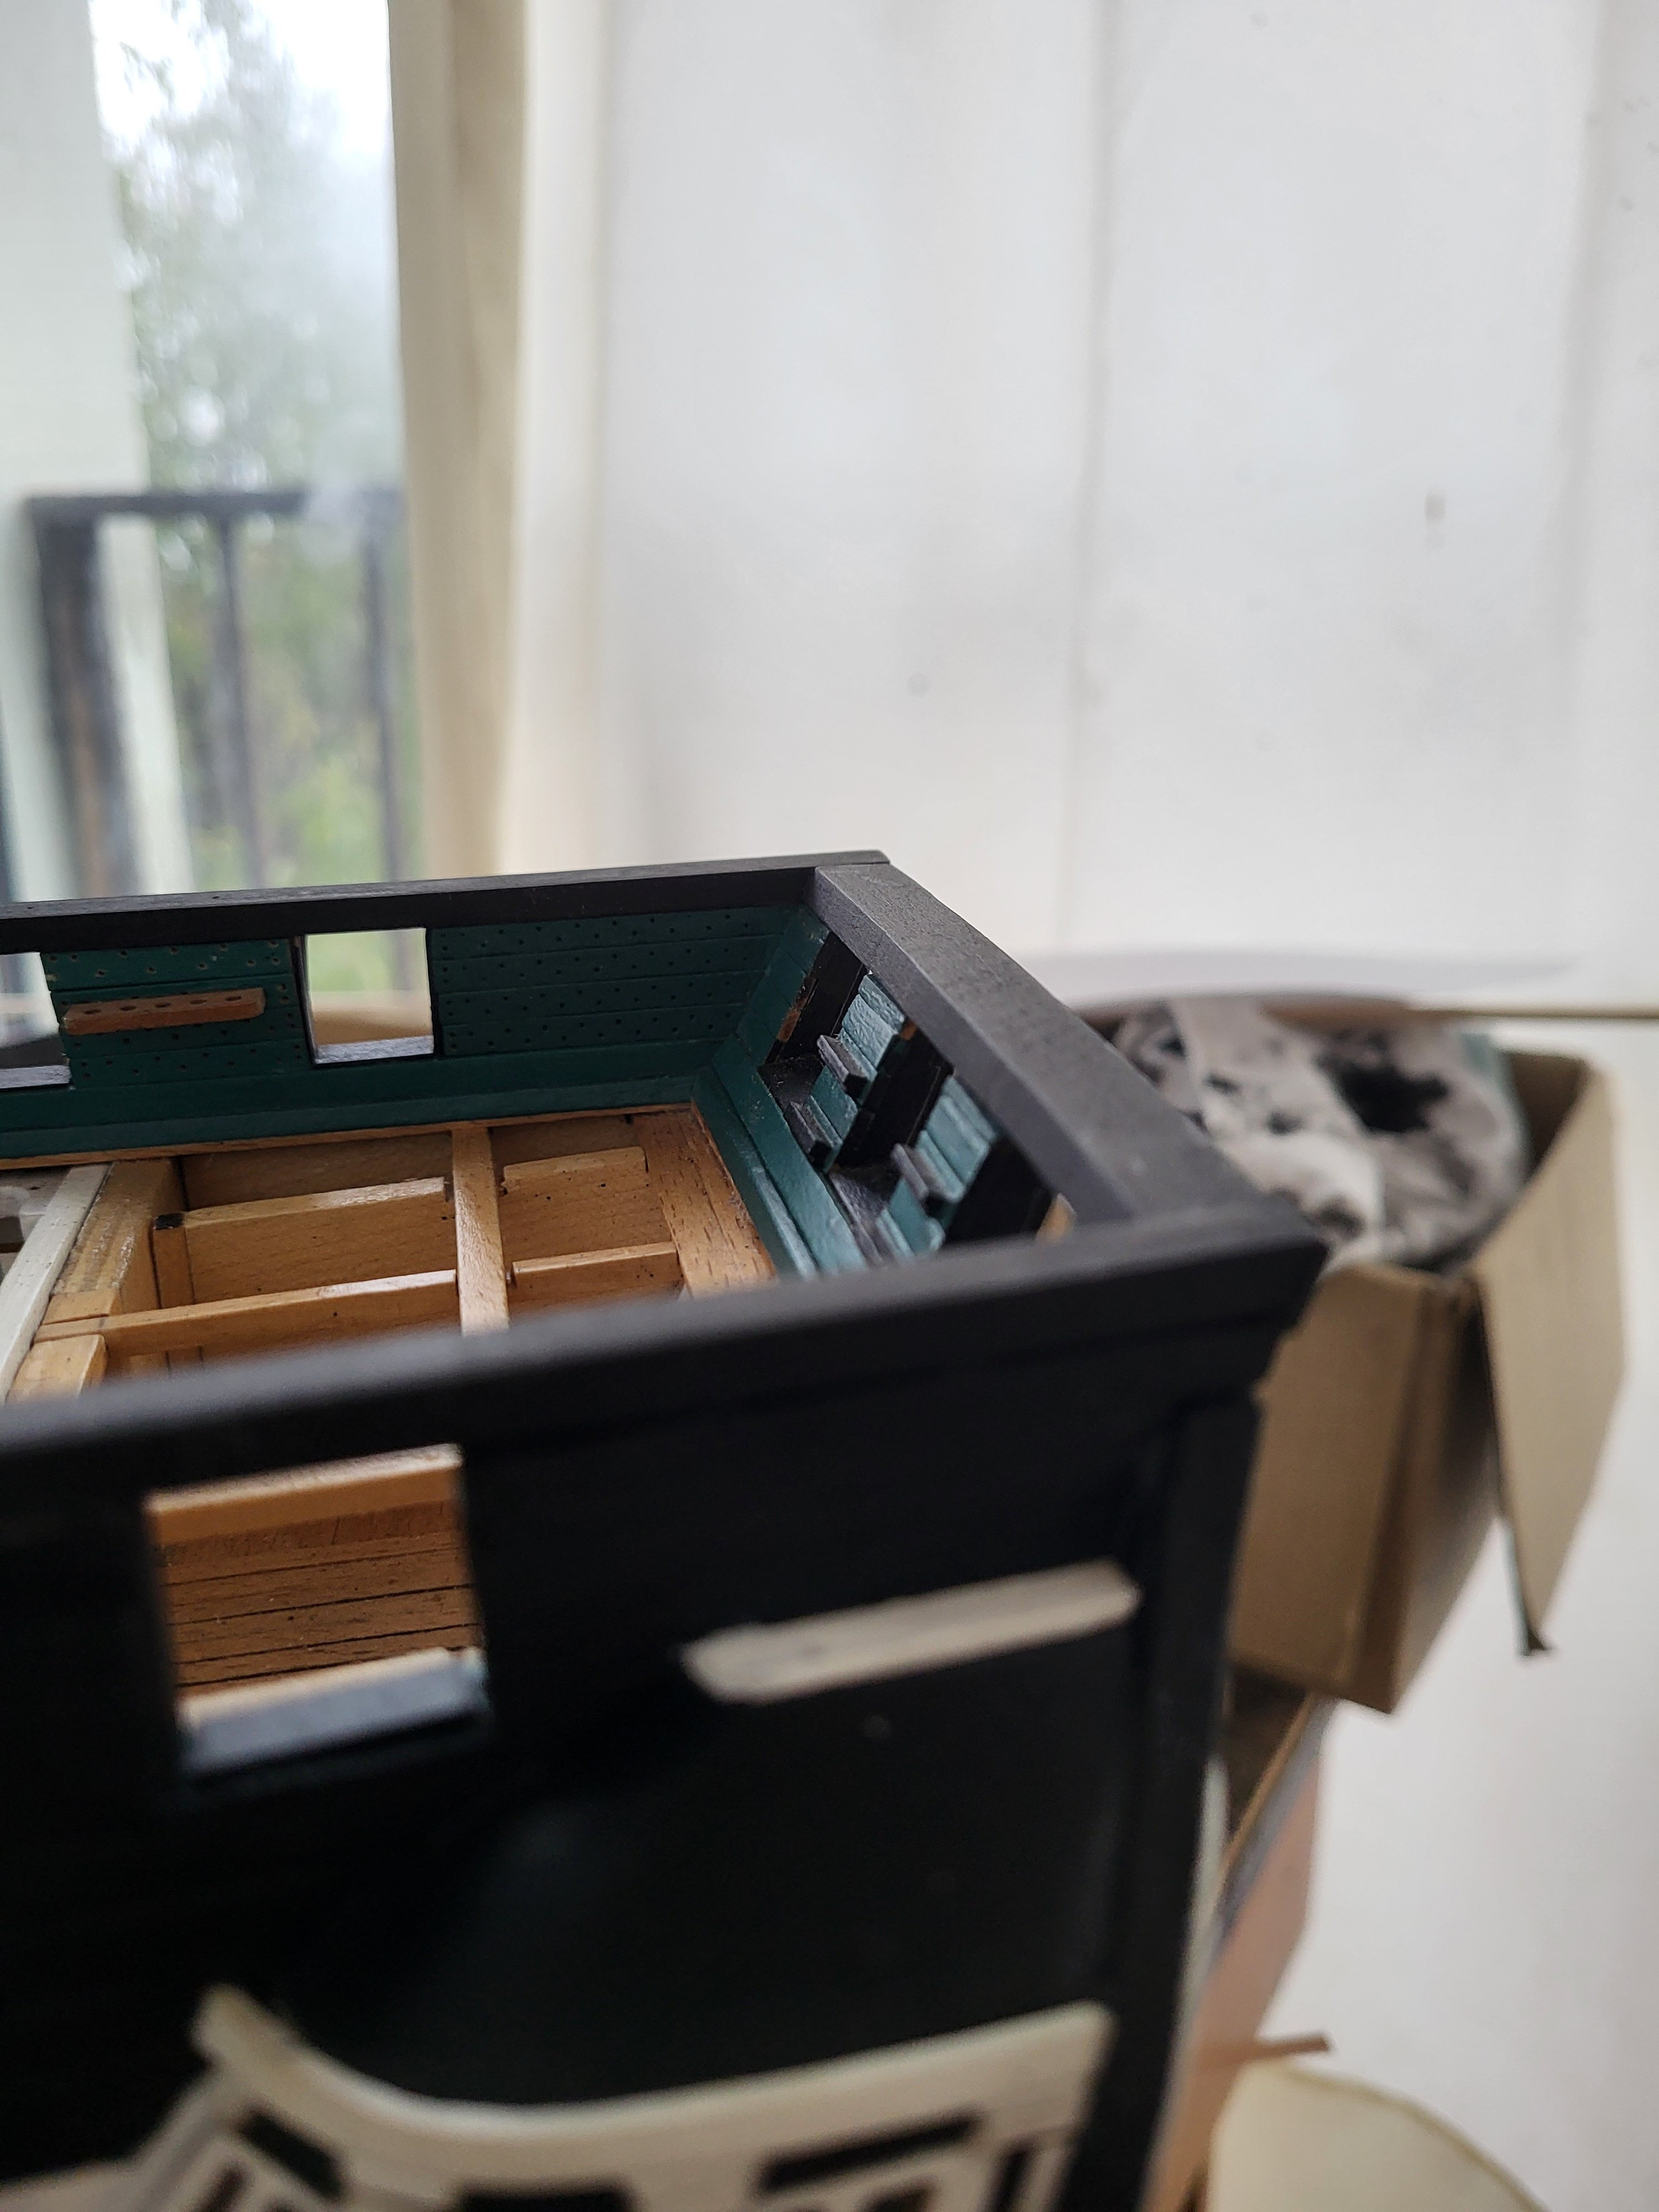
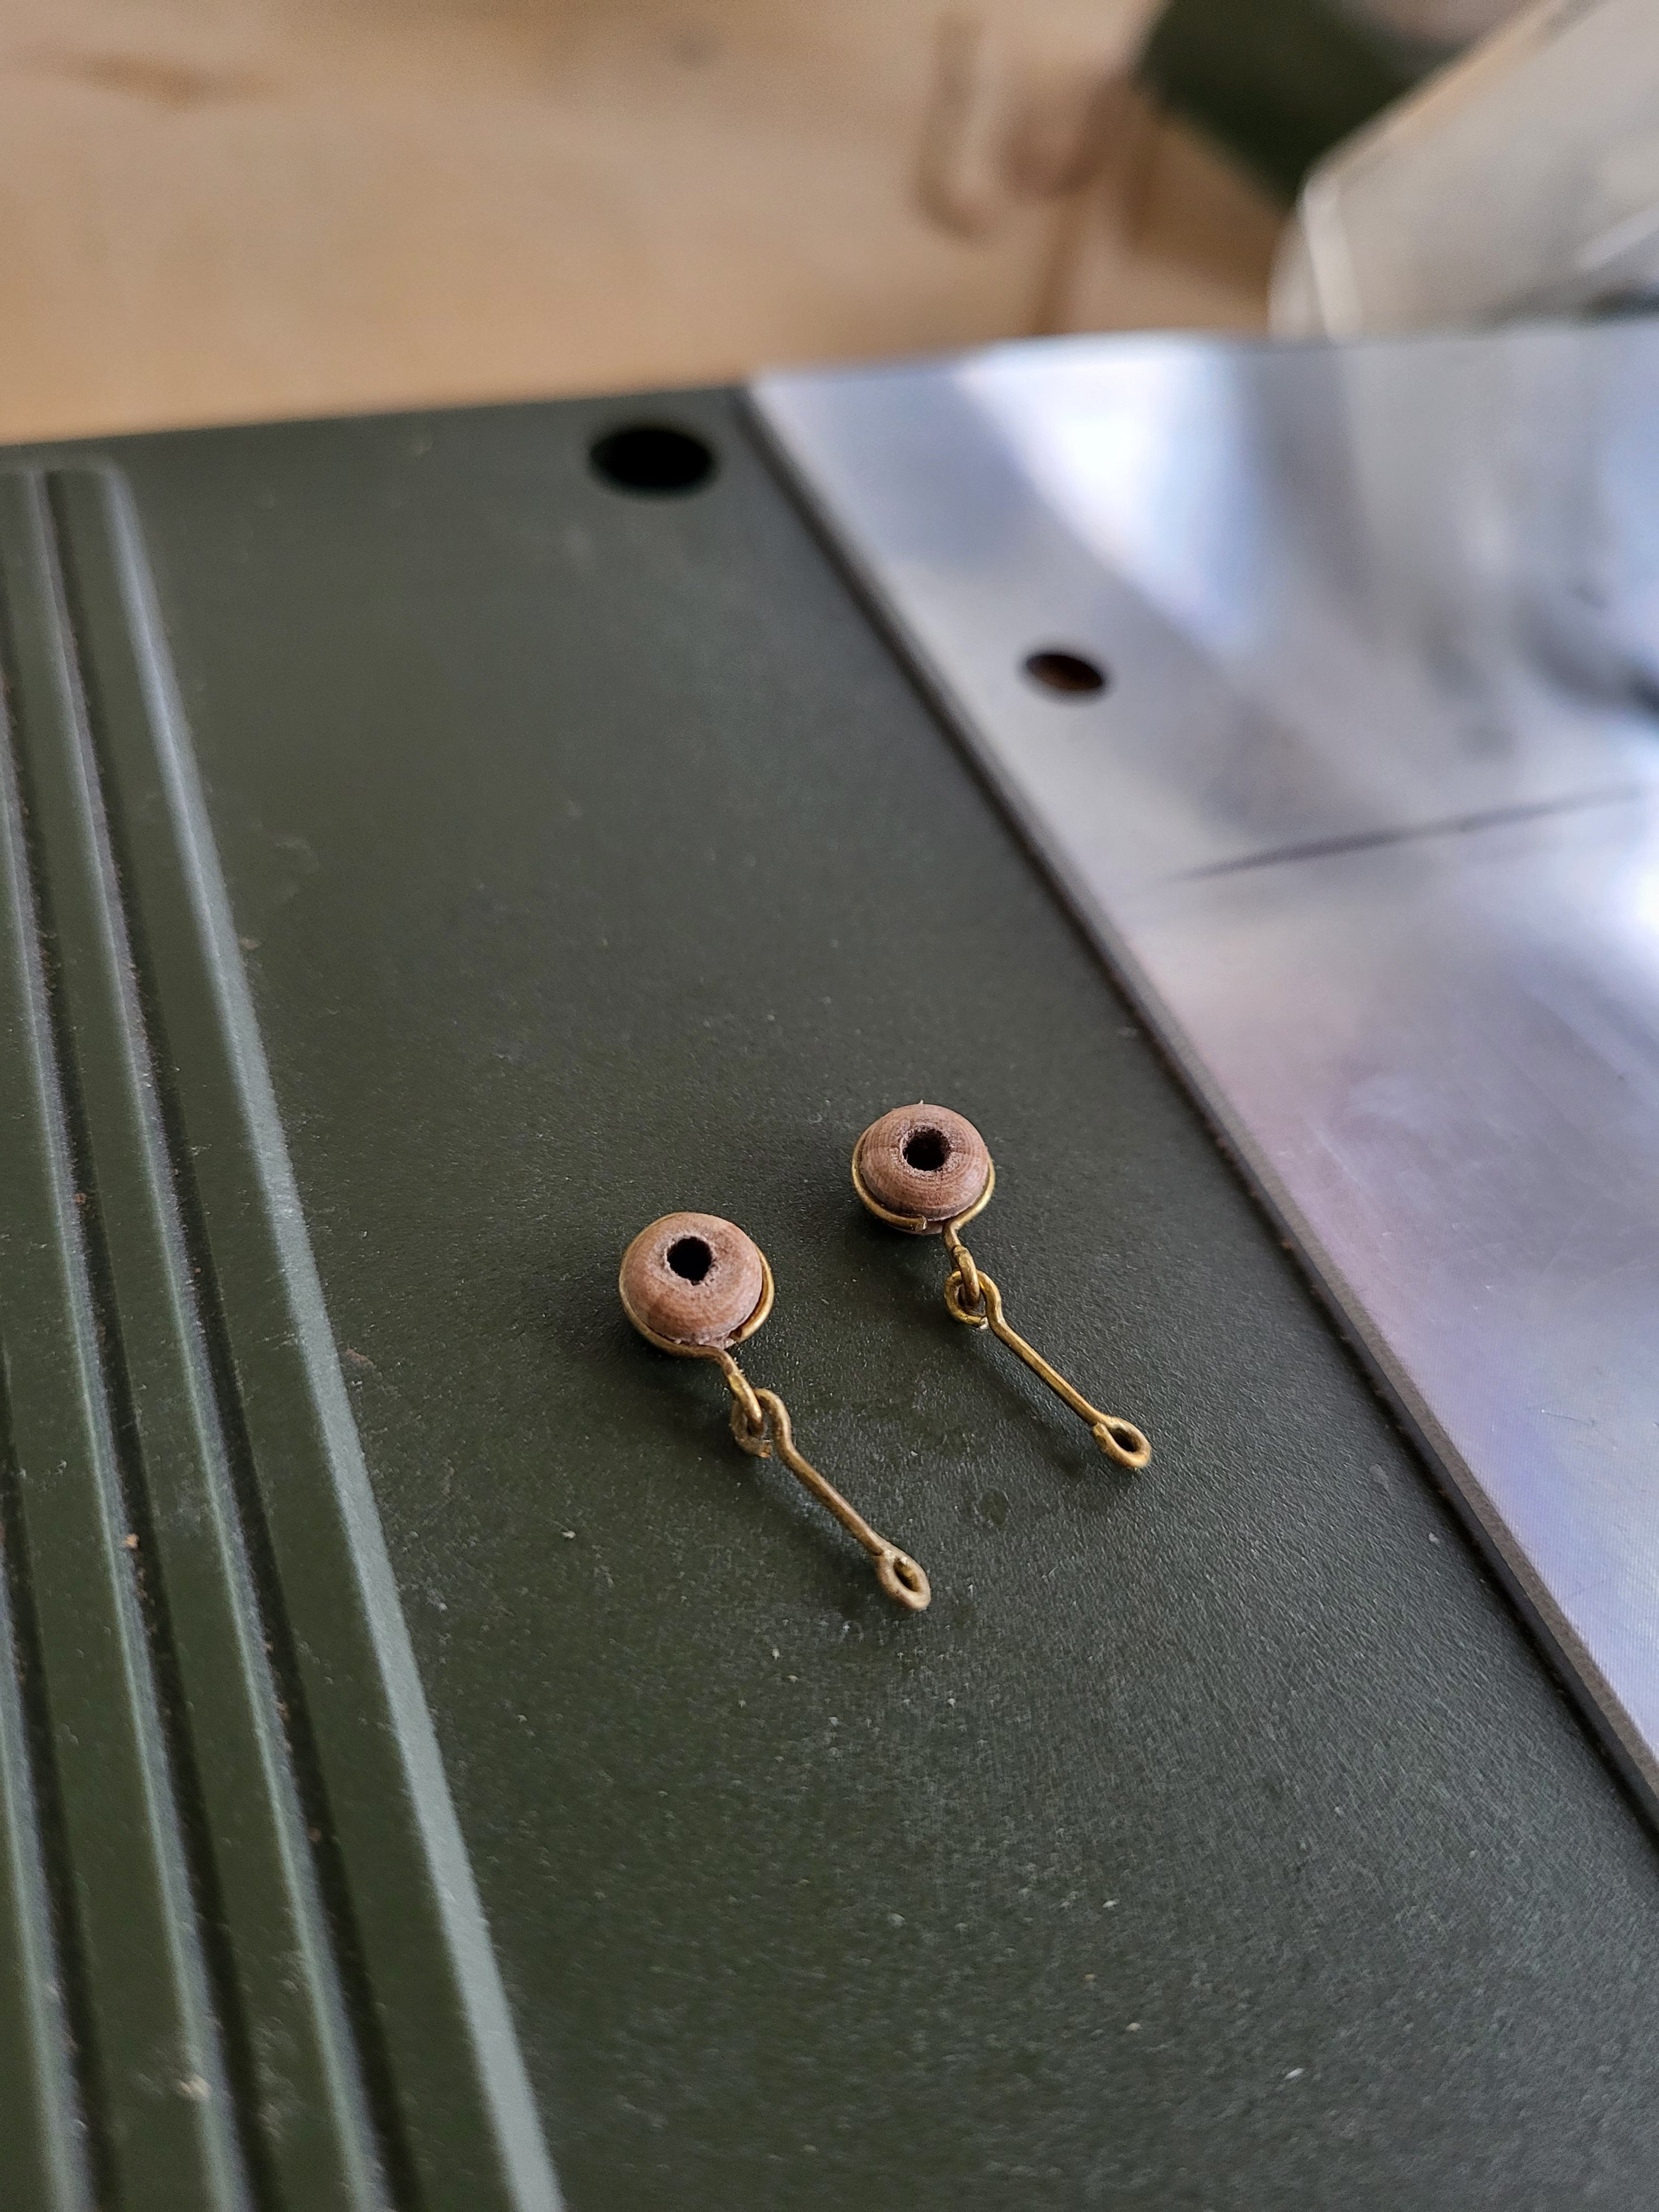
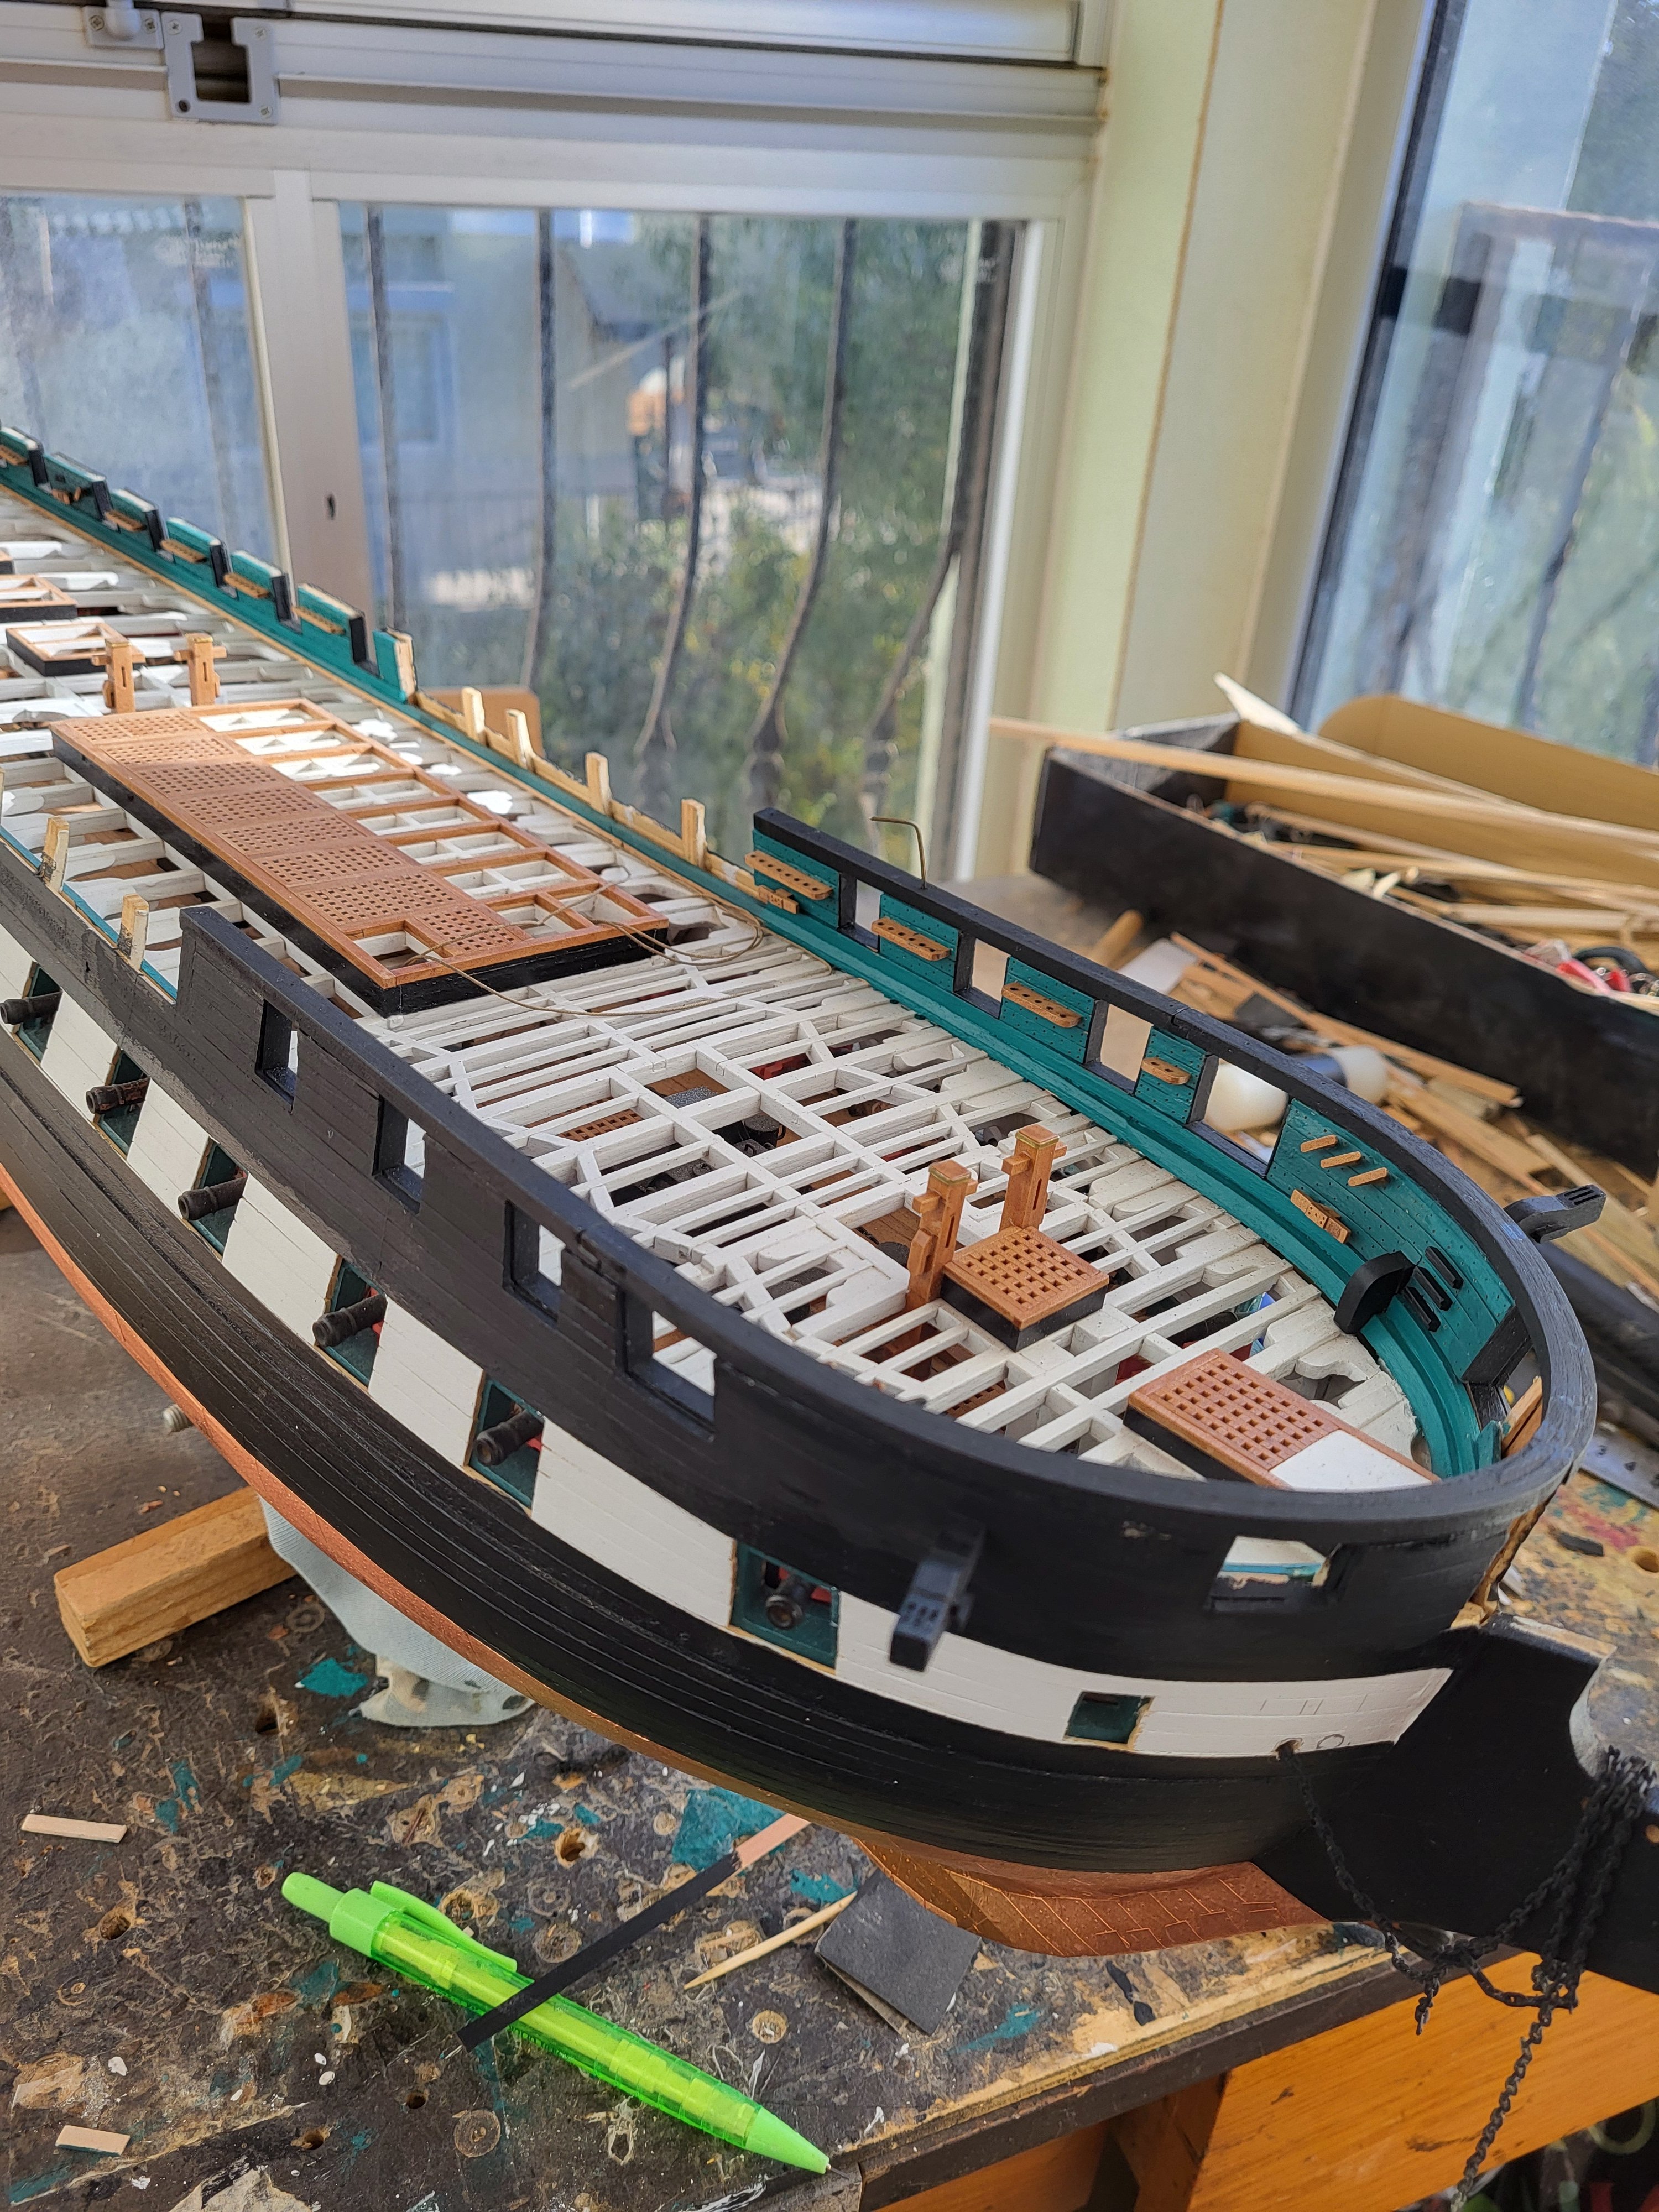
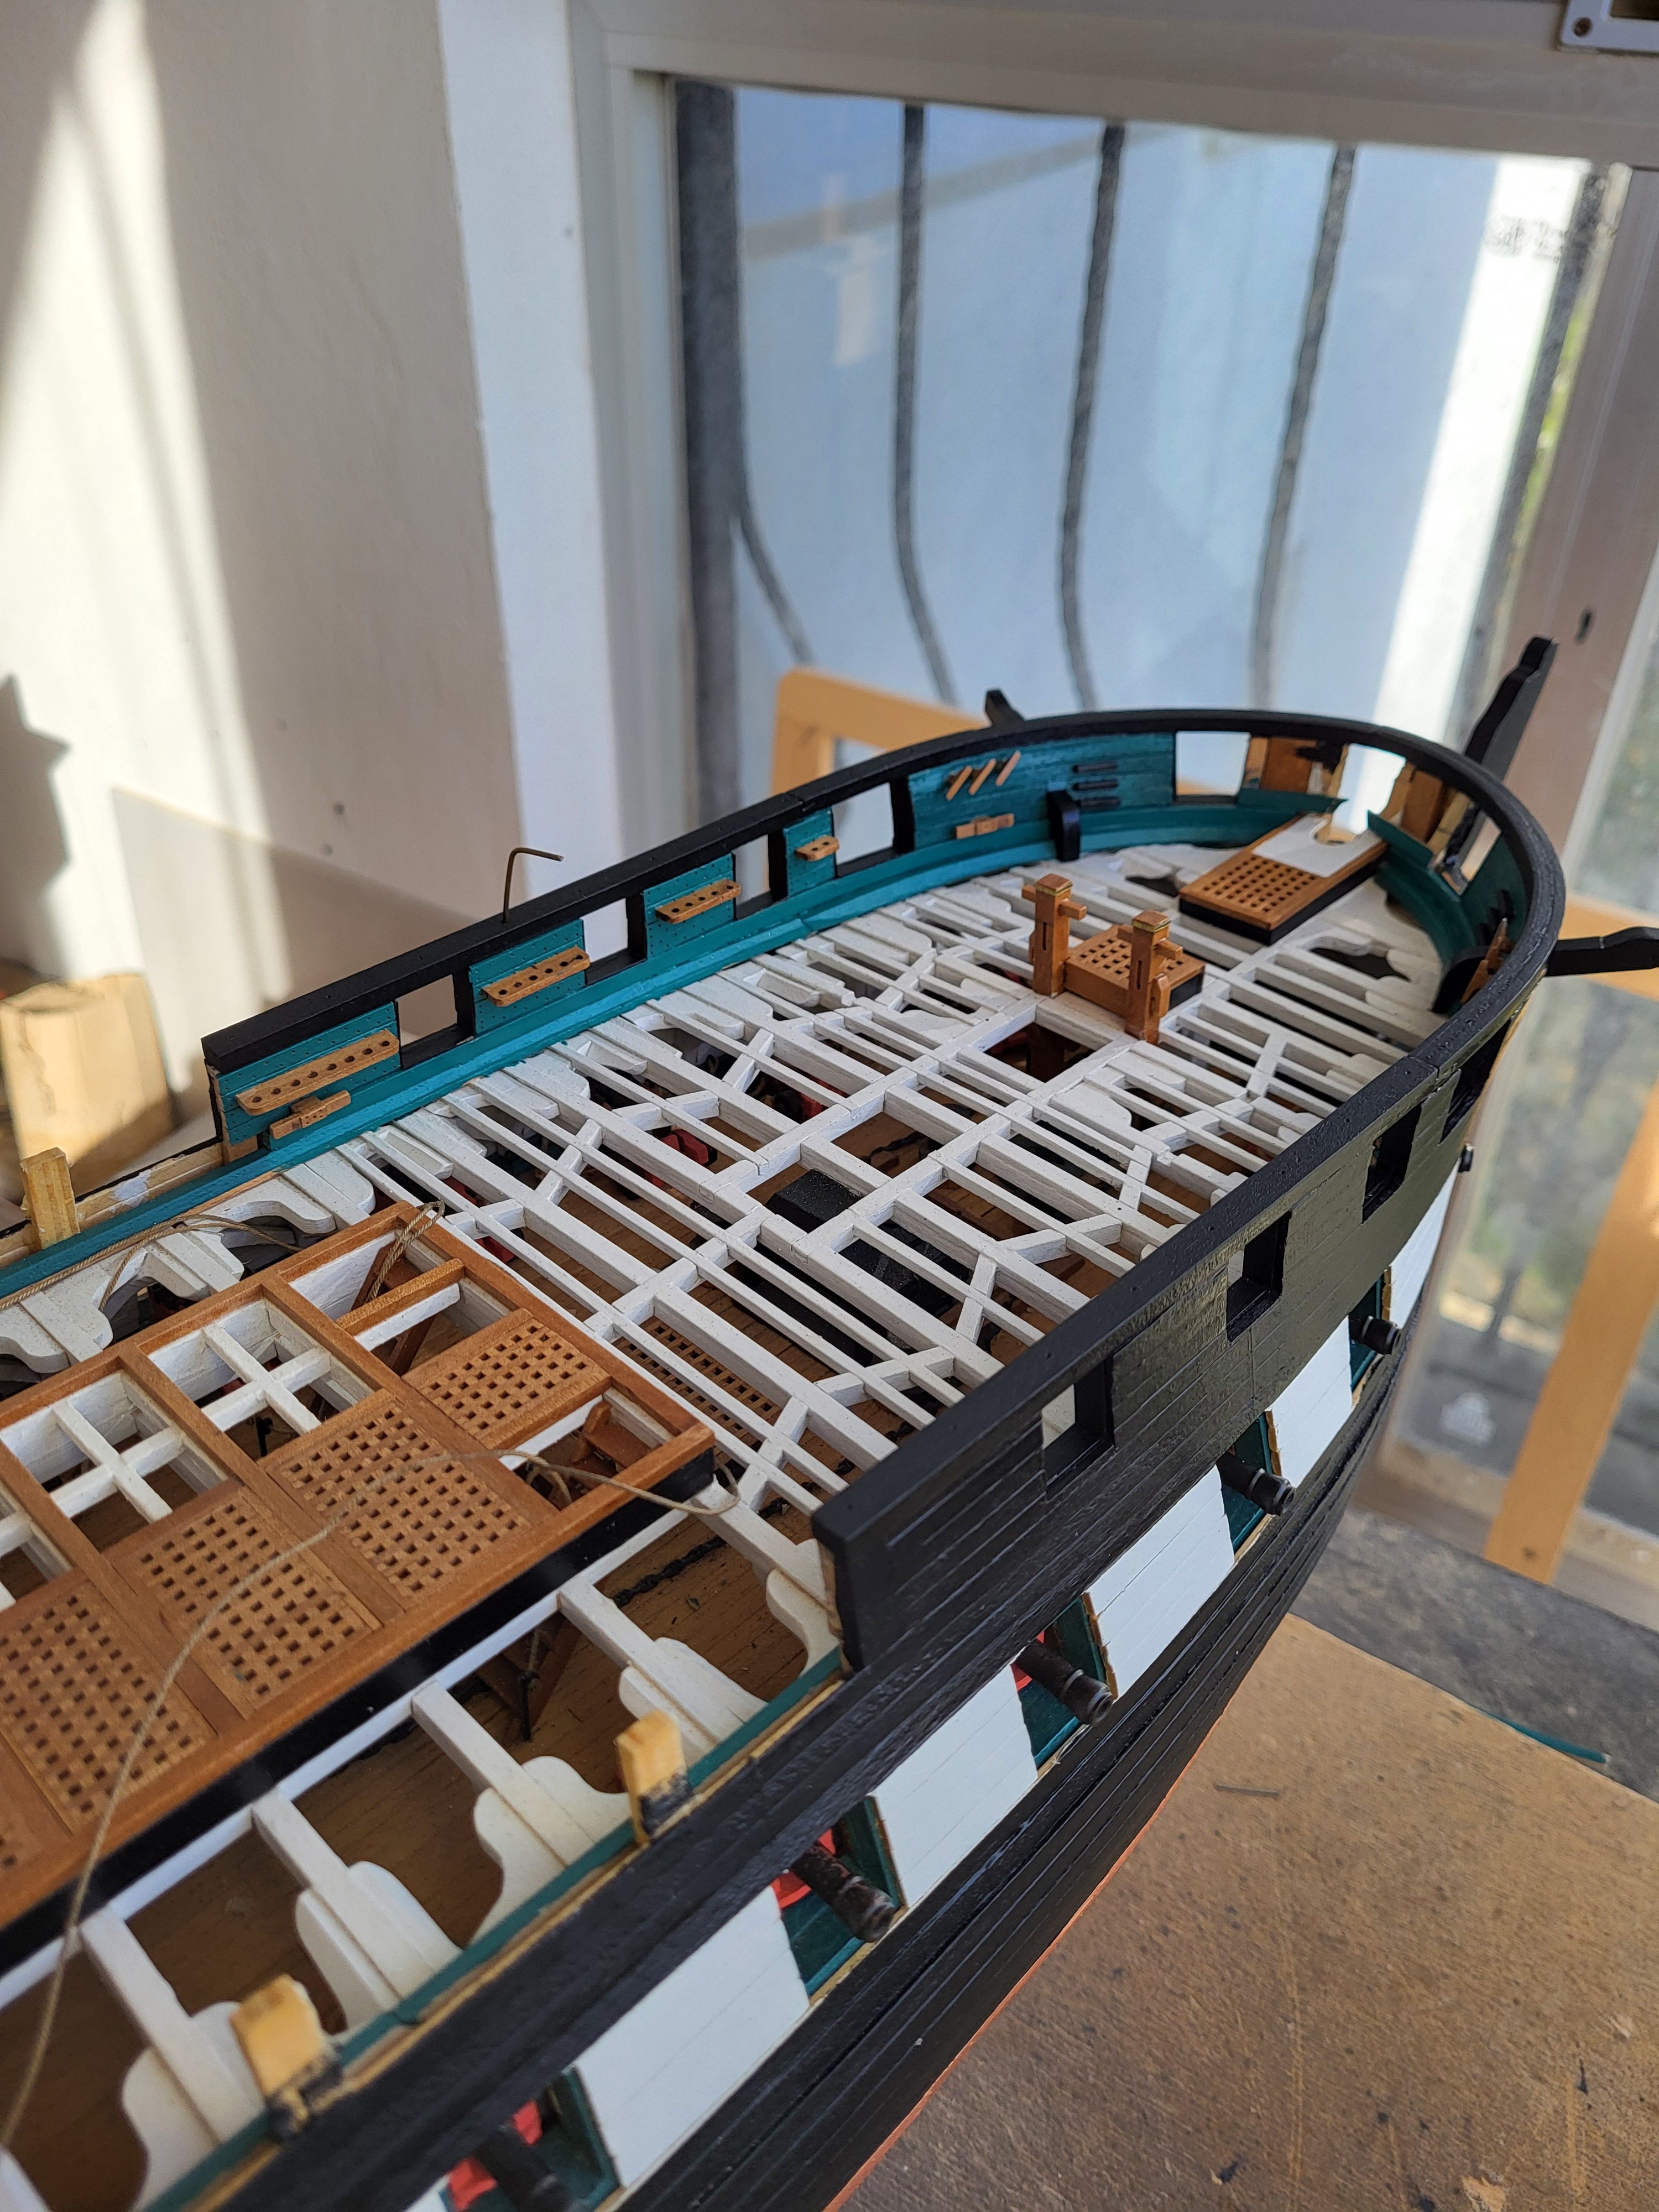
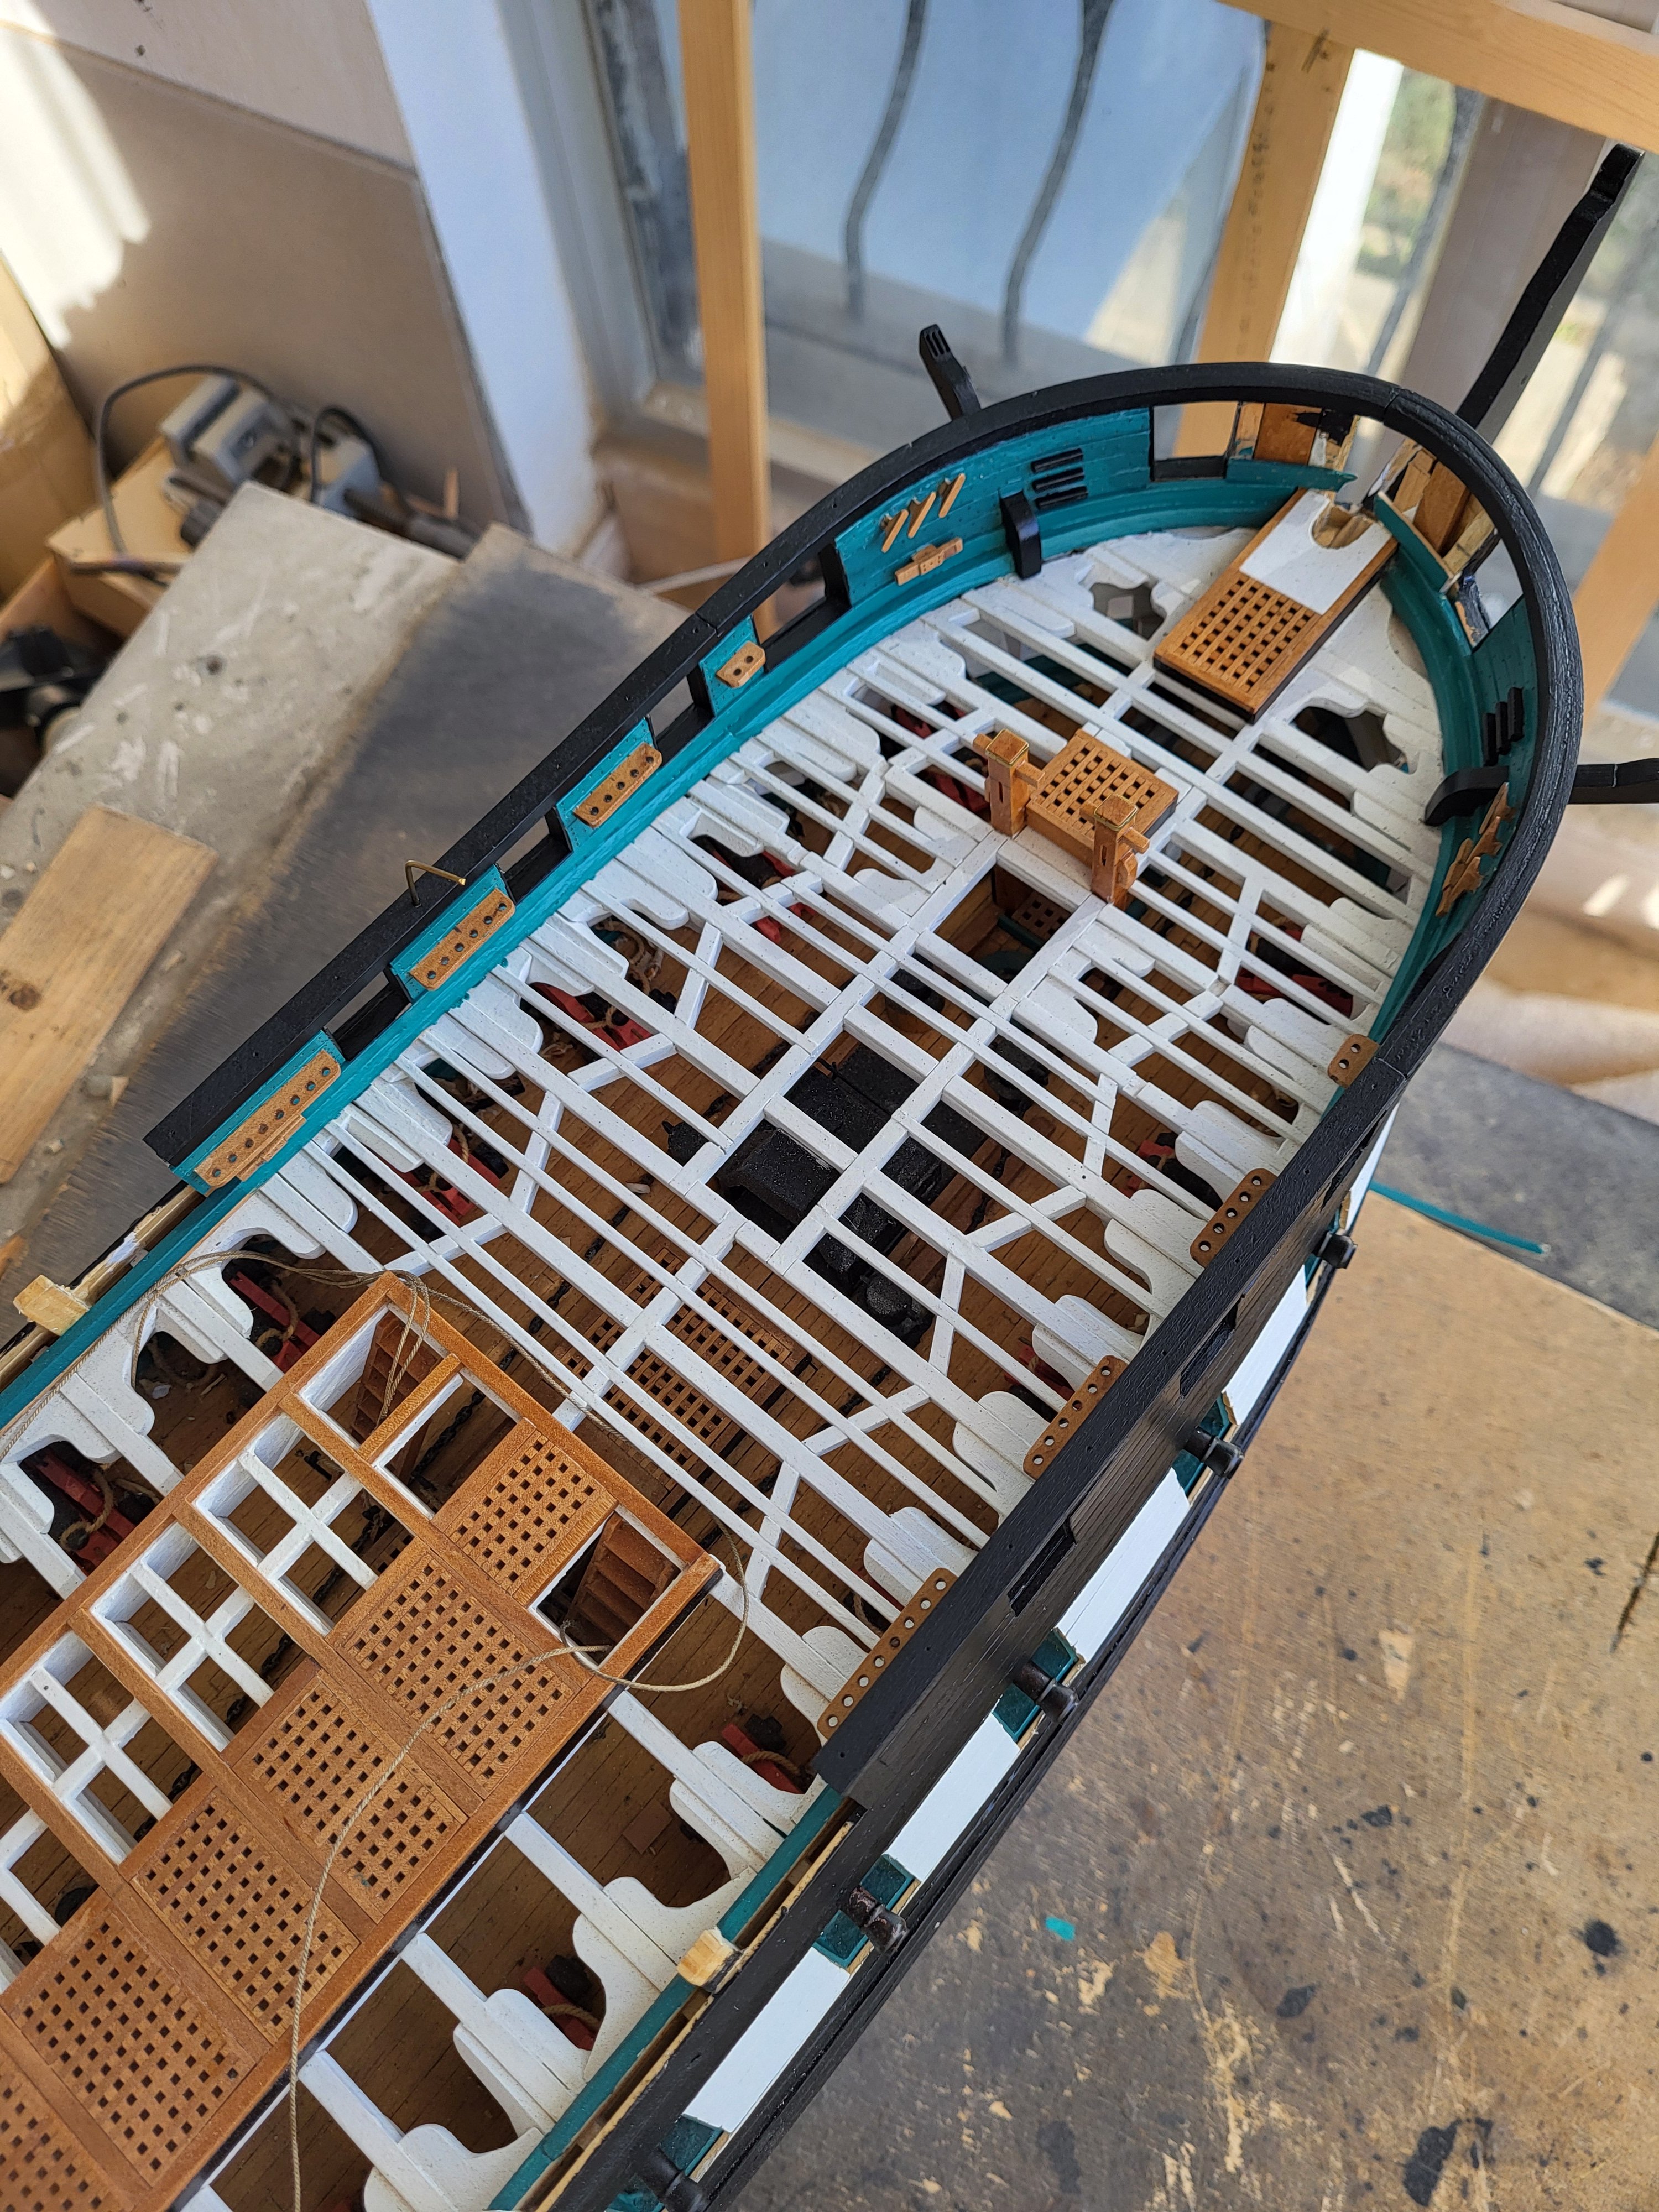
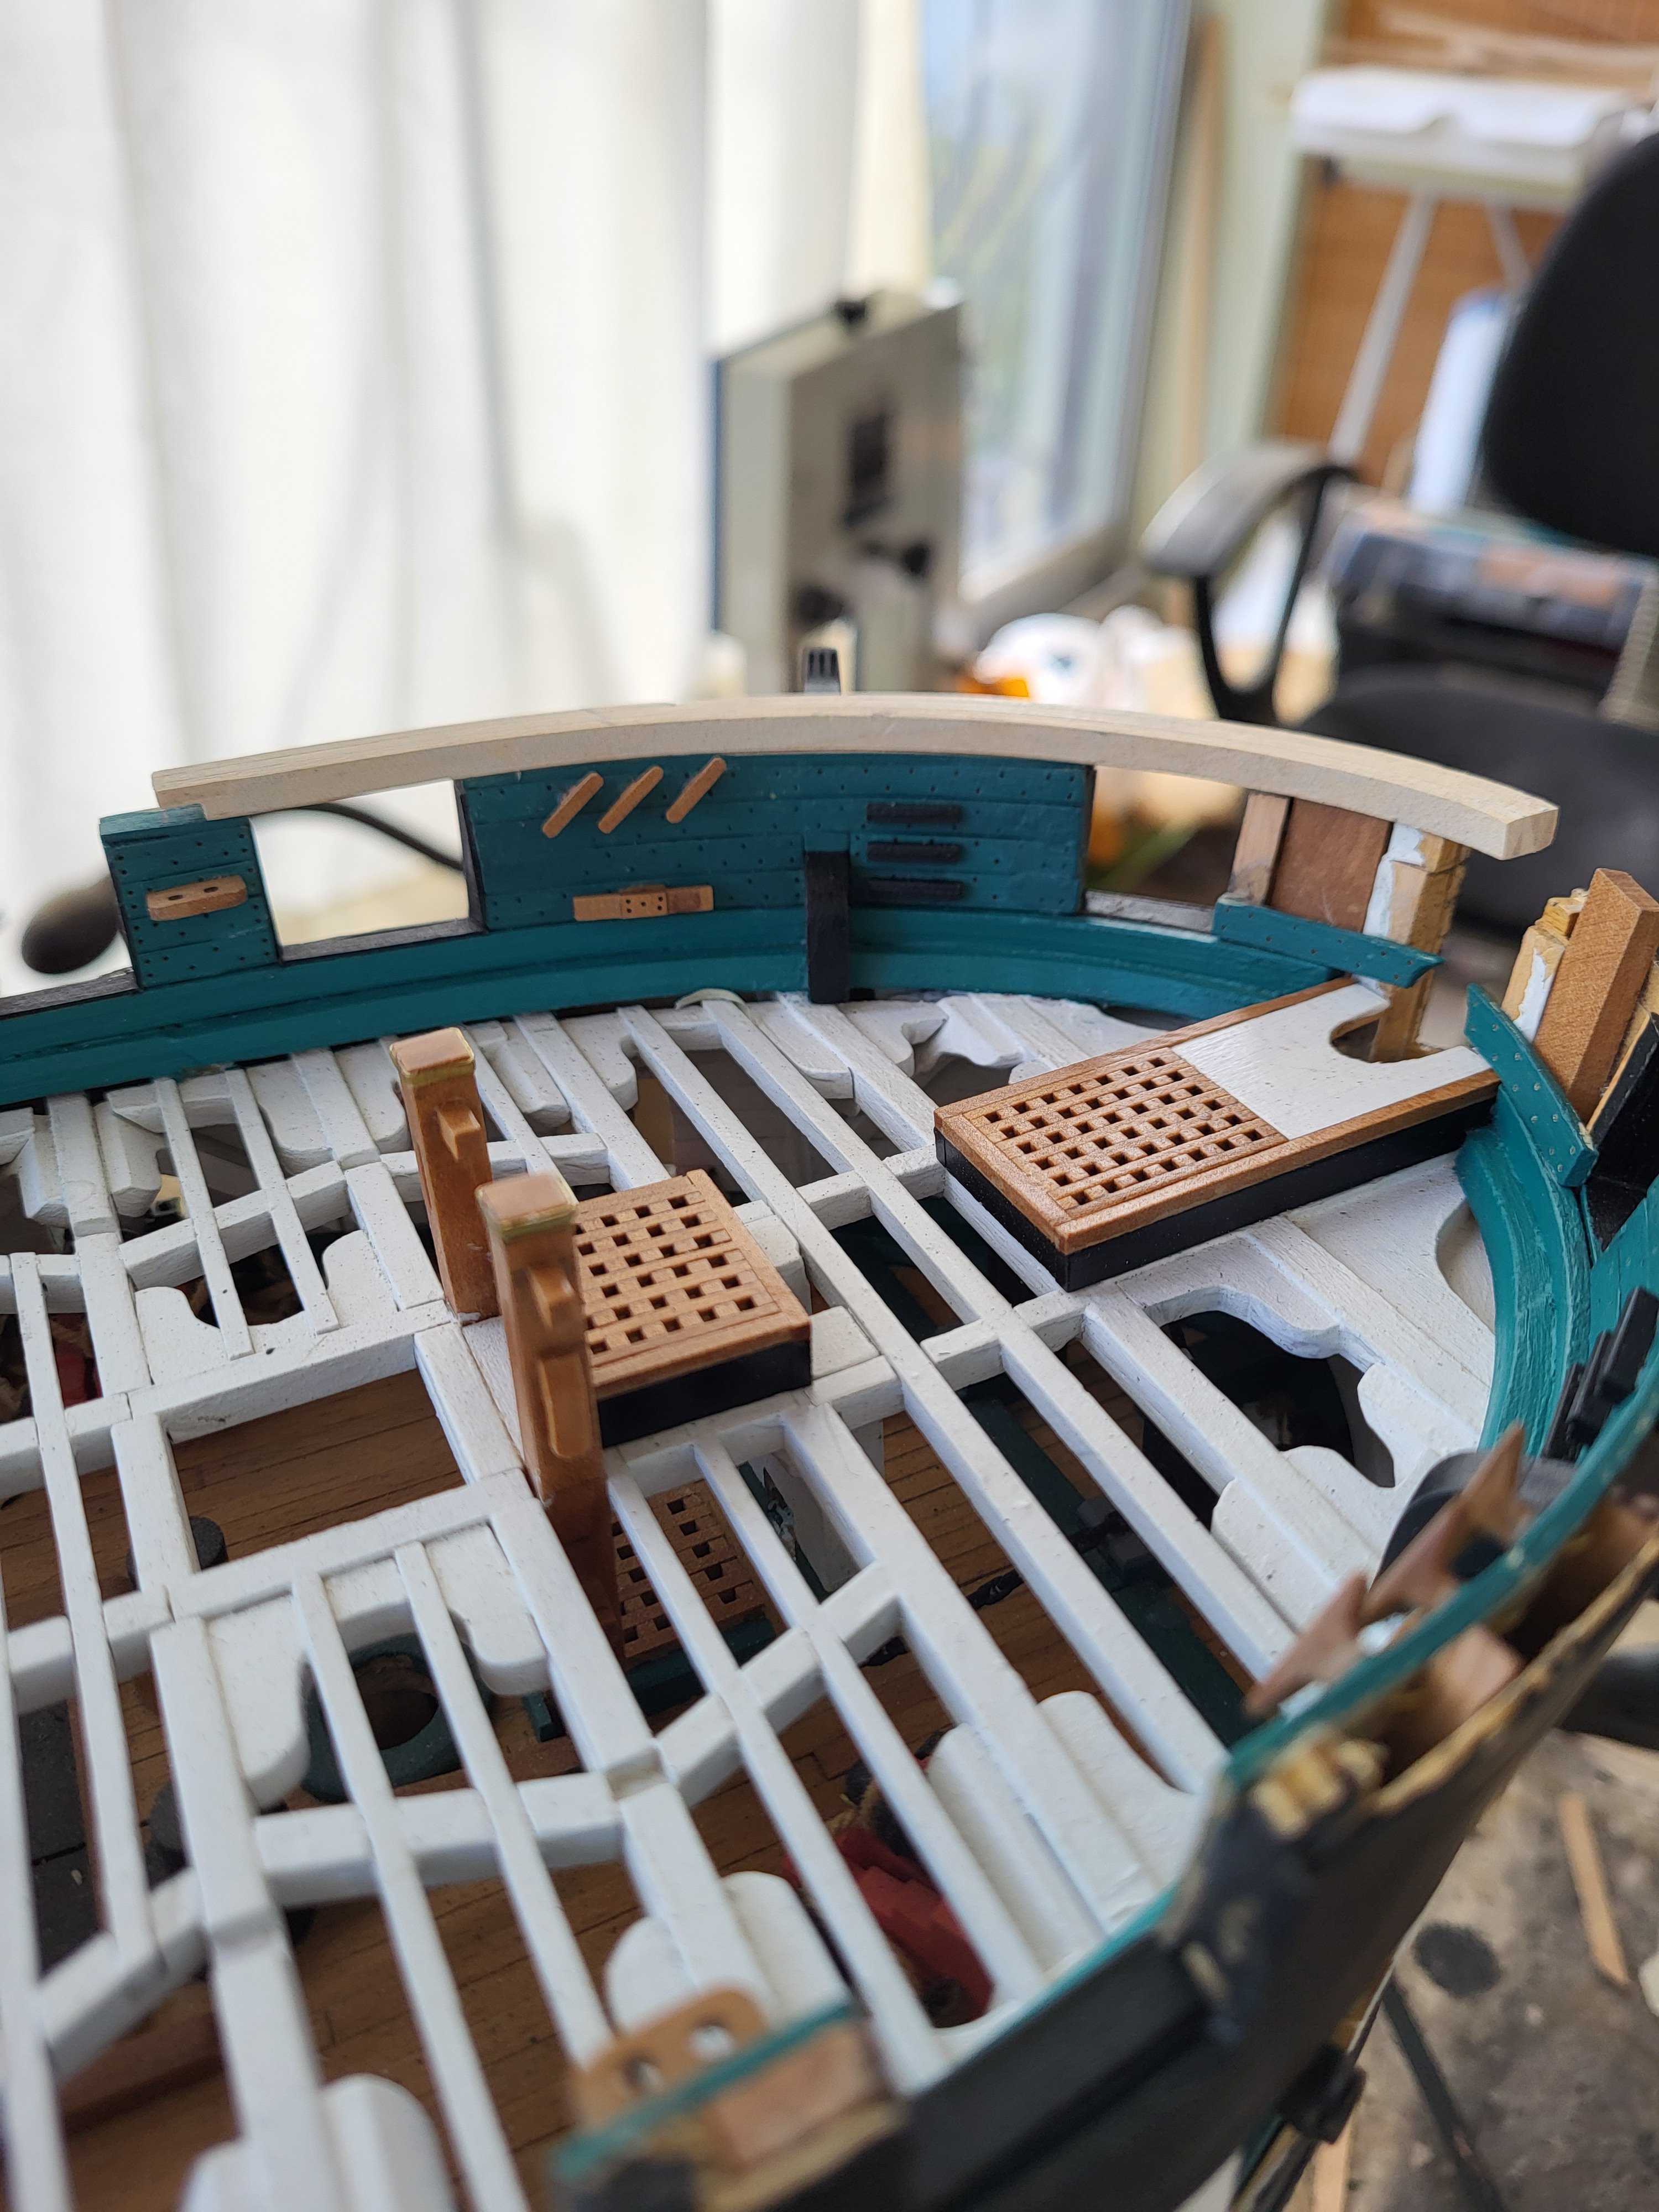
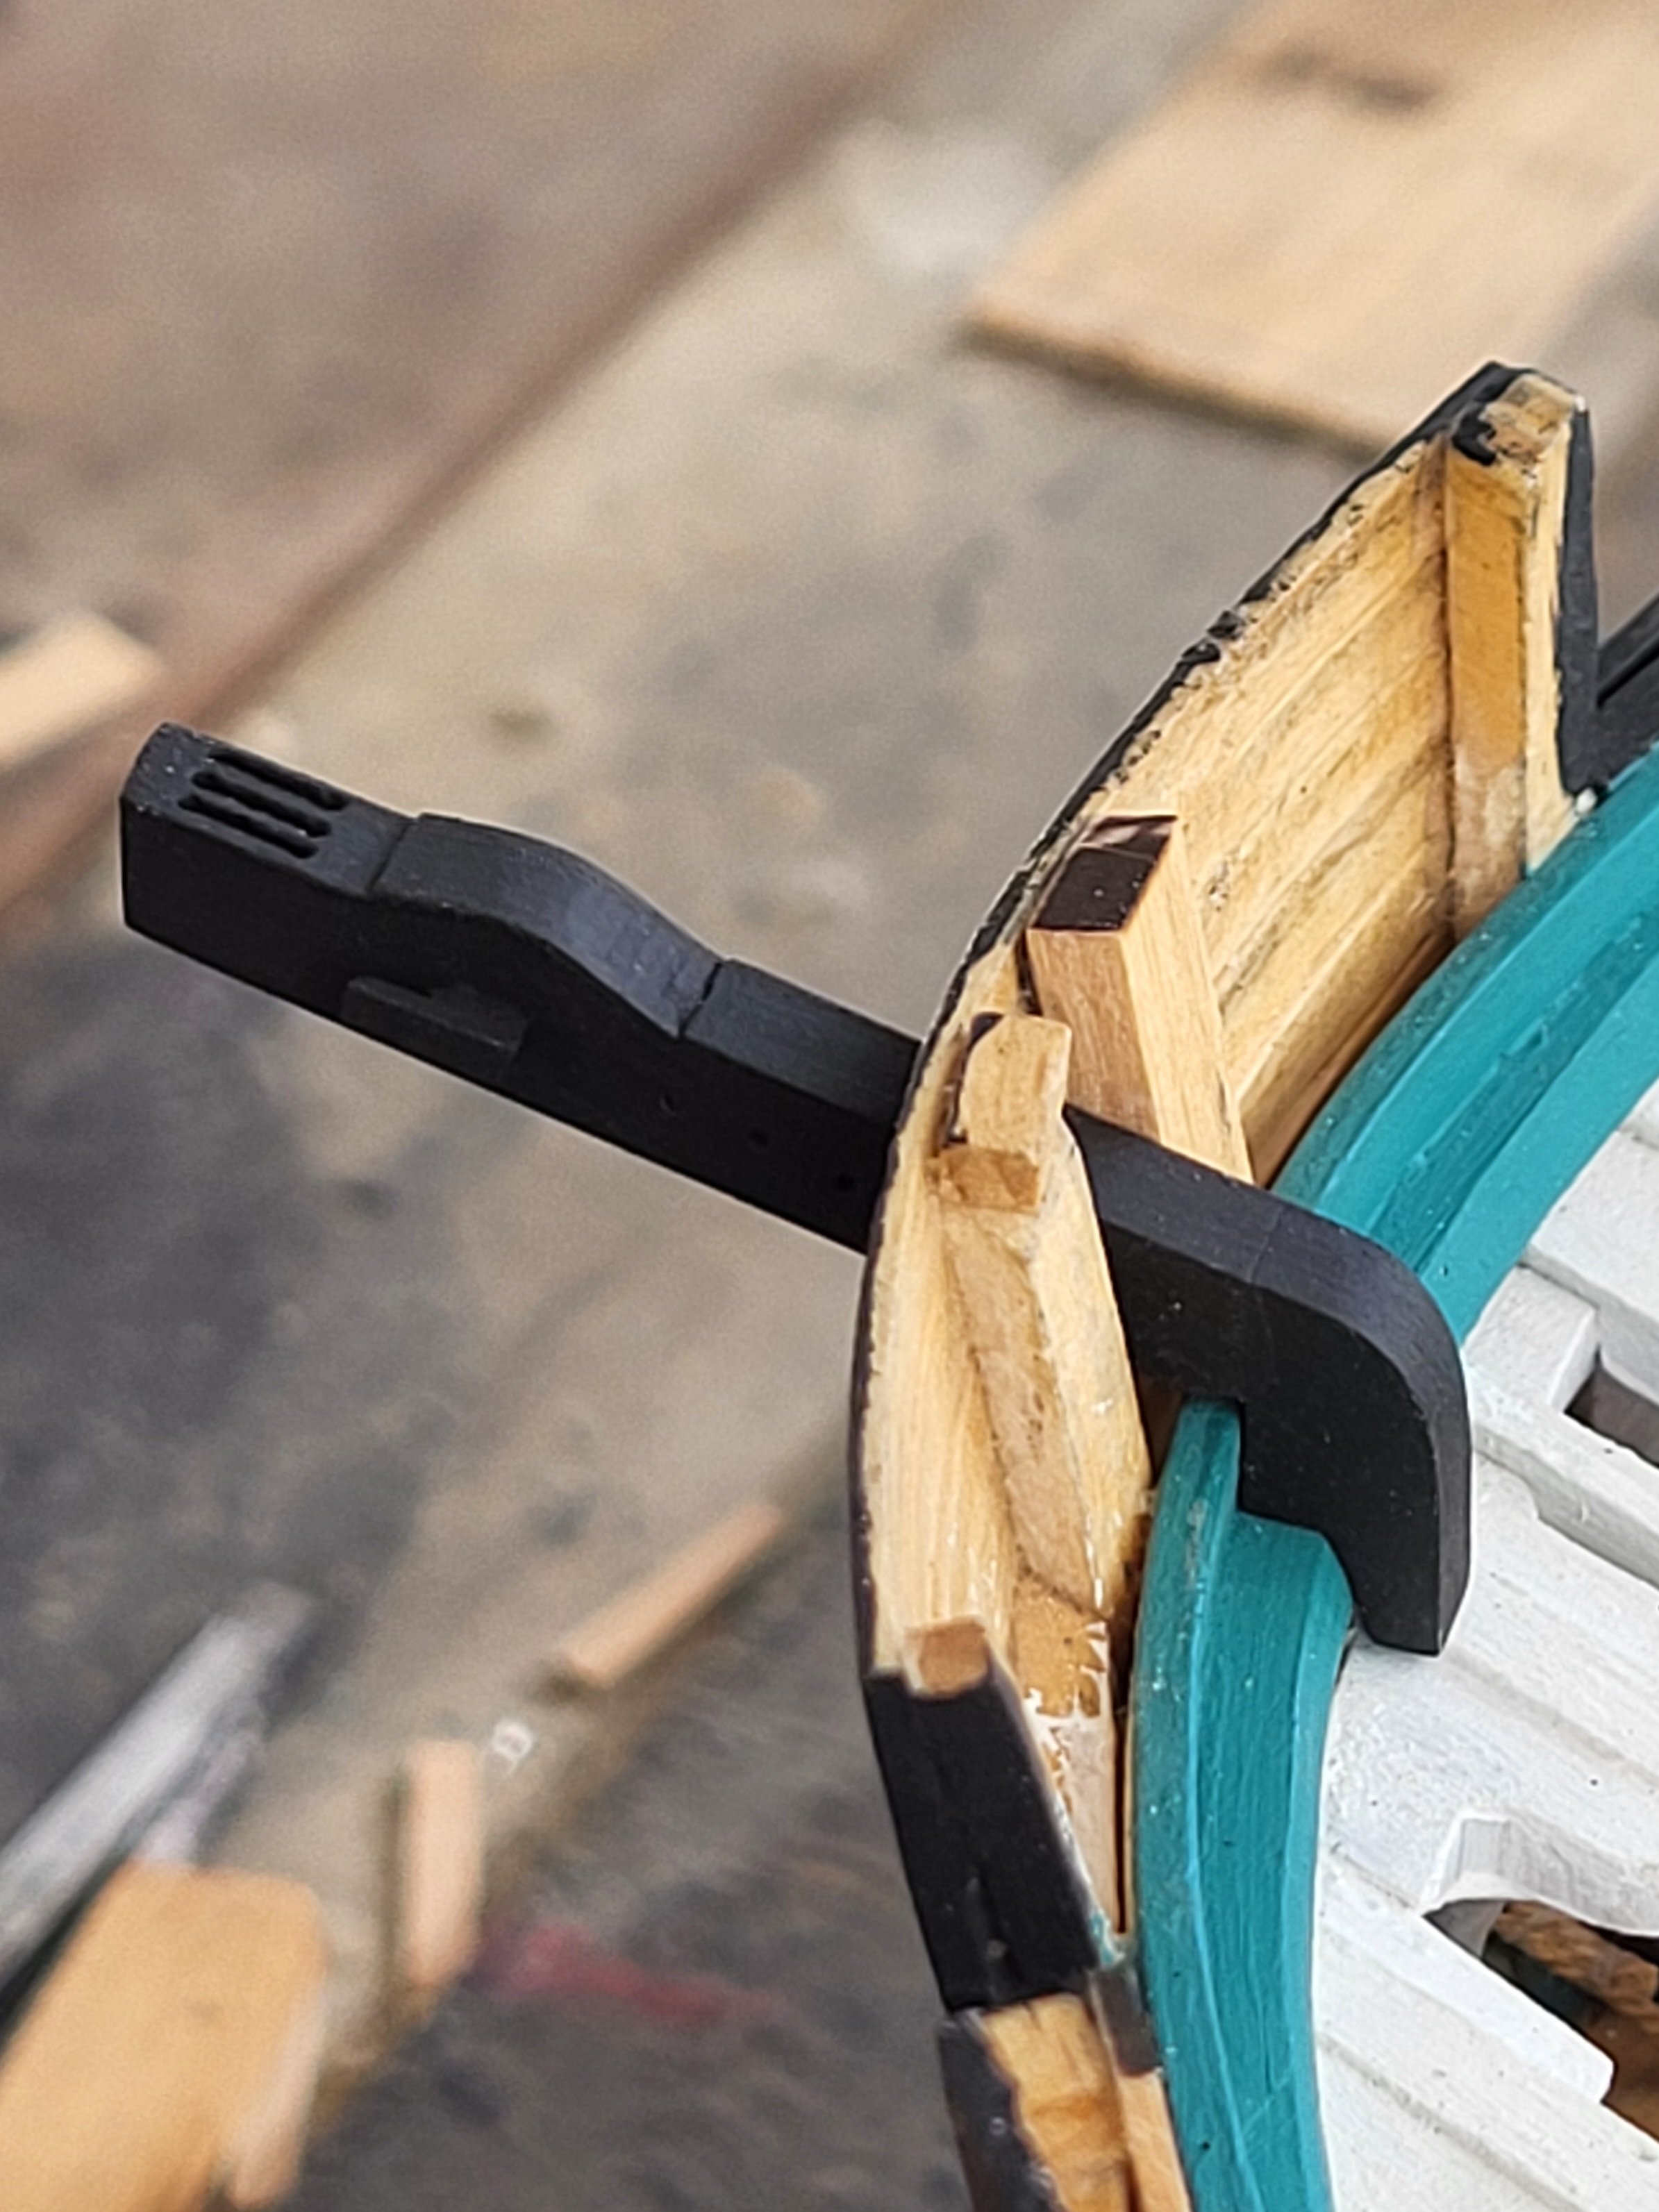
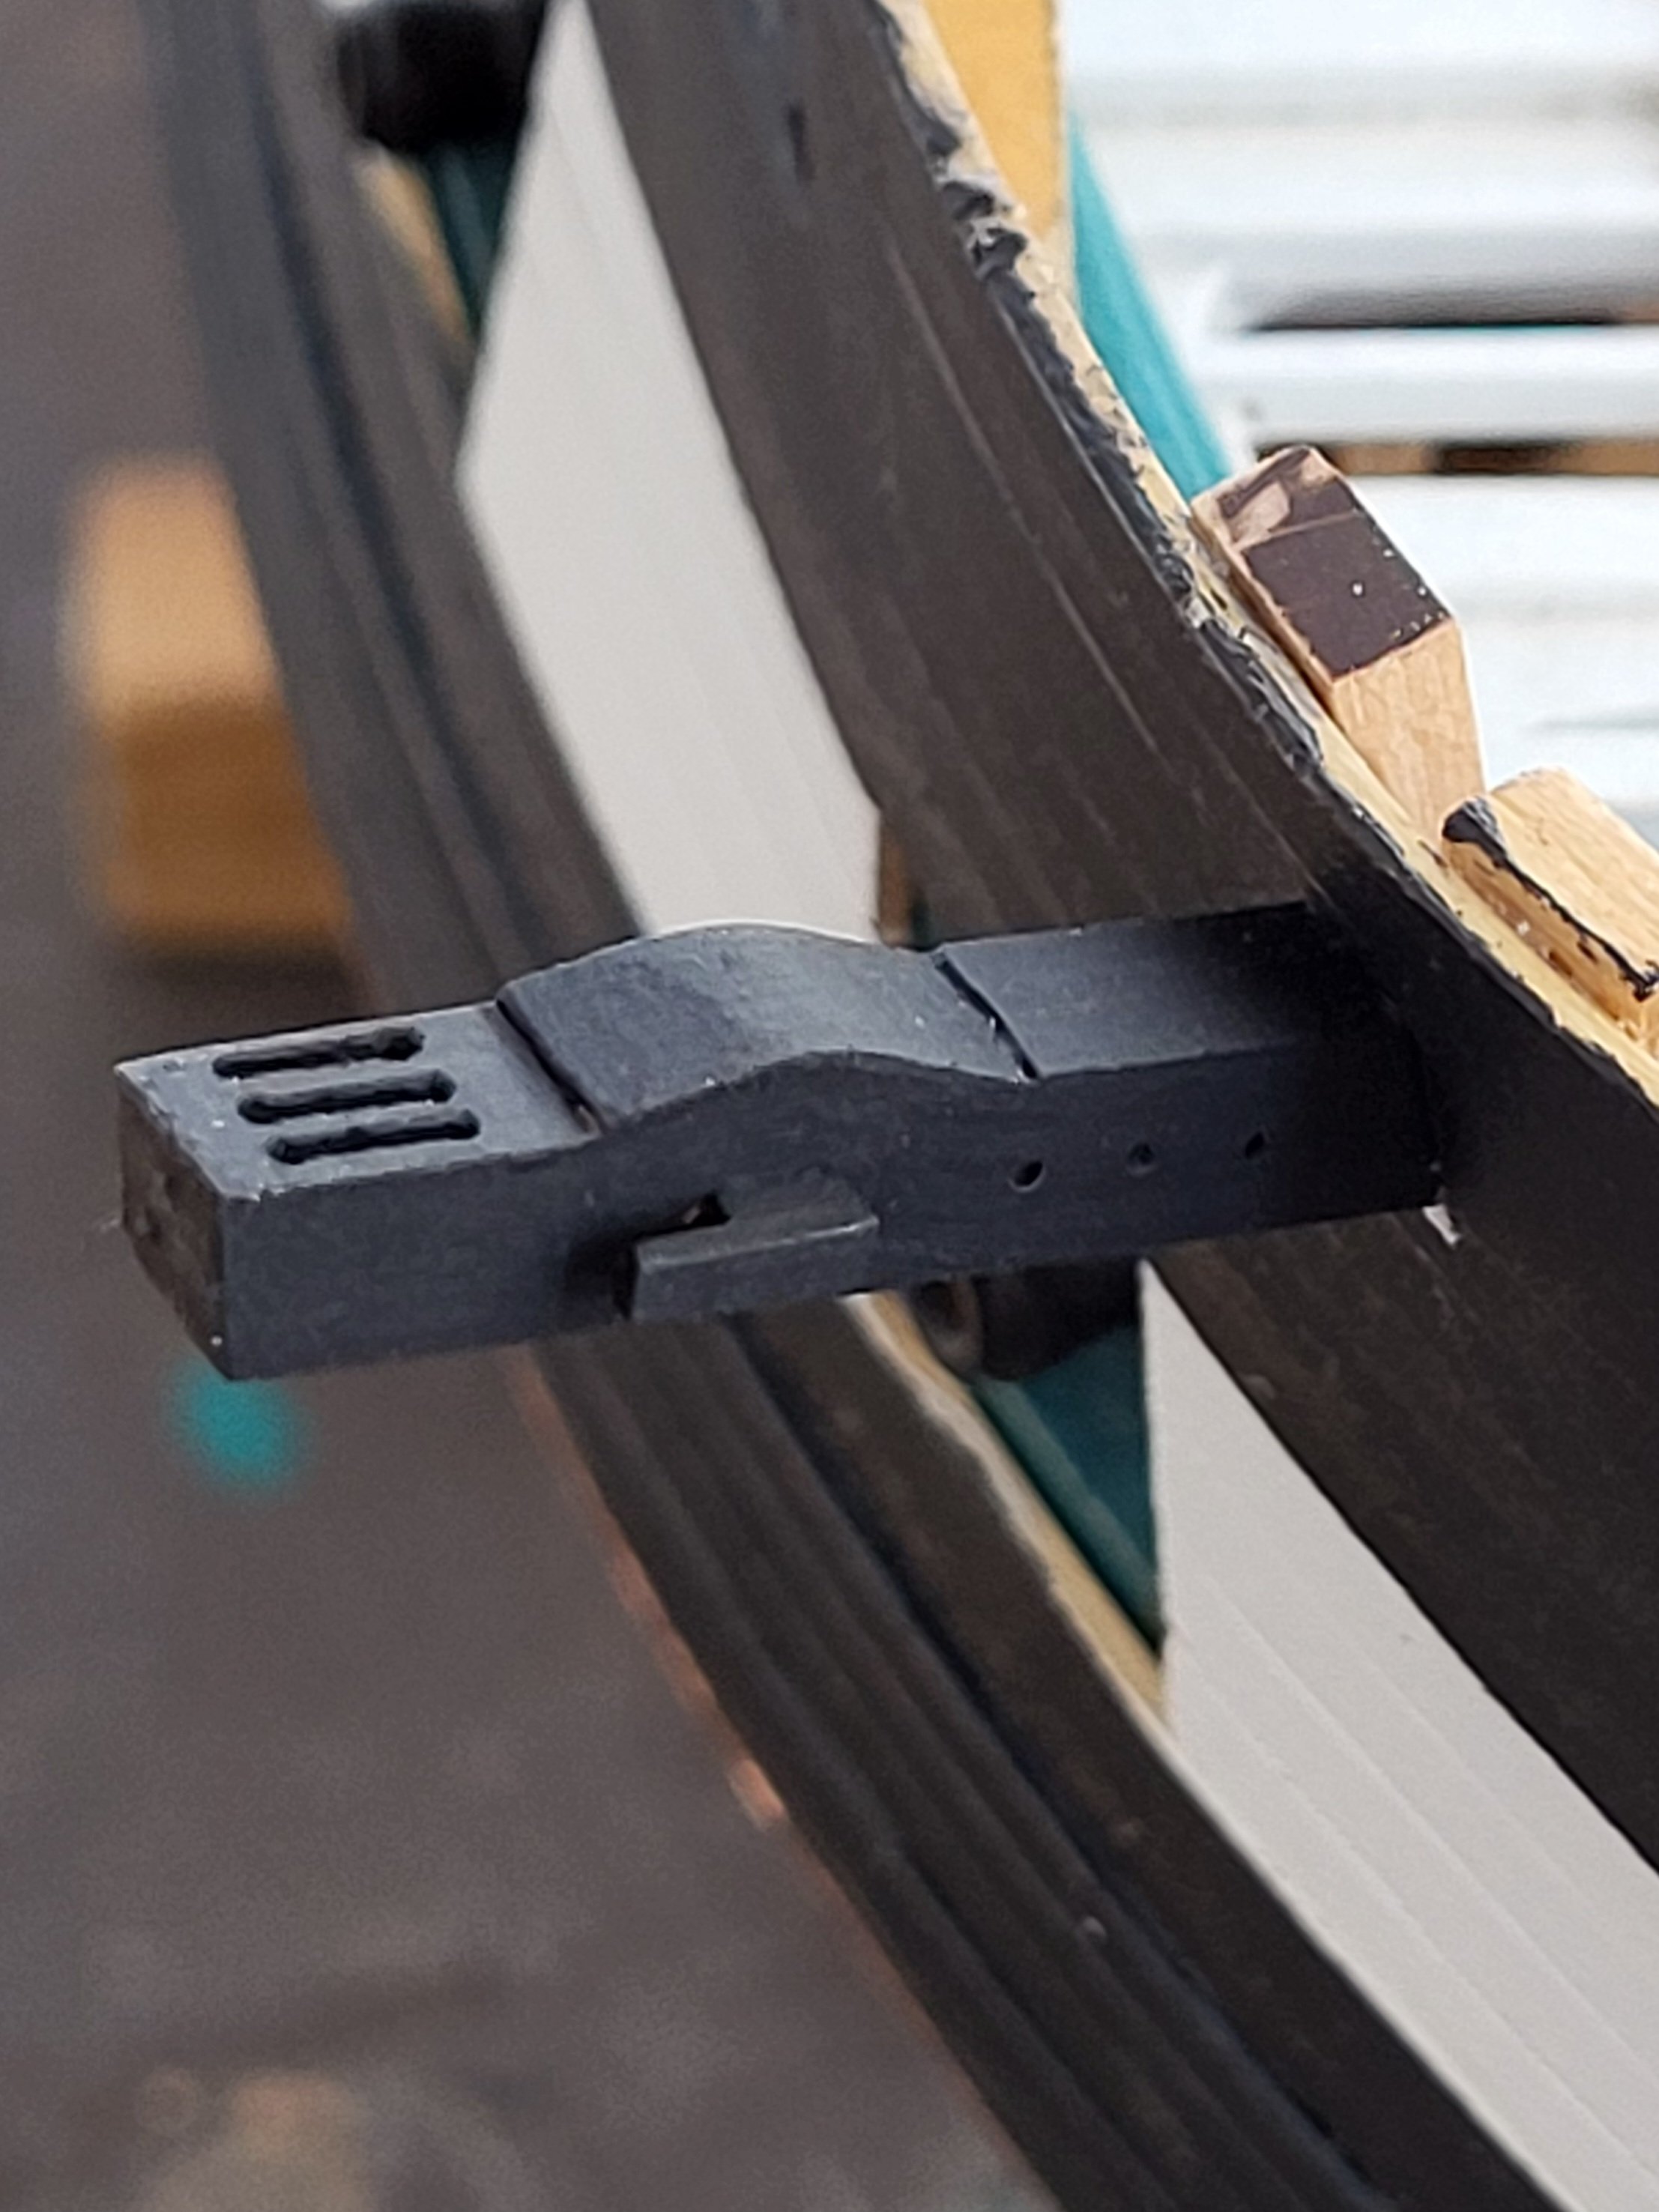
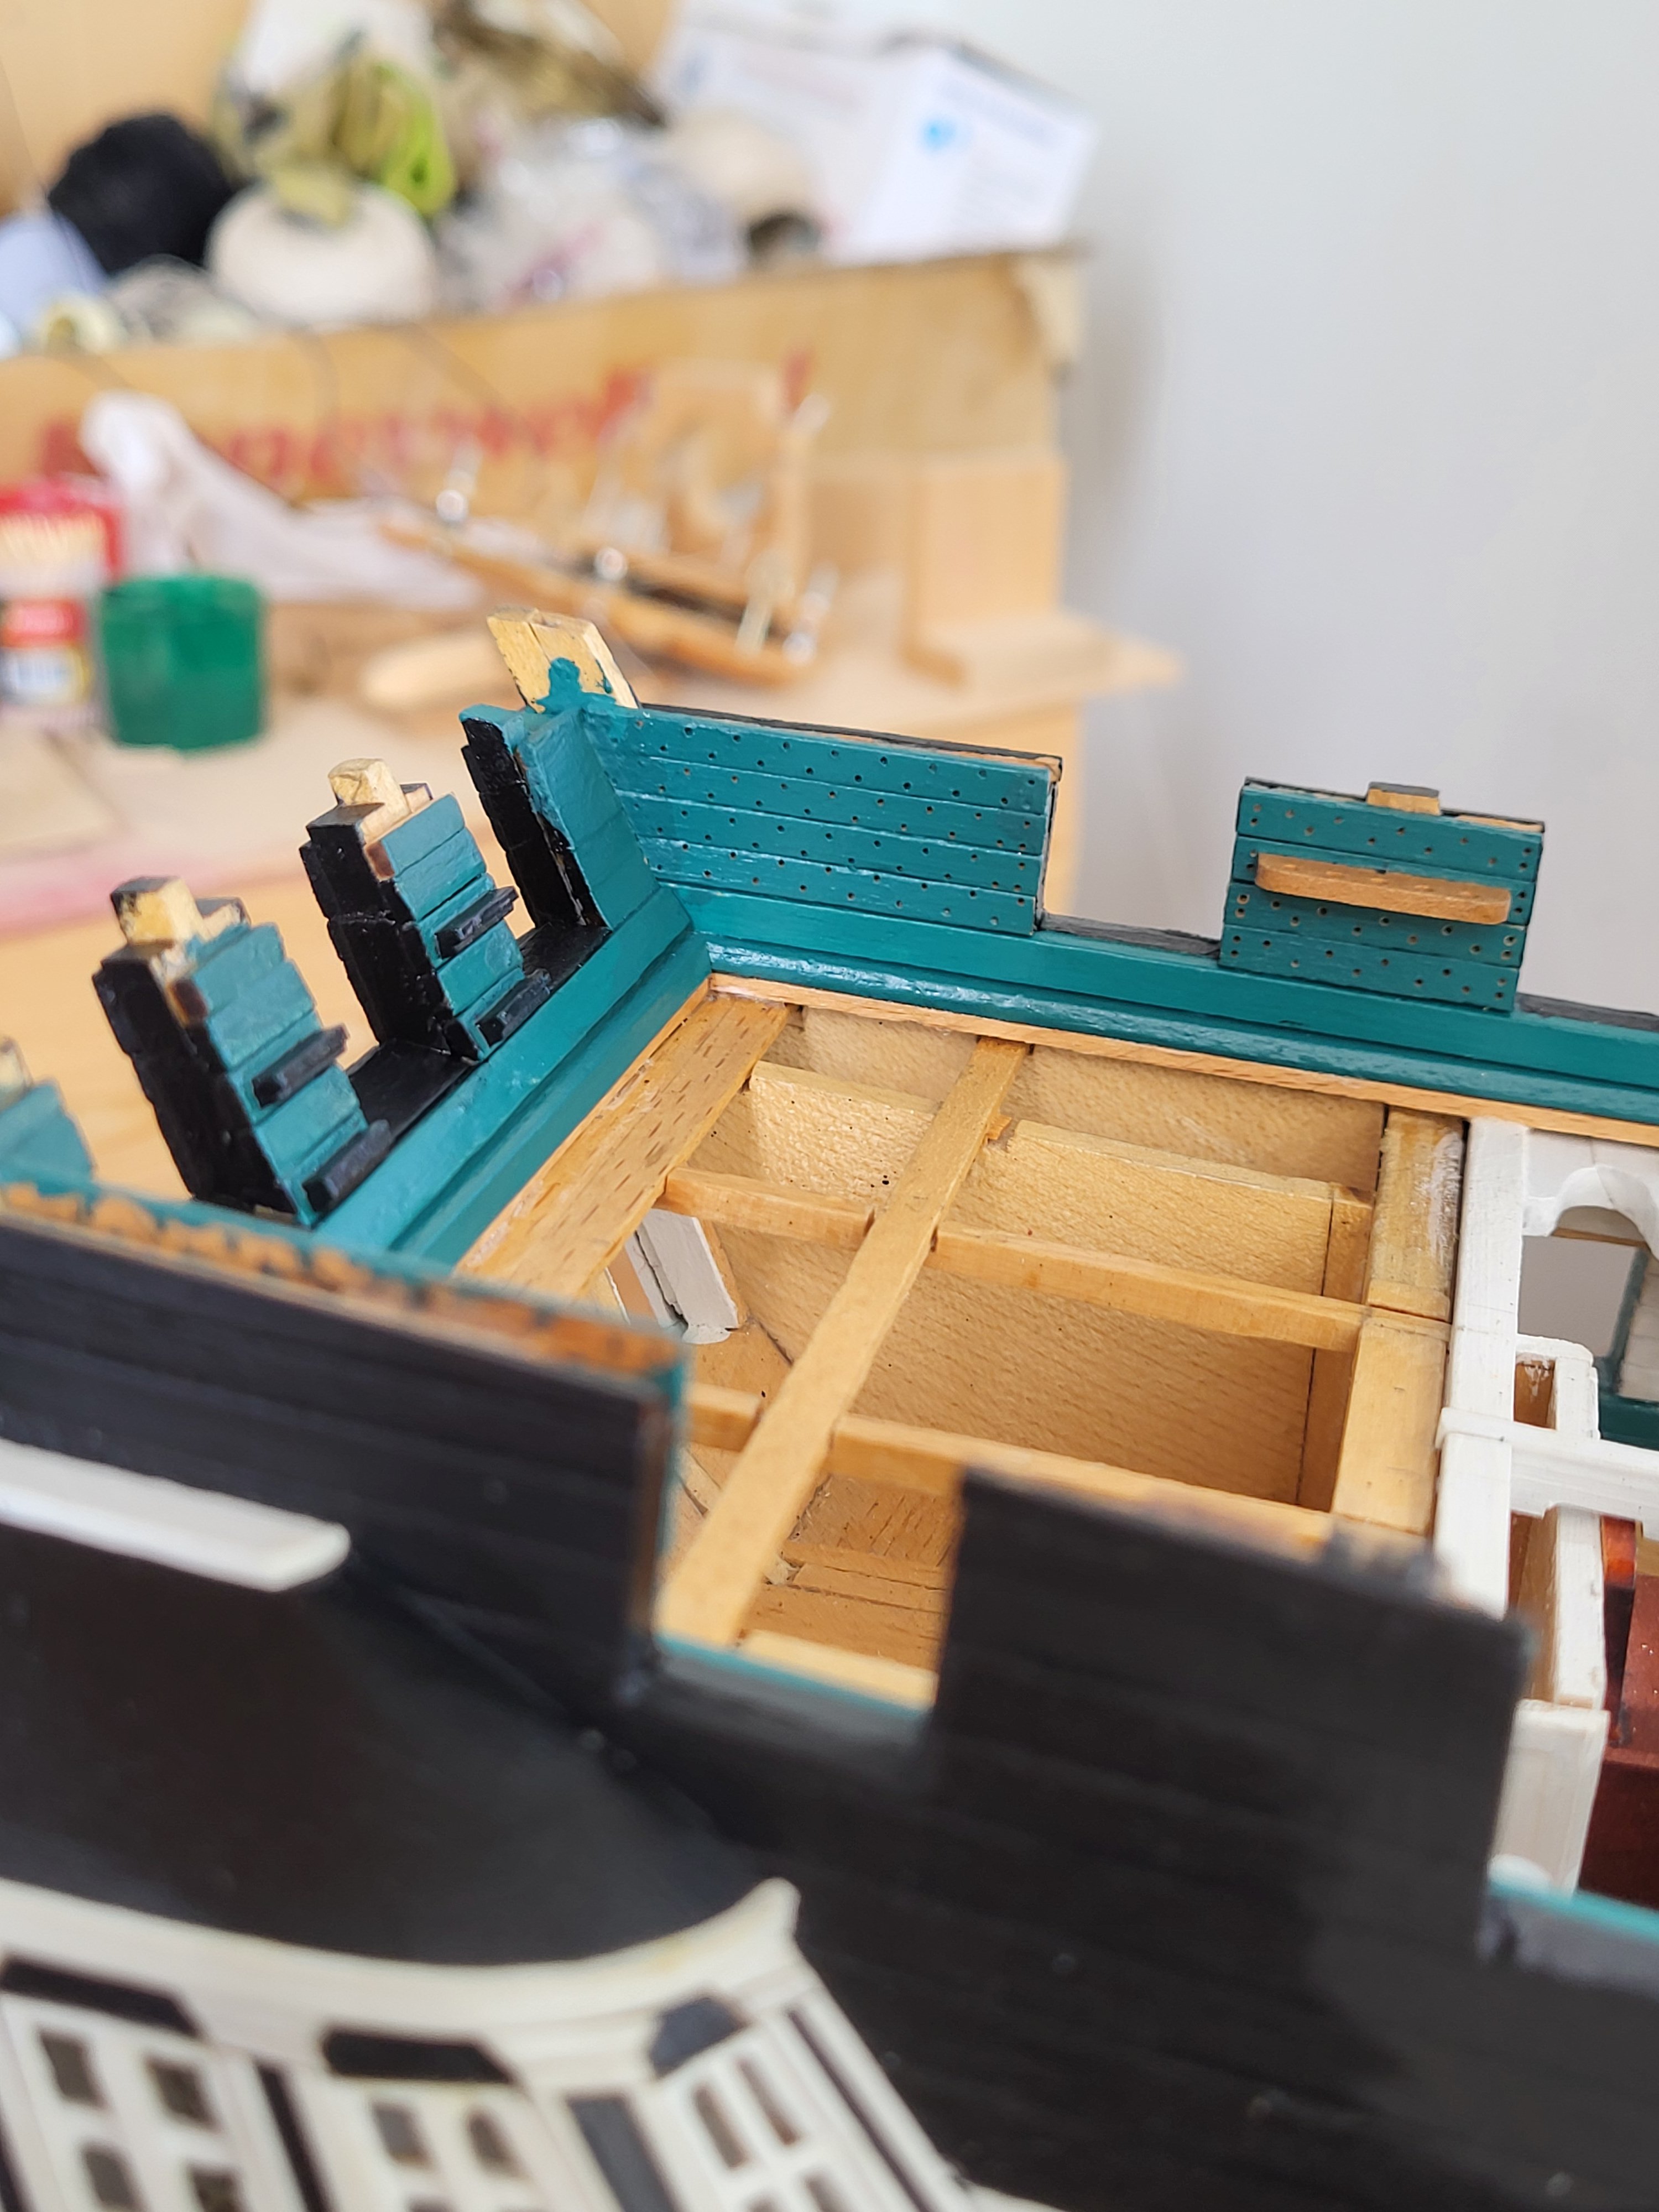
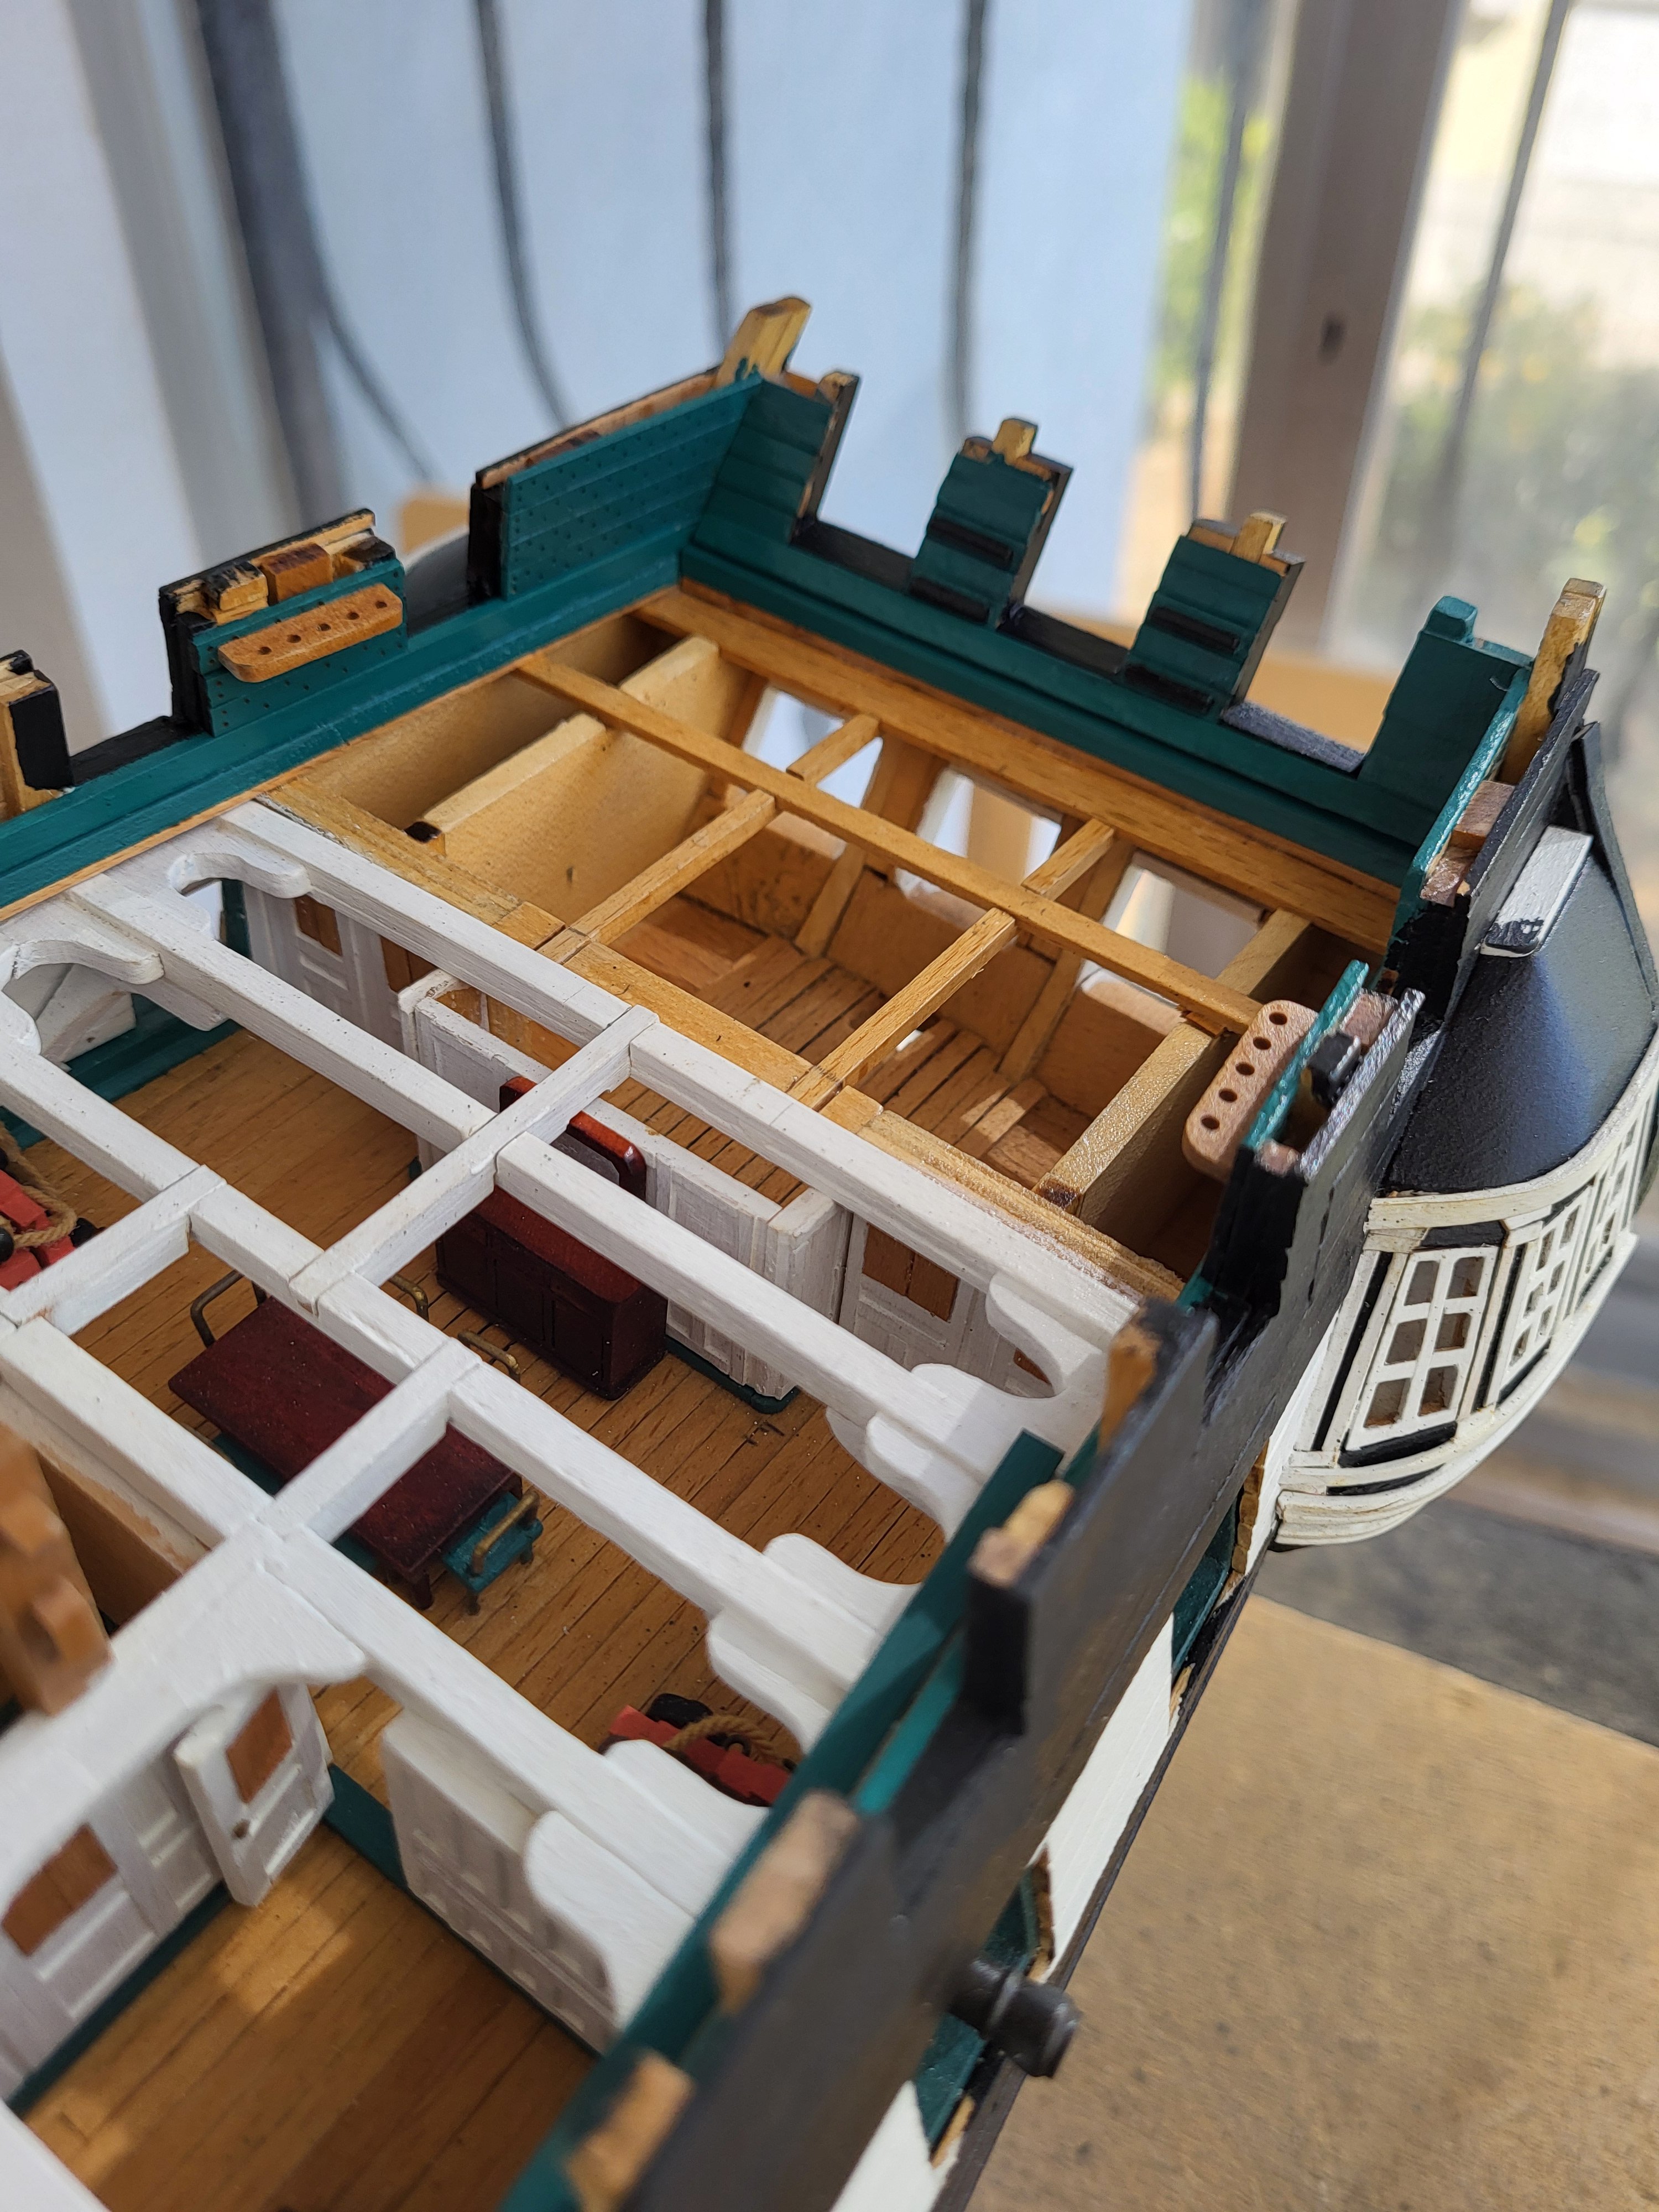
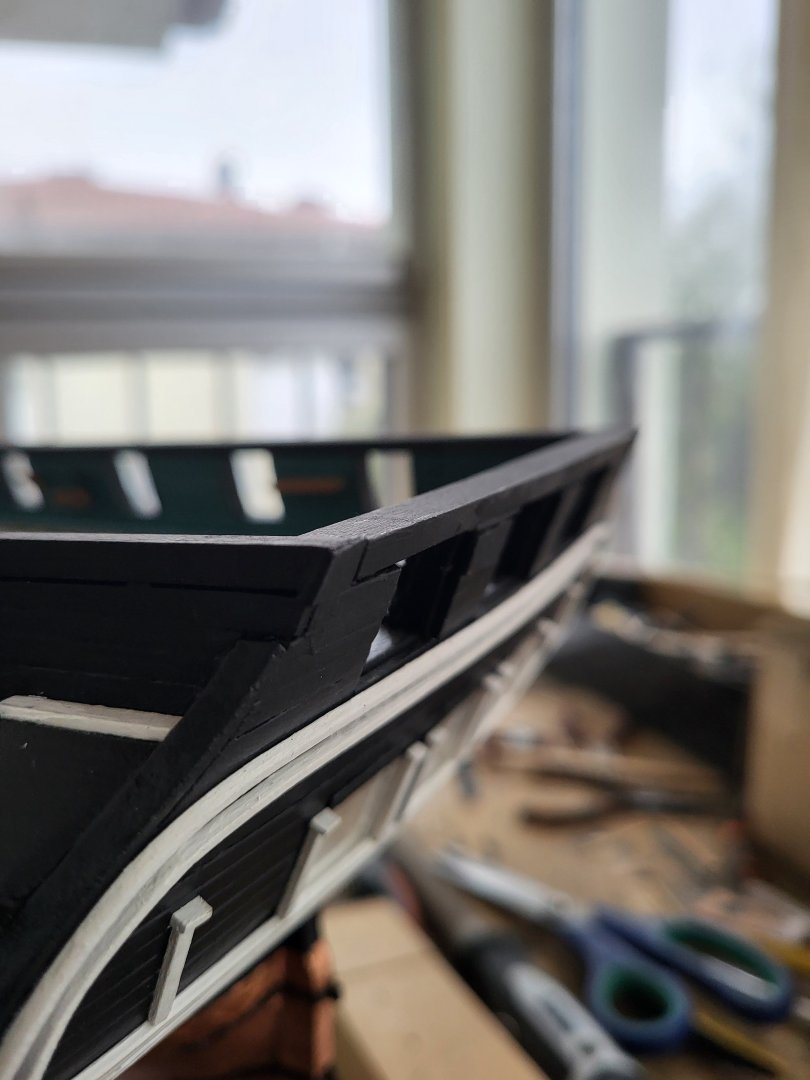
The main rails at the front of the ship have been completed. (It is worth reminding again. Since I am making a model of the ship's current state, the rail system and bulwarks are different from the ship's MS kit). Breast knee and pin rail were fabricated but not installed yet. At this point I have a question for Jon and the other friends. In the internet images of the ship, the main stays appear to be connected to the breast knee via bullseyes, but the images are not clear and the details are not visible. My question is; How are bullseyes attached to the breast knee? If anyone has an image that clearly shows this detail and can share it here, I would be grateful.
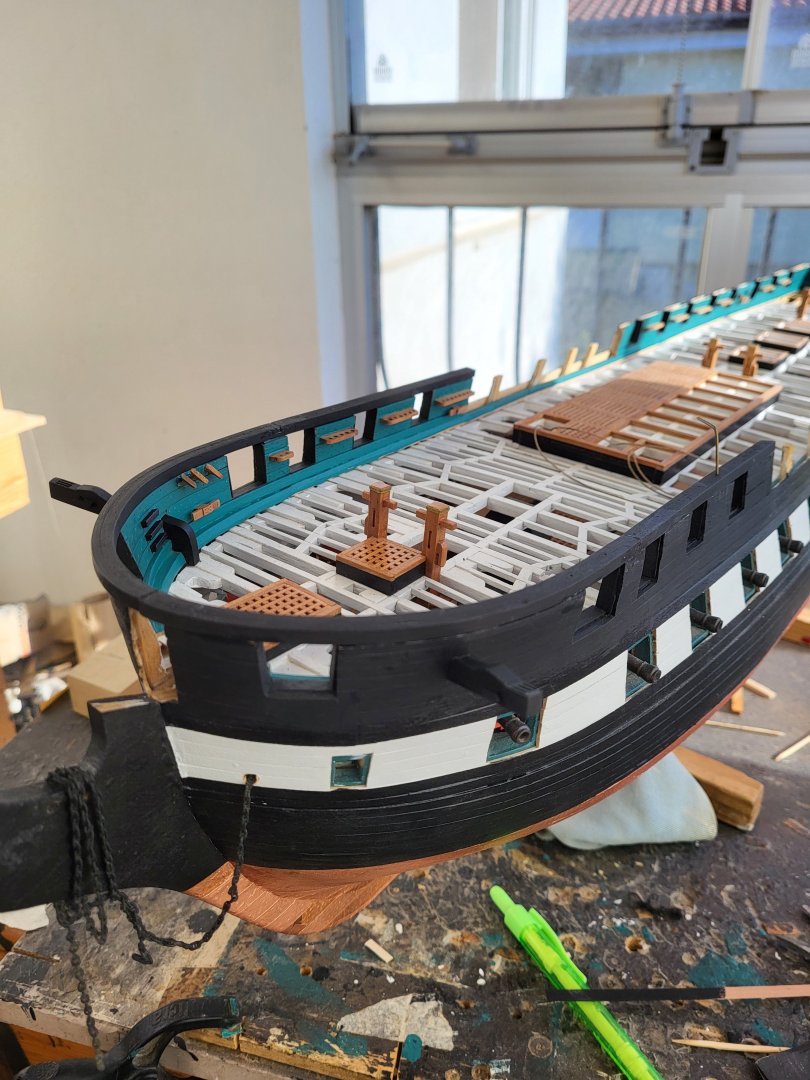


-
USS Constitution by mtbediz - 1:76
mtbediz replied to mtbediz's topic in - Build logs for subjects built 1751 - 1800
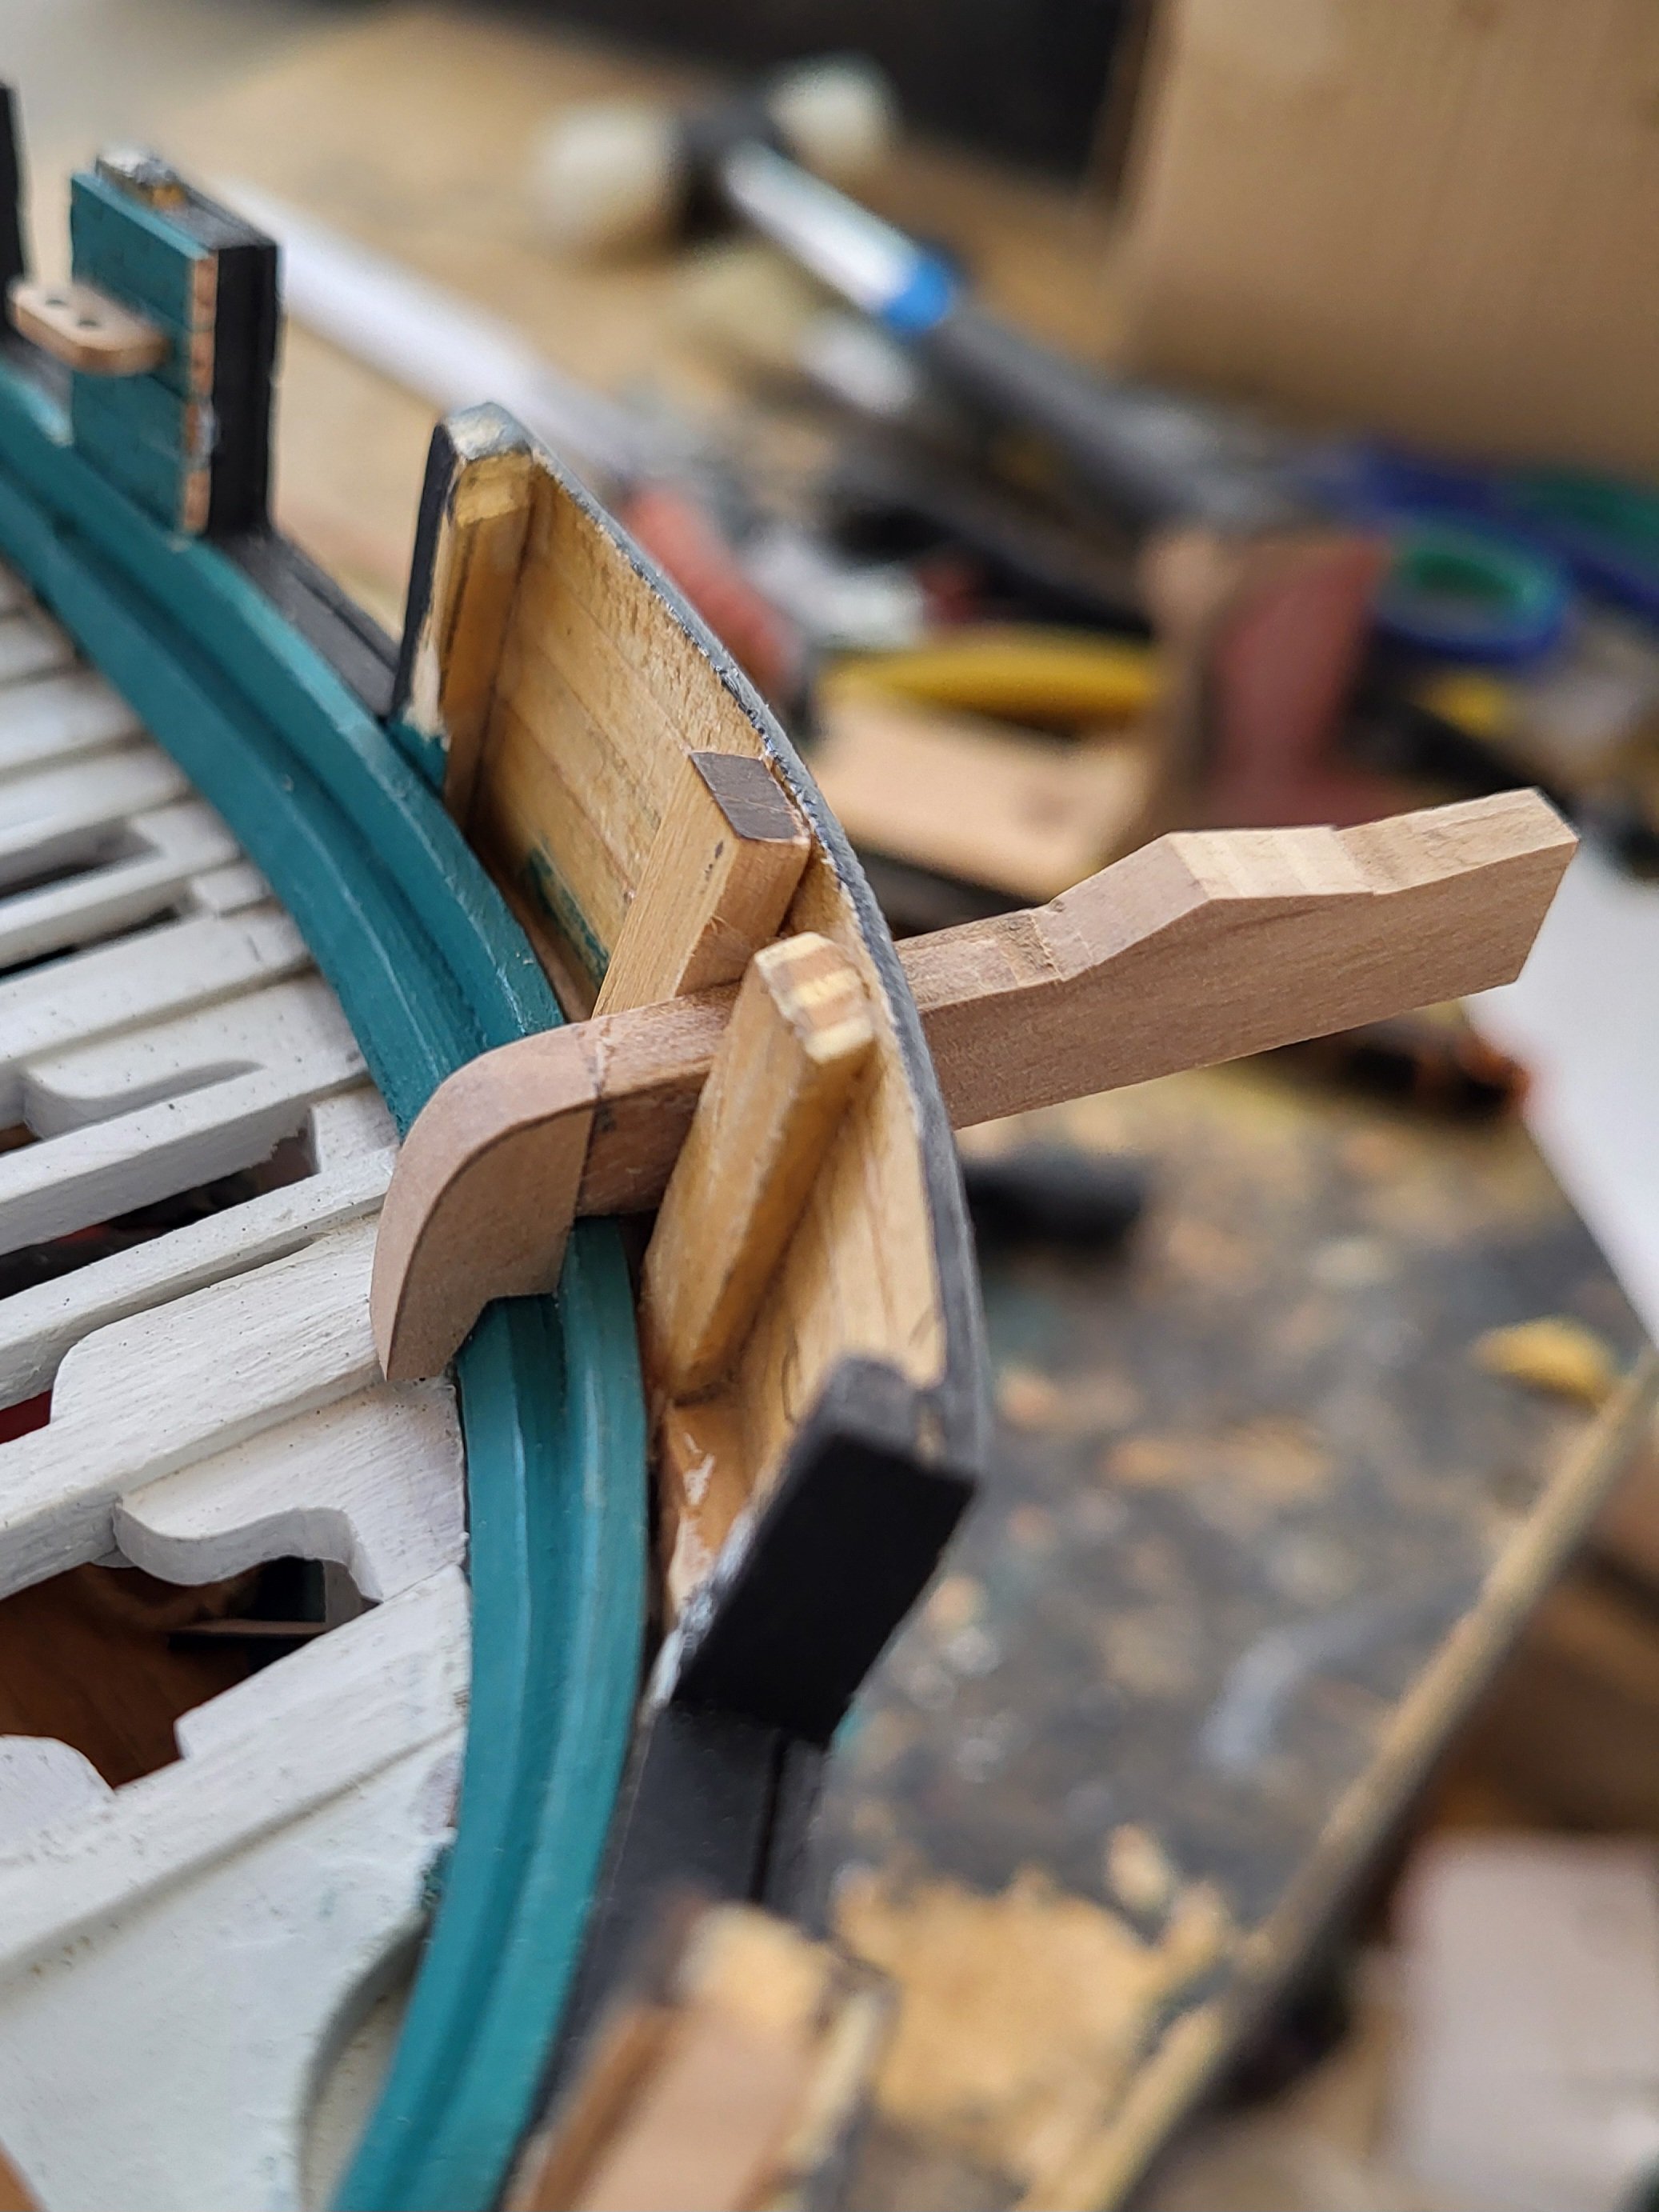
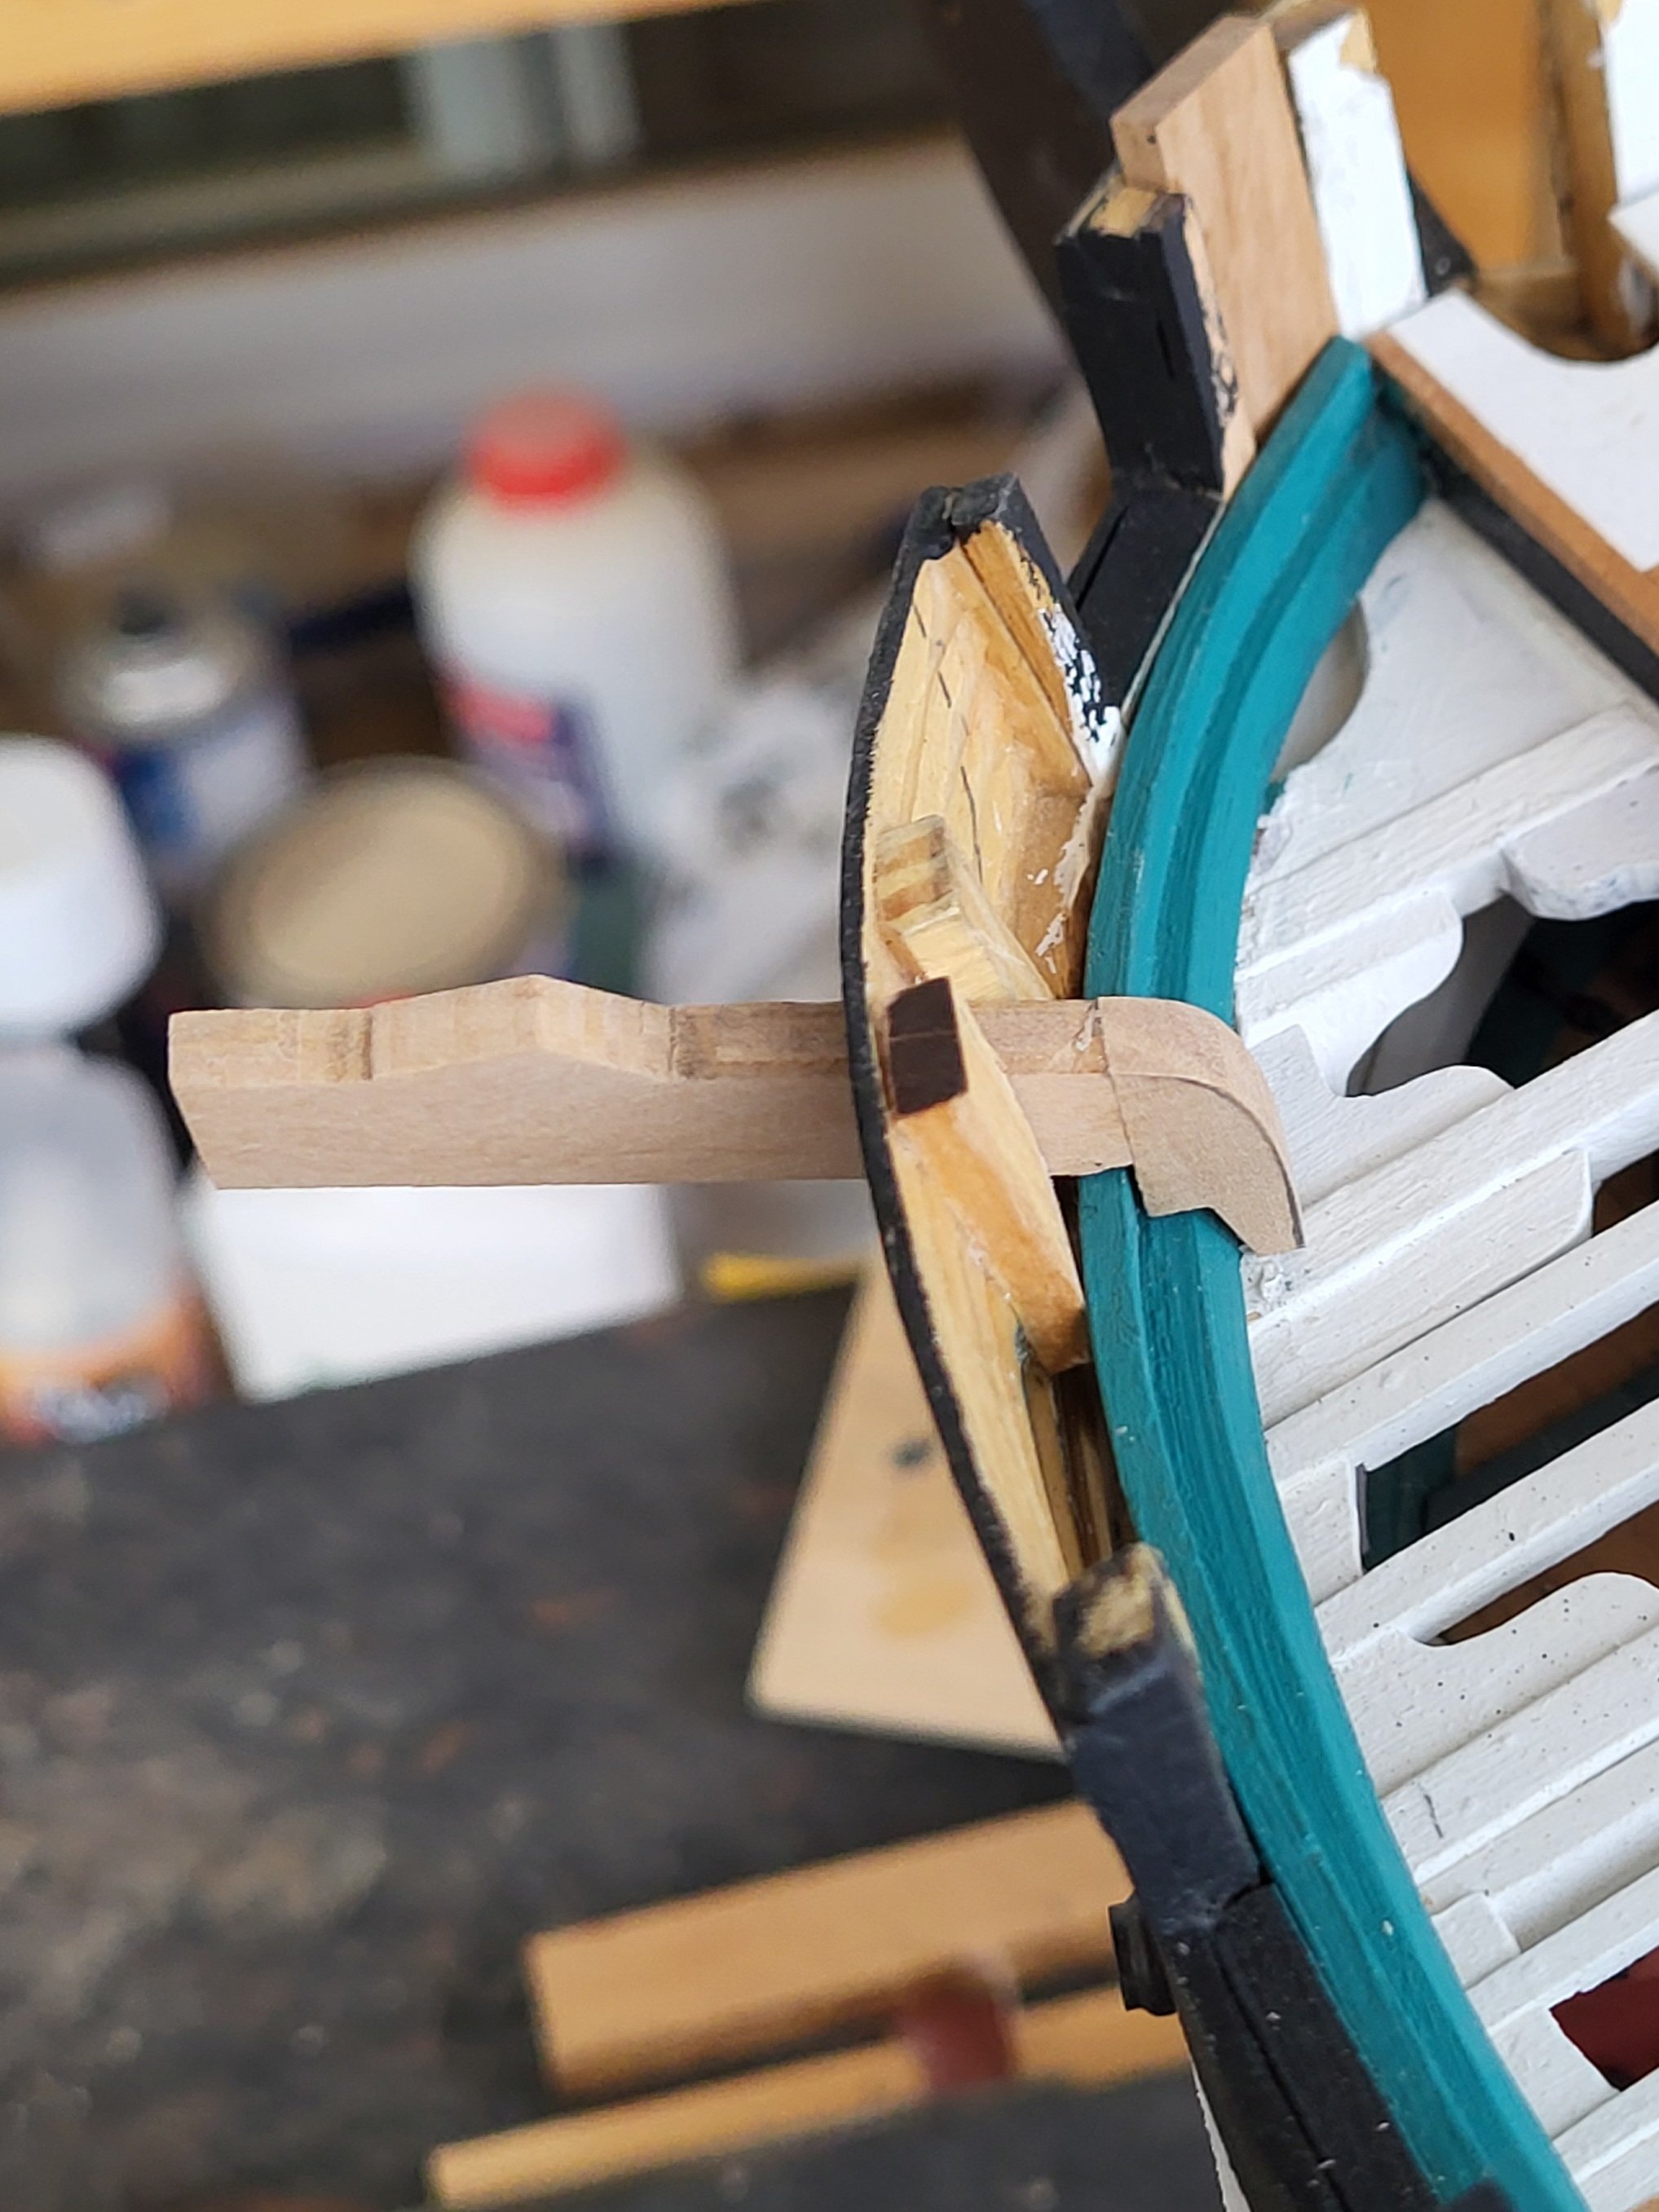
Thank you so much for your efforts, Jon. If I were to build the catheads according to these plans, I would have to cut the waterways. Since I didn't want to do this, I shaped the cathead according to the waterways. -
USS Constitution by mtbediz - 1:76
mtbediz replied to mtbediz's topic in - Build logs for subjects built 1751 - 1800
Thanks Greg and yes, to create the half-lap joint I used my mill. Once you start using your own mill, you will realize how much you can do with it. -
USS Constitution by mtbediz - 1:76
mtbediz replied to mtbediz's topic in - Build logs for subjects built 1751 - 1800
I'm glad I could contribute, Peter. In a boat building video I watched on YouTube, I saw boat builders making the stempost of a sailboat using this method. Since I experienced in my previous models that bending wide boards was very difficult or even impossible, I planned to try this method on this model. I am glad that I achieved a good result. -
USS Constitution by mtbediz - 1:76
mtbediz replied to mtbediz's topic in - Build logs for subjects built 1751 - 1800
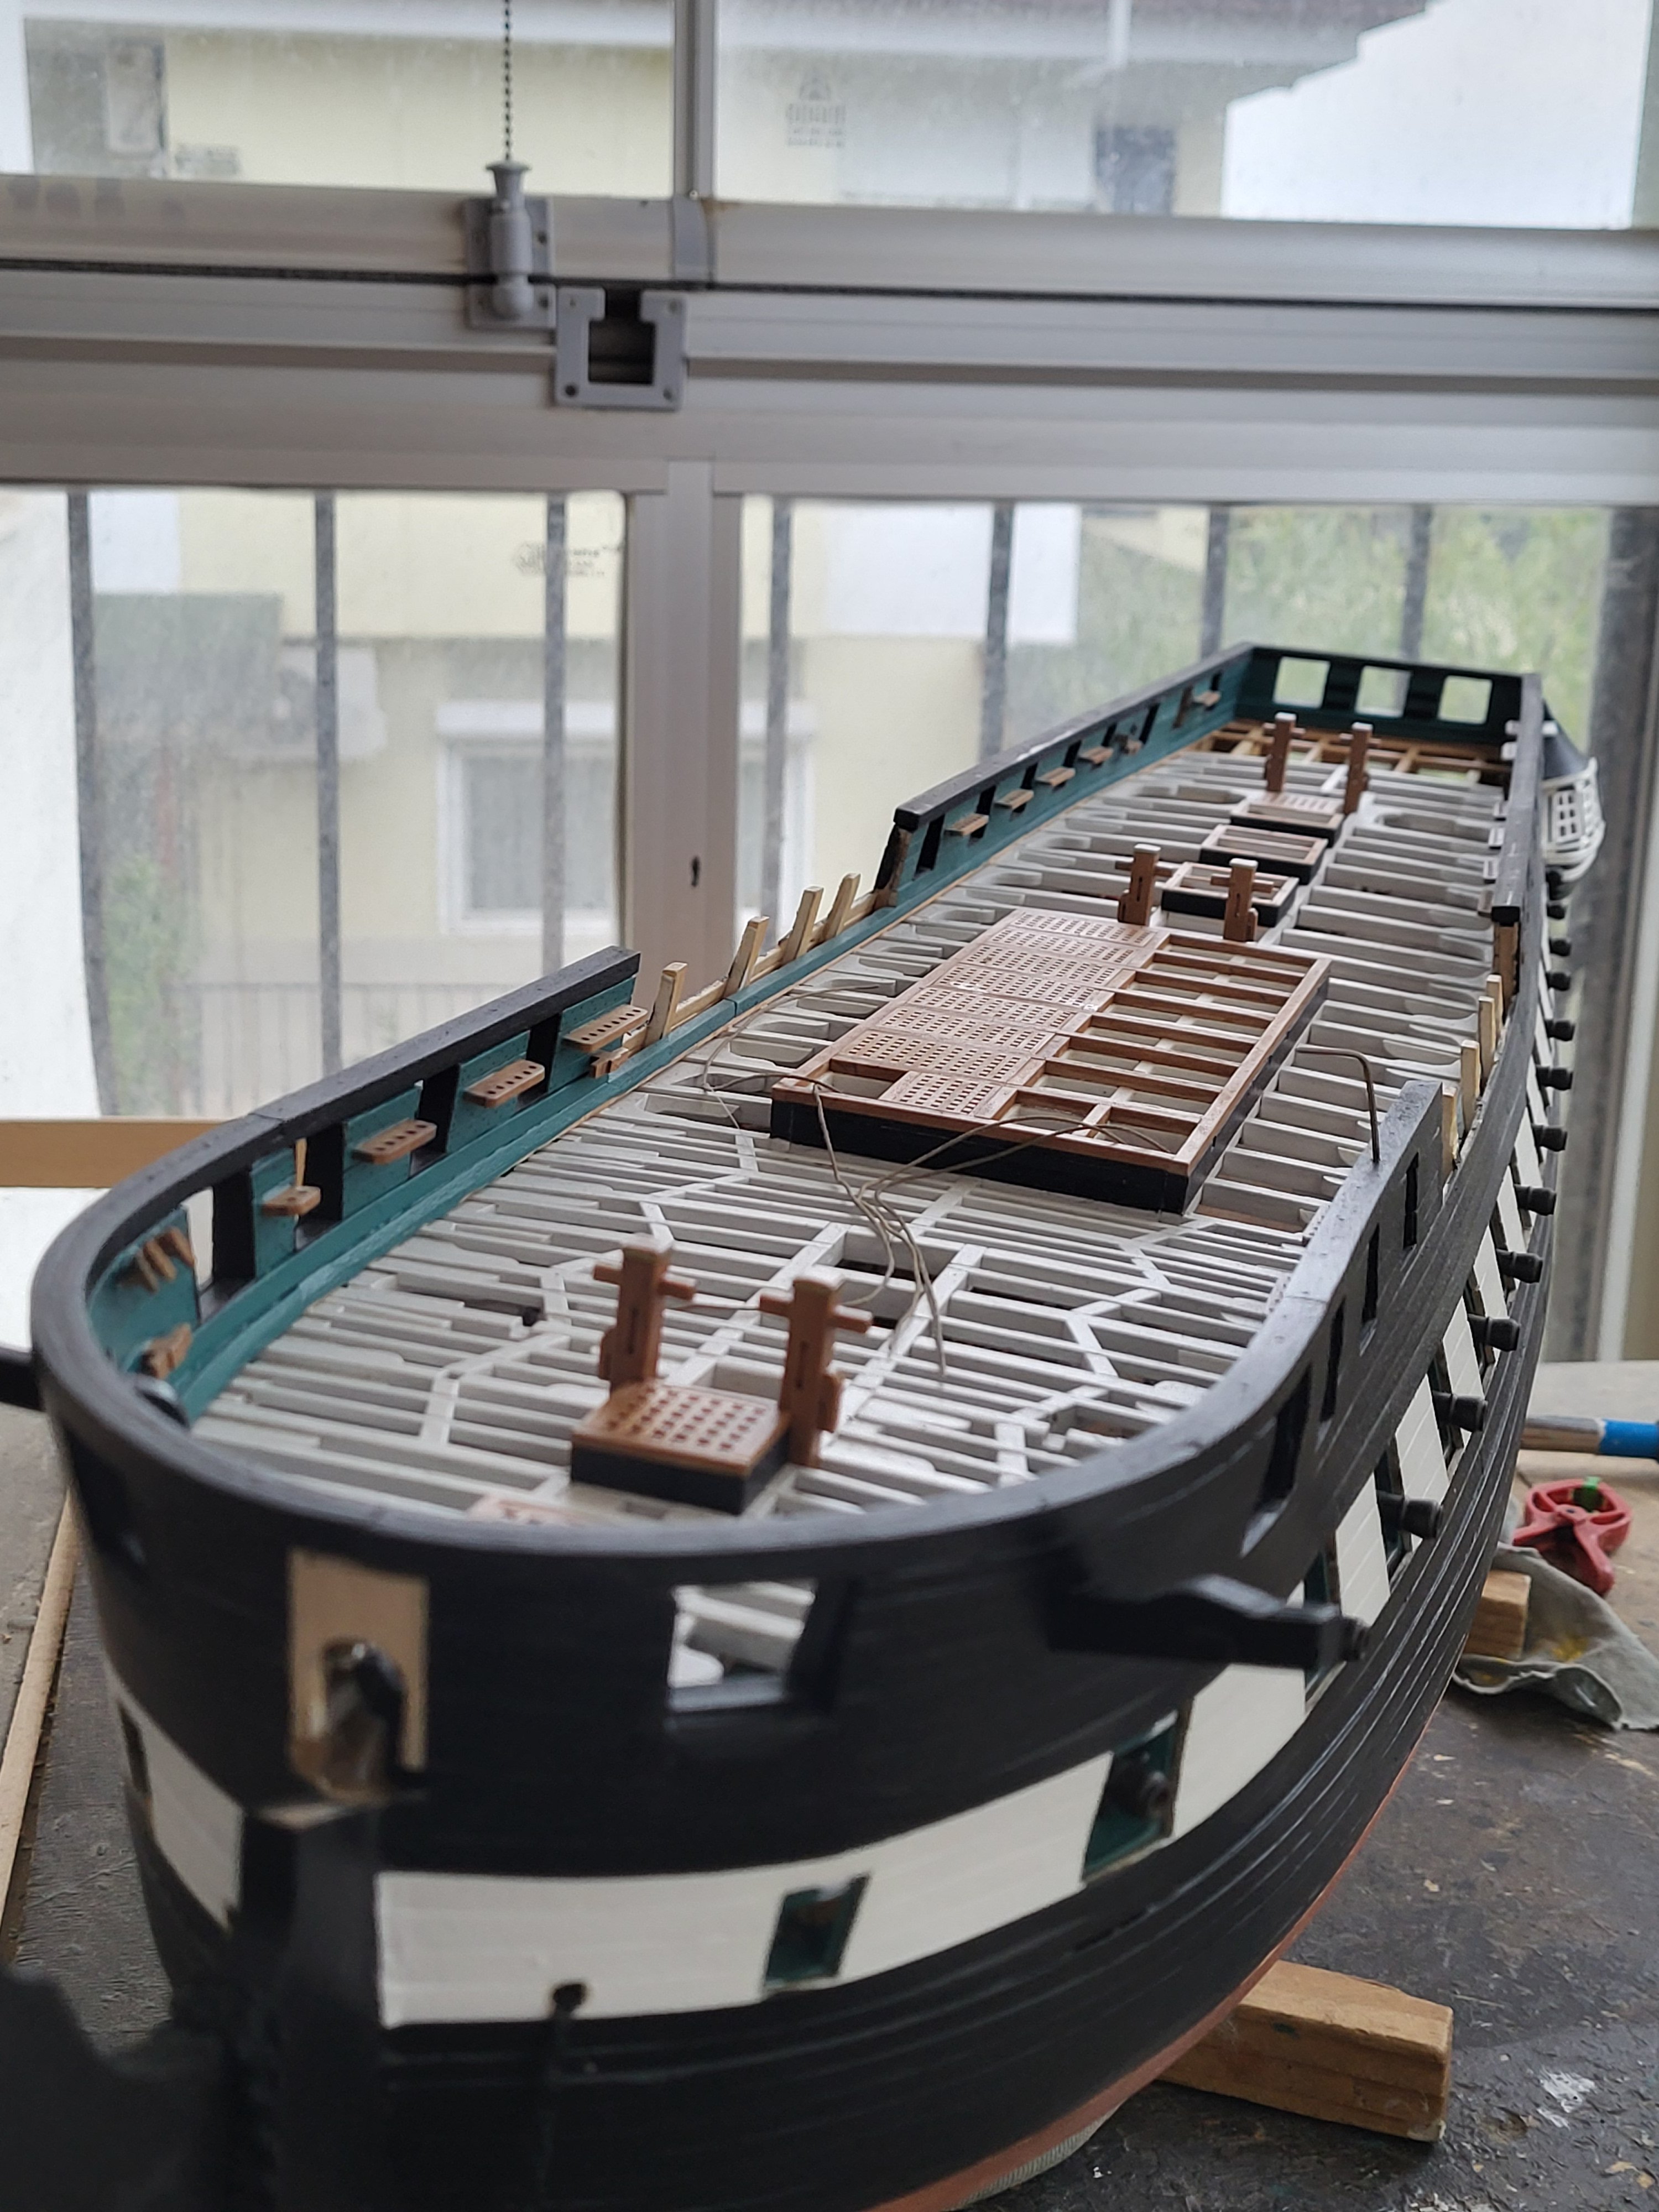
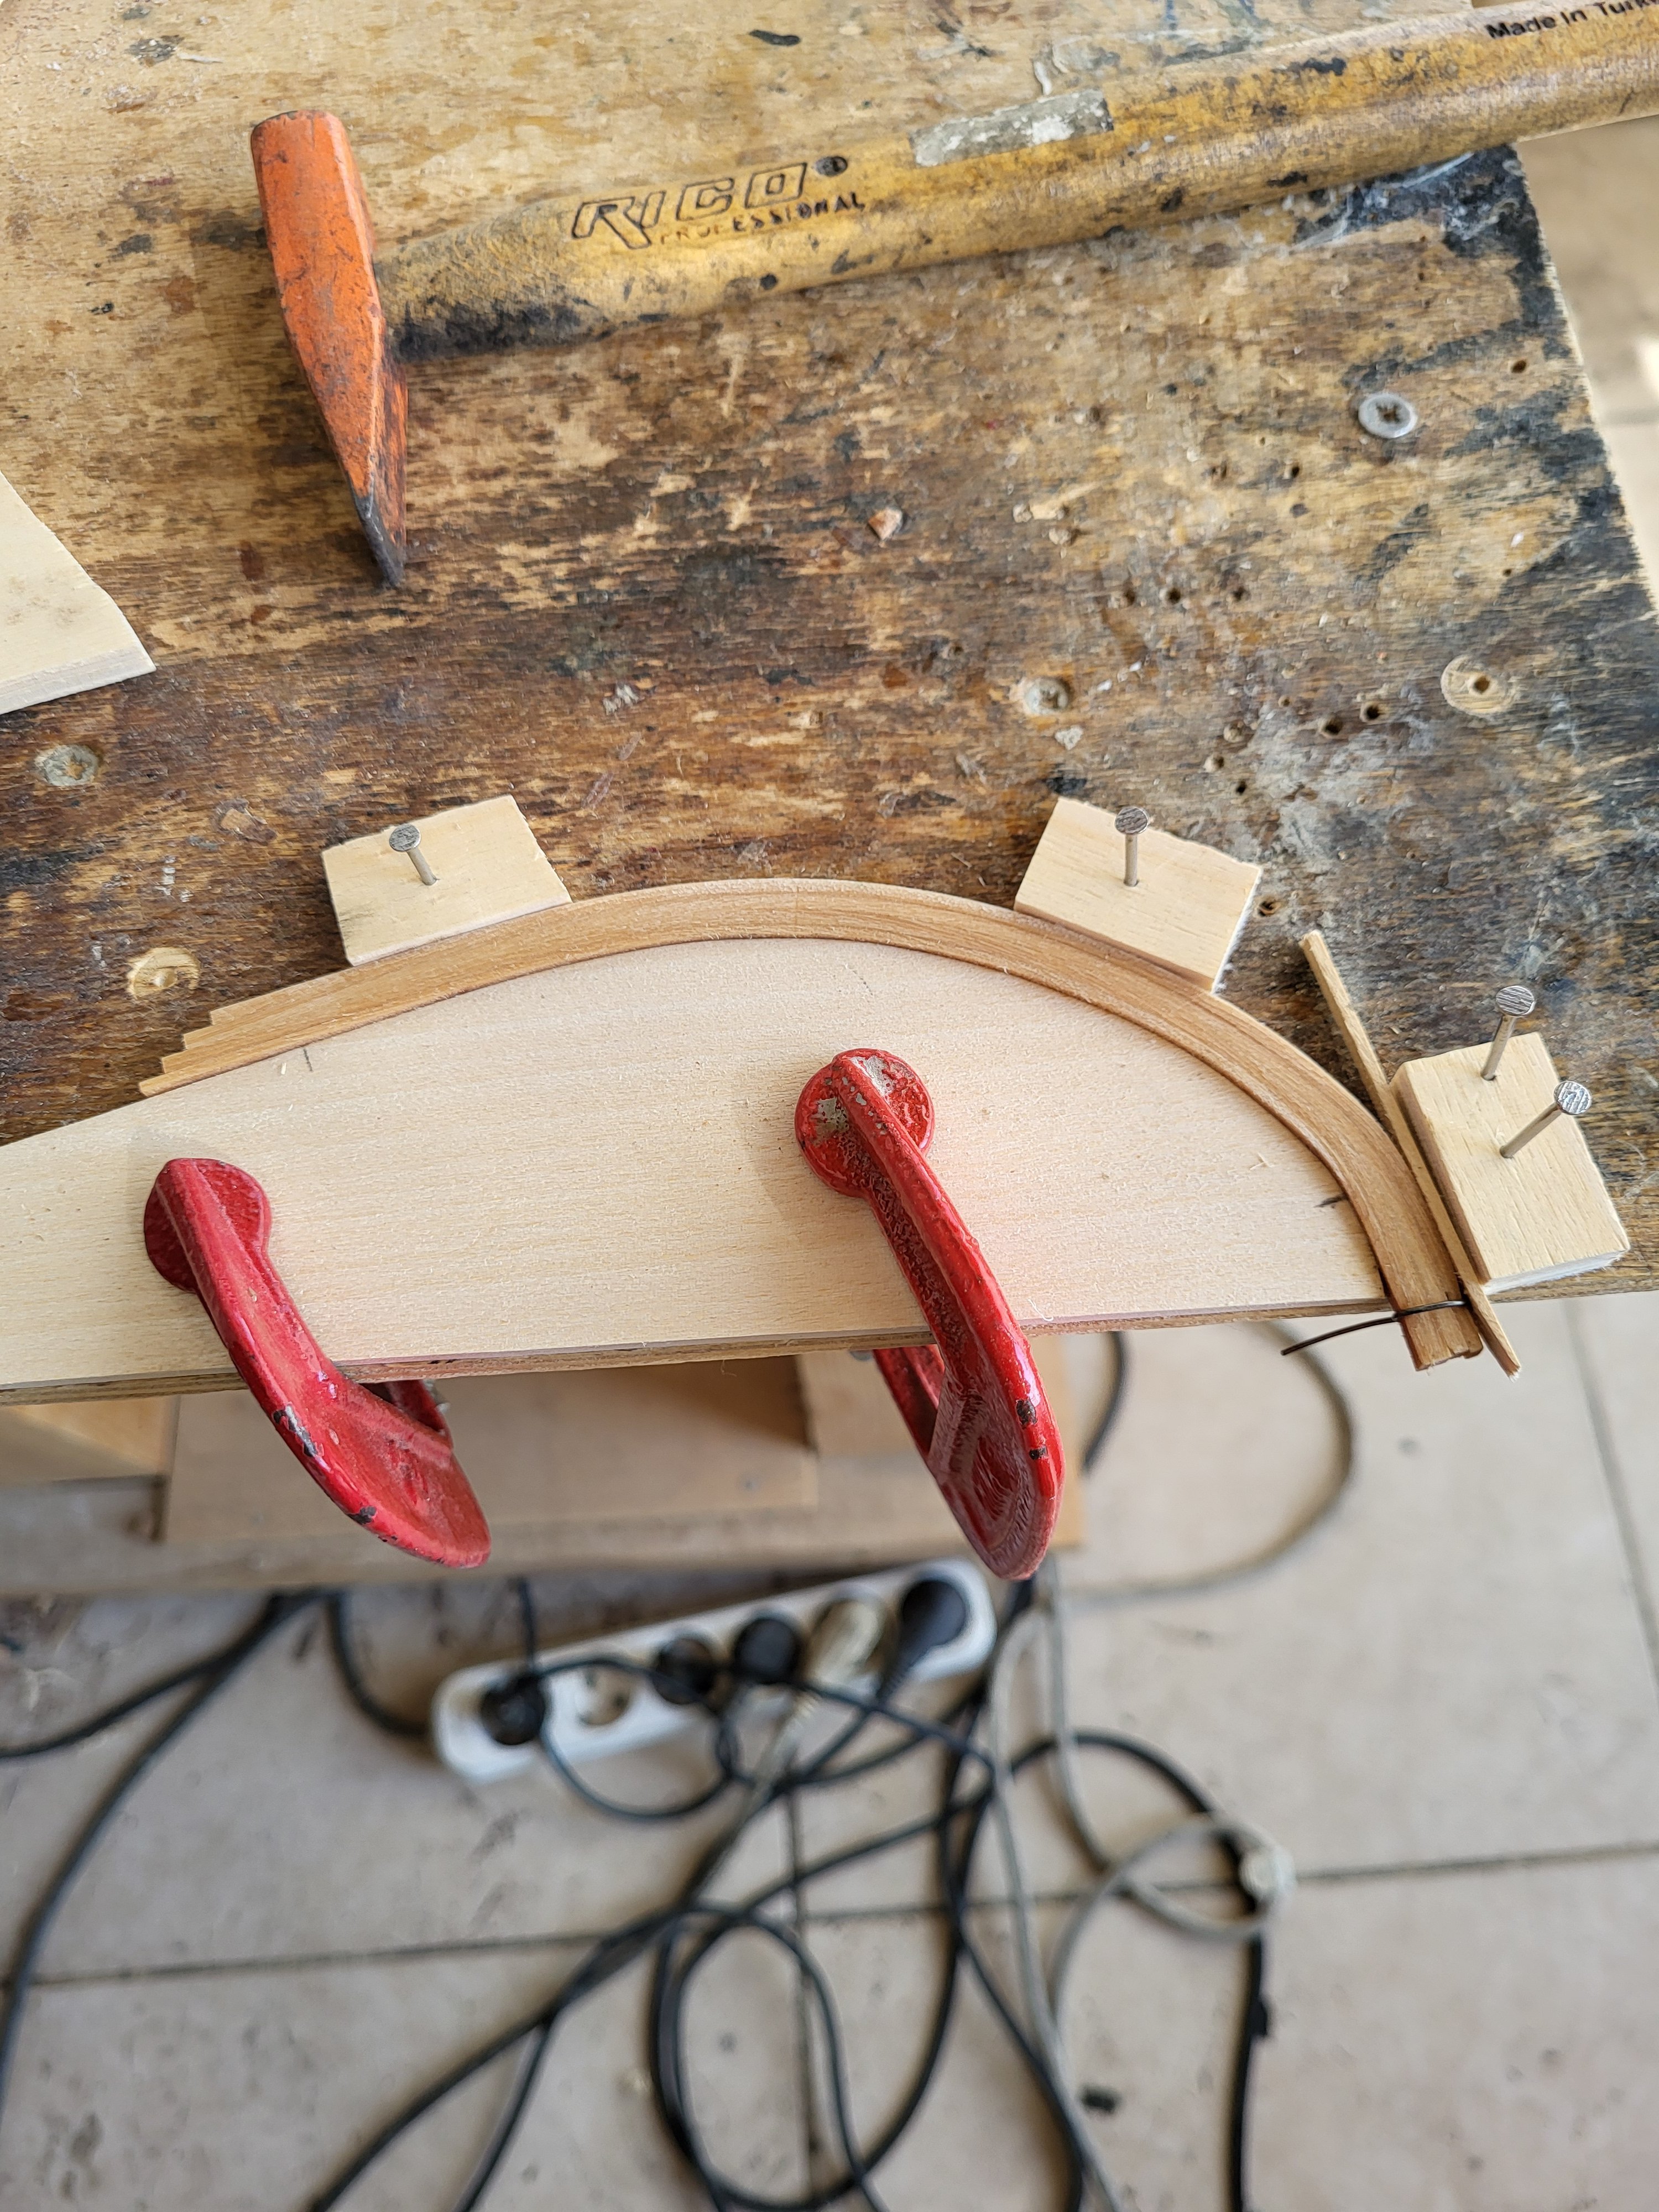
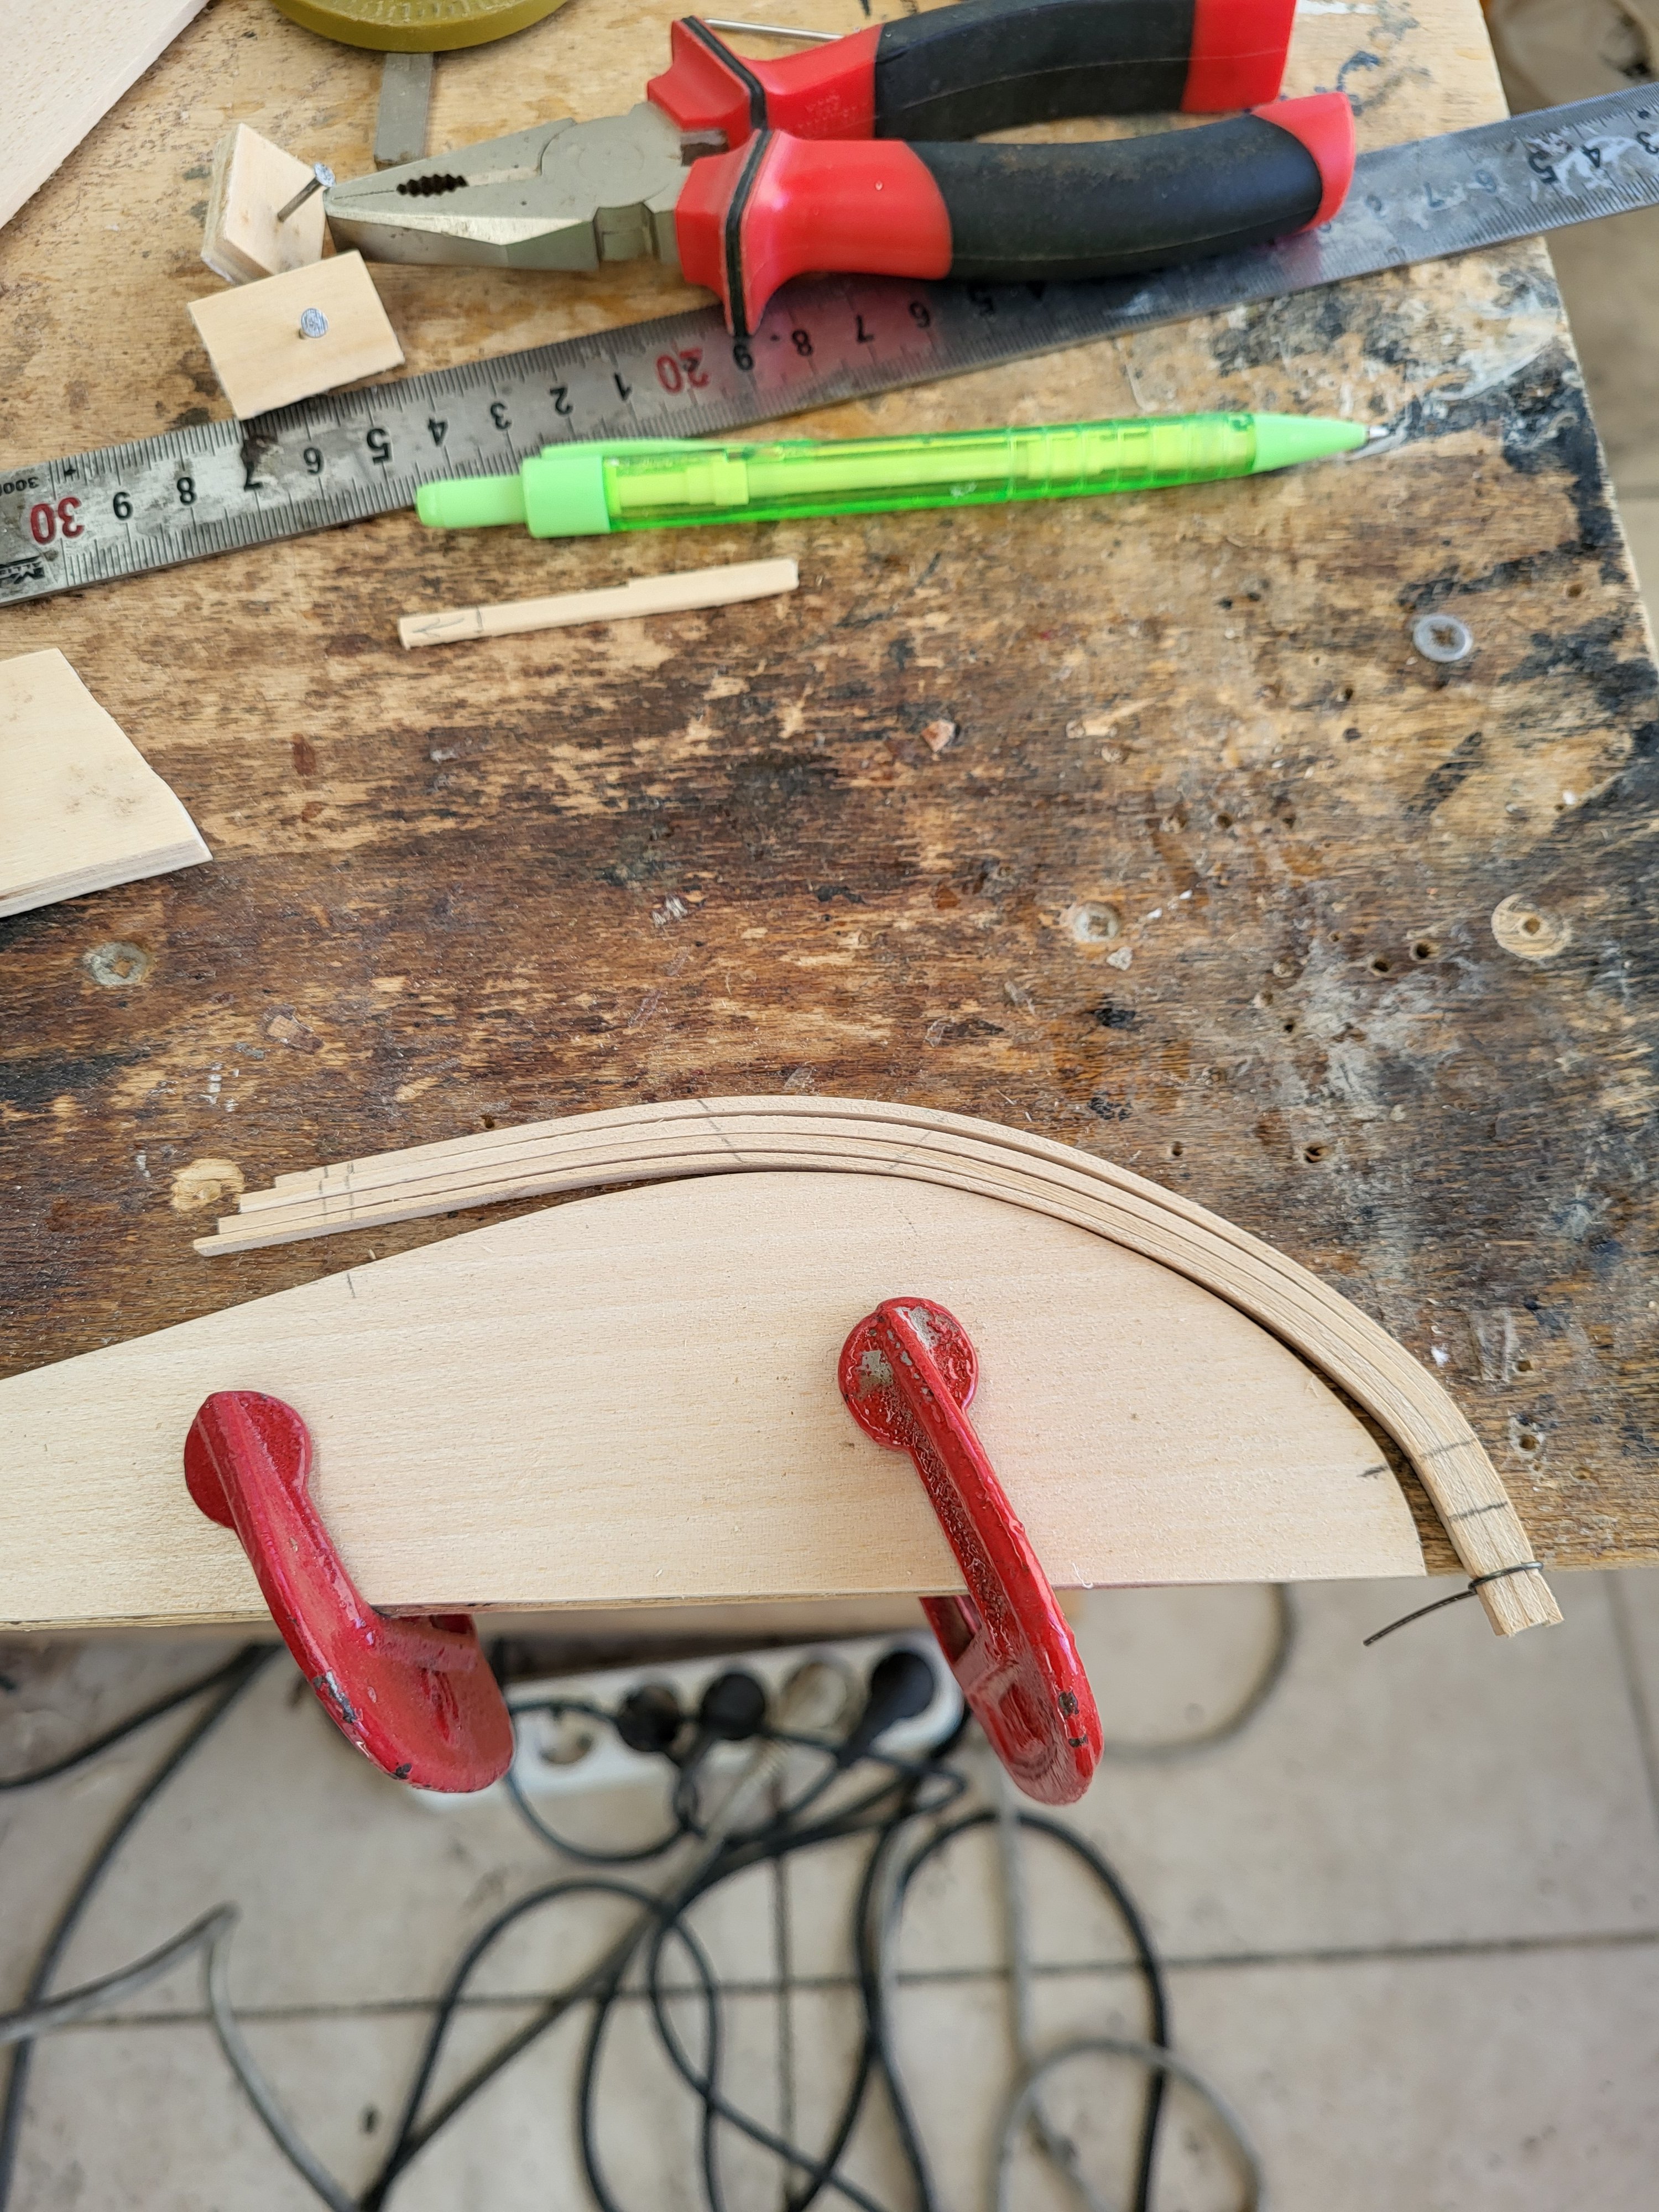
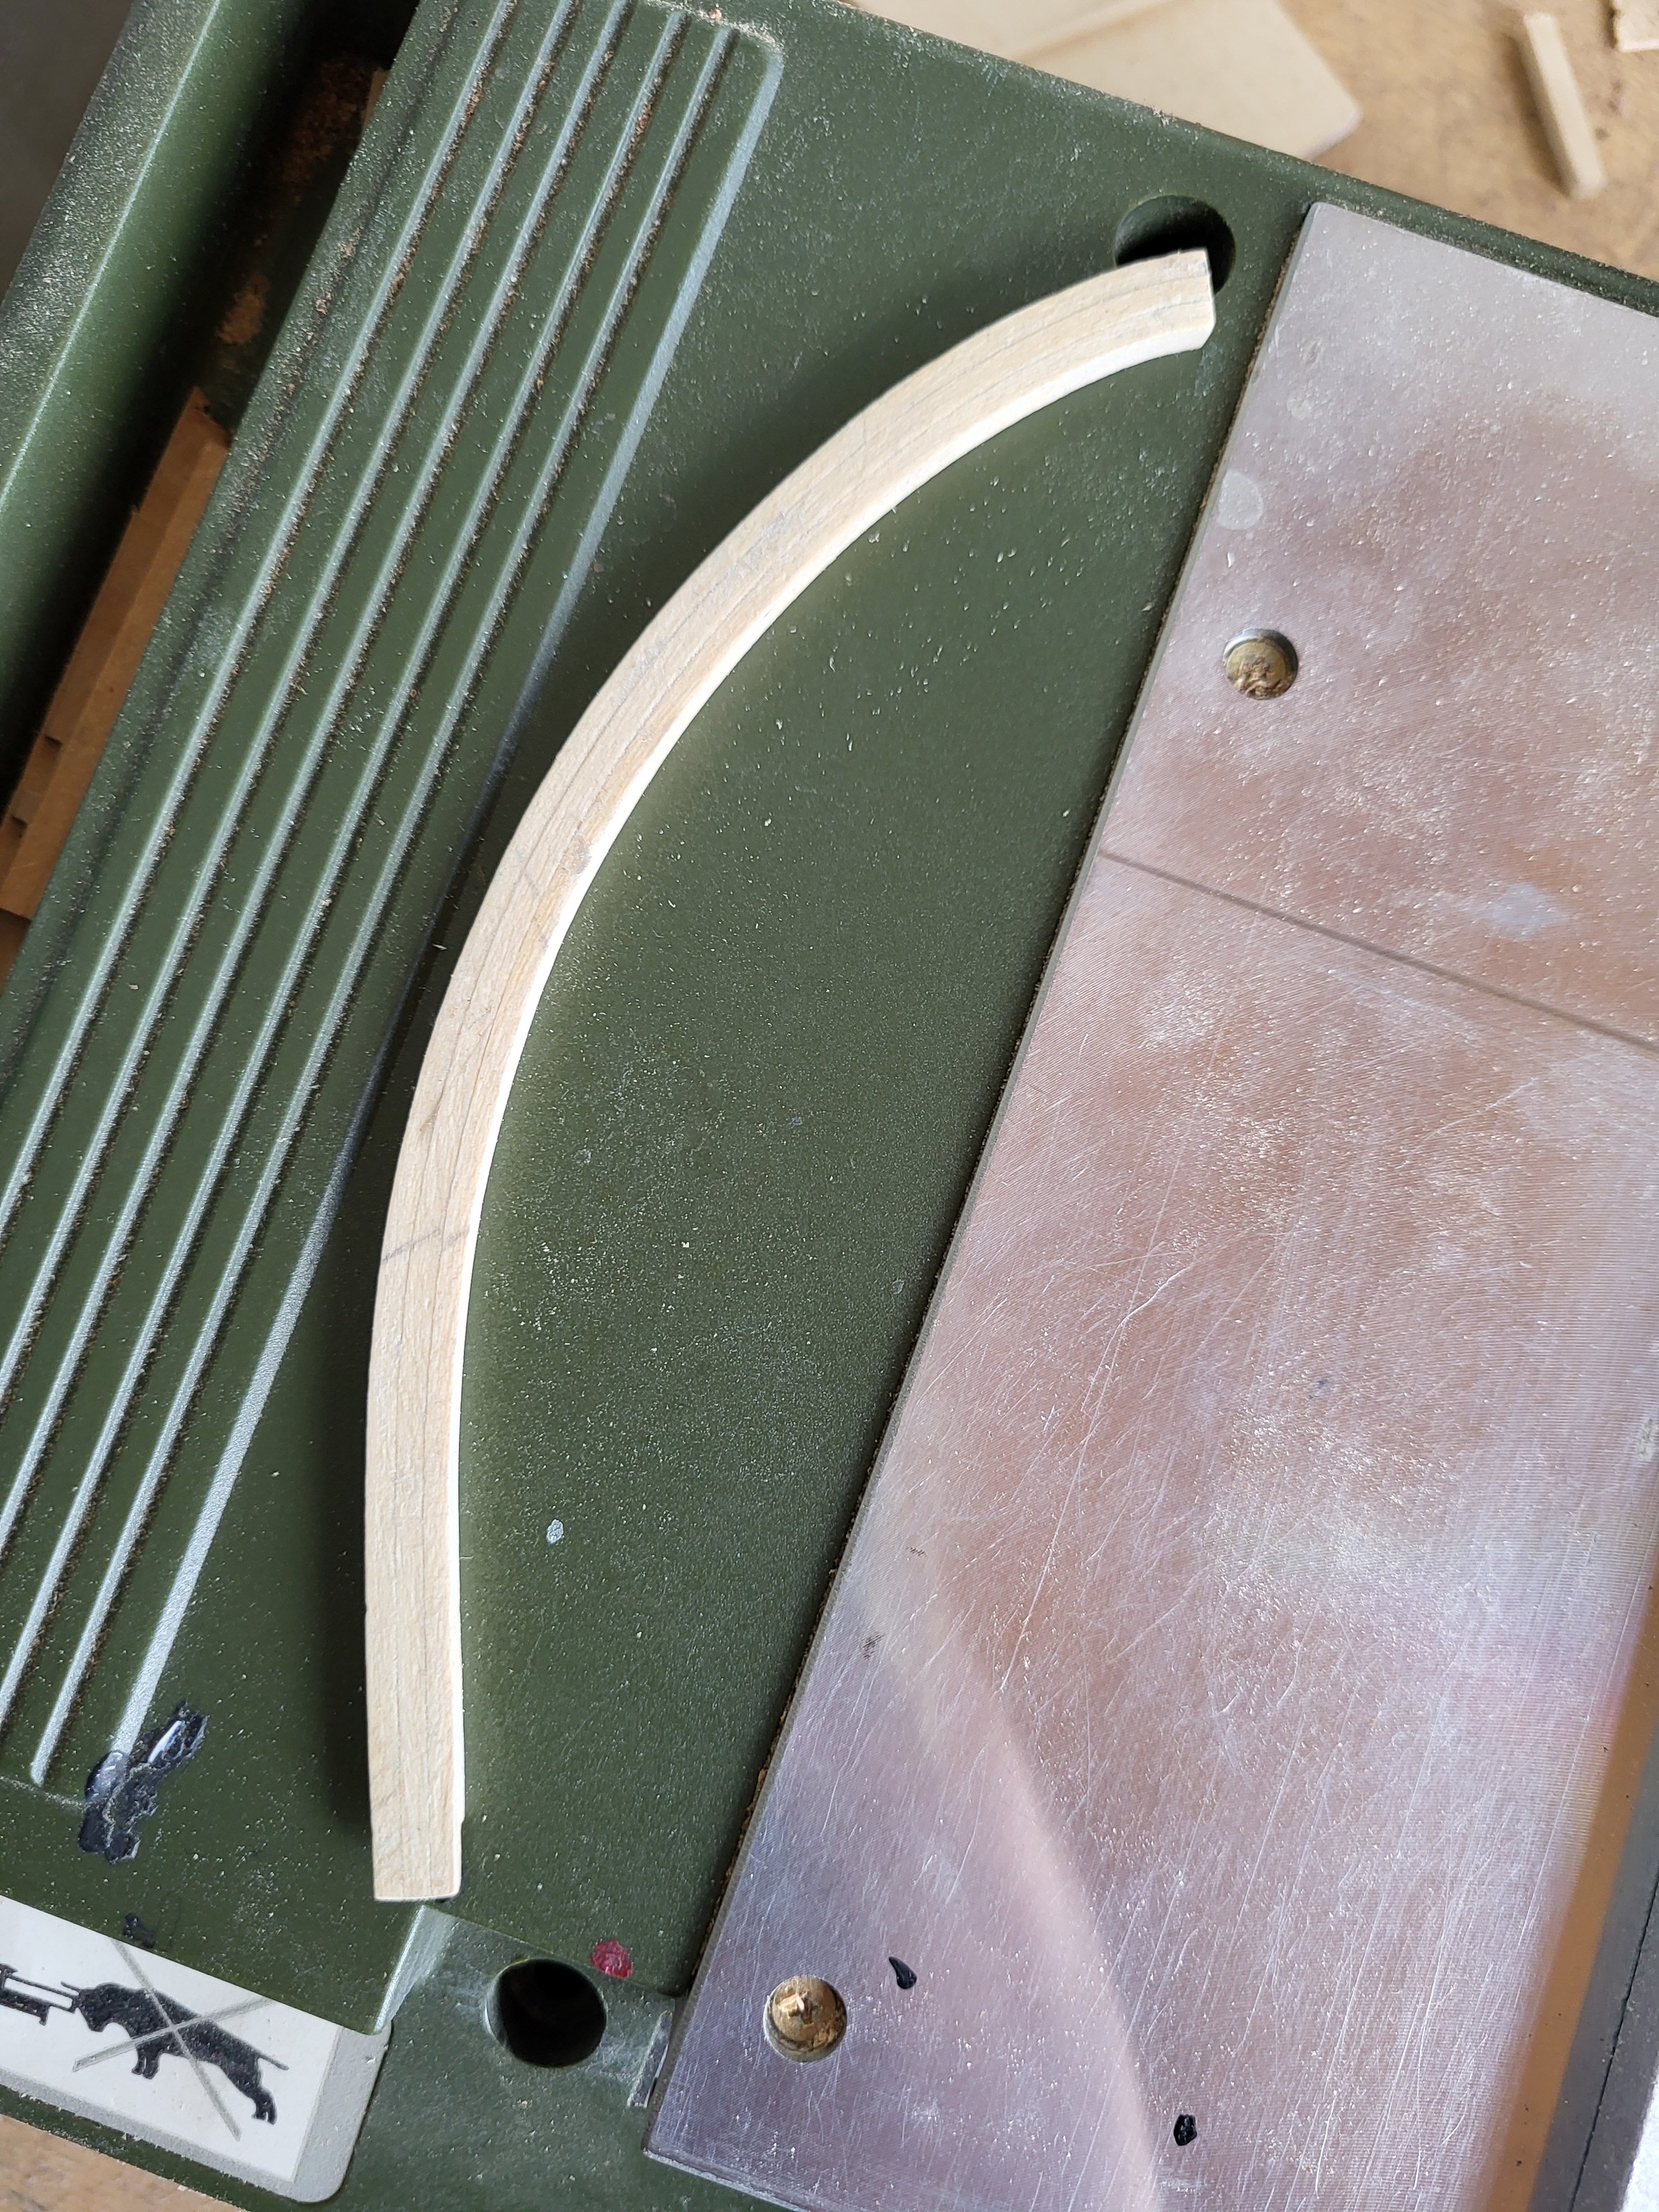
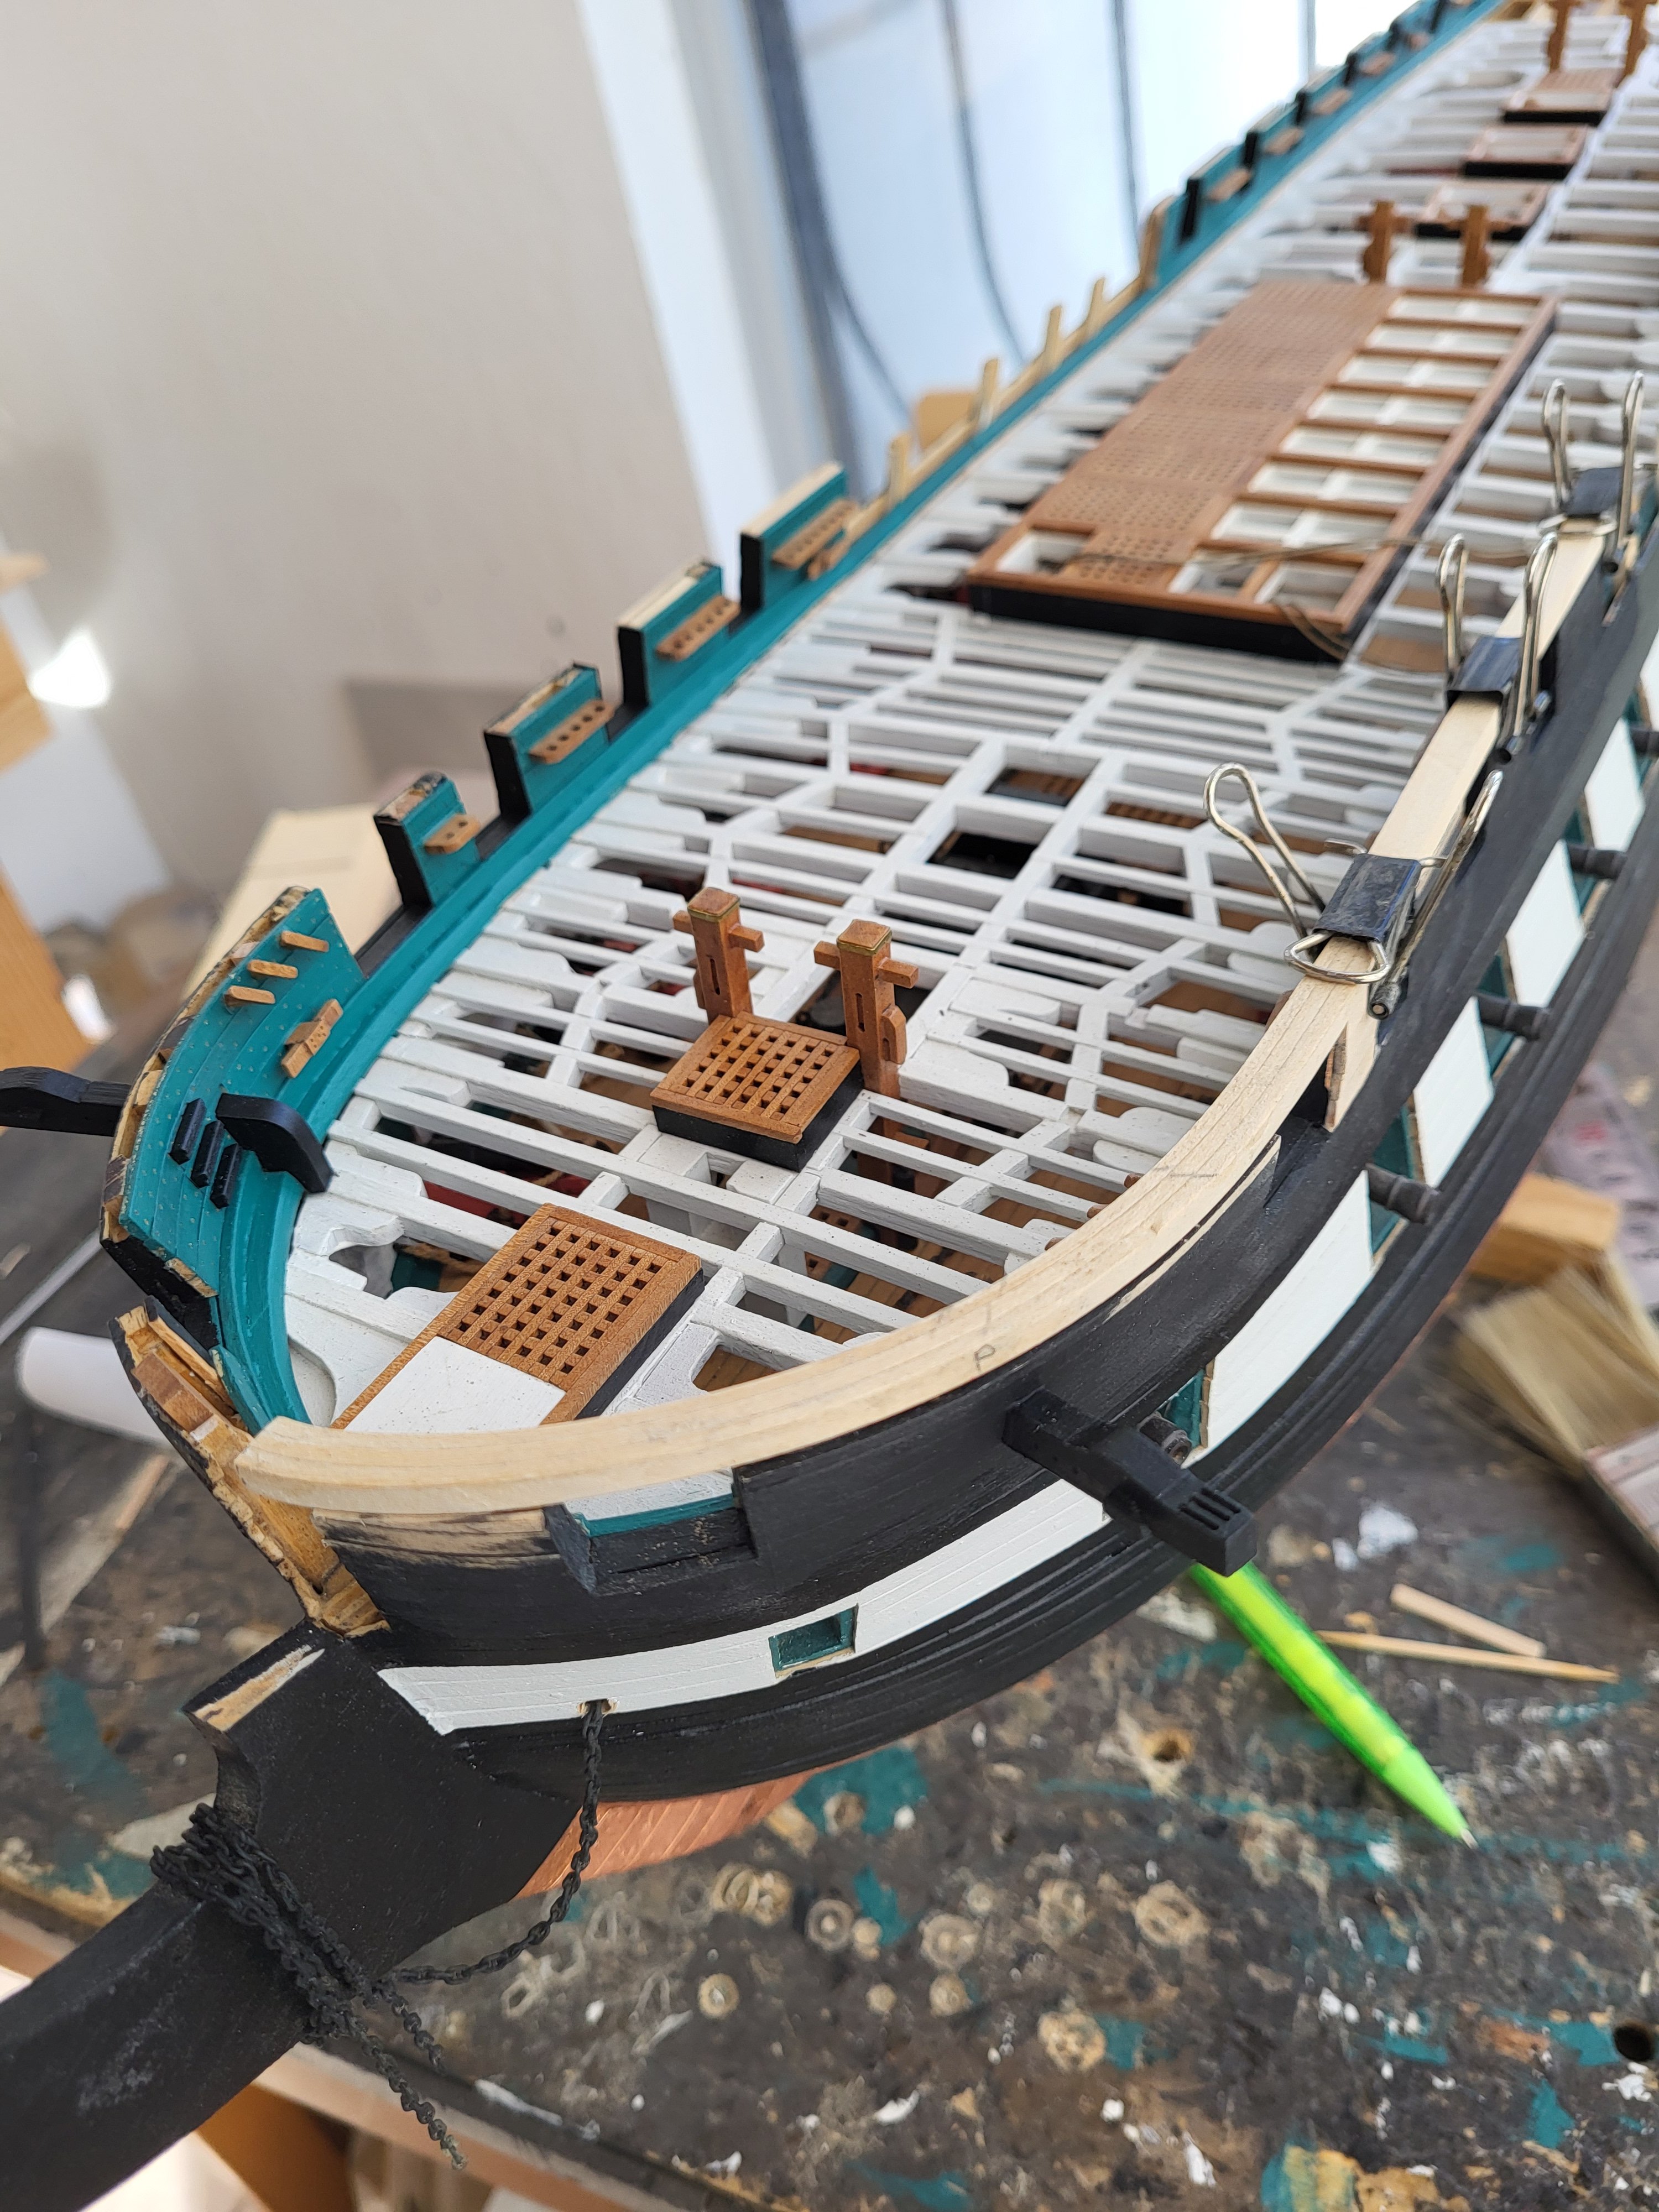
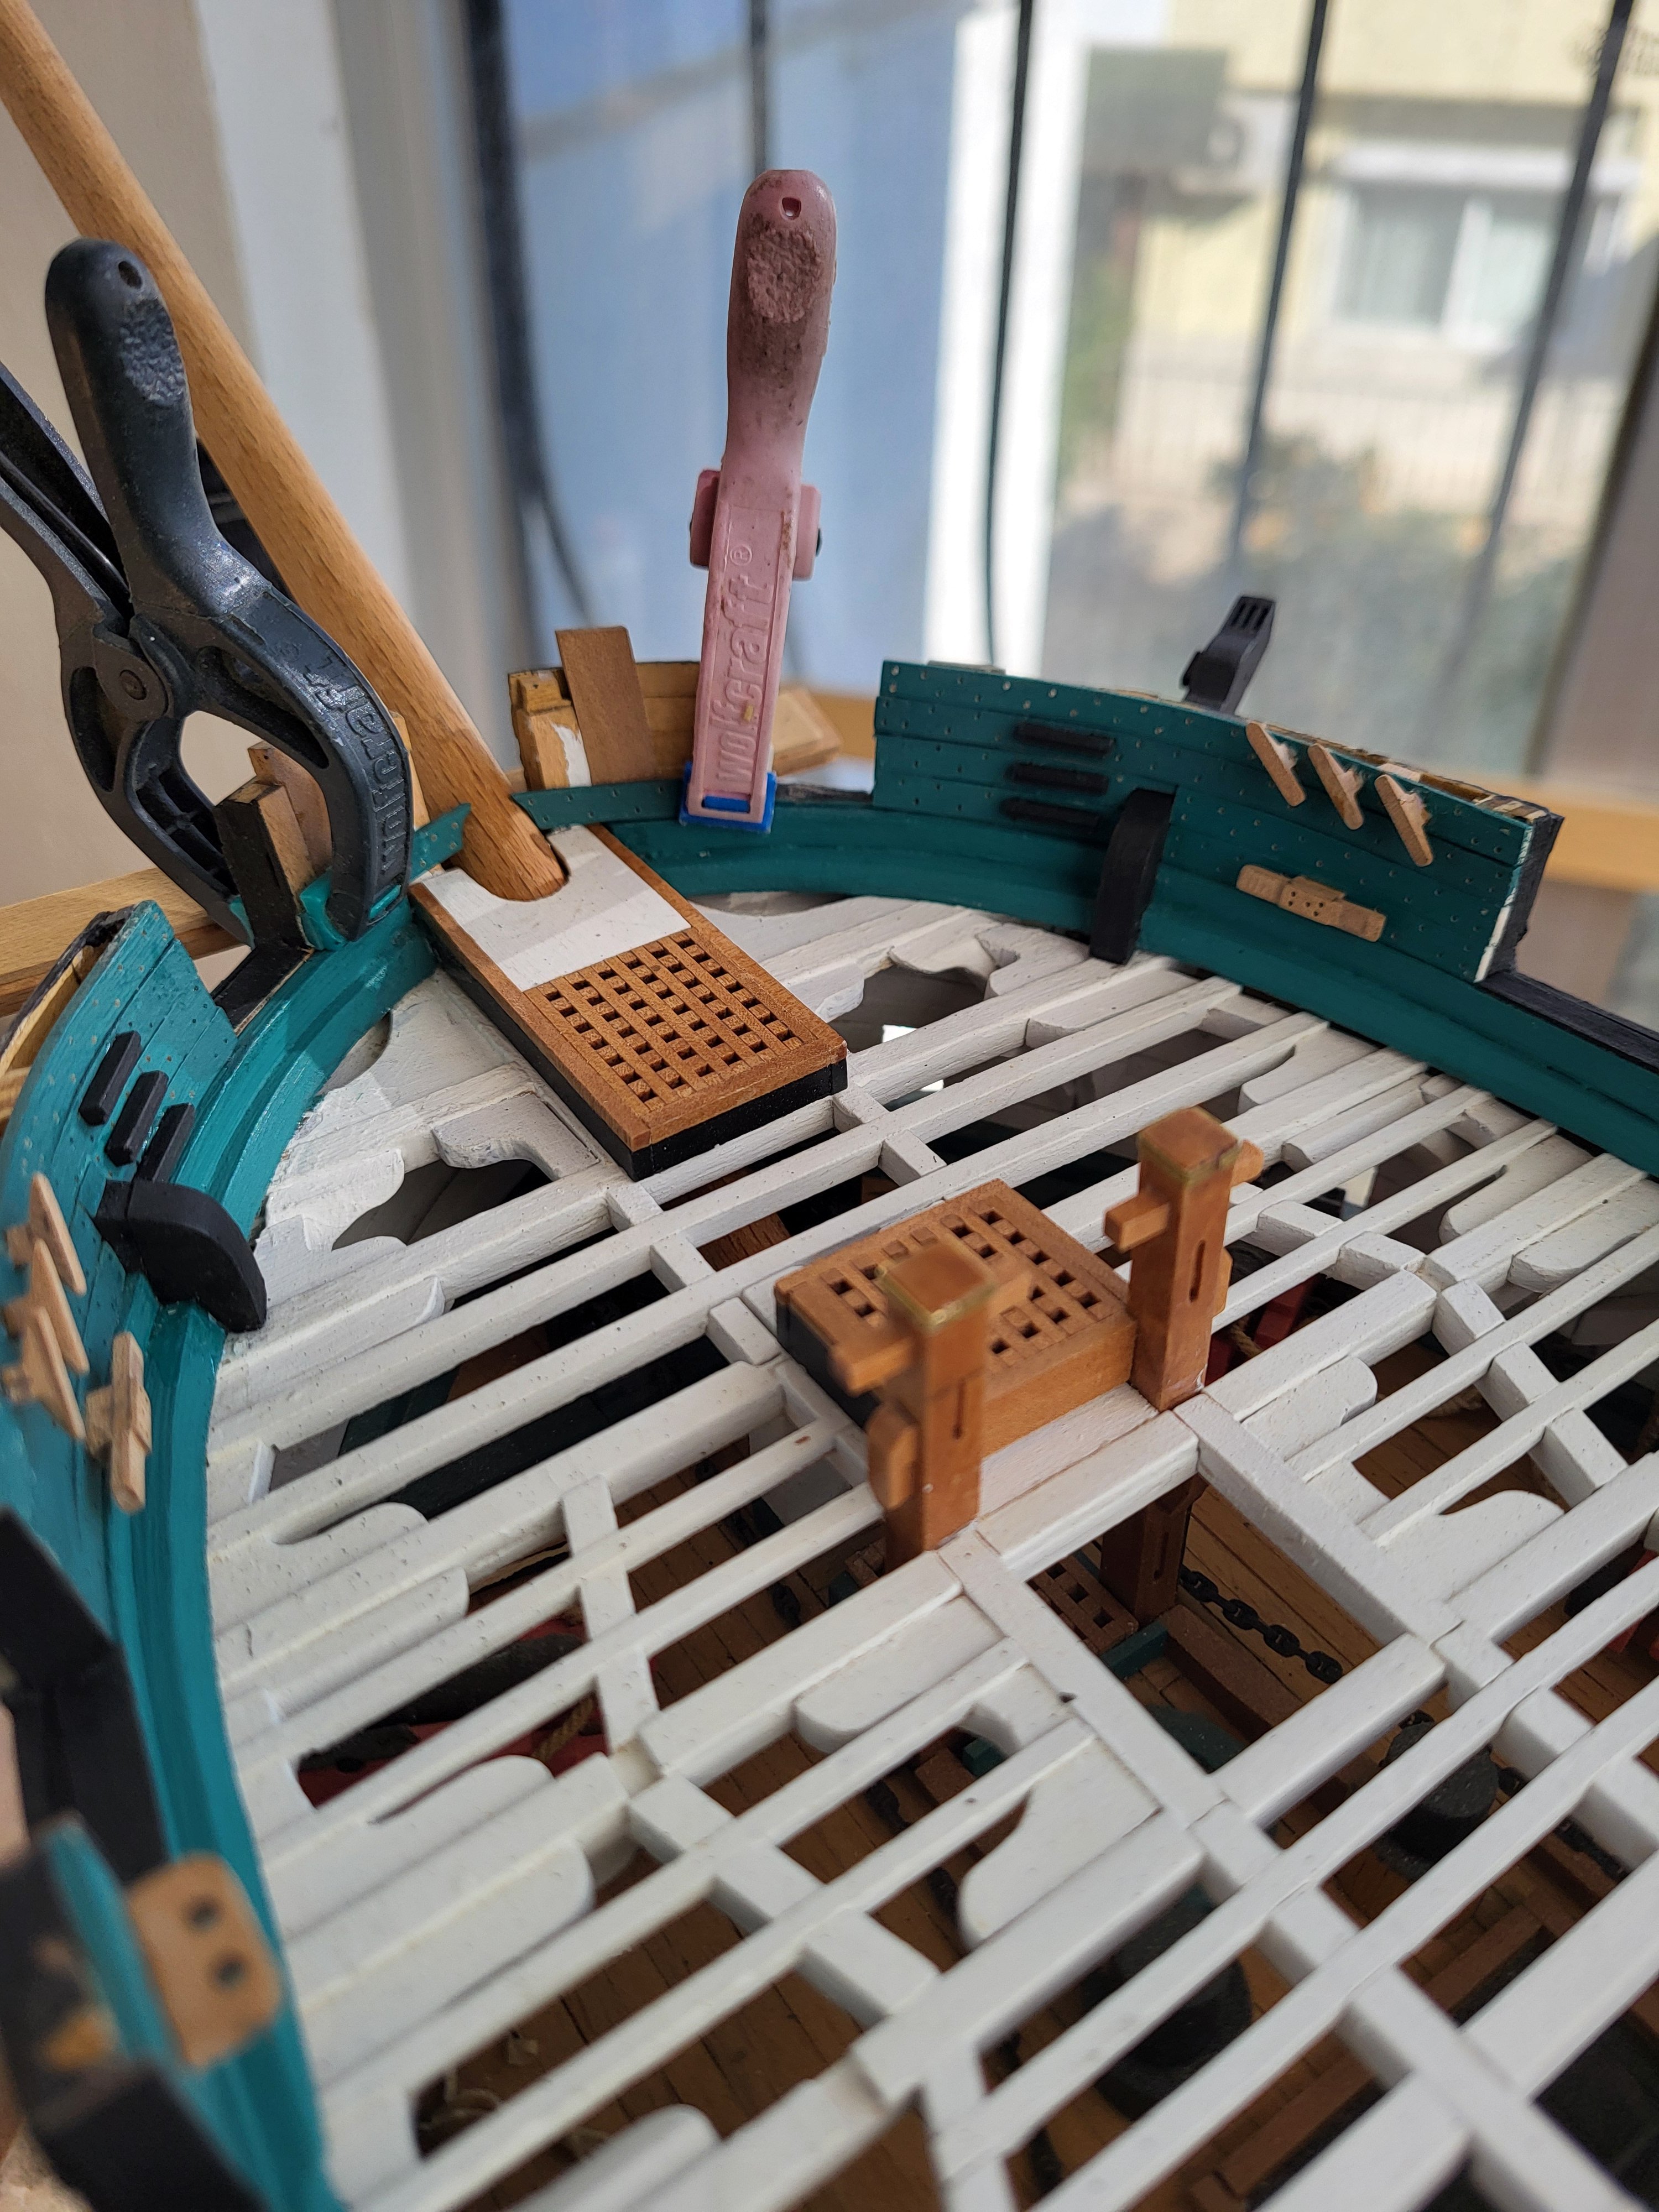
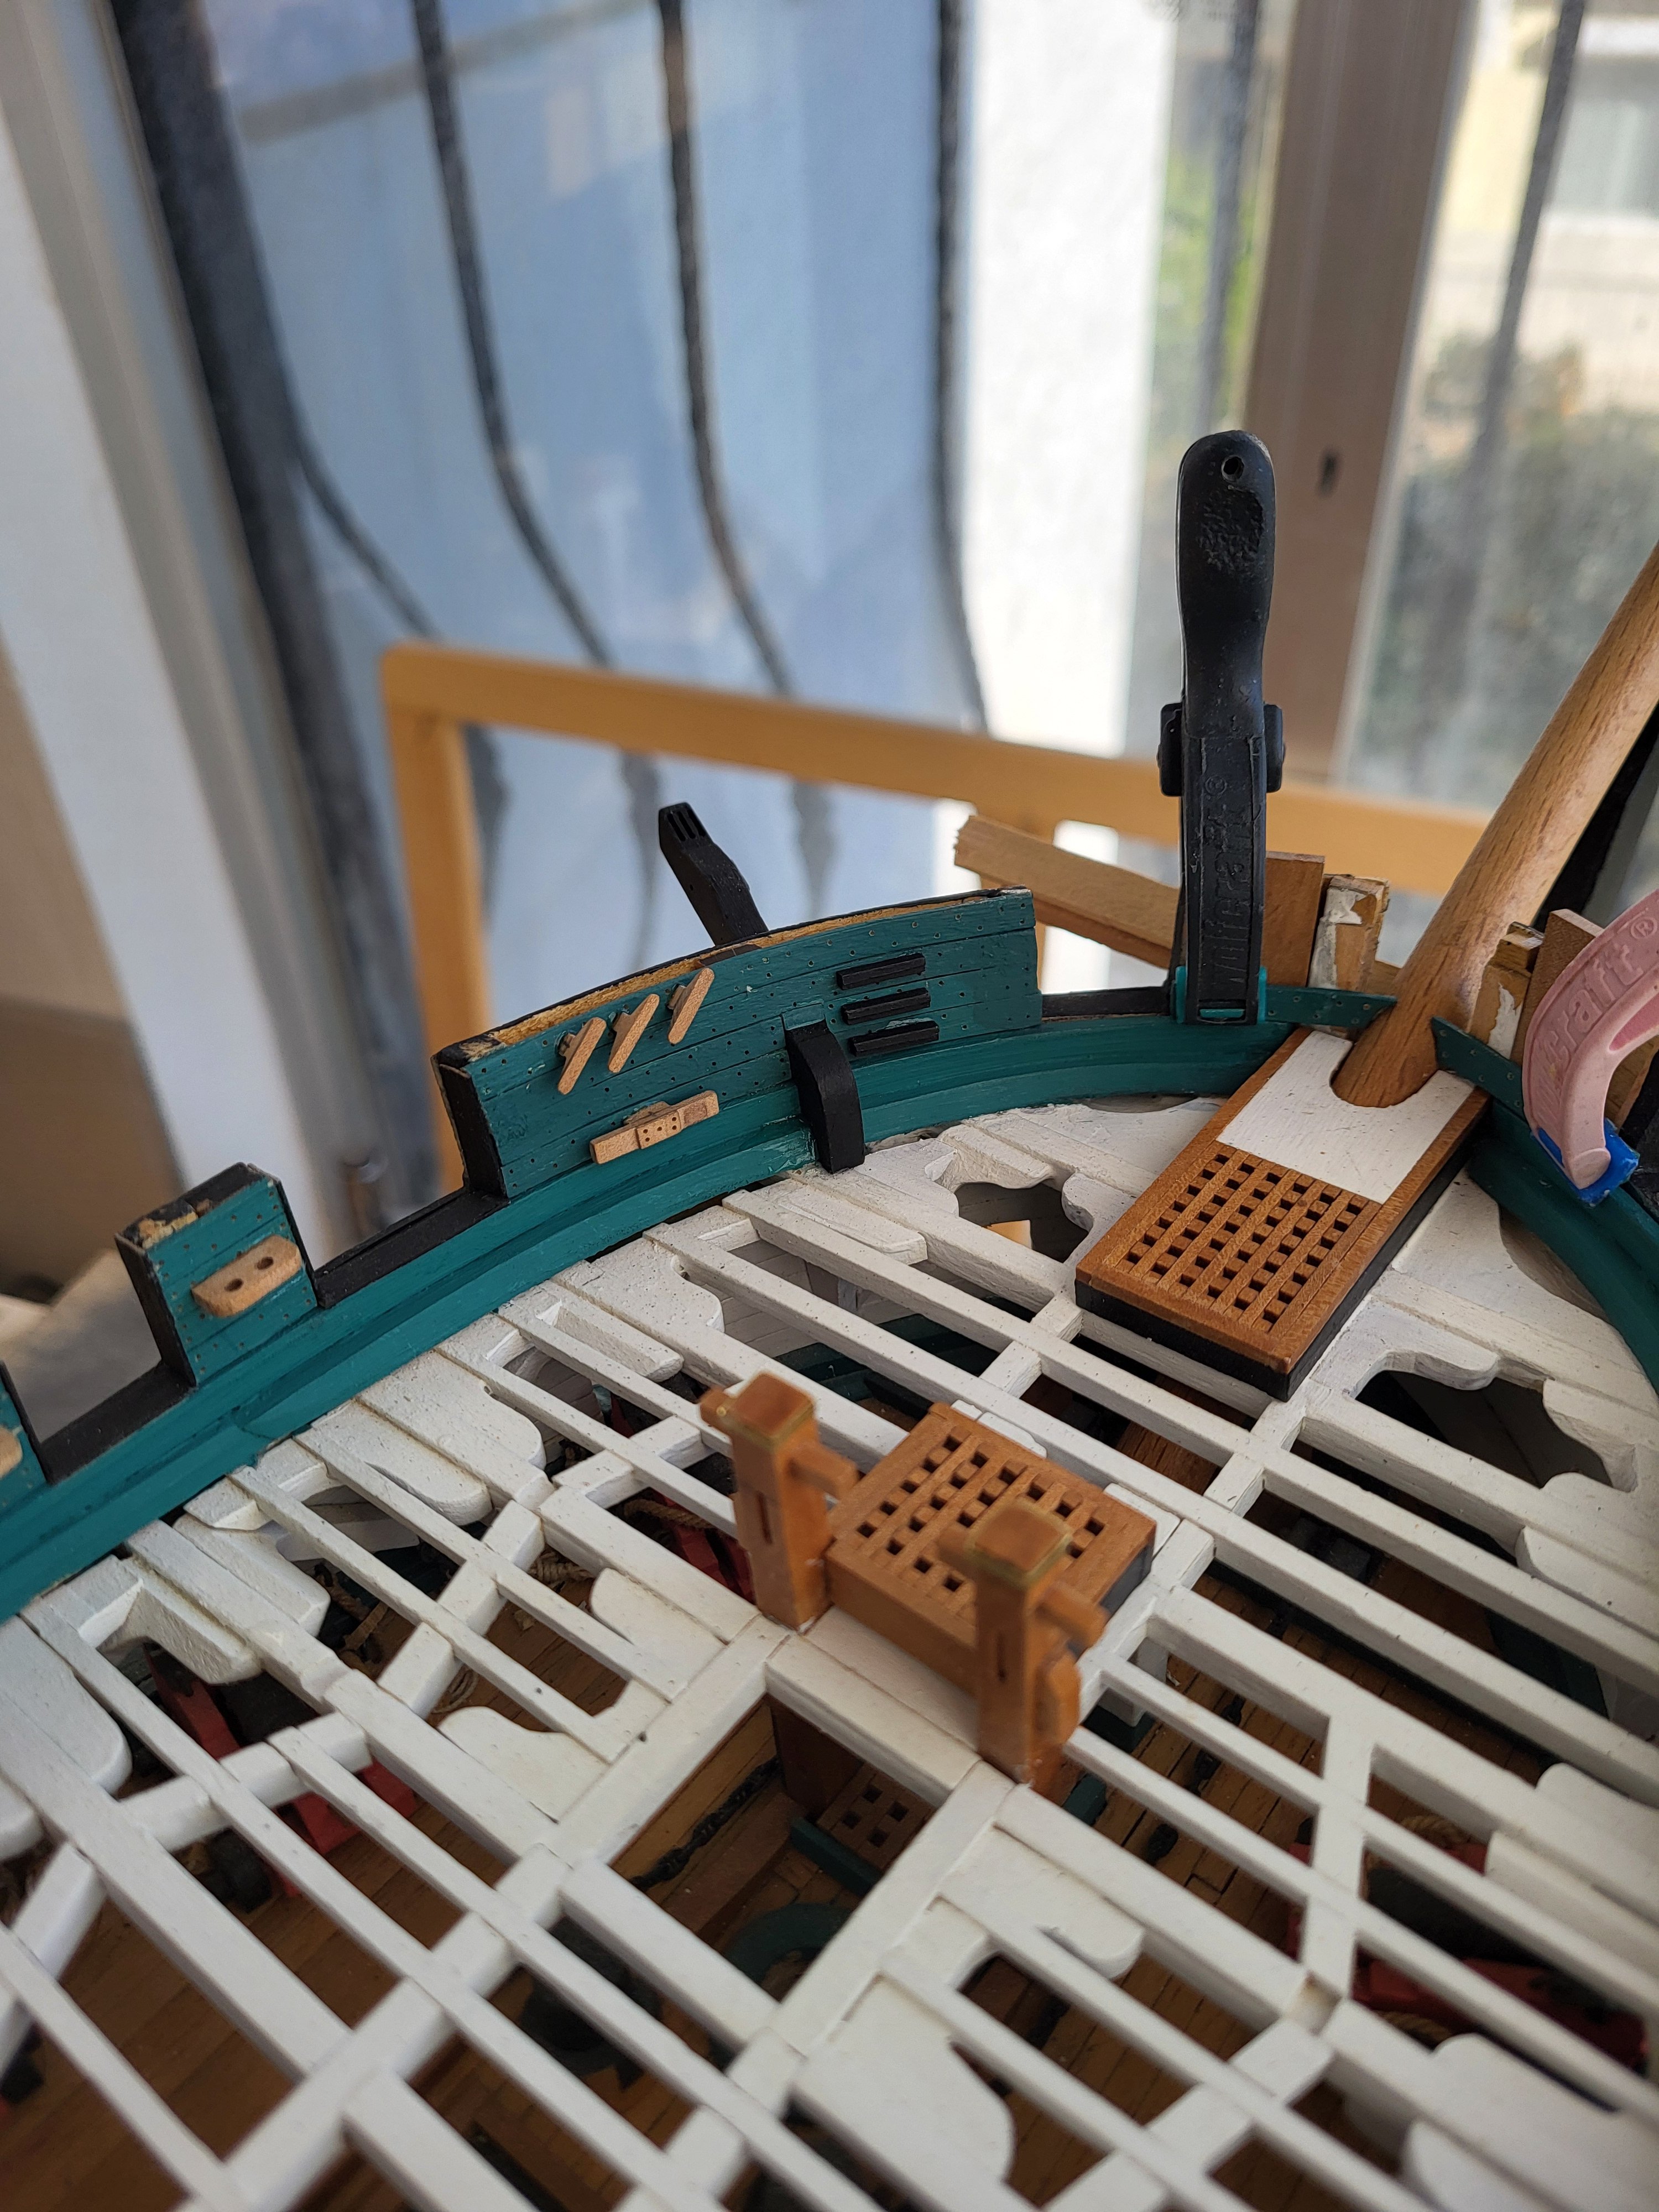
I started the main rail. I'm making the curved rail in the bow section differently this time. In my previous models, I did it by cutting, but this time I am making it with a different method. I cut three 2x4 mm of baswood strips according to the size and kept them in hot water for 15 minutes. Then, I clamped the strips into the mold I prepared before and waited for it to dry. Then, I applied PVA glue between the strips and clamped again to the mold, waited for the glue to dry, and removed it from the mold.

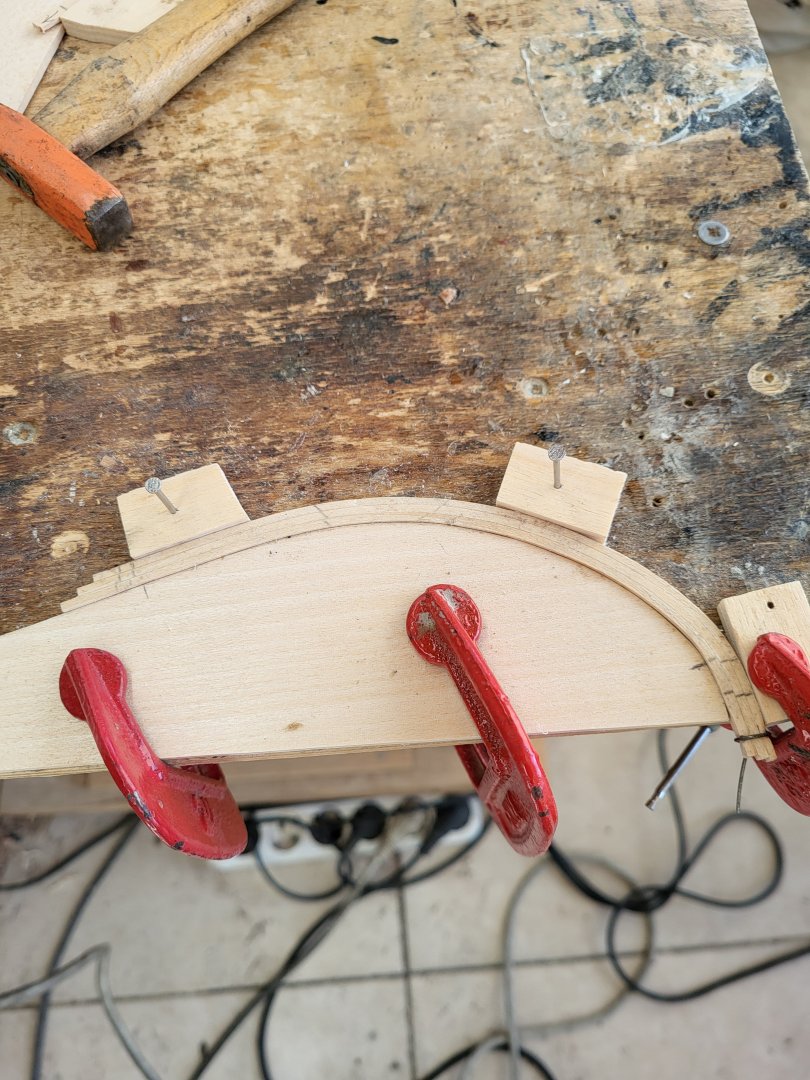
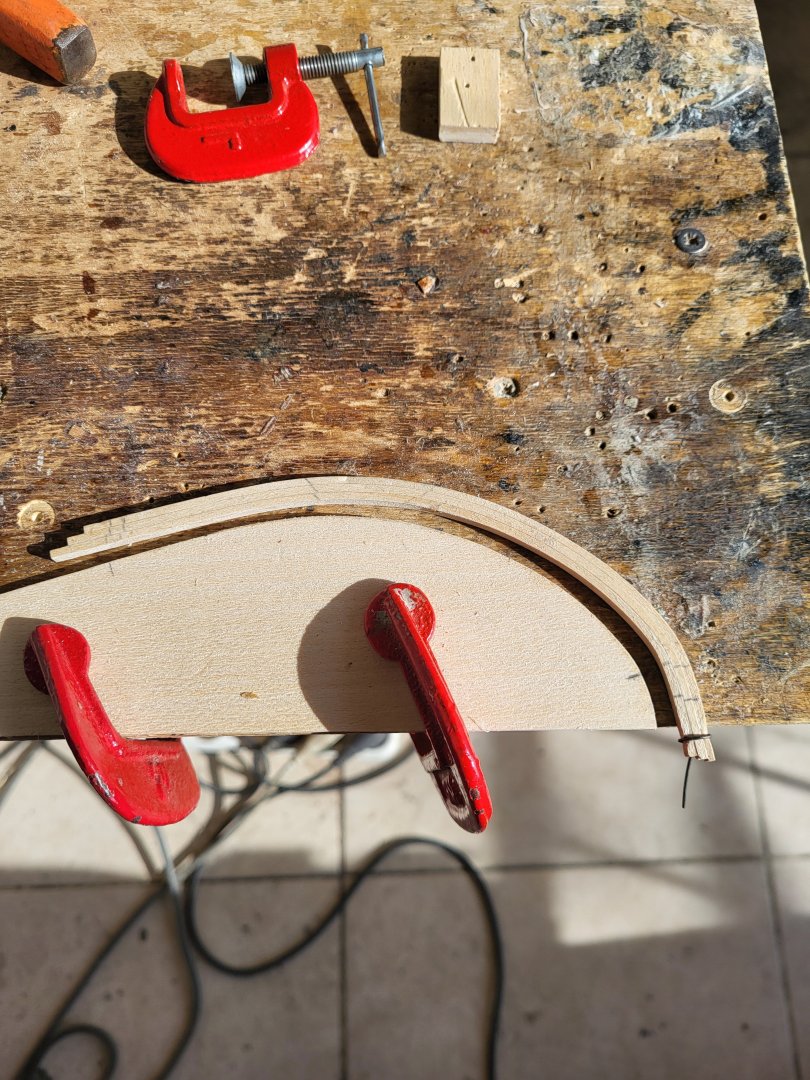


-
USS Constitution by mtbediz - 1:76
mtbediz replied to mtbediz's topic in - Build logs for subjects built 1751 - 1800
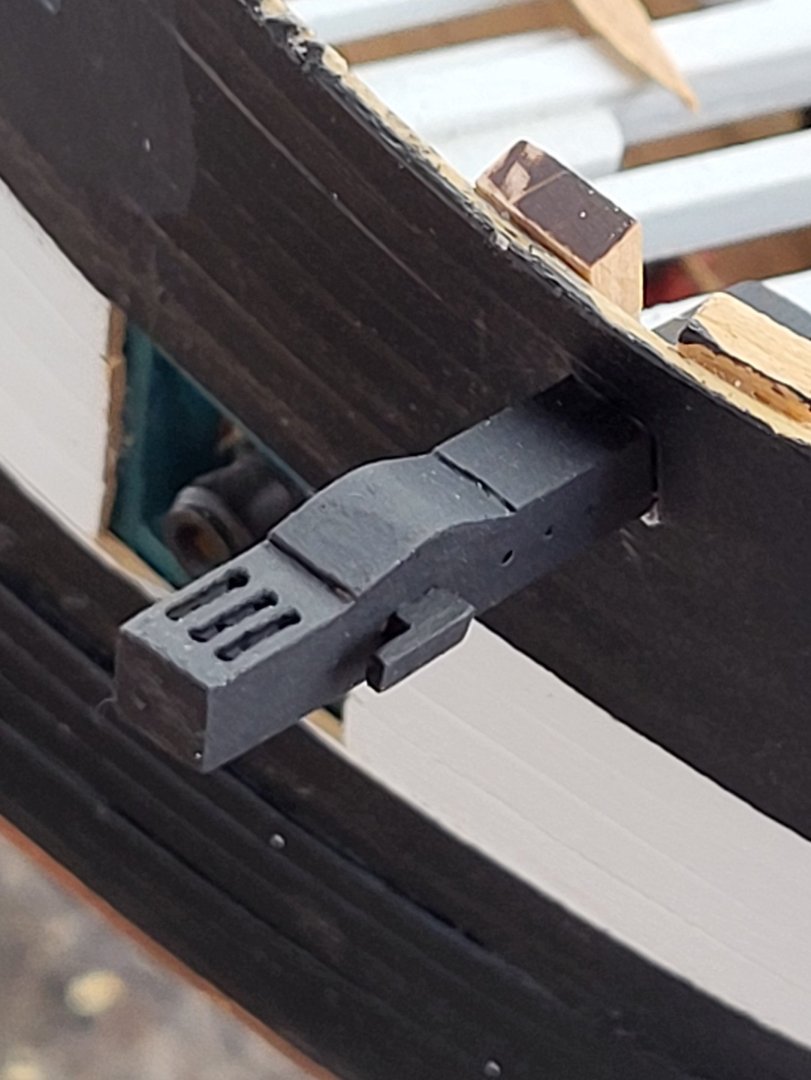
Thanks Greg. I made the large cleats with the Proxxon mill, the smaller ones were made by hand filing and sanding. -
USS Constitution by mtbediz - 1:76
mtbediz replied to mtbediz's topic in - Build logs for subjects built 1751 - 1800
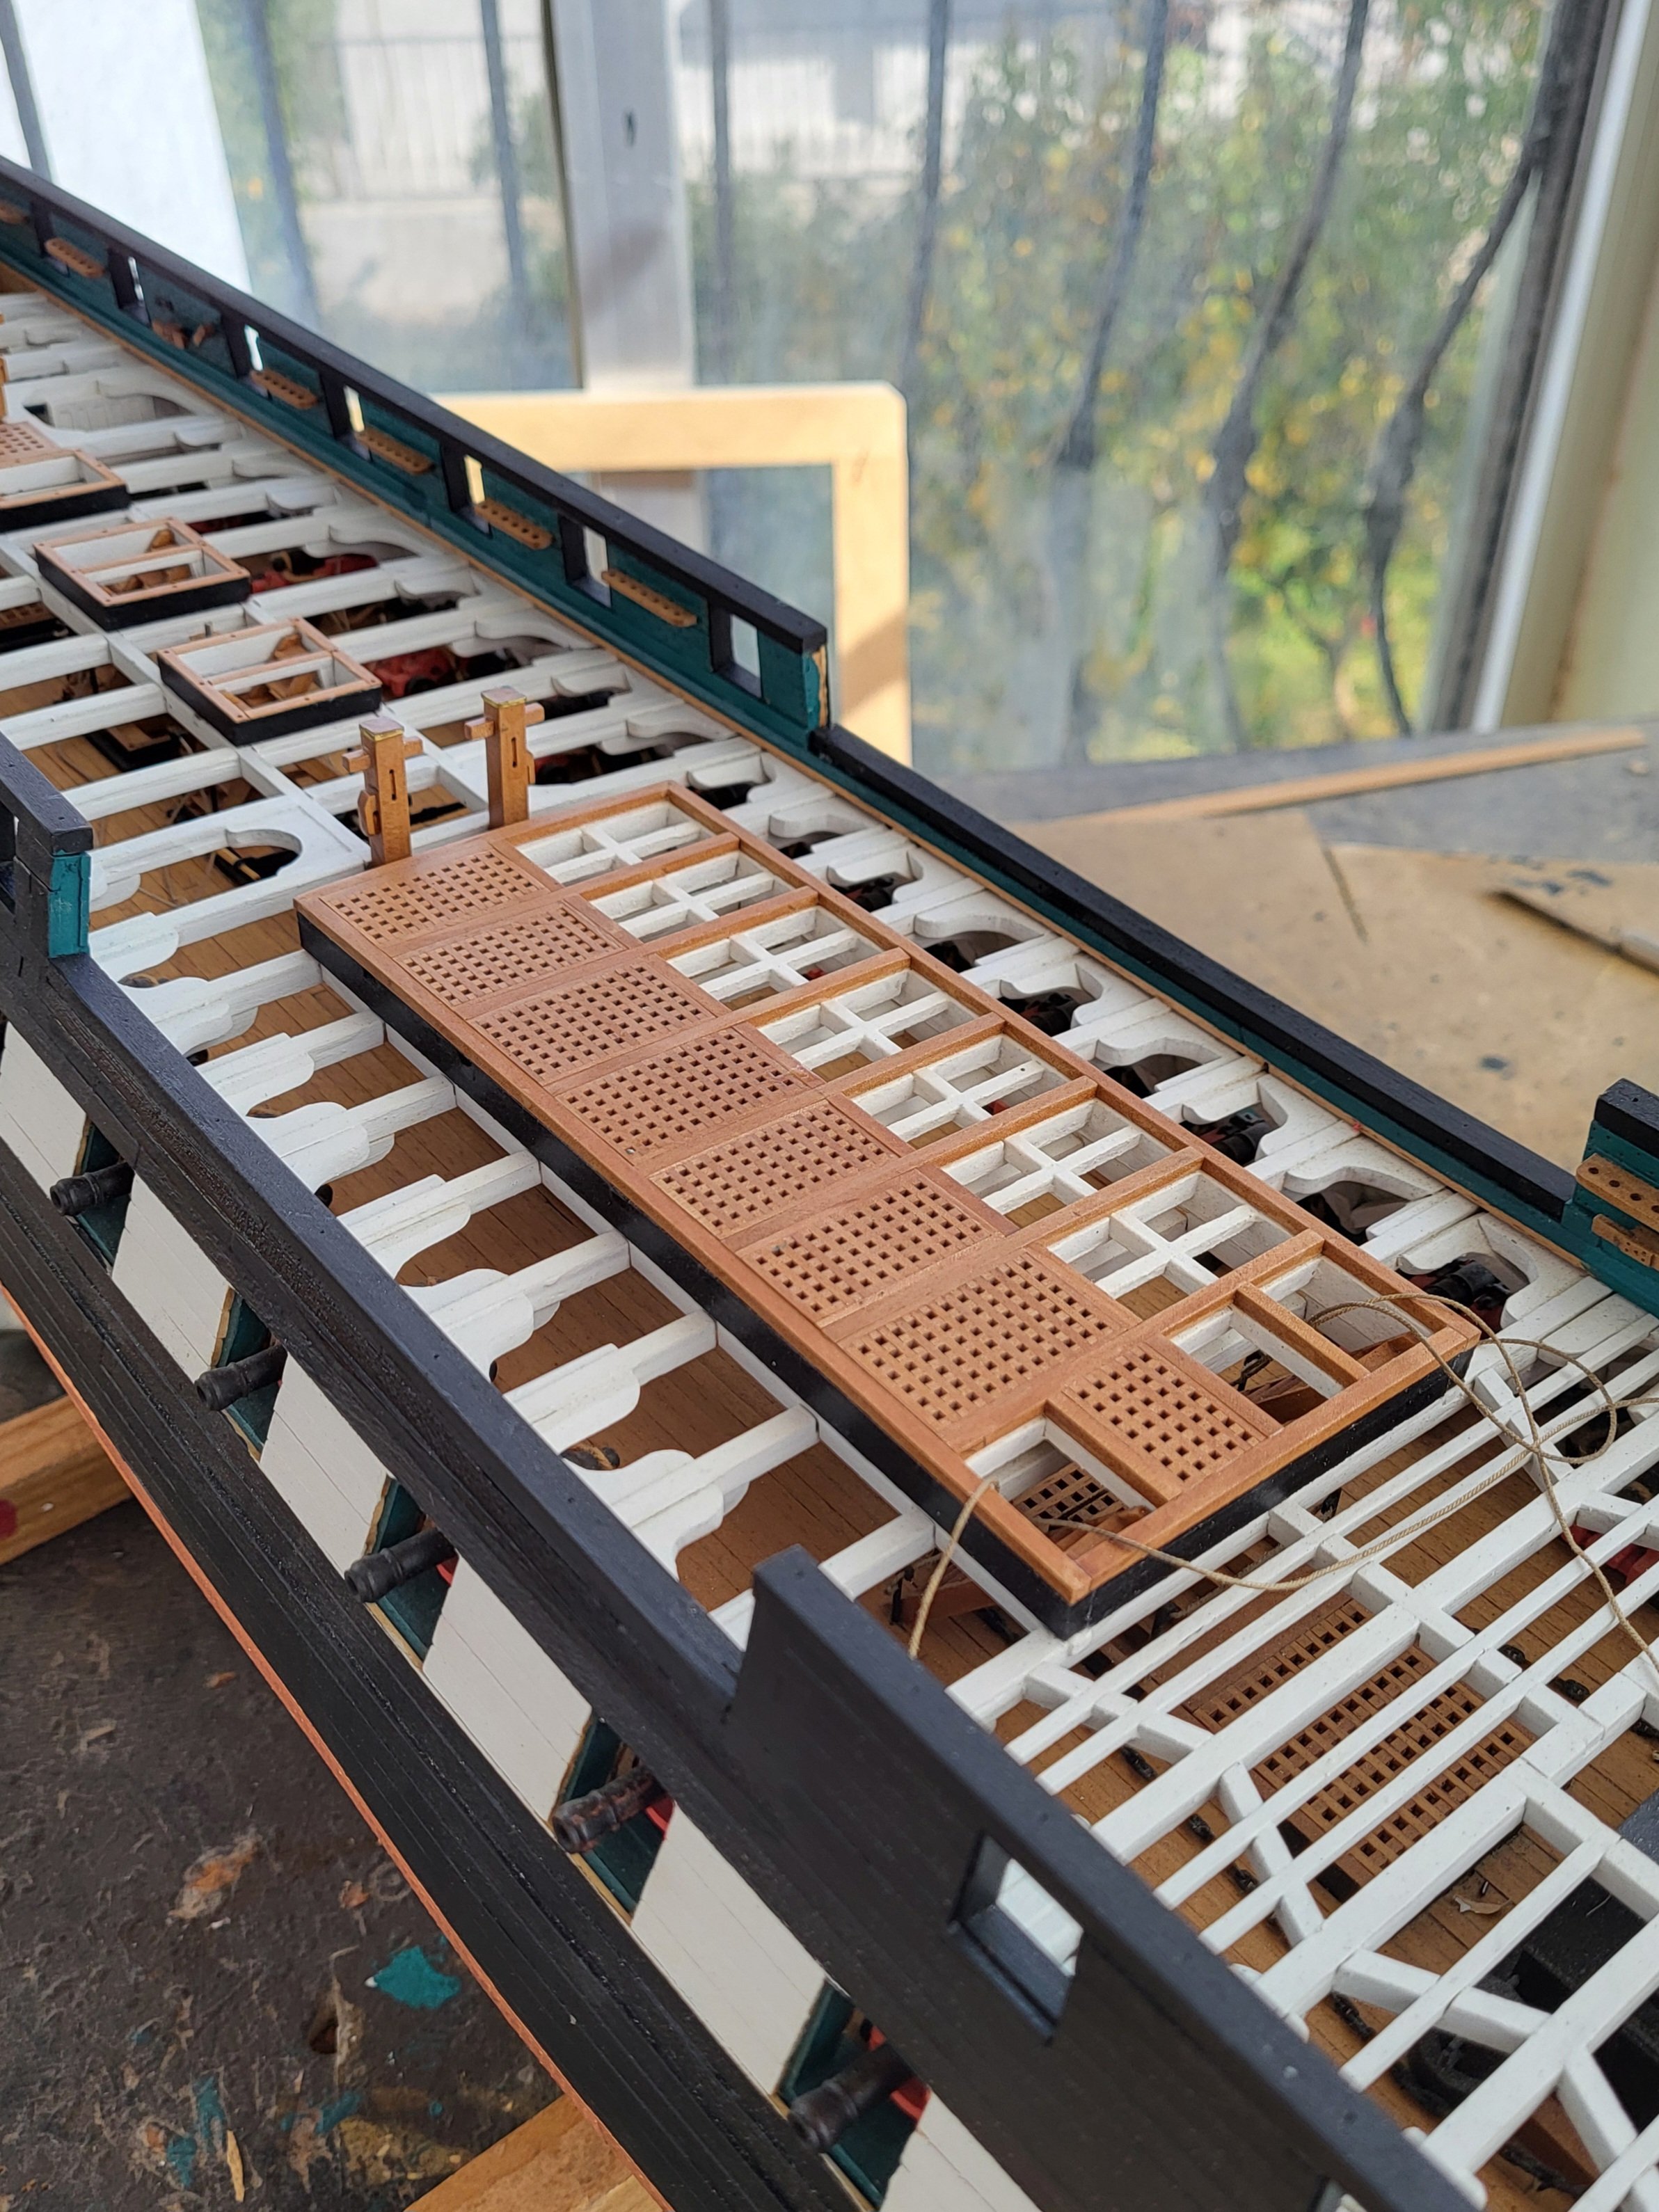
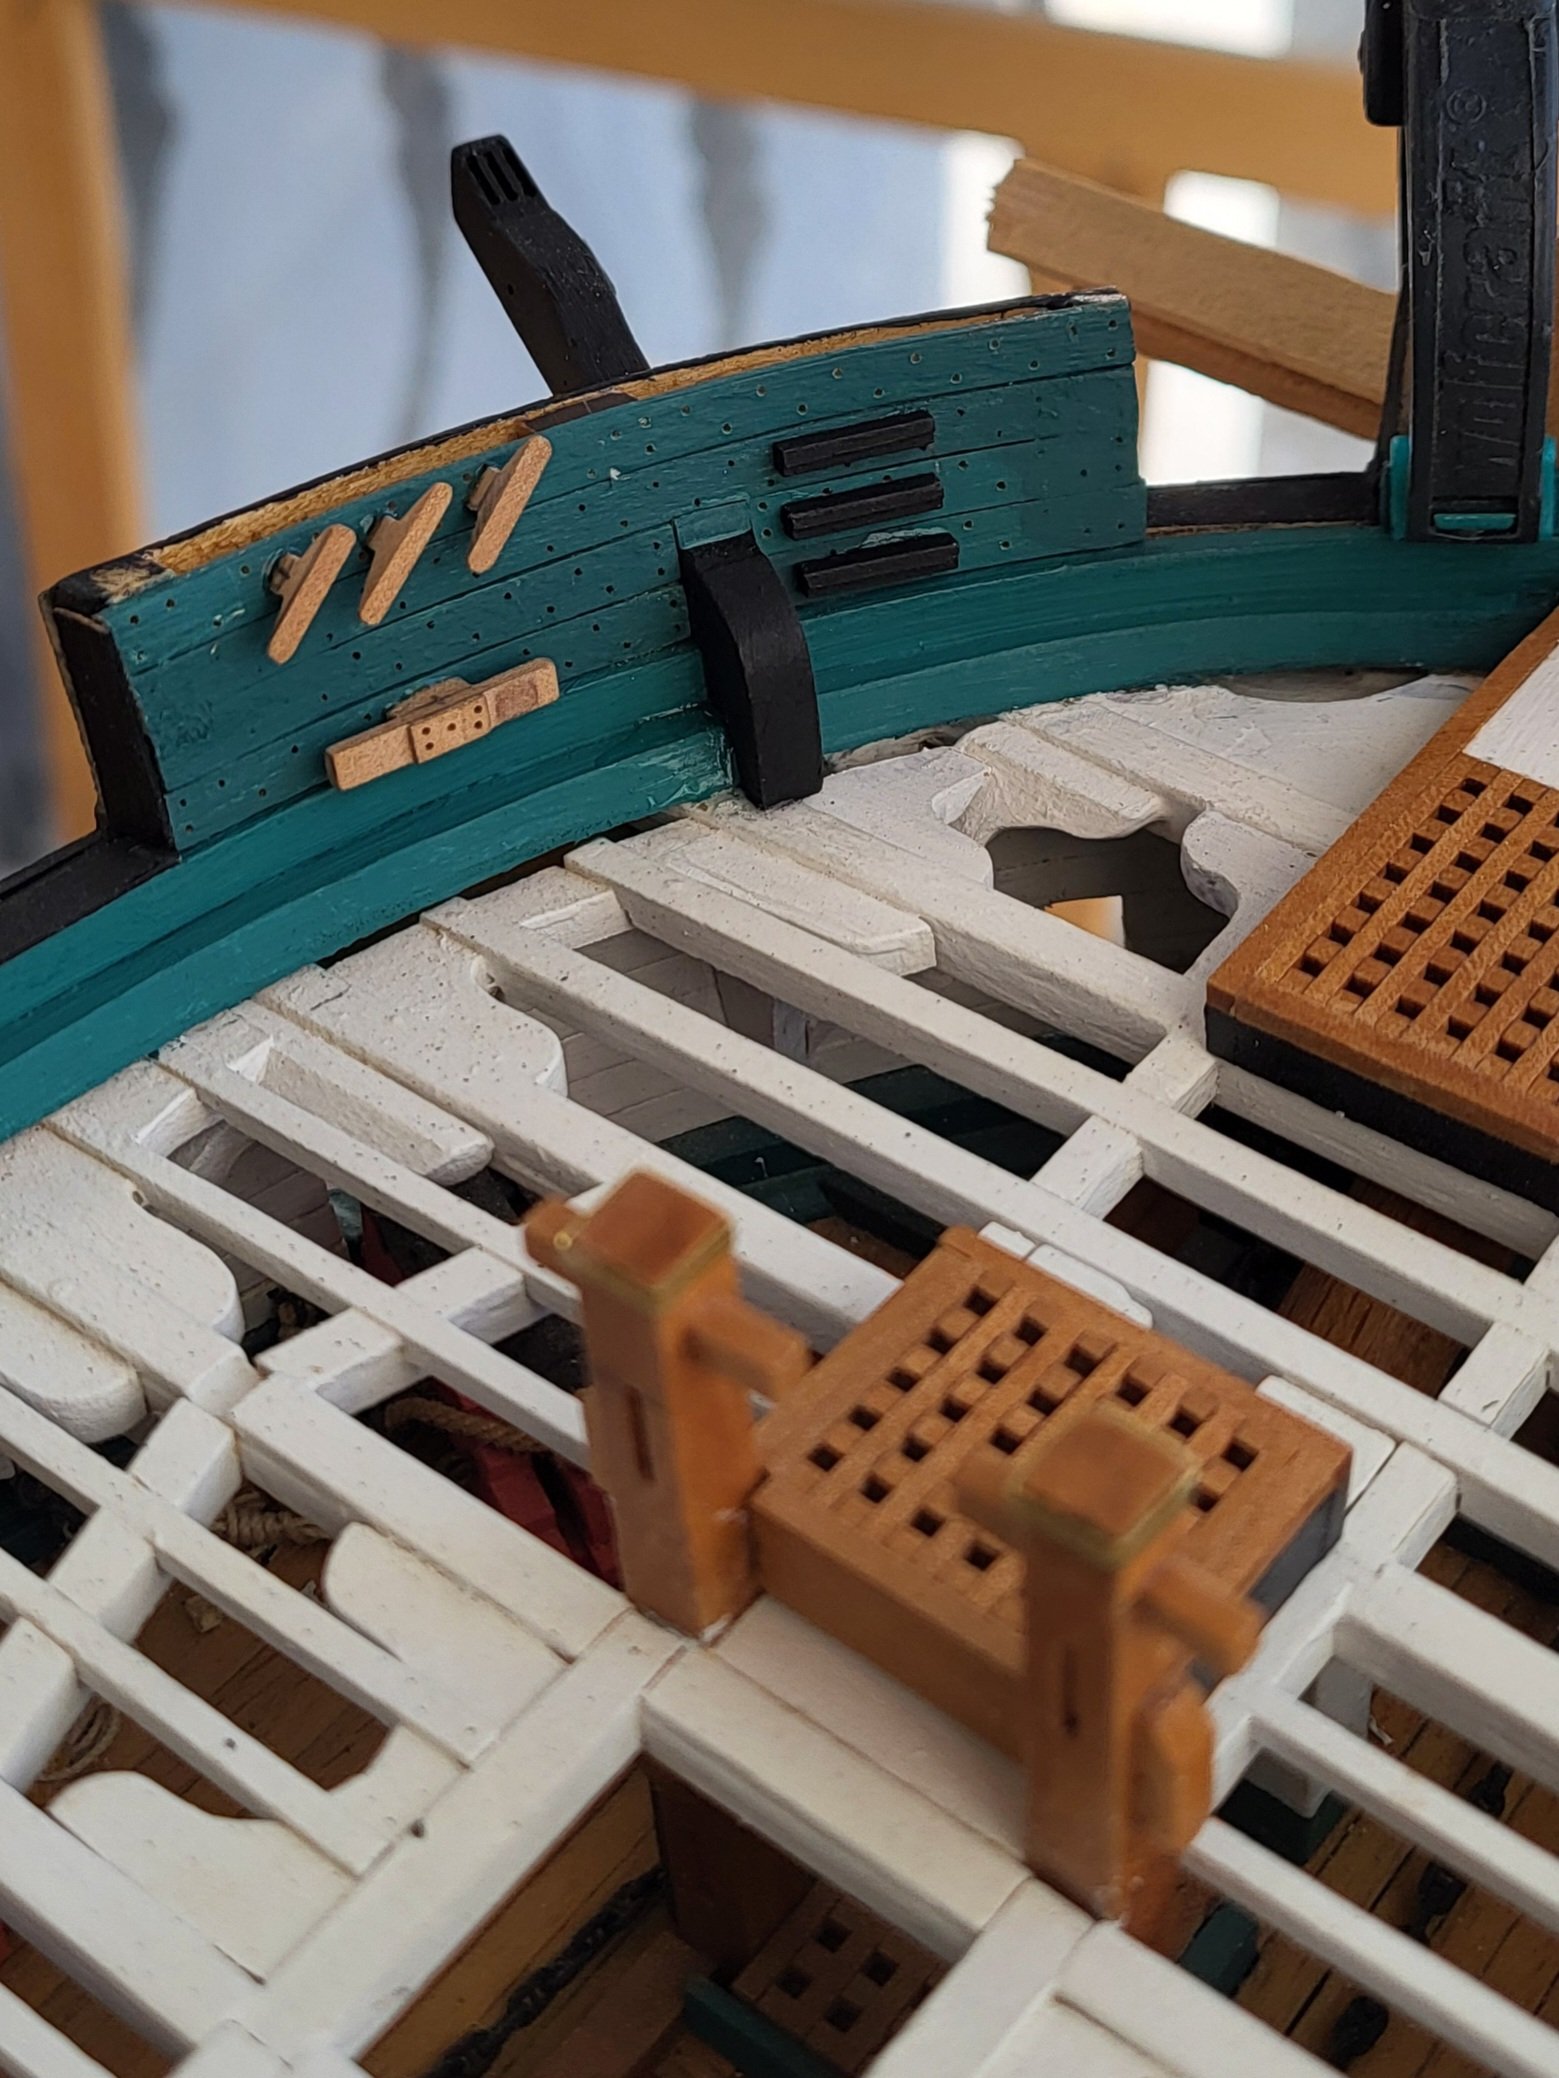
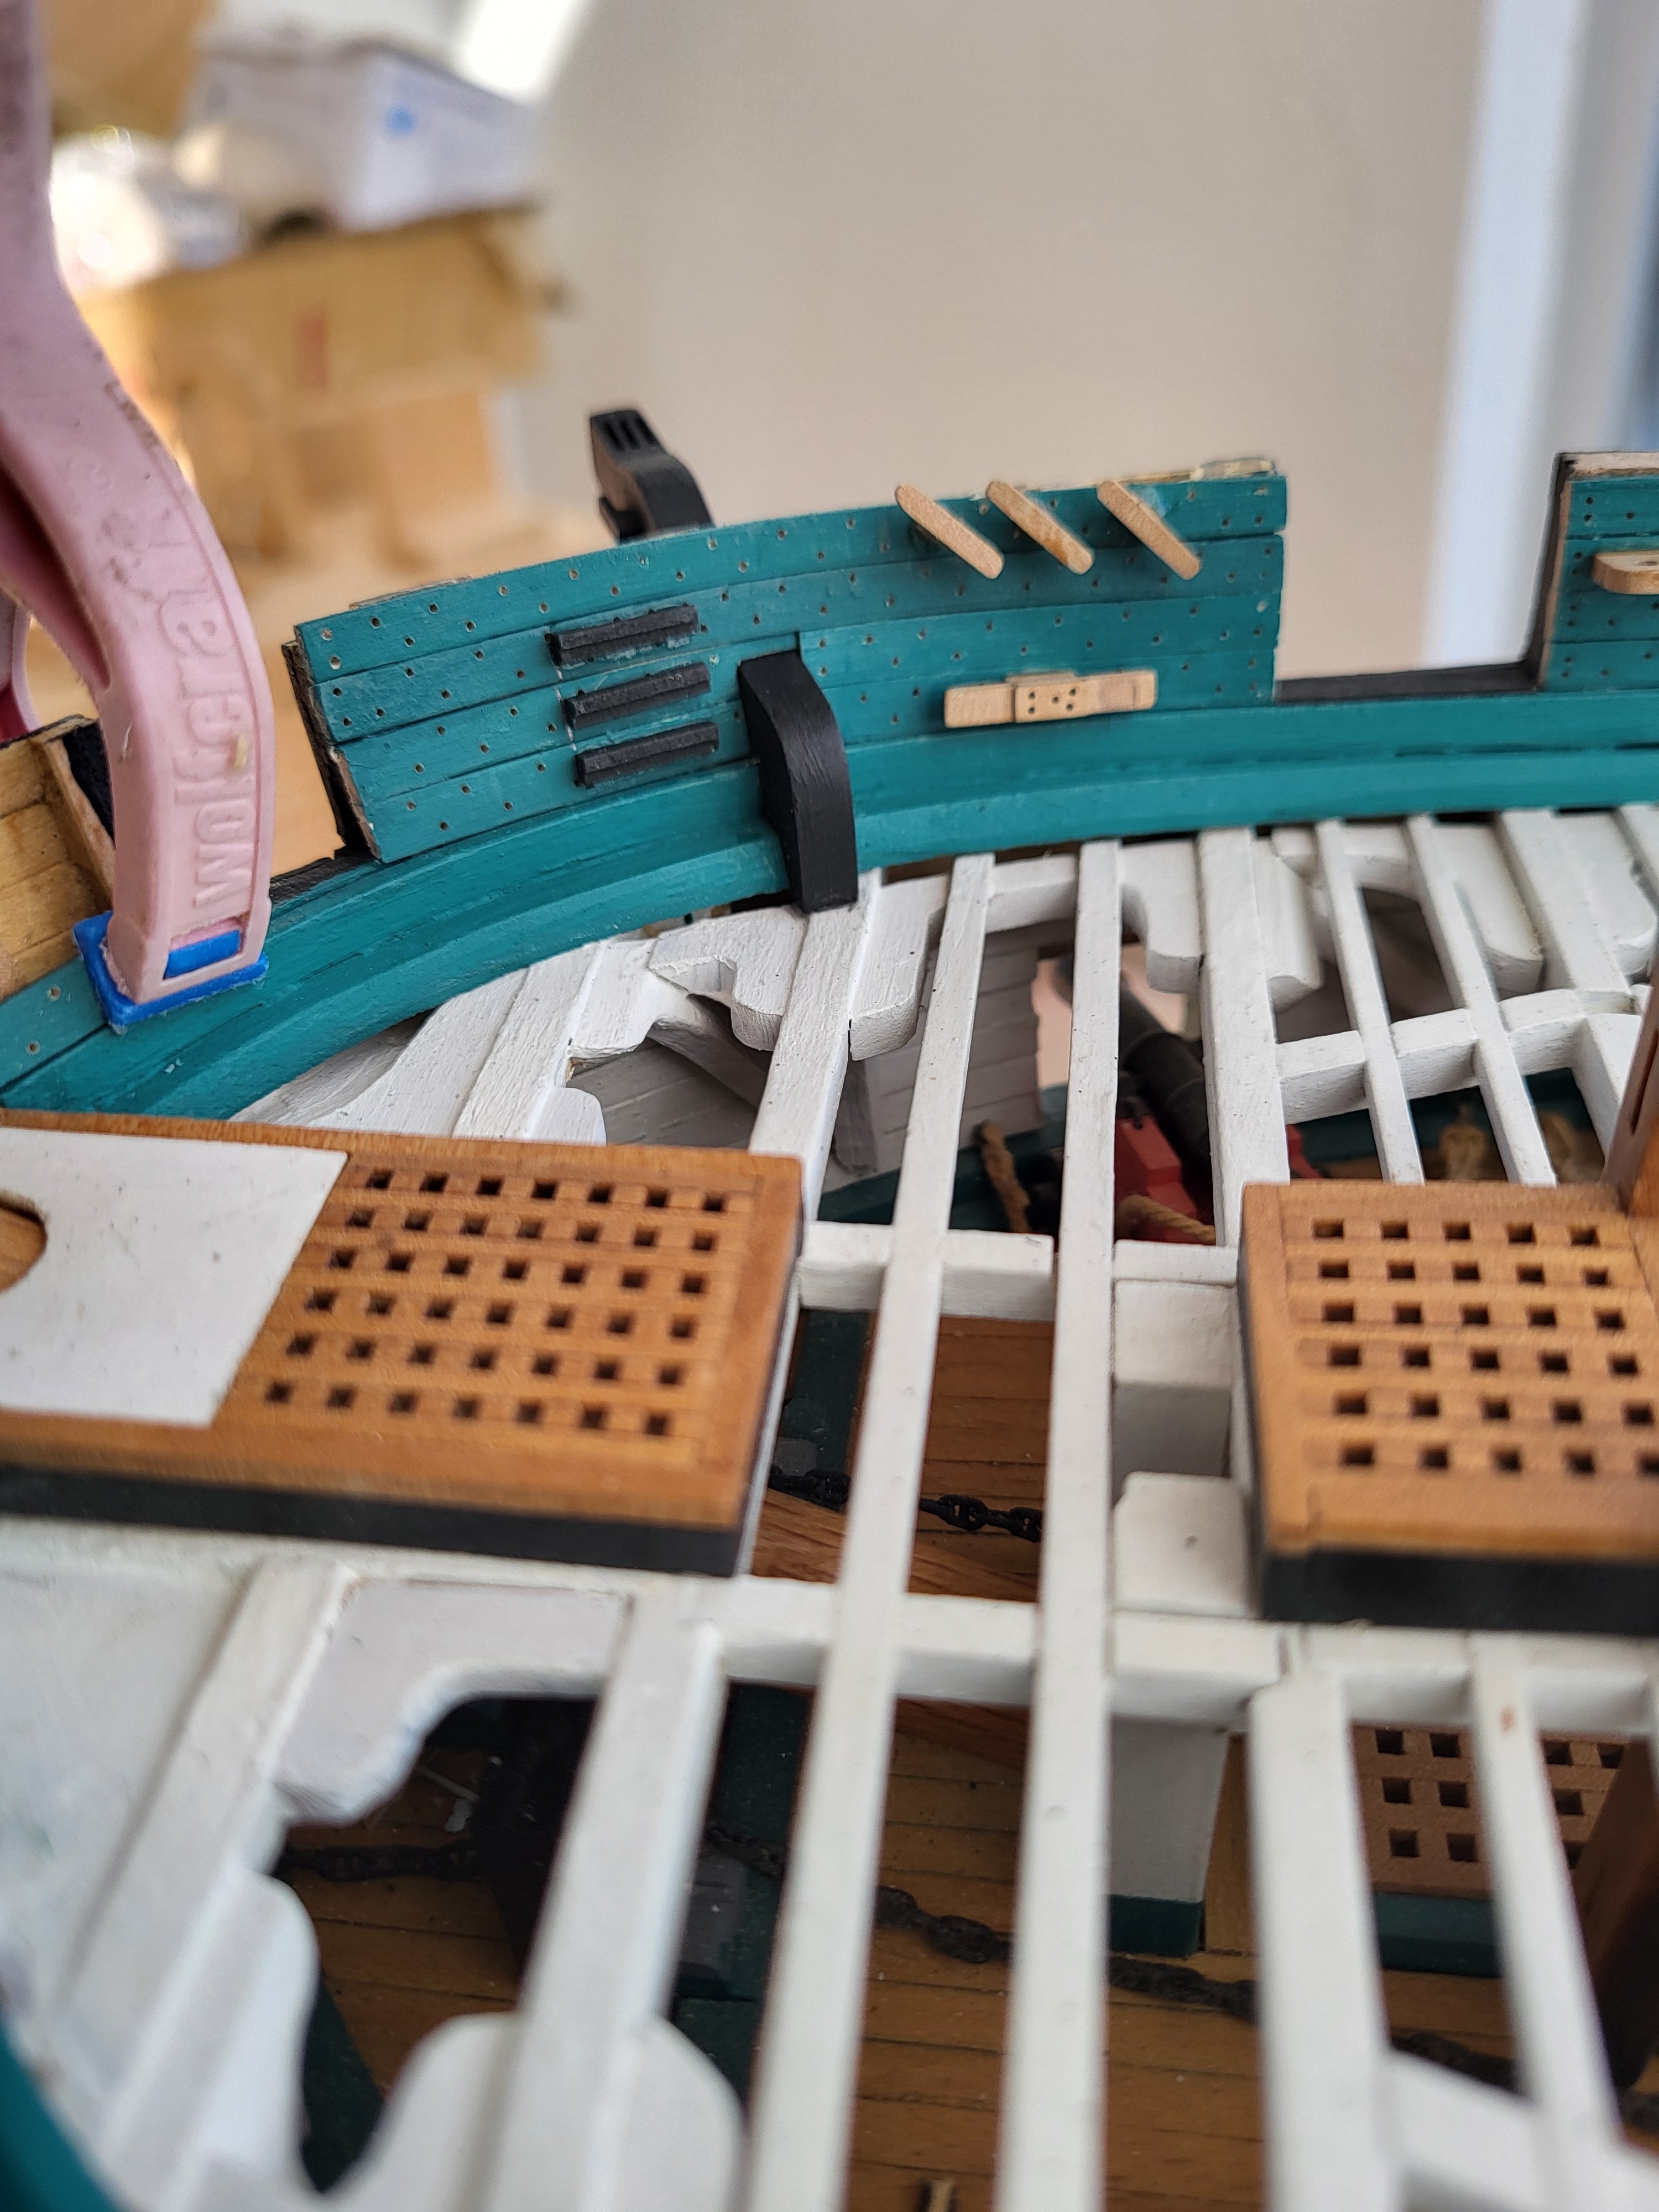
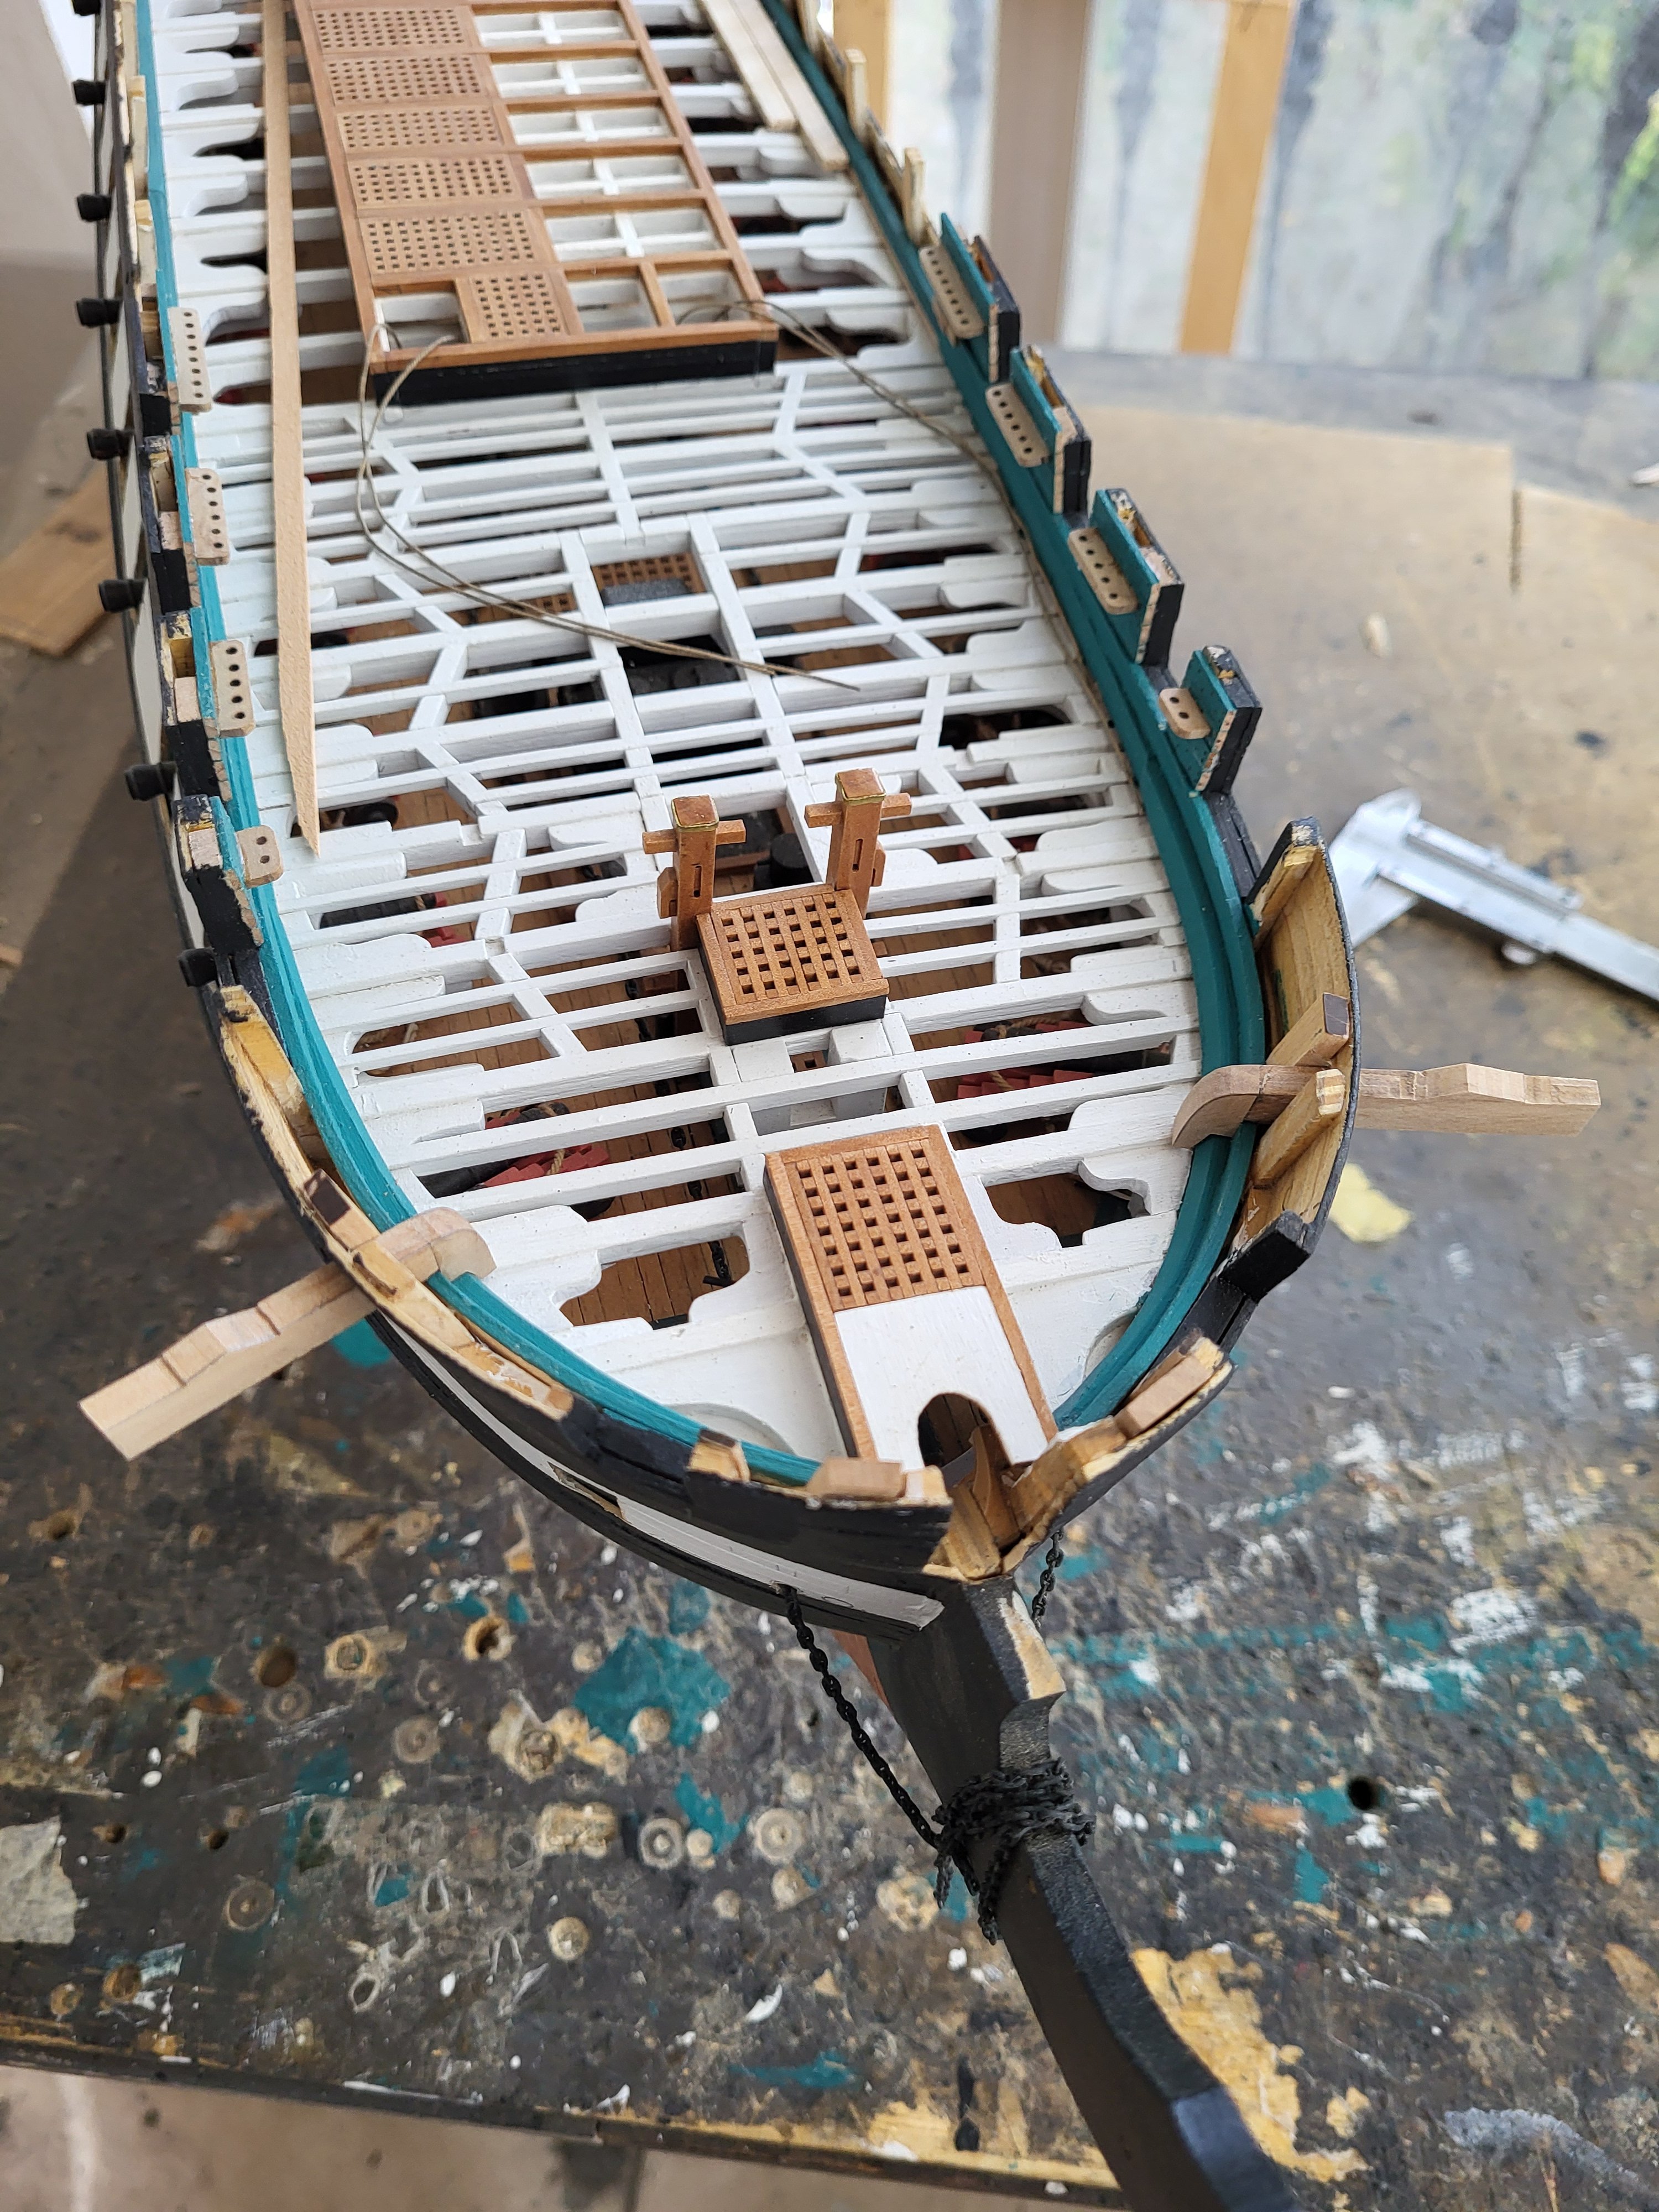
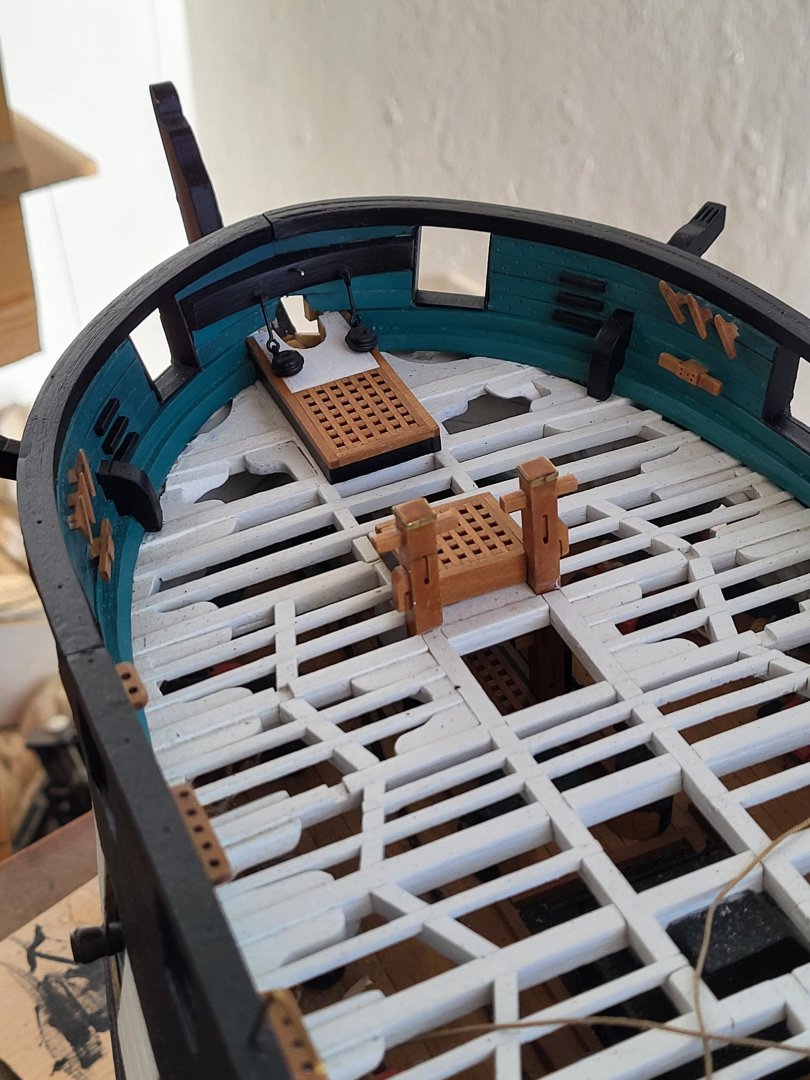
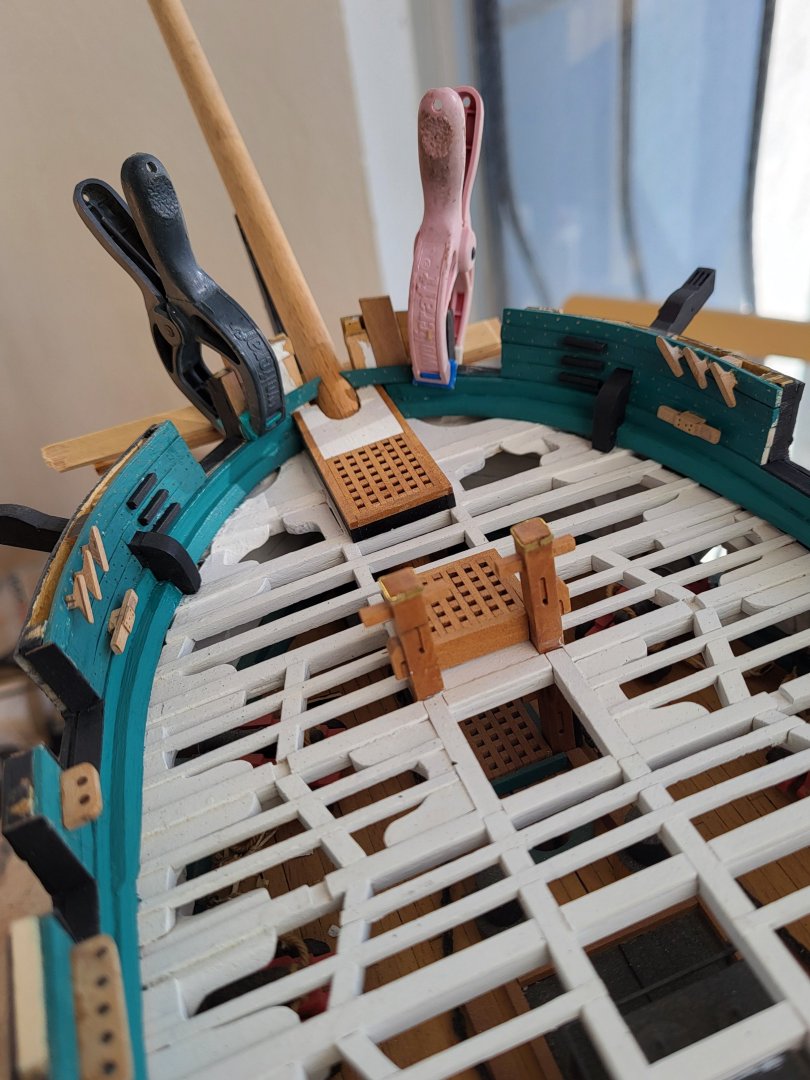
In the bow section, I have almost completed the interior planking of the bulwarks and the accessories on the bulwarks. I first assembled the cleats and steps made from scratch onto the planks, then glued these planks into place.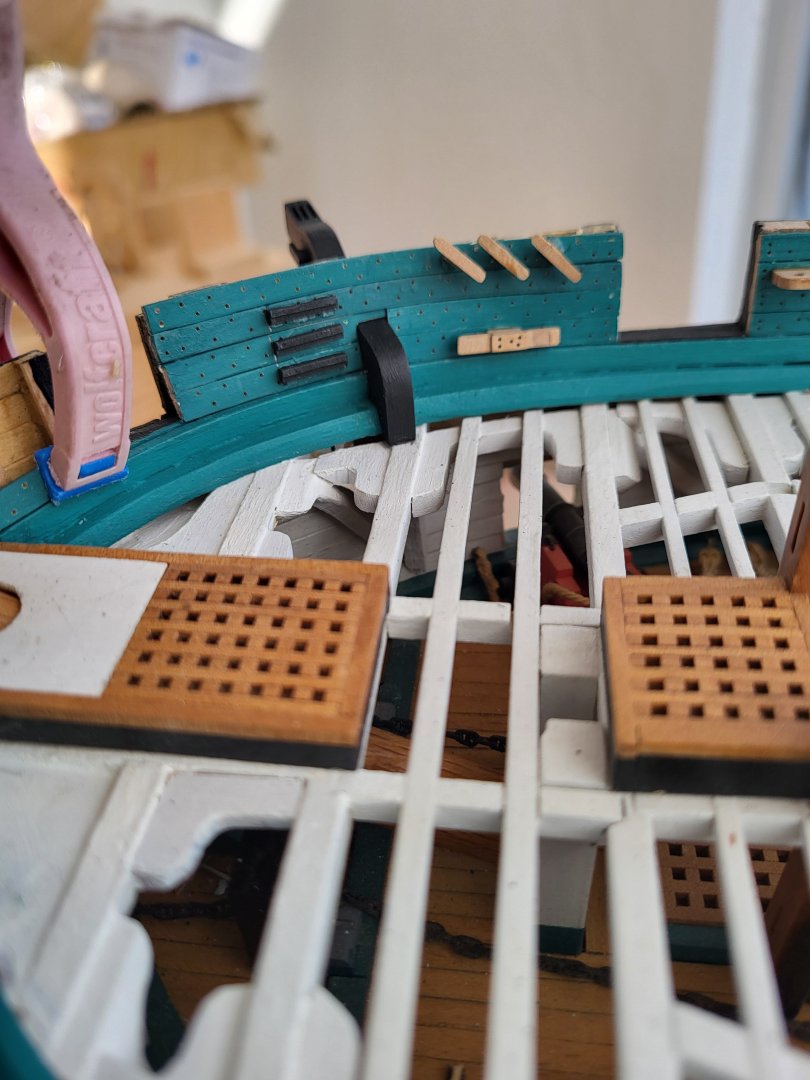


-
I don't know why you need an extra layer but If the issue is aesthetic requirement maybe instead of the 1.5 mm second layer, you might consider adding a 0.5 mm veneer, as many modelers do.
- 233 replies
-
- 2
-

-
- Model Shipways
- constitution
- (and 5 more)
-
She looks great!
-
You've been preparing extensively for Conny, Greg. I think we can expect a heavily modified kit build from you.
-
USS Constitution by mtbediz - 1:76
mtbediz replied to mtbediz's topic in - Build logs for subjects built 1751 - 1800
Thank you Peter. Yes, these details can be added on the model, but it is easier to do it beforehand. -
USS Constitution by mtbediz - 1:76
mtbediz replied to mtbediz's topic in - Build logs for subjects built 1751 - 1800
Thank you so much. -
USS Constitution by mtbediz - 1:76
mtbediz replied to mtbediz's topic in - Build logs for subjects built 1751 - 1800
The appearance is satisfactory.


-
USS Constitution by mtbediz - 1:76
mtbediz replied to mtbediz's topic in - Build logs for subjects built 1751 - 1800
Thanks Jon. Yes I can wait for the plans. -
USS Constitution by mtbediz - 1:76
mtbediz replied to mtbediz's topic in - Build logs for subjects built 1751 - 1800
Jon, Peter; Happy Thanksgiving to both of you!! -
USS Constitution by mtbediz - 1:76
mtbediz replied to mtbediz's topic in - Build logs for subjects built 1751 - 1800
Thank you so much my friend. -
USS Constitution by mtbediz - 1:76
mtbediz replied to mtbediz's topic in - Build logs for subjects built 1751 - 1800
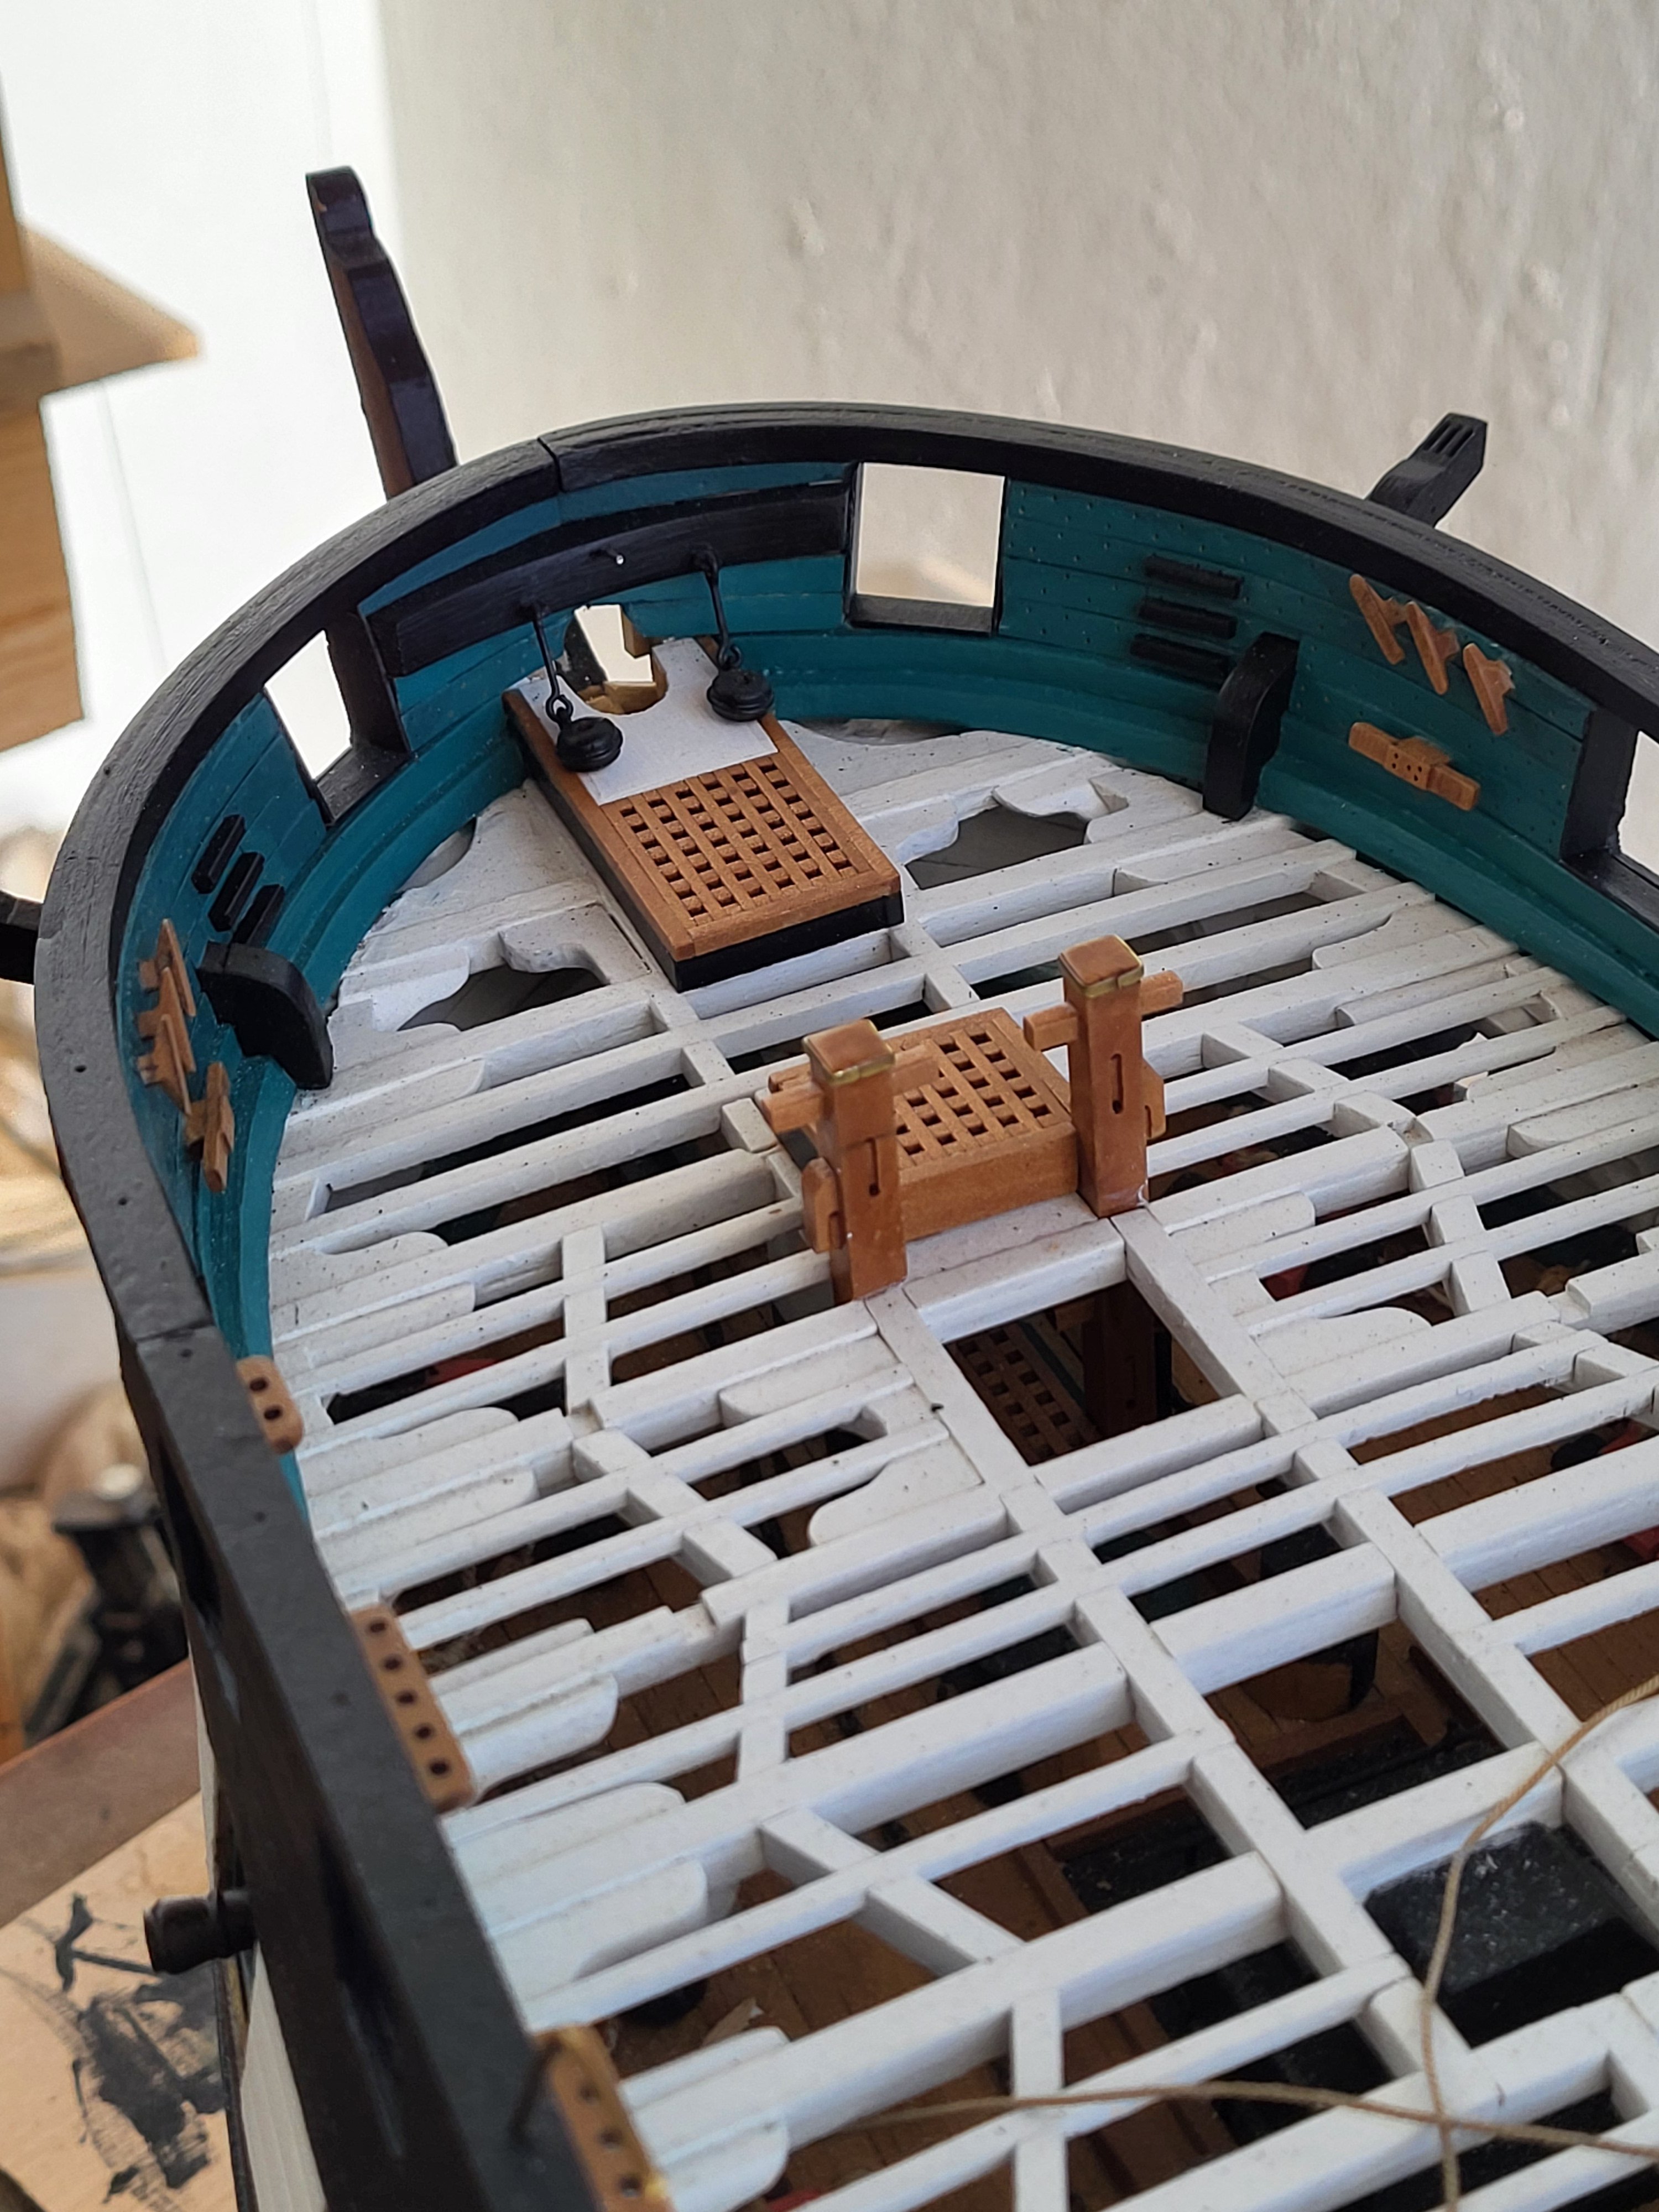
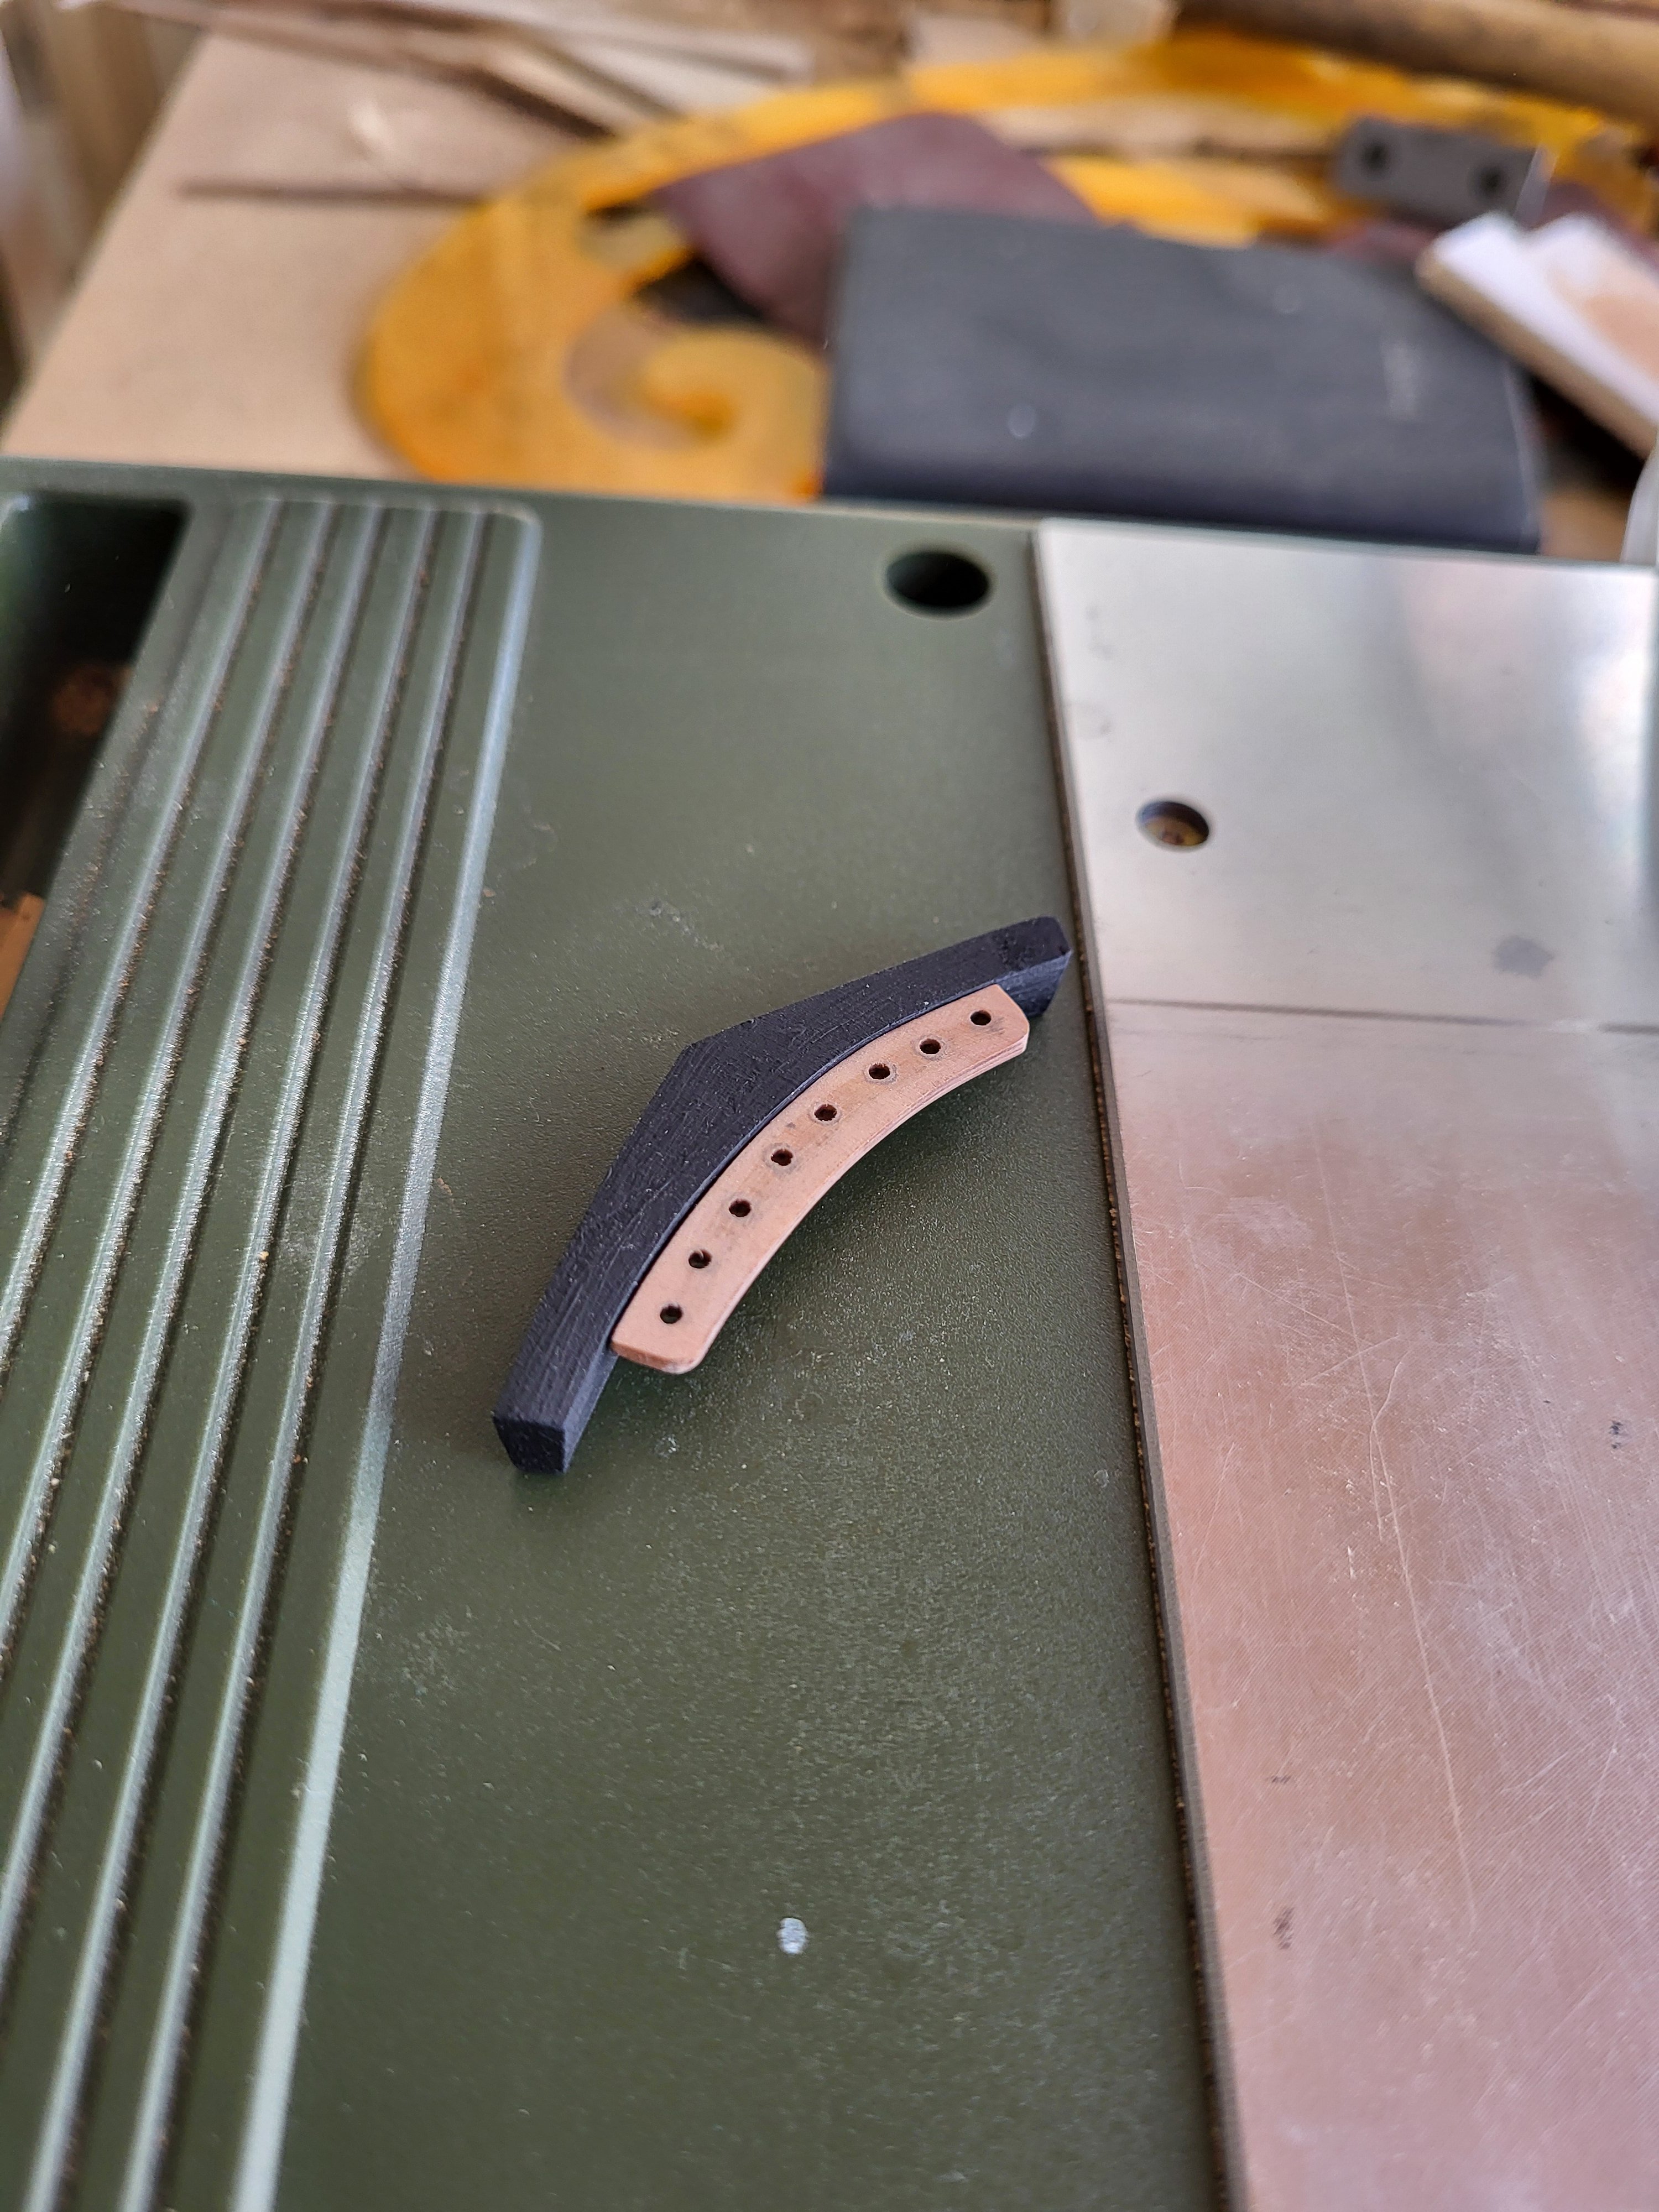
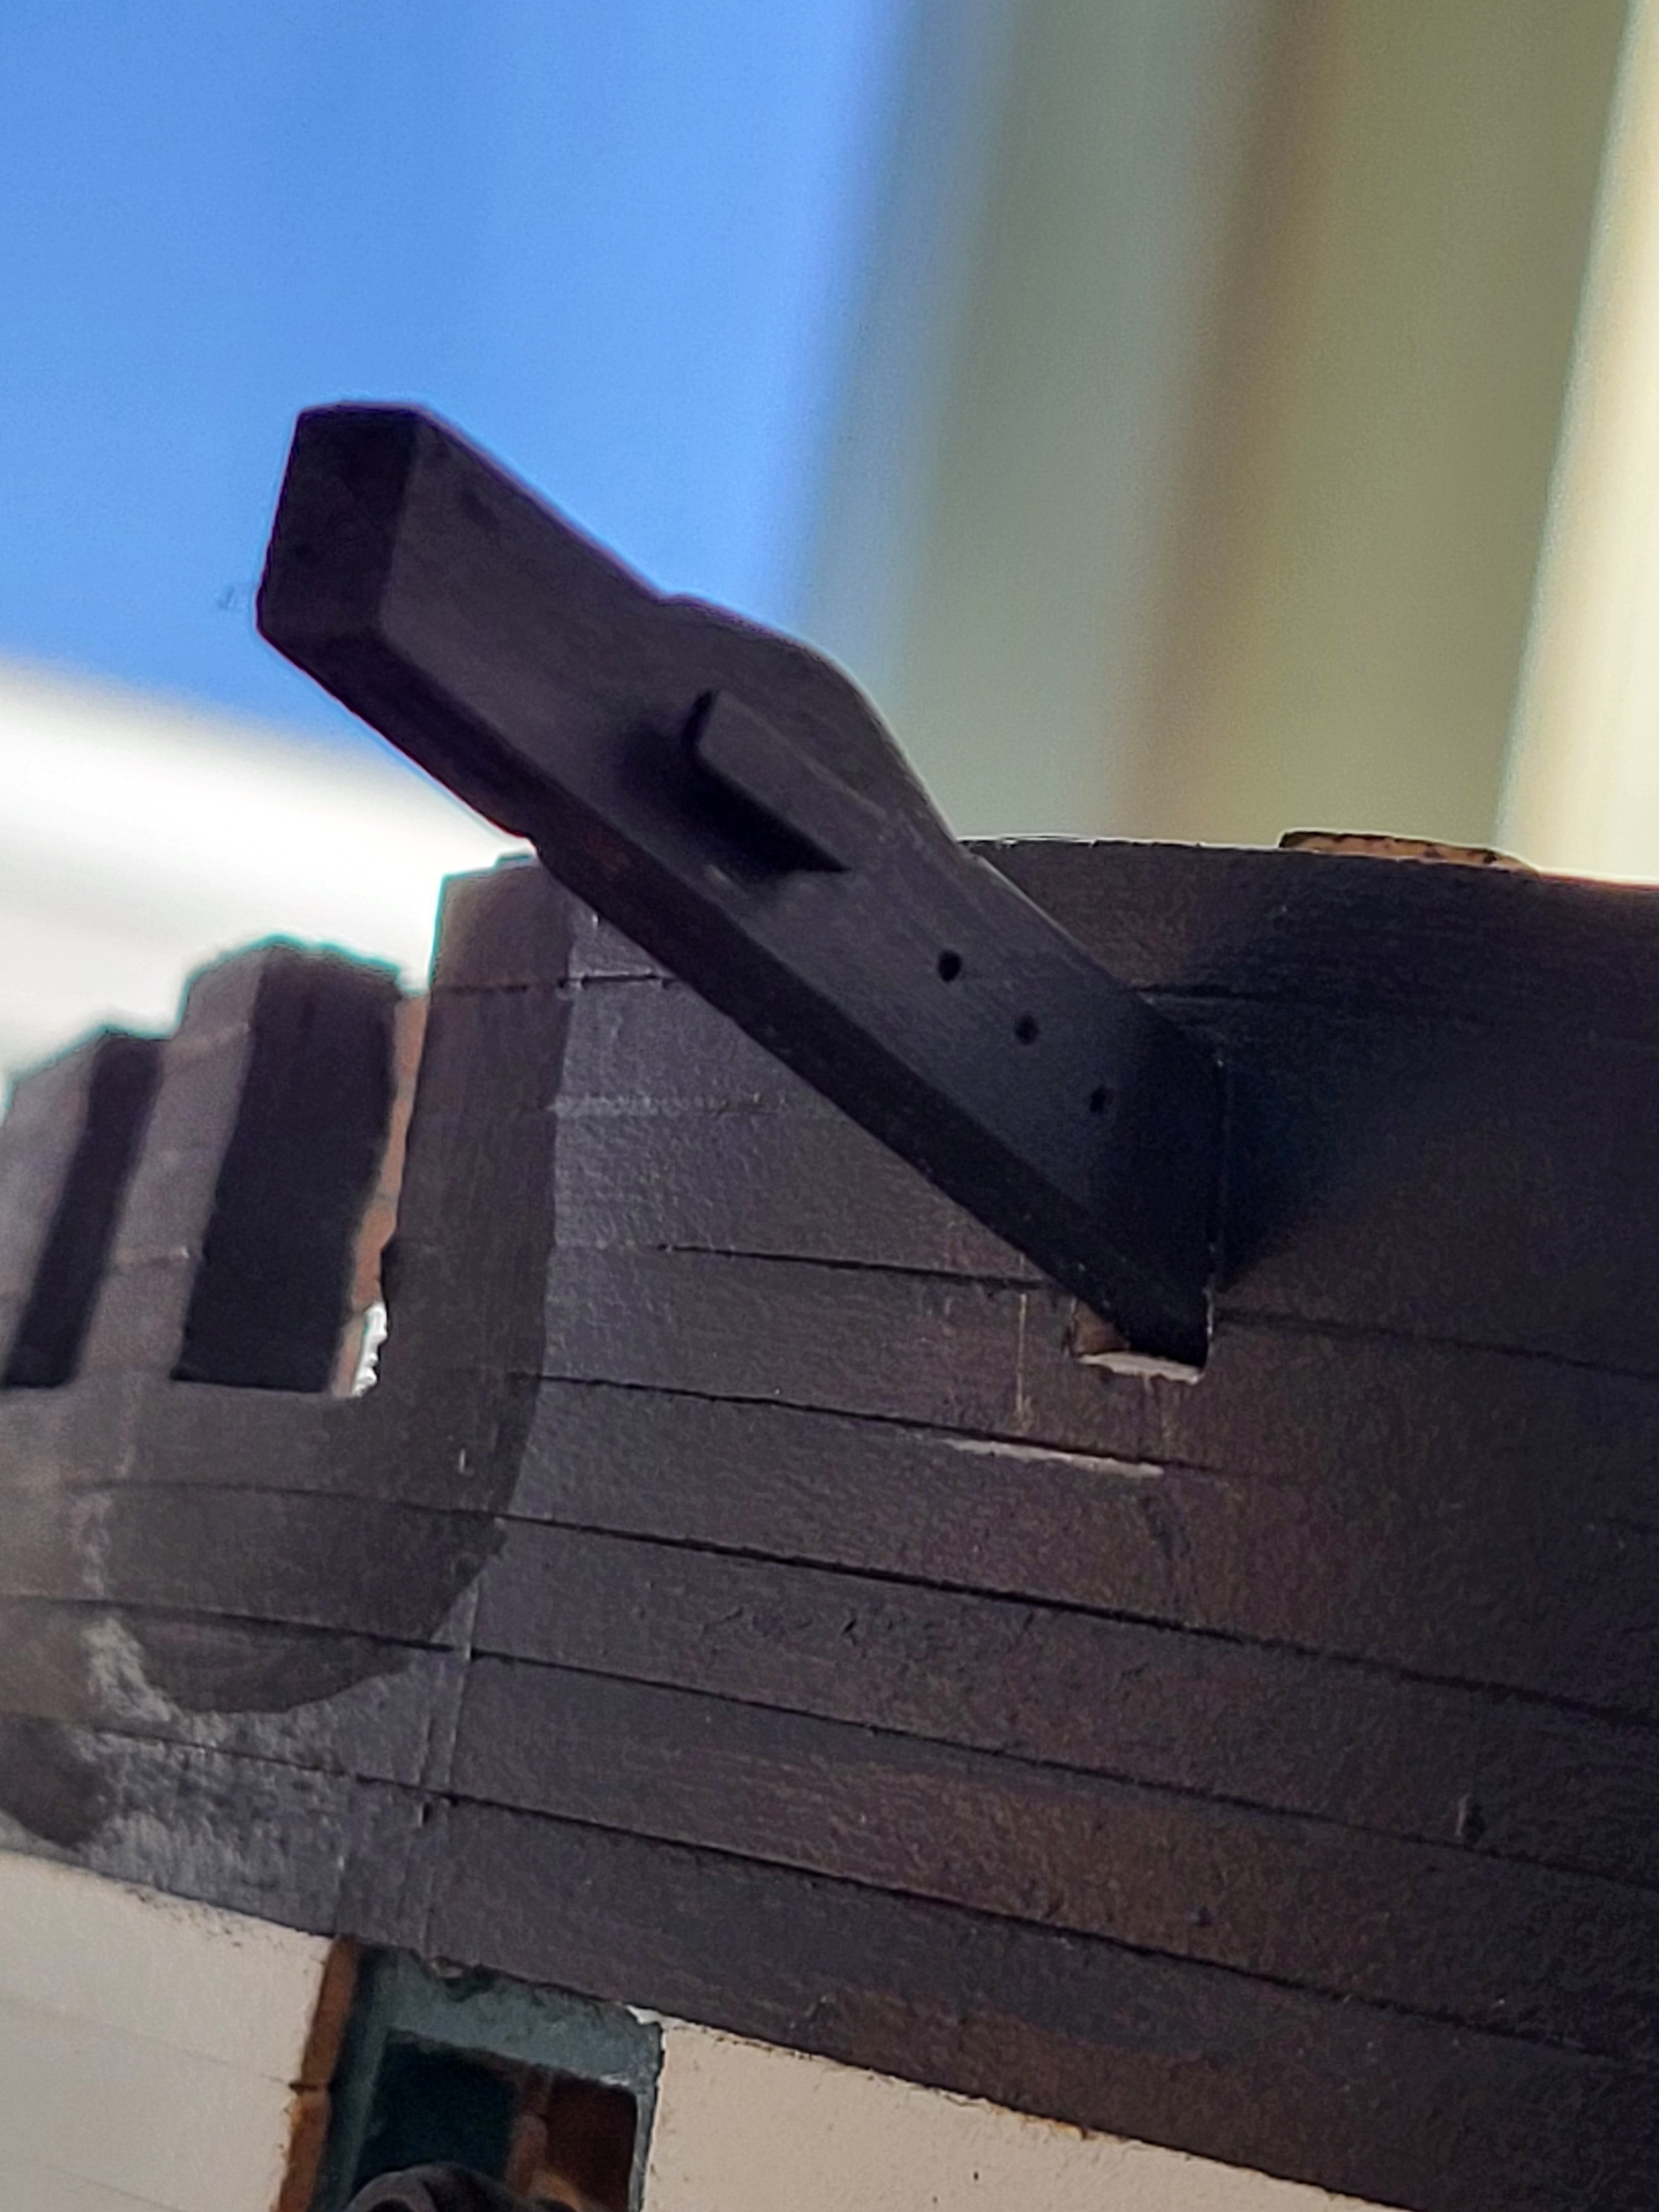
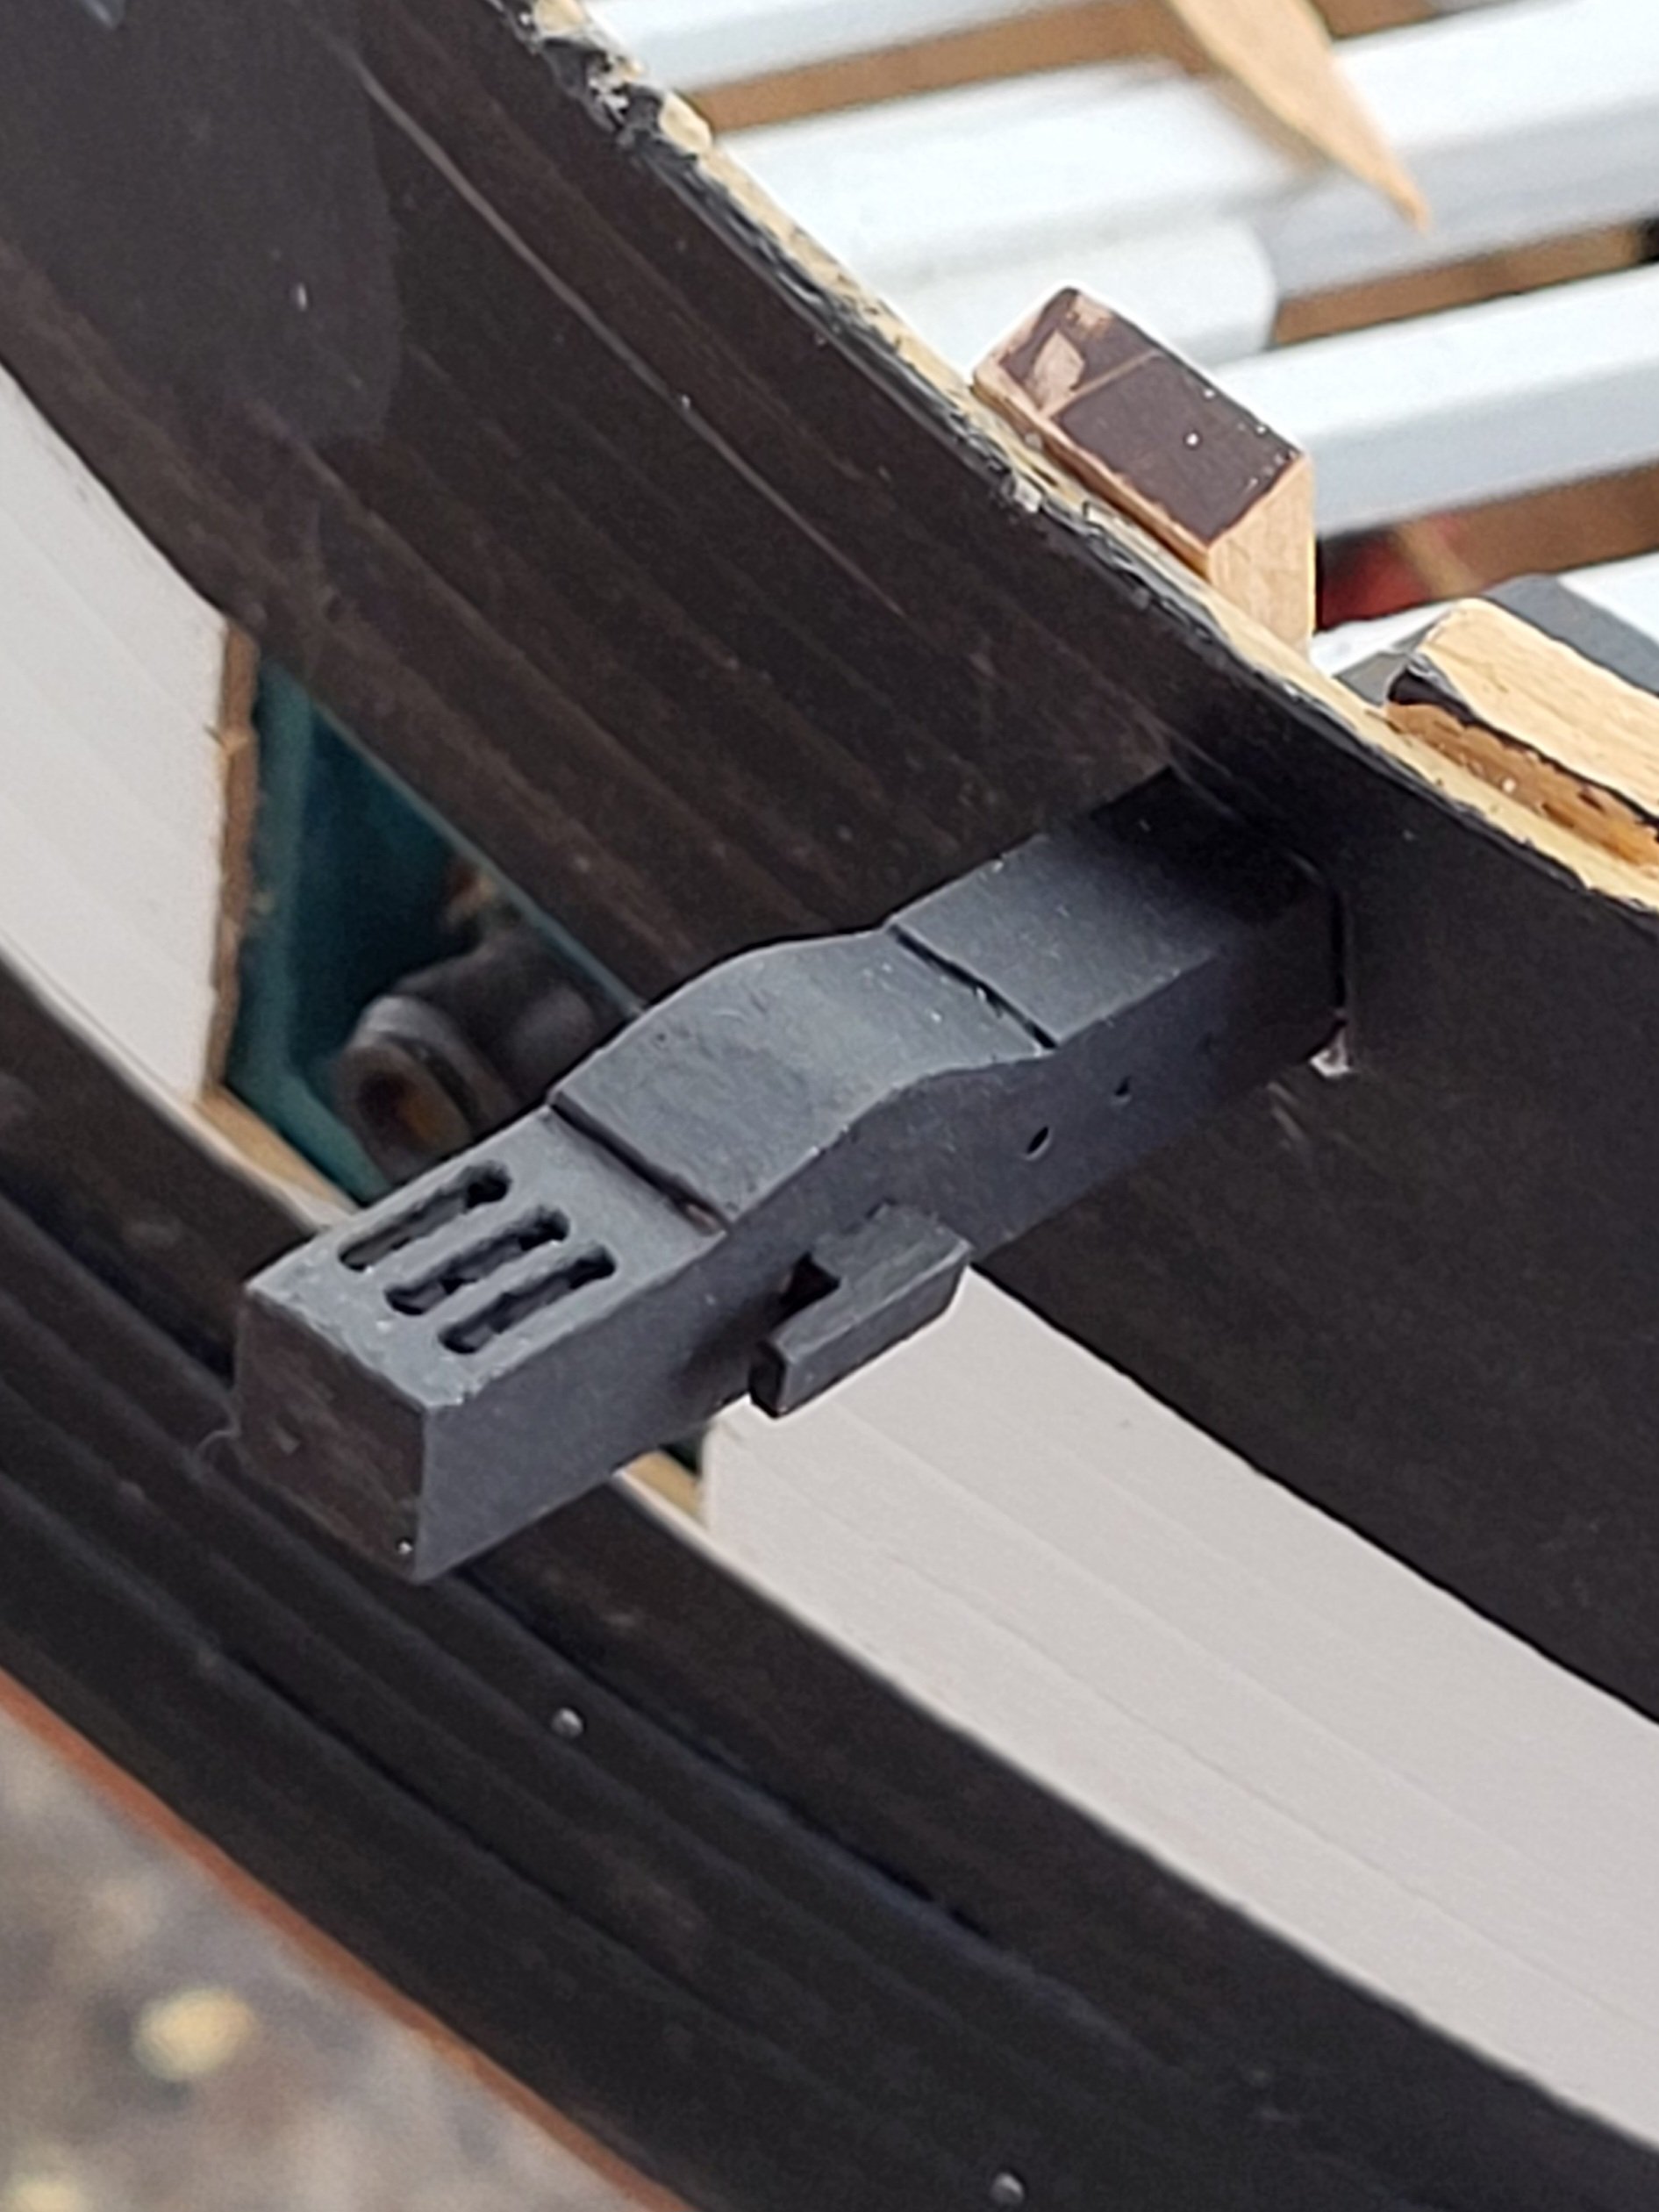
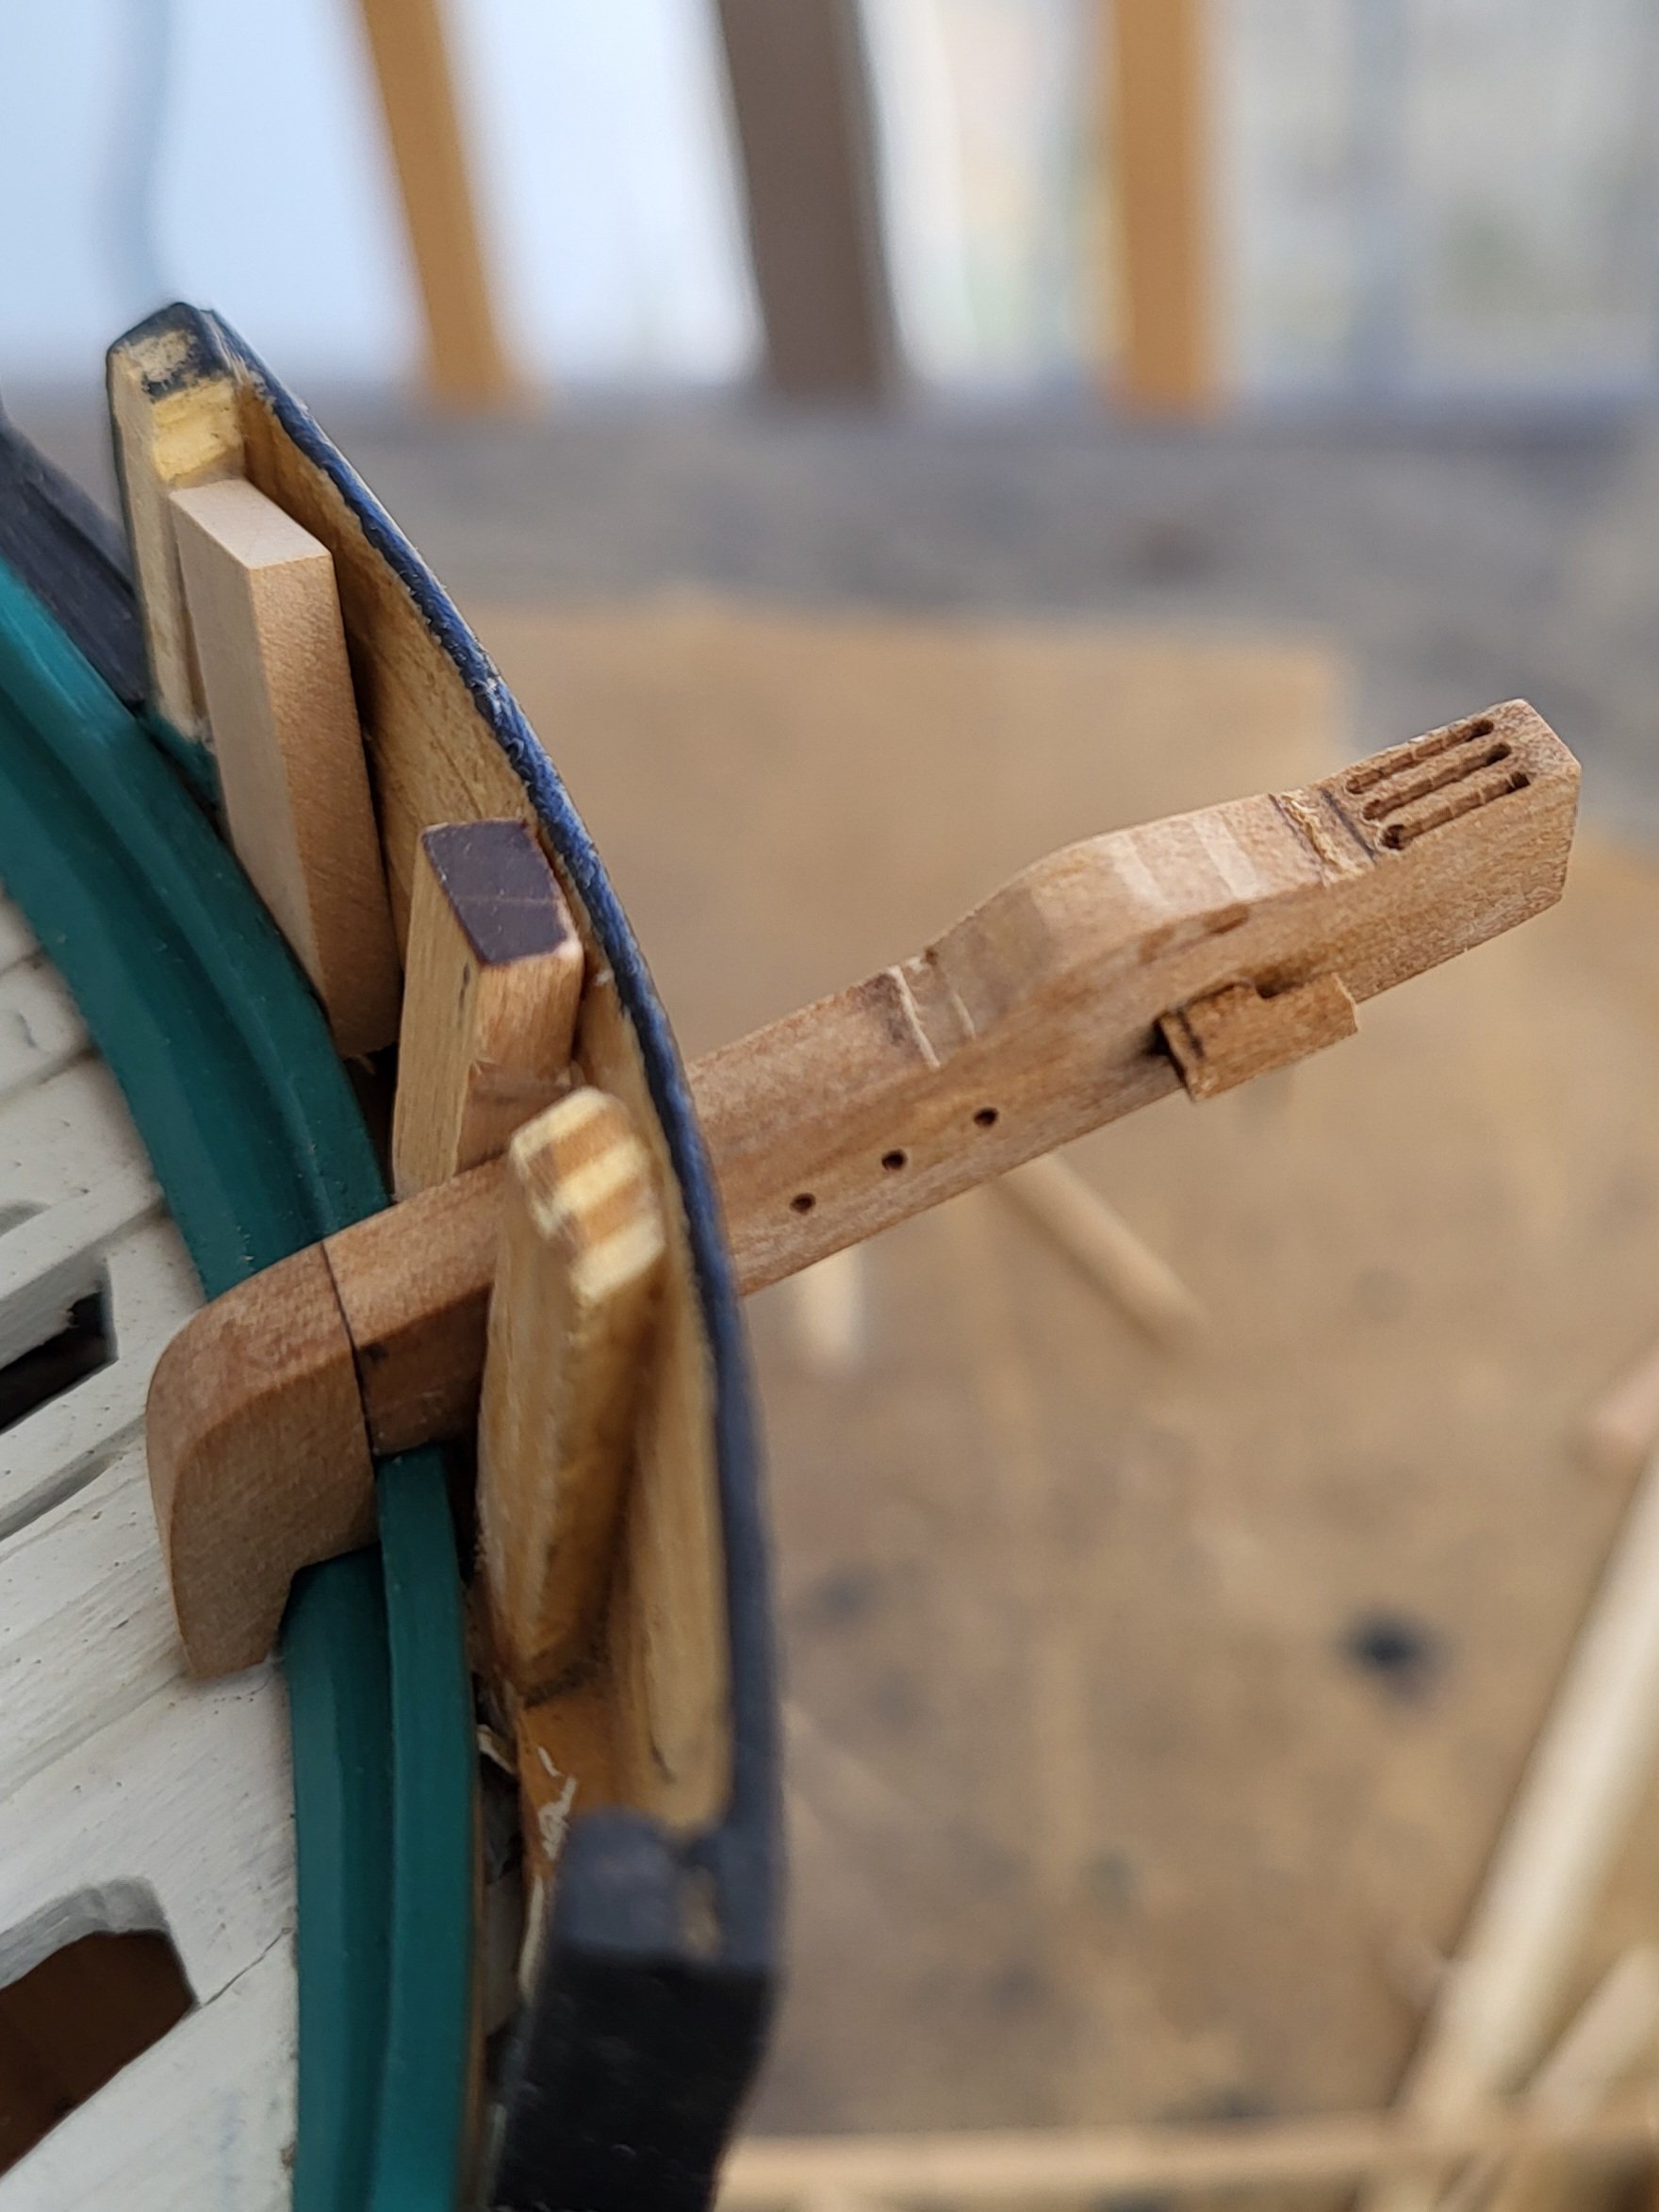
I started making the catheads.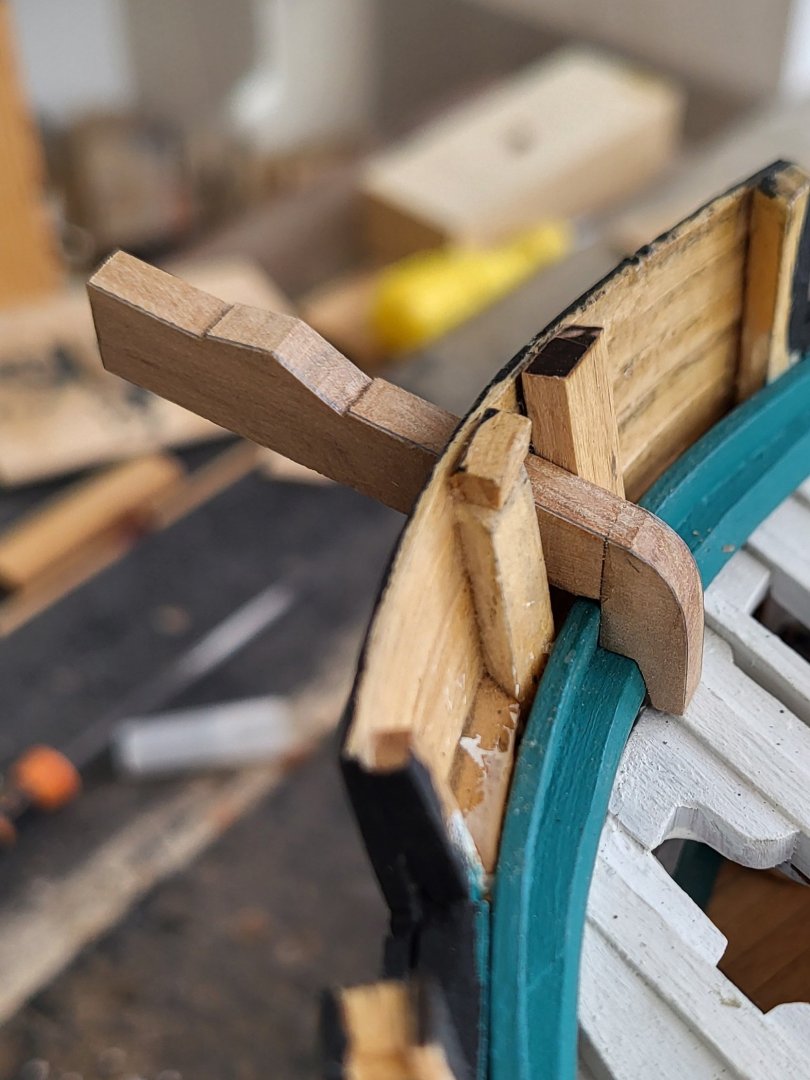


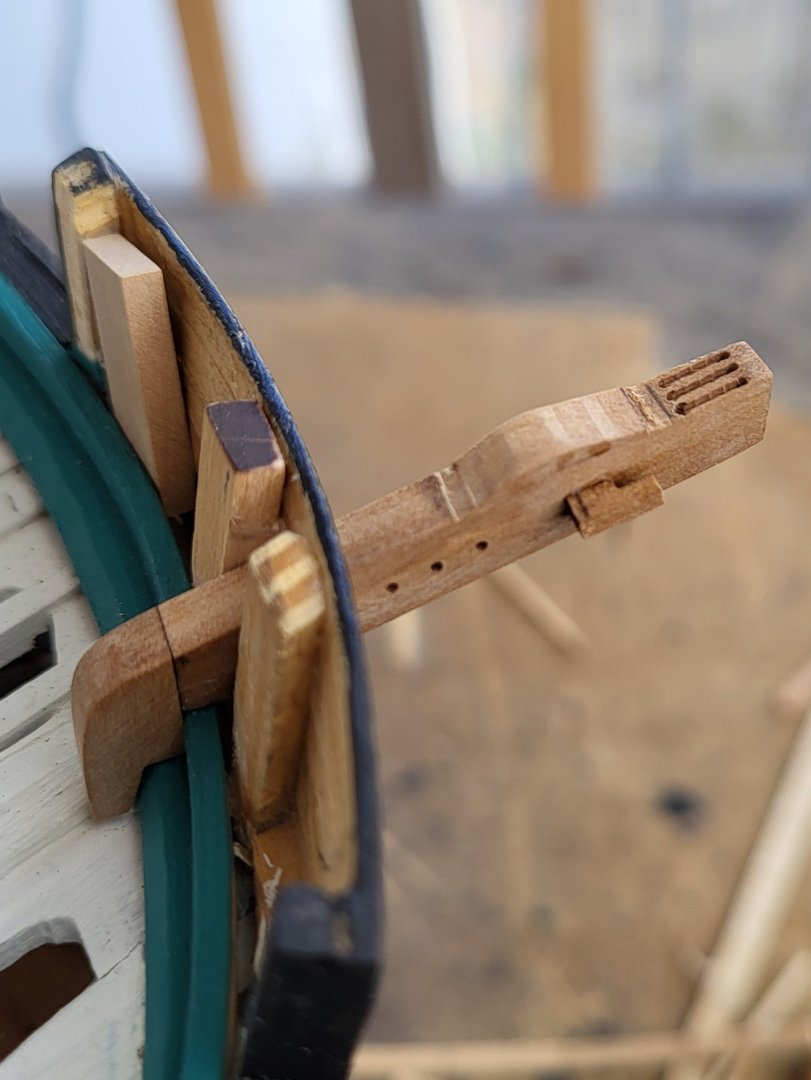
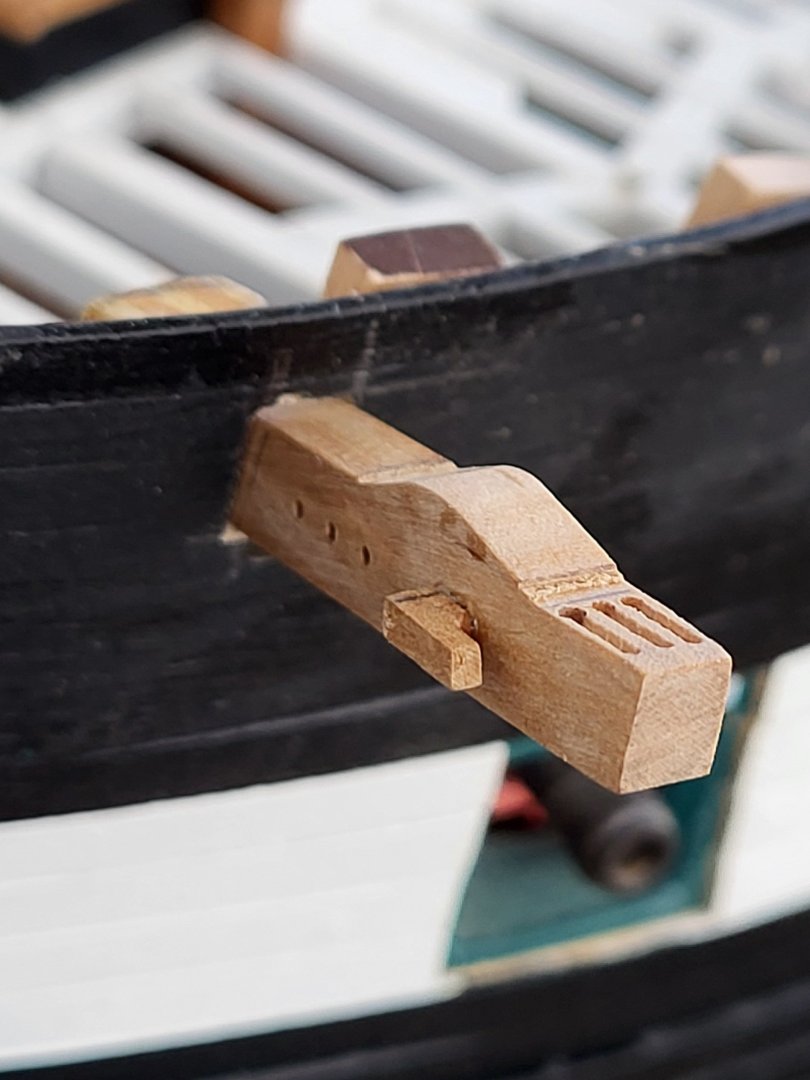
-
USS Constitution by mtbediz - 1:76
mtbediz replied to mtbediz's topic in - Build logs for subjects built 1751 - 1800
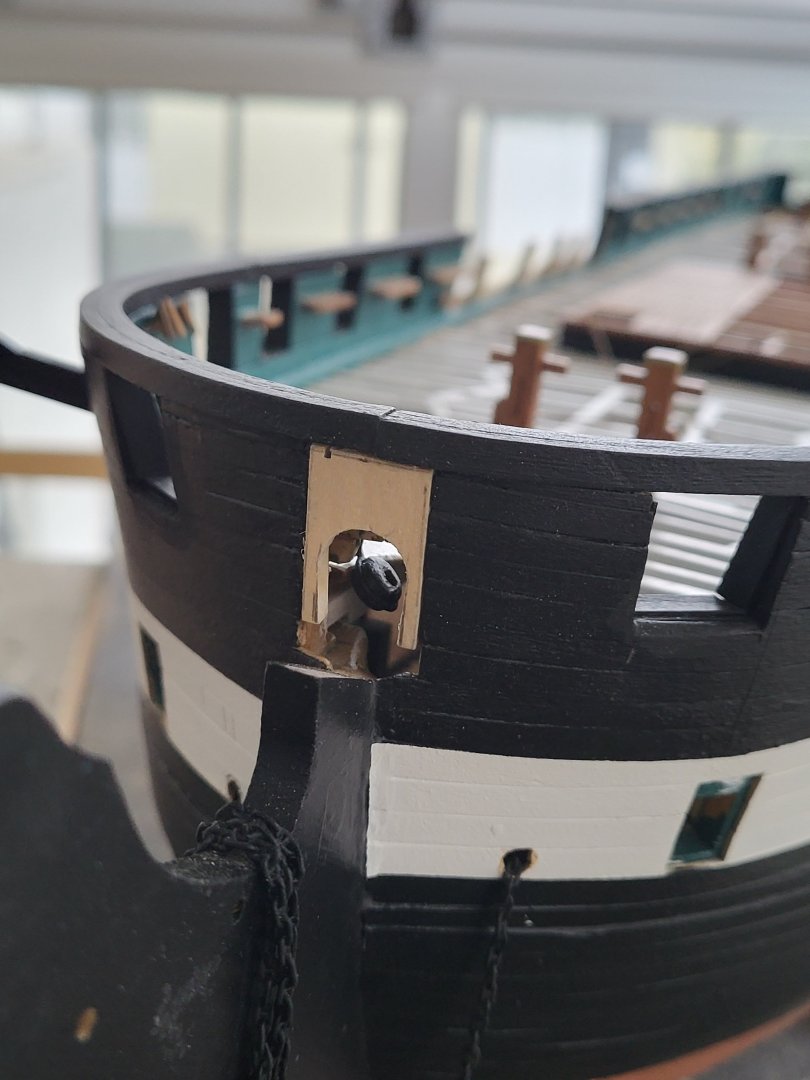
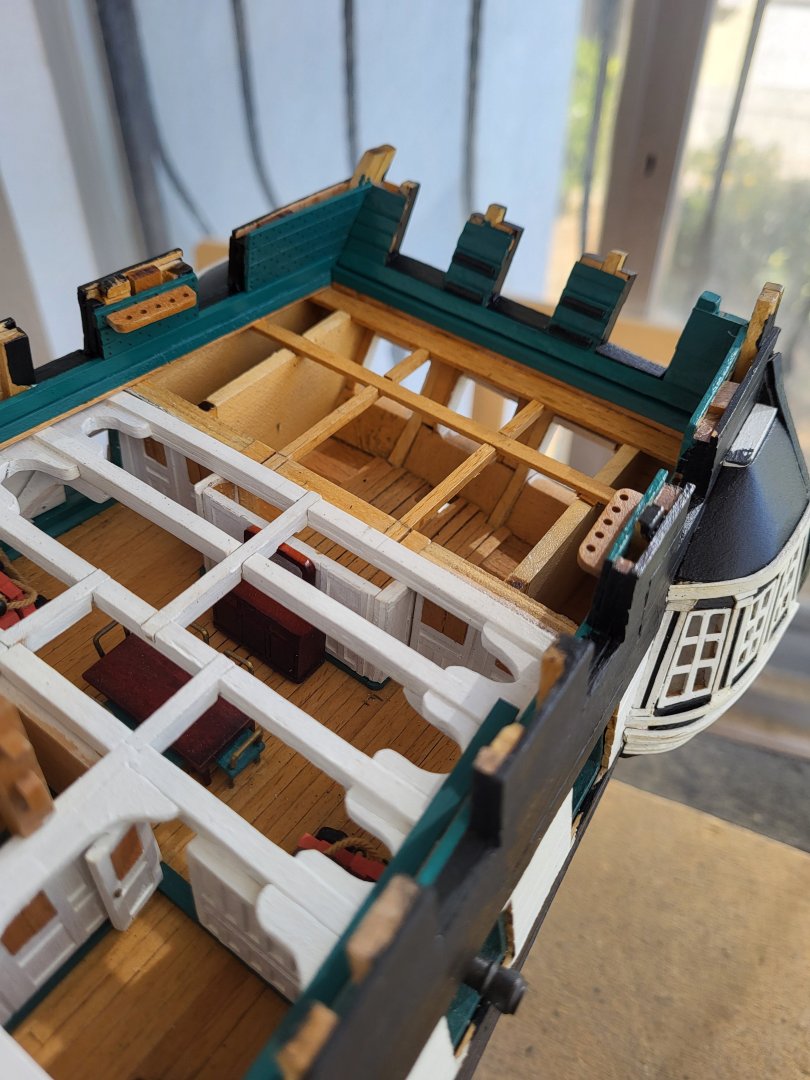
Friends who follow will remember. The distance between the spar deck aft windows and the gun deck aft windows was not in accordance with the plans (was my mistake). For this reason, when the spar deck construction was completed, these window sills remained under the spar deck. By adding to the sills of these windows, I raised these windows to the spar deck level. That's why the moldings had to be redone as well. https://ussconstitutionmuseum.org/discover-learn/modeler-resources/


-
USS Constitution by mtbediz - 1:76
mtbediz replied to mtbediz's topic in - Build logs for subjects built 1751 - 1800
Thank you.