mtbediz
-
Posts
1,339 -
Joined
-
Last visited
Content Type
Profiles
Forums
Gallery
Events
Everything posted by mtbediz
-

USS Constitution by mtbediz - 1:76
mtbediz replied to mtbediz's topic in - Build logs for subjects built 1751 - 1800
Thanks, Greg. I forgot to mention this: when painting brass material, I use matte spray varnish as a primer. That is, before painting the brass, I apply a layer of varnish and leave it to dry for at least 24 hours, then I paint it. After the paint dries, I apply another layer of varnish and again leave it to dry for at least 24 hours. When I patiently follow this procedure, I achieve good results. -
USS Constitution by mtbediz - 1:76
mtbediz replied to mtbediz's topic in - Build logs for subjects built 1751 - 1800
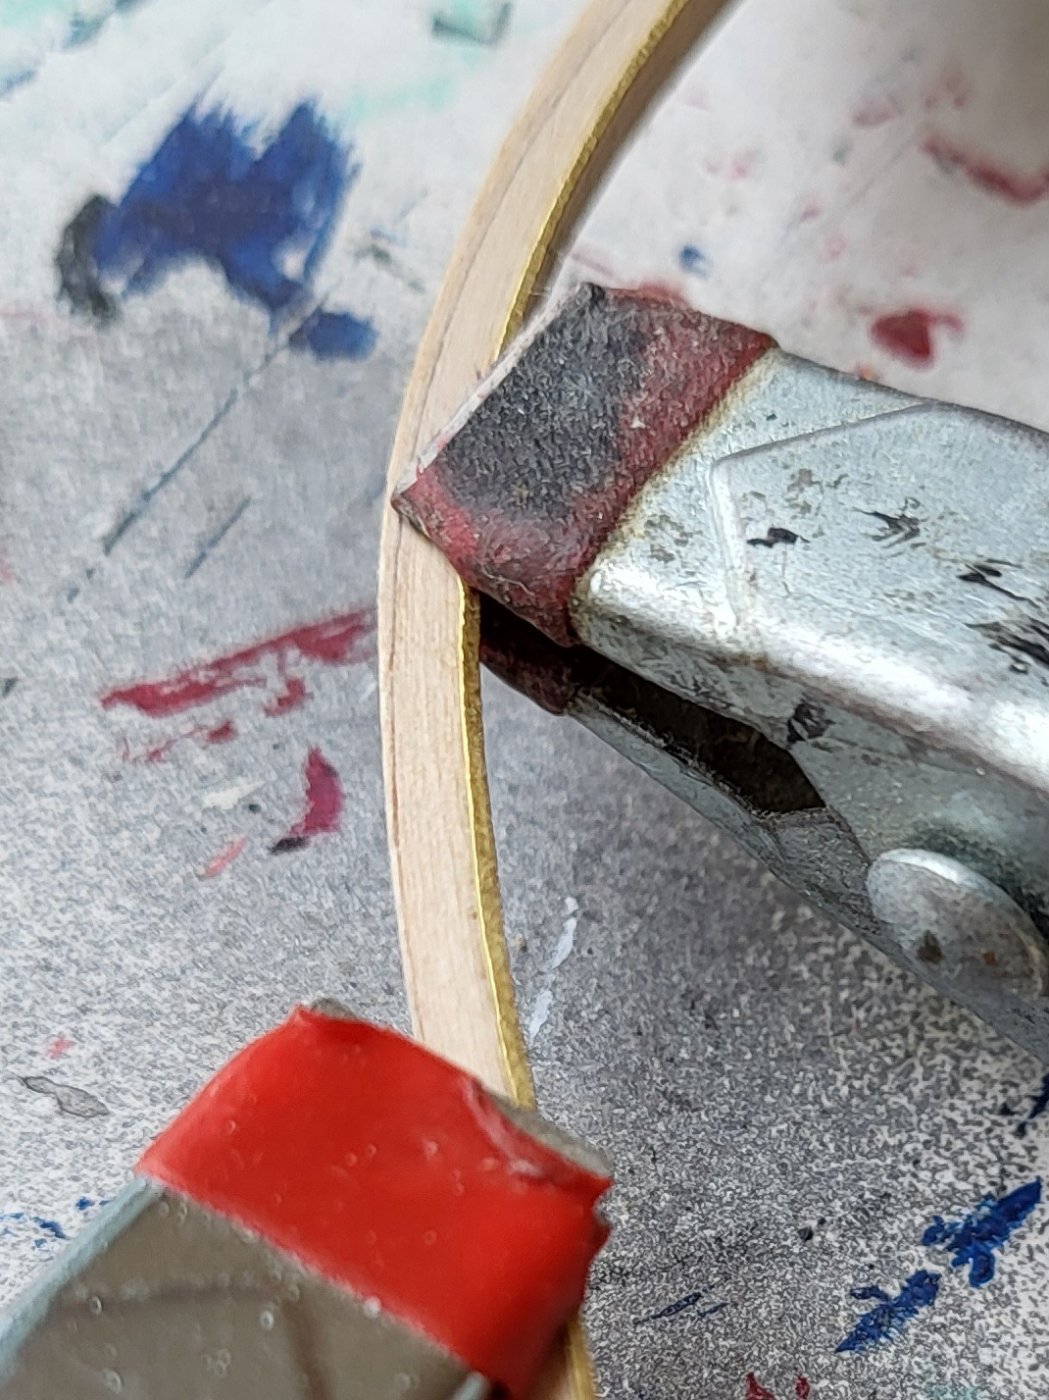
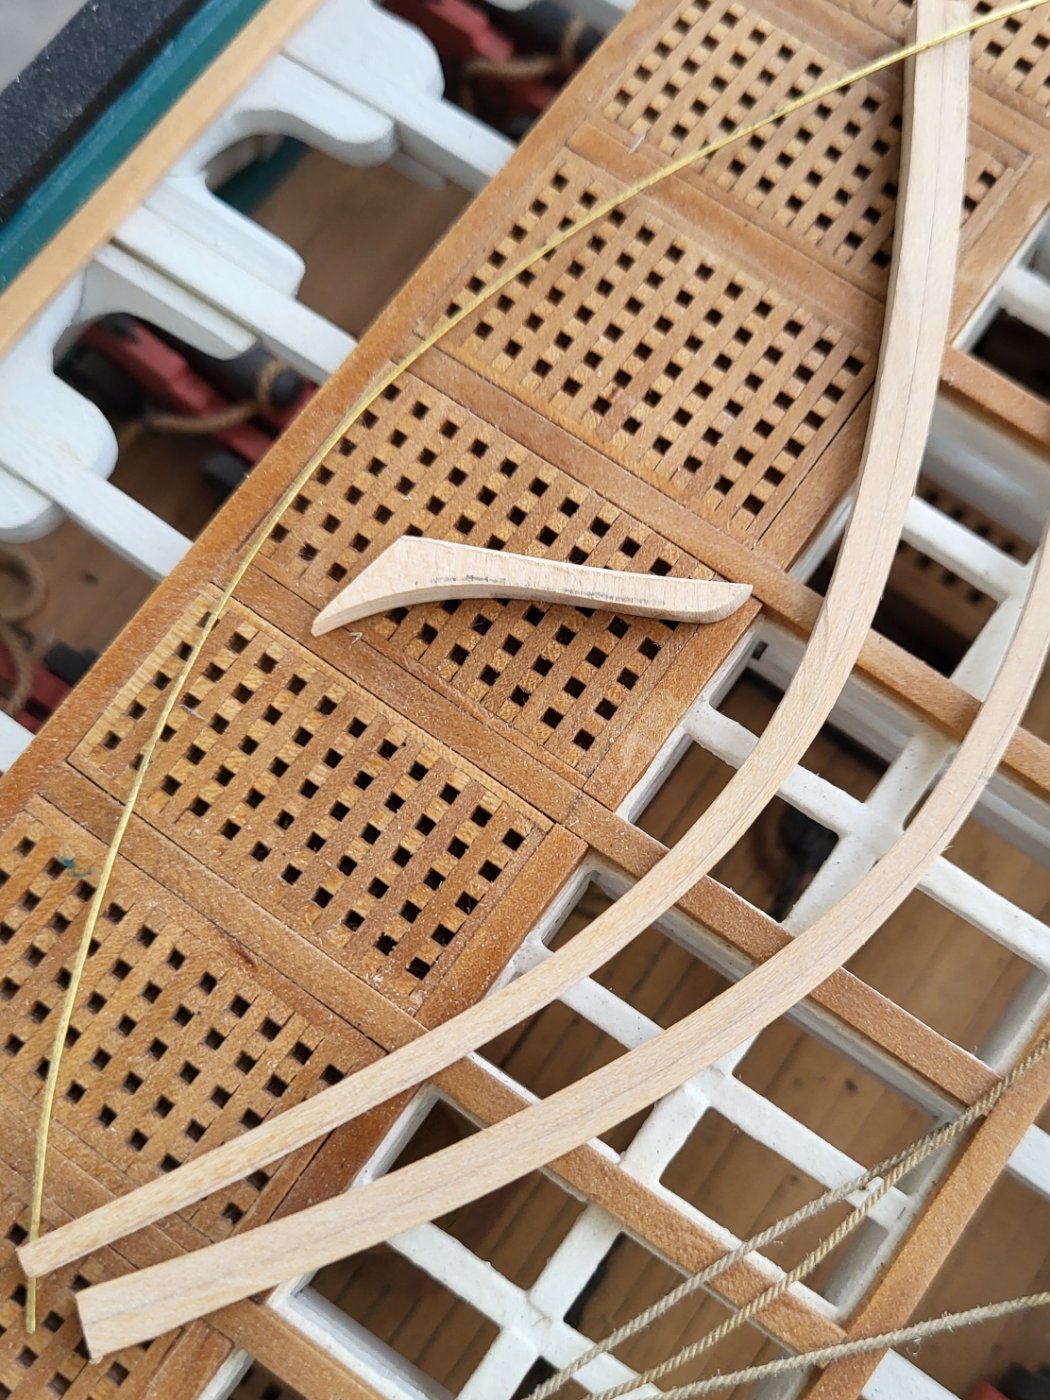
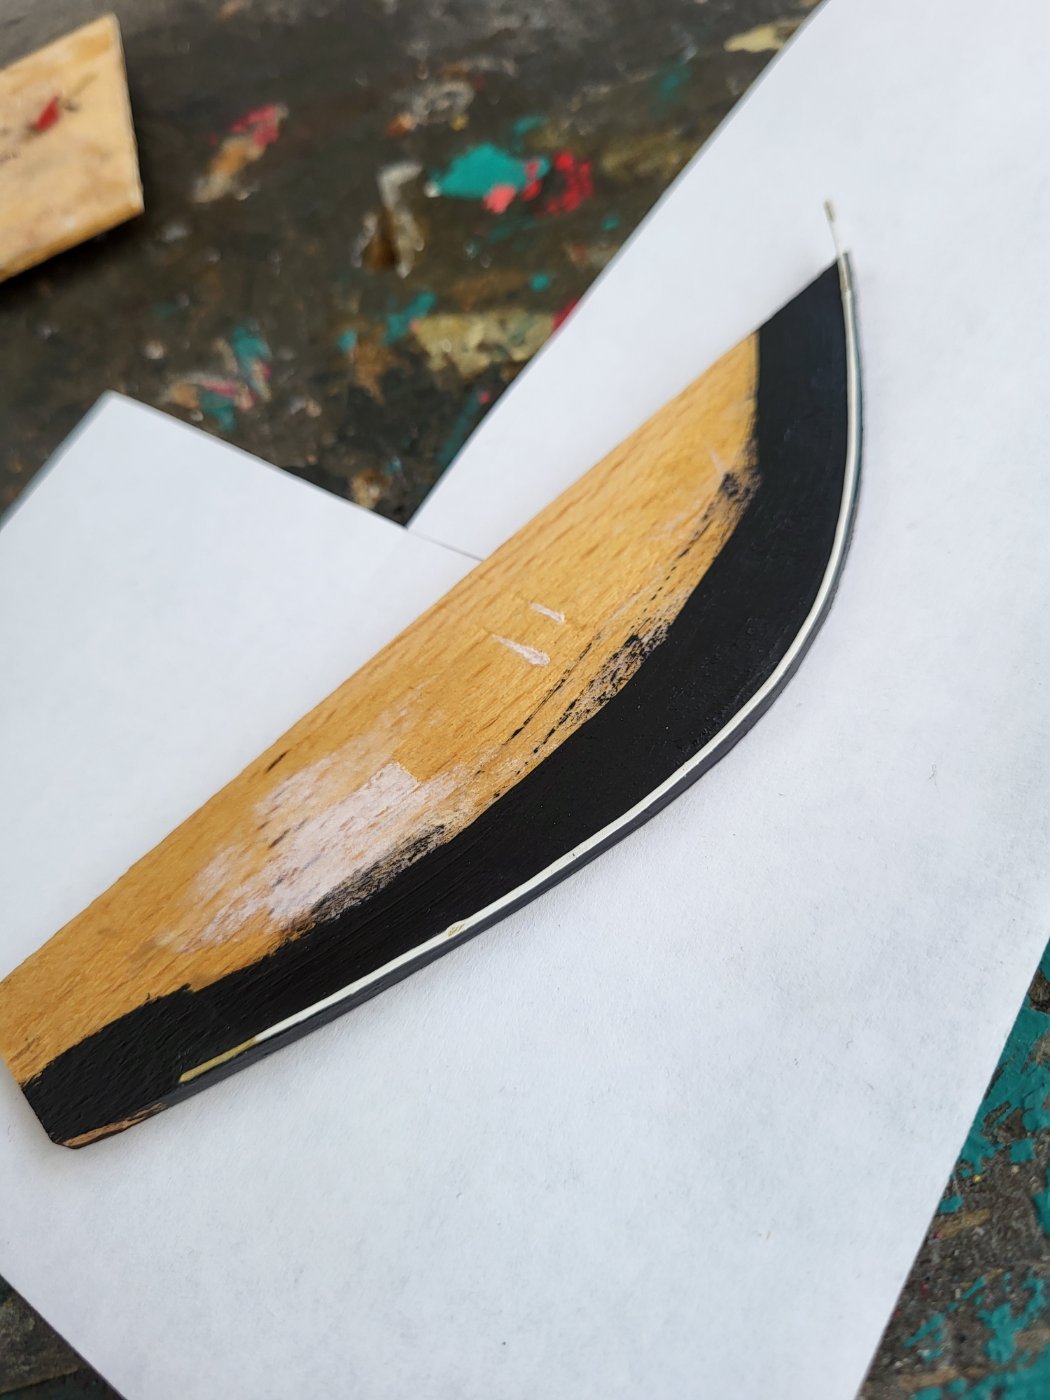
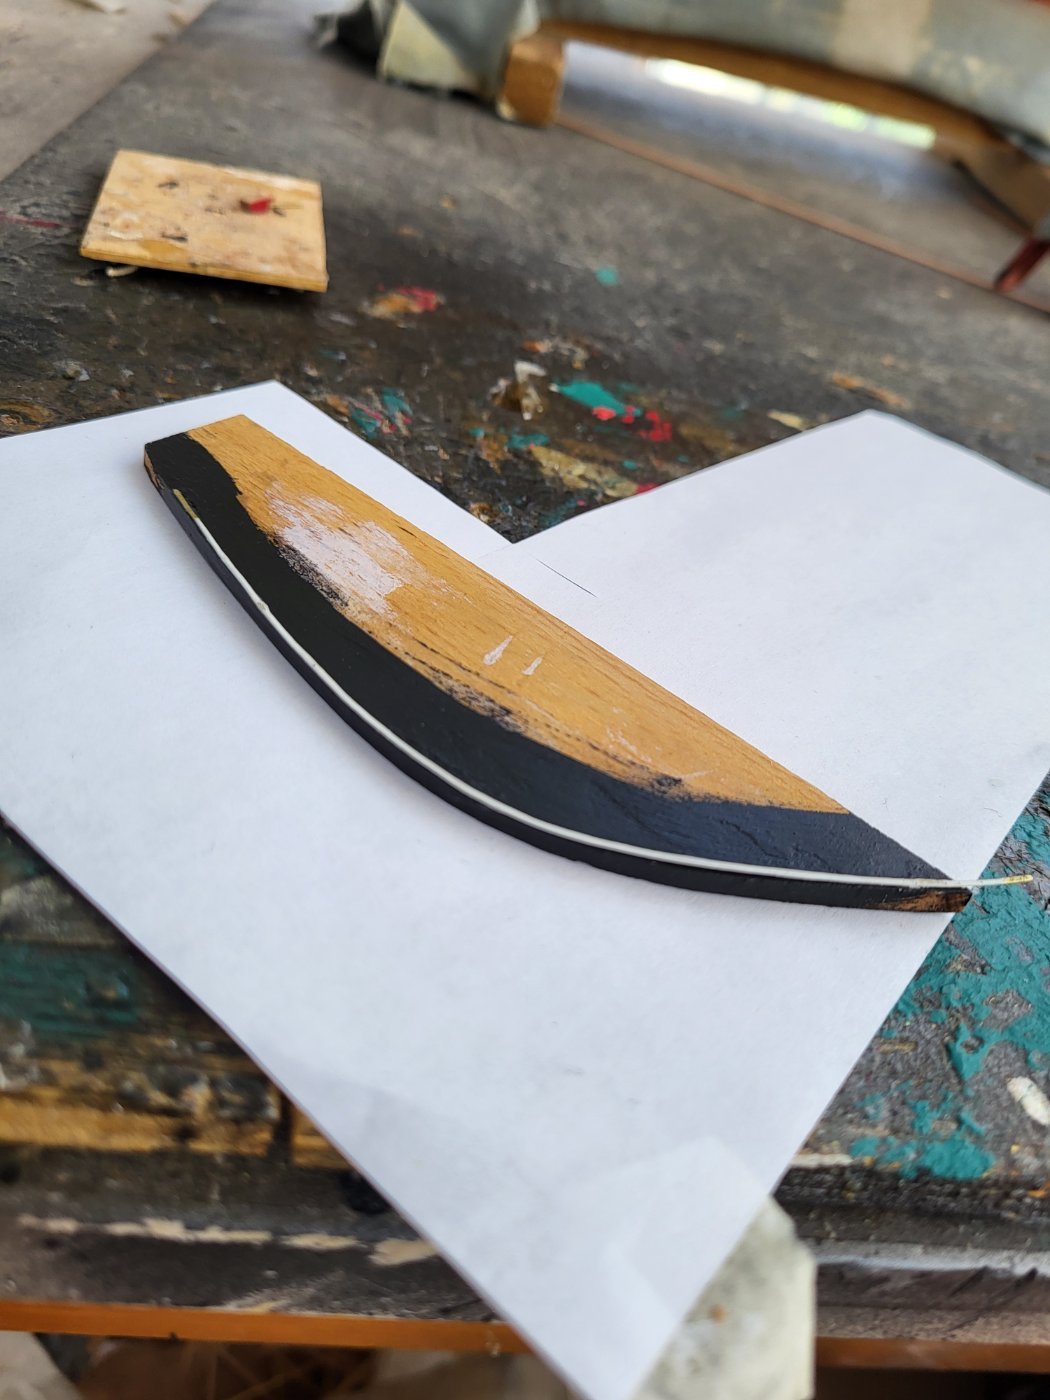
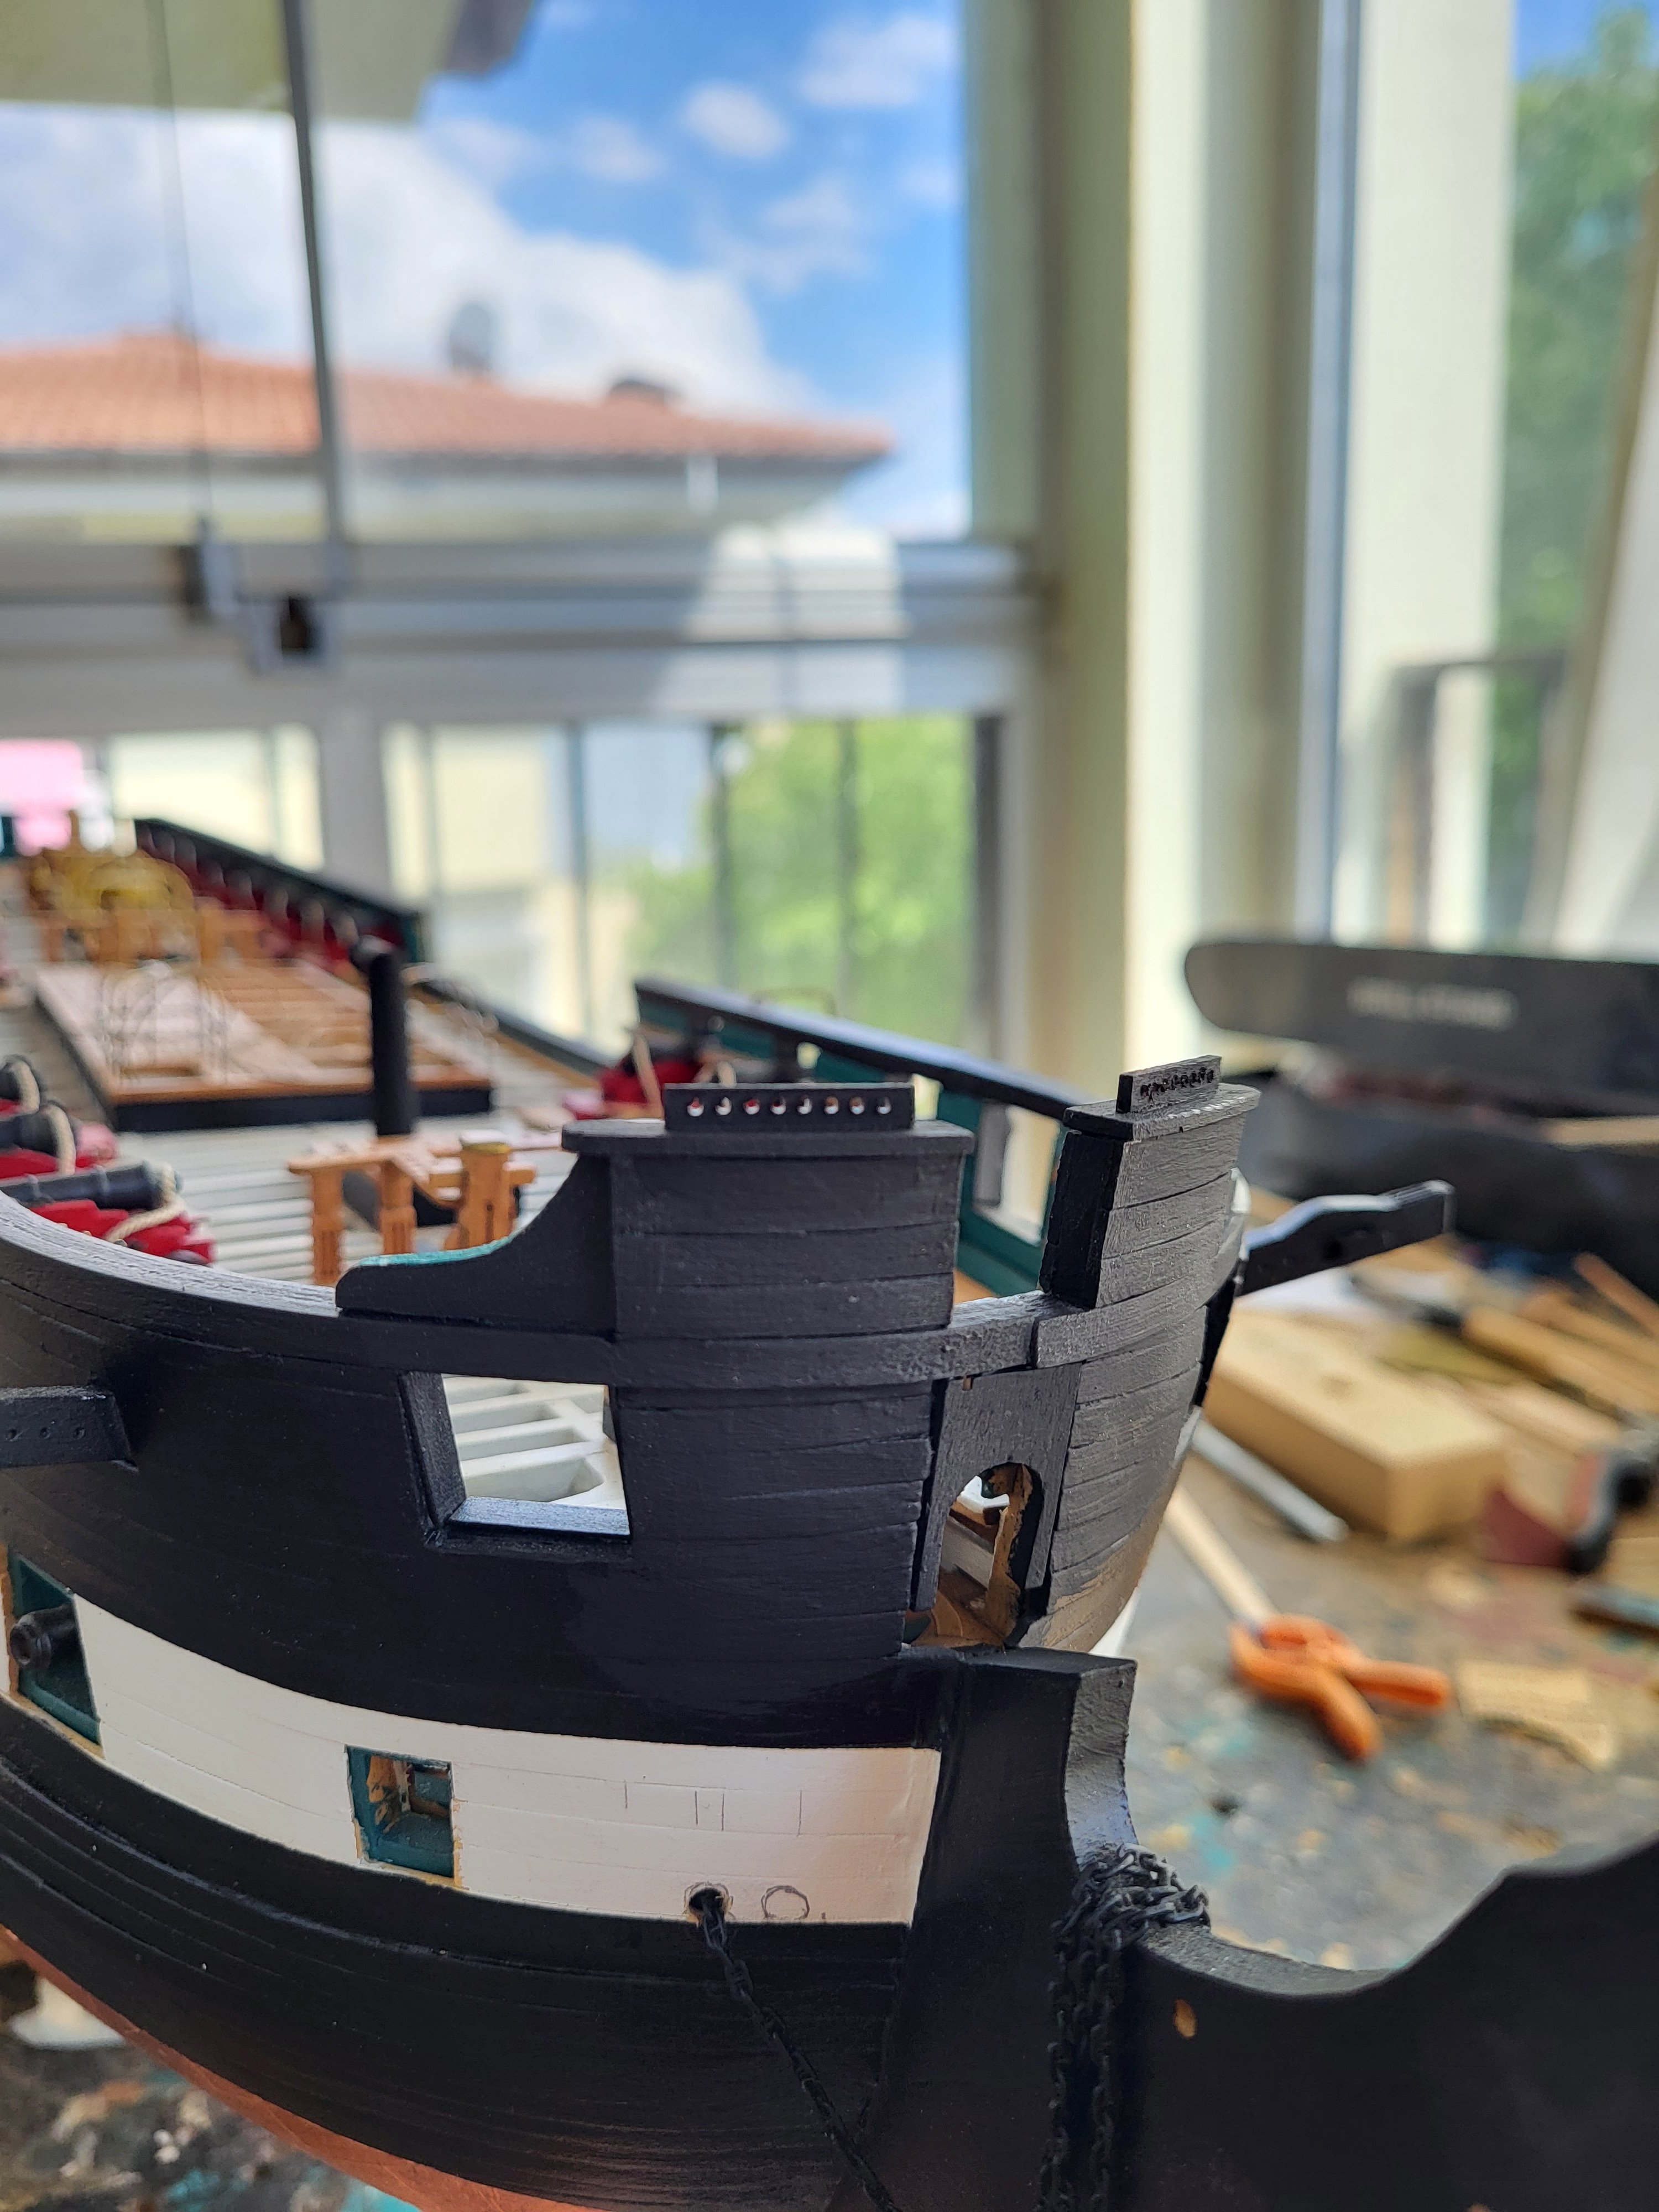
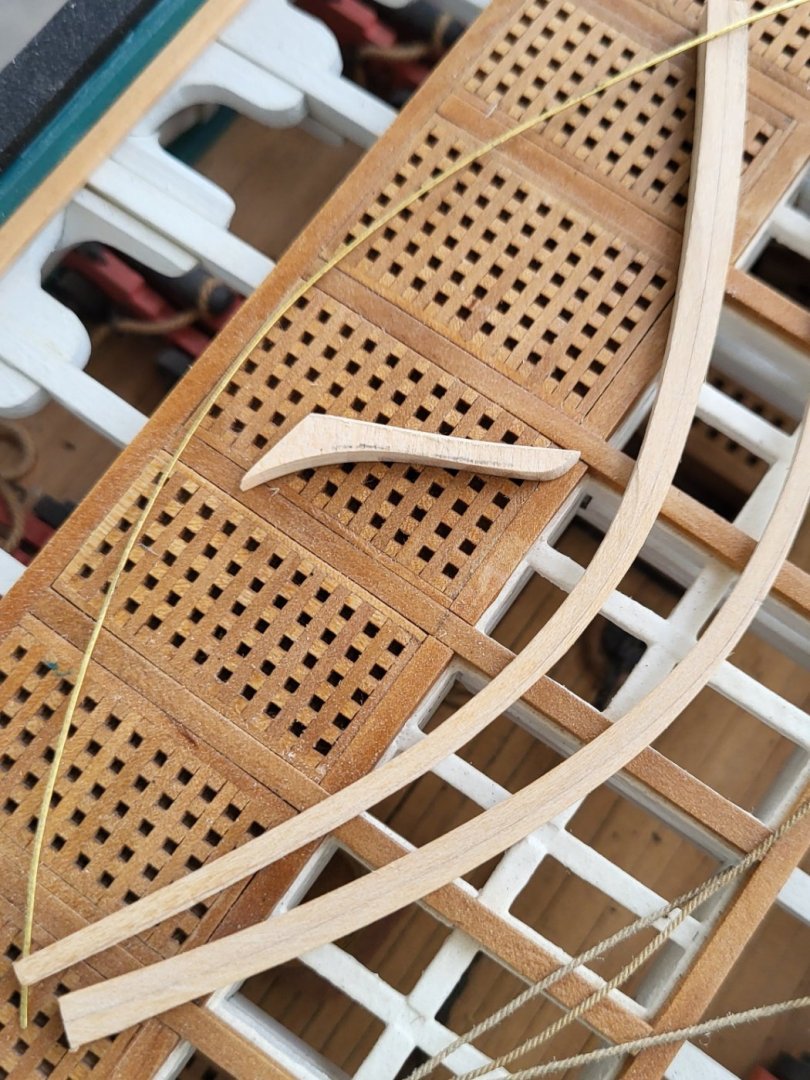
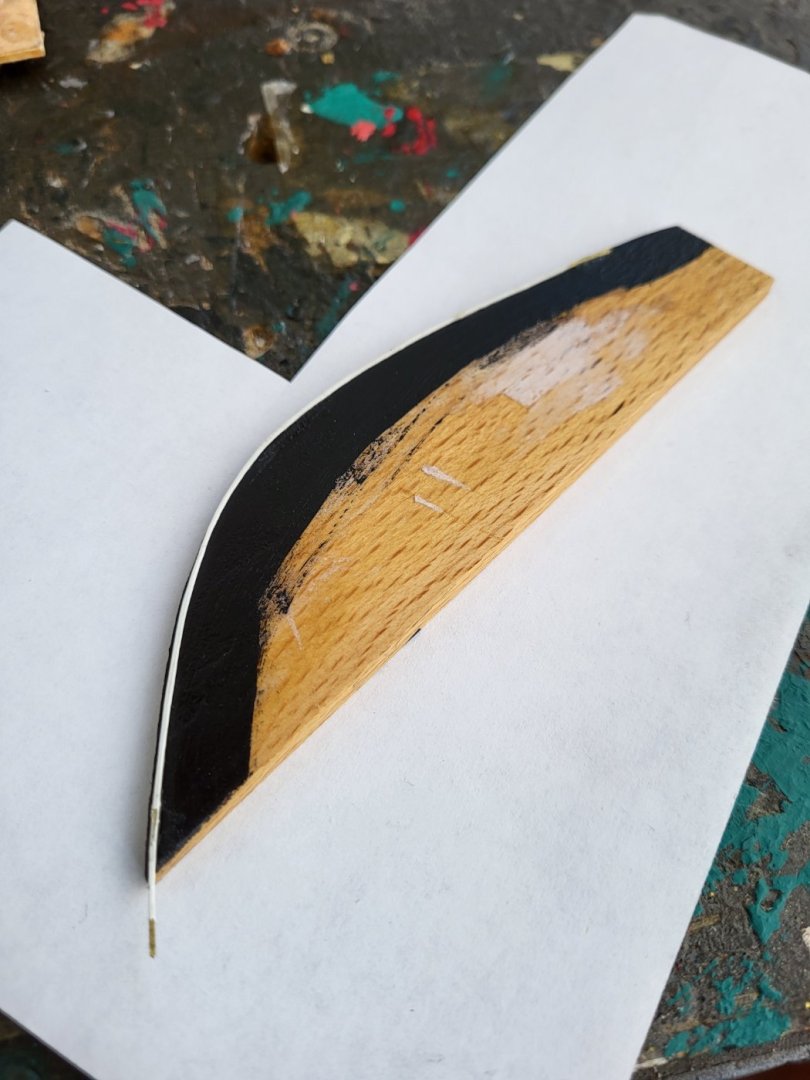
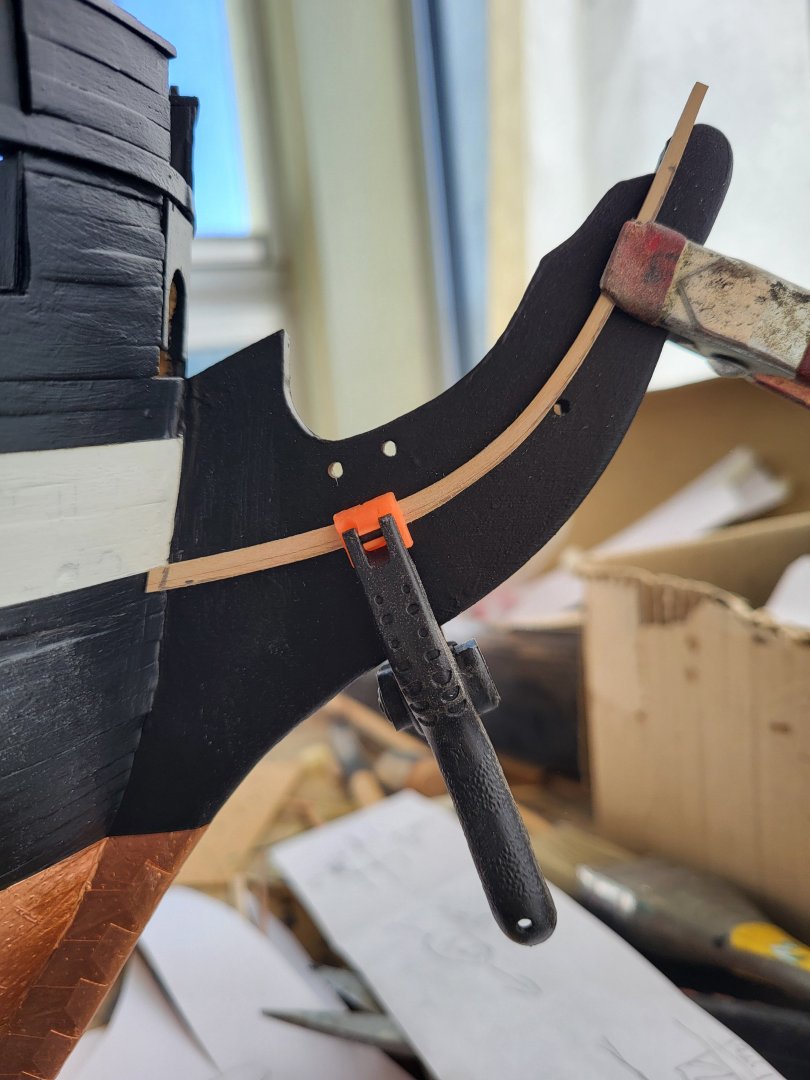
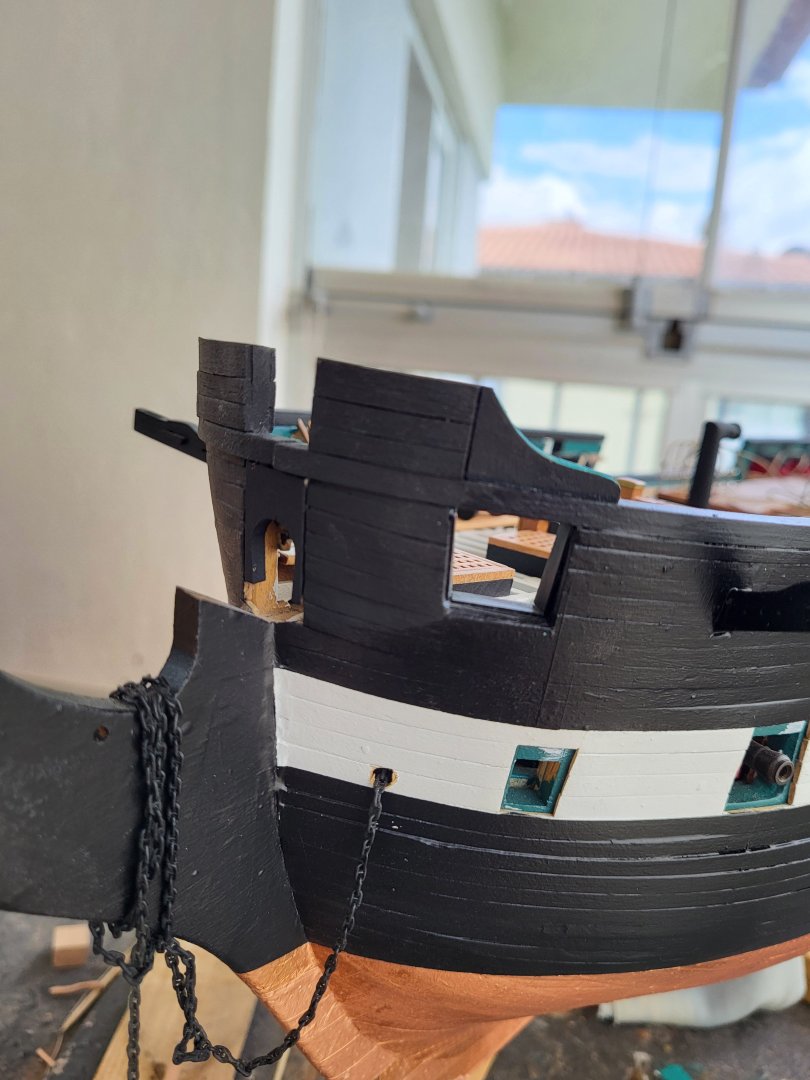
I've started working on the bow details, which are my greatest fear. I see that the most challenging detail for modelers in this model is the white stripes on the rails and other items. I've been pondering for some time about how to make these stripes in the best way. Finally, I decided to try making them out of brass wire. I flattened a brass wire with a diameter of 0.5 mm by hammering it, then shaped it as needed, painted it white, and varnished it. After it dried completely, I carefully glued it onto a test piece. The result looks satisfying. We'll see if I can achieve the same on the model itself."


-
I was curious, so I wanted to ask, Peter. I don’t have an MS kit, but here’s what I’m wondering: Is the material they sent so limited that you can’t remake that item? Because it’s very small and remaking it isn’t really that difficult.
-
I am also making the cheek knees using a similar method. The only difference is that I extend the side timbers all the way to the hull, then I will glue the part that I’ll attach to the hull by resting it against the side timber.
-
USS Constitution by mtbediz - 1:76
mtbediz replied to mtbediz's topic in - Build logs for subjects built 1751 - 1800
I don't know the reason, but recently I've been having difficulty accessing the MSW webpage, even though other websites load quickly -
USS Constitution by mtbediz - 1:76
mtbediz replied to mtbediz's topic in - Build logs for subjects built 1751 - 1800
Recently, has anyone been experiencing difficulties accessing the MSW webpage, or is it just me? The page either doesn't load at all or takes a long time to load. Thanks. -
USS Constitution by mtbediz - 1:76
mtbediz replied to mtbediz's topic in - Build logs for subjects built 1751 - 1800
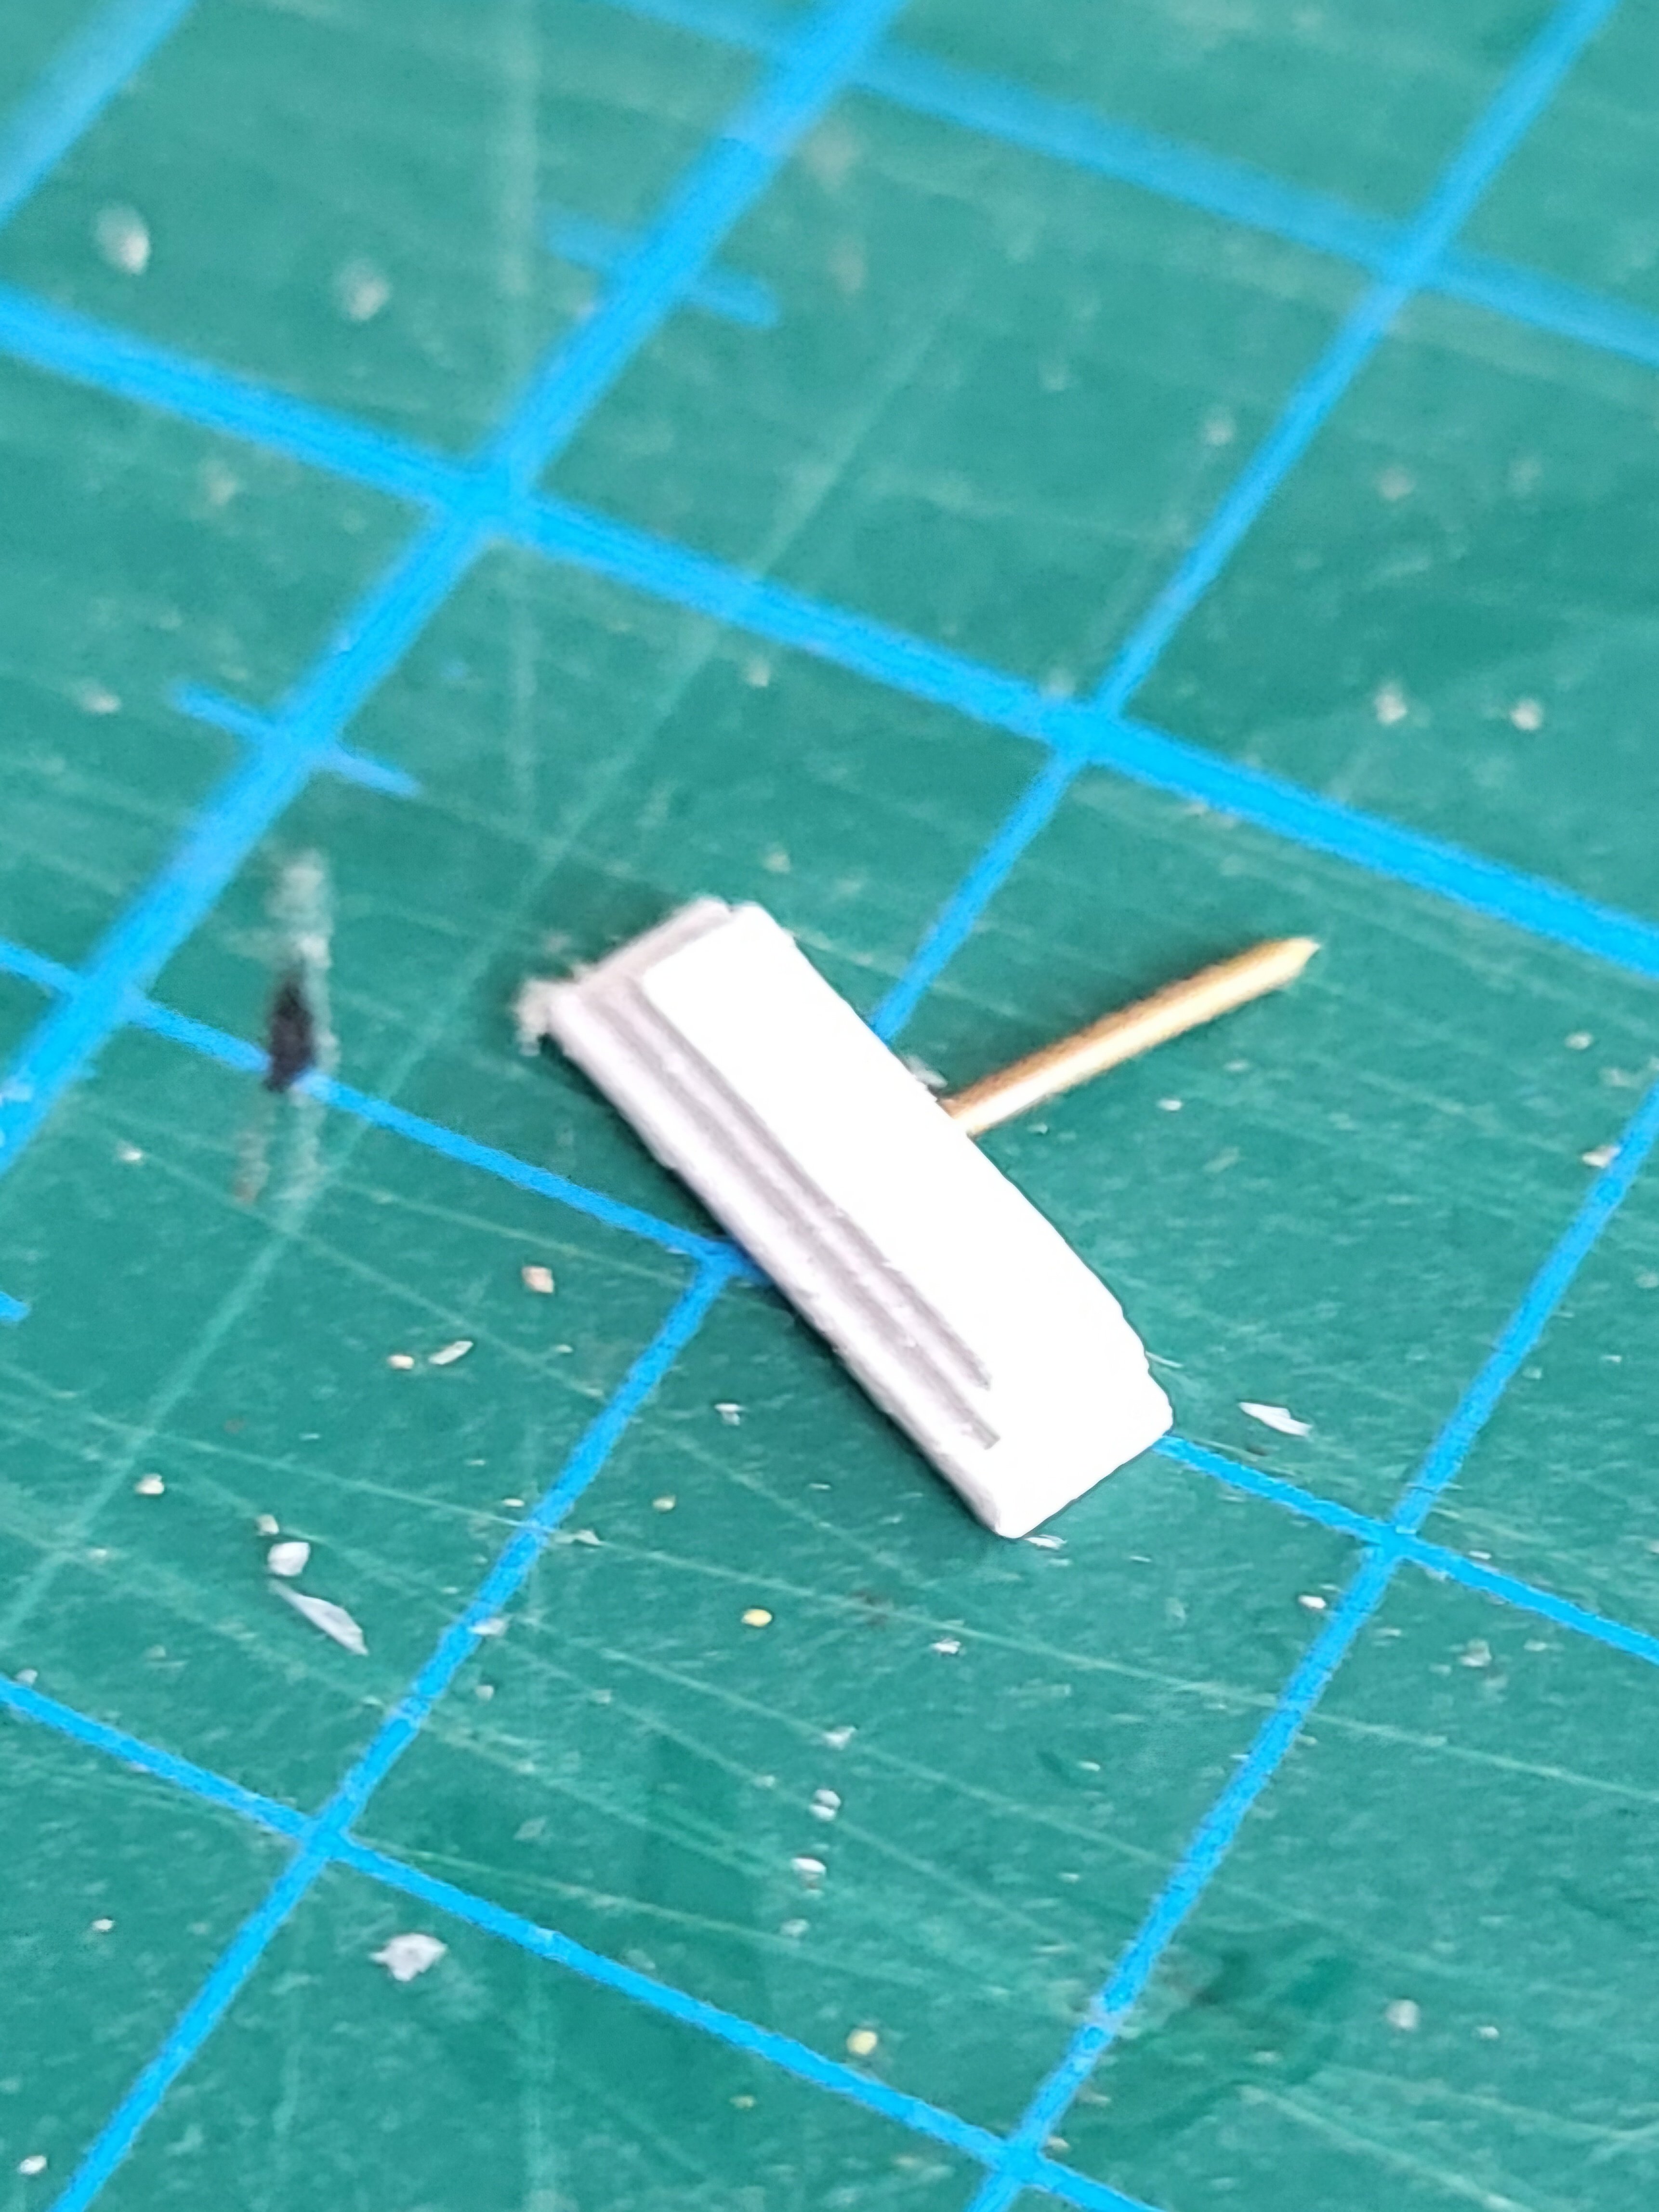
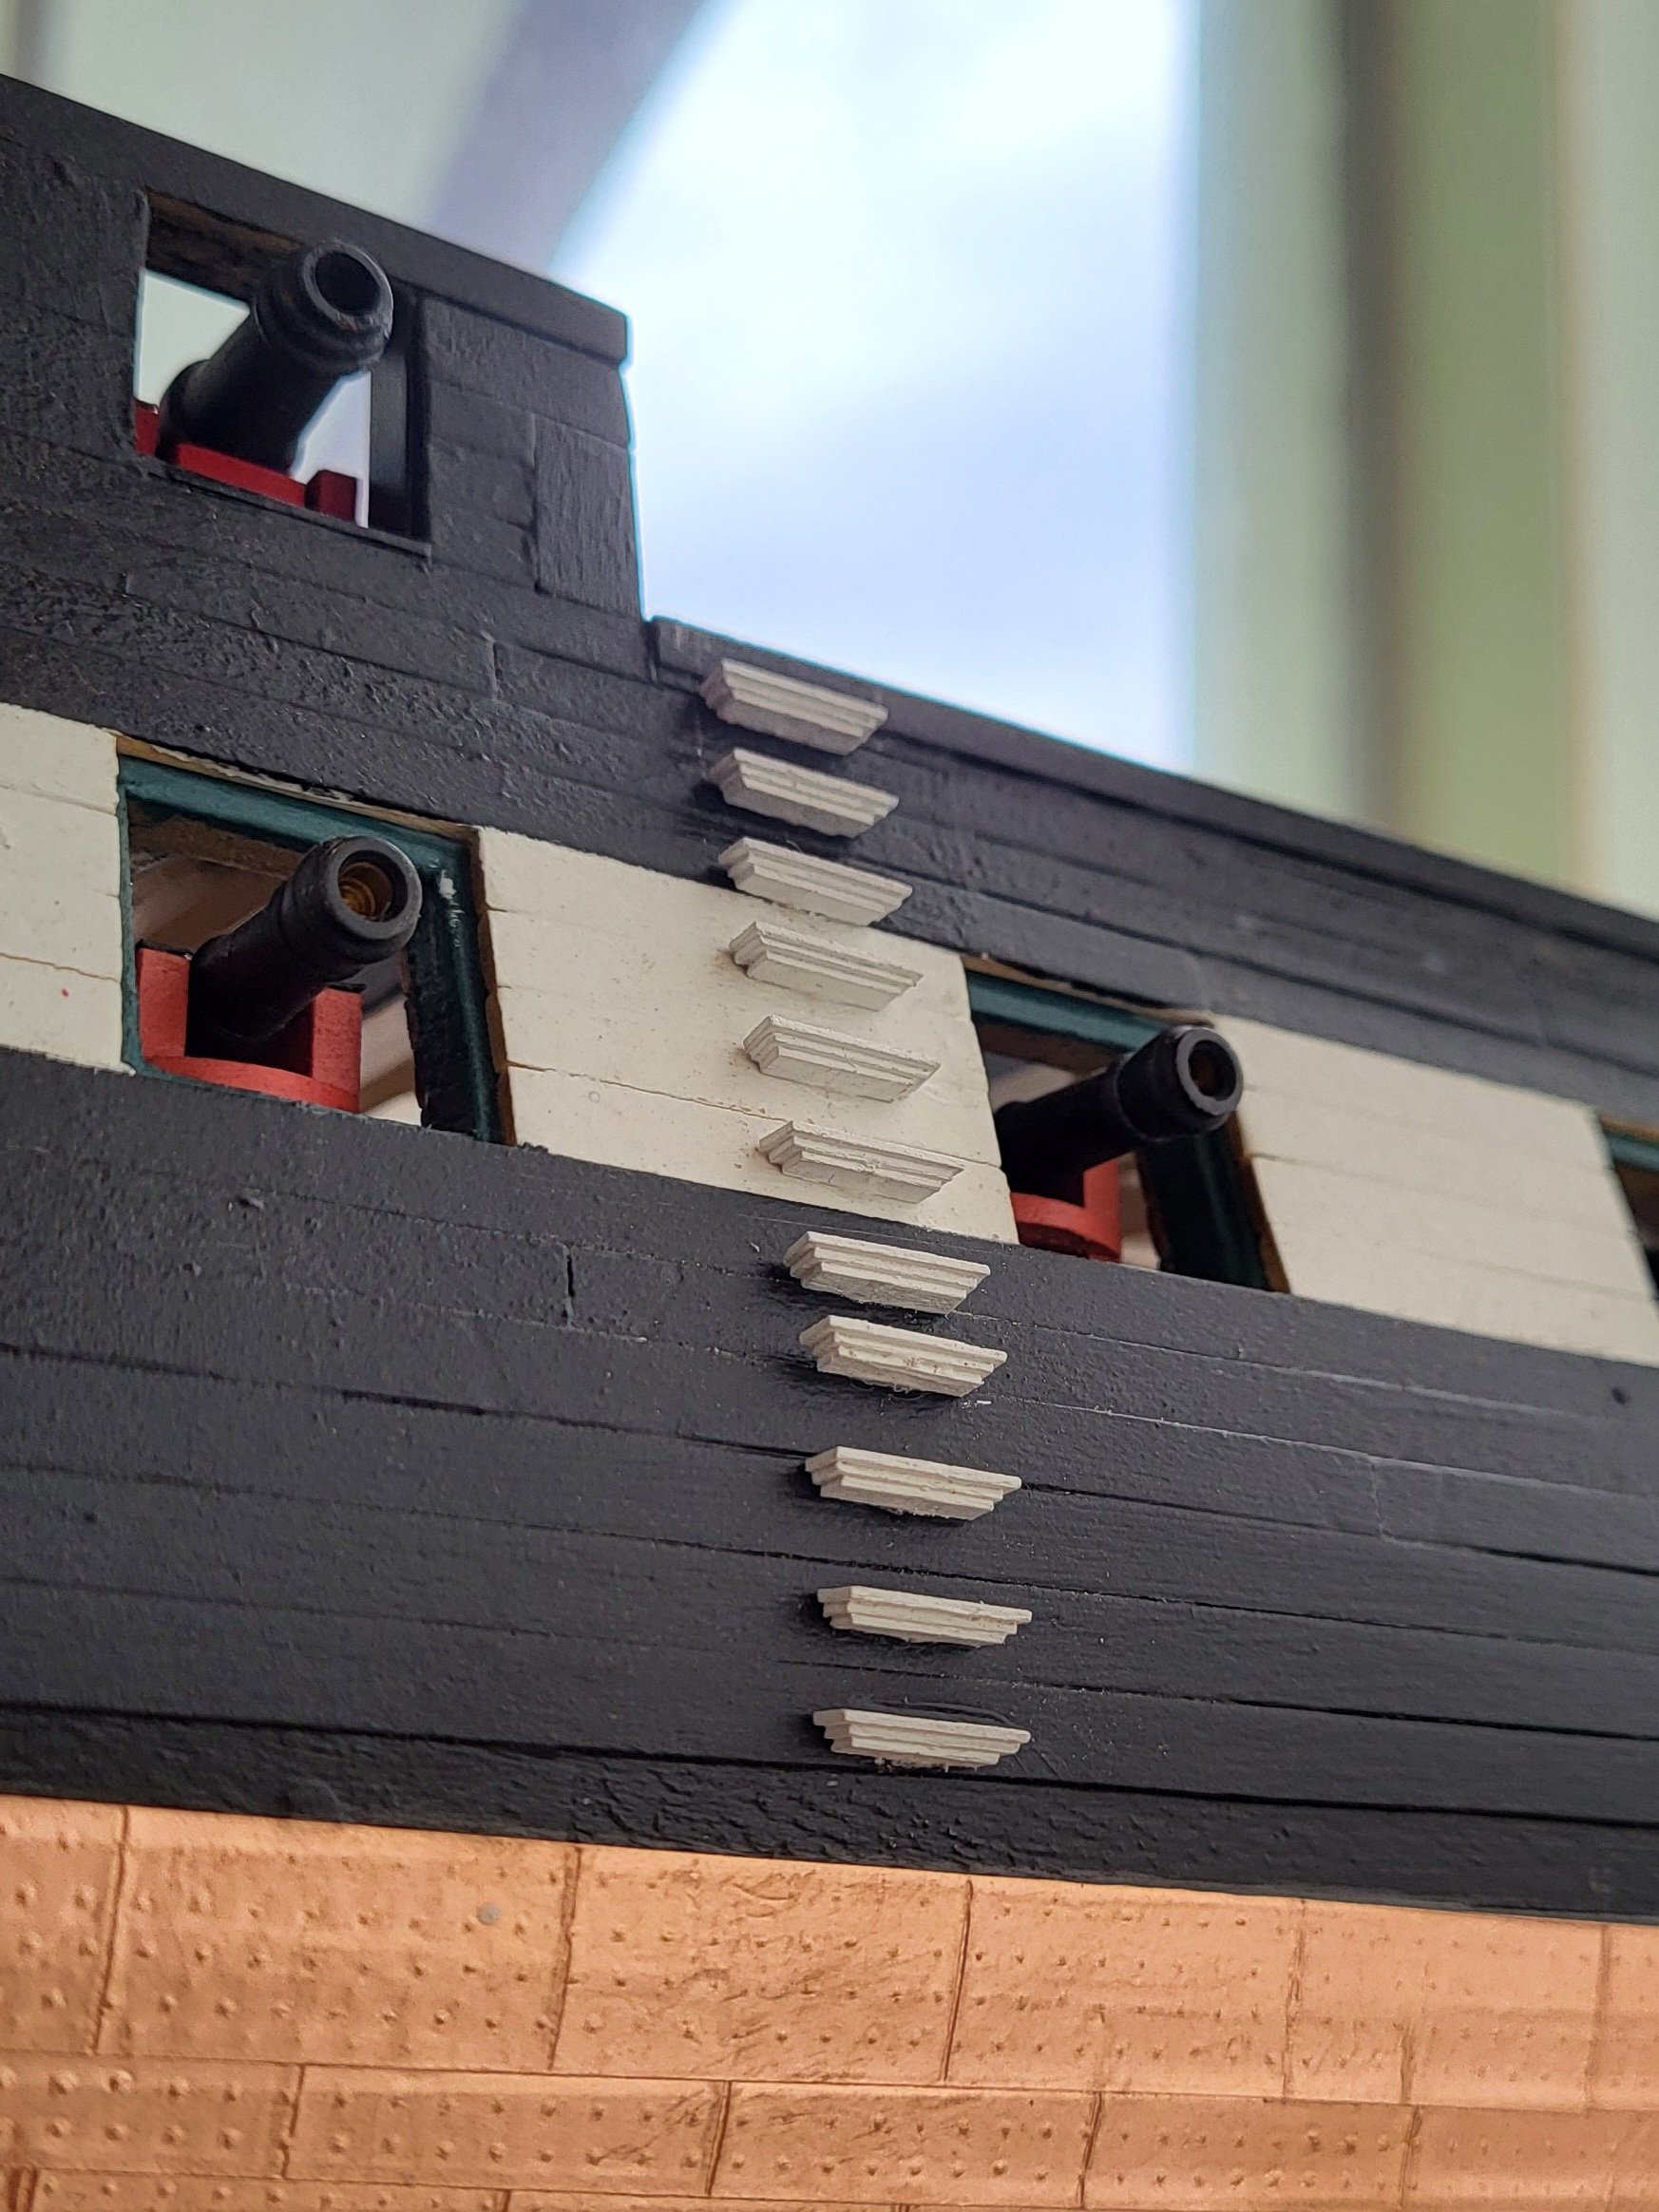
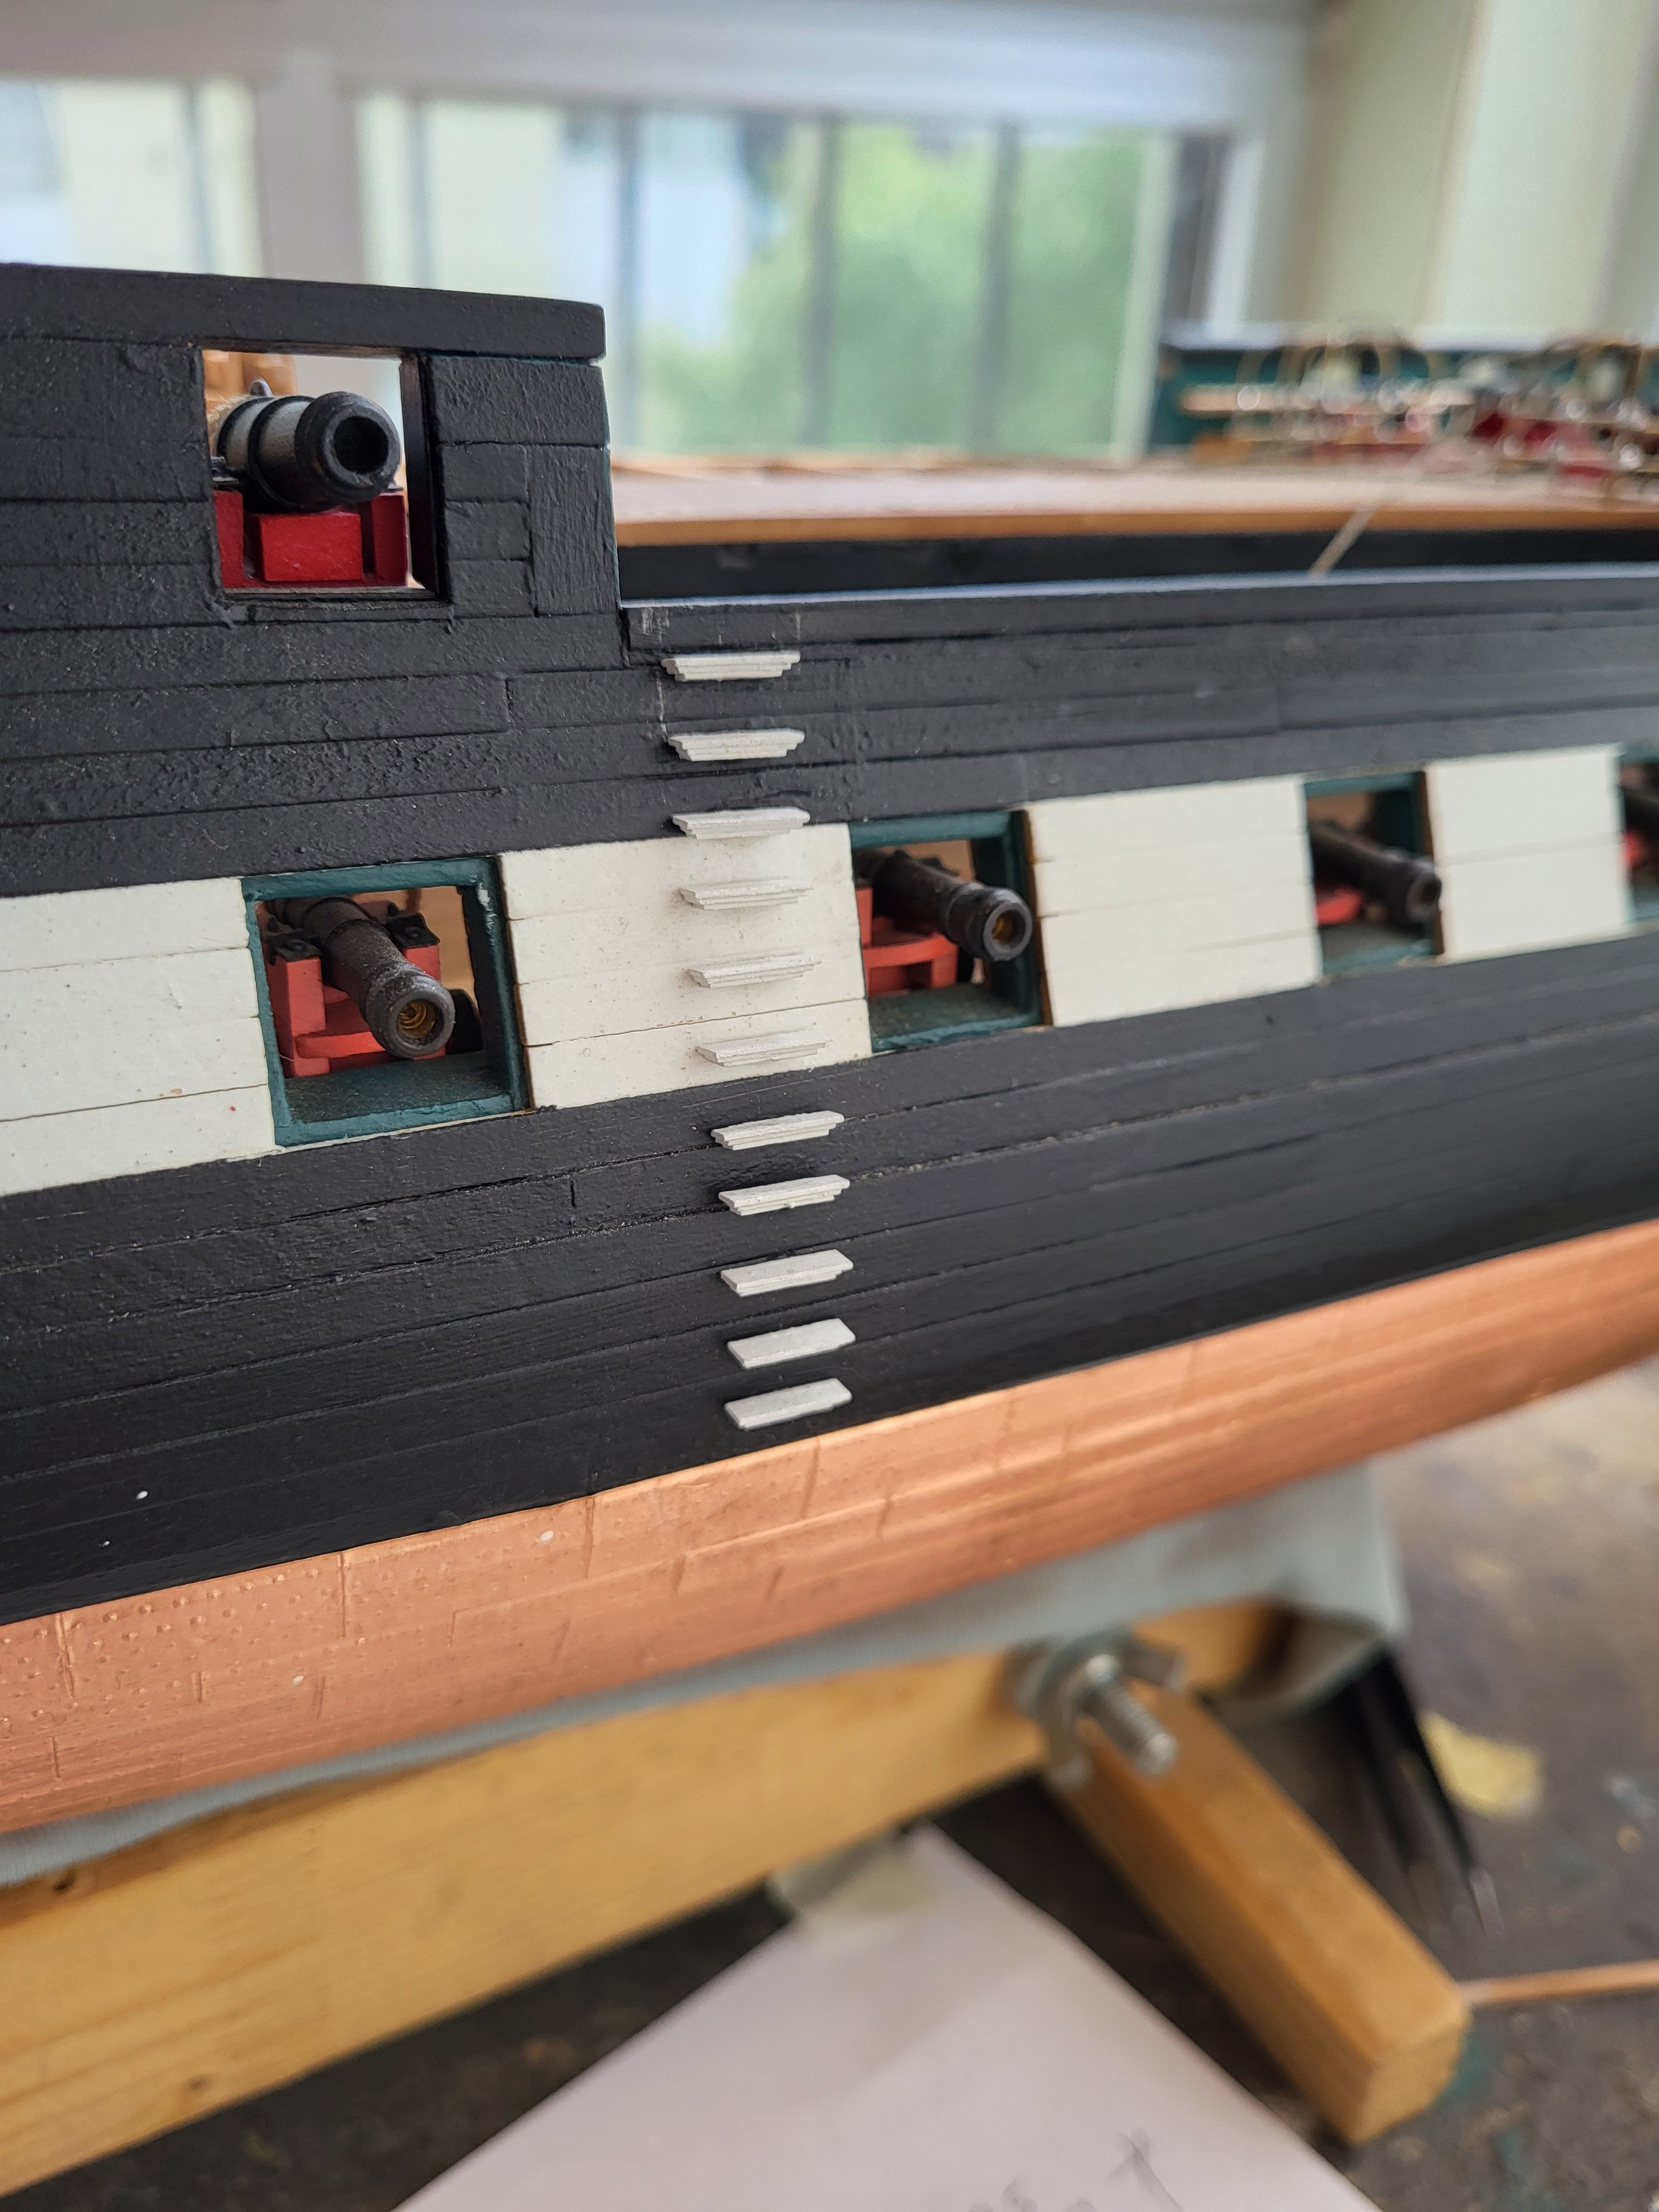
Hi Greg, to secure the steps I used 0.6 mm brass pins as you can see in the photo. Of course this helps a lot. It is especially beneficial to use those pins to properly align the steps. Even if it is a painted surface, there is no problem when glued with CA.
-
USS Constitution by mtbediz - 1:76
mtbediz replied to mtbediz's topic in - Build logs for subjects built 1751 - 1800
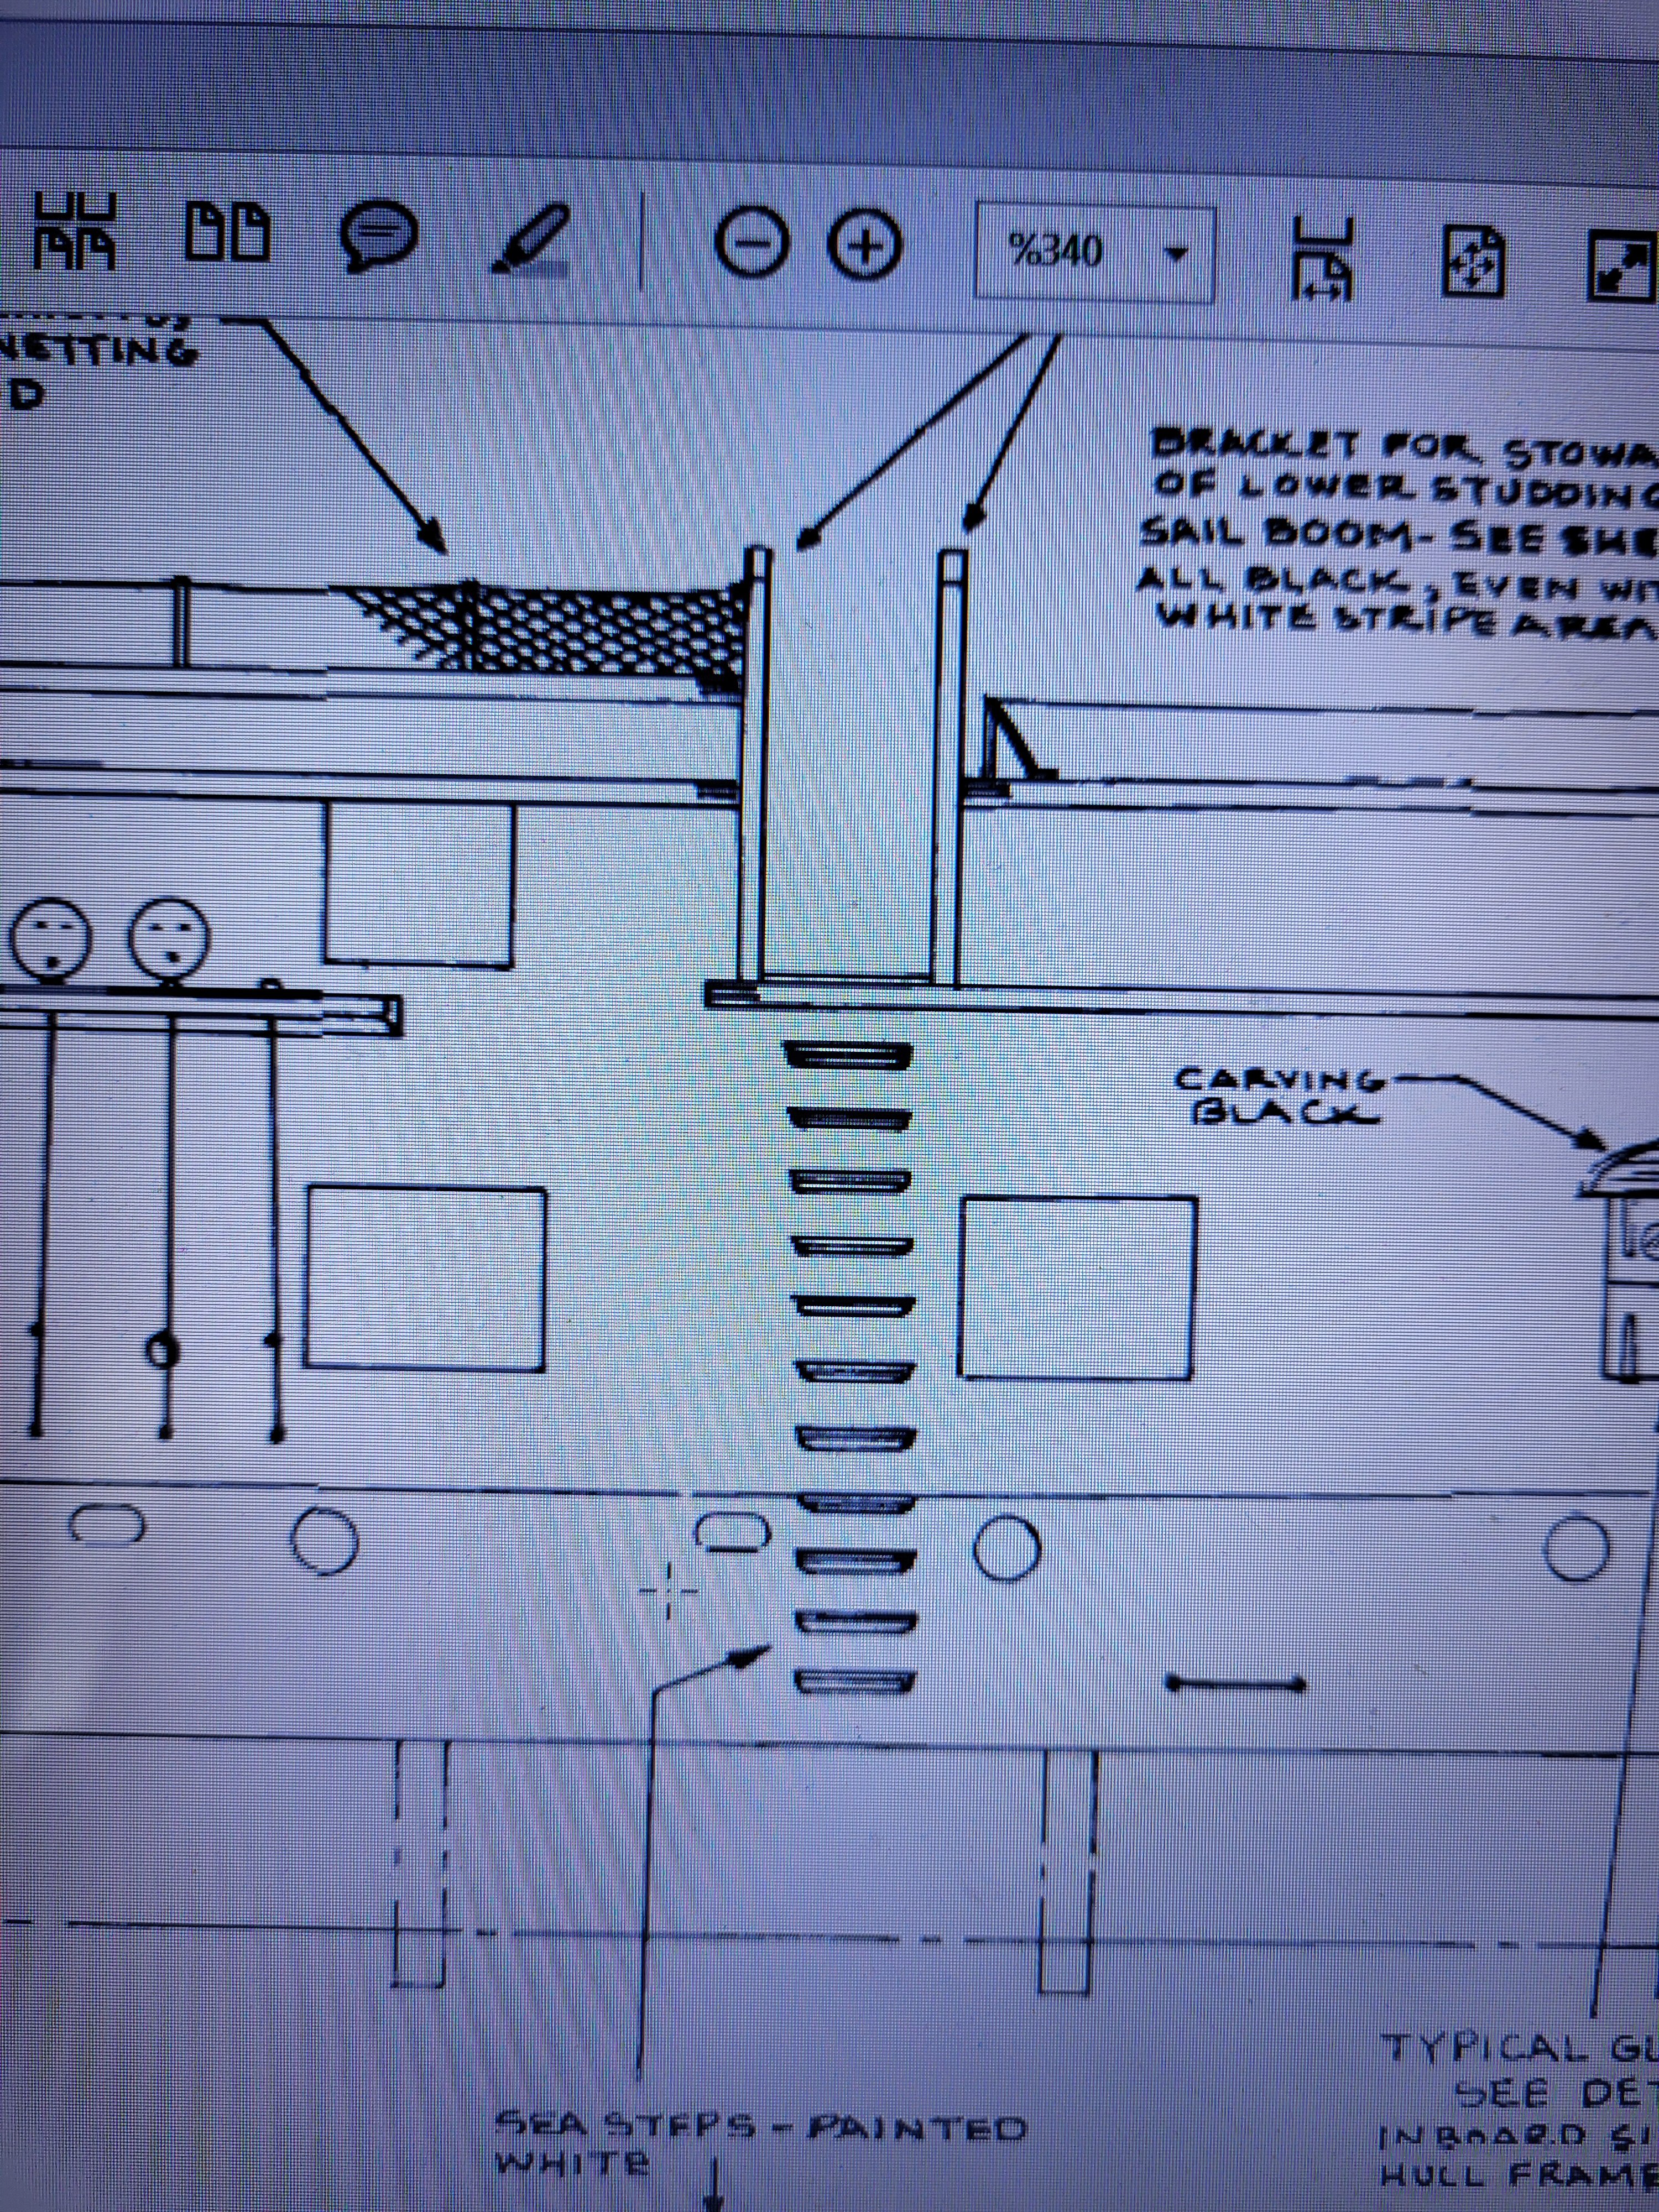
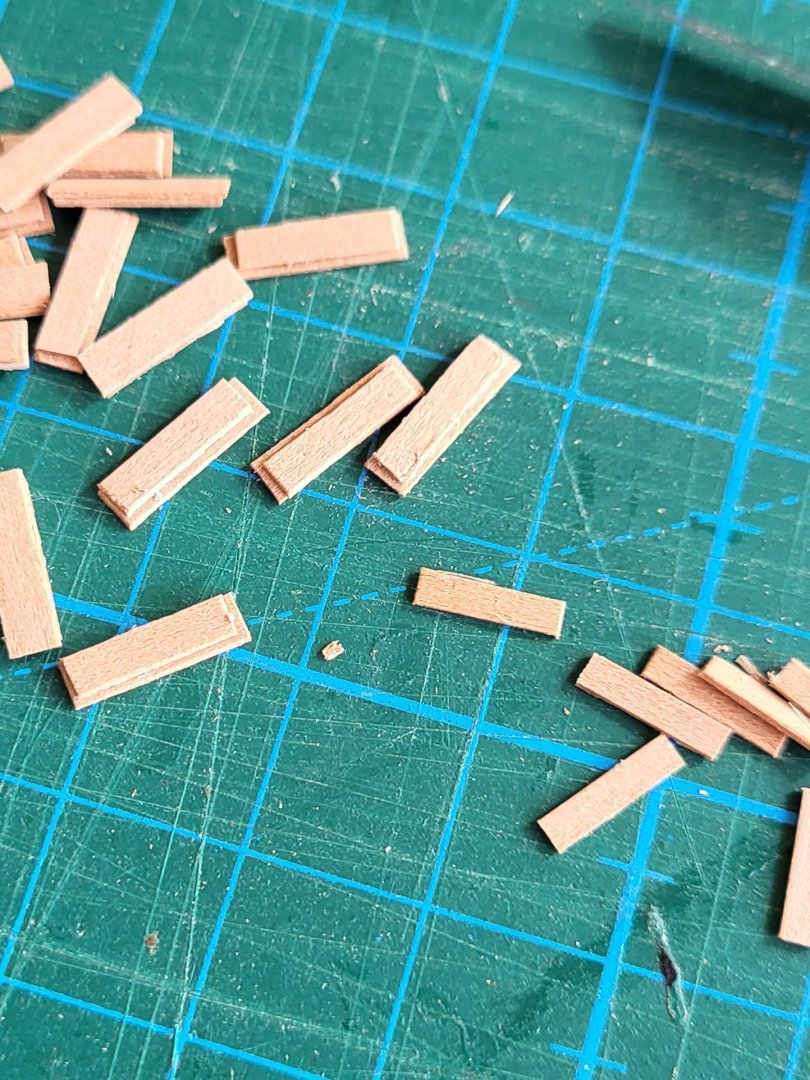
I have completed the sea steps. I used 0,5 mm pear strip and cut three pieces to correct size and glued stacked together.


-
USS Constitution by mtbediz - 1:76
mtbediz replied to mtbediz's topic in - Build logs for subjects built 1751 - 1800
Thomas, thanks for the information and suggestion. I'm sure they will come in handy one day. I've left the guns behind now and am slowly moving towards my nightmare of bow detail and ornament. I try to stay away from it as much as possible but I know I'll face it eventually, -
USS Constitution by mtbediz - 1:76
mtbediz replied to mtbediz's topic in - Build logs for subjects built 1751 - 1800
Yes, I had already decided a long time ago that I would build the ship that I only saw in the 3D tour, and I will continue to do so. What I didn't know was that this was the ship before 2015. But thanks to you, it's good to know that now. -
USS Constitution by mtbediz - 1:76
mtbediz replied to mtbediz's topic in - Build logs for subjects built 1751 - 1800
Thanks Greg. Yes, that's what I was talking about. -
USS Constitution by mtbediz - 1:76
mtbediz replied to mtbediz's topic in - Build logs for subjects built 1751 - 1800
I also thought about adding these screw type carronades, but I gave up because I broke two of the carronades I had while drilling the holes for the screws and I did not have any spare carronades. -
USS Constitution by mtbediz - 1:76
mtbediz replied to mtbediz's topic in - Build logs for subjects built 1751 - 1800
From now on, I have to say this to those who ask! "2015 3D tour" -
USS Constitution by mtbediz - 1:76
mtbediz replied to mtbediz's topic in - Build logs for subjects built 1751 - 1800
I know Jon has something to say about this, because he has explained it somewhere before. He will respond when he sees your post. -
USS Constitution by mtbediz - 1:76
mtbediz replied to mtbediz's topic in - Build logs for subjects built 1751 - 1800
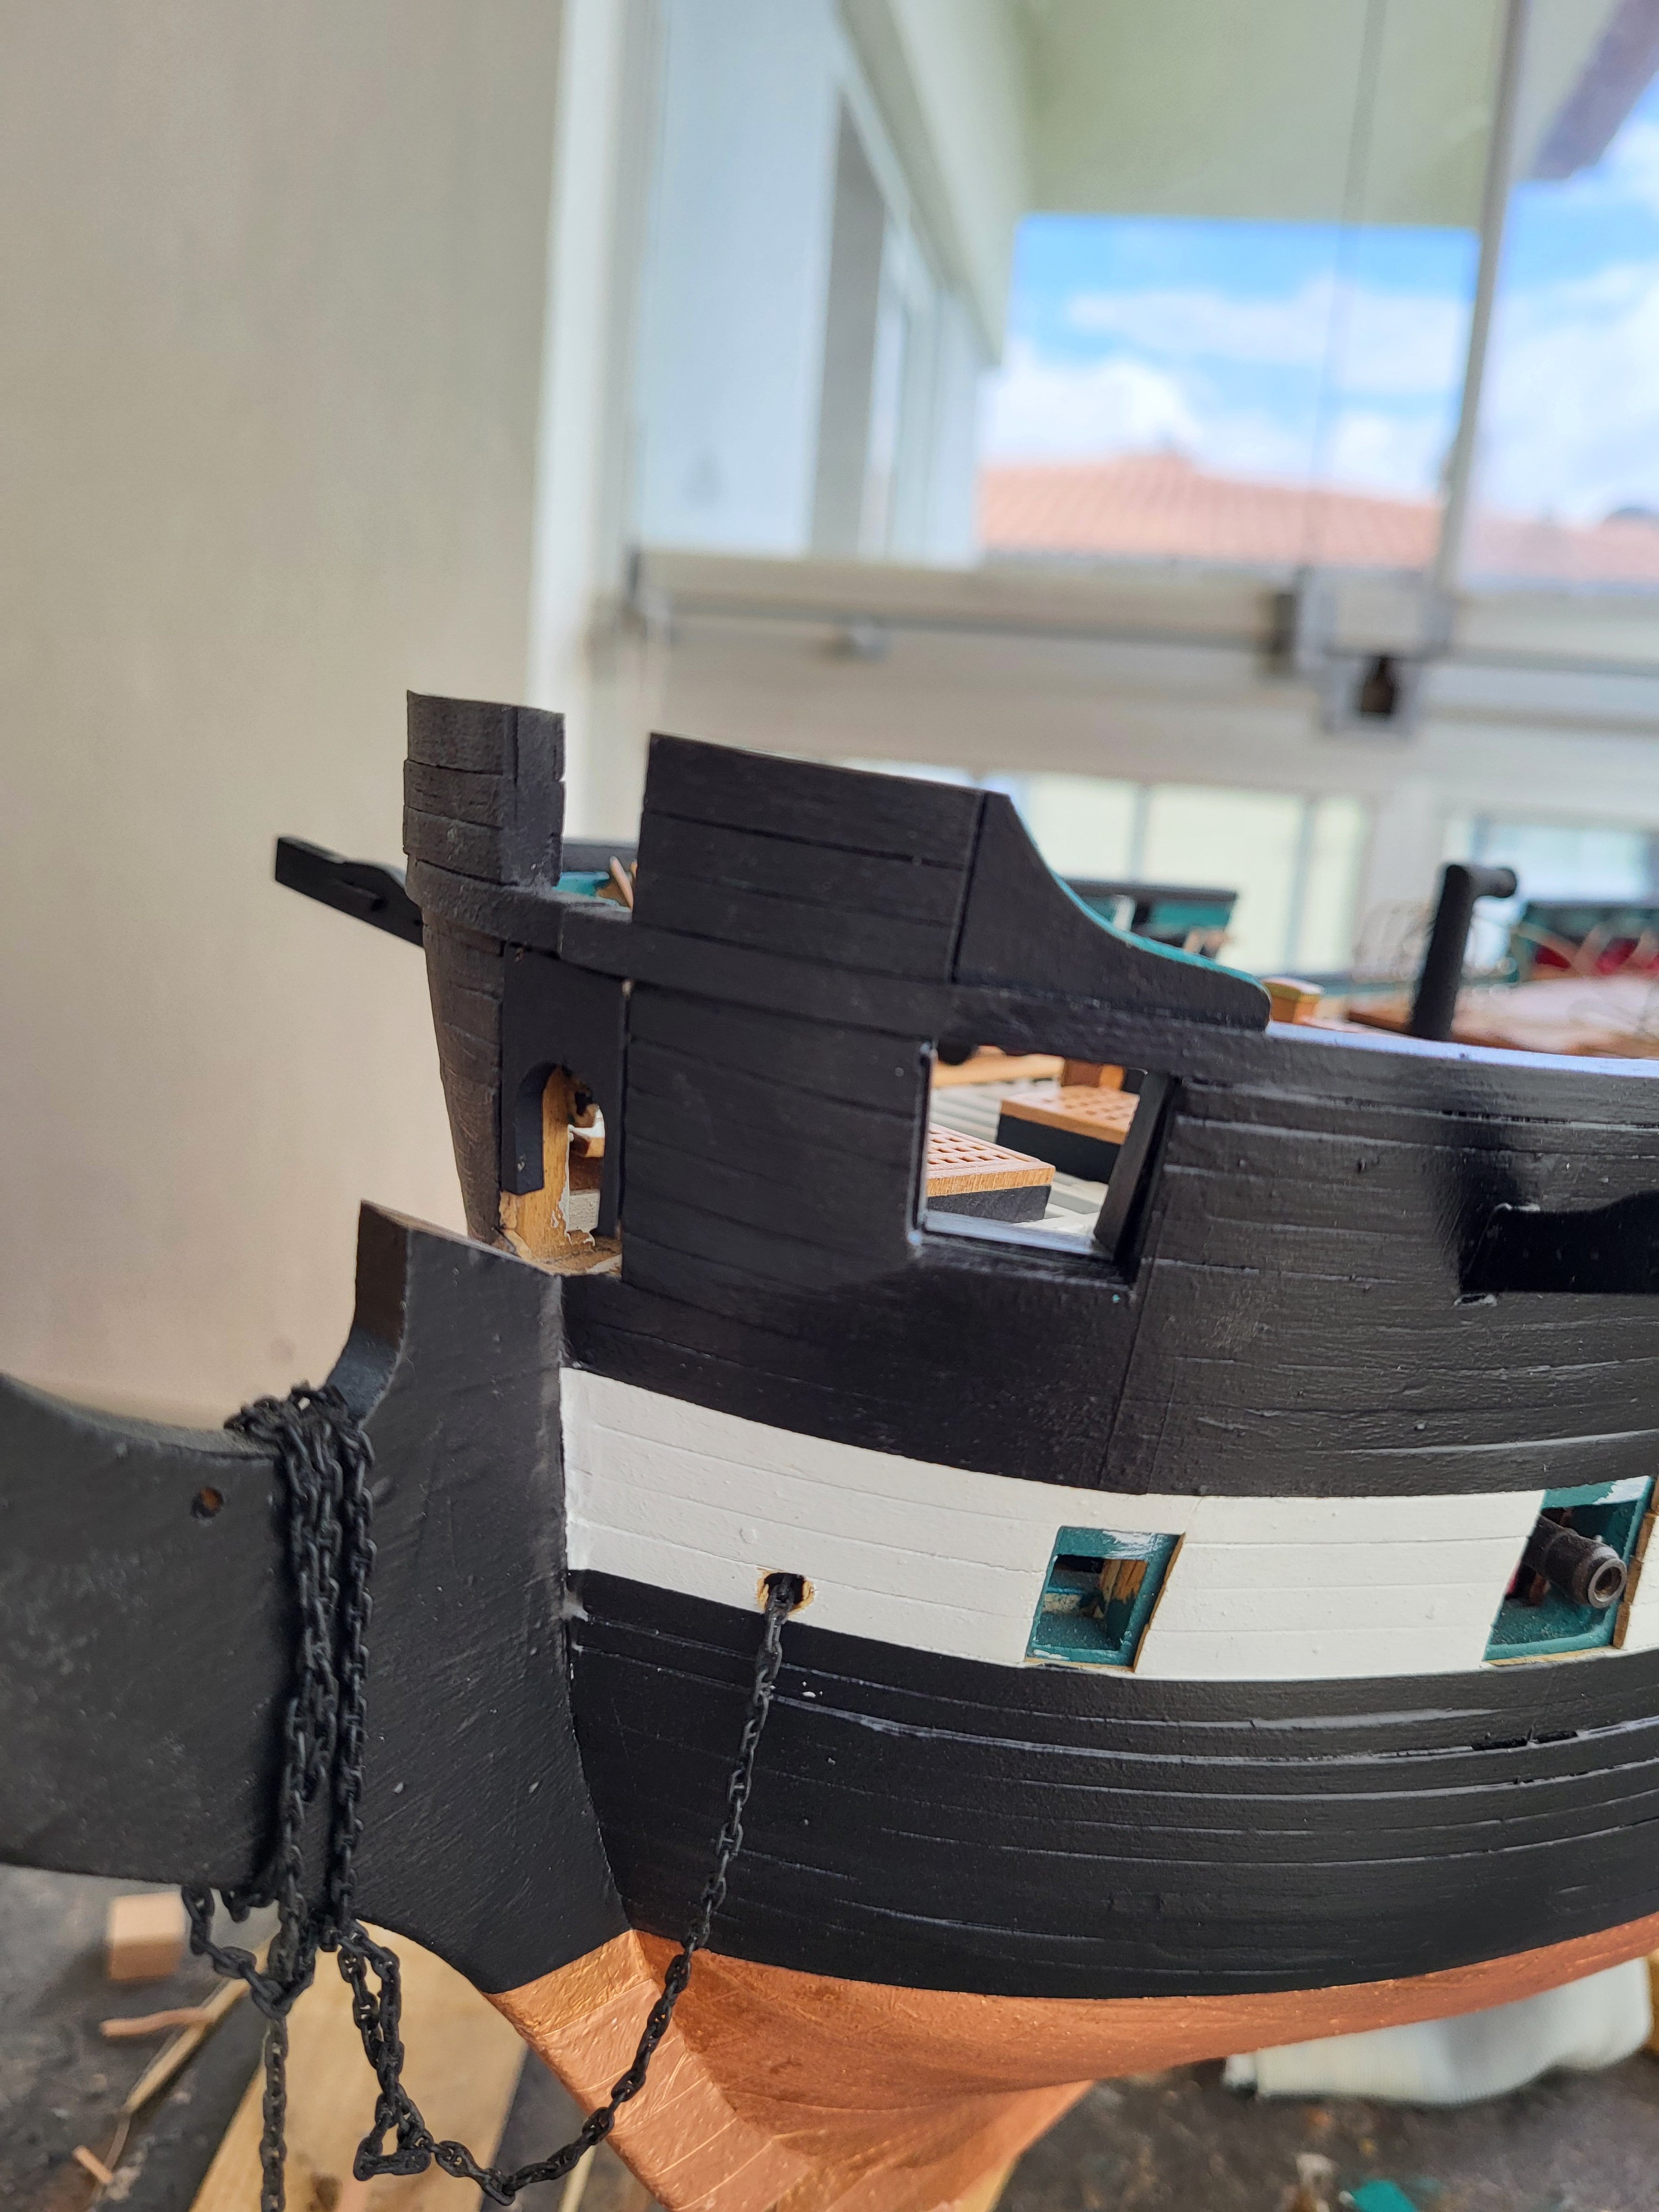
Thanks for the info Jon. Yes, you are absolutely correct. I mentioned earlier that I was building the ship as it looks today because until you mentioned it I didn't know about the 2015-2017 restoration and I thought the ship looked like it does today in the 3D virtual tour online. I will continue without removing the bow rail as I will continue to use the 3D Tour as a reference. -
USS Constitution by mtbediz - 1:76
mtbediz replied to mtbediz's topic in - Build logs for subjects built 1751 - 1800
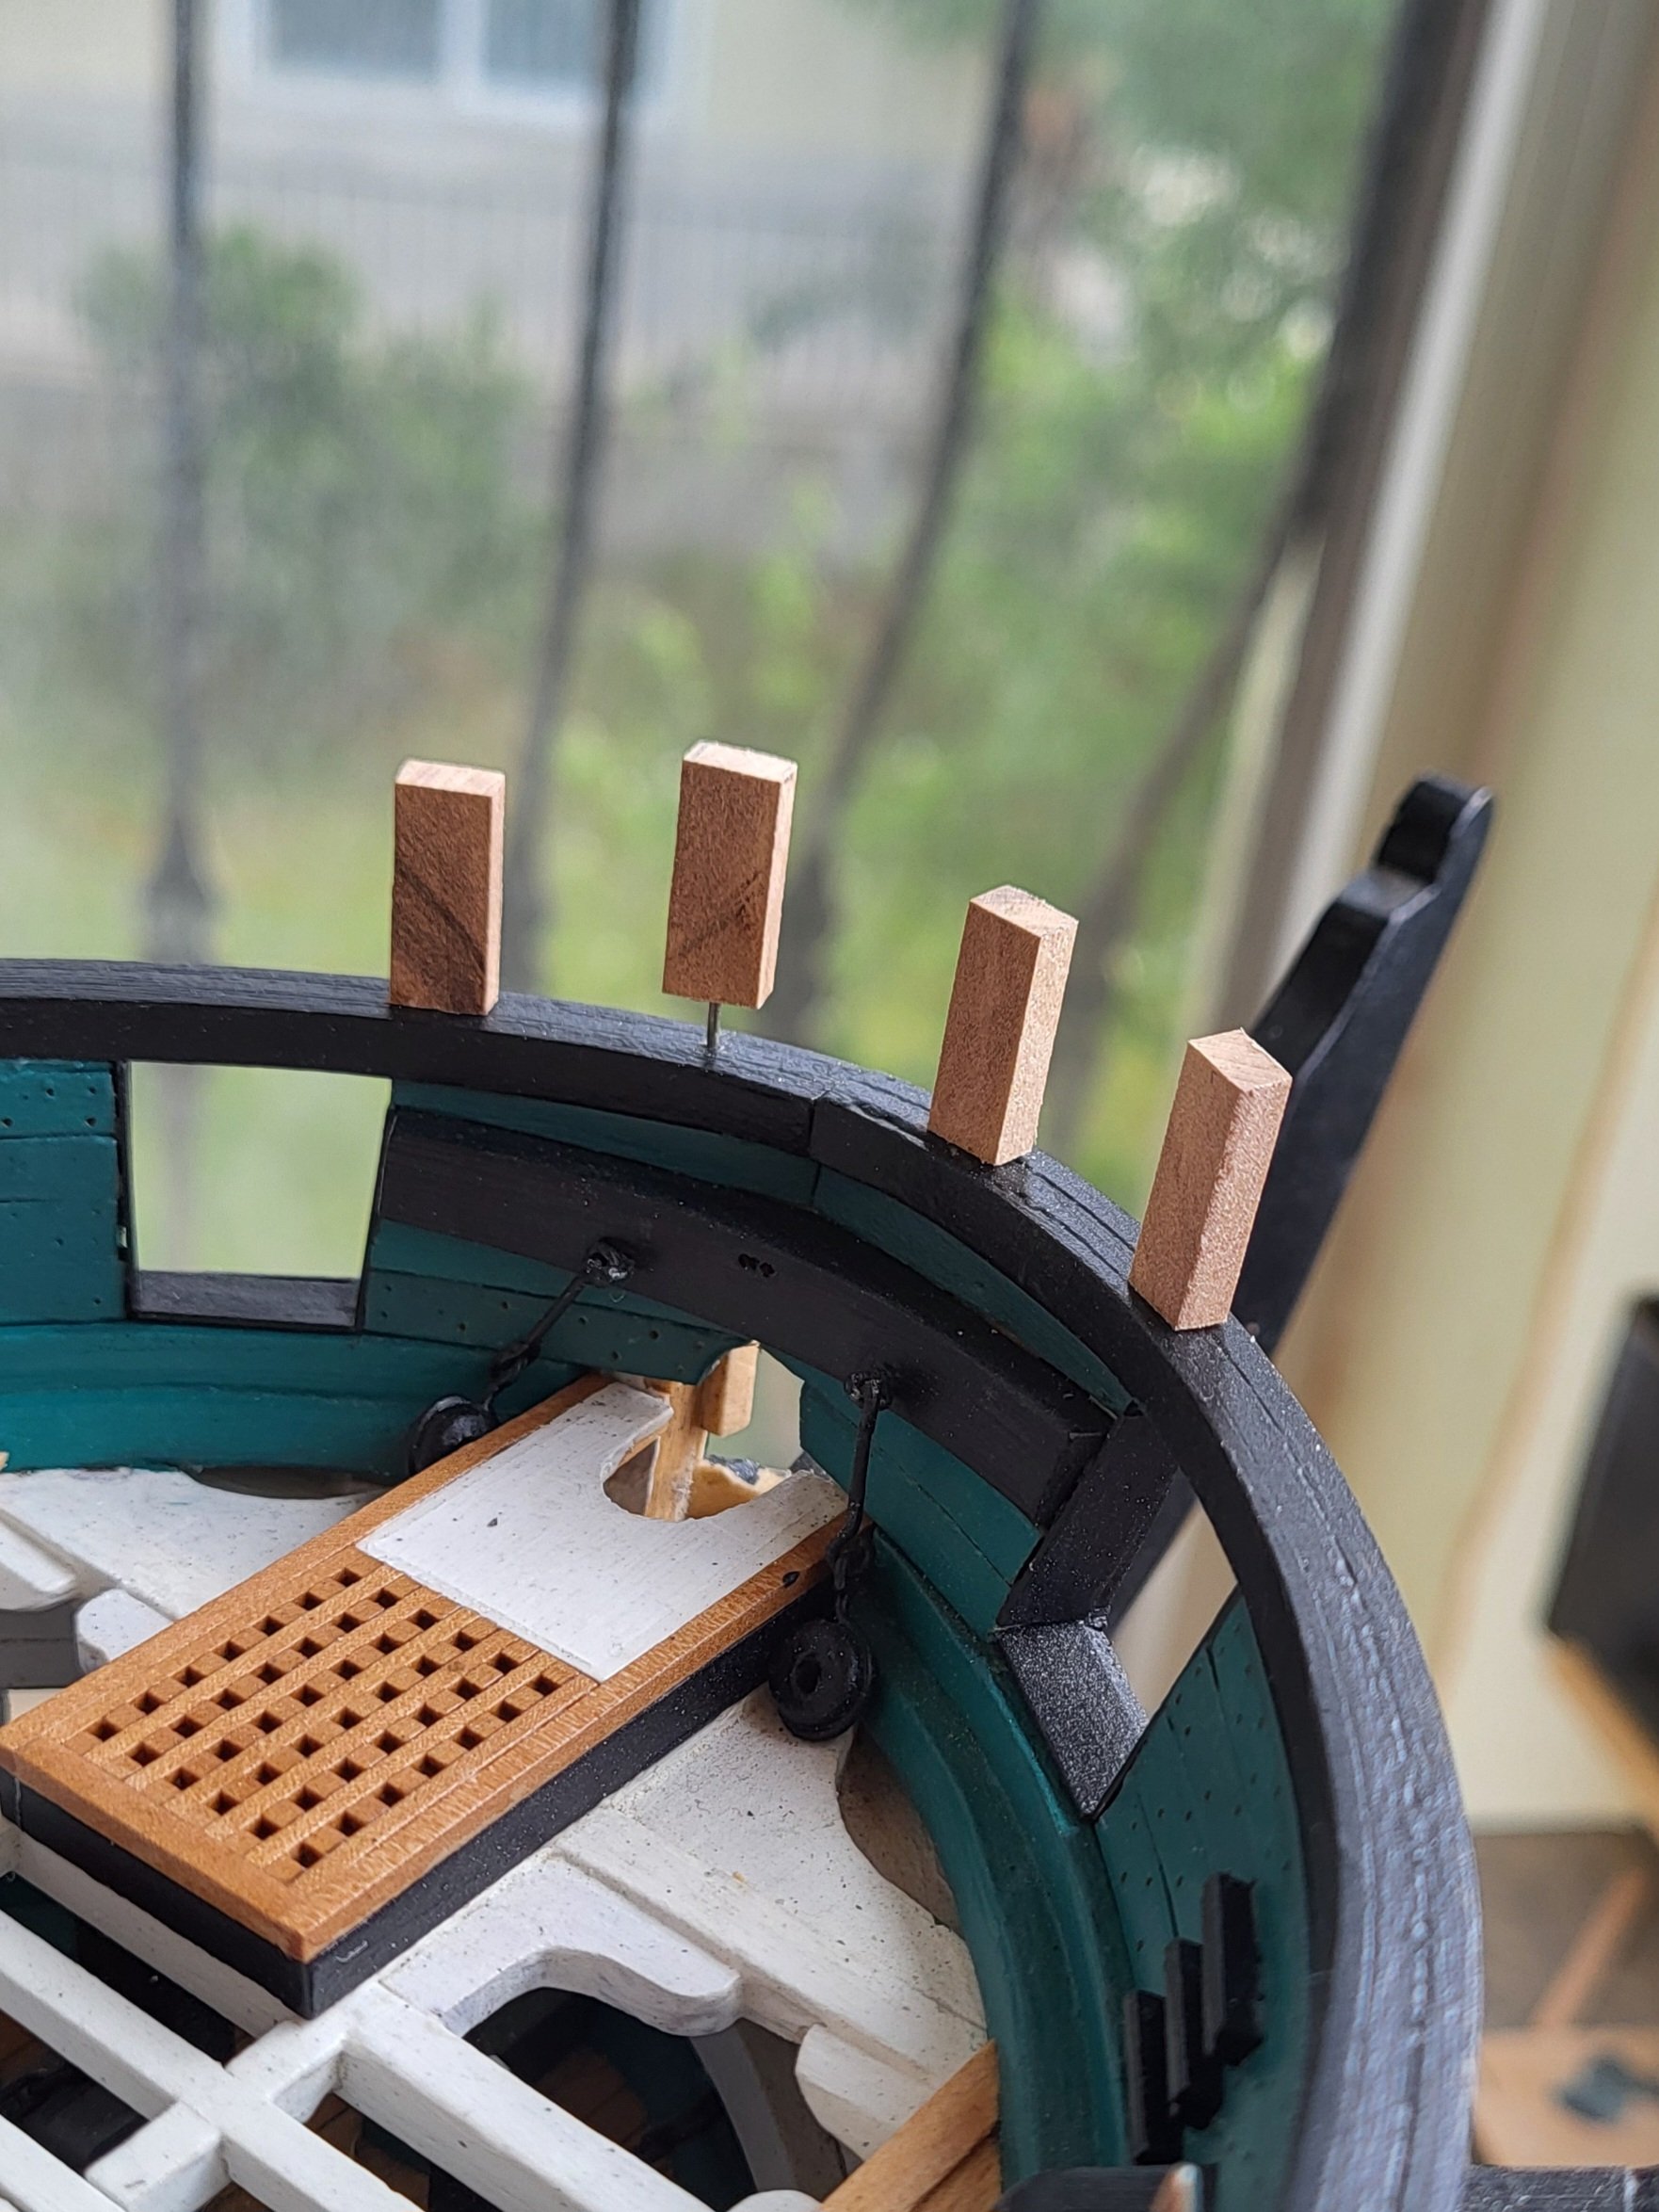
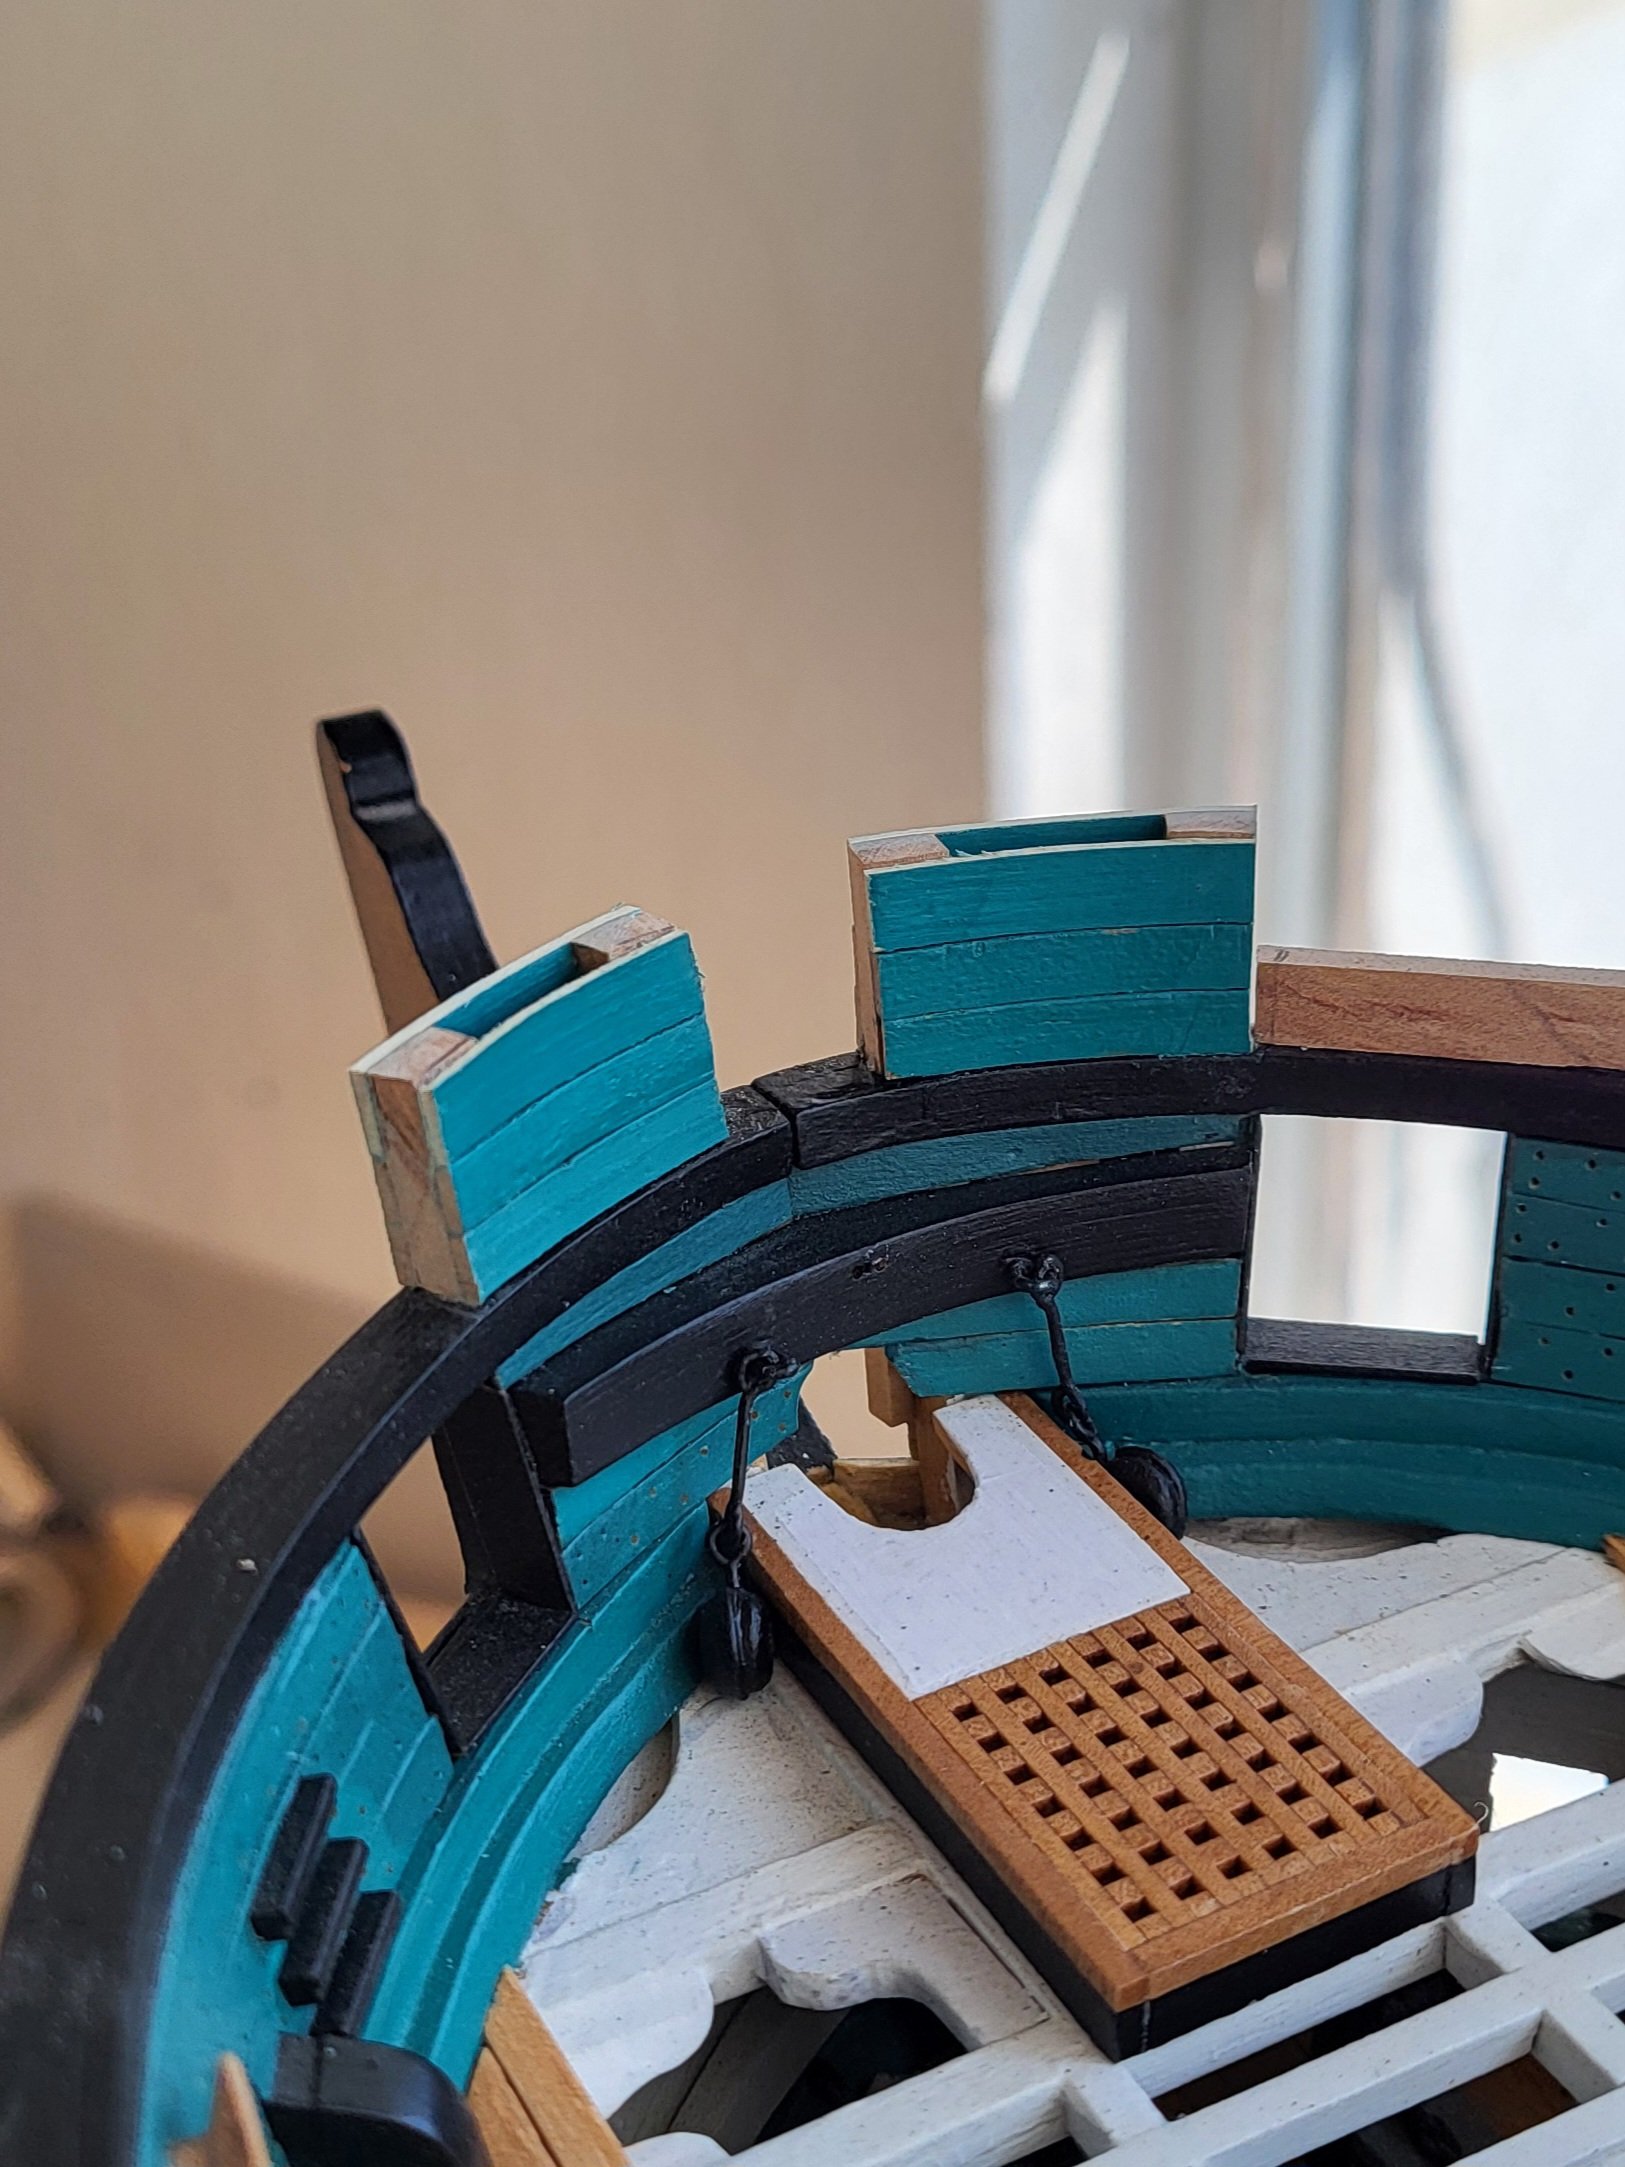
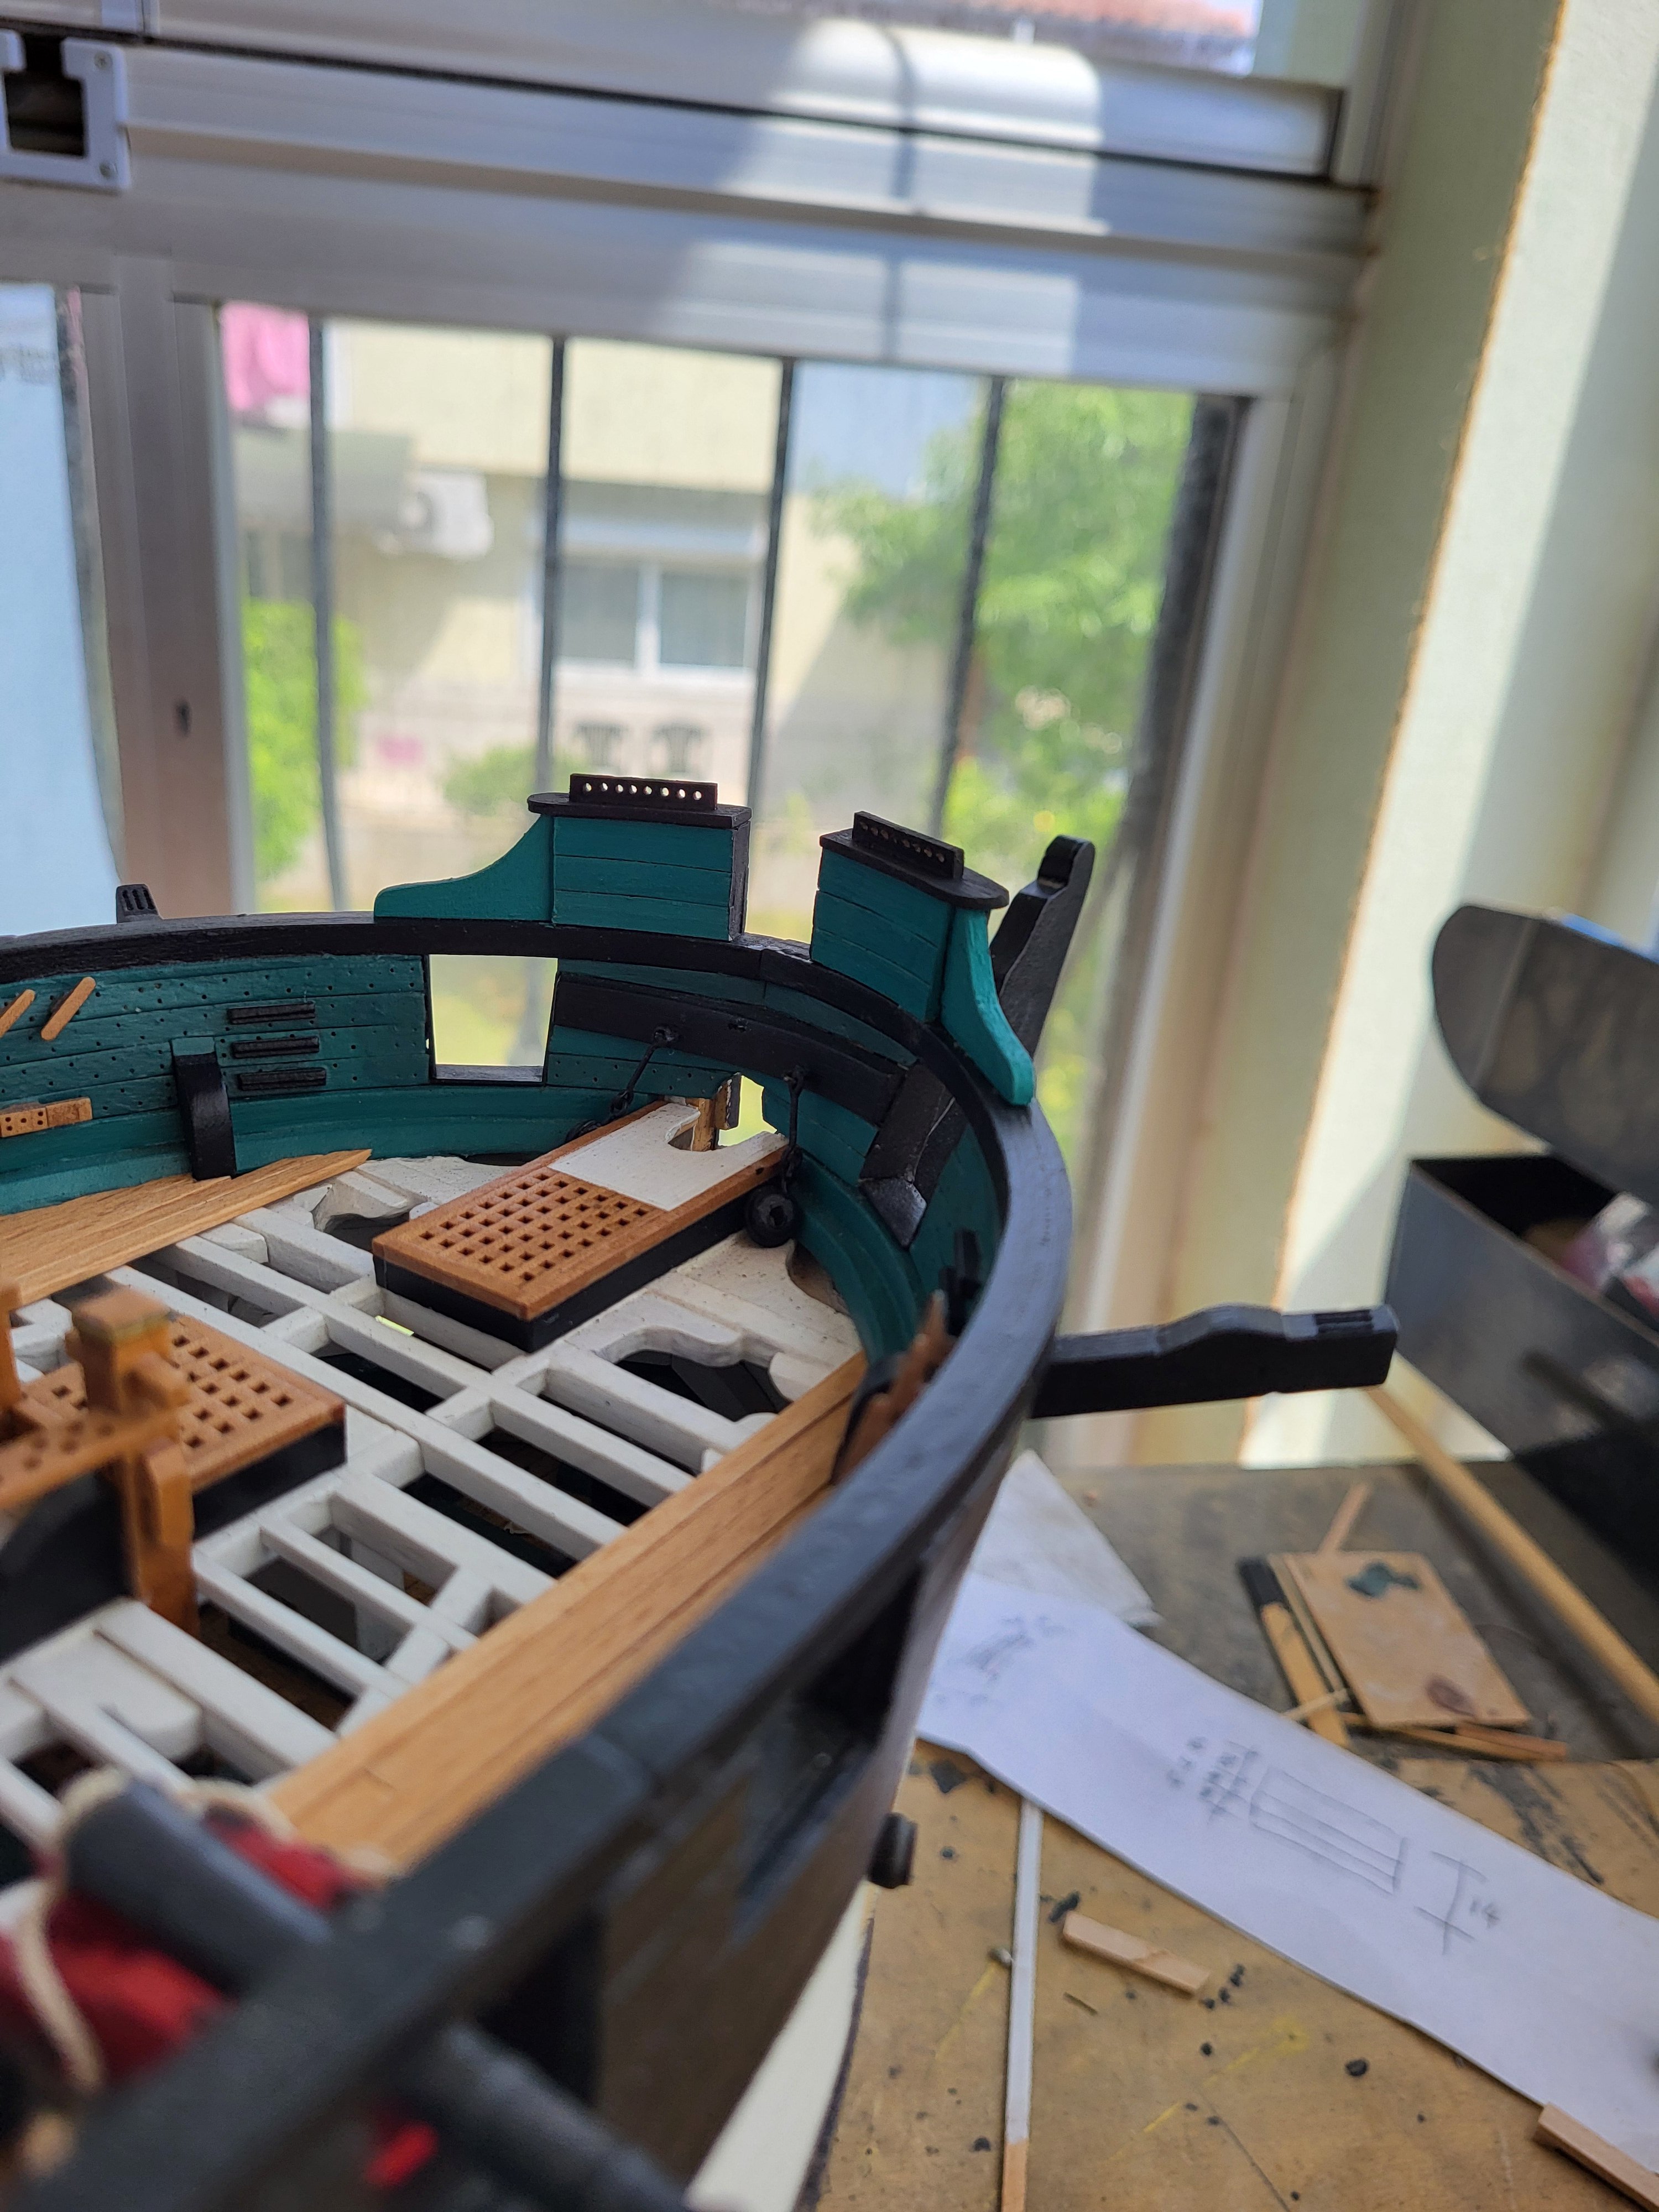
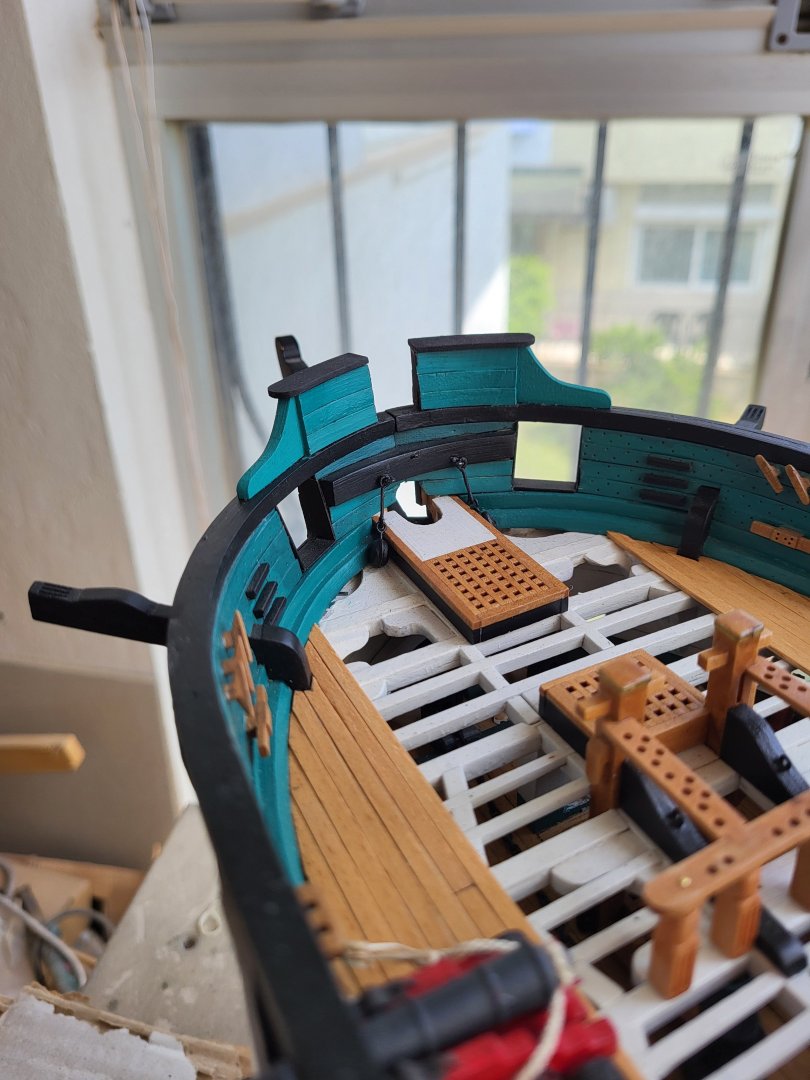
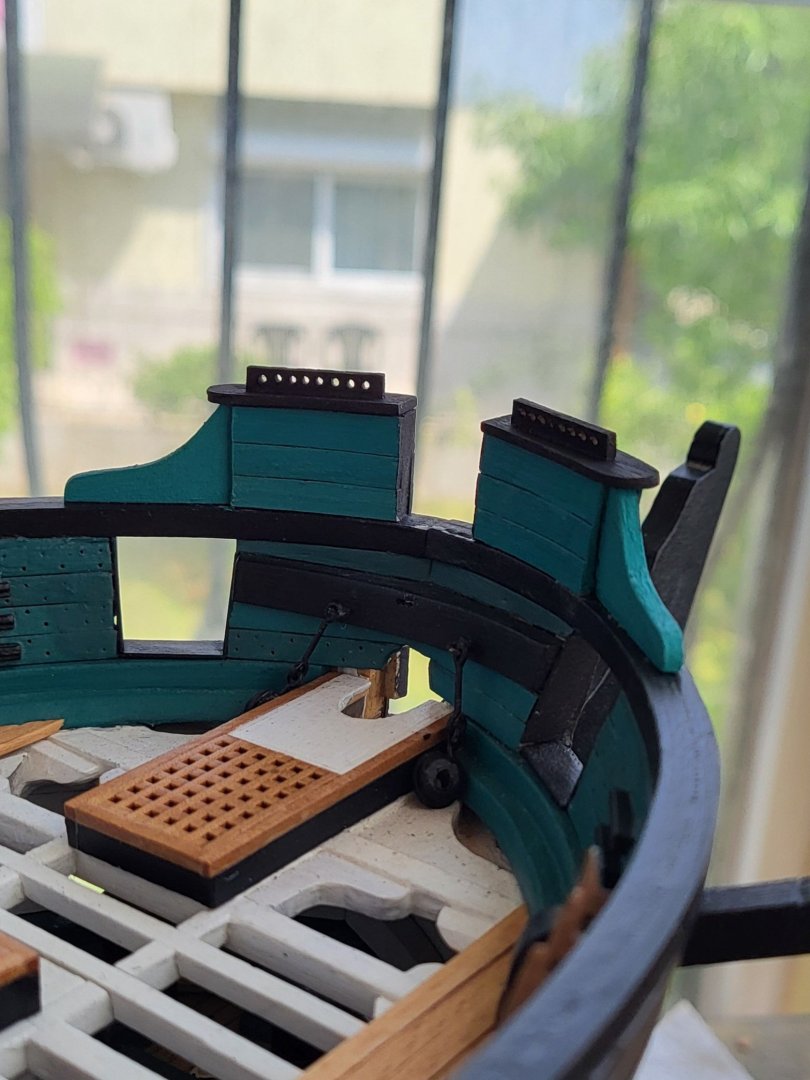
I added the bow rail.


-
USS Constitution by mtbediz - 1:76
mtbediz replied to mtbediz's topic in - Build logs for subjects built 1751 - 1800
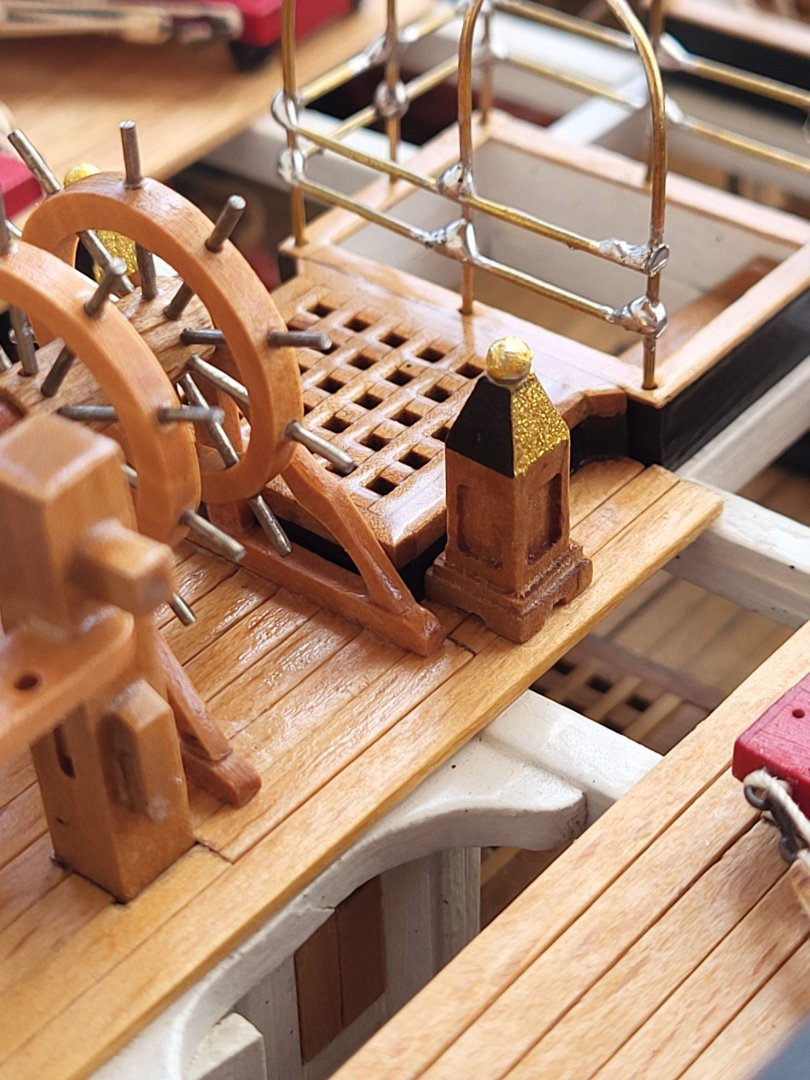
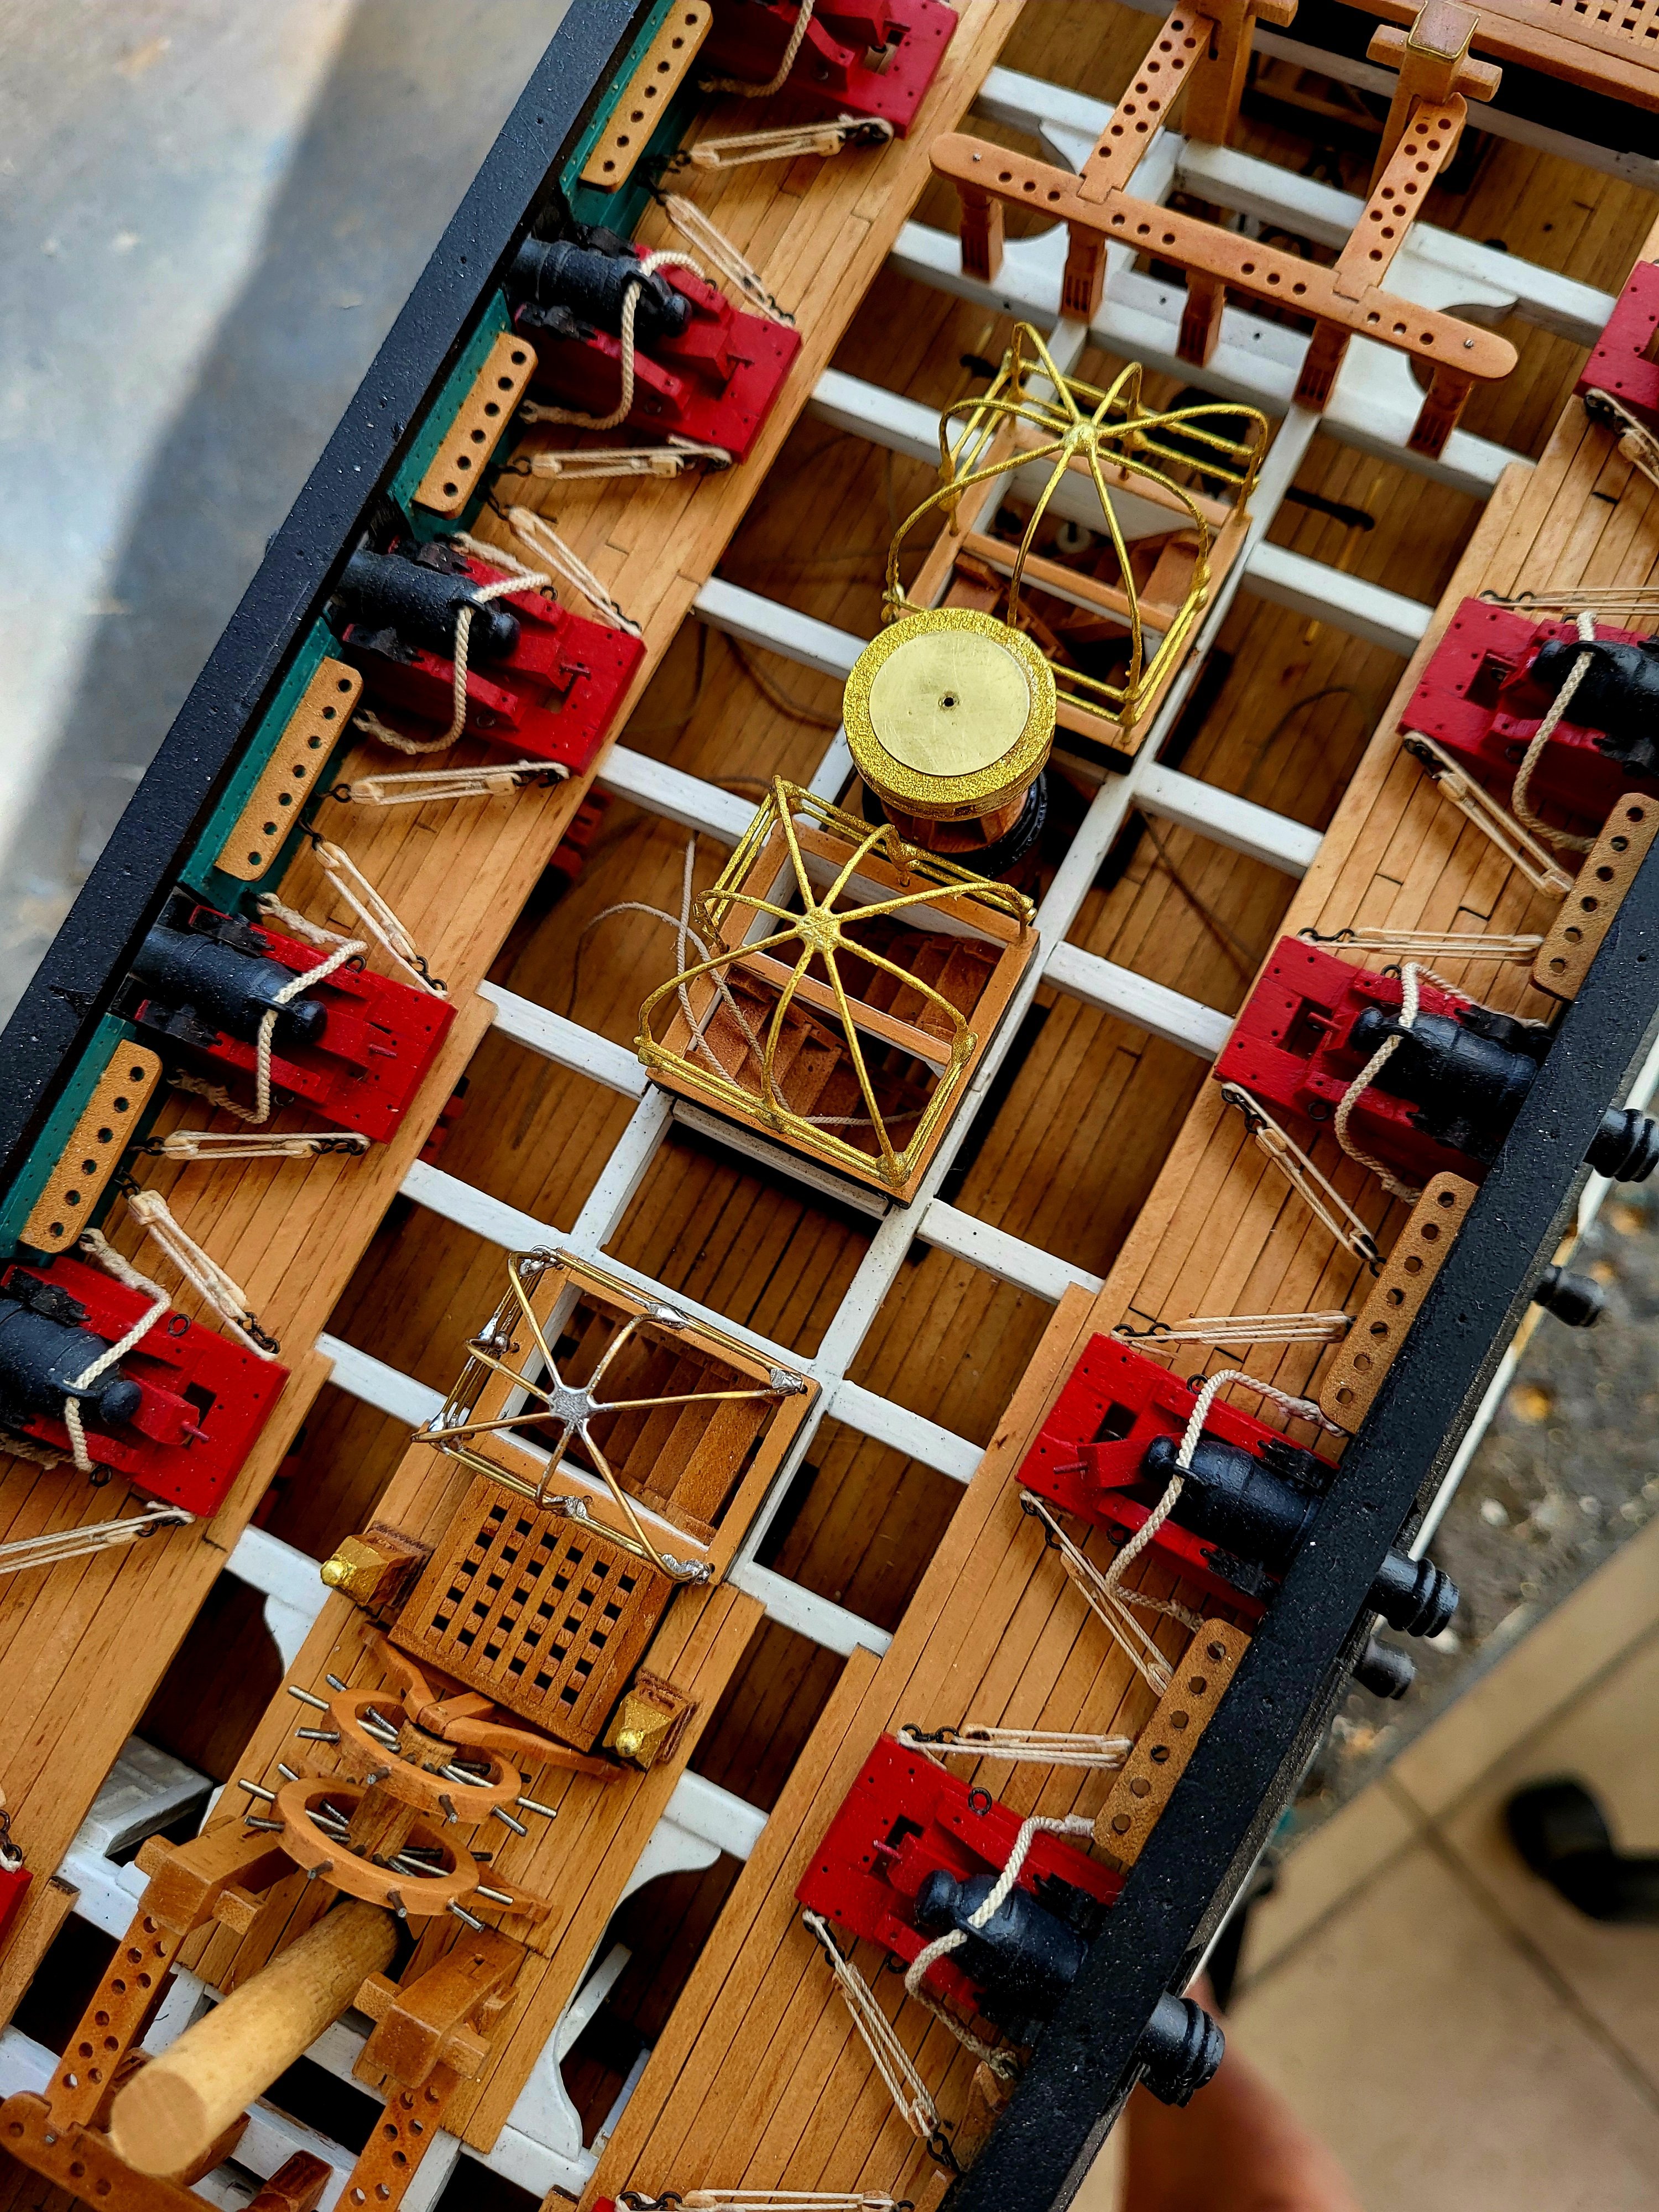
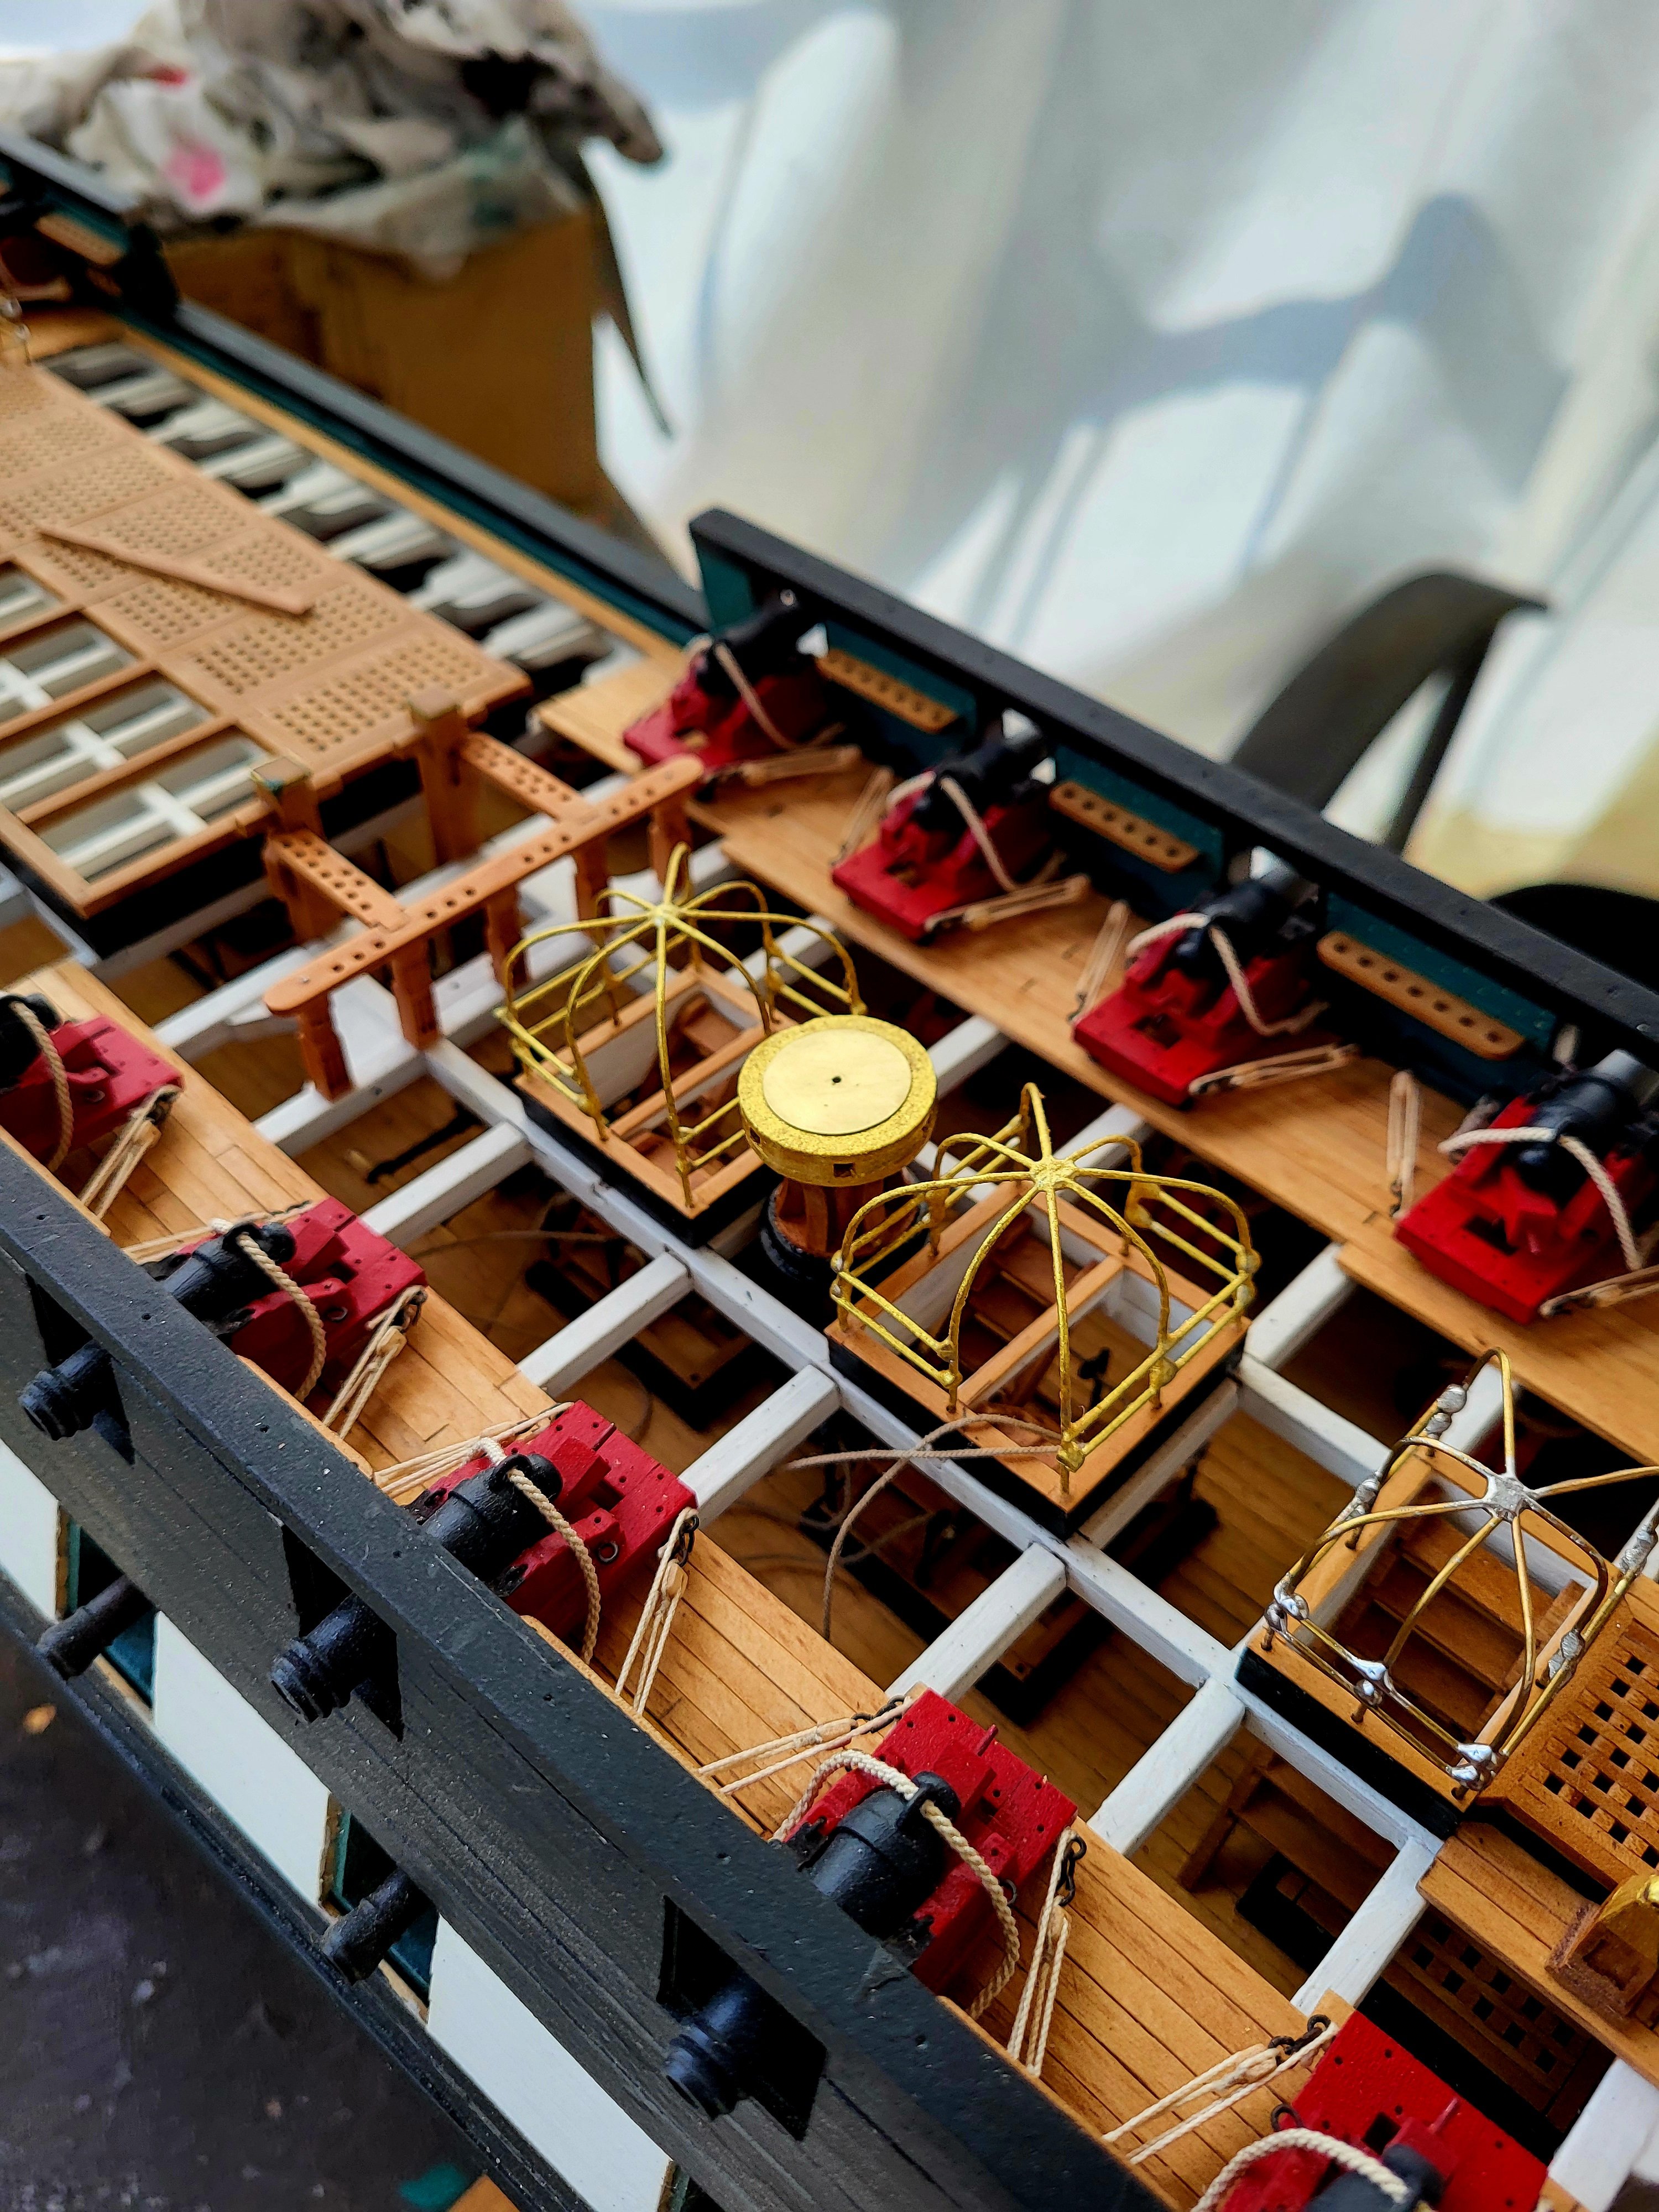
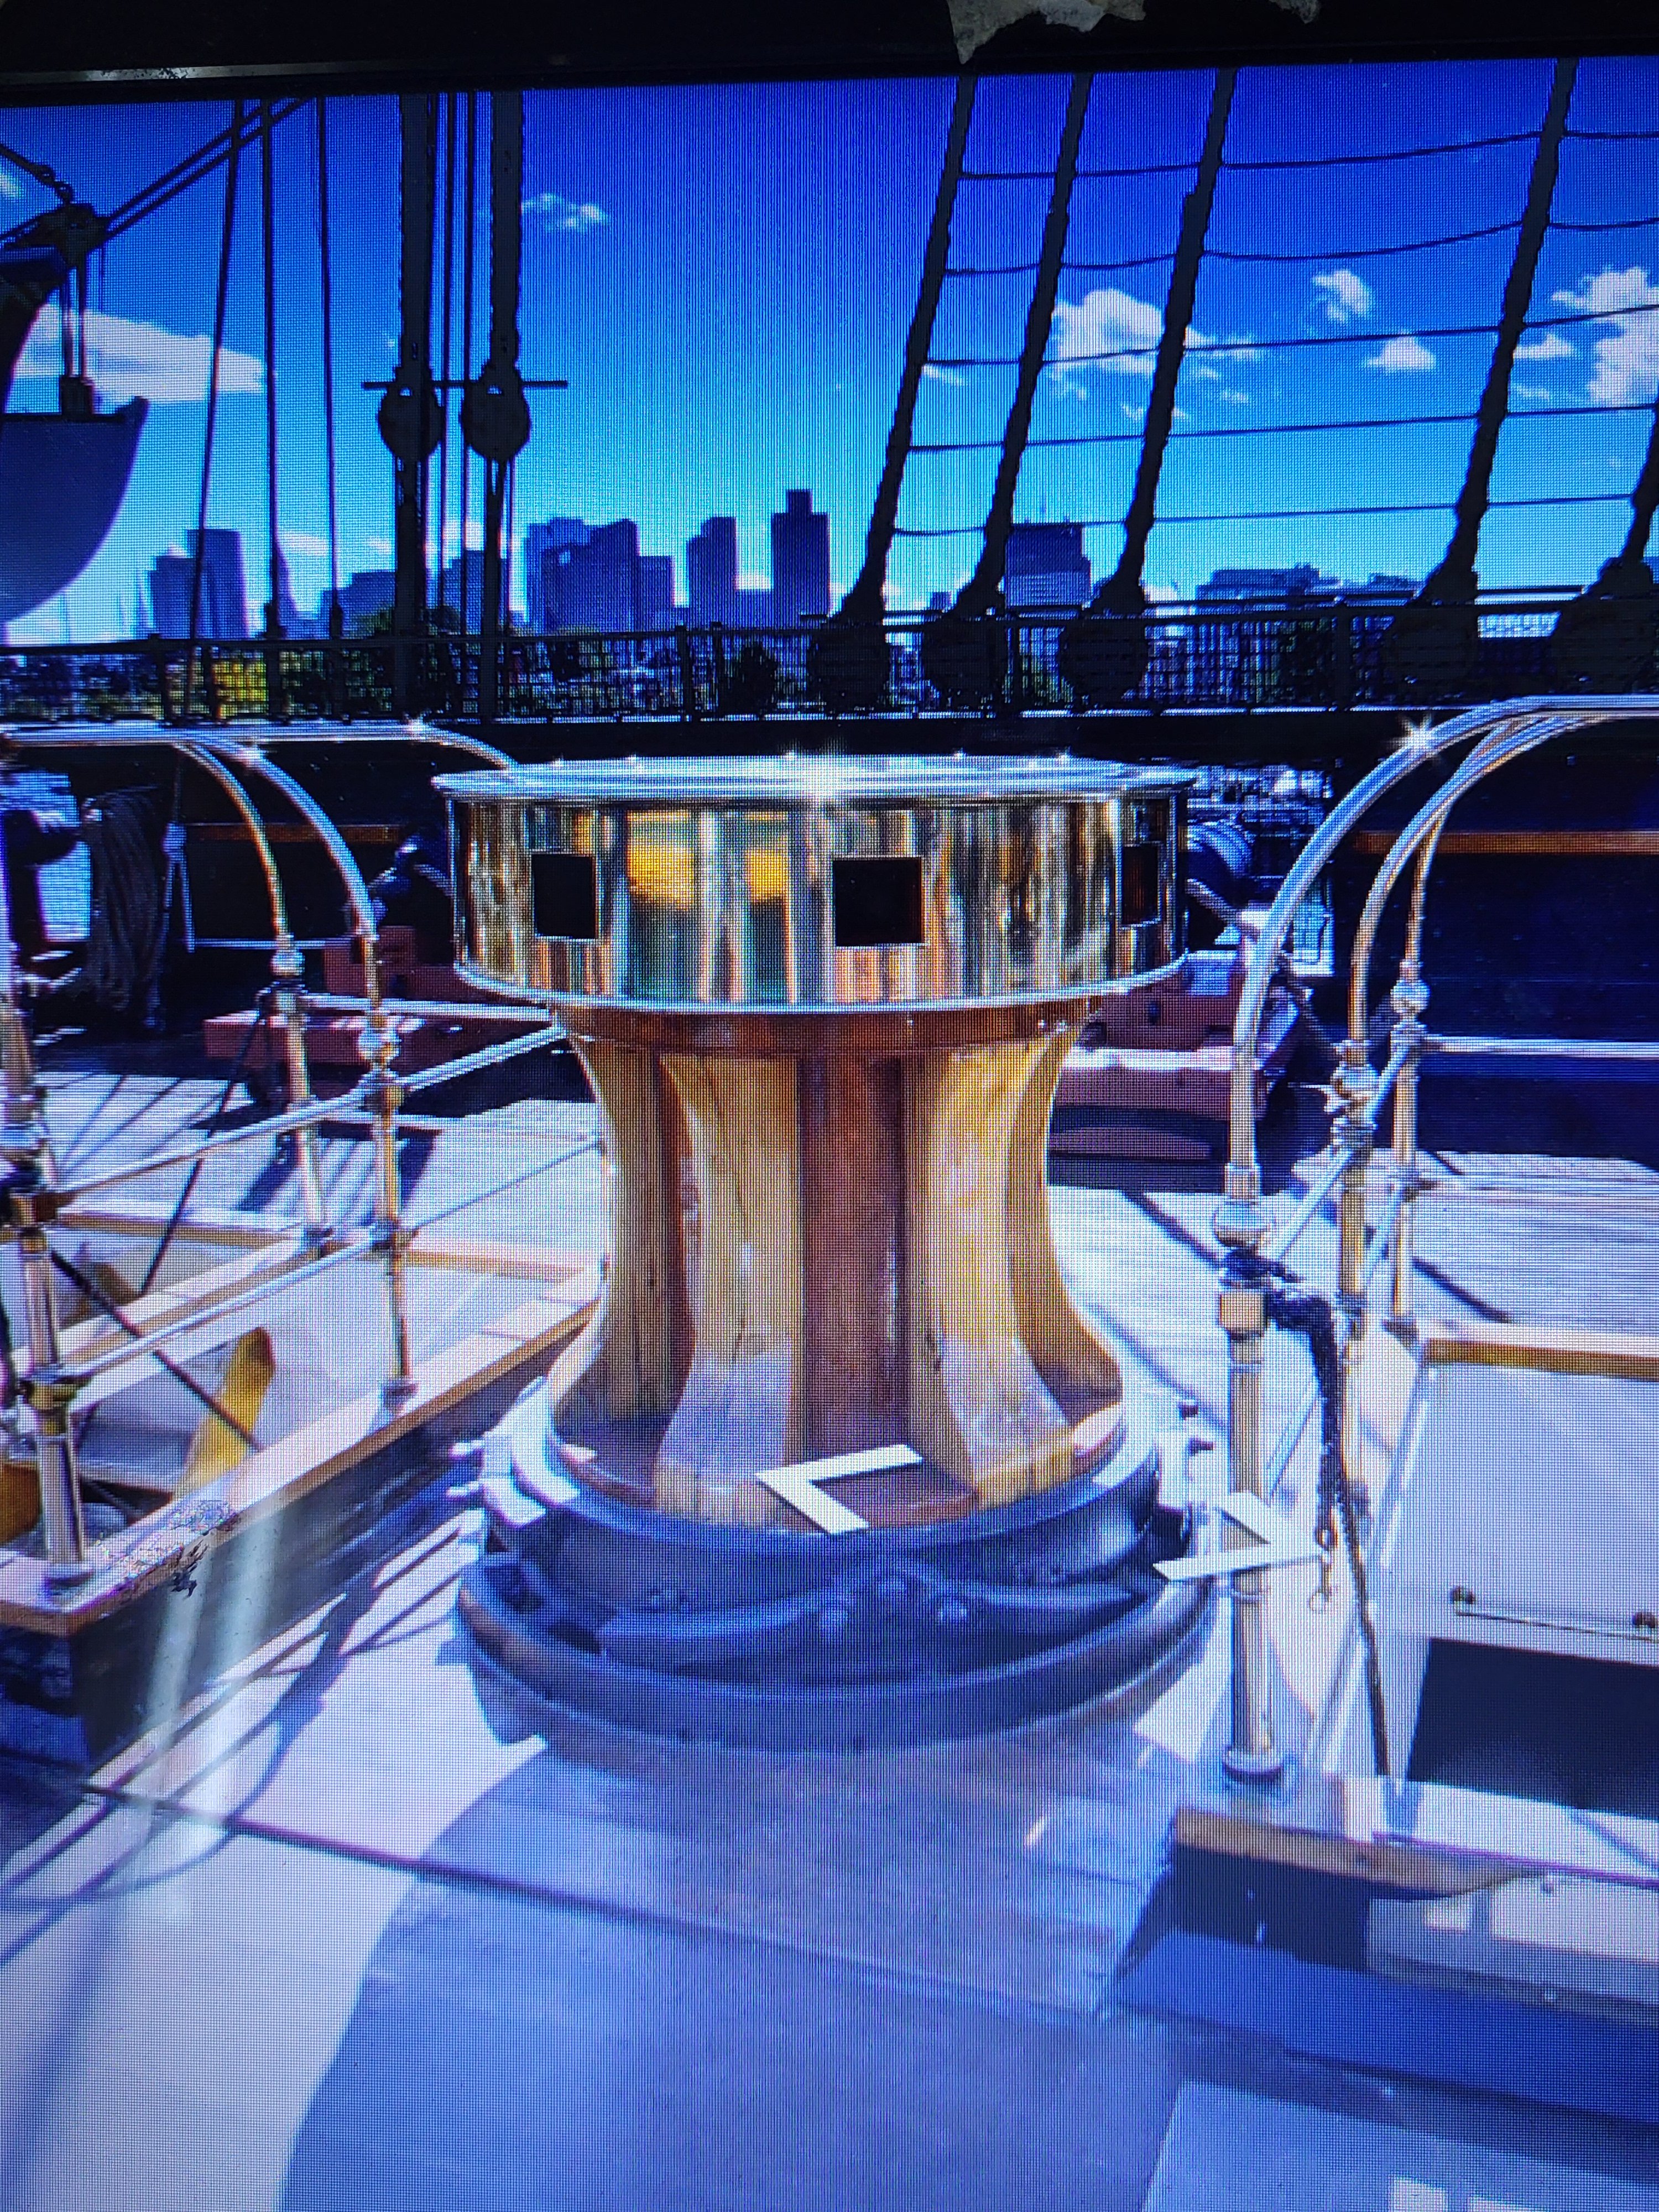
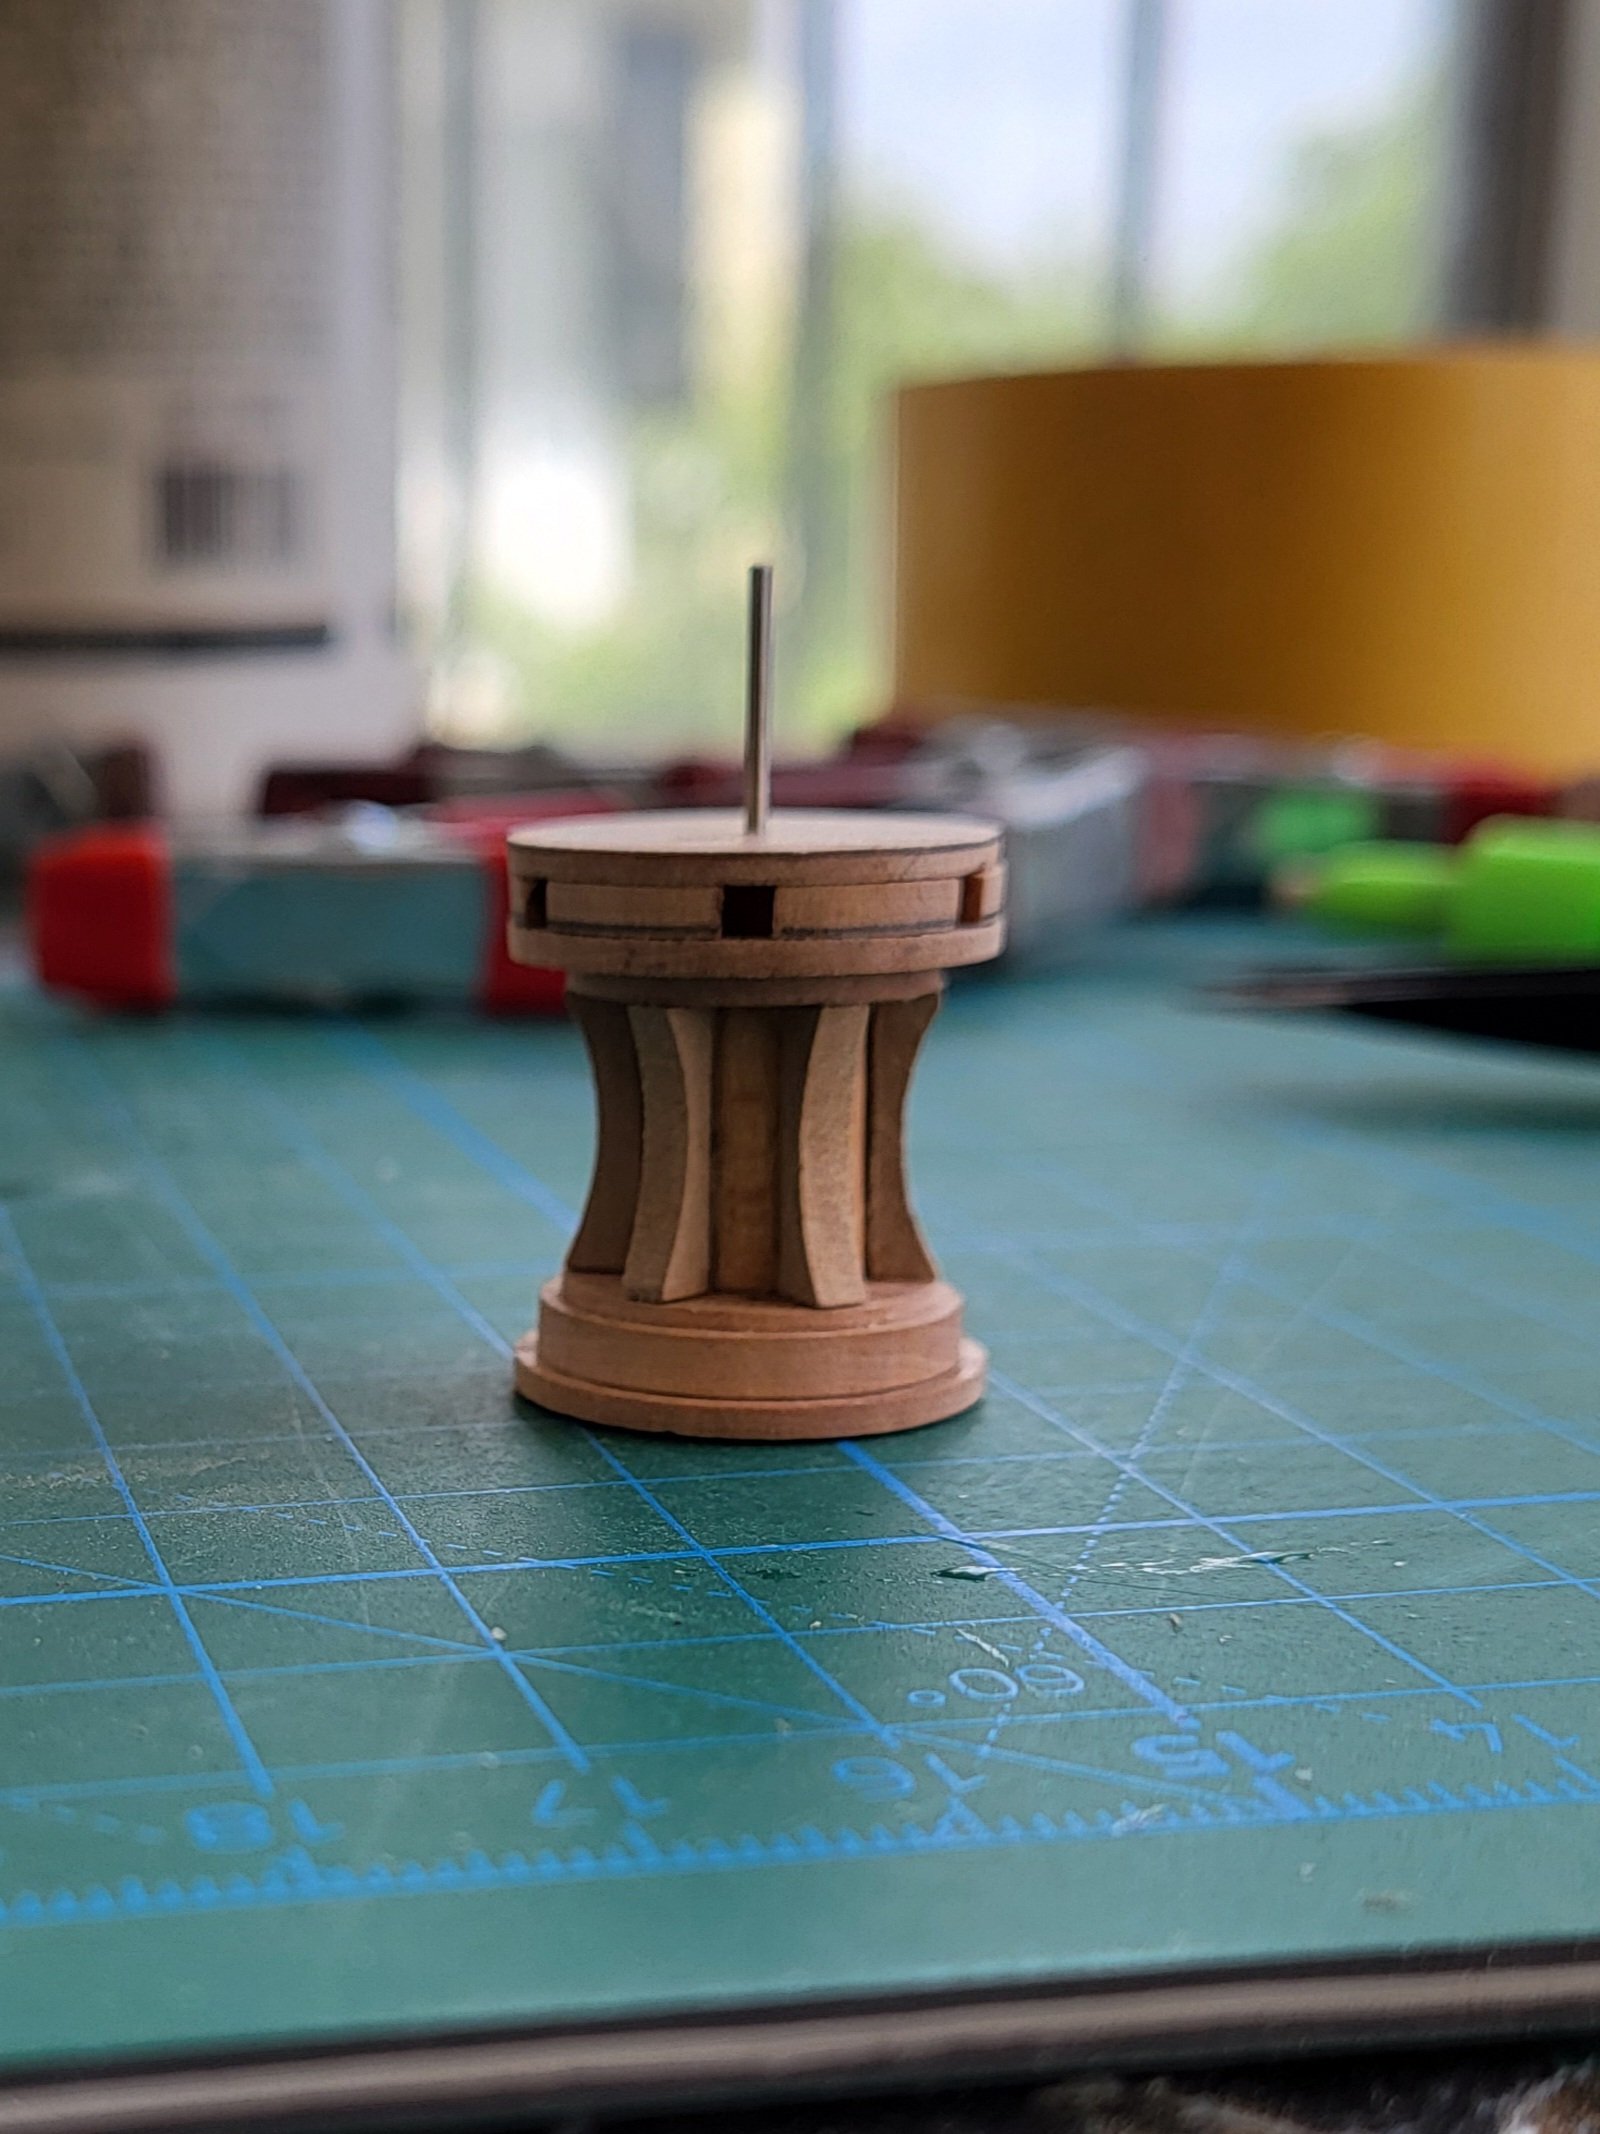
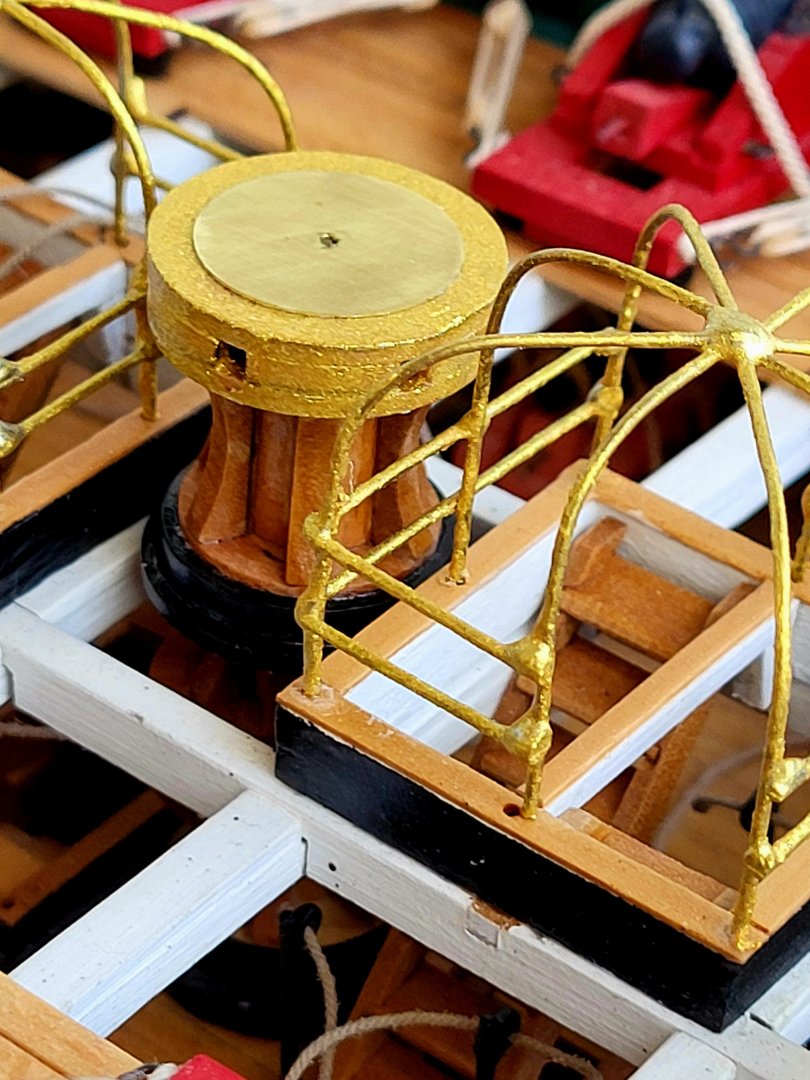
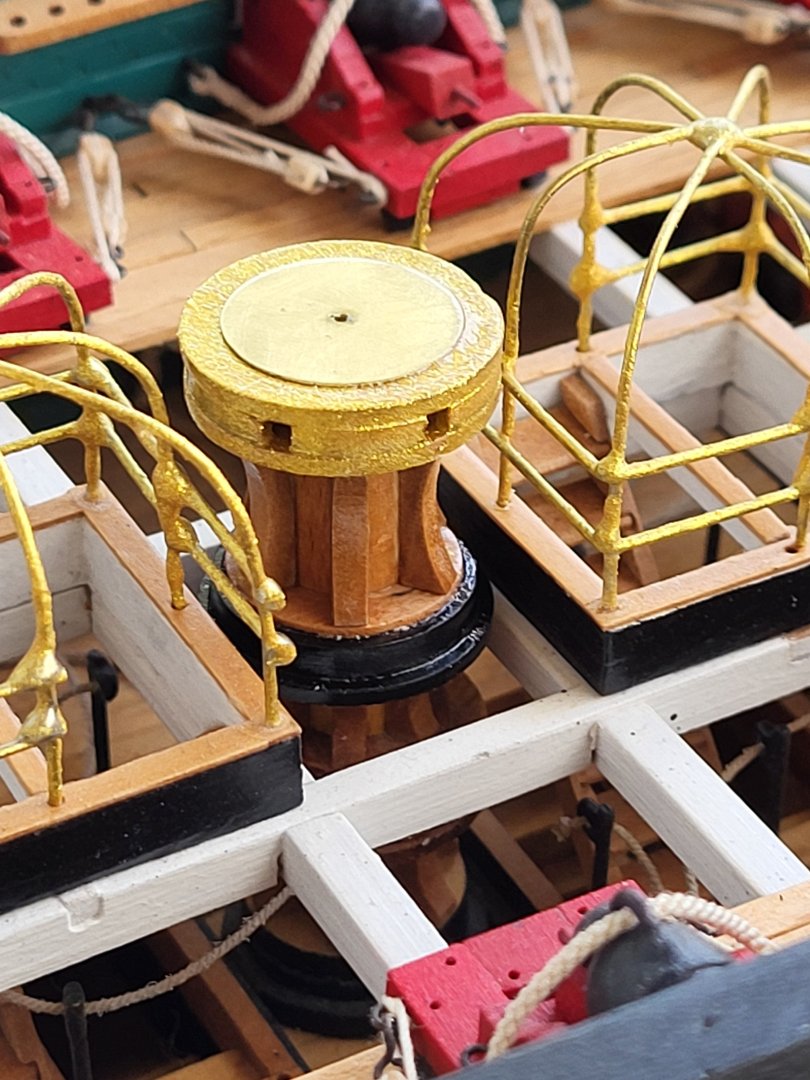
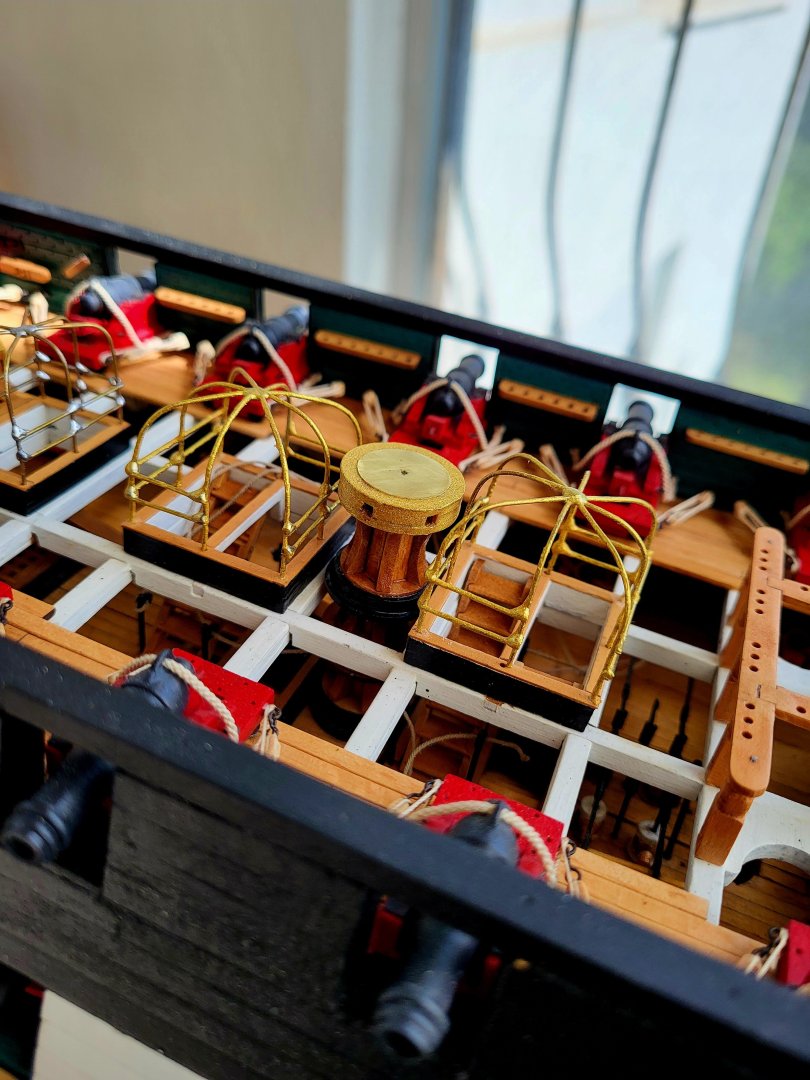
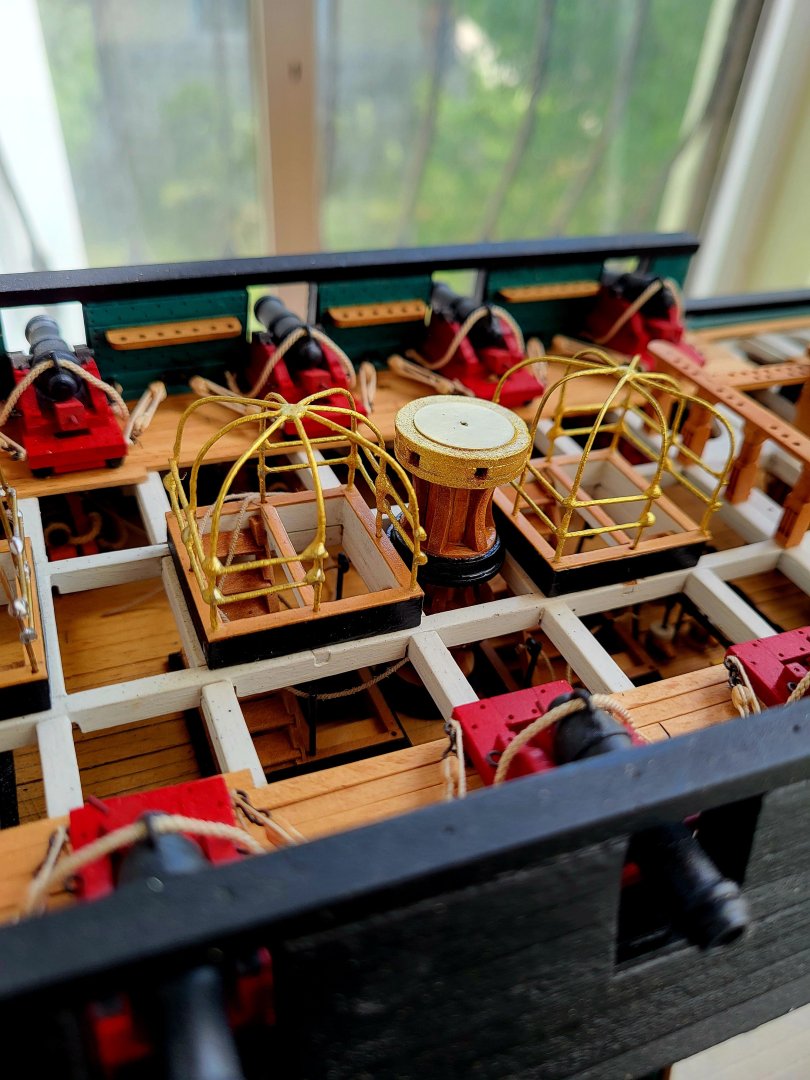
I painted the capstan.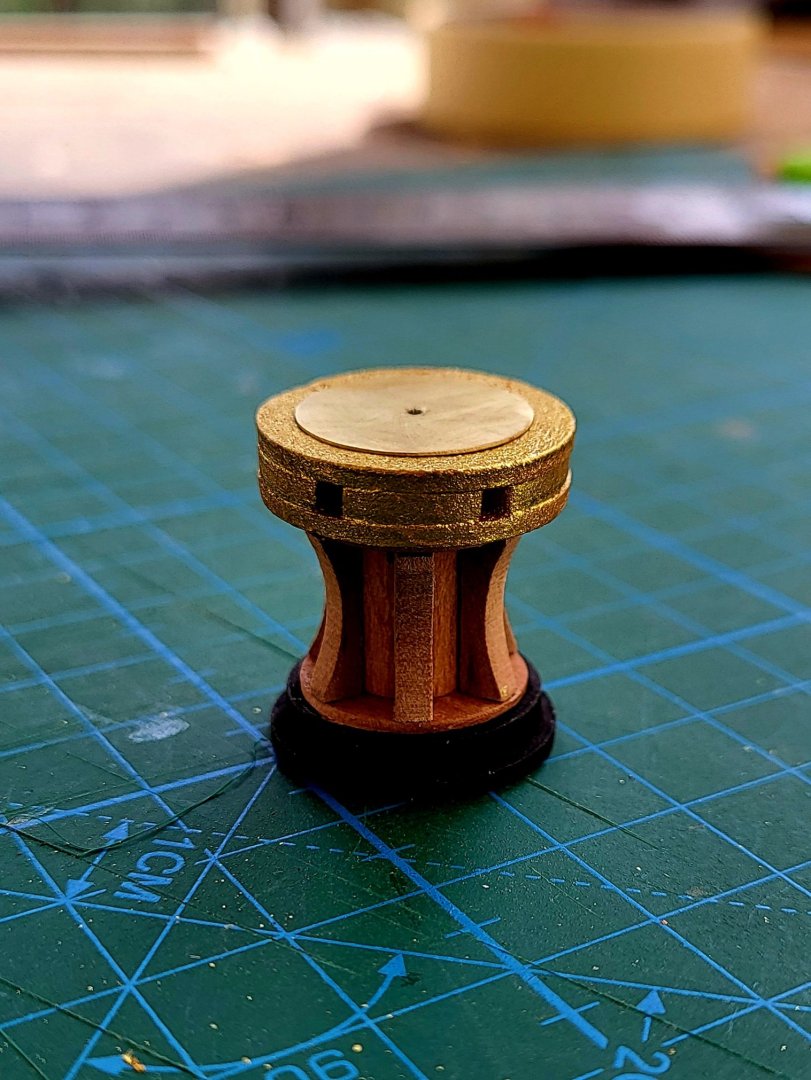


-
USS Constitution by mtbediz - 1:76
mtbediz replied to mtbediz's topic in - Build logs for subjects built 1751 - 1800
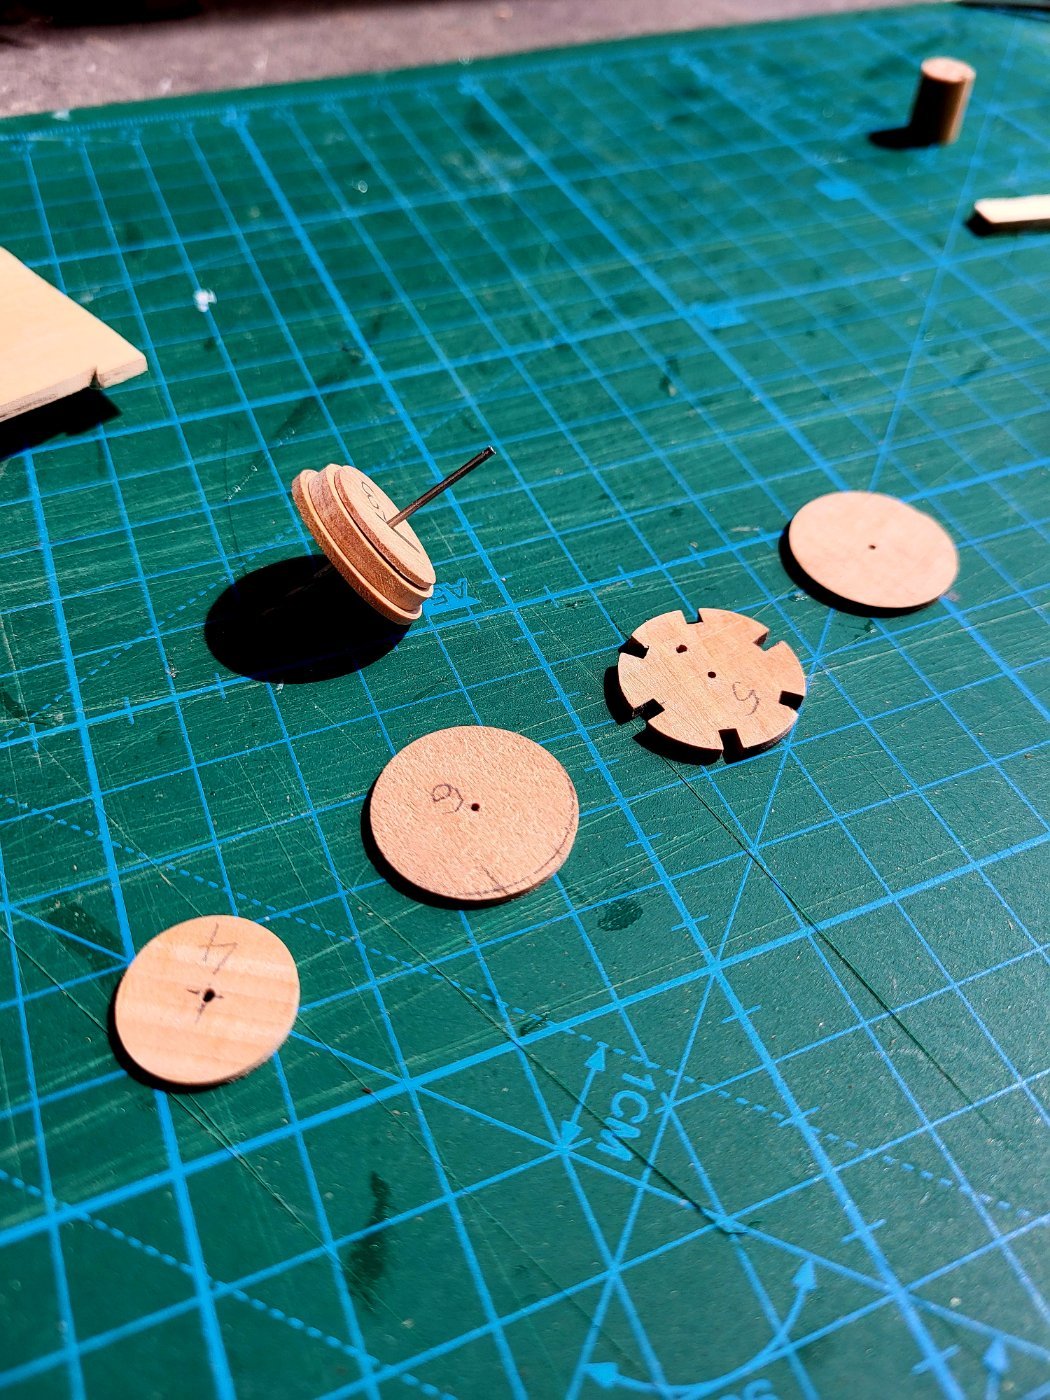
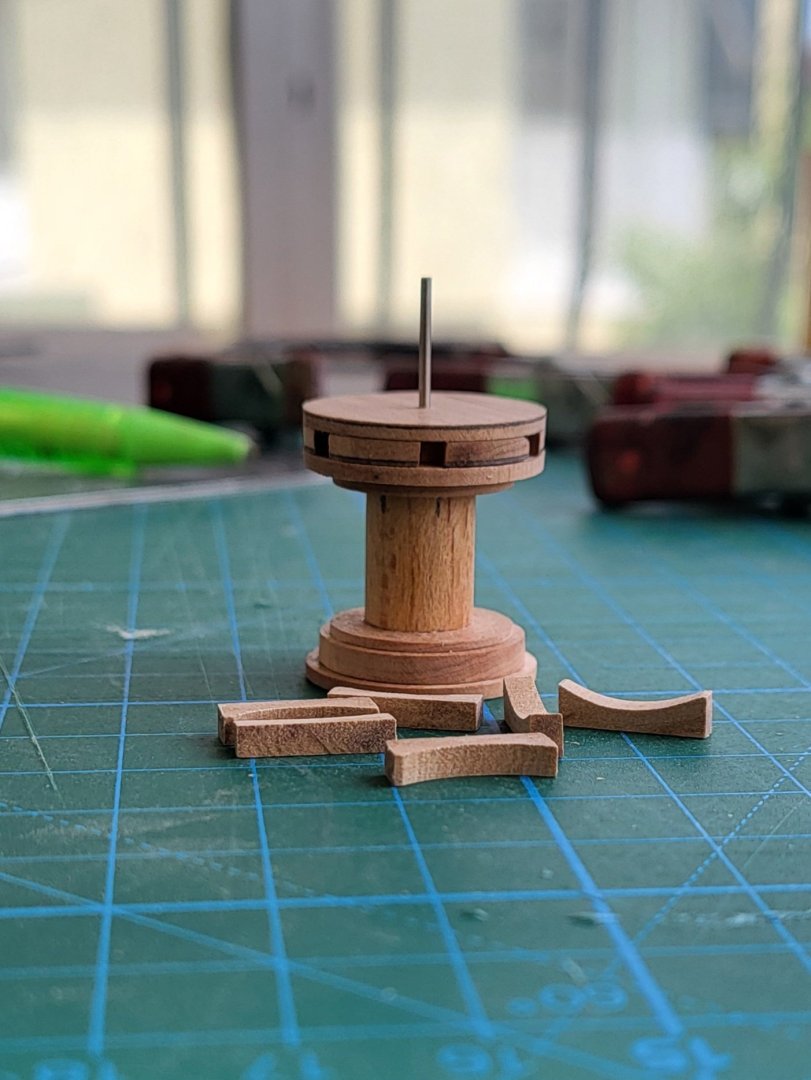
Thanks Jon. I was supposed to paint the bottom two round pieces black before gluing them but I forgot. Now I'm trying to figure out how to keep the paint from spilling over to the other side when painting them -
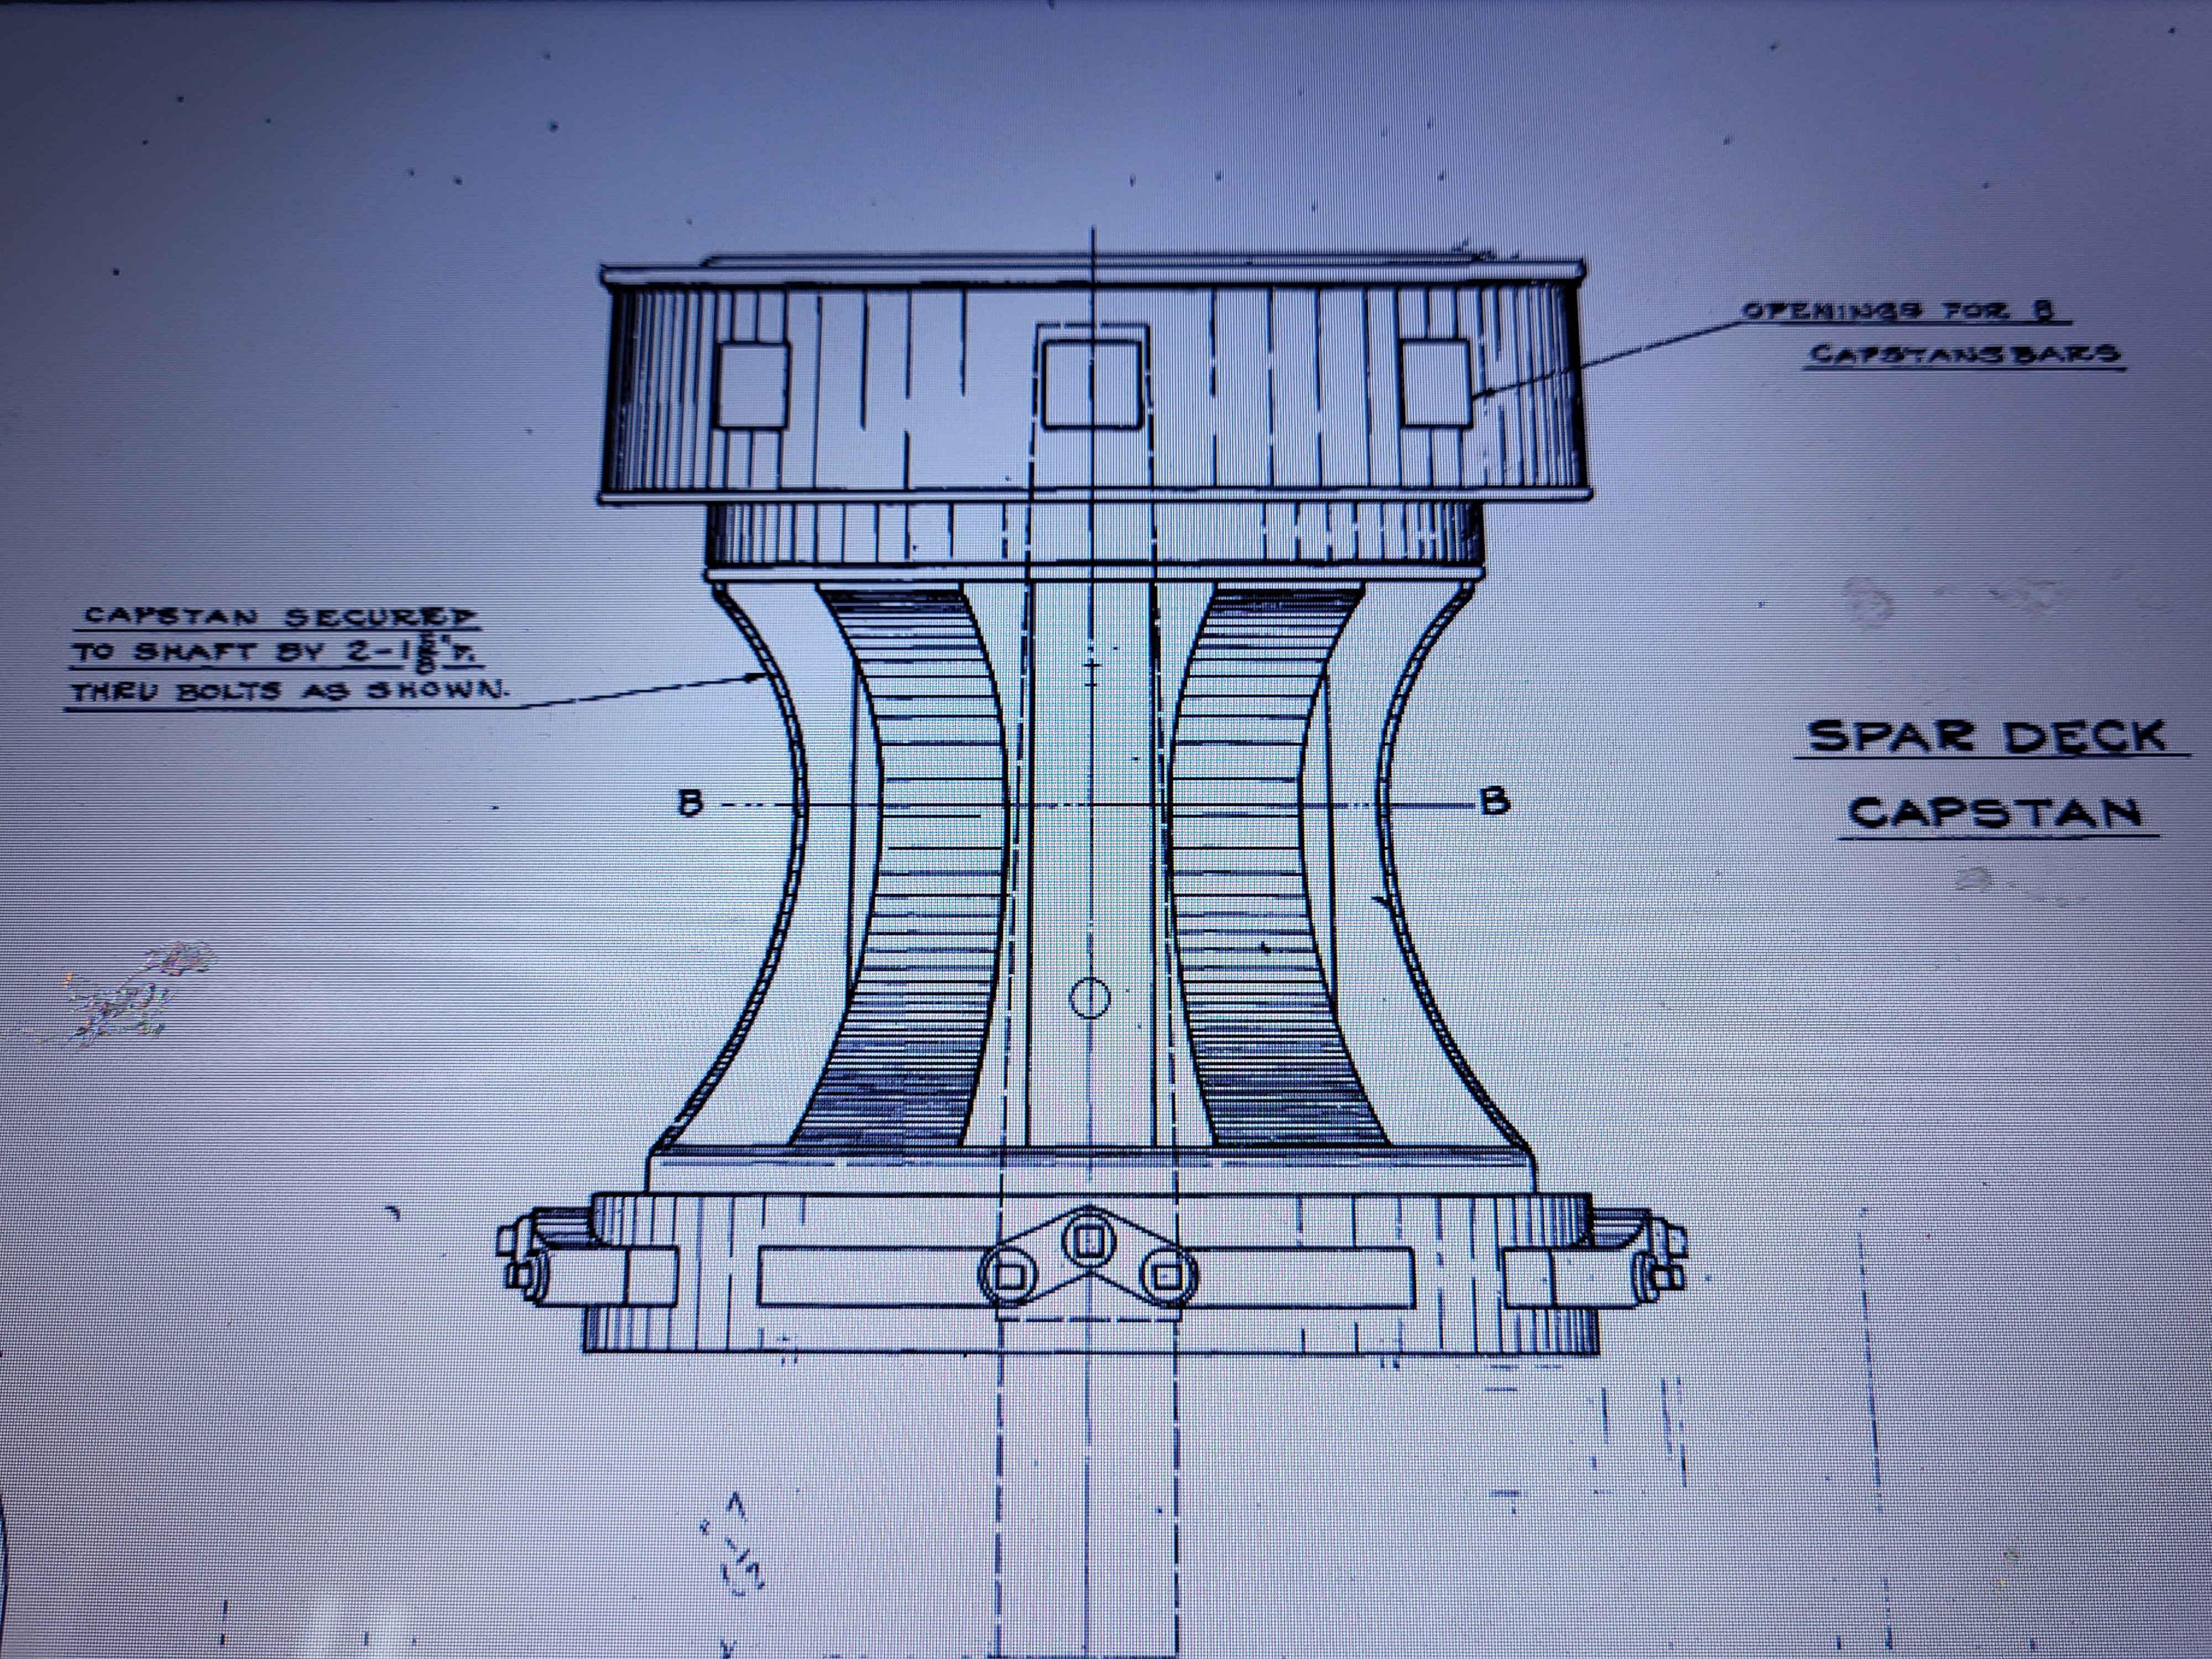
USS Constitution by mtbediz - 1:76
mtbediz replied to mtbediz's topic in - Build logs for subjects built 1751 - 1800
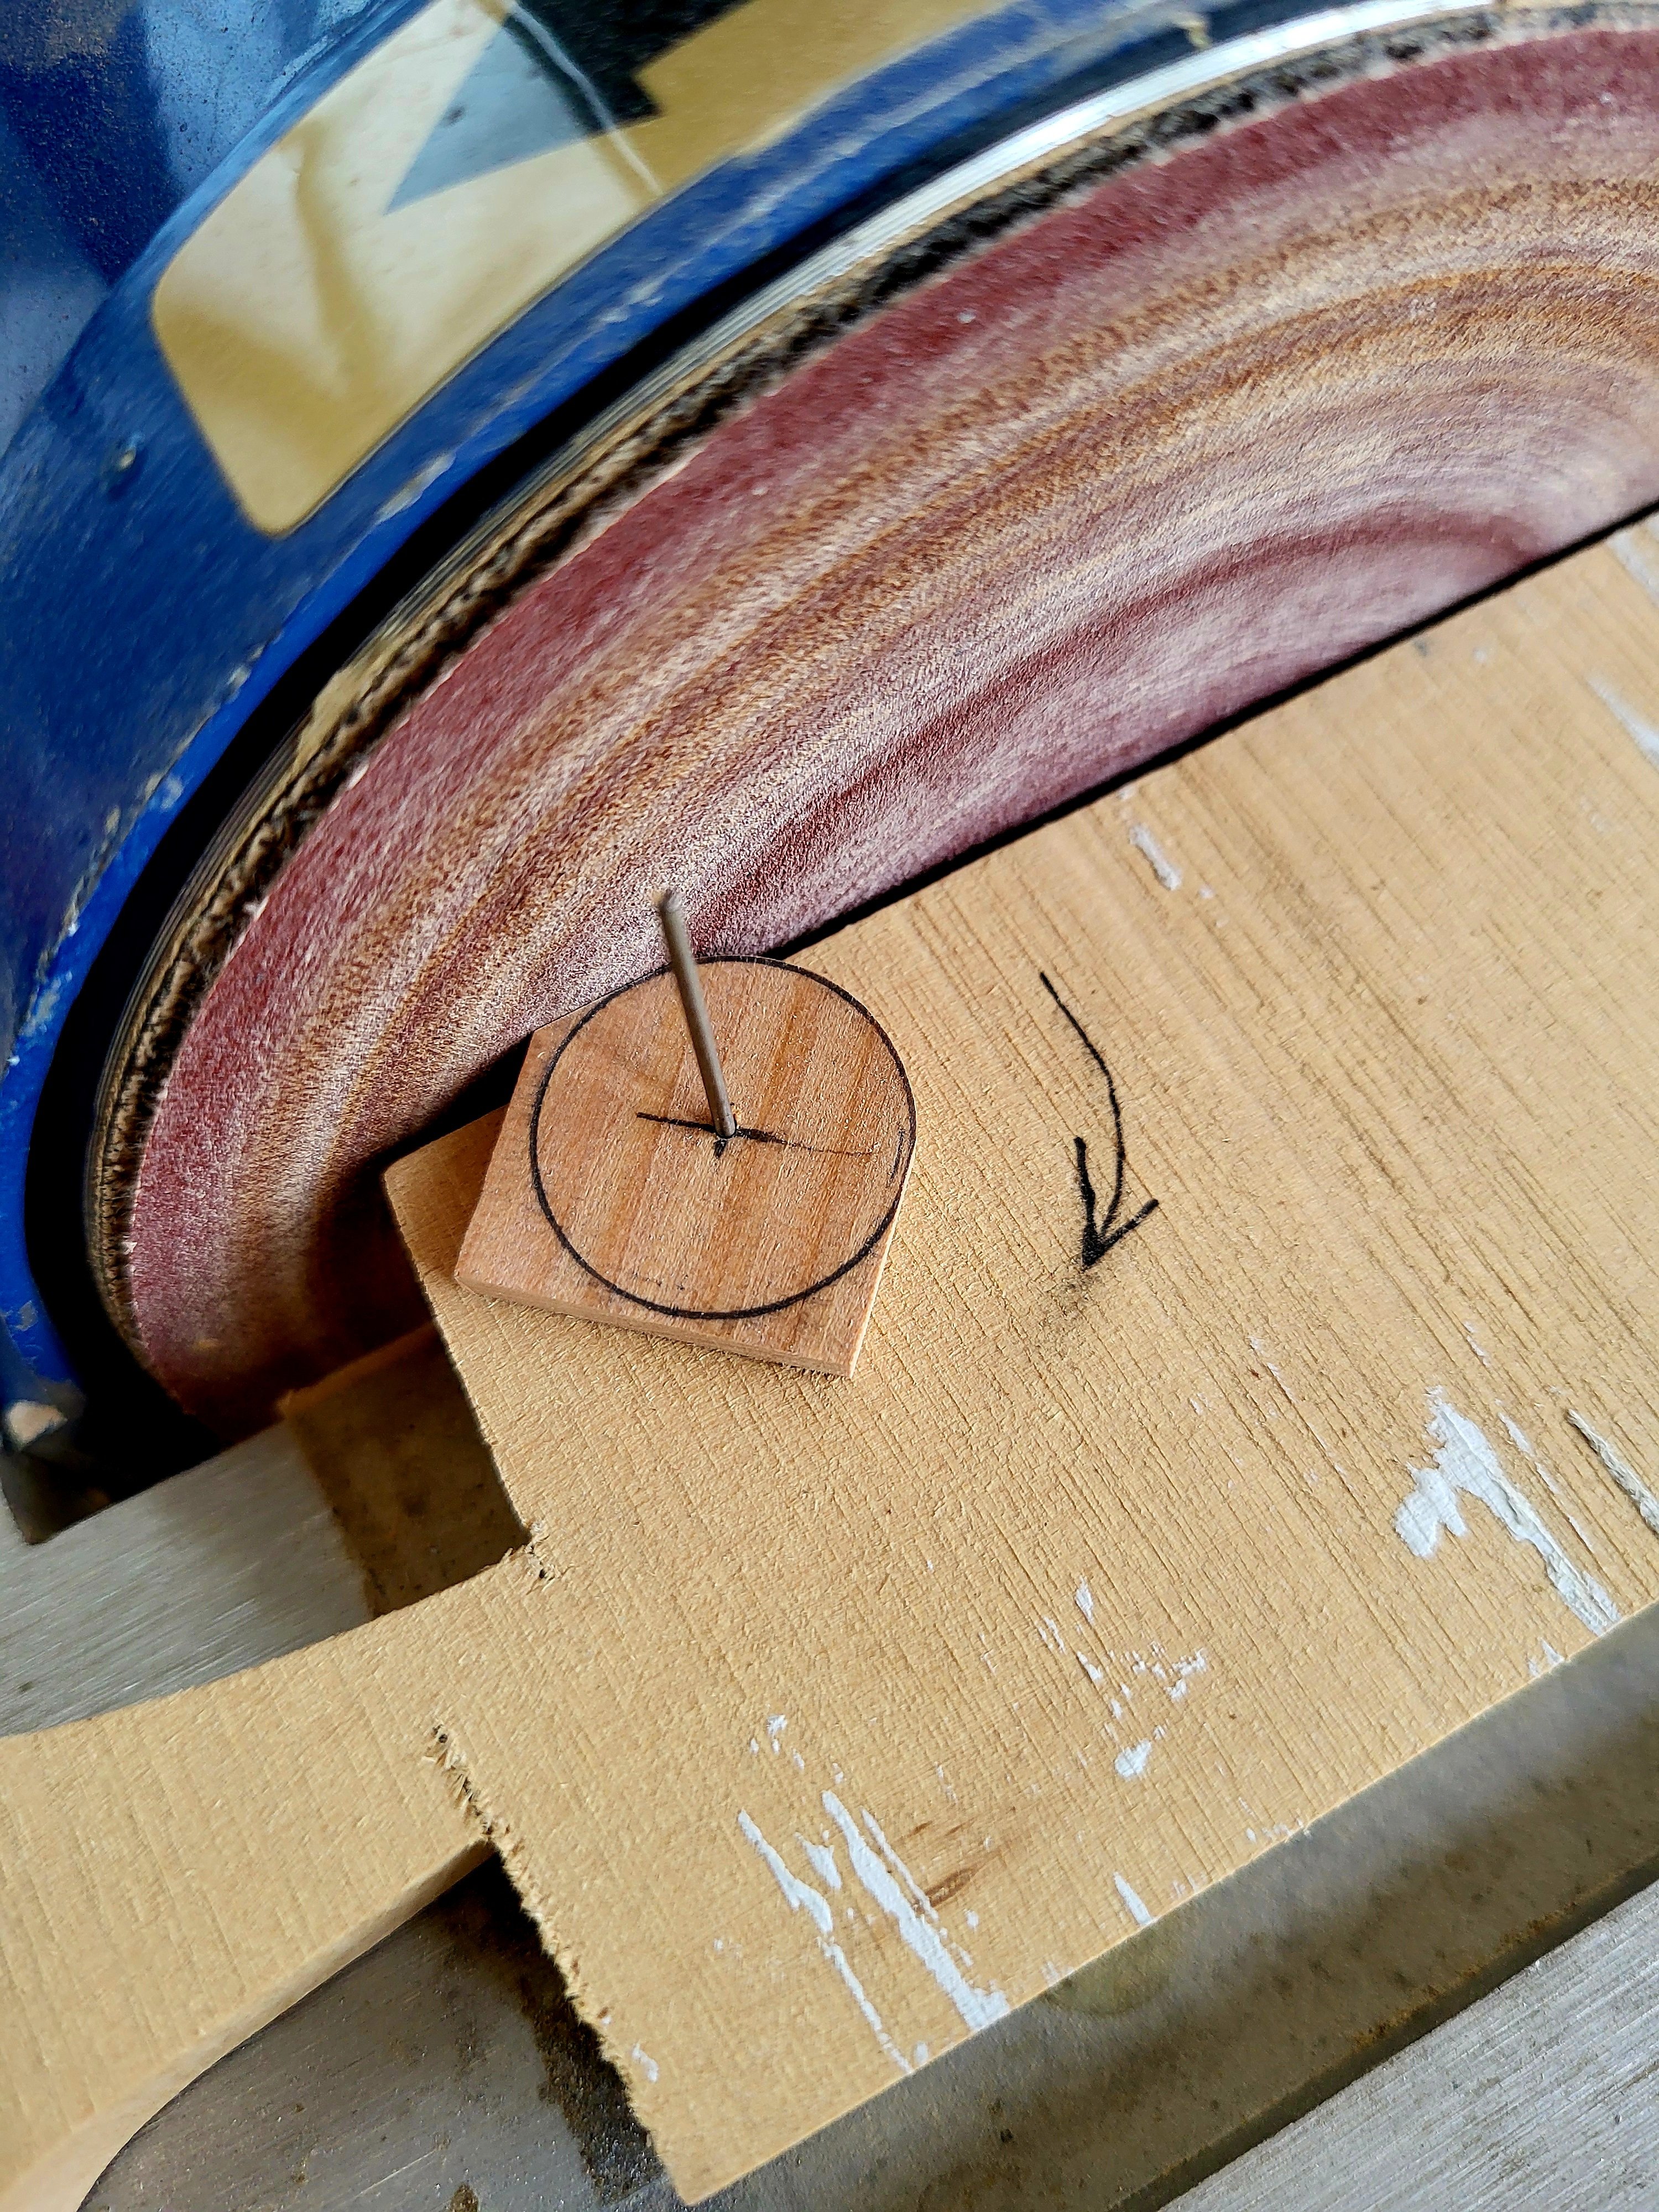
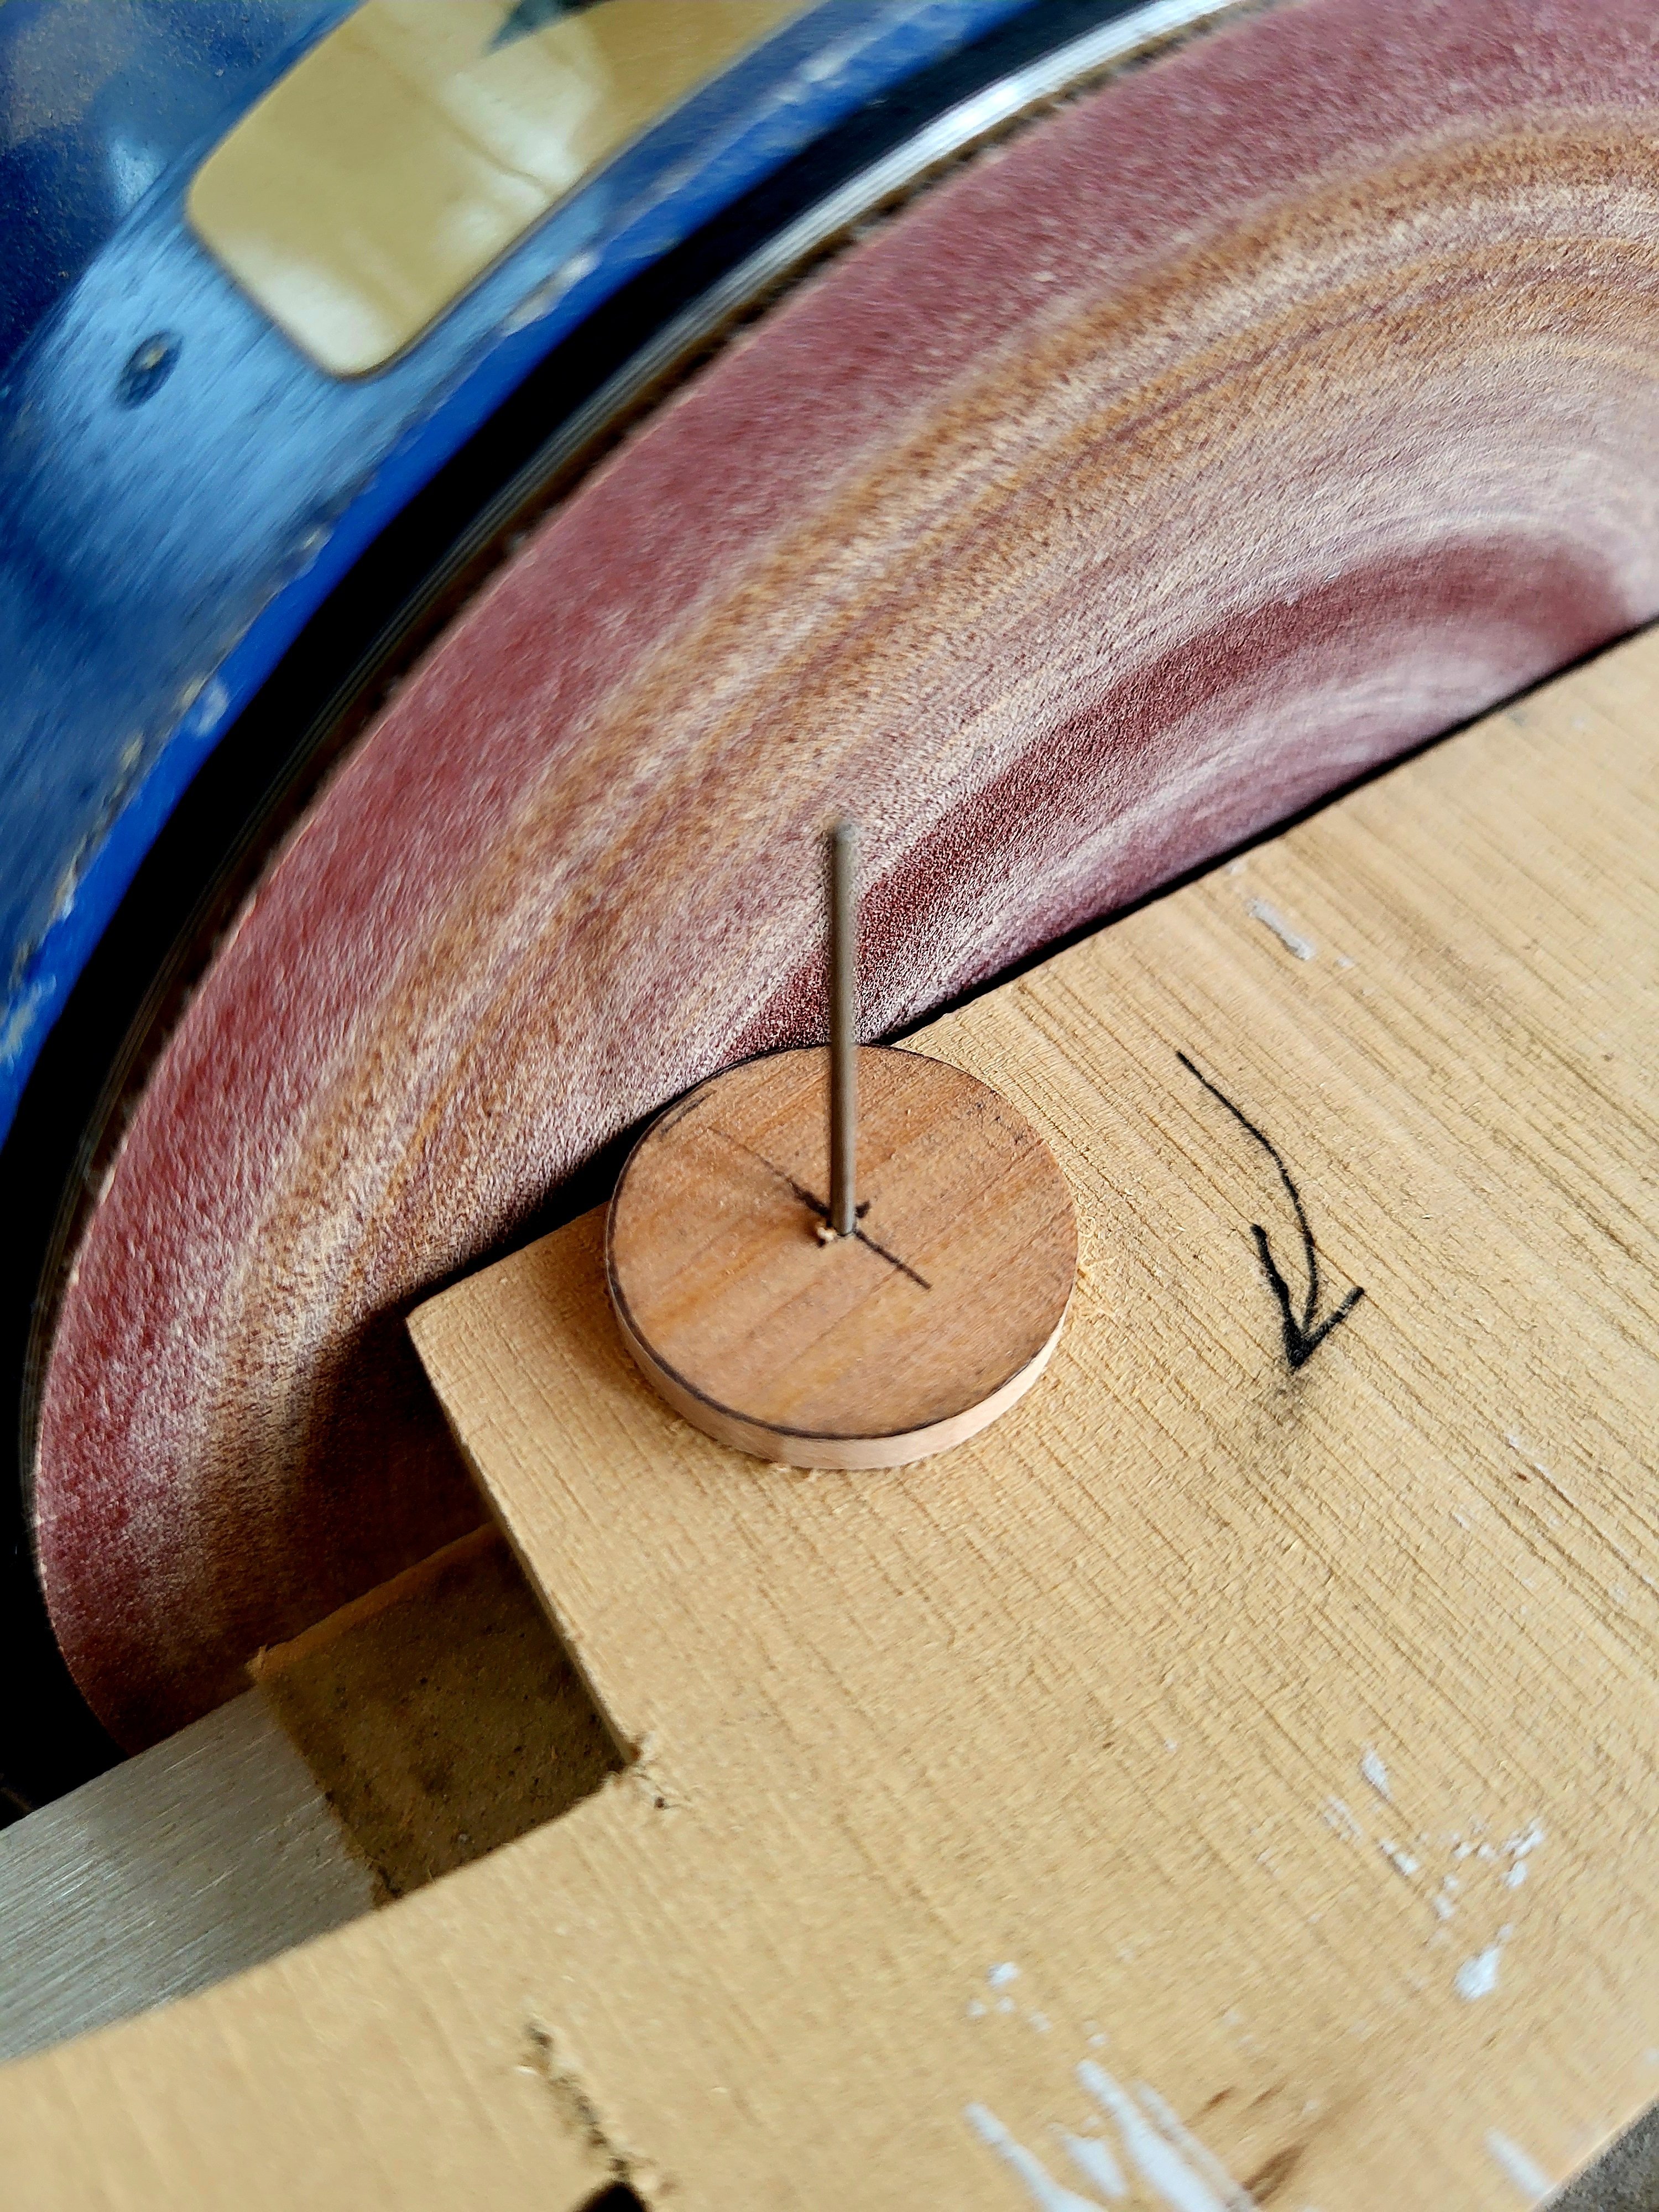
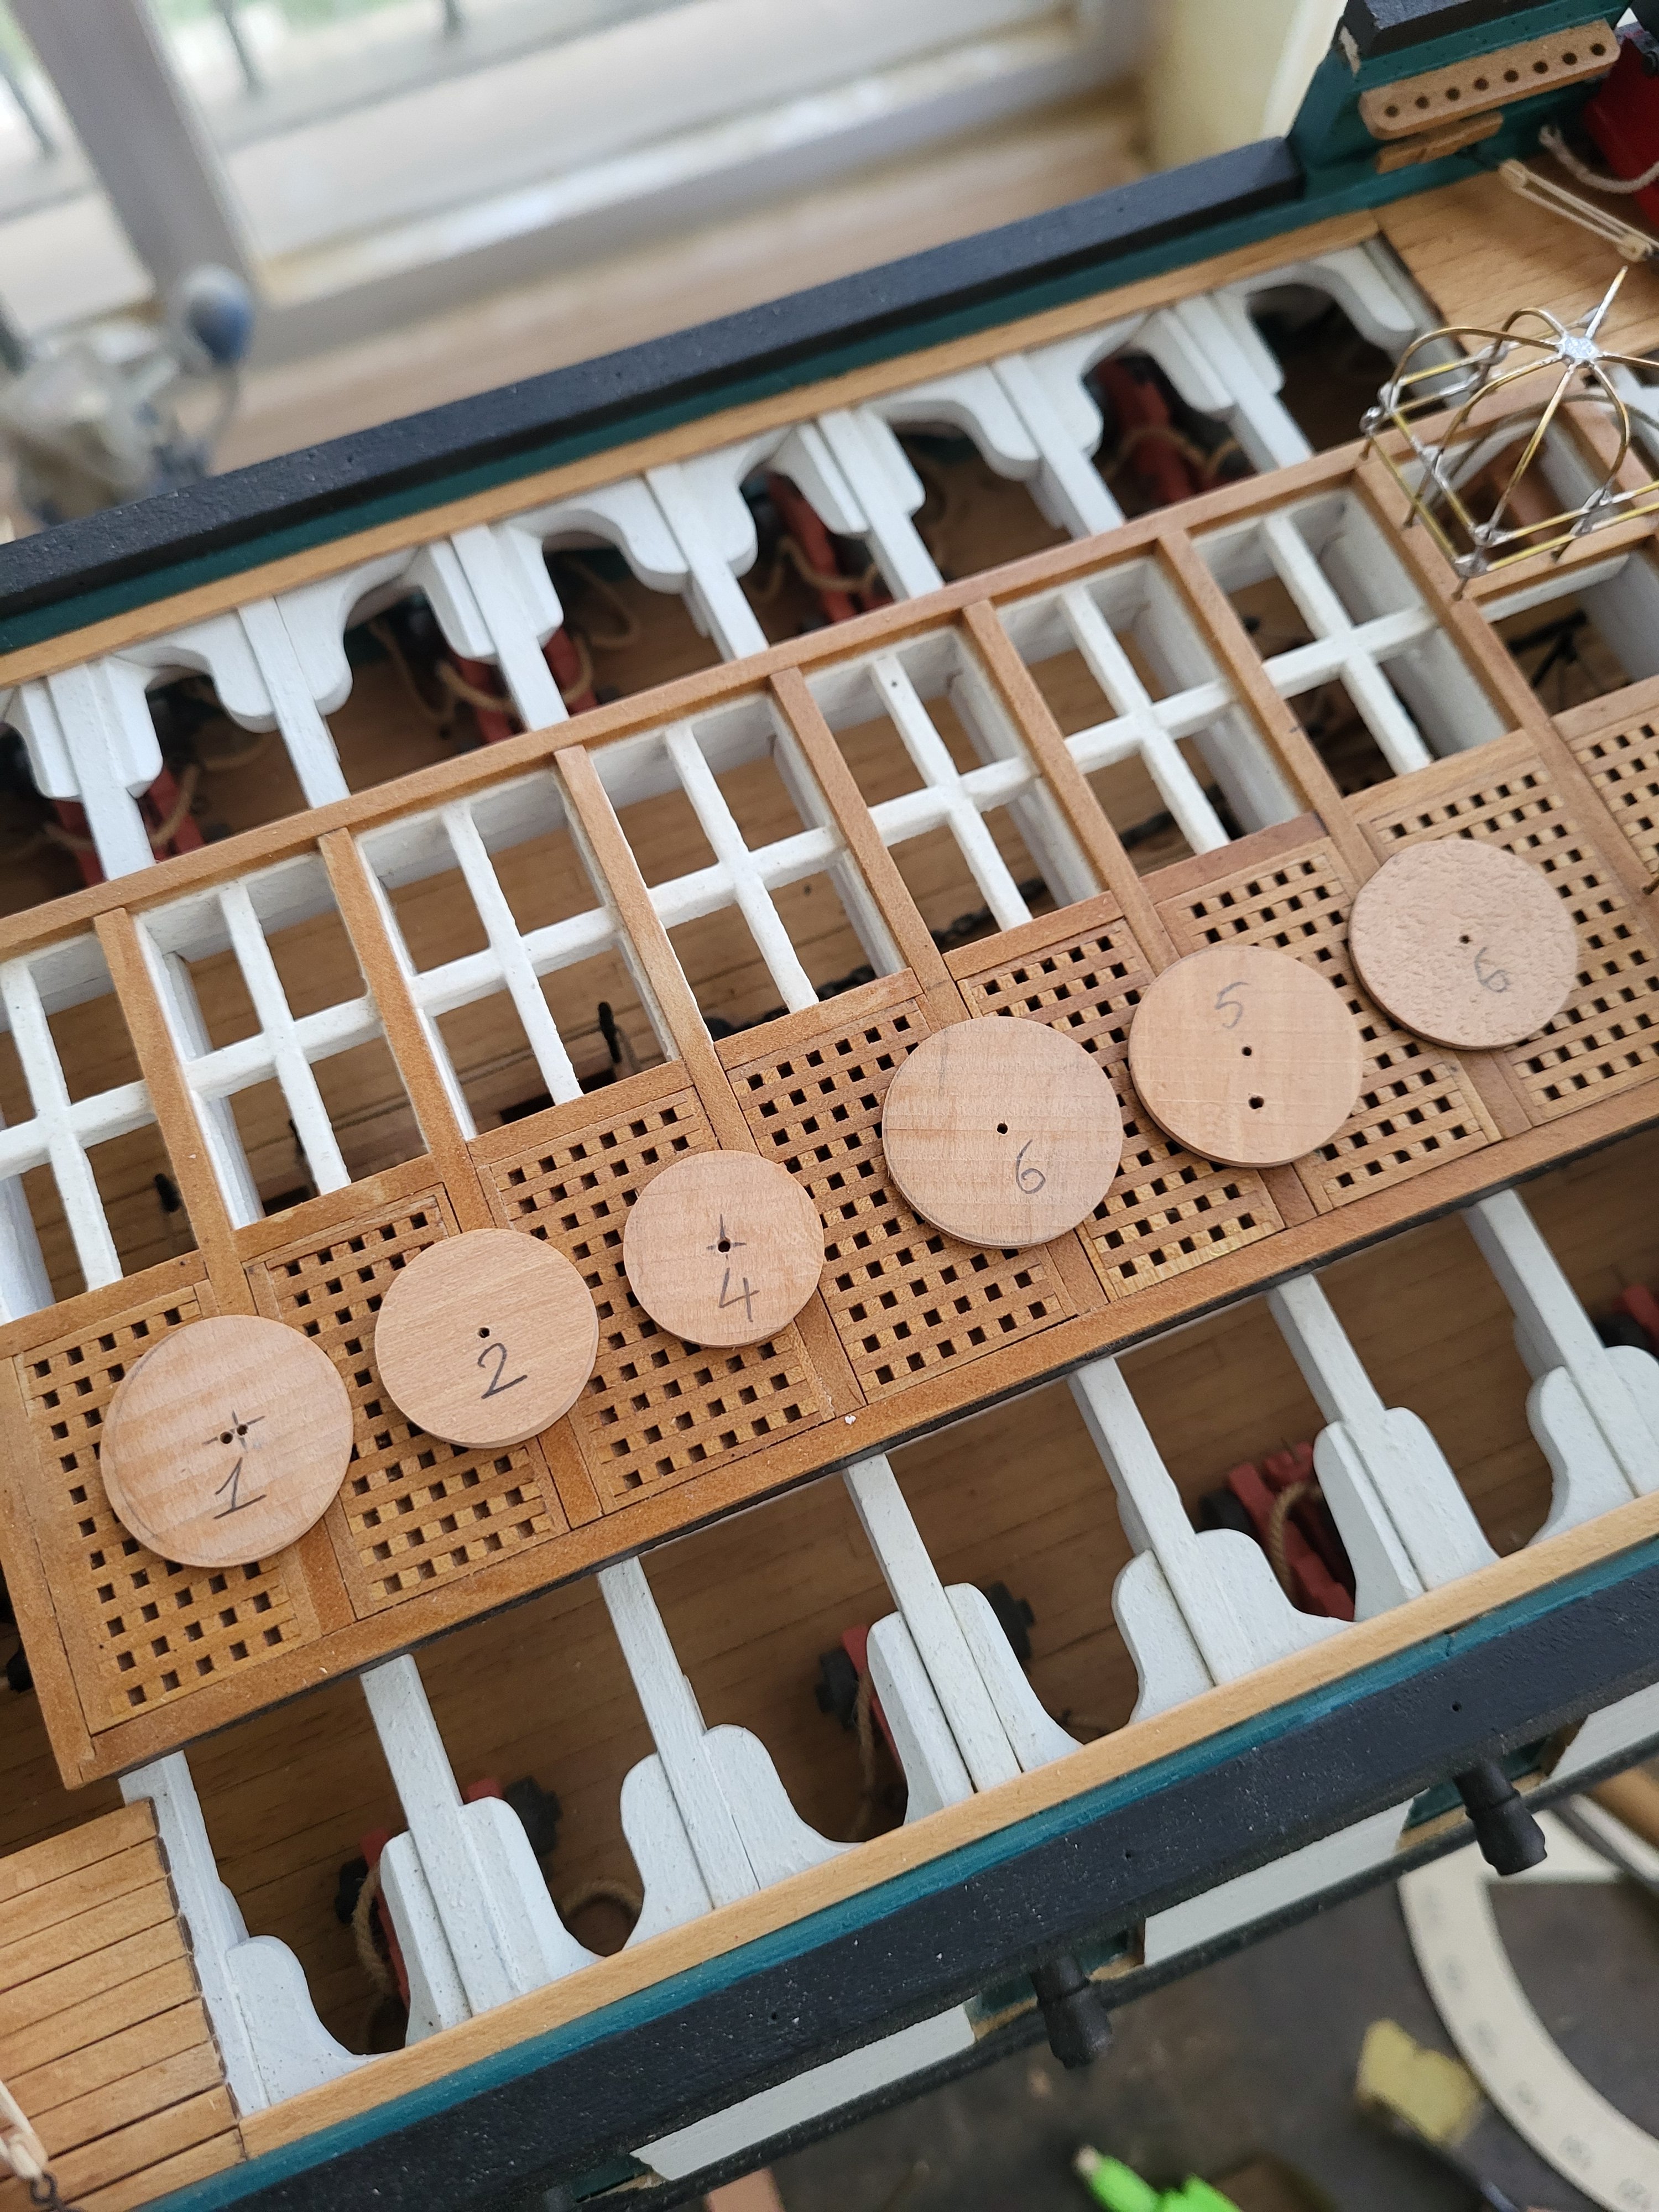
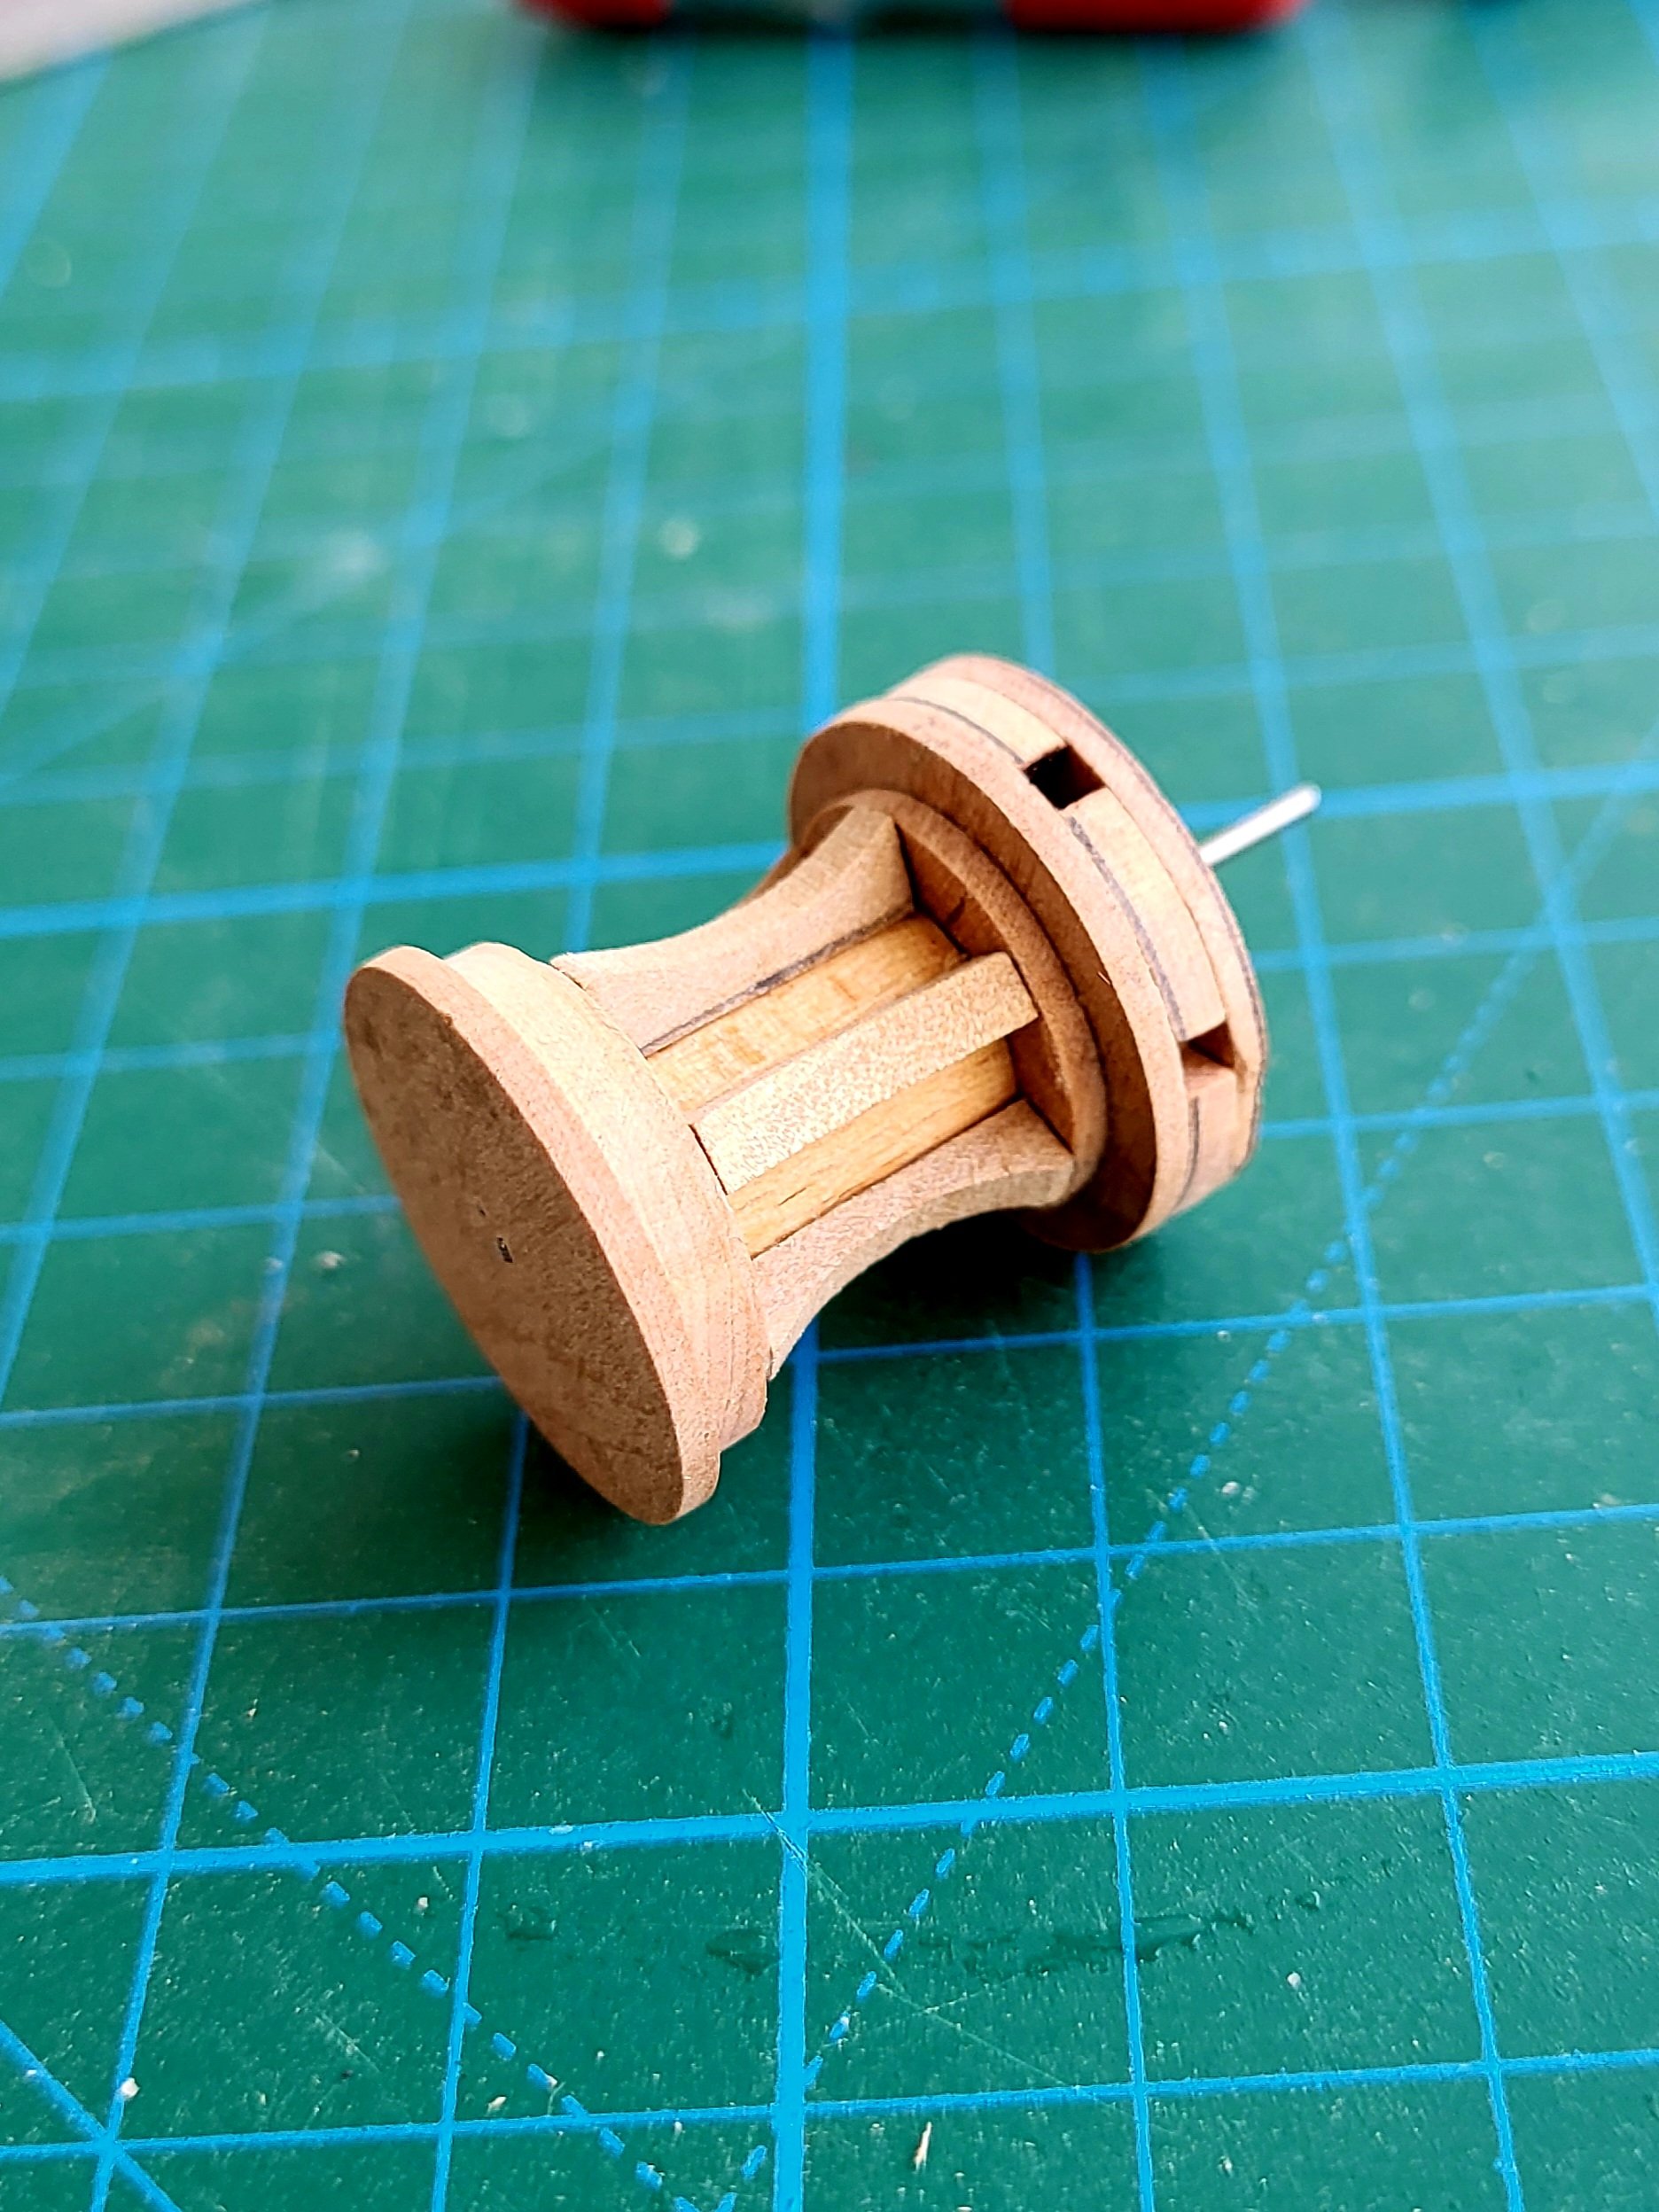
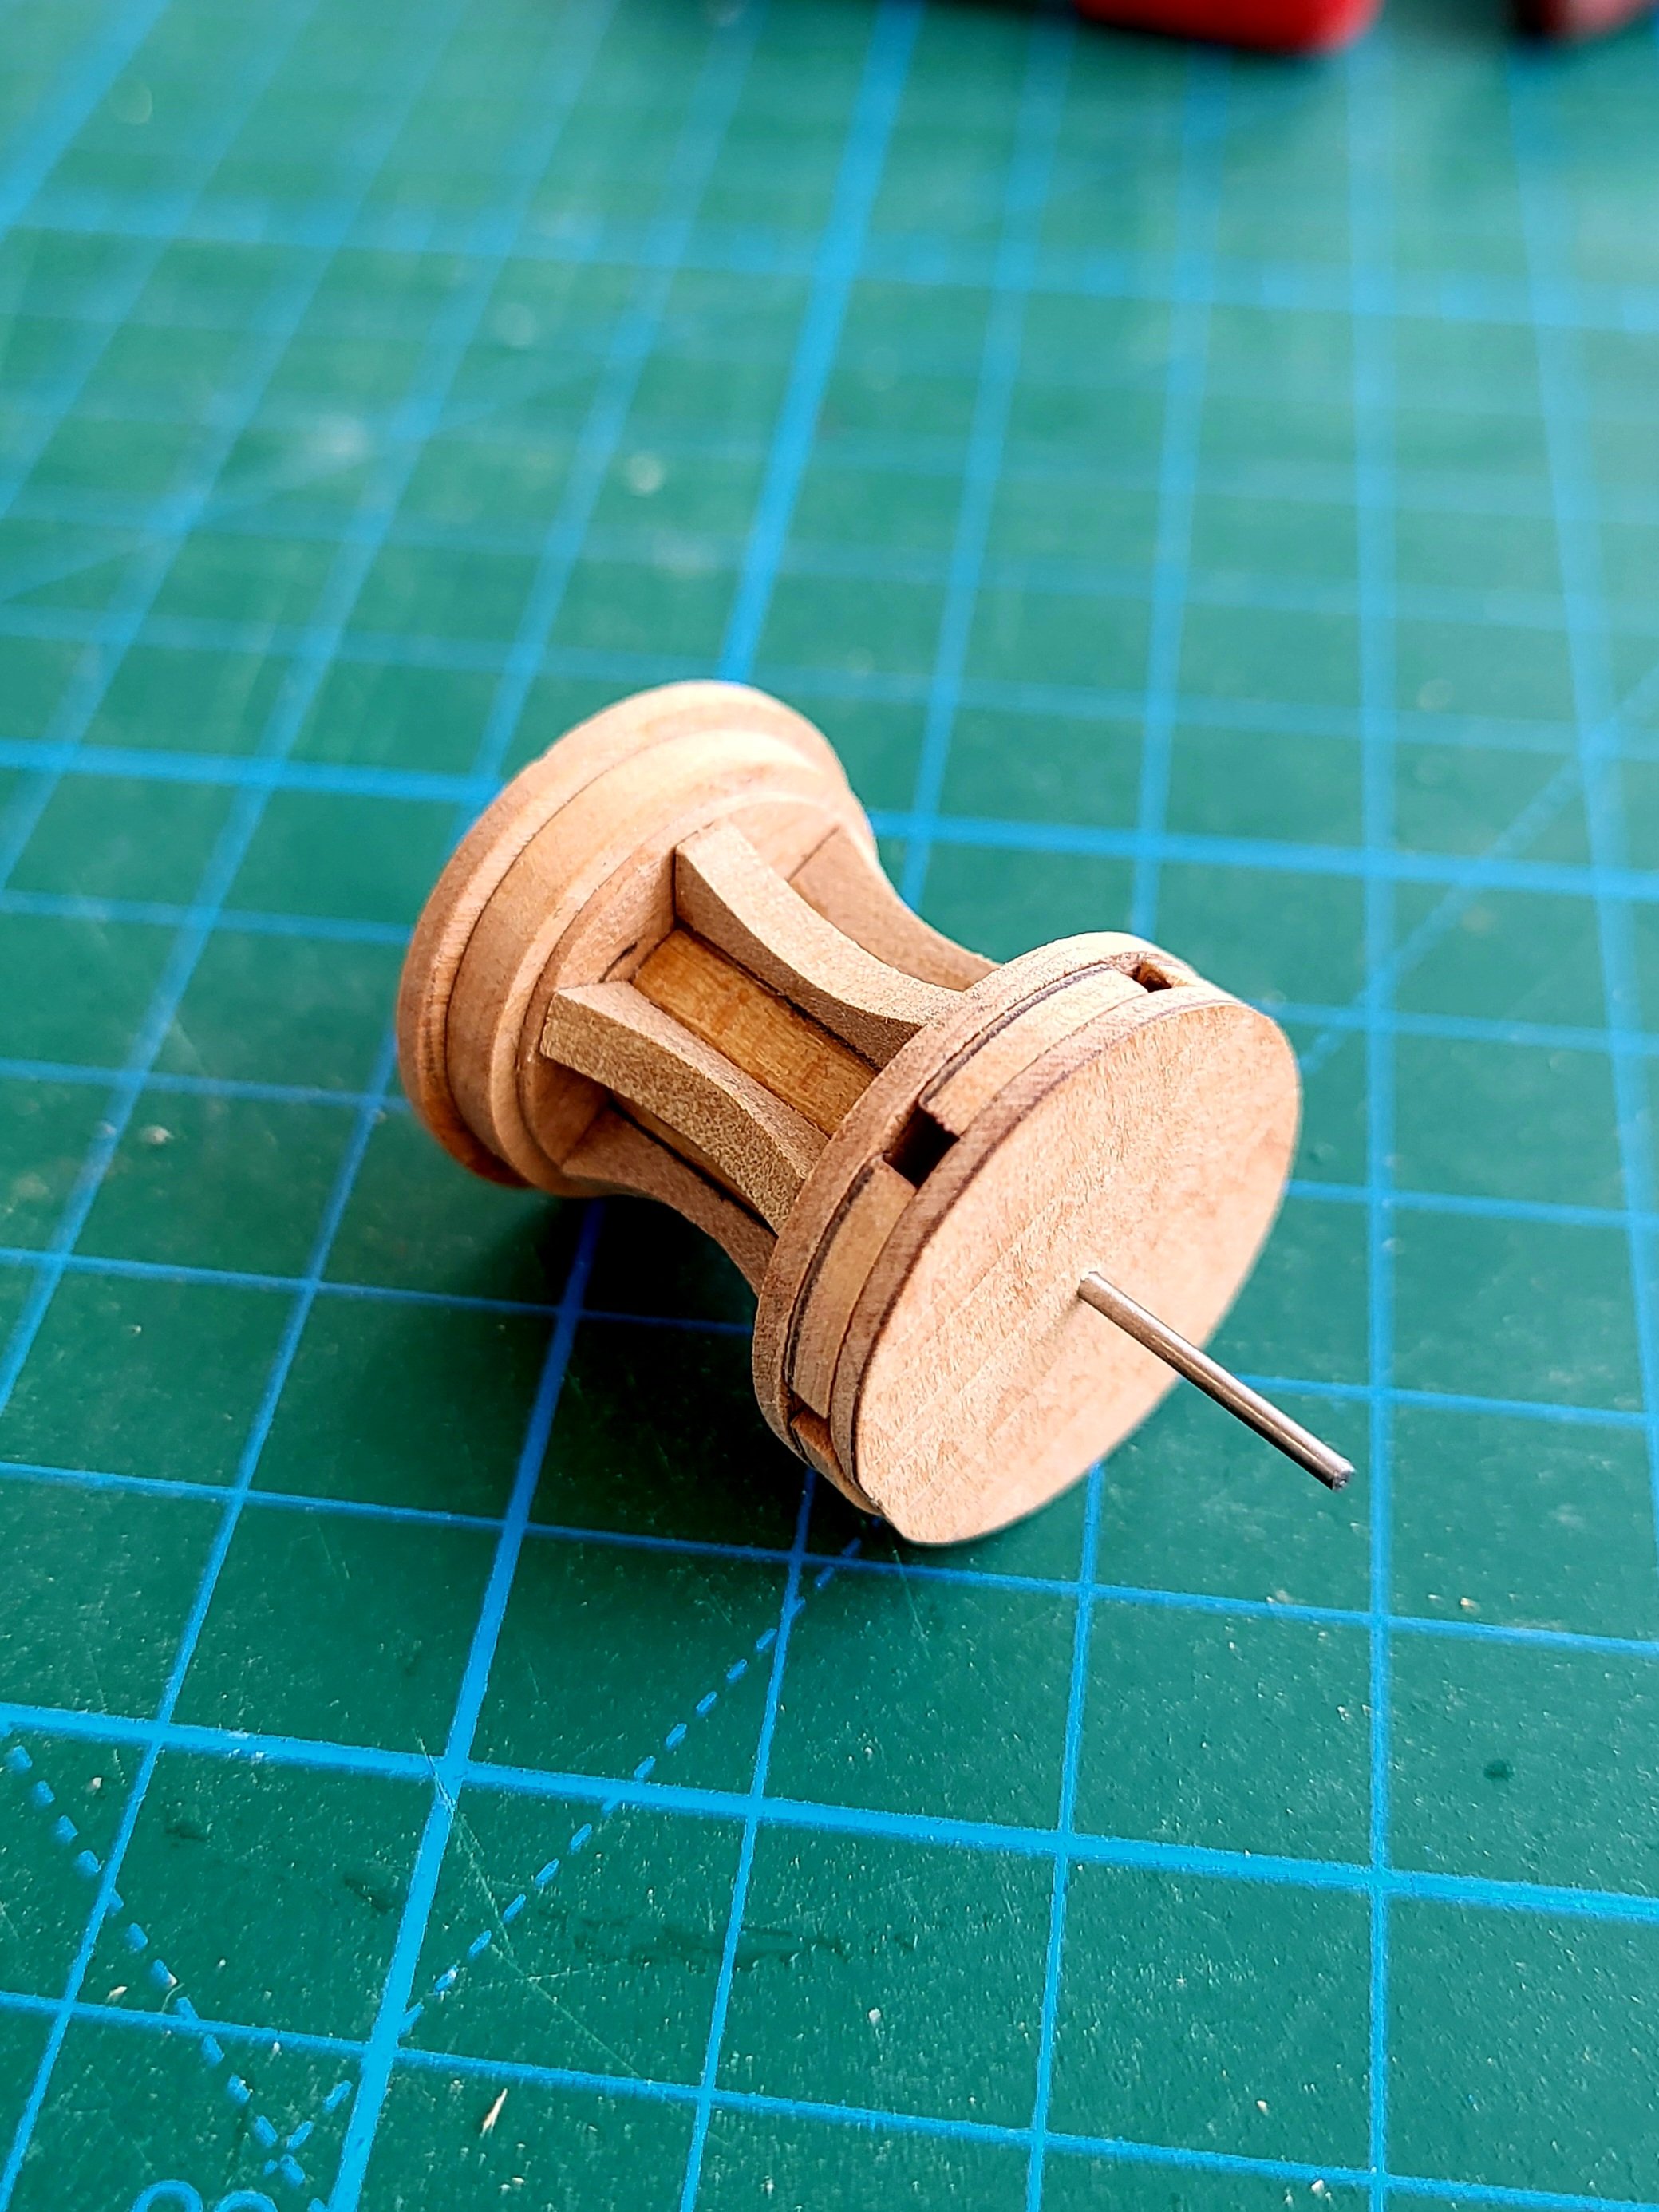
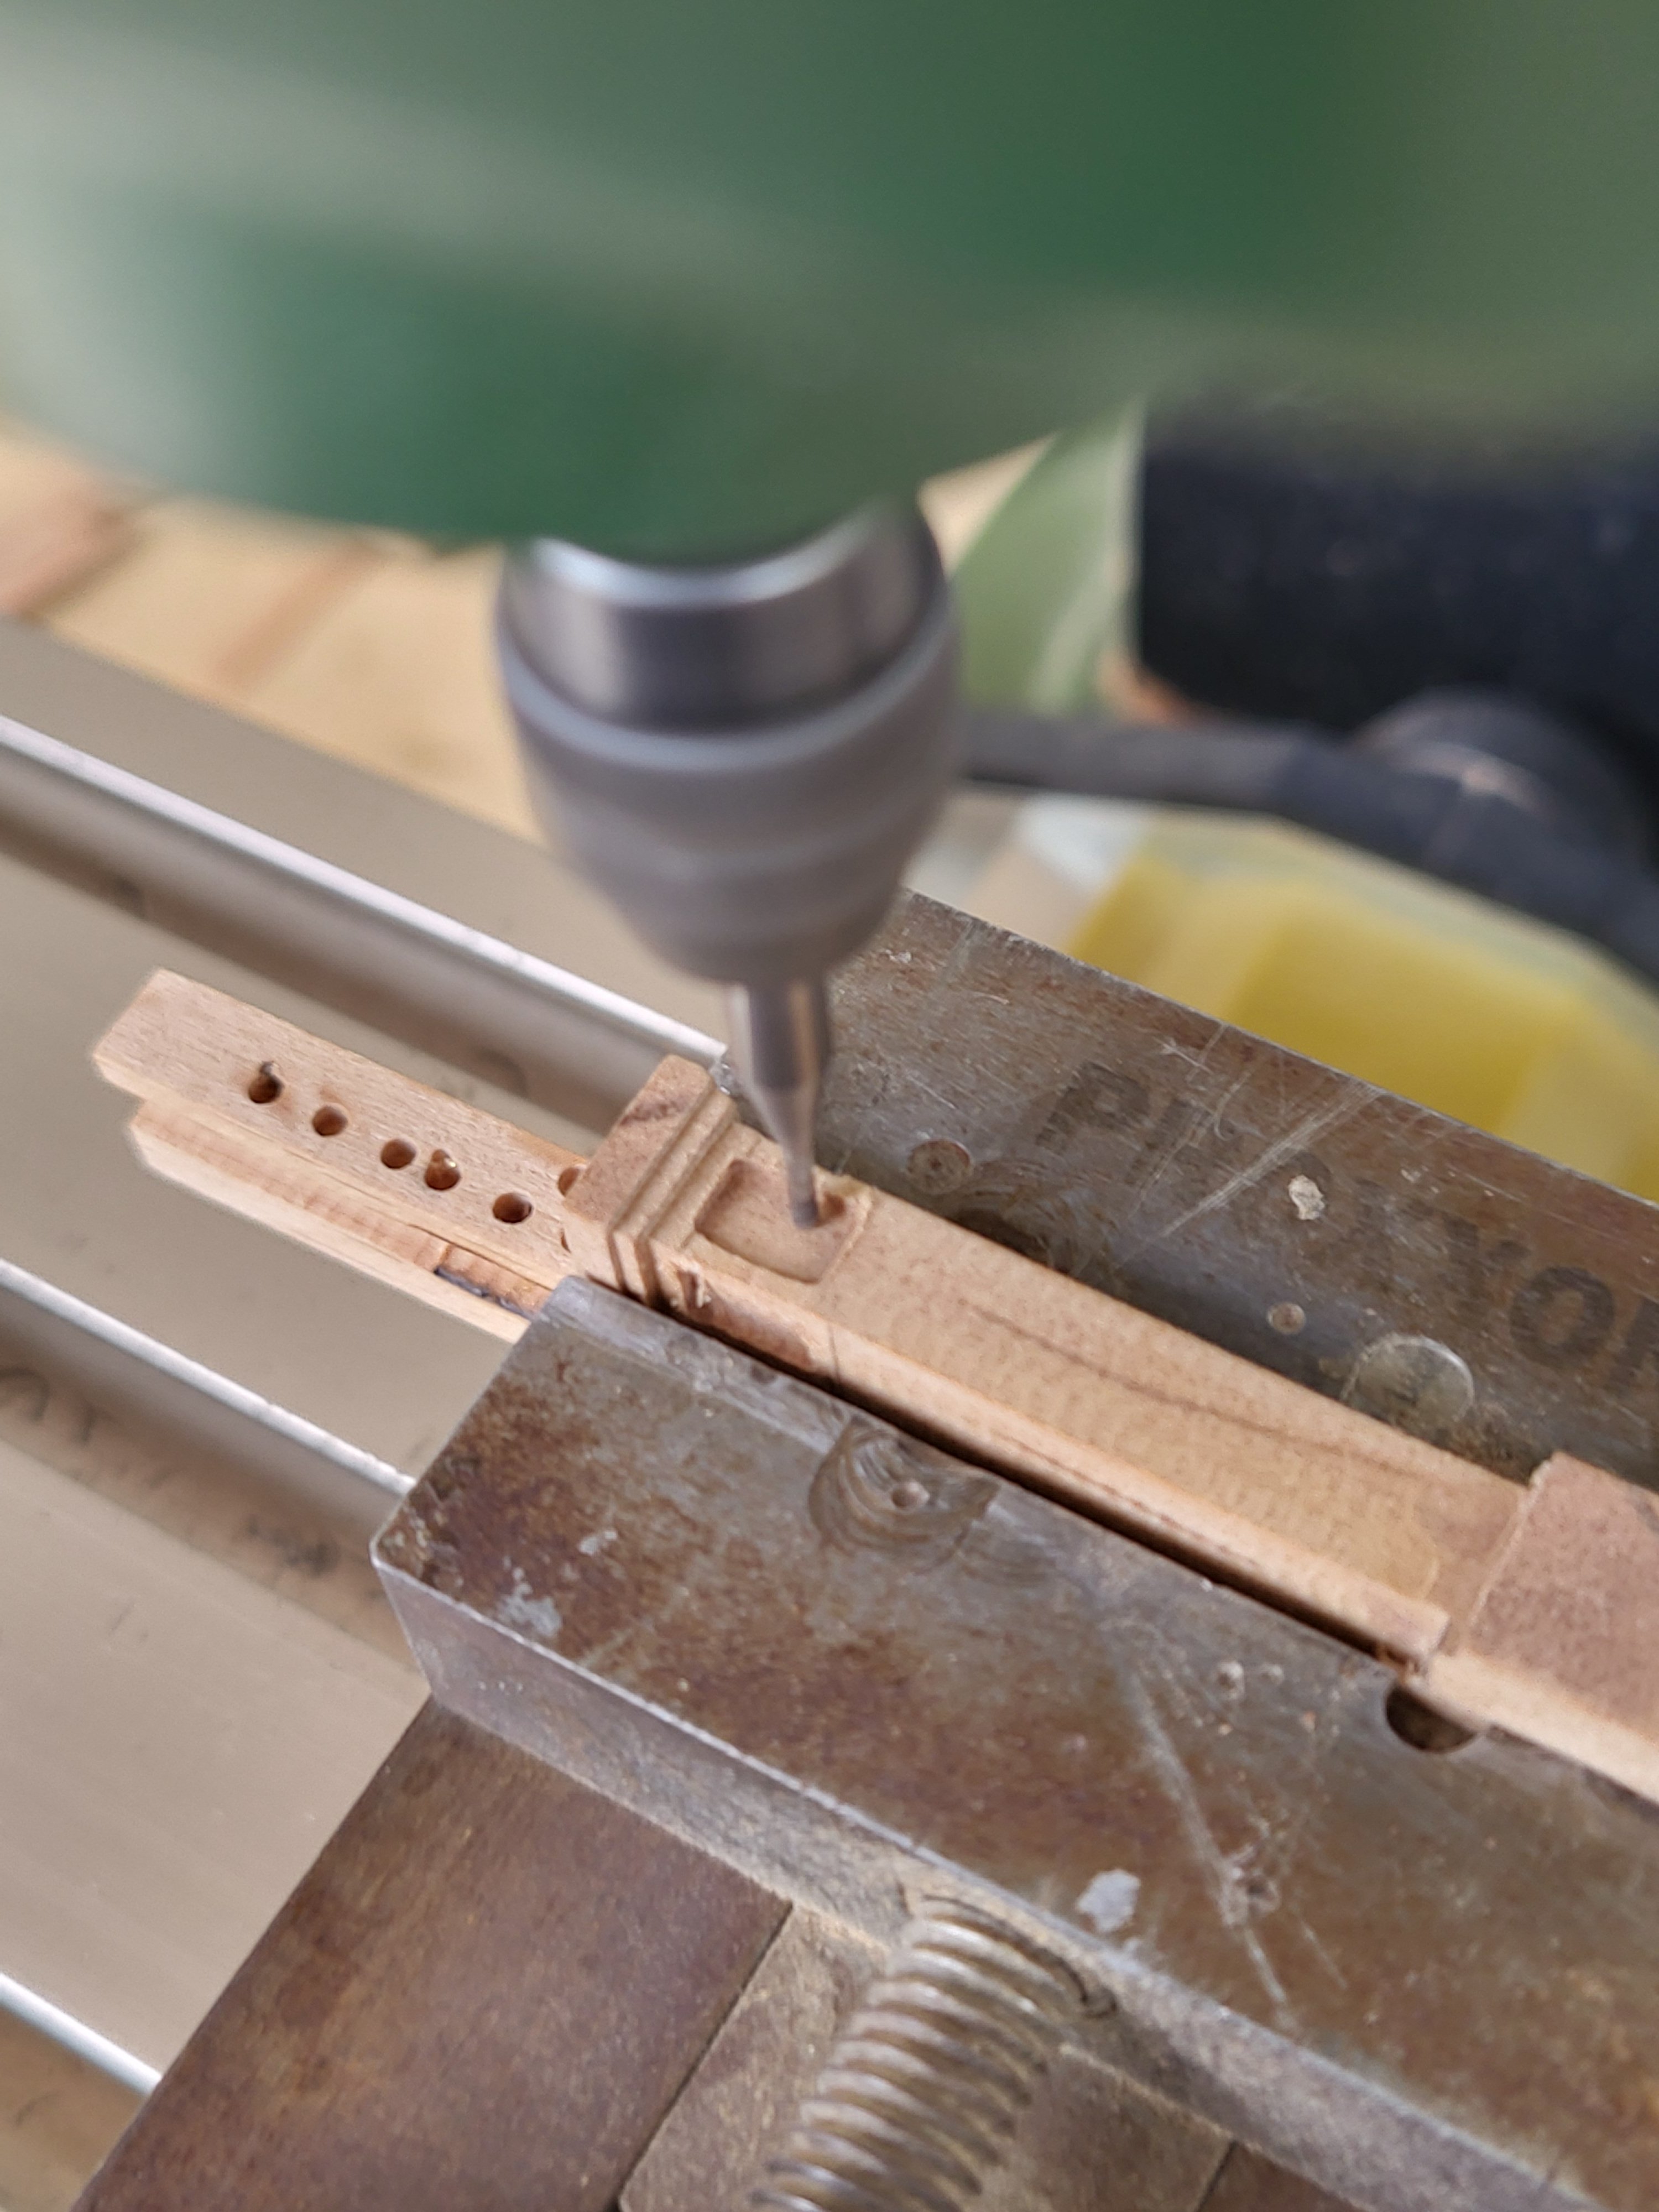
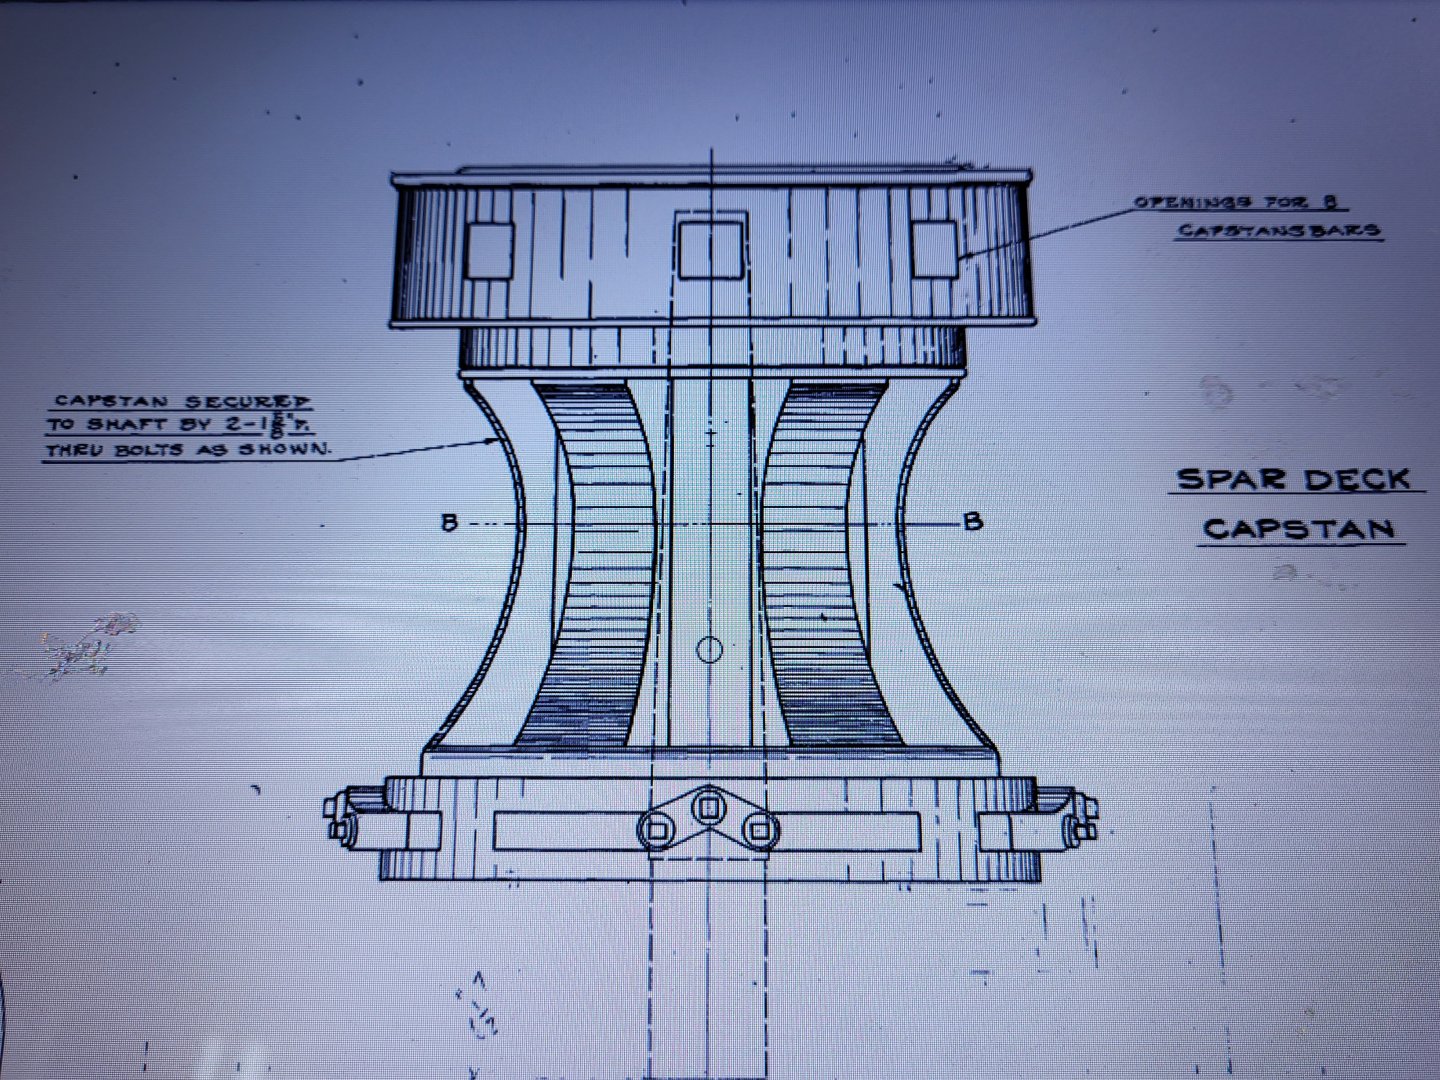
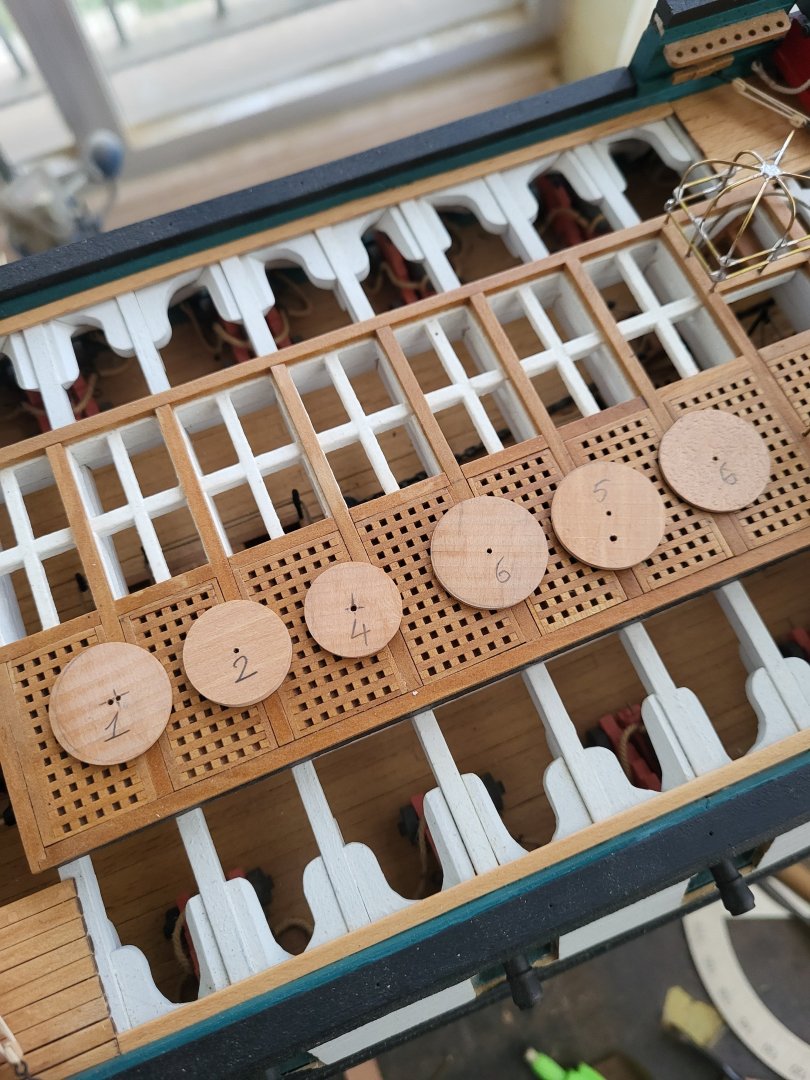
I am working on the spar deck capstan. I am using the jig in the photo to make the round pieces. The capstan will be installed in place after painting.


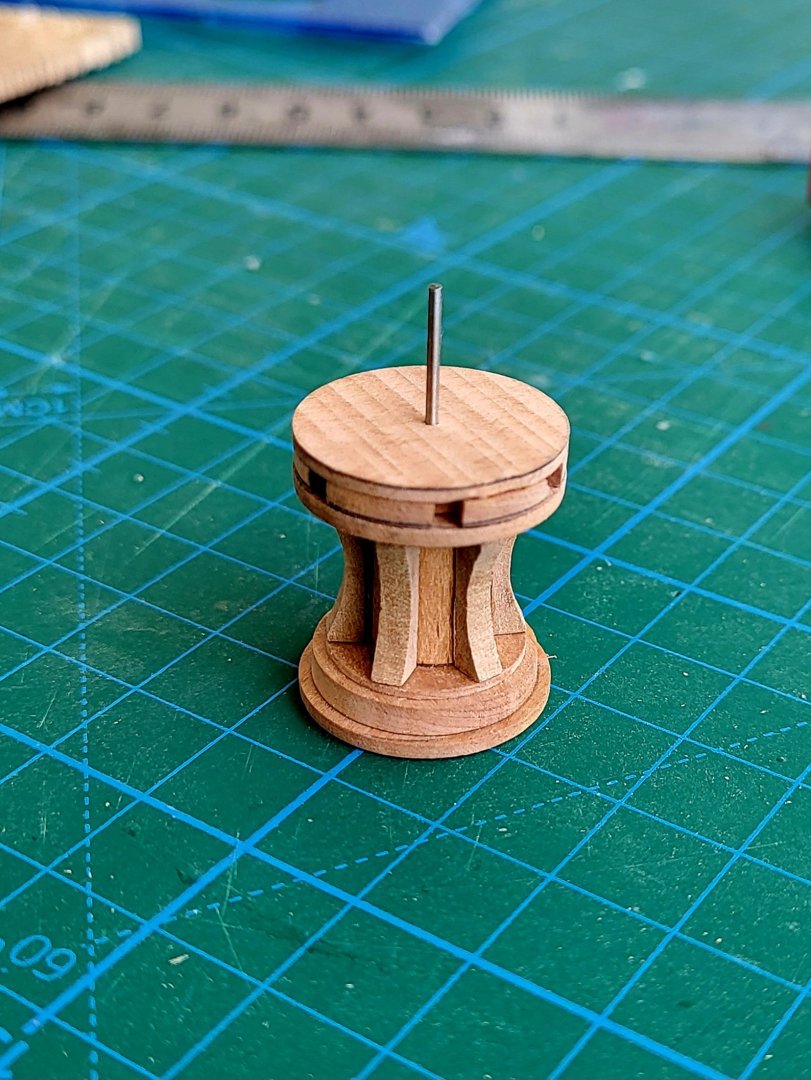


-
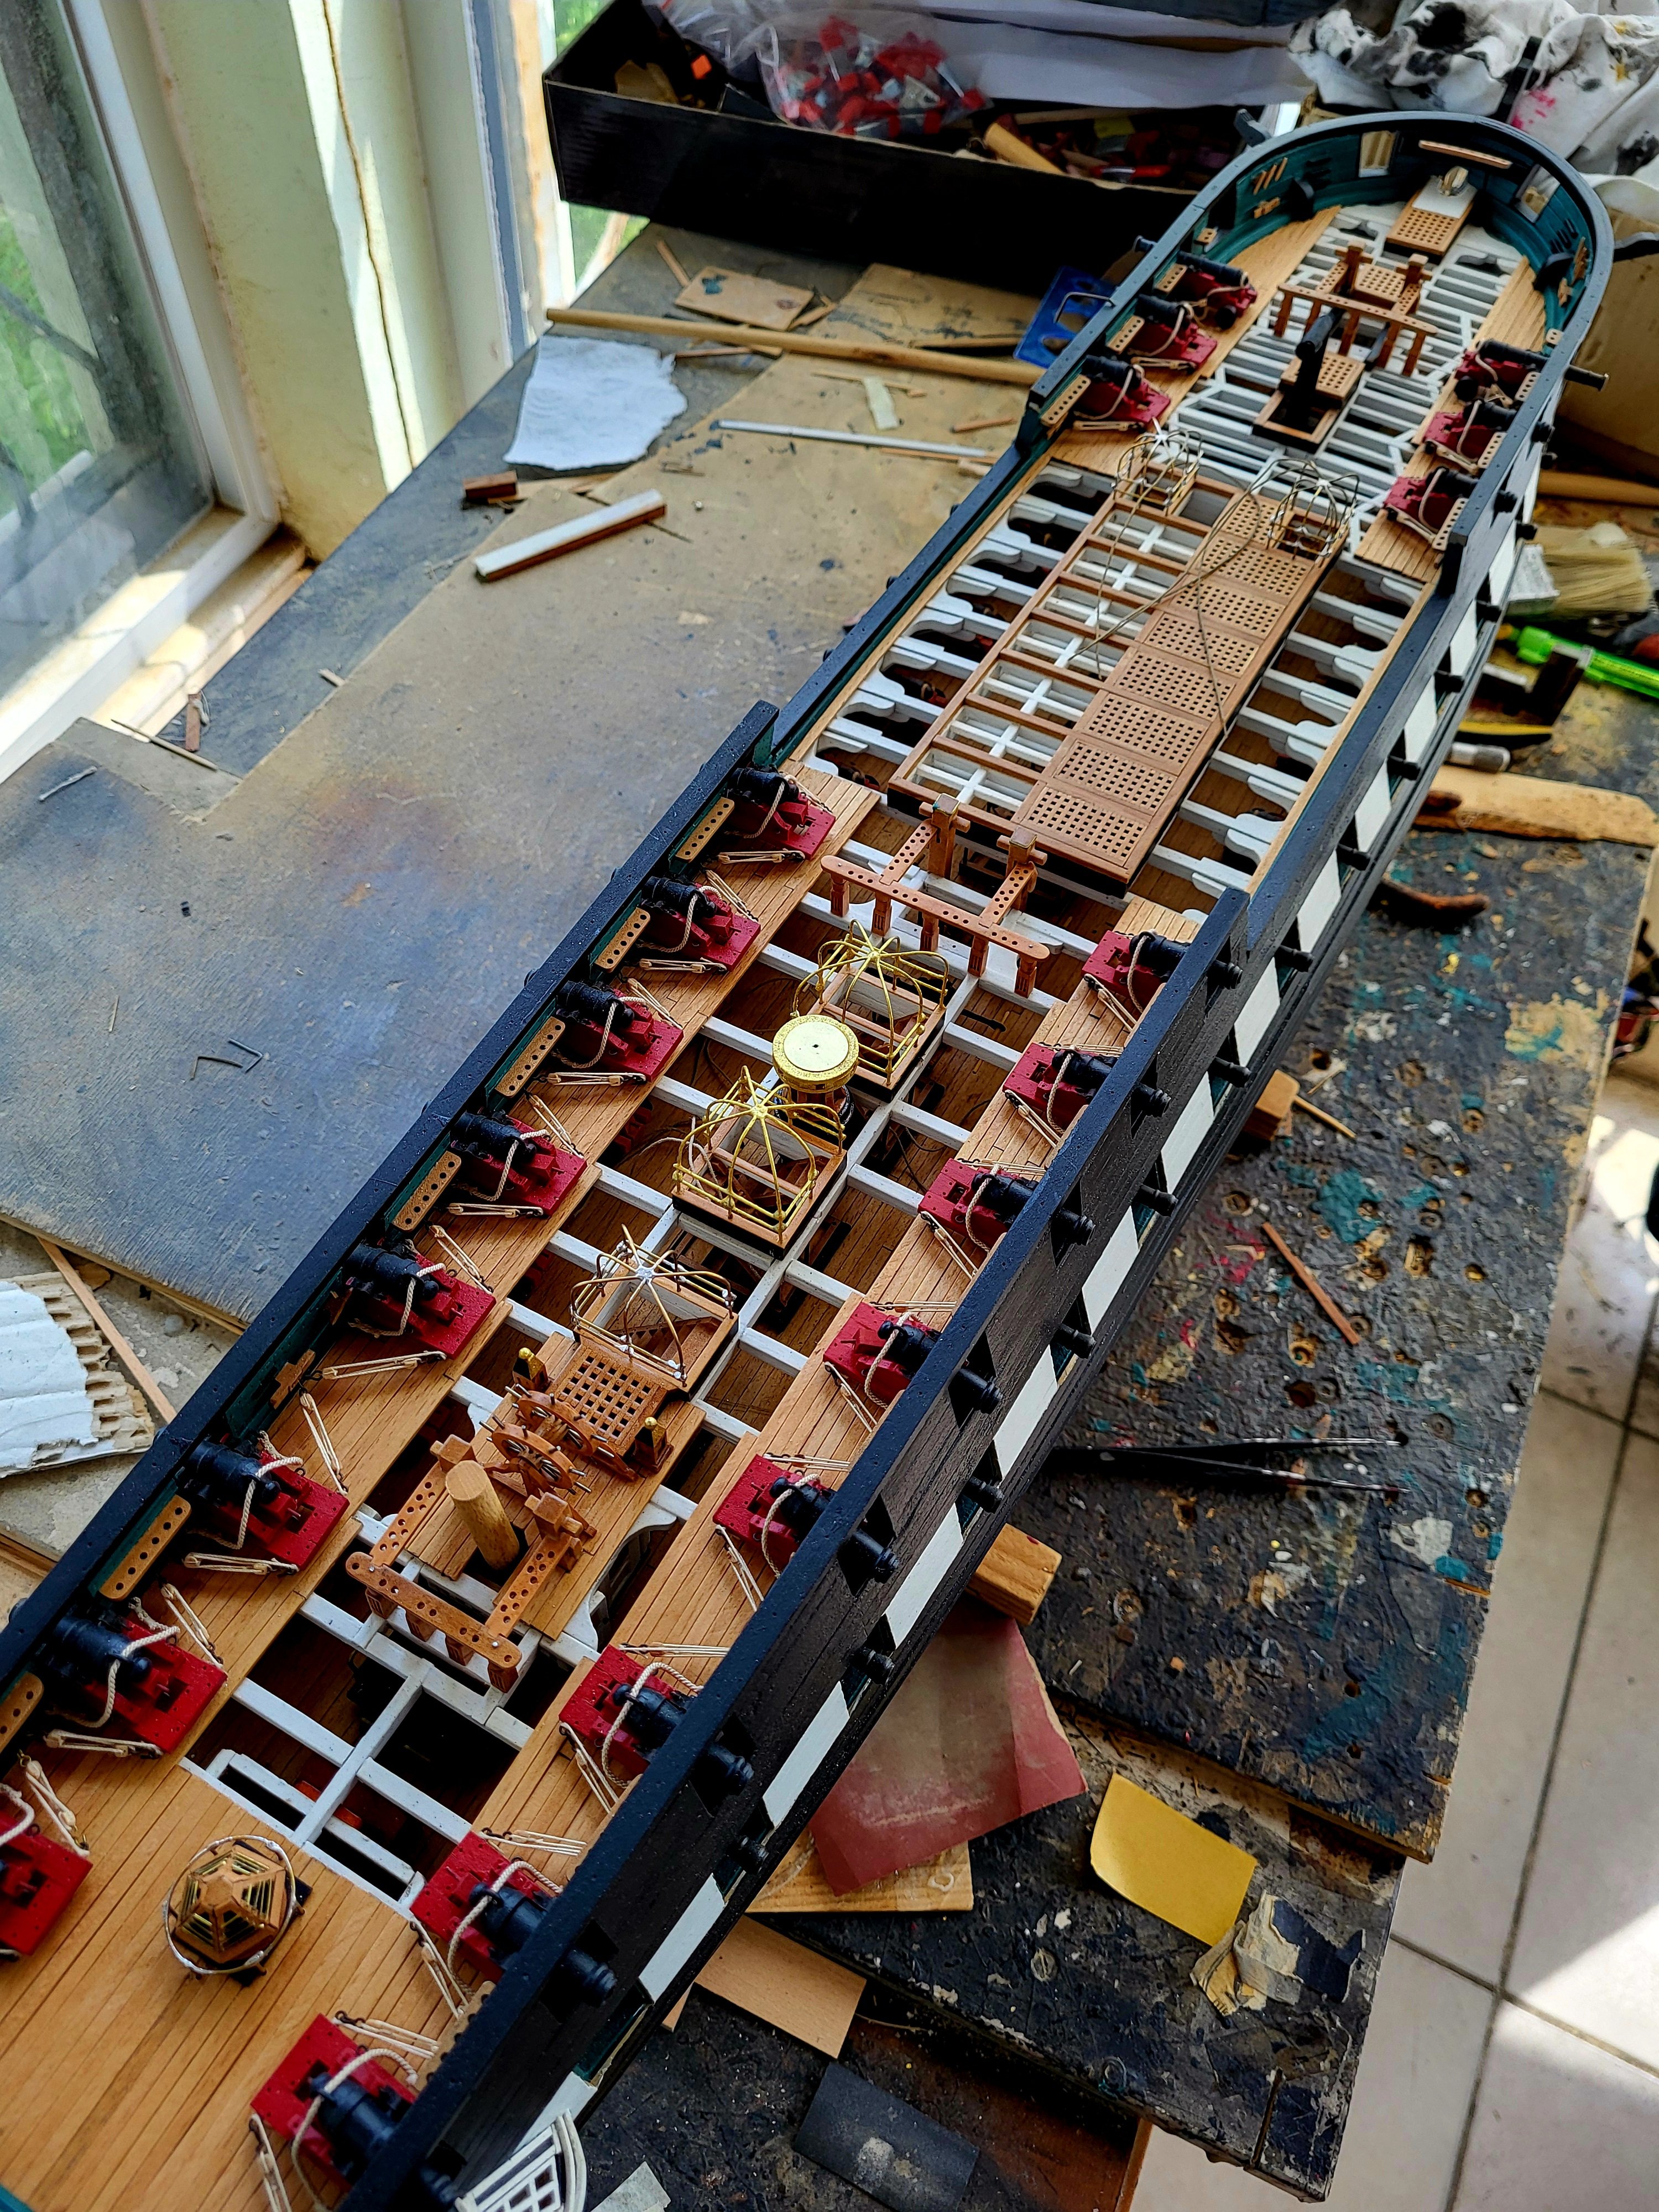
If I understand correctly you are planning on not adding breeching ropes. I think it would look better if you added breeching ropes instead of the second tackles.
-
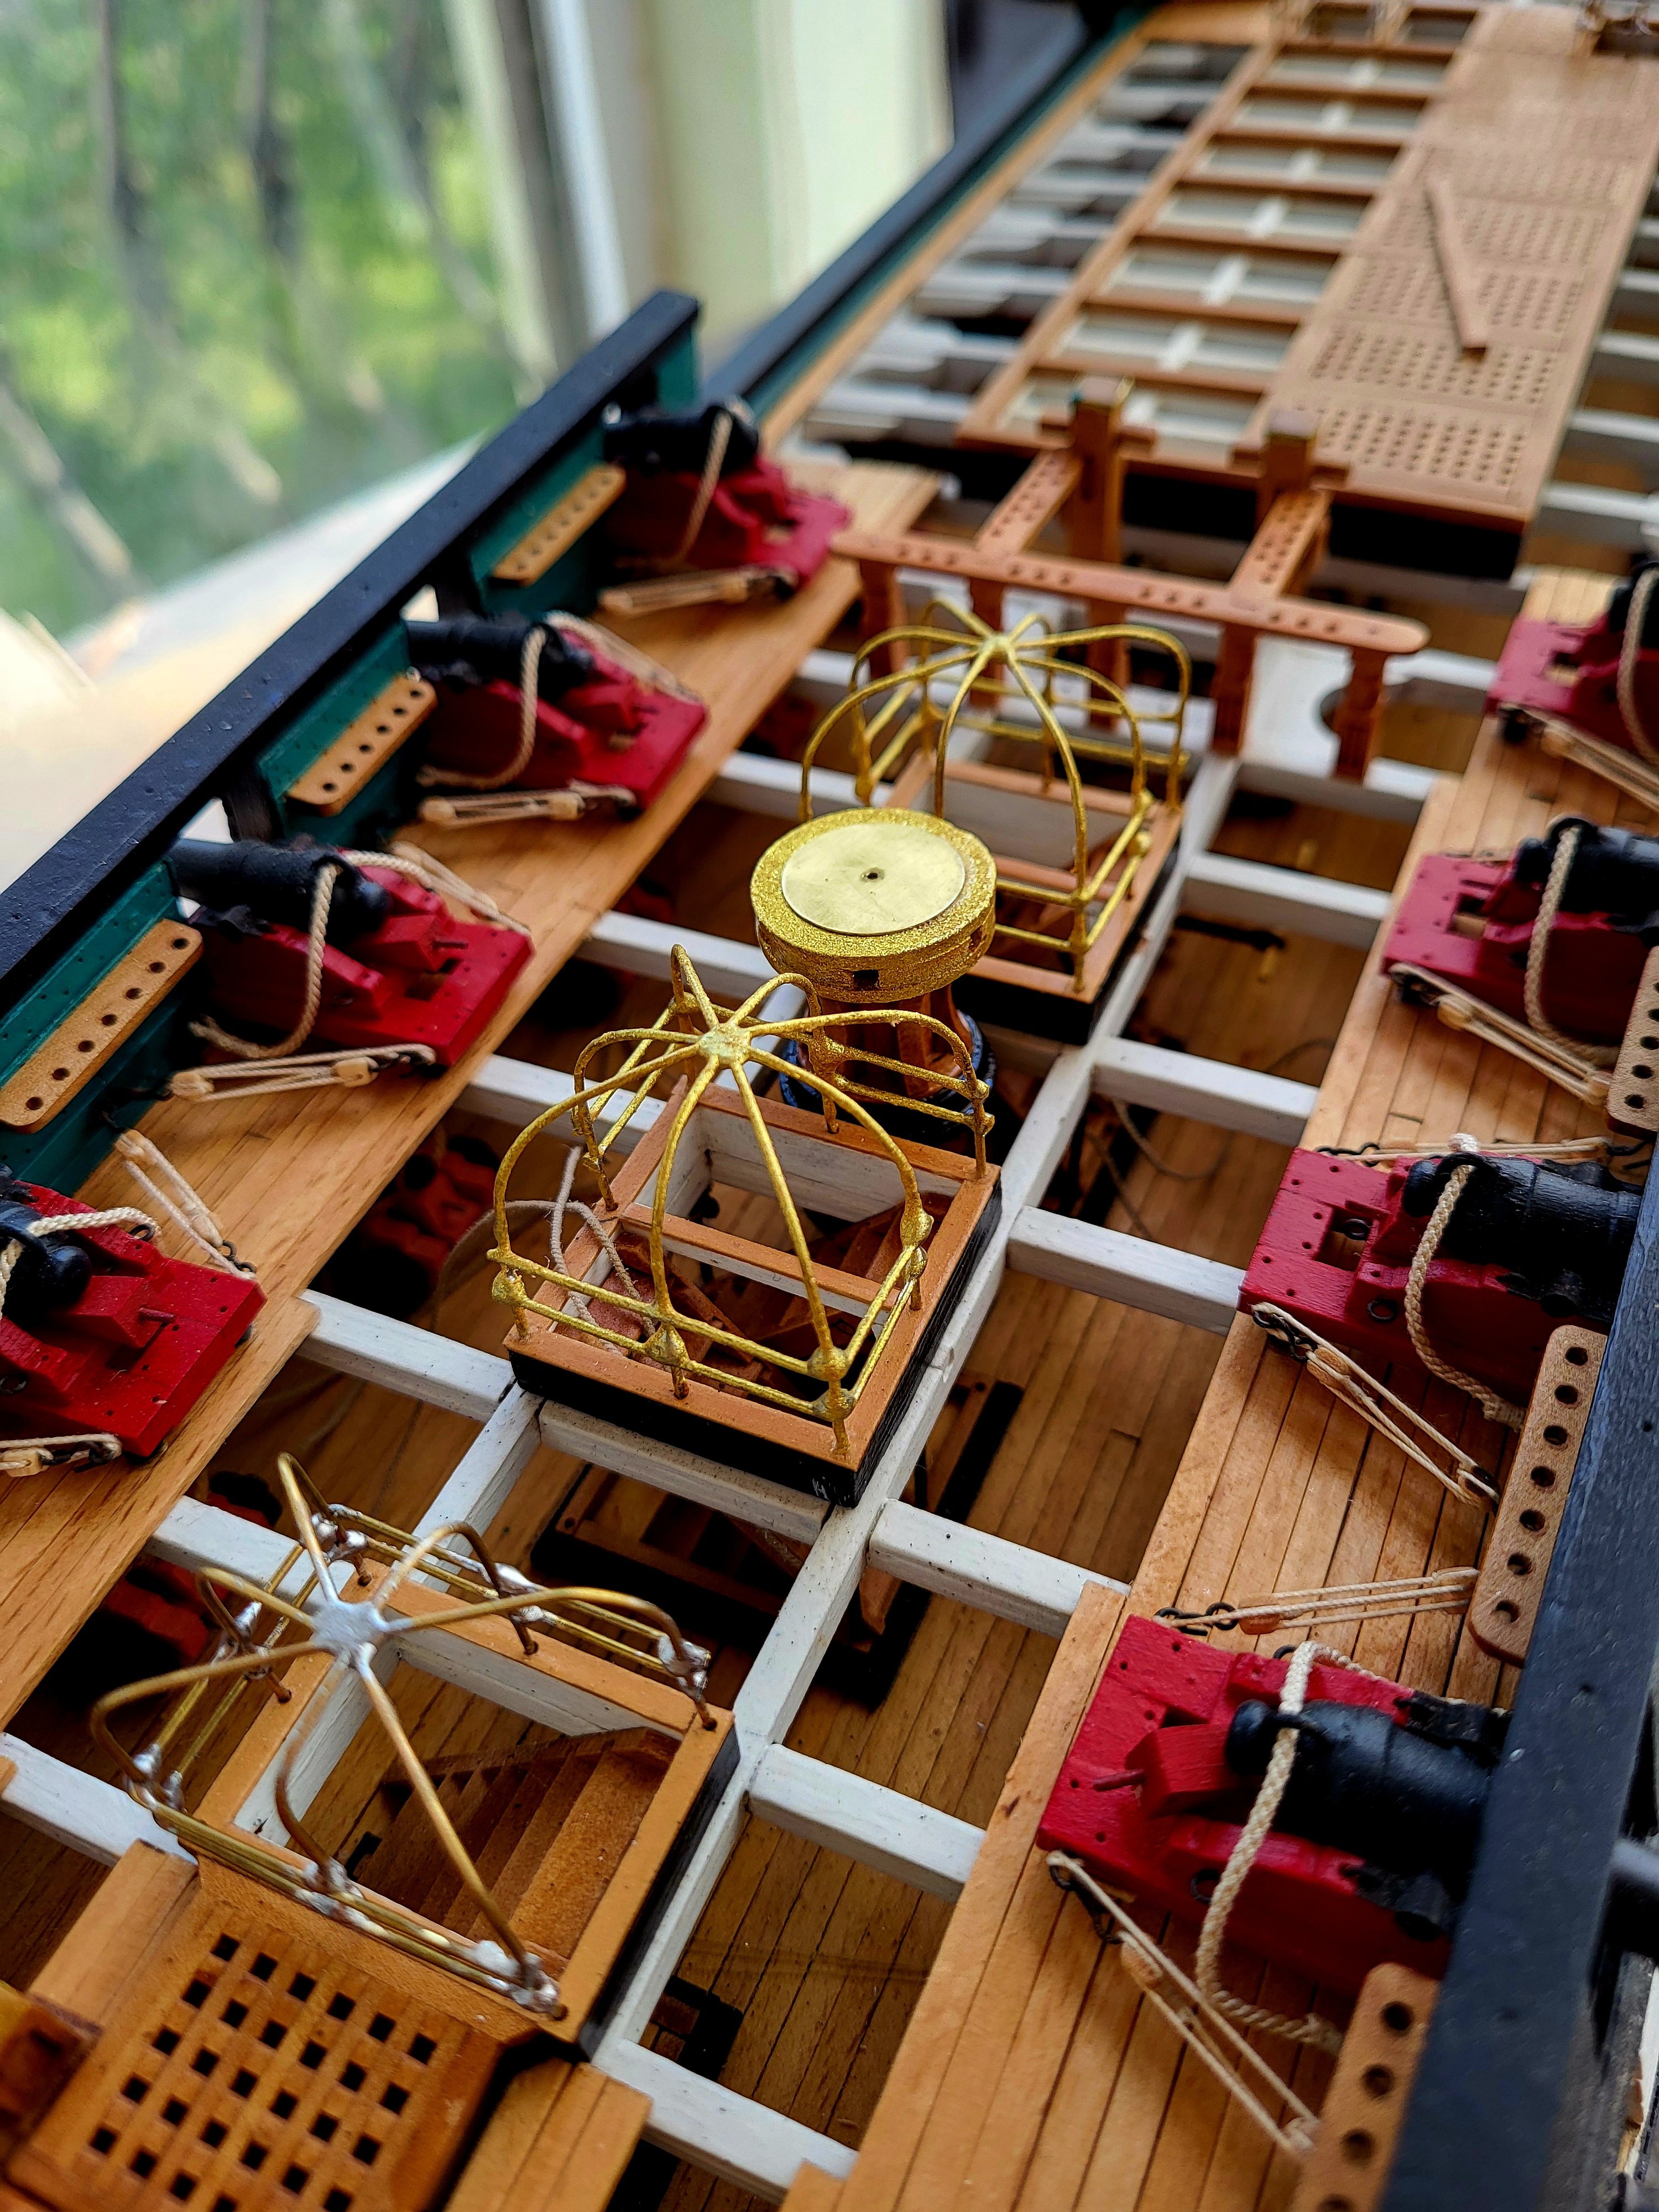
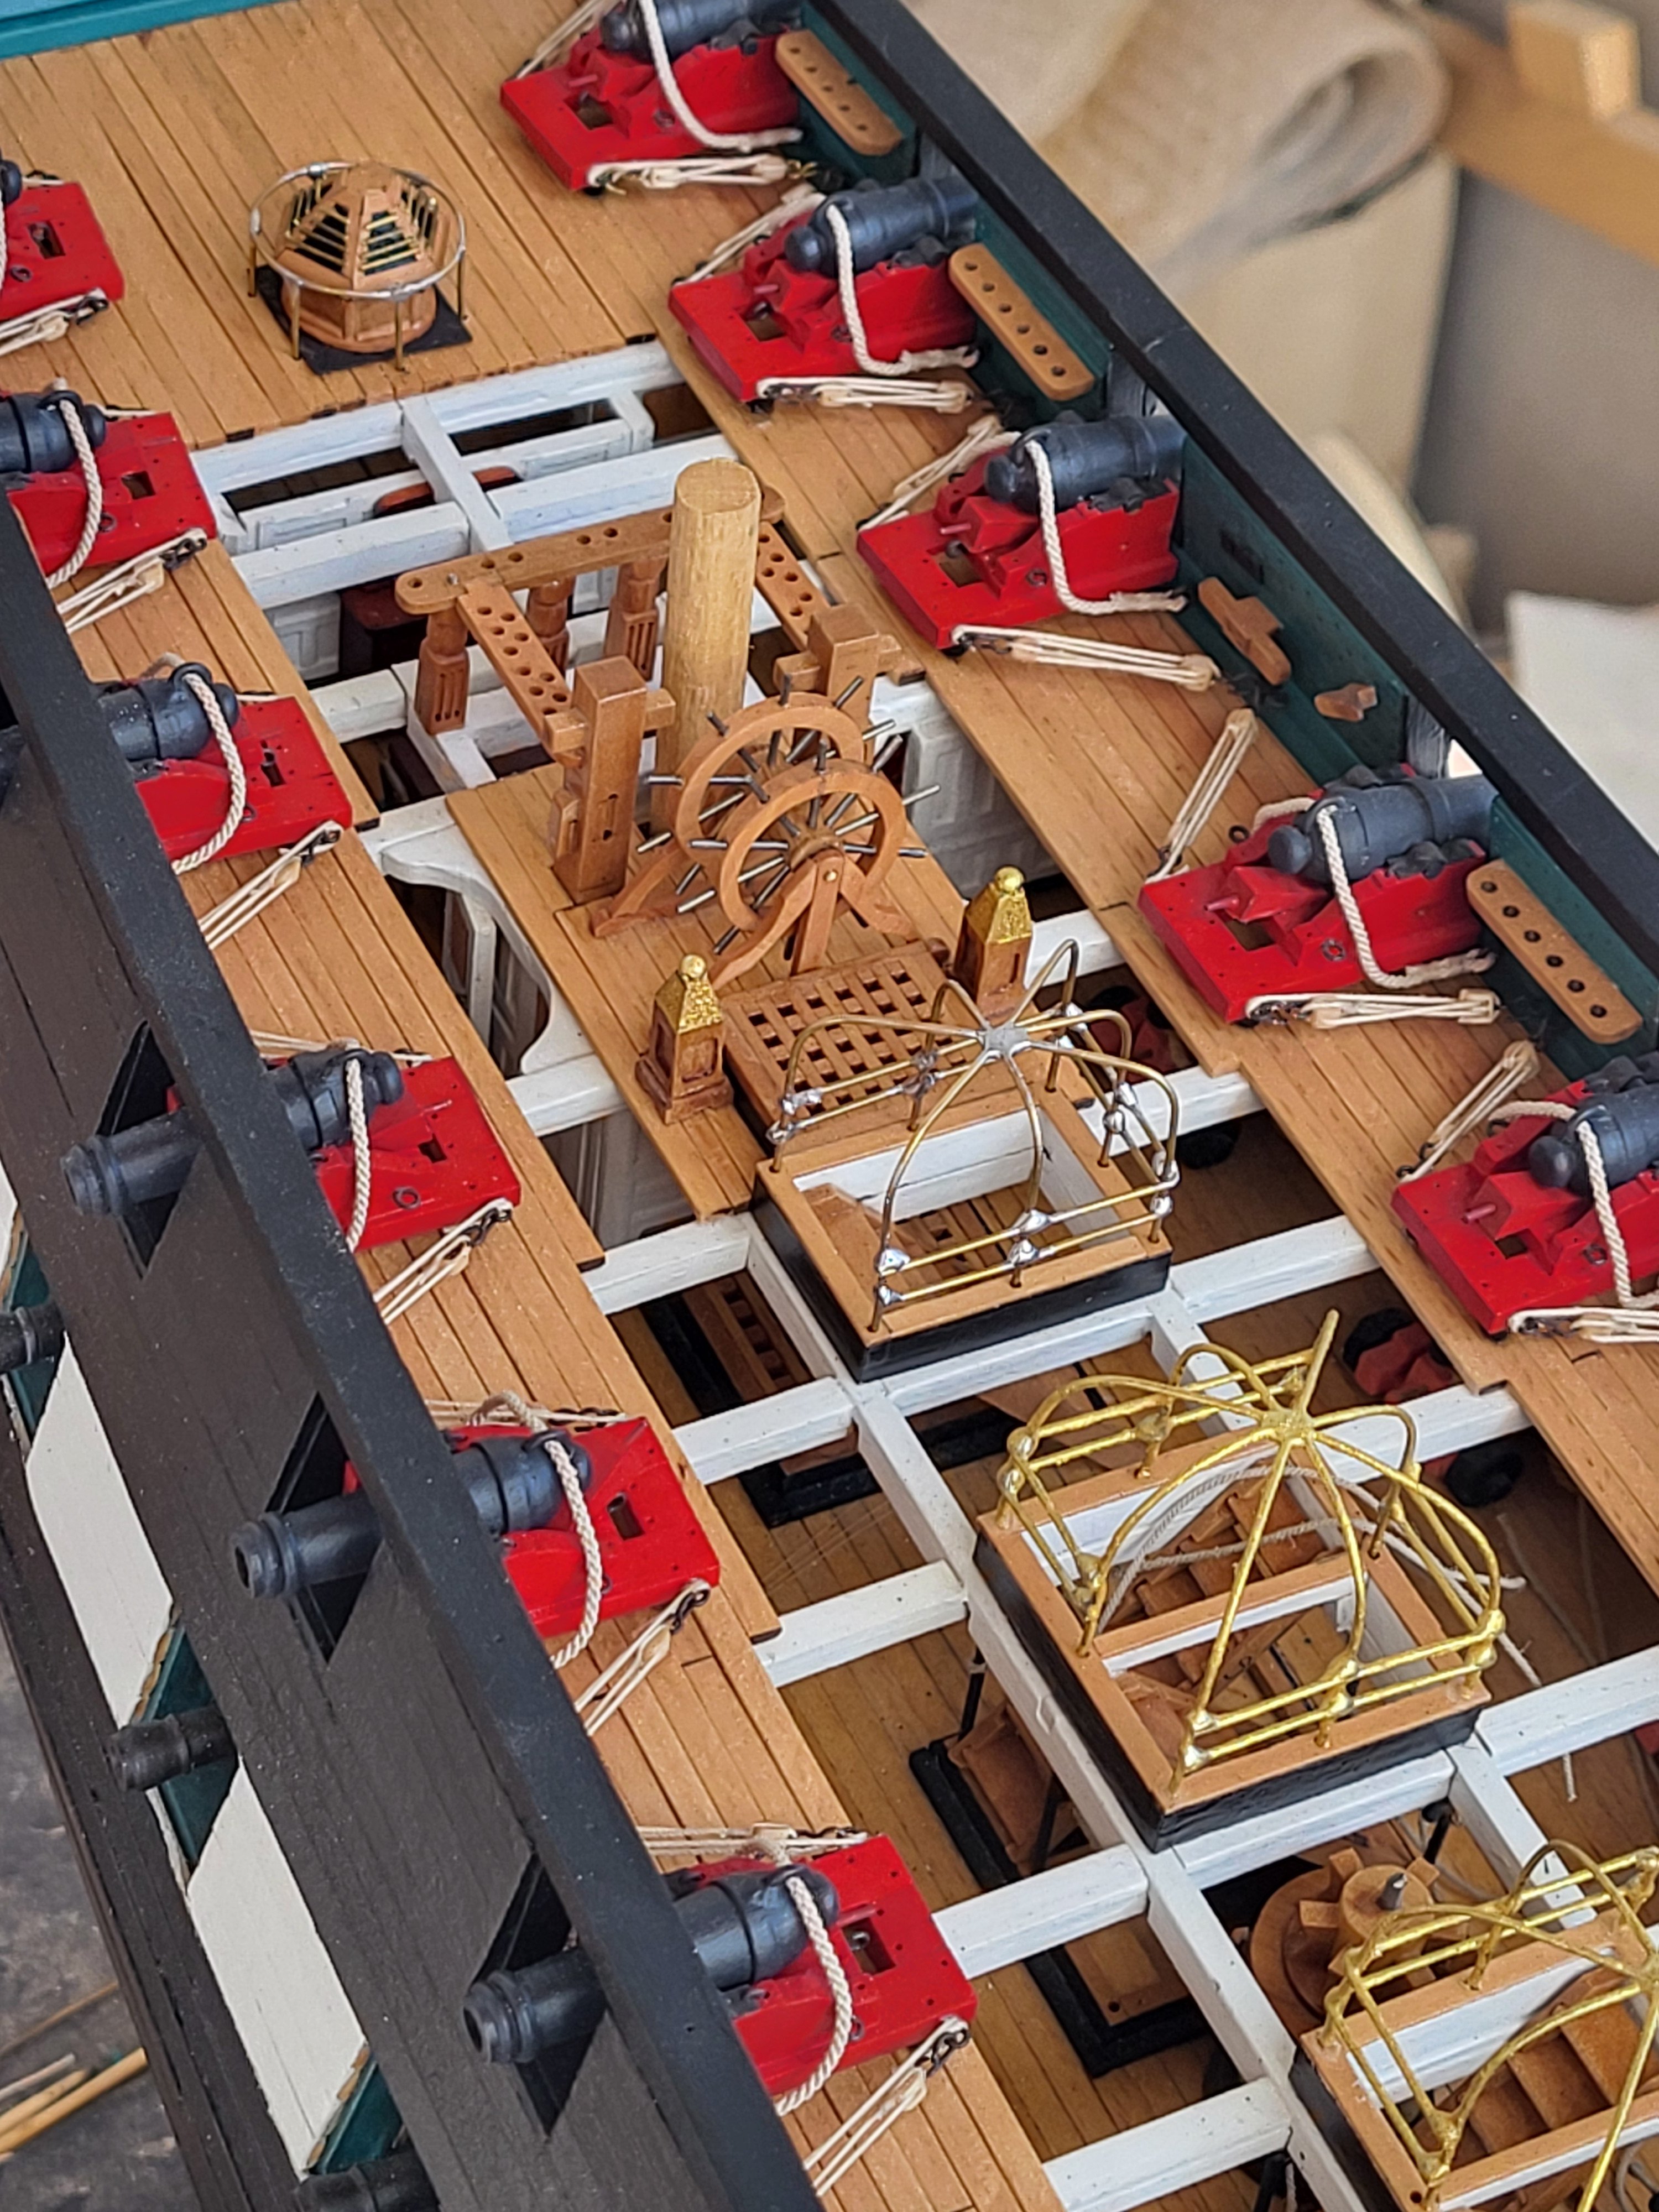
That canopy frame looks nice Jon. Well done. It's a good idea to leave one of the companionways closed. I might steal that idea from you
-
USS Constitution by mtbediz - 1:76
mtbediz replied to mtbediz's topic in - Build logs for subjects built 1751 - 1800
Believe it or not, I bought this dividing attachment two years ago and used it for the first time when I was building this wheel. I don't know when I'll use it again. You'll probably need this tool once or twice during a model ship build, but if you have it, it's a lifesaver and you'll get great results. I agree with Jon, he's in no rush to finish his model, and there's no point in investing in an expensive tool that he might need every 10-15 years! As for milling, a real milling machine is a must, especially if you're building a model from scratch or tackling a kit bashing. Its signature can be found on every square inch of my Constitution. -
USS Constitution by mtbediz - 1:76
mtbediz replied to mtbediz's topic in - Build logs for subjects built 1751 - 1800
Thanks Greg. Life is pretty easy with that mill. -
USS Constitution by mtbediz - 1:76
mtbediz replied to mtbediz's topic in - Build logs for subjects built 1751 - 1800
So I made the right decision not to try to make the canopies your way. -
USS Constitution by mtbediz - 1:76
mtbediz replied to mtbediz's topic in - Build logs for subjects built 1751 - 1800
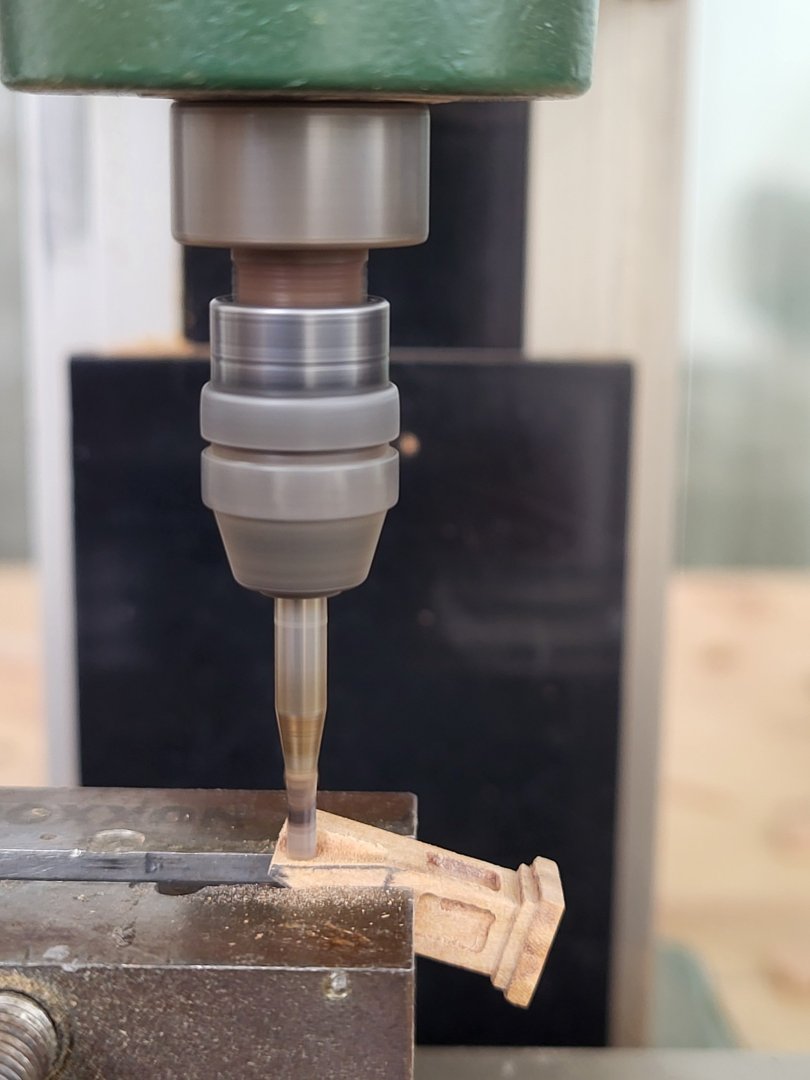
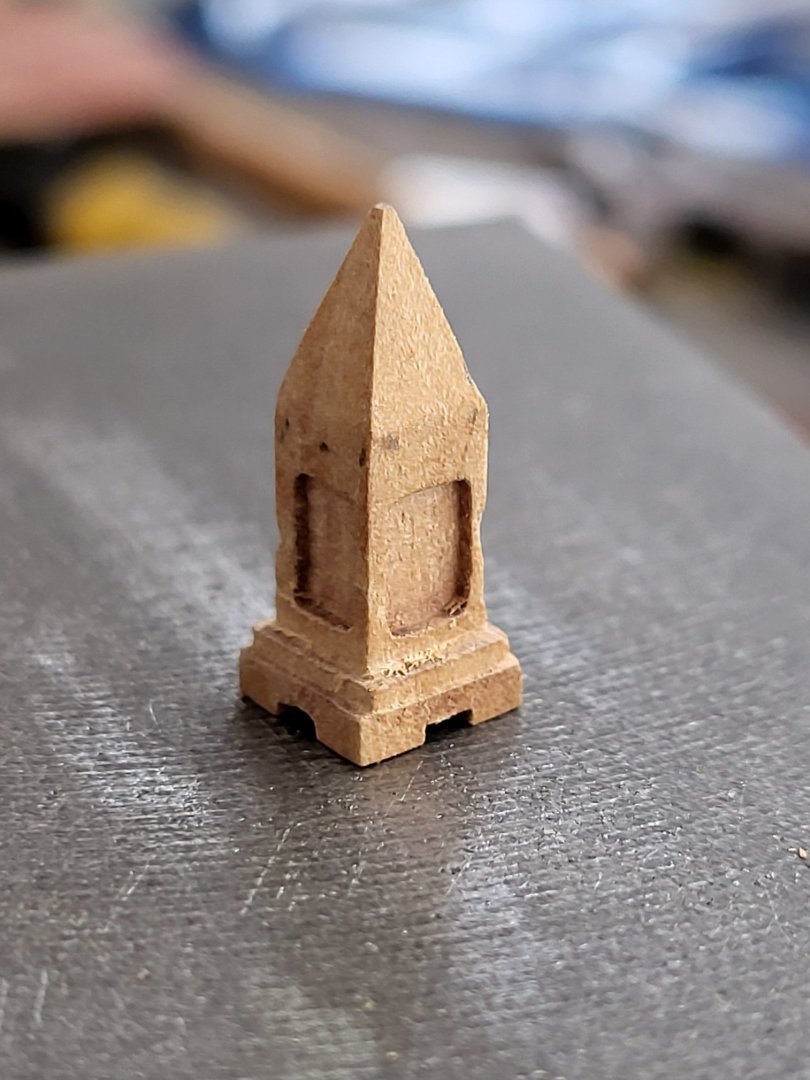
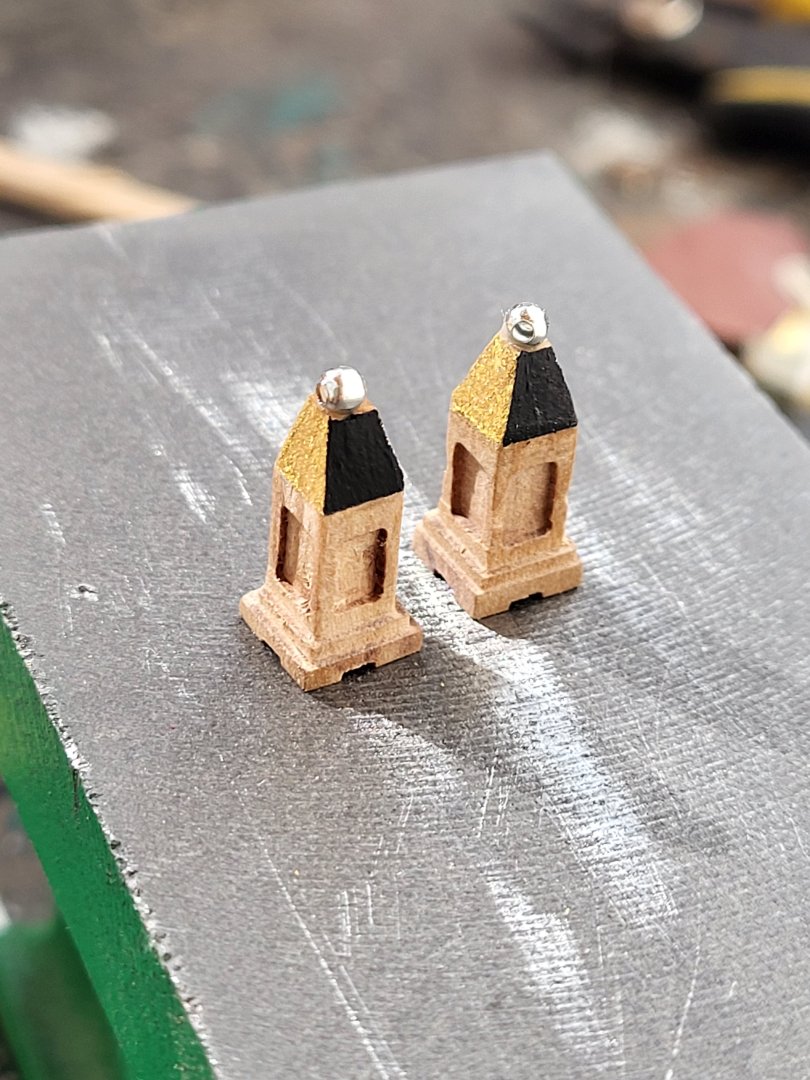
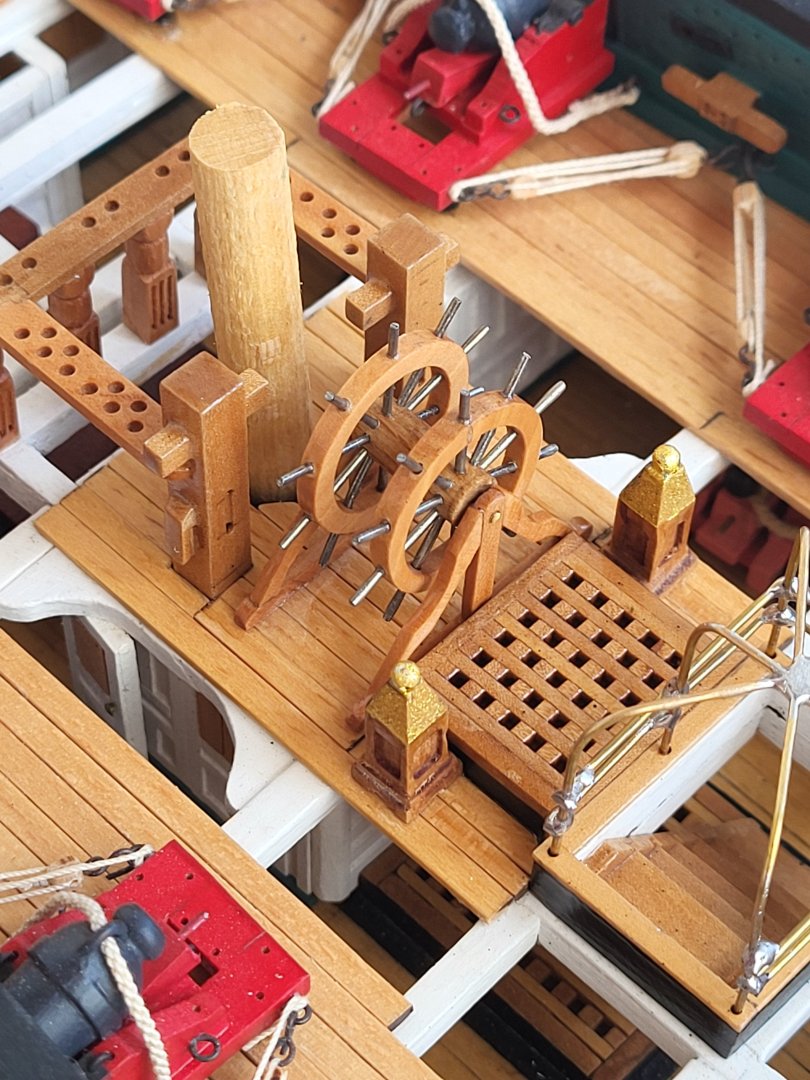
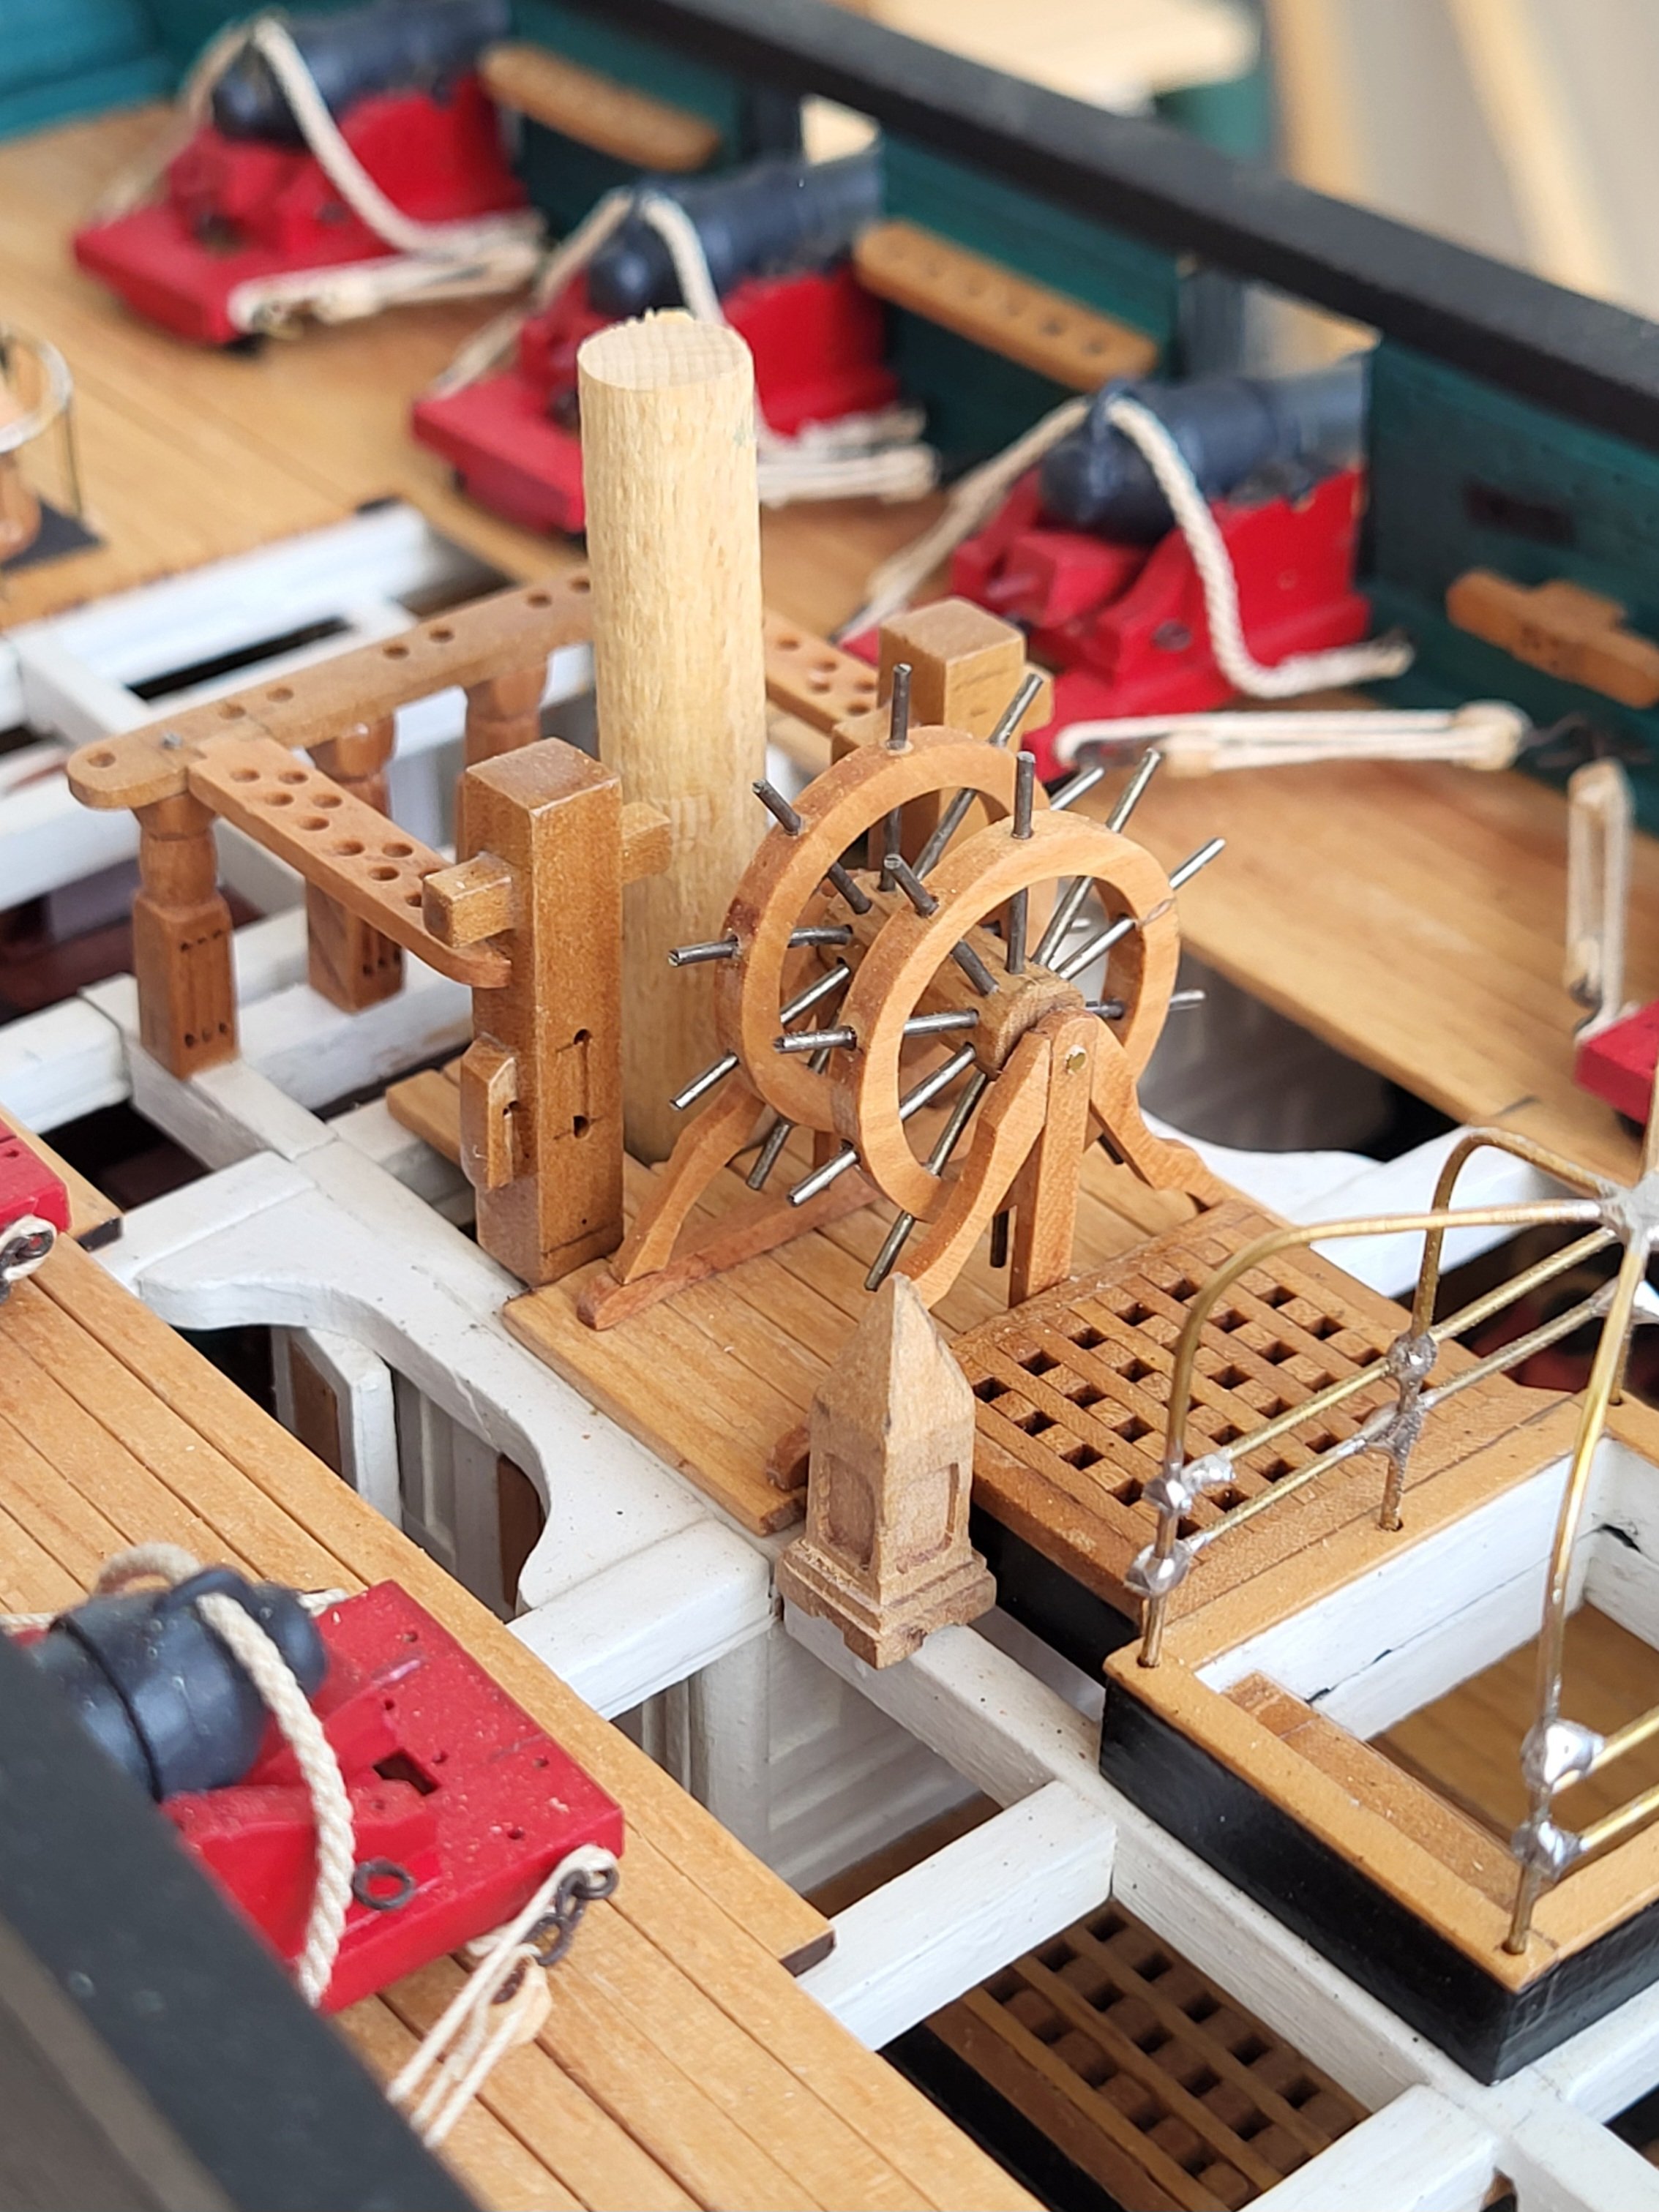
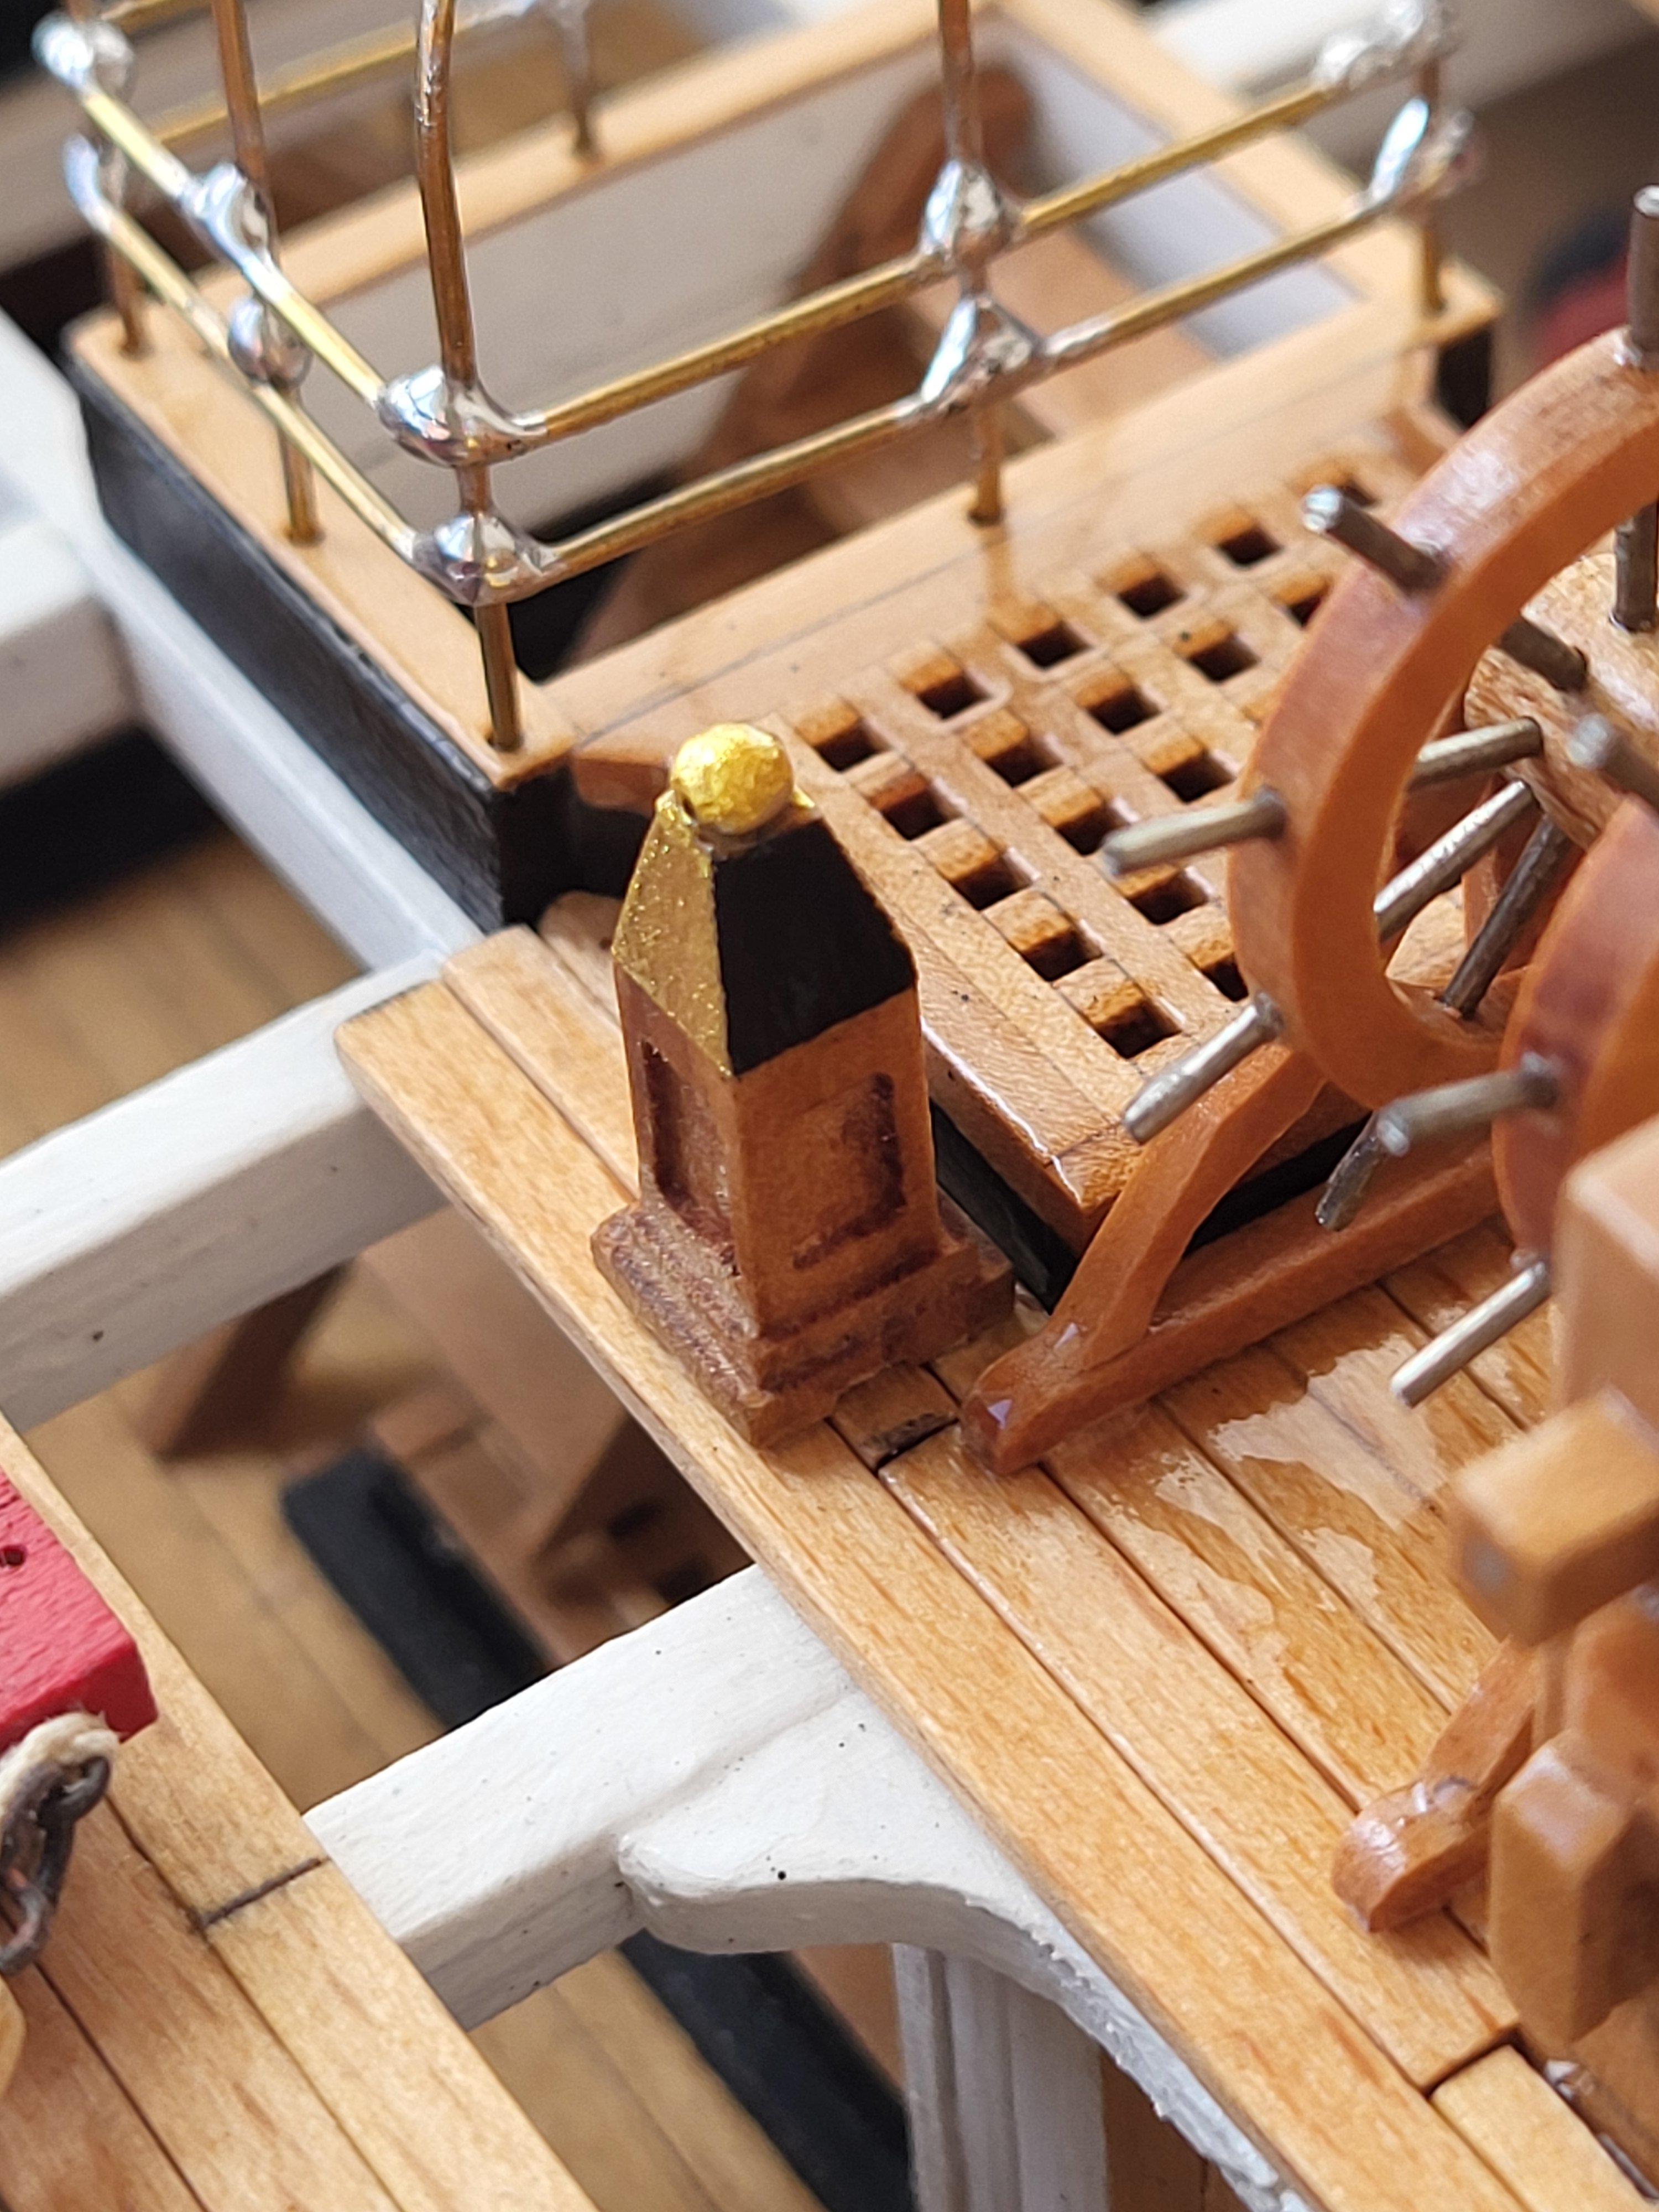
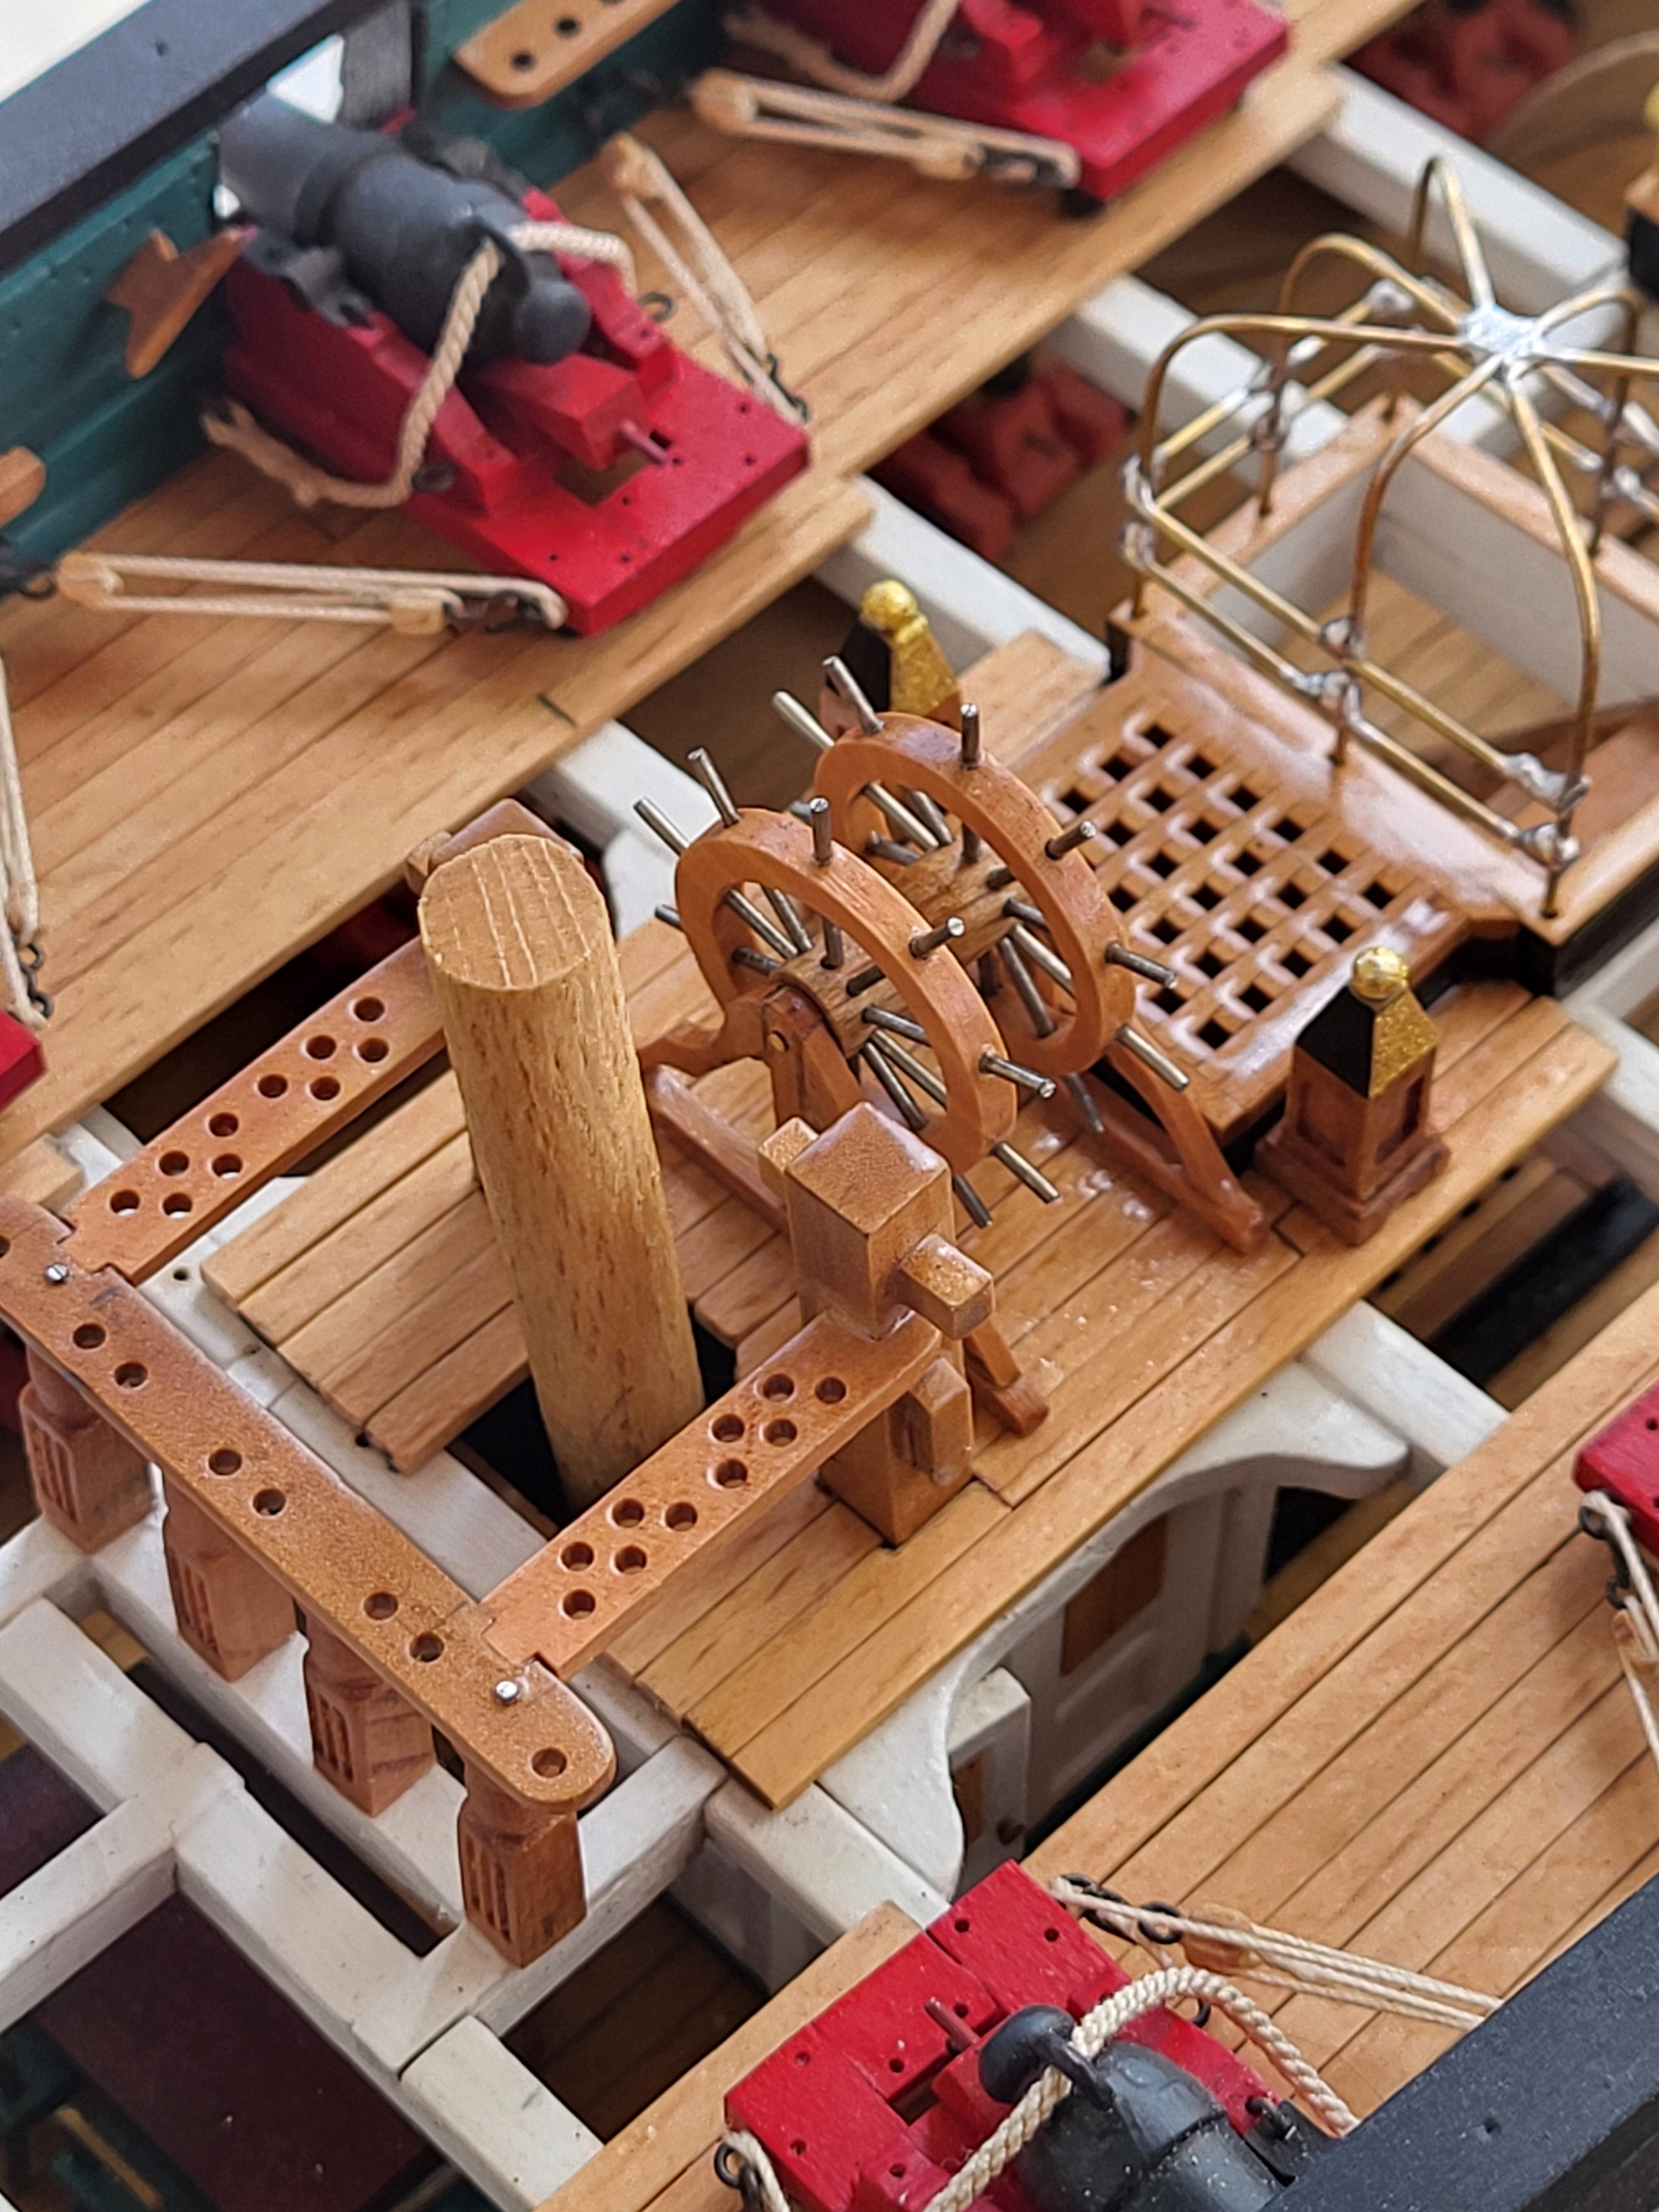
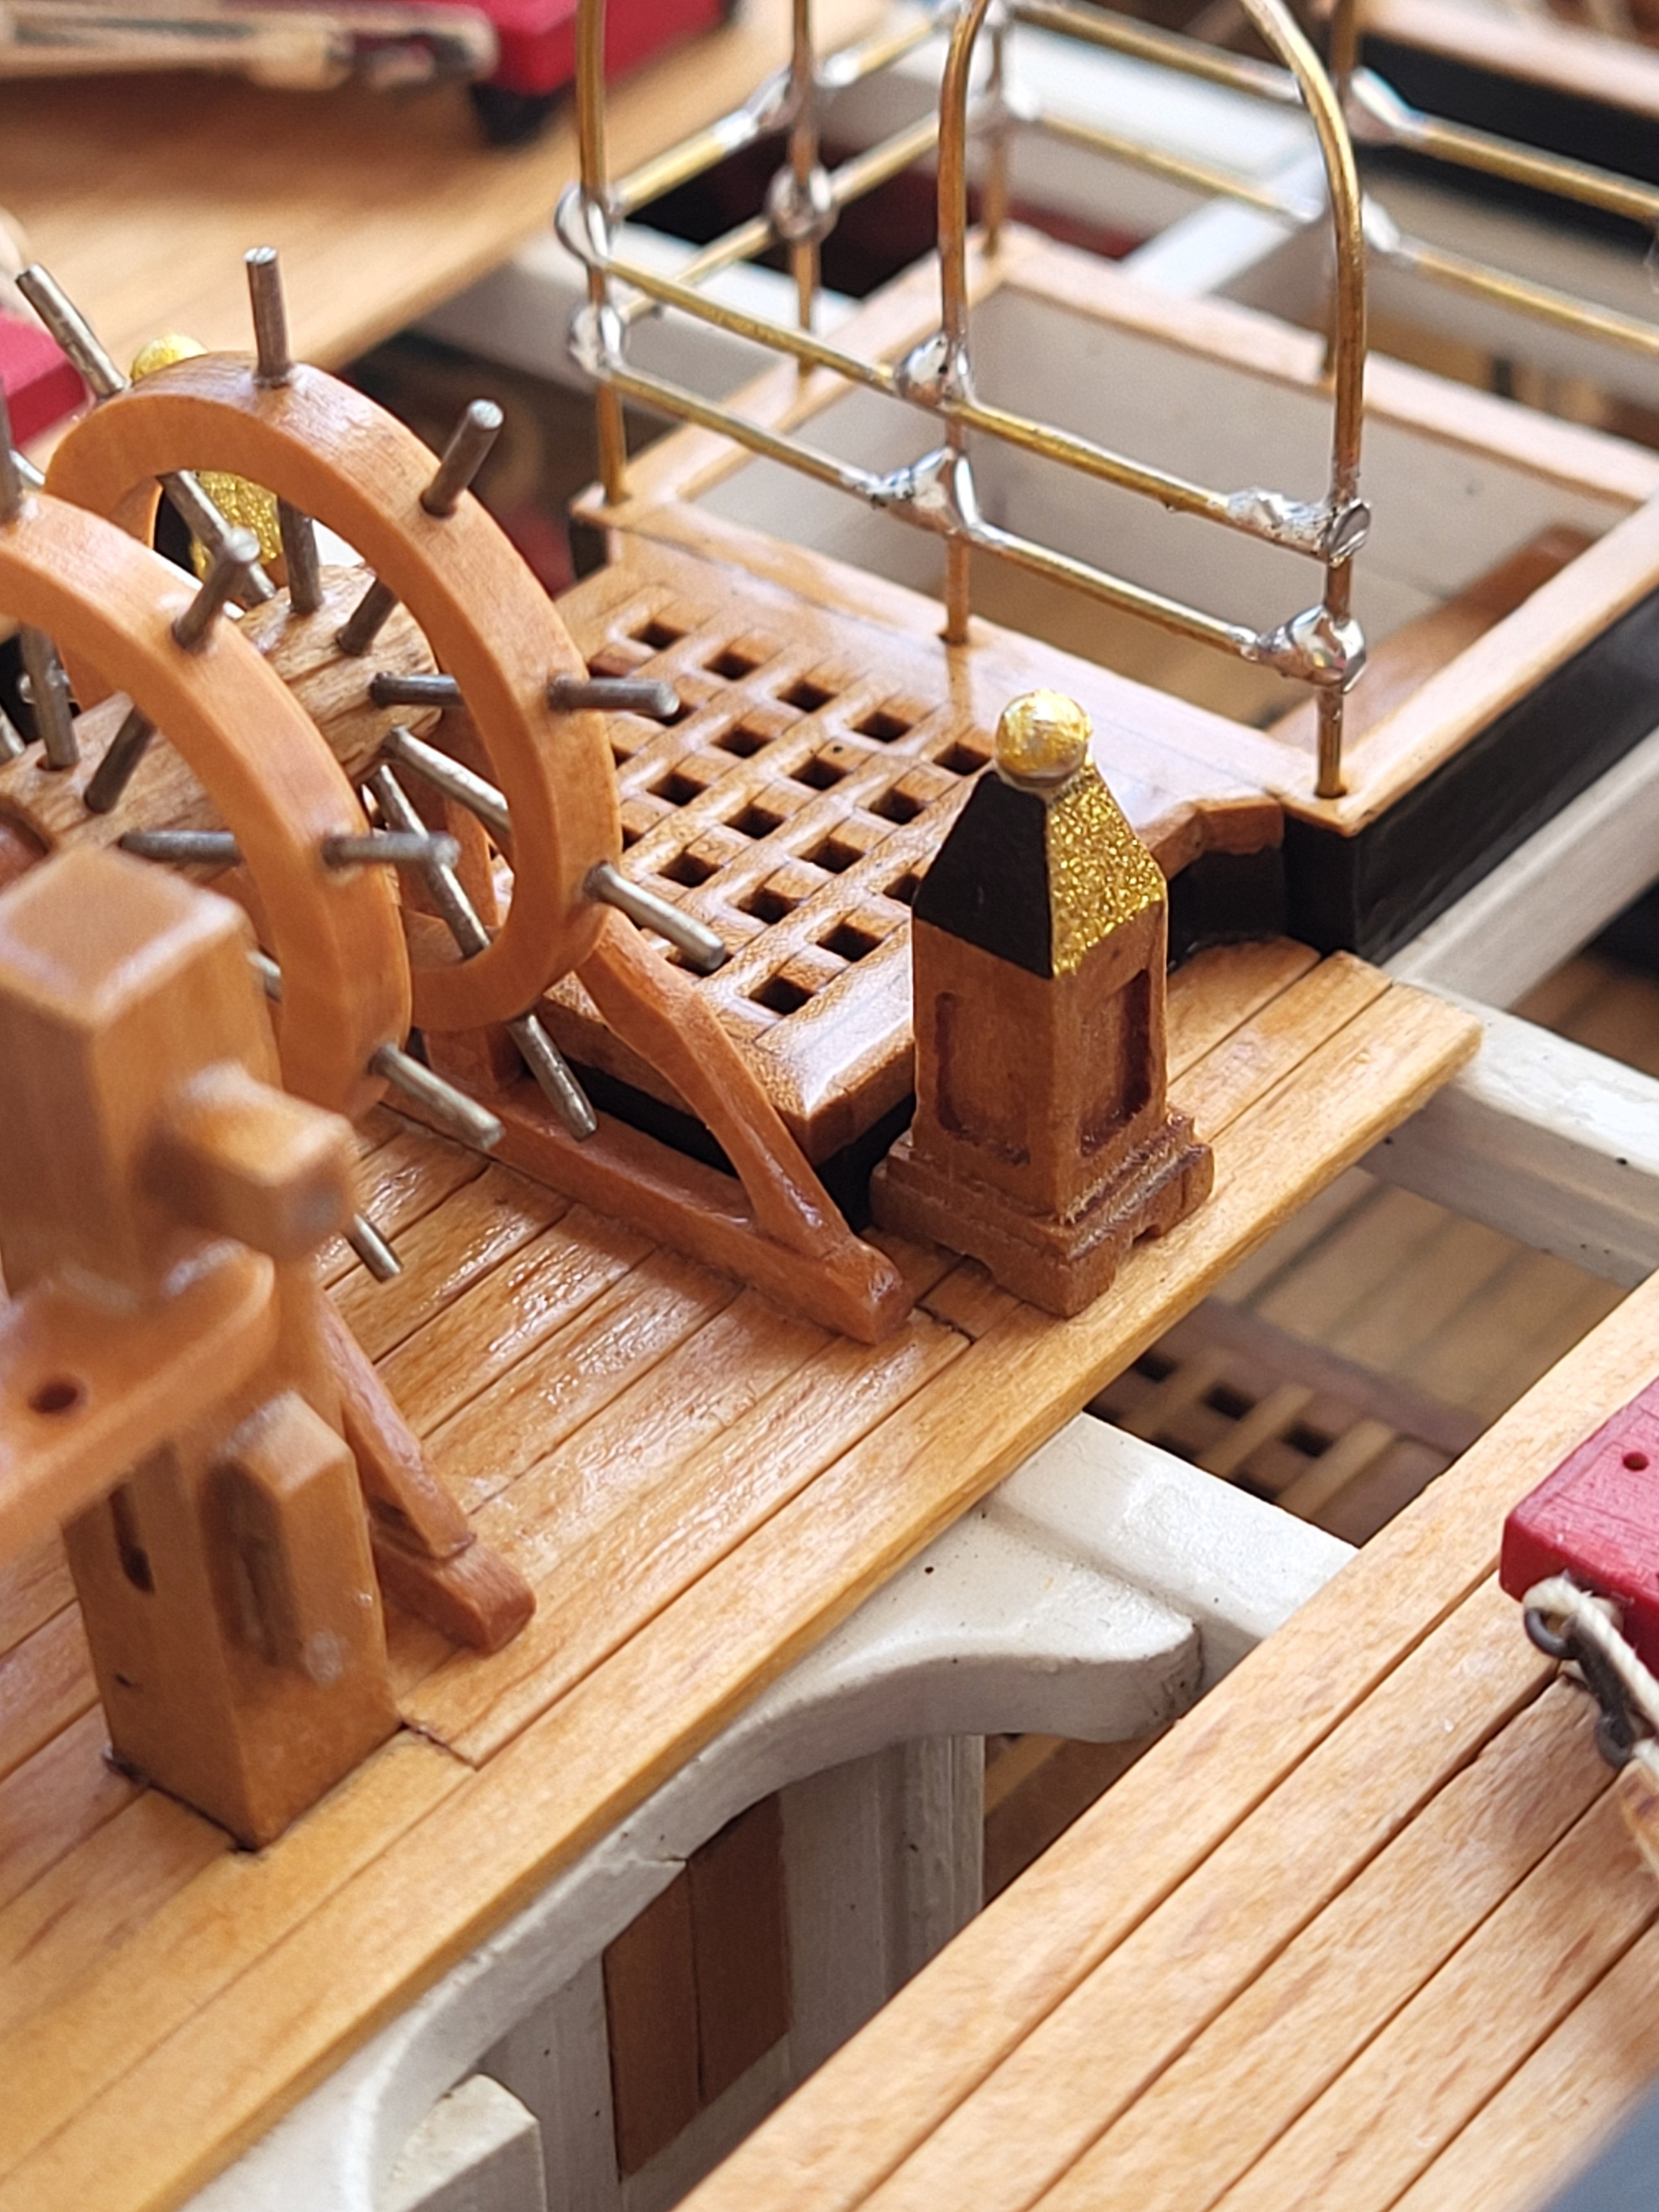
I completed the binnacles and installed them in their places.