mtbediz
-
Posts
1,344 -
Joined
-
Last visited
Content Type
Profiles
Forums
Gallery
Events
Everything posted by mtbediz
-

USS Constitution by mtbediz - 1:76
mtbediz replied to mtbediz's topic in - Build logs for subjects built 1751 - 1800
Thank you Greg. -
USS Constitution by mtbediz - 1:76
mtbediz replied to mtbediz's topic in - Build logs for subjects built 1751 - 1800
Thank you so much Peter. As I mentioned before, my model is actually 1:70 scale, so it is slightly larger than yours. The reason is that I could not fully match the scale of the kit plan. But I'm glad it happened, it gave me some relief while working. -
She really looks nice. I wonder whether Constitution has always been painted black since she was launched or she was painted later.
-
USS Constitution by mtbediz - 1:76
mtbediz replied to mtbediz's topic in - Build logs for subjects built 1751 - 1800
Thank you. -
USS Constitution by mtbediz - 1:76
mtbediz replied to mtbediz's topic in - Build logs for subjects built 1751 - 1800
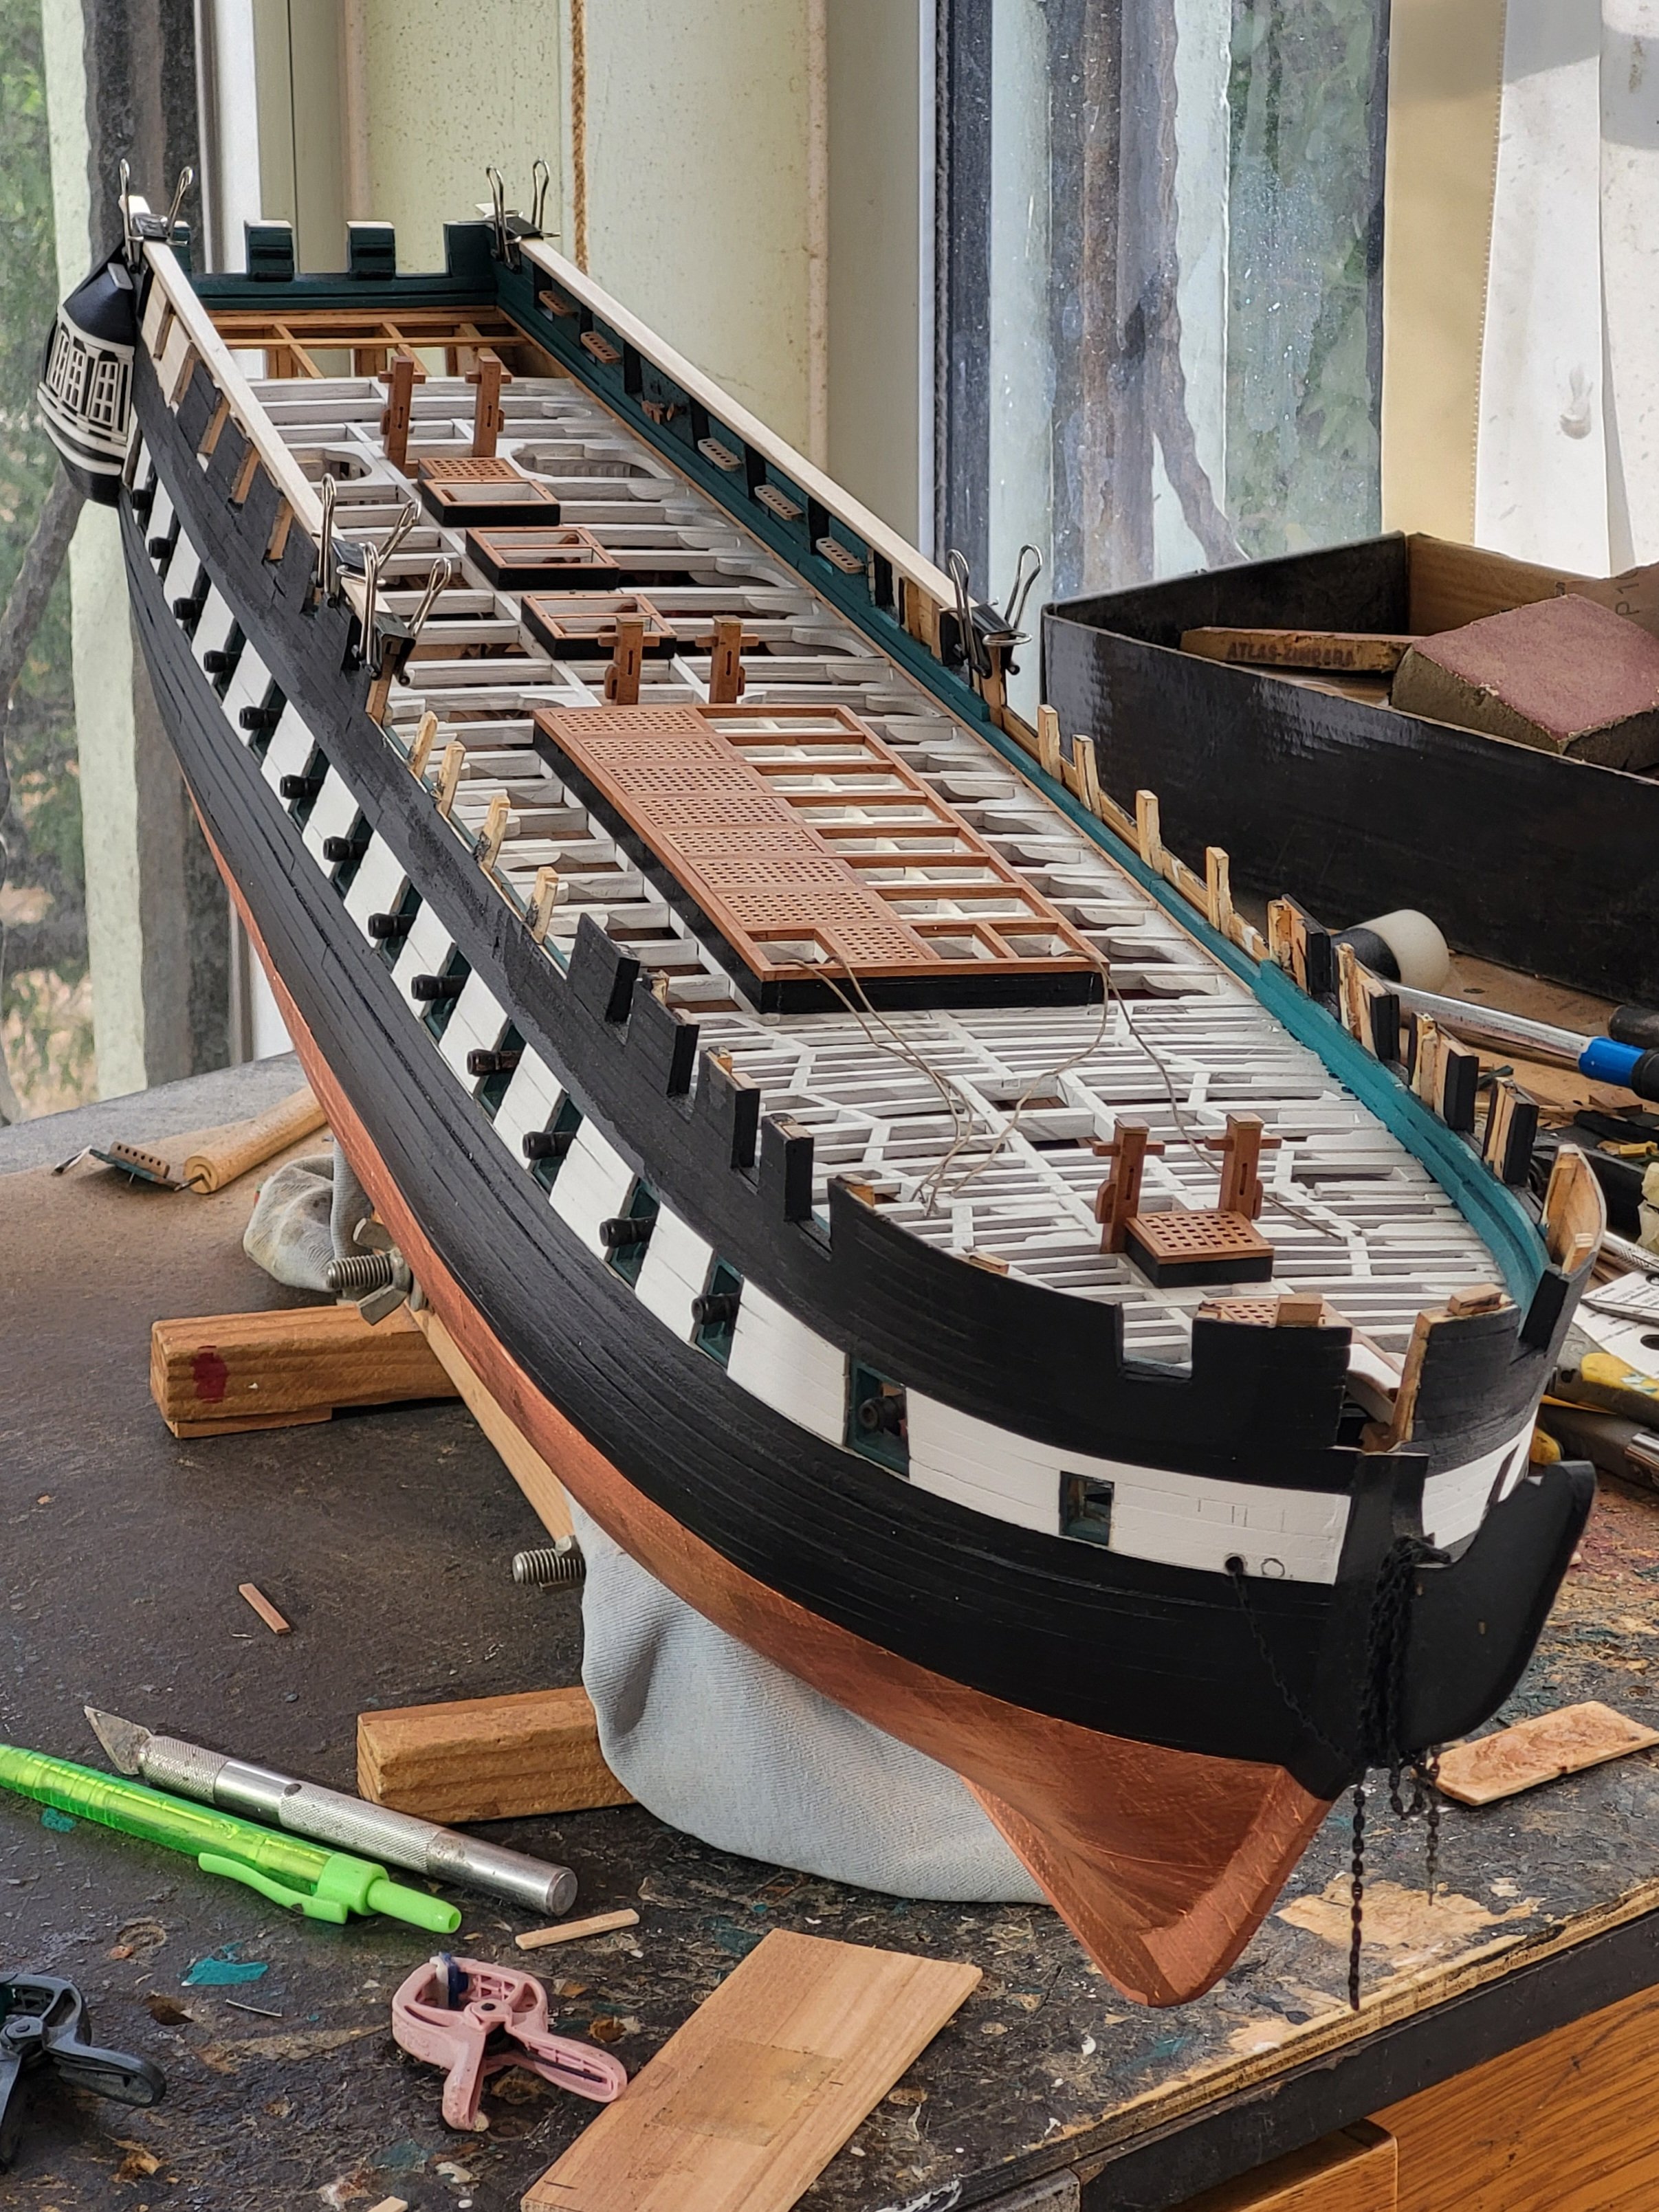
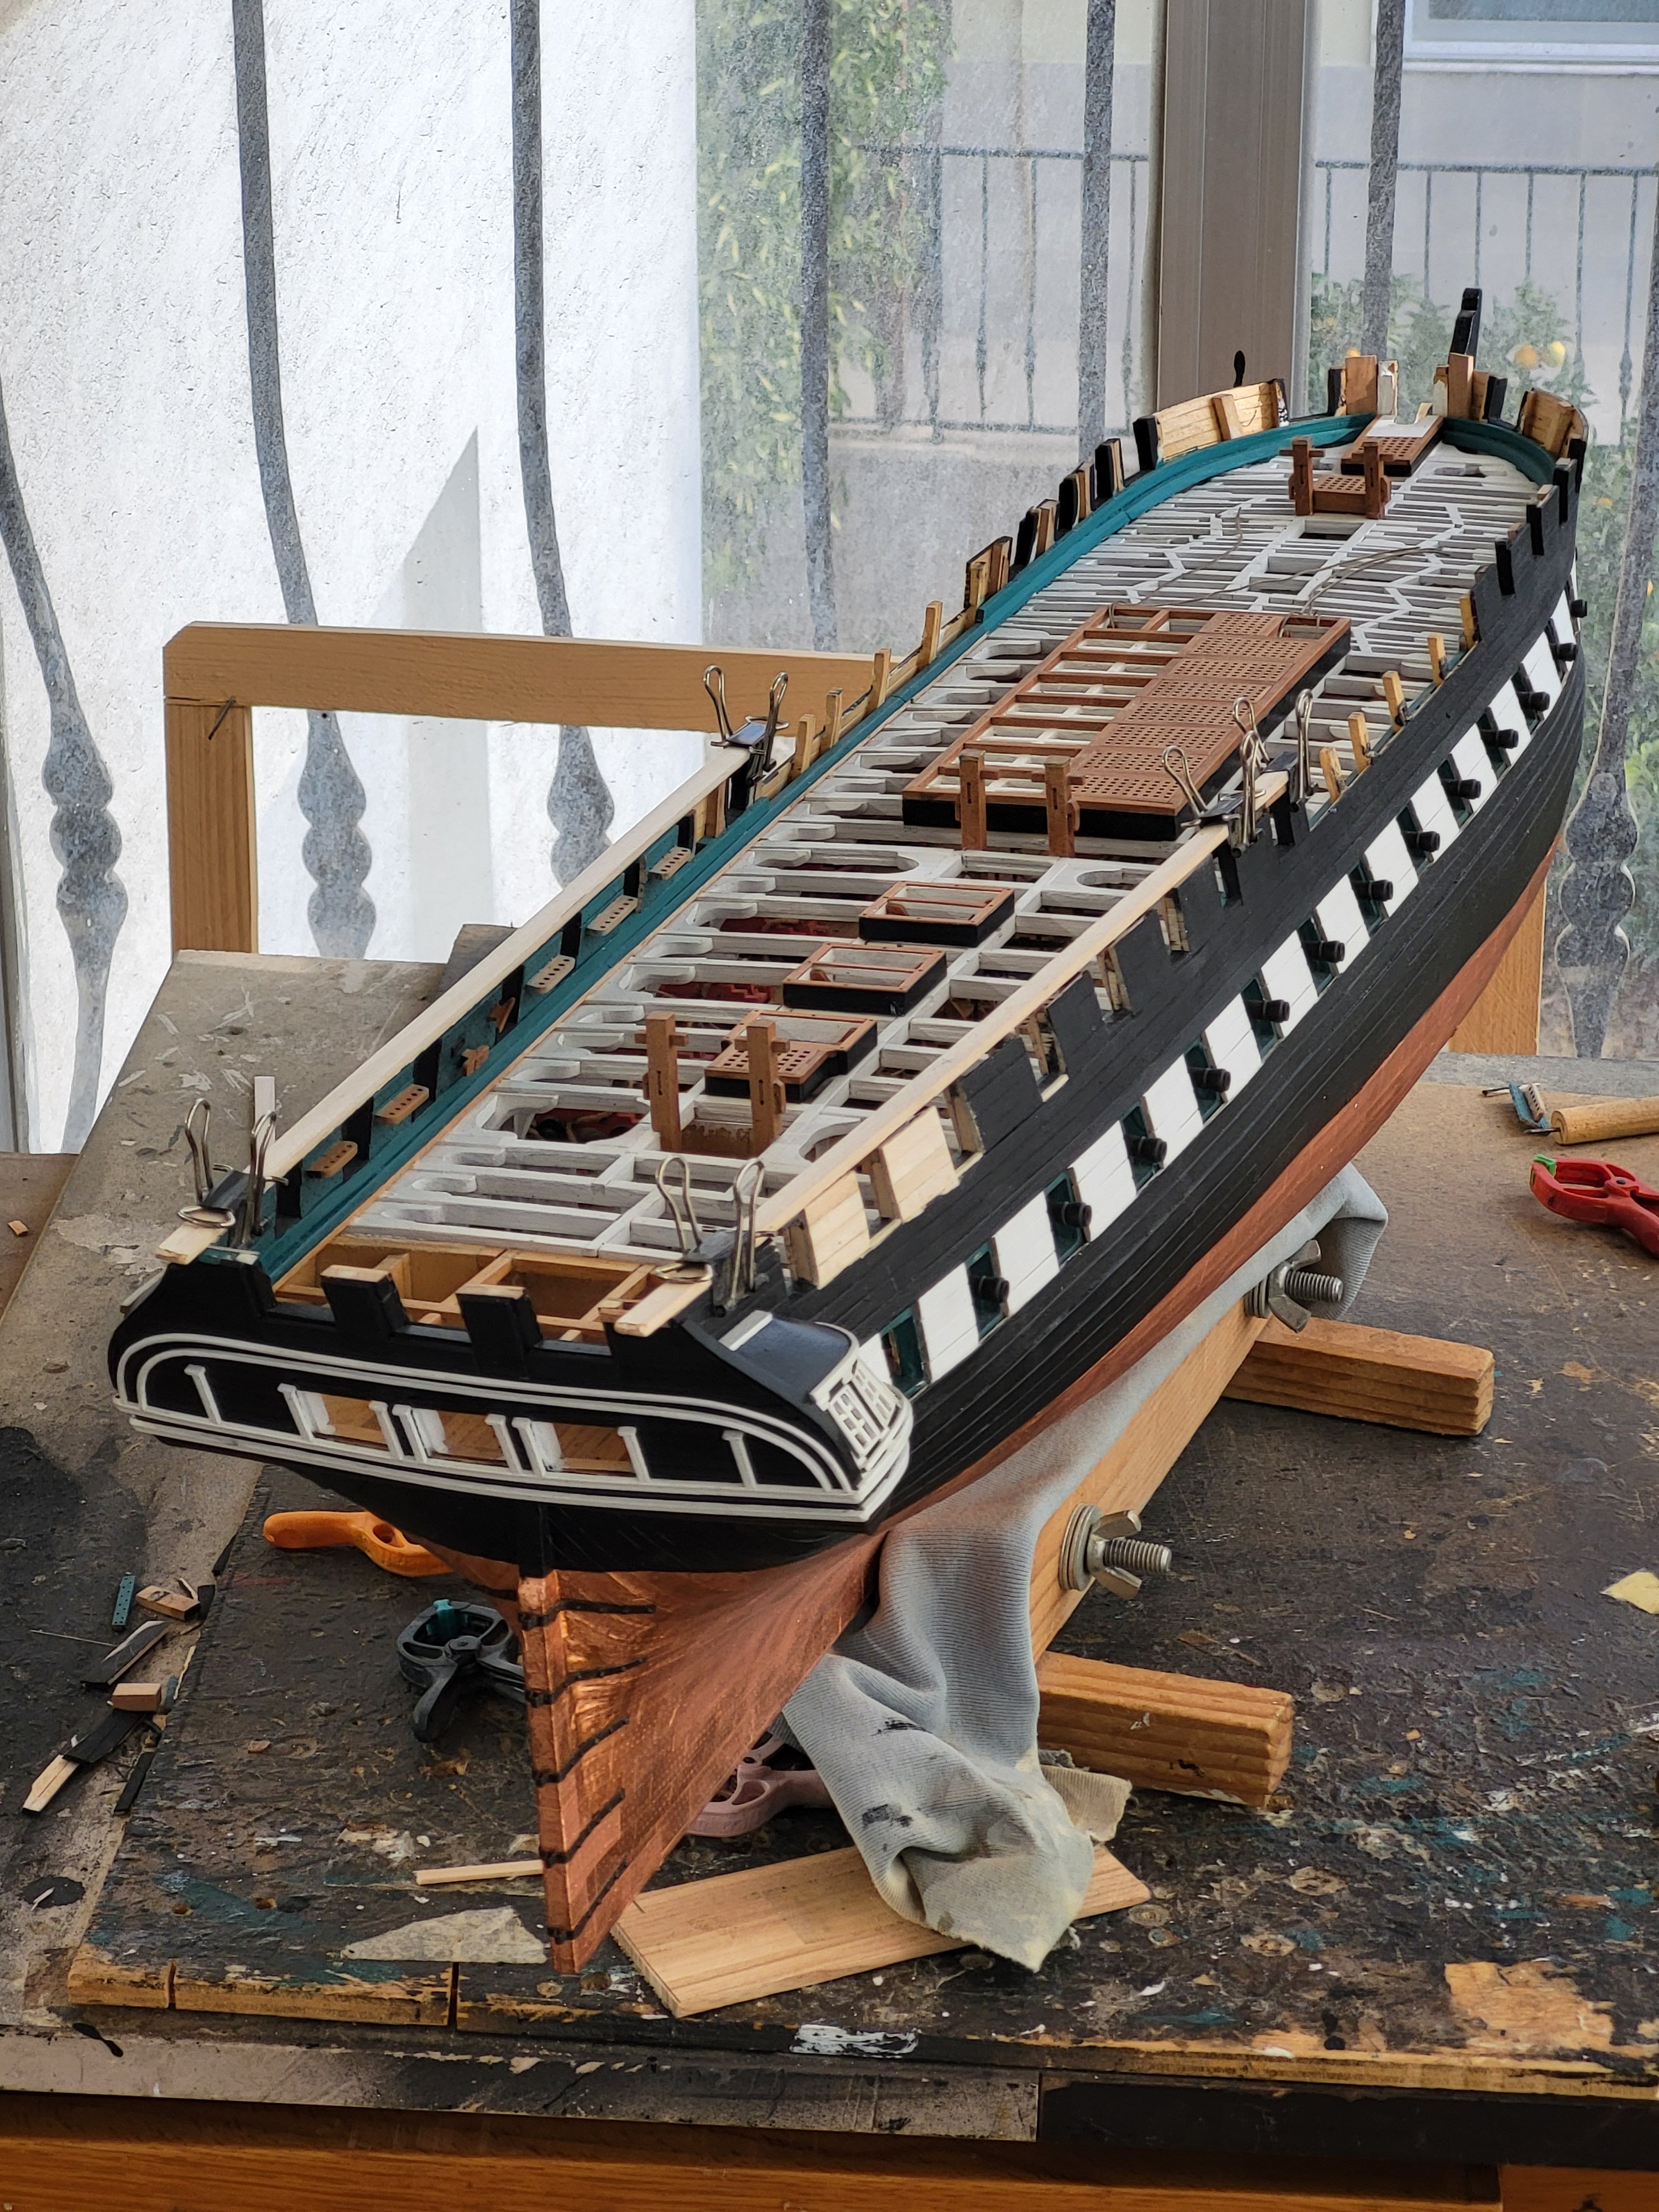
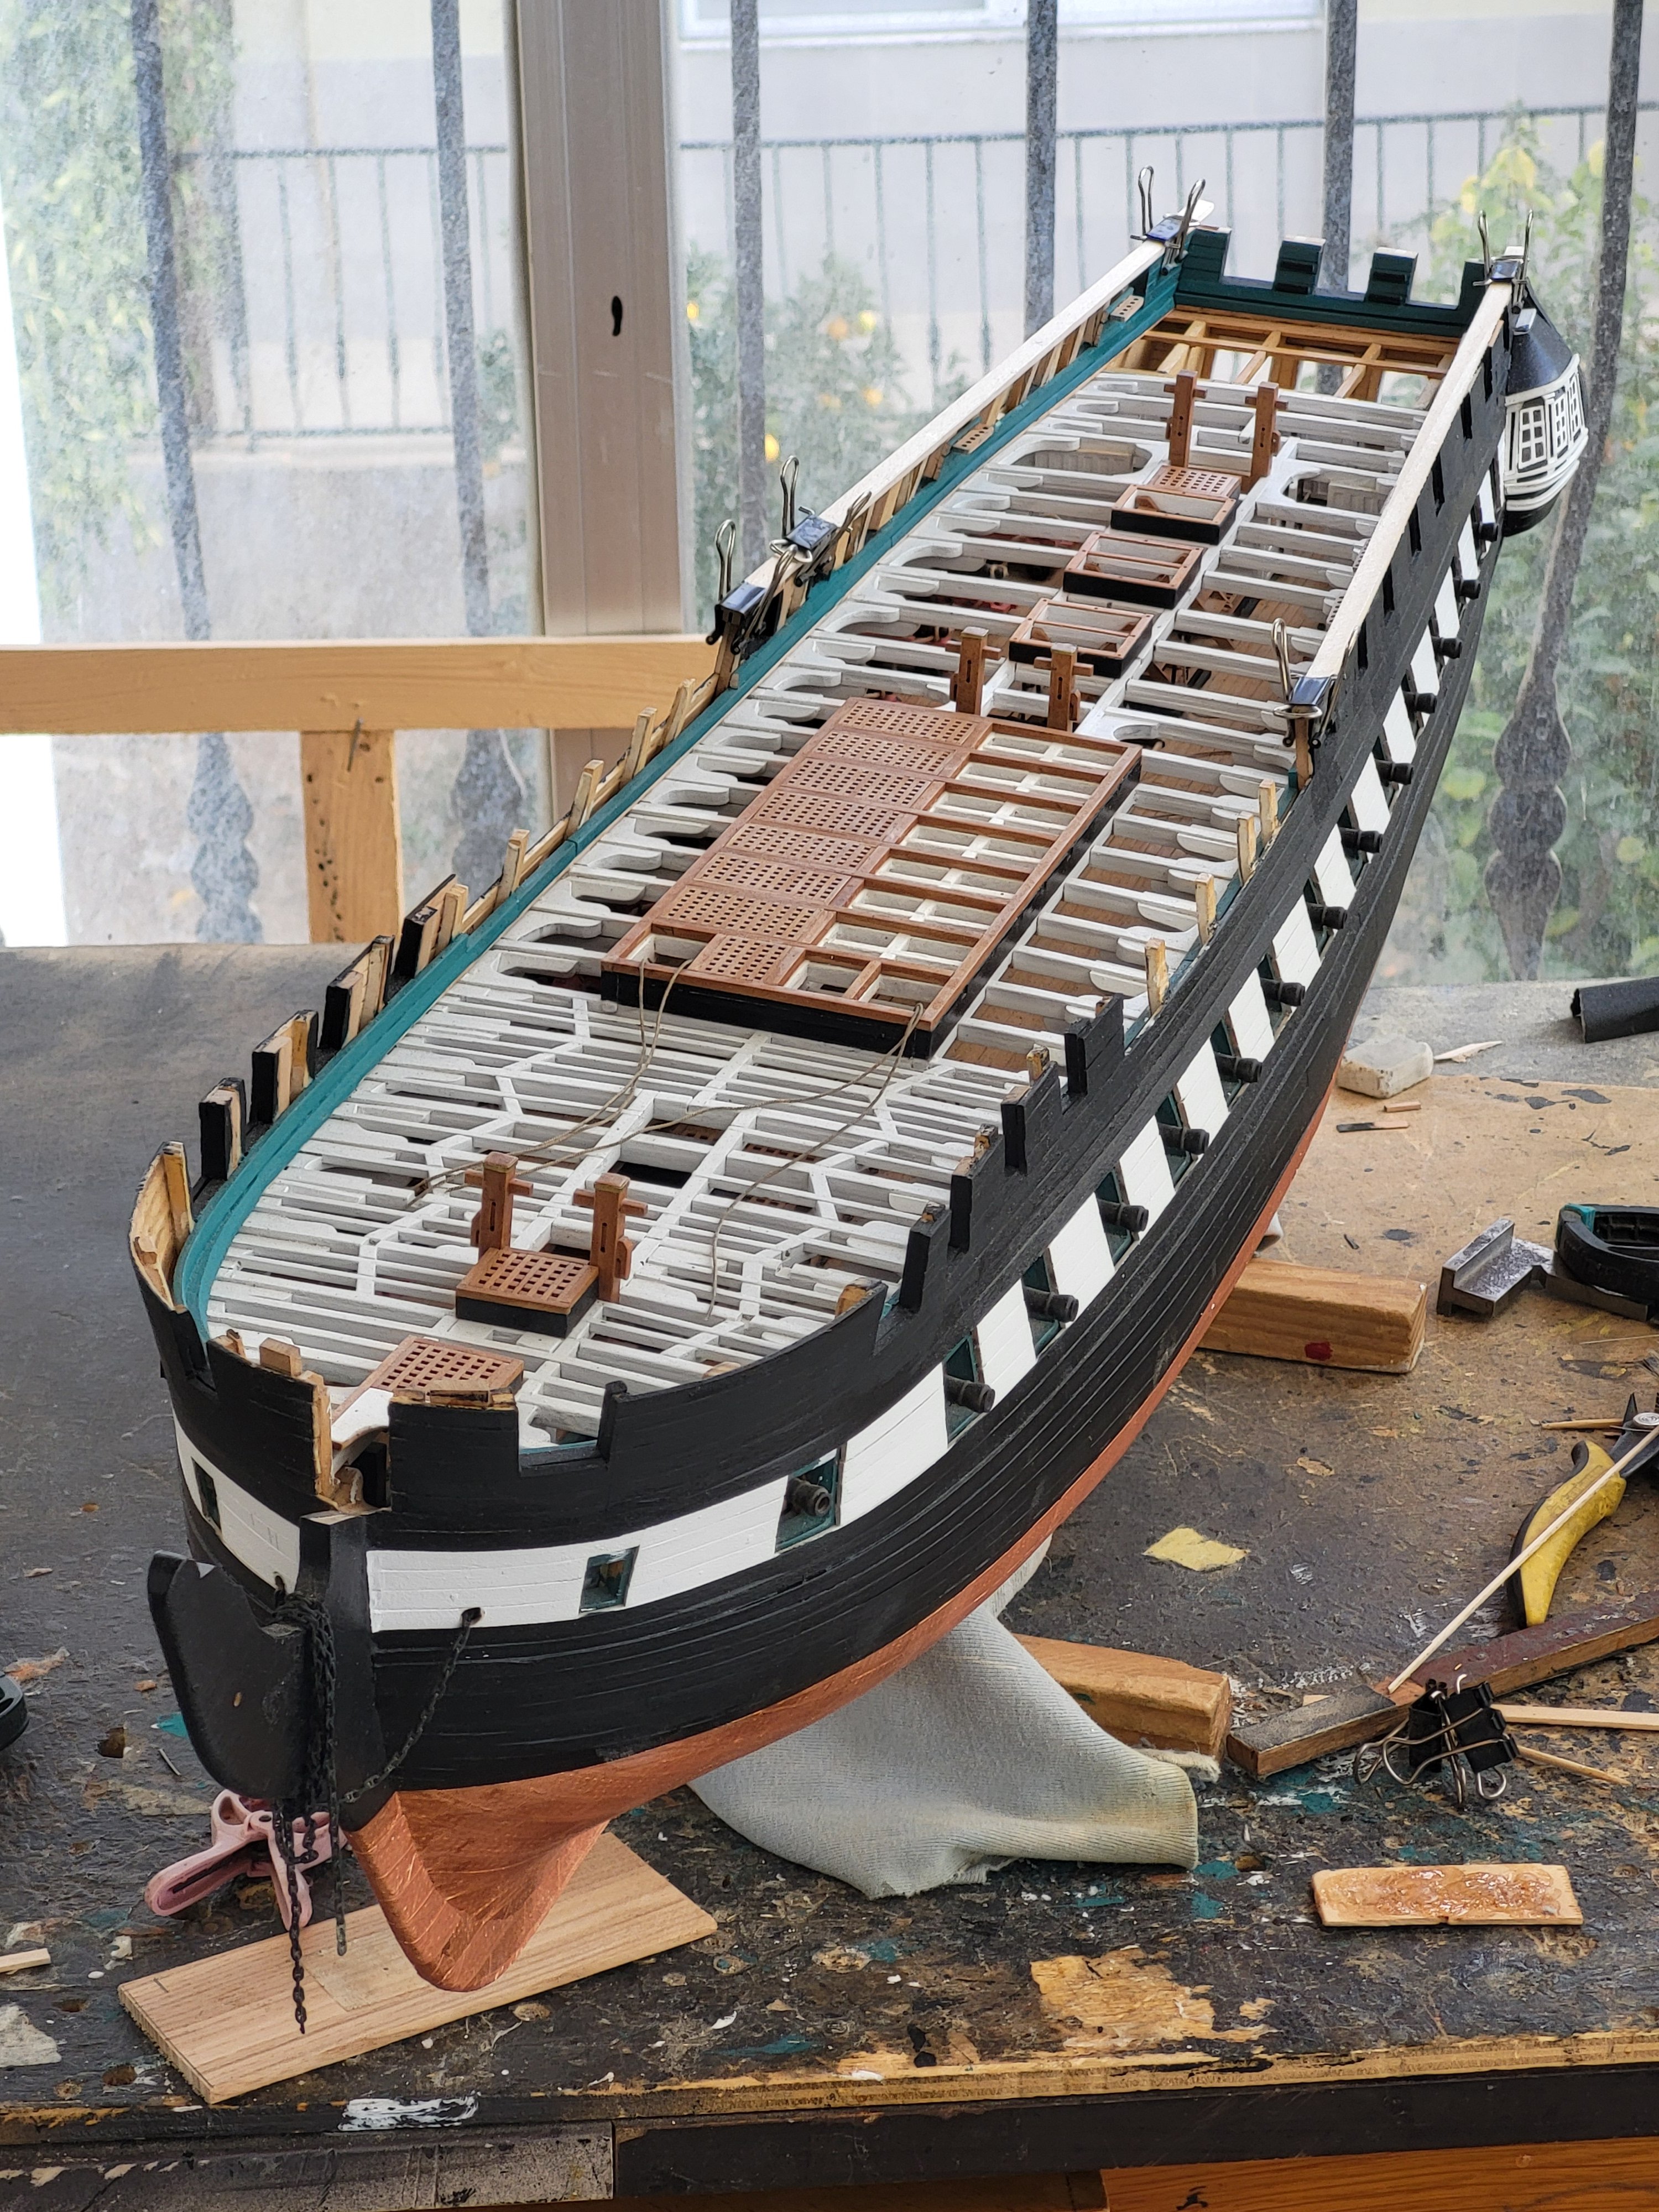
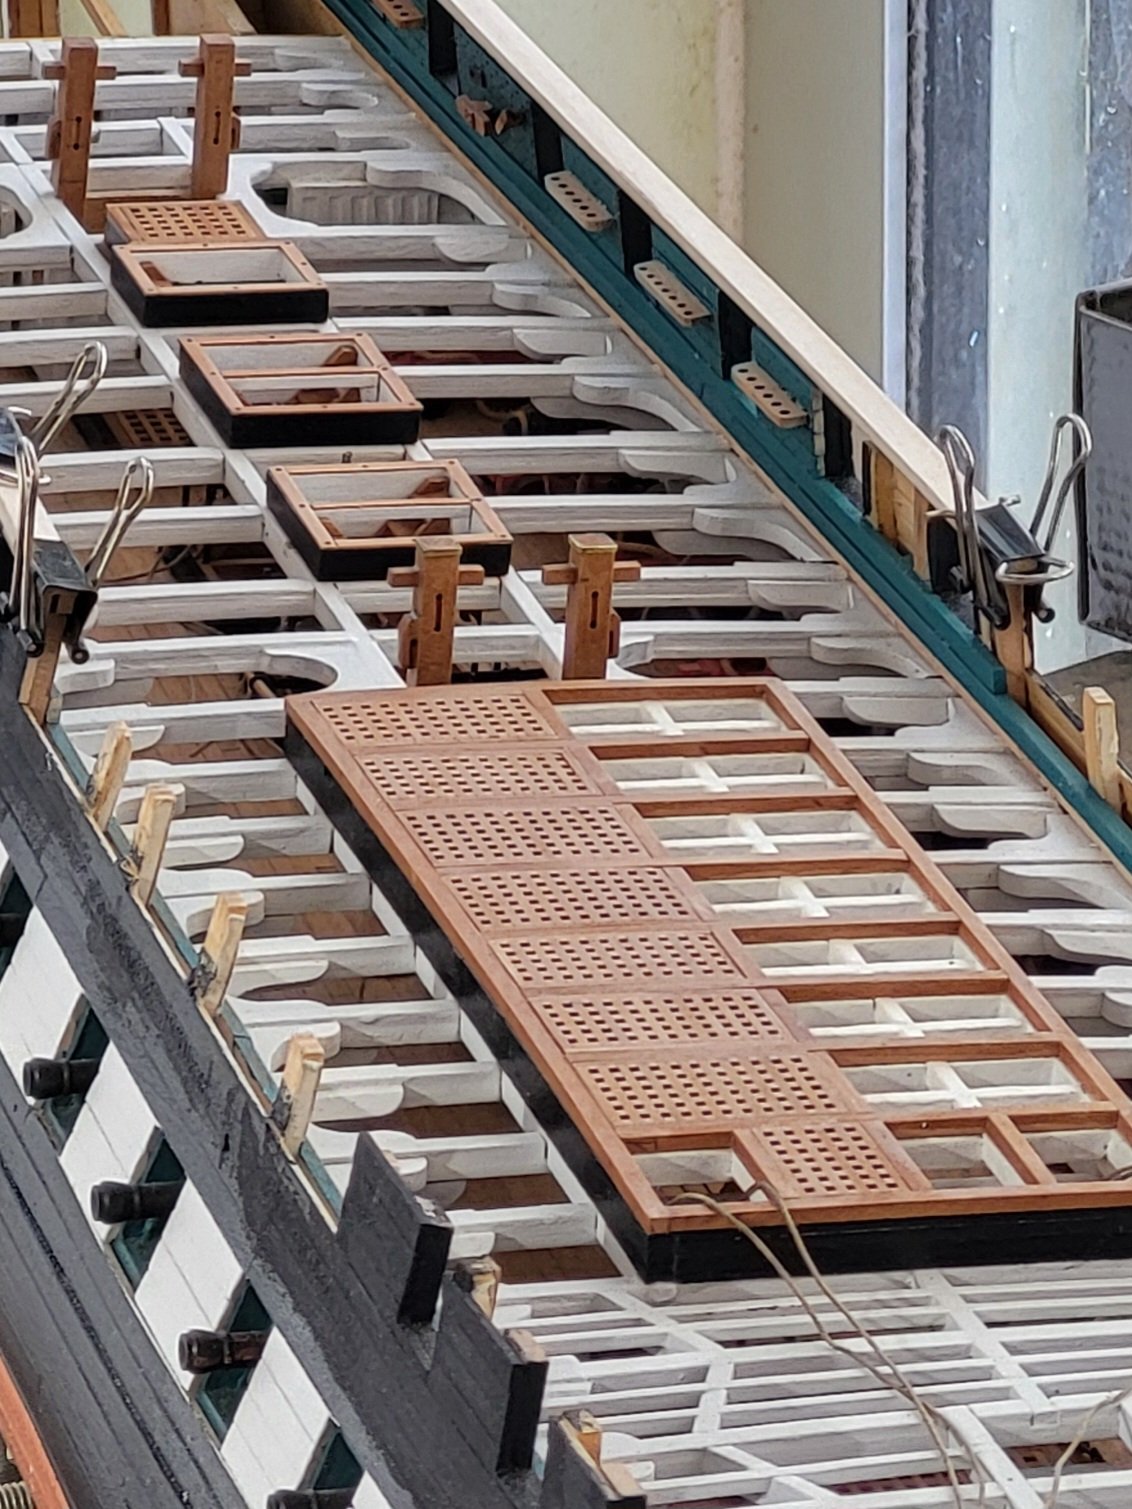
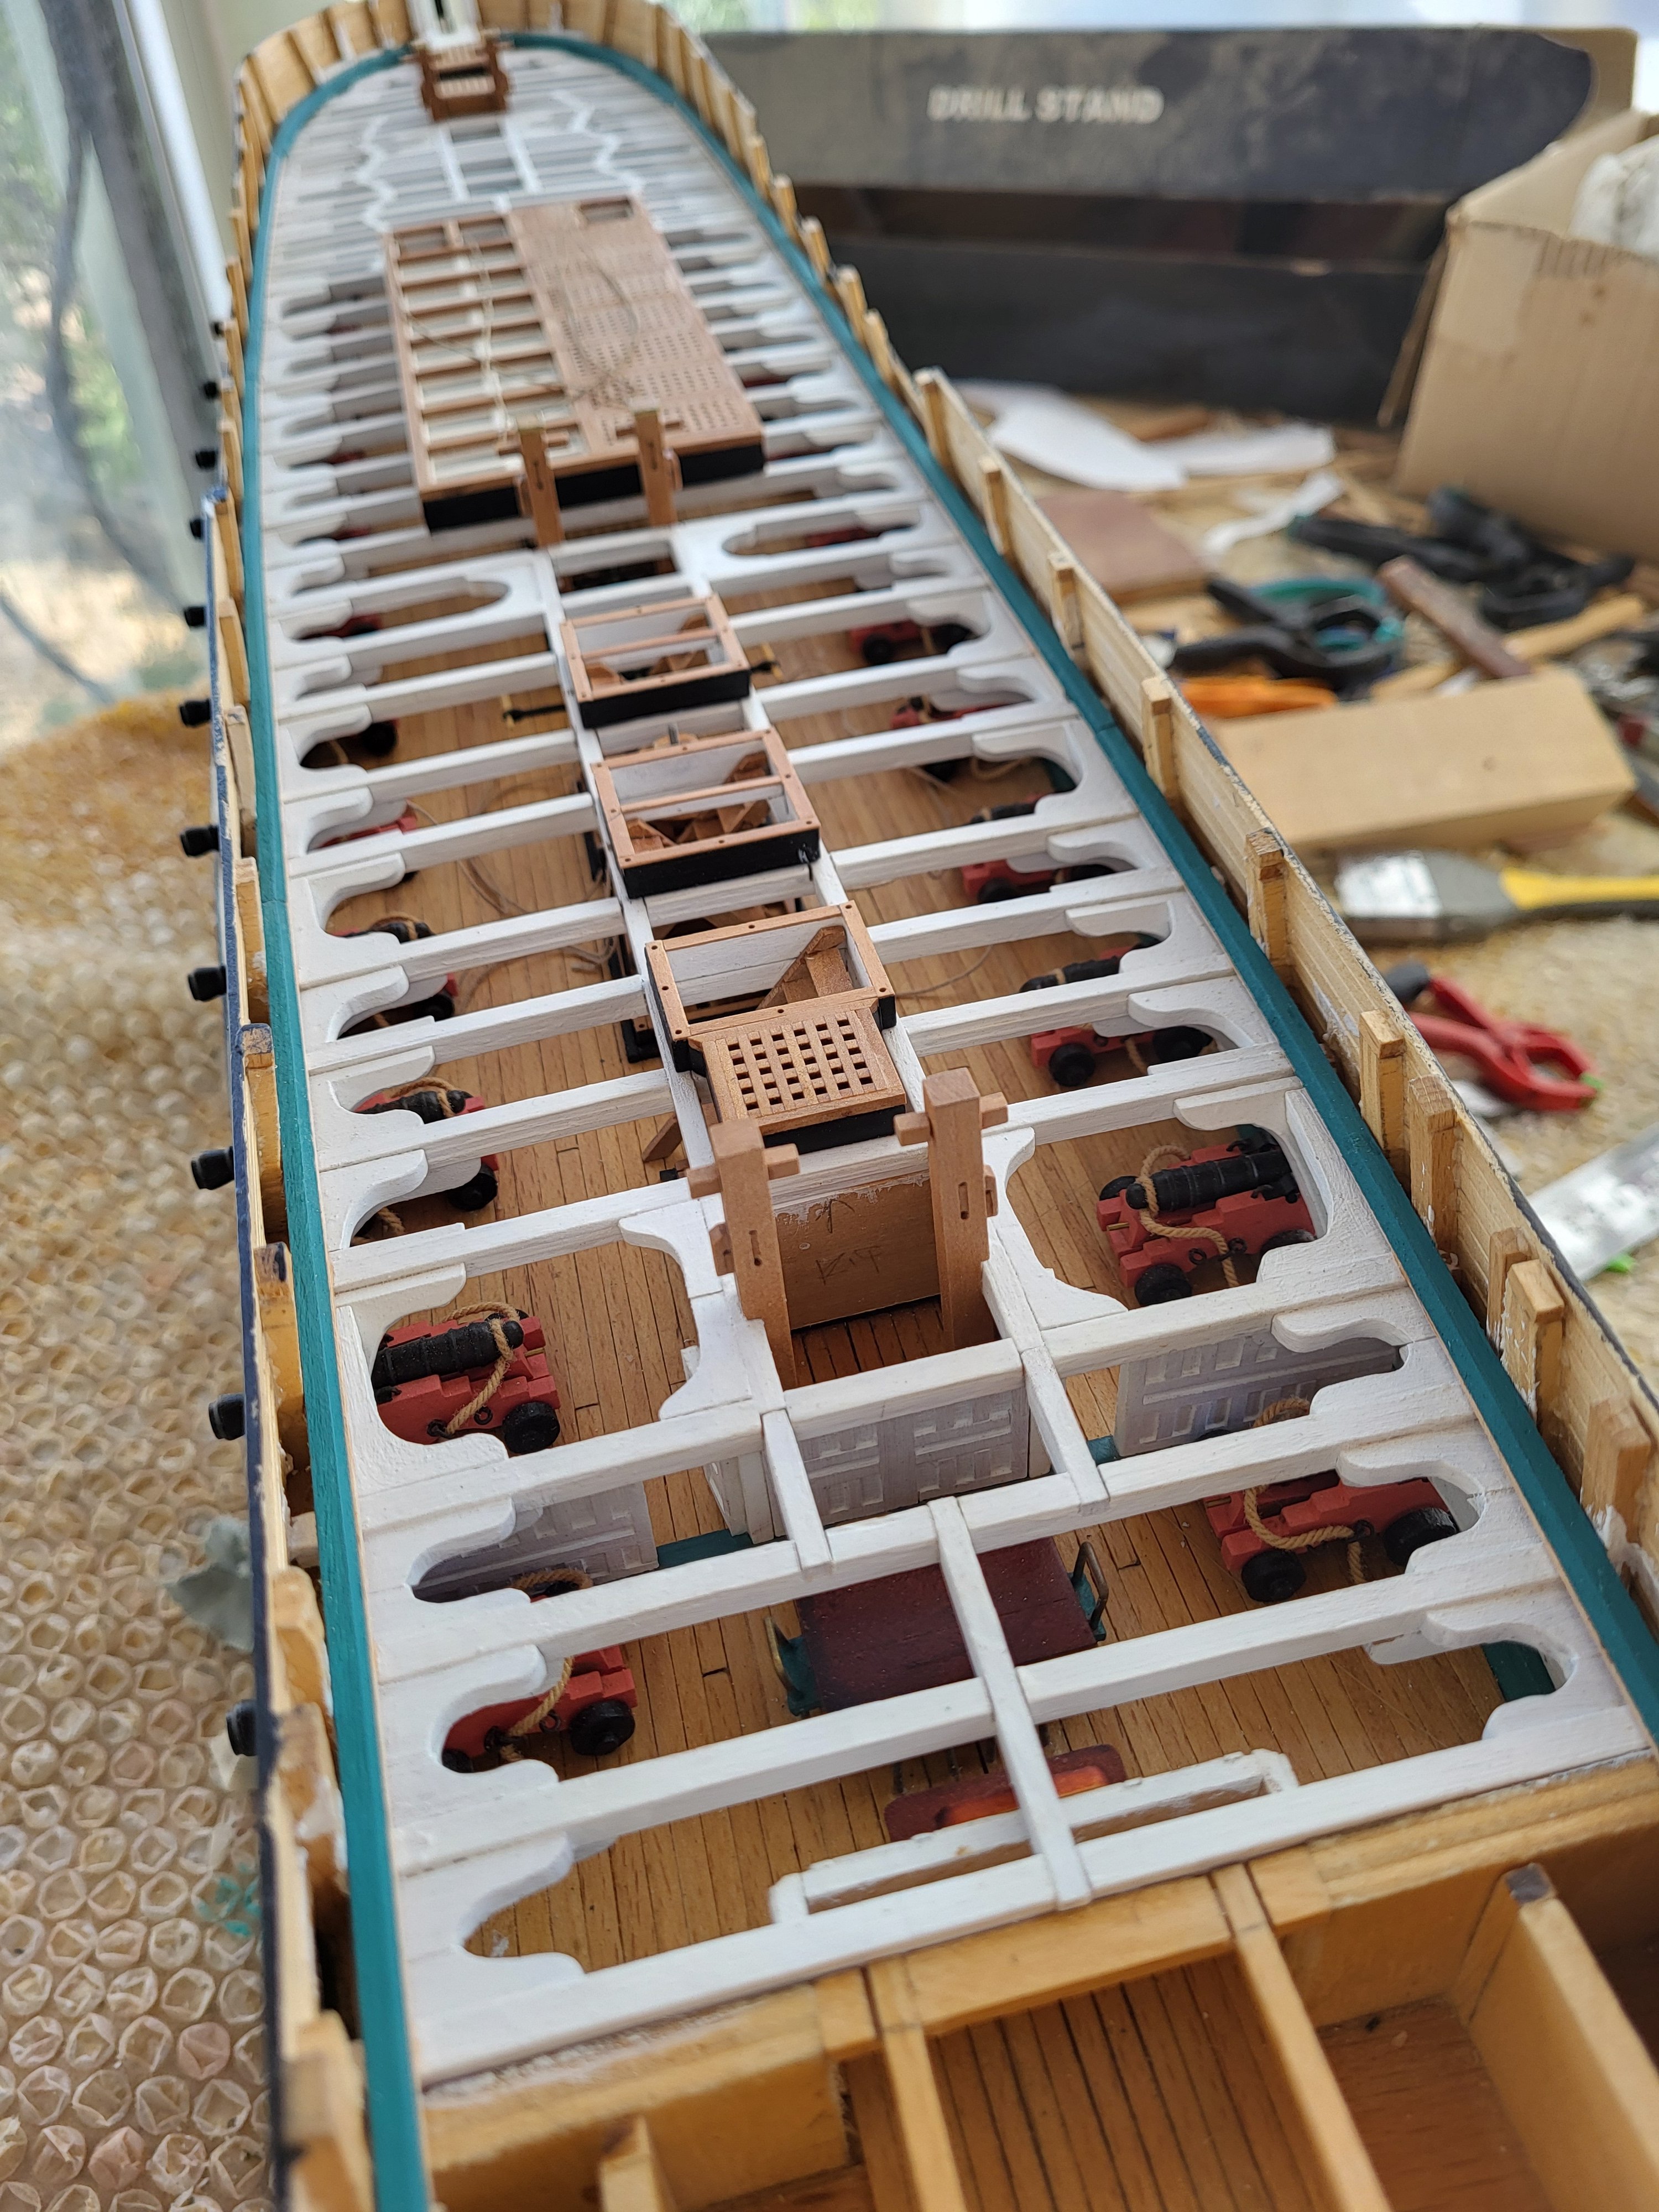
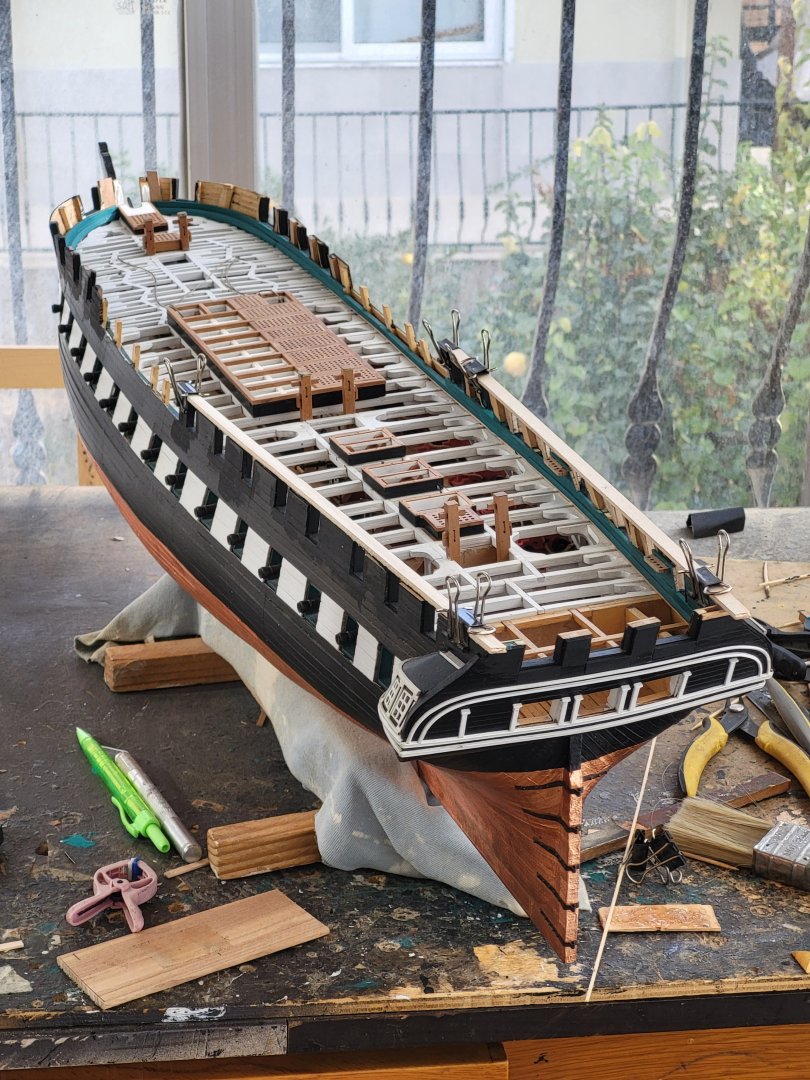
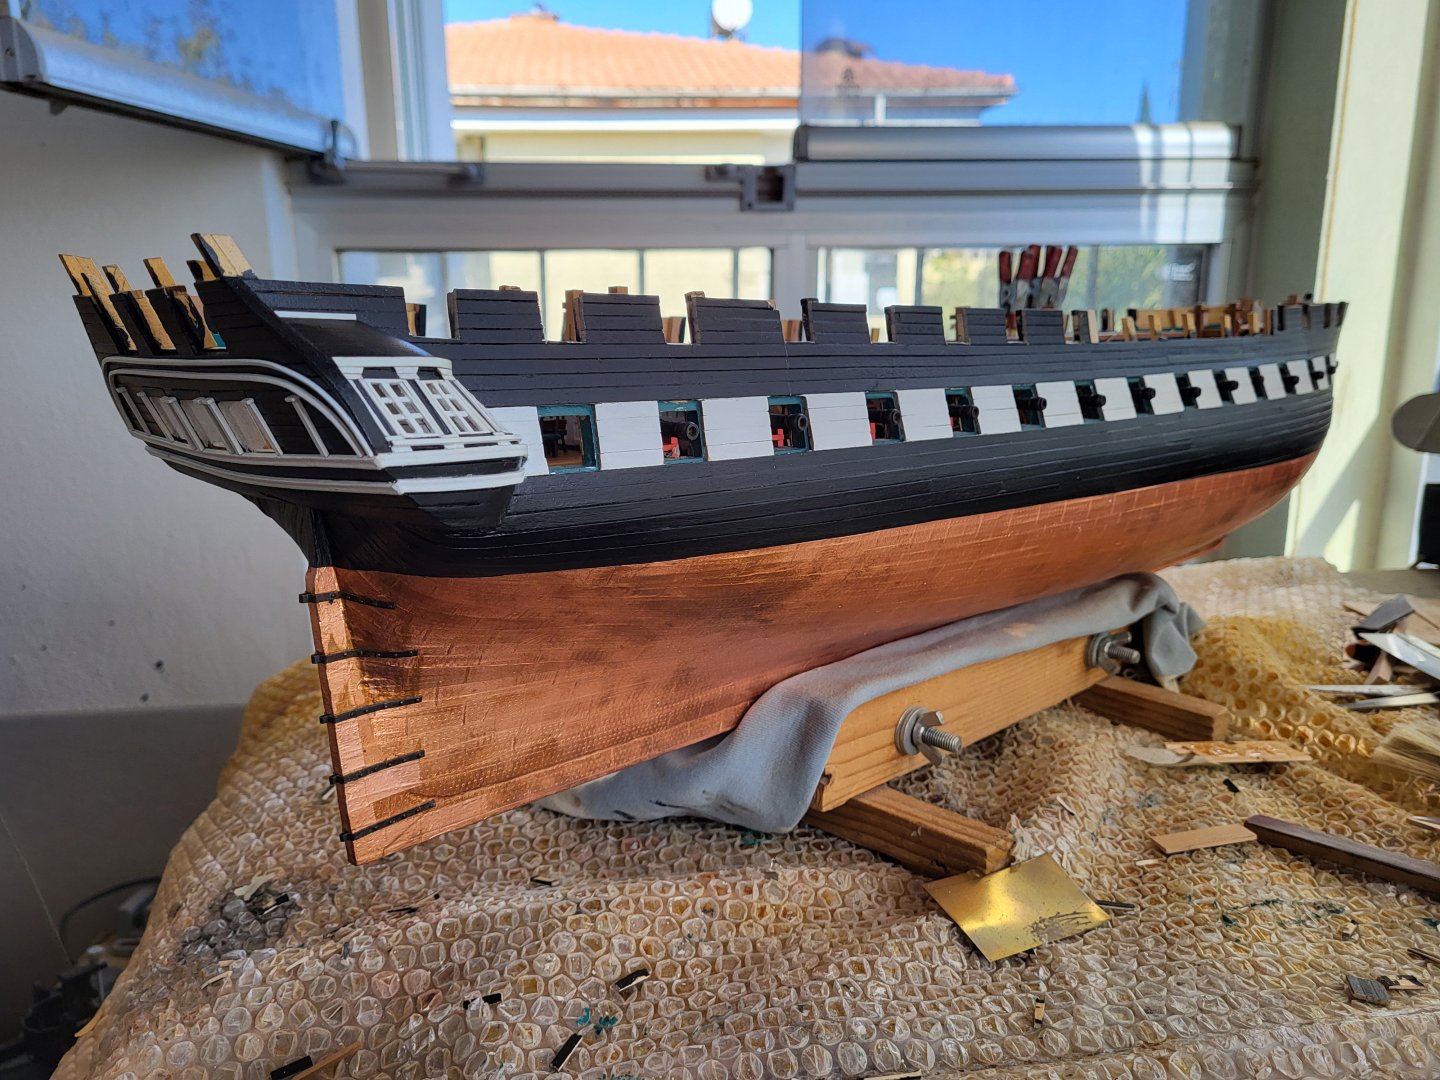
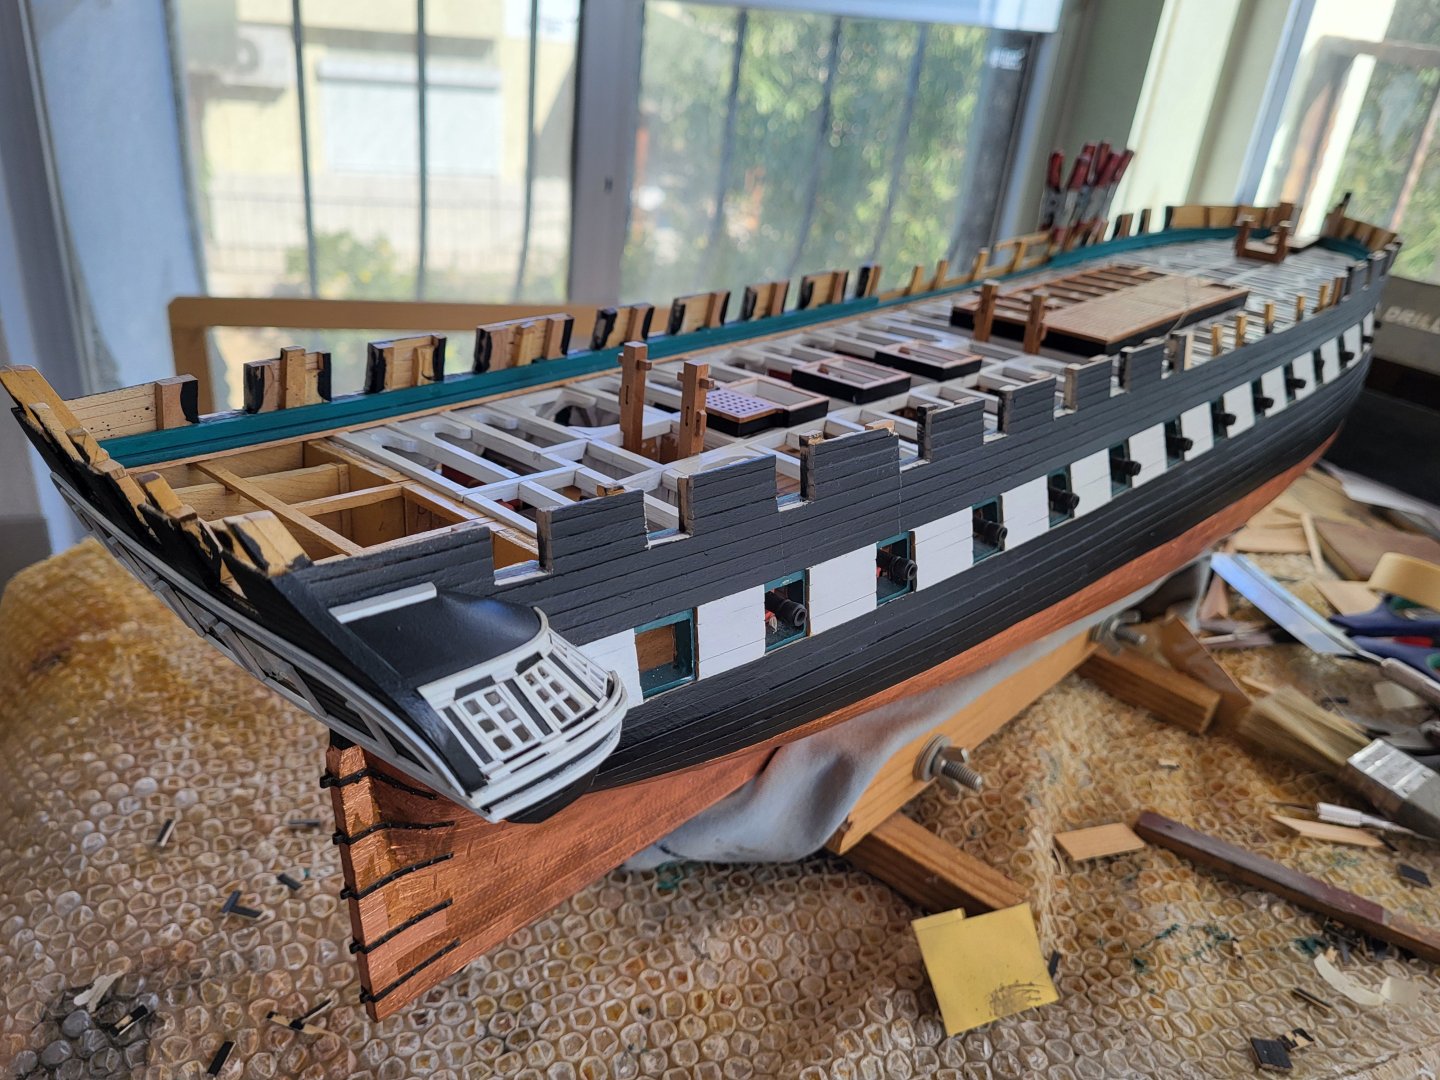
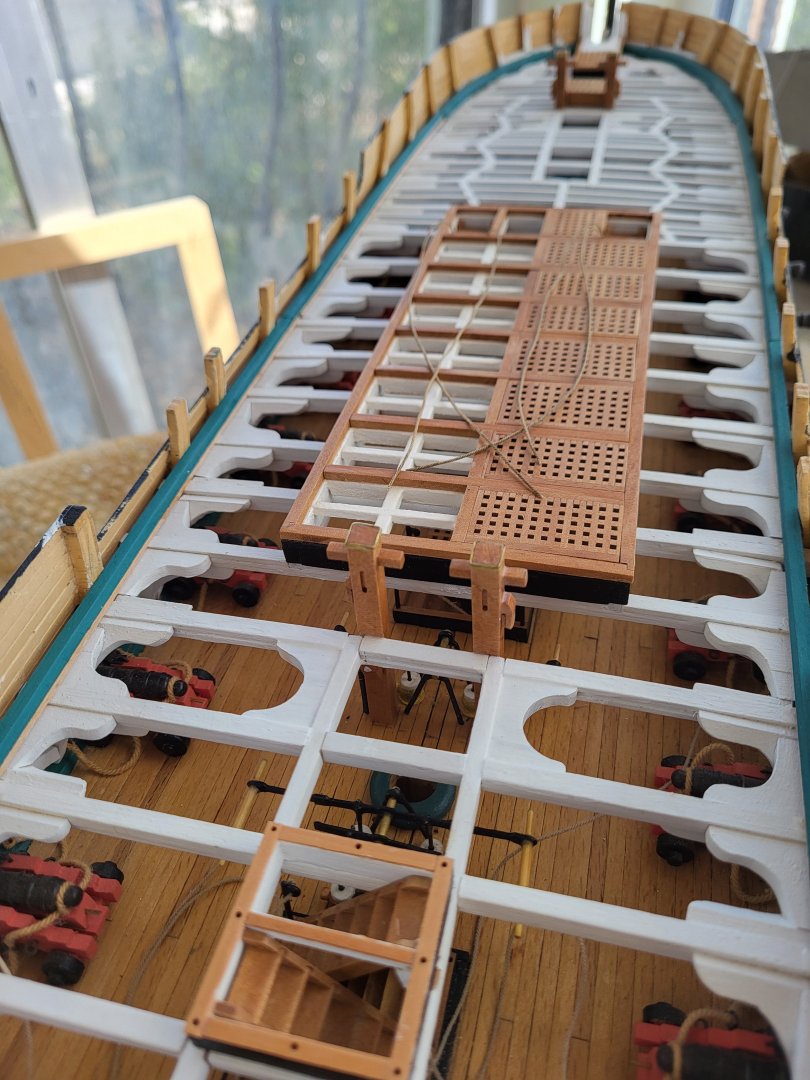
There is not much progress, I just want to share the current overview of the model.


-
Those furnitures are amazing Peter! Is carpentry your profession or are these part of your hobby too?
-
Yes, unfortunately if the model is not going to be painted, the basswood is not a good choice. In my opinion it would be better if you switch to black.
-
USS Constitution by mtbediz - 1:76
mtbediz replied to mtbediz's topic in - Build logs for subjects built 1751 - 1800
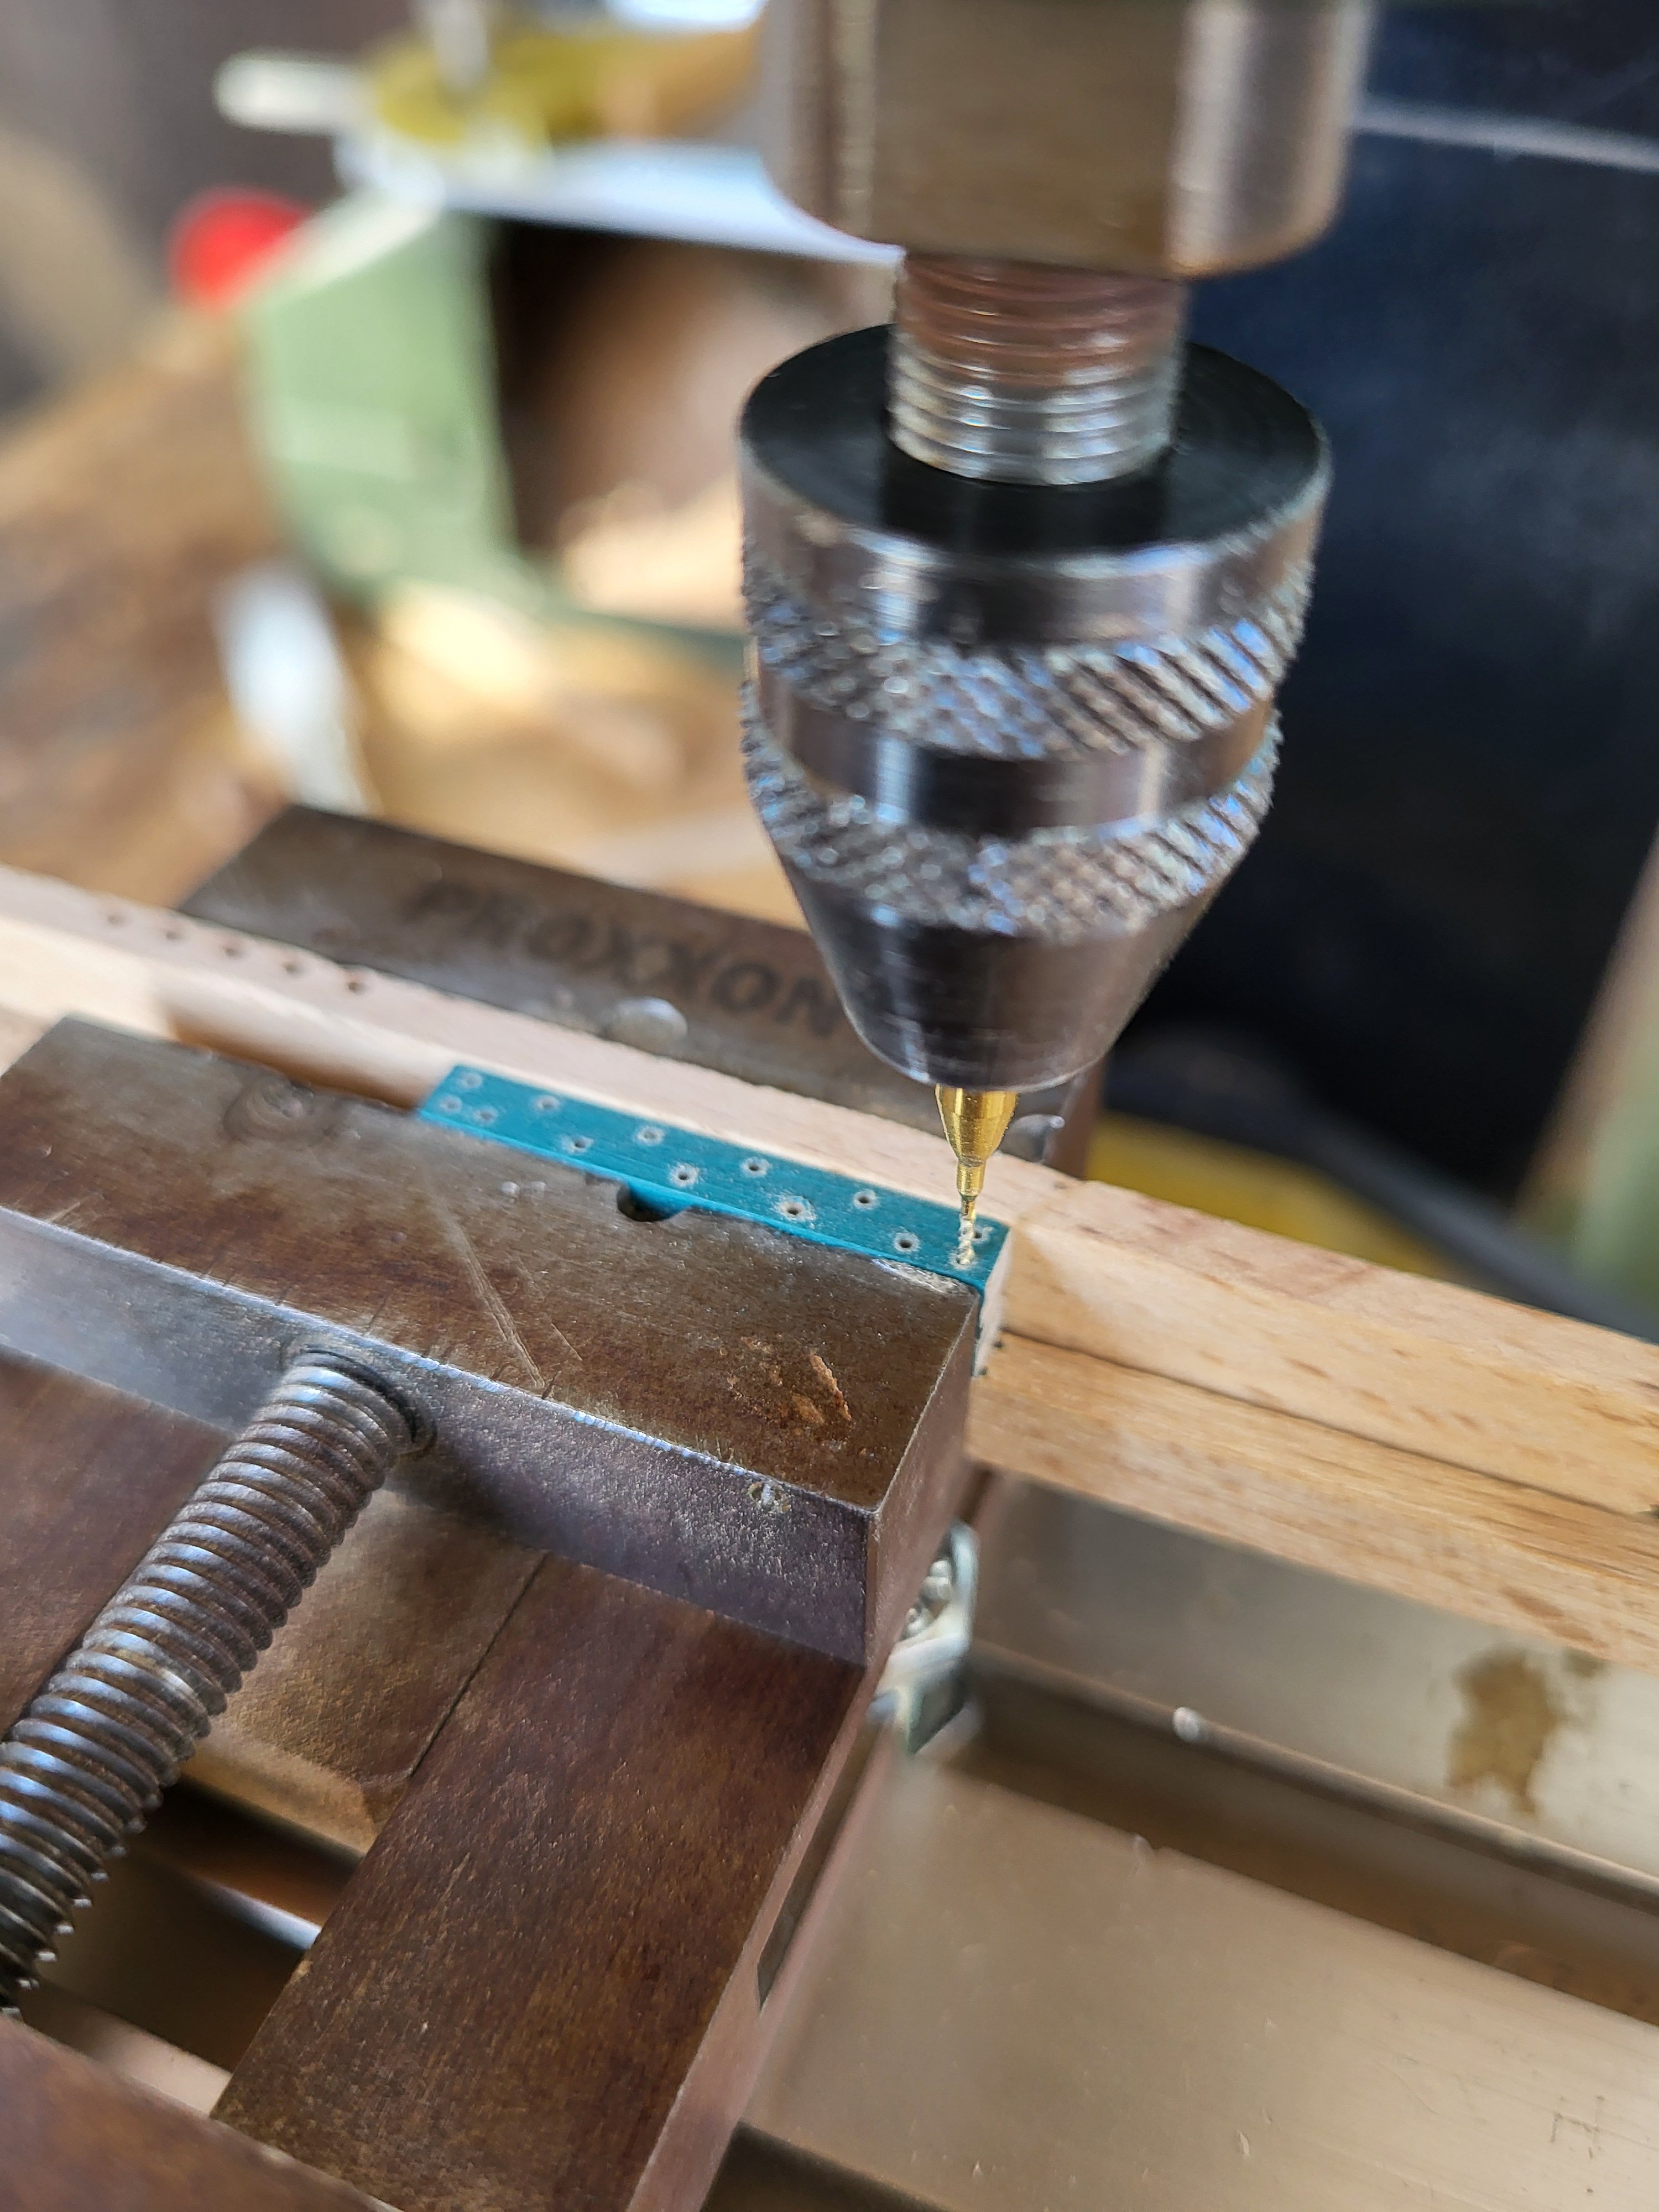
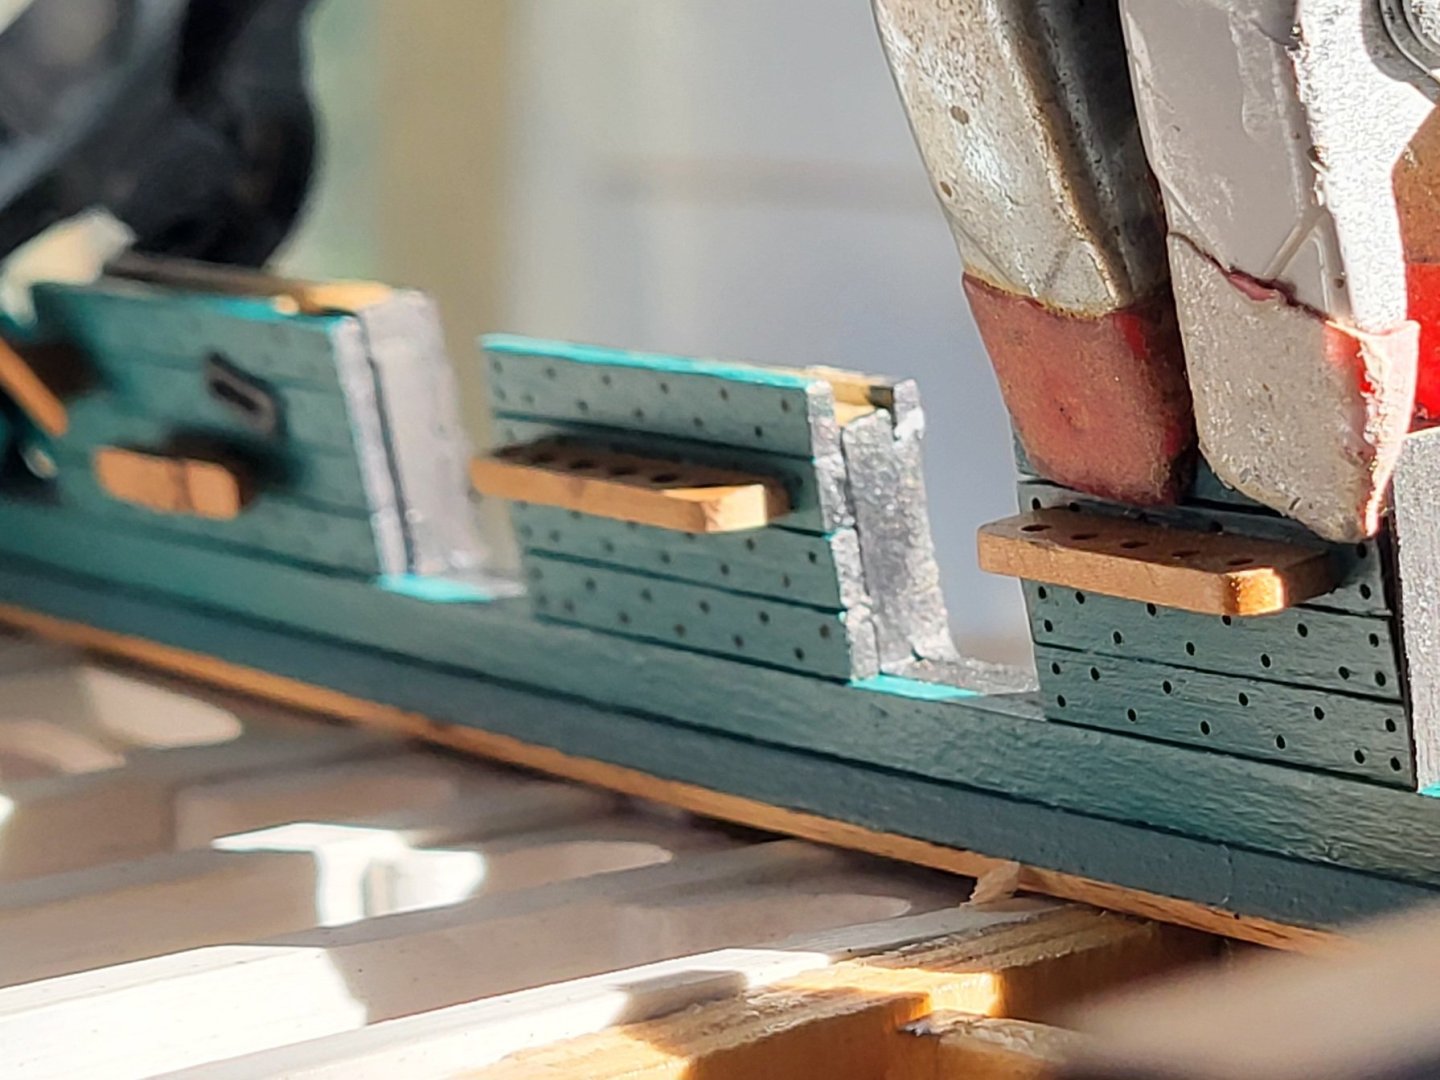
Friends, thank you for your nice feedback. I use this method often in deck planking of my models. It's a bit of a lazy job, but it's an effective method. In this case, I drilled all the planks which are going to be laid in the same space by stacking them on top of each other, which ensured regularity. By the way, Jon's bolts are much more realistic. Even if I could find the material he used, I'm not sure if I would have the patience to make it. Below is an example for the deck. I did this on my Alert model.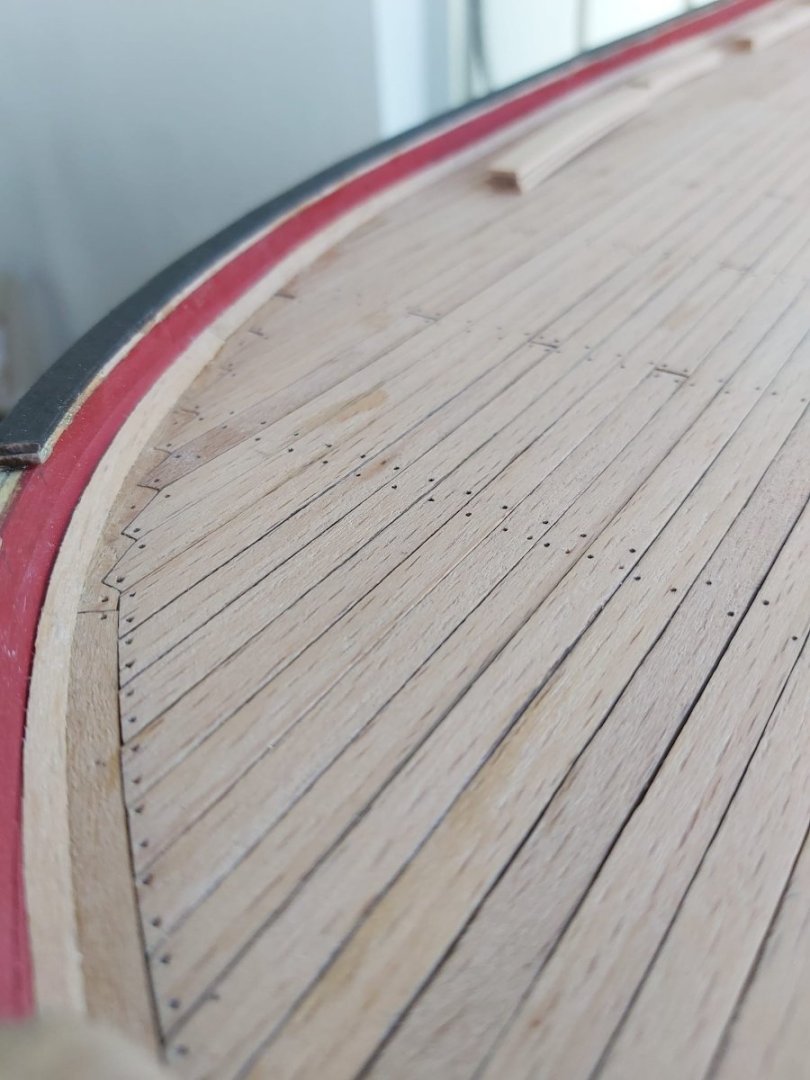
-
USS Constitution by mtbediz - 1:76
mtbediz replied to mtbediz's topic in - Build logs for subjects built 1751 - 1800
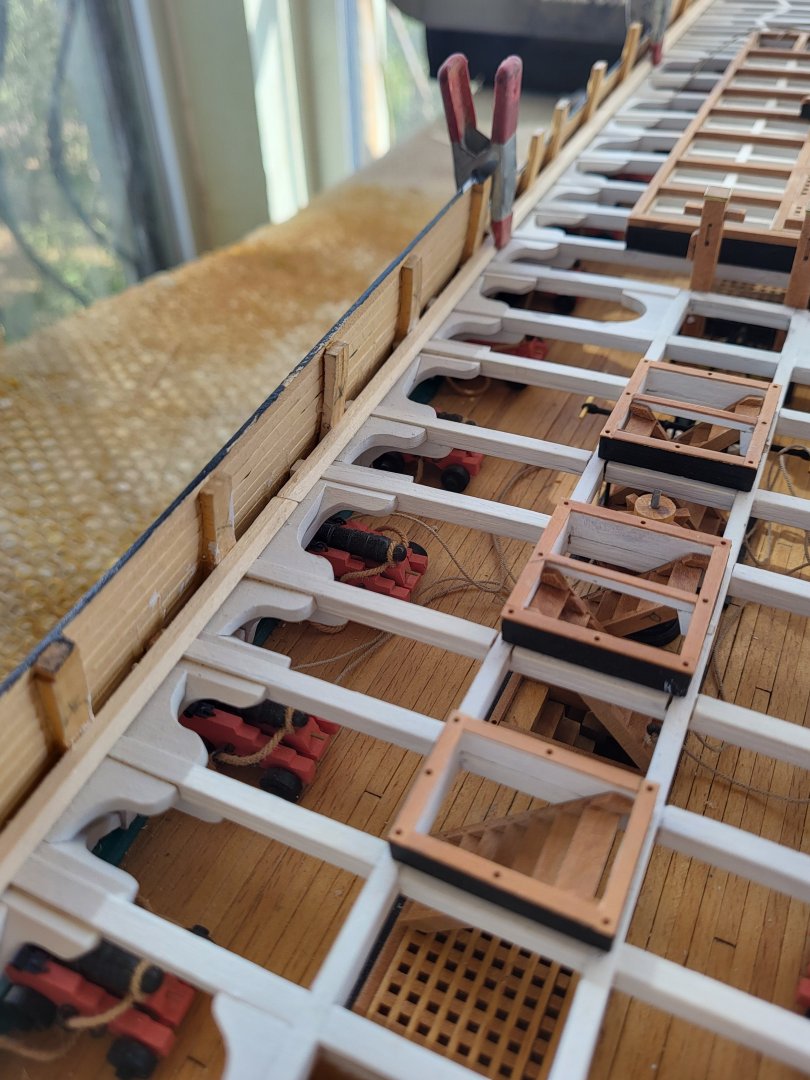
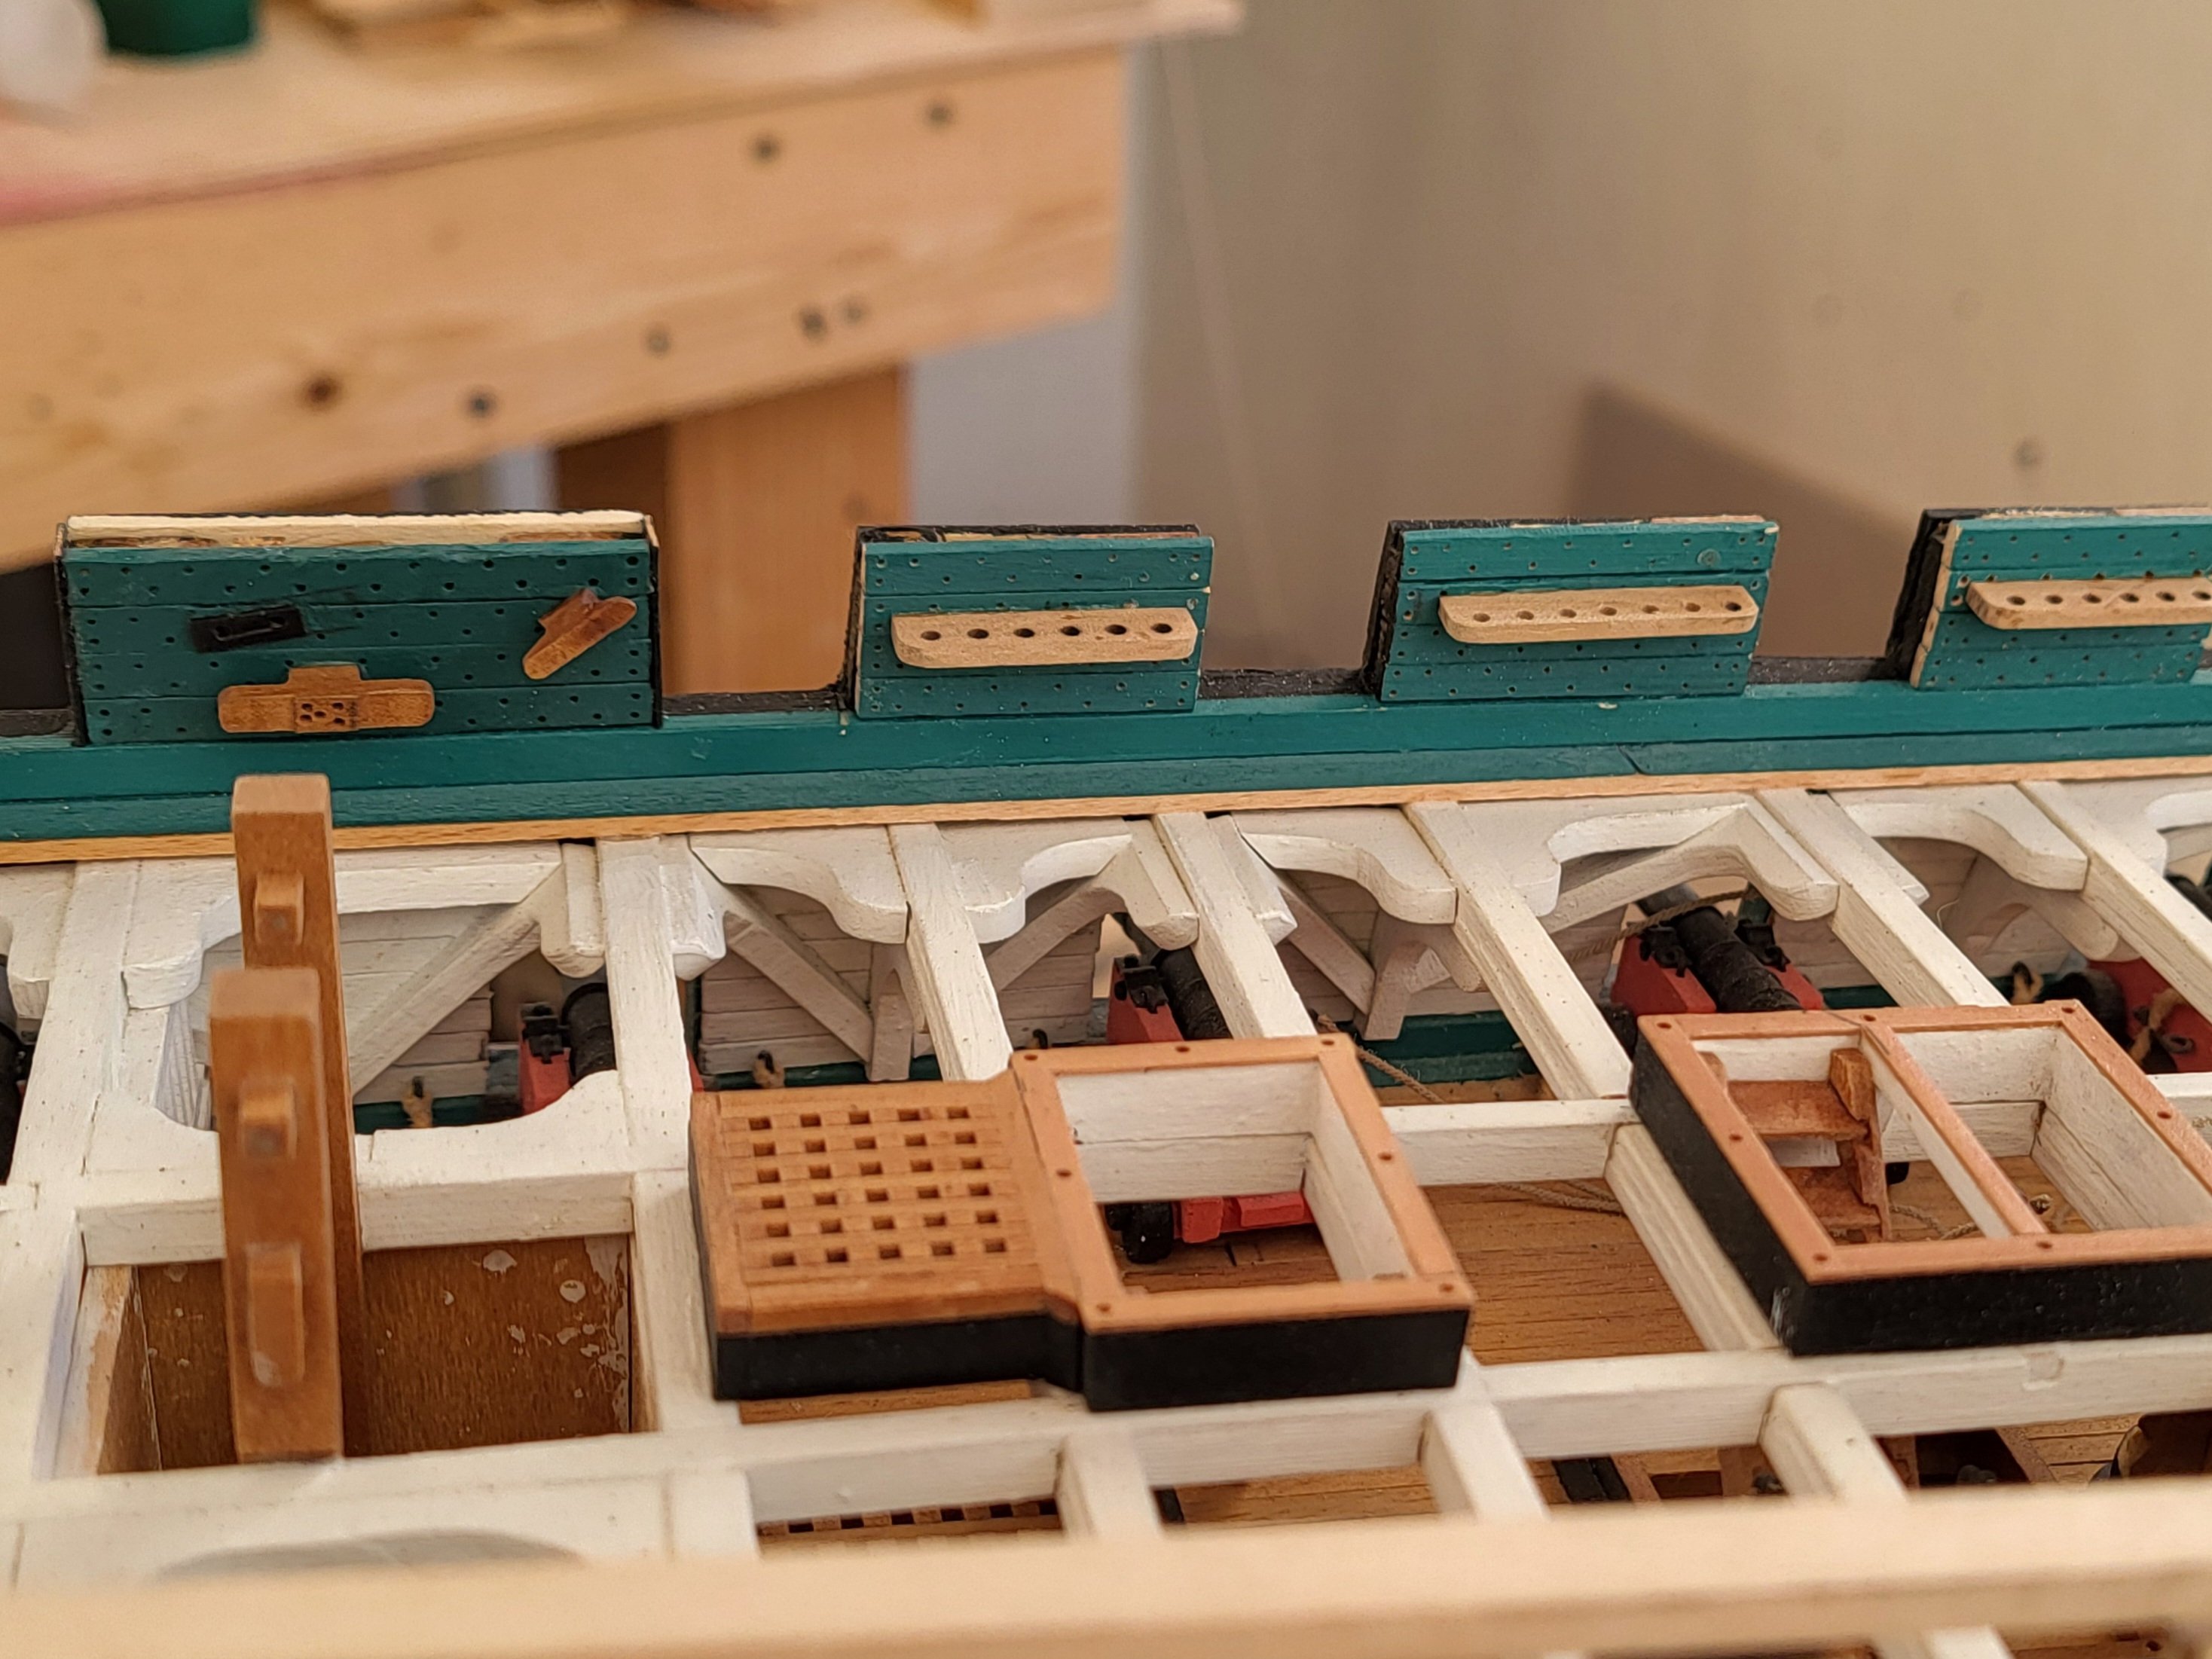
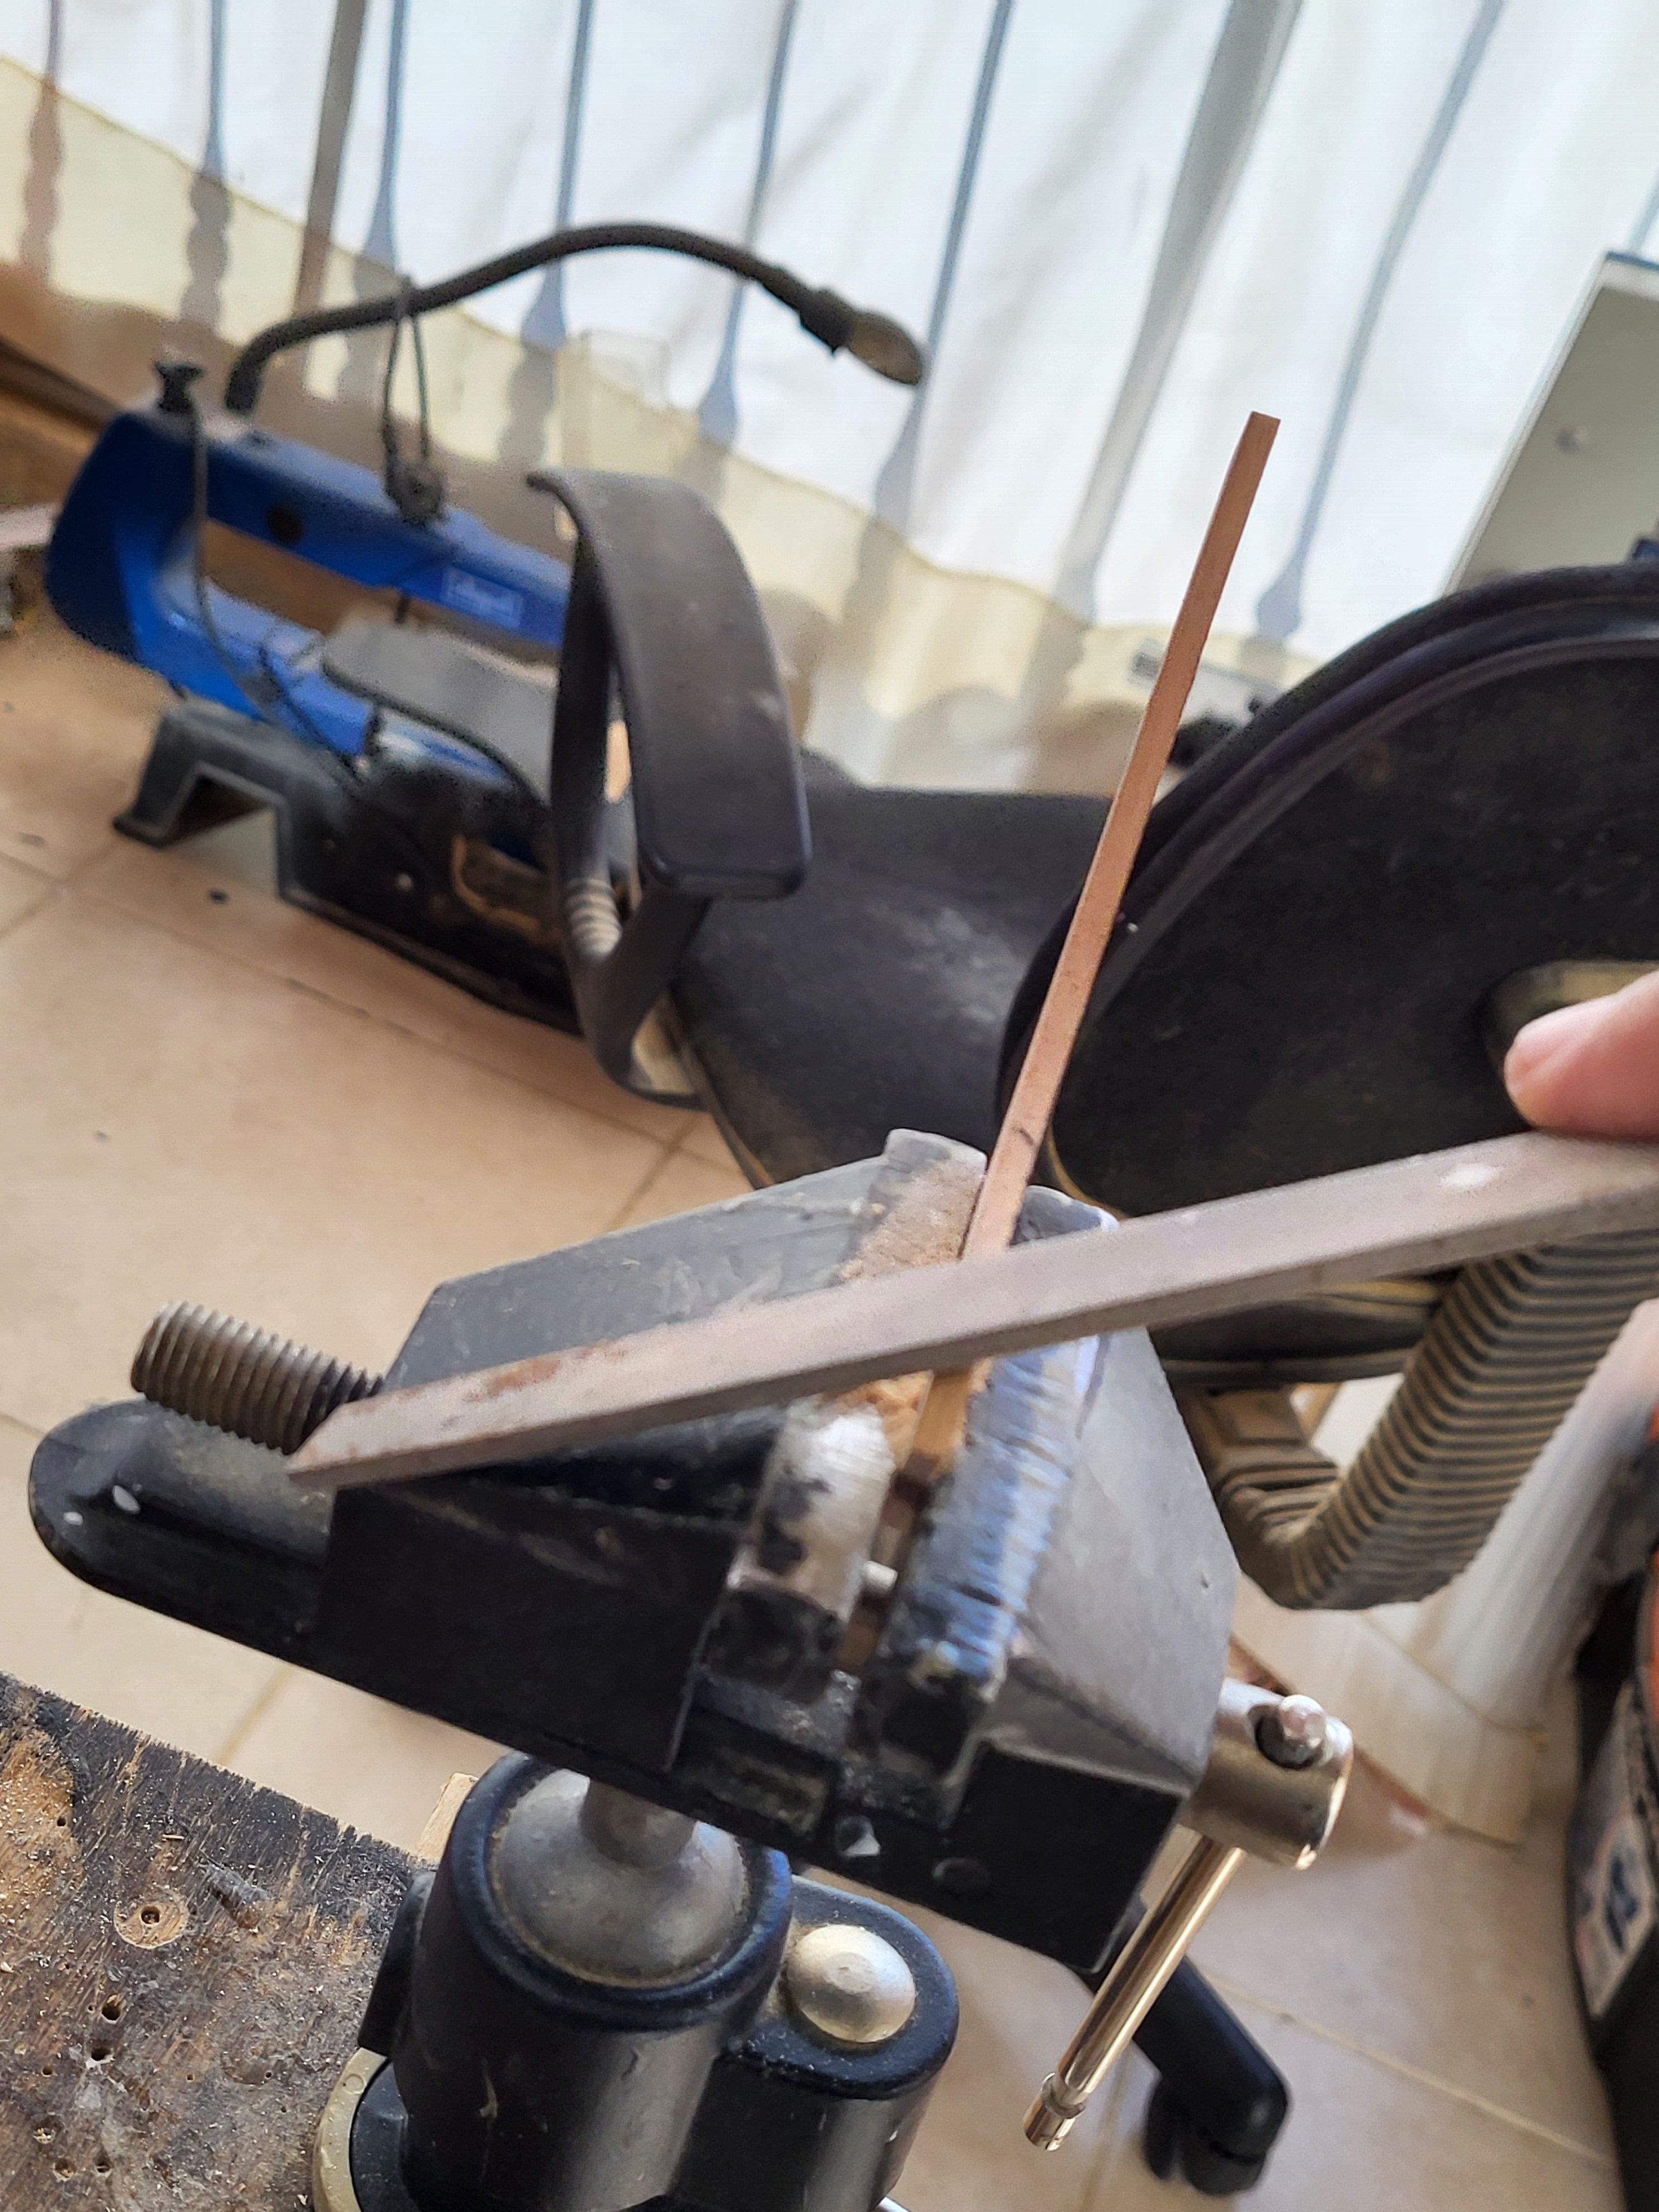
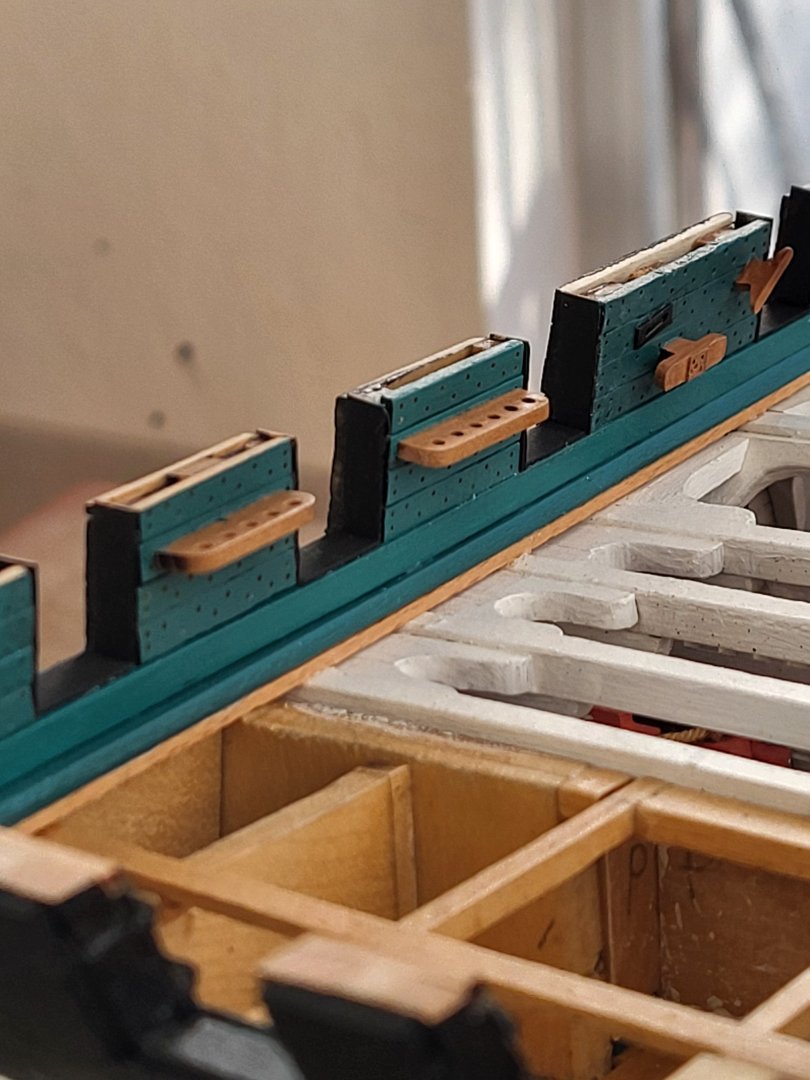
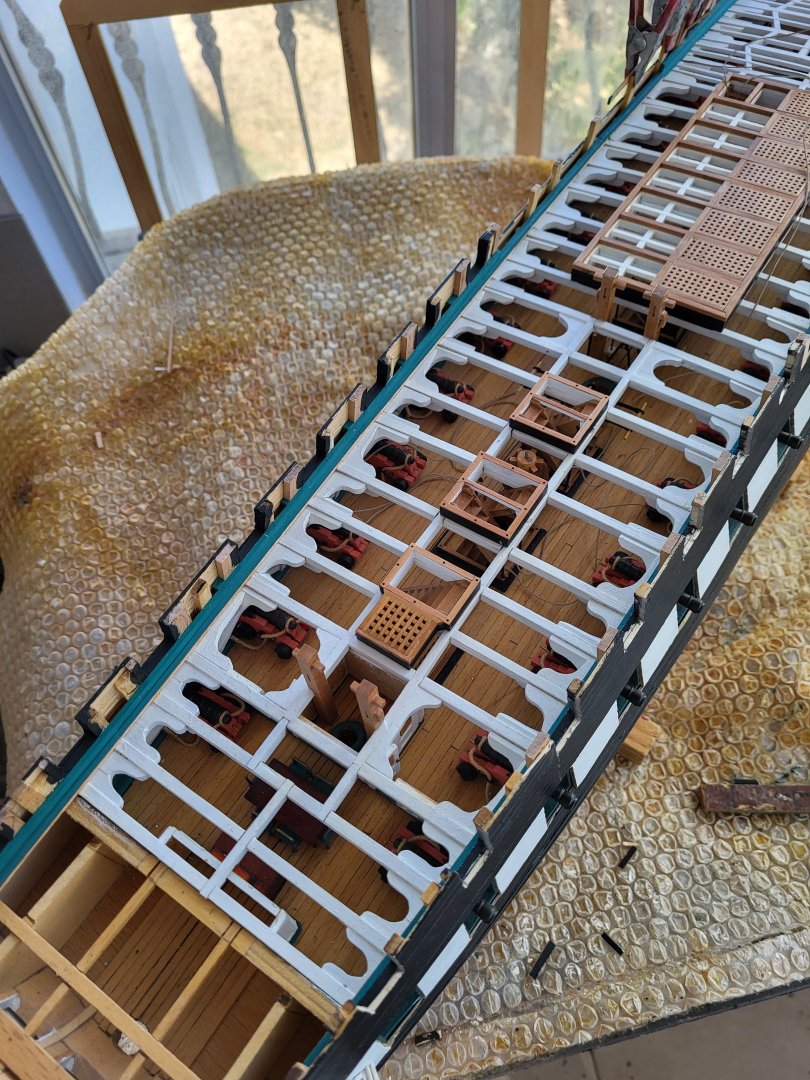
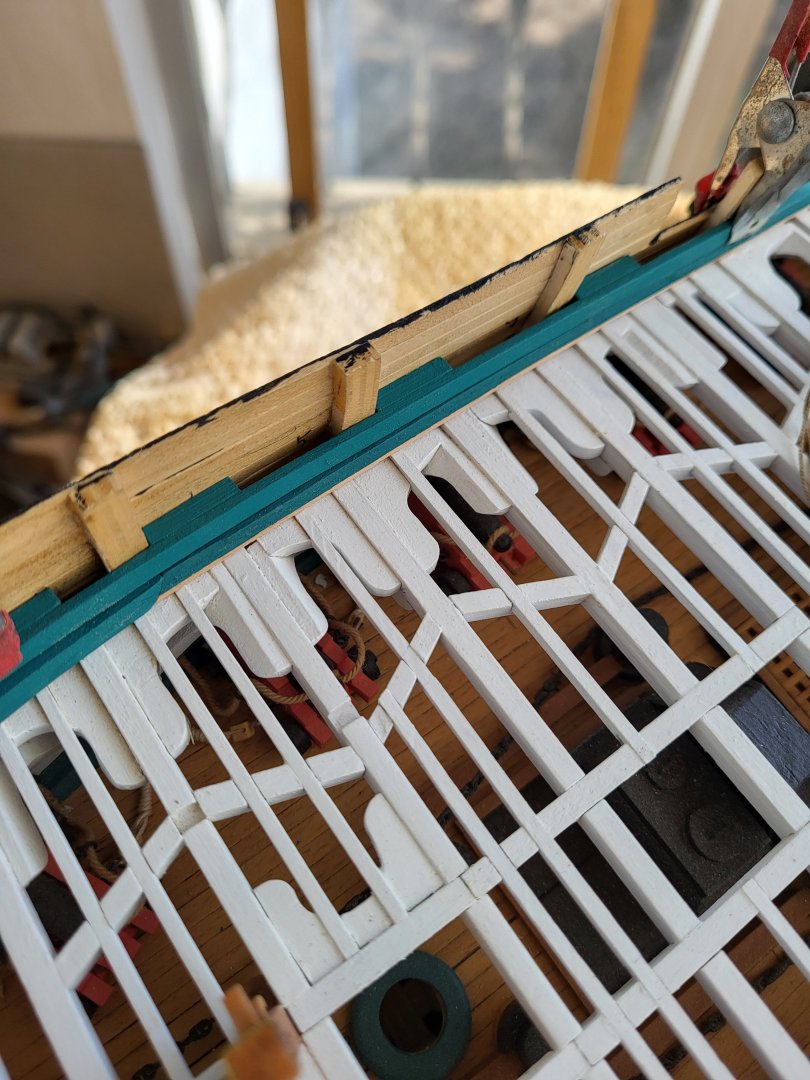
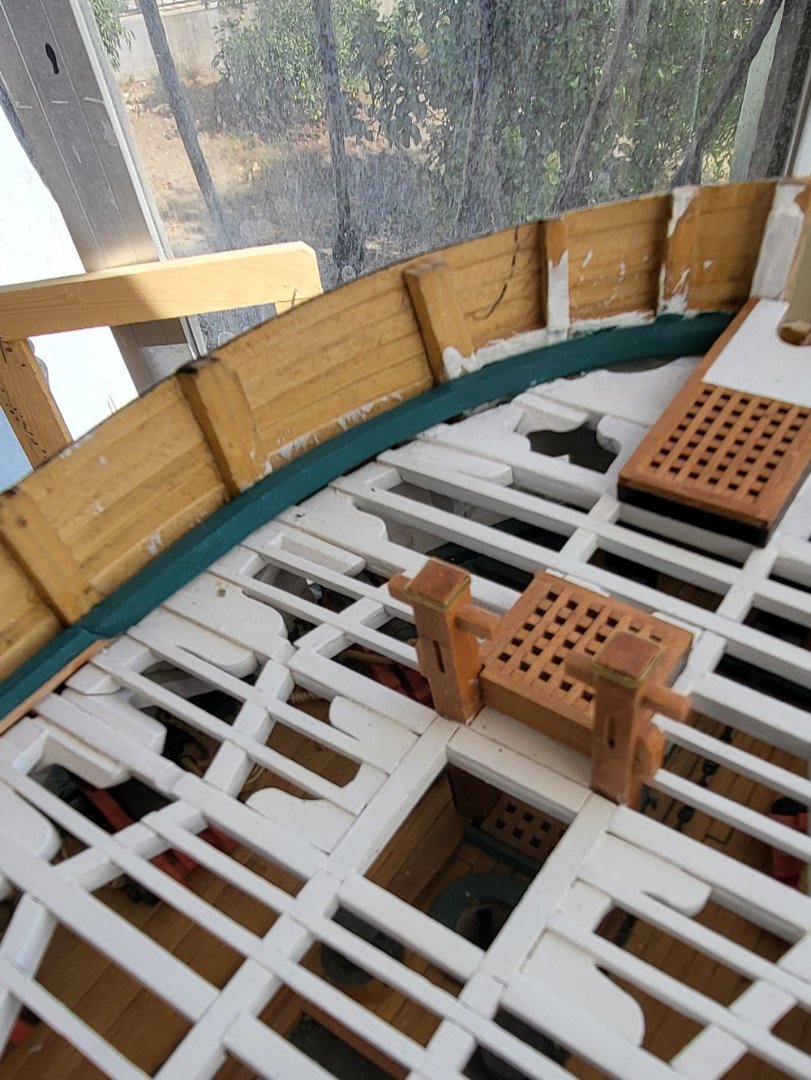
I have started planking the spar deck bulwark and adding the pin racks and other detail. I drilled 0,6 mm diameter holes into the planks to represent the bolts and was happy with the result. For the bolts, I didn't feel the need to struggle for a more realistic look at this scale.


-
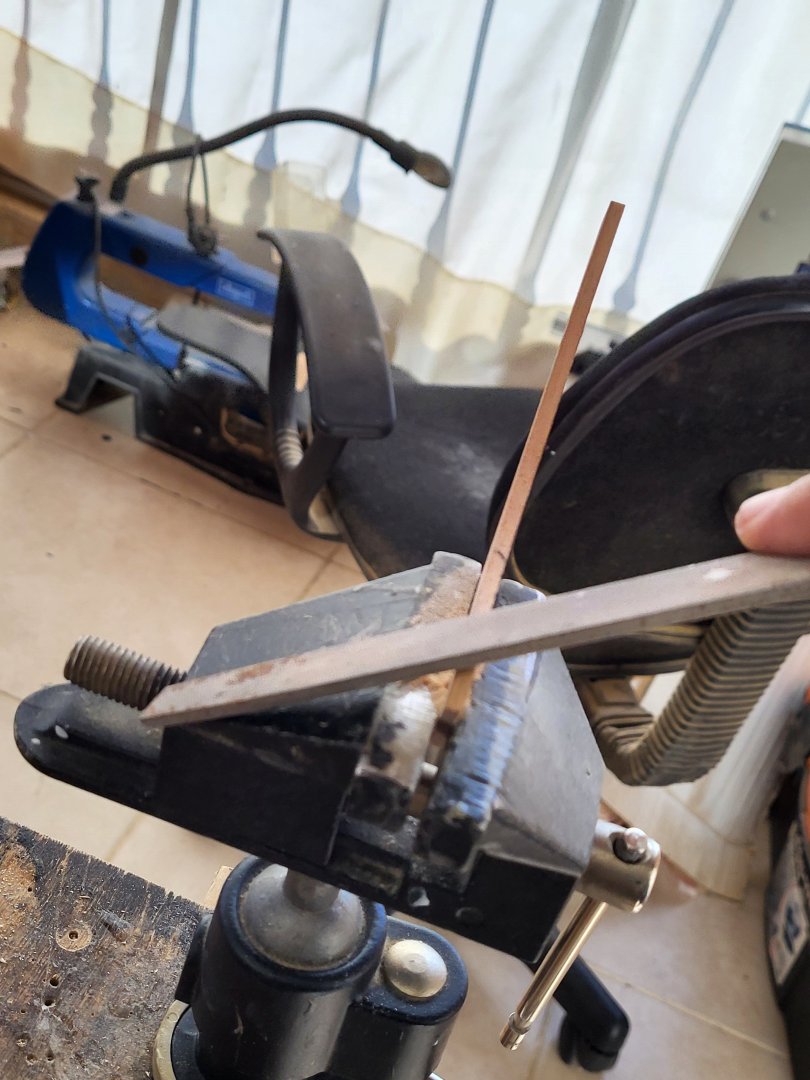
These can never be bent, but remember that since they are hardened metal, they are more brittle. They require more careful work.
-
USS Constitution by mtbediz - 1:76
mtbediz replied to mtbediz's topic in - Build logs for subjects built 1751 - 1800
You are so right, Phil. I actually experience that happiness at the end of every working day. Sitting in front of the model for a while and watching what I did makes me so happy every day. That is the best part of this hobby. -
I solved this problem by purchasing the drill bits on the link below from Aliexpress. I recommend it. https://tr.aliexpress.com/item/32861744539.html?spm=a2g0o.order_list.order_list_main.4.63923d12uWMMlA&gatewayAdapt=glo2tur
-
USS Constitution by mtbediz - 1:76
mtbediz replied to mtbediz's topic in - Build logs for subjects built 1751 - 1800
Thank you Peter. -
USS Constitution by mtbediz - 1:76
mtbediz replied to mtbediz's topic in - Build logs for subjects built 1751 - 1800
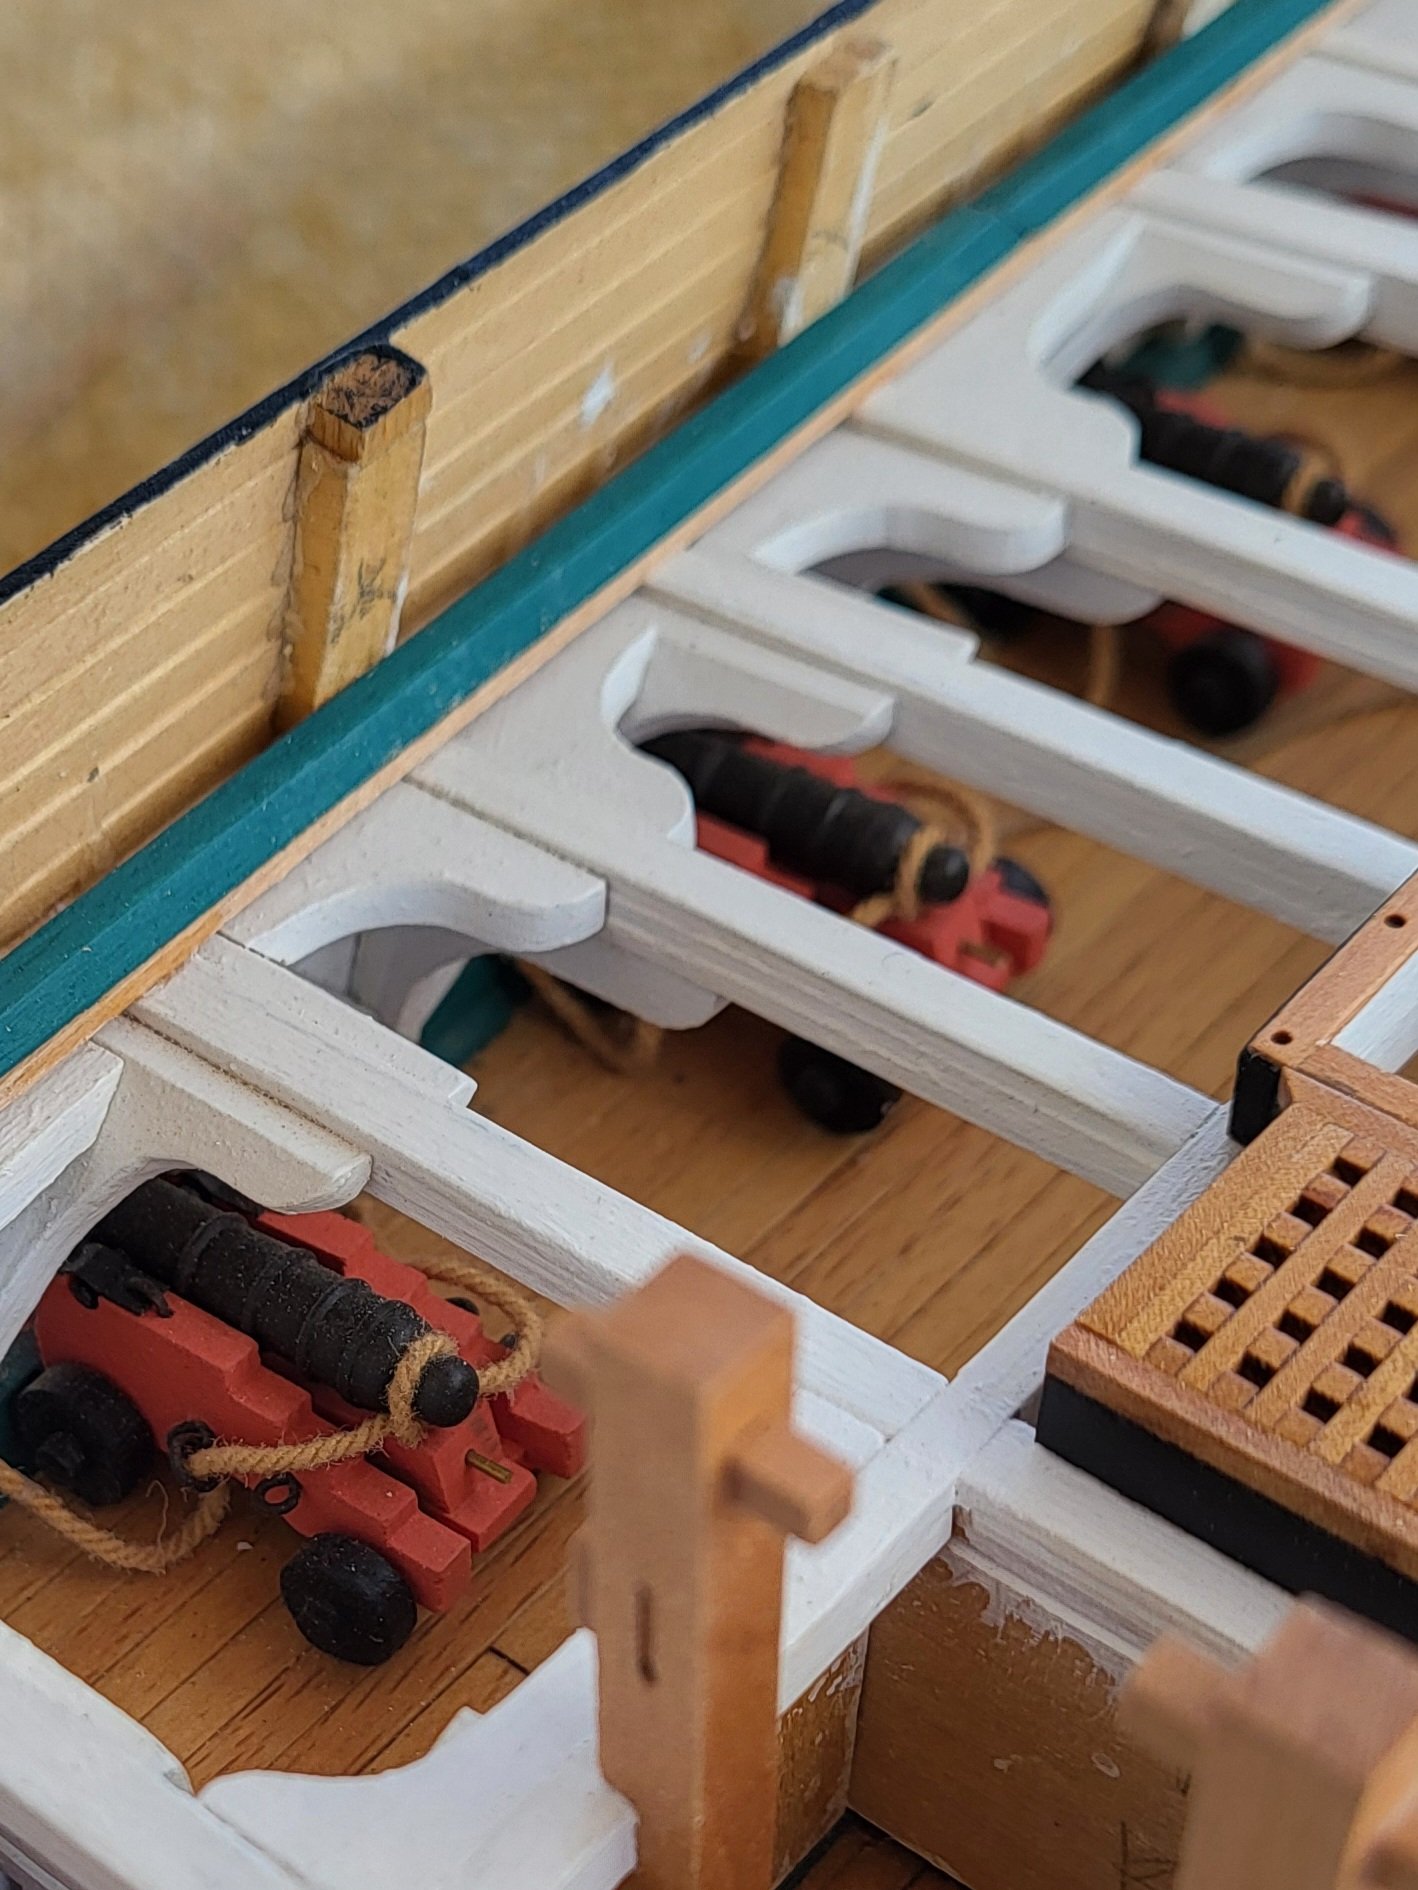
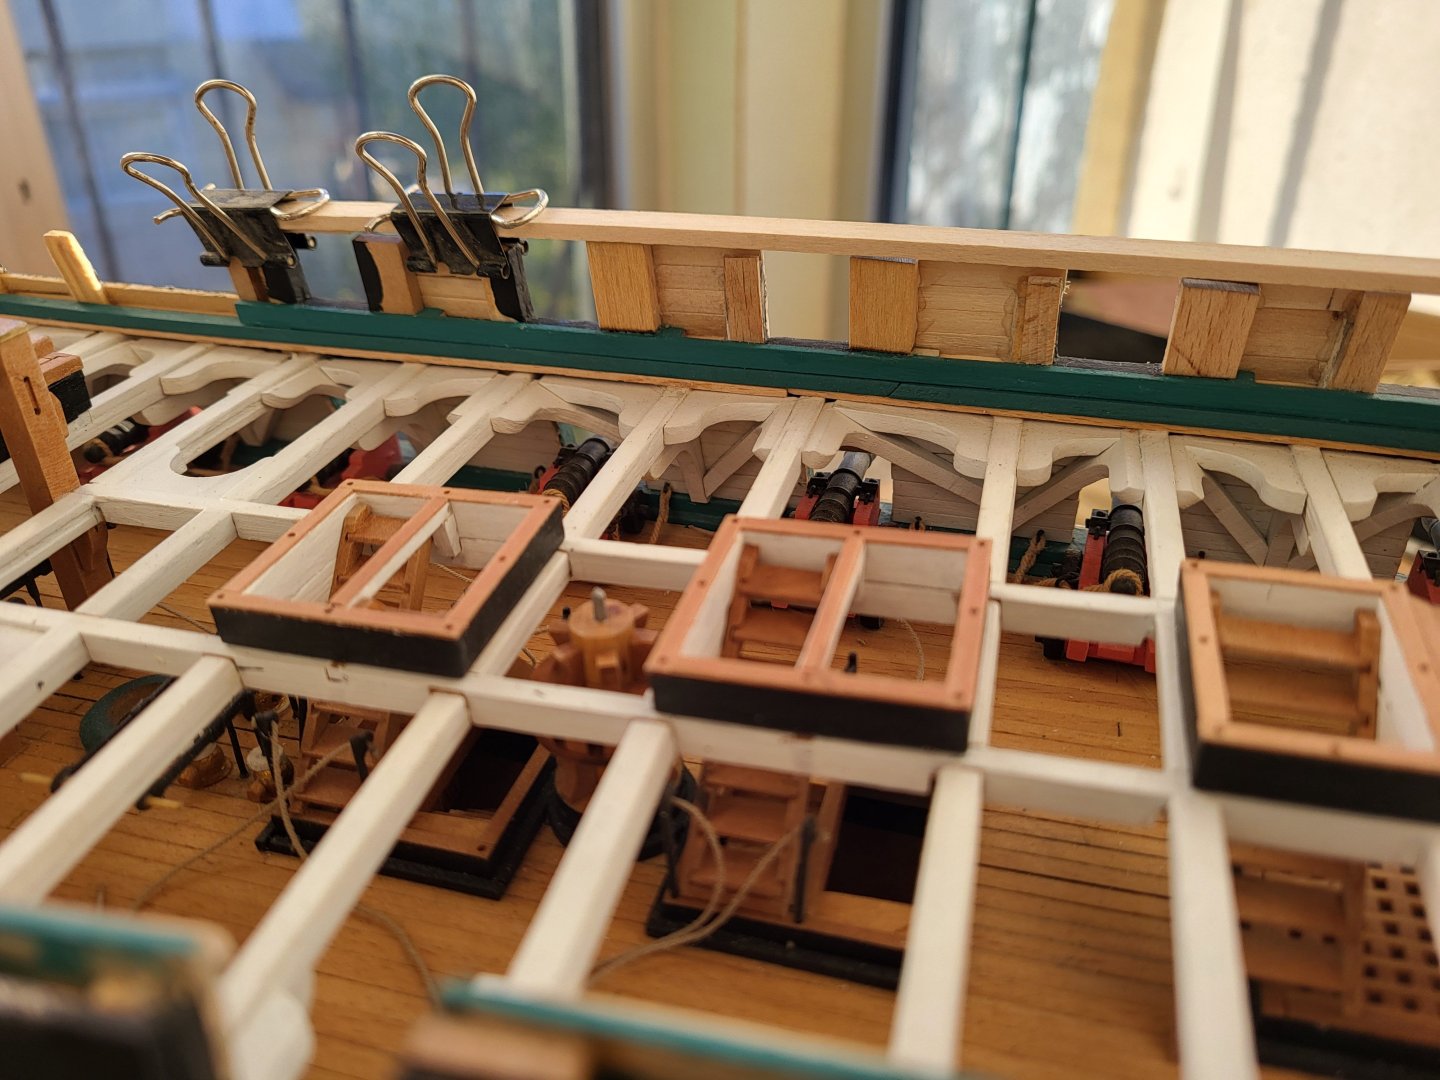
Thank you Greg. Yes, the gun deck detail and spar deck beams are complete. It was a real marathon for me. Especially building the beams and knees was a lot of repetition and hard work. Thank God it's over. I think it'll be more fun from now on. -
USS Constitution by mtbediz - 1:76
mtbediz replied to mtbediz's topic in - Build logs for subjects built 1751 - 1800
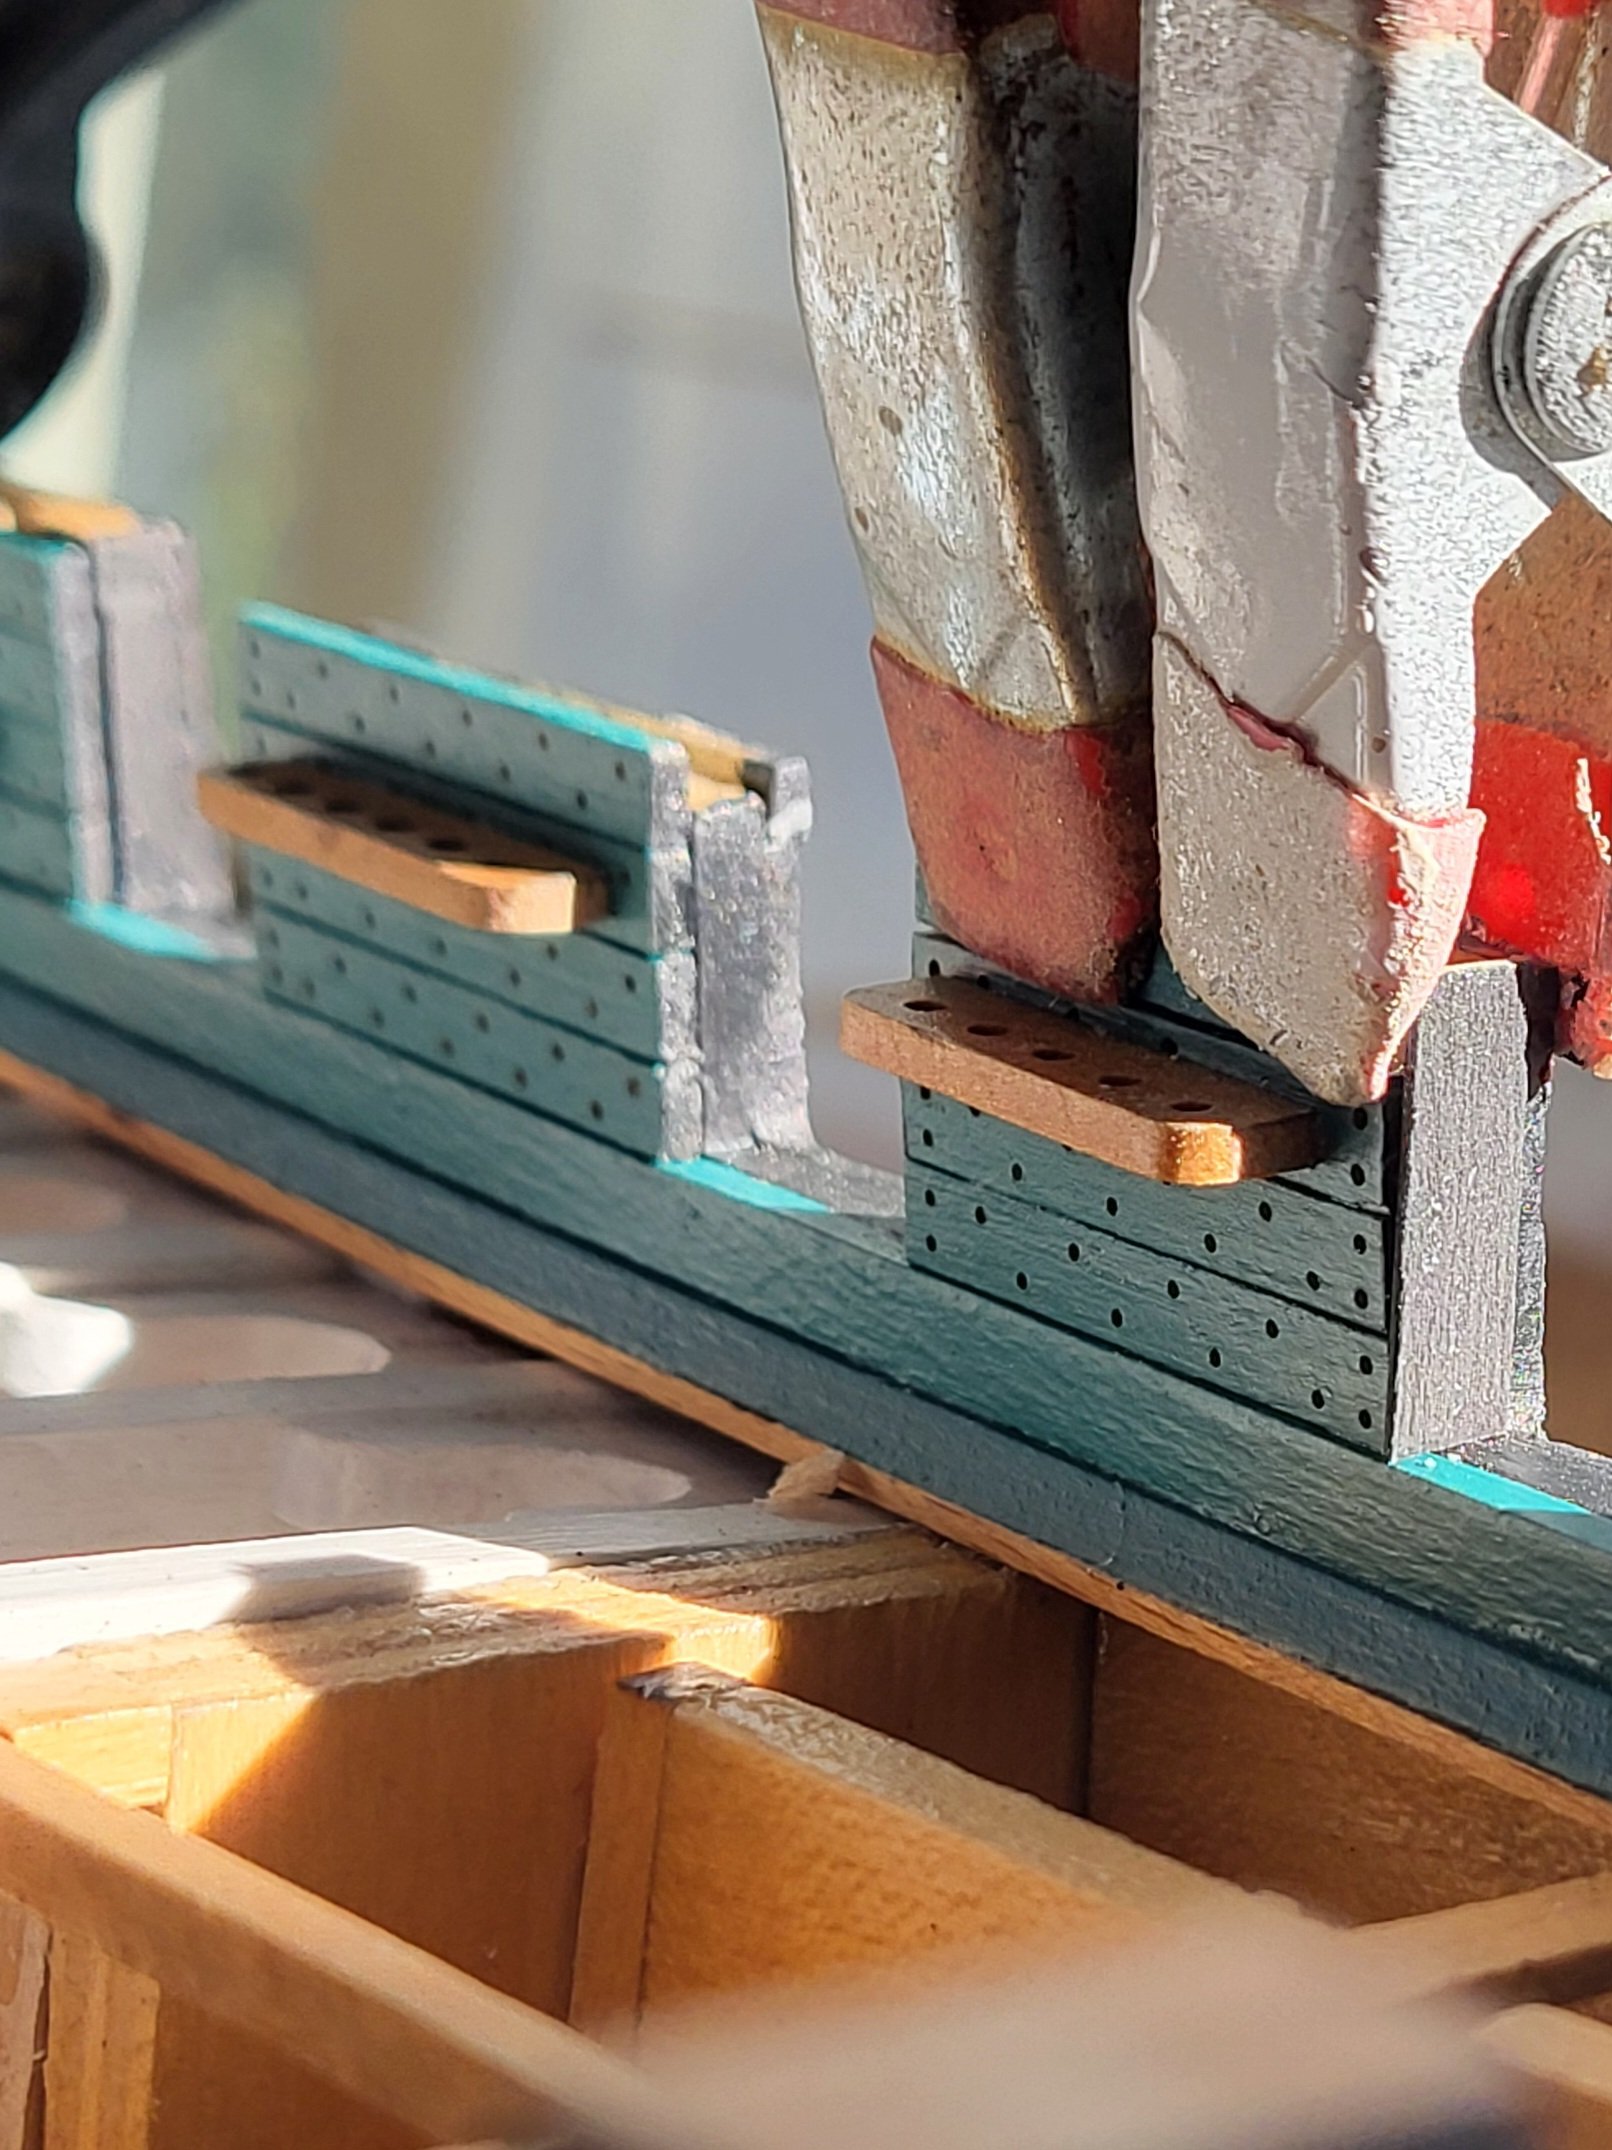
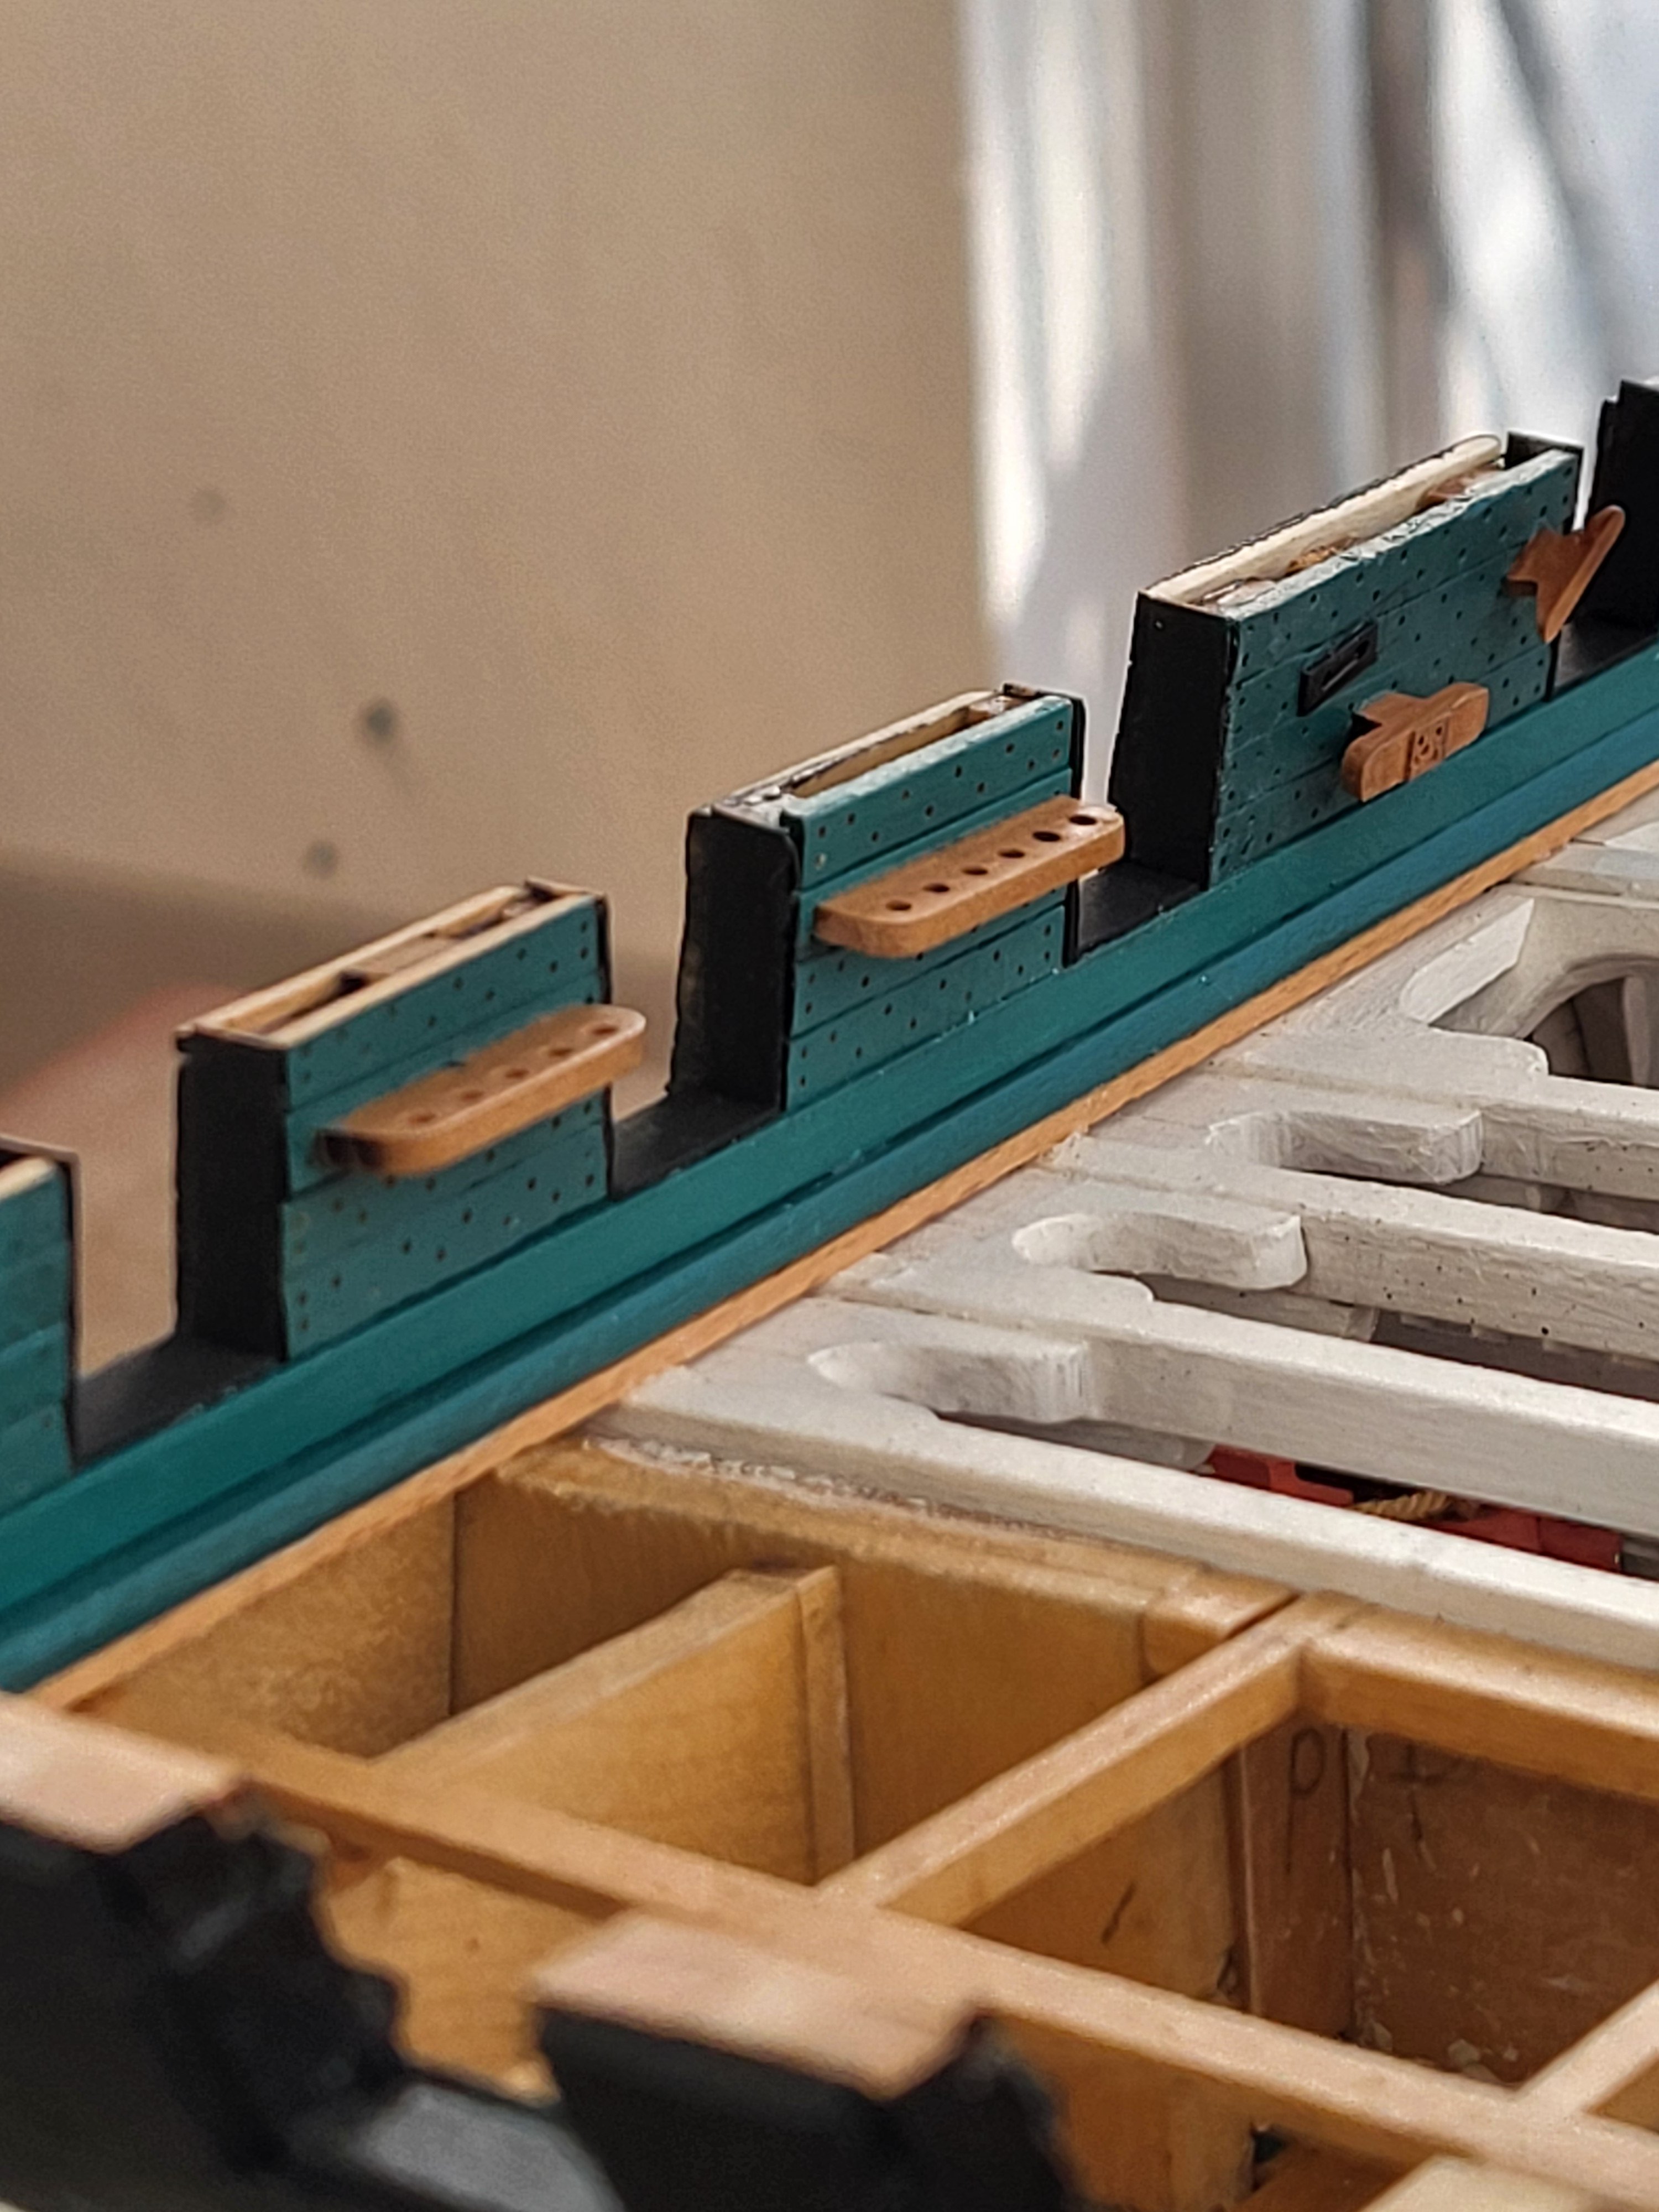
I completed the frames of the spar deck gunports and cut the gunports. I protected the sills with a brass jig to prevent damage during cutting.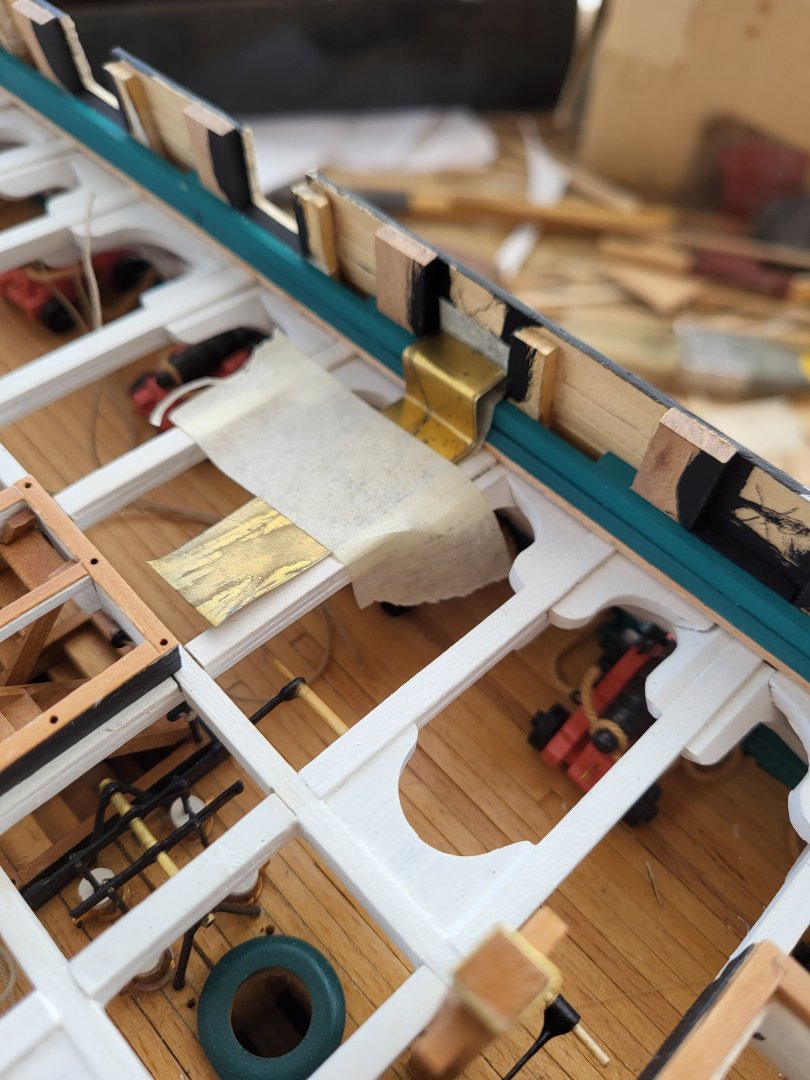
-
USS Constitution by mtbediz - 1:76
mtbediz replied to mtbediz's topic in - Build logs for subjects built 1751 - 1800
Yes, there is such a risk if I don't take measure. I have some measures in my mind and I will try to implement them. -
USS Constitution by mtbediz - 1:76
mtbediz replied to mtbediz's topic in - Build logs for subjects built 1751 - 1800
I have started making the gun ports in the front. I glue the bottom sills of the gun port frames to the planksheer and mount it on the waterway. I will cut the gun ports after the frames are completed.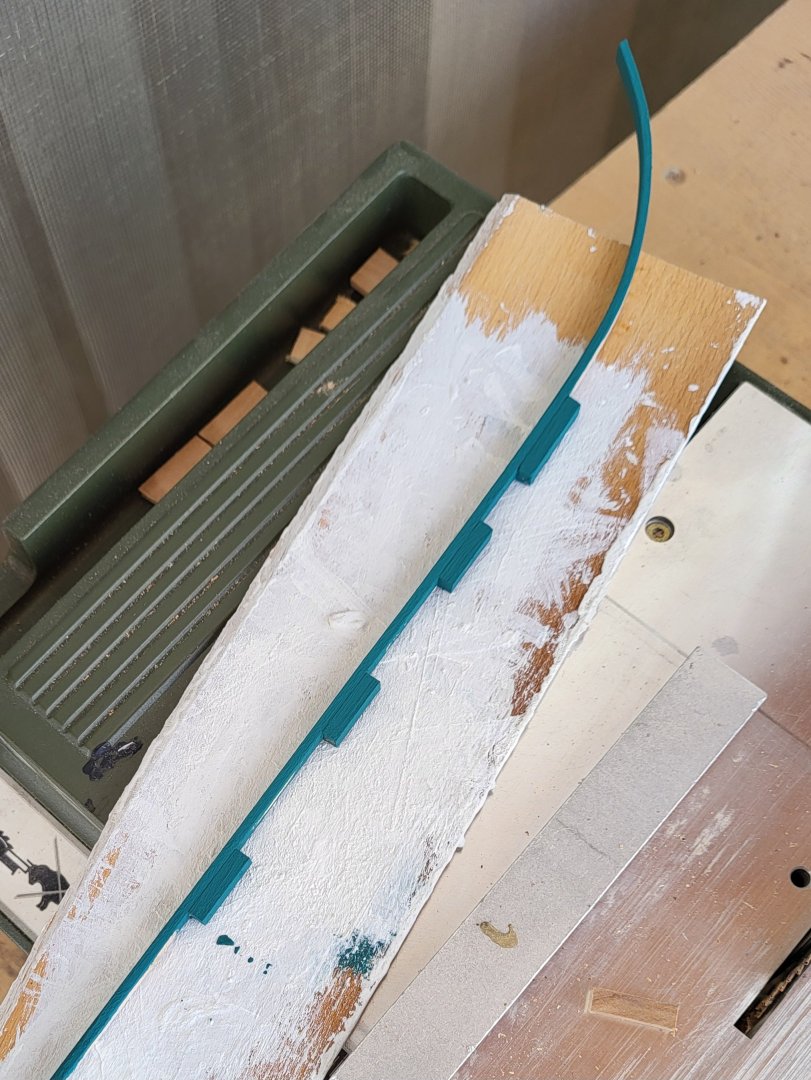


-
It was very clever of you to make each piece separately from the model, Peter. I worked entirely on the model when making the galleries and it was very difficult. As always, you did a very clean and neat job.
-
USS Constitution by mtbediz - 1:76
mtbediz replied to mtbediz's topic in - Build logs for subjects built 1751 - 1800
I think the reason is that it makes the hull of the ship stronger against lateral forces. Like zigzag braces on lattice electric poles. If there is an expert on the subject here, maybe he/she can contribute to the reason for this. -
USS Constitution by mtbediz - 1:76
mtbediz replied to mtbediz's topic in - Build logs for subjects built 1751 - 1800
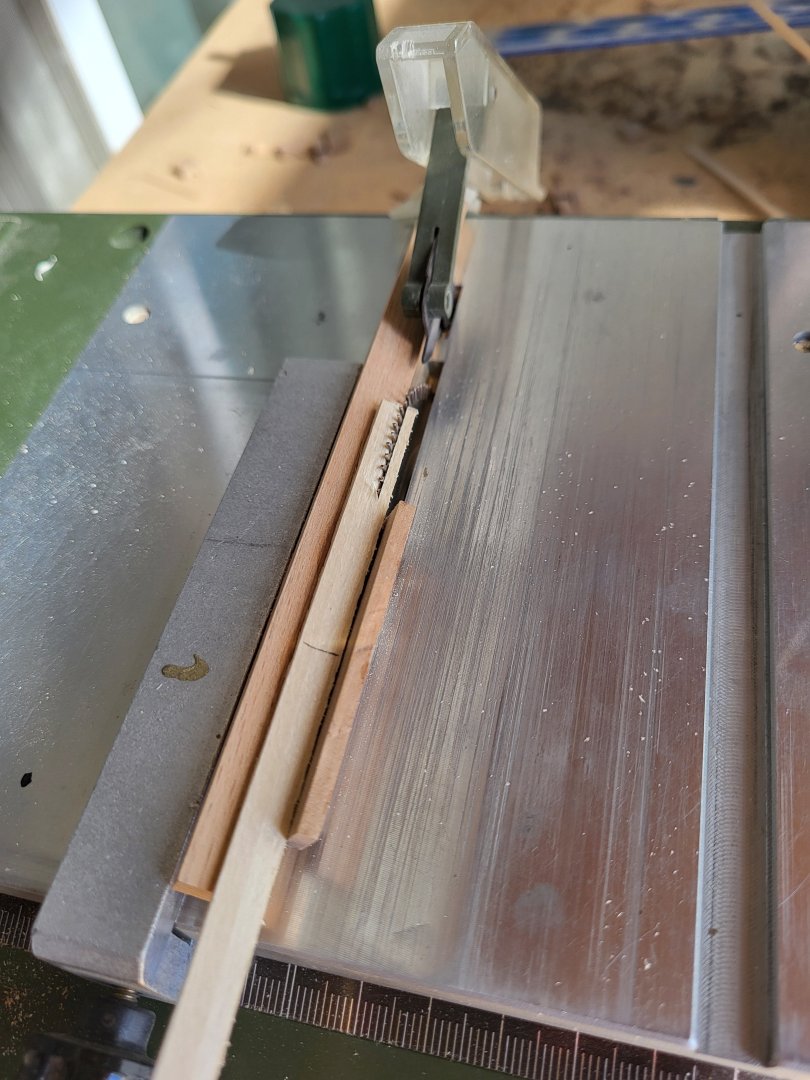
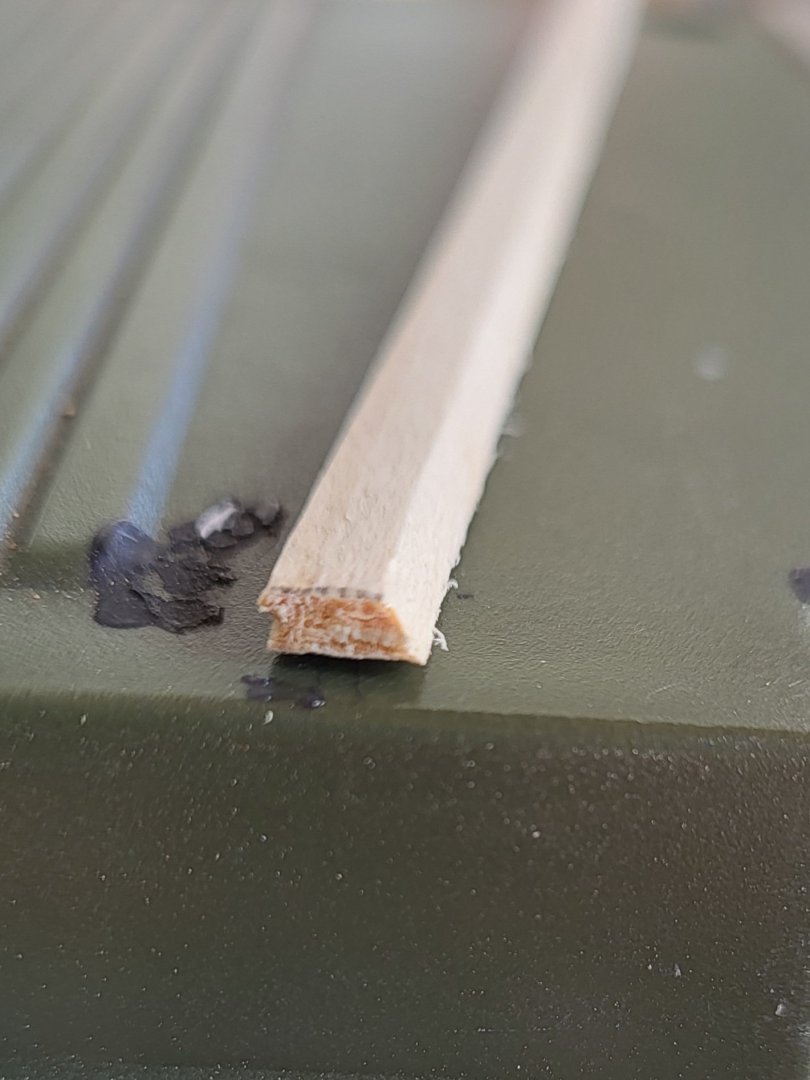
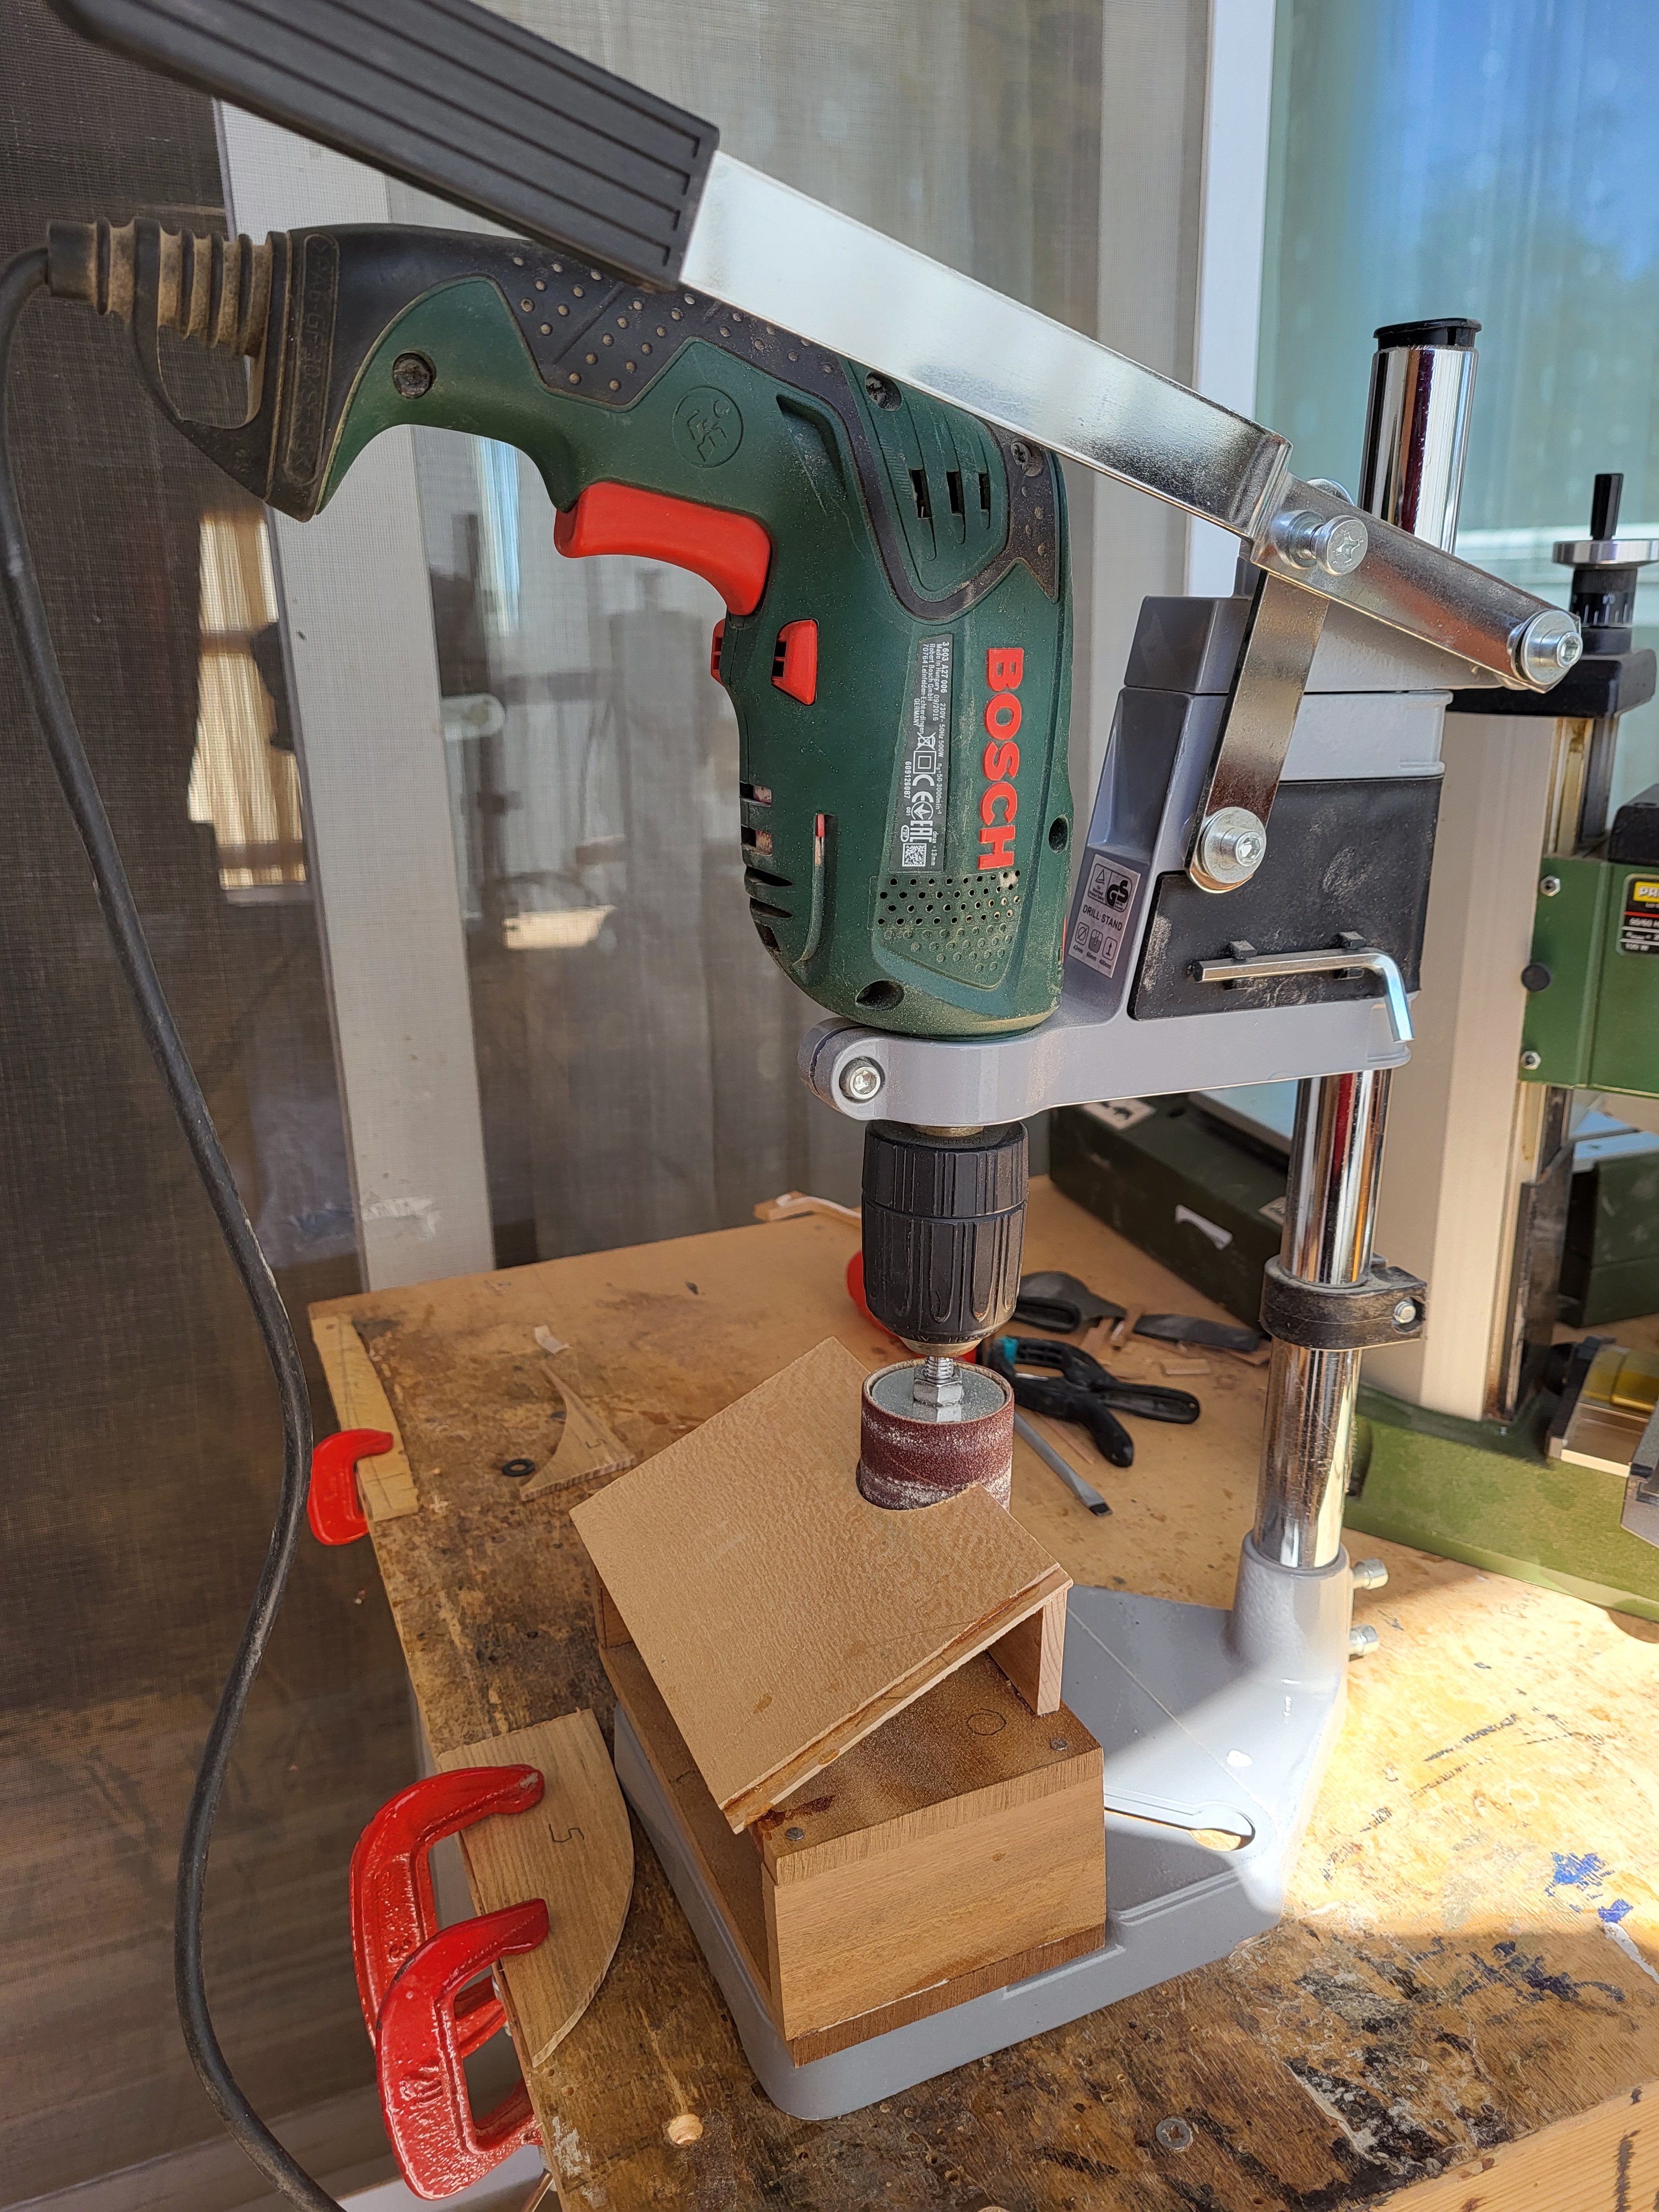
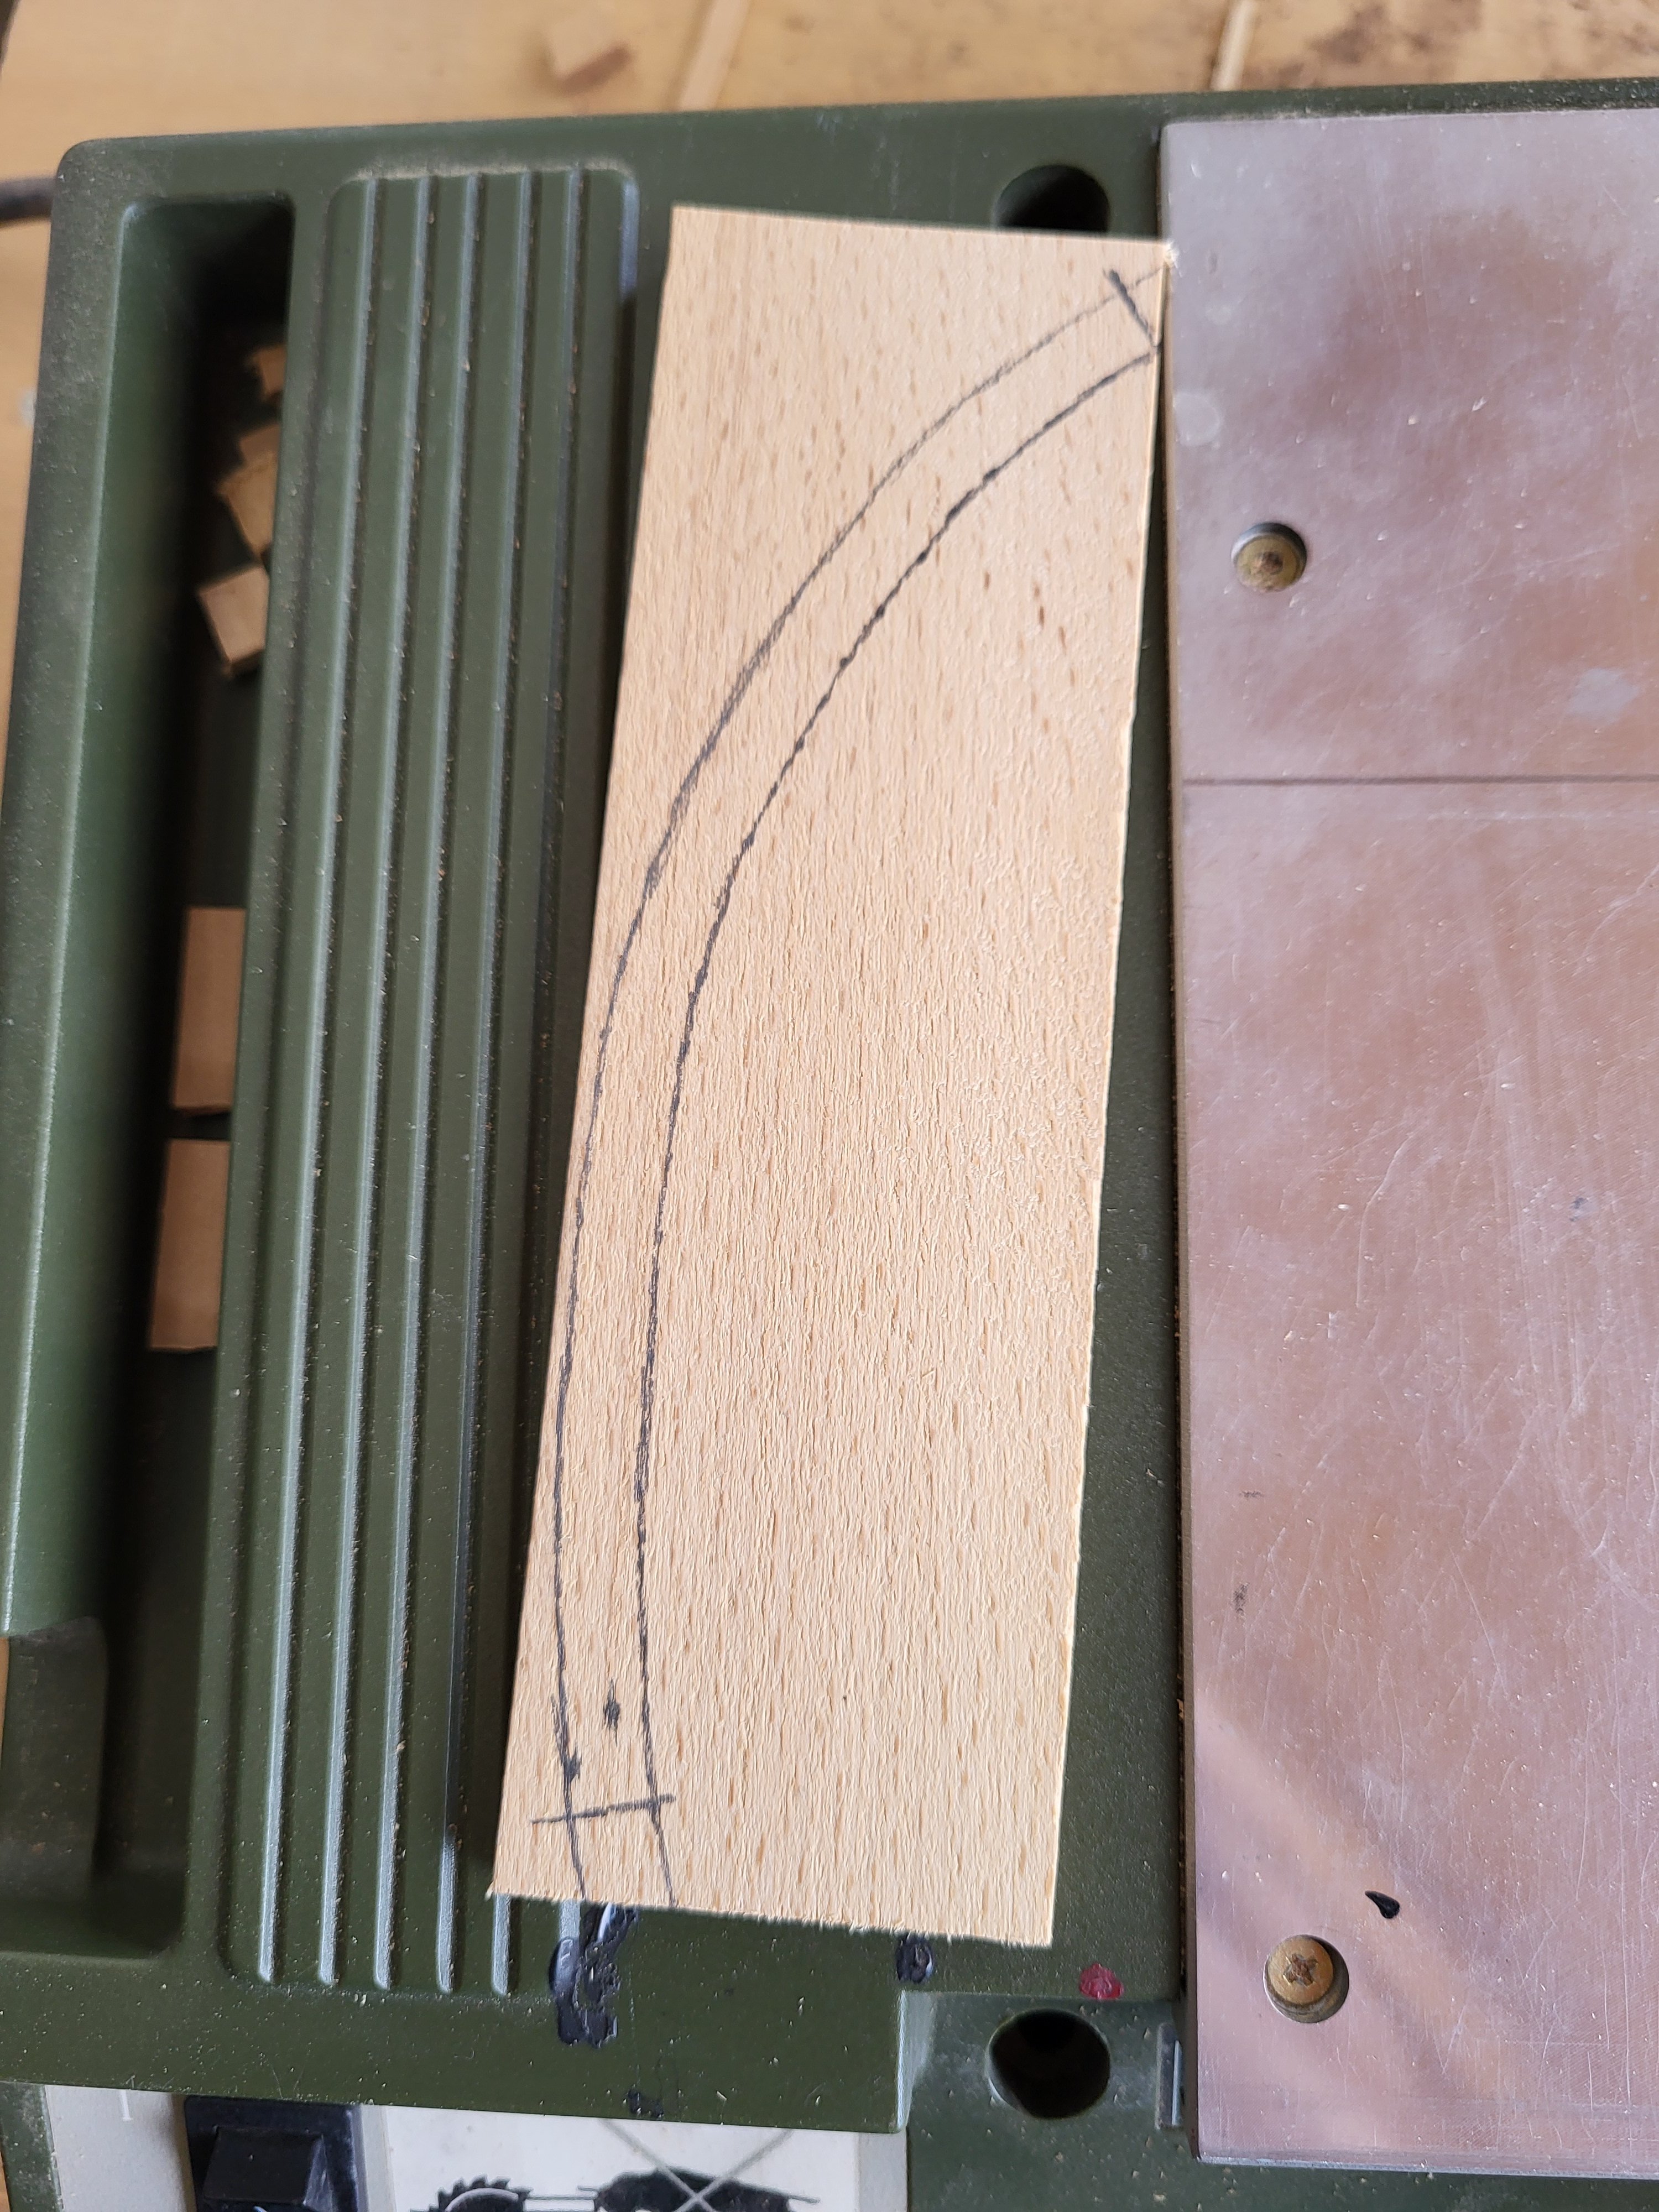
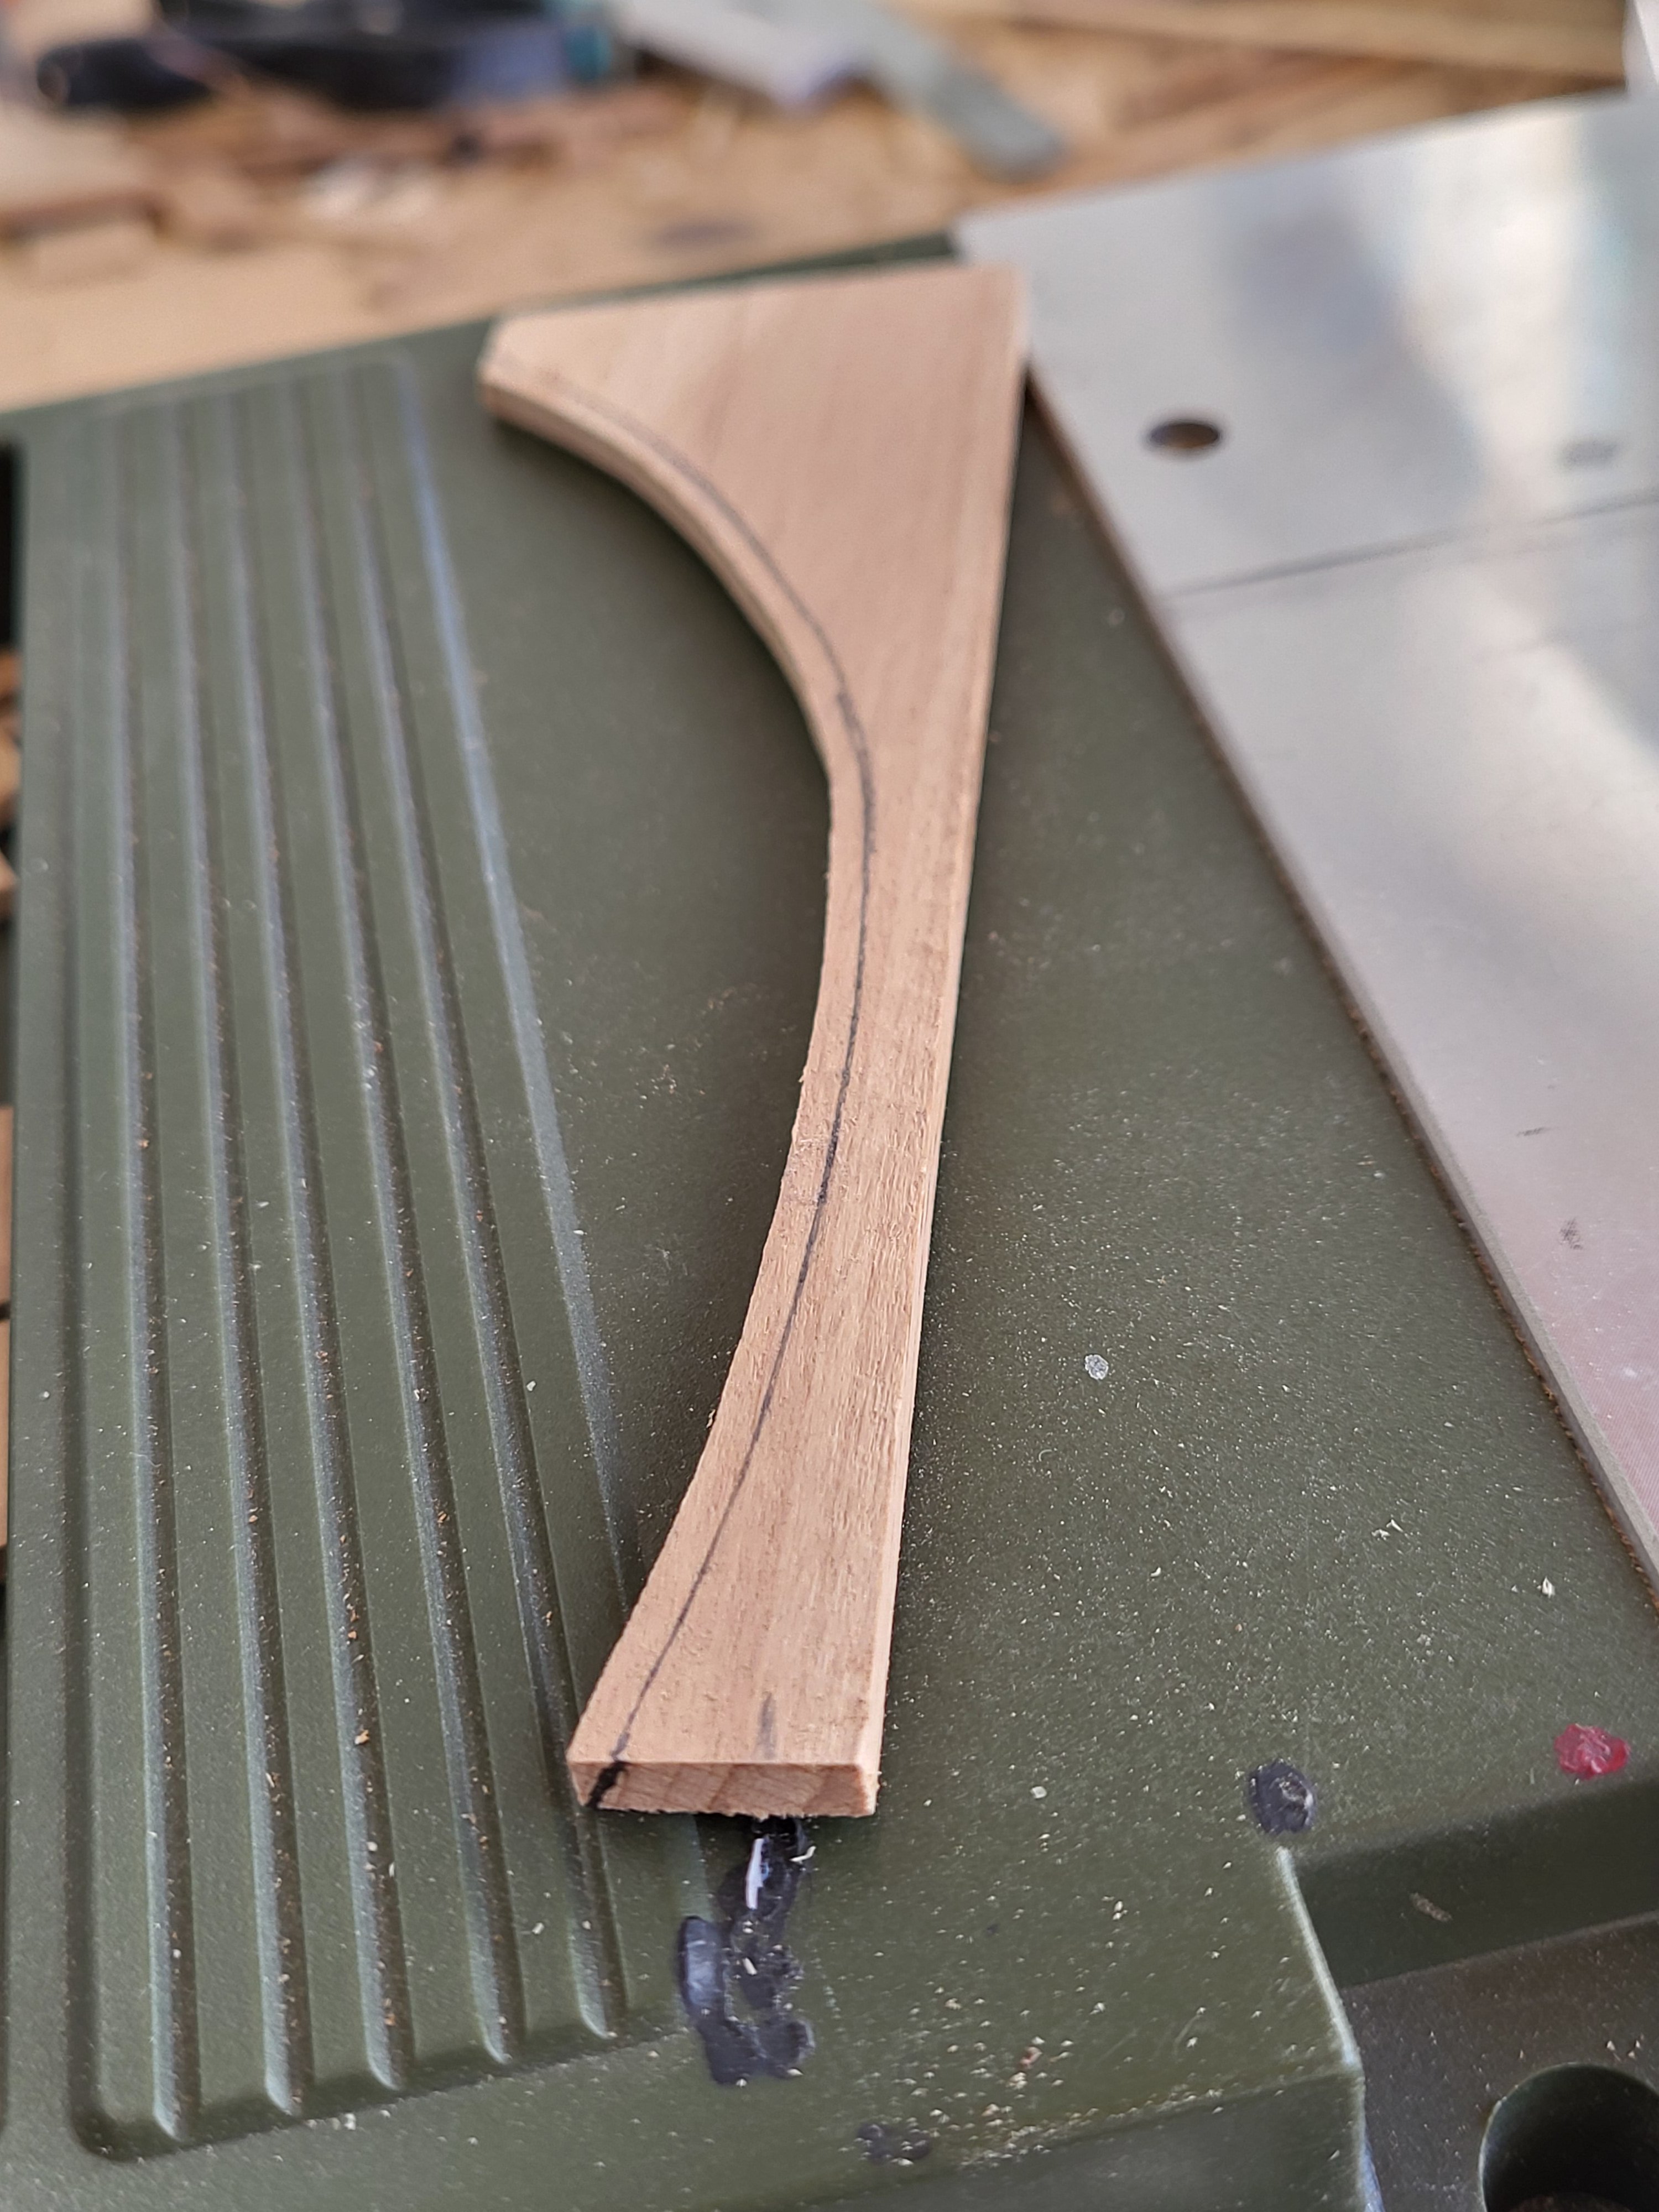
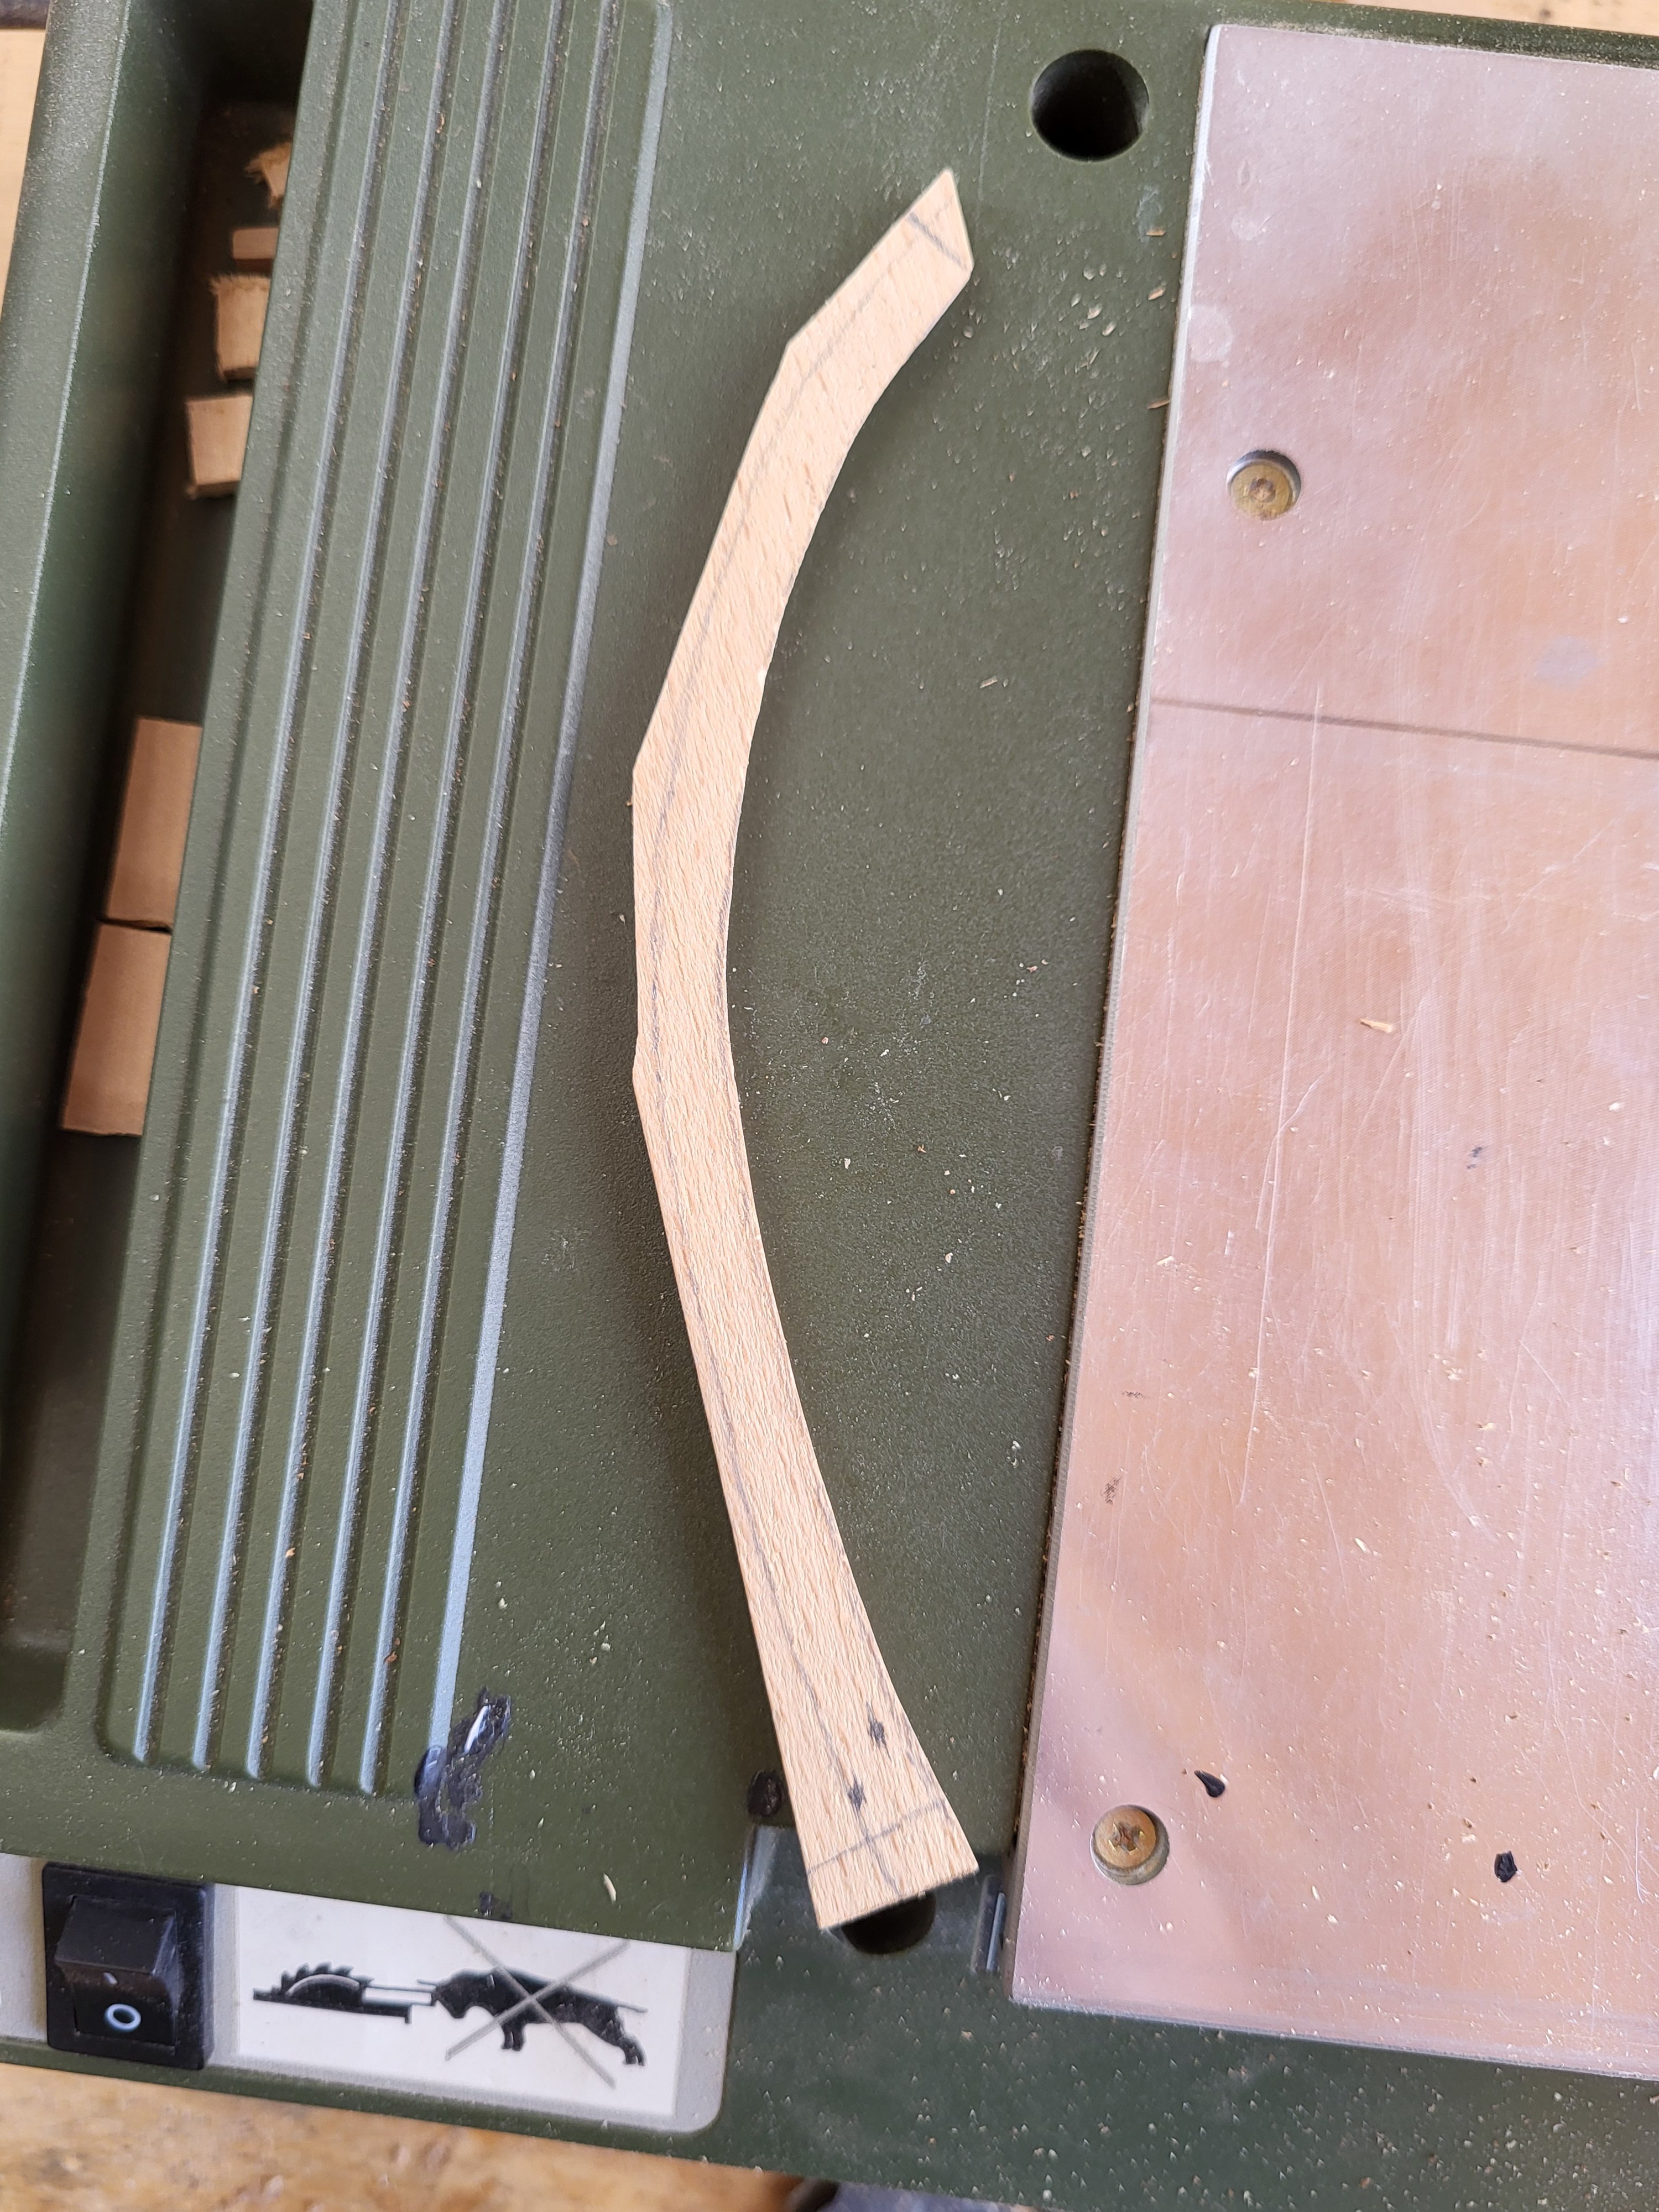
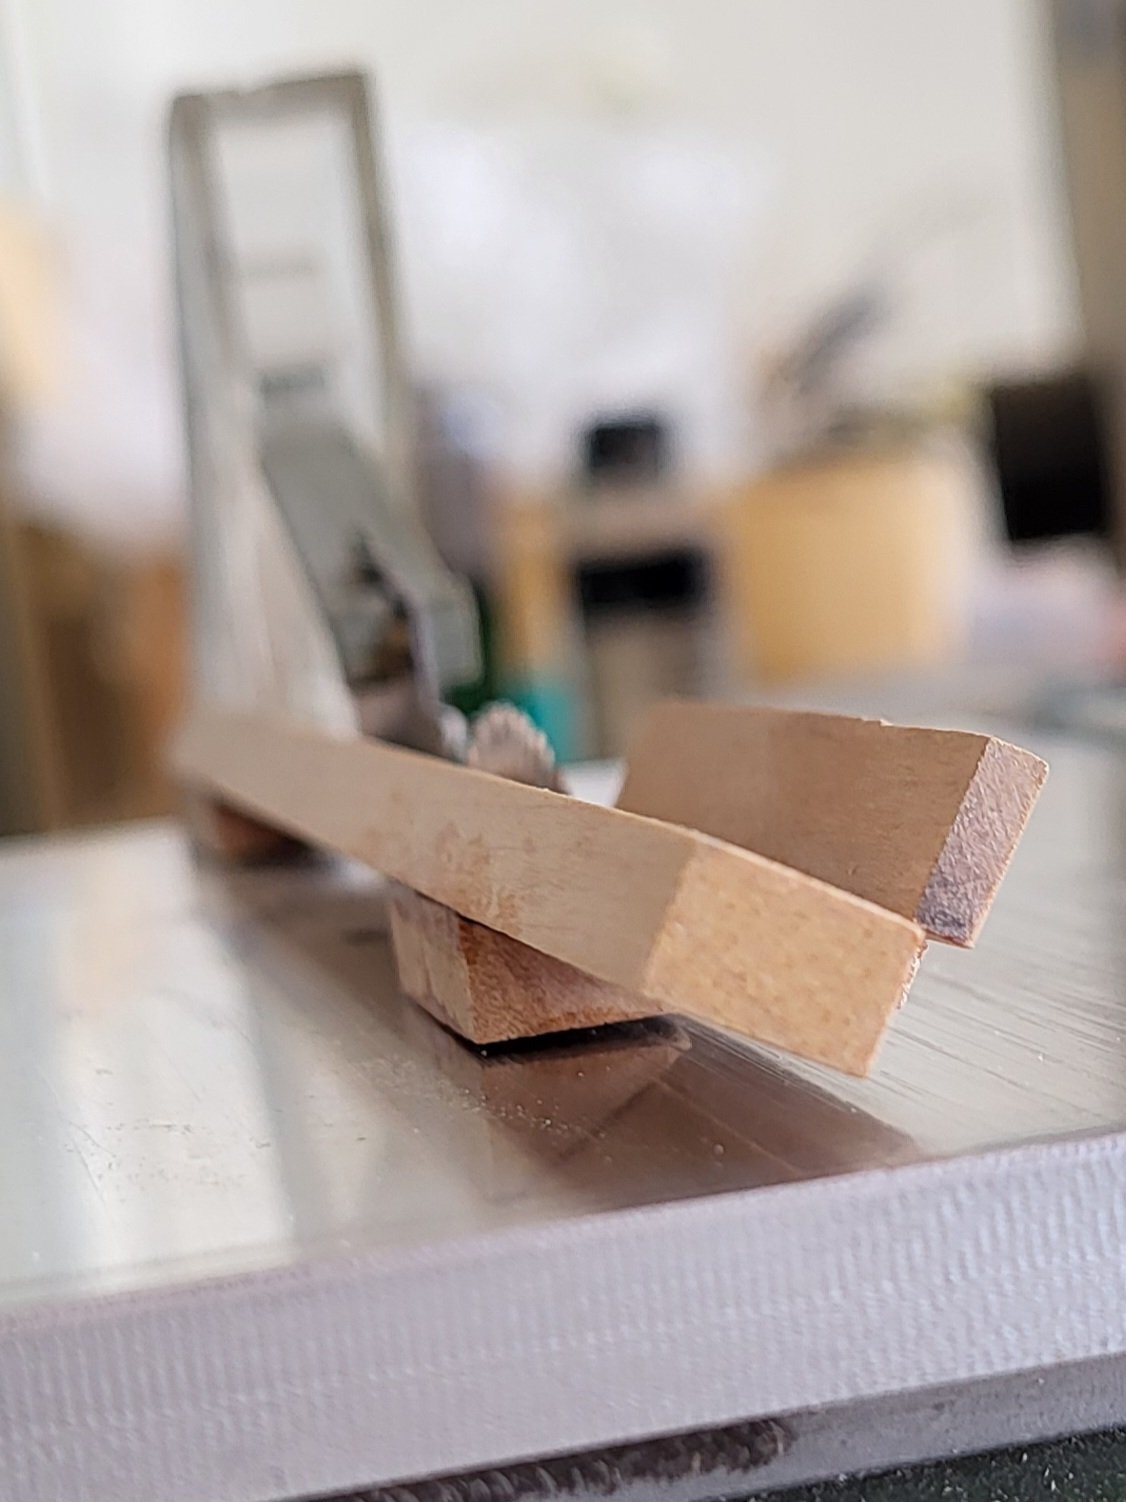
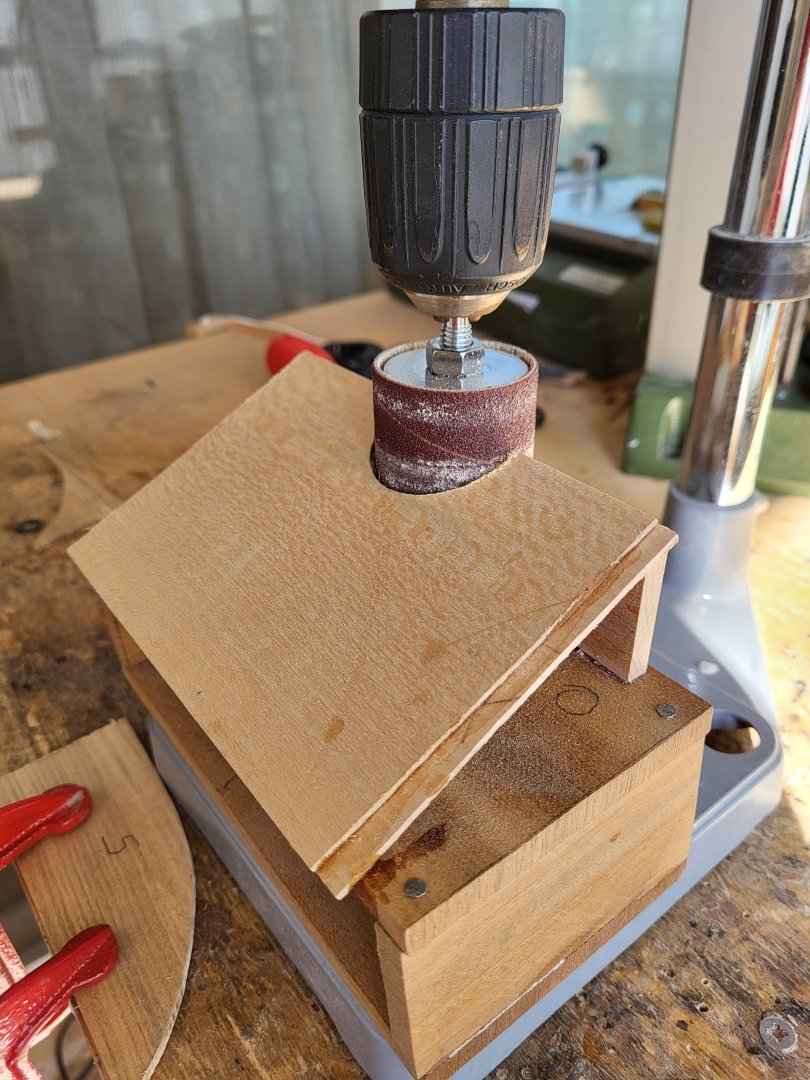
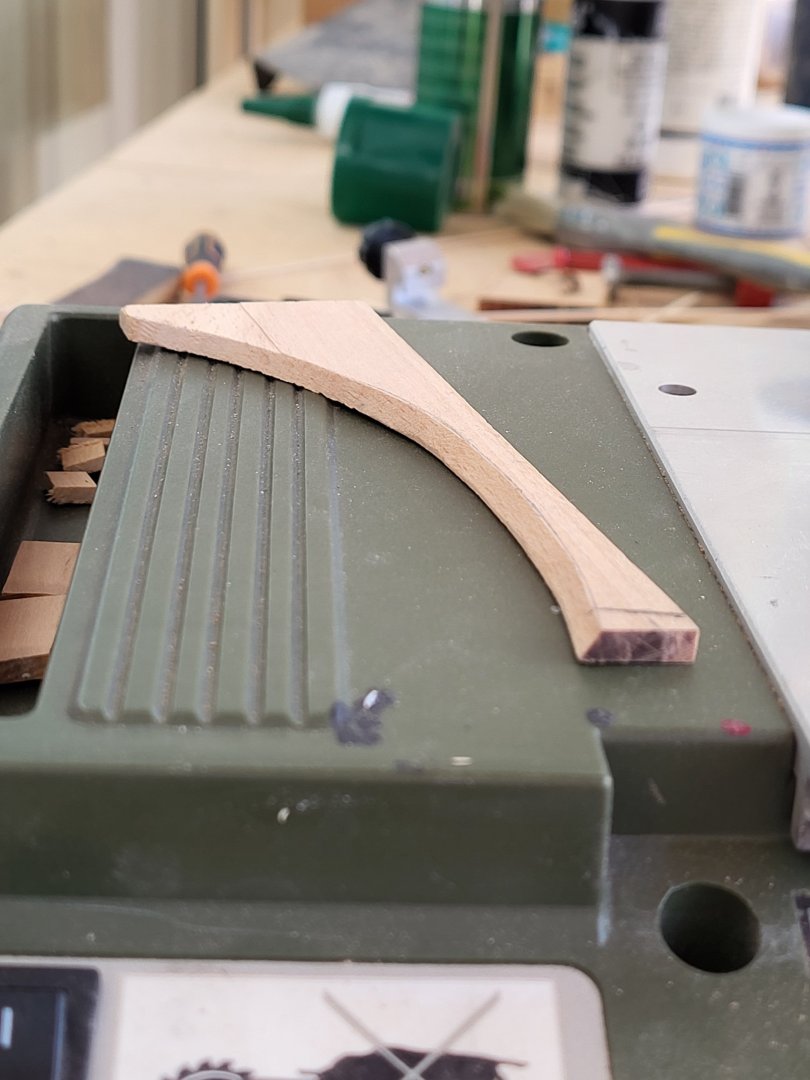
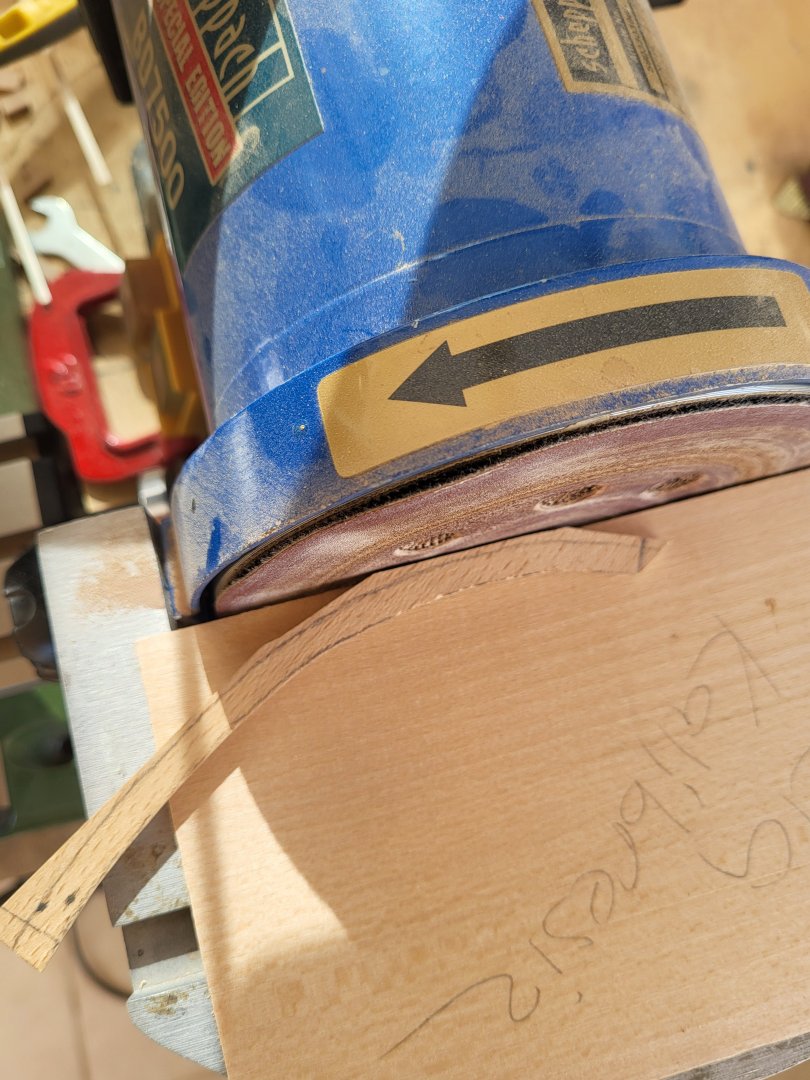
Actually, I did not use a file when chamfering the curved bow waterway on the port side. I thought about how I could do it better. I attached a drum sander to my hand drill mounted on my drill stand and made an inclined table in front of the drum. Thus, by sanding the waterway at a fixed angle, I achieved a more regular chamfer and completed the job in a much shorter time.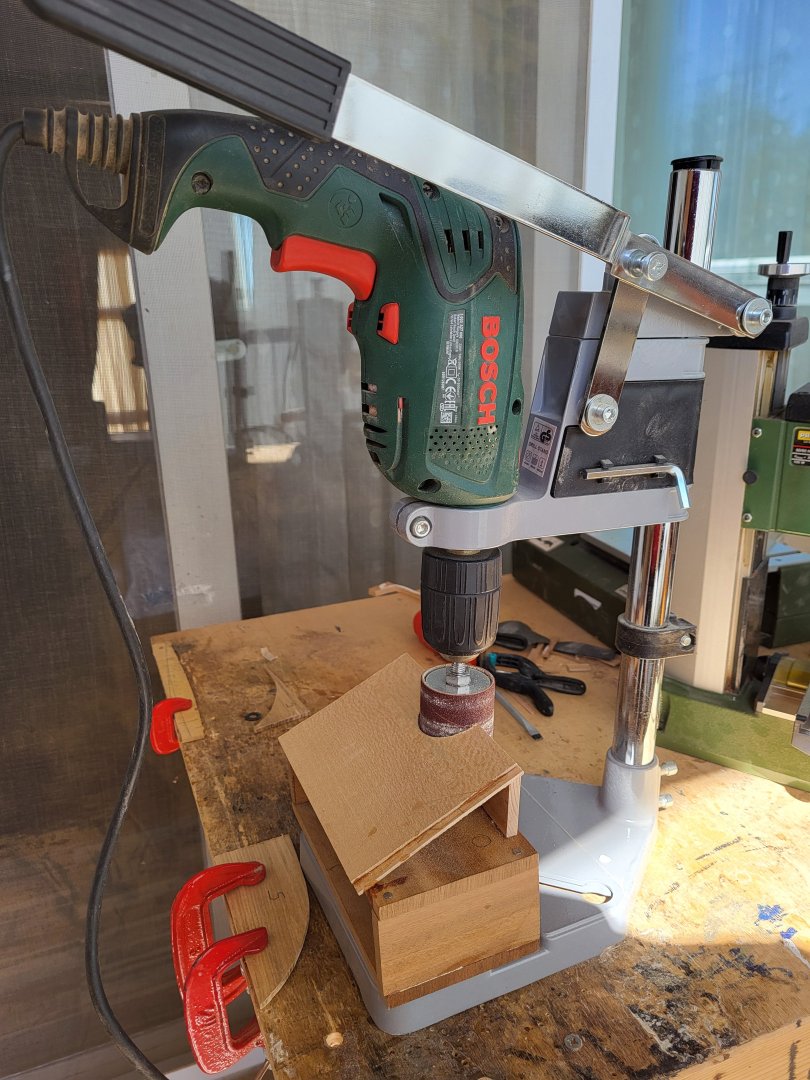
-
USS Constitution by mtbediz - 1:76
mtbediz replied to mtbediz's topic in - Build logs for subjects built 1751 - 1800
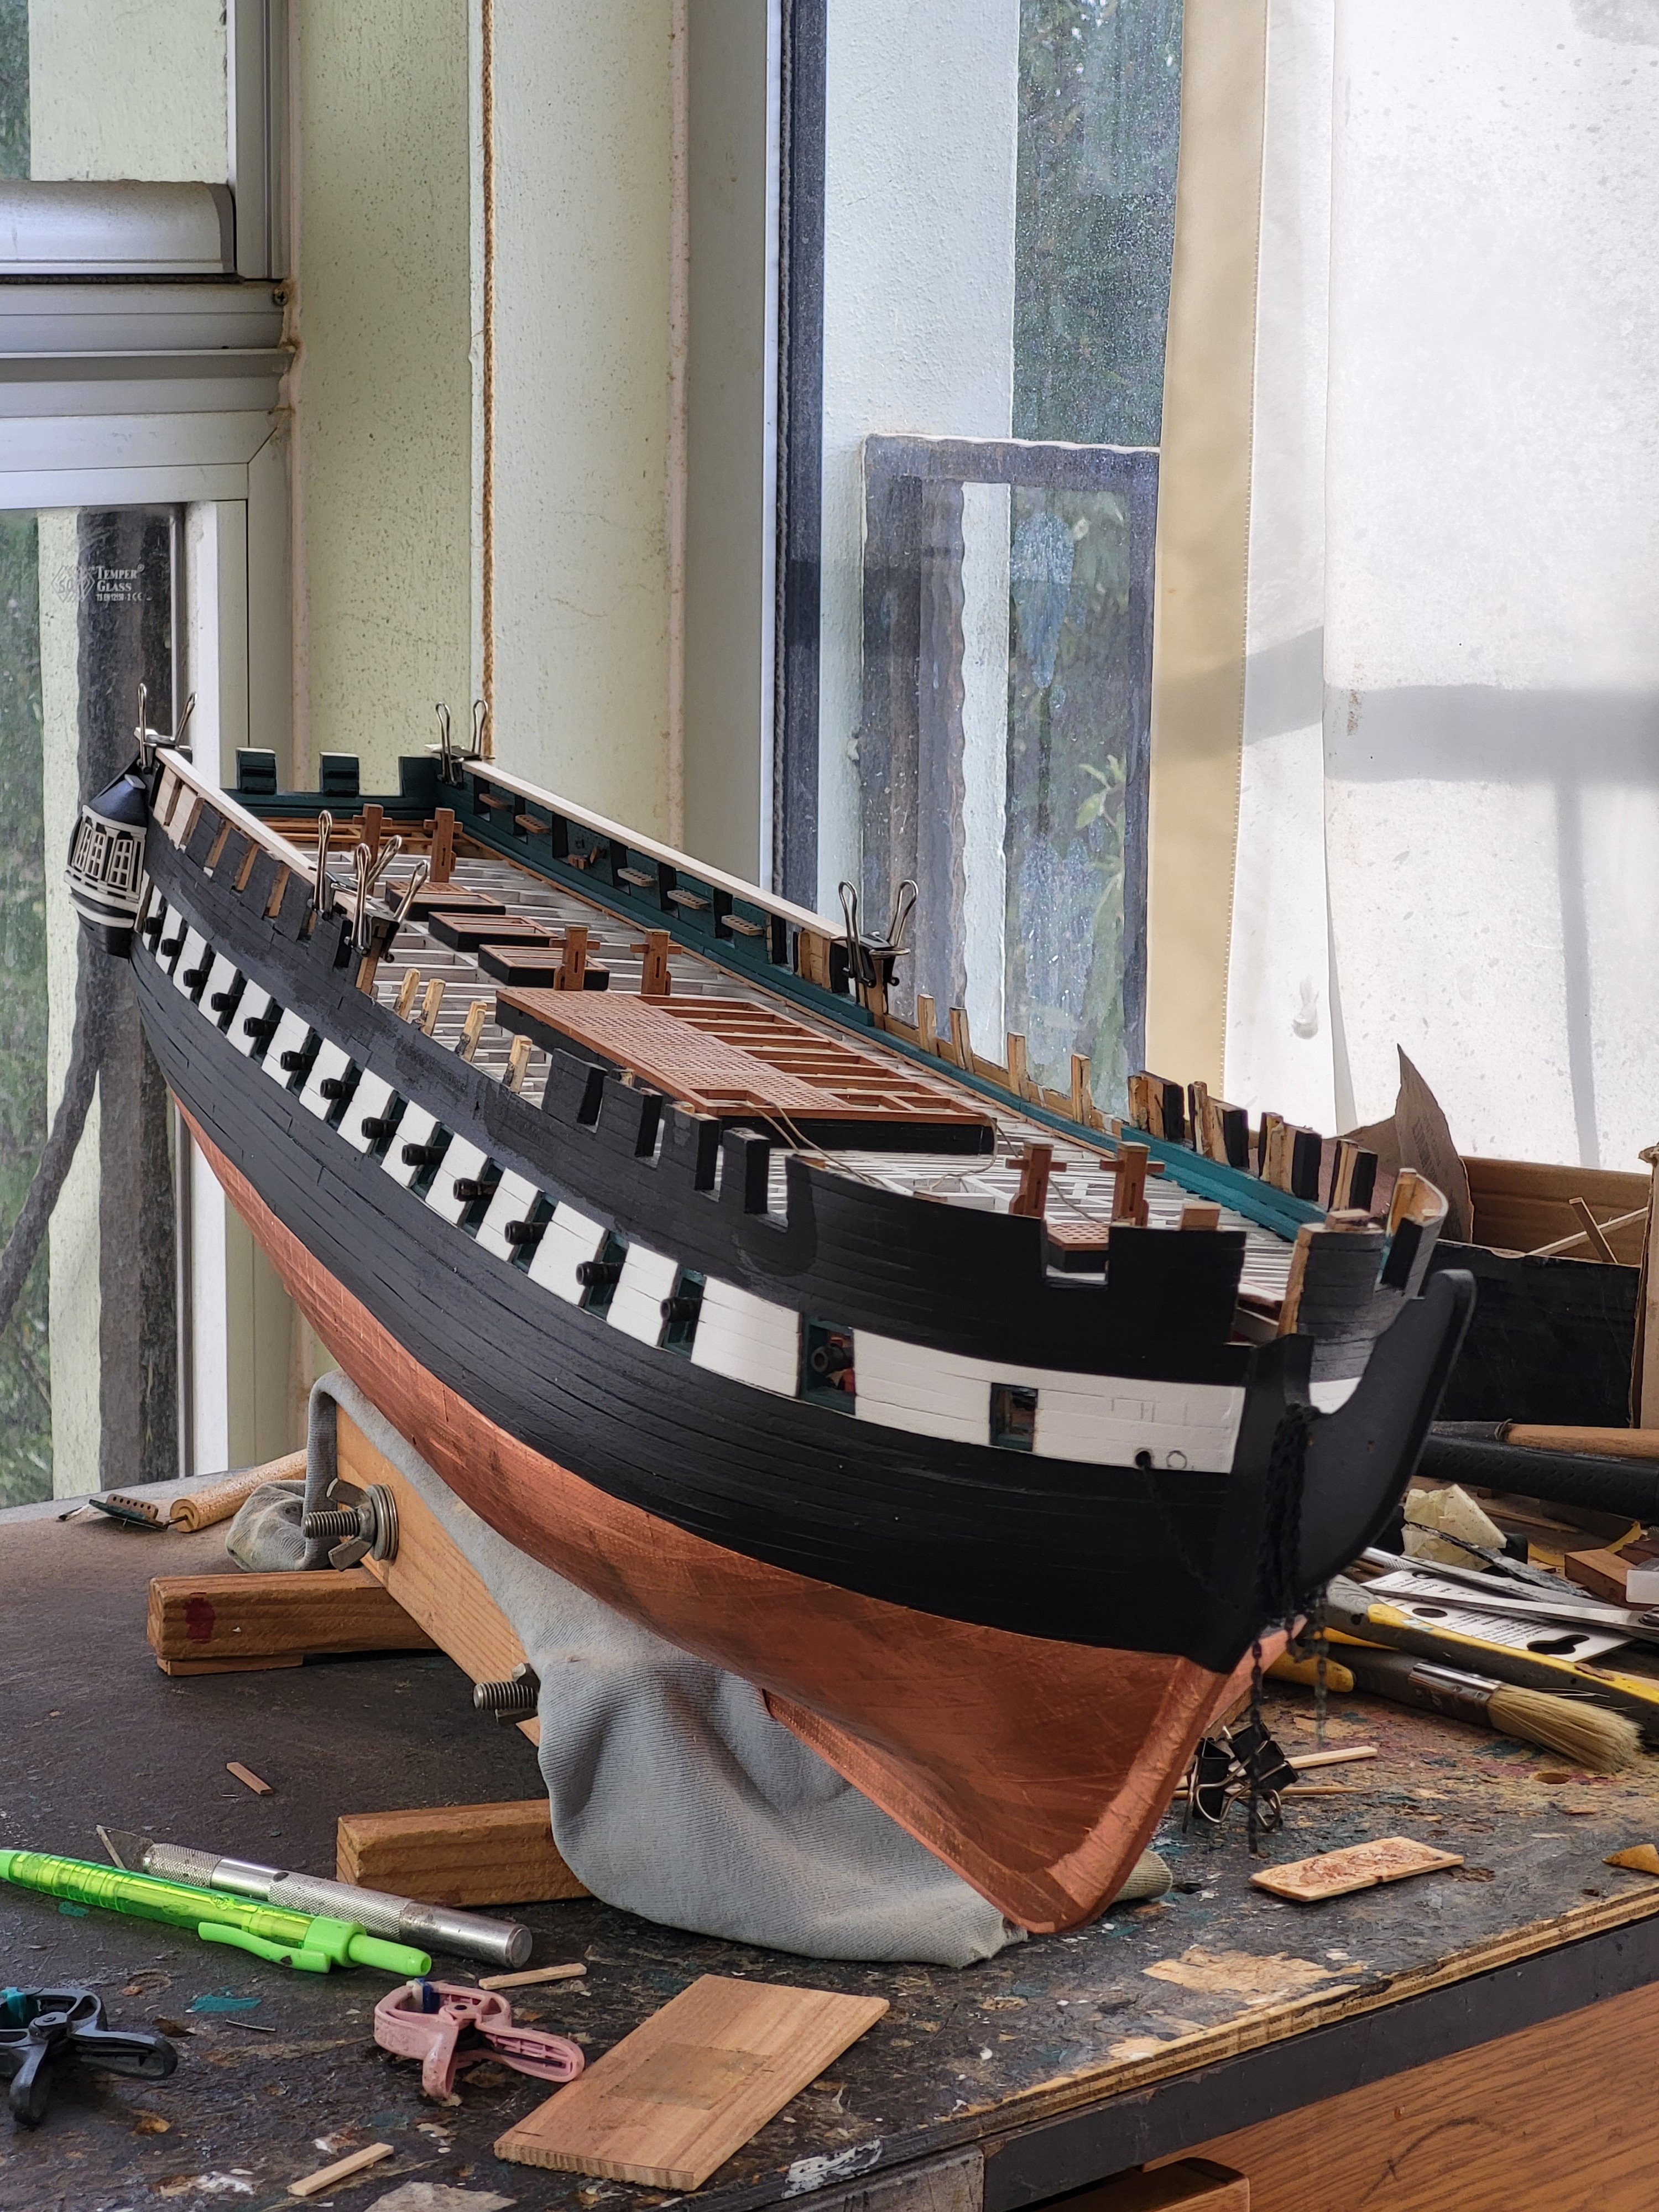
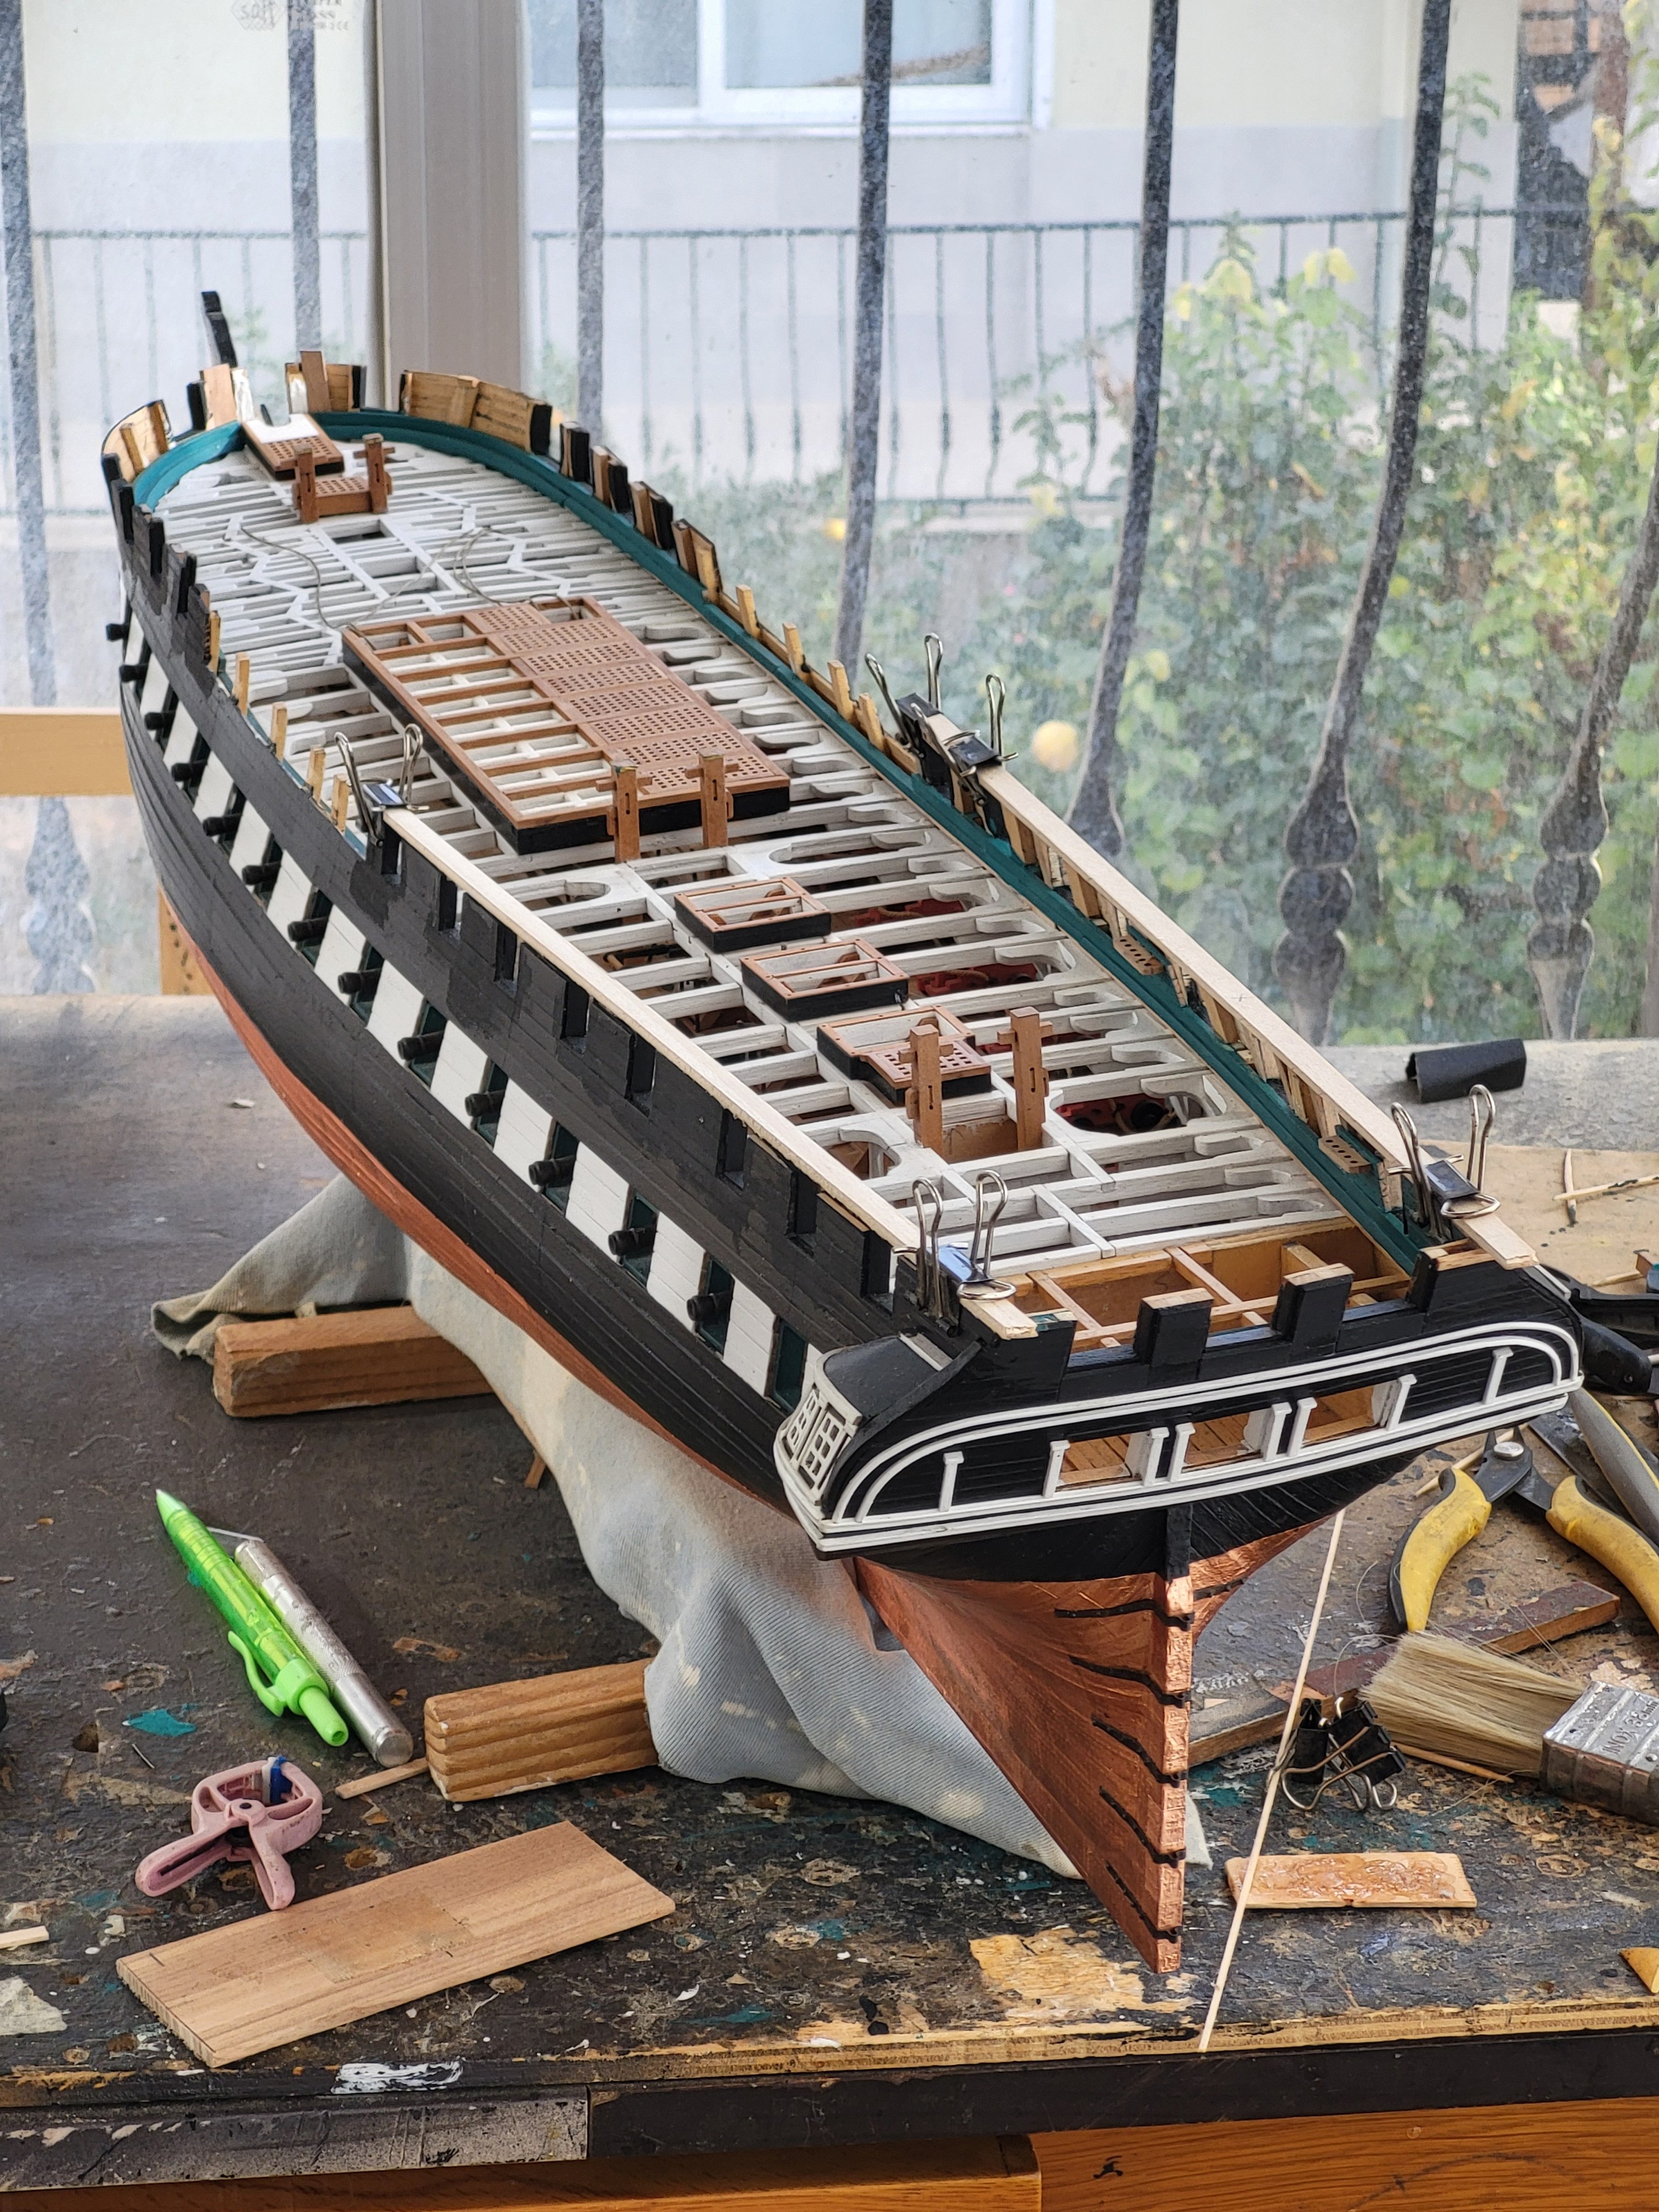
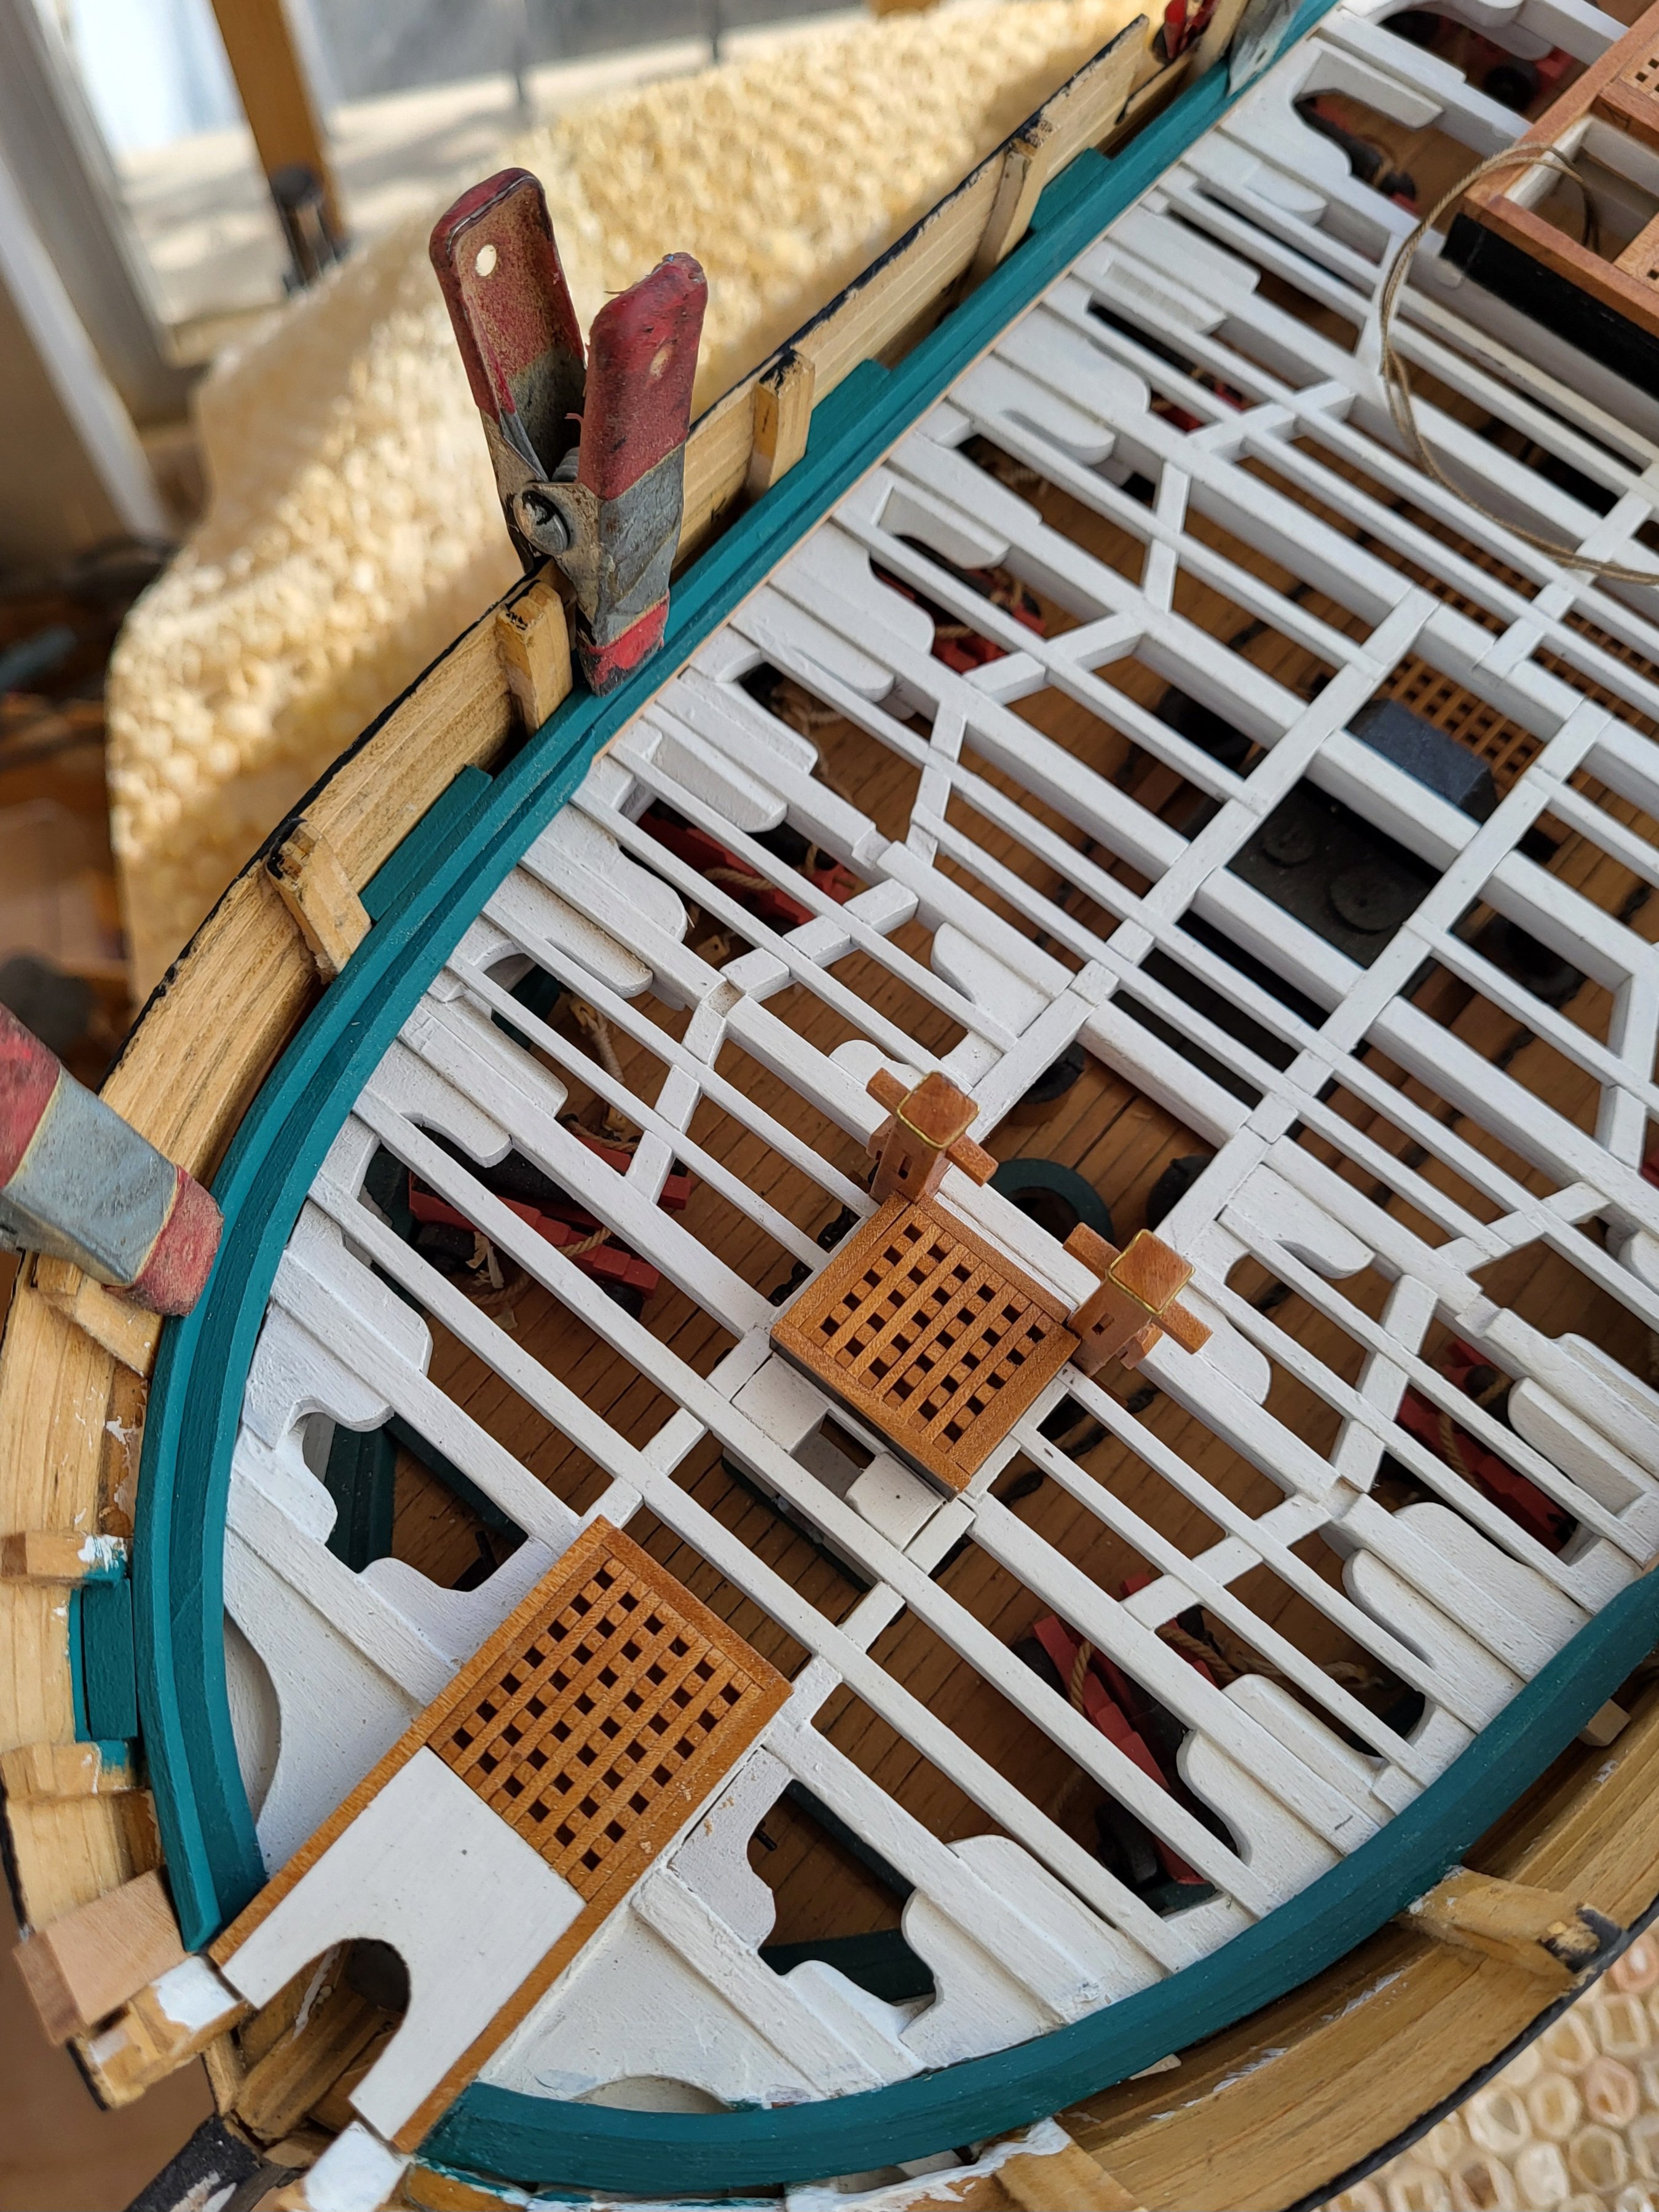
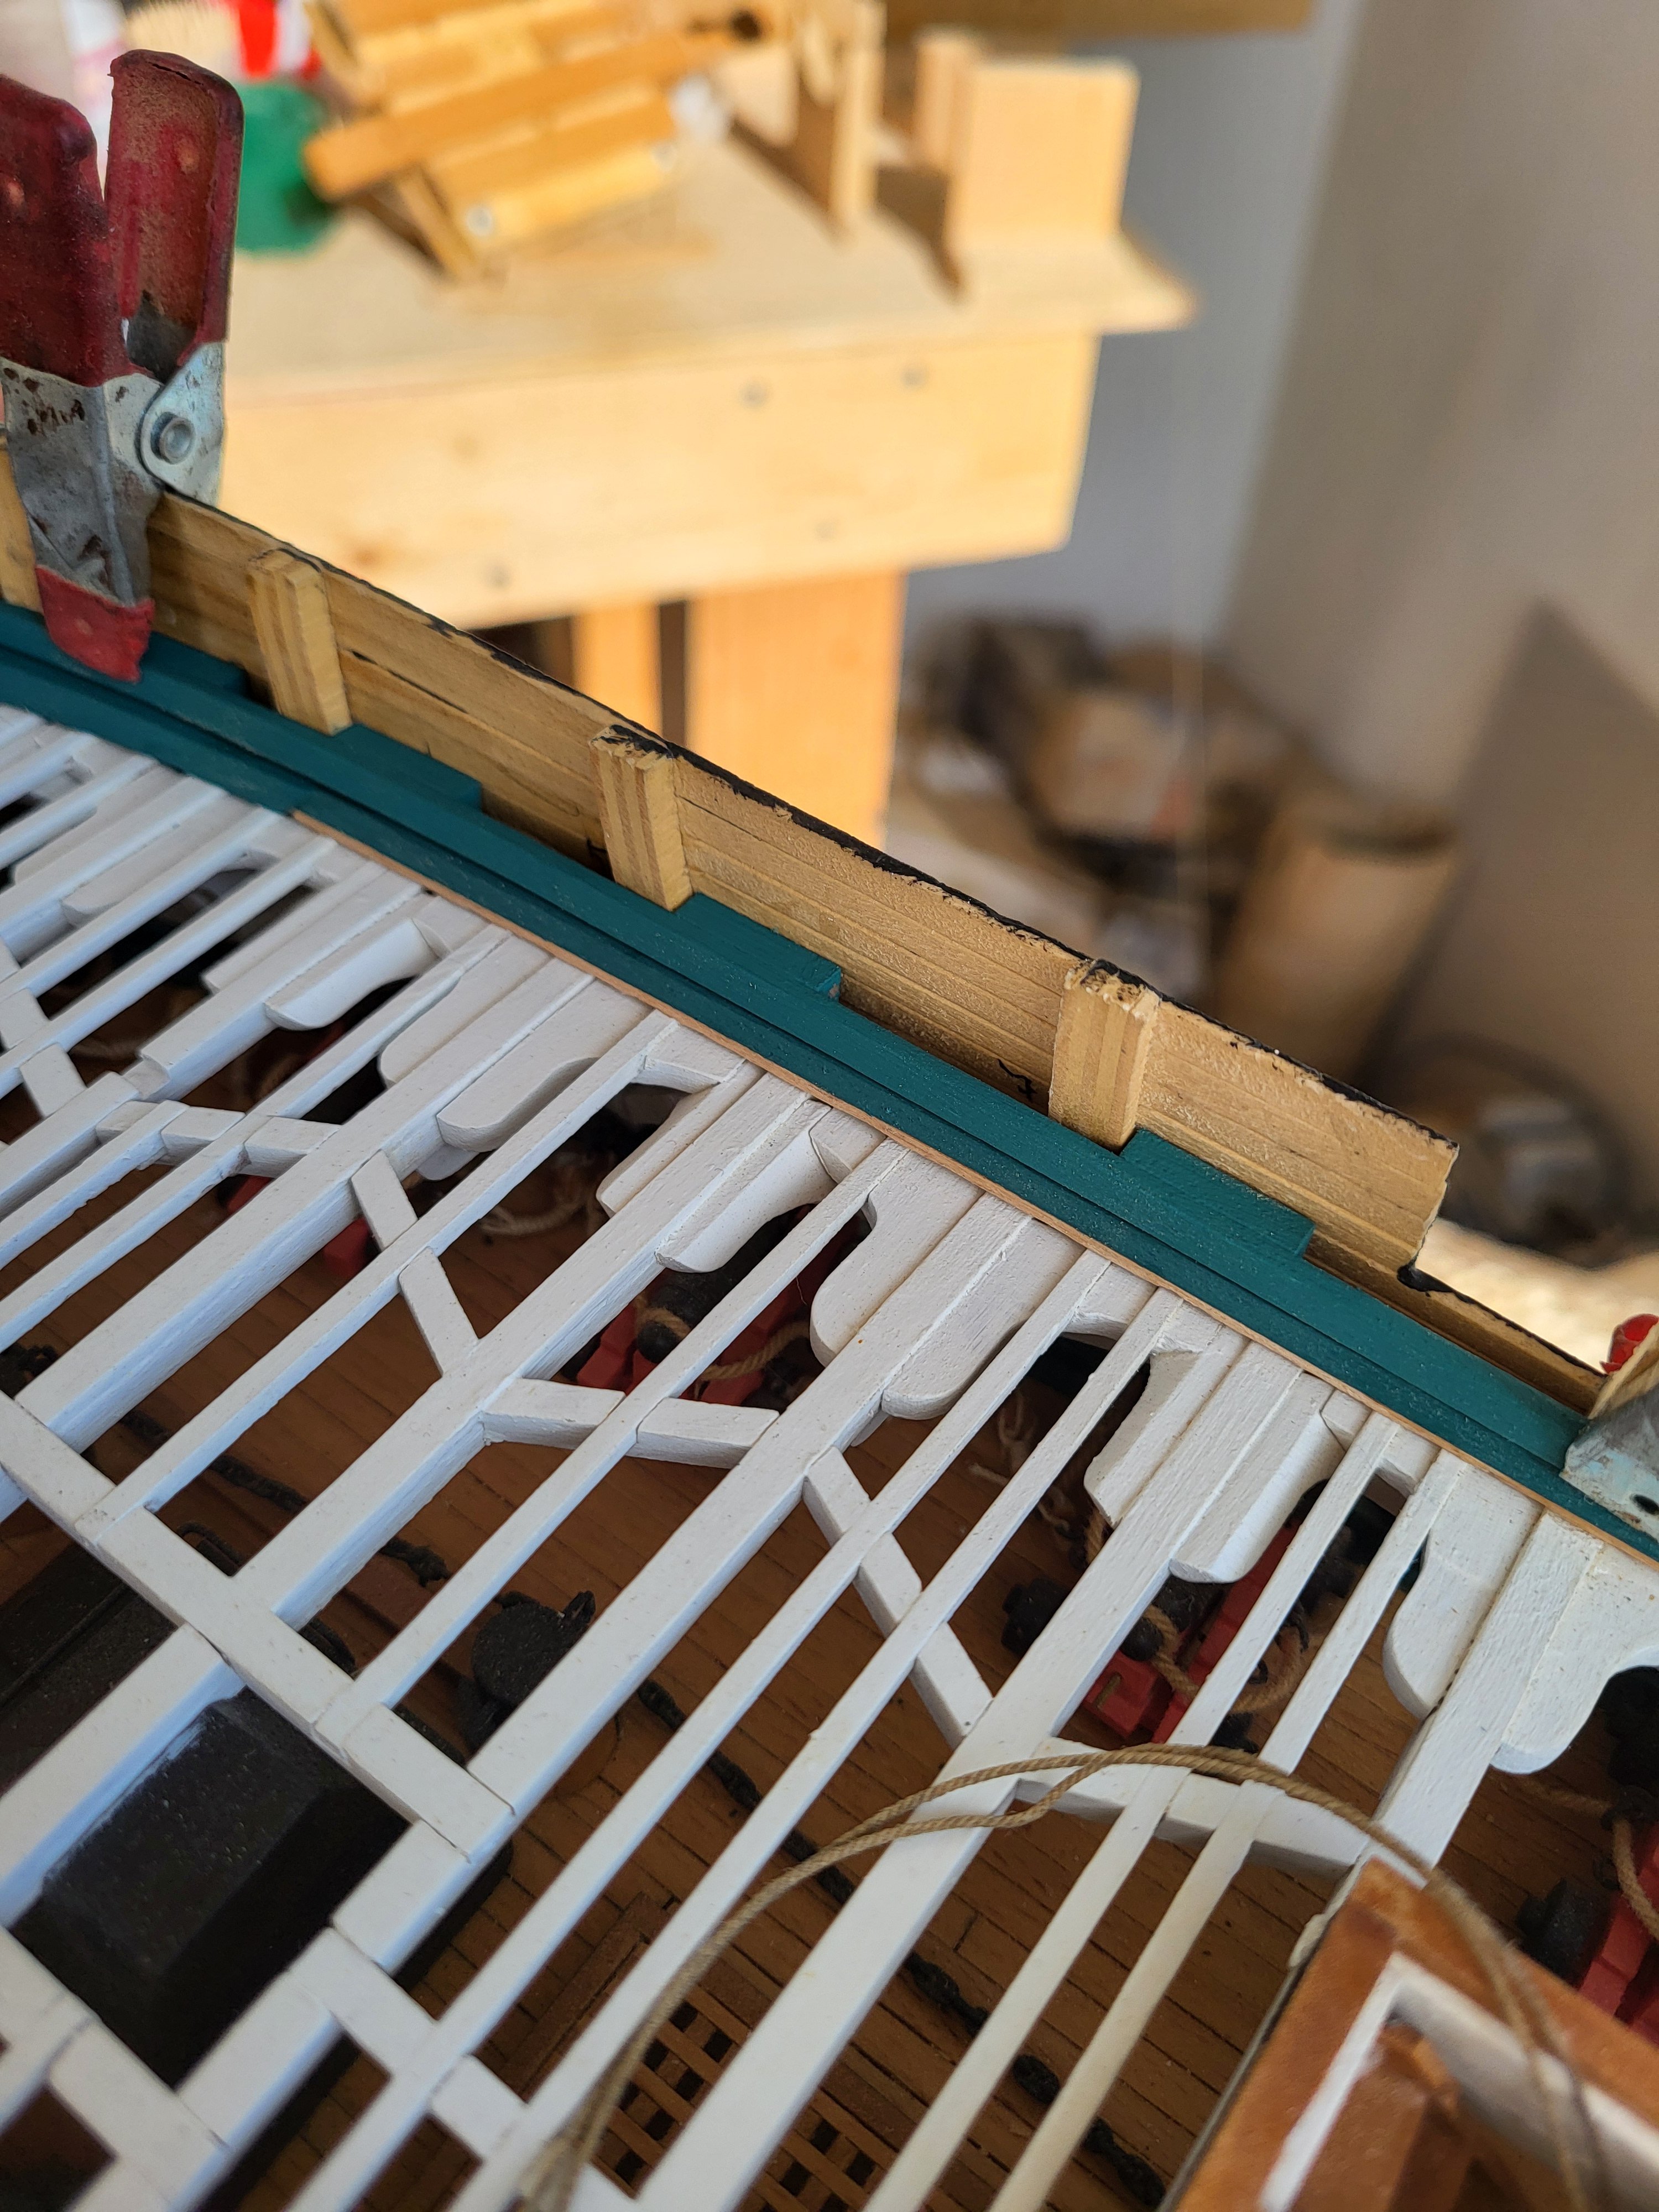
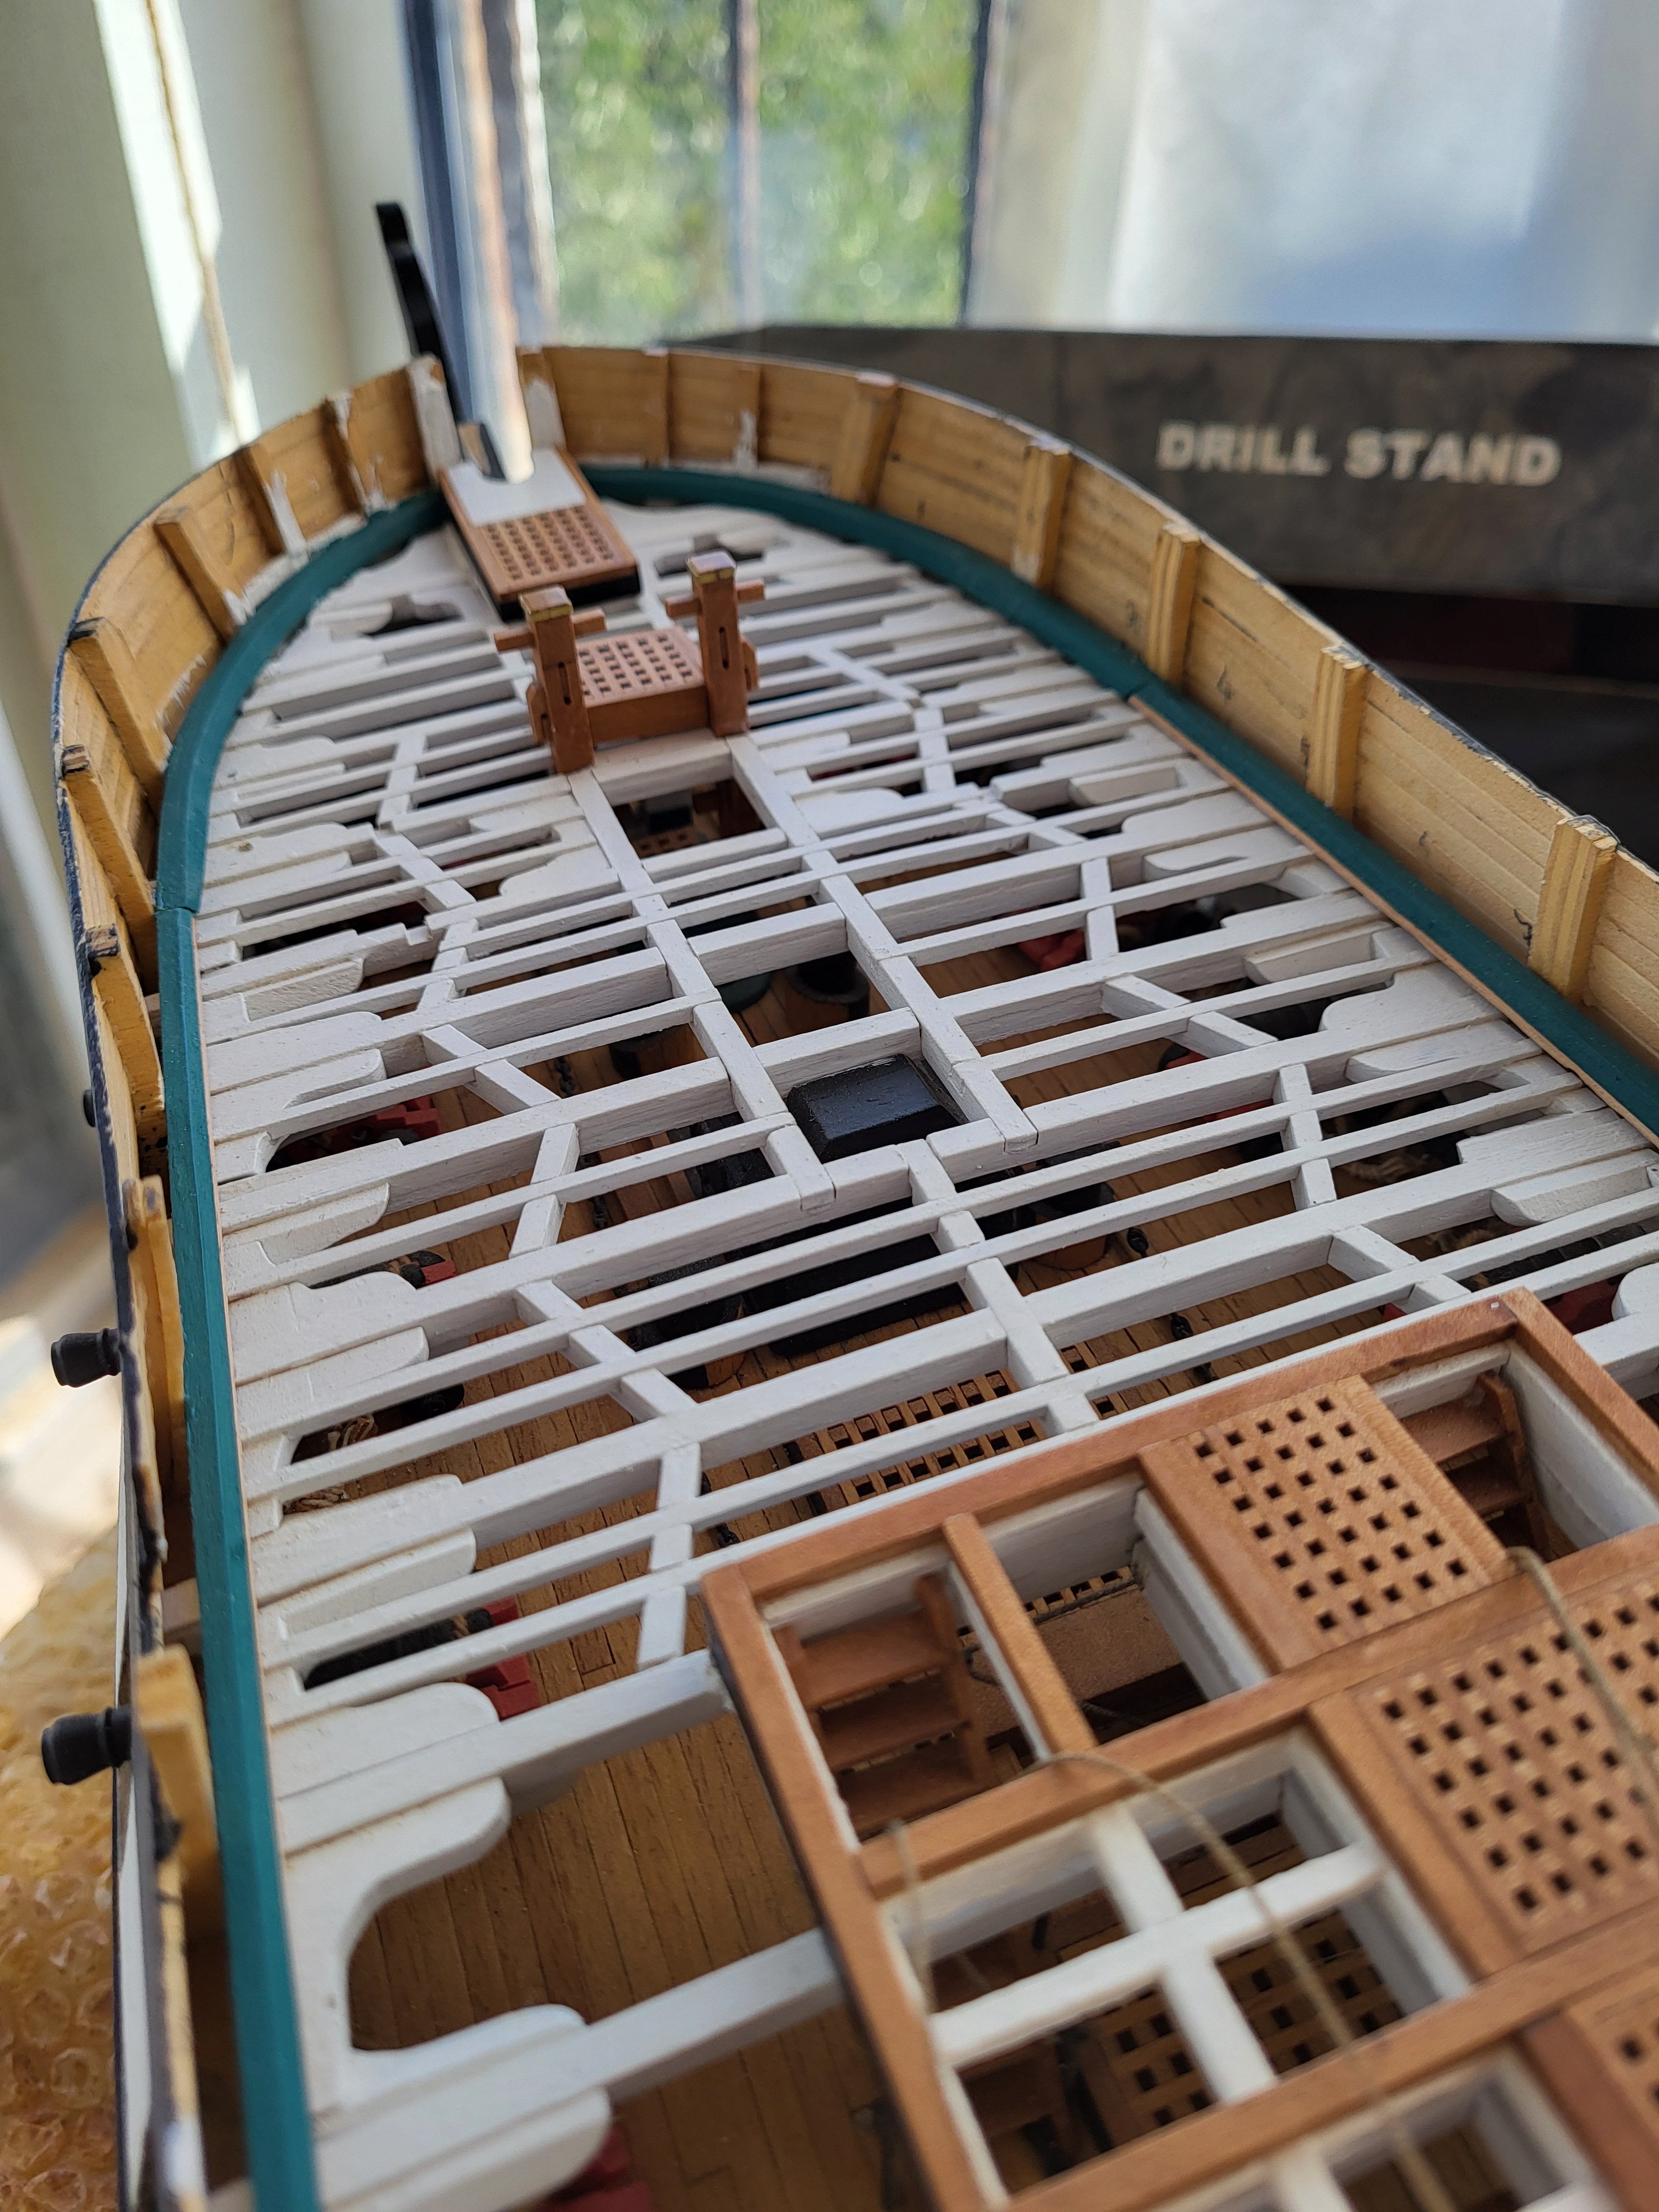
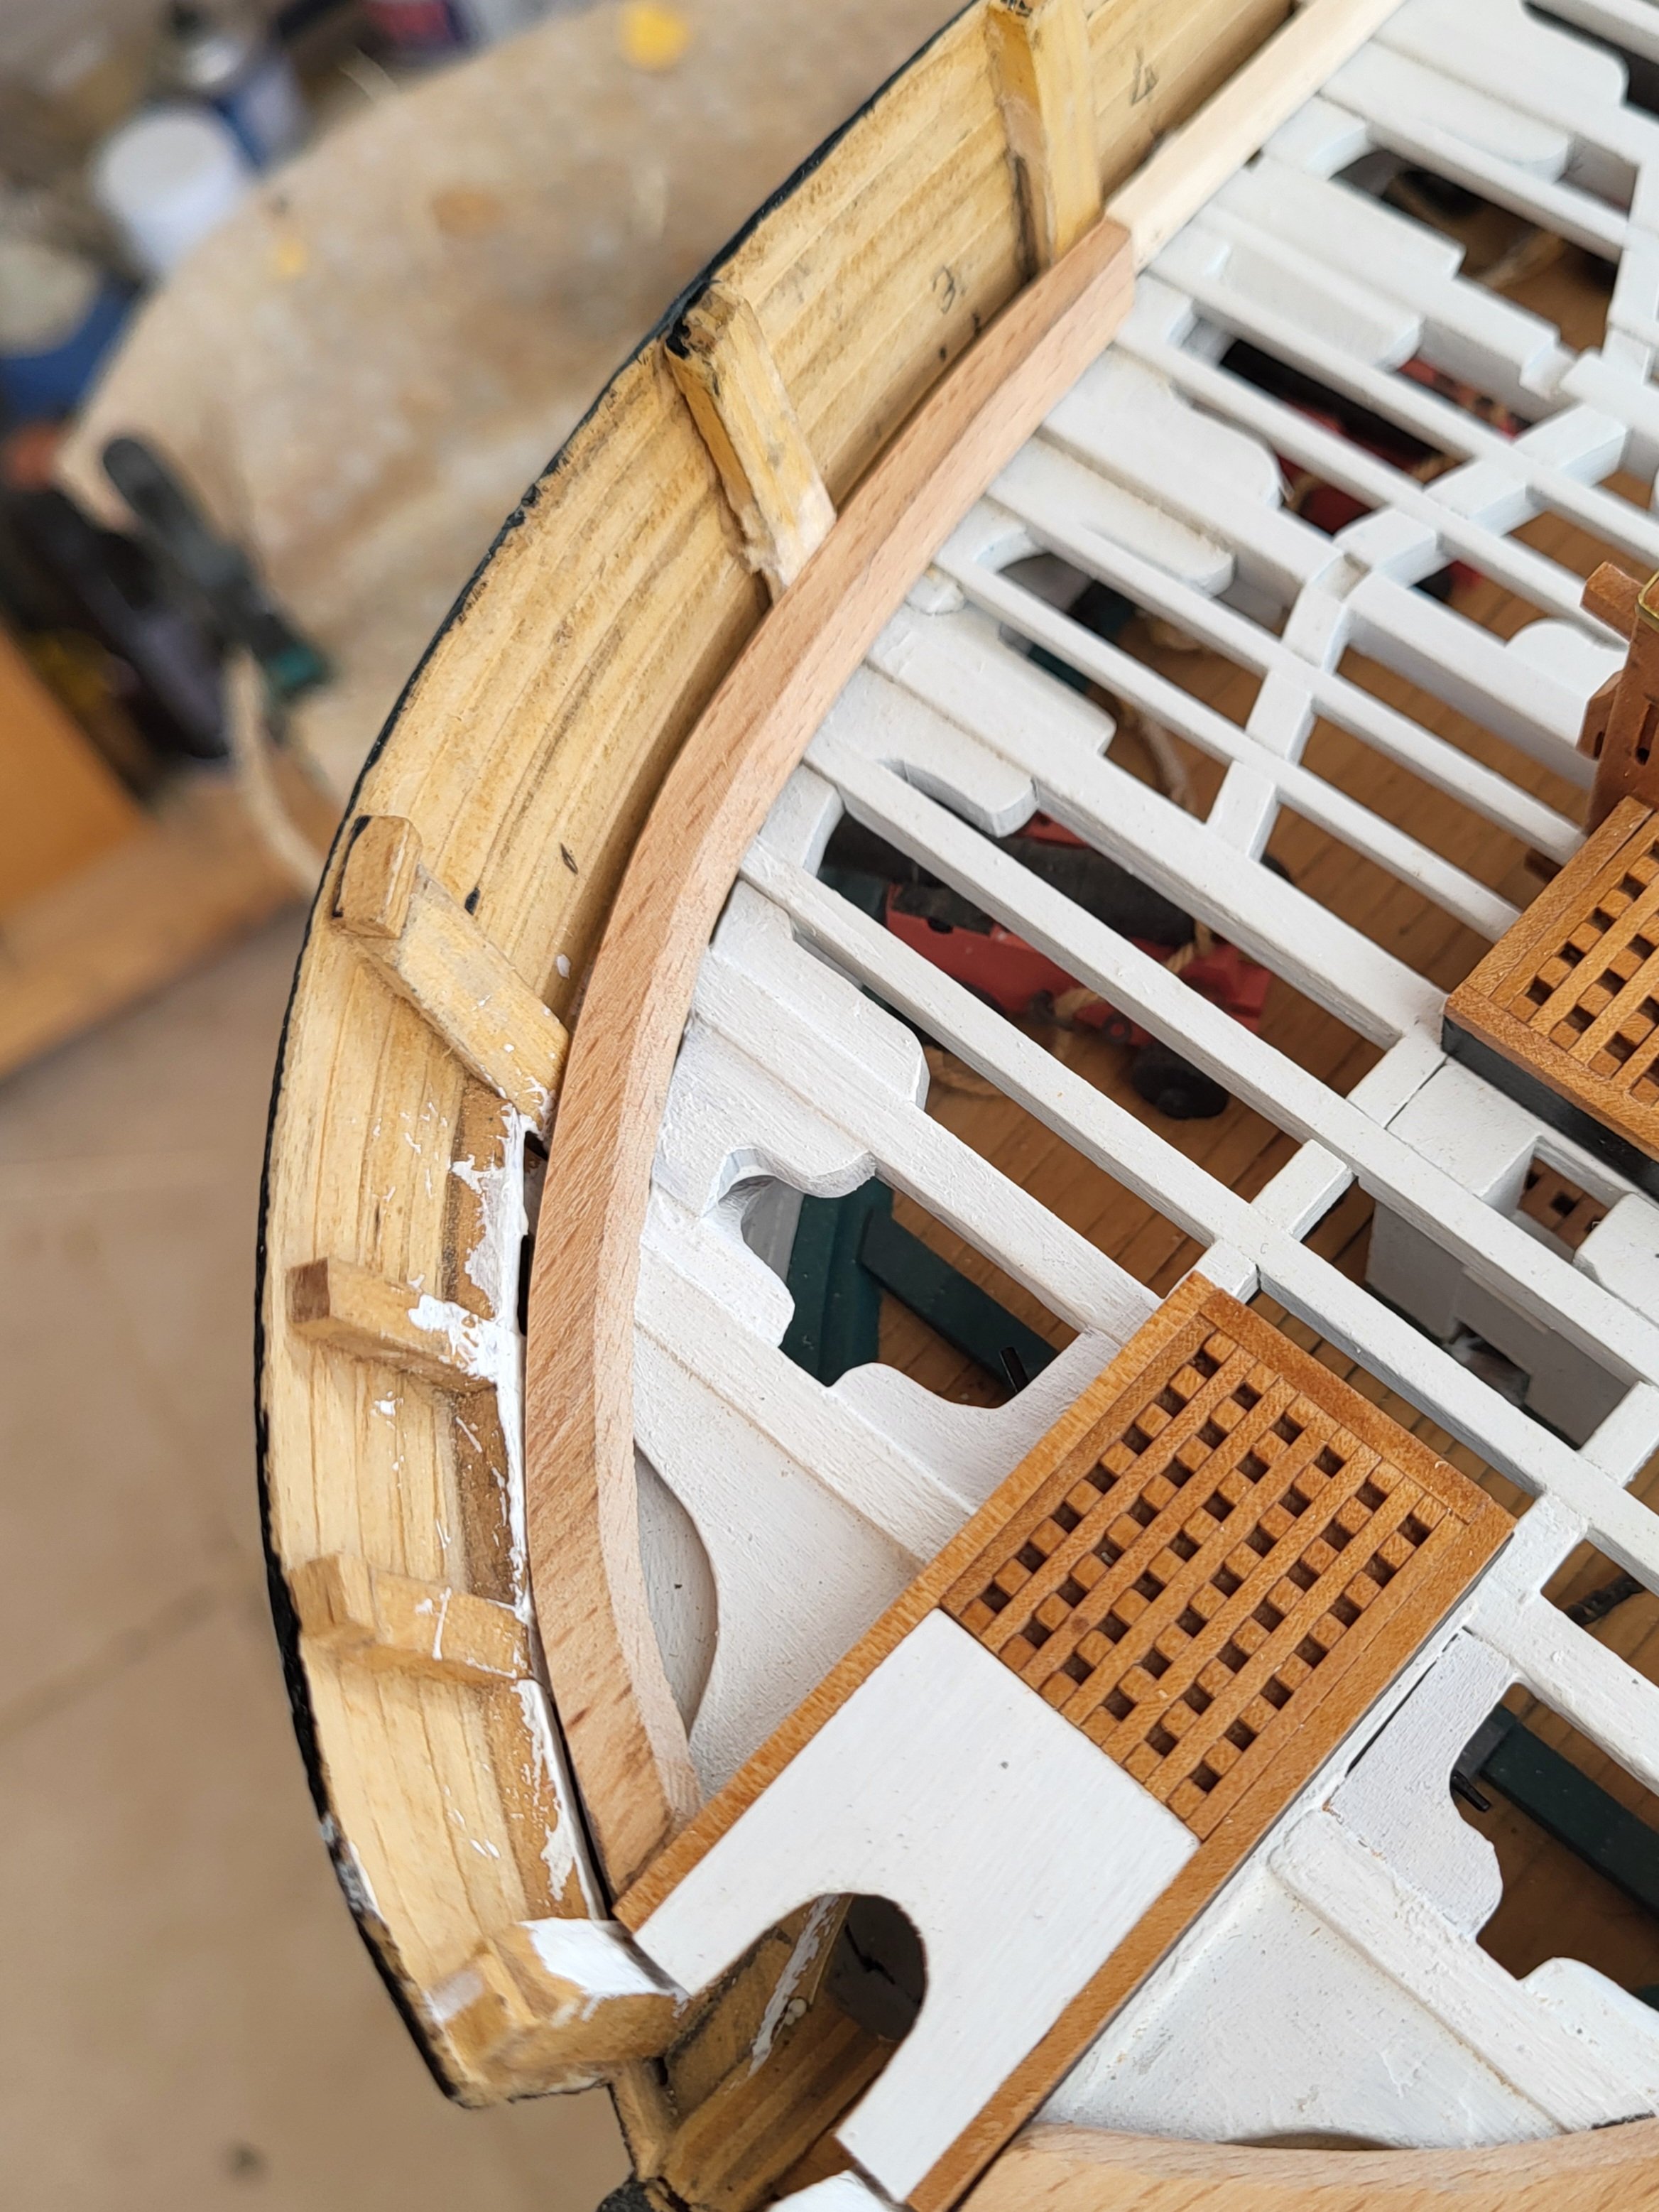
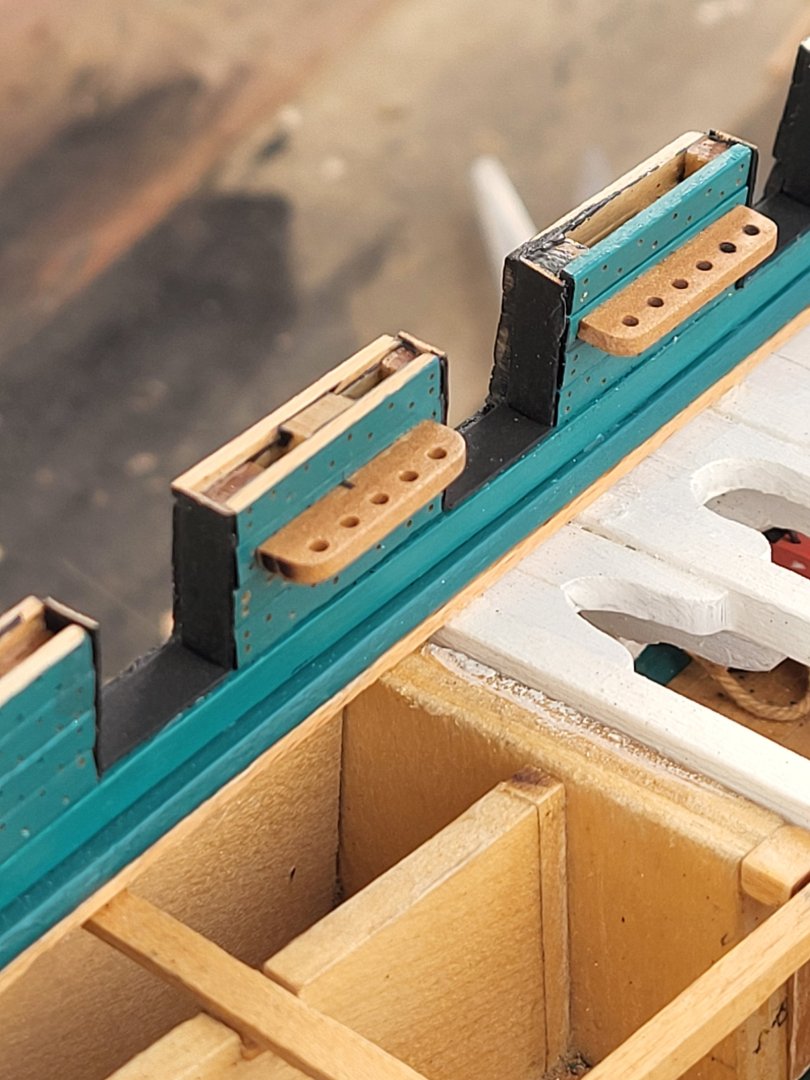
The spar deck waterways have been completed.


-
USS Constitution by mtbediz - 1:76
mtbediz replied to mtbediz's topic in - Build logs for subjects built 1751 - 1800
Thank you. -
USS Constitution by mtbediz - 1:76
mtbediz replied to mtbediz's topic in - Build logs for subjects built 1751 - 1800
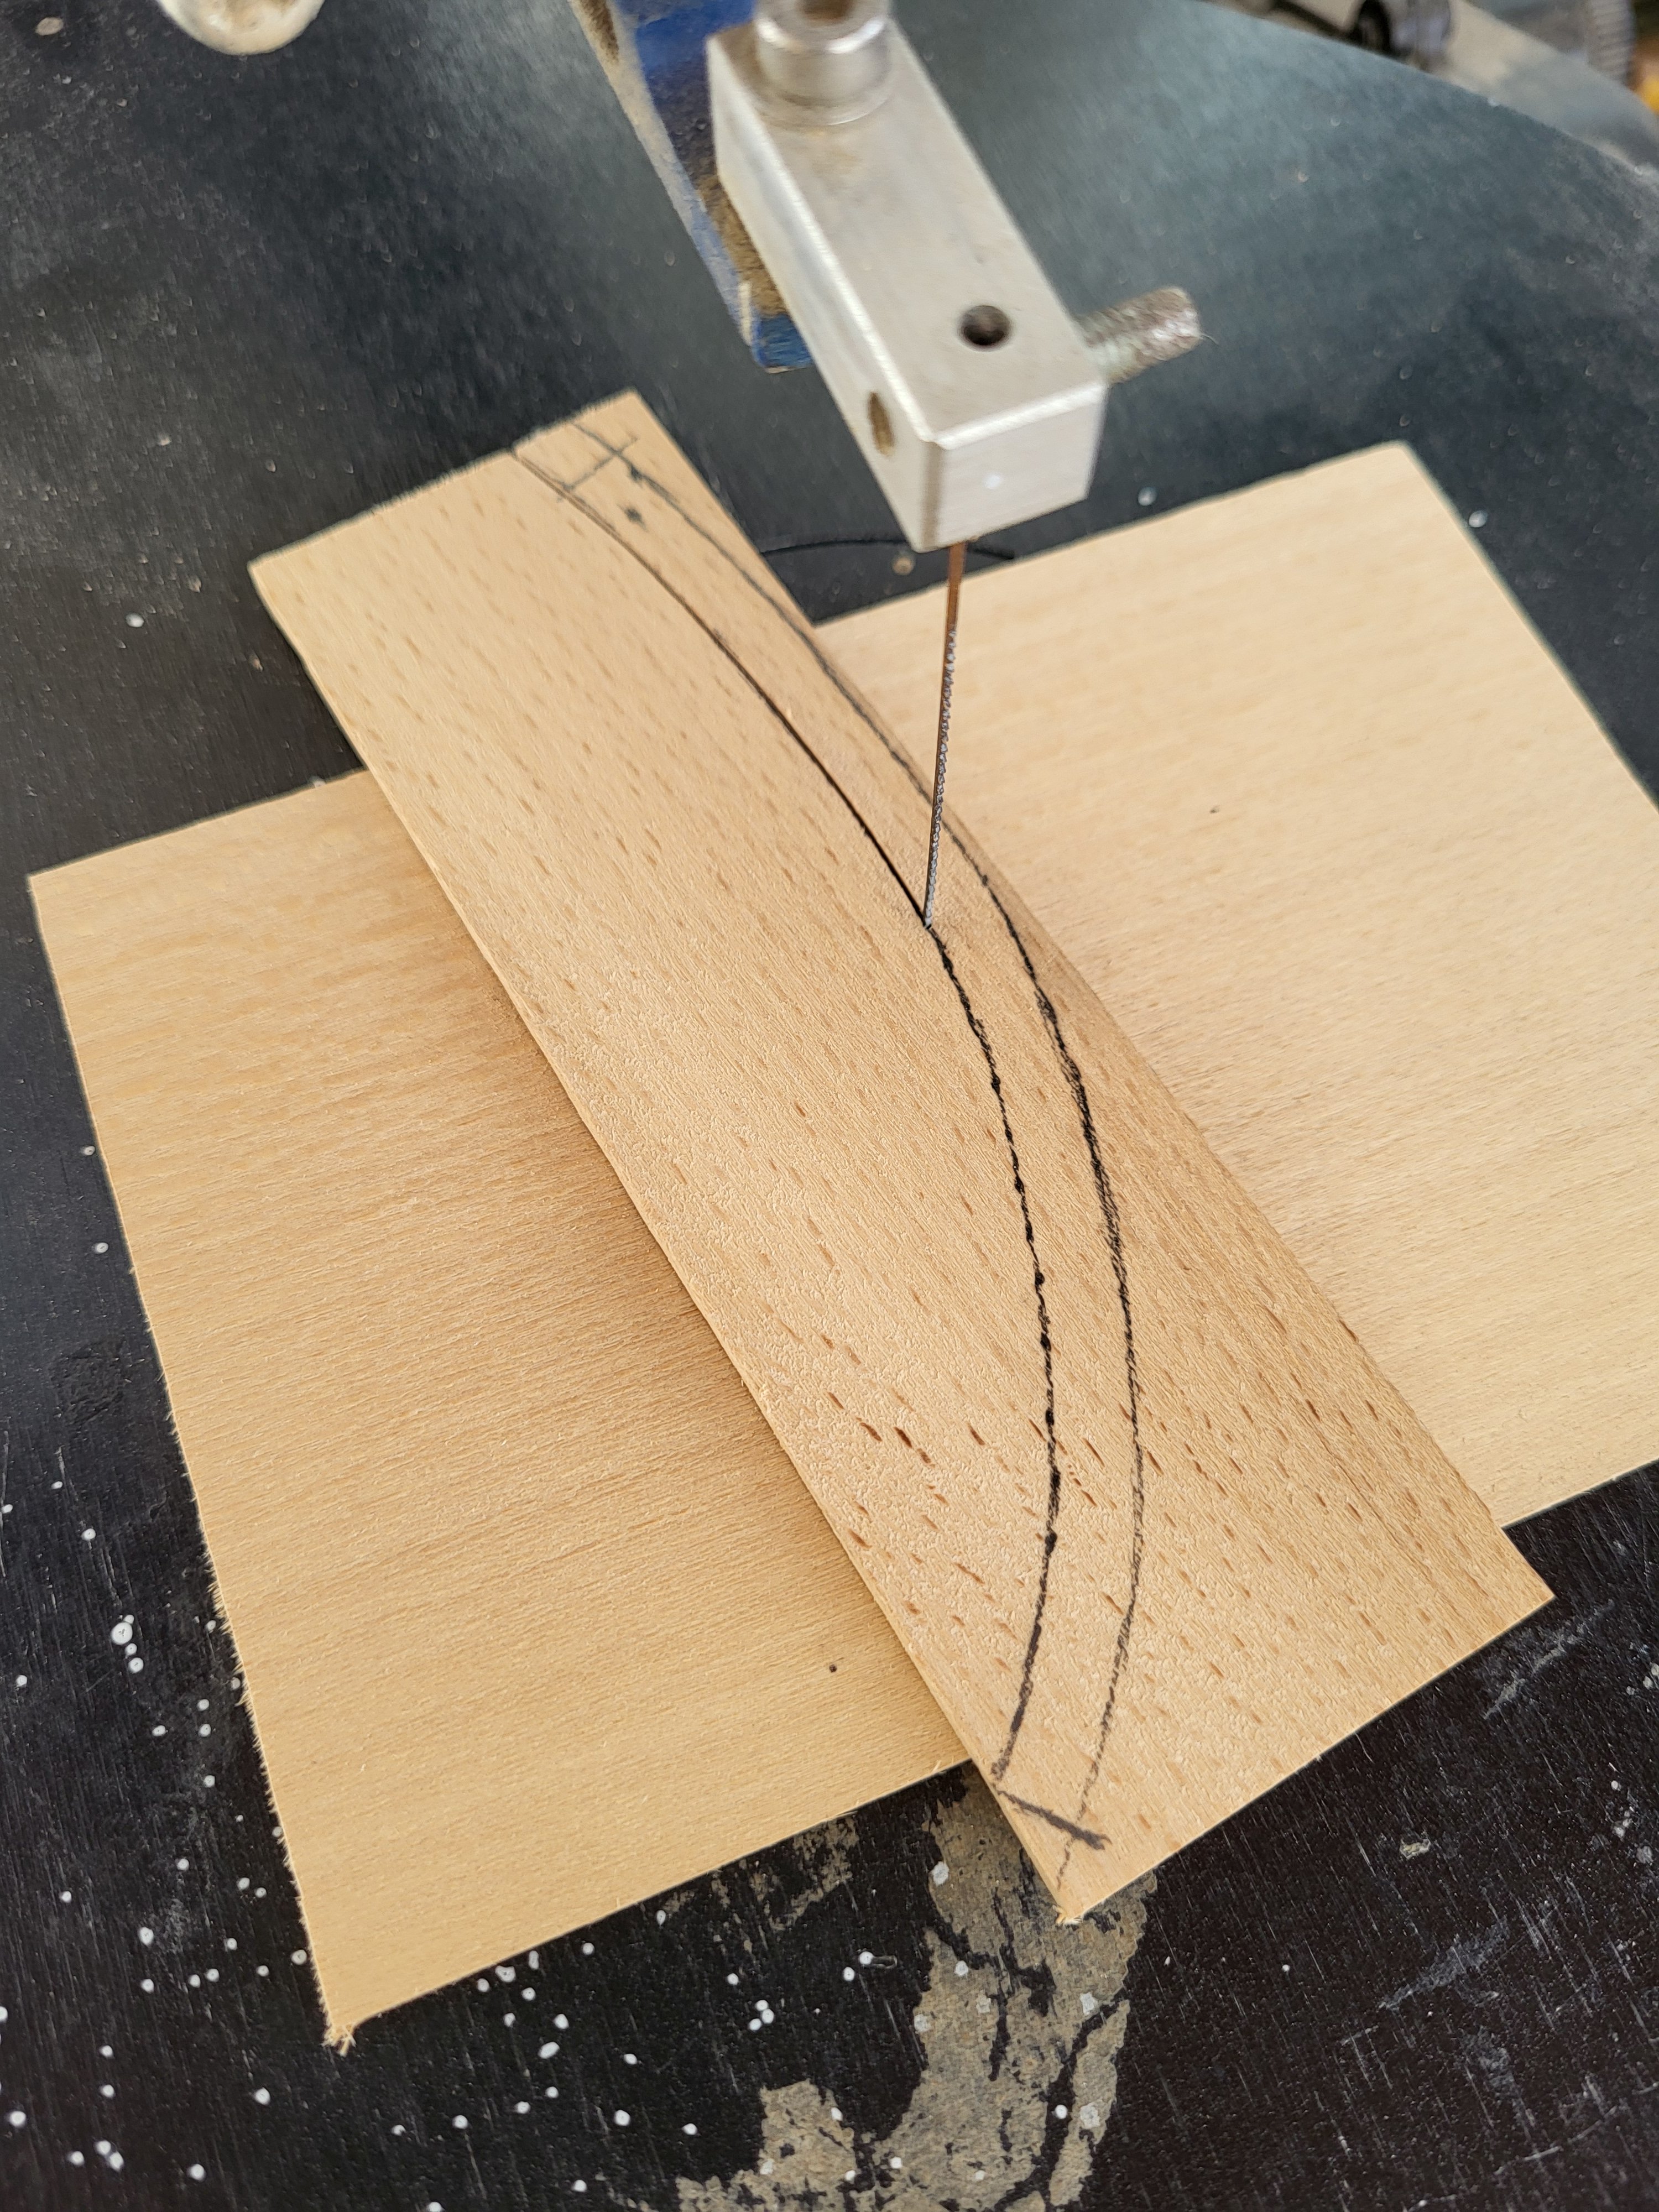
Hi Jon, actually there aren't many ways to do this. I do what most modelers do. First, I make a template and transfer it to the wood. After cutting it with a scroll saw, I chamfer it with a file. Finally, I make corrections with sandpaper, that's all.


-
Peter, windows look very good. I've never worked with styrene before. What tools do you use to cut and shape it properly? Thanks.
-
USS Constitution by mtbediz - 1:76
mtbediz replied to mtbediz's topic in - Build logs for subjects built 1751 - 1800
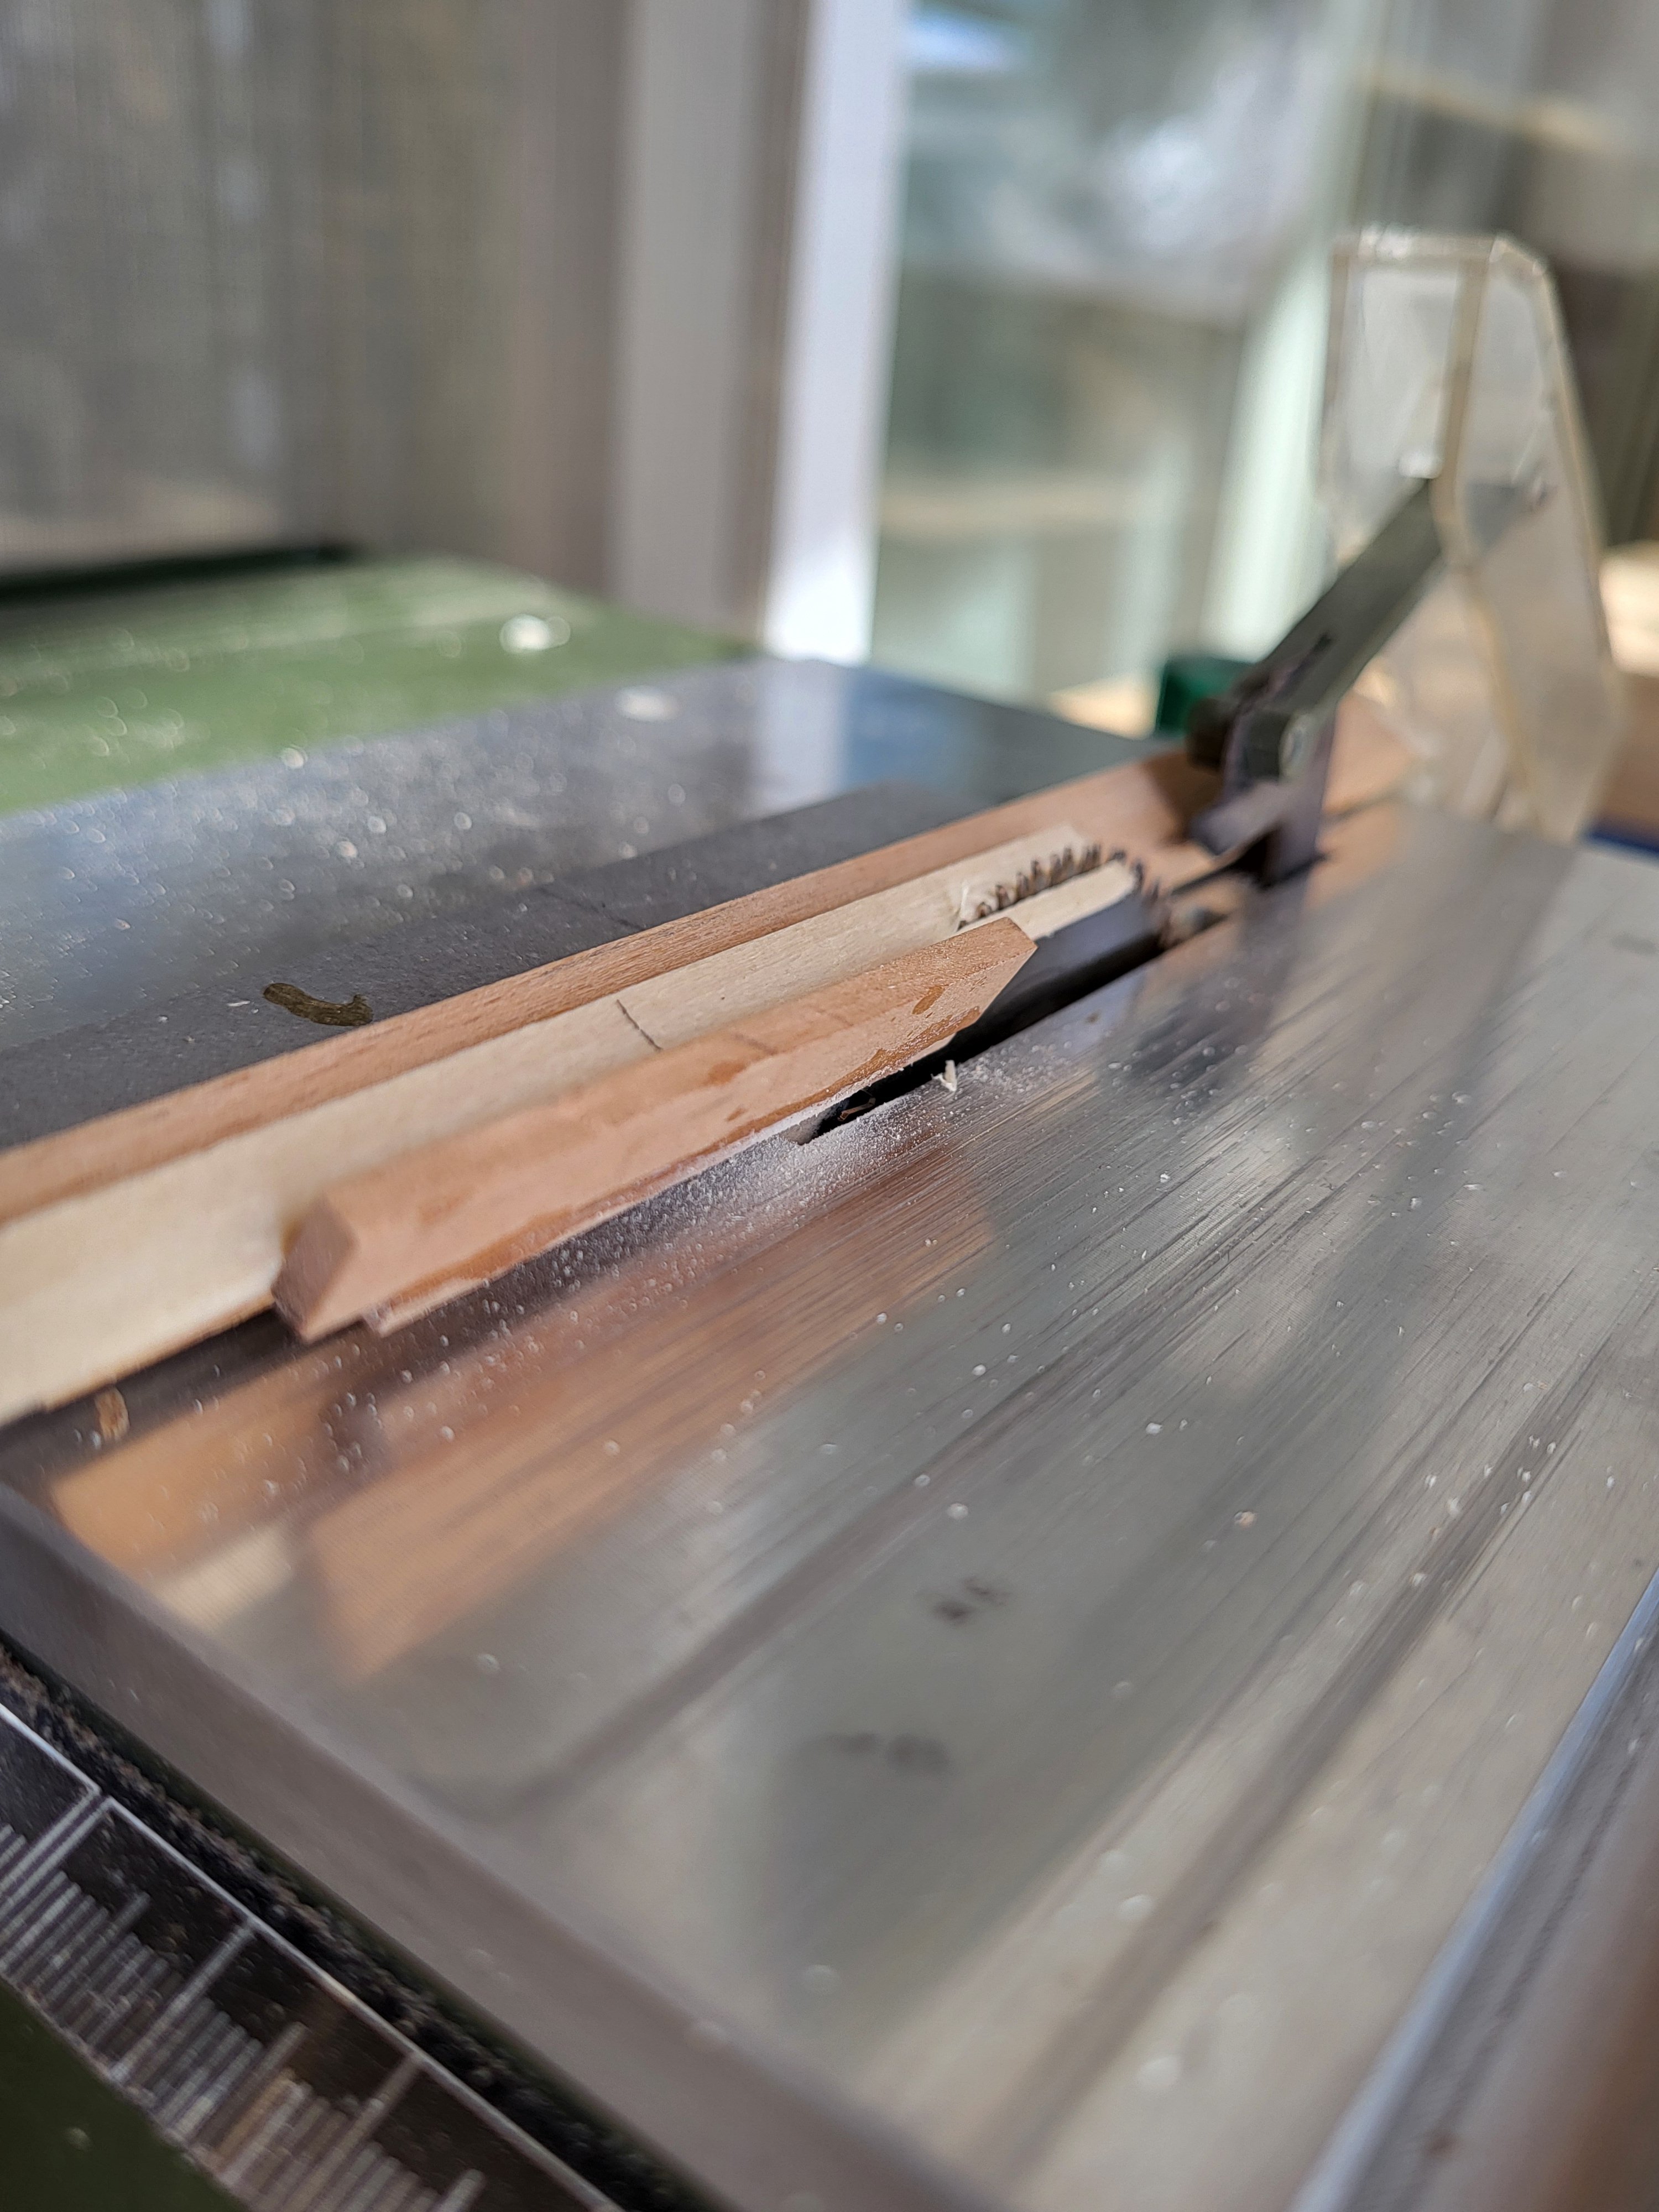
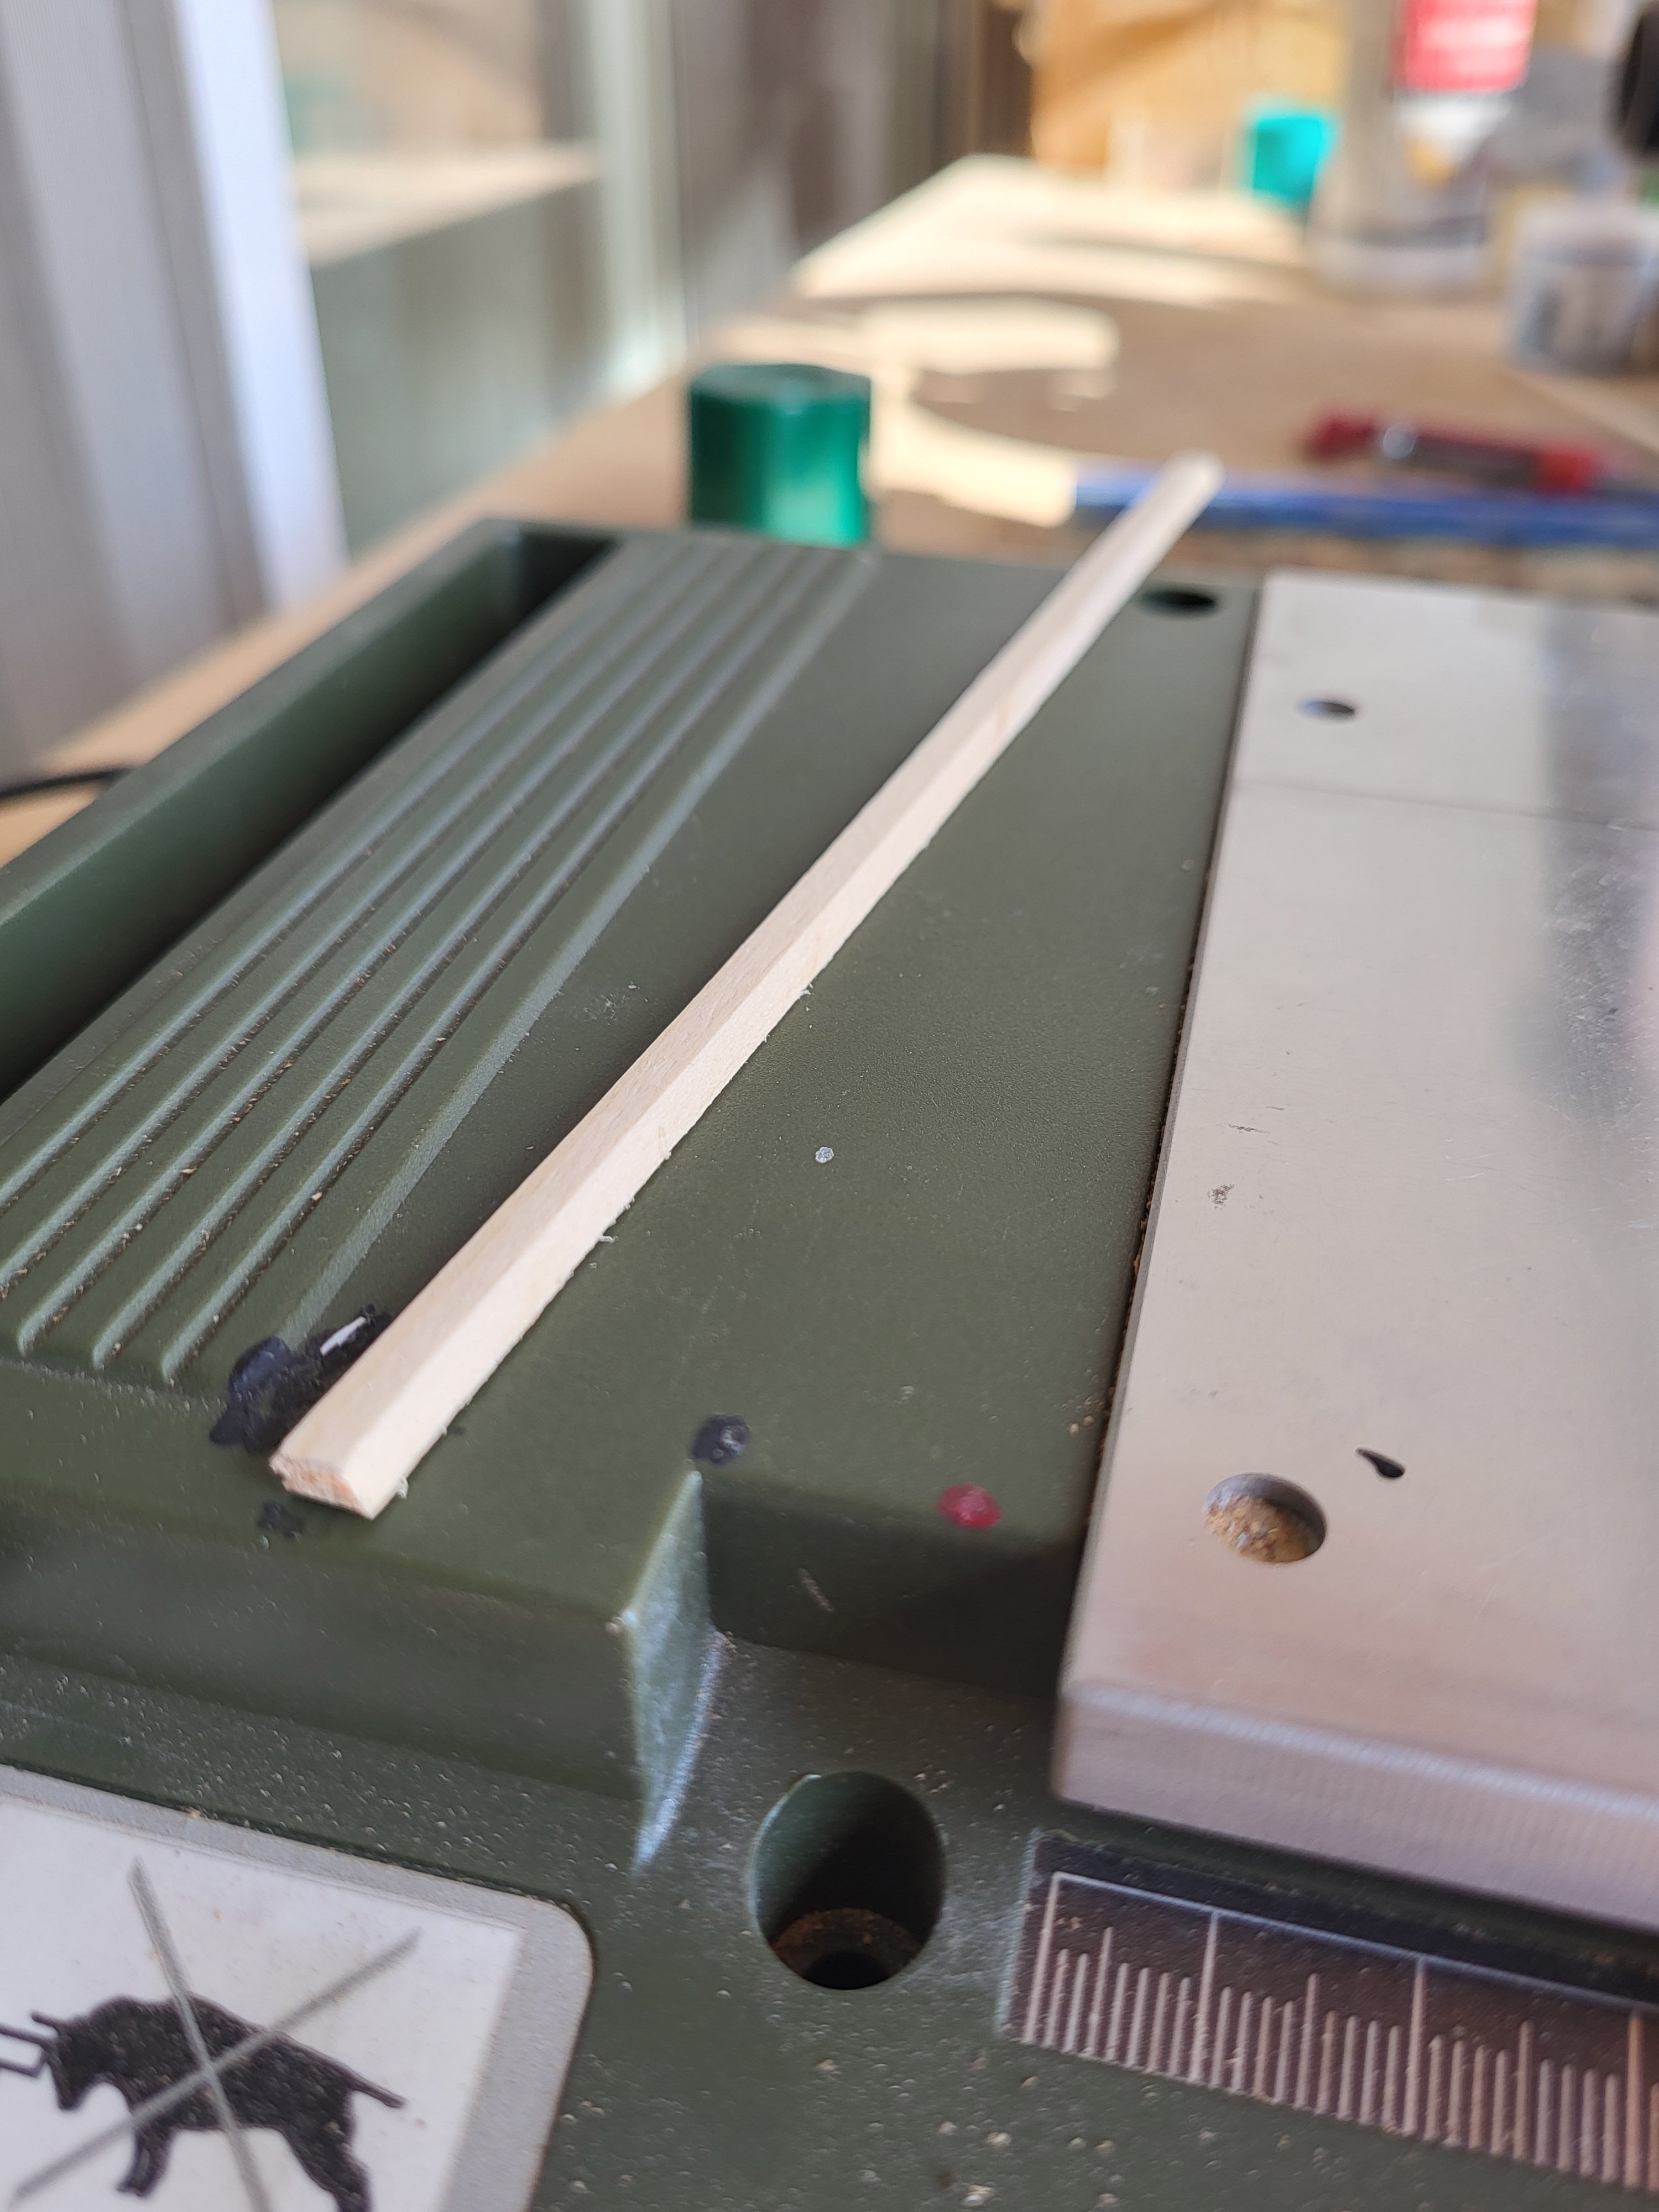
I'm making the waterways. I made a jig for my circular saw to chamfer the waterways.