drobinson02199
-
Posts
1,079 -
Joined
-
Last visited
Content Type
Profiles
Forums
Gallery
Events
Everything posted by drobinson02199
-
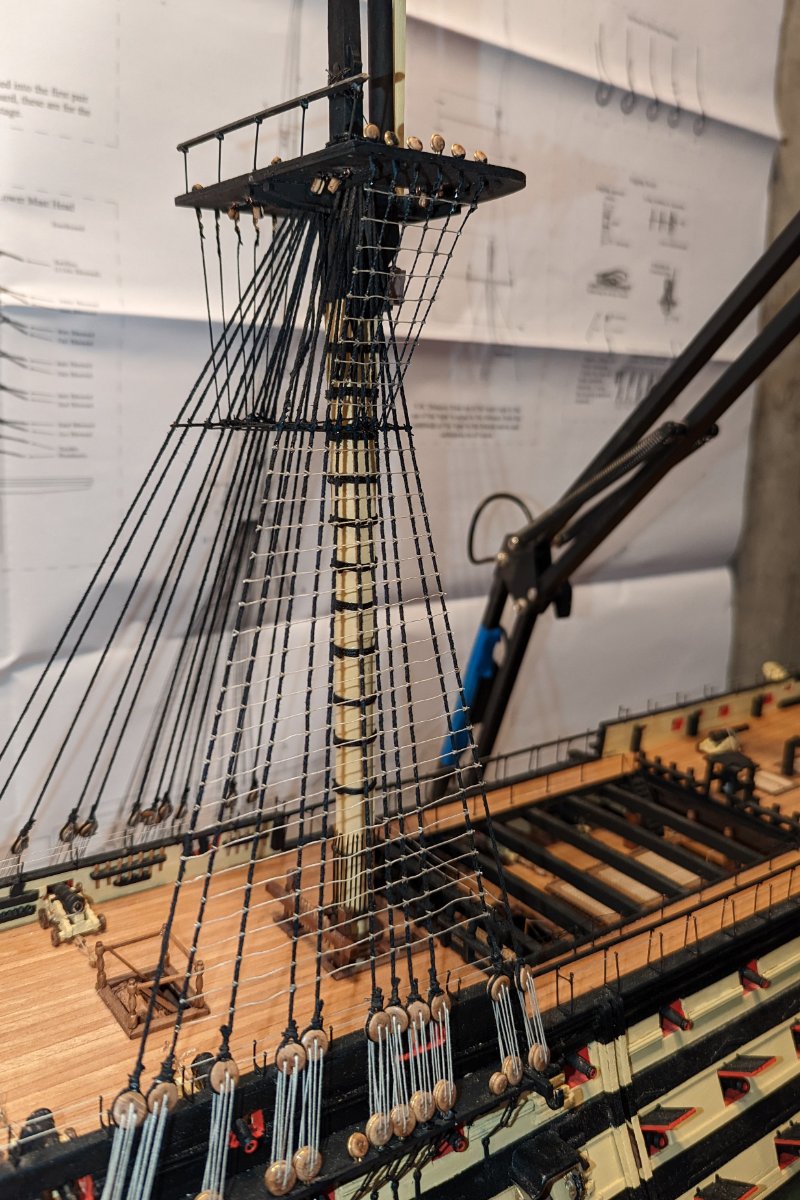
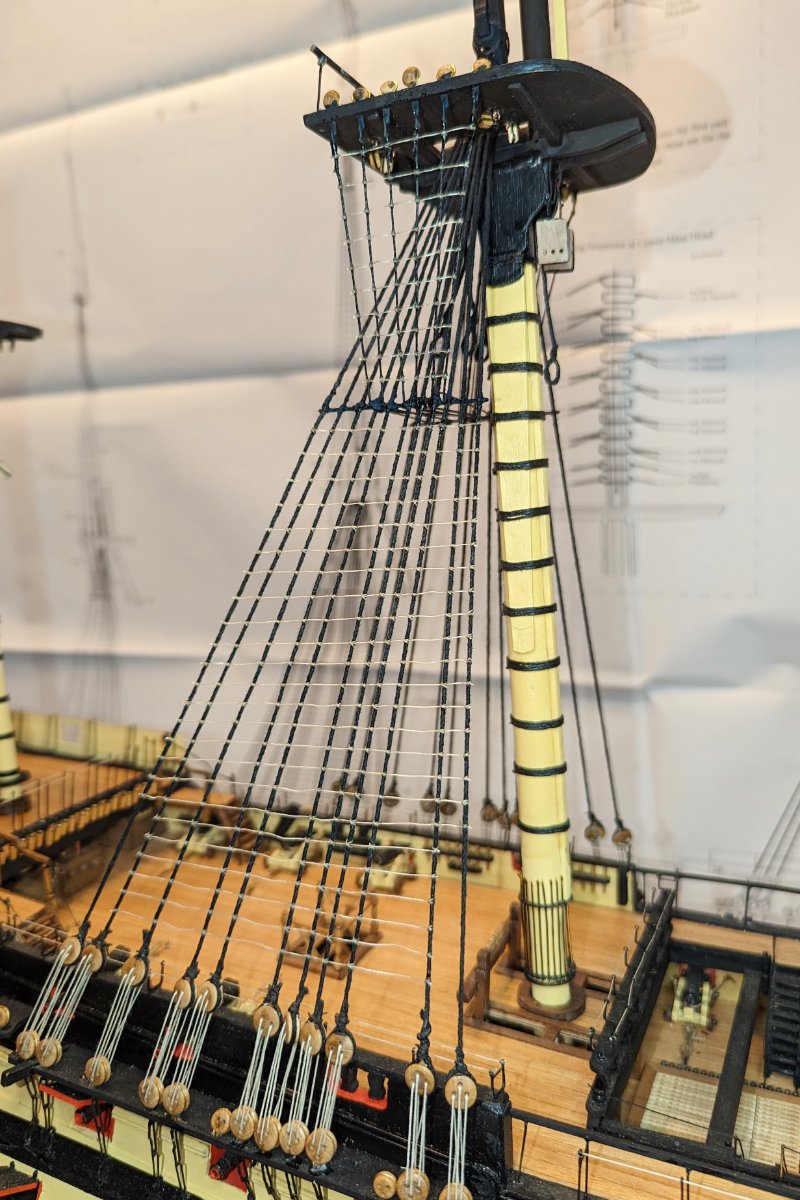
 Pictures below of completed ratlines on ONE side of the main shrouds. I've kept them a bit dark because the ratlines are white and hard to see. I've been working on these for about 2 1/2 weeks, which is an indication of my motivation level when it comes to ratlines. Probably not alone in that regard. At this rate, I'll still be working on this ship at this time next year. Regards, David
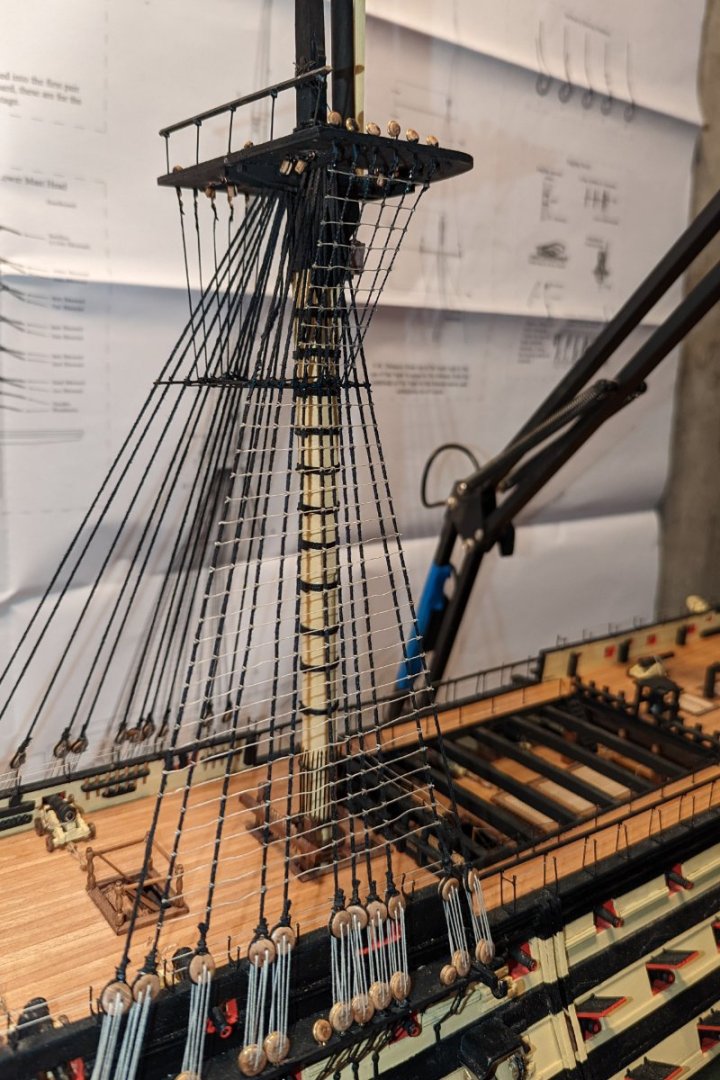

- 218 replies
-
- 6
-

-
- Victory
- Caldercraft
- (and 1 more)
-
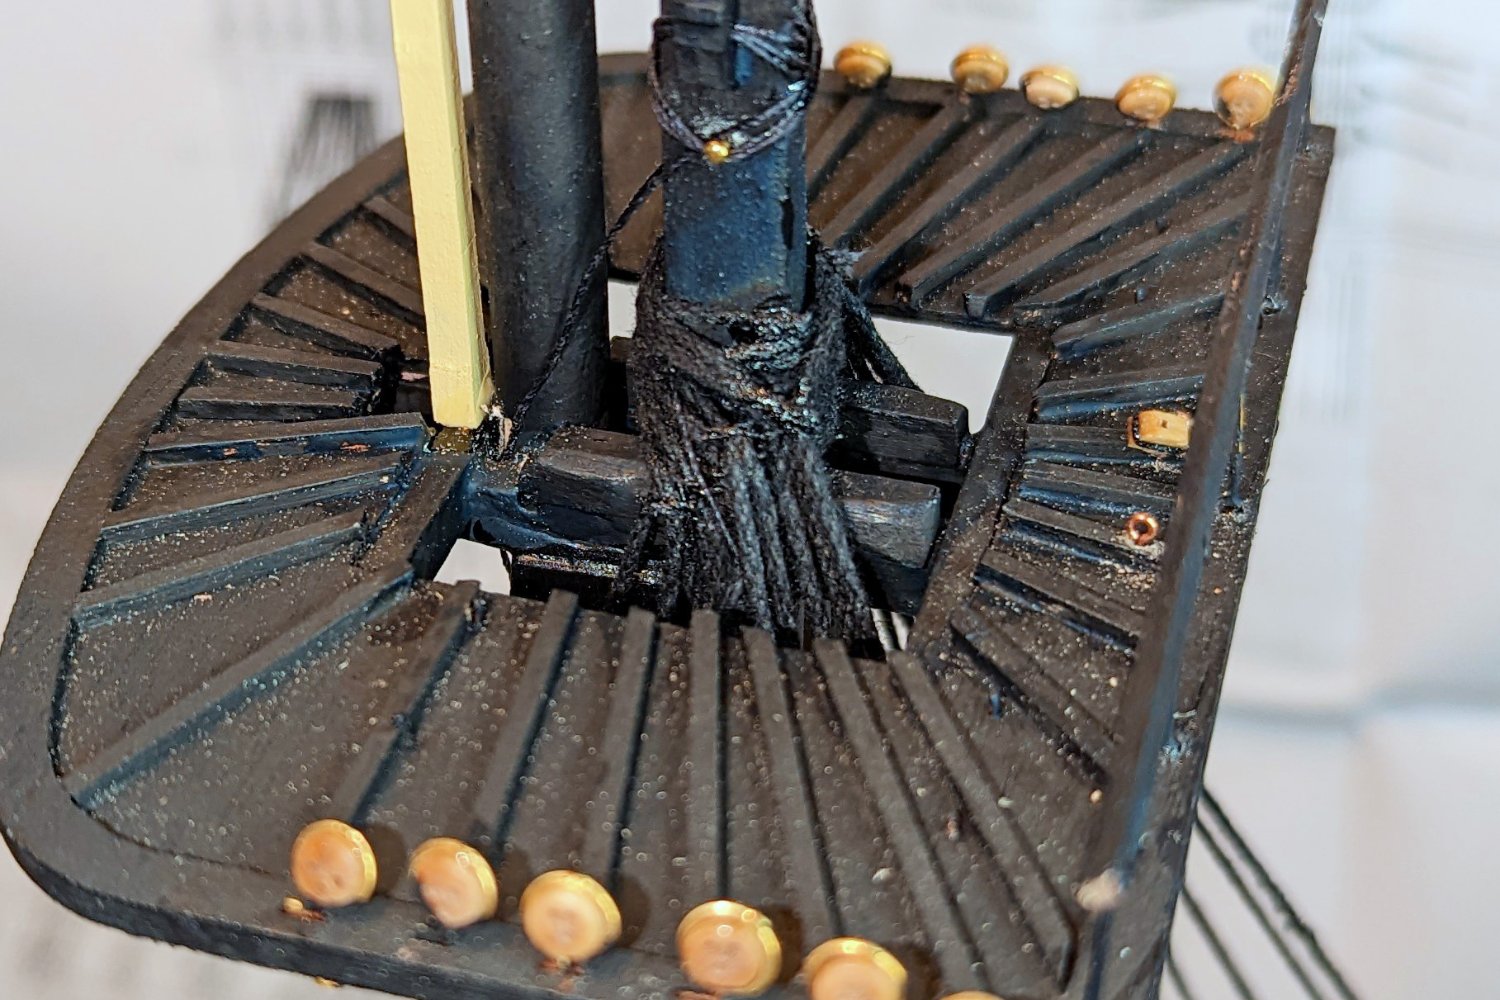
Chris: Not tarring -- just gobs of medium super glue. Regards, David
-
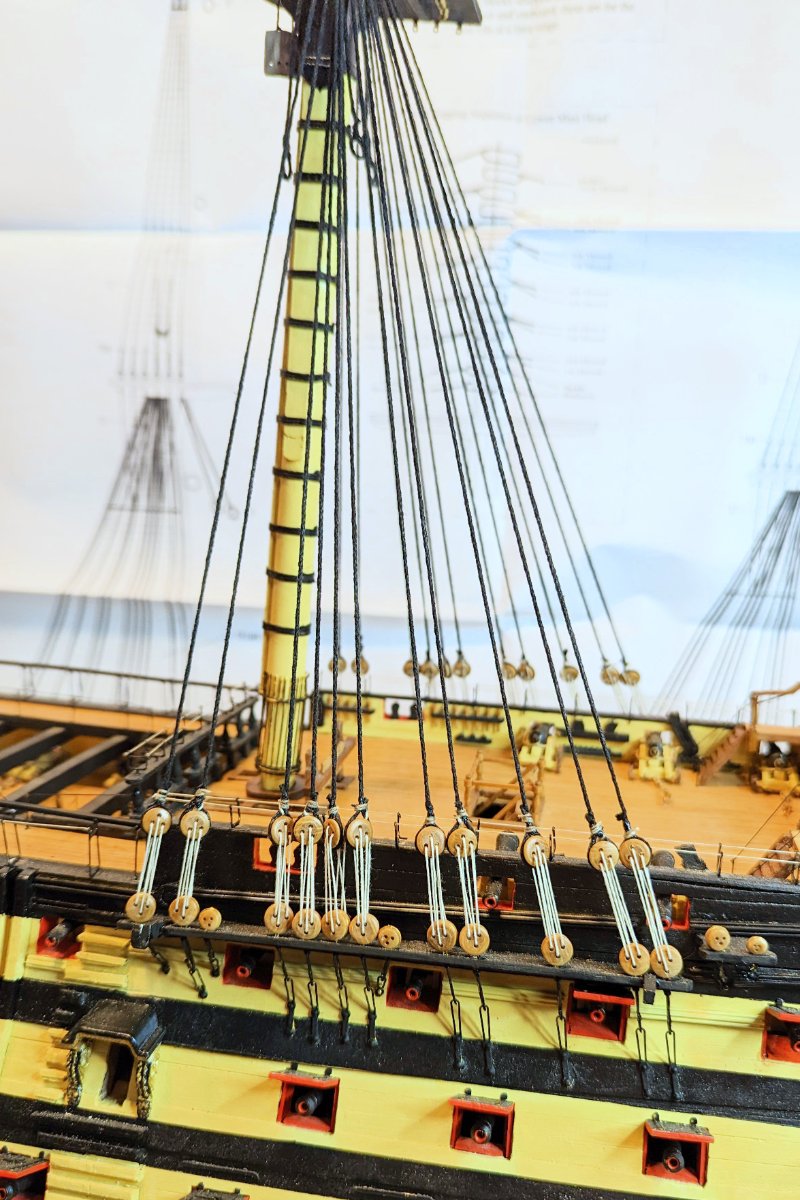
Chris: Here you go. It's really a rats nest. Except for the 11th shroud, this is all two-shroud loops, tied off at the top with black thread. The manual says to push the knots up, but that's not really practical, so I thread it and then tie it in position. I also use that to try to manage the alignment of the shrouds as they come up to the mast tie-off. I used to do one shroud at a time because it made the alignment easier, but the top was really a mess when I did that on earlier ships, so I mount one deadeye, thread it through the top, and then there is a fiendish alignment process for the second deadeye at the other end of the second shroud. Curious why you asked to see this. Regards, David

- 218 replies
-
- 3
-
-
- Victory
- Caldercraft
- (and 1 more)
-
Finished the main mast shrouds. While the instructions say to go on to the rest of the lower and upper shrouds, I'm going to do the ratlines on these first to inject some variety into the work. Regards, David

- 218 replies
-
- 2
-
-
- Victory
- Caldercraft
- (and 1 more)
-
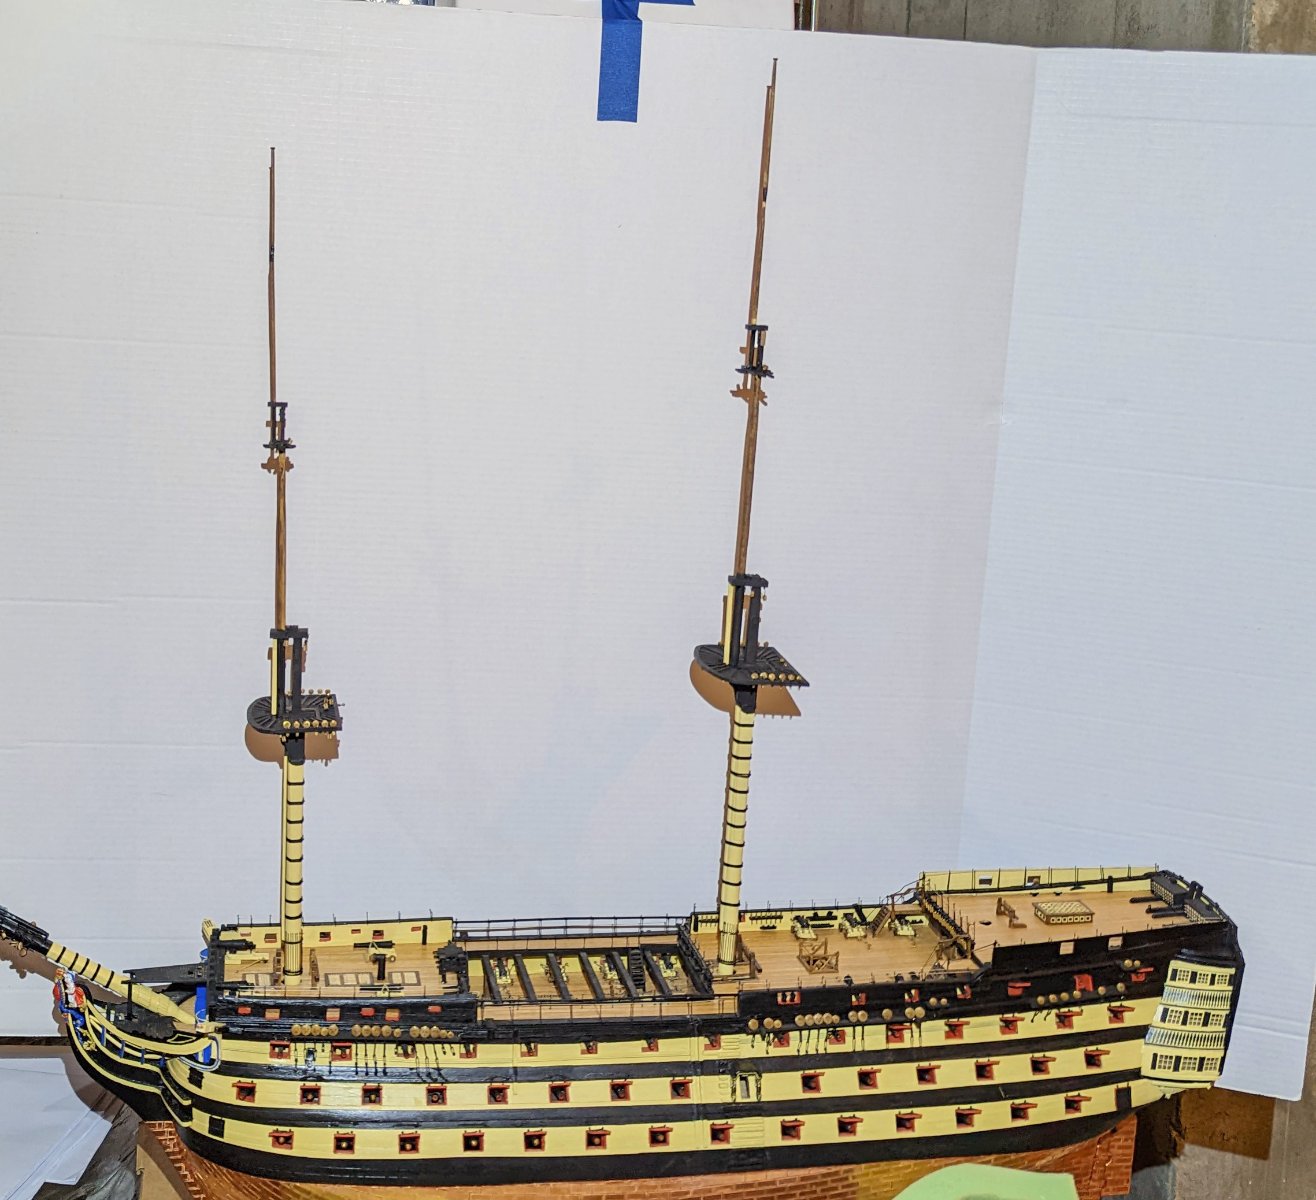
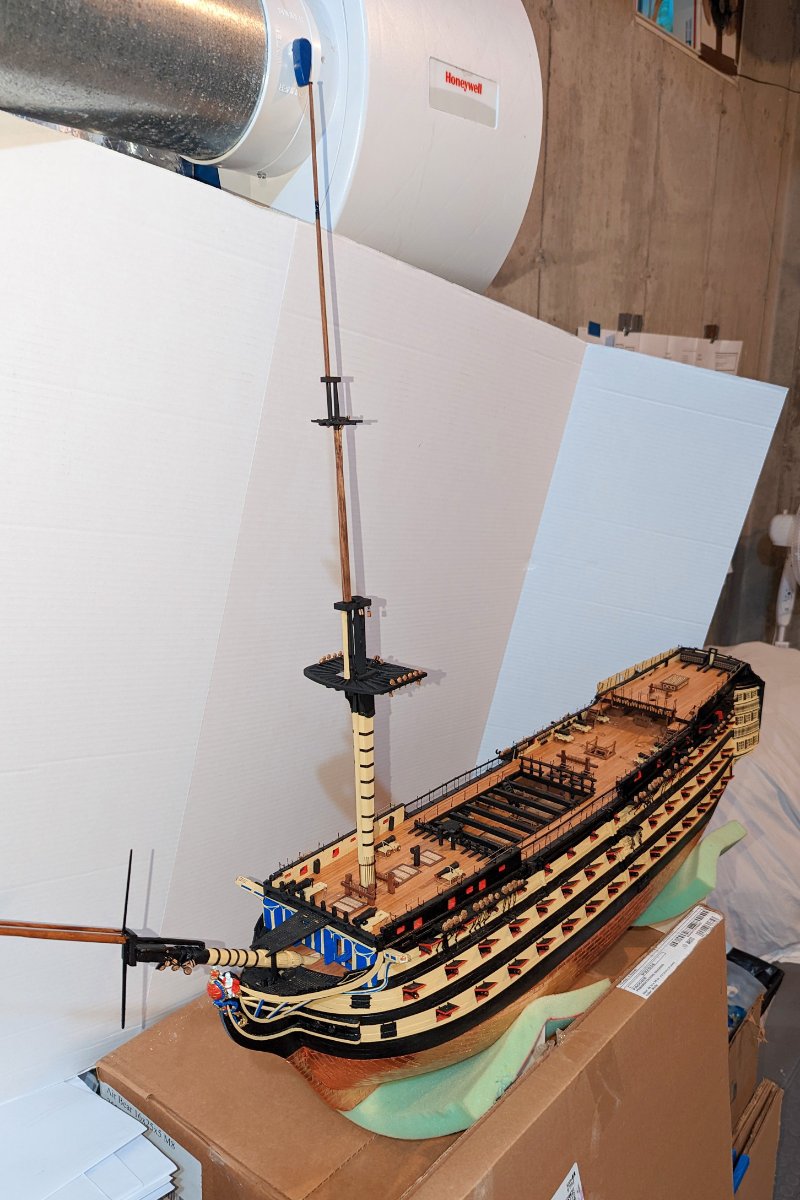
Masts are now done and permanently mounted. Including the bowsprit, the masts have taken me just about a month. Now on to standing rigging. Regards, David

- 218 replies
-
- 8
-
-
- Victory
- Caldercraft
- (and 1 more)
-
Allan: Just rechecked, and they are correct to the millimeter according to the Caldercraft plan sheets. Regards, David
- 218 replies
-
- 1
-
-
- Victory
- Caldercraft
- (and 1 more)
-
Main mast done, so 2 out of 3 completed. I've found that the tapering on the topgallant masts makes them incredibly fragile where they taper back to 3.5mm in the middle. After two breaks on the main topgallant, I had to sink a pin in while re-gluing it. Regards, David

- 218 replies
-
- 10
-
-

-
- Victory
- Caldercraft
- (and 1 more)
-
Finished the foremast. Some notes: 1) Painted the boarding pikes after they were mounted. 2) I completely gave up on trying to shape the masts as octagons. Much of that shaping is painted black and doesn't show anyway, but the real reason is that I just don't have the skills for it. So it's round masts (and yards). Regards, David


- 218 replies
-
- 7
-
-
-
- Victory
- Caldercraft
- (and 1 more)
-
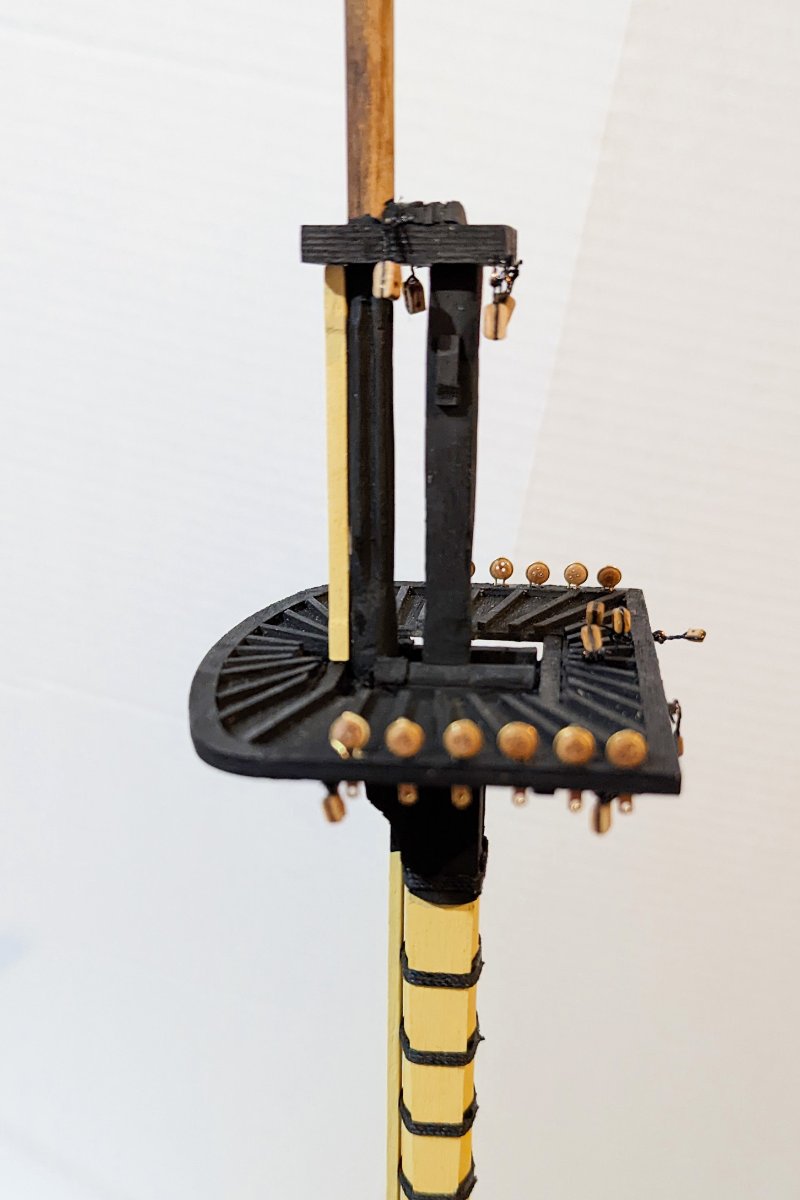
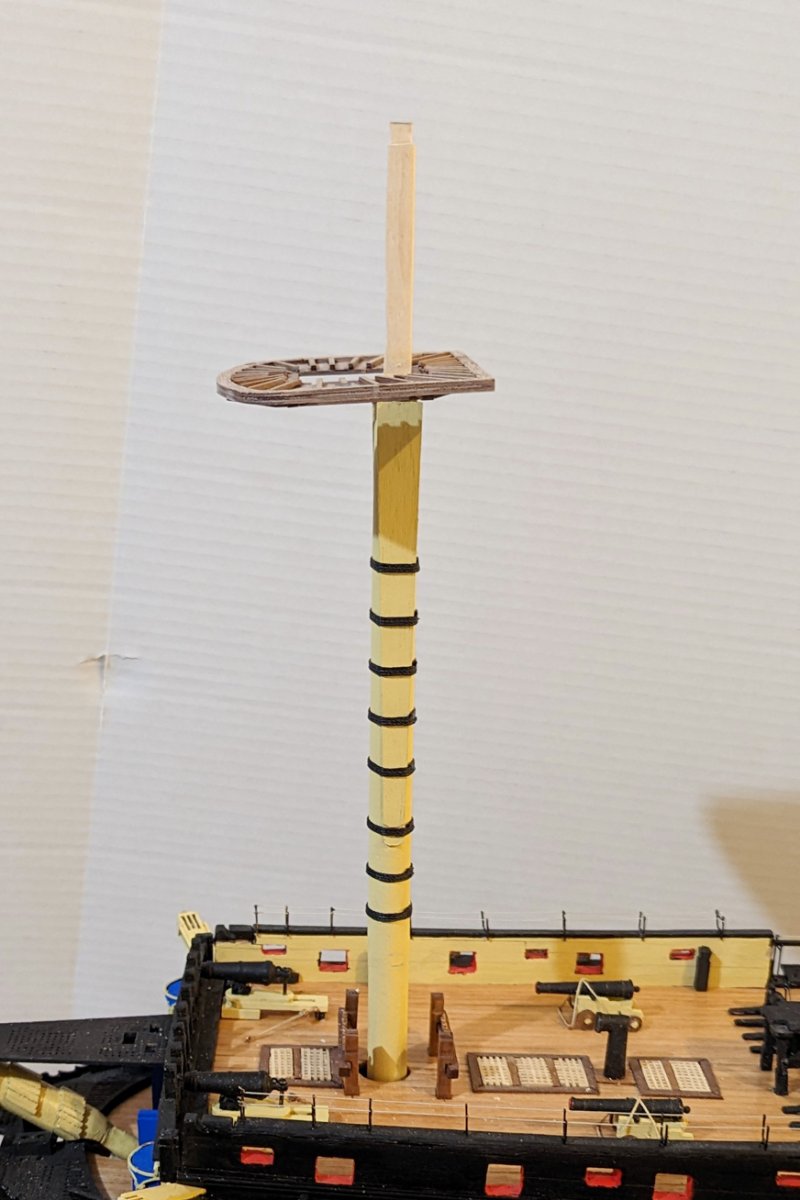
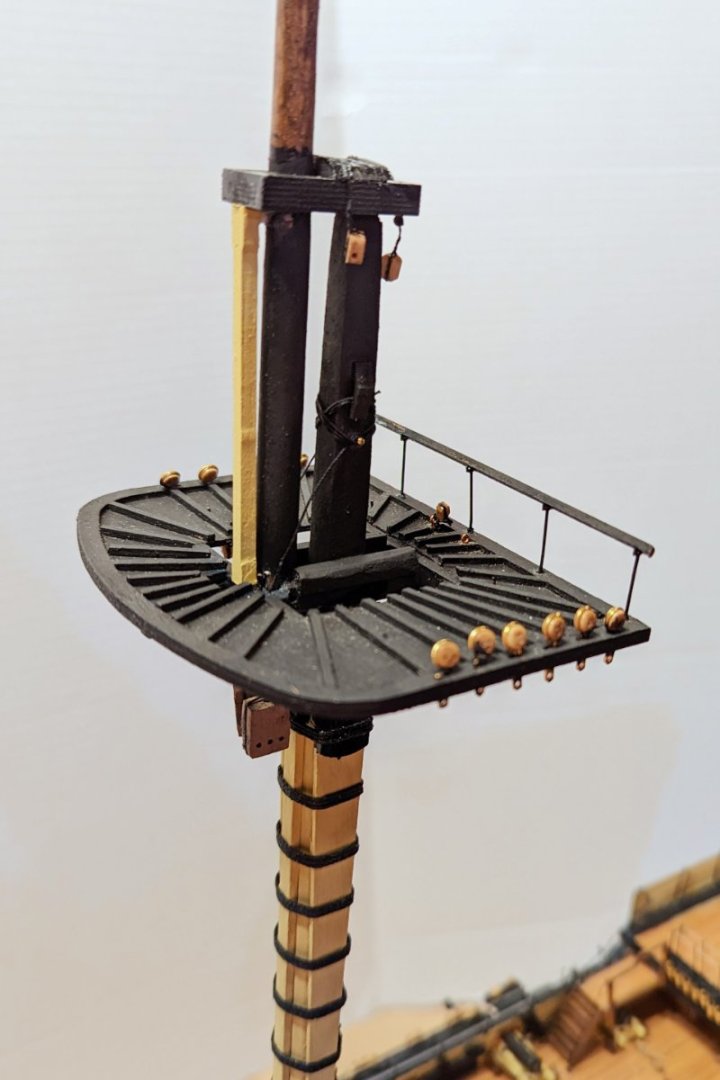
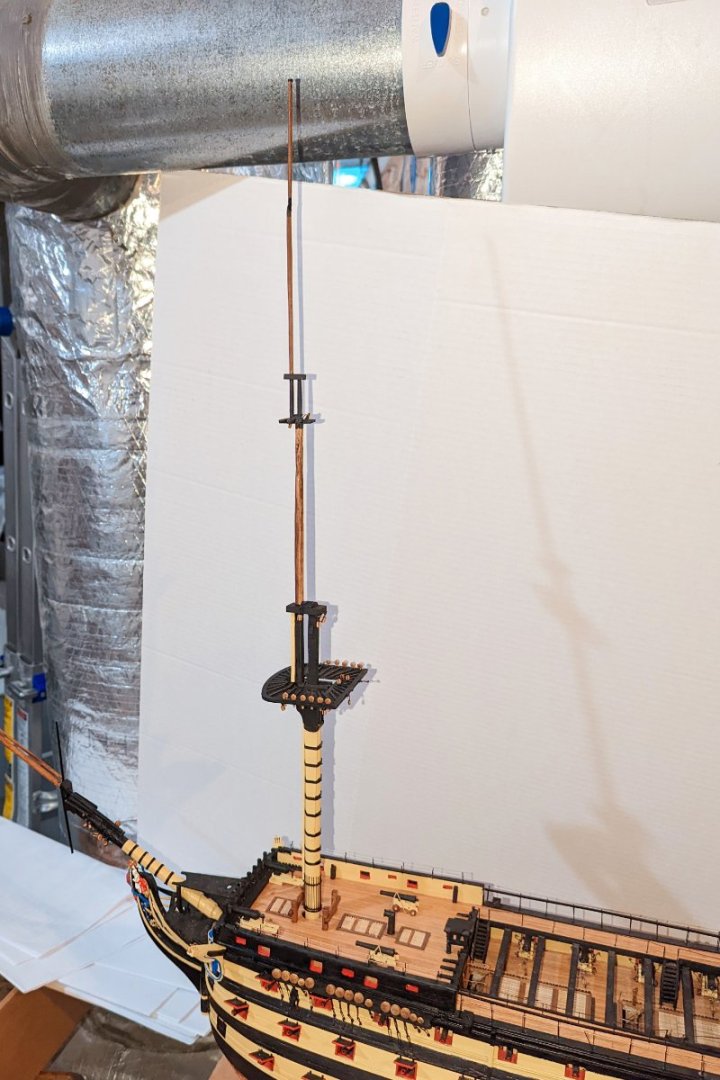
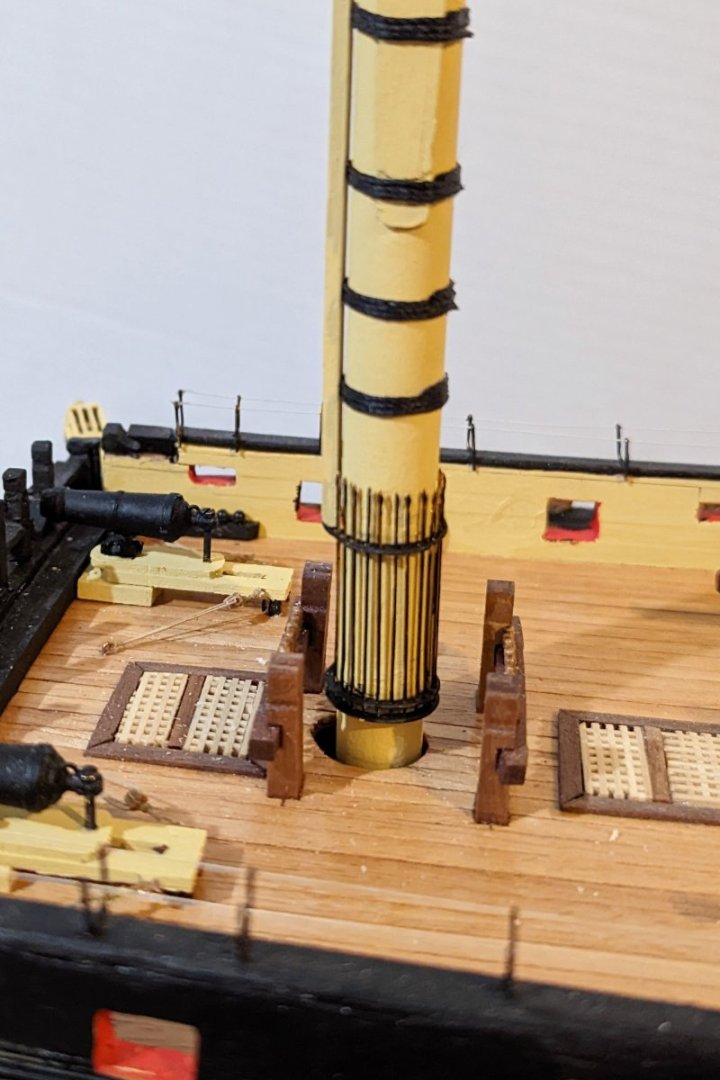
Interim fore mast progress: built the lower fore mast and banded it with thread (vs. cartridge paper). Built the top. What you see is all dry-fitted, which is why on the side view the top might seem to tilt down a bit. The bibbs aren't on yet and the top isn't painted yet. Since I used thread, some of the wood to be added later to the lower fore mast will be glued to the banding, and will stand out a bit from the mast, which I actually think is fine. My aversion to using the black cartridge paper is getting the strips to be uniform. I should also note that the manual calls for painting the bands yellow, and I think the black will look better (even if not accurate), so that's how I'm building it. Some look-aheads needed here: the boarding pike racks don't fit over the 12.7mm dowel without sanding and fitting, which needs to be done before painting. I painted it, then looked ahead and had to sand it and repaint it again to get the pike racks to fit. Those racks don't go on until later in the process, and they will need to be prepainted black. Now on to the next section. Regards, David


- 218 replies
-
- 6
-
-
- Victory
- Caldercraft
- (and 1 more)
-
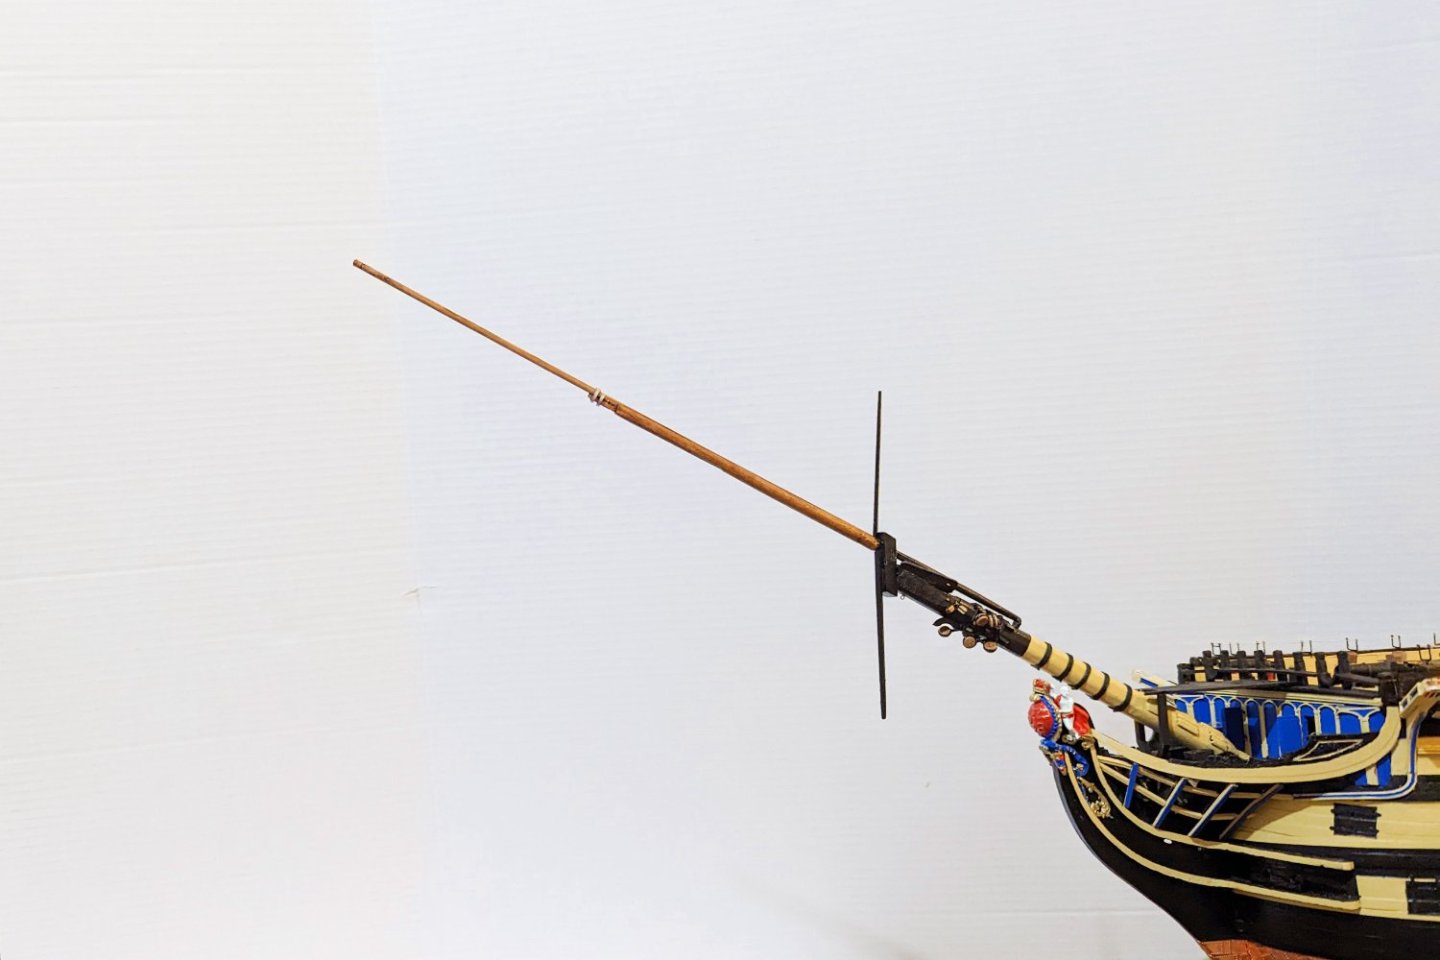
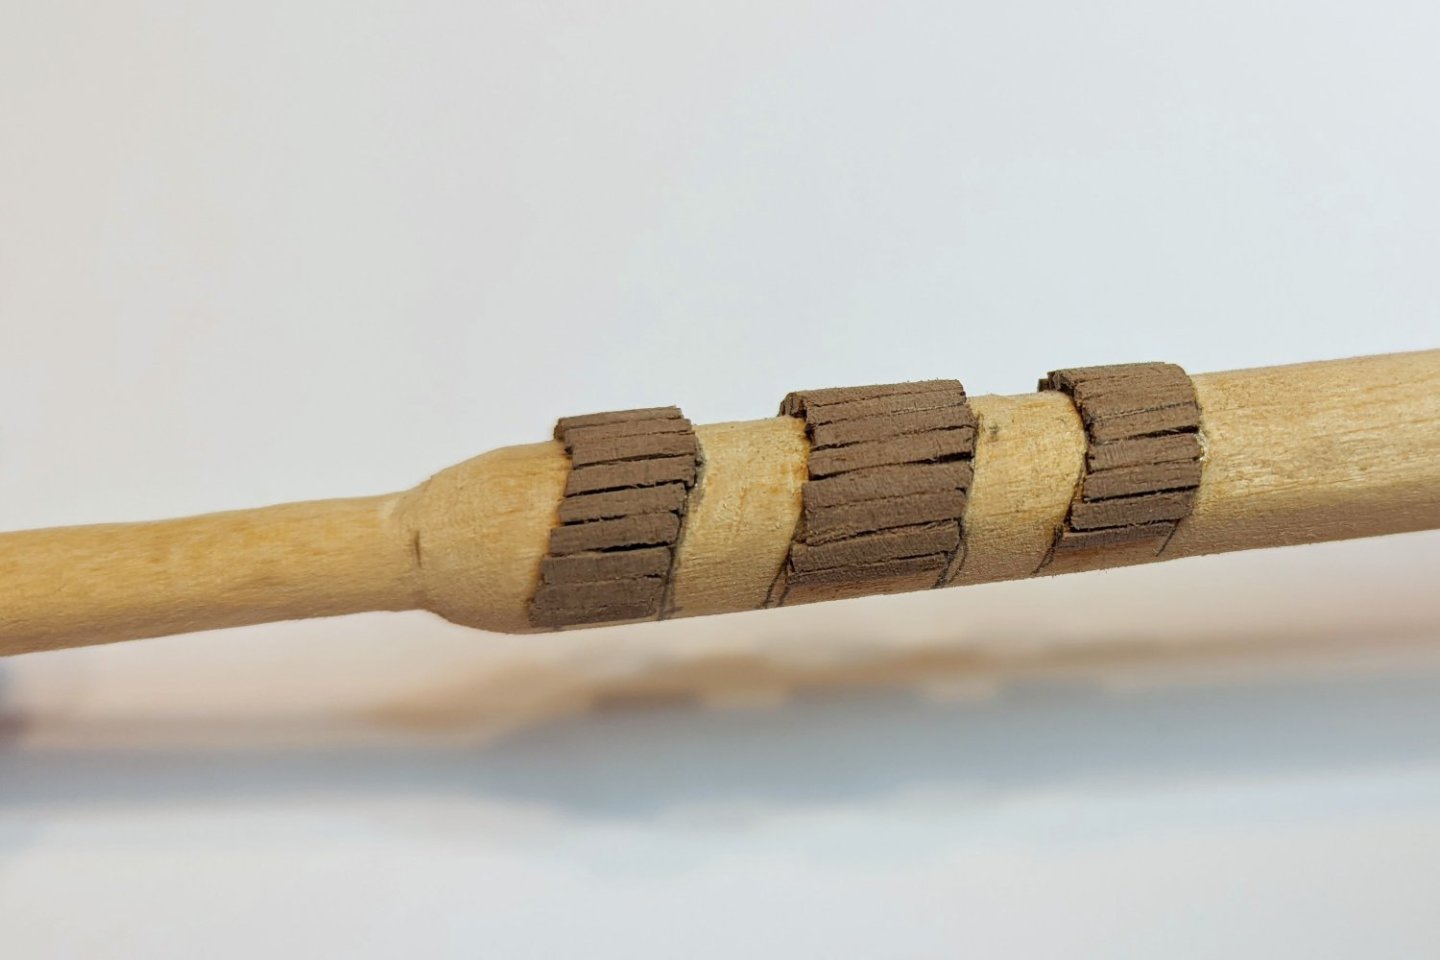
Full bowsprit completed and shown still dry-fitted. I could glue it now but I'm concerned that I'll prang it when I move the ship to mount the masts. I will wait until the mast shrouds are up, I think. Lots of "figure it out" needed with this poring between the instructions and the drawings. Also had to slice one of the mast rings to fit it on, but that works OK. I used wrapped thread for the main sprit banding vs. the black cartridge paper the manual calls for. Regards, David
- 218 replies
-
- 7
-
-
- Victory
- Caldercraft
- (and 1 more)
-
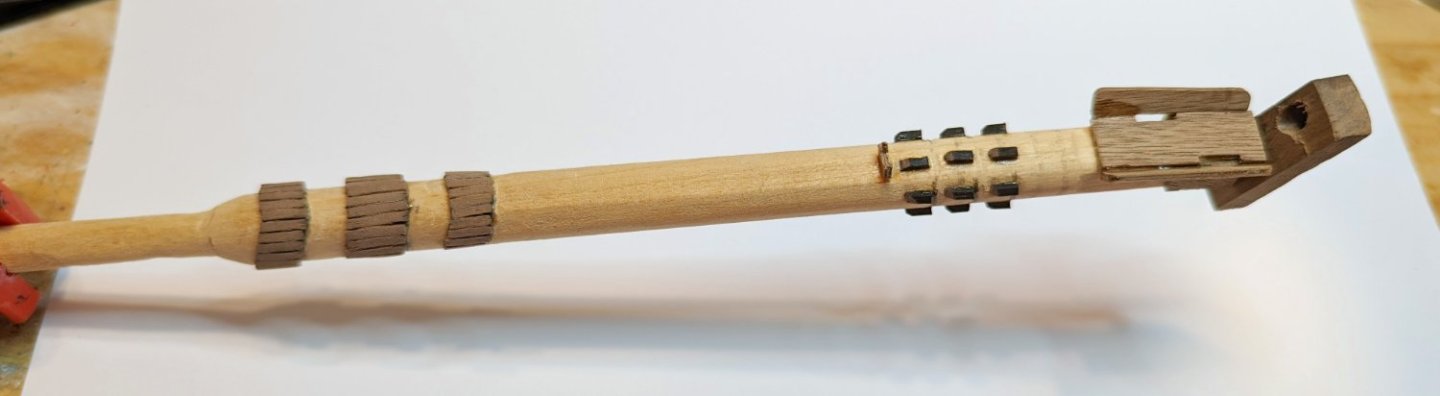
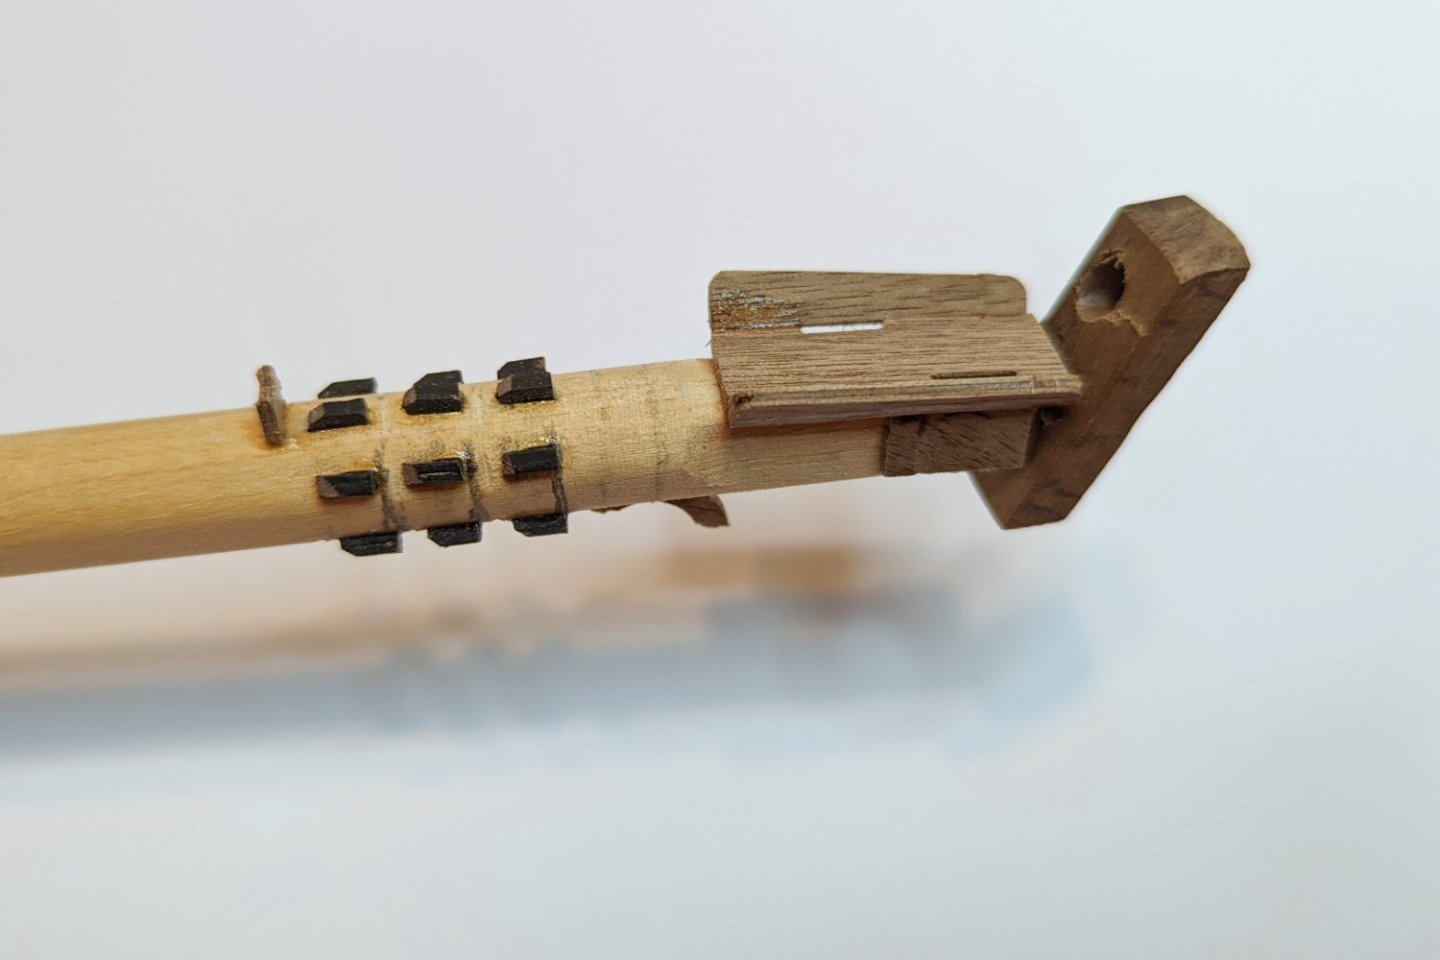
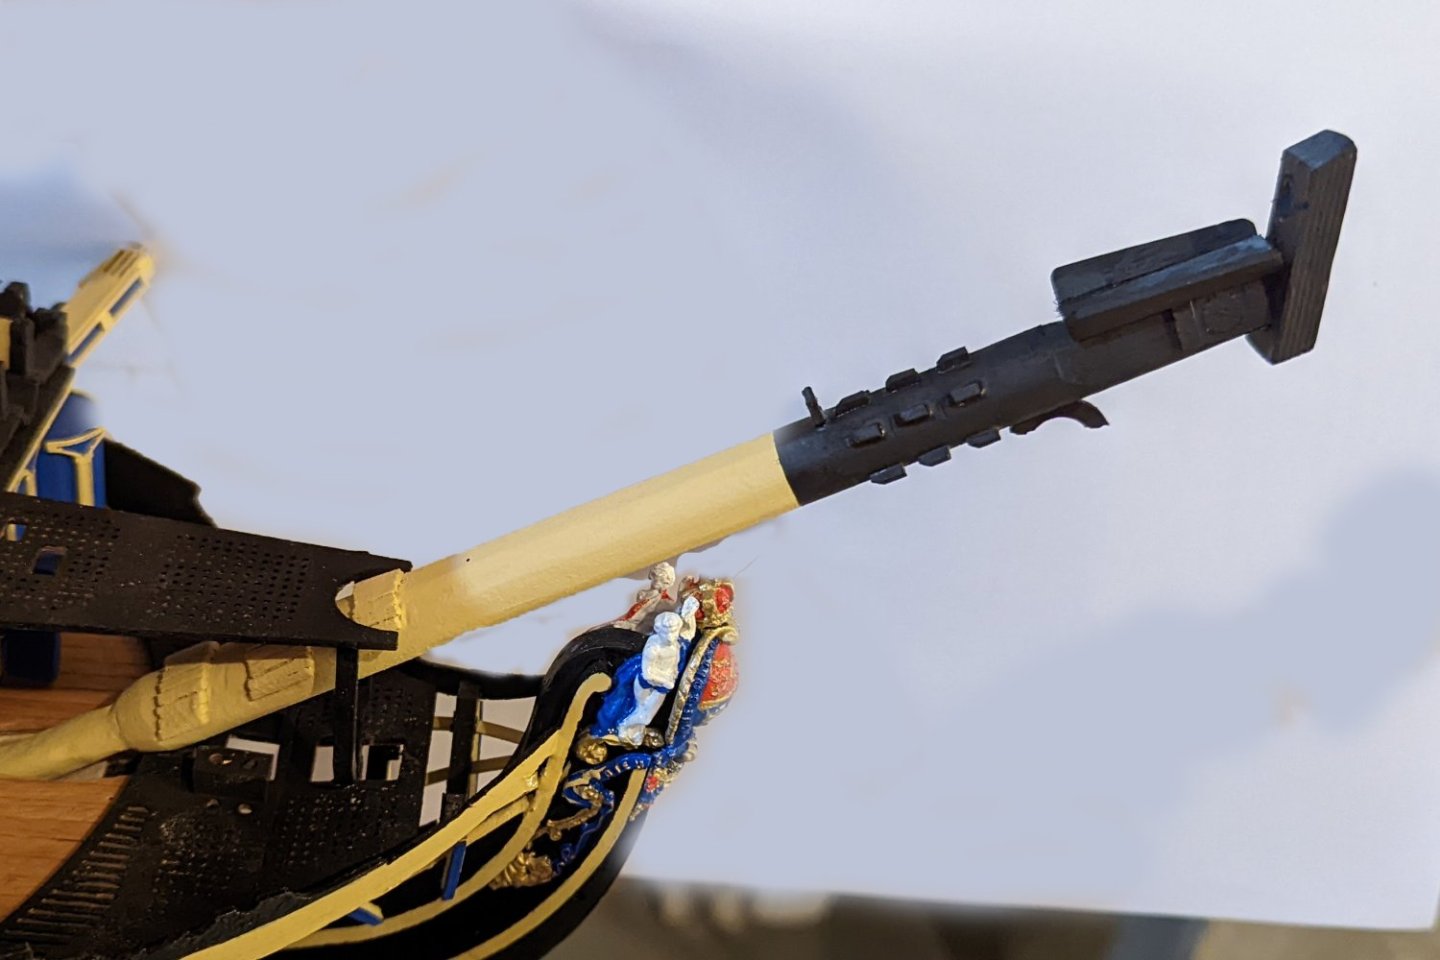
Worked on the first part of the bowsprit. I've added some pictures of the unpainted bowsprit showing all of the parts added, and then a picture of the painted one -- still dry fitted on the ship. A couple of comments on building this: The plan sheets would suggest that the full 12mm dowel can go down inside the bow -- and on my model, there's no way that a hole that size is provided by the bow deck template openings. So as you can see, I had to taper it down in order for it to fit. I found the instructions and plan sheets extremely hard to follow. Had to pull up lots of pics on the internet and feel my way through it. I think I got it right, but wouldn't swear to it. Now need to work on the jibbooms. Regards, David
- 218 replies
-
- 8
-
-
- Victory
- Caldercraft
- (and 1 more)
-
Thanks, Sam. Nice to have you looking in. Regards, David
- 218 replies
-
- 1
-
-
- Victory
- Caldercraft
- (and 1 more)
-
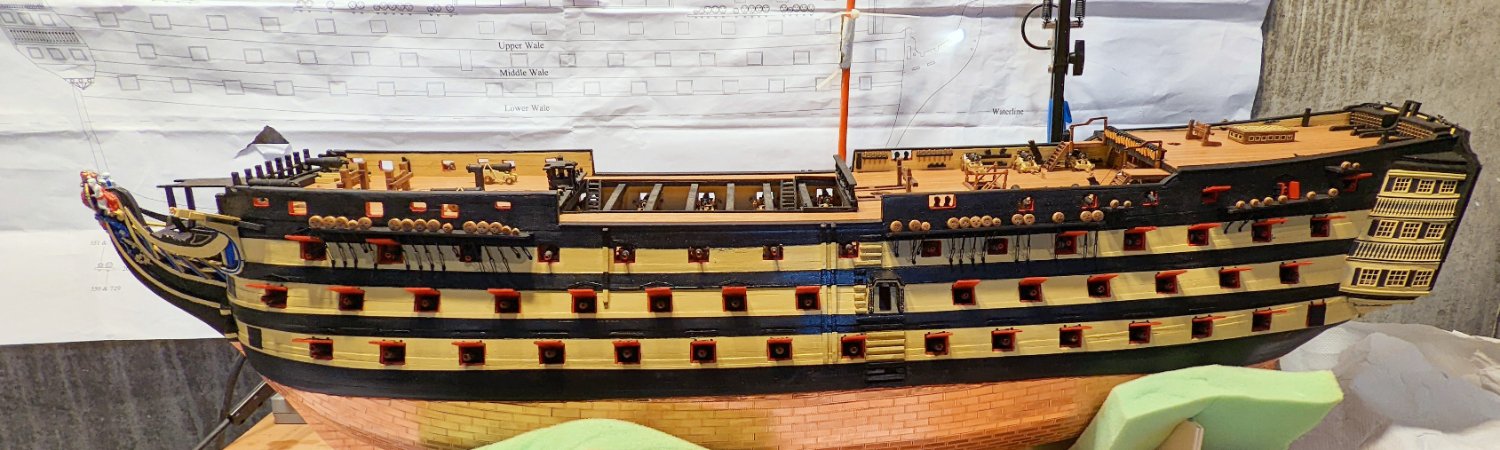
I have finished the brass rails along the side of the hull (see pictures attached), and that completes my work on the hull for now. I took some artistic license with the routing of the brass rails compared to the plan drawings, because by the time I got to this point things (like chain plate) didn't line up vertically exactly the way the plan sheet thinks they should. I say finished 'for now" because I have left some things for later that are fragile, and that I'll do at the end: The lanterns The boomkins (built but not mounted) The anchors, which need to be mounted after the other rigging is done I also have the four ship's boats to build, which I think I'll do as mental breaks when I get weary of sanding yards or rigging ratlines. The instructions for building those are in the rigging manual. Regards, David

- 218 replies
-
- 6
-
-
- Victory
- Caldercraft
- (and 1 more)
-
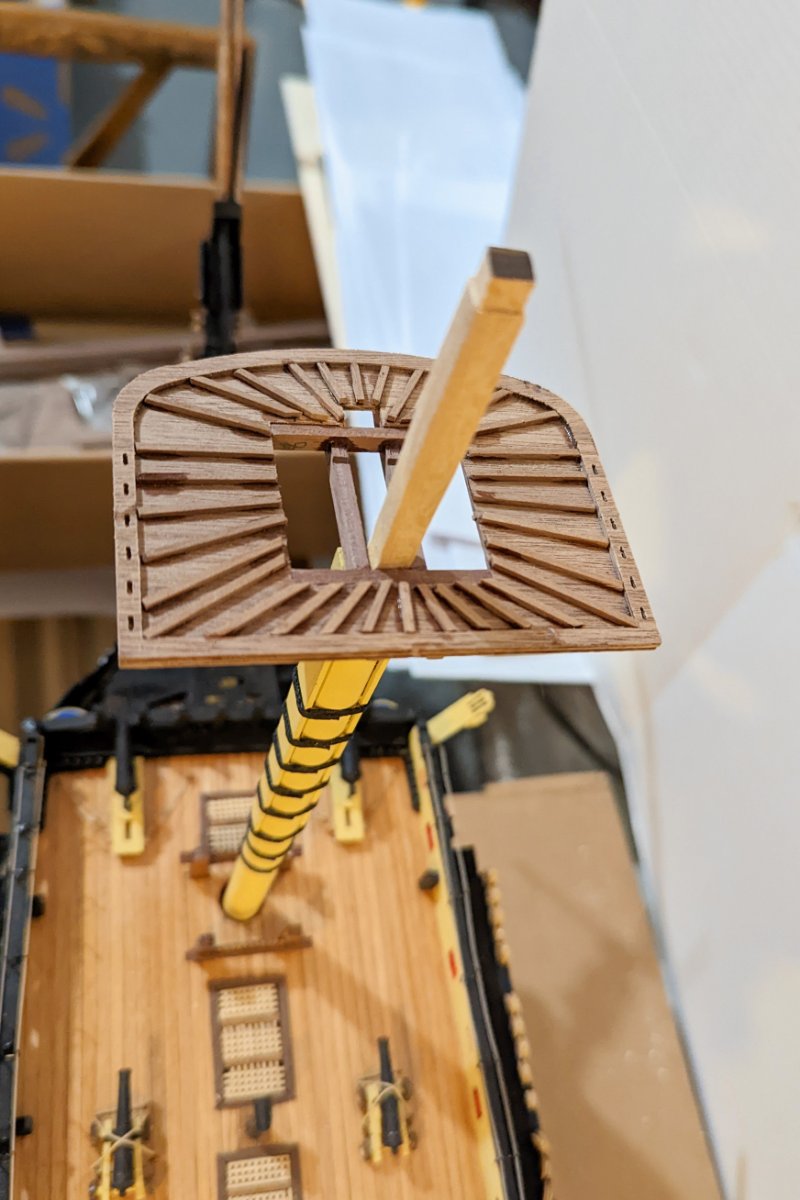
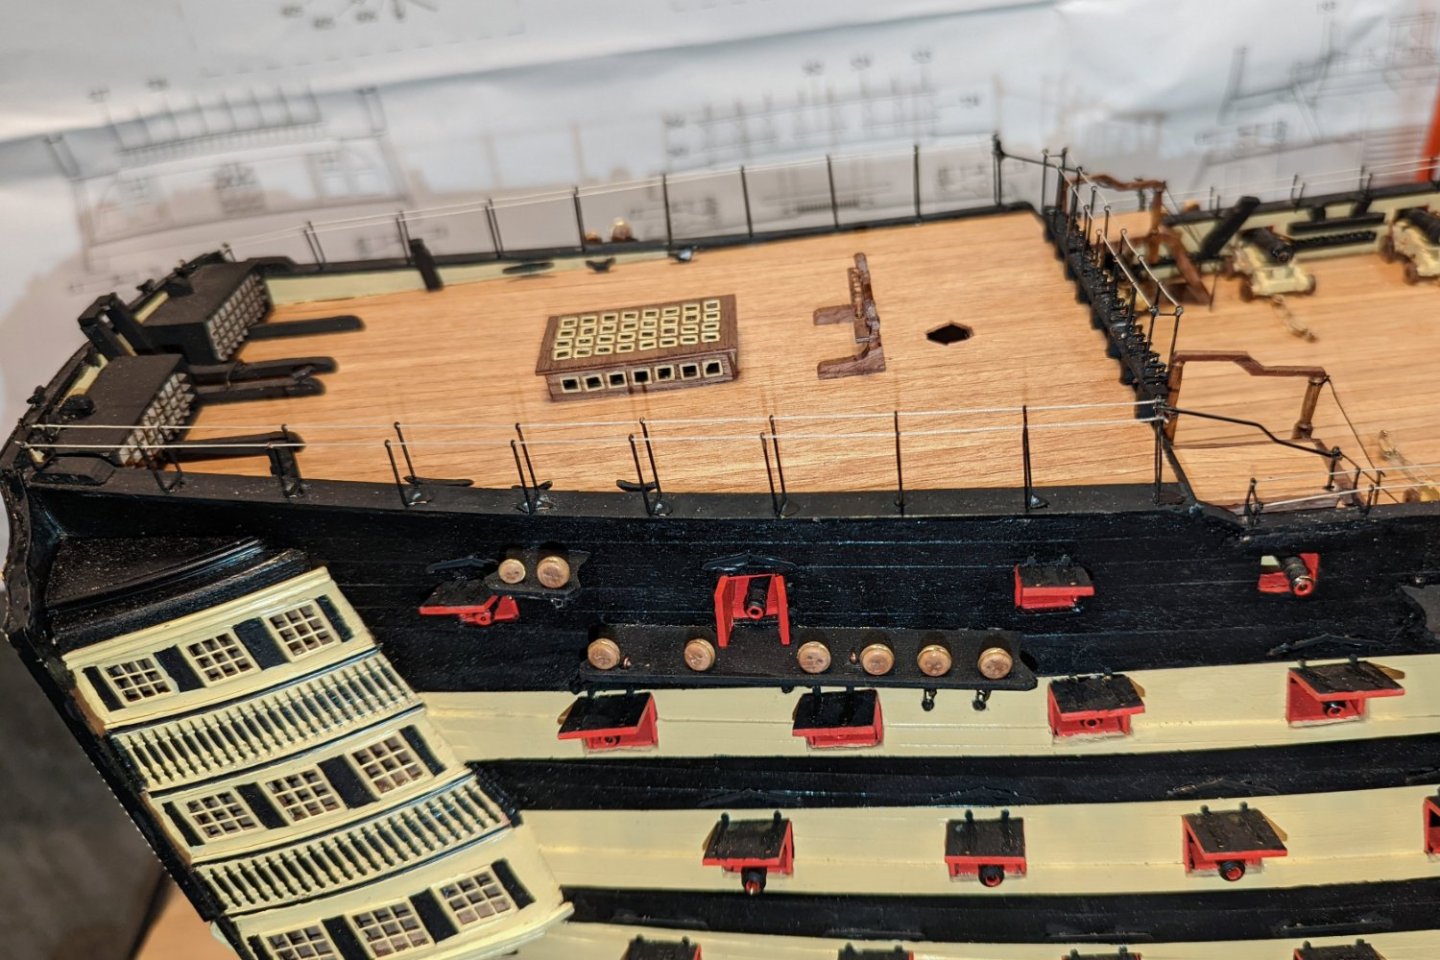
In the "much to my surprise" category, I managed to get the Poop Deck Bulwark Barricades done. My concern was fitting the lower curve that sits on the poop bulwark capping rail, so I scanned the profile of the bulwark on Plan Sheet 5, and then printed it out at about 107% to get it back to the right size. I then had a template pattern I could use to mark a line on the laminated bulwark for cutting and sanding, and it was perfect for cutting out the gunports. I only cut two of the three gunports, because the third one would require cutting down into the poop deck bulwark and I wasn't up for that. Regards, David

- 218 replies
-
- 7
-
-
- Victory
- Caldercraft
- (and 1 more)
-
Finished the hammock cranes, deck rails, and external poop stair rails. The lines aren't always easy to see in these pics because they are white. Next step is the poop barricade. I'm not clear that I can get it shaped to look nice, since I have to shape it to an irregular curve, so I'm going to give it a try and if it fits well and looks good, I'll use it -- otherwise I'll leave it off. Regards, David


- 218 replies
-
- 7
-
-
- Victory
- Caldercraft
- (and 1 more)
-
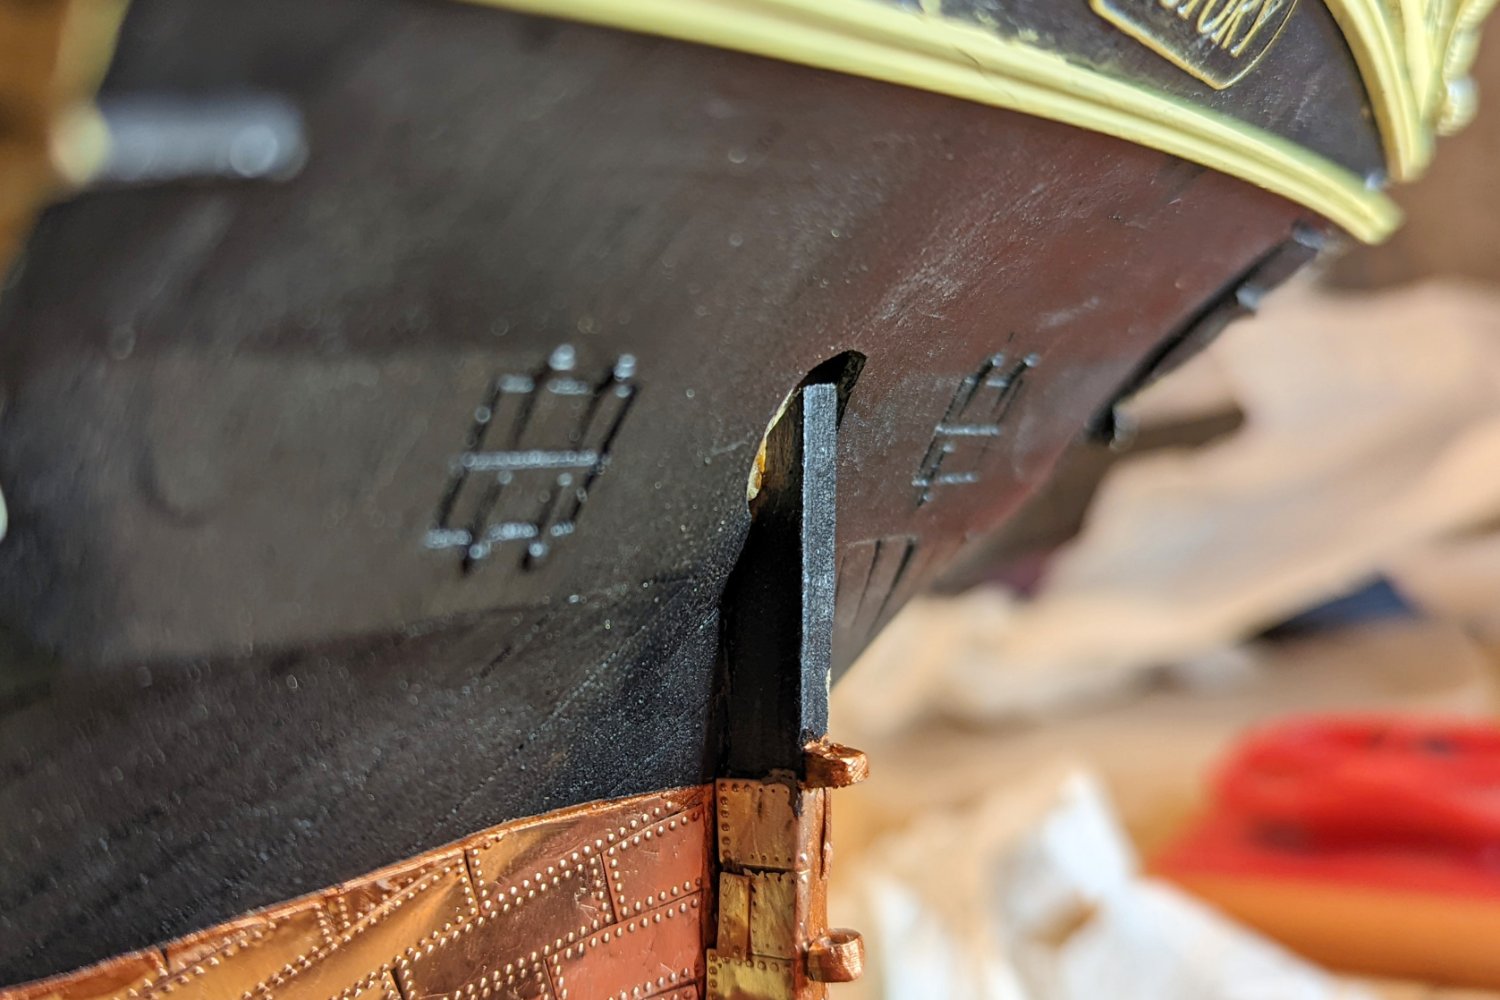
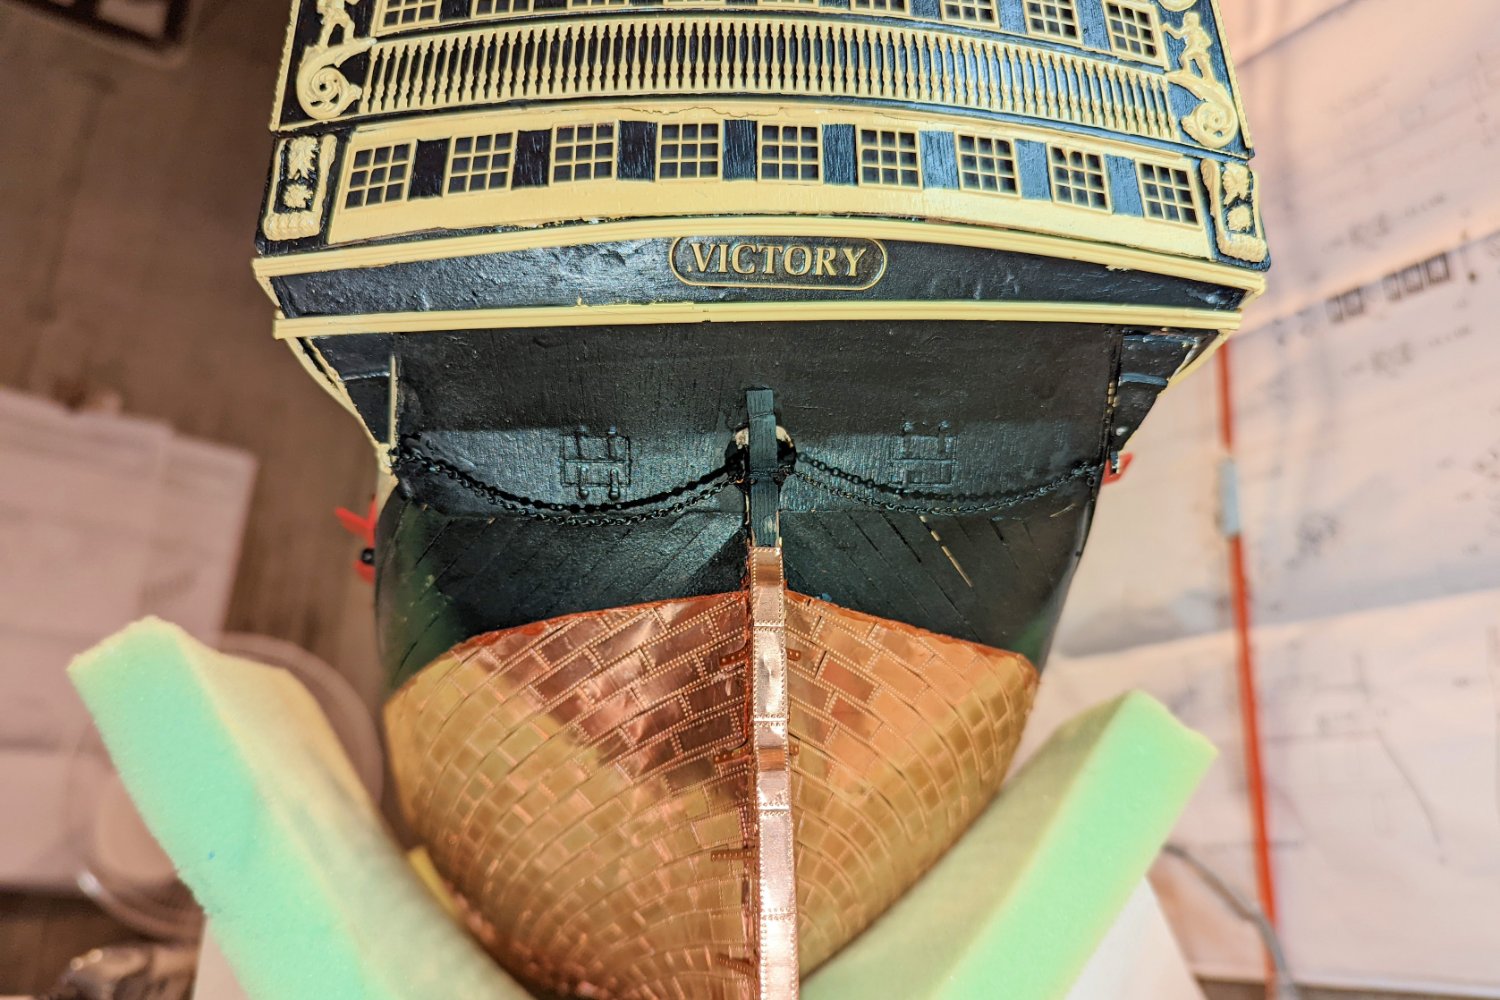
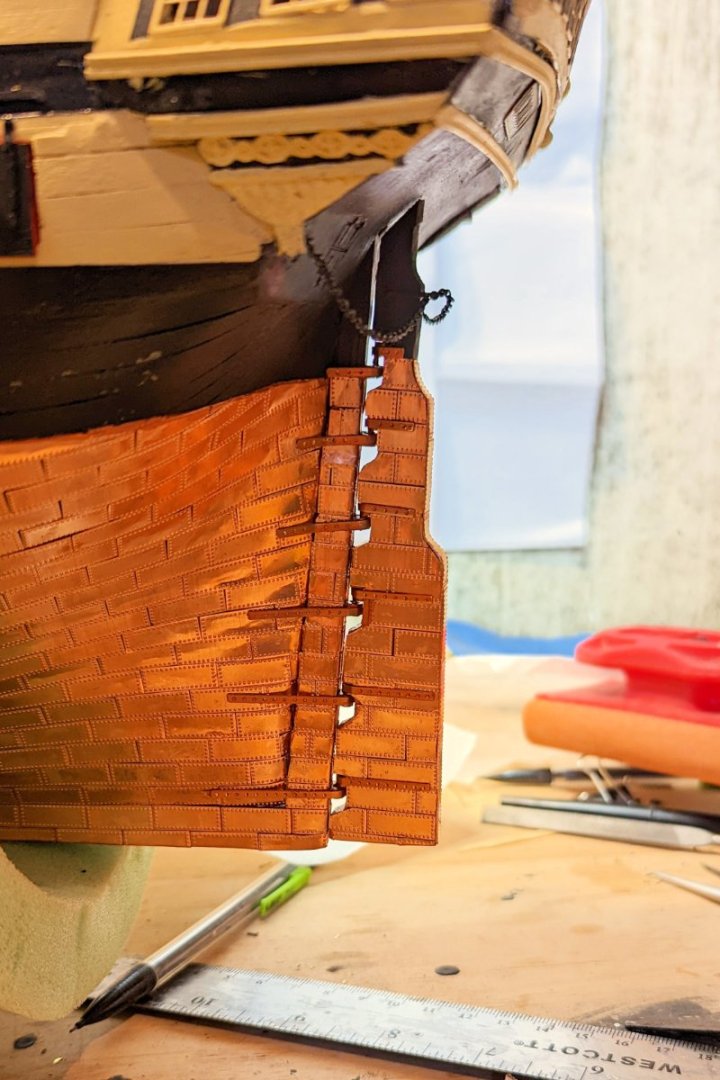
Finished the rudder -- another adventure in creative adaptation. When I got to the rudder, I discovered that the hole in the stern counter was too low and there was no place to fit the rudder up -- which meant that there was no way to "hang" it on hinges. So I cut it down to leave enough room to slip up and over the hinges, and then when finished I glued back and painted a section to go up to the stern counter. Looks fine if not perfect -- but I'm really puzzled about the alignment of that rudder hole. A note in the manual would have been helpful -- but I'm trying to remember if it would have fitted anyway if slid further up. Oh well. . . . I managed to get the hinges aligned, using a lot of step by step "fit in place" work. Helps to shorten the hinge pins so that the hull side hinge parts will fit in to the rudder spaces. Then the chain -- the manual would have the chains much lower on the rudder, and brought further around to the side. This would produce big chain loops, so I Googled a bit and found a different chain arrangement which is what you see here, and which looks much neater. Regards, David


- 218 replies
-
- 8
-
-
- Victory
- Caldercraft
- (and 1 more)
-
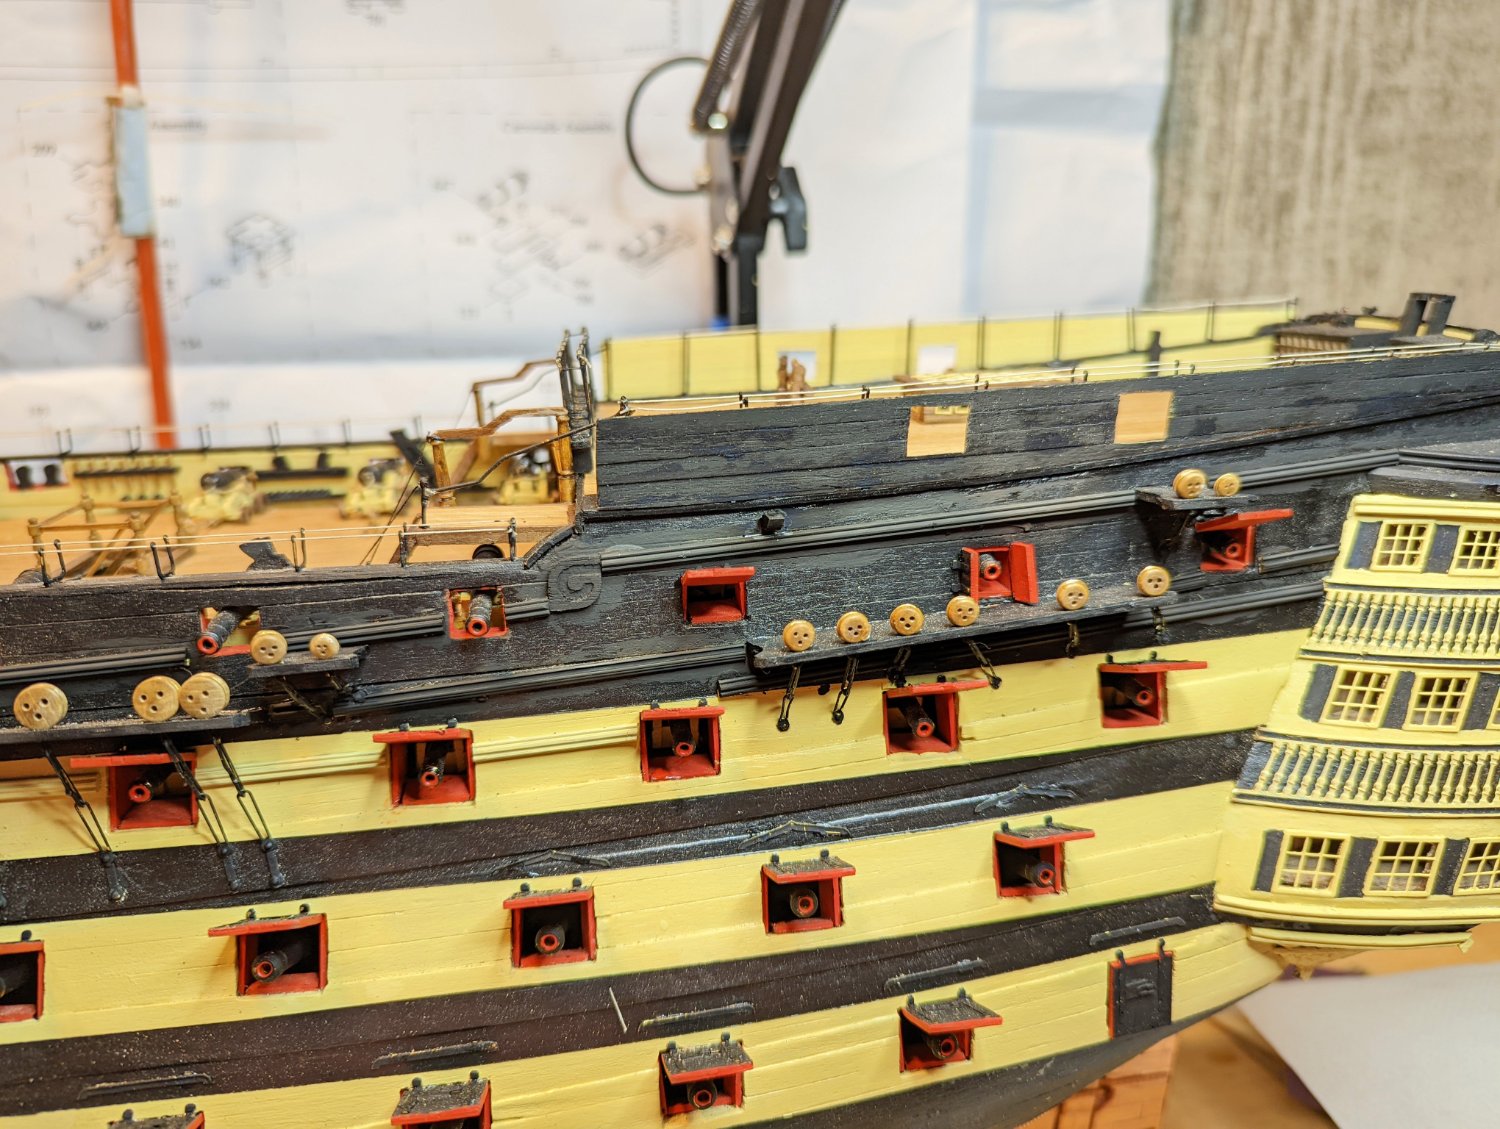
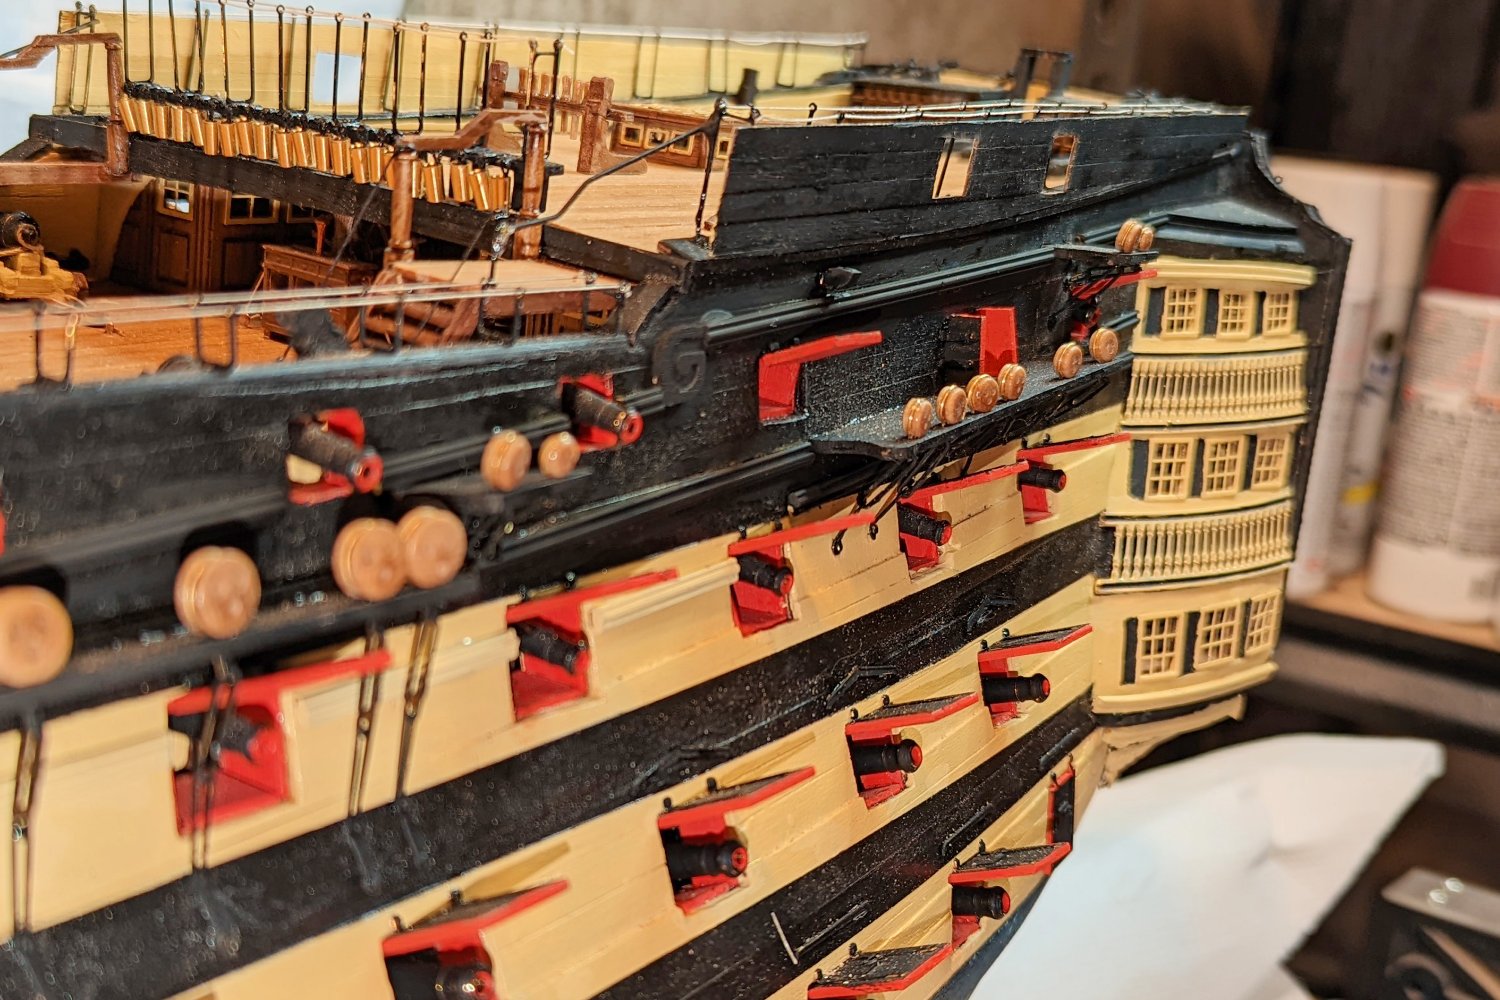
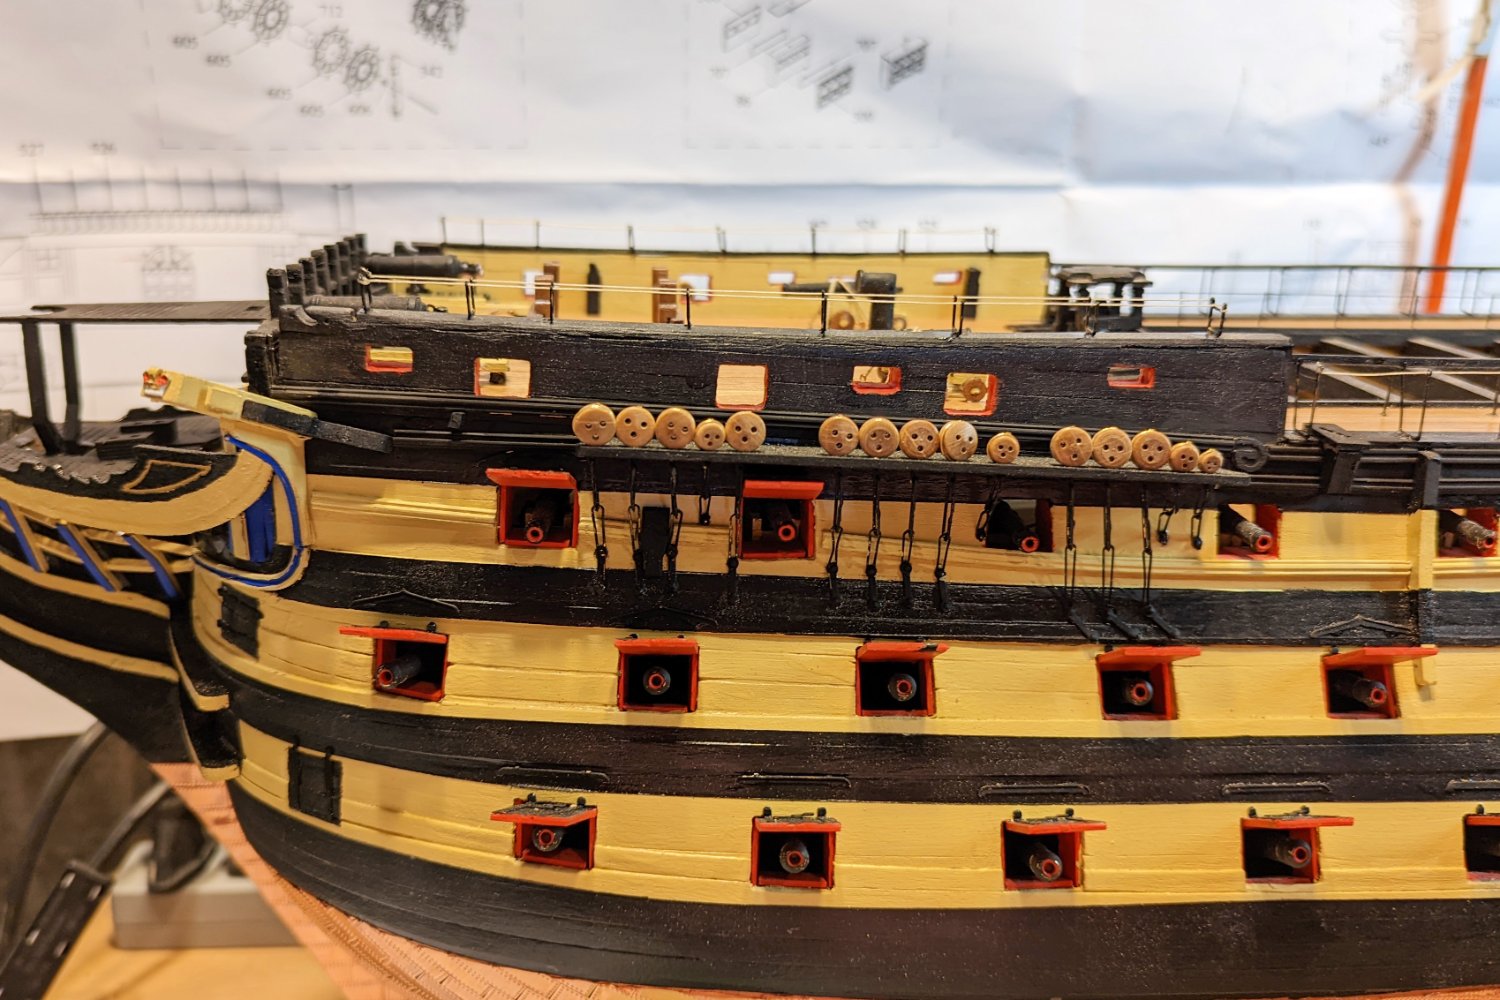
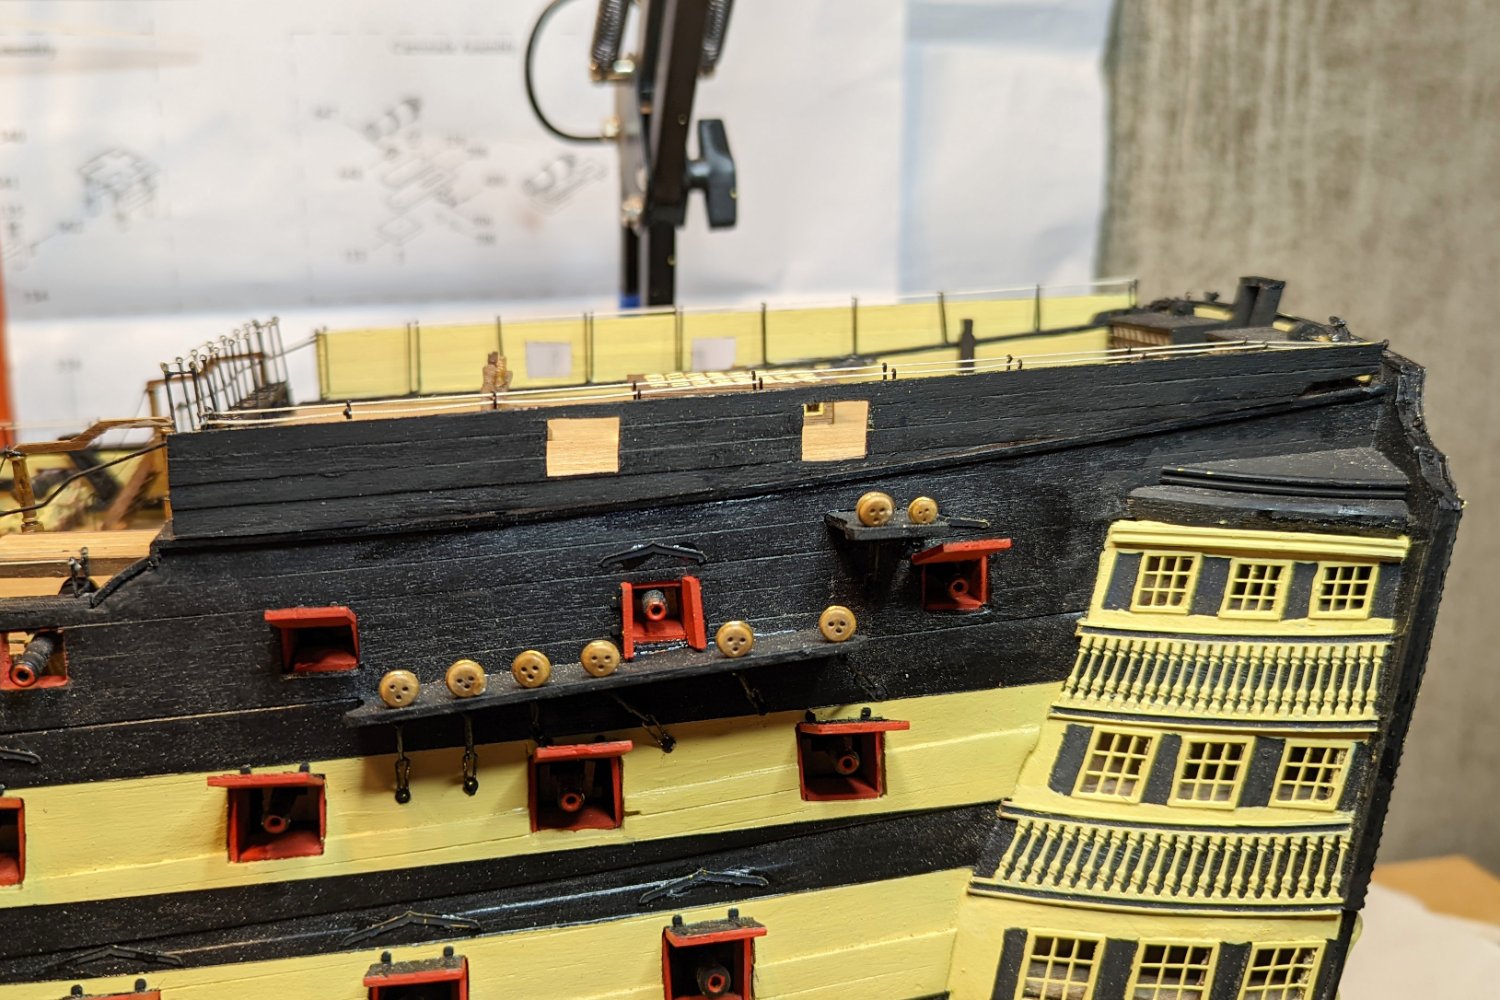
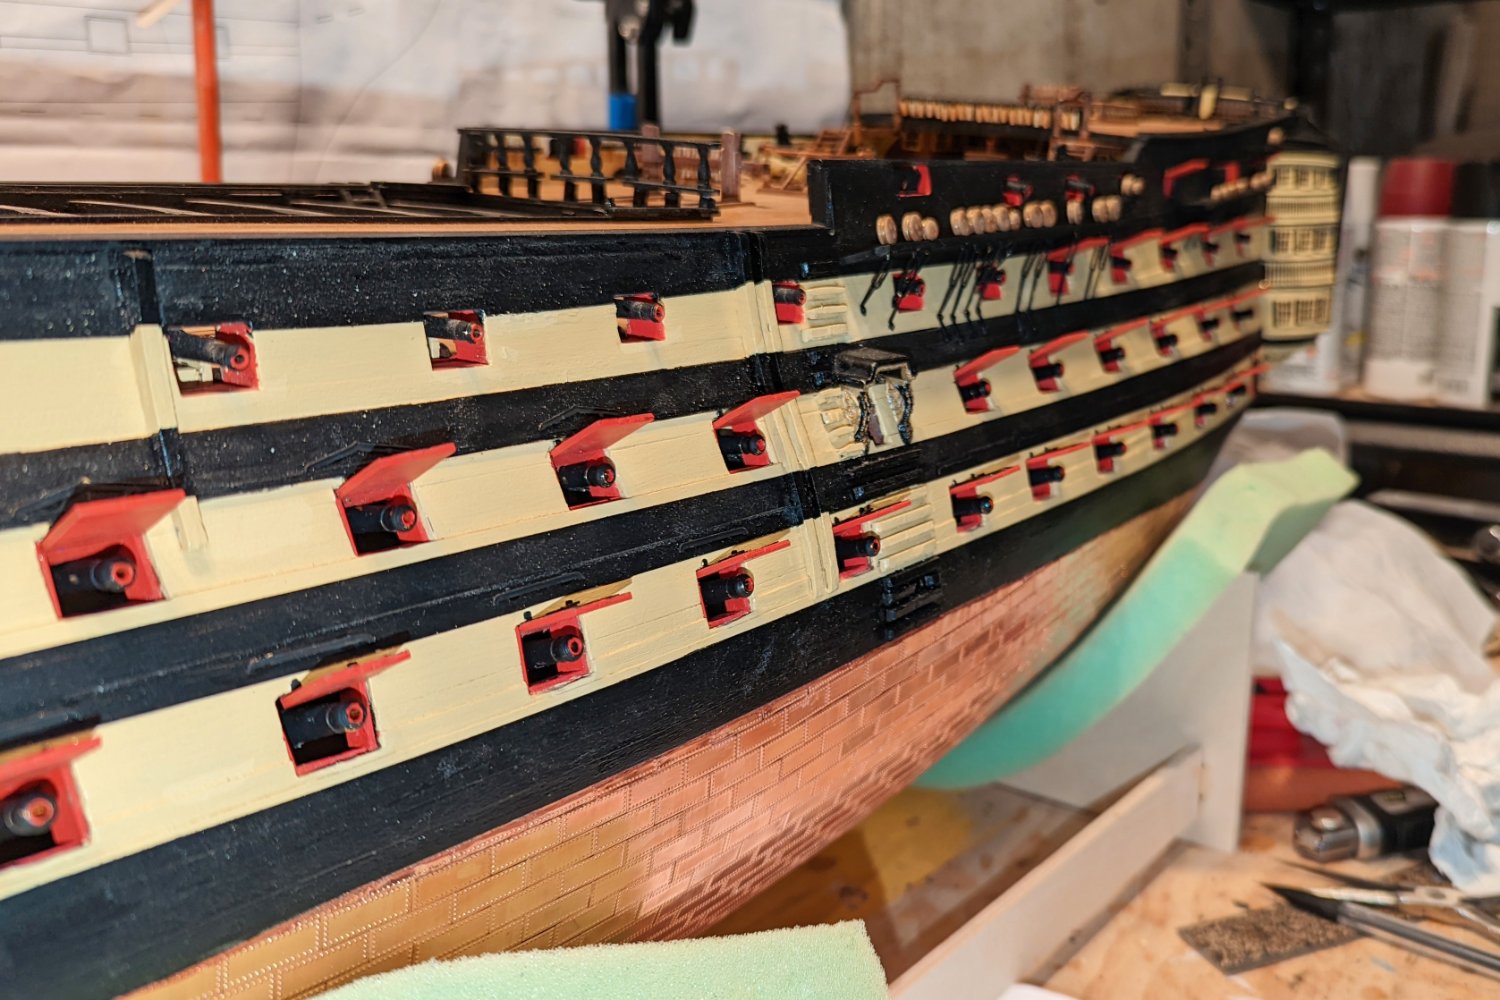
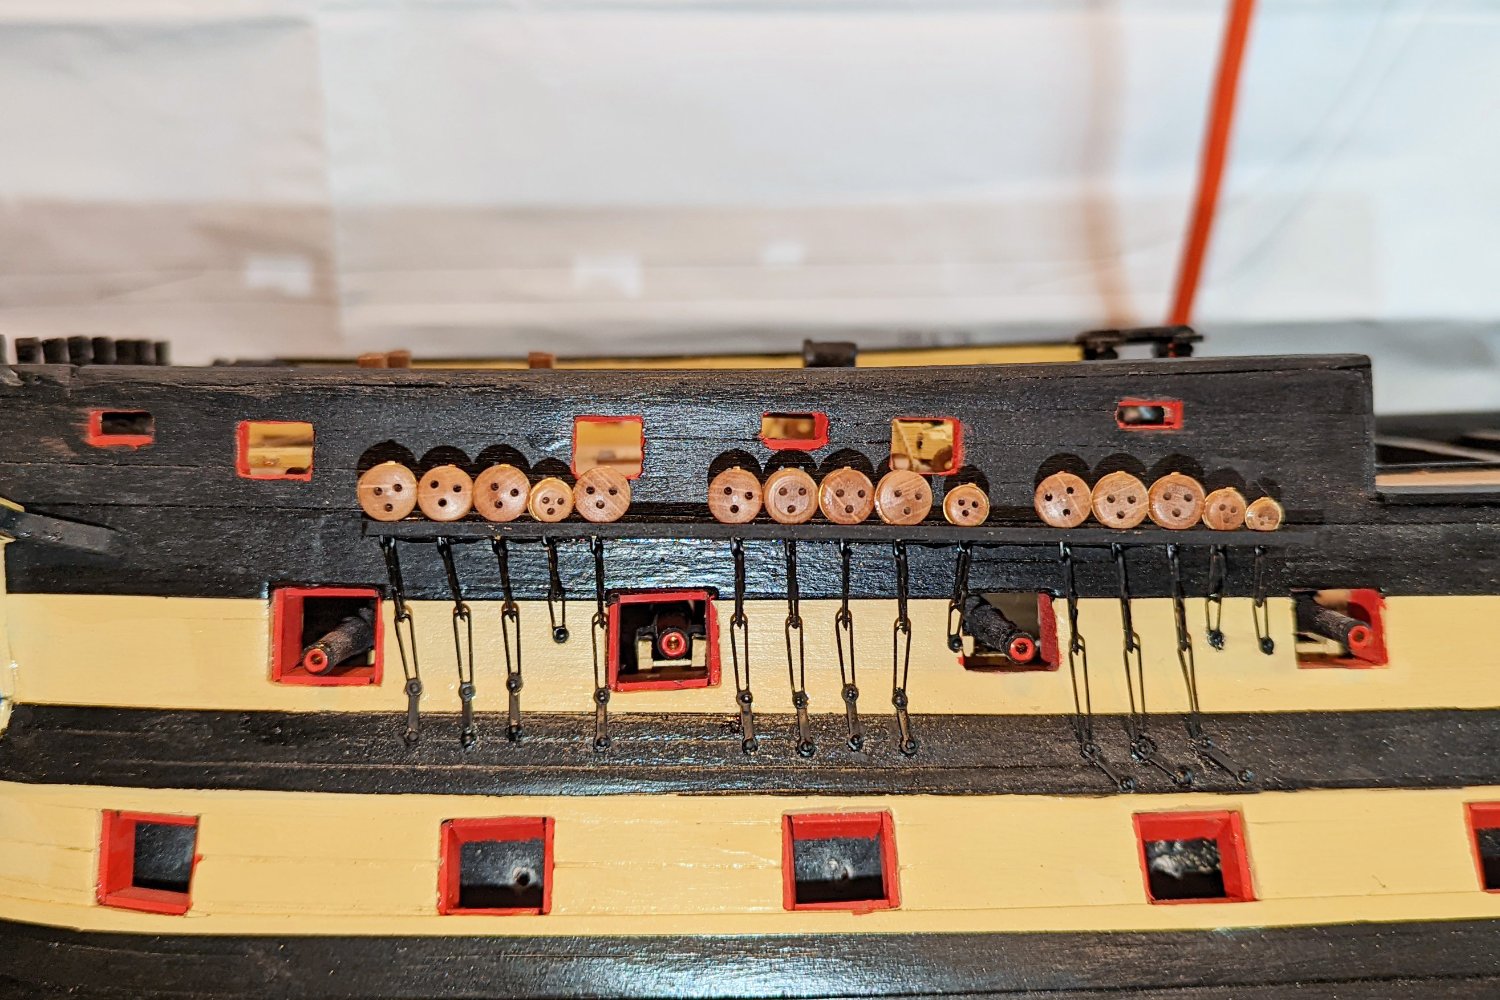
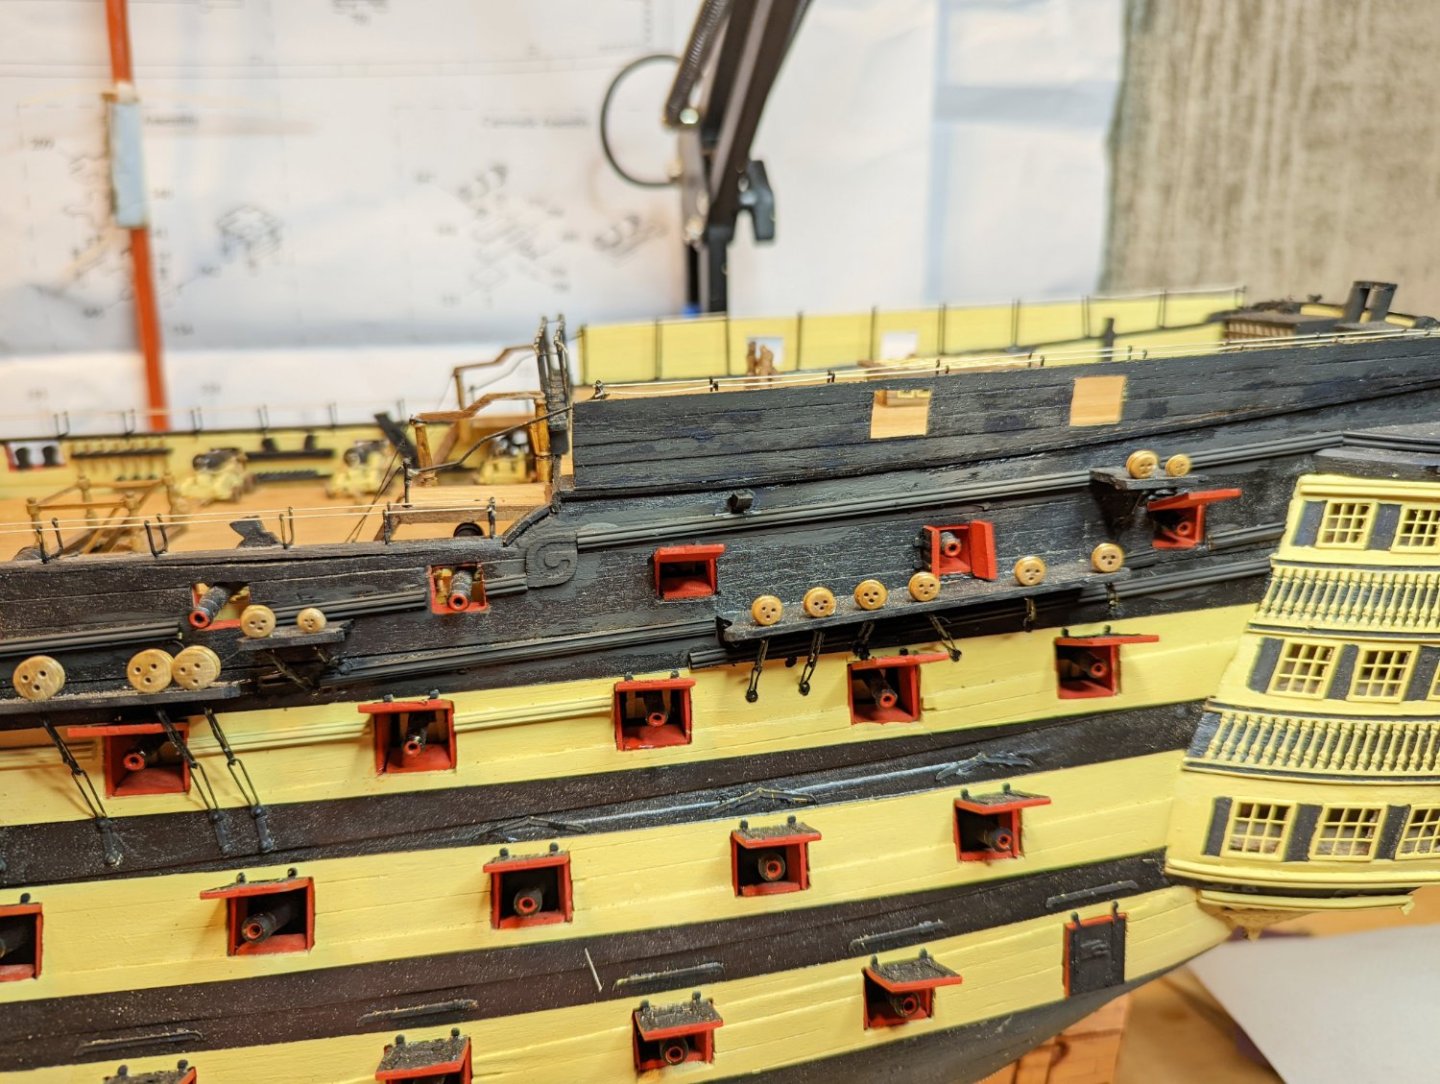
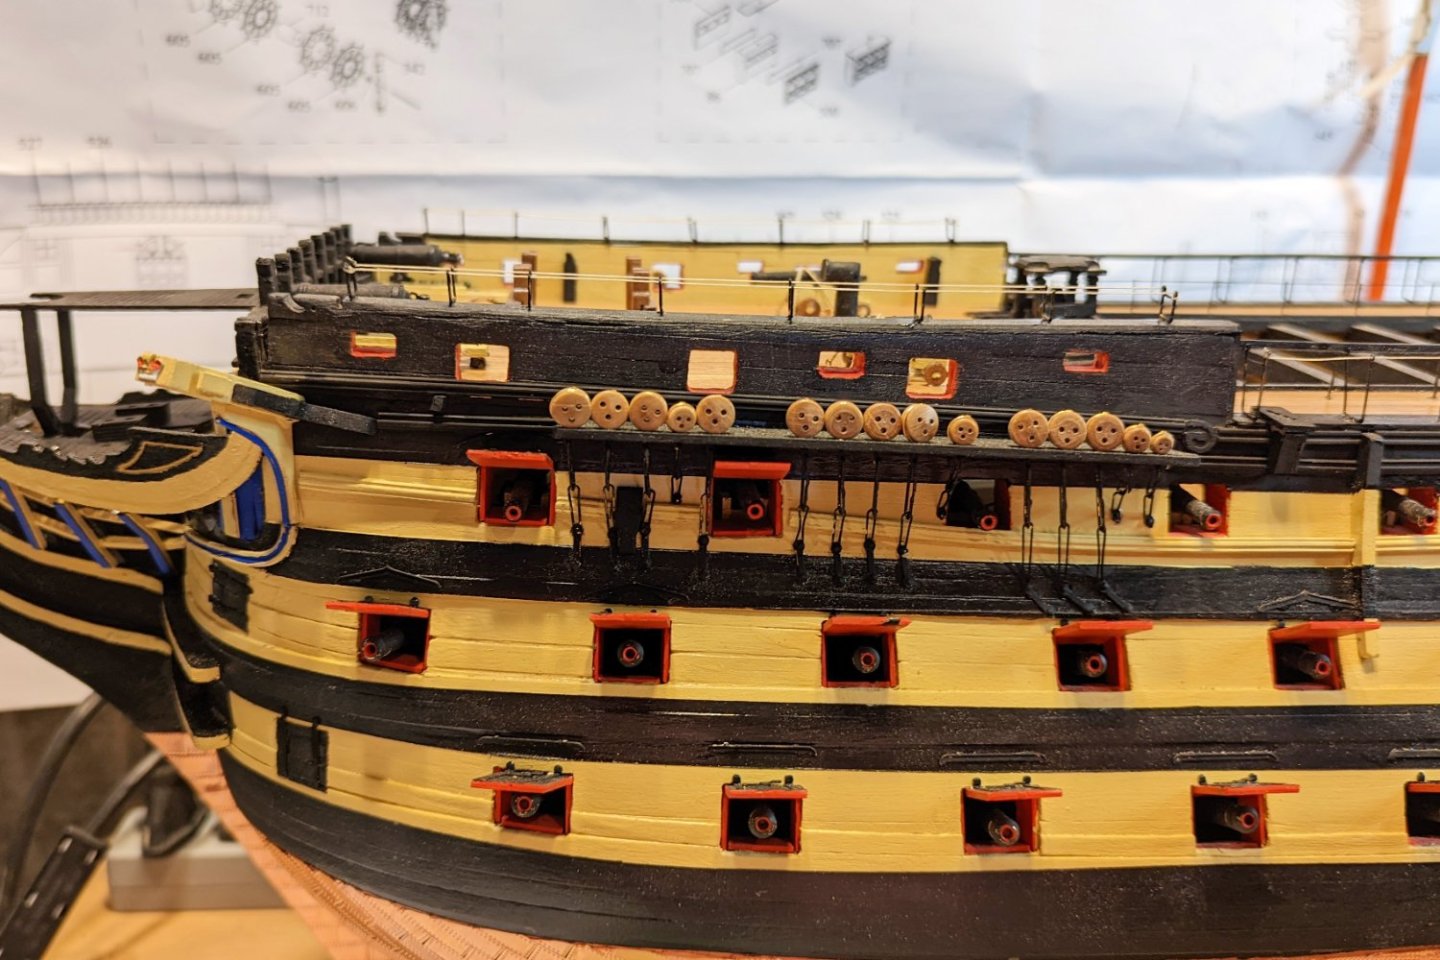
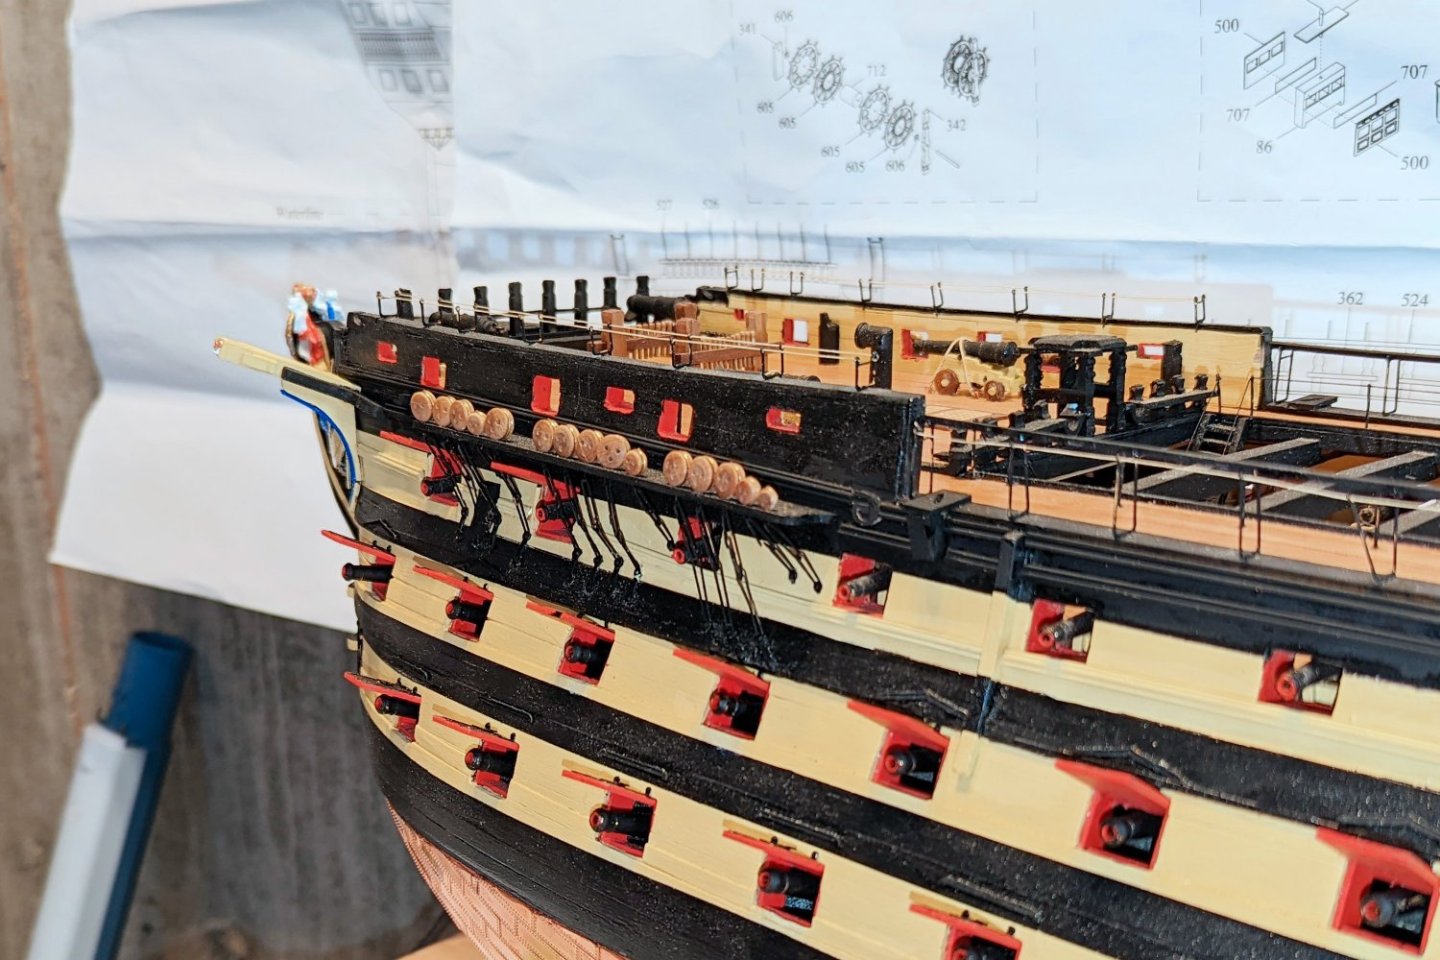
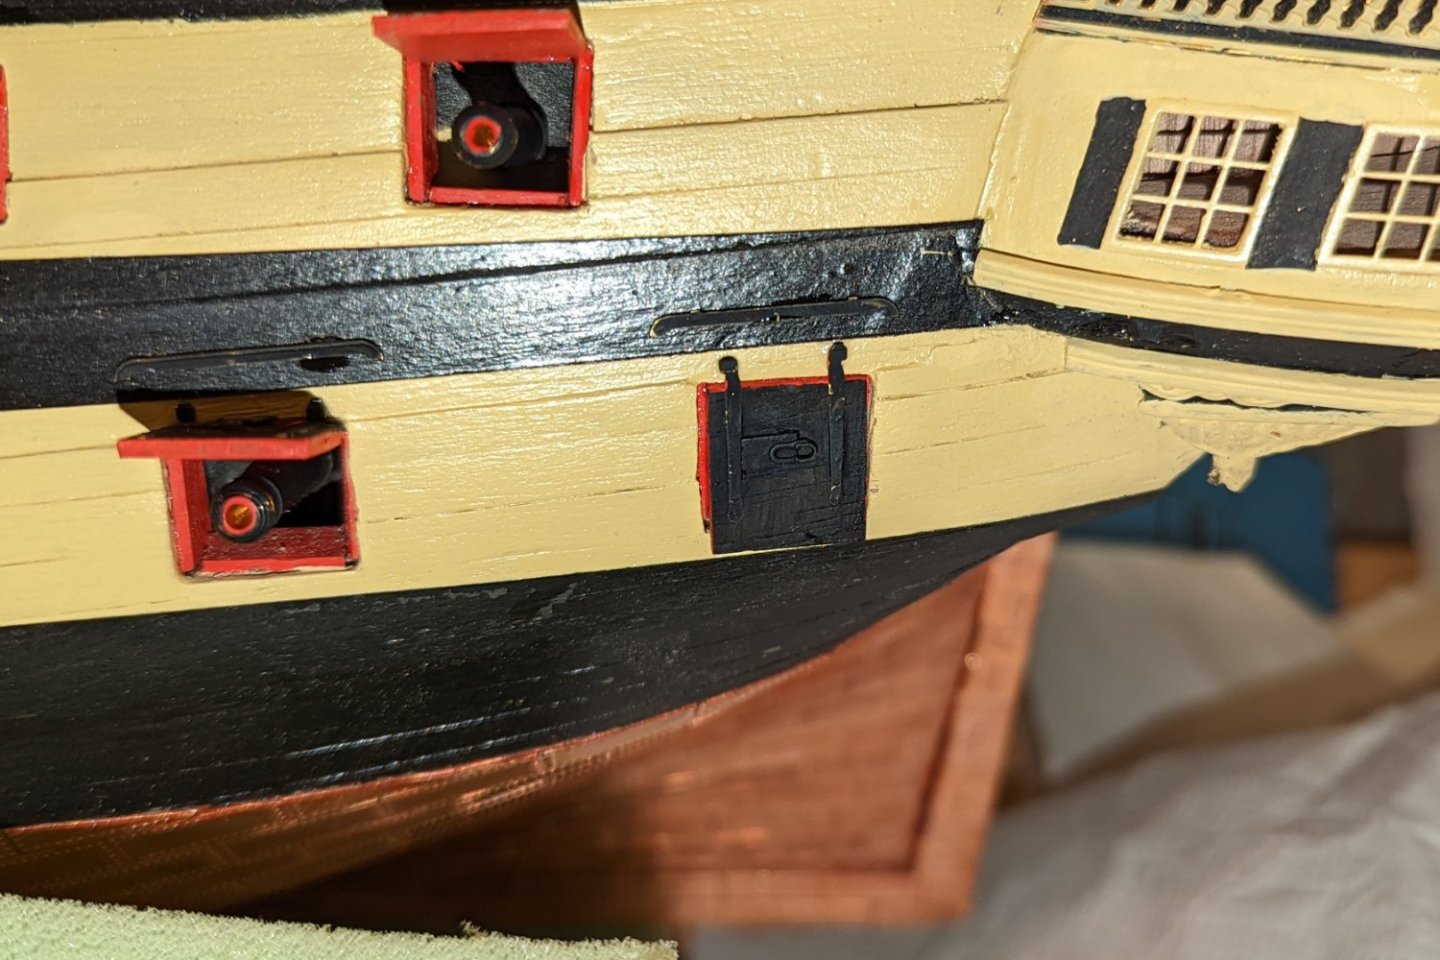
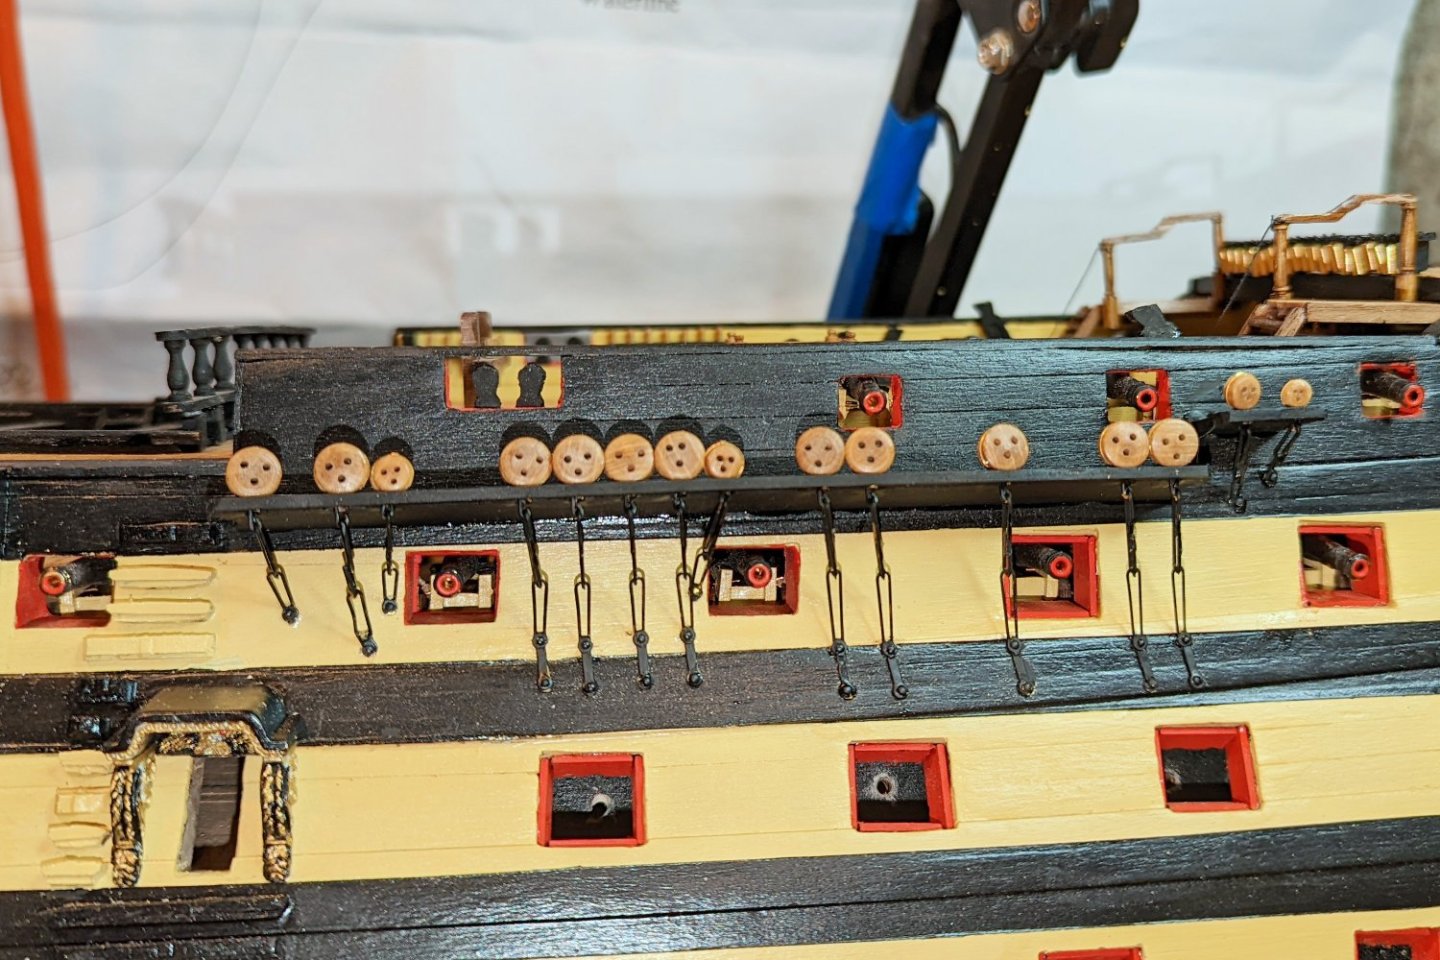
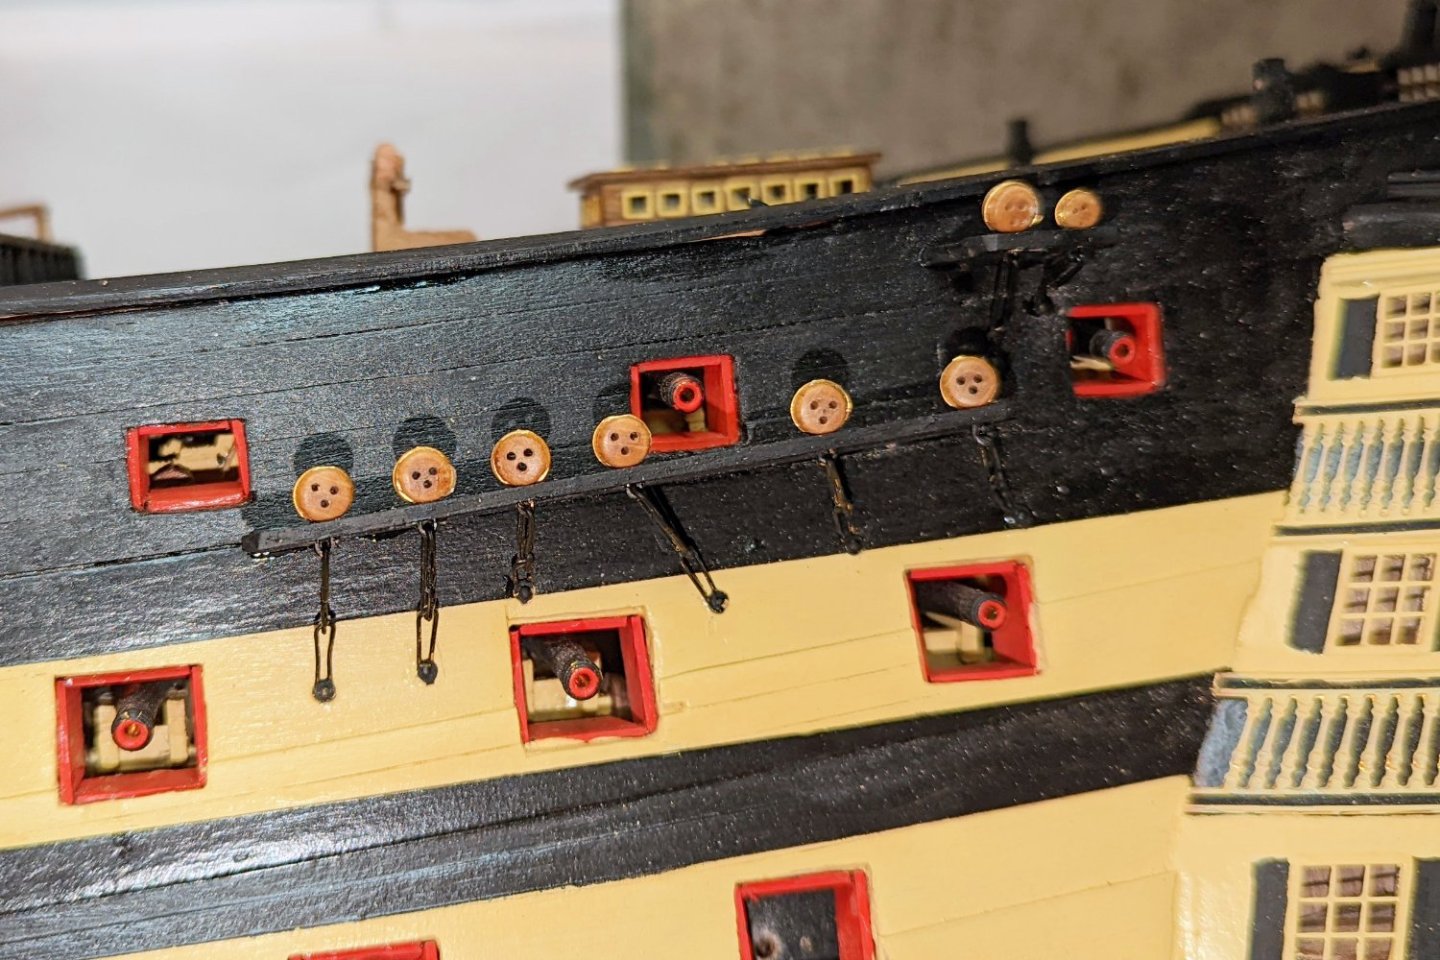
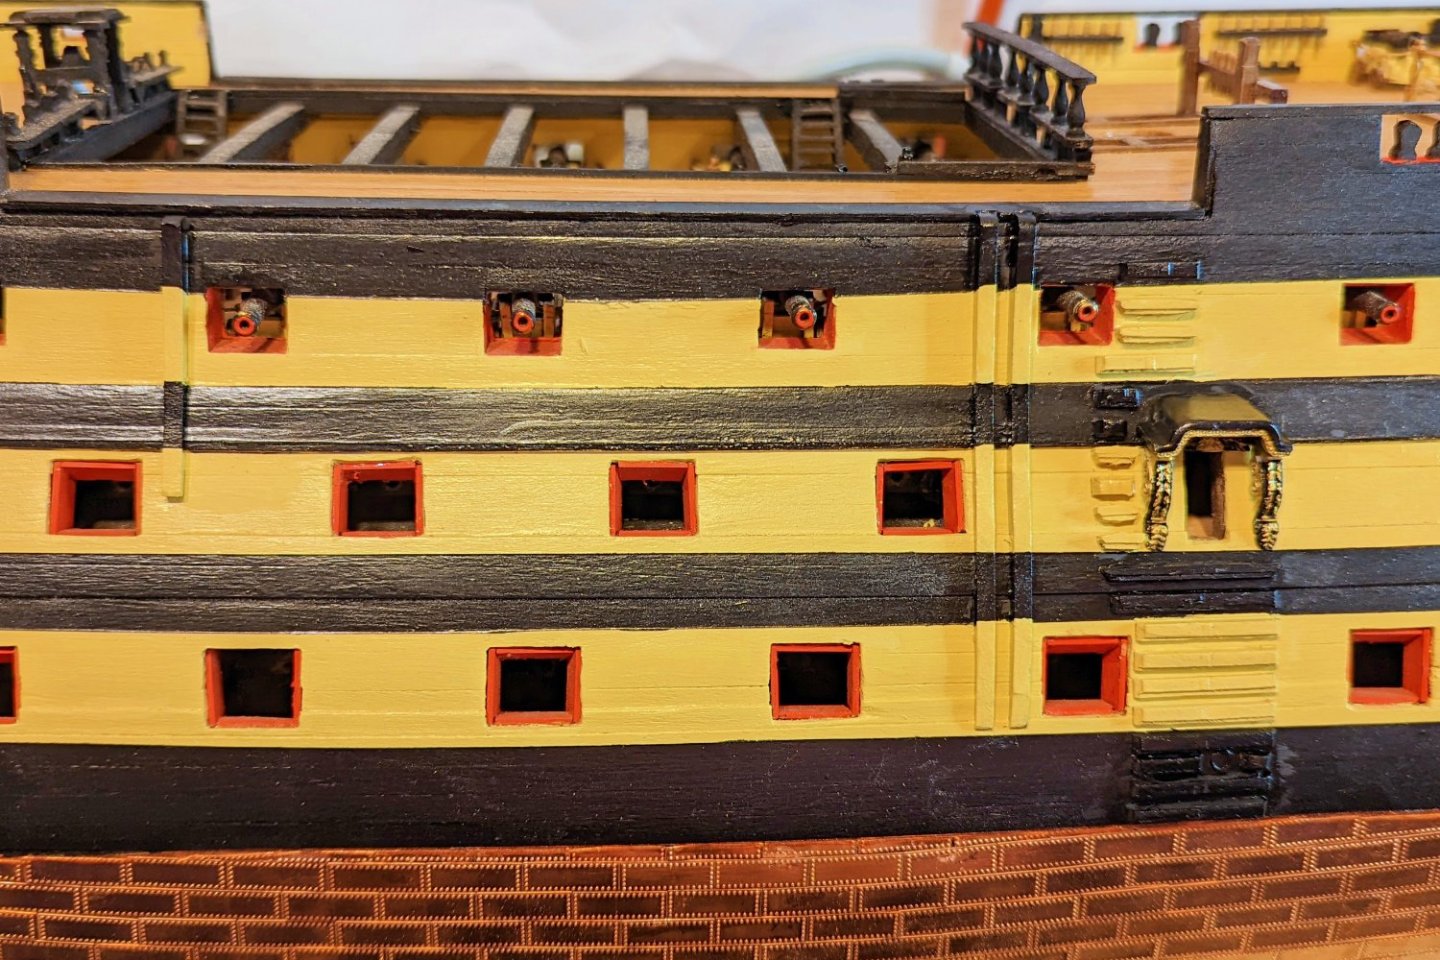
Completed the dummy cannon barrels, the gunport lids, and the "rigols". From the date of my last post, it looks like this took about 8 days for both sides. Full disclosure: You will notice that I did not install ropes on the gunport lids. On my previous models, those have "wilted" -- I suspect because it's hard to get tension on them the way you do with mast and yard rigging. The look of the lids here was so clean that I didn't want to "junk them up" with ropes that would eventually look squiggly, and I build for fun and "look on the shelf", not historical accuracy. I fully assume that this is my failing and that there is some way to keep them all straight over time -- perhaps diluted PVA glue? -- but in any event I skipped them. 🥵 While installing the dummy barrels, I dry fitted them first, and didn't notice on one of them that the bottom of the dummy barrel strip below the hold had chipped away somehow, so when I let go of the barrel it fell down inside the hull -- from the lowest gunport level -- irretrievable! And there are no spares. So as shown in the picture, I closed one of the gunports at the stern end to compensate. Since this is my "good side", I briefly considered pulling one of the barrels from the other side, but didn't want to get into removing the gunport lid. Regards, David

- 218 replies
-
- 9
-
-
- Victory
- Caldercraft
- (and 1 more)
-
Since my last post about 10 days ago, I've been working on the channels, deadeyes and chainplate. I started on my "learning side" and did come up a learning curve in terms of how to get the chainplate much better aligned. It took a while to get both sides done. Here are some pictures. Regards, David

- 218 replies
-
- 8
-
-
- Victory
- Caldercraft
- (and 1 more)
-
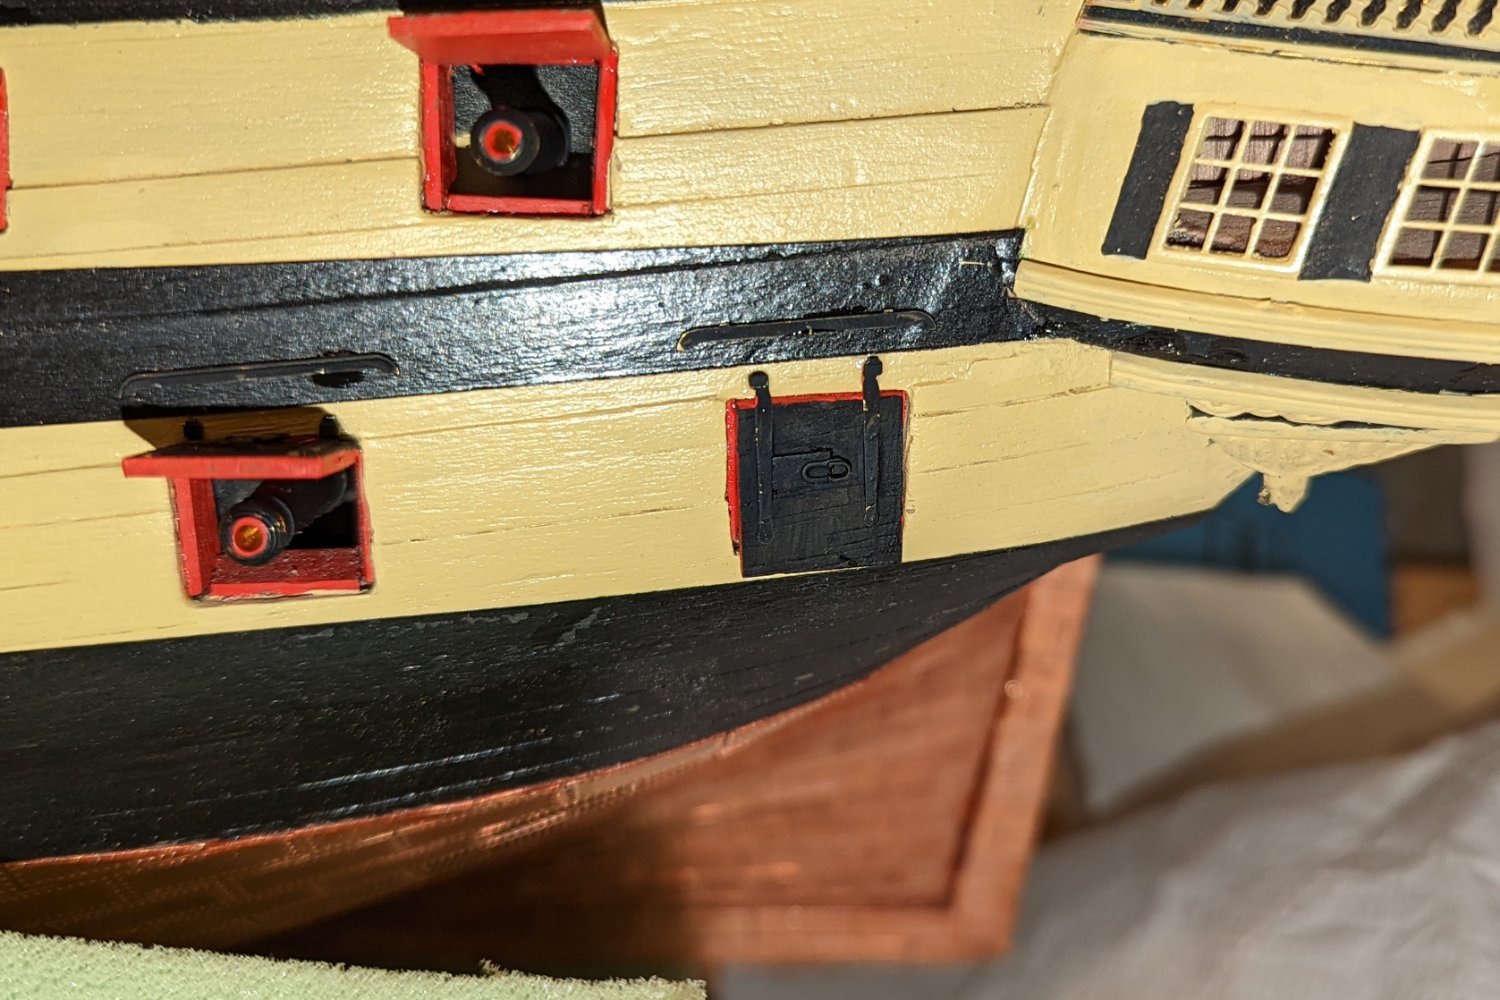
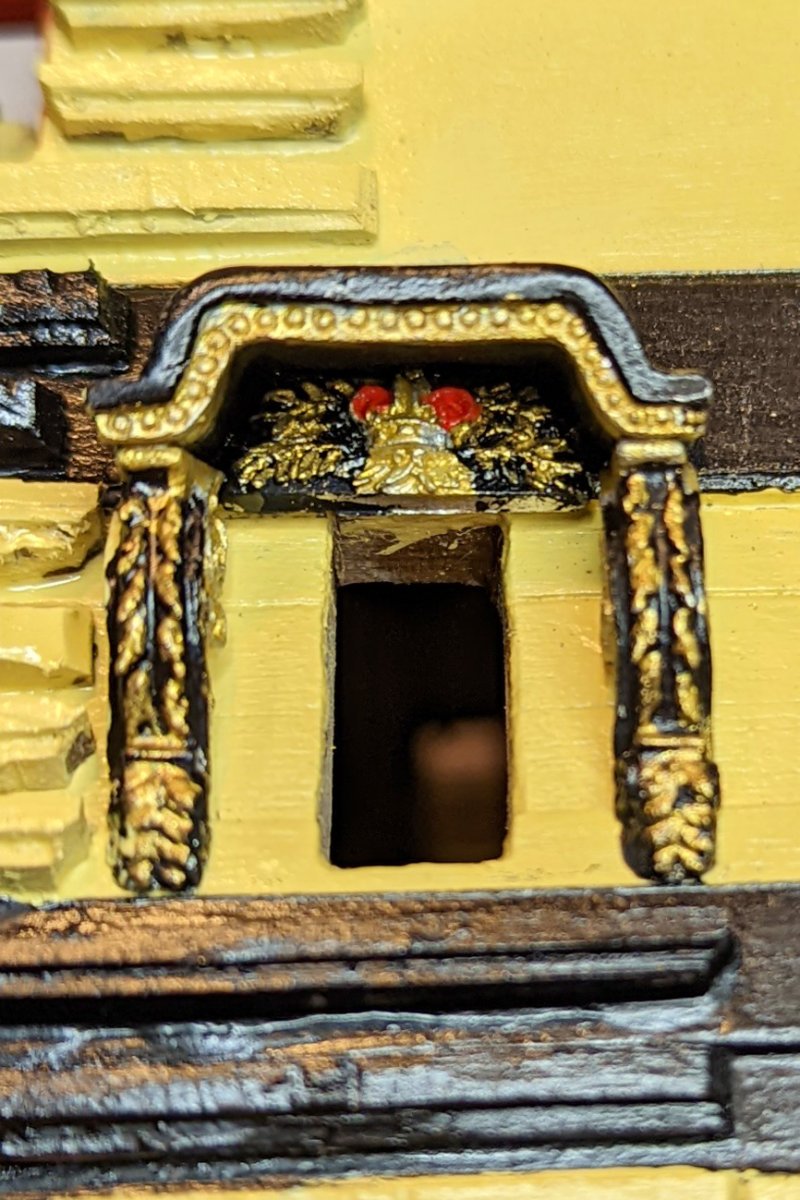
Finished side entry port, steps, fenders and chesstree. Regards, David

- 218 replies
-
- 6
-
-
- Victory
- Caldercraft
- (and 1 more)
-
Still here, Chris. Glad to see you back. Regards, David
-
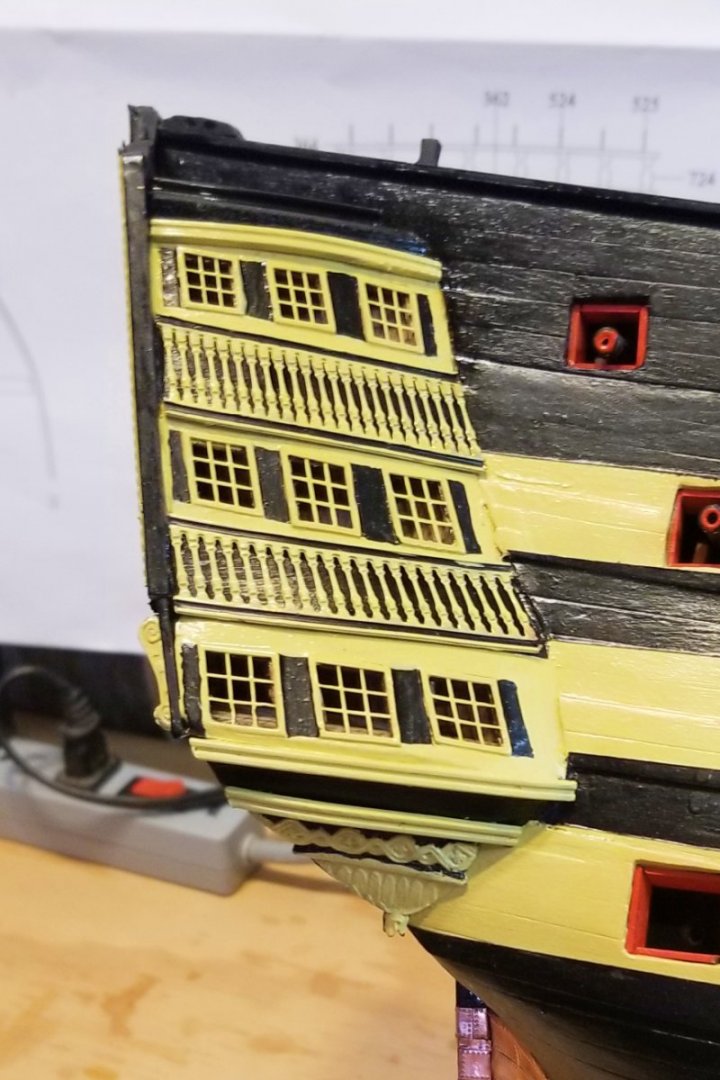
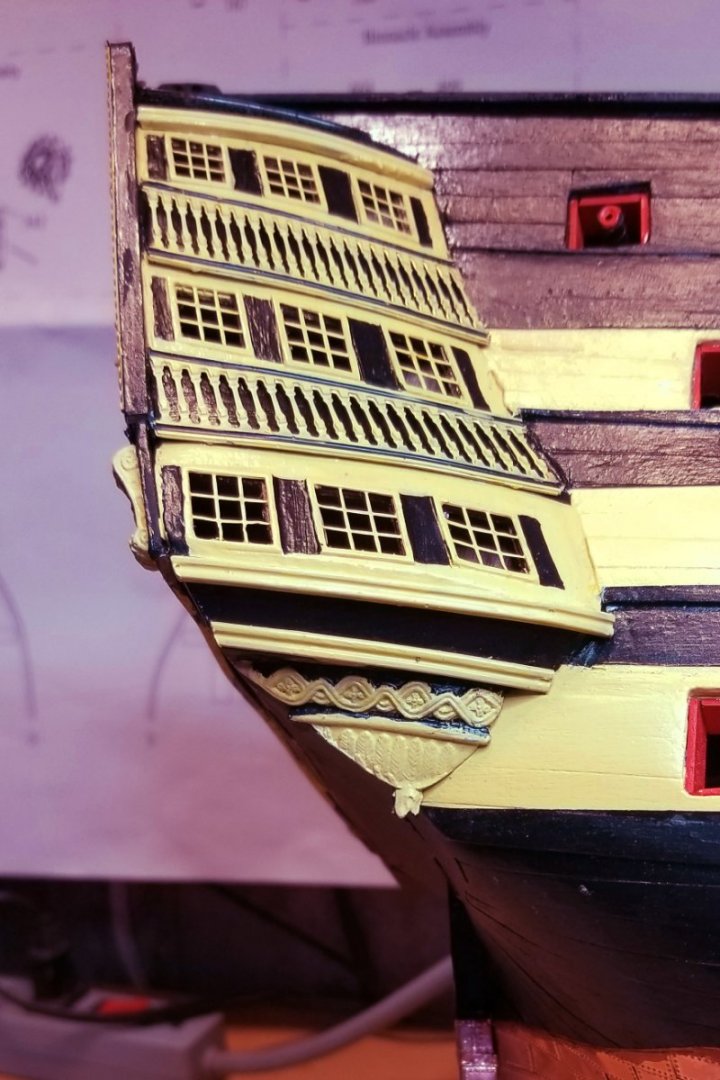
Finished painting and decorating the starboard quarter gallery. Regards, David
- 218 replies
-
- 7
-
-
- Victory
- Caldercraft
- (and 1 more)
-
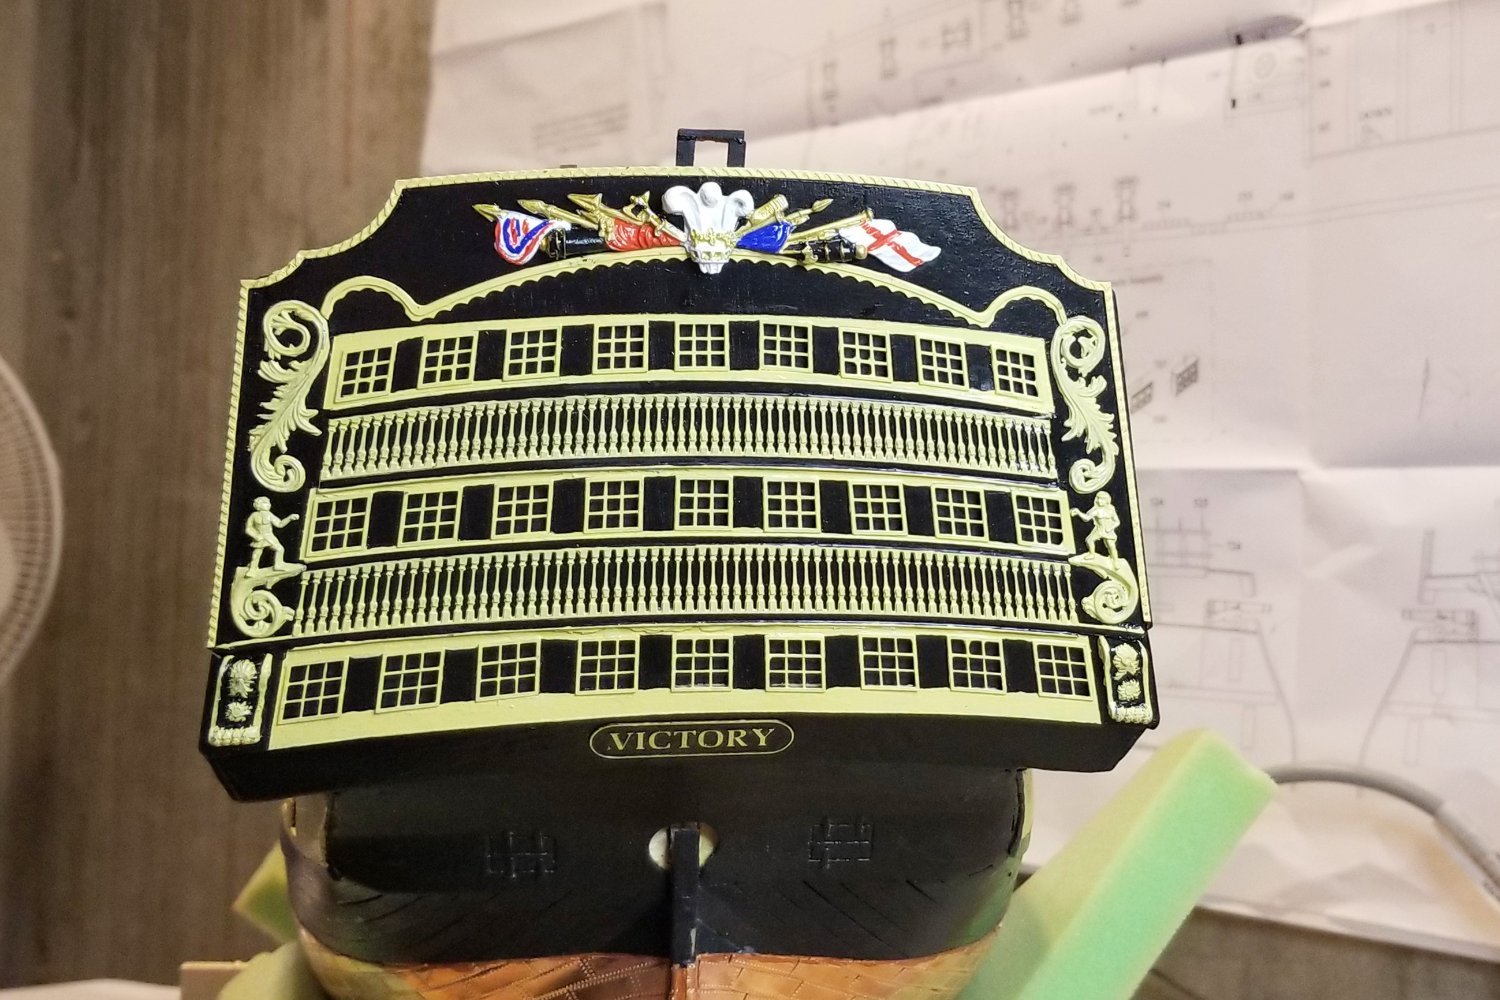
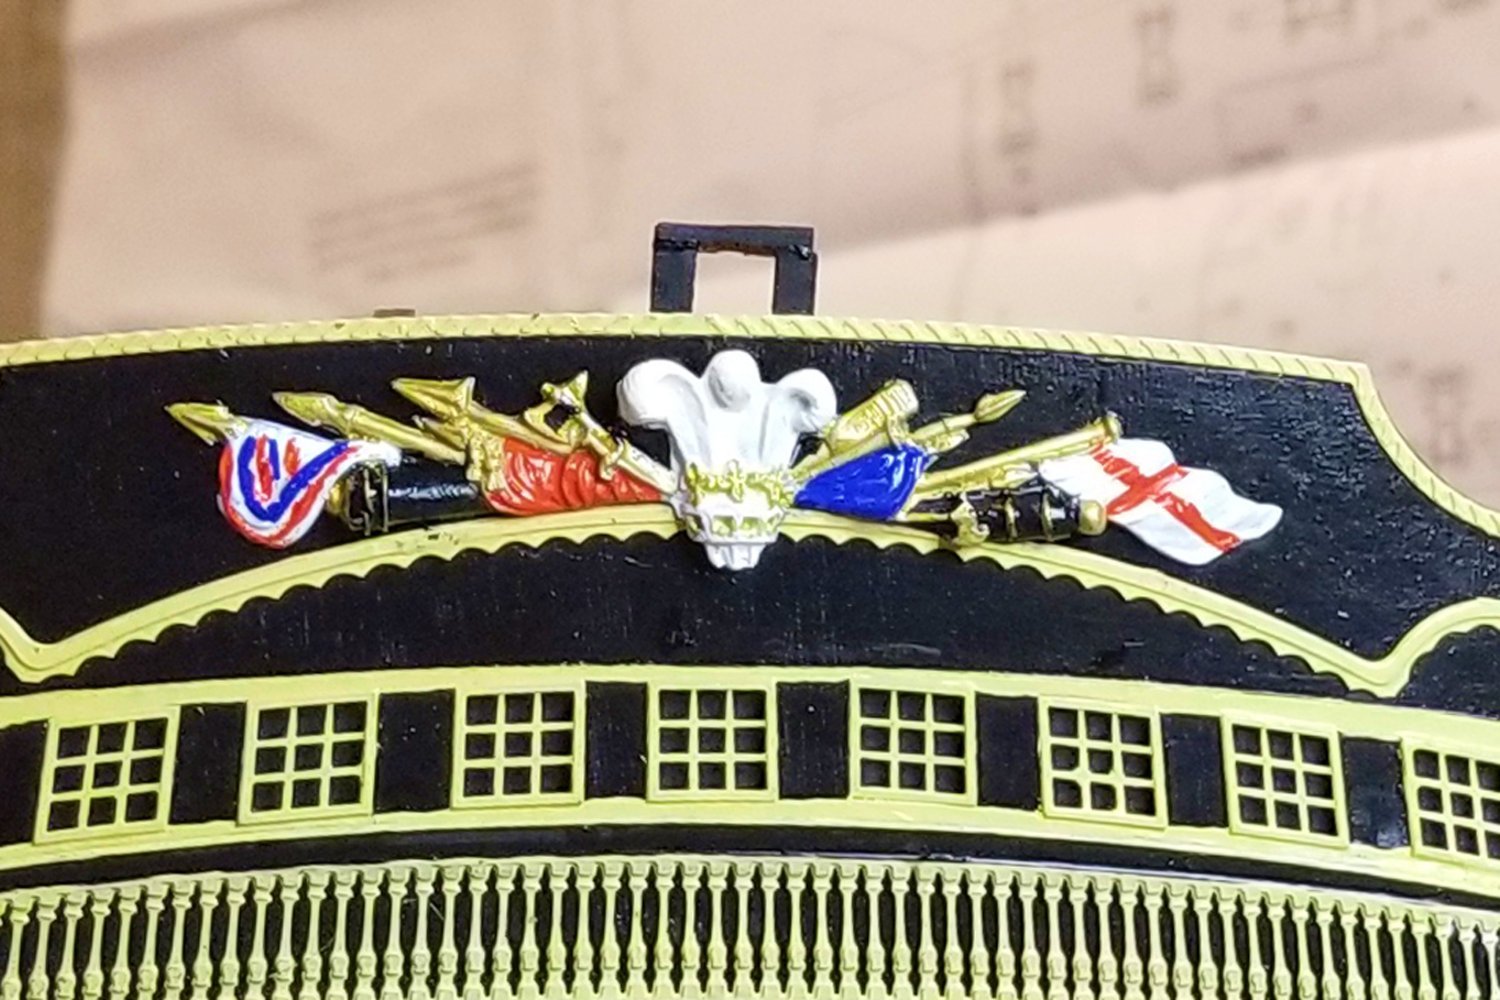
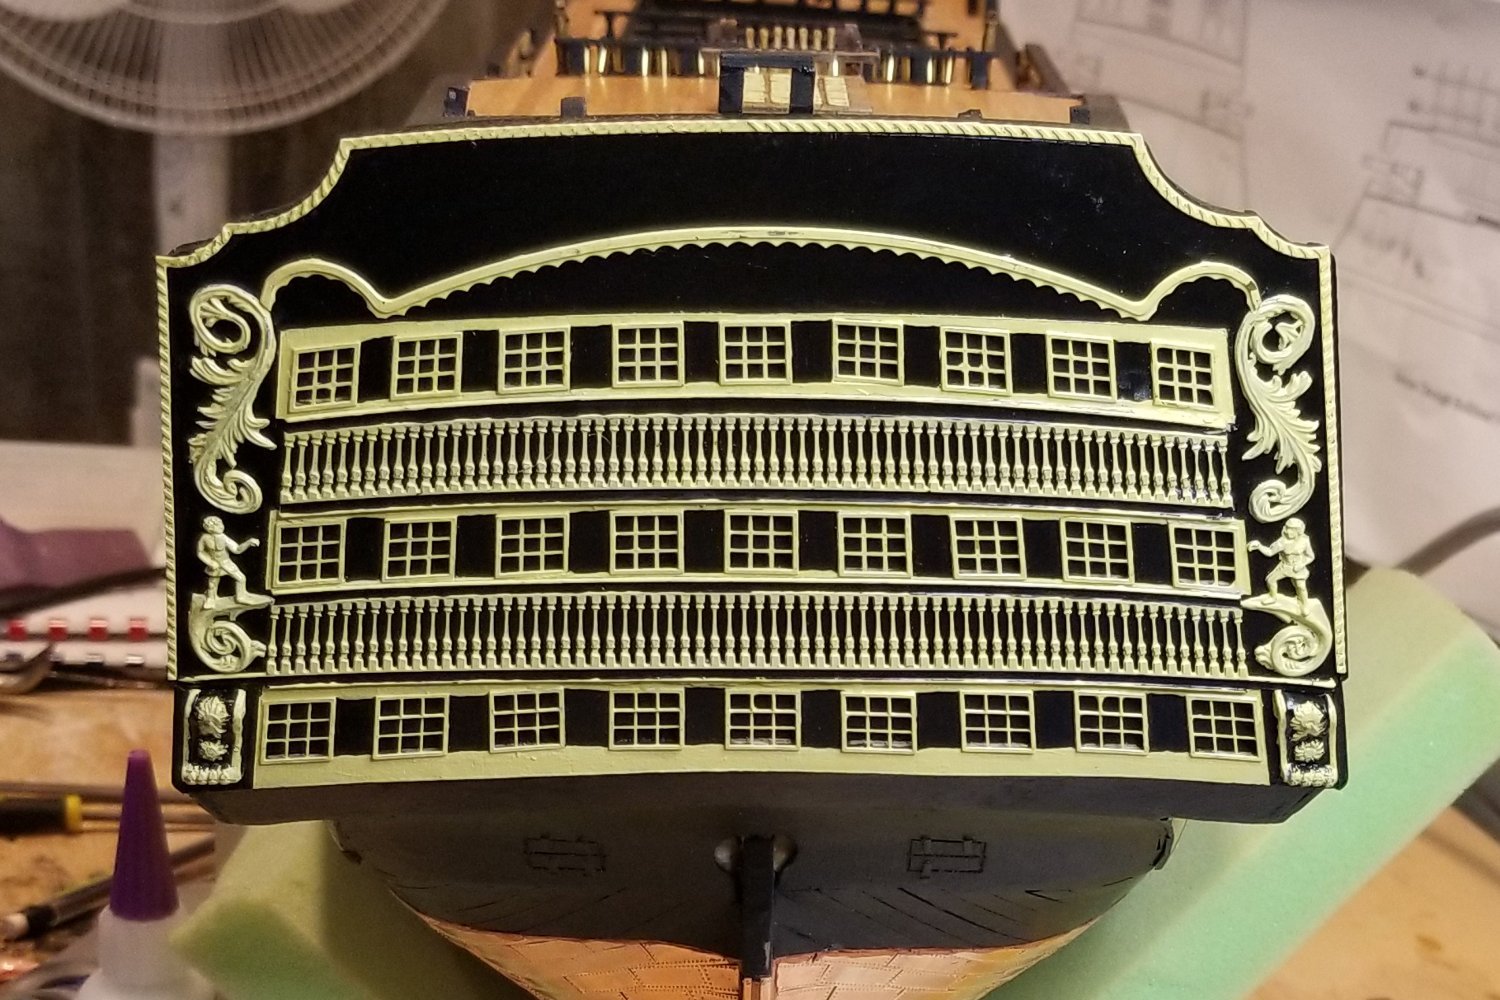
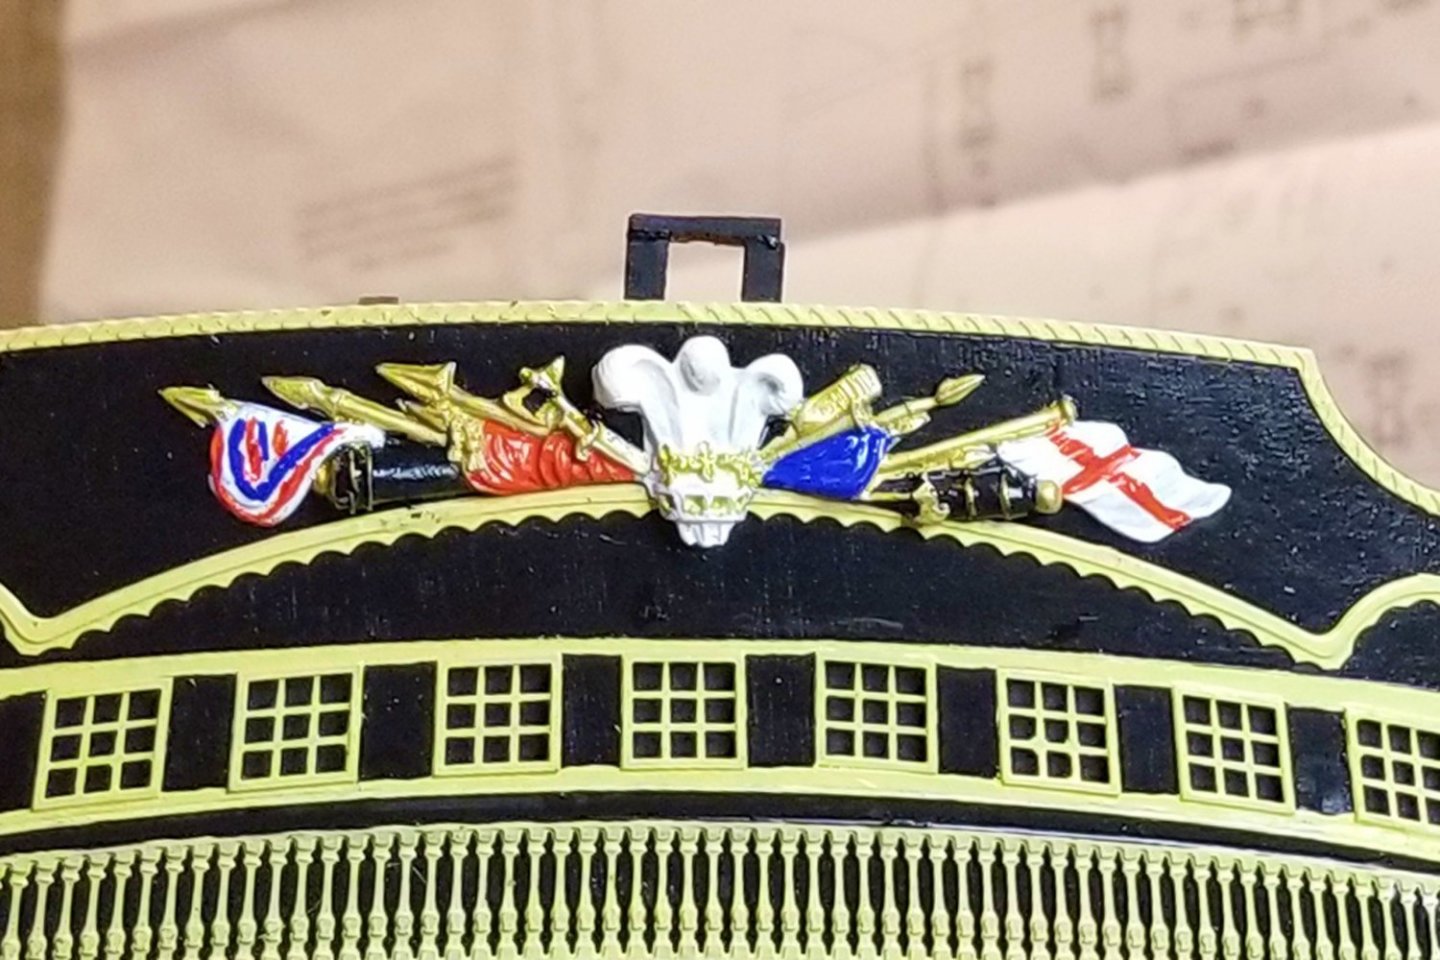
Finished the Trophy of Arms and the stern nameplate. Some notes: On the Trophy, the blue section to the right of the white crown is supposed to have some detail, but try as I might, I couldn't get those lines to show well, so I just painted it over as a solid color. On the nameplate, I didn't paint it yellow because I'd never have been able to get sharp lettering. So this is painted black and then the raised parts sanded off. Regards, David

- 218 replies
-
- 7
-
-
- Victory
- Caldercraft
- (and 1 more)
-
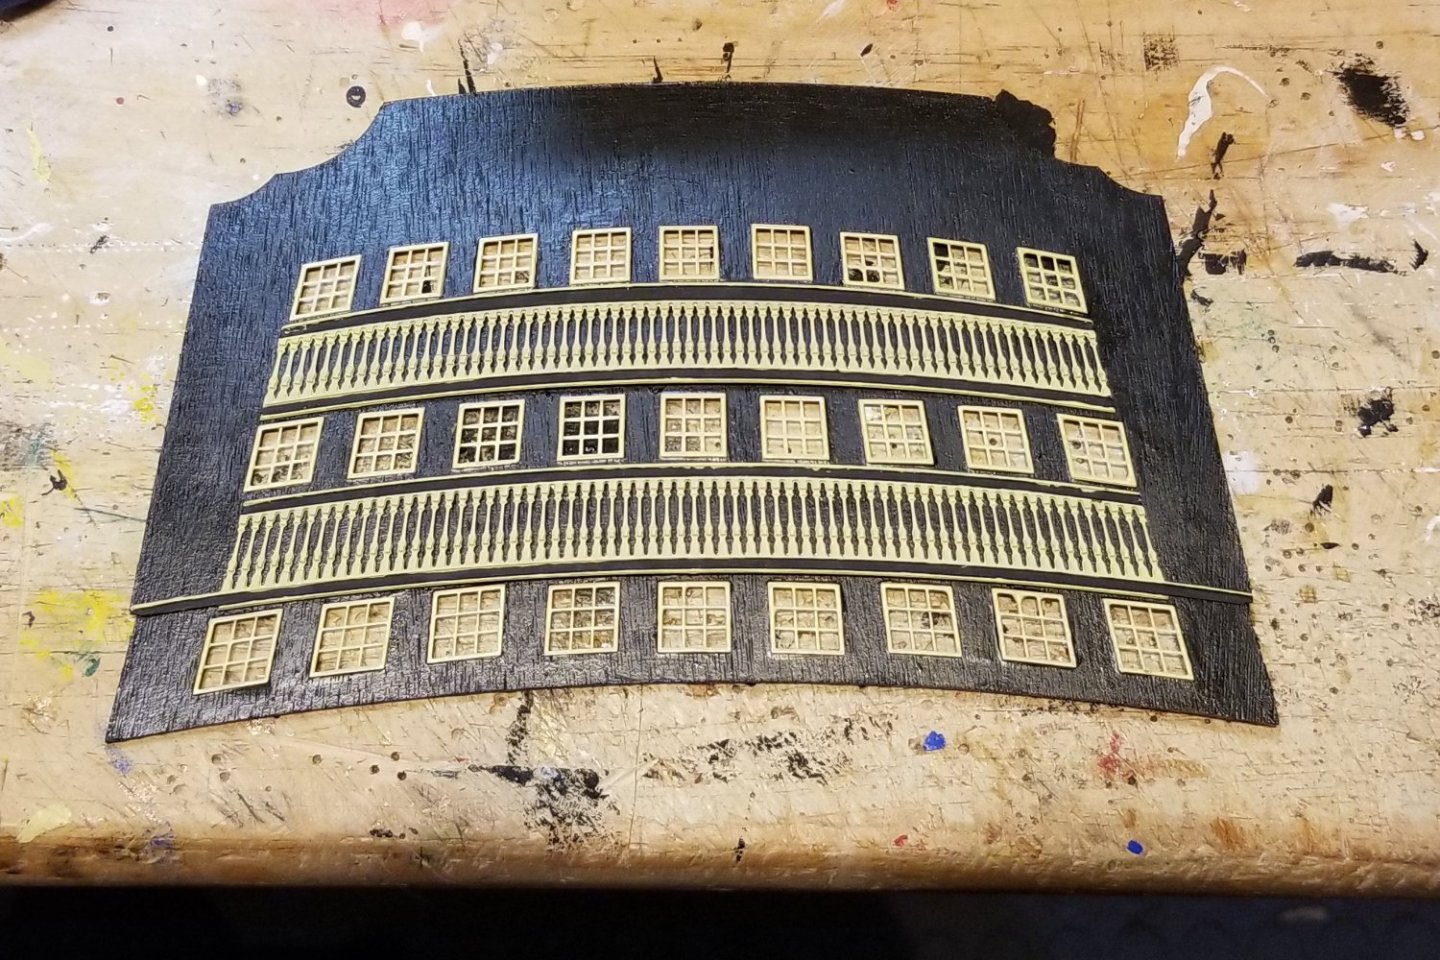
More progress on the stern fascia. What's missing from this pic is the trophy of arms (big deal micro painting coming up), and the nameplate. I am not terrific at the fine painting, so we'll see what I get. Regards, David

- 218 replies
-
- 5
-
-
- Victory
- Caldercraft
- (and 1 more)
-
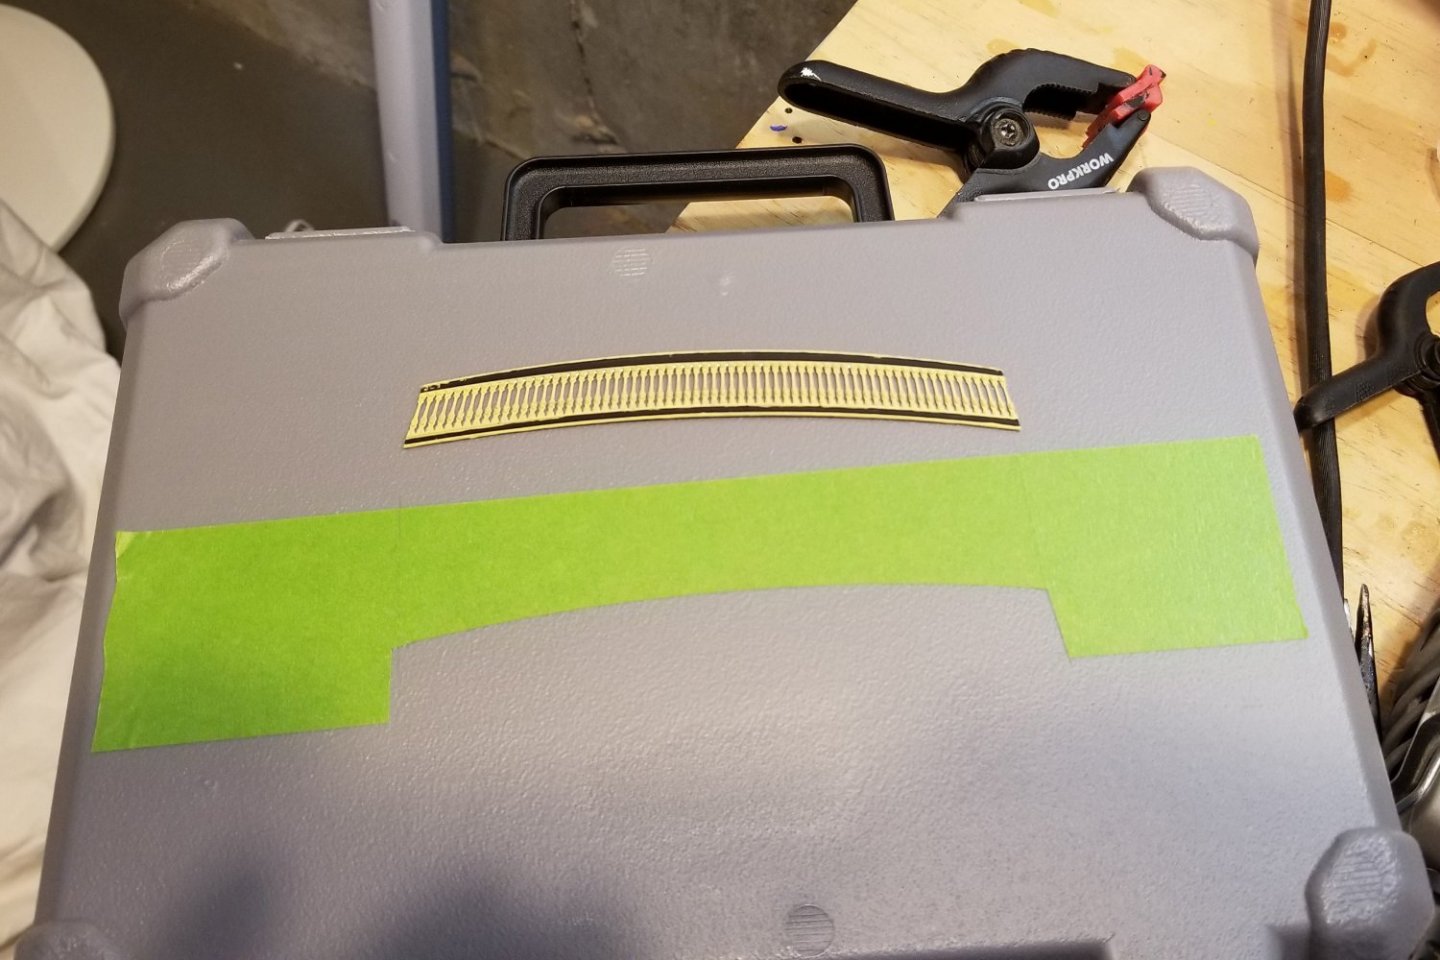
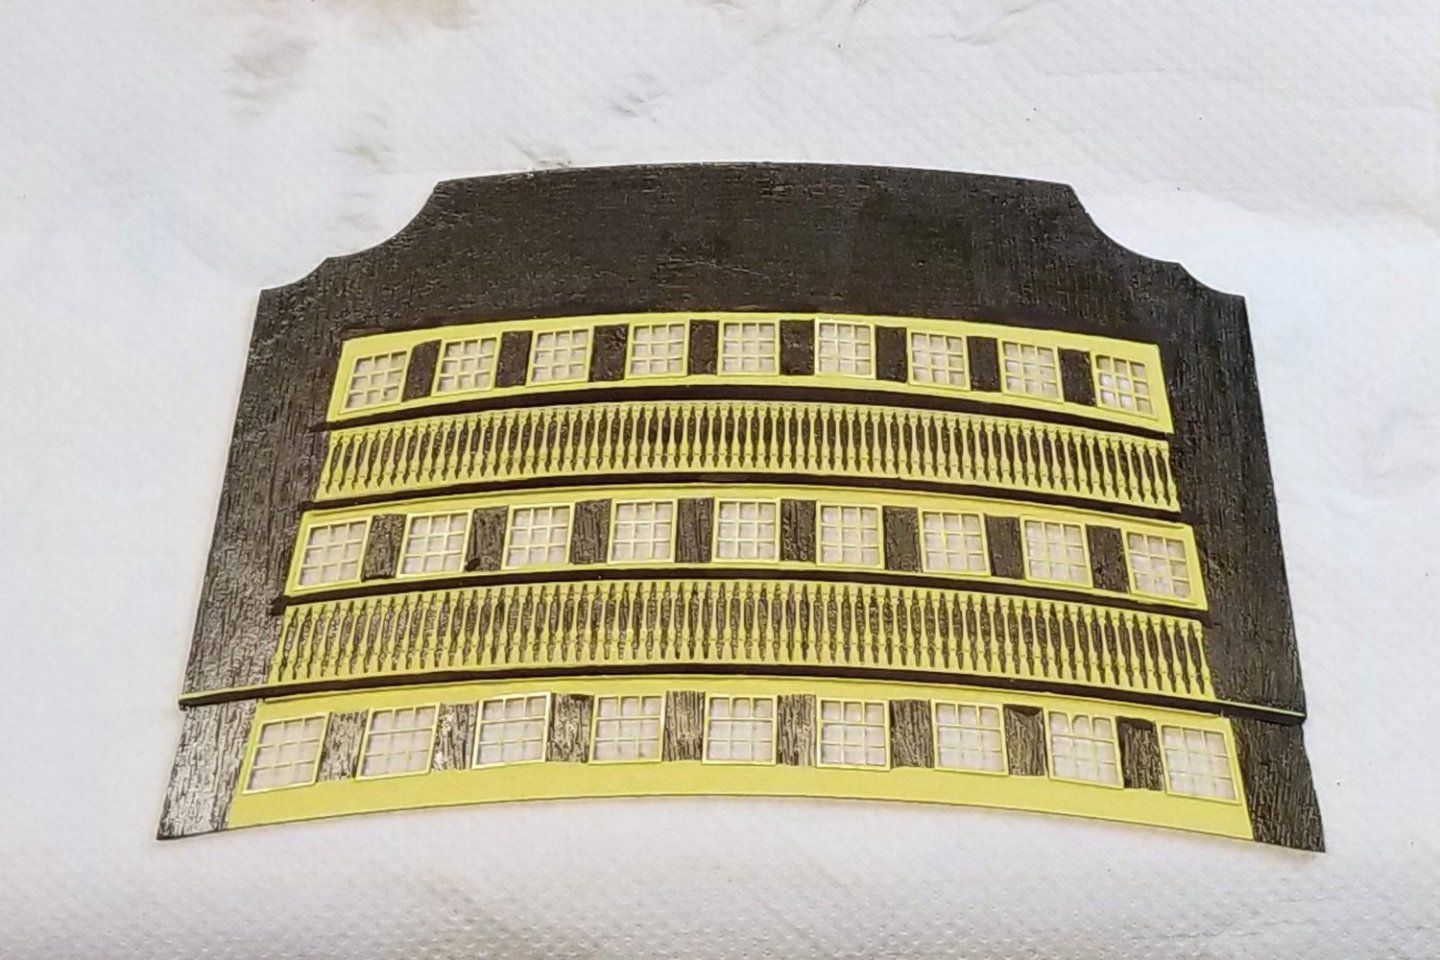
Working on the stern fascia. The dilemma was how to paint the yellow bands. Most get a good edge from the railing assemblies, but the top curve appeared to be a freehand job, which wouldn't look clean. Then it hit on me to cut painters tape to that curve using one of the railings as a guide for the knife. Worked pretty well, with some touchup. The pictures show the process. [EDIT: The pics came up out of order. The third one below is pre-painting, dry fitted railings. Then the process with tape is #1 and #4, and then #2 is the finished product. I really wish the website wouldn't do this random reordering.] Now I'm trying to see how much of this I can build off the ship before I mount the external fascia, because once mounted, detail work will become much more difficult. Regards, David

- 218 replies
-
- 9
-
-
- Victory
- Caldercraft
- (and 1 more)
-
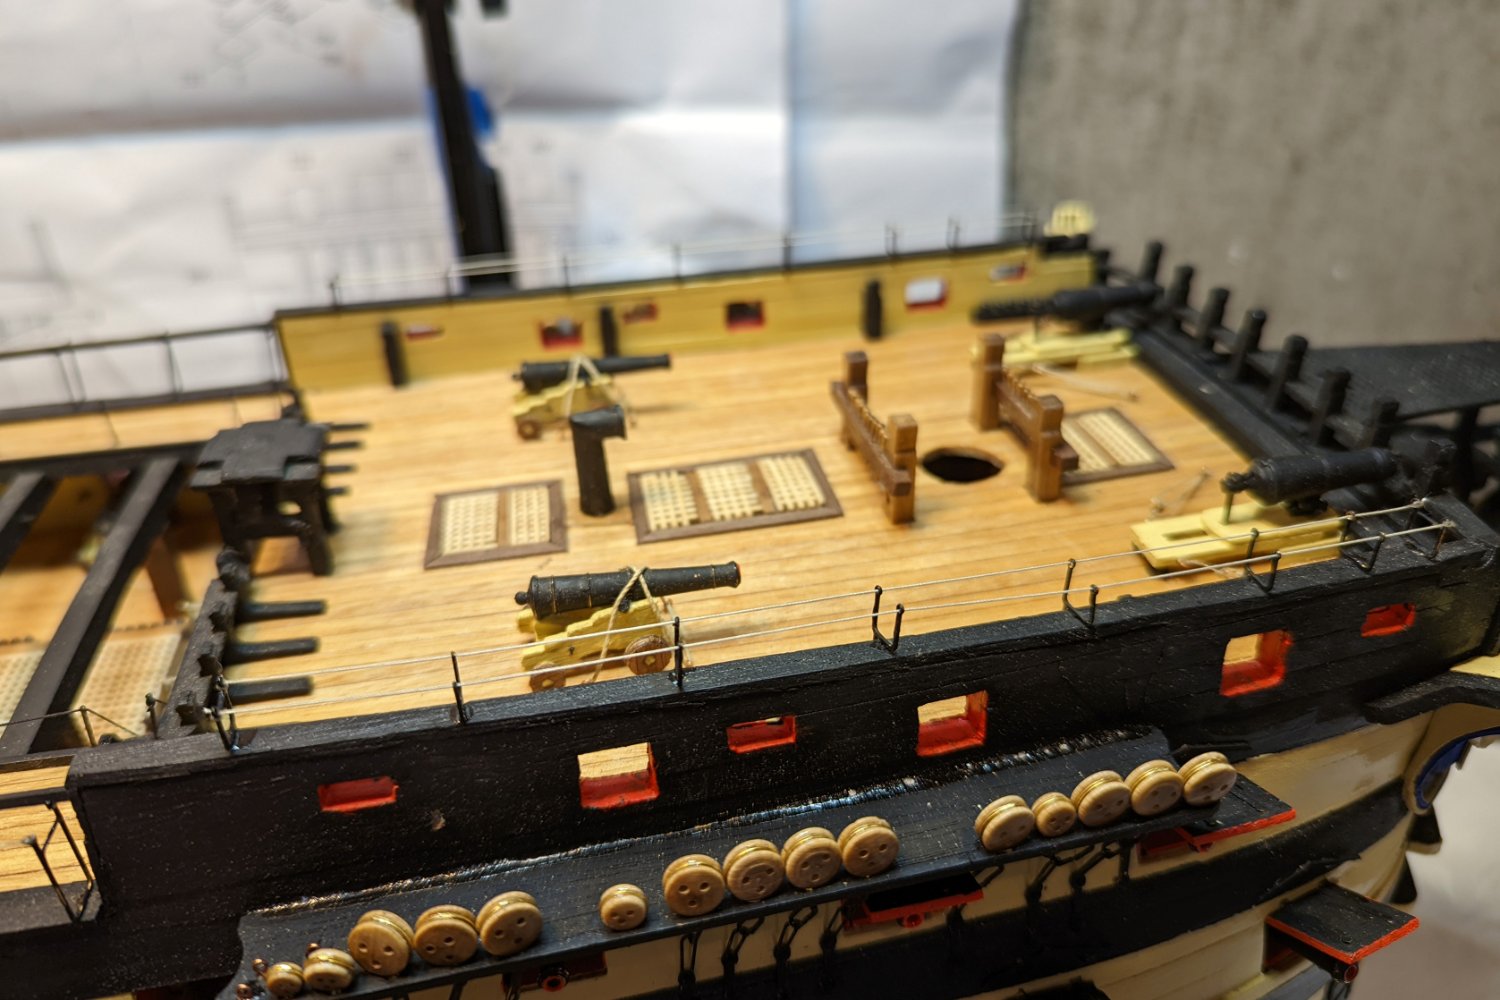
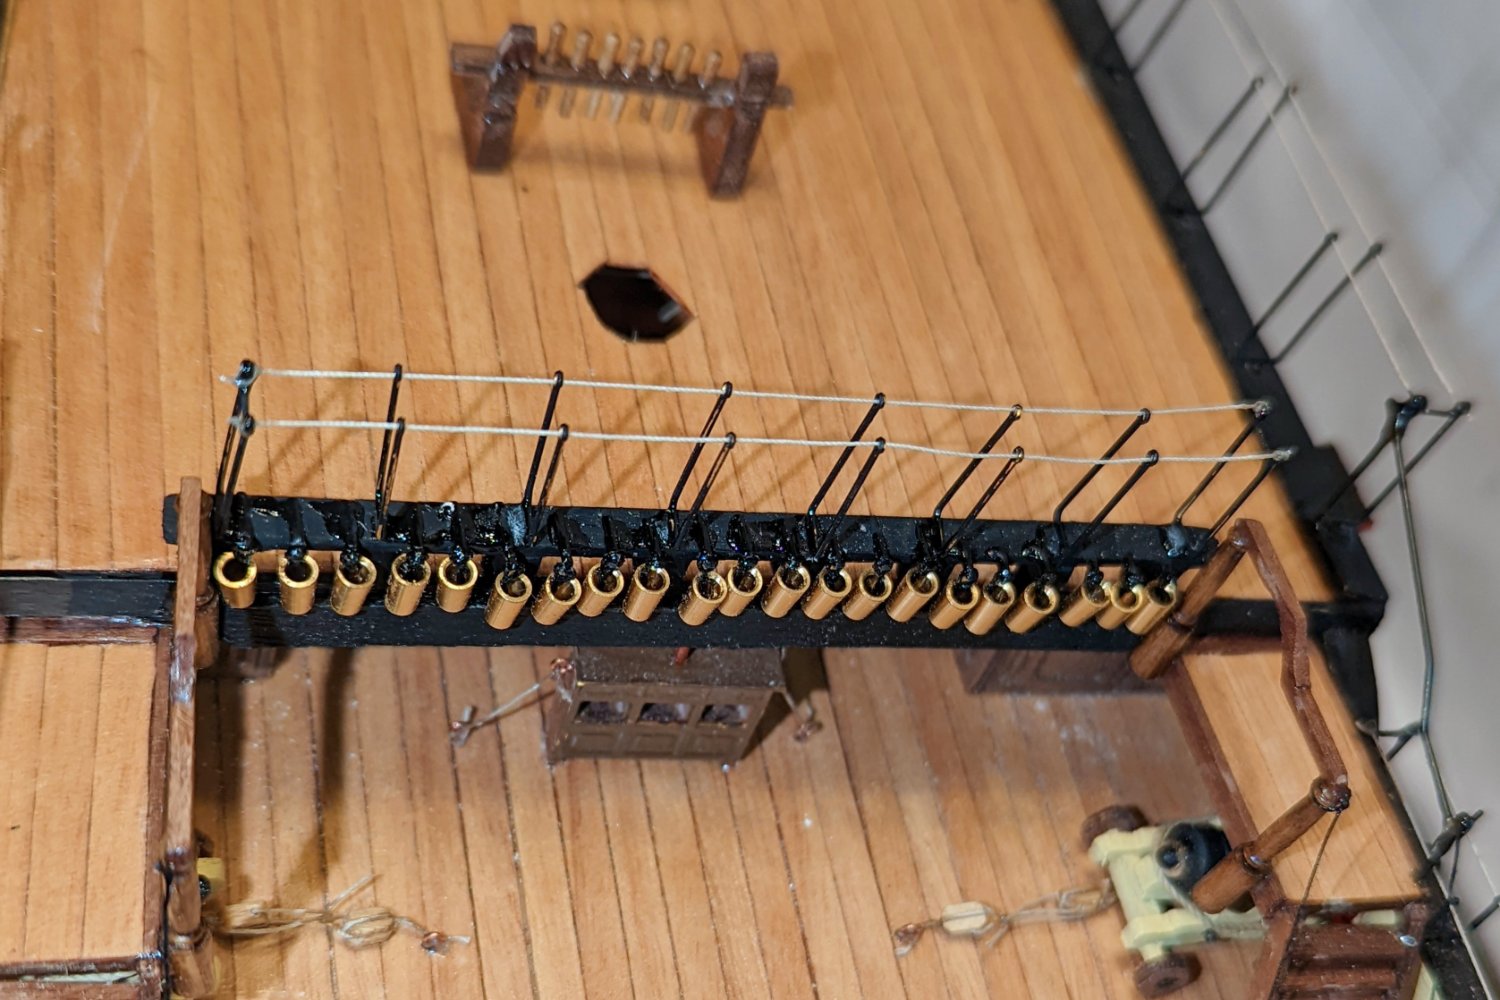
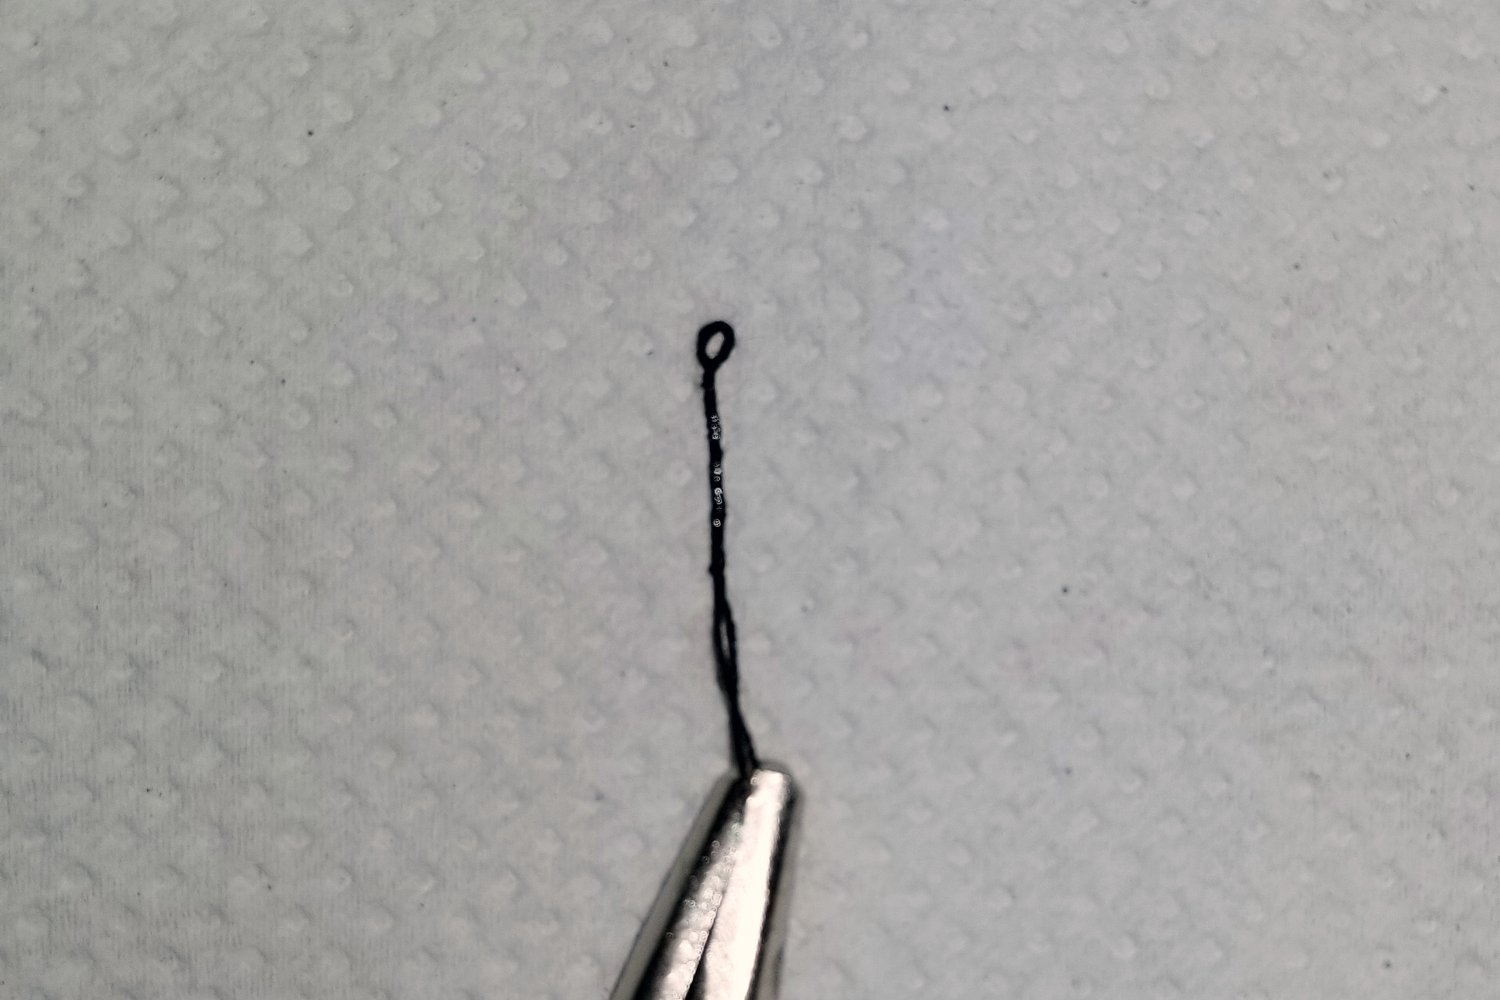
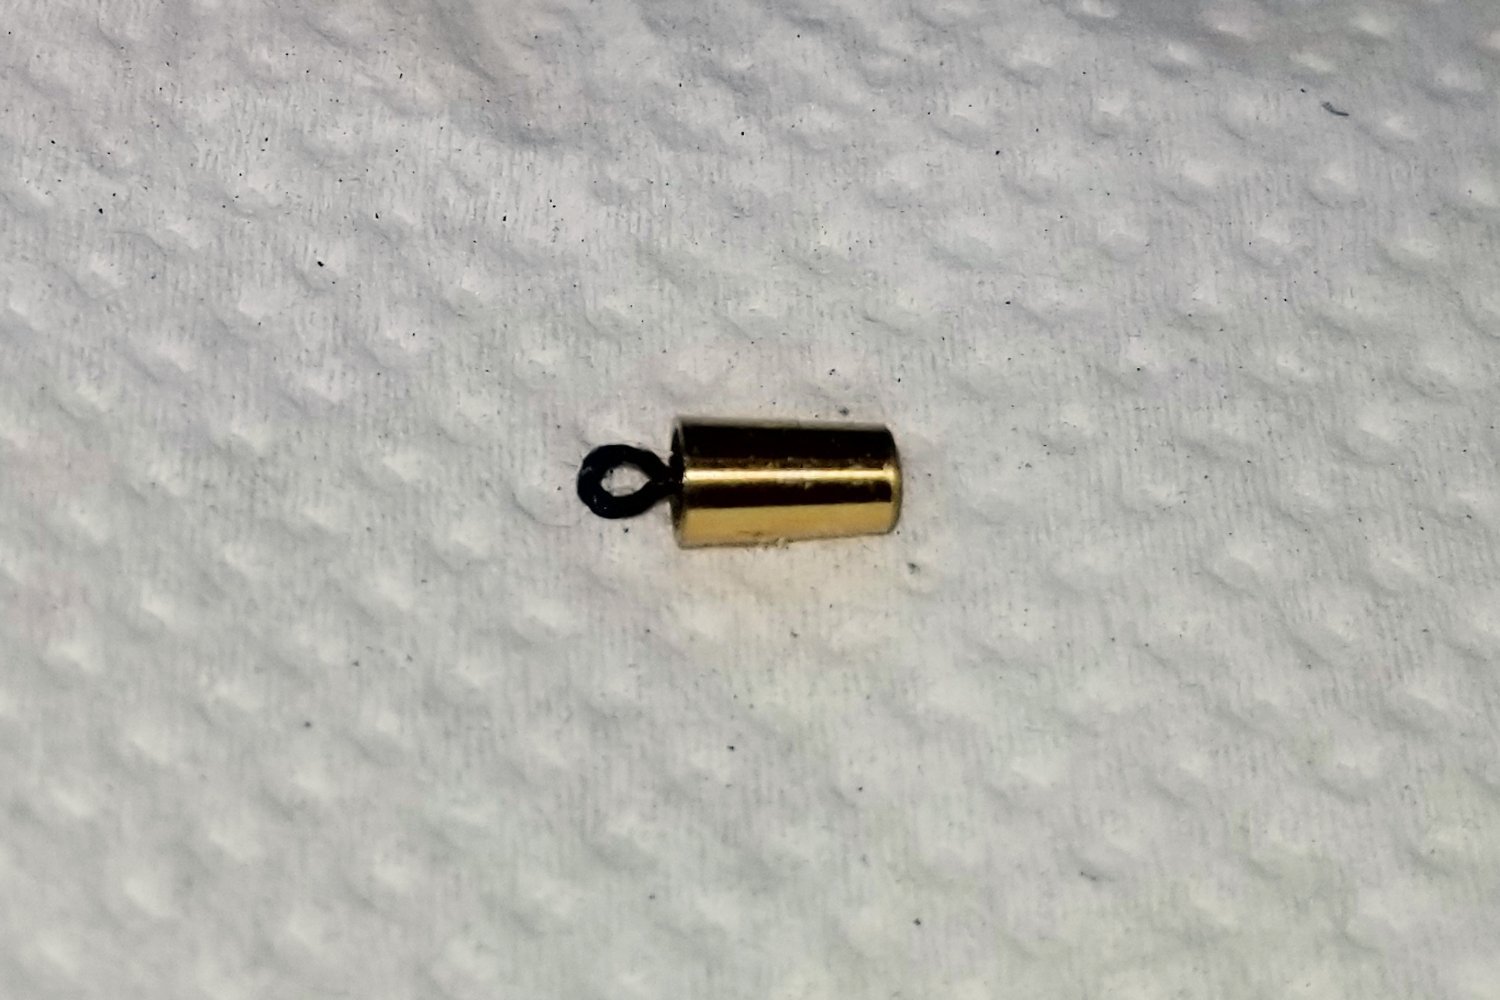
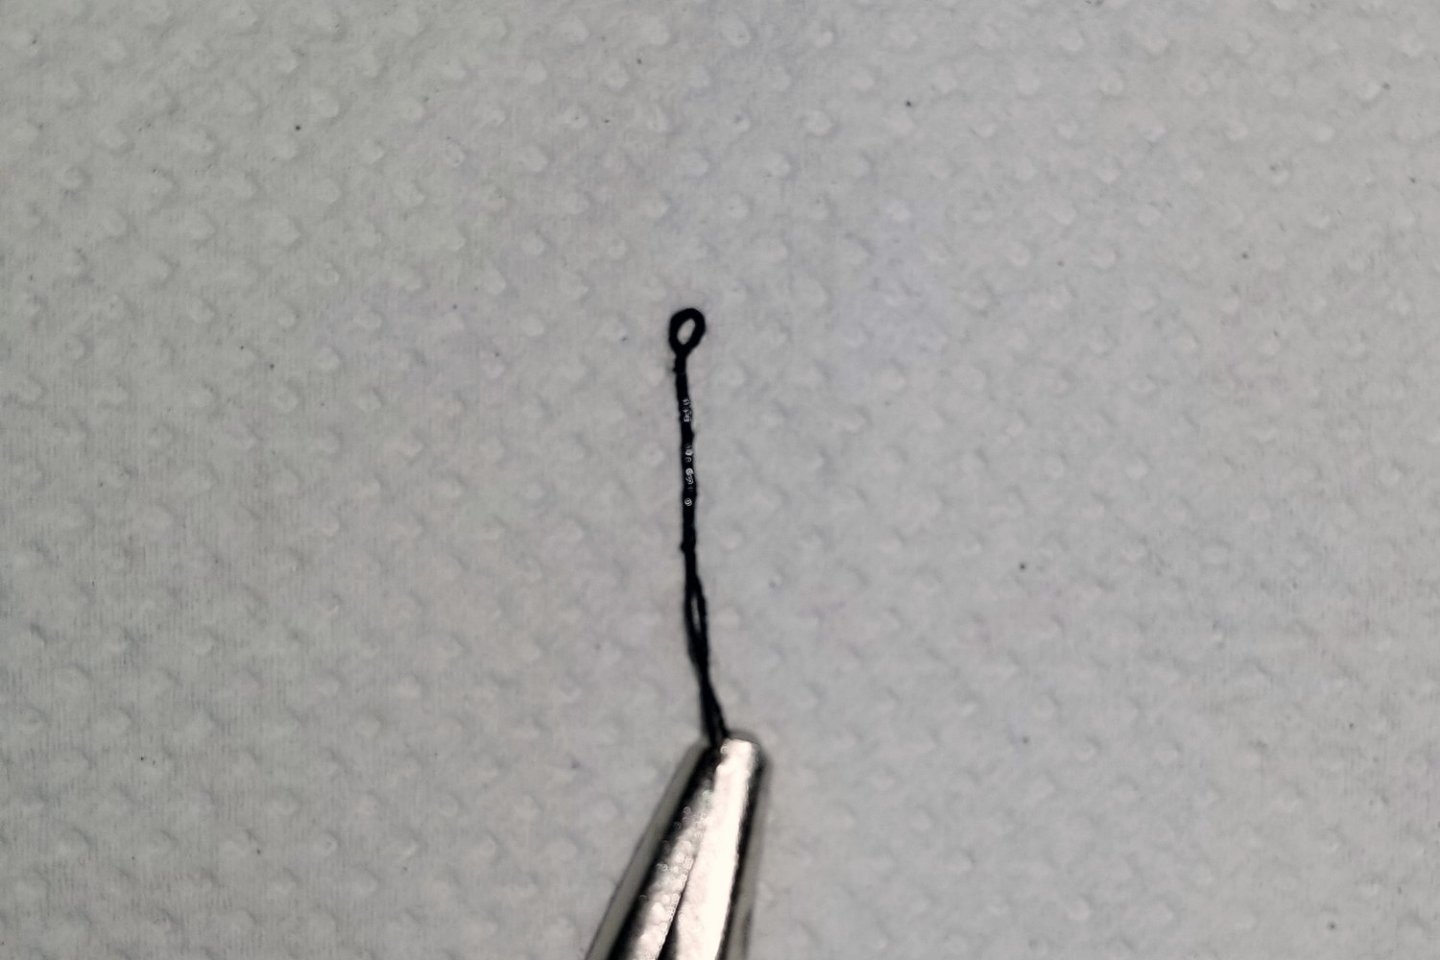
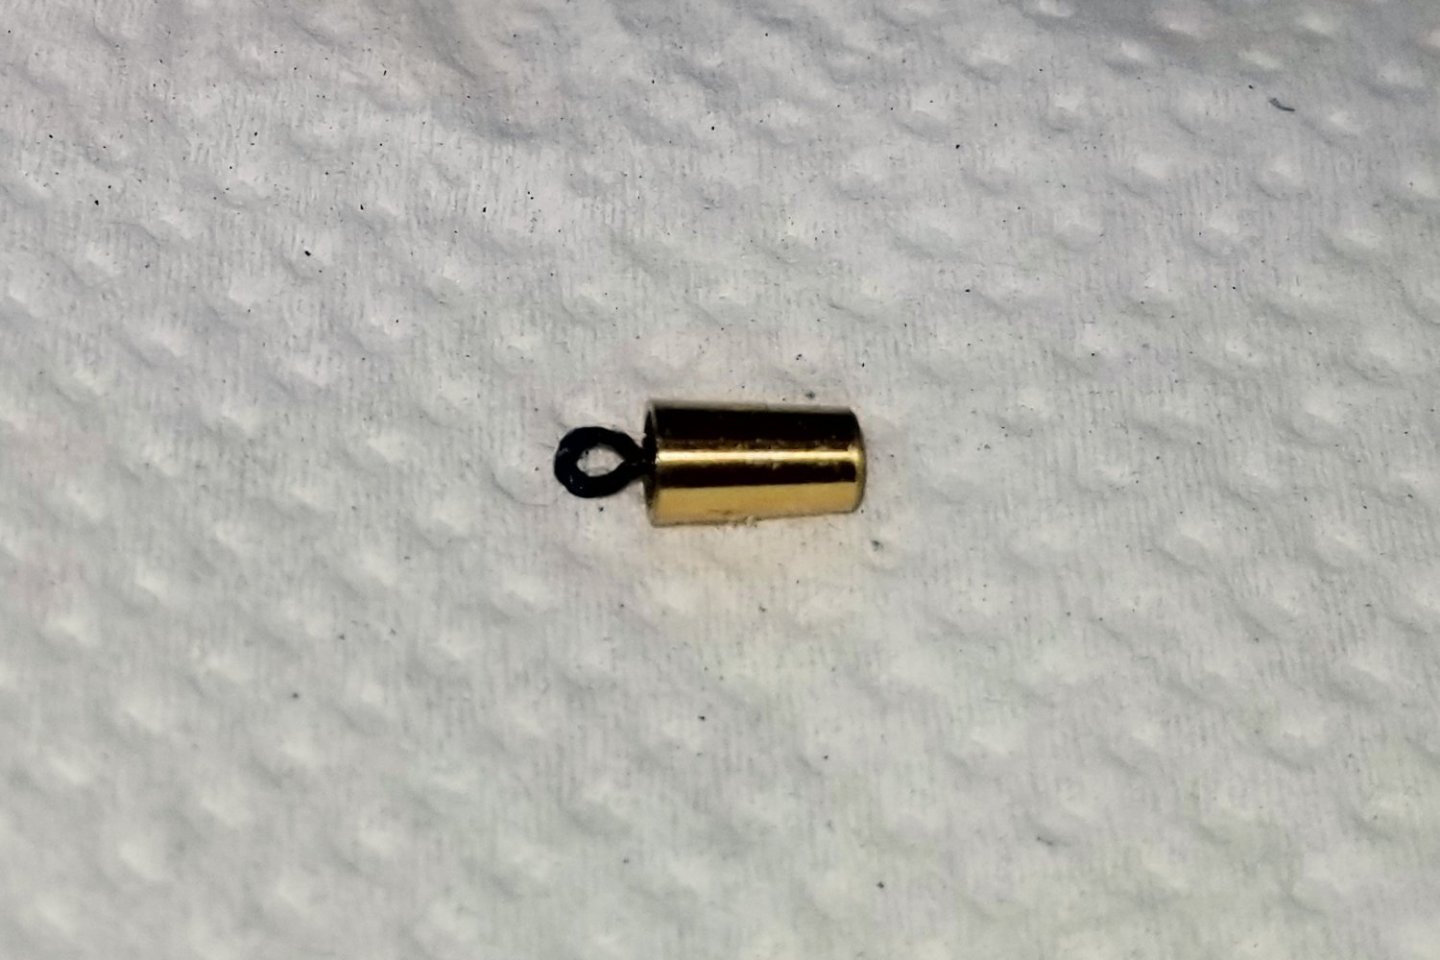
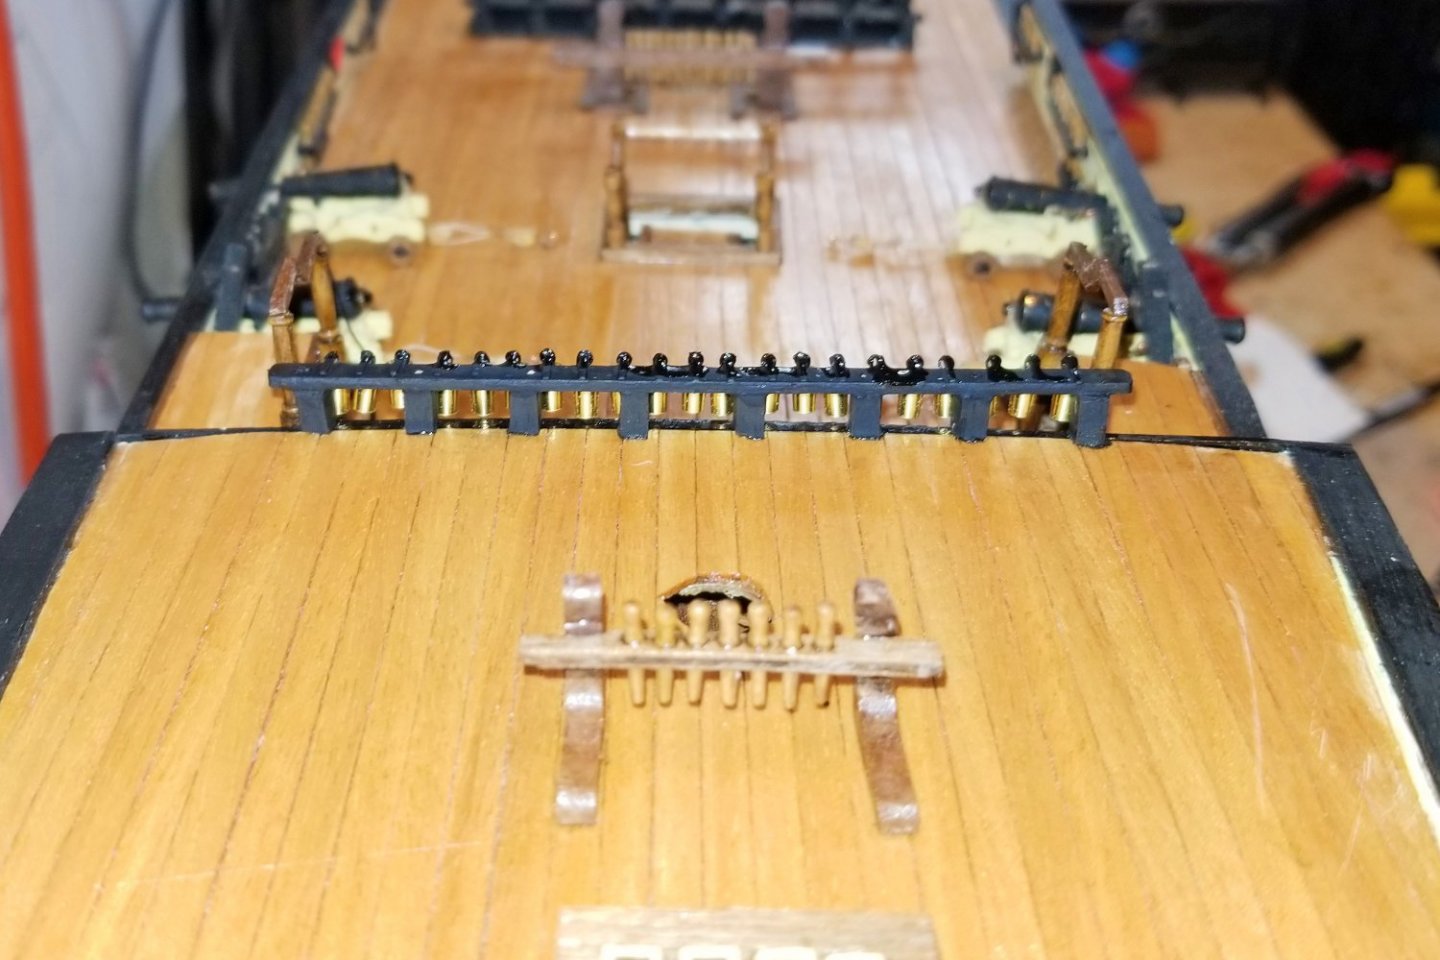
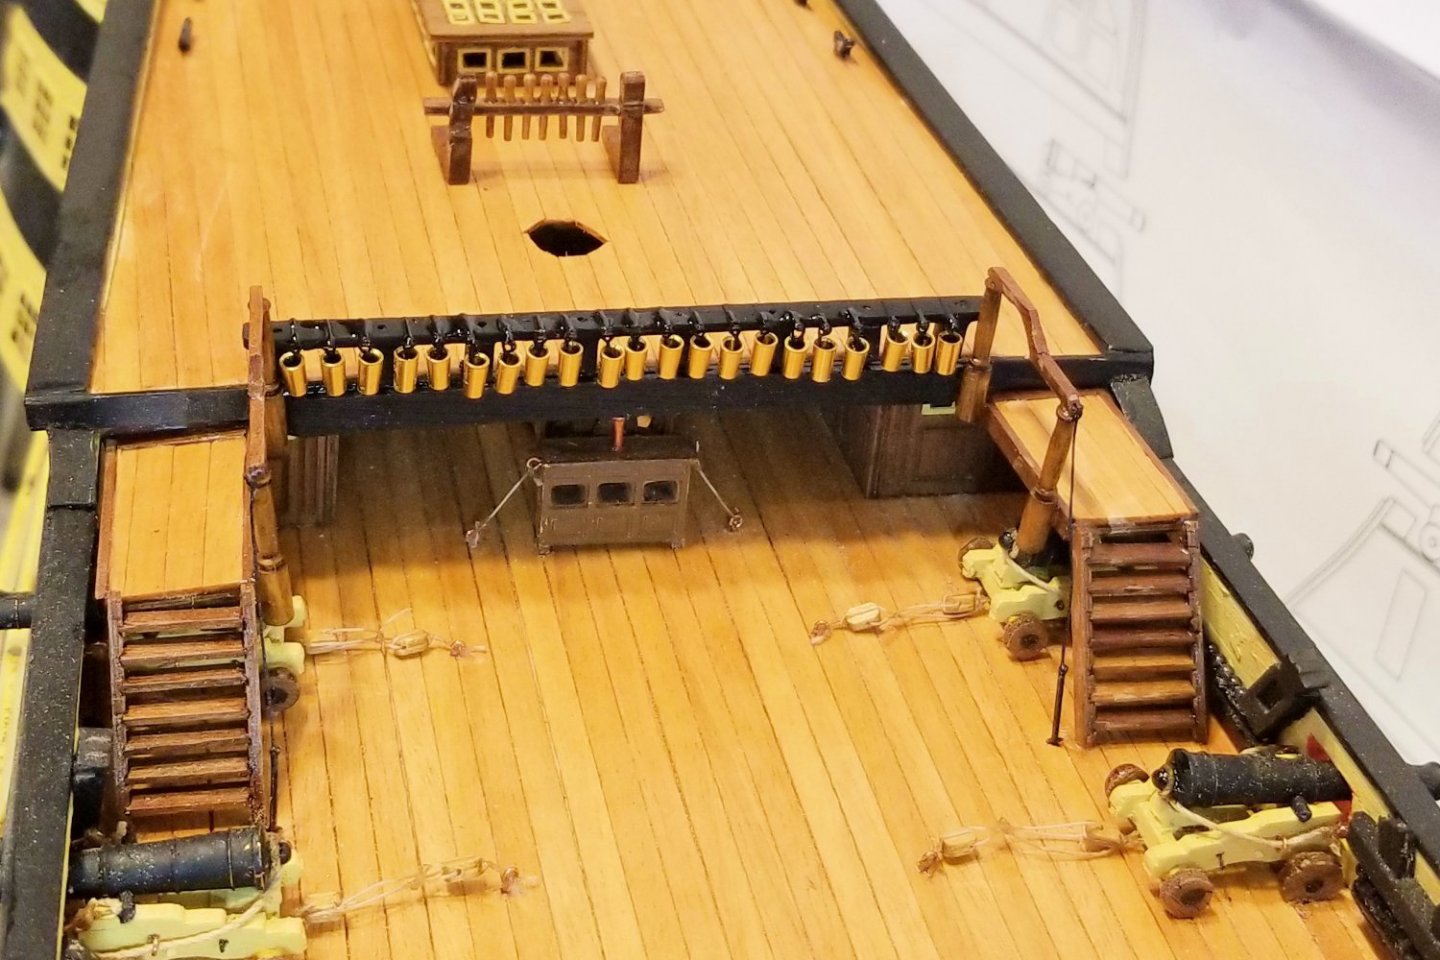
The buckets: The manual says to drill the brass buckets to accept a handle, but I wasn't up for that, so I used a different approach pictured below. First, create a wire loop around a small nail. Then, glue the stem into the bucket. The other pictures show the stern and bow side of the poop deck barricade, from which the buckets are hung. You'll notice that I did not paint them black as called for, because I like a bit of brass in every model and because I thought it would add more interest. It's almost impossible to get them perfectly aligned, but I think that wouldn't be as realistic as what came out here. Regards, David
- 218 replies
-
- 3
-
-
- Victory
- Caldercraft
- (and 1 more)