HOLIDAY DONATION DRIVE - SUPPORT MSW - DO YOUR PART TO KEEP THIS GREAT FORUM GOING!
×


drobinson02199
-
Posts
1,071 -
Joined
-
Last visited
Content Type
Profiles
Forums
Gallery
Events
Everything posted by drobinson02199
-
 Thanks, Mort. I need to find your build log and will do so. Regards, David
- 218 replies
-
- 1
-

-
- Victory
- Caldercraft
- (and 1 more)
-
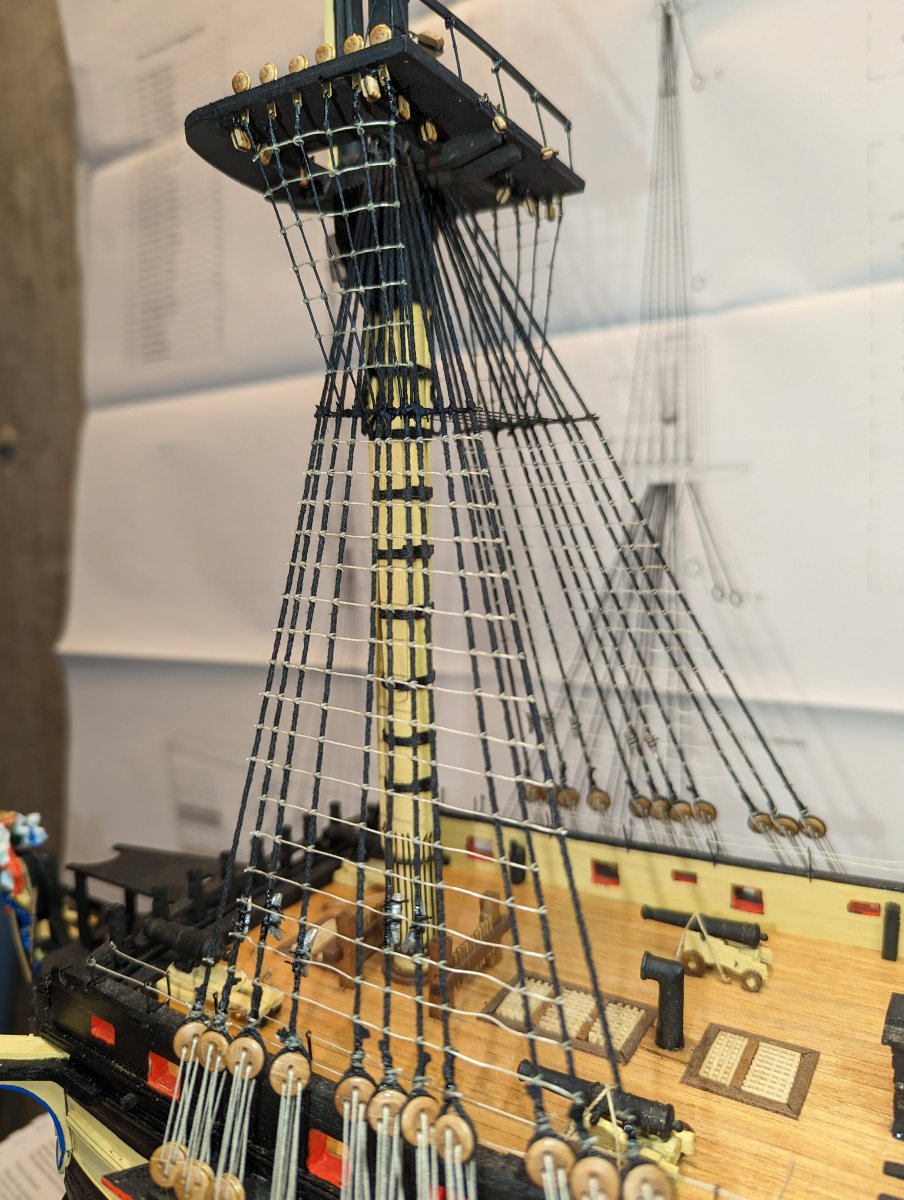
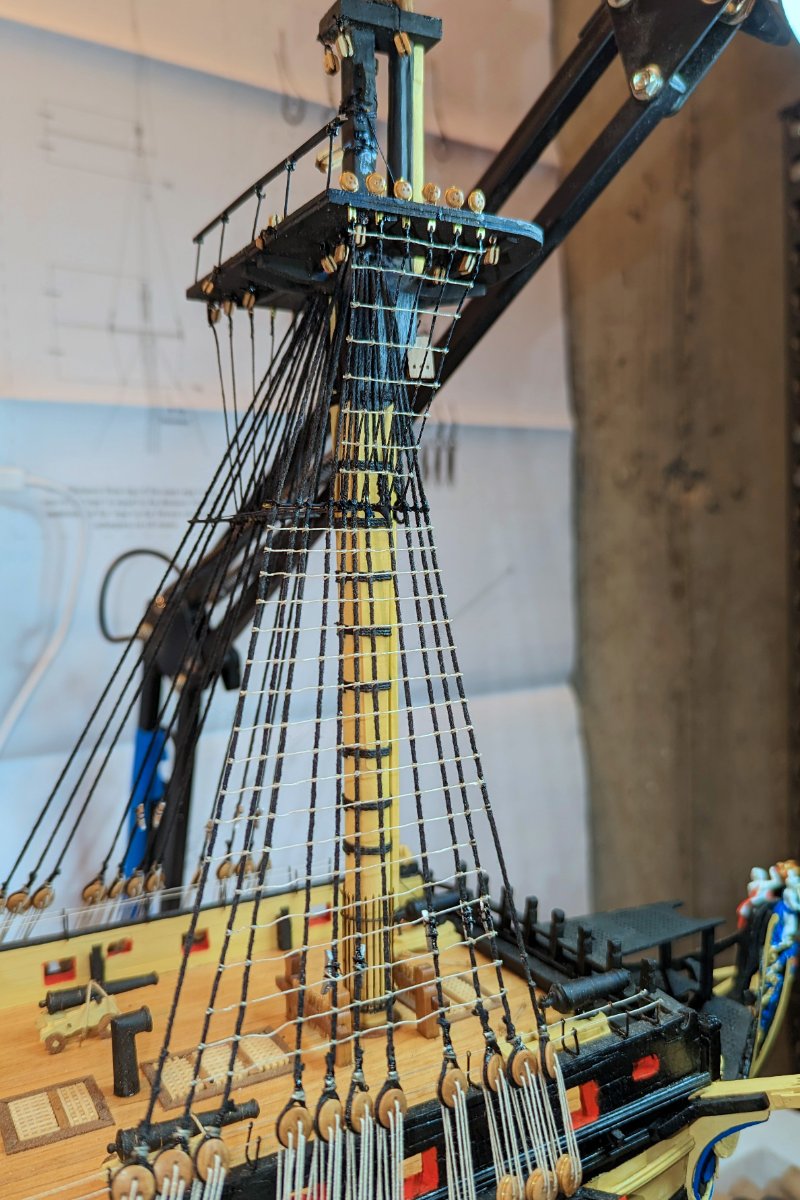
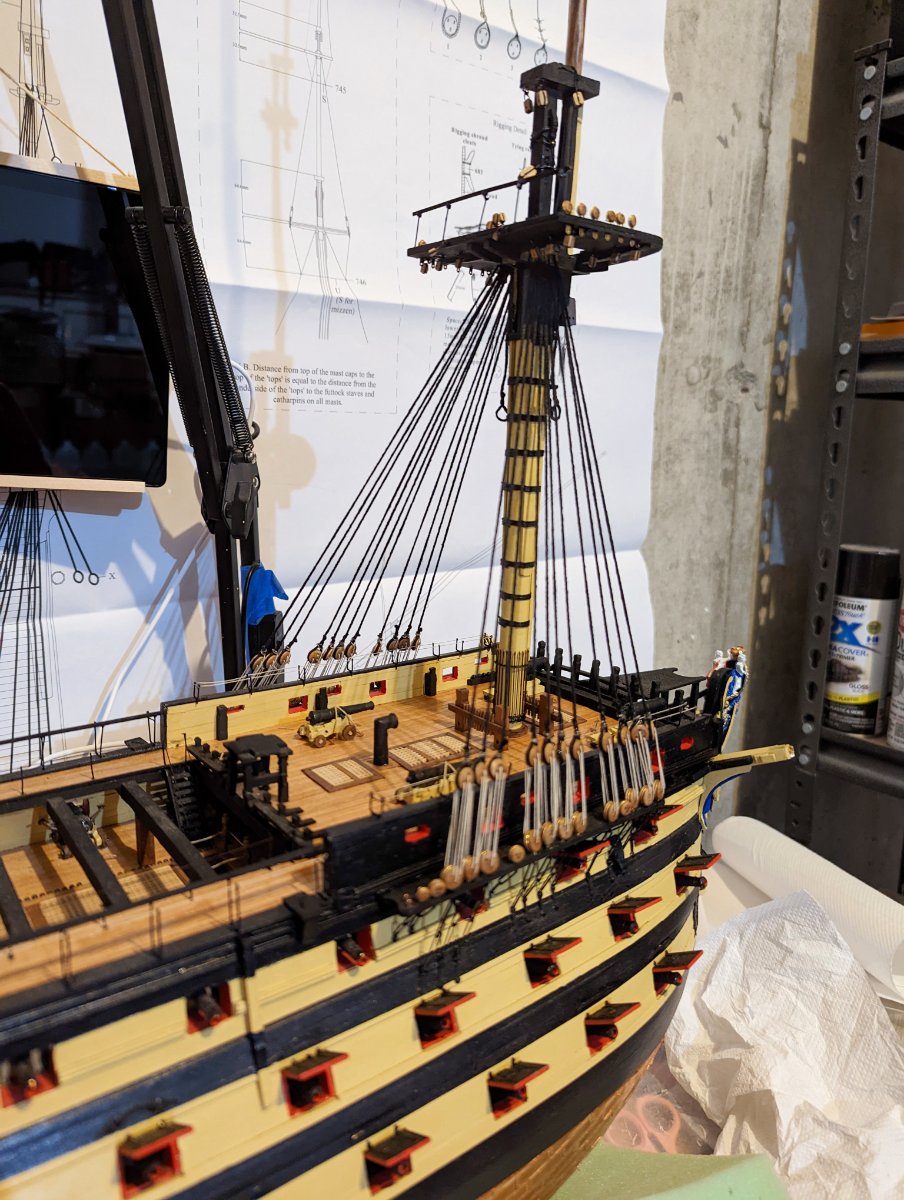
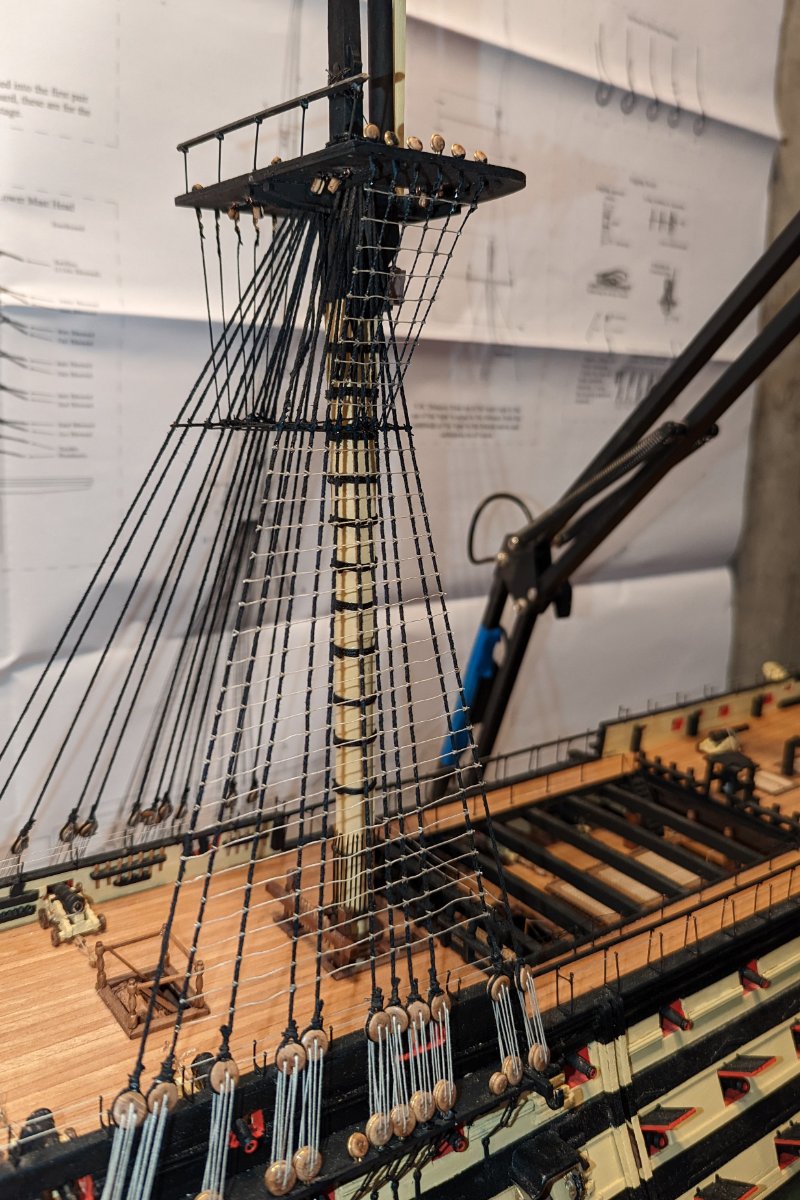
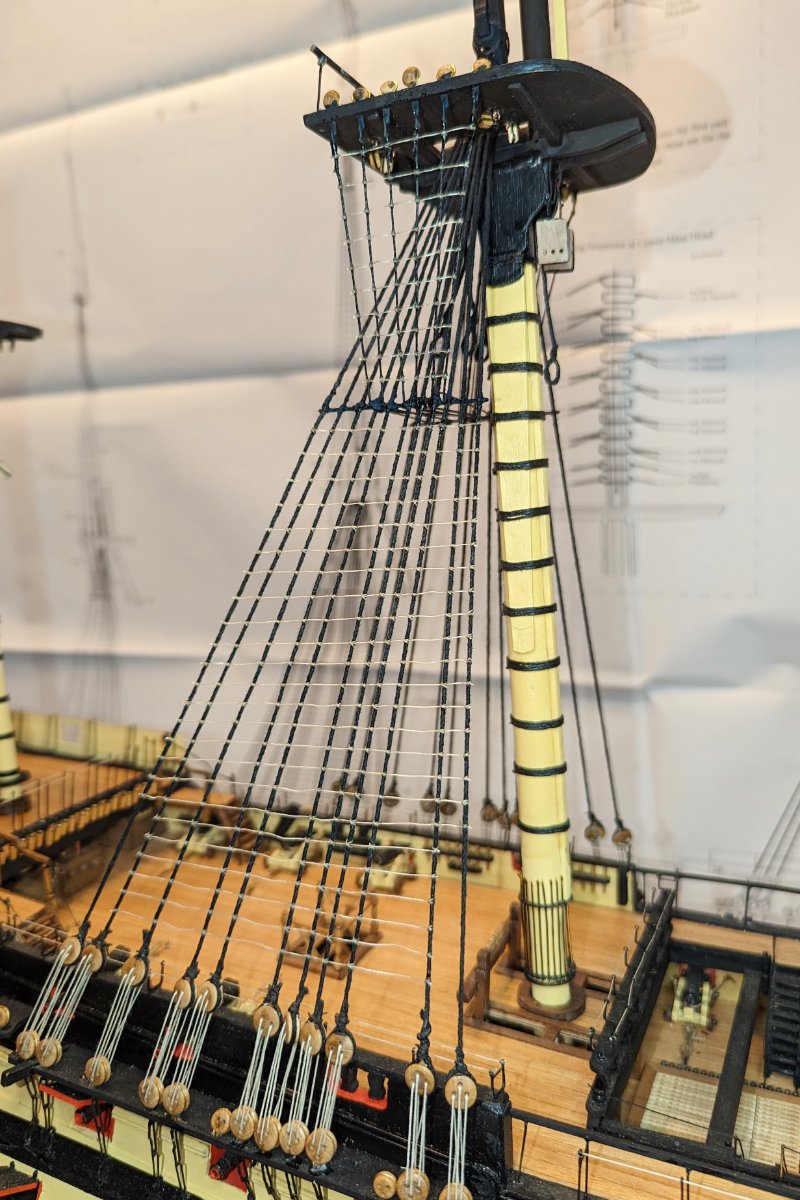
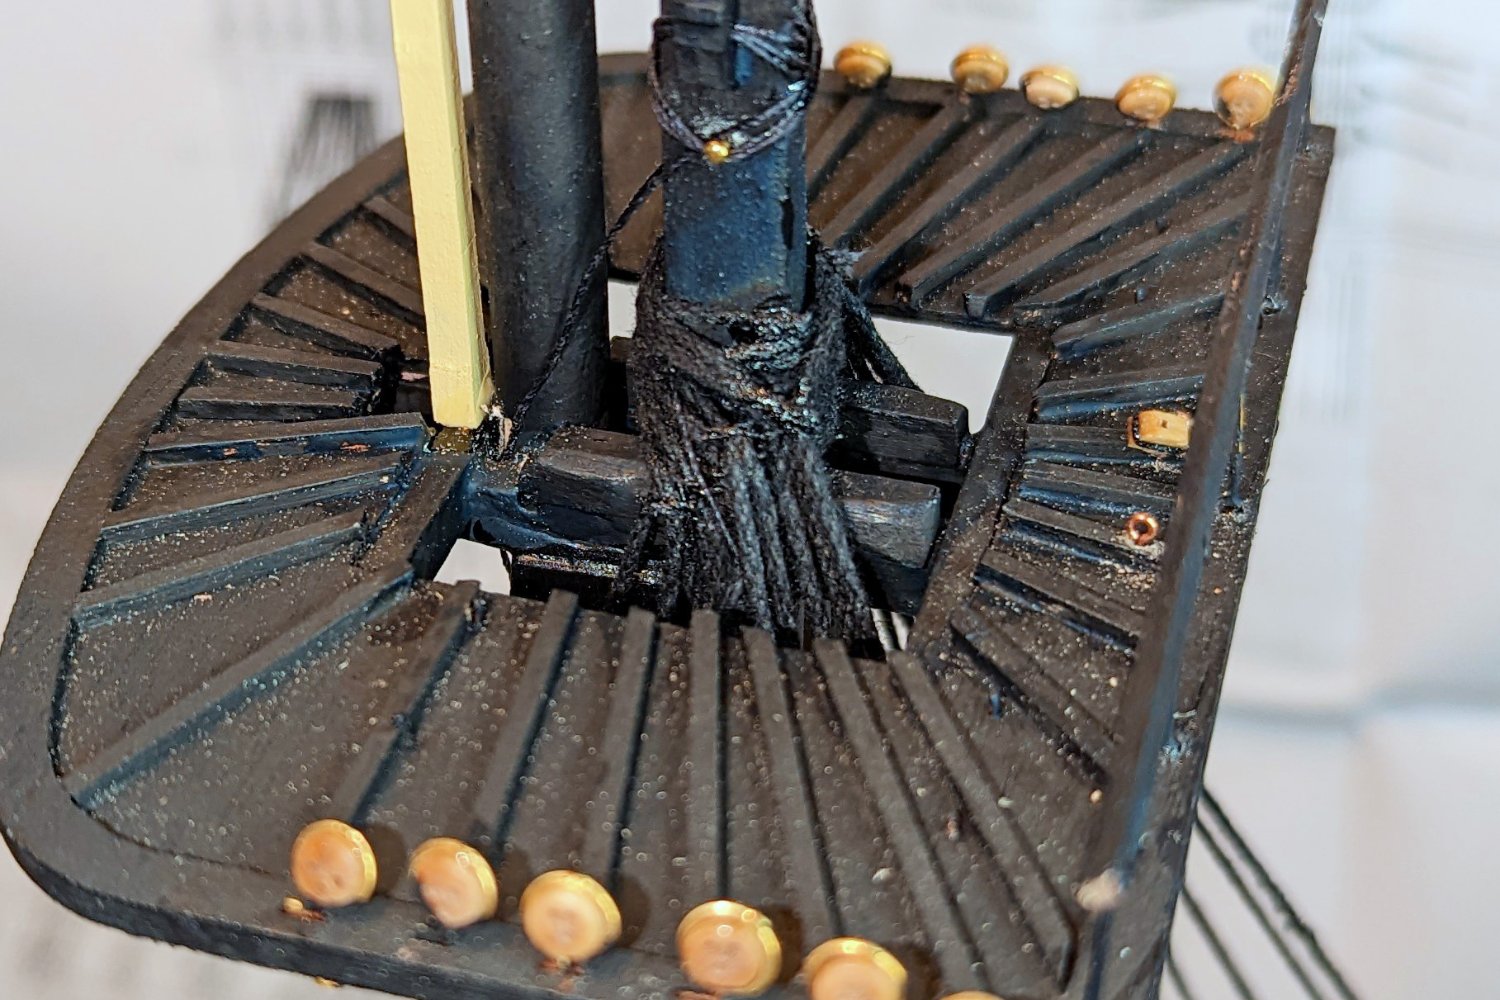
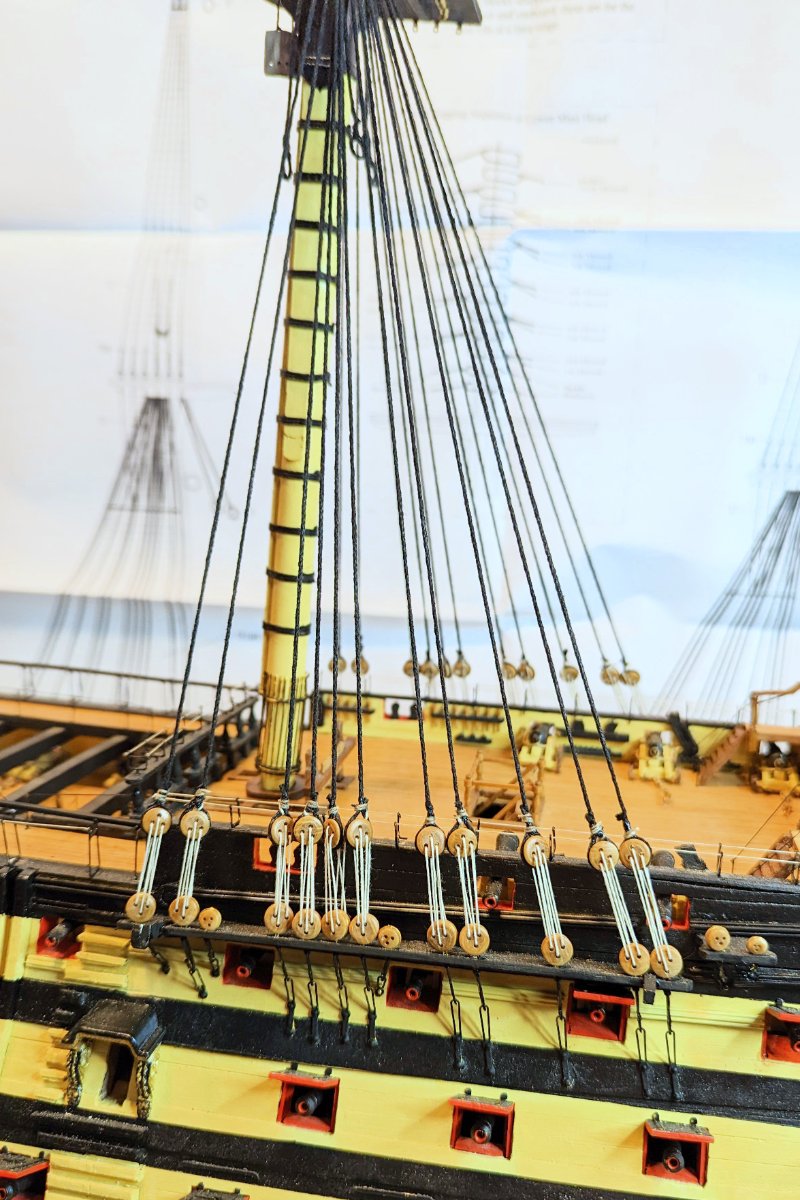
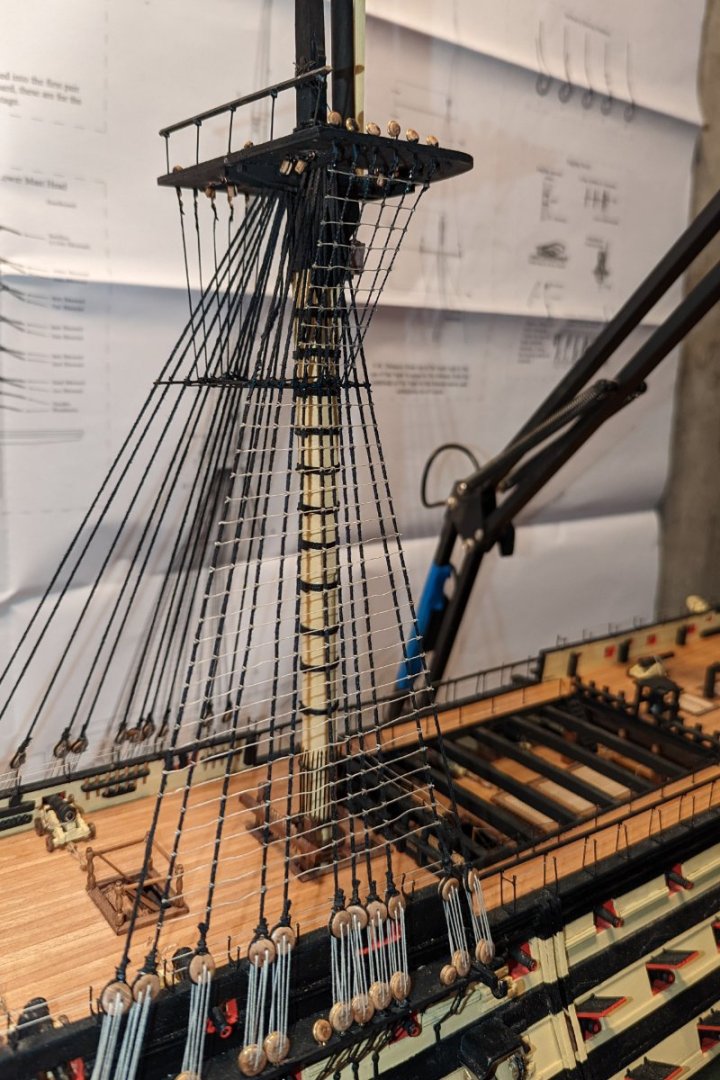
Finished the foremast topmast shrouds and ratlines, and THAT'S IT for ratlines on this model!😃 I looked back to when I started the shrouds, and removing the 6 weeks I was away on vacation, I was dong shrouds and ratlines for 4 1/2 months. That's as long as some other models I've built took overall. Not sure what it is about this model that makes things go so slow -- maybe the size? Regards, David
- 218 replies
-
- 7
-
-
- Victory
- Caldercraft
- (and 1 more)
-
Finished the main mast topmast ratlines. Now on to the fore mast. Regards, David
- 218 replies
-
- 6
-
-
- Victory
- Caldercraft
- (and 1 more)
-
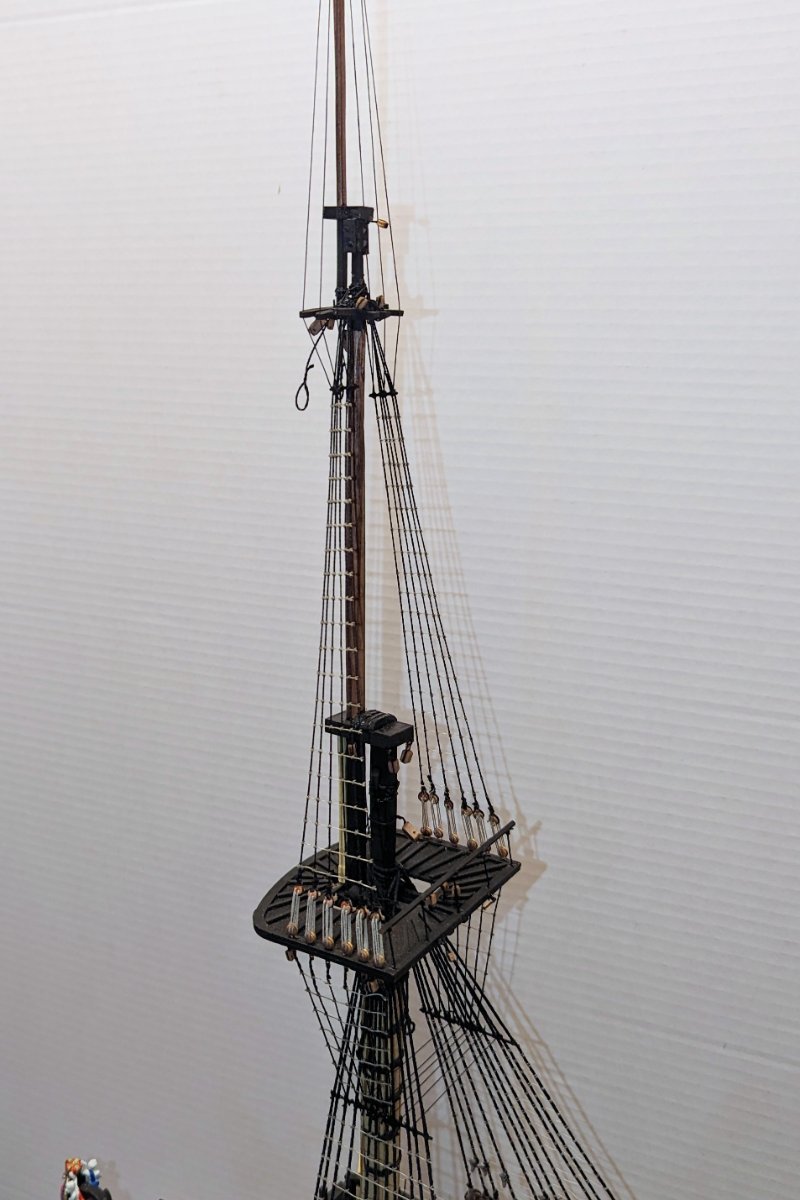
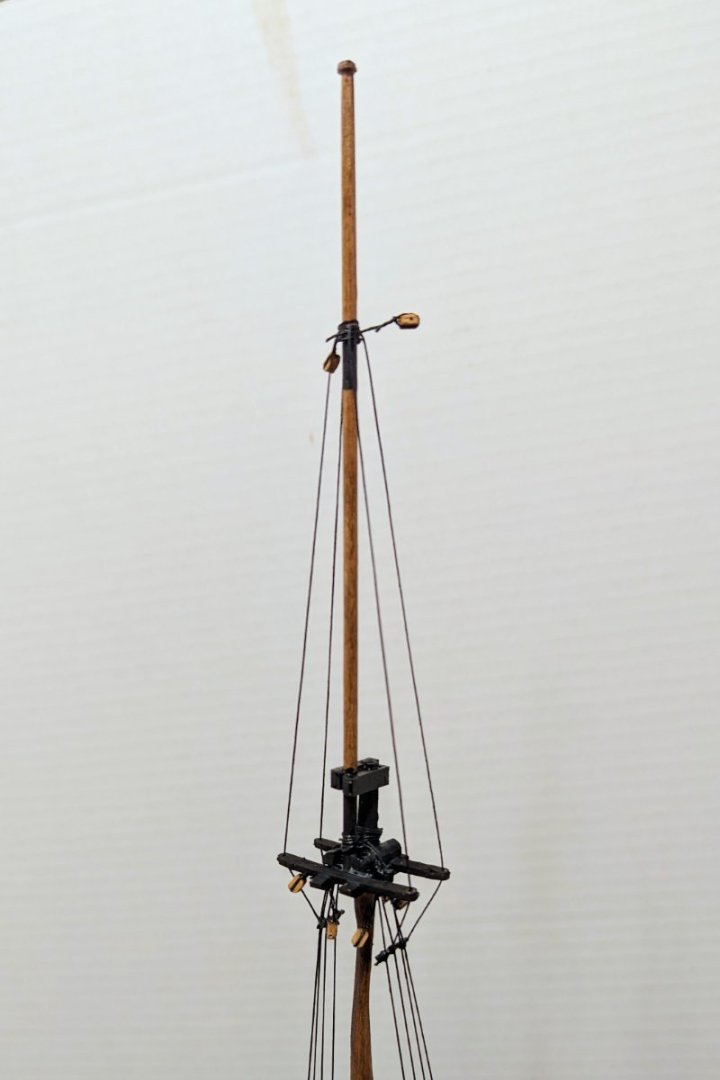
Finished the shrouds on the main topmast and topgallant mast. And yes, for the sharp-eyed, the shroud attachments for the futtocks are not level with each other. That's just a goof. I find attaching those to the shrouds to be devilish, so my latest approach is to put glue on the bar and spray the shrouds with quick-set, then press the bar against the shrouds. Got them aligned on the mizzen, but missed here. I'm not worried about it because the ship on display will be viewed from one side (the one showing below), and the other futtock attachment won't be that noticeable. Regards, David
- 218 replies
-
- 7
-
-
- Victory
- Caldercraft
- (and 1 more)
-
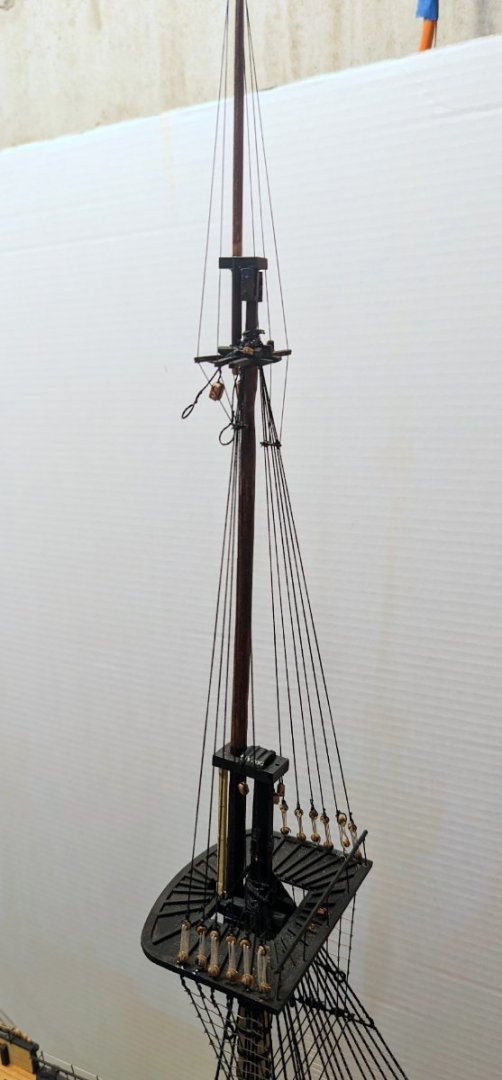
Finally -- one mast completed. This is the mizzen, all shrouds and ratlines done. Regards, David
- 218 replies
-
- 7
-
-
- Victory
- Caldercraft
- (and 1 more)
-
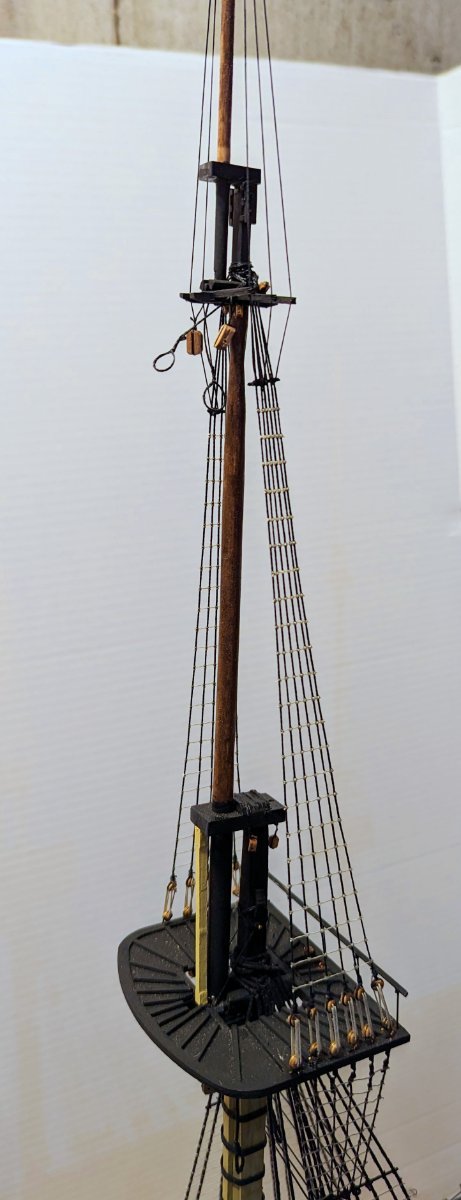
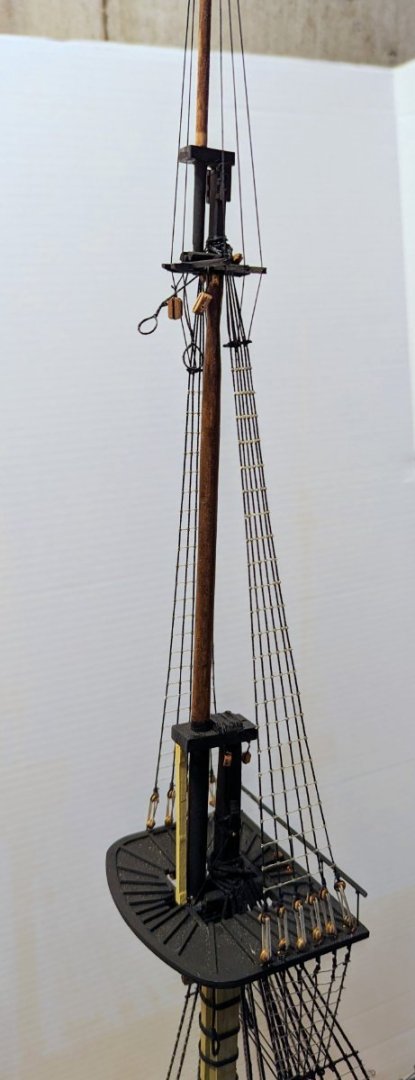
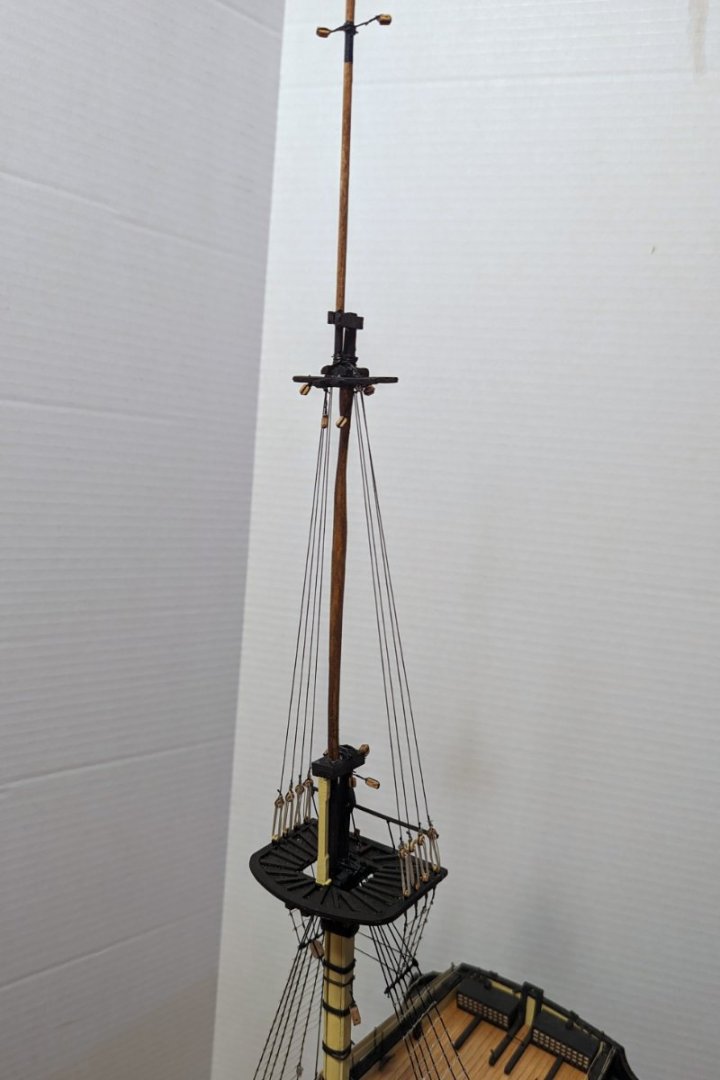
The topgallant shrouds run down through the topmast crosstrees and become the topmast futtock shrouds in one continuous run. The instructions aren't terribly clear about this. This is still the mizzen. Regards, David
- 218 replies
-
- 7
-
-
- Victory
- Caldercraft
- (and 1 more)
-
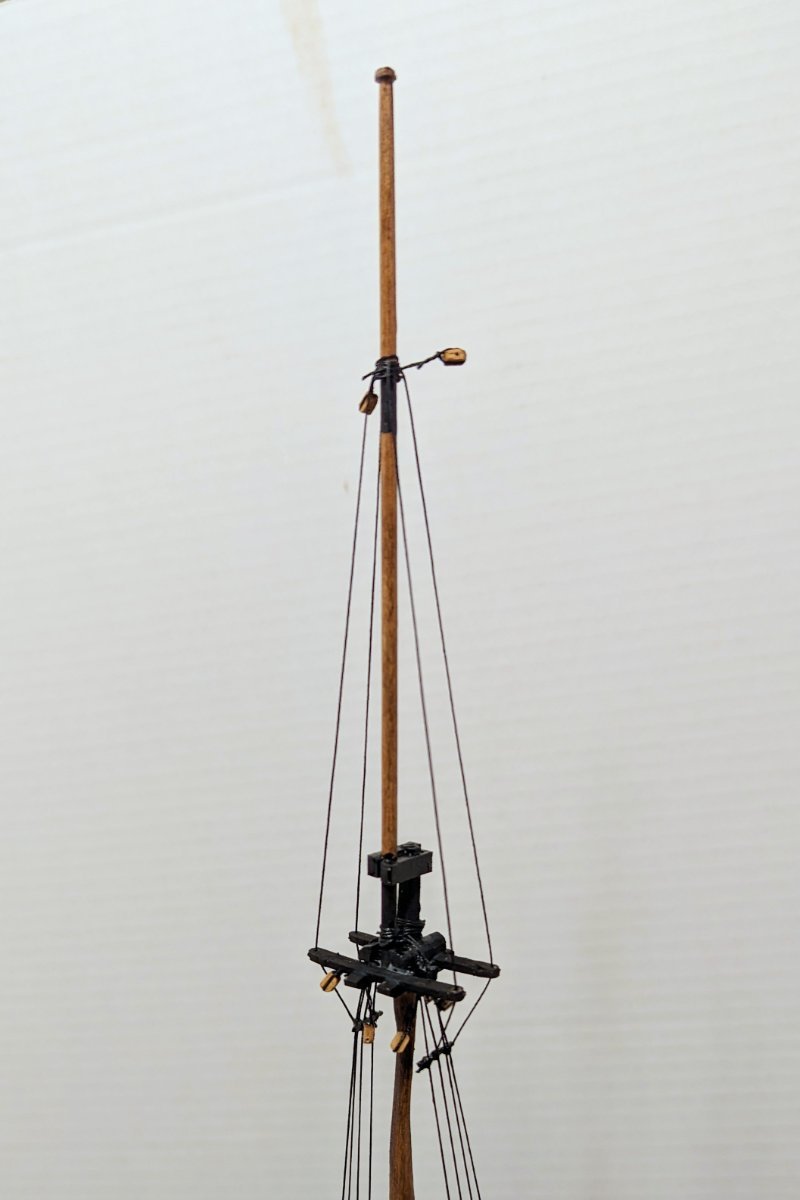
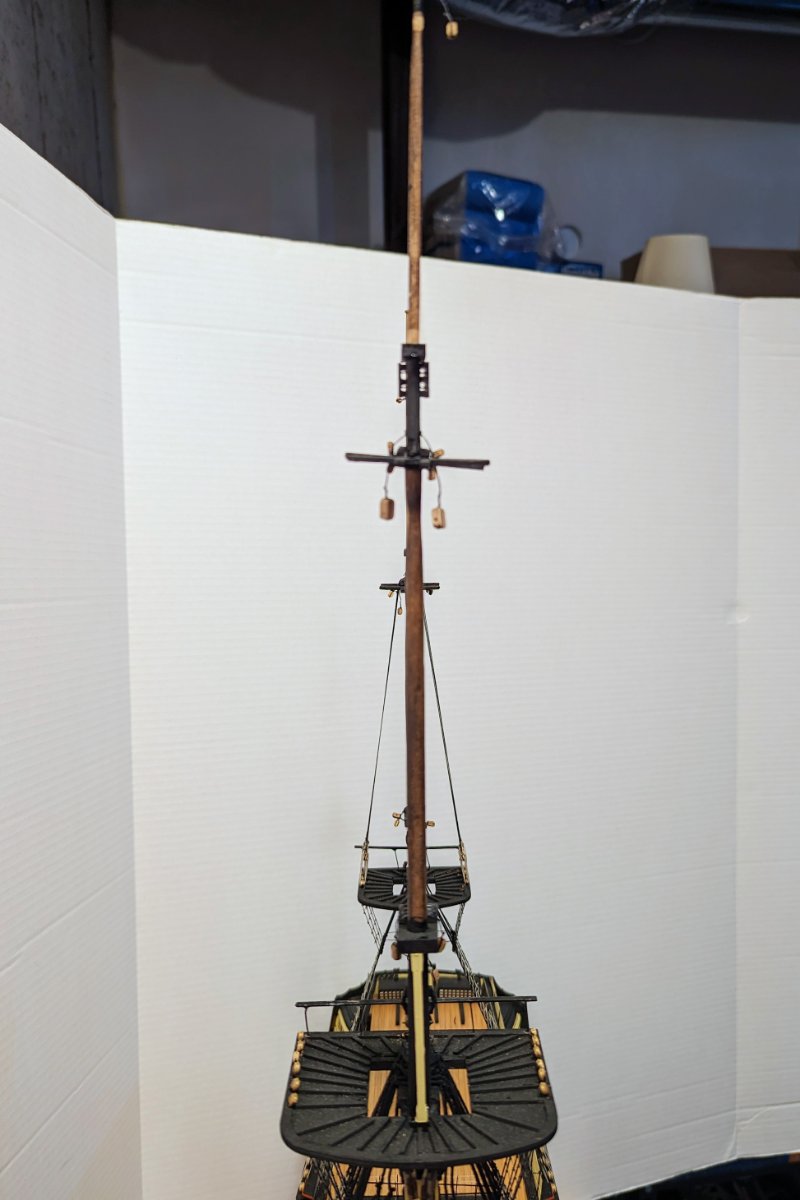
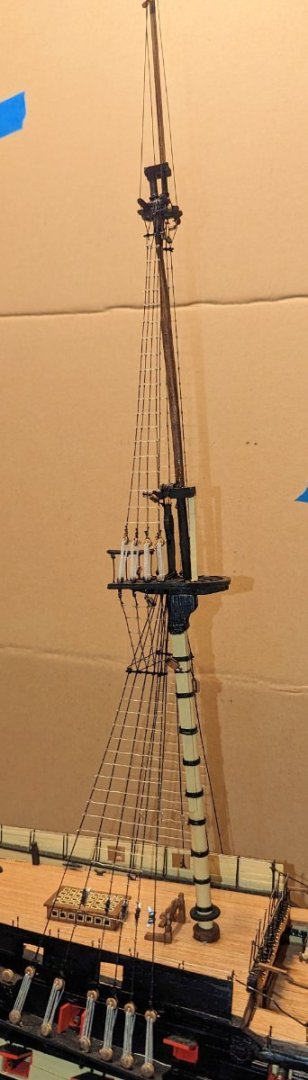
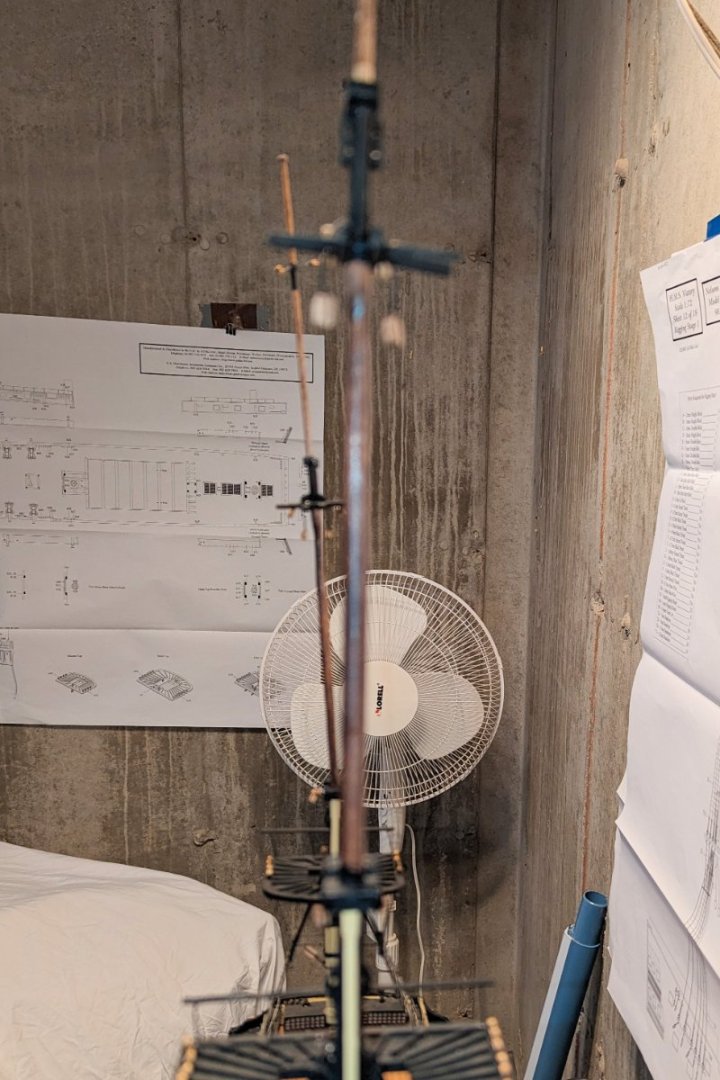
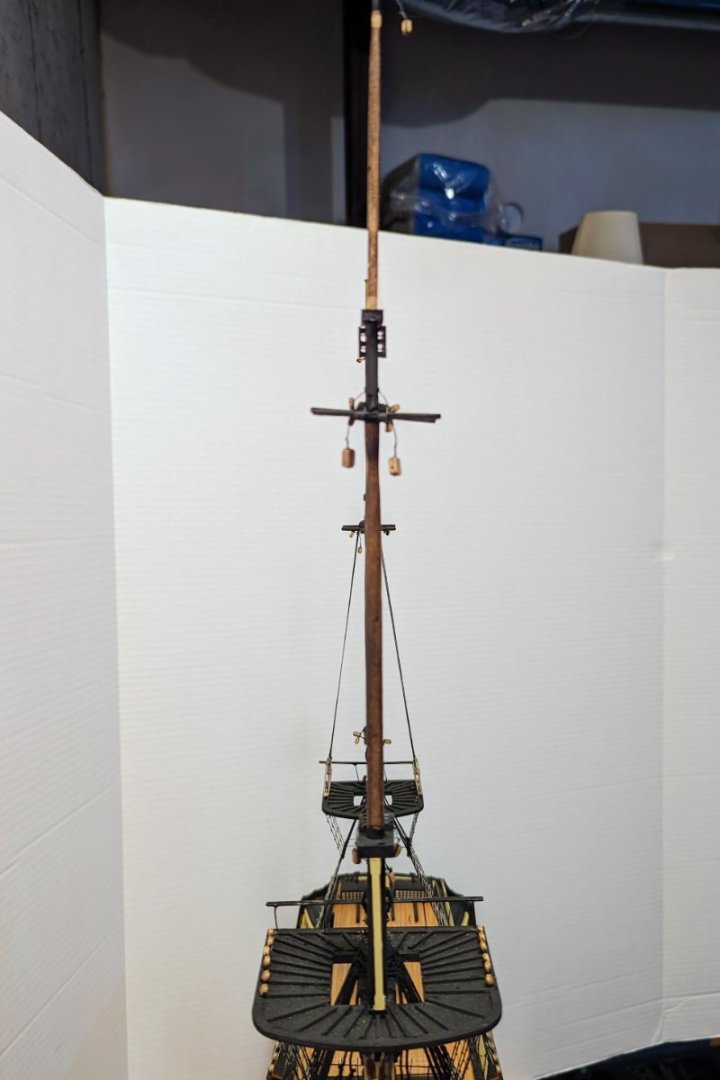
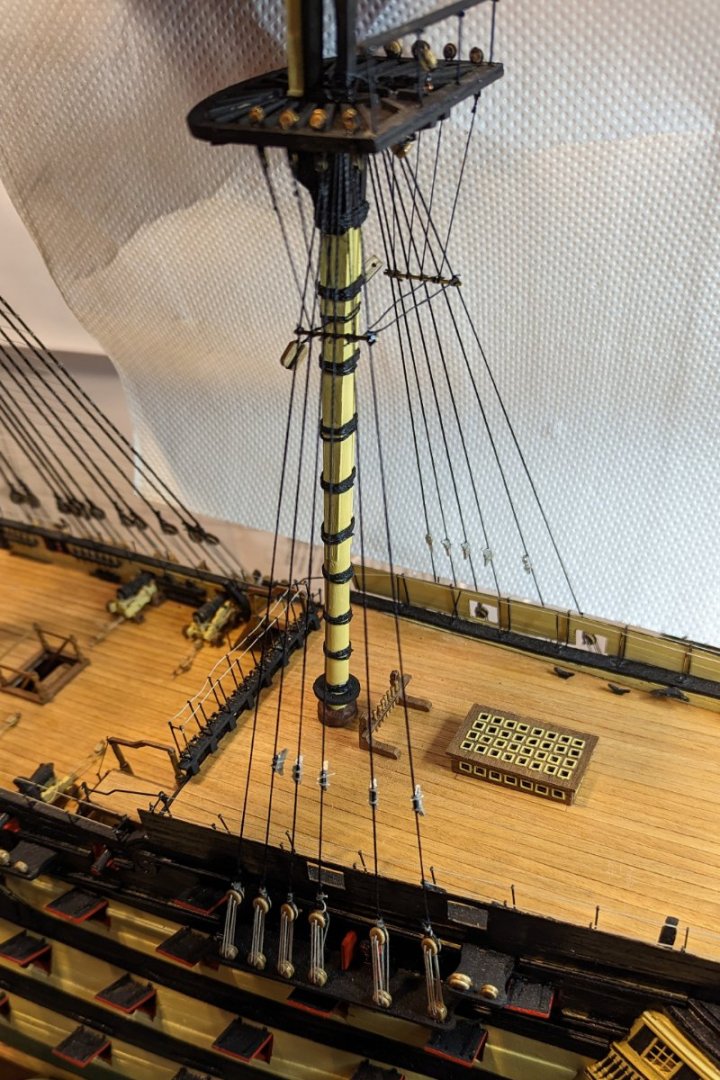
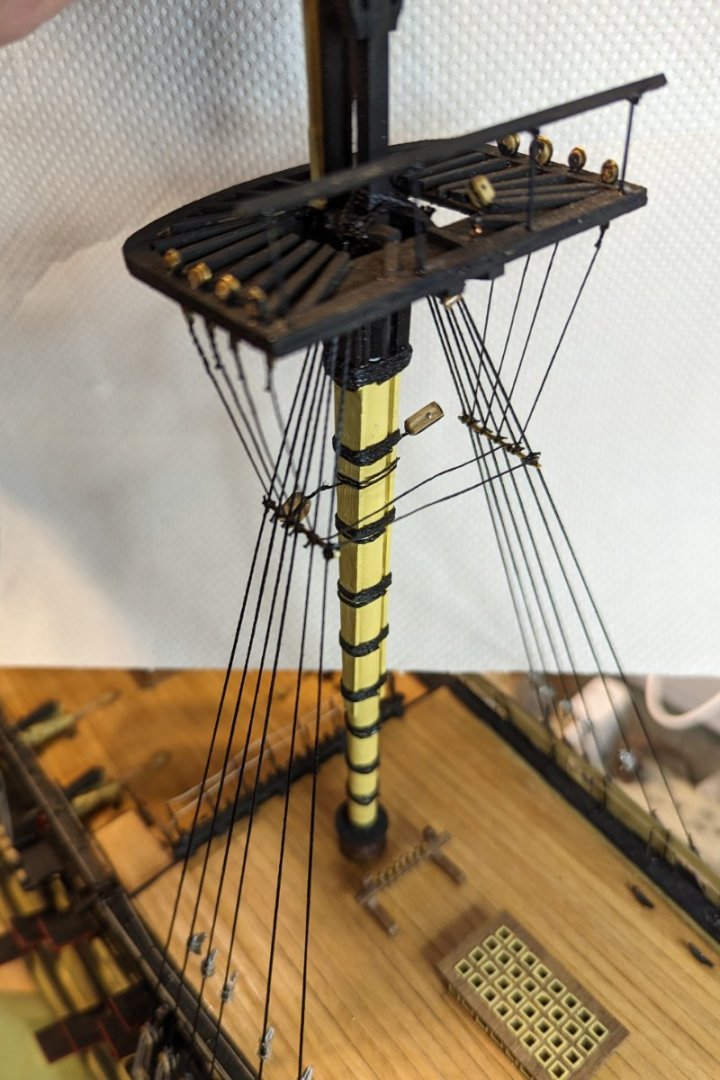
Here are the upper mizzen shrouds. I inadvertantly pranged the mizzen and the second mast broke, so I glued it -- but as you can see (in the picture with the bad background, looking aft from the main mast), it was misaligned. So I used the shrouds to pull it back into alignment, and it came out pretty straight. Pretty well aligned with the main now. One of those few occasions when the rigging is functional, not just decorative. Regards, David
- 218 replies
-
- 5
-
-
- Victory
- Caldercraft
- (and 1 more)
-
Allan: No, your vision is spot on. The instructions say to paint the cleats black -- I haven't done that as yet, but brown would be interesting. As for the ties, they only look like monofilament because of the glue, but they are actually thin light rope. Regards, David
- 218 replies
-
- 1
-
-
- Victory
- Caldercraft
- (and 1 more)
-
Finished the lower mizzen ratlines, which means I have now finished the lower shrouds and ratlines for all three masts. Only took about 3 1/2 months 🥵 (subtracting my vacation time), and I have built some entire ships in that time. Not a reflection of difficulty per se, so much as my lack of appetite for ratlines. Now I get to repeat the process for the upper shrouds and ratlines, but fewer shrouds so may go faster. Regards, David
- 218 replies
-
- 6
-
-
- Victory
- Caldercraft
- (and 1 more)
-
Finished the Mizzen shrouds. Pictures include the futtock shrouds and the shroud cleats. I did the cleats by first gluing them to the shrouds, then lashing them. Regards,
- 218 replies
-
- 10
-
-

-
- Victory
- Caldercraft
- (and 1 more)
-
Back from my winter trip and dug back into the foremast ratlines. Finished off the port side. Now onto the mizzen shrouds. Regards, David

- 218 replies
-
- 10
-
-
- Victory
- Caldercraft
- (and 1 more)
-
One side of the foremast lower ratlines done. This took me 2 weeks, which is mostly because ratlines are BORING and REPETITIVE. About to leave for a long trip, so won't be posting again for a bit. Regards, David

- 218 replies
-
- 7
-
-
- Victory
- Caldercraft
- (and 1 more)
-
Chris: I'm set up to follow any of your logs, so I'll look for the pics in the gallery once you finish. At the rate I'm going on Victory, I'll finish her sometime late next year. Best regards, David
-
Chris: Thanks for your comment. No, I didn't do that one. What are you working on now? Regards, David
-
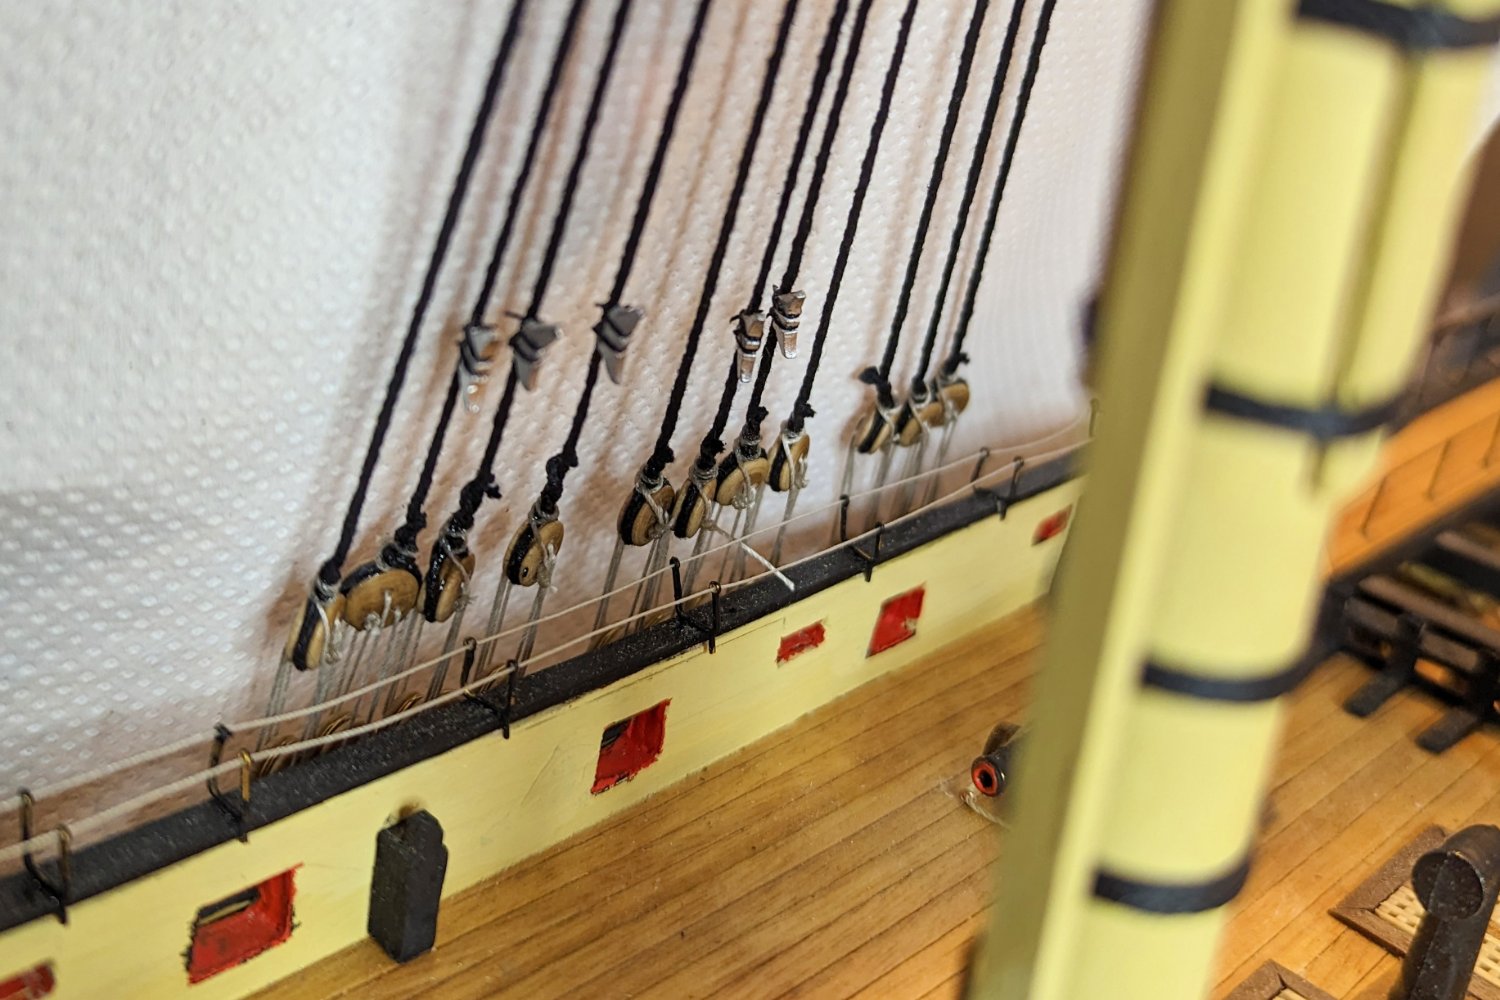
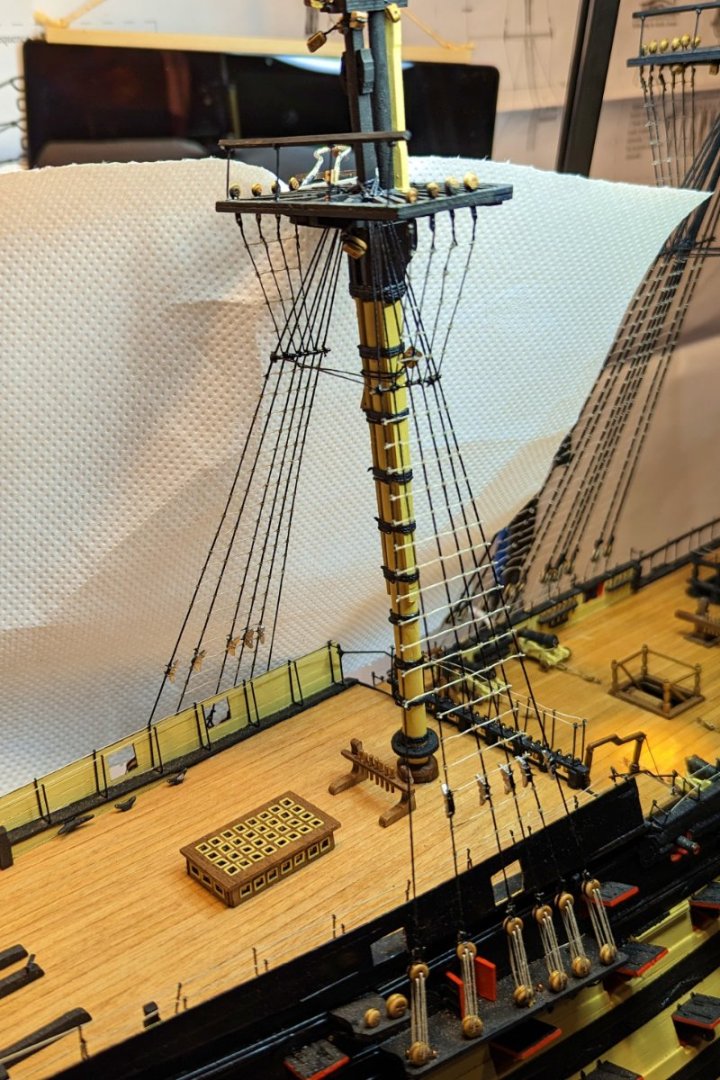
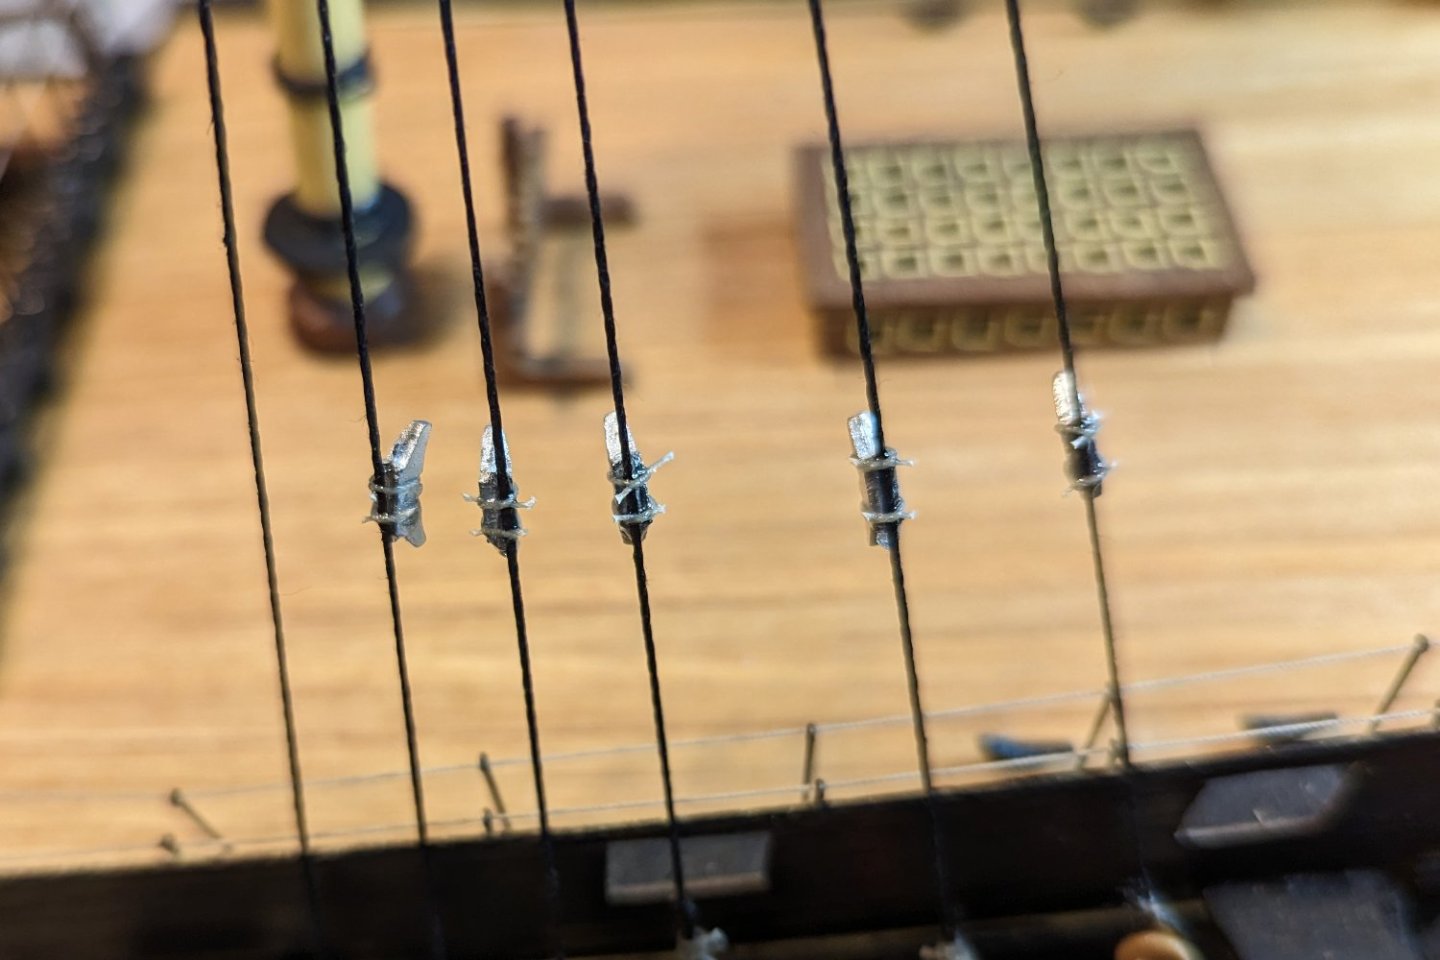
I see from my last post that it's been over a month since that one -- a reflection of a very busy November and early December. Also a reflection of the surprising difficulty I found in fitting the fore shroud cleats, pictured here (with a white paper towel background so you can see them). I suspect that my bottle of CA gel may be getting old and not setting as fast as usual, but I found it hard to get them glued to the shrouds so that I could then apply the lashings. Now to ratlines. Regards, David

- 218 replies
-
- 4
-
-
- Victory
- Caldercraft
- (and 1 more)
-
Main mast ratlines now done on the other side. Slow but steady. I put them against a black background since they are white, in order to see them better. You can't see it, but hanging behind the black baseboard is a tablet I bought that allows me to stream TV while I'm working on the model. Helps on the grindingly repetitive things like ratlines. Regards, David
- 218 replies
-
- 4
-
-
- Victory
- Caldercraft
- (and 1 more)
-
Pictures below of completed ratlines on ONE side of the main shrouds. I've kept them a bit dark because the ratlines are white and hard to see. I've been working on these for about 2 1/2 weeks, which is an indication of my motivation level when it comes to ratlines. Probably not alone in that regard. At this rate, I'll still be working on this ship at this time next year. Regards, David

- 218 replies
-
- 6
-
-
- Victory
- Caldercraft
- (and 1 more)
-
Chris: Not tarring -- just gobs of medium super glue. Regards, David
-
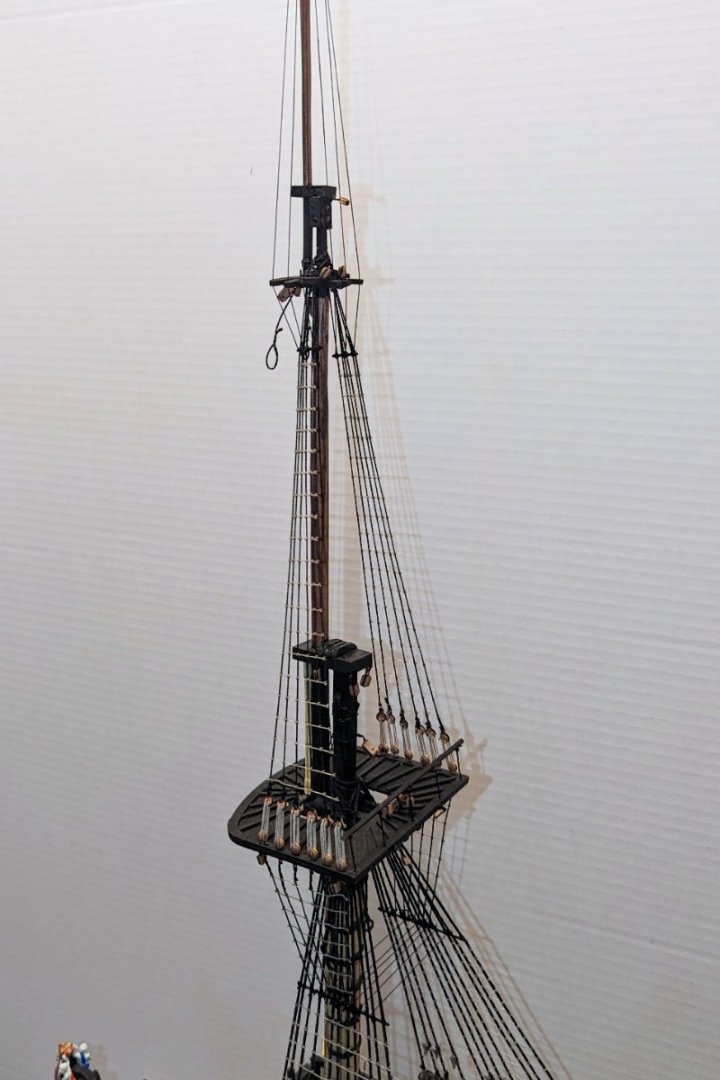
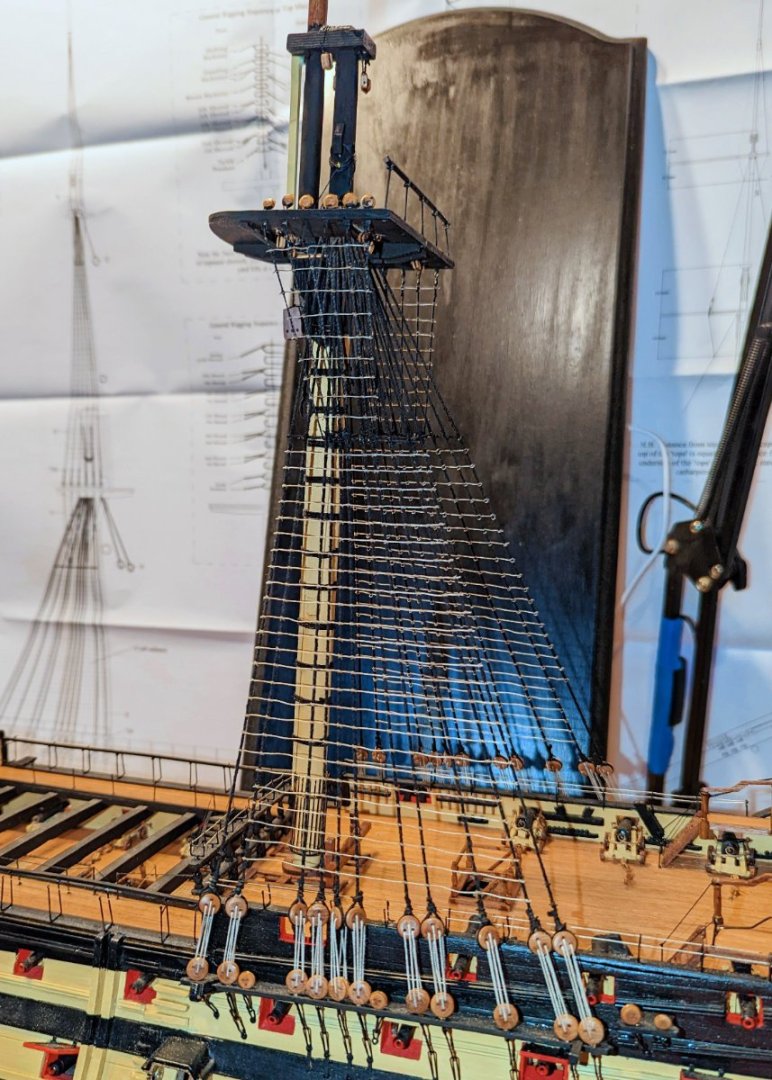
Chris: Here you go. It's really a rats nest. Except for the 11th shroud, this is all two-shroud loops, tied off at the top with black thread. The manual says to push the knots up, but that's not really practical, so I thread it and then tie it in position. I also use that to try to manage the alignment of the shrouds as they come up to the mast tie-off. I used to do one shroud at a time because it made the alignment easier, but the top was really a mess when I did that on earlier ships, so I mount one deadeye, thread it through the top, and then there is a fiendish alignment process for the second deadeye at the other end of the second shroud. Curious why you asked to see this. Regards, David

- 218 replies
-
- 3
-
-
- Victory
- Caldercraft
- (and 1 more)
-
Finished the main mast shrouds. While the instructions say to go on to the rest of the lower and upper shrouds, I'm going to do the ratlines on these first to inject some variety into the work. Regards, David

- 218 replies
-
- 2
-
-
- Victory
- Caldercraft
- (and 1 more)
-
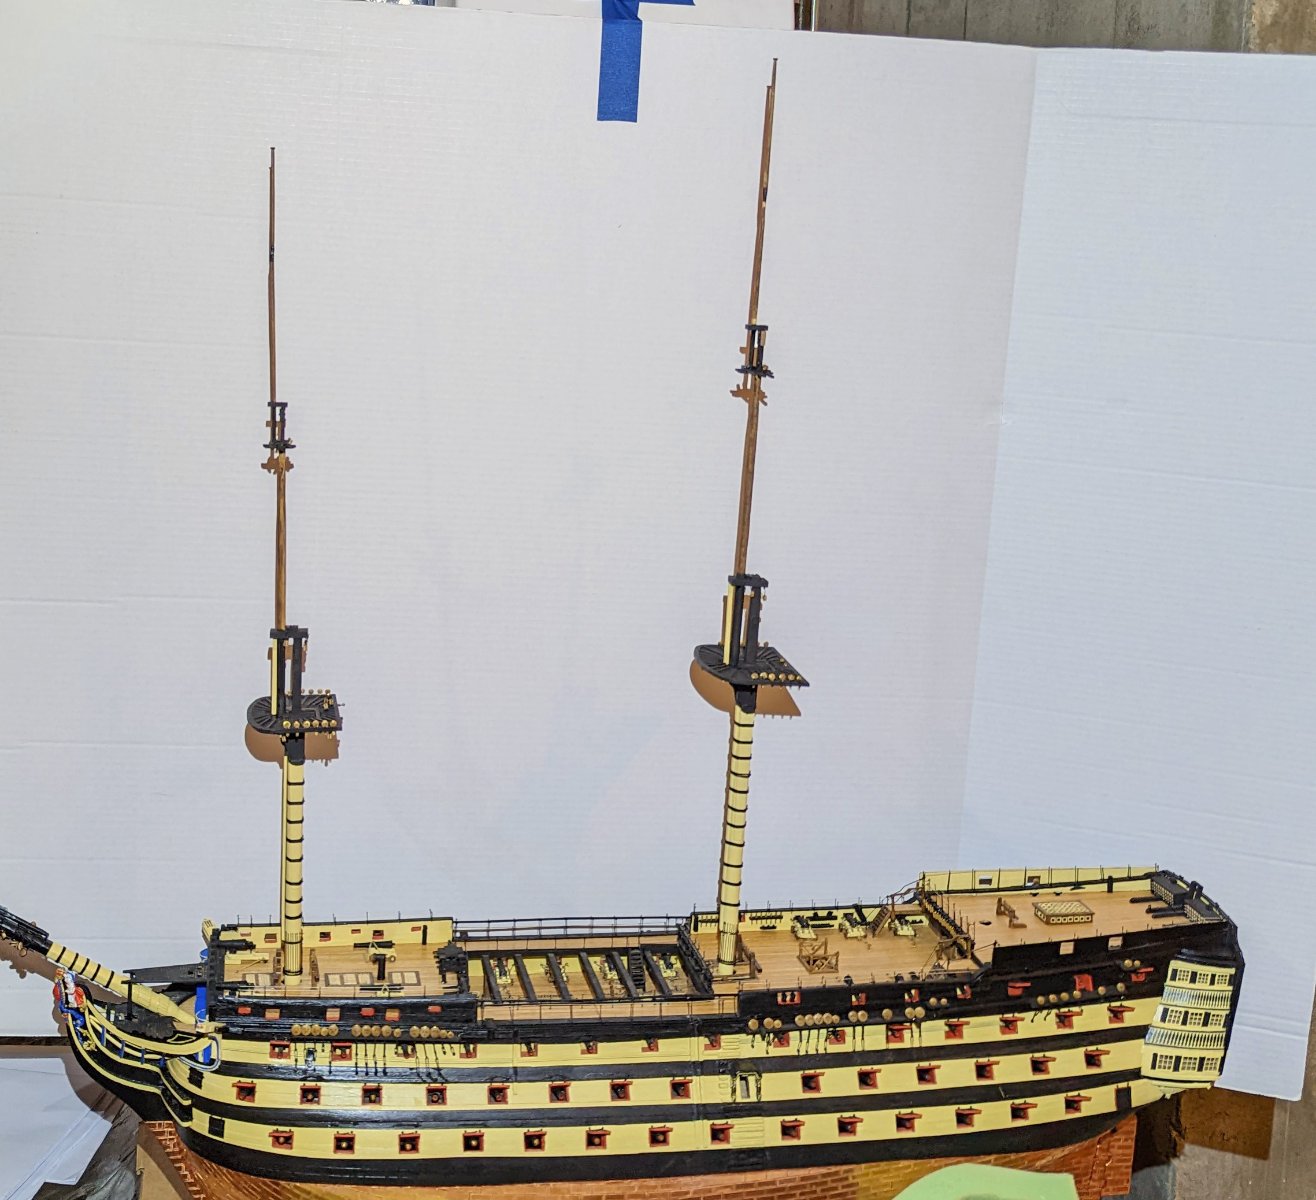
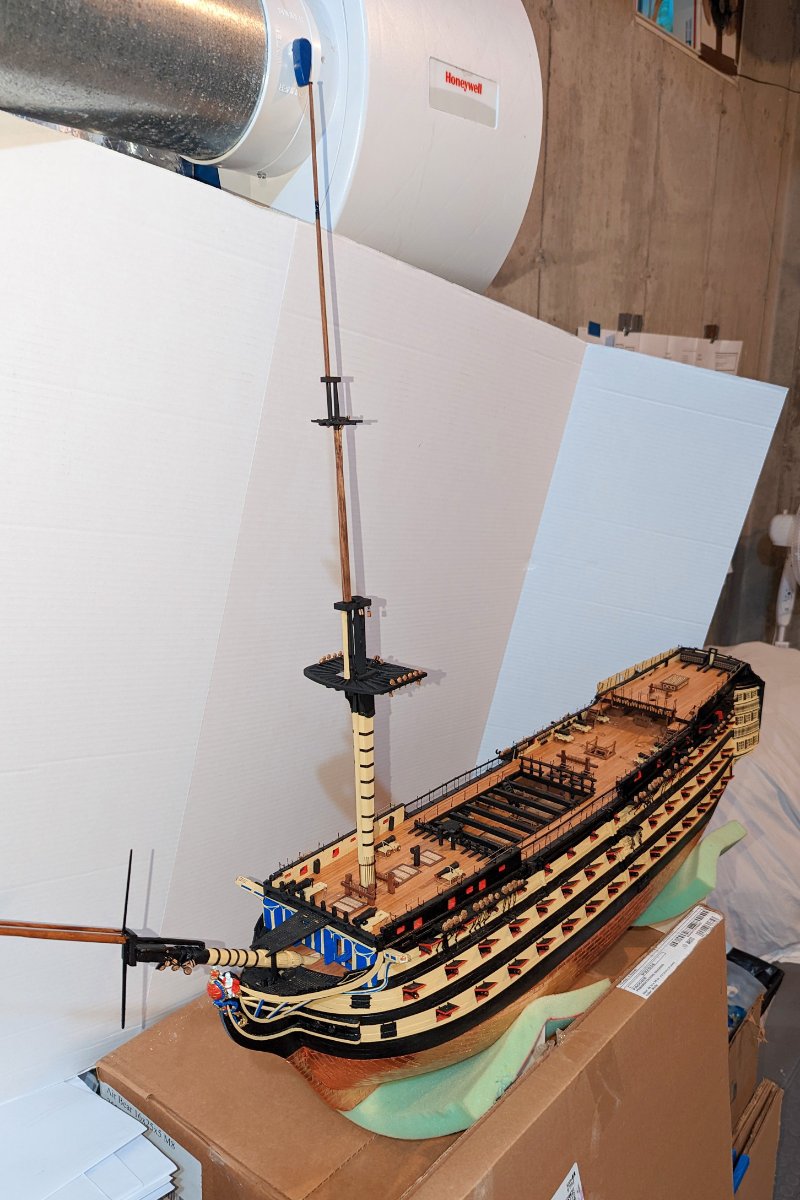
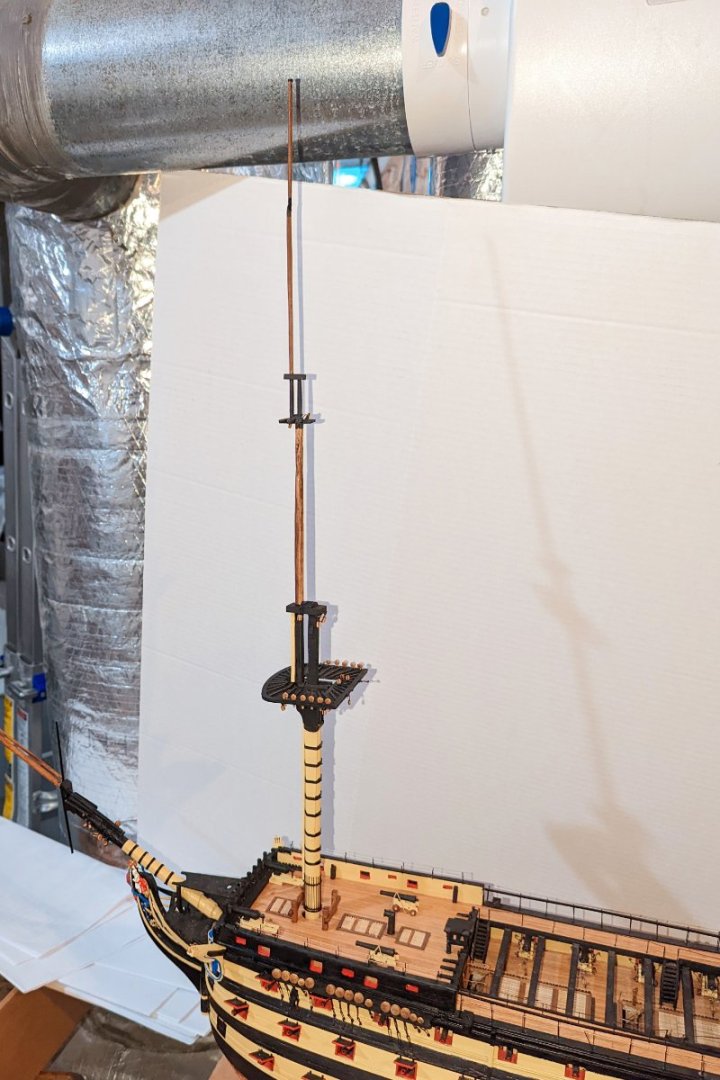
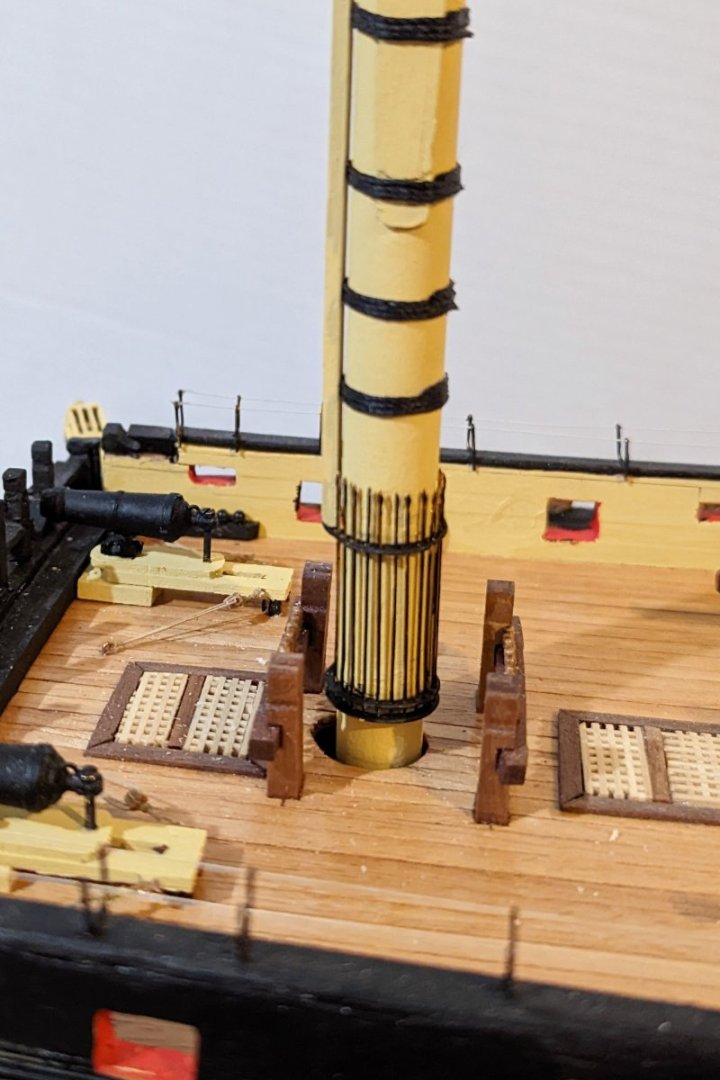
Masts are now done and permanently mounted. Including the bowsprit, the masts have taken me just about a month. Now on to standing rigging. Regards, David

- 218 replies
-
- 8
-
-
- Victory
- Caldercraft
- (and 1 more)
-
Allan: Just rechecked, and they are correct to the millimeter according to the Caldercraft plan sheets. Regards, David
- 218 replies
-
- 1
-
-
- Victory
- Caldercraft
- (and 1 more)
-
Main mast done, so 2 out of 3 completed. I've found that the tapering on the topgallant masts makes them incredibly fragile where they taper back to 3.5mm in the middle. After two breaks on the main topgallant, I had to sink a pin in while re-gluing it. Regards, David

- 218 replies
-
- 10
-
-
-
- Victory
- Caldercraft
- (and 1 more)
-
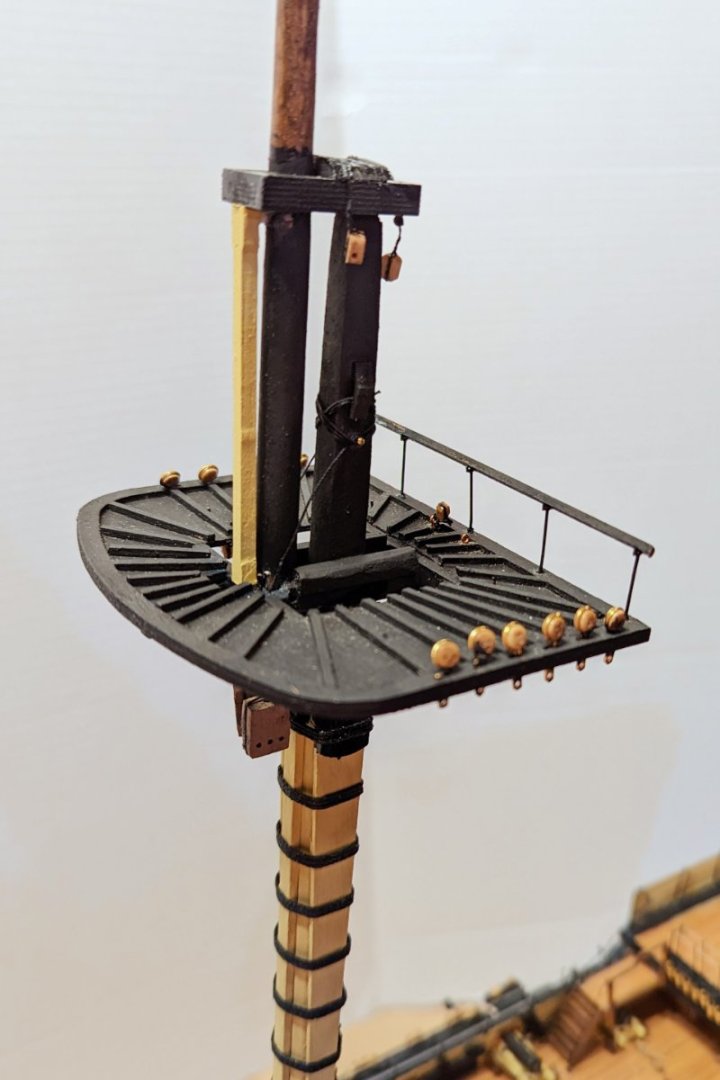
Finished the foremast. Some notes: 1) Painted the boarding pikes after they were mounted. 2) I completely gave up on trying to shape the masts as octagons. Much of that shaping is painted black and doesn't show anyway, but the real reason is that I just don't have the skills for it. So it's round masts (and yards). Regards, David


- 218 replies
-
- 7
-
-
-
- Victory
- Caldercraft
- (and 1 more)