drobinson02199
-
Posts
1,076 -
Joined
-
Last visited
Content Type
Profiles
Forums
Gallery
Events
Everything posted by drobinson02199
-
 Built the mizzen mast and completed the lower shrouds and ratlines. Now I have 5 more double sets of shrouds and ratlines to do before moving on to the stays. Regards, David
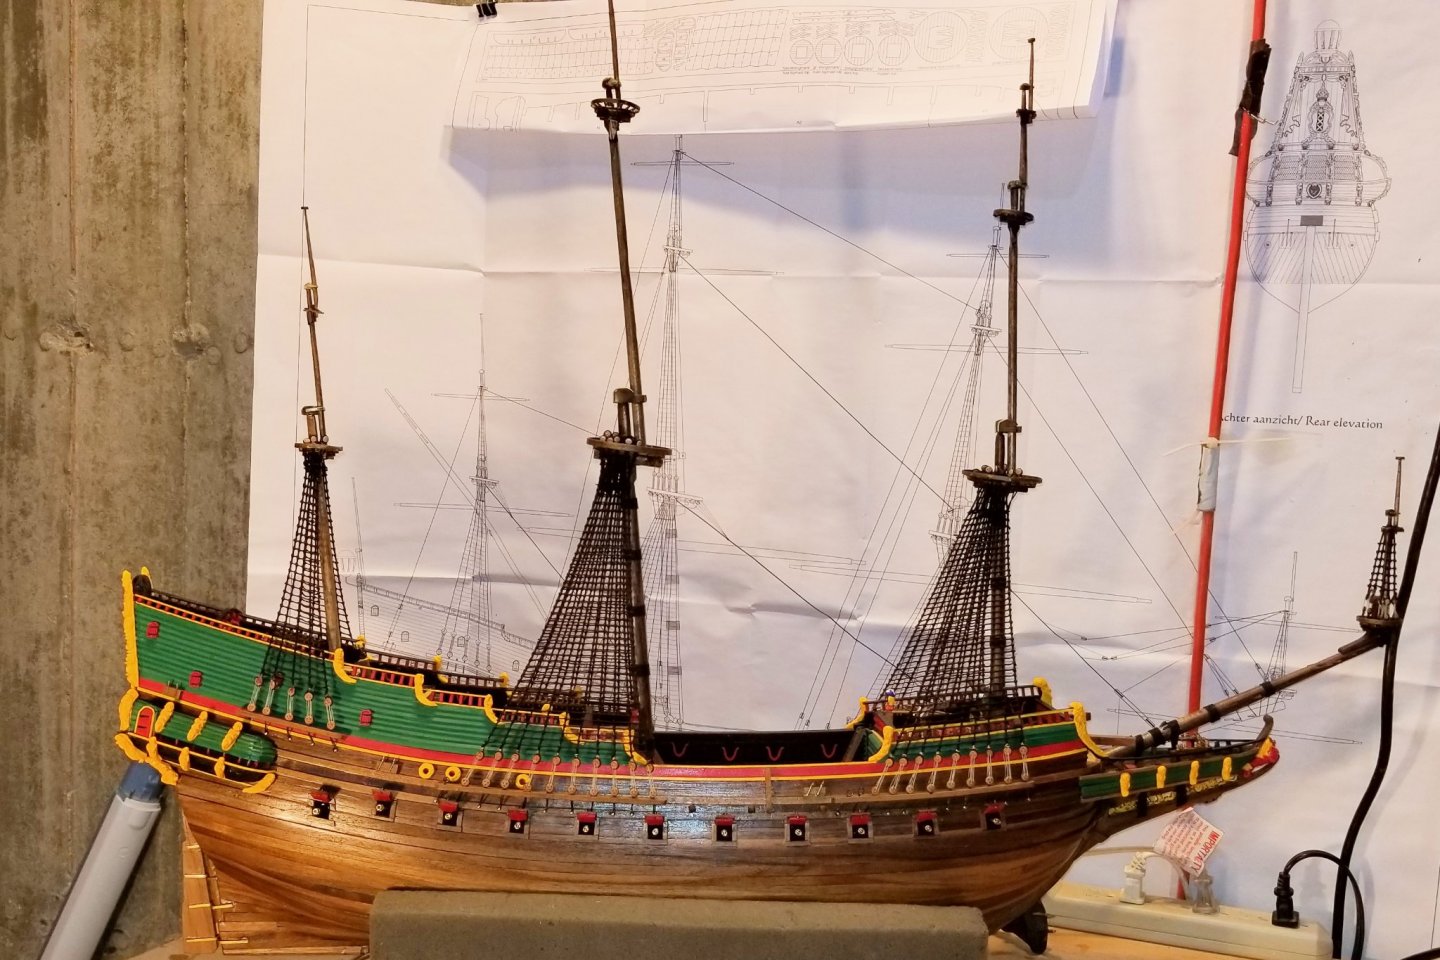

- 136 replies
-
- 4
-

-
- kolderstok
- batavia
- (and 1 more)
-
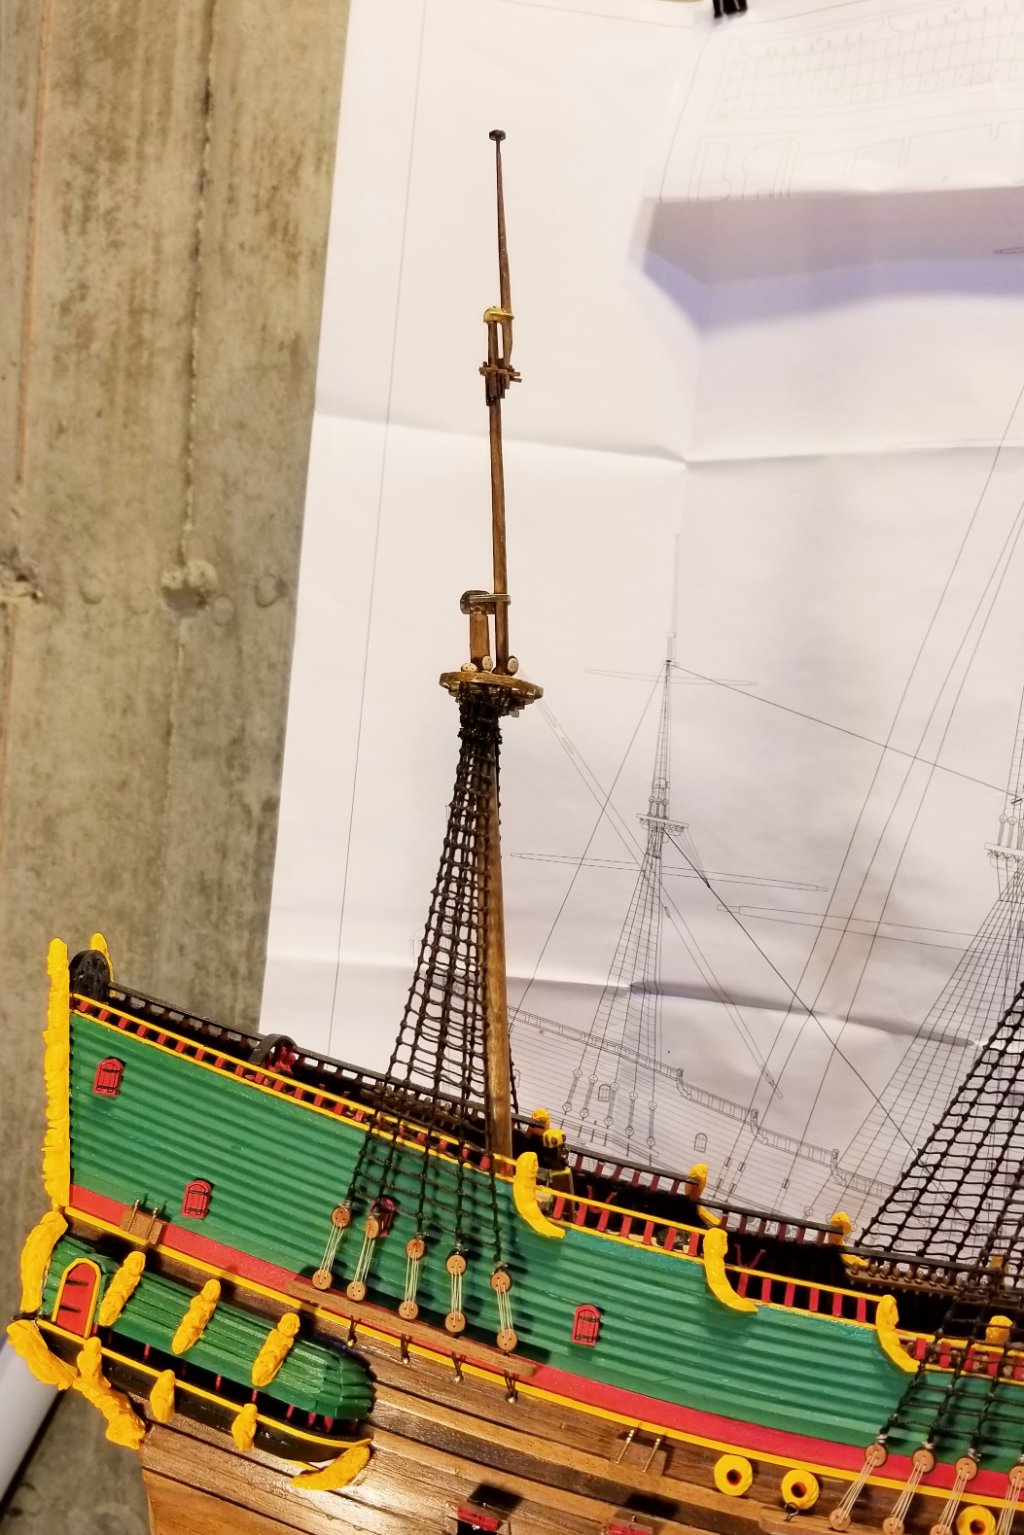
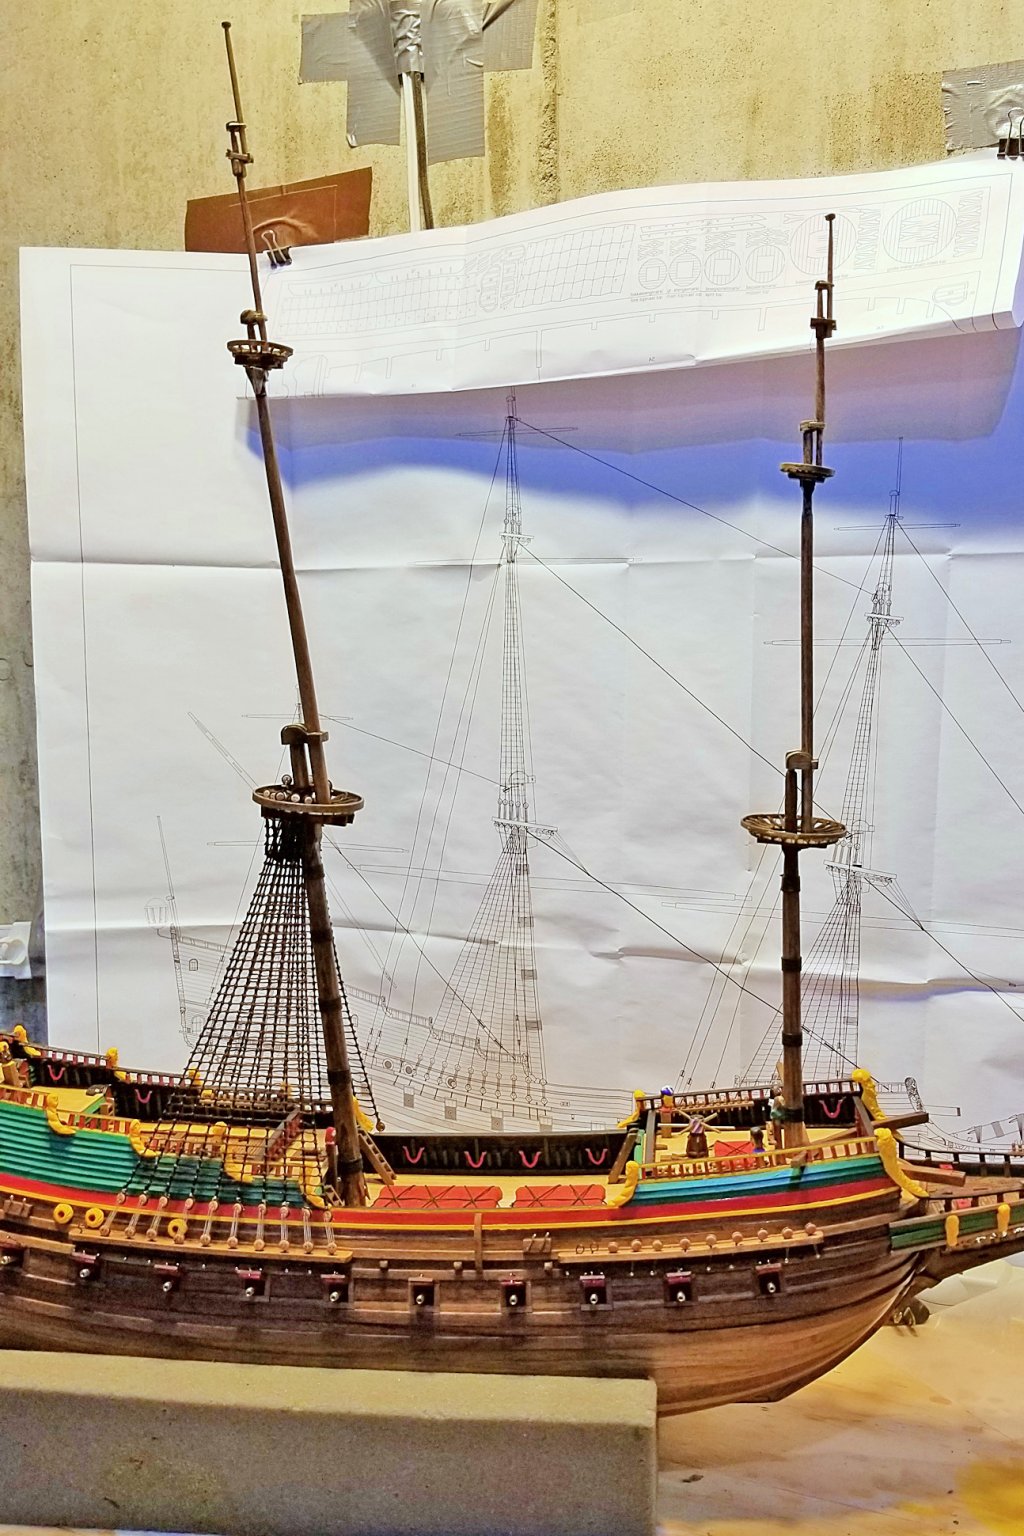
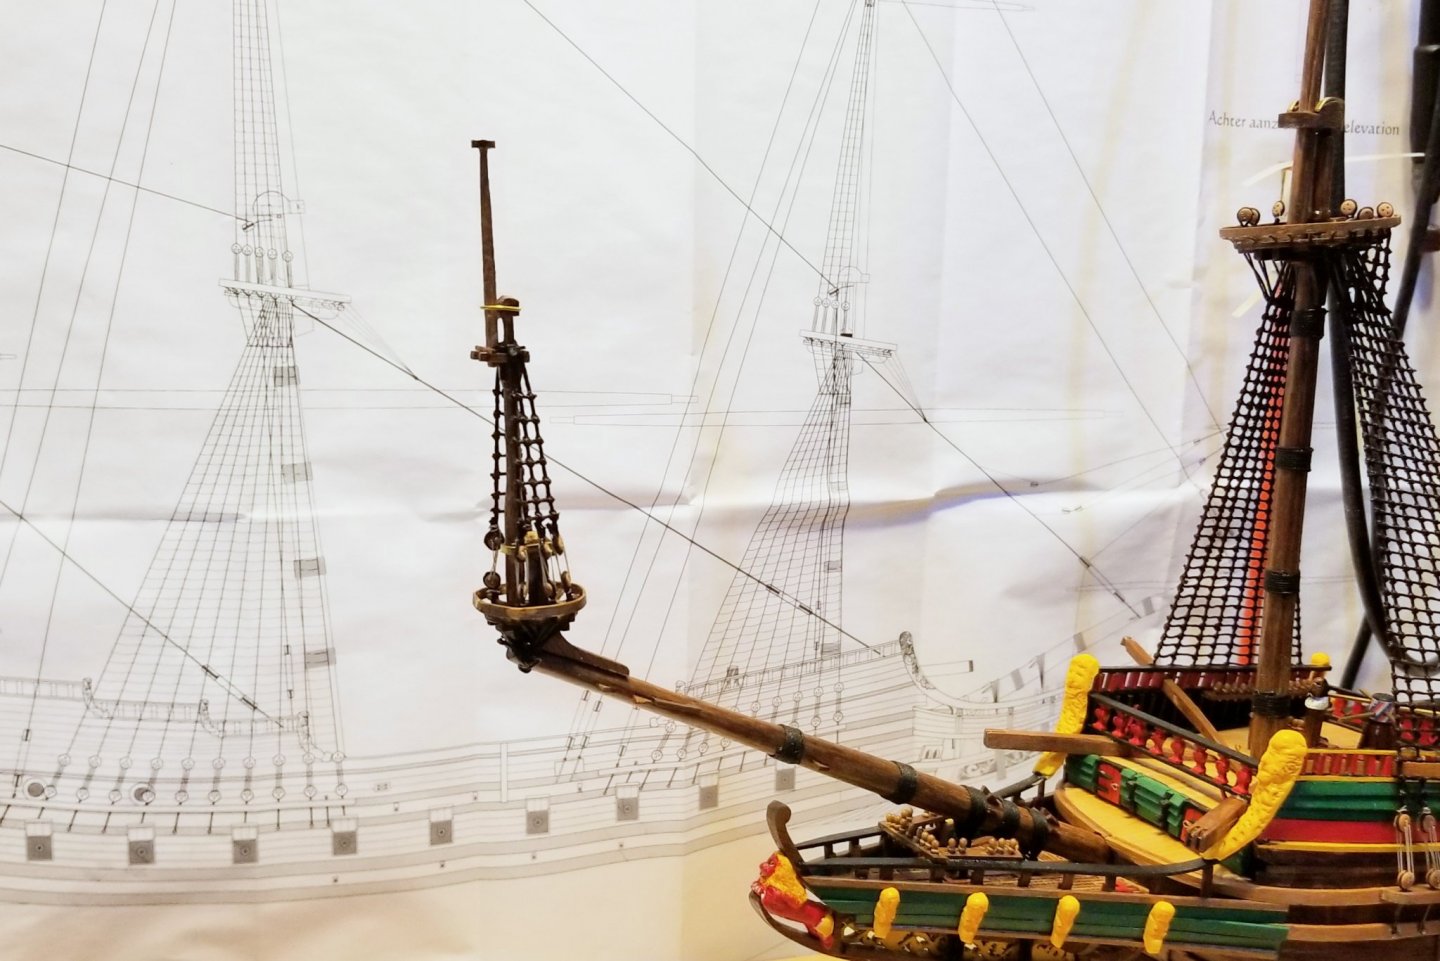
Finished the bowsprit (see pics), which is really interesting with the small mast & shrouds at the end. I was looking at this and thinking about the spritsail, which on the real ship must have put a lot of torque on the sprit in high winds. Looking at the rigging plans, I don't see a lot of side bracing, but I may not be looking closely enough. Regards, David

- 136 replies
-
- 6
-
-
- kolderstok
- batavia
- (and 1 more)
-
Finally finished the foremast shrouds and ratlines. Goes slower than I recall from other ships -- possibly because I'm tying the knots correctly on this ship! Regards, David
- 136 replies
-
- 6
-
-
- kolderstok
- batavia
- (and 1 more)
-
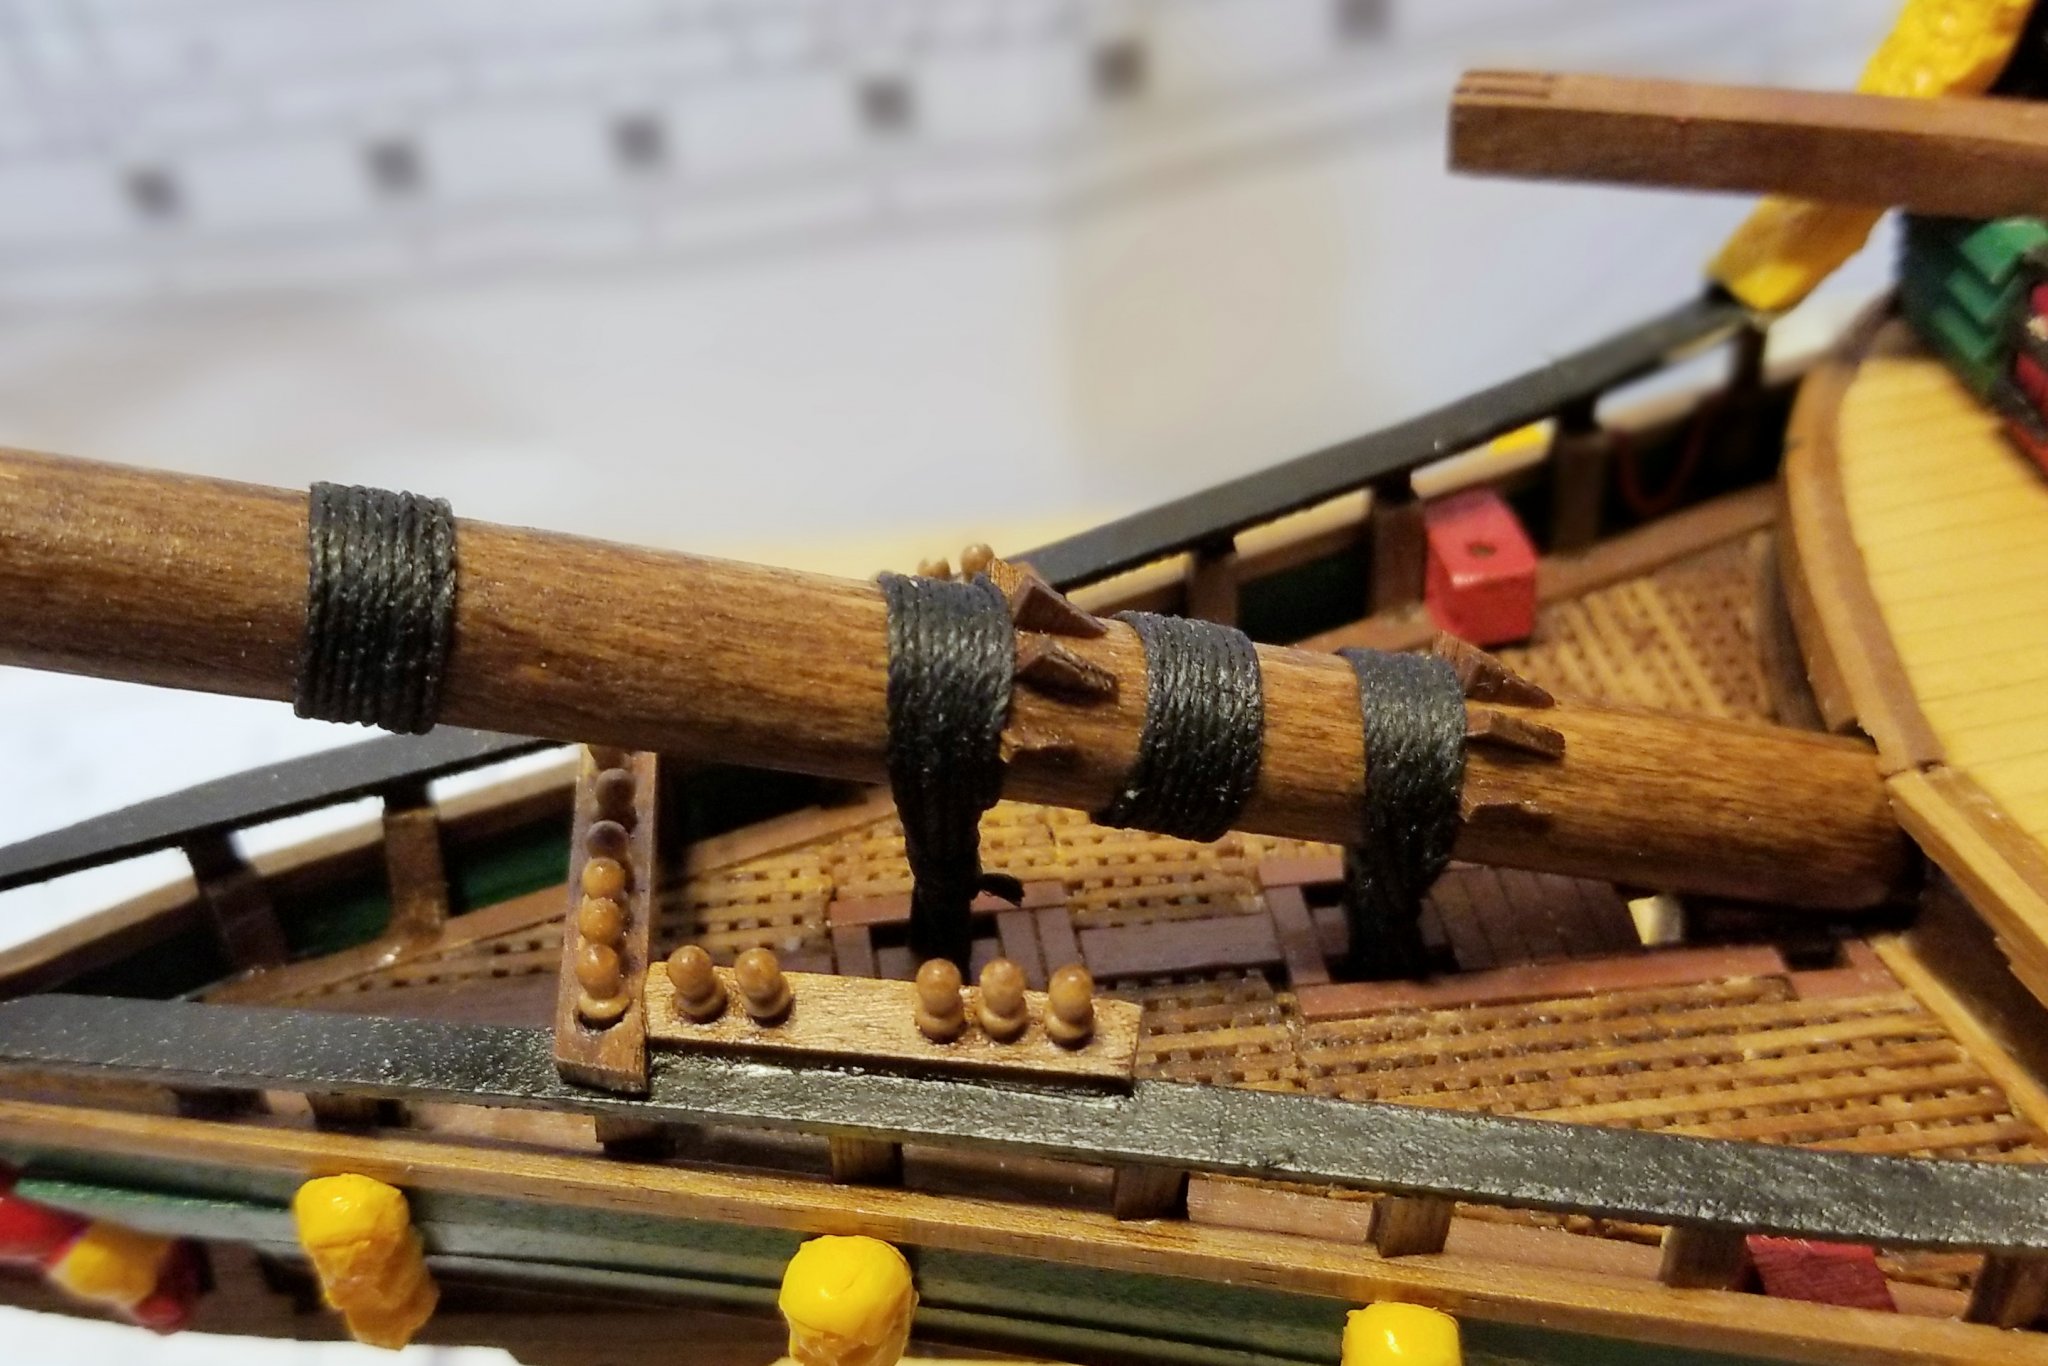
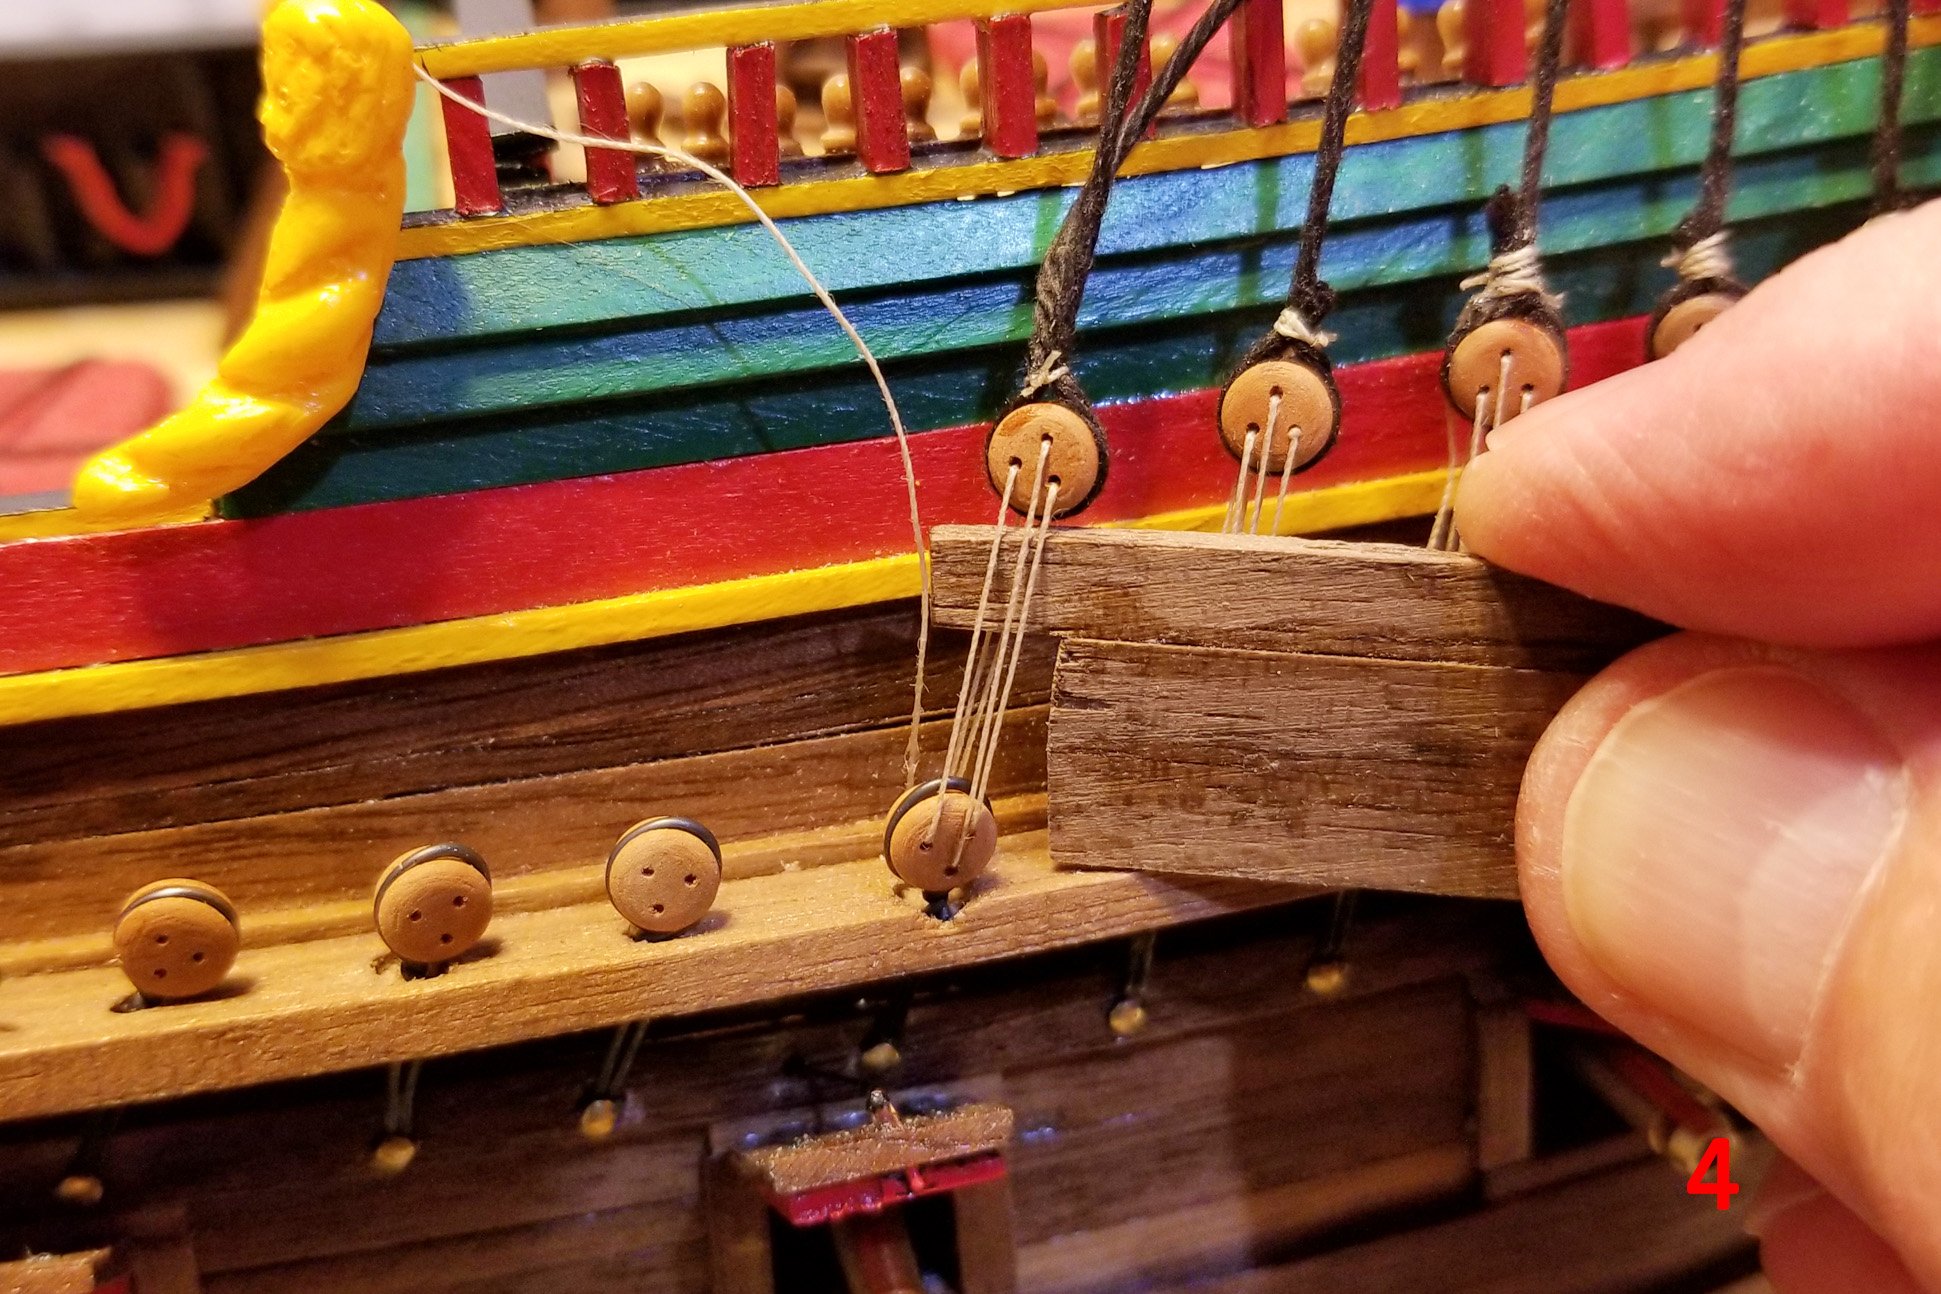
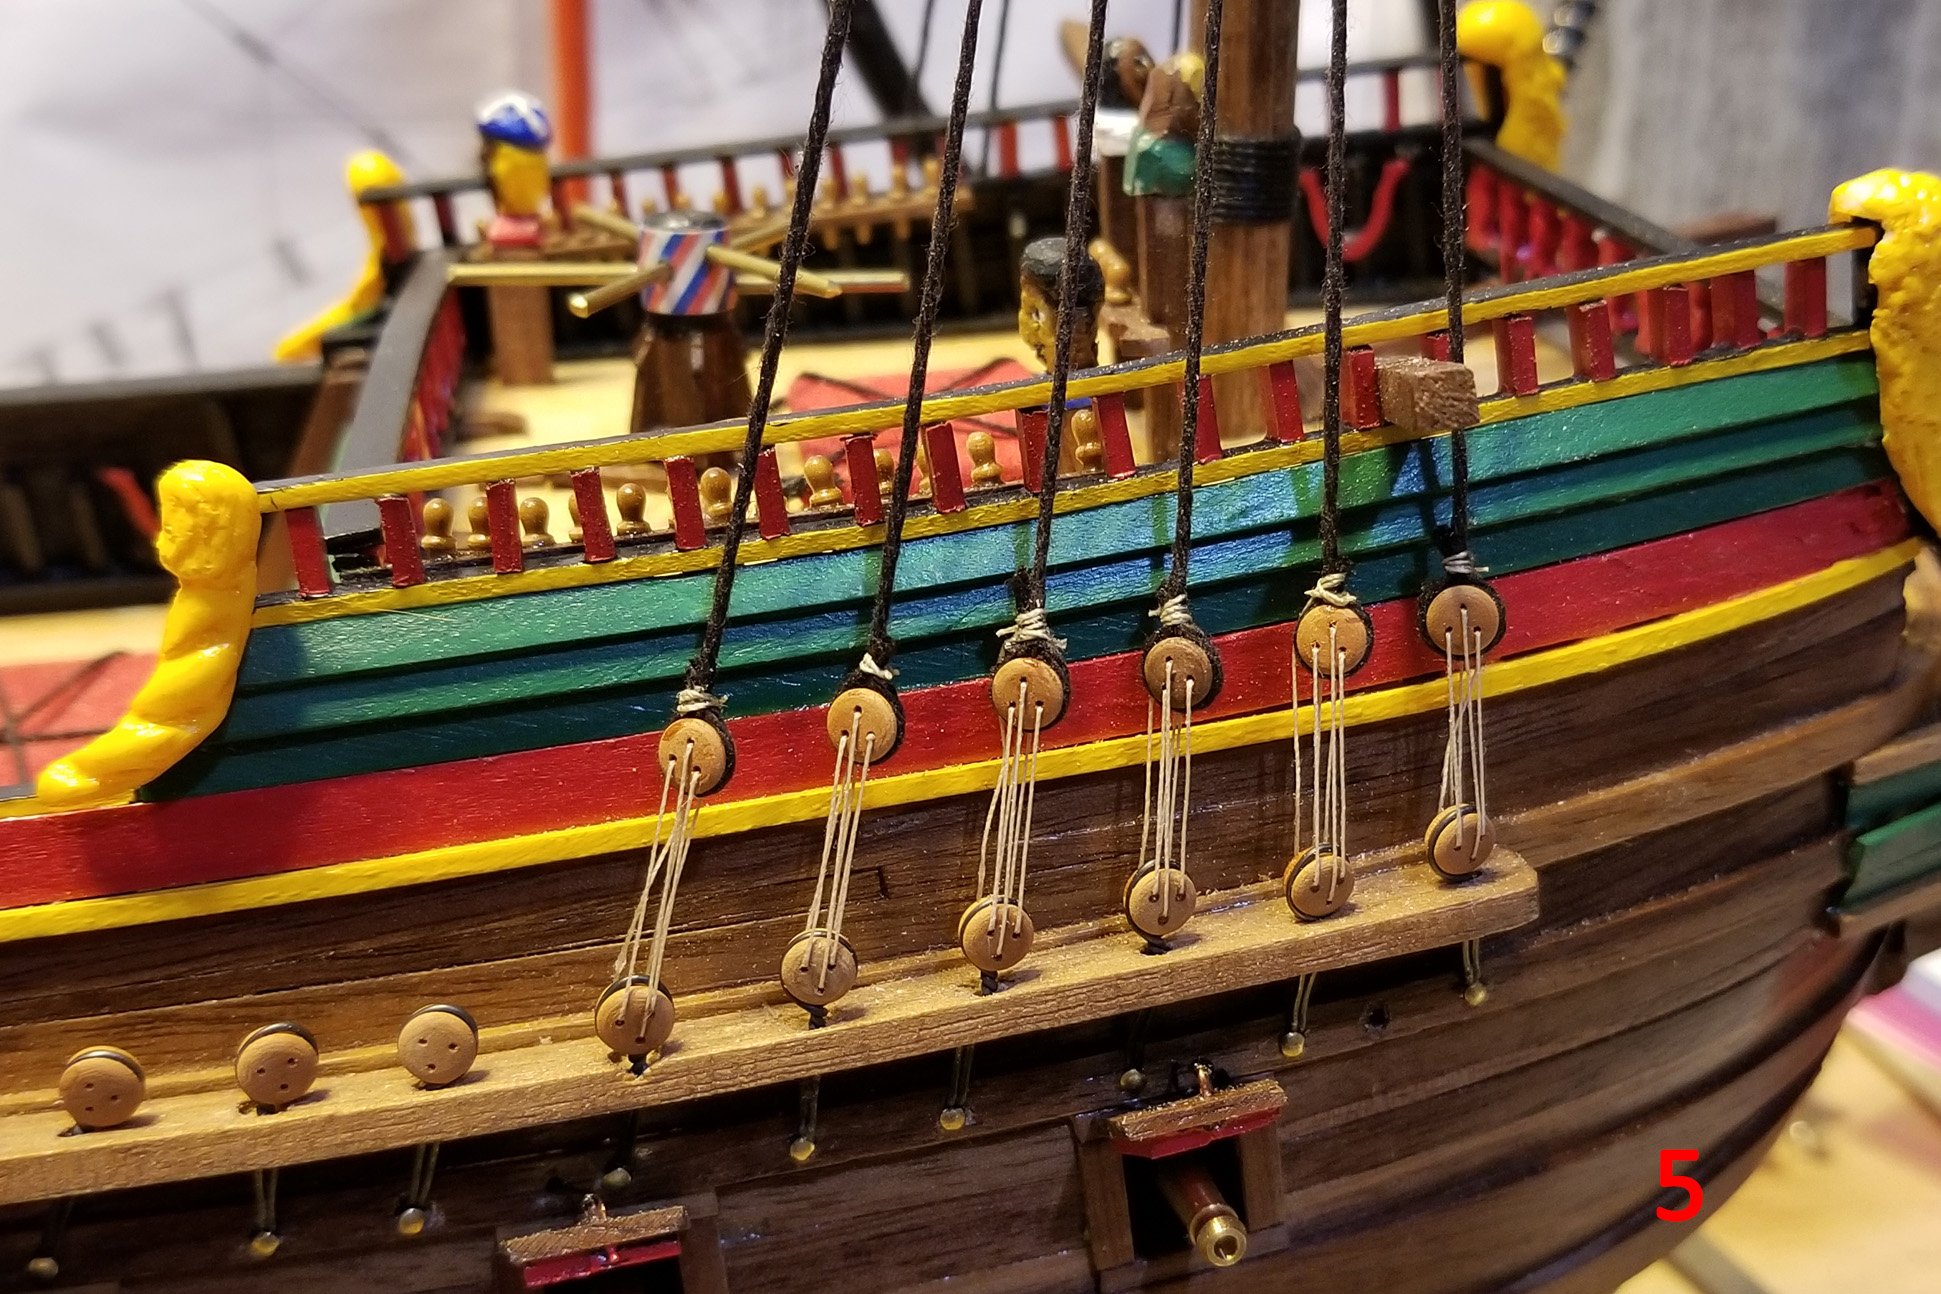
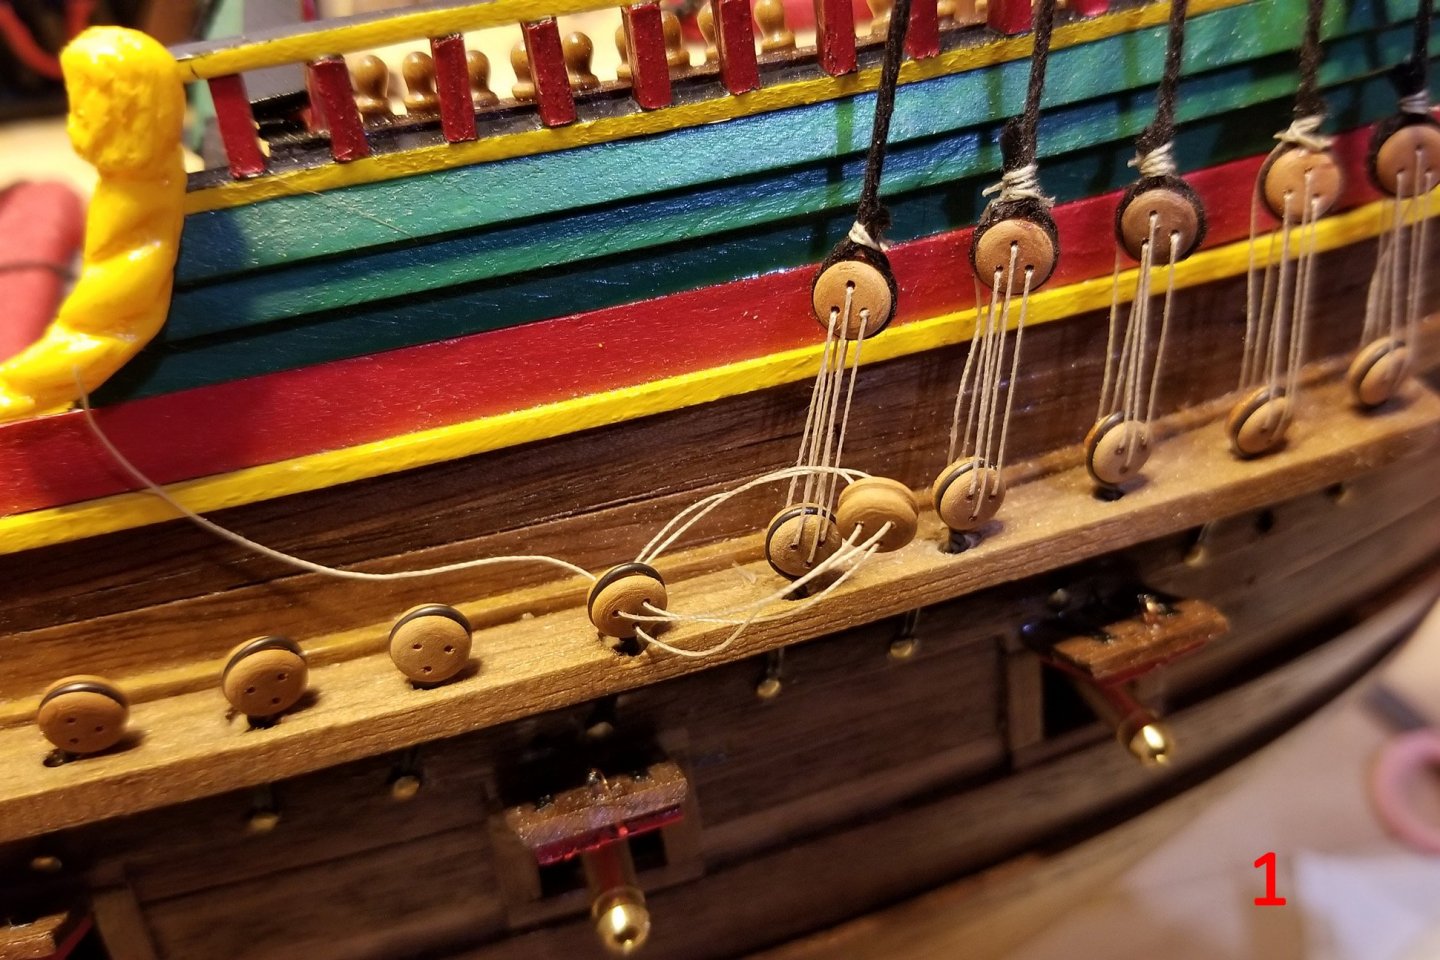
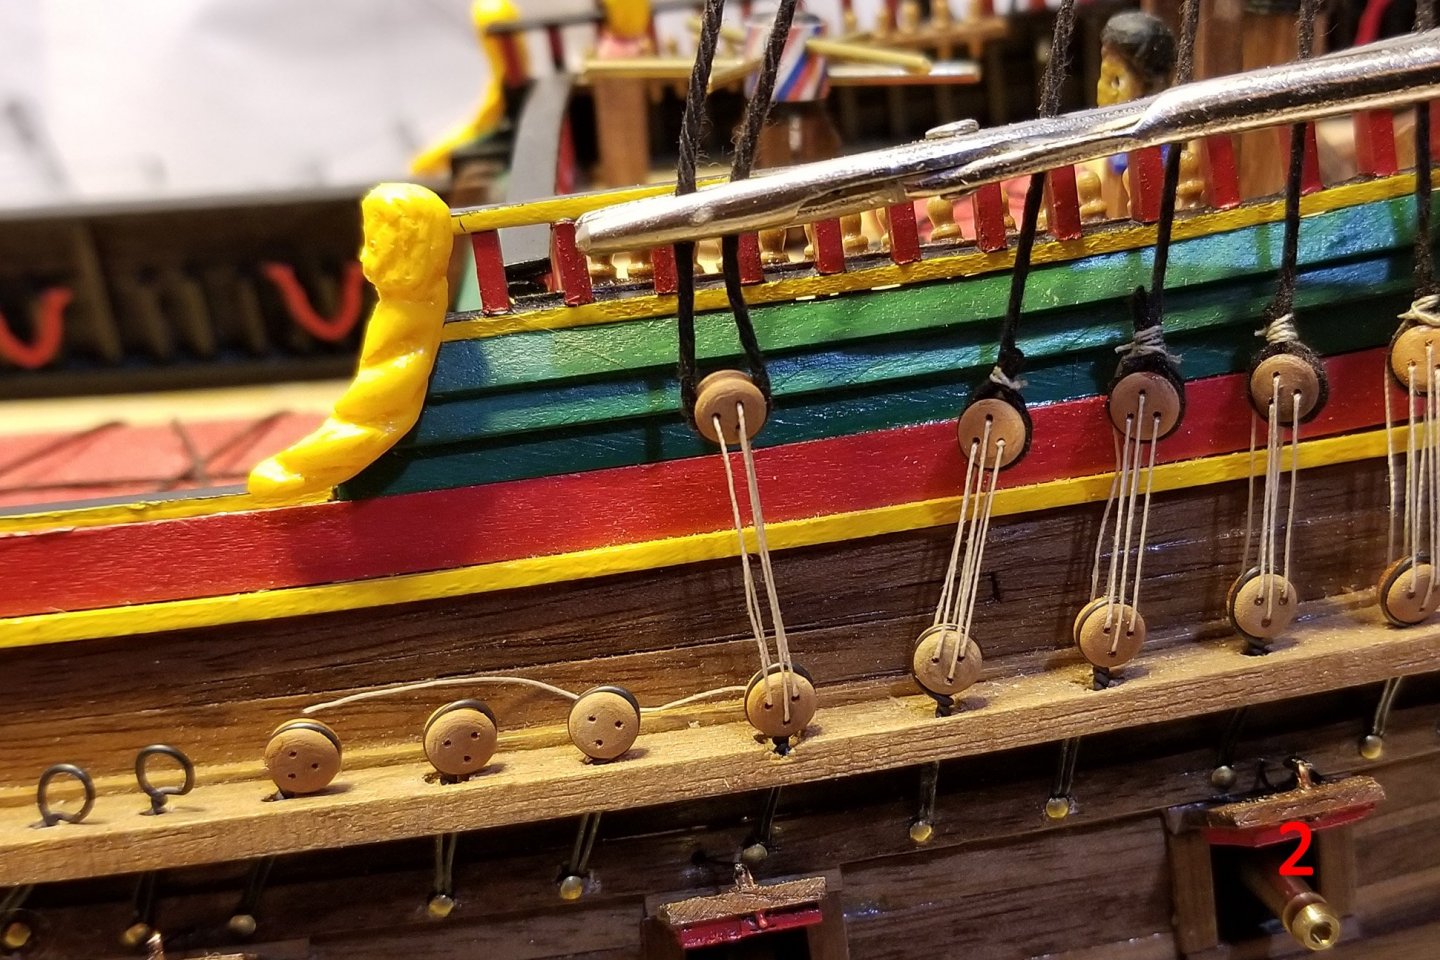
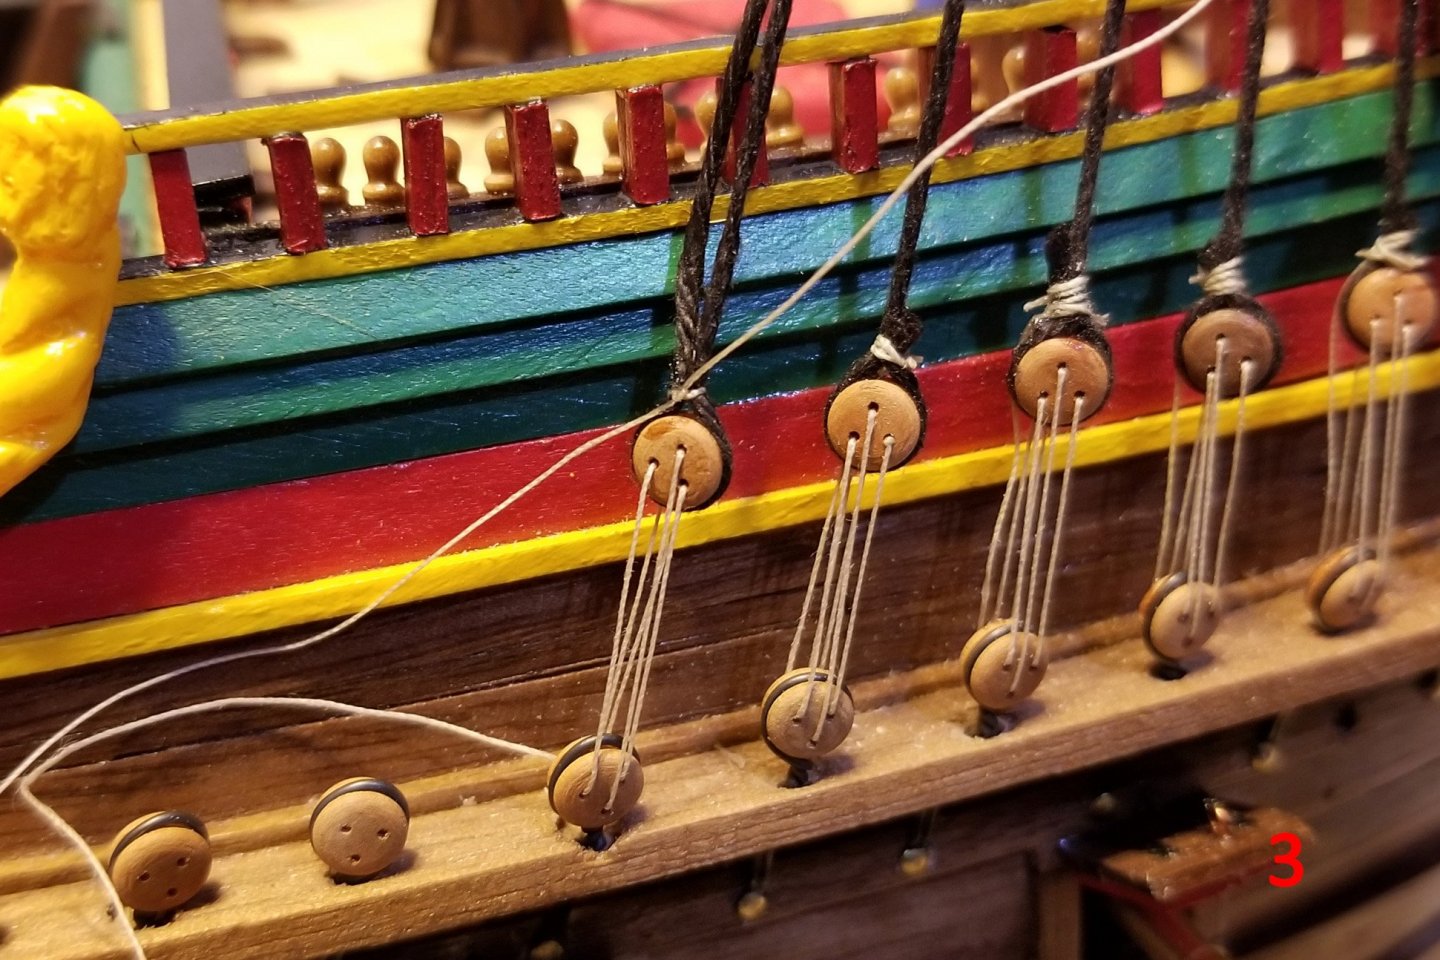
I have found it difficult and frustrating to get the second deadeye in a shroud "loop" installed on the shroud at the right height to be aligned and yet create some tension on the shroud. I've been getting it done, but lots of fiddling and trying. This morning I tried a new approach, shown in the pictures below (because this site sometimes puts the pictures in a different order than I upload them, I have put a red sequence number in the lower right corner of each one). First, after rigging the first deadeye on the shroud loop, rig the second one by itself before attaching it to the shroud, but don't tighten (Picture 1). Then attach the shroud, test the height, and clamp it. (Picture 2). The hard part here is that you can't just pull up on the shroud end, because the deadeye will rotate. So I had to hold the deadeye in place while testing the length of the shroud -- then clamp it and re-test by pulling the deadeye lines tight. This was still much easier than trying to test the height while juggling the deadeye, before rigging it. [Hope that's clear] Then tie off the deadeye (Picture 3), and pull down the deadeye rigging until it's at the right height according to my jig (Picture 4), Picture 5 shows them lined up. There is probably an even better way to do this, but this works a bit better for me than trying to align the deadeye height and then clamping and attaching it, and then rigging it. On earlier models, I was so concerned about the alignment that I did the shrouds individually rather than using a two-shroud loop (which is much better). Regards, David


- 136 replies
-
- 7
-
-
- kolderstok
- batavia
- (and 1 more)
-
Foremast built and mounted. The construction is identical to the main mast. Regards, David

- 136 replies
-
- 7
-
-
- kolderstok
- batavia
- (and 1 more)
-
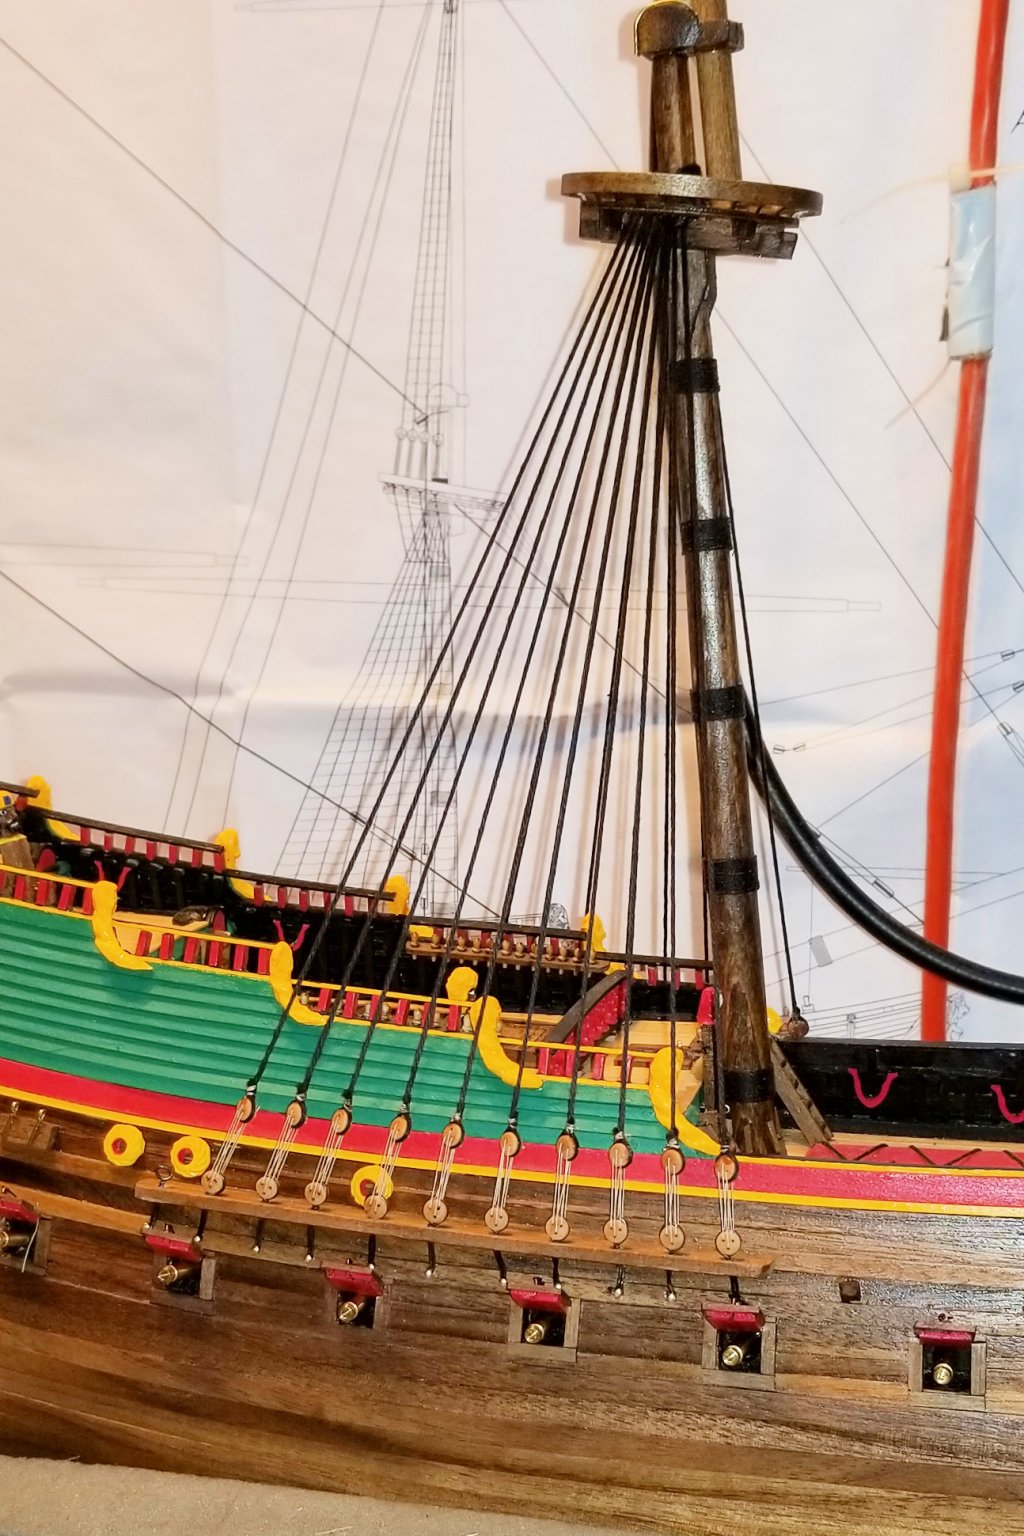
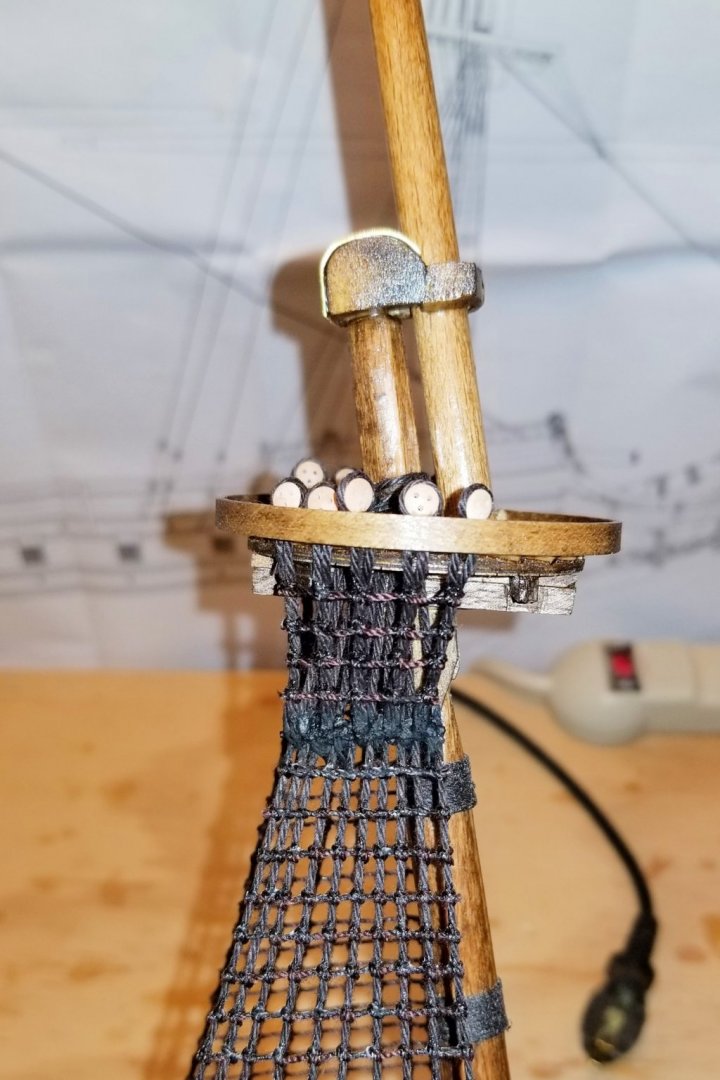
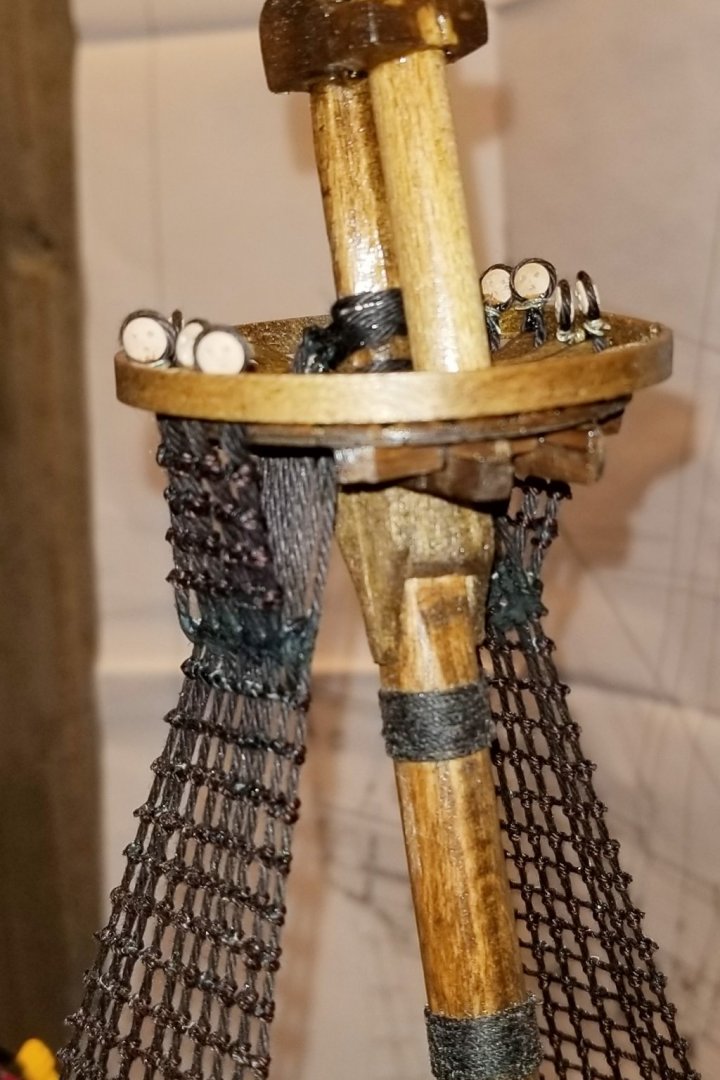
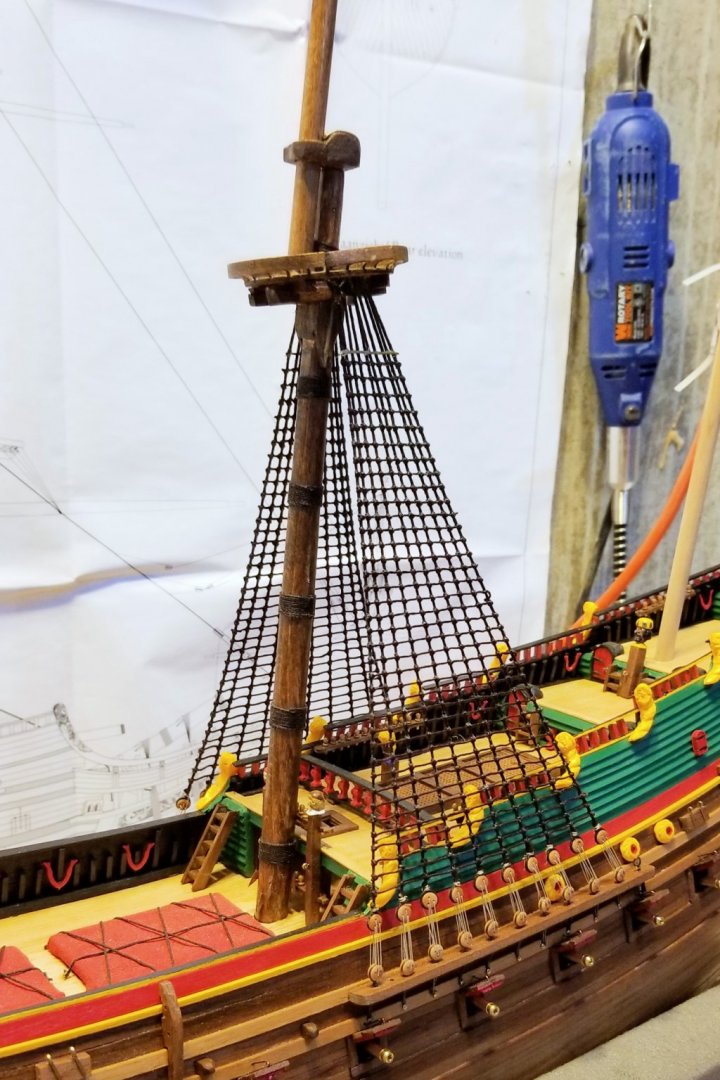
Futtock shrouds at the top of the lower main shrouds. Regards, David
- 136 replies
-
- 7
-
-
- kolderstok
- batavia
- (and 1 more)
-
Finally finished the ratlines on the lower main mast shrouds. Took a lot of time, which is why I haven't posted in a while. Now for the foremast. Regards, David
- 136 replies
-
- 7
-
-
- kolderstok
- batavia
- (and 1 more)
-
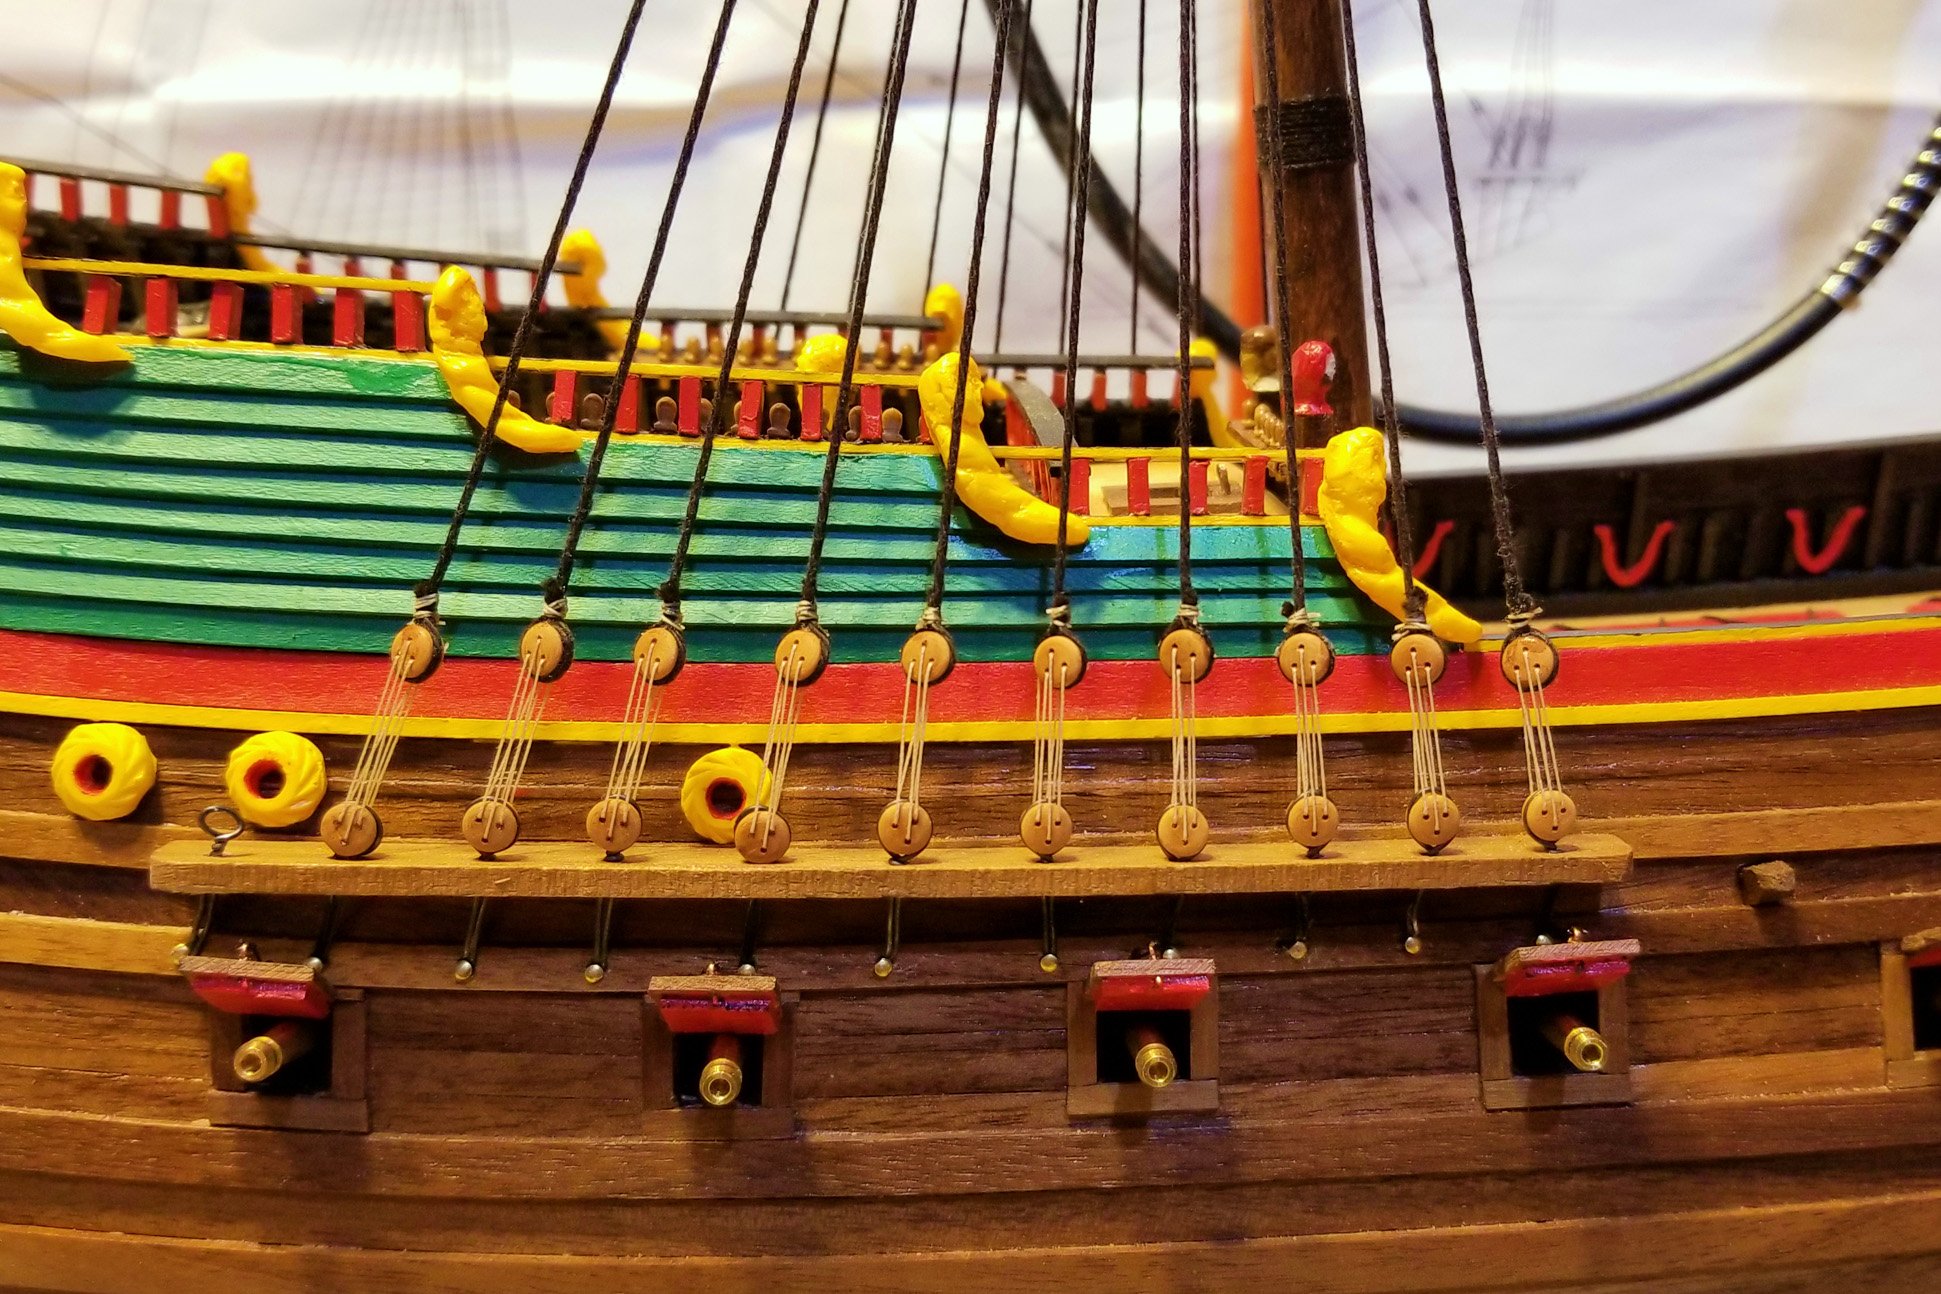
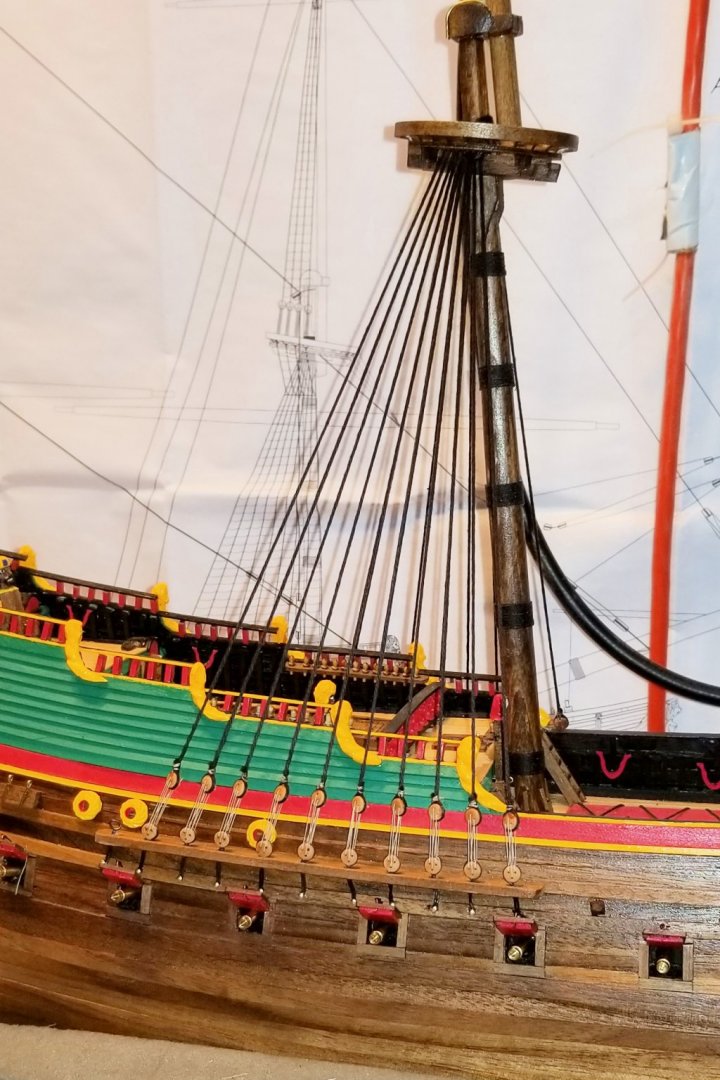
Main mast shrouds up -- ratlines still to come. I spent a lot of time getting my deadeyes to line up. Regards, David

- 136 replies
-
- 9
-
-
- kolderstok
- batavia
- (and 1 more)
-
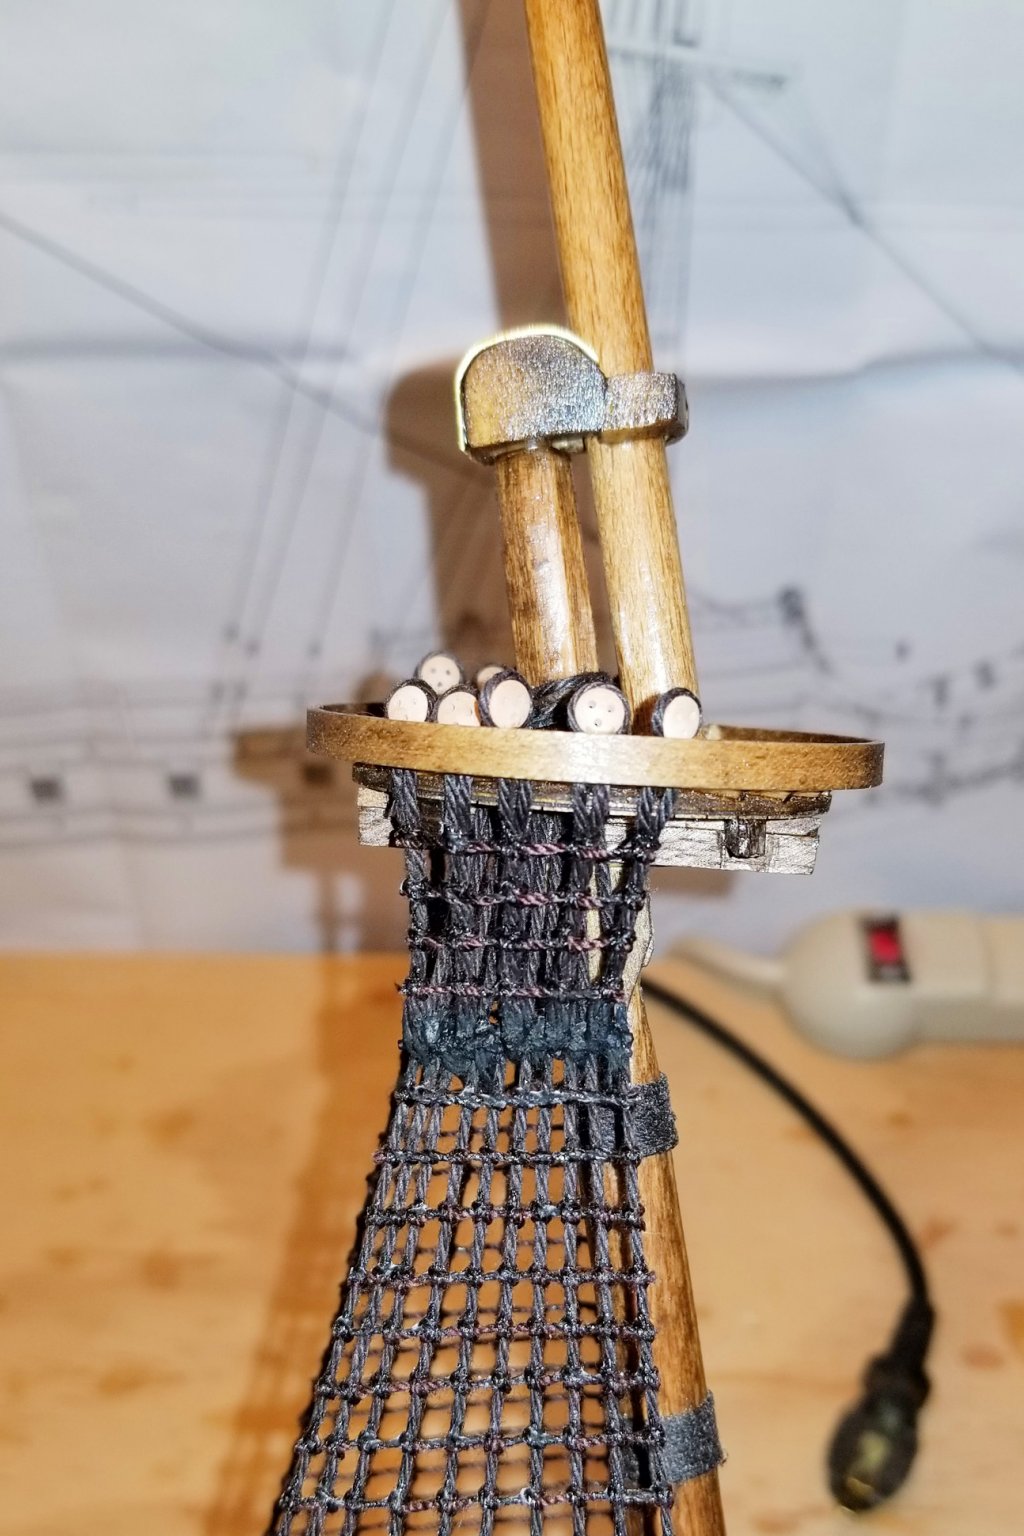
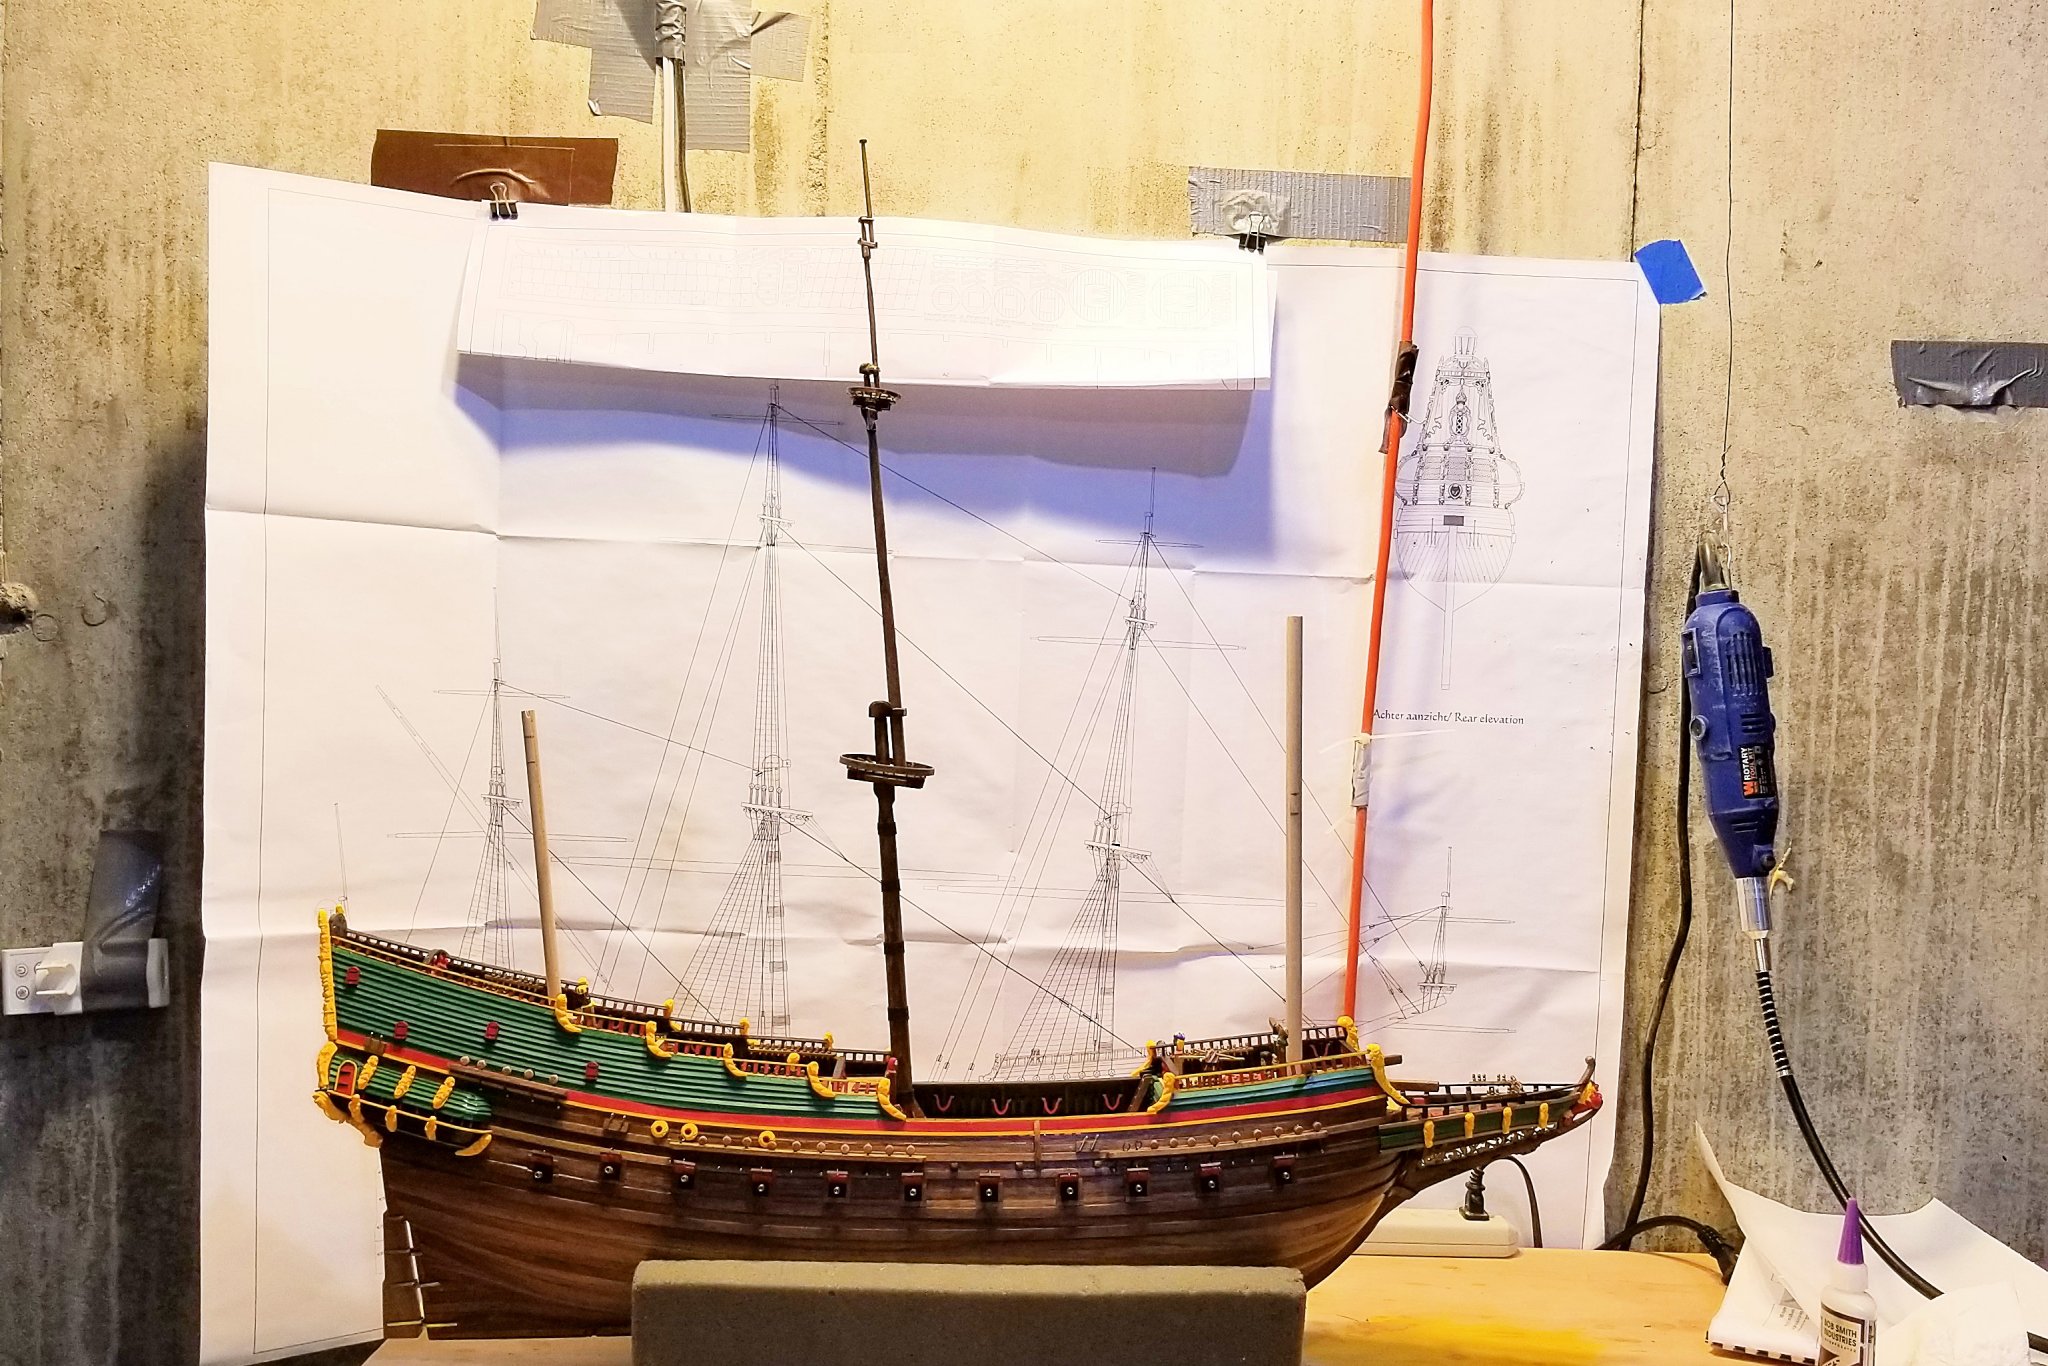
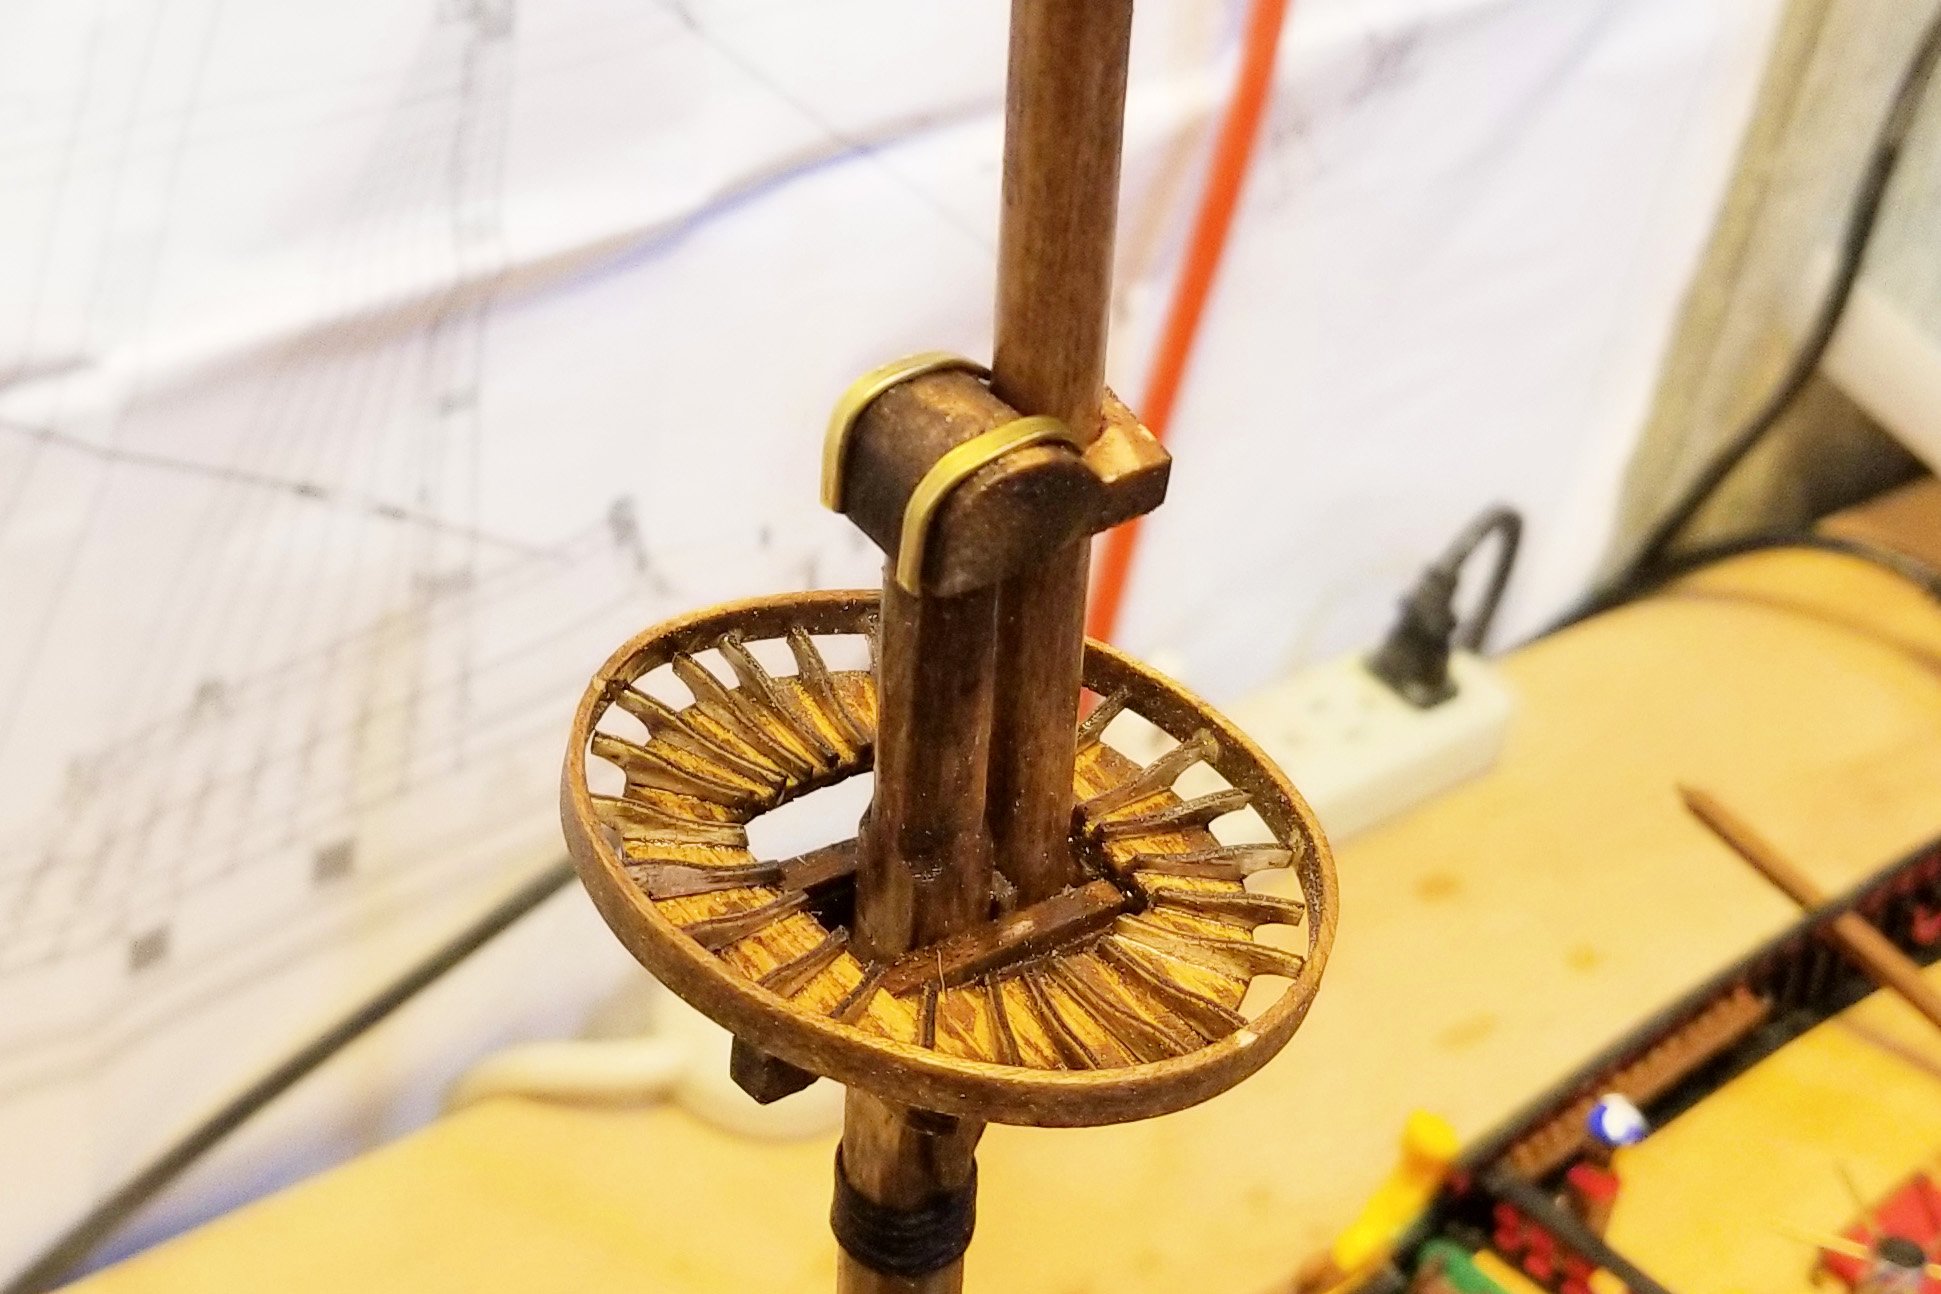
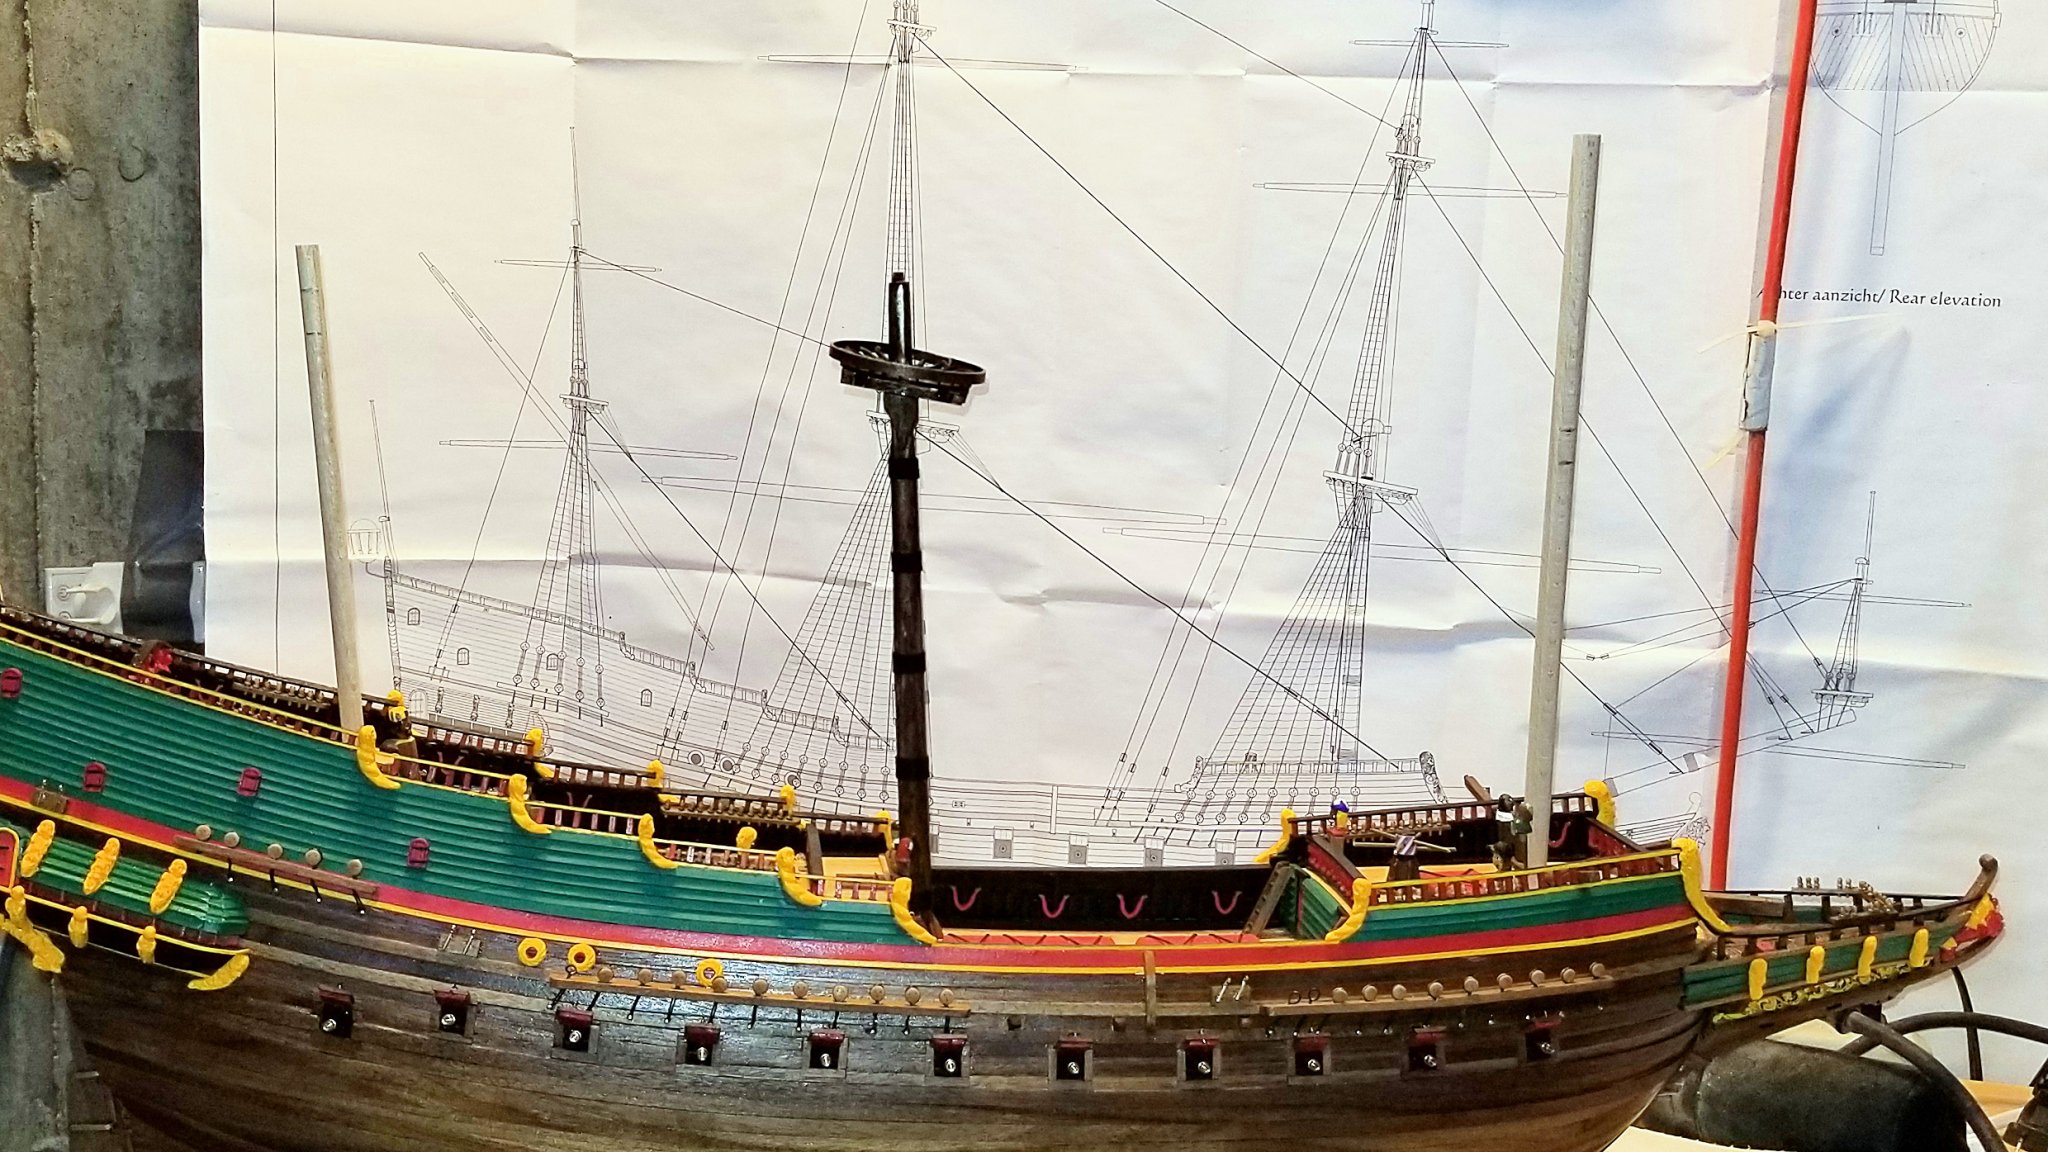
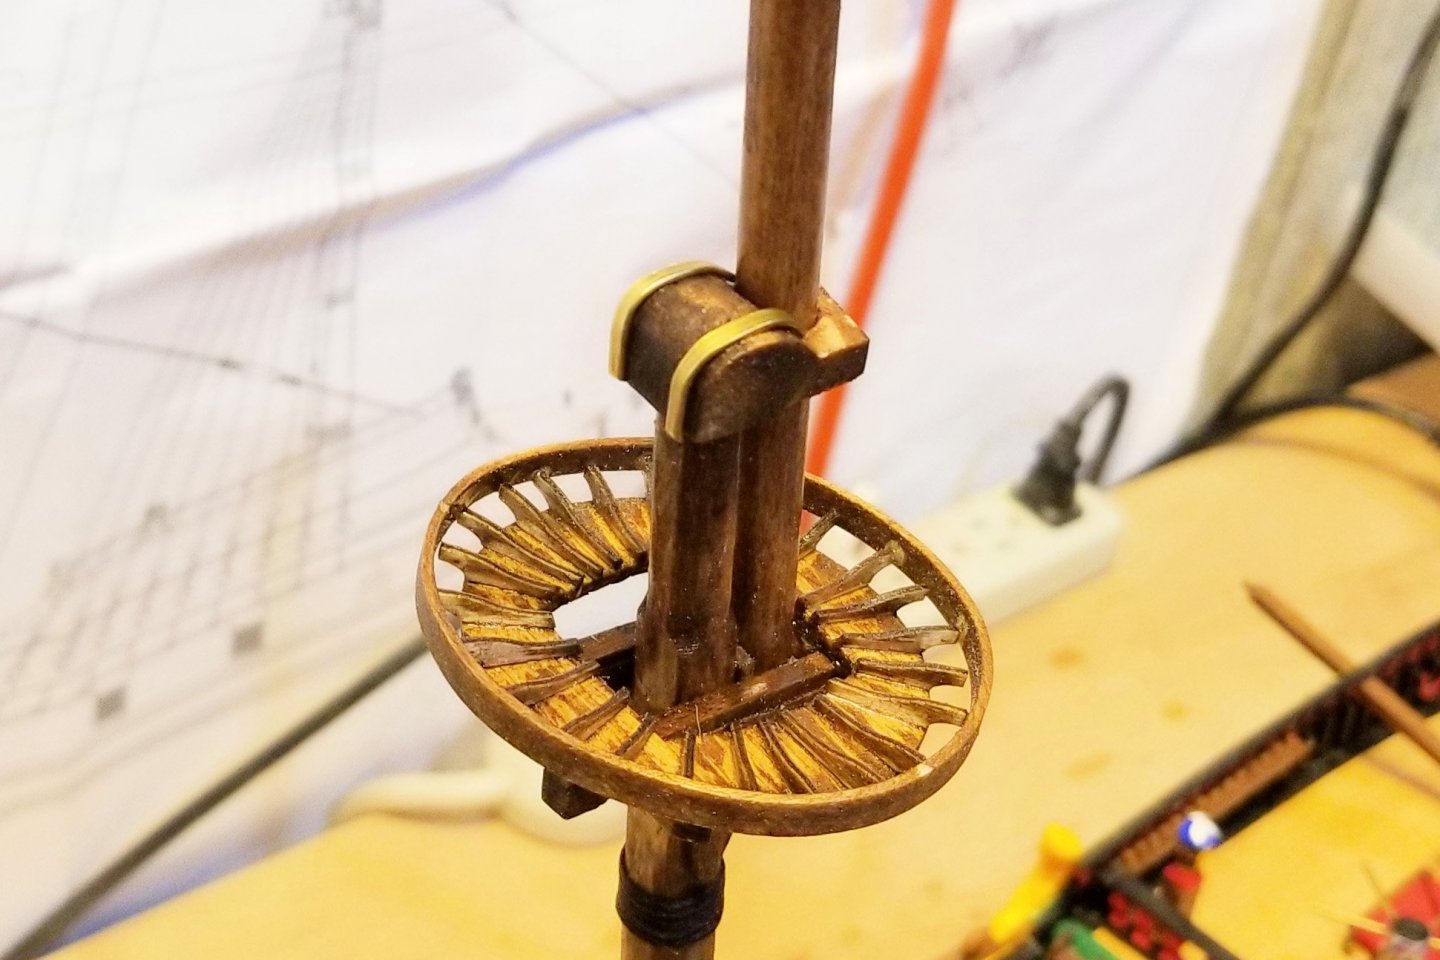
Here's the completed main mast. Many of the parts, such as the mast top shown in closeup, need to be hand-made following the plans. I think my next step will be do to the shrouds on the lower part of this mast before moving on to the next mast. That will put some variety in the build, and also help to forestall "repetitive shroud fatigue" later on. 😛 In previous ships I have attached the yards before doing the shrouds and stays, but I think I'll do it after the shrouds are up on this one and see how that goes. Some concern about access, but we'll see. Regards, David

- 136 replies
-
- 7
-
-
- kolderstok
- batavia
- (and 1 more)
-
Hans, I don't mind at all -- want it to be right when I describe it. For the benefit of other readers: the quality of wood in this model is excellent -- as good as any I have seen in the best of other models I've built. James, I'm not sure I understand your comment. Other than the resin decorations, this is a fully wooden model. Regards, David
-
Here's the first section of the main mast. The supplied wood is basswood, so I had to stain it. Regards, David

- 136 replies
-
- 11
-
-
- kolderstok
- batavia
- (and 1 more)
-
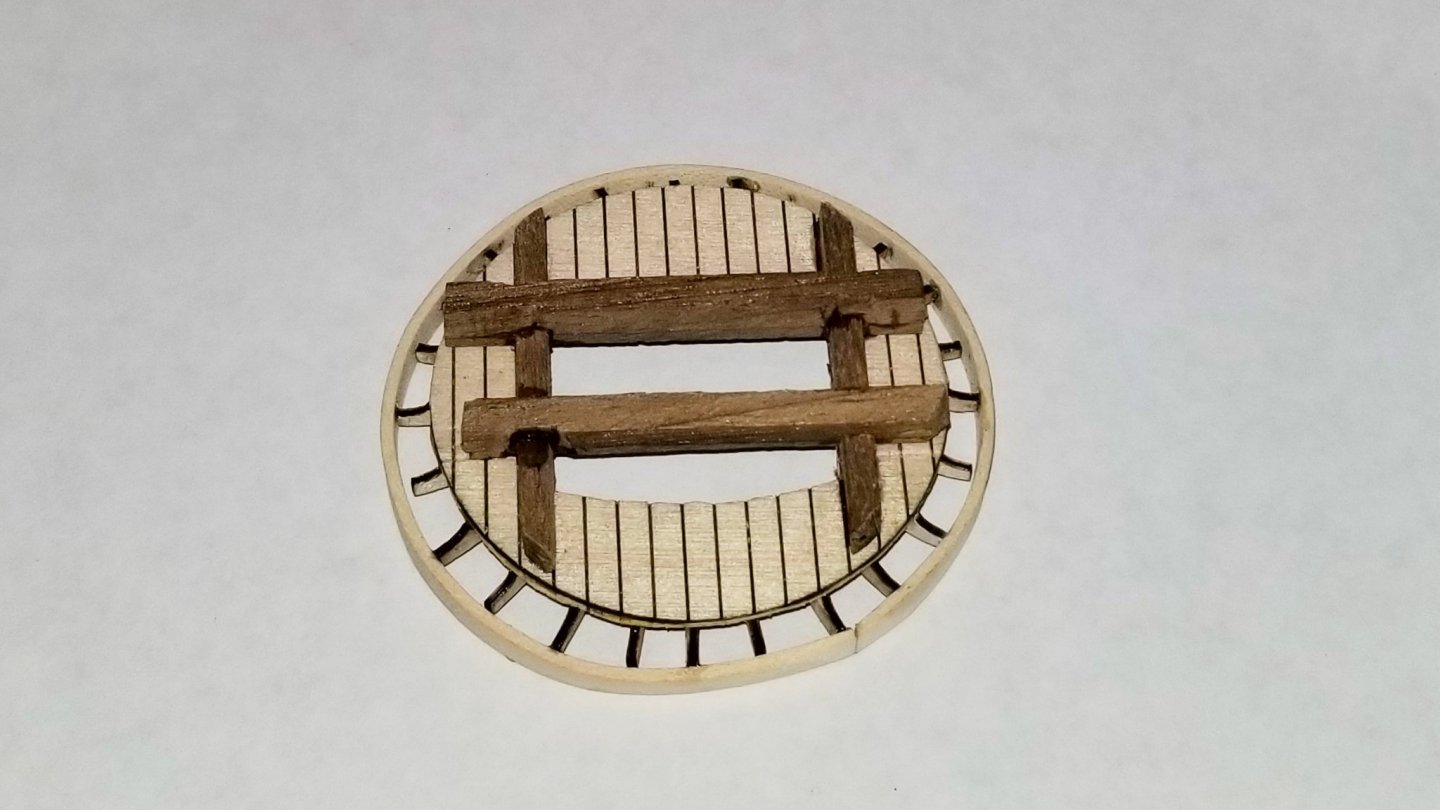
Here's the top for the first section of the main mast. Regards, David

- 136 replies
-
- 6
-
-
- kolderstok
- batavia
- (and 1 more)
-
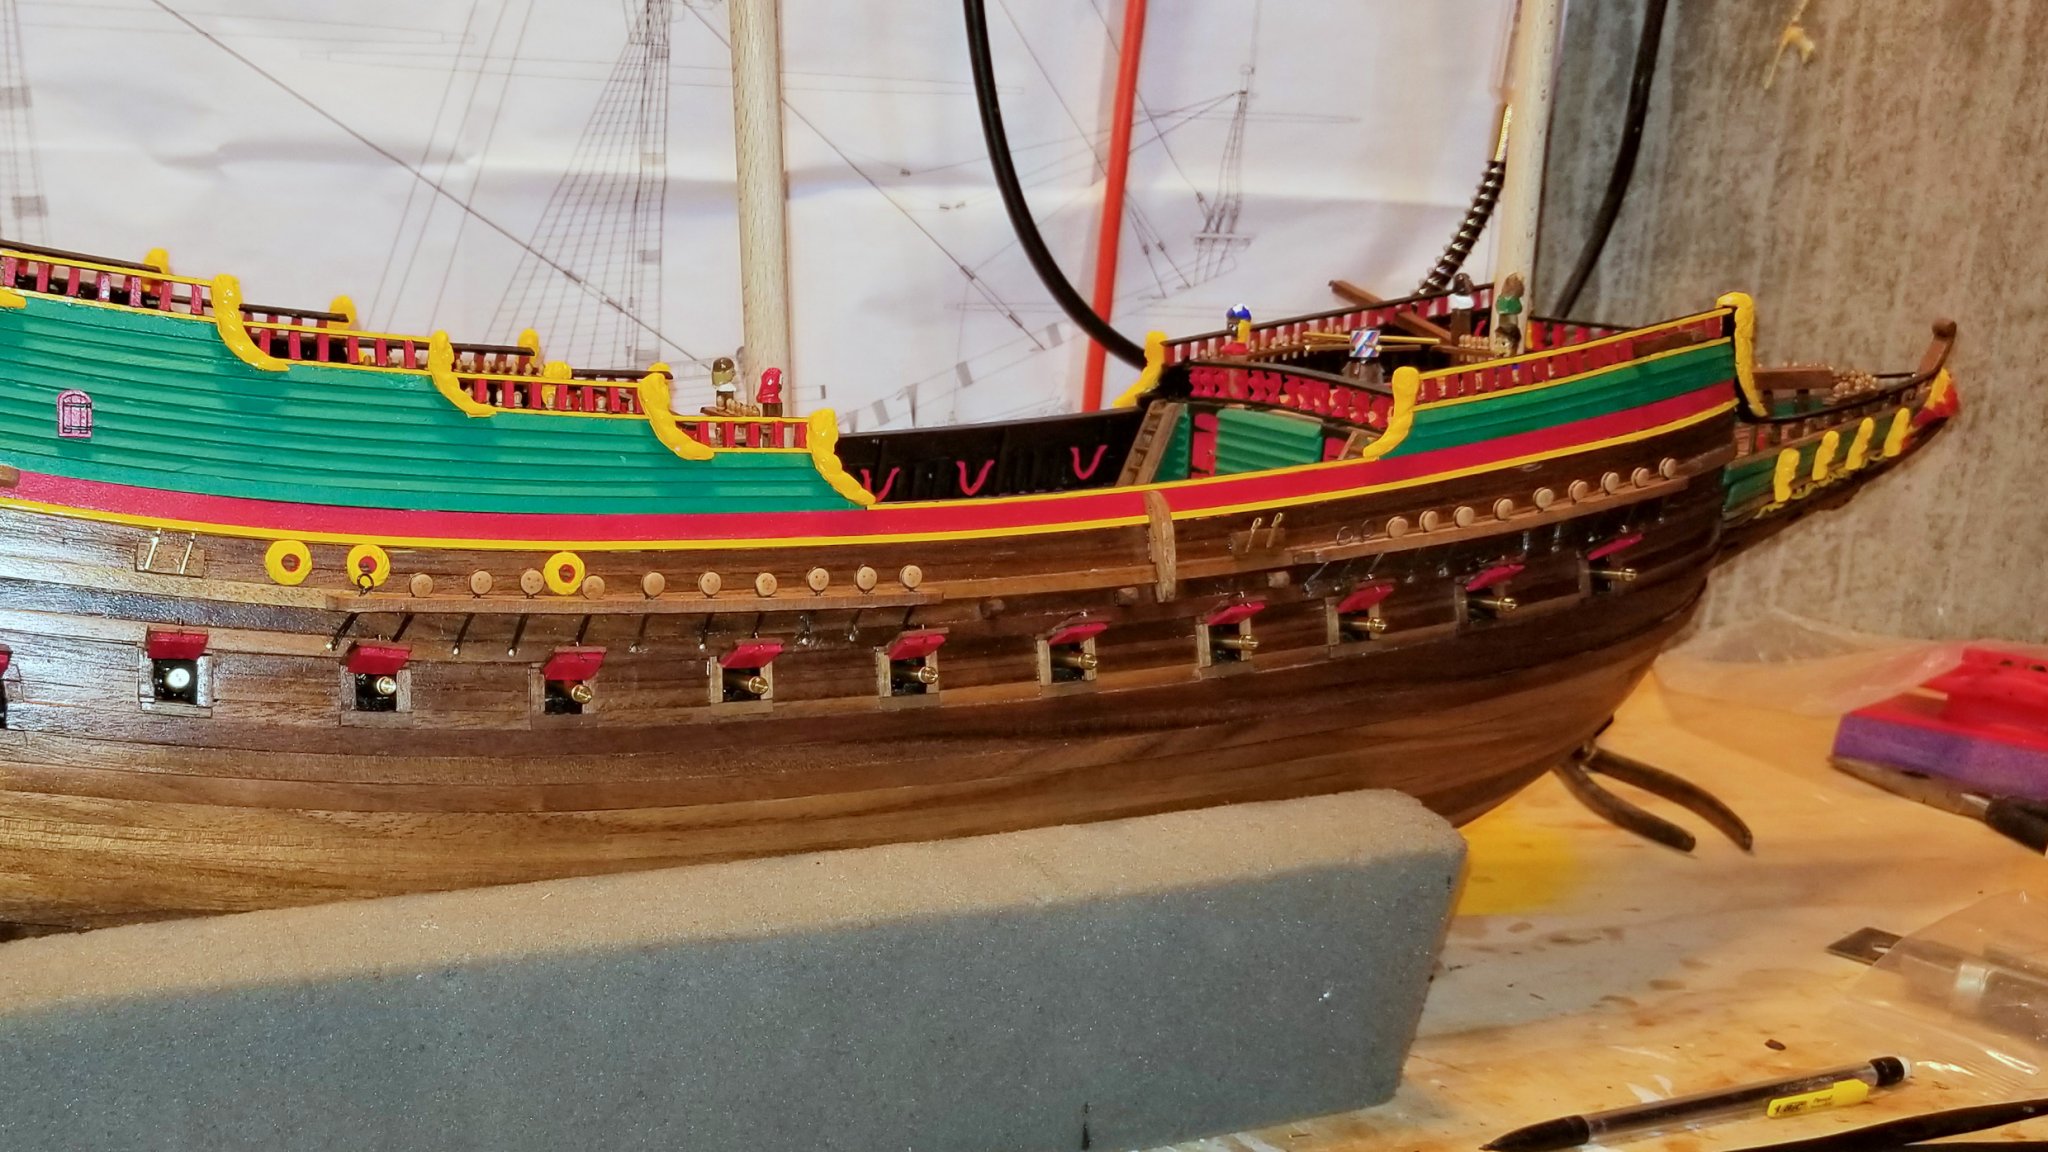
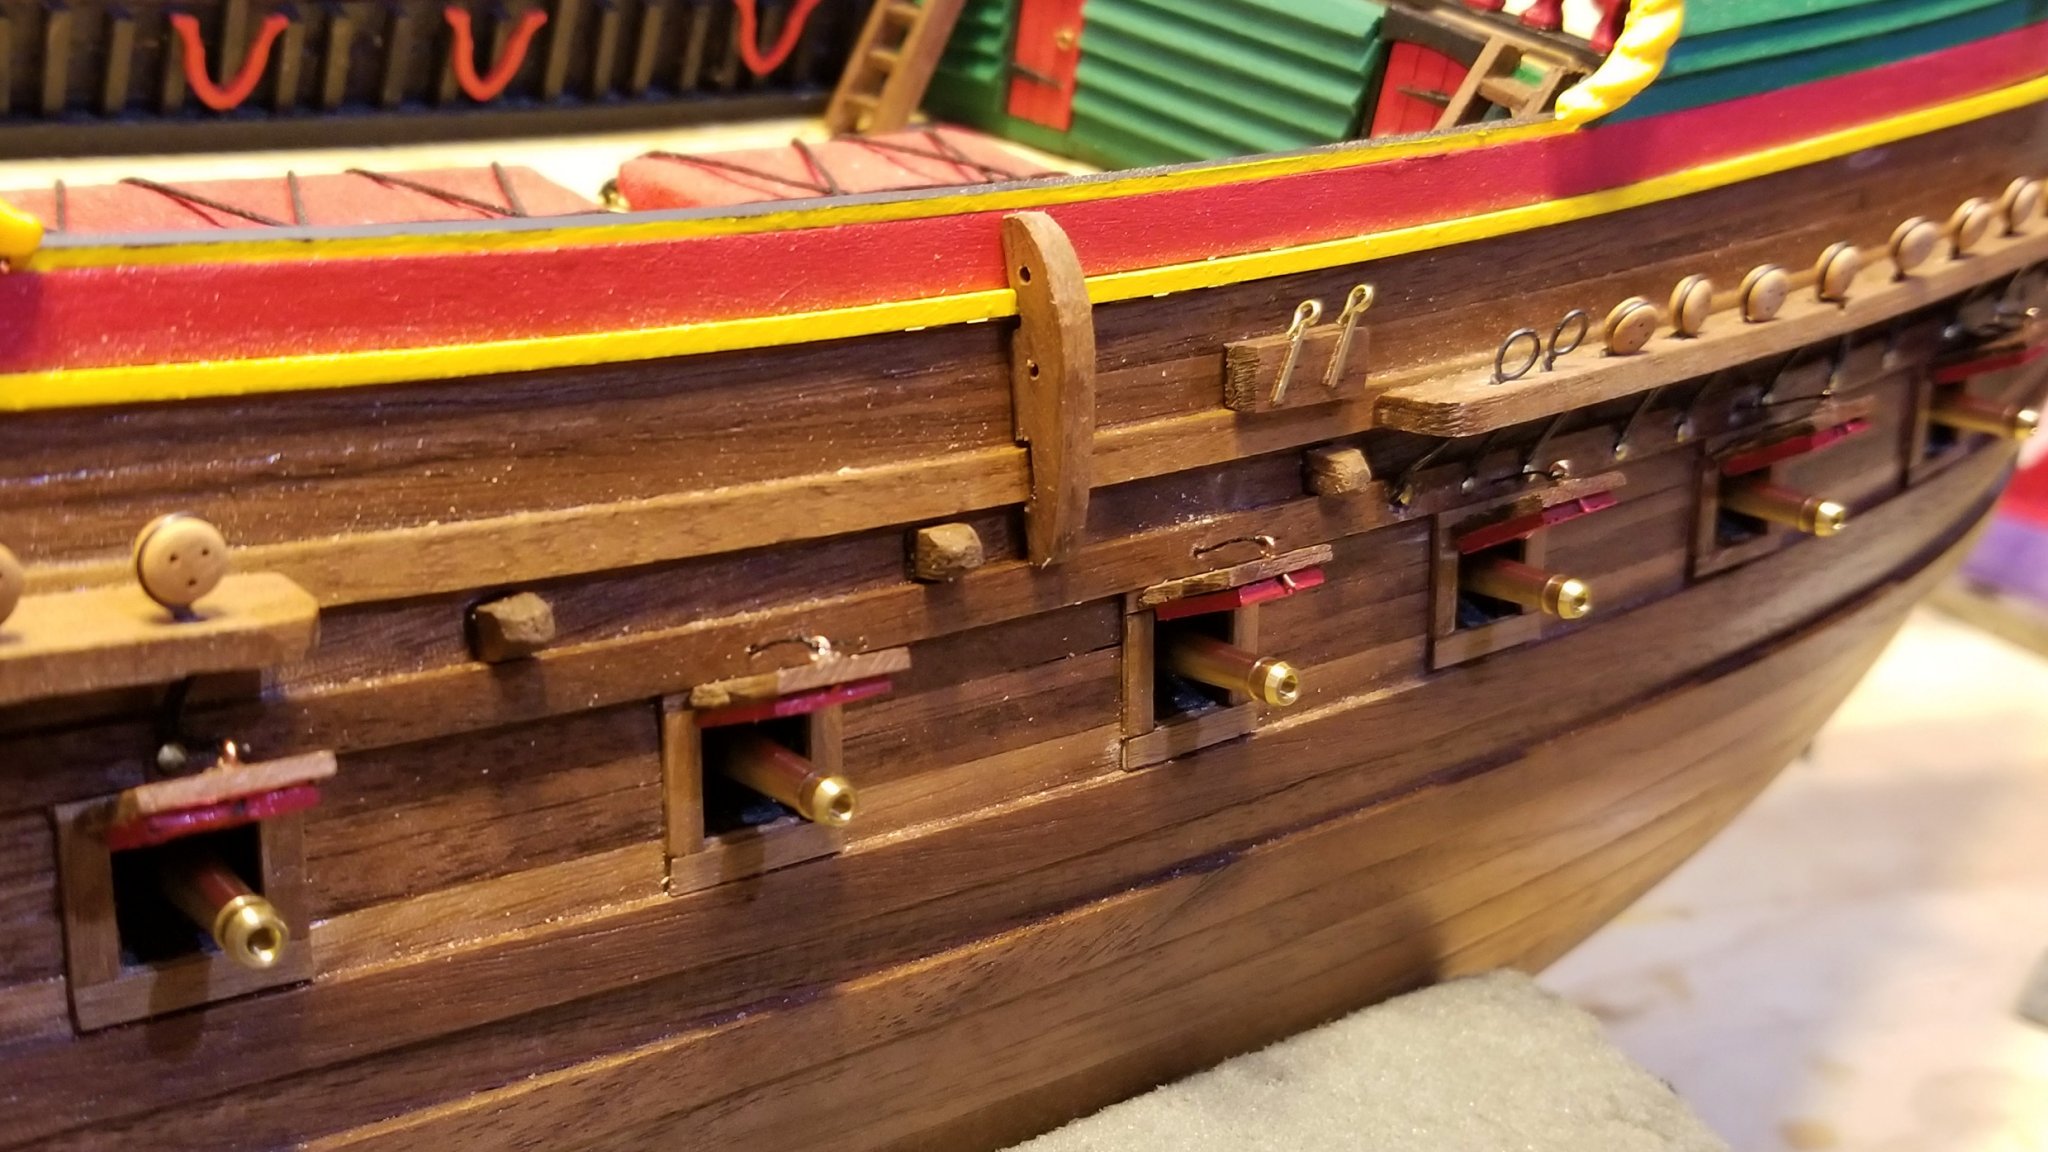
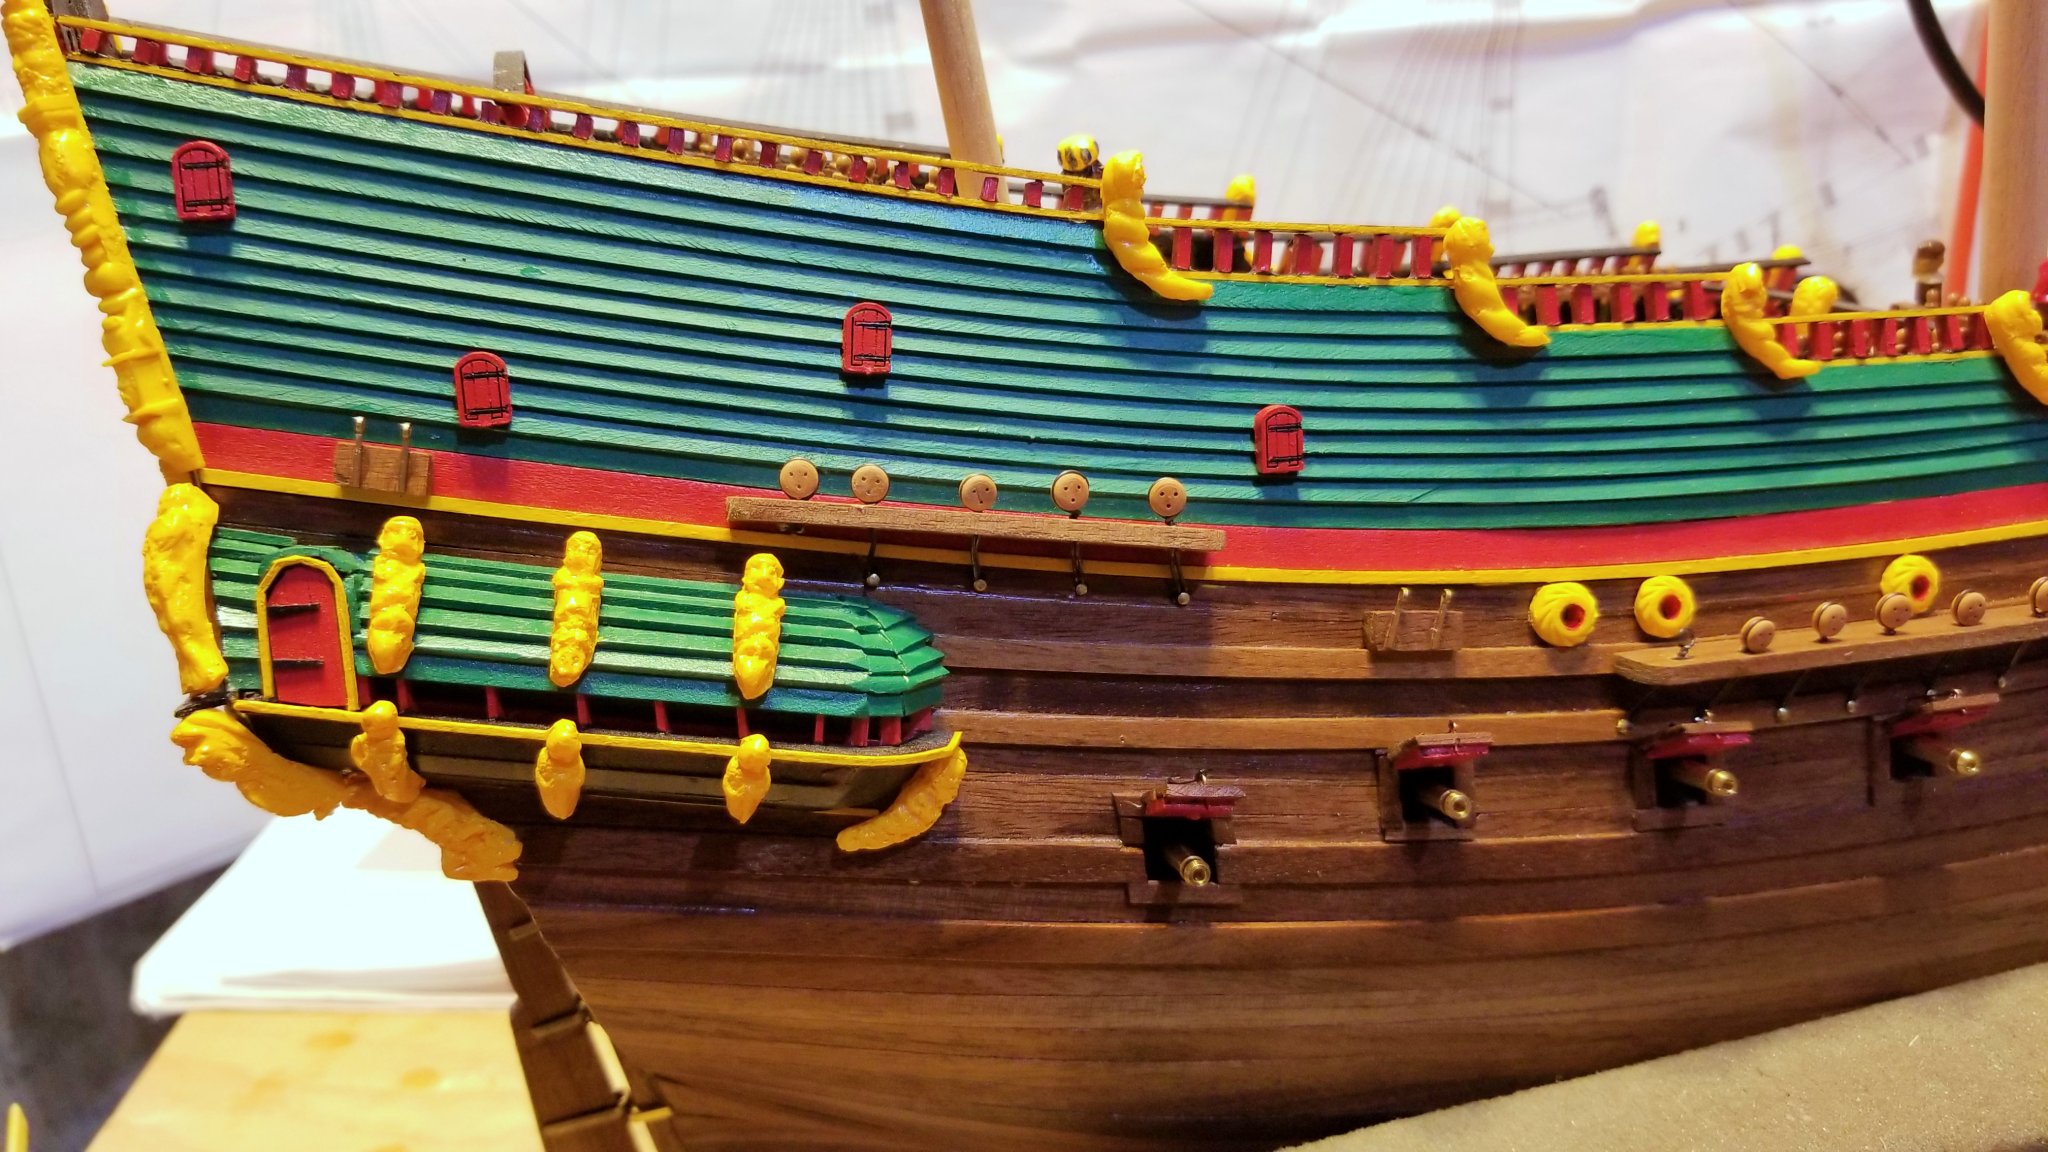
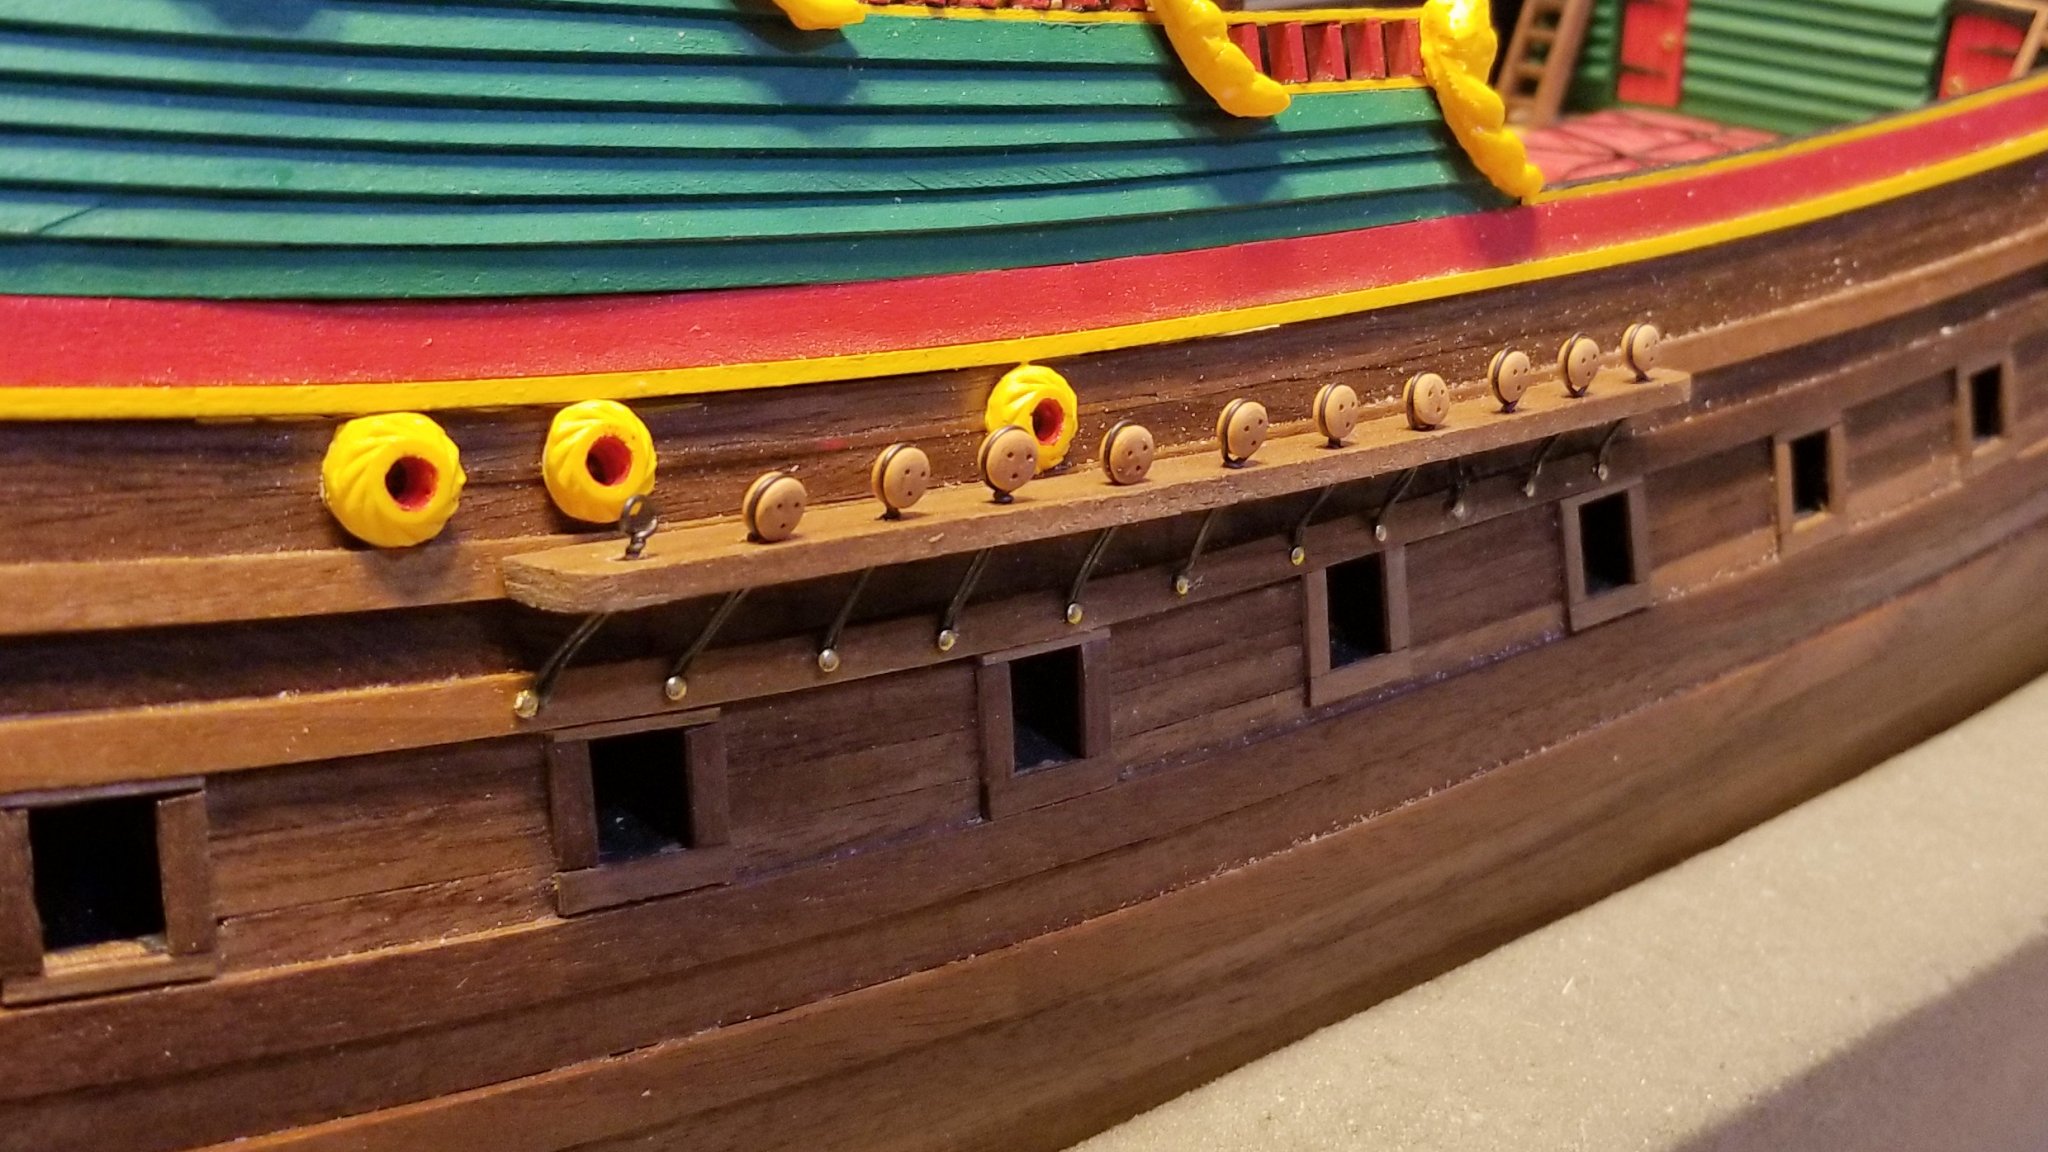
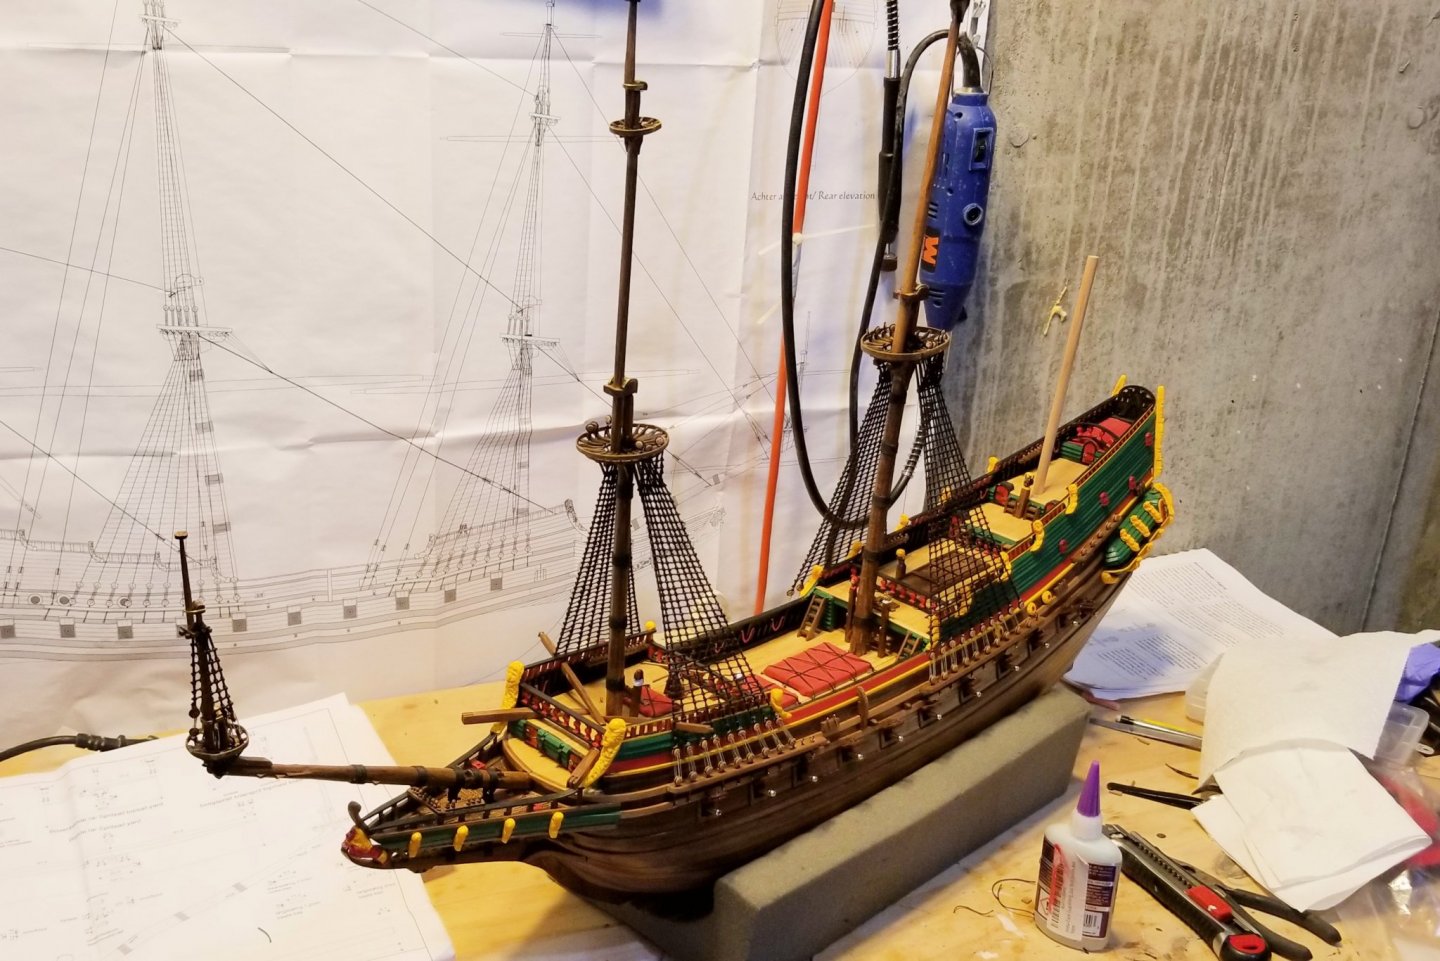
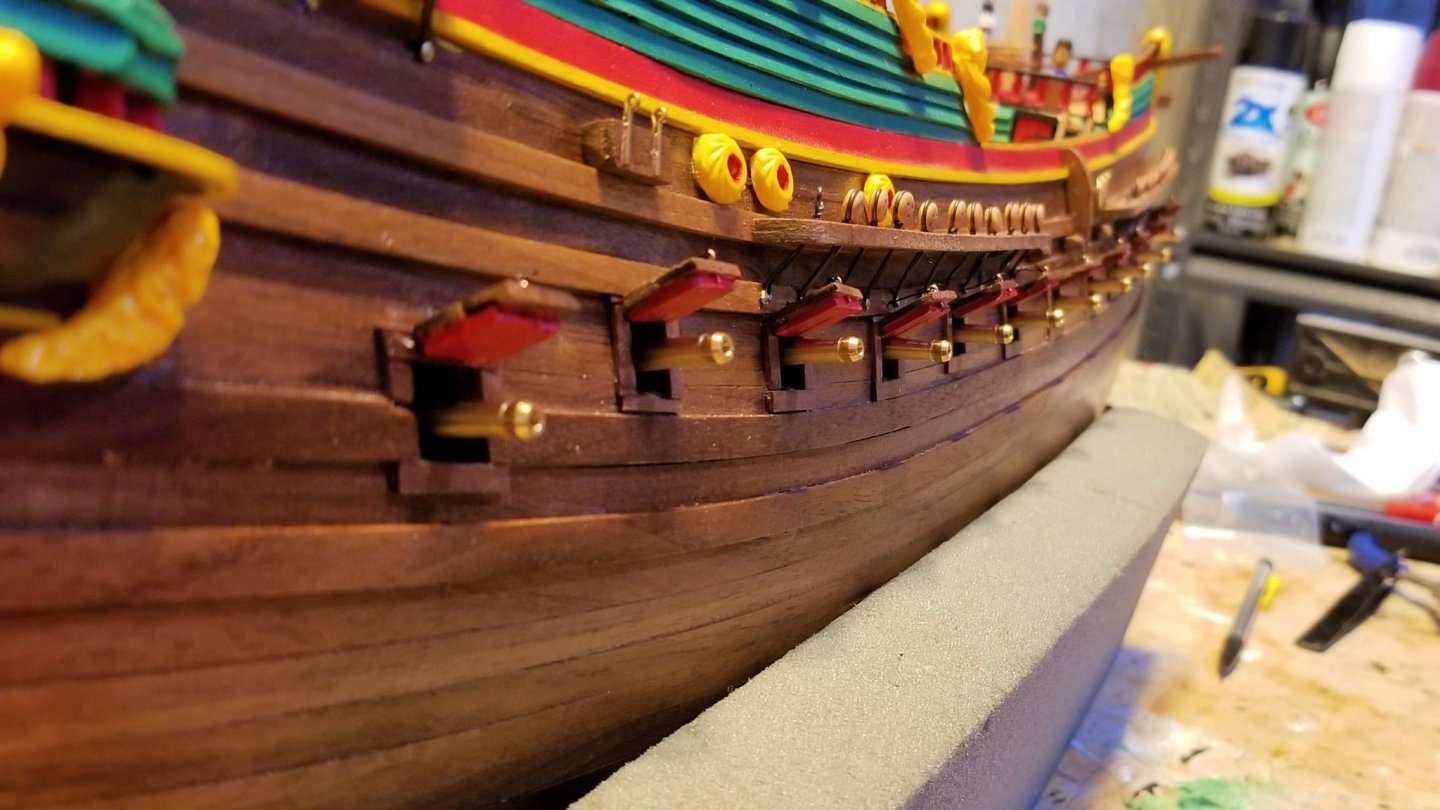
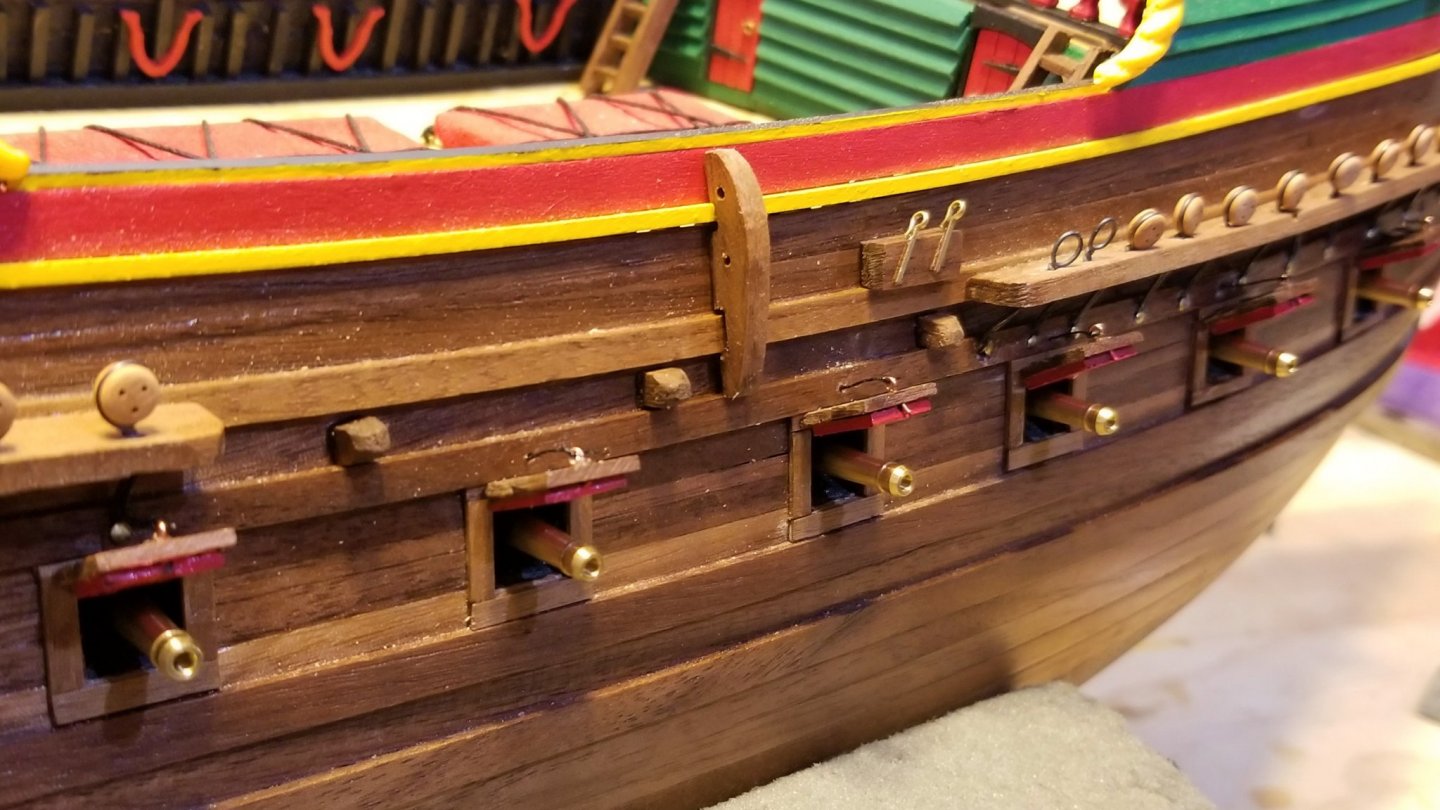
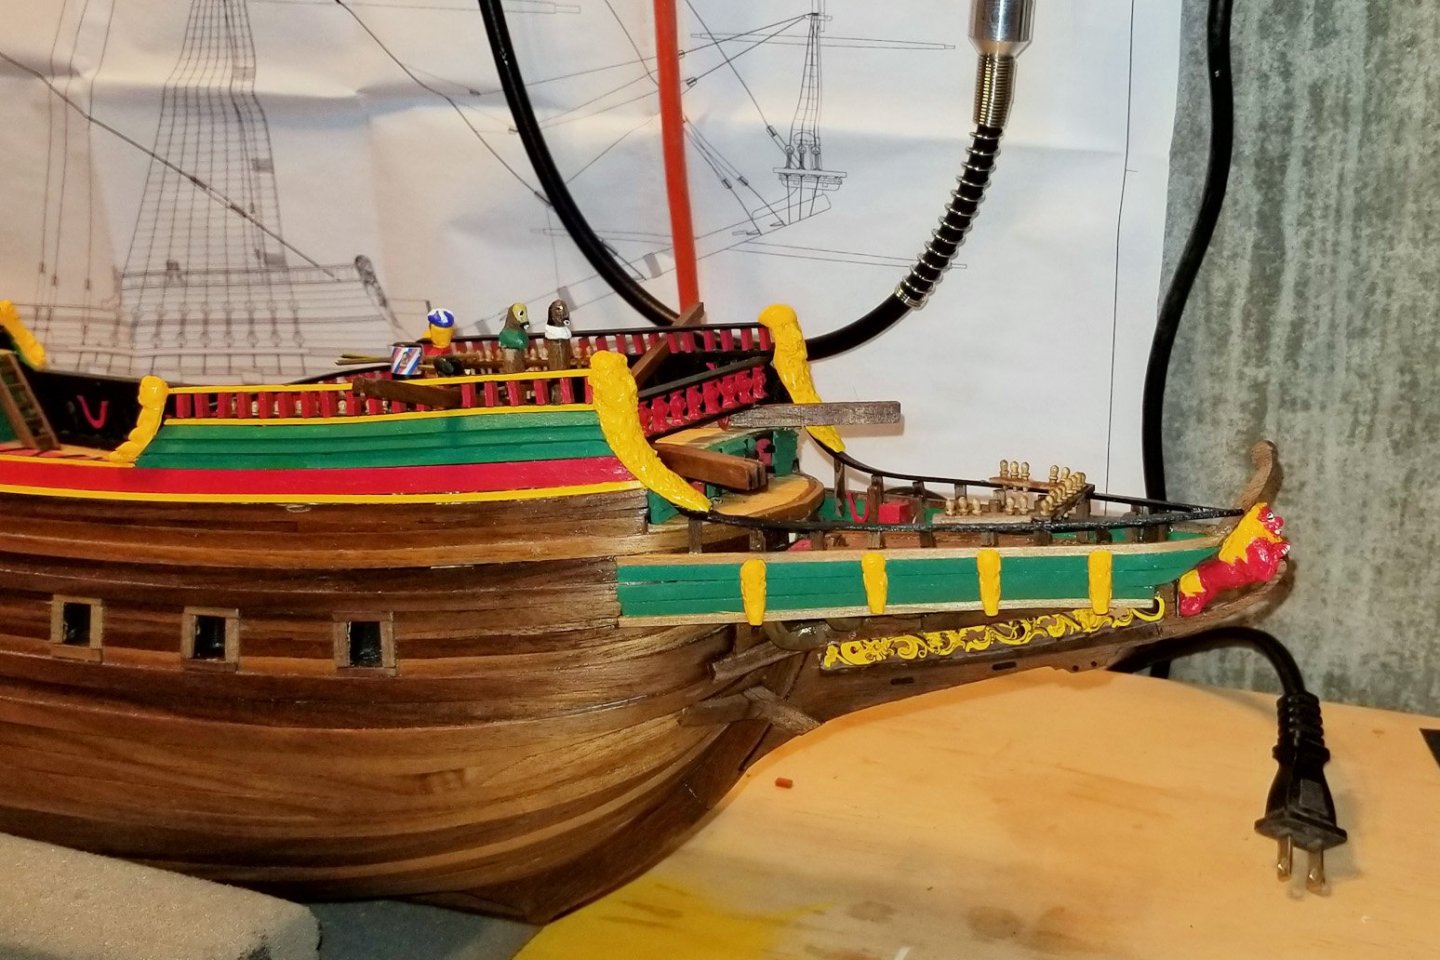
I have now completed all of the hull except for the rear lantern. It's mounted on two stiff wires and if I do it now I know I'll prang it during rigging, so it's the last thing. These pics show the cannon port lids and cannons, external hull rigging points, and some external walnut hull decorations. I have left the cannons brass vs. painting them black. I'm a sucker for the look of brass on a ship, and these are so beautiful that I can't stand to paint them black. Regards, David

- 136 replies
-
- 6
-
-
- kolderstok
- batavia
- (and 1 more)
-
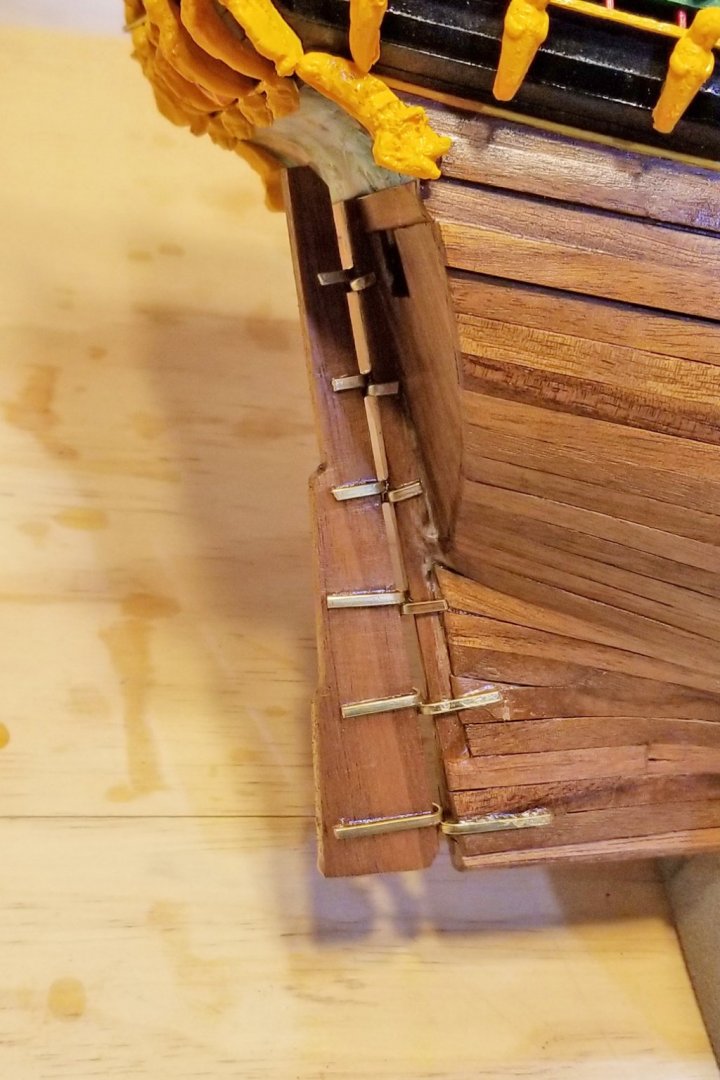
Finished the channels and the deadeyes for the lower shrouds. The deadeyes are attached with stiff wire, which becomes the chain plate and attaches into holes in the hull with a nail and glue. The masts you see are just for alignment of the deadeyes to the shroud attachment points. I haven't worked on them yet. Regards, David

- 136 replies
-
- 4
-
-
- kolderstok
- batavia
- (and 1 more)
-
Rudder completed -- see picture. True confessions time: this is where you learn just how much of a purist I am not. If I had done the rudder properly, I'd have soldered hinge pins and tubes to the copper strip to create a rudder that would move. But I don't care if it moves -- I just want it to look good -- so I put on the strips but the rudder strips are simply glued to the hull strips. I also didn't mount a horizontal post to the top of the rudder, because I don't want to damage the painting by opening it up where the underlying hole is into the hull. I'm happy -- but those of you who take historical accuracy and proper workmanship seriously may be horrified. I hope you don't abandon your seats in this log! Regards, David
- 136 replies
-
- 5
-
-
- kolderstok
- batavia
- (and 1 more)
-
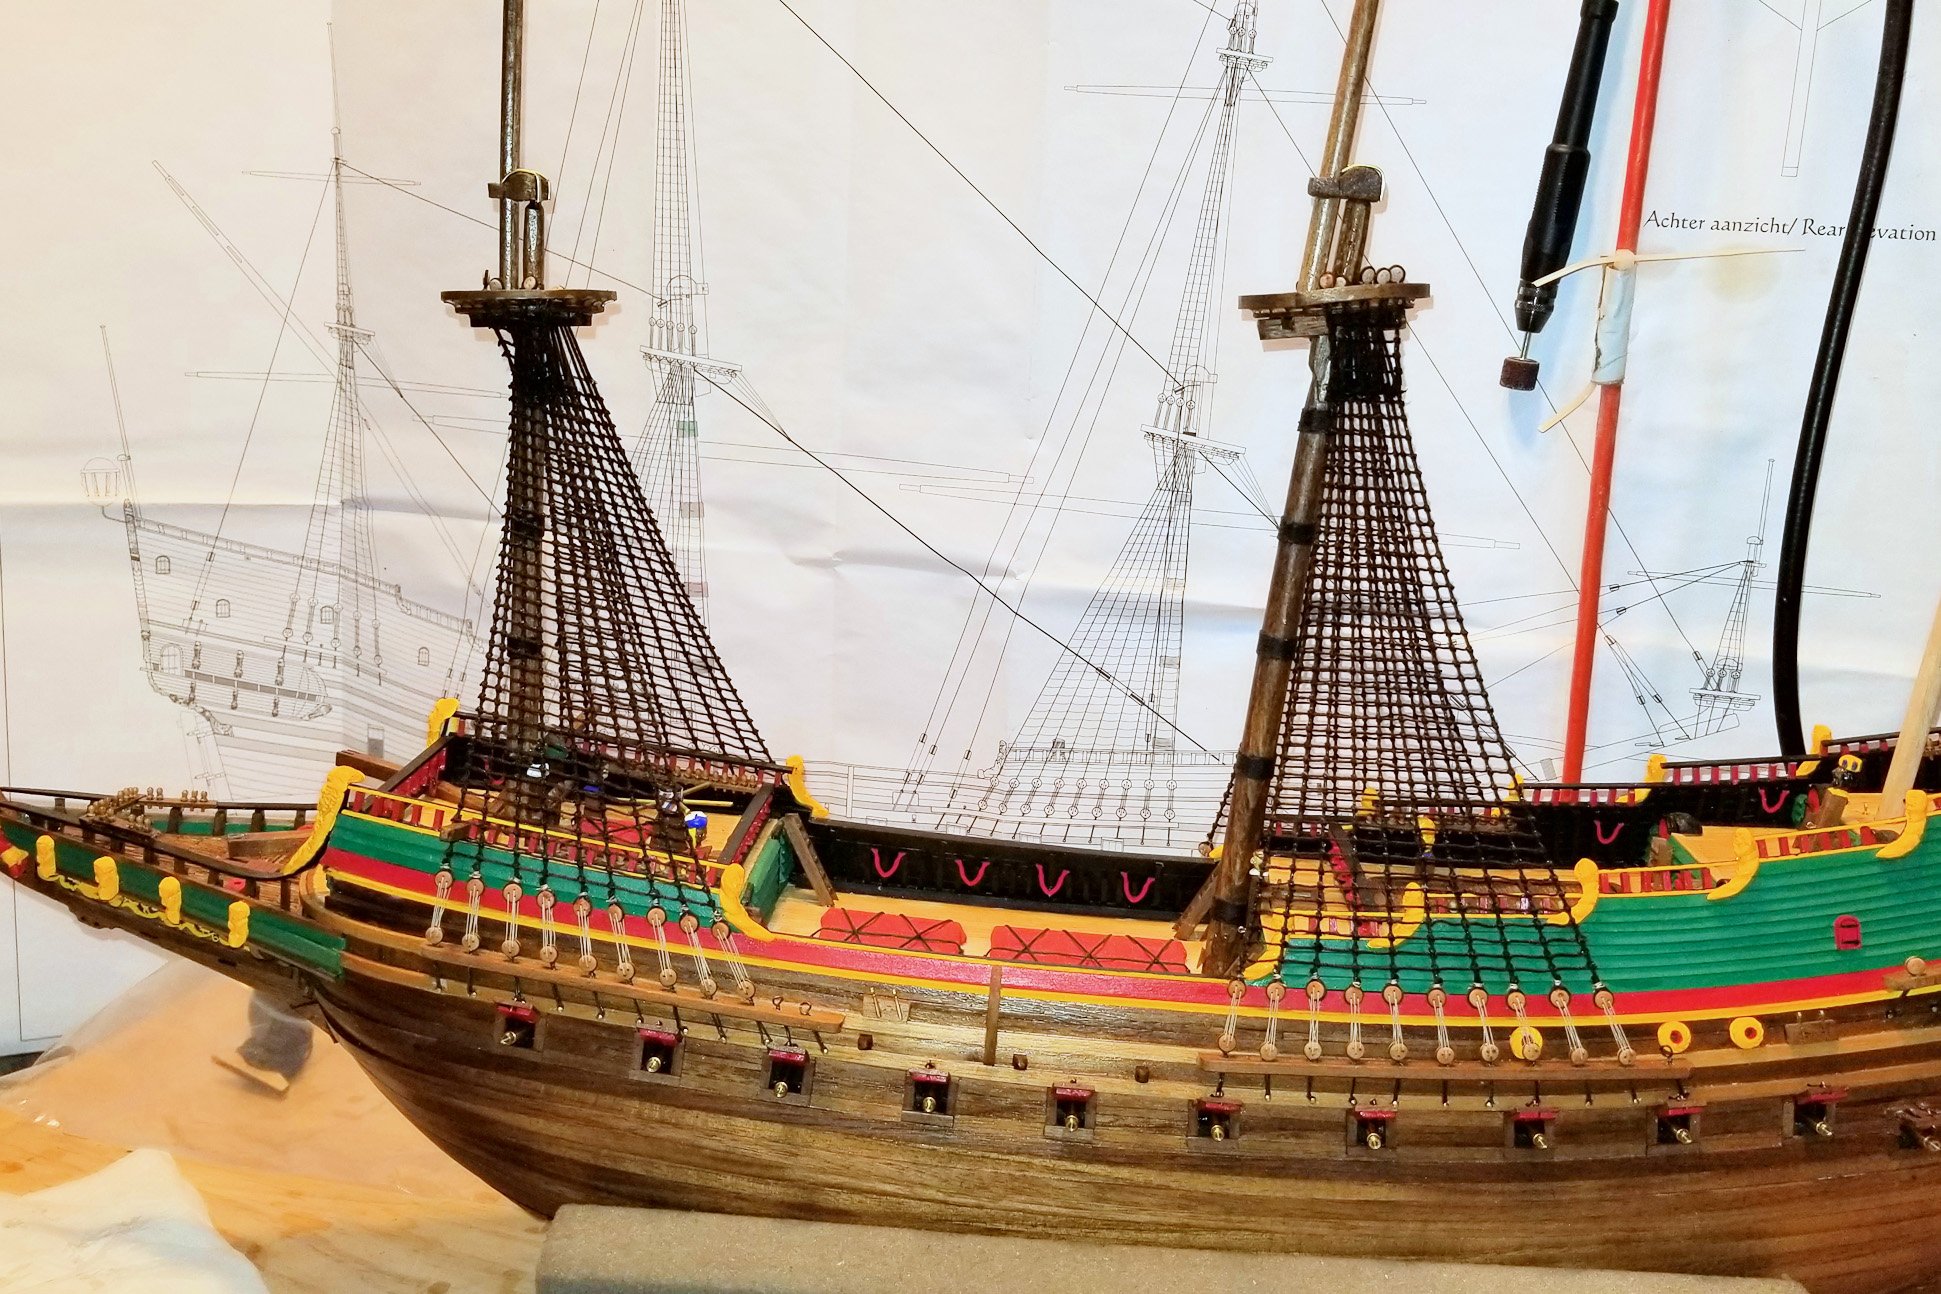
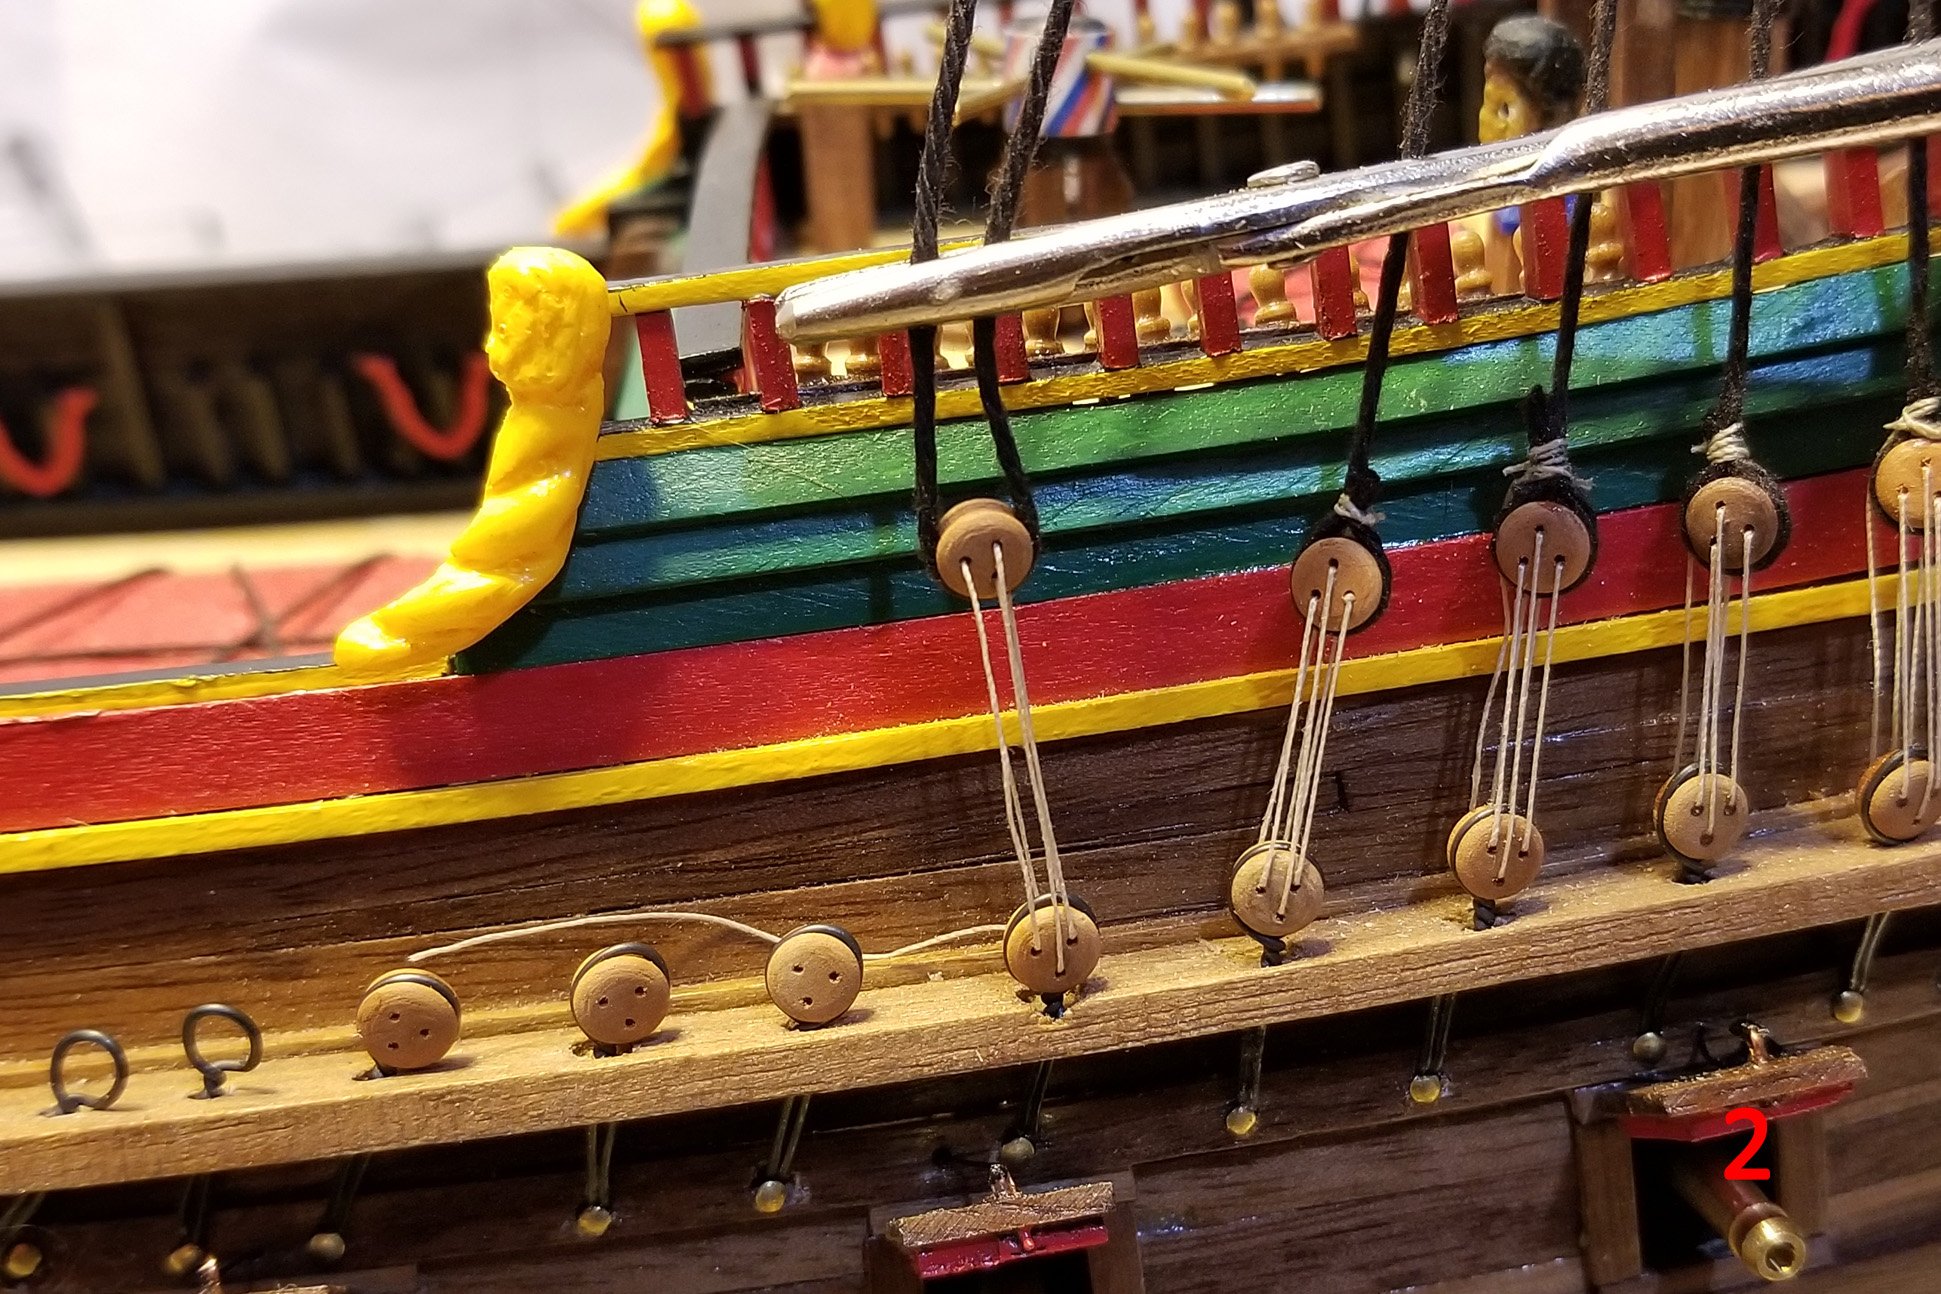
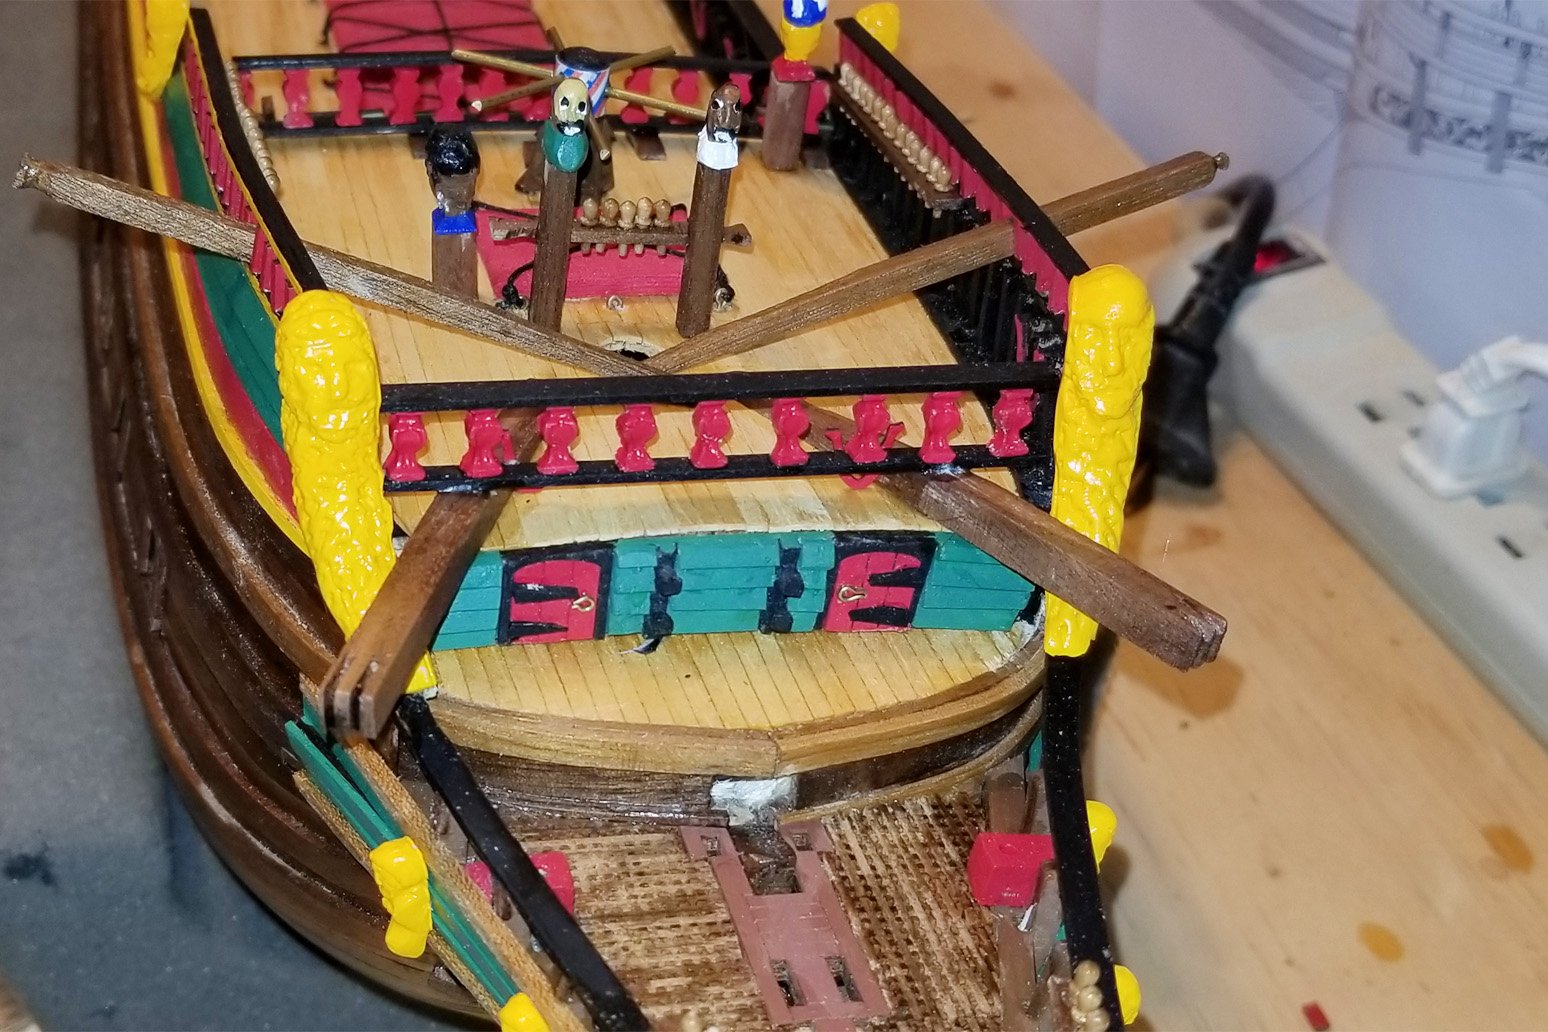
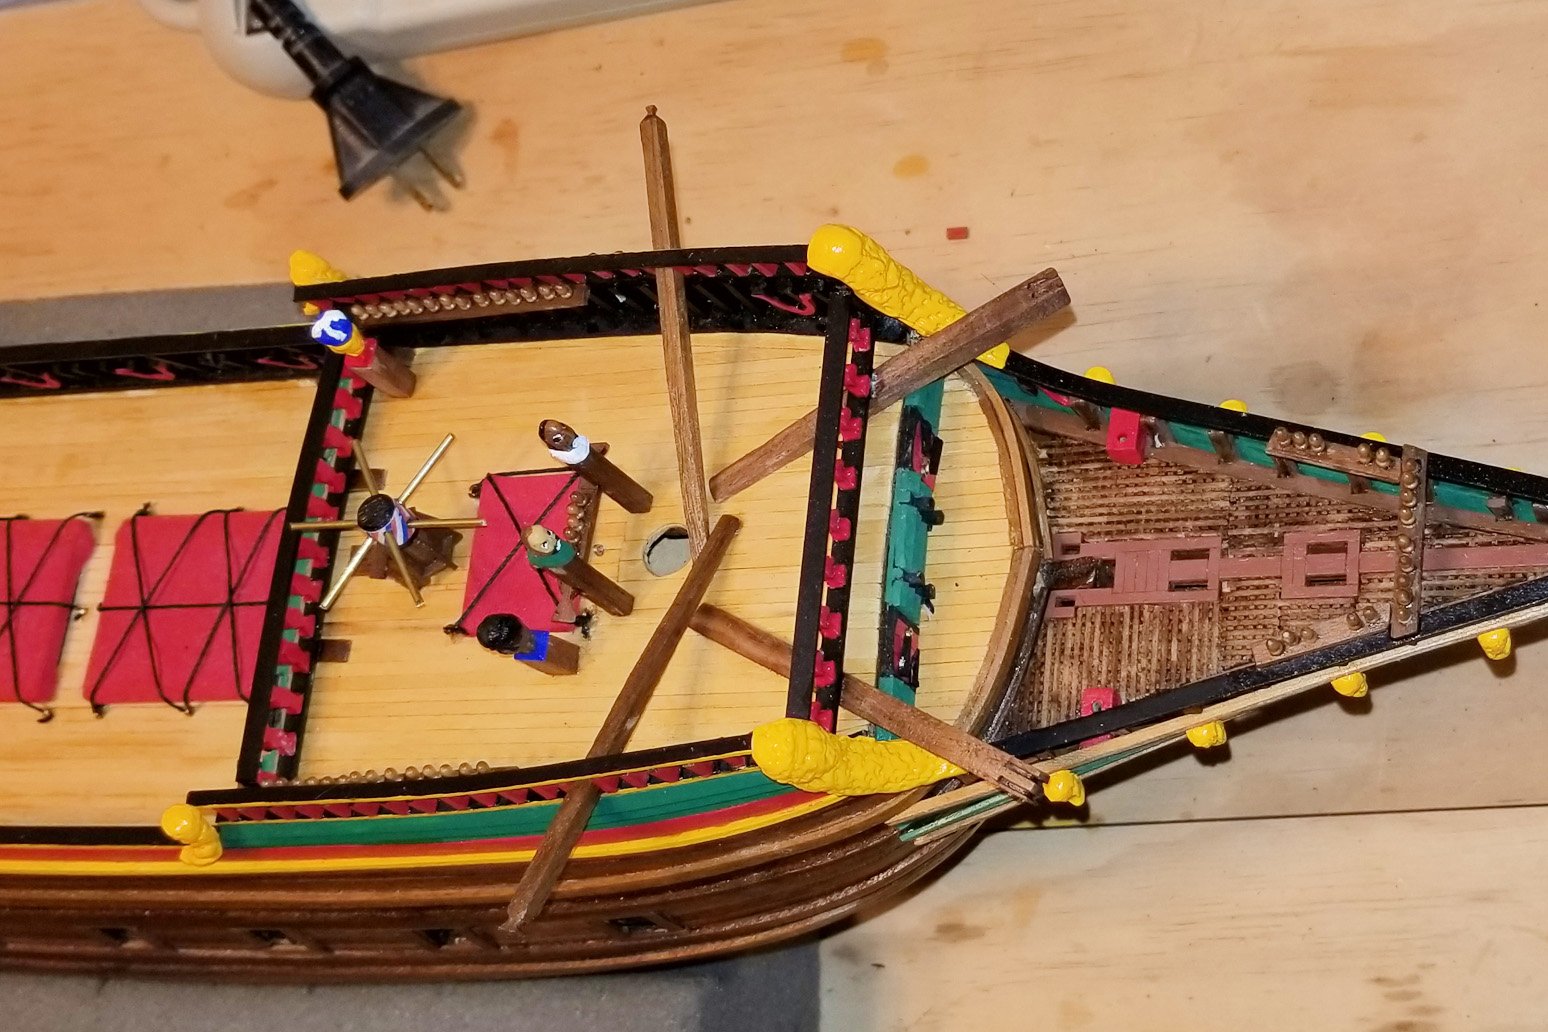
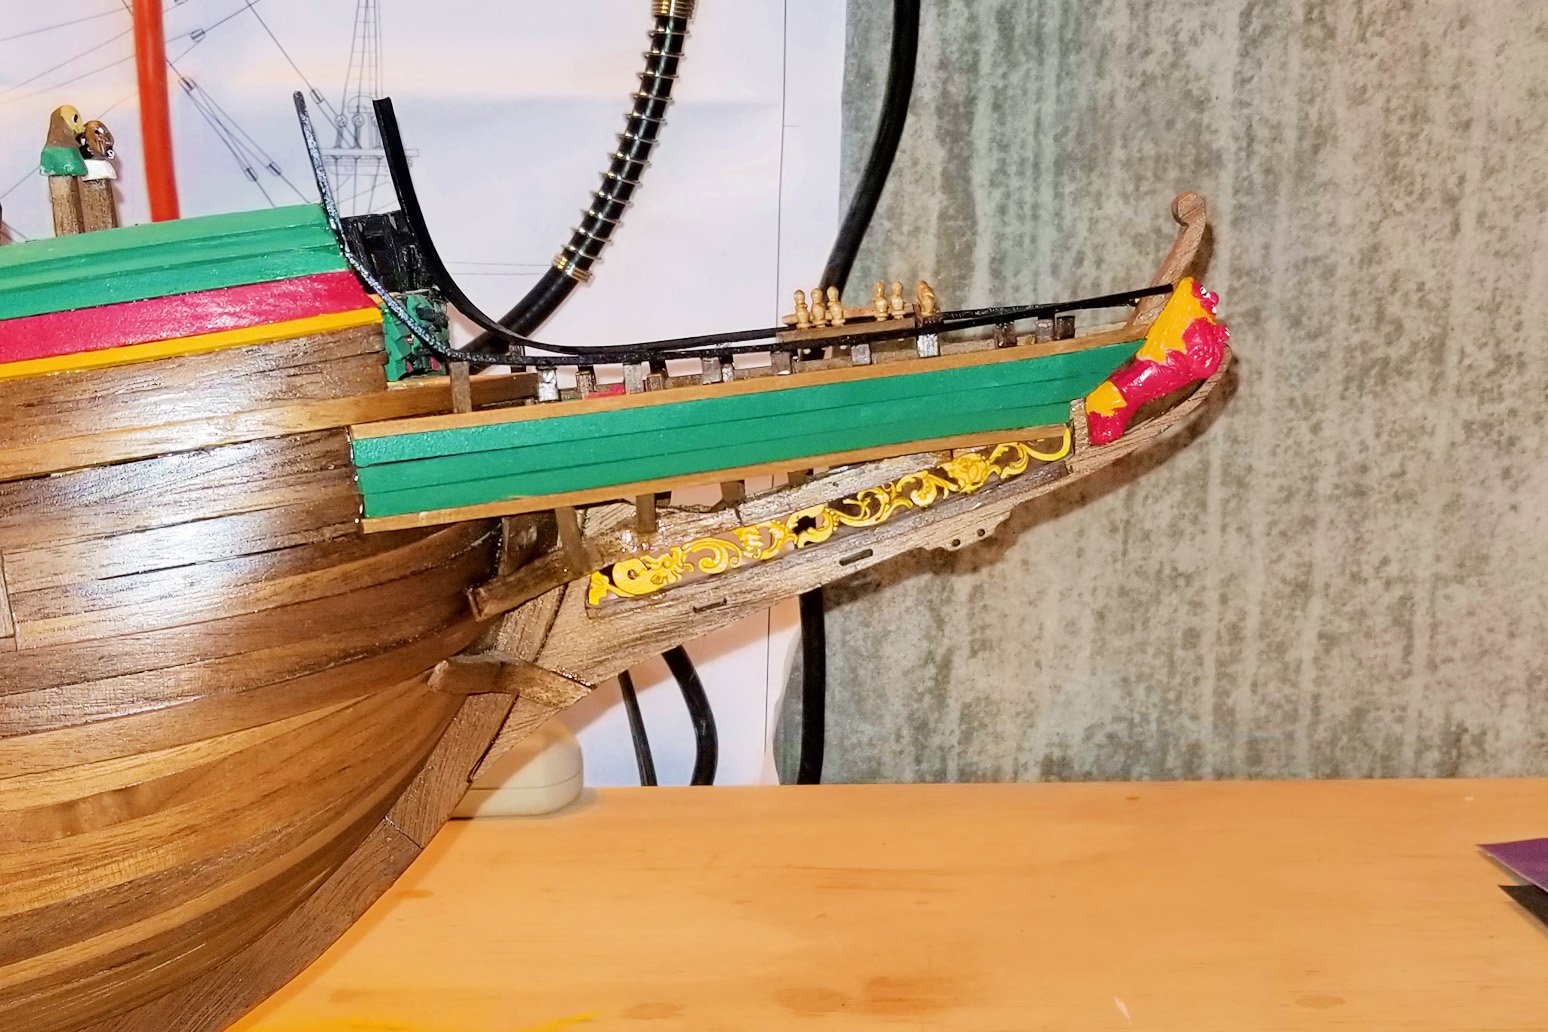
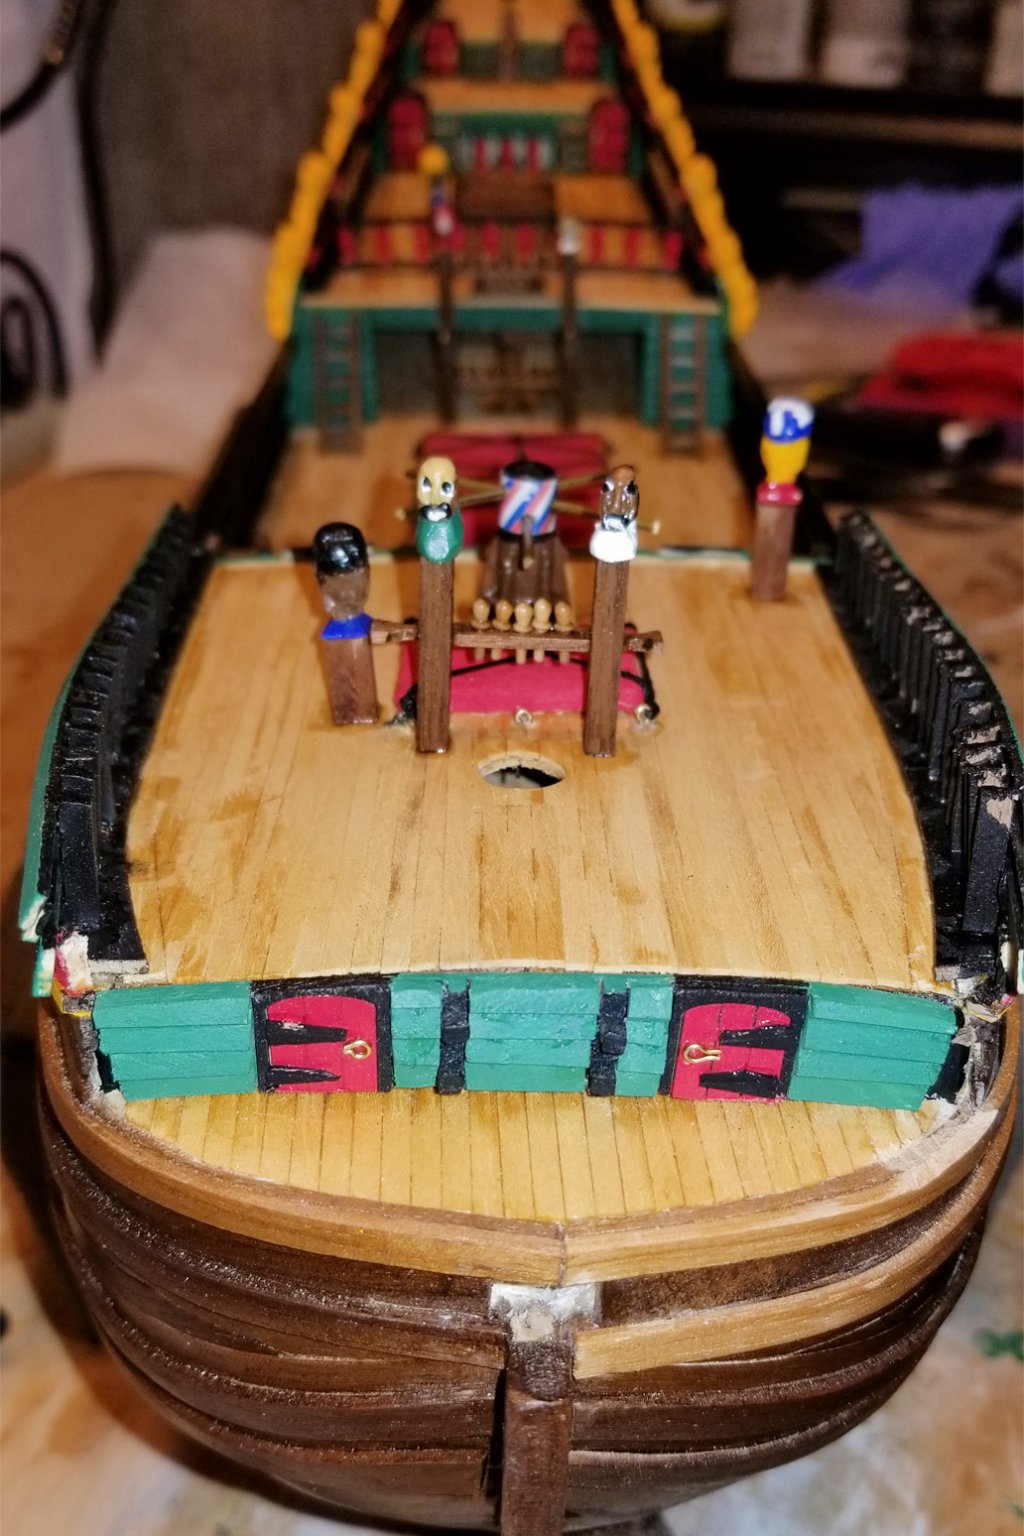
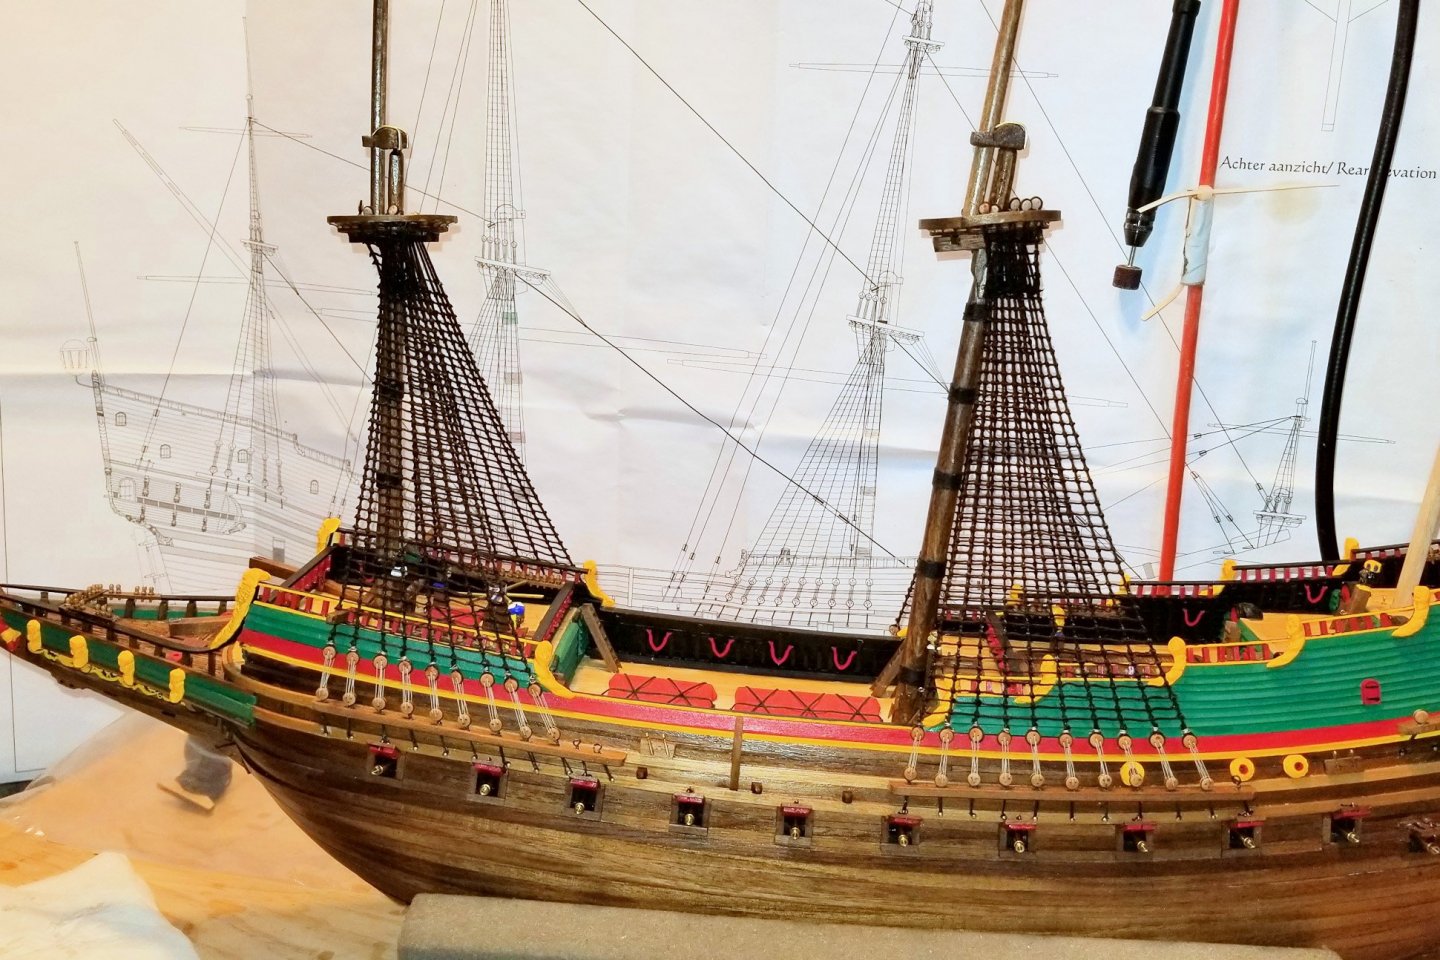
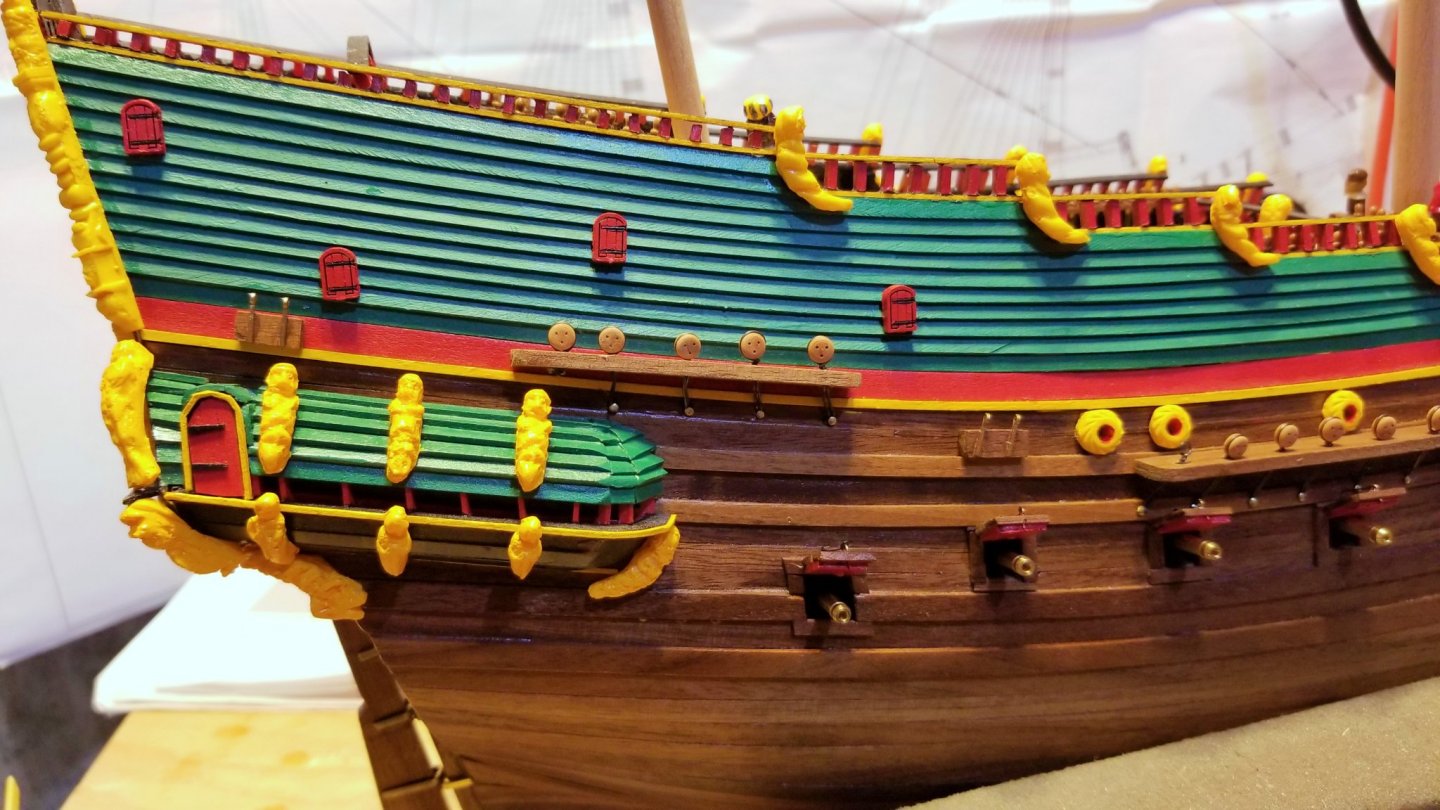
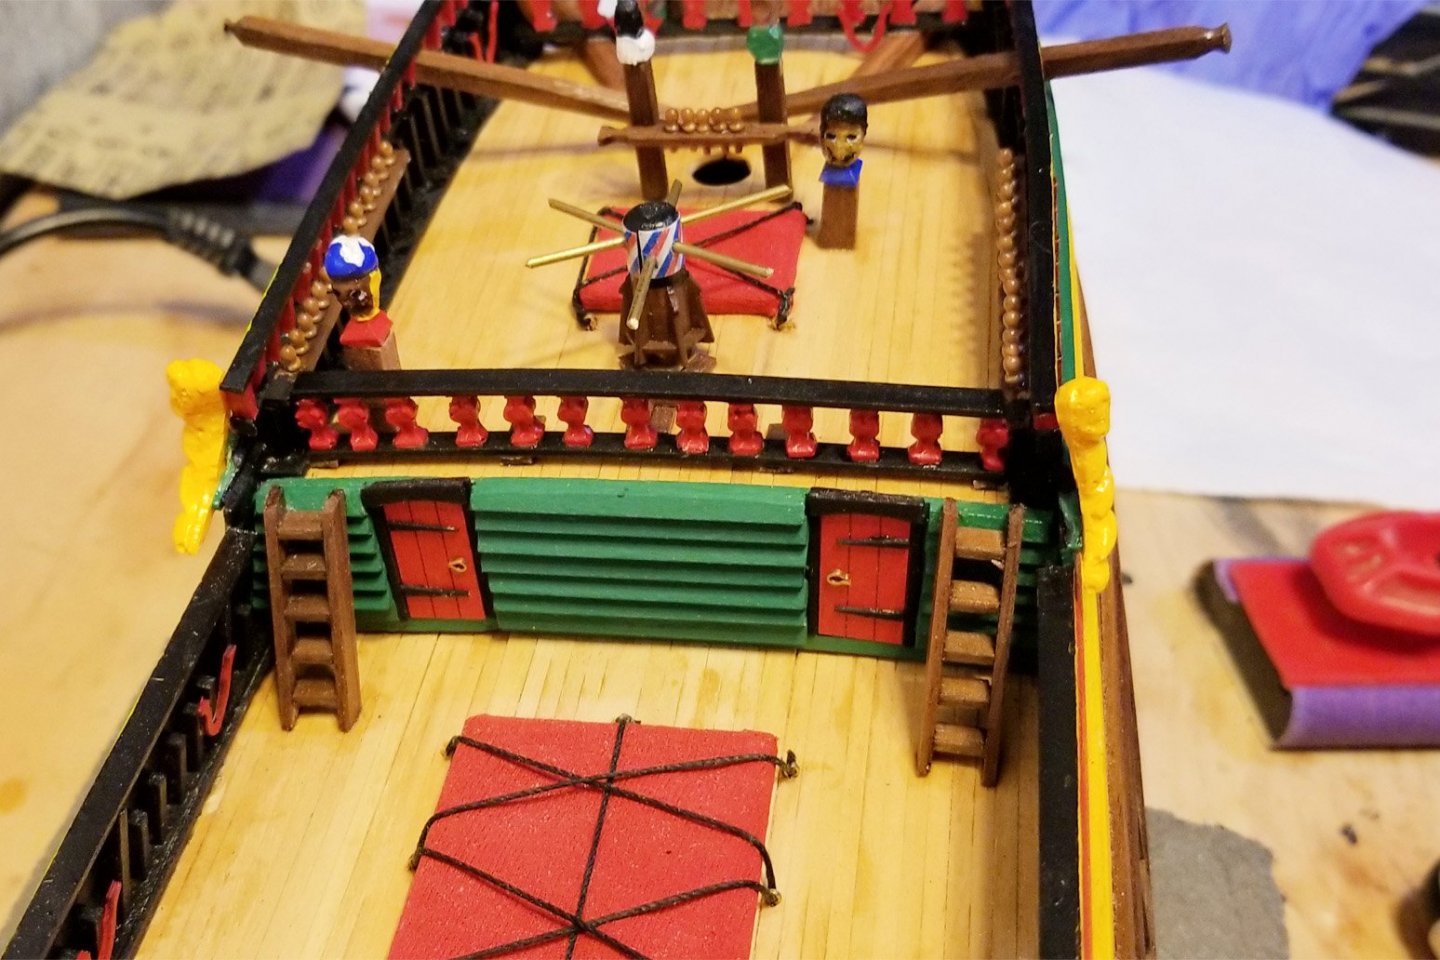
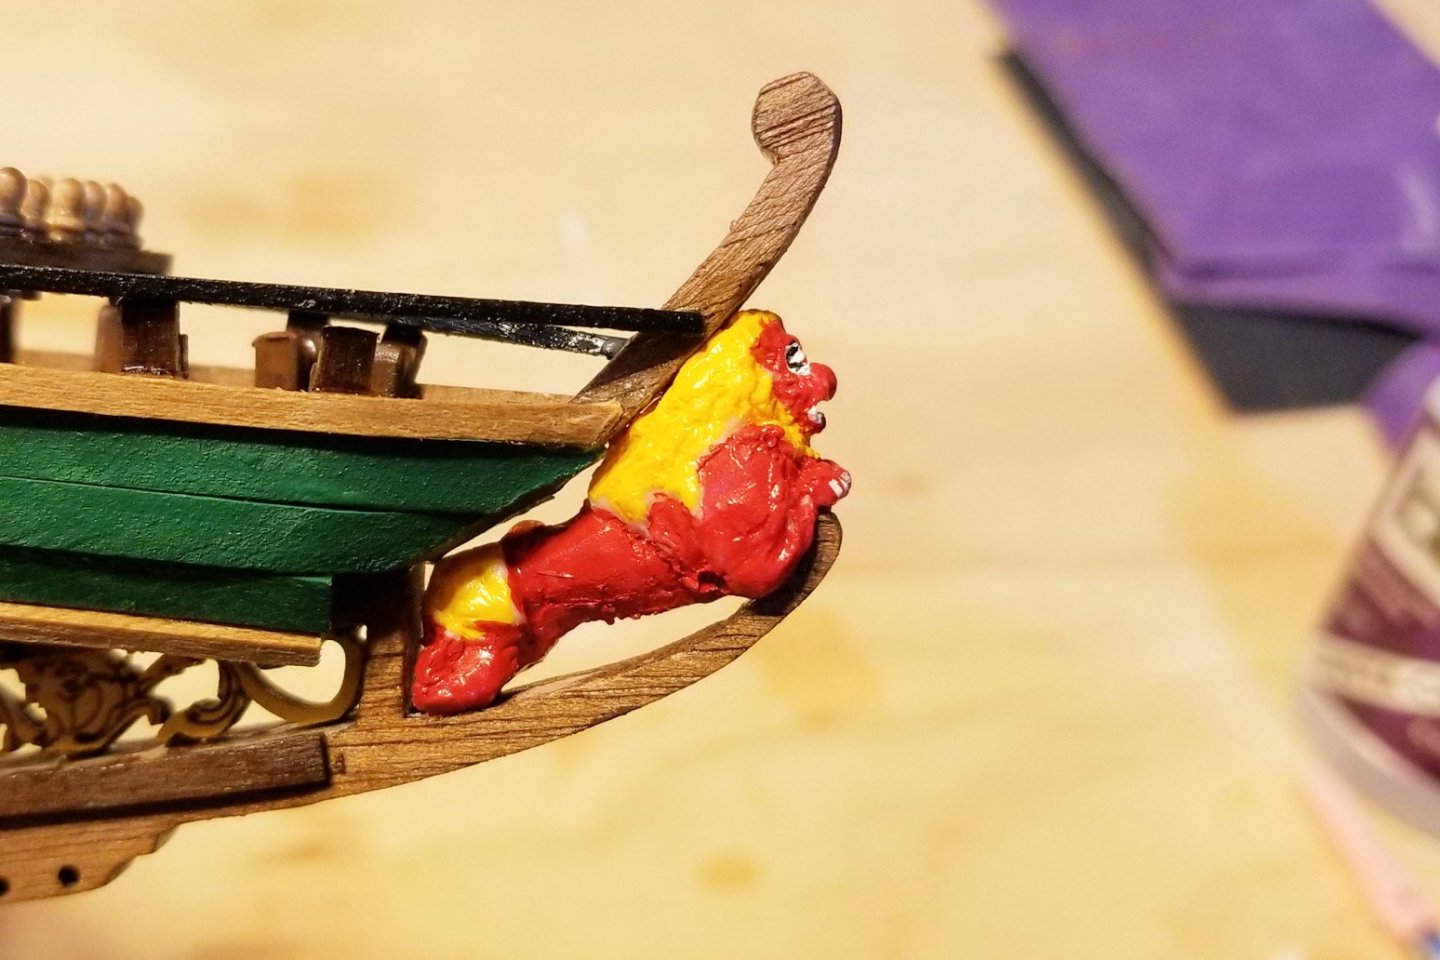
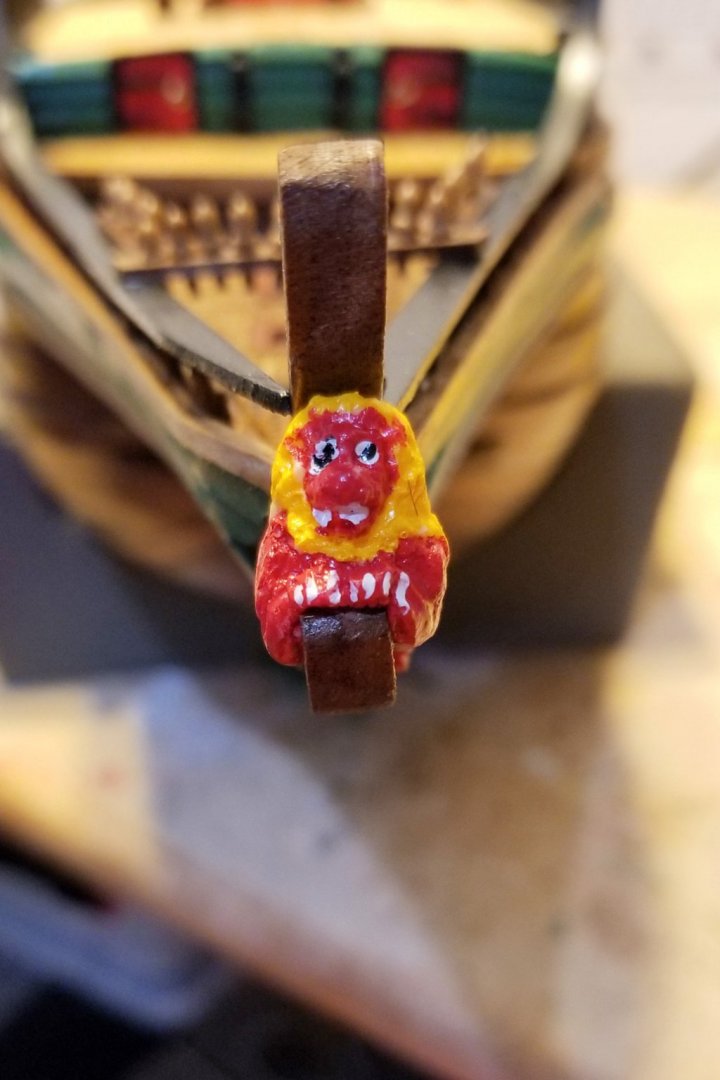
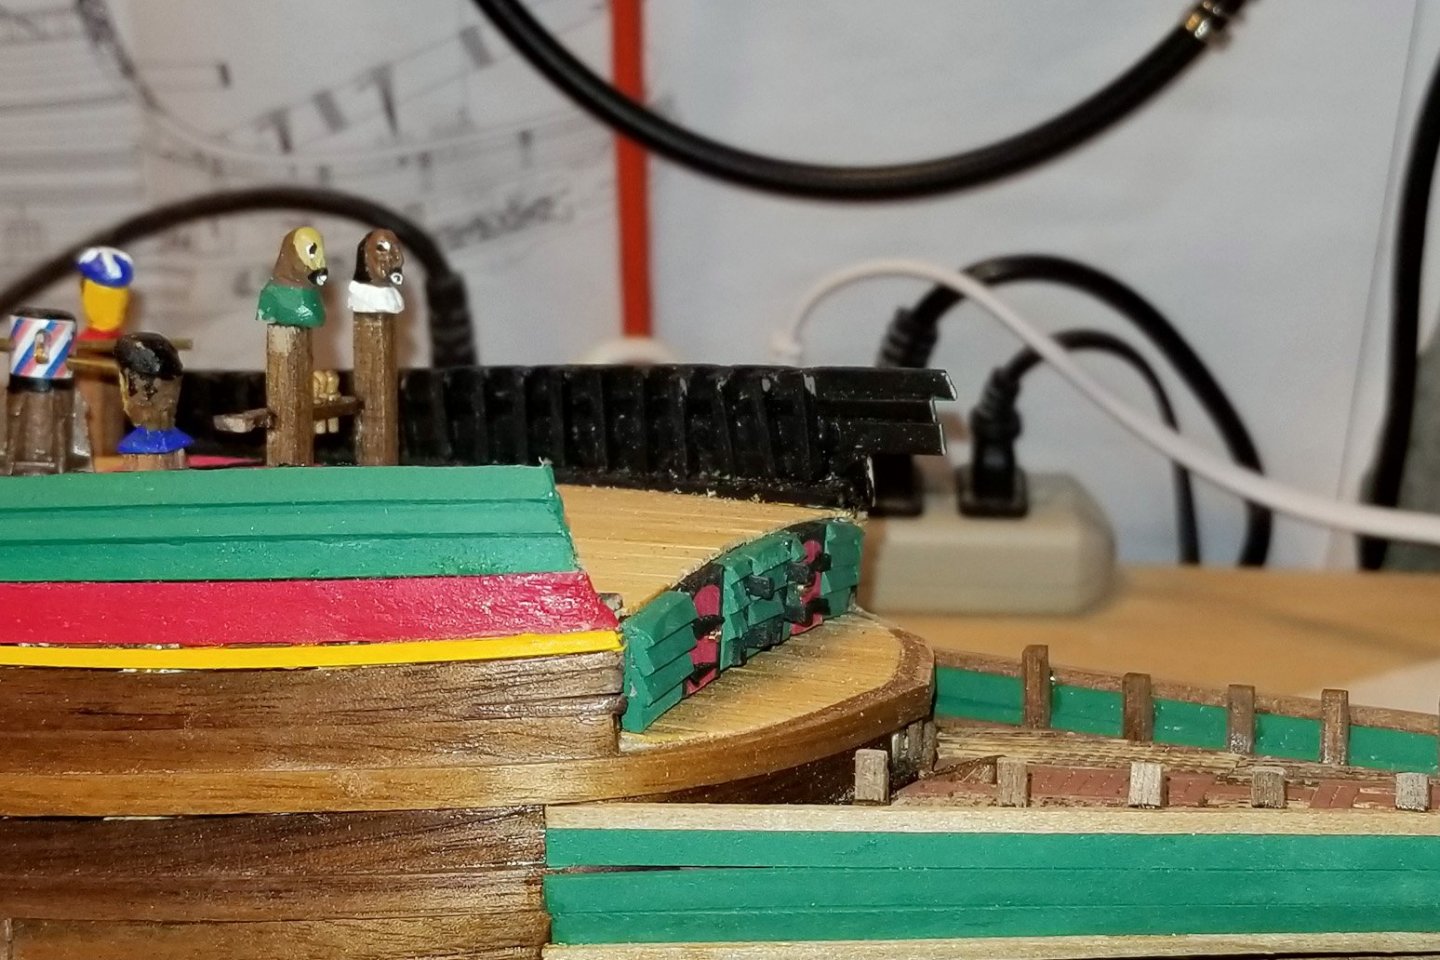
Forecastle railings on side, front and back finished, along with pin racks, catheads, bowsprit decorations, and staghorn cleats along the inside of the ship's bulwarks. Regards, David


- 136 replies
-
- 6
-
-
- kolderstok
- batavia
- (and 1 more)
-
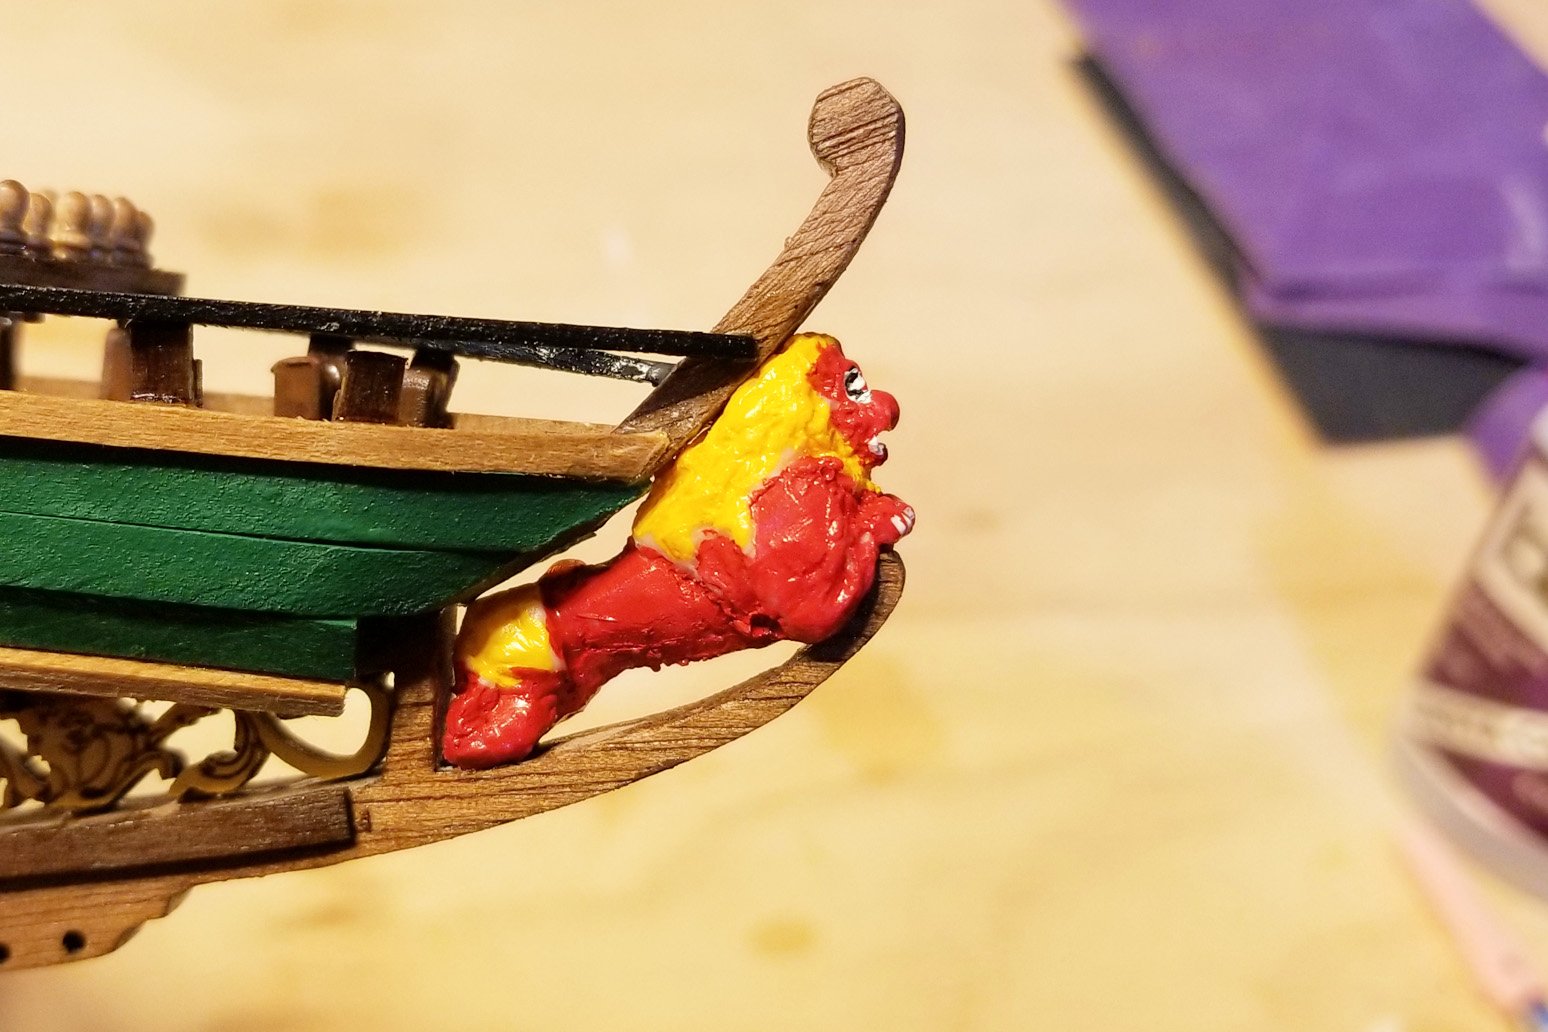
Completed the bowsprit -- pictures below. The top railings have been left long going up to the forecastle until I build the forecastle railings and can then trim them back to match. Regards, David


- 136 replies
-
- 5
-
-
- kolderstok
- batavia
- (and 1 more)
-
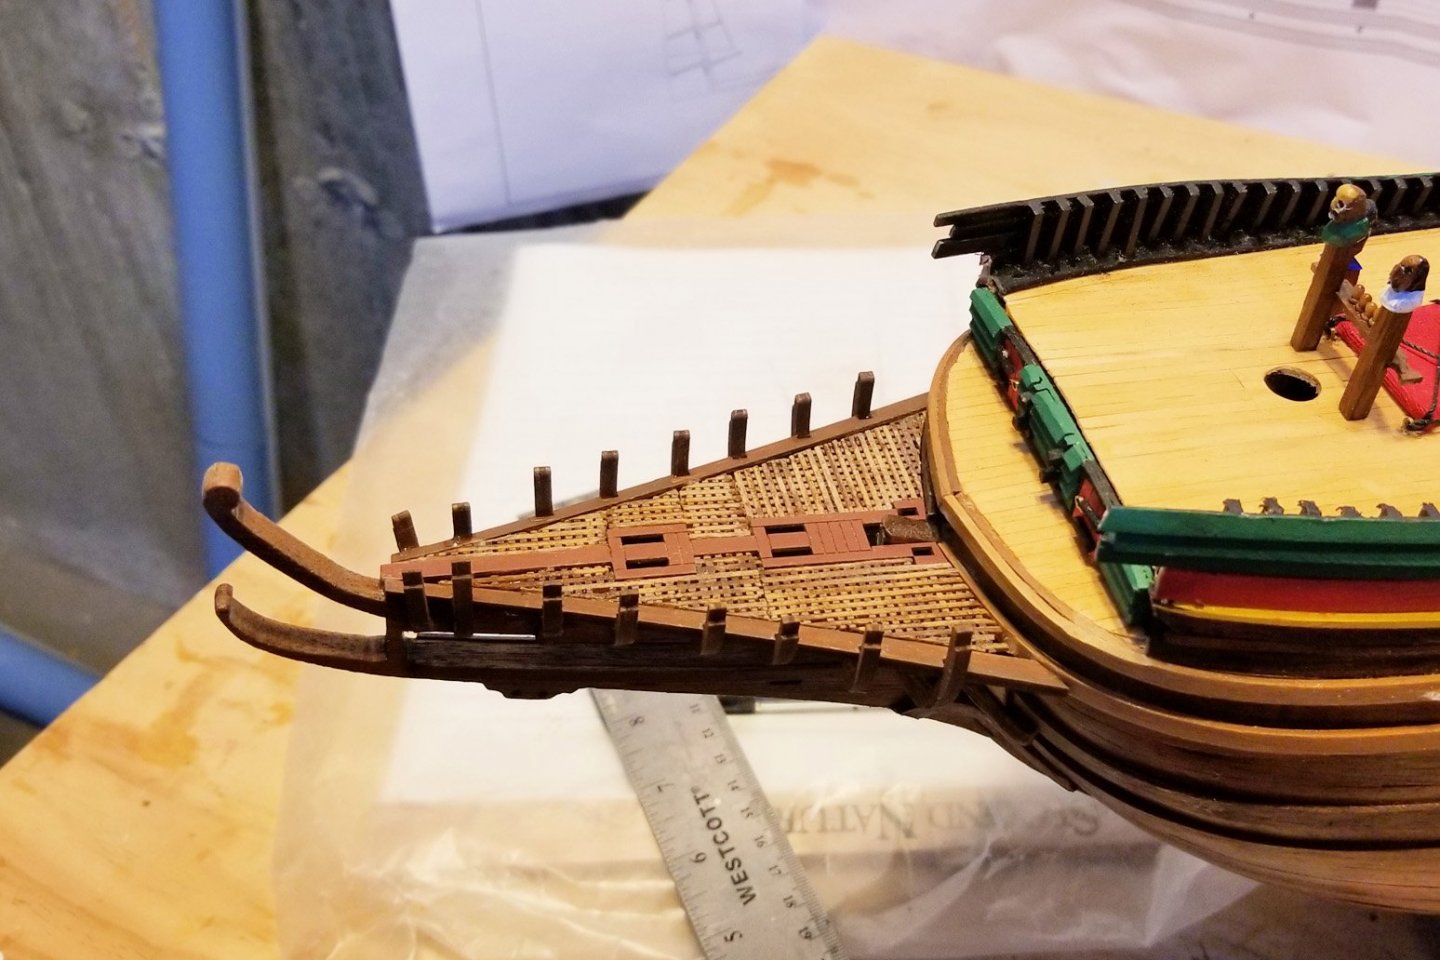
A while back in this log I mentioned that I wanted to build the bowsprit so I could figure out how and where to shape the curve on the leading edges of the forecastle planks. My concern was that I had stopped the planking too early and wanted to be careful in how to shape it. I've progressed on the bowsprit to the point where I could dry fit a curved railing and figure out that alignment. Pictures below show the curve I ended up with, and the curved railing installed. I've left a lot of excess railing above the planks which I'll trim down to align with the forecastle railings. The whole vertical portion of the railing will be covered with an ornament. Regards, David

- 136 replies
-
- 3
-
-
- kolderstok
- batavia
- (and 1 more)
-
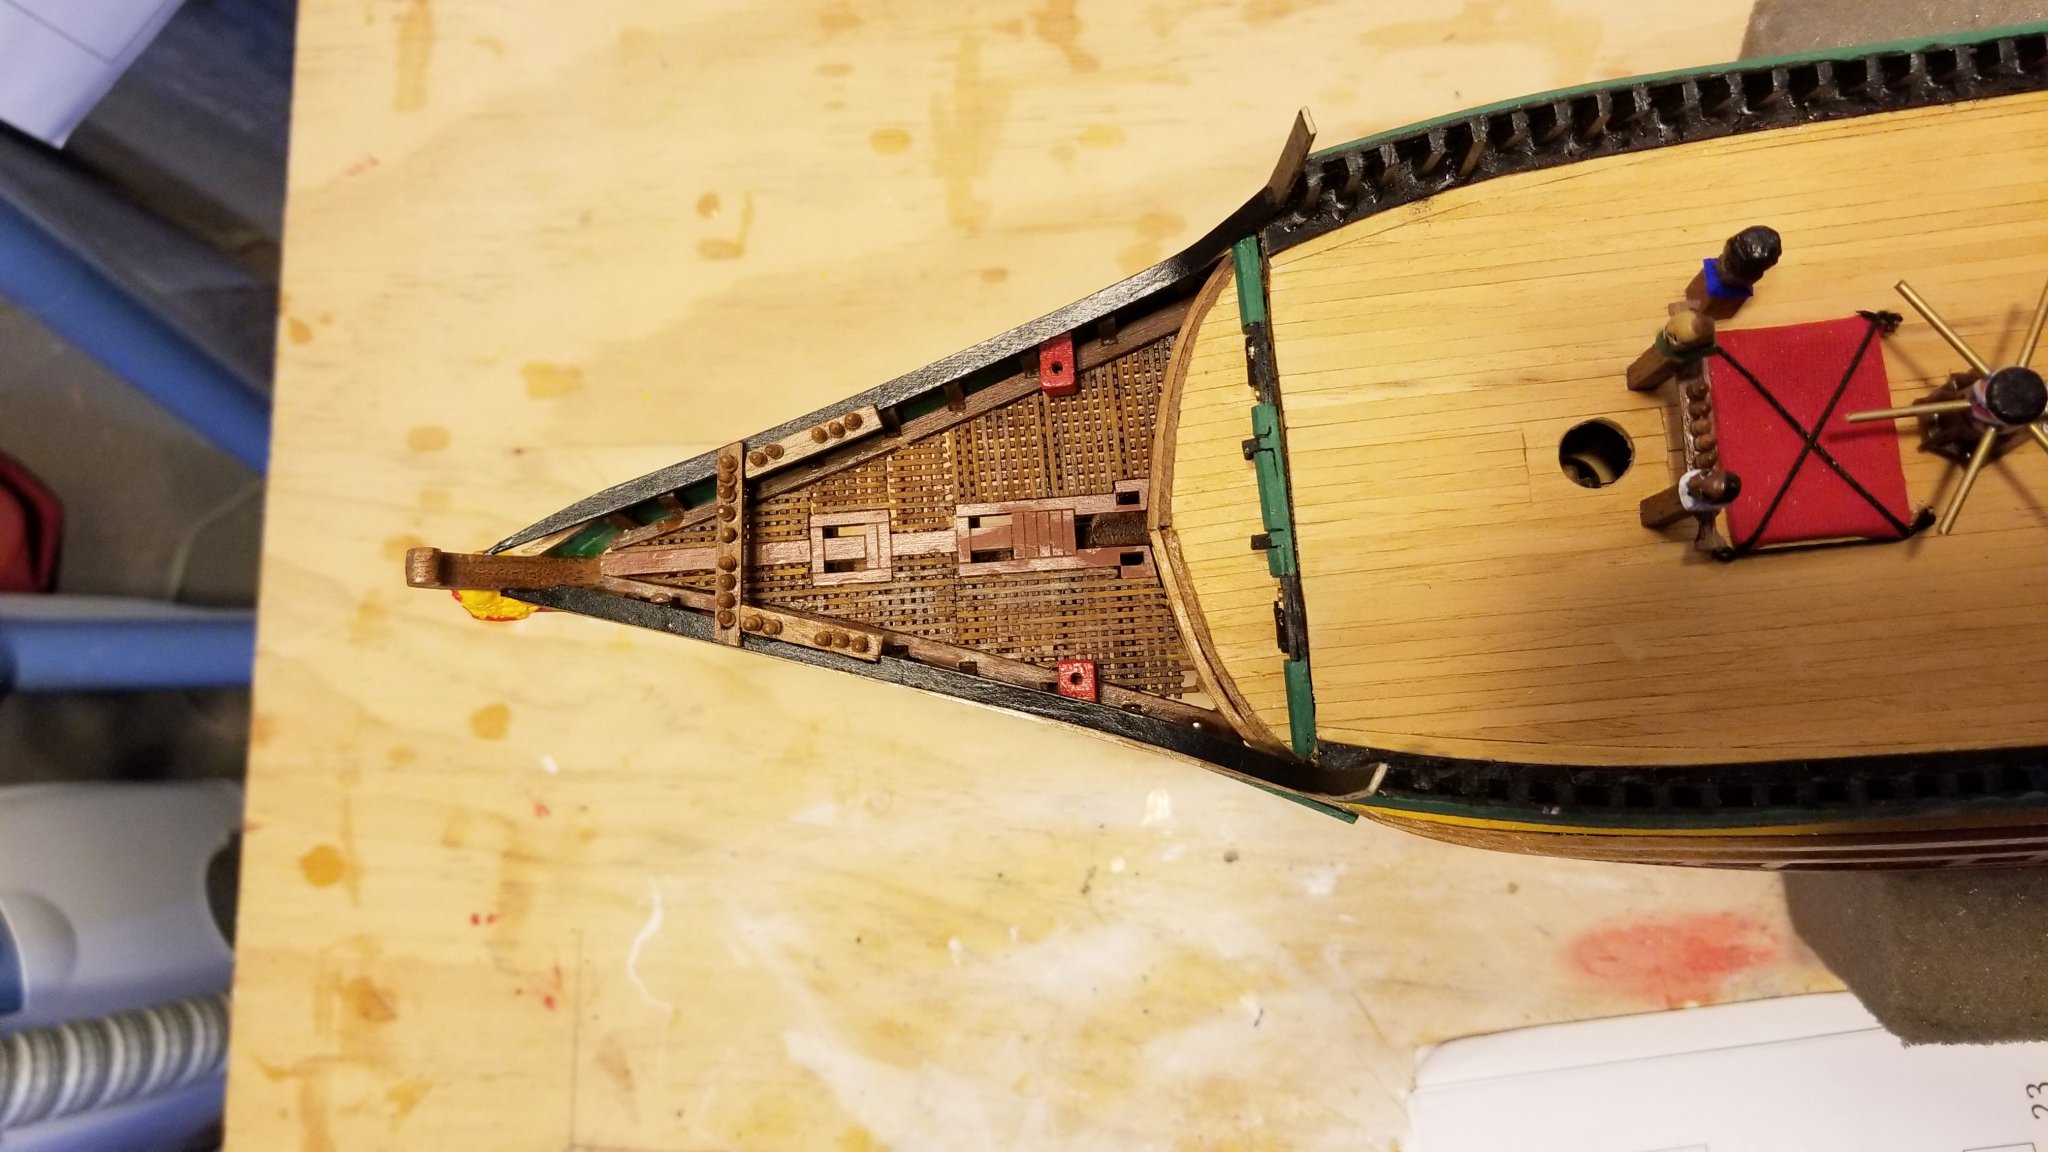
And the finished bowsprit deck, mounted. This is not an easy item to get shaped and fitted. Regards, David
- 136 replies
-
- 4
-
-
- kolderstok
- batavia
- (and 1 more)
-
Thanks, Hans! Regards, David
-
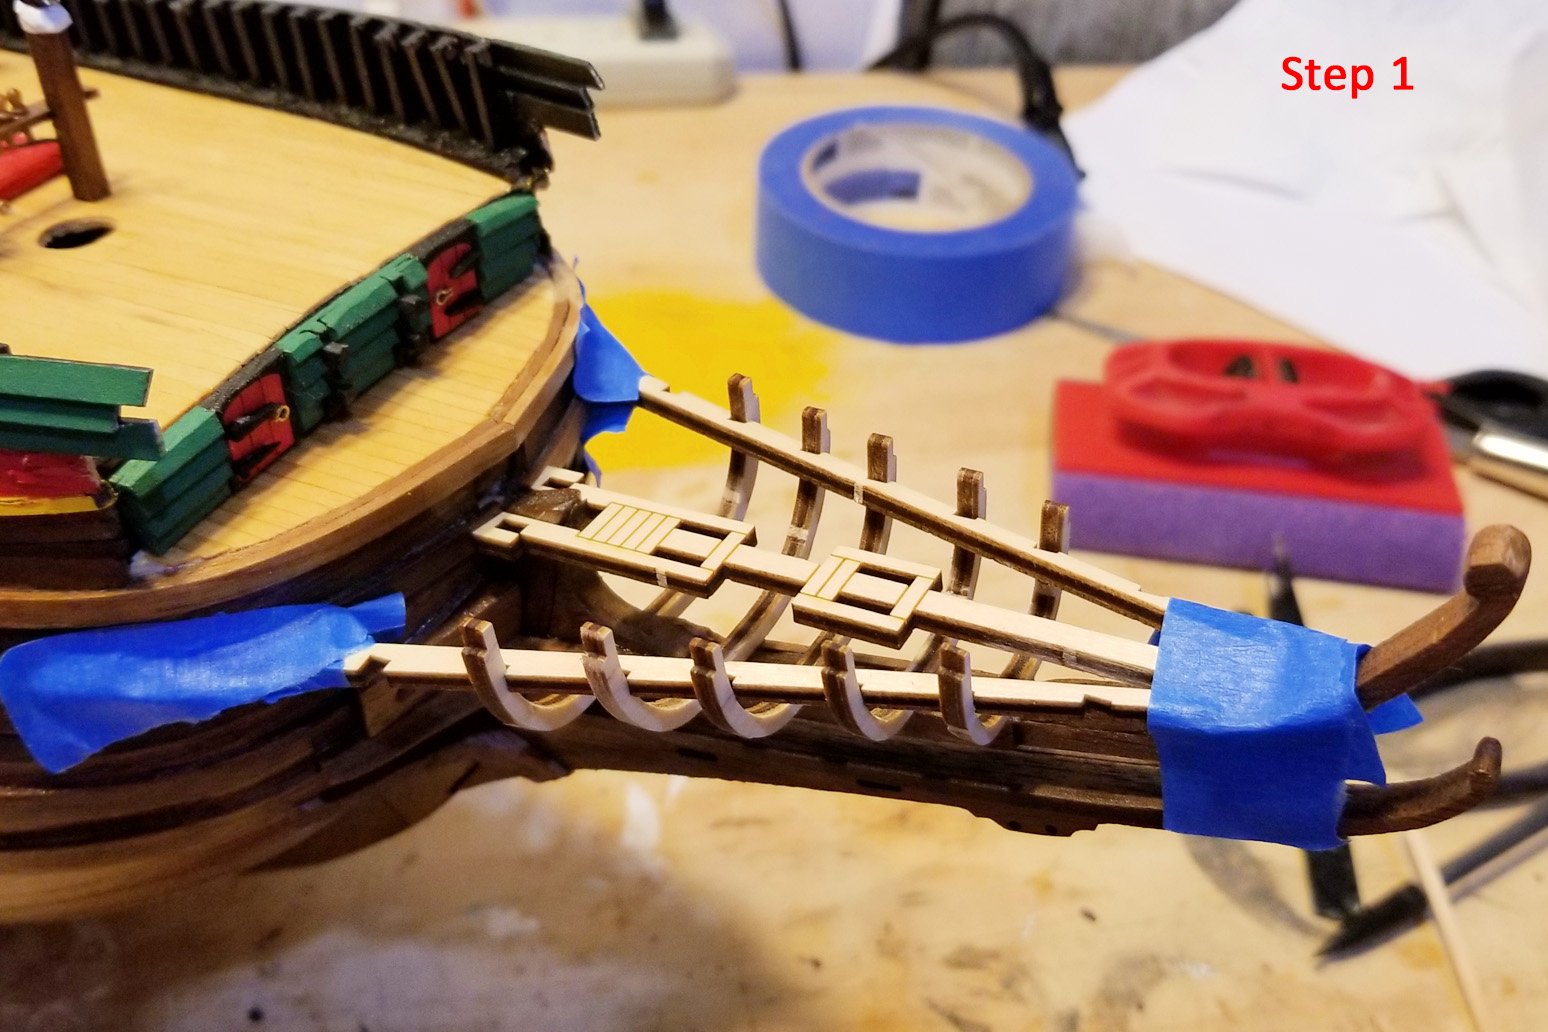
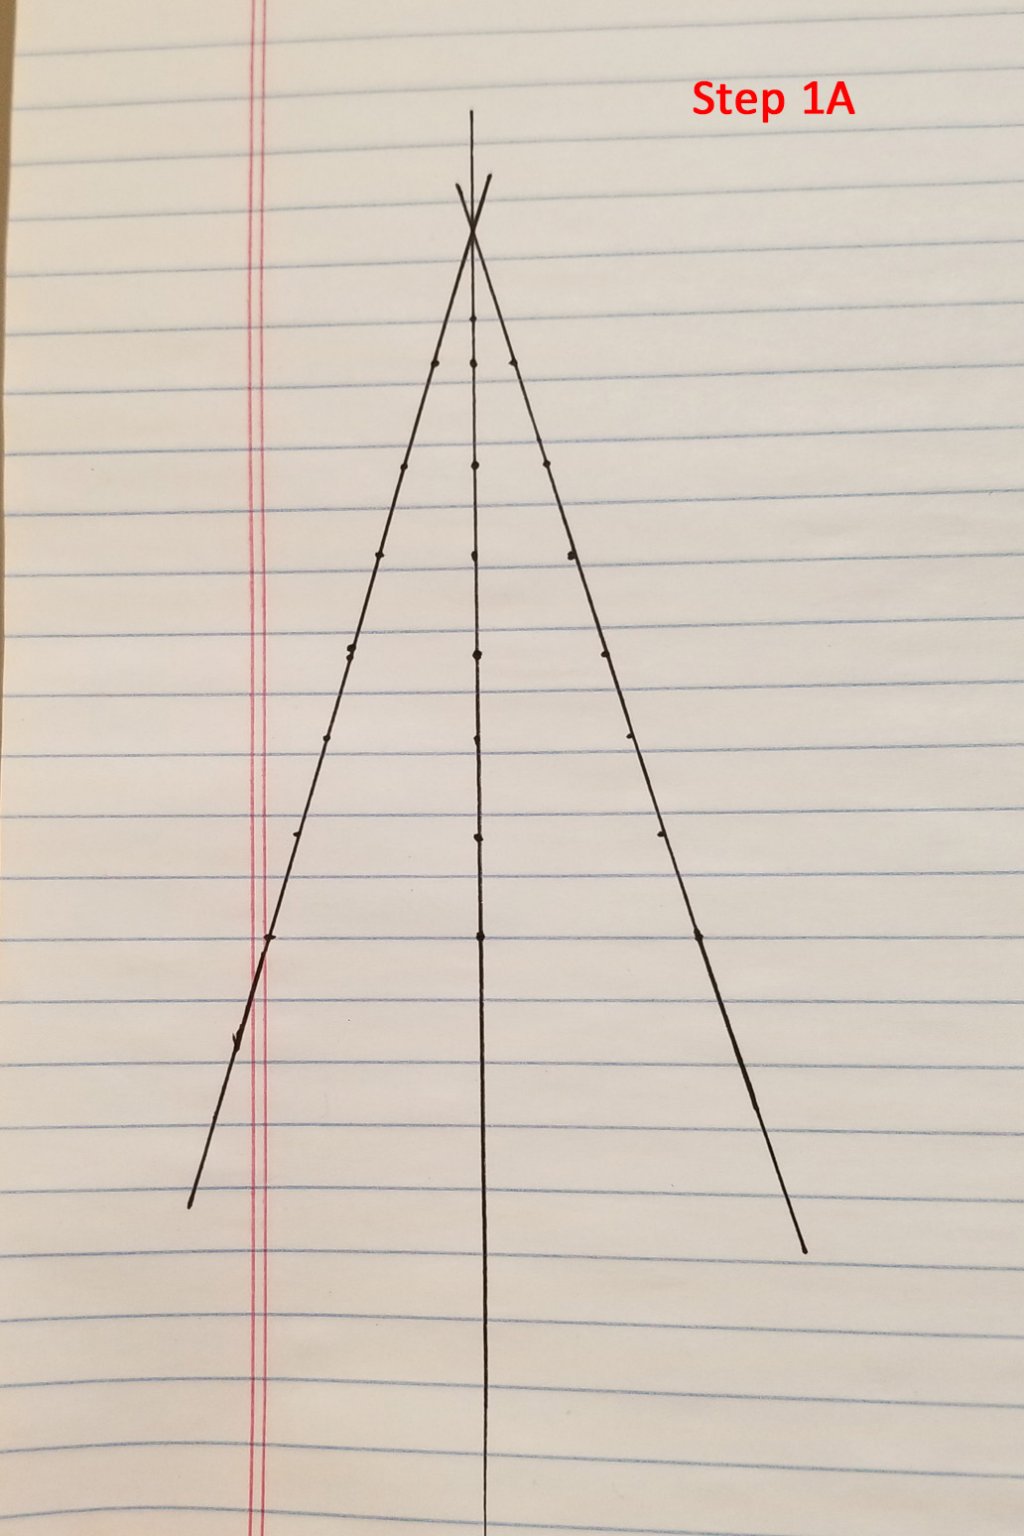
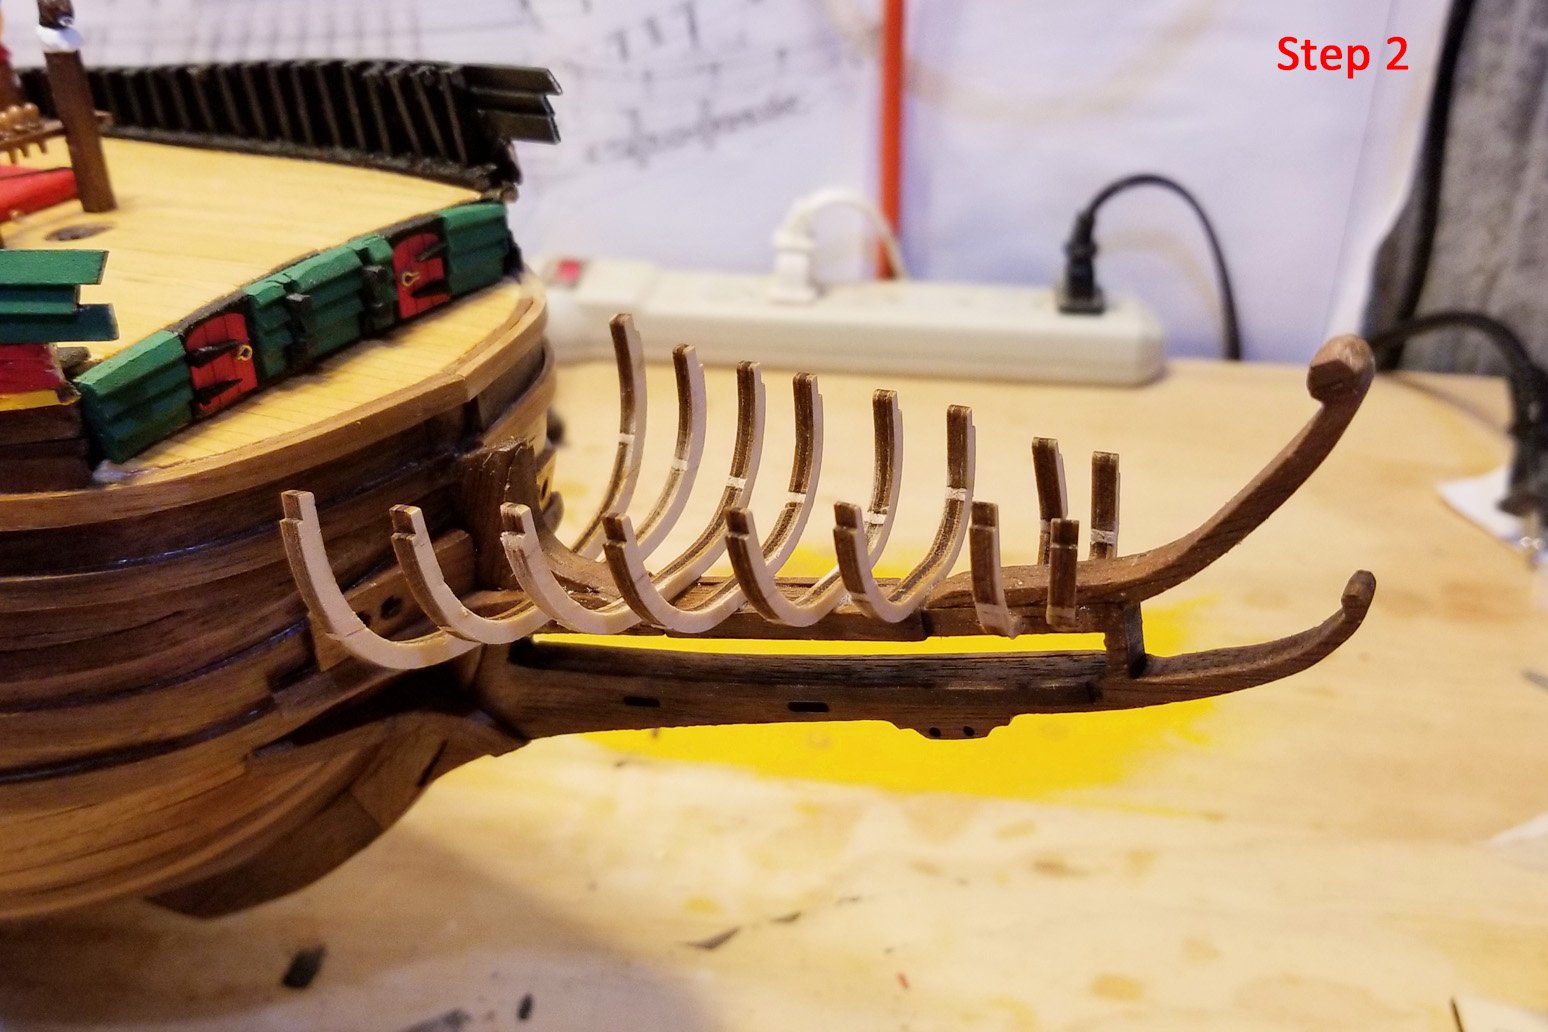
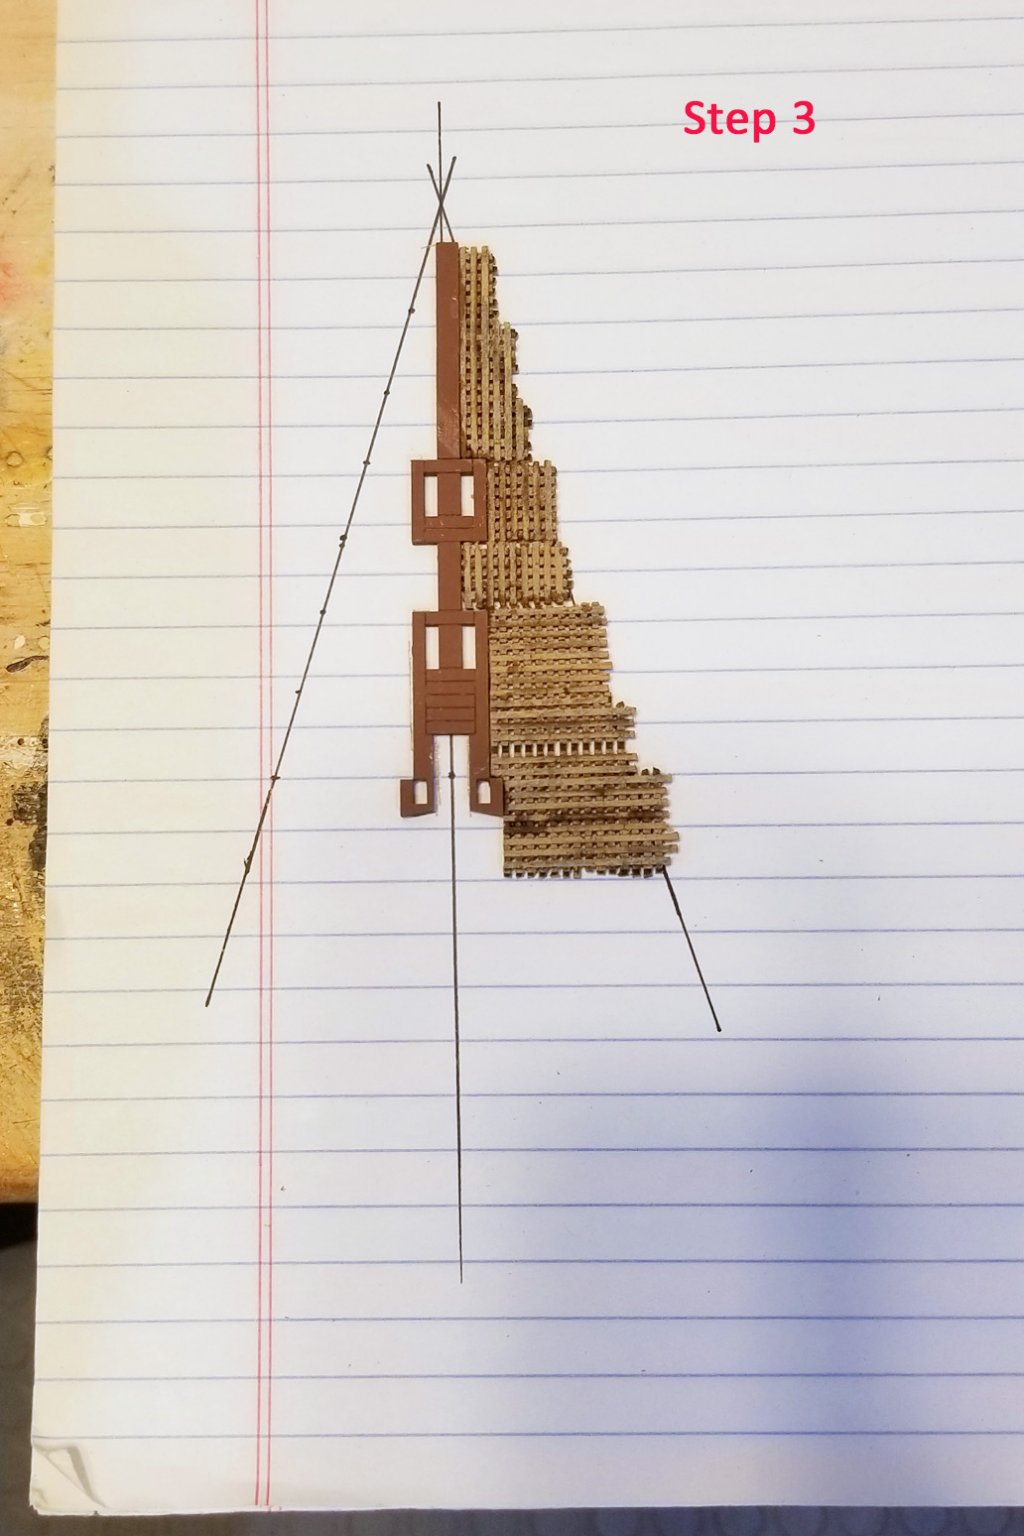
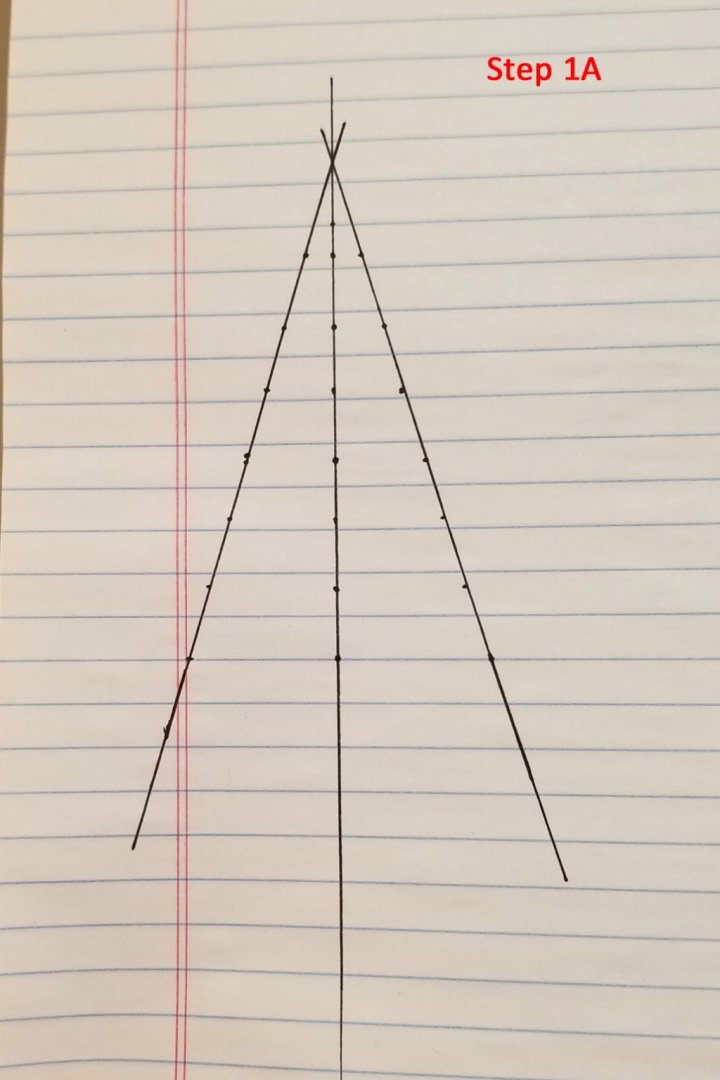
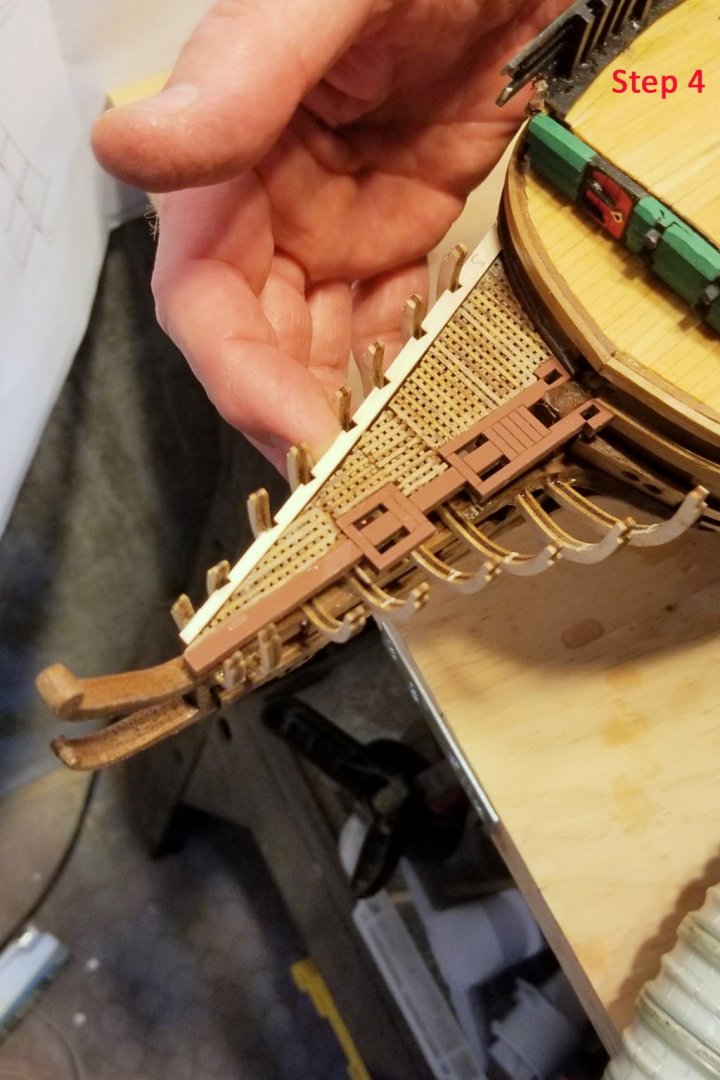
I thought I would lay out the steps I'm going through to build the bowsprit framing and deck. Because this site sometimes orders pictures differently than I put them in, I have labeled each one "Step 1", "Step 2", etc. in the upper right corner so you can reference the pictures to the text. I found this part to be an interesting "engineering challenge" in terms of build steps and sequence. Step 1: Dry fitted the center section of the deck and taped the two side edges. This allowed me to line up the bowsprit frames to t he notches in the side edges and glue them on in the right position. Step 1A: I took measurements across the width of the deck at the notches in the side edges, and used those to create a template of the finished deck shape. Step 2: Shows the bowsprit frames with the deck supports removed. VERY delicate, so I want to build the deck and get it installed to provide support. Step 3: The bowsprit deck is made up of hatching, and you build it in sections with an outside edge that roughly follows the line on the template. Step 4: Bowsprit deck edge sanded down to align with the template. This picture shows the parts dry fitted into the bowsprit. I'll now build the other side and then glue the deck into the frames. Regards, David


- 136 replies
-
- 6
-
-
- kolderstok
- batavia
- (and 1 more)
-
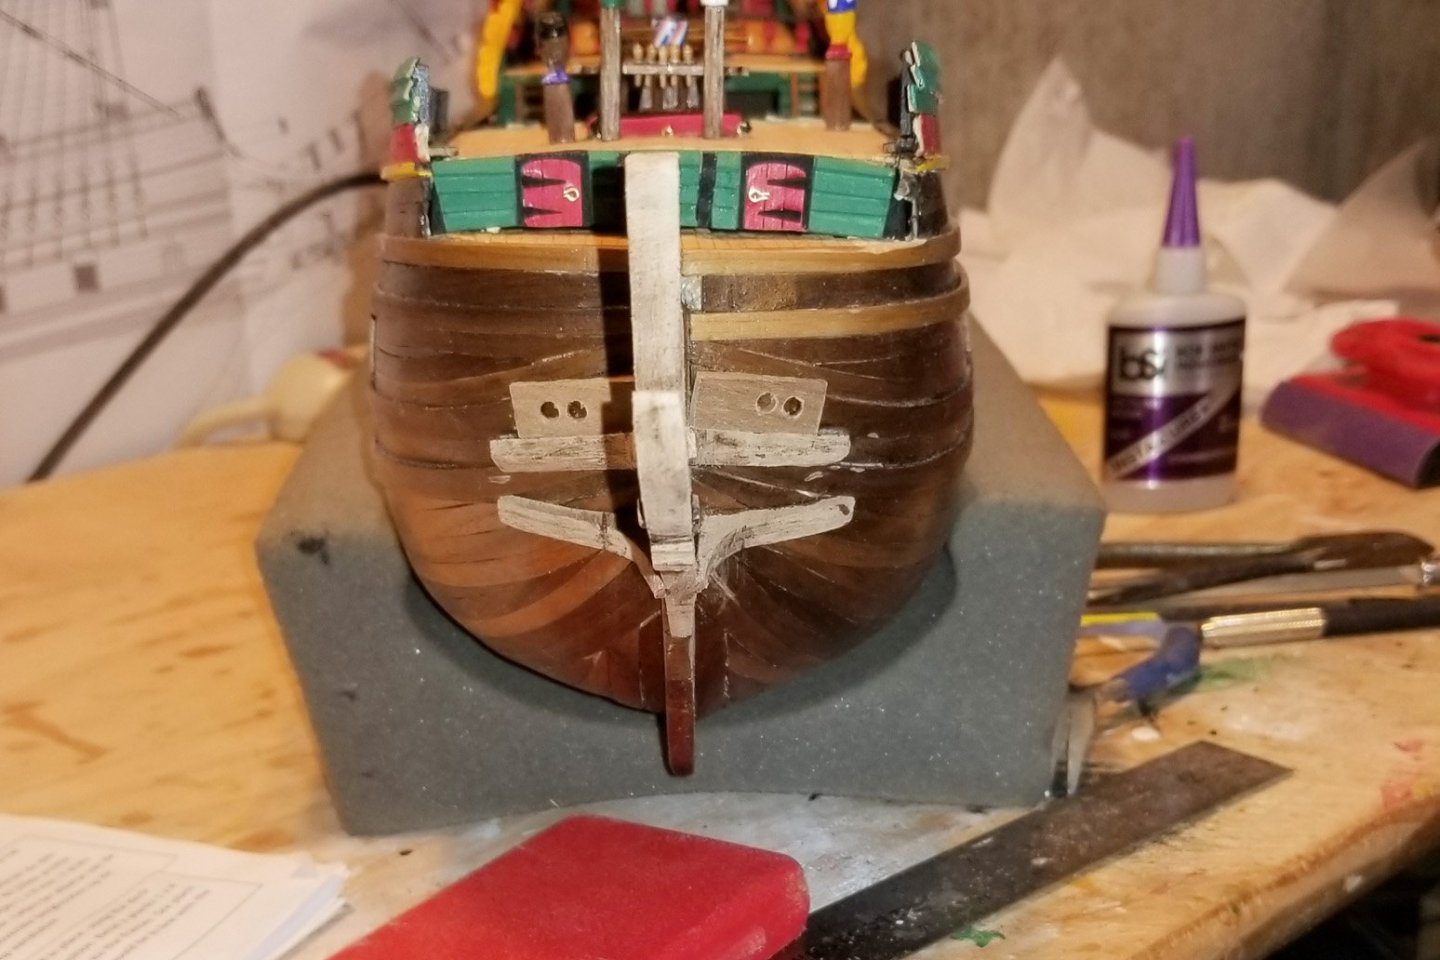
Turns out the next step was varnishing the bowsprit and side braces, and it does blend in better even though it's something of a kluge. Regards, David

- 136 replies
-
- 5
-
-
- kolderstok
- batavia
- (and 1 more)
-
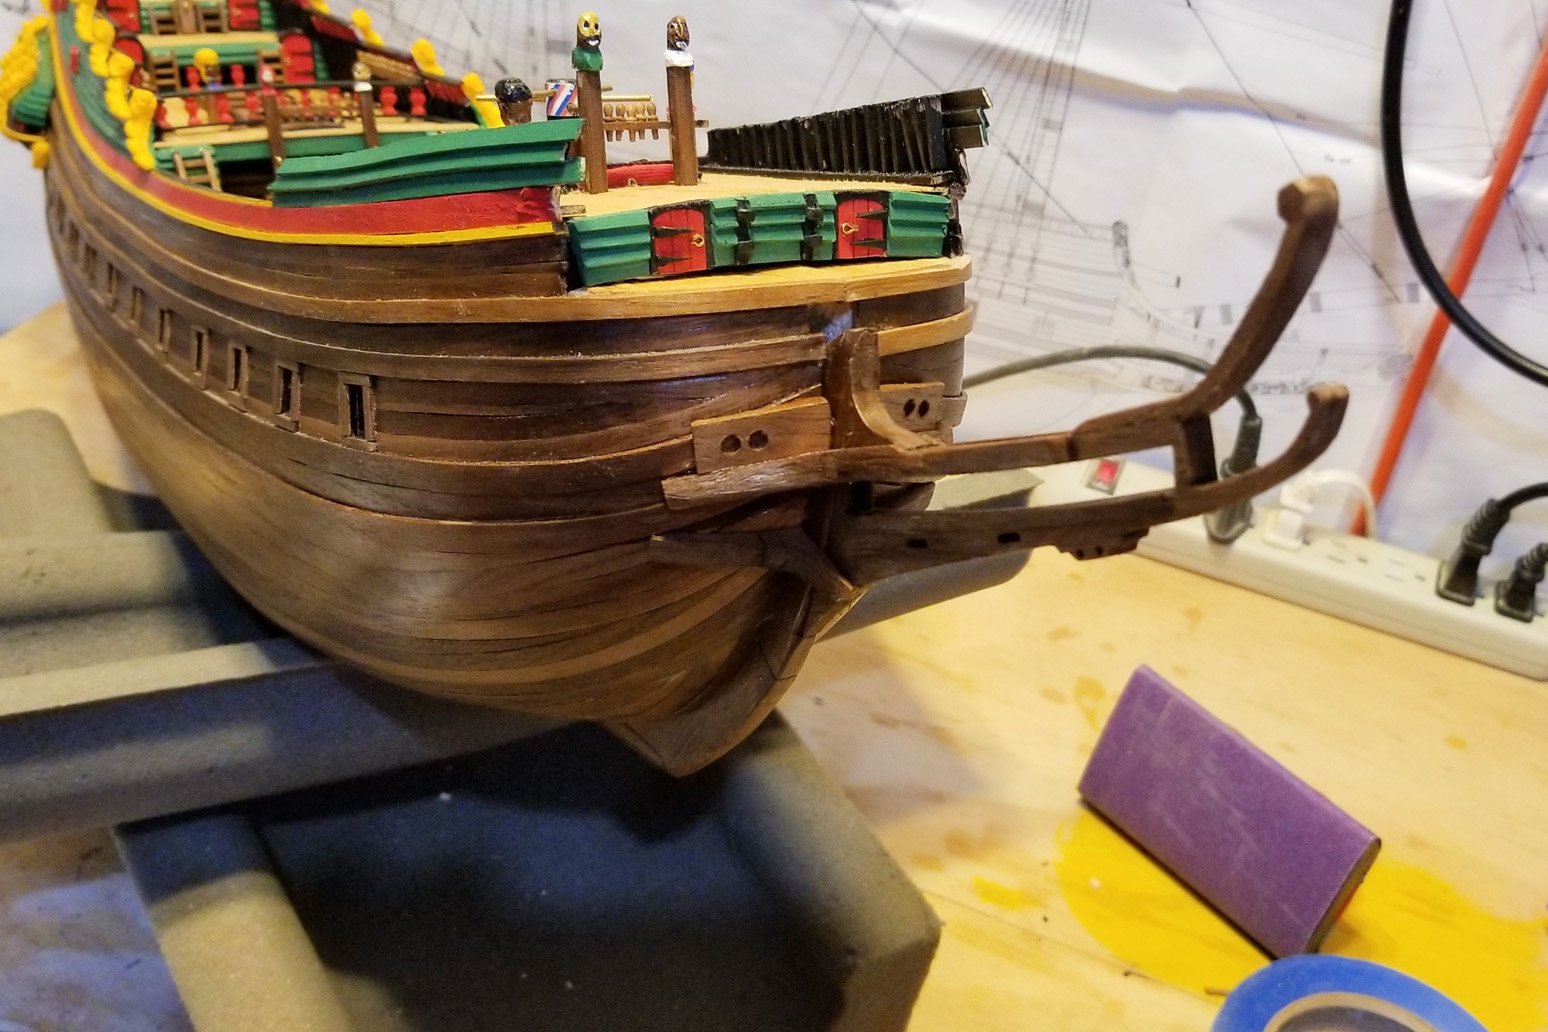
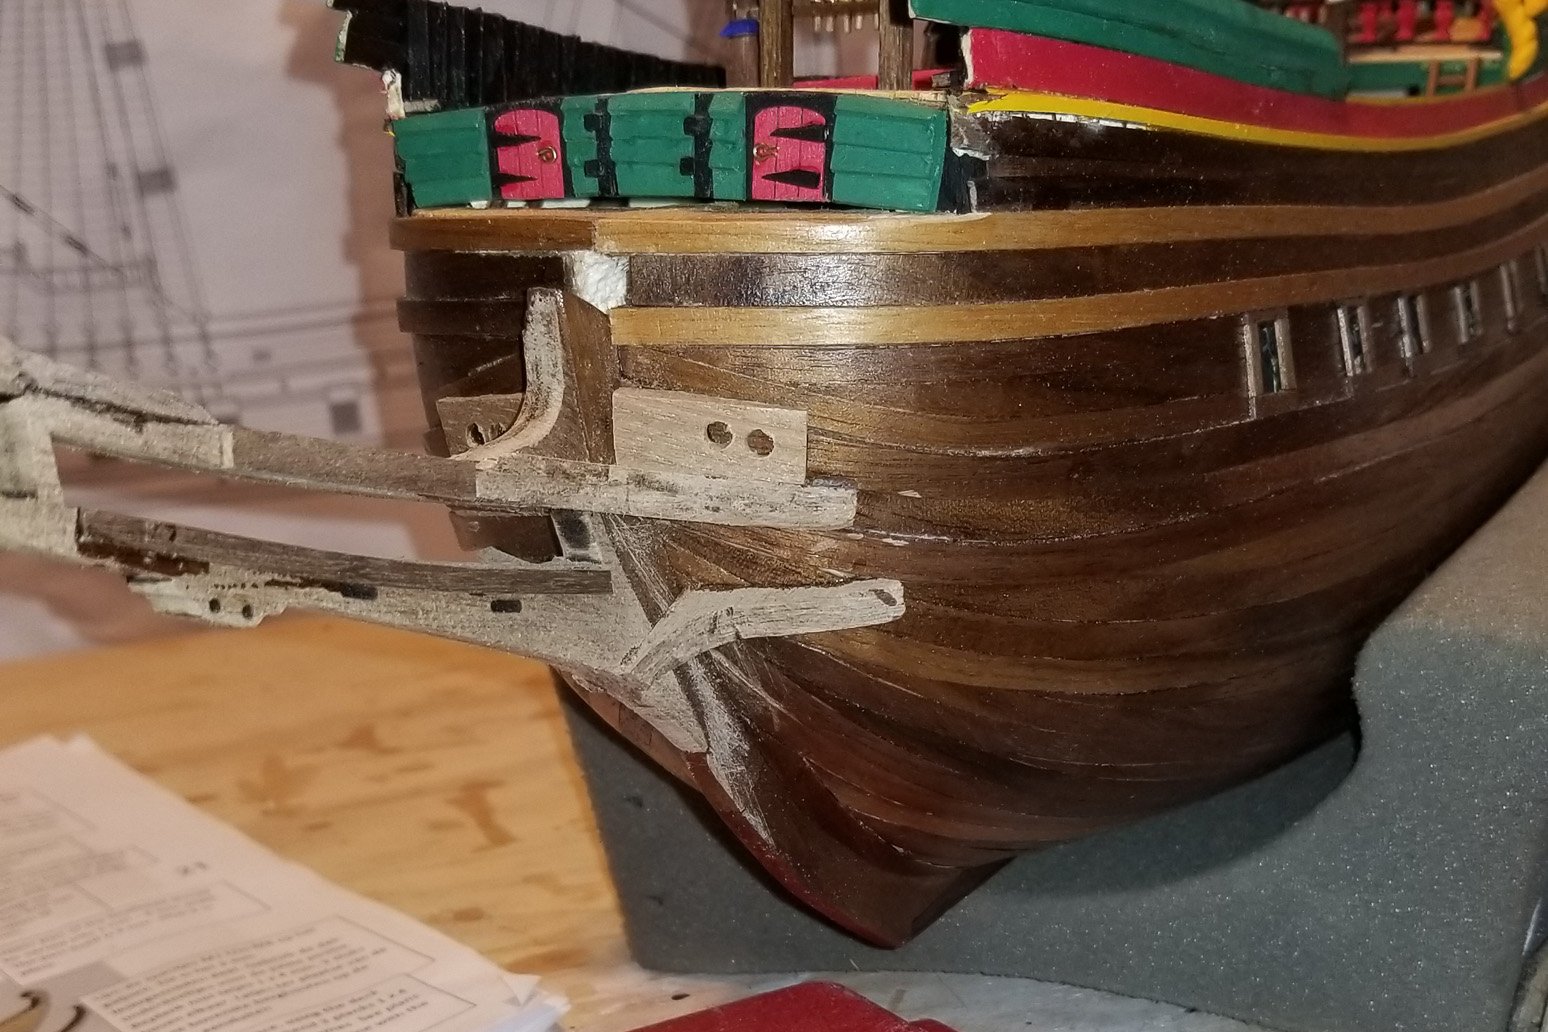
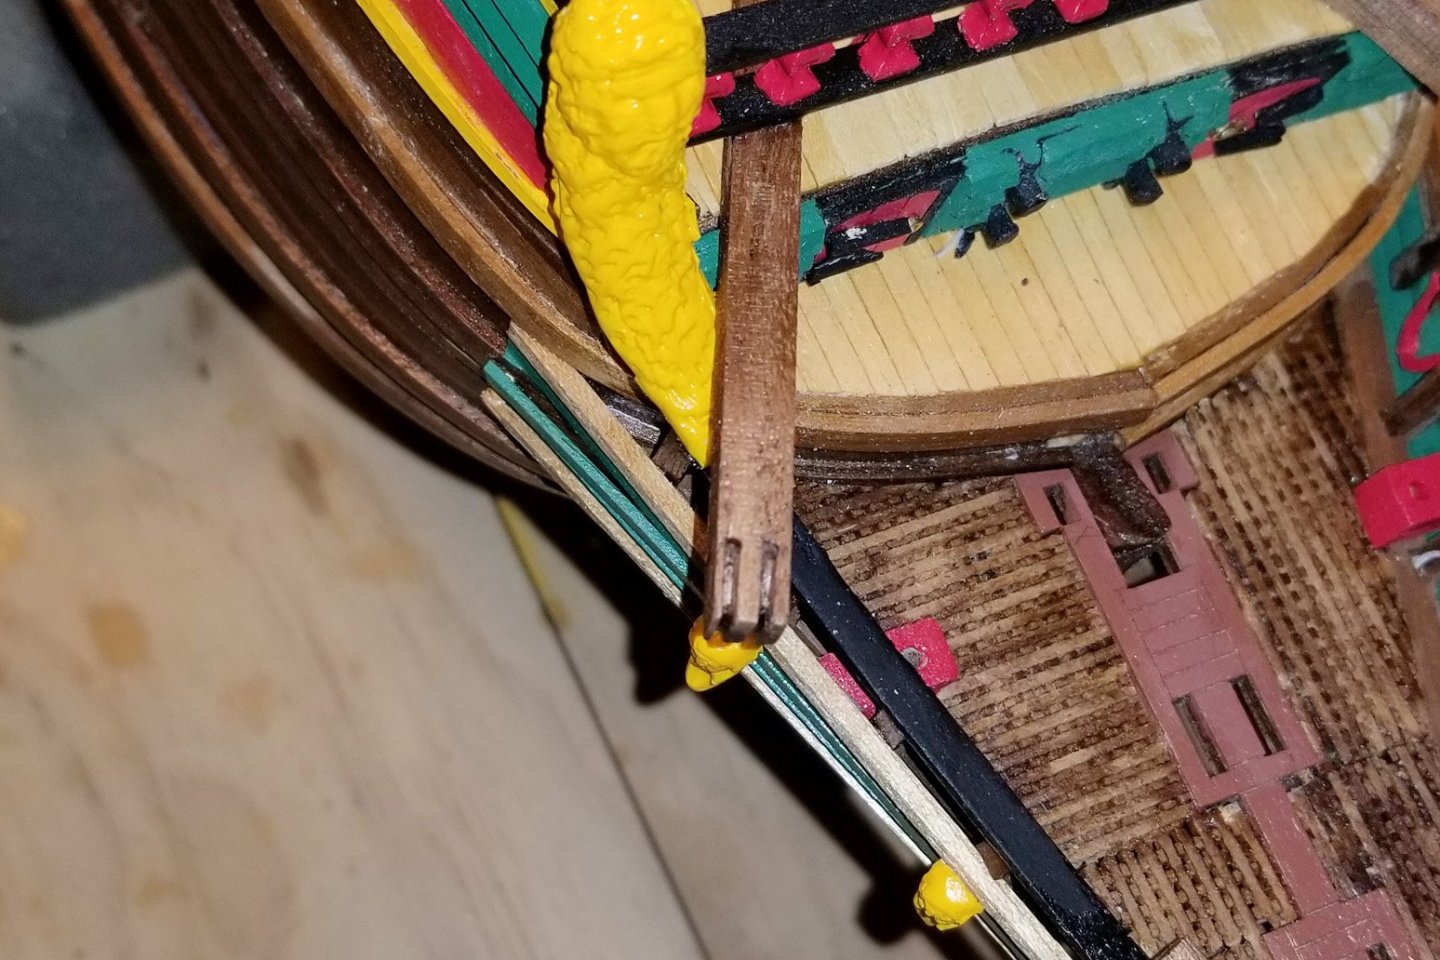
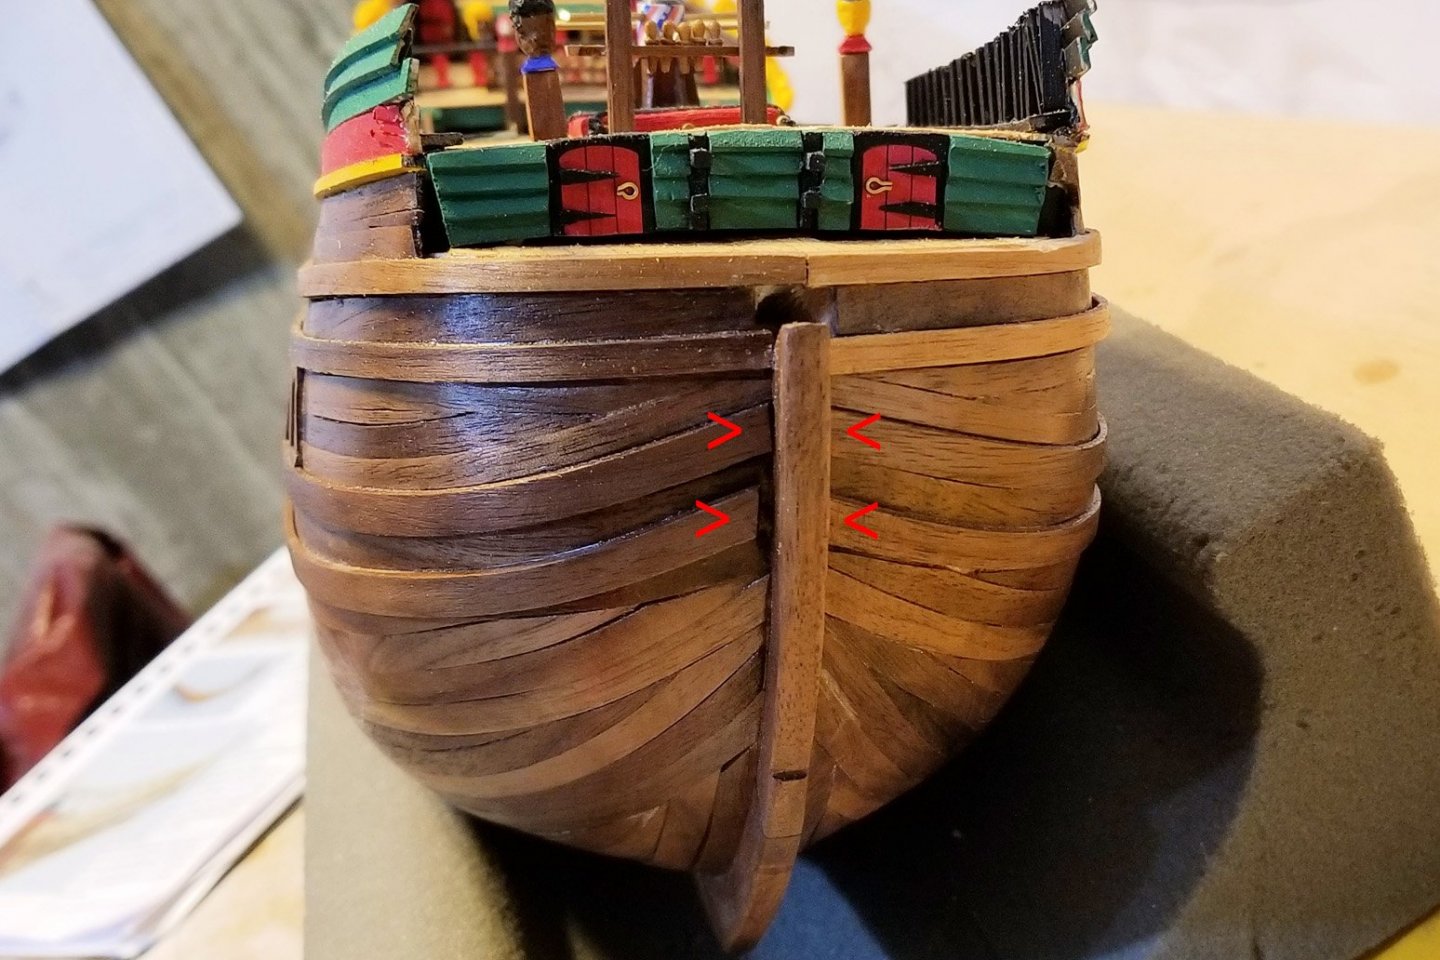
More prior construction issues to solve at the bow. The bowsprit has side braces that are intended to merge into the two large wales running up to the bow. For that to happen that way, those wales have to be kept straight as they run up to the bow, and not understanding this, I let mine curve upward as you can see in the picture marked with arrows. There were probably tic marks on the bow frames and I either missed them, or sanded them off when smoothing the bow frames. So I had to get creative in mounting the bowsprit, and the results are shown here. This is unvarnished: once it's varnished all of the side braces will blend into the hull much better. It's not as much of a kluge as I thought it would be. But a note to builders who follow about that wale alignment. Regards, David

- 136 replies
-
- 3
-
-
- kolderstok
- batavia
- (and 1 more)
-
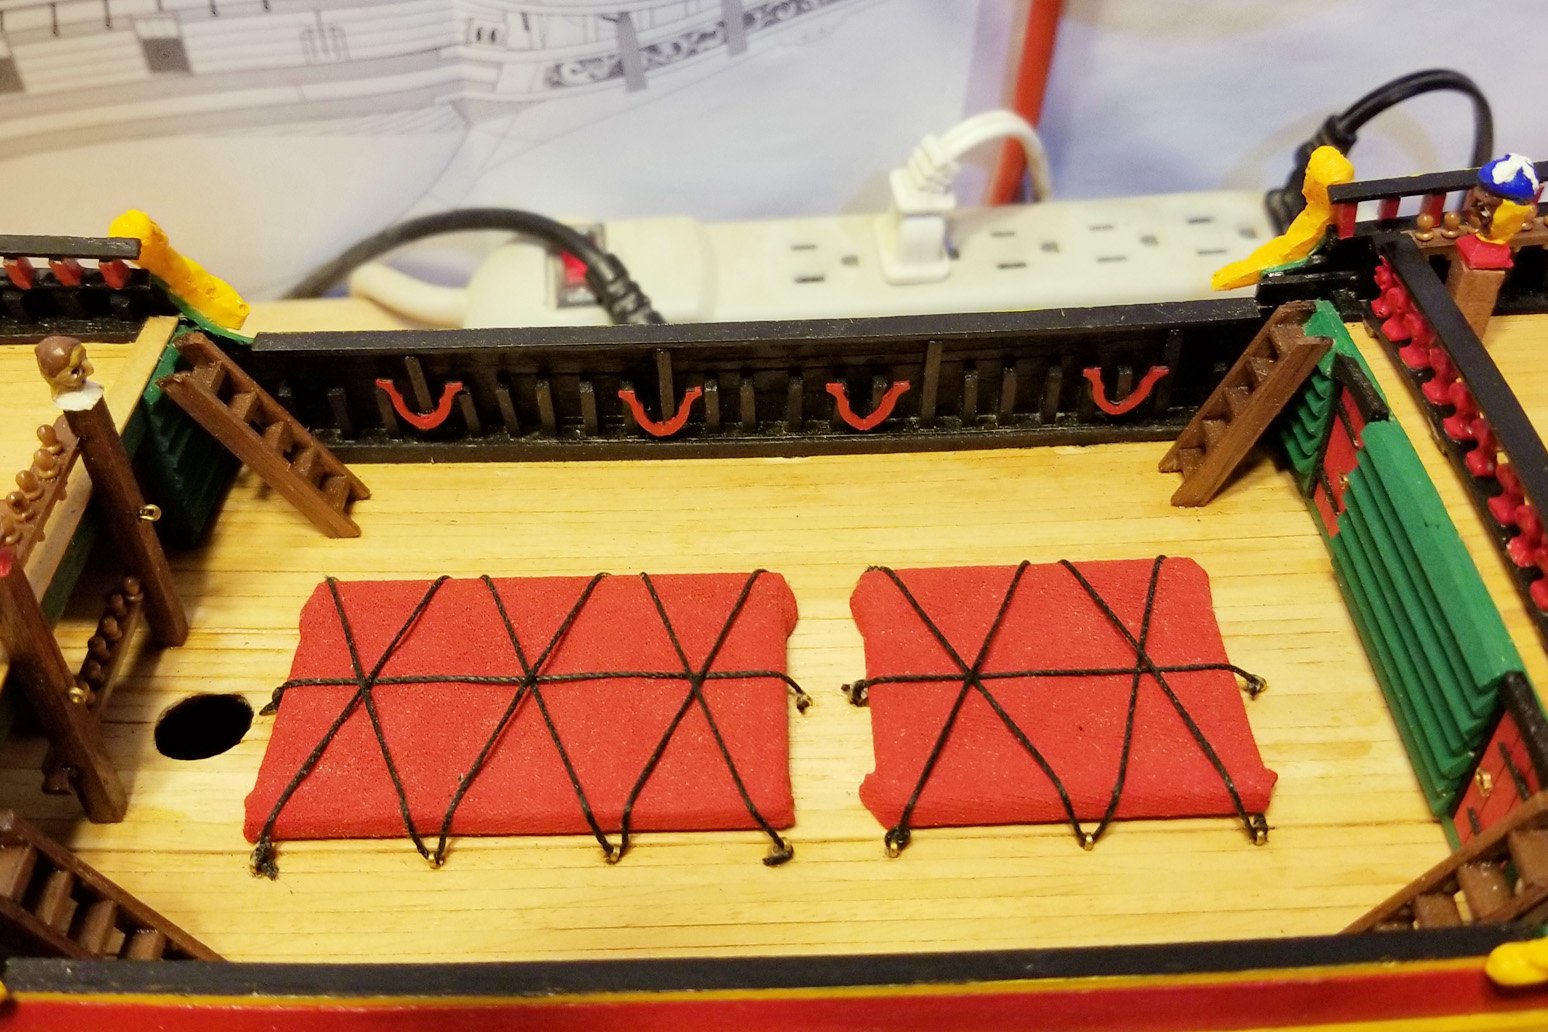
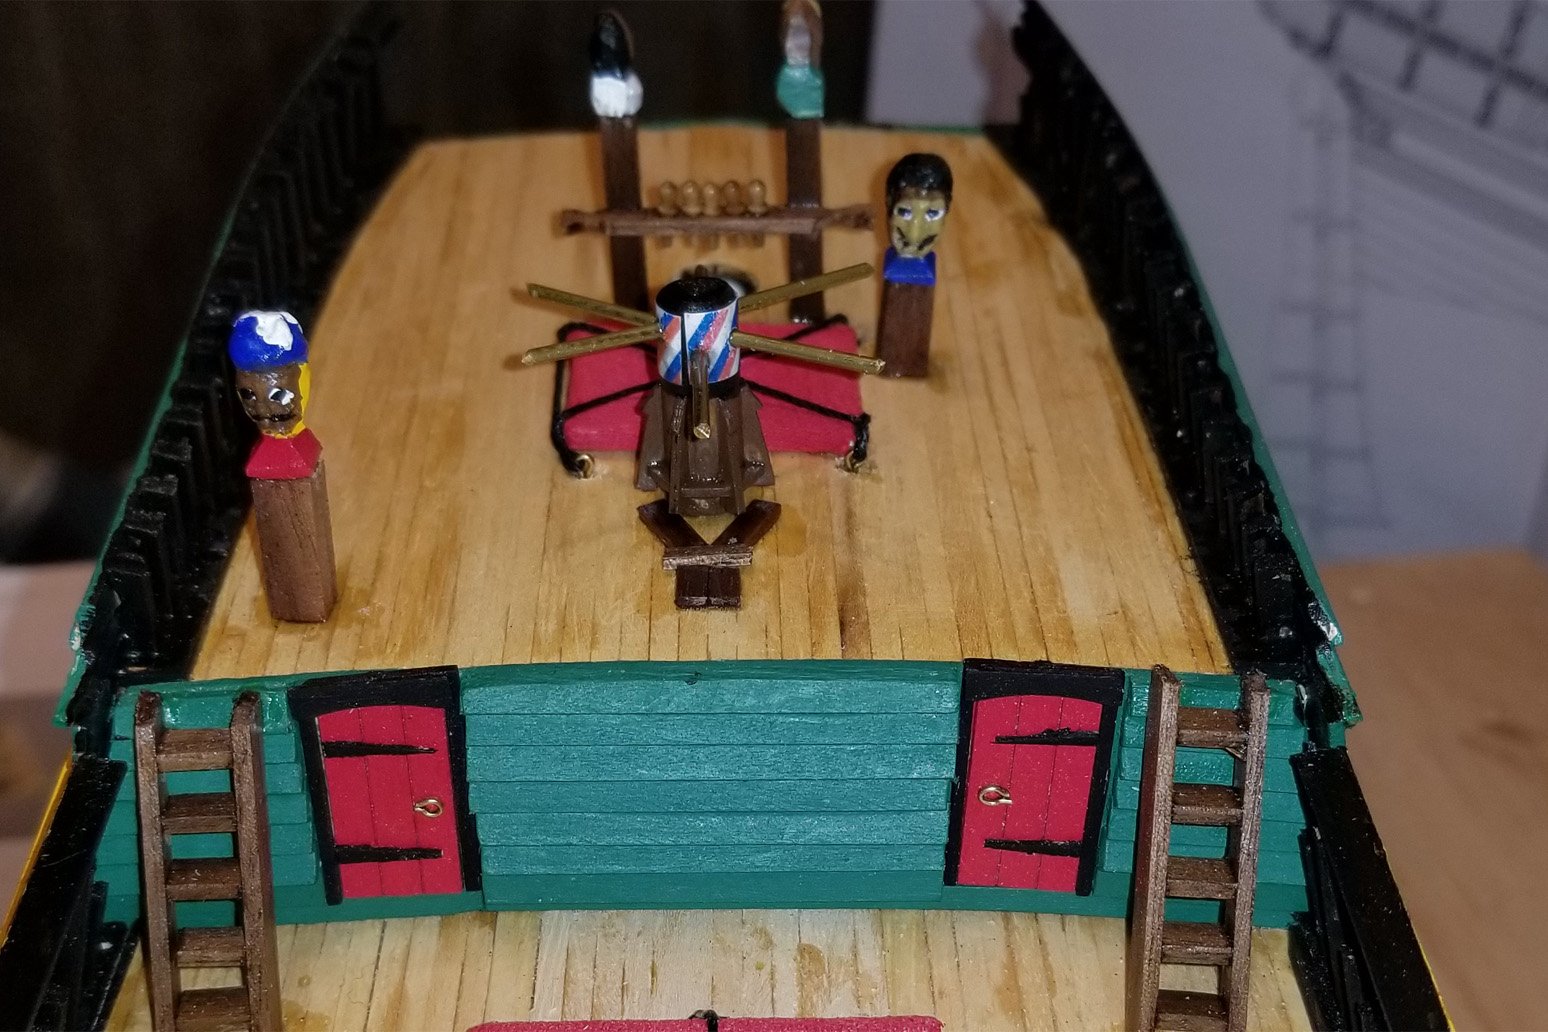
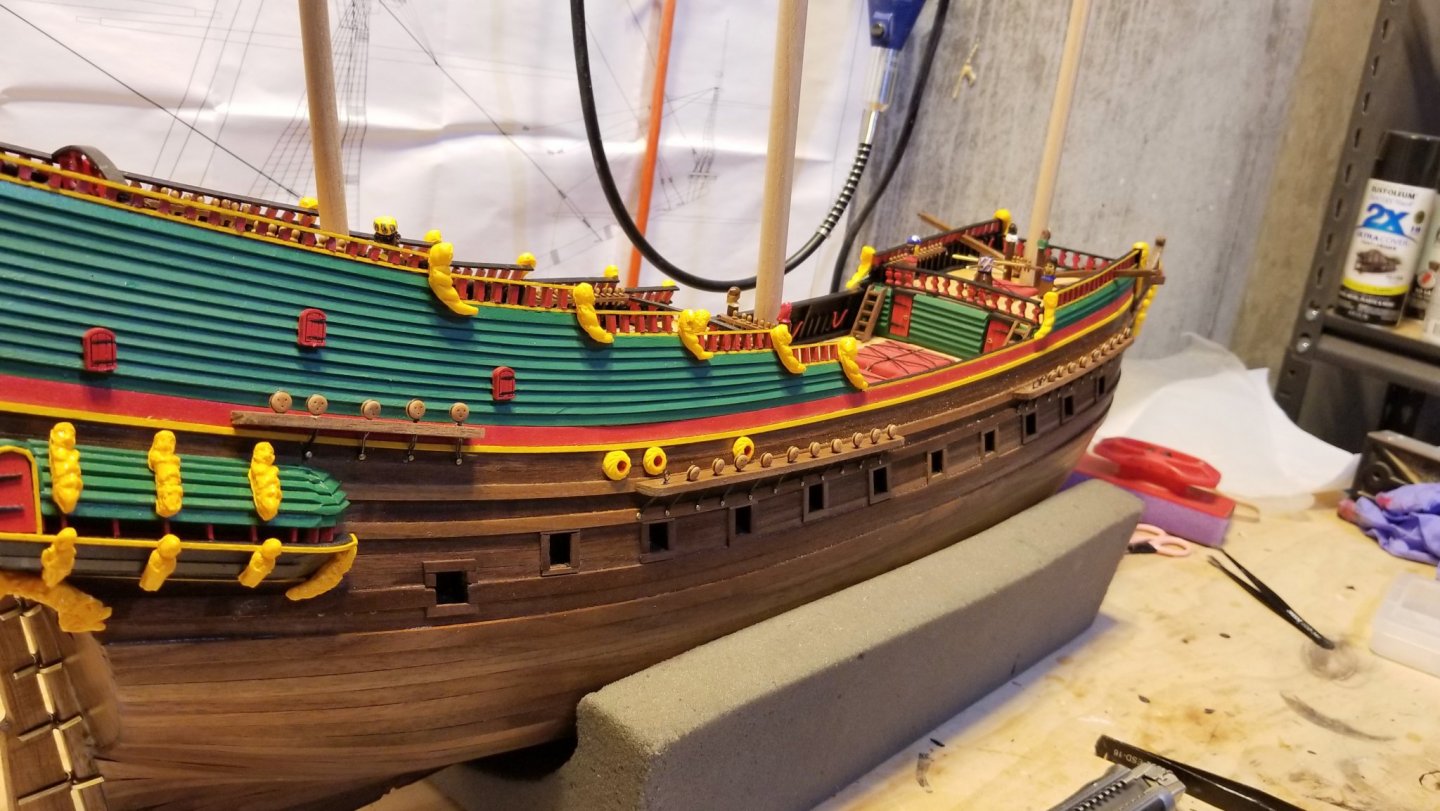
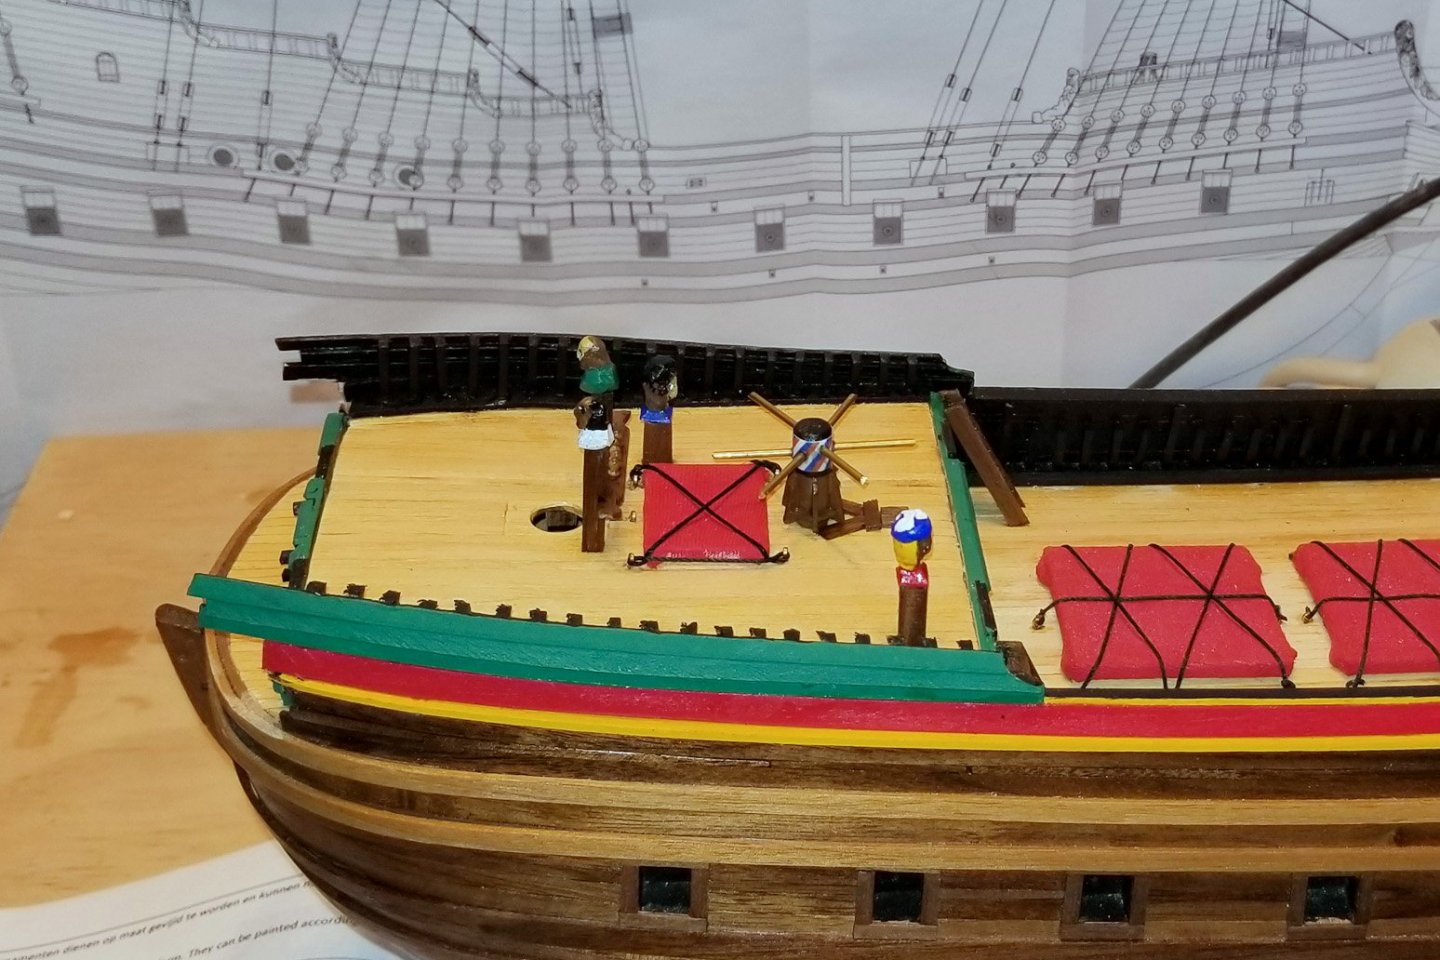
Progress pictures on the forecastle deck, including capstan, hatch cover, foremast knighthead with pin racks, and two other knightheads. Left to go are railings on all sides, pin racks, and catheads. But I need to work on the bowsprit for a bit because of a construction issue. The planking running forward should (I think) run past the cabin bulkhead at the bow by about 5mm, but as you can see I ended the red plank at that bulkhead. I picked this up from the Dutch build log I have referenced above, where the extra length gives space to shape a curve matching the others on the ship. I am pretty sure I can compensate for it, but in order to do so I need to have some of the bowsprit mounted so that I can figure out the line of a curved railing that runs down the end of those planks and then flattens out to the tip of the bowsprit. In the Dutch build log, that line happens forward of the cabin bulkhead, although I see it closer to the bulkhead in the manual. So I want to have the bowsprit in place so I can engineer that line. Once that's established, then I will know how far forward to run the side railings at the forecastle deck, and then I can mount the fore and aft railings and the rest of the forecastle fittings. Regards, David


- 136 replies
-
- 3
-
-
- kolderstok
- batavia
- (and 1 more)