drobinson02199
-
Posts
1,078 -
Joined
-
Last visited
Content Type
Profiles
Forums
Gallery
Events
Everything posted by drobinson02199
-
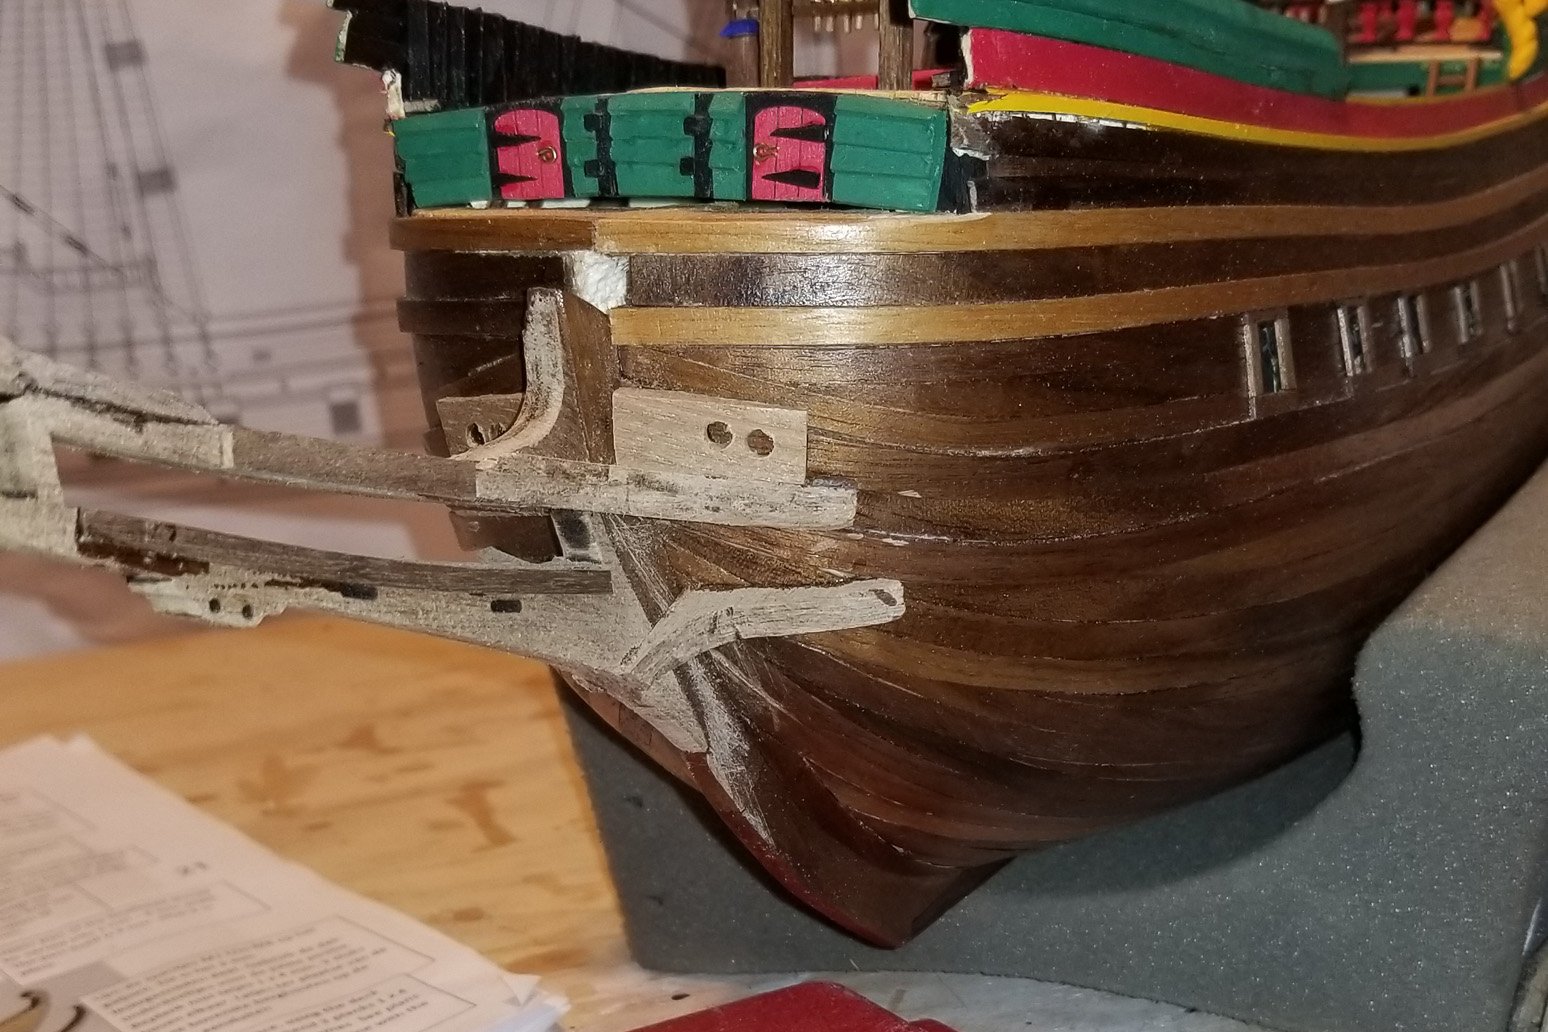
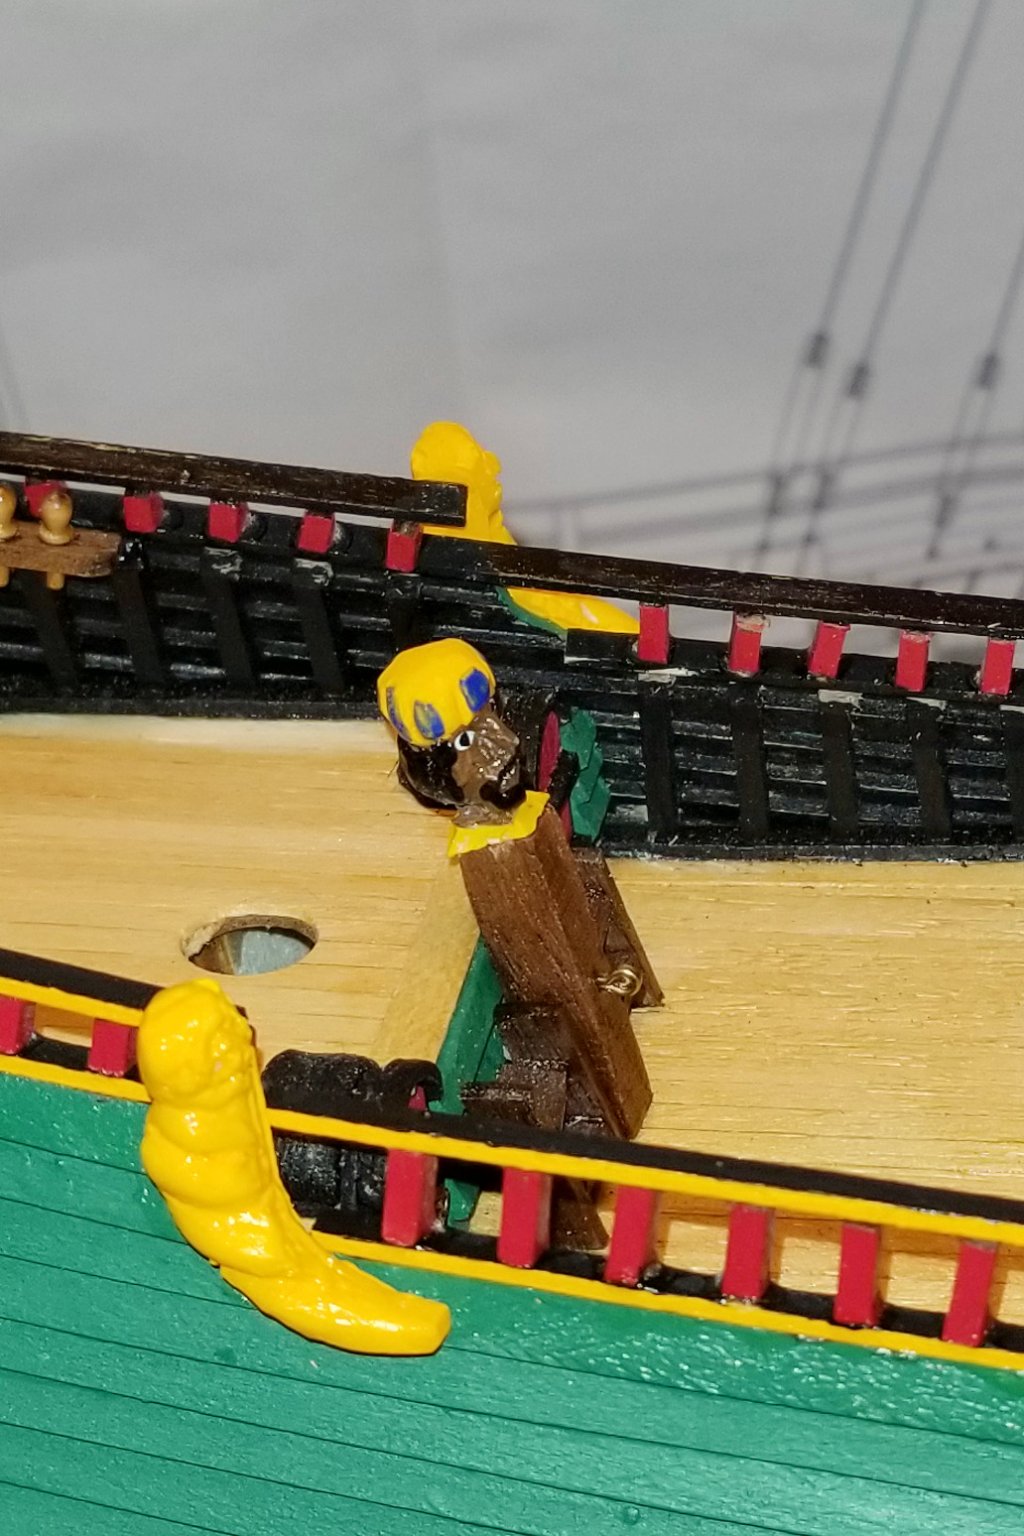
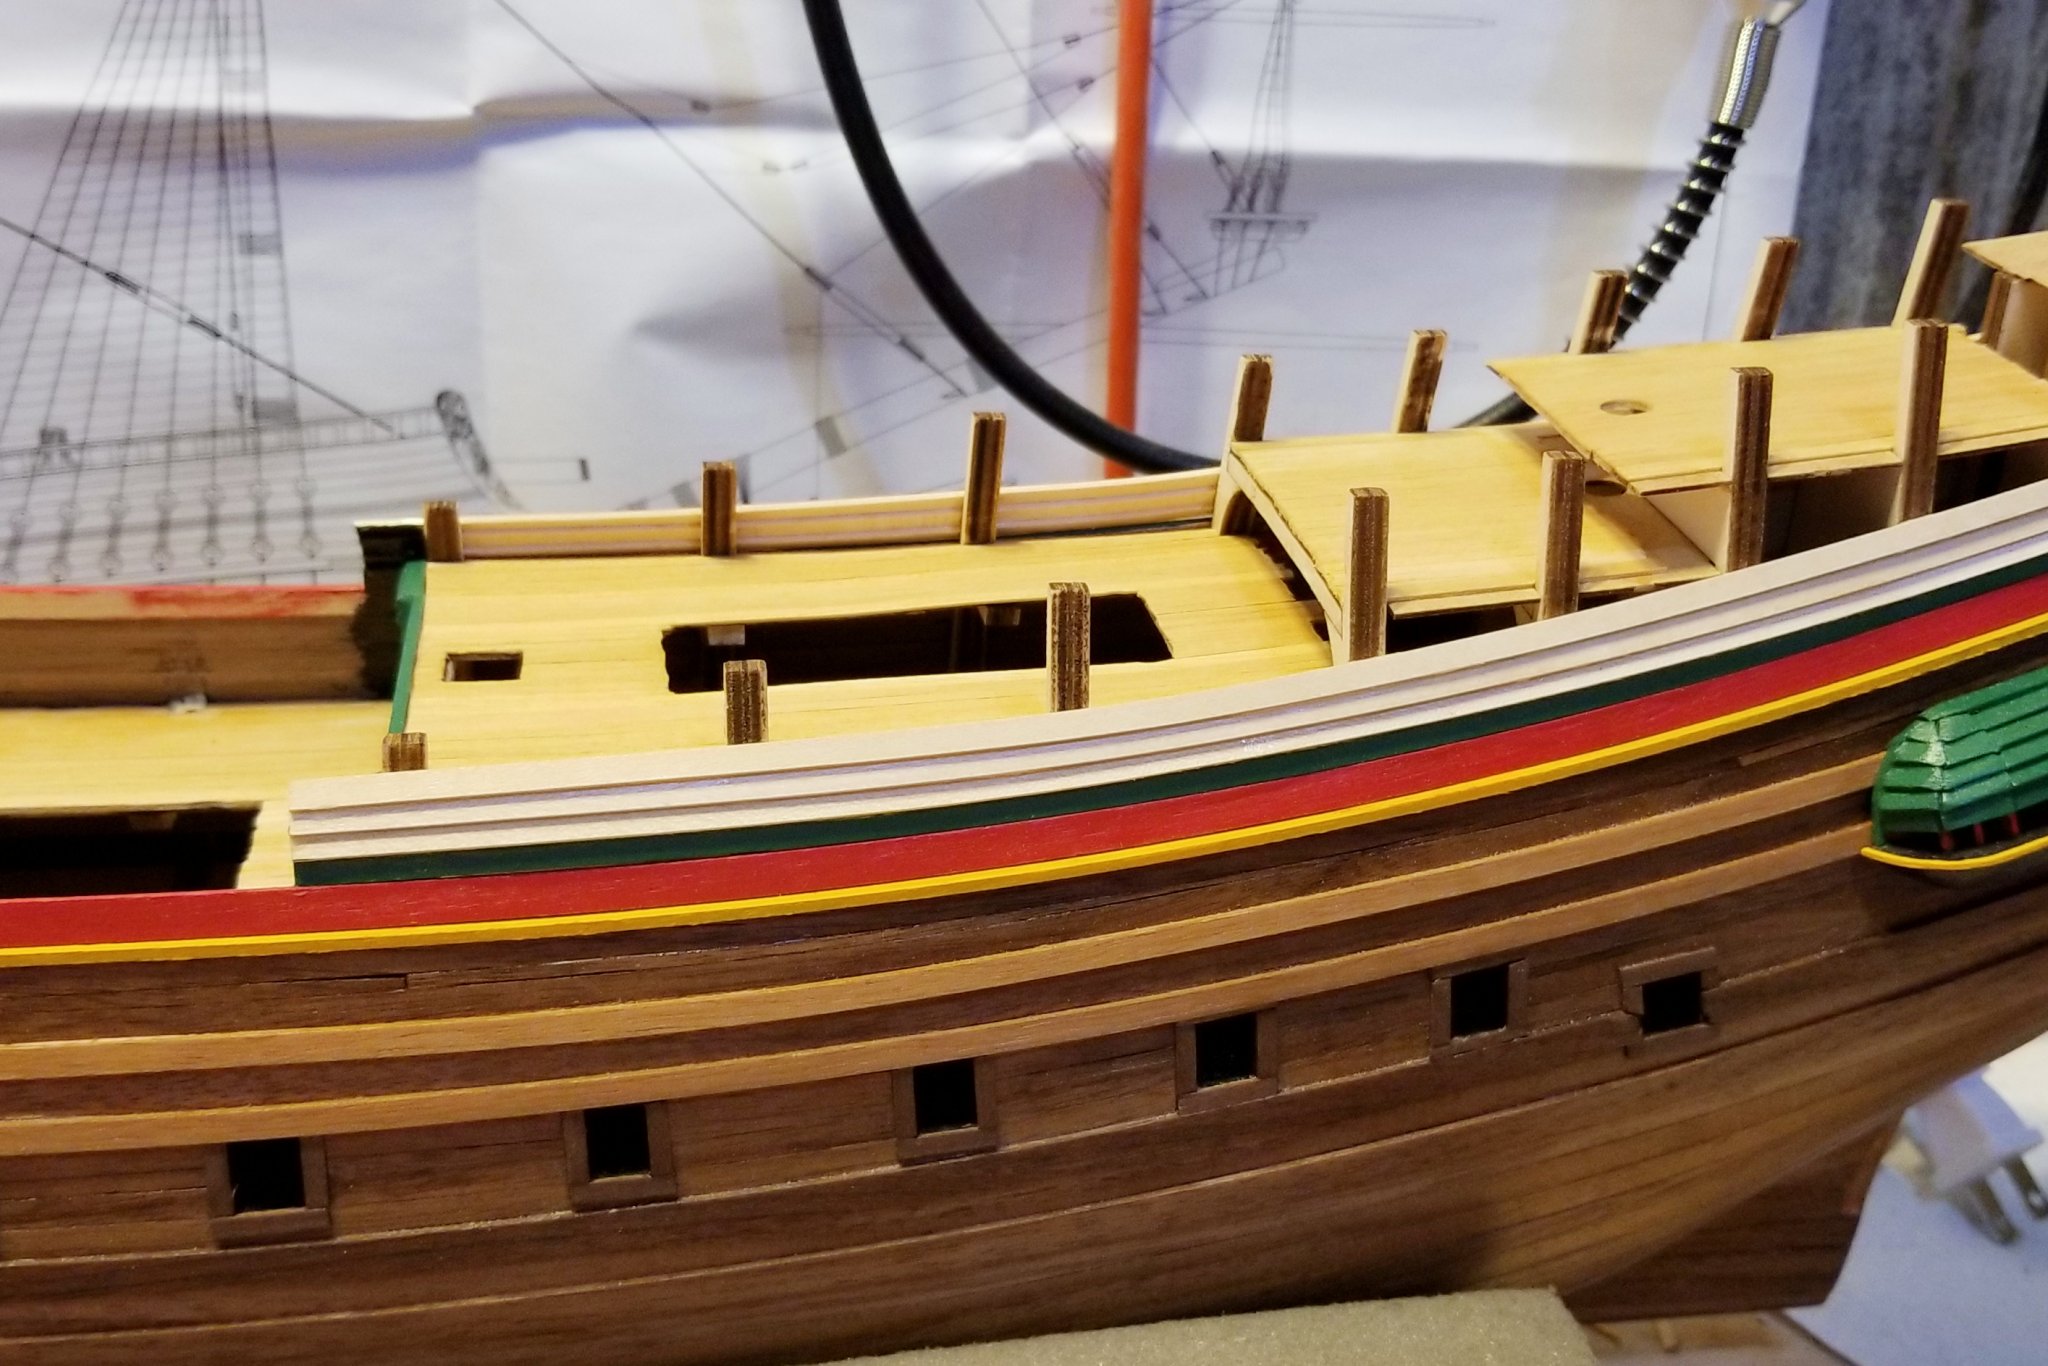
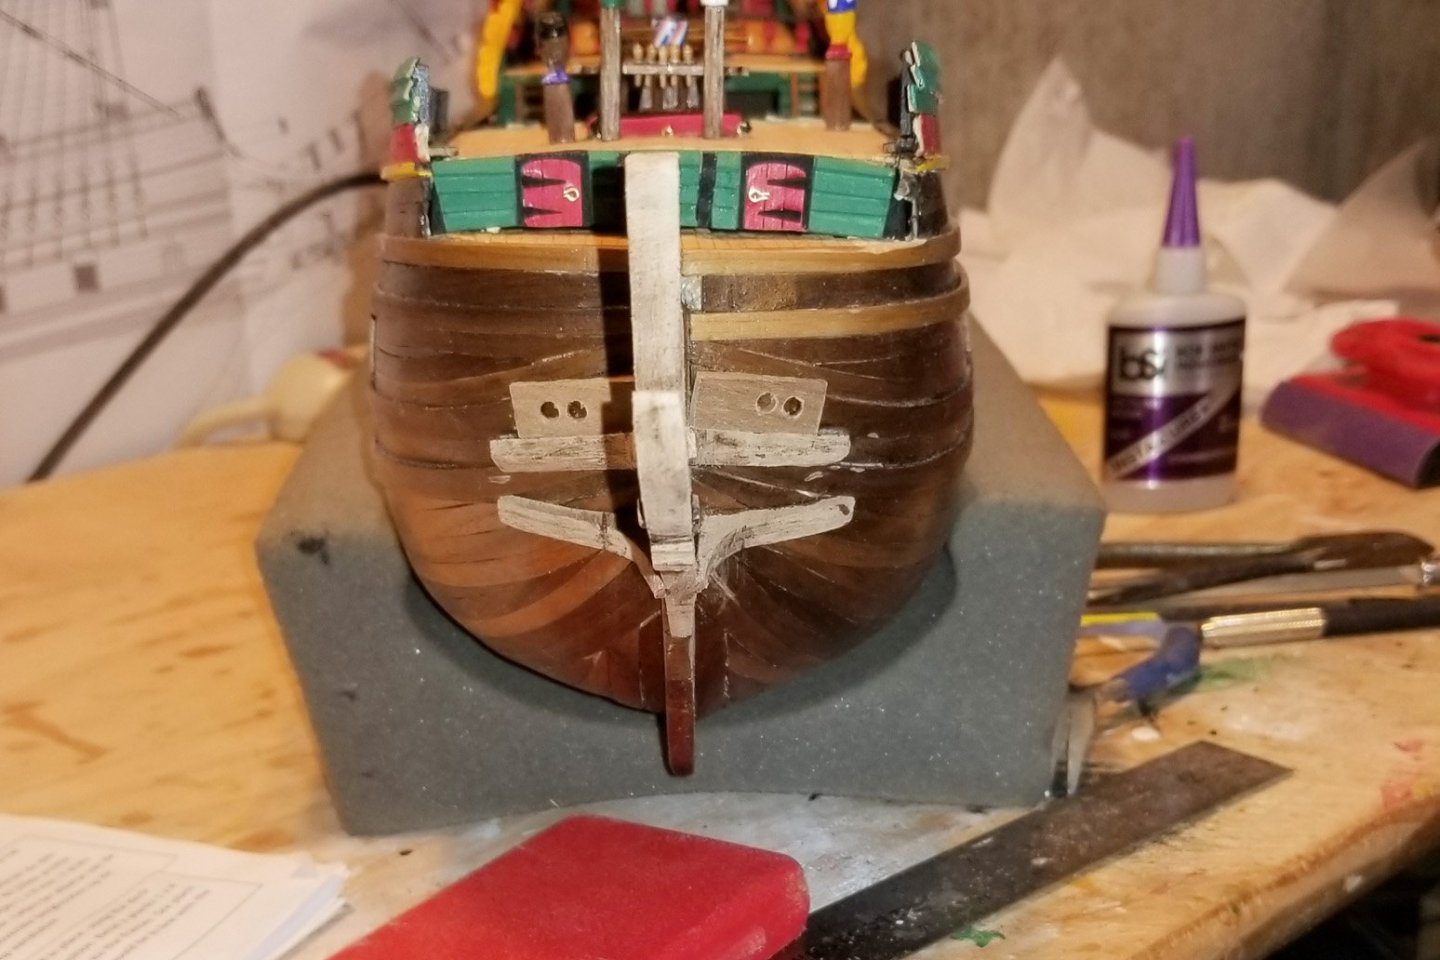
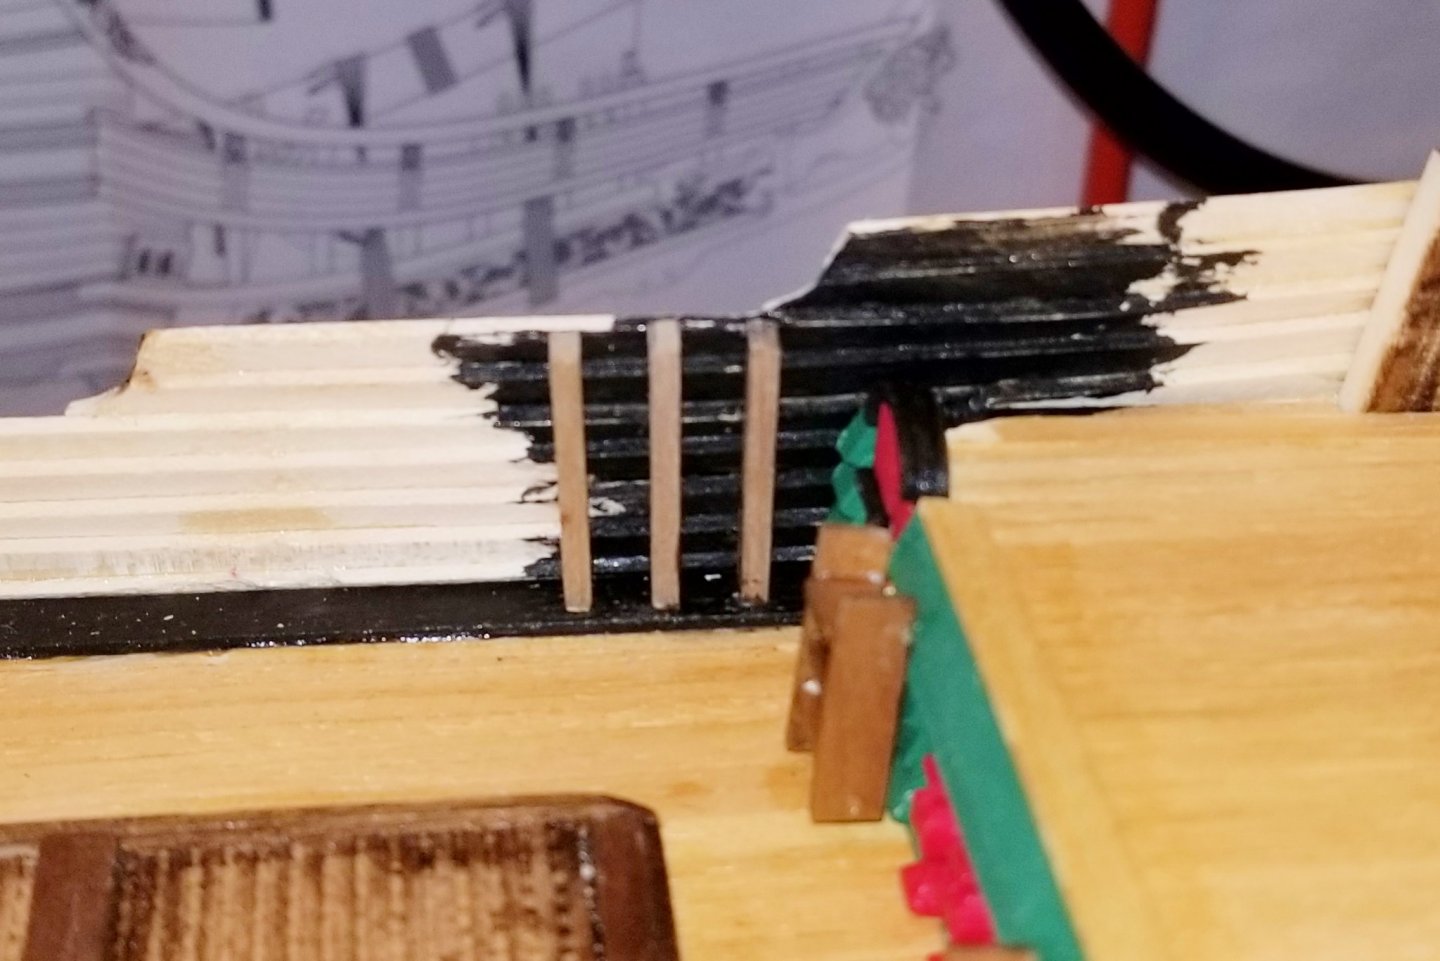
 More prior construction issues to solve at the bow. The bowsprit has side braces that are intended to merge into the two large wales running up to the bow. For that to happen that way, those wales have to be kept straight as they run up to the bow, and not understanding this, I let mine curve upward as you can see in the picture marked with arrows. There were probably tic marks on the bow frames and I either missed them, or sanded them off when smoothing the bow frames. So I had to get creative in mounting the bowsprit, and the results are shown here. This is unvarnished: once it's varnished all of the side braces will blend into the hull much better. It's not as much of a kluge as I thought it would be. But a note to builders who follow about that wale alignment. Regards, David
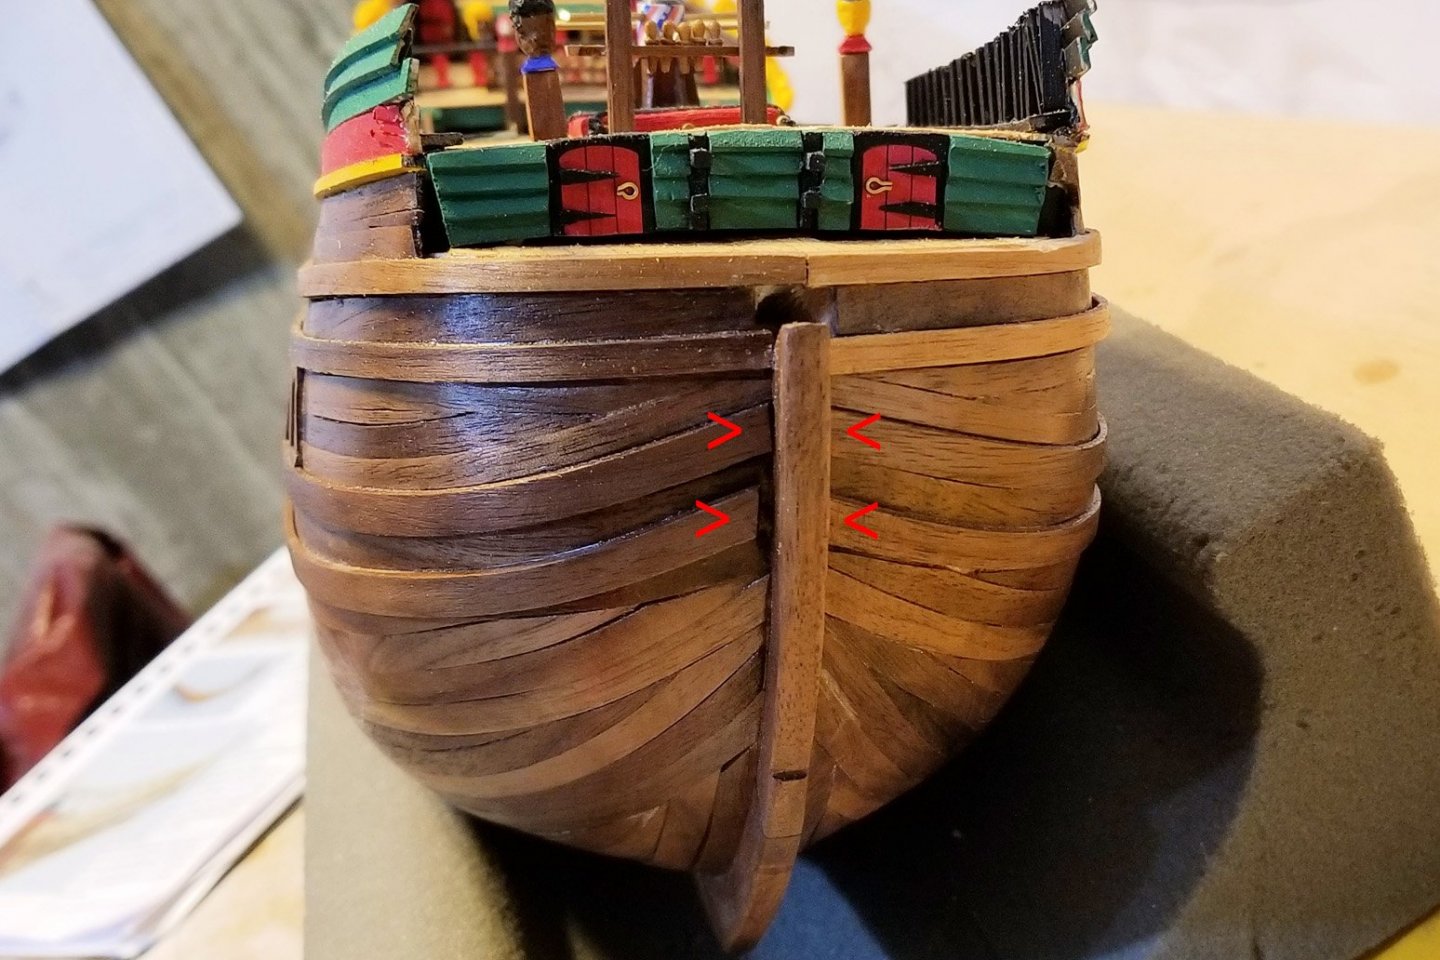

- 136 replies
-
- 3
-

-
- kolderstok
- batavia
- (and 1 more)
-
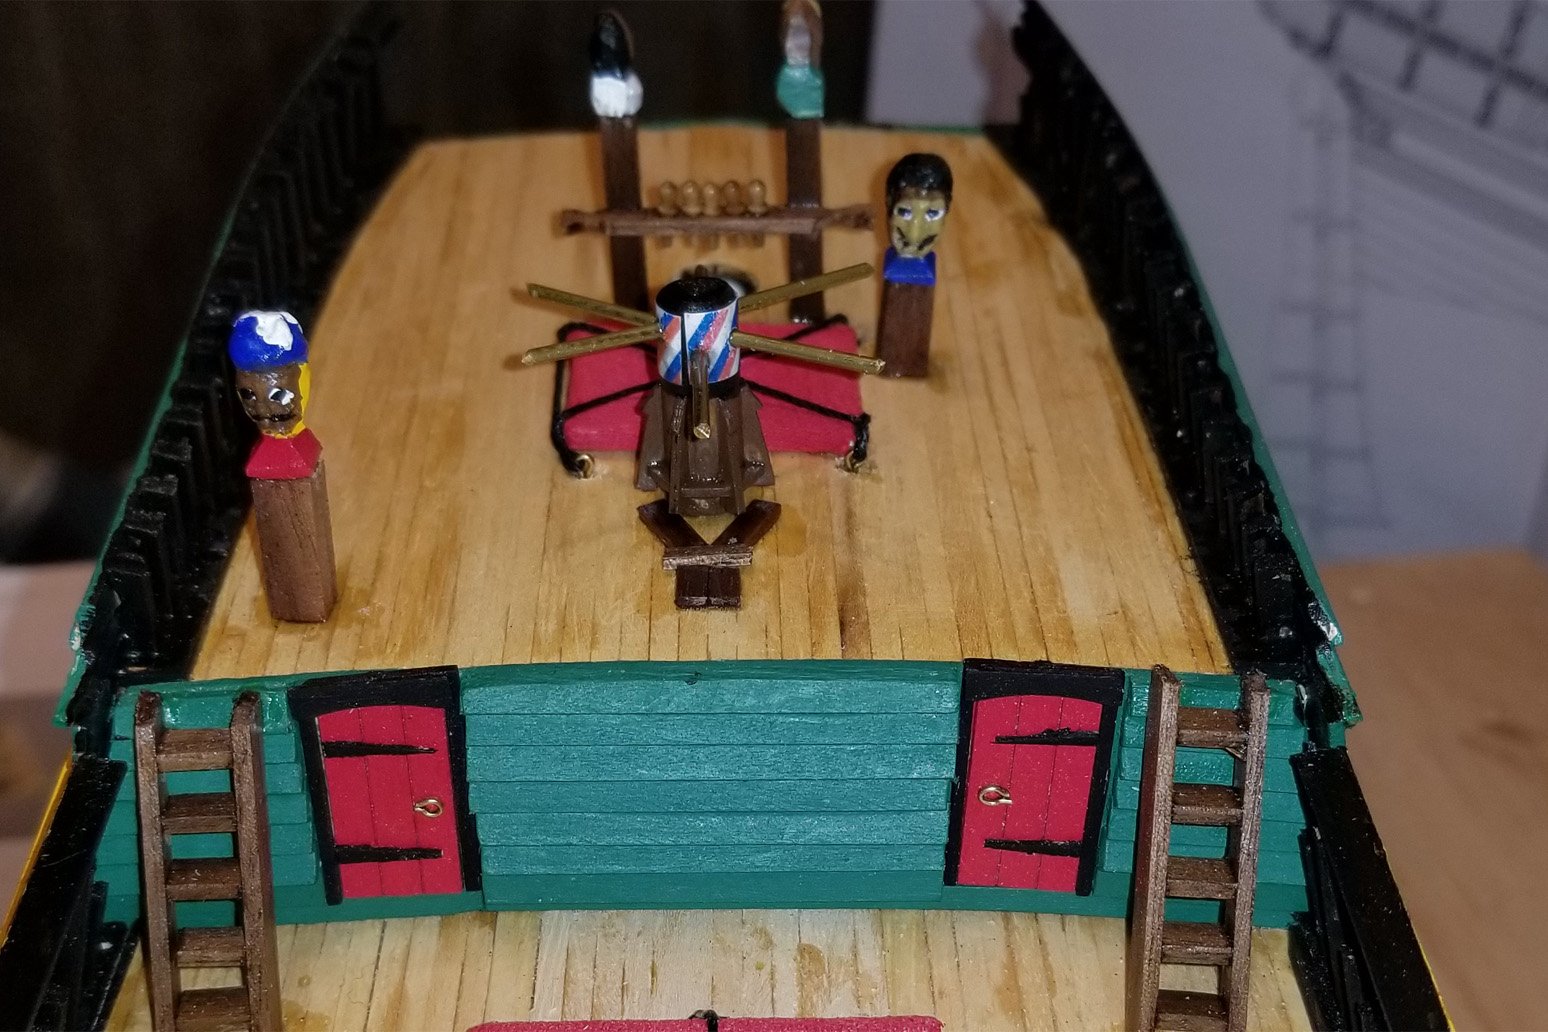
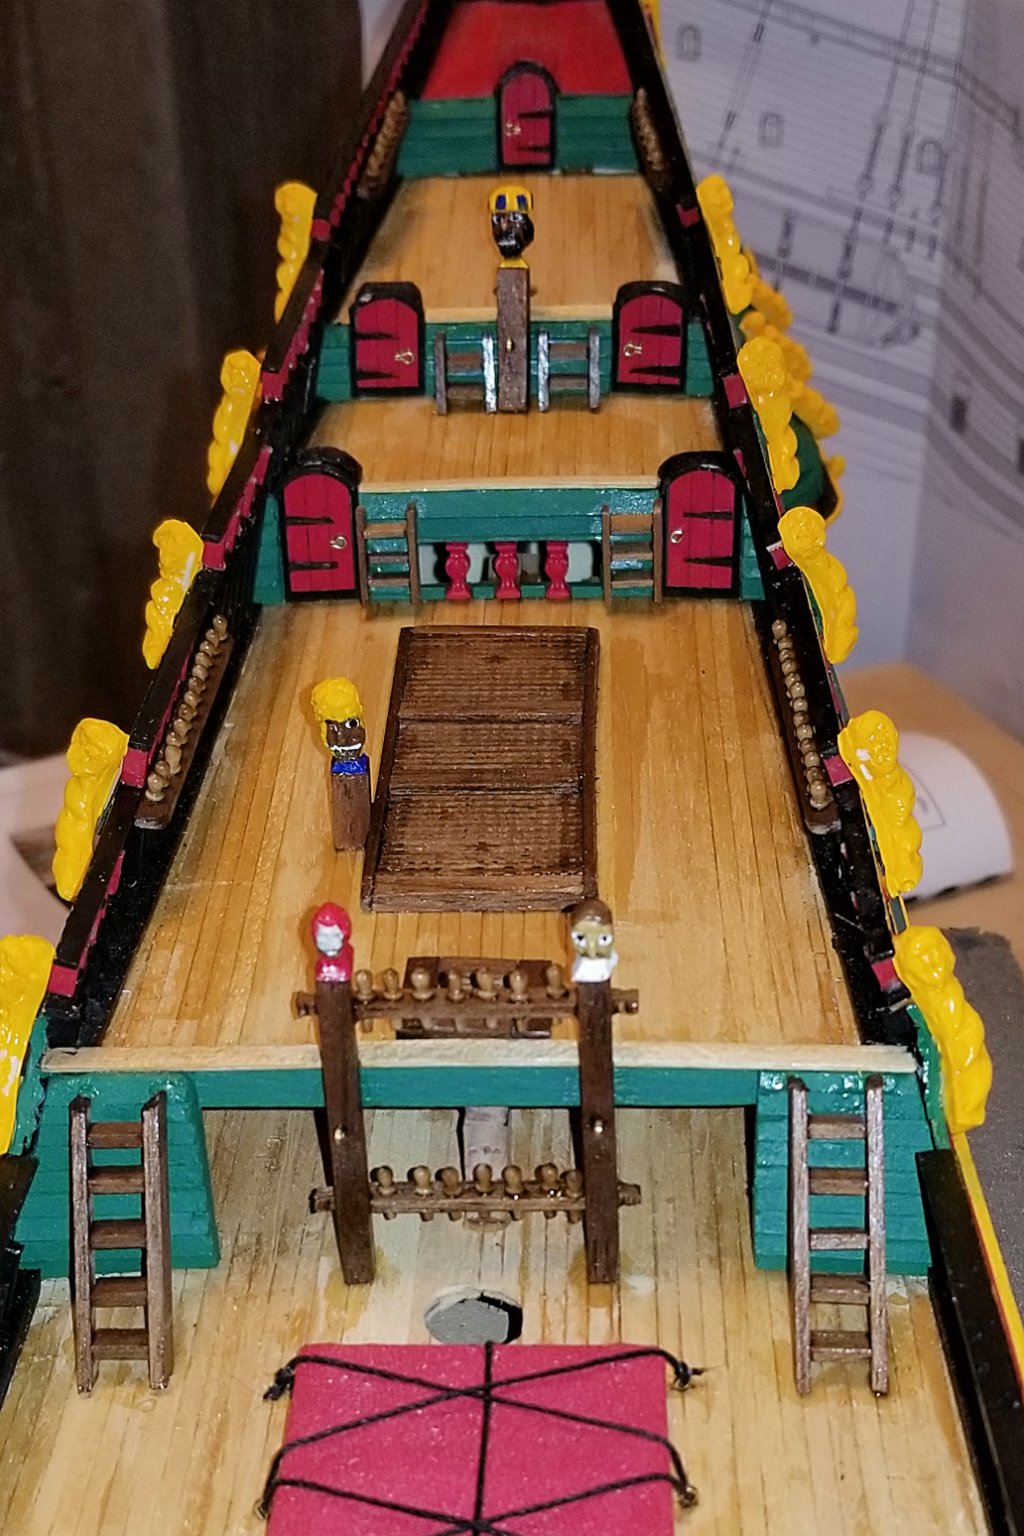
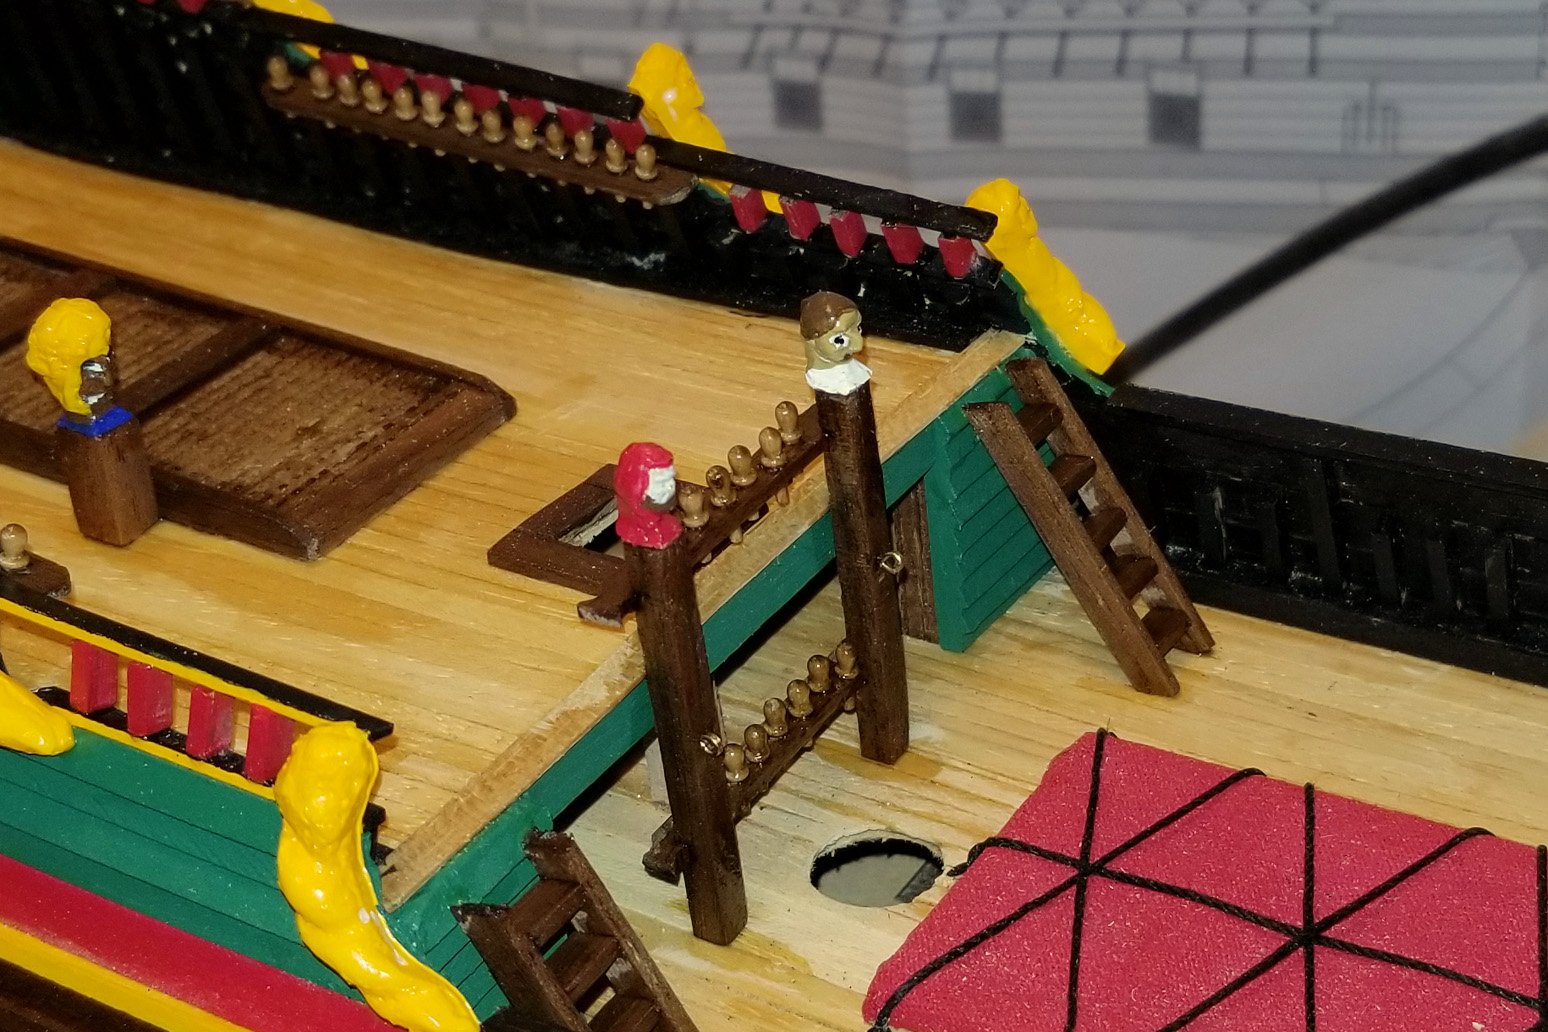
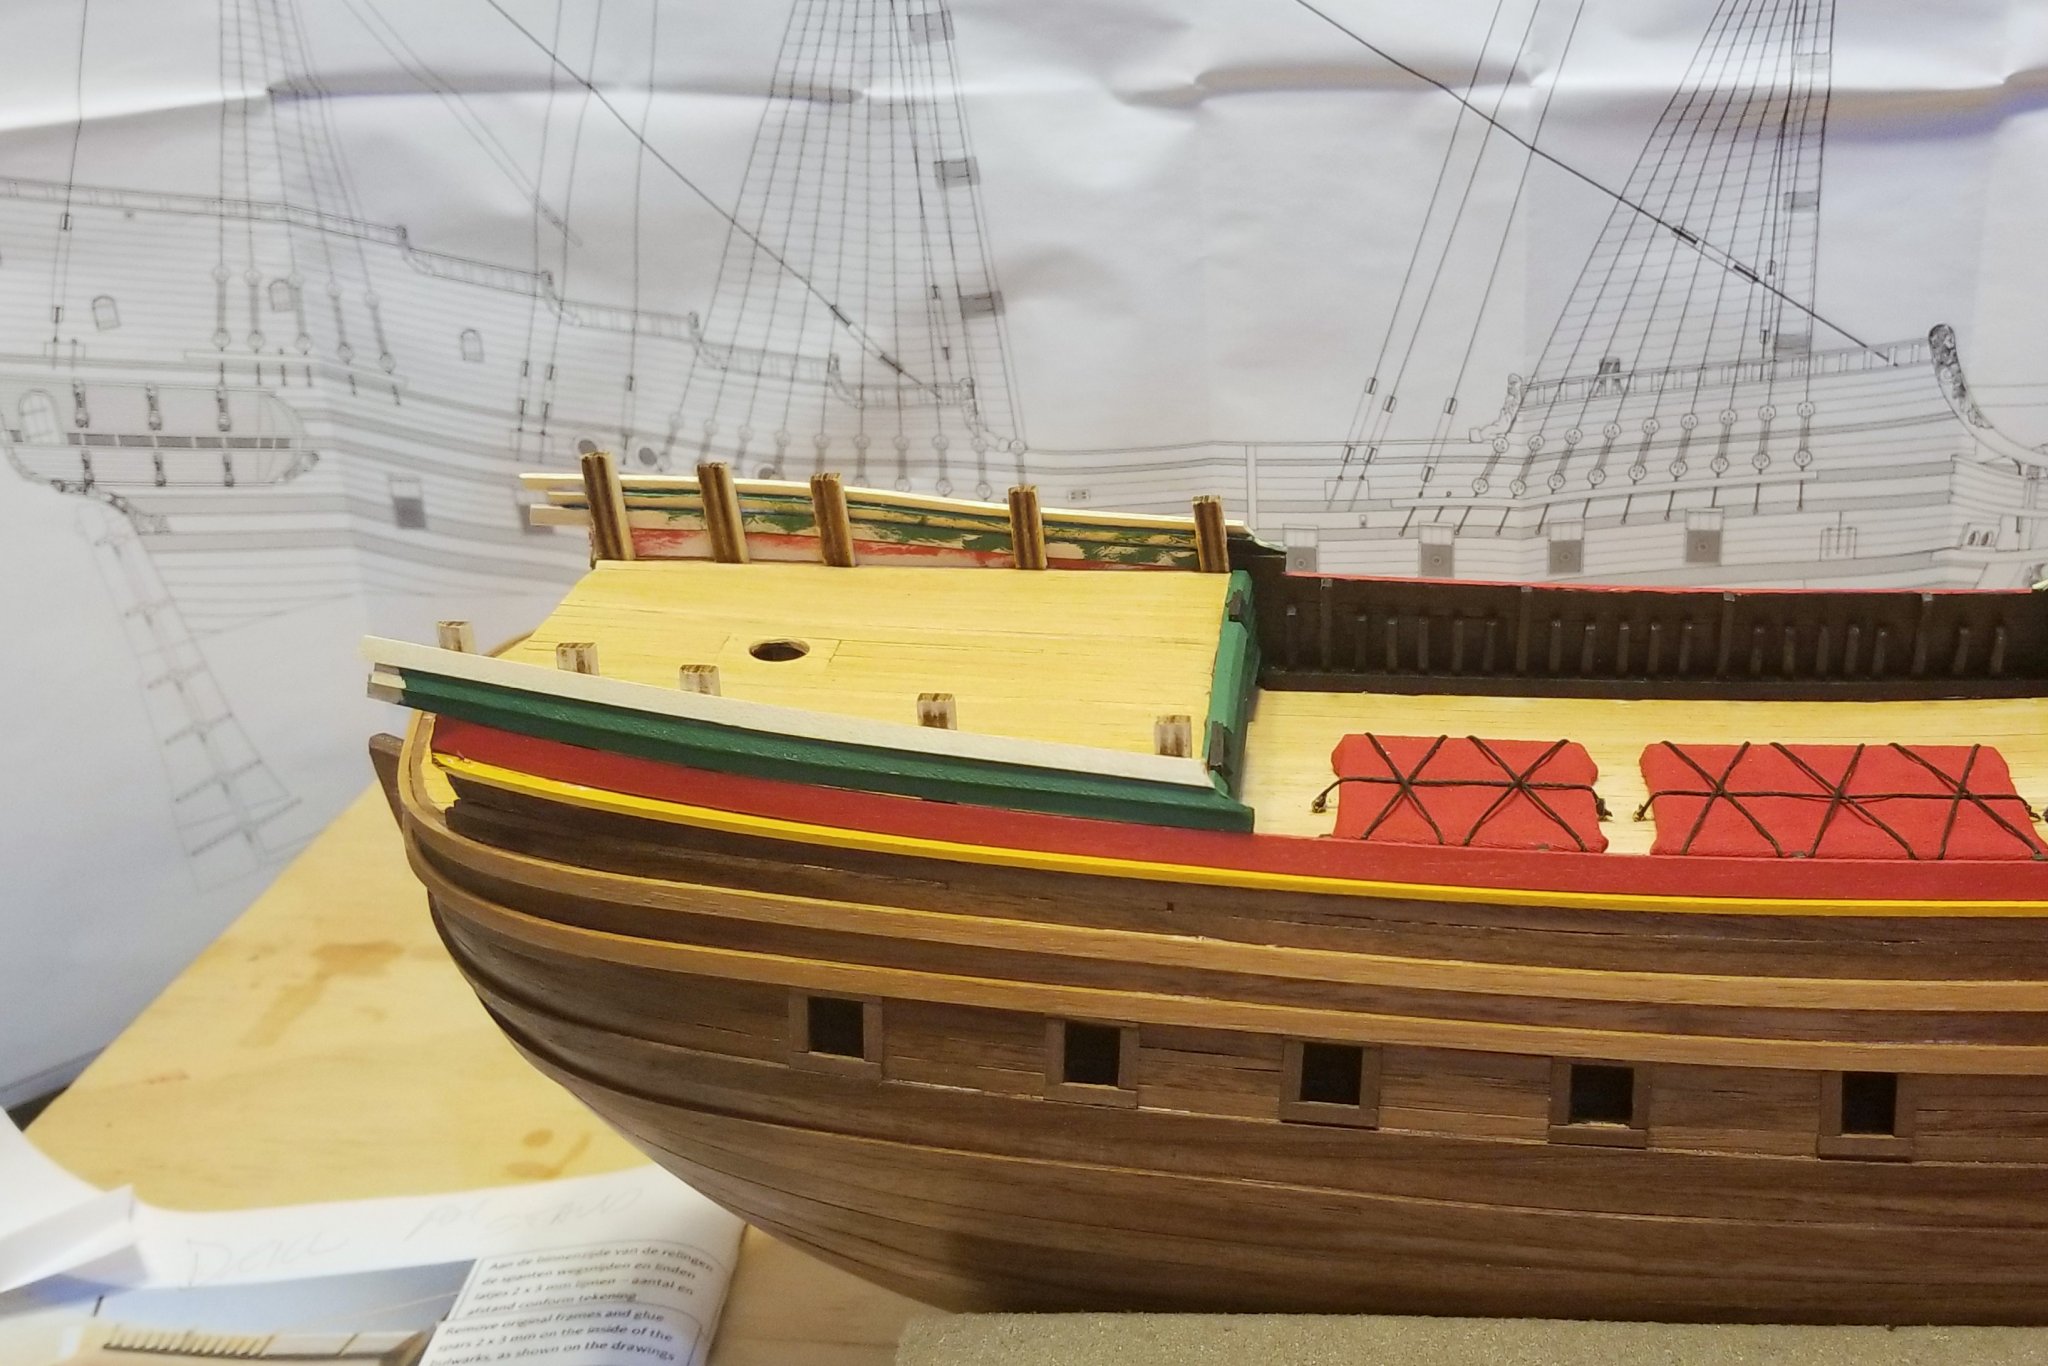
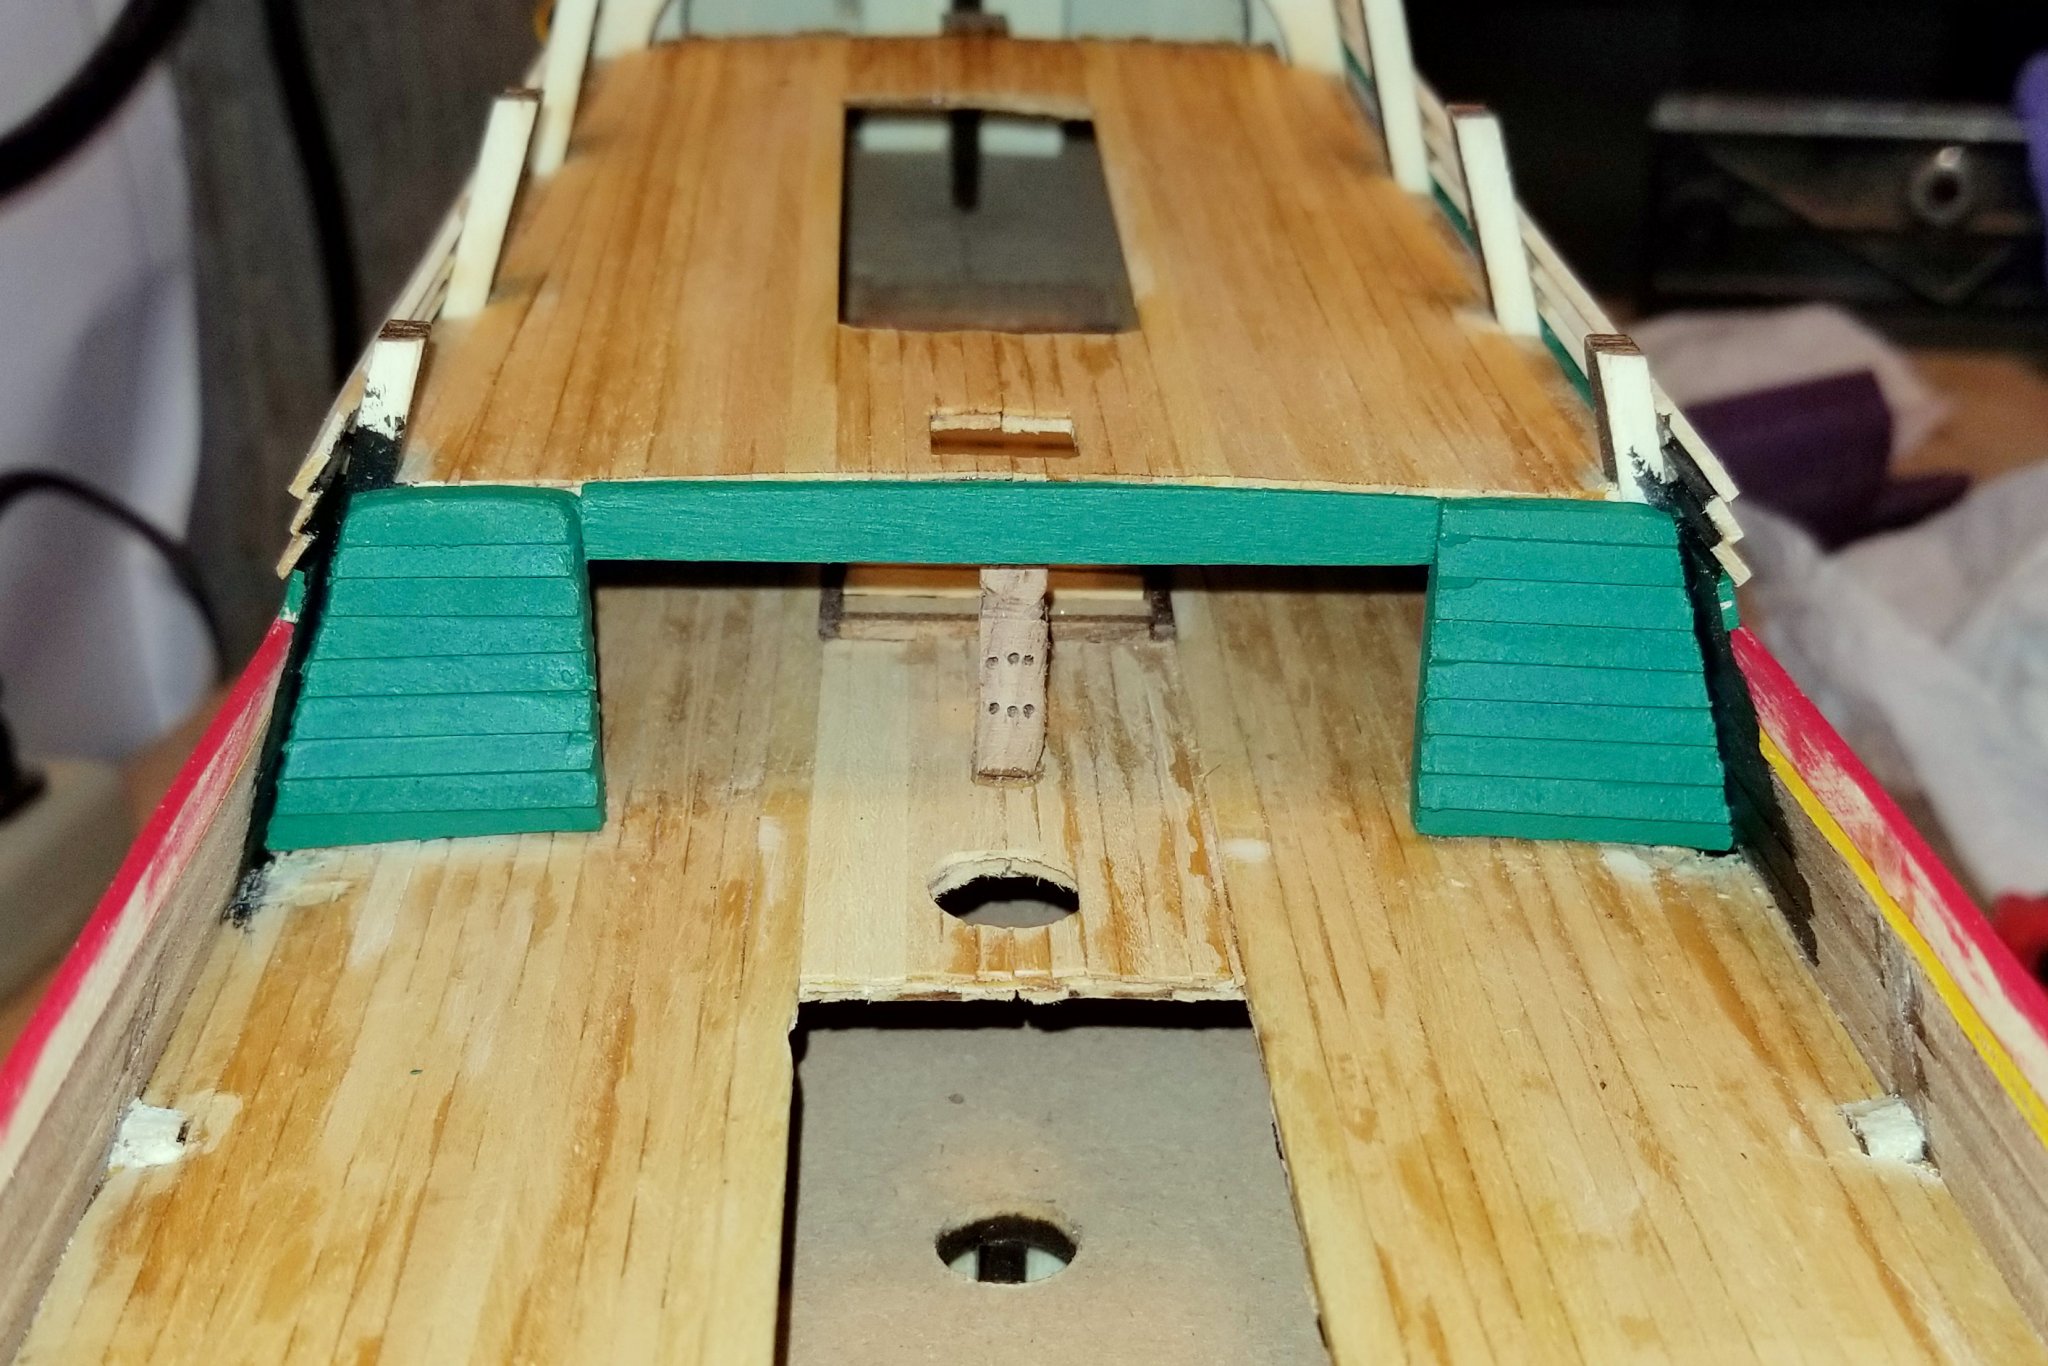
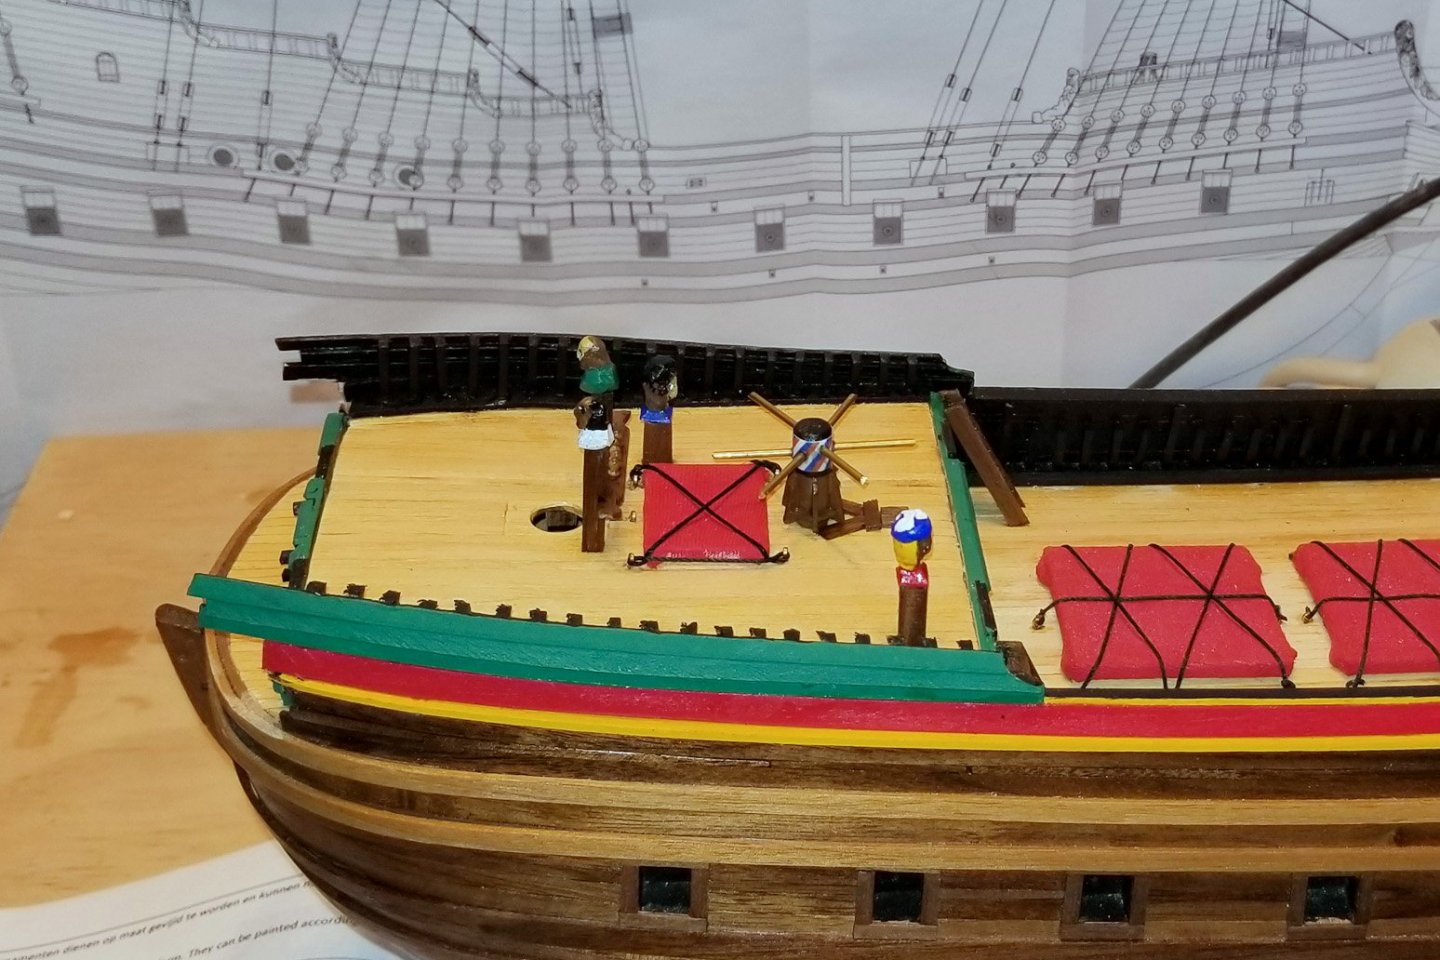
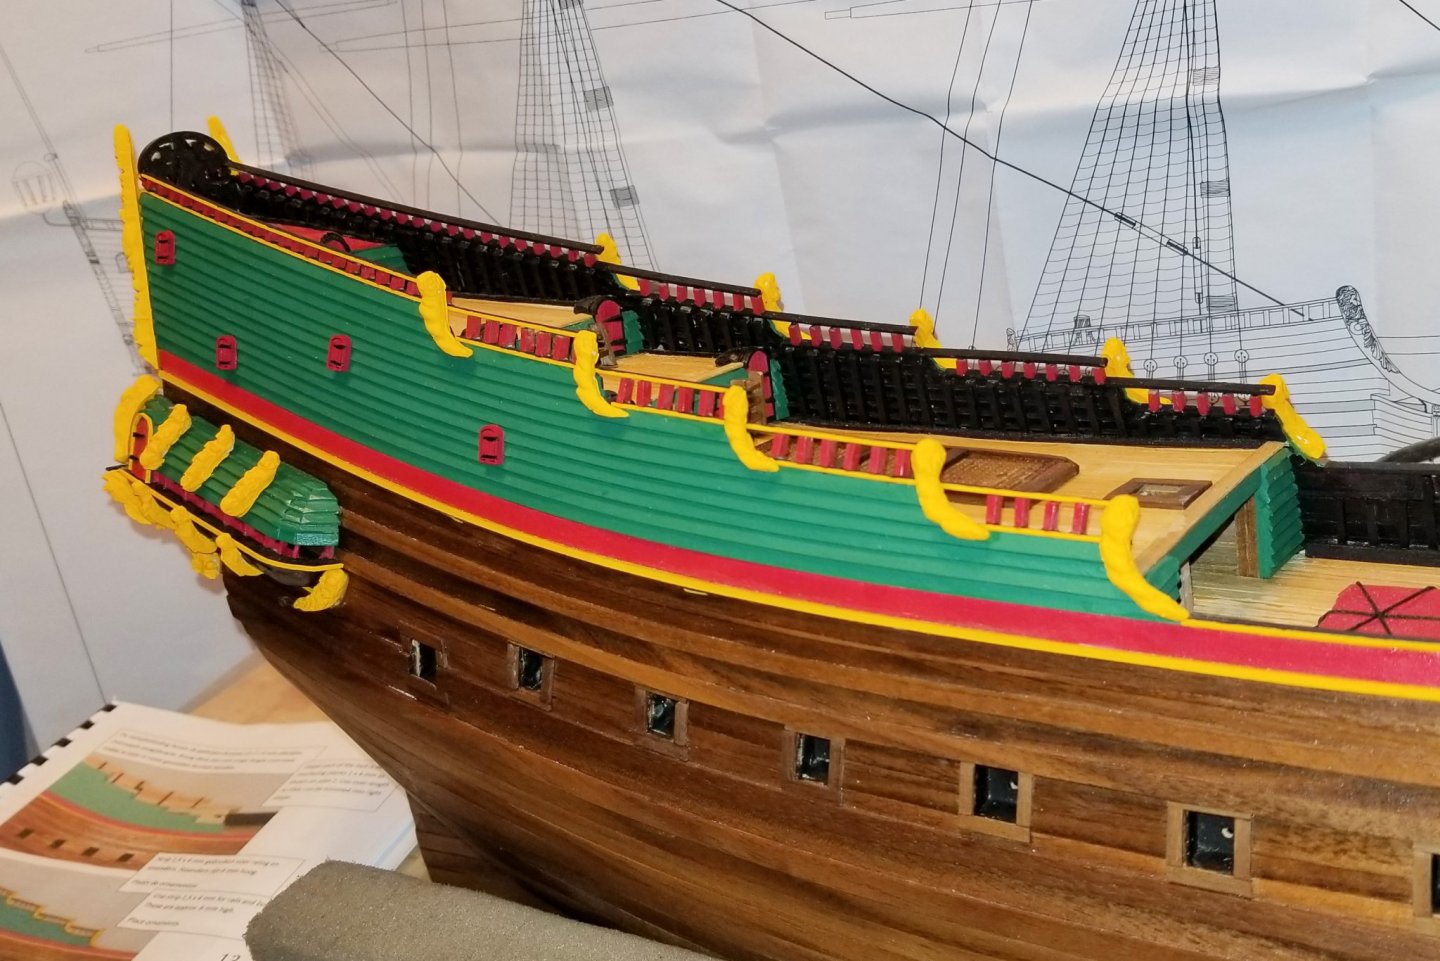
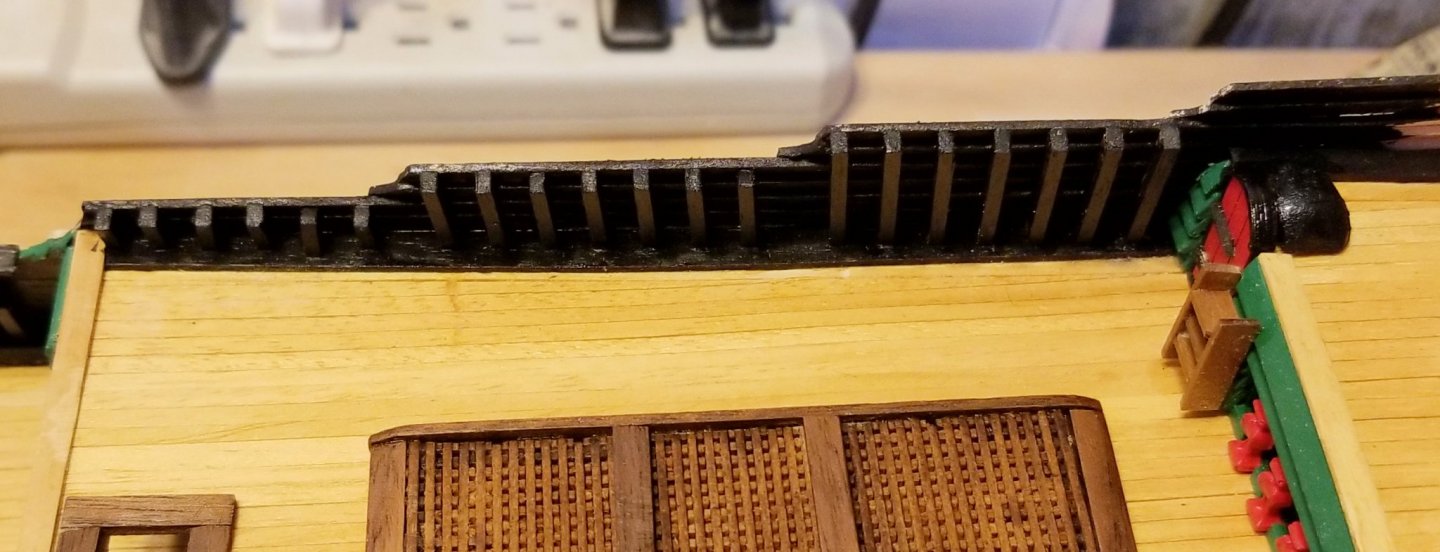
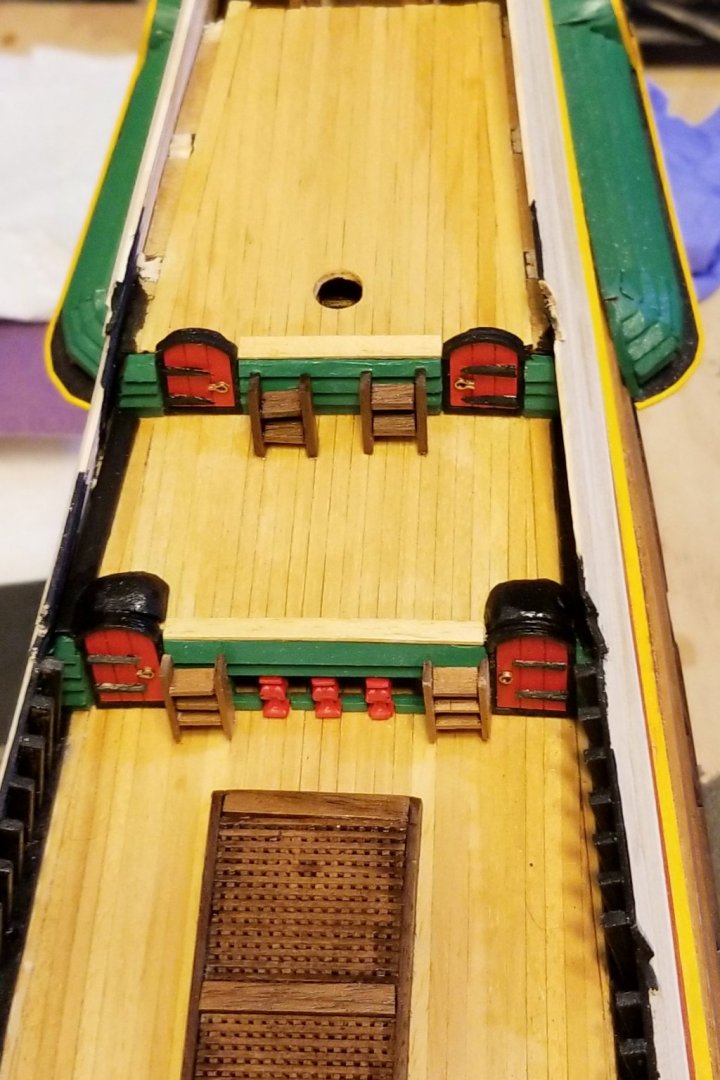
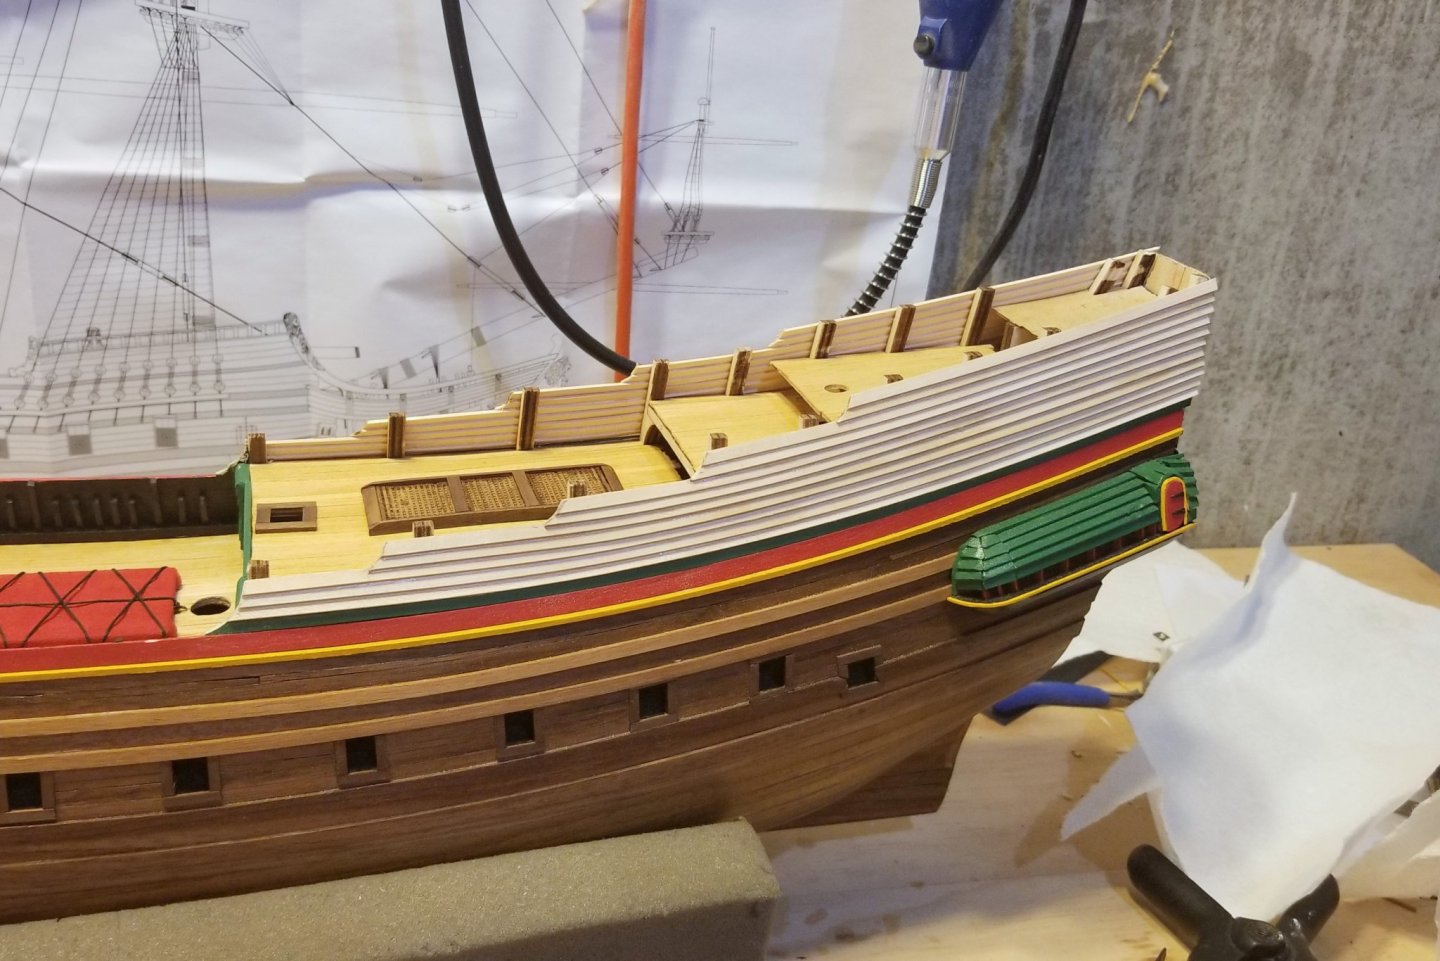
Progress pictures on the forecastle deck, including capstan, hatch cover, foremast knighthead with pin racks, and two other knightheads. Left to go are railings on all sides, pin racks, and catheads. But I need to work on the bowsprit for a bit because of a construction issue. The planking running forward should (I think) run past the cabin bulkhead at the bow by about 5mm, but as you can see I ended the red plank at that bulkhead. I picked this up from the Dutch build log I have referenced above, where the extra length gives space to shape a curve matching the others on the ship. I am pretty sure I can compensate for it, but in order to do so I need to have some of the bowsprit mounted so that I can figure out the line of a curved railing that runs down the end of those planks and then flattens out to the tip of the bowsprit. In the Dutch build log, that line happens forward of the cabin bulkhead, although I see it closer to the bulkhead in the manual. So I want to have the bowsprit in place so I can engineer that line. Once that's established, then I will know how far forward to run the side railings at the forecastle deck, and then I can mount the fore and aft railings and the rest of the forecastle fittings. Regards, David


- 136 replies
-
- 3
-
-
- kolderstok
- batavia
- (and 1 more)
-
NOW the stern decking is finished with the addition of the two railings shown here. The resin pillars have nice detailing. Regards, David

- 136 replies
-
- 8
-
-
- kolderstok
- batavia
- (and 1 more)
-
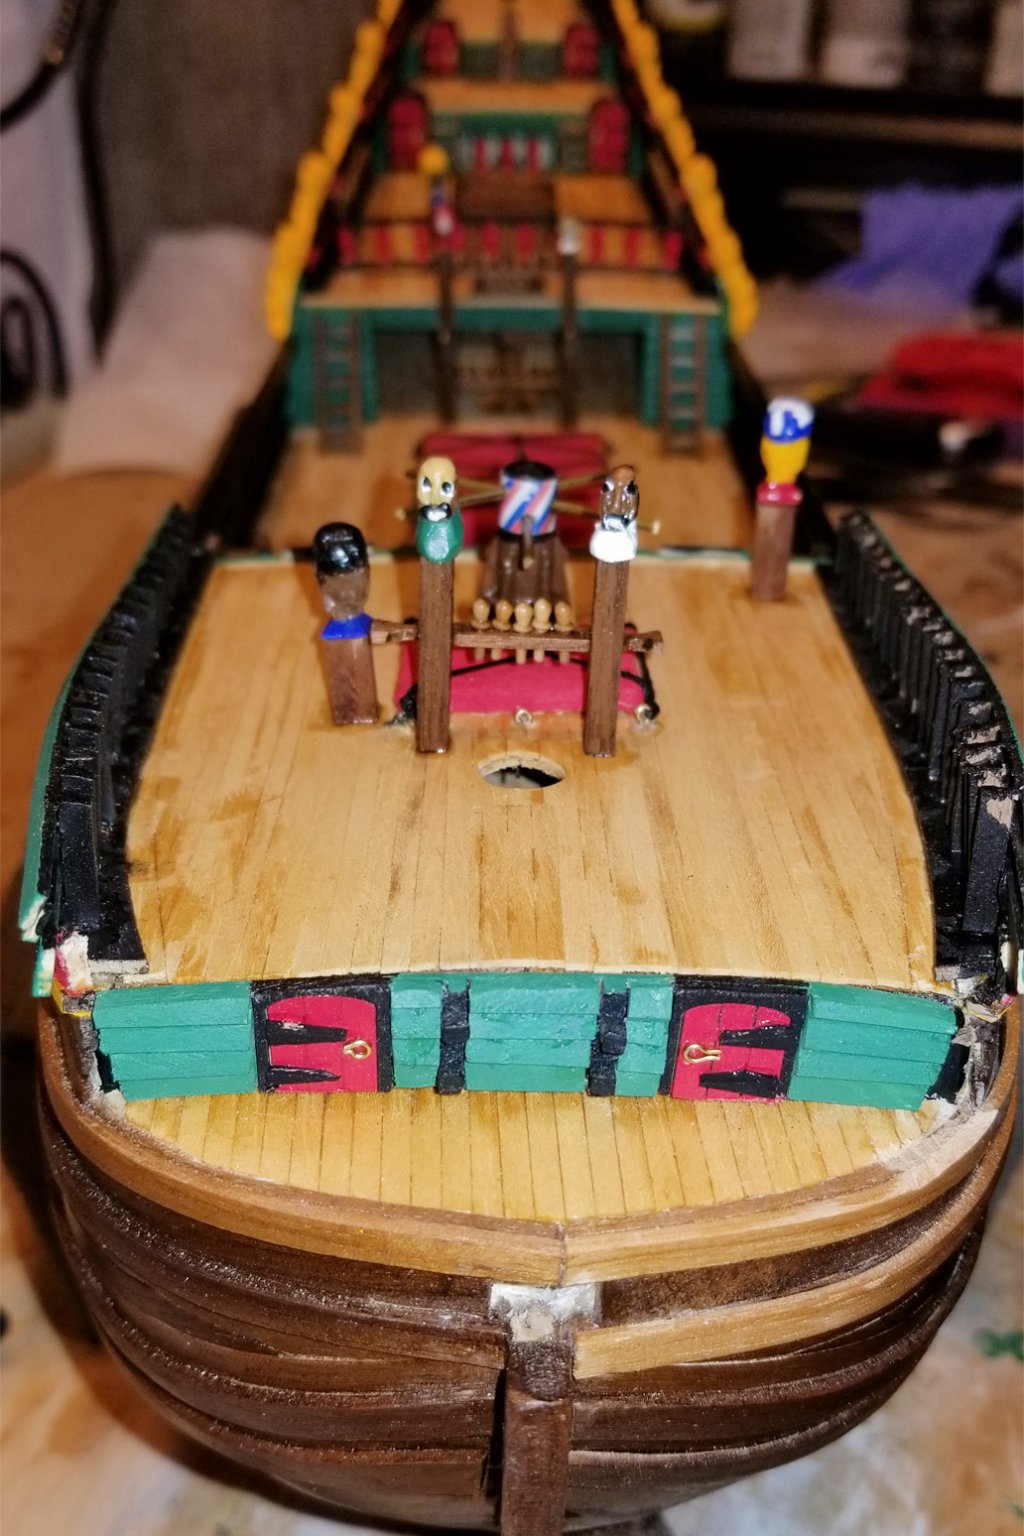
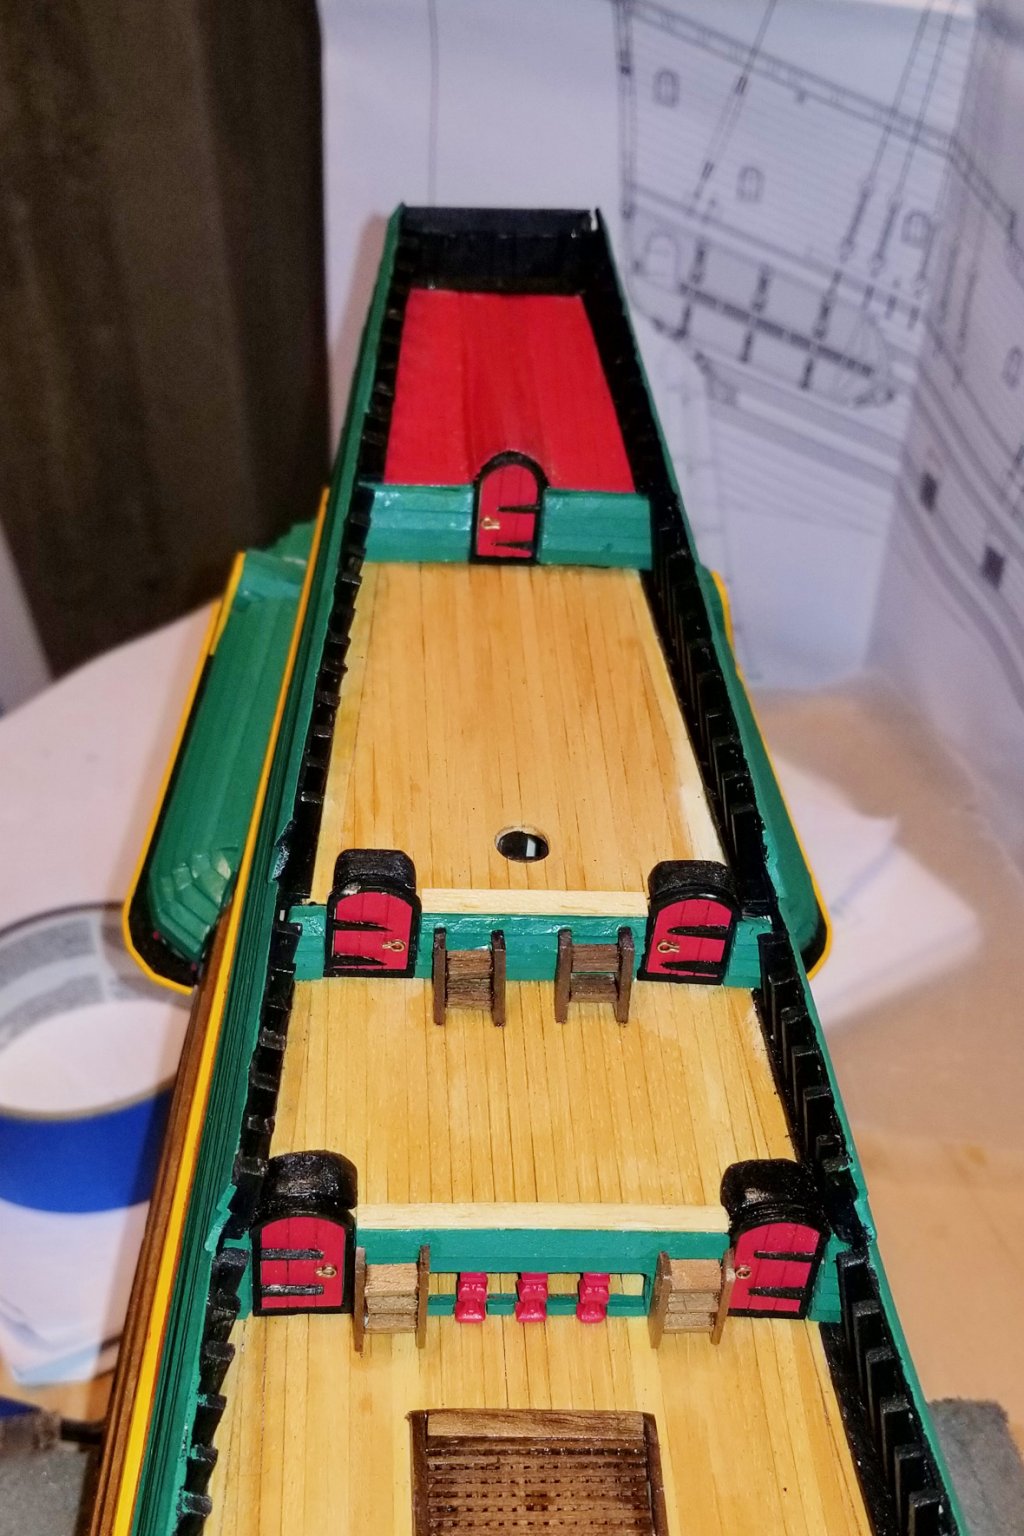
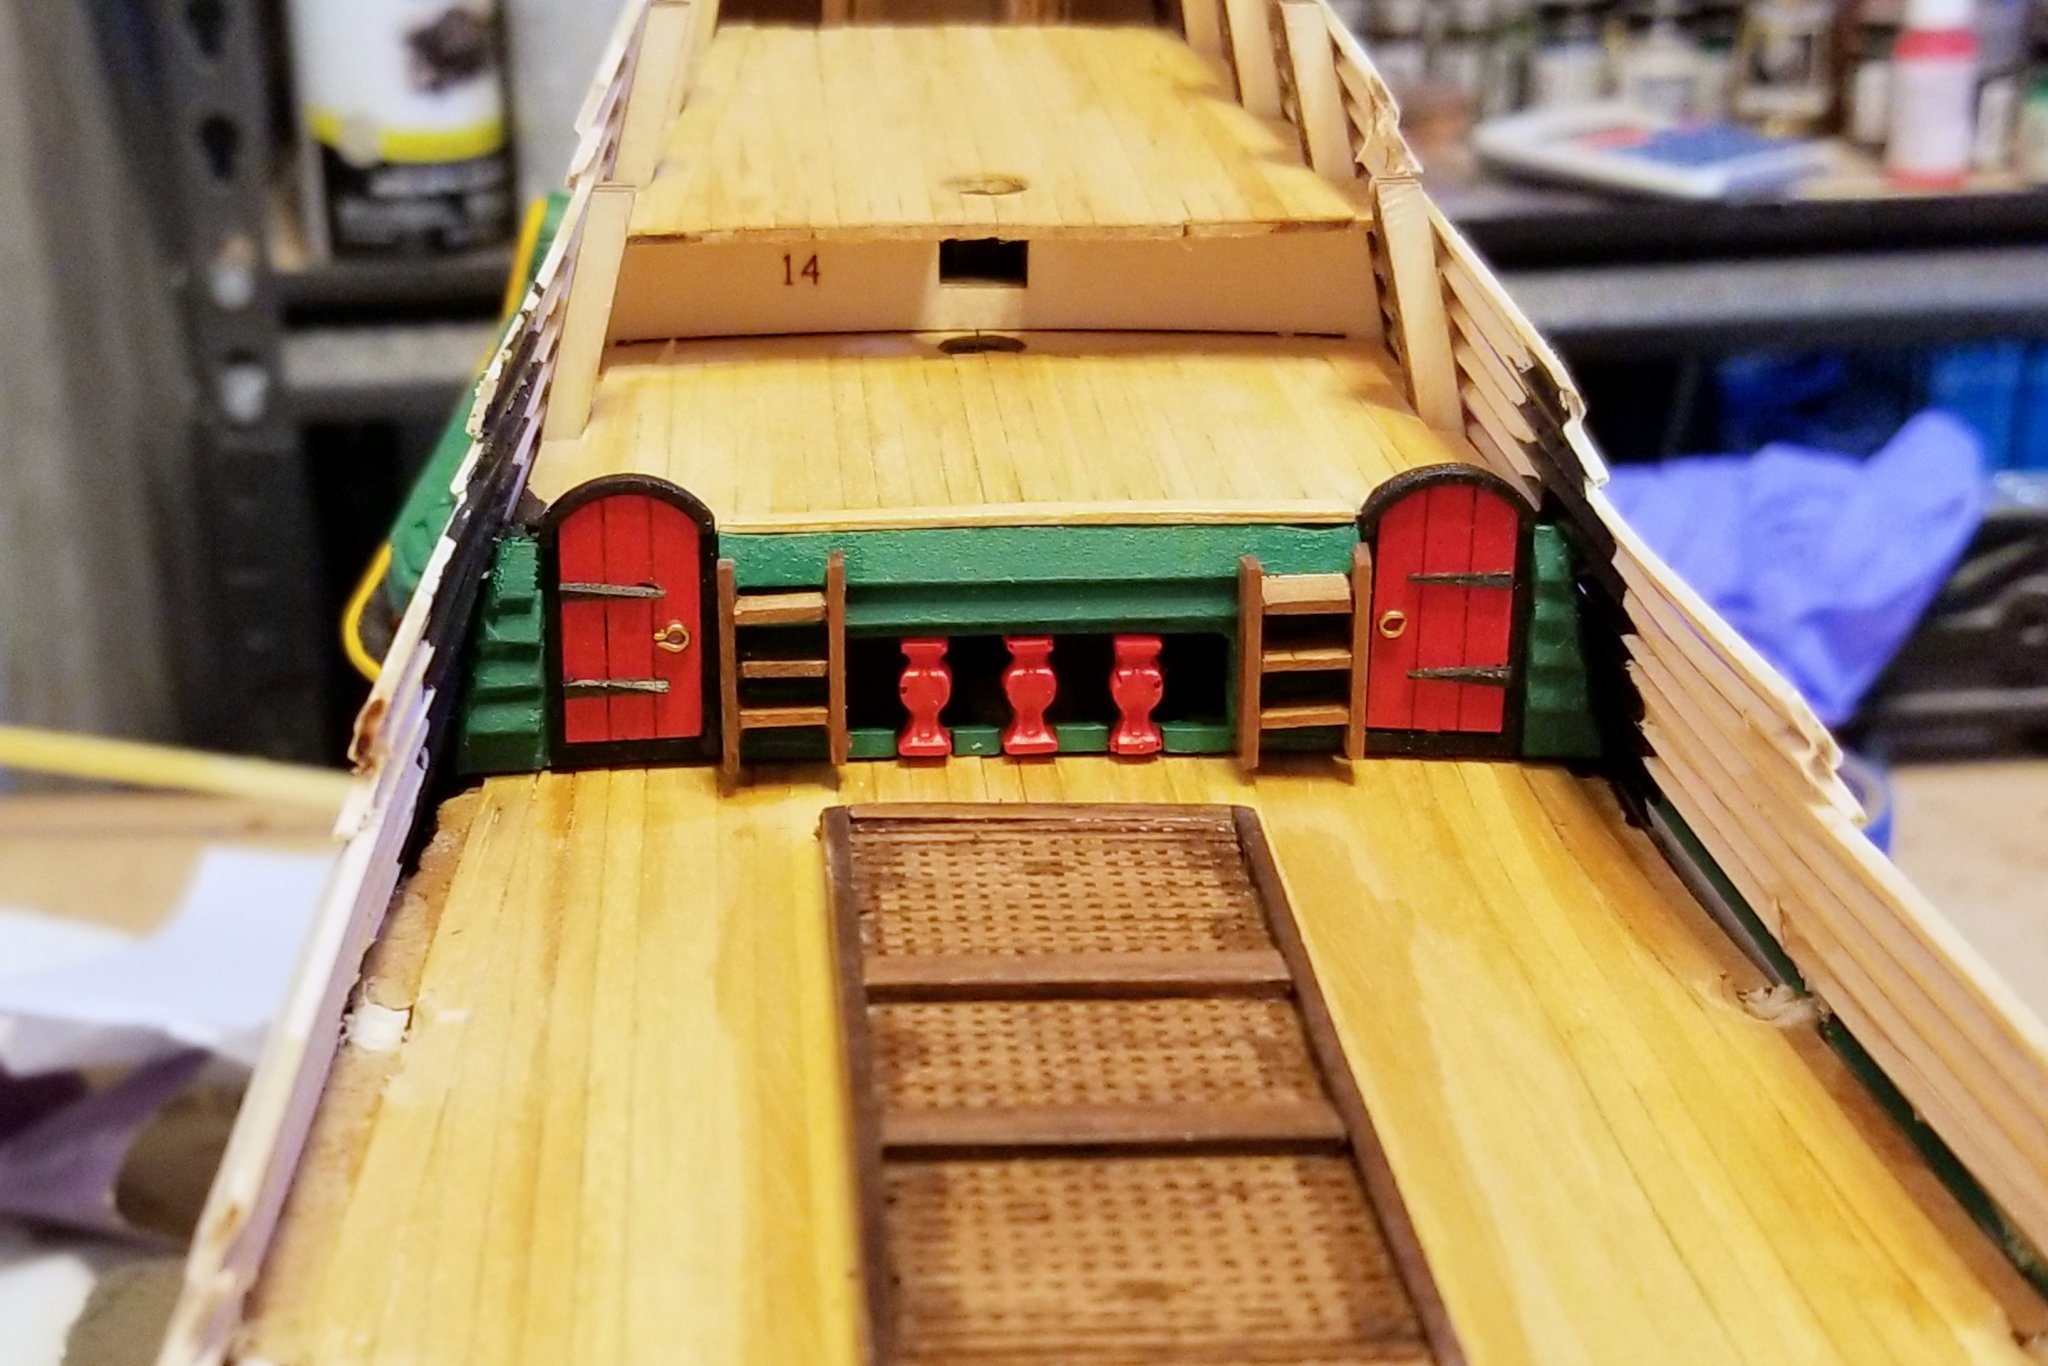
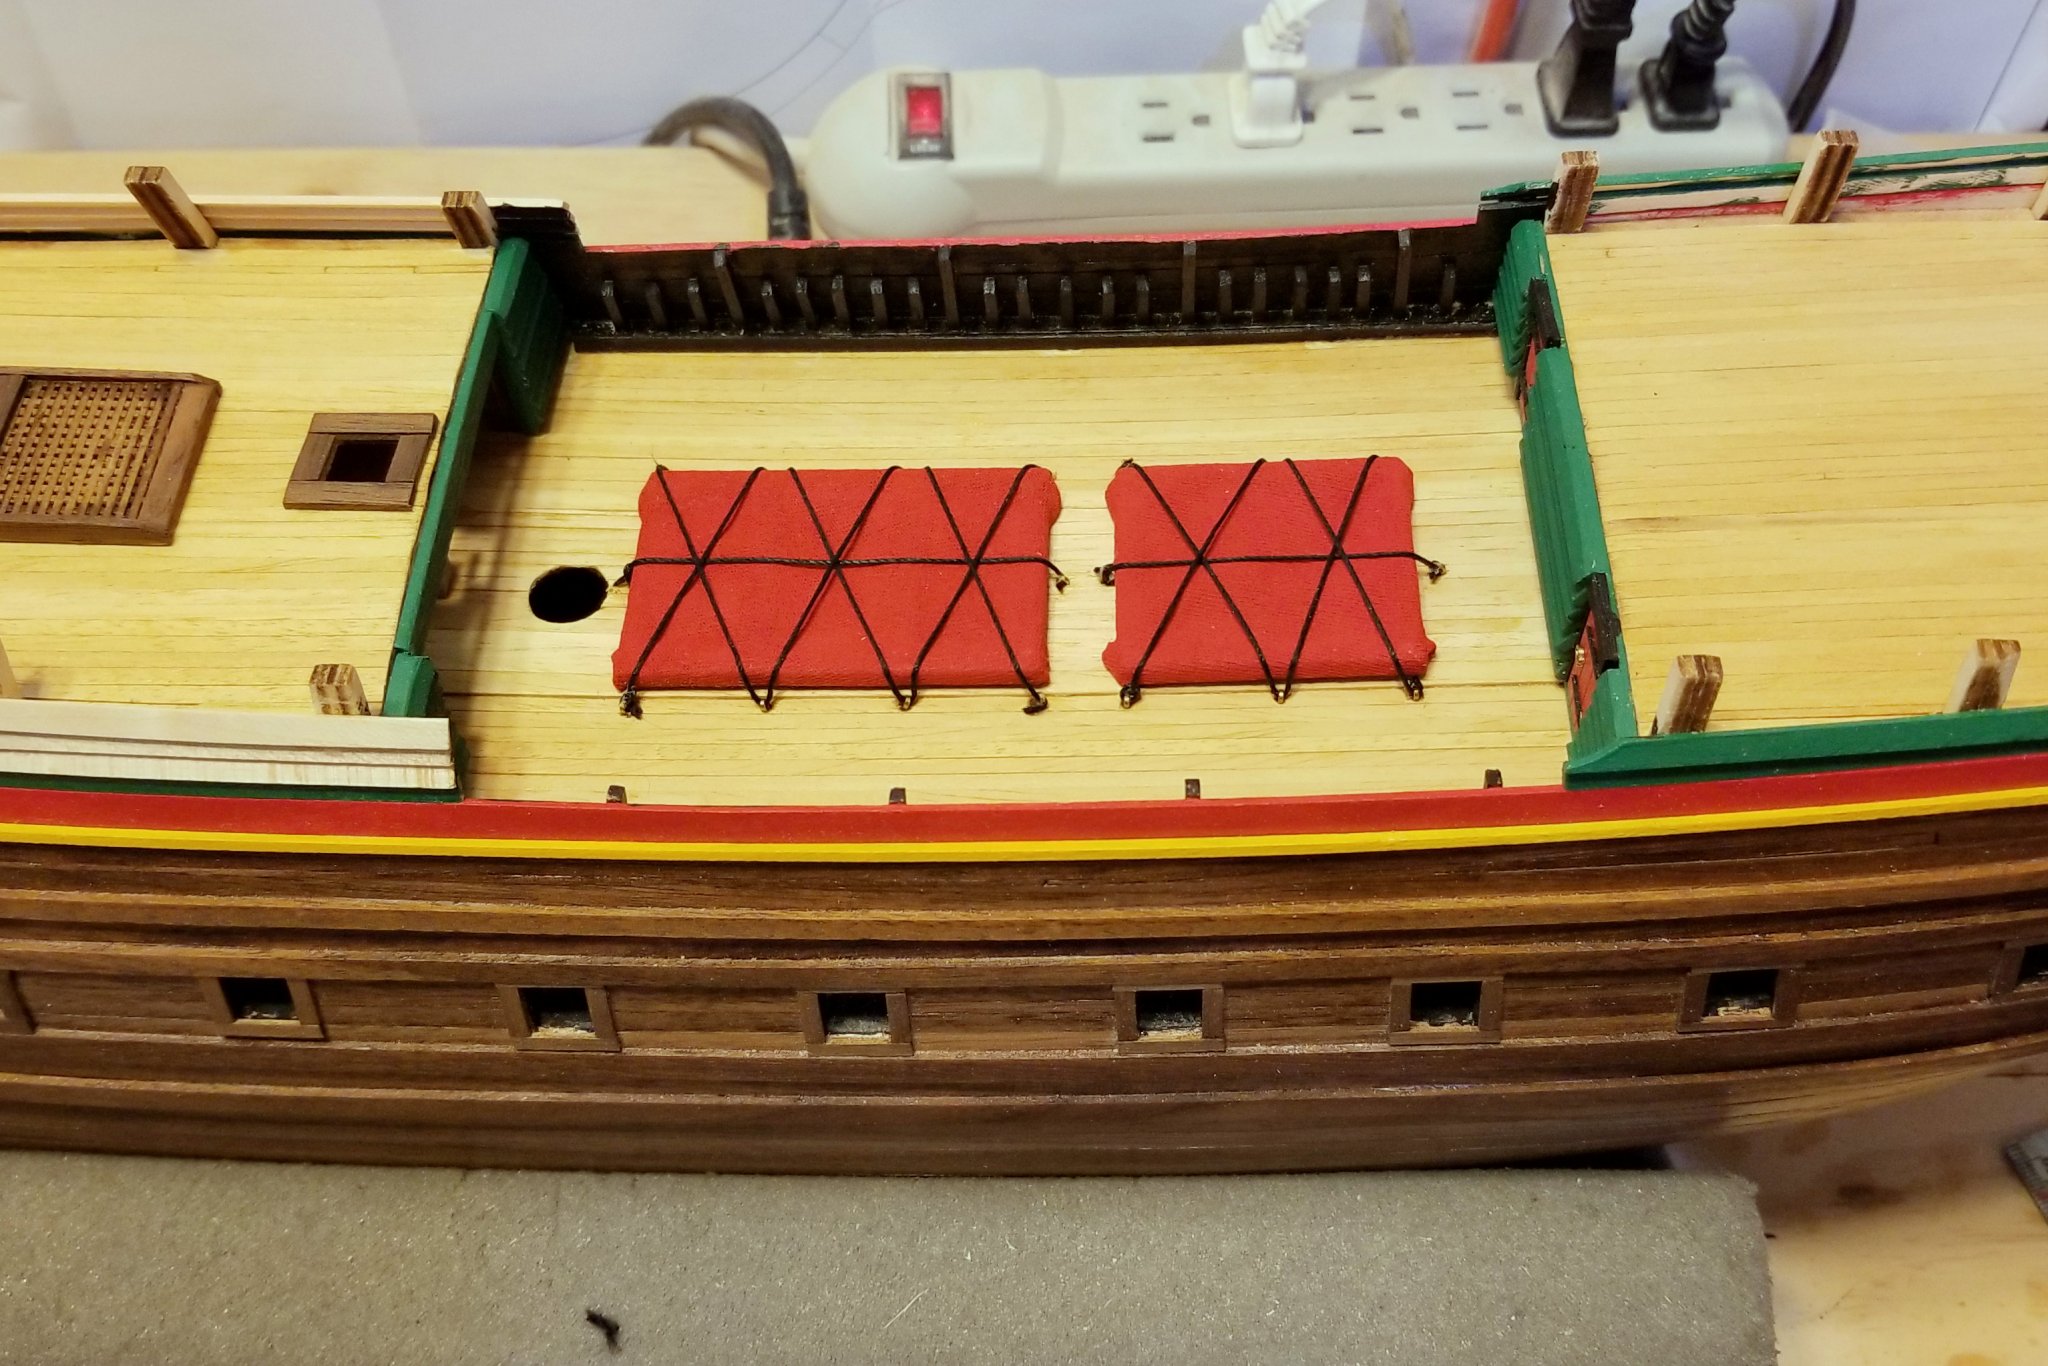
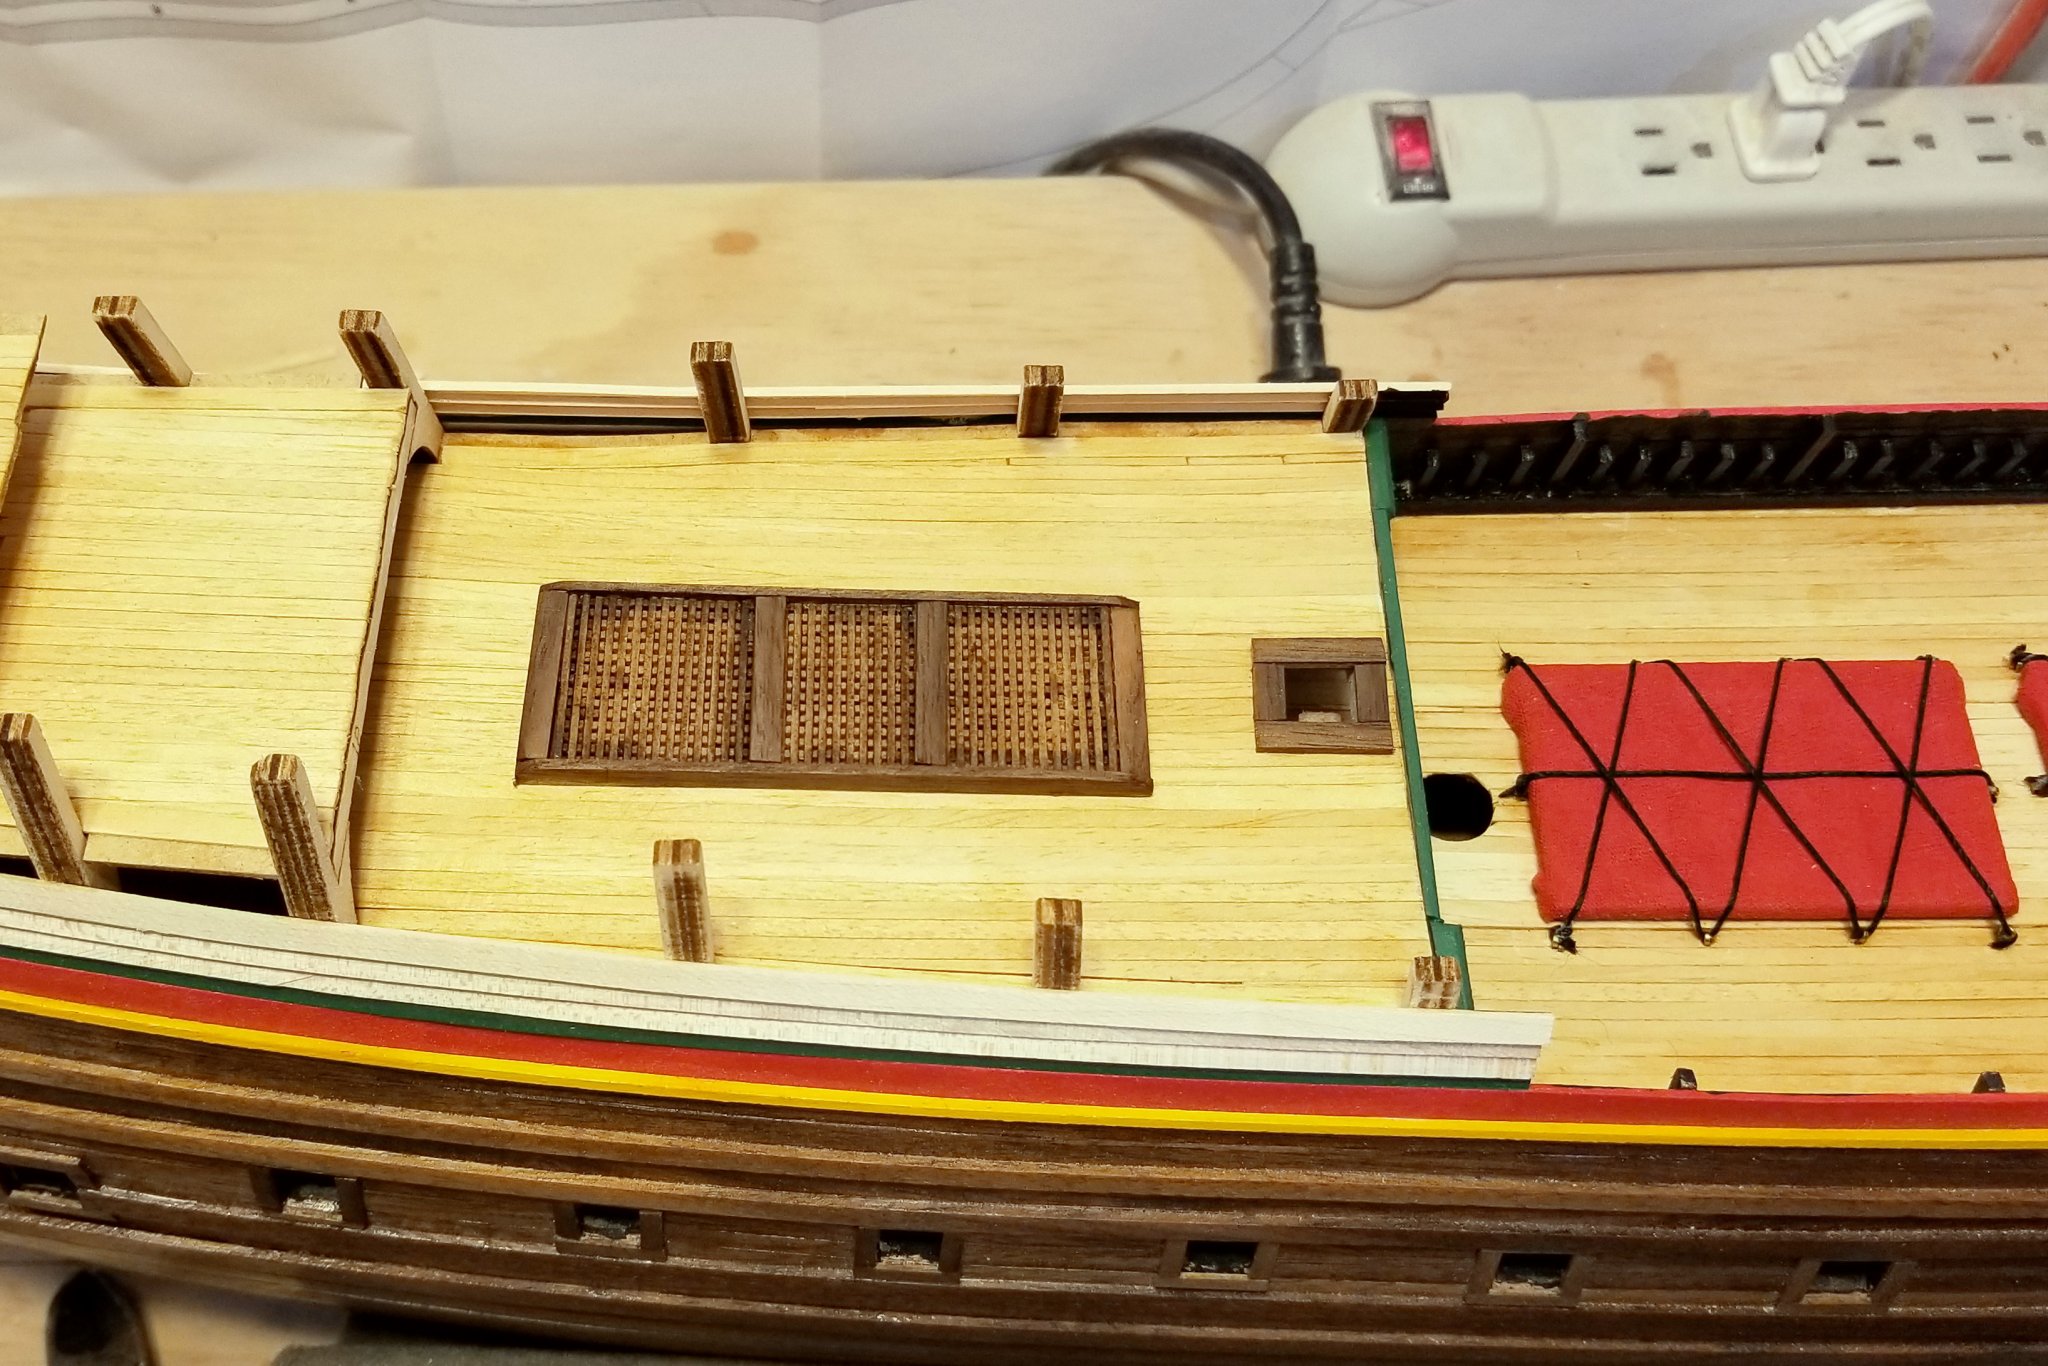
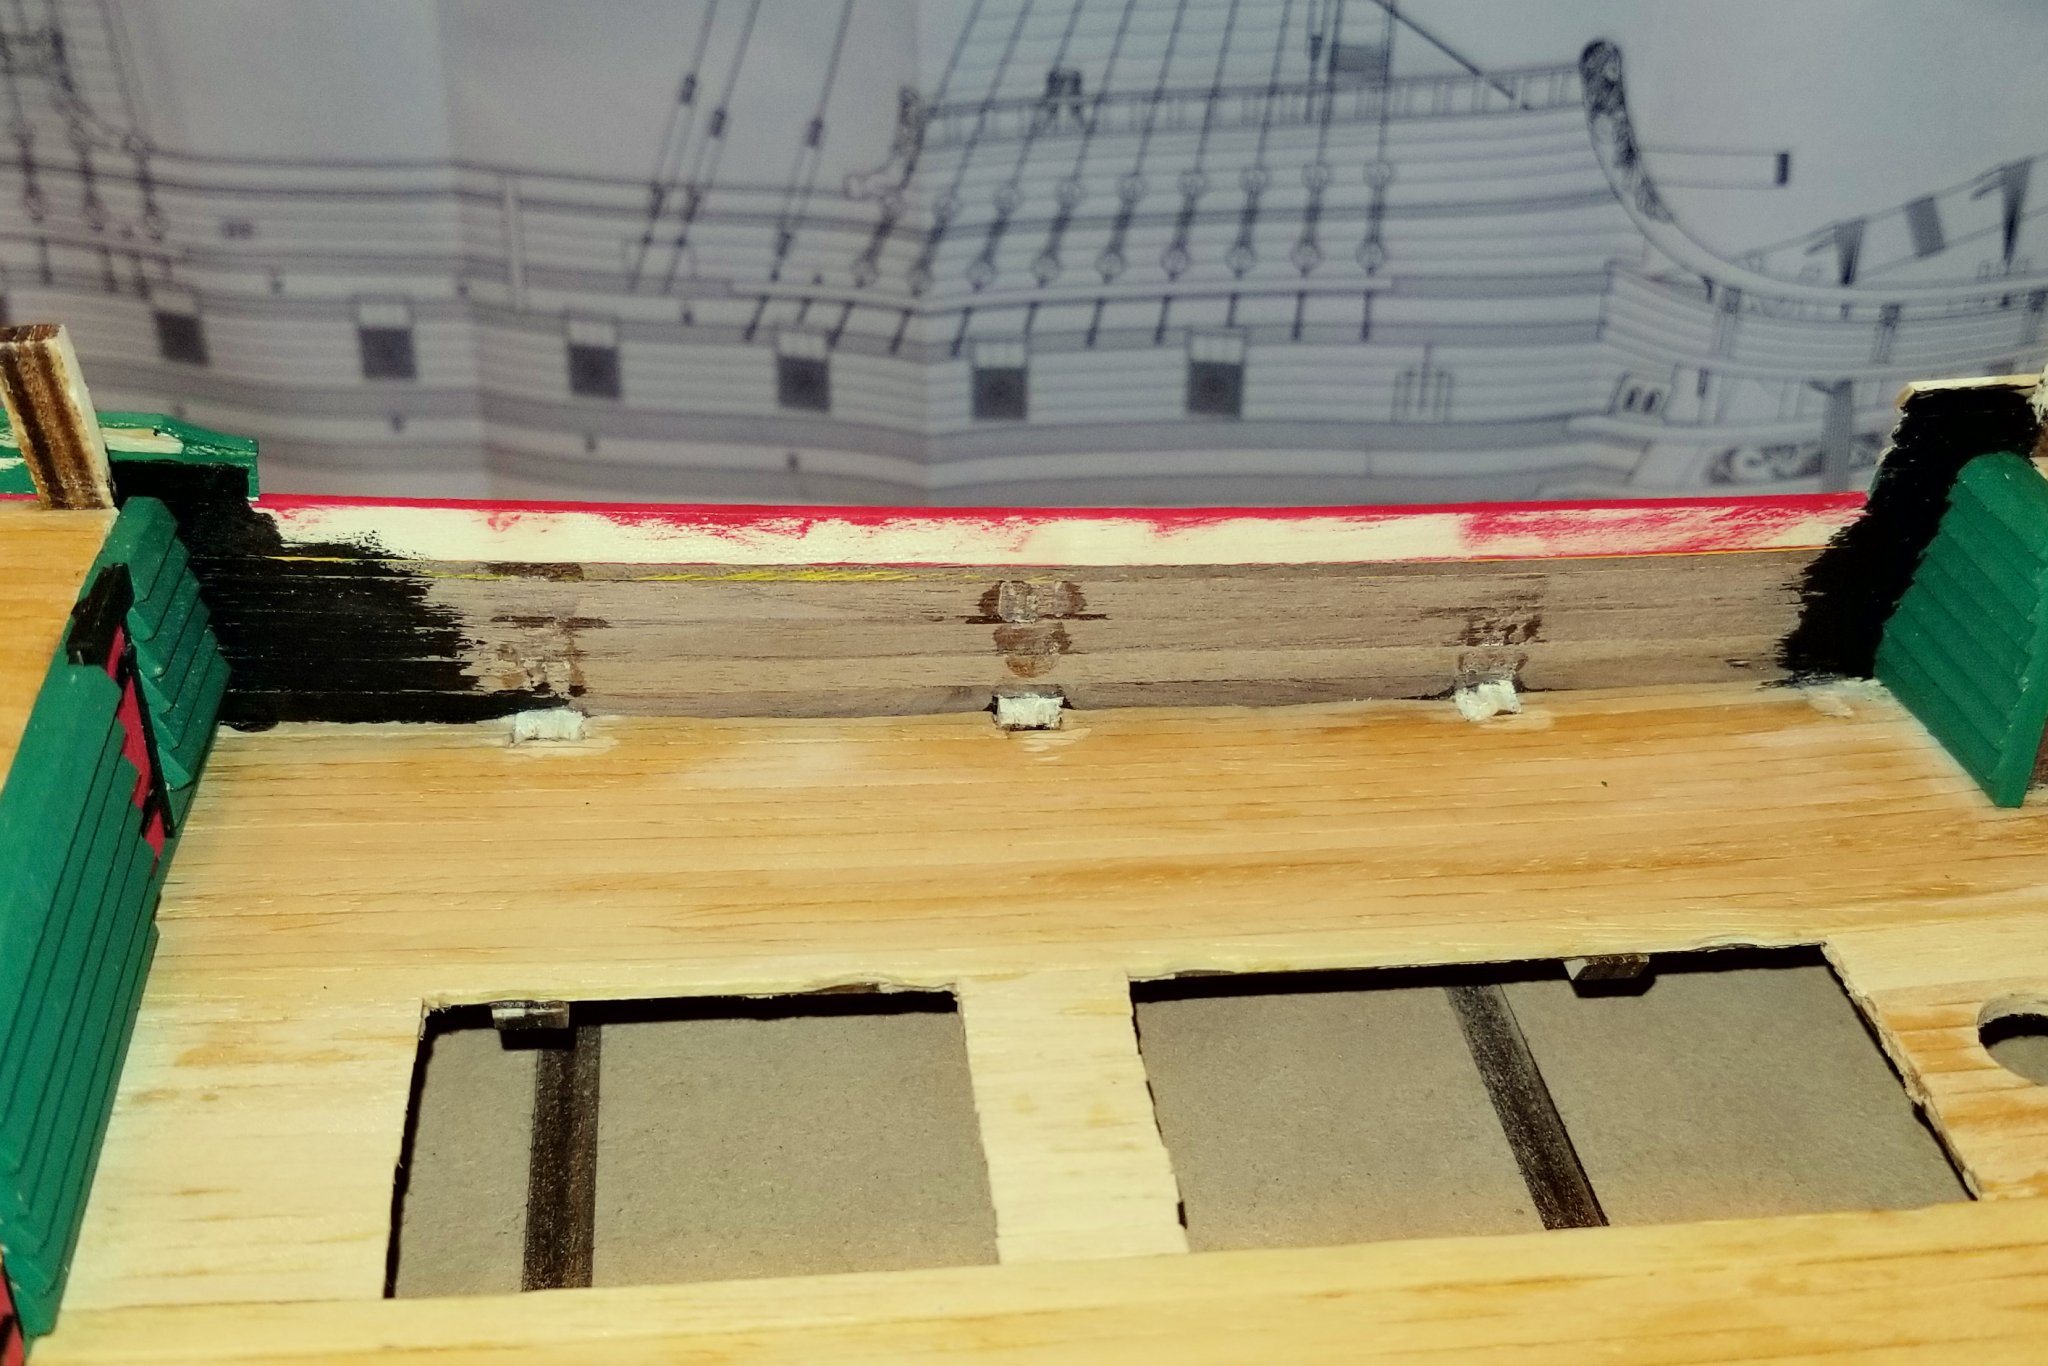
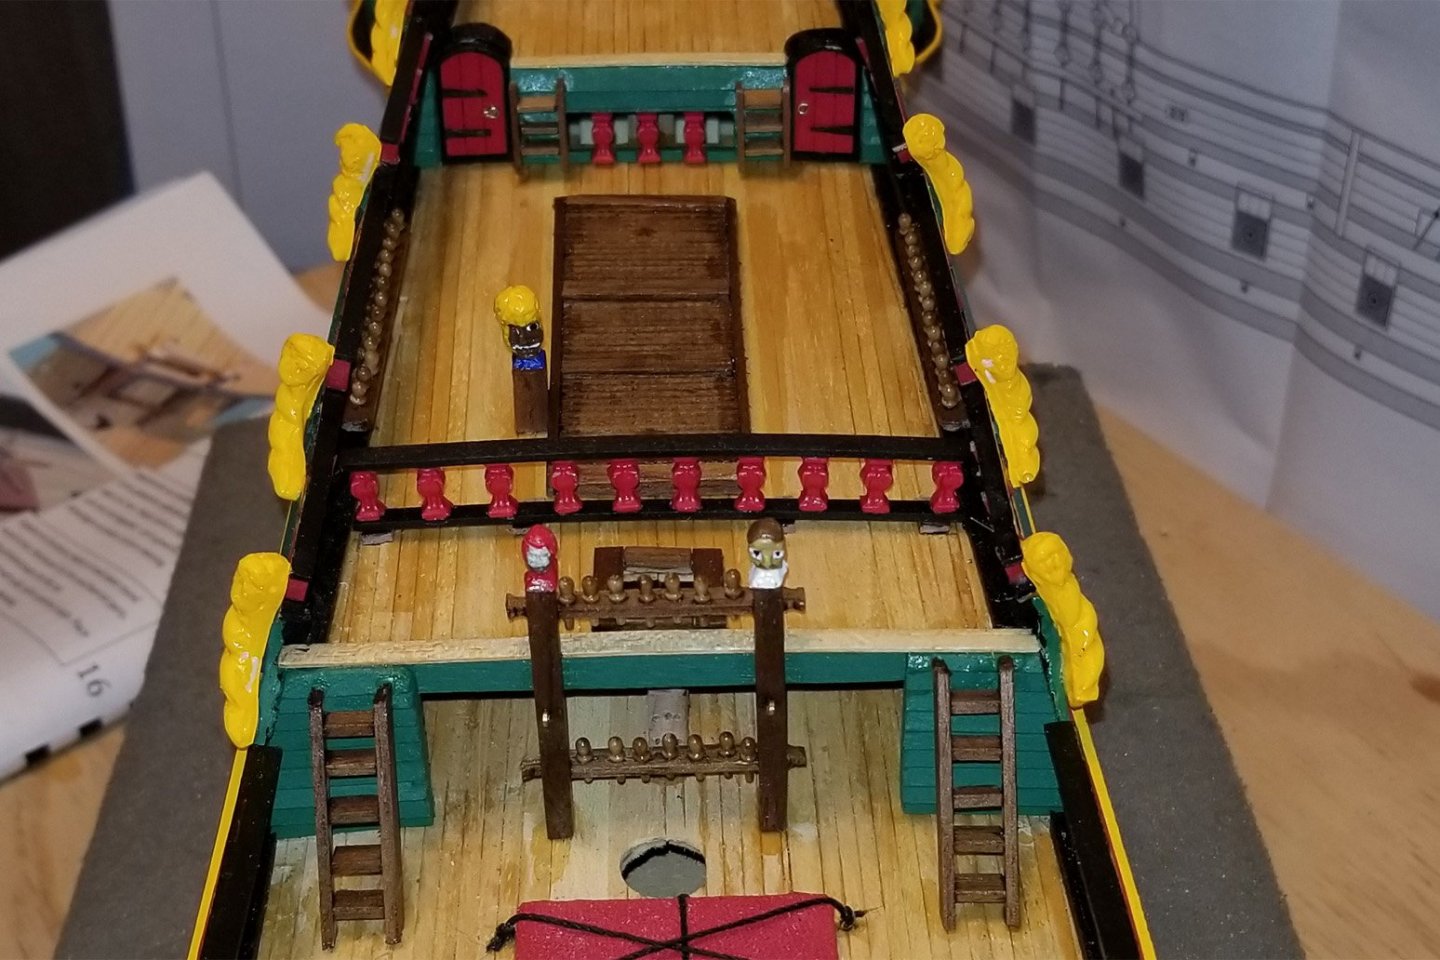
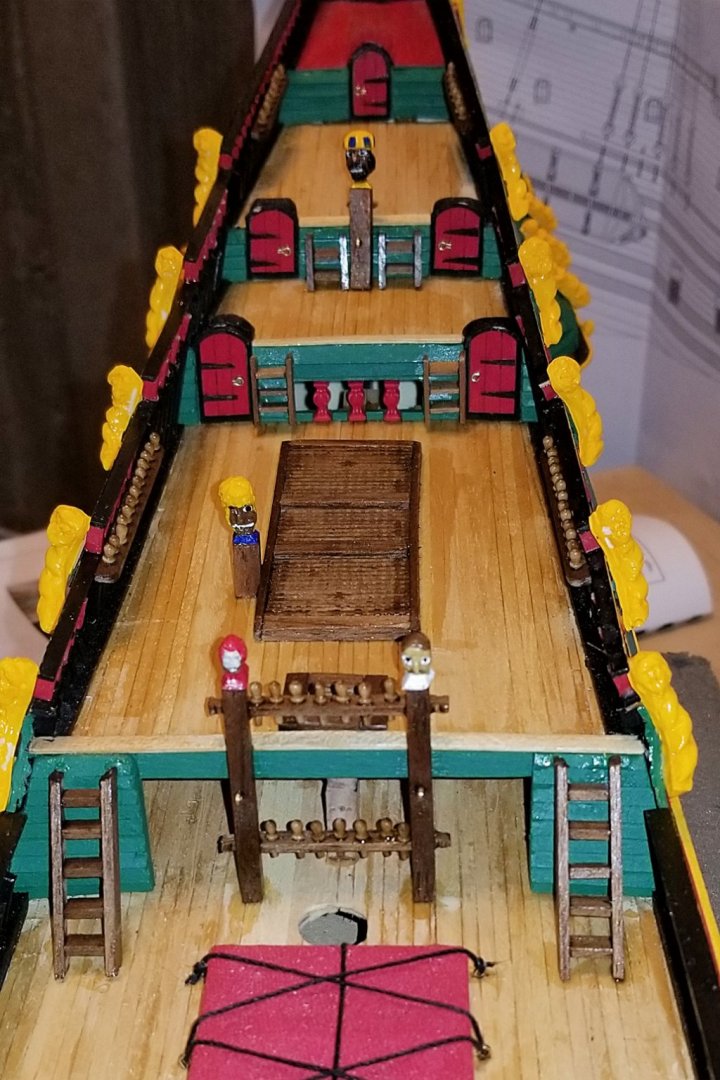
I have added the deck fittings for the stern area aft of the main deck (except for those associated with rigging). In the long shot, you can see the main mast double knighthead, two singles, plus the ladders and pinracks. The other shots show the knighthead painted details in closeup. The heads on the main mast knighthead (the double) are fiendishly small. I did better with the one closest to the stern. Now on to the bow area forward of the main deck. [EDIT: Not so fast. There are two railings that need to be added running across the deck from side to side. ] Regards, David

- 136 replies
-
- 5
-
-
- kolderstok
- batavia
- (and 1 more)
-
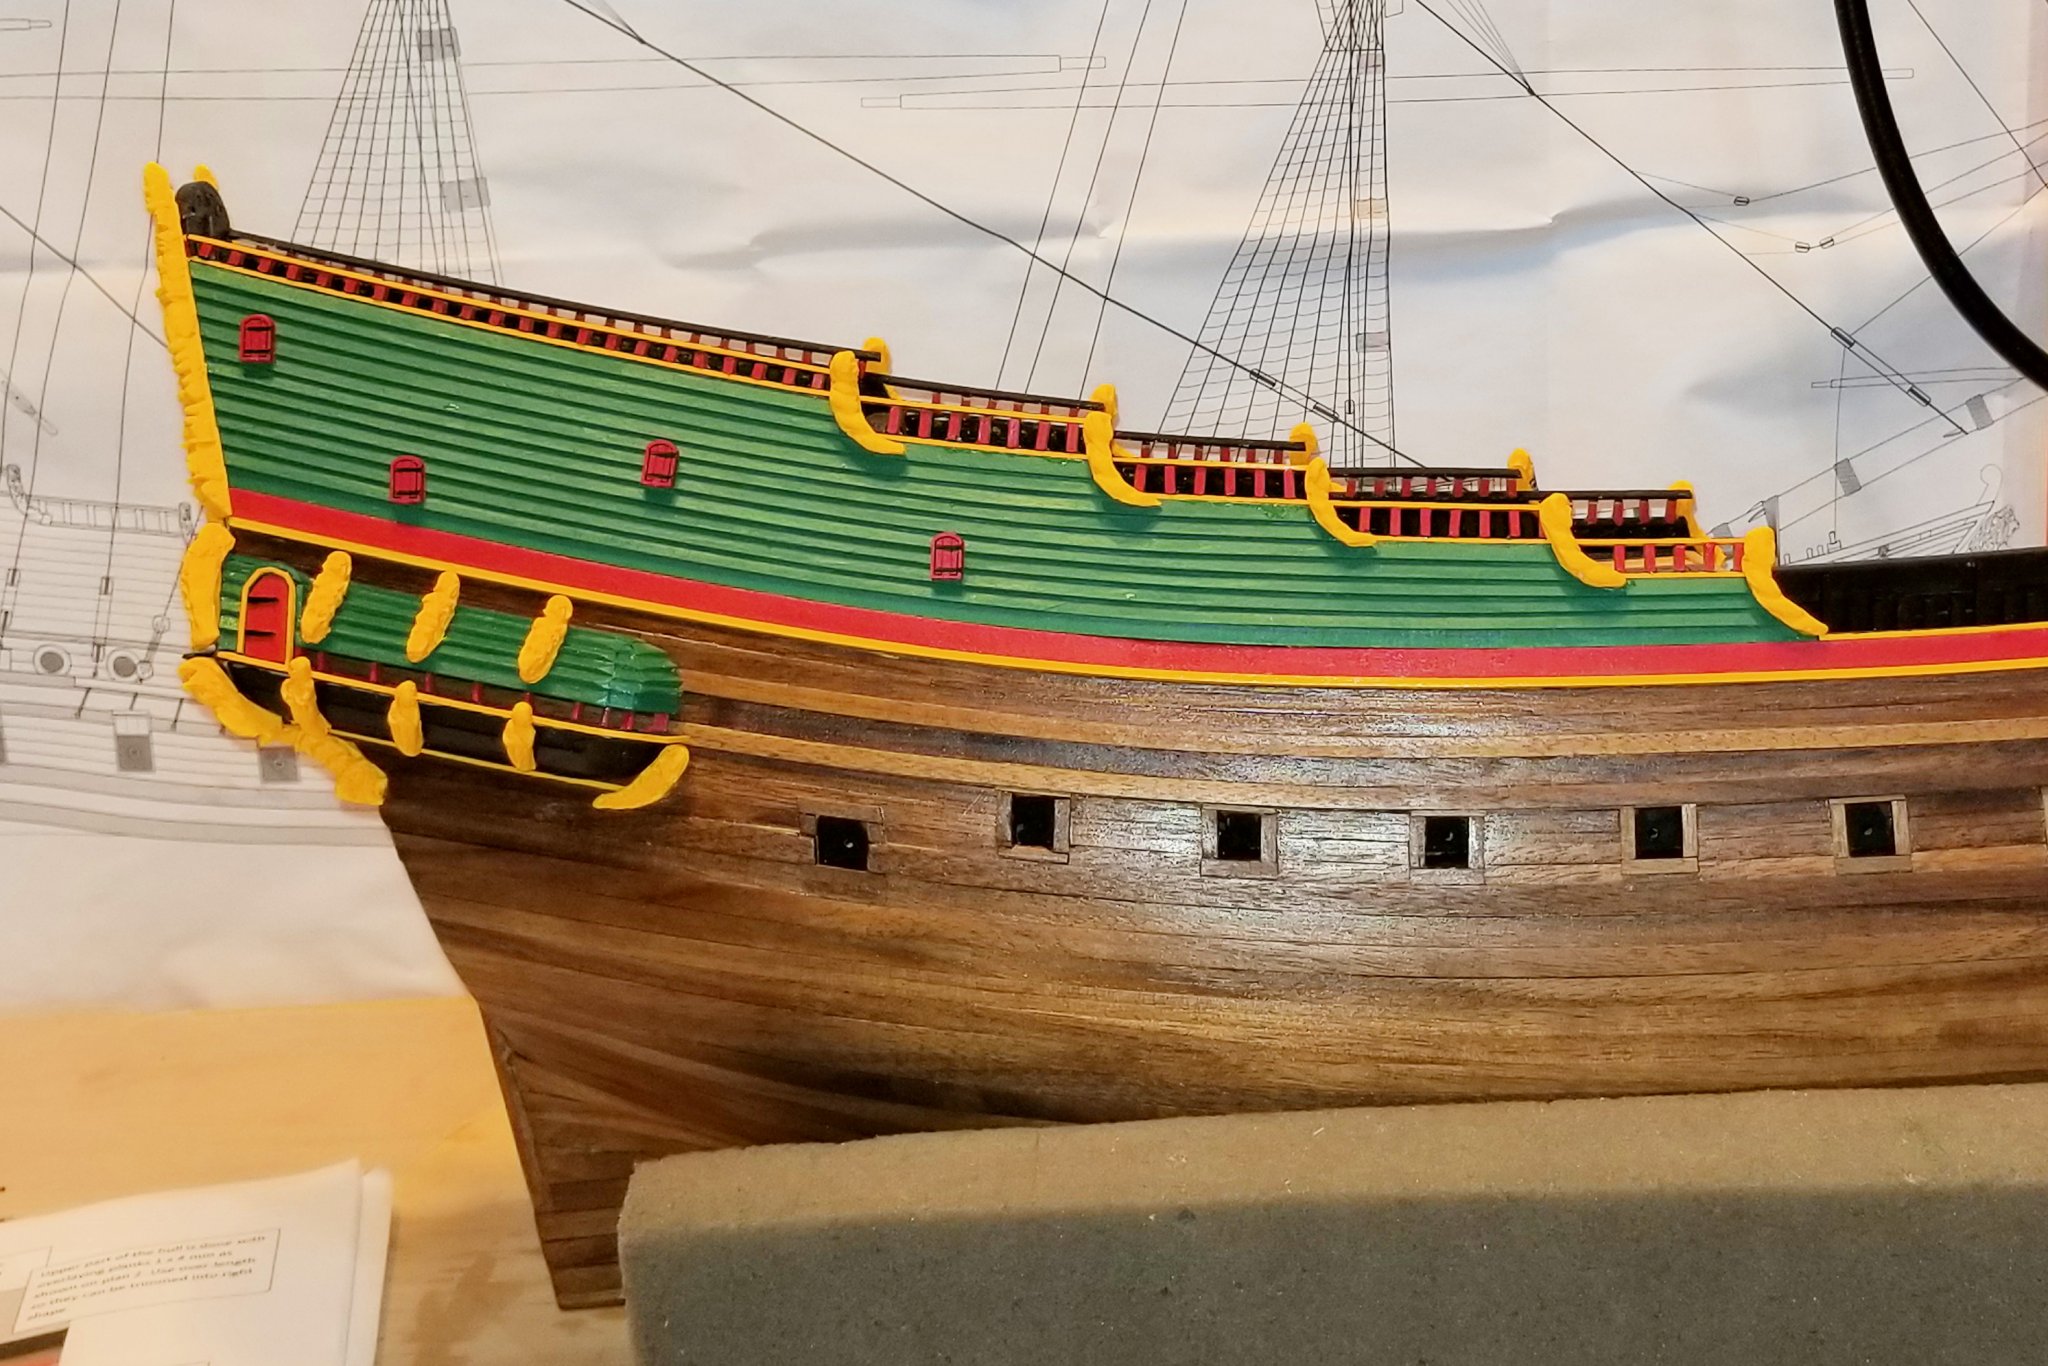
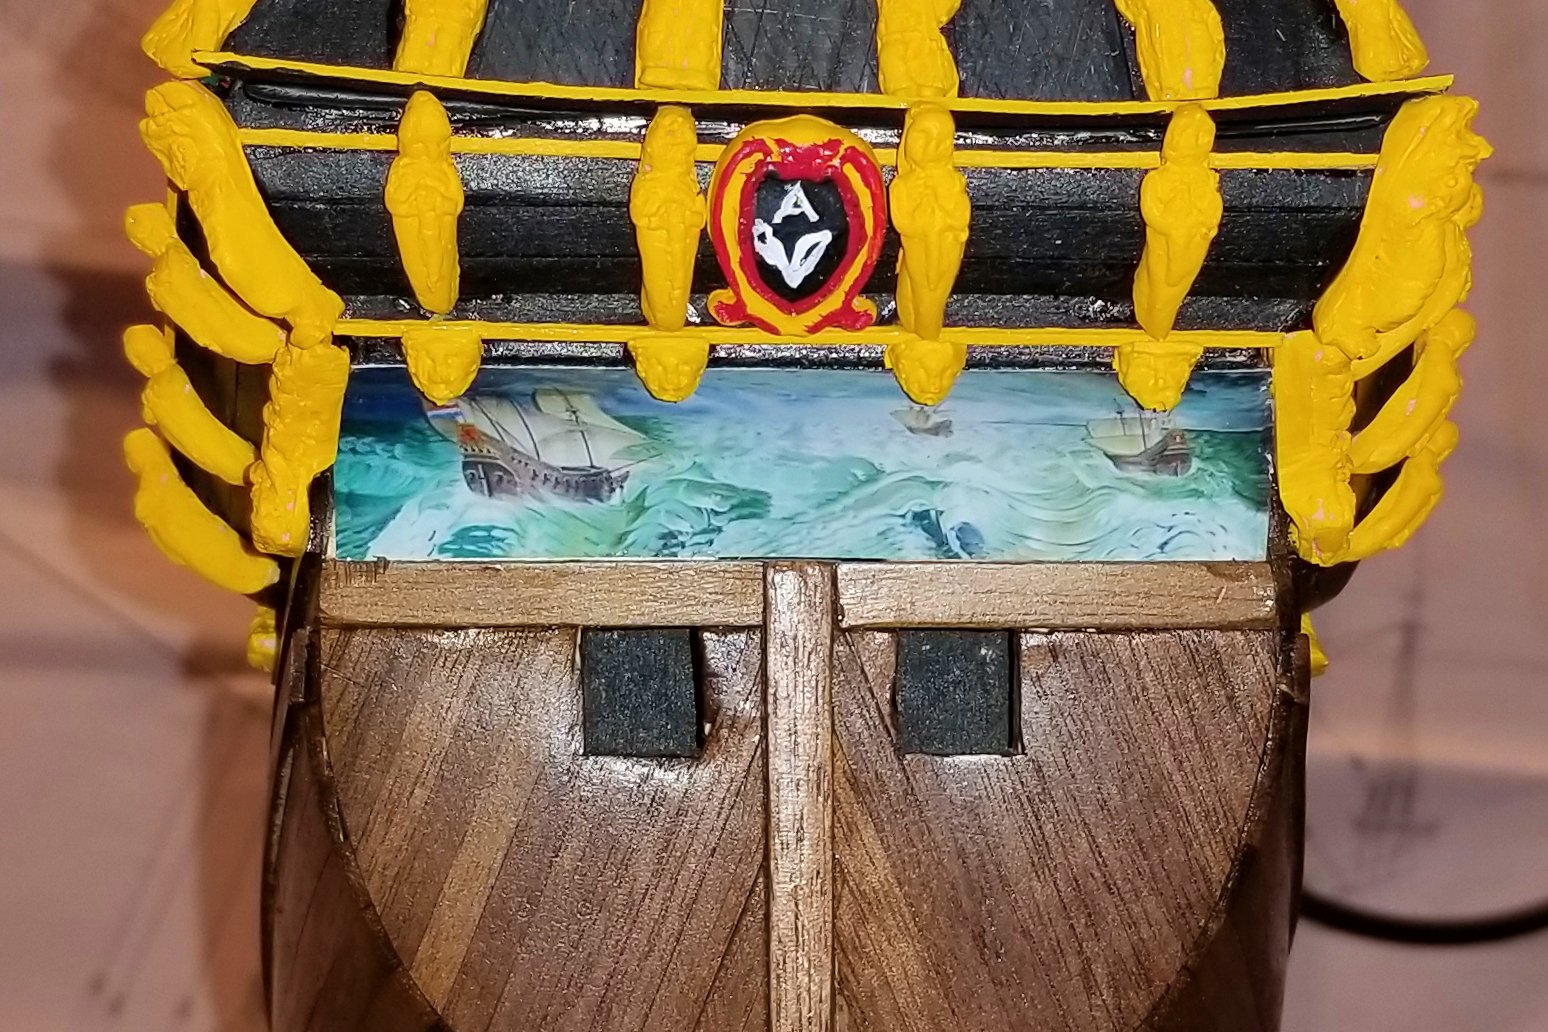
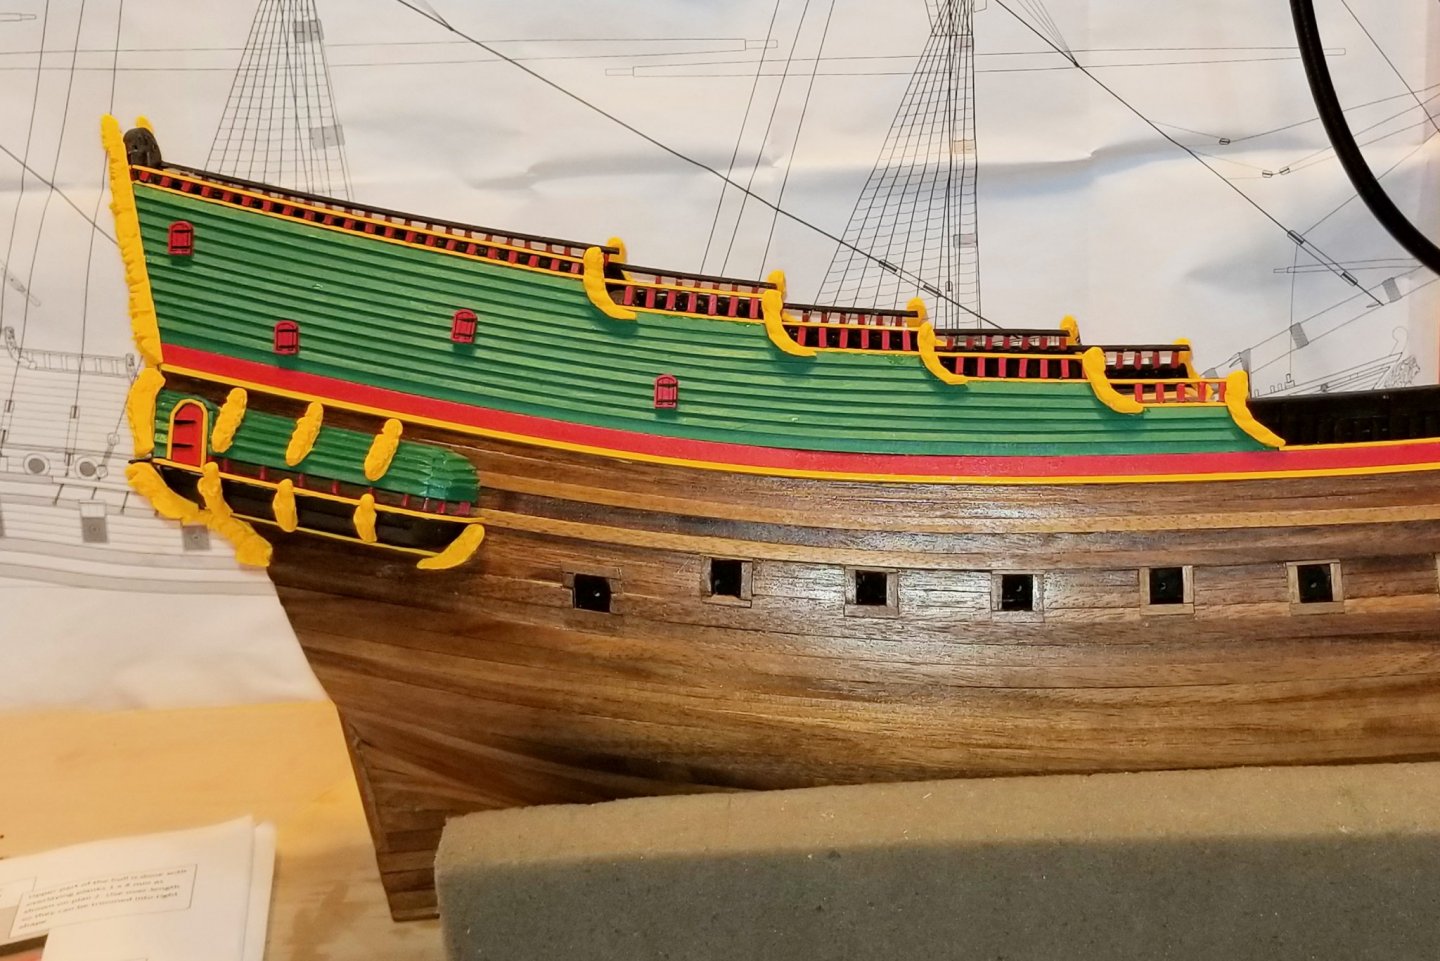
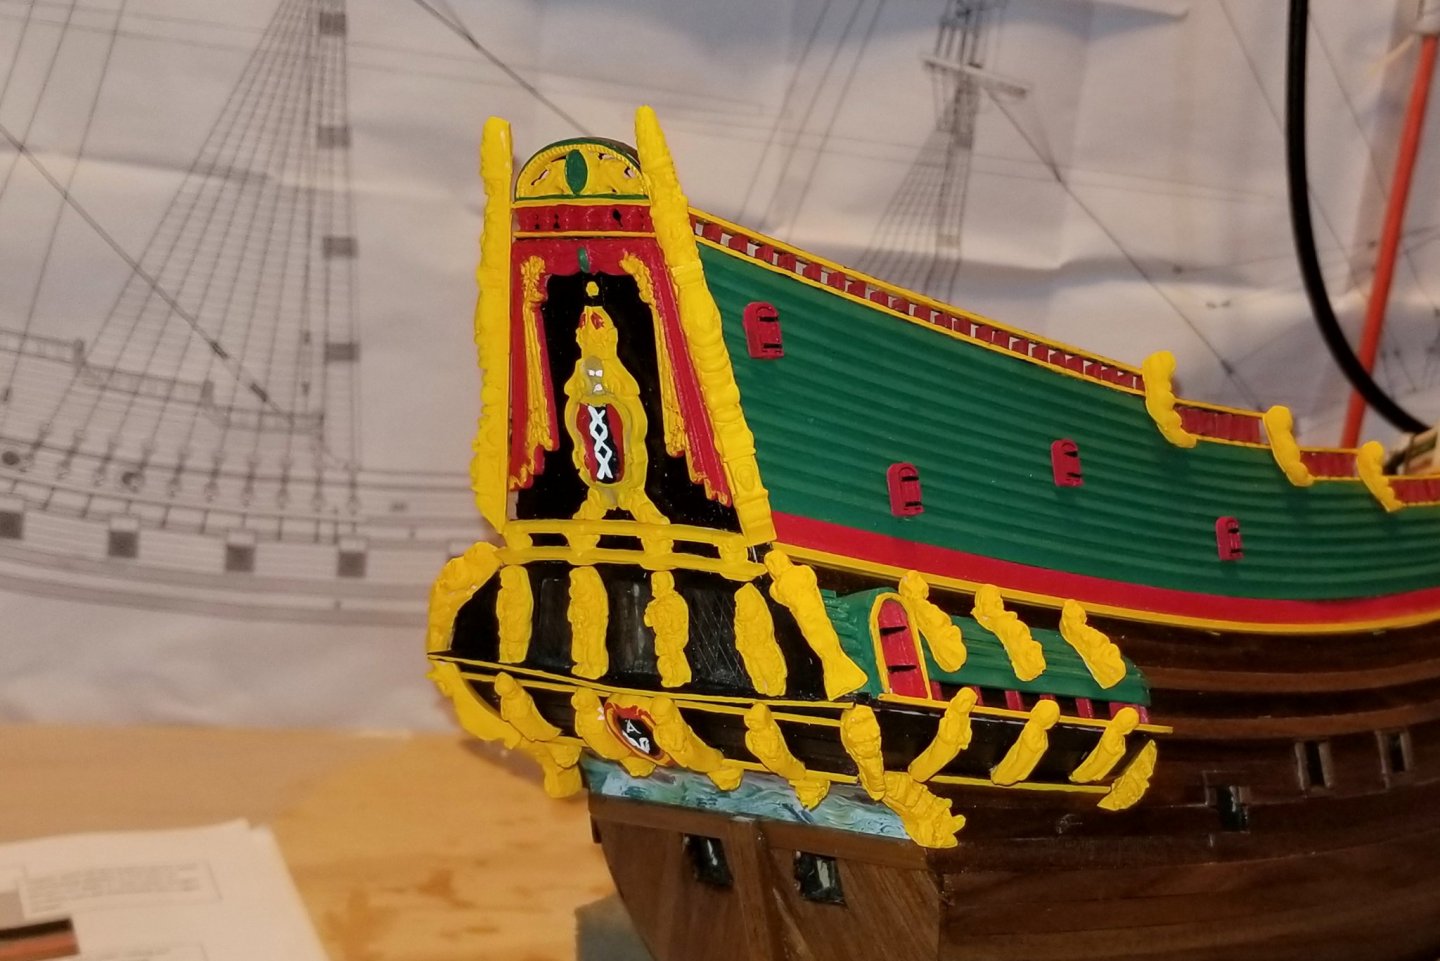
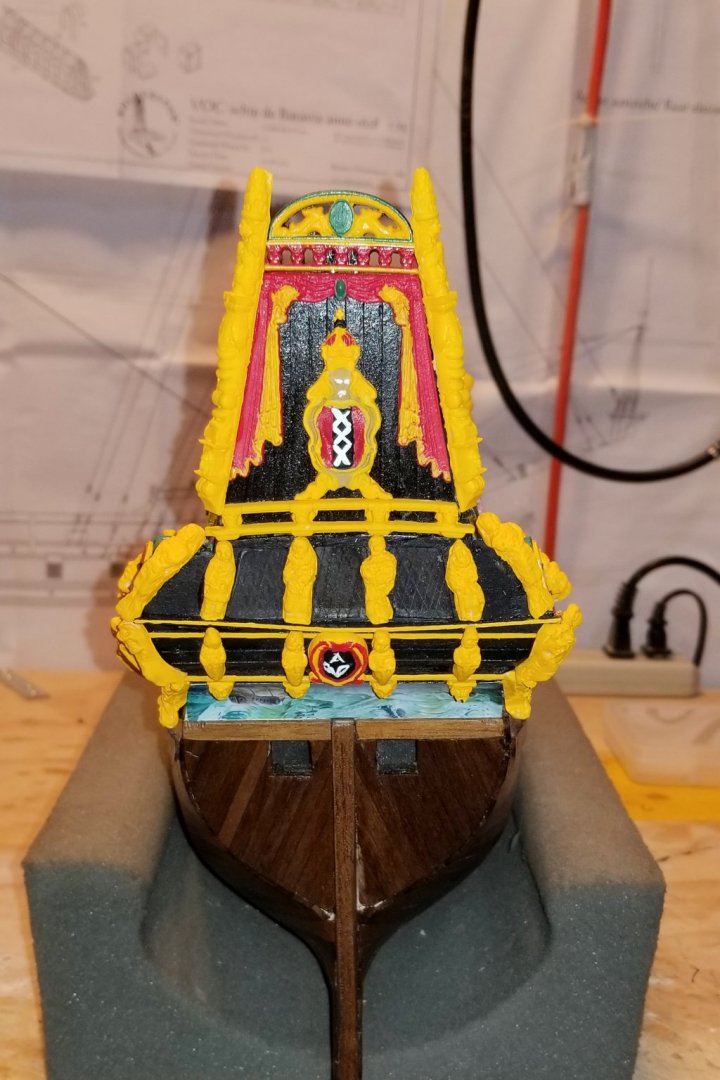
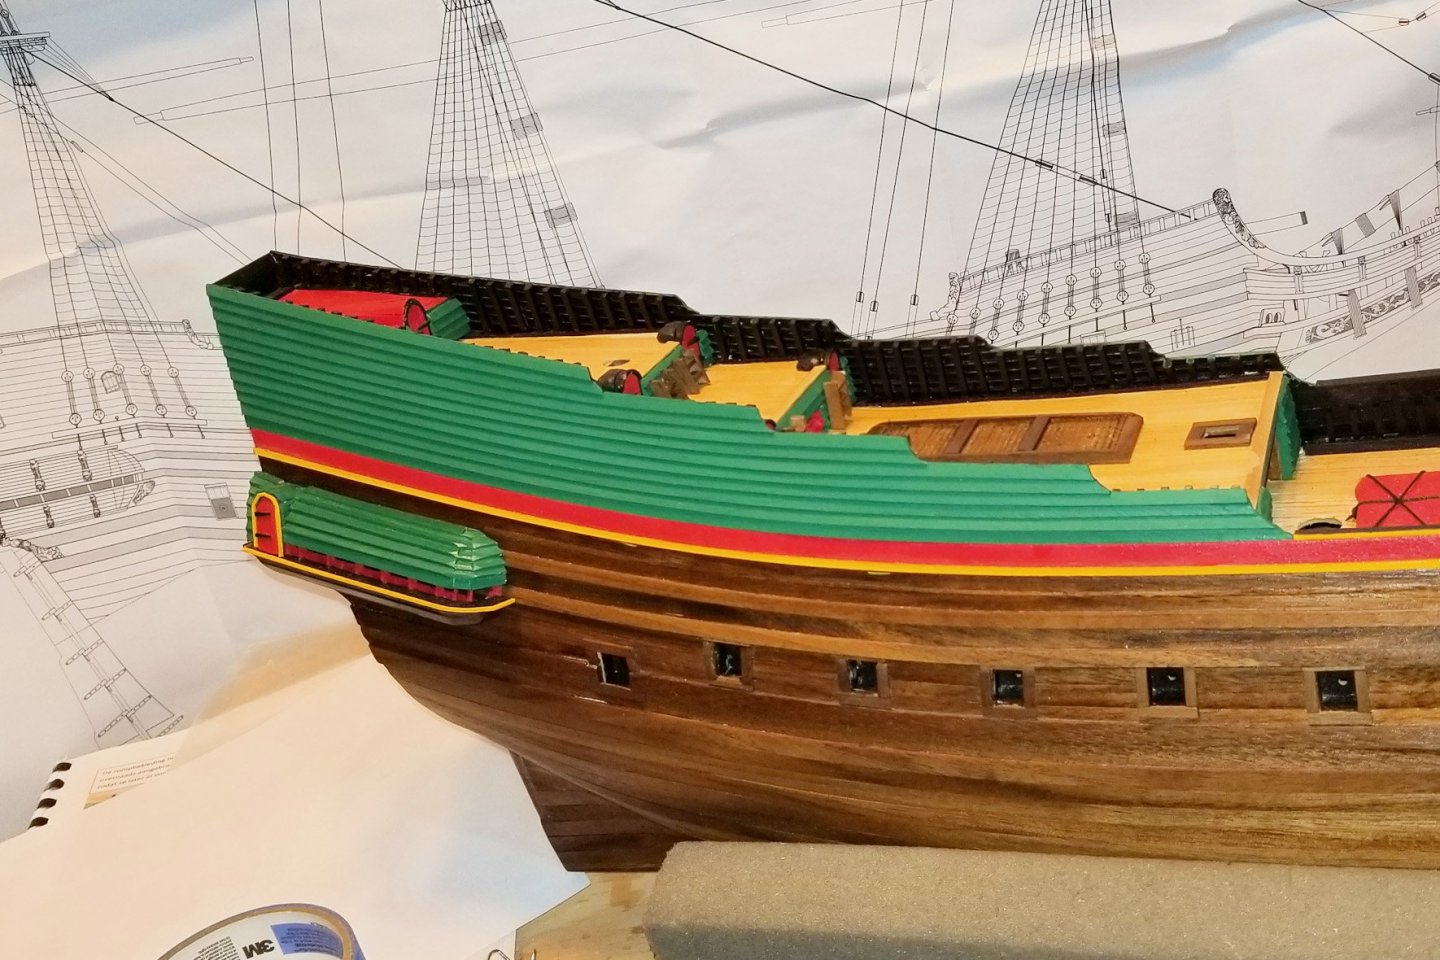
I have finished the exterior of the stern area aft of the main deck -- pictures below showing the decorations and small doors. The painting of the ships on the lower part of the stern is a photograph. Hans sent me a good digital copy, and I adjusted it a bit in Photoshop to snap the colors up, and then printed it using photo paper to capture the detail. Regards, David

- 136 replies
-
- 6
-
-
- kolderstok
- batavia
- (and 1 more)
-
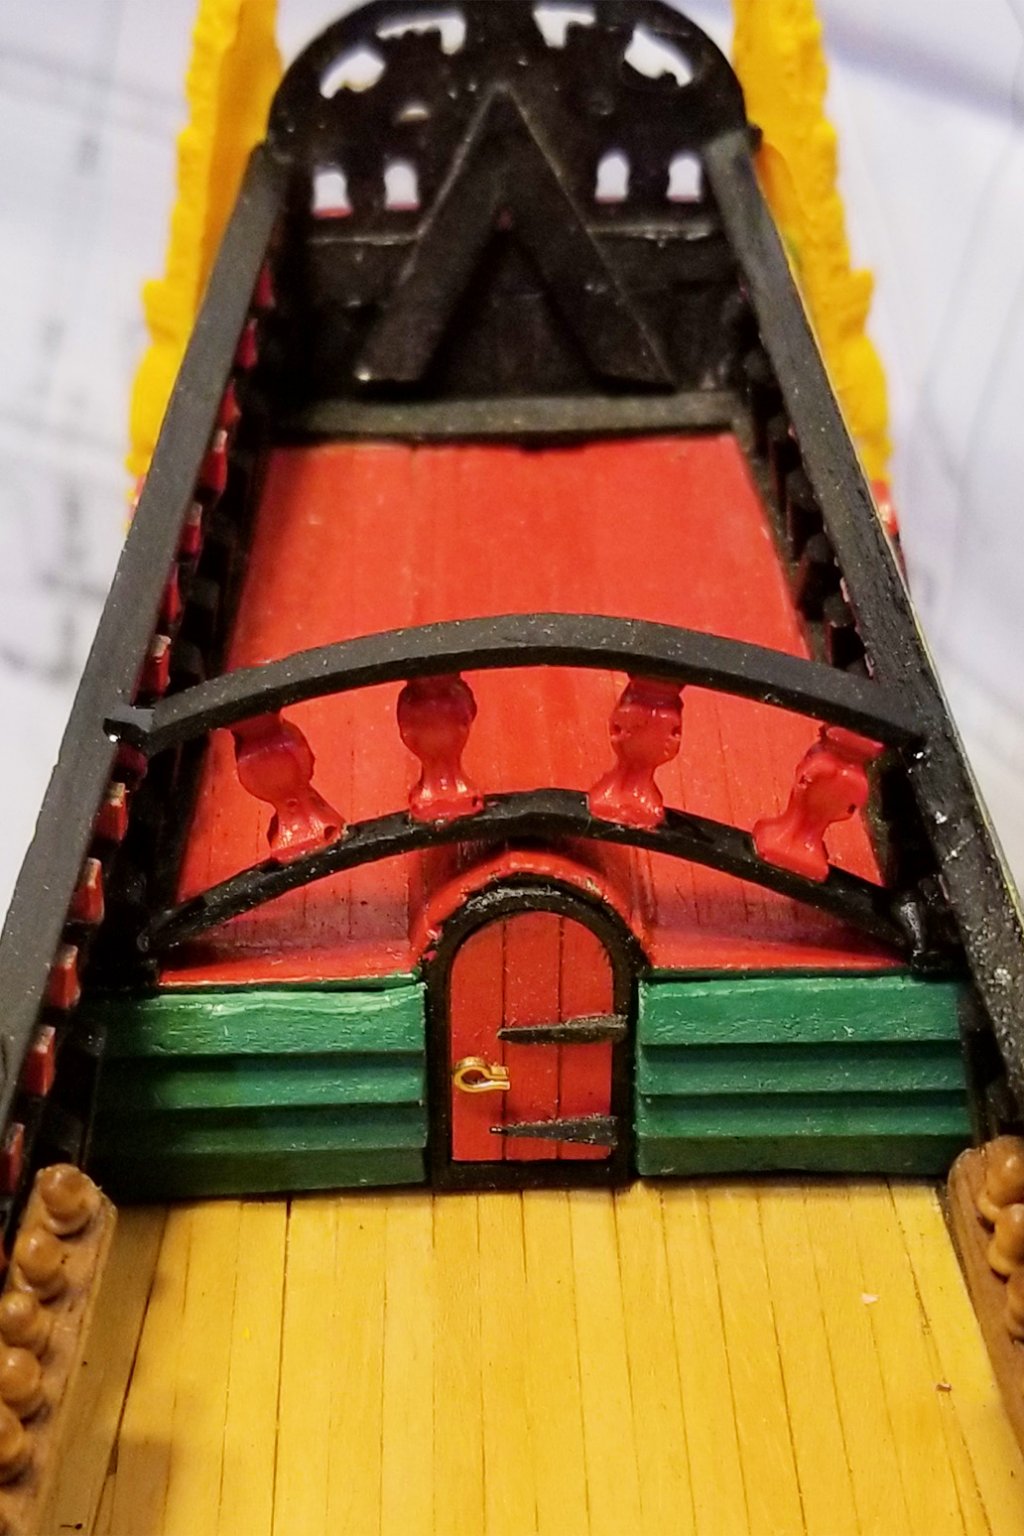
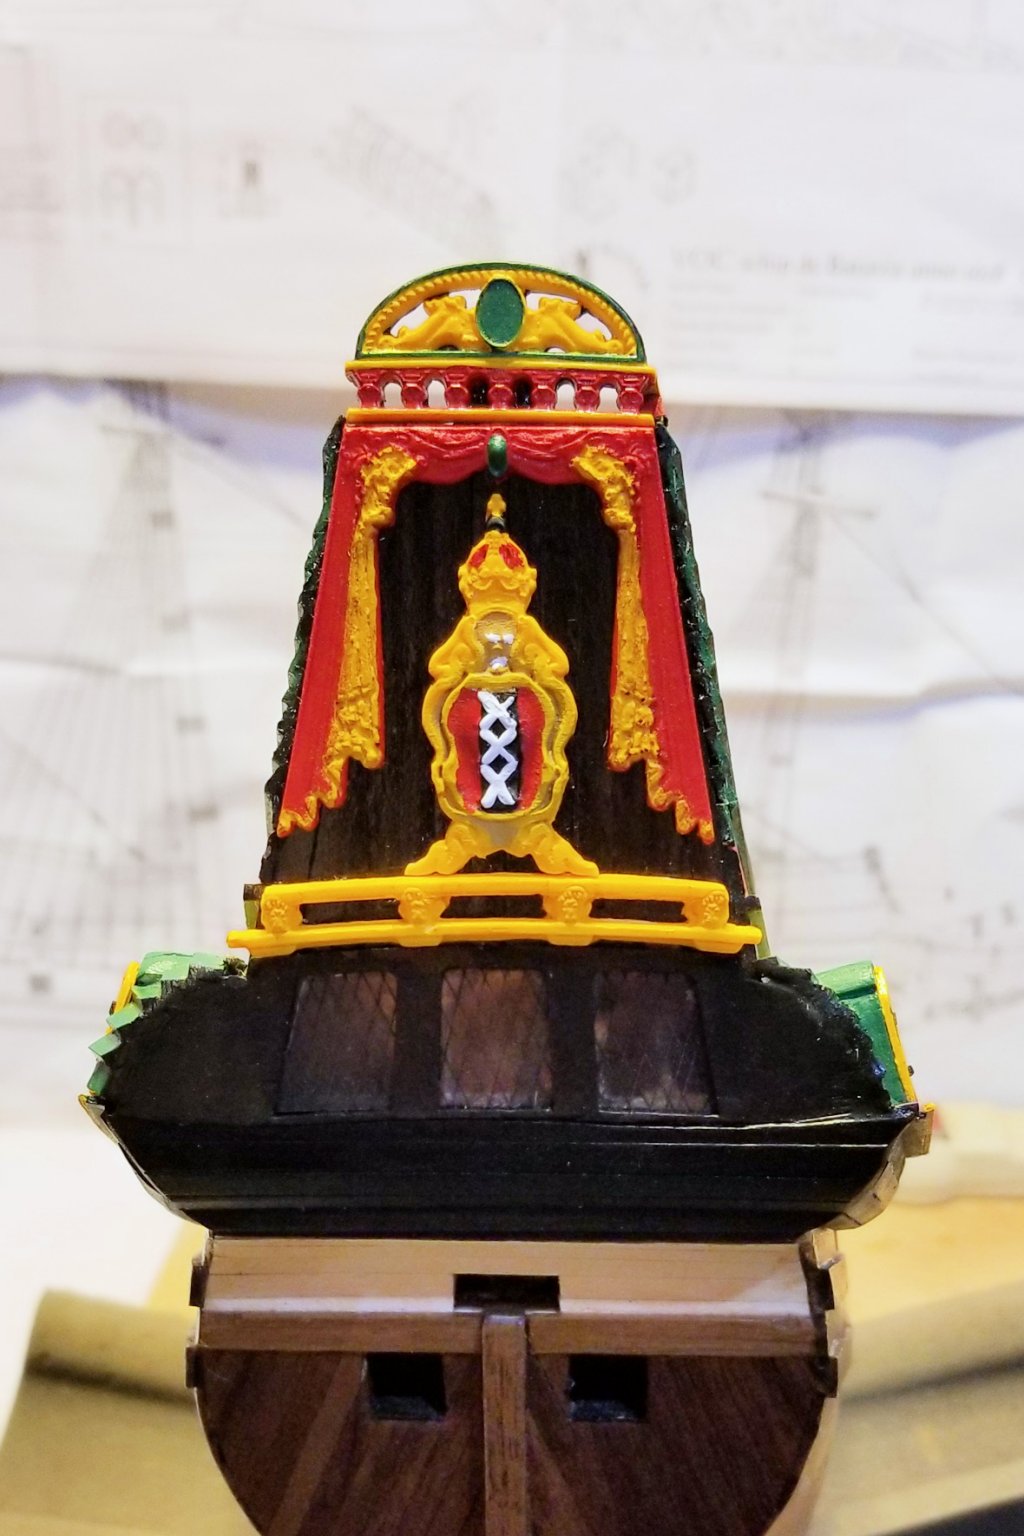
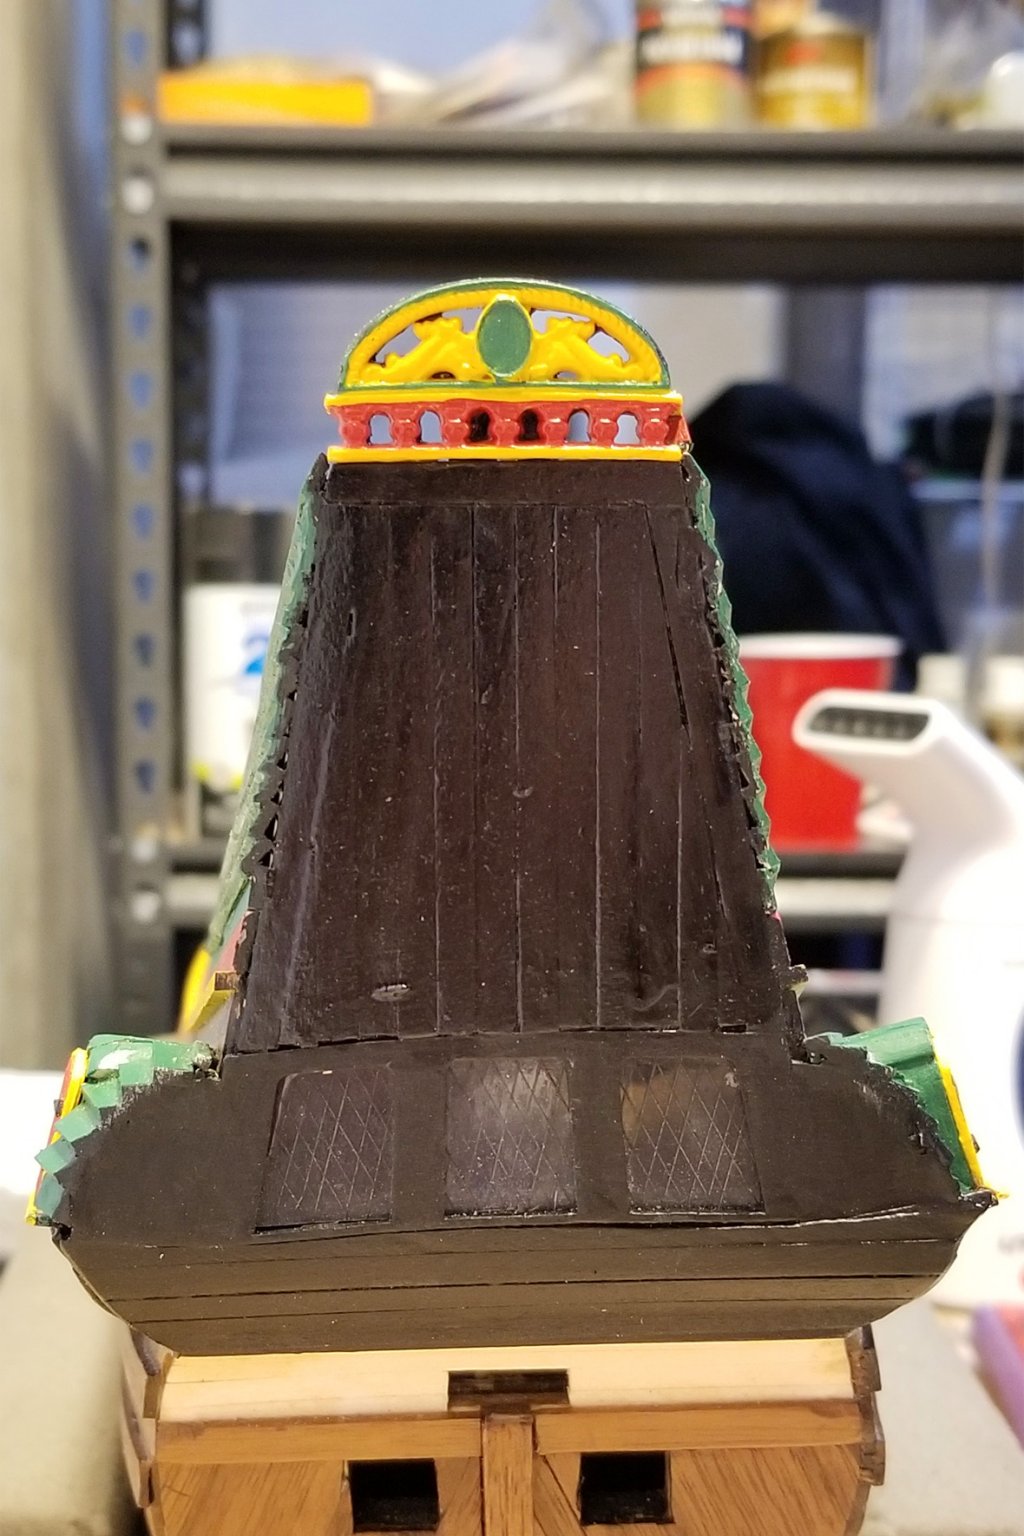
Here's the decoration for the upper part of the stern. I'll go on to the port side railings now. Regards, David

- 136 replies
-
- 6
-
-
- kolderstok
- batavia
- (and 1 more)
-
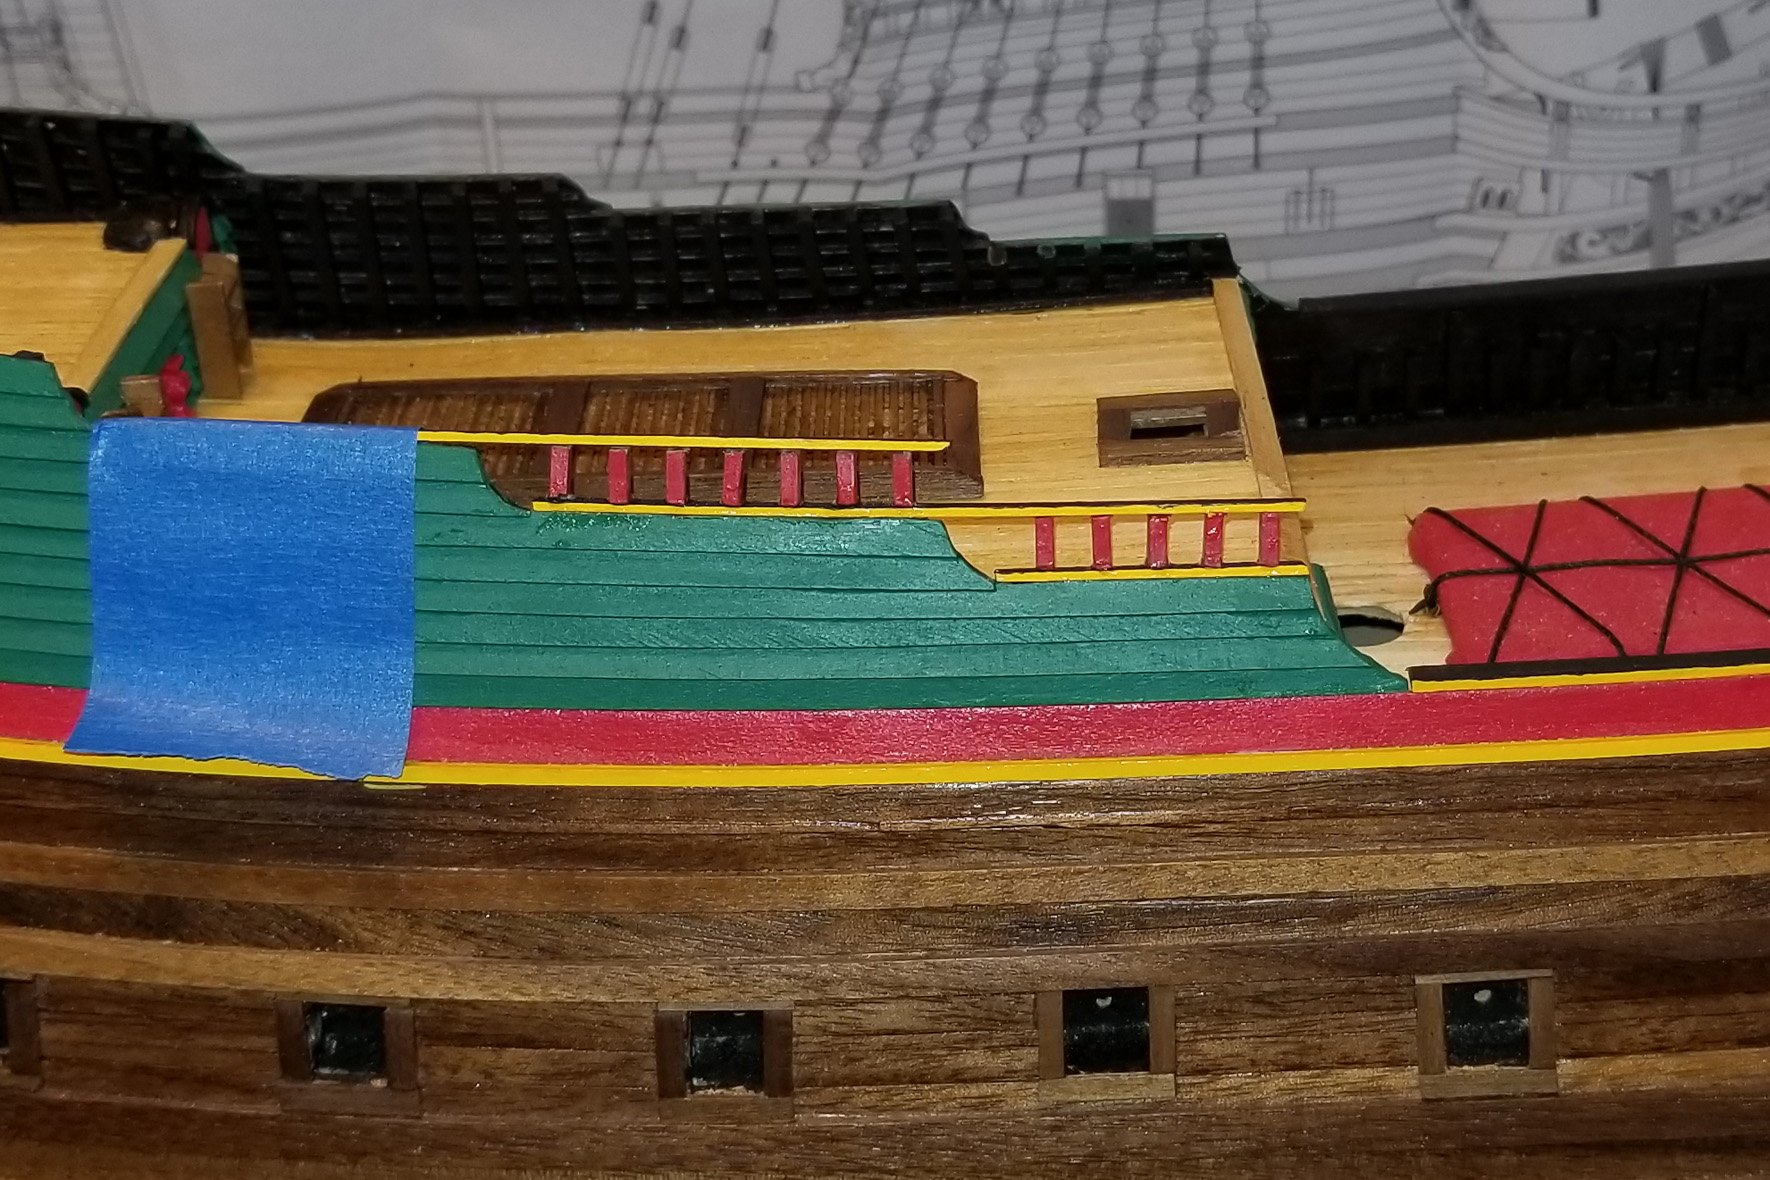
Finished the stern railings on the starboard side. In order to line up the last, shorter railing, I had to paint and mount the top of the stern decoration, so that is shown too. My first venture into fine detail painting. Again, the level breaks between the railing sections will be dressed with curved ornaments. For variety, I may do more of the stern decoration before doing the port side railings. Regards, David

- 136 replies
-
- 3
-
-
- kolderstok
- batavia
- (and 1 more)
-
Peter: Thank you -- that's an extremely generous offer. I'm finding that the main value of that log for me is the pictures. They show me colors and the treatment of some intricate builds that are hard to figure out from the plans and manual. But if I need a translation and Google doesn't produce something I can understand, I will certainly call on you. Regards, David
- 136 replies
-
- 1
-
-
- kolderstok
- batavia
- (and 1 more)
-
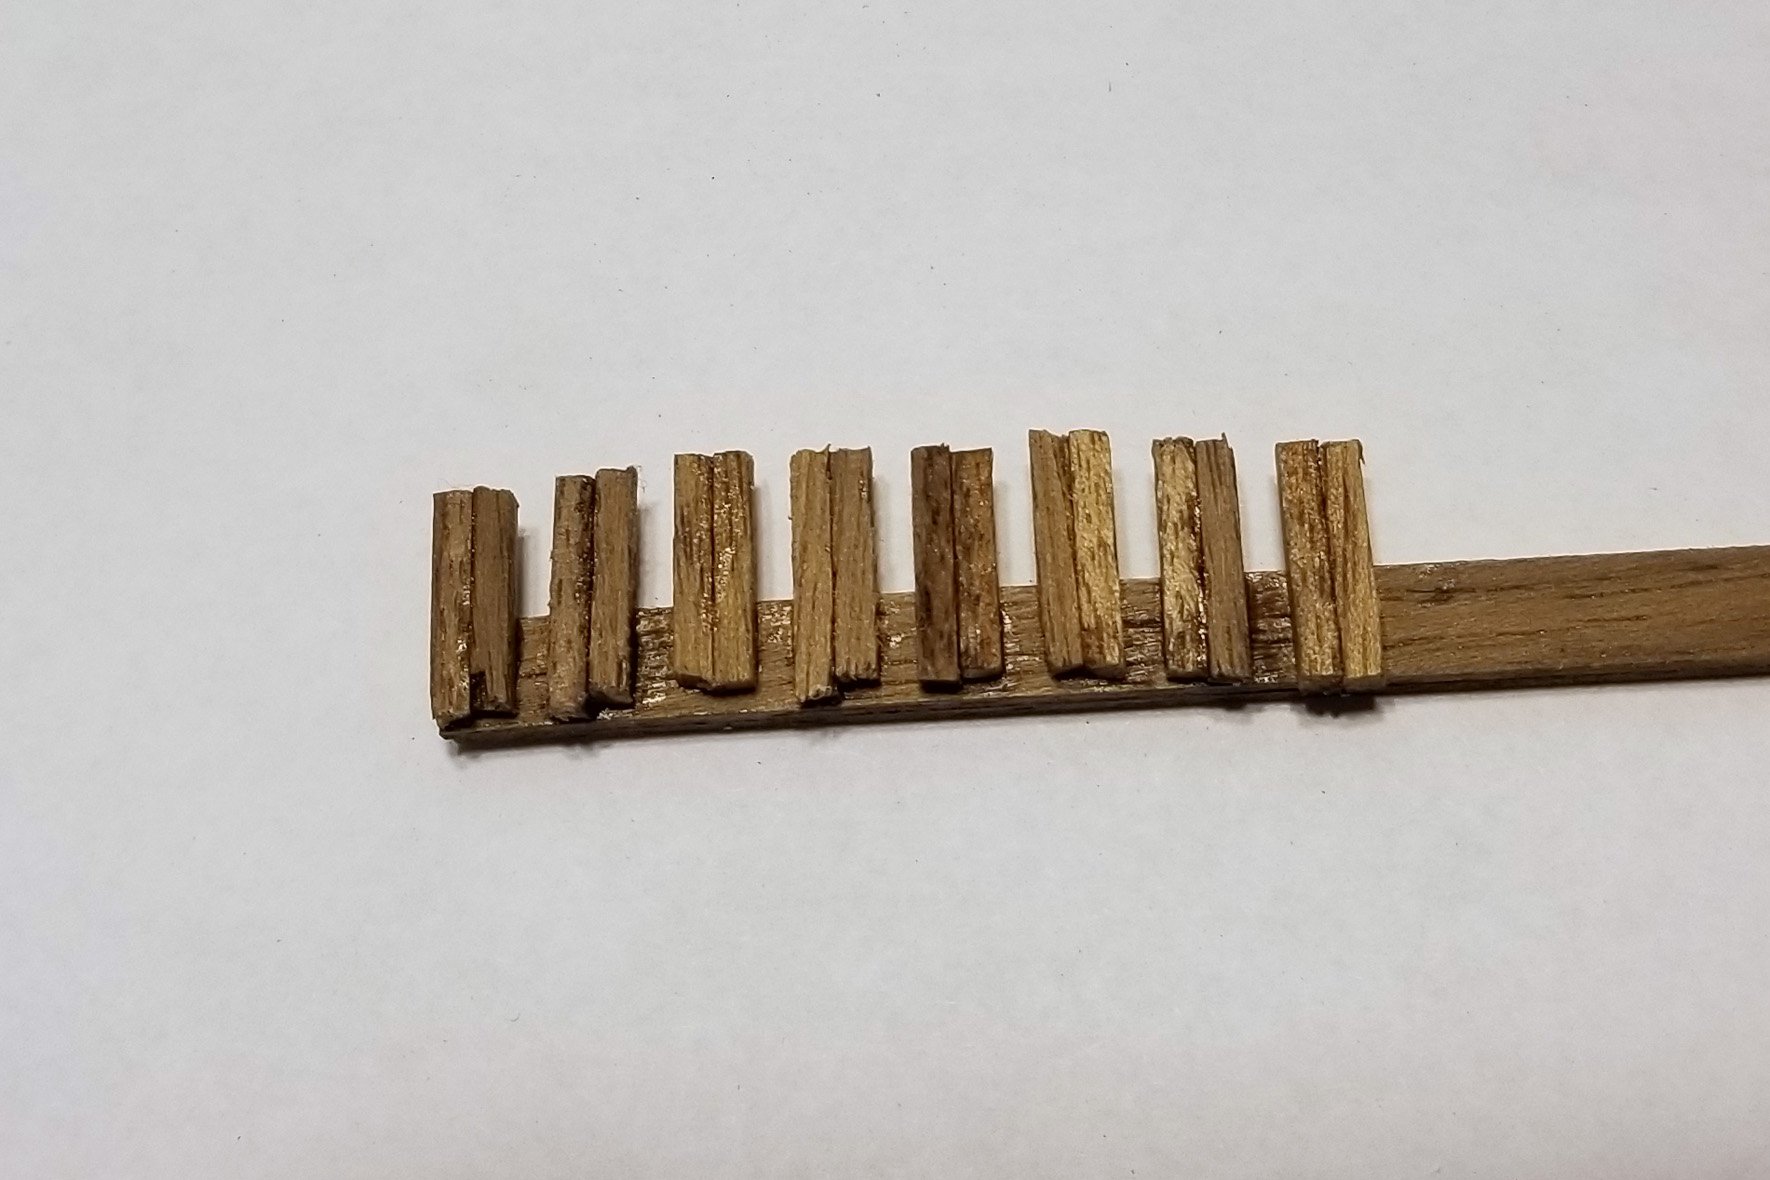
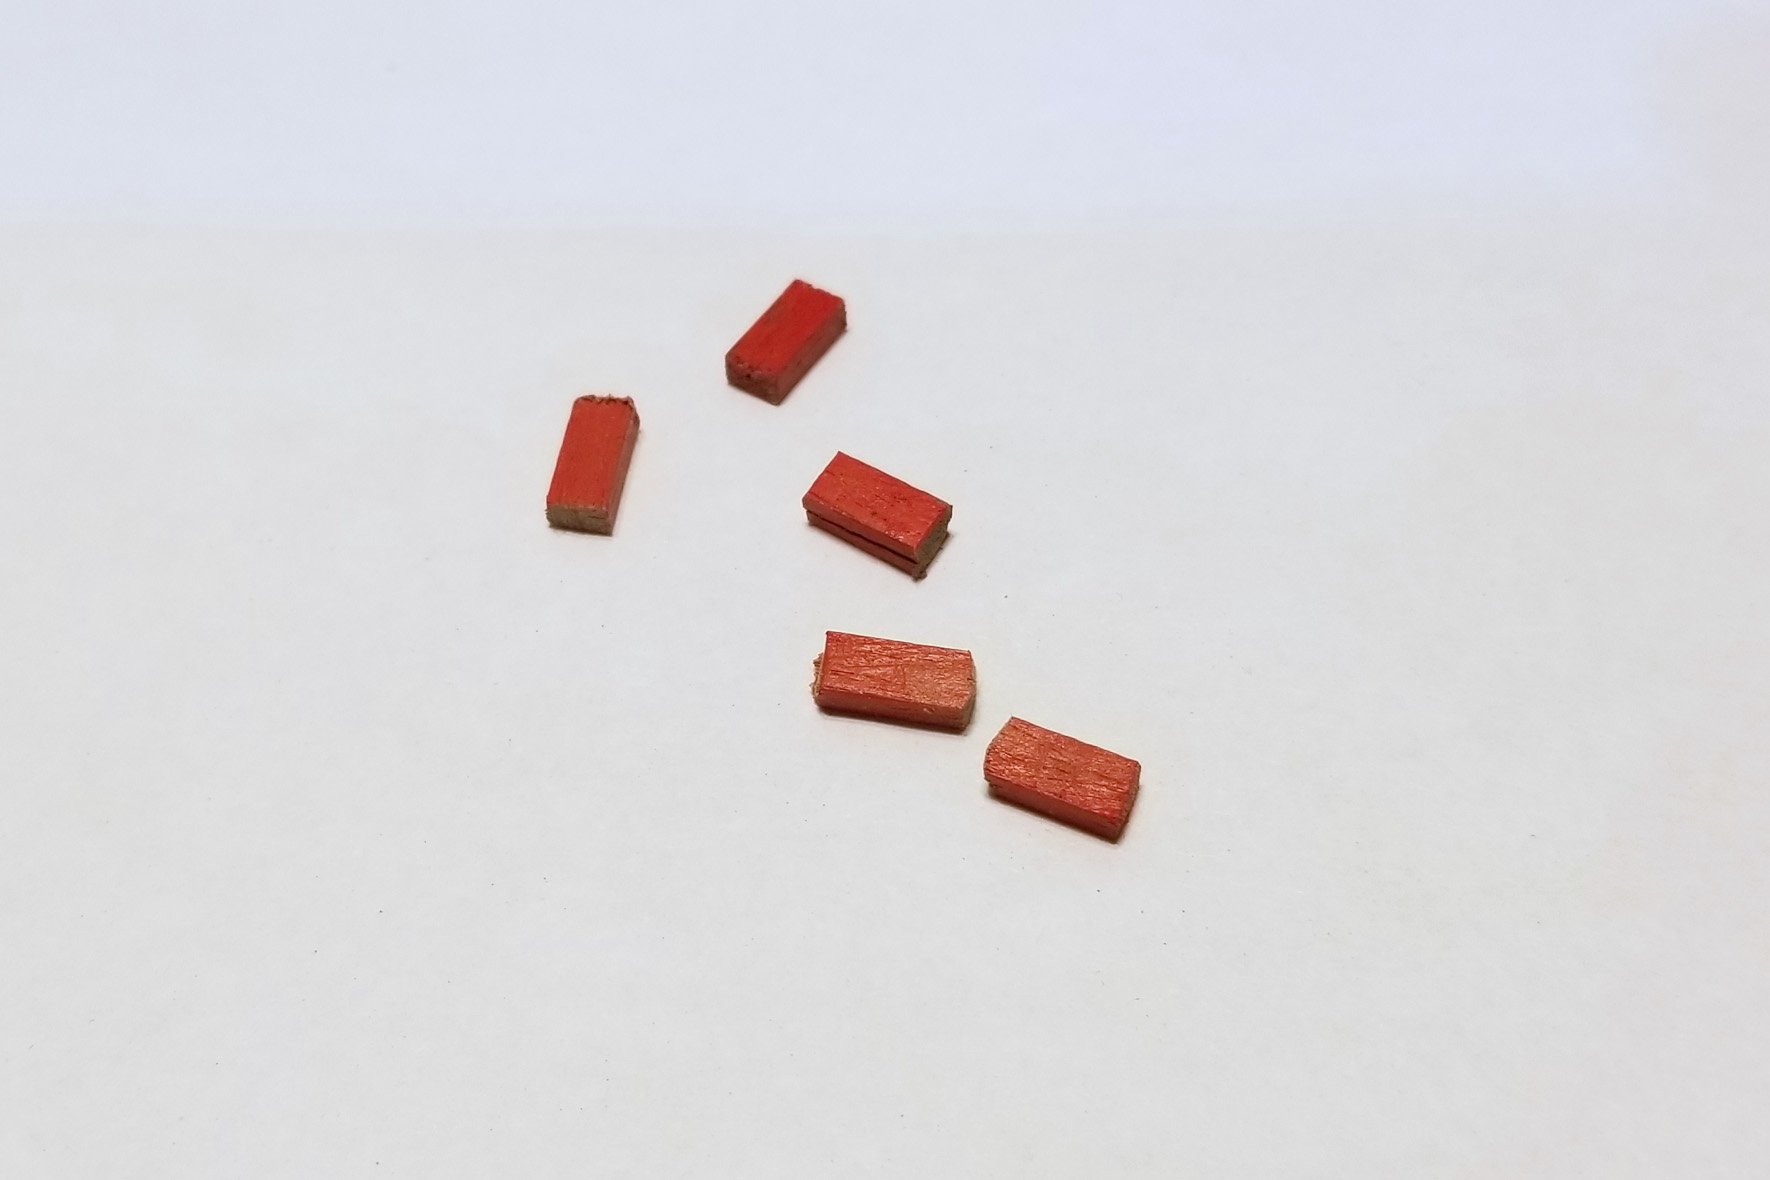
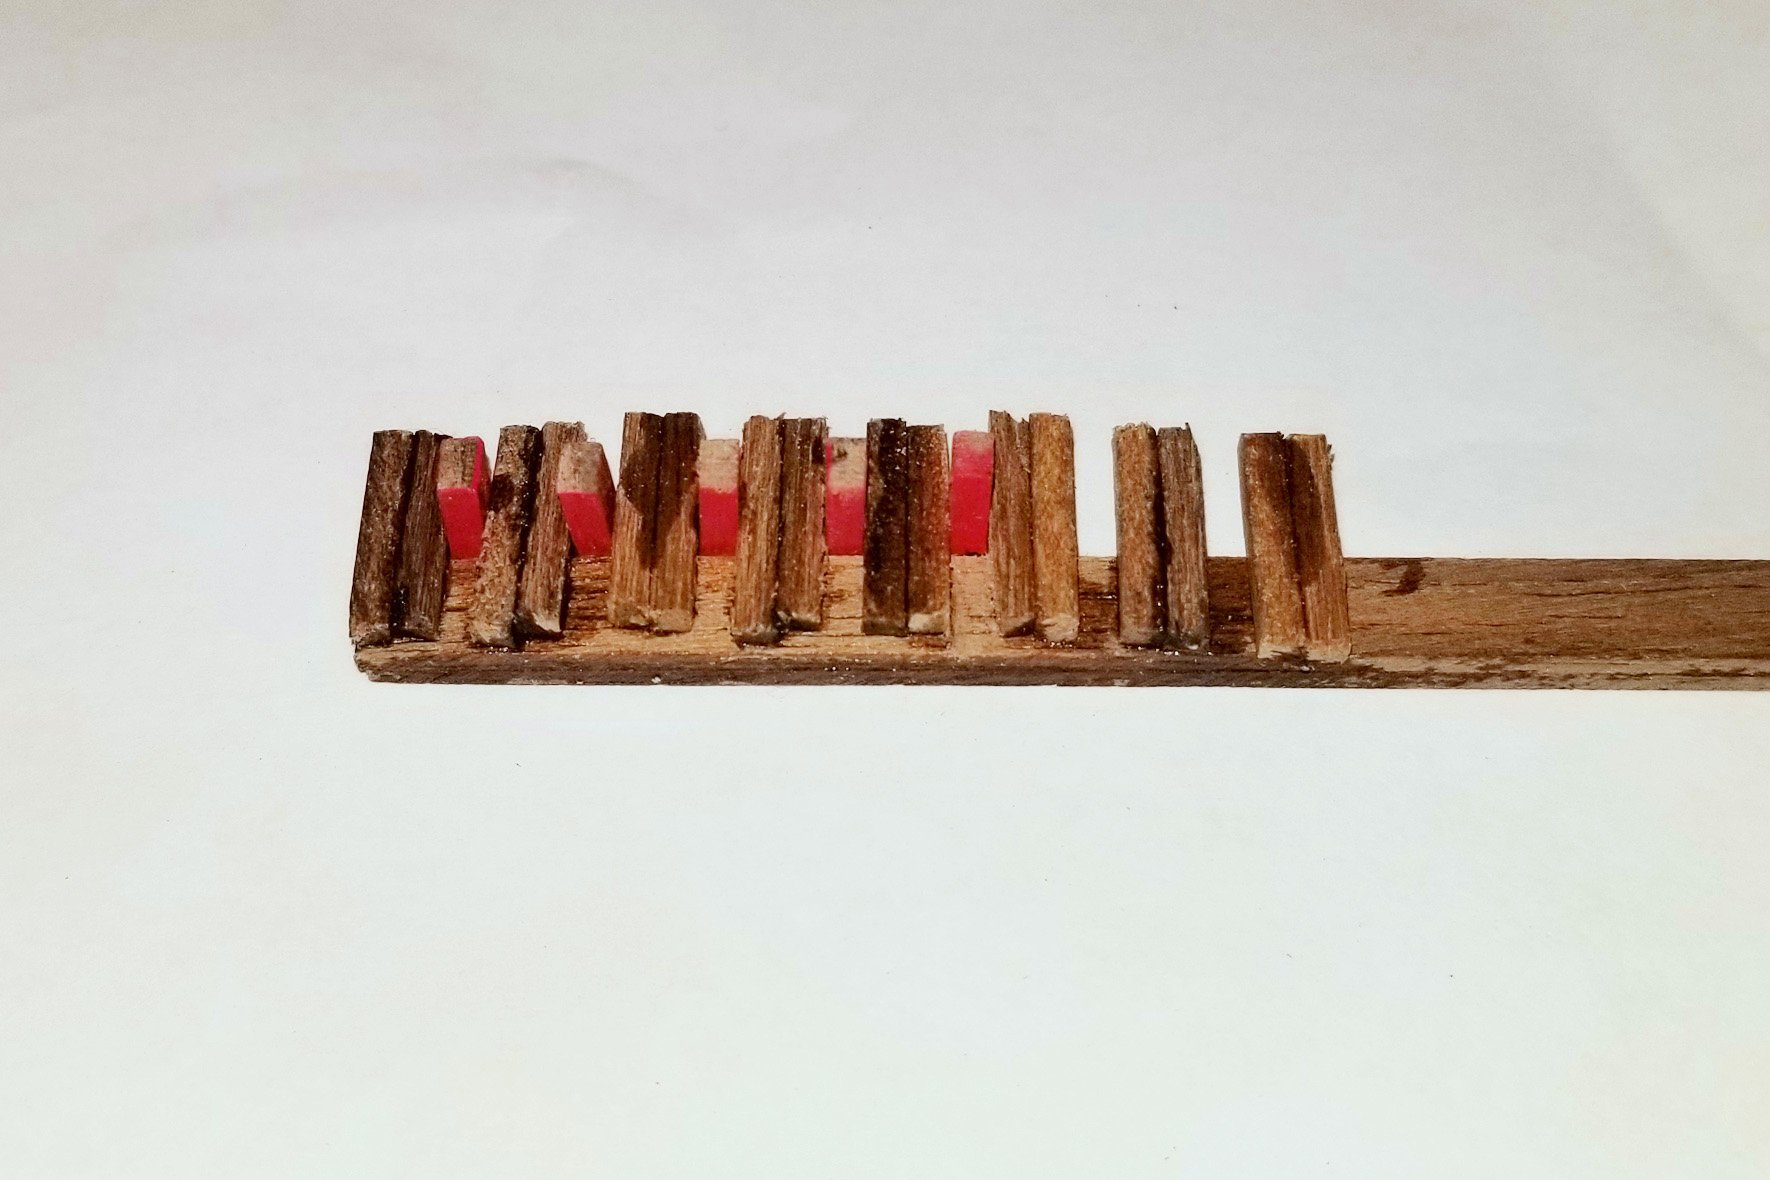
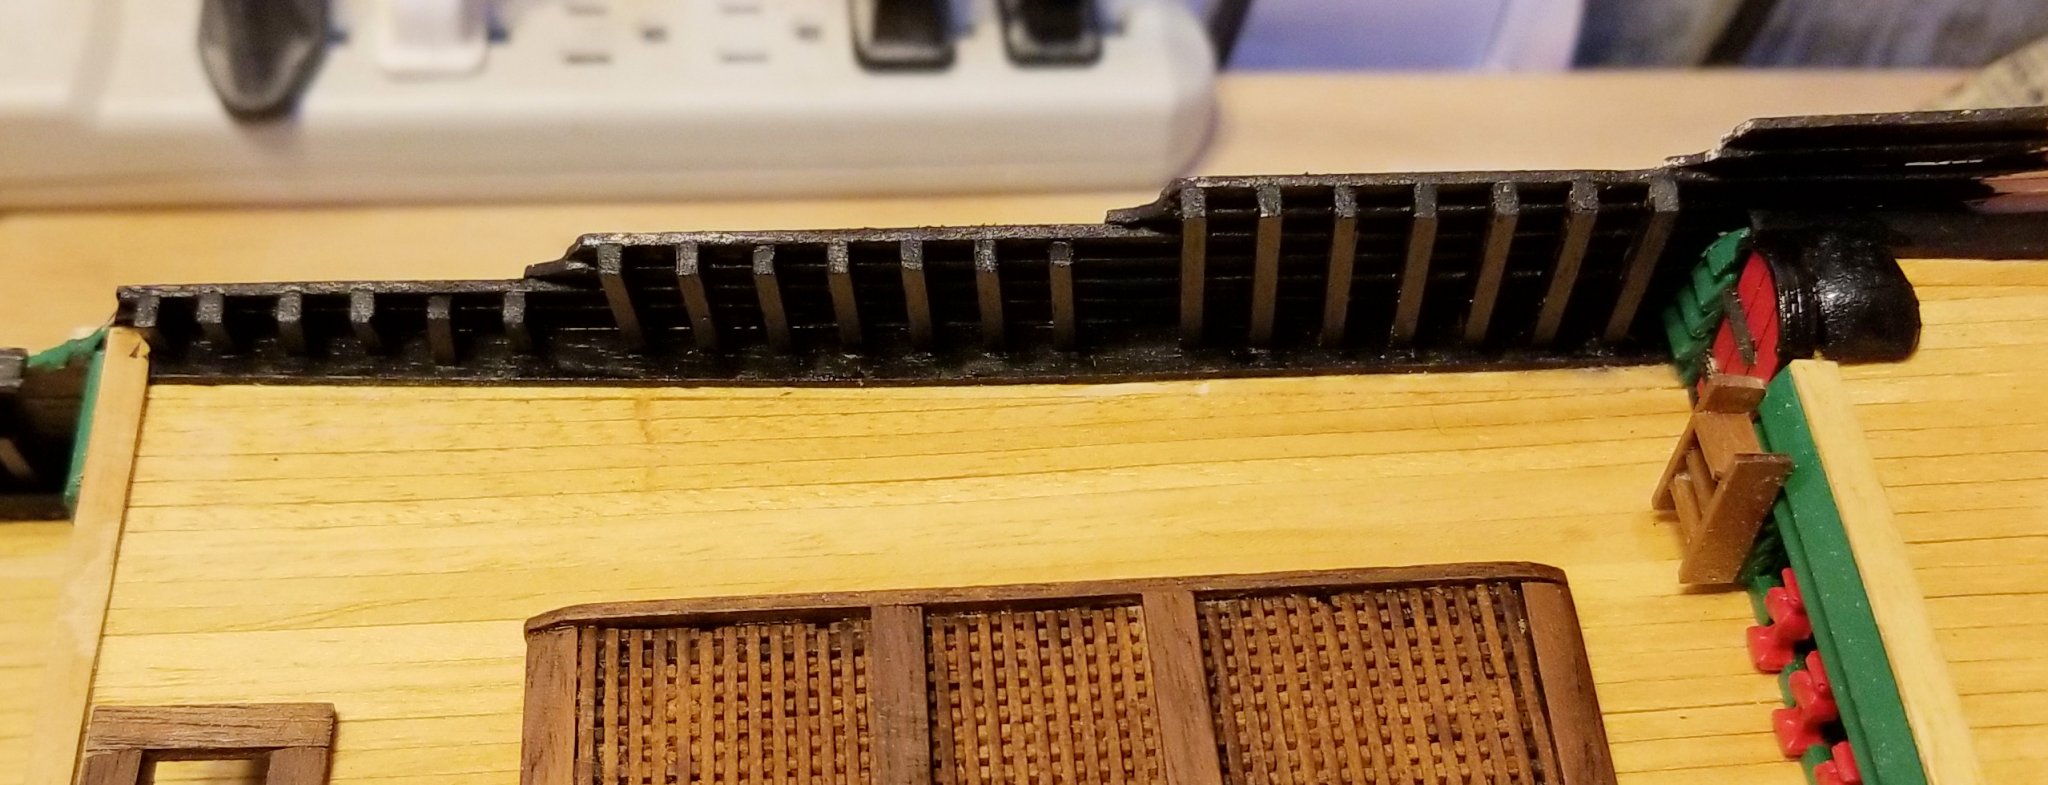
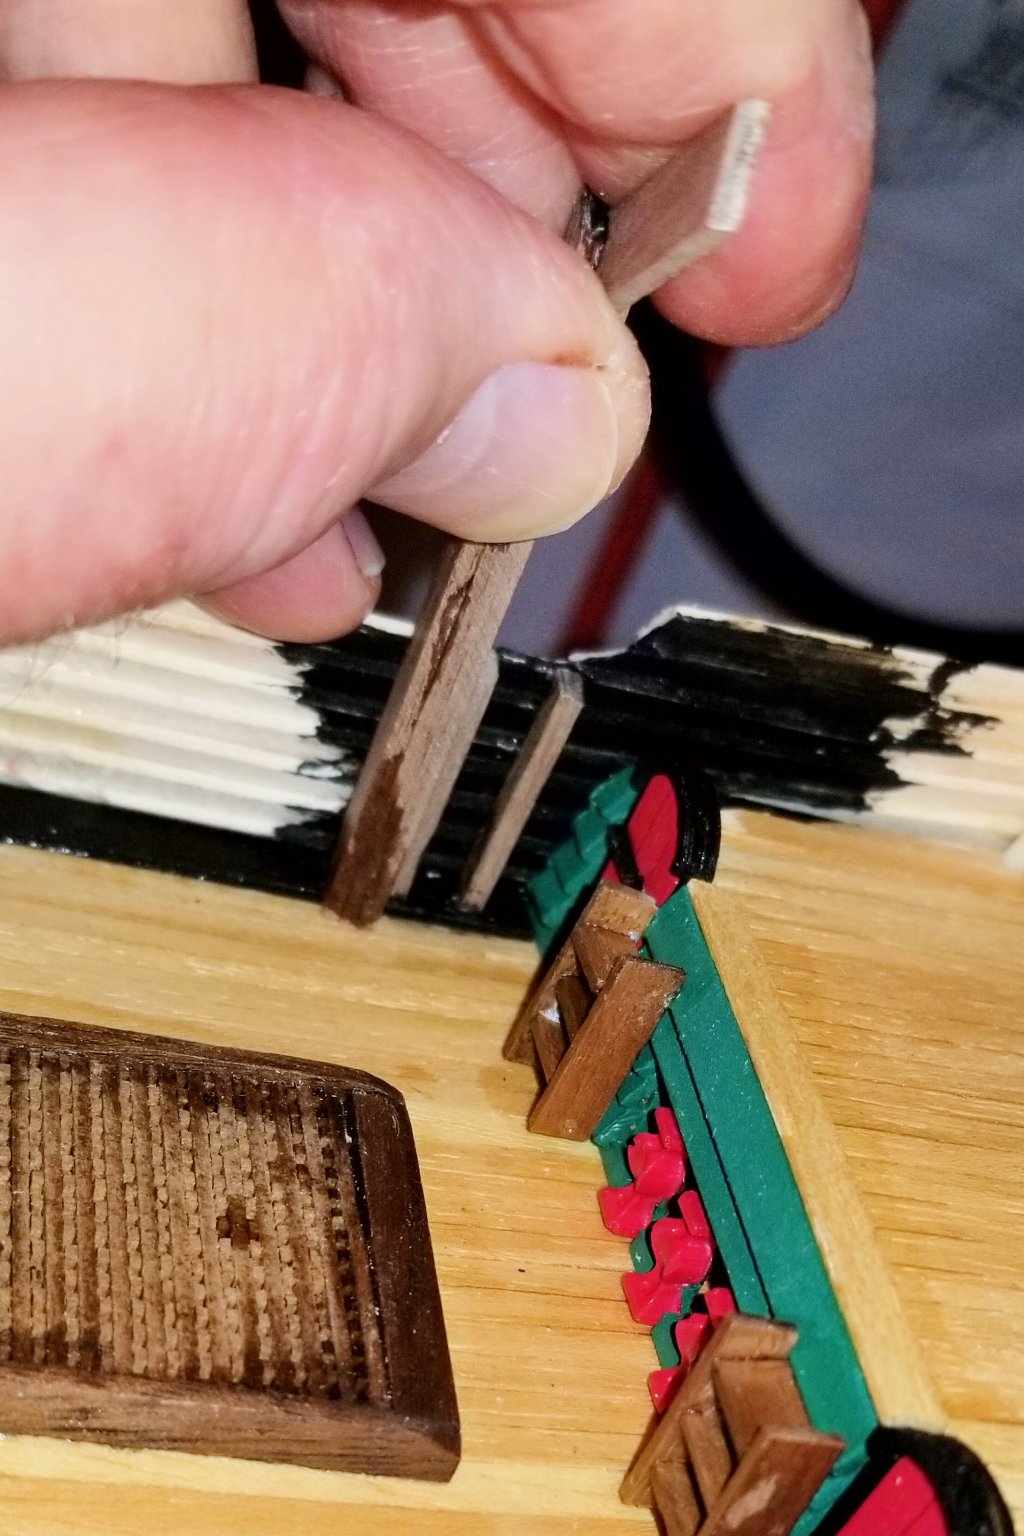
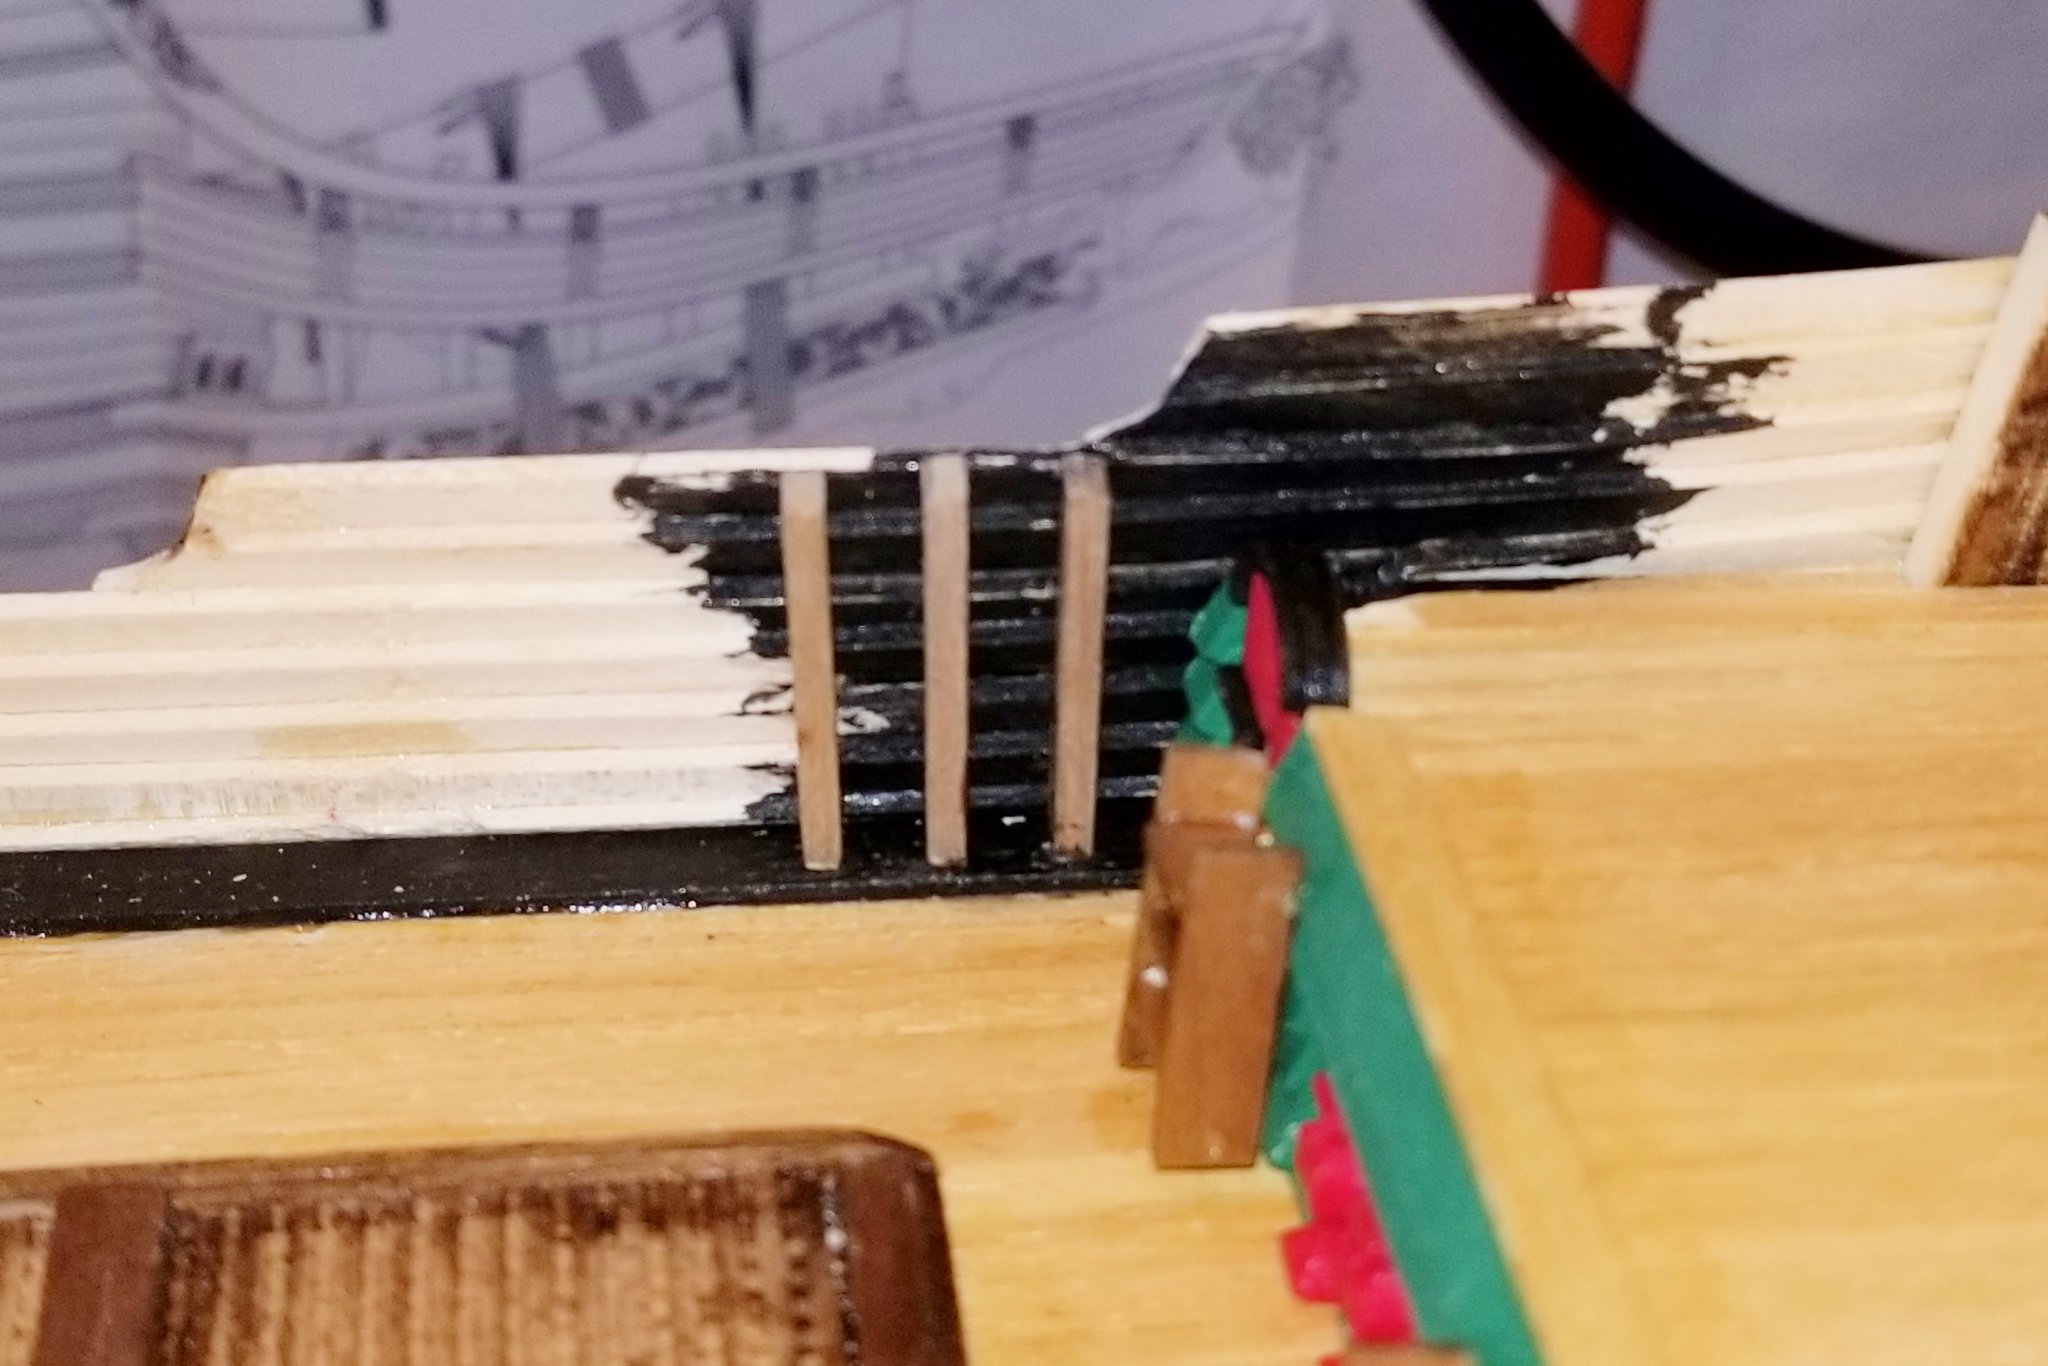
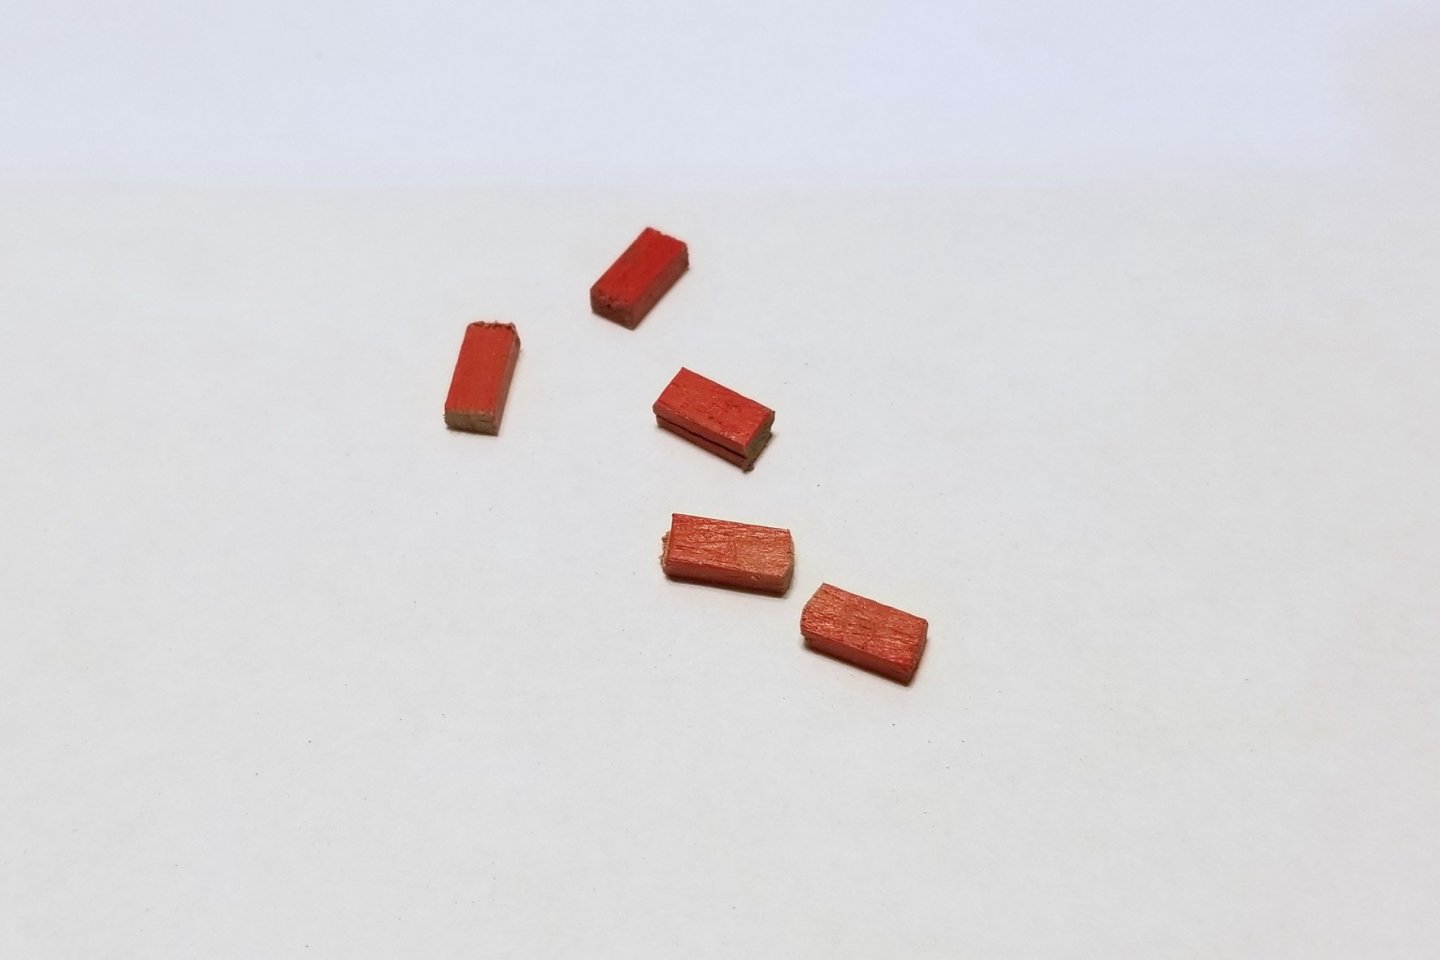
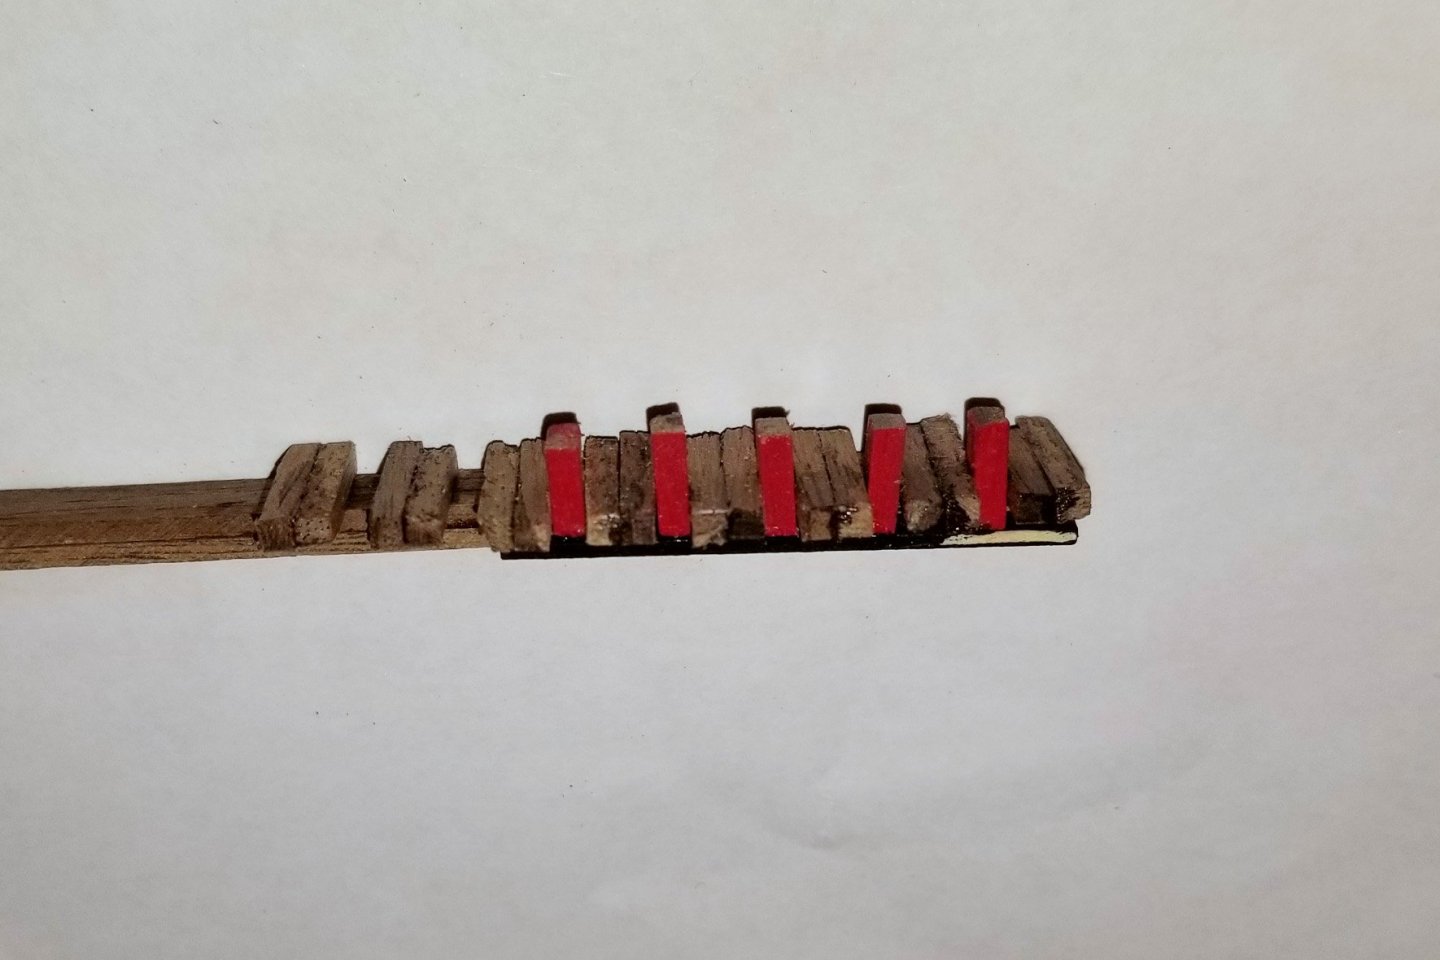
[I have pictures below that are supposed to follow my text in sequence, but sometimes this site reverses the order or mixes it up, so if it does that, you should still be able to figure it out] I've started on the railings, which are among the most intricate and challenging things I've encountered on any ship -- but fun too. In order to get them right, I built another jig, which is shown below. This one has two purposes: first, to get the initial spacing and orientation right, and second, to support the posts for fine sanding (see below). After painting and striping the bottom rail section, I cut red post sections from a strip of red painted walnut. Those go into the jig as shown. The tricky thing is that it's impossible to keep glue off of the jig, so there's a sort of dance of letting them set just enough to move the assembly out, before they get stuck in the jig. Then a trial fitting with the top strip (which is also the bottom strip for the next section. That indicates where the posts need to be sanded down, and for that the assembly goes back into the jig, and I used the drum sander for that with the jig providing lateral support so that the posts don't pop off. Then there's some alignment checking, gluing the first assembly, and then making the next one (which contains the top rail of the first one) in the same way. What you see in the assembled picture is two sections with the bottom rail of the third (top rail of the second) taped into place to show how the railings look. I have some touch-up to do on one of the rail edges. The challenge is not just building the assemblies, but also getting the post height right and the alignment right between sections. But the result is pretty satisfying. By the way, there are some curved cast resin pieces that dress the area between sections. That's why I didn't worry about running the posts right up to the curve on the lowest section. It may seem like I'm working fast given how quickly I posted this after the last one, but I've actually been doing parts of this in parallel with the hull painting and the last spars, since glue and paint have to dry. But it's now going to take a while to finish the railings on this side and do the other, and then go up to the bow section for more of the same. Regards, David


- 136 replies
-
- 2
-
-
- kolderstok
- batavia
- (and 1 more)
-
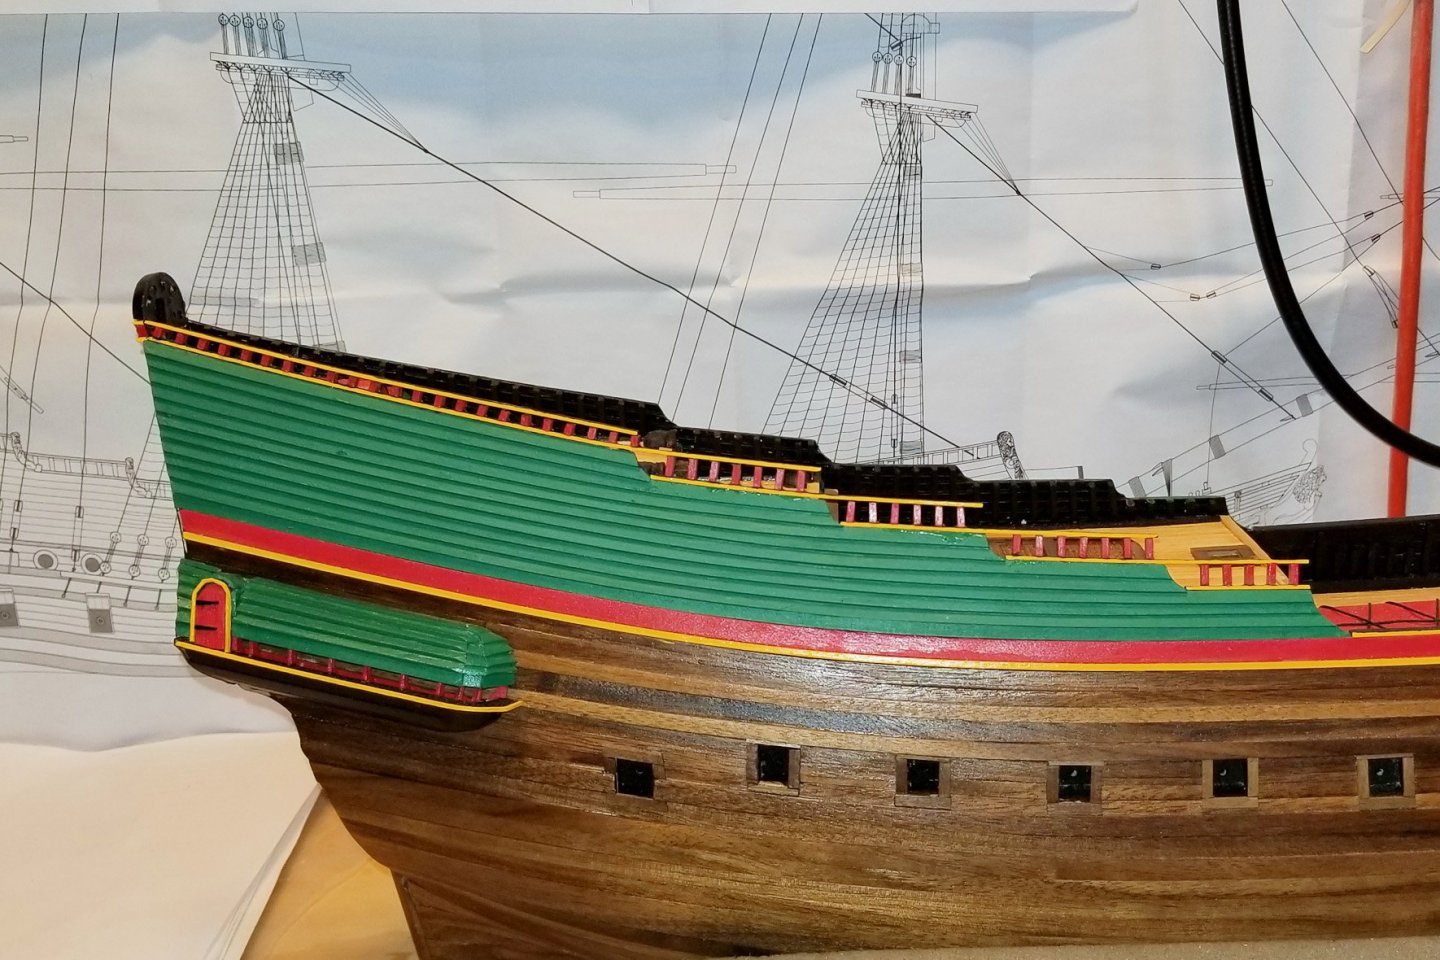
Finished the cabin bulkhead at Frame 16 as well as all of the spars on both sides leading back from the main deck. Also painted the unfinished part of the planking a nice green. I should mention that Hans gave me a Dutch build log that's an excellent source of pictures. I don't try to translate the Dutch -- I have just copied down all the pics so I have something to reference, as the ones in the manual don't show everything. That log was, for example, my source for the red deck at the rear. It can be found at https://www.modelbouwforum.nl/threads/bouwverslag-kolderstok-voc-retourschip-batavia-1628.234841/ Regards, David

- 136 replies
-
- 5
-
-
- kolderstok
- batavia
- (and 1 more)
-
Peter -- Yes, I think this will be a beautiful model. The painted colors are the reason I was attracted to this model. Regards, David
- 136 replies
-
- 1
-
-
- kolderstok
- batavia
- (and 1 more)
-
Hans -- Yes I did notice. You had said they would really add stiffness, and they do. The bulwarks are very solid. Regards, David
-
Finished installing and painting the spars between frames 9 and 12. The little jig made the alignment come out well. Built and installed the cabin bulkhead at Frame 14. Now I'll do the spars between 12 and 14. As you can see, I'm working my way back to the stern, after which I'll paint the exterior hull and do the railings (which promise to be a real challenge to get right). Regards, David
- 136 replies
-
- 8
-
-
- kolderstok
- batavia
- (and 1 more)
-
Alex and Robert: These are both wonderful sites. Thank you for sending them to me! Regards, David
- 136 replies
-
- 1
-
-
- kolderstok
- batavia
- (and 1 more)
-
I made a jig to help with installing the spars to keep them properly spaced and parallel. Regards, David


- 136 replies
-
- 7
-
-
- kolderstok
- batavia
- (and 1 more)
-
Peter: Welcome aboard! Glad you are interested. You are right -- I am really enjoying this build. It has a number of new differences and challenges from other models I have built, and I really love the way the colors work. The materials quality in this kit is excellent -- on a par with the Amati Victory series, which has been my gold standard for kit quality. Regards, David
- 136 replies
-
- 1
-
-
- kolderstok
- batavia
- (and 1 more)
-
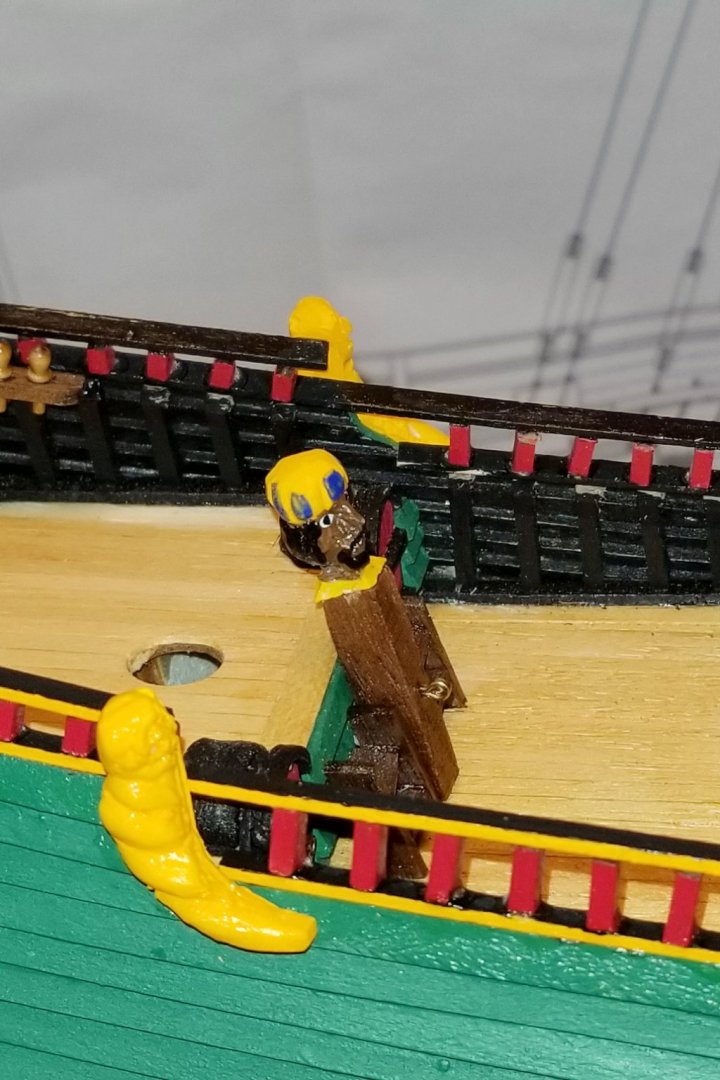
Yankee D -- No problem asking. Regarding the pillars: you are correct when viewing carefully from the photo angle, but from a normal viewing angle you can't tell. Re the ladders: I debated whether to have them standing on the deck (slanted) or vertical and attached to the bulkhead, and chose the latter treatment. Maybe I'll change that for the main deck ladders, which are more visible. Regards, David
- 136 replies
-
- 2
-
-
- kolderstok
- batavia
- (and 1 more)
-
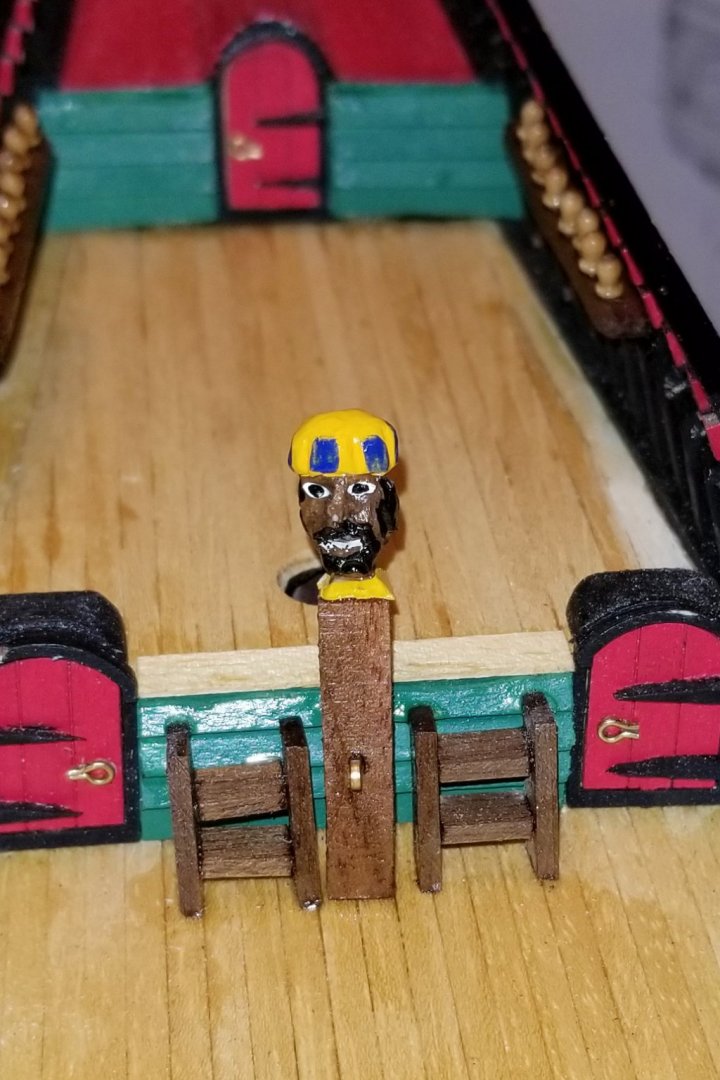
Built and installed the cabin bulkhead at Frame 12. The three pillars are made of molded resin. There are a lot of these parts, and this is the first time I've run across this material. It's a joy to work with -- easy to separate the pieces, and they clean up easily with a file. Regards, David

- 136 replies
-
- 10
-
-
- kolderstok
- batavia
- (and 1 more)
-
The rest of the side planking is up. This is overlapped, clapboard-style. Goes up pretty quickly. Next step will be to remove the frame ribs and start working on the cabin bulkheads and spars on the side. I want to do those before painting the exterior as I'll need to sand the spars down to be level with the top of the sides. Regards, David

- 136 replies
-
- 7
-
-
- kolderstok
- batavia
- (and 1 more)
-
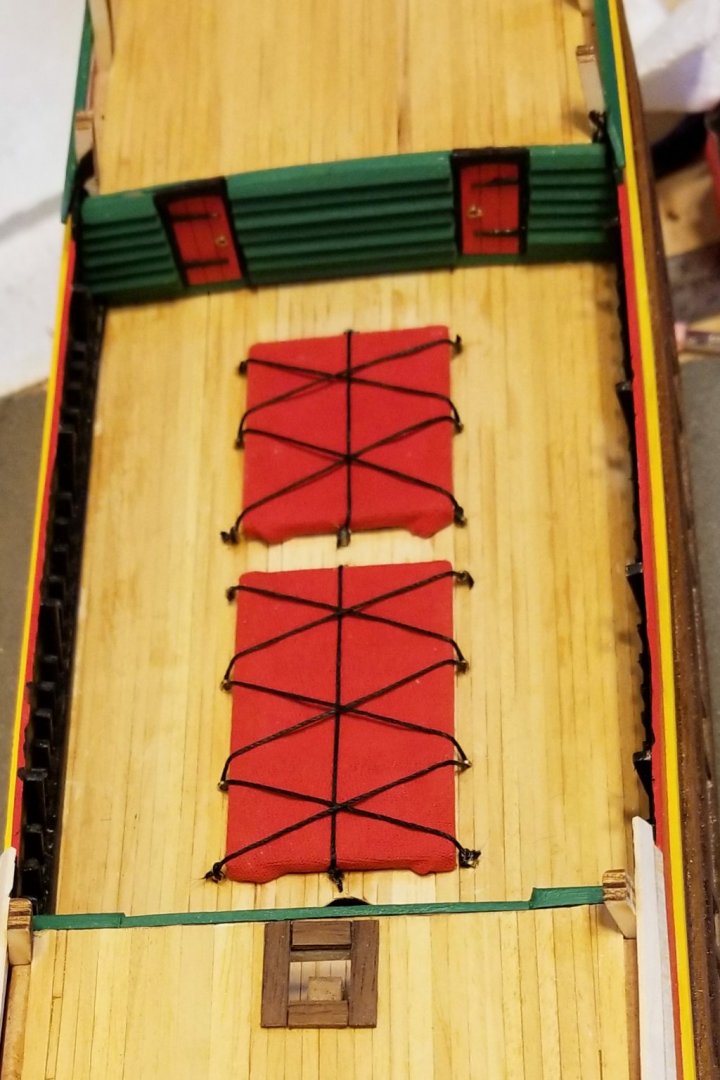
Three hatches done. The two red ones are simulated canvas using T-Shirt material and paint. The wooden one on the quarterdeck was difficult. I had trouble with glue adhesion on the hatch material, and also with sanding. Did the best I could and then varnished it, and what I got was a "weathered" hatch, which looks fine on the boat -- better than in the pic. Regards, David


- 136 replies
-
- 6
-
-
- kolderstok
- batavia
- (and 1 more)
-
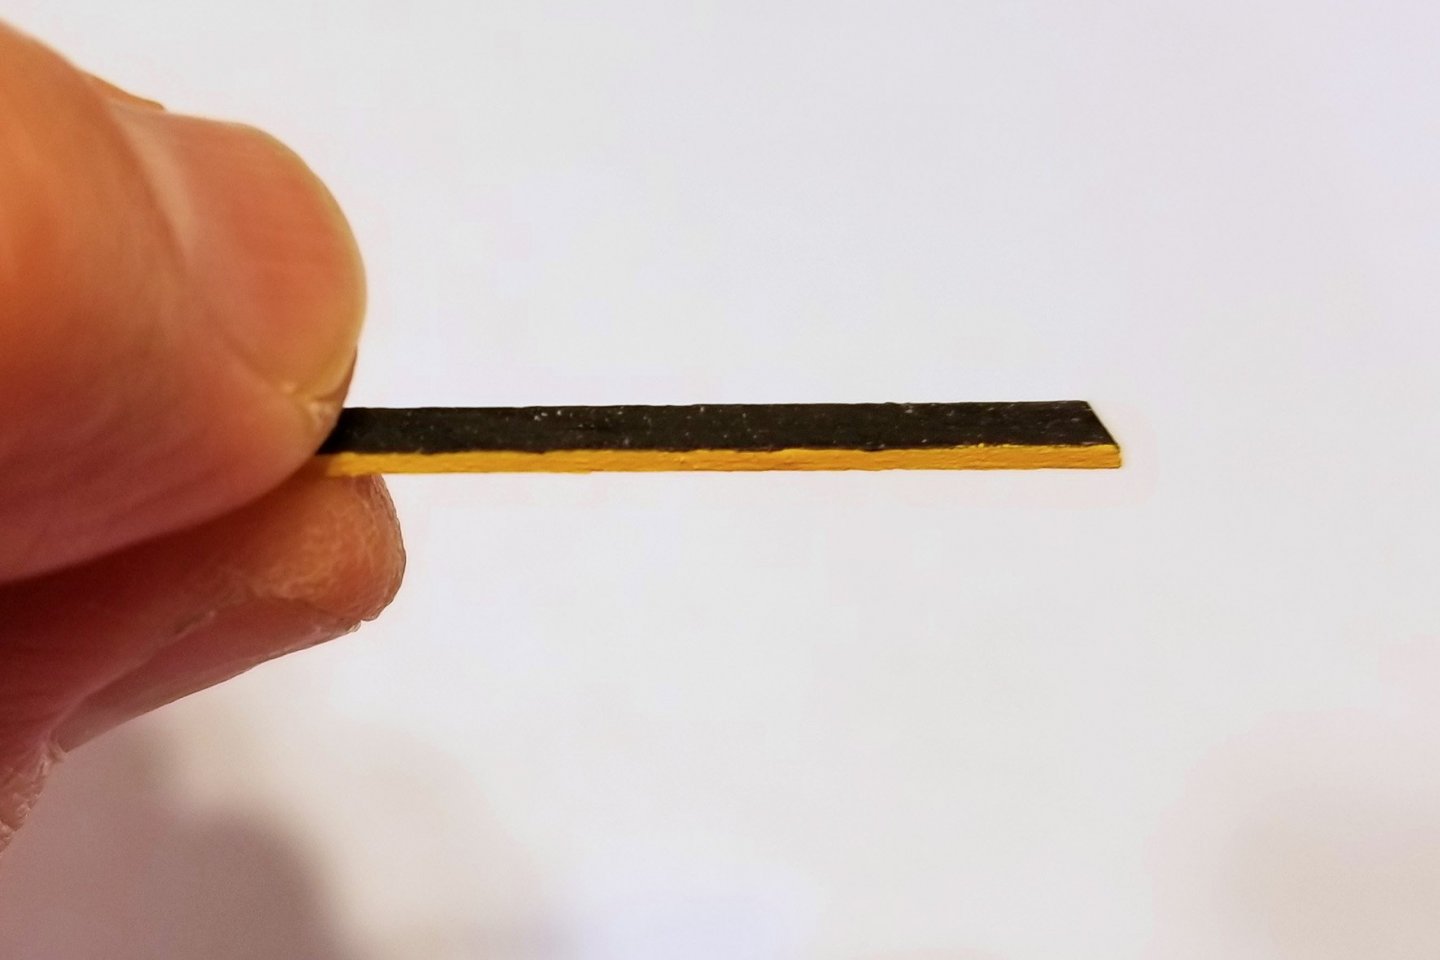
Spars installed on the side bulkhead. One picture pre-painting to show the pattern, and one after painting. There will be a cap rail on top. Regards, David

- 136 replies
-
- 5
-
-
- kolderstok
- batavia
- (and 1 more)
-
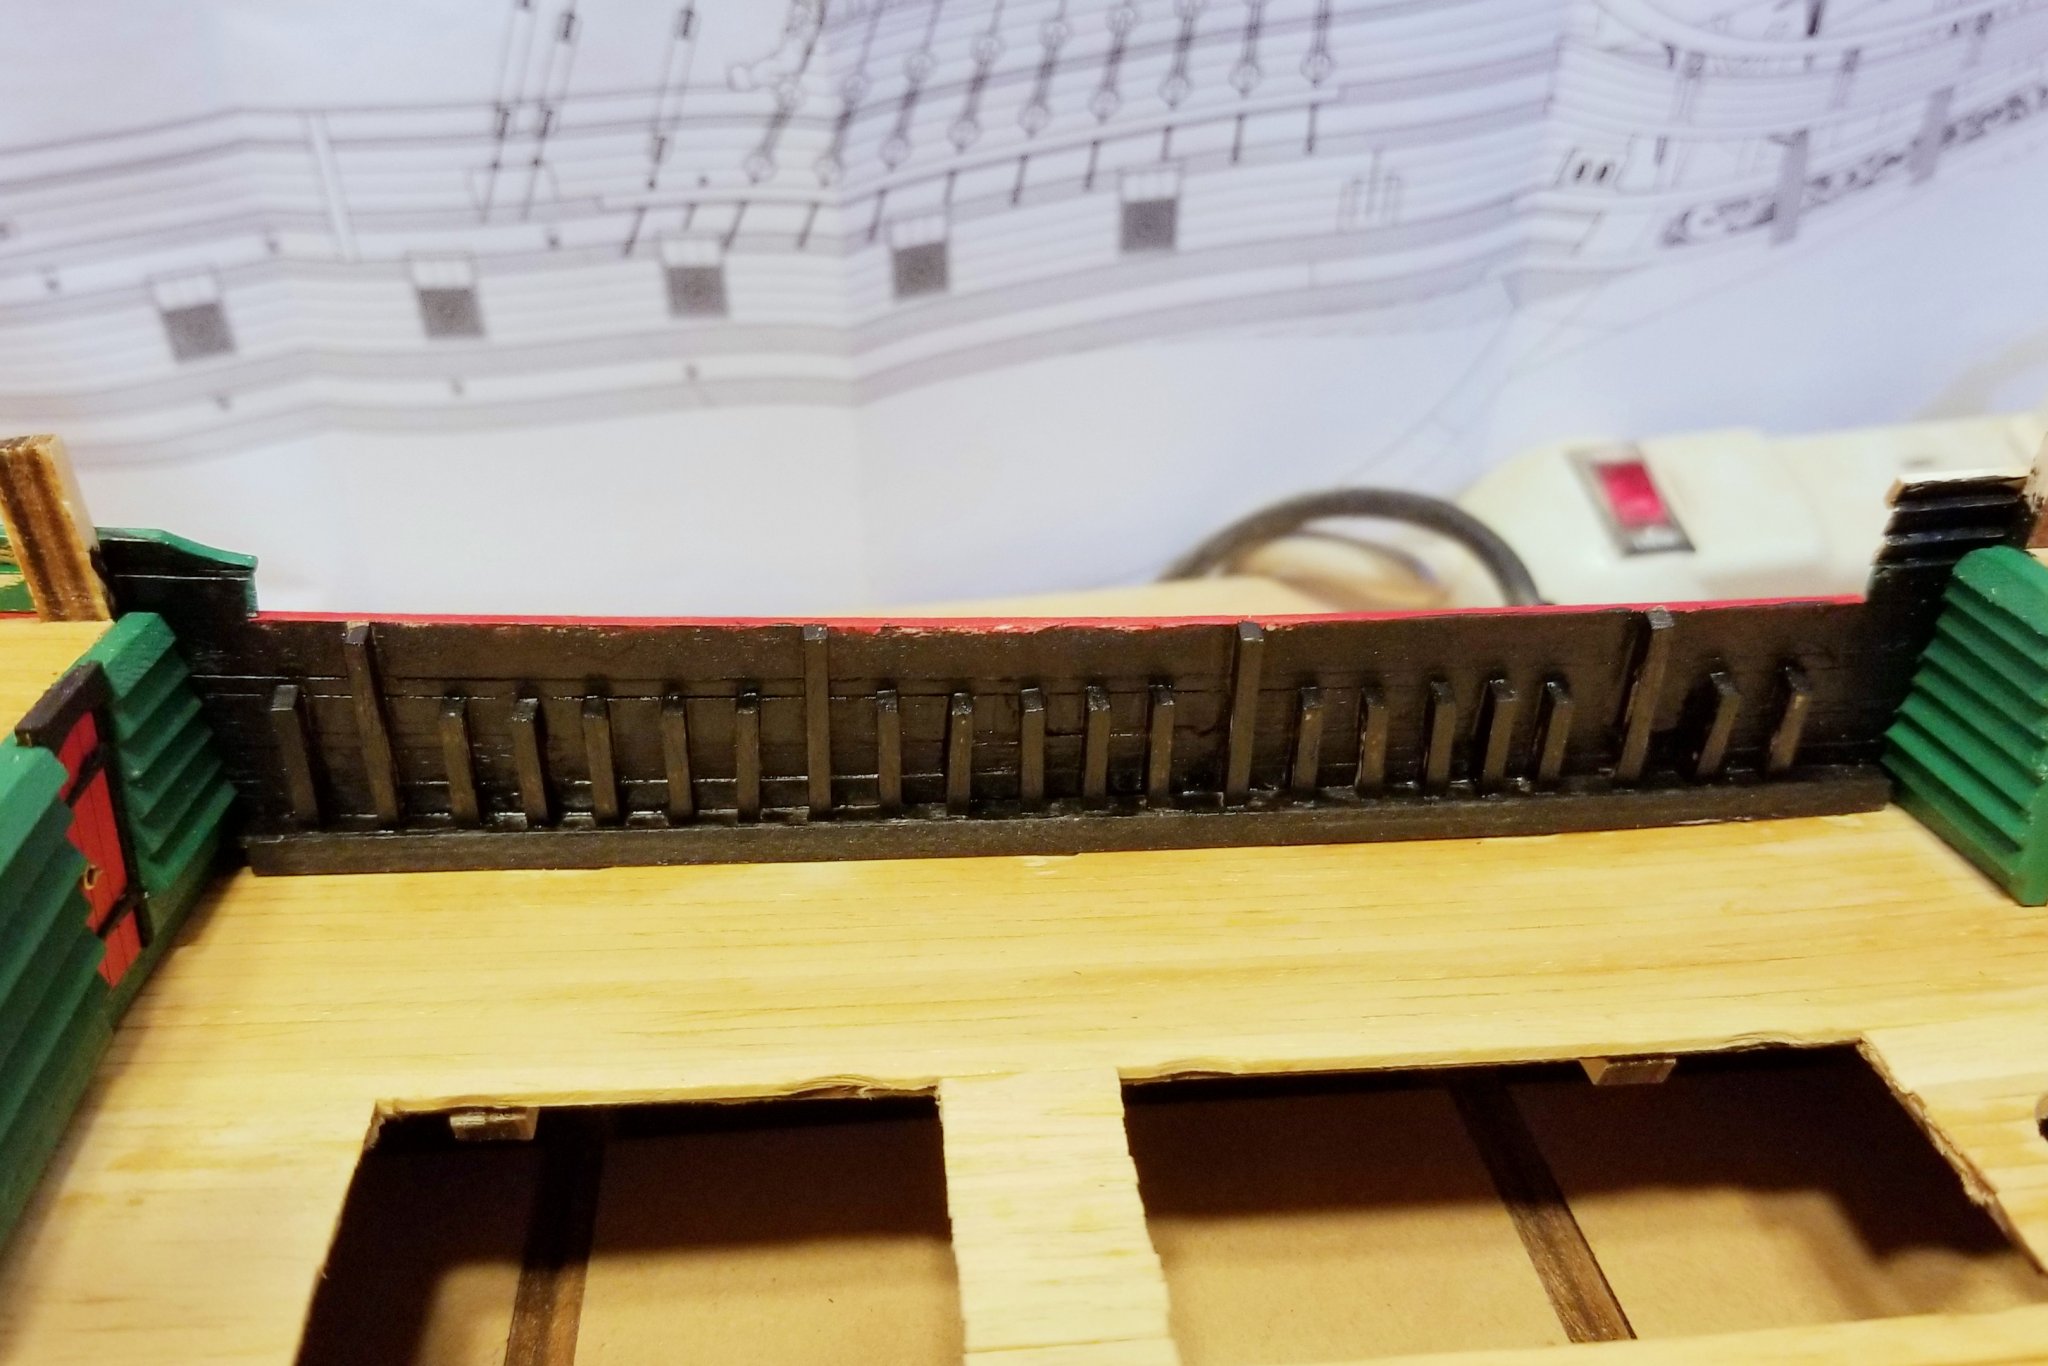
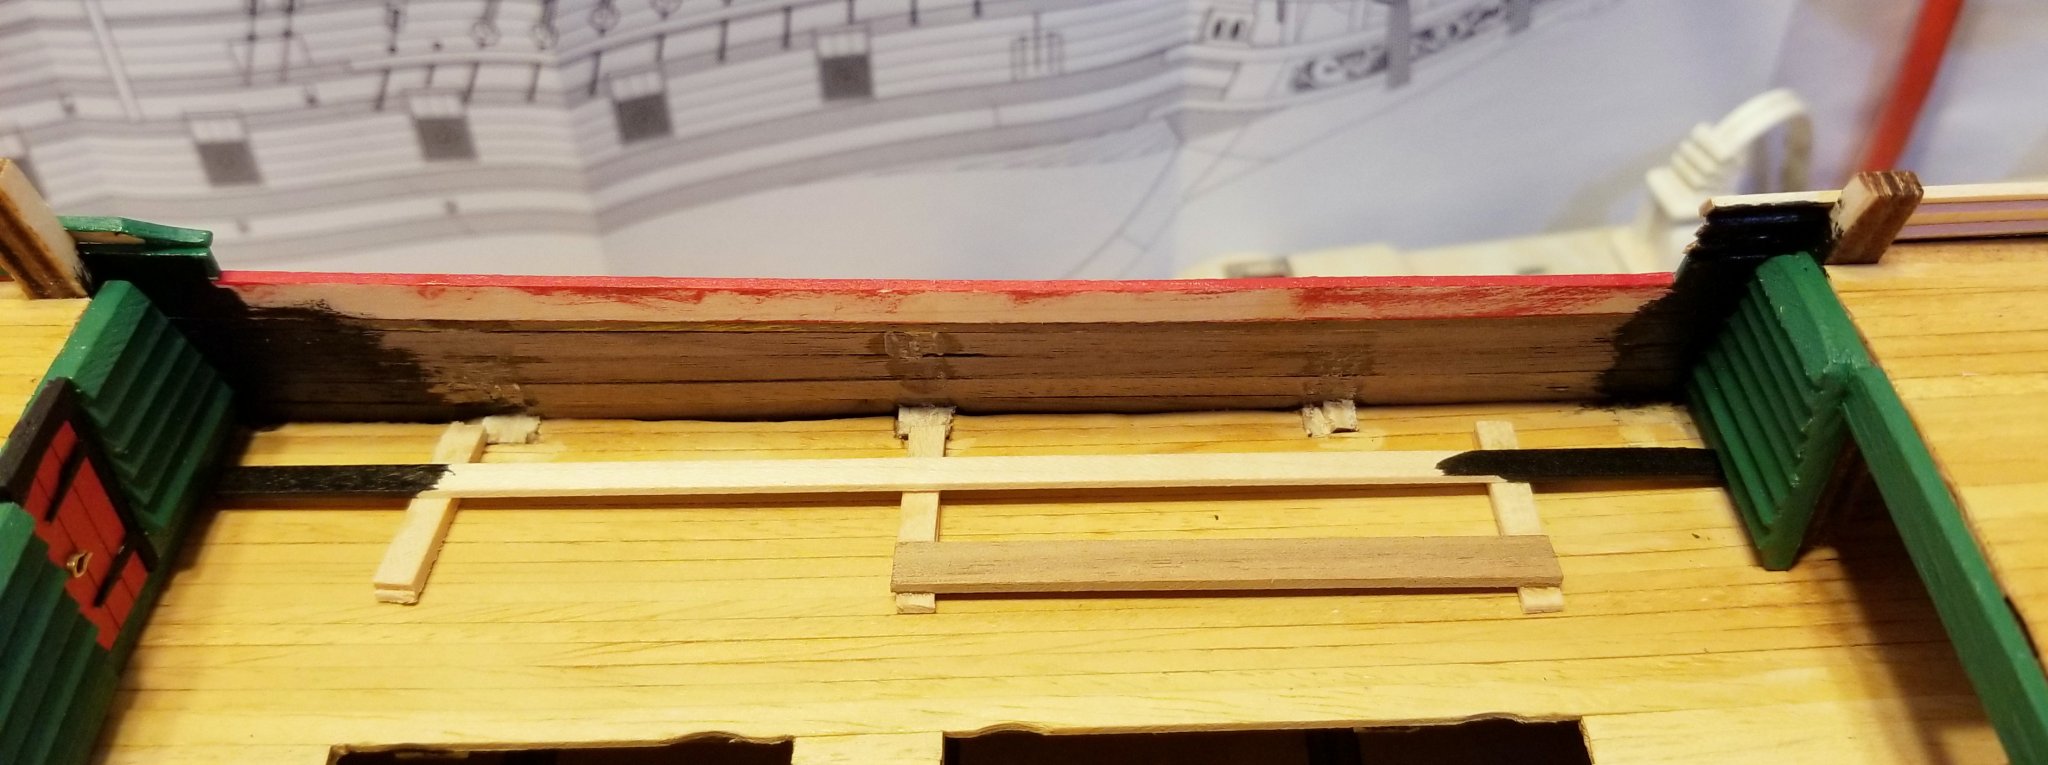
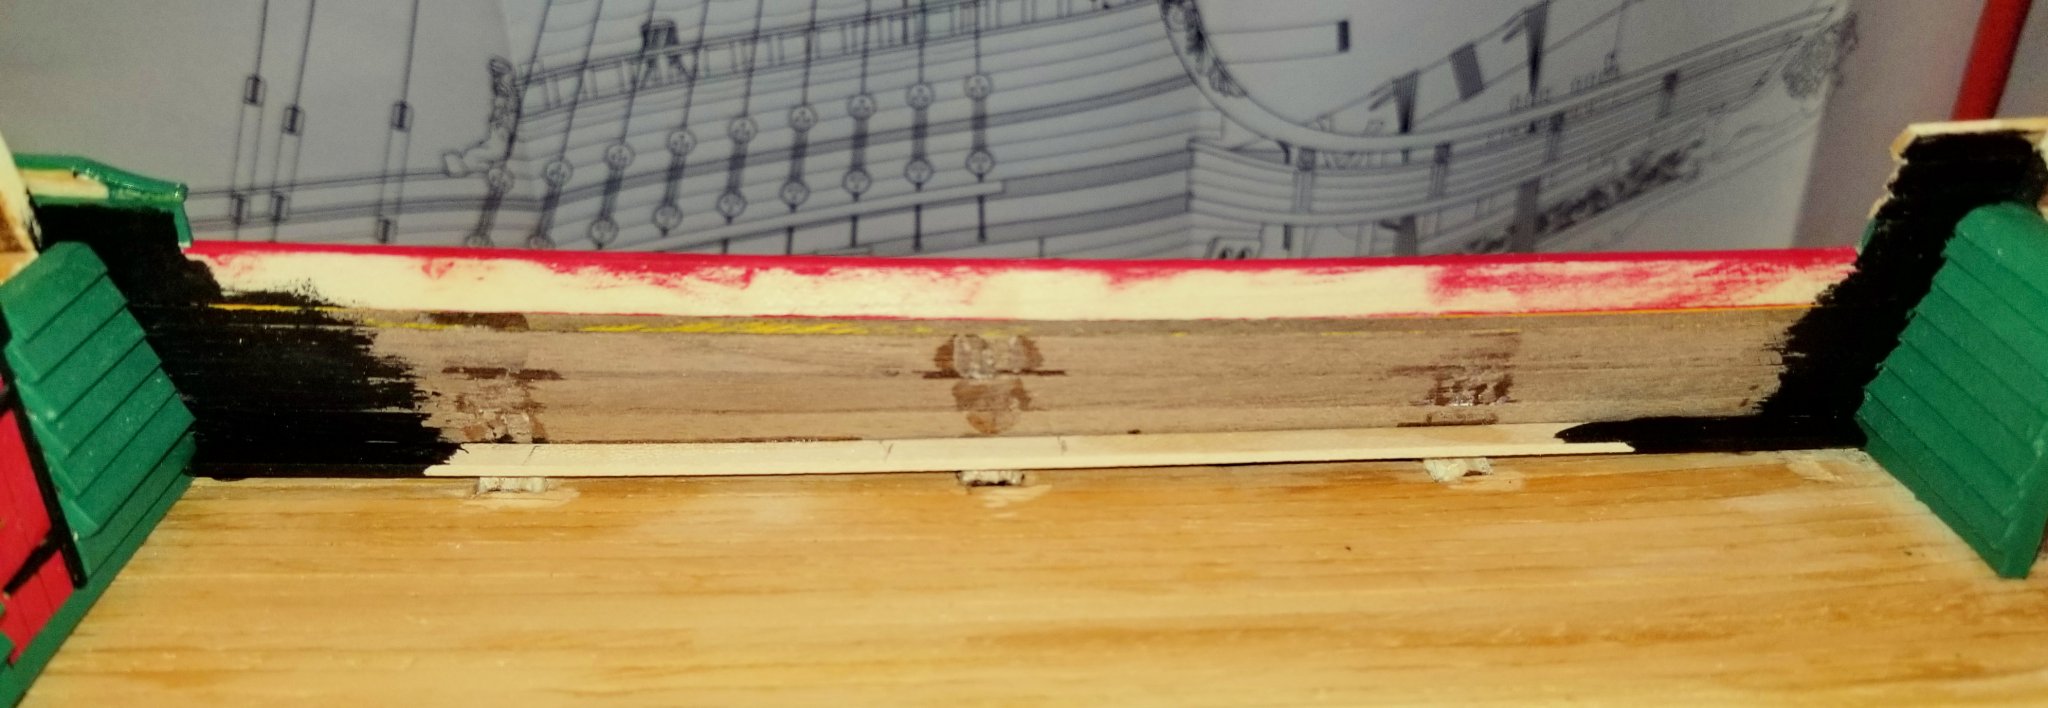
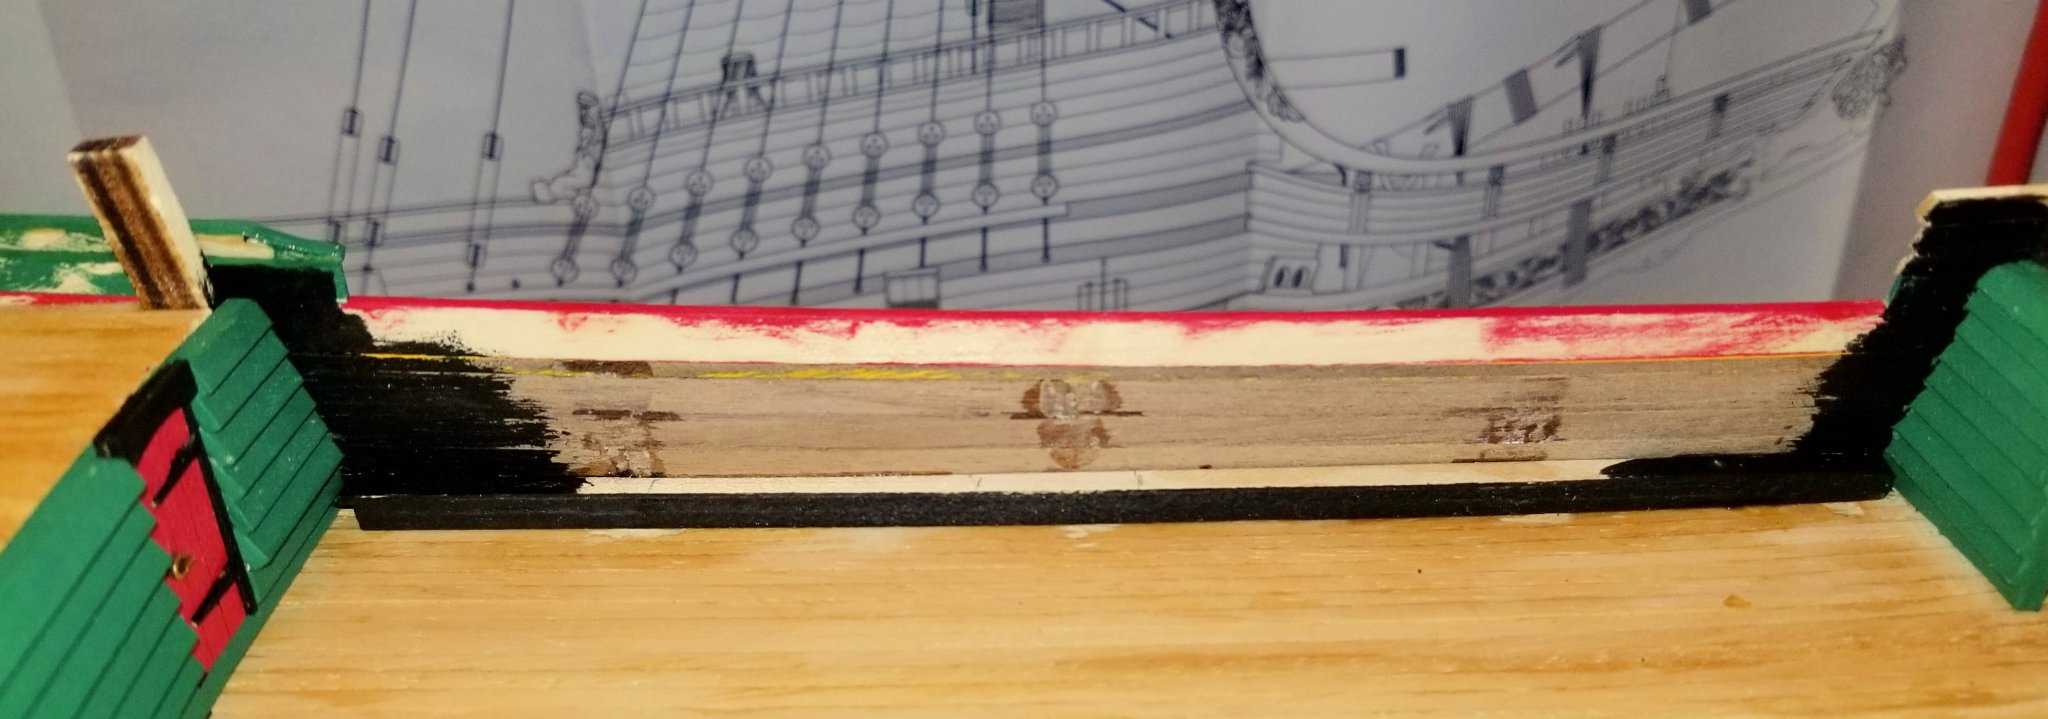
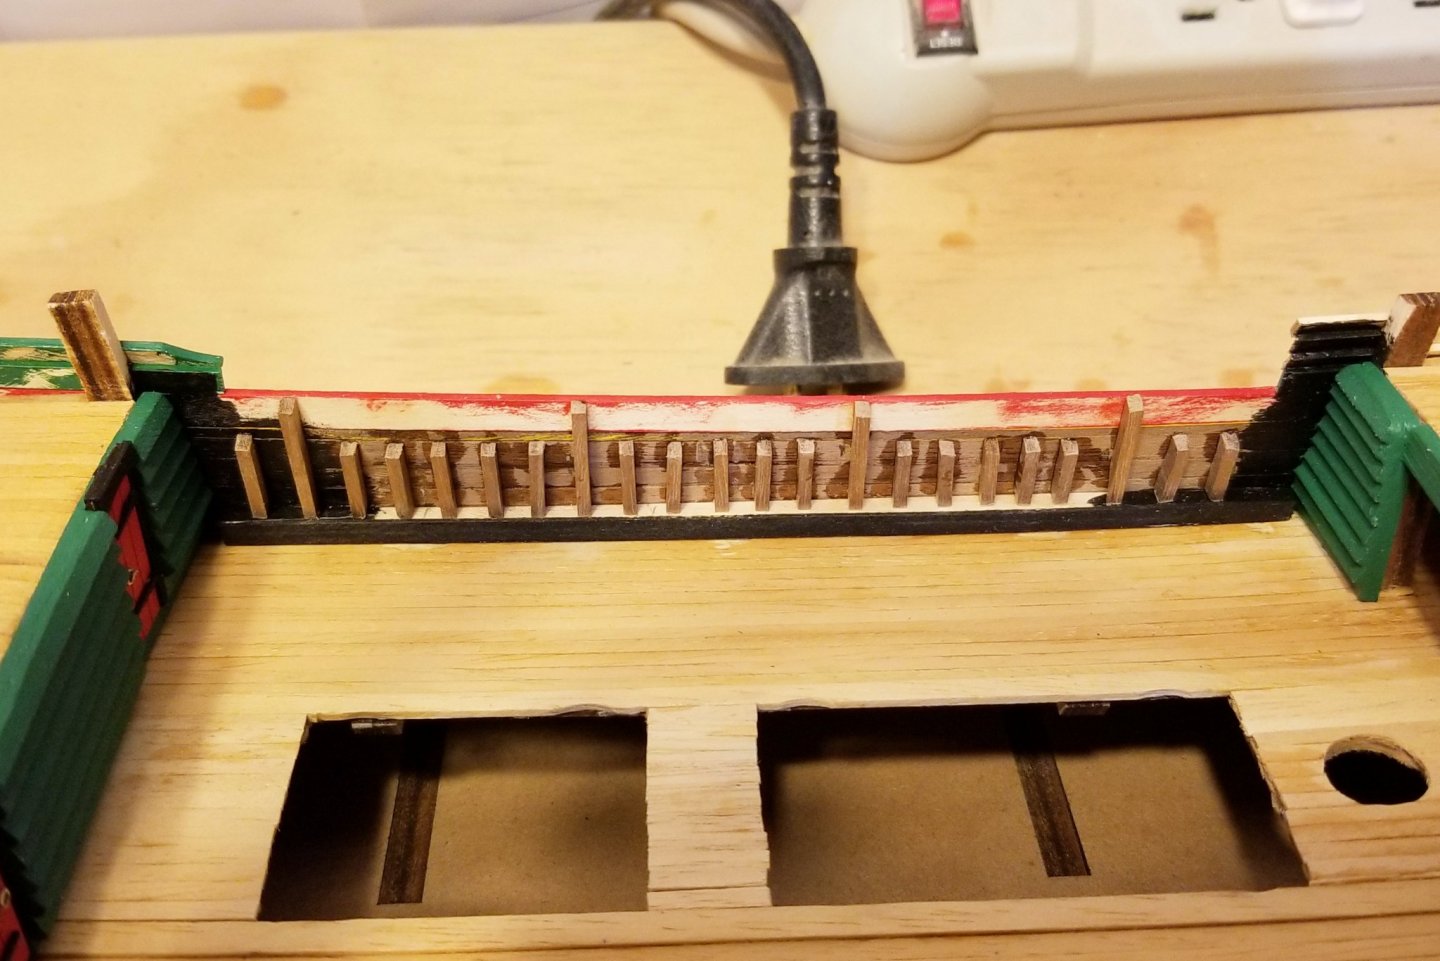
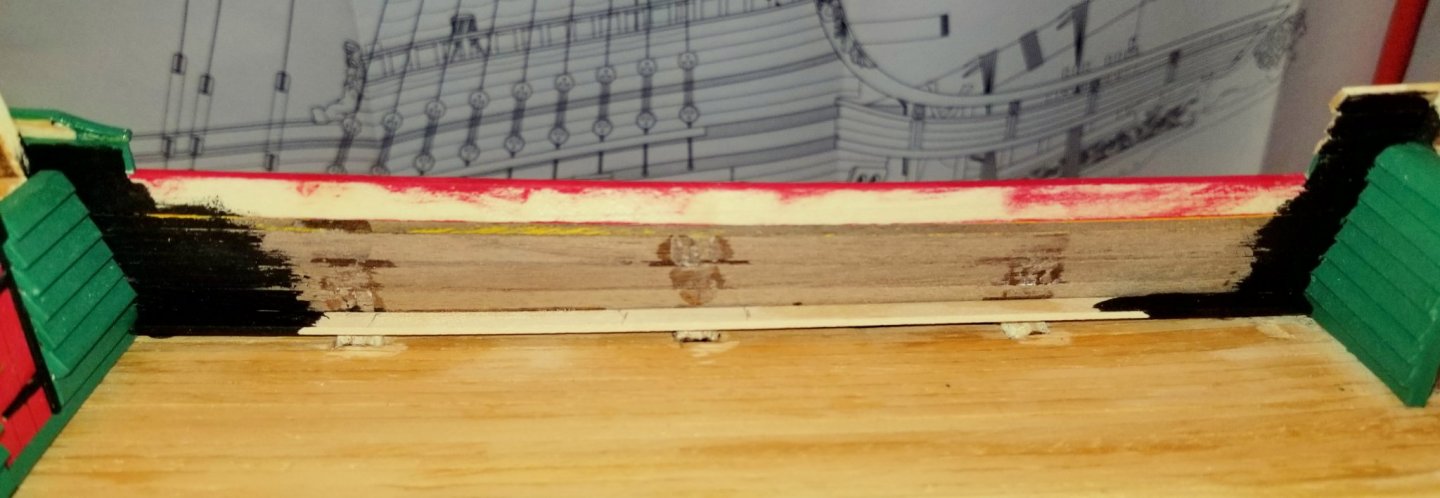
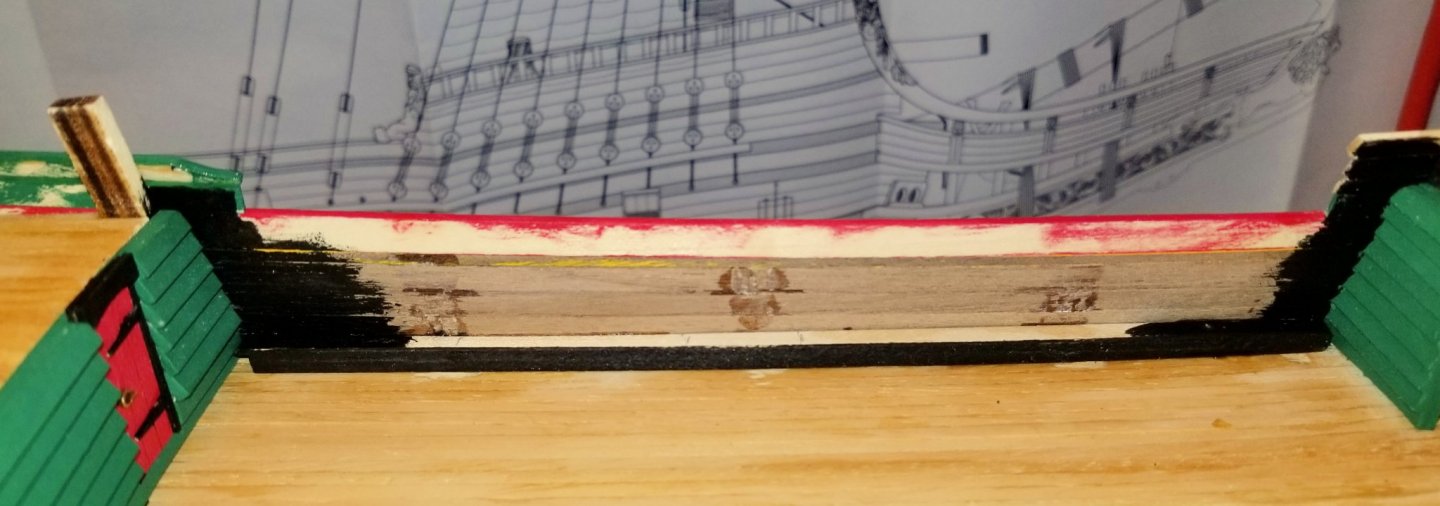
I referred in my post above to the "box" across the side bulkhead. Here's how I built it: I created a simple jig to get the top of the box level. Prepainted the ends so I wouldn't have to paint near the green cabin bulkheads Glued the top to the side bulkhead, covering the rib stubs Prepainted a soffet (for a clean line at the deck) and glued it on. Now I can install the spars on top of the box and then paint it all black. I'll use this same approach on the other decks as I move up. Regards, David

- 136 replies
-
- 5
-
-
- kolderstok
- batavia
- (and 1 more)
-
Finished the cabin bulkhead at Frame 9. First, I had to build up the side planking a bit so that I could paint the inside corner black. Then I painted and installed the two side bulkheads and the span between them. What's left is the unfinished side bulkhead. Next step is to build a "box" to cover the area where the ribs were removed, then install spars and paint it all black. Regards, David


- 136 replies
-
- 7
-
-
- kolderstok
- batavia
- (and 1 more)
-
Bluebeard -- Glad to hear it. This means that my many mistakes will have some lasting value. 😄 Regards, David
- 136 replies
-
- 2
-
-
- kolderstok
- batavia
- (and 1 more)