drobinson02199
-
Posts
1,079 -
Joined
-
Last visited
Content Type
Profiles
Forums
Gallery
Events
Everything posted by drobinson02199
-
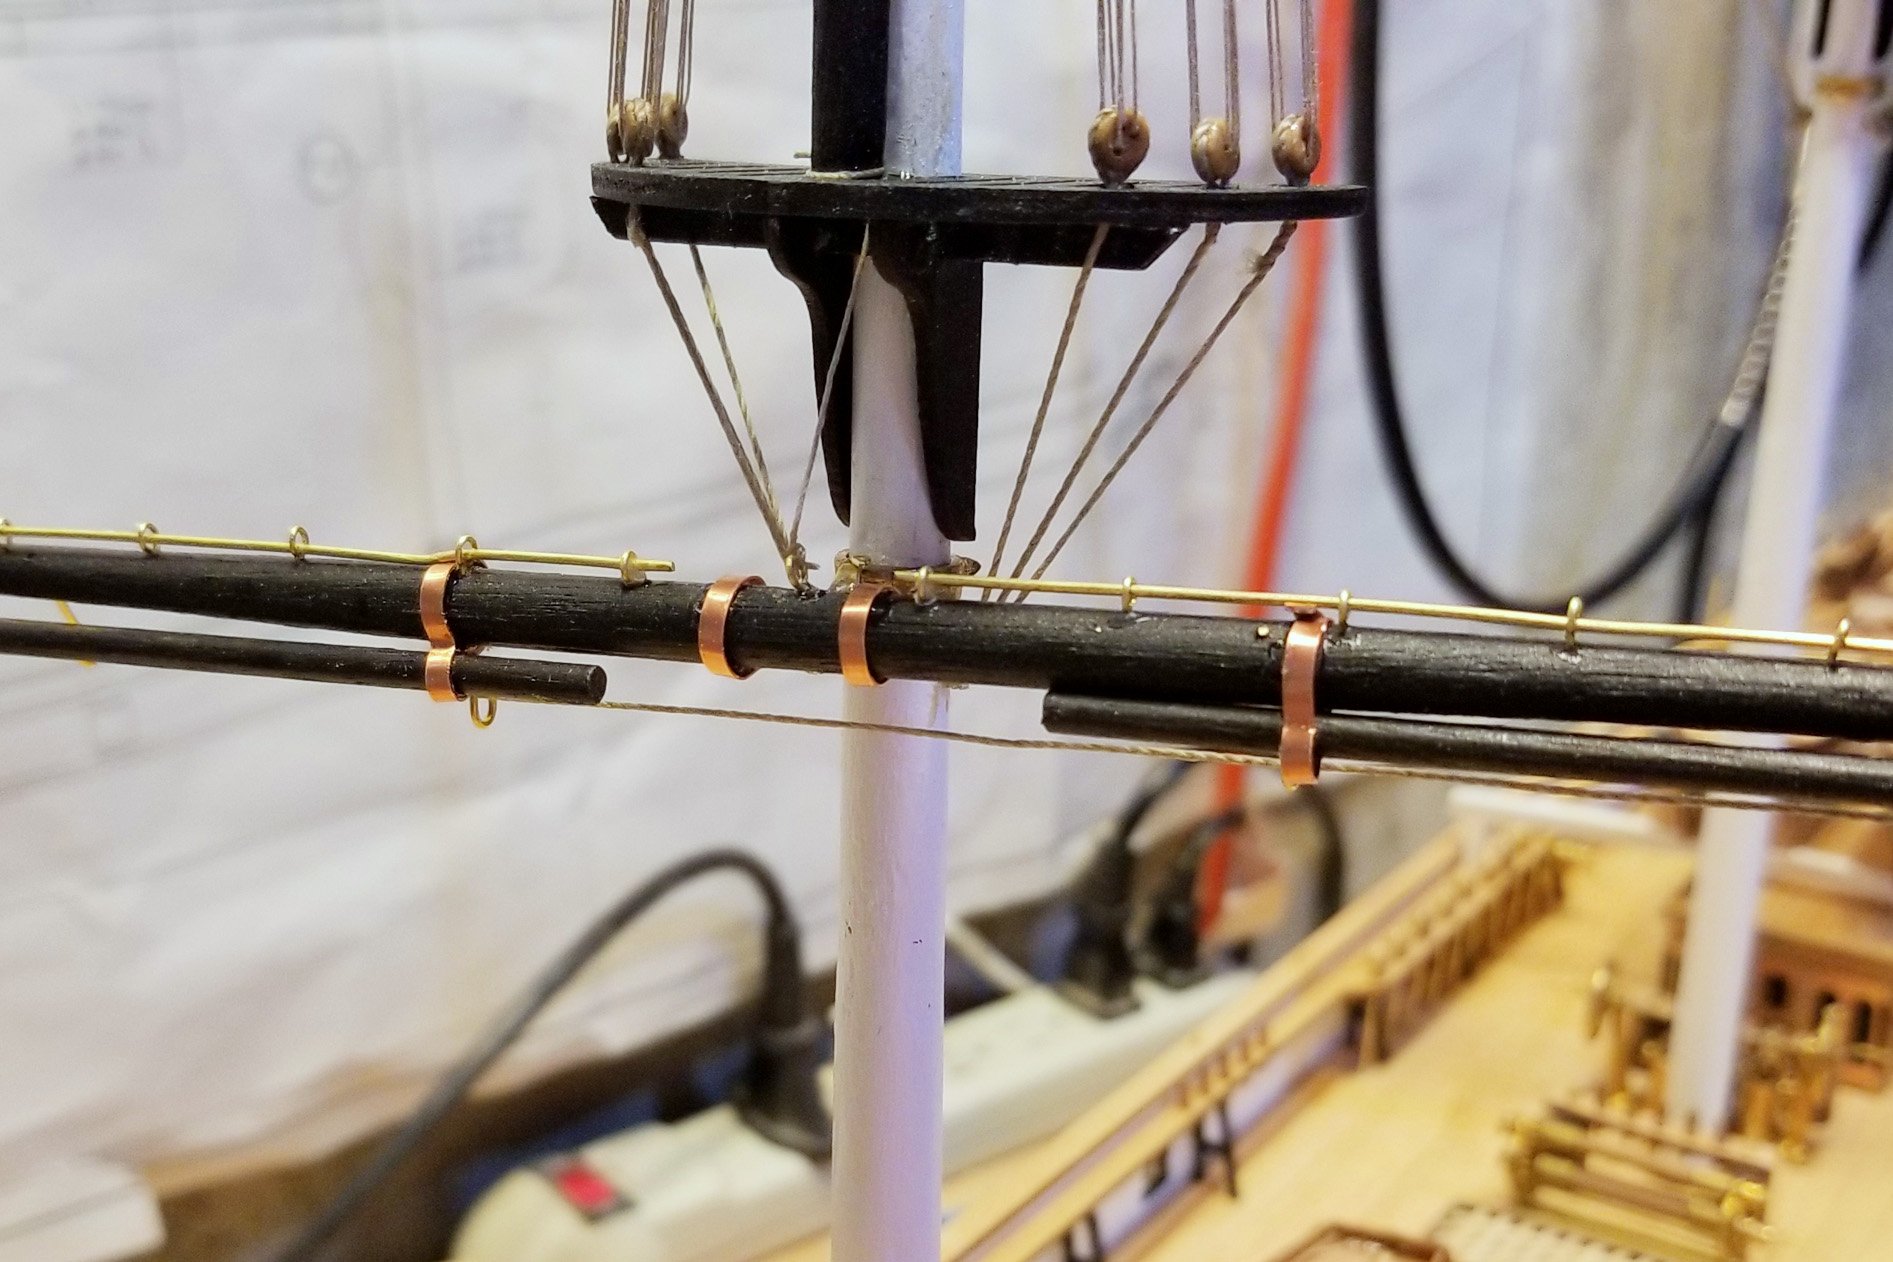
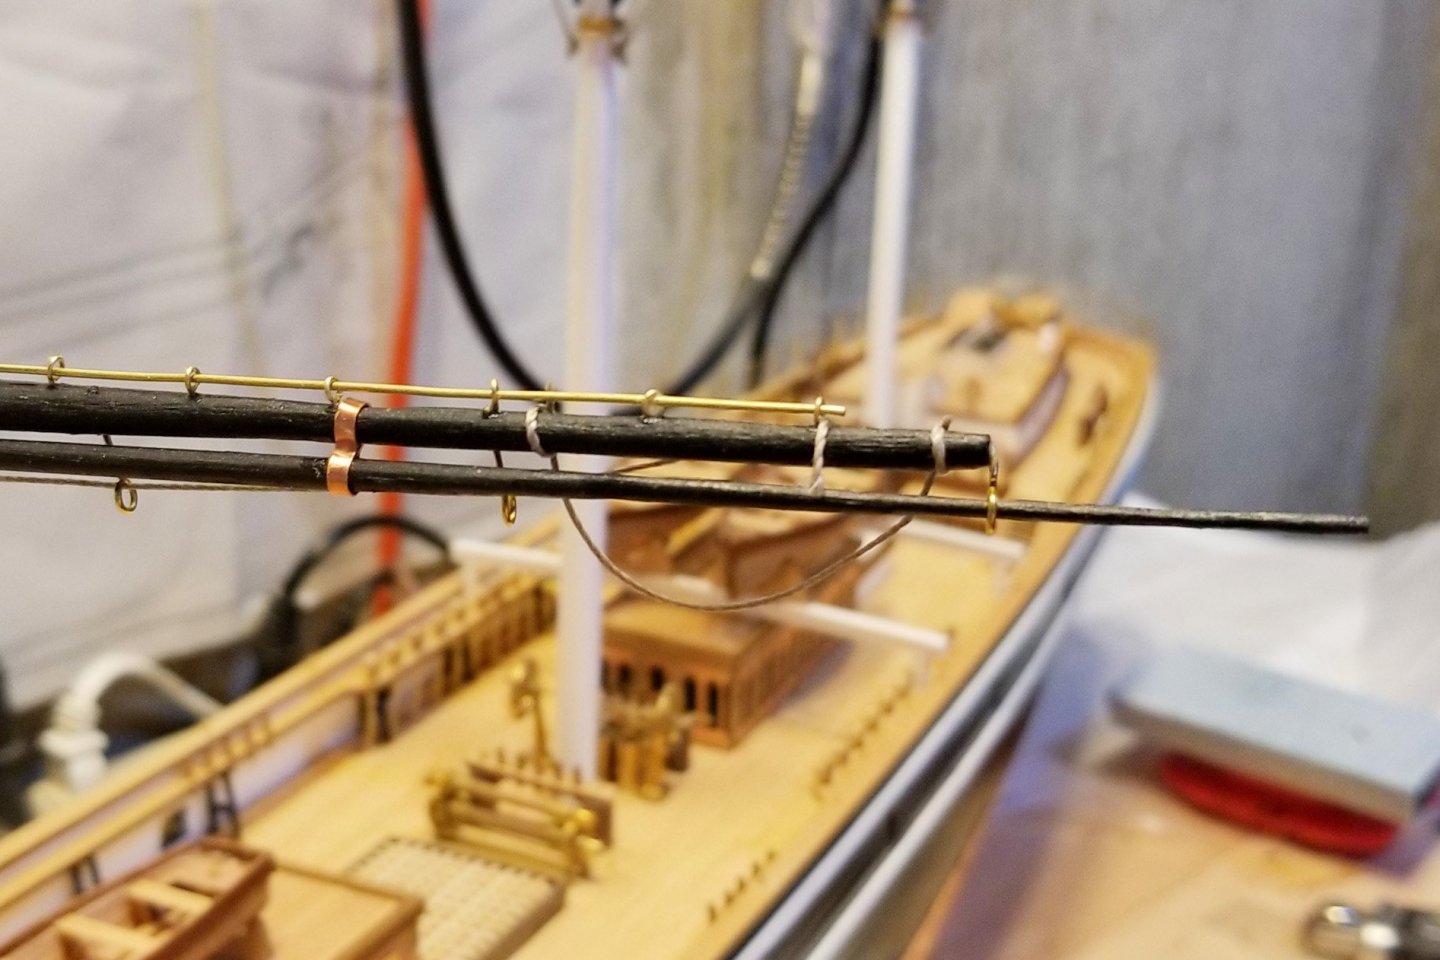
 I've built the lowest yard on the foremast -- pictures attached. The brass swivel fitting gives about a 90 degree swing to this yard, which I think could spell trouble while I'm building, so my next move will be to put up the foremast shrouds to give some side support to the yard. The upper shrouds are already rigged so they will support the next yard up, and then the ones above have wooden fittings which will be stiffer. I was originally reluctant to fix the masts too soon as I thought I might want to remove them to mount these lower yards with brass swivels, but now that I've done it it's actually easier with them fitted on the ship. The swivel assembly on the yard is difficult and a bit fragile -- took a couple of tries to get it right. Regards, David
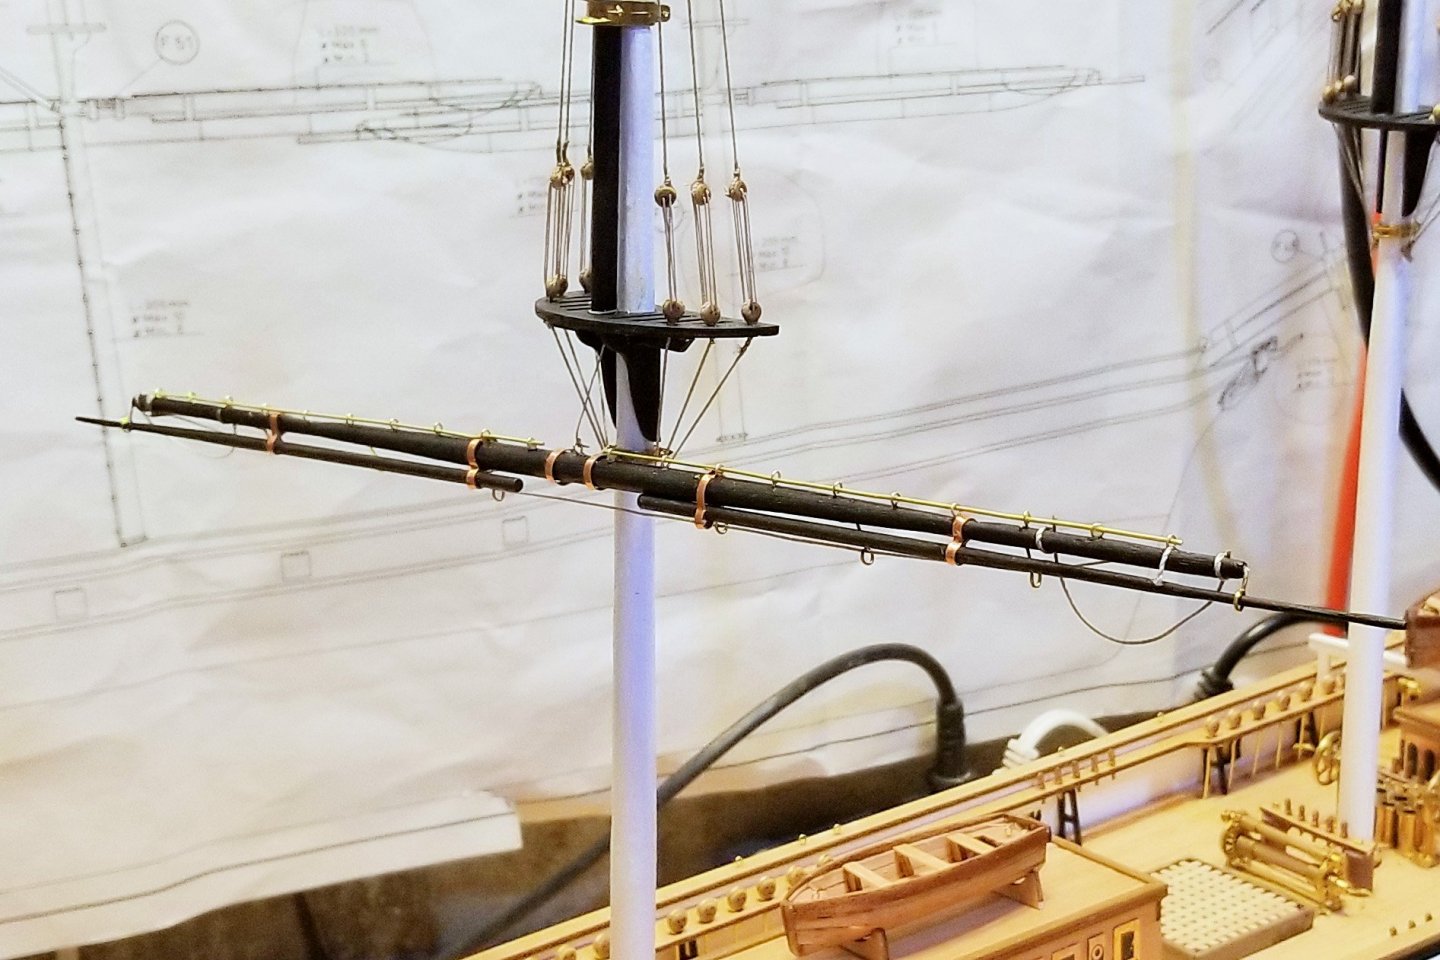


- 133 replies
-
- 9
-

-
- cutty sark
- mantua
- (and 3 more)
-
Peter: Thanks for your comments. In previous boats, I have left the natural wood wherever possible because I too like that look. My Revenge, for example, is all natural vs. white hull, and looks wonderful. On this ship, however, the second planking strips are not very good, and there was a lot of chipping that I had to fill with wood filler. I have never figured out how to use wood filler on a natural surface, so at the end I was glad to cover this one up. Thanks, David
-
Chris: Nothing so fancy. I taper the masts using a rotary drum sander (Dremel size), first square and then octagonal, and then finish with sandpaper. The mast top you see is actually a small spare deadeye I had, with wood filler in the holes. Mantua didn't supply anything in the kit. Have you finished your riverboat yet? Haven't seen any posts. Regards, David
-
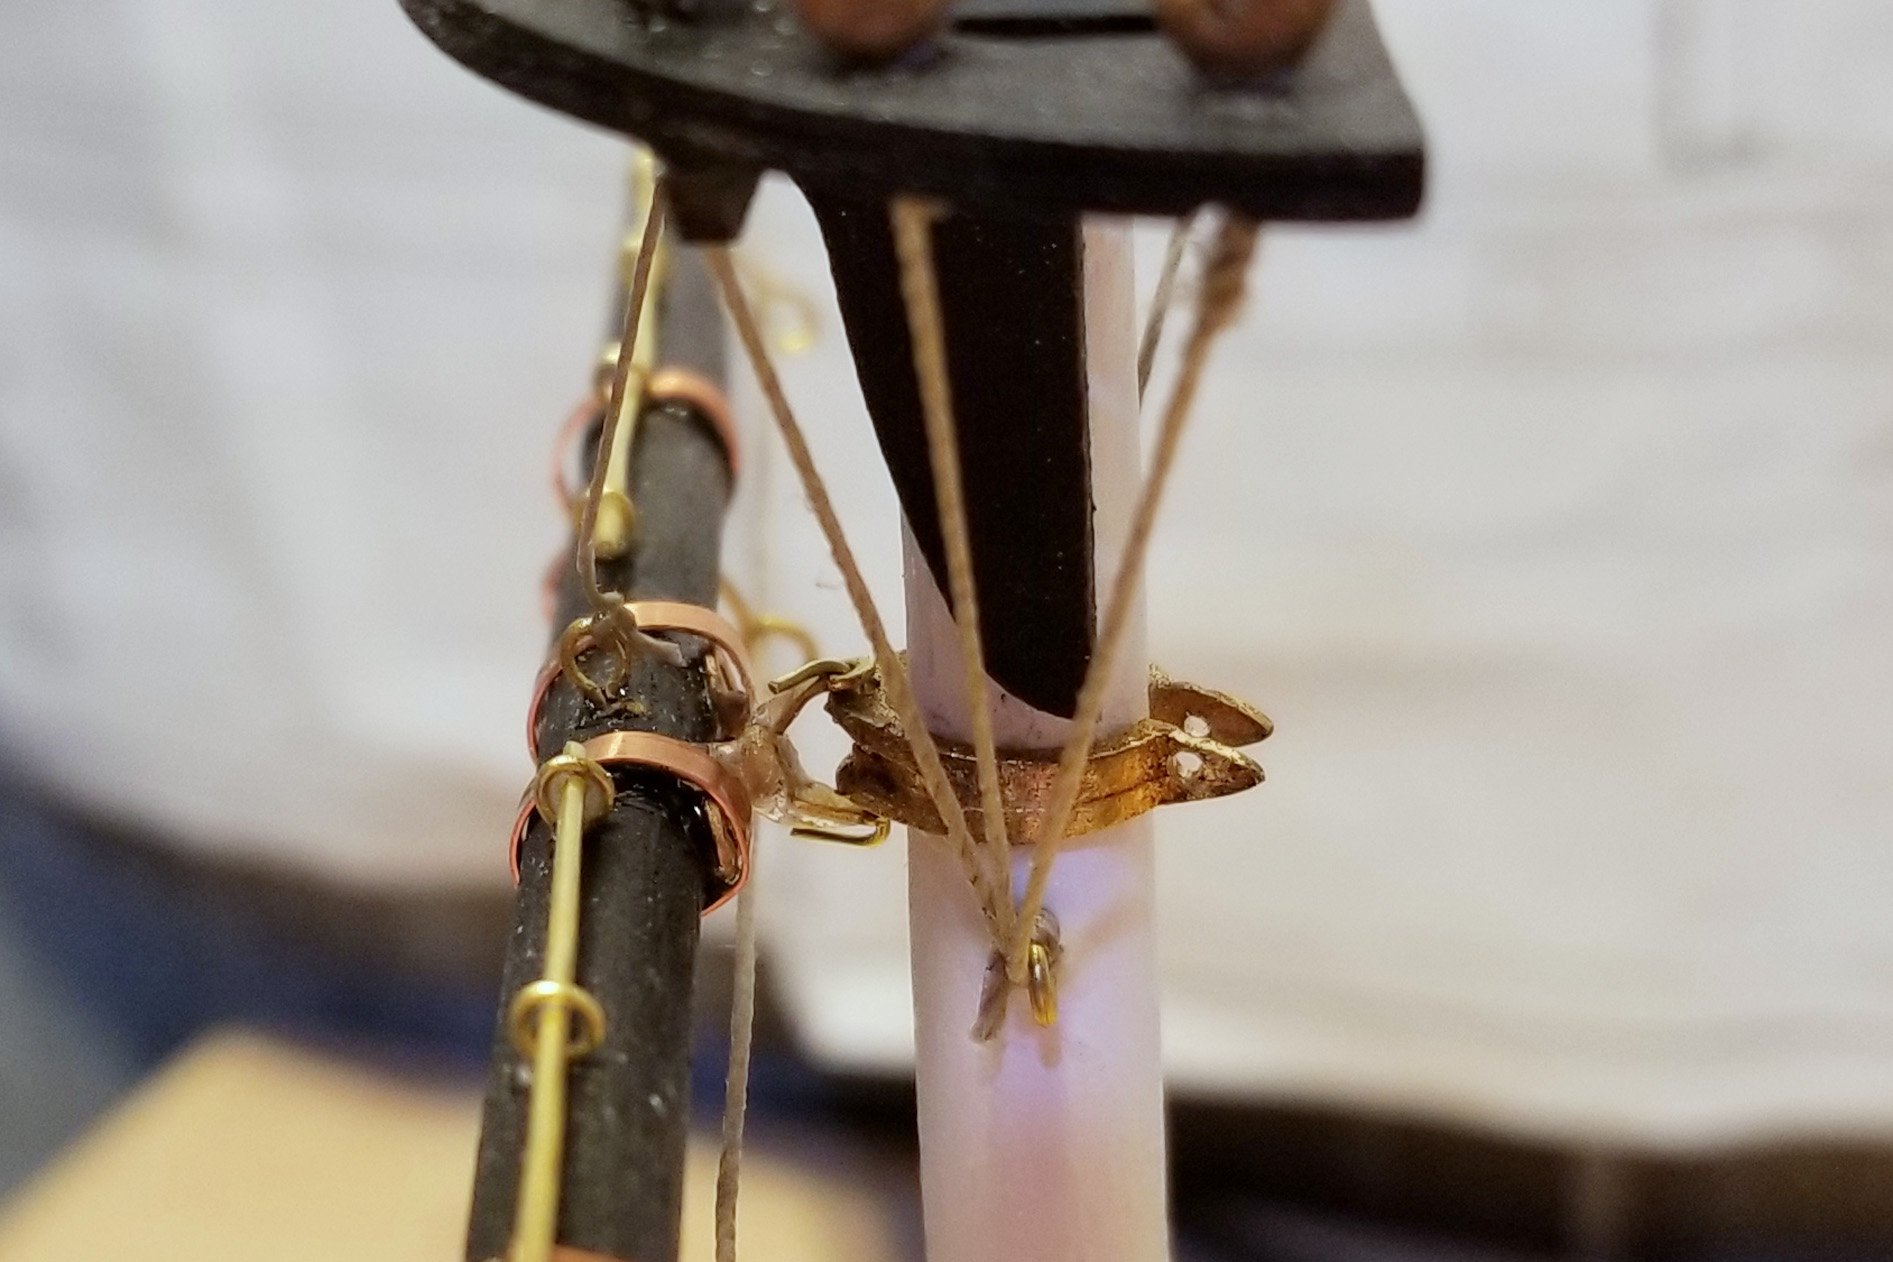
I decided to rig the upper shrouds before mounting the masts, because the deadeyes are very small and it's easier to manipulate the mast while working them. See pictures. One with flash to make the lines show up (but too many shadows), and one without. I'll do the ratlines once the masts are mounted. Thanks, David


- 133 replies
-
- 6
-
-
- cutty sark
- mantua
- (and 3 more)
-
Charles: Well, the square holes in the planking could serve as scuppers, since there are no cannons. Regards, David
-
Charles: The issue you raise is one I gave some thought to. Thinking ahead, once those ribs are removed, you have some long stretches of planking with no rib support above the deck. So it's important to glue the sides of the planks to each other across that whole length, at least, so they support each other and remain flush. I went ahead and glued the planks to the ribs, because you want the ribs to shape the run of the planking both horizontally and vertically and keep the planks flush, and I've never been a fan of pins as I find they don't hold. Used CA medium glue. Then, when you are ready to remove the ribs, take a pair of long nose pliers and fix them to a rib lengthwise from the top down to the deck, and wiggle gently side to side to detach the rib from the planks. Then twist the pliers to remove the rib. That will leave a stub at the deck which you can sand or grind down. The sanding doesn't have to be too pretty because that whole area is covered over by a molding later on. Now that I have typed the above, I belatedly realize that I planked the deck AFTER removing the ribs, as stated in the manual, so that I could plank over the rib stumps and not mar the planking grinding them down flush with a Dremel drum. But again, as long as you are careful to grind them down in parallel with the planks and not extend too far out toward the center of the ship, the molding will cover any marring of the deck. What you can do is punch out that molding and see how far it extends from the planking toward the center, and that will tell you where to be careful and where you can grind away. Hope this helps. Regards, David
-
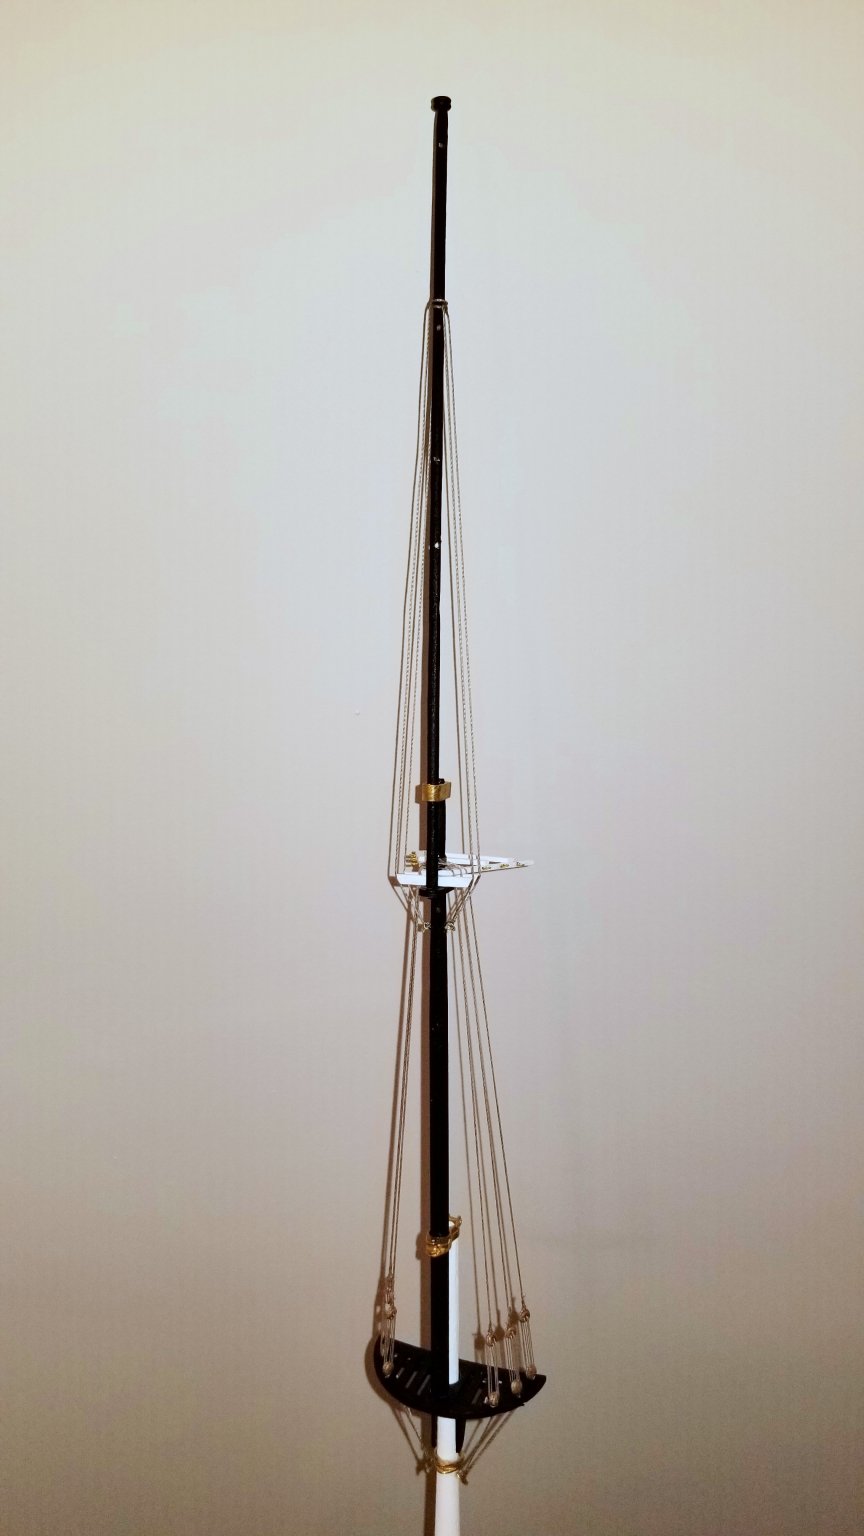
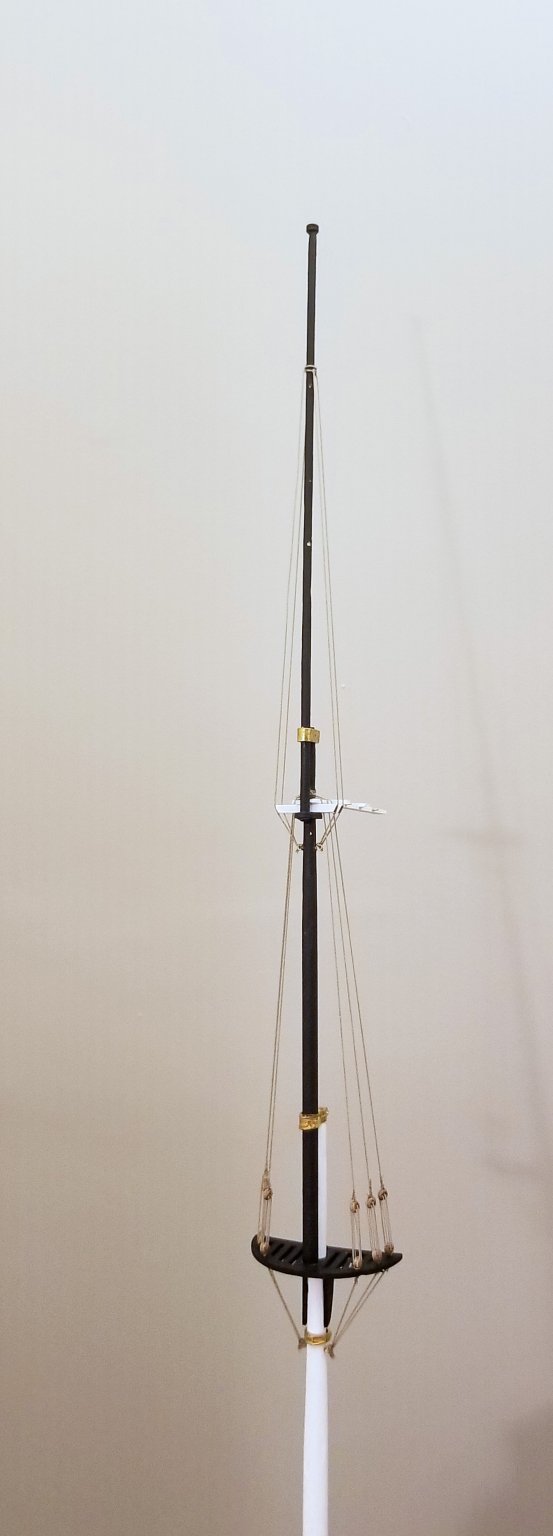
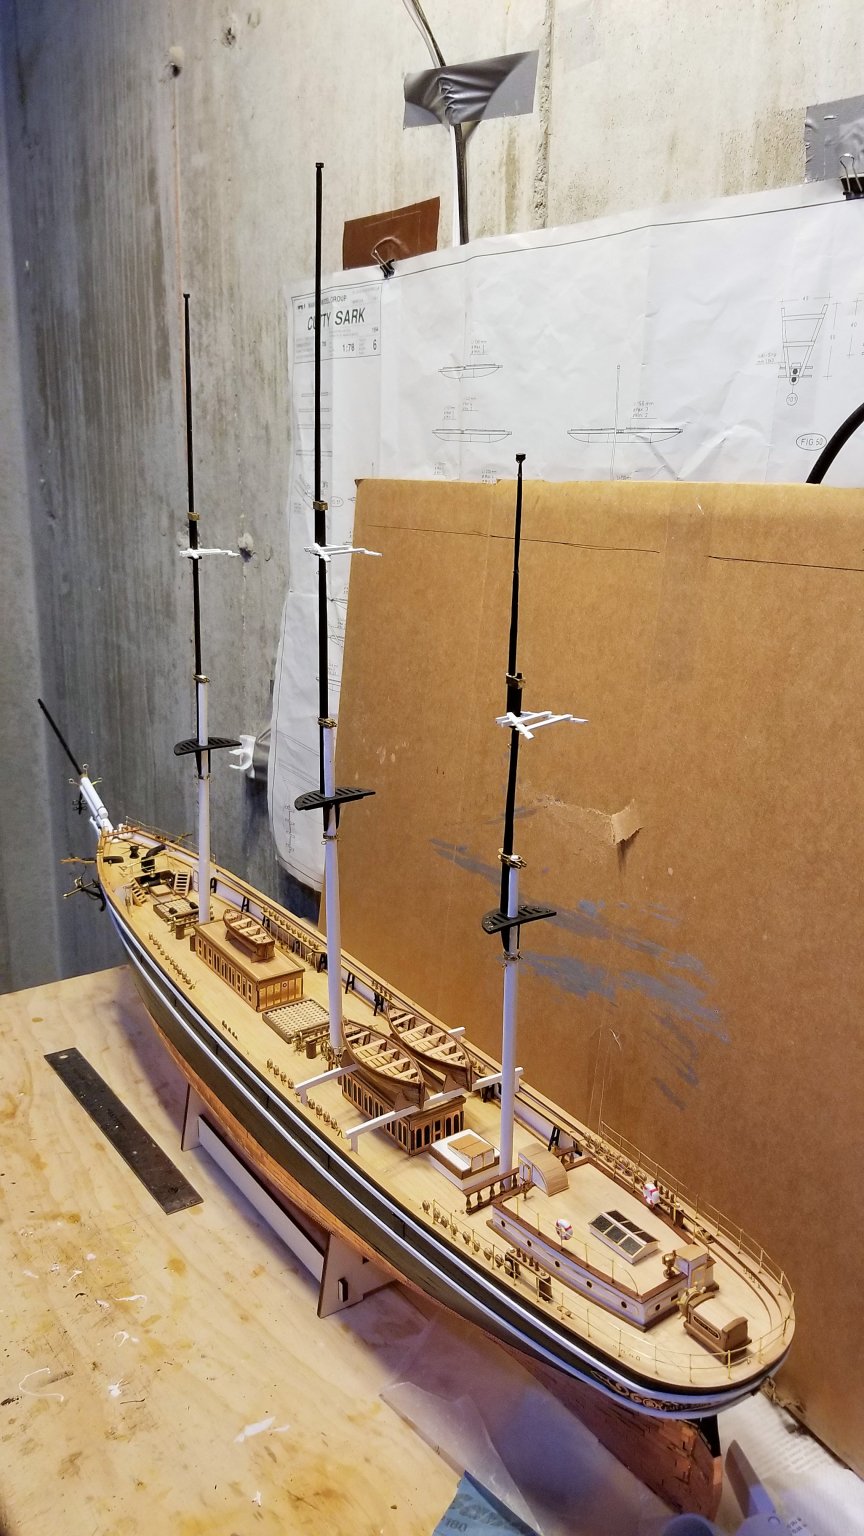
Masts and bowsprit are now up. Pictures below. Some of the holes in the brass fittings need to be drilled out -- important to do that before mounting them. Now on to the yards -- there are 19 of them on this thing. Regards, David


- 133 replies
-
- 8
-
-
- cutty sark
- mantua
- (and 3 more)
-
Cornish Pirate: I think that's how I did it. Don't have any view on the thread. Regards, David
-
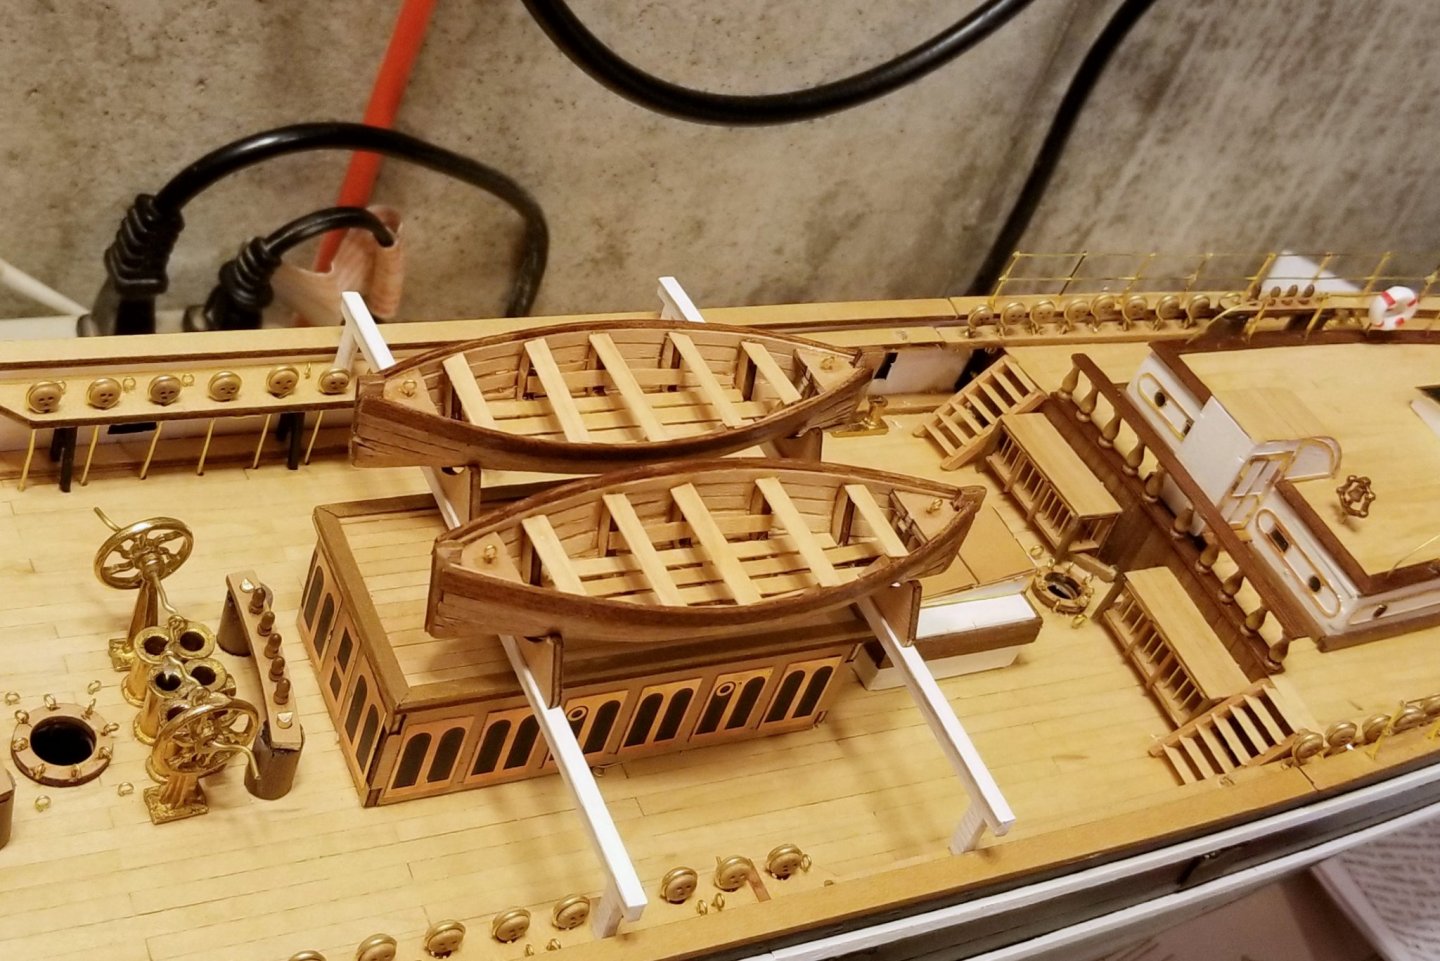
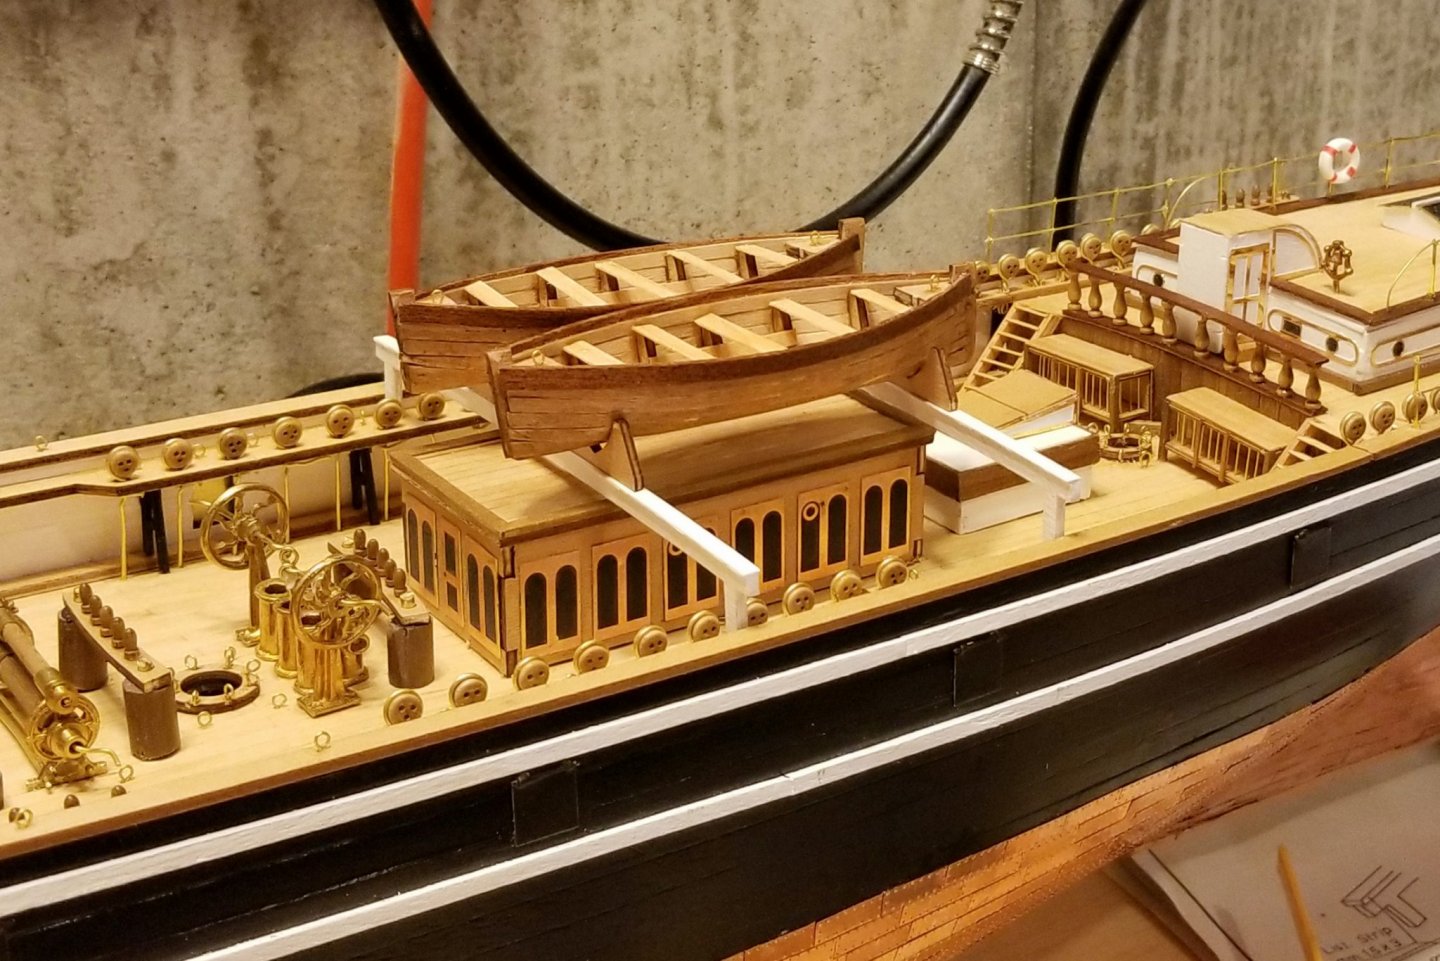
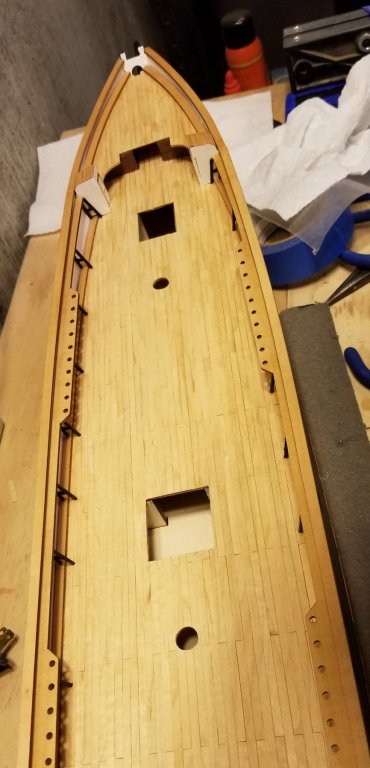
Pictures below of the lifeboats and the anchor. The hull is now complete (with the exception of the lifeboat parrels, which the manual says leave until later). So it's on to the masts now. Regards, David


- 133 replies
-
- 8
-
-
- cutty sark
- mantua
- (and 3 more)
-
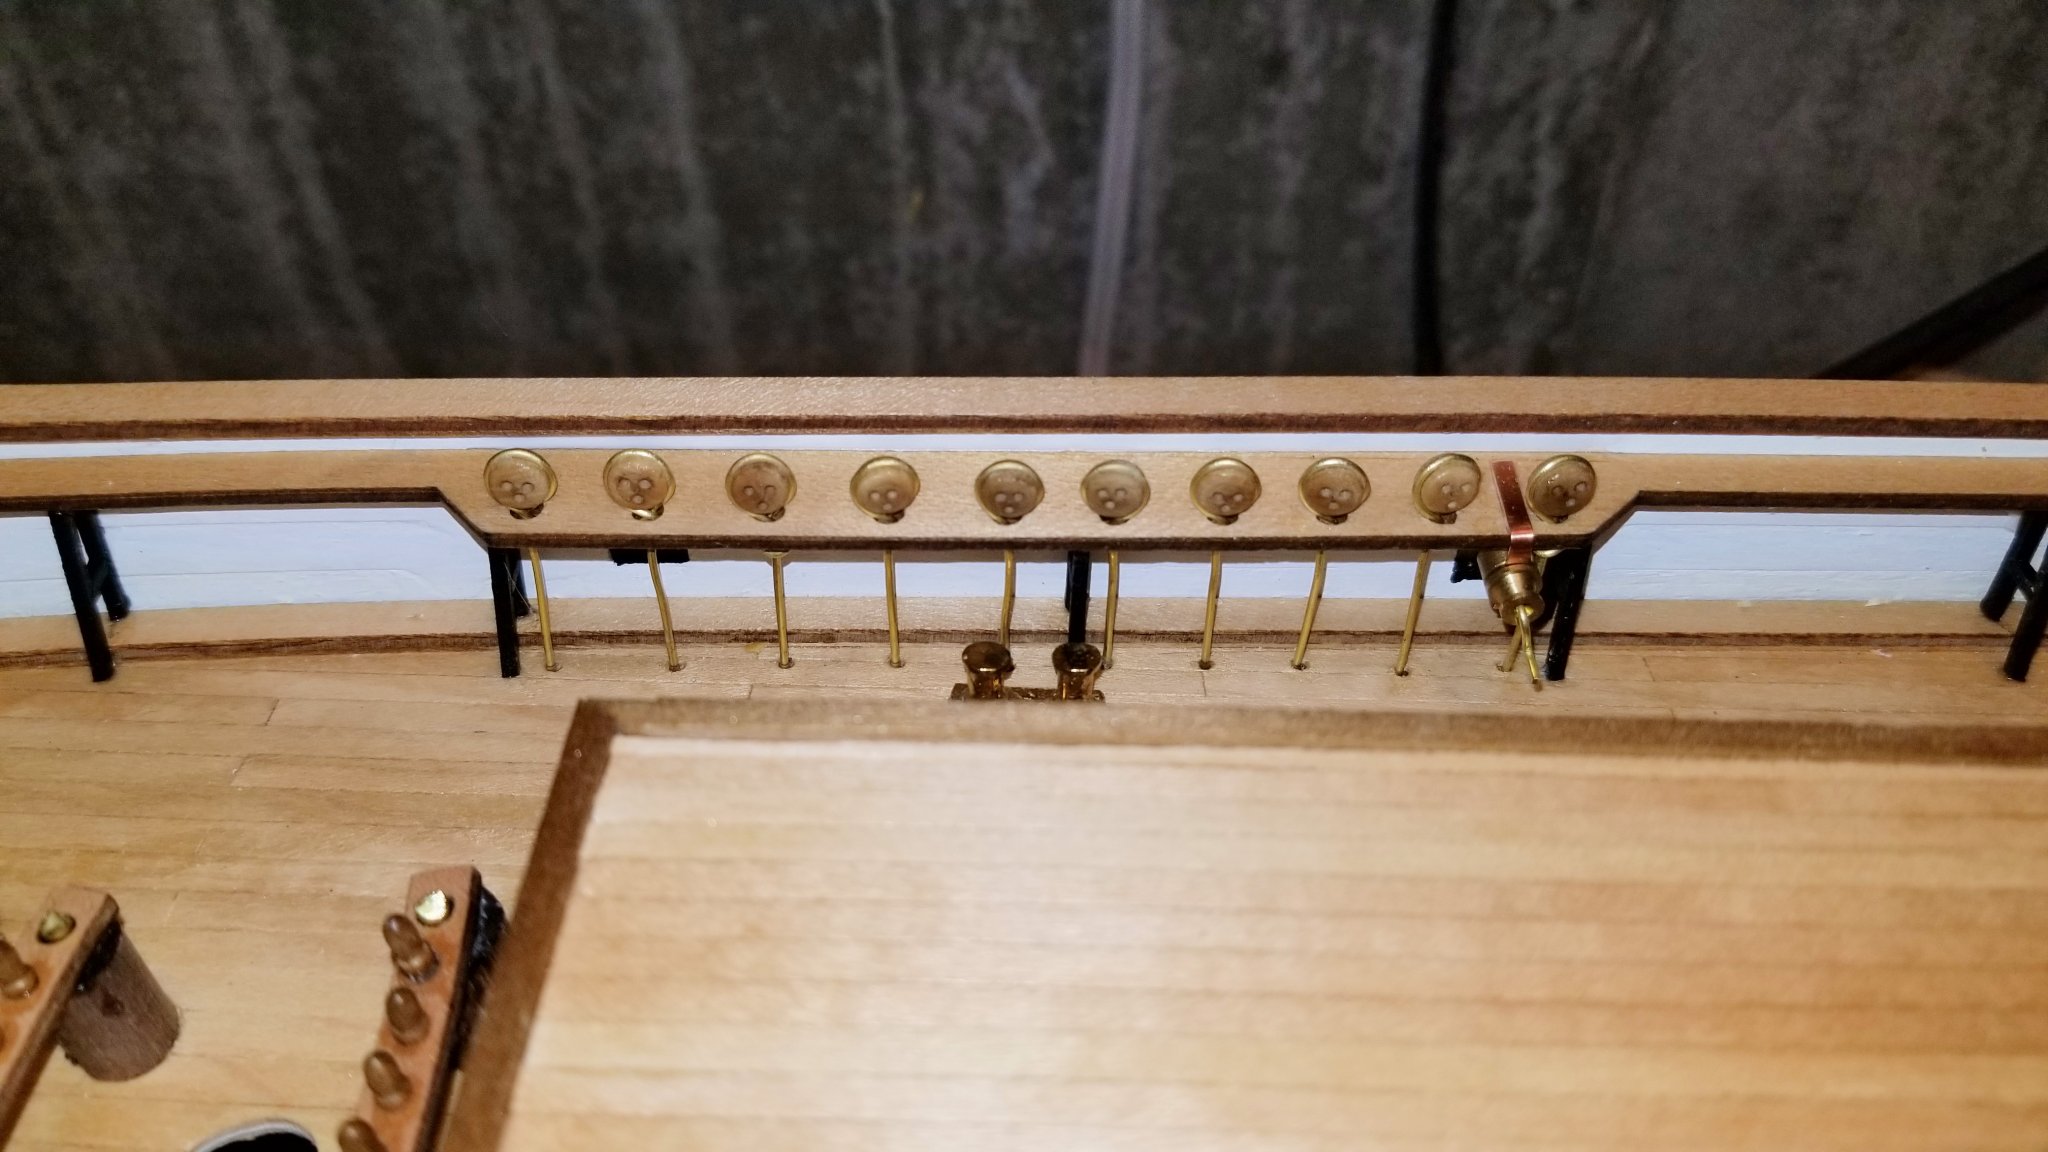
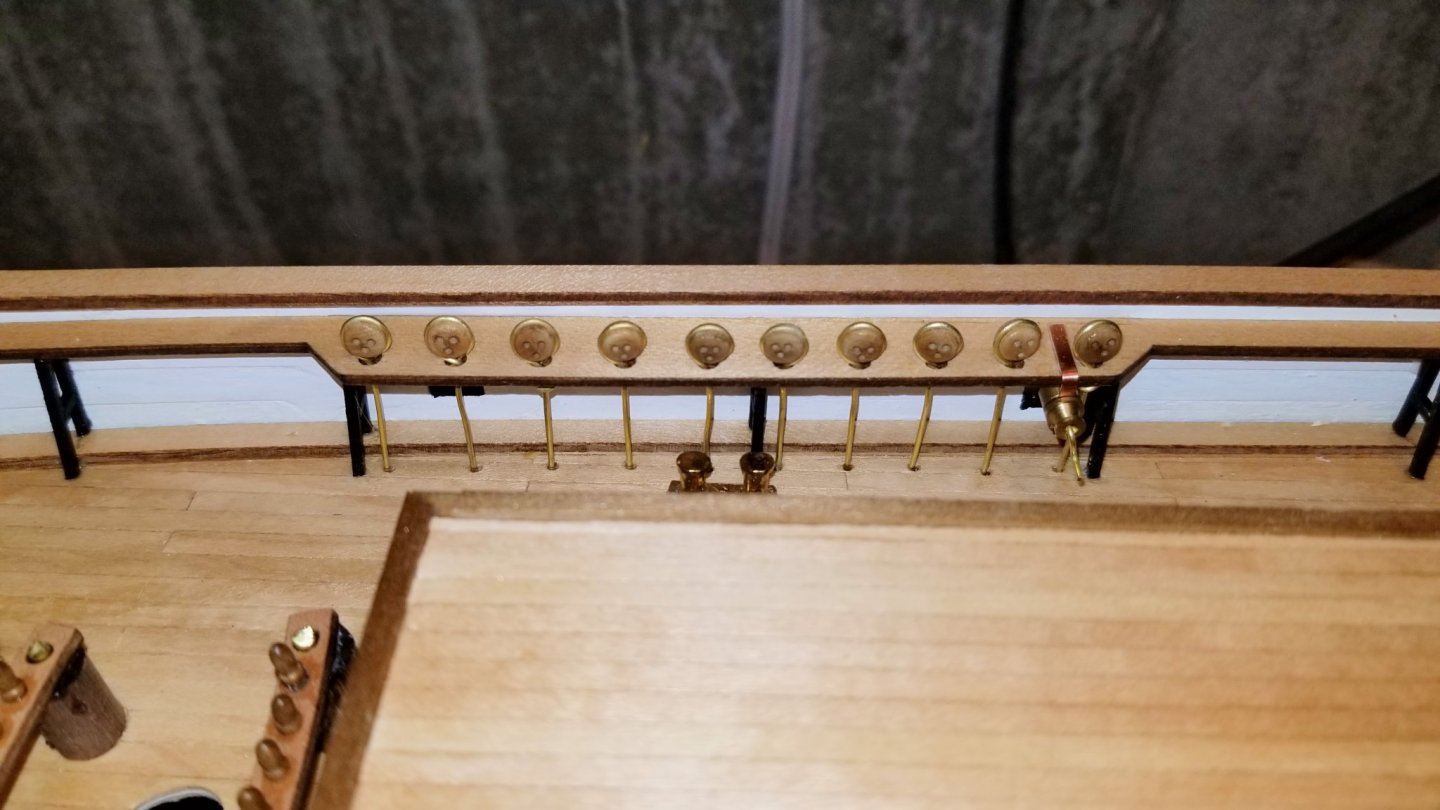
Re my comments above about drilling holes under the channels for the deadeyes, I used the right size (short) drill on an angle and then angled in the bottom of the chain plate. Worked OK, but some distortion of the rods that I couldn't fix. I did that on the side that won't be visible. Then I just bit the bullet and used a 1/16 inch drill straight down, which gave a hole a bit too large, but since I was reinforcing these by bending the other wire under the channel, worked fine. A picture of that below. Regards, David
- 133 replies
-
- 7
-
-
- cutty sark
- mantua
- (and 3 more)
-
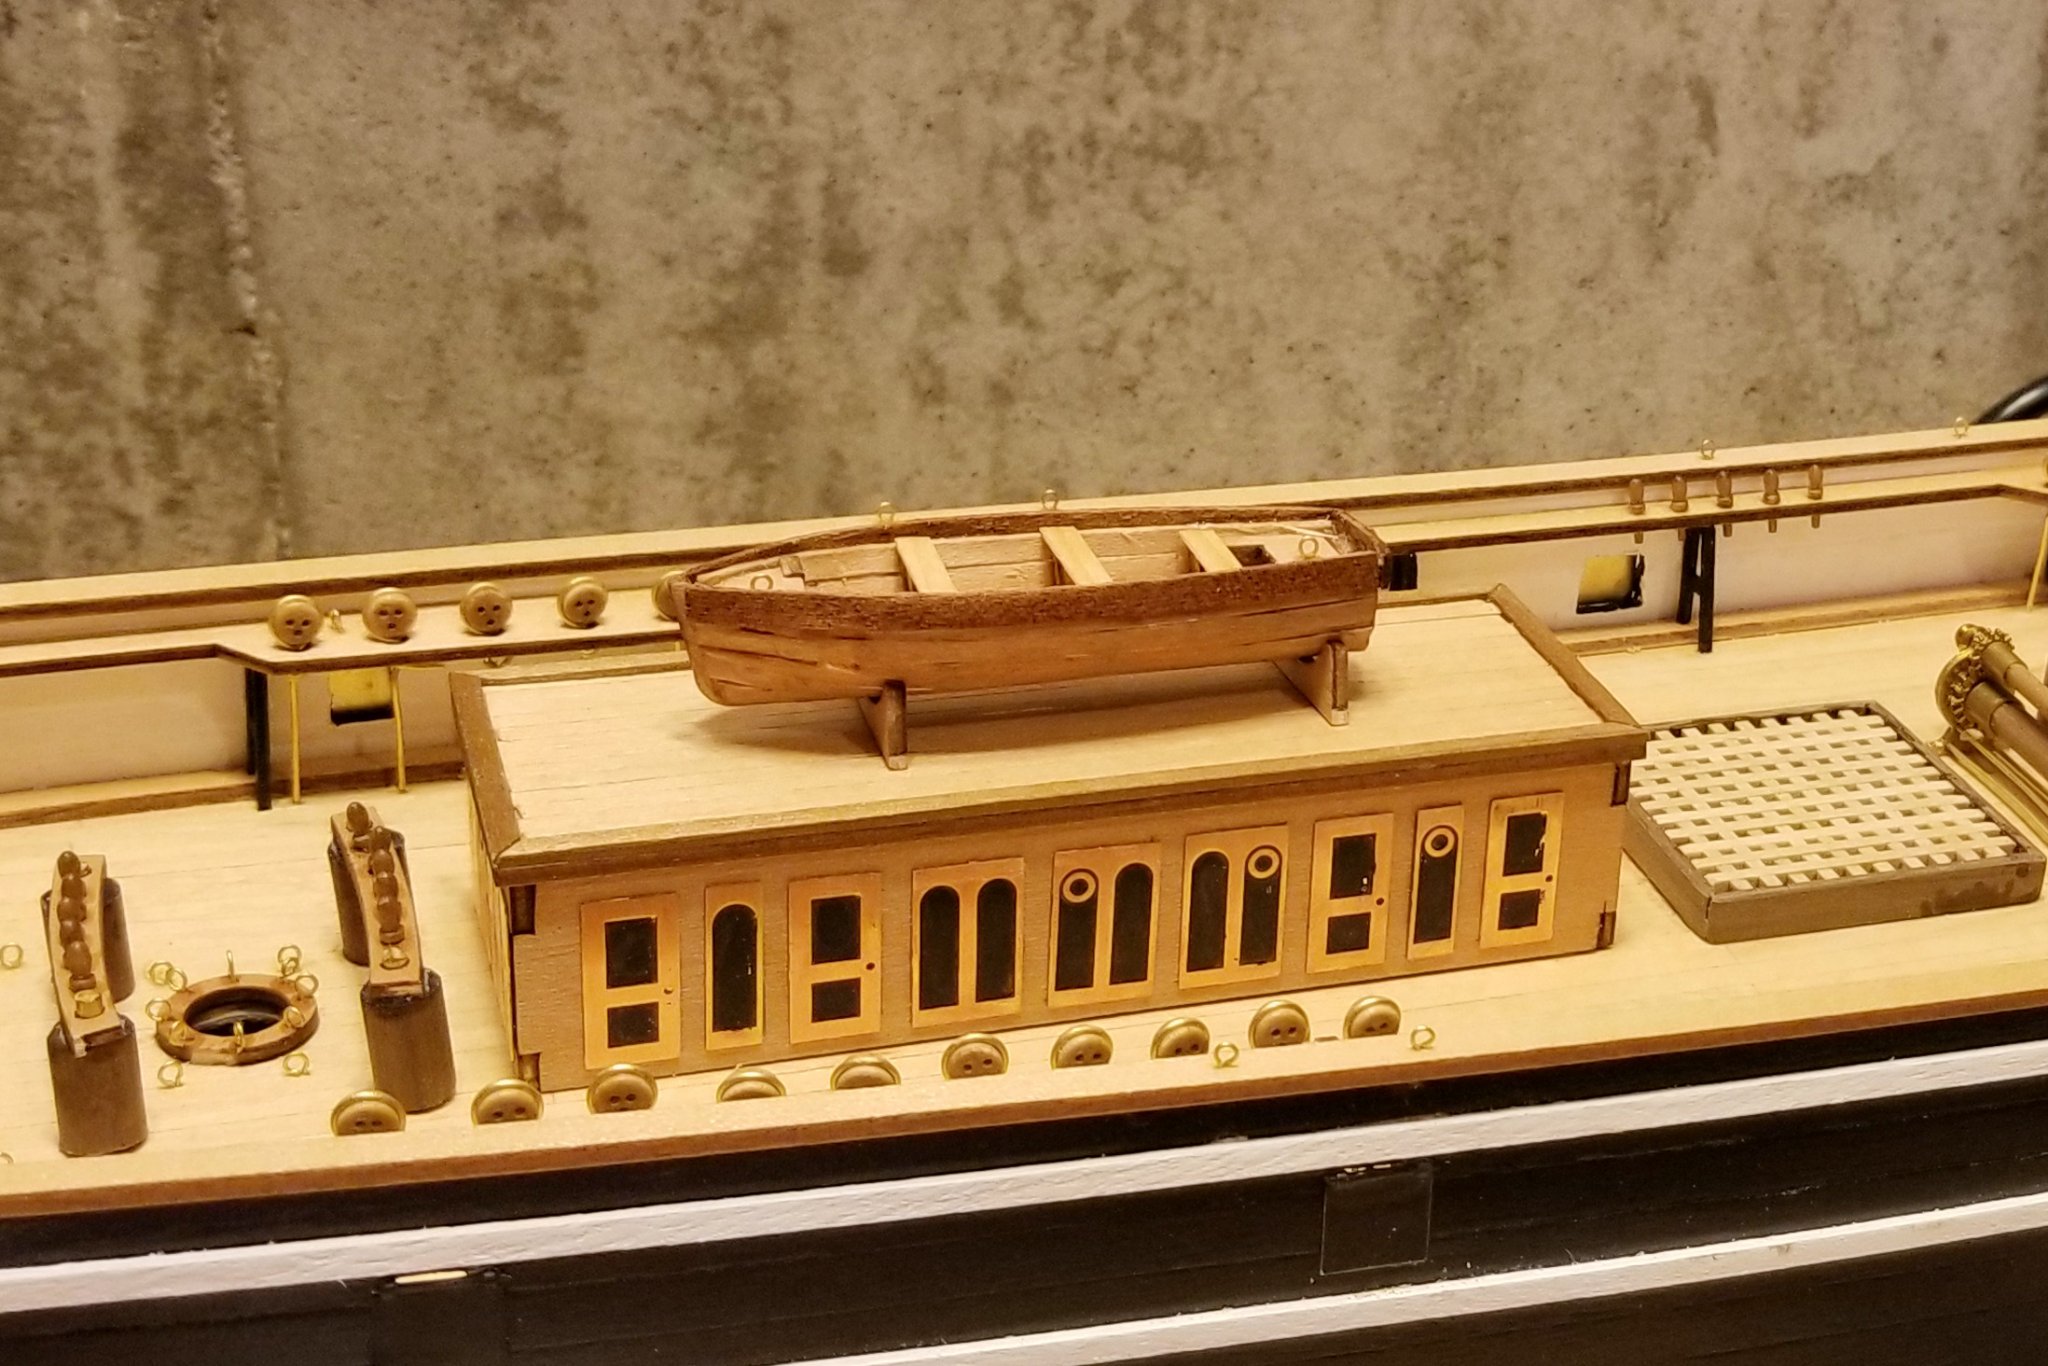
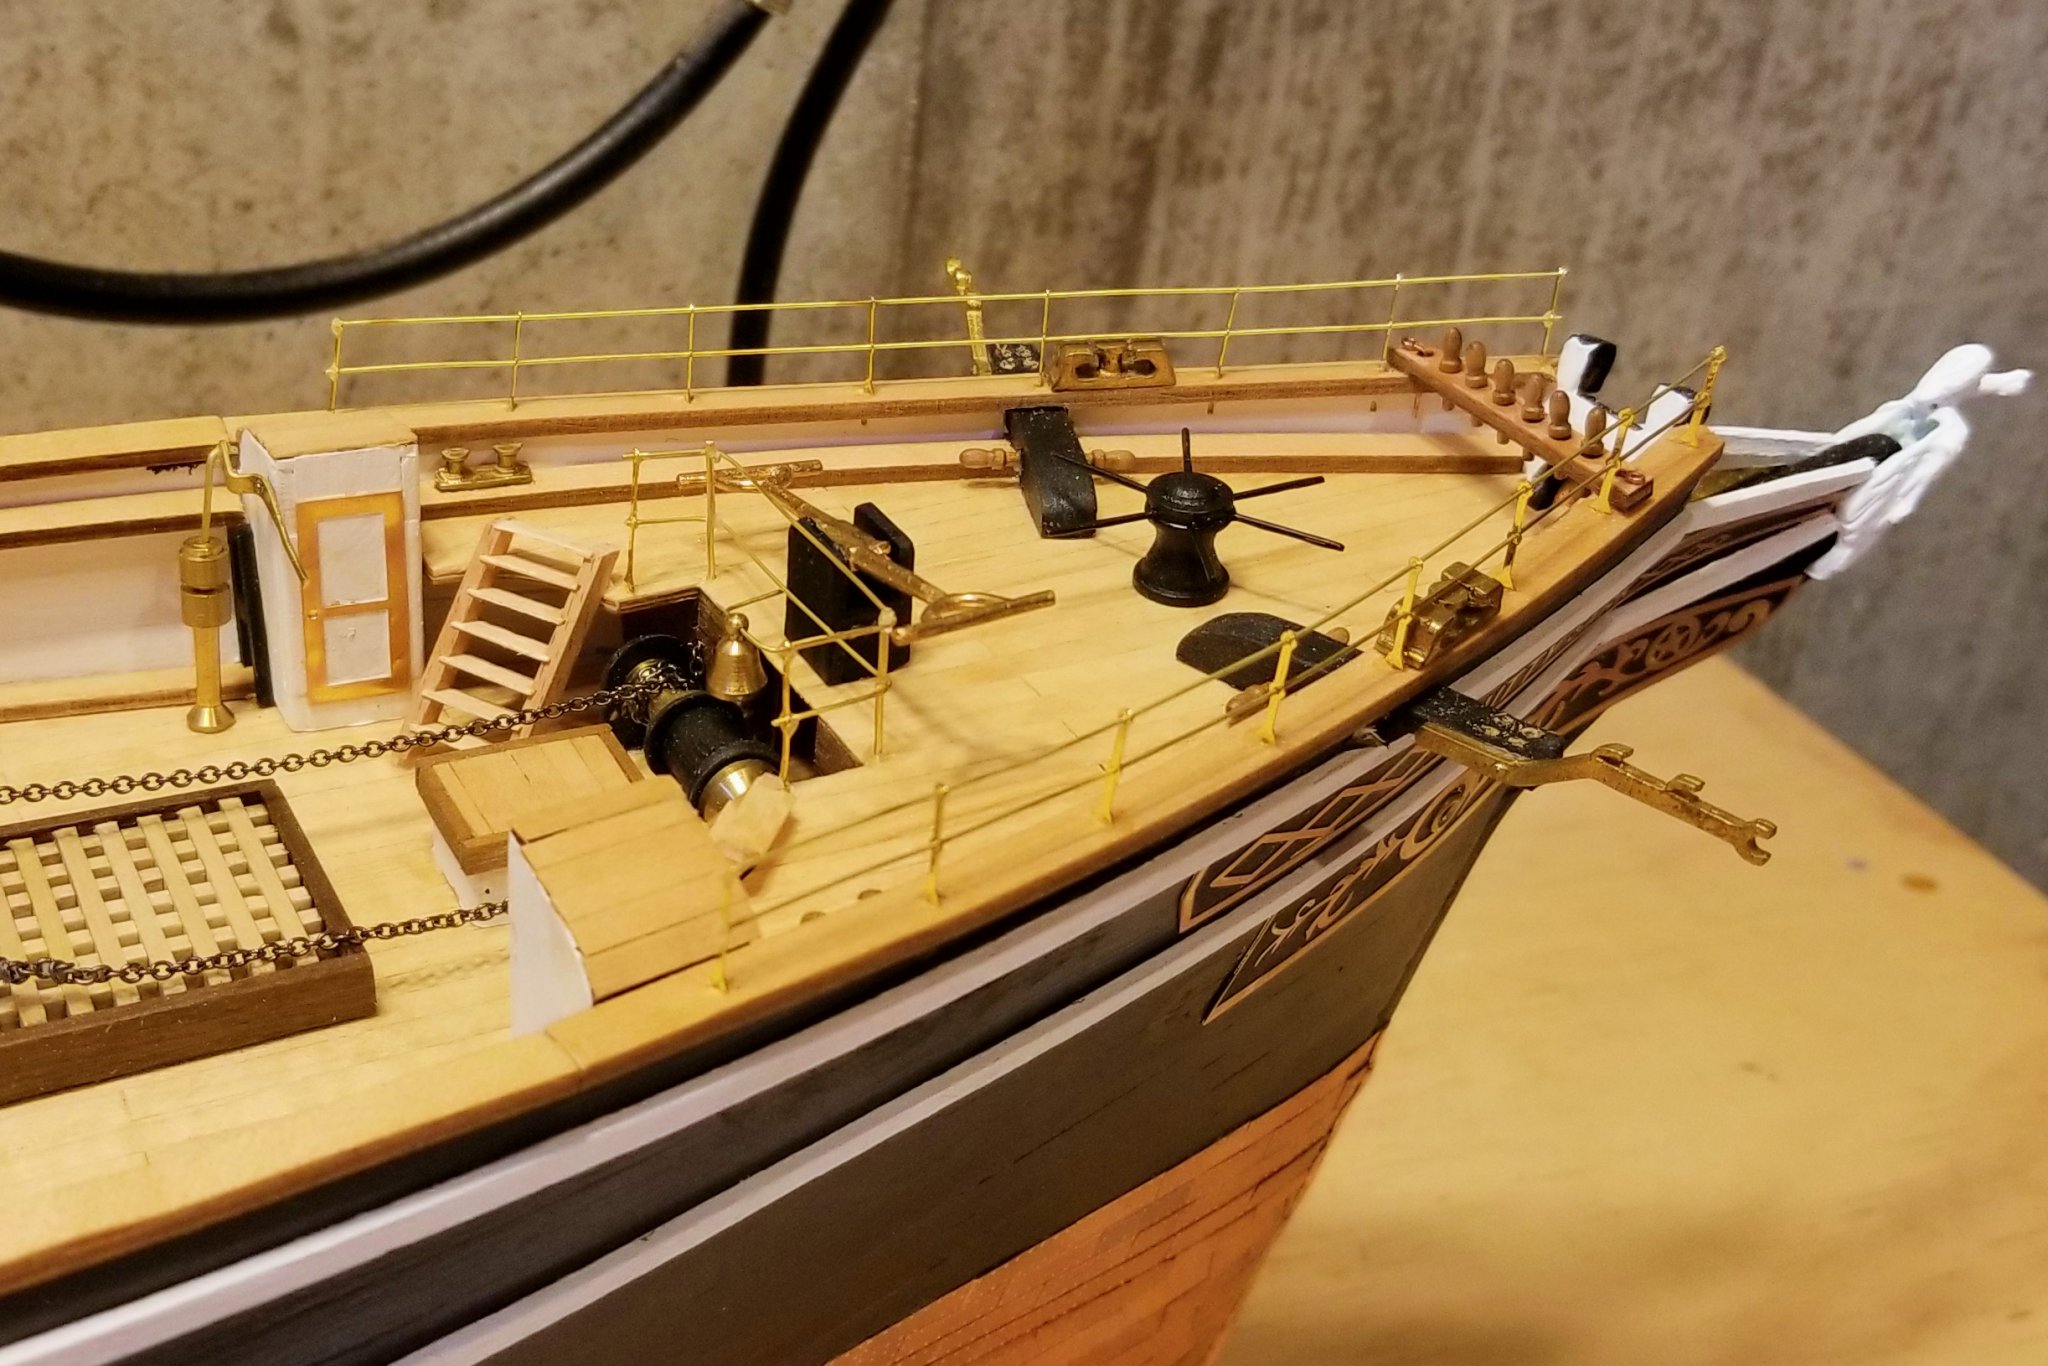
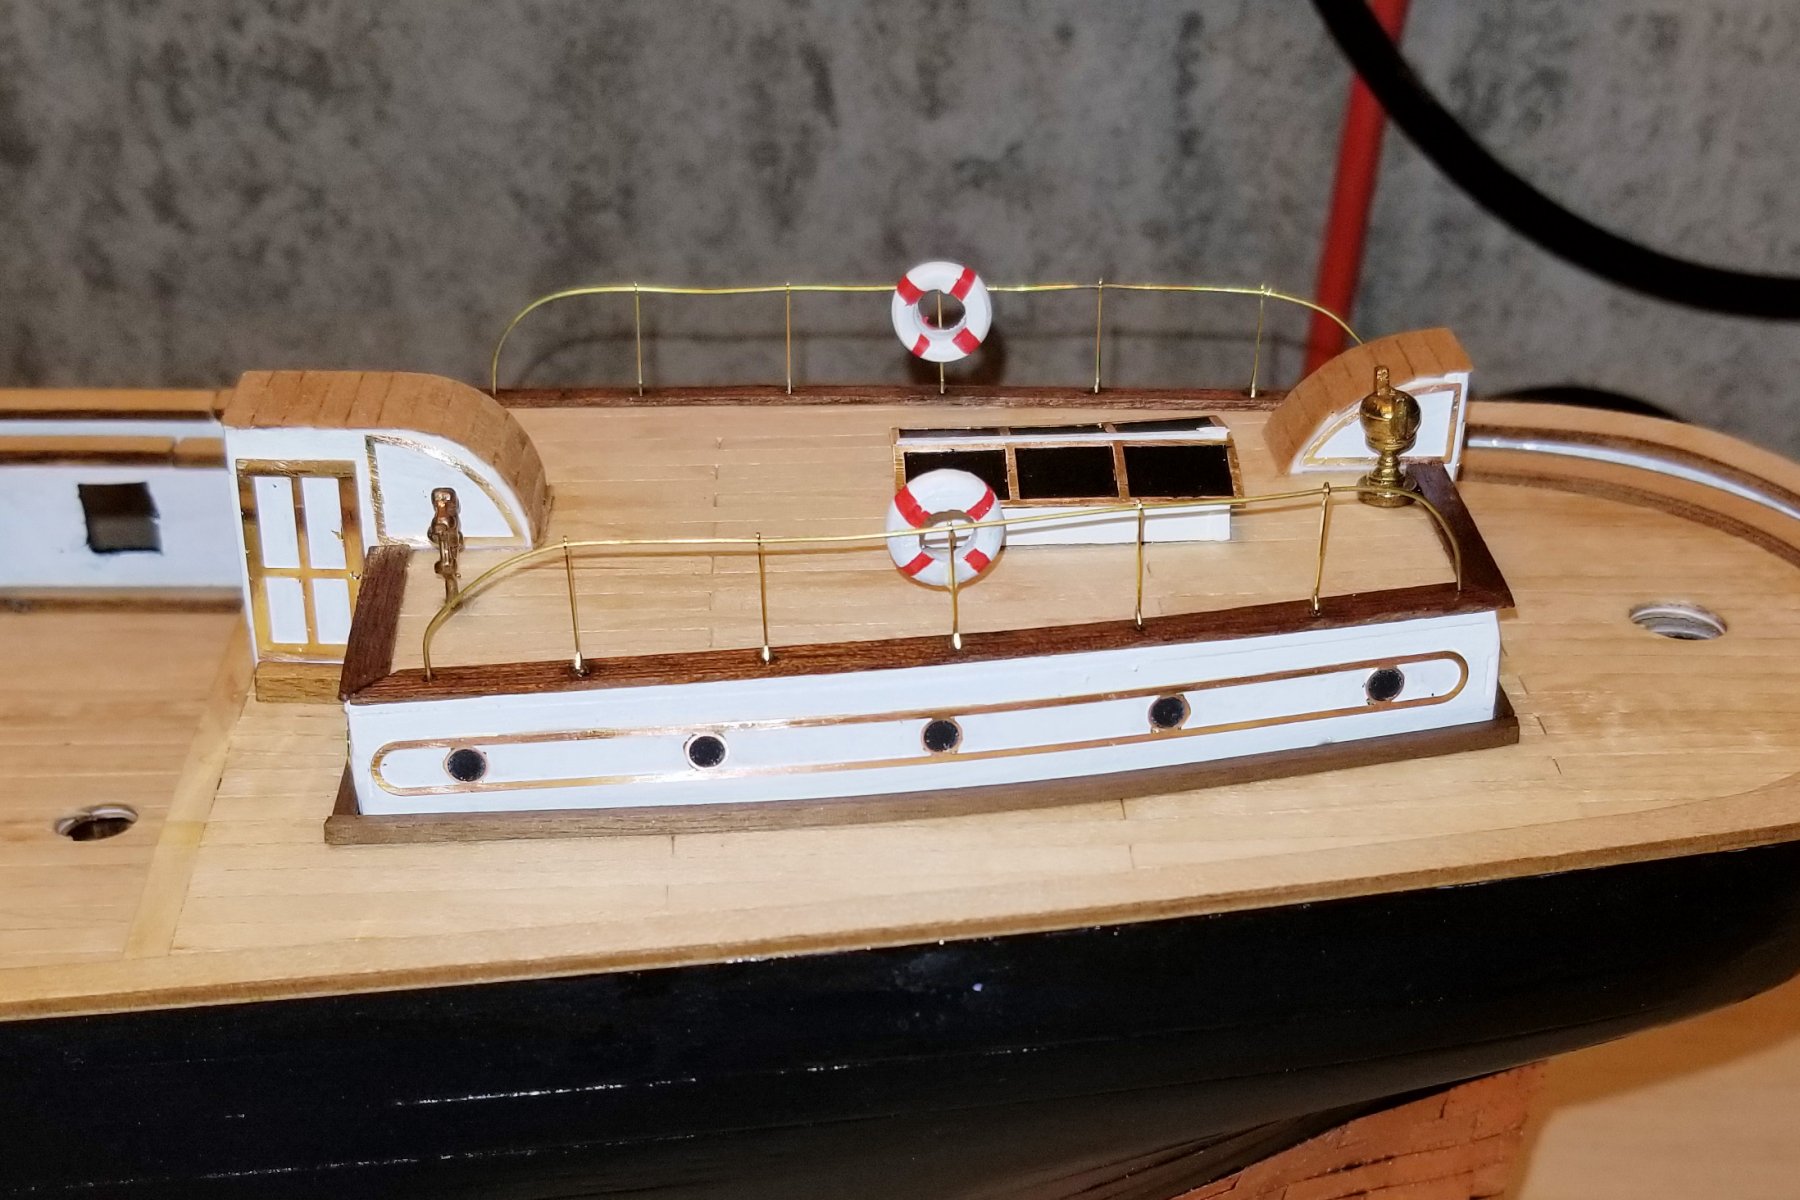
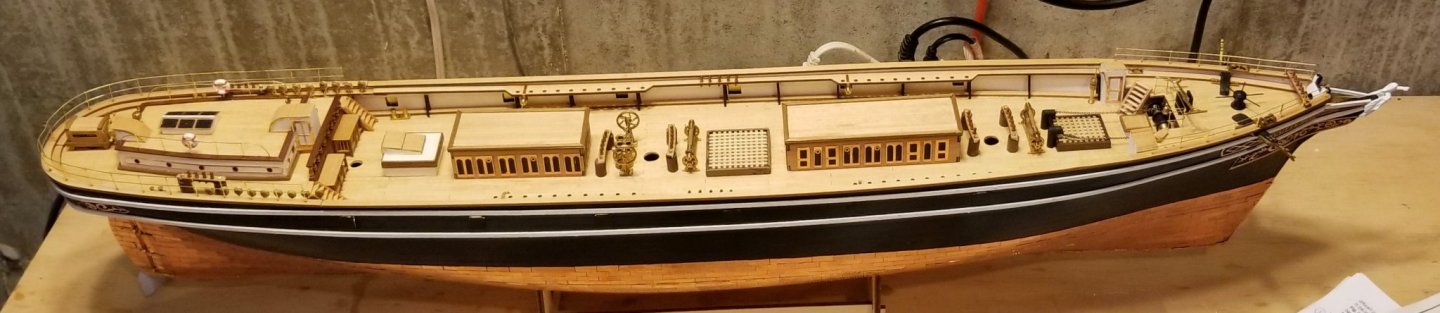
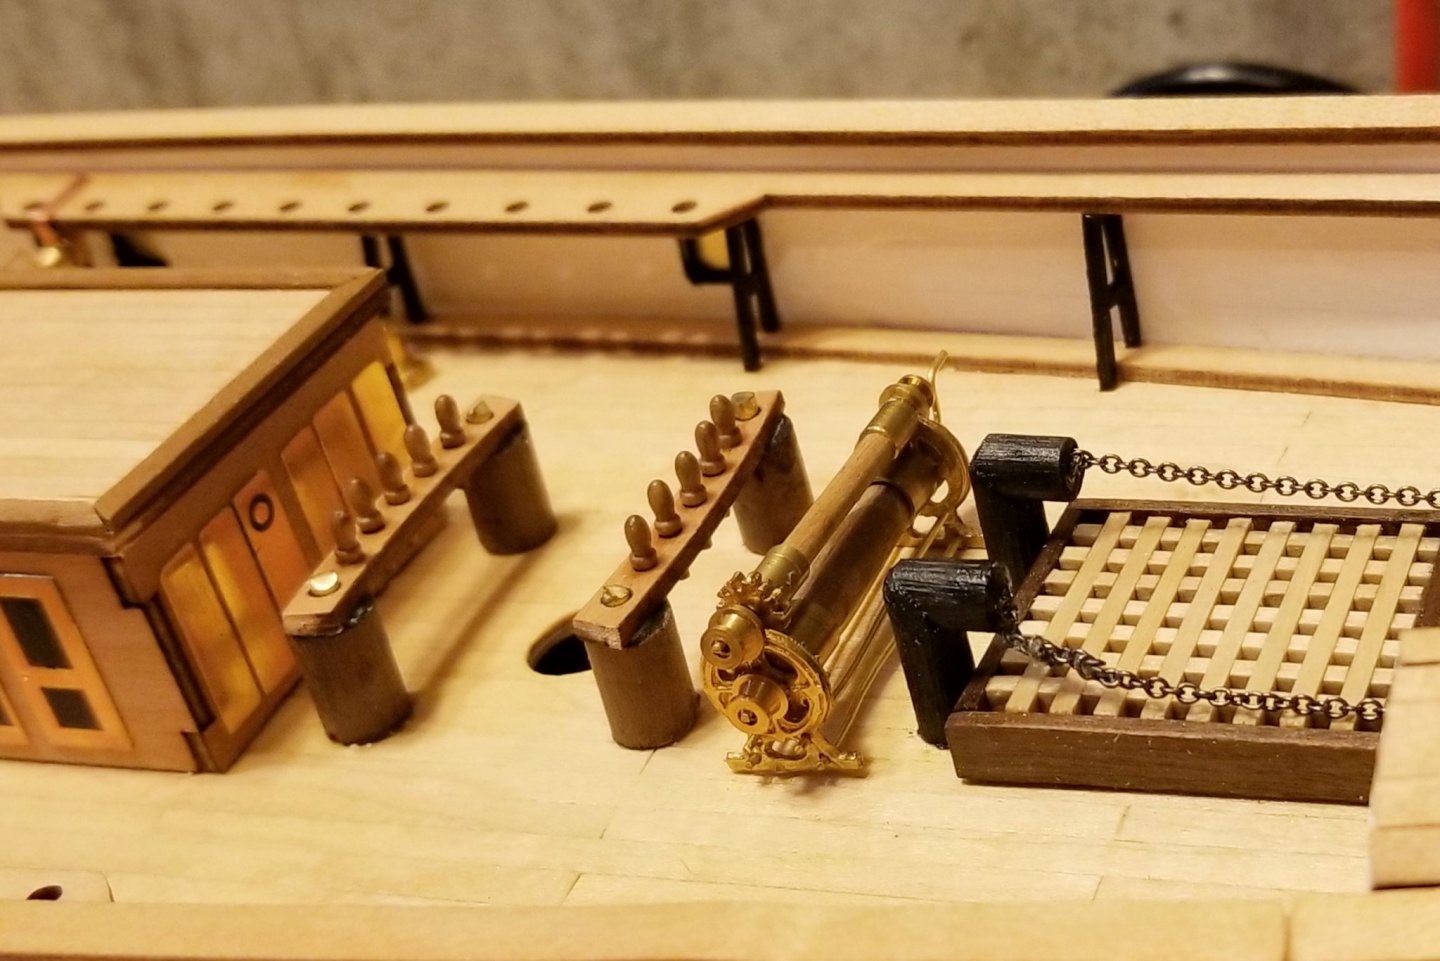
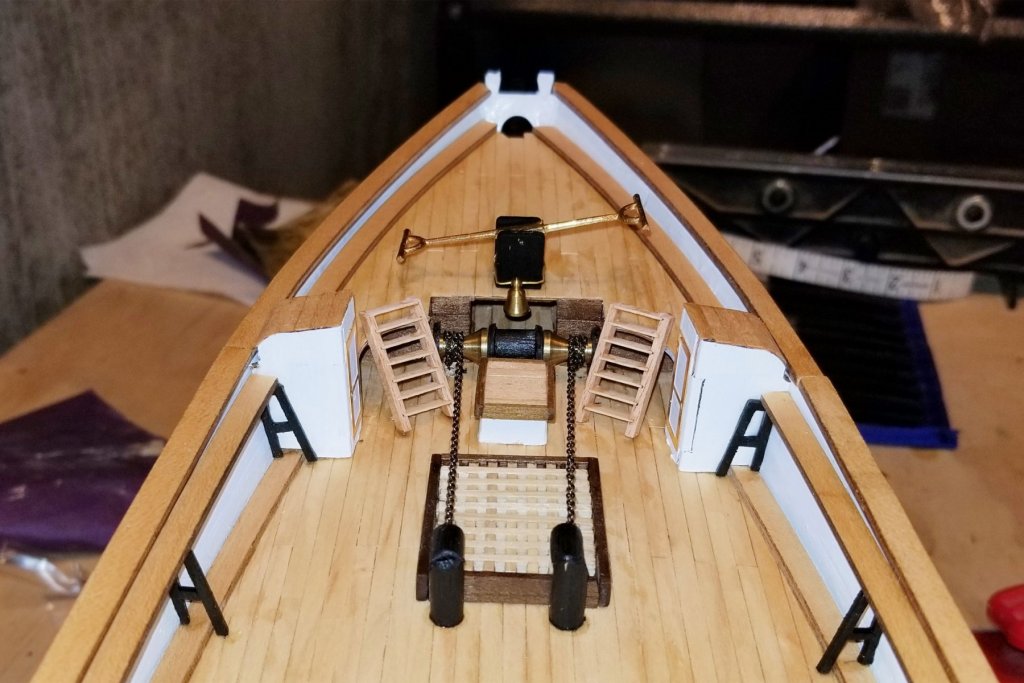
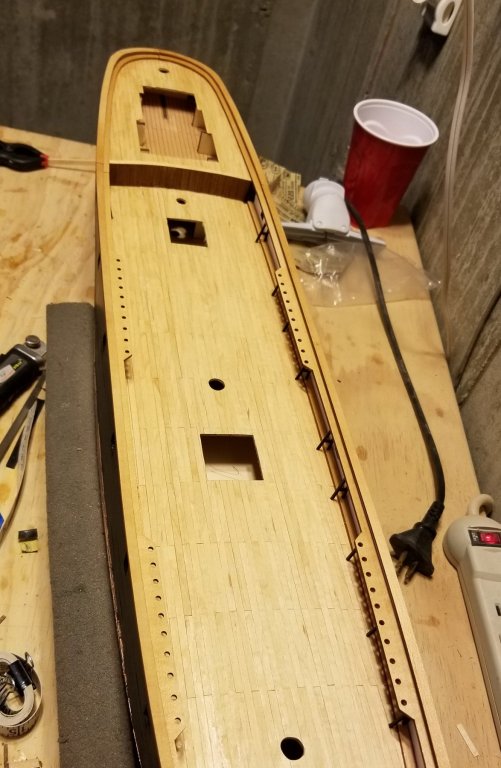
I've now pretty much finished all the deck structures and fittings. Pictures here of all that. Some comments on sequence. I'm not exactly sure why, but I chose to go ahead and do the stern deadeyes early, which was a relief when I installed the curved stern railing. I'm not sure I'd have been able to avoid mangling it if I'd done them in the manual sequence, which is during the rigging stage. Speaking of those, the manual and drawings show a way to create the chain plate from wire, and then fix it to the deck below the deadeyes, which is conceptually fine for those in the middle of the hull if you have a 3 inch long .75mm drill bit -- mine are shorter, and I'm not sure they exist. I may still do it by drilling on an angle. It still looks like a flimsy fixing for the tension on the deadeyes, so I'm going to reinforce them to the bottom of the channel. But there's no clear way shown to attach the ones on the stern that you see here -- so I improvised by creating a sort of wire "plug" on the deadeye and gluing that into the hole. I'll do the ones on either side of the hull next, as I won't want to try to maneuver those into place with masts and yards up (which is the way the manual would have you do it). The other improvisation is the small front railing between the ladders. I lost one of the stanchions on the floor somewhere, and of course Mantua provides no spares. So I had to fashion the two rear stanchions out of wire. Before I get to the rigging, I need to build the lifeboats and mount them, which is the next step. Regards, David


- 133 replies
-
- 8
-
-
- cutty sark
- mantua
- (and 3 more)
-
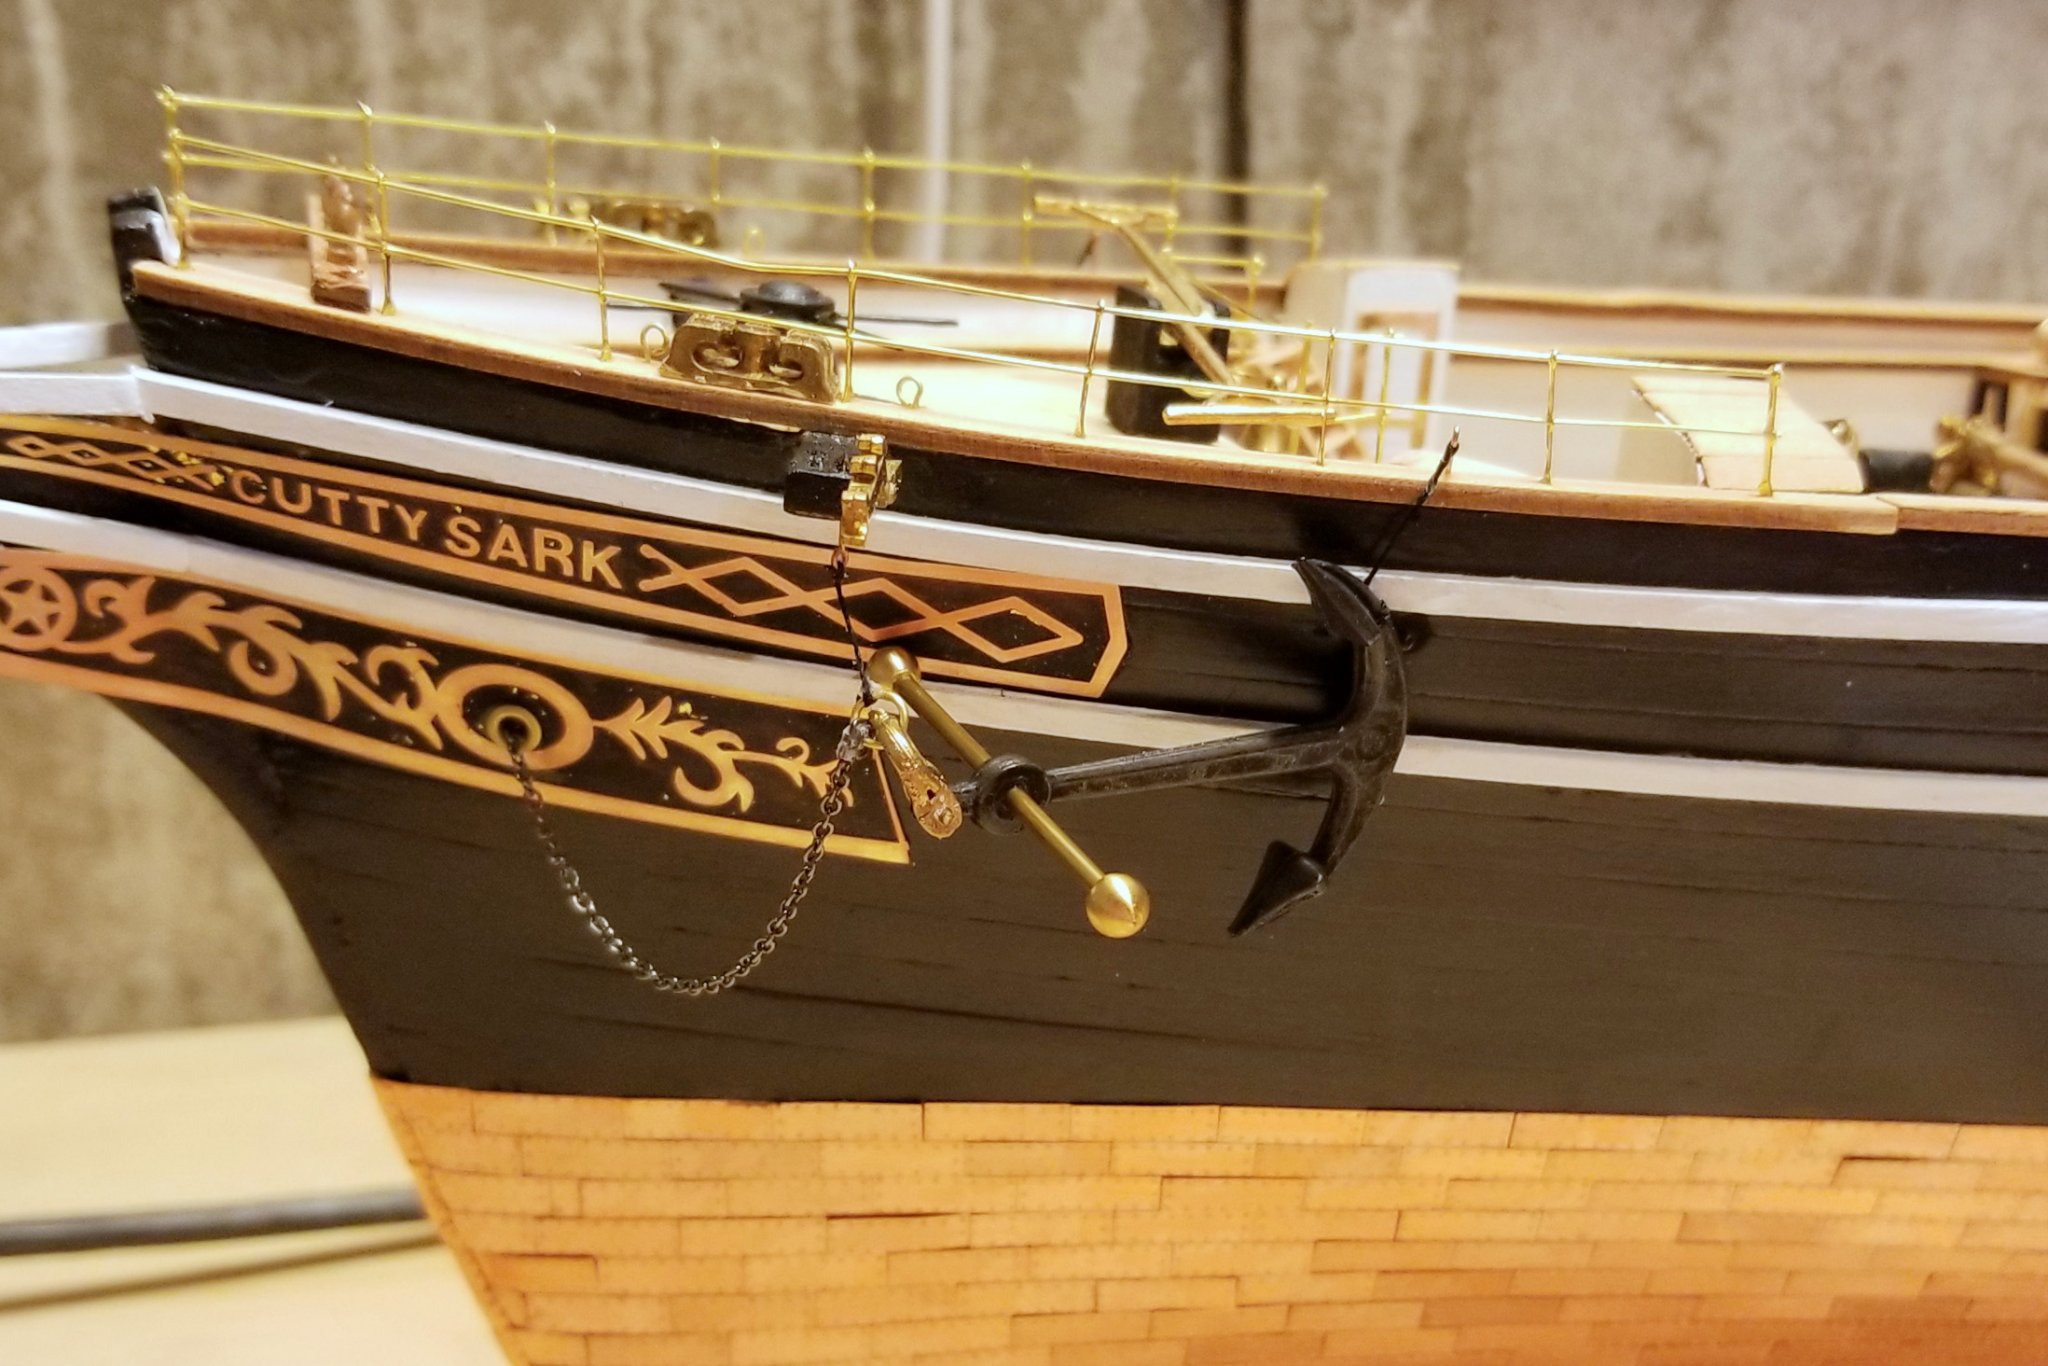
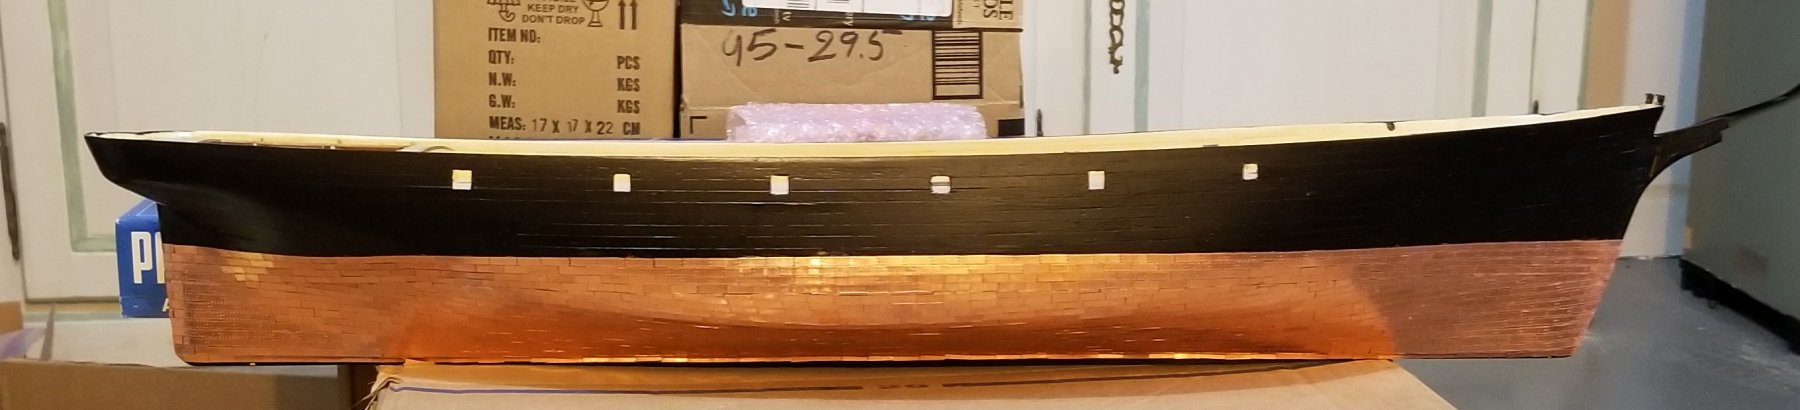
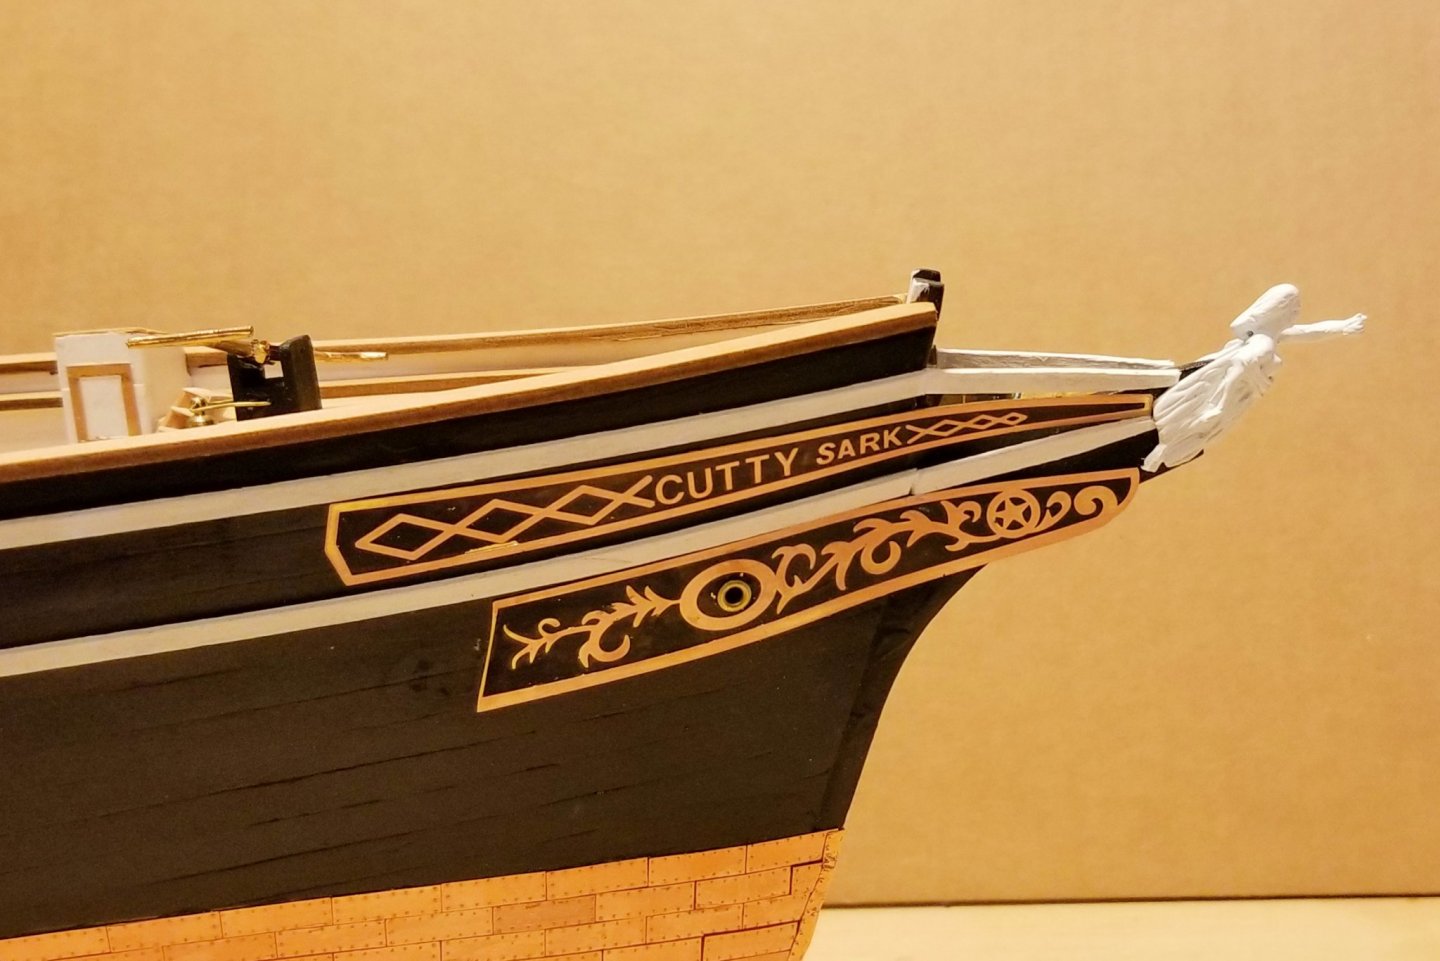
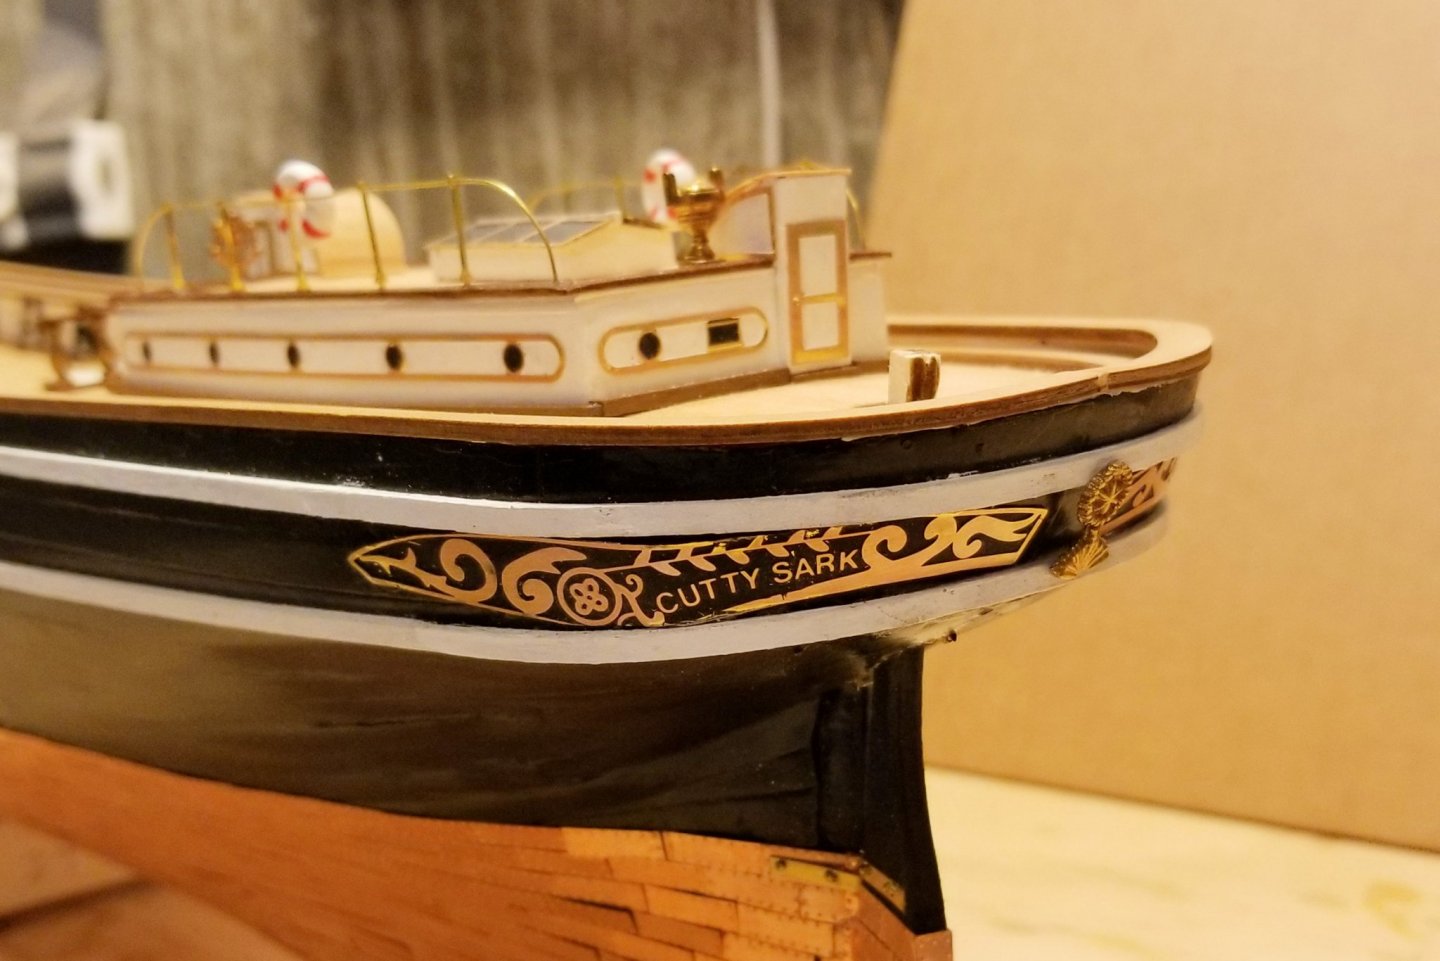
I finished and mounted the rudder, and applied the bow and stern decorations. Pictures below. The drawing shows the white rubbing strakes running straight to the figurehead at the bow, and the brass decorations on that same line without the bend you see here. While the rubbing strakes would "frame" the top decoration, I'm not sure what the bottom of the lower one would look like. In any event, as I mentioned above, I had missed that in the drawings and terminated the strakes at the end of the hull. So I extended them and applied the decorations as you see here. Also as noted in my earlier post, the space between the strakes at the stern was not wide enough for the stern decorations, so I had to file them down to fit. That seems to have worked out OK. Regards, David
- 133 replies
-
- 6
-
-
- cutty sark
- mantua
- (and 3 more)
-
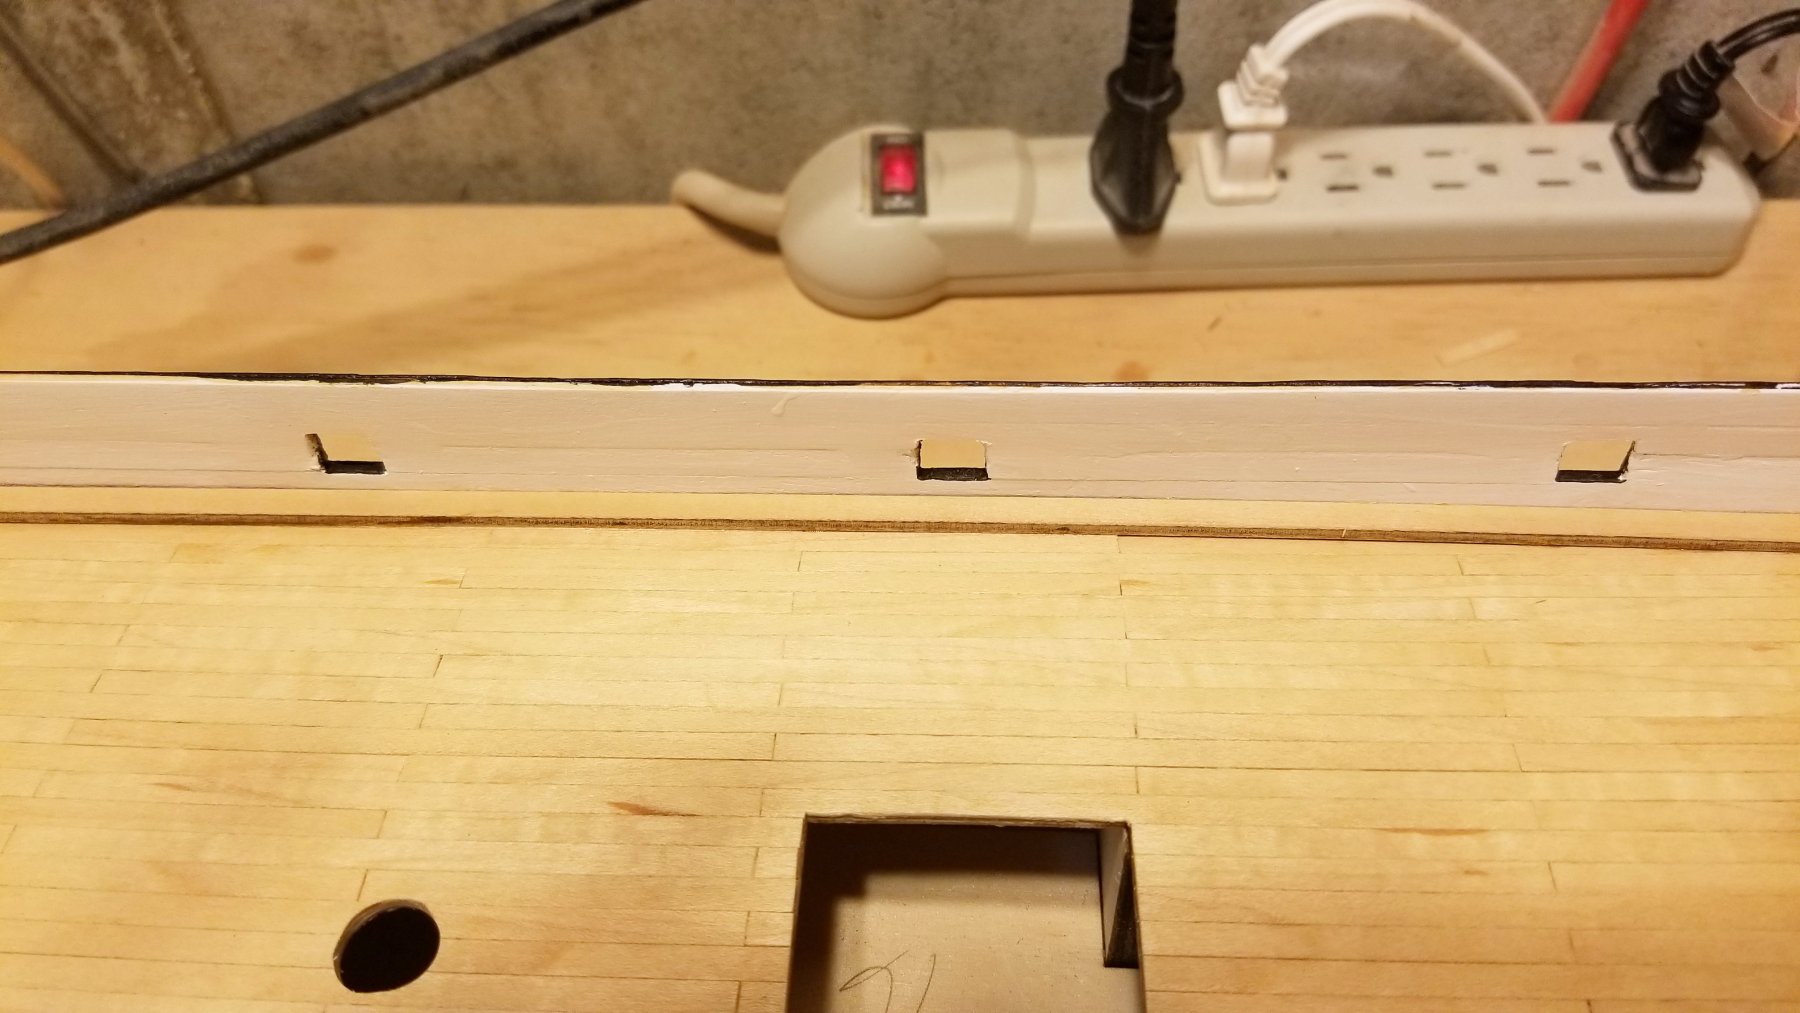
The white rubbing strakes are now on. The manual wants pins to hold the curve, but I steamed the curve into the strips, then painted them, and then used CA glue. I think I may have ended the strakes too soon at the bow, and if so, I'll fix that later. I KNOW I have an issue at the stern where the width between the strakes isn't quite large enough for the brass figures that go in there, but I ran out of stern to fix the lower strake to, so I'll fix that as well by cutting down the brass to fit. I need to touch all of this up now with black and white paint. Regards, David

- 133 replies
-
- 7
-
-
- cutty sark
- mantua
- (and 3 more)
-
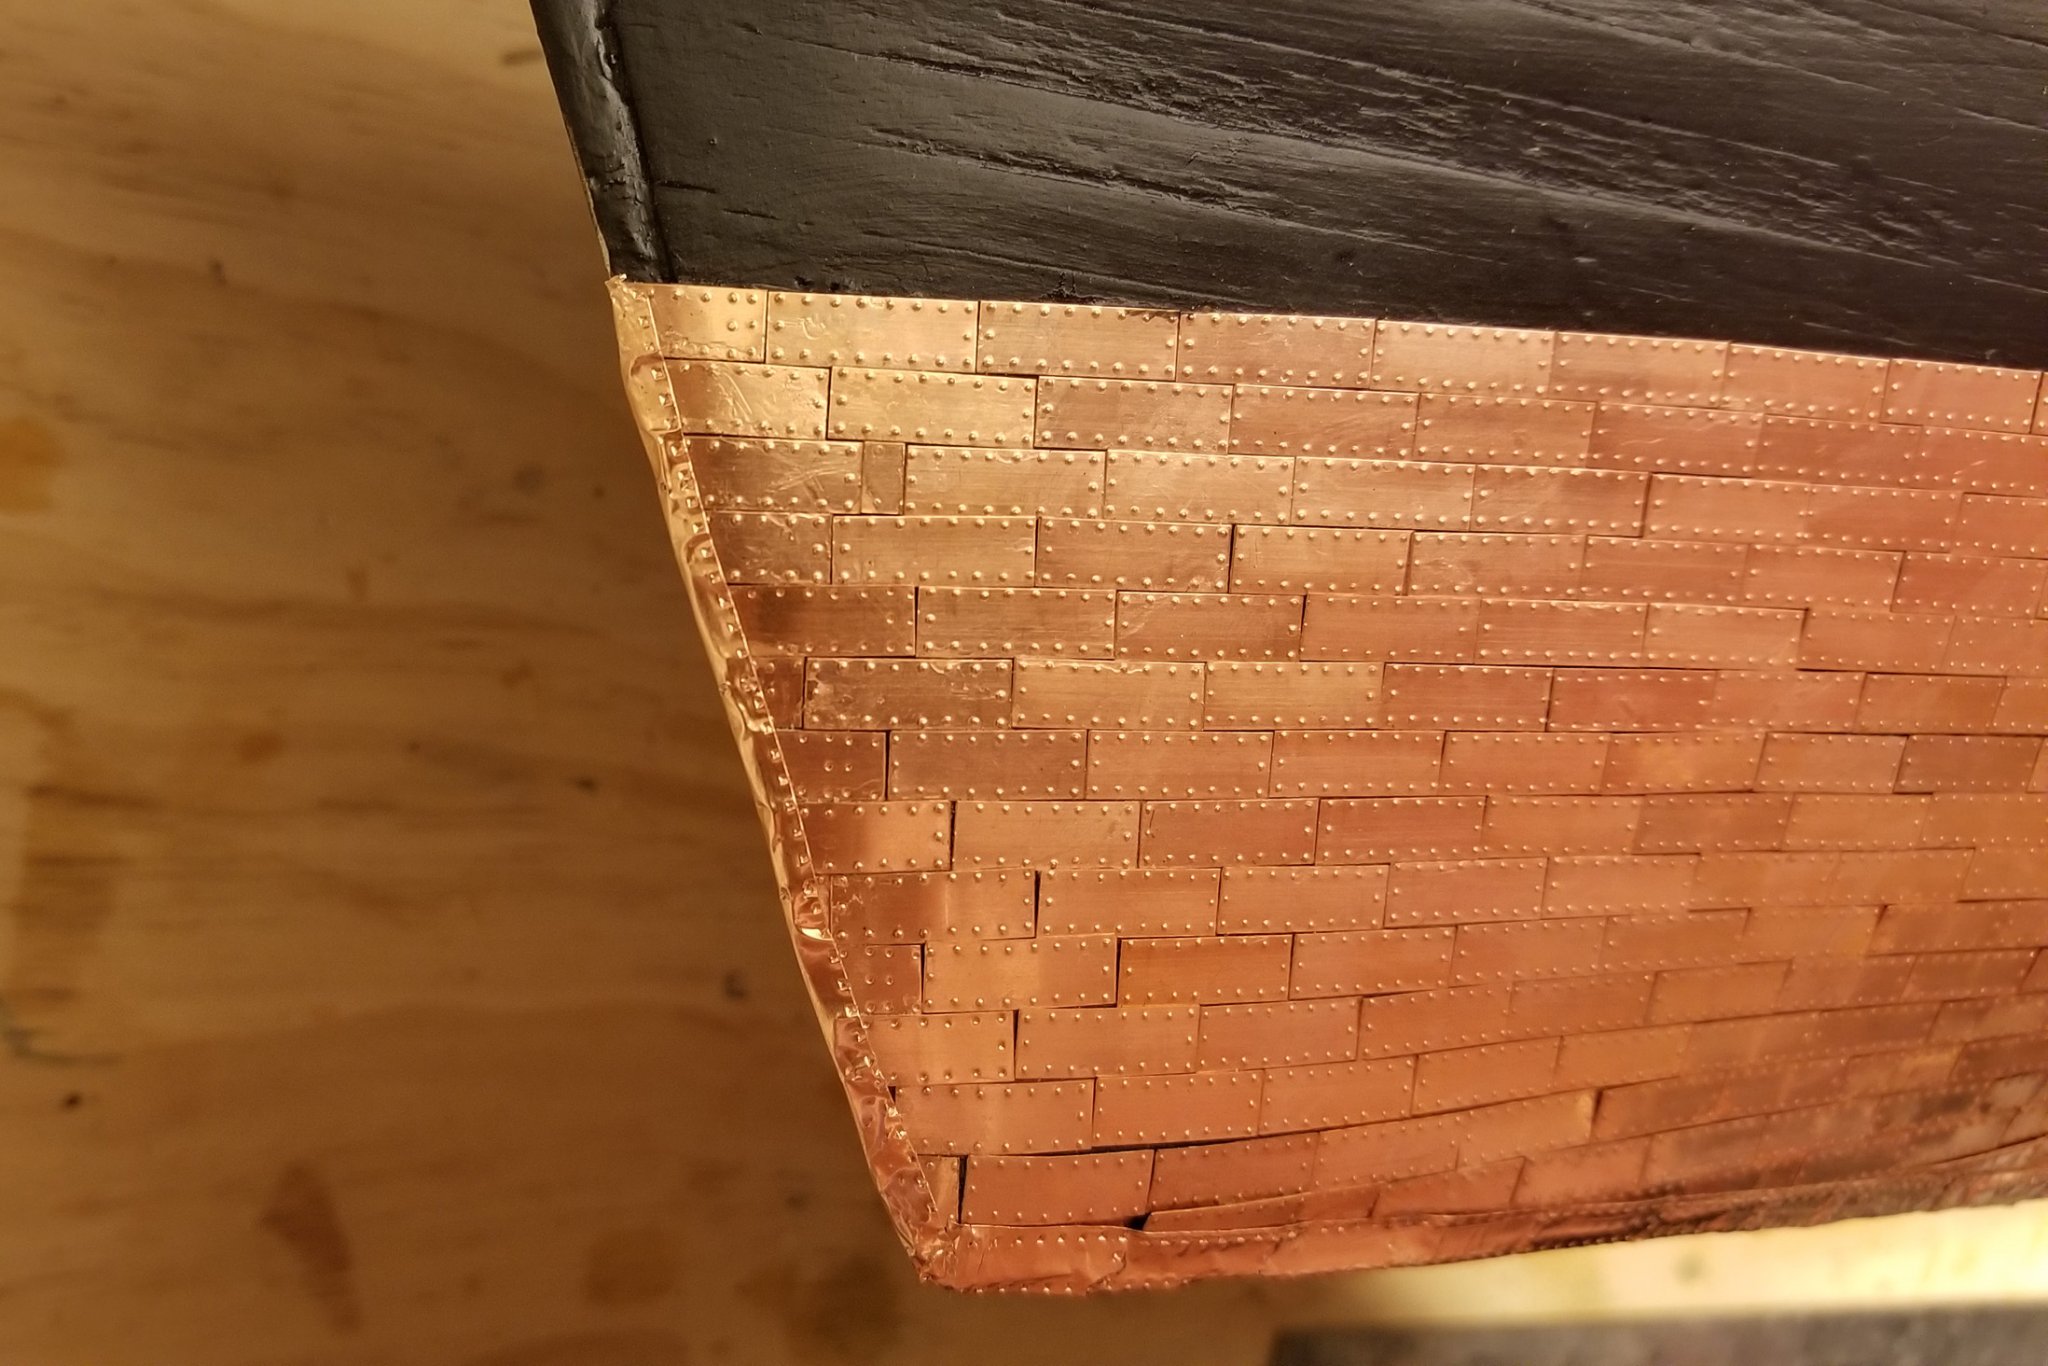
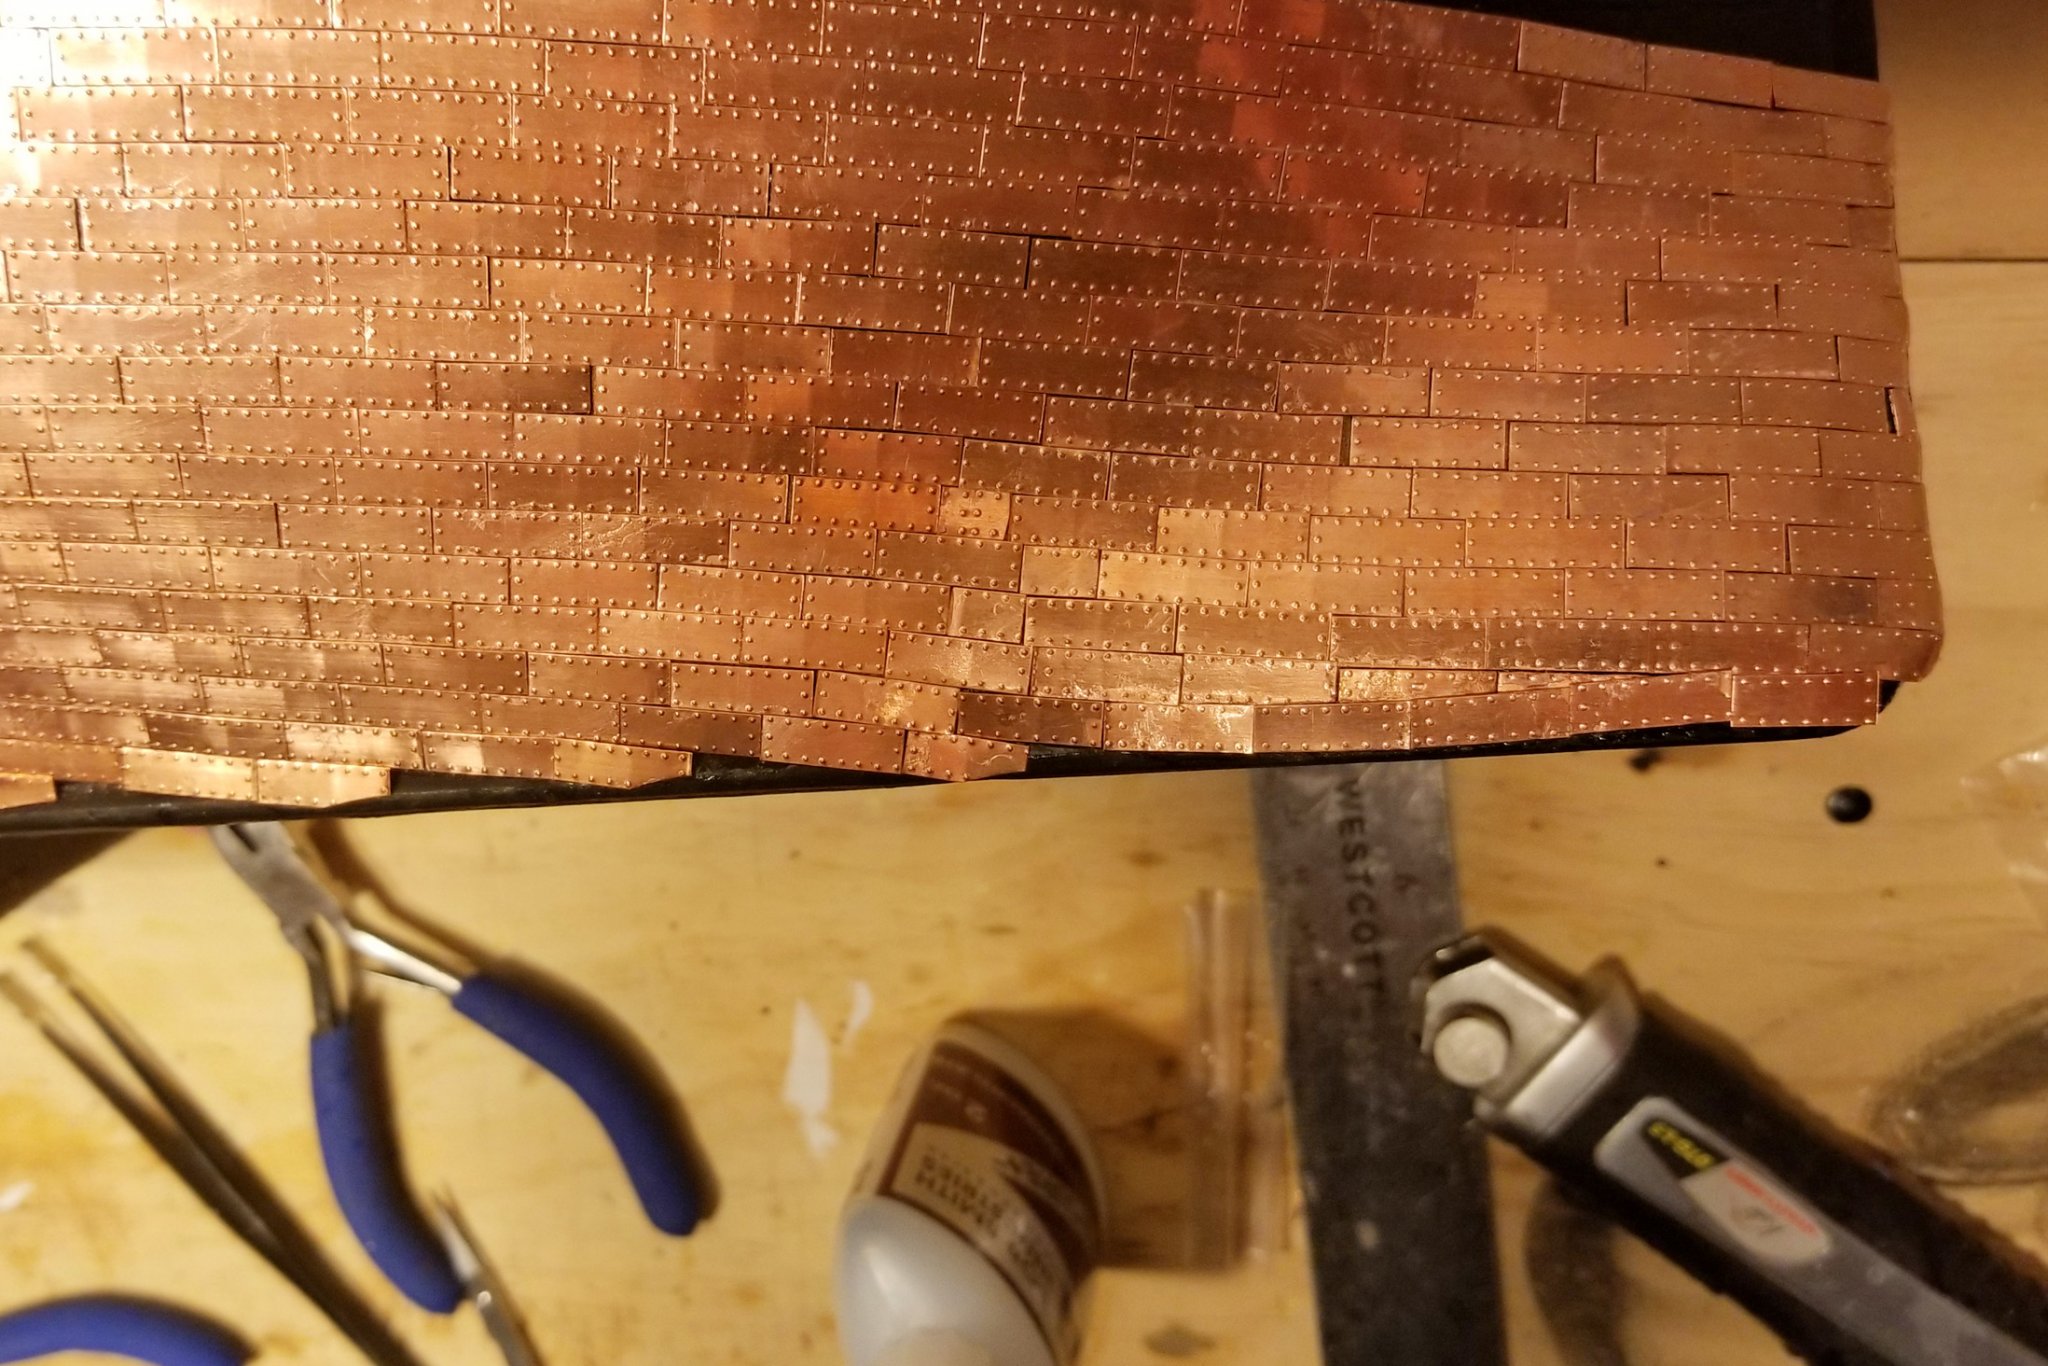
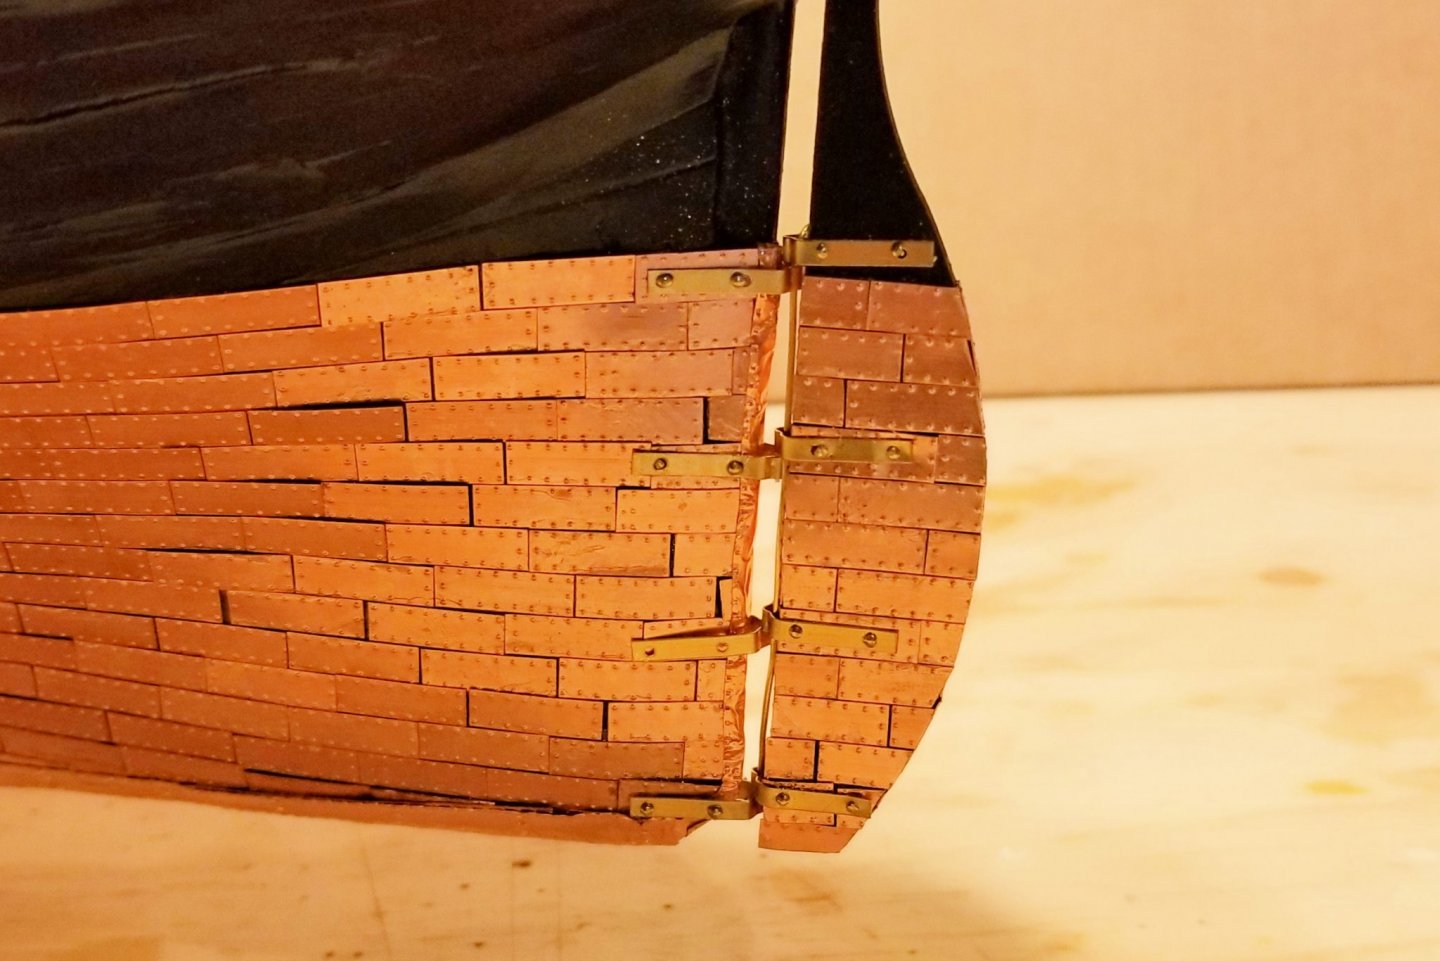
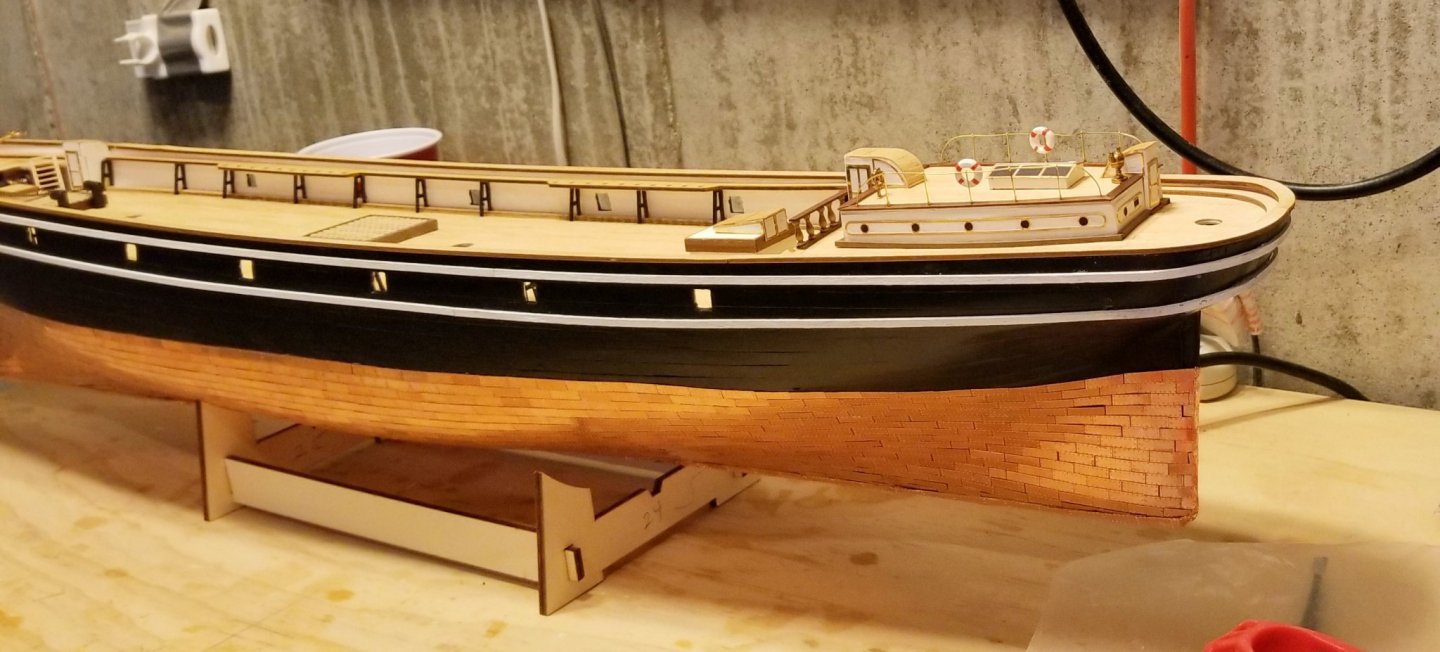
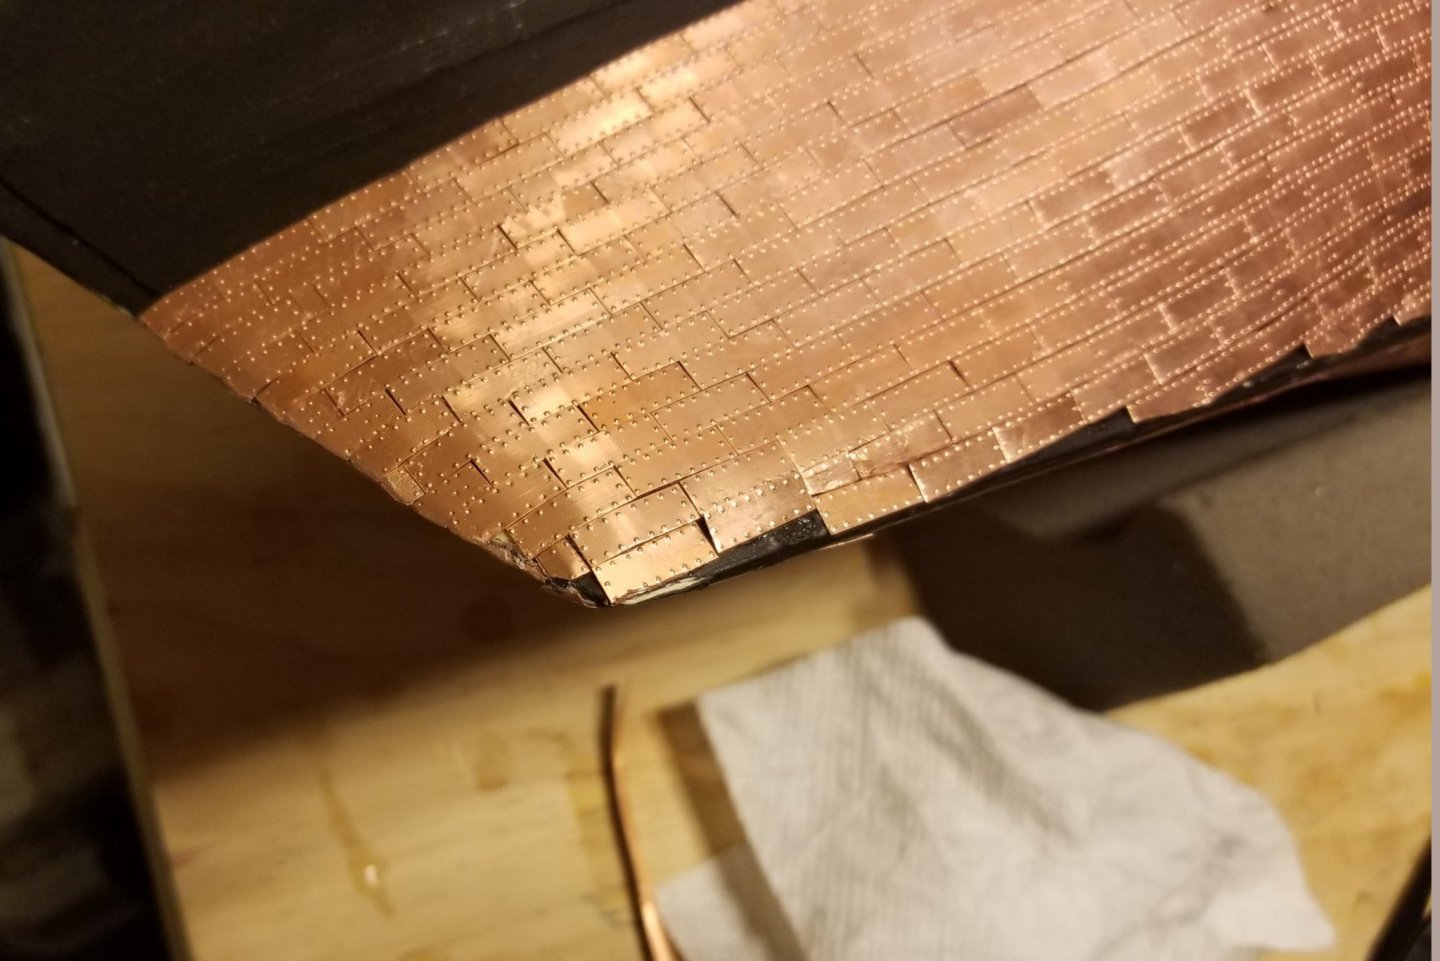
Back from vacation, and found the extra copper plates waiting for me. Took me a while amidst post-vacation catch up tasks to finish off the coppering of the hull. That brought me to finishing off the keel, bow and stern. I had planned to use copper tape for that, and as things turned out, it worked really well. I've attached pictures showing pre-taping rough sections, and then the finished product. Found there was a learning curve in handling the tape to minimize crinkles, but they show up no matter what you do, so I'm glad I used the plates for most of the hull, and equally glad I used tape to finish off the edges. Now I can go back and pick up the sequence items I skipped waiting for the extra plates to arrive. Regards, David


- 133 replies
-
- 7
-
-
- cutty sark
- mantua
- (and 3 more)
-
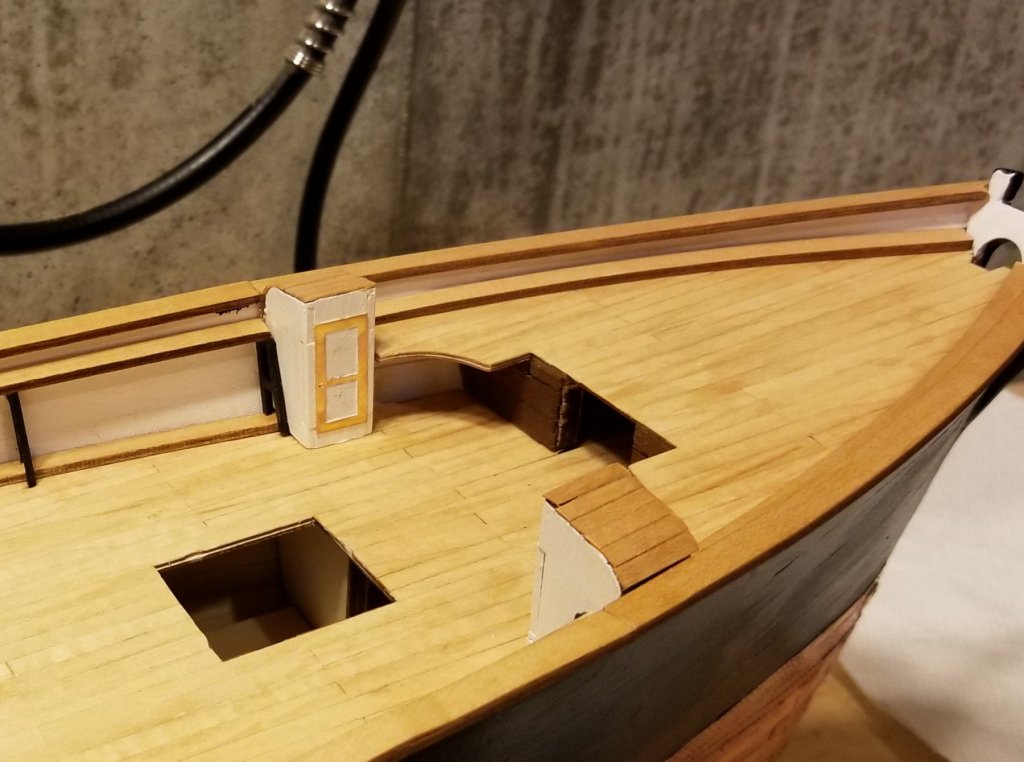
Now some deck detail at the bow. This will be my last progress post for a few weeks. Off for a vacation with my wife. The copper plates are now in shipping to me, so when I get back I'll be able to finish the coppering. Regards, David
- 133 replies
-
- 8
-
-
- cutty sark
- mantua
- (and 3 more)
-
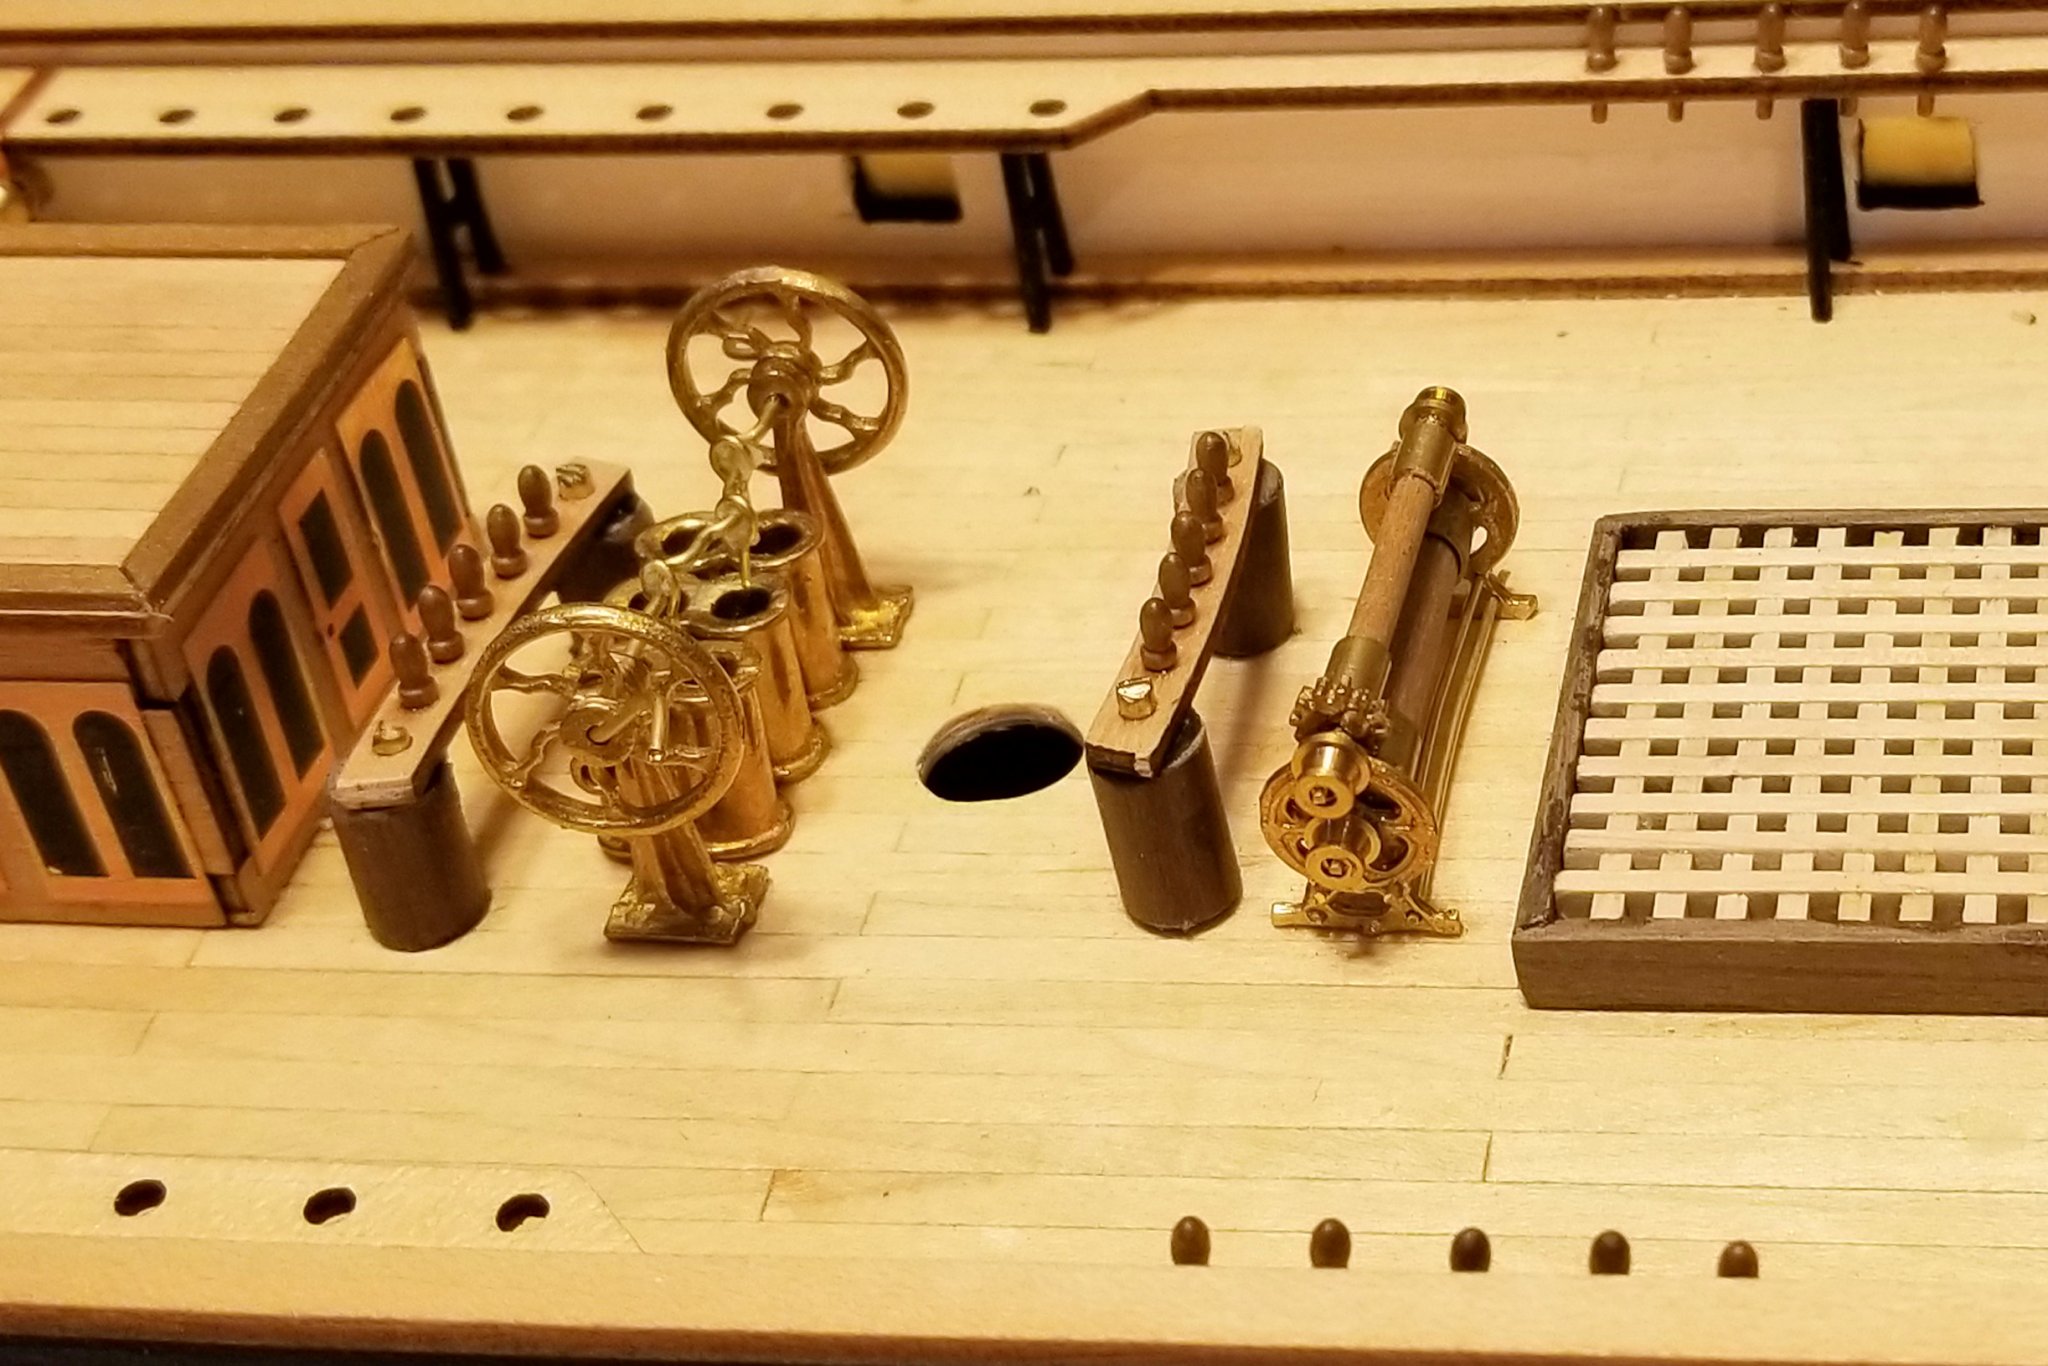
More deck detail at the stern. I need to find something to "decorate" that blank white wall above the railing. Regards, David

- 133 replies
-
- 6
-
-
- cutty sark
- mantua
- (and 3 more)
-
Antony: I just caught up to this wonderful build. The quality and ingenuity of your work on these scratch built models continues to amaze me. This is quite a step up from the Turtle Ship! Regards, David
-
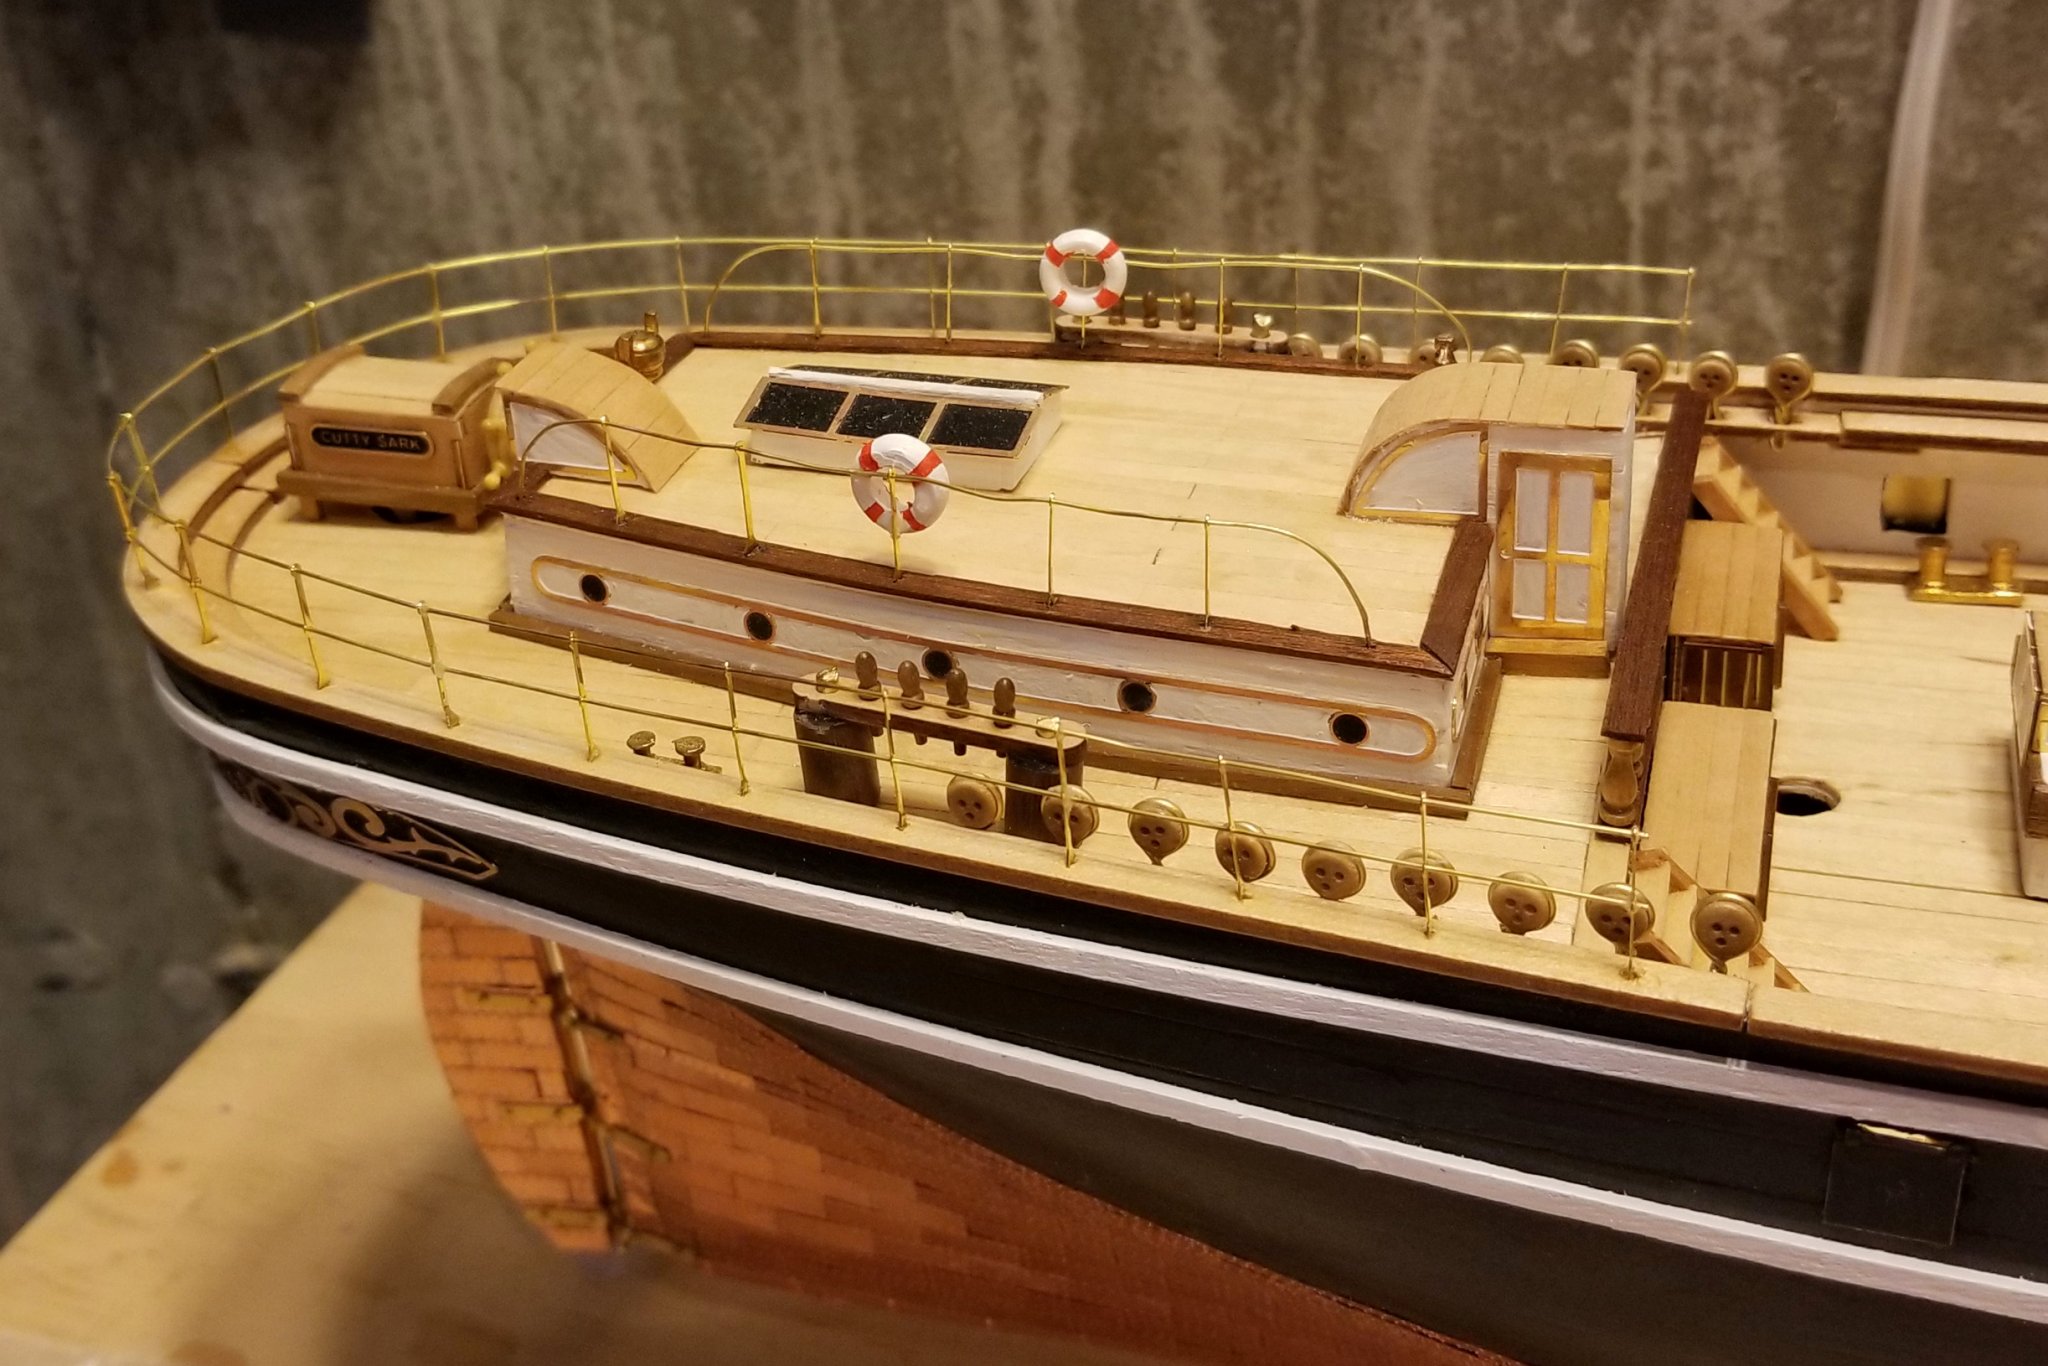
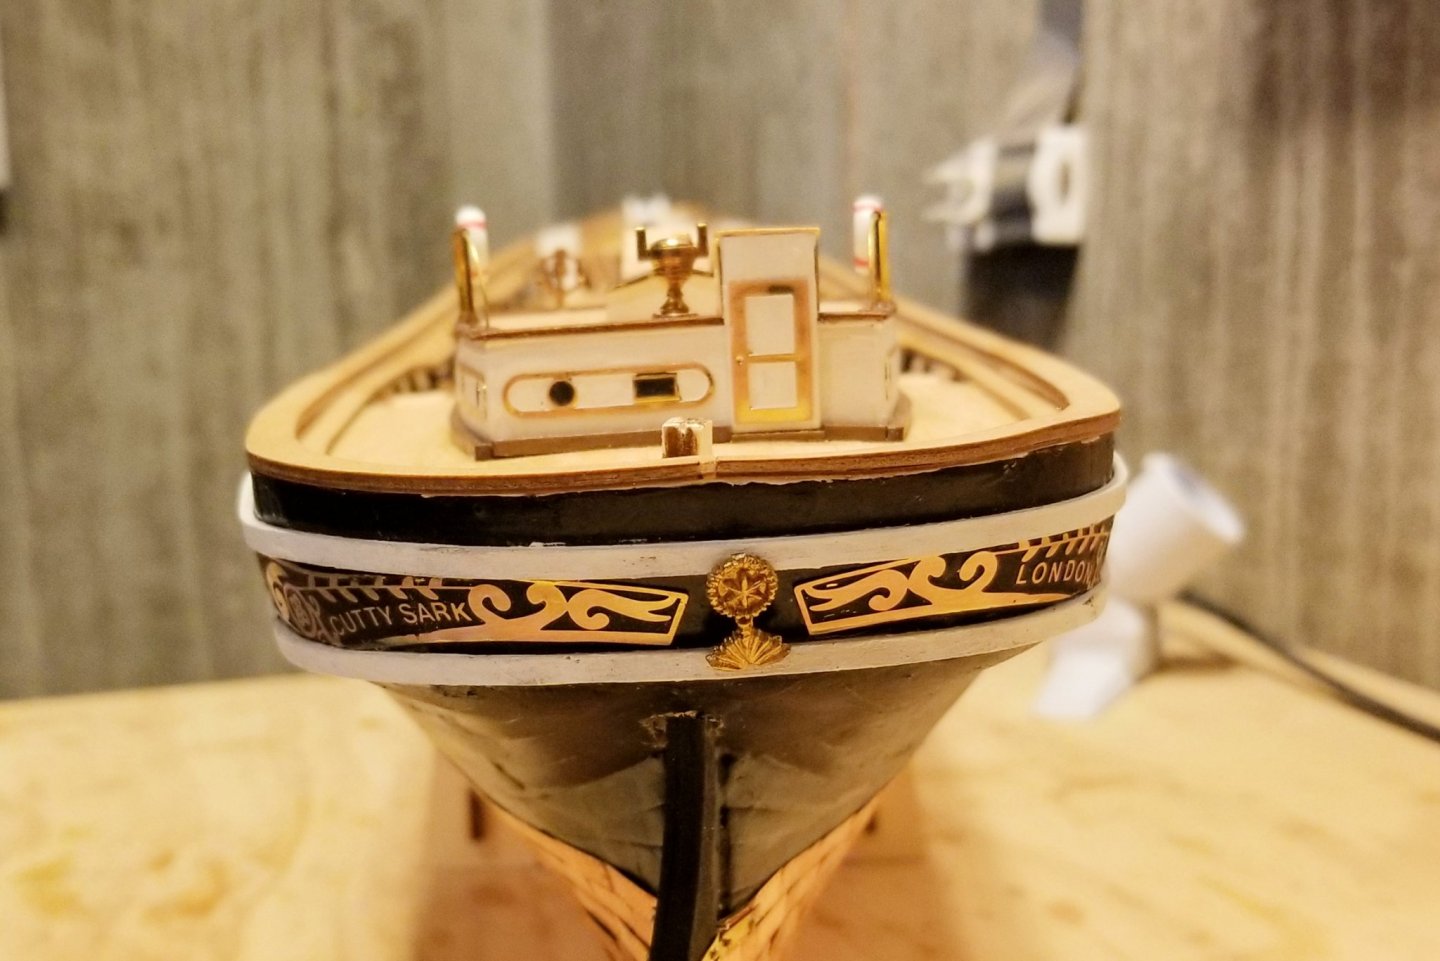
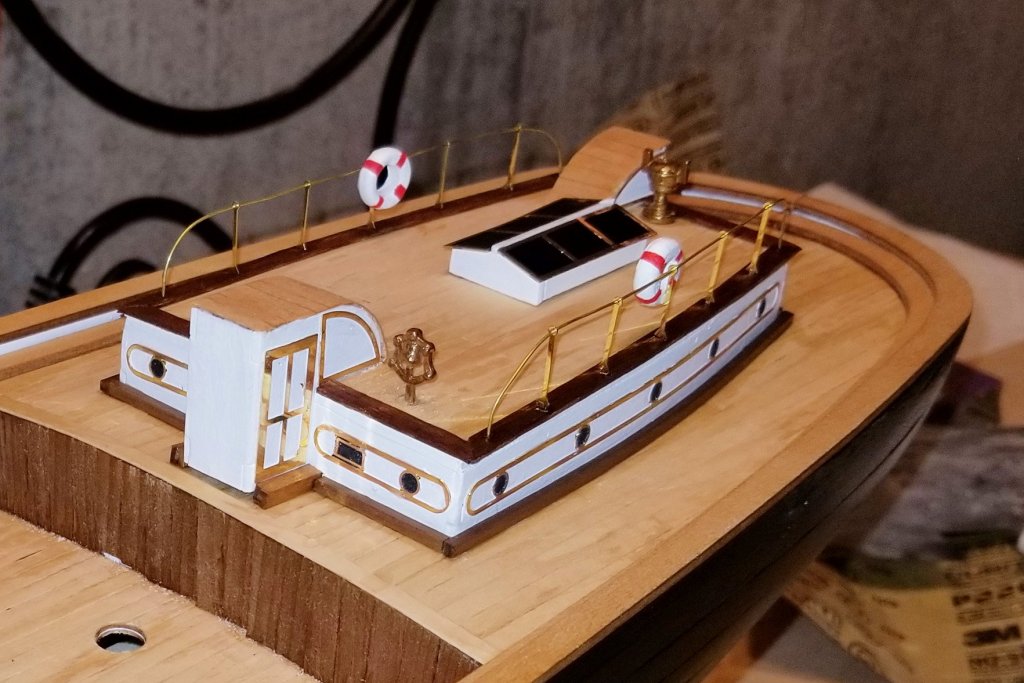
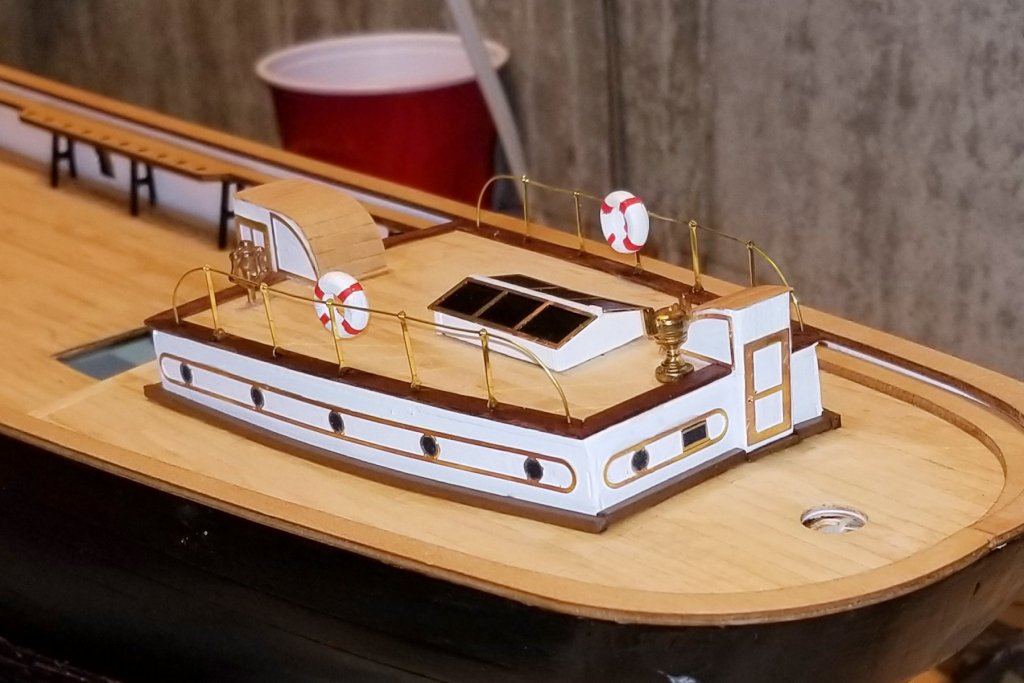
Here's the stern deckhouse. I like the look of this model with the brass/paint/wood combination. Regards, David

- 133 replies
-
- 8
-
-
- cutty sark
- mantua
- (and 3 more)
-
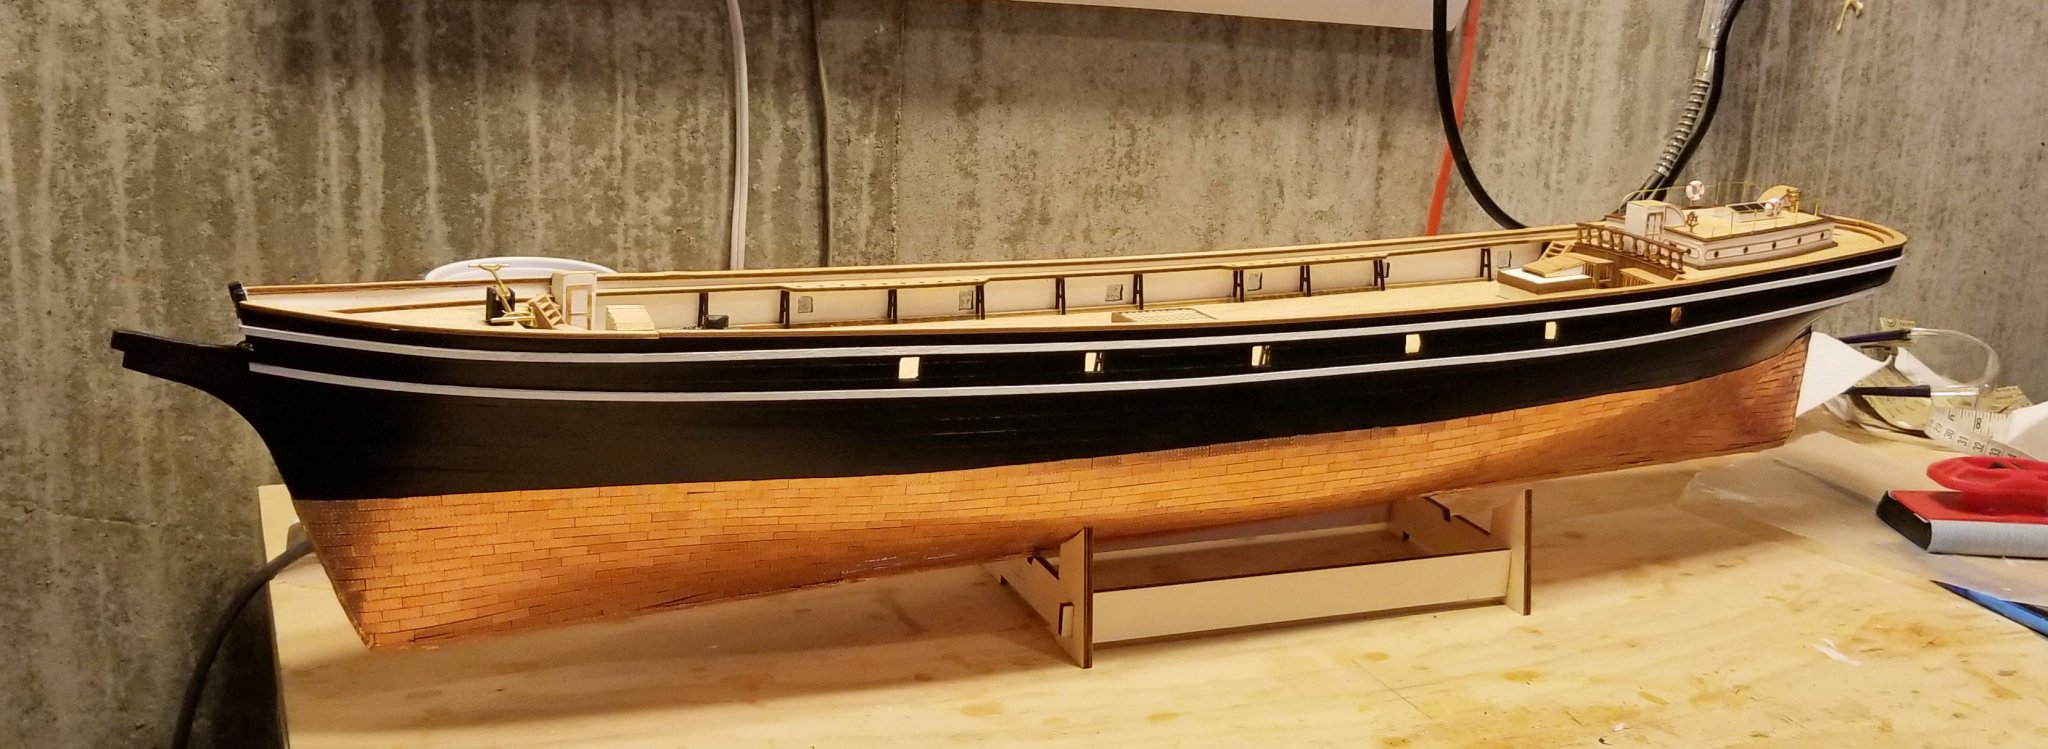
The deck moldings and the channels are now on the ship, and they make it look much more finished. I'm having to work out of sequence waiting for the hull plates to arrive, but fortunately there are deck structures I can do. Regards, David

- 133 replies
-
- 7
-
-
- cutty sark
- mantua
- (and 3 more)
-
Your strips look terrific. As I noted in an earlier post, I couldn't get a good result using a pounce wheel -- but I am going to use strips to edge the bow, stern and keel. Regards, David
- 133 replies
-
- 1
-
-
- cutty sark
- mantua
- (and 3 more)
-
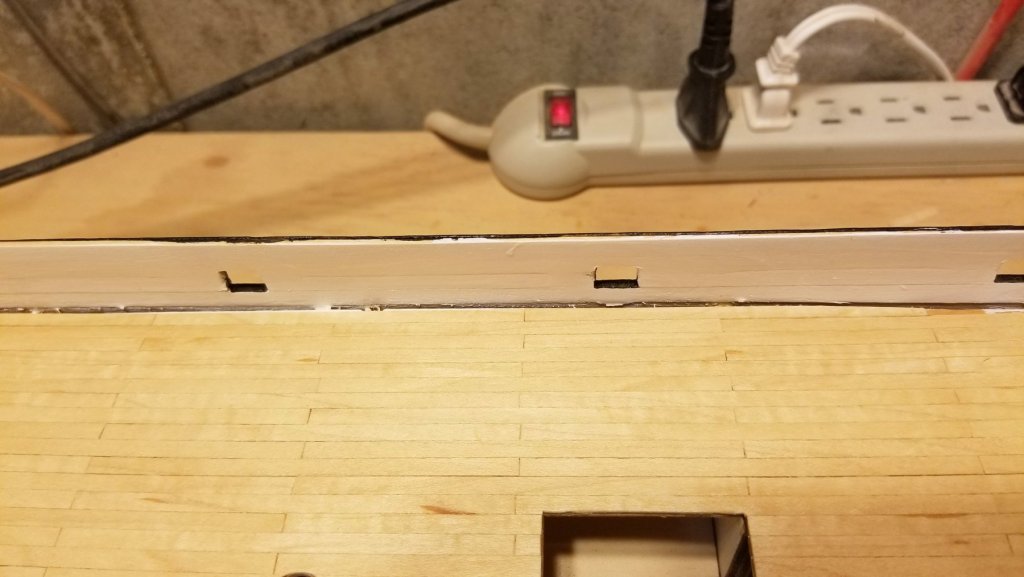
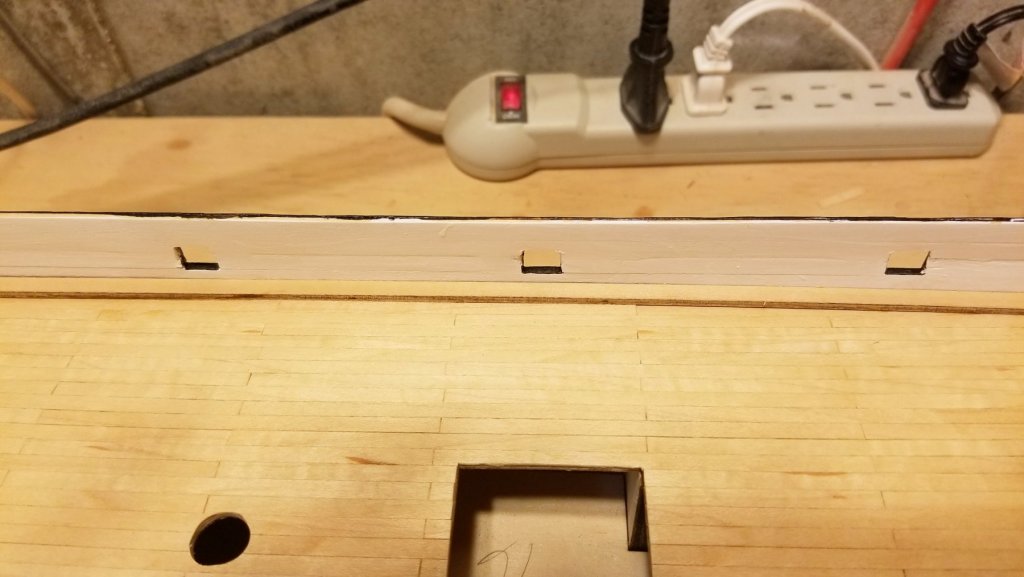
A bit more -- there is nice molding to dress the area where the planked deck meets the bulkhead. See before & after pics. [and again, pictures in reverse order] Regards, David
- 133 replies
-
- 6
-
-
- cutty sark
- mantua
- (and 3 more)
-
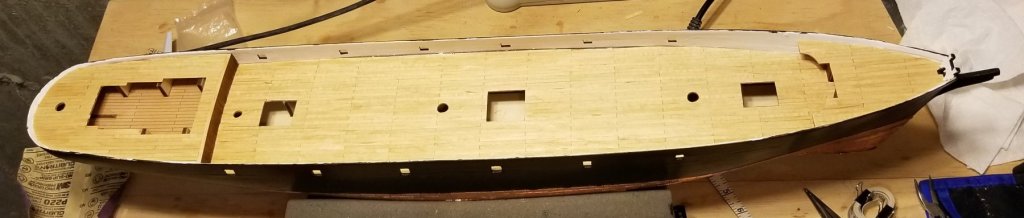
While I'm waiting for the rest of the copper plates to arrive from Ages of Sail, I'm doing what I can to move forward. Here are the planked decks. I can do the next steps involving more deck finishing, but don't want to do the port covers or the white hull strips until I finish the coppering, because they will mar/bend when I lay the ship on its side. Regards, David
- 133 replies
-
- 4
-
-
- cutty sark
- mantua
- (and 3 more)
-
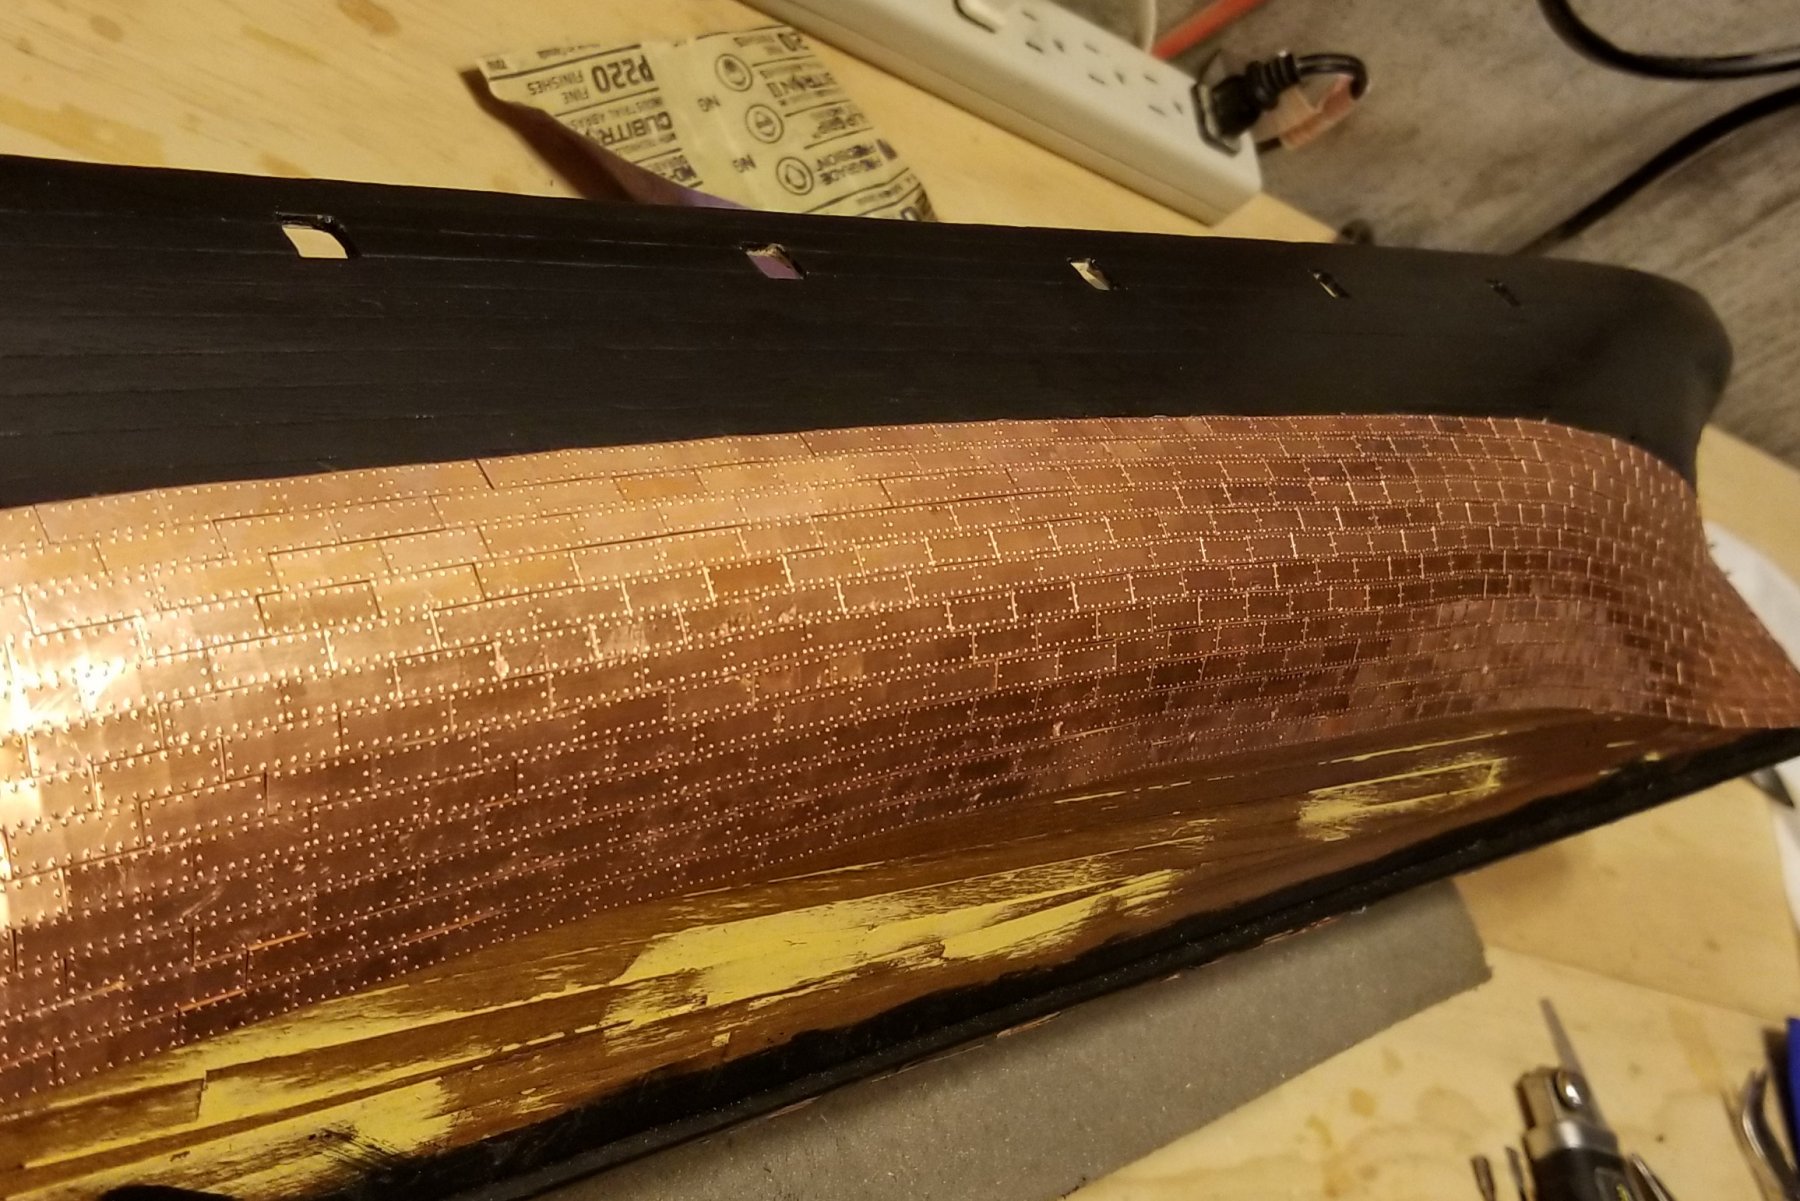
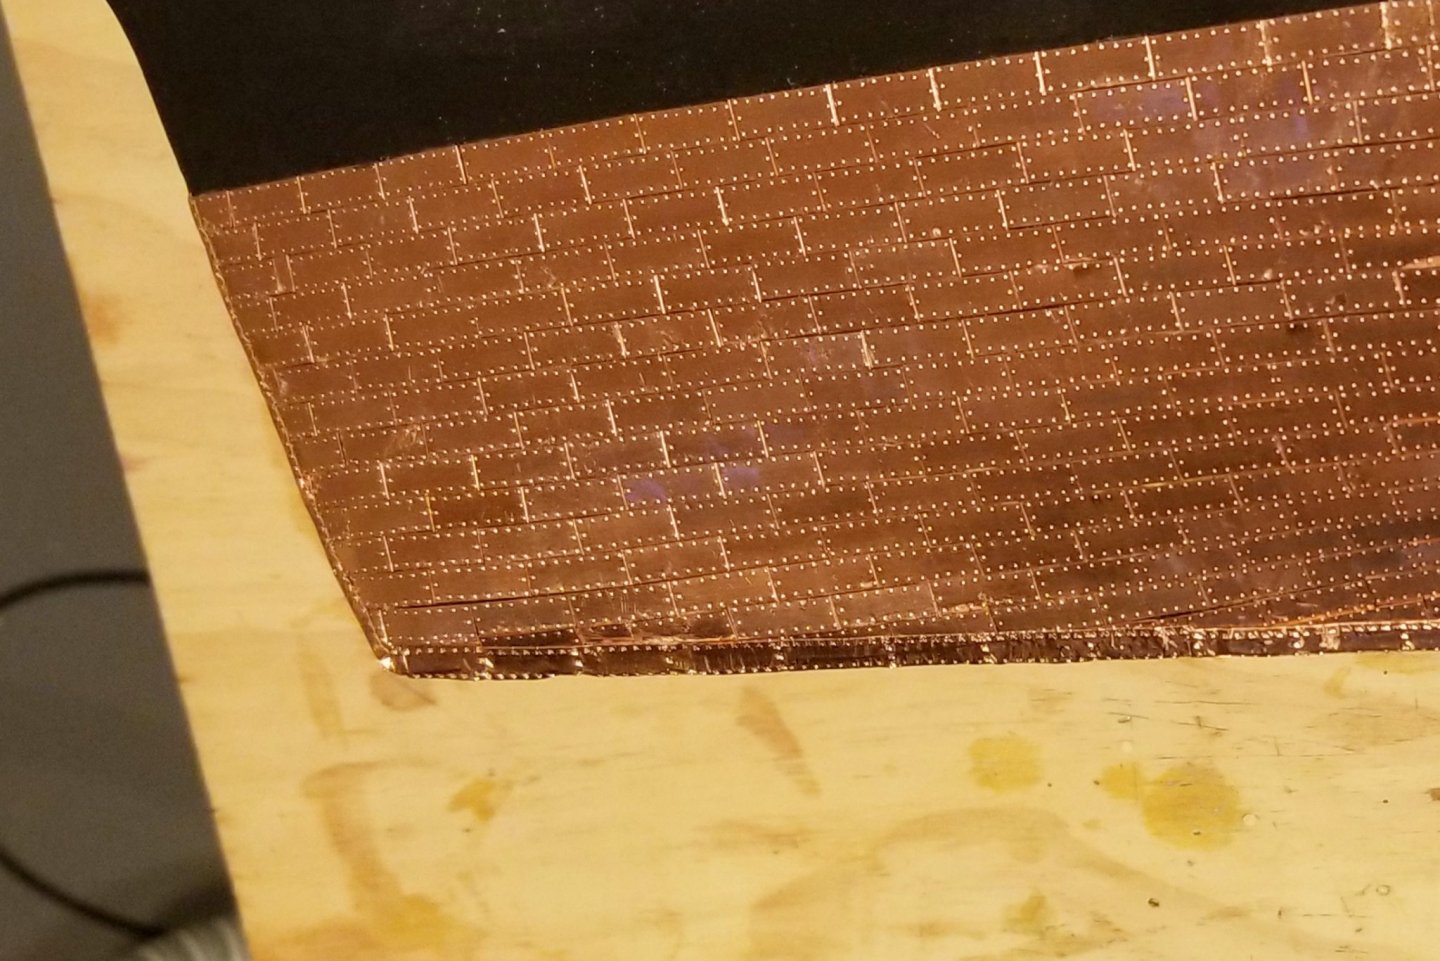
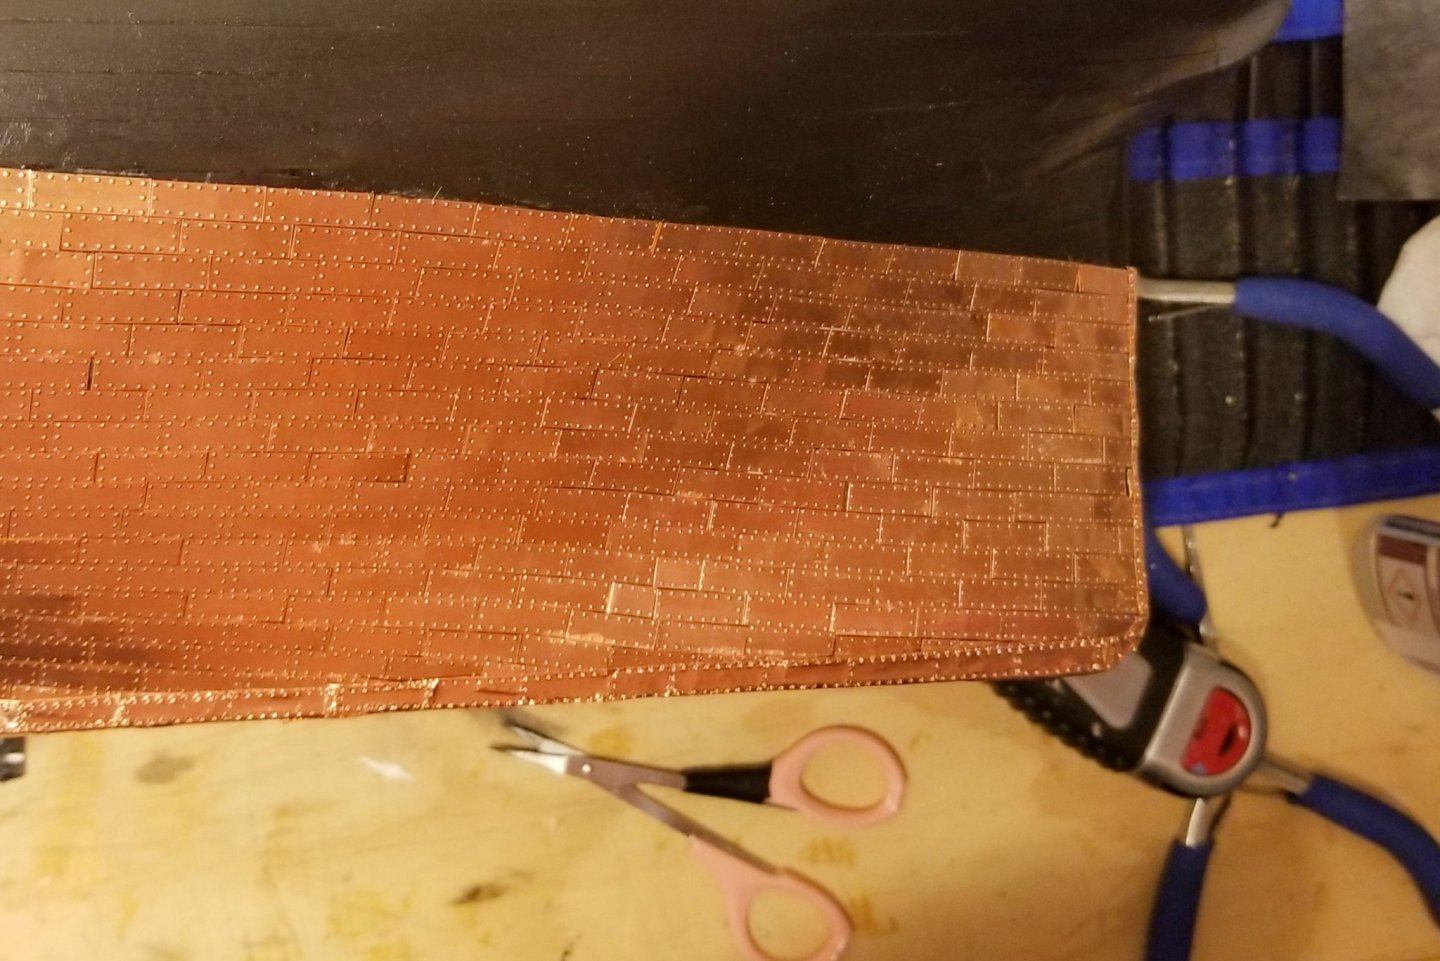
[EDIT NOTE: As sometimes happens on this site, the pictures came out in reverse order from what I intended] I'm stuck at the moment because there aren't enough copper plates in the kit to finish the job -- by about 400. Ages of Sail is sending me more, but in the meantime I'm working around it to the extent I can, which is limited. I've mentioned above that I used a different approach to copper each side of the hull. On the first side I started at the keel, then worked up a bit, then went to the waterline, worked down, and then fitted the two together. You can see that in the picture below. On the second side (the one I plan to display), I started at the waterline and am working down (you can see where I ran out of plates). As the picture shows, it's a much better looking pattern up close. From 3 feet or more away, the first side looks fine, but the display side looks much better. Regards, David


- 133 replies
-
- 8
-
-
- cutty sark
- mantua
- (and 3 more)
-
I haven't posted in a while because I've been coppering, coppering, coppering . . . One side now done -- picture attached. I started on the side I don't plan to display so I could learn from it. Results are fine, but on the other side I think I'll start at the waterline and bring it down to the keel, where the final fitting of odd pieces and shapes will be easier. On this side, I did it where the bottom and top layers met, and it was a LOT of cutting, filing, and fitting. I'm a bit concerned about my supply of copper plates, but we'll see how that goes. May have to call Ages of Sail for a "make good". Regards, David

- 133 replies
-
- 7
-
-
- cutty sark
- mantua
- (and 3 more)
-
Yes -- as soon as I bring this section over to the bow, I'm going to start on the waterline and work down. Regards, David