drobinson02199
-
Posts
920 -
Joined
-
Last visited
Content Type
Profiles
Forums
Gallery
Events
Everything posted by drobinson02199
-
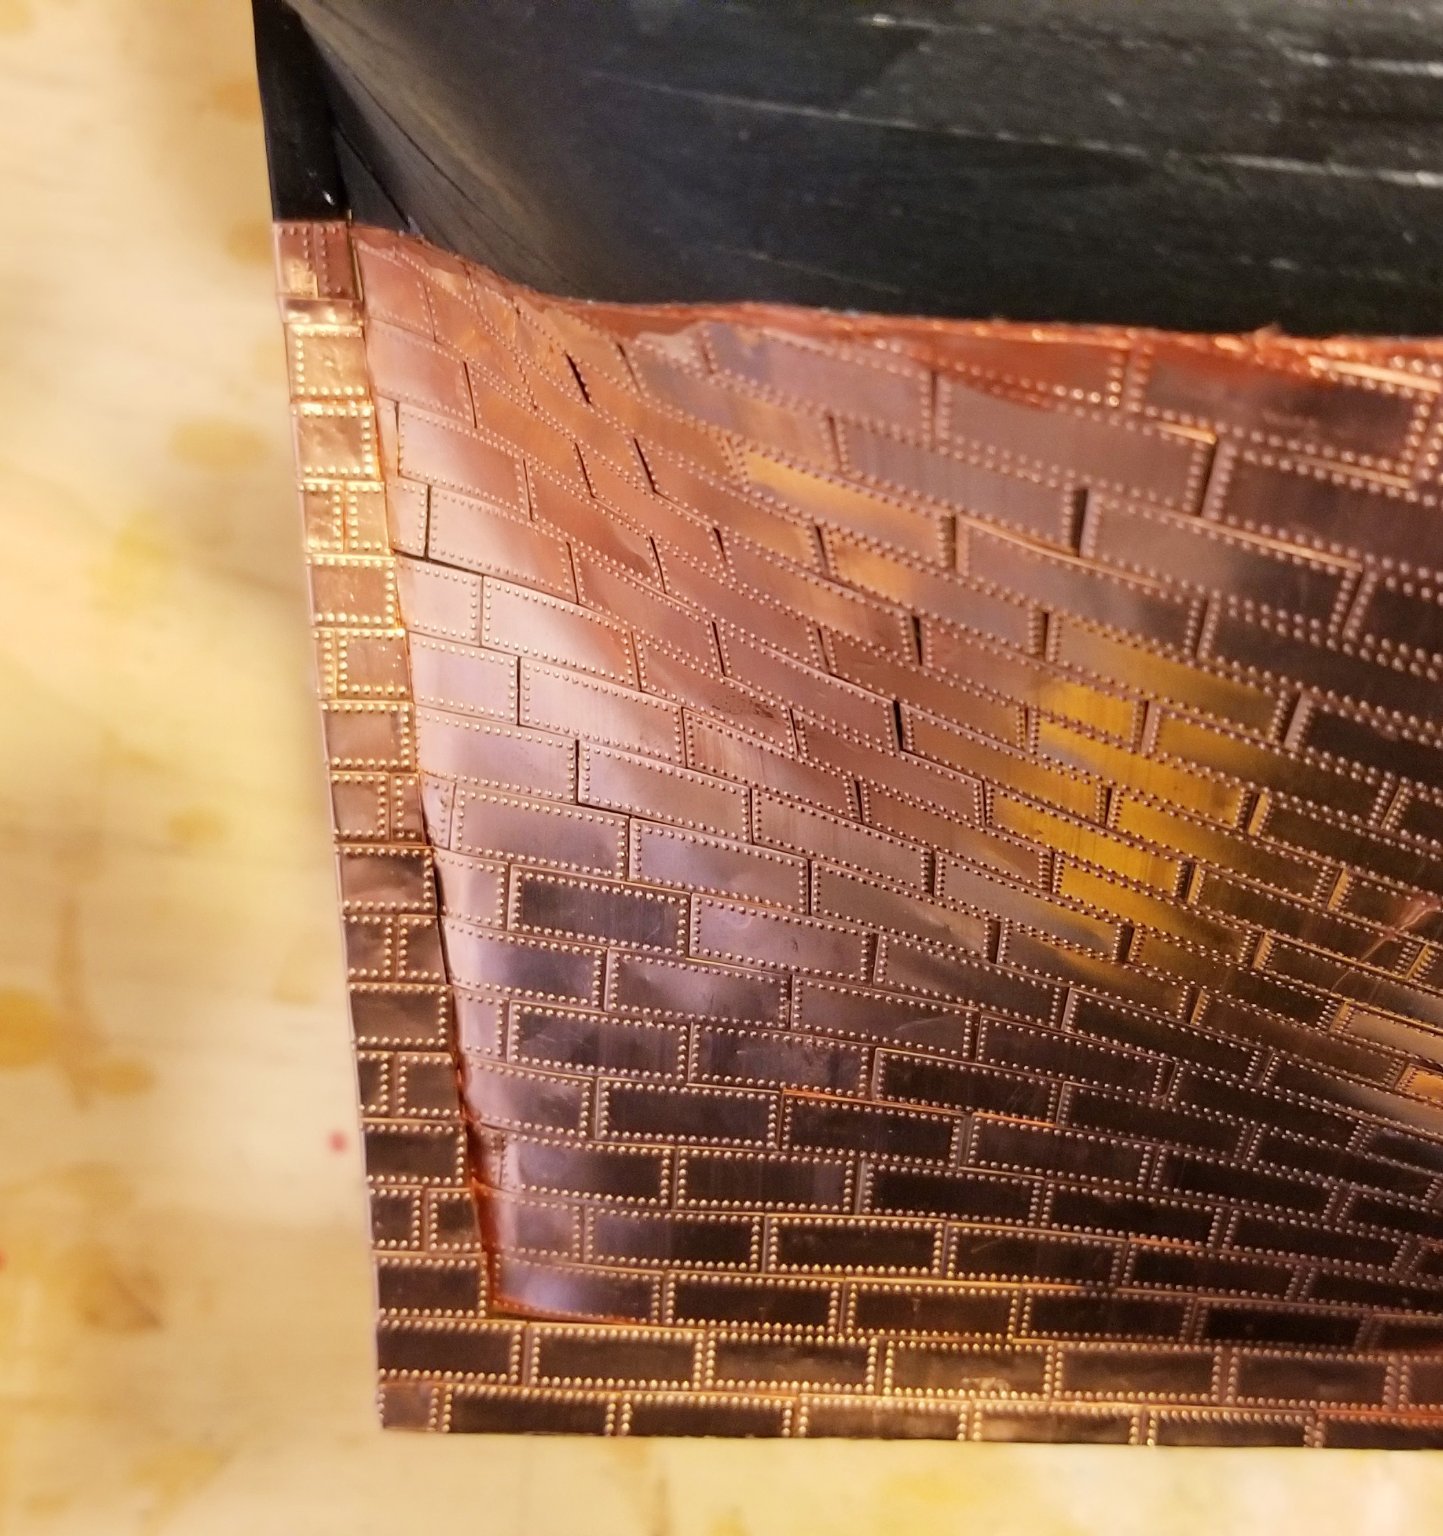
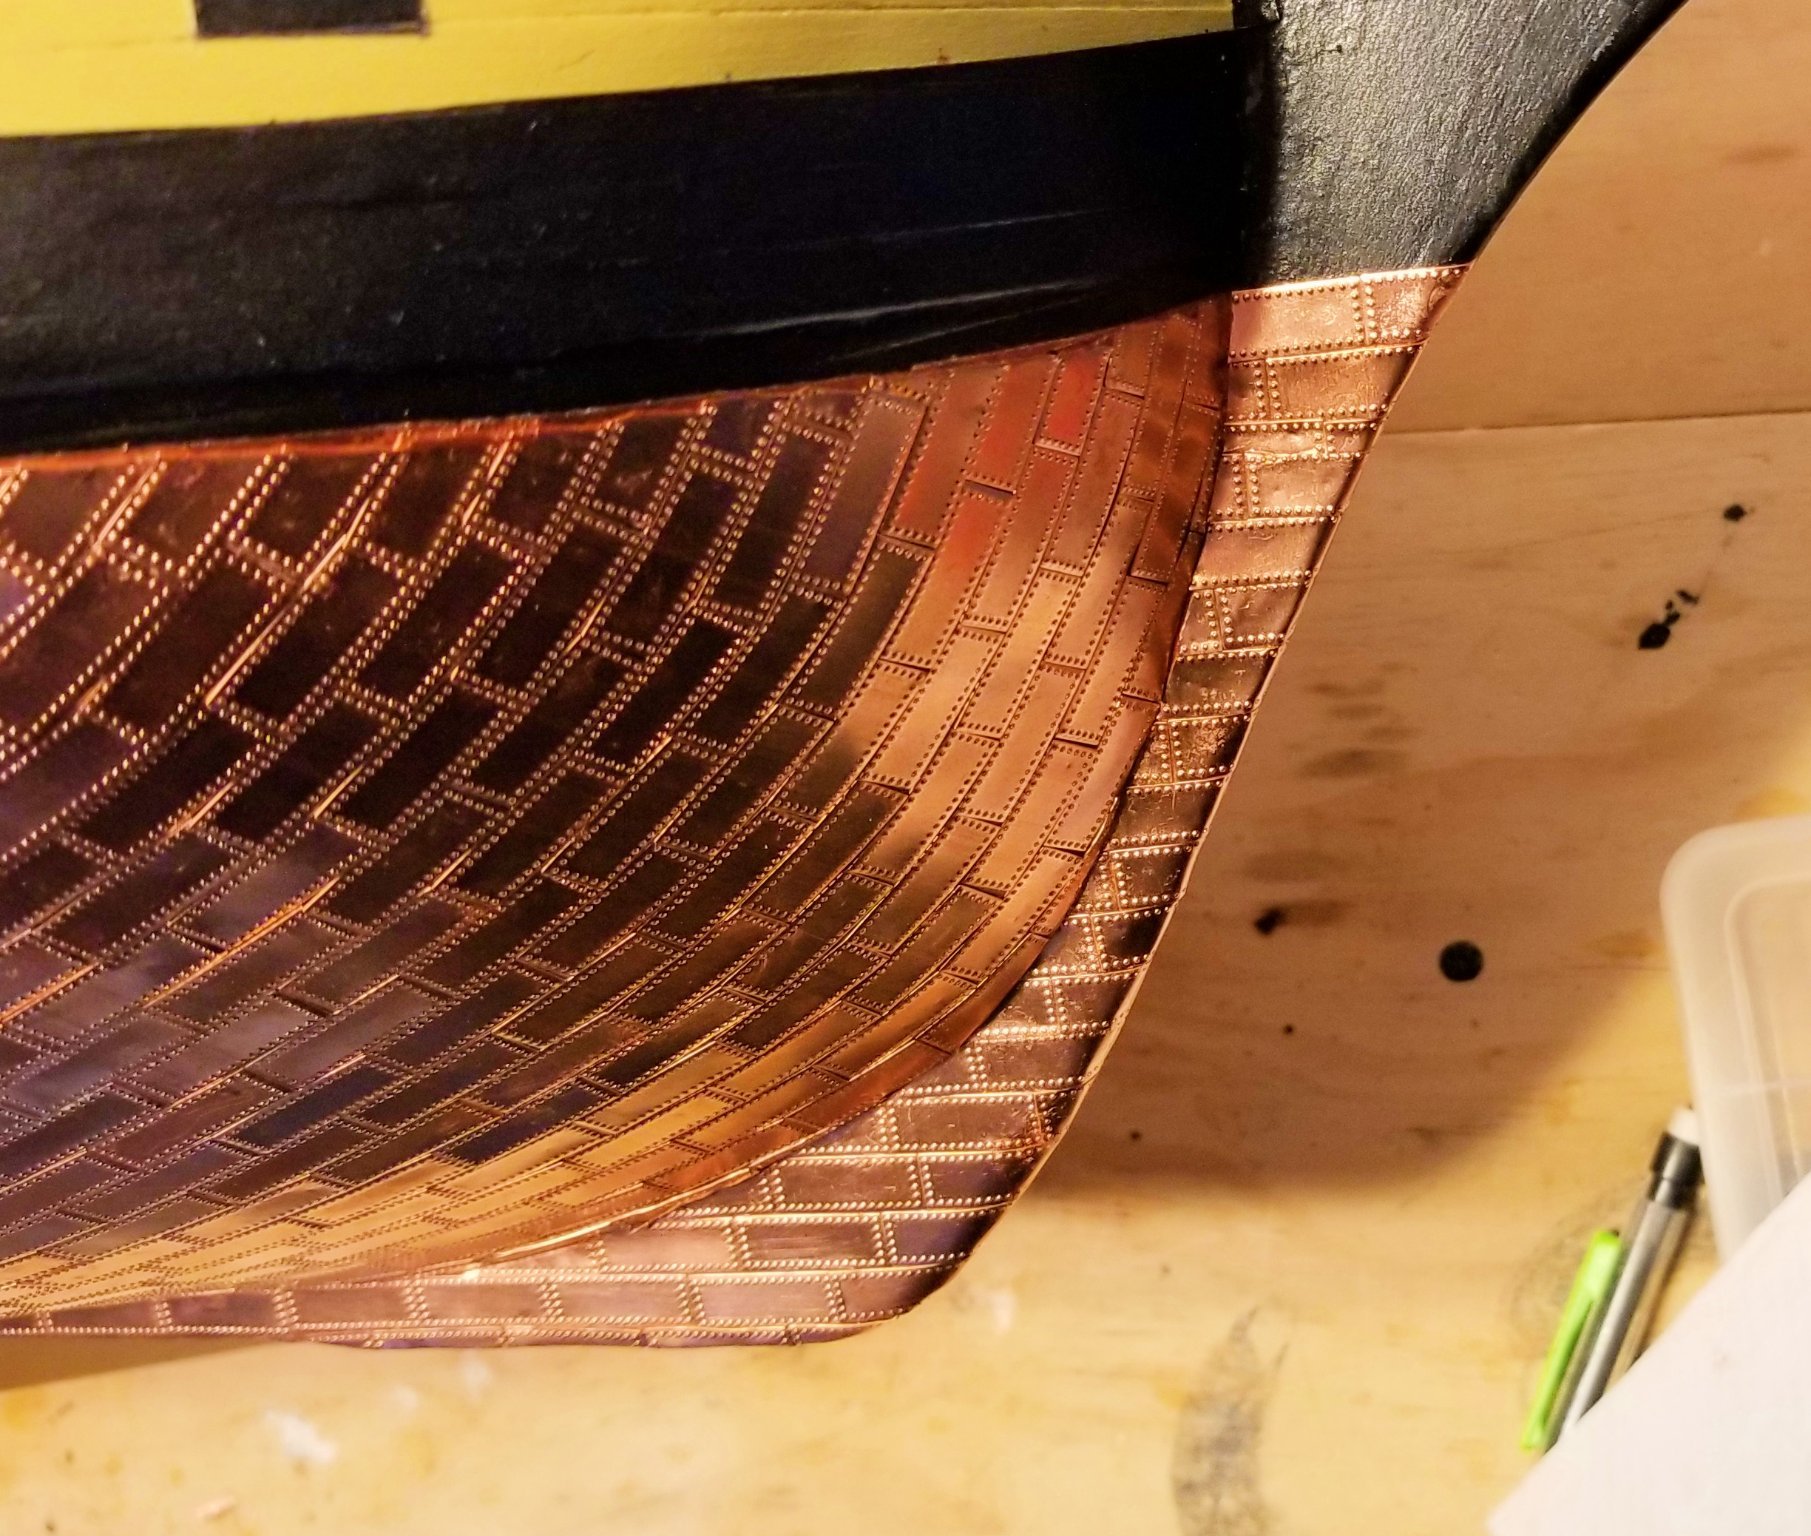
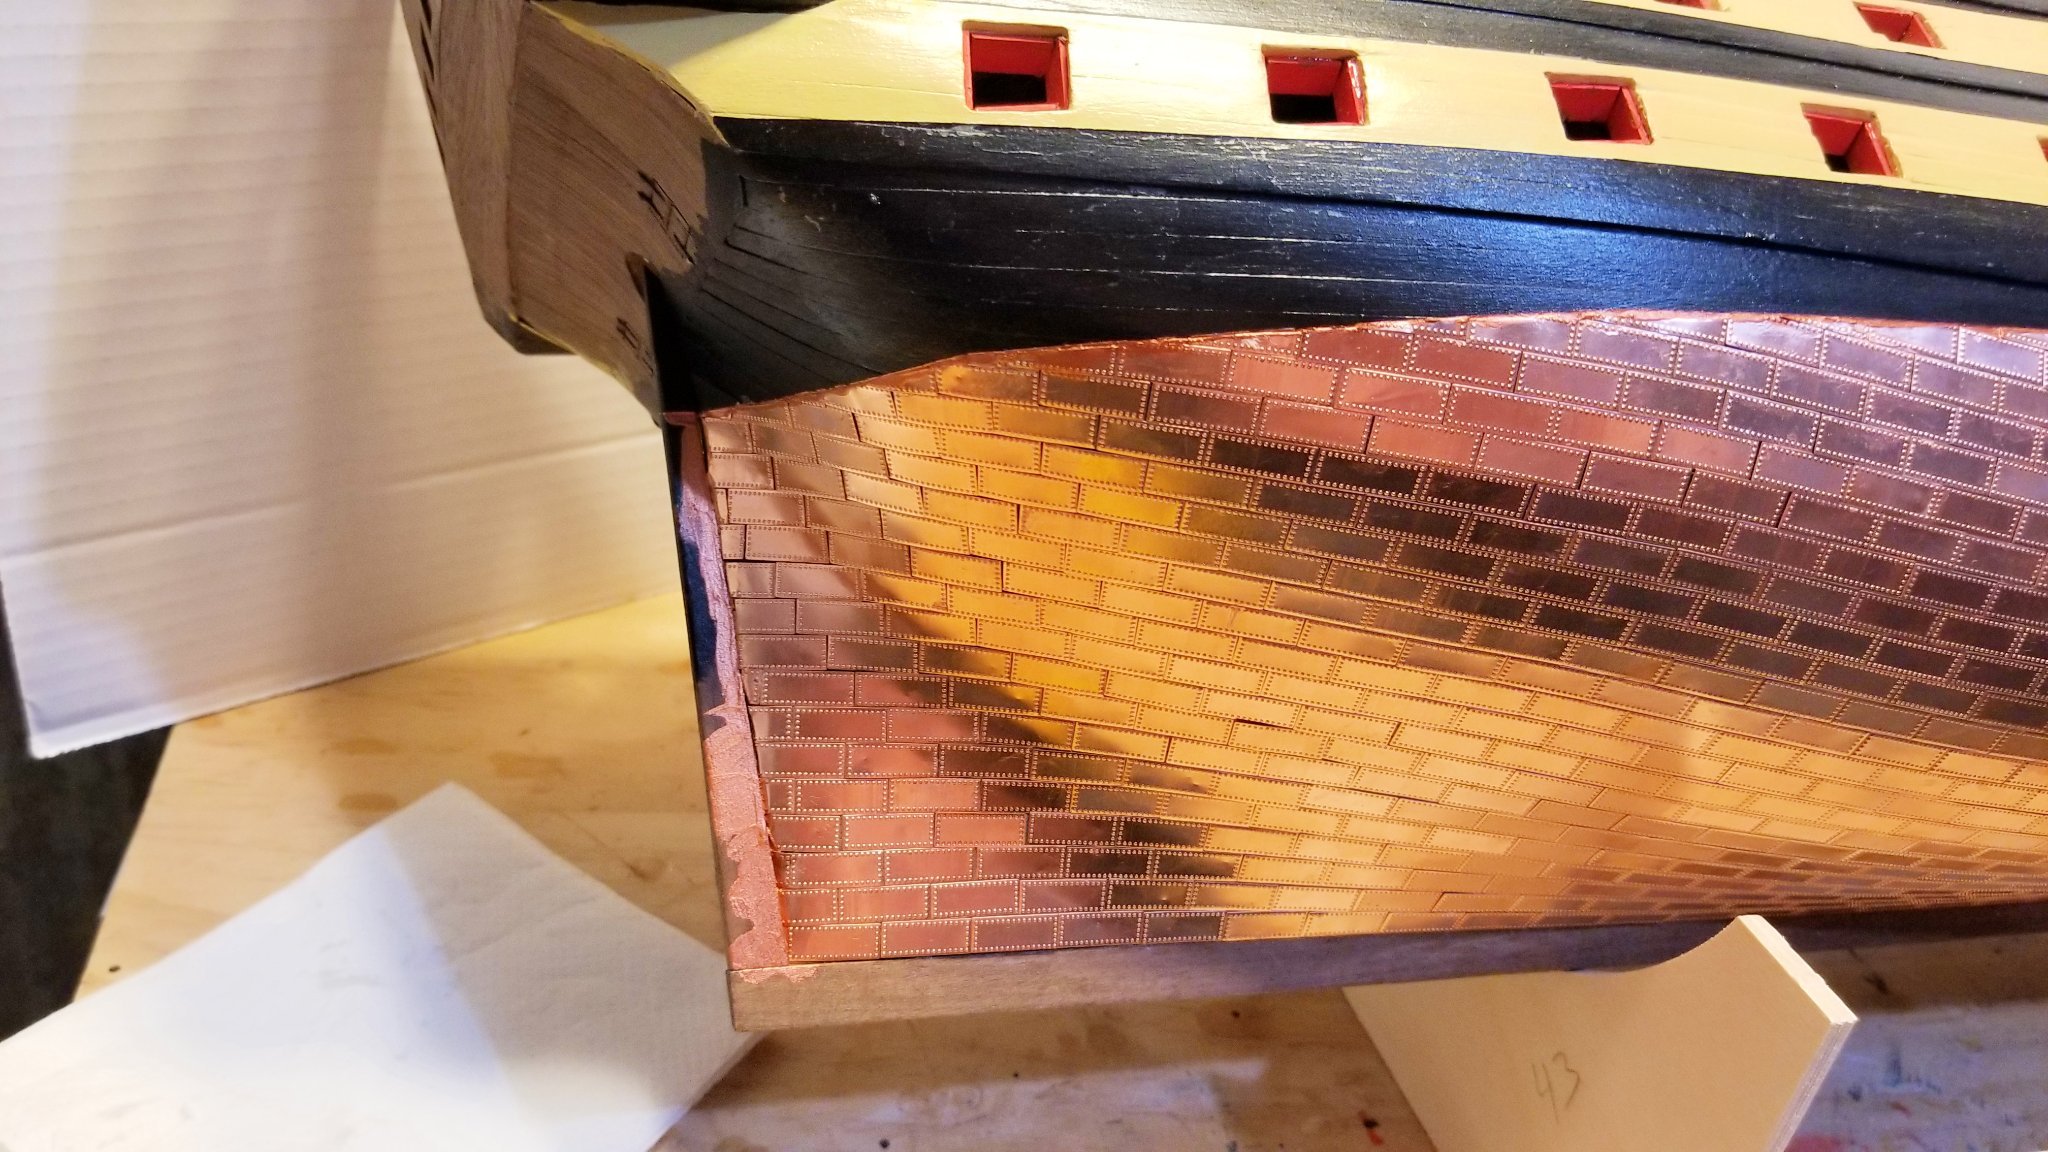
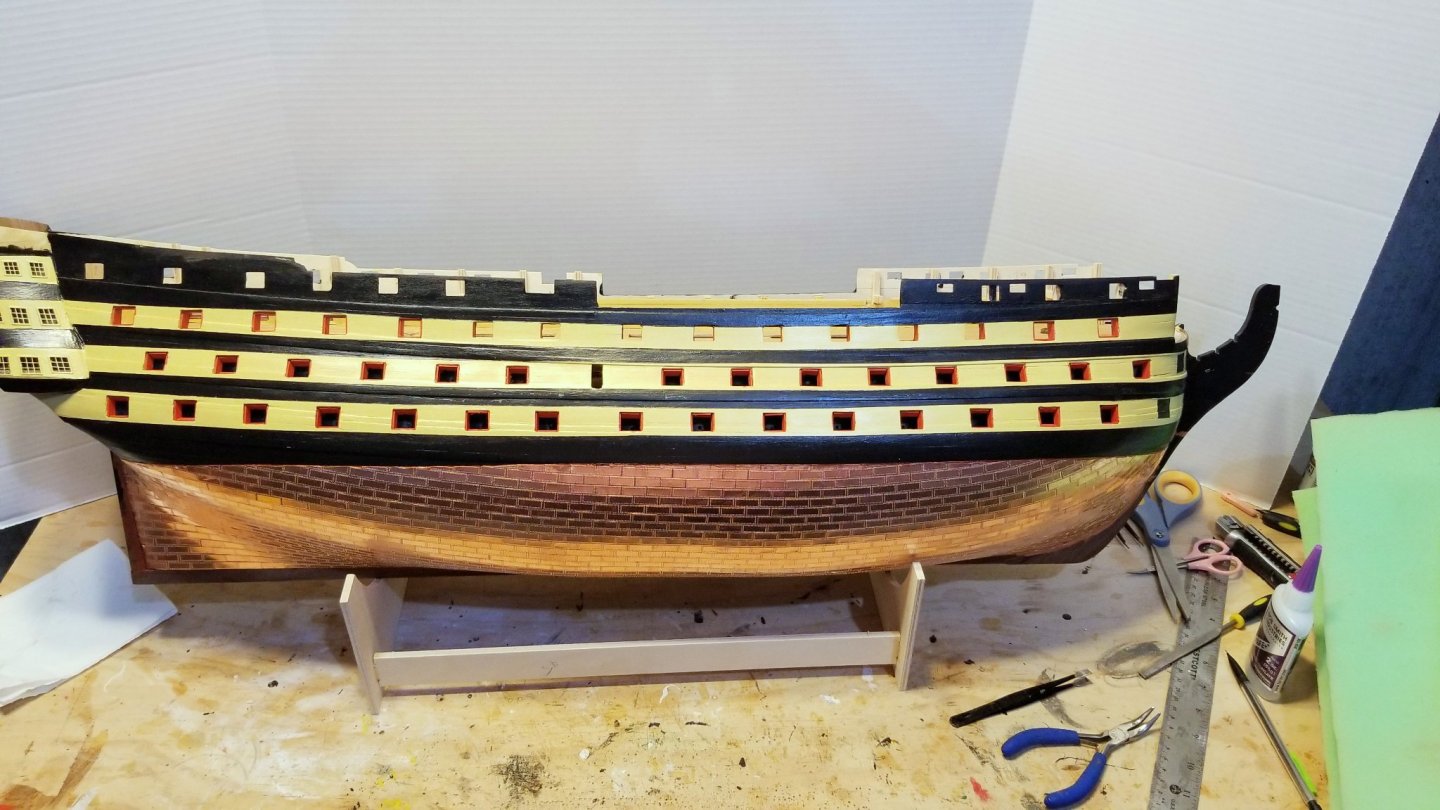
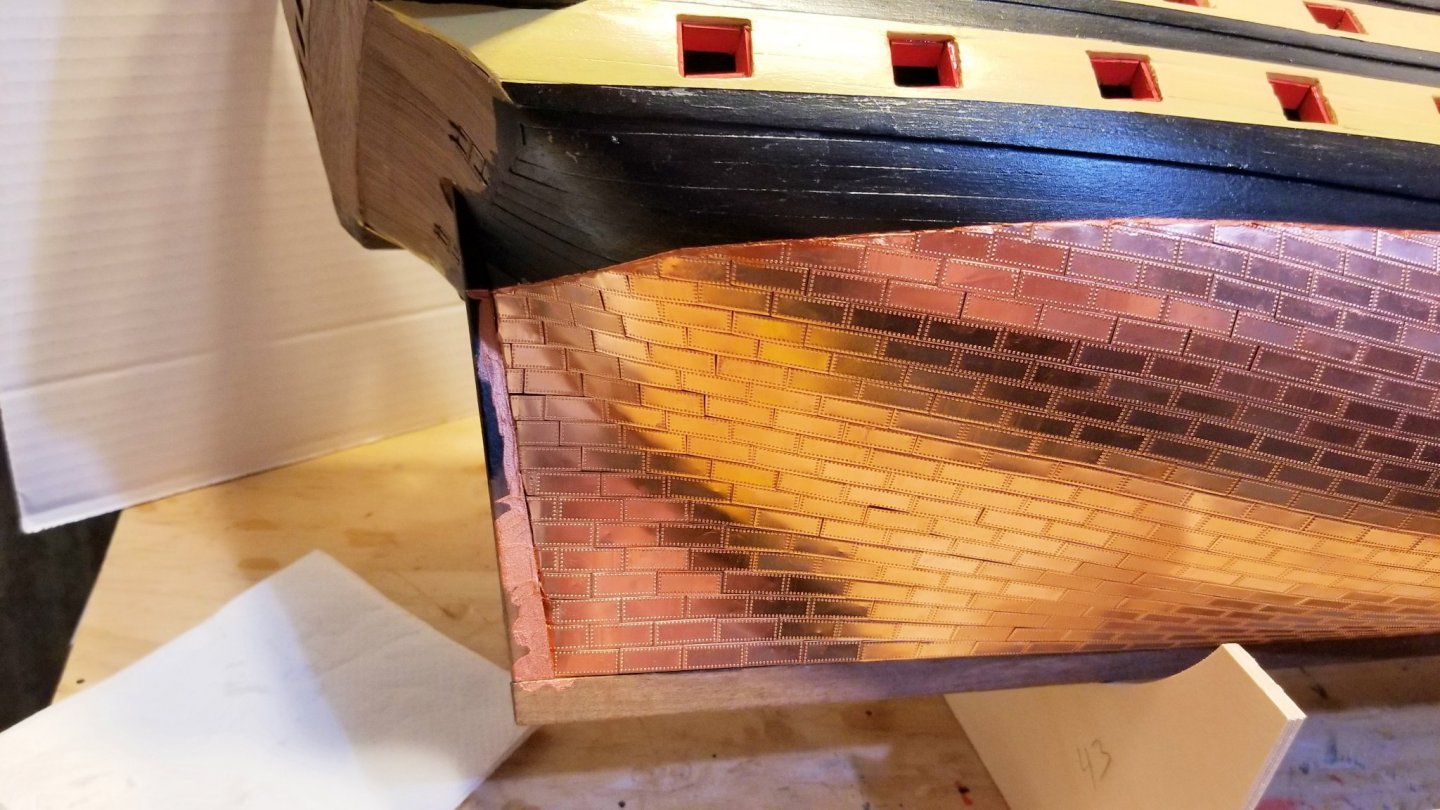
 Coppering of starboard hull is in the previous post. I've now finished coppering the port hull (looks the same). I've also finished coppering the keel, stern post and bow on the starboard side, and pictures of those are below. Regards, David
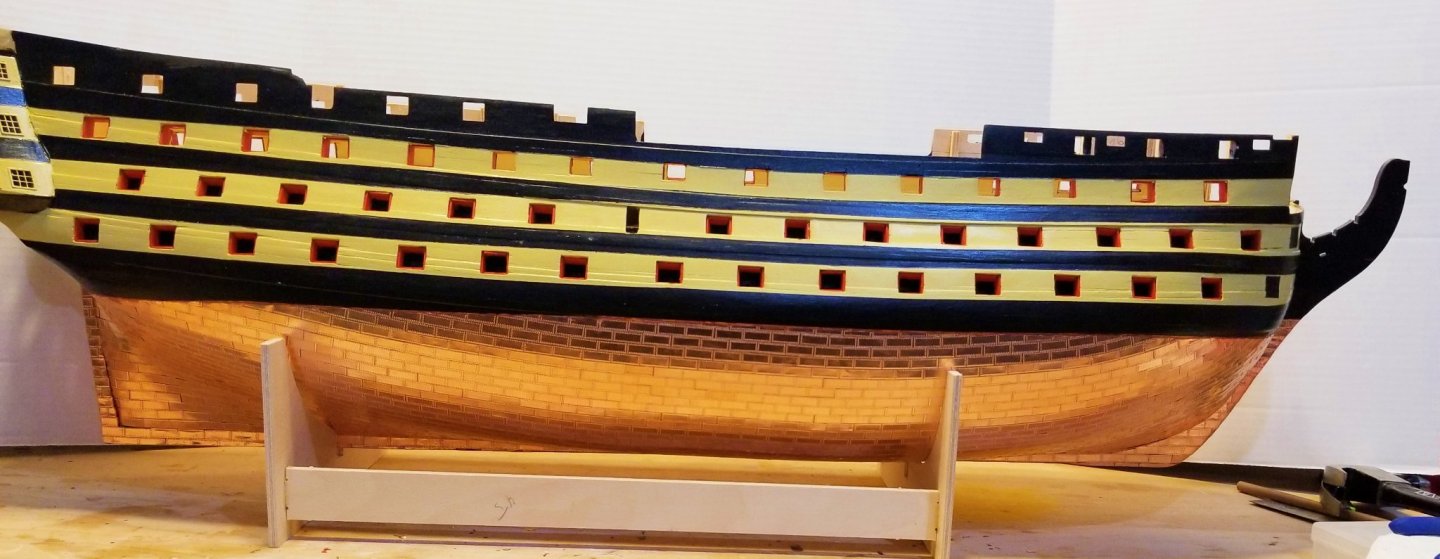


- 218 replies
-
- 9
-

-

-
- Victory
- Caldercraft
- (and 1 more)
-
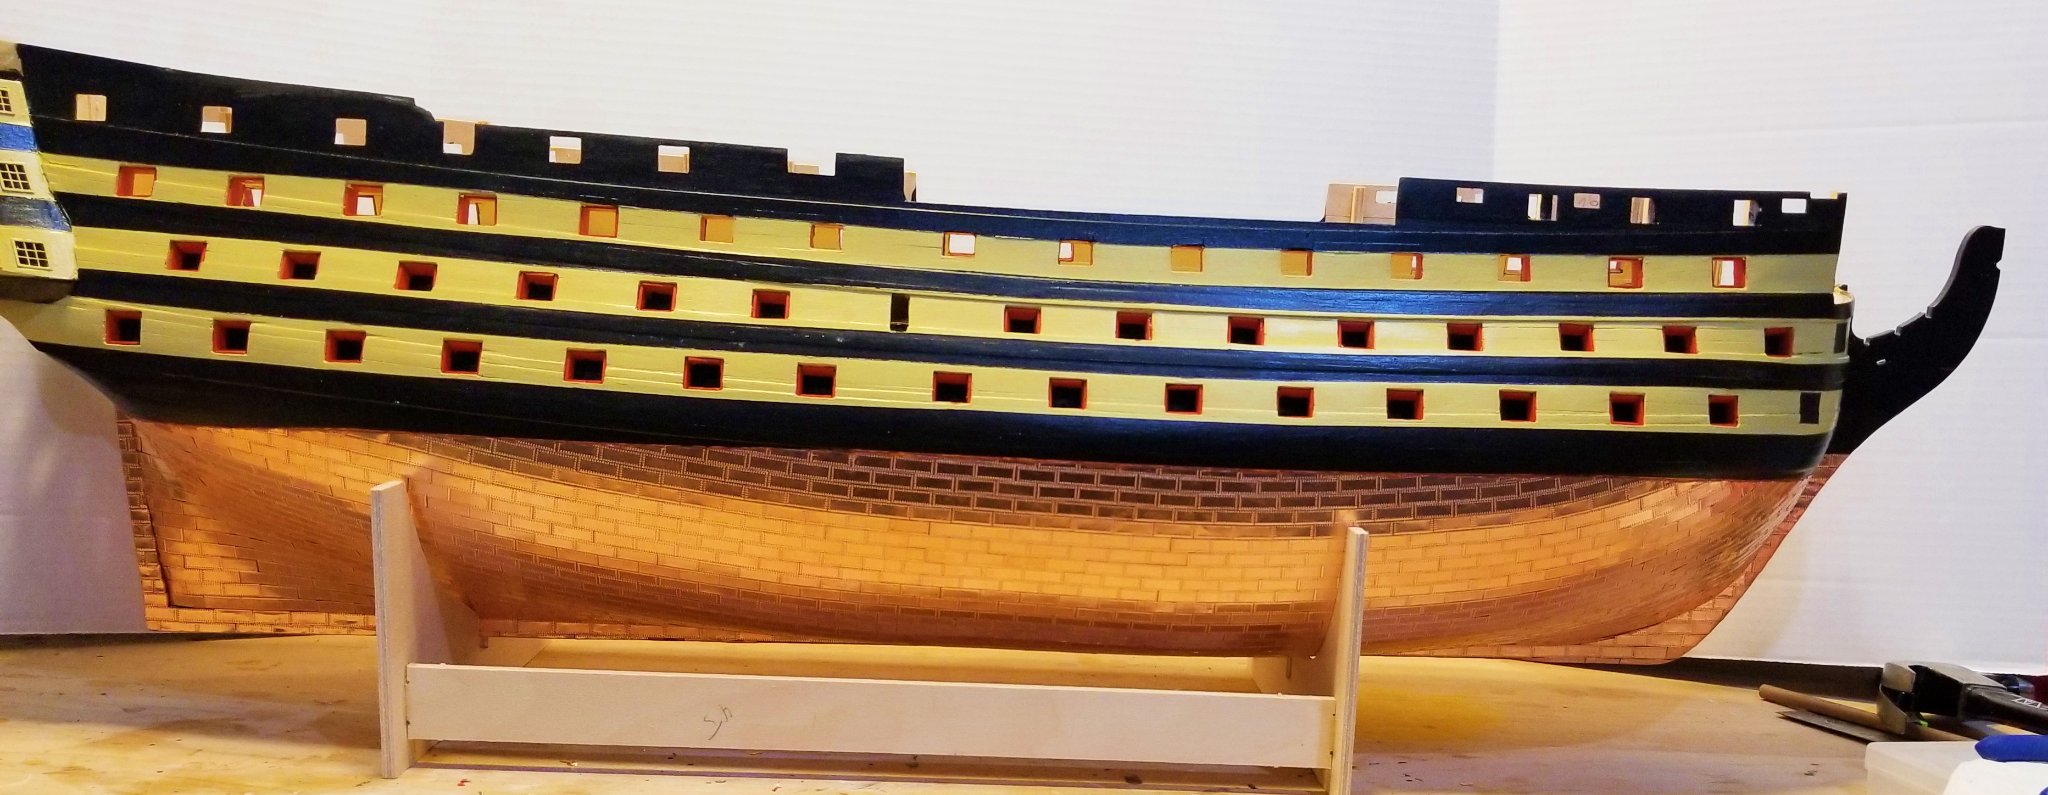
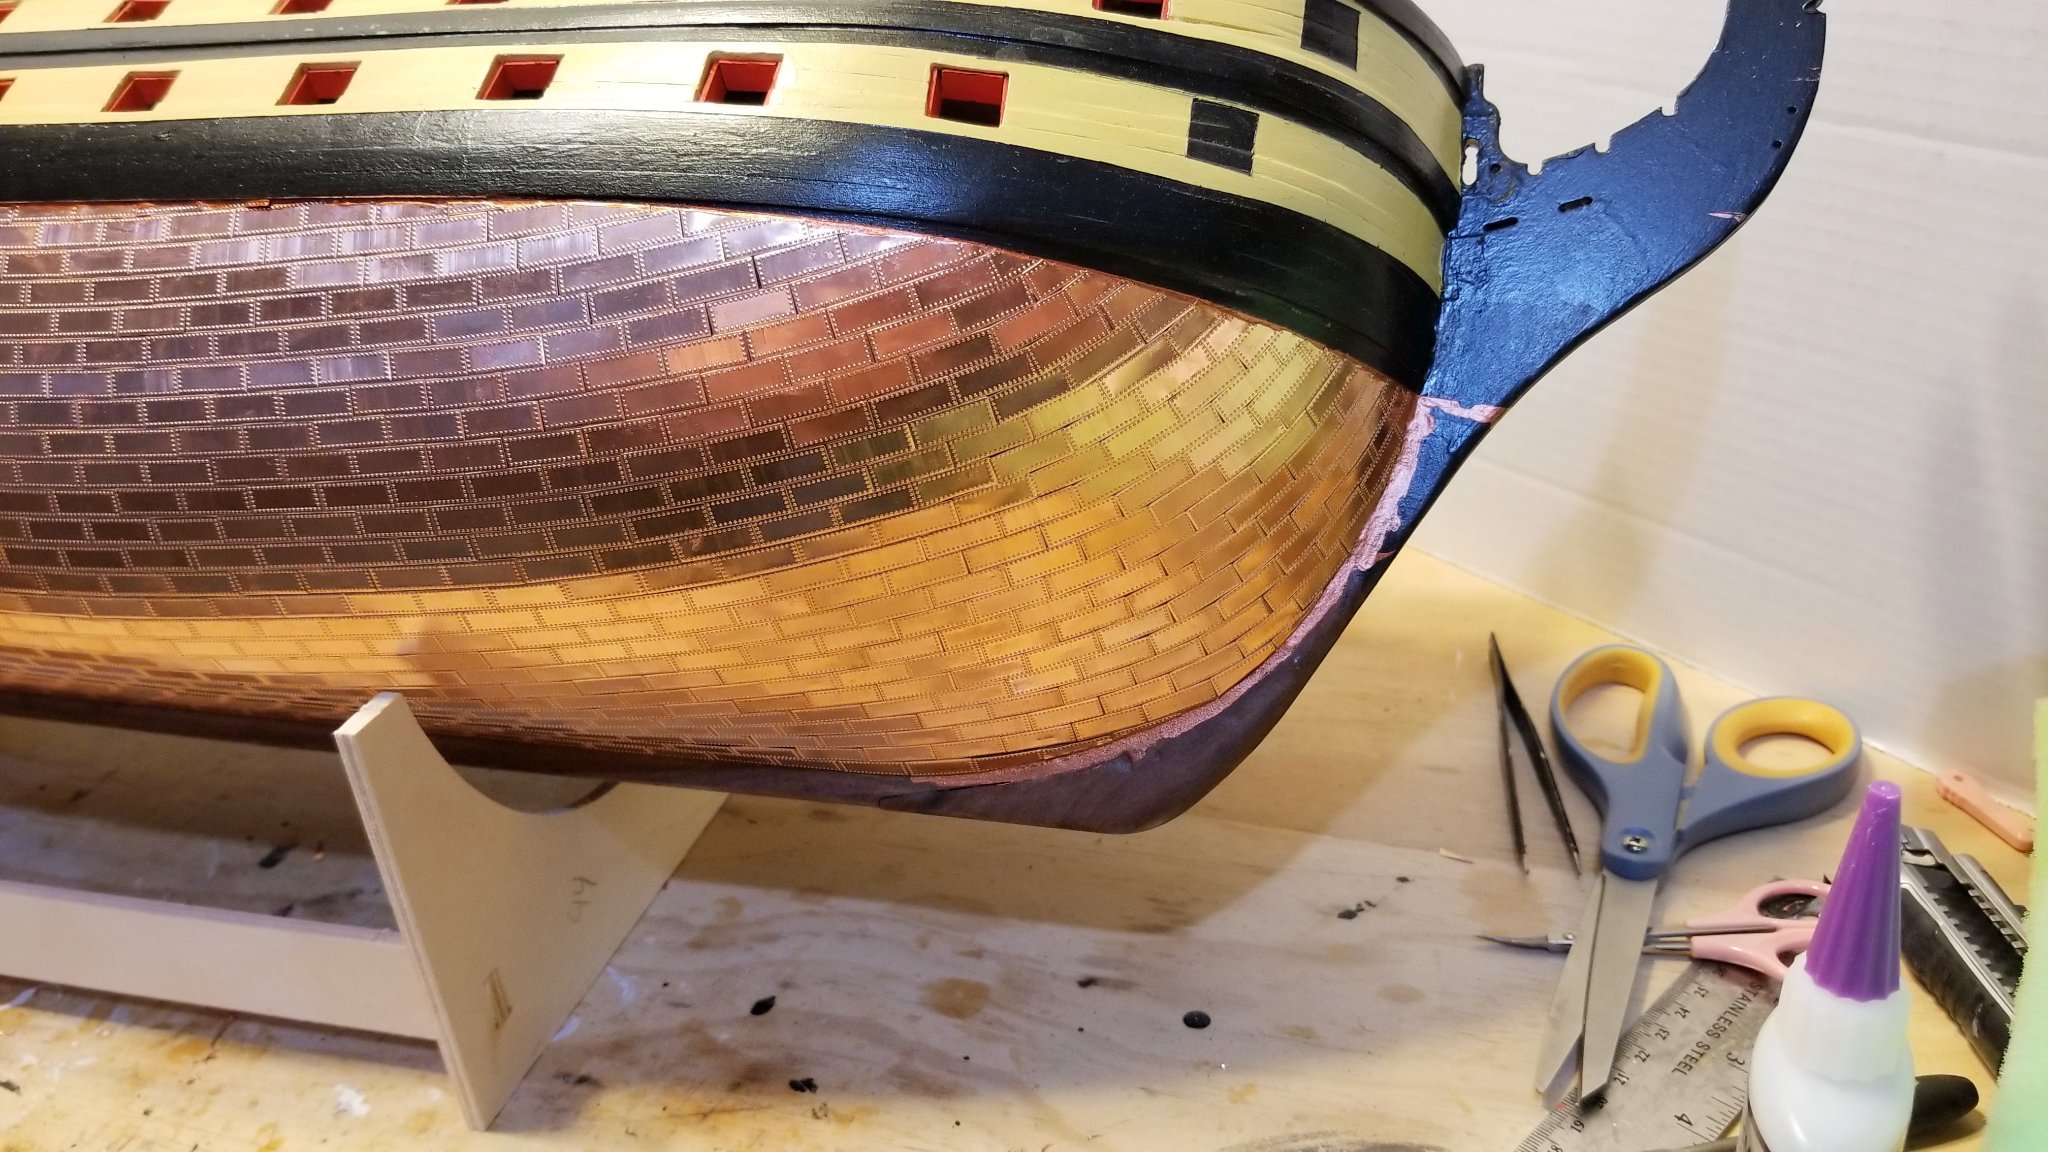
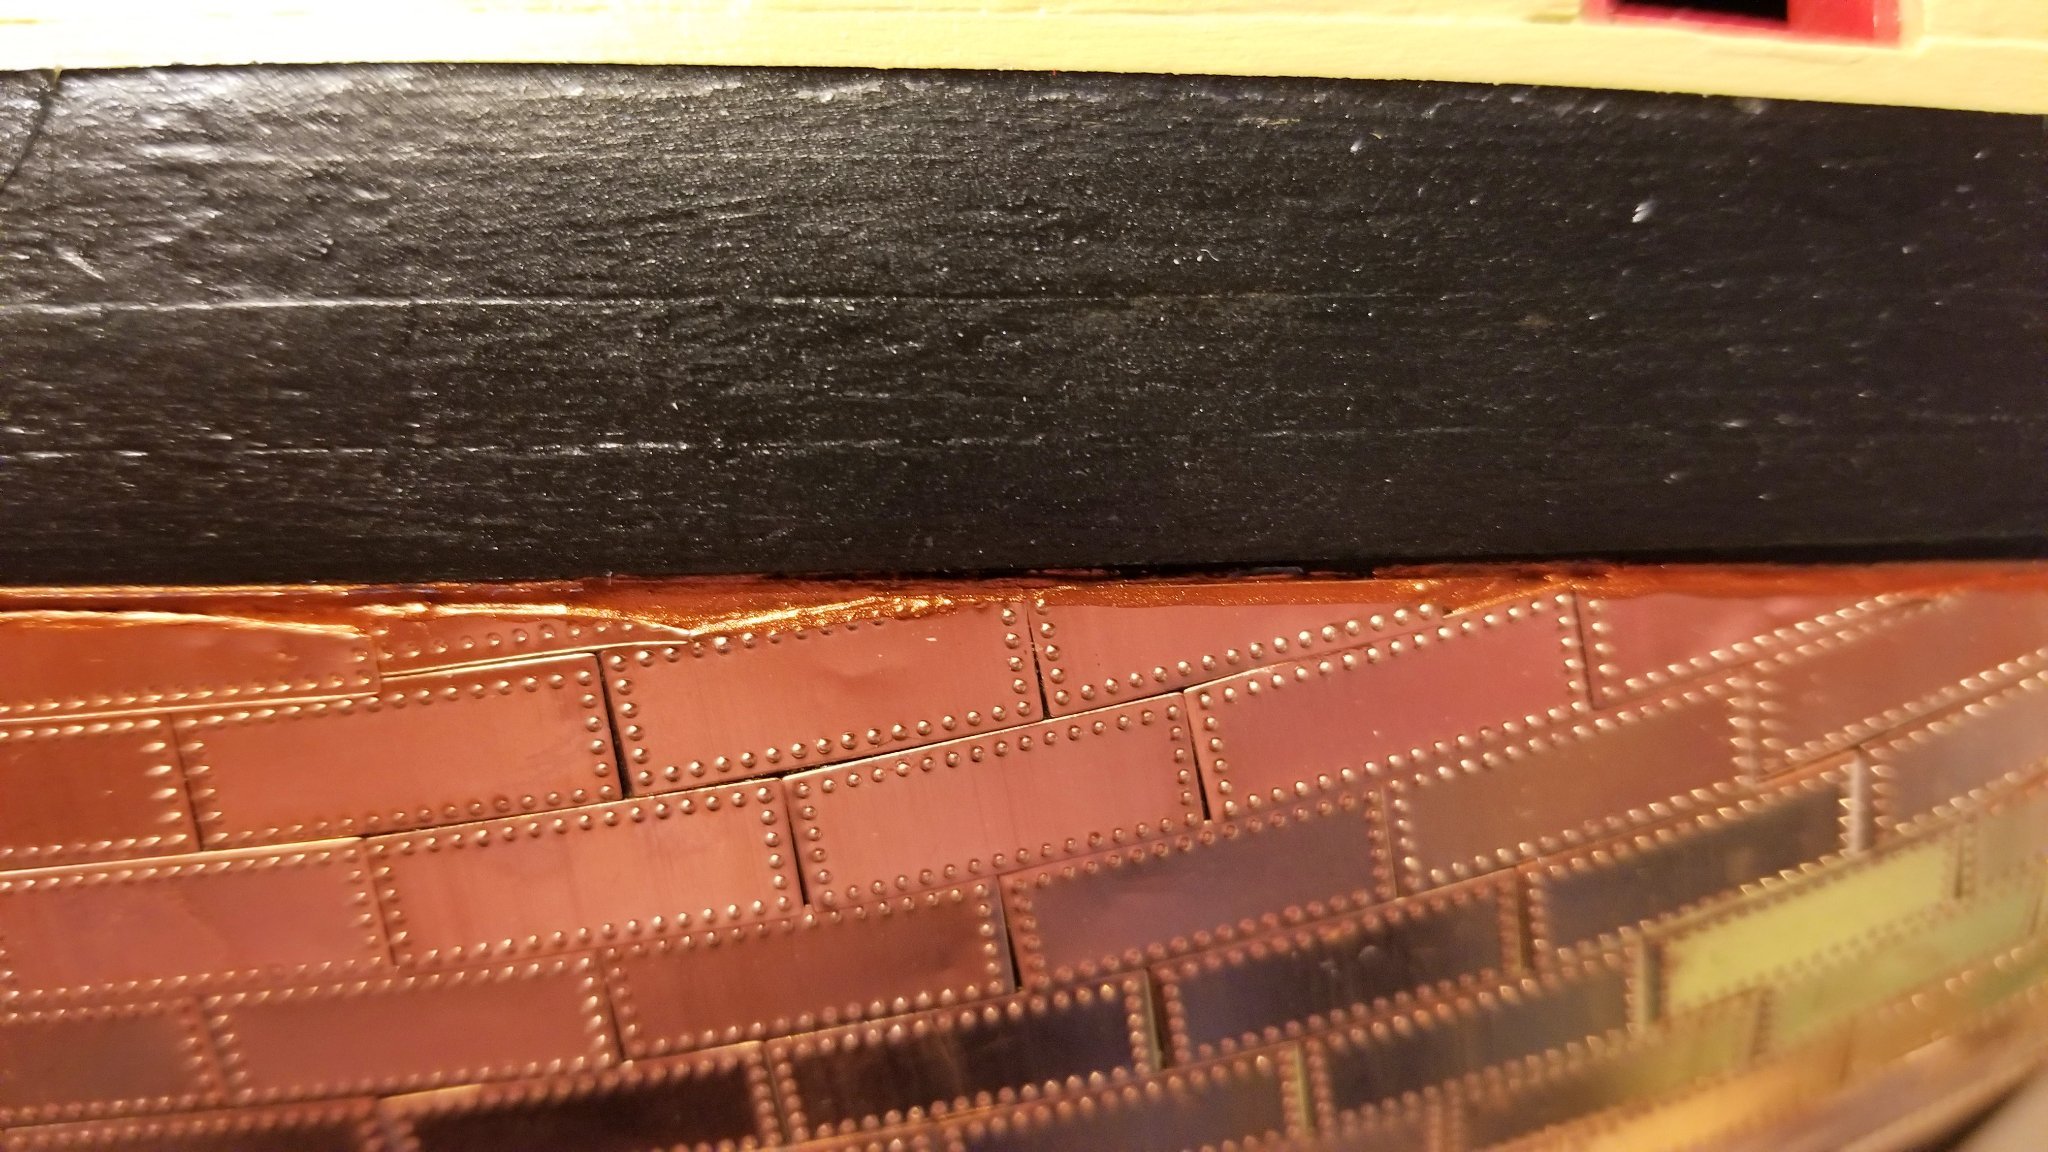
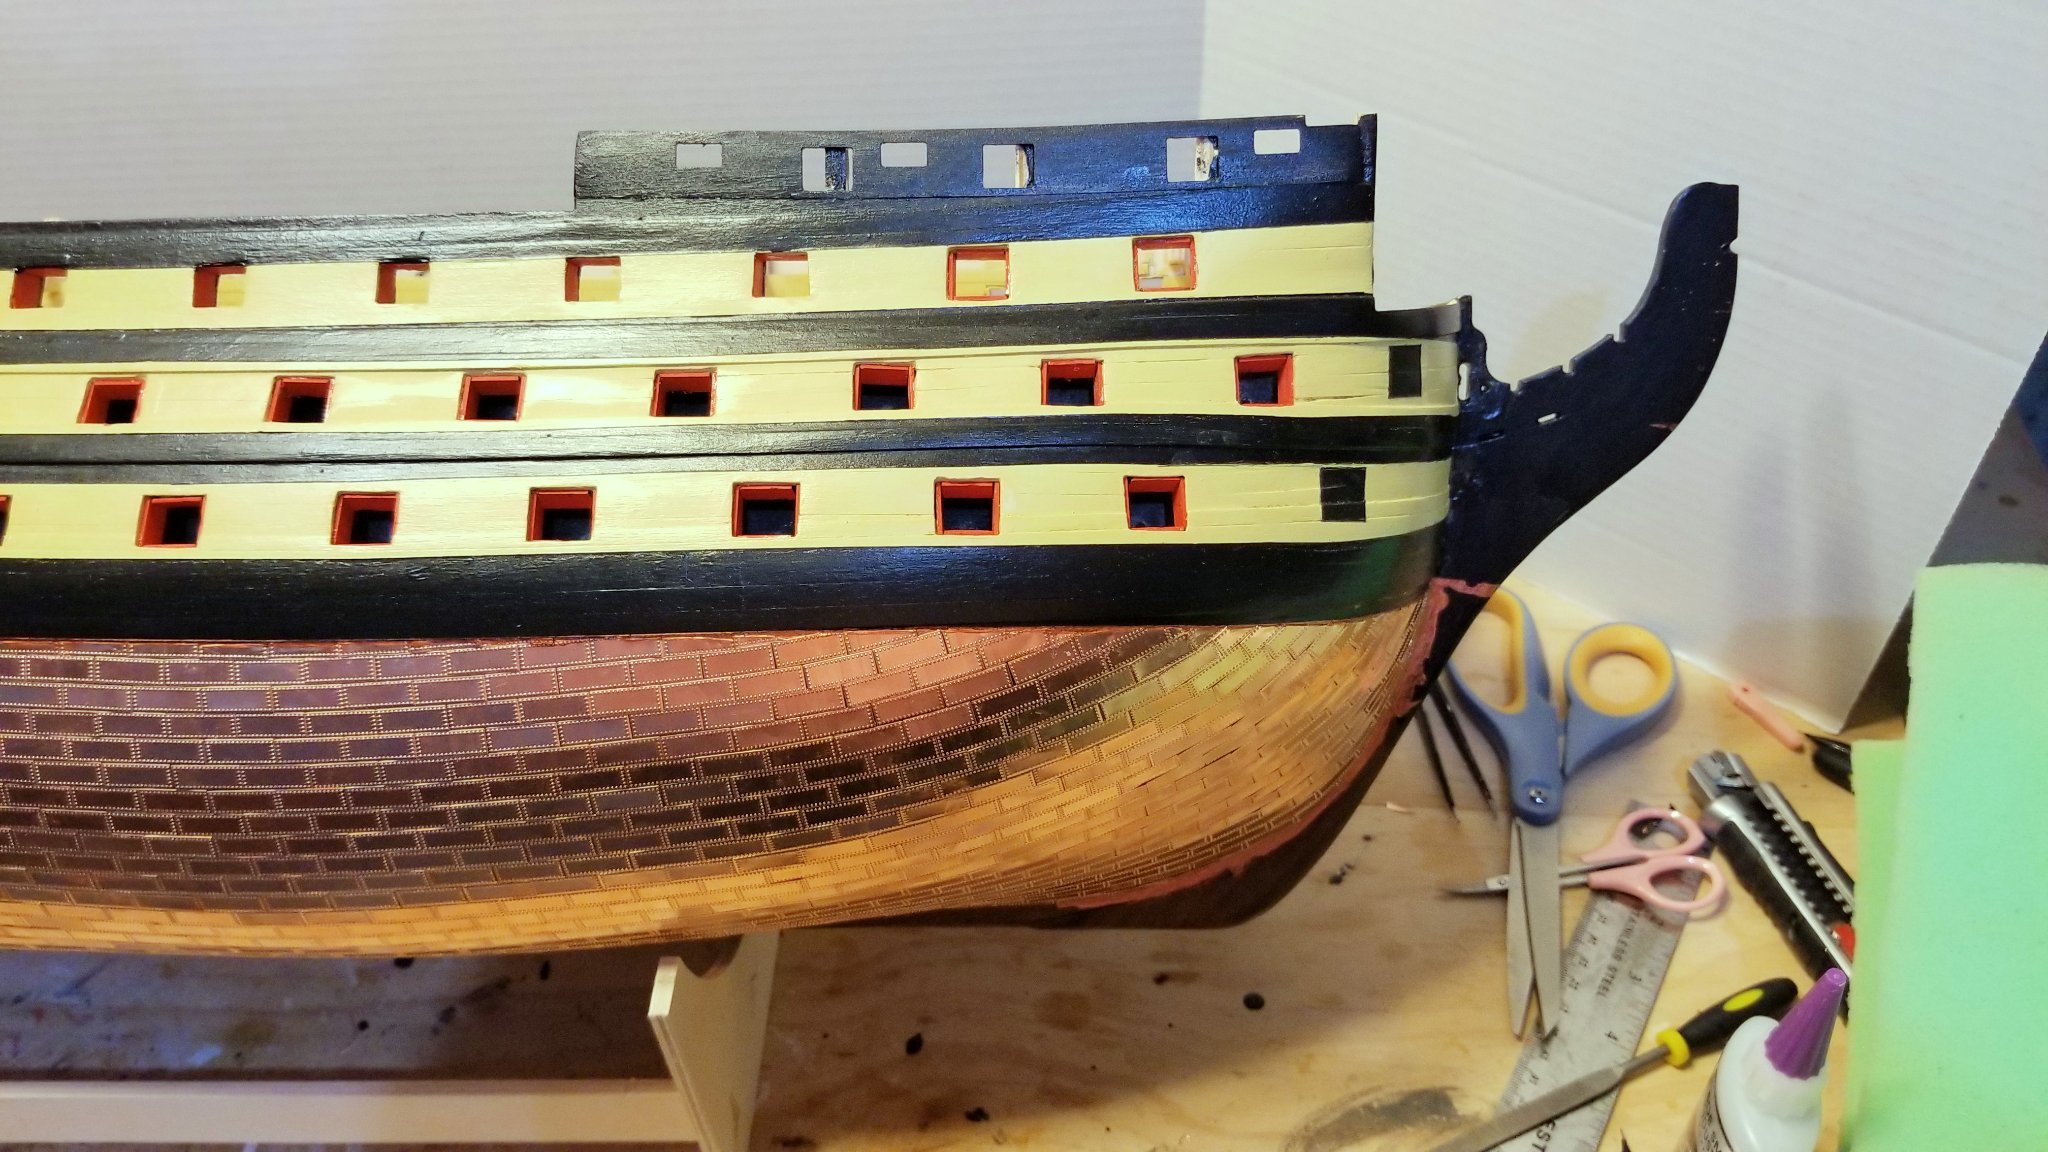
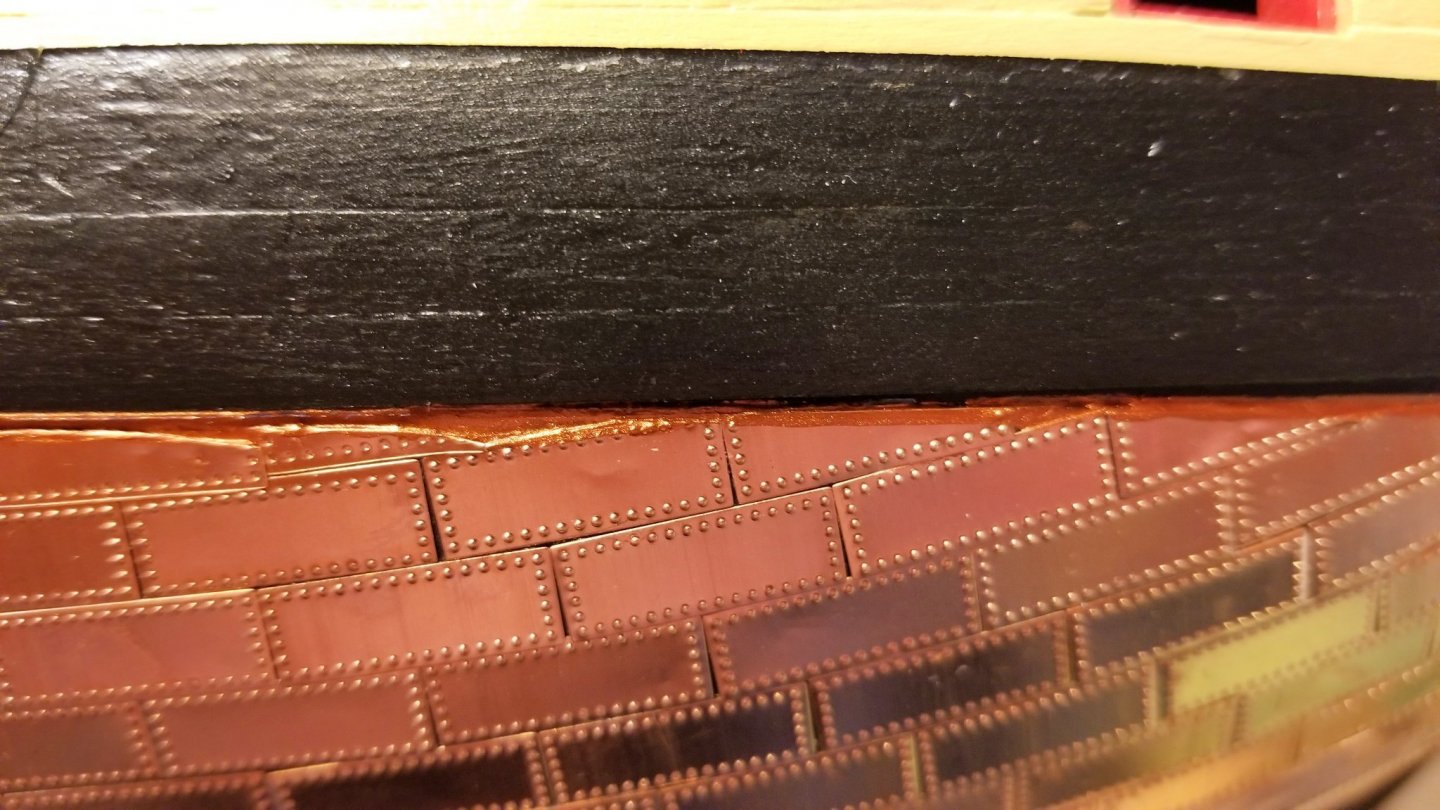
I've finished coppering the starboard side (not yet the rudder frame or bow piece or keel). I gave some thought to whether to start at the keel, as the manual suggests, or start across the waterline to get a straight edge. I knew if I did the latter I would lose the beautiful upsweep at the bow, so I went with starting at the keel and hoped that the suggested technique of using copper paint and masking tape would work. So I masked off the waterline and then coppered up to it, leaving gaps in spots. Finally finished, and applied copper paint at the top, said a prayer and peeled off the tape. I was delighted with the result. A really straight looking waterline. Several pics here of the result that show how good the waterline looks, and also that upsweep at the bow -- and the stern line. I also took a closeup of one of the "gaps" that is filled in by the paint, and then stepped back to viewing distance with that gap in the center, and you don't really see it unless you are looking for it. The copper paint is made by Golden, and it's "Iridescent Copper". Got it on Amazon. Regards, David


- 218 replies
-
- 9
-
-
-
- Victory
- Caldercraft
- (and 1 more)
-
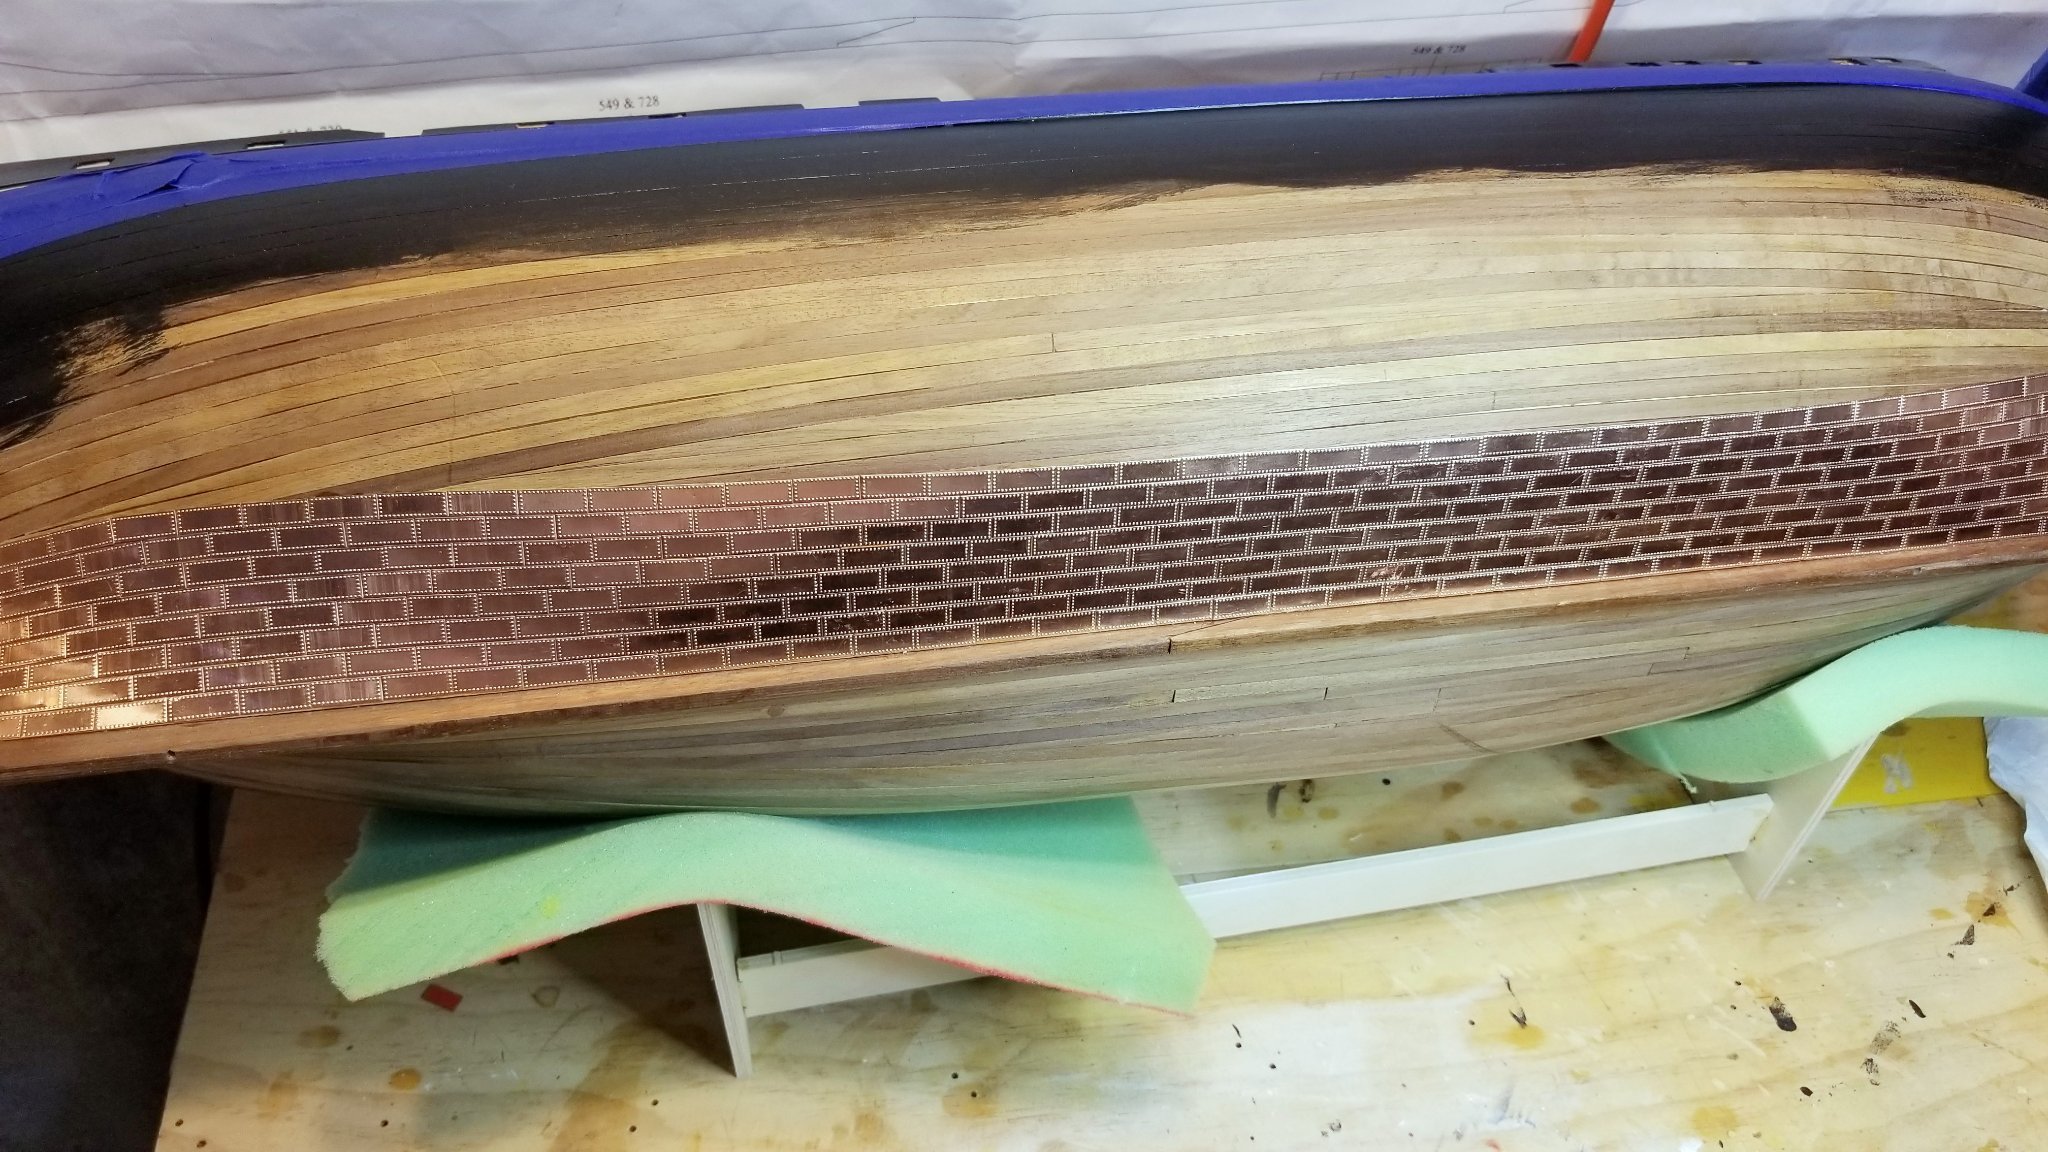
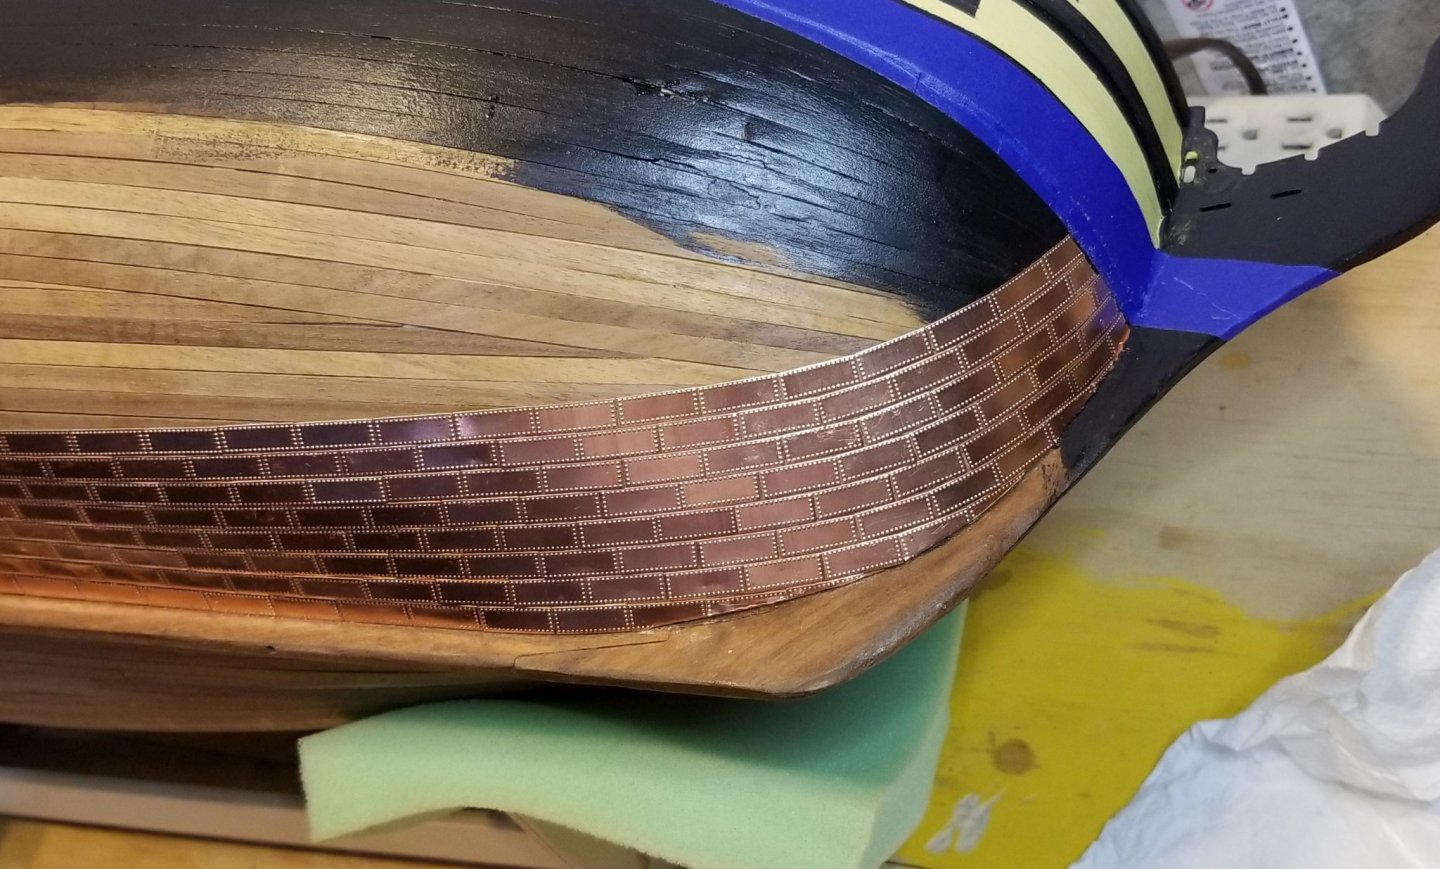
Started coppering the hull. You can see the curved section running up to blue masking tape, which is marking the waterline. I'm trimming it close, and then plan to use a tip from the manual by applying copper paint into the gaps to get a straight waterline. This is my "bad" side (the side that faces the wall), so we'll see how it comes out when I'm done. Not sure there's much choice to do it differently. Regards, David

- 218 replies
-
- 6
-
-
- Victory
- Caldercraft
- (and 1 more)
-
I've drilled the holes for the dummy barrels -- sort of. In the waist area of the boat, the dummy barrel strips rise behind the second level gunports to a point where there's no way to drill a centered hole -- nothing but air there. I drilled off-center holes anyway, but I think for those I'm going to have to put in a jury-rigged fix to keep the cannon barrels aligned. I'll have to drill a hole in a short piece of first planking, put the dummy barrel in the hole, and then using super glue, place the short planking back in the rear of the gunport such that the hole is centered and the barrel is aligned, but at least one end of the planking glues to the part of the barrel strip that's visible. It should work if I align the barrels for the centered holes first. It's a "down the line" step (mounting the dummy barrels), but that's the solution I"ll try. Regards, David
- 218 replies
-
- 3
-
-
- Victory
- Caldercraft
- (and 1 more)
-
Finished scoring and painting the false gunports at the bow. Regards, David

- 218 replies
-
- 4
-
-
- Victory
- Caldercraft
- (and 1 more)
-
Gun deck inside bulkheads painted. The critical area to get right is at the waist -- the quarterdeck will block visibility of most of the rest. Regards, David
- 218 replies
-
- 8
-
-
- Victory
- Caldercraft
- (and 1 more)
-
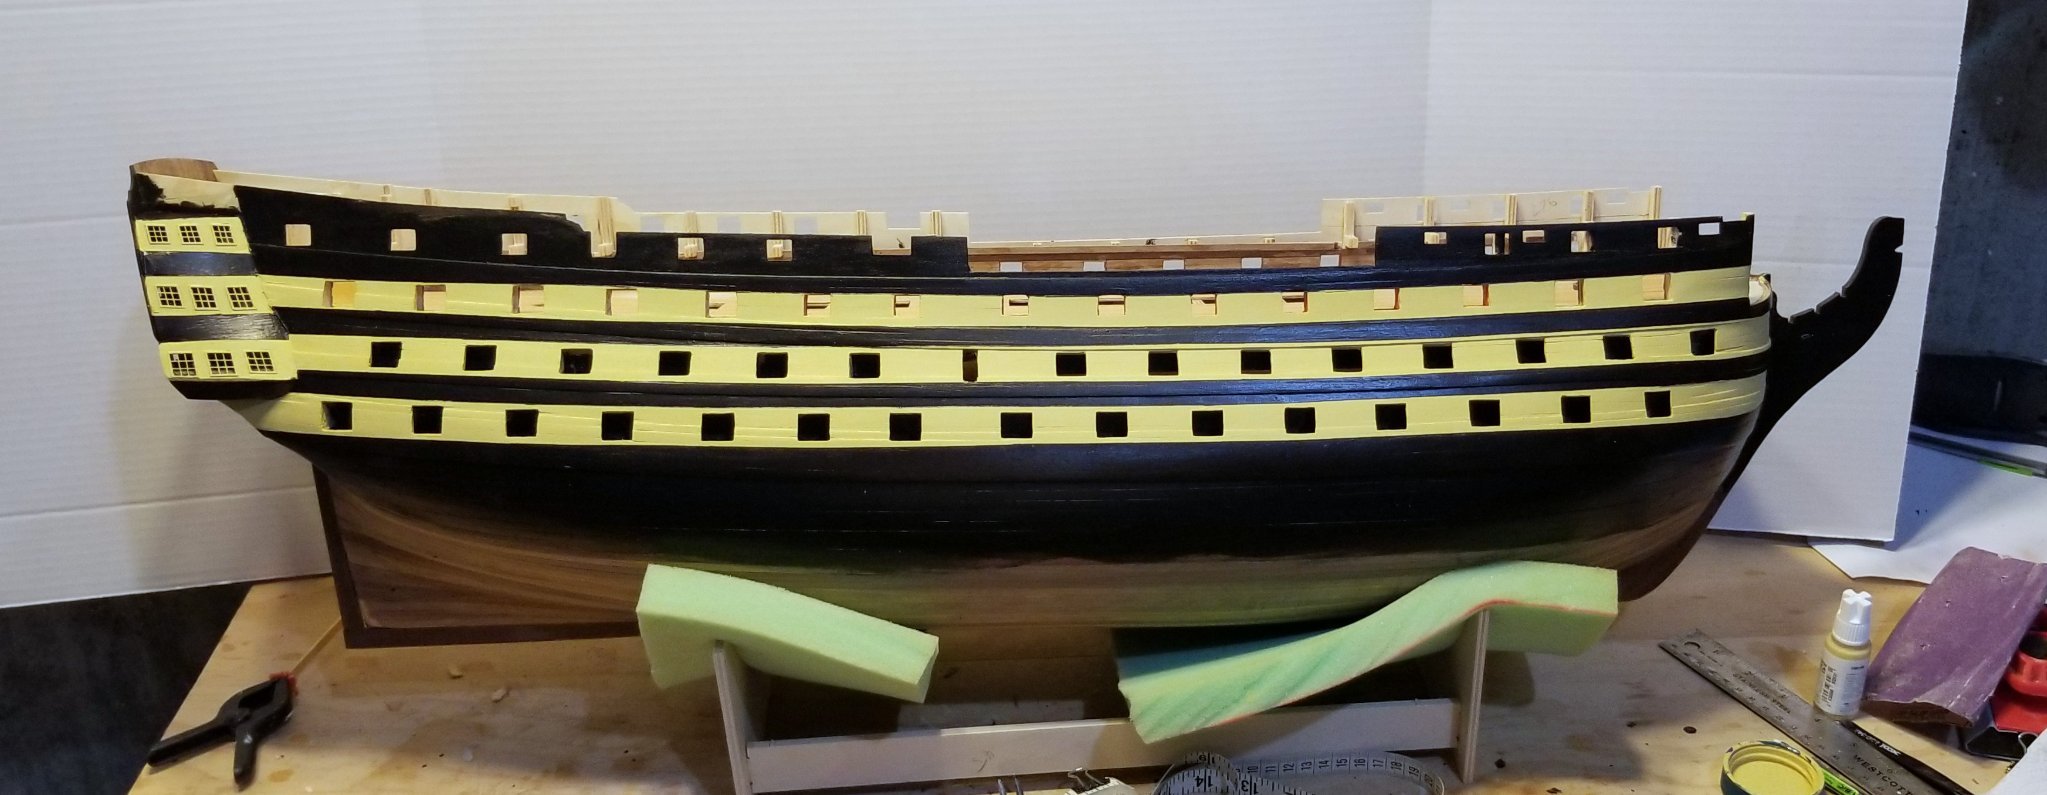
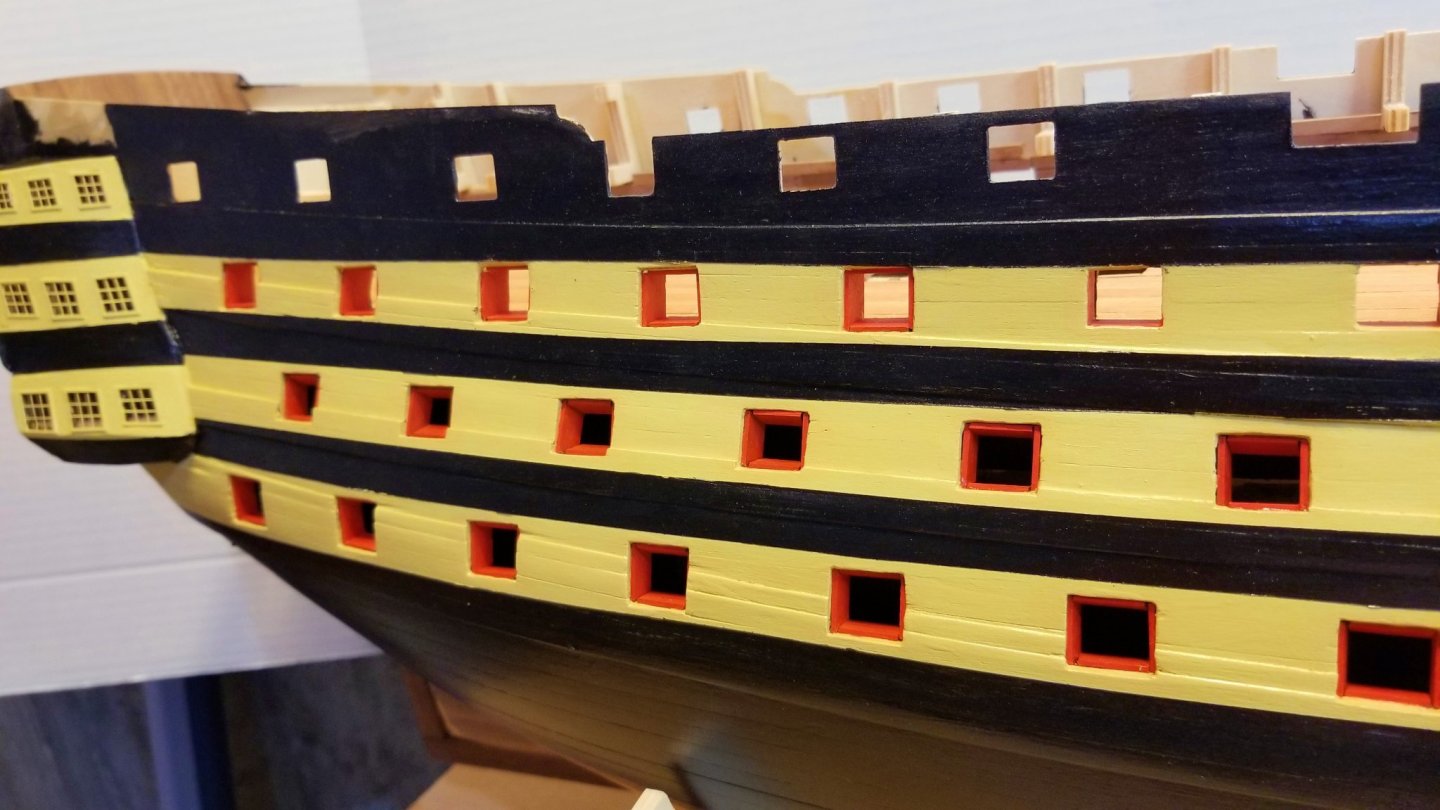
I've lined the gunports on the starboard side. I really like the look of the 3 colors together. I slightly flared the linings inward on the lower two gunport rows to show off the red just a bit more. Can't do it on the top row as the lining orientation is governed by being attached to templates at front and back. Regards, David


- 218 replies
-
- 12
-
-
-
- Victory
- Caldercraft
- (and 1 more)
-
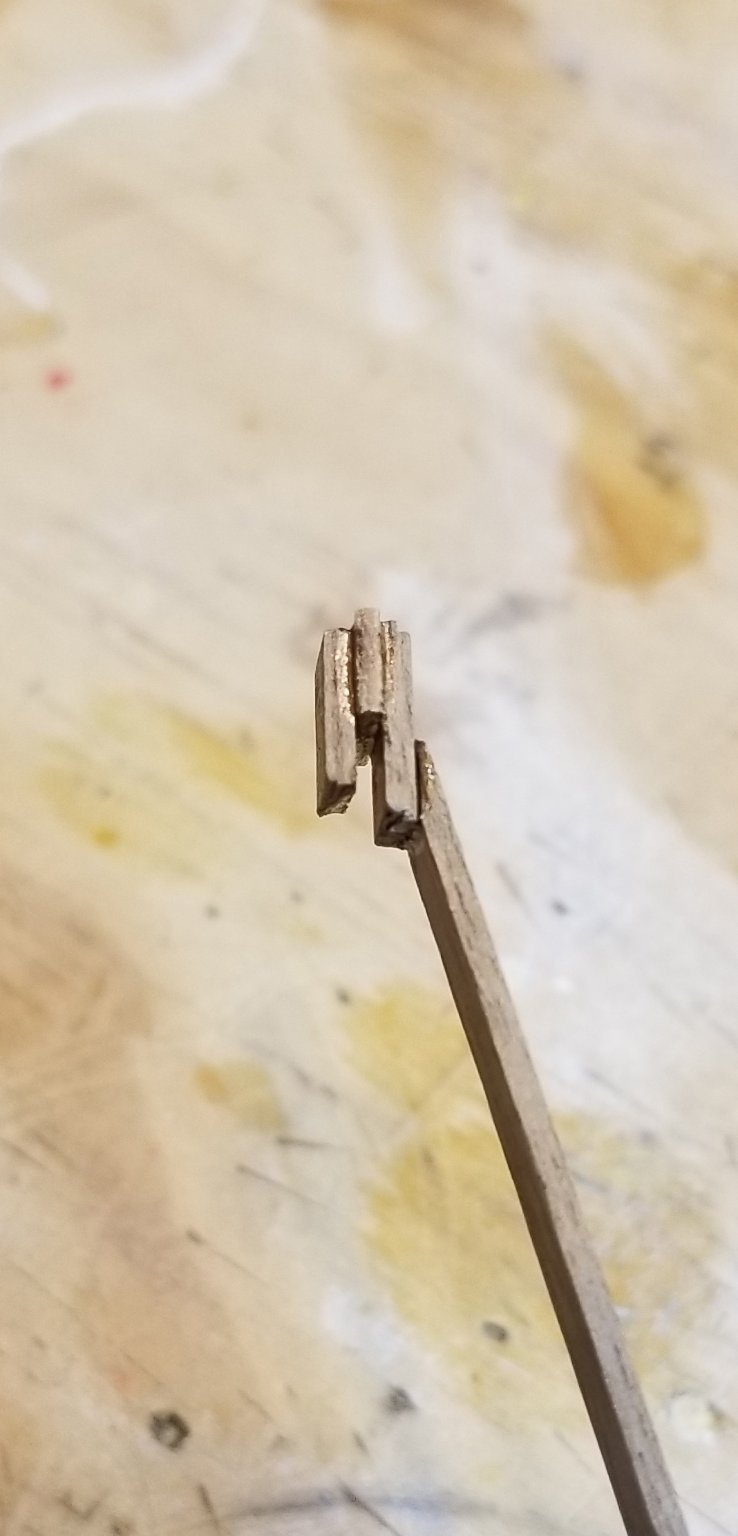
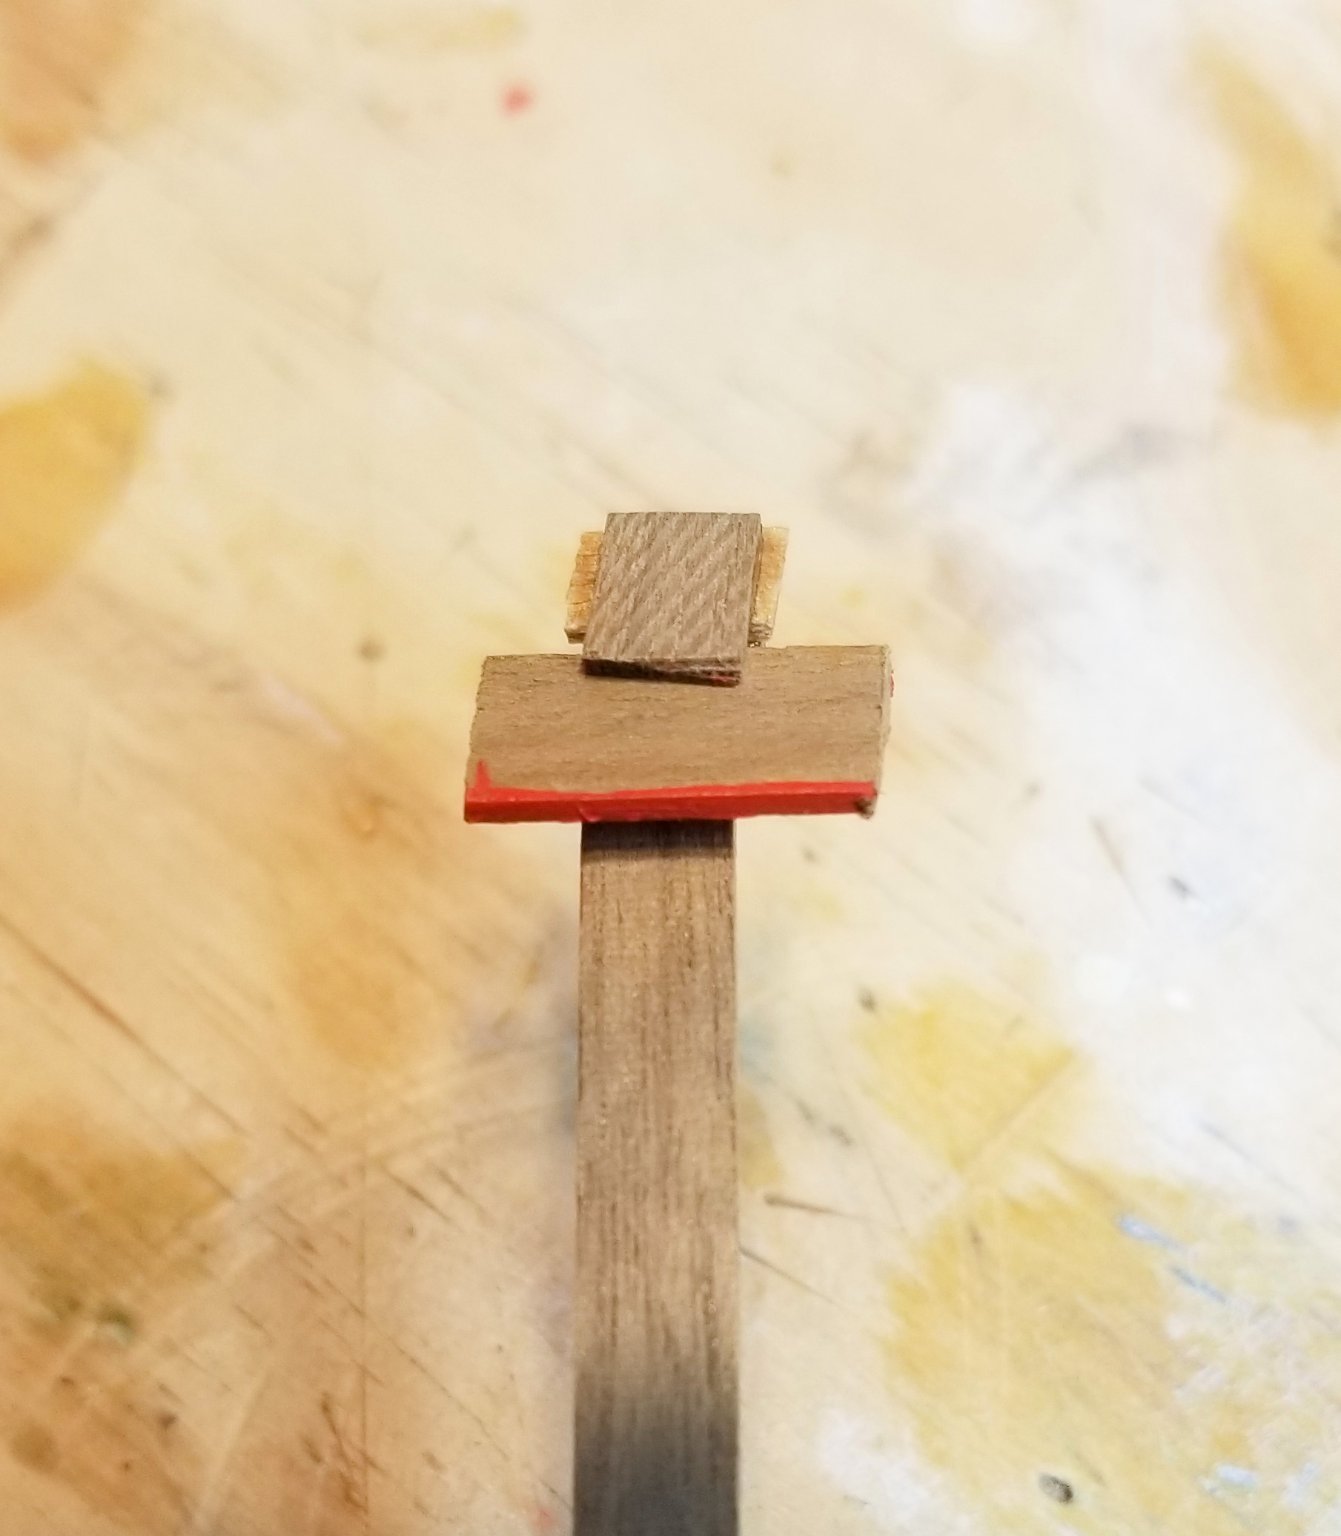
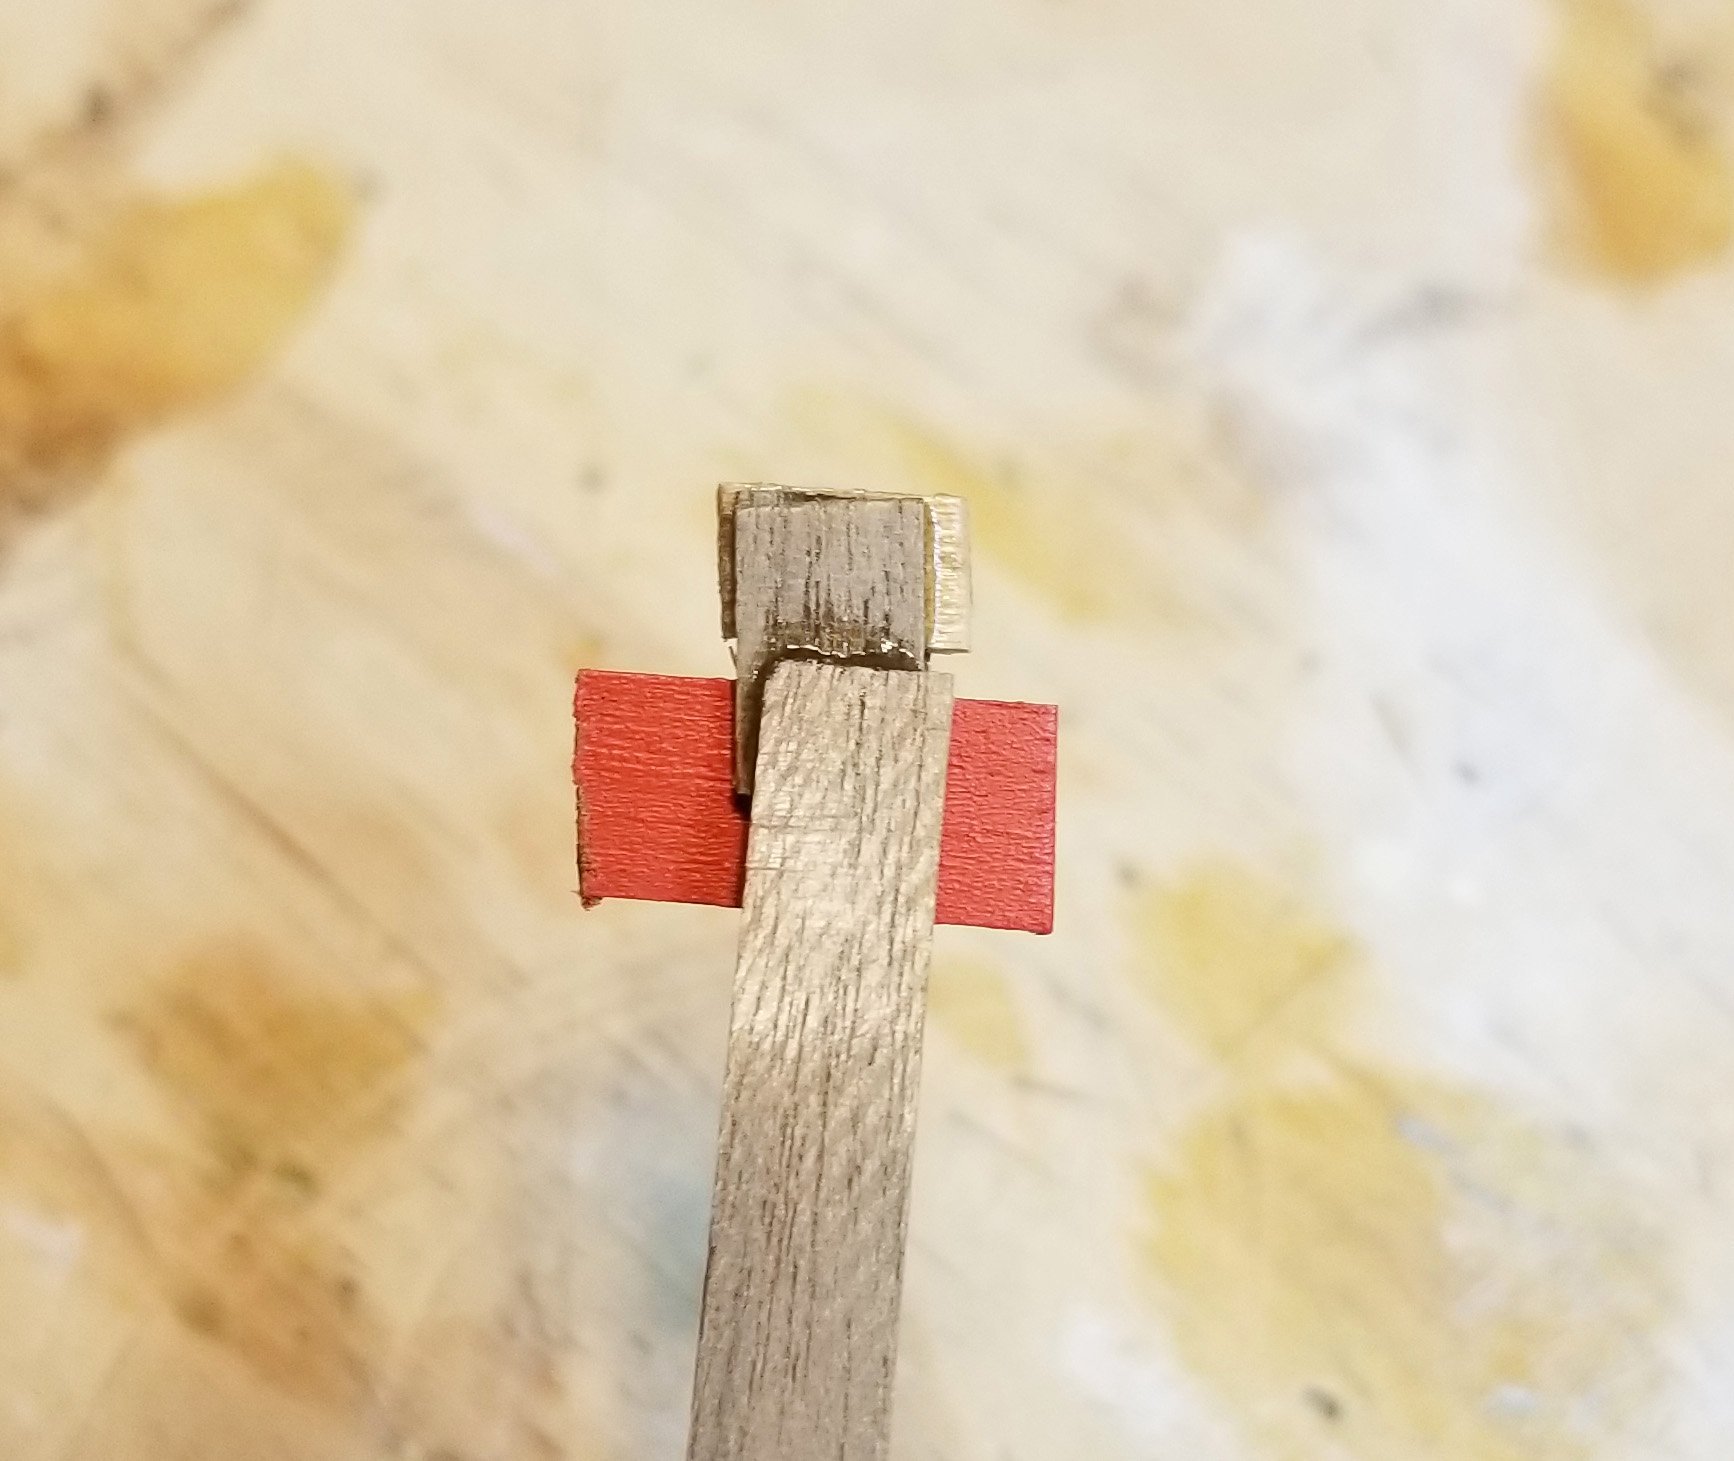
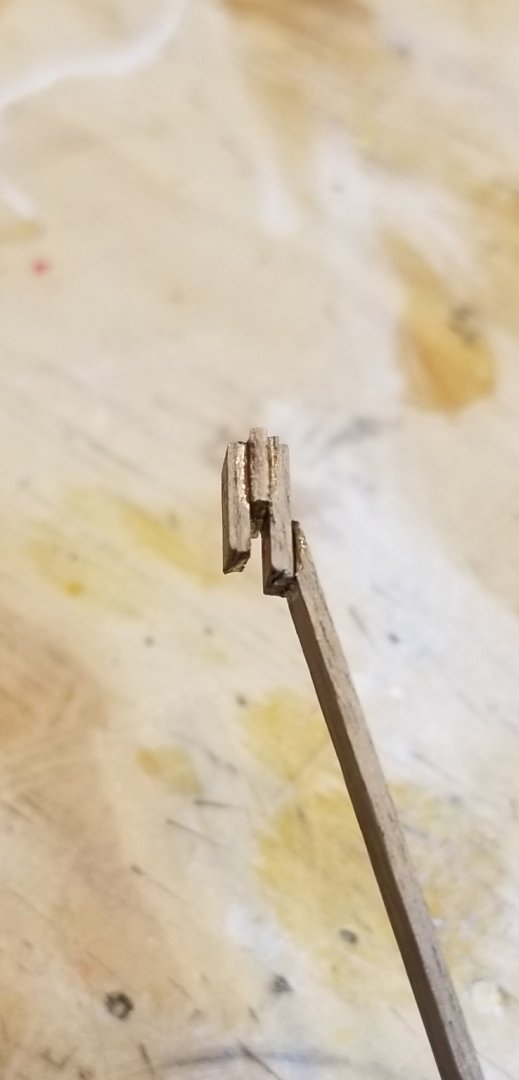
I have started lining the gunports. They attach by a very thin edge, with 1mm recessed positioning important, so I needed a way to hold them in place while gluing. I made this jig which holds the side pieces with slight pressure, and allows them to be positioned. One finished gunport positioned -- 80+ to go! Regards, David


- 218 replies
-
- 4
-
-
- Victory
- Caldercraft
- (and 1 more)
-
That "floor" idea is a great one. I already have some miscellaneous wood chips rattling around inside my hull. Regards, David
- 218 replies
-
- 2
-
-
- Victory
- Caldercraft
- (and 1 more)
-
Toni: I took the color scheme from this picture on the Caldercraft Website. There are about 80 Victory pics in different stages of construction. Best regards, David Robinson

- 218 replies
-
- 7
-
-
- Victory
- Caldercraft
- (and 1 more)
-
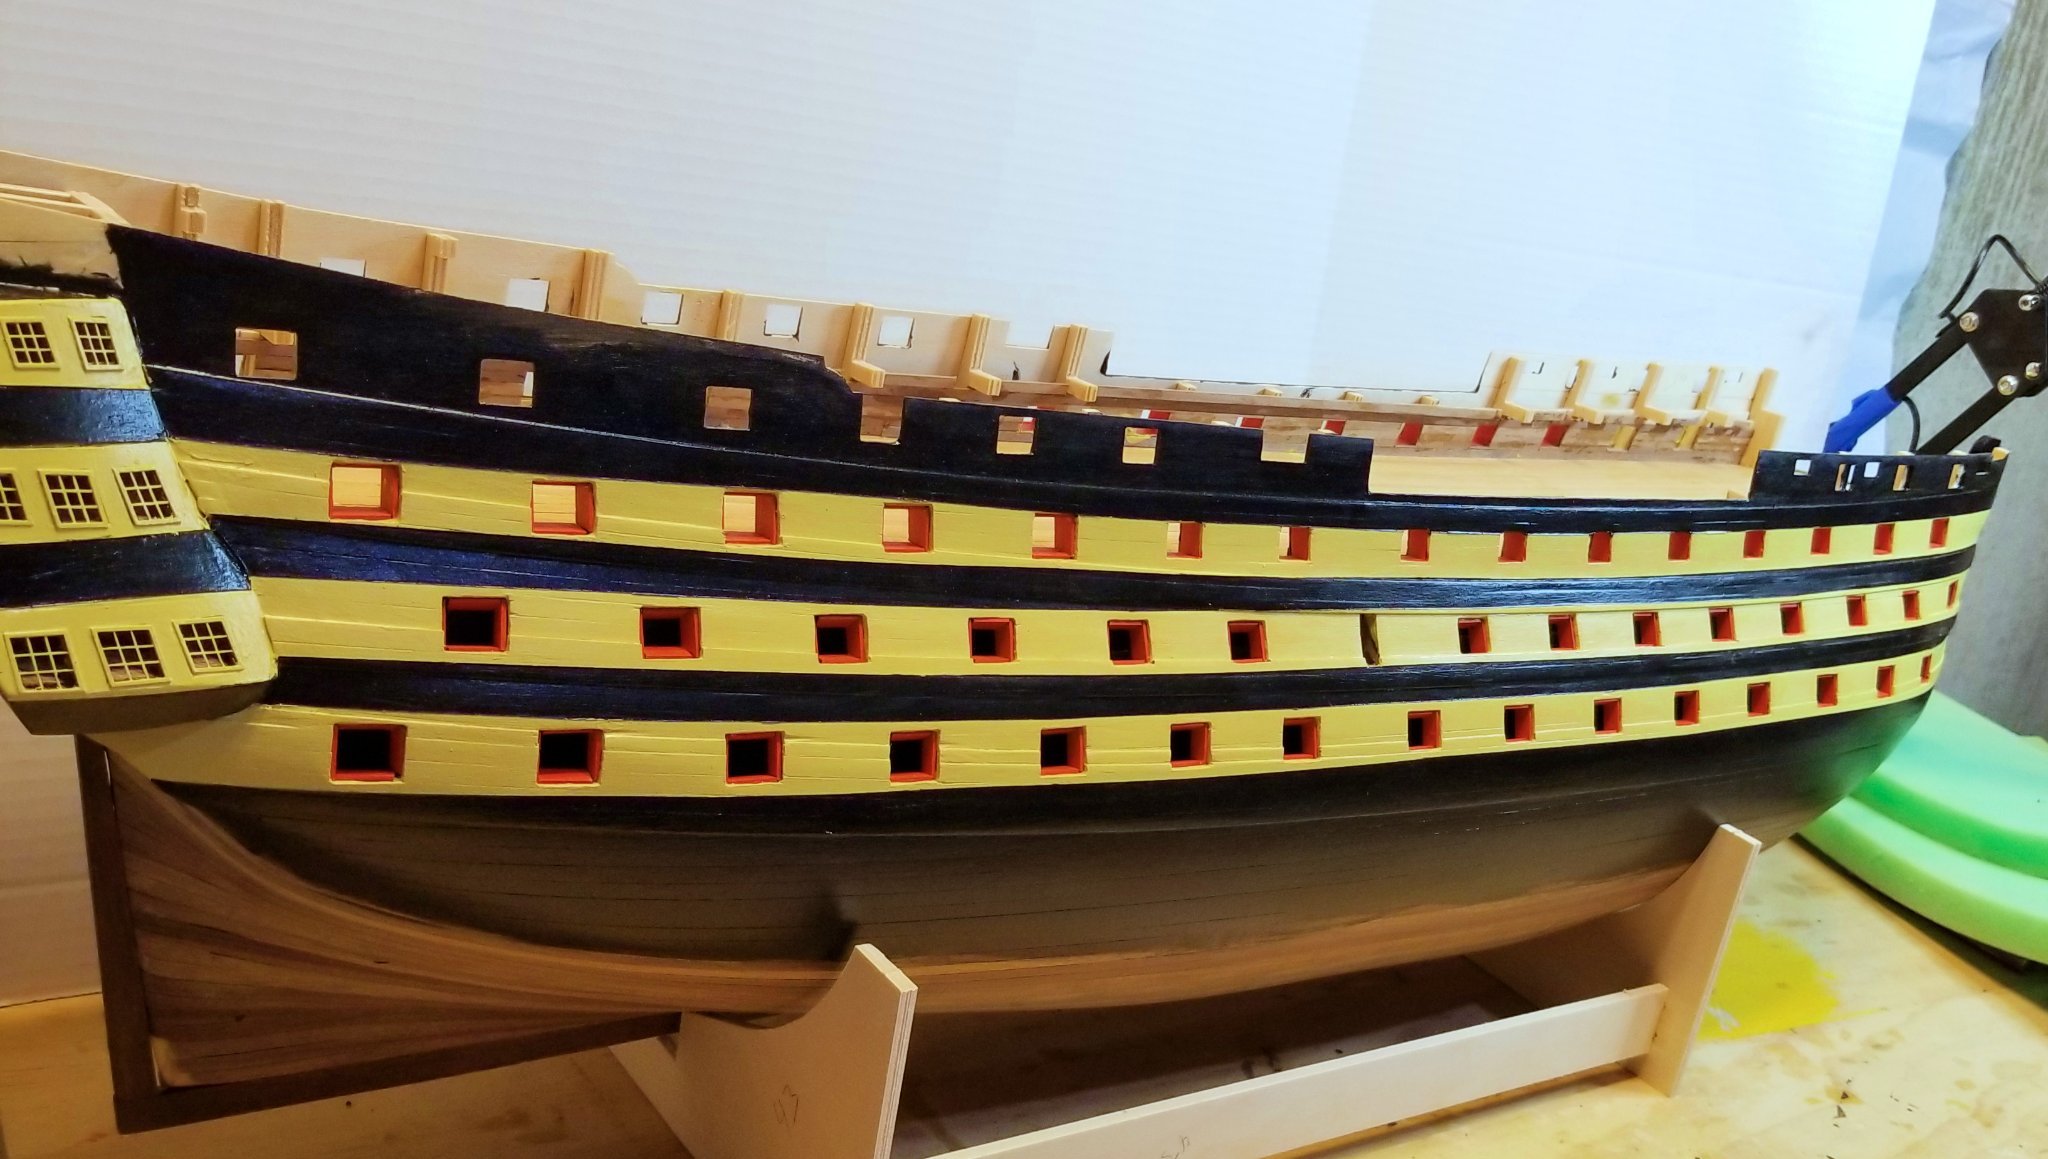
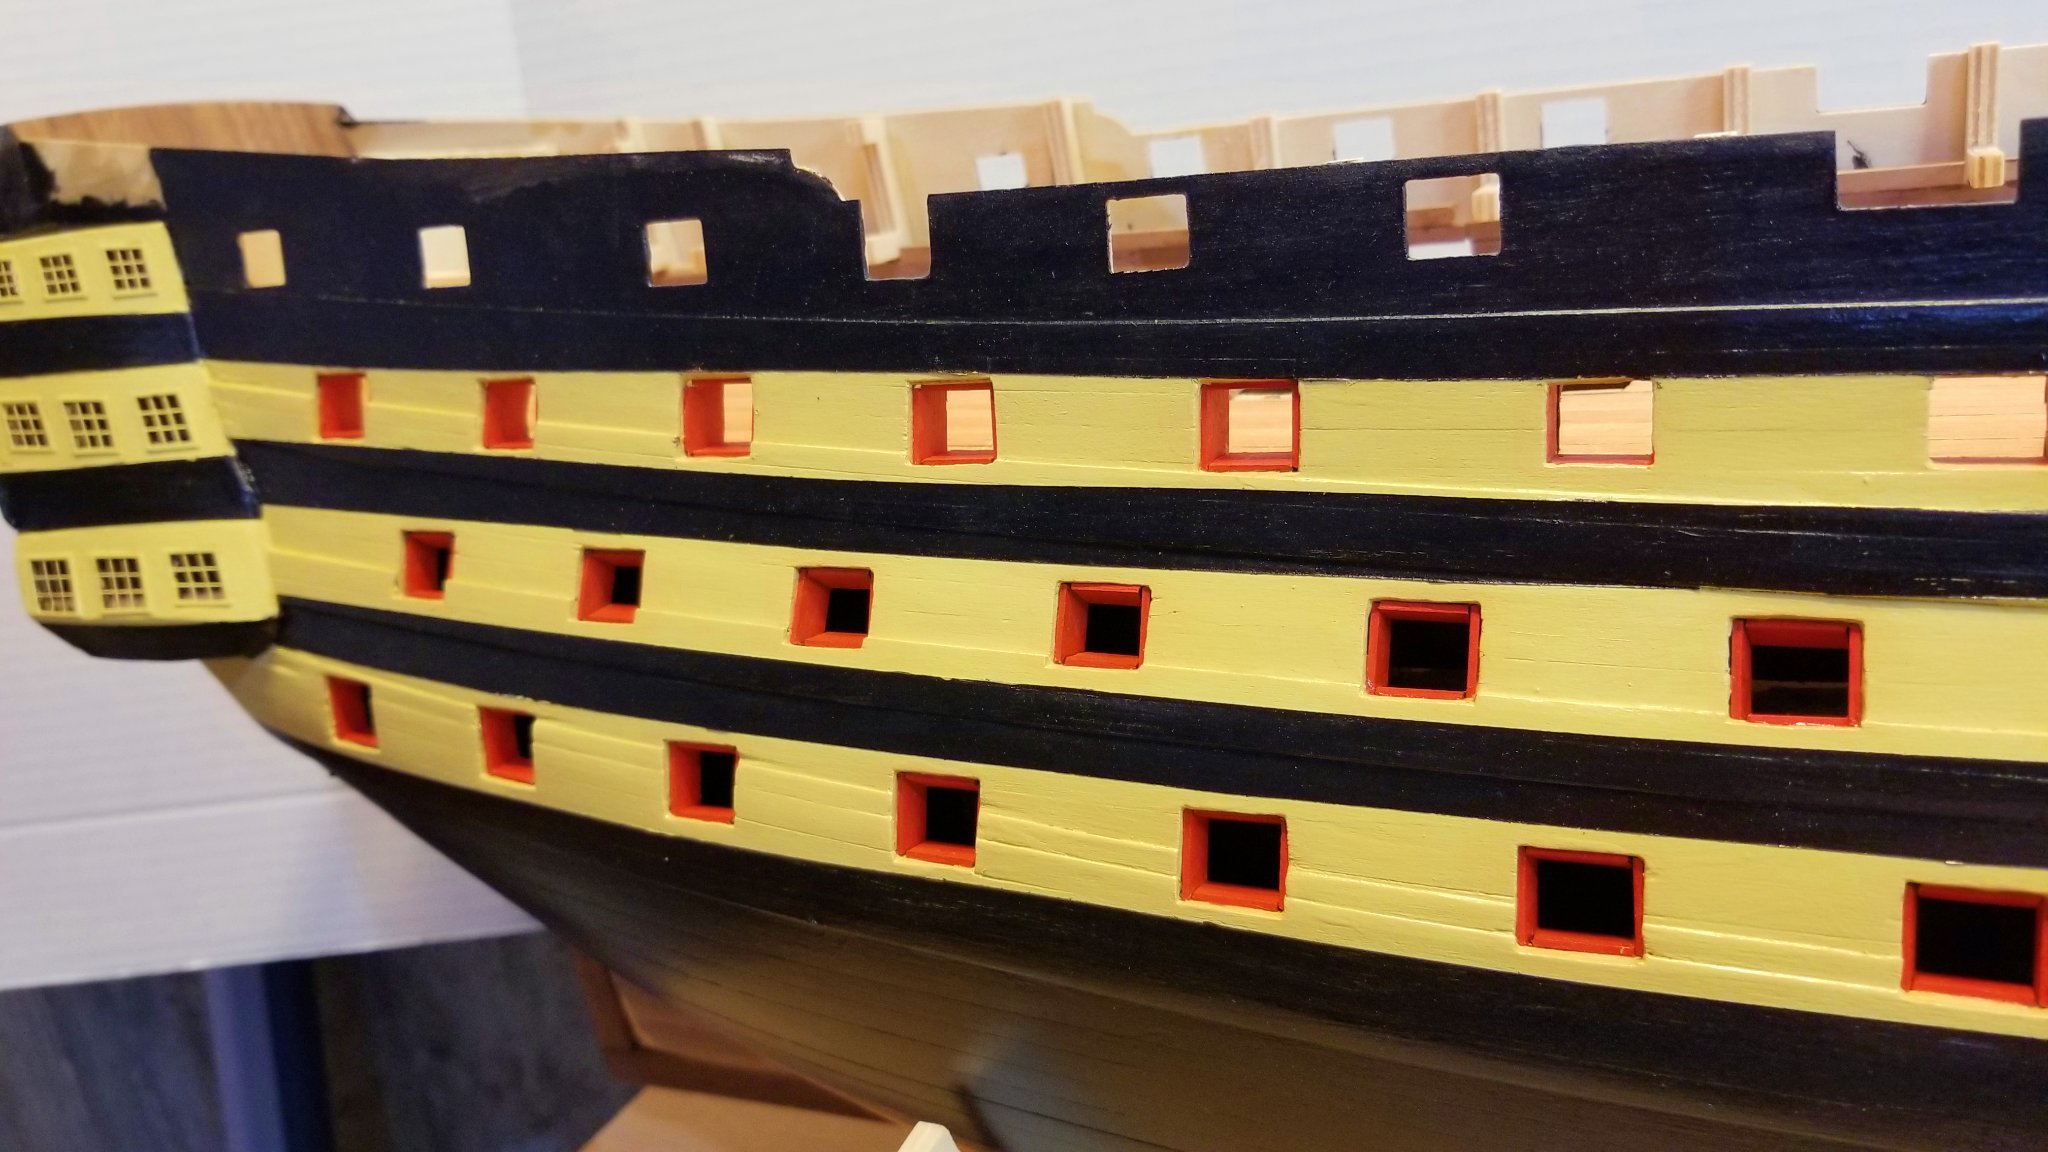
I have painted one side, and I'm pleased with the result. I'll have more to do right at the top when I finish off the planking, but that's down the line, and it will be all black -- no masking needed. For the "yellowish" stripes, I used a color called beige from AK Paints. I wasn't happy with the yellow ochre paints I found online, and this one seemed to have the shade I was looking for, as it has some yellow in it. I'm going to put a coat of varnish on this to protect the paint job. Regards, David

- 218 replies
-
- 11
-
-
-
- Victory
- Caldercraft
- (and 1 more)
-
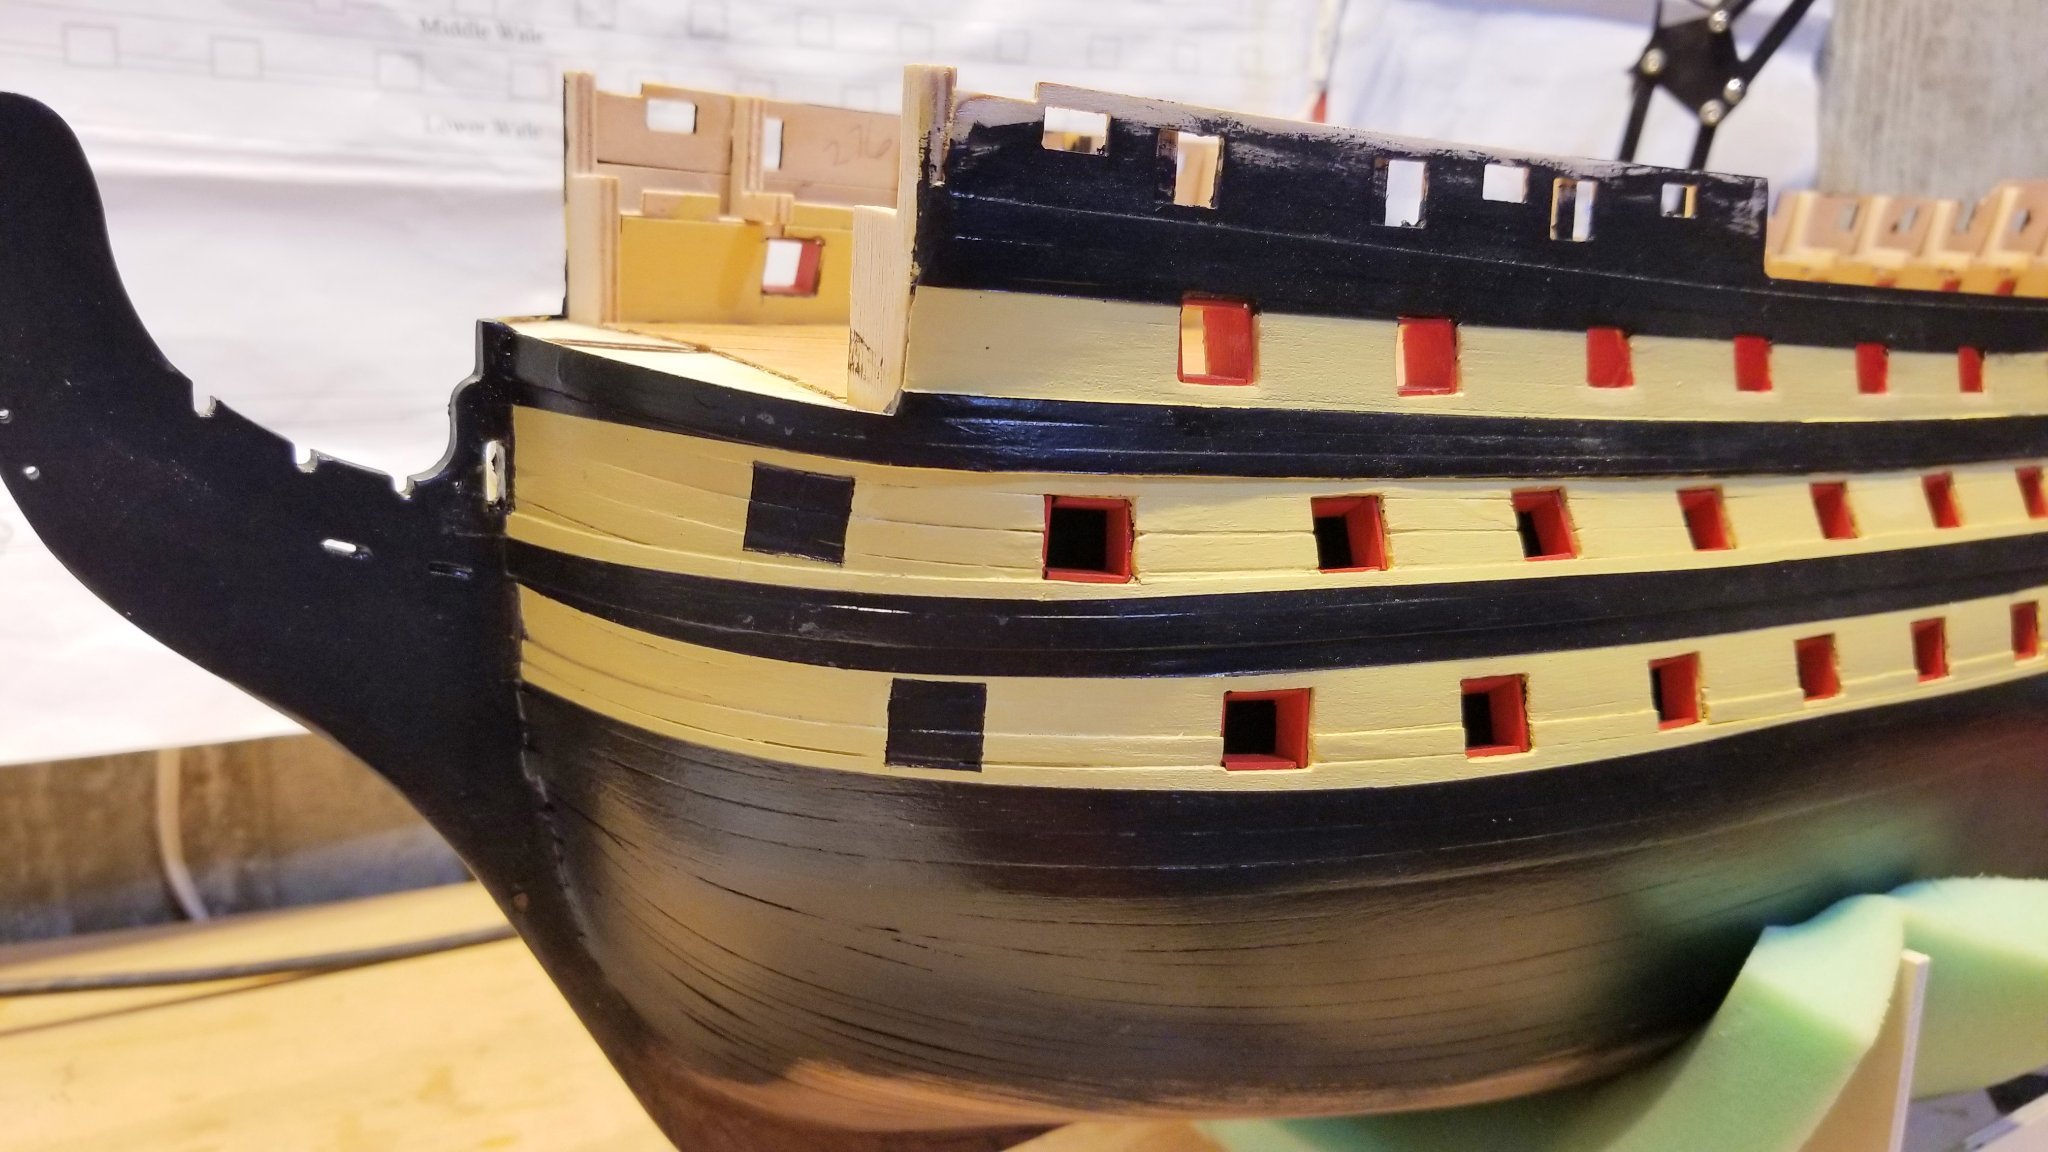
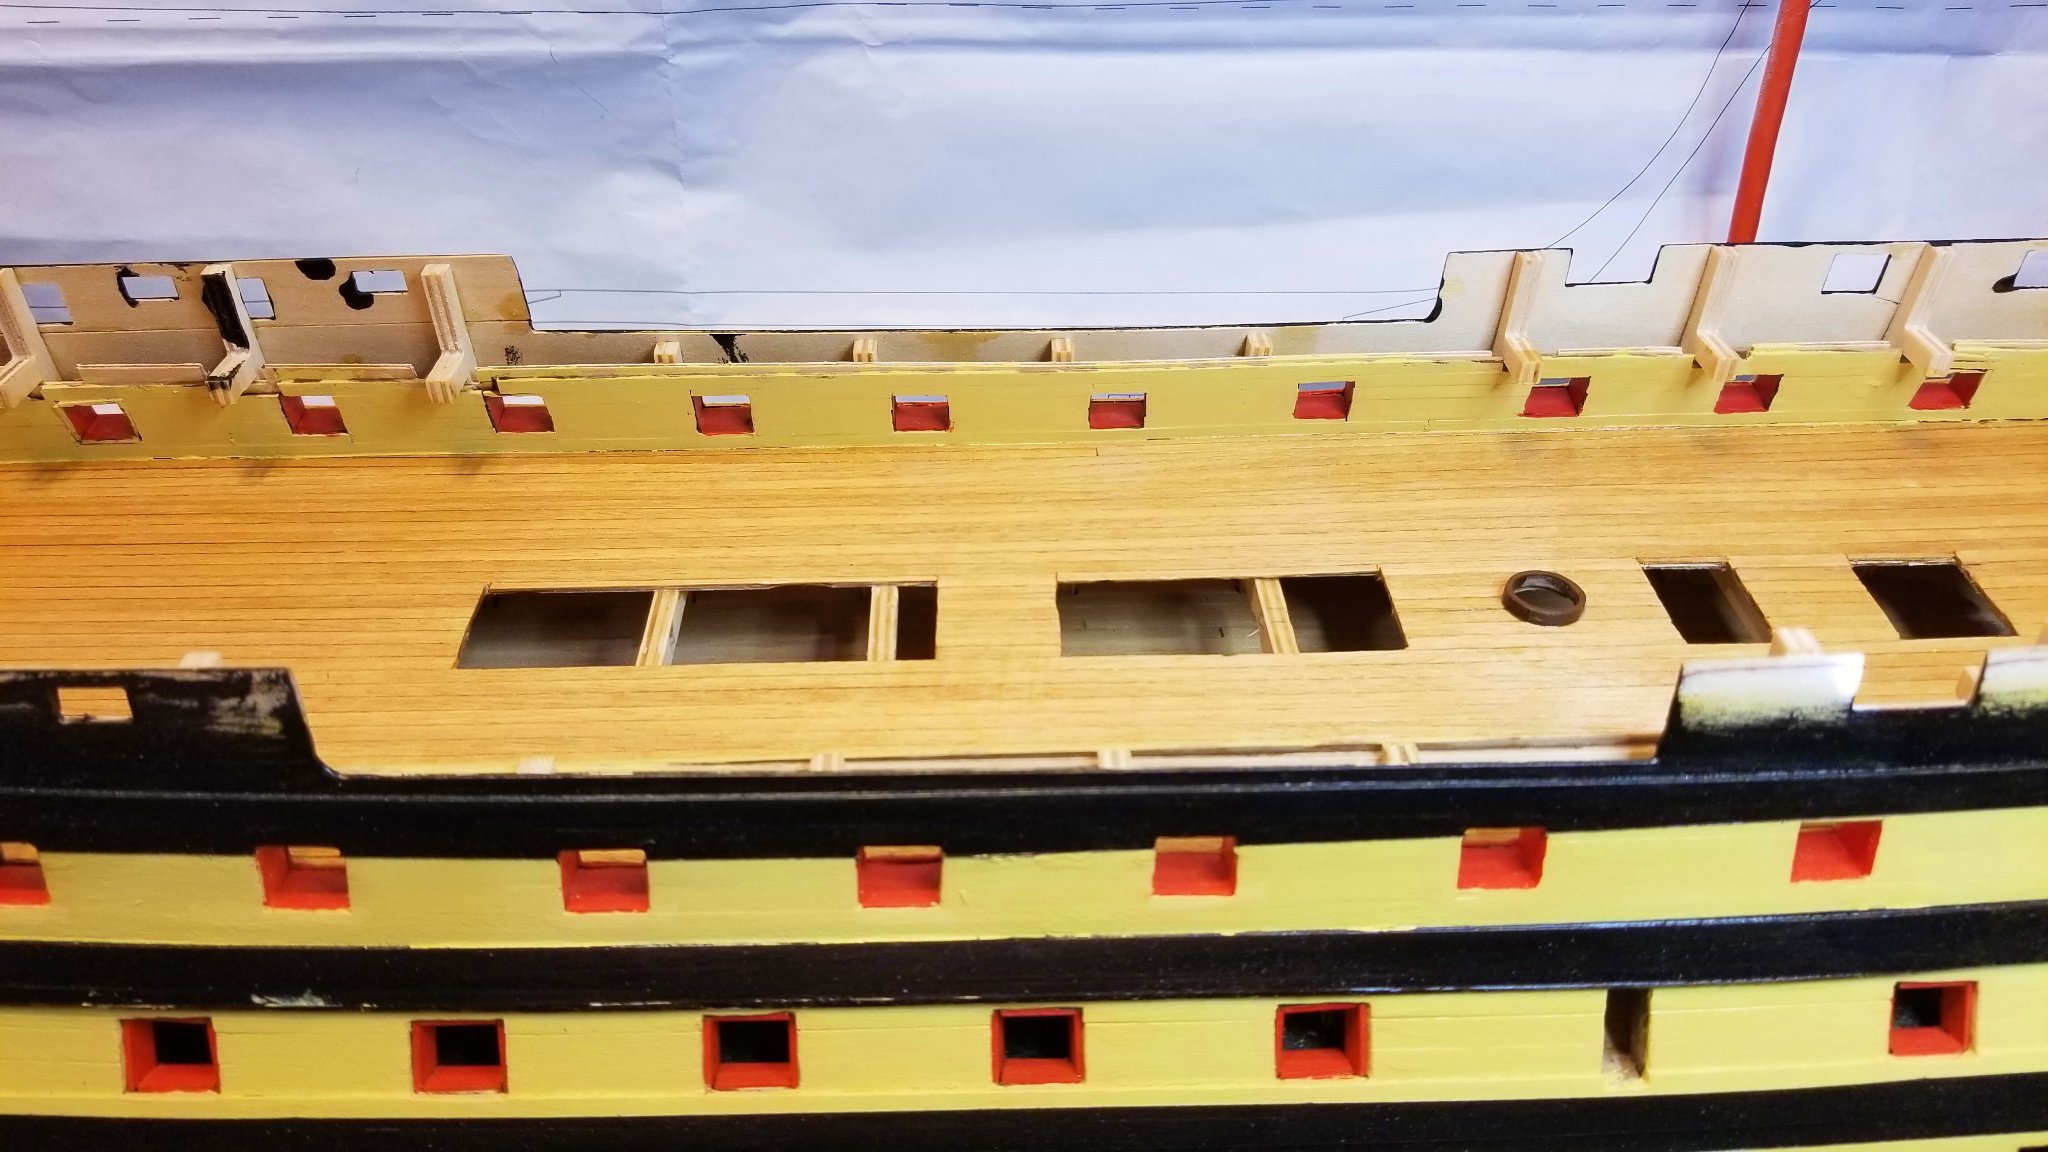
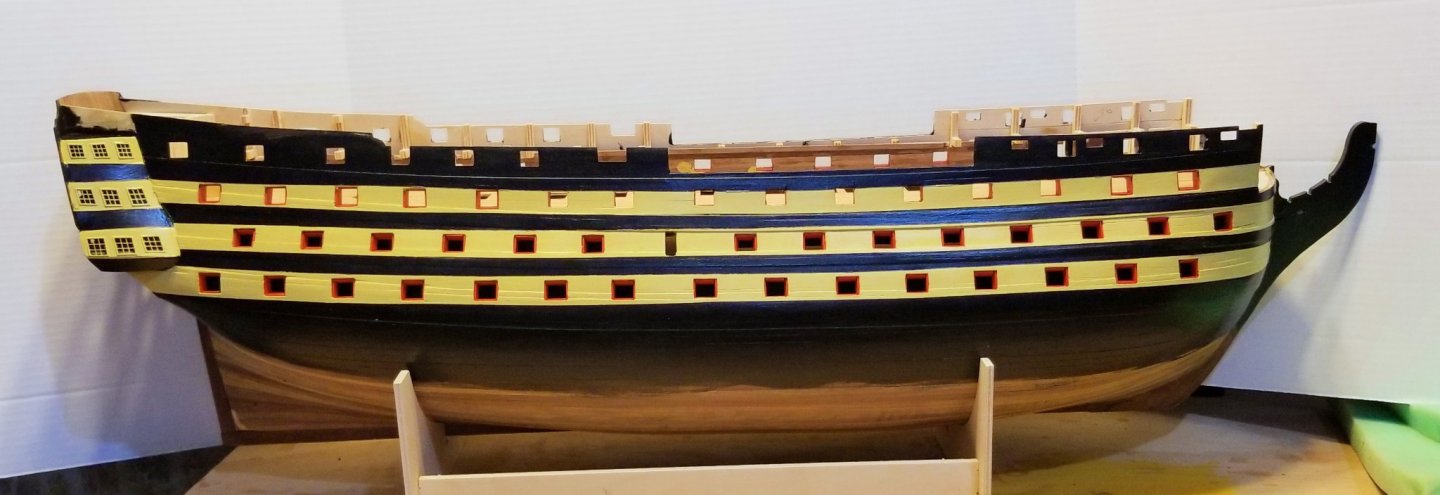
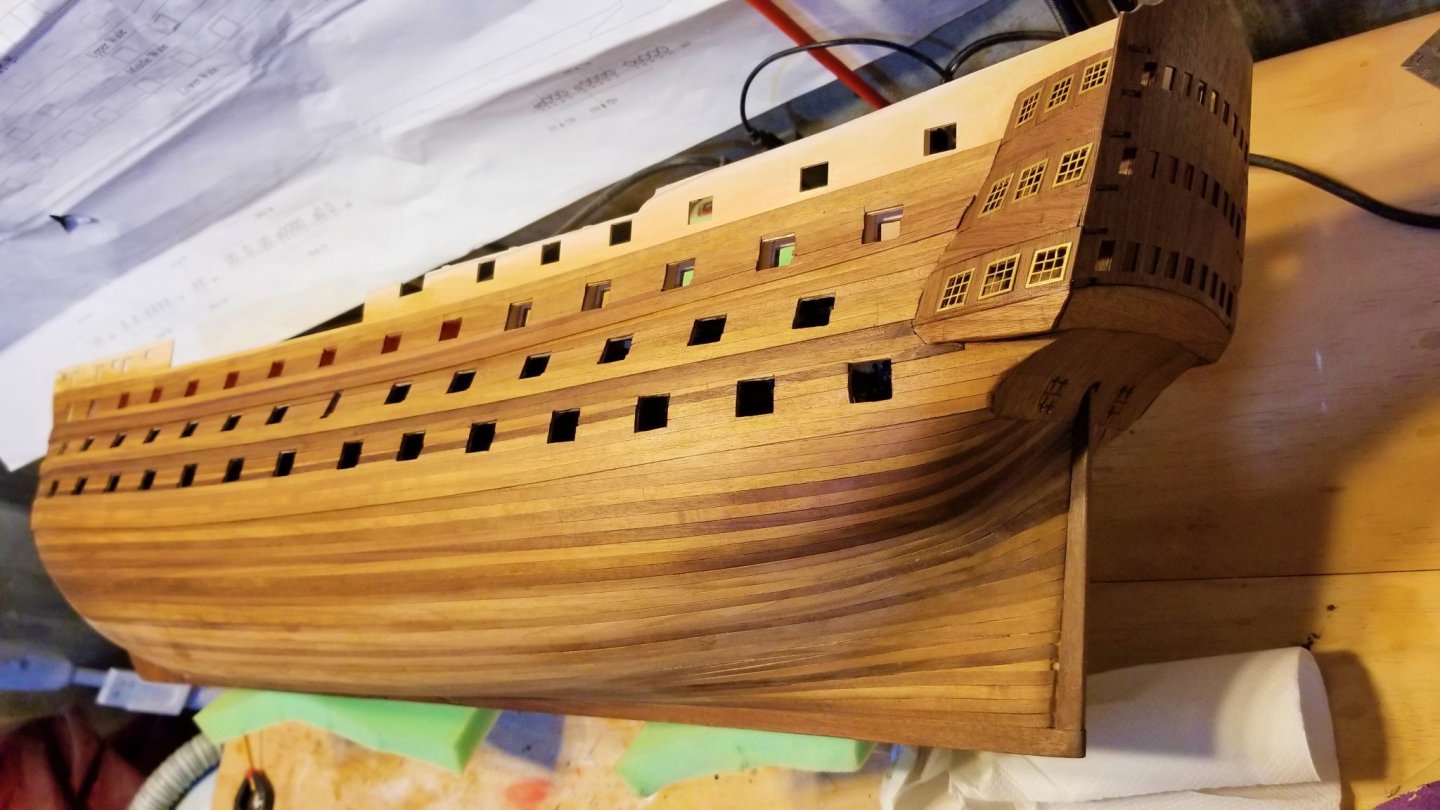
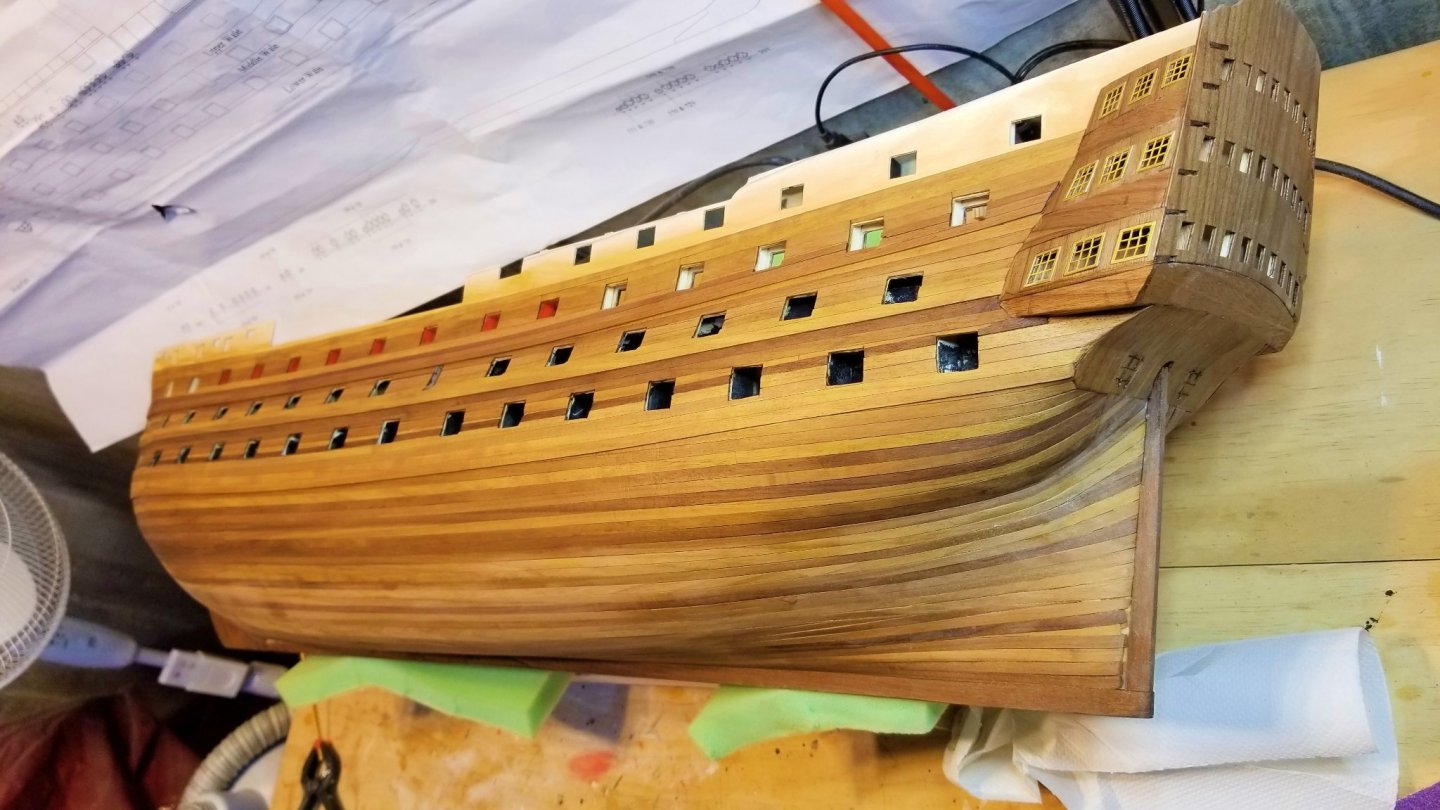
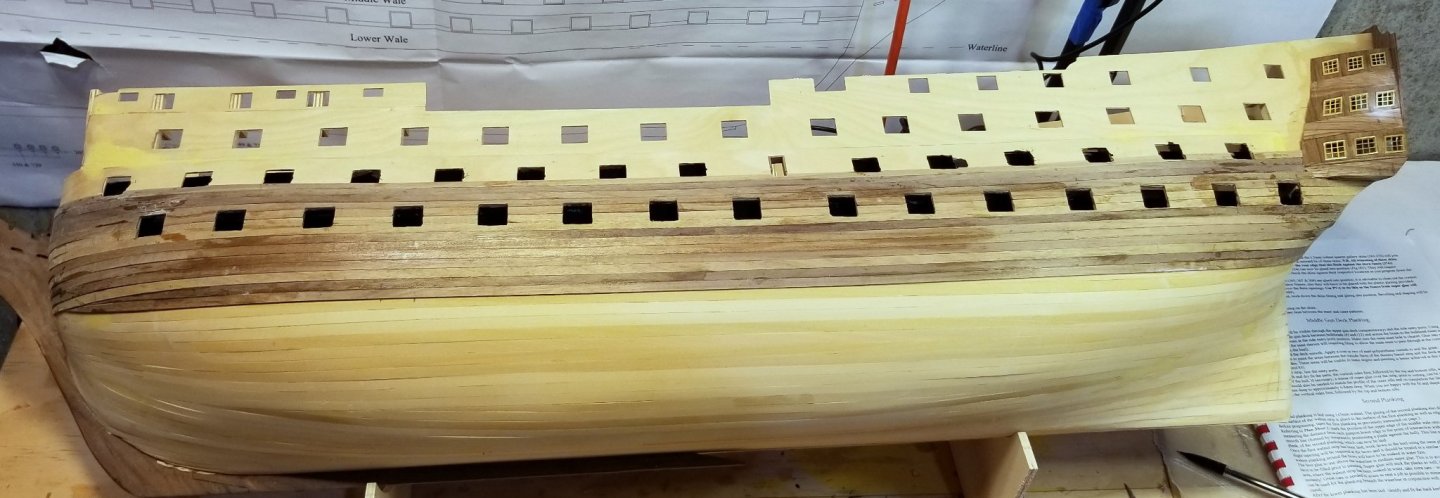
Here are the wales. I've attached two pictures that I worked over in different ways in Photoshop because they are hard to see, which is also why I picked the angle I did. The lower wale is the widest and begins in the lowest gunports. You can see the lower edge below them. The middle wale is below the middle gunports, and the upper wale is above them. Some construction notes: The measurements on the plan sheets differ slightly from the actual measurements produced by the gunport templates. The actual vertical distances are a bit larger. So I had to interpolate a bit. The upper wale is tricky, because the middle of the three boards has to lie 1 mm above the front edge. Took some fitting and taping of dummy planks to get it right. Now I will paint the sides, so that the inner lips of the gunports are painted, and then the red gunport lining strips will create a clean finish. I'll have some final painting to do when the top part of the planking is done after the quarterdeck is mounted. Regards, David
- 218 replies
-
- 7
-
-
-
- Victory
- Caldercraft
- (and 1 more)
-
I'm doing the wales. Lower wale done on both sides (not yet sanded & varnished). Turning to the middle and top wale, I see in the manual that both are made from three 3.5 x 1 mm strips -- so that's a total of 12 strips needed. I have searched the kit and all the wood strip bundles multiple times, and I can find 8. That's not enough to do both wales on both sides, even if I try to redeploy the leftover wood. Three 3.5 strips is 10.5mm. Two 5 mm strips is 10.0 mm, and I have lots of those. Looking at pictures of the model and where other rigging is involved, it seems safest to use the 5mm strips for the middle wale, which will be 0.5 mm narrower than spec, and then do the top wale with the 3.5 strips. I've had worse workarounds. Regards, David
- 218 replies
-
- 4
-
-
- Victory
- Caldercraft
- (and 1 more)
-
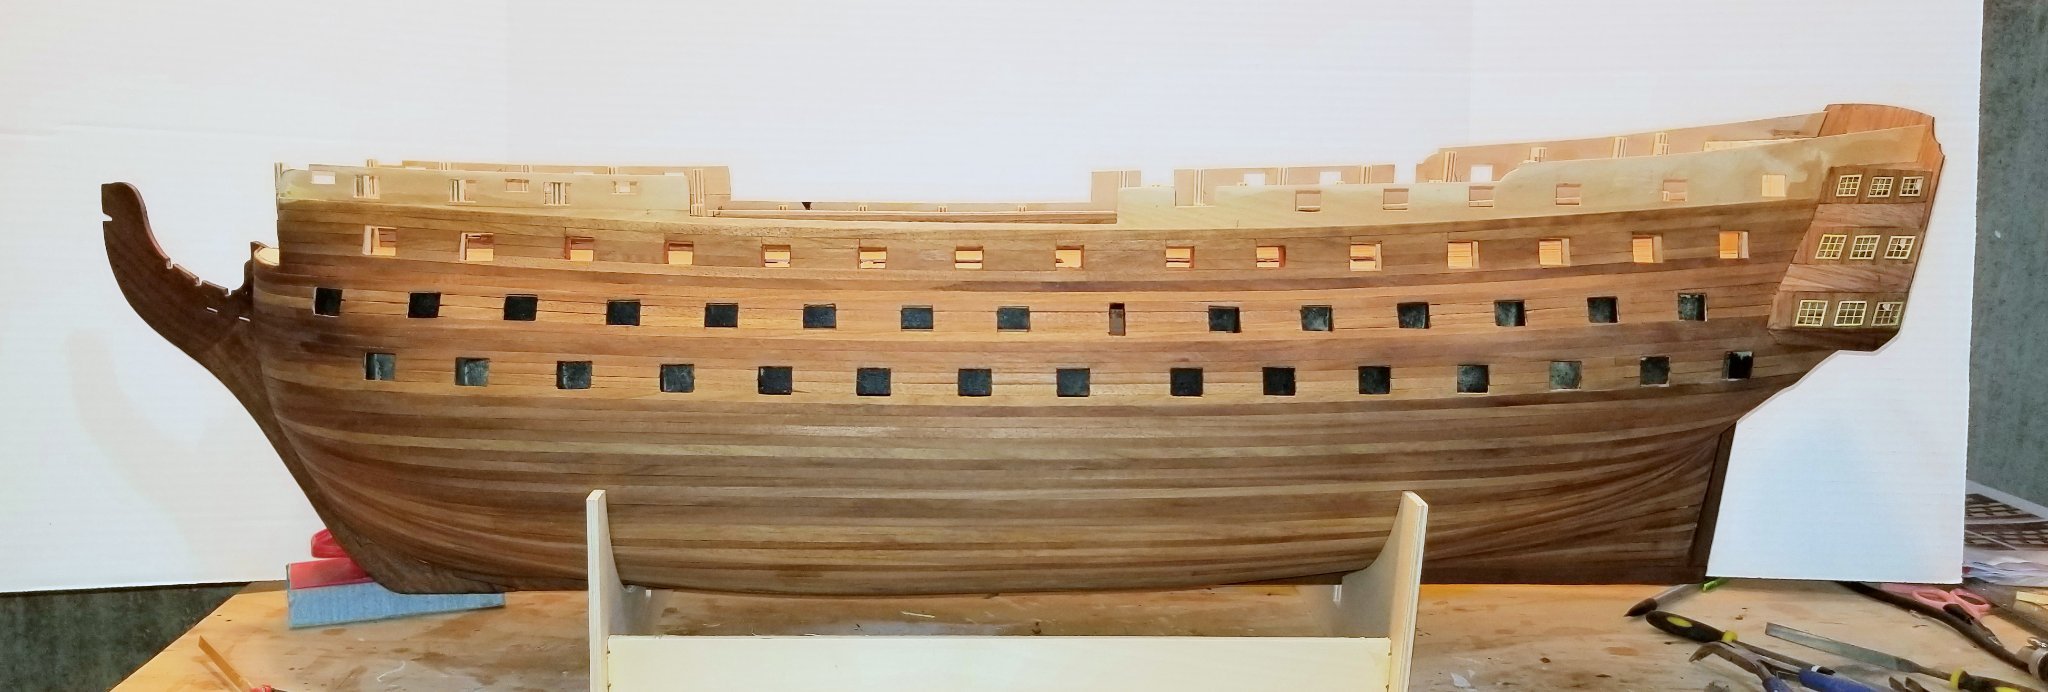
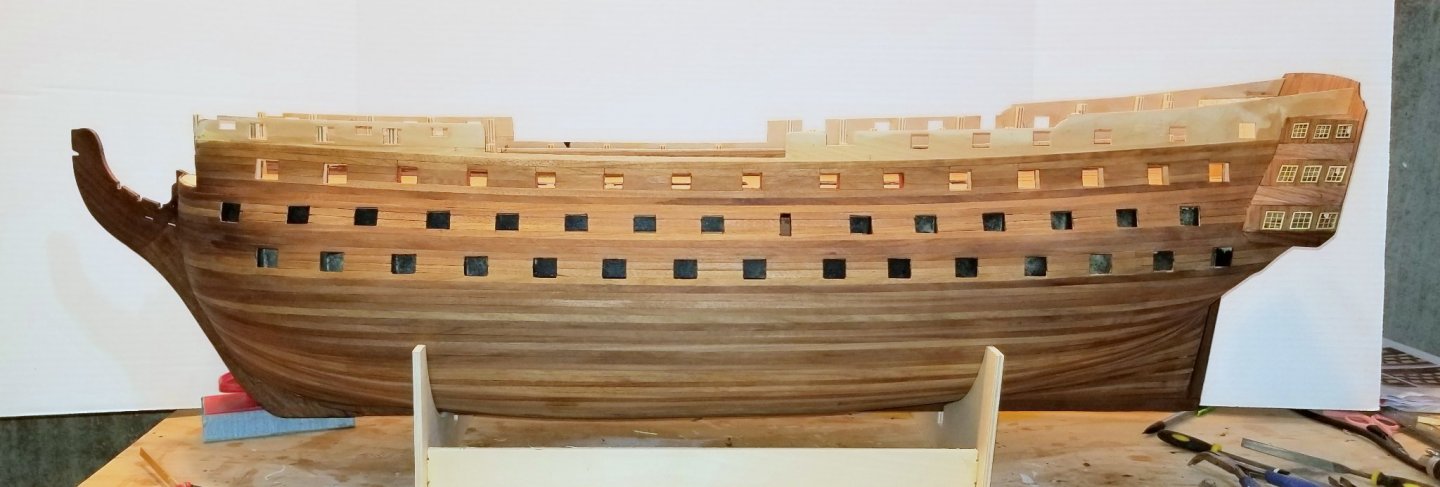
Finished planking up the sides to the point indicated in the manual; then sanded & varnished the hull in preparation for adding the wales. A big varnished walnut hull -- very pretty, and 100% will be covered! 😛 Regards, David
- 218 replies
-
- 8
-
-
- Victory
- Caldercraft
- (and 1 more)
-
Finished planking the gun deck inner bulwarks. What you see is unsanded, so all of the messy glue spots will sand out. I'm going to wait to do that until I have lined the remaining gunports, as bulkhead sanding is required for those. As I mentioned earlier, cutting out the gunports didn't seem practical at these angles, so I cut and fitted each piece. Regards, David

- 218 replies
-
- 5
-
-
- Victory
- Caldercraft
- (and 1 more)
-
Yes, what I mentioned in step 3. I will sand and varnish the second planking to protect it and make painting easier. I'll also sand and varnish the inside bulkhead planking before I paint that. Regards, David
- 218 replies
-
- 2
-
-
- Victory
- Caldercraft
- (and 1 more)
-
I have lined the first set of 8 gunports on each side, as called for in the manual. I pre-painted the wood strip before cutting and mounting it into the gunport template openings. I have also started planking the inner bulkheads. I've decided to cut and fit the planks off the ship, then mount them, because if I cut them once mounted I will damage the red painting of the gunport linings. You can see the "piece-part" approach in the picture, although these gunports are different and will be lined later. The ones I have lined are to the left of what you see. Looking ahead in the manual, I have decided on the following sequence: 1) Finish the interior bulkhead planking. 2) Plank the exterior up to just below the top quarterdeck stern gunports (as called for in the manual). 3) Sand and varnish the exterior walnut hull (even though the very last top planks won't be on yet). 4) Add the wales. 5) Paint the exterior with the striped treatment. Doing this at this point will allow me to paint inside the lips the unlined gunports without being too careful. I'll only have to be careful with the lips of the 16 I've already lined. 6) Then prepaint the wood strip red, including the edge facing outboard, and line the remaining gunports (84), most of which are set back 1mm from what will now be the painted gunport lip. This will give me a clean finish at the gunport lips on the exterior if I don't go nuts lining all 84. 7) The newly lined gundeck gunports (14 of those 84) will need to be sanded flush with the inside planked bulkhead. 😎 Then I'll sand and paint the inside bulkhead. This is later than called for in the manual, but I don't see the point of painting it earlier, then having to redo much of it after sanding those 14 gunports flush. Most likely more than you wanted to know, but I thought the painting sequence stuff might be helpful if there is anyone left who hasn't already built this ship. 😋 Regards, David

- 218 replies
-
- 6
-
-
- Victory
- Caldercraft
- (and 1 more)
-
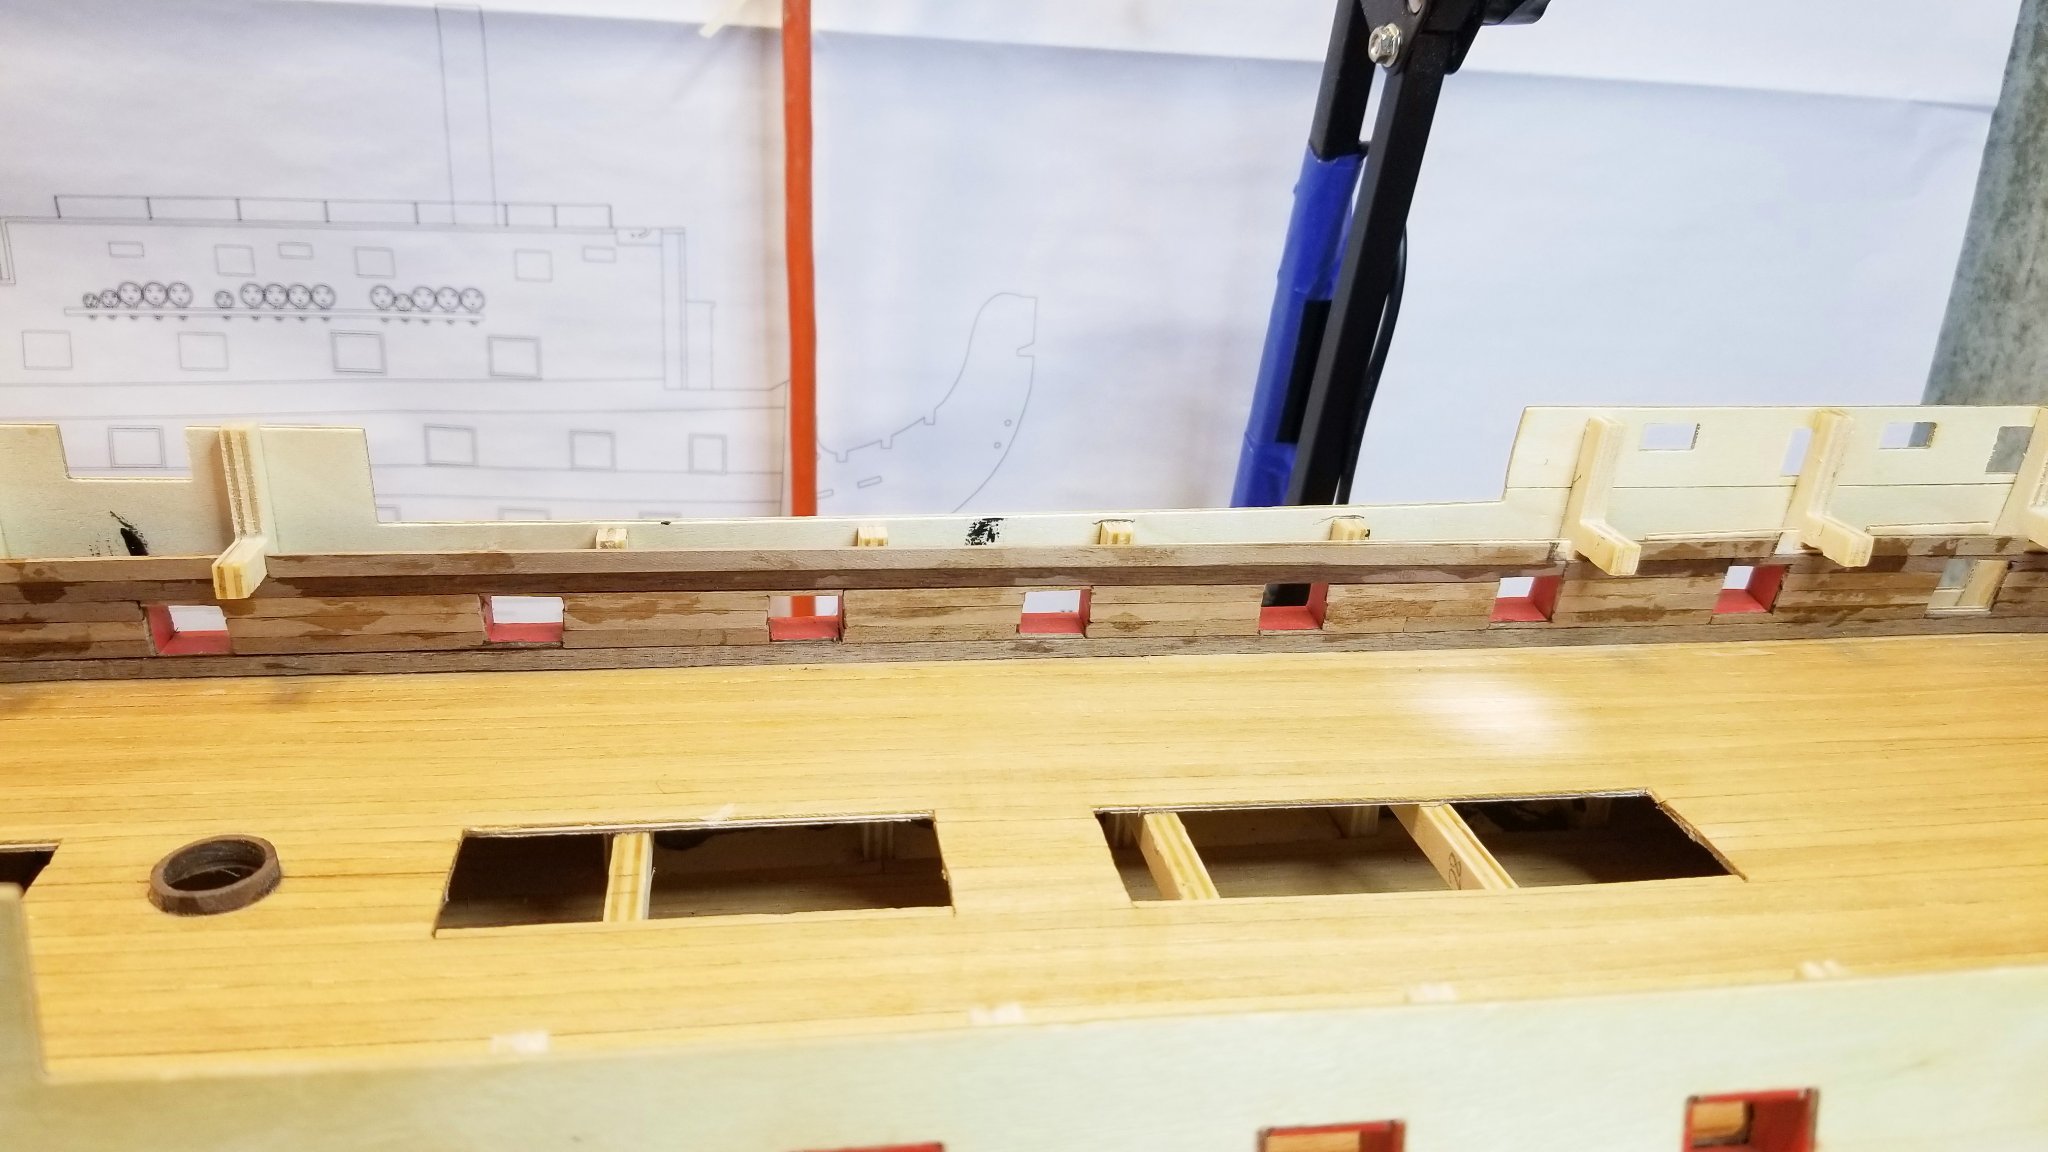
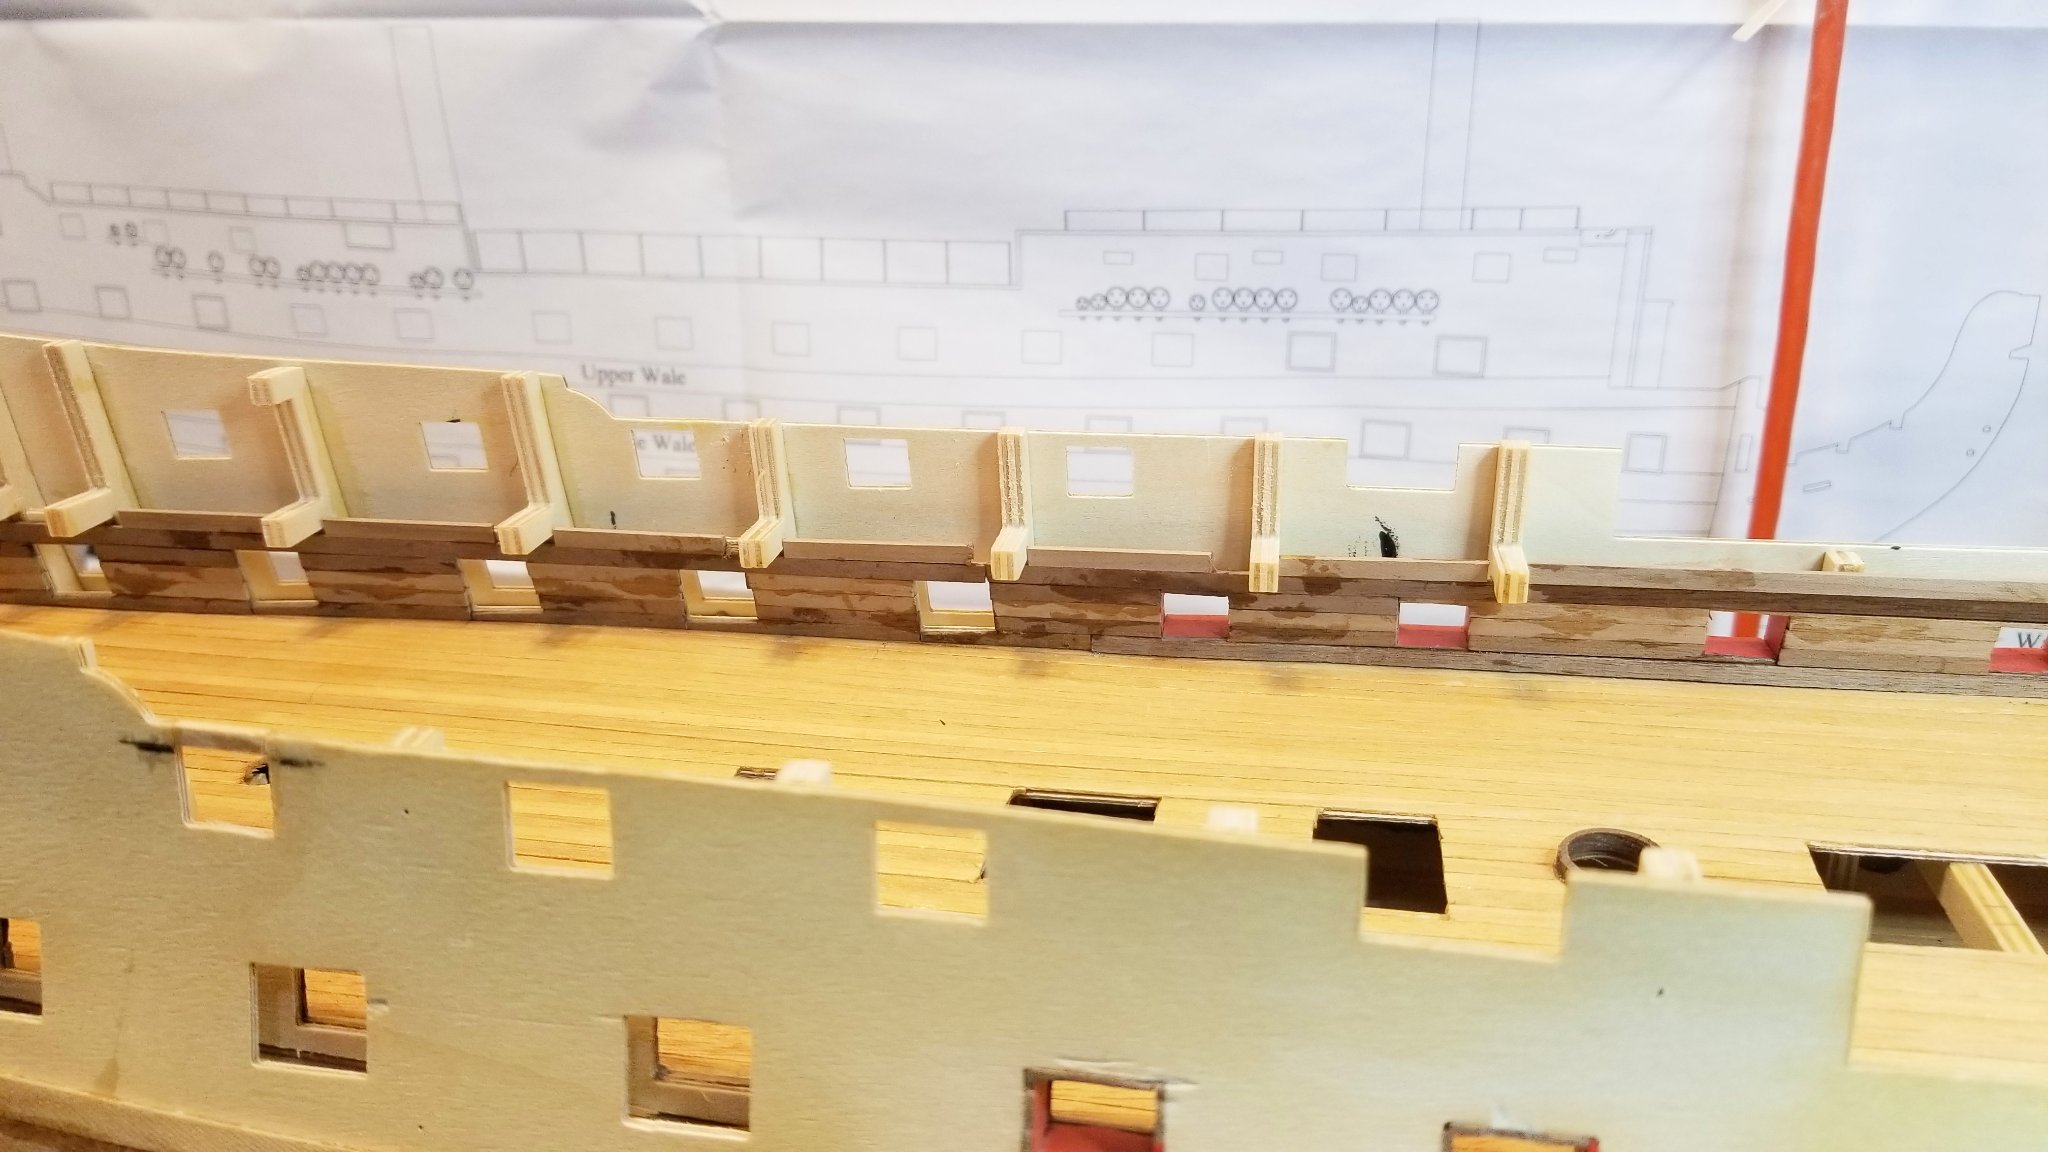
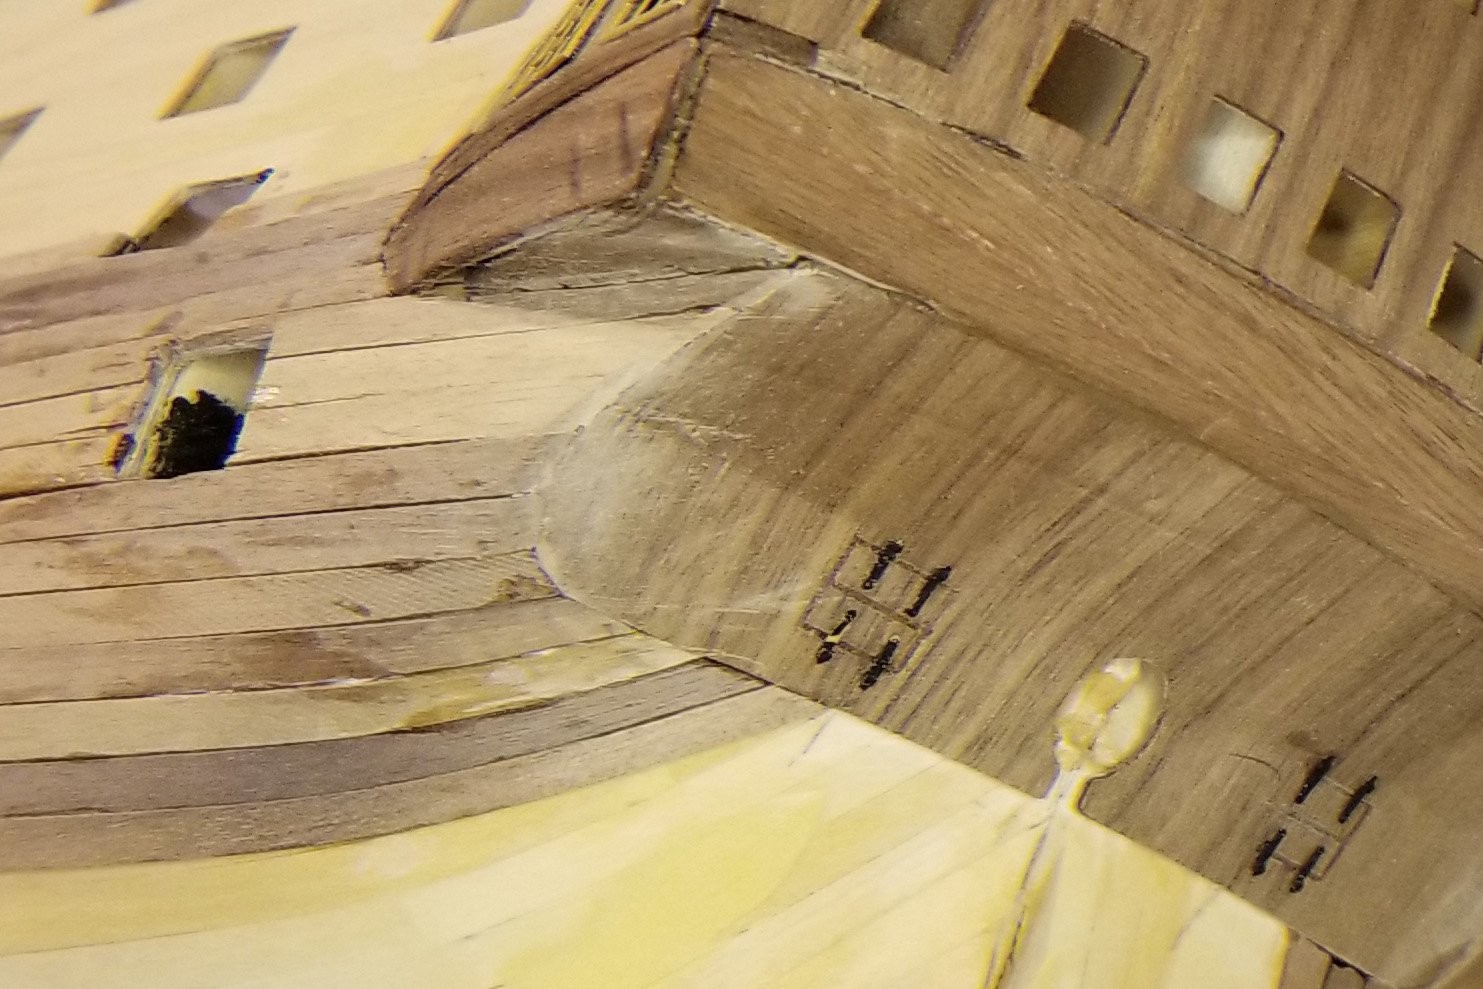
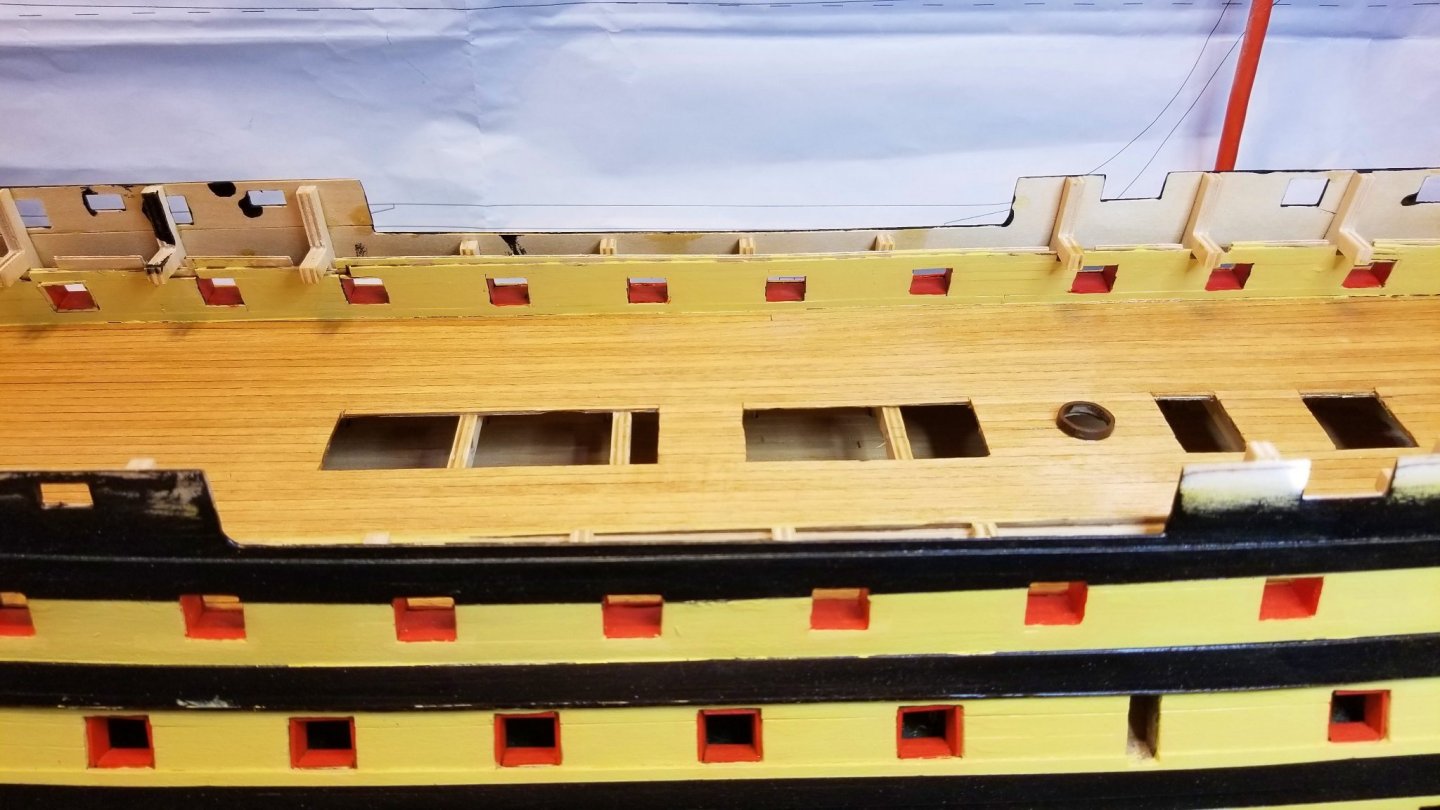
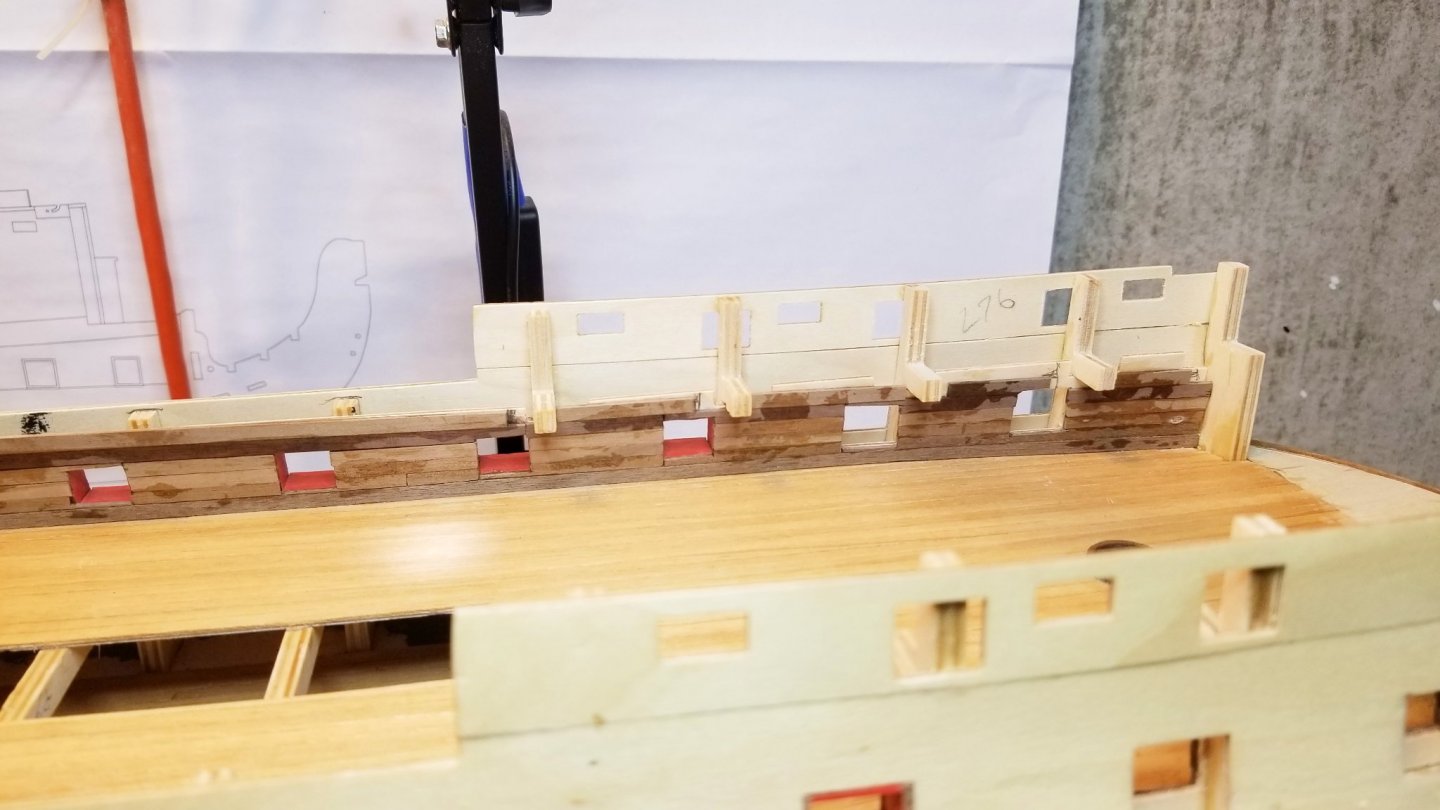
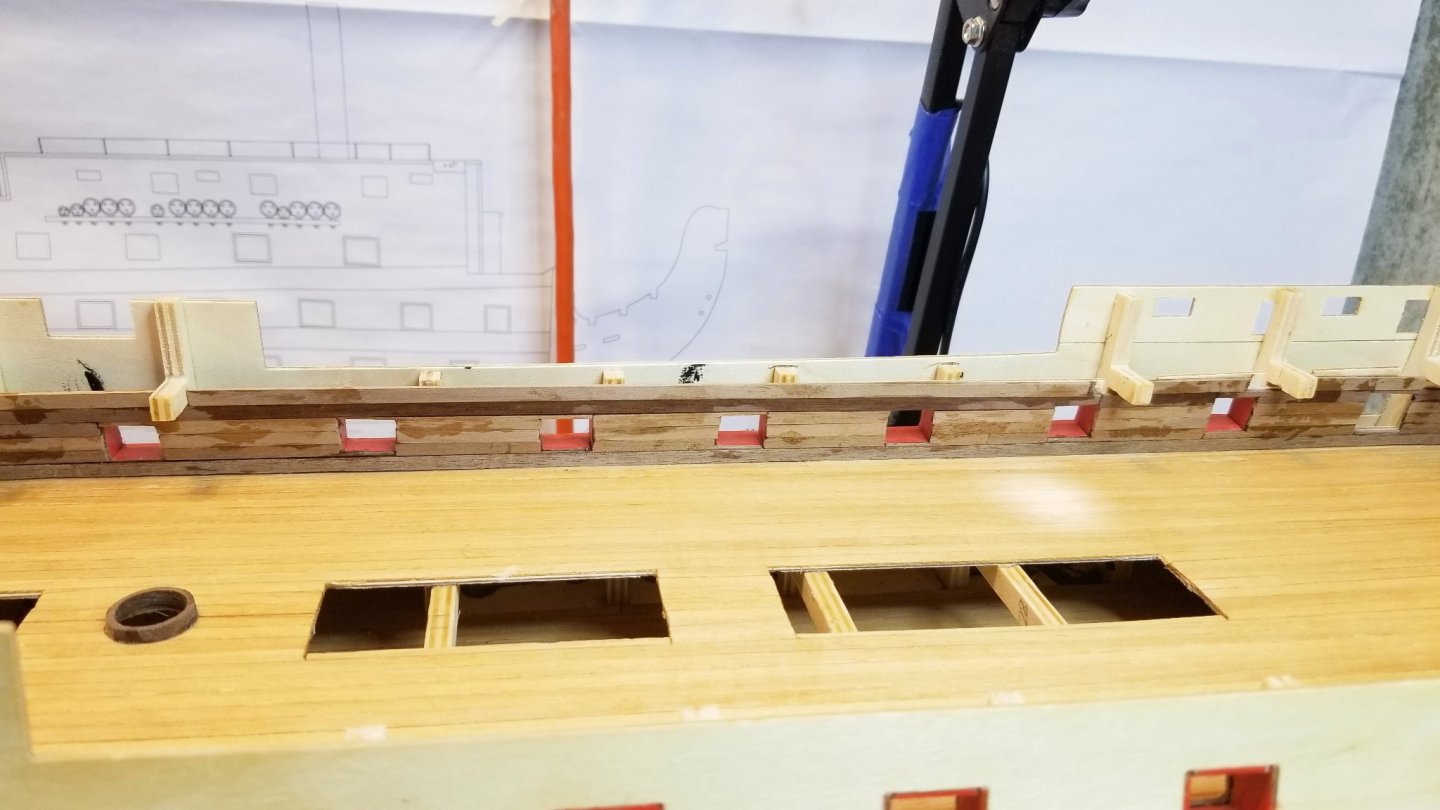
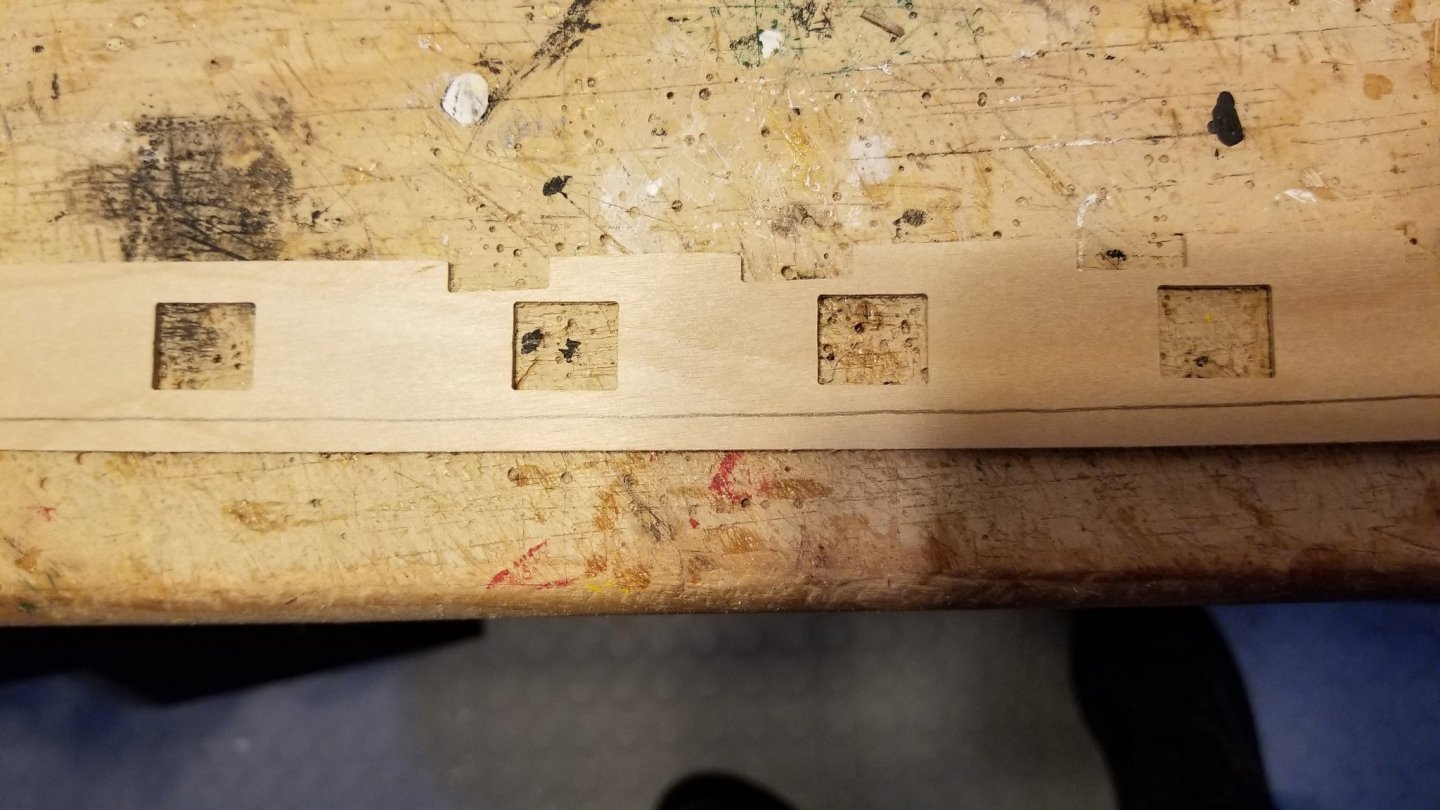
Ran the second planking down to the keel, and up to just below the gun deck gunports, where I have to stop in order to install the gun deck and inside gun deck gunport templates. While the manual doesn't say anything about it, I found that I had to cut the deck lengthwise into two pieces in order to shape the edges to fit, and to have any hope of gluing it down. Two pics show the effect of the cut. Then I had to take a lot off the inside gunport templates to get them to fit. I used the one I shaped by trial & error as a template to line off the other one, and you can see how much has to be taken off the bottom. Best regards, David

- 218 replies
-
- 9
-
-
- Victory
- Caldercraft
- (and 1 more)
-
Chugging away on second planking. There's a lot of it! Regards, David

- 218 replies
-
- 7
-
-
- Victory
- Caldercraft
- (and 1 more)
-
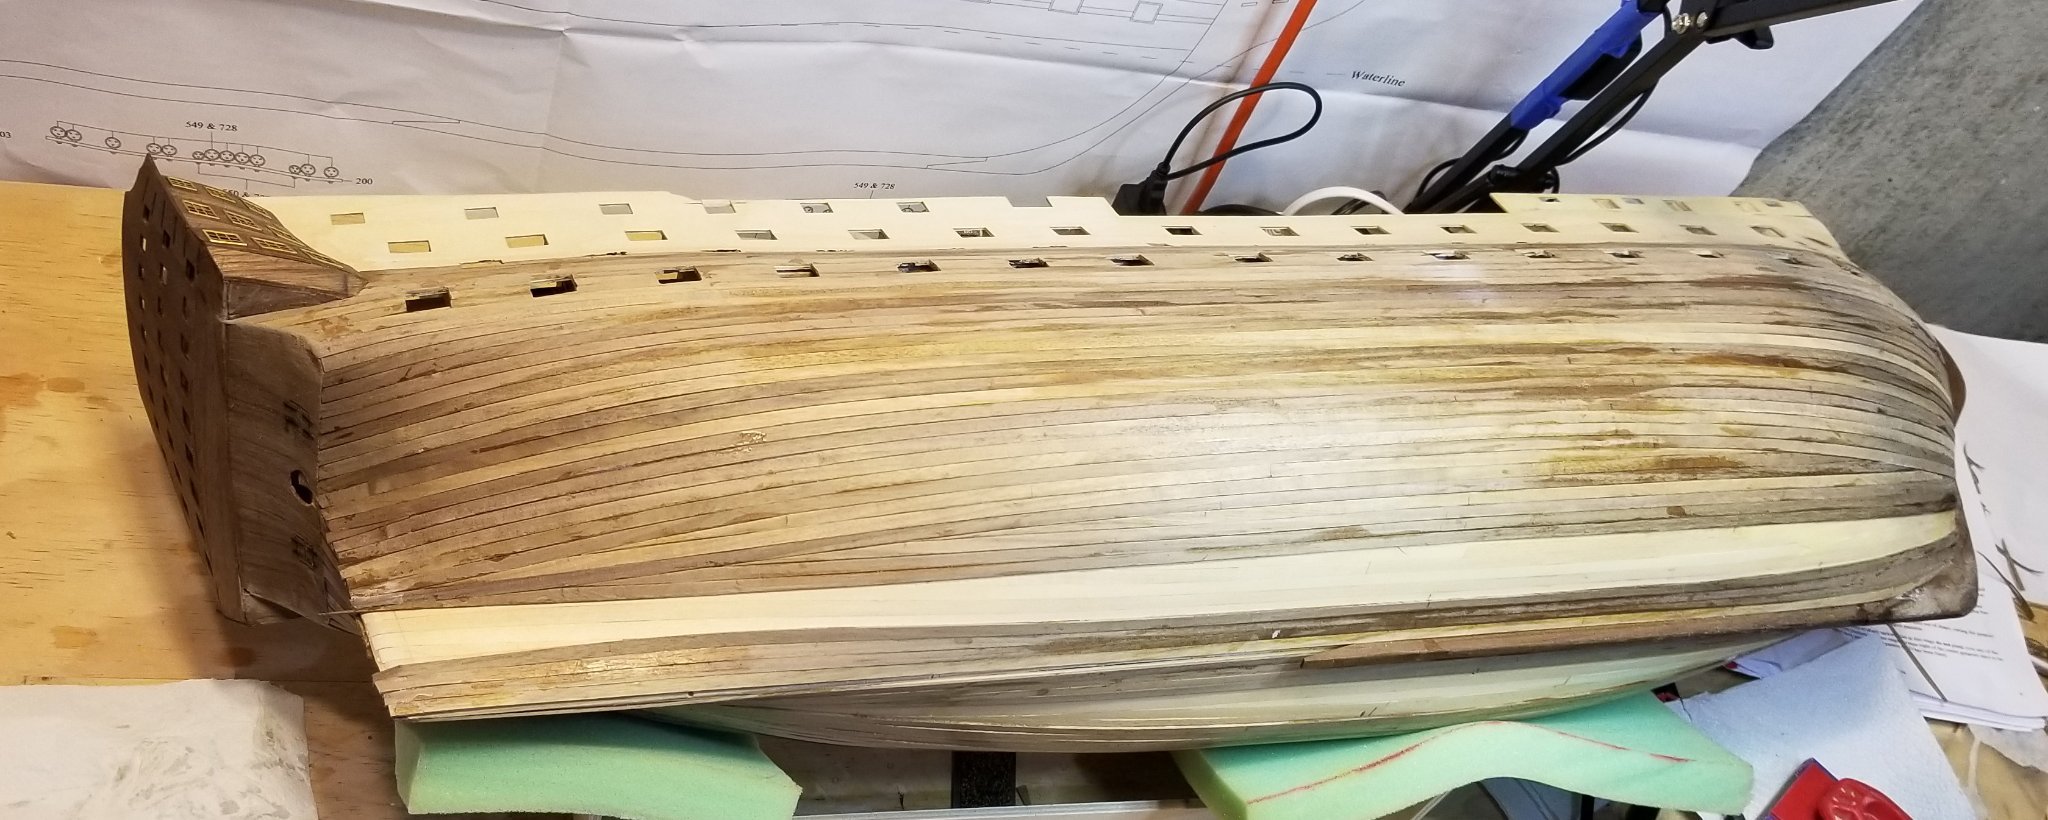
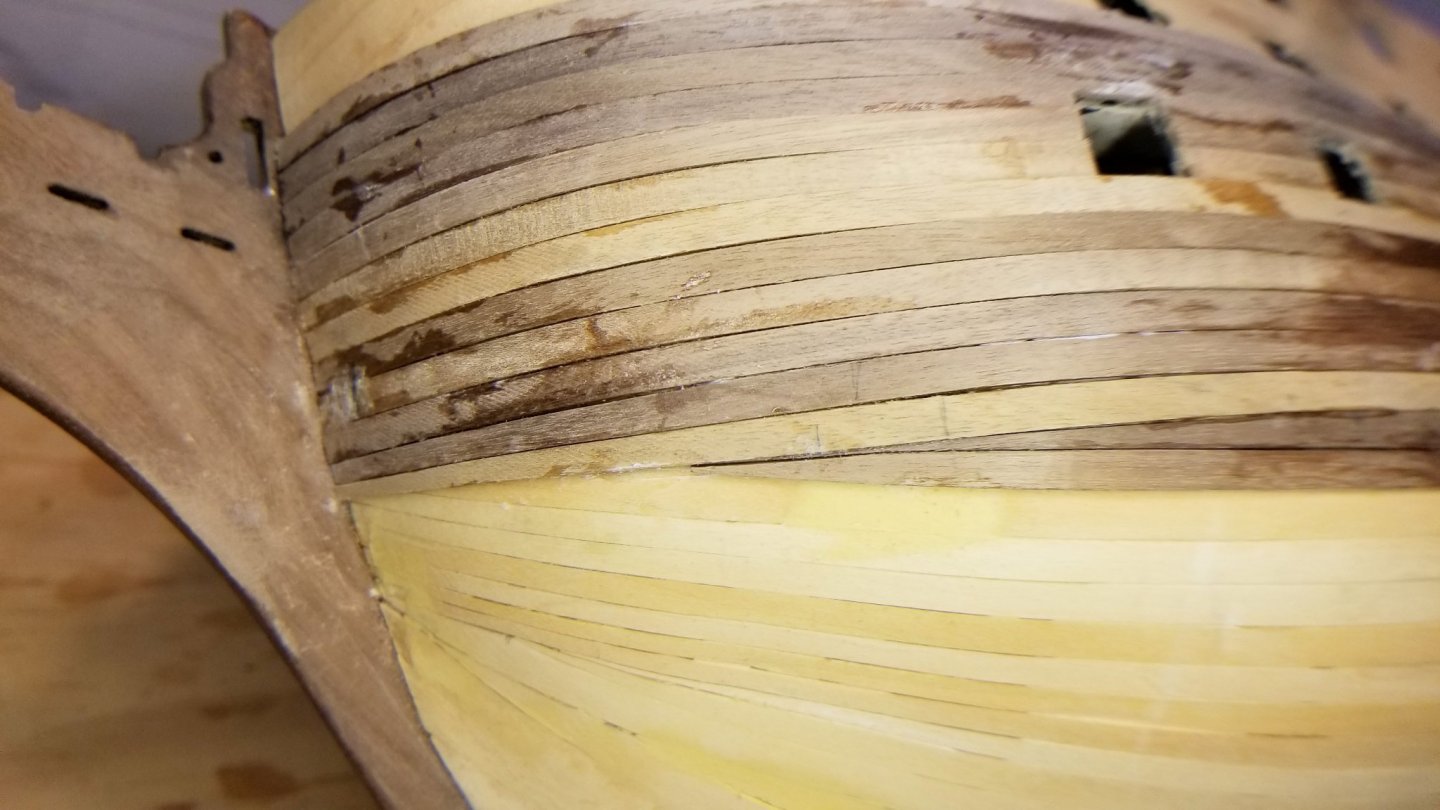
Interim progress on the second planking. I found that with regular tapering, I was still having to work too hard to get the bow runs flat to the hull, so as shown I've begun some "layered tapering". The stern requires some careful fitting to get the pieces to butt properly against the stern piece. I use a steamer to get the bends right, so I don't have to soak the wood. The walnut looks pretty messy from glue marks, but all of that will sand away, and it will have a nice walnut finish . . . . . just in time to paint all of it or cover it with copper. 😛 Regards, David
- 218 replies
-
- 6
-
-
- Victory
- Caldercraft
- (and 1 more)
-
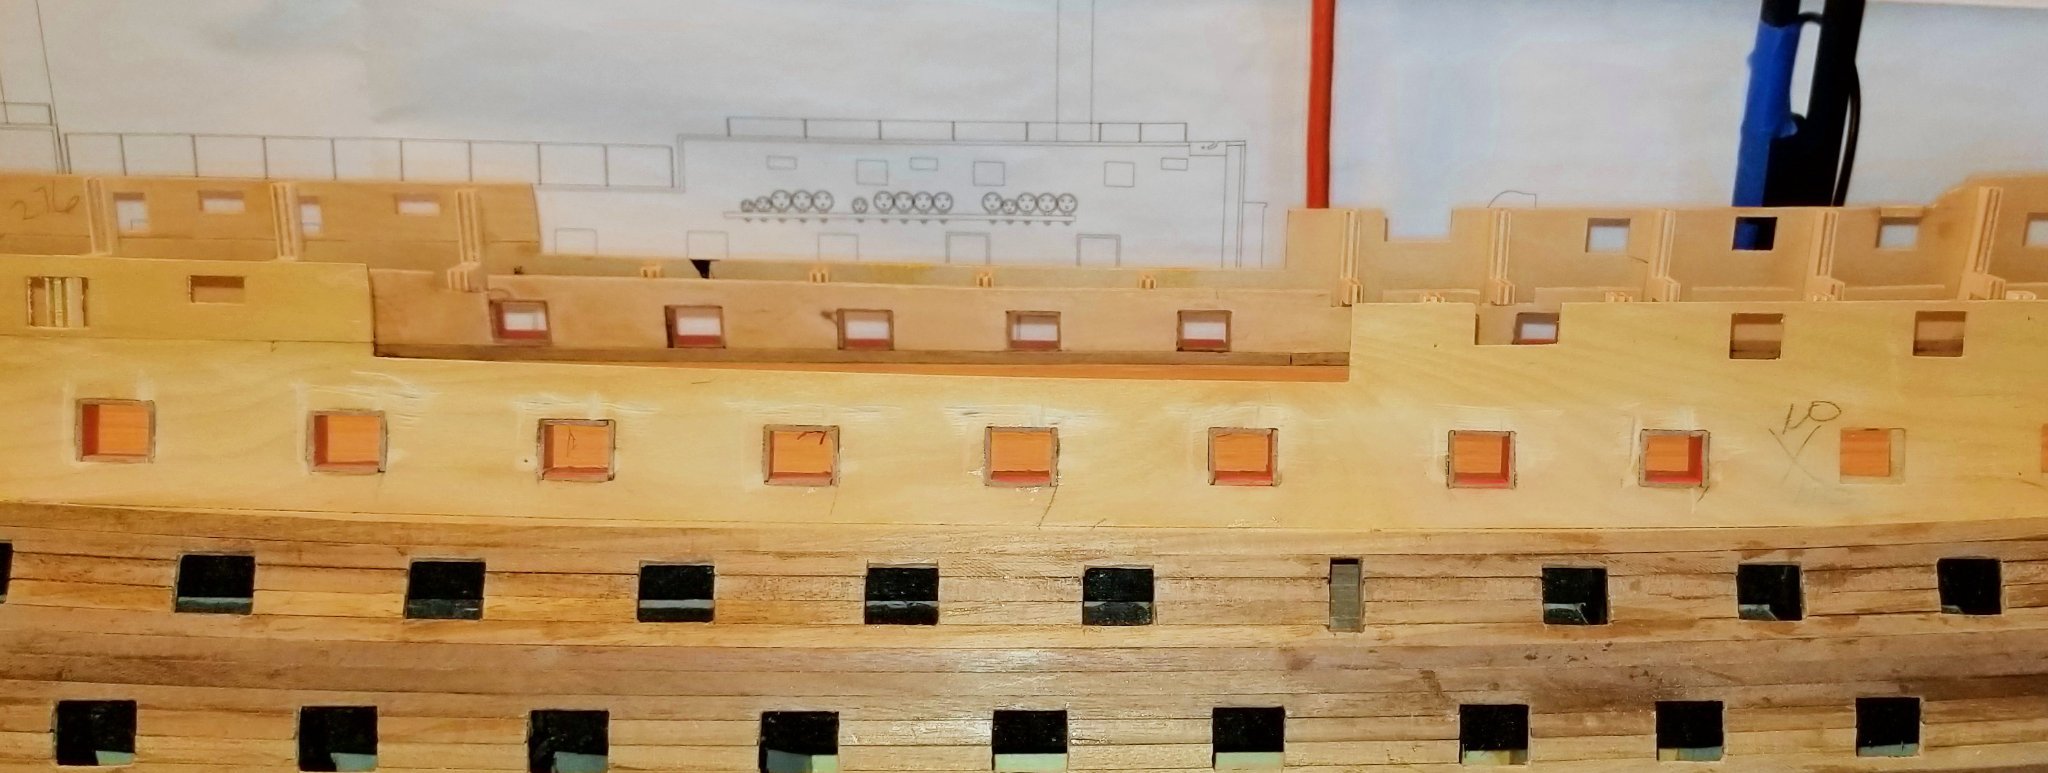
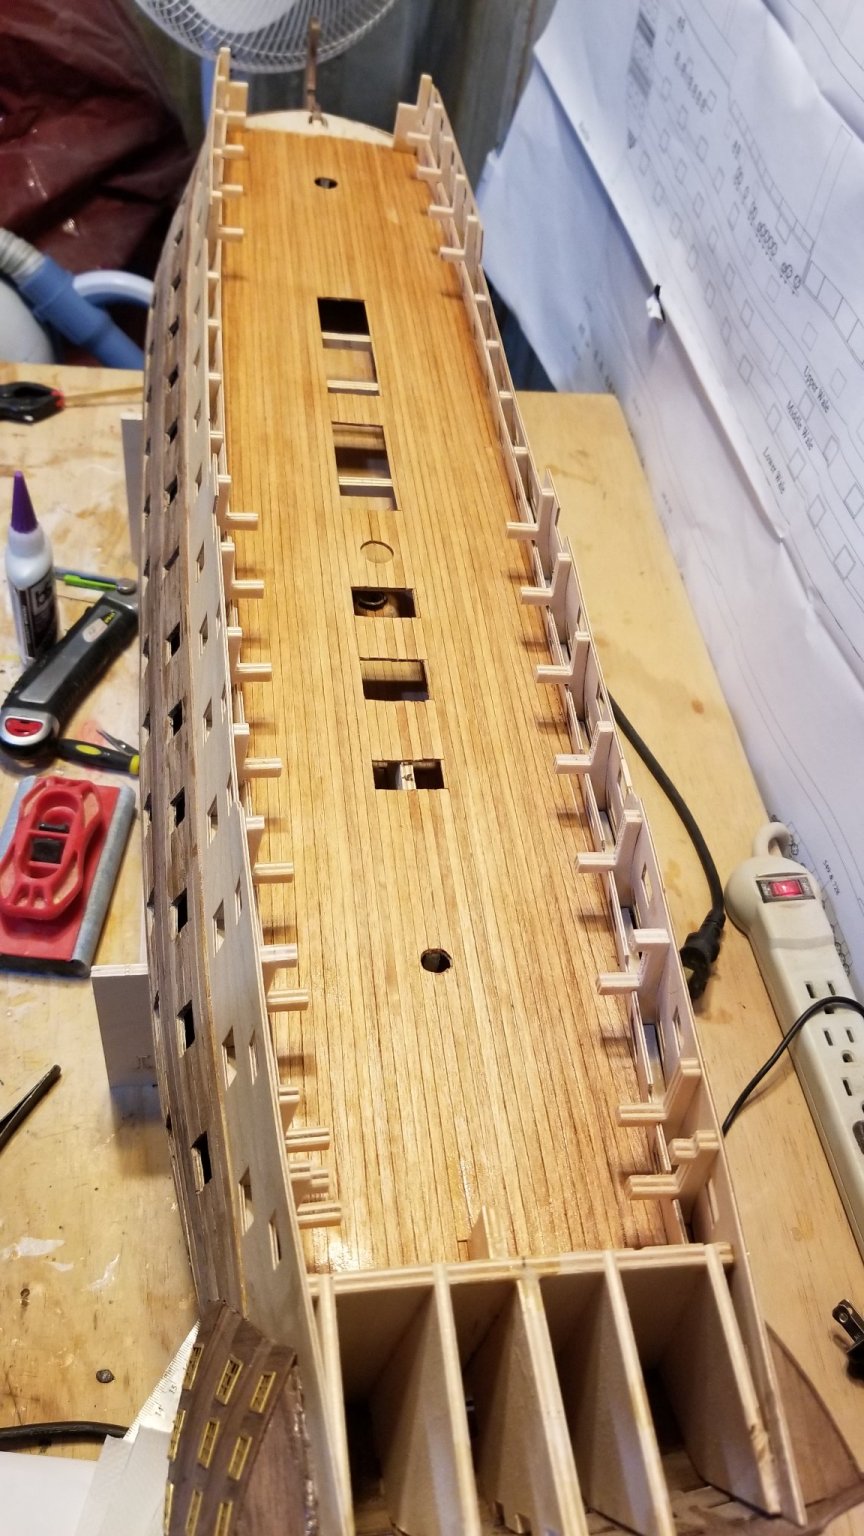
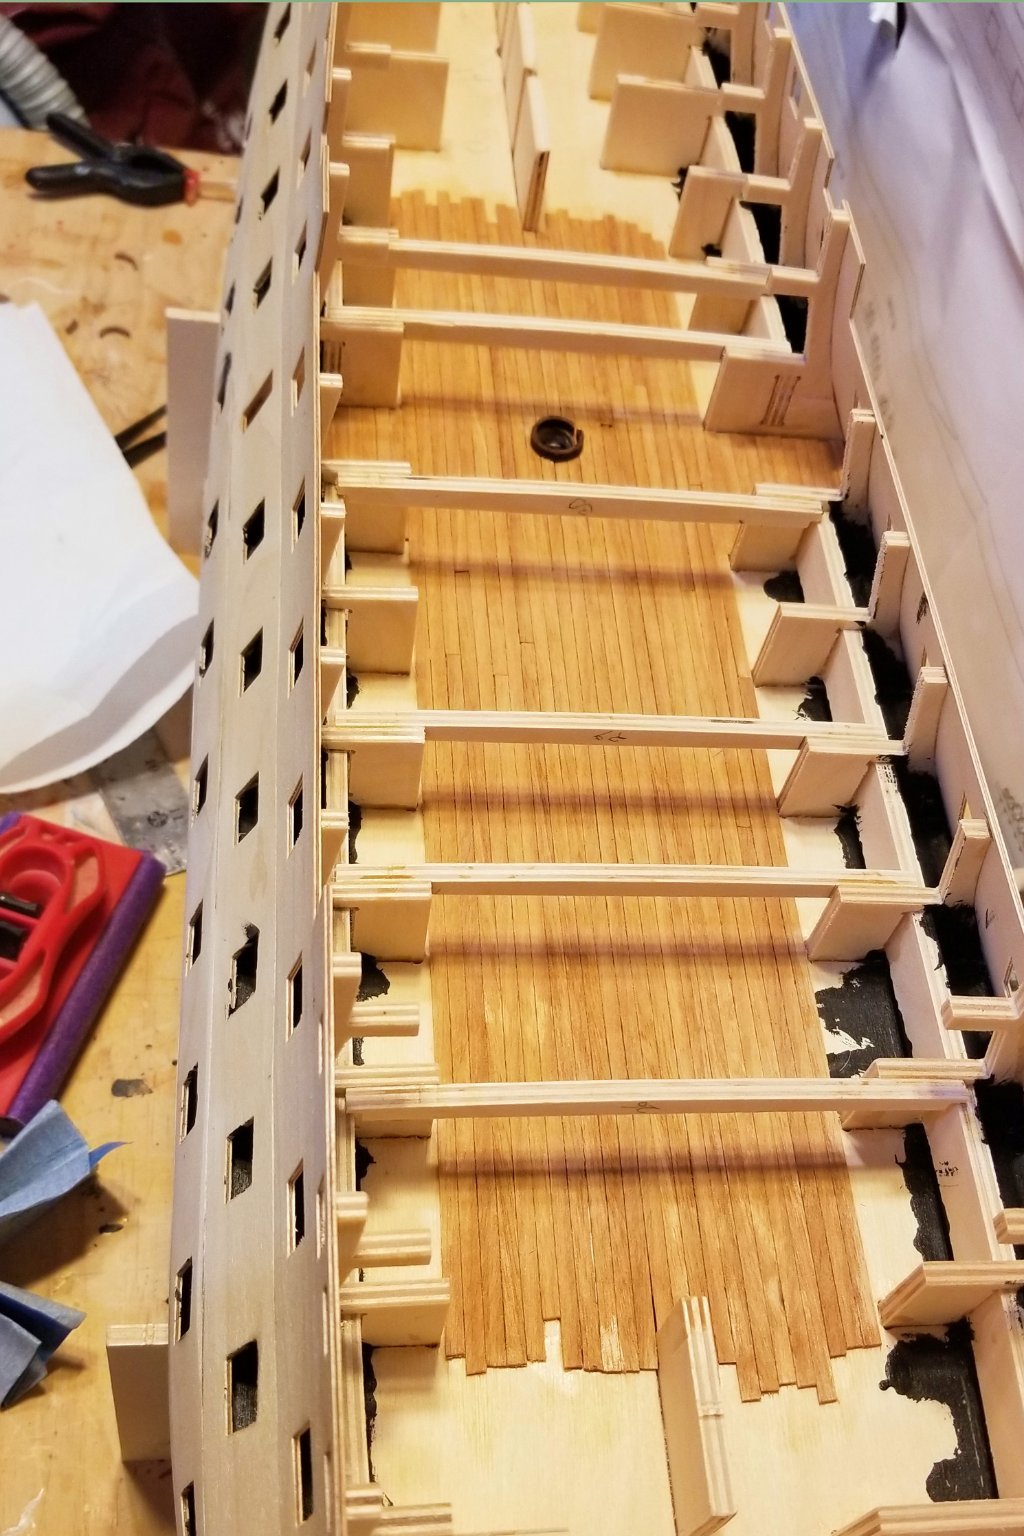
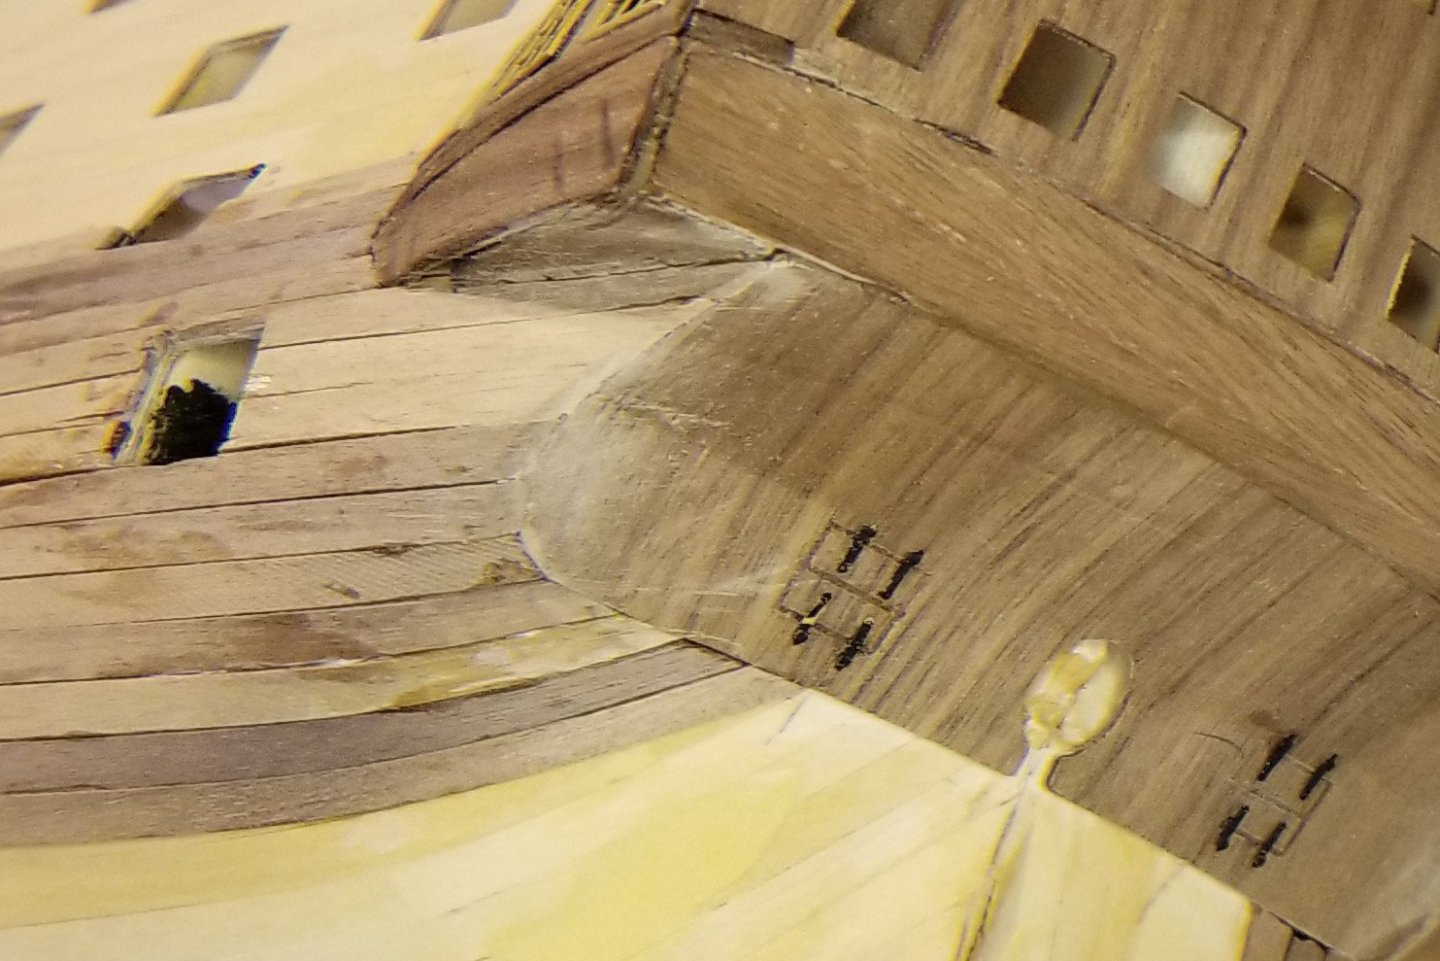
Planked the portion of the Middle Gun Deck called for in the manual (the part that is visible from above or outside. I made a sequence goof and put the crossbeams in too early, so had to work around them when doing this planking. I also wish the manual had called for painting the areas black that can be seen through the gunports before the gunport templates went on, vs. after during this planking step. Would have been a whole lot easier. Regards, David

- 218 replies
-
- 6
-
-
- Victory
- Caldercraft
- (and 1 more)
-
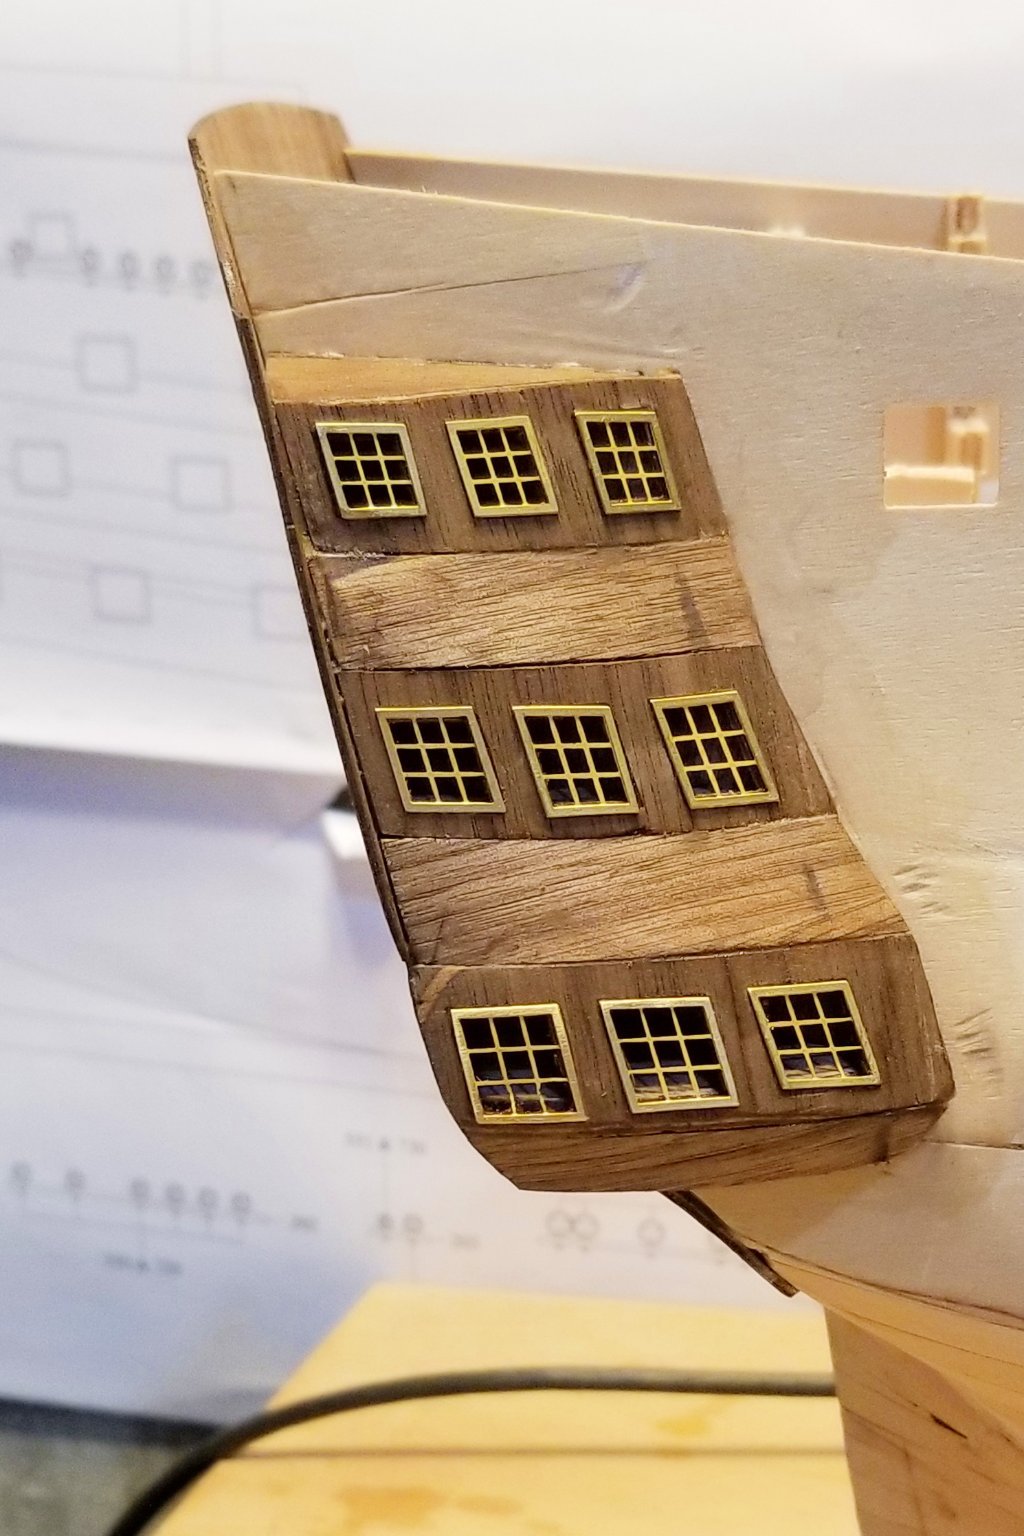
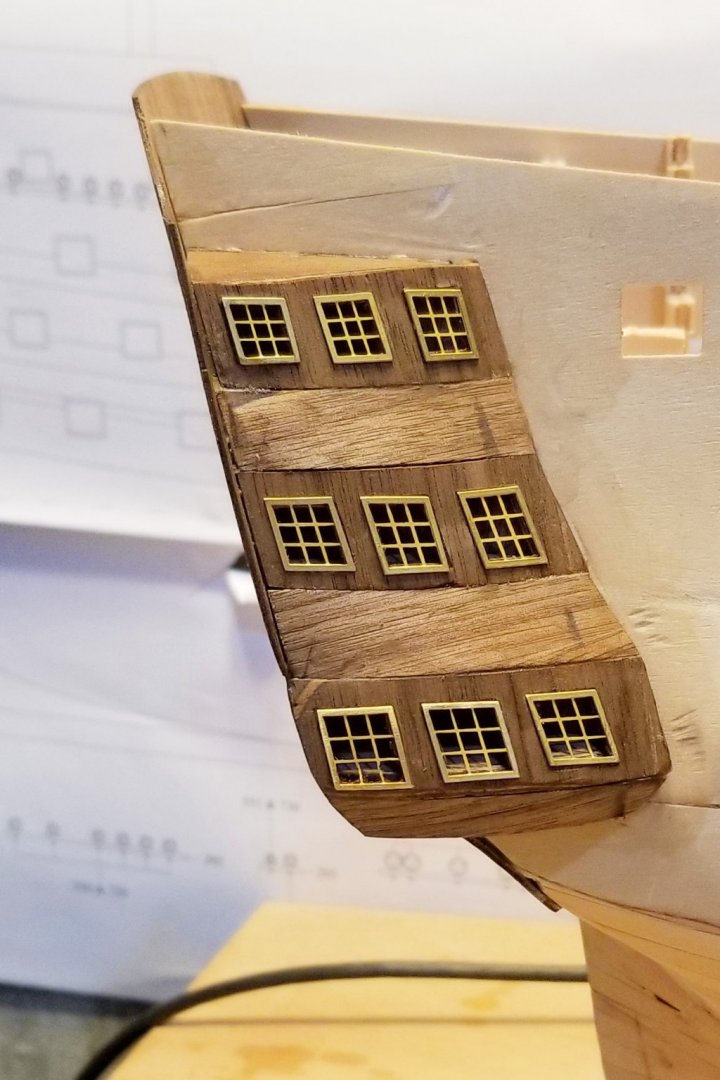
I finished building the stern quarter galleries -- pic attached. Had to make a strategic building decision. The way I think the instructions will go (without looking forward, but looking at pictures of this construction stage) is: Varnish the side pieces Install the "glazing" (plastic windows) Build the galleries Paint the ship, avoiding the plastic Paint the windows off the ship Then install the painted windows But I'm not a huge fan of plastic windows, because they collect dust, and in this case the window panes (looking through the brass) are small. I also didn't trust mounting the windows when the glazing was installed. So I installed the windows now and mounted the sides, and varnished it. I'll skip the plastic windows and when I paint, I can paint across the brass window panes. Regards, David
- 218 replies
-
- 3
-
-
- Victory
- Caldercraft
- (and 1 more)
-
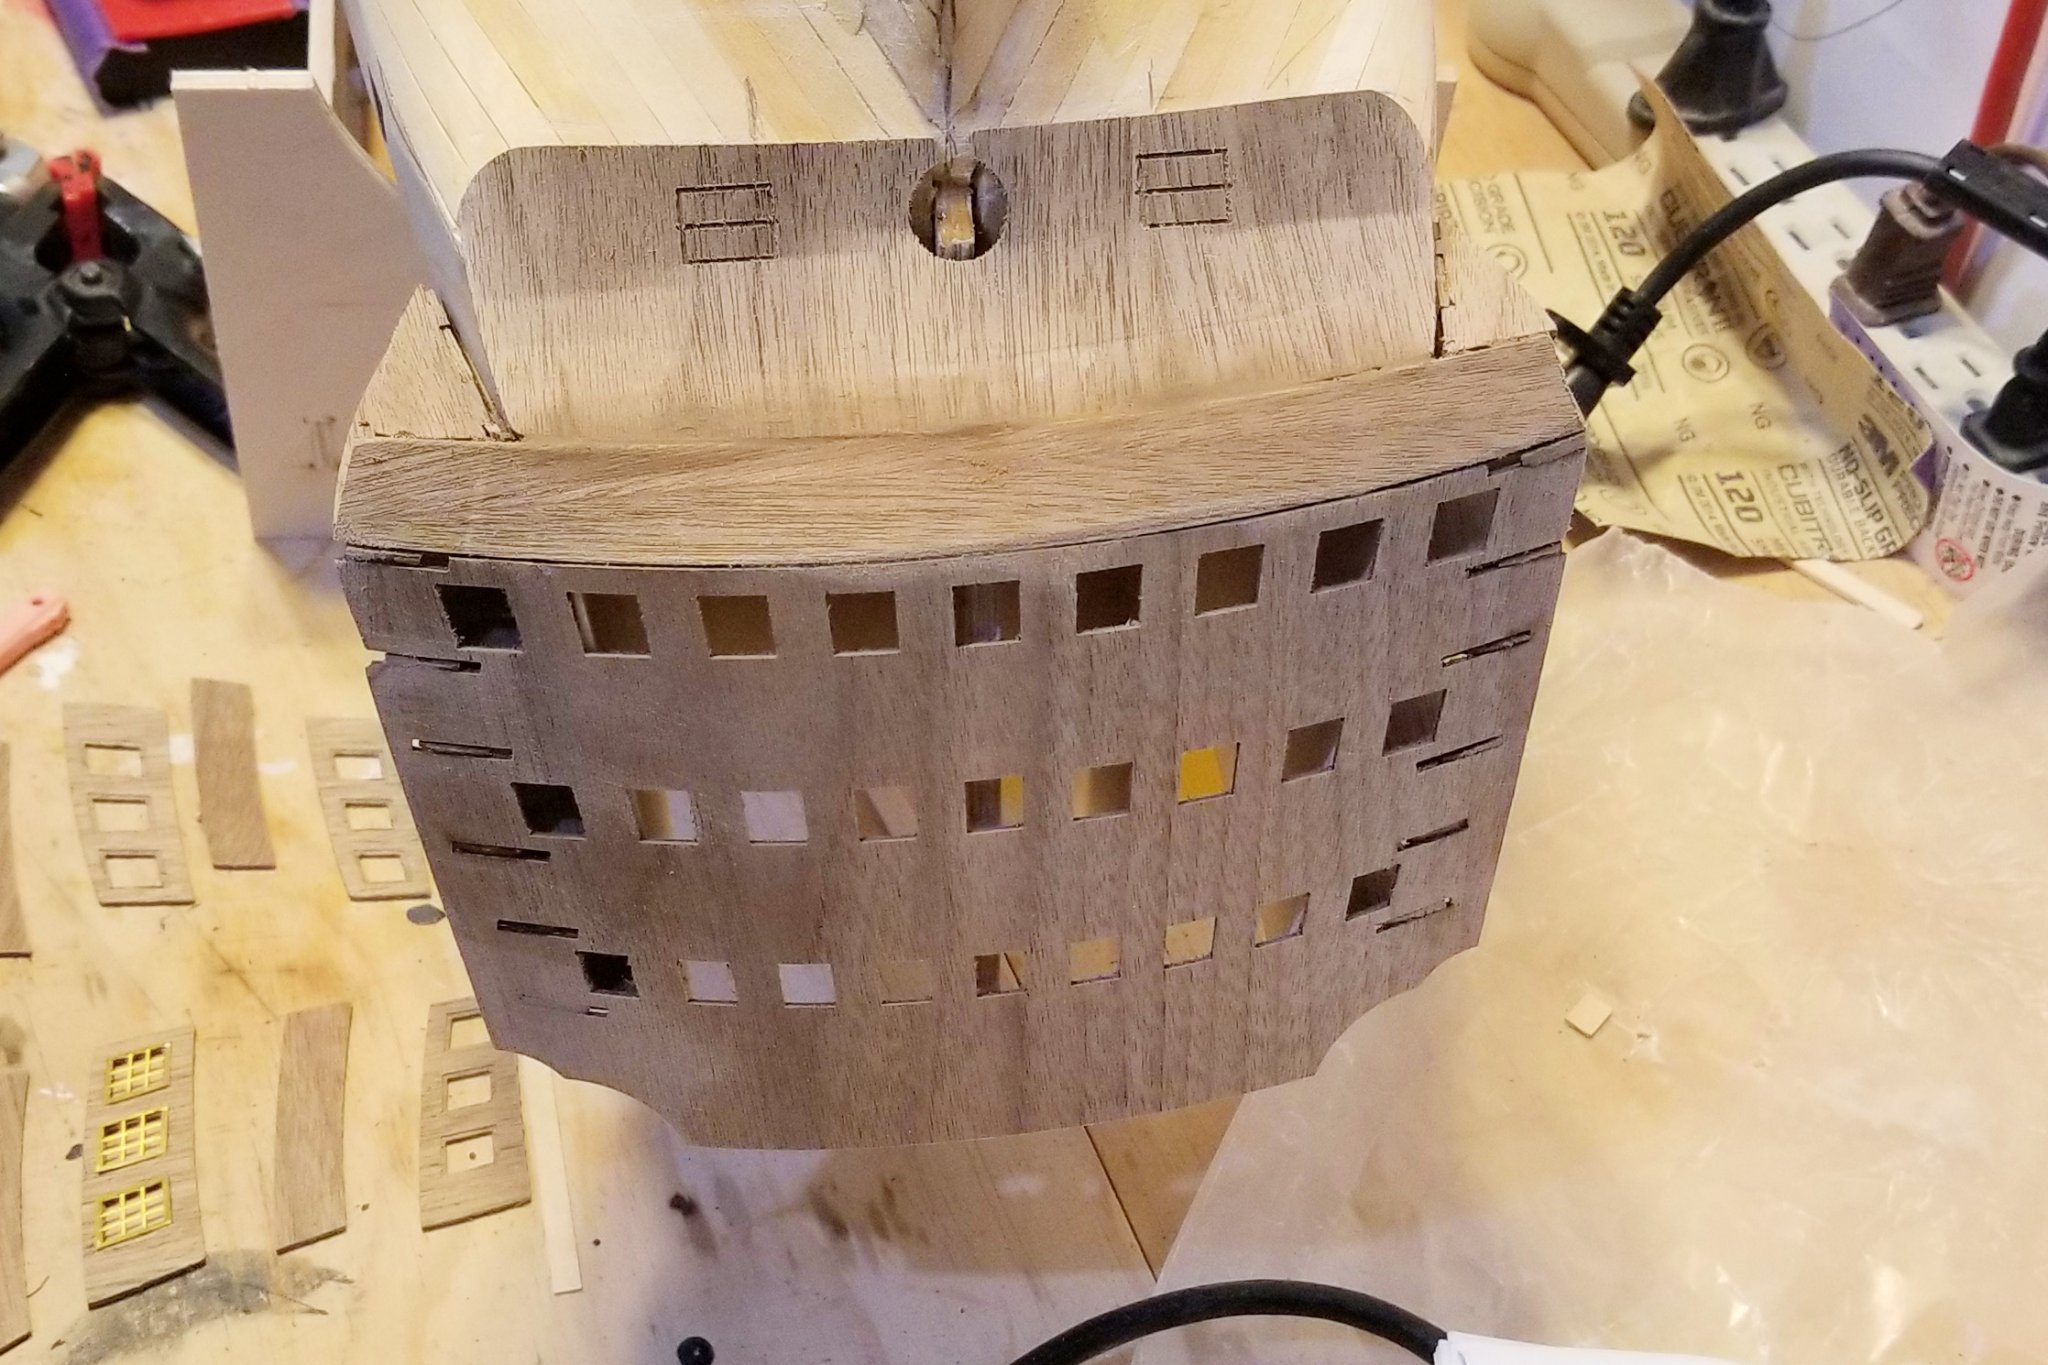
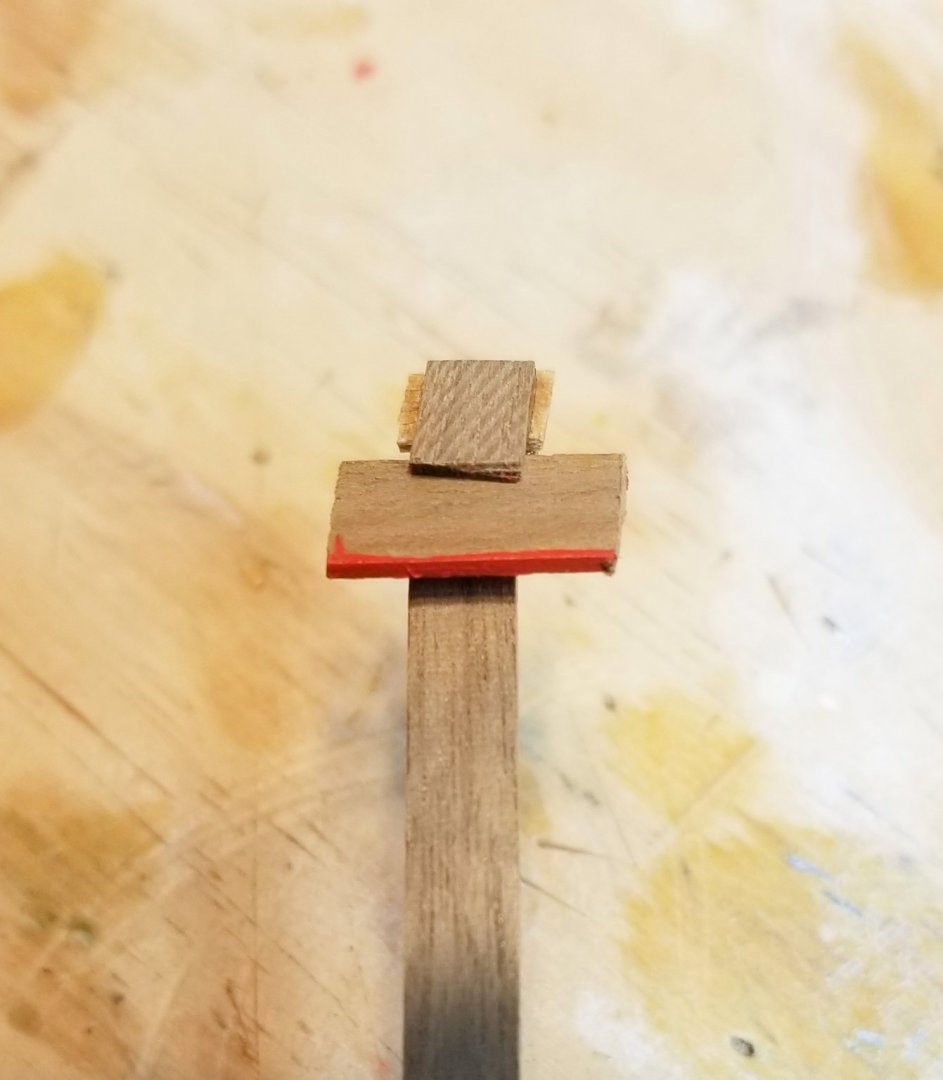
Stern fascia on. The curved lower part took some doing, because it just doesn't want to bend -- even with soaking. I finally scored the rear side about 12 times (the way a mechanical plank bender works) and that helped achieve the curve. Regards, David


- 218 replies
-
- 7
-
-
- Victory
- Caldercraft
- (and 1 more)
-
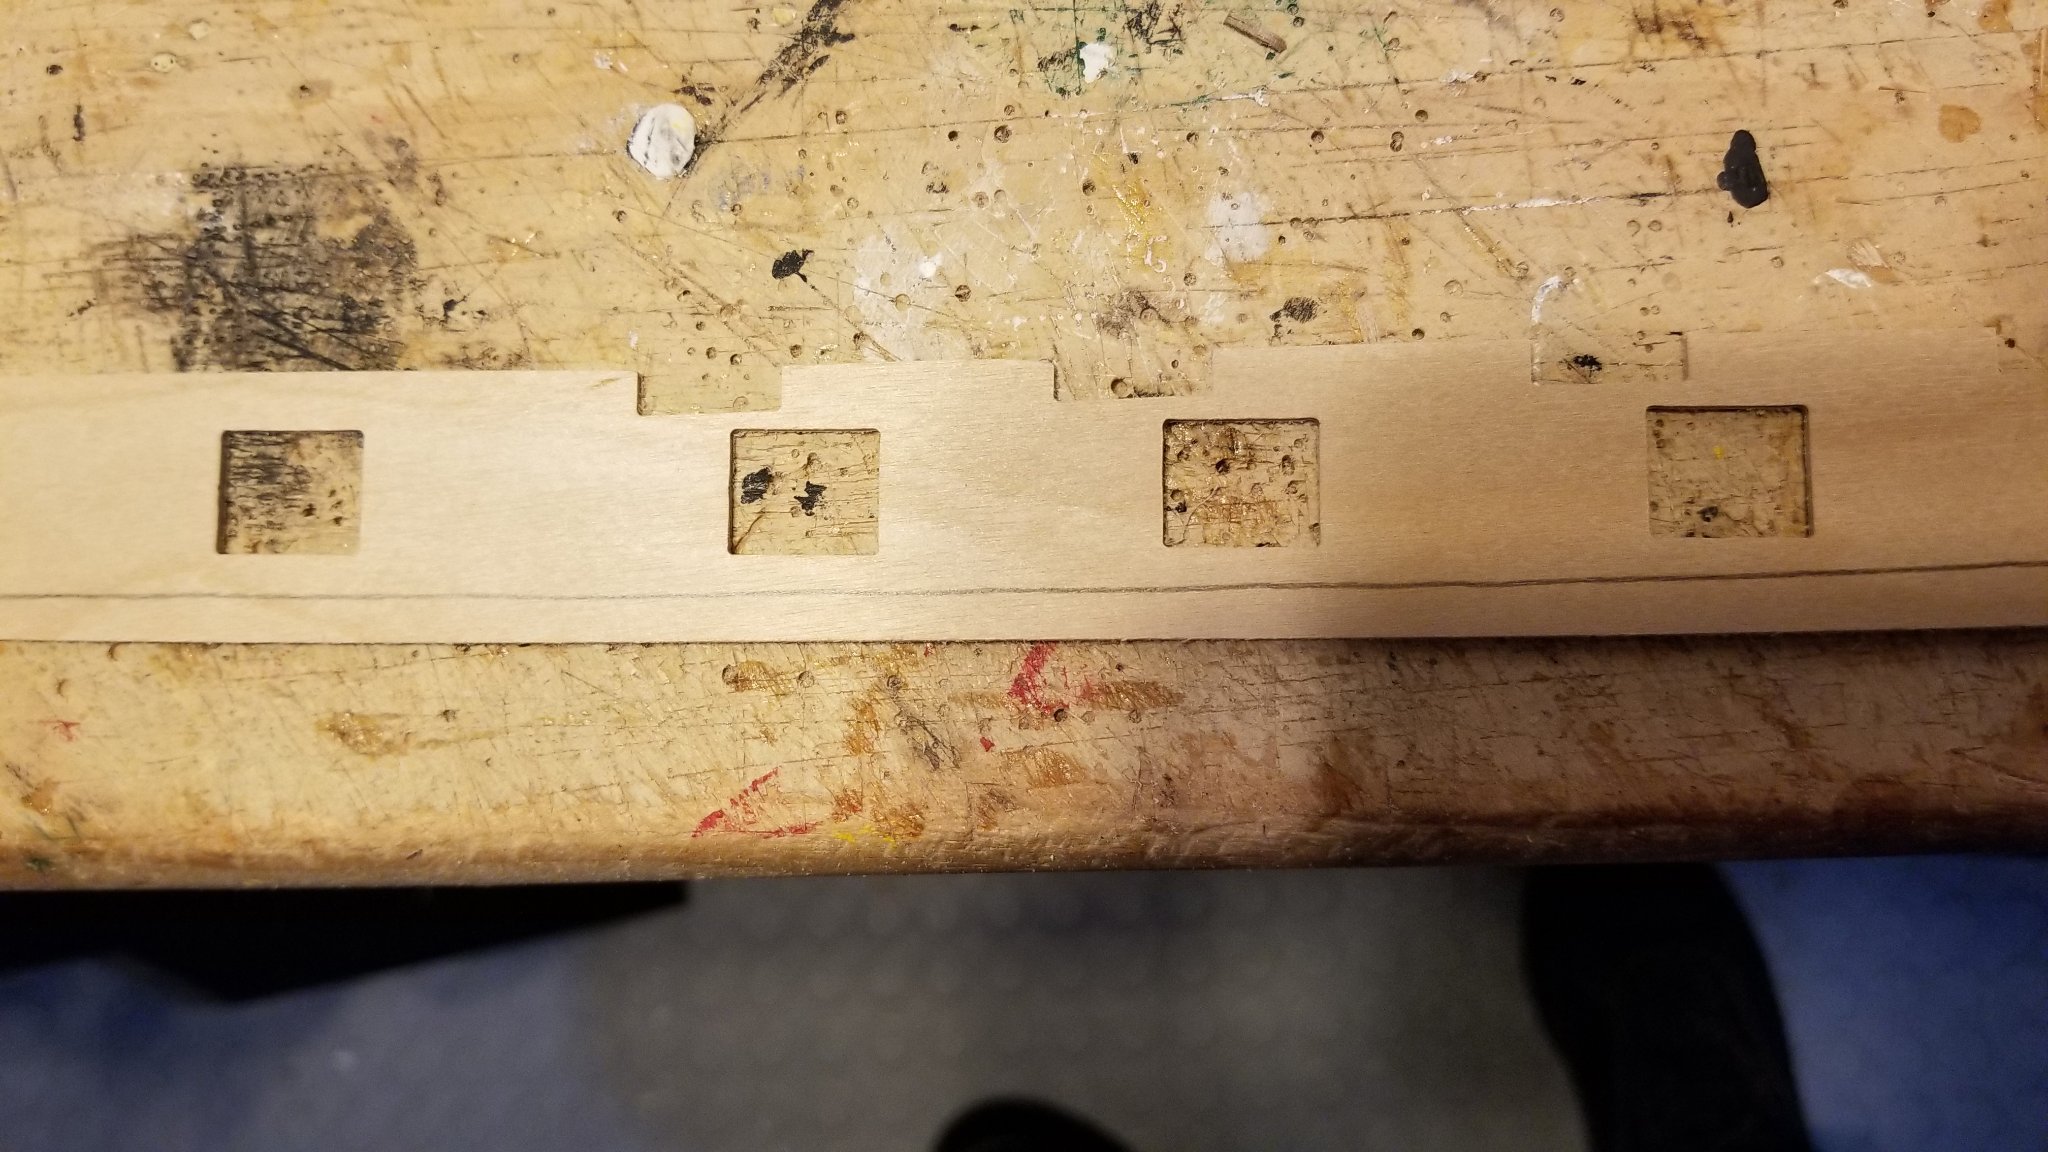
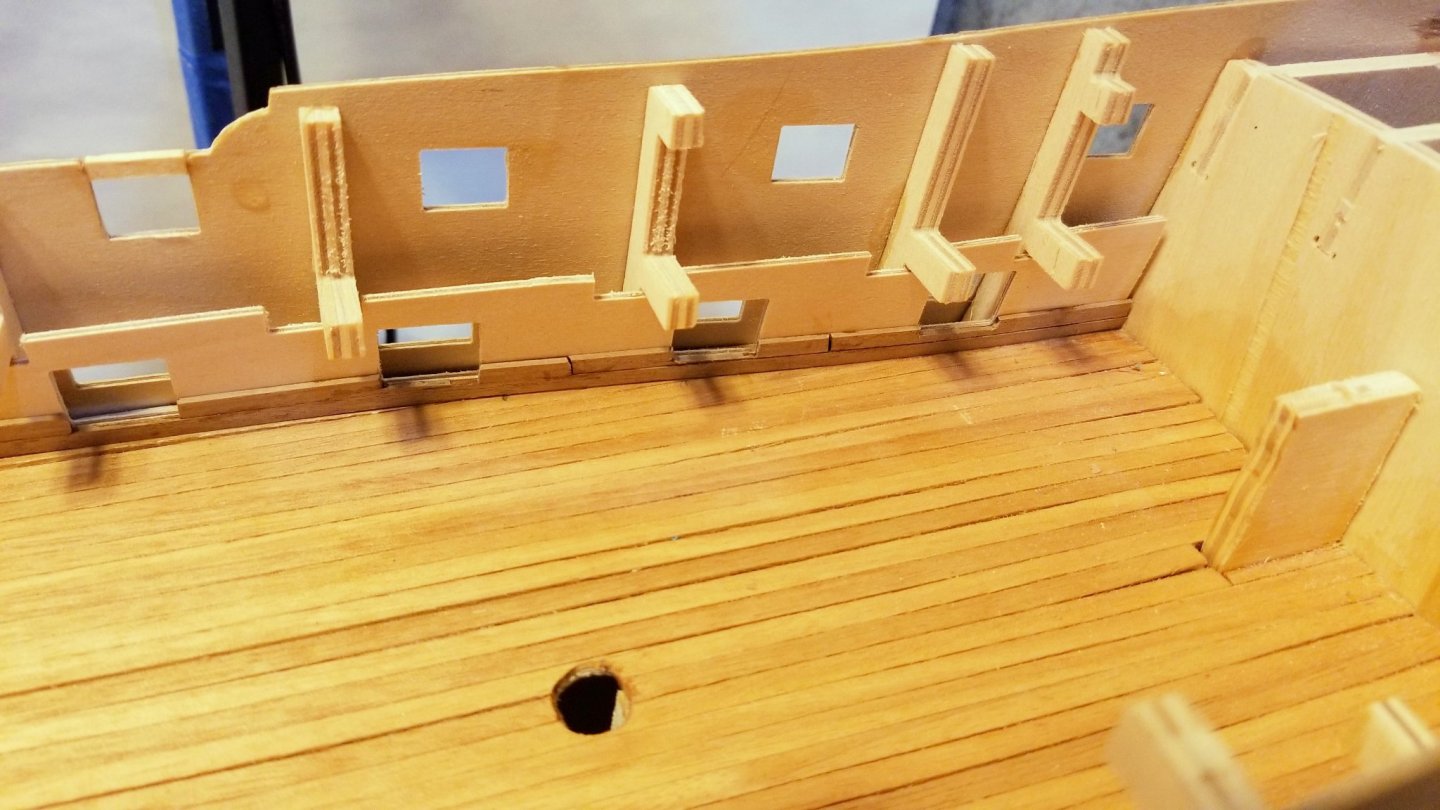
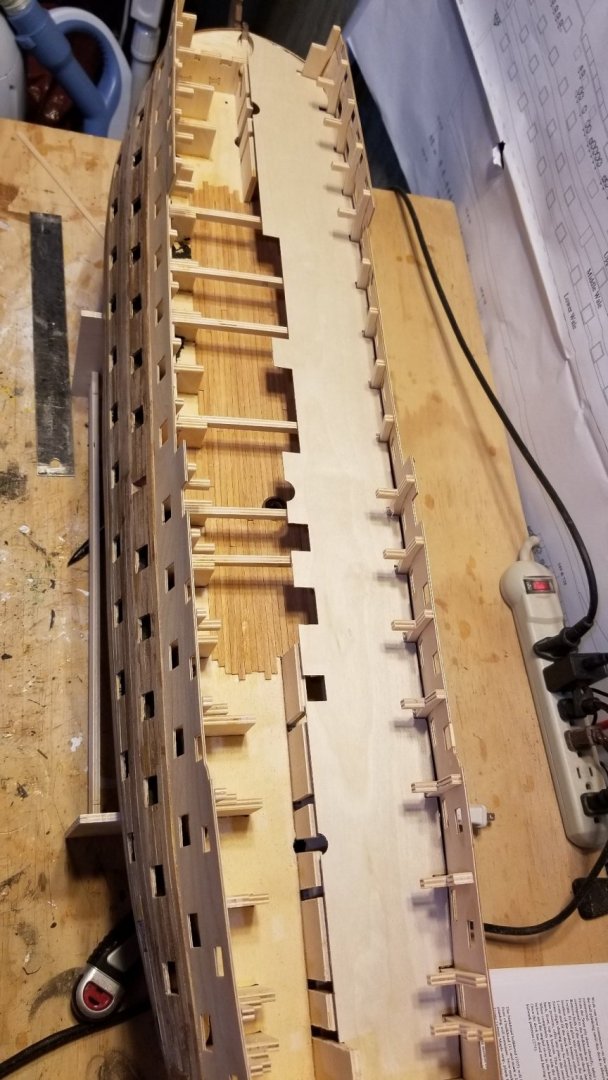
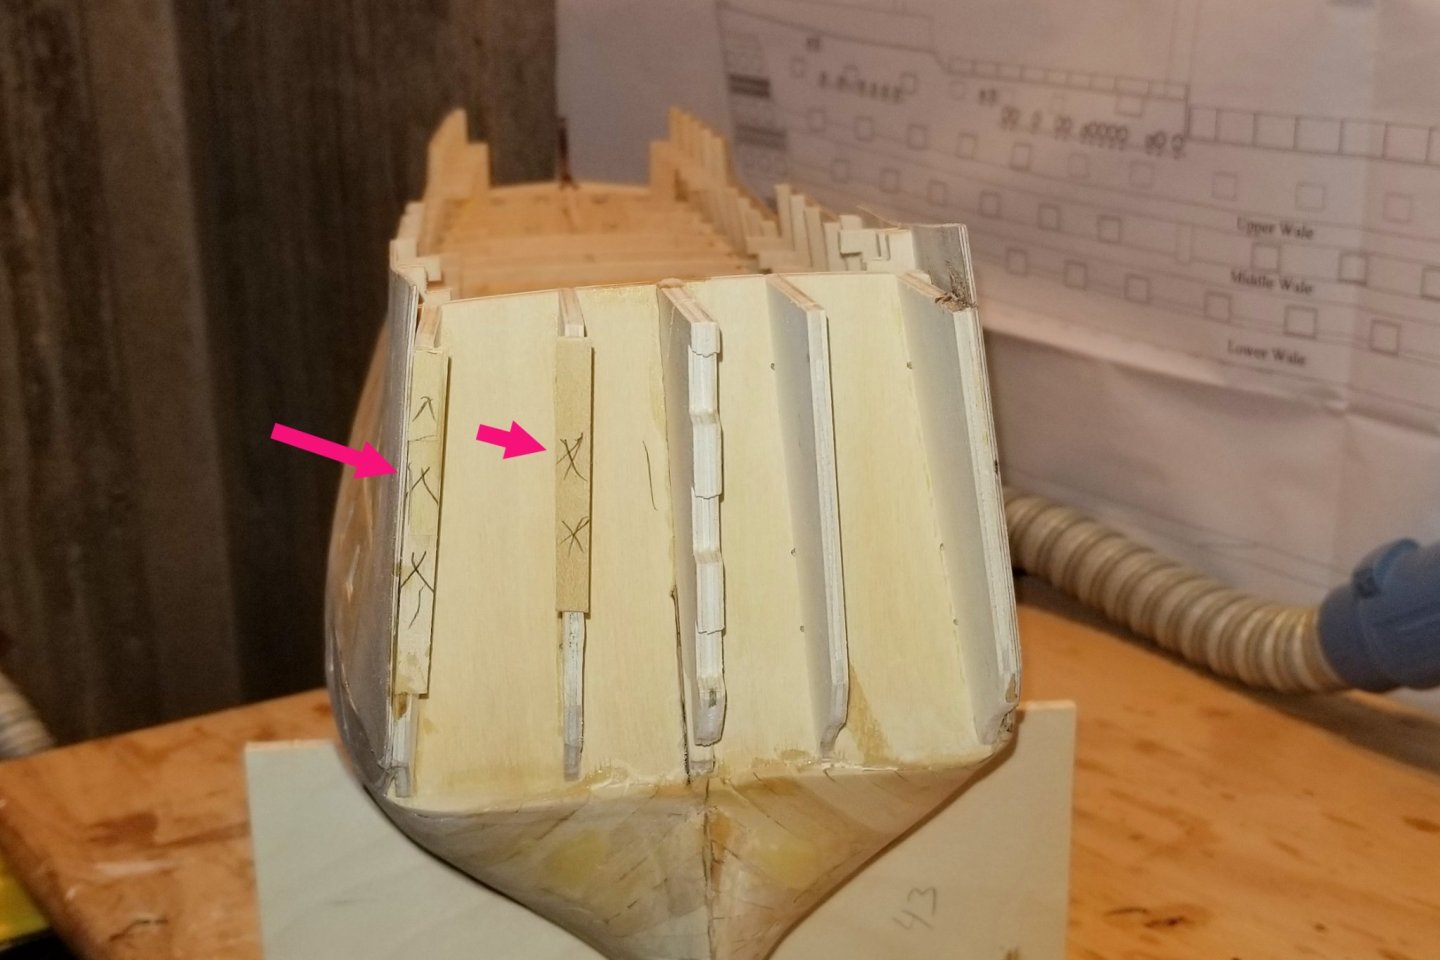
I mentioned in an earlier post that the top gunport pattern extended beyond the leftmost stern-facing bulkhead, and that instead of sanding down the gunport pattern (which would create a misalignment), I planned to shim out the port side bulkheads. The picture below shows that -- the shims are marked with red arrows and I have put asterisks on them. Now when I put the stern template up against the stern, the curve aligns properly on the port side. Regards, David
- 218 replies
-
- 2
-
-
- Victory
- Caldercraft
- (and 1 more)