flying_dutchman2
-
Posts
1,735 -
Joined
-
Last visited
Content Type
Profiles
Forums
Gallery
Events
Everything posted by flying_dutchman2
-
 Plain white printing paper. Marc
 -
Thanks. It is difficult to get straight lines but then if I fold them correctly you may not see that. Kurt mentioned that if I keep practicing they will get better over time. That is why I made several this time. Some people air brush the flags, I can't figure out how they do that. Speaking of airbrushing, Kurt gave a workshop on that. Are you getting the pdf's on that? What ever you need, let me know. Marc
-
3D Printing - Not Just Yet!
flying_dutchman2 replied to dvm27's topic in CAD and 3D Modelling/Drafting Plans with Software
I know it is not naval related but still amazing. Here is something from the University of Southern California which is testing a giant 3D printer that could be used to build a whole house in under 24 hours. http://innovation.uk.msn.com/design/the-3d-printer-that-can-build-a-house-in-24-hours Just think in a couple of years 3D printers will build boats, cars, etc. Marc -
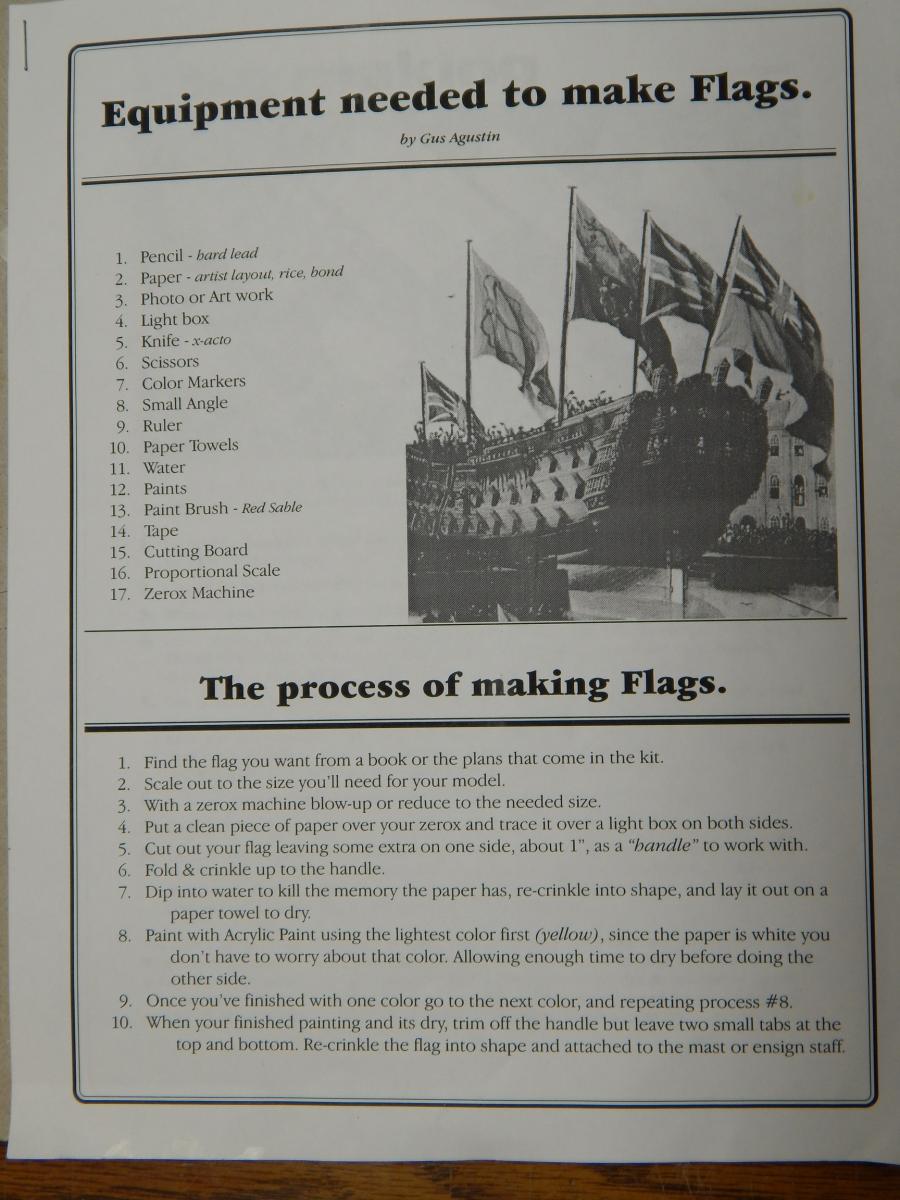
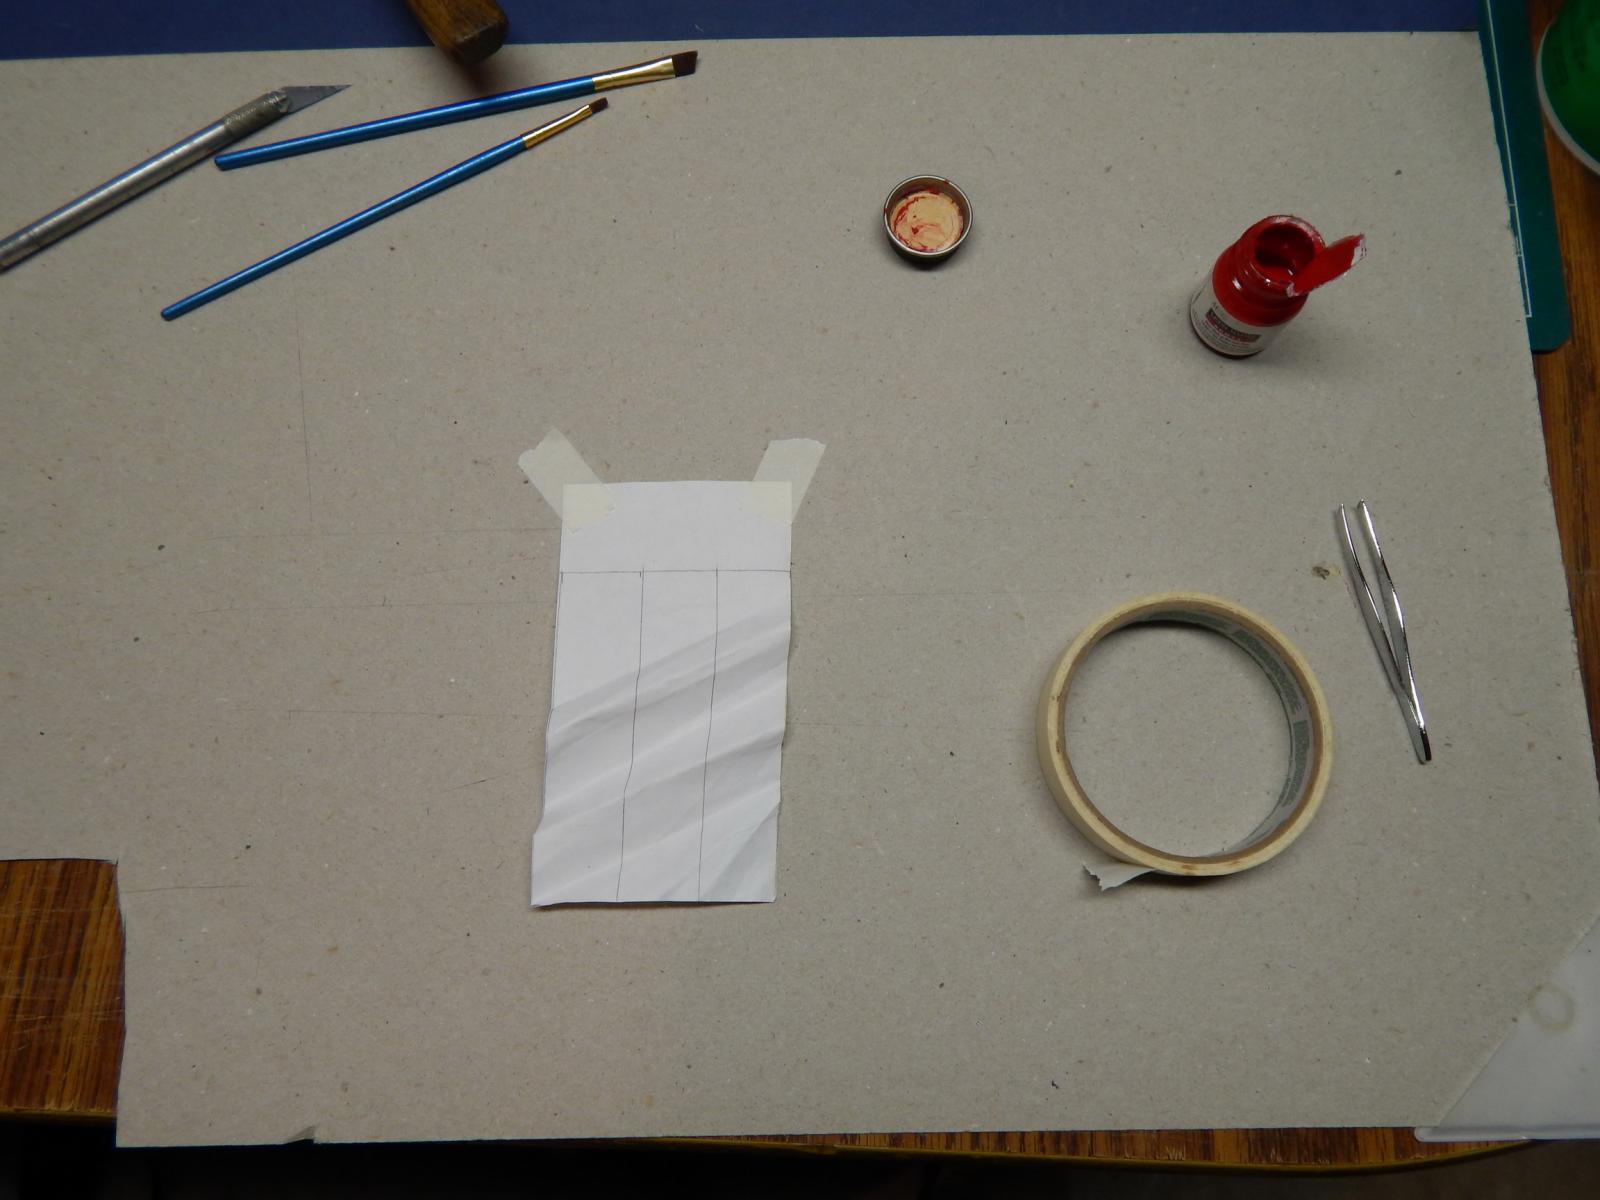
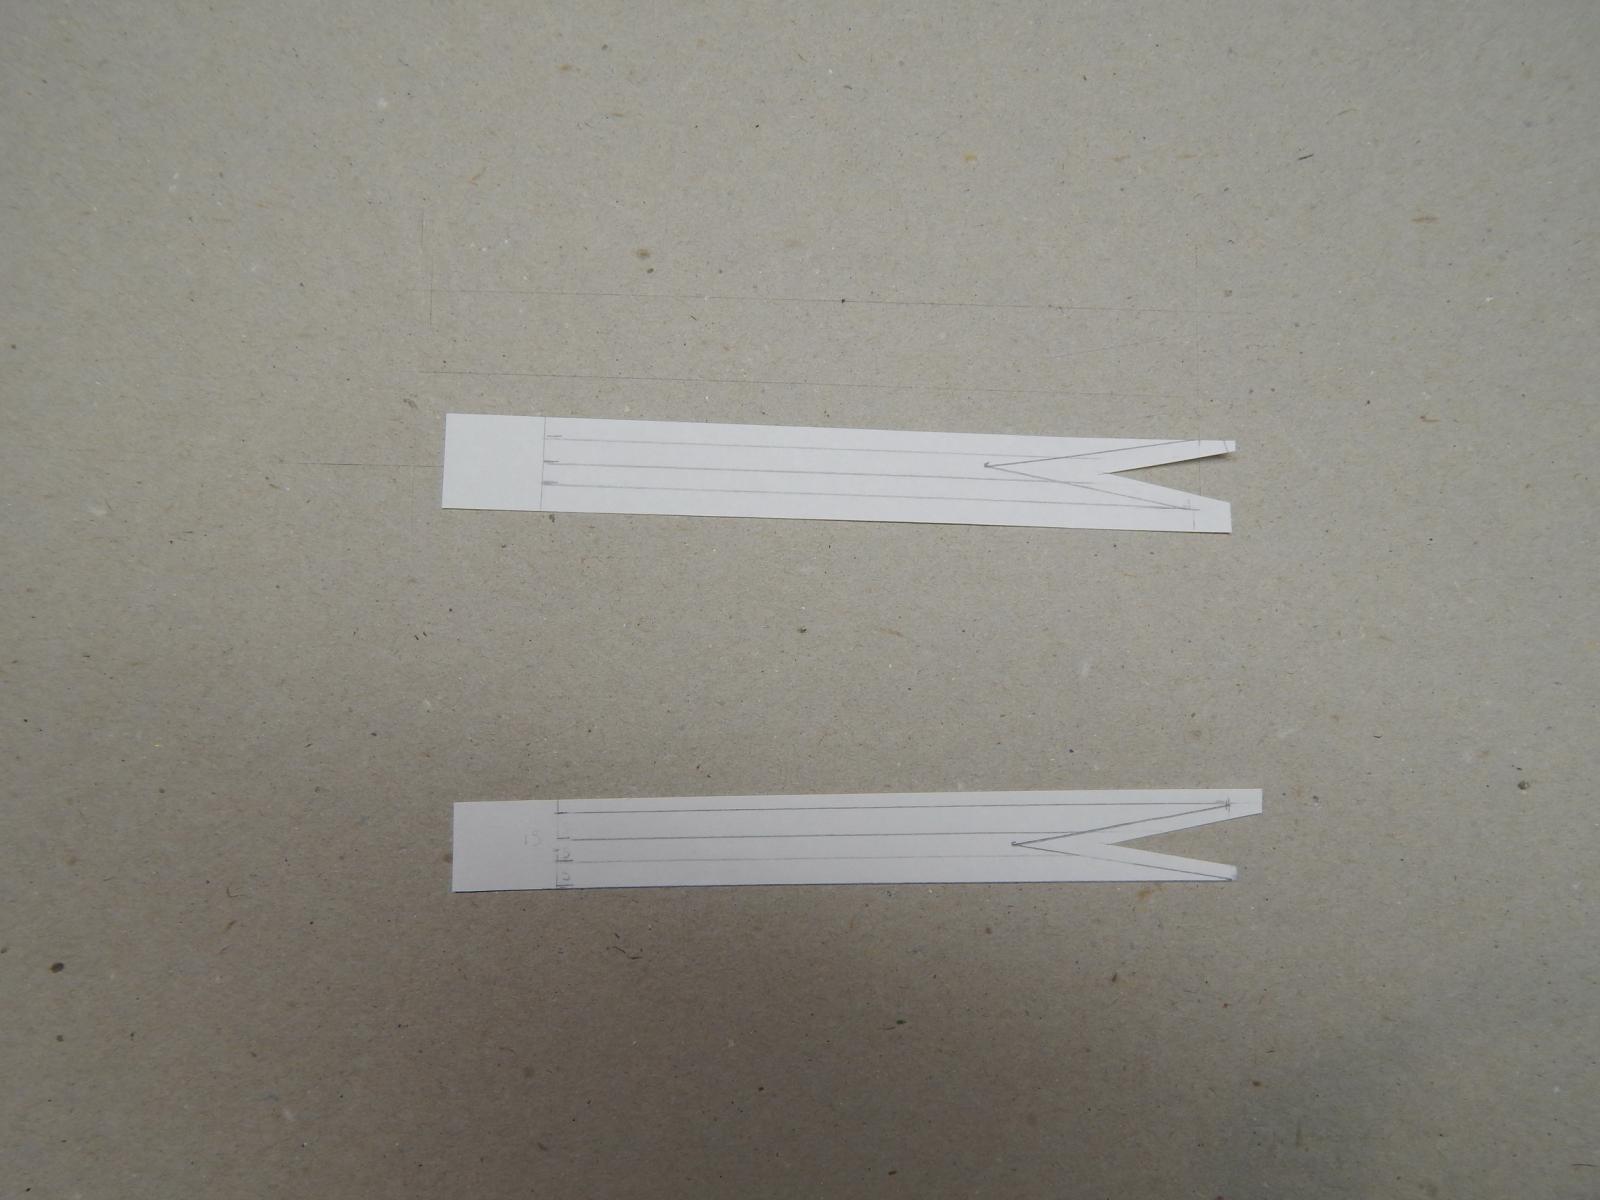
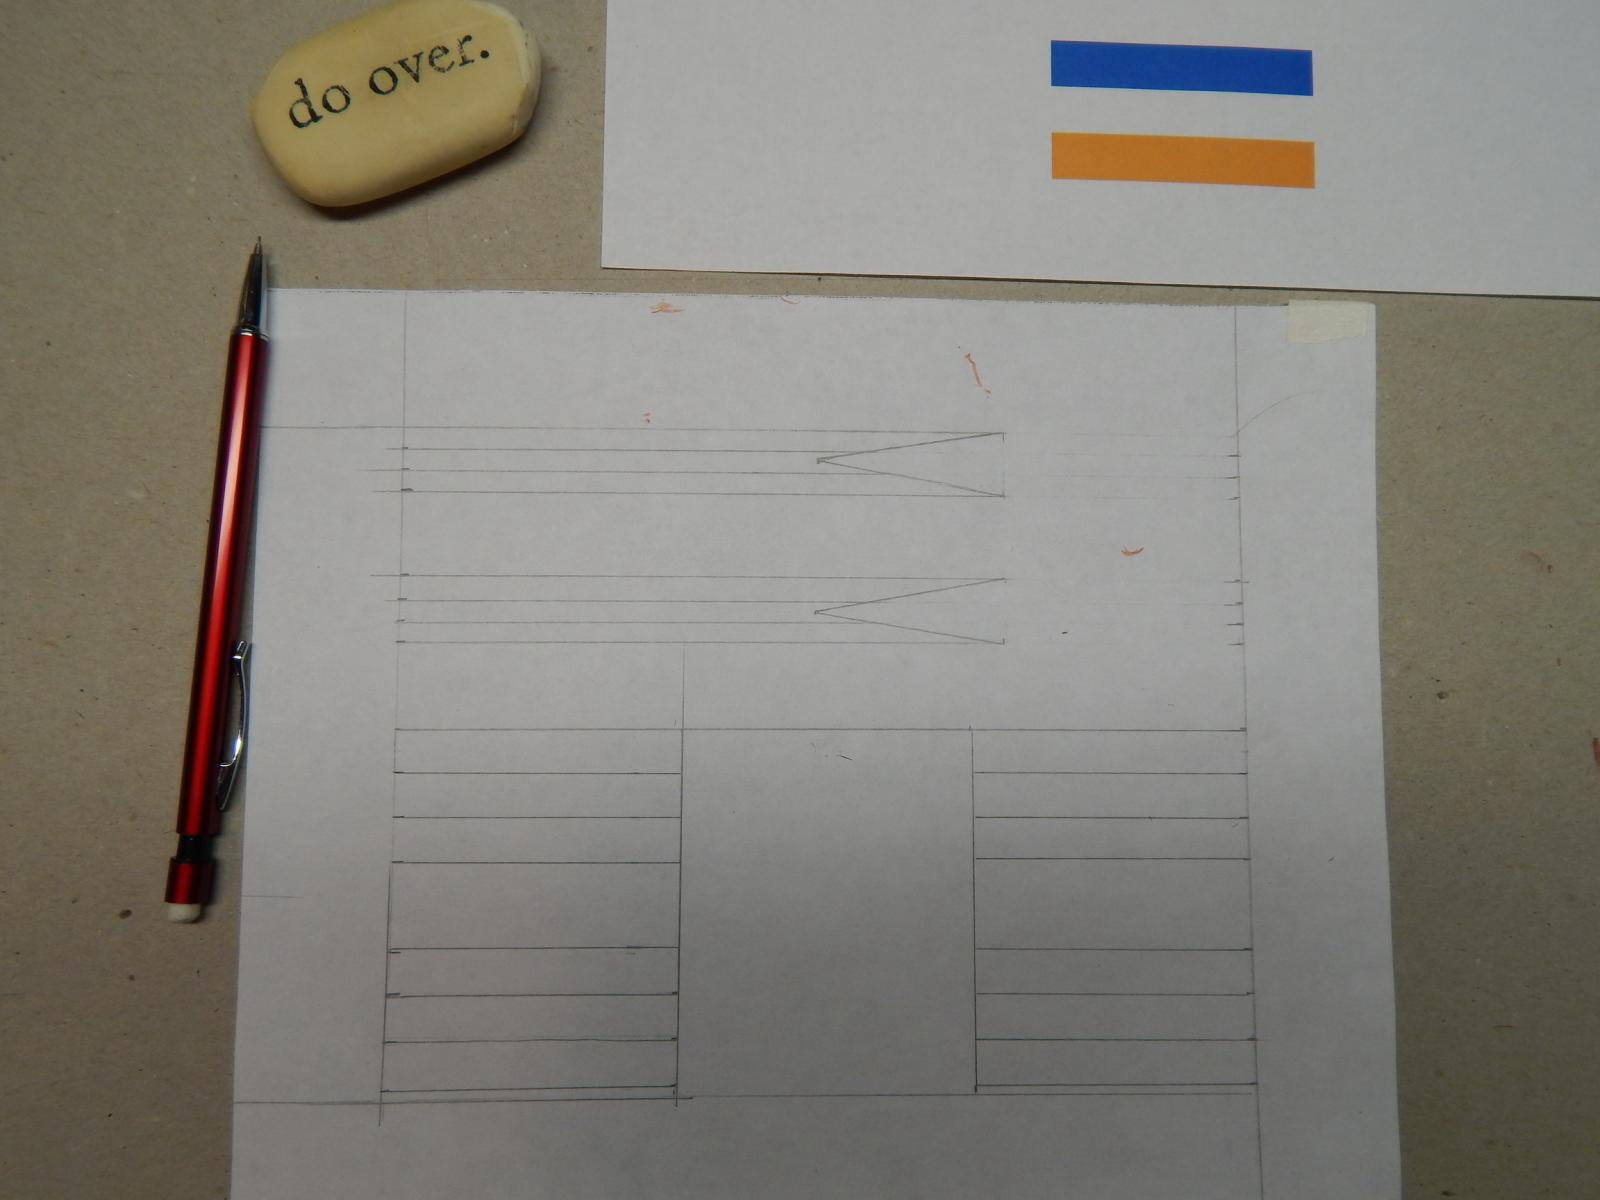
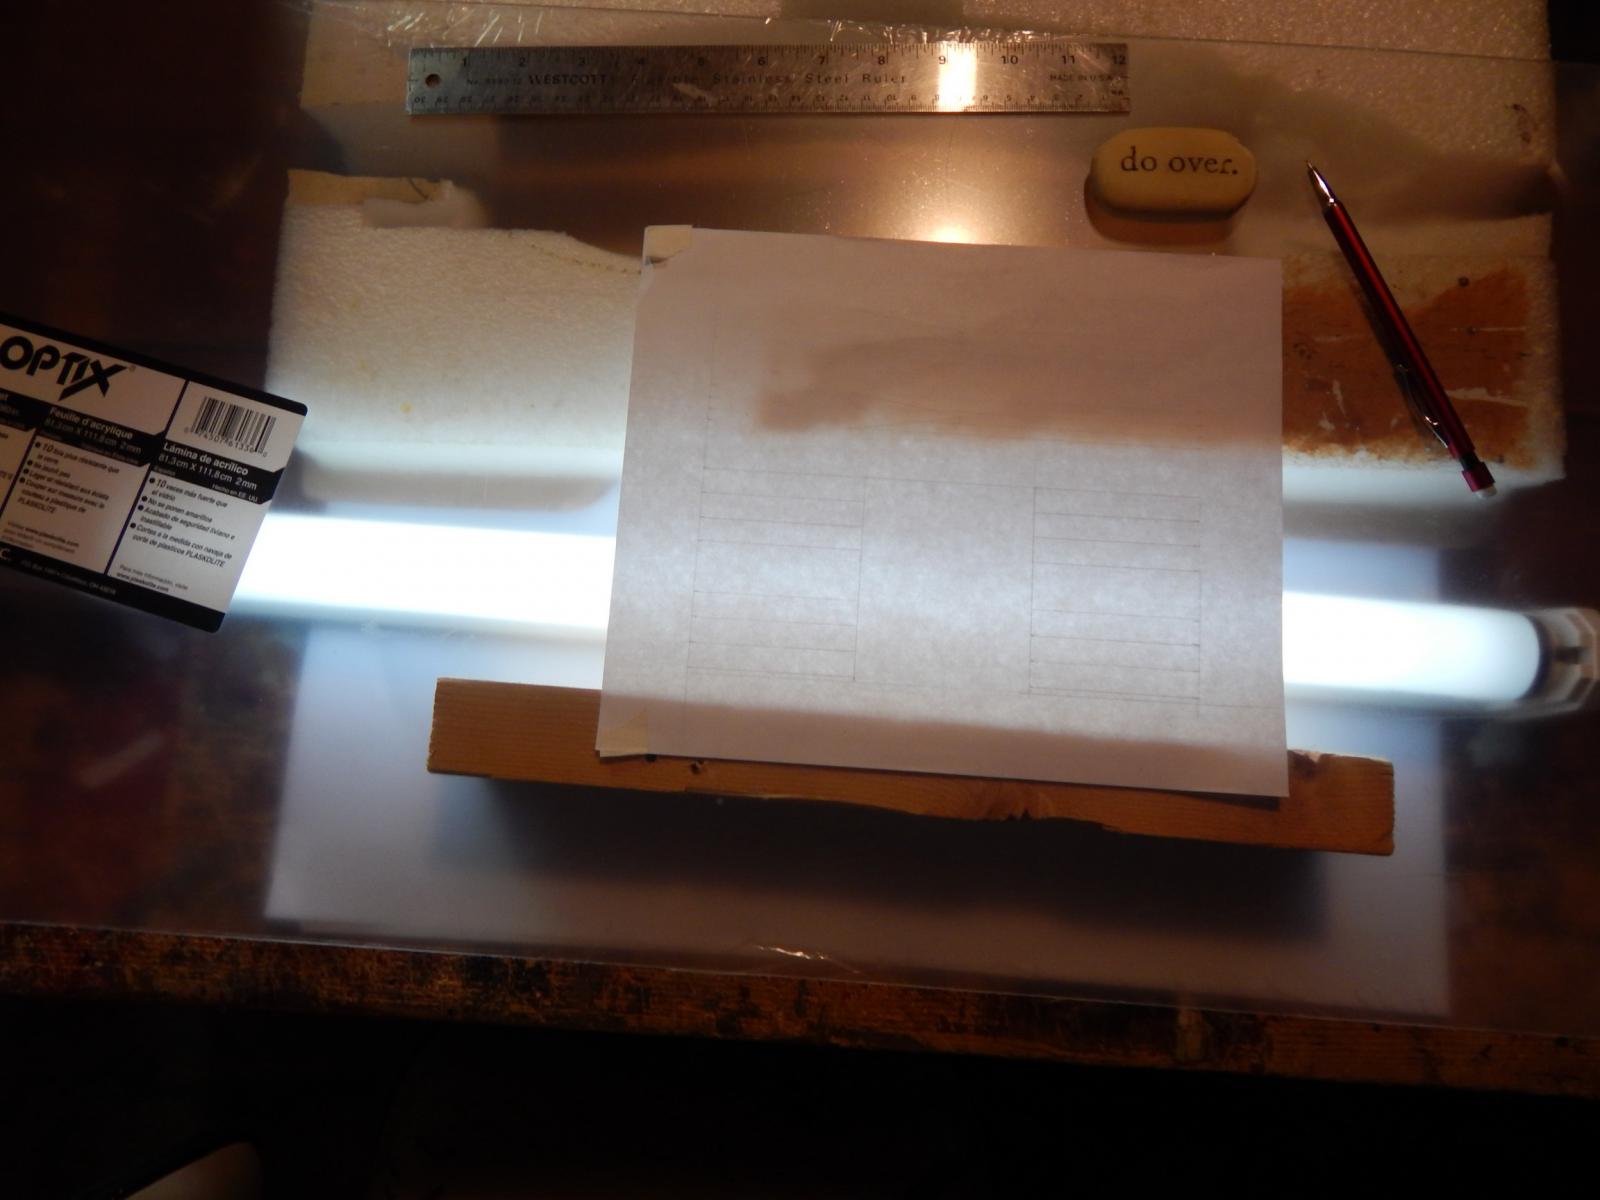
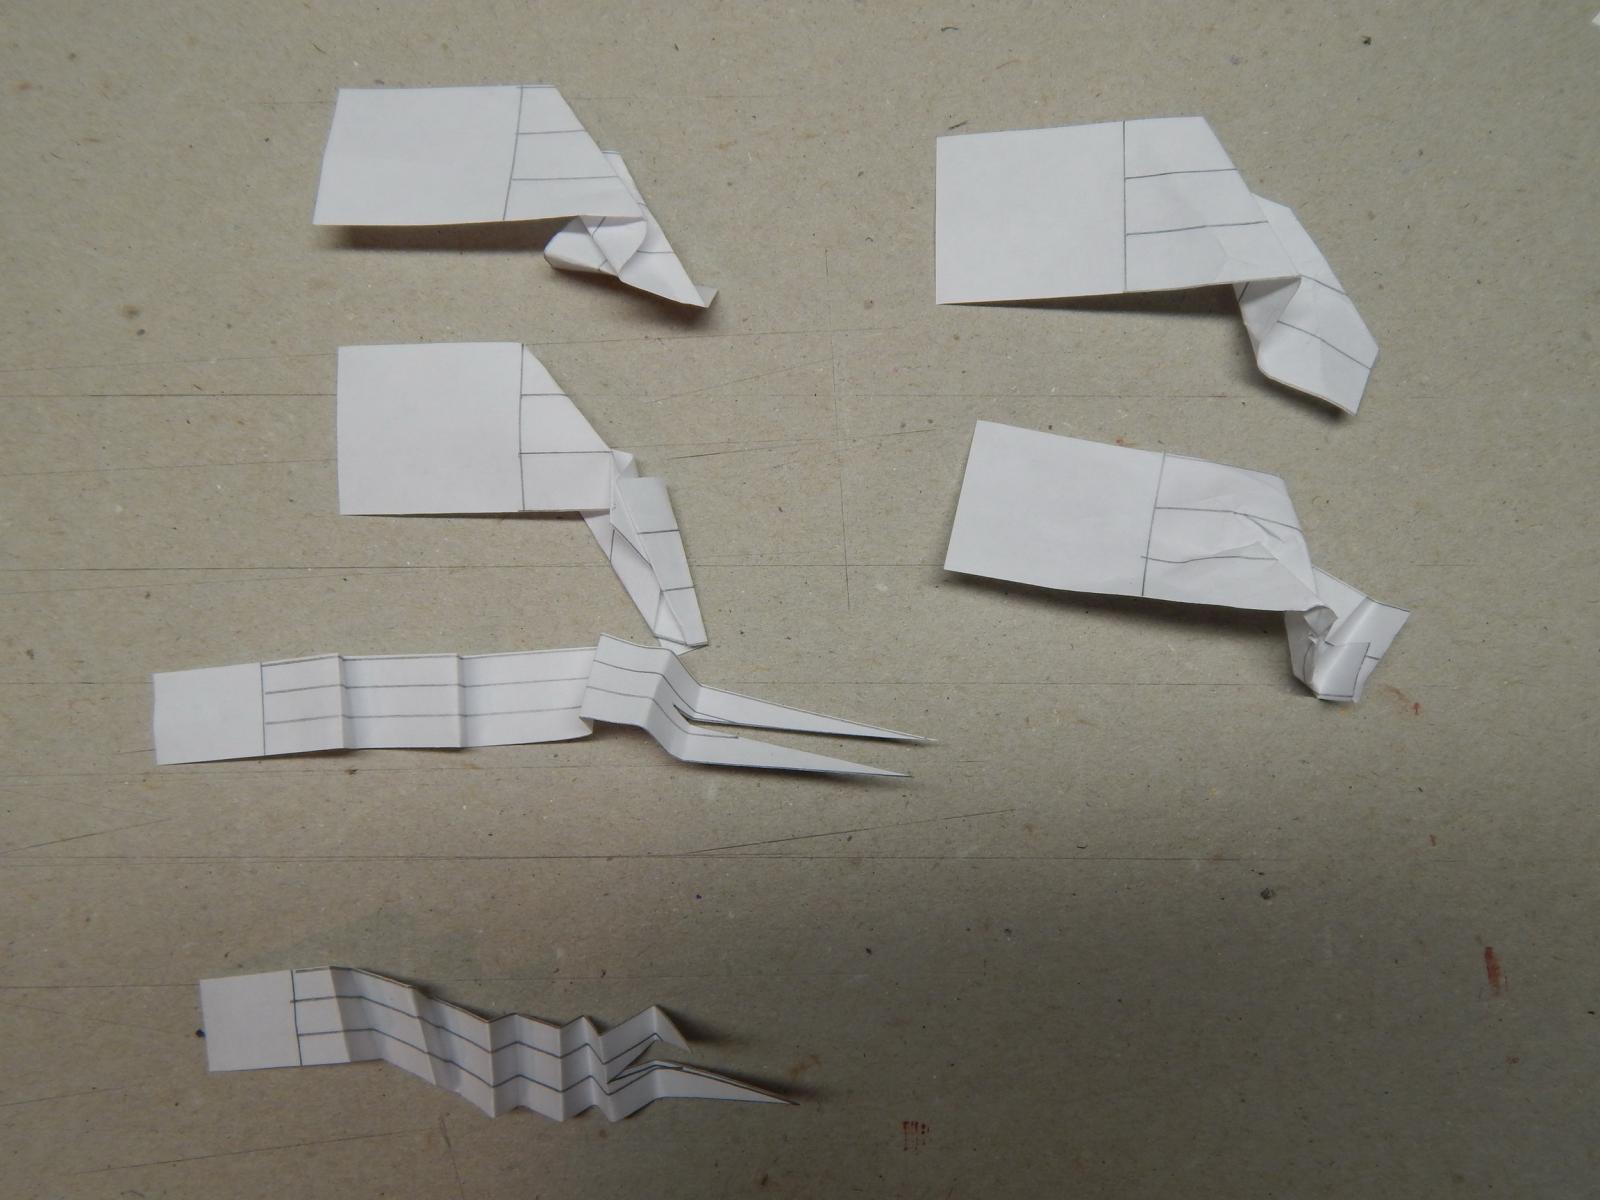
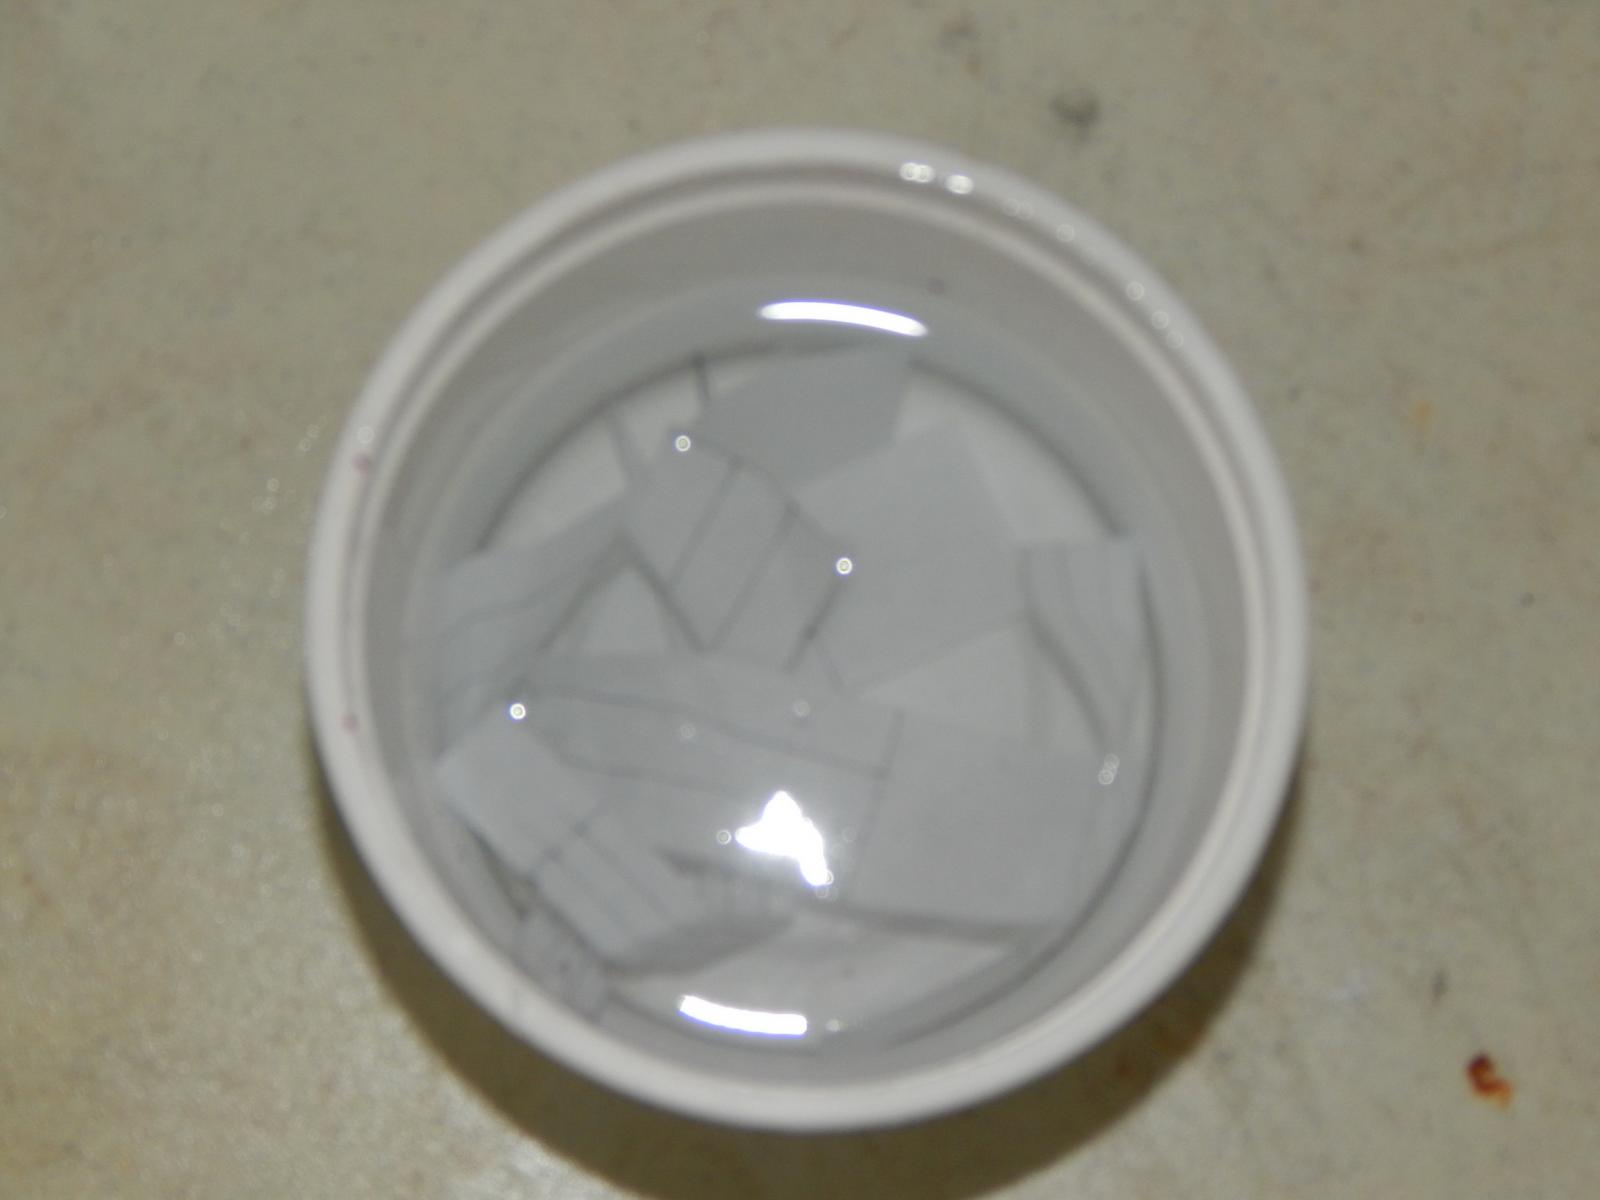
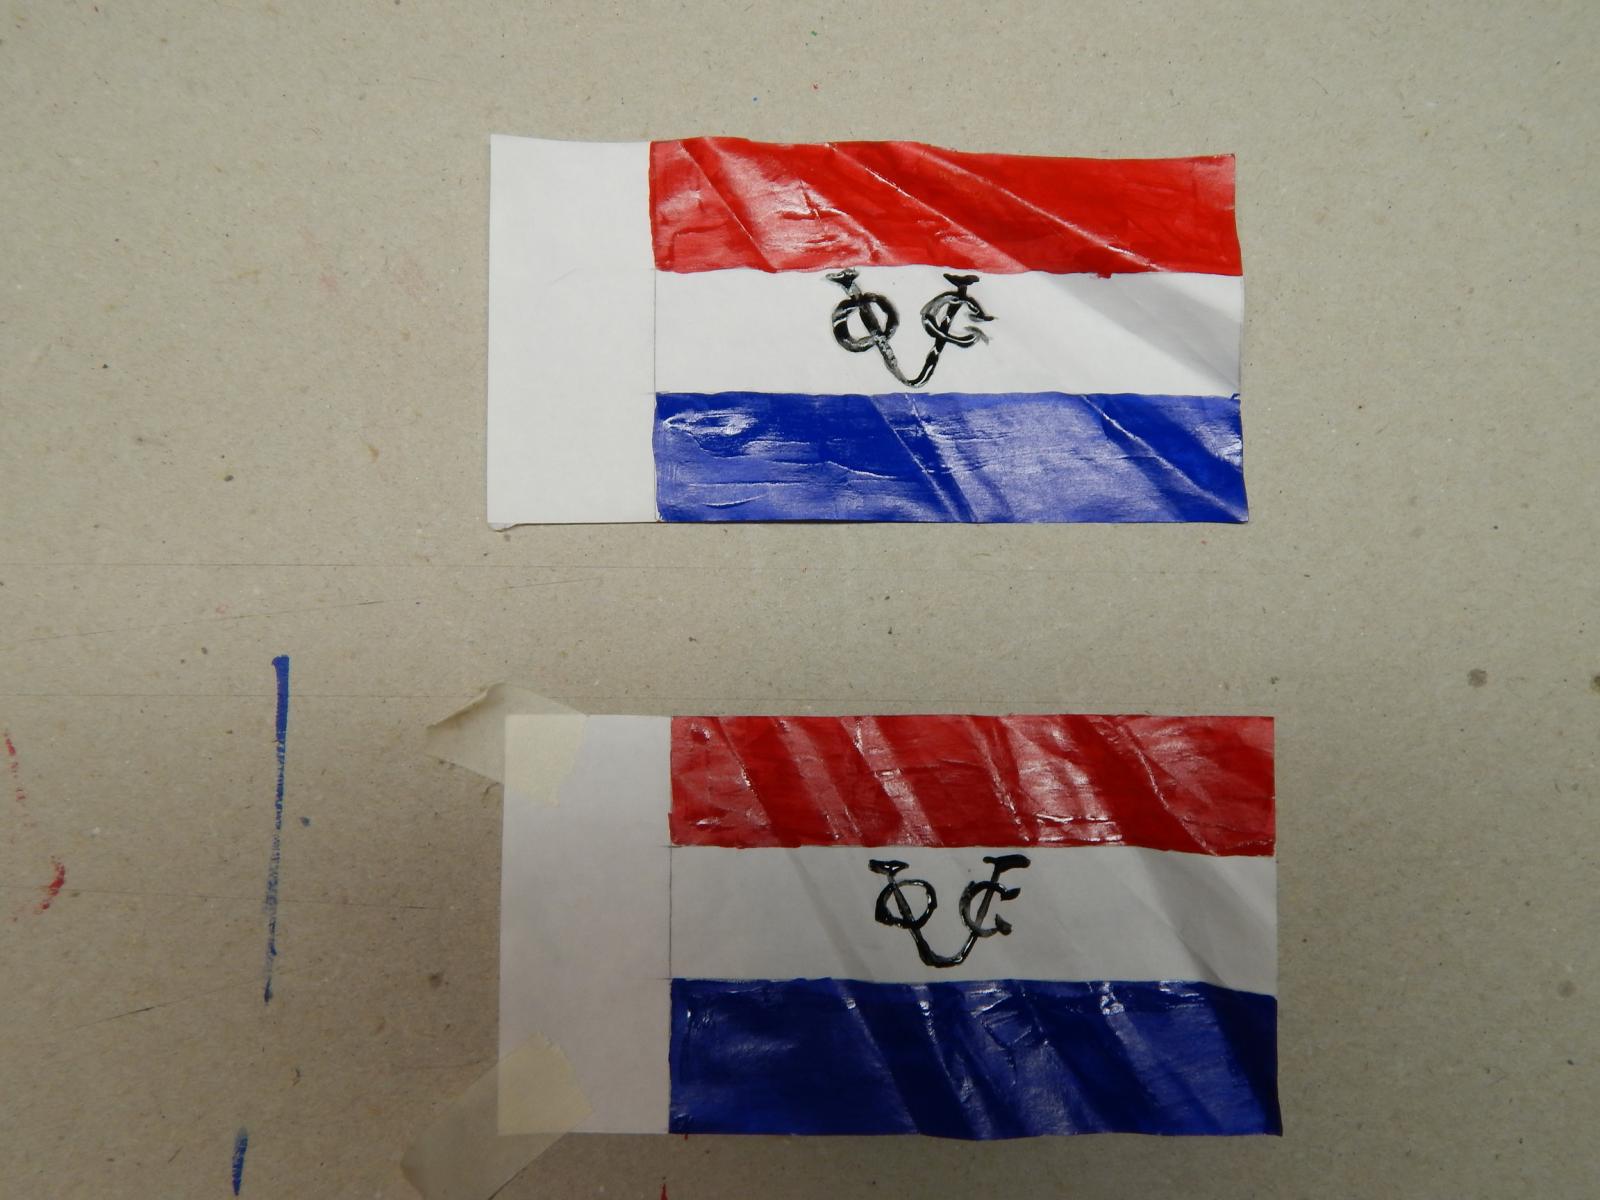
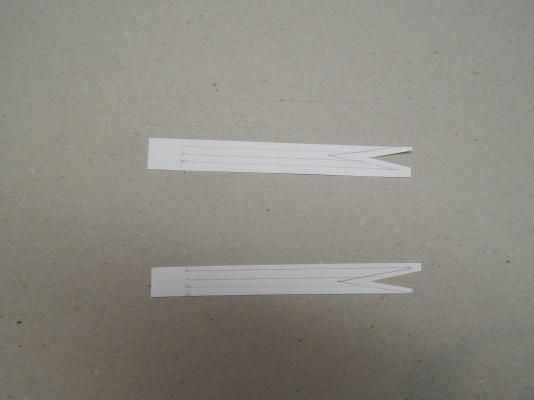
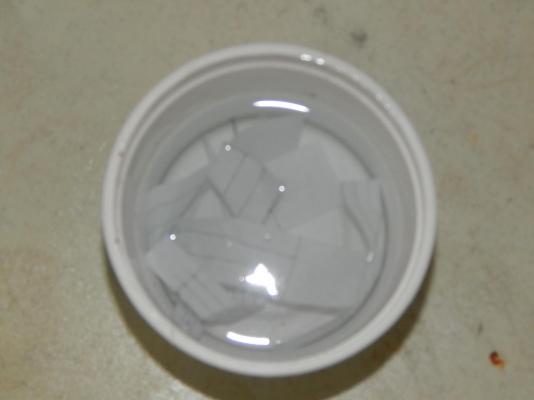
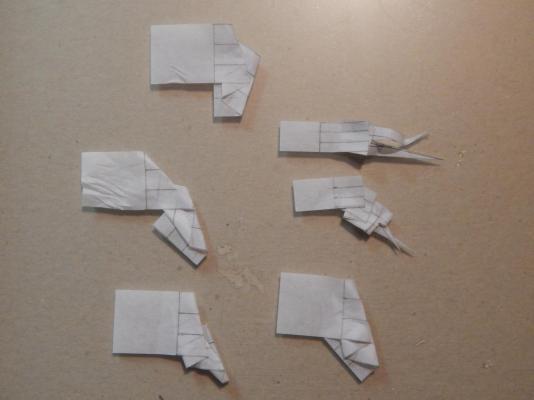
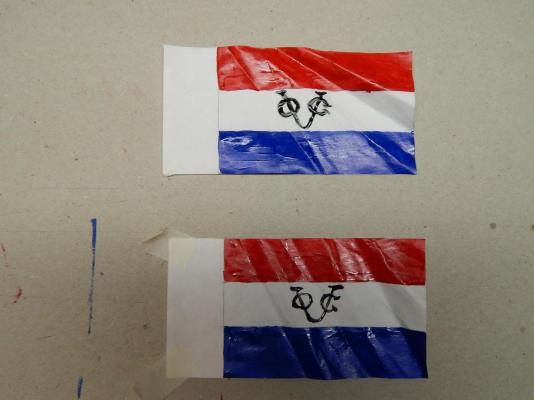
This time I decided to omit the flags that come with the kits because, a. - they are one sided print and b. - they never fall correctly. I am doing it from a handout from Gus Augustin - Equipment needed to make flags. You make them from paper, fold them, wet them to take memory out, paint them with acrylic, fold them and you have a flag. I make more than one so I can chose the best one and as the brochure says, it is cheap as you use paper and you get better at making them over time. The brochure Drawing the flags. Using a light table jig to draw the other side of the flag. Folding the flags Soaking them in water. Folding the flags after the water and drying. Ready to paint. Finished flag.


- 85 replies
-
- 3
-

-
- yacht mary
- mamoli
- (and 1 more)
-
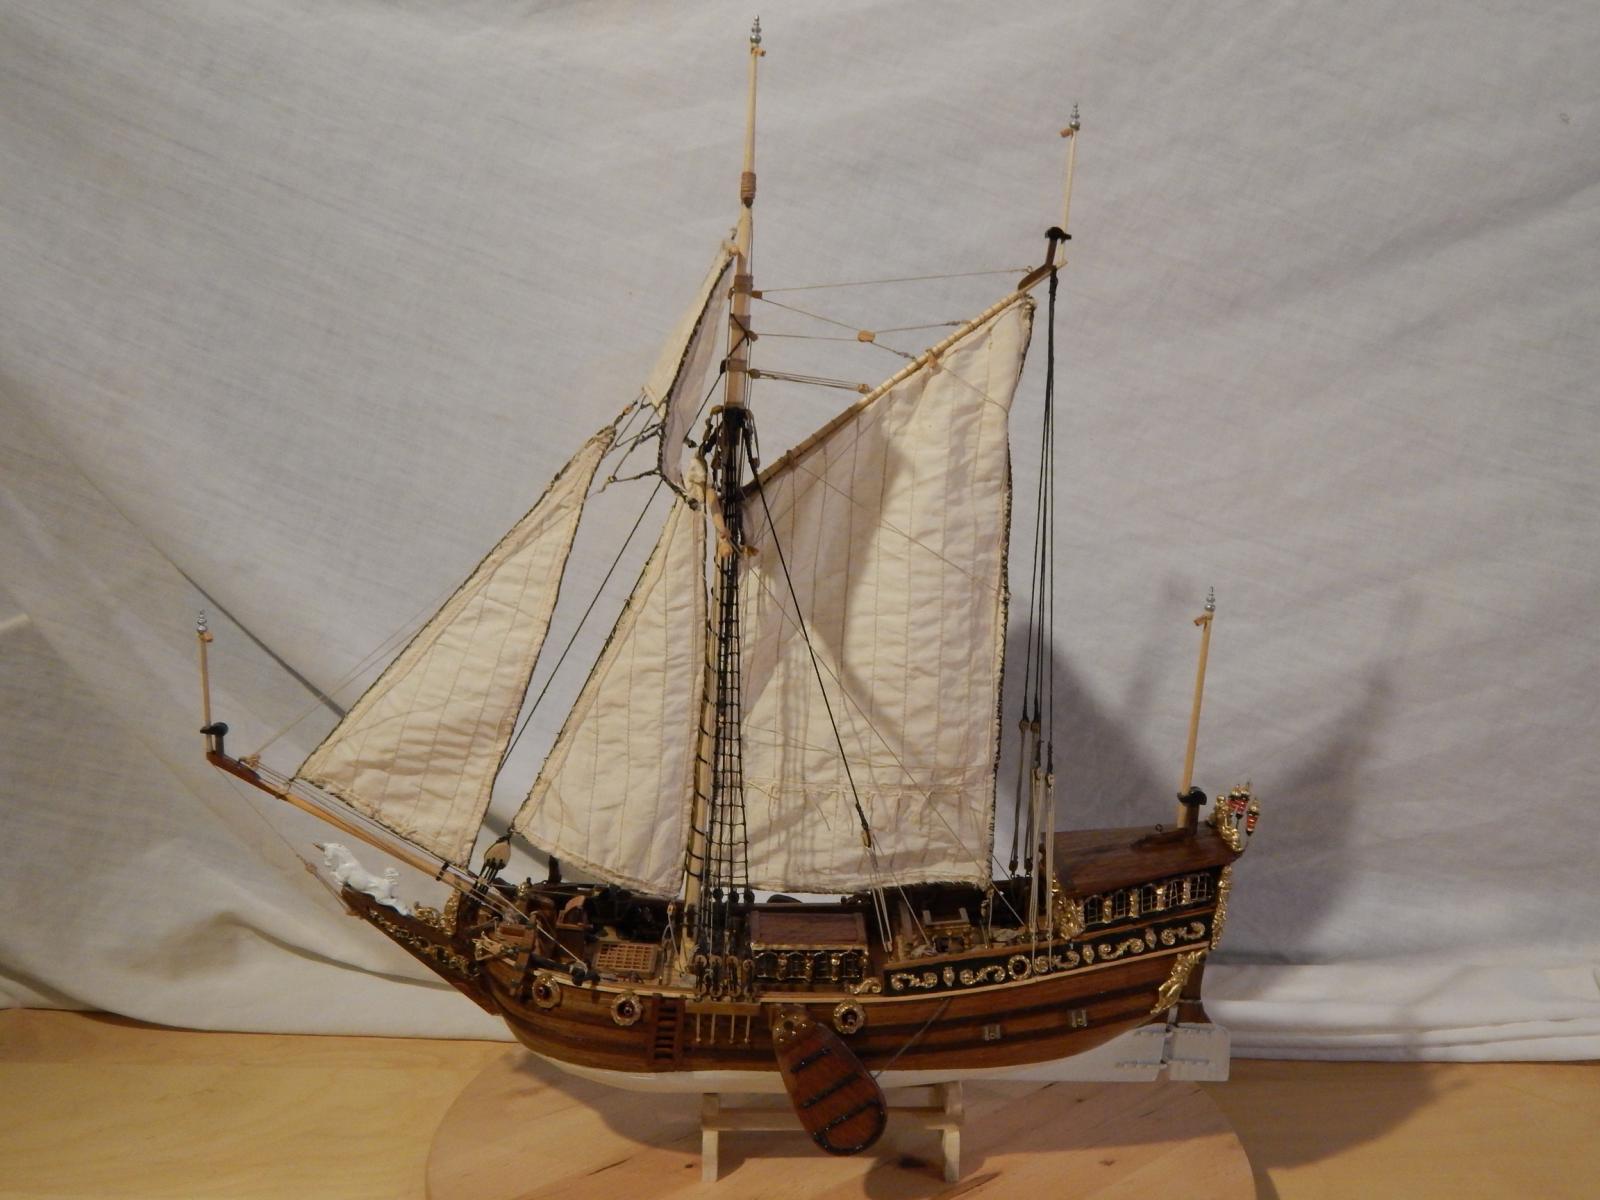
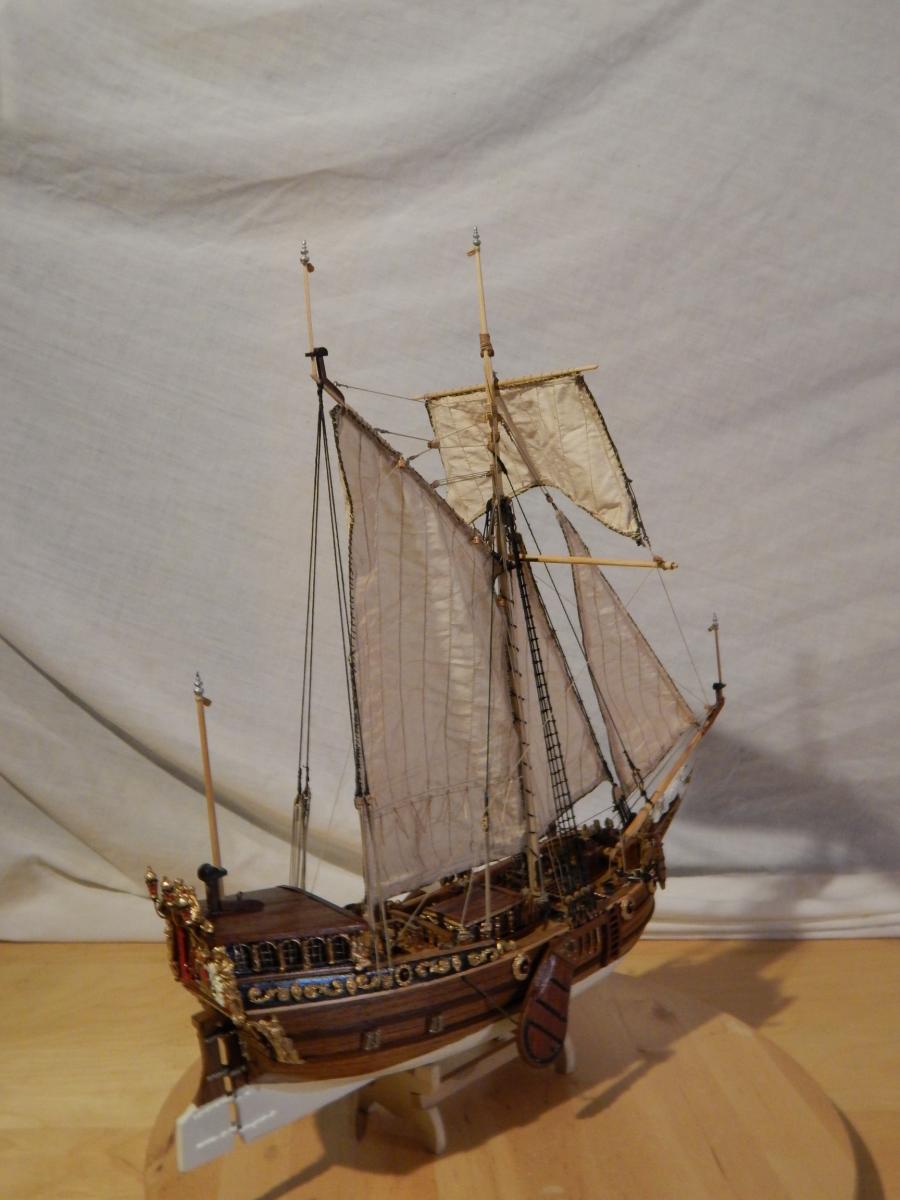
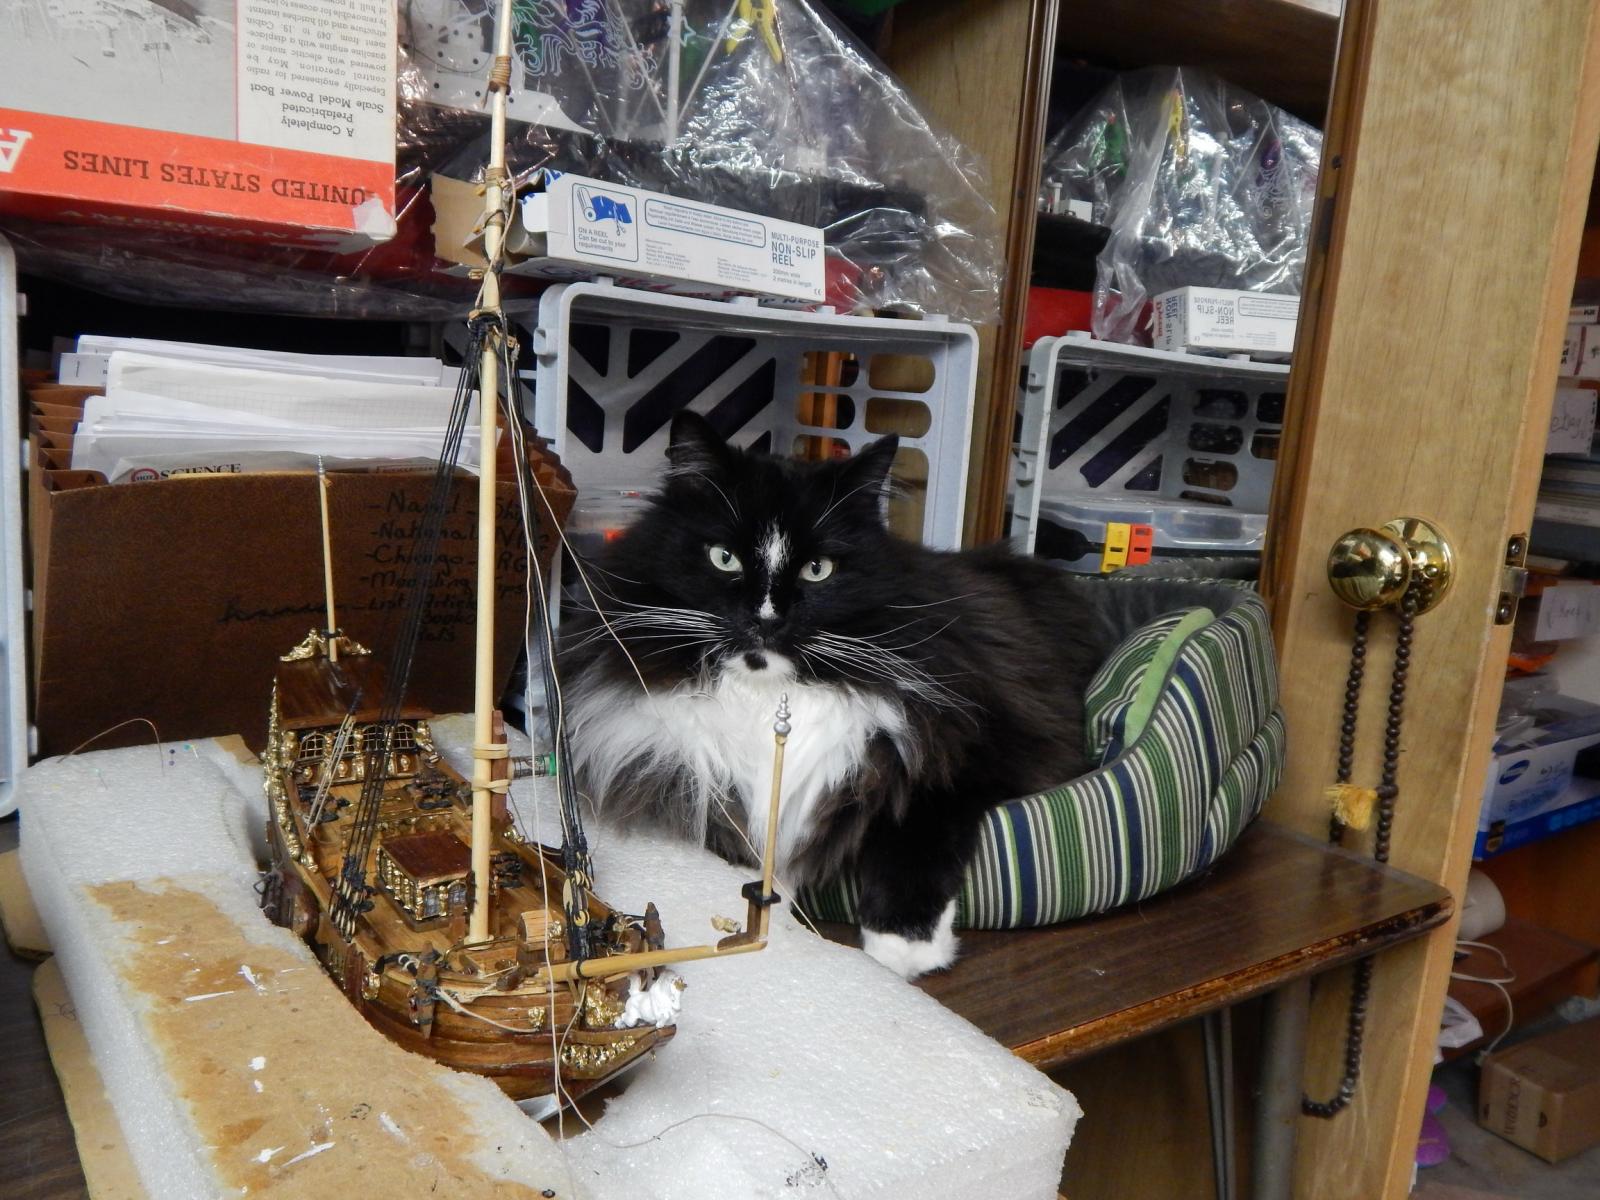
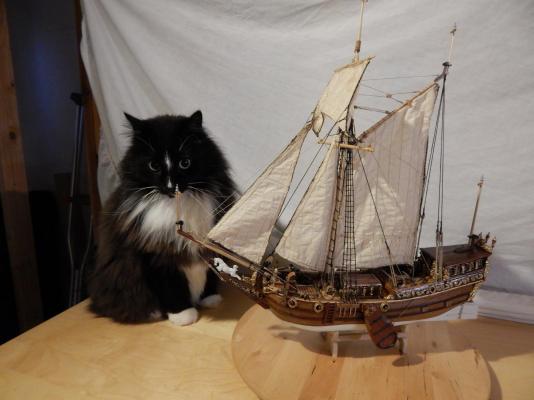
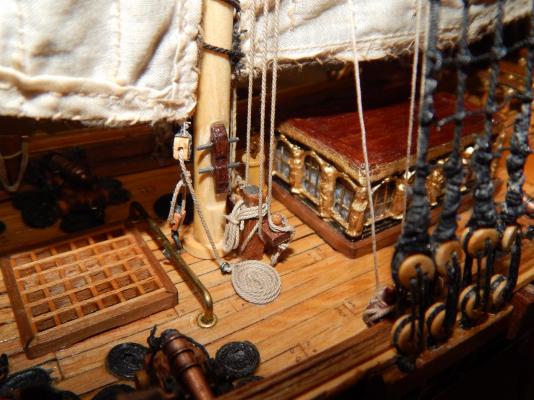
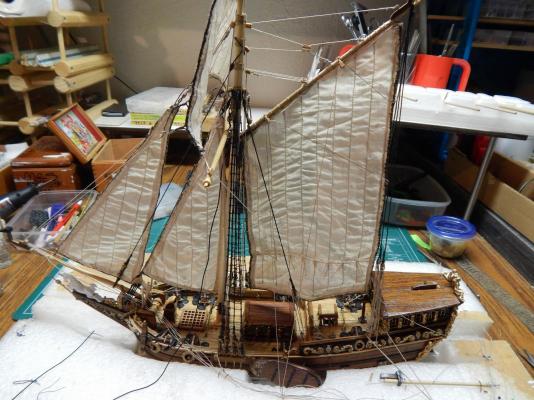
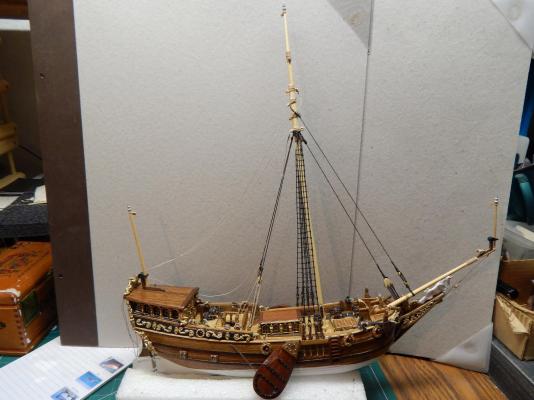
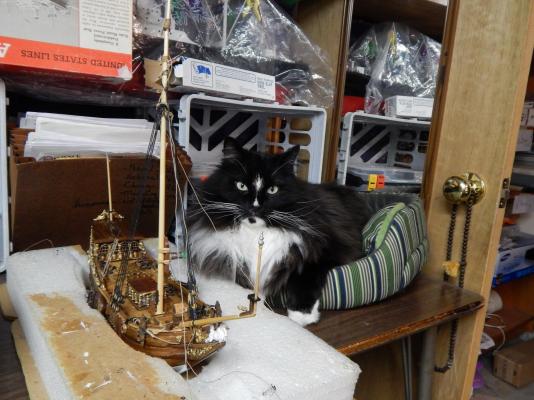
Here is the almost finished Mary. I am still working on the flags and the display case. More details. I always add coiled rope to ships. The cat just wants to be where to rigging is present.

- 85 replies
-
- 9
-
-
- yacht mary
- mamoli
- (and 1 more)
-
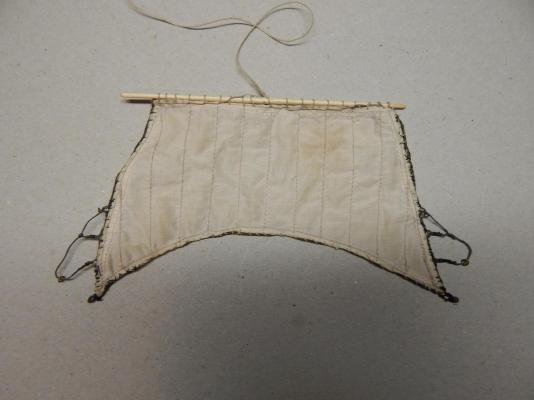
Your sails are looking just like the real thing. If you look at the tjalks, zeeschouws, and other flat and round bottom boats in the Netherlands, their main sail is usually that color, a heavy brown canvas. My neighbor does all my sails on her fancy computer controlled sewing machine. In return I advice her husband on what to do with his garden. I believe in bartering. Overall, your zeeschouw, looks beautiful, the paint job, the lines of the boat and I look forward in seeing her completed. Marc
-
Naval History On This Day, Any Nation
flying_dutchman2 replied to Kevin's topic in Nautical/Naval History
I know I haven't put up much as my season has started. I manage and run a medium sized garden center. I am not as active on MSW from around April first to about the third week in November. 1946 - USS Missouri arrives in Turkey to return the body of Turkish ambassador to the U.S. and to show U.S. support and willingness to defend Turkey. Marc -
Can't seem to delete my double post. To moderator: Please delete my double post. Thank you, Marc
-
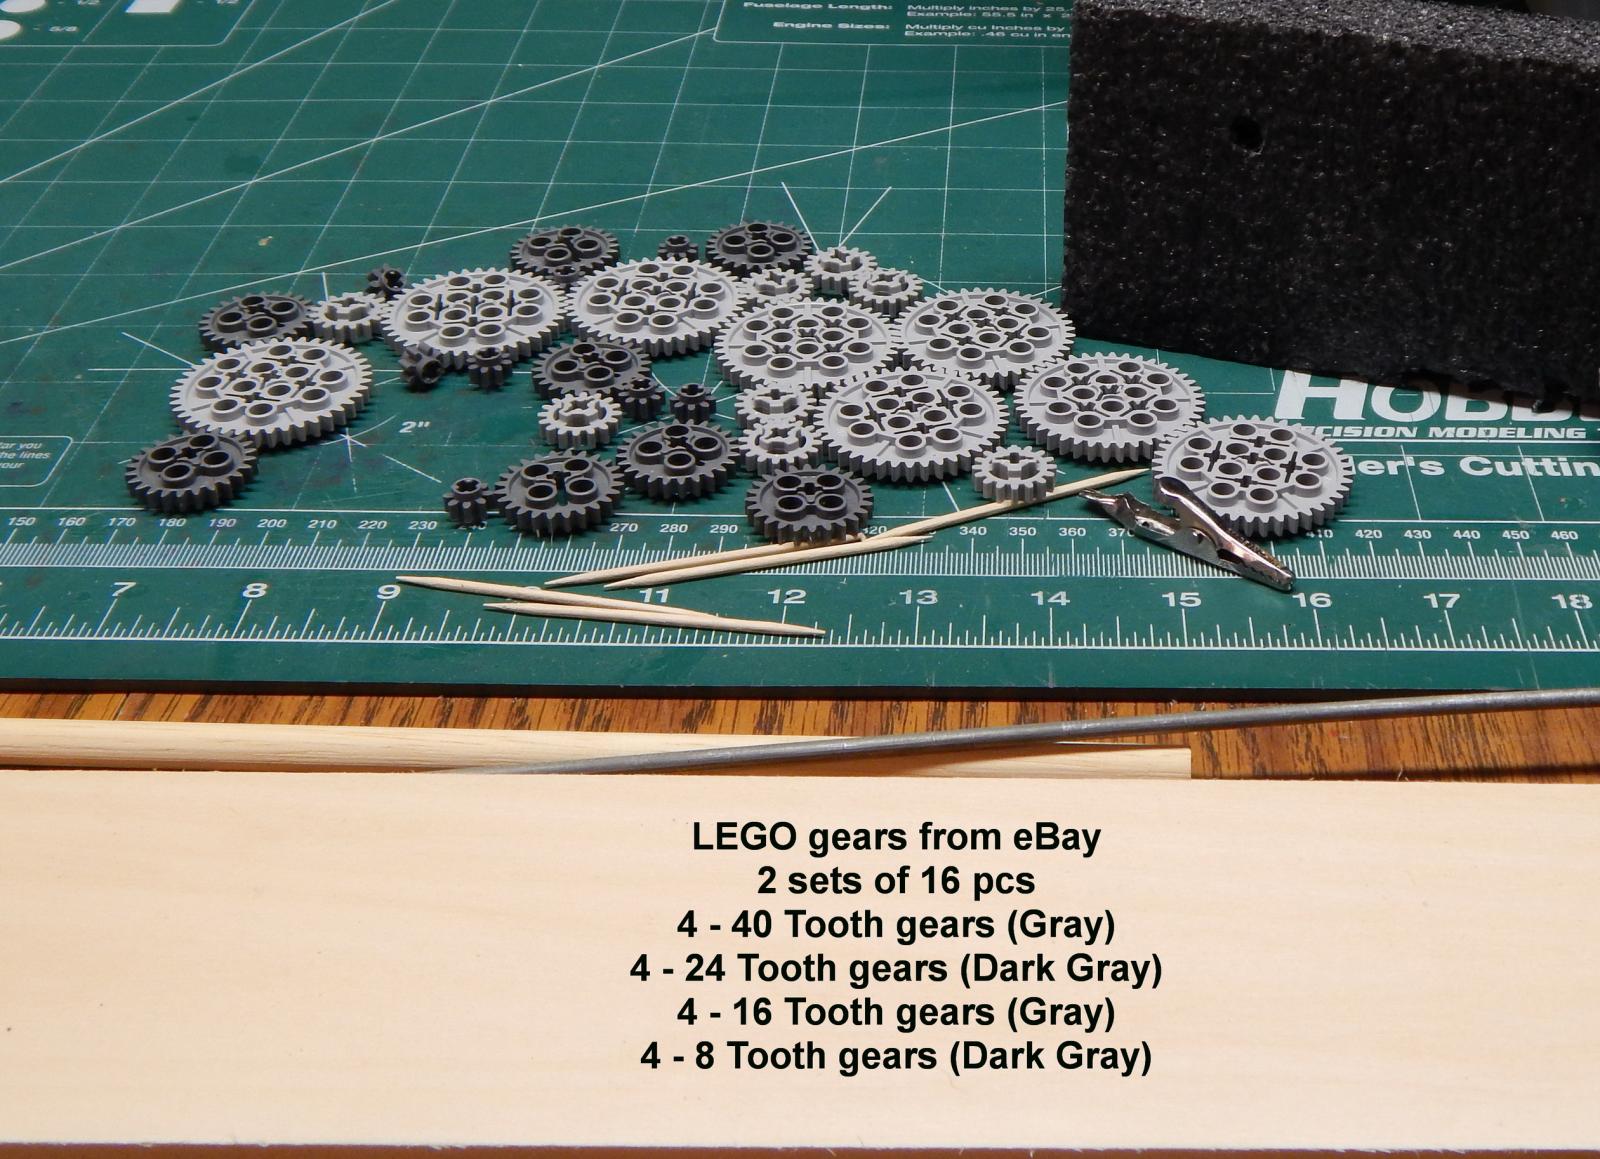
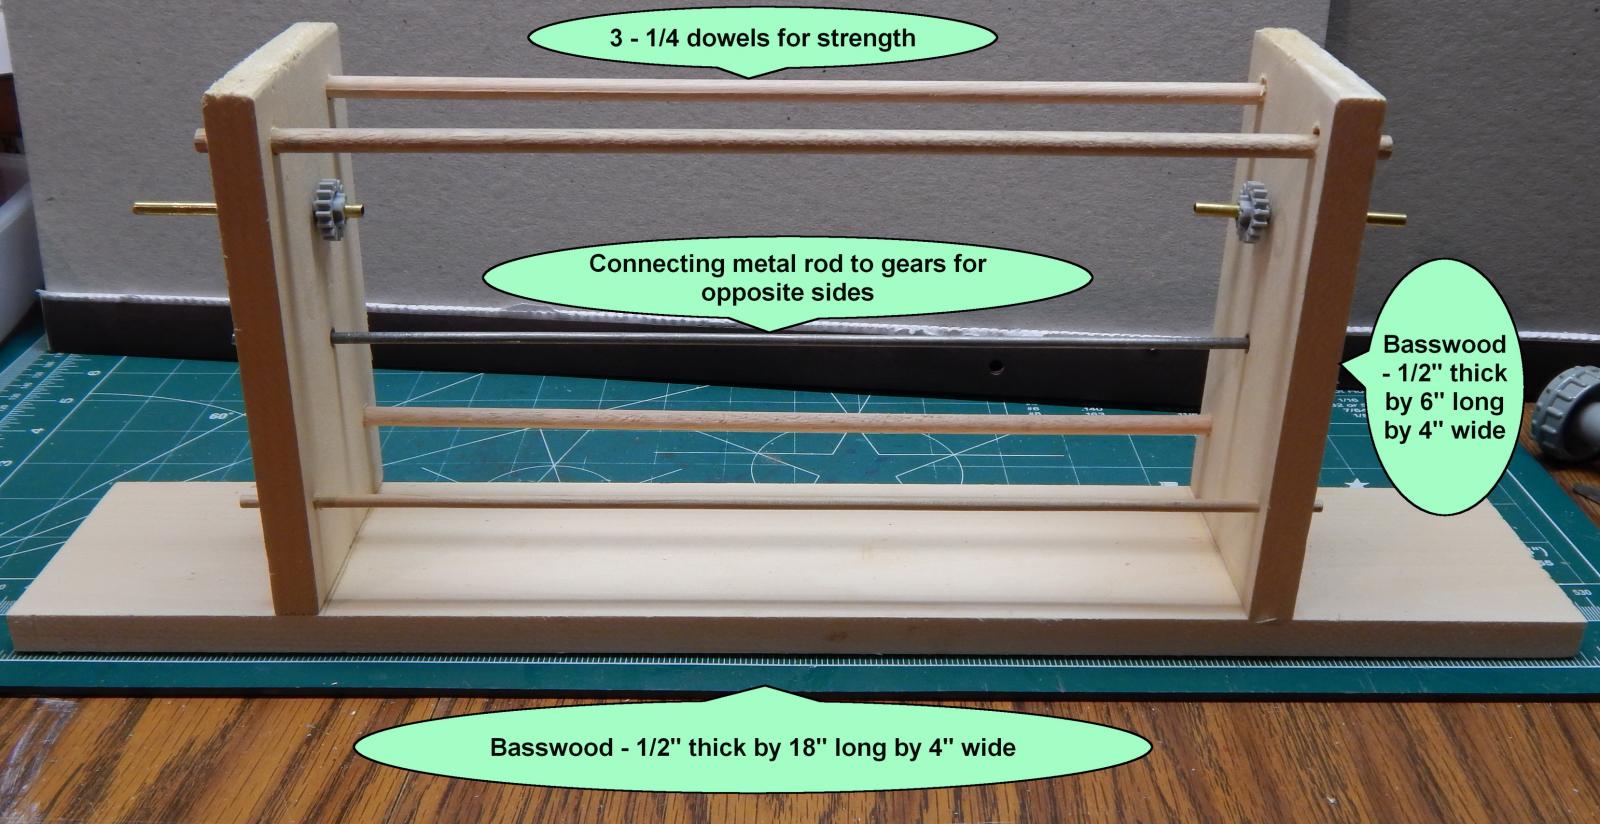
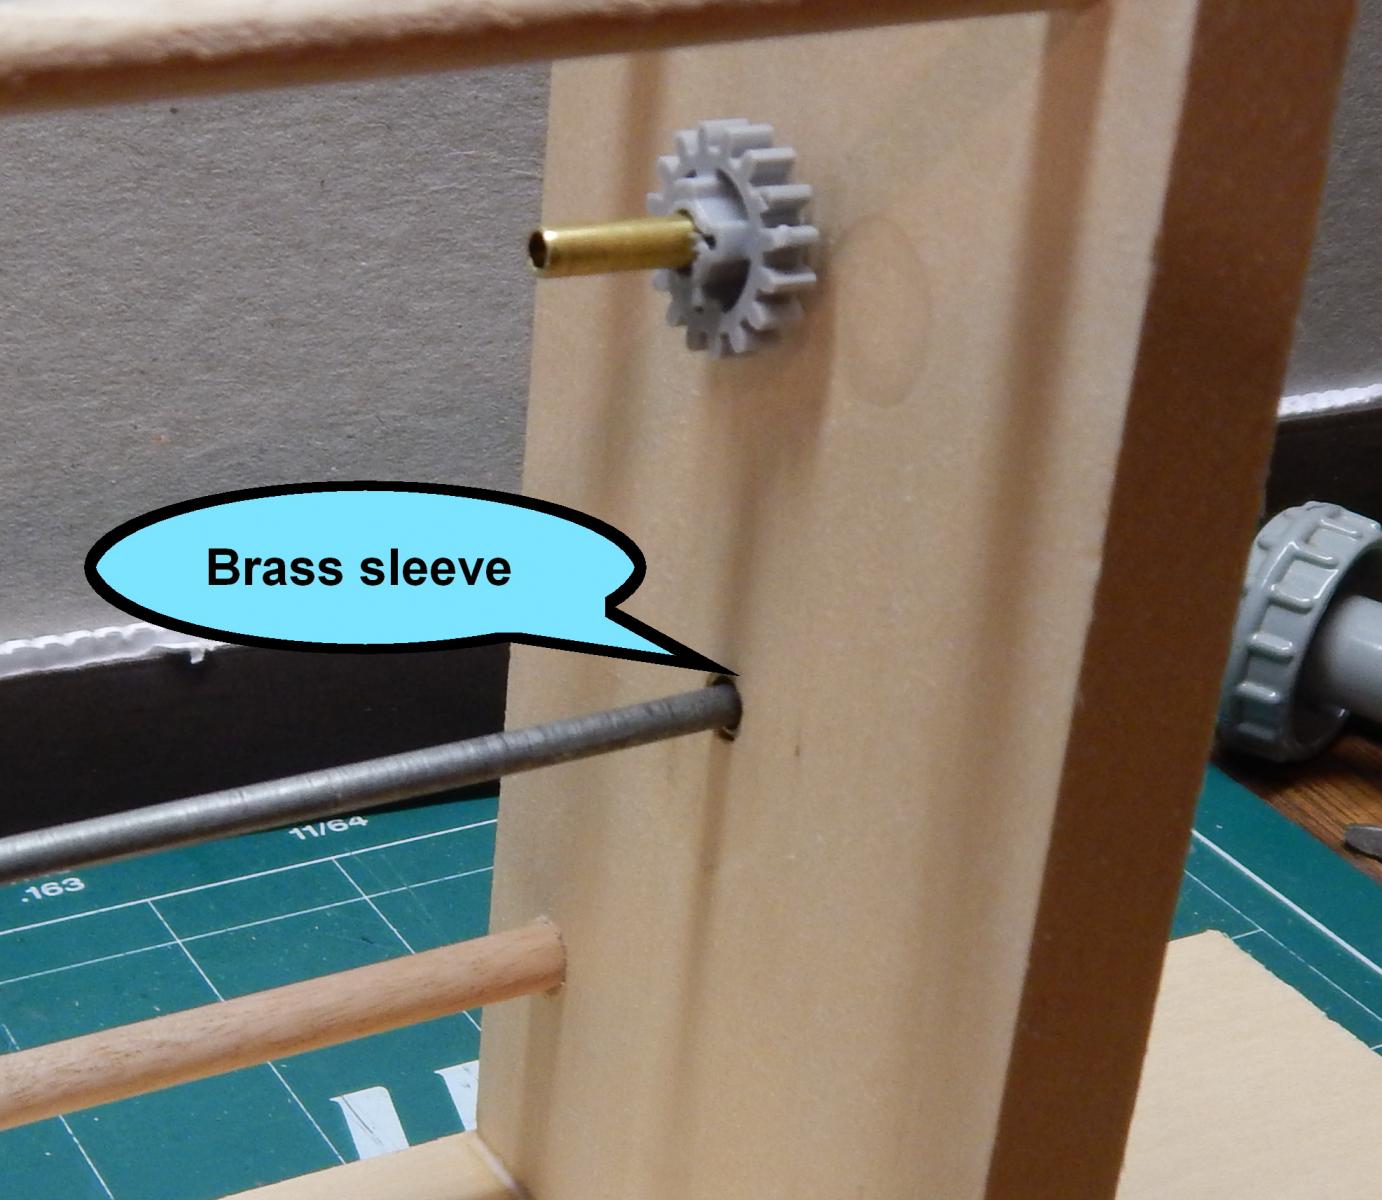
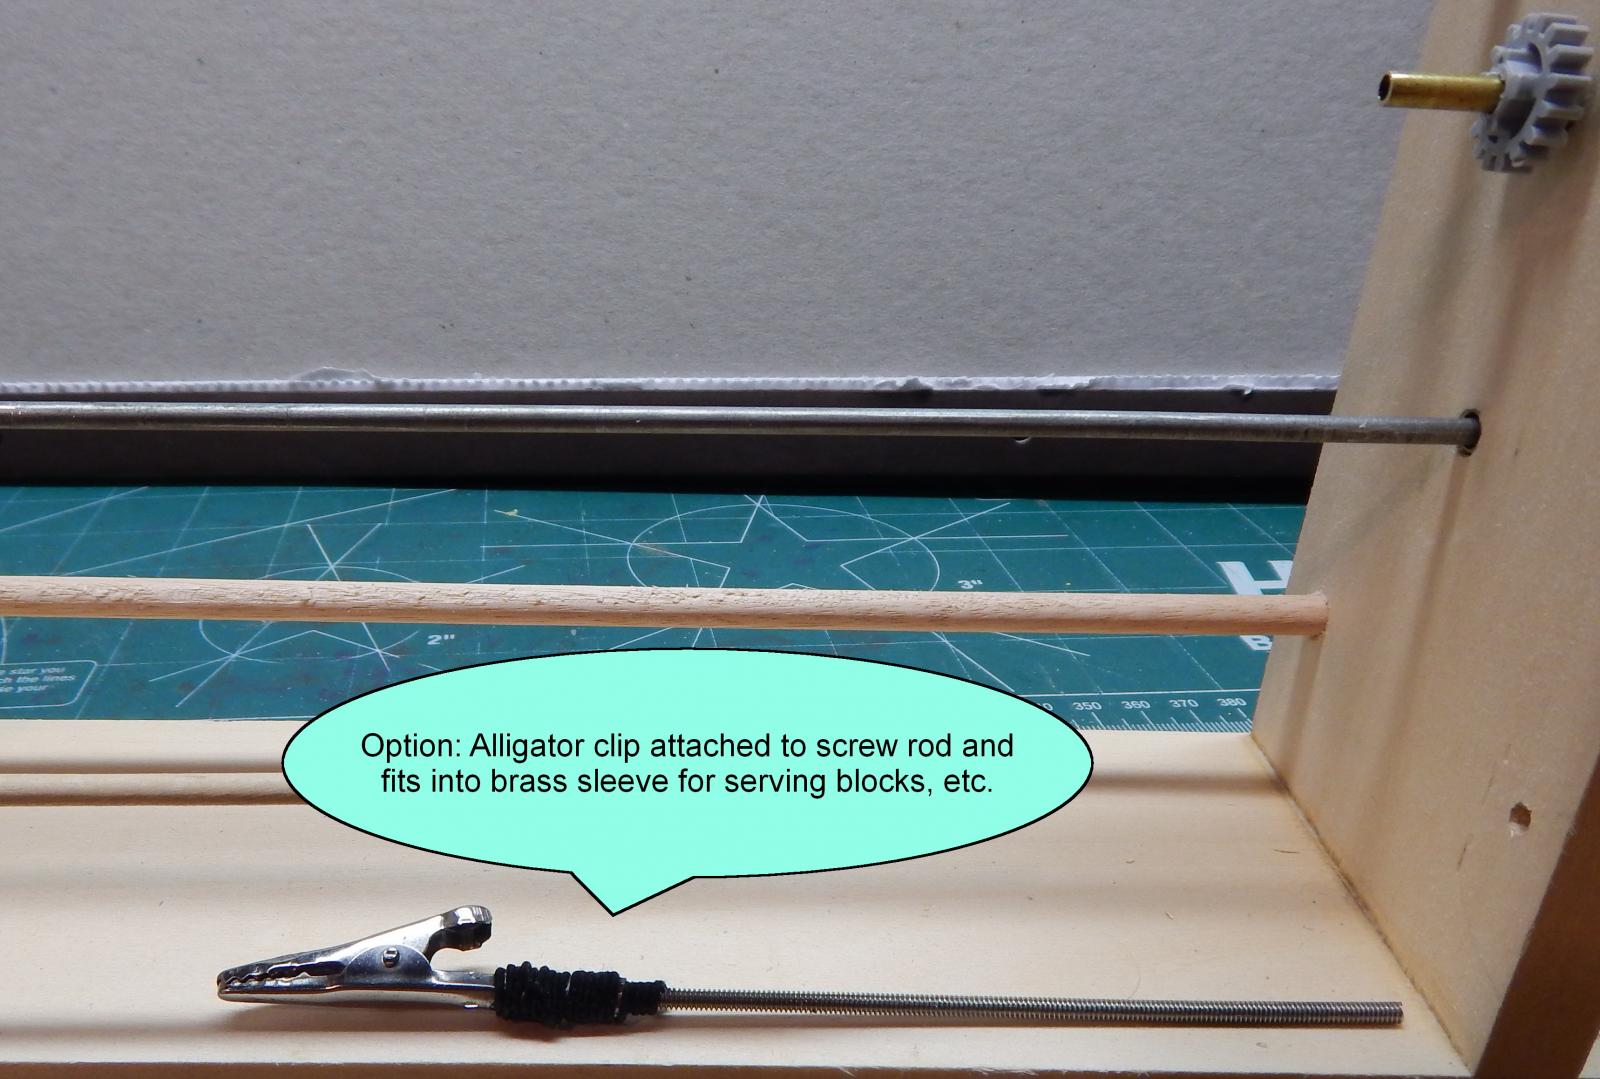
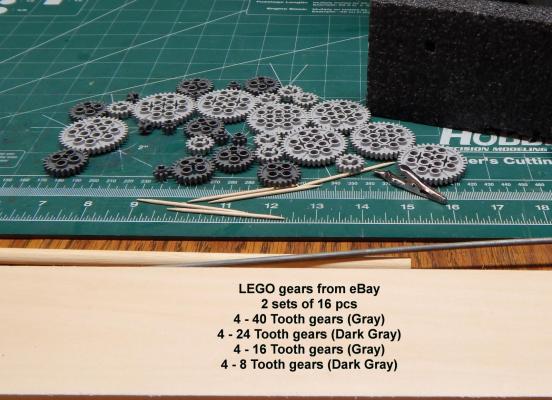
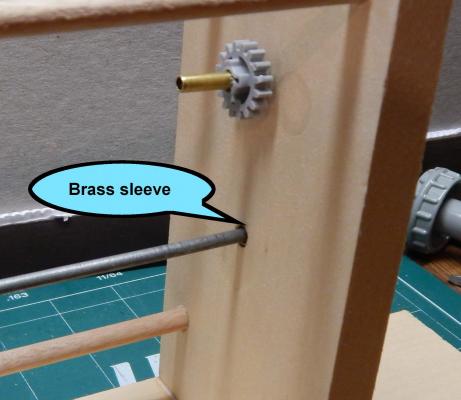
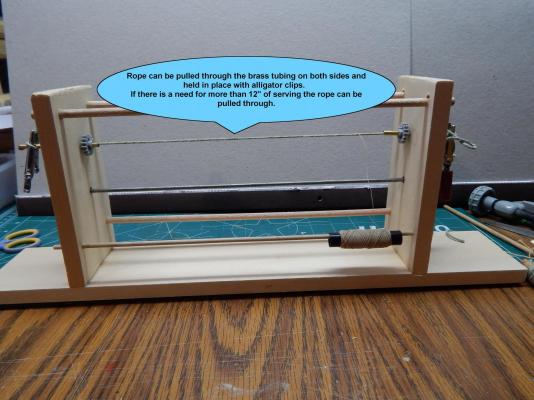
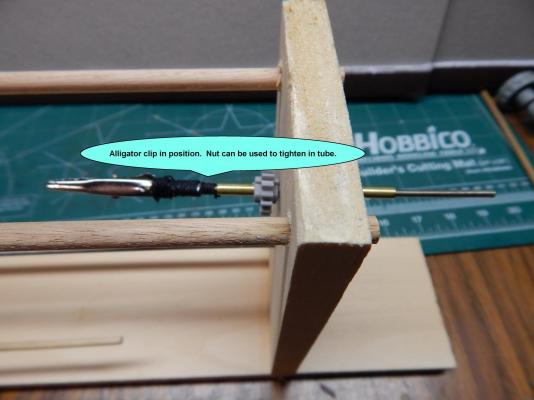
After seeing "egkb" serving jig, I decided to make one as well. For this idea to materialize I give ALL the credit to him. All items except the LEGO gears I already had in my collection or scavenged from other items and all pictures give measurements and descriptions. Purchased 2 sets of LEGO gears from eBay. I did 2 sets in case I made mistakes with enlarging the hole for pulling the rods through (and I did make mistakes). I used 4 - 40 tooth gears for connecting the rod and tubing together and 2 - 16 tooth gears to act as nuts on the brass tubing. The brass tubing is from my R/C pile and the metal rod is from an old cloth hanger. Basswood is used for this jig. Attached LEGO gears. Top gear has a brass tube for serving rope and the bottom gear holds the metal rod. Same setup on the opposite side of the jig. I cut up 2 - 1/2" brass tubing to act as a sleeve for the metal rod. This was hammered into the 2 holes where the rod goes through for a tight fit. The metal rod turns smoothly. For serving roping can be pulled through the brass tubing. This is essential if the rope is longer than 12" inches. Optional alligator clip attached to a rod which fits into the brass sleeve for serving blocks, etc. Picture says it all.


- 85 replies
-
- 7
-
-
- yacht mary
- mamoli
- (and 1 more)
-
I have used numerous CAD apps all my life, both for Mac & PC and in both mechanical and landscape architecture. You also need to look at the following. 32 and 64 bit applications. XP is 32 bit and is the ACAD app. you use 32 bit as well or 64 bit? For instance: I have been using Canvas since version 1 for the MAC. In version 3.5 I switched over to the PC. My version 9.2 worked great on XP. I upgraded to Windows 7-64 bit and my Canvas 32 bit kept crashing on 64 bit. Win 7-64 can run 32 bit apps but sometimes there are problems. I was going to upgrade my Canvas app but $500.00 for the 64 bit app was a bit steep. I purchased TCad 20 Deluxe ($100.00) and can do everything and then some. This version does not do any lofting. But I went to the TCad forum and asked away. Several very knowledgeable people mentioned a work around. The TCad community is extremely large and there are many third party apps. created as well. You can always take the new PC and wipe the drive and then install XP. It will work and it will scream. I still run Win 2000 on a Pentium 4 with lots of RAM as I have a CAD app. where the company went belly up. It is called "WalkThrough". I use it my free-lancing landscape design. You creat a 2D garden and set point A and then B. The app. will take all the points from the garden and create a 3D movie. Then the customer gets an idea of what the garden looks like. I have an app. at work called Pro-Landscape and pretty pricey ($1500.00) and it does what I do with WalkThrough but I can't justify buying that one...... yet. Marc
-
Naval History On This Day, Any Nation
flying_dutchman2 replied to Kevin's topic in Nautical/Naval History
March 12 1594 - Company of Distant established for business on East-Indies 1642 - Abel Tasman is 1st European in New Zealand 1917 - All American merchant ships to be armed in war zones 1942 - President Franklin D. Roosevelt designates Admiral Ernest J. King to serve as the Chief of Naval Operations, as well as the Commander-in-Chief, United States Fleet to which he was appointed on 30 December 1941. 1956 - In first overseas deployment of Navy missile squadron, VA-83 left on USS Intrepid -
Naval History On This Day, Any Nation
flying_dutchman2 replied to Kevin's topic in Nautical/Naval History
March 11 1935 - Birth of Naval Security Group when OP-20G became the Communications Security Group 1941 - President Franklin D. Roosevelt signs Lend-Lease Act 1942 - In a PT boat, LCDR John Bulkeley leaves the Philippines to take General Douglas MacArthur to Australia 1945 - Use of first Navy landing craft to cross Rhine River at Bad Neuenahr 1965 - Market Time patrols begin off South Vietnam coast WWII - 1940 Mar 11, Mon. -- U.S. freighter Exmoor, detained at Gibraltar by British authorities since 9 March, is released. 1941 - •Mar 11, Tue. United States Congress passes Lend-Lease Act; "cash and carry" provisions of Neutrality Act of 1939 are changed to permit transfer of munitions to Allies. Although criticized by isolationists, the Act proves to be the primary means by which the United States will provide Great Britain, the USSR, and other belligerents with war material, food, and financial aid without the U.S. having to enter combat. 1942 - March 11, Wed. Pacific Lieutenant General Douglas MacArthur and Rear Admiral Francis W. Rockwell depart Luzon, with their respective staffs, in motor torpedo boats PT-32, PT-34, PT-35, and PT-41, bound for Mindanao. For his role in the evacuation, as well as other operations in the Philippines since the start of hostilities, Lieutenant John D. Bulkeley, Commander, Motor Torpedo Boat Squadron 3, will receive the Medal of Honor (see 13 March). Submarine Pollack (SS-180), operating in the East China Sea about 270 miles east of Shanghai, sinks Japanese merchant cargo ship Fukushu Maru, 30°53'N, 126°20'E and passenger-cargo ship Baikal Maru, 31°00'N, 126°32'E. U.S. passenger ship Mount McKinley is stranded off Unimak Island, Aleutians; wrecked subsequently by heavy seas, the ship will be written off as a total loss. Atlantic Unarmed U.S. freighter Texan is torpedoed, shelled, and sunk by German submarine U-126 about 40 miles east of Nuevitas, Cuba, 21°32'N, 76°24'W; Cuban fishing boat Yoyo rescues survivors. Unarmed U.S. freighter Caribsea is torpedoed and sunk by German submarine U-158 about 14 miles east of Cape Lookout, North Carolina, 34°40'N, 76°10'W; U.S. freighter Norlindo rescues survivors. Coastal minesweeper AMc-202, at 40°32'N, 71°40'W, rescues seven survivors from Brazilian steamship Cayru, sunk by German submarine U-94 on 9 March, and transports them to New London, Connecticut. 1944 - 11 March, Sat. -- Pacific Japanese submarine RO-110 is sunk by Indian Navy sloop HMIS Jumna and Australian minesweepers HMAS Ipswich and HMAS Launceston 17 miles south of Vizagapatam, 17°25'N, 83°21'E. Submarine Bowfin (SS-287) sinks Japanese army cargo ship Tsukikawa Maru, west of Halmahera Island, 01°25'S, 128°14'E. Japanese minelayer Wakatake and army aircraft carry out ineffective counterattack on Bowfin, which attacks, unsuccessfully, Asaka Maru, which is rescuing Tsukikawa Maru's survivors. Japanese cargo ship Daitoku Maru is sunk in collision with cargo ship No.6 Daiboshi Maru in the Sea of Japan, 40°10'N, 137°41'E. Mediterranean Commander Cruiser Division 8 breaks flag in French light cruiser Emile Bertin and takes operational command of Emile Bertin, Gloire, Georges Leygues, and Duguay-Trouin for training purposes (see 24 March1944). USAAF aircraft sink German submarines U-380 and U-410, Toulon, France. 1945 - 11 March, Sun. -- Europe LCVPs (TG 122.5.1) go into action 200 miles from the sea, sailors assisting in erecting and maintaining an army pontoon bridge at the Remagen bridgehead. Navy support of the army's crossing the Rhine River proves invaluable and adds greatly to the successful invasion of the enemy's homeland. USAAF heavy bombers (Eighth Air Force) sink German submarines U-2515 and U-2530 during raid on Hamburg, Germany. PB4Y-1 (VPB 103) sinks German submarine U-681 southwest of the Scilly Islands, 49°53'N, 06°31'W. Pacific Army troops landed on 10 March take Zamboanga, Mindanao Japanese land attack planes [FRANCES], flying direct from Kanoya, Japan, attack U.S. fleet anchorage at Ulithi; one FRANCES damages carrier Randolph (CV-15), 10°01'N, 139°40'E, another crashes into Sorlen Island. Salvage vessel Current (ARS-22) is damaged by collision with Randolph during fire-fighting operations. Submarine Segundo (SS-398) sinks Japanese merchant cargo ship Shori Maru off Shori Island southern Korea, 34°25'N, 127°54'E. PBM-3D (VPB 28) attacks Japanese convoy in South China Sea, sinking water carrier Wayo Maru about 40 miles southeast of Macao, 21°31'N, 112°28'E. USAAF B-25s bomb Japanese shipping off Tourane, French Indochina, sinking motor sailships Kinsei Maru, Namikiri Maru and No.3 Hinode Maru. Japanese merchant trawler Koko Maru is sunk by USAAF mine in Yangtze River, 31°22'N, 121°34'E. -
That is an excellent idea and I am going to start doing that. On a very early model I built I used Q-tips for the sponge and the rammer for the cannon accruements. I did shape the Q-tip somewhat and painted it black. Marc
- 396 replies
-
- 1
-
-
- Idea
- Bright Idea
- (and 1 more)
-
Batavia by *Hans* - FINISHED
flying_dutchman2 replied to *Hans*'s topic in - Build logs for subjects built 1501 - 1750
Hans, Beautiful work and I love your carvings. The stern's paint job is well done and thanks for explaining the four statues. I did not know this as I am always reading something about Dutch naval history. In both SAIL Amsterdam and Philadelphia I have visited her. She is an impressive ship. I will continue to follow your build. Thanks for sharing. Marc -
Naval History On This Day, Any Nation
flying_dutchman2 replied to Kevin's topic in Nautical/Naval History
March 9 1454 - Amerigo Vespucci, Italian explorer (America). 1500 - Pedro Cabral departs with 13 ships to India. 1798 - Appointment of first surgeon U.S. Navy, George Balfour. 1914 - Test of wind tunnel at Washington Navy Yard. WWII Saturday, March 9, 1940 The unescorted British steam merchant Borthwick was torpedoed and sunk by the U-14, commanded by Oberleutnant zur See Herbert Wohlfarth, north of Zeebrugge off the Belgian coast. Of the ship’s complement, all 21 survived and were picked up by the Flushing pilot boat Loodsboot No.9. The 1,097 ton Borthwick was carrying general cargo and was bound for Leith, Scotland. The British steam merchant Akeld was torpedoed and sunk by the U-14 north of Zeebrugge. All of the ship’s complement of 12 died. The 643 ton Akeld was carrying general cargo and was bound for Newcastle, England. The British steam merchant Abbotsford was torpedoed and sunk by the U-14 north of Zeebrugge. All of the ship’s complement of 19 died. The 1,585 ton Abbotsford was carrying steel and flax and was bound for Grangemouth, Scotland. The neutral Irish steam trawler Leukos was torpedoed and sunk by the U-38, commanded by Kapitänleutnant Heinrich Liebe, in the fishing grounds in Donegal Bay near Dublin, Ireland. The Greek steam merchant P. Margaronis was torpedoed and sunk by the U-28, commanded by Kapitänleutnant Günter Kuhnke, southwest of Lands End, near the English Channel. All of the ship’s complement of 30 died. The 4,979 ton P. Margaronis was carrying ballast and was bound for Canada. Sunday, March 9, 1941 The minesweeping trawler HMS Gulfoss (FY 710) struck a mine and sank in the English Channel east of Hastings. Tuesday, March 9, 1943 Sailing with Convoy SC-121, the Norwegian motor merchant Bonneville was torpedoed and sunk by the U-405, commanded by Korvettenkapitän Rolf-Heinrich Hopmann, in the northern Atlantic Ocean. Of the ship’s complement, 36 died and 7 survivors were picked up by the rescue ship Melrose Abbey. The 4,665 ton Bonneville was carrying general cargo, explosives and a landing craft as deck cargo and was headed for Liverpool, England. Sailing with Convoy SC-121, the American steam merchant Malantic was torpedoed and sunk by the U-409, commanded by Oberleutnant zur See Hanns-Ferdinand Massmann, in the northern Atlantic Ocean. Of the ship’s complement, 25 died and 22 survivors reached land by lifeboat. The 3,837 ton Malantic was carrying ammunition, bombs and general cargo and was headed for Liverpool, England. Sailing with Convoy SC-121, the British motor tanker Rosewood was torpedoed and sunk by the U-409 in the northern Atlantic Ocean. All of the ship’s complement of 42 died. The 5,989 ton Rosewood was carrying fuel oil and was headed for Clyde, United Kingdom. A straggler from Convoy SC-121, the Swedish steam merchant Milos was torpedoed and sunk by the U-530, commanded by Kapitänleutnant Kurt Lange, in the northern Atlantic Ocean. All of the ship’s complement of 30 died. The 3,058 ton Milos was carrying general cargo, including steel and lumber and was headed for Grimsby, England. Sailing with Convoy BT-6, the British motor merchant Kelvinbank was torpedoed and sunk by the U-510, commanded by Korvettenkapitän Karl Neitzel, about 200 miles northeast of Paramaribo, Dutch Guiana in the western Atlantic Ocean. Of the ship’s complement, 28 died and 32 survivors were picked up by the American steam merchant George G. Meade. The 3,872 ton Kelvinbank was carrying ballast and was headed for Macoris, Cuba. A straggler from Convoy RA-53, the American steam merchant Puerto Rican was torpedoed and sunk by the U-586, commanded by Kapitänleutnant Dietrich von der Esch, about 100 miles northeast of Iceland in the northern Atlantic Ocean. Of the ship’s complement, 64 died and 1 survivor were picked up by the ASW trawler HMS St. Elstan (FY 240). The 6,076 ton Puerto Rican was carrying ore and was headed for the United States. Thursday, March 9, 1944 While escorting convoy CU-16 the destroyer escort USS Leopold (DE 319) was torpedoed and sunk by the U-255, commanded by Oberleutnant zur See Erich Harms, approximately 400 miles south of Iceland in the northern Atlantic Ocean. Of the ship’s complement, 171 died and 28 survivors were picked up by the destroyer escort USS Joyce (DE 317). -
Naval History On This Day, Any Nation
flying_dutchman2 replied to Kevin's topic in Nautical/Naval History
March 8 1945 - Phyllis Daley becomes first African-American Ensign, Navy Nurse Corps 1958 - Battleship USS Wisconsin (BB-64) is decommissioned, leaving the Navy without an active battleship for the first time since 1895. 1965 - Seventh Fleet lands first major Marine units in South Vietnam at Danang WWII 1940 - Mar 8, Fri. -- War again comes to the Americas: Canadian destroyer HMCS Assiniboine stops German freighter Hannover in Mona Passage, off the coast of the Dominican Republic, at which point the merchantman's crew sets fire to the ship and abandons her. Boarding party from British light cruiser HMS Dunedin, however, saves Hannover from destruction. Conflicting representations by British and German diplomats as to Hannover's exact position prompt the Dominican government to drop the question of violation of territorial waters (see 24 May). Hannover will ultimately be converted into the escort carrier HMS Audacity. The effort expended to capture Hannover, however, allows German freighters Mimi Horn and Seattle to escape the Caribbean and make a break for Germany. Mimi Horn is scuttled to avoid capture in Denmark Strait on 28 March; Seattle is lost during the early phases of the invasion of Norway on 8-9 April. 1942 - March 8, Sun. Pacific Japanese naval force (Rear Admiral Kajioka Sadamichi) occupies Lae and Salamaua, New Guinea. Japanese occupy Rangoon, Burma. Small reconnaissance seaplane from Japanese submarine I-25 reconnoiters Wellington, New Zealand. Atlantic Net tender Mulberry (YN-22) rescues 14 survivors from U.S. freighter Cardonia, sunk by German submarine U-126 the day before. Coast Guard cutter Calypso (WPC-104) rescues 54 survivors from Brazilian steamship Arabutan, sinks their lifeboats as a hazard to navigation, and transports the men to Little Creek, Virginia. 1943 - 8 February, Mon. Pacific Operation KE: Japanese destroyer force (Rear Admiral Hashimoto Shintaro) completes the evacuation of 1,796 troops from Guadalcanal. Submarine Tunny (SS-282) sinks Japanese merchant cargo ship Kusuyama Maru off southwest coast of Formosa about 55 miles west of Takao, 22°40'N, 119°12'E. Japanese cargo ship Shotoku Maru is sunk by storm near Hinomizaki, Honshu, 35°26'N, 132°38'E. Atlantic During continued efforts by German submarines against SC 118, U-608 unsuccessfully attacks destroyer Schenck (DD-159). Swiss freighter Caritasi rescues 14 survivors of U.S. freighter Charles C. Pinckney, sunk on 28 January 1943 by U-514; eight of the 27-man Armed Guard survive their ordeal, as do six merchant sailors. 1944 - 8 March, Wed. -- Pacific Japanese planes bomb Eniwetok, Engebi Island, destroying ammunition, petroleum products and distillation units but leaving airstrip undamaged. Submarine Lapon (SS-260), in attack on Japanese convoy southeast of Hong Kong, damages merchant cargo ship Toyokuni Maru in South China Sea, 19°21'N, 116°09'E; merchant cargo ship Nicherei Maru takes the damaged freighter in tow (see 9 March). British submarine HMS Sea Rover, in attack on Japanese convoy, sinks transport Sh_bu Maru in Strait of Malacca, 03°38'N, 99°12'E. PBY sinks Japanese fishing boat No.5 Ebisu Maru off Tadji, 03°10'S, 142°13'E. USAAF P-38s sink Japanese fishing boat No.38 Taigyo Maru off Aitape. U.S. aircraft sink Japanese guardboat No.2 Nanshu Maru off Duke of York Isle, St. George Channel, 04°12'S, 152°30'E. Mediterranean U.S. freighter Virginia Dare, irreparably damaged by Allied mine on 6 March off Tunis, breaks up after encountering heavy weather; she is subsequently written off as a total loss. 1945 - 8 March, Thu. -- General Inter-American Conference, in session at Mexico City since 21 February 1945, ends. Europe Submarine chaser PC-564 engages German minesweepers M 412, M 432, M 442 and M 452 and nine smaller craft off Chaussey. The Germans are bound for the port of Granville, France (see 9 March). Pacific Covered lighter YF-926, being towed to Pearl Harbor, T.H., founders in heavy weather and sinks. USAAF aircraft sink Japanese landing ship T.143 off Formosa, 23°35'N, 121°35'E. Japanese guardboat No.3 Daikoku Maru is sunk by U.S. aircraft east of Ogari Jima. Japanese merchant cargo ship Toyo Maru is sunk by aircraft off Hankow, China. USAAF aircraft (5th Air Force) sink Japanese merchant cargo ship I shima Maru, 22°34'N, 114°53'E. USAAF B-24s (14th Air Force) sink Japanese Coast Defense Vessel No.69 southeast of Hainan Island 19°02'N, 111°50'E (see 16 March). Navy PBMs bomb Japanese convoy, sinking cargo vessel No.21 Yusen Maru off Chinman Tao, 24°27'N, 118°19'E. USAAF B-24s (10th Air Force) attack Japanese shipping in Andaman Sea, sinking cargo vessel Hoyo Maru, 13°00'N, 98°00'E. USAAF B-24s bomb Japanese shipping at Hong Kong, sinking guardboat Hyushin Maru off St. John Island 21°42'N, 112°44'E. USAAF P-51s (14th Air Force) attack Japanese shipping in the Yangtze, off Hankow, sinking cargo vessel Toyo Maru (ex-Chinese Tang Yang), 30°33'N, 114°17'E. Japanese cargo vessel Kwan-Shan Maru is sunk by mine off Kiangyin, China, 31°55'N, 120°16'E. -
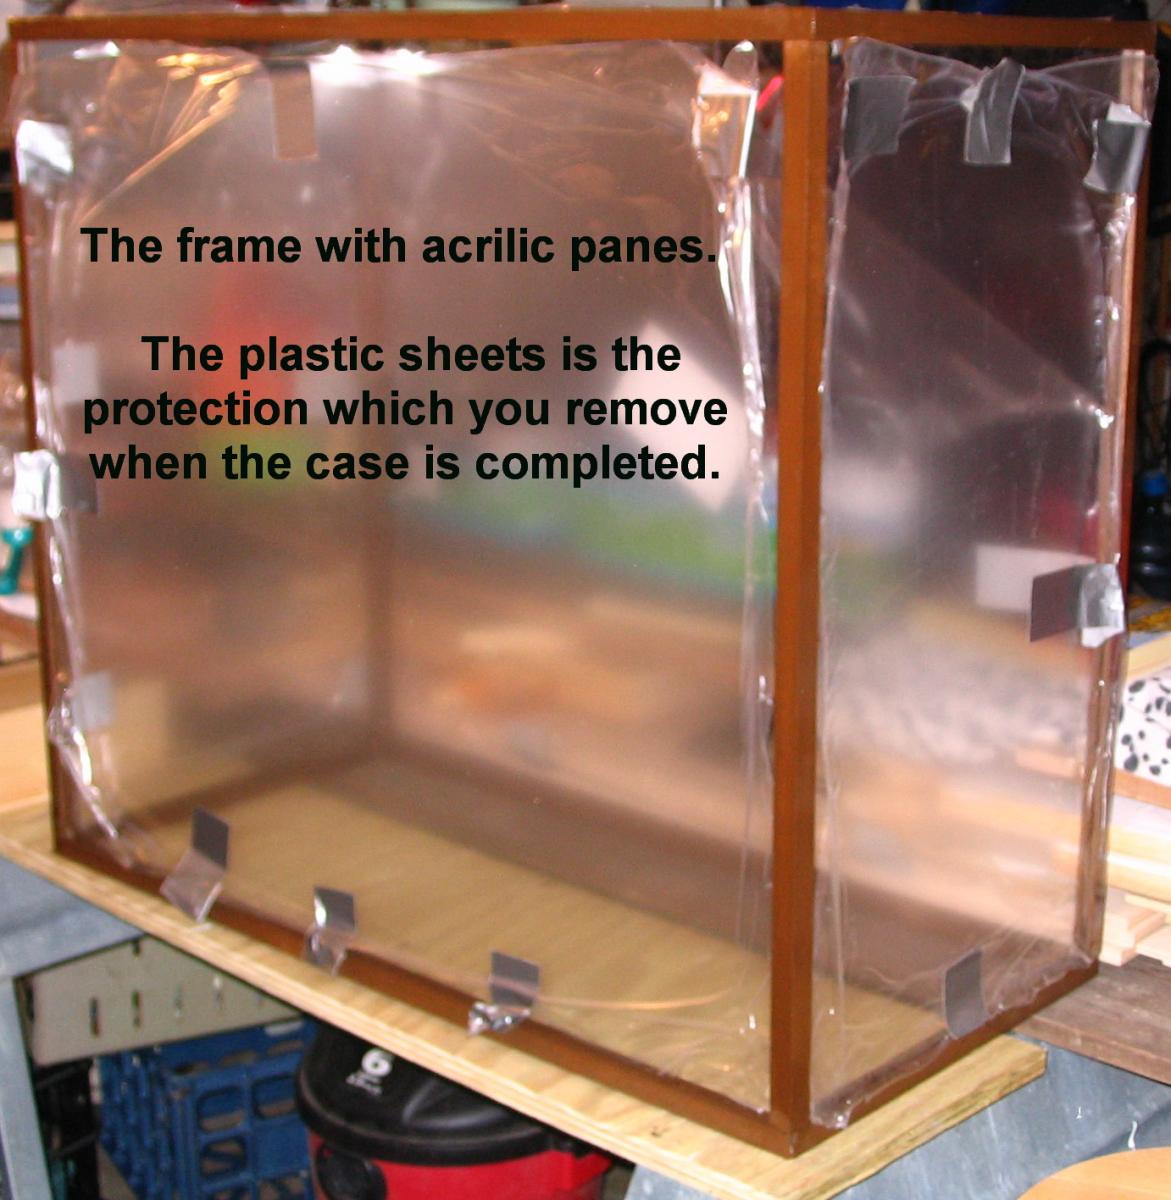
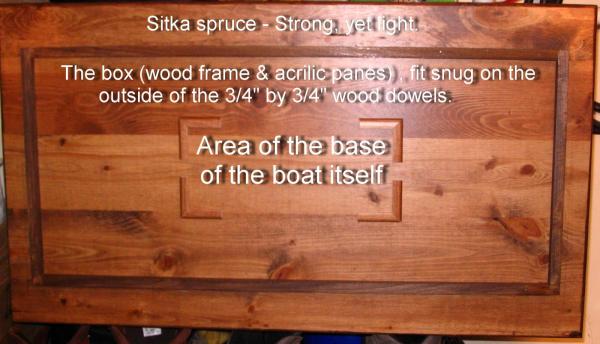
You may already know this but when you measure the height (includes the stand/cradle/base), length and width of your model you need to add a minimum of 2 inches for each side. Example: If your model is 20" long by 24" high by 8" wide, your case needs to be at least 24" long by 28" high by 12" wide. My dowels for the frame where from popular. 3/4" by 3/4" by 36". purchased 10 of them. I used my router and with trail and error got the correct depth for the groove for the acrylic pane to fit. I purchased 3' by 4' sheets of acrylic and measured many times until I used my scroll saw to cut the panes to the correct size. I don't have a table saw so I rigged a fence on the scroll saw to keep the pane even.

-
I made a case for my Bounty and I used my router to make the groove. I used 4mm thick acrylic. For a base I used 3/4 " Sitka spruce. Spent around $35.00 on the whole thing. Marc
-
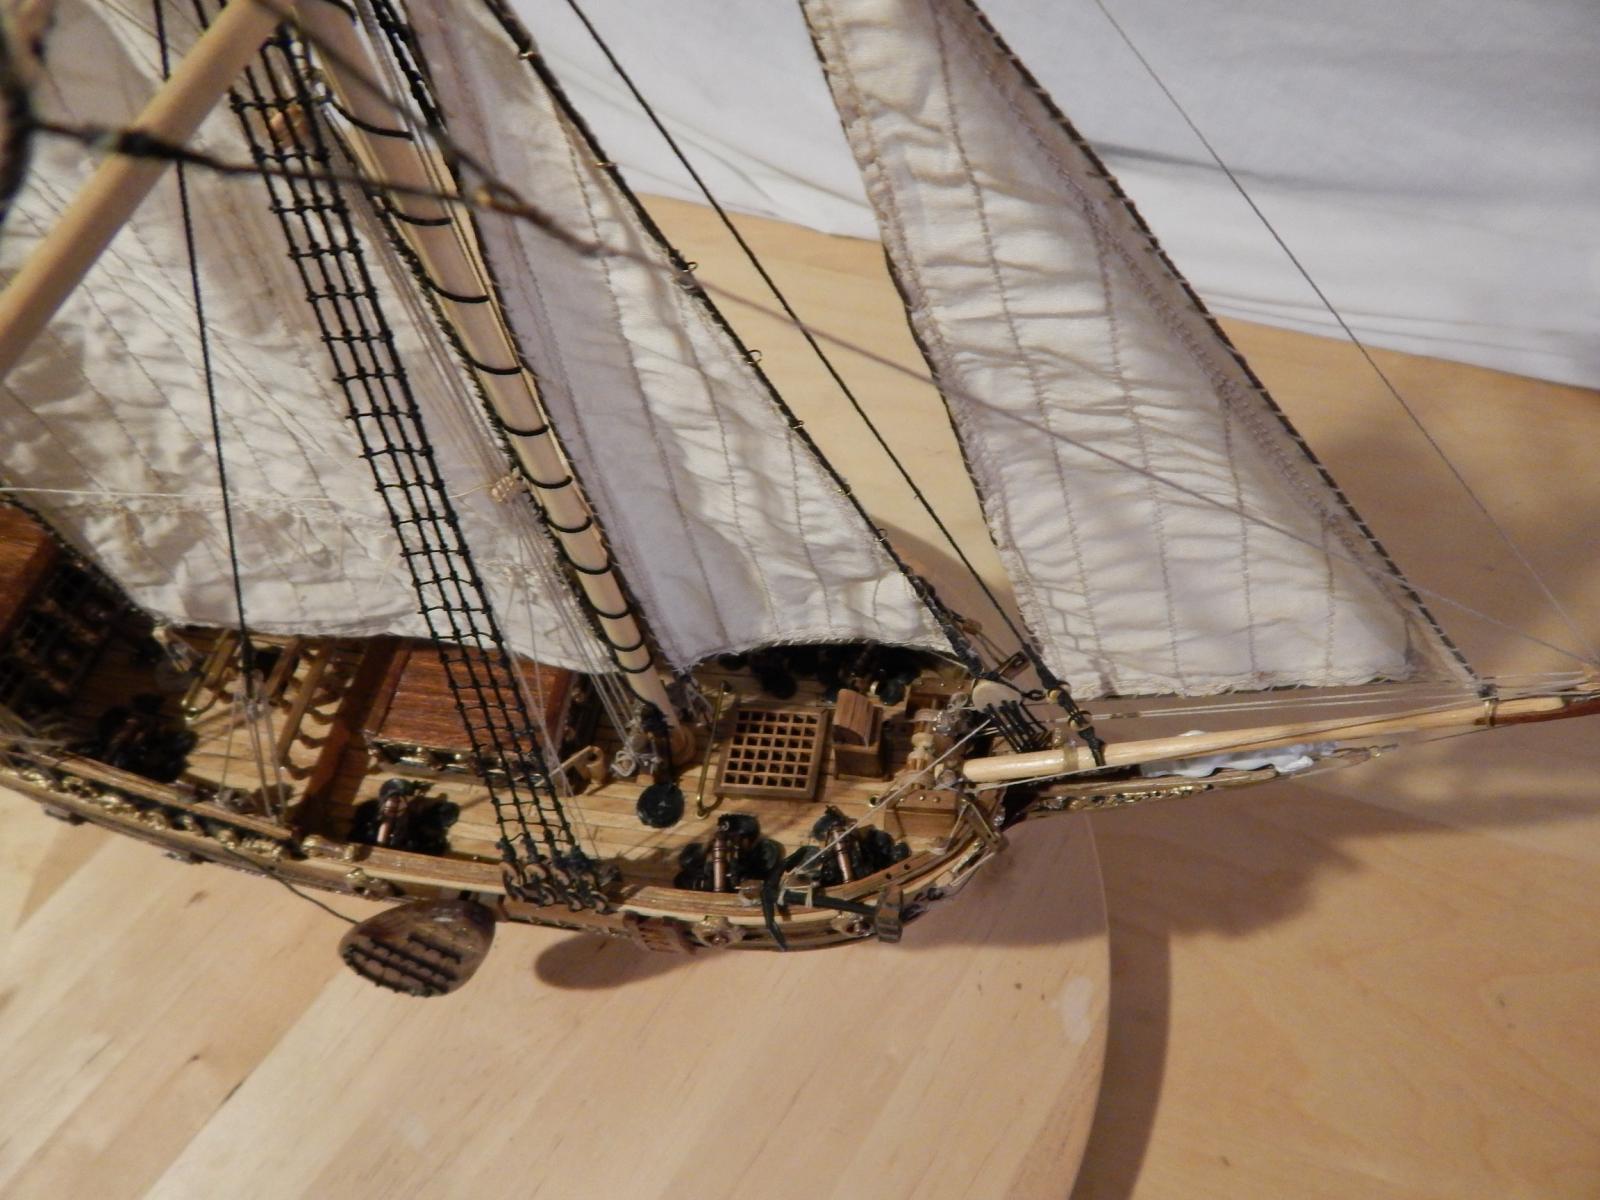
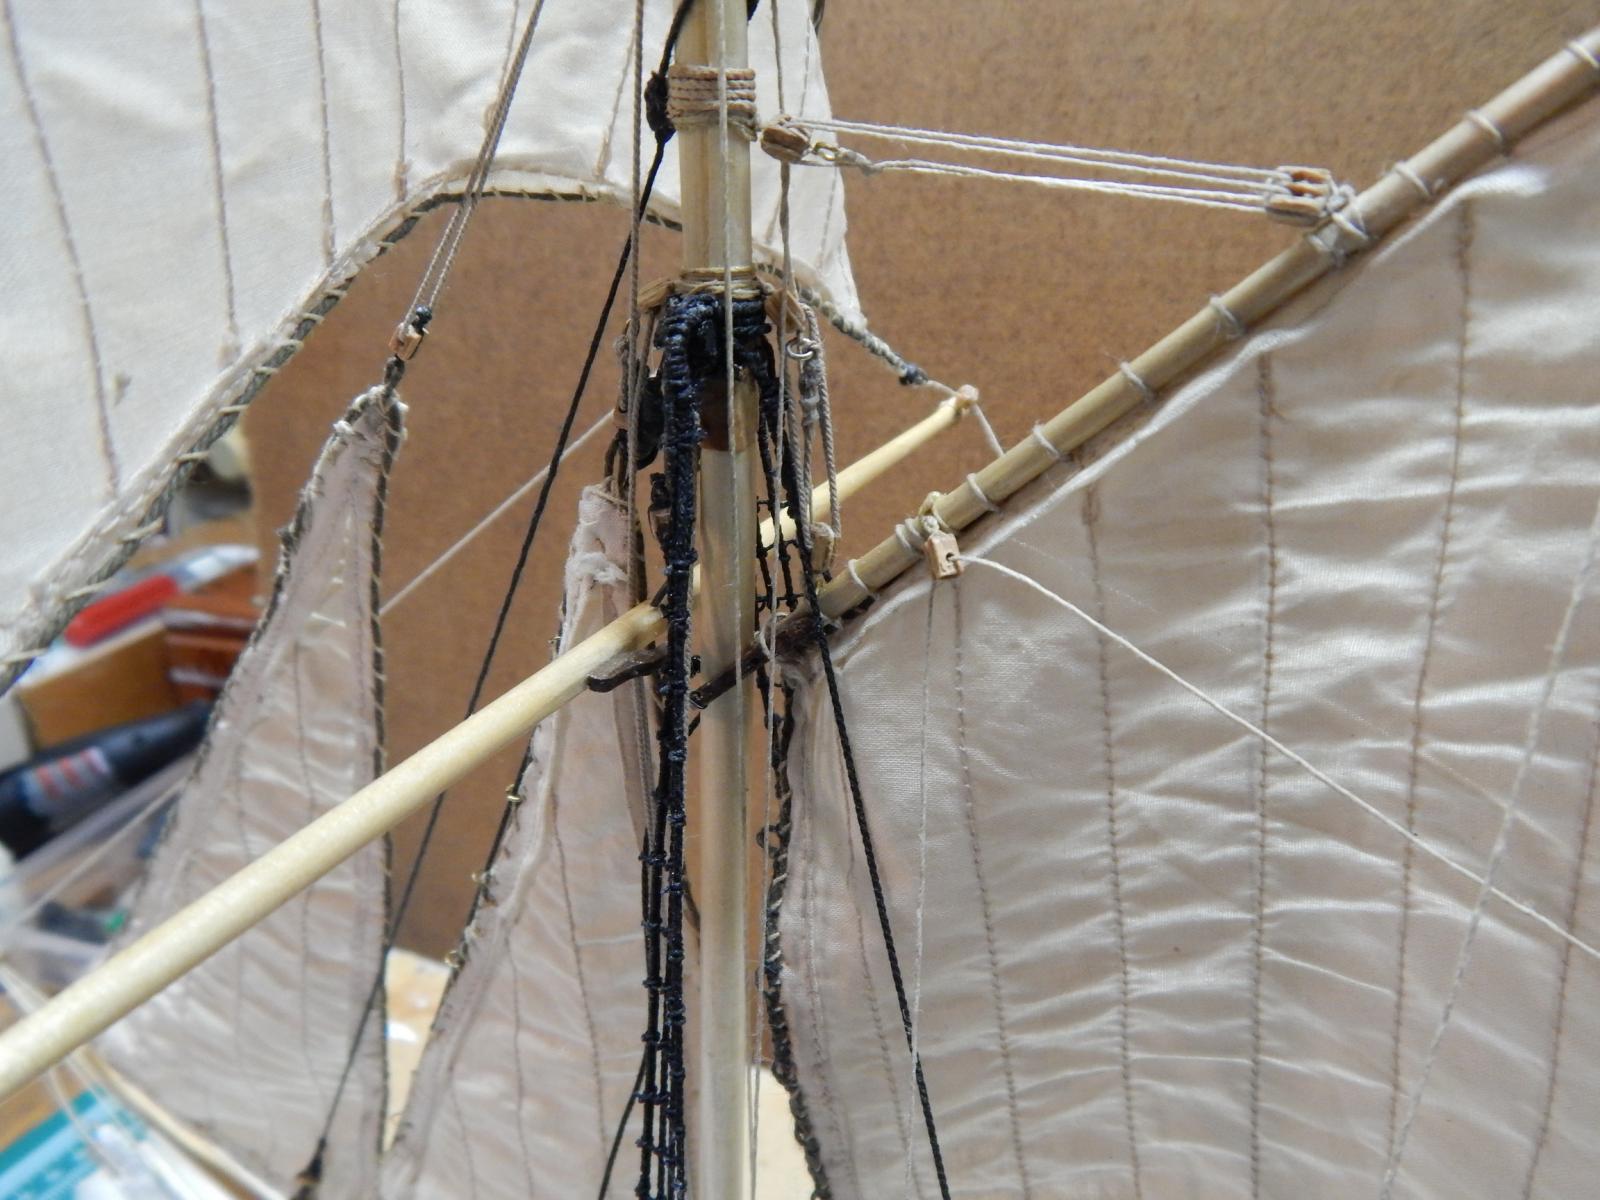
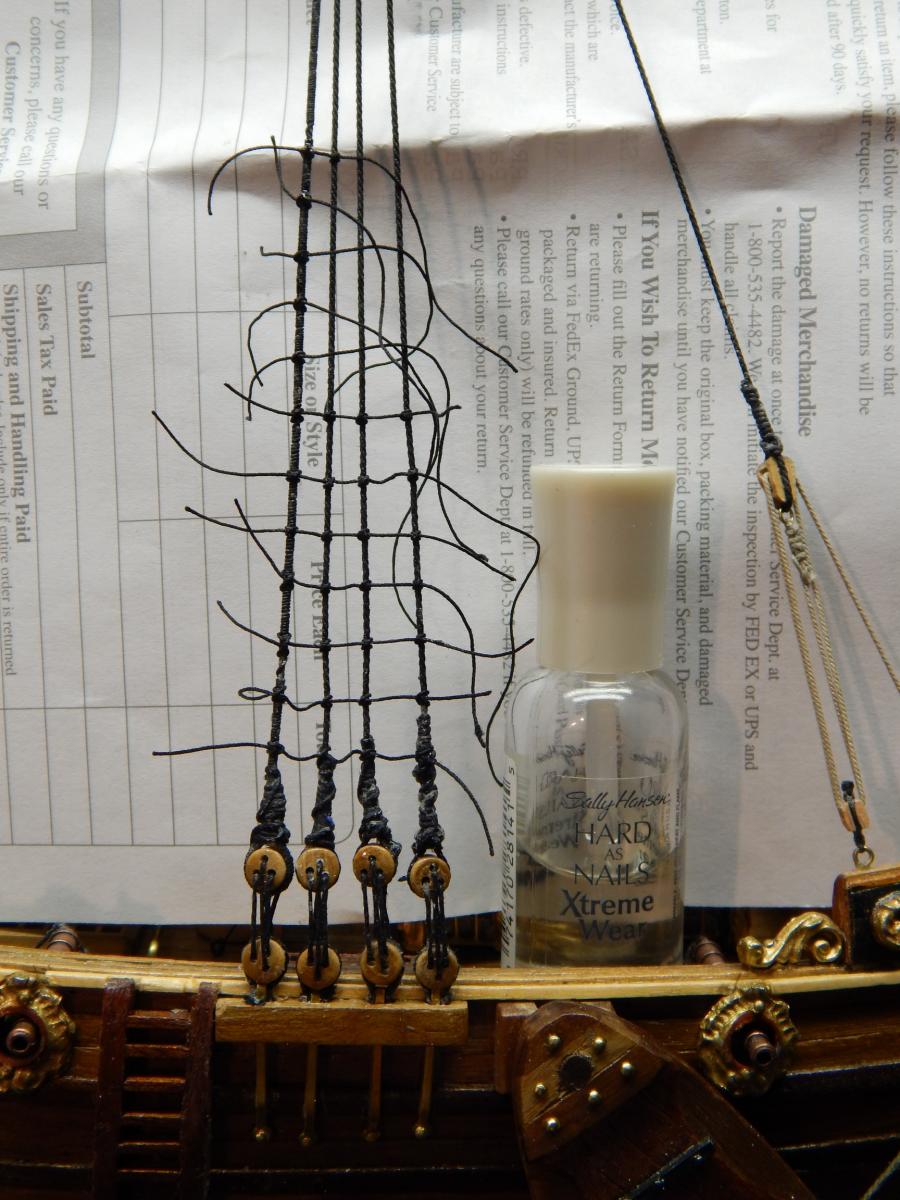
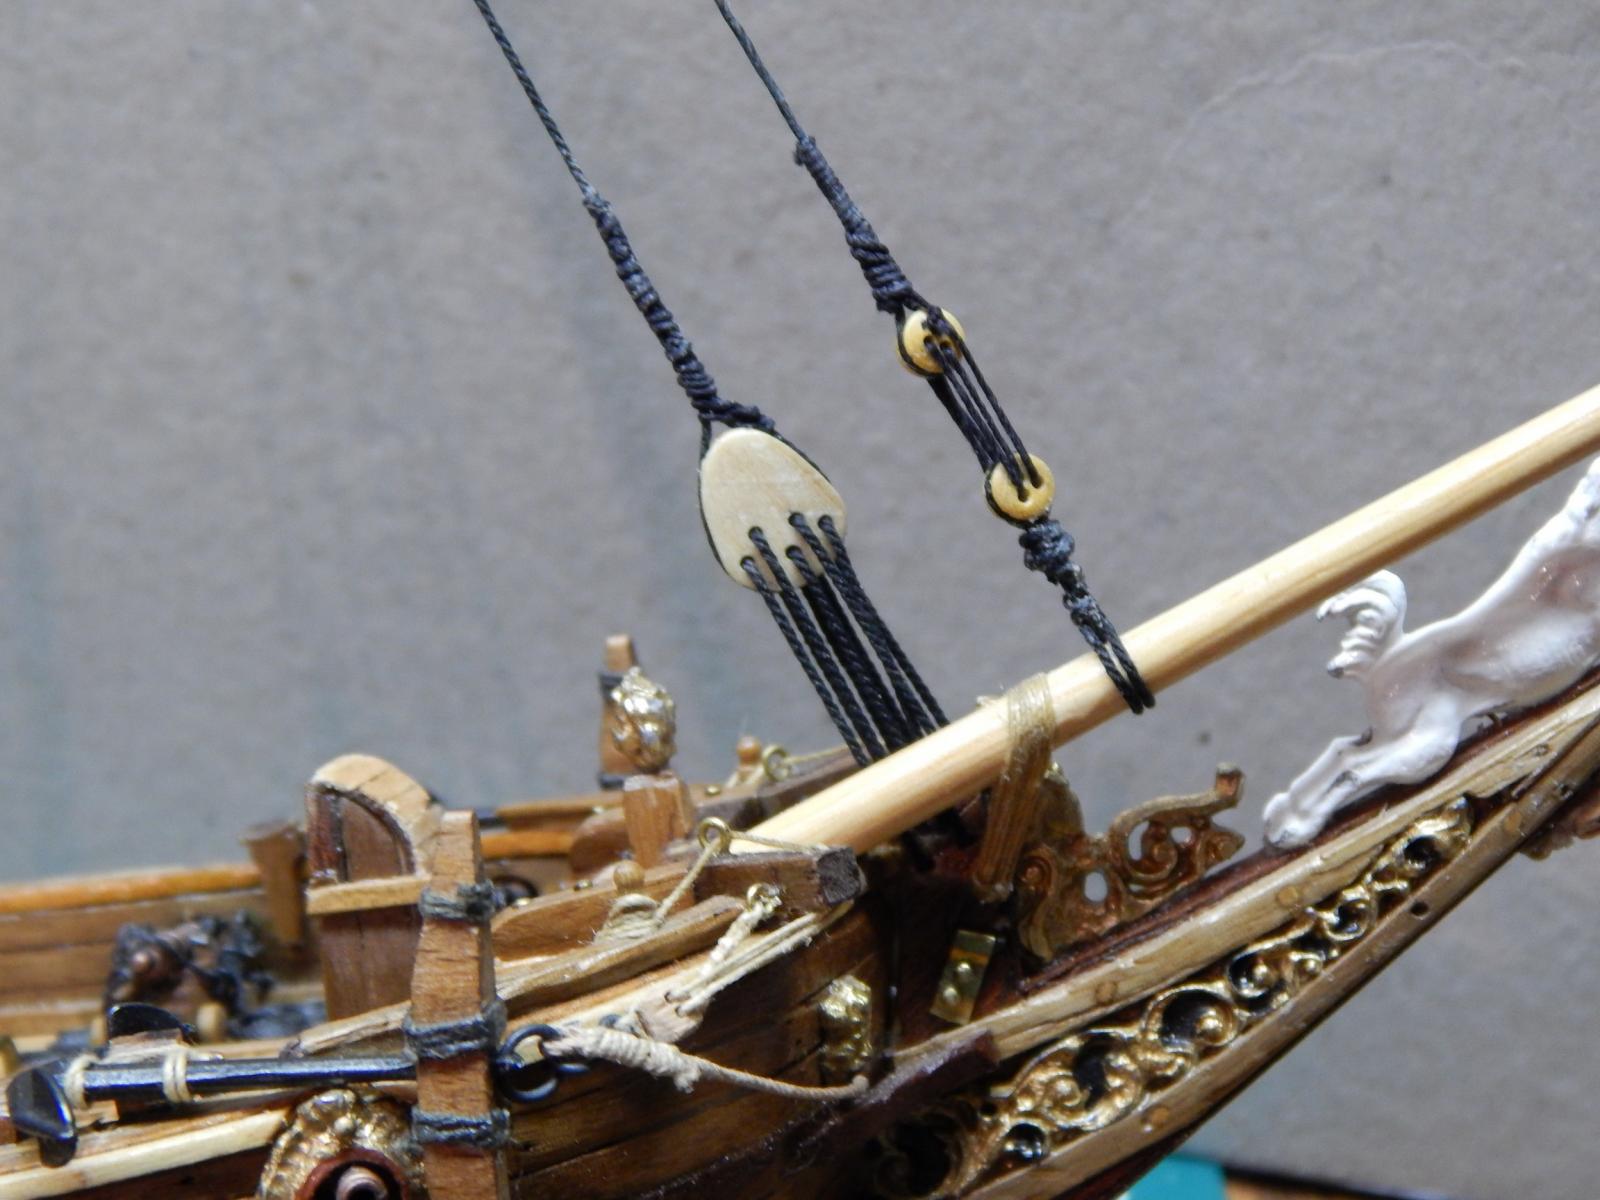
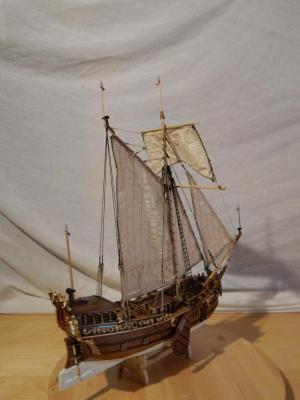
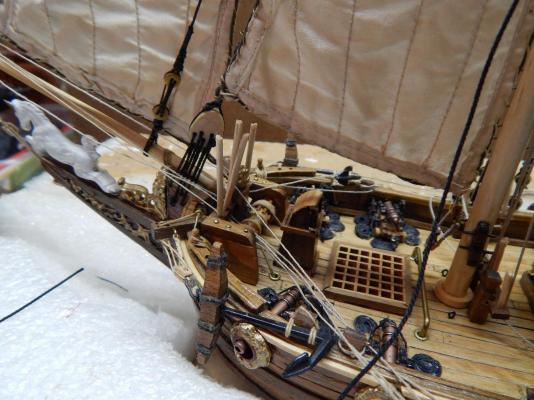
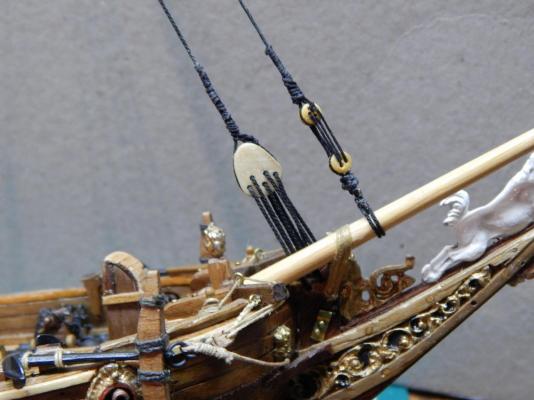
I am working on the running rigging and attaching the sails to the roping and masts. Adding more rope where needed as I go. Just a close-up from the standing & running rigging. I use toothpicks to keep the ropes taught and this is temporary. I tighten here and there so it is just a matter of removing the toothpick, pull the rope a bit and put the toothpick back. I will do this until everything is taught, even and looks good. Then the roping will become permanent. For dgbot - First picture, lower right corner - I broke off the flagstaff. I'll just wait till I finish the rigging and start on the flags. Marc
- 85 replies
-
- 4
-
-
- yacht mary
- mamoli
- (and 1 more)
-
Here are 2 sites I have had in my favorite folder. (you may already know about these). http://www.cardfaq.org/faq/freeb.html http://www.paper-replika.com/ (dead link) The only card model I have ever done was a clock kit that was from a Canadian manufacturer. It worked but it was slow. Meaning it lost 5 minutes every day. Marc
-
These pieces are exquisite. The detail is amazing. You do beautiful work. You can start doing custom work for people who model but don't know how to carve. Marc
-
Thank you for the comment and this will help me decide to purchase one. I did some research on the reviews of several models and price. The one from Harbor Freight is reasonable, I've seen it in there store and I like it. I am going to get it. I don't want to spend a lot of money on an electric tool, I have never used before. Try it out and if I use it as much as you do, I will look for a mid-range model. Calipers do count. I uses them as well, I have one from grad. school and it is still very accurate. Marc
-
Thanks, Dave. I am trying to be very careful. So if I need something on my table and it is behind the boat, I need to STOP, Think, Look around, move ship, get item, bring ship forward and work on it. Marc
- 85 replies
-
- 2
-
-
- yacht mary
- mamoli
- (and 1 more)
-
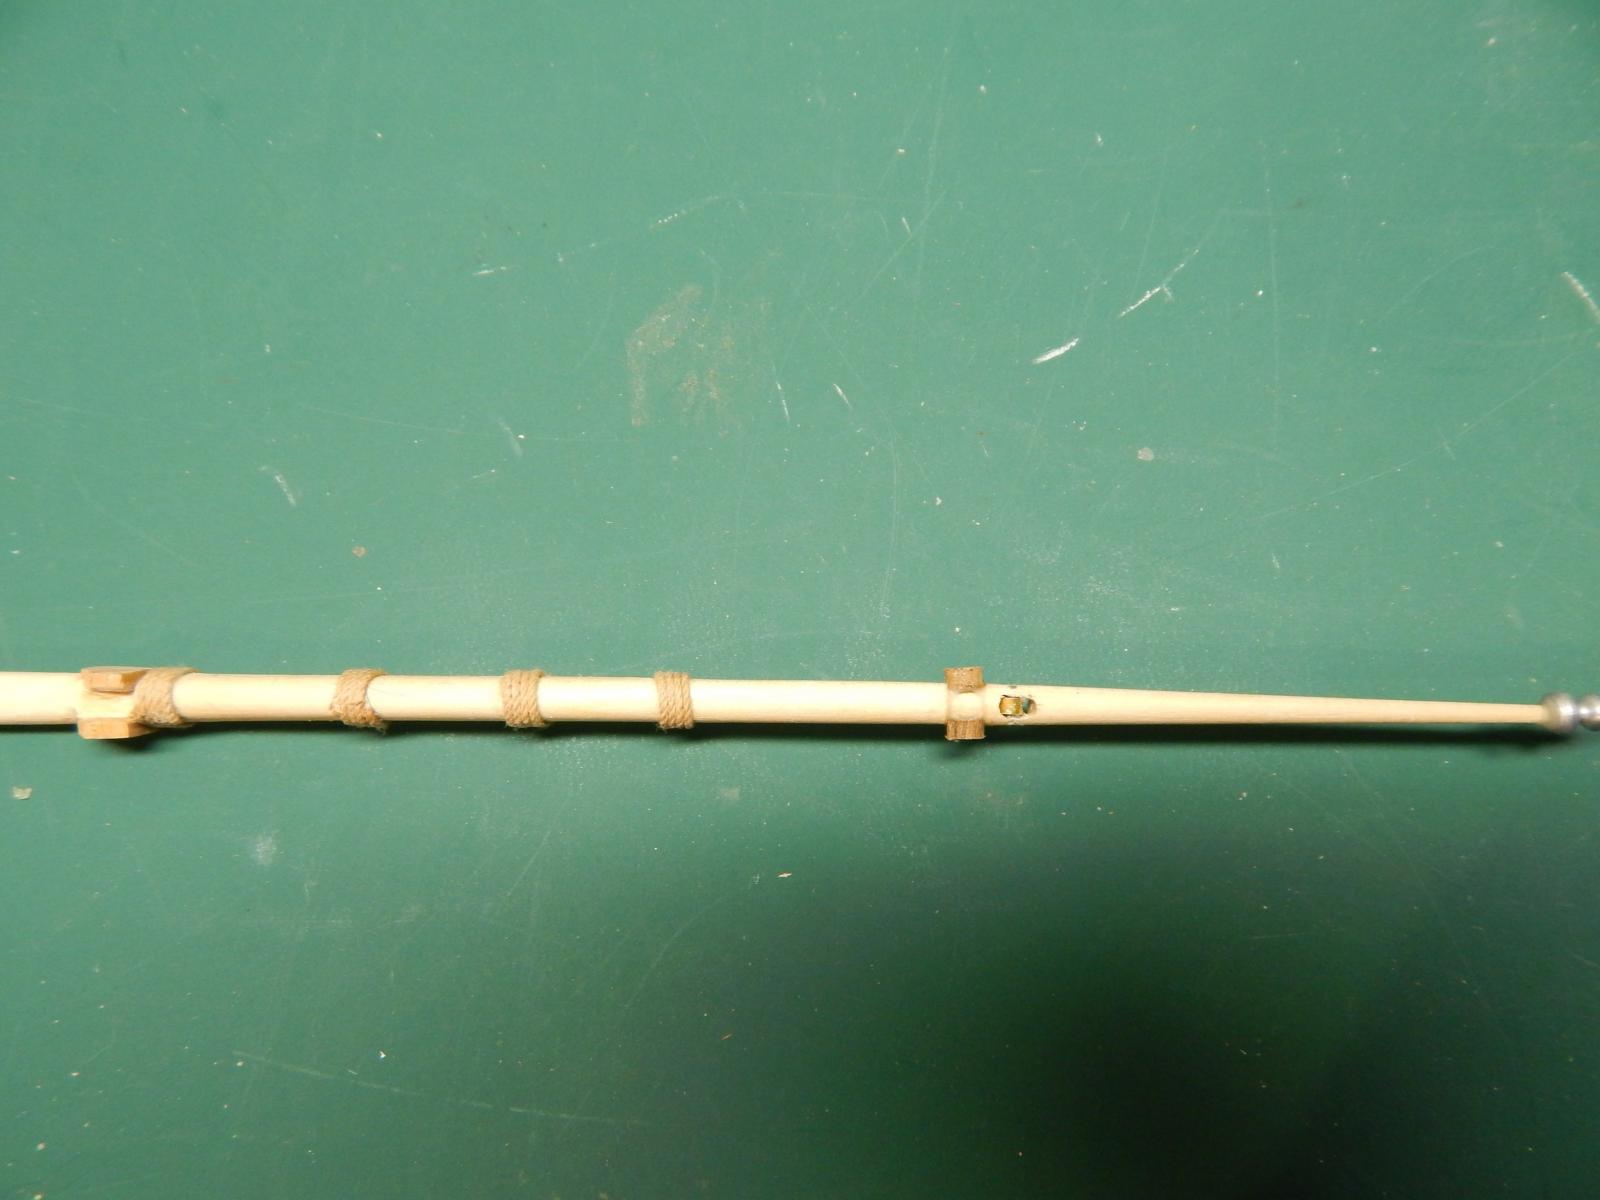
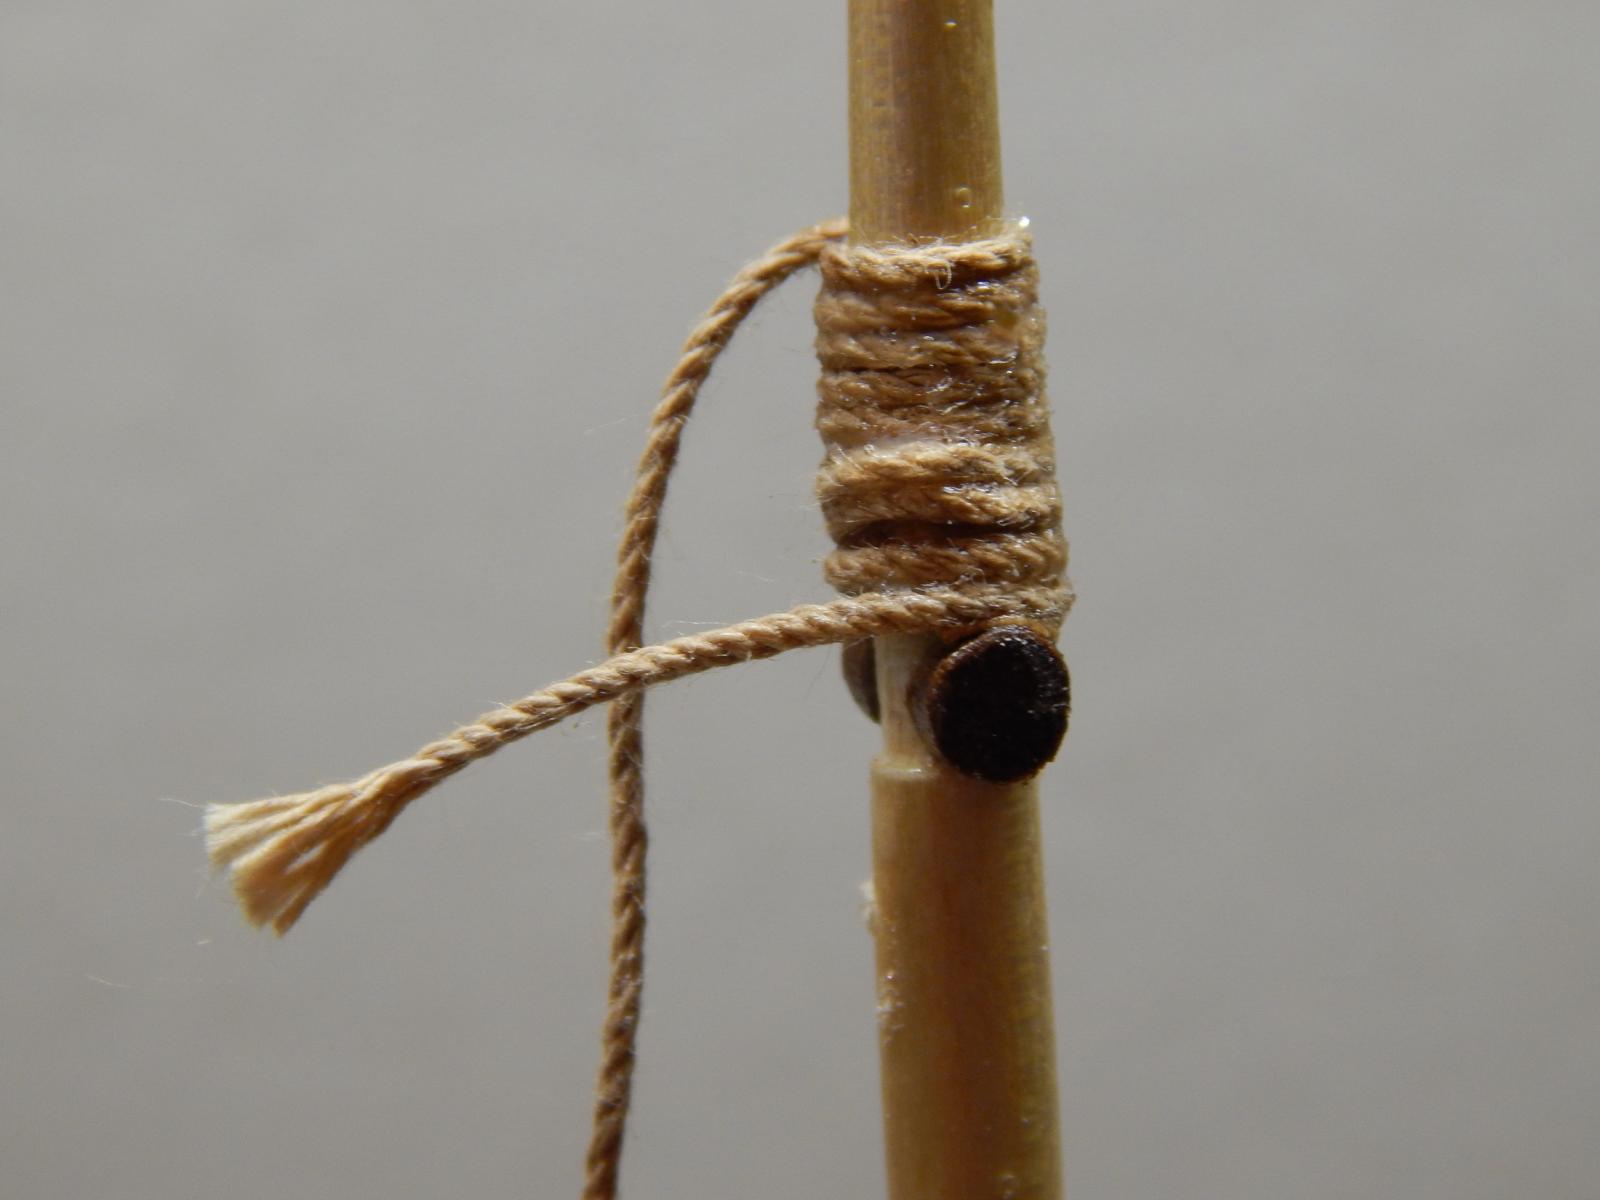
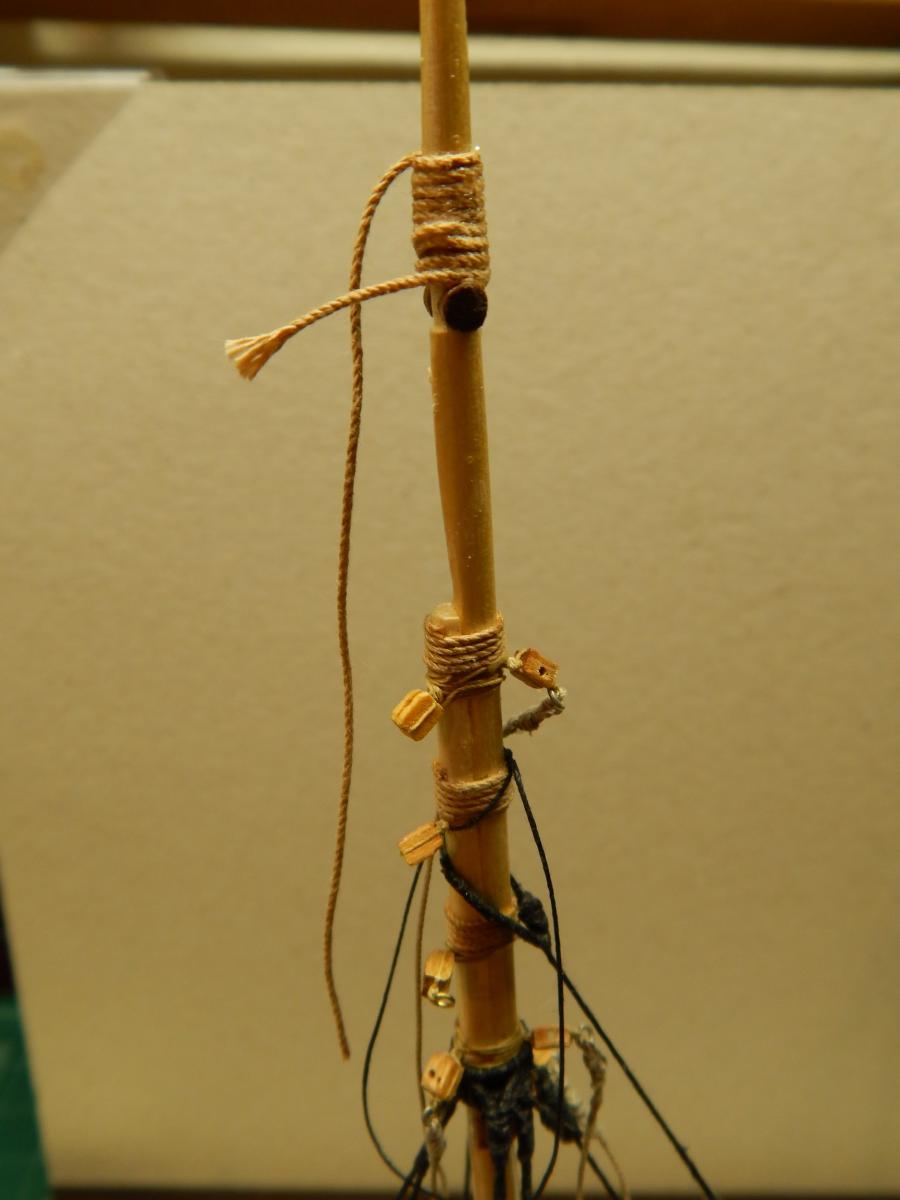
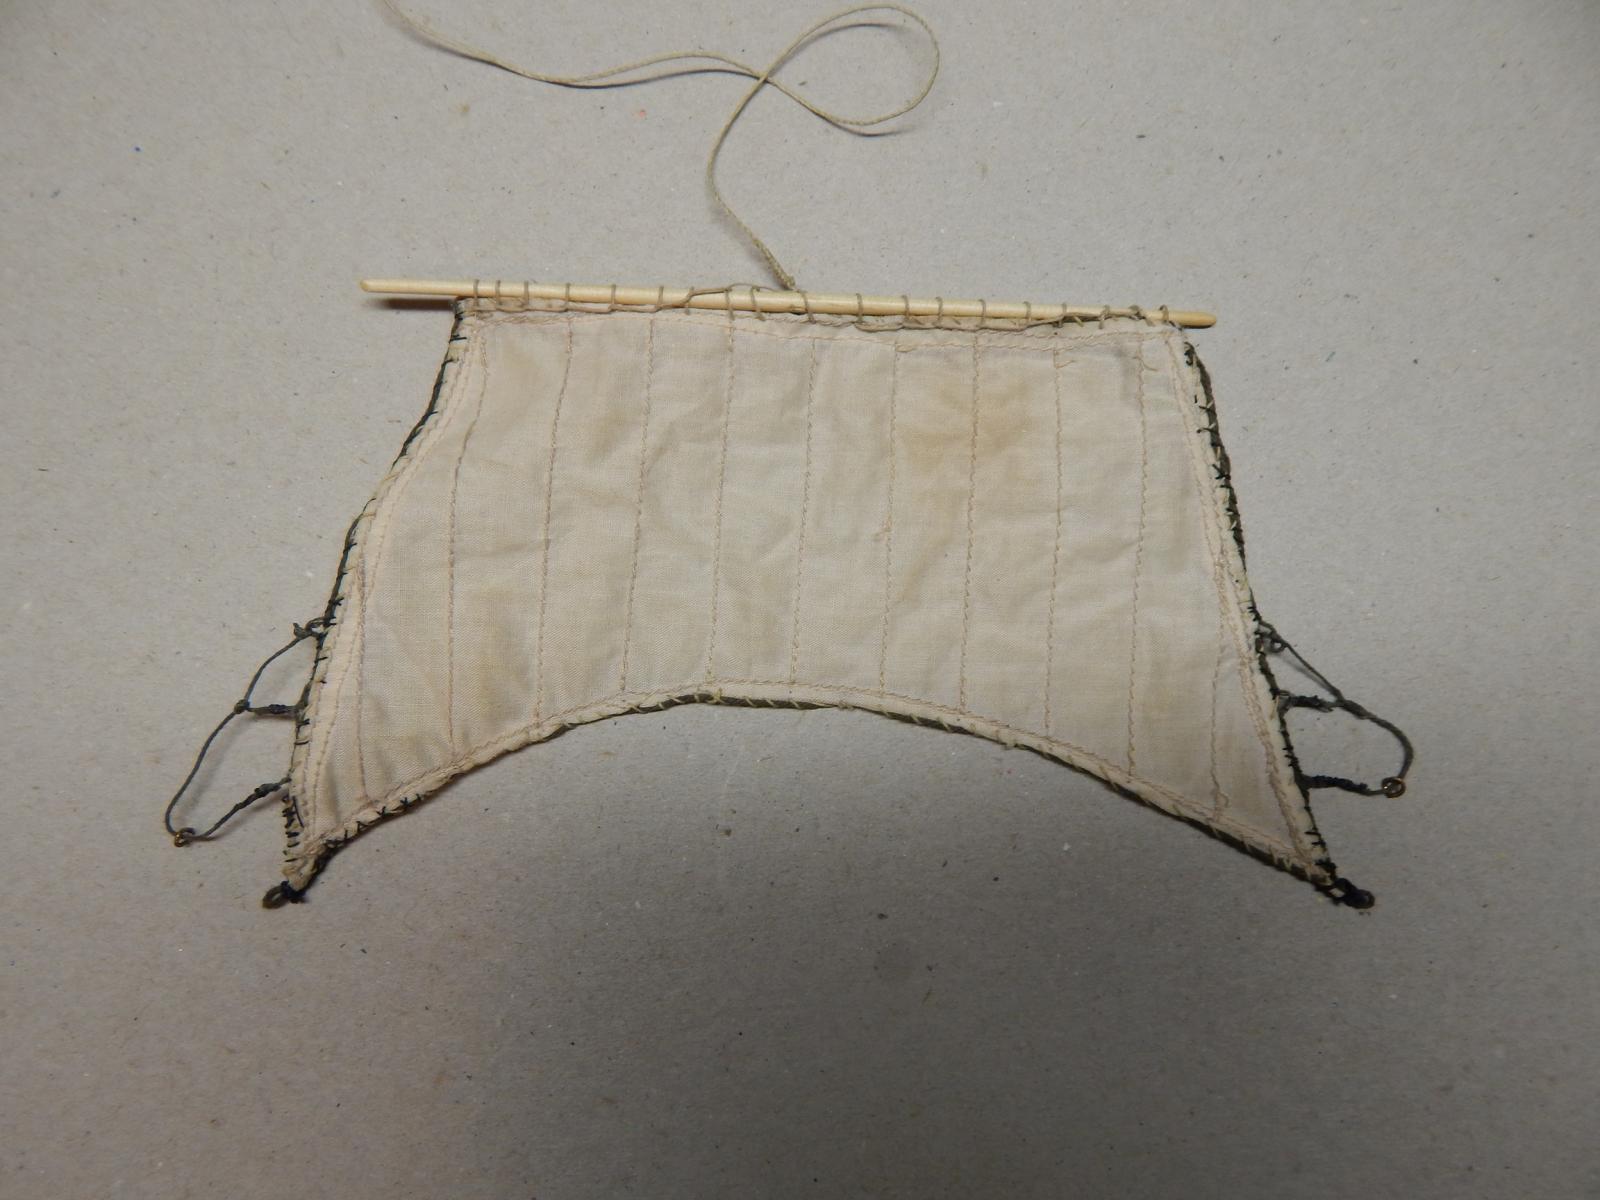
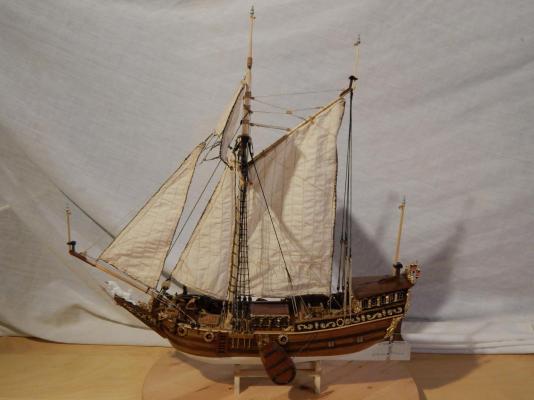
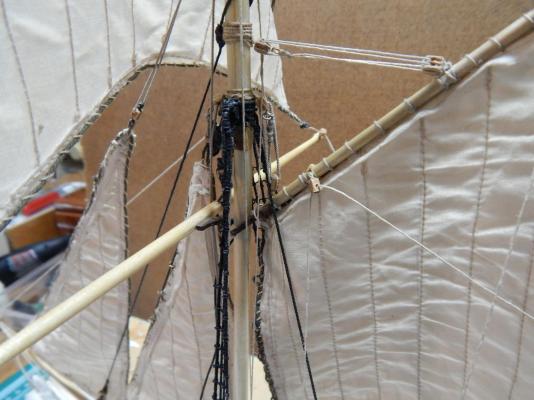
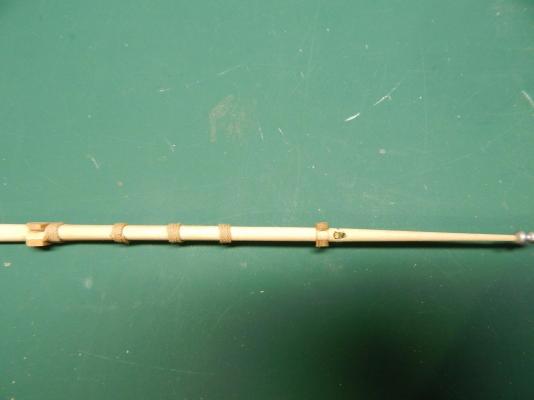
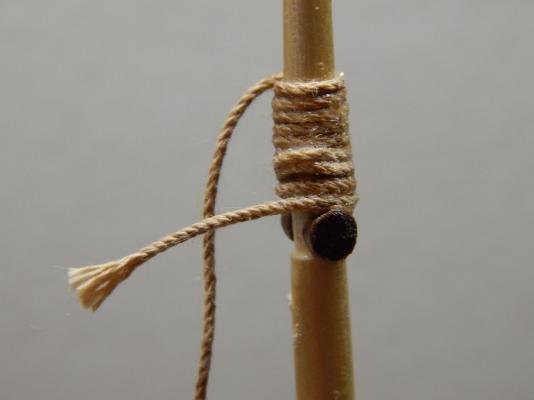
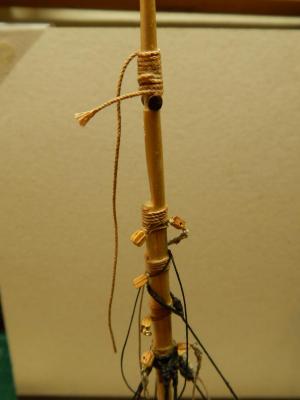
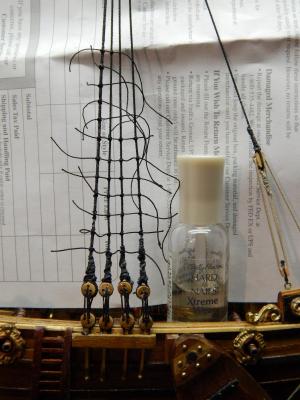
As I mentioned before, I broke the top of the mast because there wasn't enough wood as I had built a sheave in it. The repaired mast. Got rid of the sheave, molded wood putty in the hole and wrapped it with roping. This roping is all along the mast so it doesn't look that awkward. I read a long time ago that you can use clear nail polish on the ratlines and I have used it on every ship I've built that had ratlines. The clove hitch doesn't come apart and it is virtually invisible to the eye. The rigged heart block. Standing rigging is complete. I finished the topsail with the clew lines and the lines (that I don't have a name for). They are tied as half moon shapes on each side of the top sail. The directions only show one side on how it integrates with the rigging. I went to the Frisian maritime museum http://www.friesscheepvaartmuseum.nl/ and looked at there ship models as well as there paintings. Also I came upon a model where it clearly shows how it is rigged. "This model is ALL mine".
- 85 replies
-
- 4
-
-
- yacht mary
- mamoli
- (and 1 more)
-
I use mostly hand tools (sandpaper, files, knifes, etc). For power tools it would be Dremel and scroll saw. I have been contemplating about buying a combo belt and disc sander. Besides building boats I also build working clocks and getting those teeth sanded by hand takes a long time. I don't know. Marc