flying_dutchman2
-
Posts
1,735 -
Joined
-
Last visited
Content Type
Profiles
Forums
Gallery
Events
Everything posted by flying_dutchman2
-

Naval History On This Day, Any Nation
flying_dutchman2 replied to Kevin's topic in Nautical/Naval History
Eamonn; There would be a lot of that. Everything mankind did? My suggestion: Stick to the same centuries Kevin already used and add other naval facts. Admirals-born/died and what achievements they did. Ships used such as descriptions. Armaments used, when they came into existence, who invented it and how. Go here: http://www.gutenberg.org/ type in keywords and get FREE books - copyright is no longer valid, lots of Naval. I have learned a lot from books on this site. Lots of VOC, British East Indies, diaries of Bligh, and other sailors, lots of everything. Marc -
Naval History On This Day, Any Nation
flying_dutchman2 replied to Kevin's topic in Nautical/Naval History
Kevin; Where do you get all those detailed dates from? The Net? I am looking on Dutch sites and there isn't a lot of naval info, but I will keep looking until I hit the jackpot of information. The Brits always kept detailed information. Better than the Dutch. Marc -
Title: Reconditioning an Eighteenth Century Ship Model, VALKENISSE Retourschip of 1717 Author: Rob Napier Publication Date: 2008 Publisher: SeaWatchBooks LLC. 19 Sea Watch Placé, Florence, OR 97439; www.seawatchbooks.com. ISBN: 978-0-9820579-0-2. Binding: Hardcover, 8"X 11" Edition: First Pp.: 253 Numerous photographs, drawings, five appendices including tables, brief glossary of Dutch terms, index, four plans. Valkenisse, a “retourschip,” meaning a return ship, was a Dutch East Indiaman belonging to the Verenigde Oostindische Compagnie (VOC) or United East India Company. Built in Middelburg in 1717, the vessel sailed between Holland and Batavia (now Djakarta) taking supplies out and expensive merchandise back, making seven round trips before being wrecked in 1740. While Valkenisse was lost, a model of her still exists, almost 300 years after an unknown builder created it to decorate VOC headquarters in Middelburg. This model is now in the collection of the Museum of Fine Arts (MFA), Boston. Valkenisse, one of twenty retourschip models in existence, was damaged and devoid of its masts and rigging when MFA asked Napier if he would like to rig the model, this despite the fact that two others had worked on the model in the previous hundred years and there was little information as to what either had done. The book, beautifully written and produced, documents Napier's ten-year reconditioning process, a term he feels is more appropriate, with much of the time spent on vast amounts of research, study and old- fashioned detective work to decide what had been, how, and by which builders hand - the original builder, an unknown English one, or a later American owner. The book contains a foreword by Albert Hoving, ship model restorer at the Rijksmuseum in Amsterdam; the preface is by Gerald W.R. Ward, senior curator of decorative arts at MFA, Boston. Hoving, Ward and others provided support during the reconditioning and book-writing process. Chapters are as follows; Opportunity, Provenance, Research Sources including studies and photos of most of the existing retourschips, The Riddle of the Scales, Preparing the Berth, The Hull Below the Main Rail, The Hull, Main Rail and Above, Going Aboard (a tour of the model) Sparring, Rigging Preparations, Standing Rigging, Running Rigging and the Final Steps, followed by five appendices, a glossary, sources and an index. There are also four folding plans by Napier in a pocket on the inside back cover. The book is lavishly illustrated, primarily with Napier's photos and illustrations. If I never build this boat, it is still worth having it in my library. Thank you, Marc

- 1 reply
-
- 2
-

-
- Valkenisse
- Retourschip
- (and 5 more)
-
Title: The Ships of Abel Tasman Author(s): Ab Hoving & Cor Emke with an introduction by Peter Sigmond Year: 2000 Publisher: Verloren, Hilversum, The Netherlands Language: English Edition: First ISBN: 90-6550-087-1 Pages: 144 Book Type: Softcover Extra: This box contains a book (Dutch, English or German), 40 printed drawings scale 1:75 and a cd-rom. The cd-rom includes Plans for both the Heemskerck - yacht and the Zeehaen - fluit for the following metric scales: 1:50, 1:87.5, 1:100 and 1:150. The plans are in HPLT format. Any decent CAD app. can read this. I use TurboCAD Deluxe 20 and it reads it well. The cd-rom also includes tabels in Microsoft Excel for Every measurement in Every scale and lots of pictures of the model, paintings of these types of ships and maps. Summary: As described in his preserved extract-journal, Abel Tasman had two ships under his command during his memorable voyage to the mysterious 'Southland' in 1642: the yacht 'Heemskerck' and the fluyt 'Zeehaen'. According to historian Peter Sigmond, head of the department of Dutch History of the Amsterdam Rijksmuseum, these ships can be placed in the same rank as ships like the 'Santa Maria', the 'Golden Hind' and the 'Endeavour'. Ab Hoving, head of the restoration department working for Sigmond, built models of these ships. Cor Emke has recorded the entire (experimental) building process on cad drawings. These drawings are not only printed but also recorded on cd-rom. This cd-rom enables the model builder to examine and print each part of the ship in a scale selected by himself. In the book to which the cd-rom belongs, Peter Sigmond describes the historical background of Tasman's expedition. Original illustrations from Tasman's journal, and paintings and pictures of yachts and fluyts illustrate the narrative. The book also offers an analysis of seventeenth-century shipbuilding; an account of how the models were built; a typology of the ships Tasman sailed with and a lot of information from which anyone interested can make his own choice in order to construct his model. My Personal Interest. Some of the modelers in this site know that my interests is in Dutch ships, preferably VOC and flat & round bottom boats. For a couple of years I have been looking for boats to scratch built. To start with I am going to built the Statenjacht "Utrecht". From there on I wanted something larger, challenging and historical. As I read anything about the VOC I have been reading a lot about Australia (Anthony van Diemens landt), New Zealand (Named after the Dutch Provence Zeeland) and Tasmania (last name of the explorer). So decided that the Ships of Abel Tasman would be a challenge and different. (I enjoy building boats that very few people built). I had difficulty obtaining the book, but found out that a member of my local nautical club, Bob F., had the book in possession and was willing to part with it. Purchased the book and have been reading it and studying the plans. The printed plans in the book are in scale 1:75 which is of a good size. If I am energetic enough I may do the boats in scale 1:50. I plan to do the jacht 'Heemskerck' first and when I have more experience with building do the fluit 'Zeehaen' last. The fluit looks so odd to me. Small waist (deck), big buttom (hull). Pear shaped boat with a large cargo bay near the waterline and a narrow deck. For the members of this site that do not know what the purpose of a fluit was is the following: The Dutch had to pay high taxes to Denmark which was assessed based on the area of the main deck and this is how the fluit came about. It was not built for conversion in wartime to a warship, so it was cheaper to build and carried twice the cargo, and could be handled by a smaller crew. Minimized or completely eliminated its armaments to maximize available cargo space. Construction by specialized shipyards using new tools made it half the cost of rival ships. These factors combined to sharply lower the cost of transportation for Dutch merchants, giving them a major competitive advantage. Another advantage was a shallow draft which allowed the vessel to bring cargo in and out of ports and down rivers that other vessels couldn't reach. The fluit gained such popularity that English merchants build similar looking ships. Here is a link of a person in Germany that built the Zeehaen. Excellent built. http://www.modelships.de/Fluyt-Zeehaen/Photos-ship-model-fluyt-Zeehaen_details.htm Thank you for reading. Marc

- 5 replies
-
- 4
-
-
- Abel Tasman
- Heemskerck
- (and 7 more)
-
Naval History On This Day, Any Nation
flying_dutchman2 replied to Kevin's topic in Nautical/Naval History
1991 - Operation Desert Storm, liberation of Kuwait from Iraq, begins and there was some Naval involvement. I remember this as we were glued to the BBC in the office in Riyadh, Saudi Arabia. The Gulf war was one big joke. No chemical attacks, EVER. I kept a dairy and reading it every so often makes me laugh as everything was clockwork. Around 5pm and 5 am there would be a scud attack. 5 minutes later it would be on CNN and they would make it out to be that WWIII had started. CNN and others exaggerated sooooo much. Except the BBC. Marc -
Naval History On This Day, Any Nation
flying_dutchman2 replied to Kevin's topic in Nautical/Naval History
Always great reading this history. Thanks, Kevin. Marc -
Delftship is another FREE program. There is a learning curve and the FREE version lets you do all kinds things. http://www.delftship.net/ Marc
-
Good looking boat. I love the lines of any flat or round bottom boats. Your built looks great. Marc
-
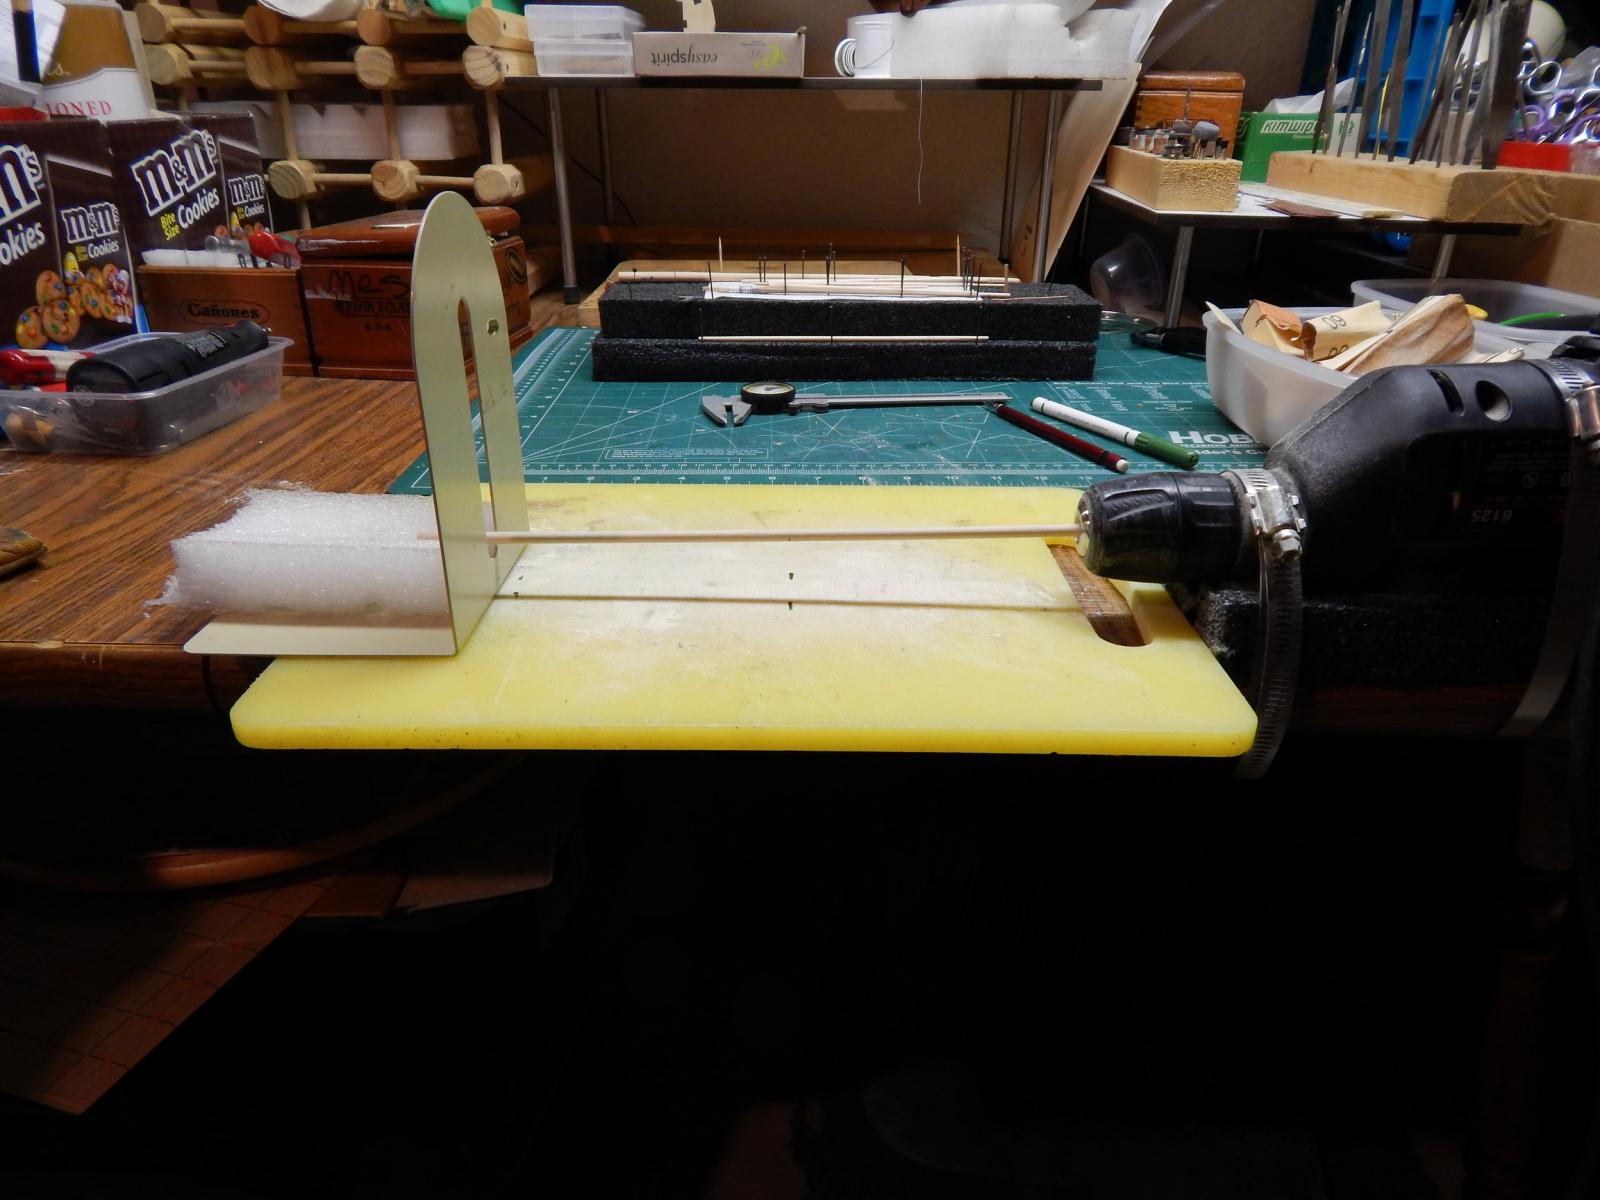
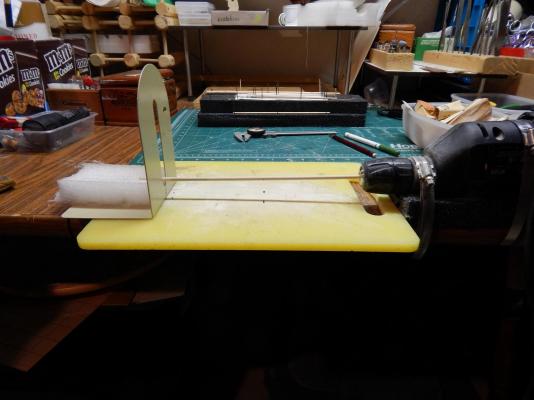
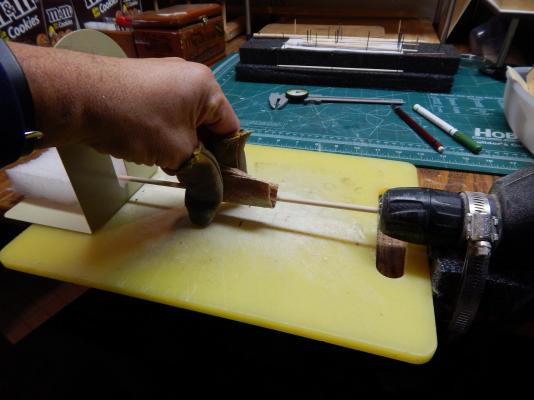
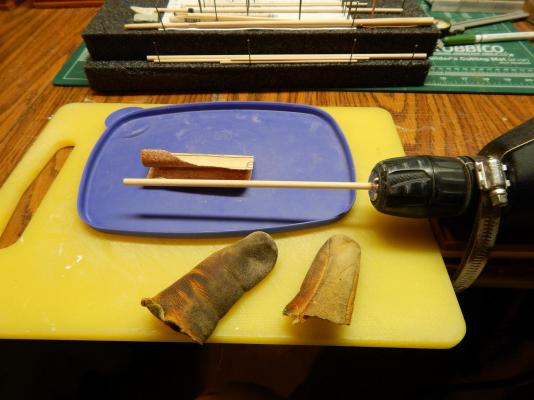
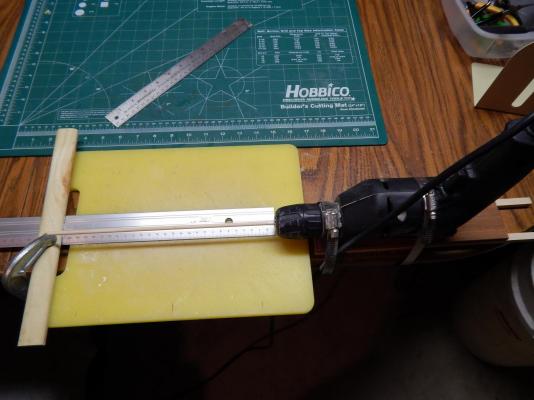
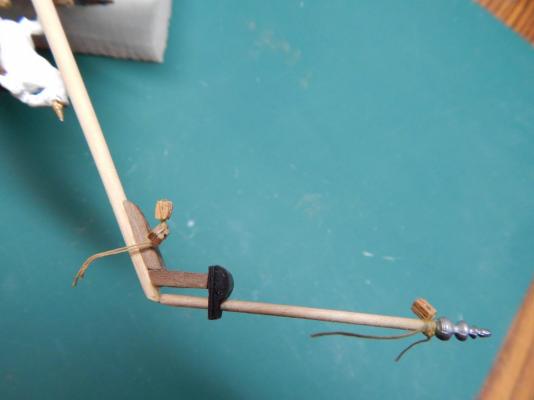
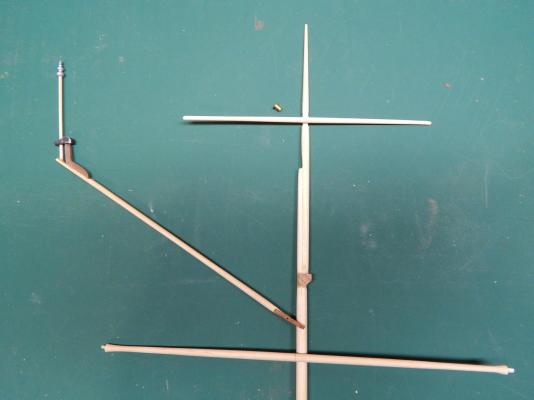
The rig I made for sanding, & tapering masts and spares, saved me a lot of time. The leather fingers from an old glove is to protect my hand from heat. Marc
- 85 replies
-
- 4
-
-
- yacht mary
- mamoli
- (and 1 more)
-
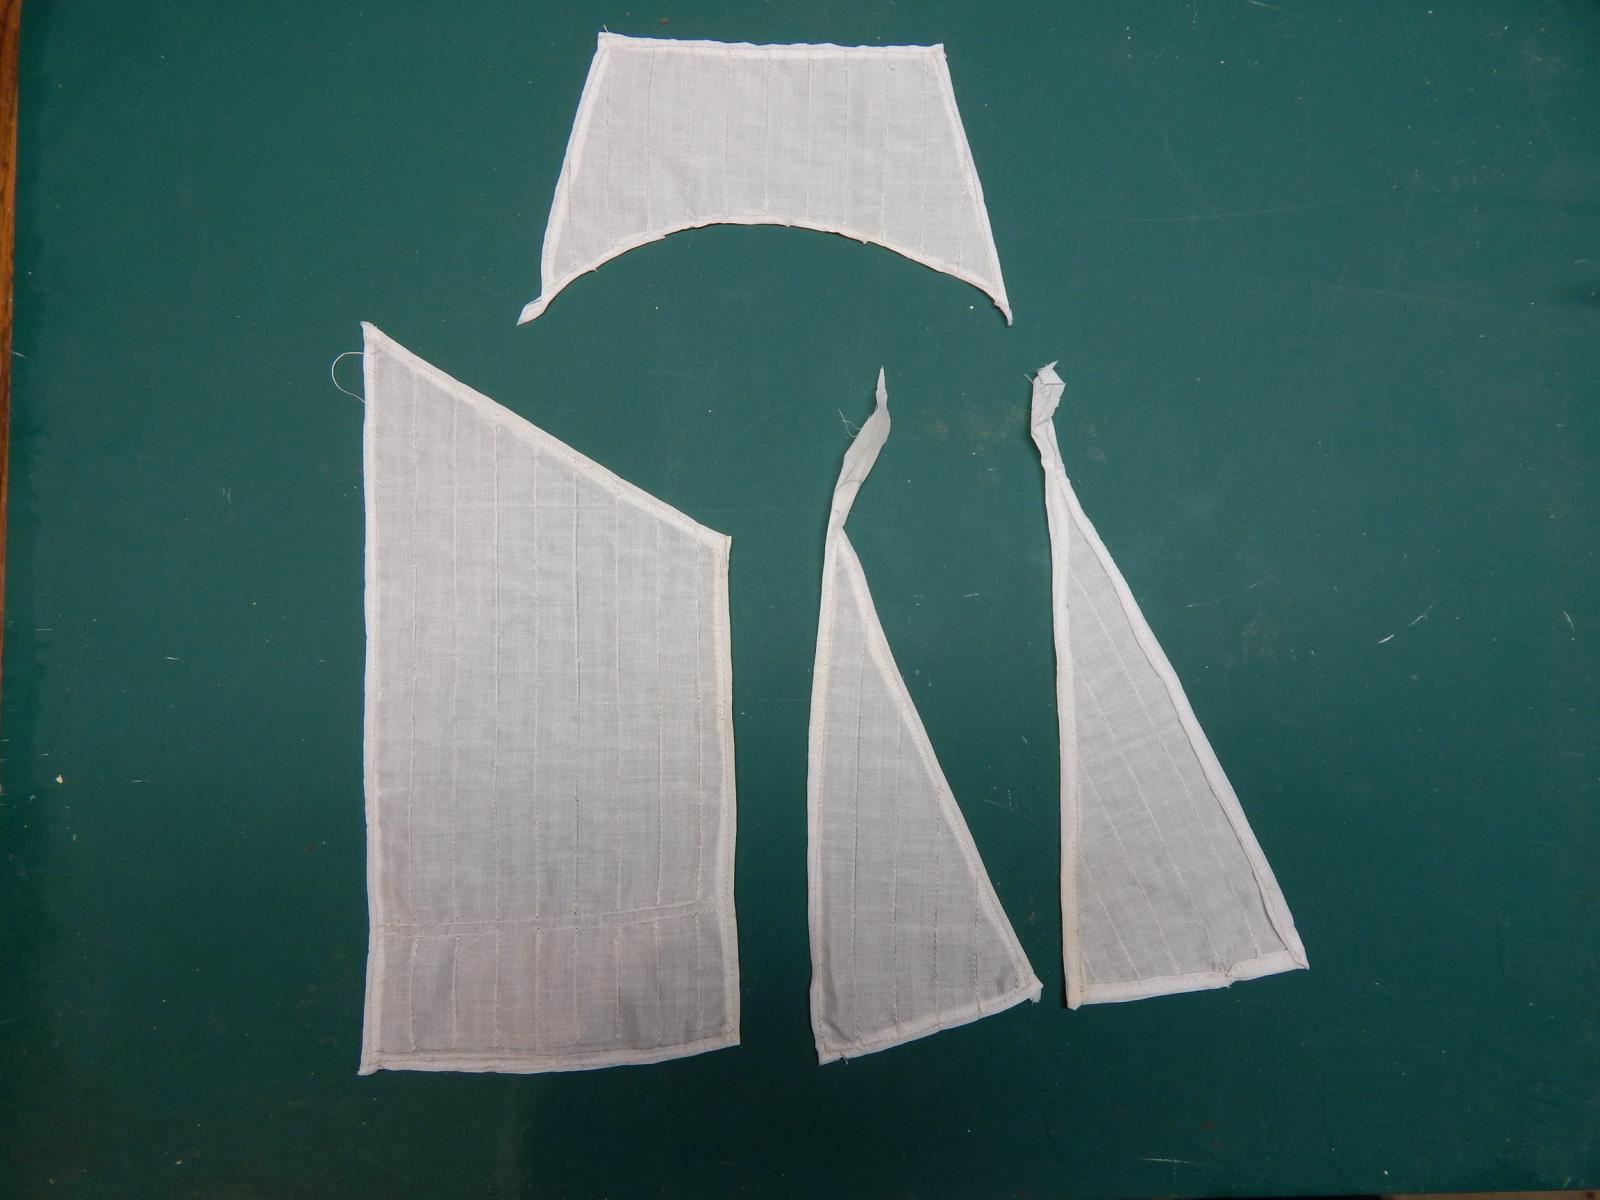
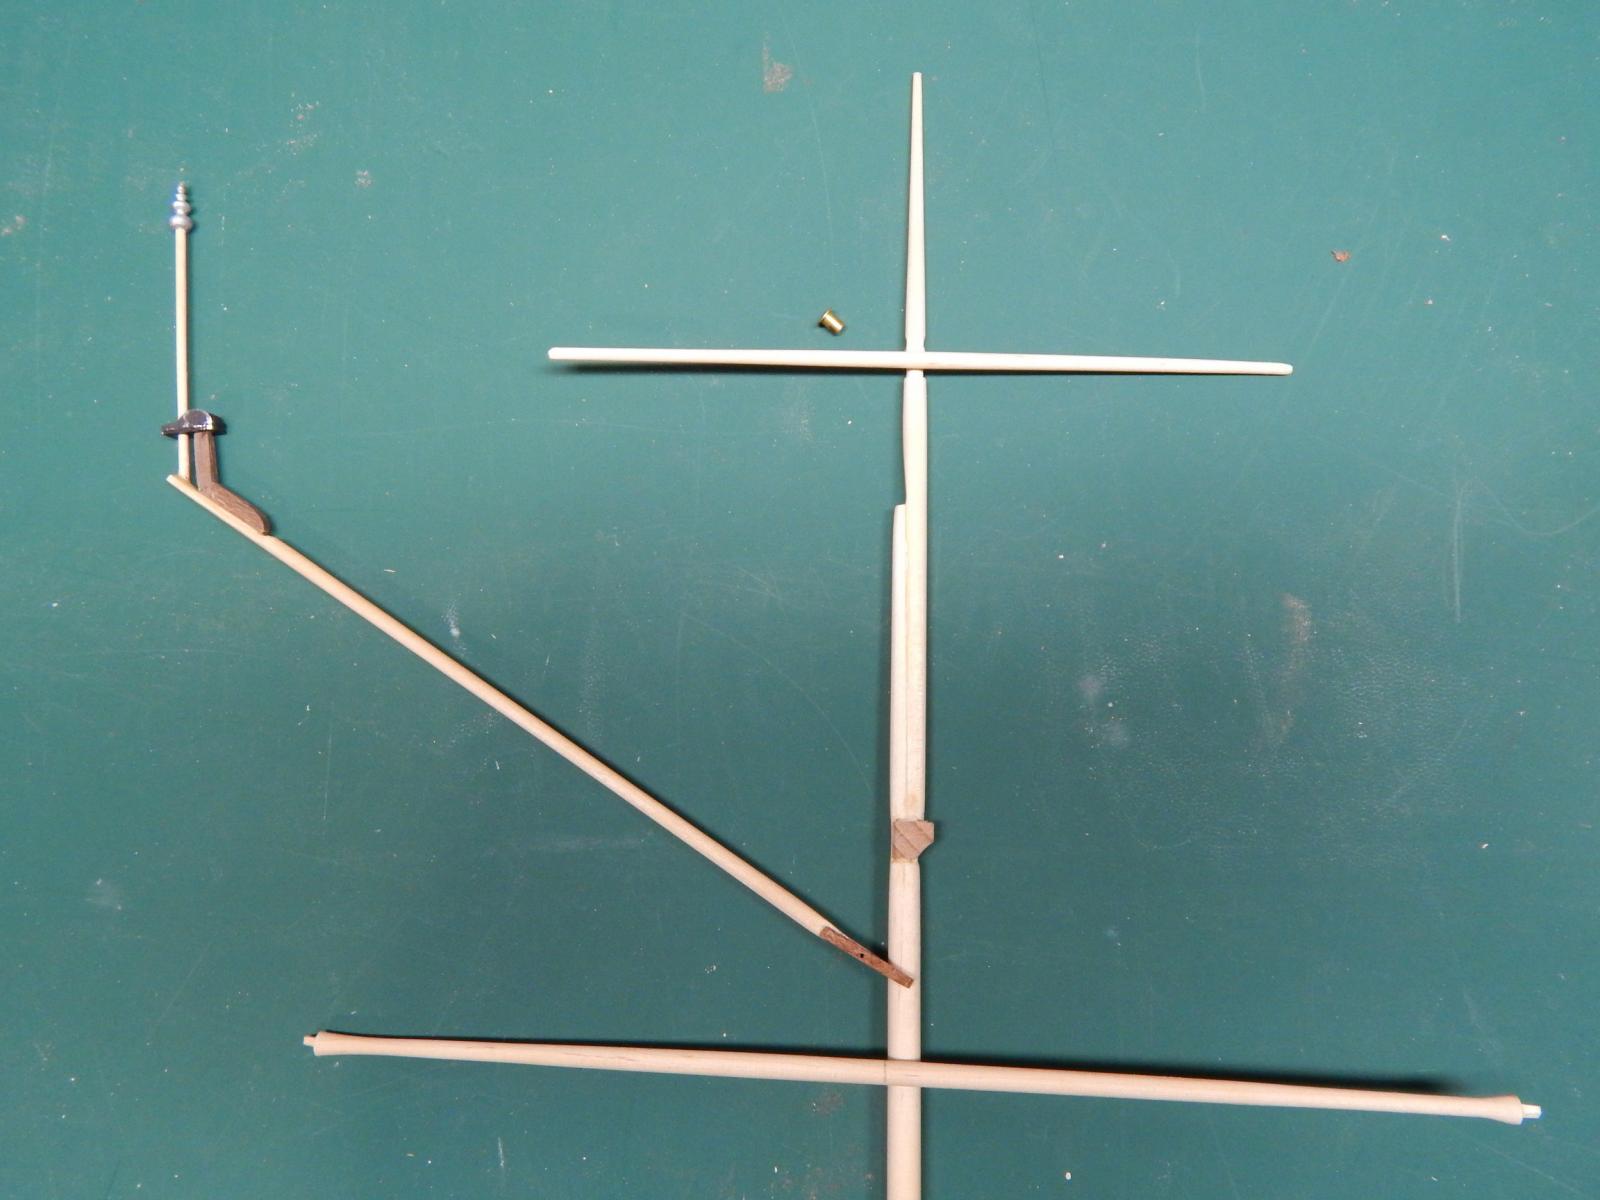
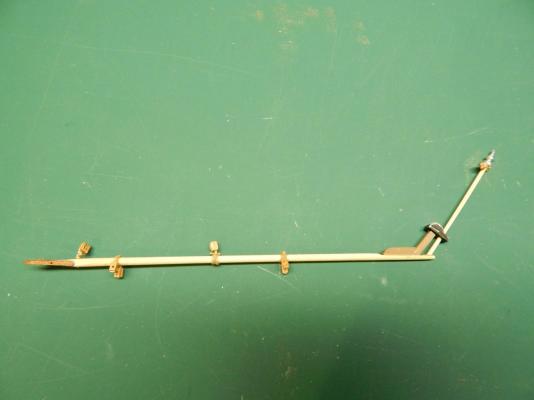
Finished up the masts and stitched up the sails. I will not be doing any building in the next couple of weeks because Mon01-13-2014 I am getting my carpal tunnel on my left wrist fixed. I had my right wrist done last year. It is all that repetitious work I have done over the years (computer programming, pruning of plants). Once the other hand is fixed I can build for longer periods of time. Marc


- 85 replies
-
- 1
-
-
- yacht mary
- mamoli
- (and 1 more)
-
When I first read this thread and read "De Sperwer", I thought of Hendrick Hamel. Born in Gorinchem in the 1600's. Worked as an accountant for the VOC. He boarded the Sperwer in Batavia and due to a sudden storm the ship broke on the rocks of an unknown island which was South Korea. He kept a detailed dairy which is well known. He was the "discoverer" or explorer of Korea. The Sperwer was a Yacht. Here is a link where you can read about it and it has line drawings of what the boat looked like: http://www.hendrick-hamel.henny-savenije.pe.kr/holland18.htm Marc
-
Nice, and lots of parts. Going to be a big boat - 1.30 meters Good luck and this is going to be a beauty when it is completed. Marc
- 1,616 replies
-
- 1
-
-
- caldercraft
- agamemnon
- (and 1 more)
-
I love these boats as well and have build several of them. I am finishing up the Royal Yacht "Mary" and after that my first scratch Het Statenjacht - Utrecht. Other future boats are all Dutch. Marc
-
Excellent work, the small metal custom made pieces, I love the figures (reminds me of old pictures my grandfather had), the sails. Everything about this boat looks pleasing to the eye. The resin model looks a lot like the kit from Authentic Ship Models which I crudely built as my first wooden boat in 1984. This one is so much better. I also love the old equipment you restore and then use on your models. Excellent job. Marc
-
Colored thread for rigging
flying_dutchman2 replied to flying_dutchman2's topic in Masting, rigging and sails
Thank you for the suggestions and they are a great help. Will do the dark colors and the running rigging a shade of tan. Makes sense that the running rigging is un-tarred as that would clog the blocks. Marc -
Thanks for all the suggestions. I ordered from WoodCraft a variety of wood for the dowels and different sizes. 90% of them are straight. For the masts and spars I am using the birch. Marc
-
Hi; Question: How do I decide what color rigging to go with? My Mamoli model the Royal Mary has all Tan line - do not like it much as the color is too light. My Bounty had black rigging and looked good. I see some models on this forum with shrouds that are black line for vertical and white line for horizontal. Did every century have different color line? Does it depend on what country the boat is from? Does it depend on the type of rigging? I always like to built my models historically correct, so who knows the answer, if there is one. Thanks, Marc btw. If my era boat is to have tan lines I will give it tan lines.
-
BEESWAX FOR SHIP MODEL RIGGING
flying_dutchman2 replied to vas1949's topic in Masting, rigging and sails
I use beeswax all the time. Warm it up in hands. Run line through the warm wax and the friction which in turn produces heat and melts it right in the line. I tried something else which is called "Snowseal" I use it on my hiking boots. Put the boots at low temp in oven, The get warm. Take out of the oven and rub the Snowseal on it. Sucks it right in and the boots are sealed. While I put the boots in the oven I put the thread in a bowl at the same time. Take out bowl, add Snowseal and the thread sucks it right up. I then need to remove excess and I am good to go. Marc -
I just browsed Shapeways website and checked out there video's. So cool. My dilemma is should I carve all the figures for my next built (Statenjacht Utrecht) or just design it in TurboCAD pay a price and have them make me the objects. Think of the possibilities with this technology. Anything can be created. Now I will sit back at let my mind process this technology and see what it can do. Marc
-
Vivian; Interesting shape of the boat. I do like the lines and you are doing a great job of putting it all together. Marc
-
Nigel; WOW, this is intense especially all those tree nails on the hull. So perfect. I am always amazed by the people - you included - that have perfected the art of ship modeling ( I know it takes time to learn and practice of doing, that is with everything). Excellent workmanship. Questions: Why is it on the works of Willem van der Velde de Oudere (the elder)? Did he do a painting of this boat? Why 1/84th? I never heard of this. But then again one can do a boat any scale he or she desires. Did you adjust it to a scale you liked best? Thank you Marc
-
Thanks Alistair, Always interested in anything about Bligh and the South Pacific as well as Australia and New Zealand. Lots of Dutch influence. Almost moved to New Zealand in the 90's to a Dutch settlement. Sort of a commune. Marc
-
Storing and using those tiny drills
flying_dutchman2 replied to Modeler12's topic in Modeling tools and Workshop Equipment
With my dental drill bits I have a block of wood with holes where I store the bits. With all the drill bits, I took plastic Styrofoam from a DELL computer box. Cut a block to size and put it in a tall cigar box. I just stick the bits in the foam. It holds them up right. I do like the elaborate set up that modeler12 has. It is not a guessing game like what I have. Wackowolf - Thanks for the link to "Drillbitcity", never heard of it, checked it out and like what they have. Marc -
Great ideas and the computer parts I do already. The Nautical Research Journal had a one page article that showed pieces from frames of glasses. I have used the hinges from the frames on doors for some of my RC models. Starbuck in my area used to have bamboo stirrers. I use them for tree nails. That's it for now. Marc
- 396 replies
-
- 2
-
-
- Idea
- Bright Idea
- (and 1 more)
-
Ahoy; Brief descriptions about 2 well researched books I am reading. First: The True Story of the Mutiny of the Bounty. By Caroline Alexander 2003, ISBN-978-0-14-200469-2 This book is extremely detailed and very well researched. All of the events are well described. Before the voyage. The voyage out to the South Pacific. The mutiny, The Pandora. The return of Bligh to Coupang (Dutch Colony) and the trail of the mutineers. The author takes all this information and creates a seamless narrative. Many of the sources are letters from the sailors to family and diaries that the men kept. In the back of the book it has all the sources for each chapter and select biographies. Best book I have read about the HMS Bounty. Second: The Slave Ship - A Human History. By Marcus Rideker (professor of History) 2007 ISBN-978-0-14-311425-3 Another book that is well researched. The book discusses in detail the life, death and terror of the slave trade. The evolution of it. The so called "Middle Passage" From Africa to either the West Indies or the USA. Insurrections, the lives of sailors, death and diseases on particular slave ships. This book is not just about what happens to the slaves but everything that has to do with it. The people involved and then several last chapters of the abolition of slavery. You read about accounts that are quoted from actual court proceedings. Again well researched with lots of sources quoted for each chapter in the book. Thank you for reading my brief review. Marc