HOLIDAY DONATION DRIVE - SUPPORT MSW - DO YOUR PART TO KEEP THIS GREAT FORUM GOING! (Only 20 donations so far - C'mon guys!)
×


flying_dutchman2
-
Posts
1,735 -
Joined
-
Last visited
Content Type
Profiles
Forums
Gallery
Events
Everything posted by flying_dutchman2
-
 Thanks Carl. Finished the second layer of planking. I am pretty satisfied with it. Planking flows nicely towards the back and the bluff bow looks good as well. The will sand it tomorrow, and upload some pictures. Still haven't done any serious carving. I keep procrastinating on this, but will eventually have to do it. Marcus
- 305 replies
-
- 3
-

-
- utrecht
- statenjacht
- (and 1 more)
-
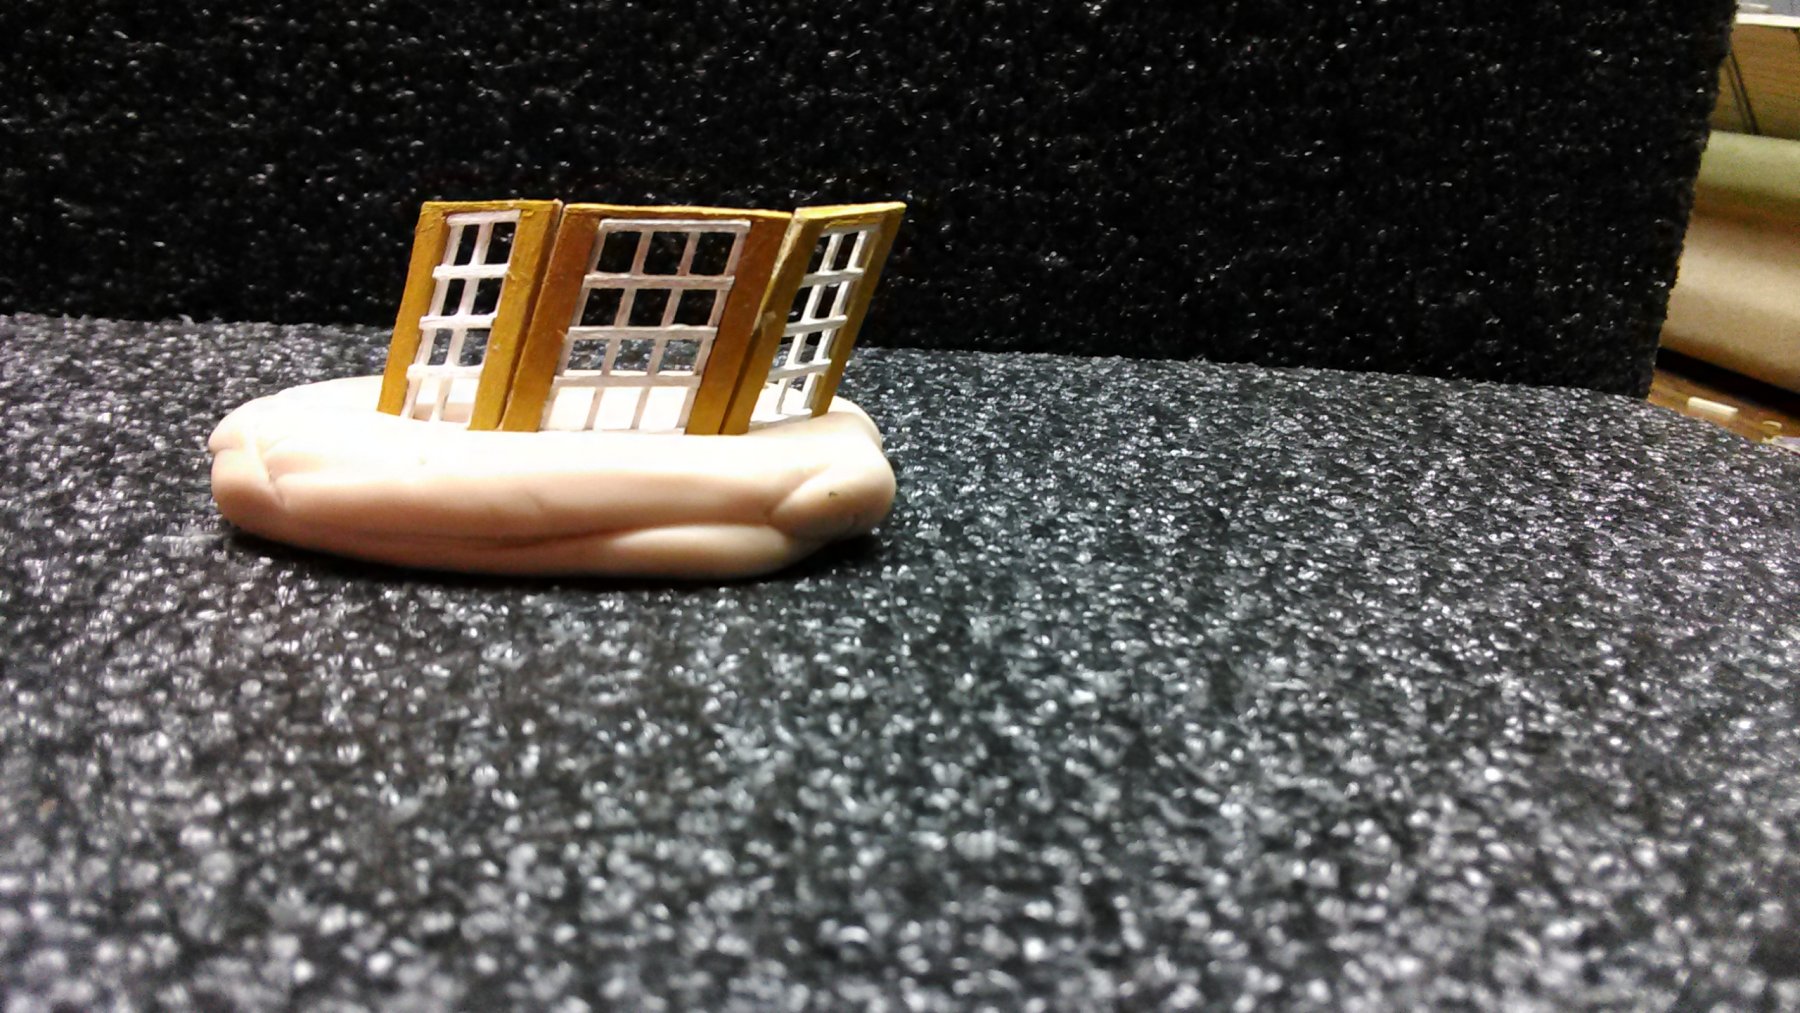
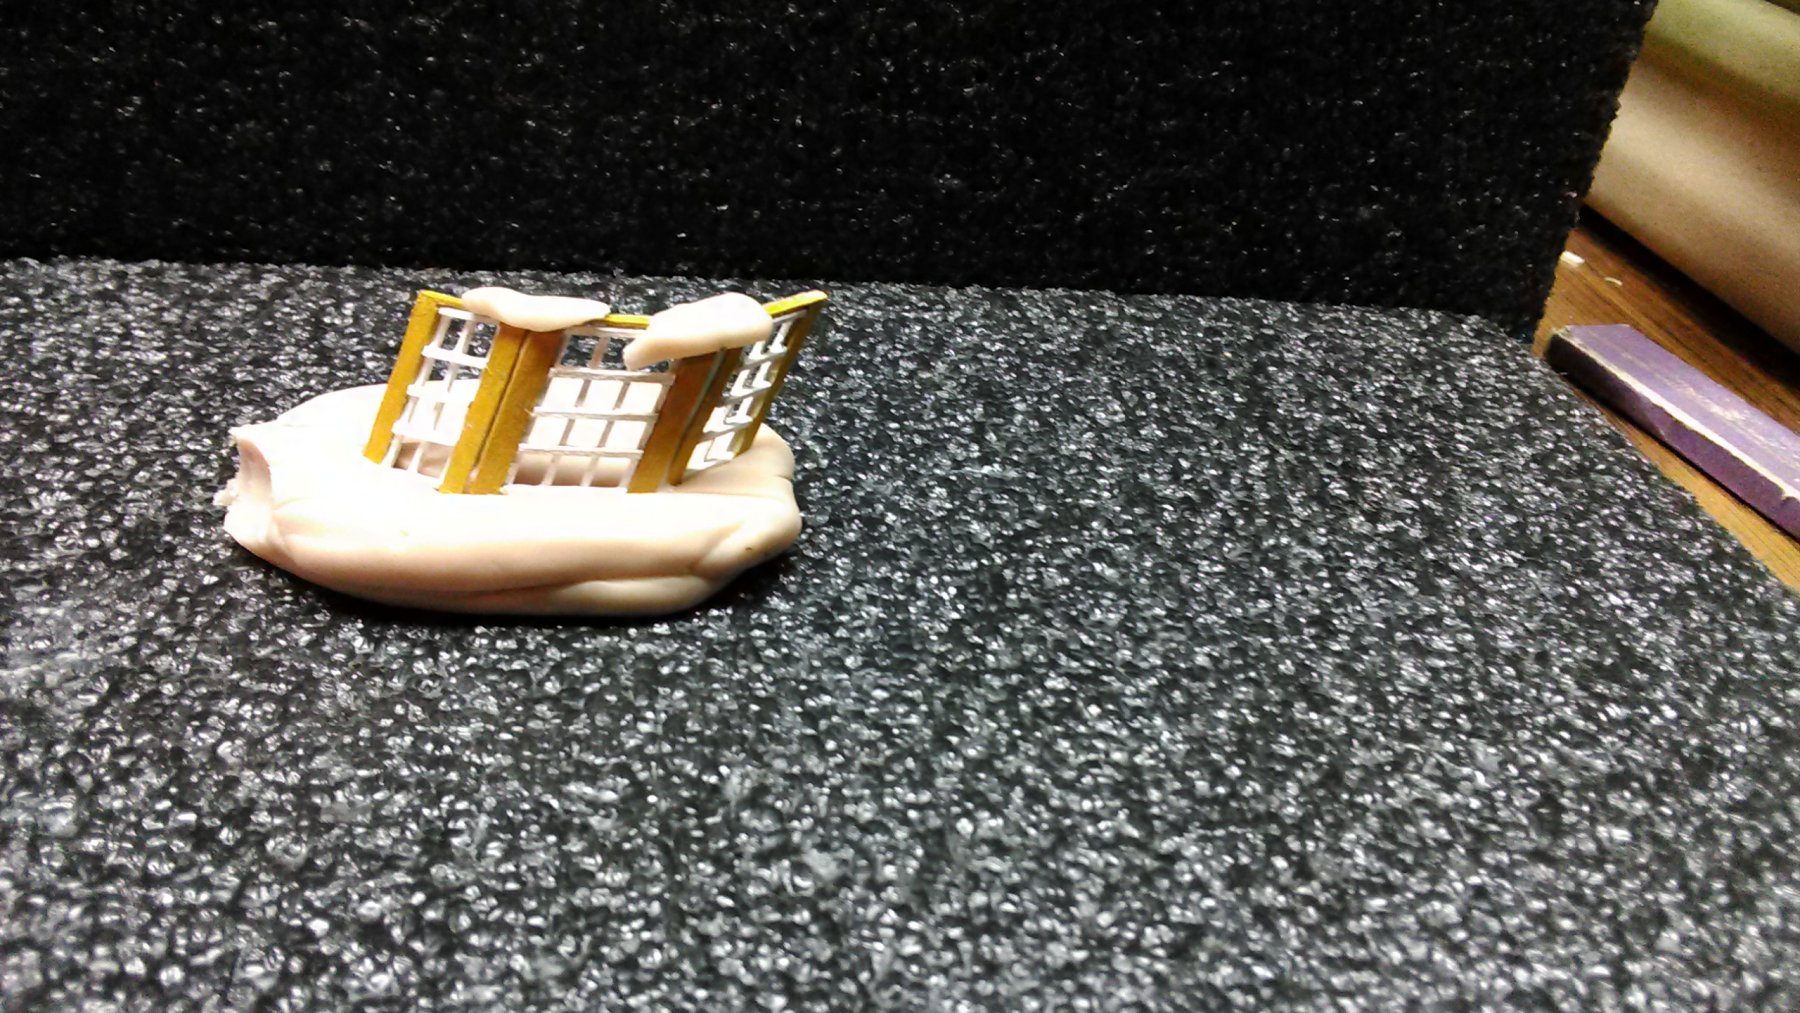
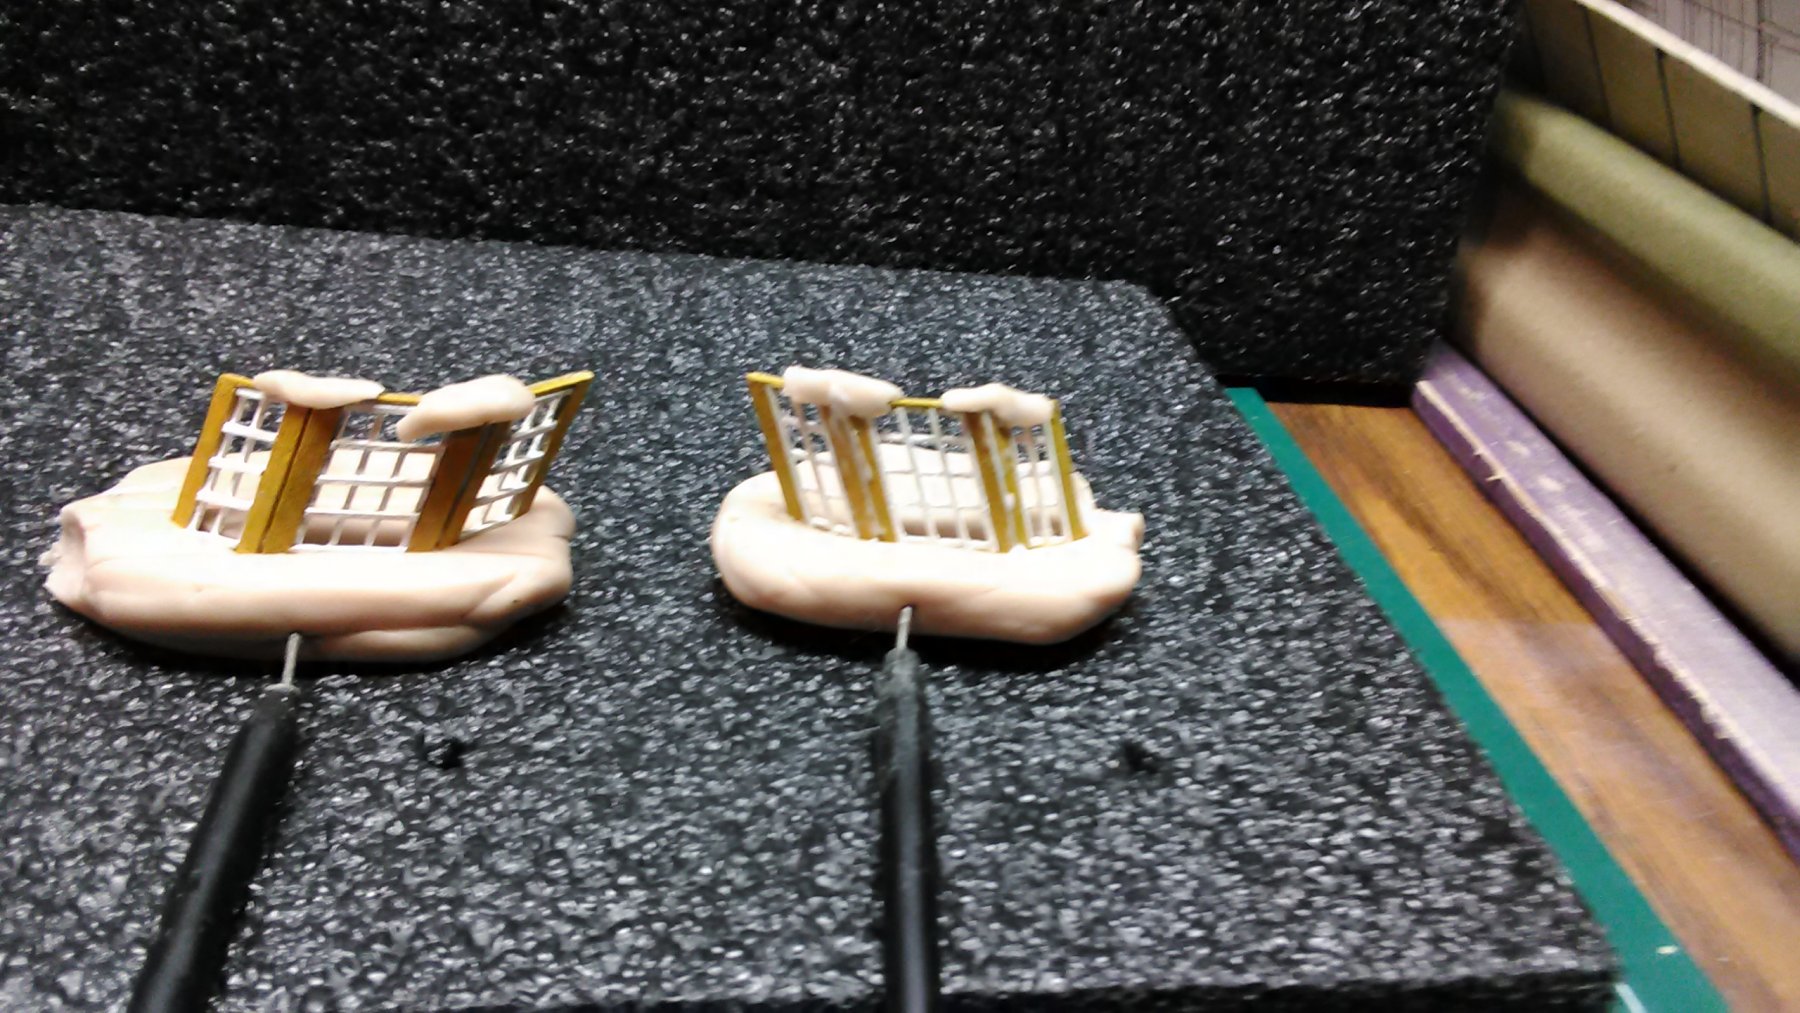
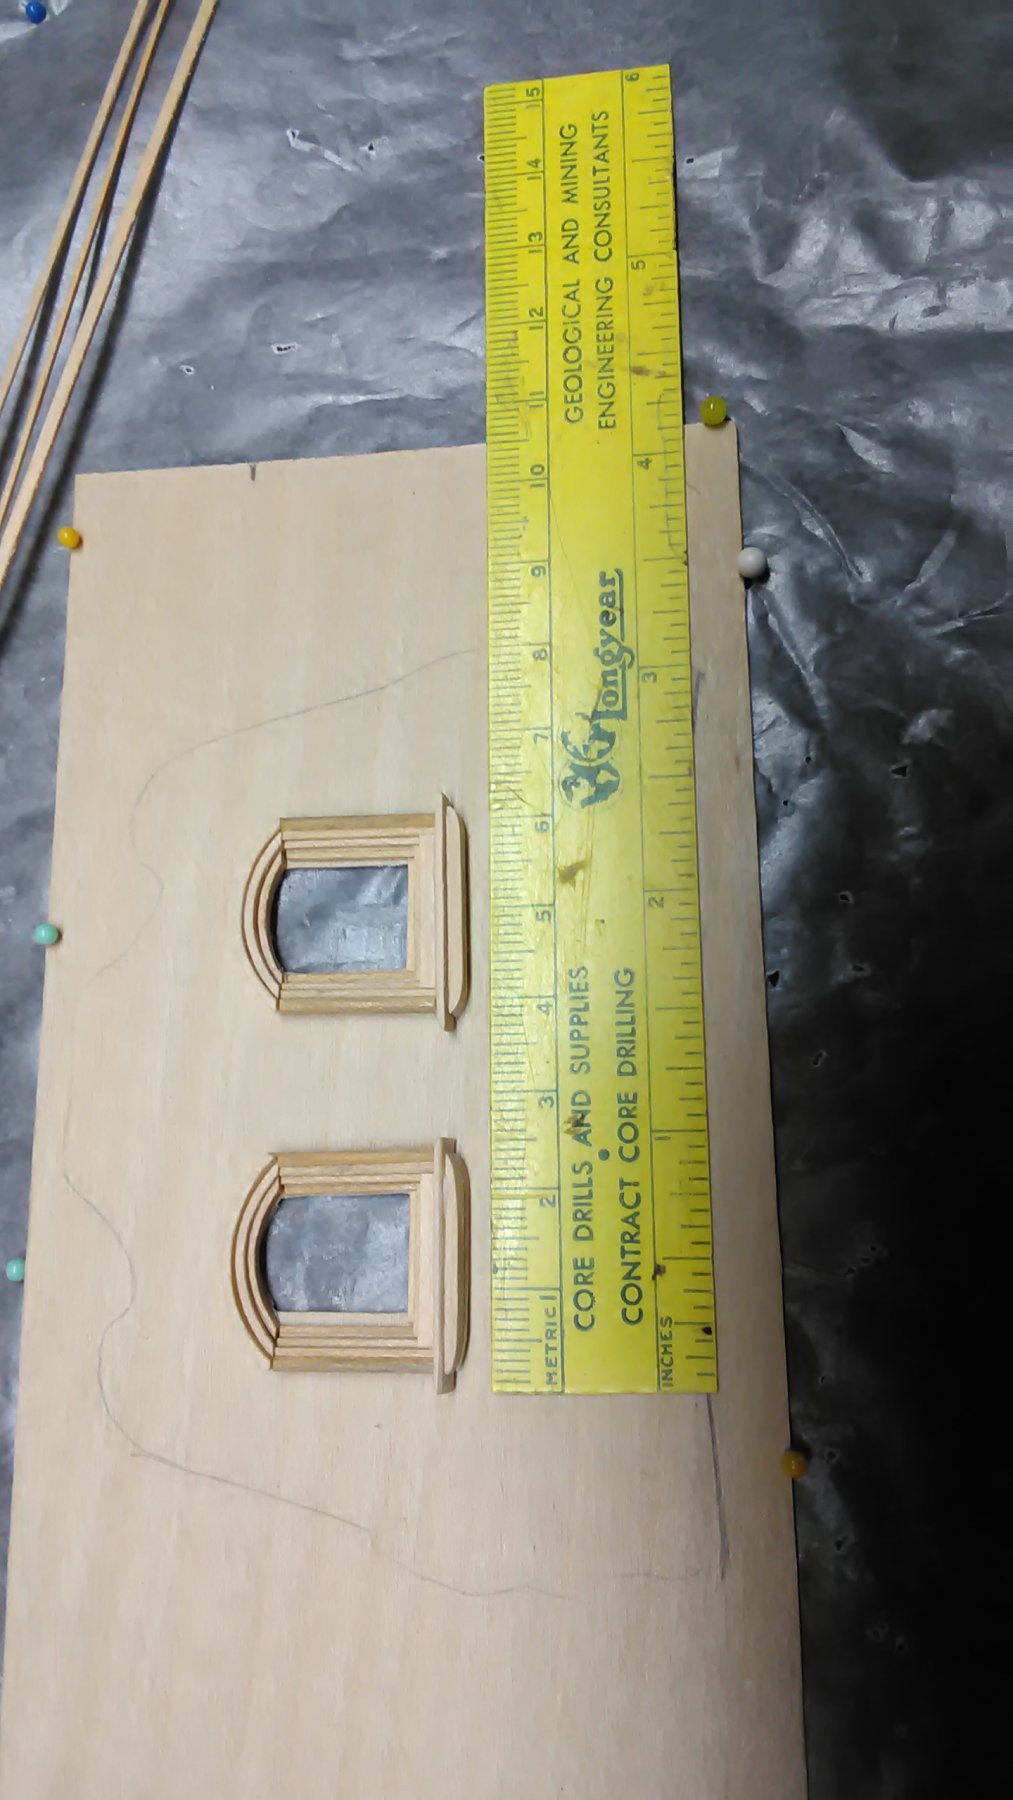
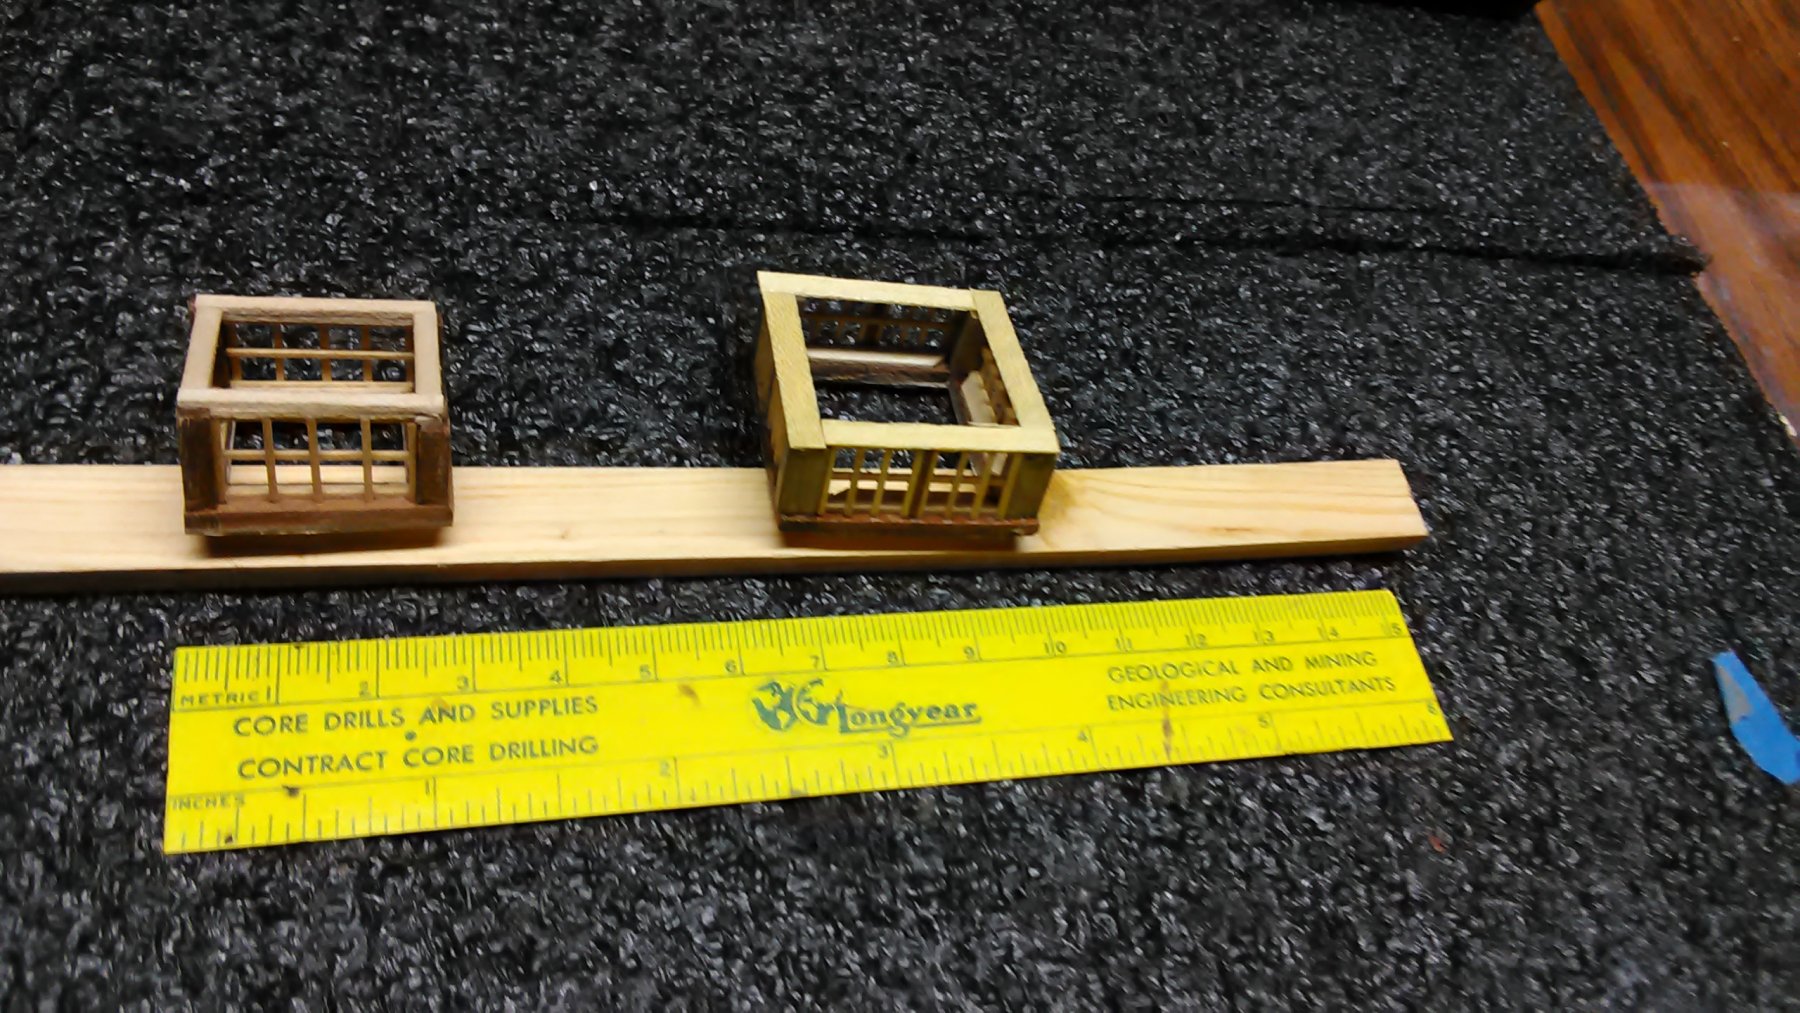
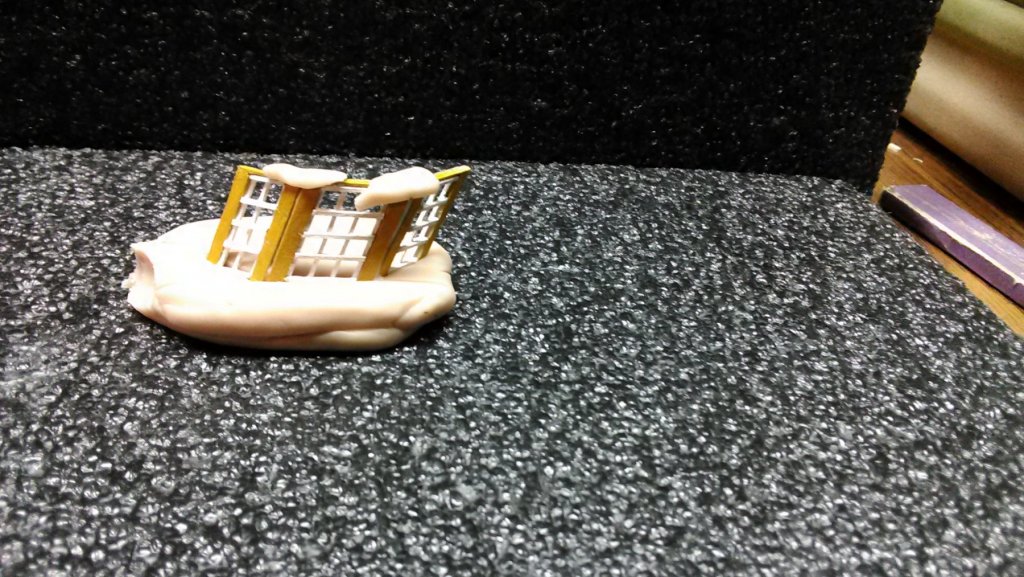
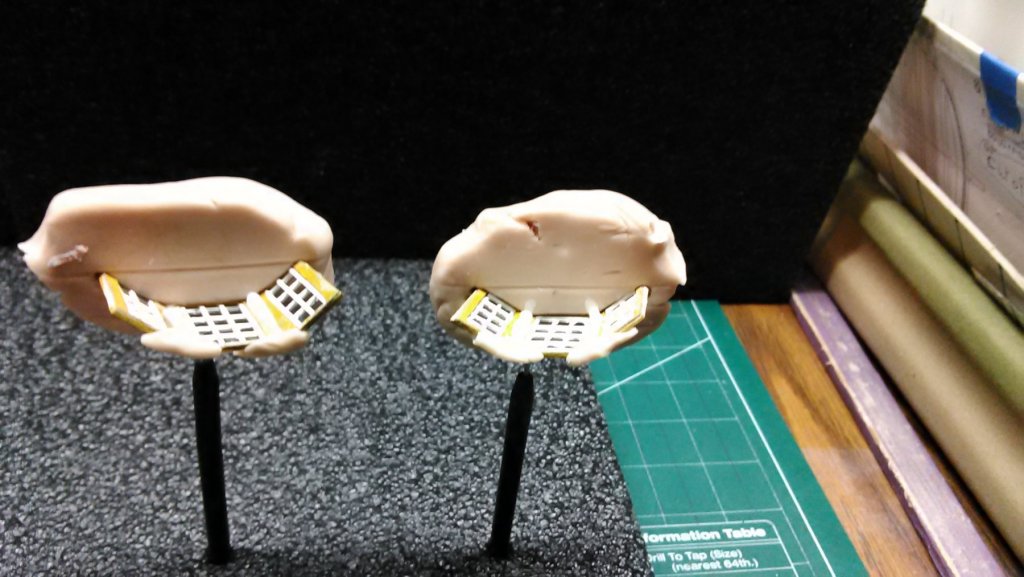
Pavilion windows: This was a difficult project. I used sculpey clay to set the window frames in, aligning the sides. After lots of trail and error, redoing the clay and measuring the length and width of all three frames together, I was able to get it close. Used bits of clay on the top as well to keep it aligned. Used white glue on the inside. Once dried and removed from the clay I can sand them a bit and touch up the paint. I have seen other models on other sites of the way the windows are positioned and they are all straight where as I have them on an angle and slightly bend forward to follow the contour of the pavilion wall. Maybe overkill. Marcus


- 305 replies
-
- 6
-
-
- utrecht
- statenjacht
- (and 1 more)
-
Put the pavilion windows together, the frames are titanium white and the frames are yellow ochre. Besides a few minute paint touch ups they are done. In Dutch this is what is called 'priegel werk' (sp.) Marcus
- 305 replies
-
- 6
-
-
- utrecht
- statenjacht
- (and 1 more)
-
Got a little tired of all the planking so I started preliminary work on a Boyer which is one of the boats from 17th century Dutch merchant ships from Hoving & Emke. Scale 1:48. The hull is 51 cm long. At this scale I can add lots of details. The Stern looks a bit like a fluit and it has a bluff bow. Nice practice for when I want to build a fluit. Xeroxed the plans and going to look for wood in my wood pile. Once I get going I will start a new thread. Back to planking of the Utrecht. Marcus.
- 305 replies
-
- 4
-
-
- utrecht
- statenjacht
- (and 1 more)
-
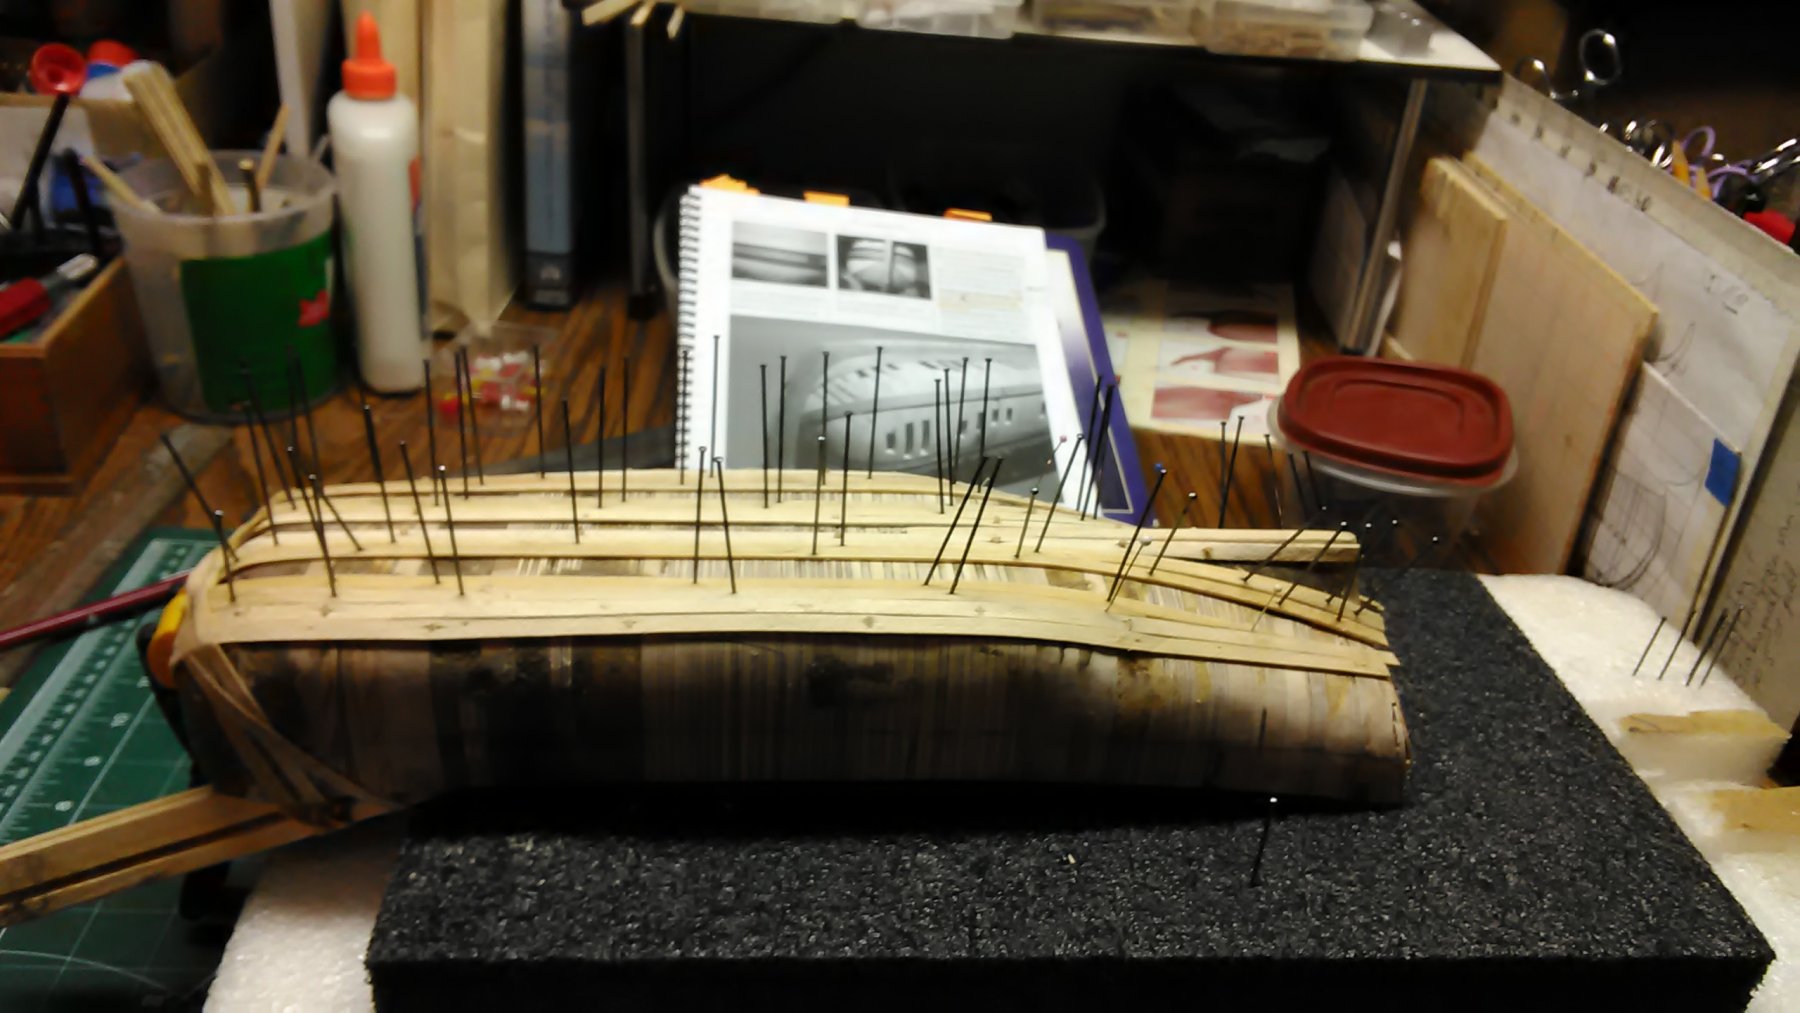
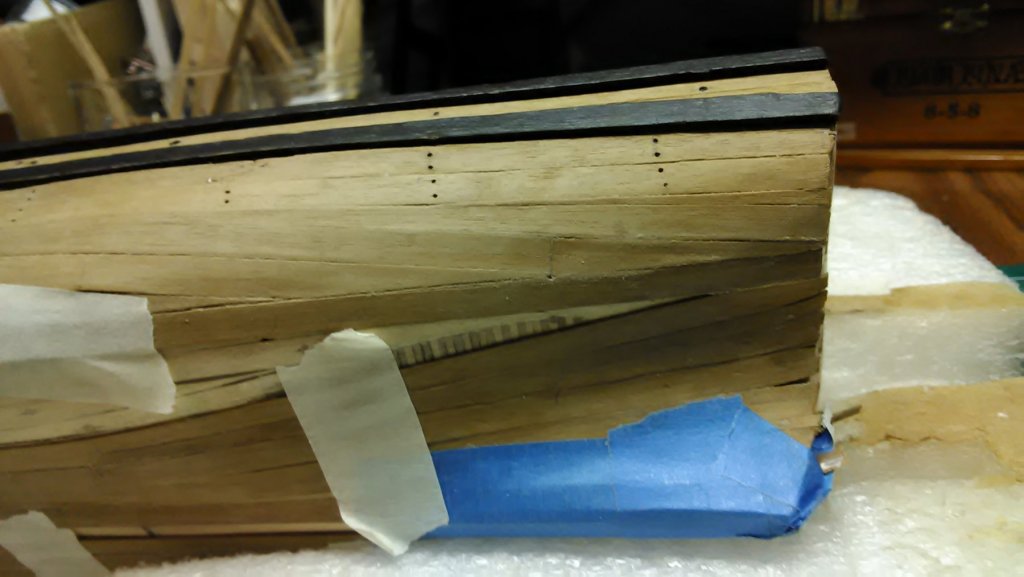
Some more planking and I let the planks go naturally, no forcing, that means I have to install lots of stealers. Planking the bow is difficult. If it wasn't so bluff this would be so much easier. I've done several bluff bows so with every boat it gets easier. The masking tape is to hold the wet planks in place. Went to hobby lobby and bought 1 pound of Super Sculpey. Started playing around with it. Marcus
- 305 replies
-
- 4
-
-
- utrecht
- statenjacht
- (and 1 more)
-
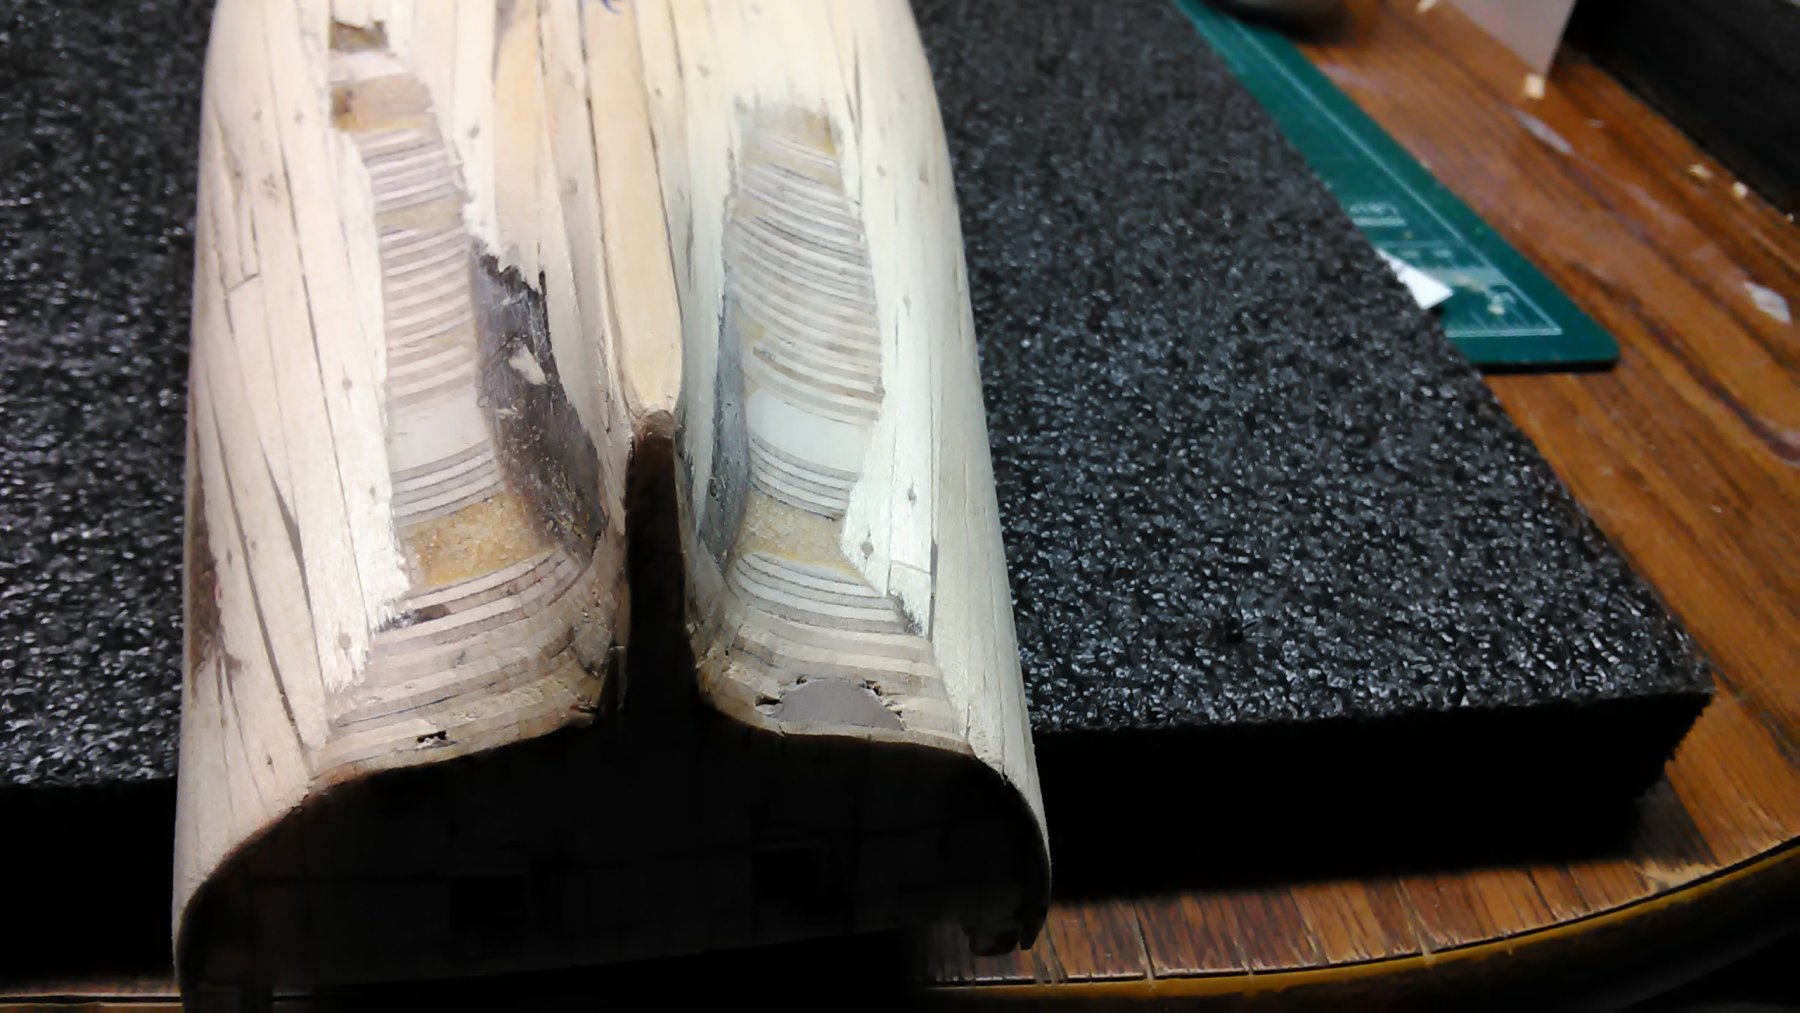
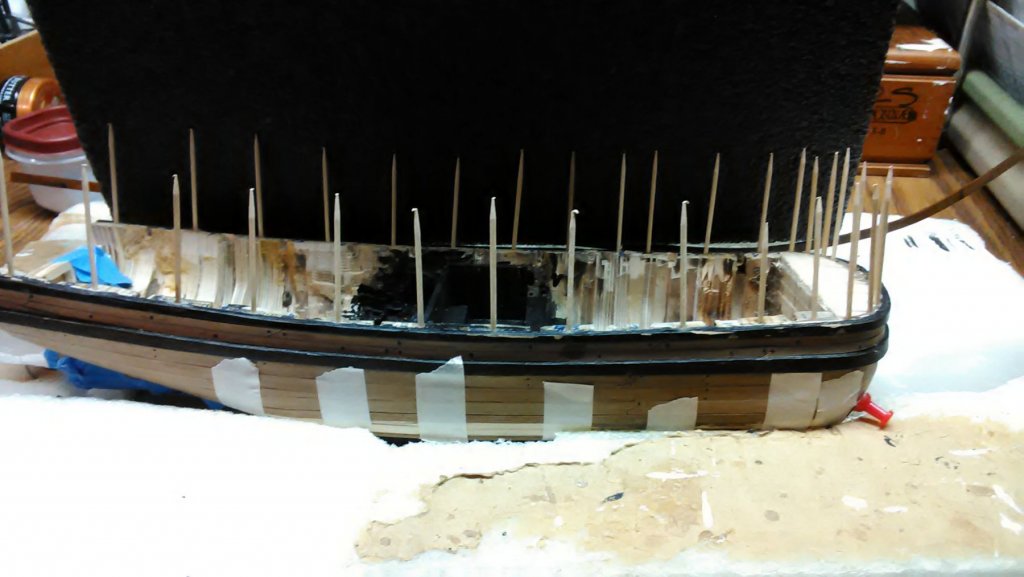
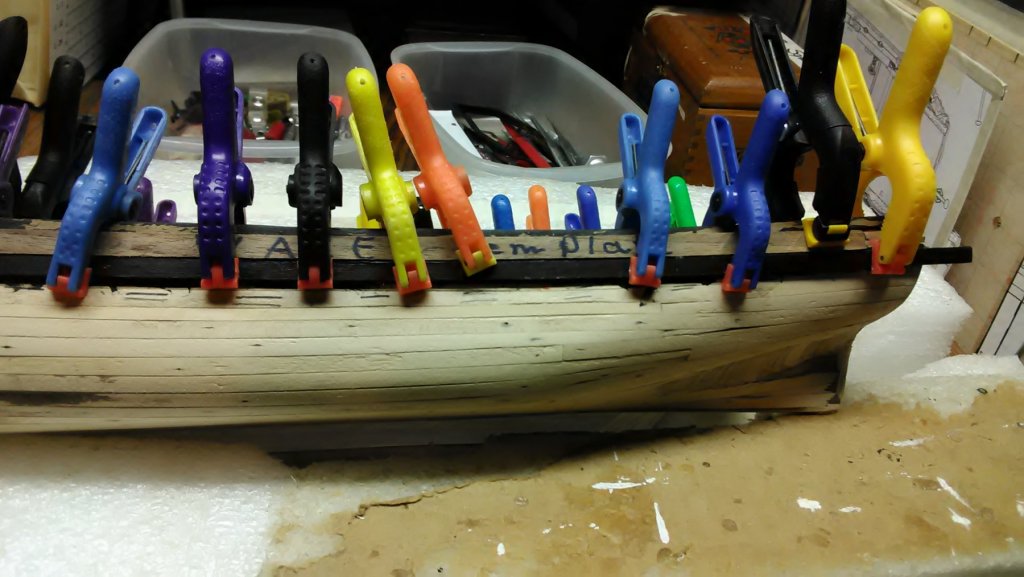
'clamp forrest'? I like that. I will make holes in the deck as well by lining them up with the hull. Glue tooth picks or beech dowels in the holes. Glue one strip of wood on the inside of the dowel and one strip on the outside and fill the space between the strips with scrap wood. Cover the top and voila, I have a solid railing. That is the plan. But things can change. Marcus
- 305 replies
-
- 4
-
-
- utrecht
- statenjacht
- (and 1 more)
-
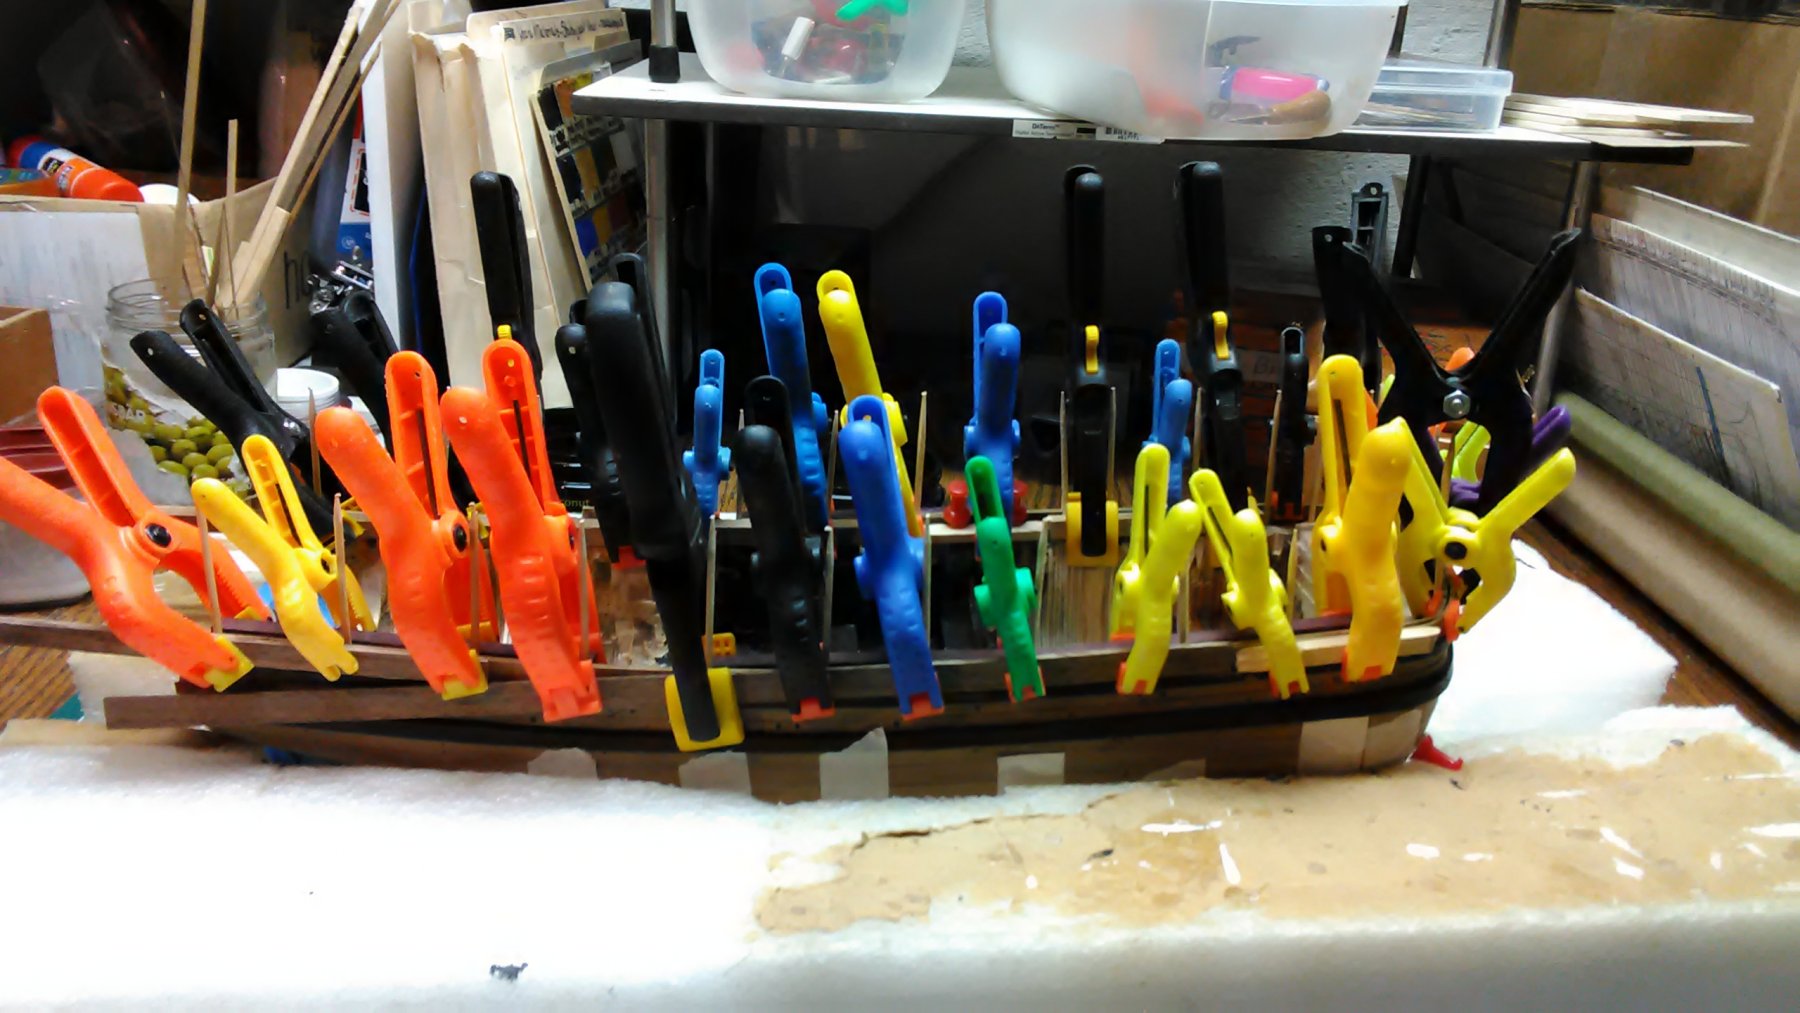
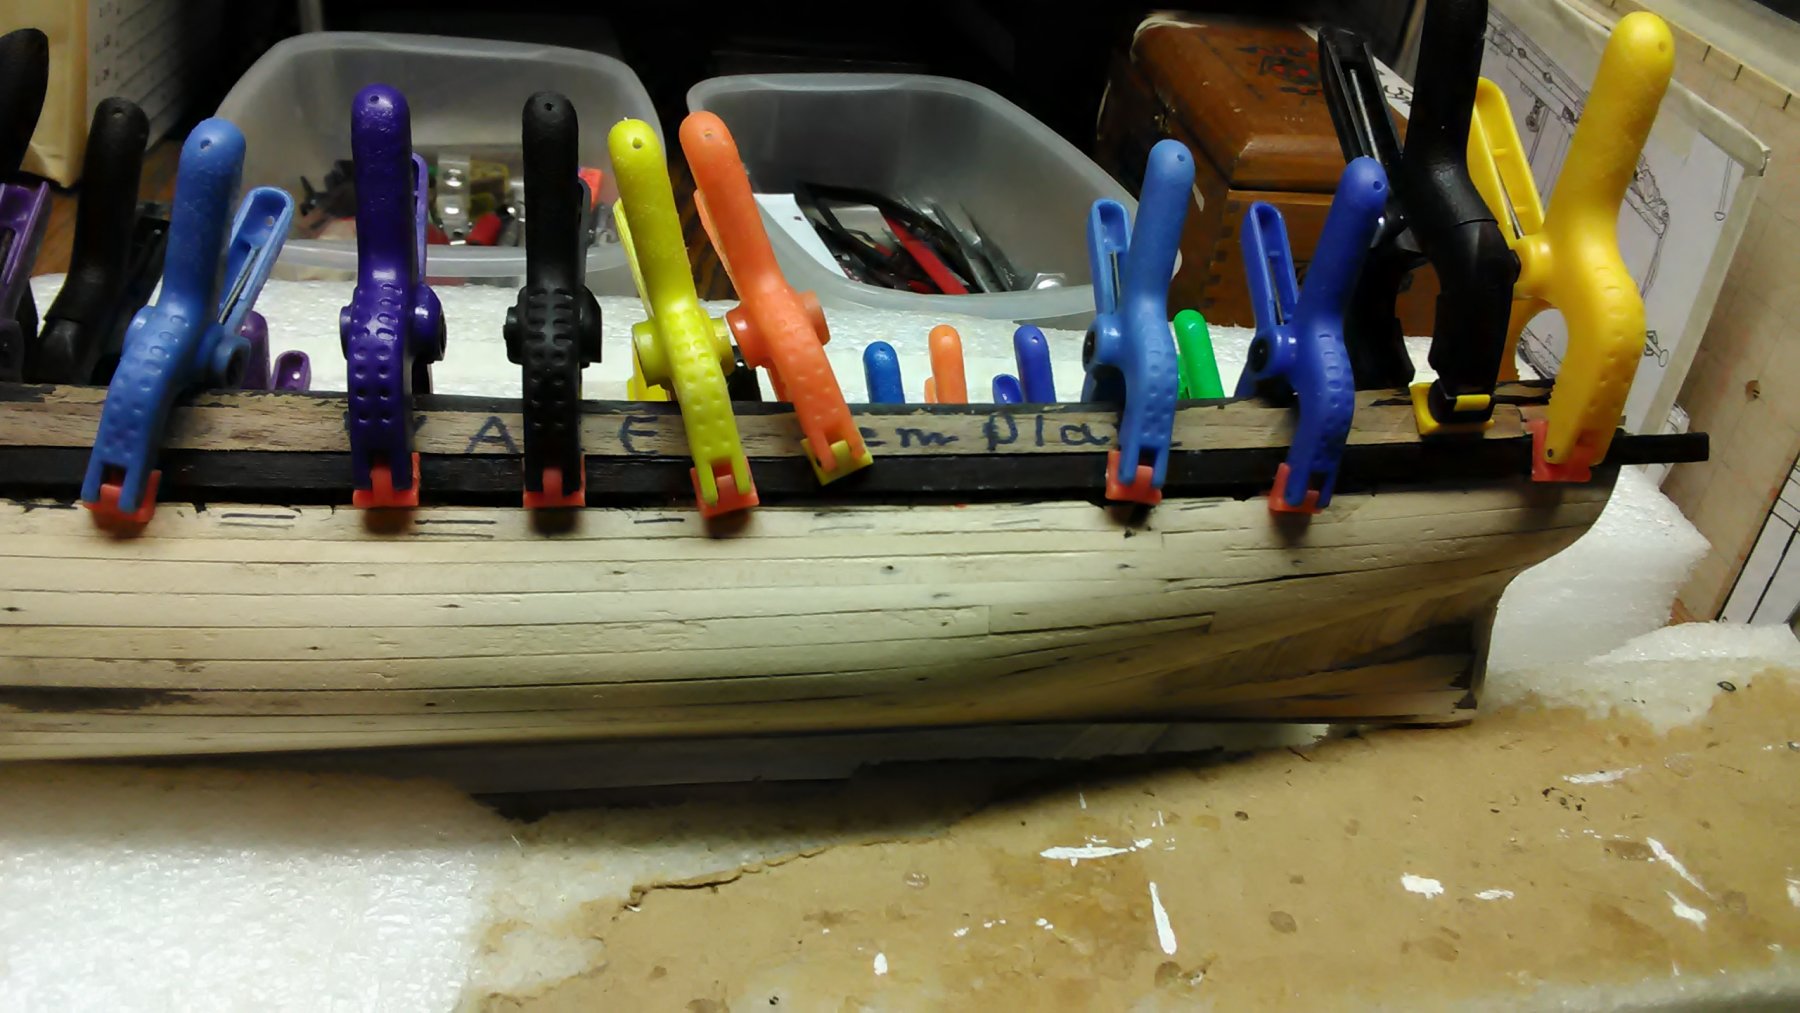
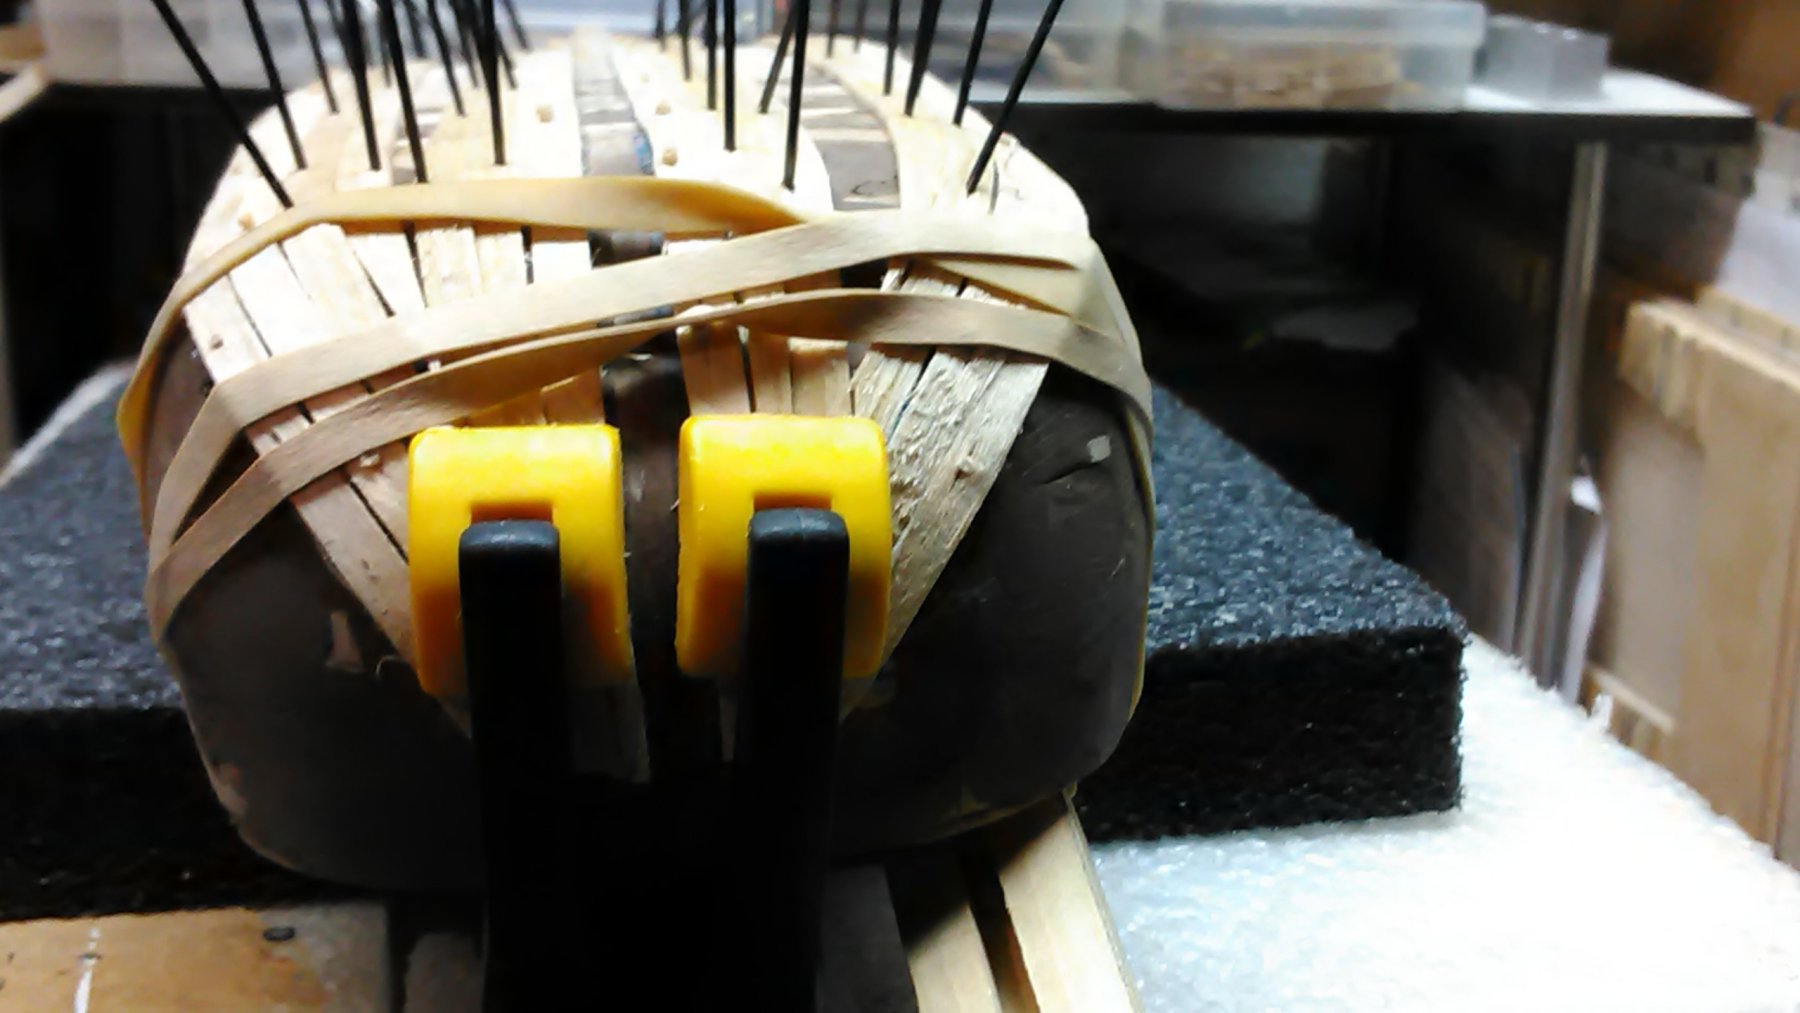
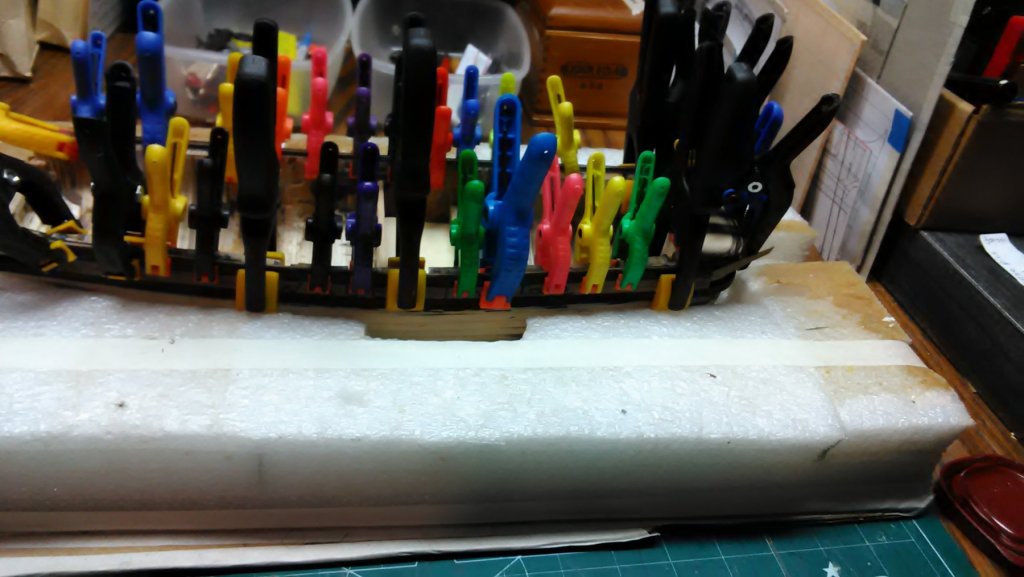
Next project is unconventional as I drilled holes in the hull next to the first layer of planking. Put toothpicks in the holes and took 2 pieces of moist wood (6mm x 1mm) and bend it around them. Pushed the wood down so it would follow the curve of the upper wale. Then used clamps and scrap wood to hold it down. Marcus

- 305 replies
-
- 9
-
-
- utrecht
- statenjacht
- (and 1 more)
-
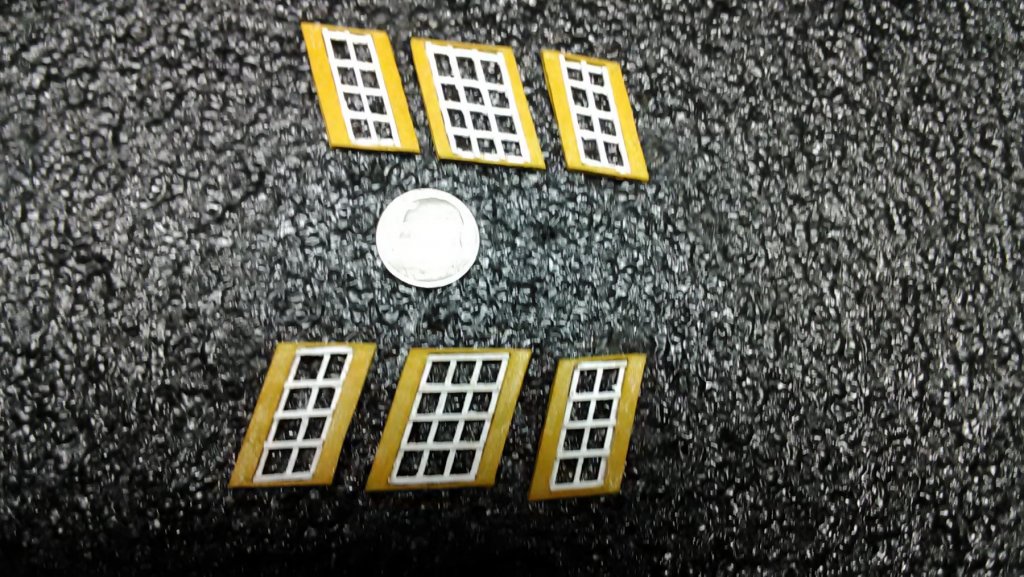
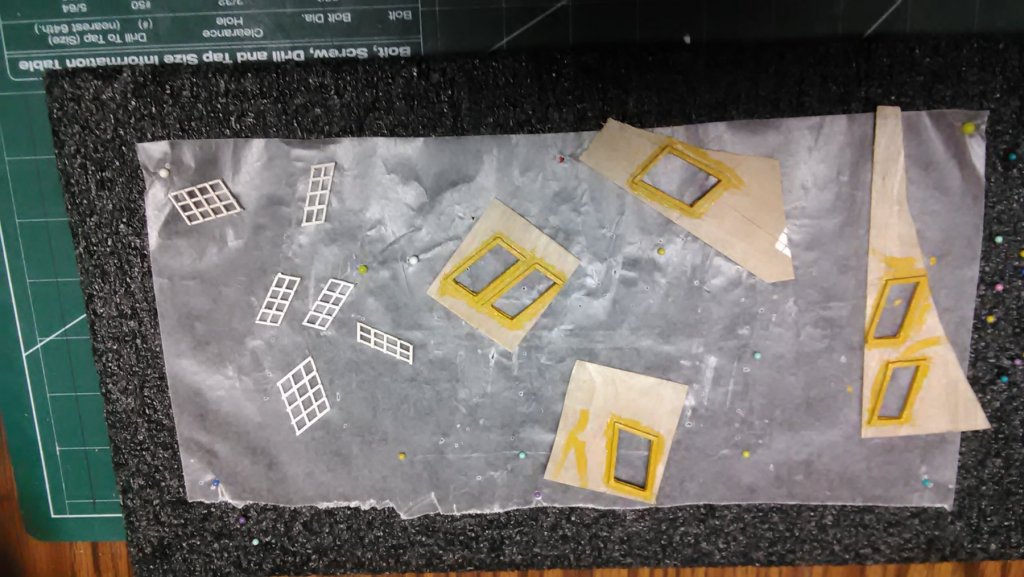
Window are made and painted white and the frames are made of 1mm square dowel and painted yellow ochre. I enjoy making the little items. Also when I am not making the small items I am working on the second layer of planking on the boat, a tedious process as the wood needs to be exact, especially on the bow. Marcus
- 305 replies
-
- 5
-
-
- utrecht
- statenjacht
- (and 1 more)
-
Thanks for the likes. After looking through numerous books, models and not finding how planking is done in the Dutch Golden age decided to do the second layer of planking like the replica of the Utrecht. The book from Hoving and Emke show how it is done. Joints are called 'nibbed scarph joint'. Painted the pavilion front, stovepipes and the skylights. The little blue pieces on the dowels go on the pavilion. Making the window frames (1mm square dowel basswood). I have made all the frames like this.
- 305 replies
-
- 5
-
-
- utrecht
- statenjacht
- (and 1 more)
-
Yes and I don't do air brush. I don't have the equipment. Maybe one day. Part of the hull will be white and will use a can for that. The cat boat was done with cans. I am pretty good with the brush, I have more control. Marcus
- 305 replies
-
- 5
-
-
- utrecht
- statenjacht
- (and 1 more)
-
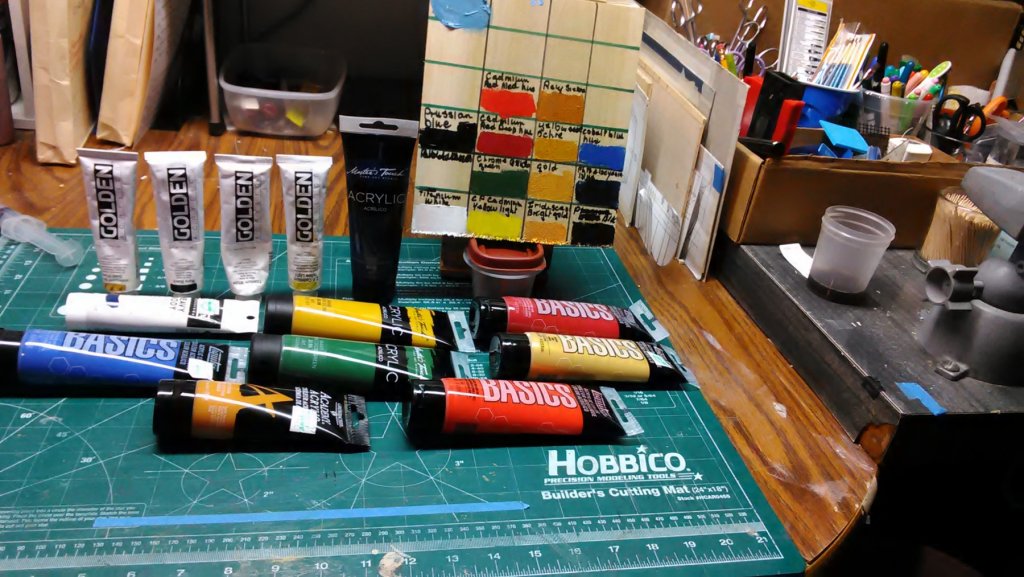
Thanks for all the likes. Saturday I went shopping for paint. I was going to get all from Golden Acrylics, but that was out of my price range ($11.00-21.00). Even Lukas and Schmincke were very pricey ($8.00-16.00). So in Hobby Lobby I compared the pricey colors with colors from Hobby Lobby 's own colors - Master's Touch - and got those ($4.00). Same name, same color but cheaper. Then went to Michael's and did the same process. These colors are from Liquitex - Basics ($3.50). One color from Grumbacher ($4.27). Only one pricey color - Prussian blue - from Liquitex professional ($8.70). I painted all the colors on a piece of wood. They all go on thick and I can't tell the difference between pricey and cheap. The Golden Acrylics I do have I got cheap a few years ago. The cheap colors are 4 oz. and pricey ones are 2 oz. My list of paint is as follows: Prussian blue Mars black Phthalocyanine blue Cobalt blue Yellow ochre Raw sienna Chrome oxide green Cadmium red deep Cadmium red medium Flat white (still need to get) So far I painted the wales Mars black. Furthermore, I took a tip from Ed Tosti on glue. Mixed white Elmer's glue with brown paint. He uses pigment powder. Results are the same. So now when I glue the deck planks they already have a dark line between them. Marcus
- 305 replies
-
- 6
-
-
- utrecht
- statenjacht
- (and 1 more)
-
Thanks for the compliment, Geoff. It is coming along. I finished the wales. Painted them there final coat. I love this acrylic paint from Gordon. Goes on thick and with a brush, I can spread it without streaks. I am to the point where I need to get more colors. Gordon has some of the colors I need and available locally. Lukas and Schmincke acrylics I have to buy on the Net. Marcus


- 305 replies
-
- 5
-
-
- utrecht
- statenjacht
- (and 1 more)
-
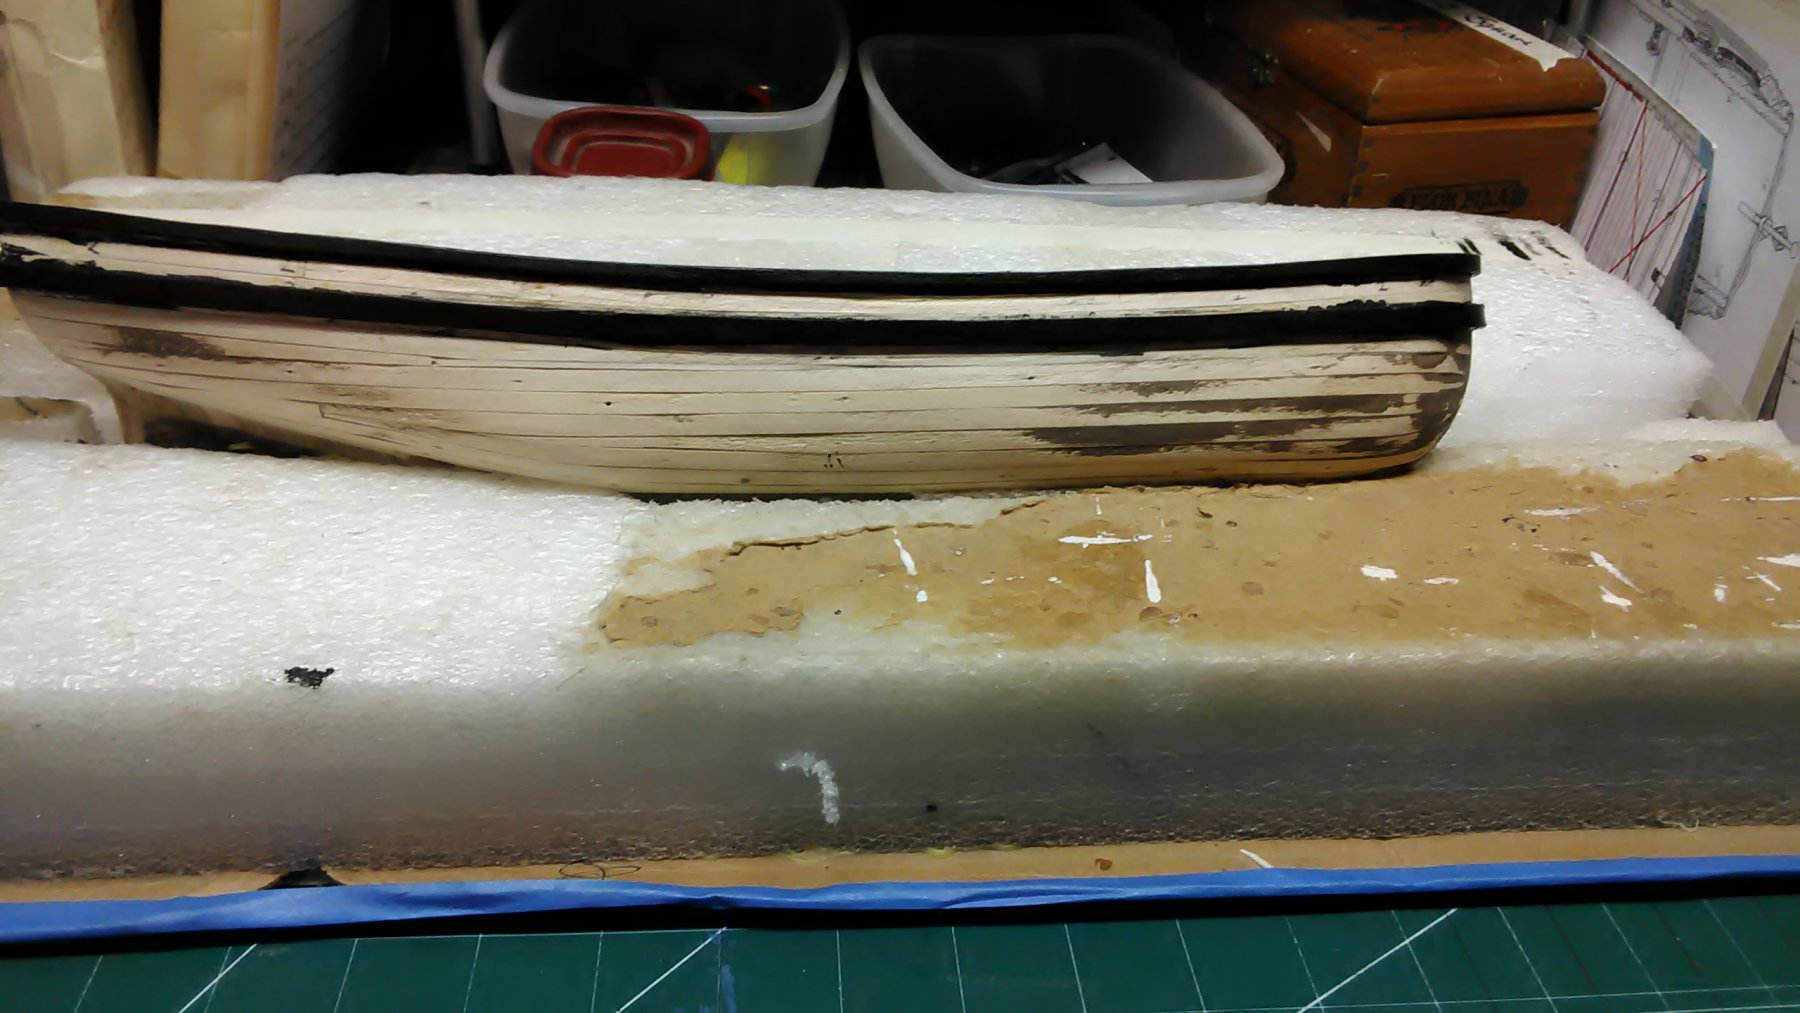
Carl, Will get you pictures without the clamps. Working on them now. Sanding them and adding some filler Marcus
- 305 replies
-
- 5
-
-
- utrecht
- statenjacht
- (and 1 more)
-
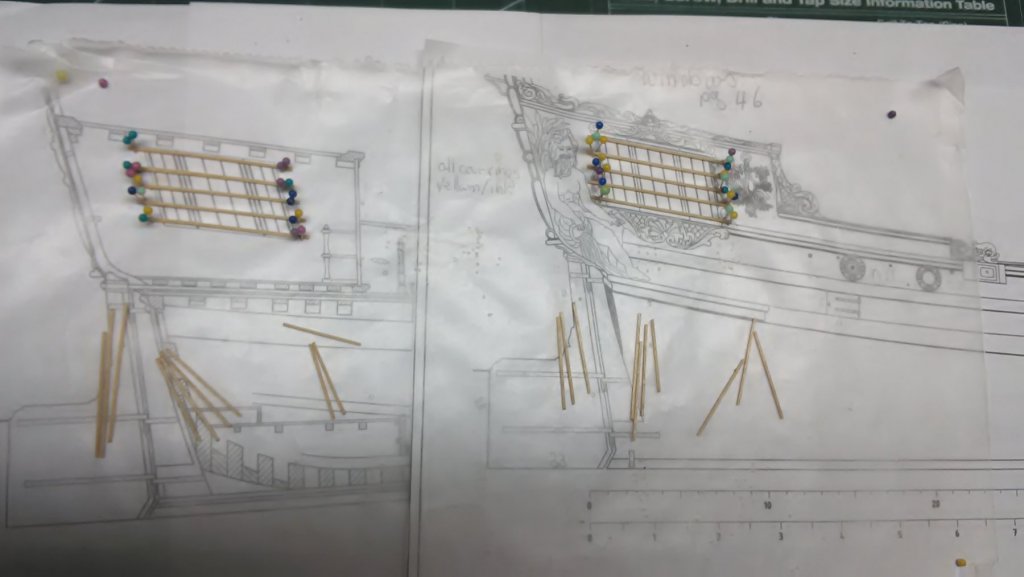
While the lower wale was drying, worked on the Stern window frames. It is created from 1mm square dowel. Glued the second layer of the top wale. Very frustrating. Broke two of them trying to make it fit in the bow. Where the stem goes there is 15 mm missing. Once all dry a piece will be fitted, sanded and painted and I hope it is not that obvious. I made many wales just in case I broke some.

- 305 replies
-
- 8
-
-
- utrecht
- statenjacht
- (and 1 more)
-
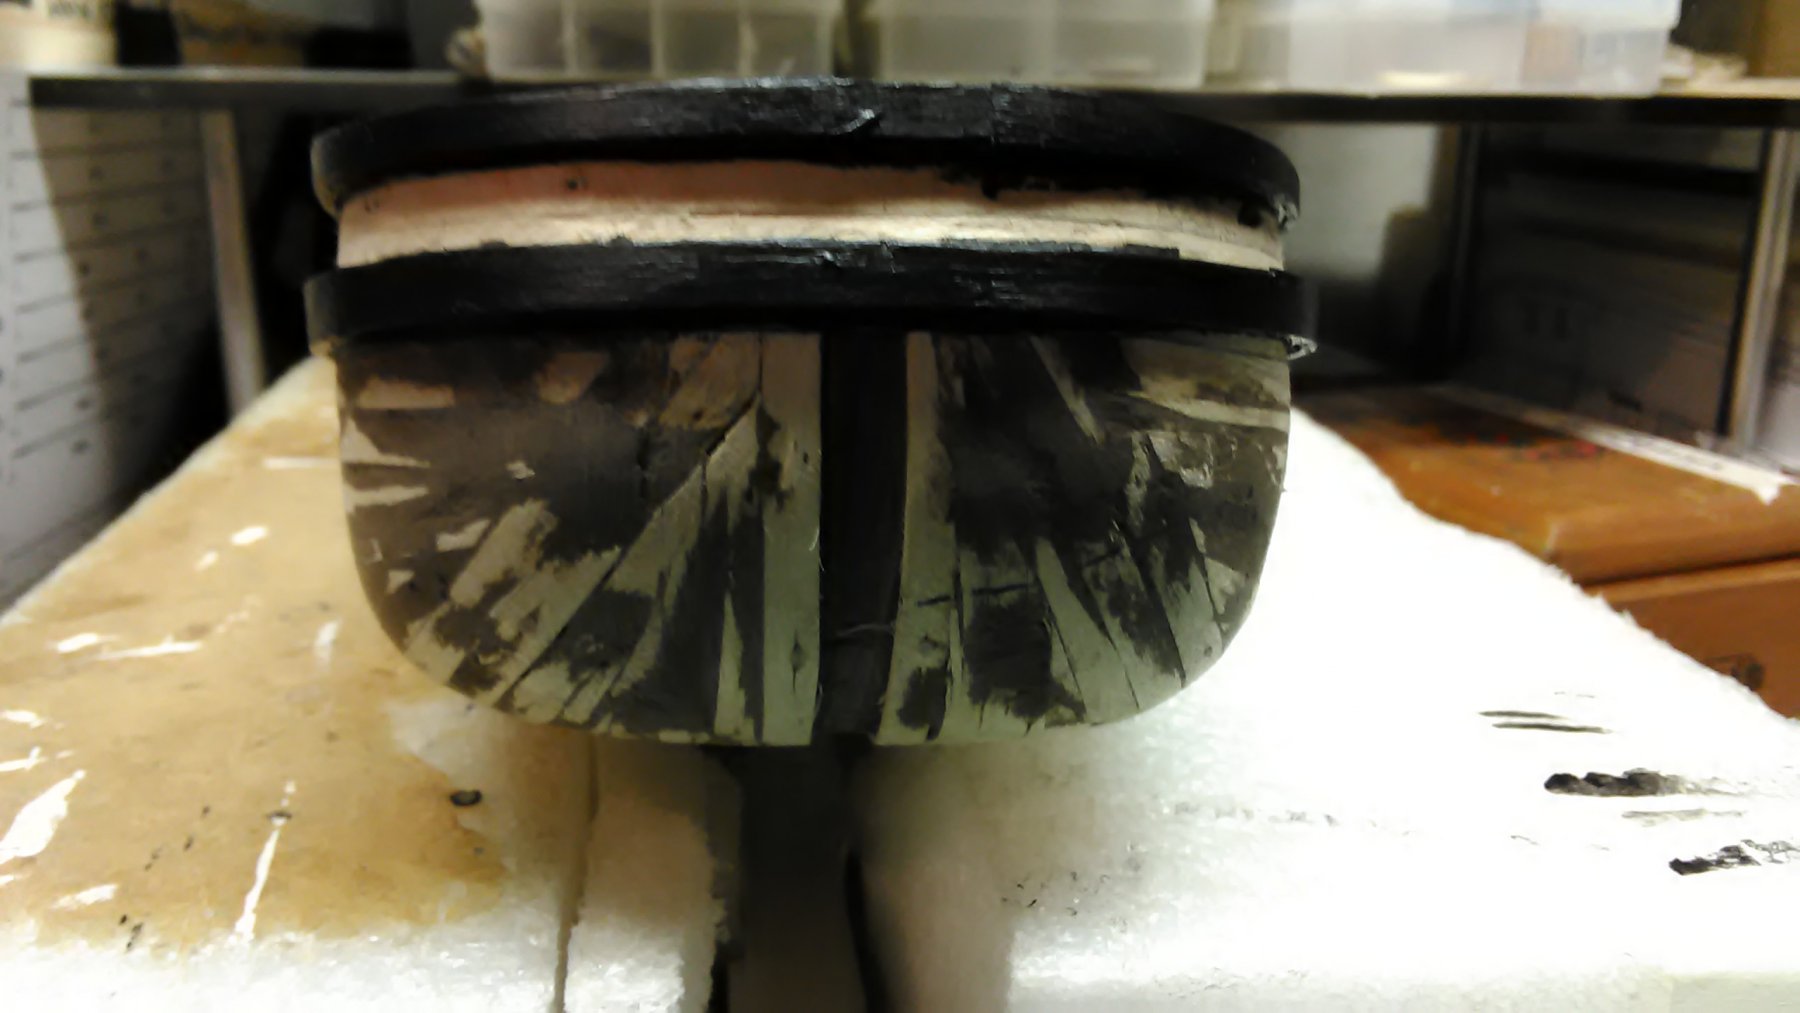
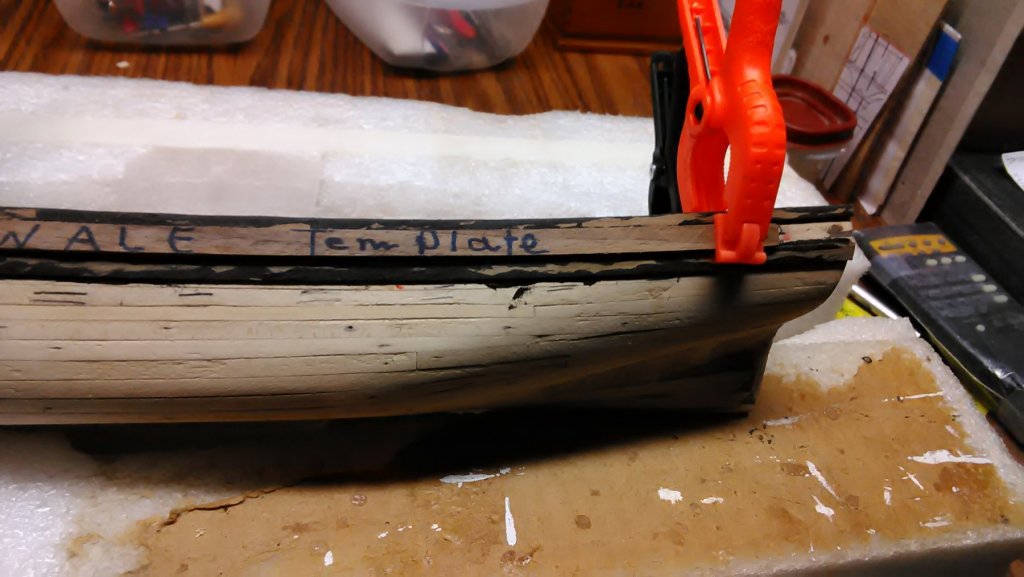
Created the lower and upper wales a while back and painted the top pieces black. I had some acrylics from past projects. The paint is Mars black #1200-2 series 1 from Golden acrylics. They will each be in two layers to build up the thickness. Upper wale is 4mm, lower wale is 6mm and the space between them is 8mm wide. Created a 'wale template' by laminating 2 pieces of walnut strips of 5mm thick and 8mm wide. Glued the first layer of both wales to the hull, put the template between them and lamented the second layer of the lower wale on top of the first layer. It is a bear to bend them without breaking them. On one side at the bow there is a small gap between the hull and the wale which I will fix. I am overall happy with all of the results. I have made lots of mistakes in the process and have learned from it by redoing it. Marcus
- 305 replies
-
- 4
-
-
- utrecht
- statenjacht
- (and 1 more)
-
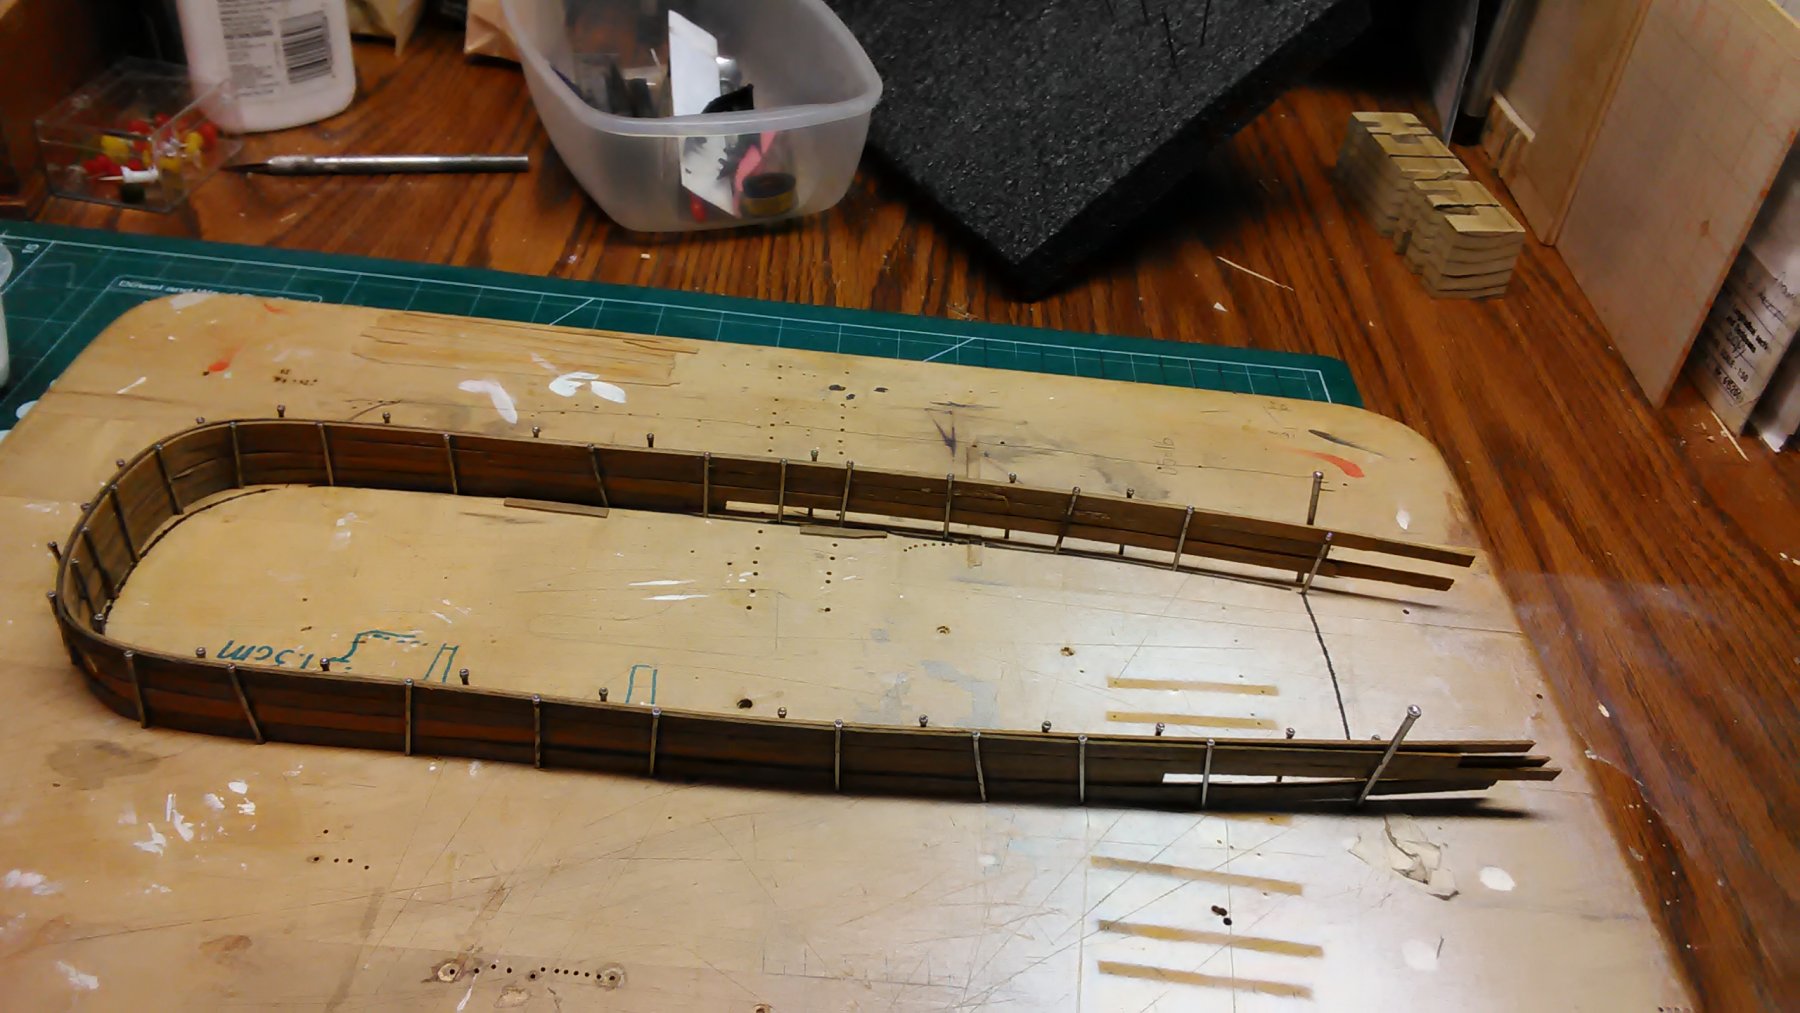
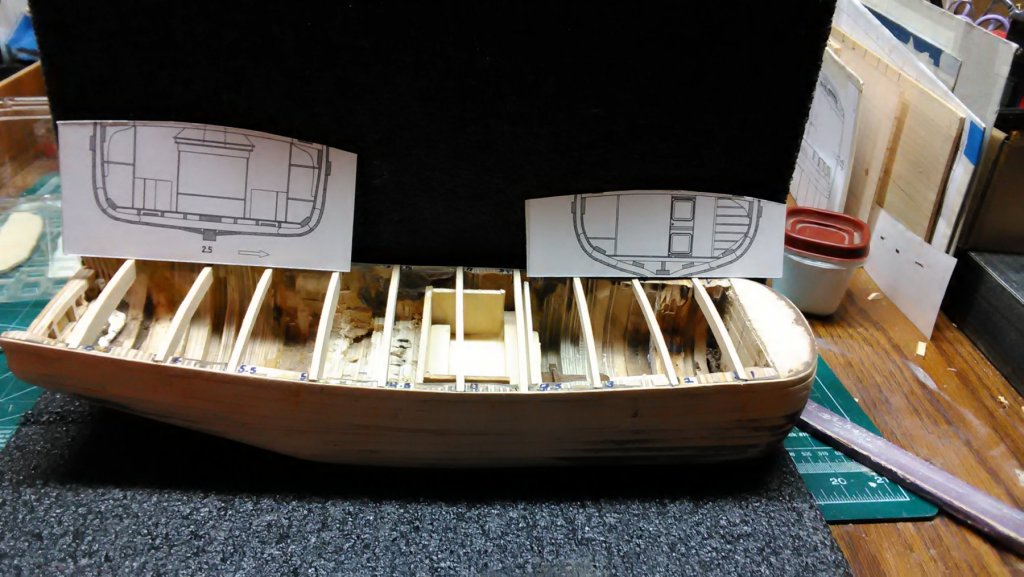
Re sanded the keel area. Wasn't curved enough and took about 10 millimeters away (yes, that is a lot) and looks much better now. Furthermore, created the deck beams with a curve and they are dry fitted. The little area of scrap wood is where the steps come down. Once steps are in place and you look into the area of the hull, I want it to look neat. I may just add a mirror with furniture. Marcus

- 305 replies
-
- 5
-
-
- utrecht
- statenjacht
- (and 1 more)
-
Thanks for the link. I will thoroughly check this out. I will put the windmill built in the thread of "what else do you do besides ship building". Marcus
- 305 replies
-
- 5
-
-
- utrecht
- statenjacht
- (and 1 more)
-
I think 1.23 meters is large enough for me. Twice the size becomes around 2.50 meters. That will make a nice statement. All you need is create the internals and you have a fully operational windmill and you can grind some grain. In Holland, Michigan there is a completely working grain mill. They bought it in the Netherlands, took it apart piece by piece, shipped it, and put it back together. Marcus
- 305 replies
-
- 6
-
-
- utrecht
- statenjacht
- (and 1 more)
-
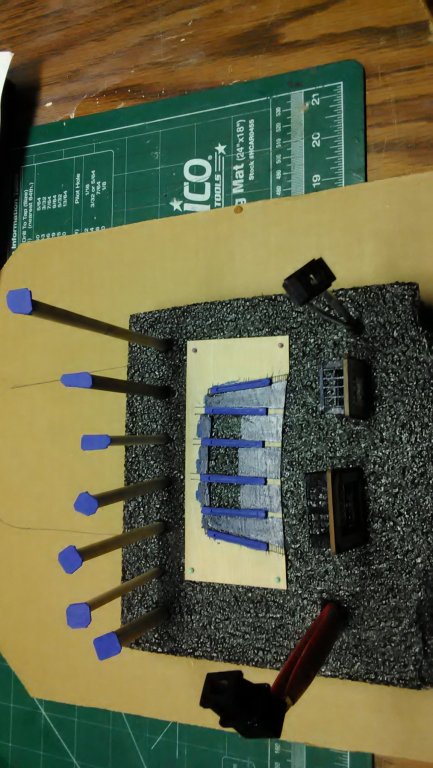
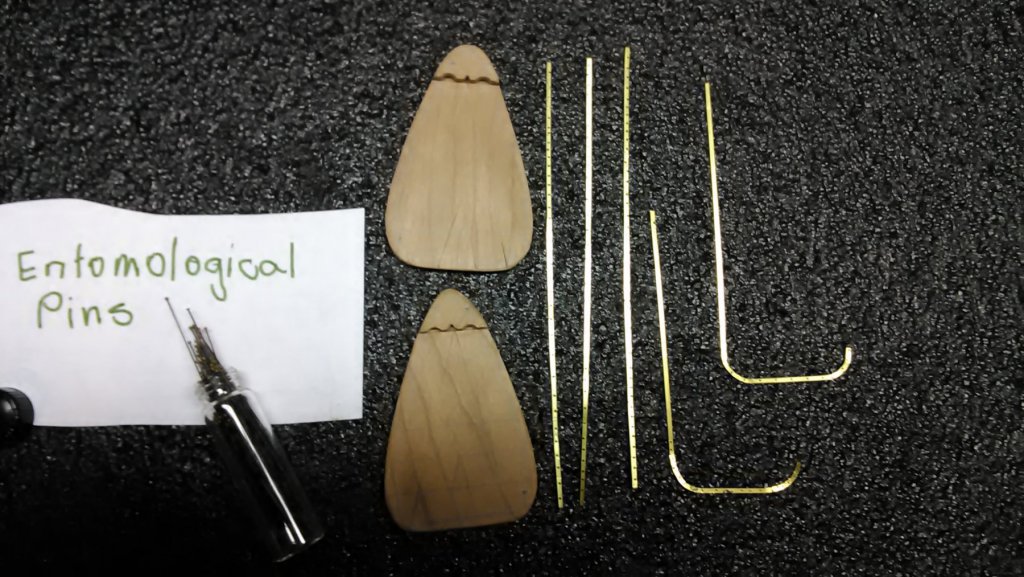
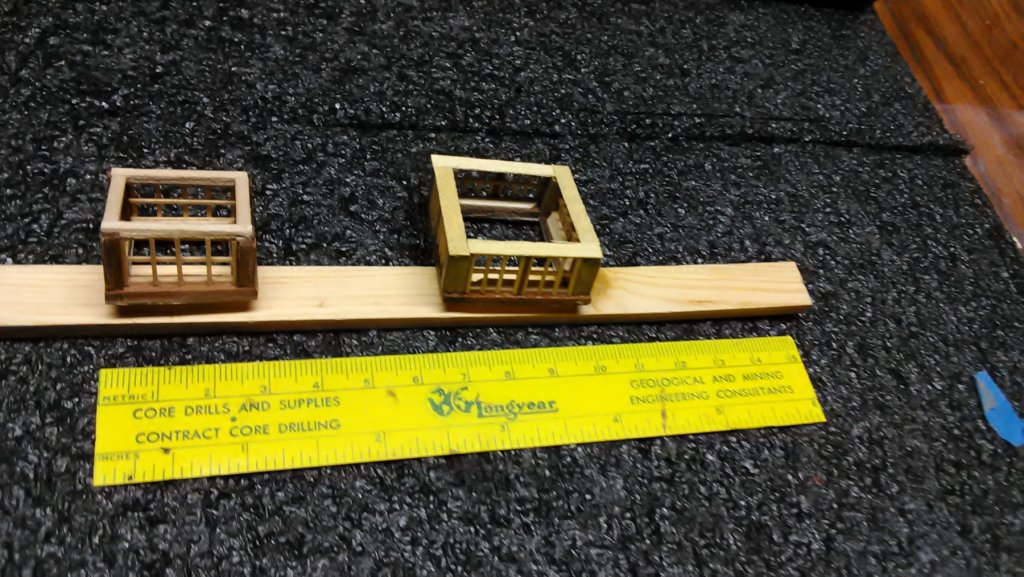
Thanks for all the likes. The skylights turned out well. Since I got the micromark table saw I have been cutting all kinds of wood and in many sizes. It is a great tool. I have also been working with those drill bits I showed a while back. Broke a few. Just like Kees de Mol said, they break like glass. If you don't drill exactly straight, they break. I drilled itty-bitty holes in the brass flat rods. I am using insect pins that I used in my past college days. Marcus
- 305 replies
-
- 8
-
-
- utrecht
- statenjacht
- (and 1 more)
-
How large do you want to go? Does that chap have any other plans as well? Marcus
- 305 replies
-
- 4
-
-
- utrecht
- statenjacht
- (and 1 more)
-
For a change of pace I created the wales. Made 8 of them and will pick the best ones. Due to the extreme curve of the bow I used one strip of wood to cover the whole boat. Two on each side resulted in a crooked piece of wood. Using one long strip of wood resulted in a nice curve that fits over the bow. Also, made the 2 skylights. Still need a roof and painted. Paint I will get in the next week or two. Note for Carl (cog) . My wife requested I built the windmill this winter. So I will do that. I have plans for a garden windmill (polder molen) which is a replica of one that is located in Amsterdam and my dad worked there as an accountant after he retired from the Dutch foreign service. I emailed the plans to Carl. Marcus

- 305 replies
-
- 8
-
-
- utrecht
- statenjacht
- (and 1 more)
-
Thanks for all the likes. After sanding and resanding the boat I am now doing the first layer of planking. Starting from the keel and at the same time the edge where it goes straight up. Laying the planks naturally without forcing them in curves. Makes for a lot of cutting as they lay over the next plank. The bluff bow is an exercise in extreme curves. I'll do more of this with future Dutch Ships. First the wet planks are shaped and pinned with stainless steel pins. Once dry, the planks are glued to the hull, fastened with toothpicks dipped in glue a the toothpicks are hammered in the hull. Marcus


- 305 replies
-
- 7
-
-
- utrecht
- statenjacht
- (and 1 more)
-
Thank you very much for listening the colors. I will research them and will probably find them. What is your red, and a item number, if there is one. Marcus
-
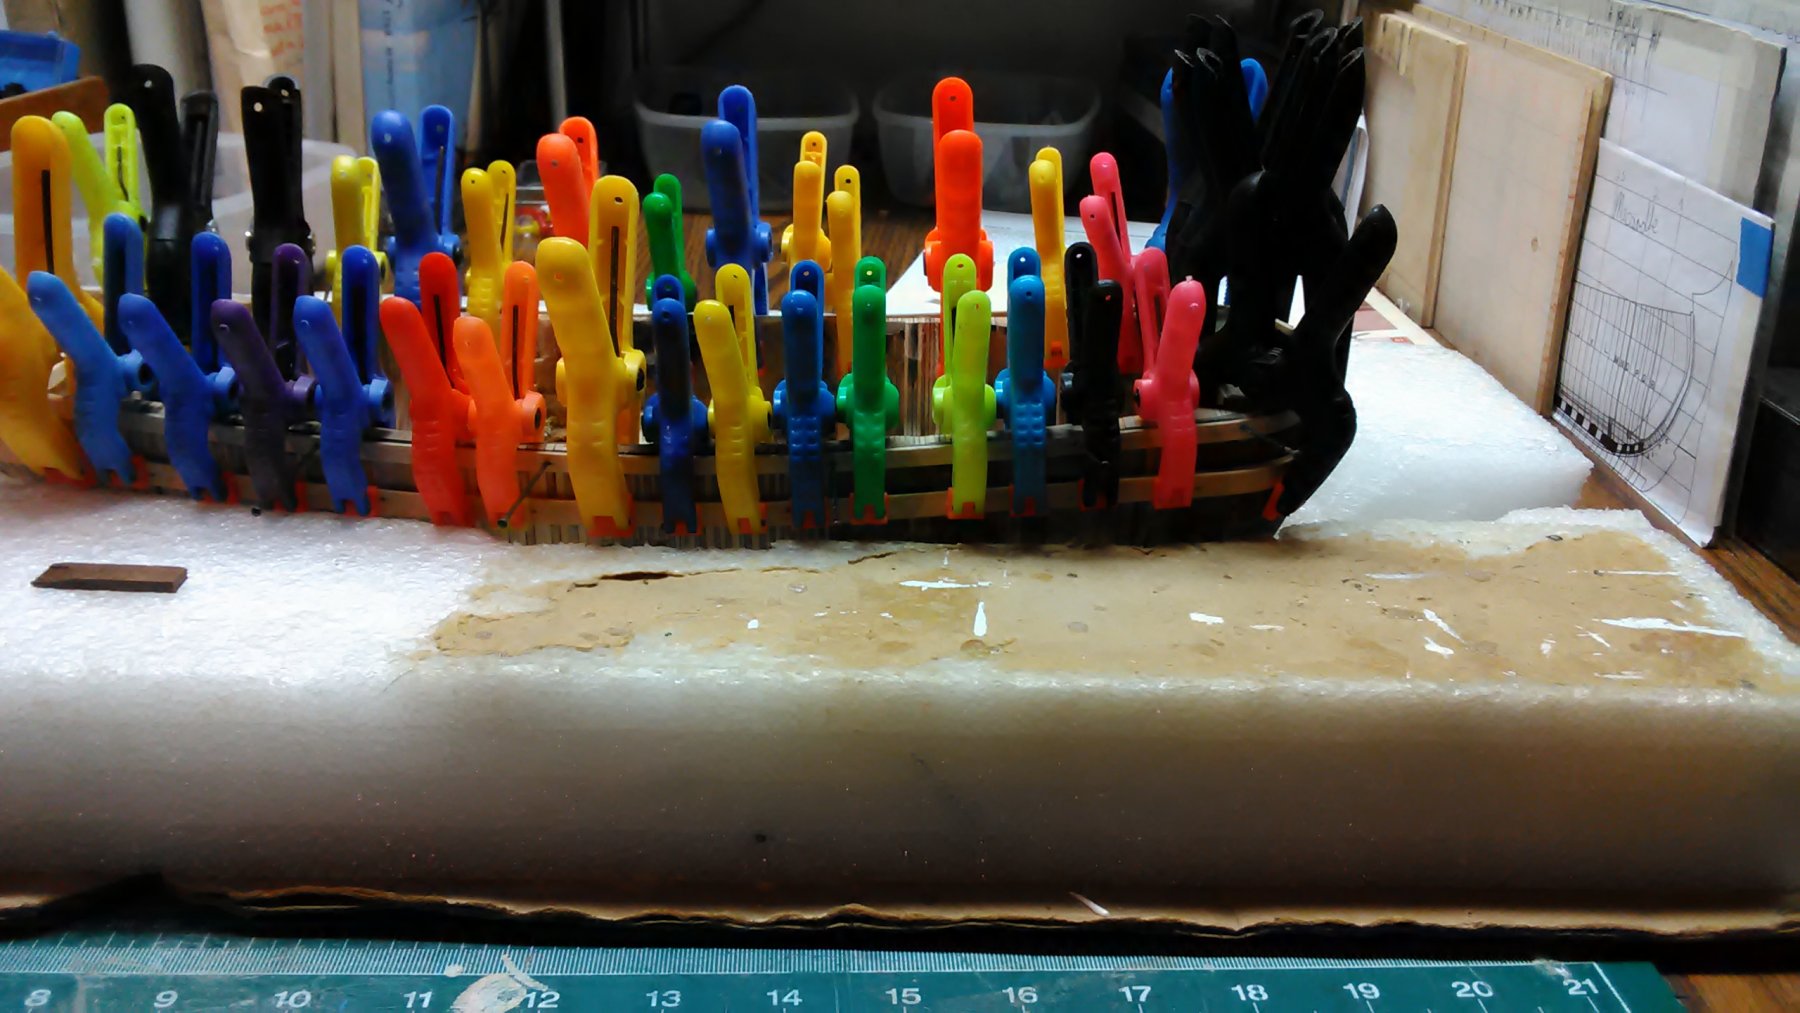
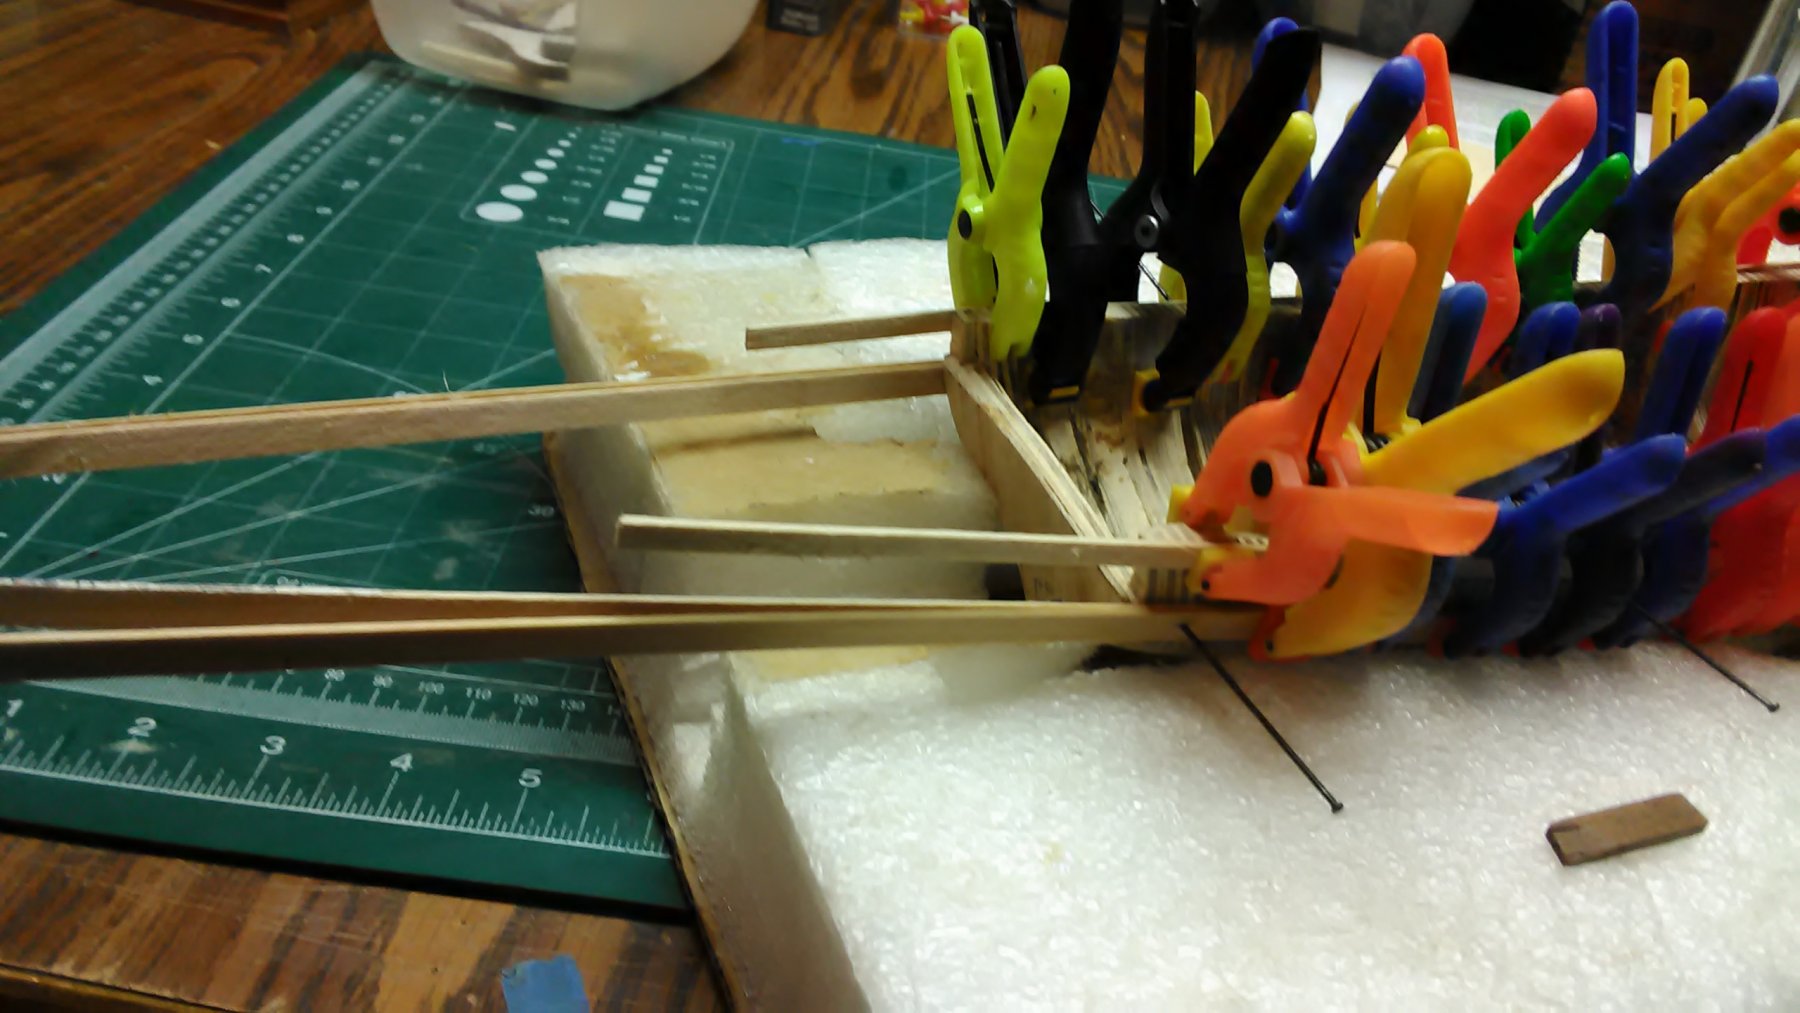
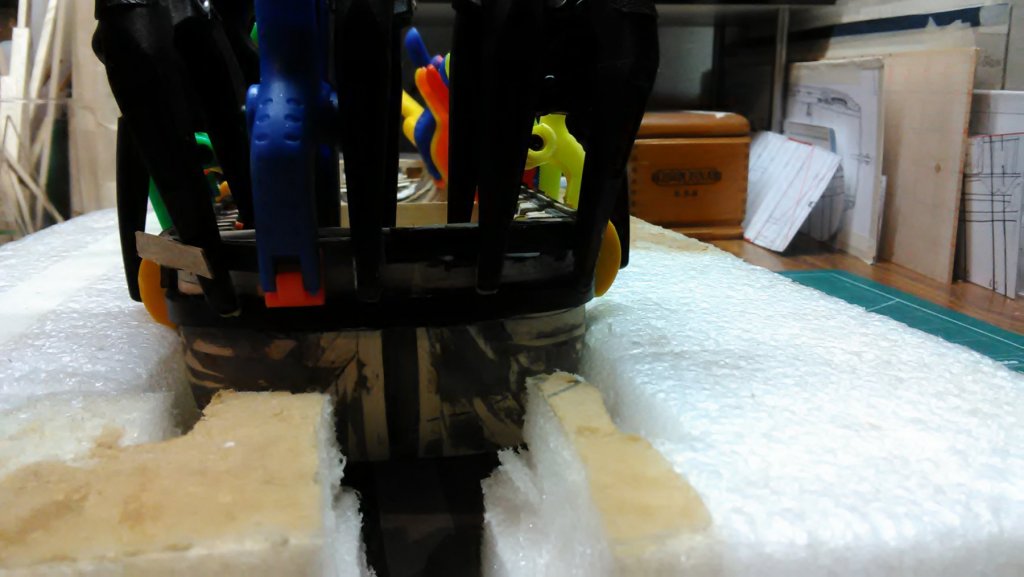
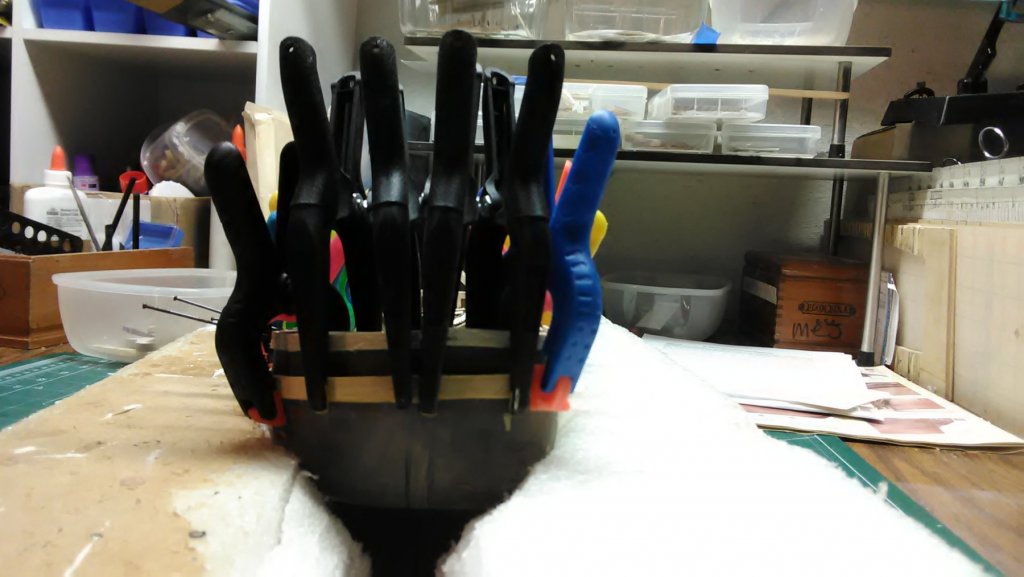
Forming the lower wales (one can never have enough clamps). The wales are two pieces of basswood strips. These will be glued together and painted black. I am still researching paints. The paint mentioned in McArdle's book is incomplete. Presently not everything is available and I was hoping angelfather, he is building the Utrecht as well, was going to list his colors on his build. So until then, I will be making all the parts until I have the paint colors. I thought curving the blunt bow was going to be difficult, but it wasn't. Marcus


- 305 replies
-
- 7
-
-
- utrecht
- statenjacht
- (and 1 more)