MORE HANDBOOKS ARE ON THEIR WAY! We will let you know when they get here.
×


flying_dutchman2
-
Posts
1,735 -
Joined
-
Last visited
Content Type
Profiles
Forums
Gallery
Events
Everything posted by flying_dutchman2
-
 Jan, Thanks for the pictures. I was also interested in the back of the figurehead. How it is attached and the way the bow pieces are attached. Thanks so much. Marcus
- 305 replies
-
- 5
-

-
- utrecht
- statenjacht
- (and 1 more)
-
Comment for the Dutch members as they would understand the following statement. The sculpey cuts and shaves like "Hele oude Leidse kaas". (very old Leiden cheese) I wish I had some. Yumm. Marcus
- 305 replies
-
- 4
-
-
- utrecht
- statenjacht
- (and 1 more)
-
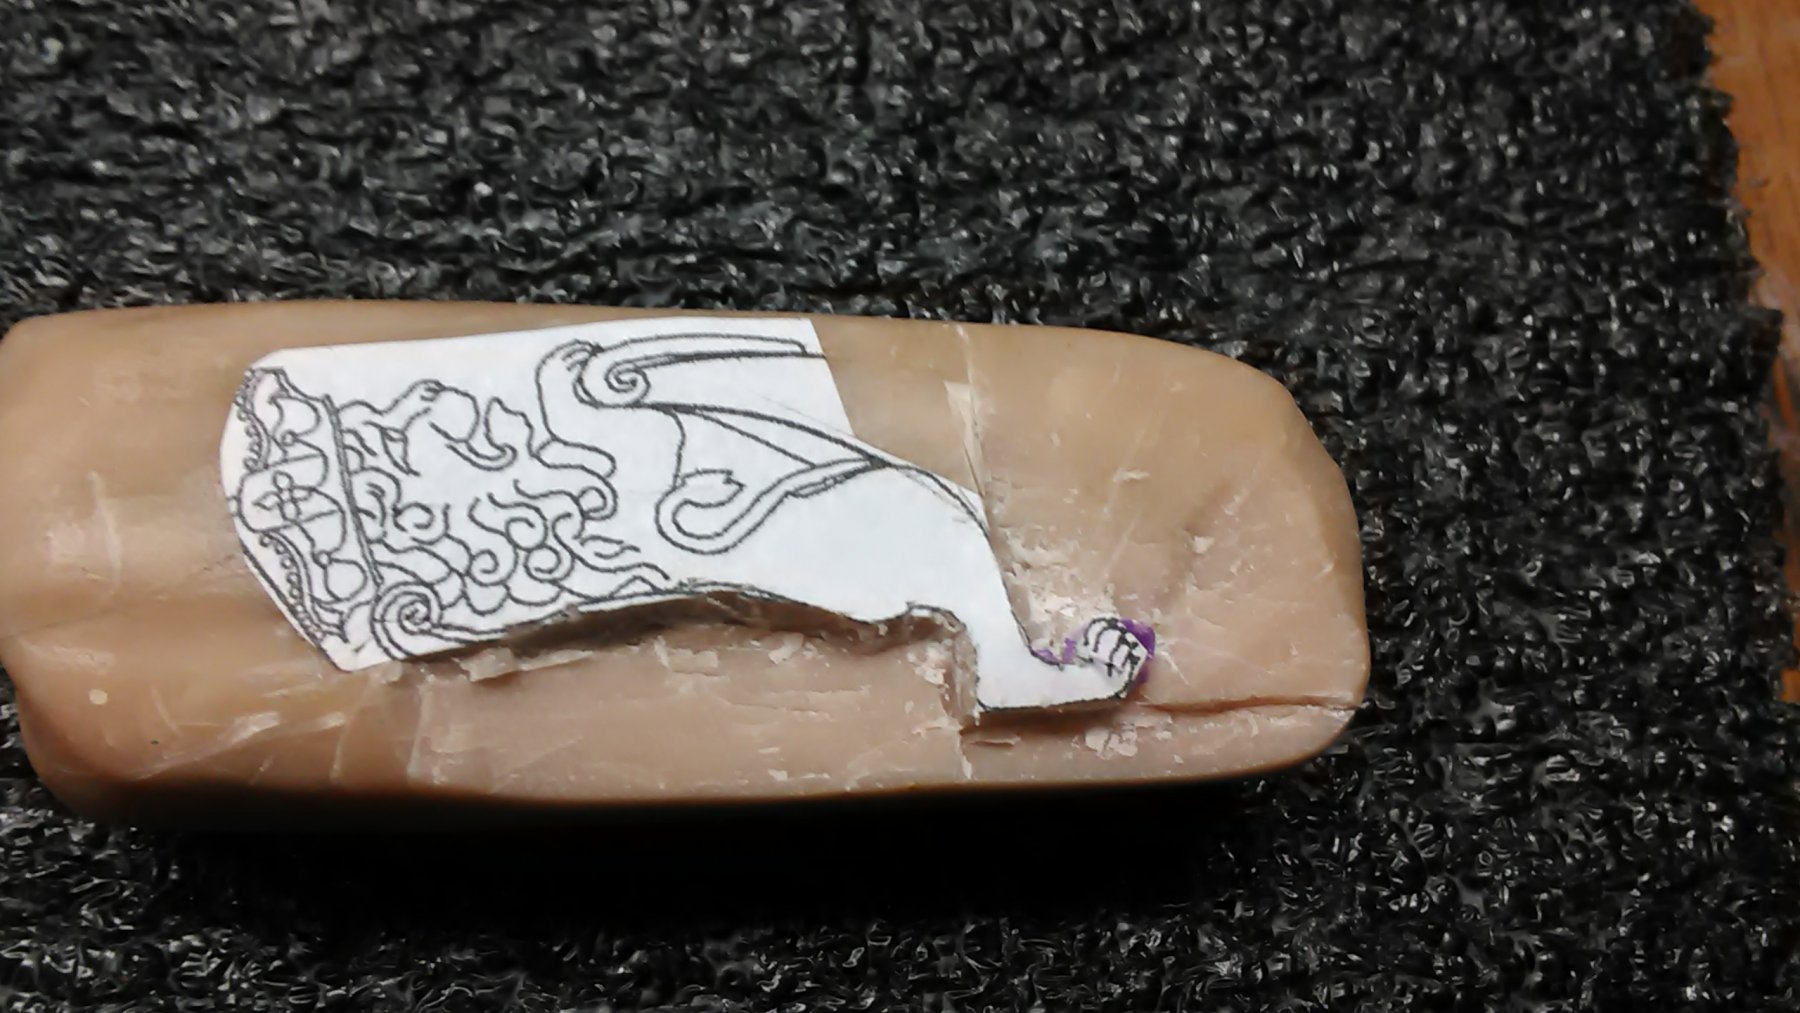
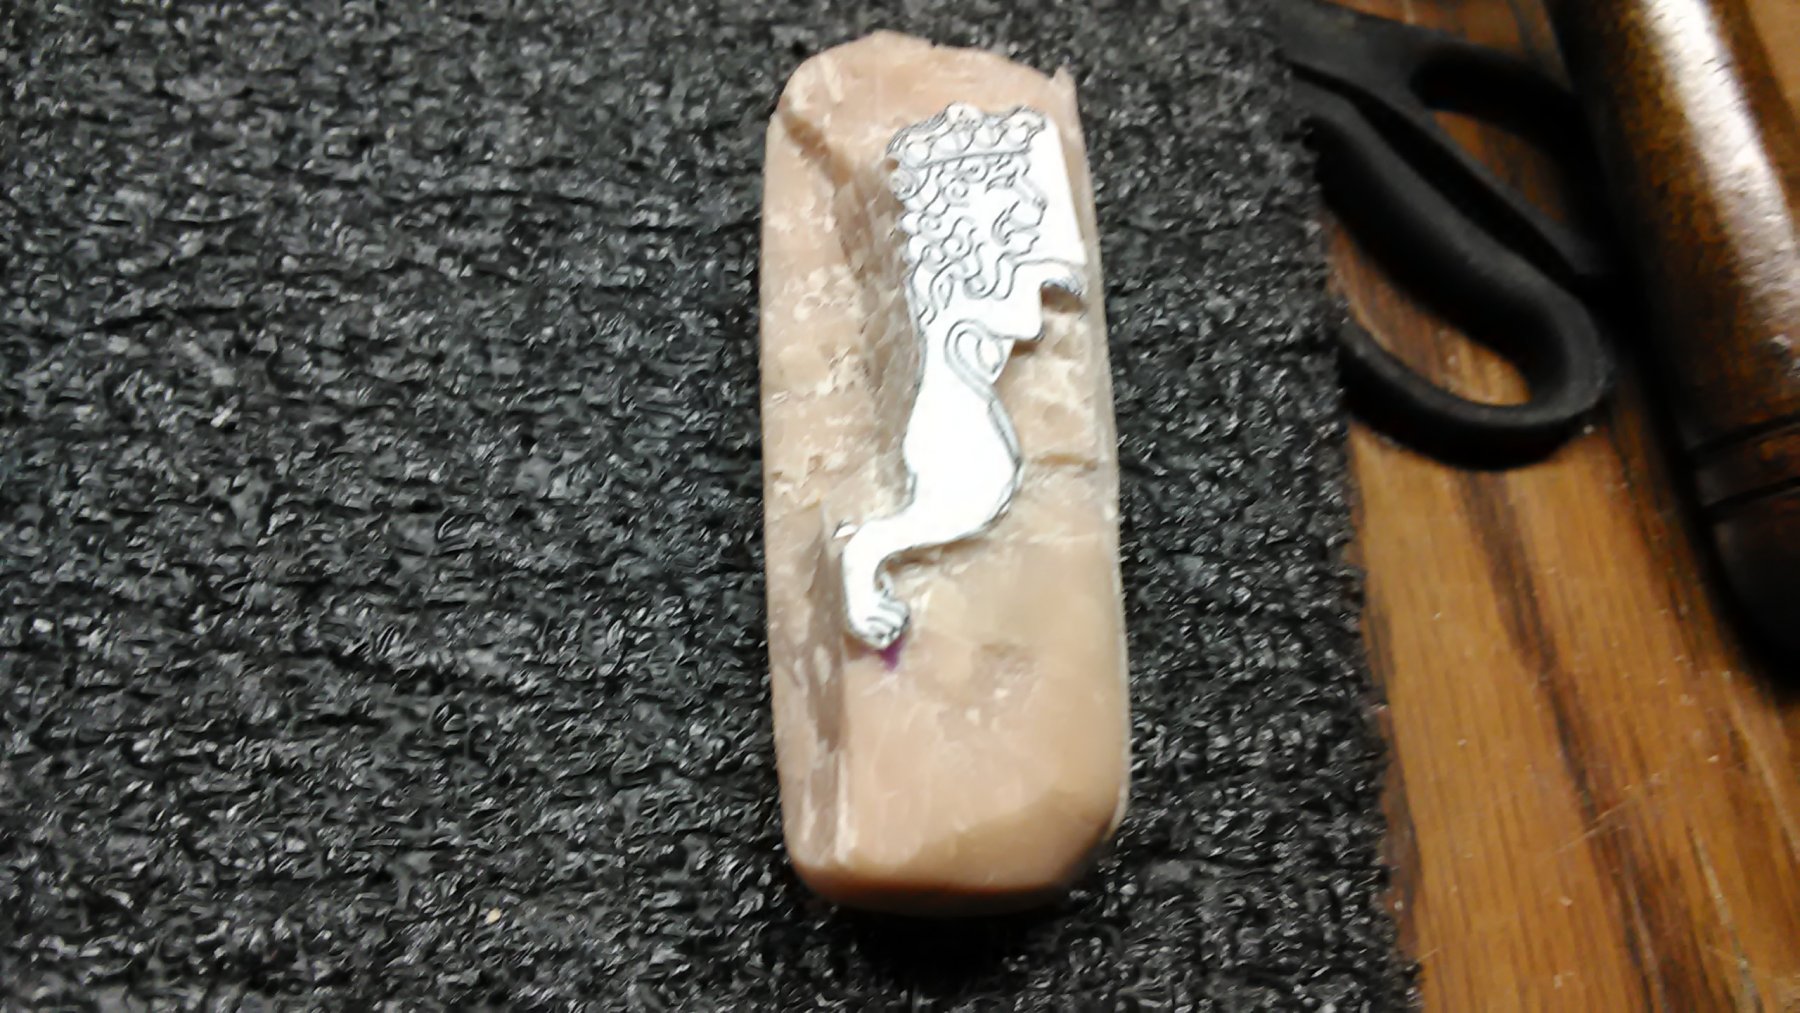
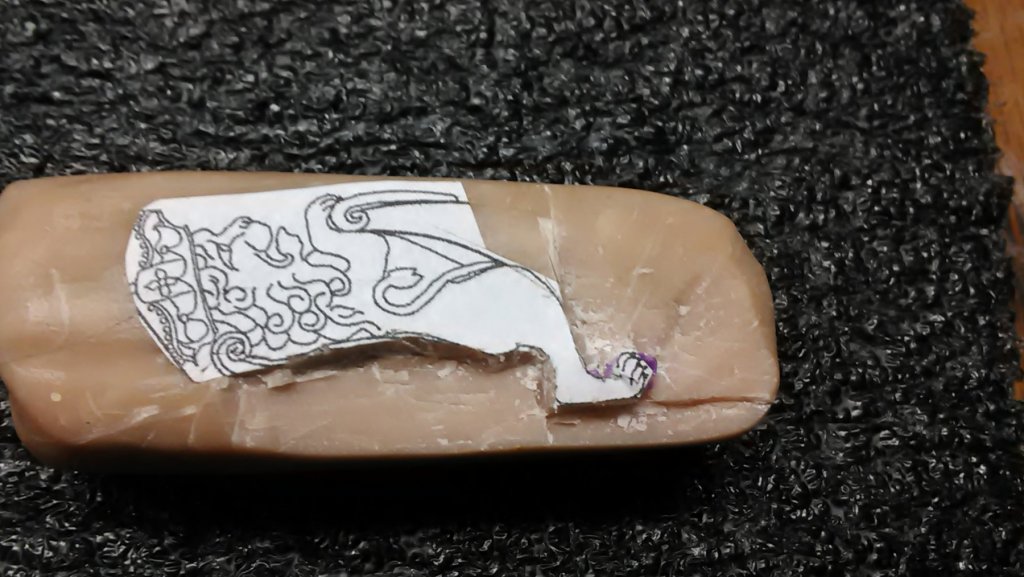
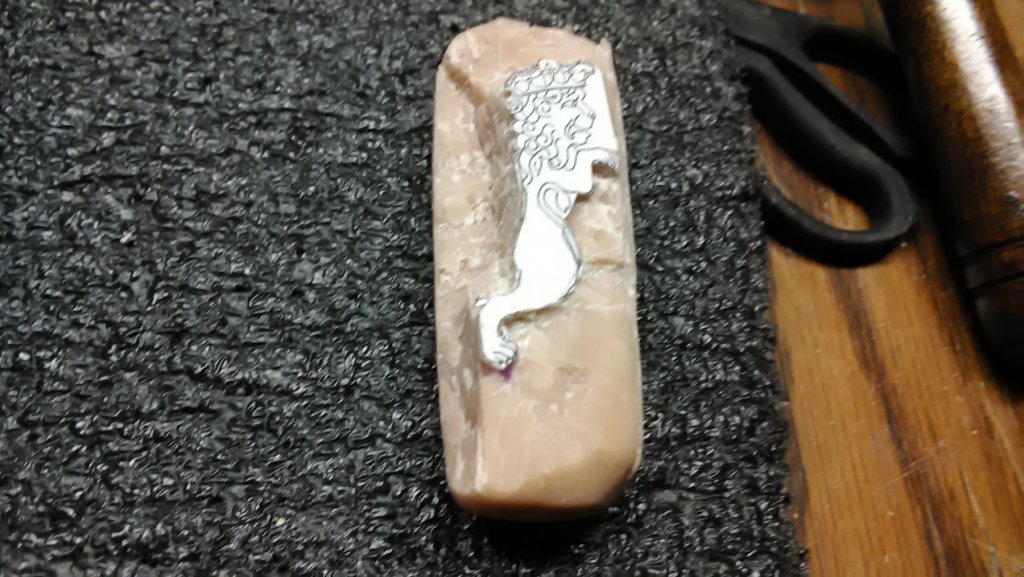
Mike, Love these boats as well. My next boat is the Boyer, one of the 17th century merchant boats. Picked this as it is a large model so I can add lots of details and it has a beautiful looking stern. Piet Thanks for the info. Found lots of Utrecht pictures on Google.nl. My first attempt to do the figurehead in sculpey. Made a piece of 3 x 1 x 1 inches. Backed it at 275F for 30 minutes. Glued a picture on it and rough carving with an xacto knife. Marcus
- 305 replies
-
- 5
-
-
- utrecht
- statenjacht
- (and 1 more)
-
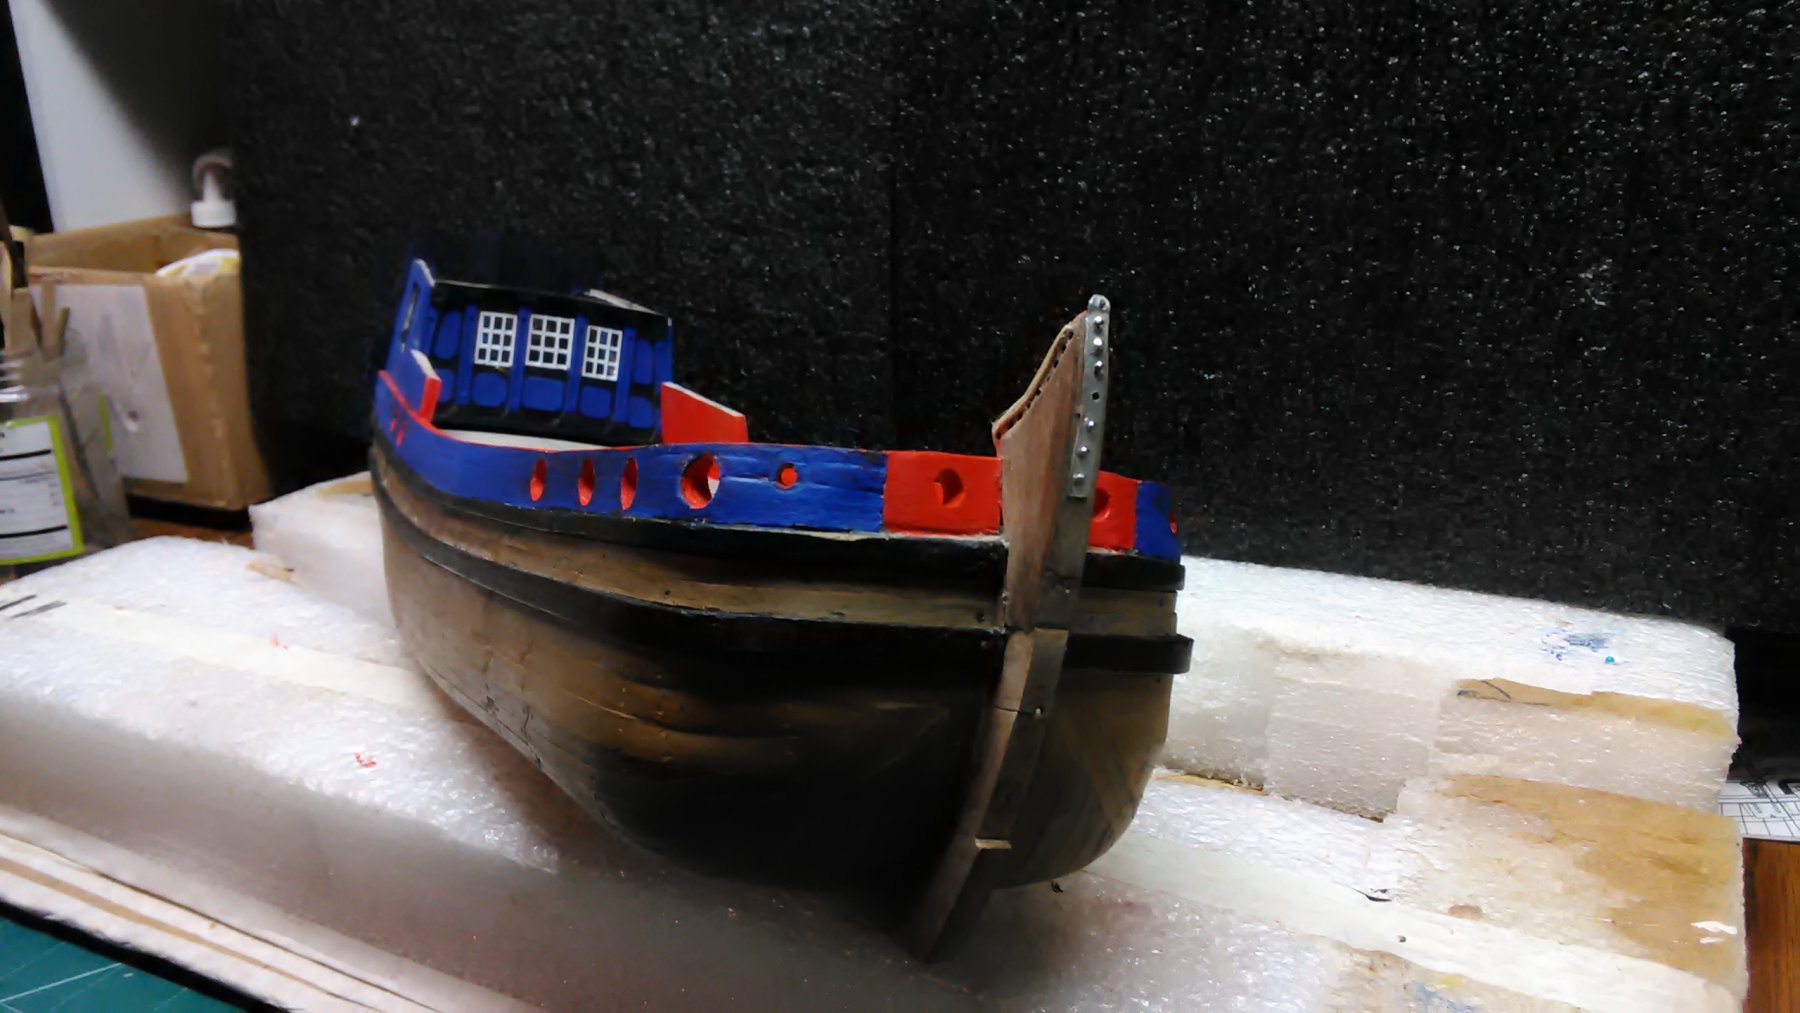
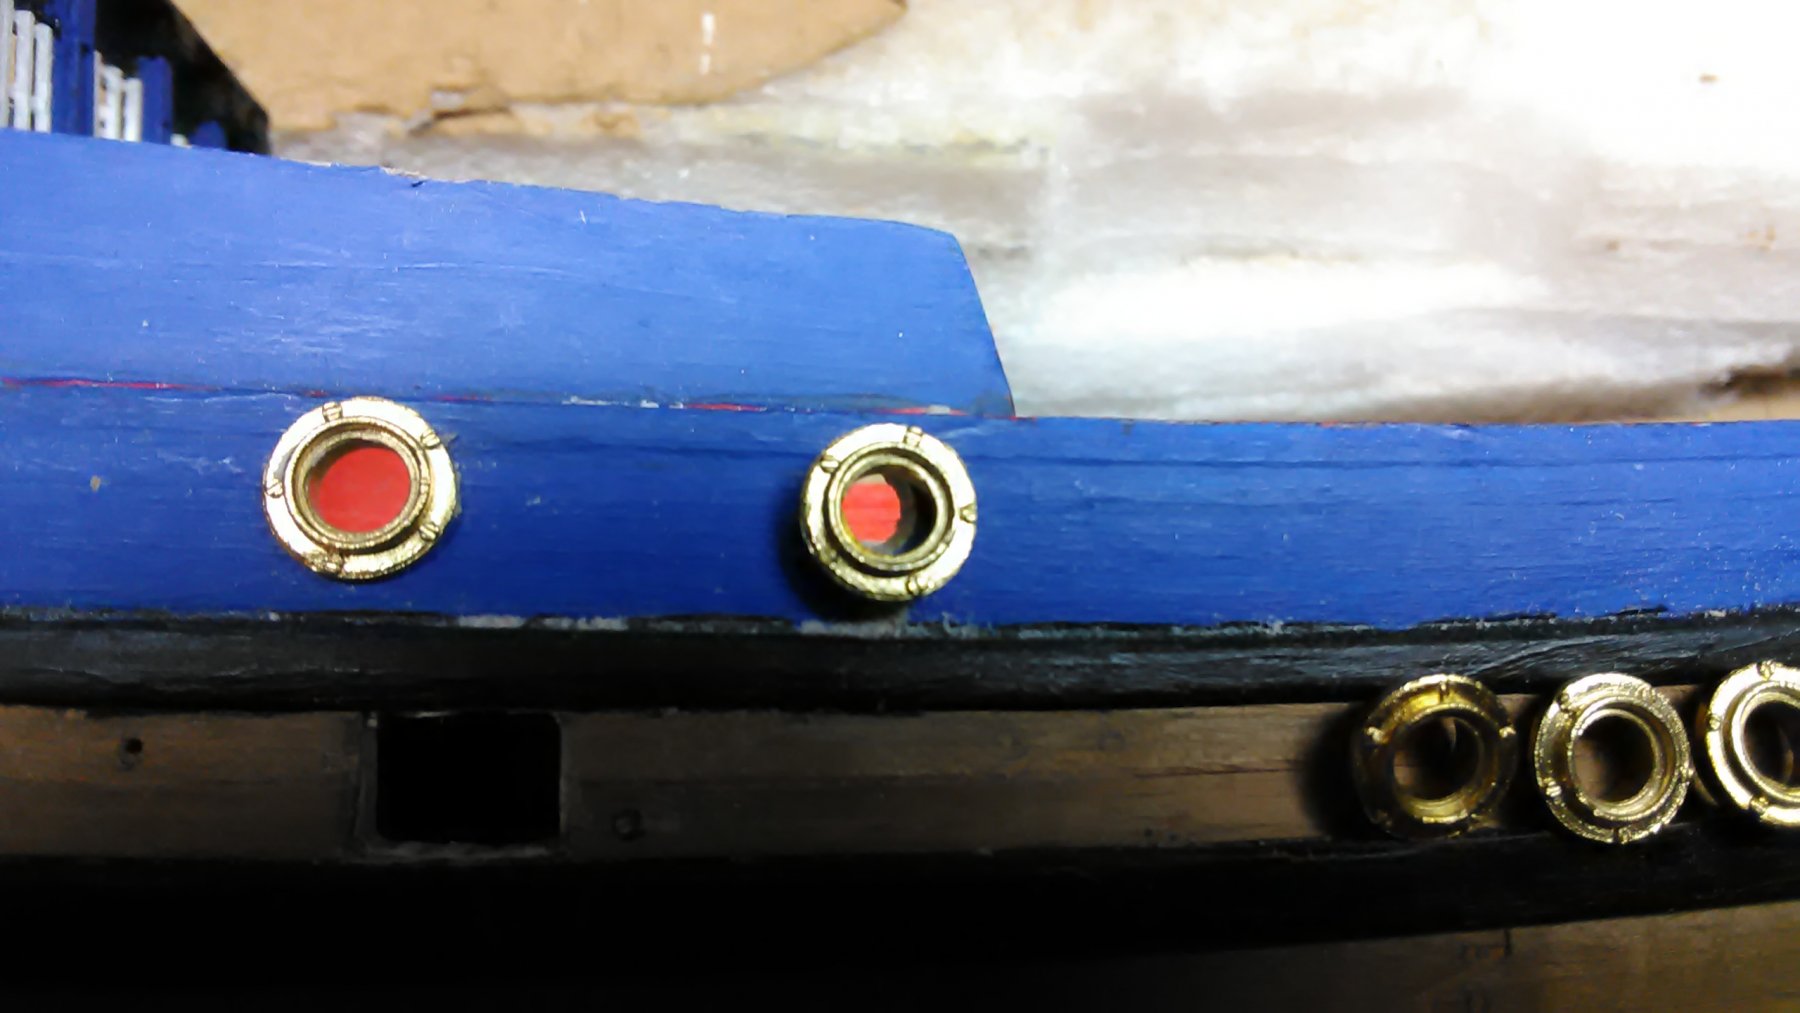
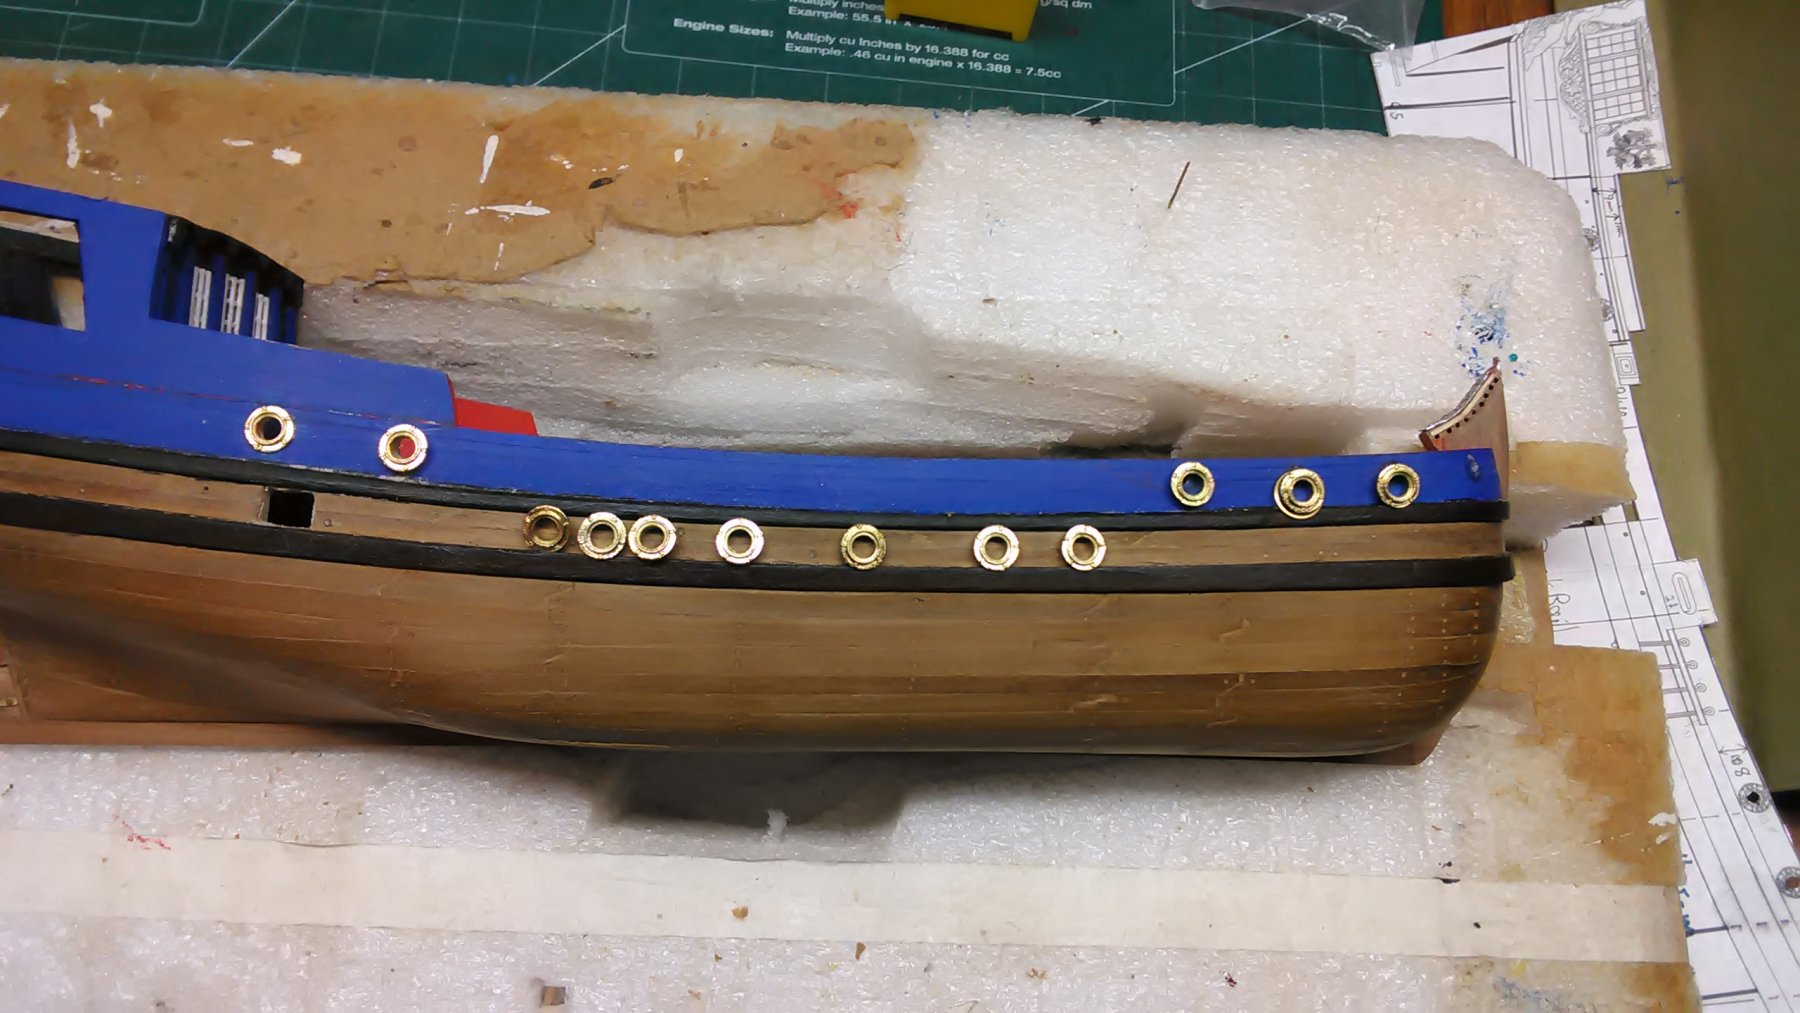
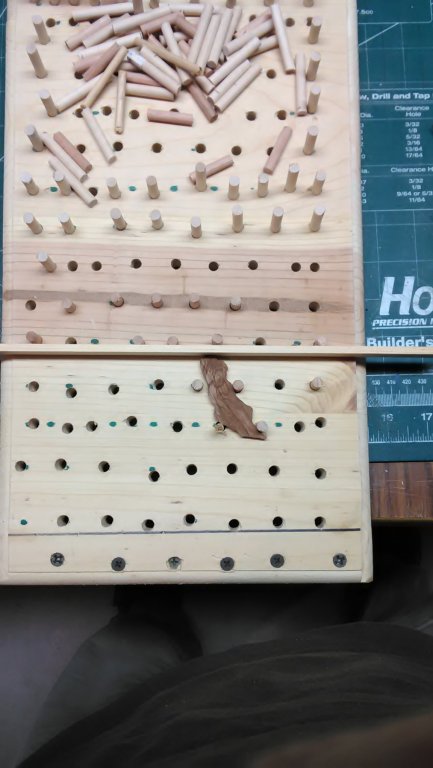
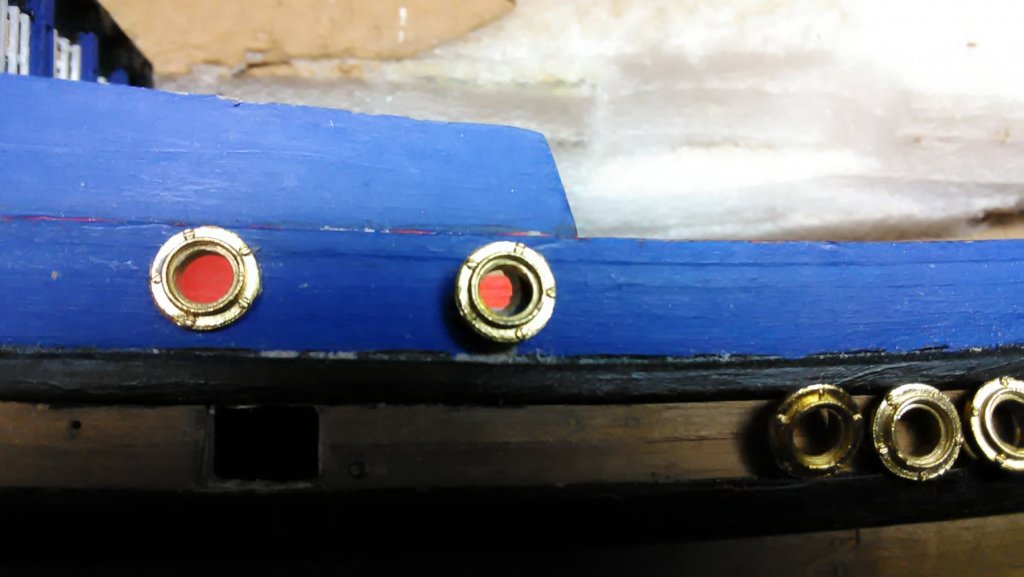
Canon holes have been filled out and painted on the inside with medium cadmium red which is the same color as the inside of the railing. Still need to do the final coat of the cadmium red and the outside in cobalt blue. Transom is cut out and painted as well. Inside is Prussian blue and outside is cobalt blue. Created a carving peg board. Took a piece of pine board and drilled 1/4" holes every 1/2" and every 1" all over the board. Took birch and left over cherry dowels and cut them in 3 and 4 cm lengths. The piece that is in between the pegs is the River God carving. I cut it out with a hand jigsaw and added pencil marks which will be carved out and painted yellow ochre. The pieces on the blue cover still need to be carved. The red is cherry and the white is maple.


- 305 replies
-
- 6
-
-
- utrecht
- statenjacht
- (and 1 more)
-
So instead of the carving the canon wreaths, I am replacing those with port hole covers. Will file them down somewhat, paint them yellow ochre and, voila, done. This Wednesday I will meet a member from the north west Indiana woodworkers Association (a club I joined recently) and go through his stash of wood cut offs. There is a lot of basswood and balsa that I know of. Also, brass, copper, stainless steel, aluminum and other metals in strips and wire in various thicknesses. At the last club meeting I mentioned that I can use any cut offs that anyone wants to part with. After the meeting several members came to me and asked if I can use cherry, ash, alder and apple. I said yes, and I will have it in the December meeting.

- 305 replies
-
- 6
-
-
- utrecht
- statenjacht
- (and 1 more)
-
Hans, Thank you for the picture. It is a better one than I saw on Google. The gray part was new to me. I will go to your website and check it out. Marcus
- 305 replies
-
- 4
-
-
- utrecht
- statenjacht
- (and 1 more)
-
I went to Google.nl and searched for statenjacht Utrecht and came up with all types of pictures. Areas that need to be painted a total different color. Also found additional items that are not included in the plans. As I am going to model it like the replica, I am going to omit the canons. Marcus
- 305 replies
-
- 5
-
-
- utrecht
- statenjacht
- (and 1 more)
-
Question for the Dutch members who have seen the replica of the Utrecht more than once. The lion is holding a shield with his front paws, what are the two colors? Top color and the bottom color. Nowhere in the Hoving book is their a picture depicting this and I have scoured the Net of Utrecht images. This would be much appreciated. Thanks Marcus
- 305 replies
-
- 4
-
-
- utrecht
- statenjacht
- (and 1 more)
-
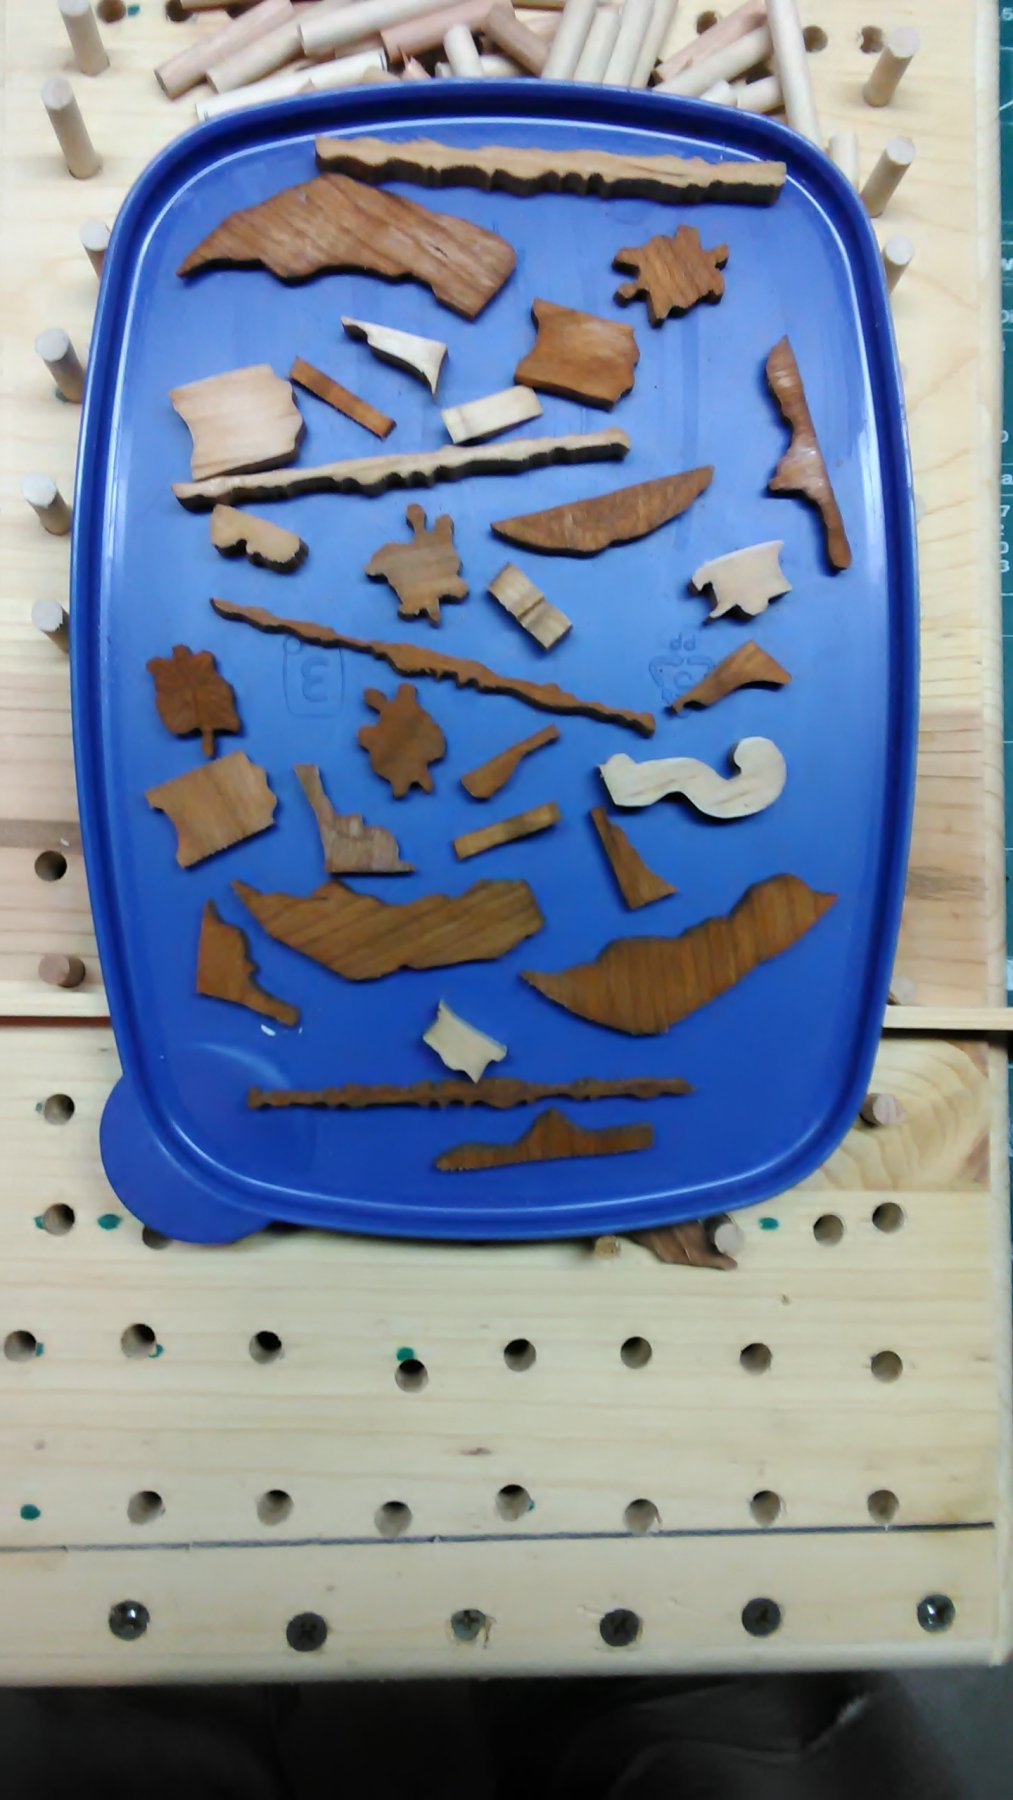
Yesterday I cut out almost all of the carvings on the scrollsaw and today penciled in some simple lines that follow the curves. I am doing some of the examples of the plans but will omit the intricate stuff. Keeping it simple. Be creative in my carvings. Made a lot of diplicates as well. Marcus

- 305 replies
-
- 9
-
-
- utrecht
- statenjacht
- (and 1 more)
-
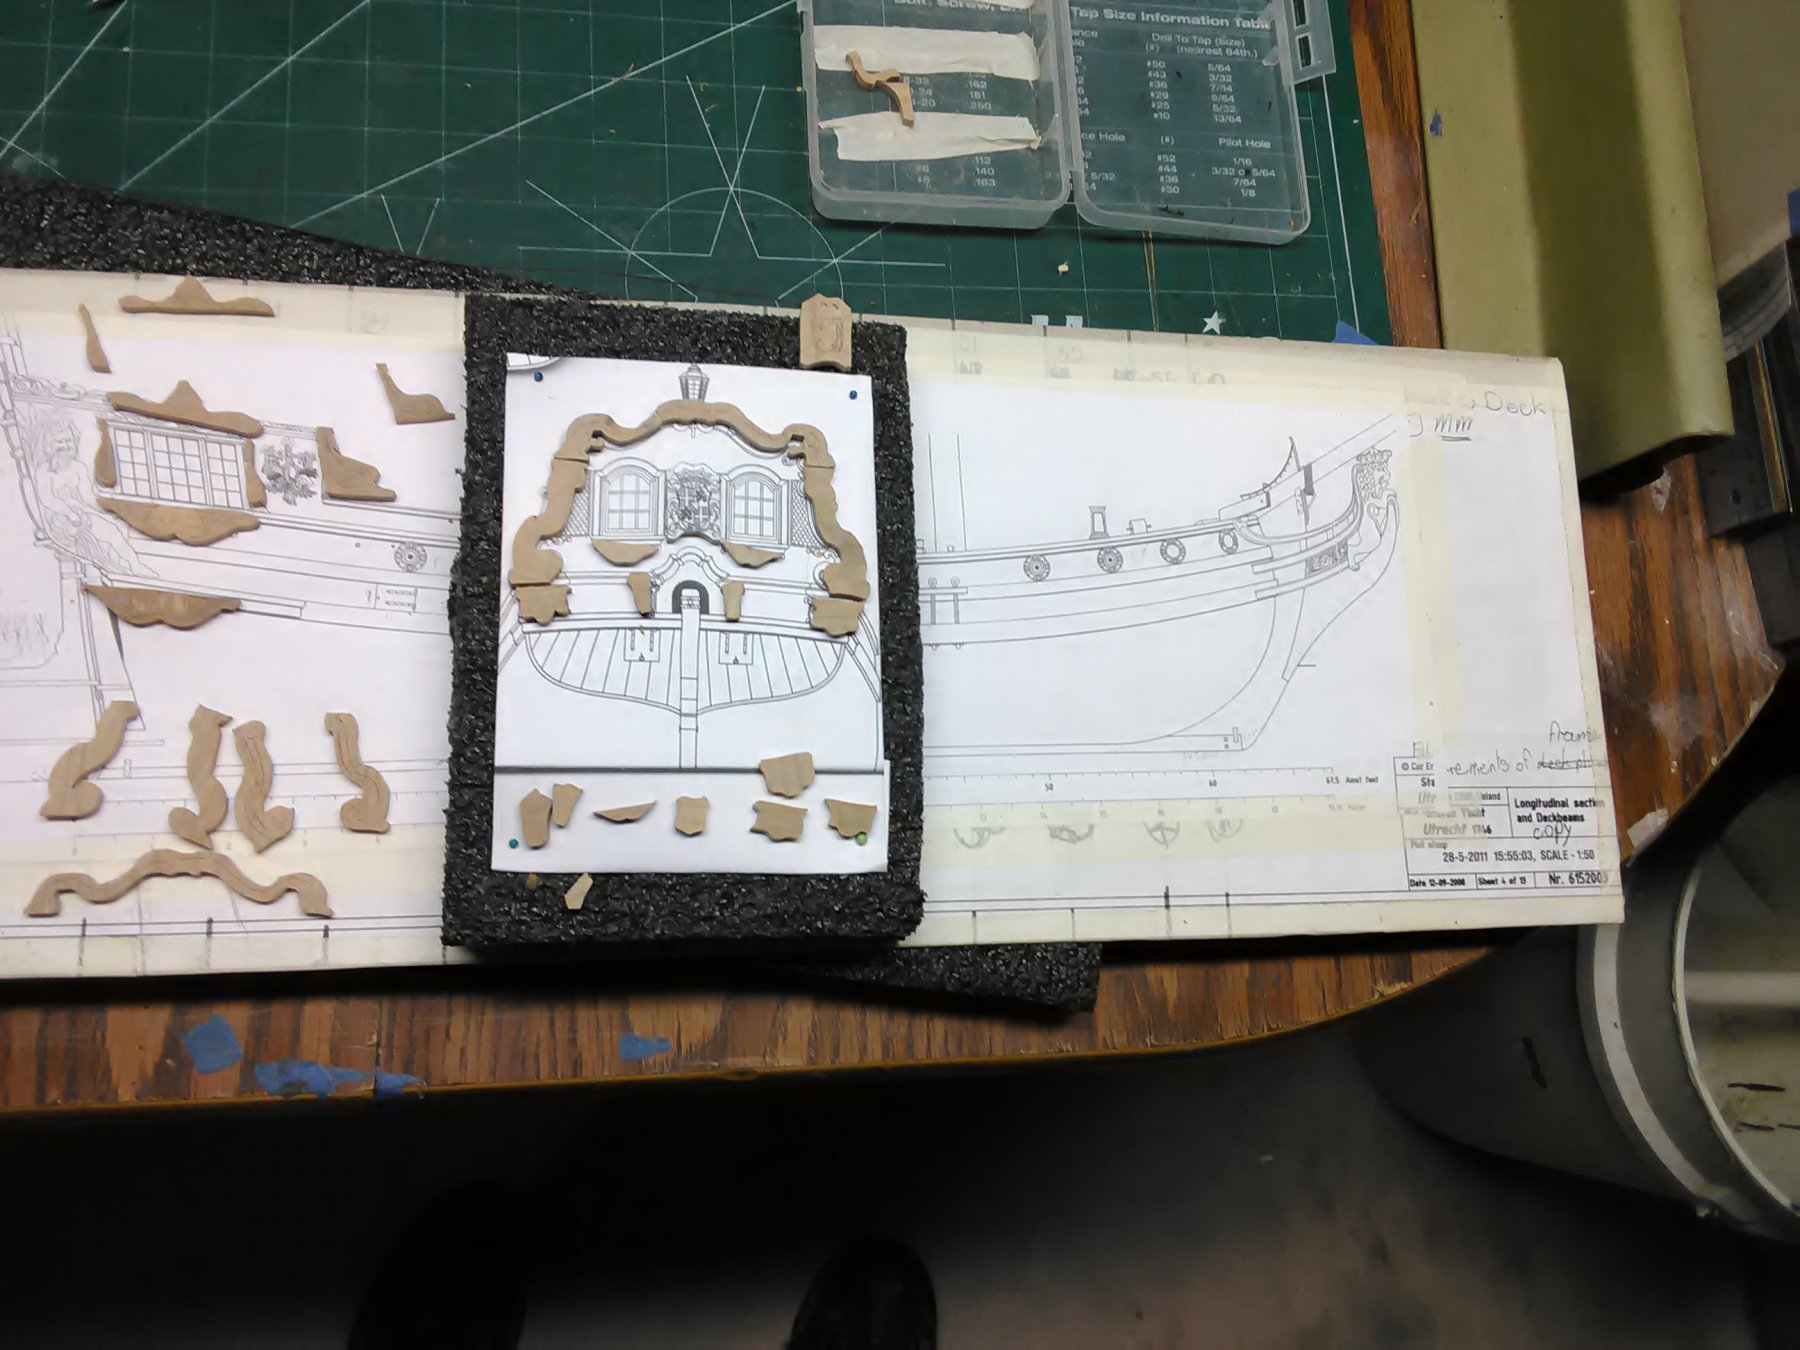
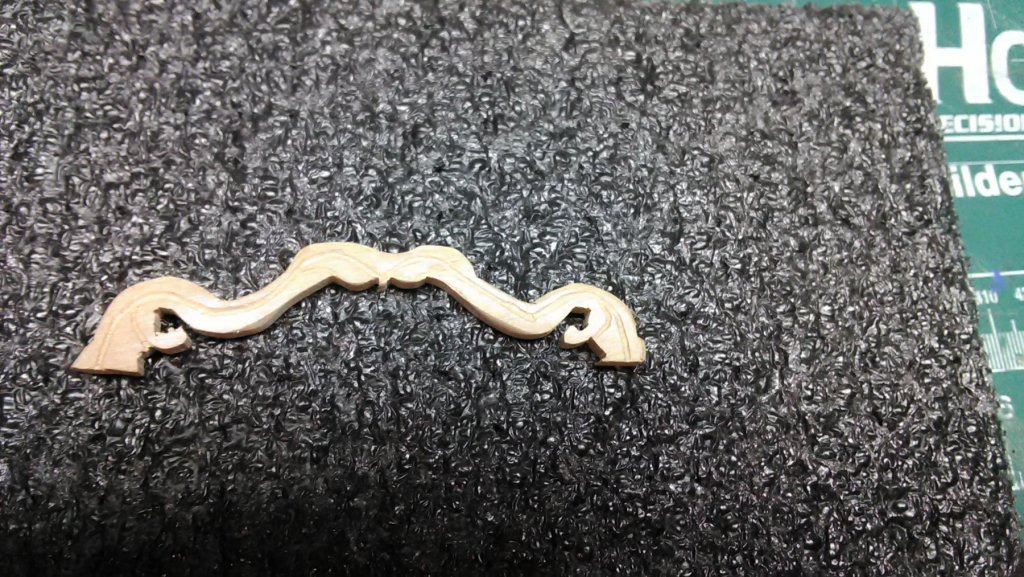
Piet, Patrick, Hans, and cog, thank you for your encouraging words. I can put a long post together of all the mistakes I have made, but this one is a "Big One". If I am off by a few mm than I can adjust it but if it is more than 5 mm, and I try to adjust it, it won't look right and at the scale of 1-50 cm it gets out of whack fast. The problem: The bottom of the Stern windows need to match up with the side windows and they didn't. The bottom of the side windows compared to the bottom of the Stern windows are 5 mm to high. So I am leaving the side windows as is (instead of redoing that as well) and raising the area above the Stern windows by 5 mm. I don't want to widen the 45 degree area where the top of the rudder is. That looks weird (I tried that as well). The carvings will be as is and where there are gaps, I will add filler pieces. The carvings are going to be cherry. This wood carves nice. I am also keeping it simple. Non of the frilly stuff. I have broken many pieces by putting in too much detail and the piece I kept simple, looks good. All of these pieces will be painted Yellow Ochre. Below is a piece that goes on the top of the Stern. Still needs to be sanded. Marcus
- 305 replies
-
- 6
-
-
- utrecht
- statenjacht
- (and 1 more)
-
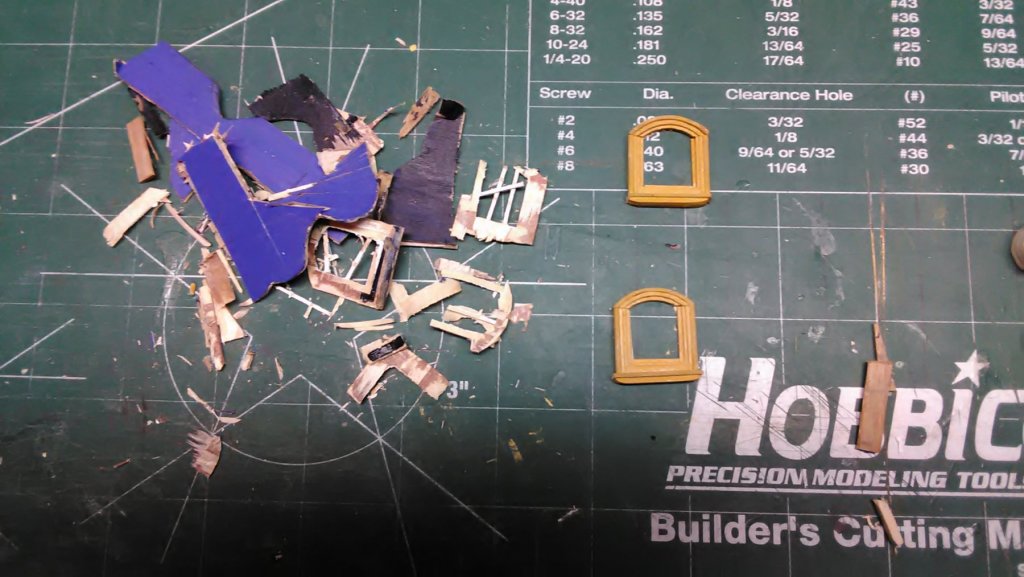
Worked on the Stern and noticed that I was off by lots of mm. Tried to adjust that but it only got worse. So I trashed the Stern but saved the window frames. I spent a lot of time making them. So tomorrow I will re-cut the Stern, make windows and fit the frames. Marcus
- 305 replies
-
- 4
-
-
- utrecht
- statenjacht
- (and 1 more)
-
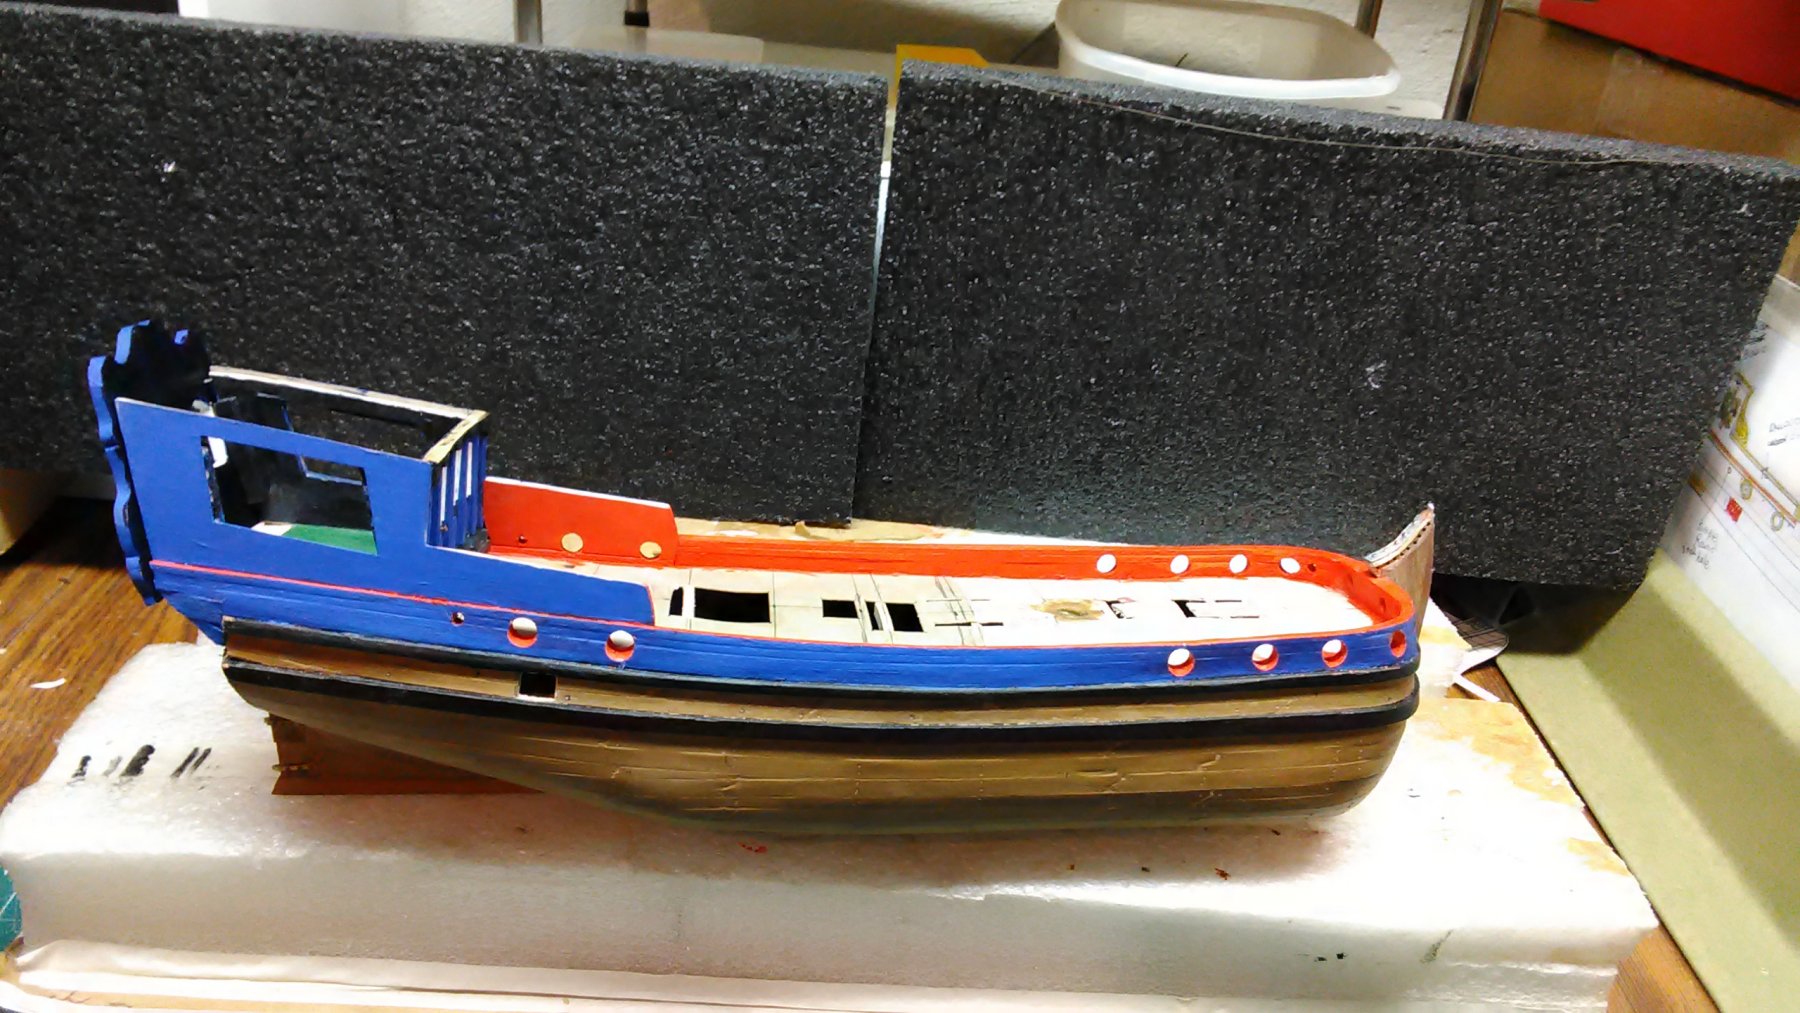
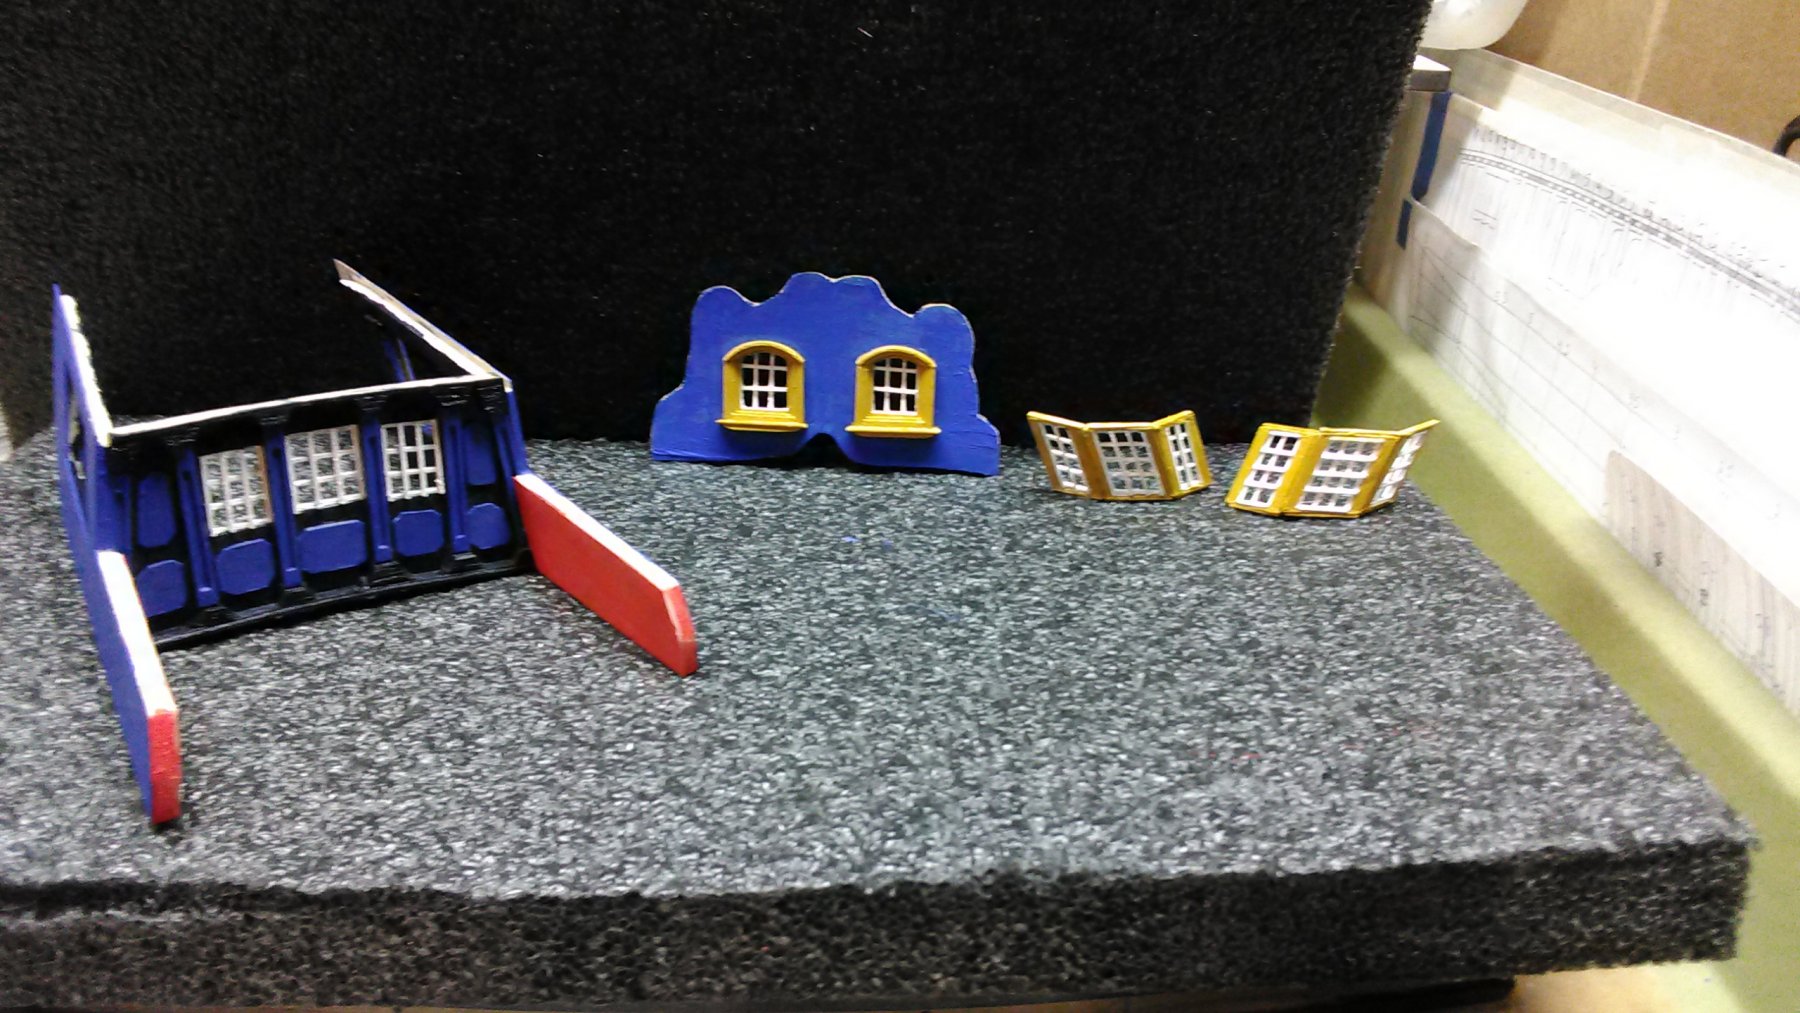
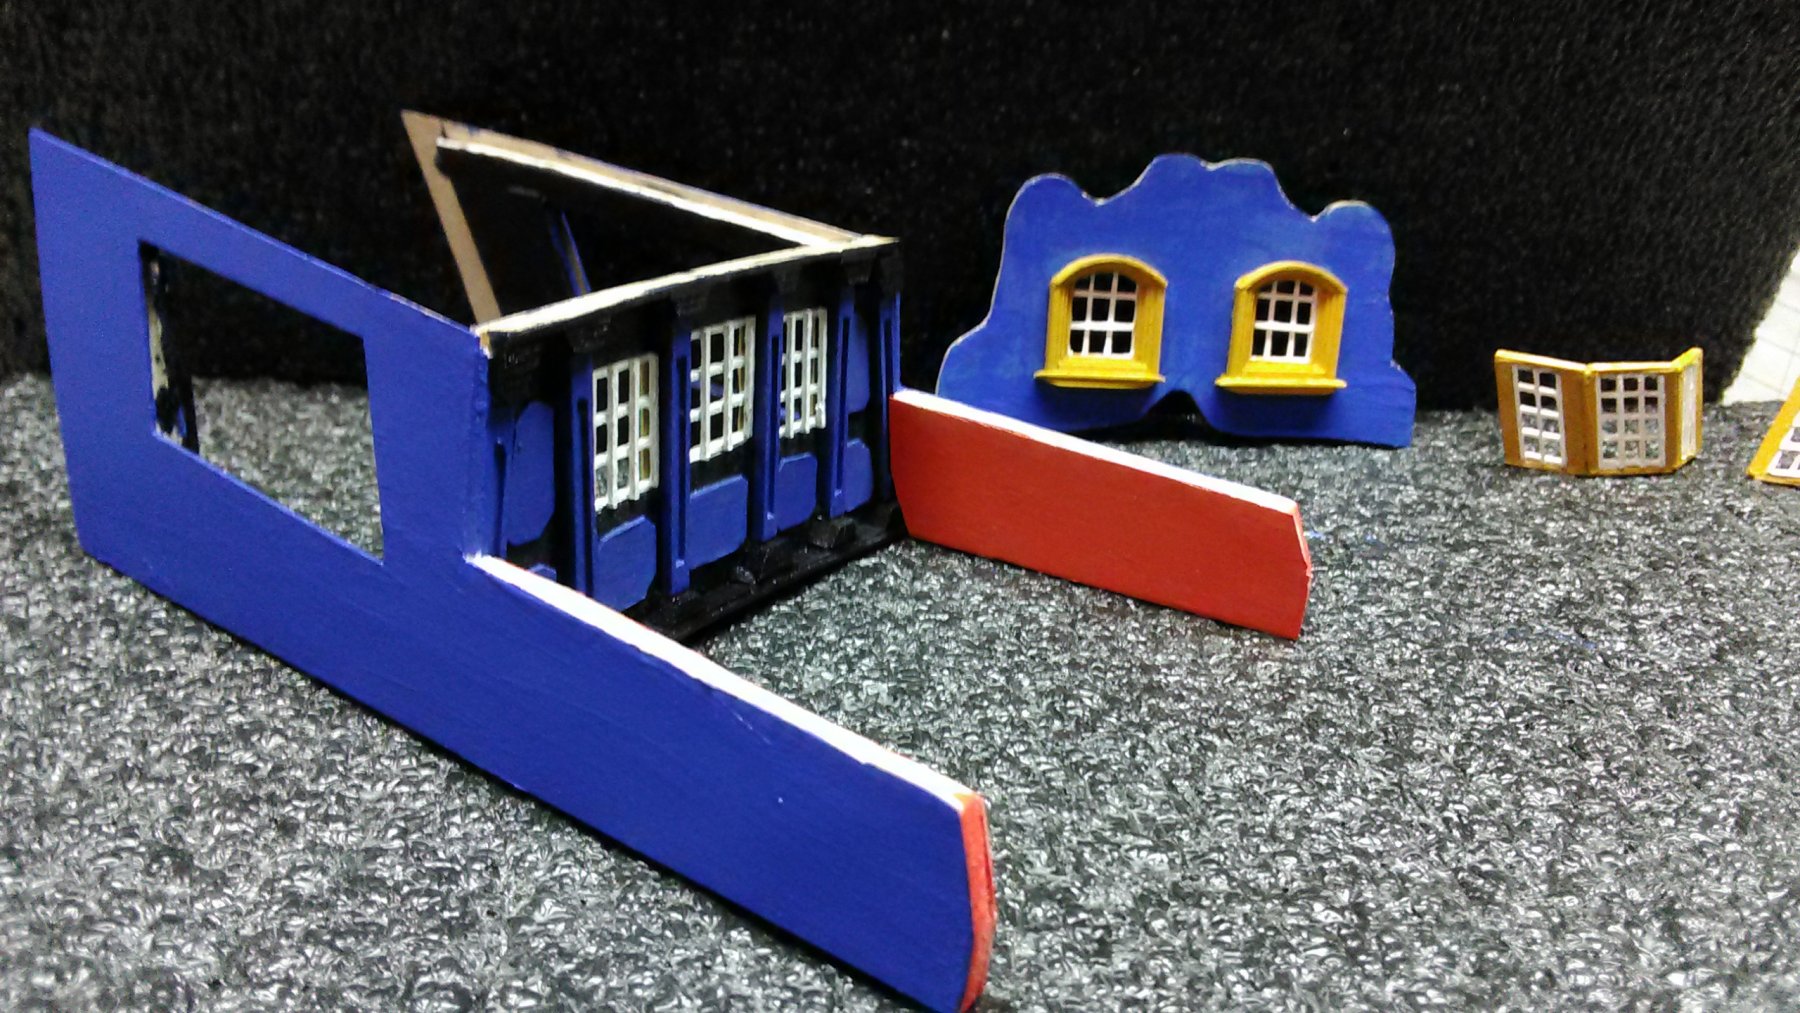
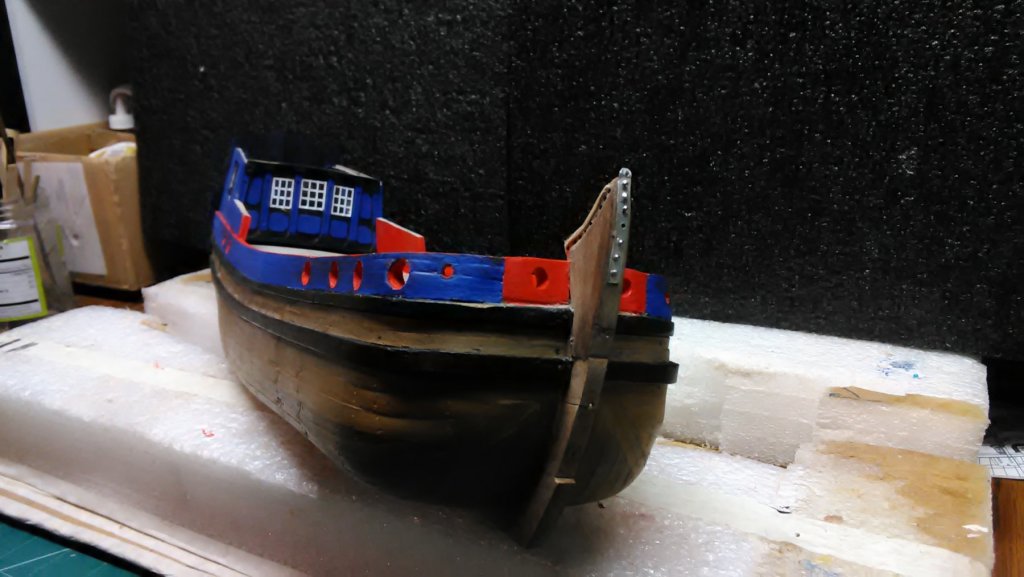
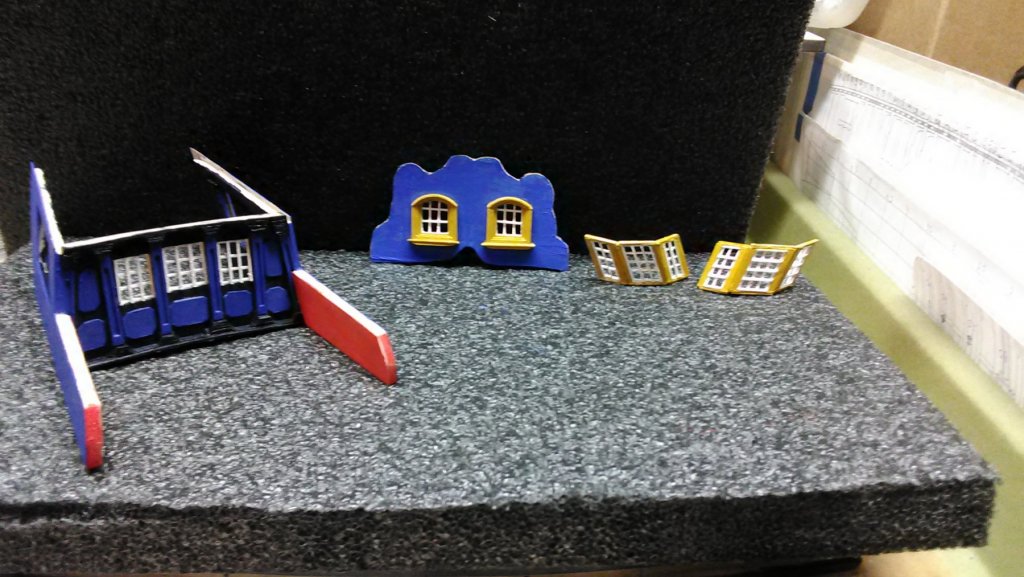
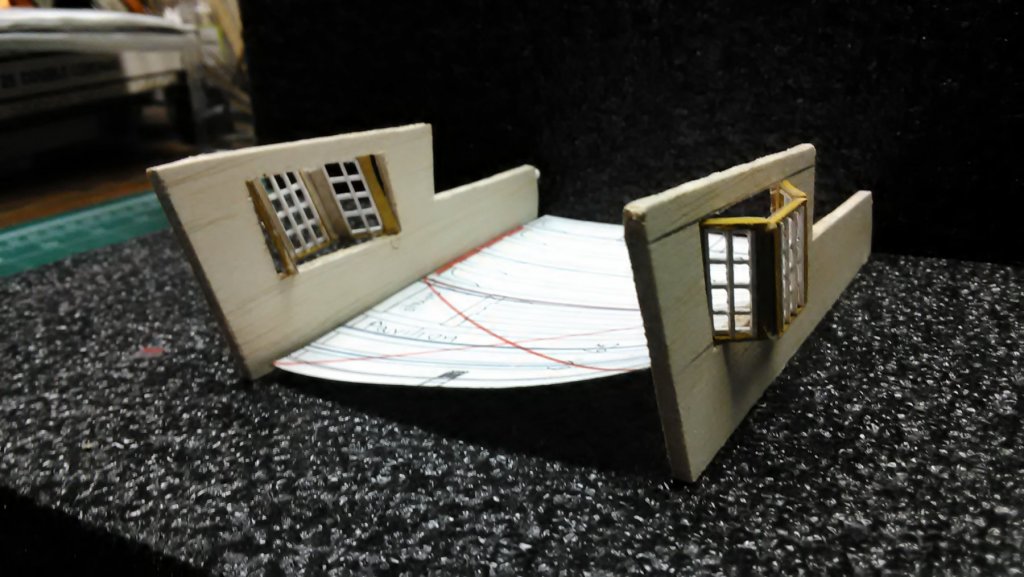
Glued the two sides and the front of the pavilion together. Most of the pavilion wall areas will be covered with carvings Paint color: Pavilion outside is cobalt blue. Inside is Prussian blue. Pavilion front is Prussian blue and the molding is cobalt blue. All window are titanium white. The window frames are yellow ochre. Inside of the railing is cadmium red, medium. Marcus

- 305 replies
-
- 7
-
-
- utrecht
- statenjacht
- (and 1 more)
-
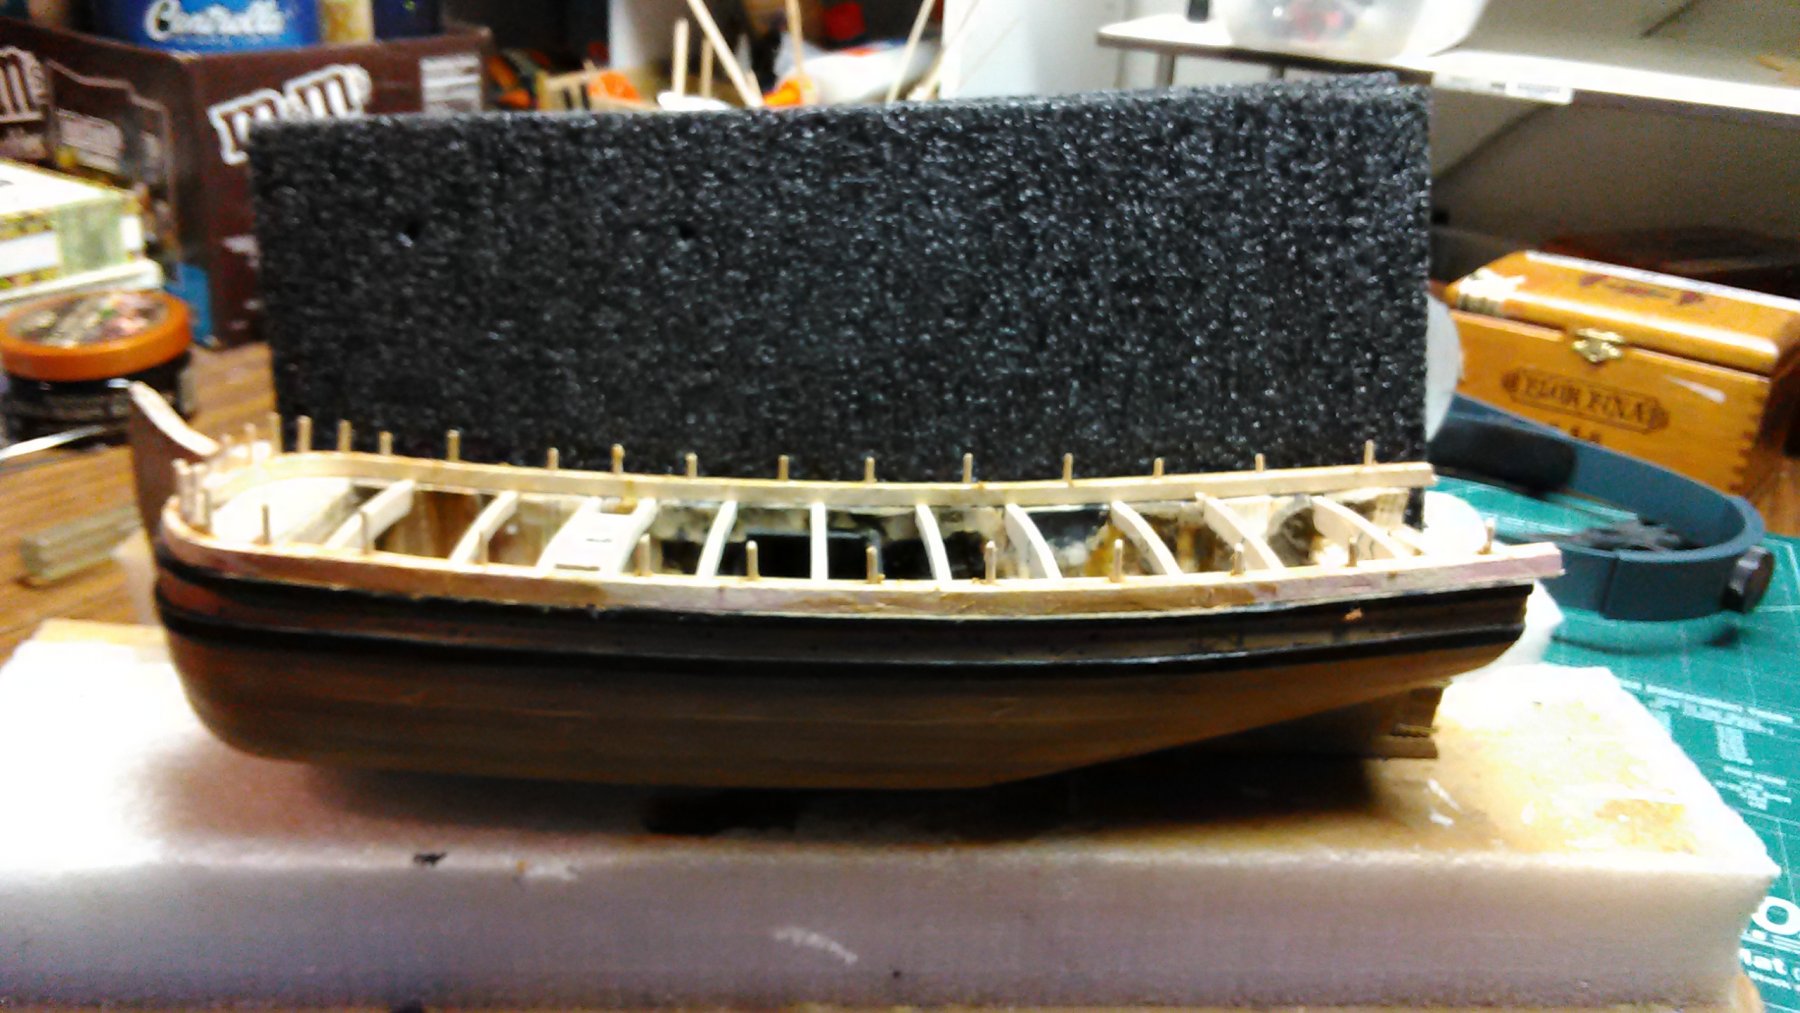
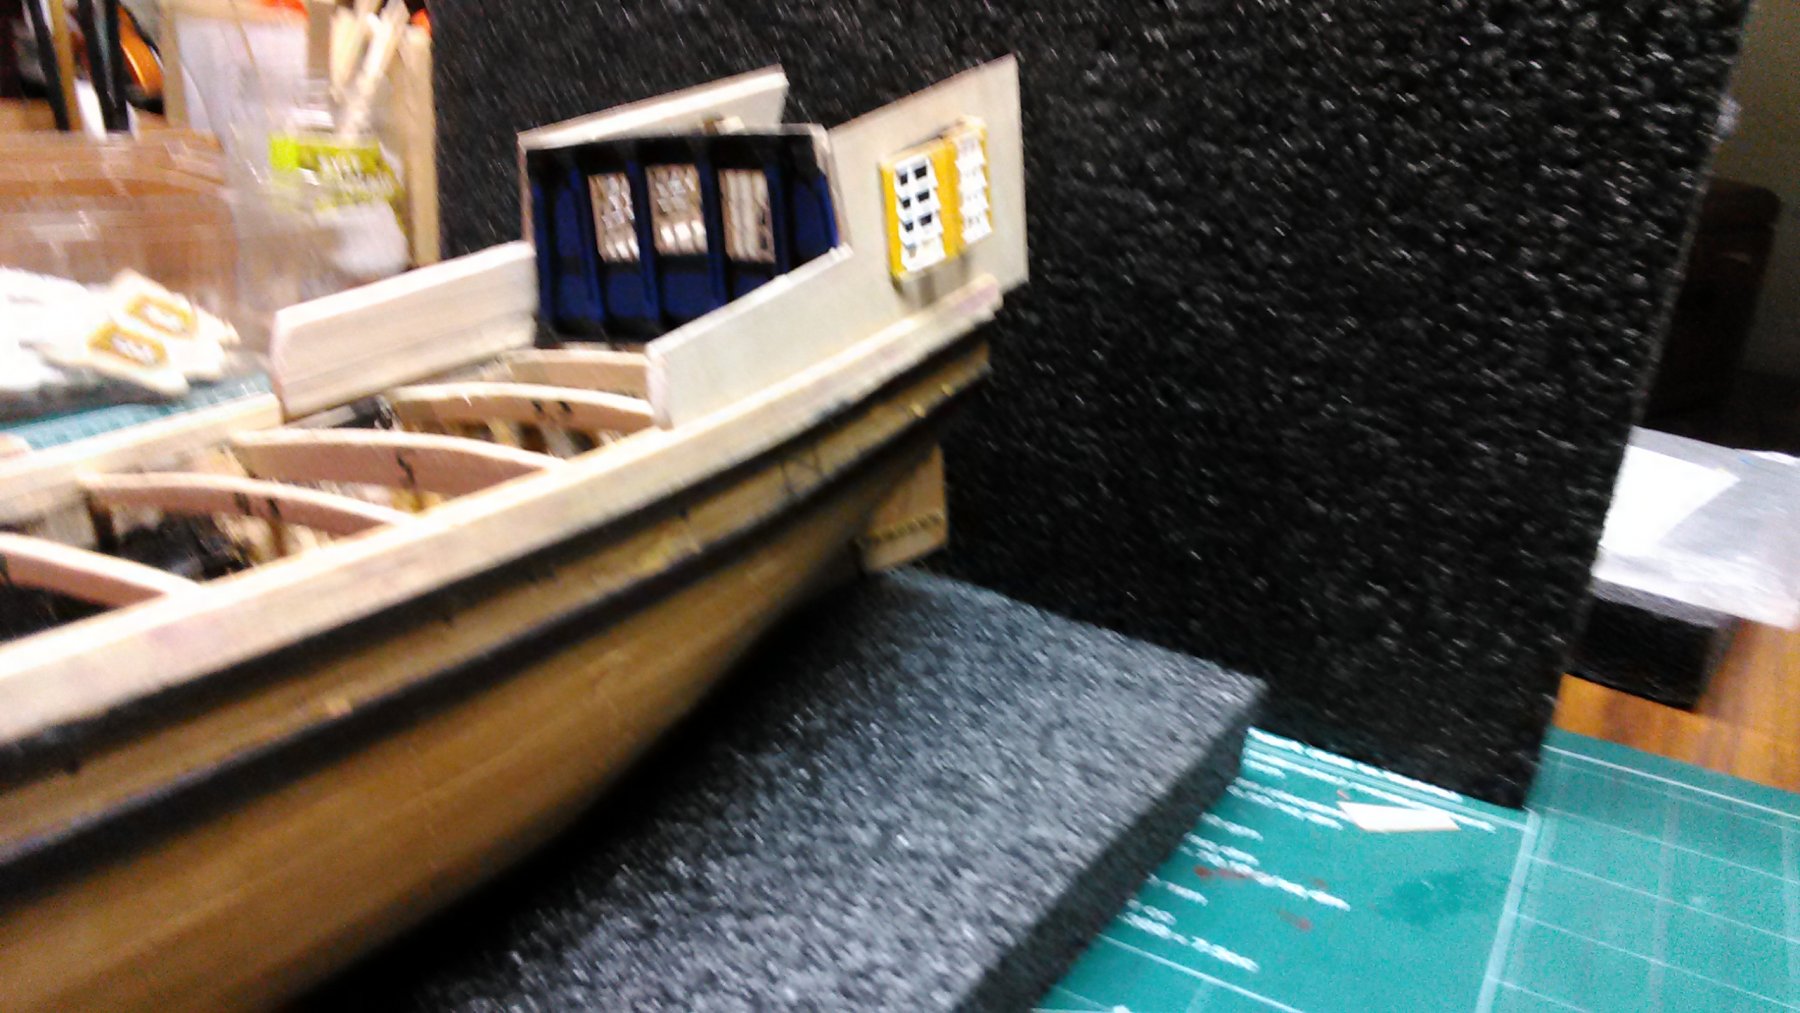
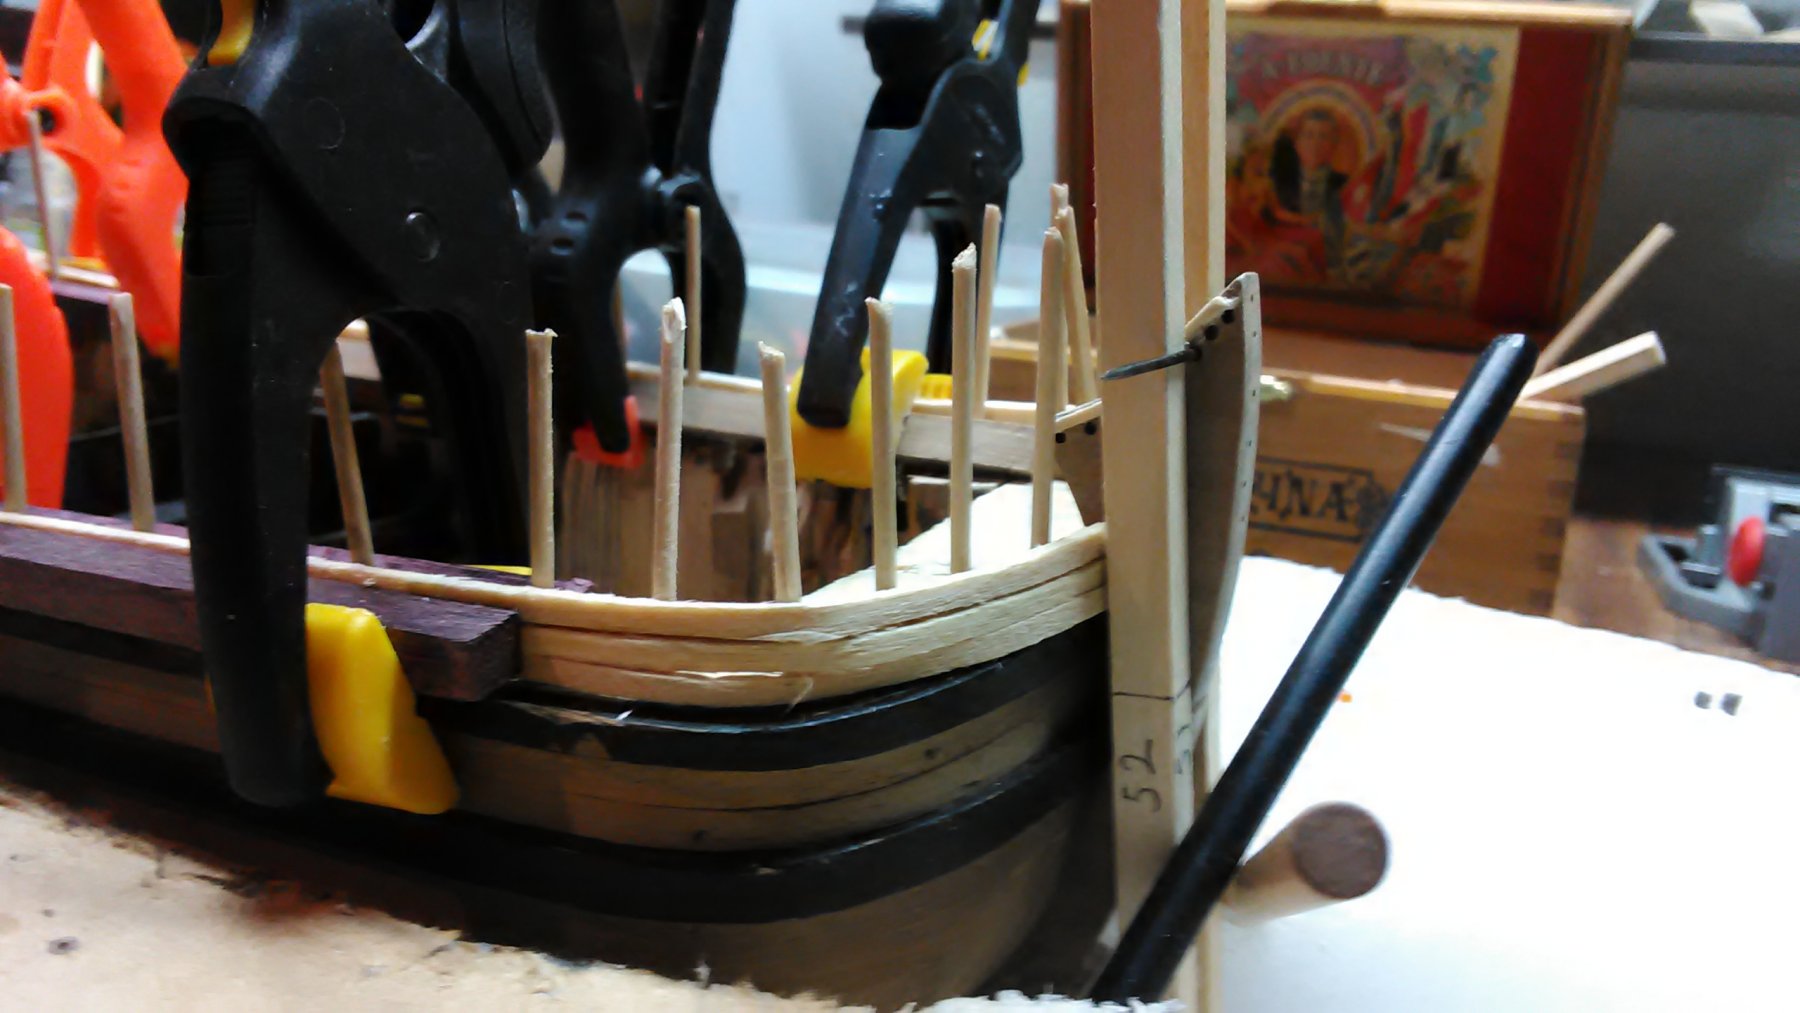
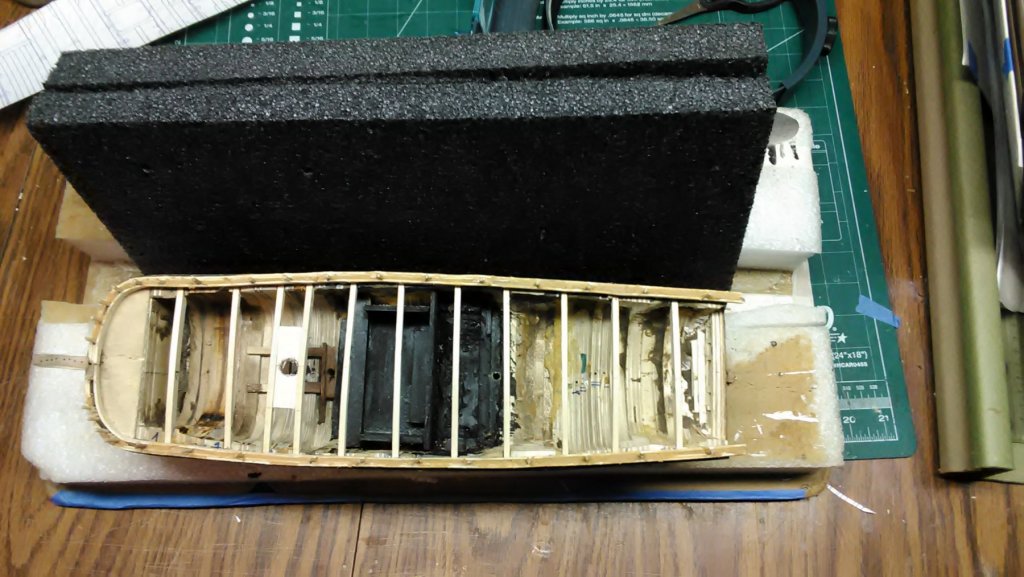
Discarded the walnut and created the railing with poplar strips. Glued in the deck beams, redrilled the holes in the hull and jammed toothpicks with a bit of glue in them. Laminated 2 strips (1x6mm) of poplar together and glued on the outside of the toothpicks and 1 of the same strip on the inside of the toothpicks. Added scrap wood to fill in the gaps between the strips. It will be finished off with 2 x 2mm strips laminated on top totalling 8mm in height. Cut out the strips on the inside including the toothpicks where the pavilion sides are glued in. Out of 3mm thick balsa cut out the pavilion sides and laminated 1/64" veneer to the front of it. Dry fitted the sides and the windows and the front. My overall width of the boat is 6mm too narrow, so I had to sand down the sides of the pavilion front. Furthermore, my Stern piece is going to be a little higher than what the plans show. Now that this is all done, I will be working on the deck. The pavilion floor will be a couple of mm higher than the deck as the tiller goes between it. This is what the plans show. Marcus


- 305 replies
-
- 7
-
-
- utrecht
- statenjacht
- (and 1 more)
-
I was going to use the walnut as it is the correct width (6mm ) plus a 2mm square dowel to make a total of 8 mm high railing. I am now going to use 4 x 2mm strips and veneer it on both sides. It will be painted Prussian blue. I can also pin down the walnut with the smallest insect pins I have and glue a 2 x 2mm strip on top of it. I have so much walnut in my possession. Marcus
- 305 replies
-
- 4
-
-
- utrecht
- statenjacht
- (and 1 more)
-
I had to rethink the railing. First time I soaked 2x6mm walnut and tried to bend it along the curve of the boat and ended up with a clamp forrest (Cog's definition). After the planks were dry they didn't keep their curve. So this morning pulled out the saw and cut 2x2mm strips from Poplar _ Tulip tree, to be exact. Made a lot of these as I am bound to break a few. For the Utrecht I have been using a lot of Poplar. It has good bending characteristics, especially for bluff bows and it is cheap. Marcus

- 305 replies
-
- 5
-
-
- utrecht
- statenjacht
- (and 1 more)
-
Roter Löwe 1597 by Ondras71
flying_dutchman2 replied to Ondras71's topic in - Build logs for subjects built 1501 - 1750
Beautiful work. Another bluff bow ship, just like my Utrecht yacht. I see that you did your planking the way I did it. Planking a bluff bow can be a challenge. Marcus -
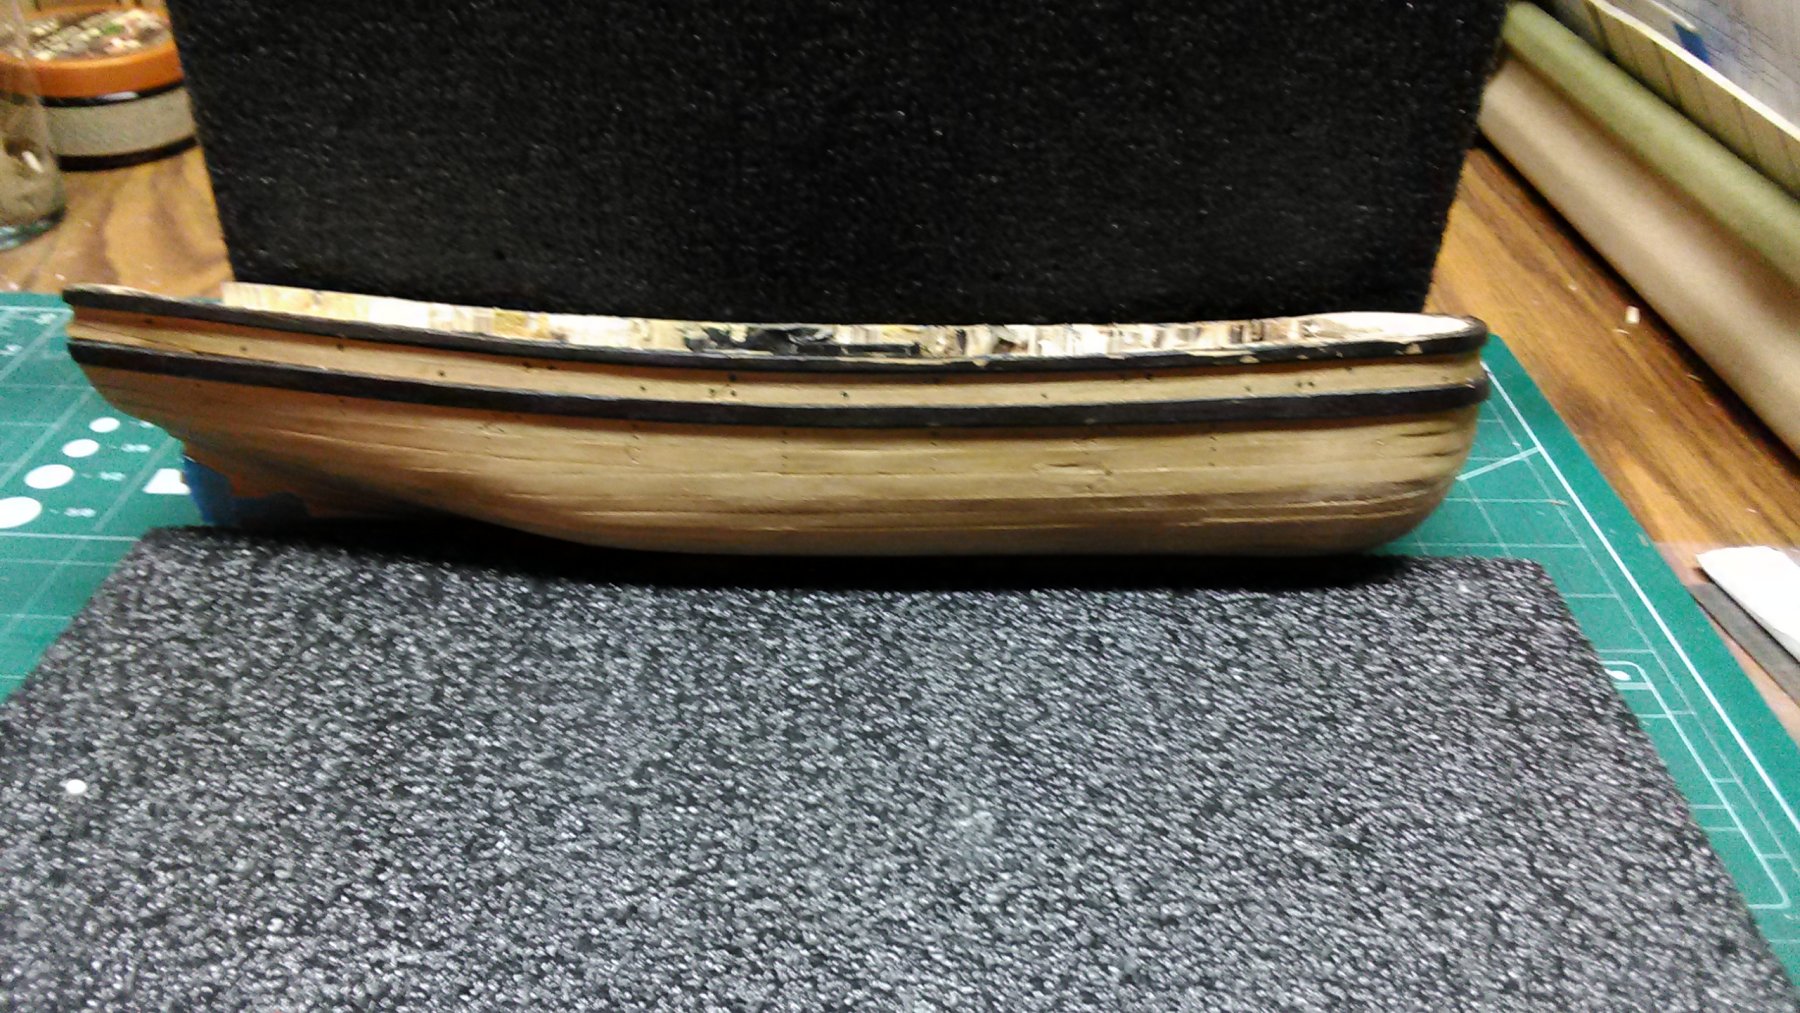
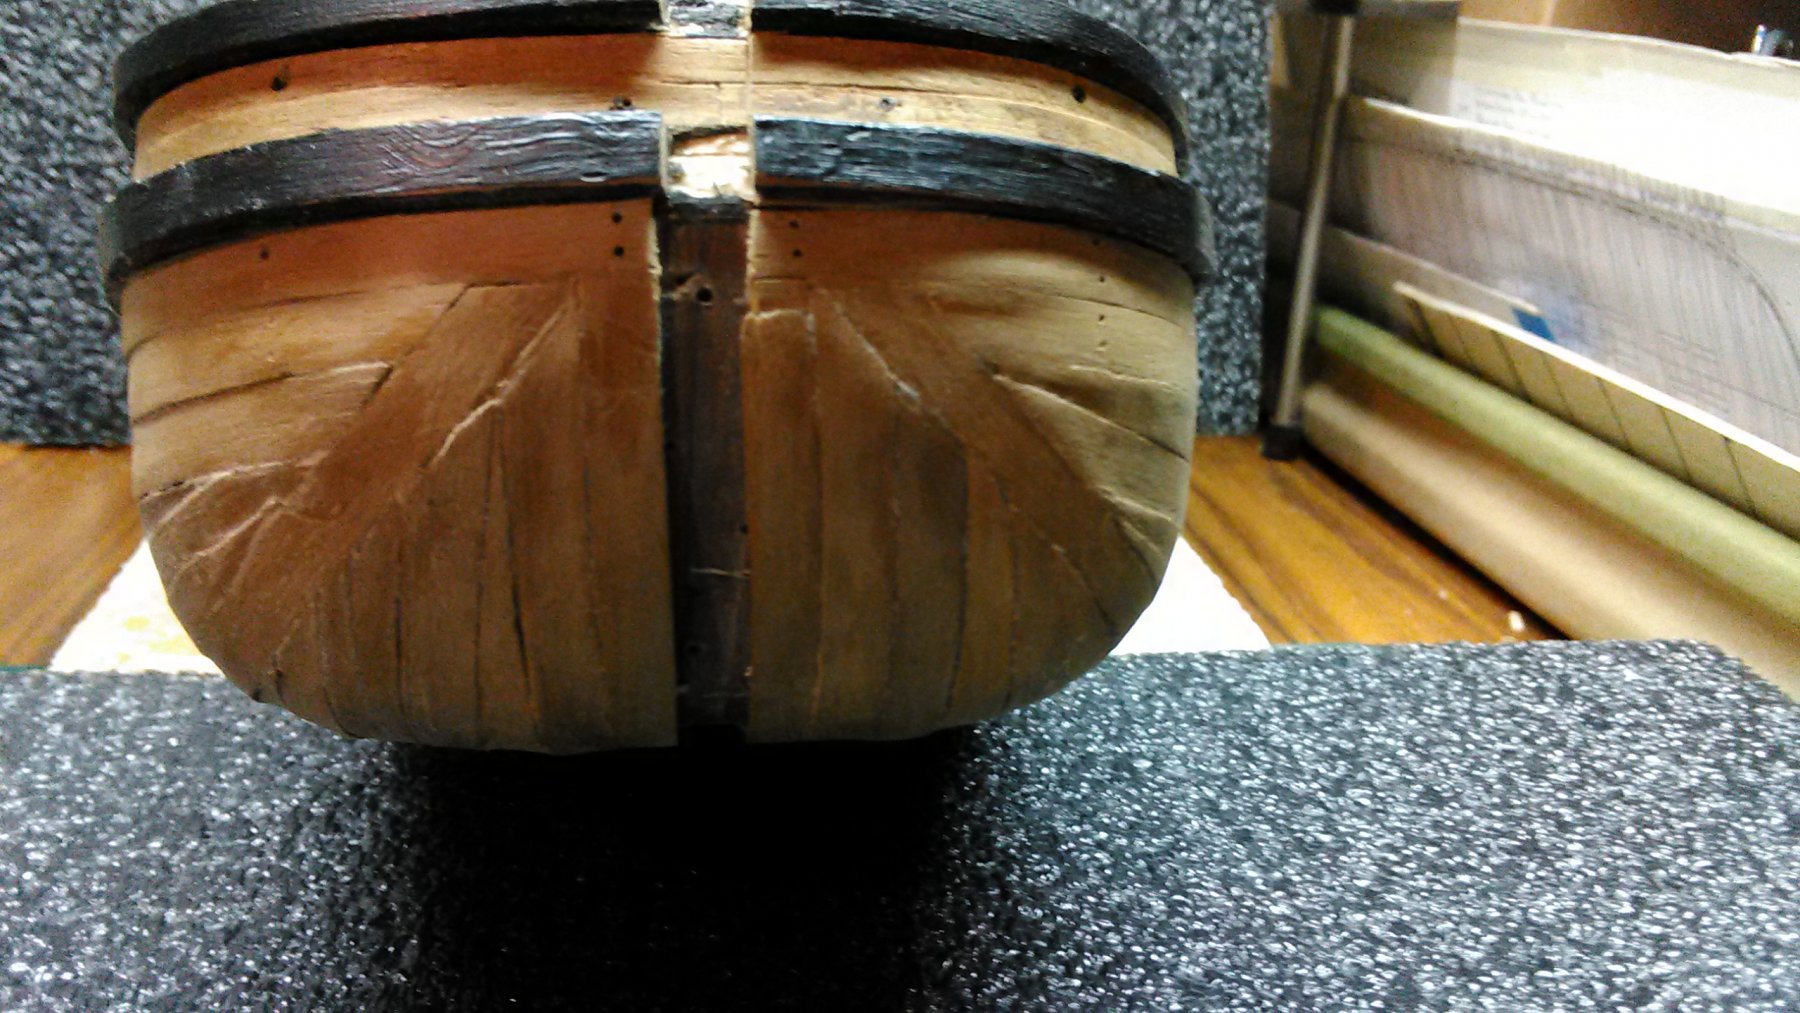
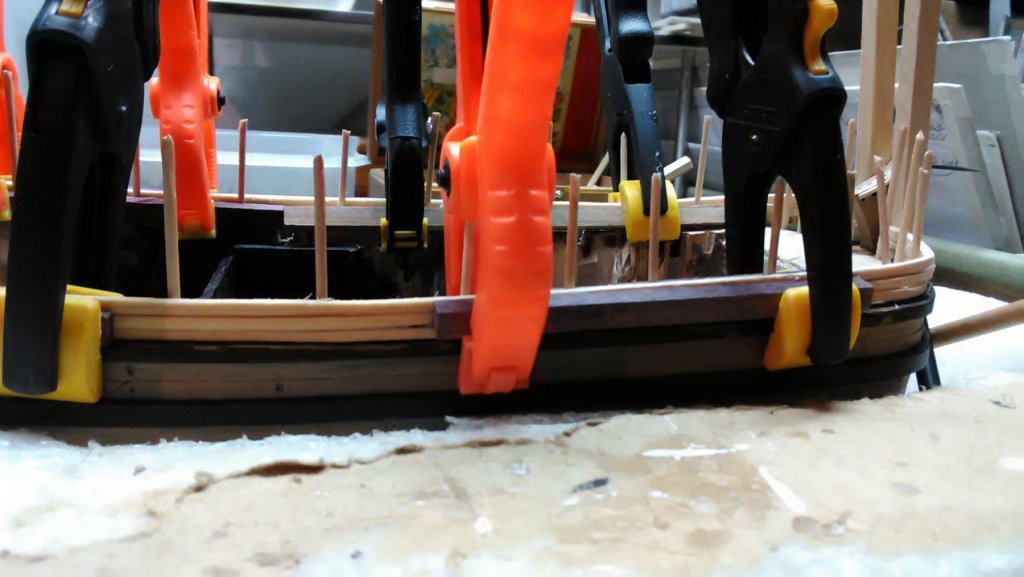
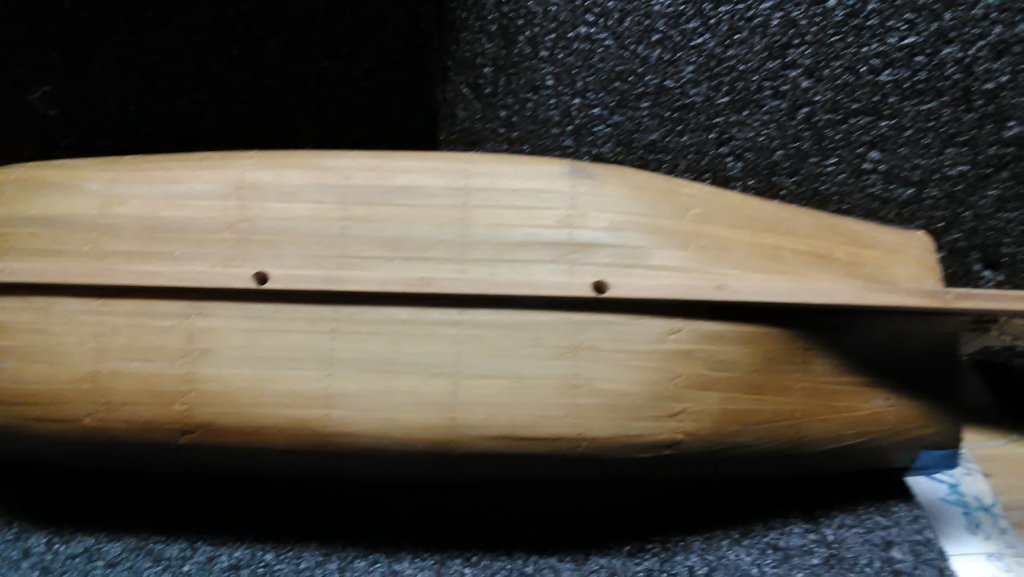
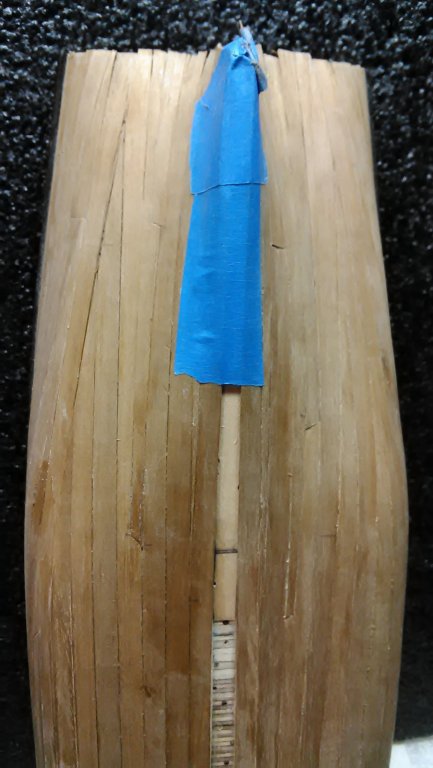
It is starting to look like a boat. Glued the stem, keel and post. Also drilled two holes for the stand. I will be using two pieces of brass tubing of equal length. I may cover the tubing with wood. Marcus


- 305 replies
-
- 6
-
-
- utrecht
- statenjacht
- (and 1 more)
-
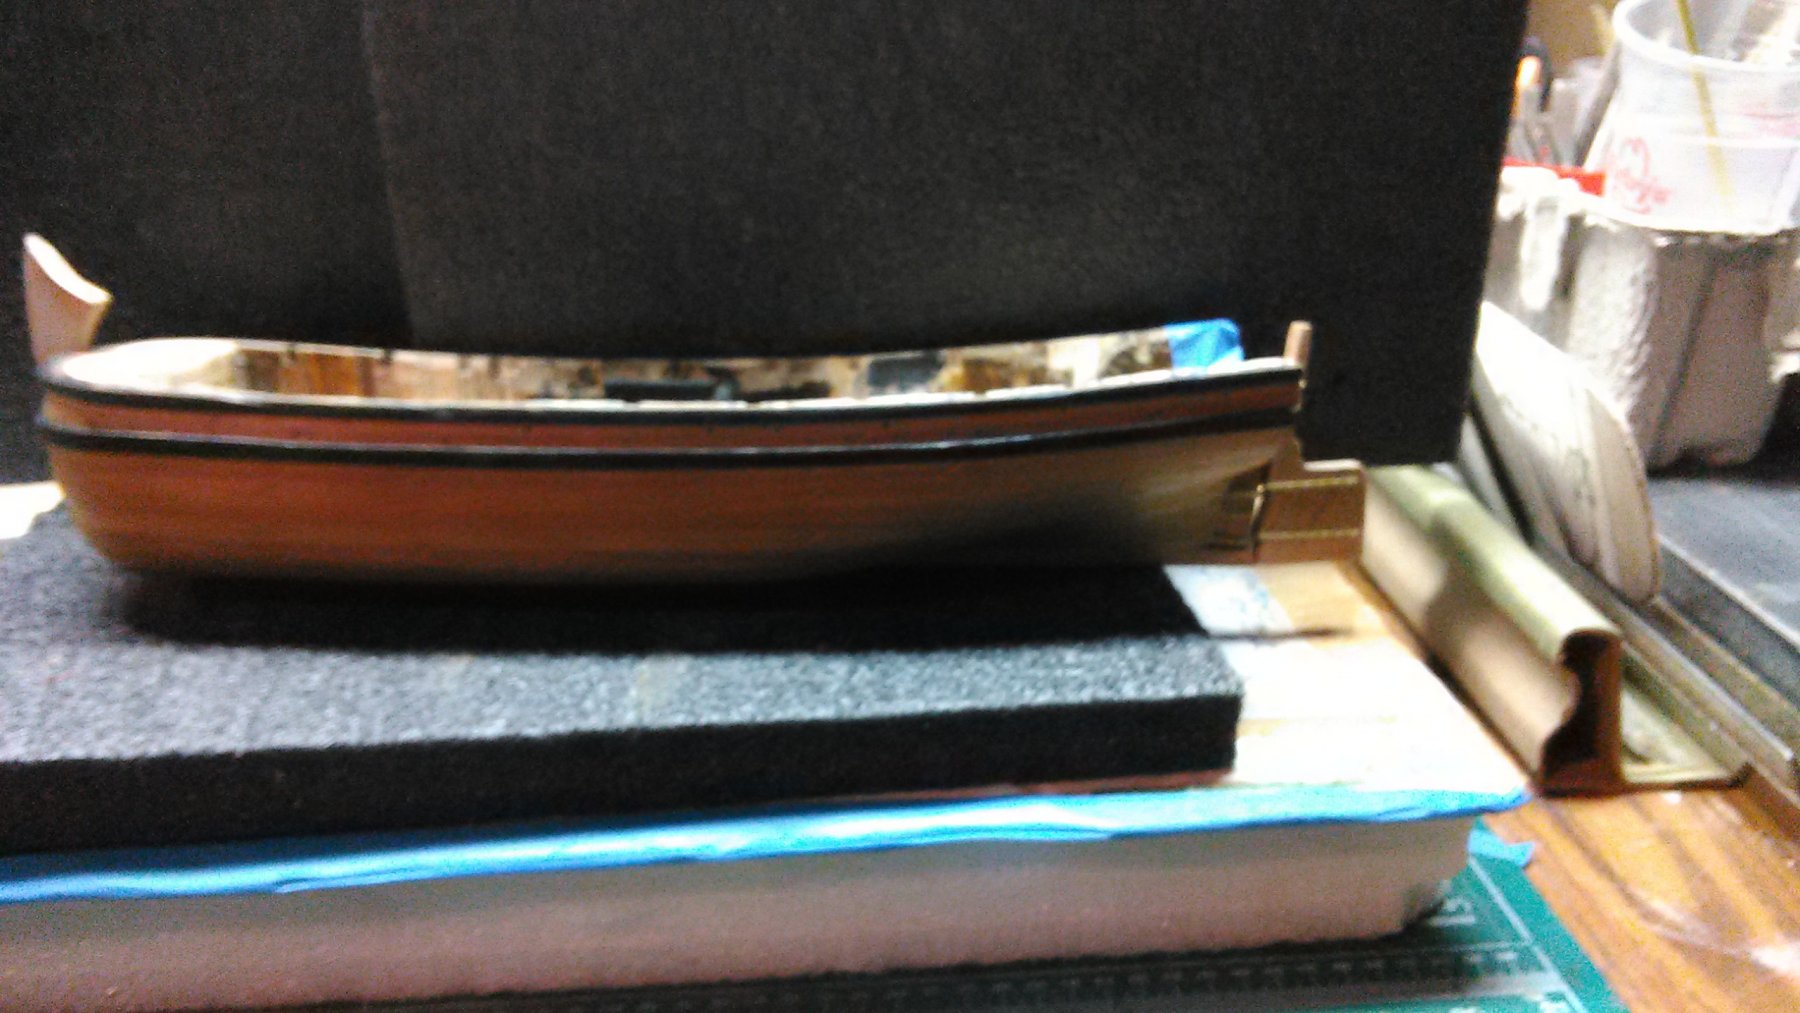
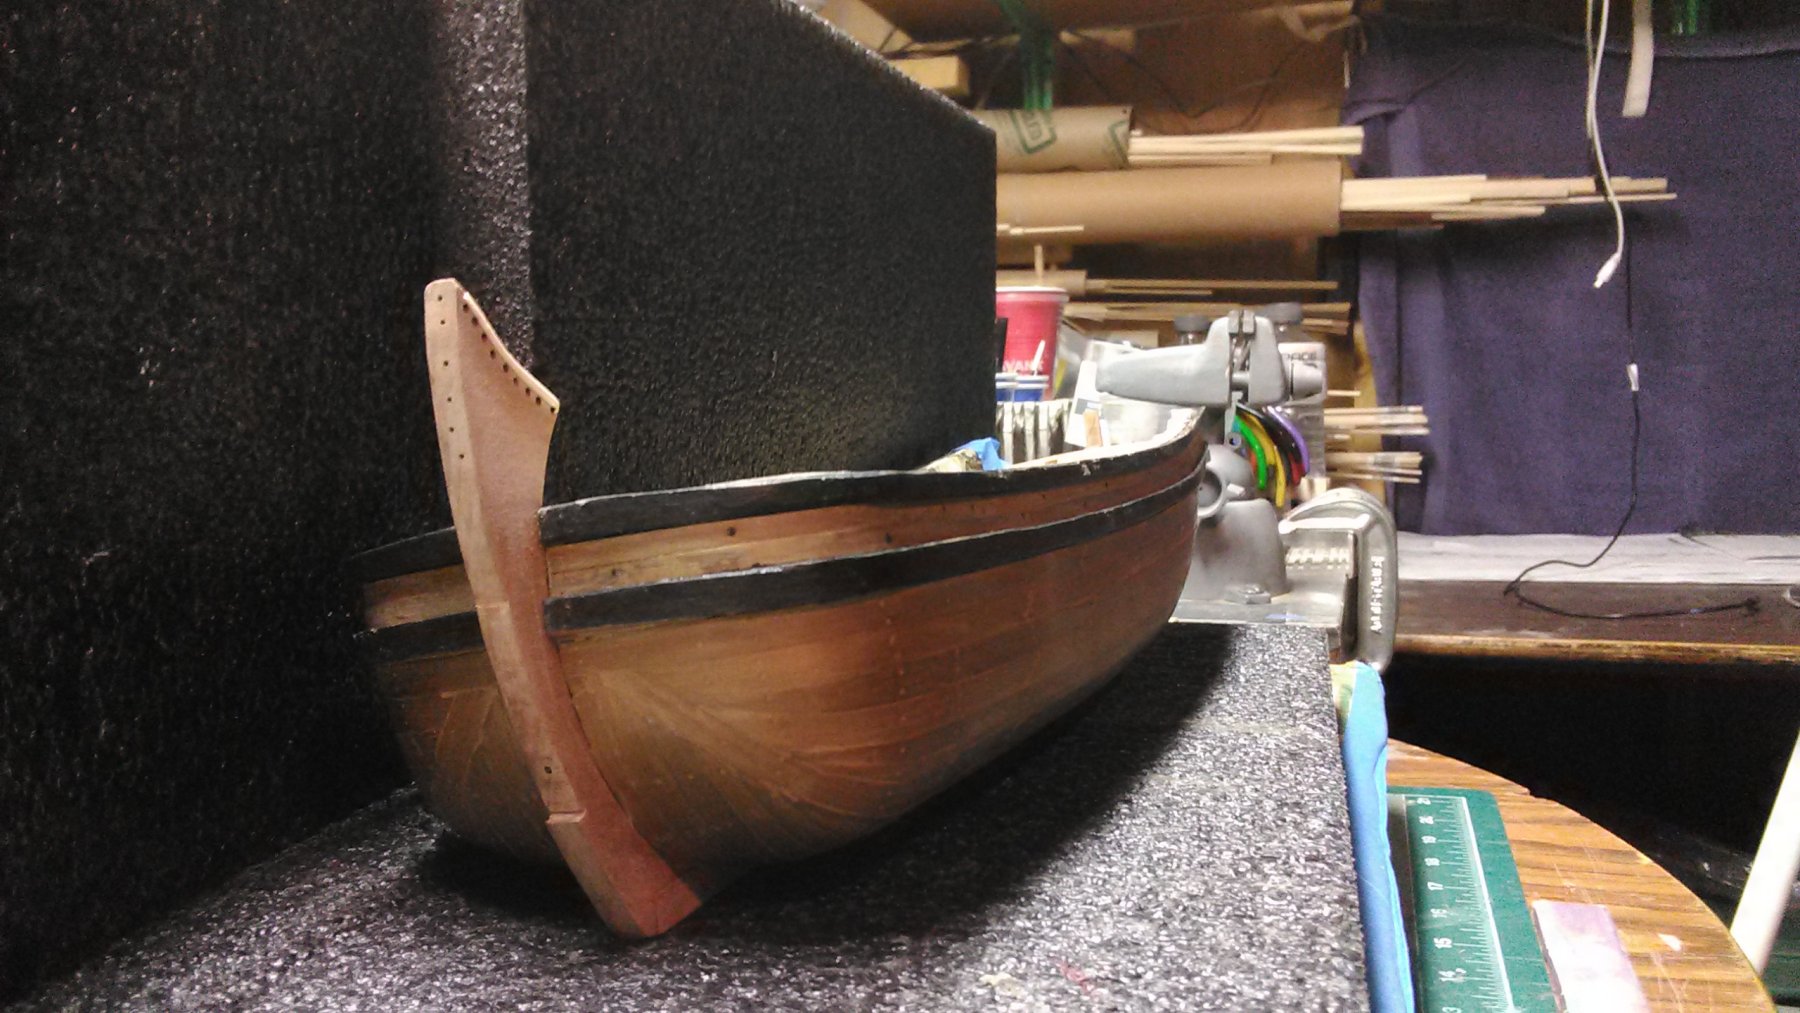
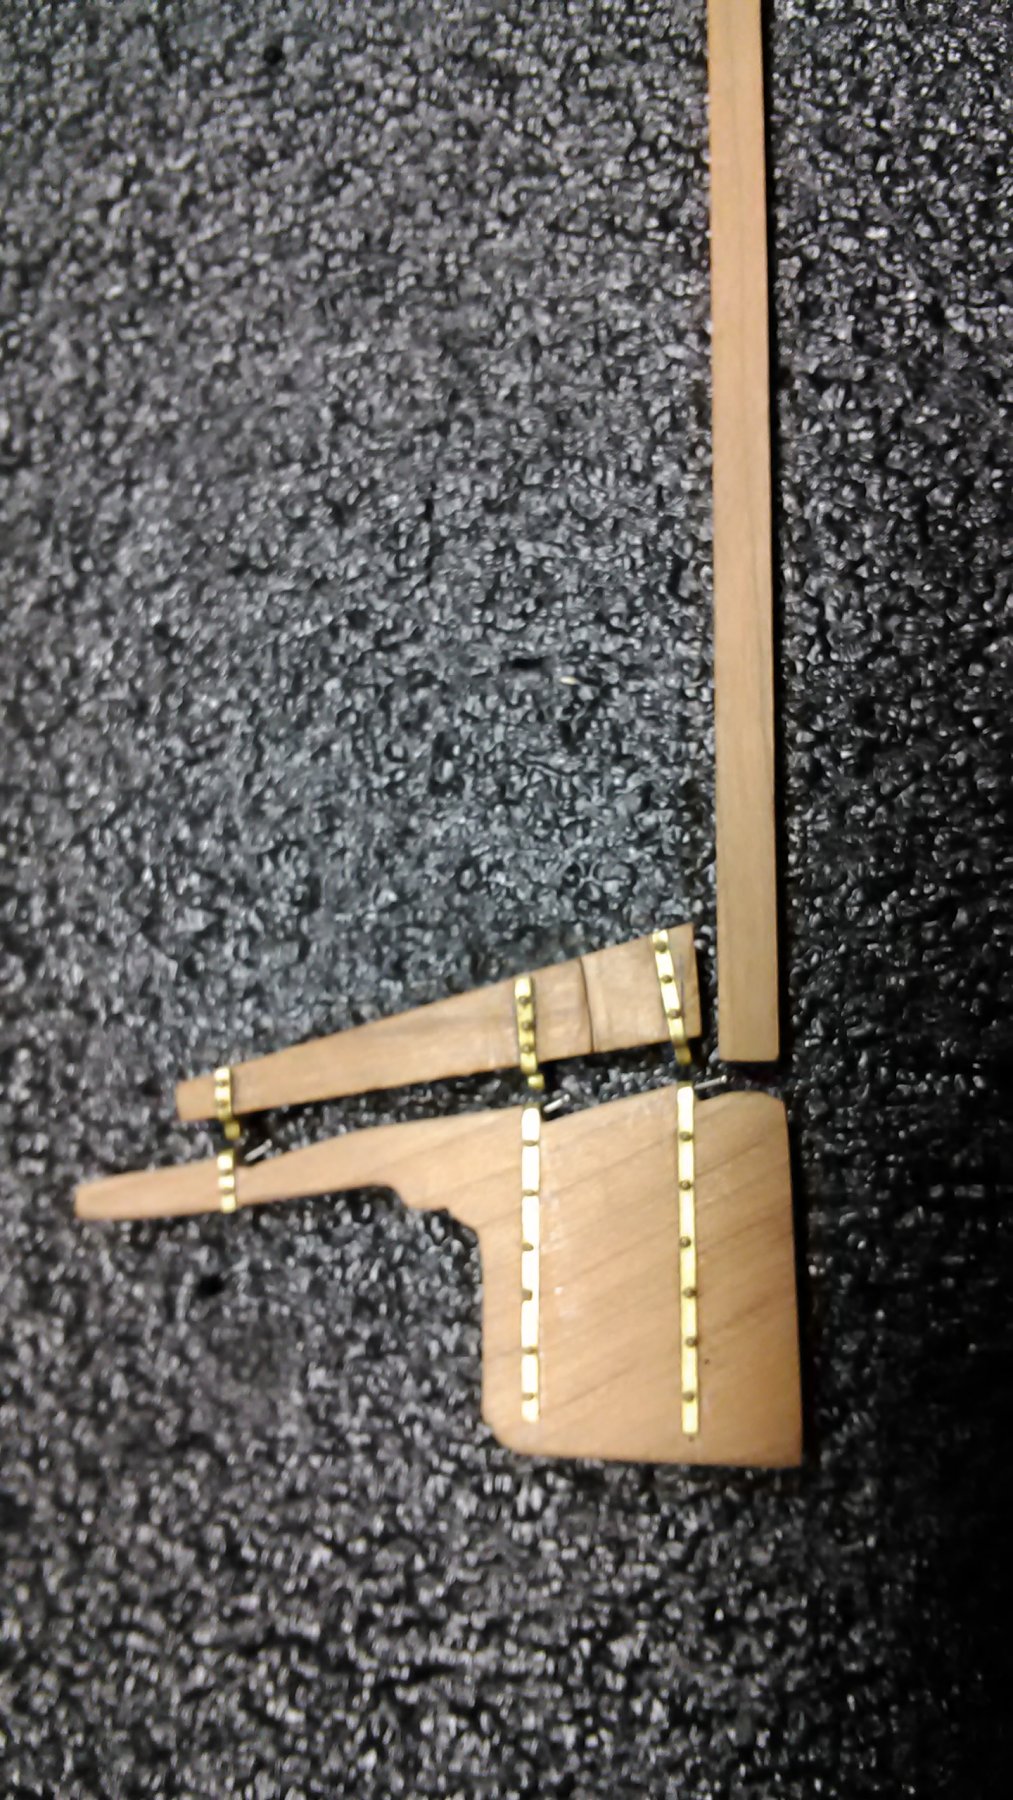
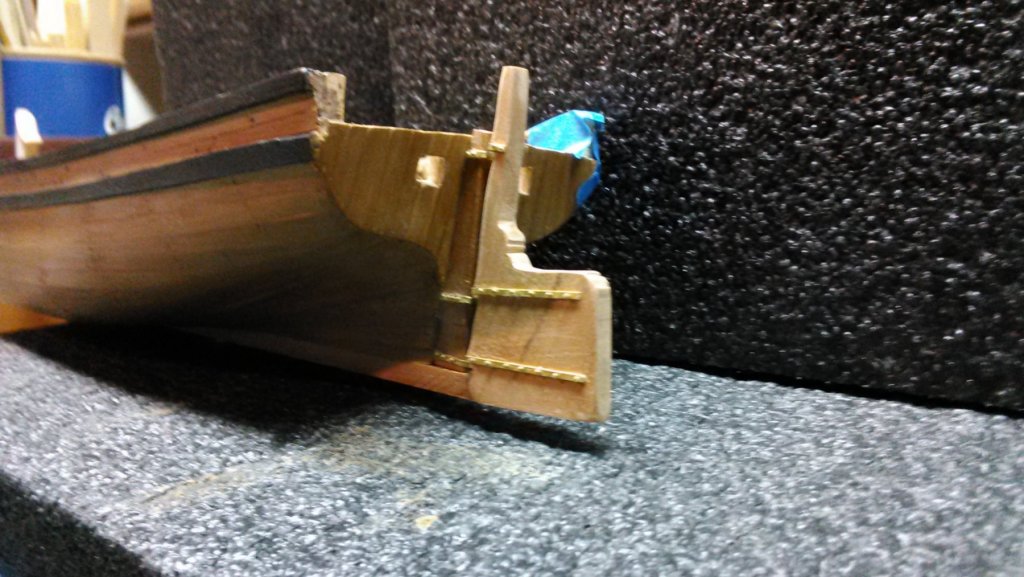
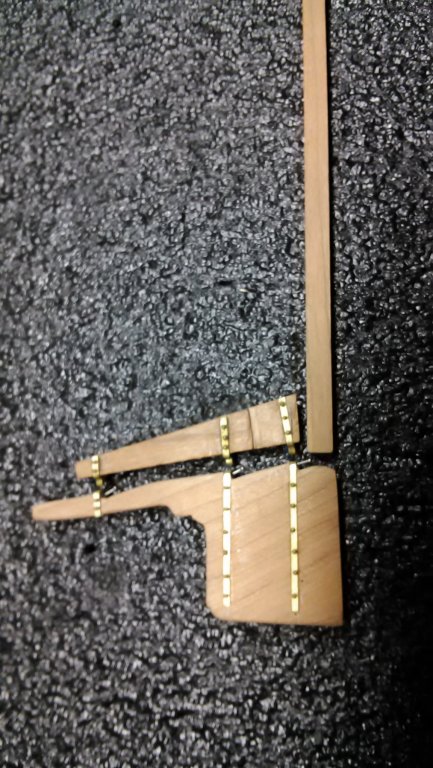
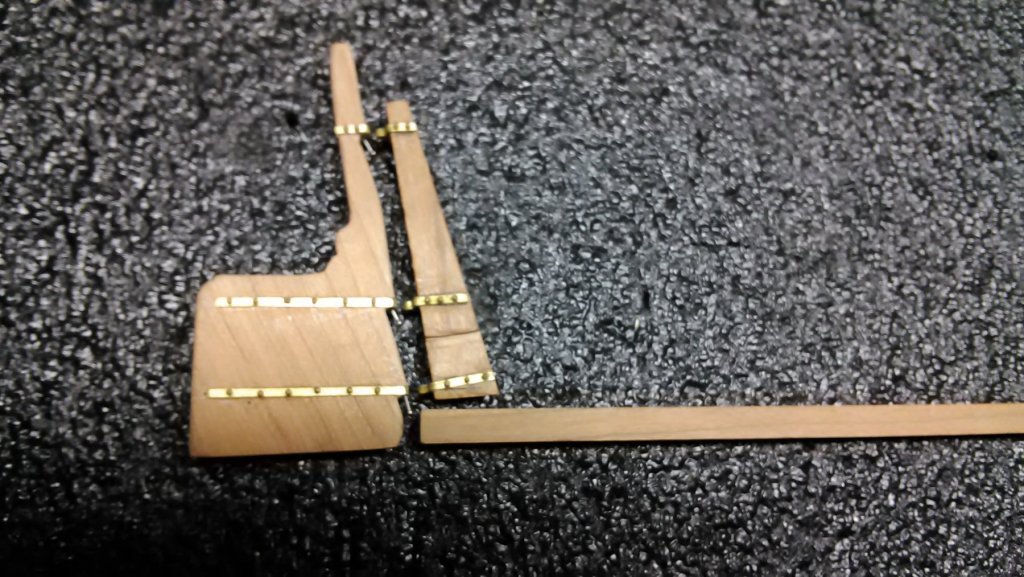
Finished the rudder and the post. Used cherry wood for both items and the brass pintels were attached with stainless steel insect pins cut to 3 mm in length. Glued the pintels with CA on the rudder and post, once dry, used a drill bit #79 (0.0145") to drill holes through the brass and partially through the wood. Then pressed the pins in. The pins are strong and they are great for this. Marcus
- 305 replies
-
- 6
-
-
- utrecht
- statenjacht
- (and 1 more)
-
Thank you for the compliment , Patrick (this coming from the king of itty-bitty scale models). Marcus
- 305 replies
-
- 3
-
-
- utrecht
- statenjacht
- (and 1 more)
-
I am pulling up a chair as well. This looks like a great kit to build. Dutch kit made by Dutch company. You know it will be accurate. Hans (one of the owners) has built a fantastic model the Batavia. Marcus
- 91 replies
-
- 3
-
-
- kolderstok
- duyfken
- (and 1 more)
-
Wow, looks really good and like the details as well Marcus
- 46 replies
-
- 6
-
-
- o16
- pacific crossroads
- (and 2 more)
-
Hi. I have been procrastinating about this but it is time that I start this. The yacht Utrecht has many carvings. I have practiced some simple items from wood but with the many mistakes I have made I am no longer using wood. Purchased 1 lbs. of Super Sculpey and I have the following questions. Is it possible that I make, say a rectangle piece of clay 1/4" by 2" by 1", bake that, and after it is cooled, carve it? As Chuck mentioned in an article in Ships and Scale is that you can bake a piece and keep adding to it. Does the new clay adhere to the baked clay just like that or how is it done? Thanks Marcus
-
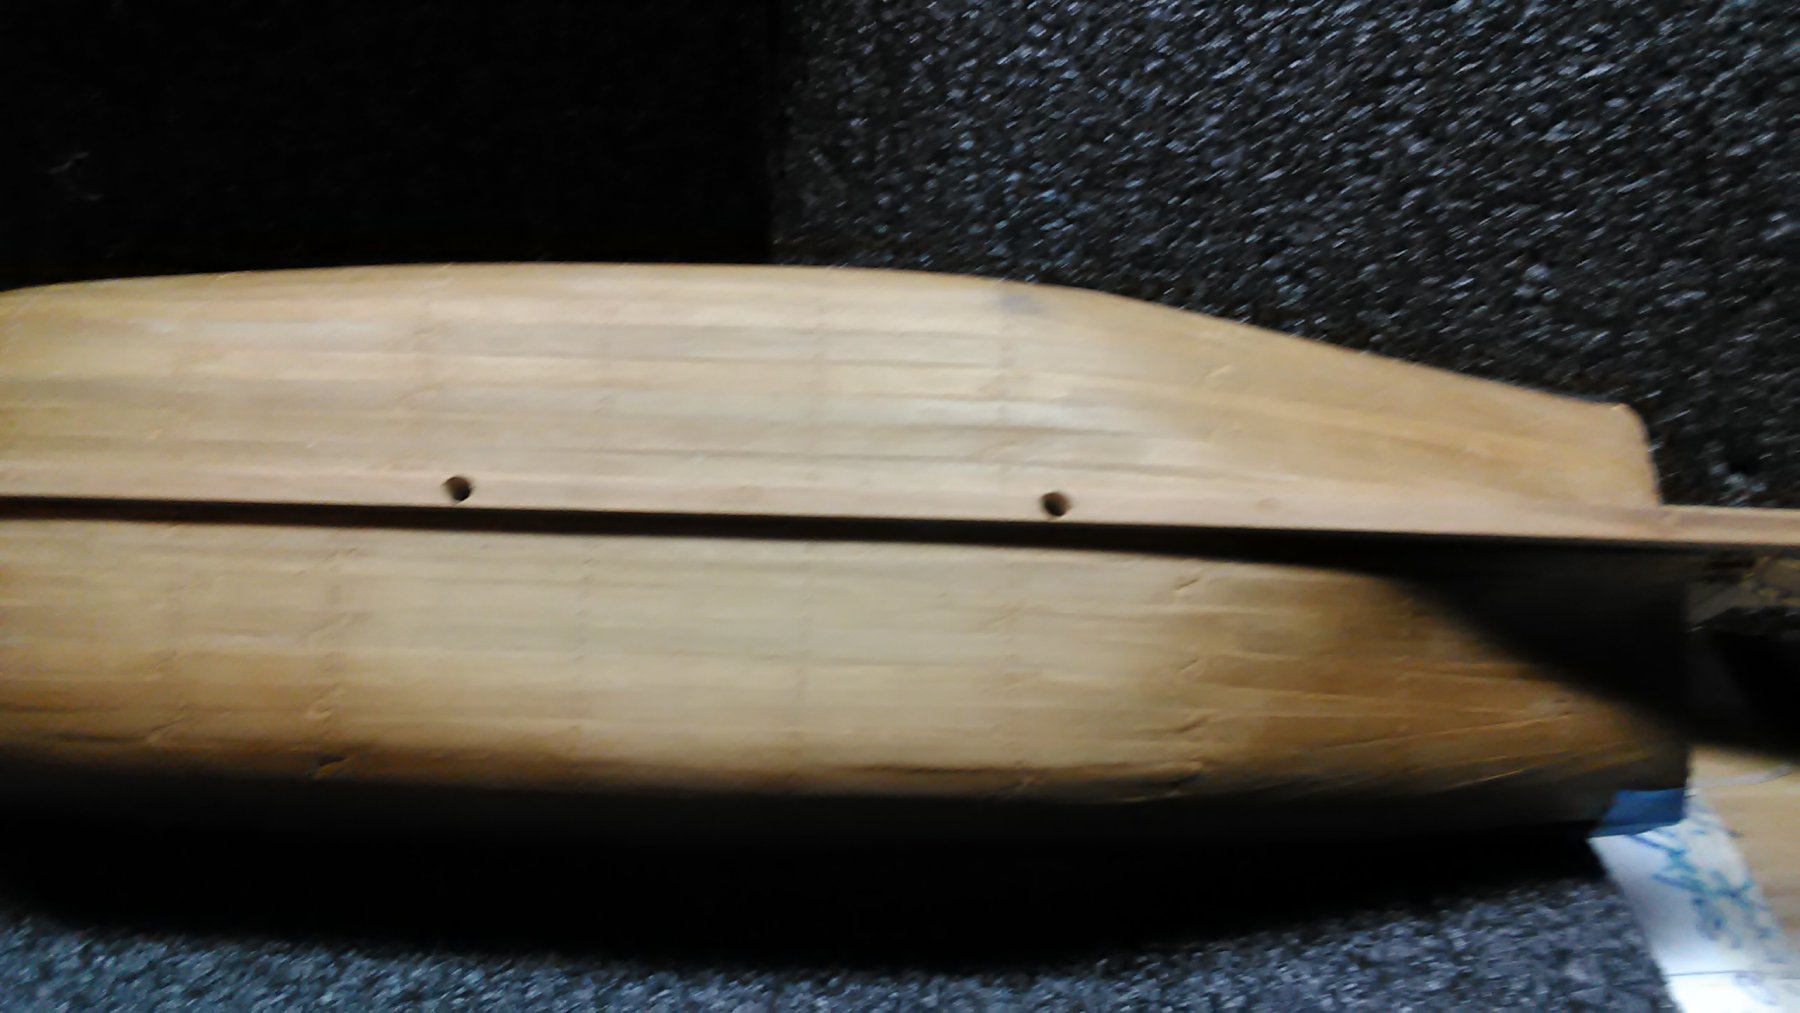
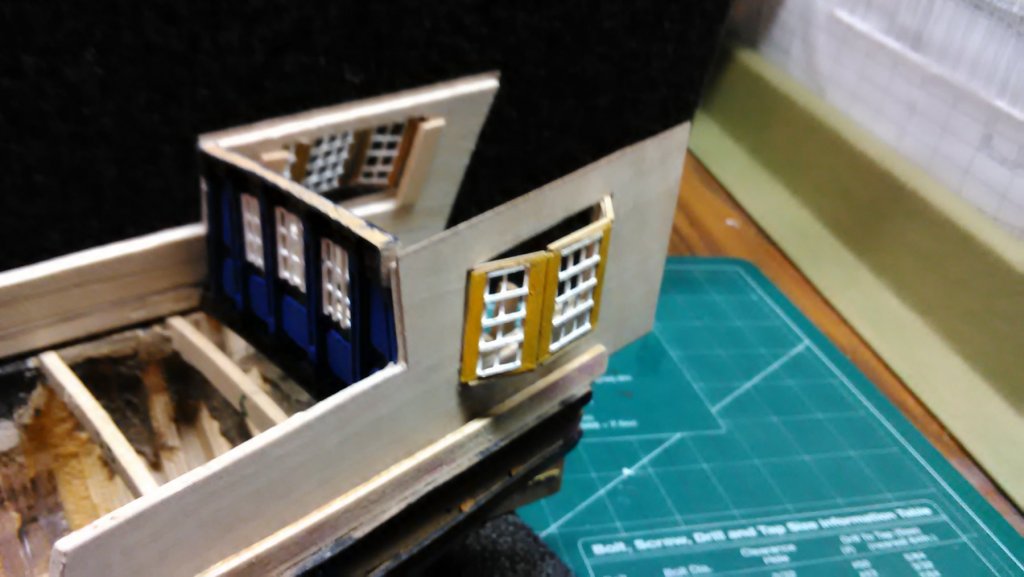
Finished 2nd layer of planking. Still needs to be sanded. The blue tape is to protect the planking on the back of the keel Also a dry set up of how the pavilion windows are placed. Here I use balsa as a template. Marcus


- 305 replies
-
- 5
-
-
- utrecht
- statenjacht
- (and 1 more)