MORE HANDBOOKS ARE ON THEIR WAY! We will let you know when they get here.
×


flying_dutchman2
-
Posts
1,735 -
Joined
-
Last visited
Content Type
Profiles
Forums
Gallery
Events
Everything posted by flying_dutchman2
-
 avsjerome2003: thanks for the videos and the one that would work for me is the one with the vice and the saw blade and that would be for large diameter dowels. All the other vid's are people who have elaborate work shops which I don't have and don't really want to have. russ: I am doing the suggestion you made in a somewhat different way. I did go to woodcraft.com to buy dowels from beech and maple and some of different imported hardwoods. If I need a 7mm mast I purchase the 8mm and just sand it down. That also goes from the 5mm to the 4mm. I have some square dowels and I will practice what I have in several of my books. From square to octagon to round. Thanks for the suggestions. Marc
 -
WOW, great links, thank you all. Marc
-
Do you happen to know what the link is to that video? Marc
-
Russ, It is what I thought I had to do. I can use a 5mm dia. dowel and turn it into a 4mm spar and the same goes for an 8mm dowel into a 7mm mast. I have an article on how to make a round dowel from a square dowel. Will have to study this and use my files, chisels, sand paper to get the masts and spars. Thanks for the suggestion. Marc
-
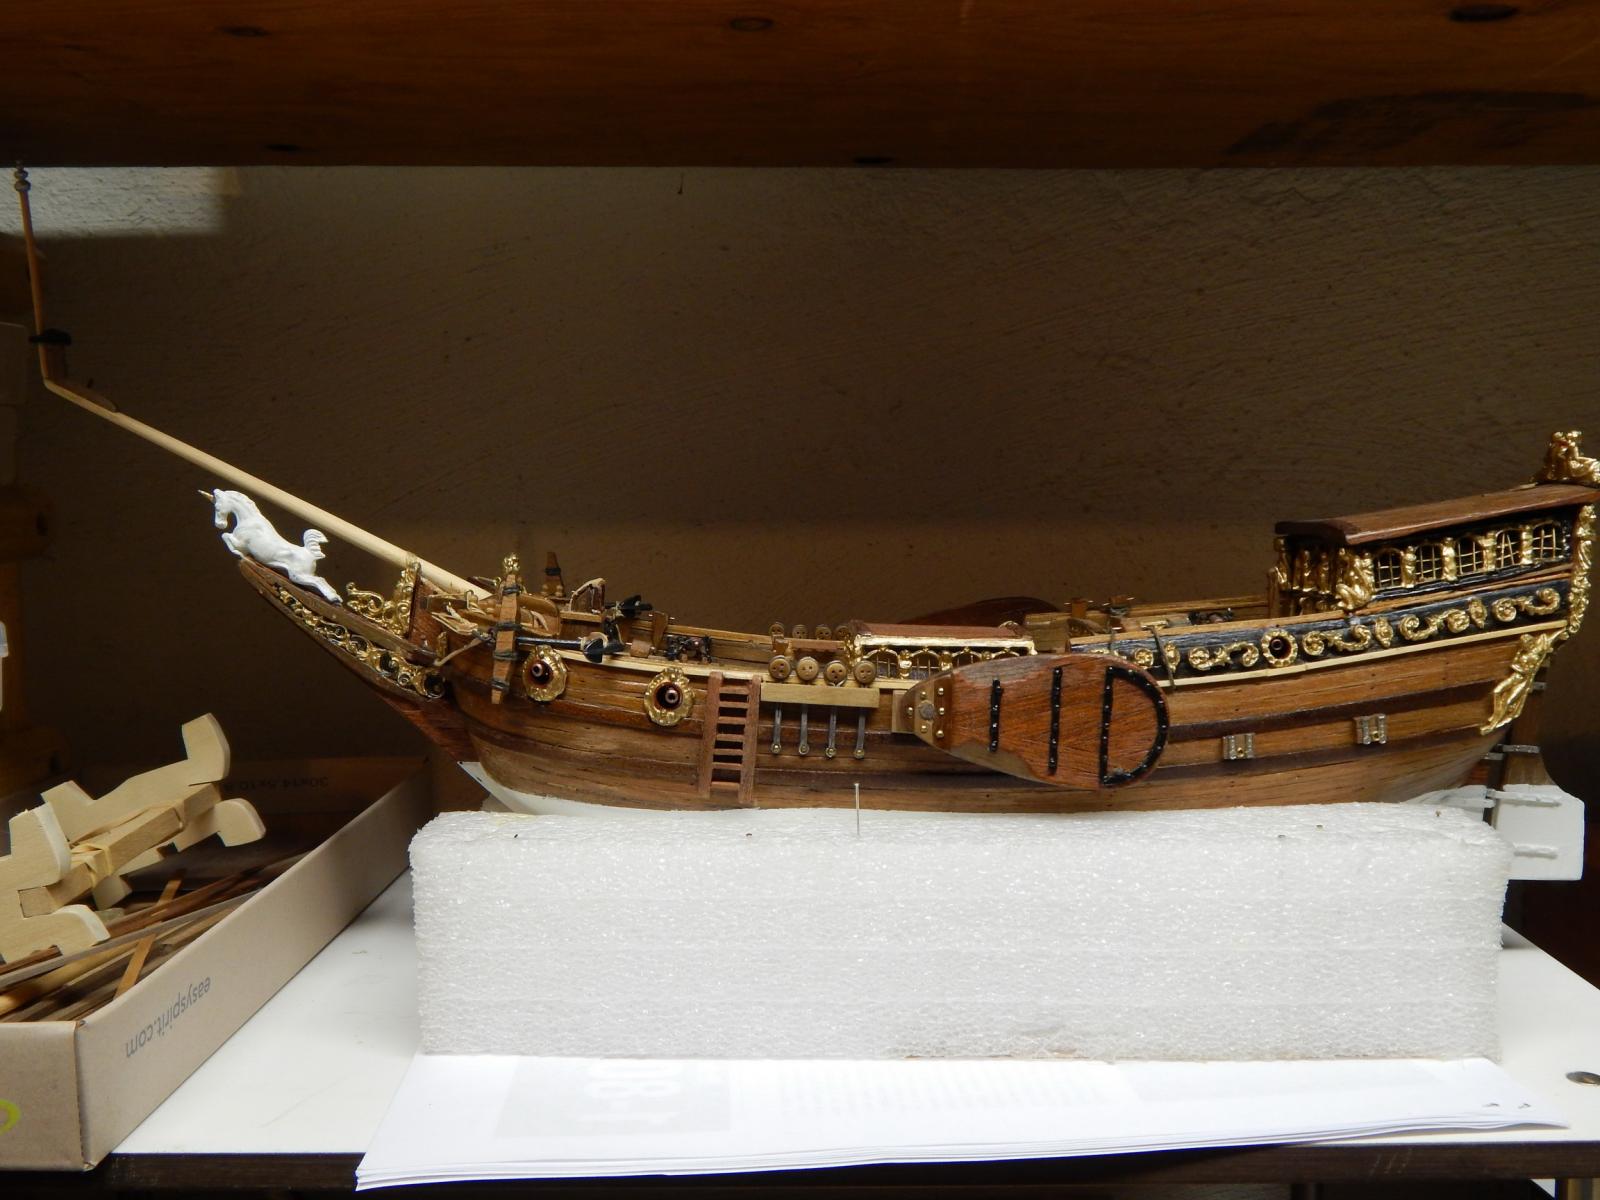
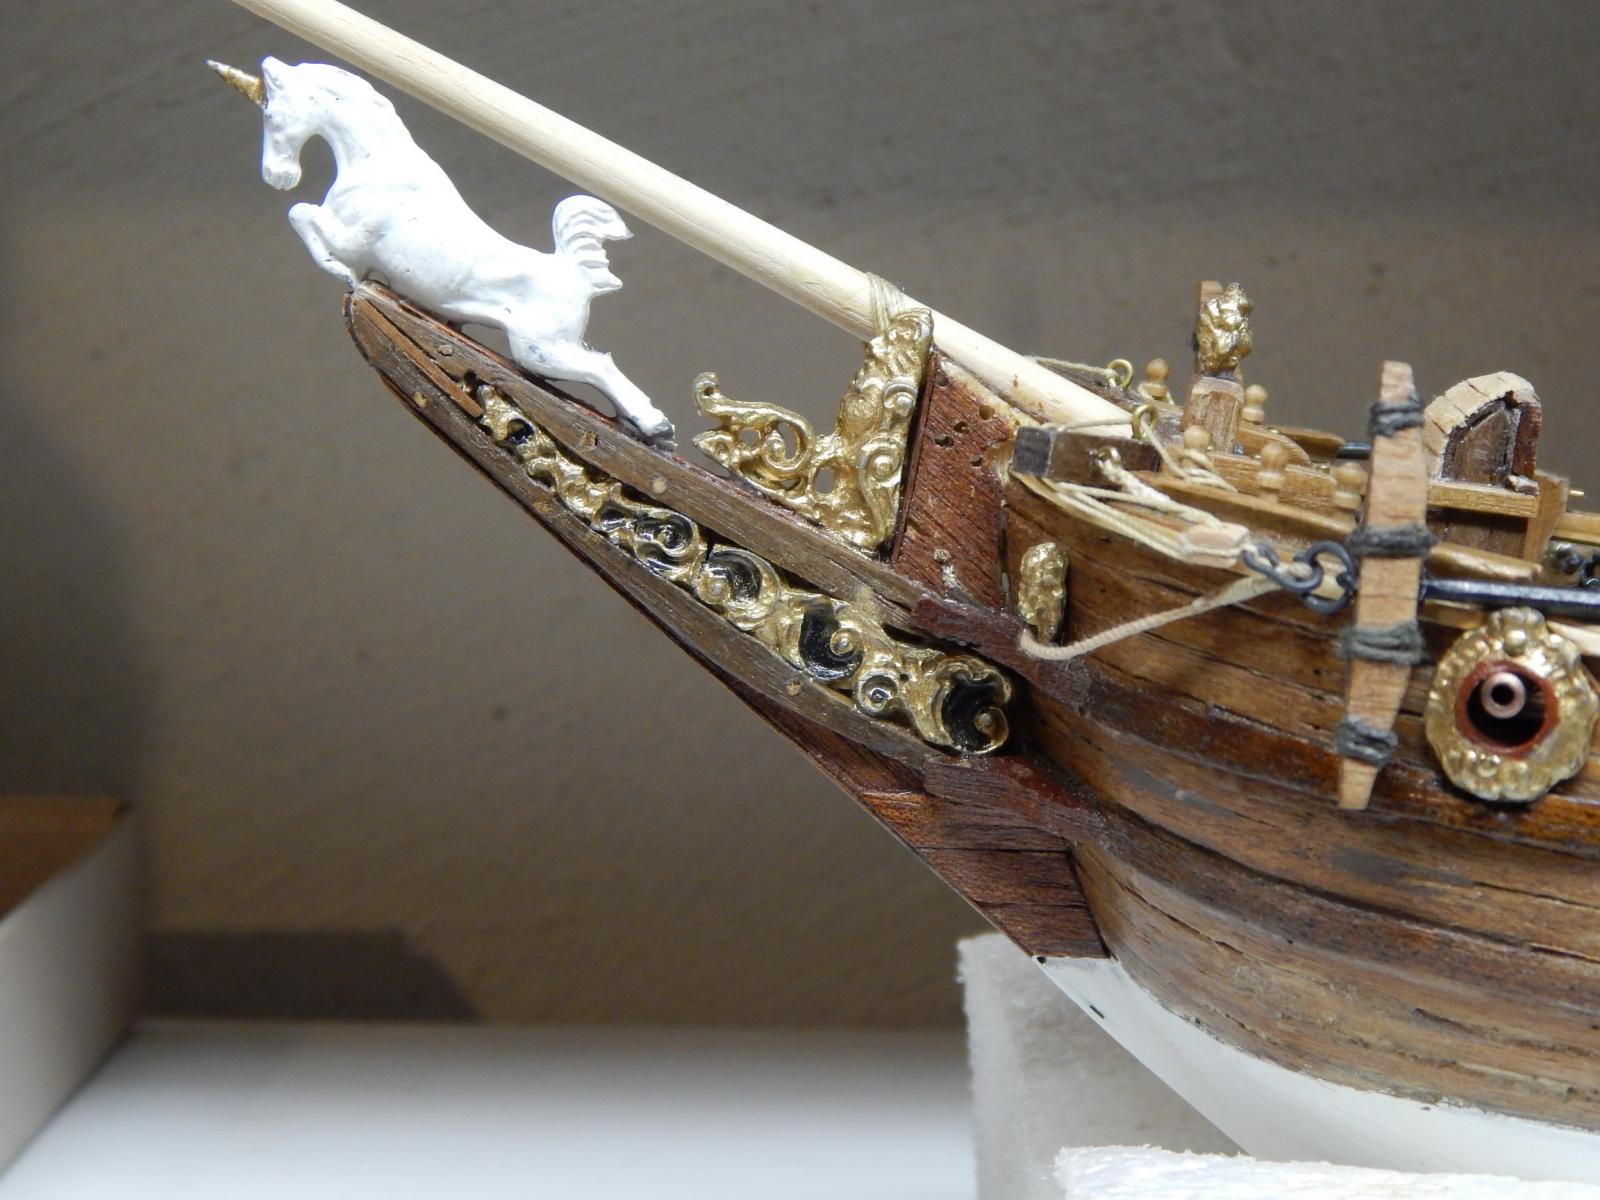
Hello, I am finishing up the Royal yacht Mary by Mamoli, and working on the masts and spars. They are from basswood, all warped and break easily when you sand them thin. I did some research in the books I have and a website from Gene Larson, on what type of wood to use for mast and spars. They suggest the following: Sitka spruce, beech, lemon wood, lance wood, maple, cherry and red cedar. No basswood, the research says it is soft and warps. I need the following dowel diameters and I have put them both in mm and inches. 8mm or 5/16" 7mm or 17/64" 6mm or 15/64" 5mm or 3/16" 4mm or 5/32" 3mm or 1/8" 2mm or 5/64" In my area I checked these stores for ready made dowels: Home Depot, Lowes, Michael's, hobby lobby and AC Moore and my local hobby stores - they all have basswood and do not have the odd sizes. I checked on line and these don't have the odd sizes too. http://www.nationalbalsa.com/ http://dlumberyard.com/index.html http://www.hobbymillusa.com/ http://www.modelexpo-online.com/default.asp (they used to have so much more) http://www.woodcraft.com/ www.historicships.com Does have the odd sizes but all of the wood is pricey. Conclusion: I can go to 3 stores on-line and buy here and there and pay a lot for shipping OR have one (1) store that provides Everything. Any suggestion of other places I missed that are reliable in the USA. The NET has lots of places that sell dowels and Amazon is connected to many sites I have never heard off. I need dowels that are not basswood. Any suggestions is much appreciated. Marc
-
Hello, I am finishing up the Royal yacht Mary by Mamoli, and working on the masts and spars. They are from basswood and I hate them. They are warped and break easily when you sand them thin. I did some research in the books I have and a website from Gene Larson, on what type of wood to use for mast and spars. They suggest the following: Sitka spruce, lemon wood, lance wood, maple, cherry and red cedar. I need the following diameters and I have put them both in mm and inches. 8mm or 5/16" 7mm or 17/64" 6mm or 15/64" 5mm or 3/16" 4mm or 5/32" 3mm or 1/8" 2mm or 5/64" I have checked the following places for dowels and diameters and types wood They all have the common diameters but not 5/64 or 15/62. http://www.nationalbalsa.com/ http://dlumberyard.com/index.html http://www.hobbymillusa.com/ http://www.modelexpo-online.com/default.asp (they used to have so much more) http://www.woodcraft.com/ Any suggestion of other places I missed that are reliable in the USA. The NET has lots of places that sell dowels and Amazon is connected to many sites I have never heard of. Any suggestions on the type of wood and where to buy is much appreciated. Marc
-
Thanks for sharing. Marc
-
Piet; I looked up your builds and this one is intense, pretty big as well. You have a fascinating introduction to this thread. Thank you for sharing. Took me a while reading through all the information and checking the pictures, but well worth it. I will be following this one. Groeten, Marc
-
I know about this book from Witsen. There is a lot Hoving has written about Dutch ship building. Whenever I am in Amsterdam visiting my mother I scour the antique book stores for Dutch shipbuilding books. As long as they are not to expensive. Marc
-
Beautiful, love the lines of the Dutch boats. I like the lights, very different. Exceptional detailed. I will follow this built of yours. I need to look up this book you are using to build this model. Marc
-
Wonder if they merged with others. I wanted to go to Boskoop but the wait time to get in was more than 2 years. Only the best of the best go there. That is why all the well known commercial plants are bred there. Sorry, for going off topic. Marc
-
Thanks for the tutorial. I have been using a more complicated CAD program I've had since its inception but this is much better. Marc
-
In the 70's I attended the Rijks Middlebare Tuinbouw School in Utrecht. Not that this has anything to do with the boat.
-
Beautiful all around and I like how you did your cannons, but I especially like the Siamese, very pretty cat. Marc
-
I don't have to change to English as I am fluent in Dutch. Your pics from the replica........ did you work on this boat? Marc
- 305 replies
-
- 2
-

-
- utrecht
- statenjacht
- (and 1 more)
-
To amateur, mtaylor, dgbot, and harvey1847, thank you. Thank you for the information. I am cutting the frames into pieces and yes, I am adding the chocks in between the frames. Marc
- 305 replies
-
- 1
-
-
- utrecht
- statenjacht
- (and 1 more)
-
How does it save on wood? On the Utrecht it is a frame cut in pieces and then glued together. I understand if it is stronger 'if' the frame is of 2 layers, so several futtocks like the cross section of the Syren (as seen on your build). I am planning to saw the frames as McArdle suggests. So not exact on the line. So rough cut. Then when all the frames a glued together I will sand it all in shape. Nothing is exact, just look at pictures when they build an actual replica. Marc
- 305 replies
-
- 2
-
-
- utrecht
- statenjacht
- (and 1 more)
-
This boat will be built from ready pre-cut wood as I do not have the equipment to create a plank from a large piece of wood. I have some very knowledgeable people in my Nautical club and they have given me numerous suggestion what wood I can use for what part of the boat. I am finishing up taping the frames to the wood. So I do have a question: If you build a POF, why cut the frames up into futtocks (sp) and then plank both the outside and the inside of the boat and add a deck? Is it a sawing exercise?
- 305 replies
-
- 9
-
-
- utrecht
- statenjacht
- (and 1 more)
-
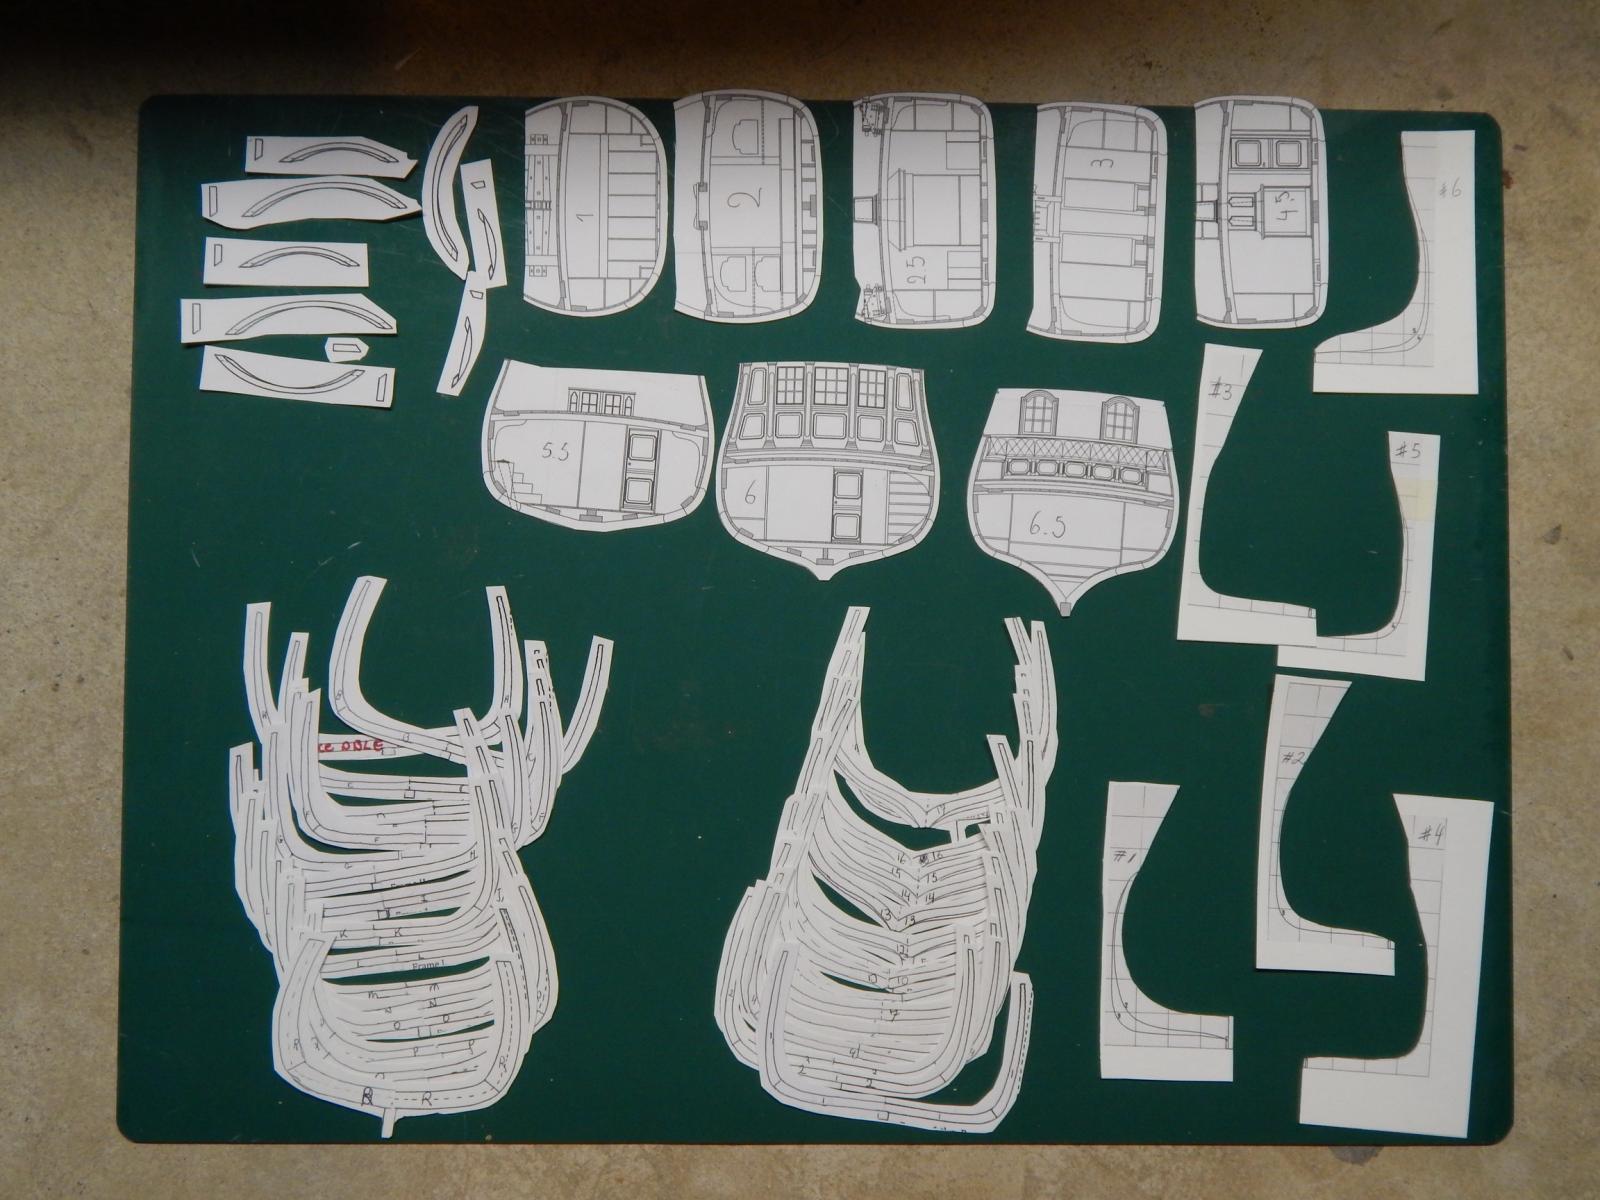
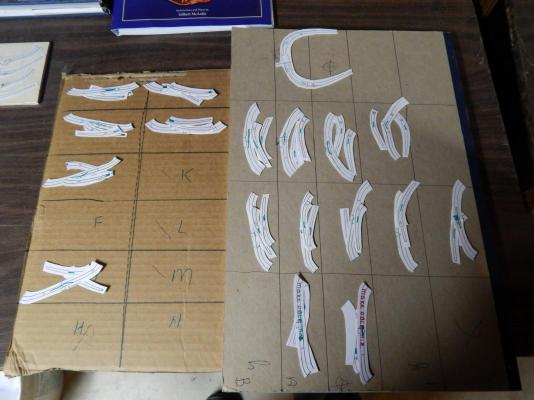
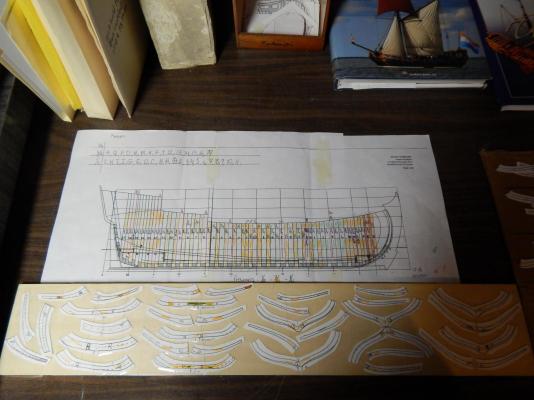
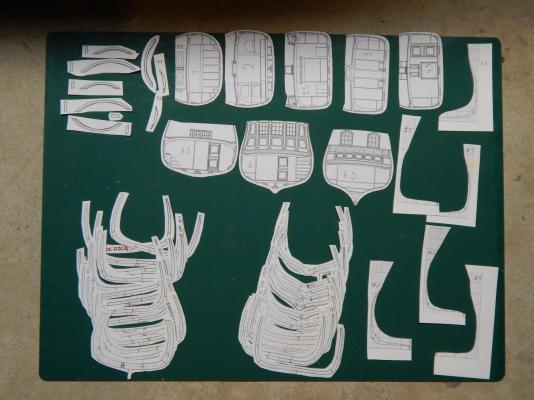
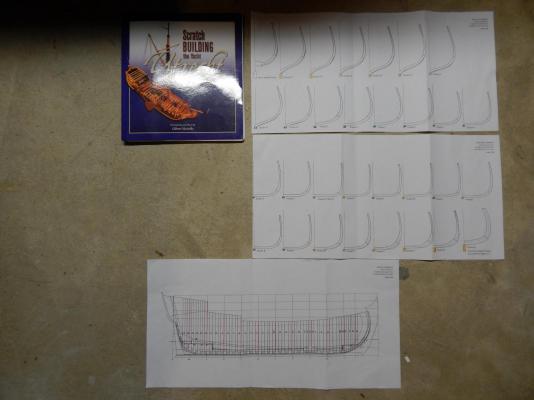
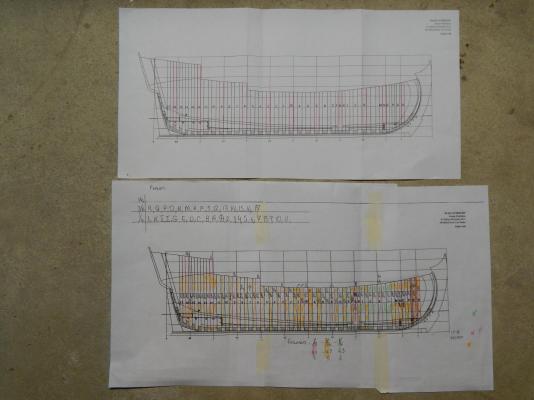
All frames and templates copied and cut out ready to be taped to wood.
- 305 replies
-
- 5
-
-
- utrecht
- statenjacht
- (and 1 more)
-
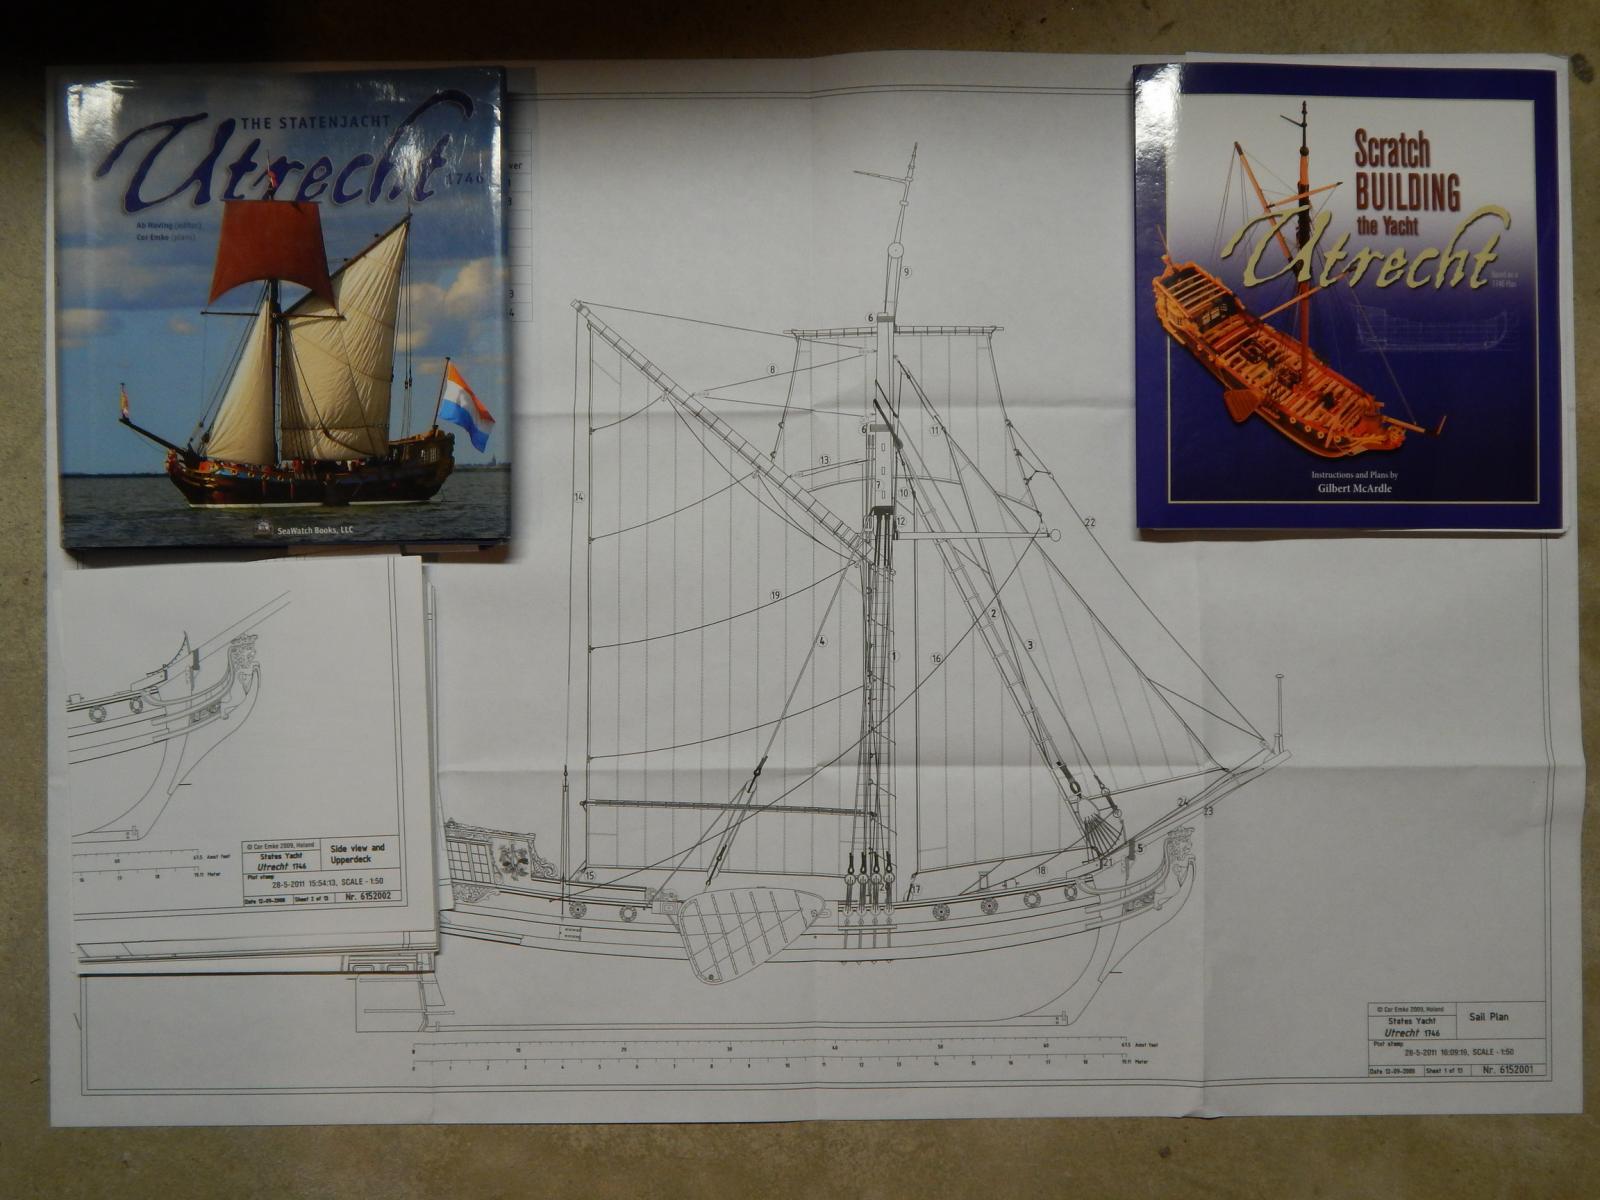
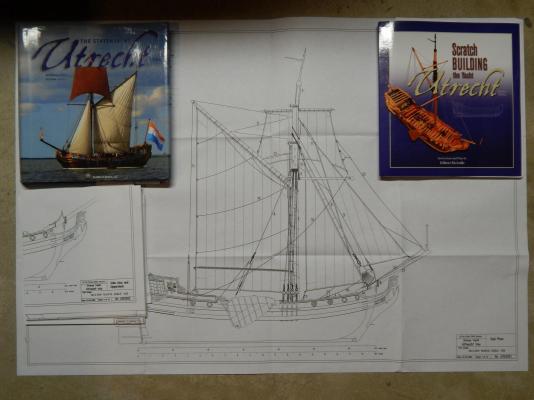
Hi there; This is my first scratch built. I’ve thought long and hard about it and the last kit (HMS Bounty – Constructo) I built, I changed numerous items as they were not accurate to that year it was built. So if I can do that, I can build a boat where I am in complete control. I decided on the Statenjacht “Utrecht”, because I love the lines from (plat bodems) flat bottom boats. I bought the book on the Utrecht from Seawatch books a while back because I am interested on how they built the replica. In the late 80’s I had a friend who worked as a volunteer carpenter on the Batavia replica in Lelystad, The Netherlands and I was with the amount of wood that went into building that boat. This year I purchased another book on the Utrecht authored by Gilbert McArdle, also from Seawatch books. This gave me insights on how to build the boat. I will not build it the way he did it. I will not do a “no deck boat” where you can see the interior. My plan is add a deck with cannons and all the deck items, sails and all the rigging. I am getting ahead of myself as I still have to finish "The Royal Yacht Mary". I started by copying all the frames and taping them with clear packing tape on the basswood. The reason of the packing tape is that this tape will lubricate the saw blade at all times and the use of basswood is that this wood is cheap and once the deck is on you will never see it.
- 305 replies
-
- 11
-
-
- utrecht
- statenjacht
- (and 1 more)
-
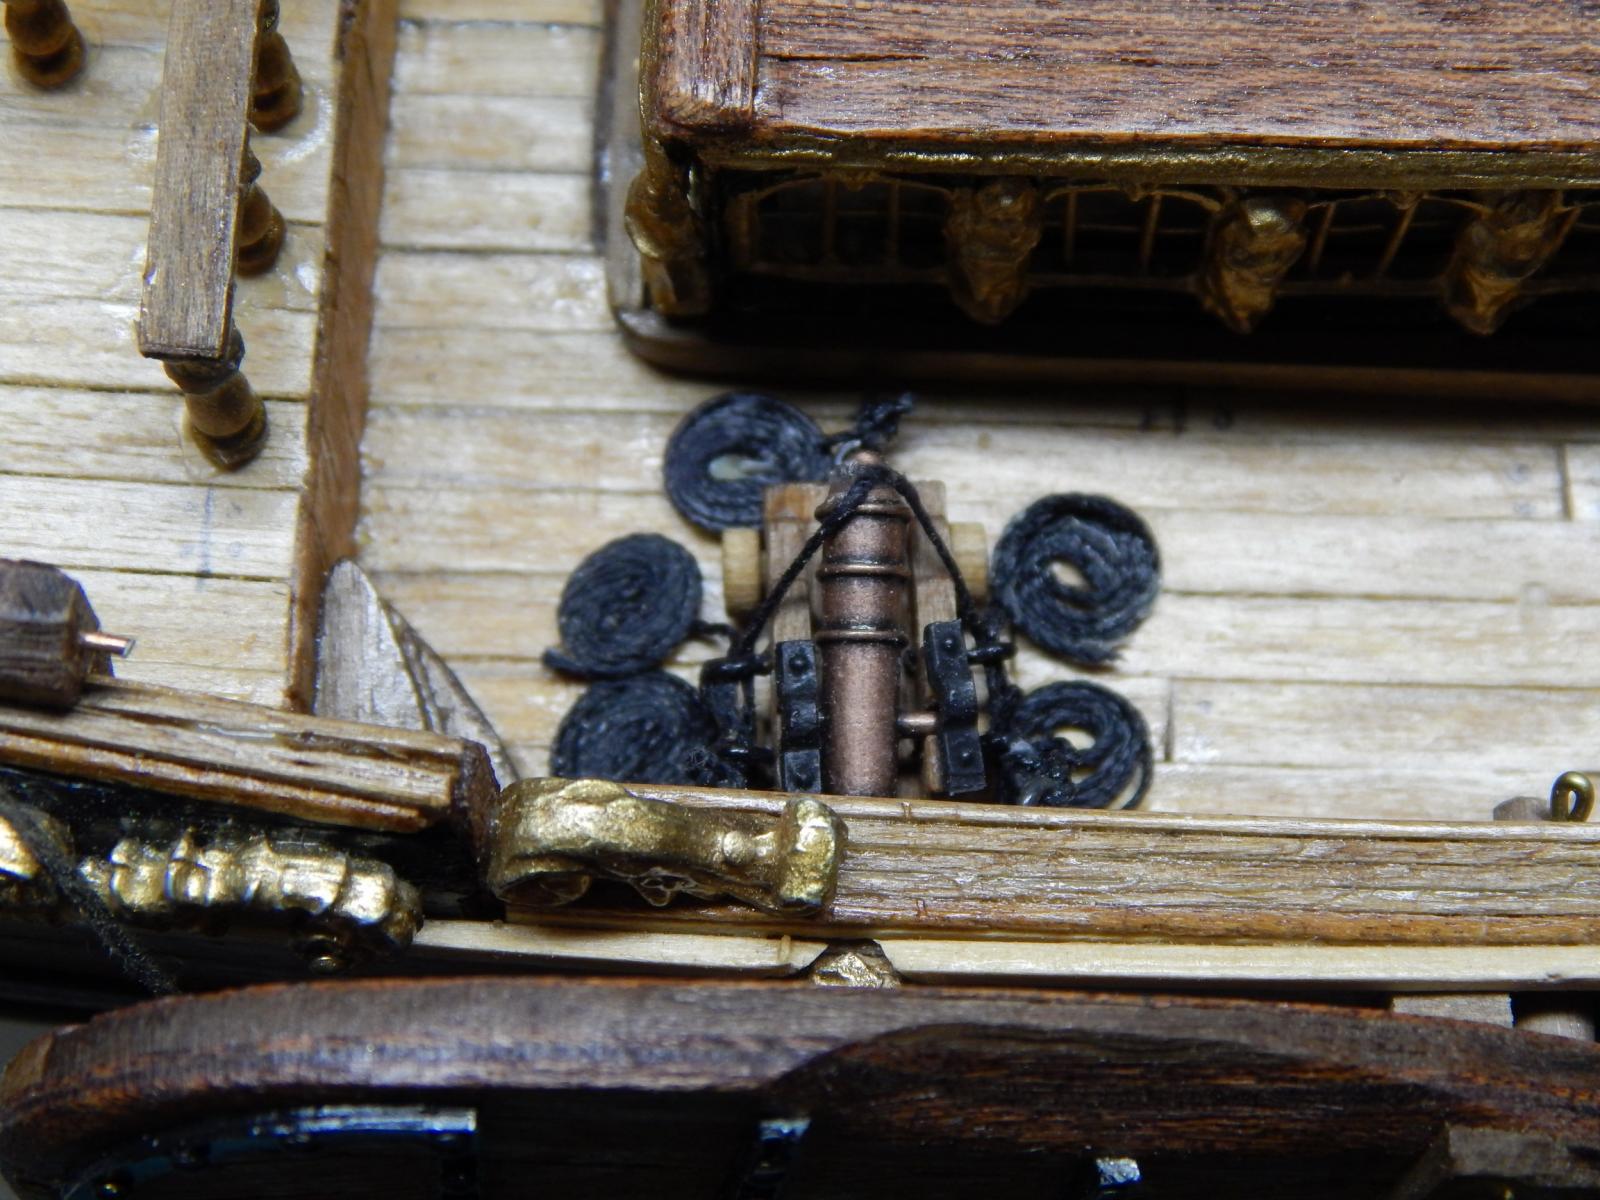
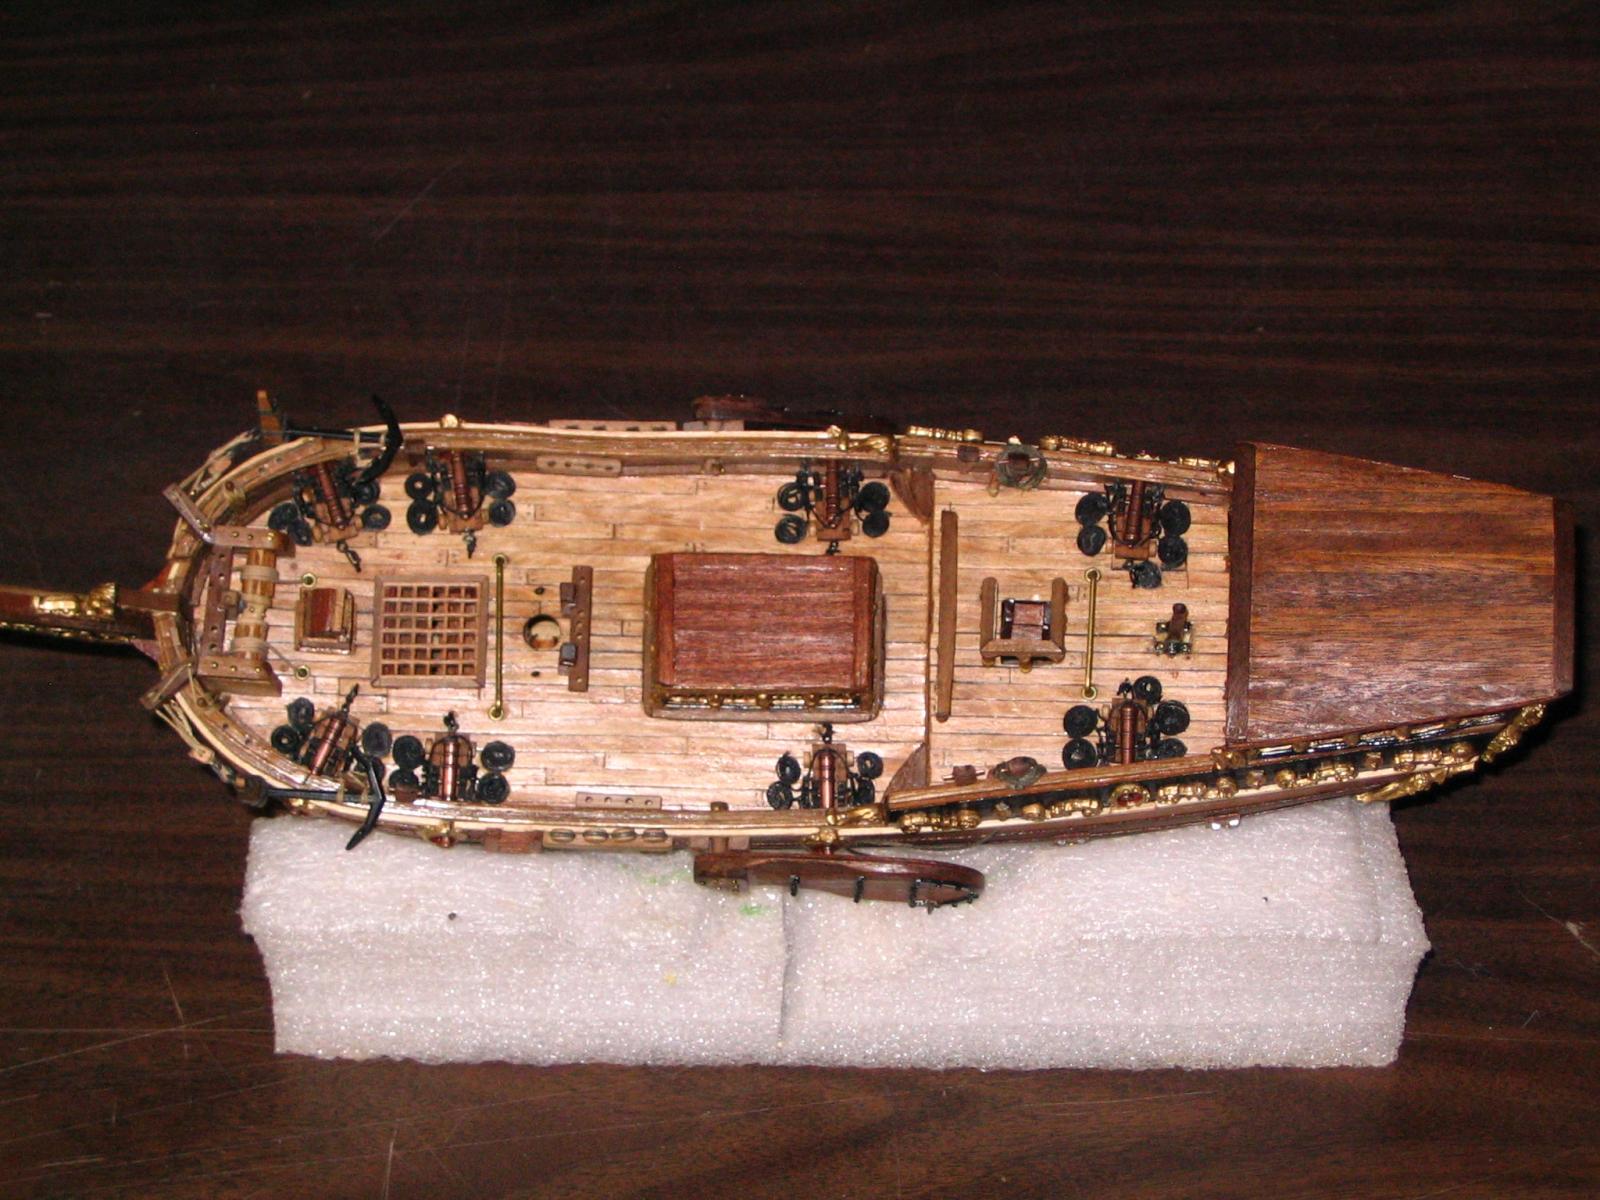
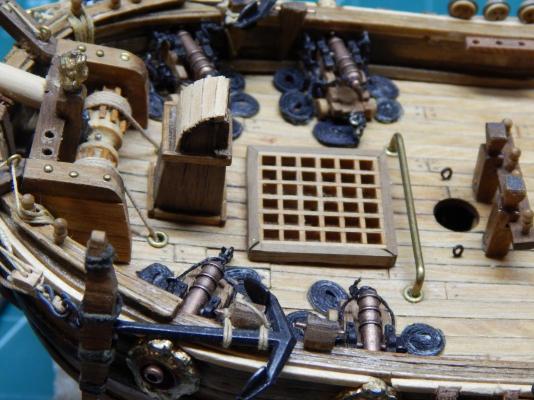
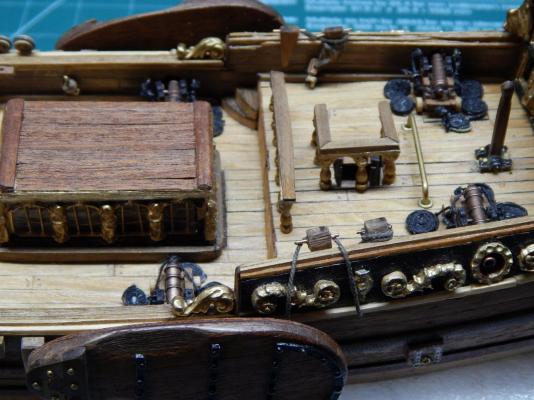
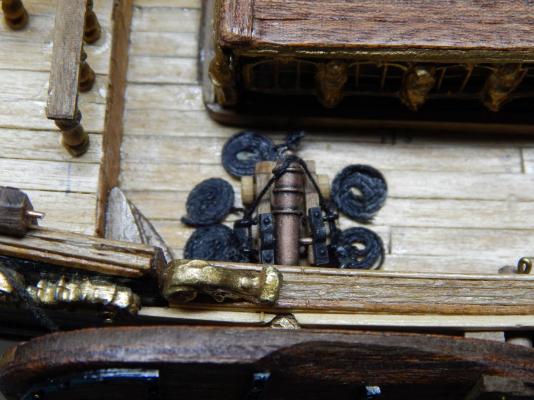
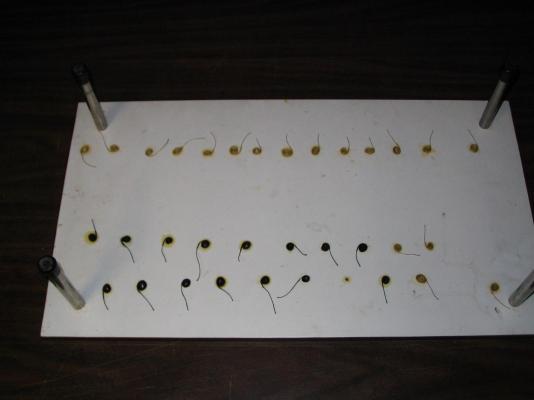
Here are some pictures of the rope coils on deck. I learned later on that the rope is a bit to large in diameter to the scale of the boat. I will correct this in my next boat.
- 85 replies
-
- 7
-
-
- yacht mary
- mamoli
- (and 1 more)
-
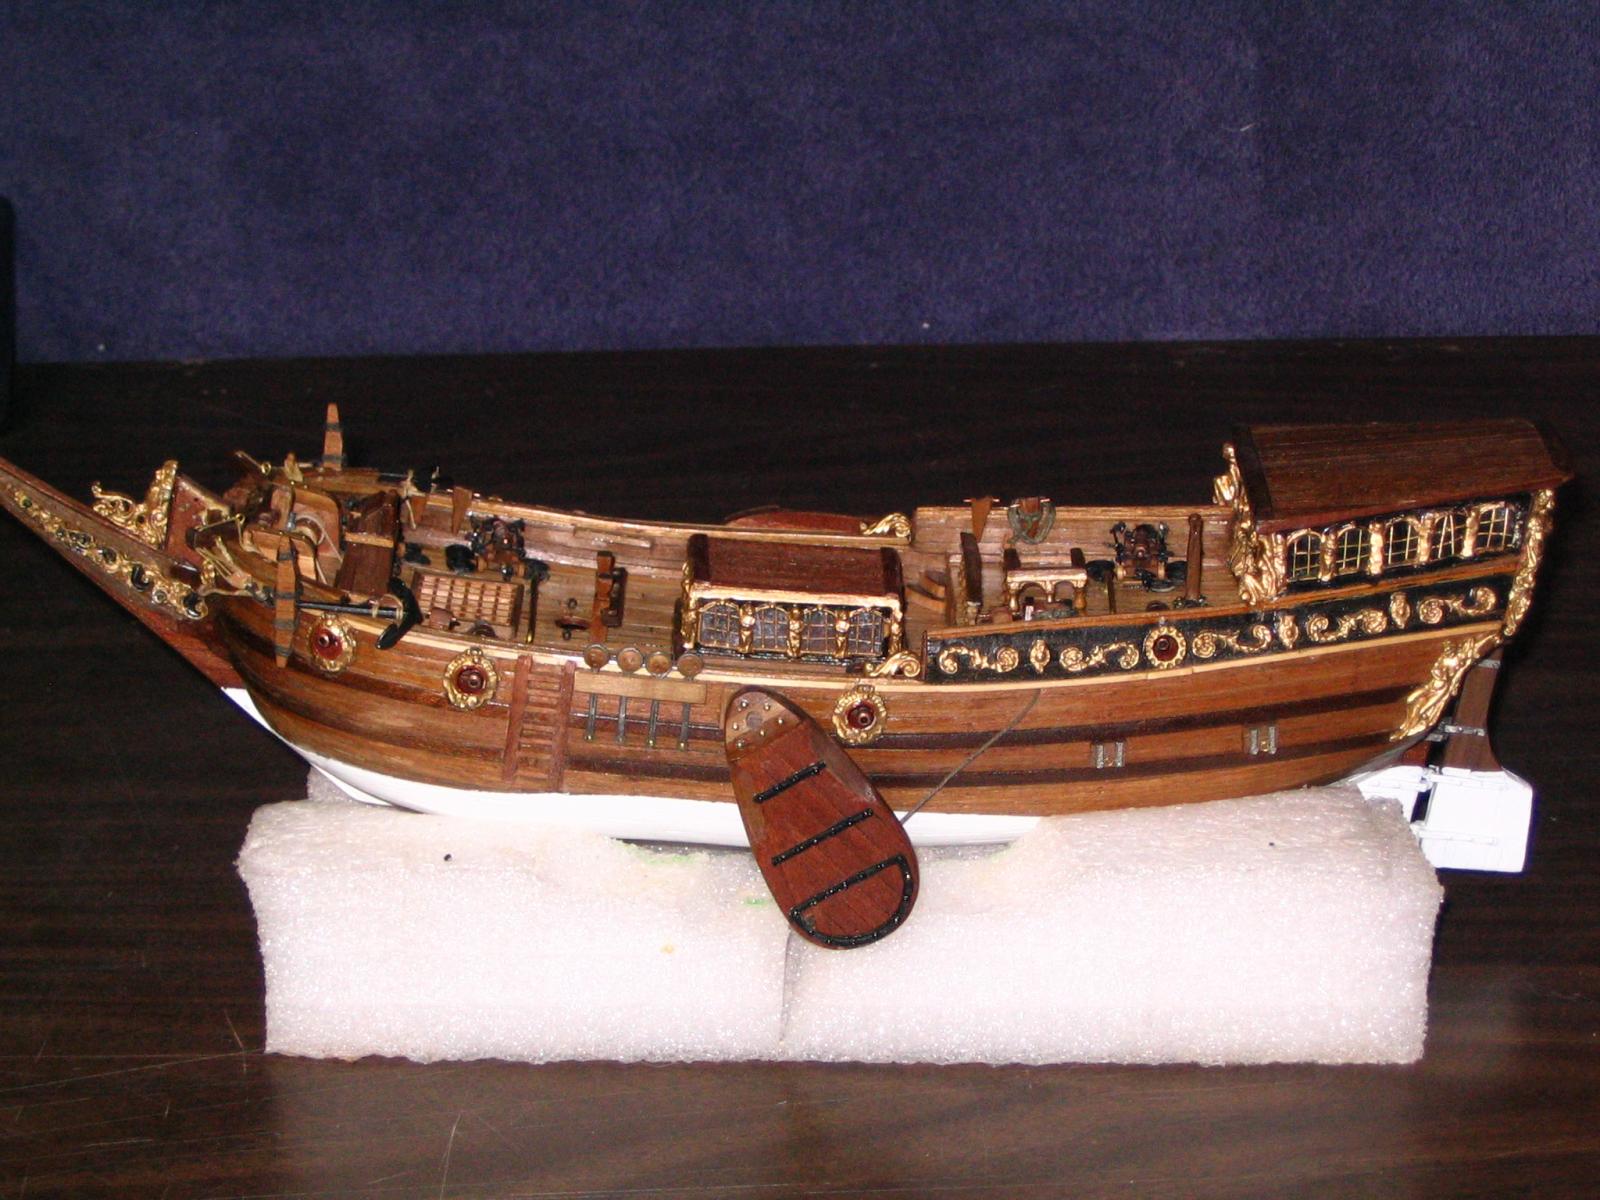
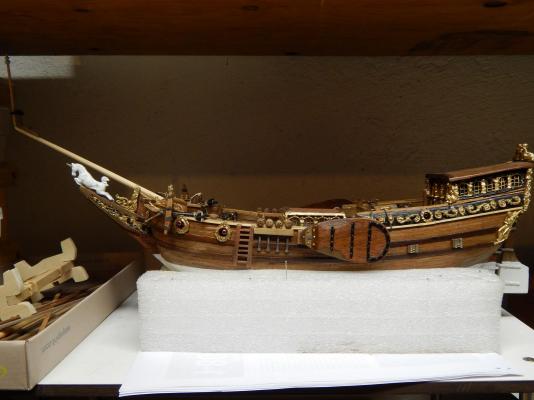
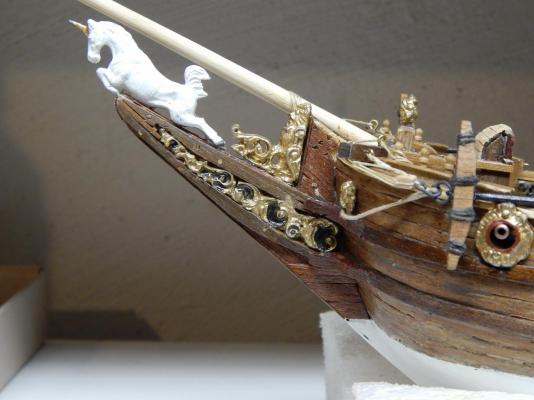
Several pictures of what I have presently finished and the next installments will be the masts. My neighbor has hemmed and stitched the sails and all there is left to do is to dye them brown. She did an excellent job on the sails of the Bounty. It is something I have to do myself one of these days.

- 85 replies
-
- 5
-
-
- yacht mary
- mamoli
- (and 1 more)
-
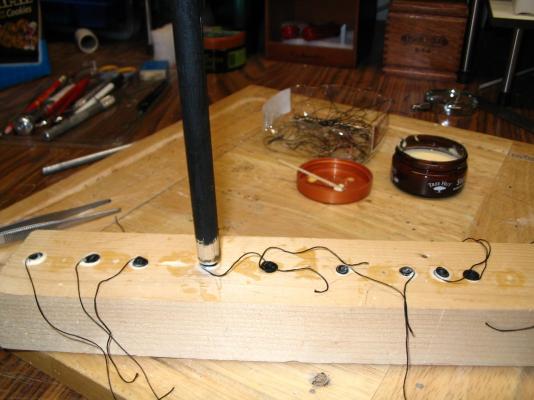
Rope coils being created.
-
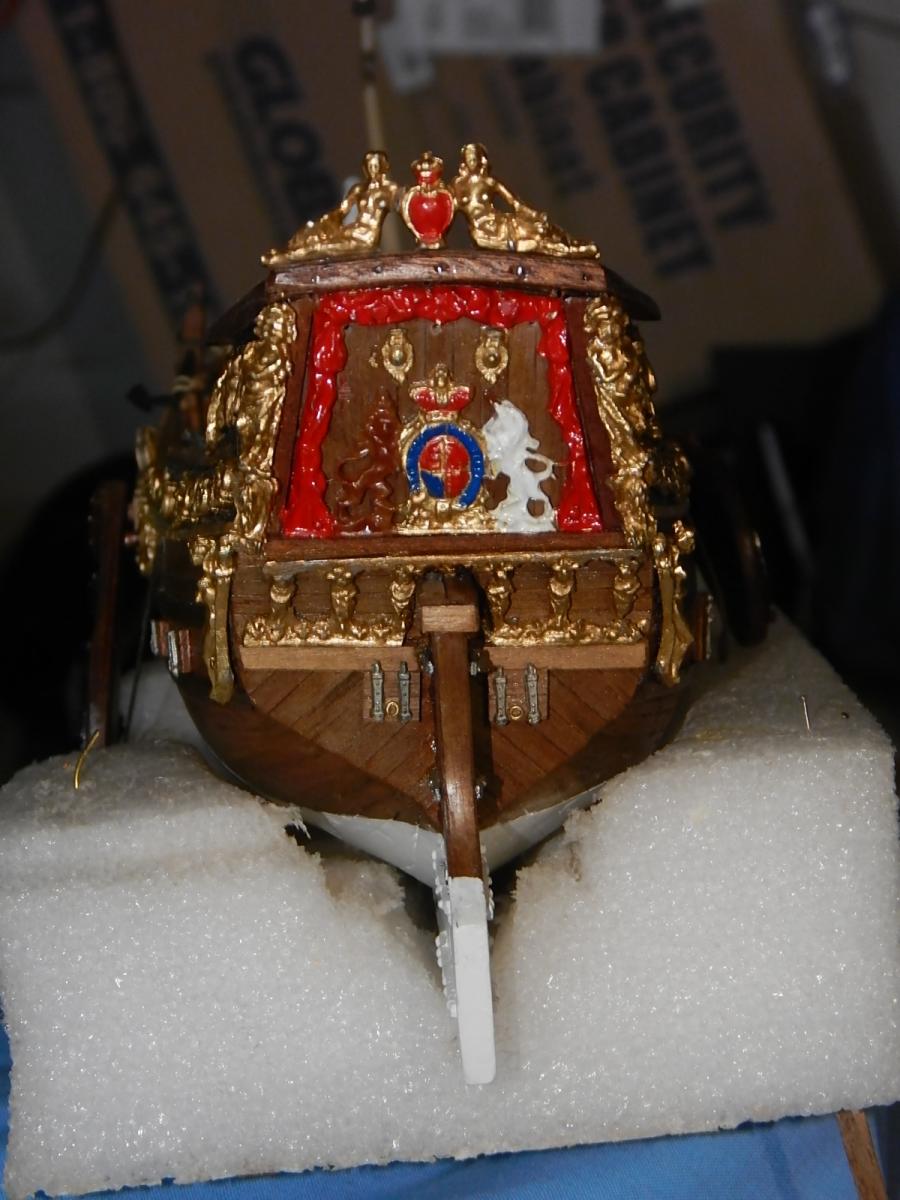
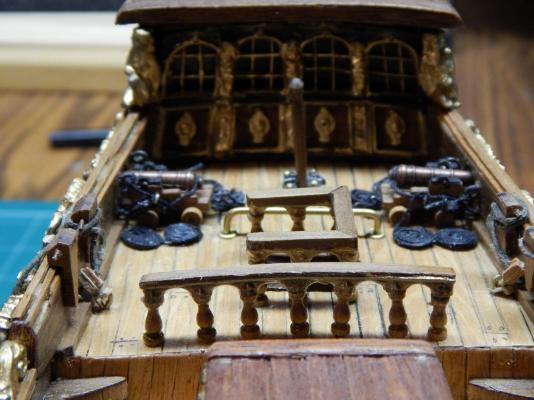
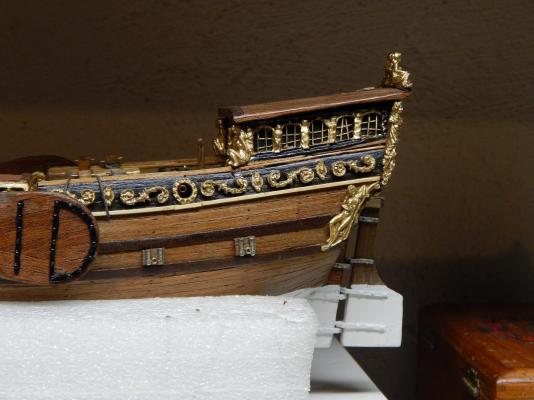
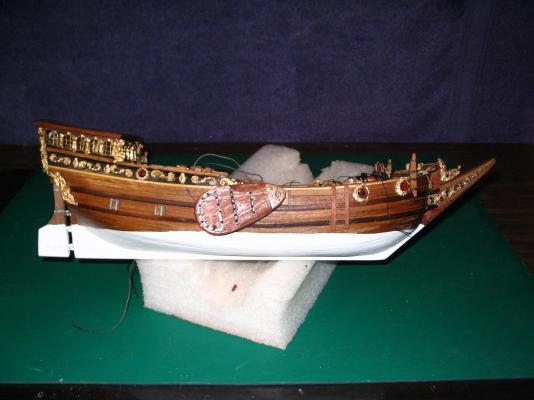
Paint job is before I cleaned it up and got the line more even. Here is the completed boat with the cannons and the leeboards.
- 85 replies
-
- 2
-
-
- yacht mary
- mamoli
- (and 1 more)