Check out our new MSW Sponsor Innocraftsman
×

KORTES
-
Posts
557 -
Joined
-
Last visited
Content Type
Profiles
Forums
Gallery
Events
Everything posted by KORTES
-
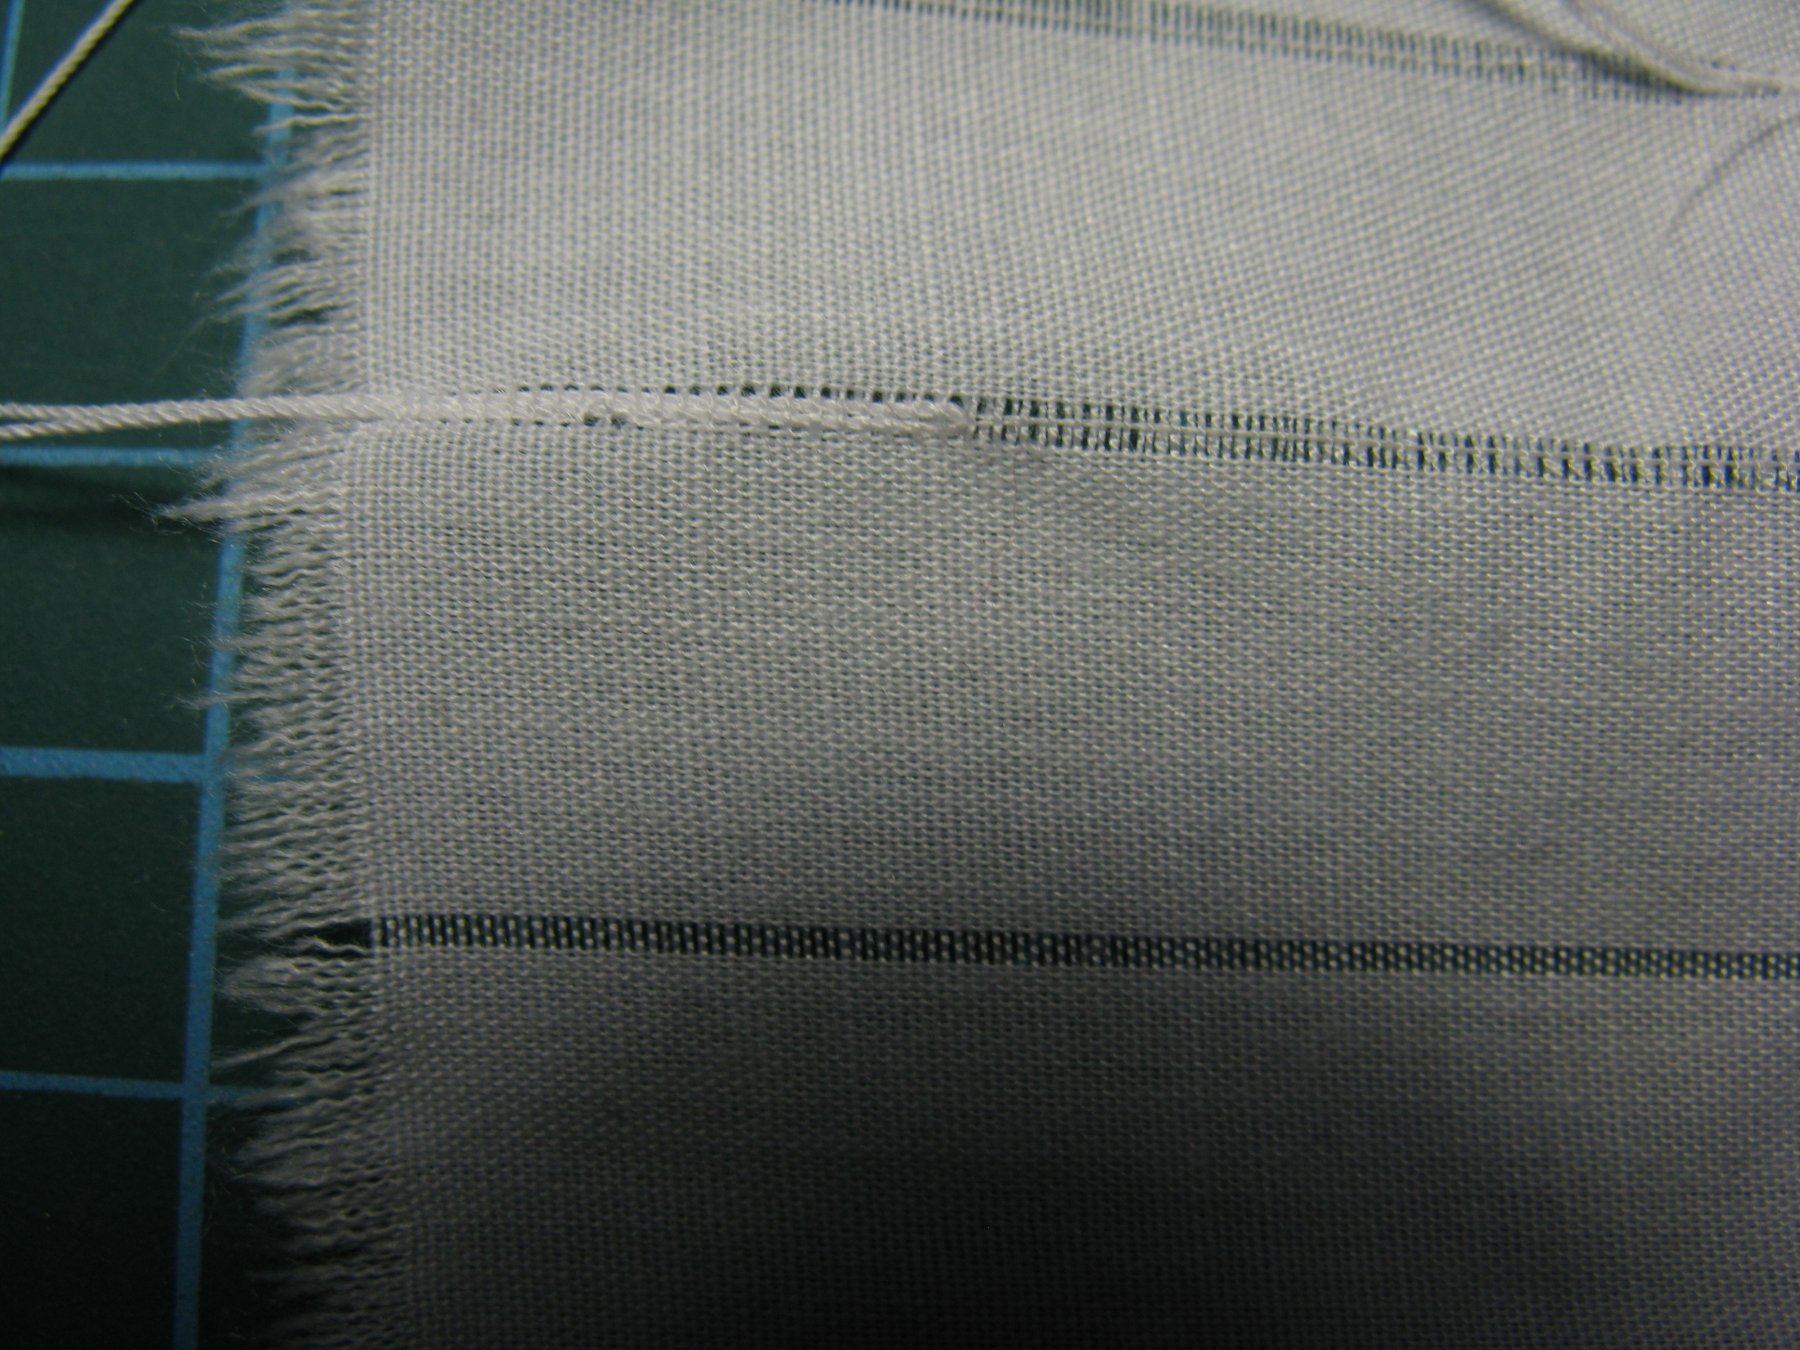
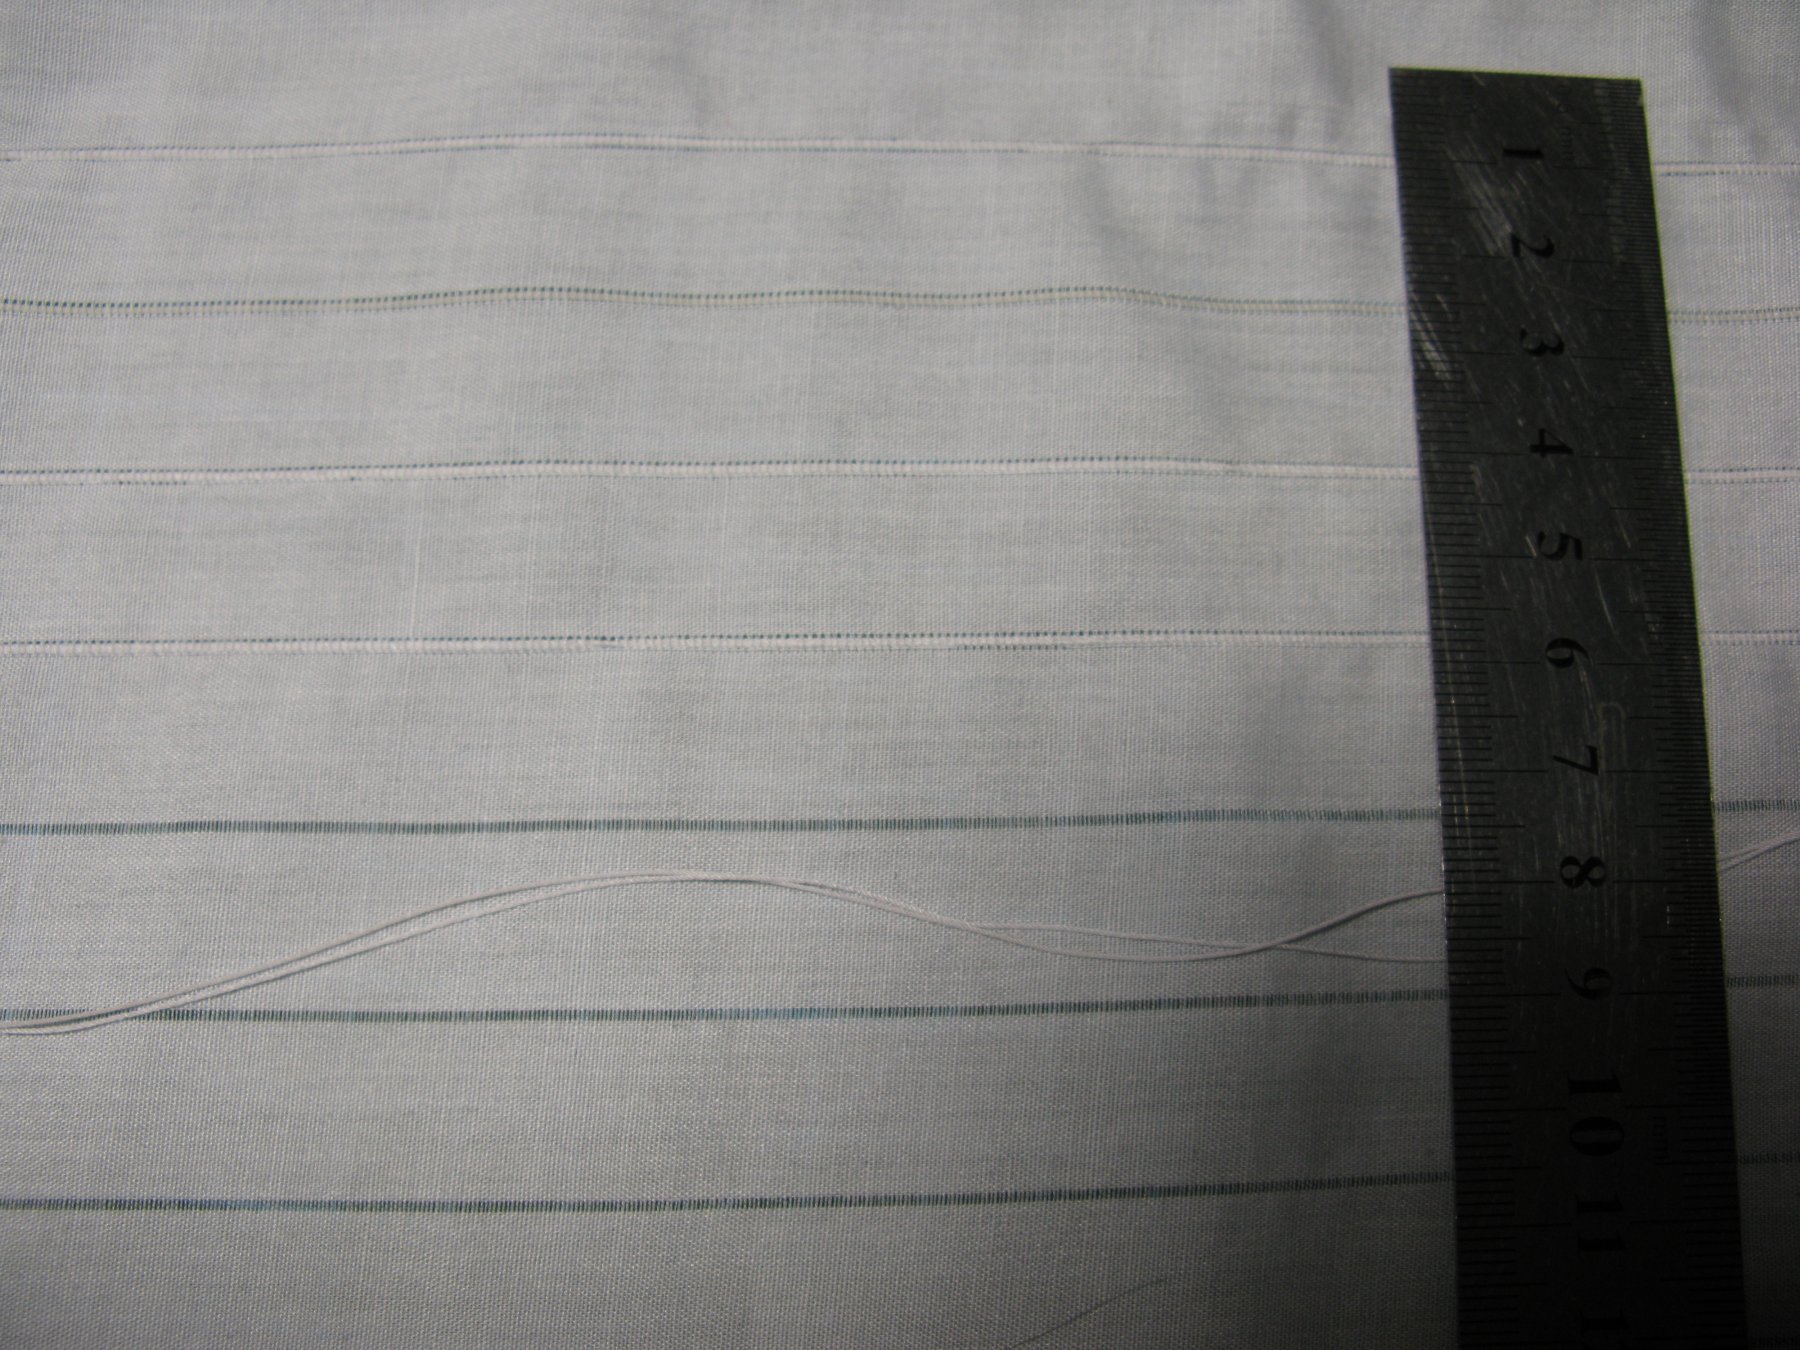
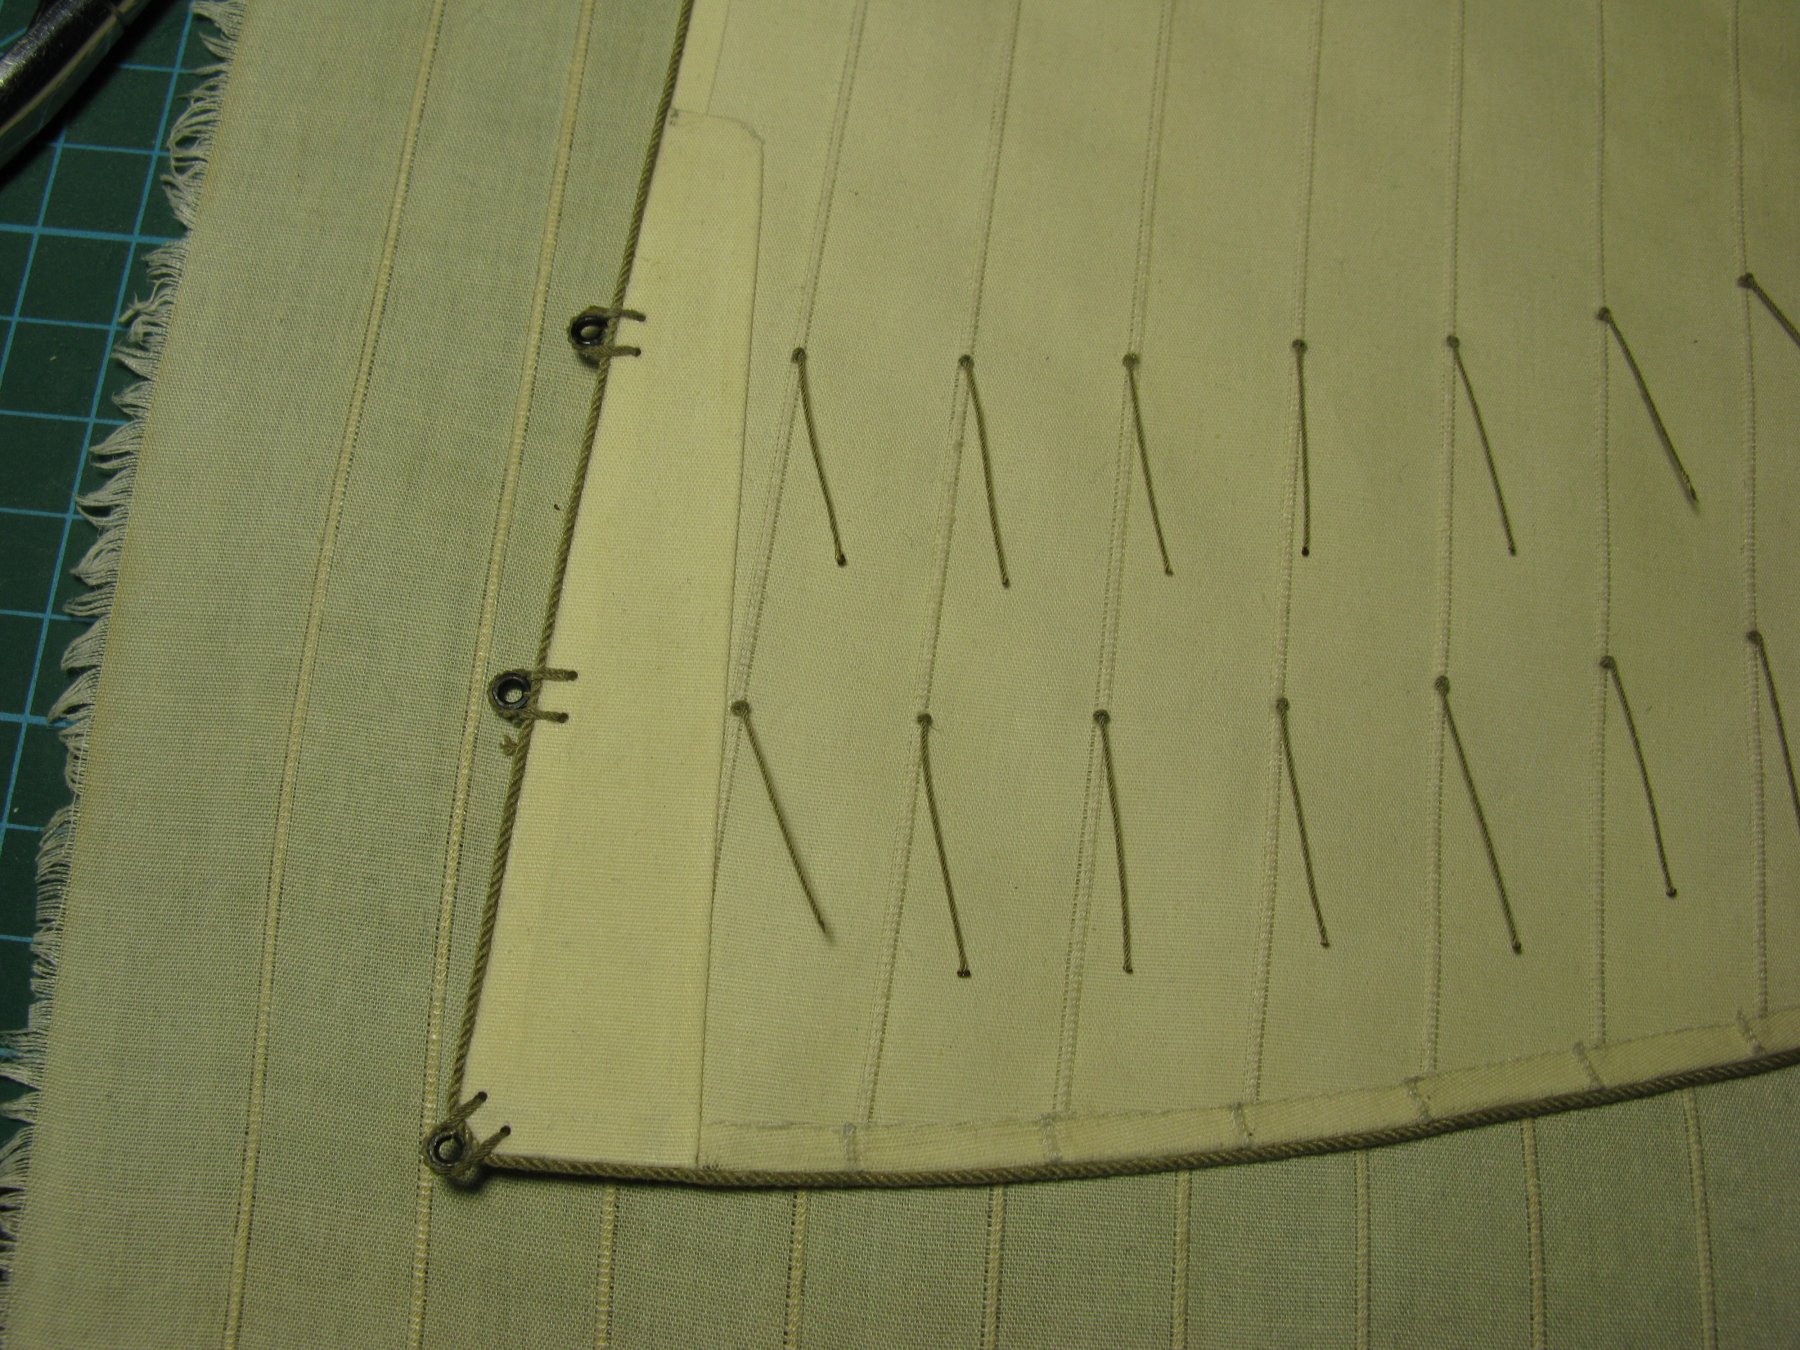
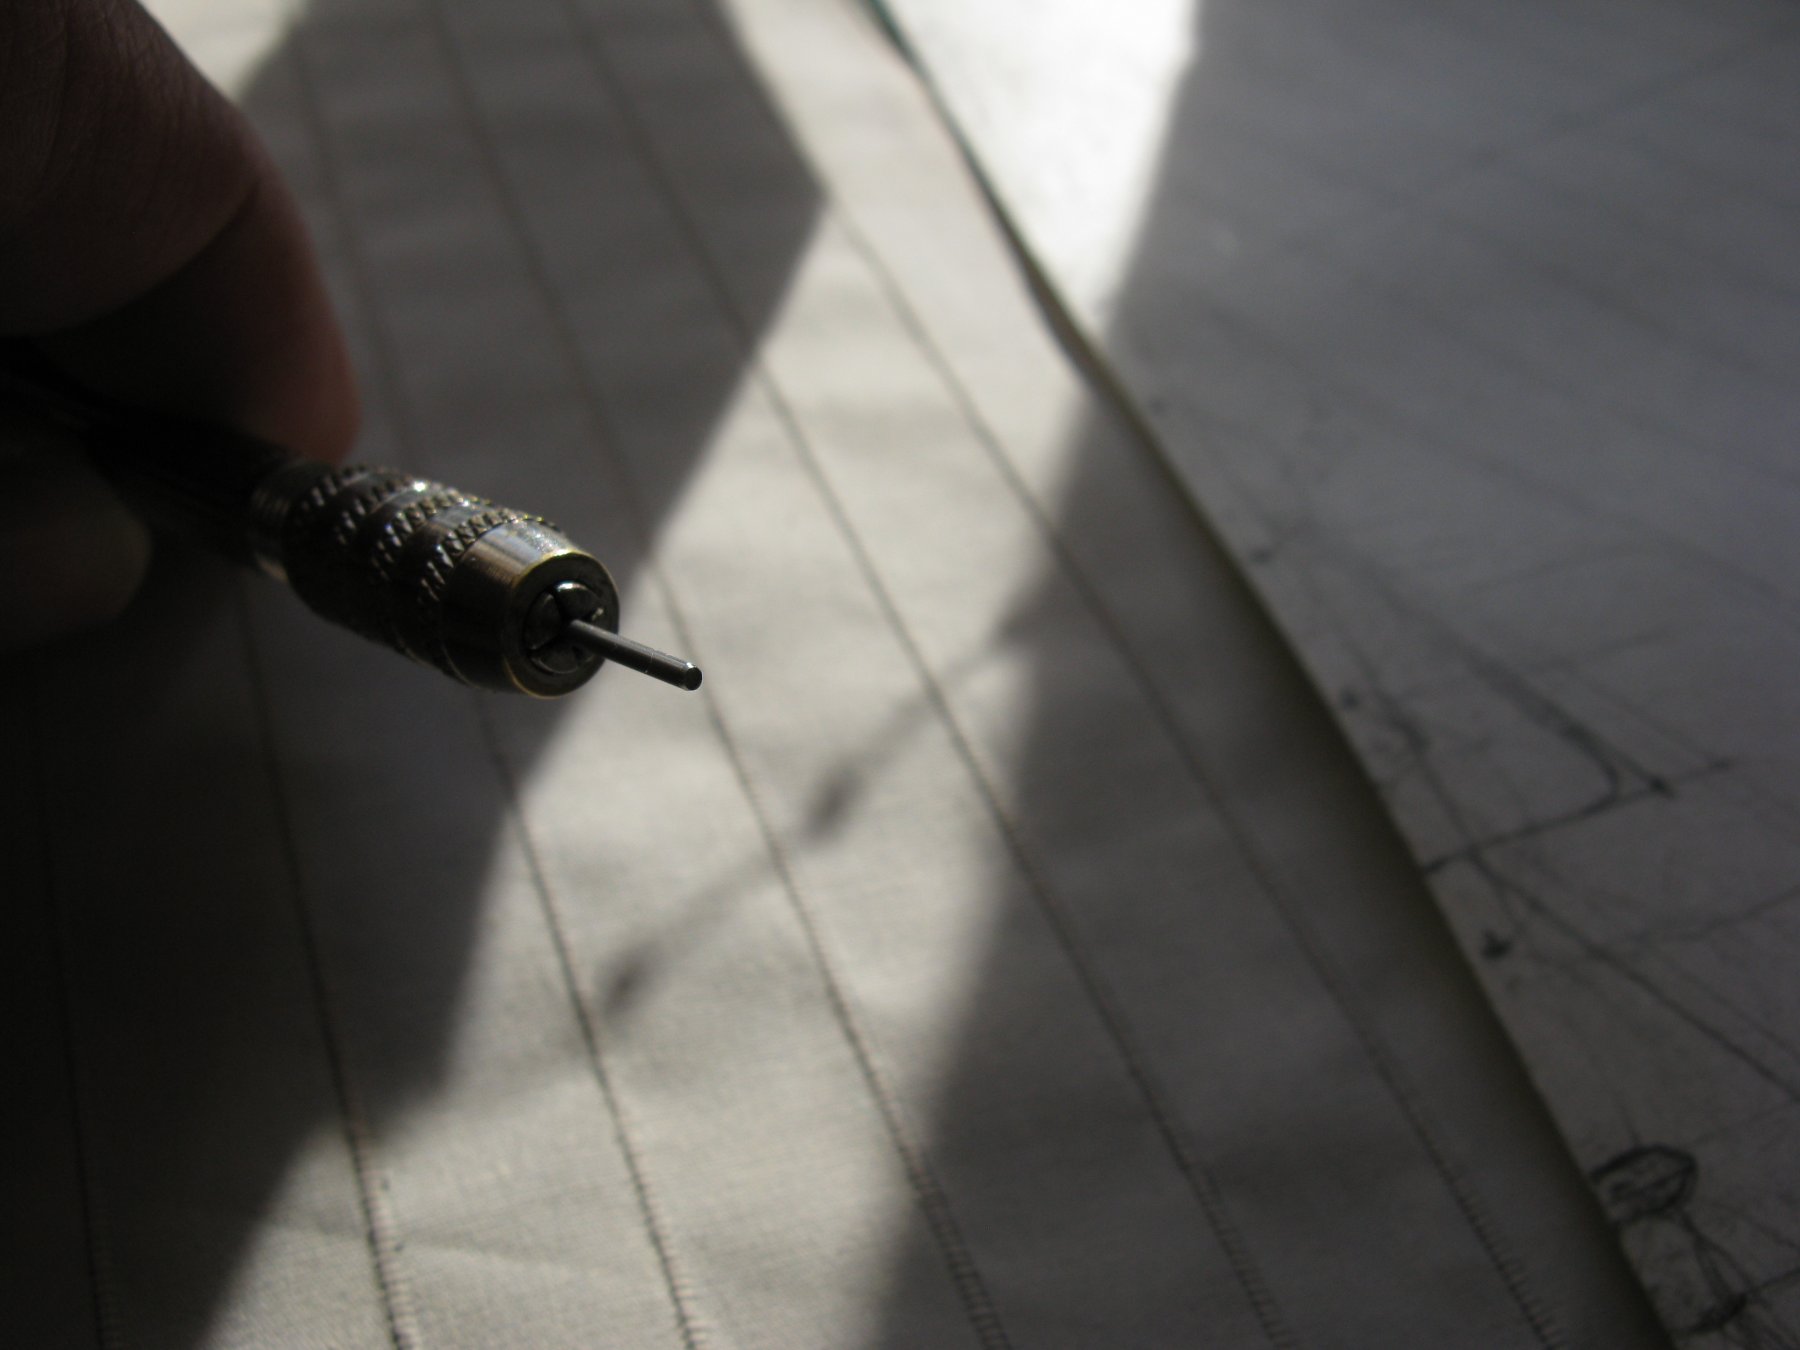
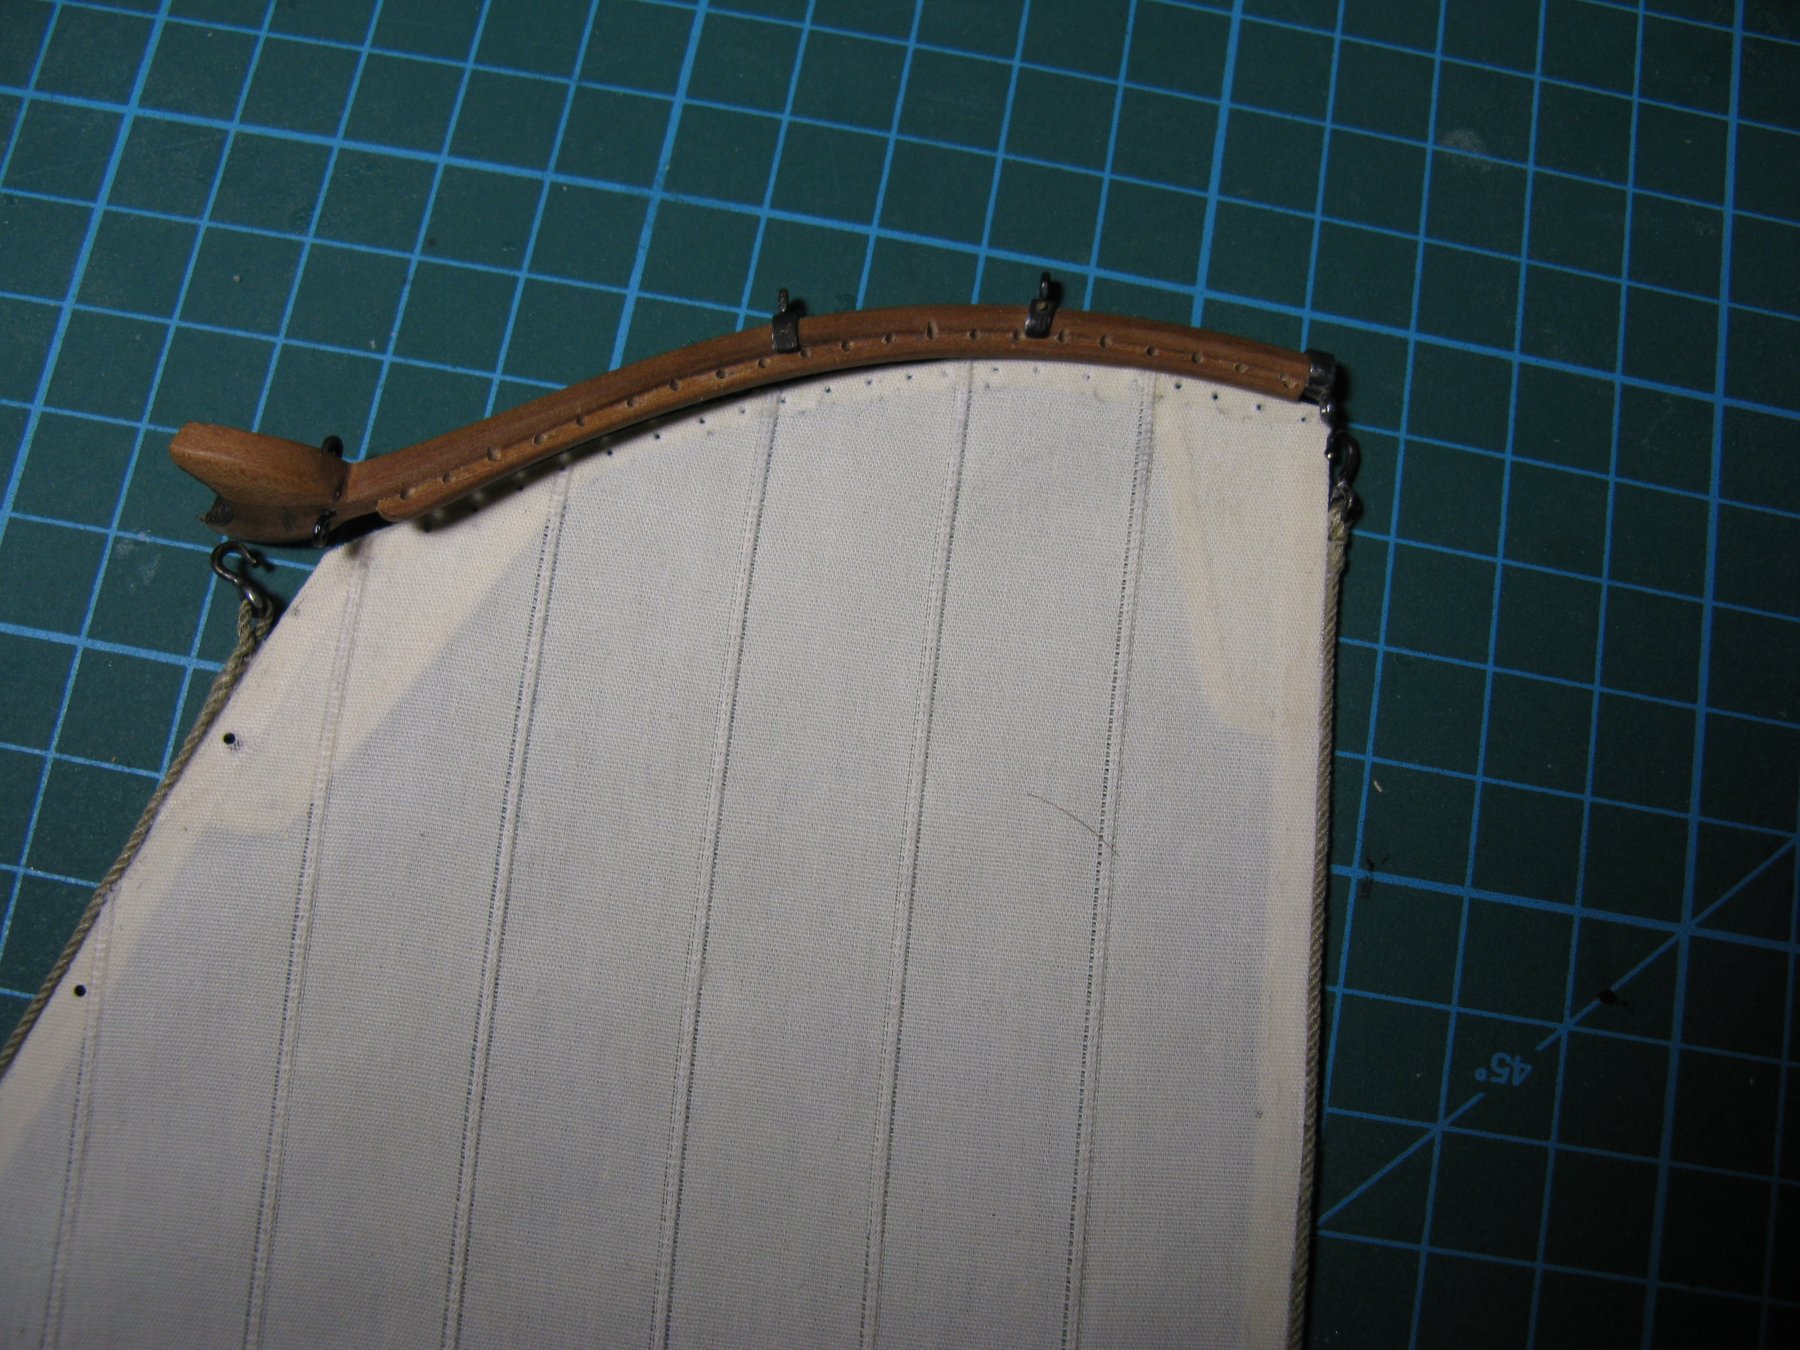
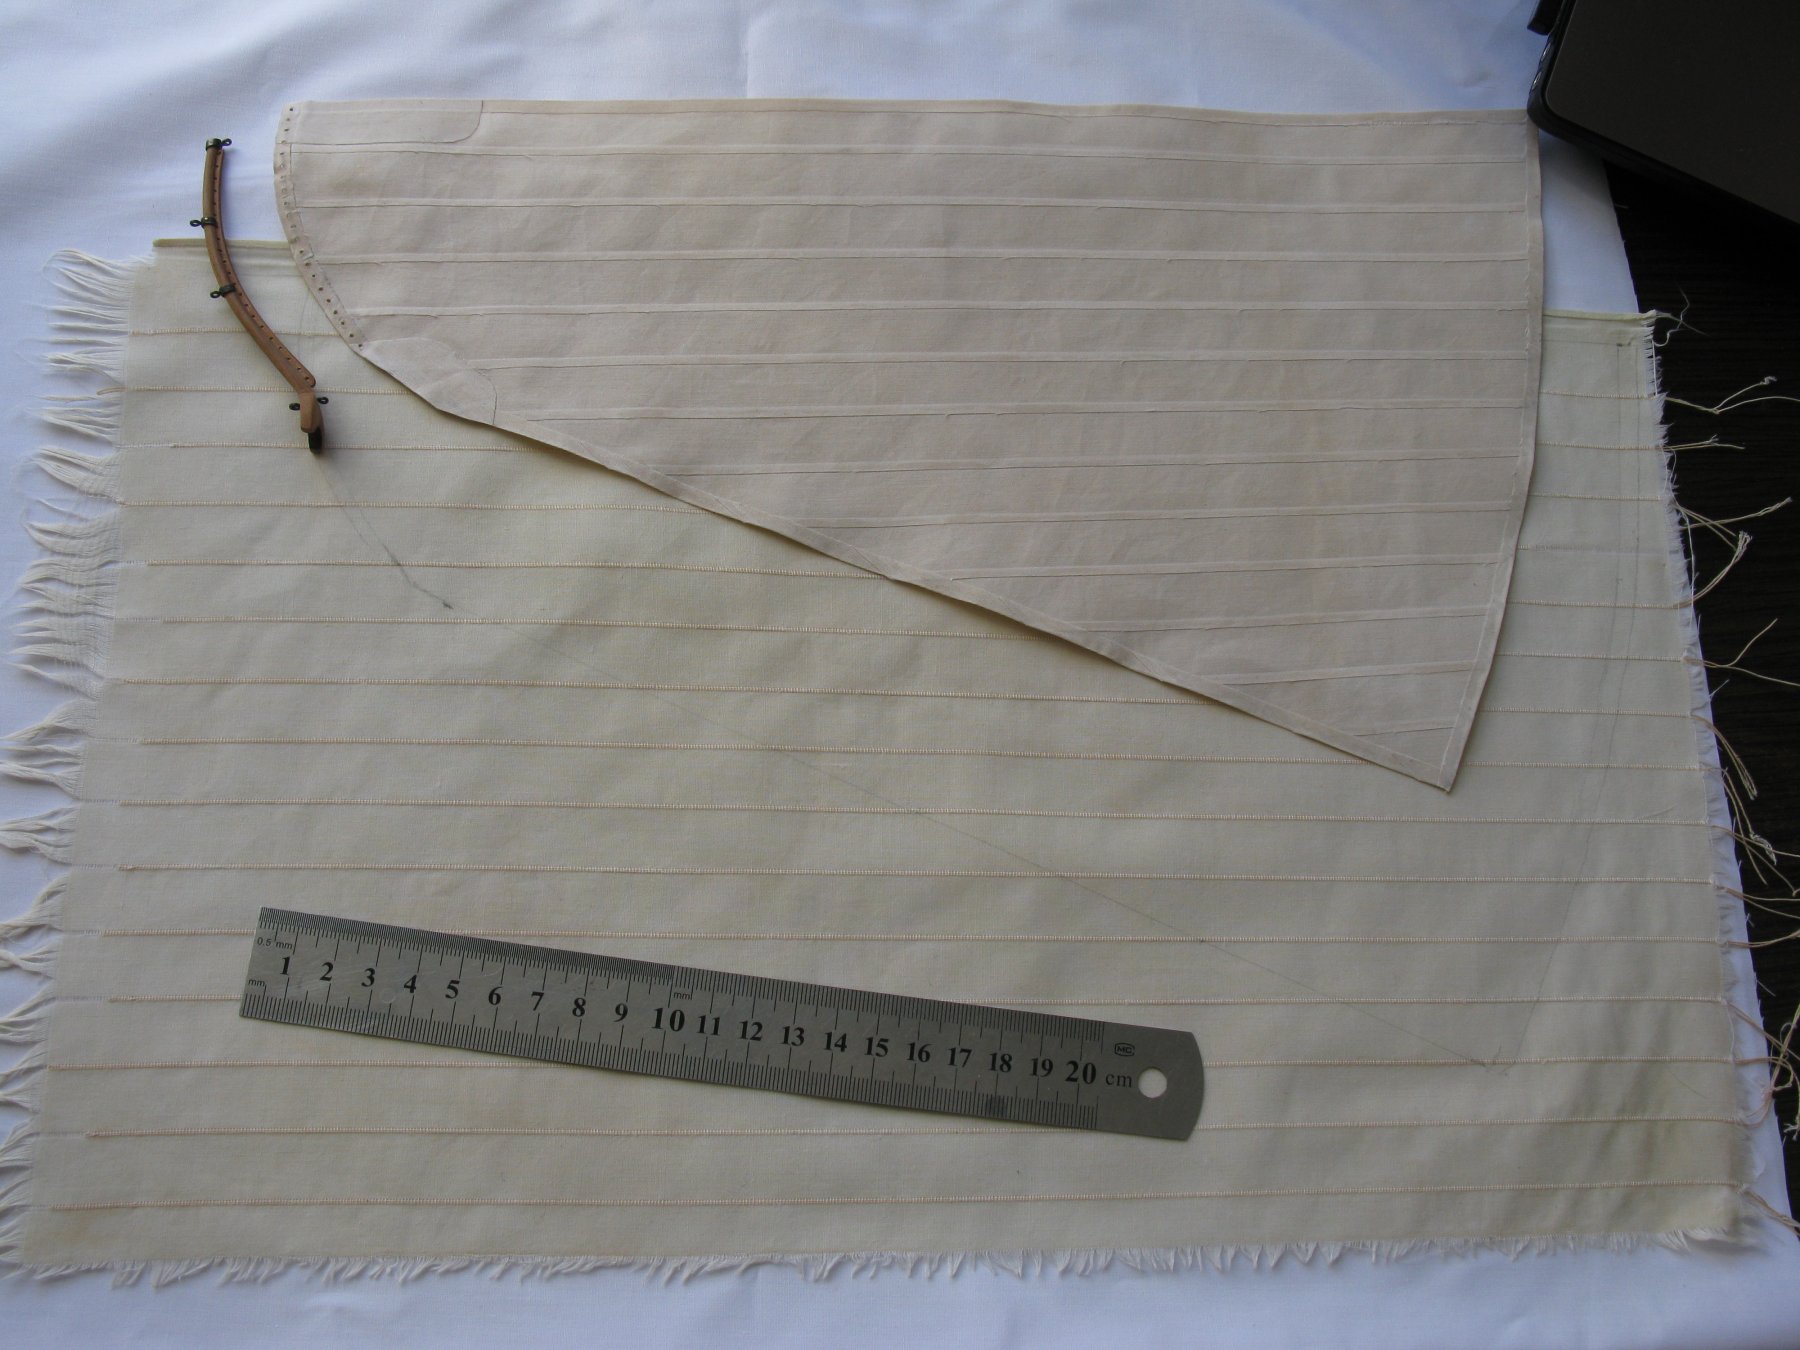
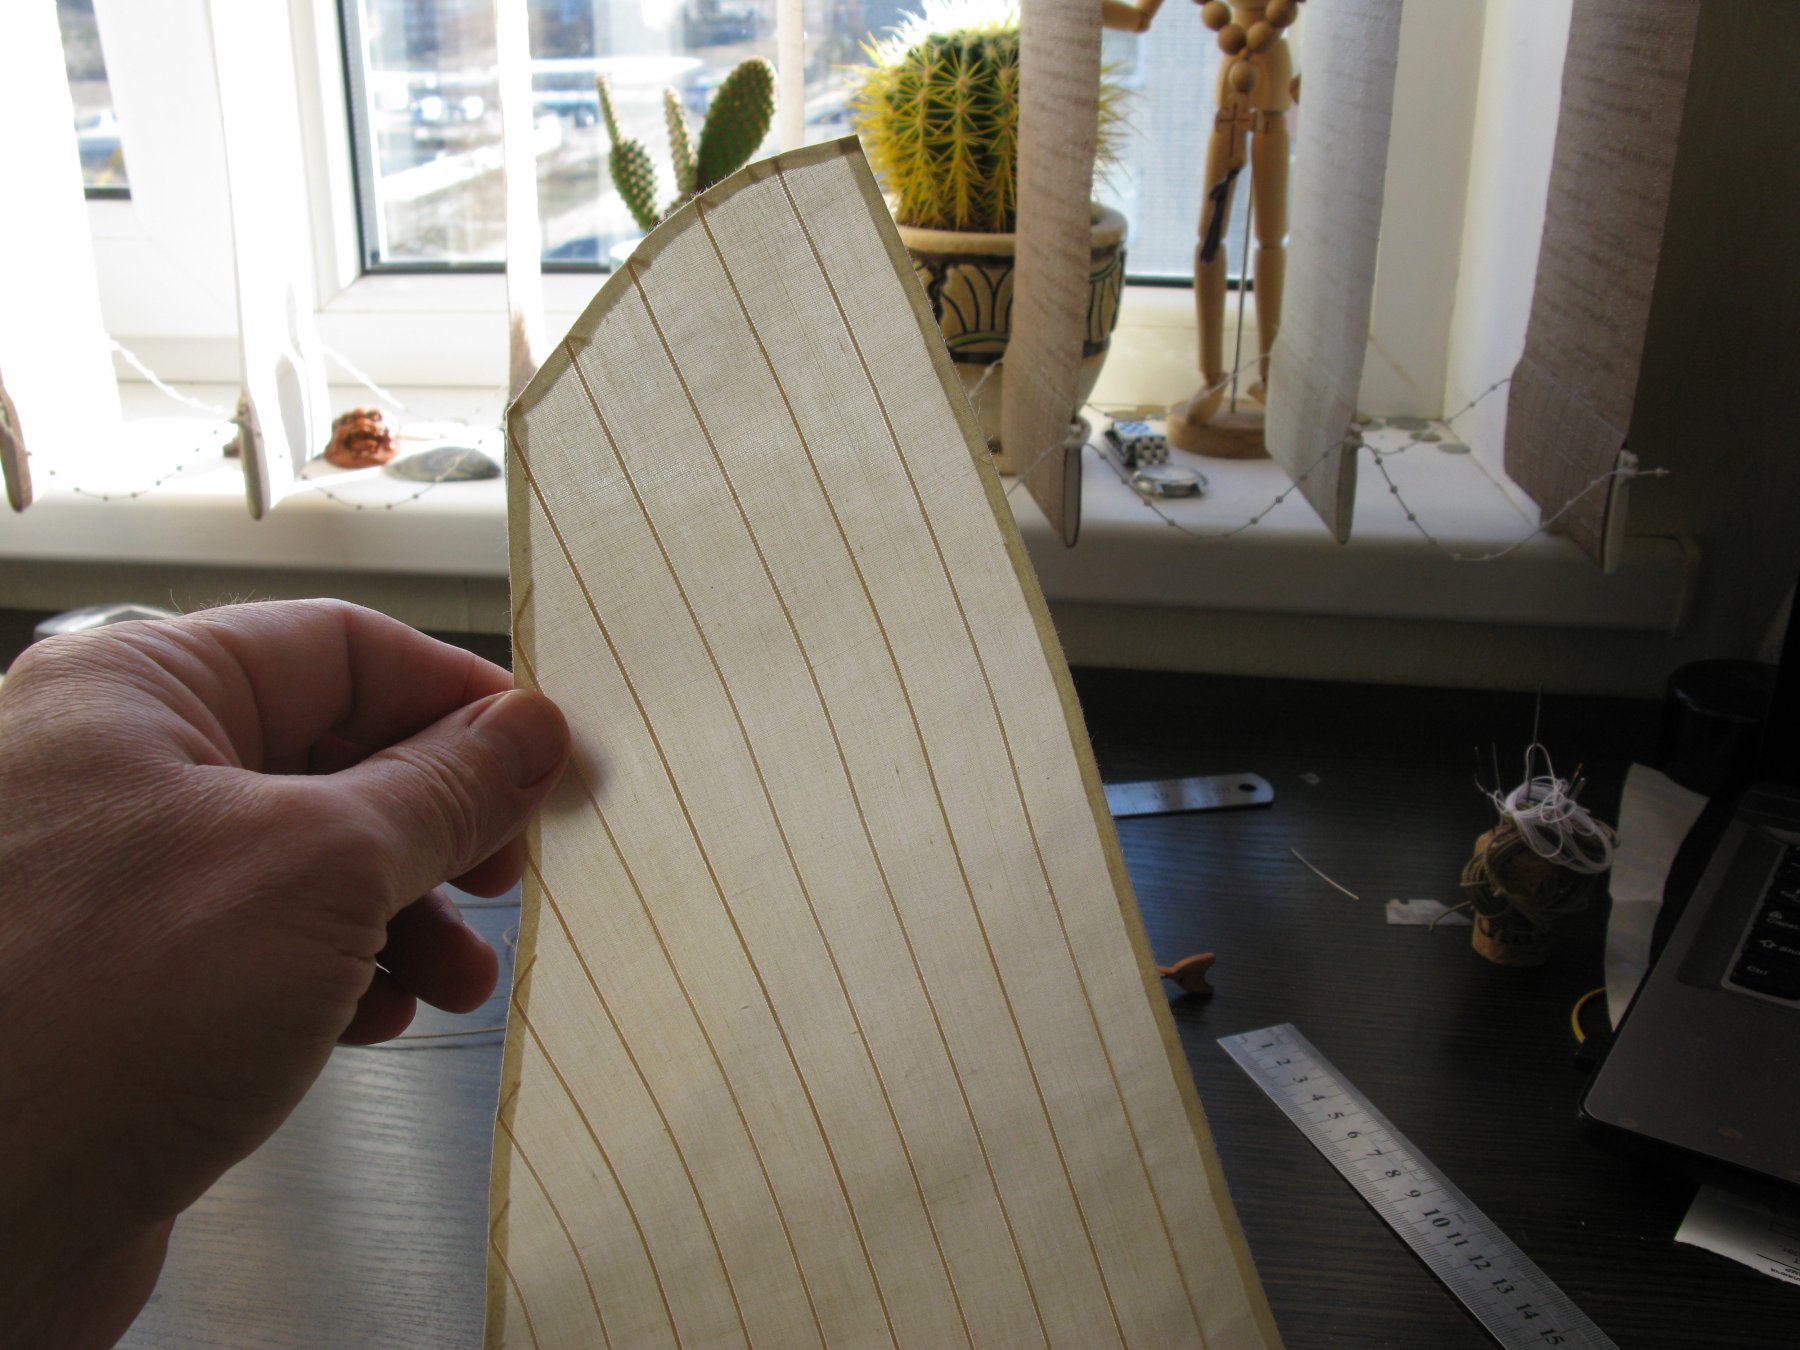
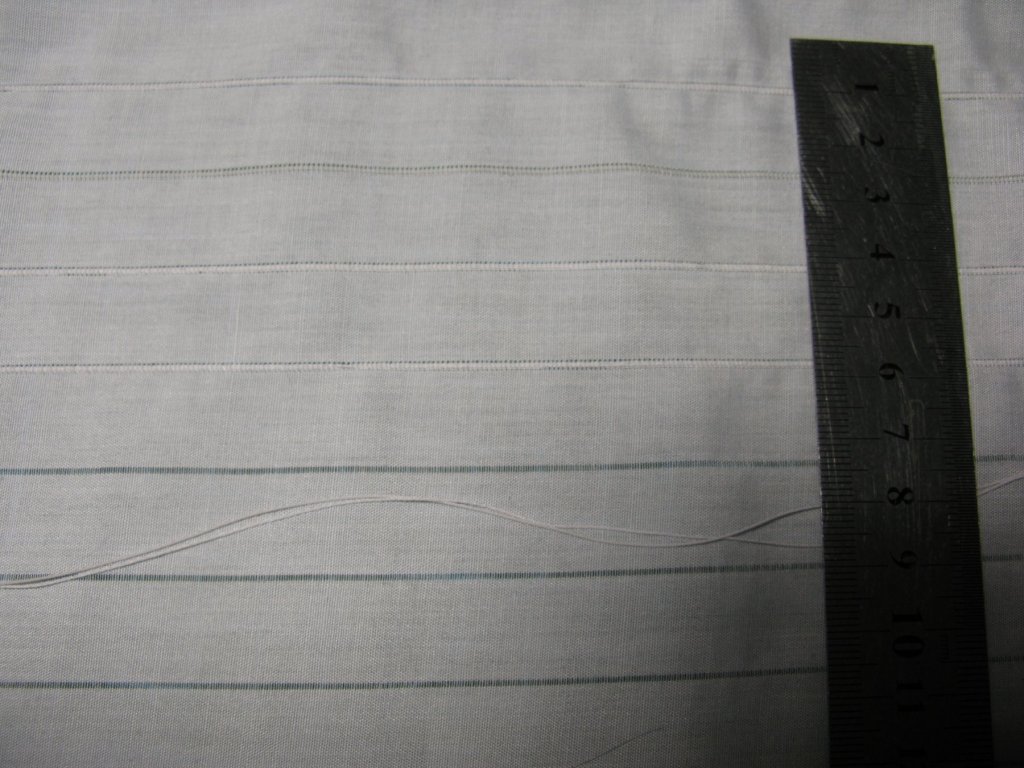
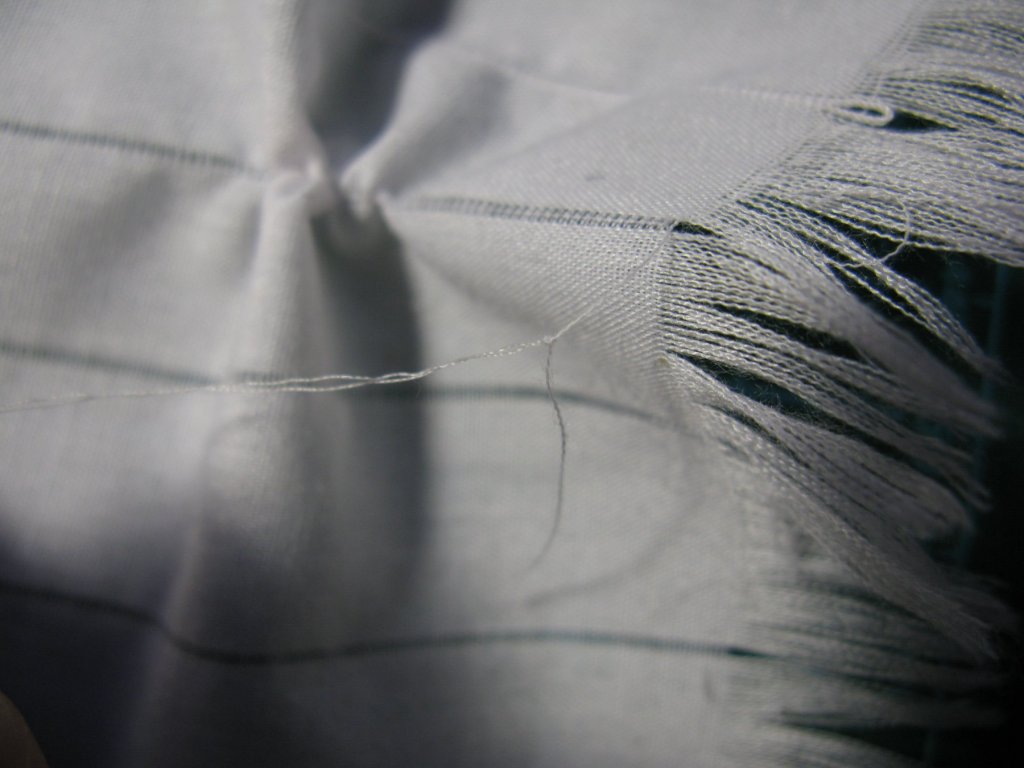
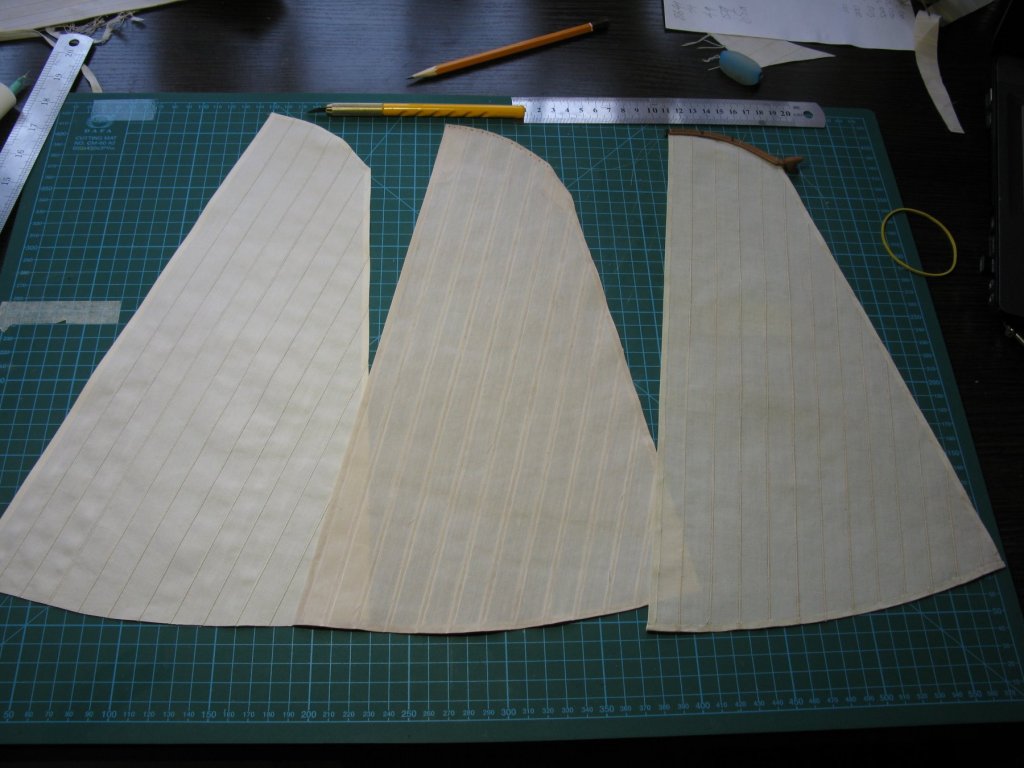
 And the last step. We fix the thick thread to our "chief" thread and pull it in in place of the pulled out threads. I had to skein the pulled-in thread, because I couldnt fing the thread of the required diameter. That's how I did it.
- 403 replies
-
- 19
-

-

-

-
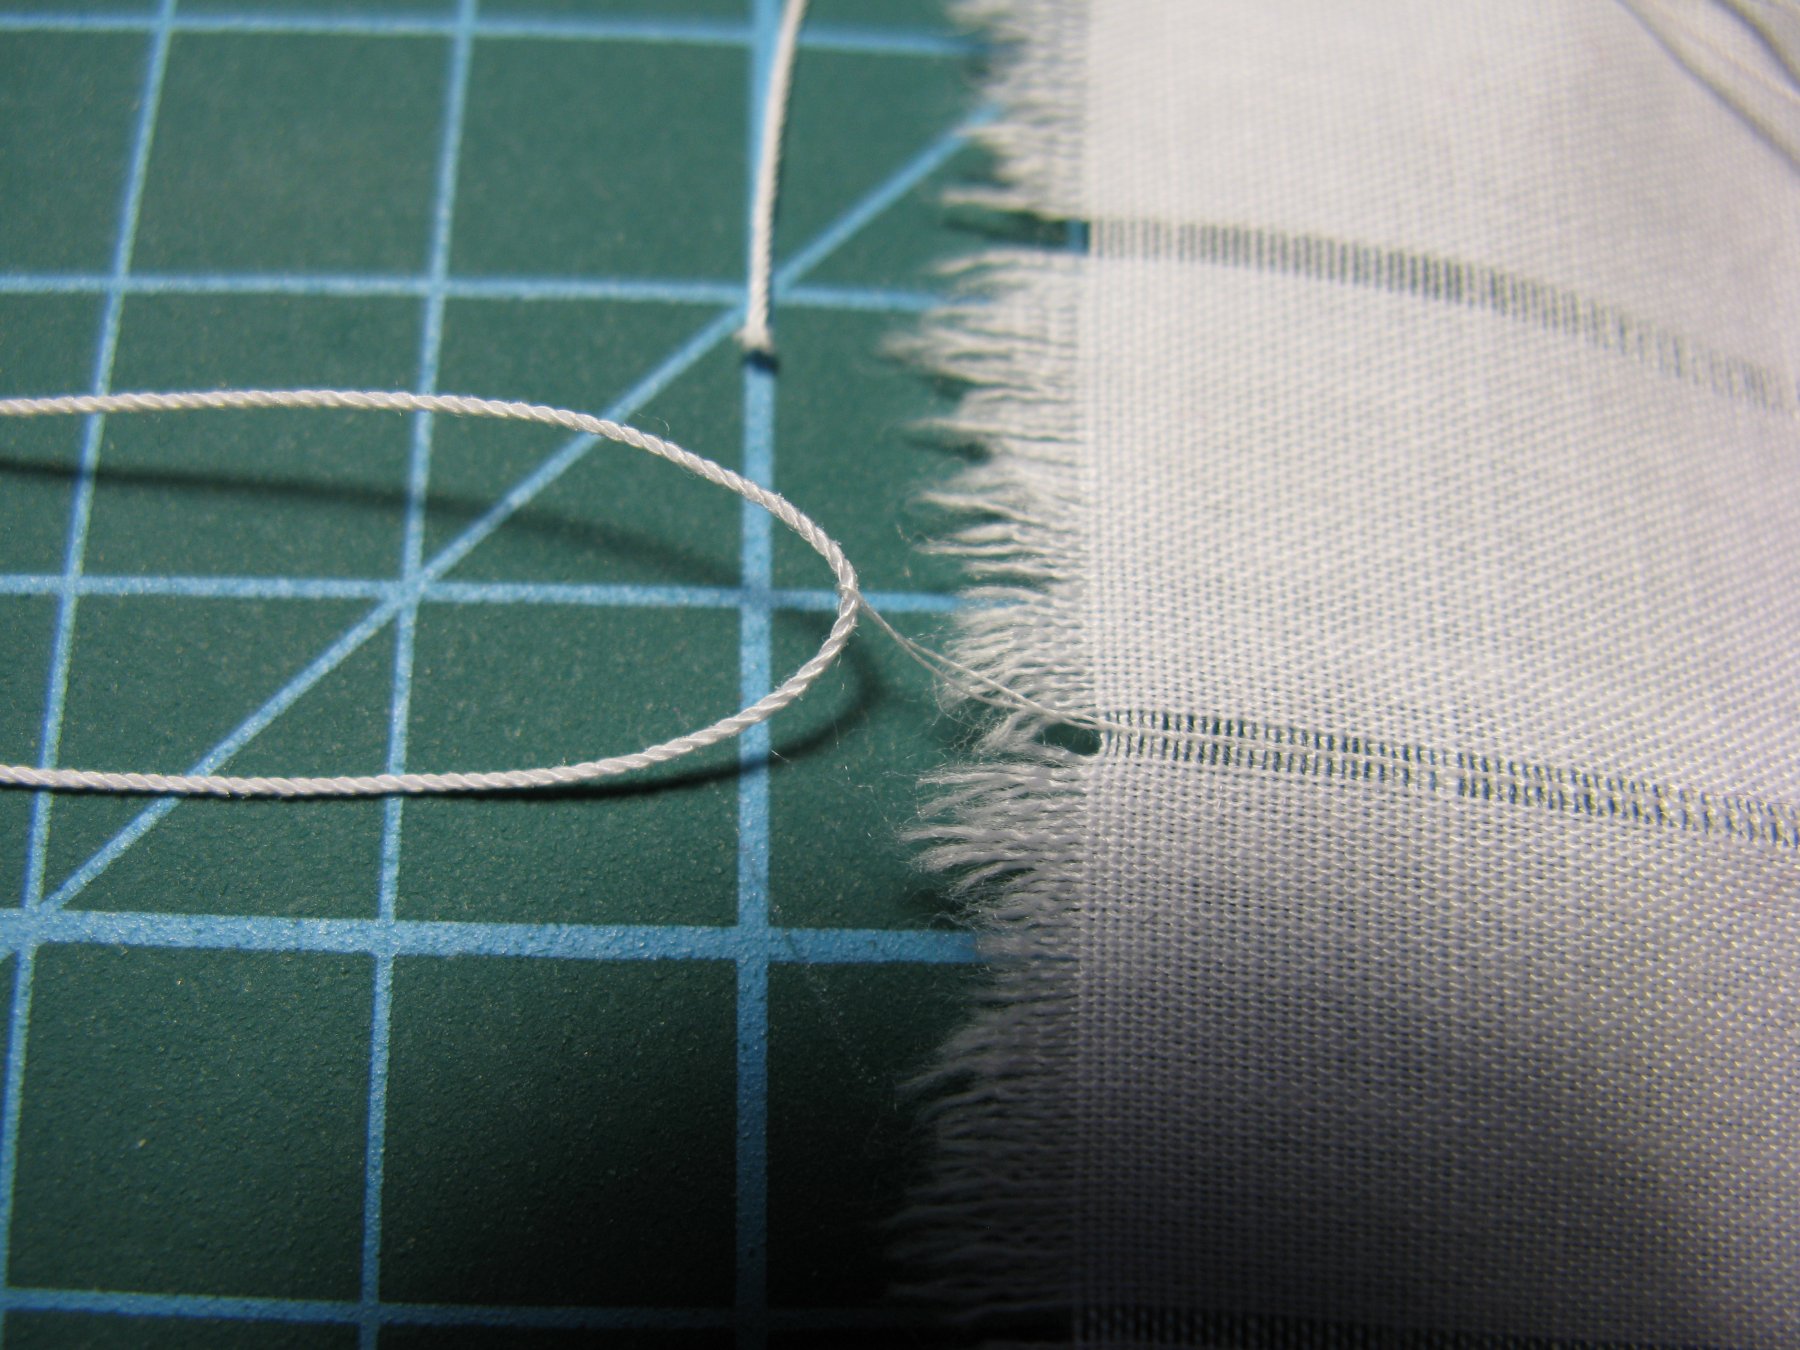
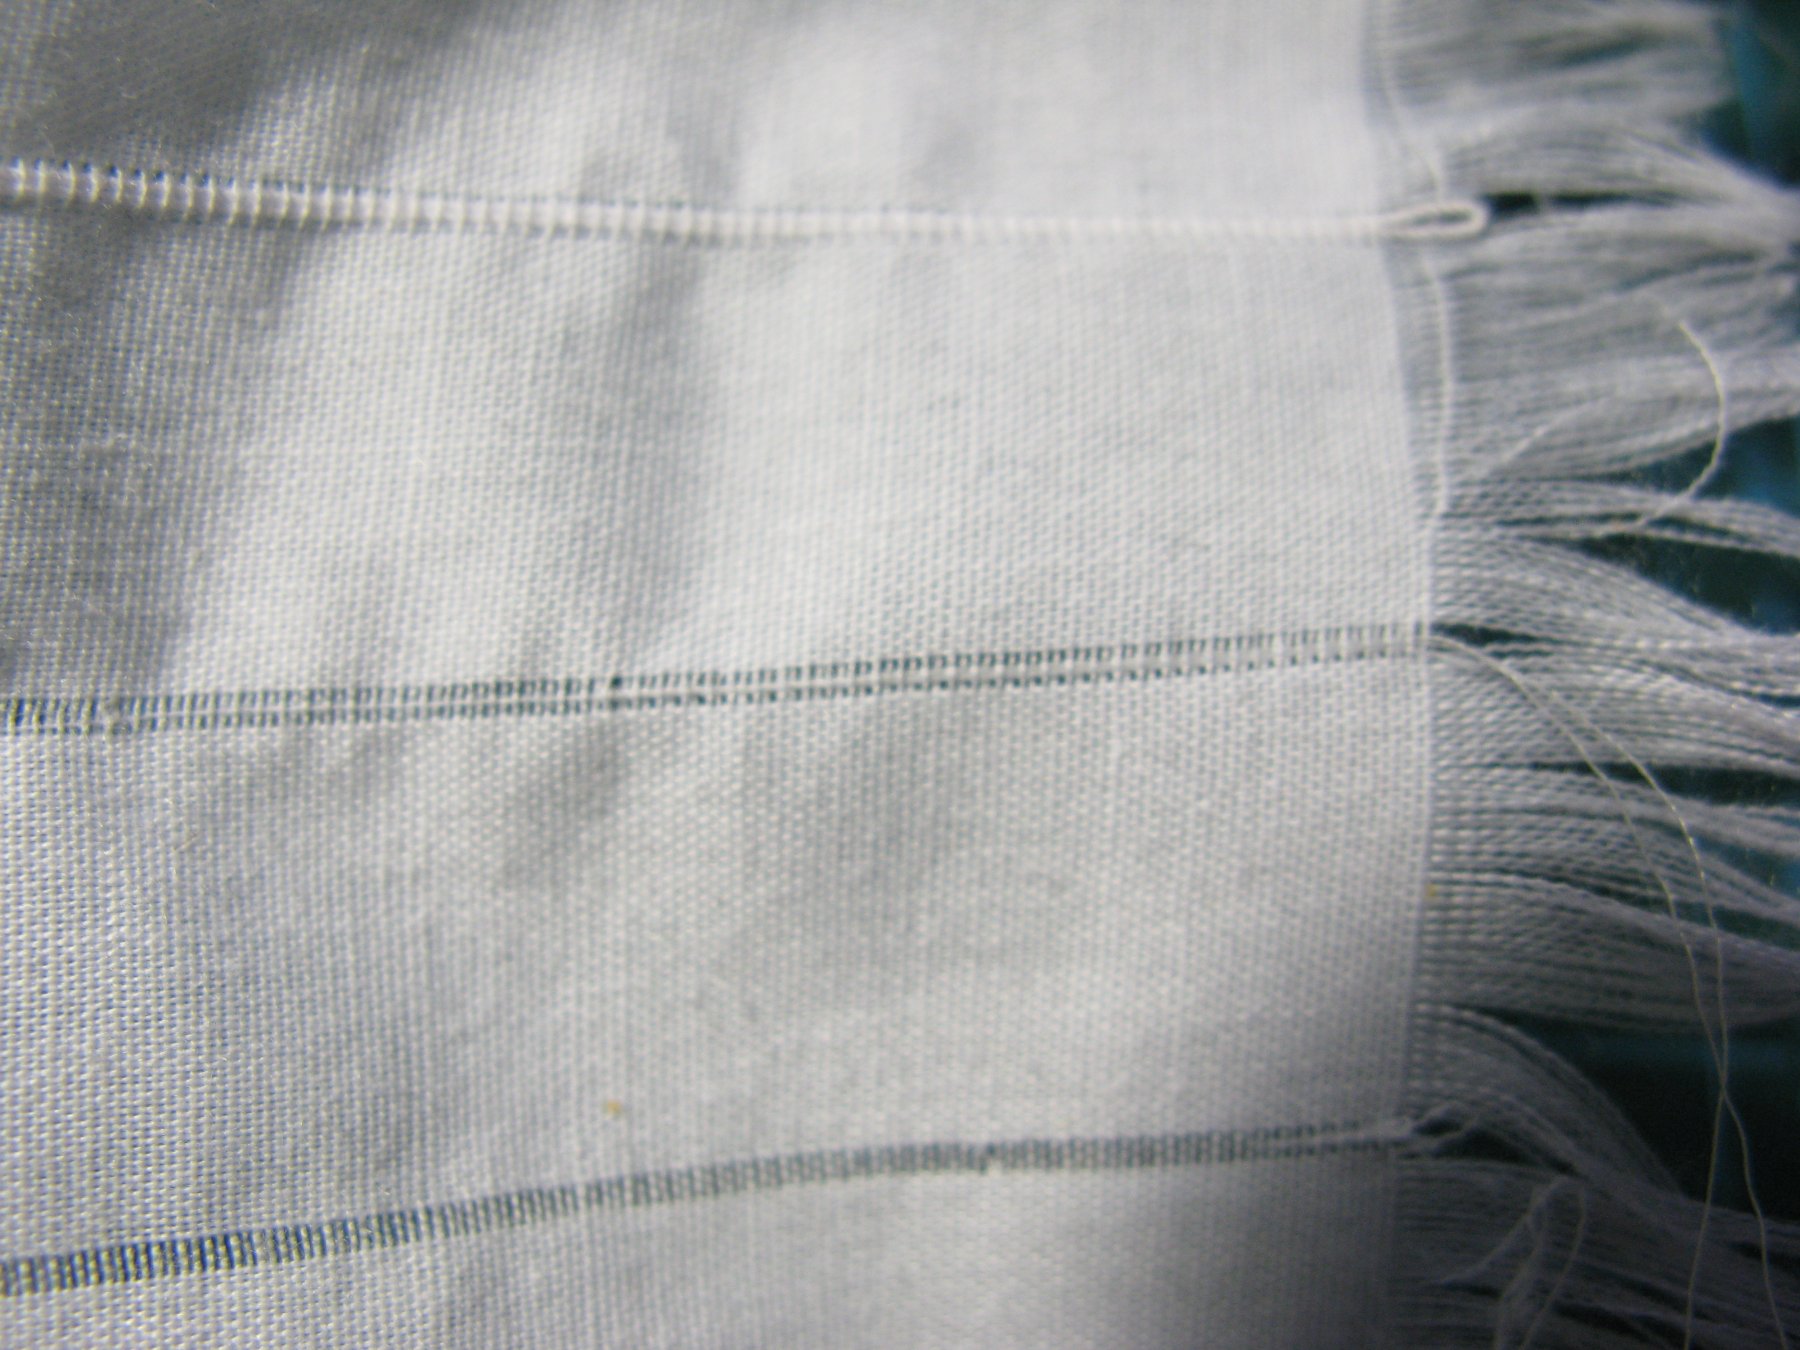
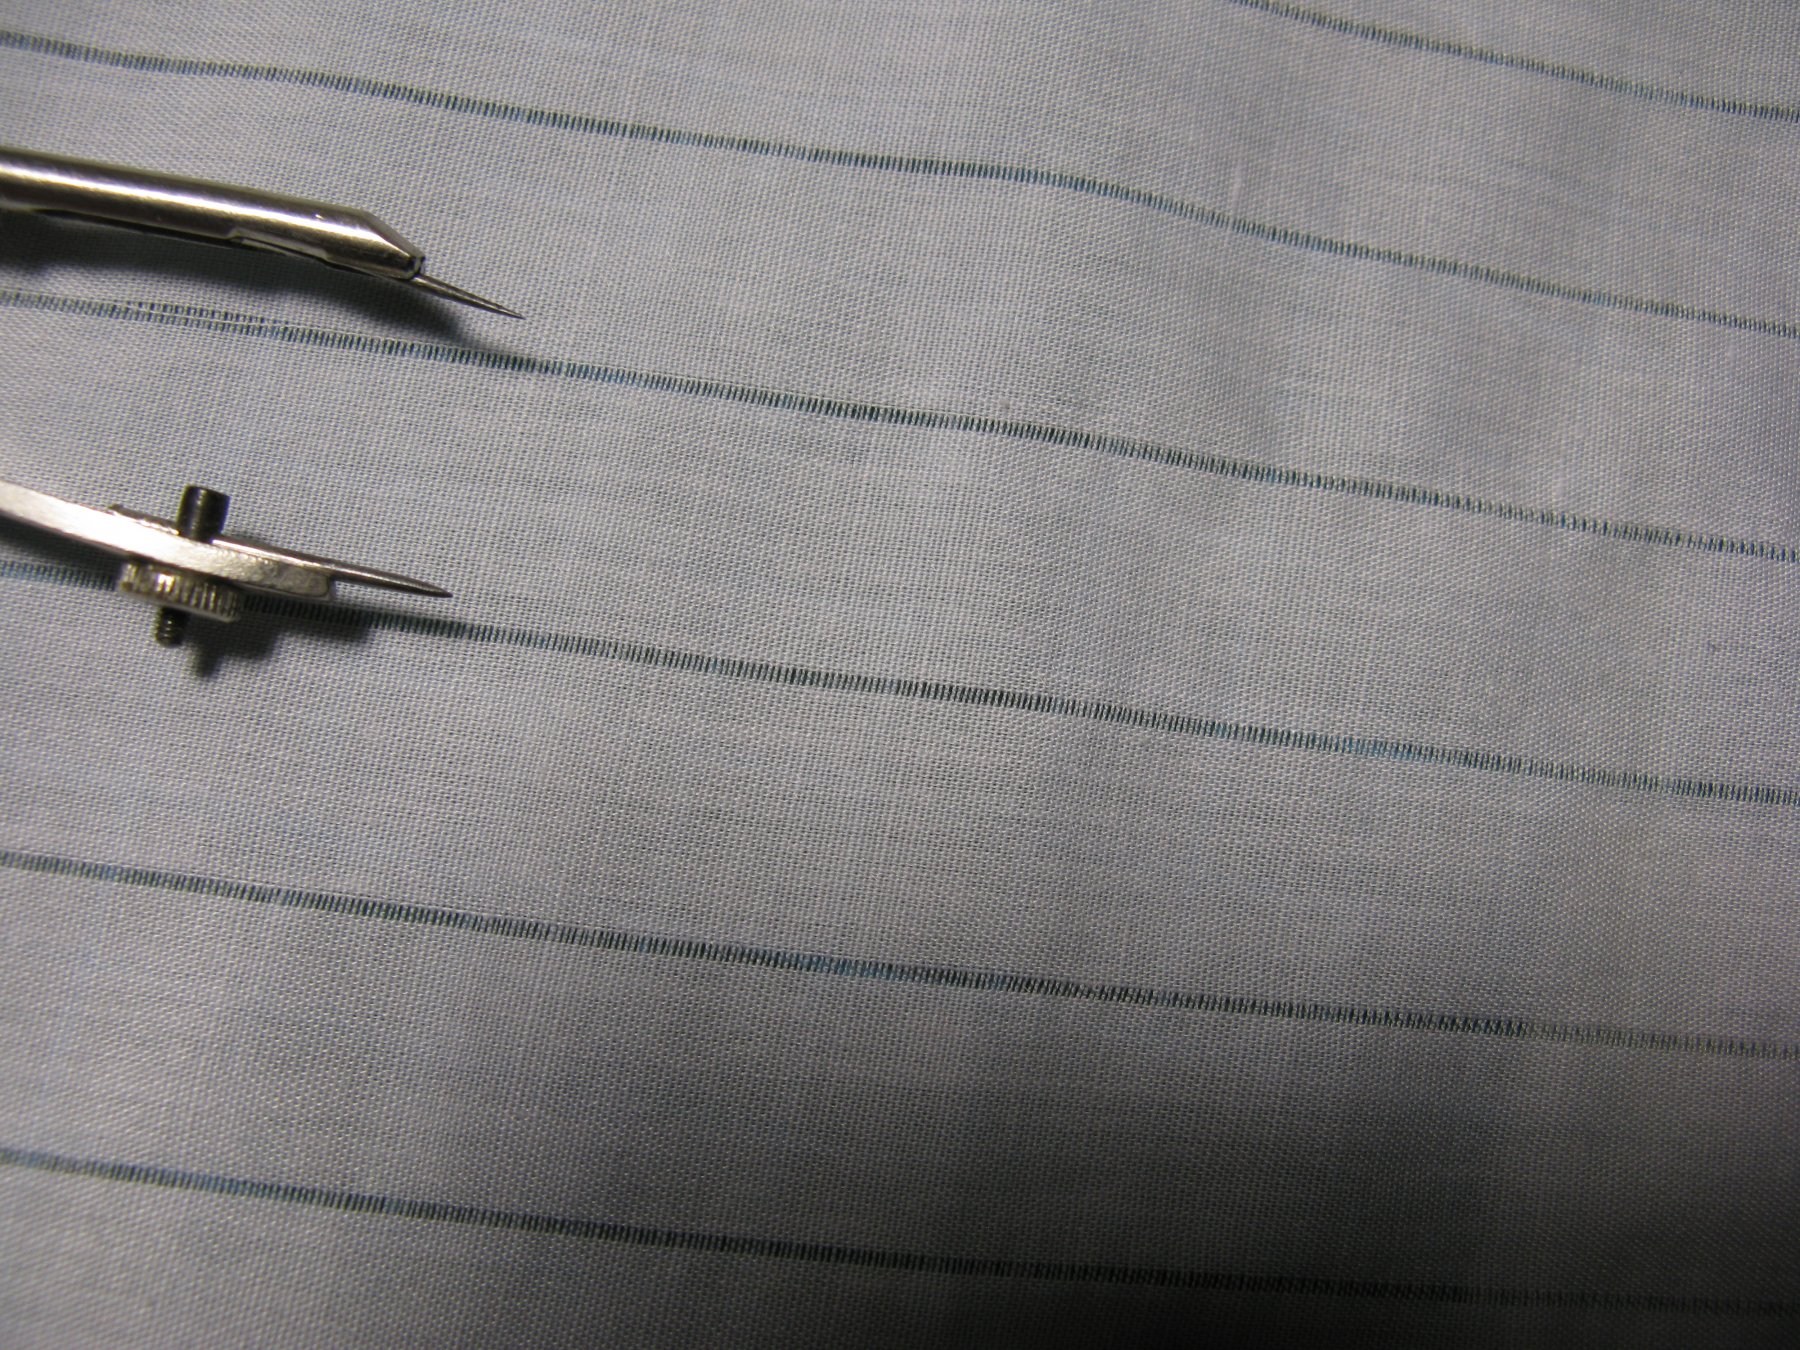
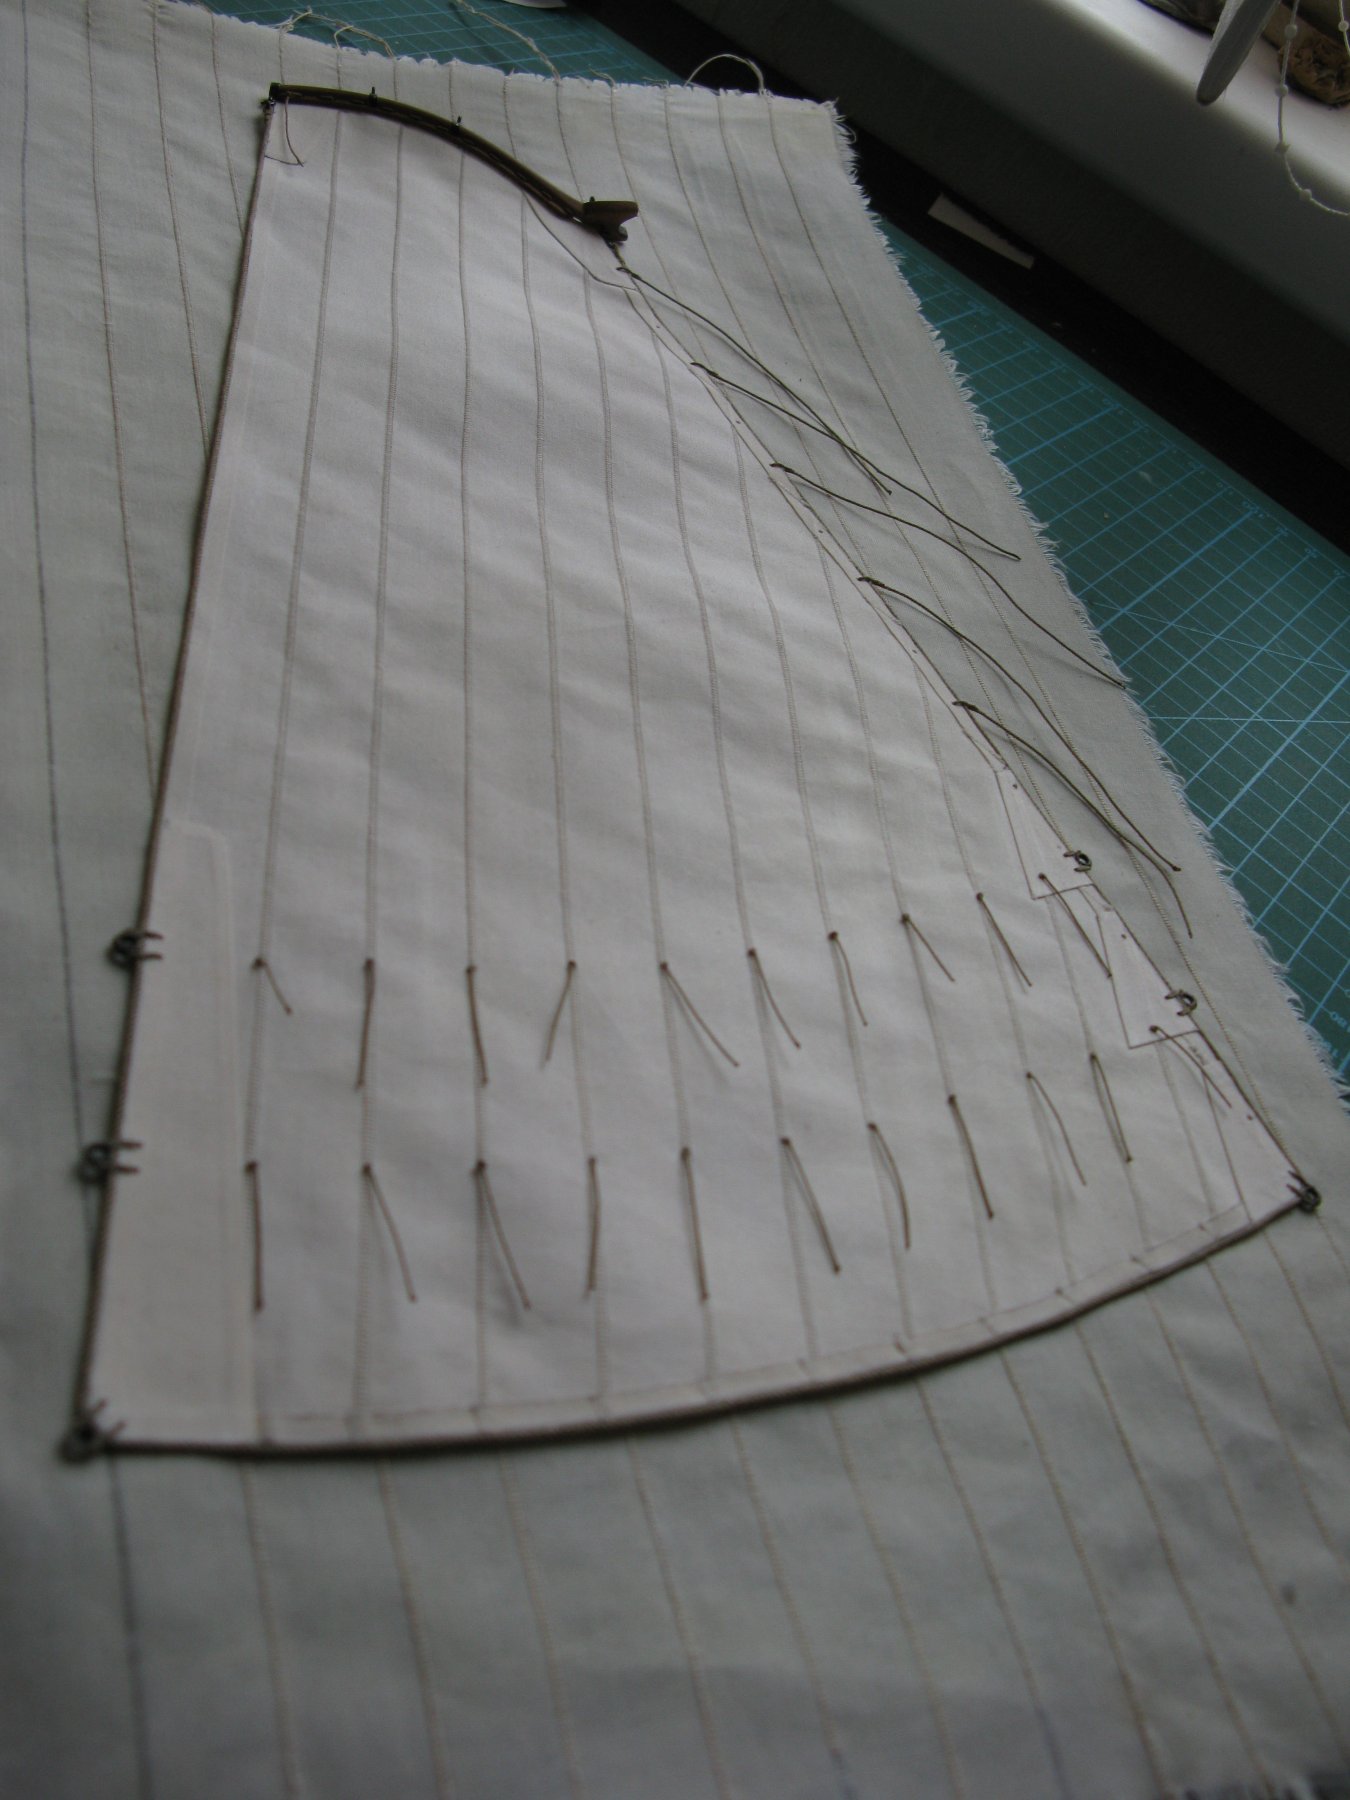
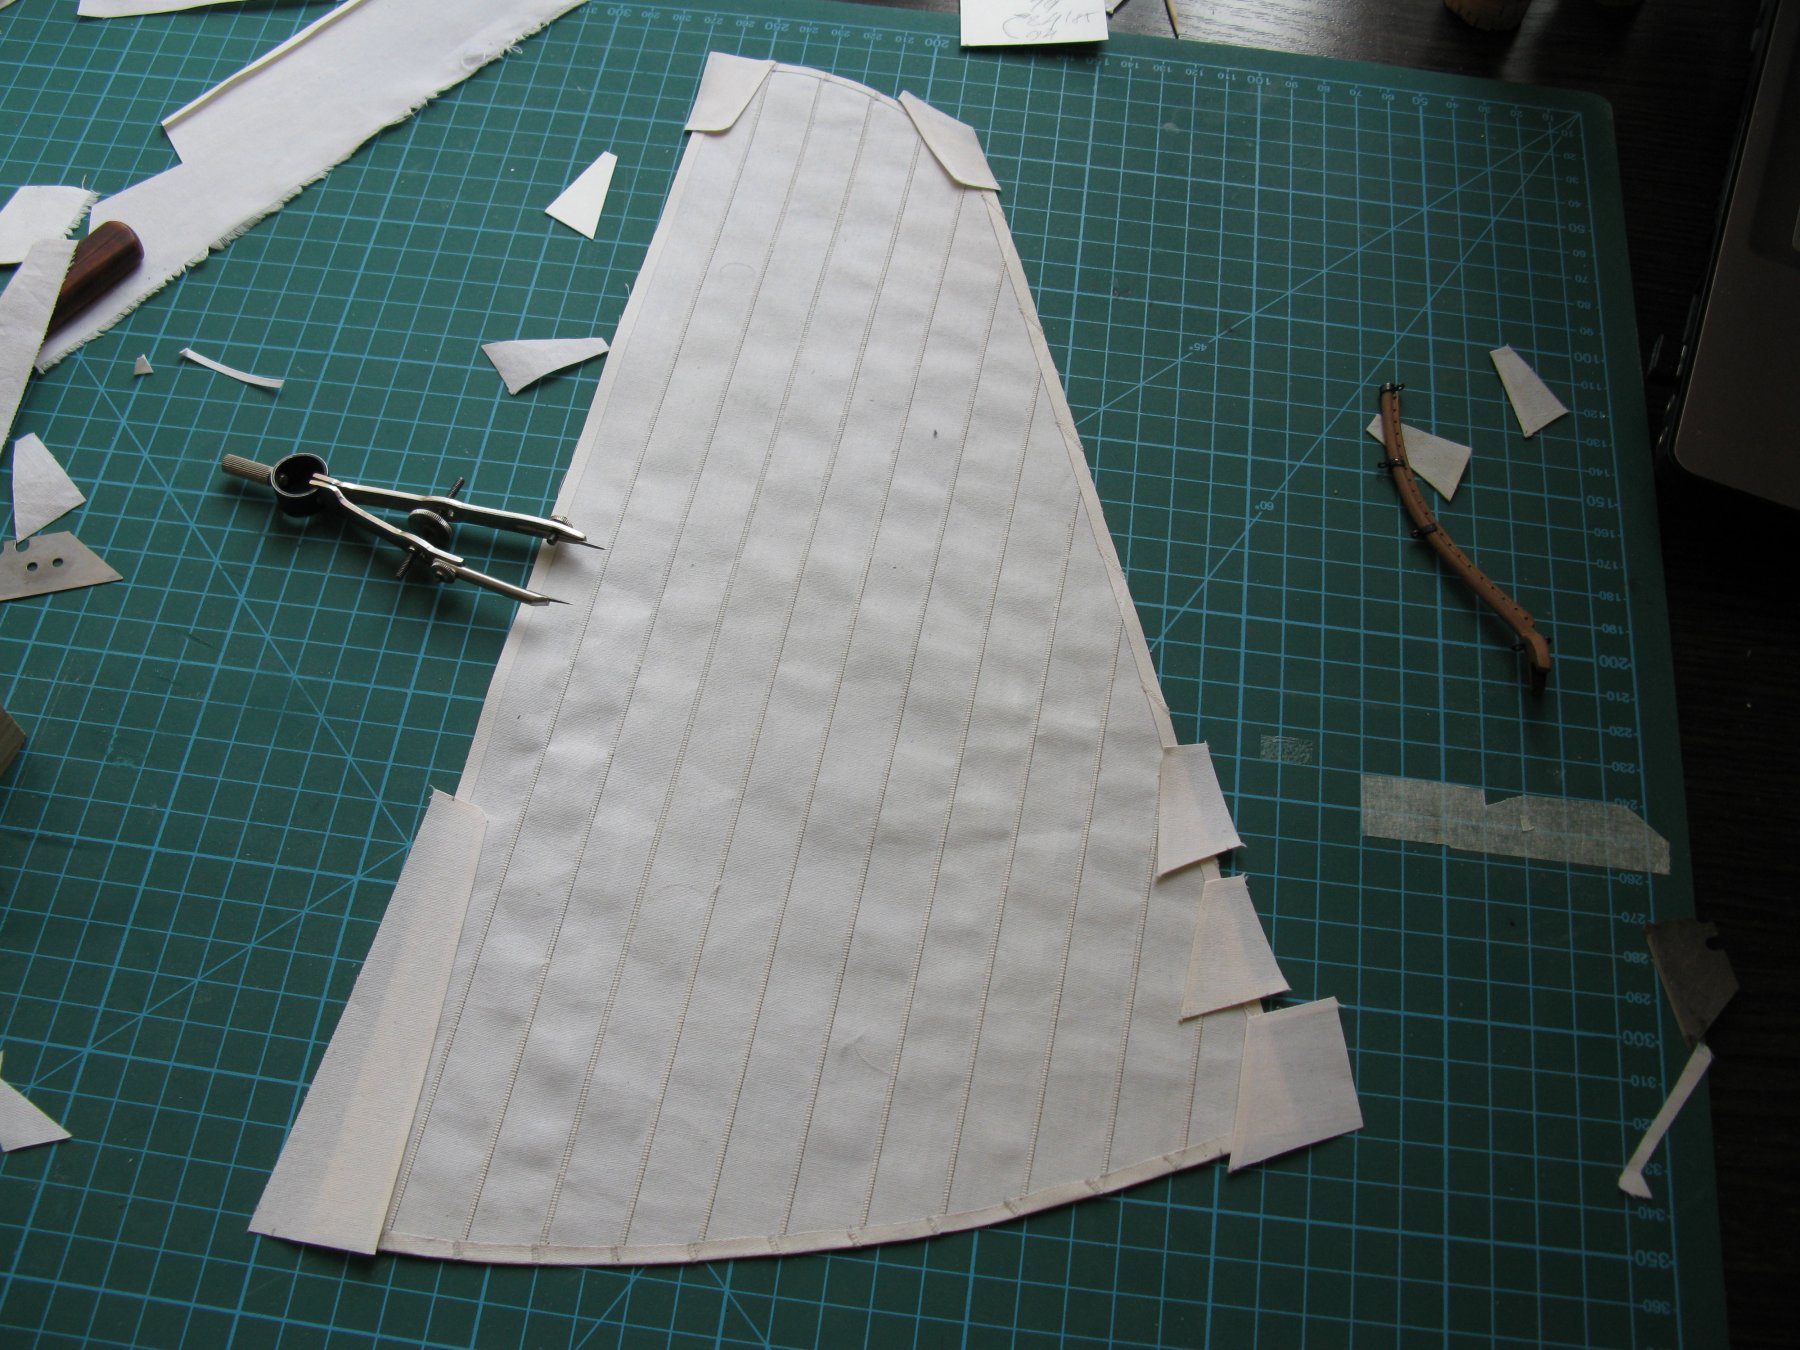
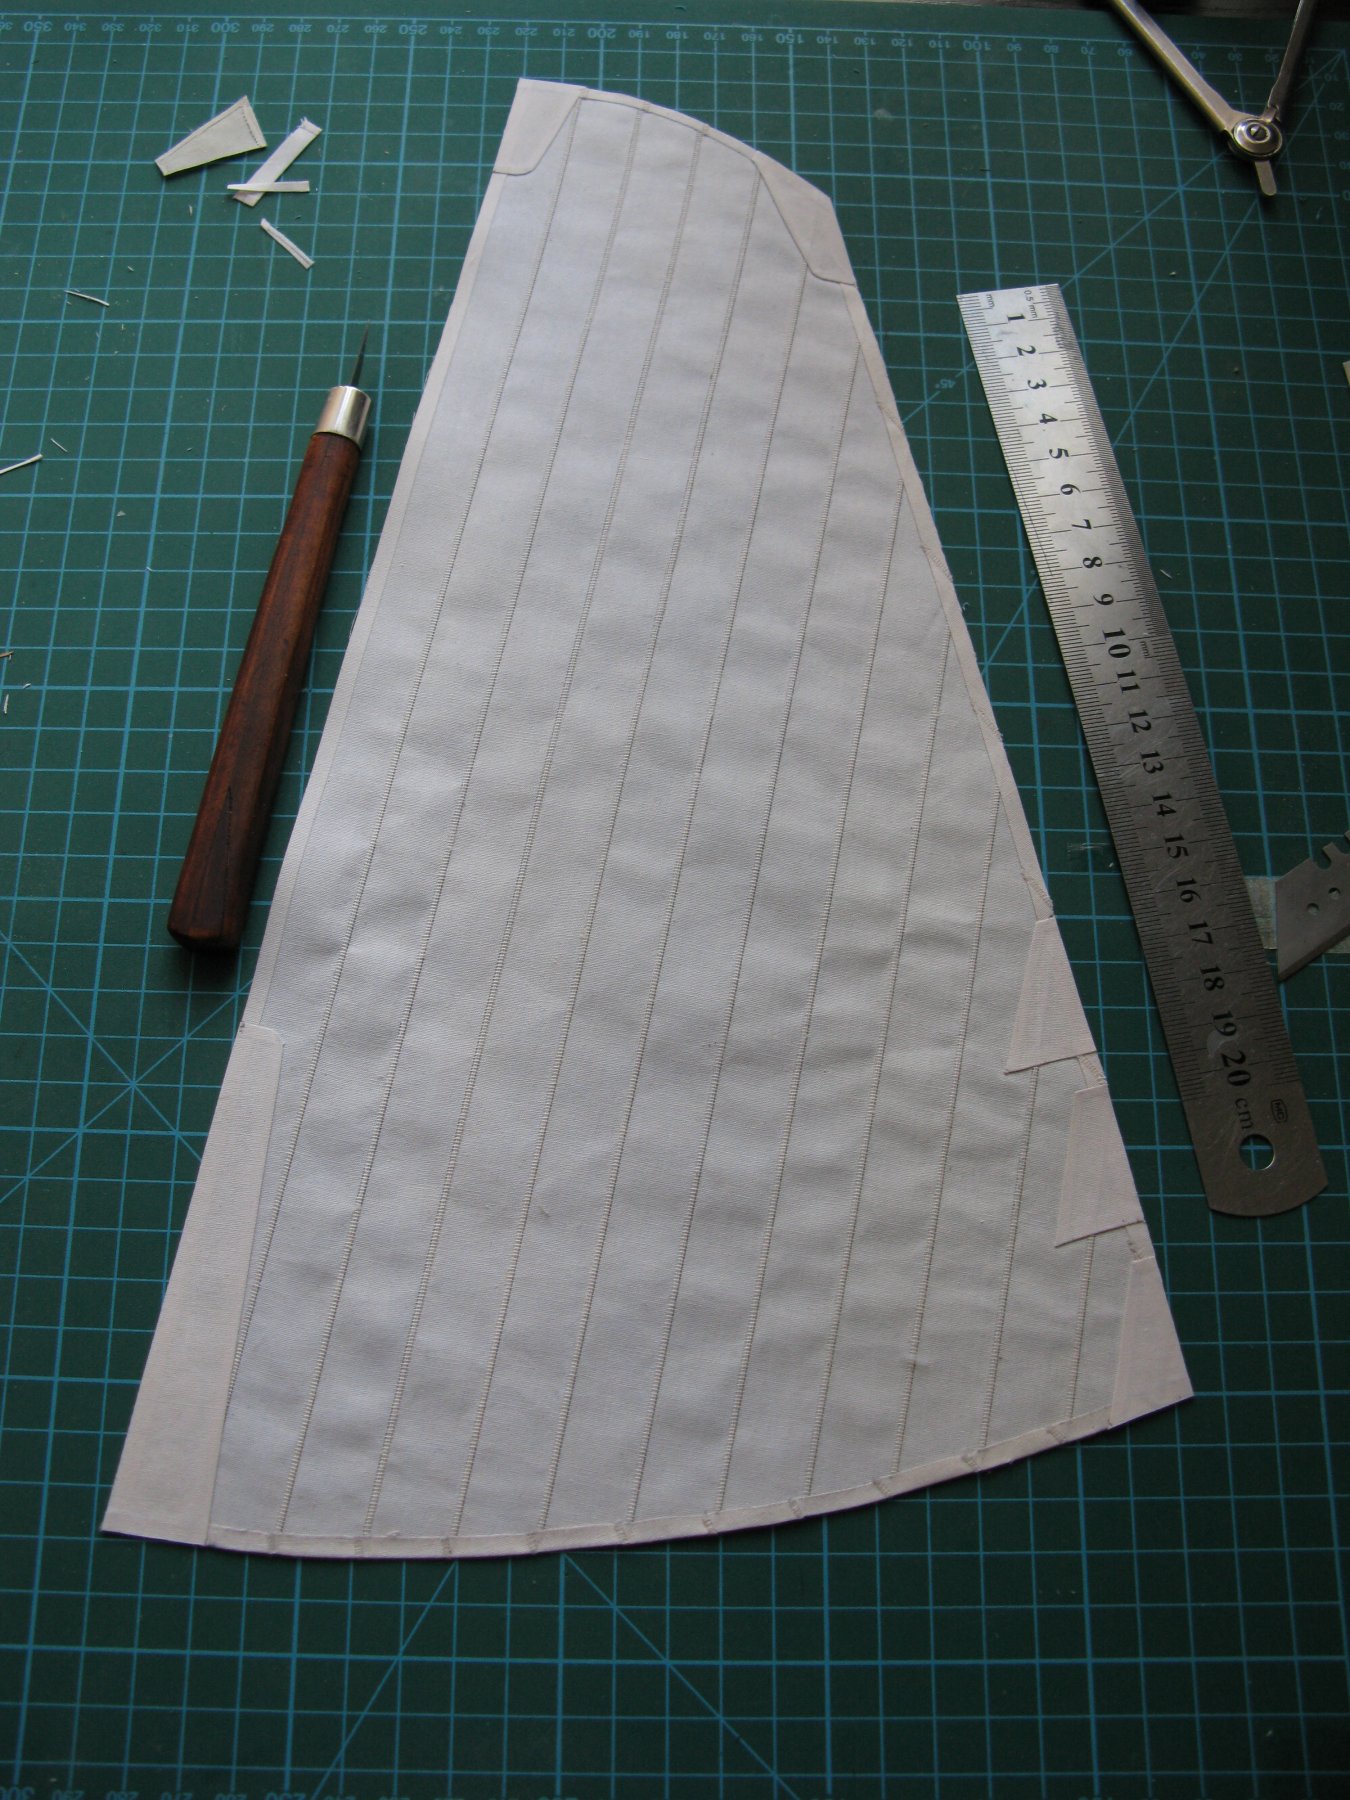
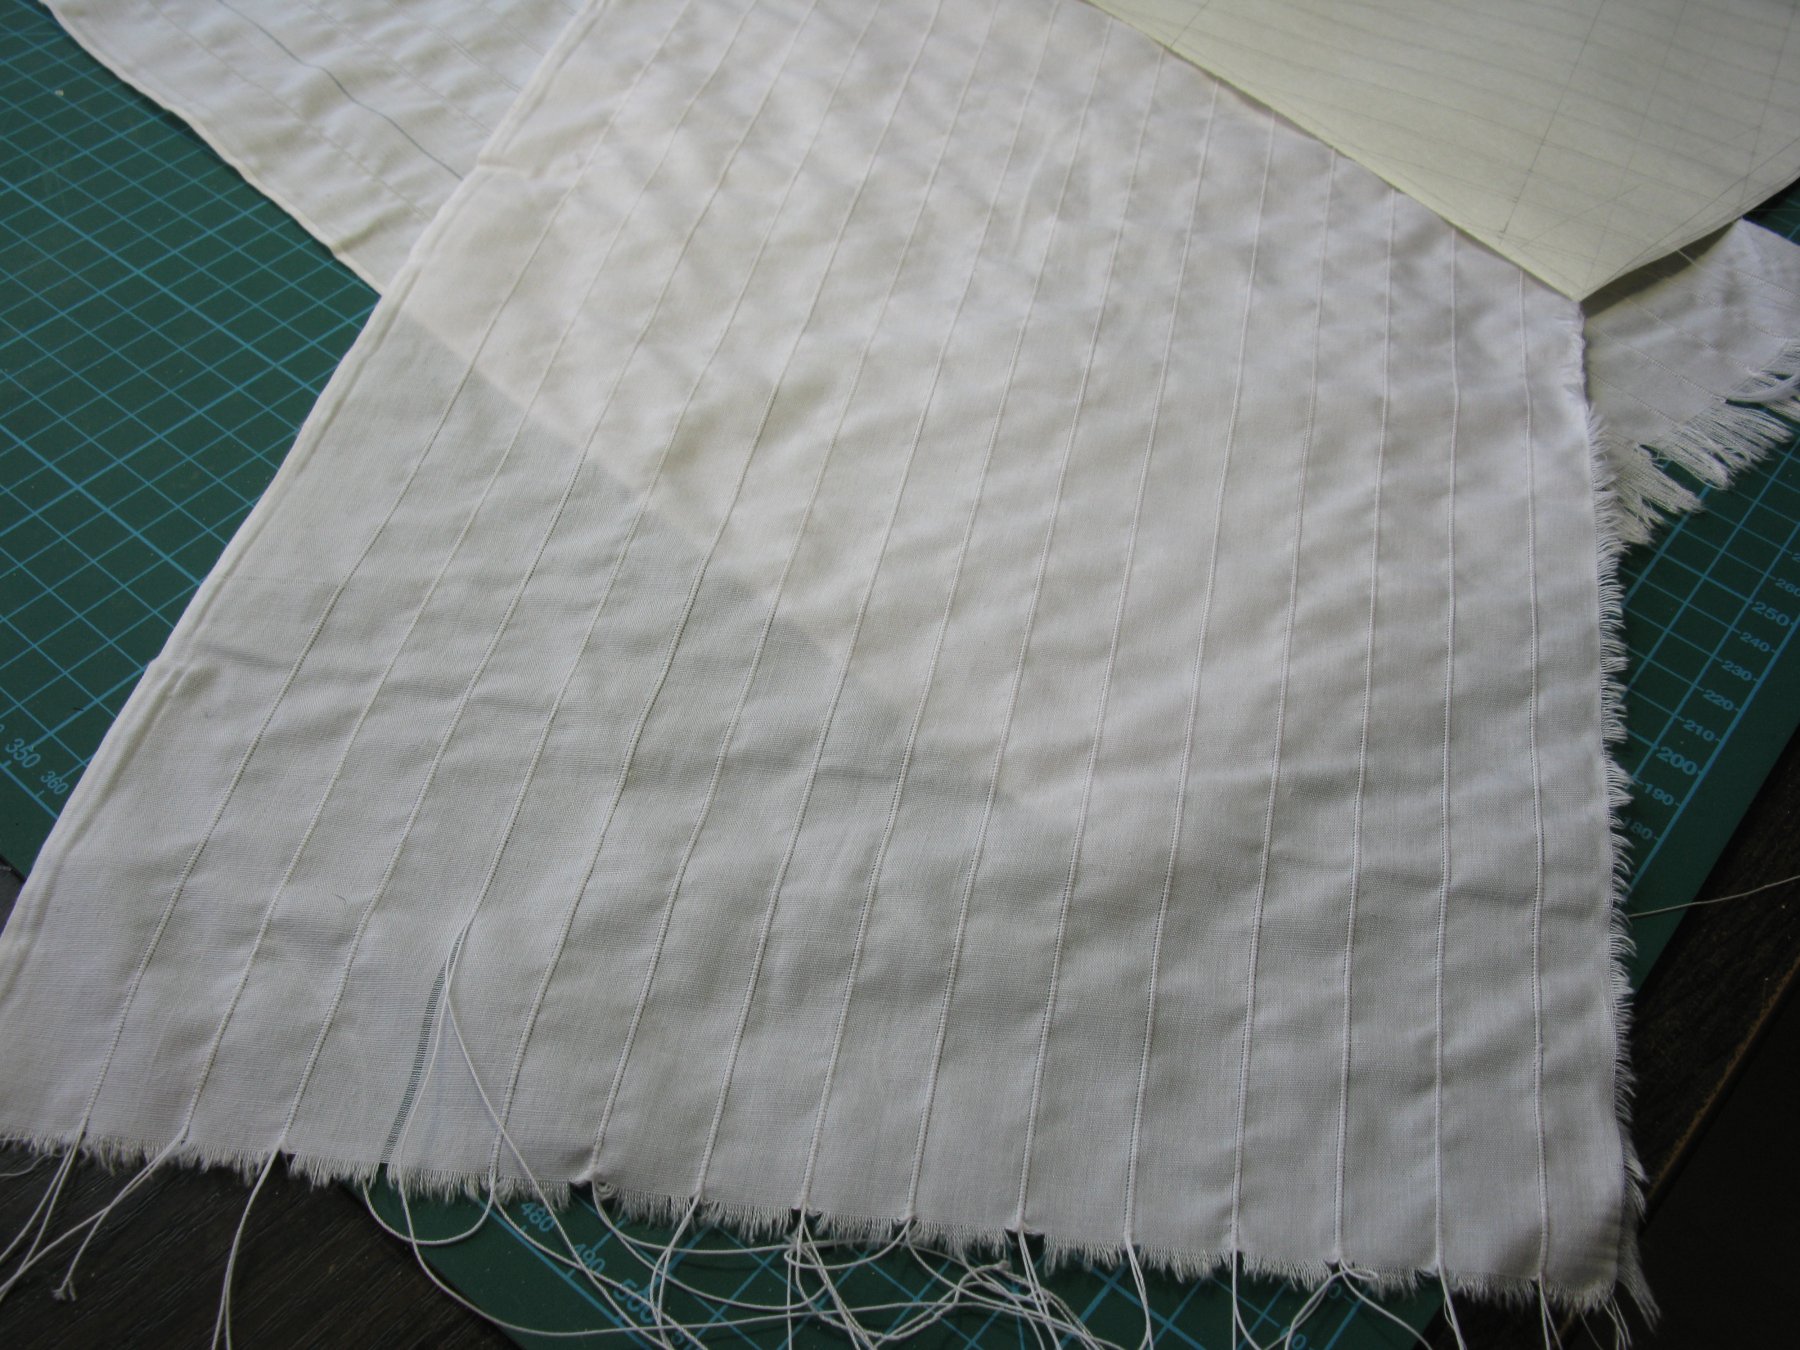
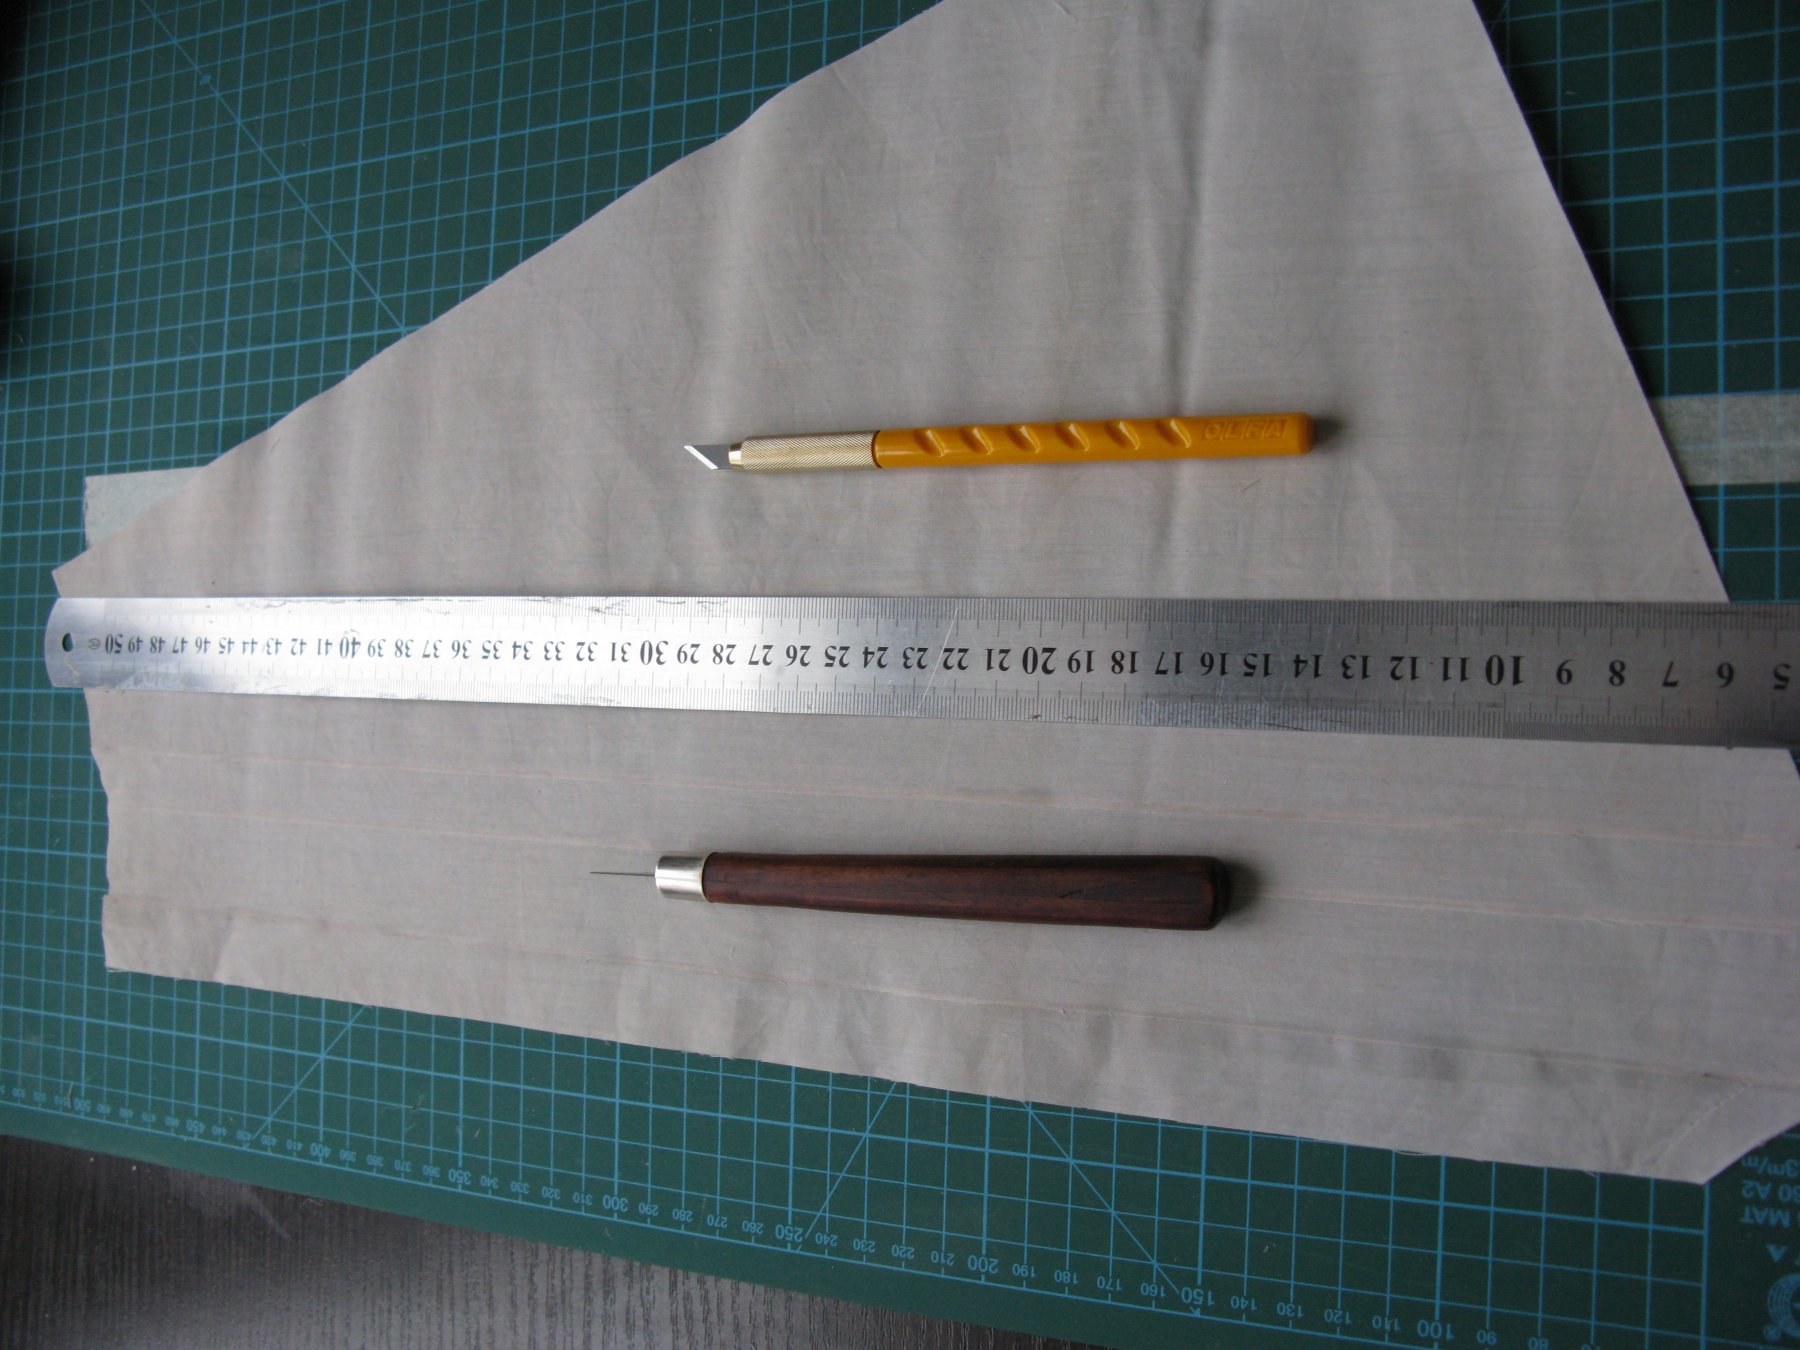
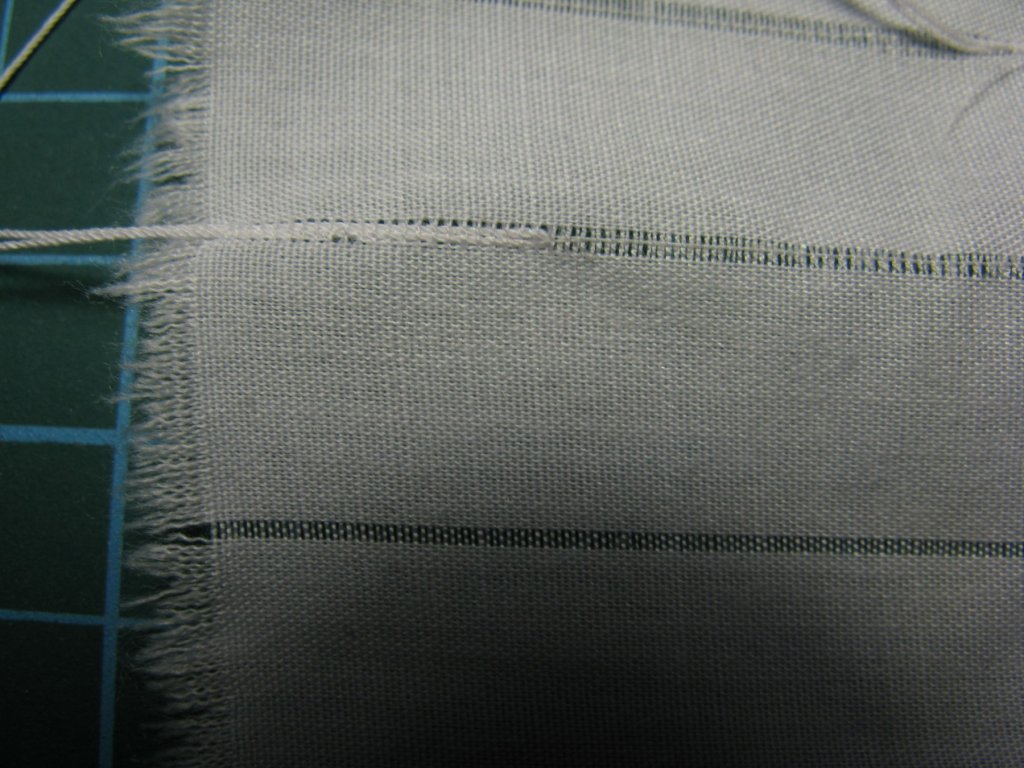
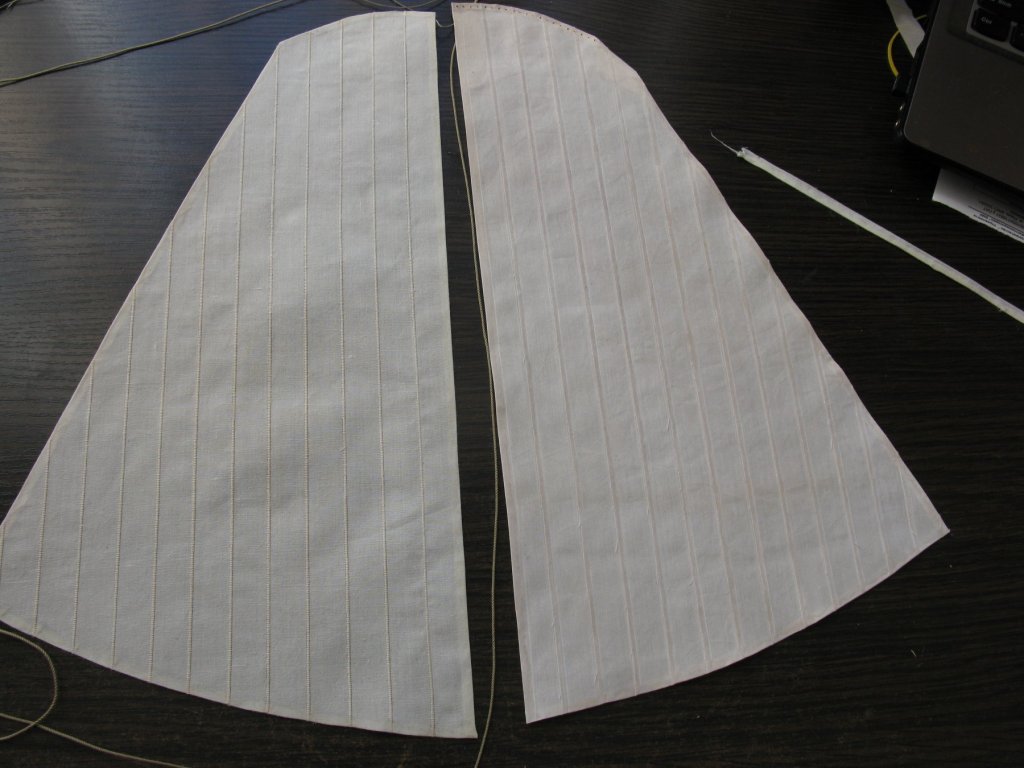
The next step. Since the threads in batiste are packless and not strong I couldn't manage to put in the threads with their help all at once. So I had to make a transit step - put in the "chief" thread, with the help of which i pulled in the pulled-in threads.

-
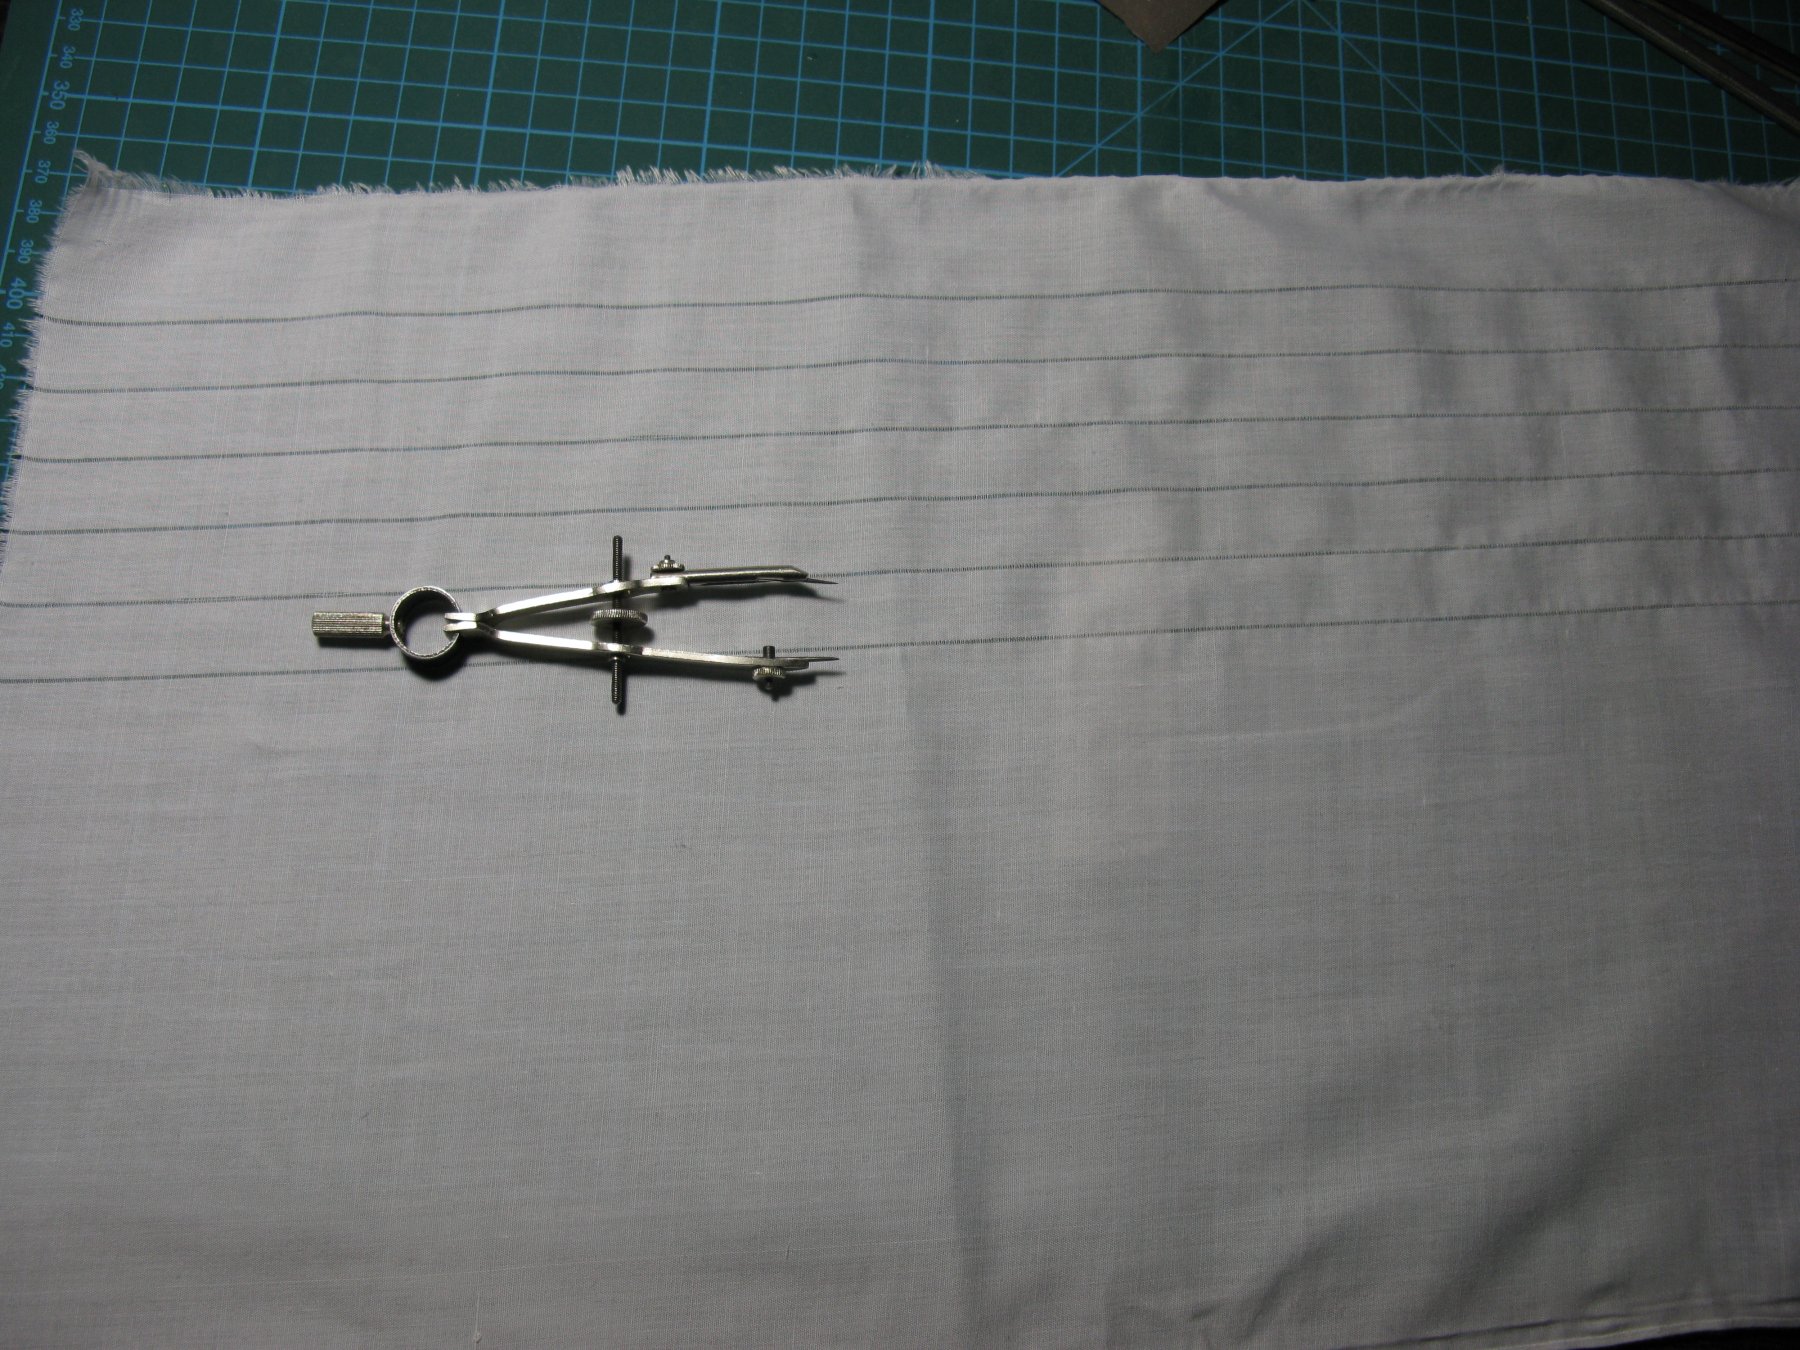
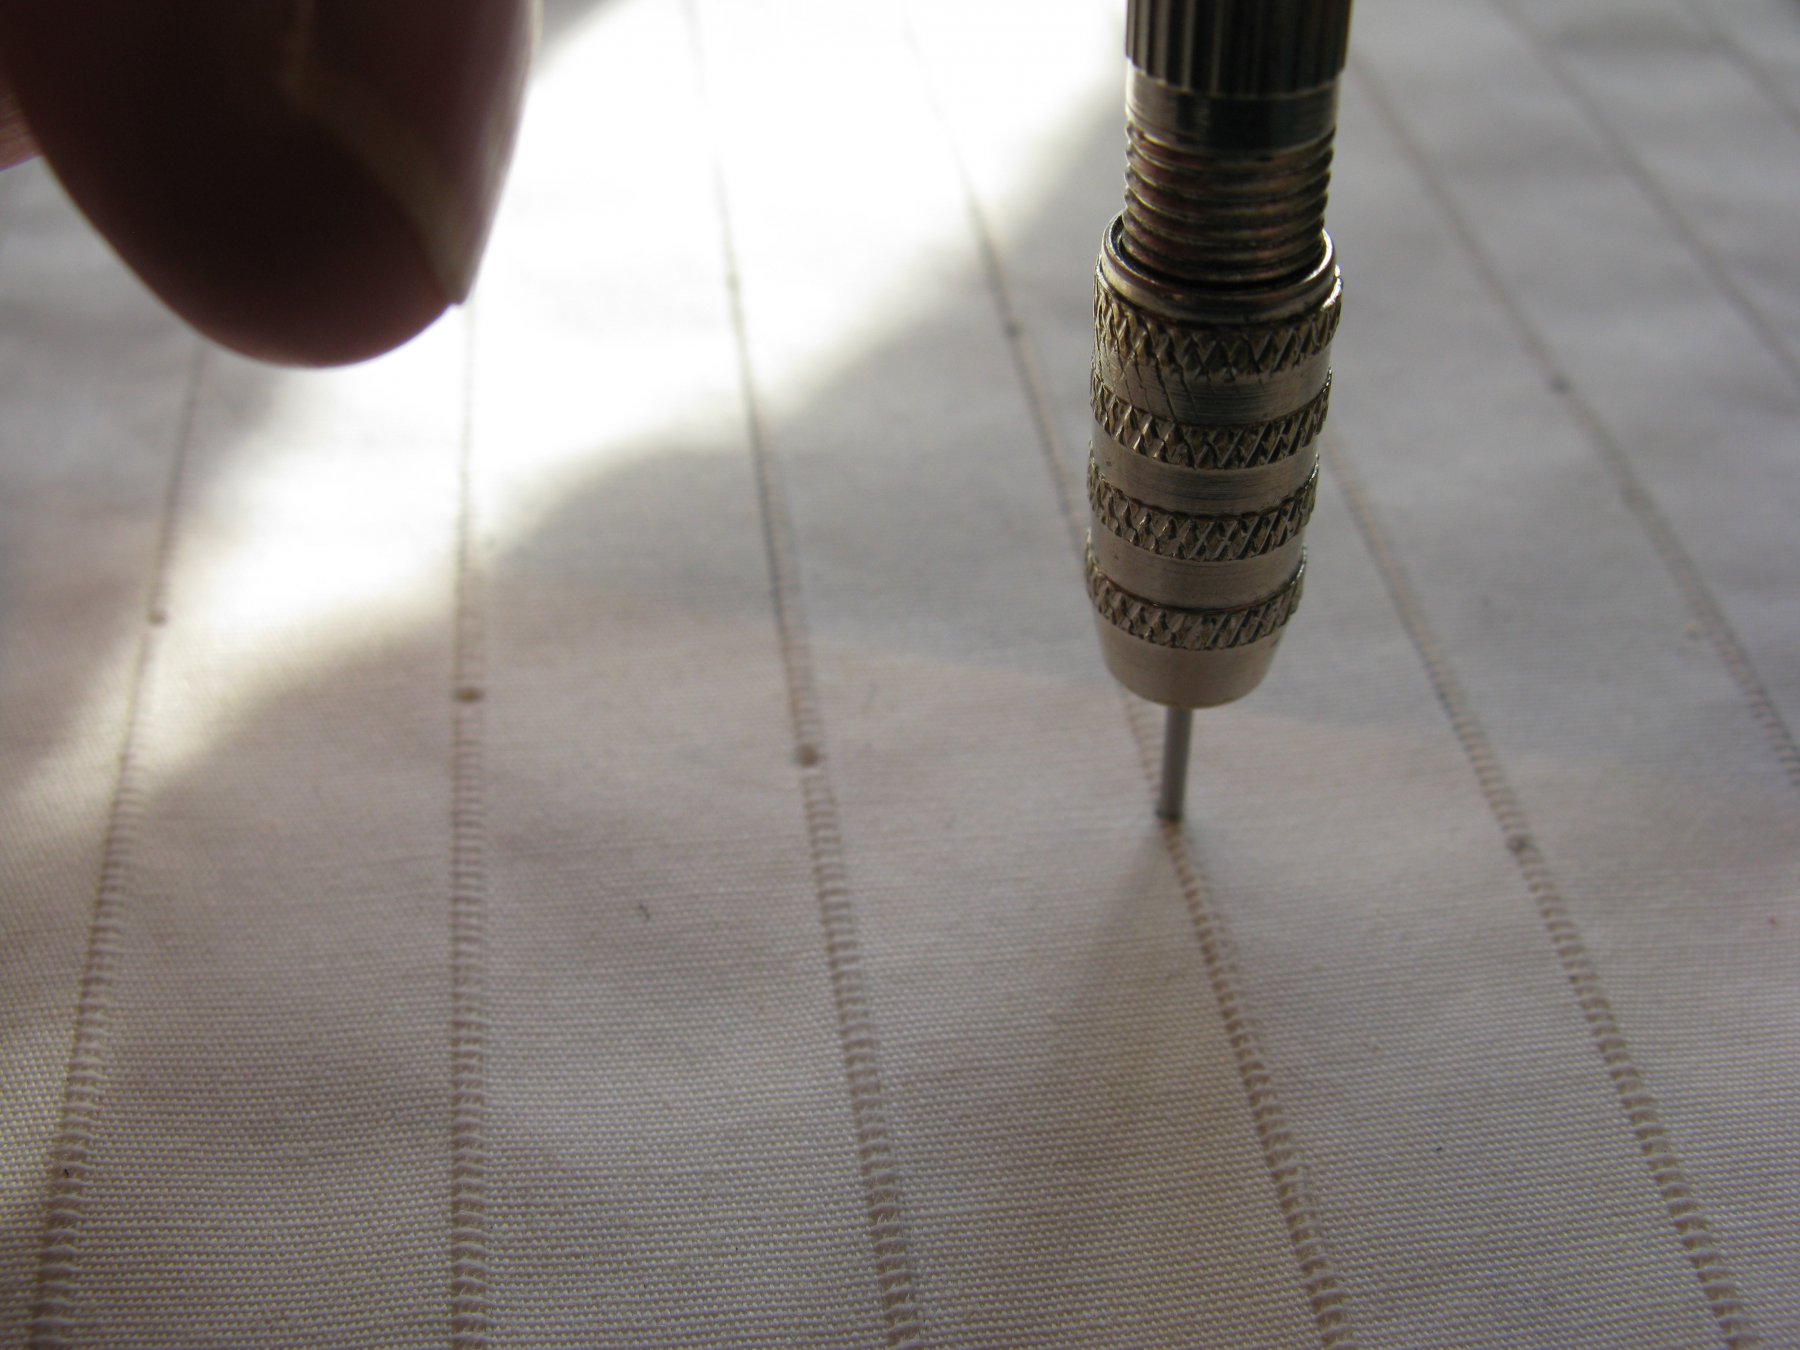
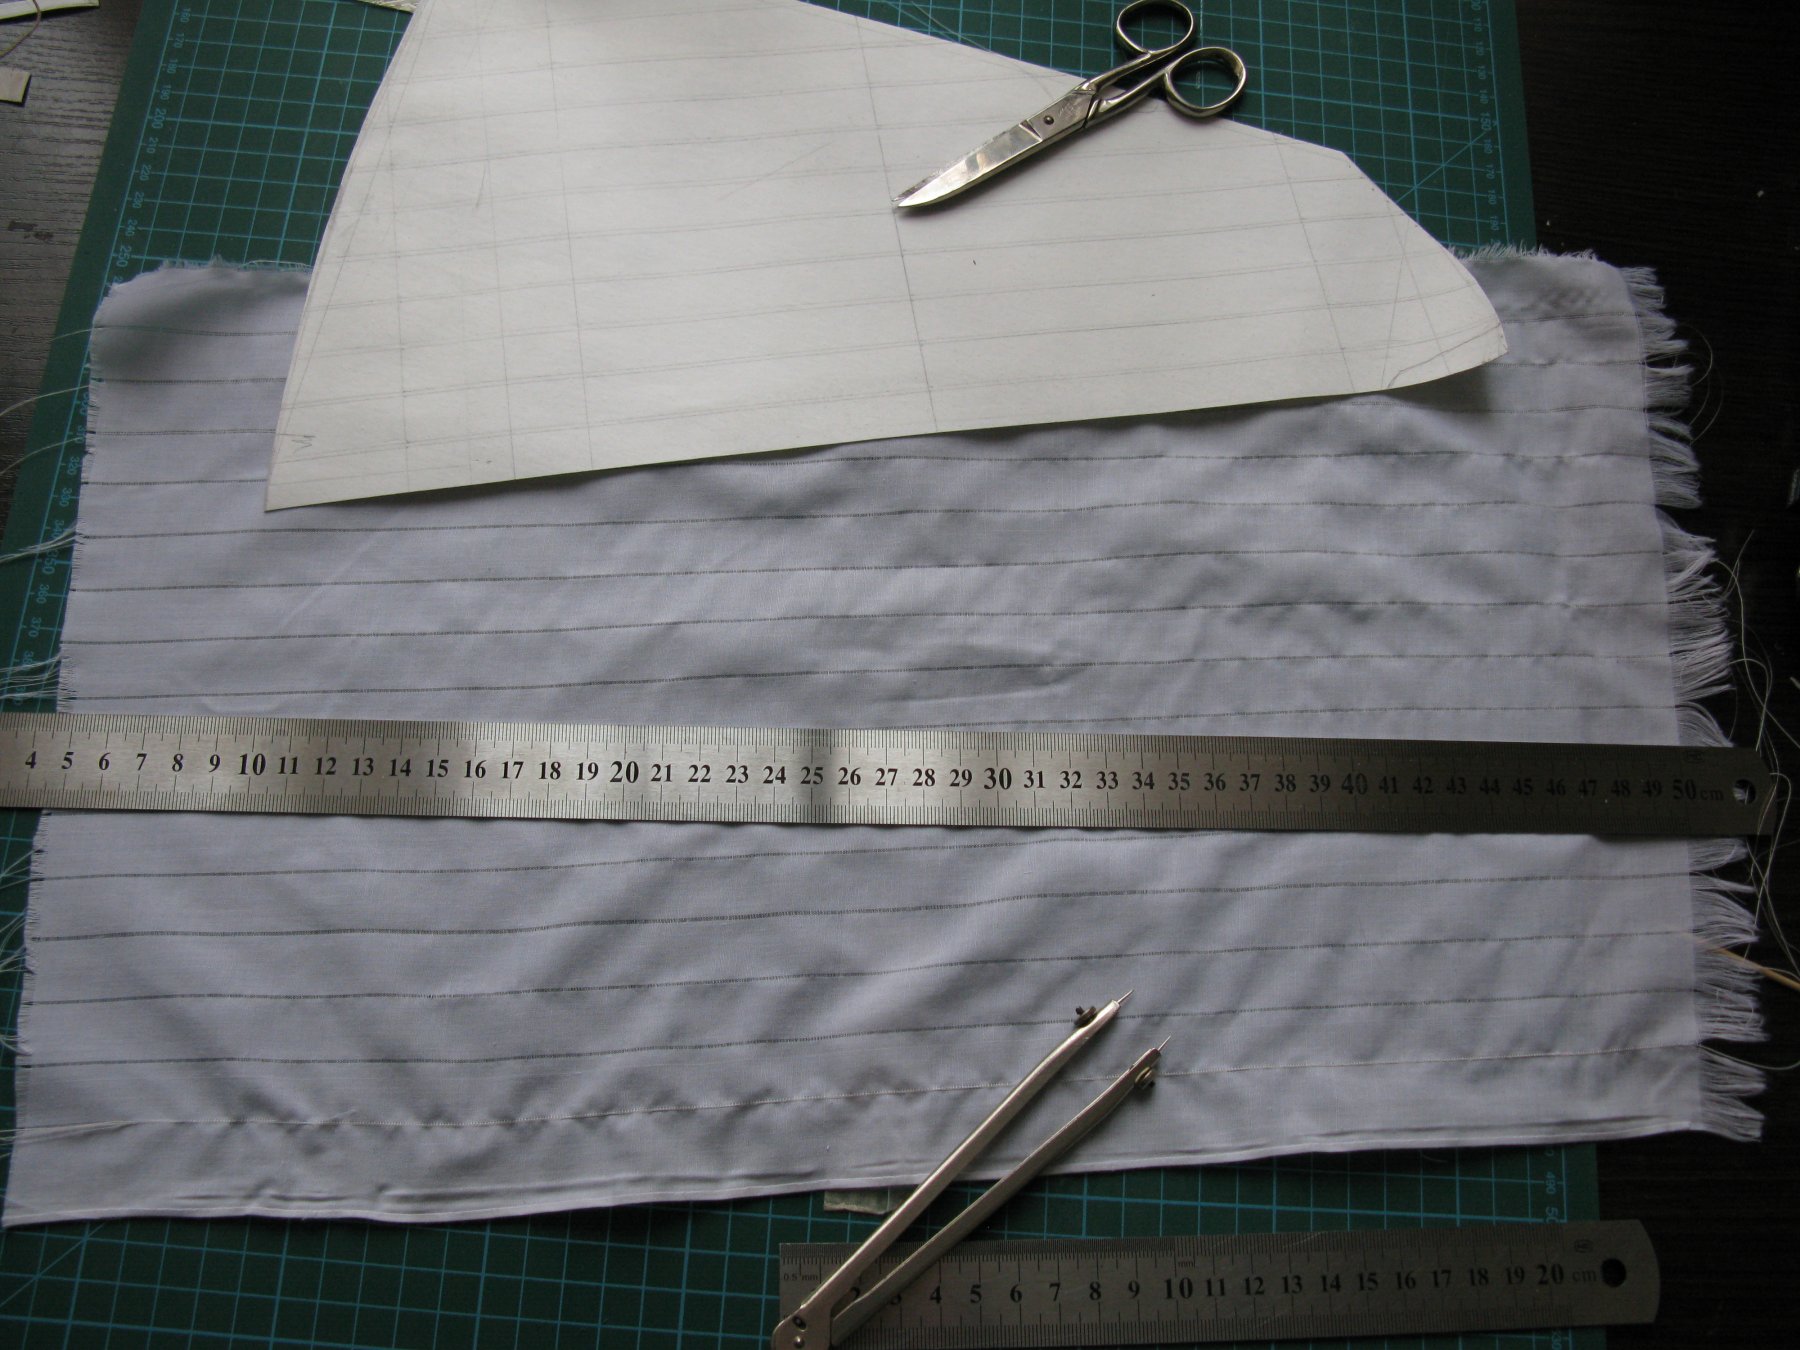
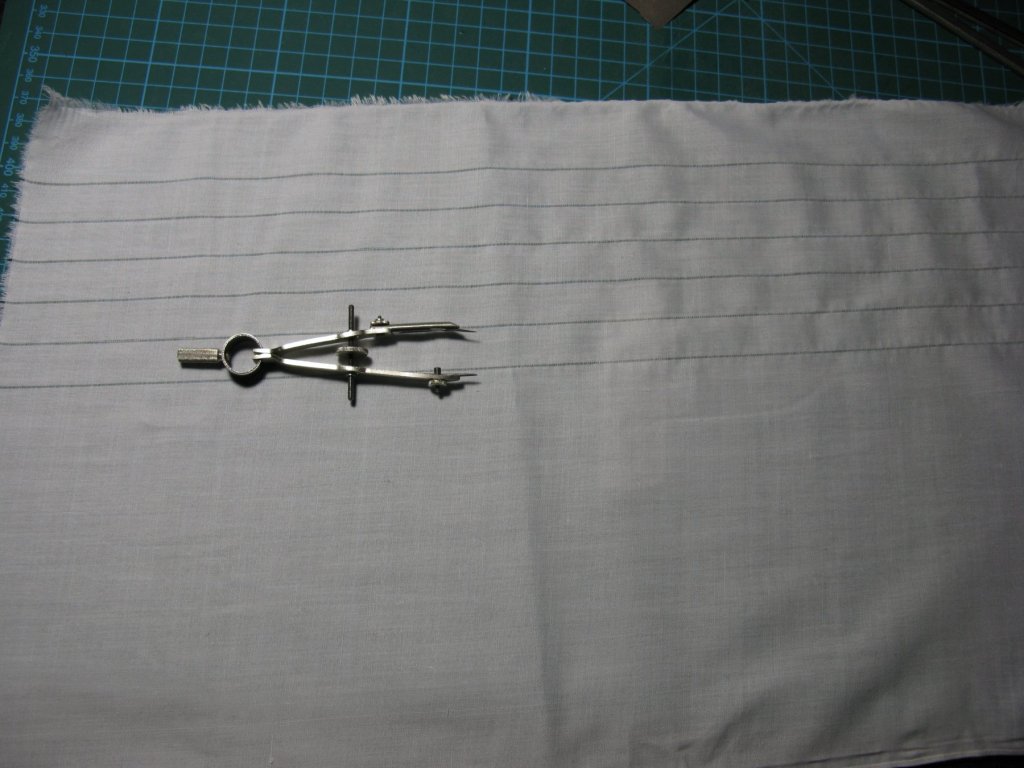
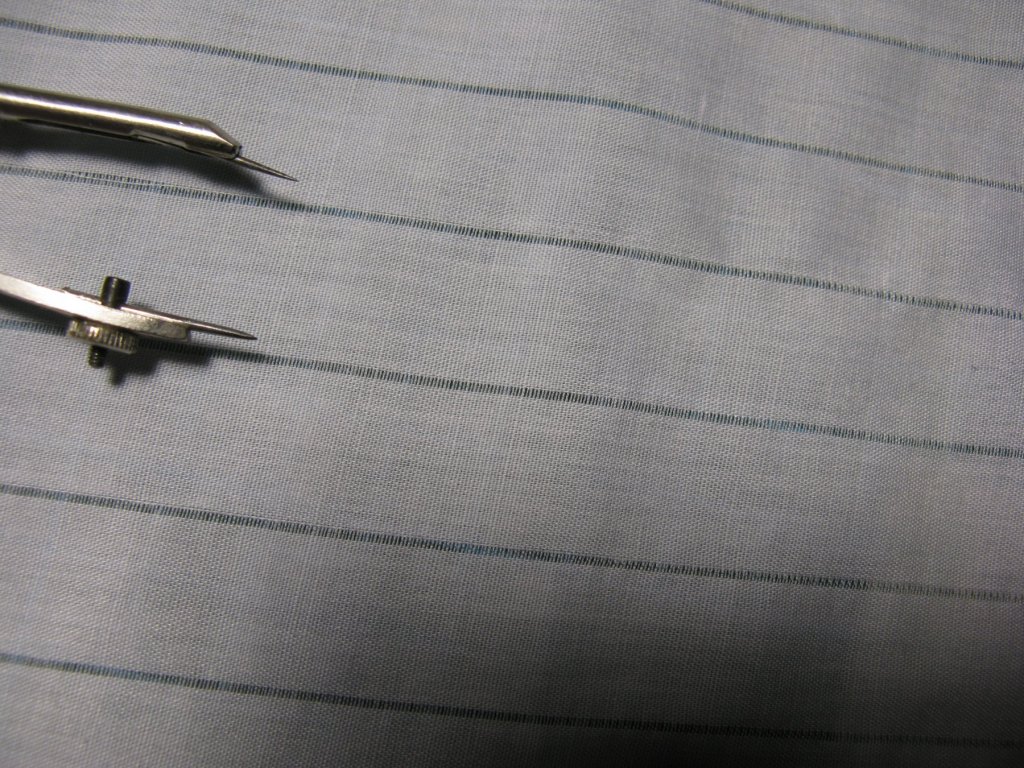
Greetings Keith. Taking into the consideration the gained experience, the technology is the following. Mark the width of the cloth. And draw out several threads. In my case I had to pull out five threads. It depends on the width of the tread you want to put in in place of the taken out ones, and , of course of the size of the sail. We need to pull 5 threads out, leave in place 2, one of them will be used to put in place the "chief" thread, and the second will be left as a backup - in case the first one will break. If you manage to pull the thread in without tearing it, this second one will have to be pullled out.
-
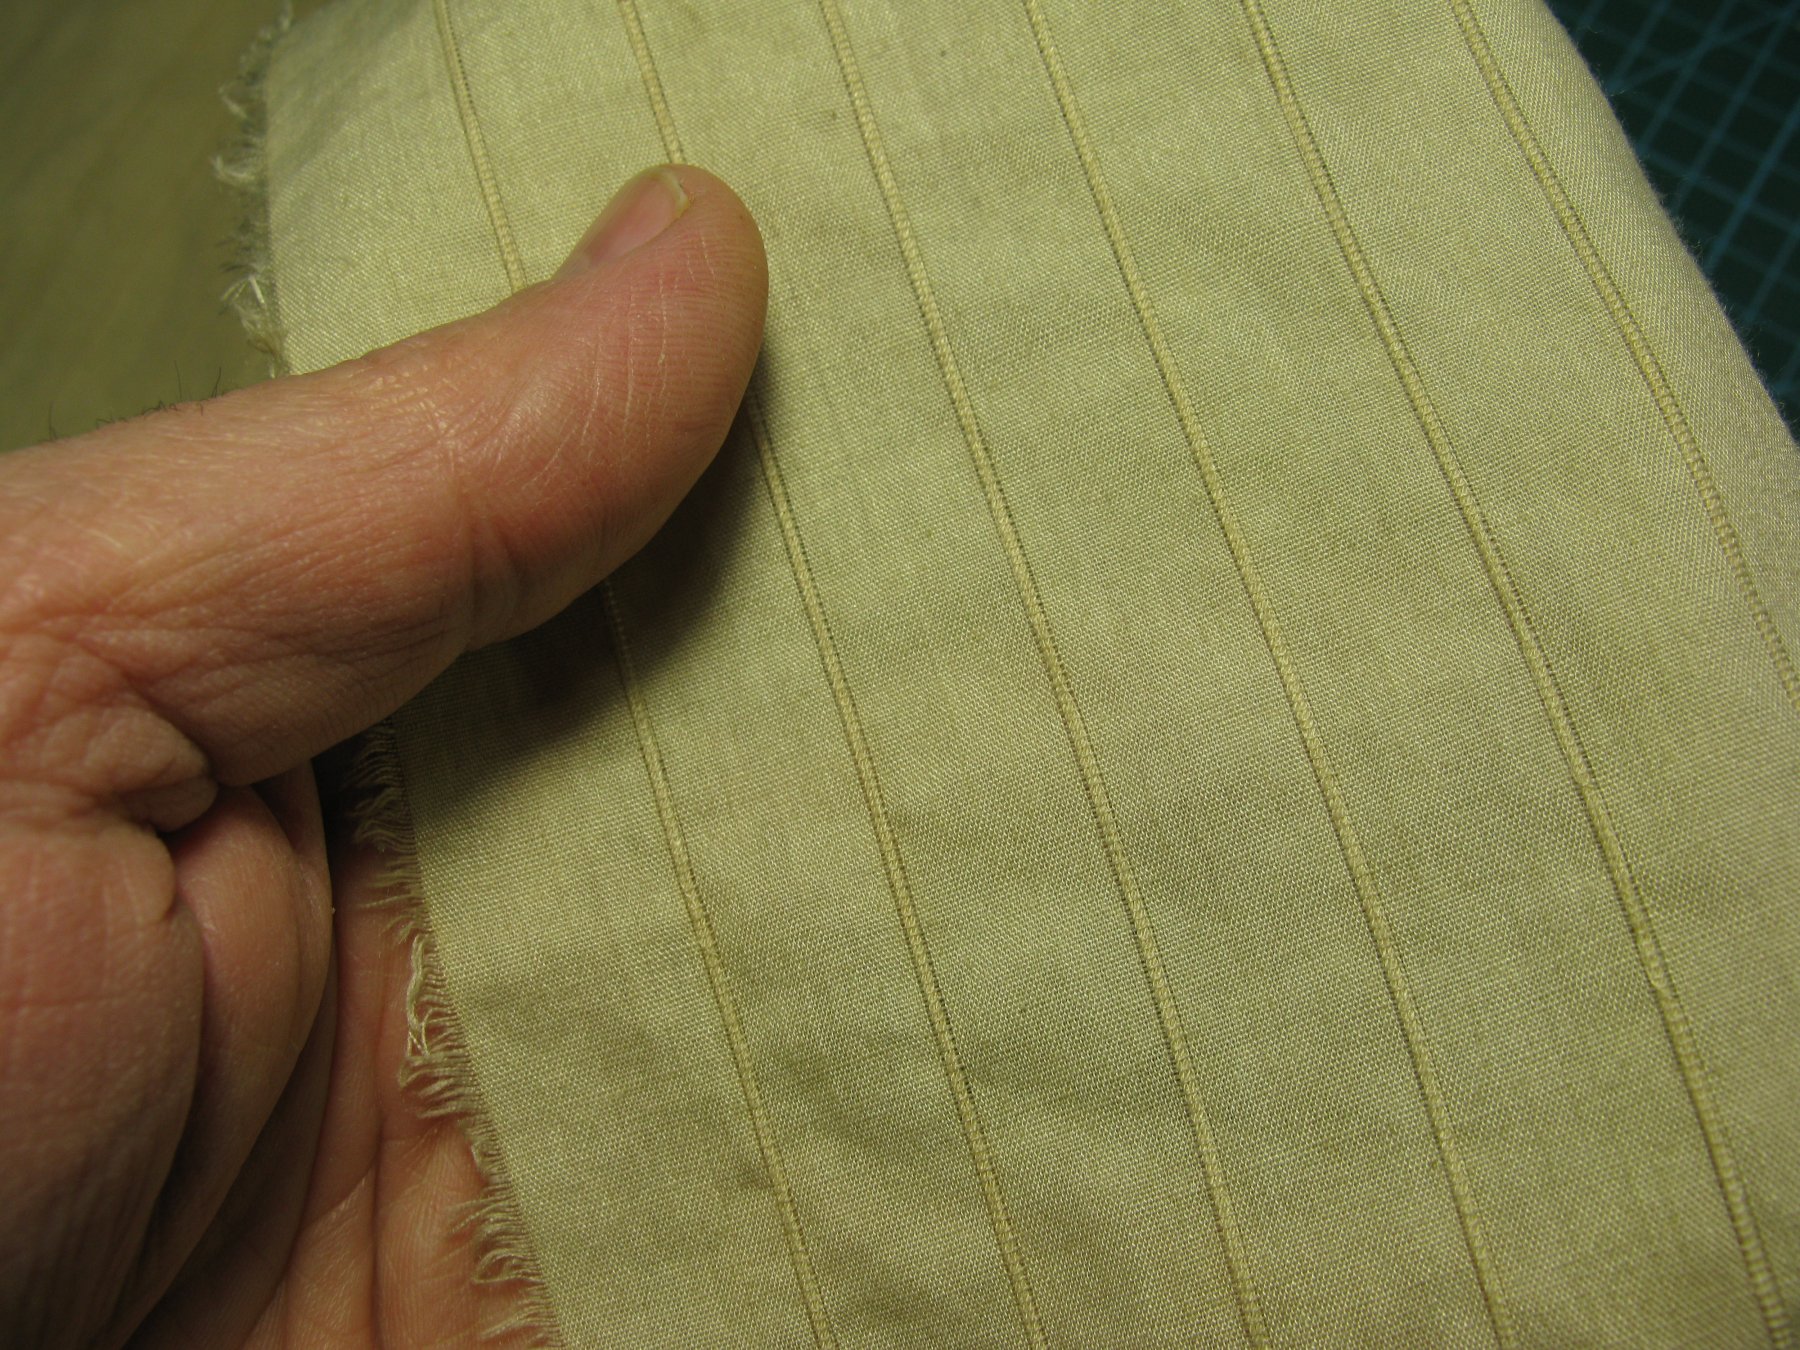
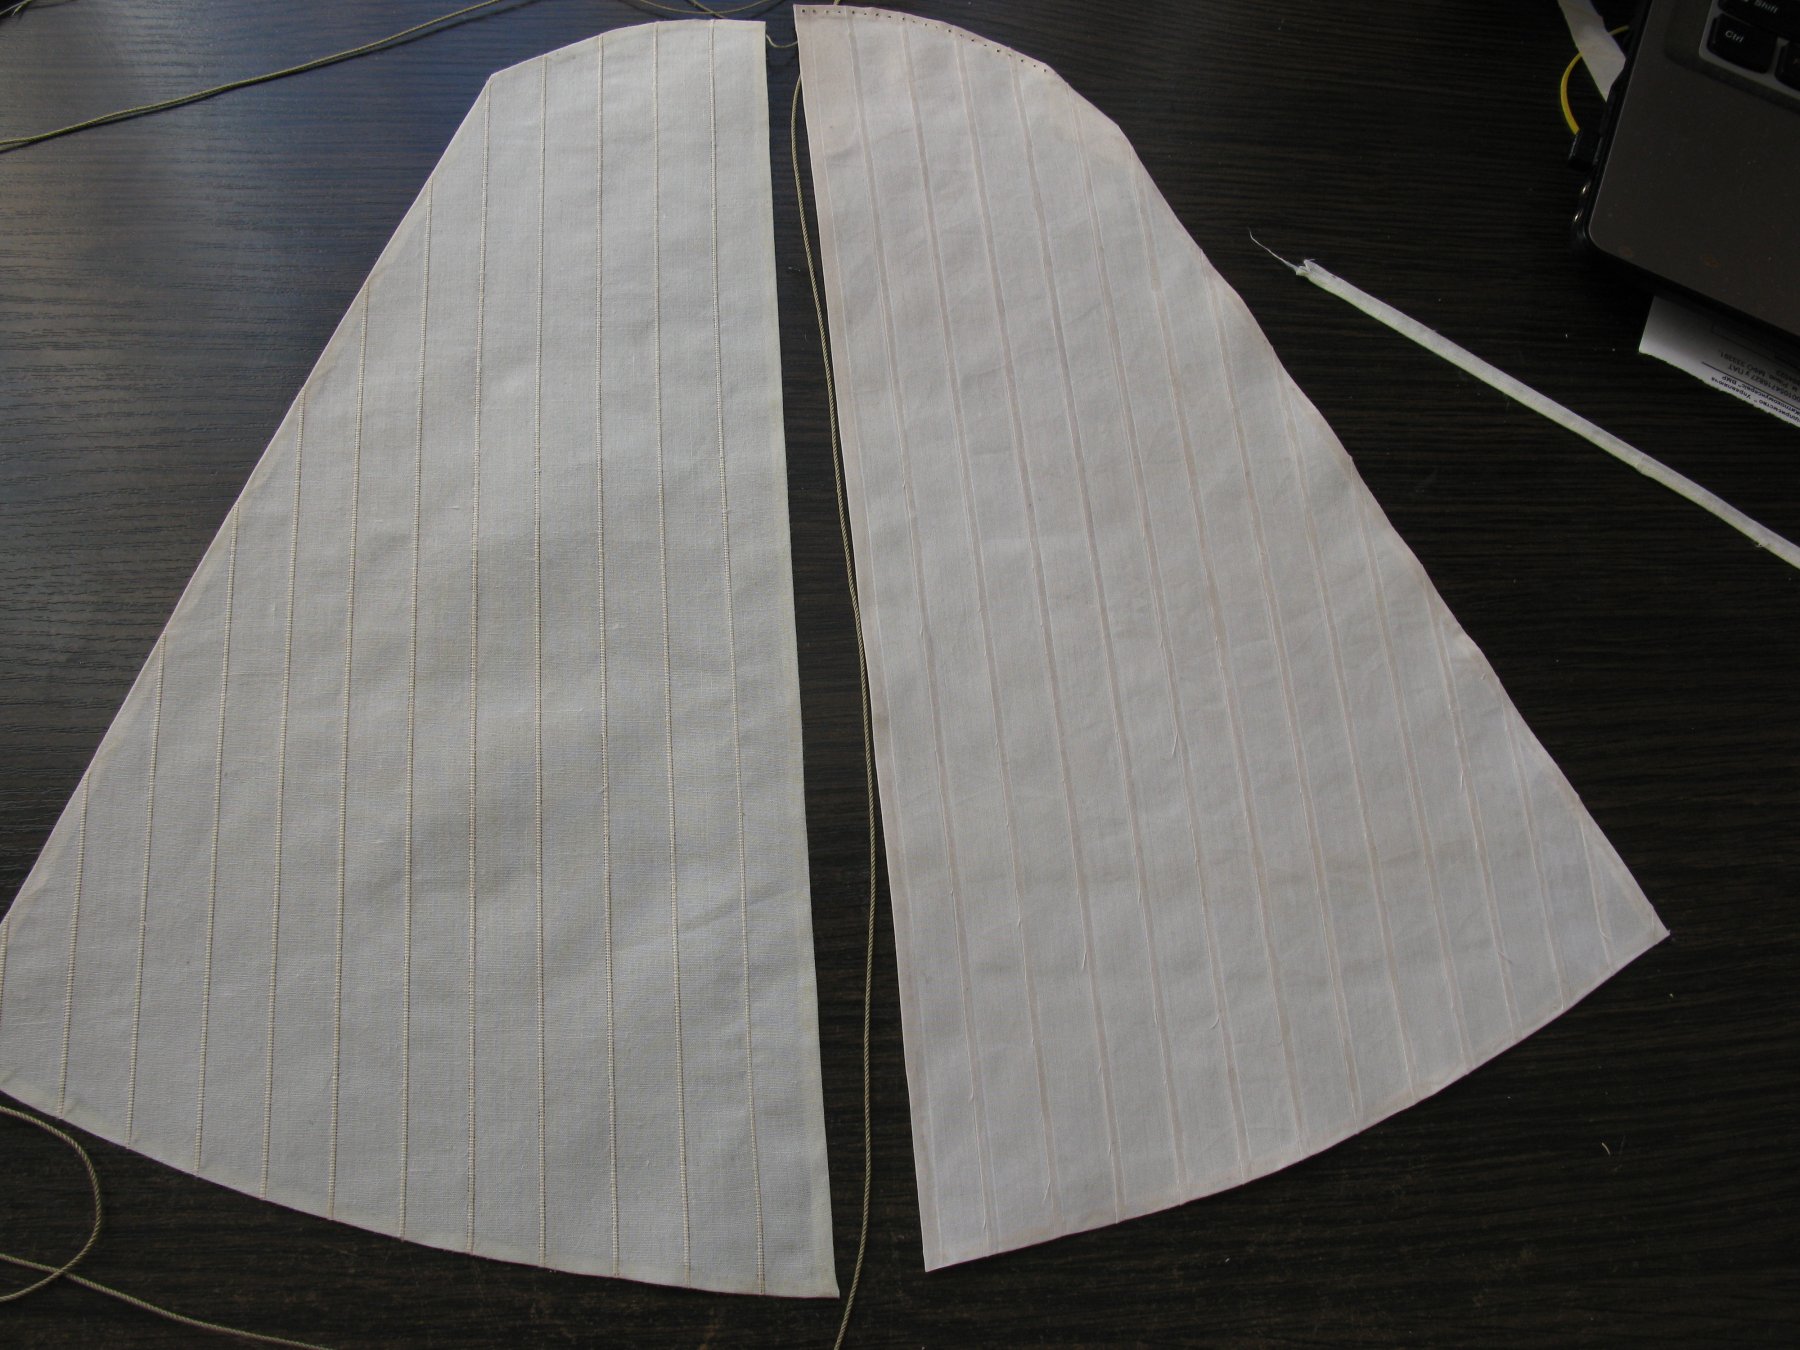
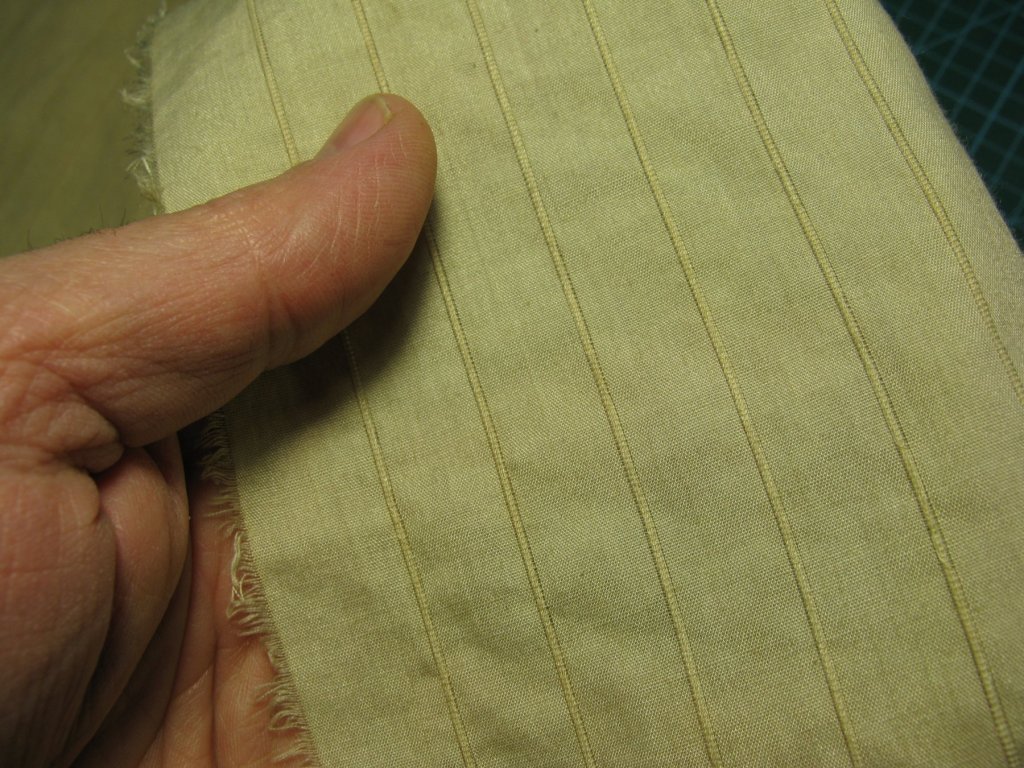
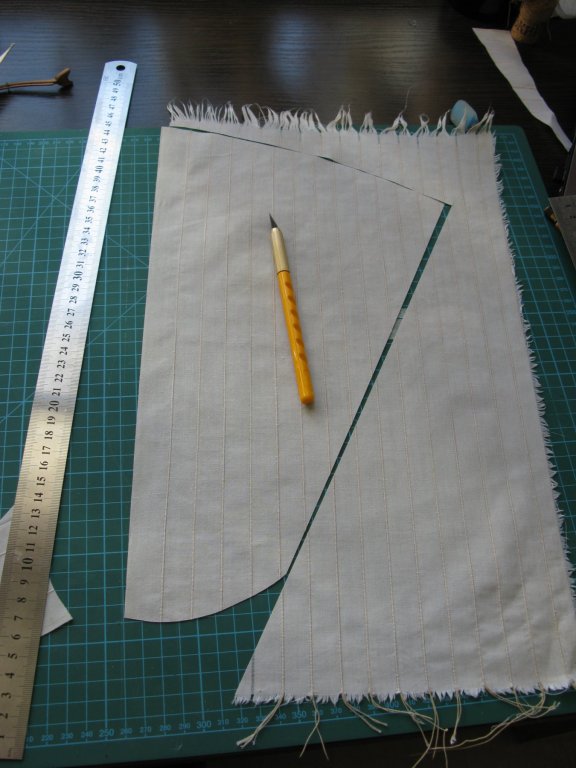
The second version. I had to redo it several times. The first time the material wasnt right - when I madeeverything and dyed it, the batiste turned out to be too transparent. I had to redo using a more dense one.


-
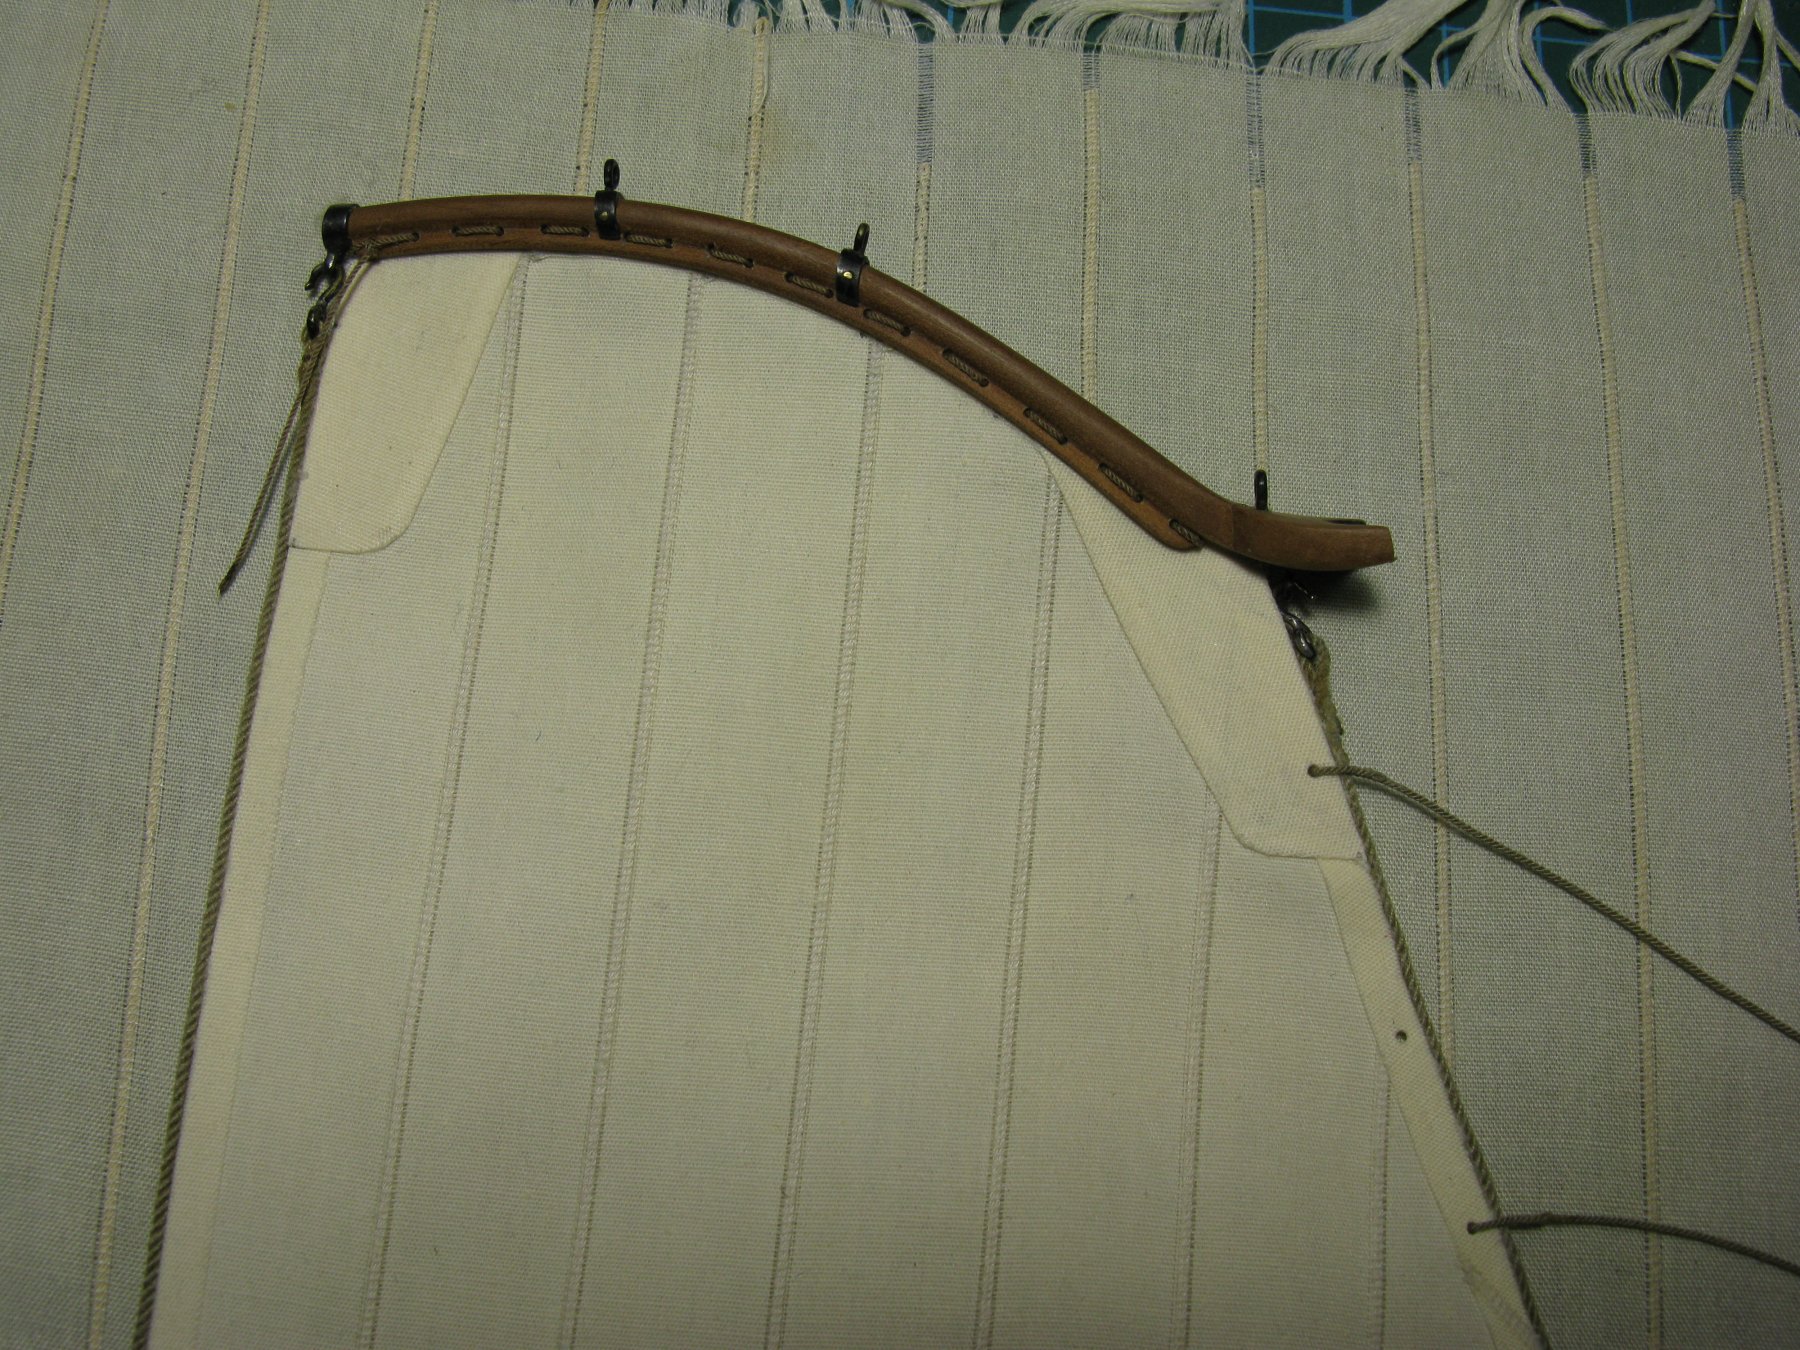
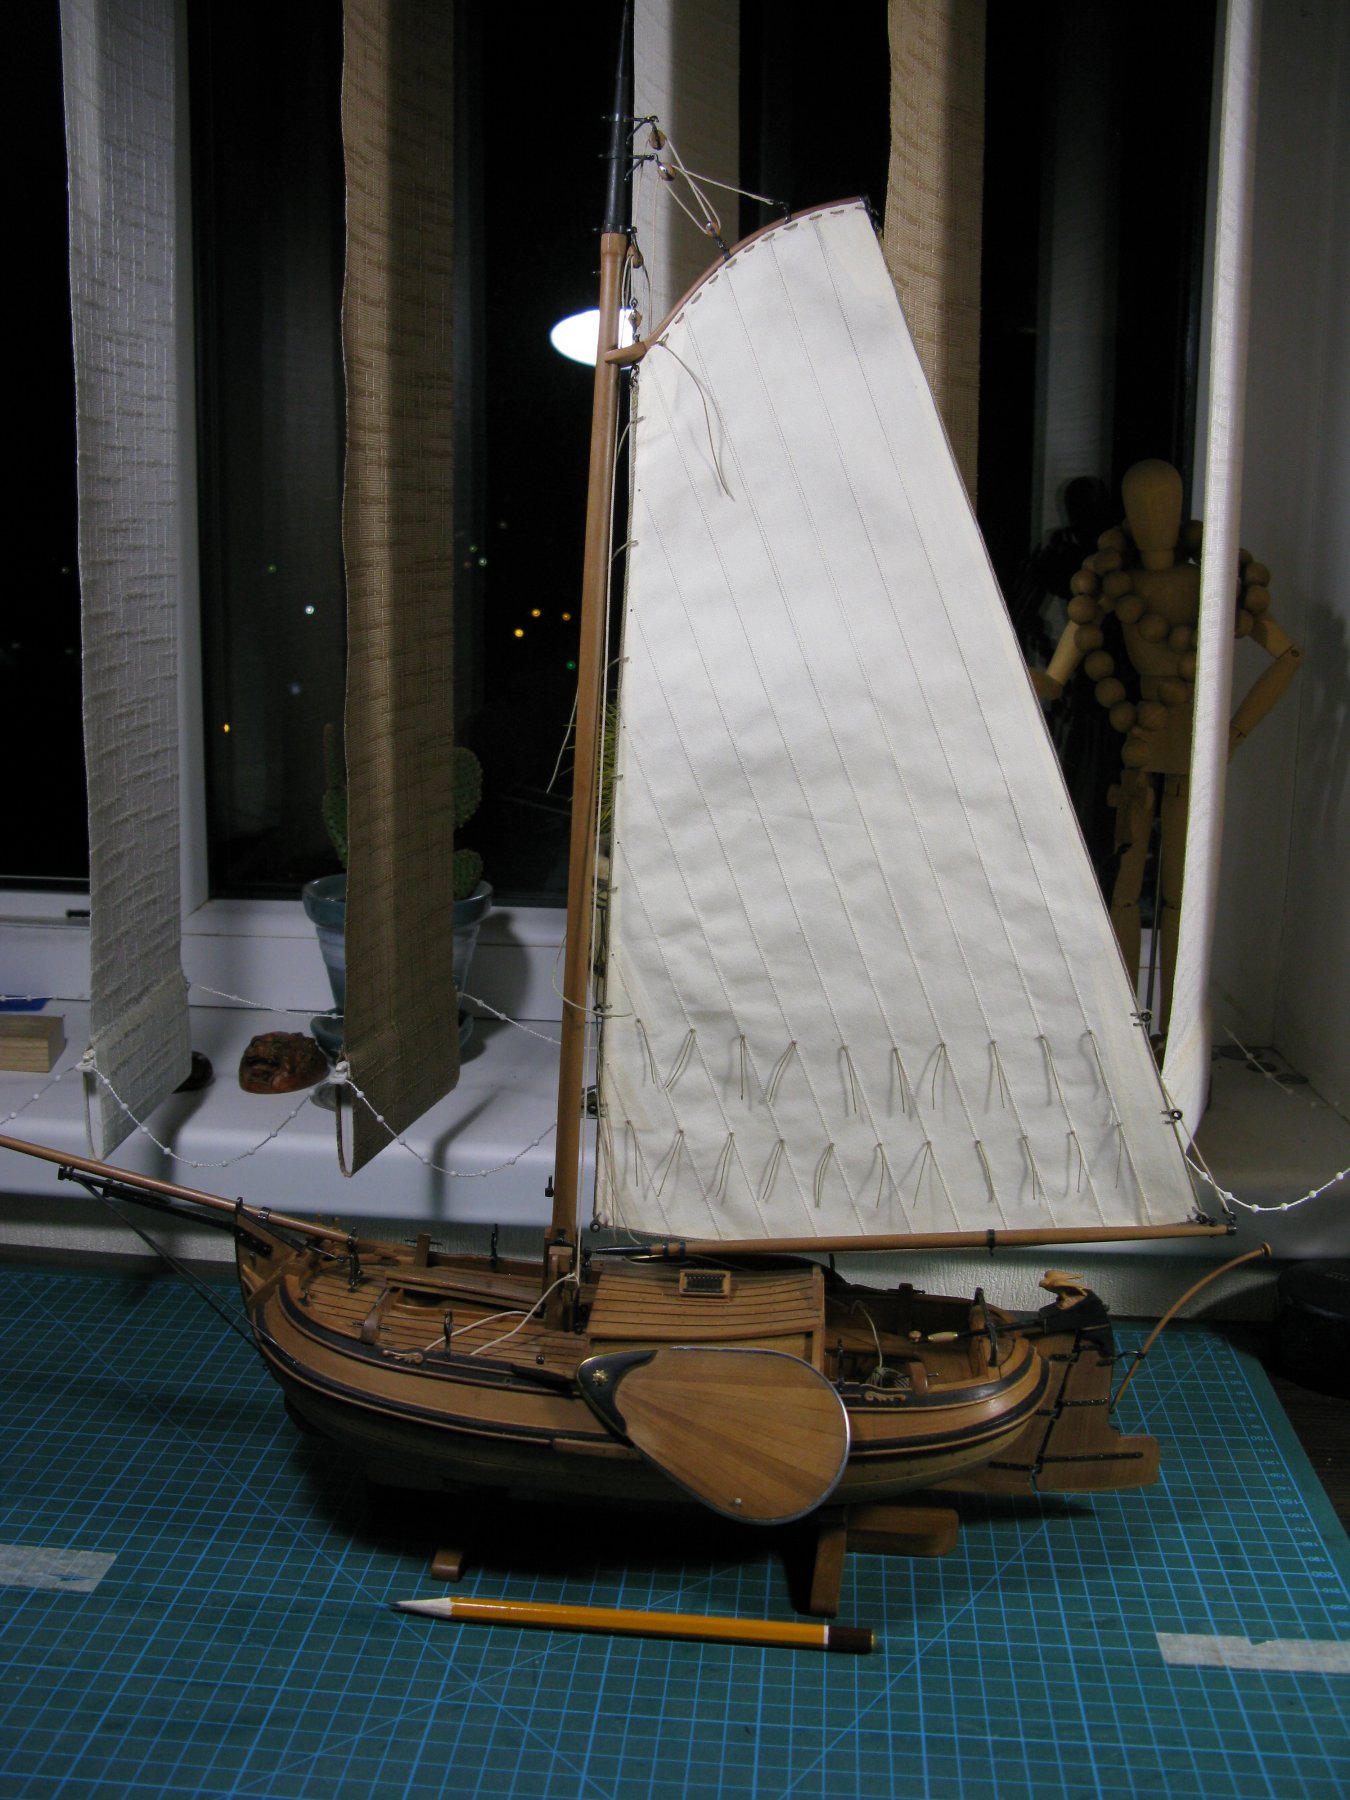
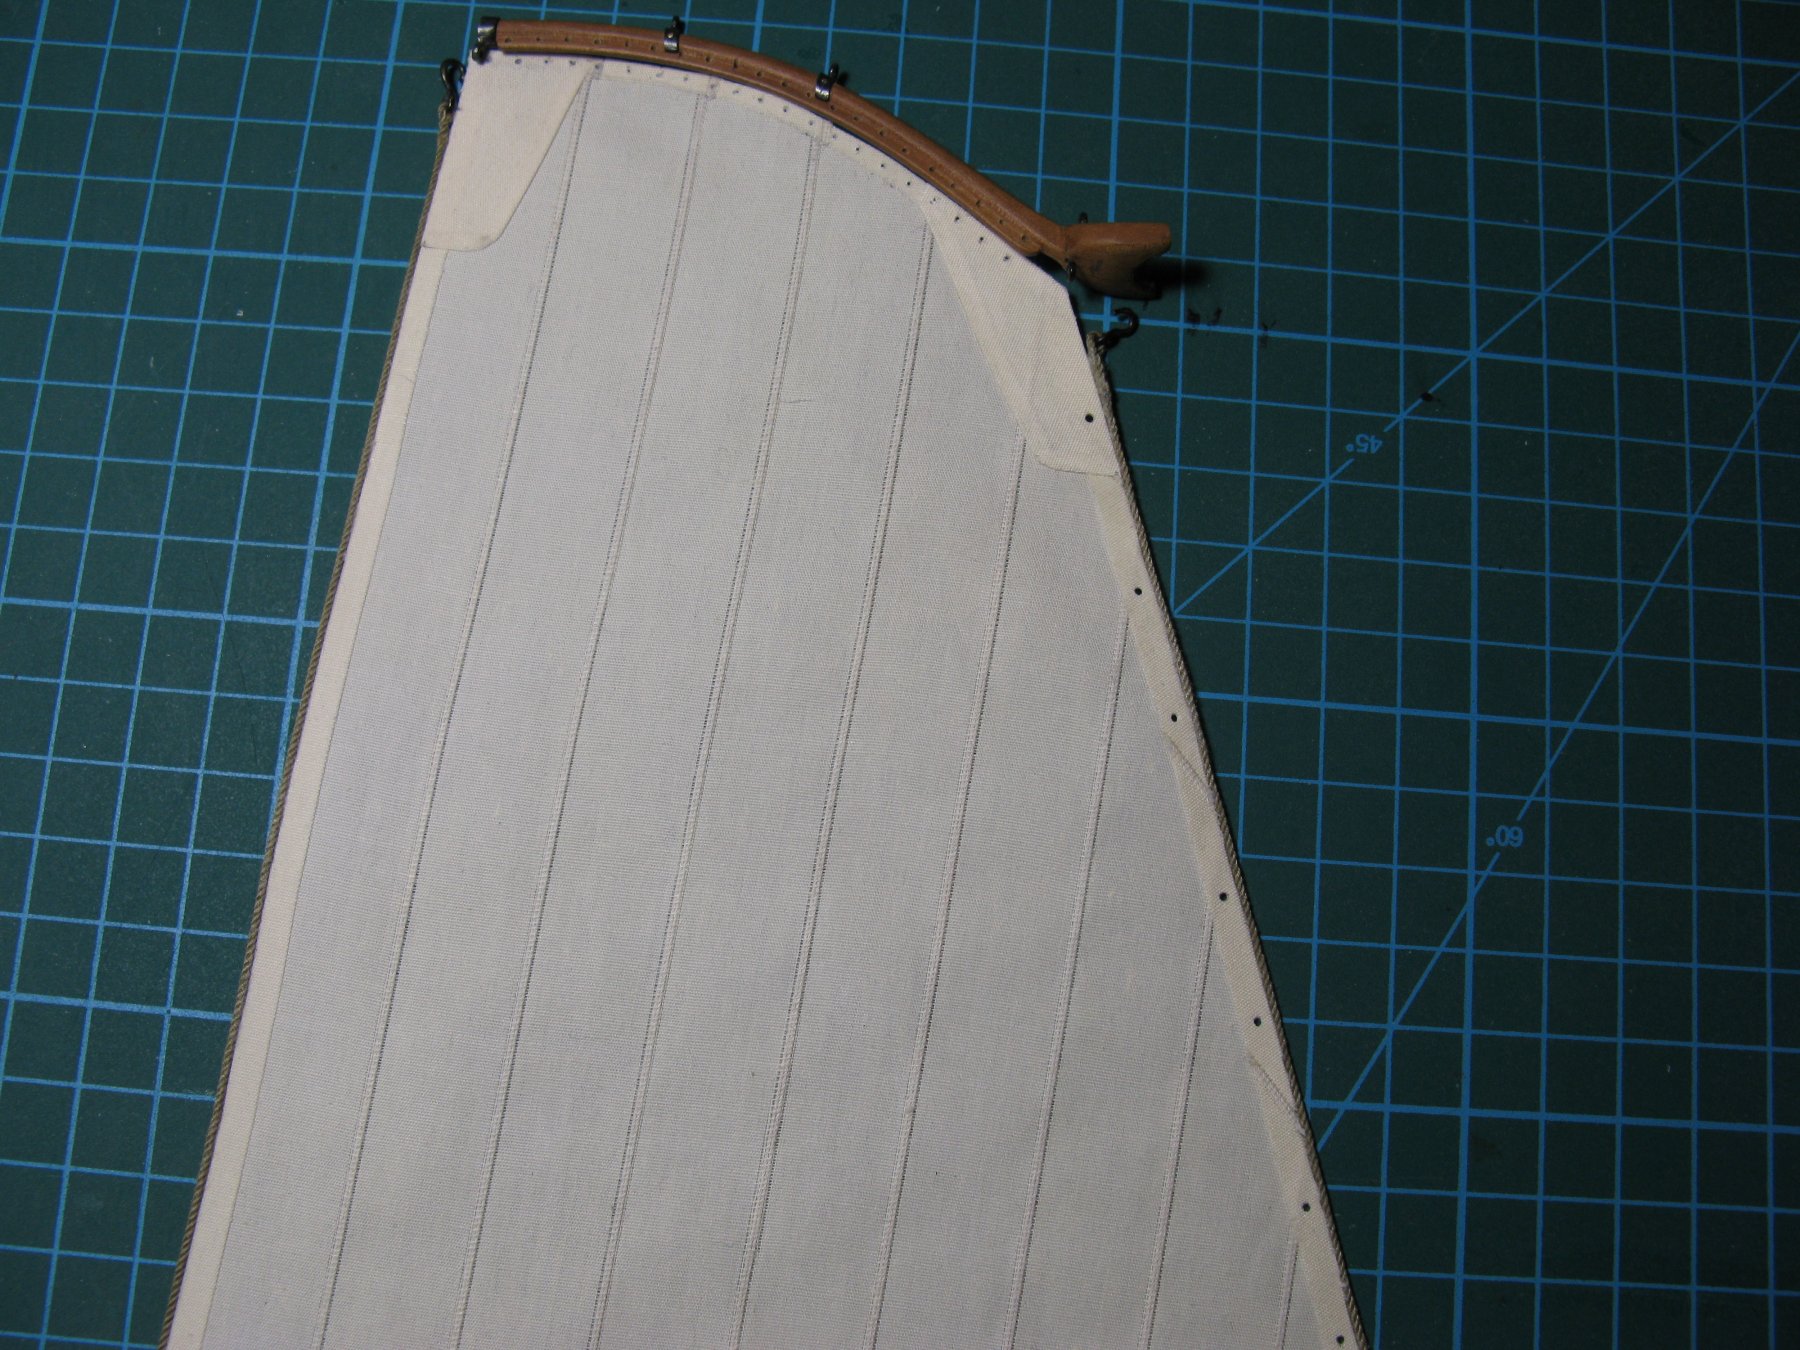
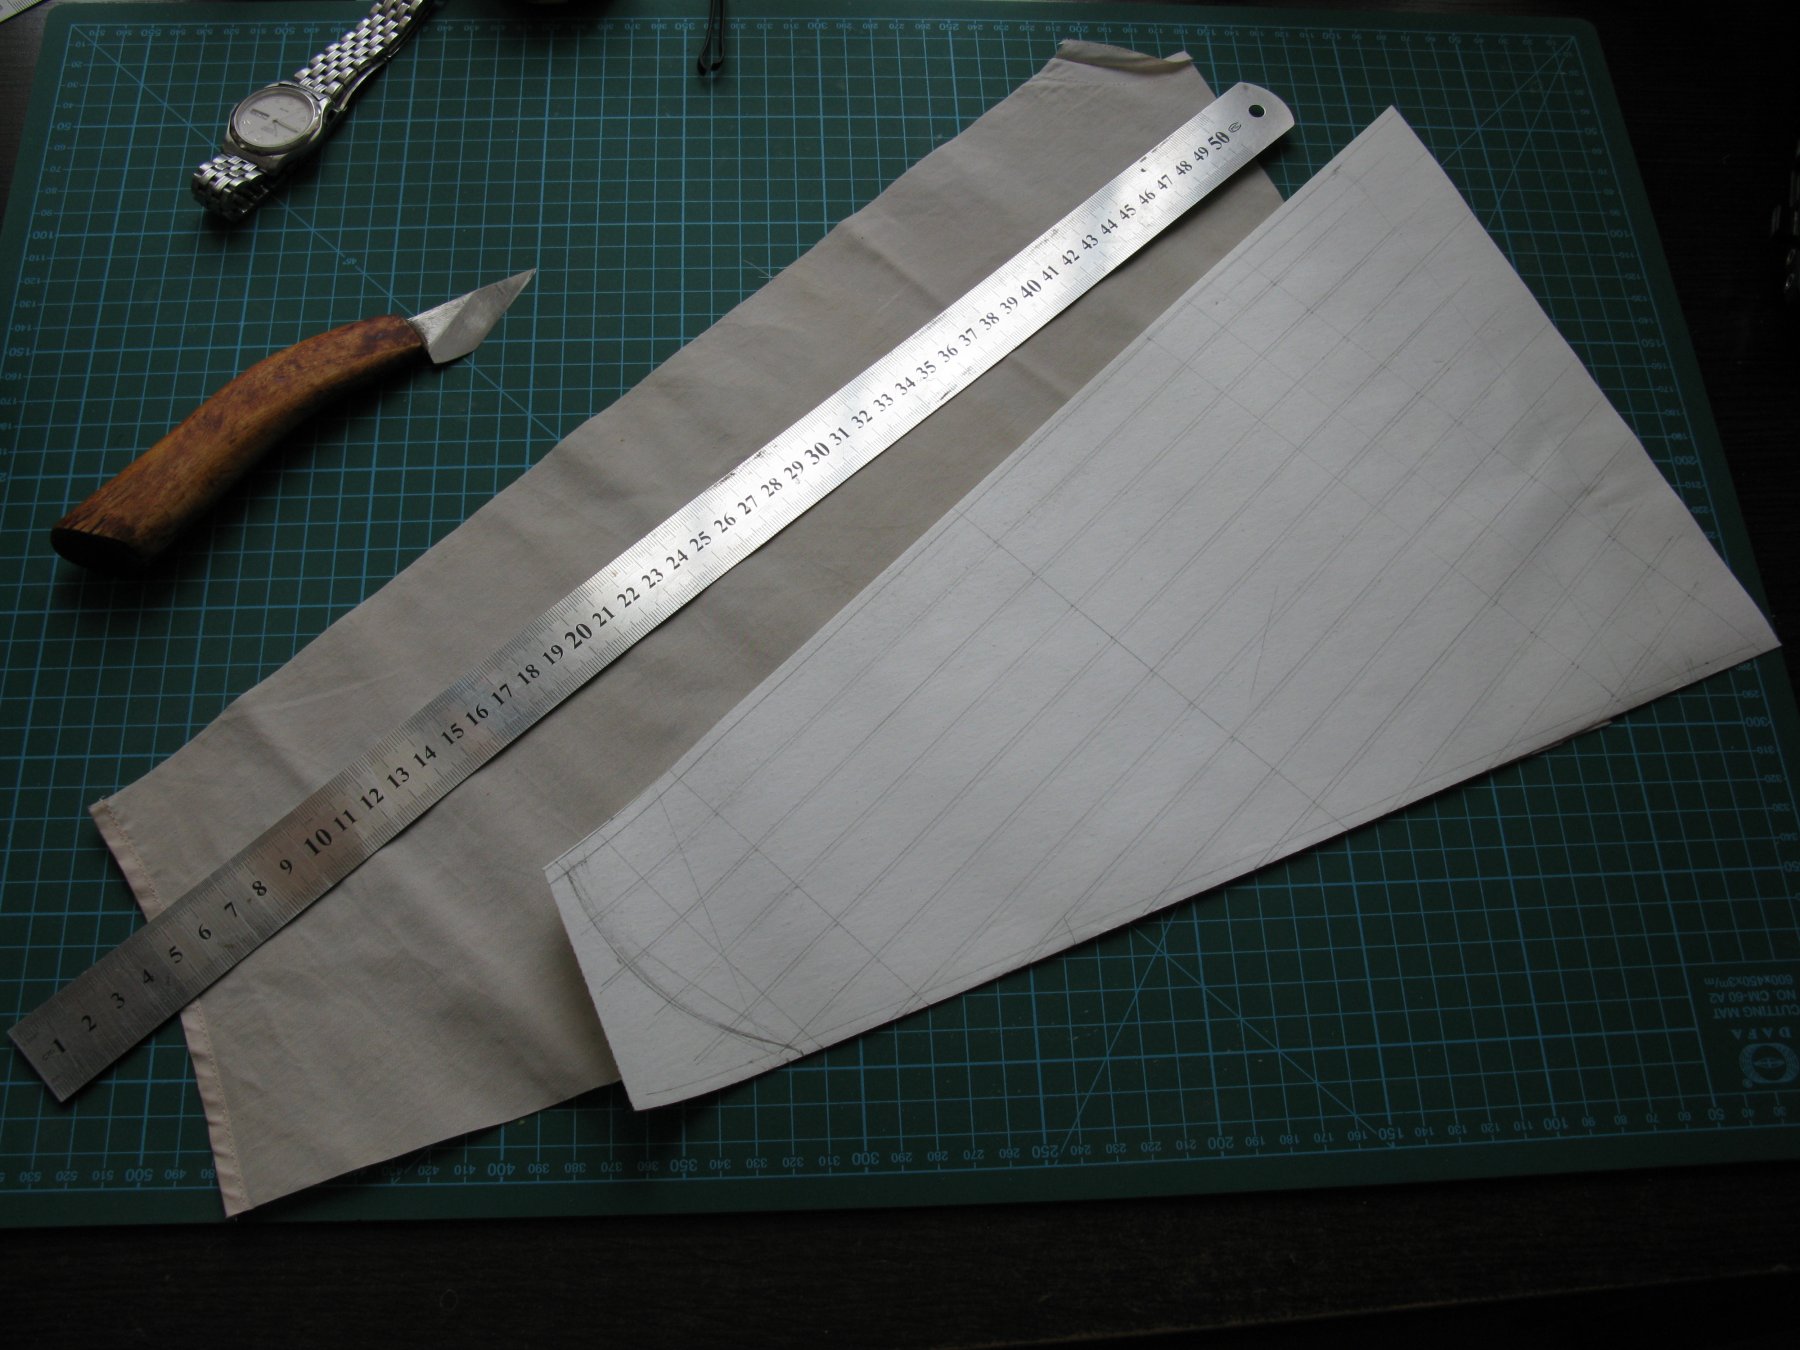
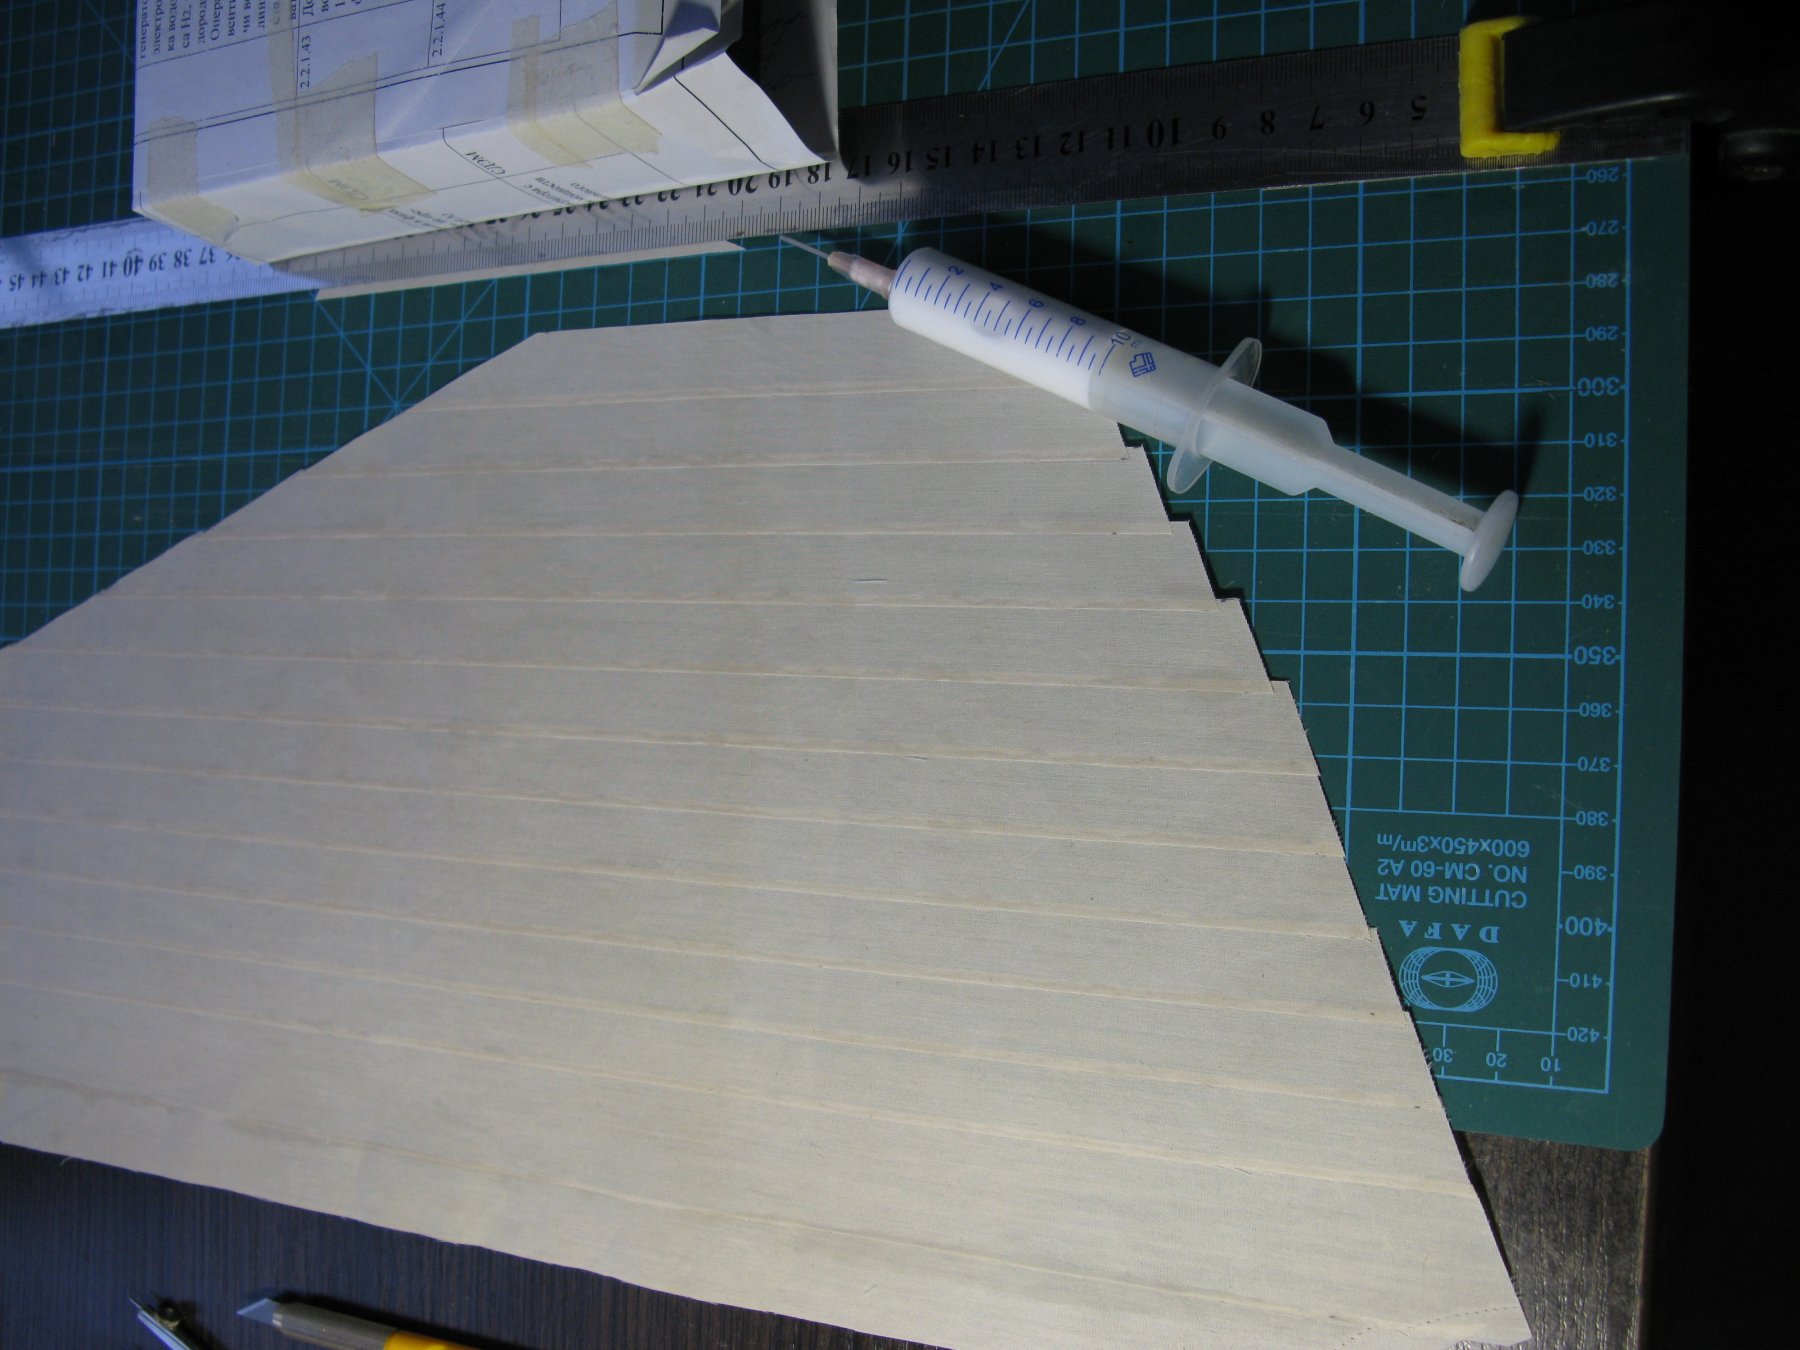
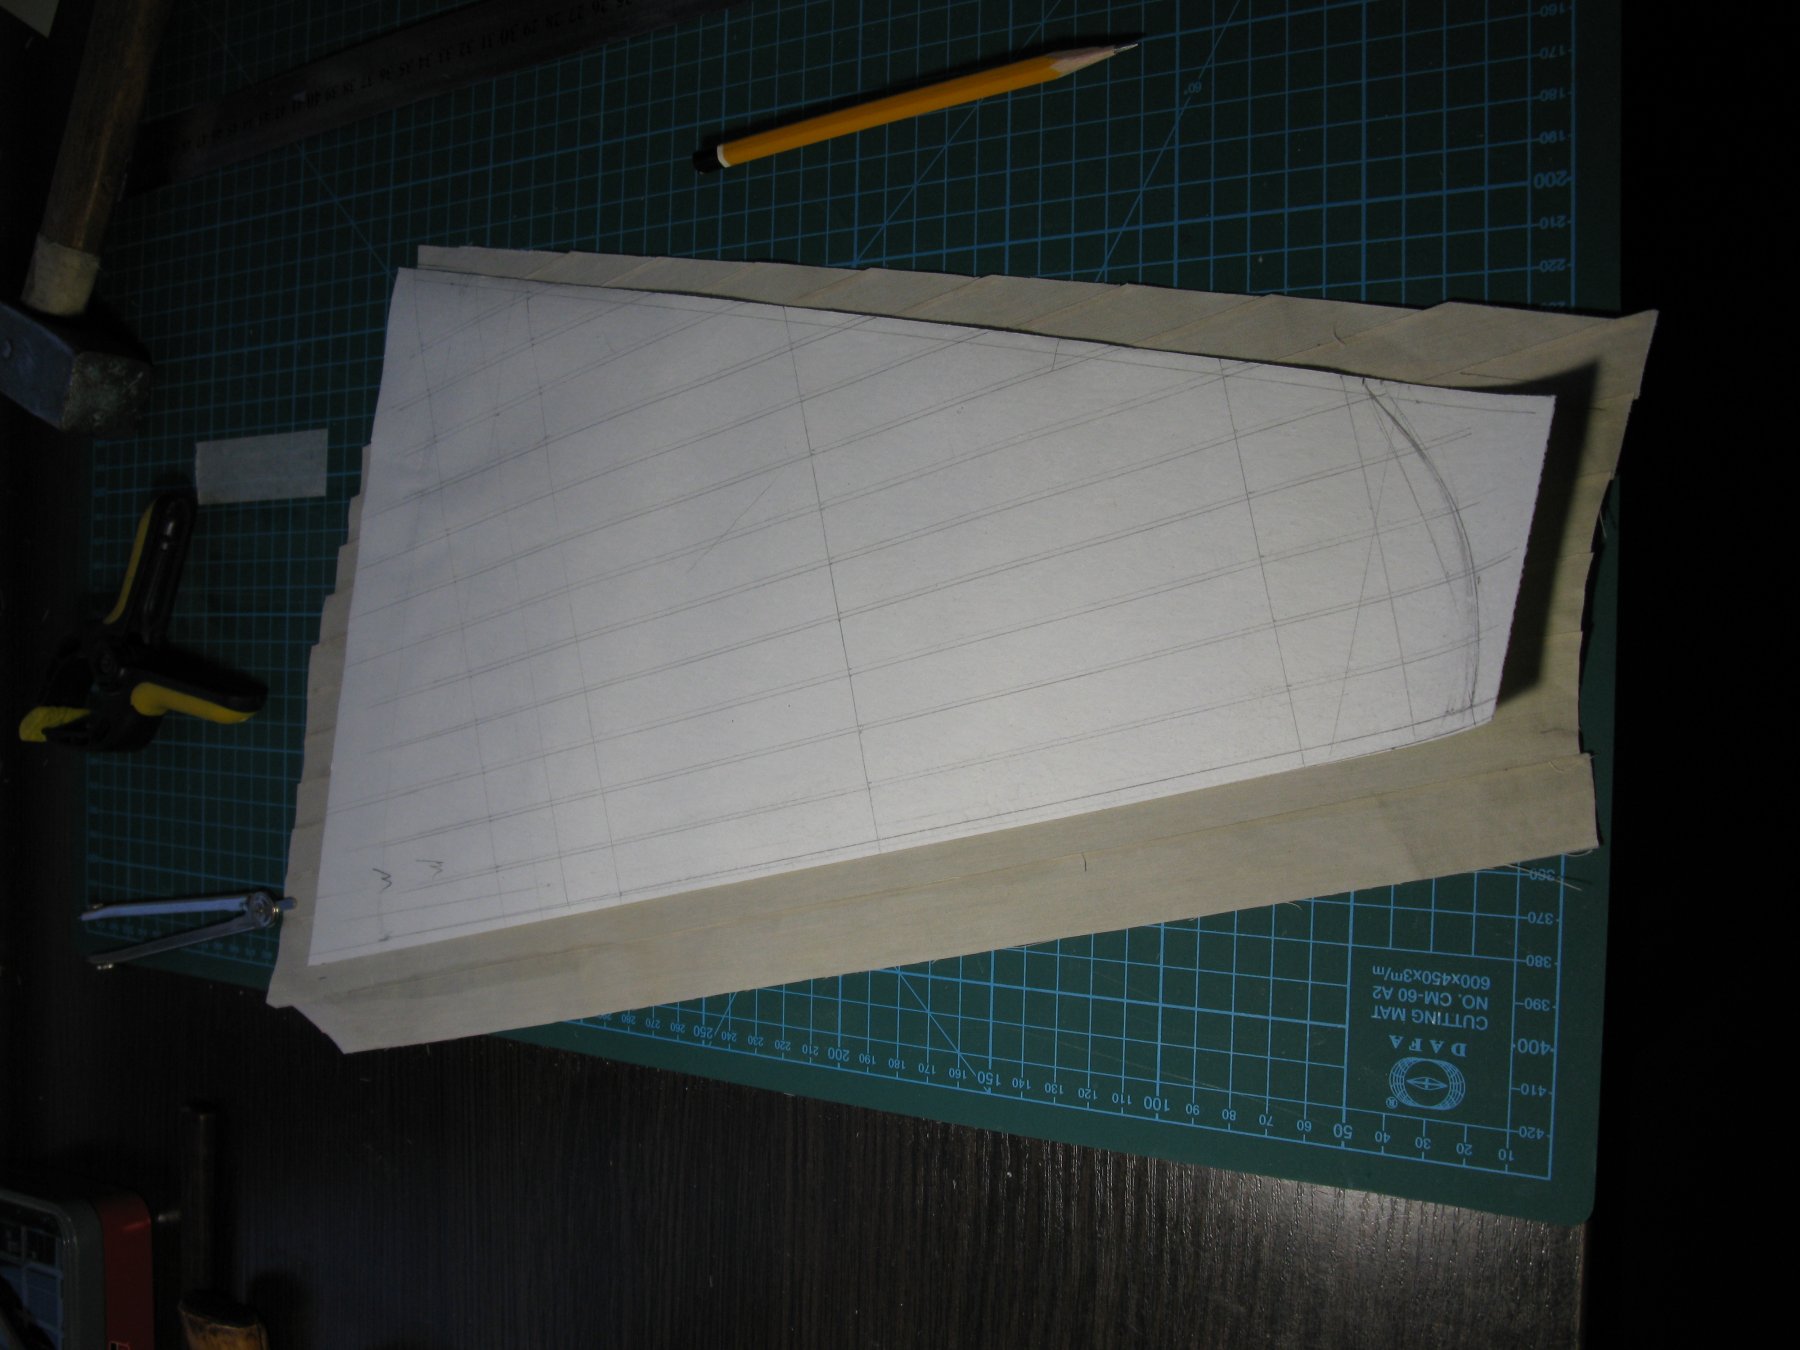
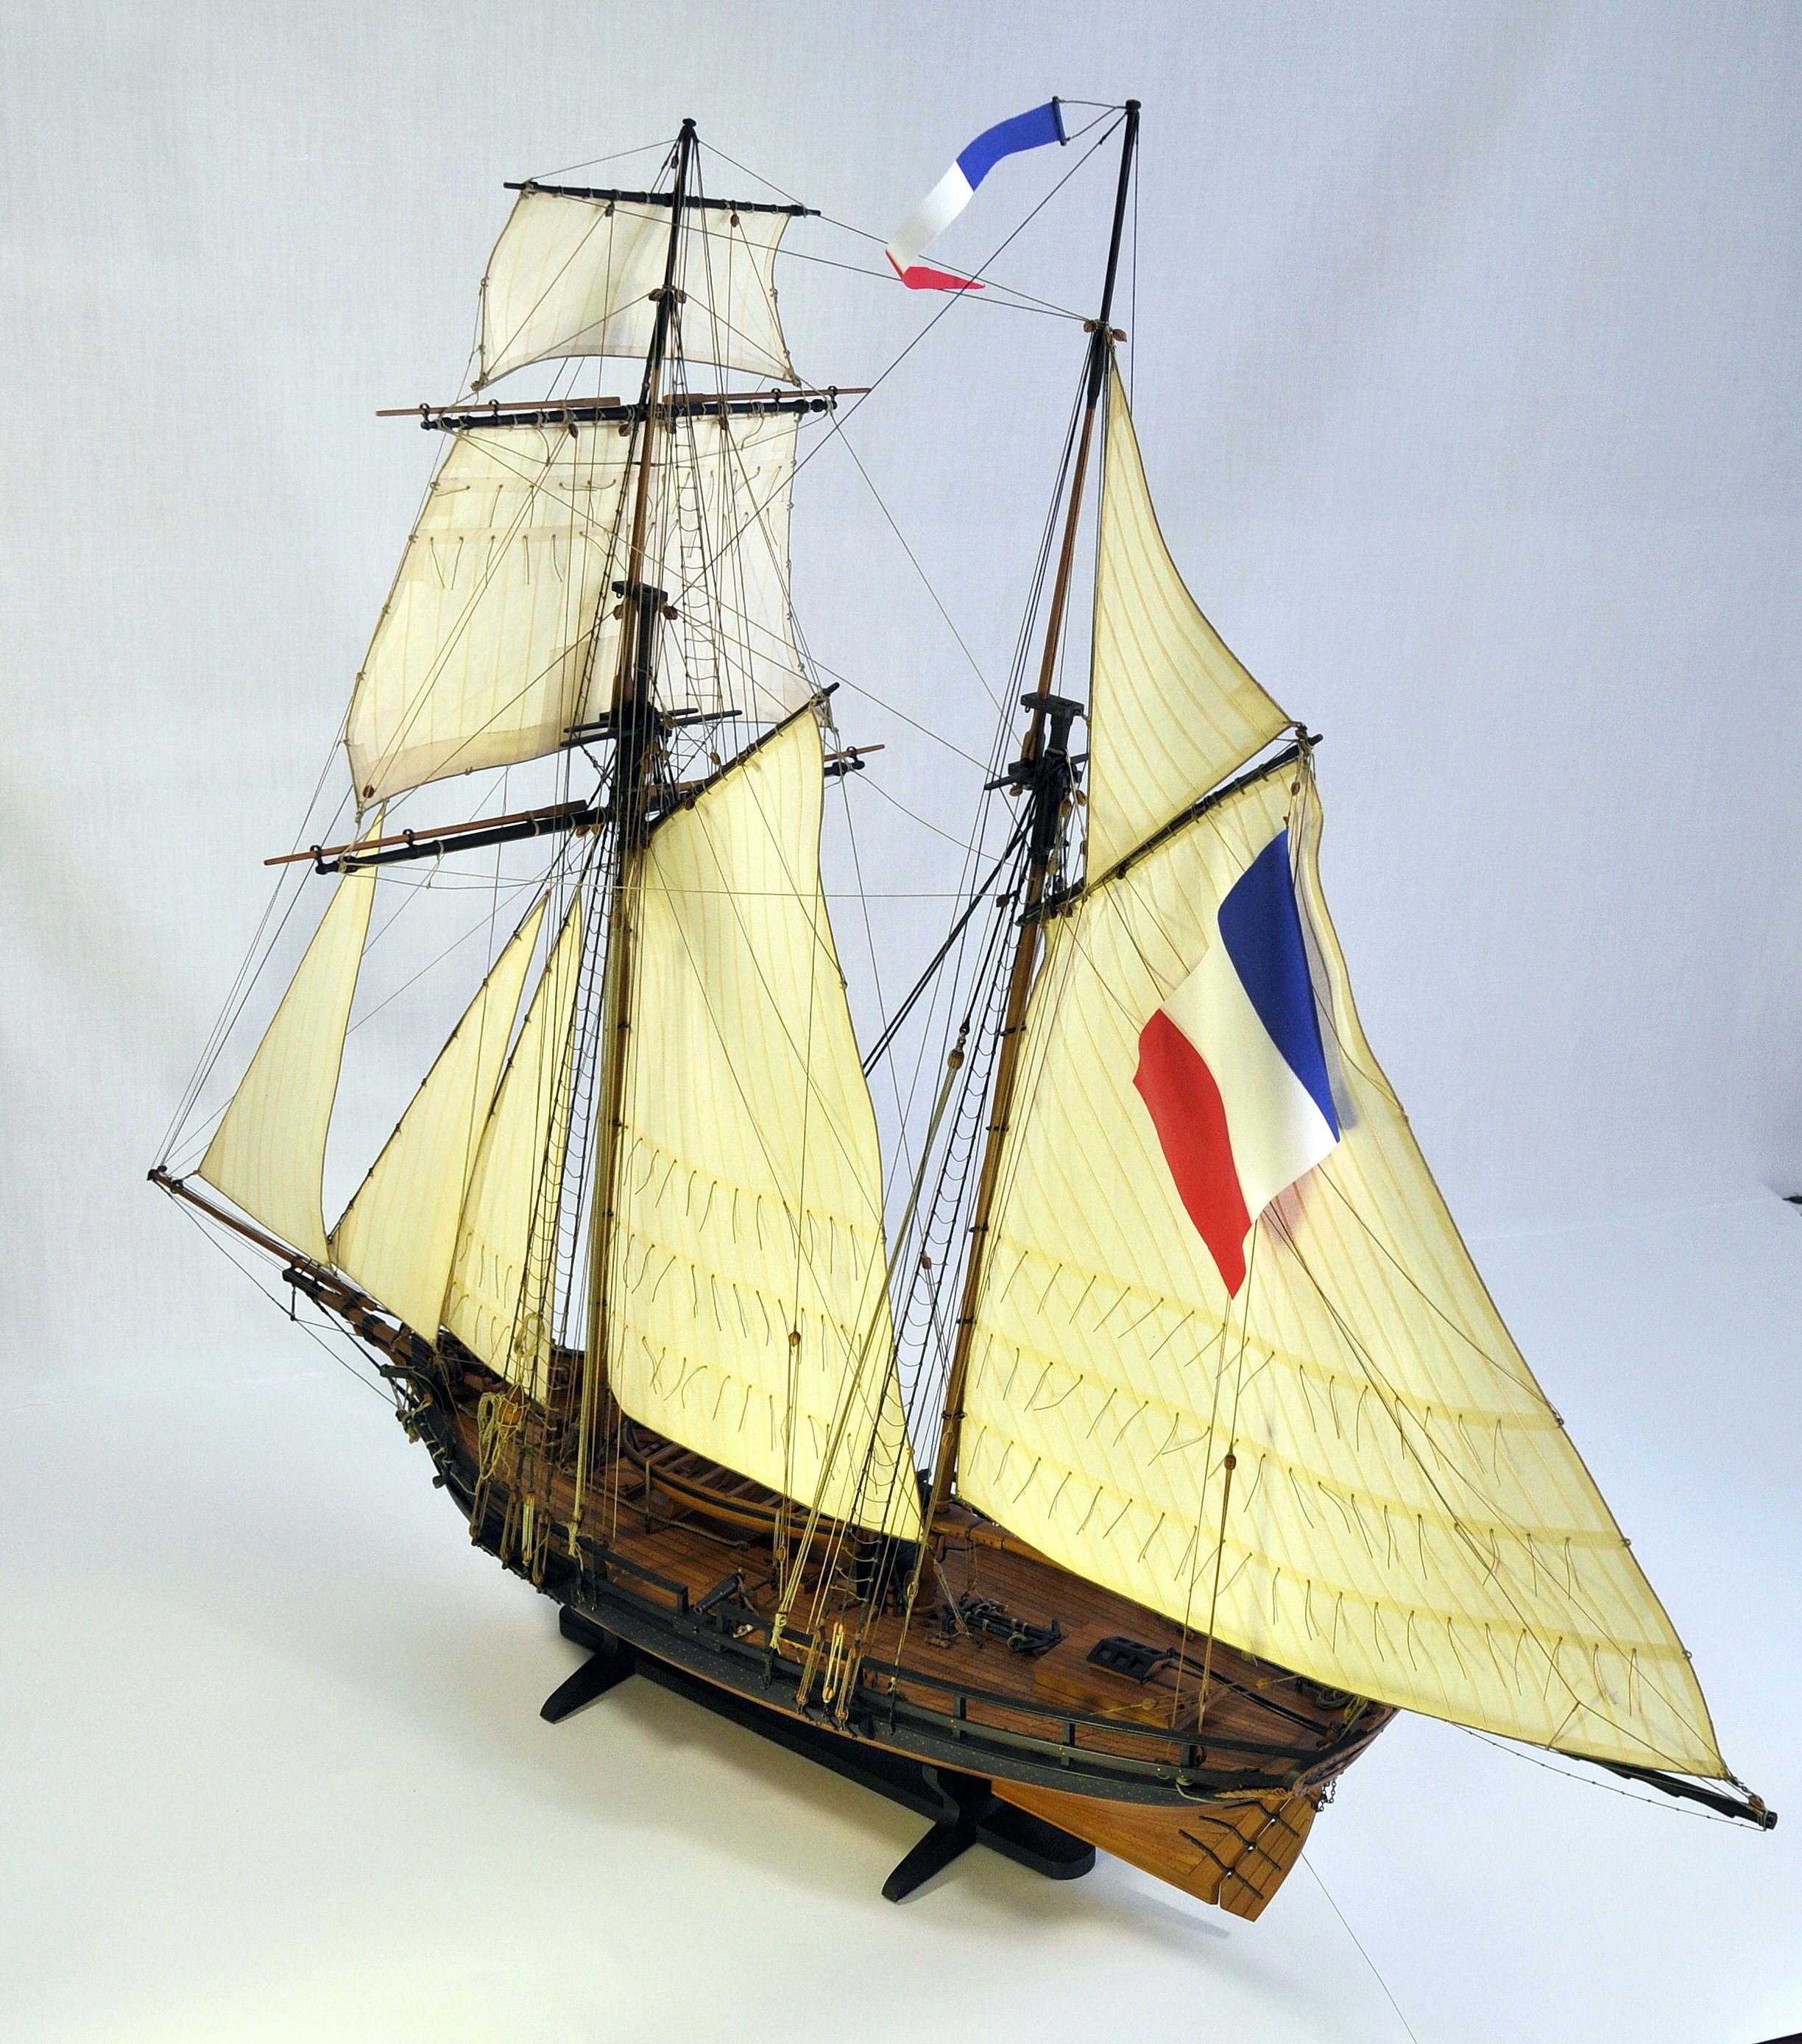
Greetings my dear colleagues, Let me please present some of the results of my experiments on making the sails. I have tried two technologies, one by Shevelev, which I already used while working on the "La Jacinthe", and the other one by Bikov. After the studying the results, I opted for using the last one. I have been practicing on making the mainsail.
-
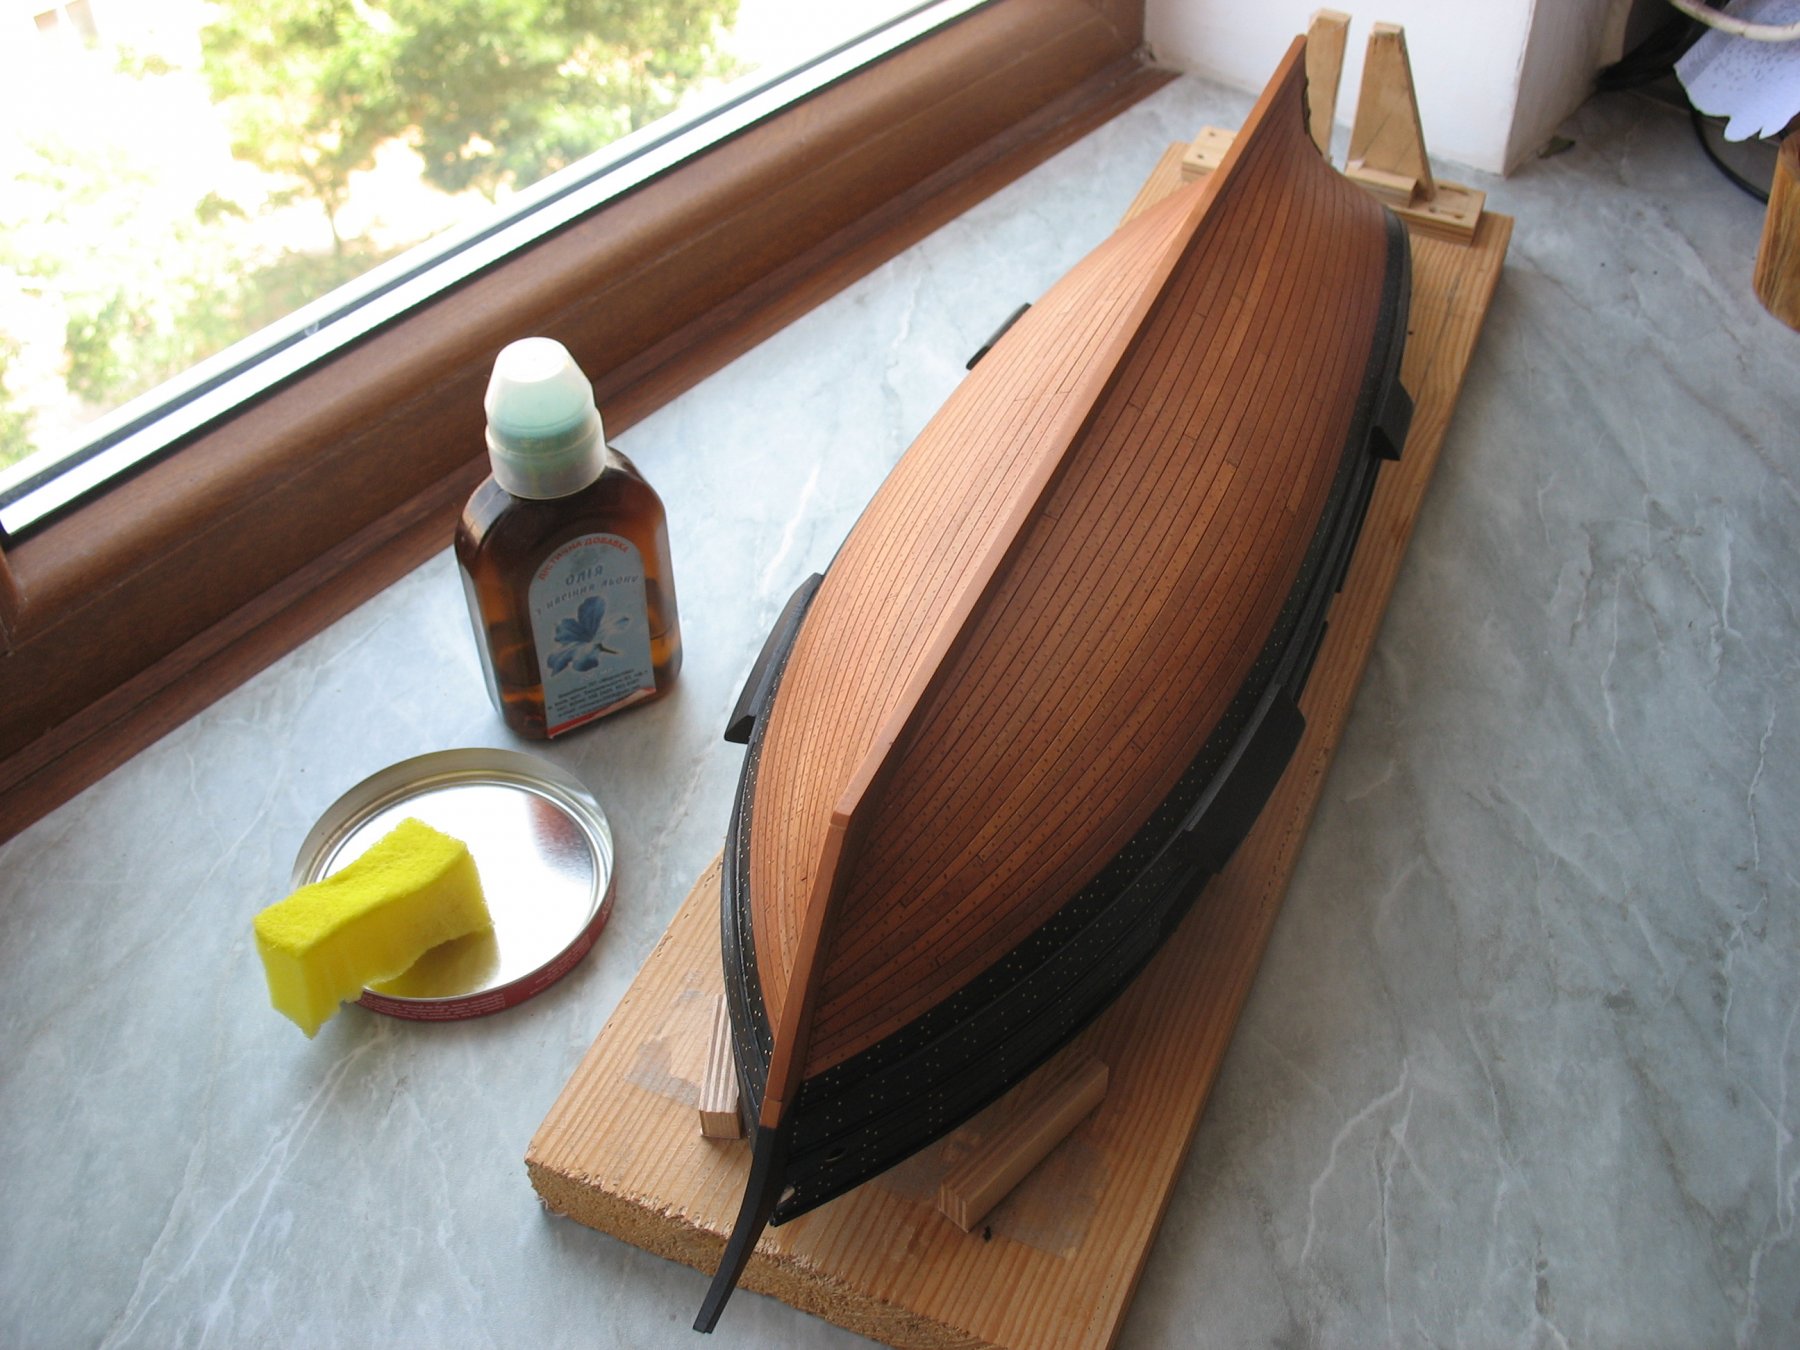
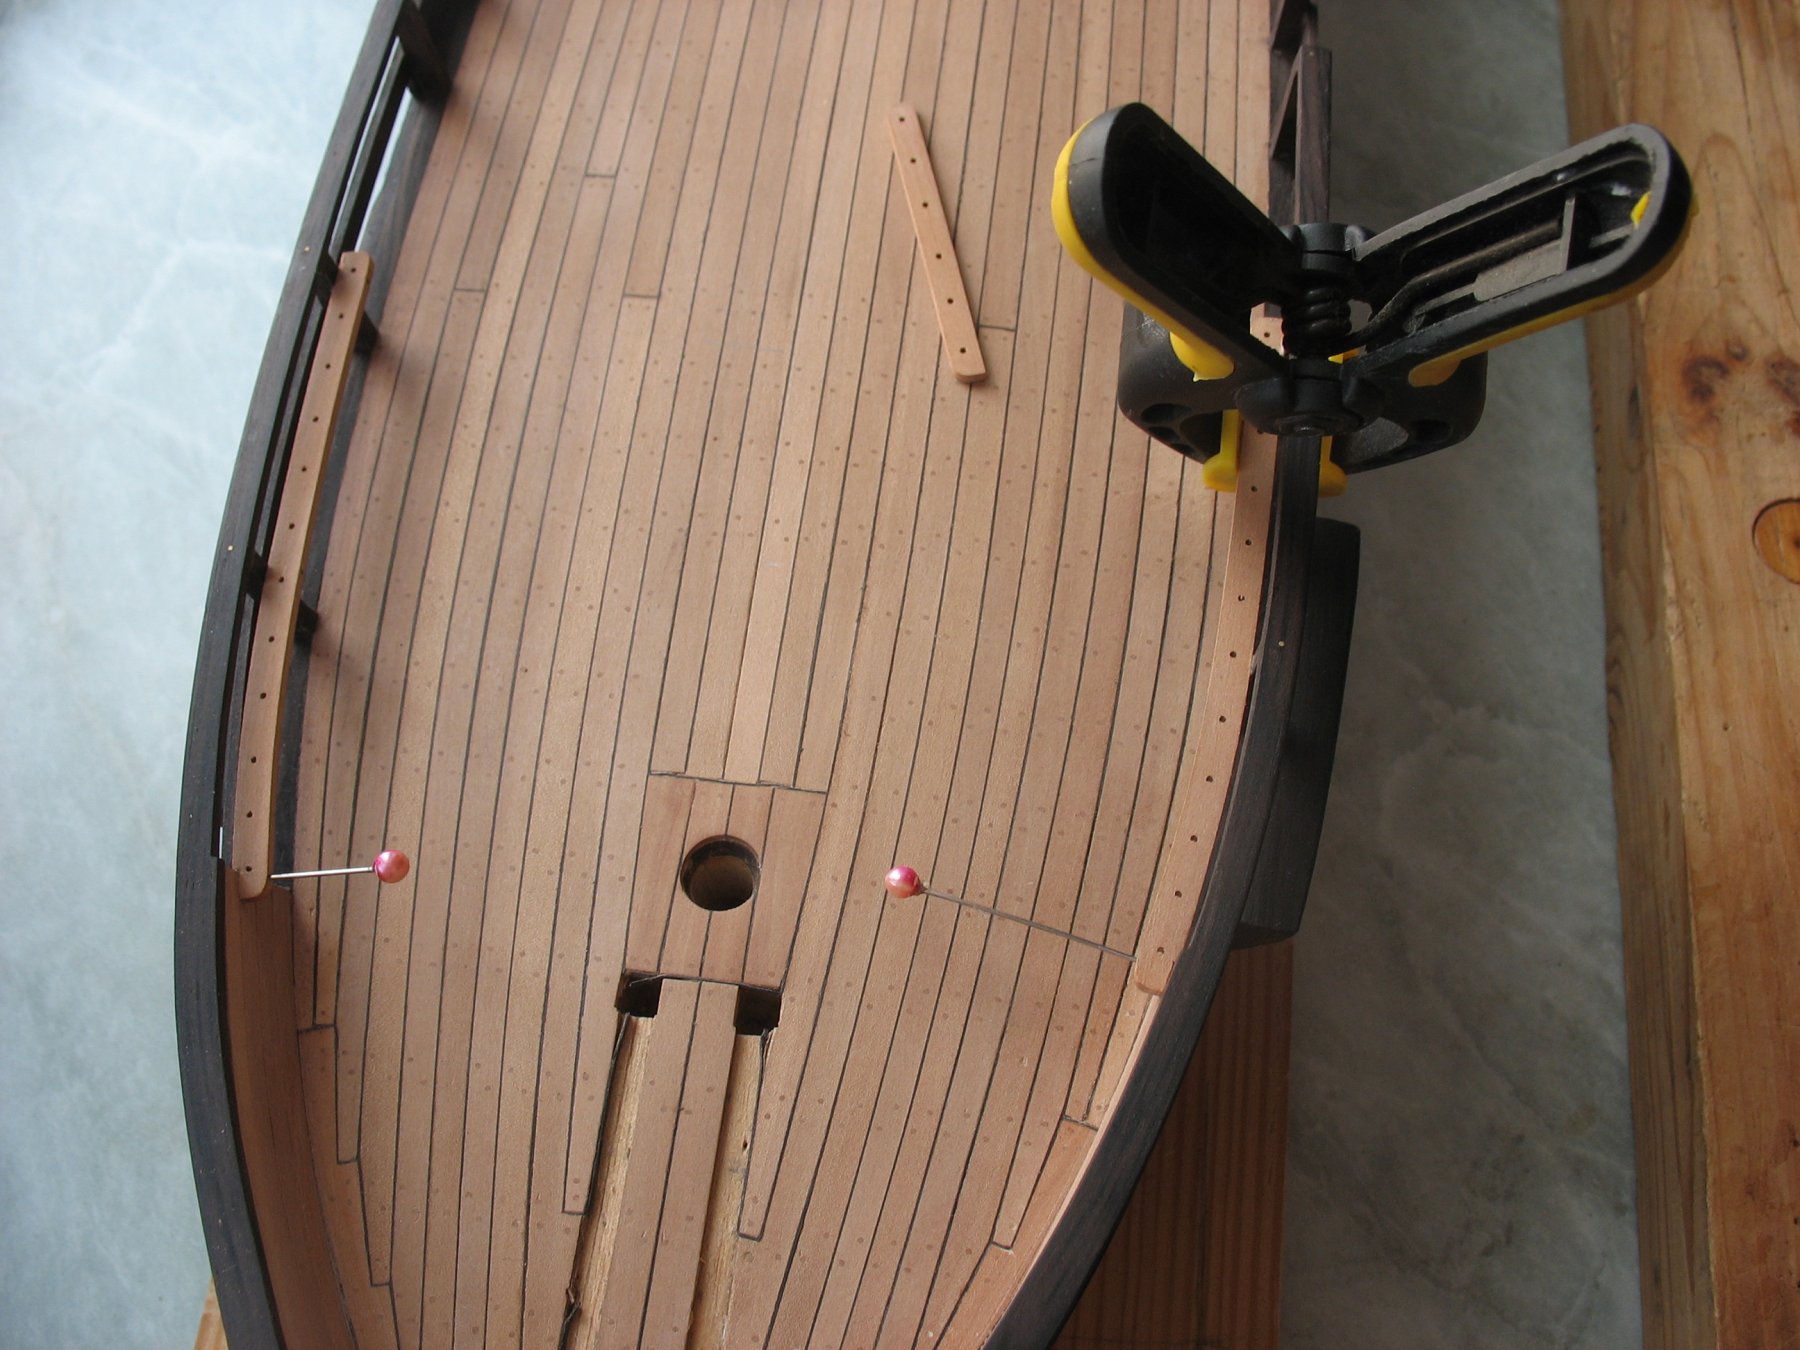
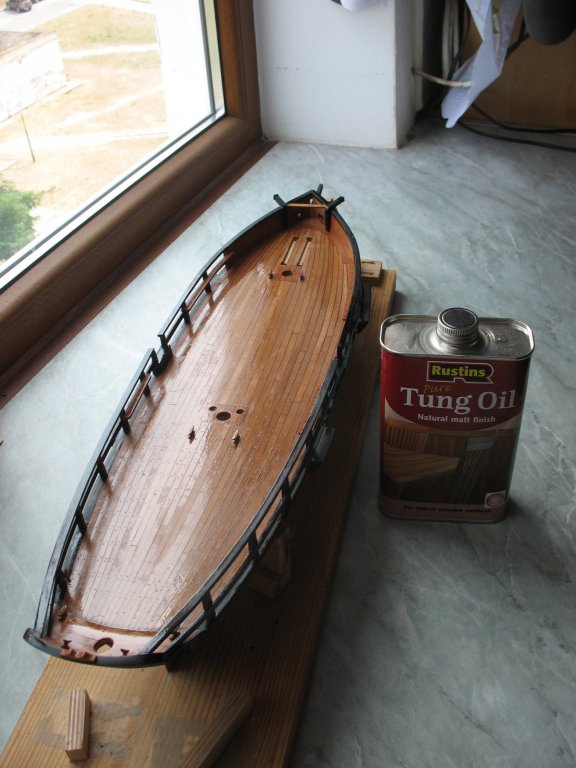
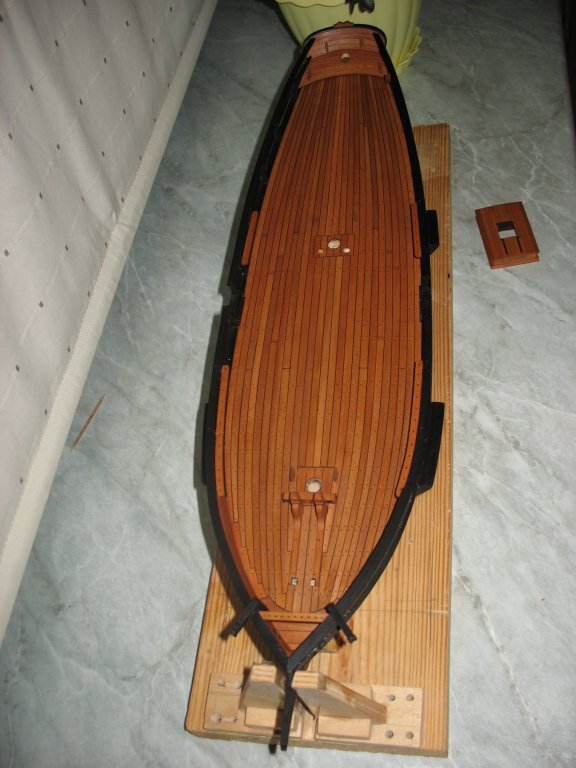
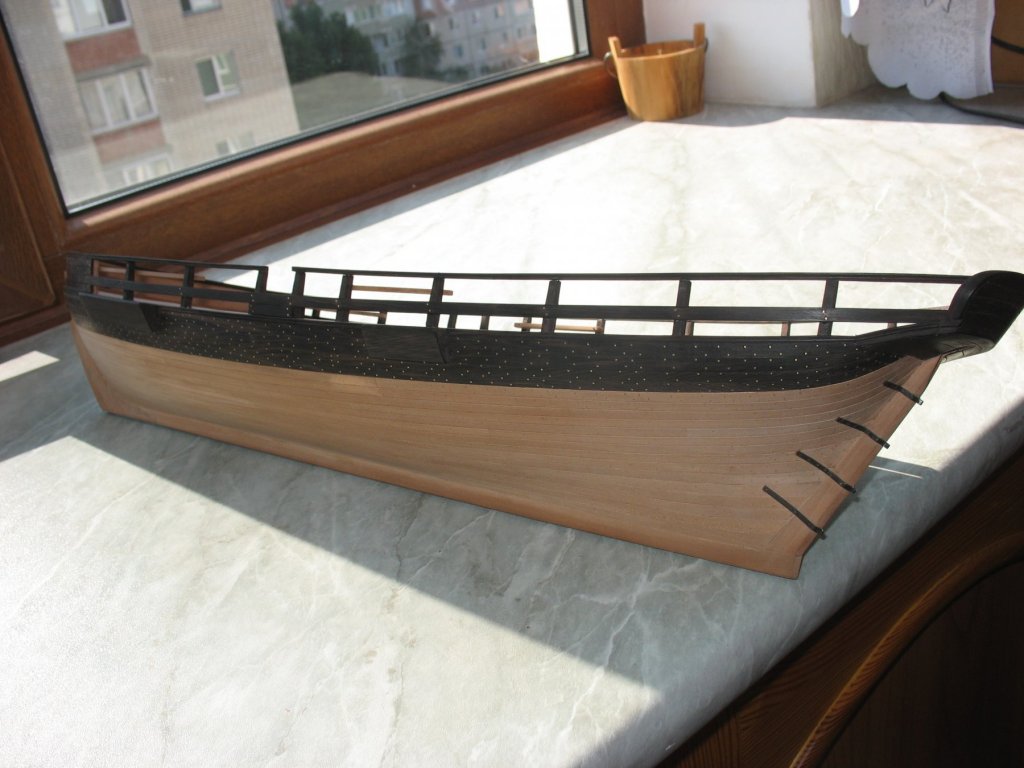
While the hull is drying, I decided to coat the deck with tung-oil. What can I say - the tung-oil is thicker than the oilseed oil. I richly coated the deck, the absorptivity is nice. My expectations that the deck would have lighter color weren’t fulfilled, but the aging effect was quite nice. I coated it in one layer, i think i’ll leave it at that, but it would be seen after polishing.
- 306 replies
-
- 23
-
-
- schooner
- la jacinthe
- (and 1 more)
-
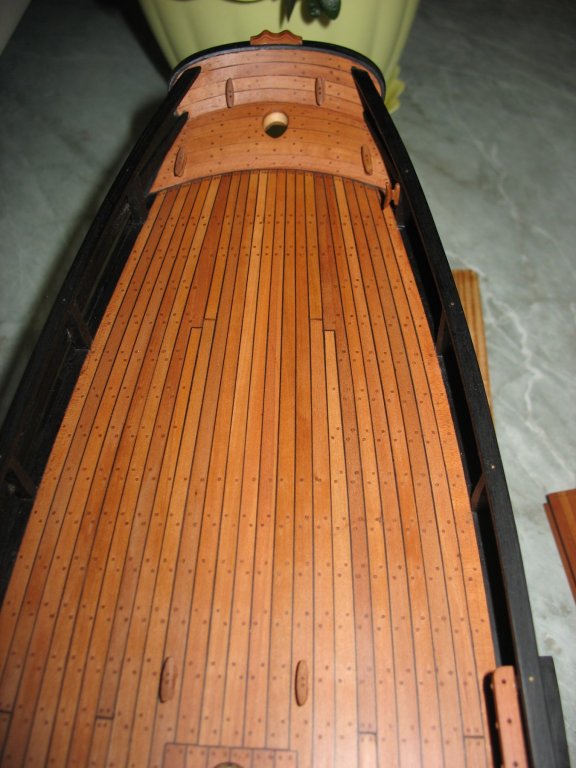
I oil-coated it, I decided to coat the hull with linseed oil, hoping it would give a darker color than tung-oil on the deck.


- 306 replies
-
- 13
-
-
- schooner
- la jacinthe
- (and 1 more)
-
My dear colleagues, thank you very much for those kind words and attention to my work.
-
Thank you very much Doris. Your work is also gorgeous and I admire your craftsmanship a lot. My best regards.
- 306 replies
-
- 2
-
-
- schooner
- la jacinthe
- (and 1 more)
-
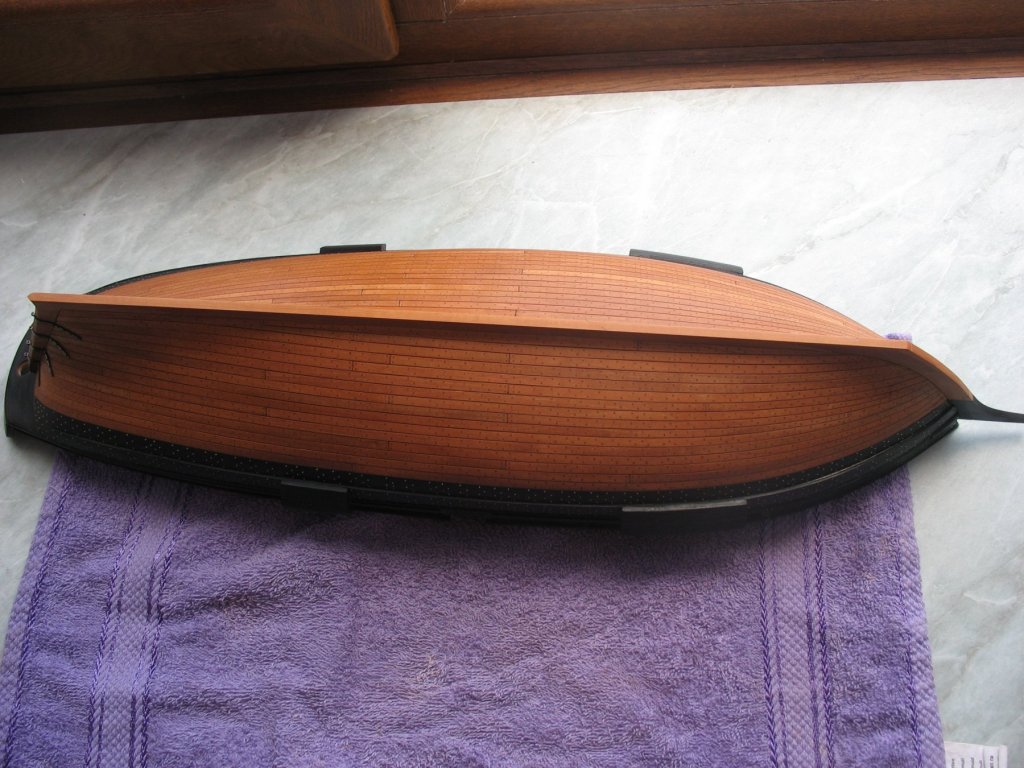
Assembled . Vitrifaction will be made after oil coating, just before installing in place.

- 306 replies
-
- 14
-
-
- schooner
- la jacinthe
- (and 1 more)
-
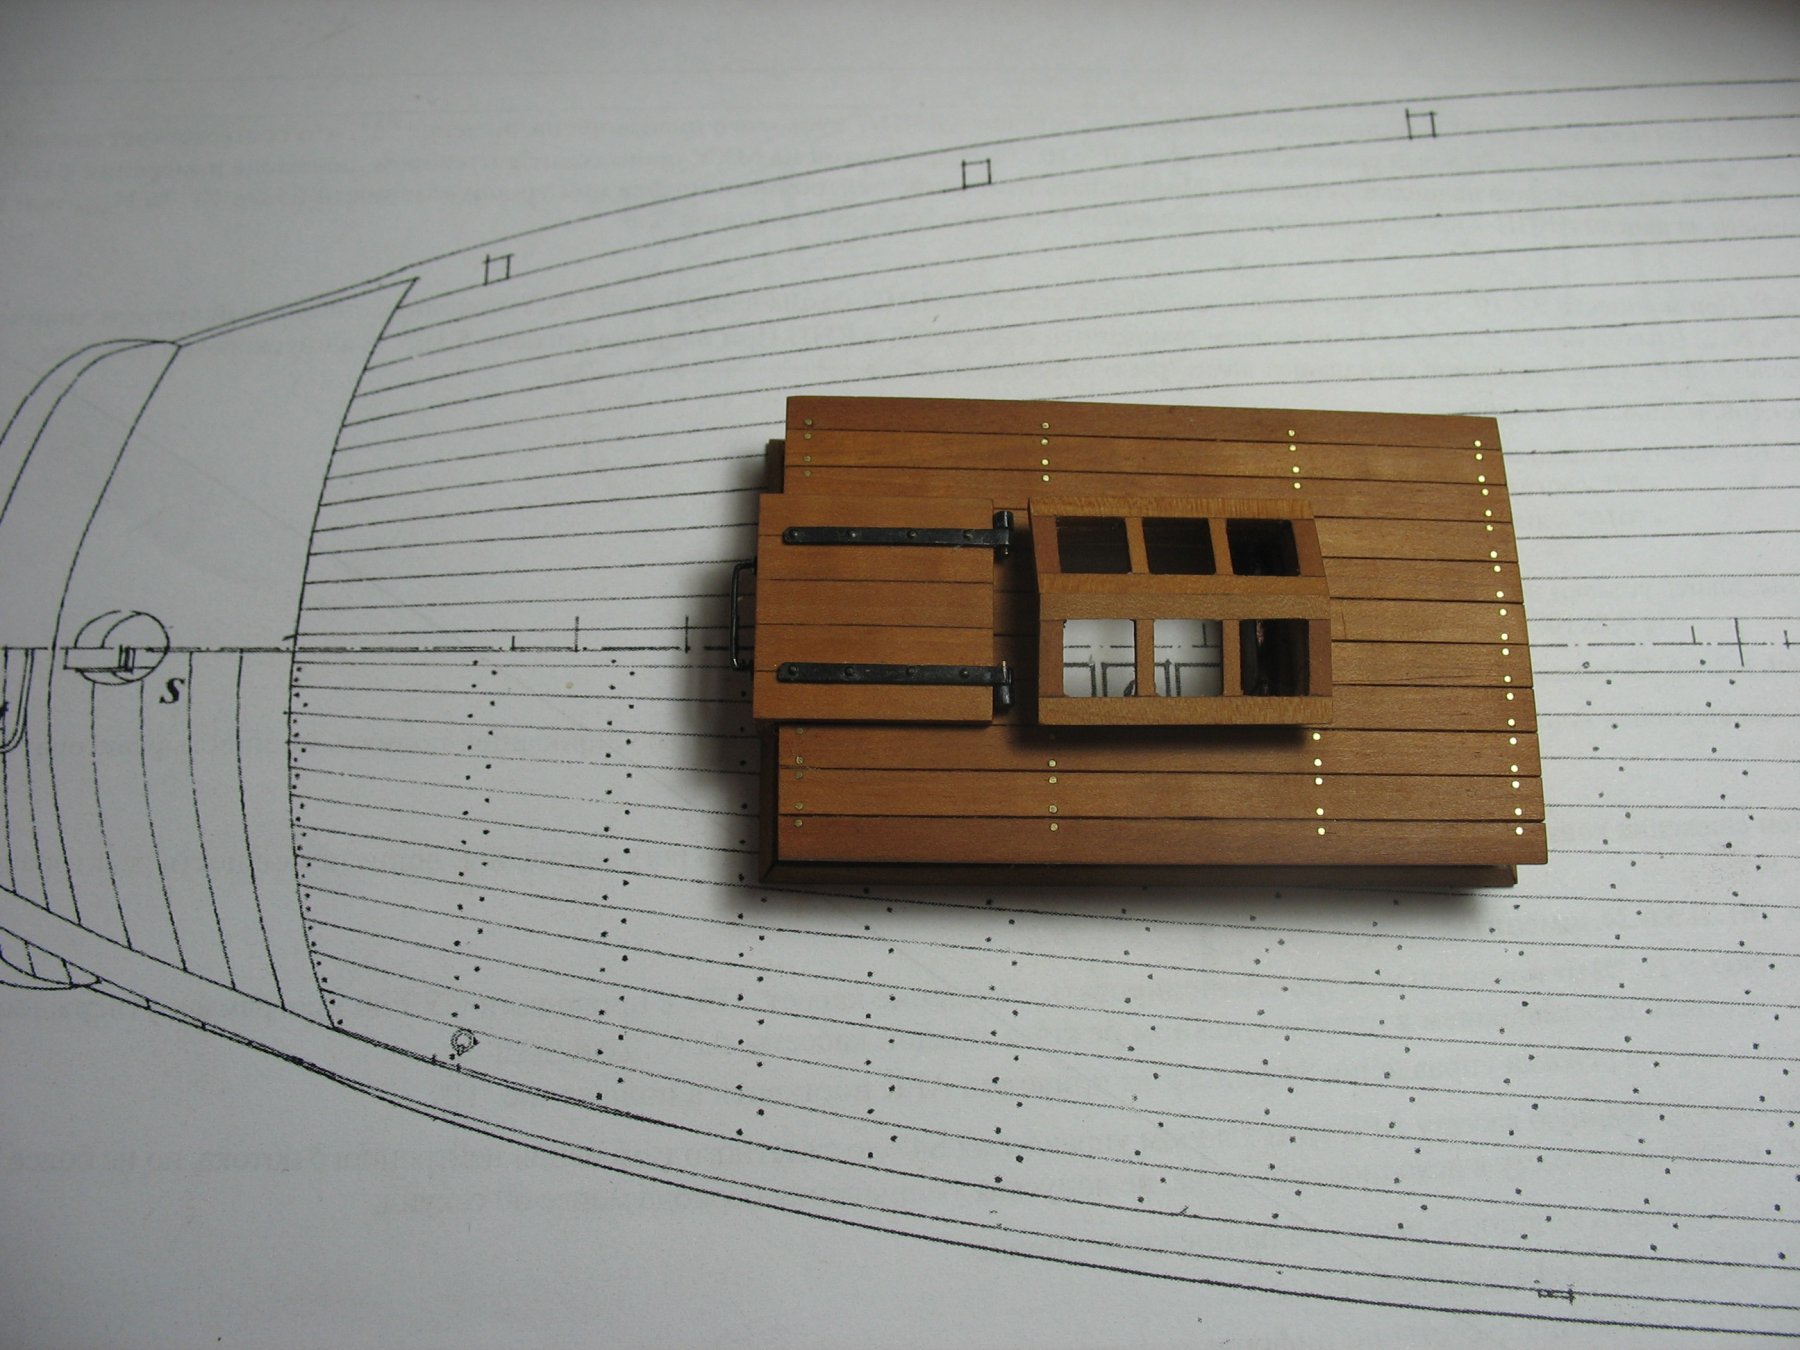
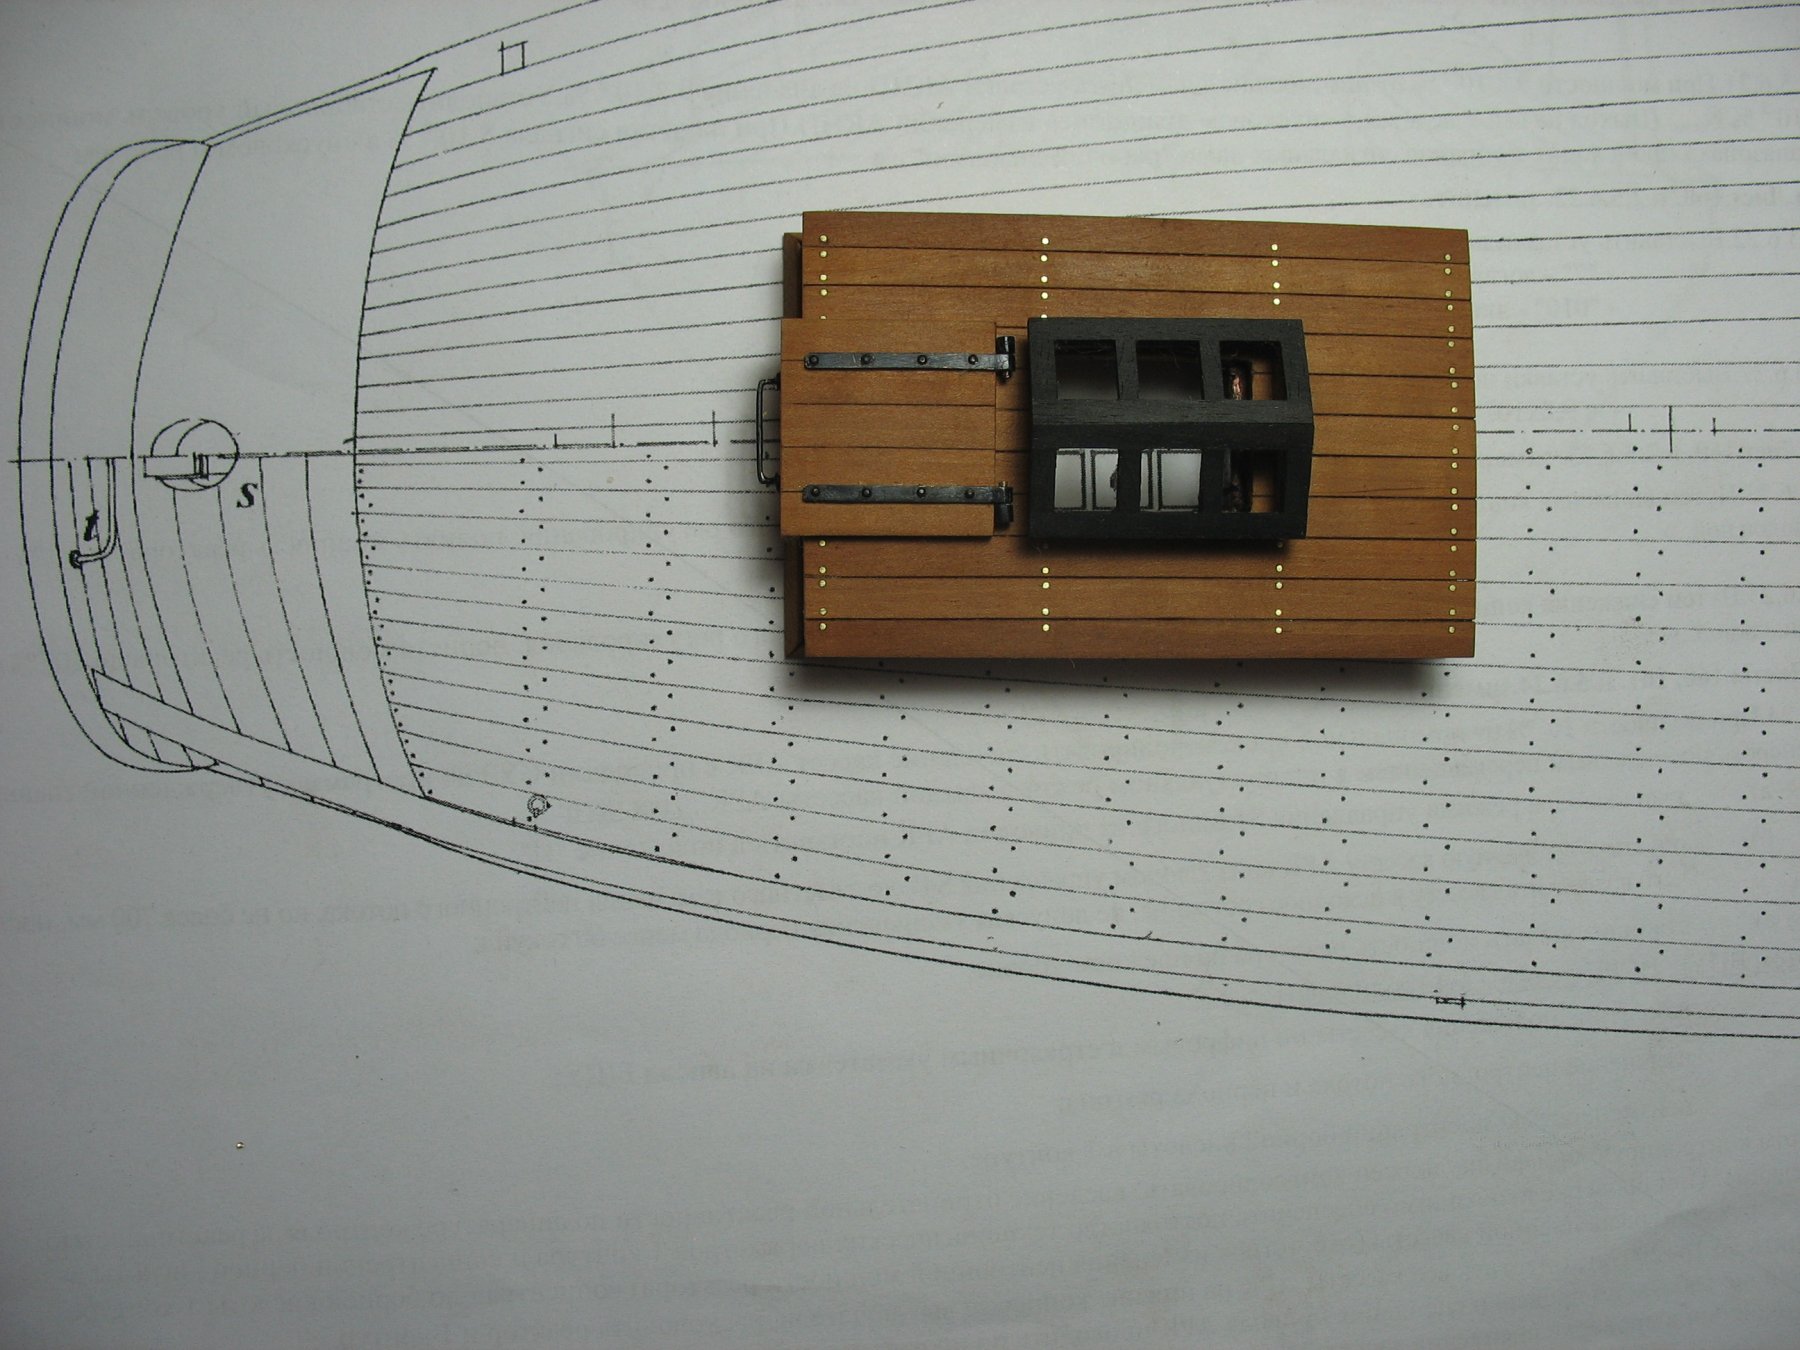
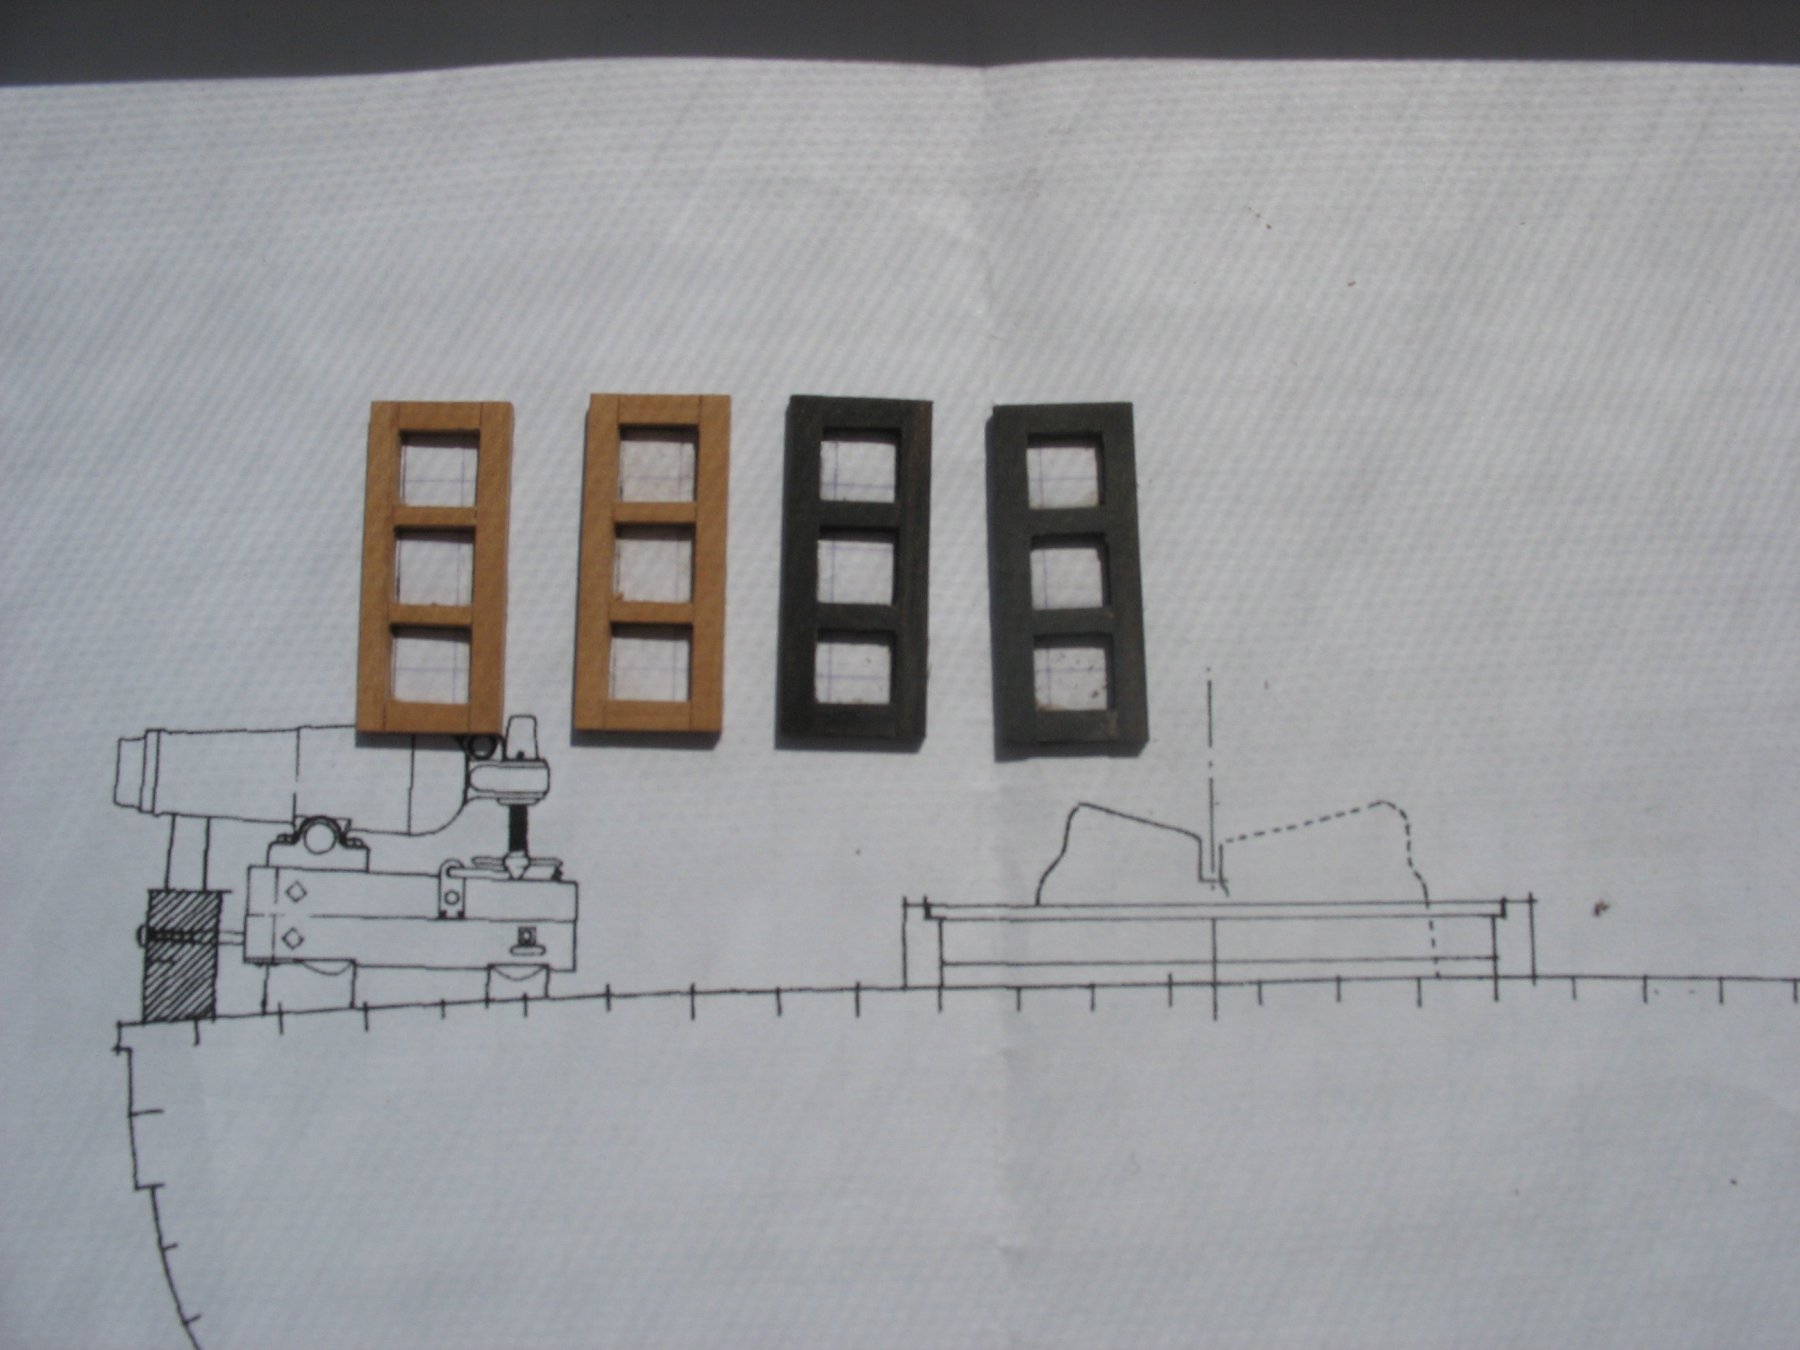
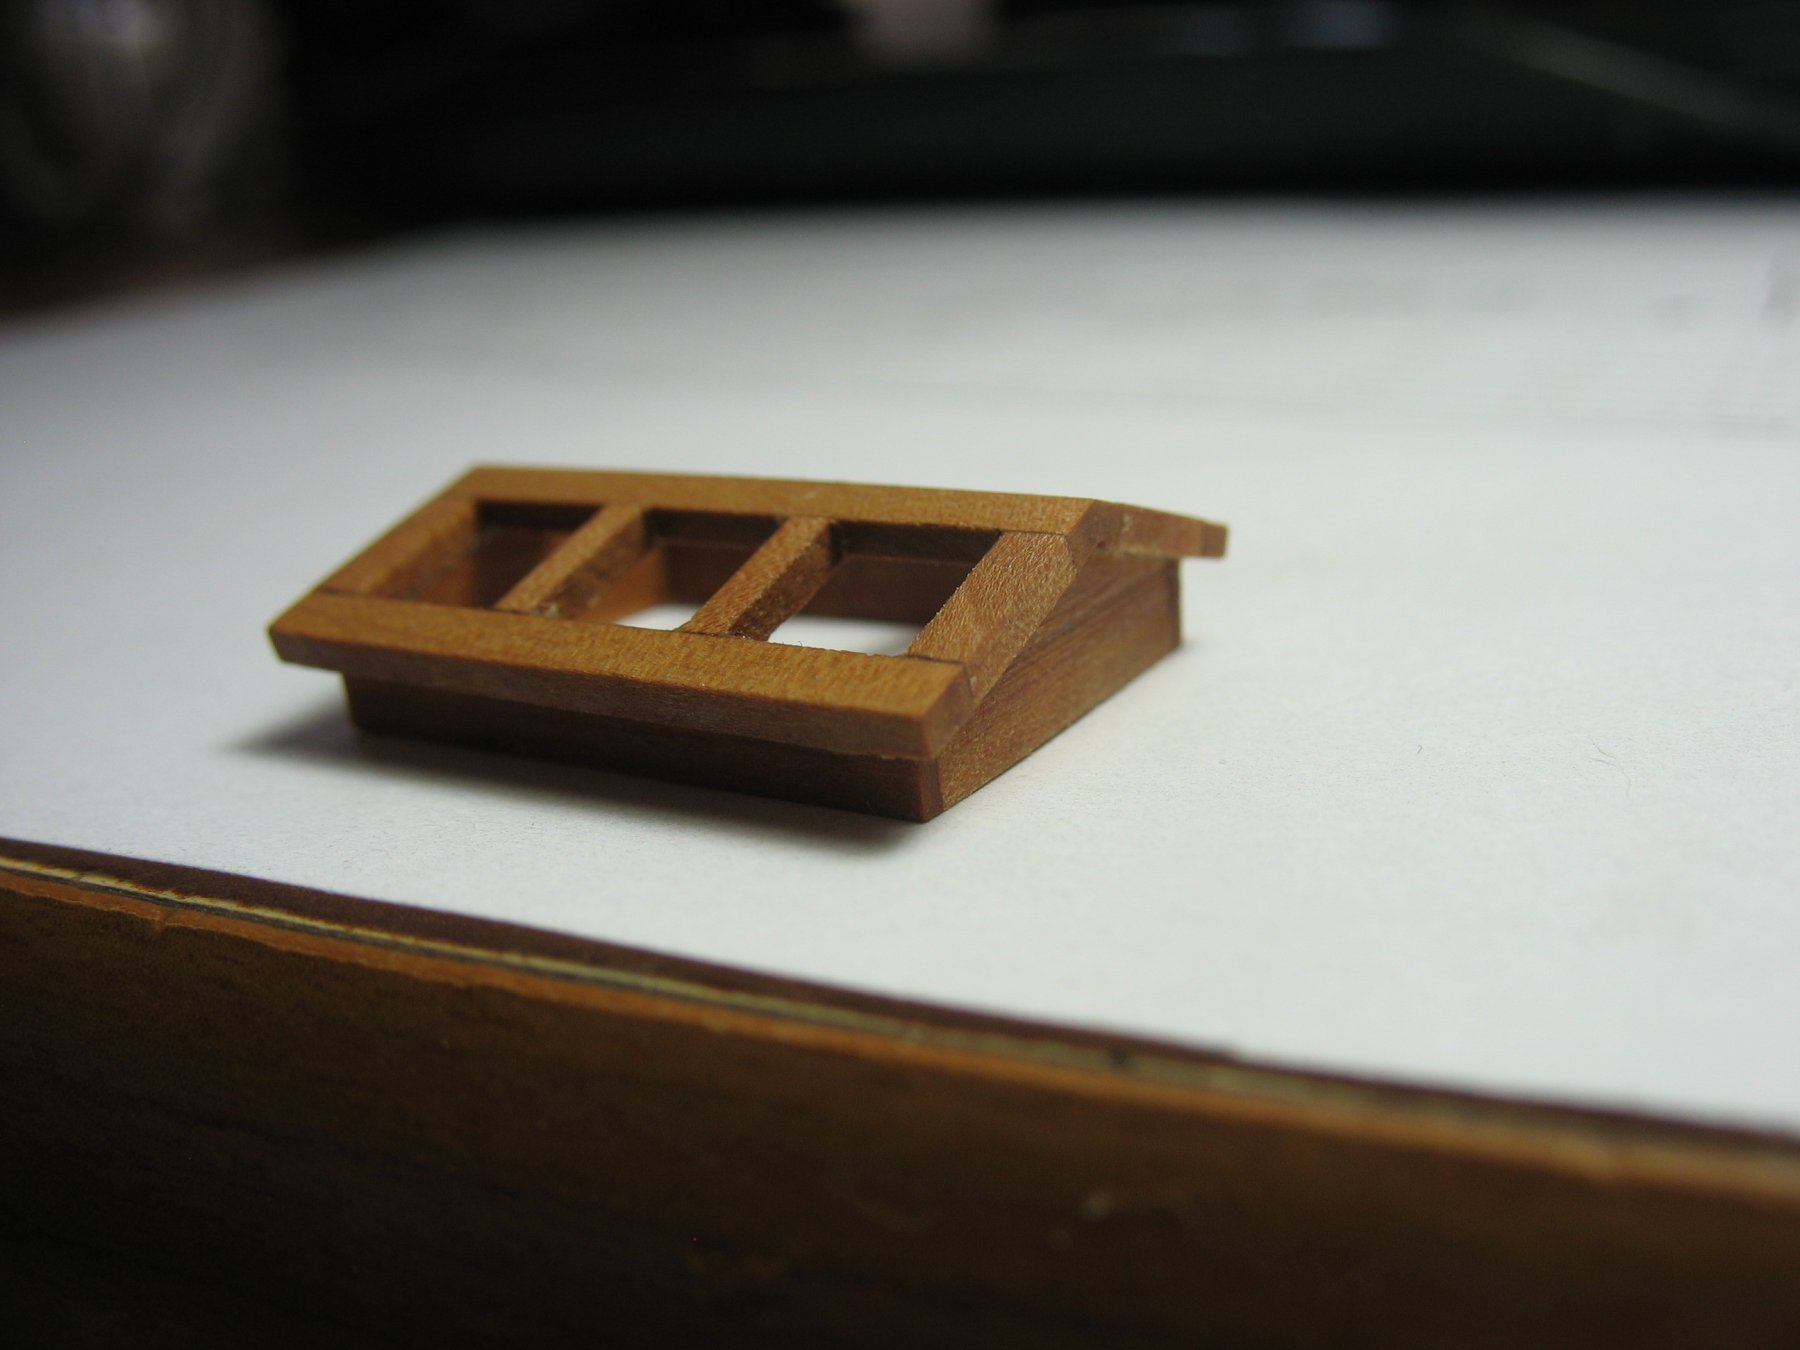
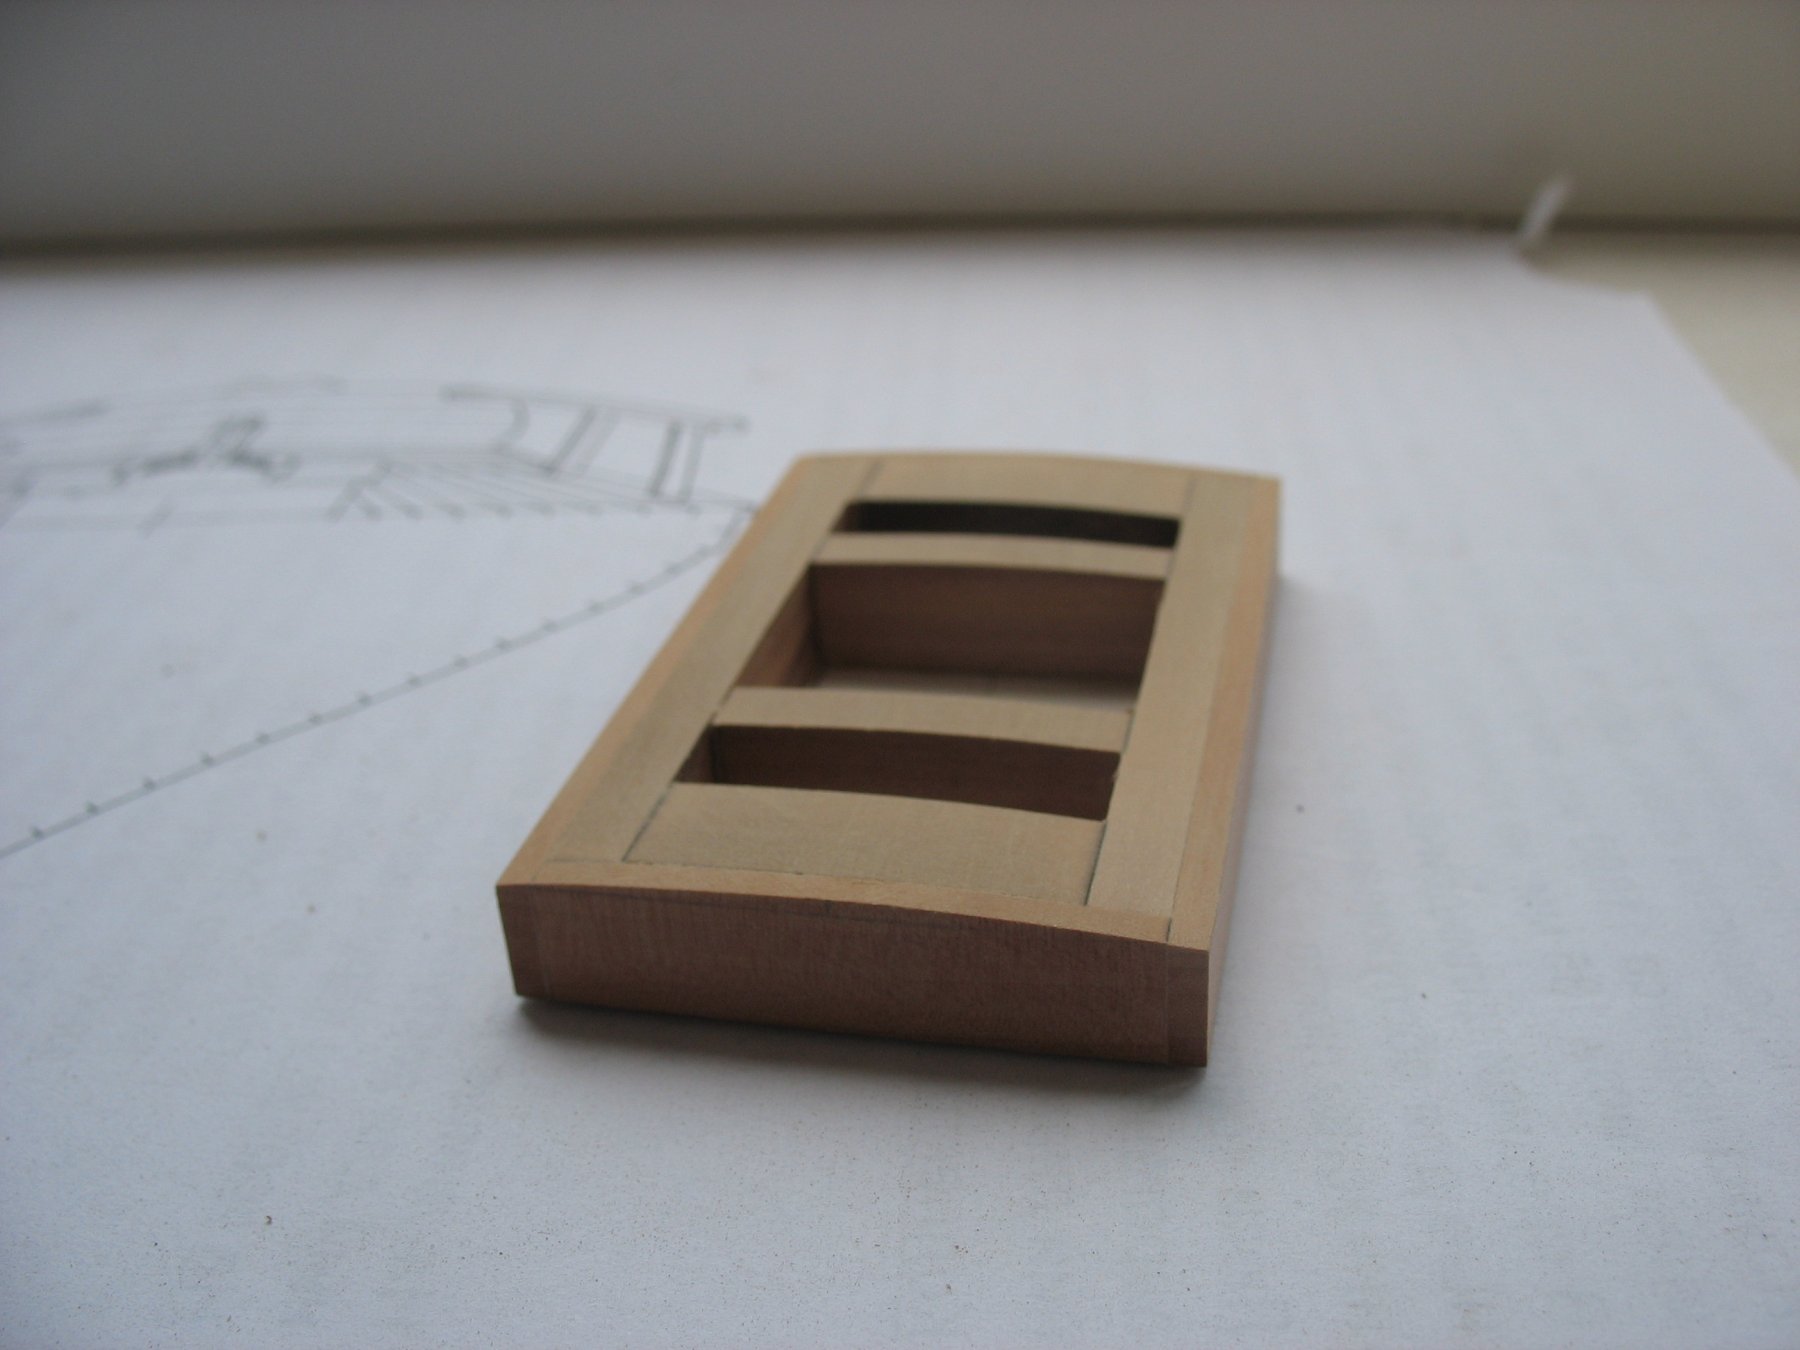
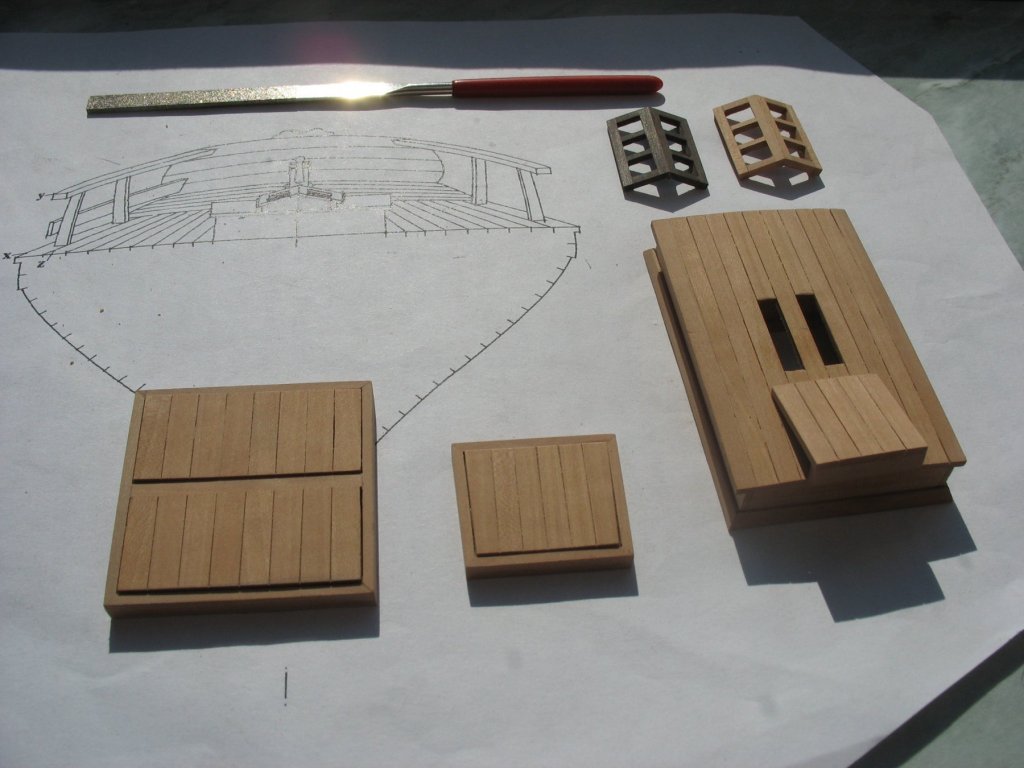
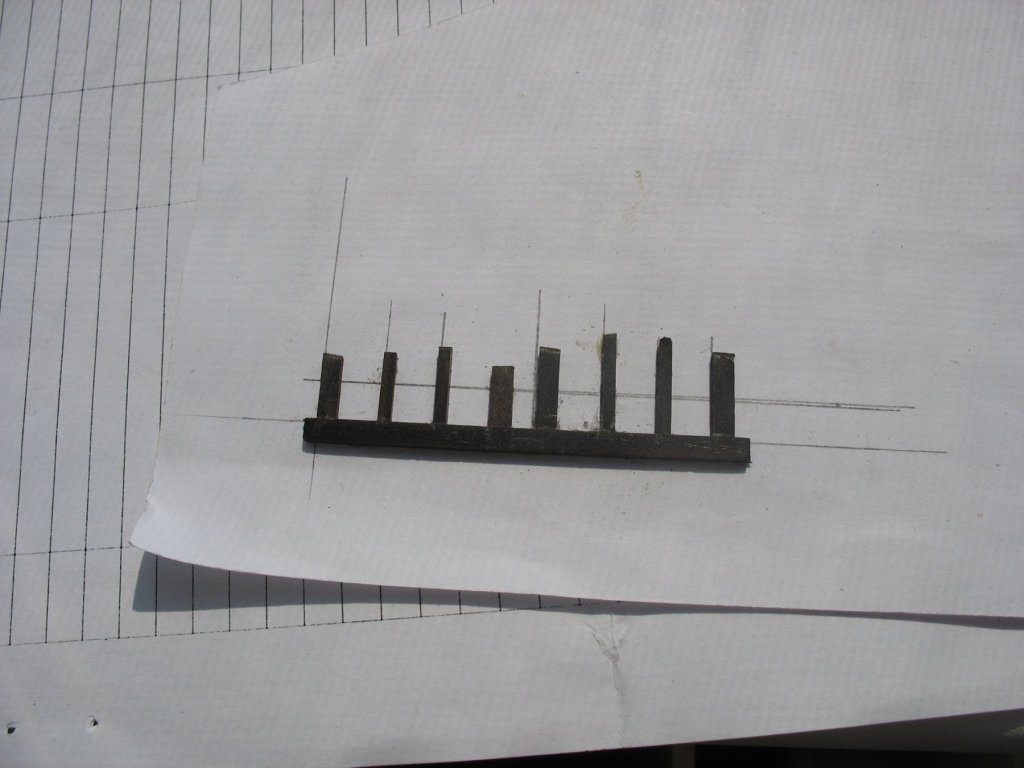
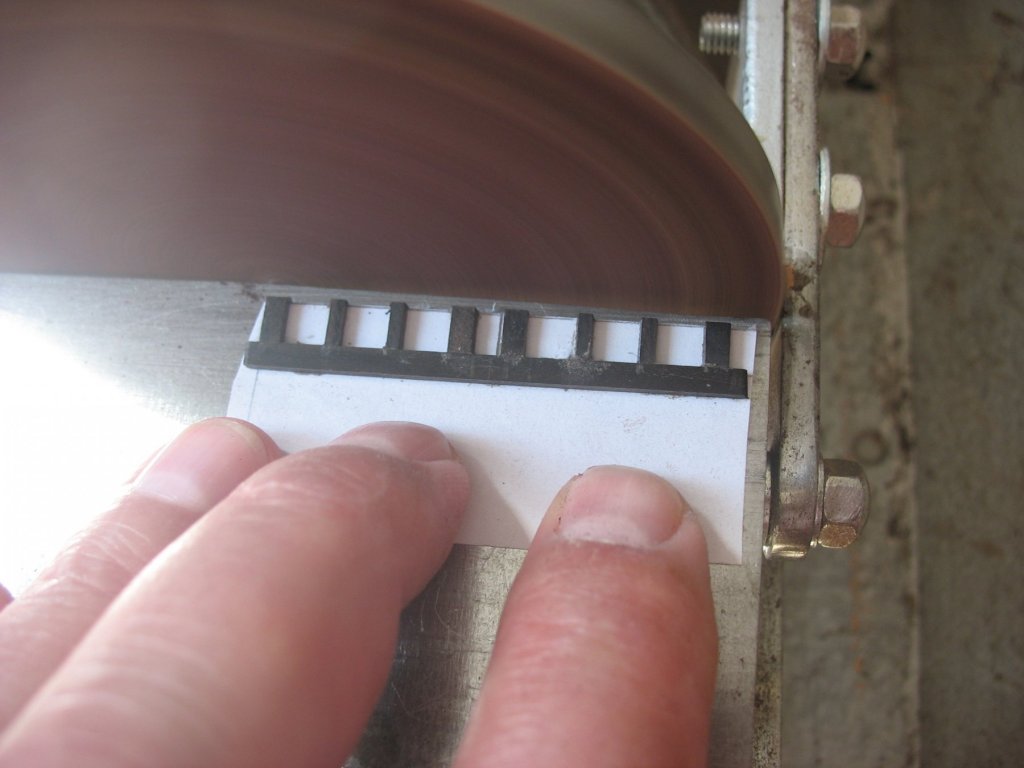
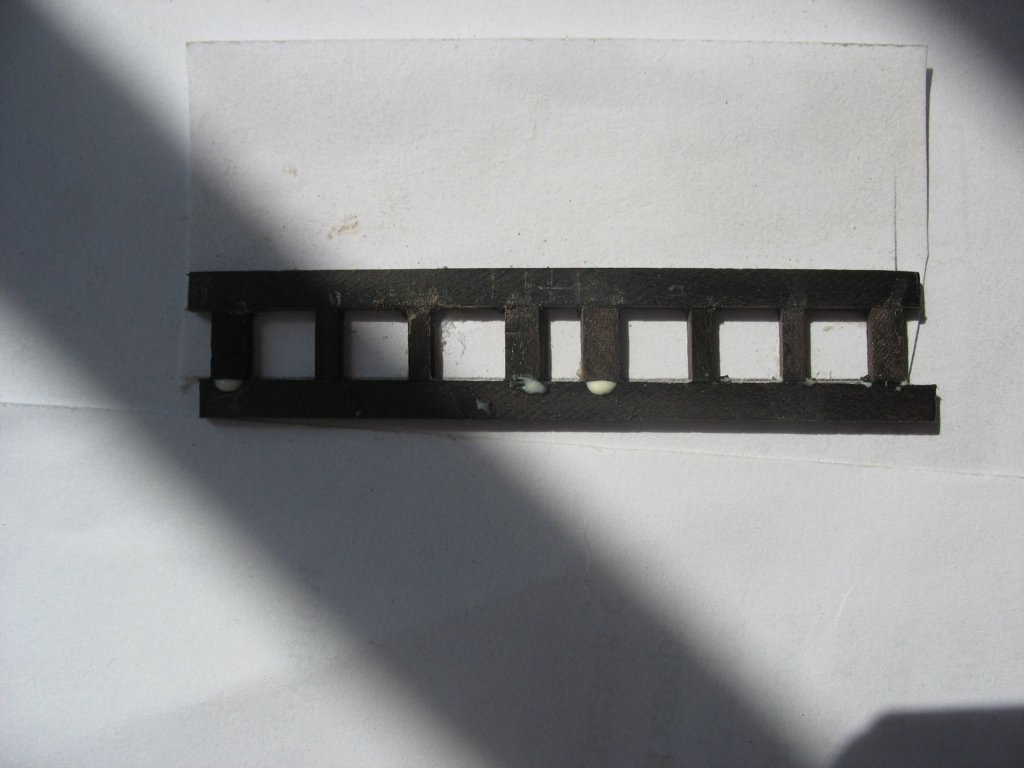
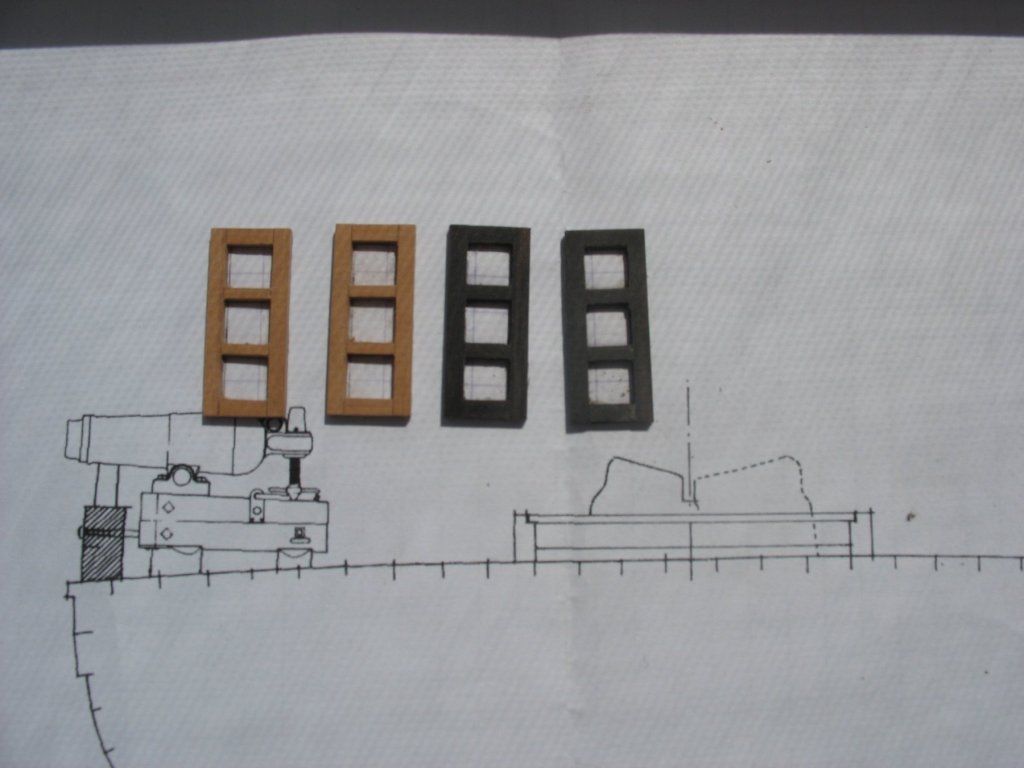
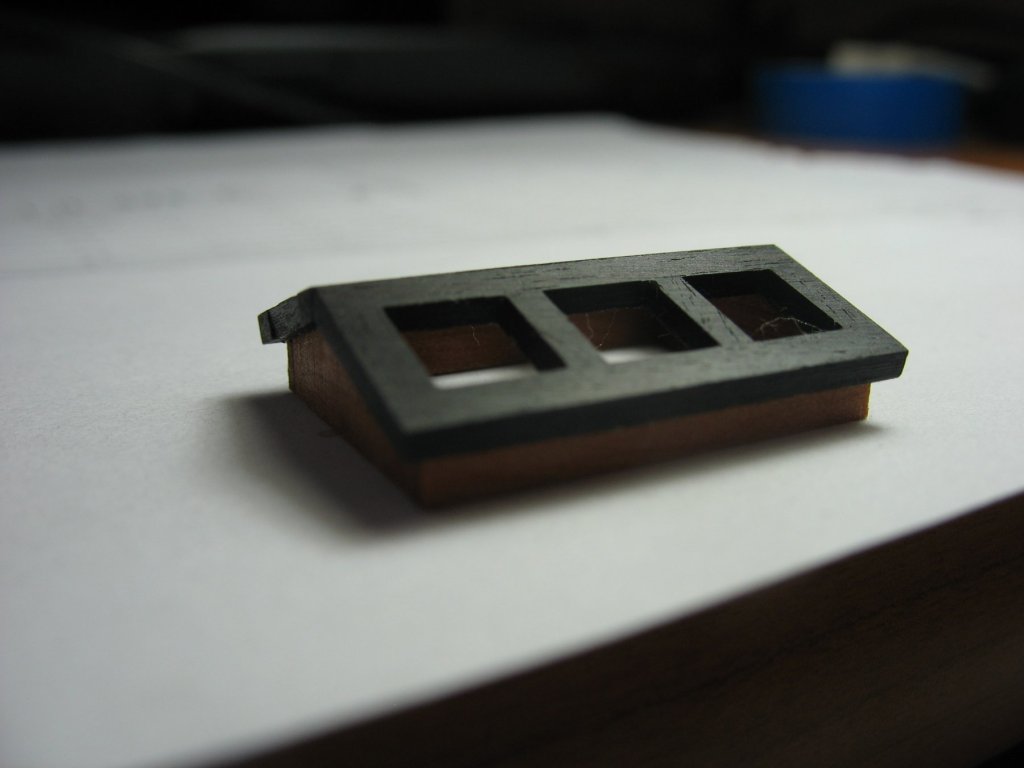
I have made the frame of the deckhouse lantern light in two variations - pear tree and hornbeam.

- 306 replies
-
- 13
-
-
- schooner
- la jacinthe
- (and 1 more)
-
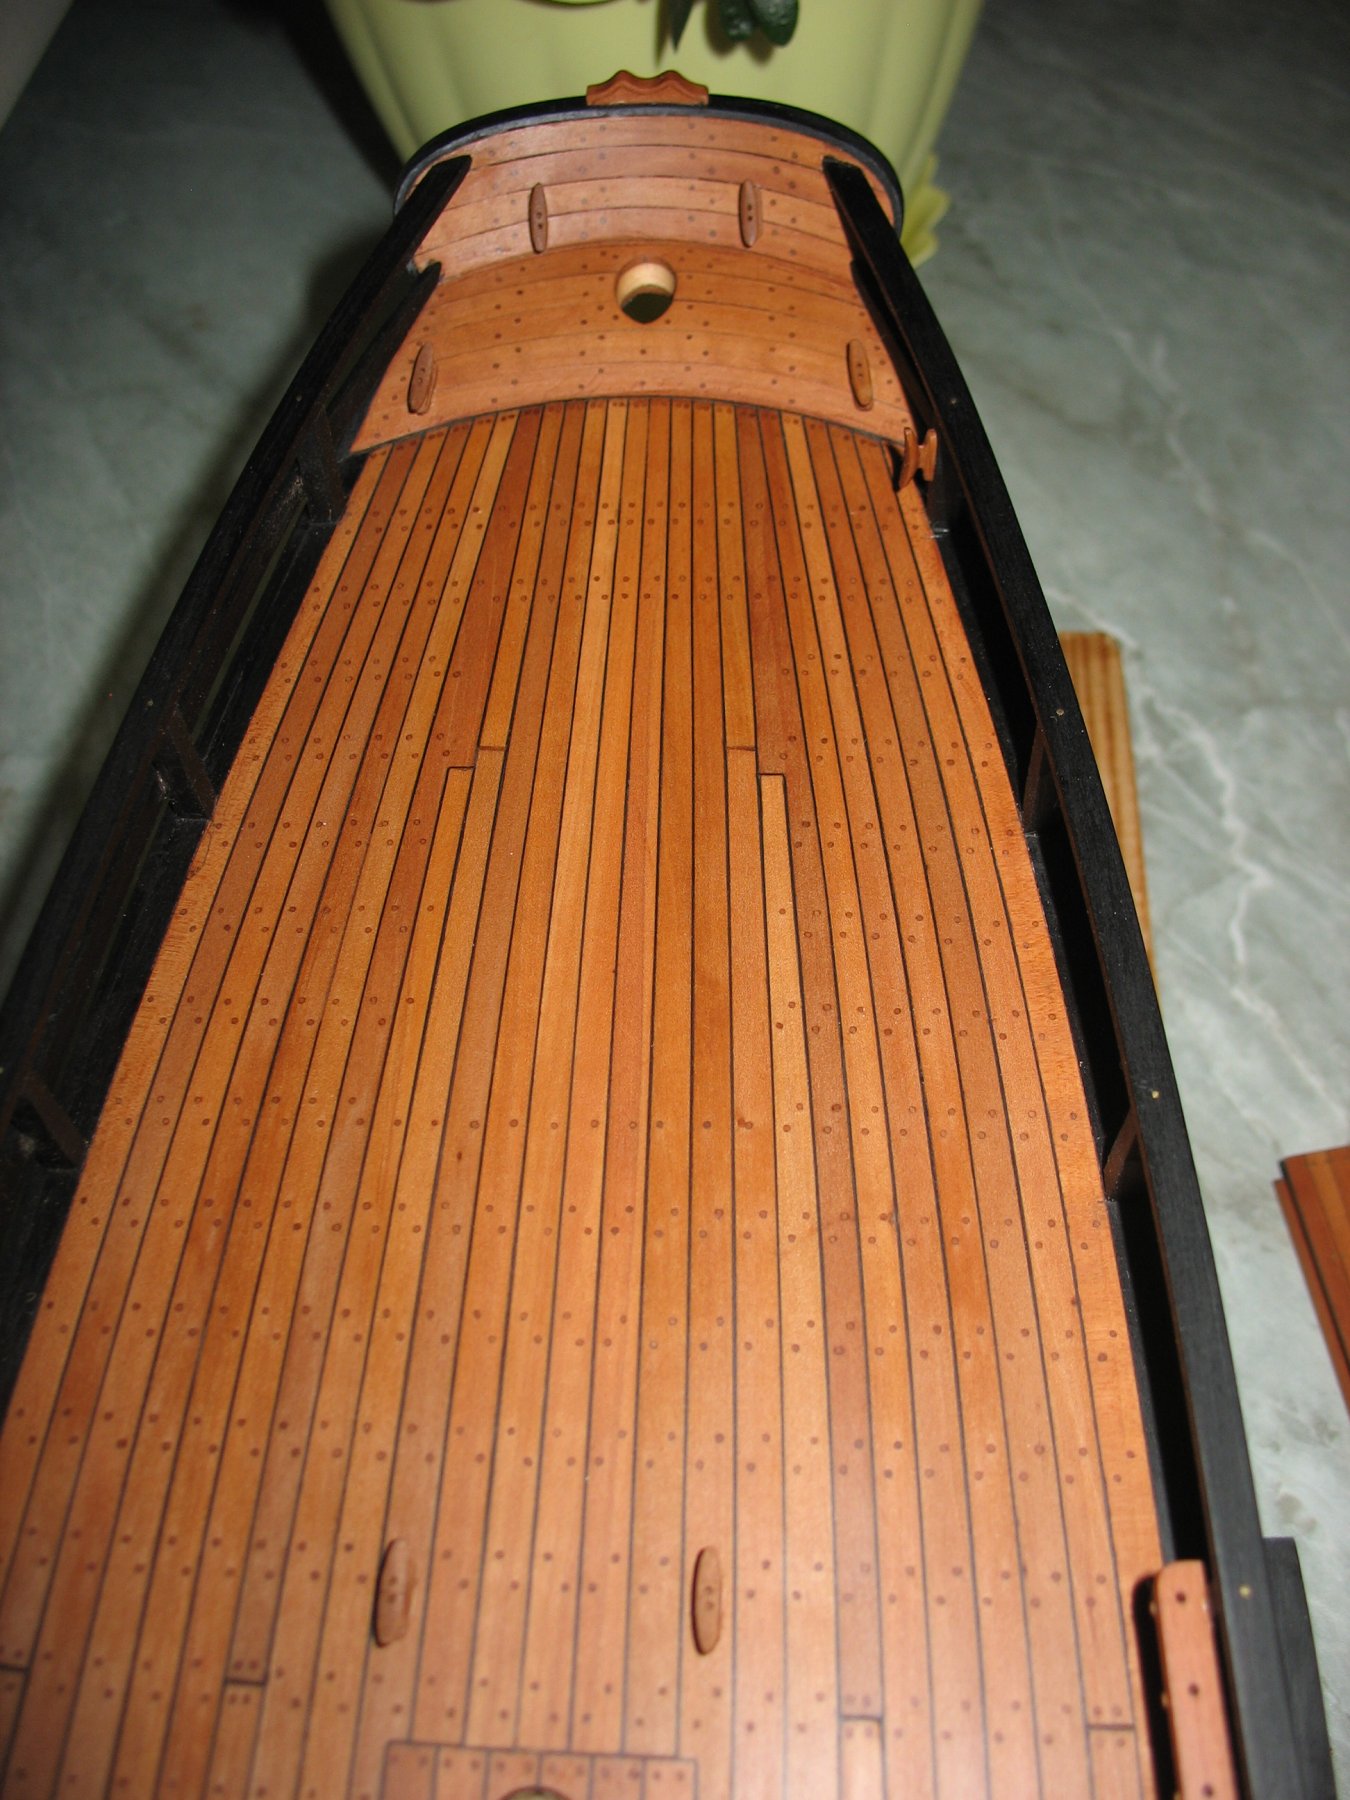
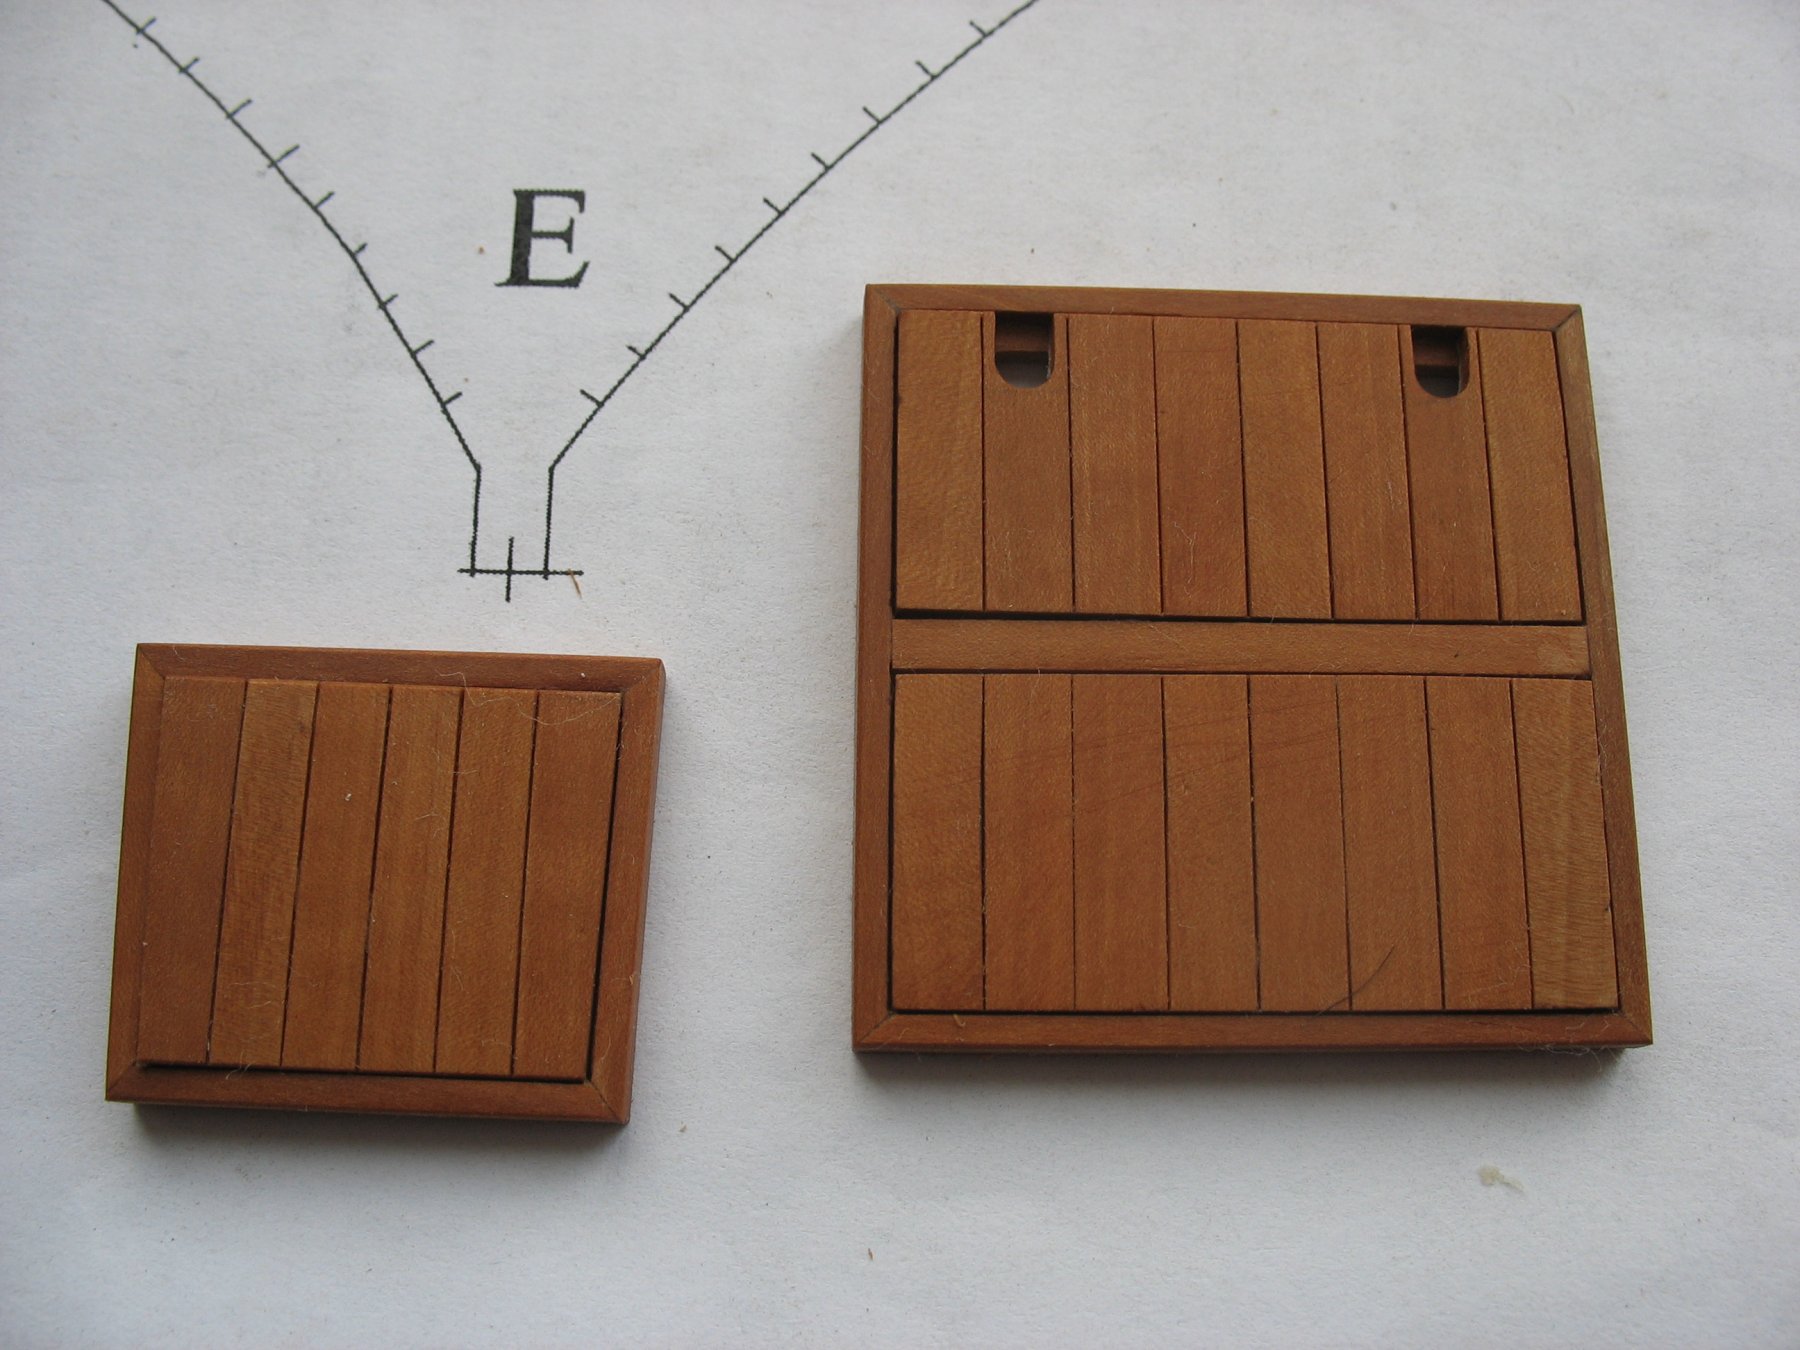
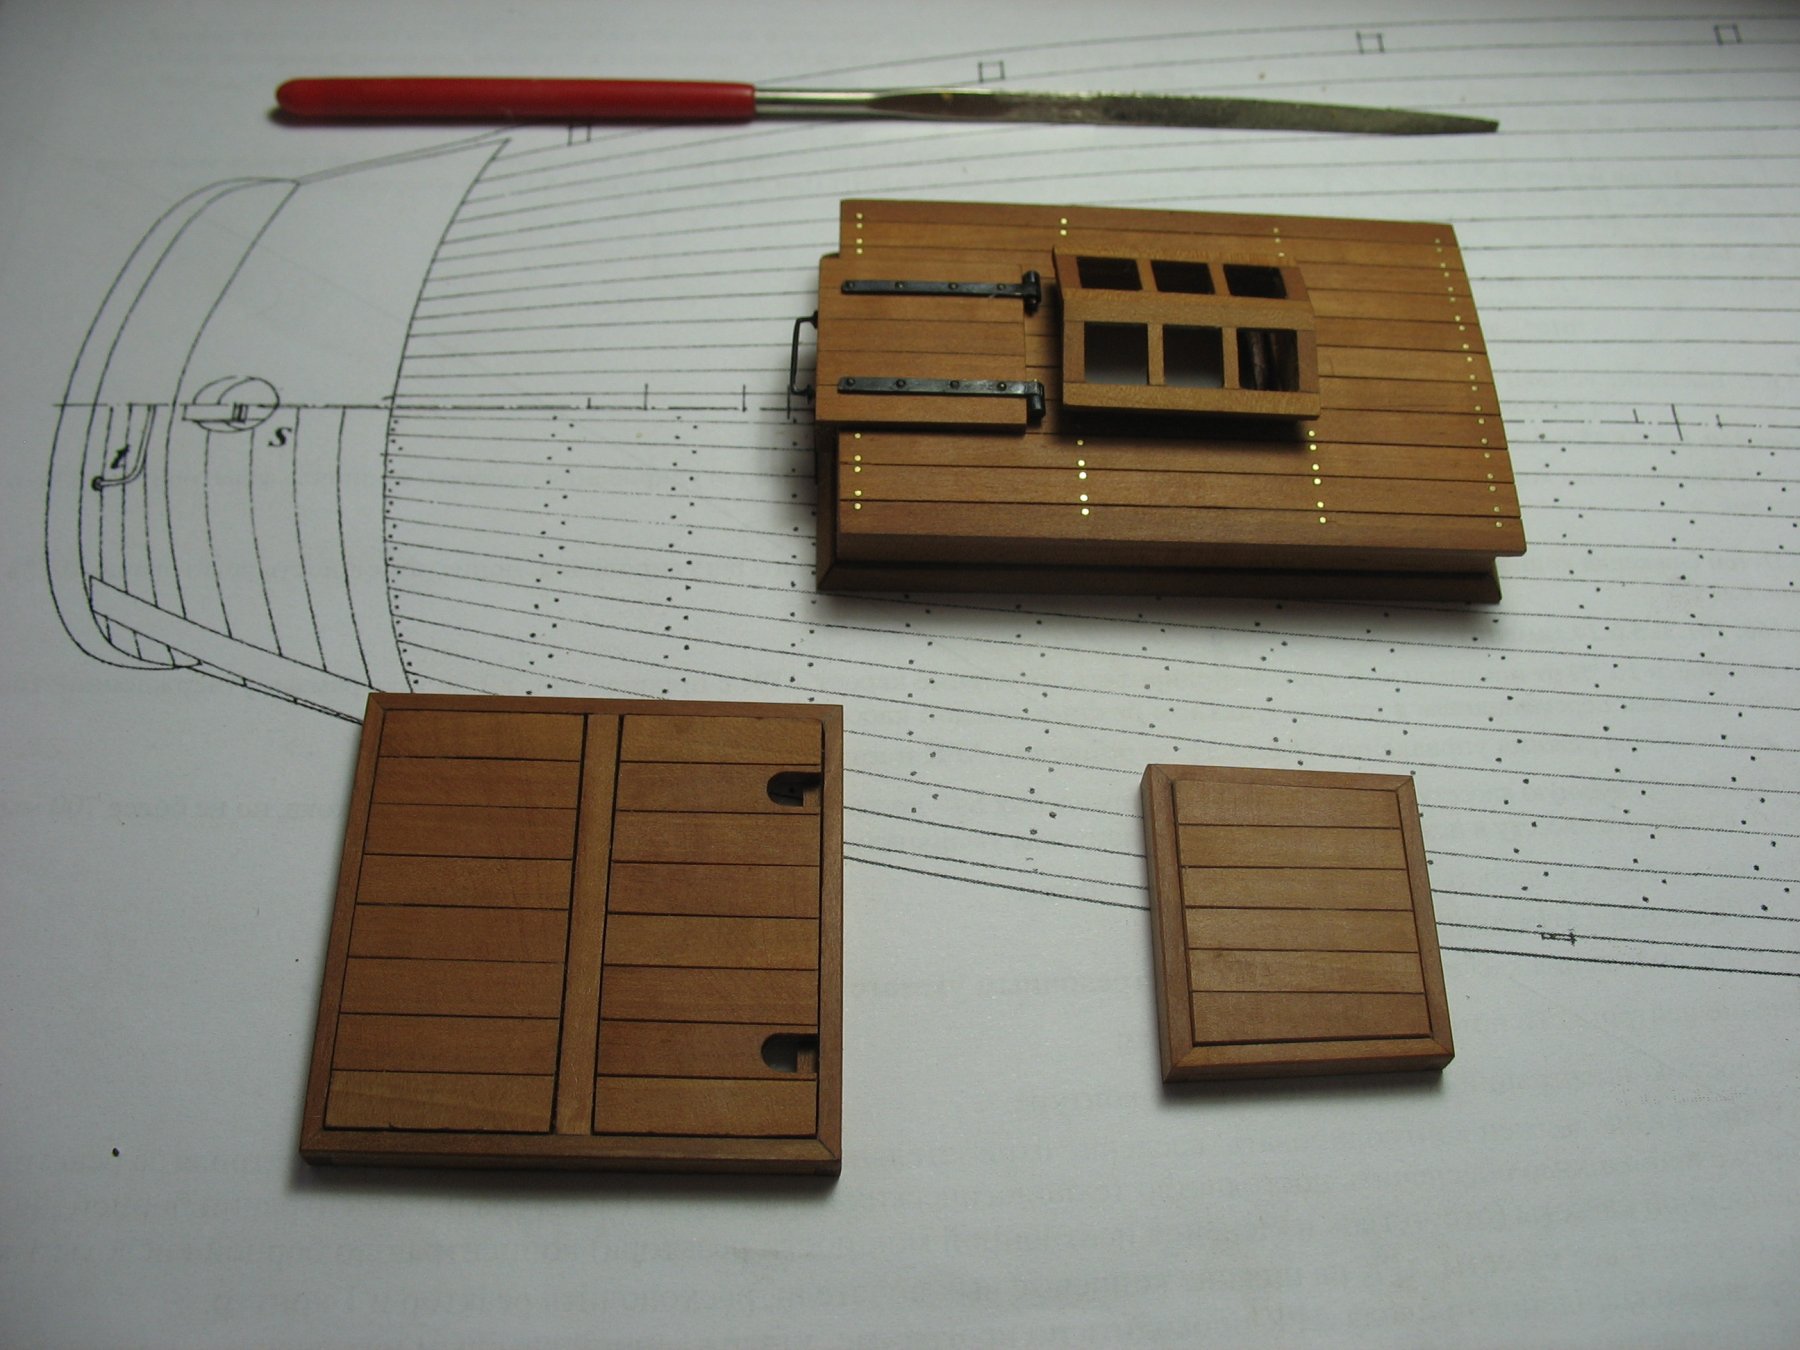
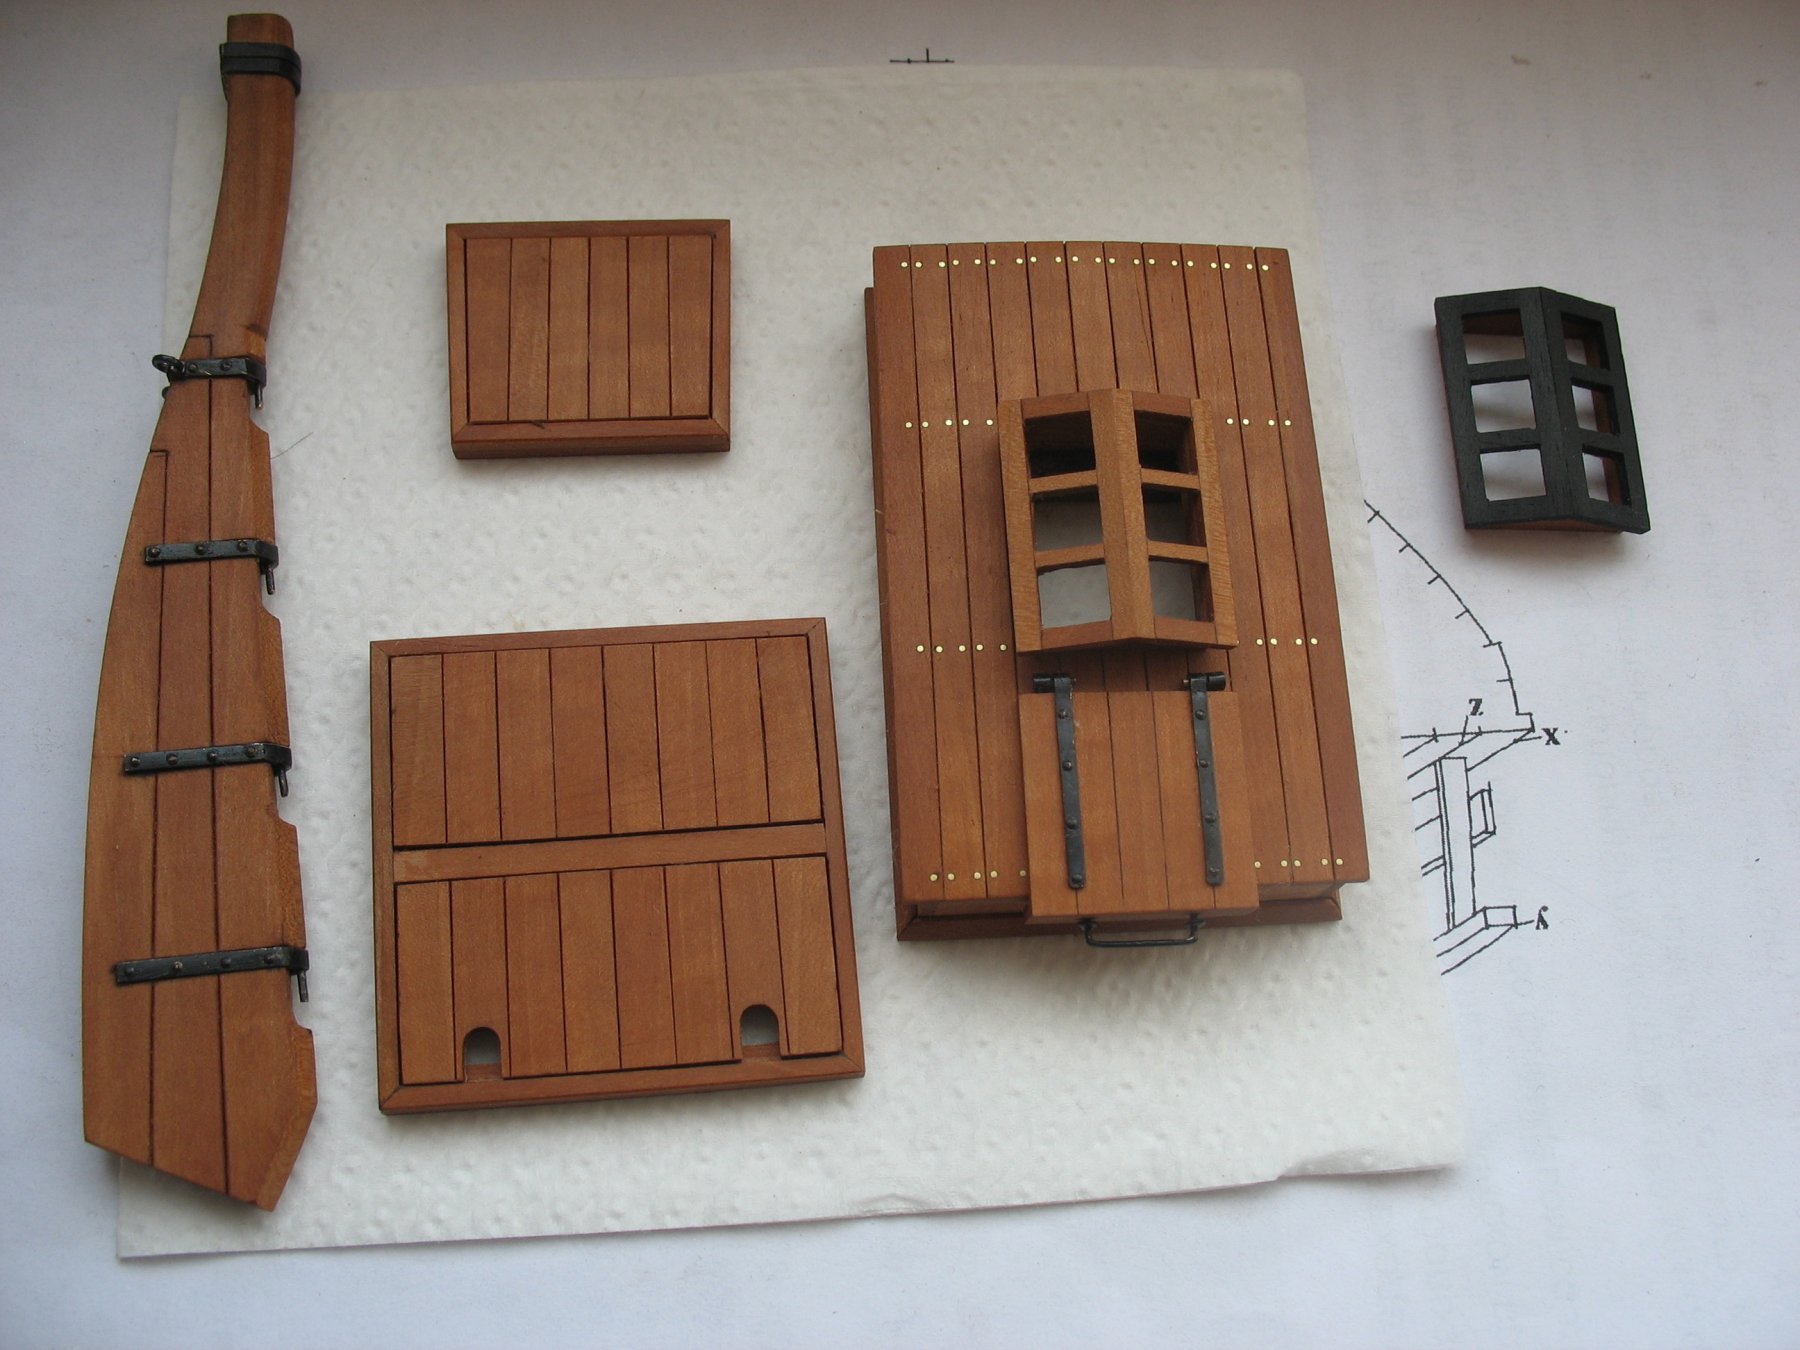
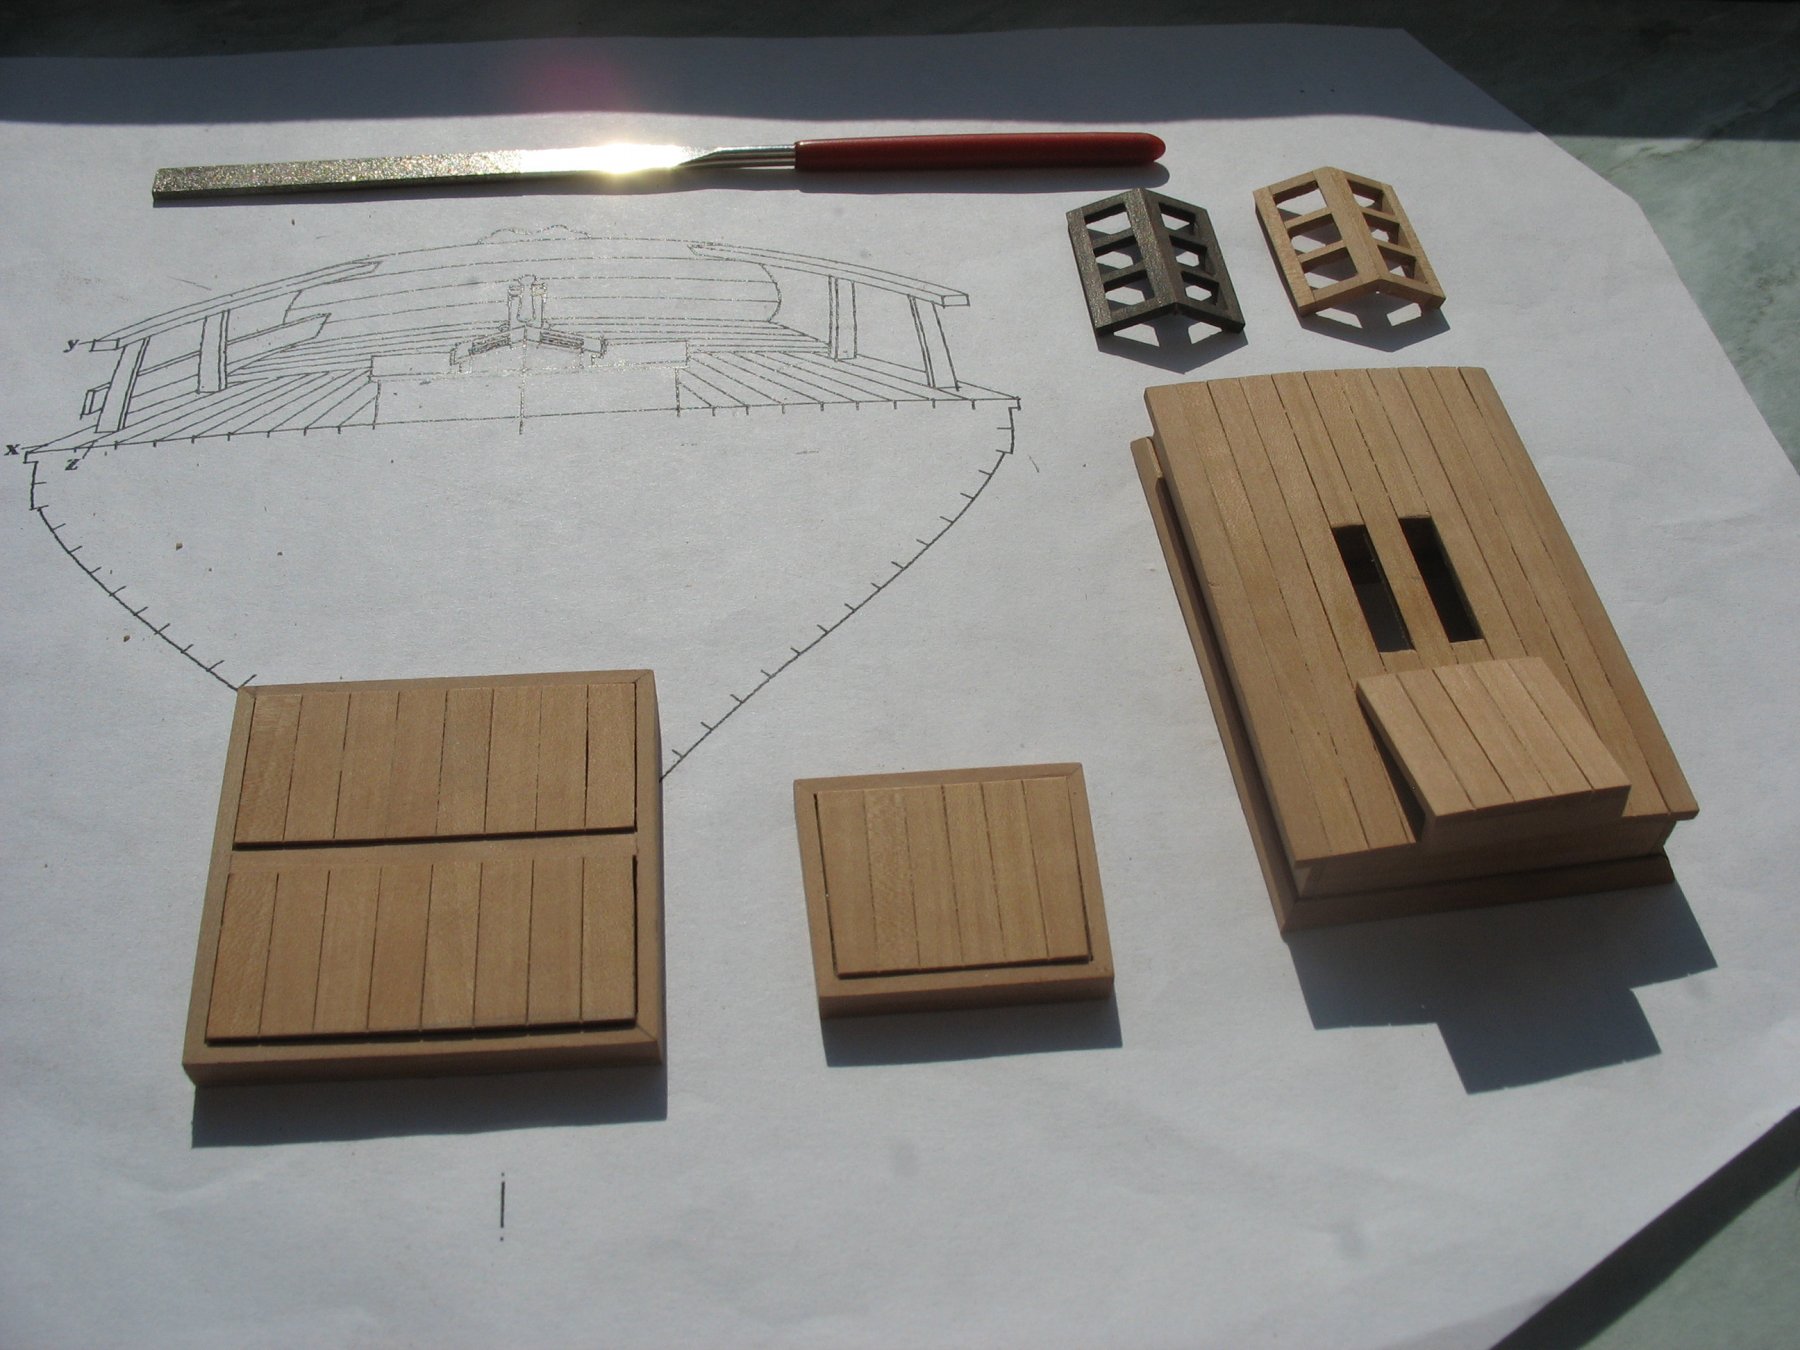
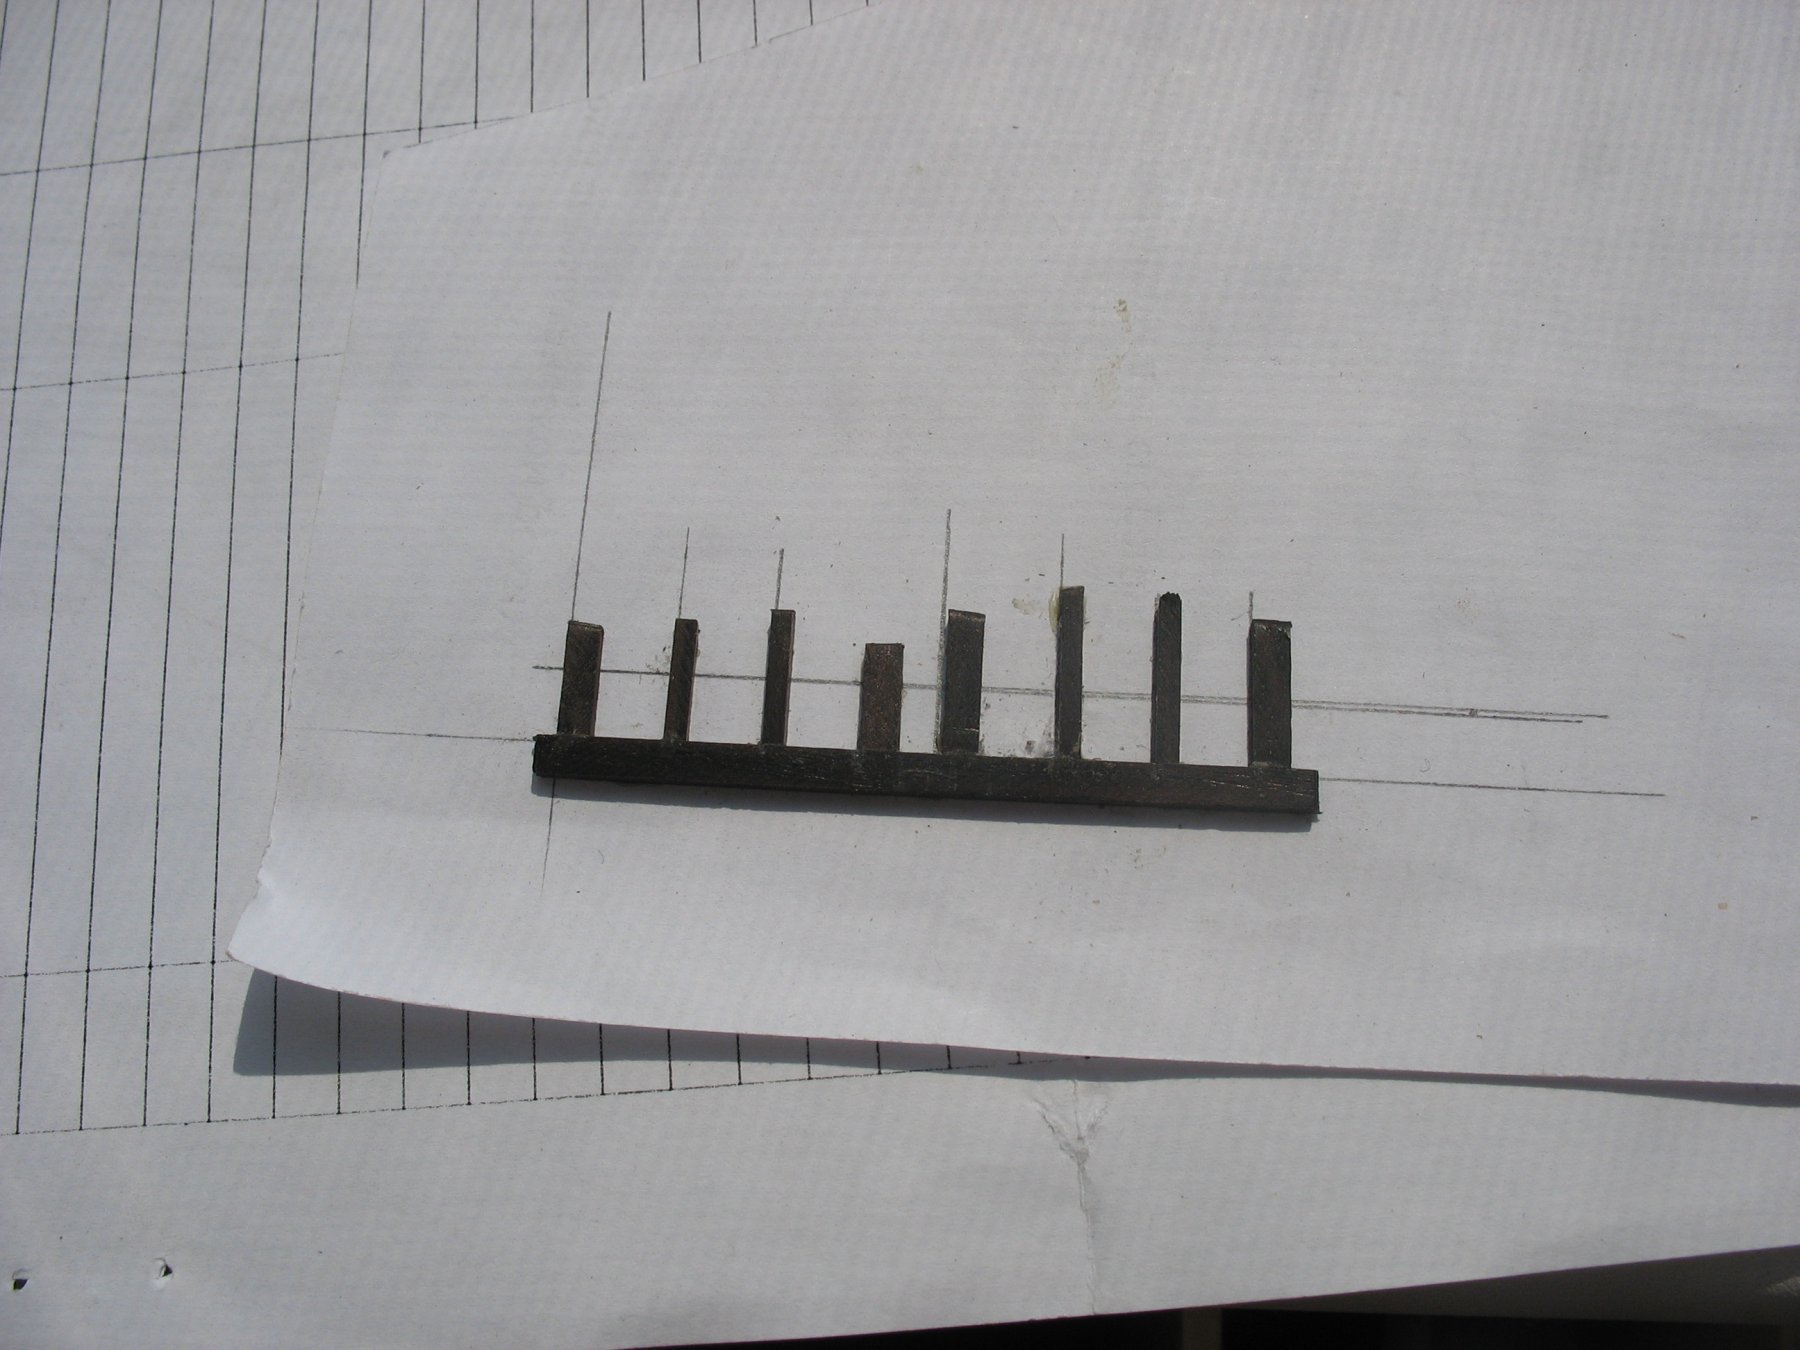
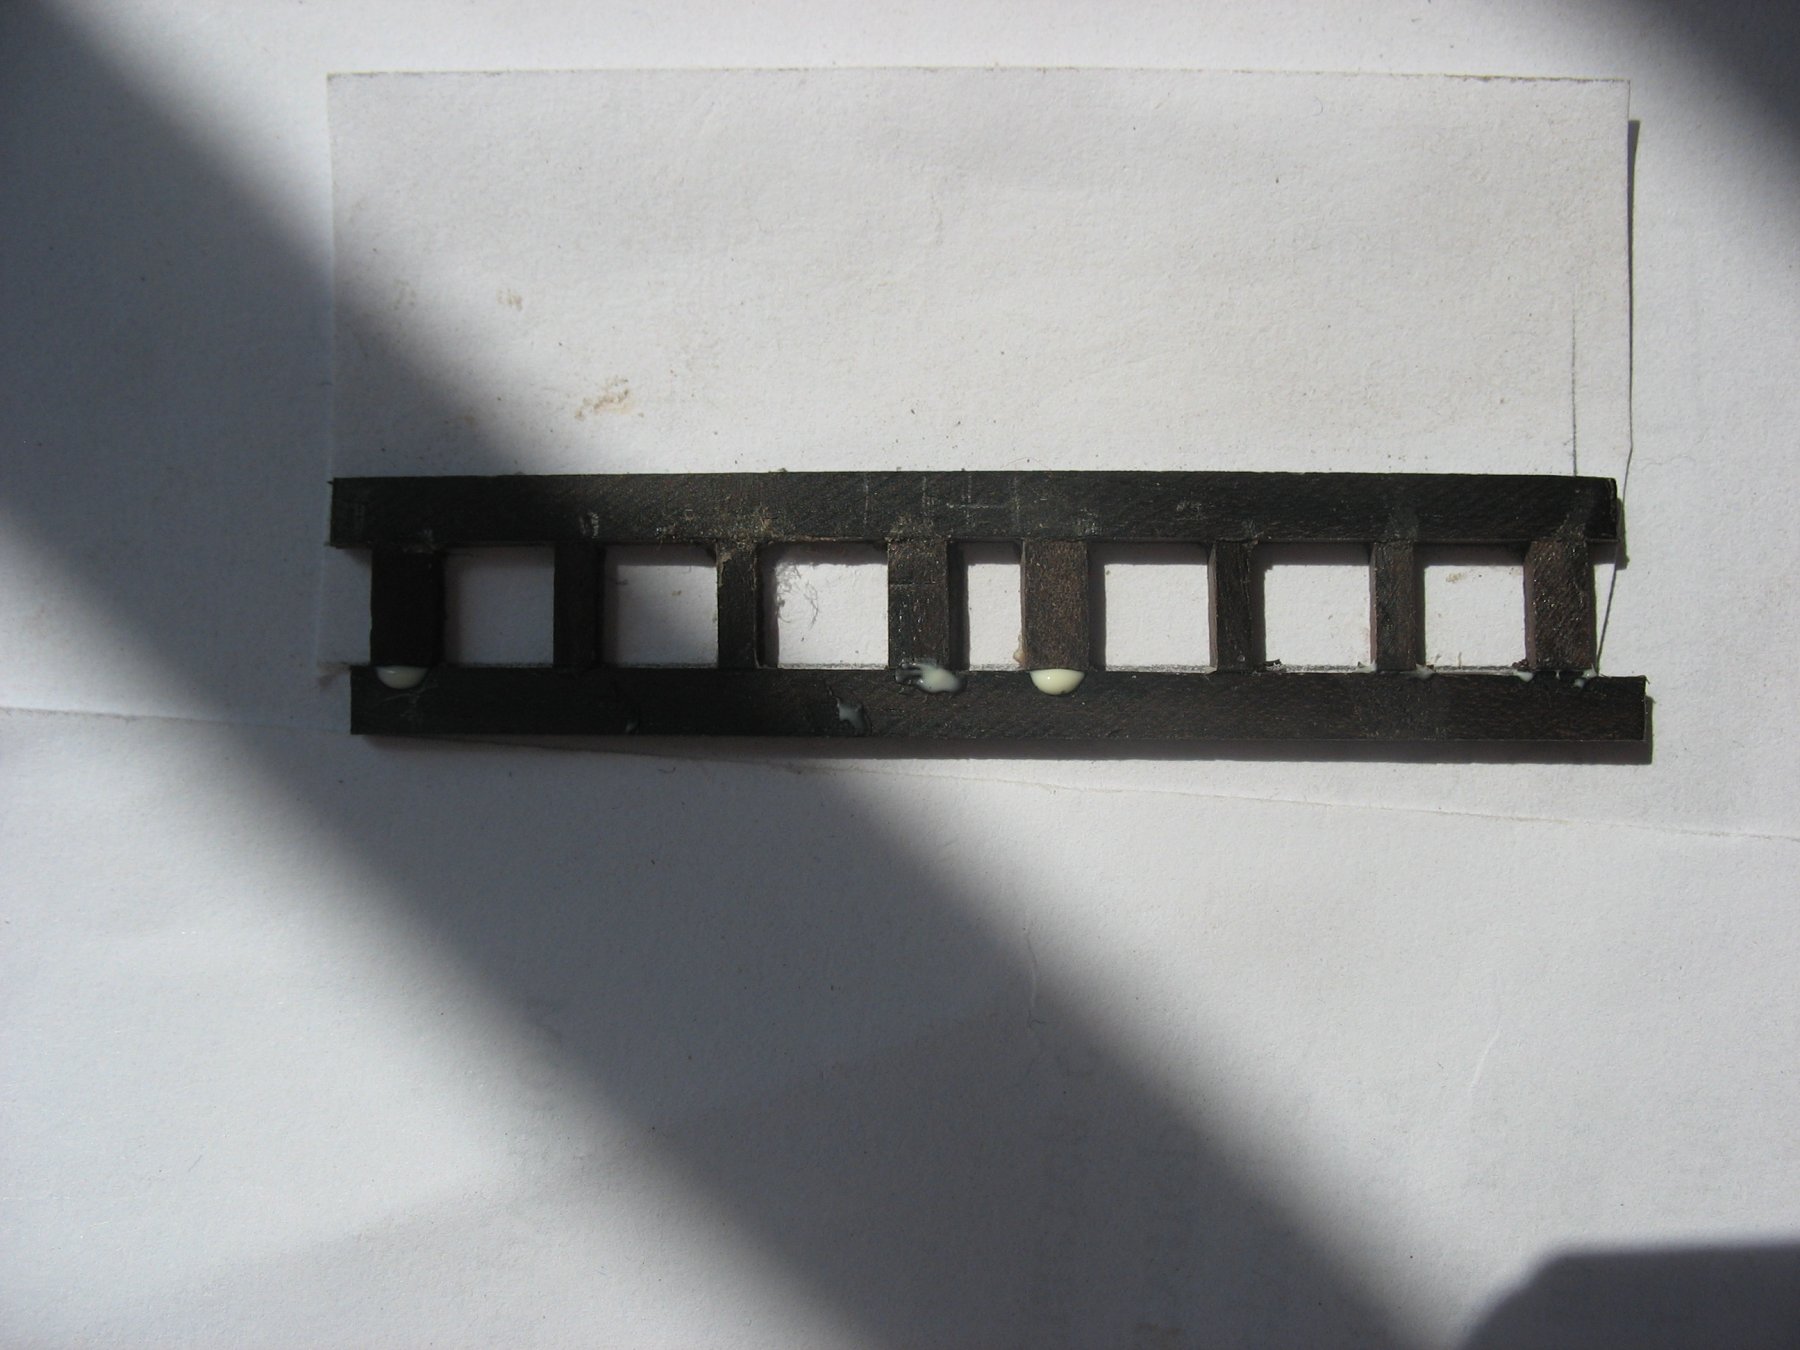
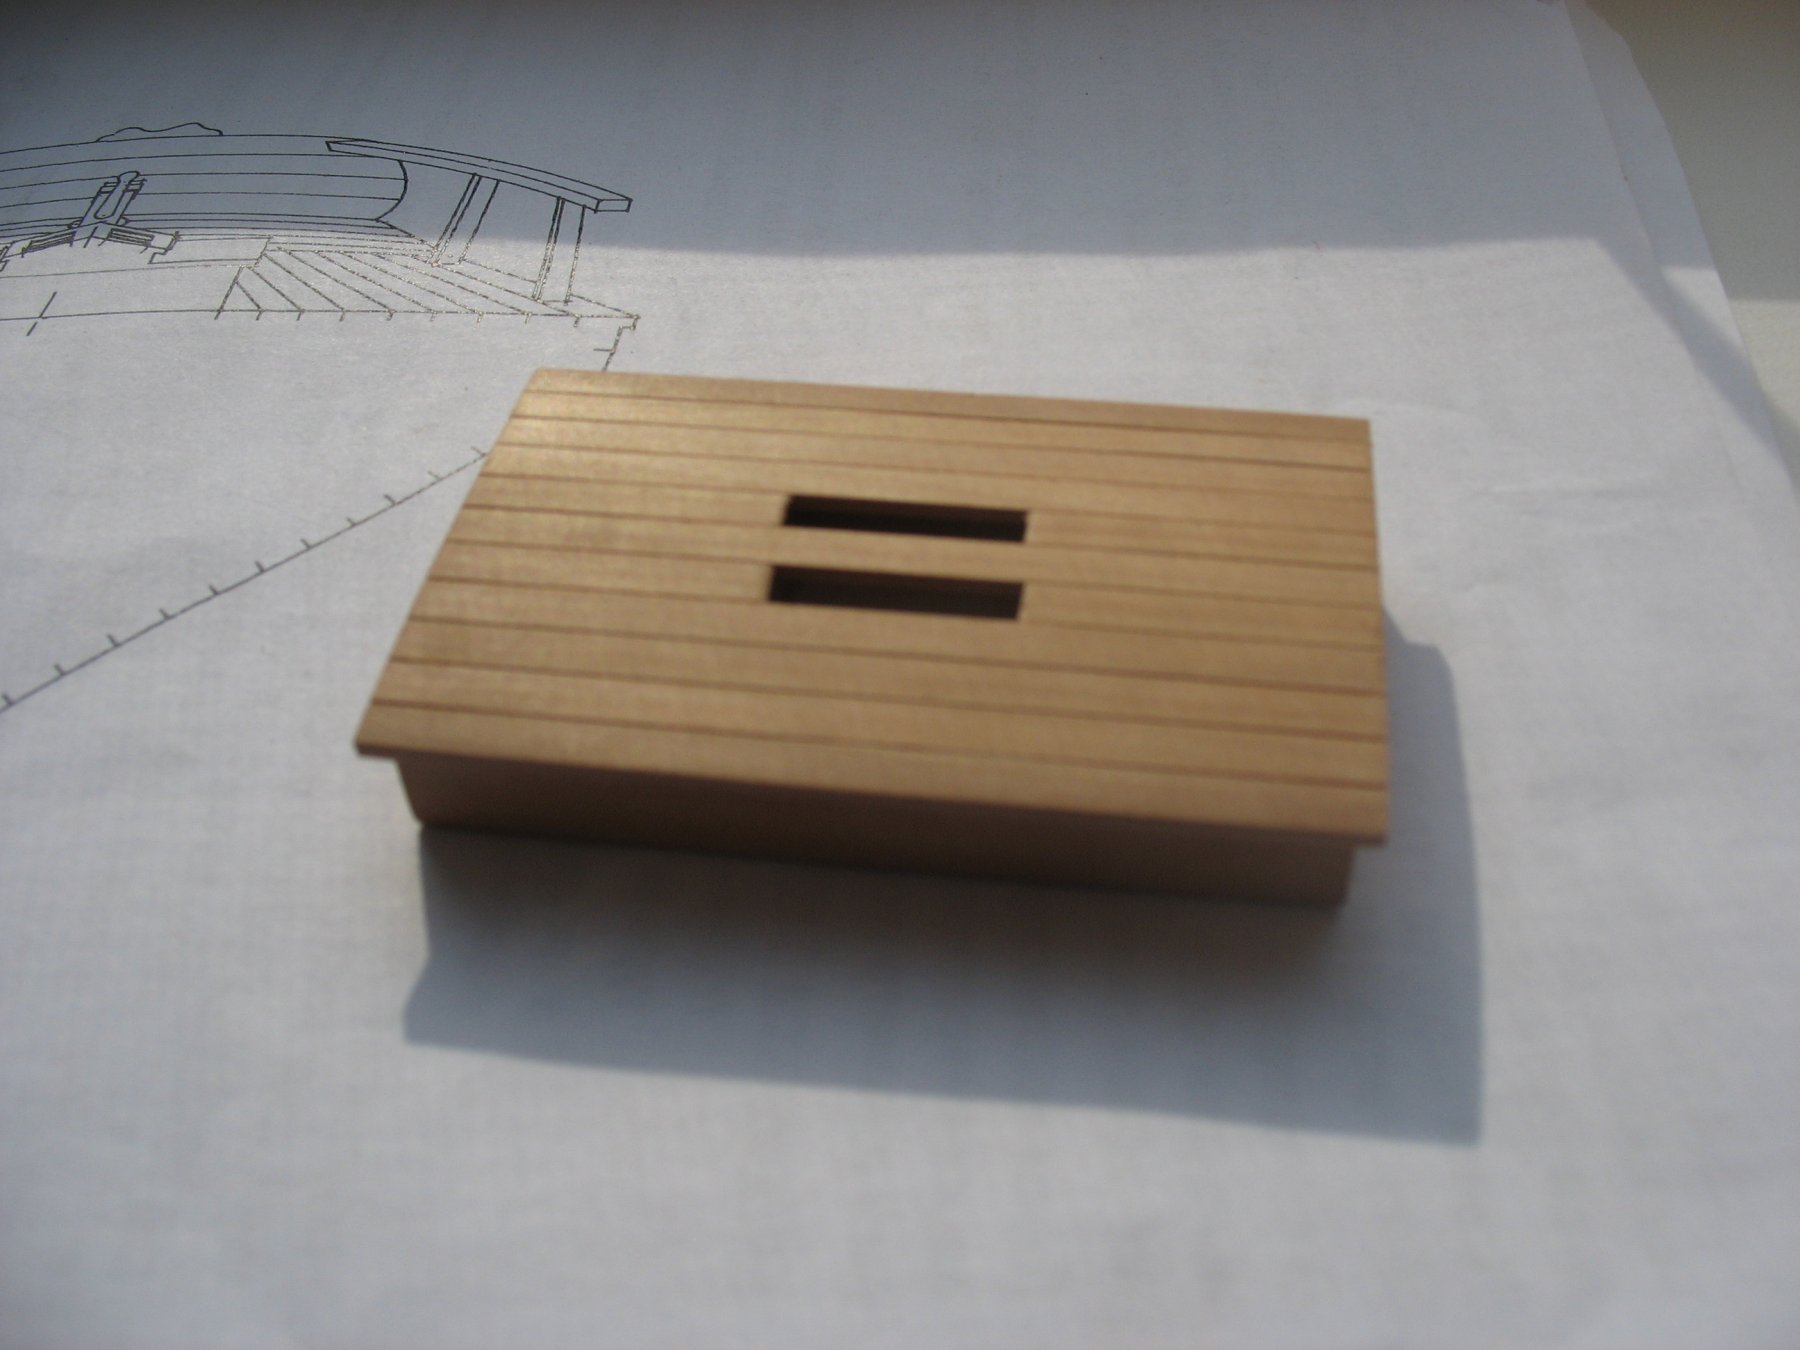
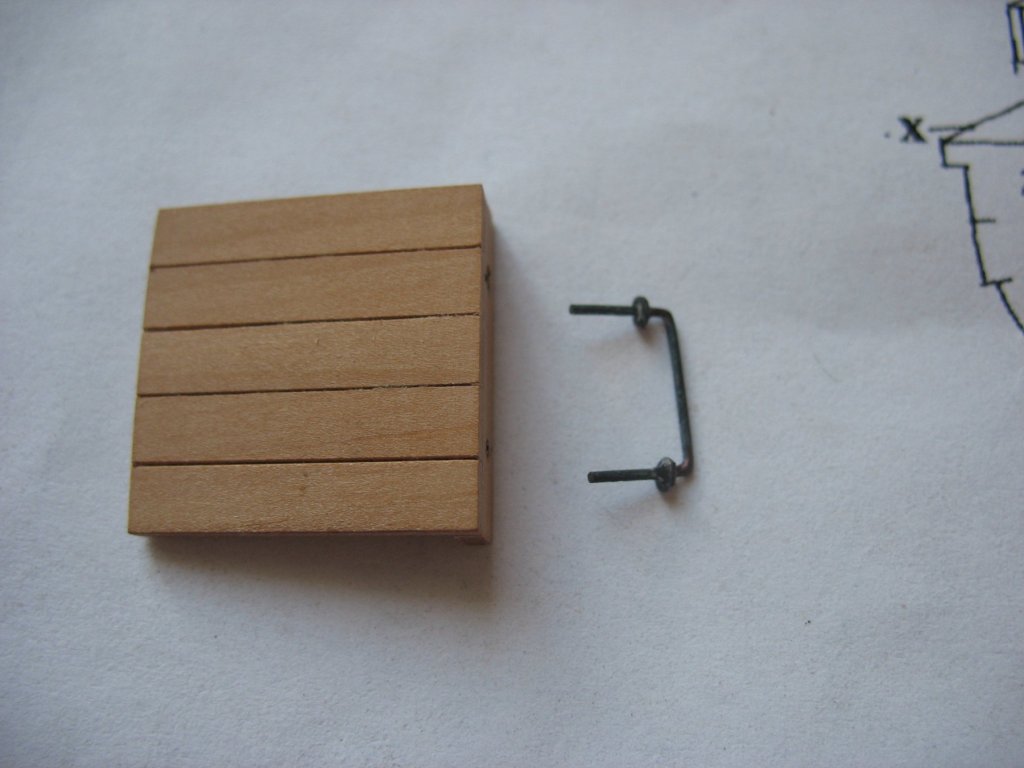
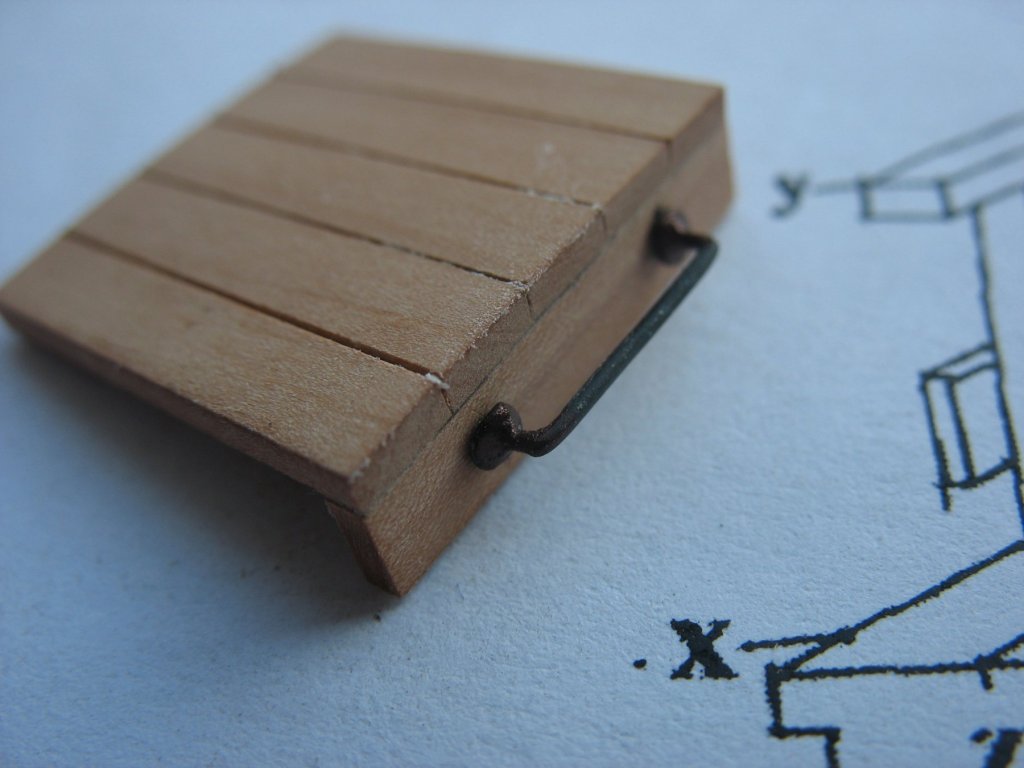
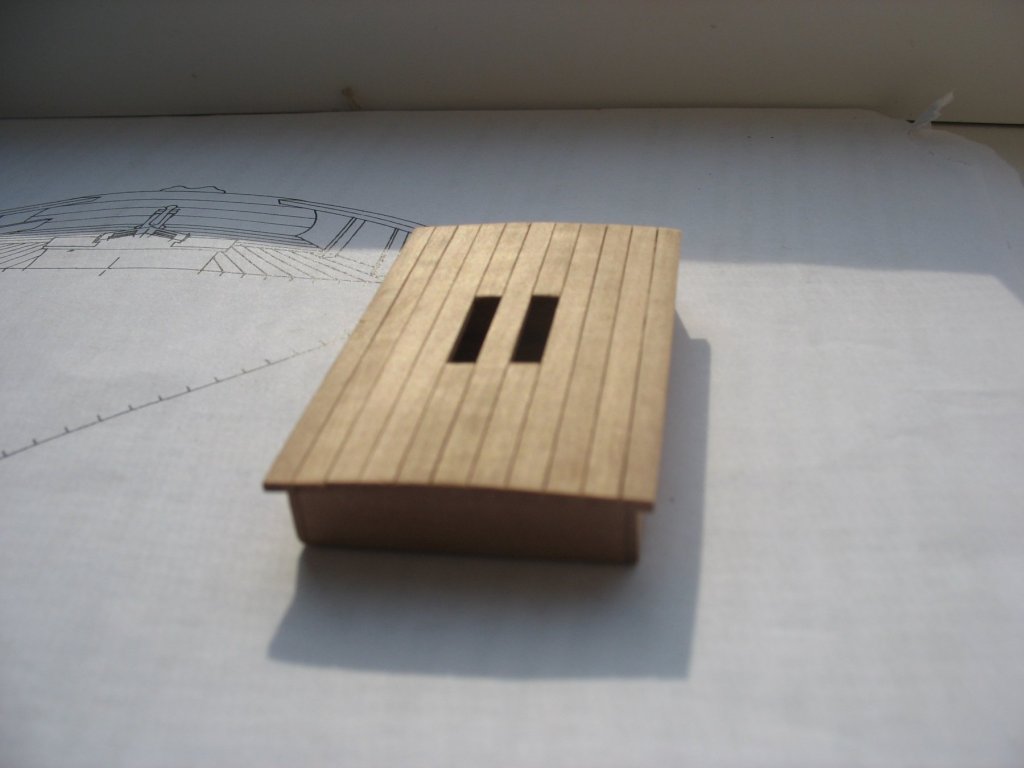
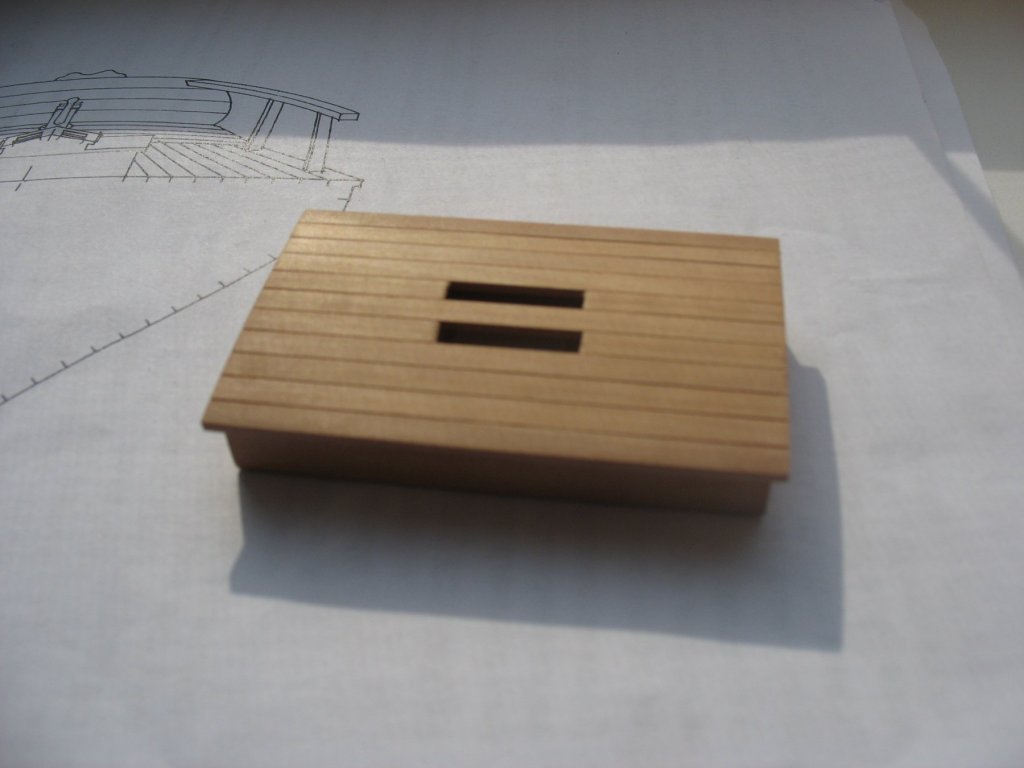
Here are some of the deck elements. Aft deckhouse and hatchway.

- 306 replies
-
- 14
-
-
- schooner
- la jacinthe
- (and 1 more)
-
Thank you very much druxey.
-
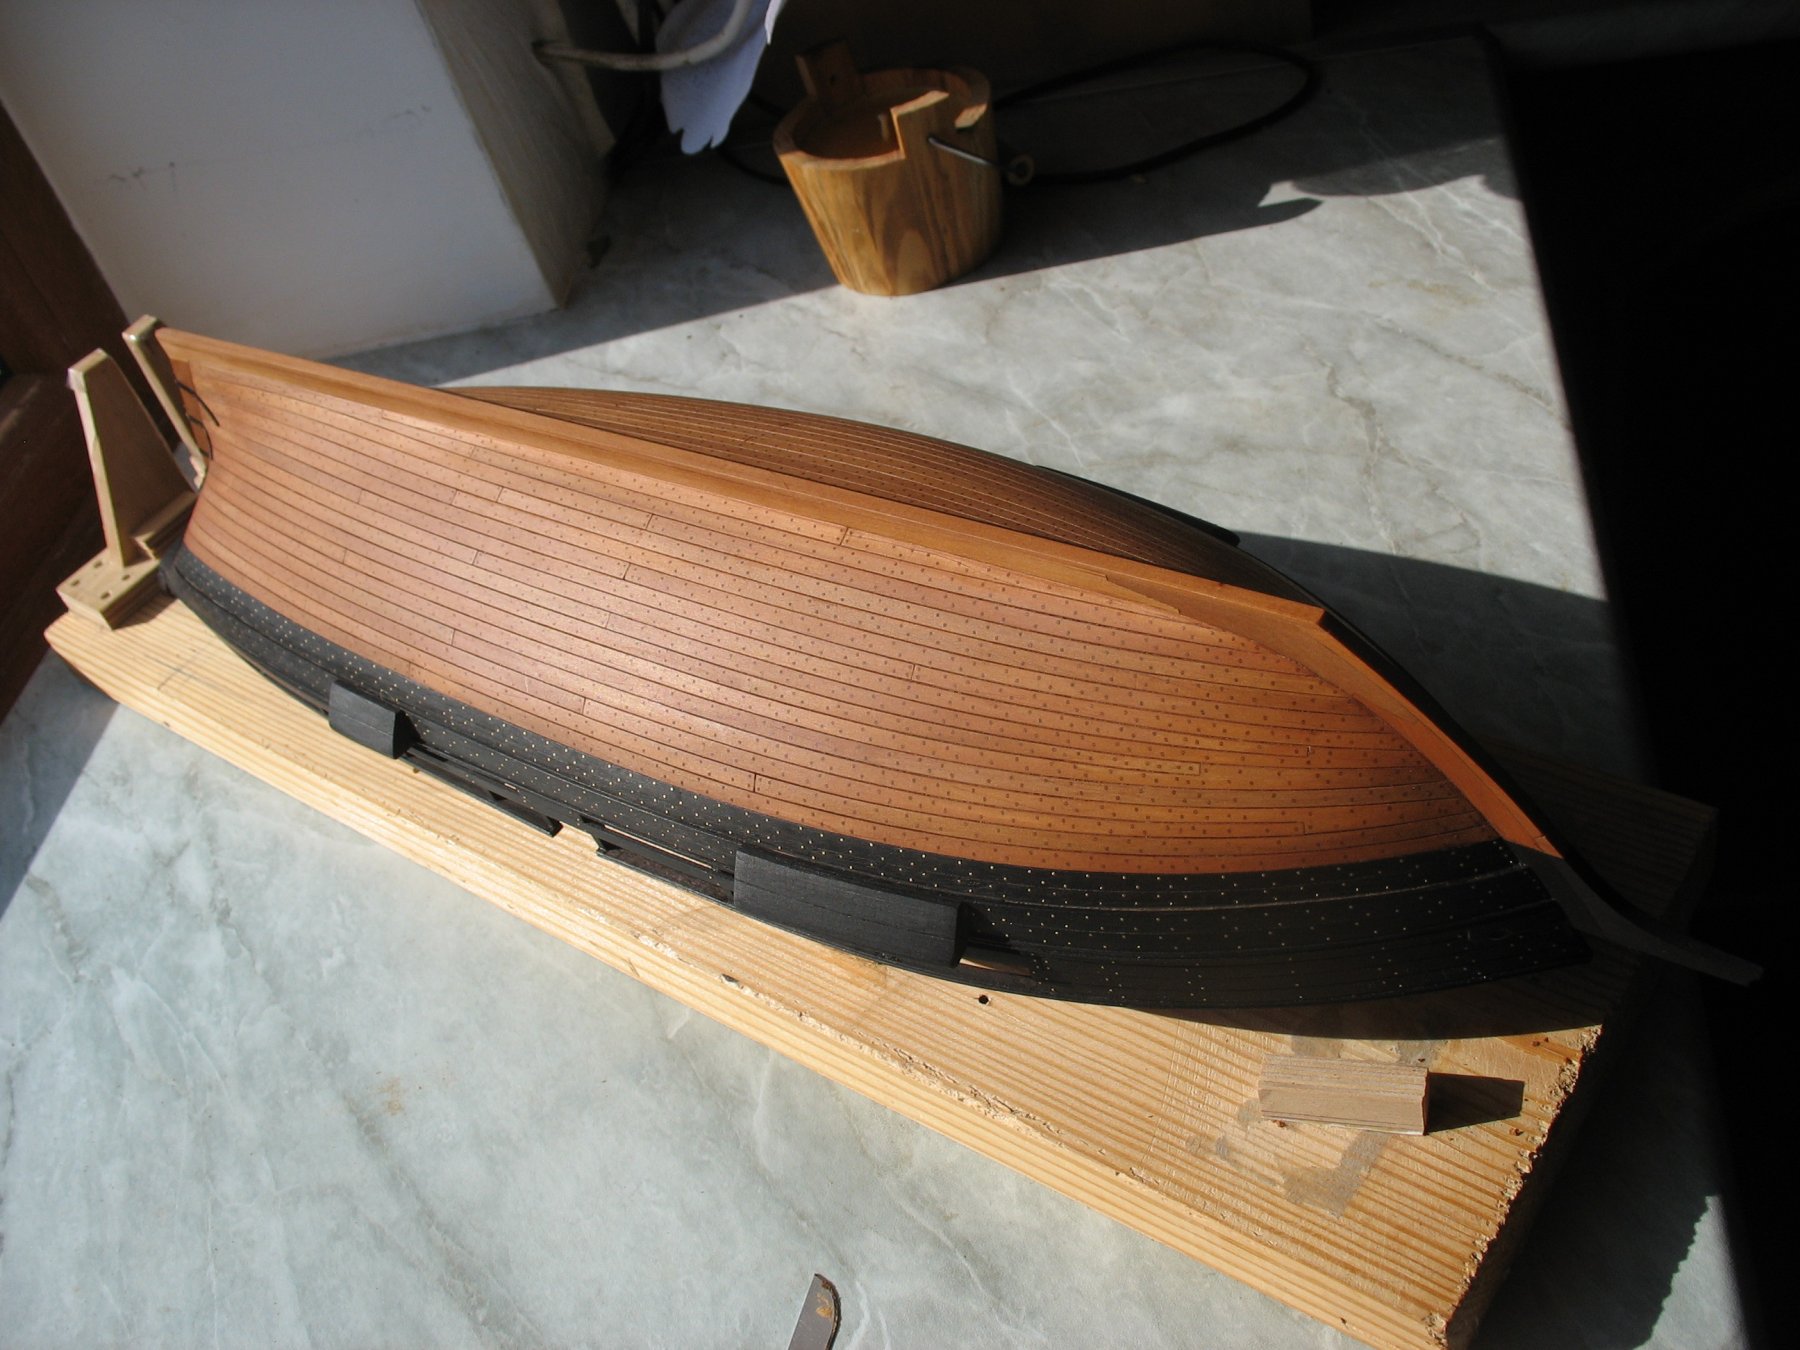
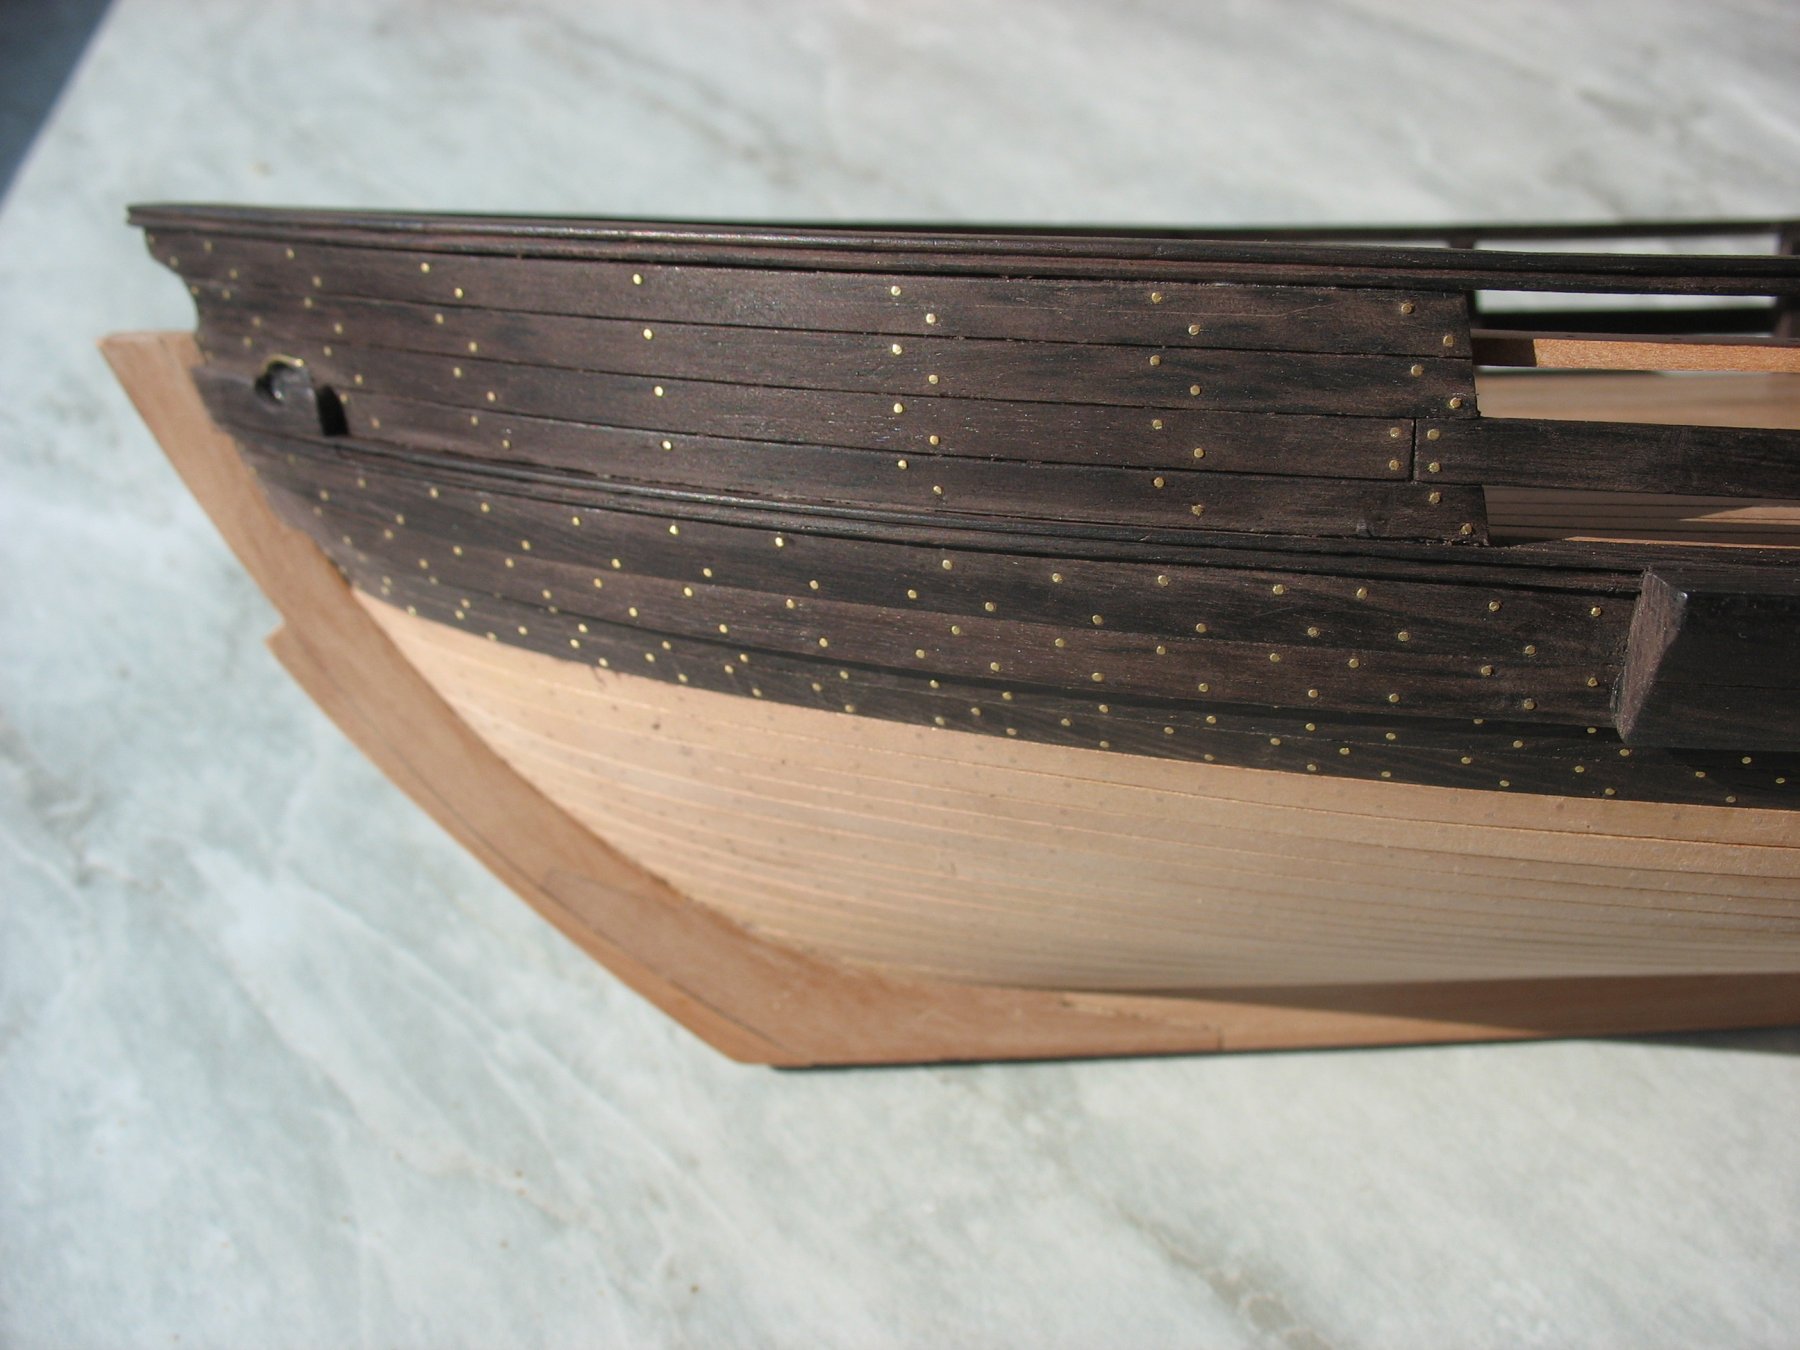
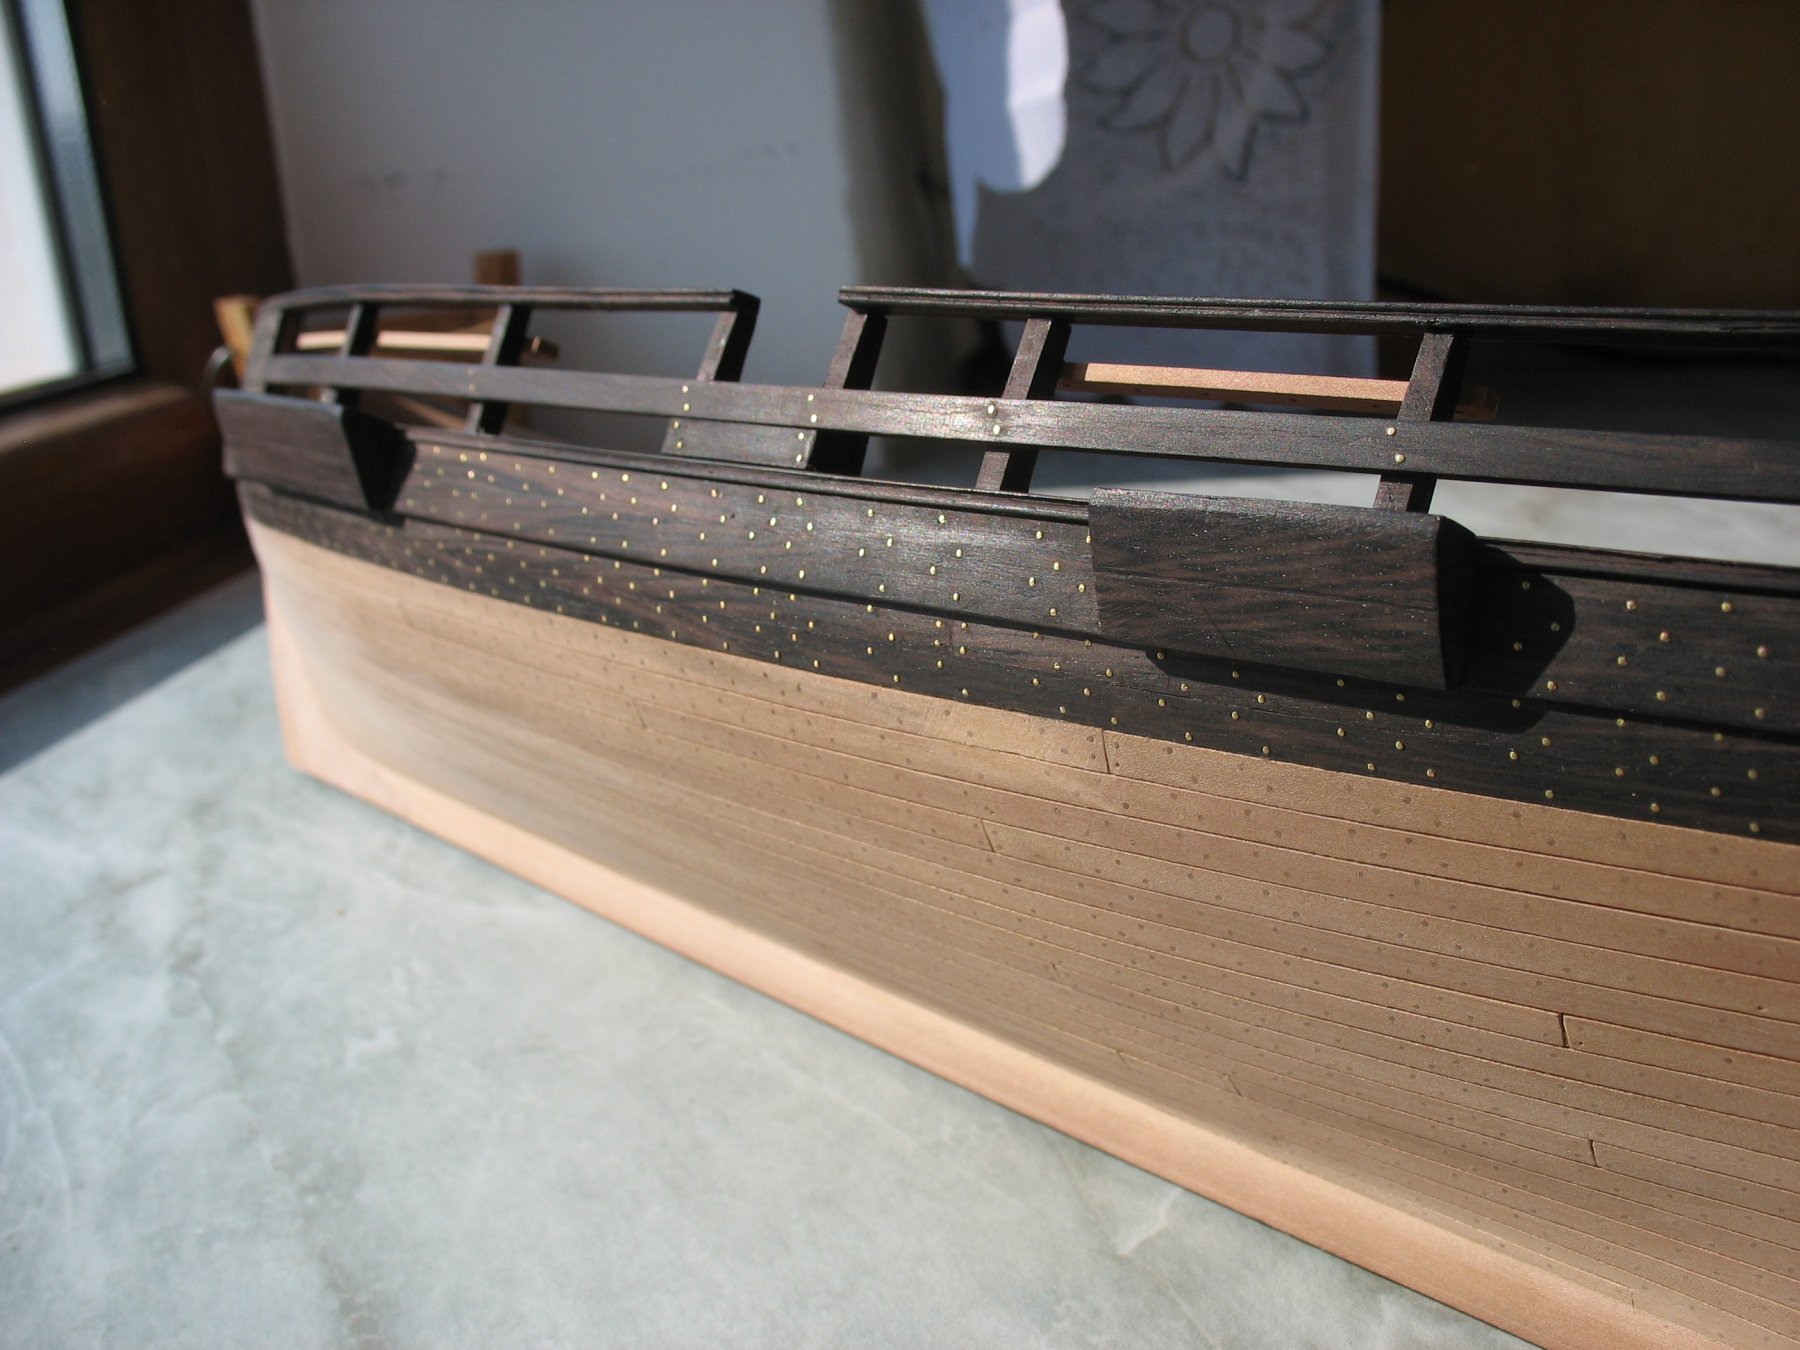
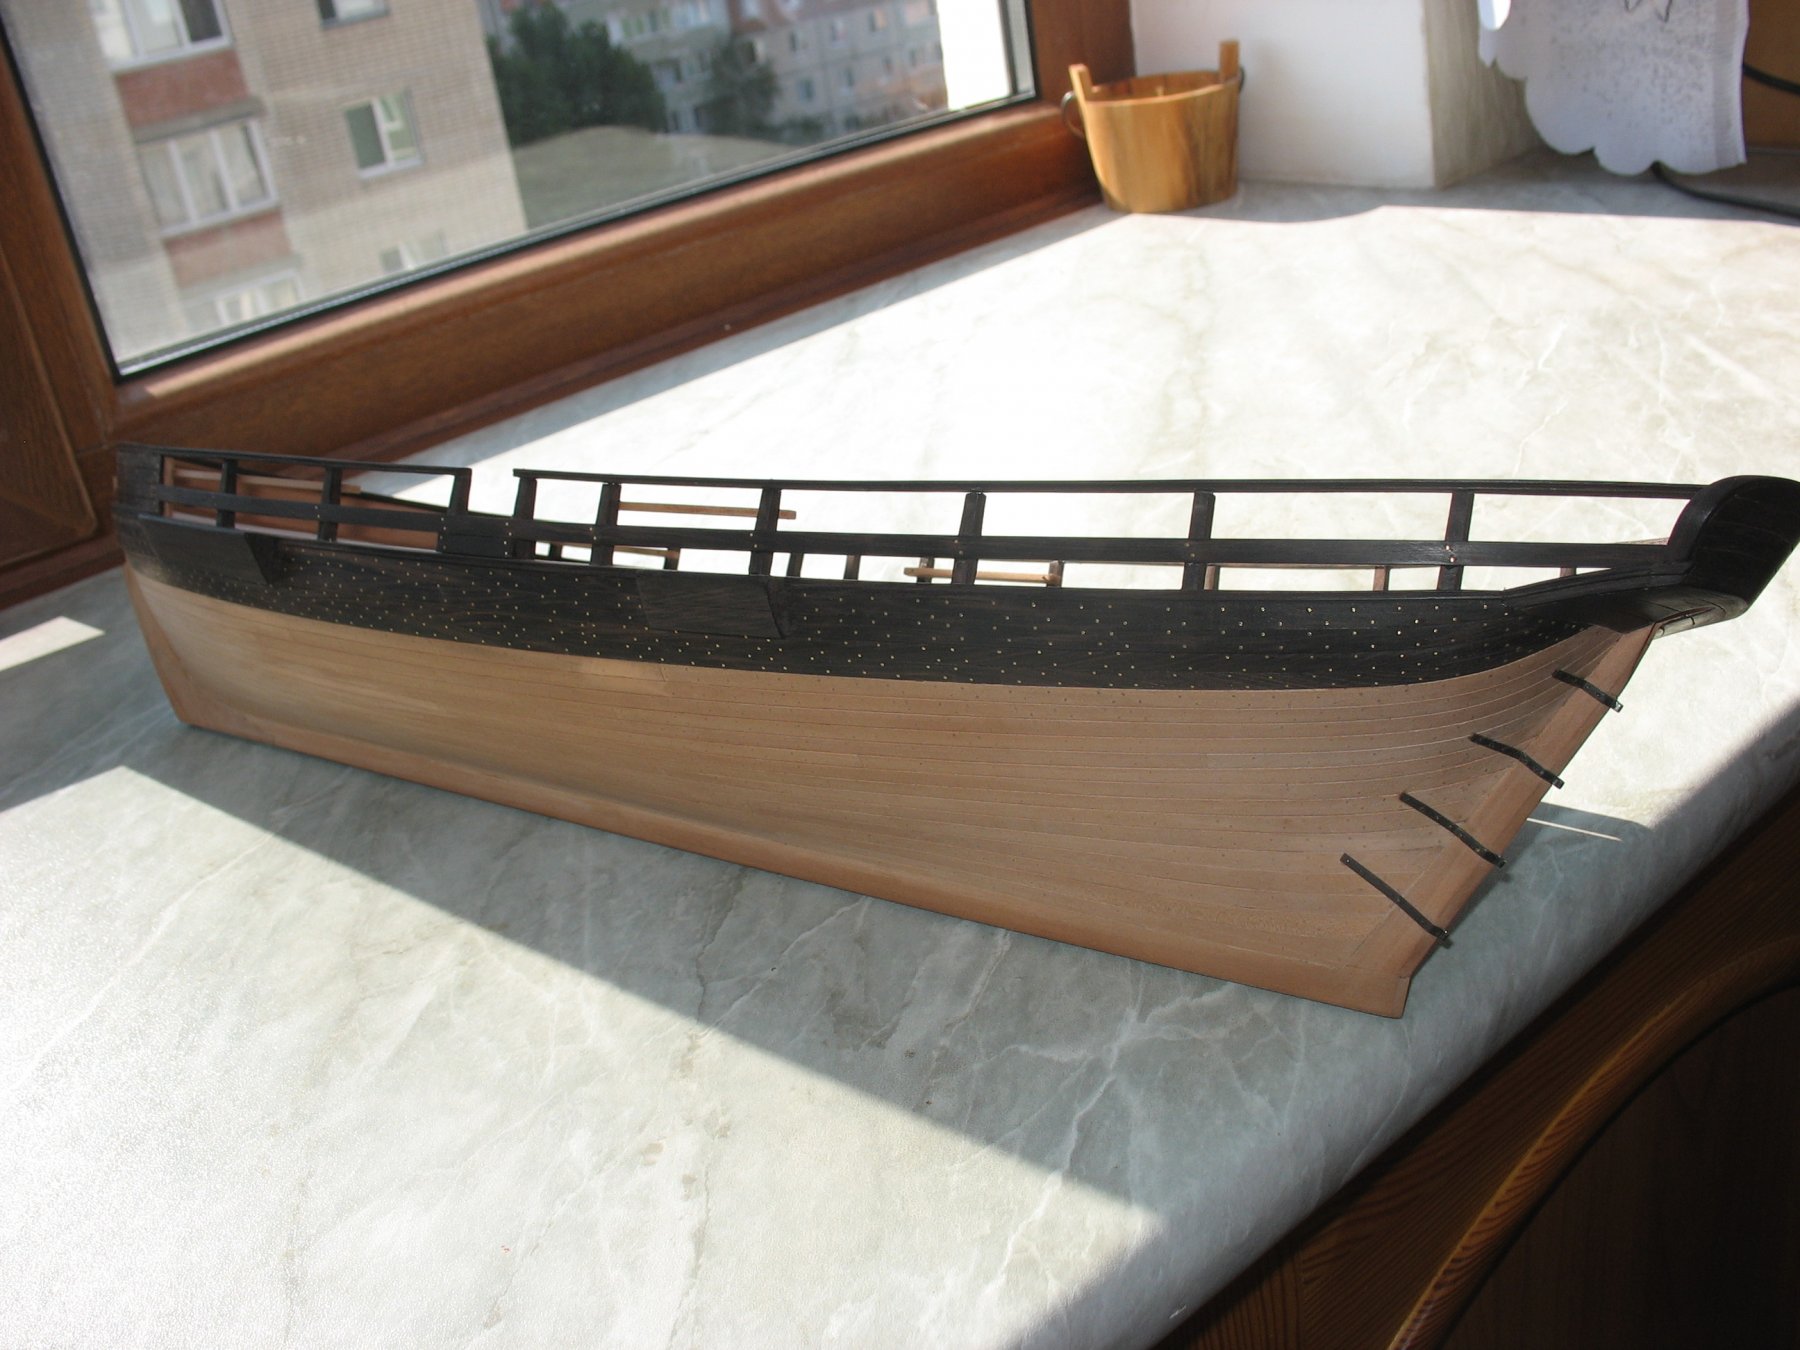
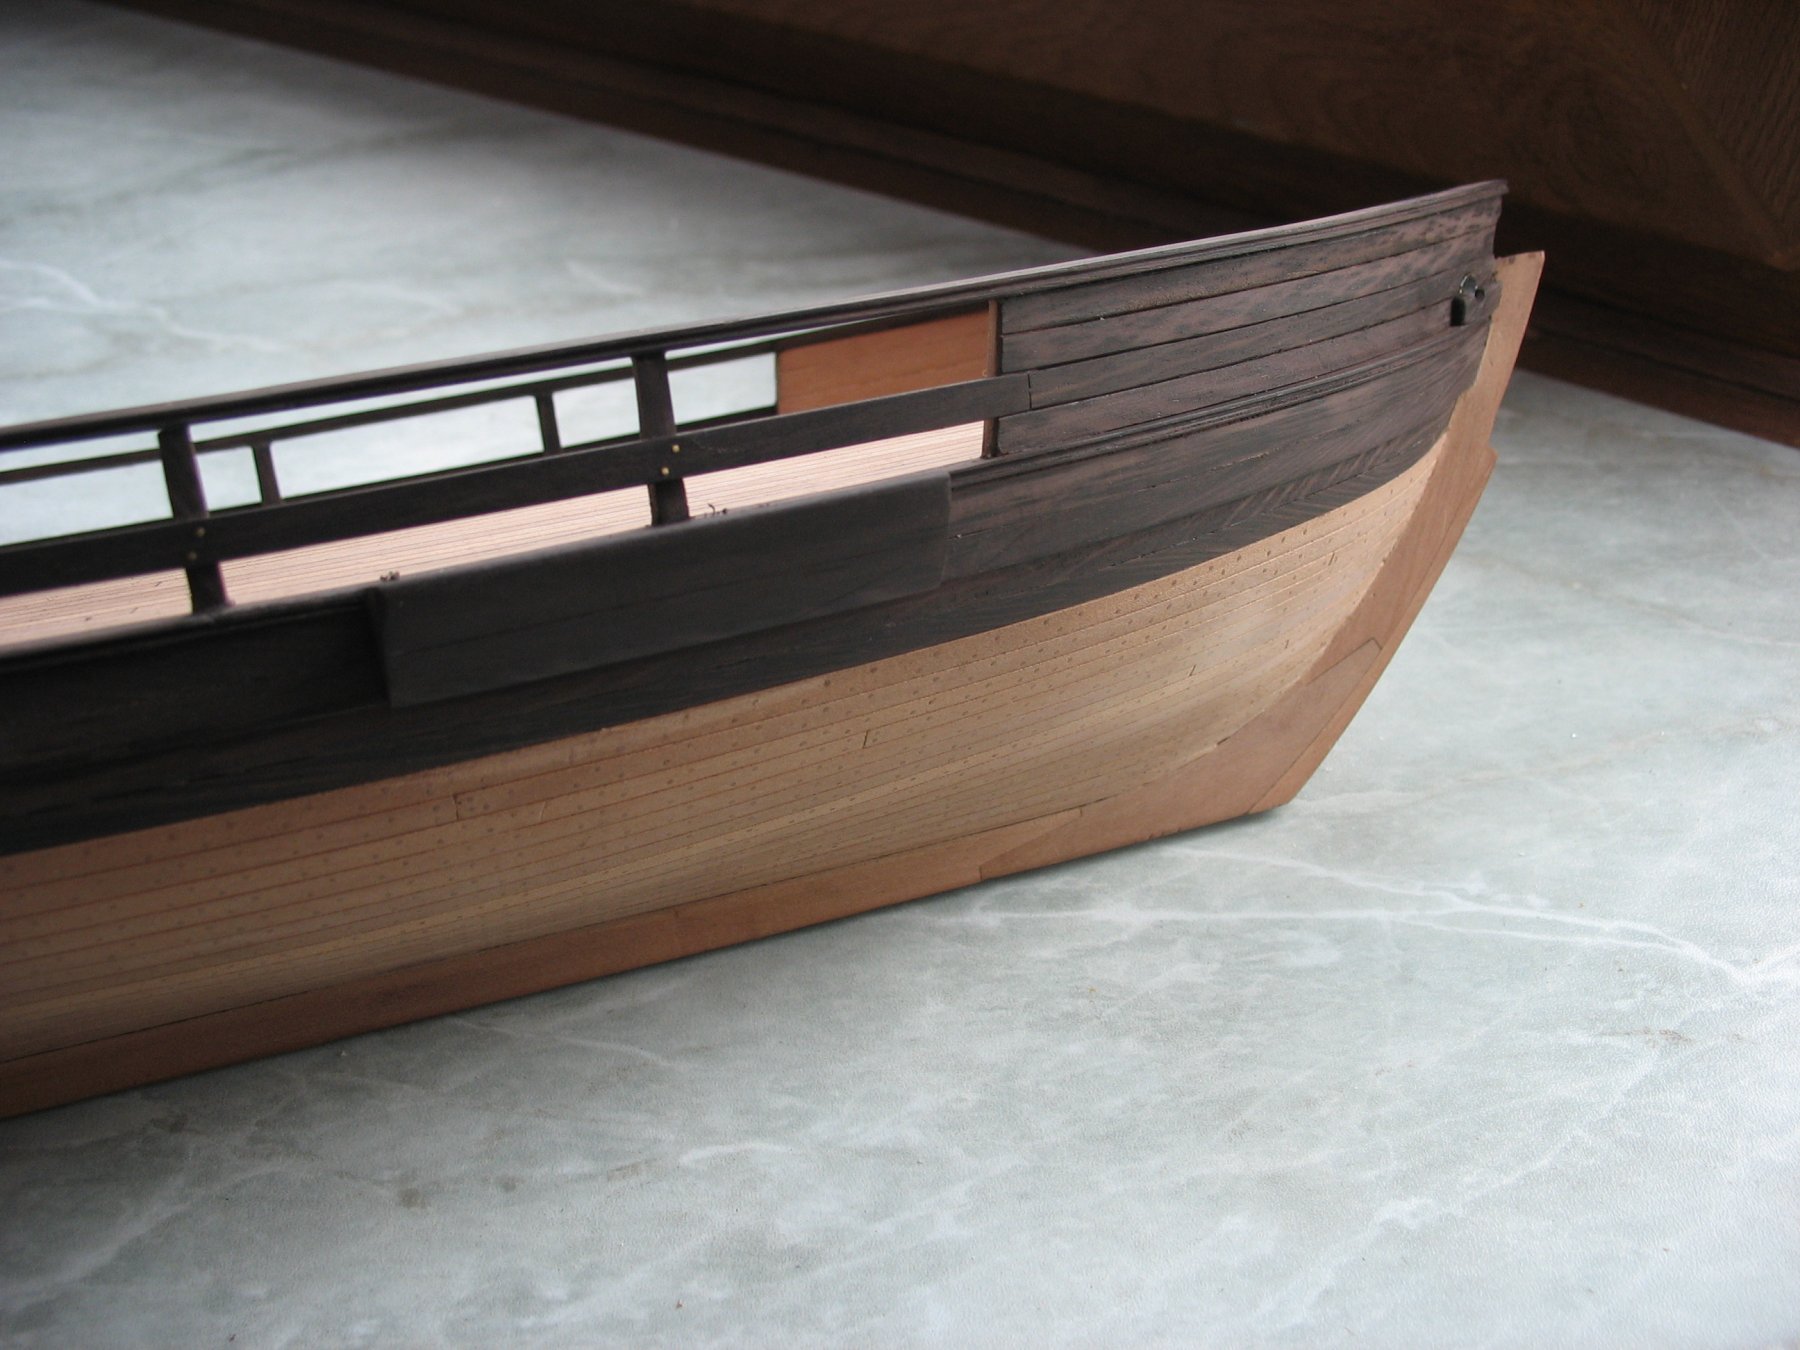
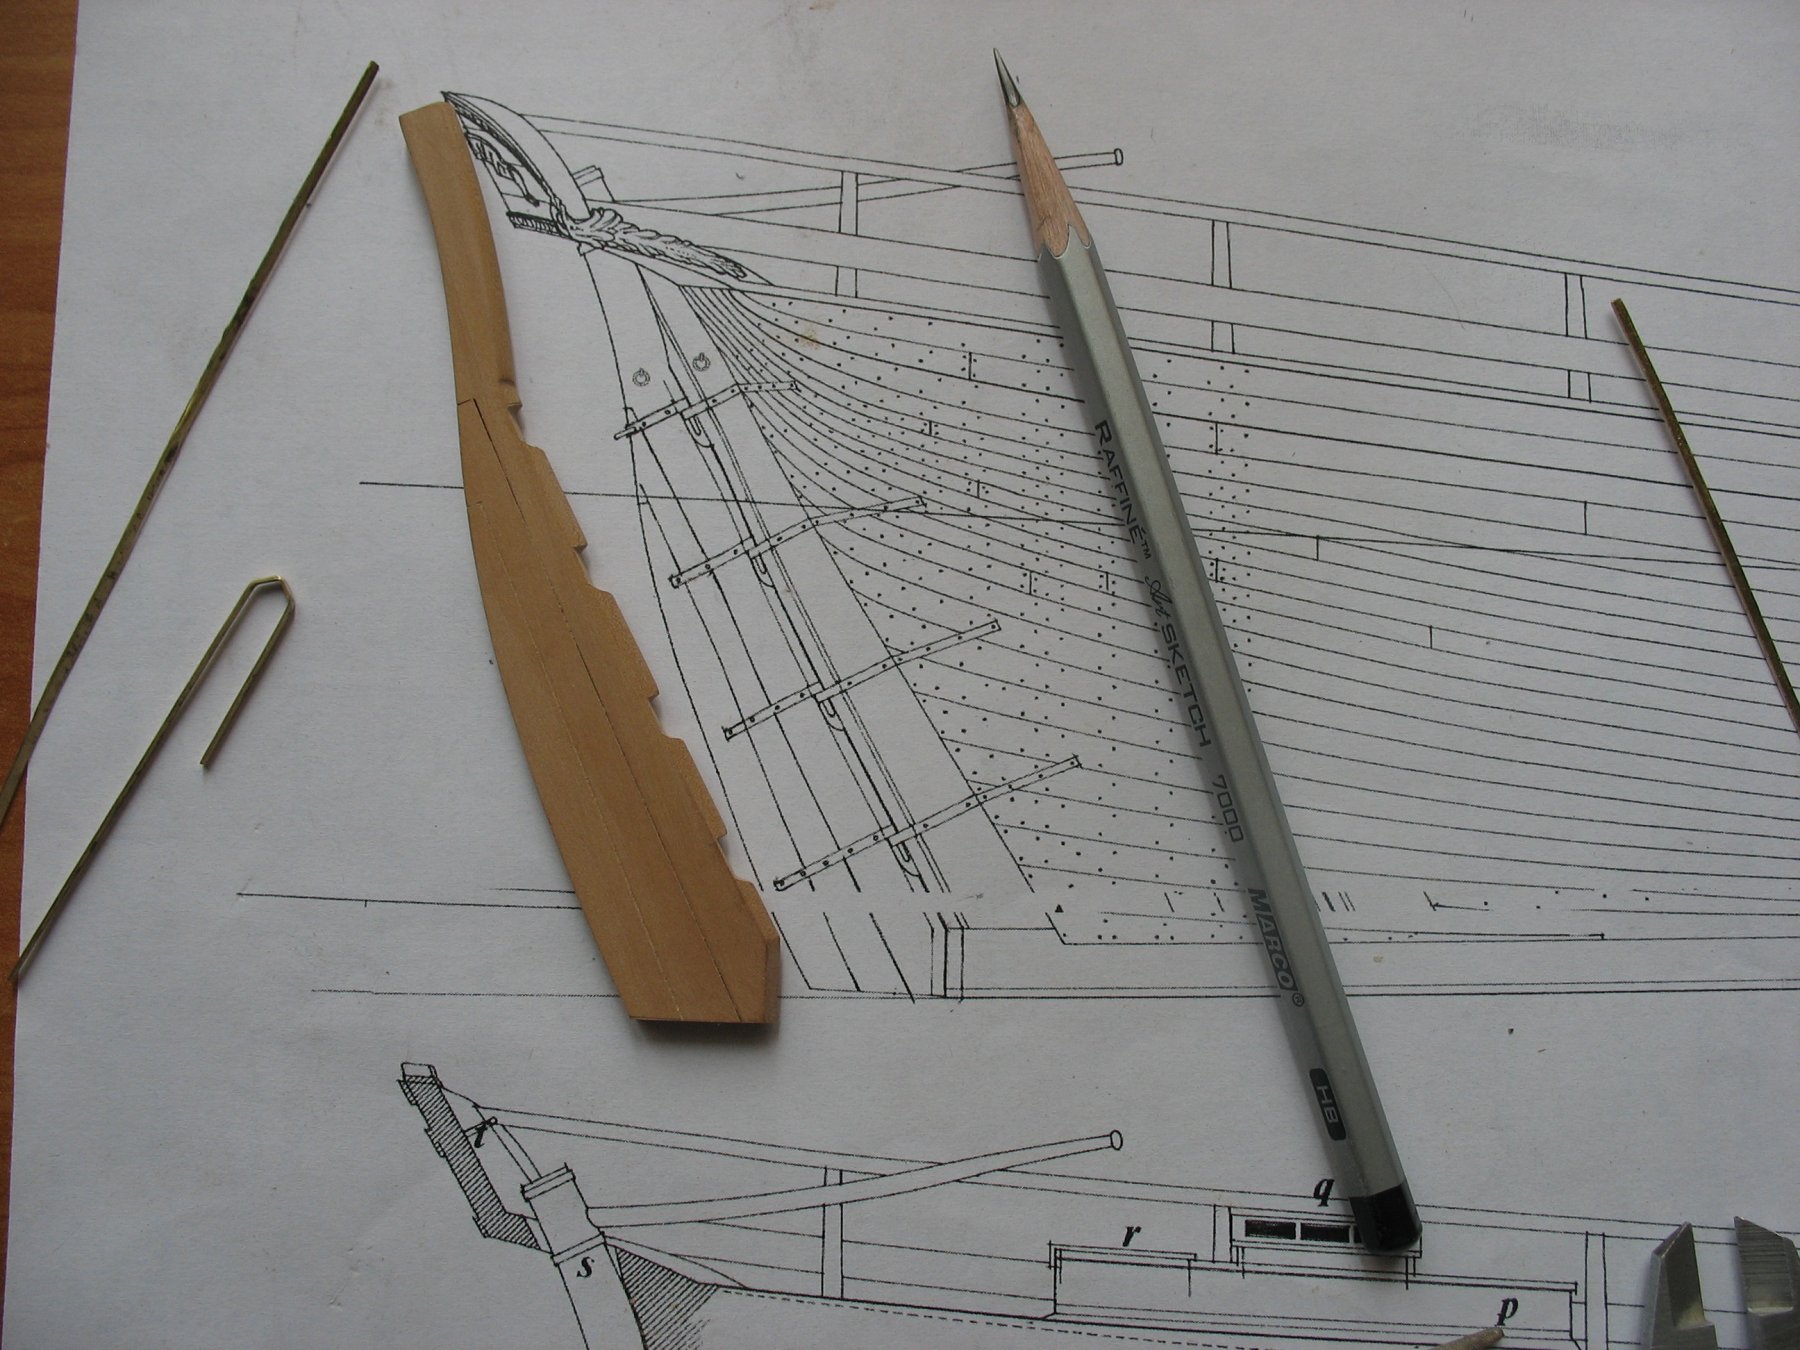
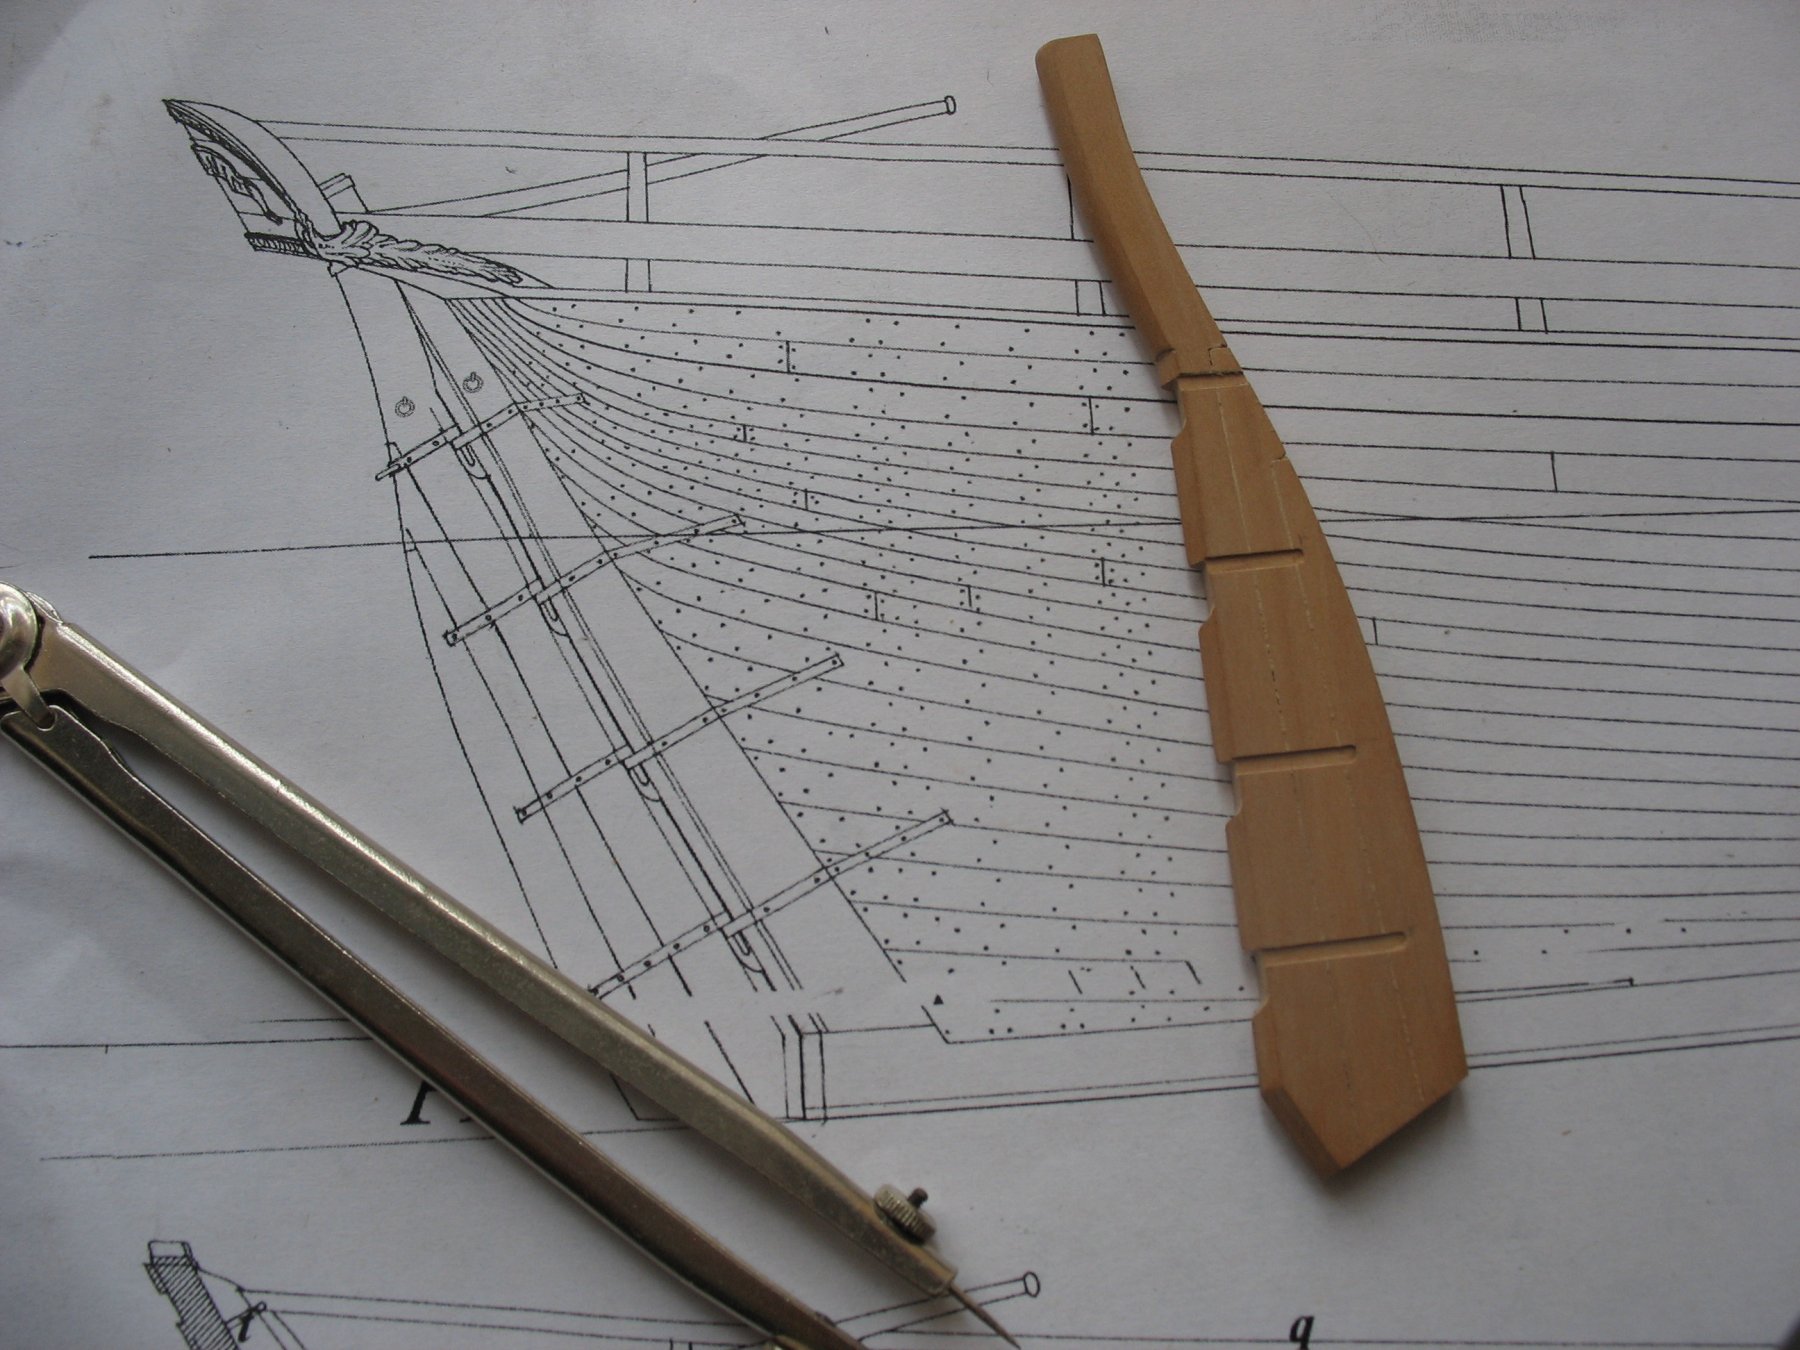
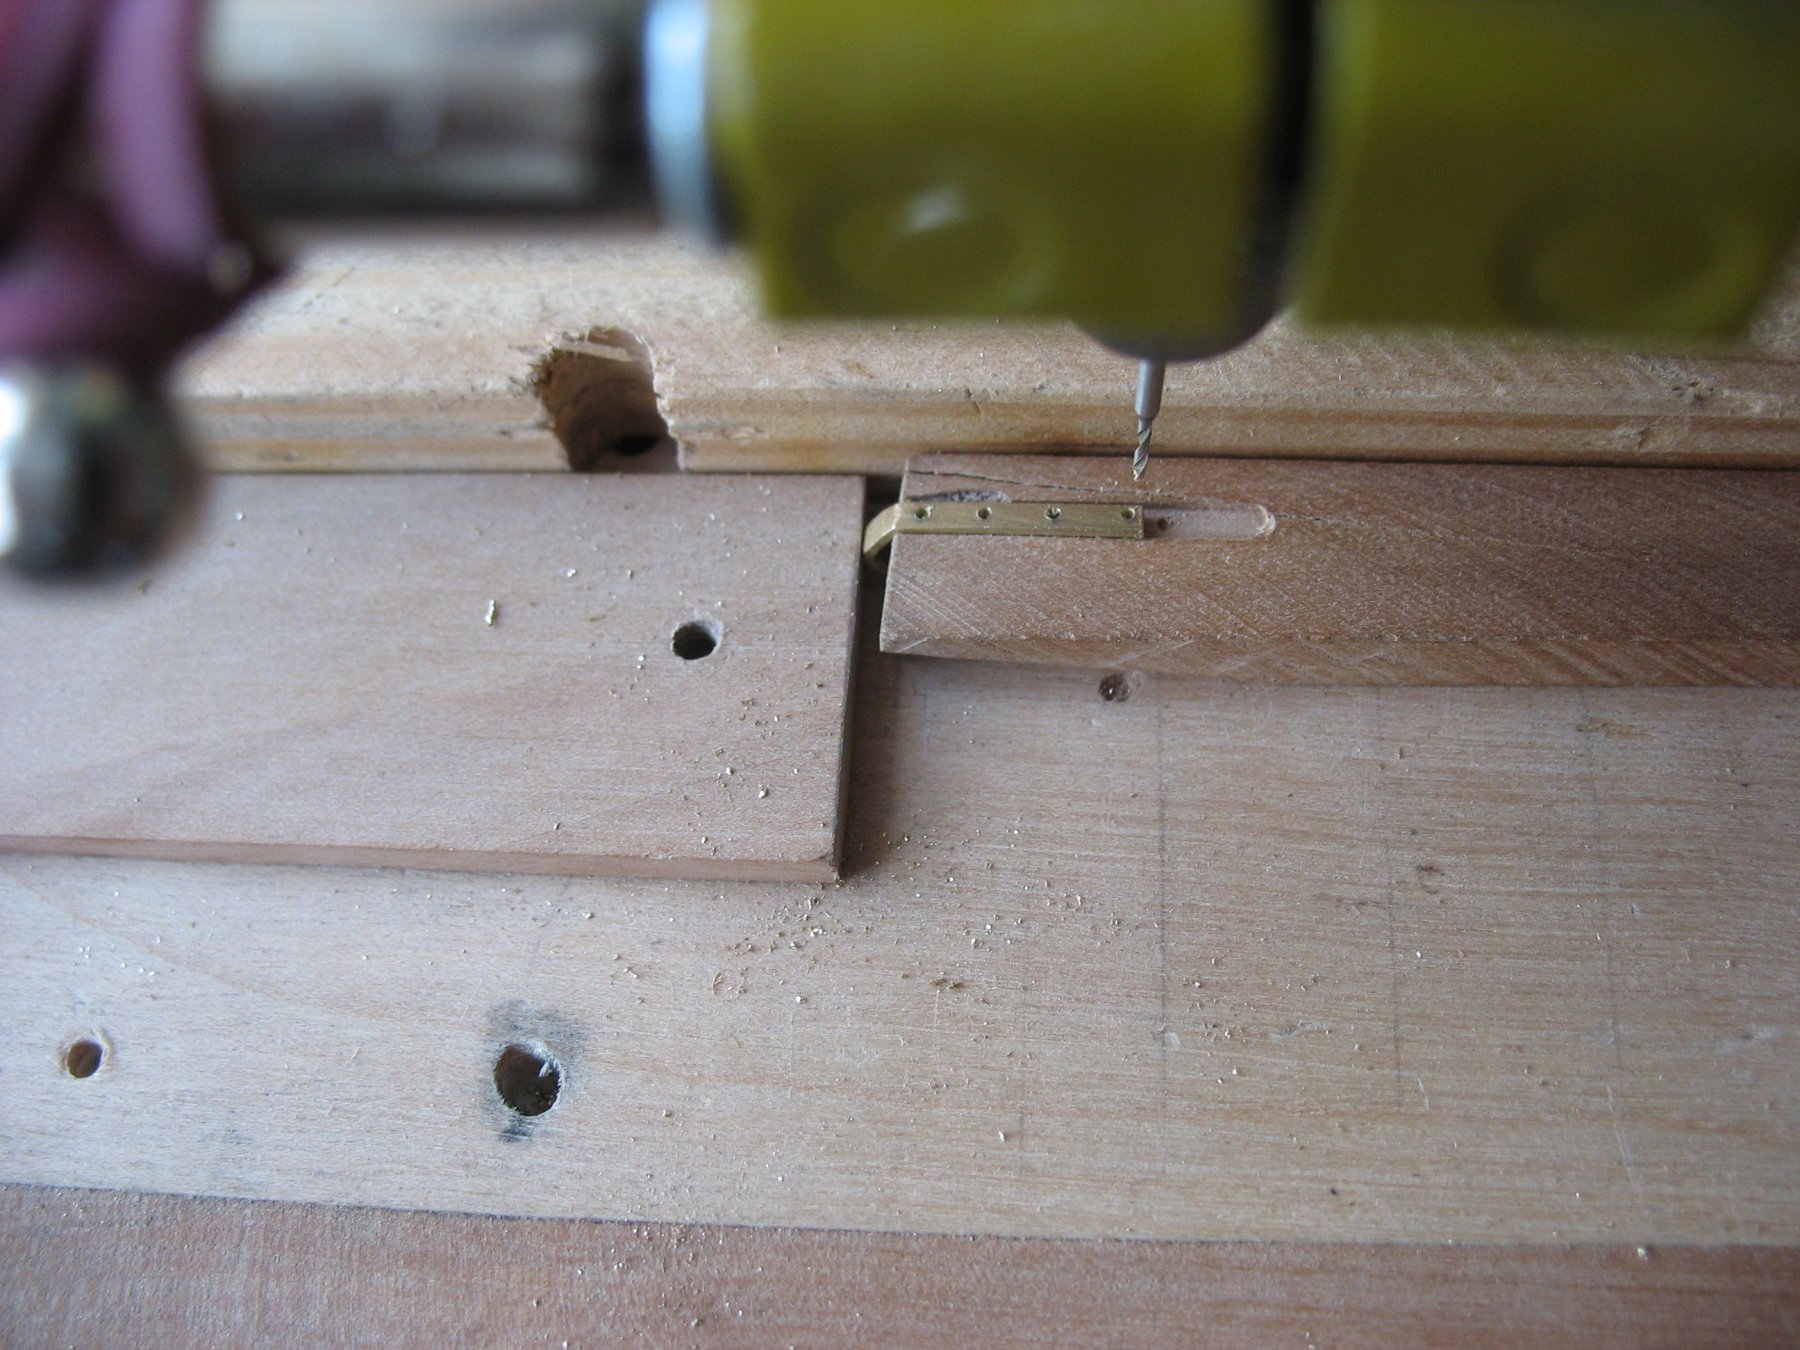
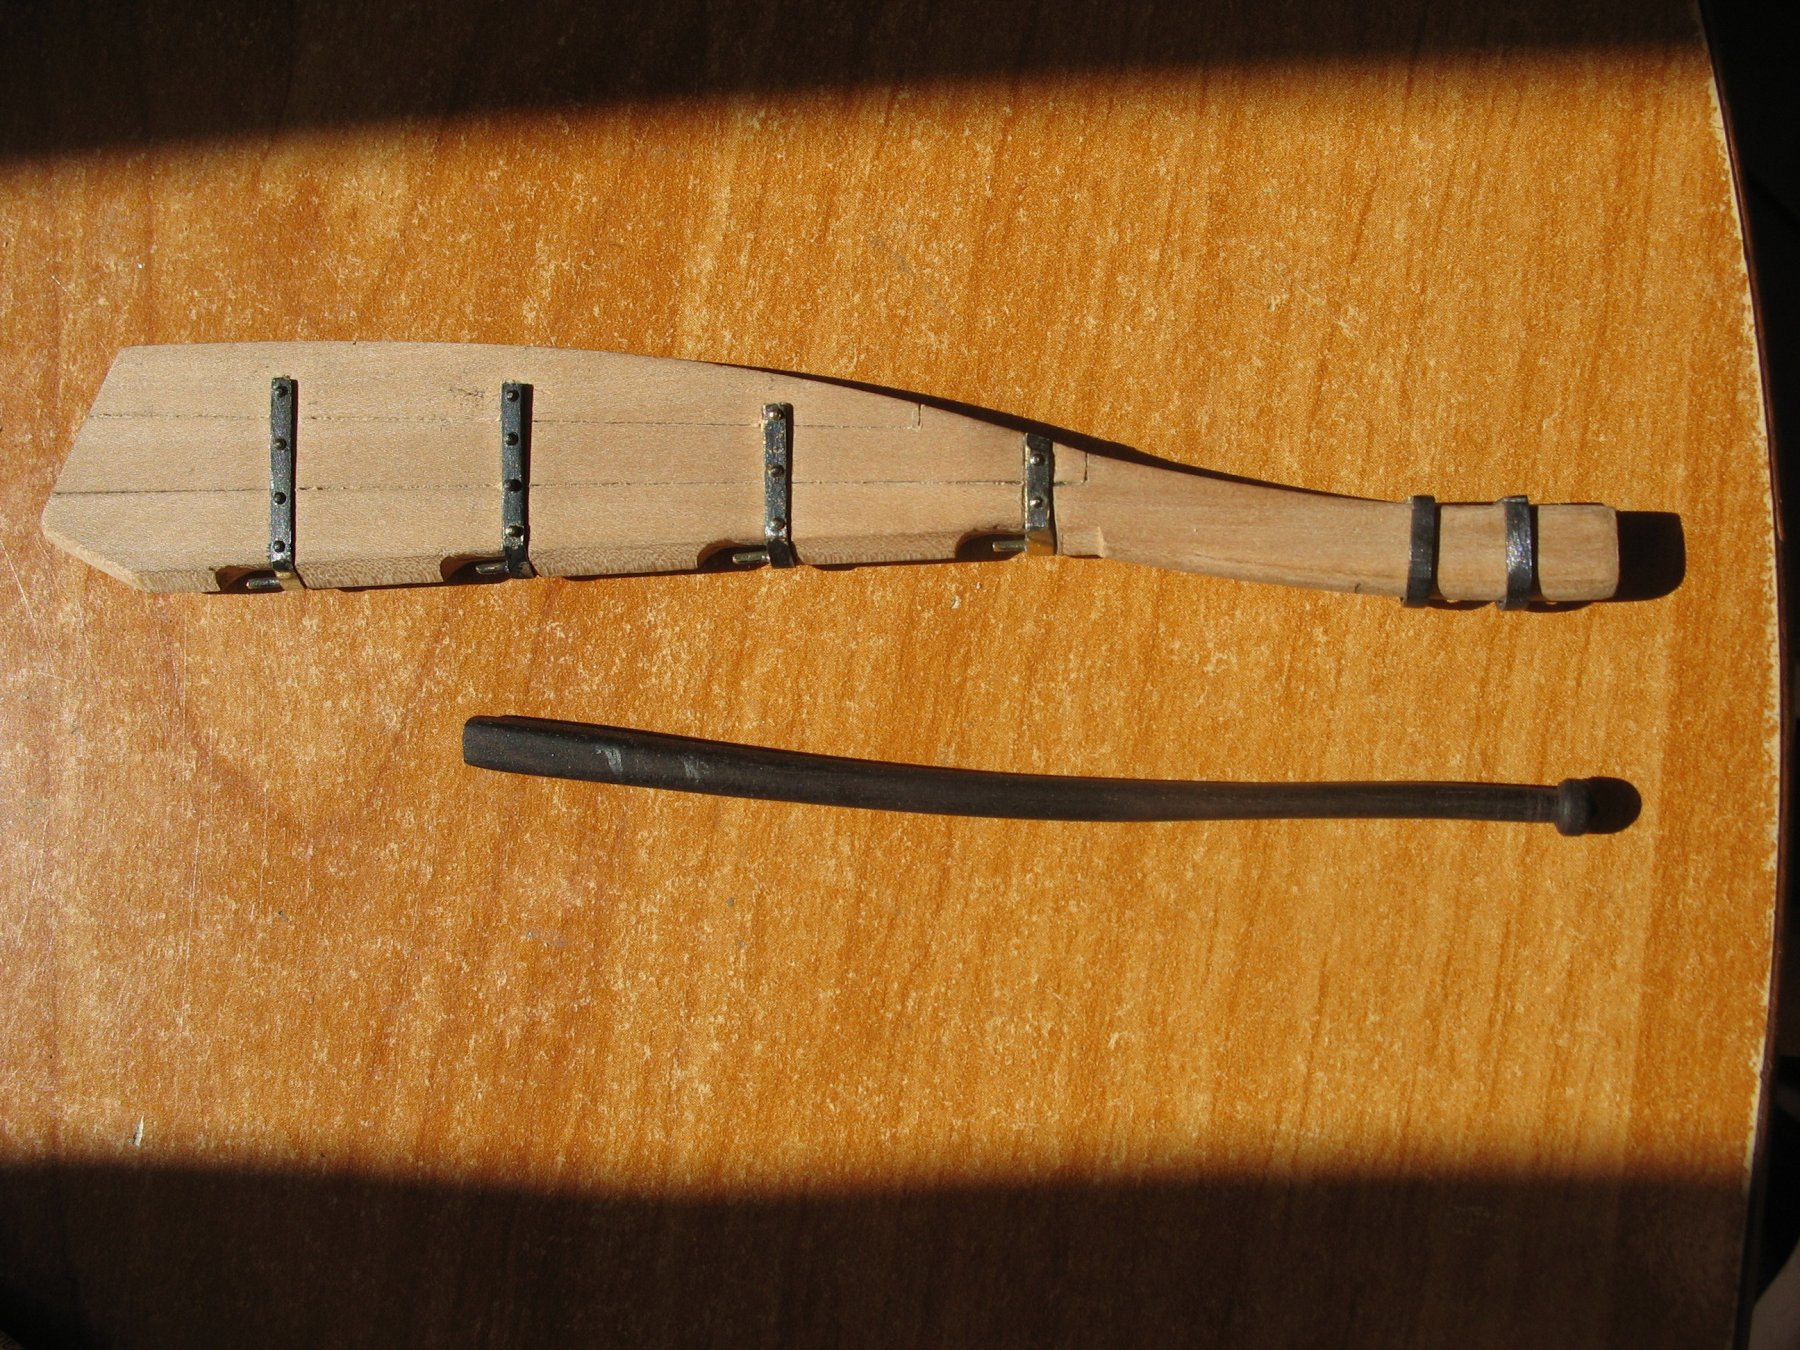
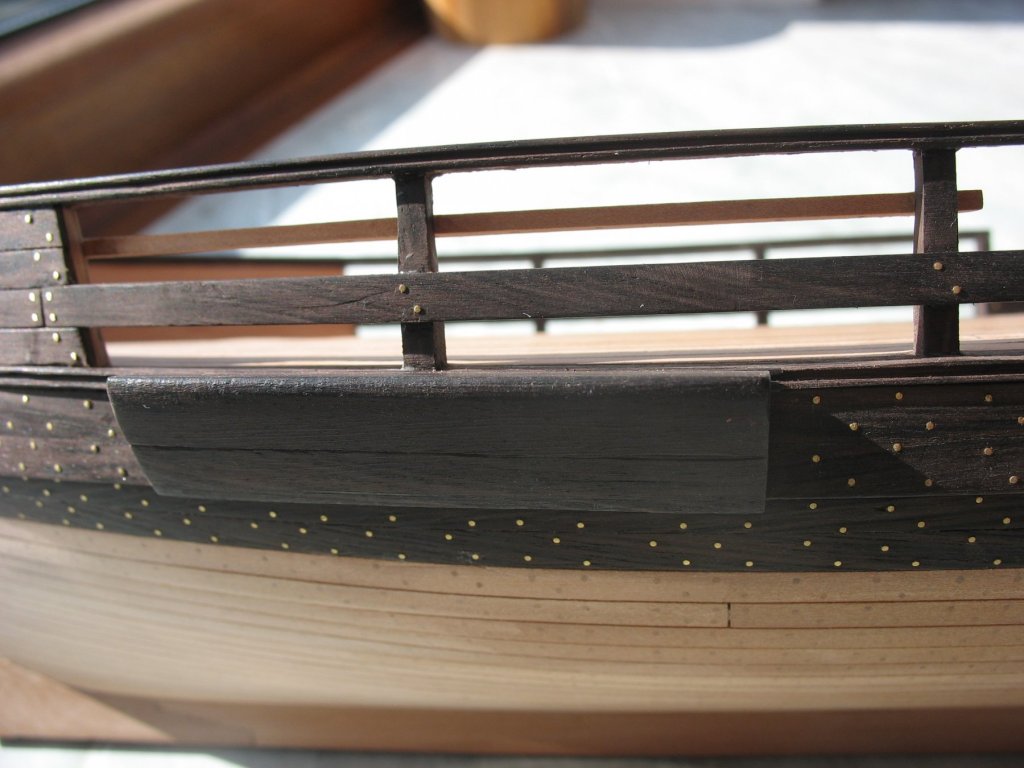
I have finished the nailing of the broadsides. I opted for the brass of 0,6 mm, and tried to make the nail-heads a little dome shaped.


- 306 replies
-
- 21
-
-
- schooner
- la jacinthe
- (and 1 more)
-
My greetings, Johann. I completely agree with You, french ships of thant period are very beautiful.
-
Dear colleagues Paul and Gary thank you very much.