HOLIDAY DONATION DRIVE - SUPPORT MSW - DO YOUR PART TO KEEP THIS GREAT FORUM GOING! (Only 68 donations so far out of 49,000 members - Can we at least get 100? C'mon guys!)
×


rwiederrich
-
Posts
5,518 -
Joined
-
Last visited
Content Type
Profiles
Forums
Gallery
Events
Everything posted by rwiederrich
-
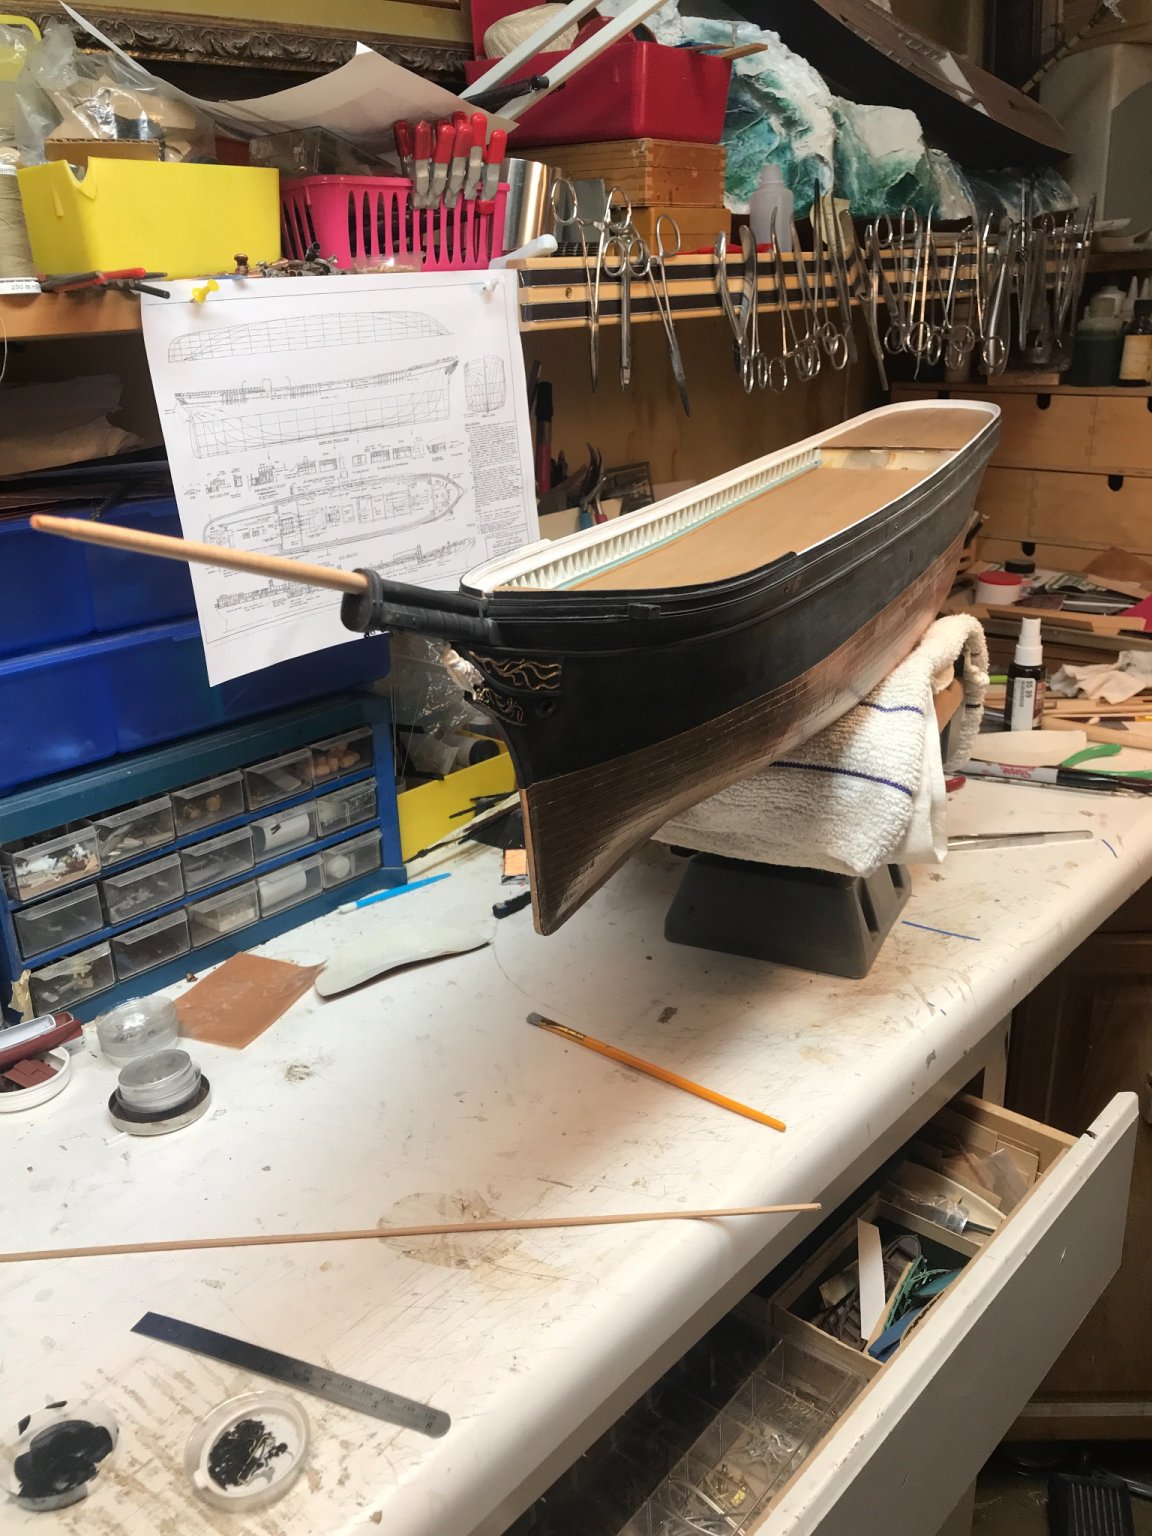
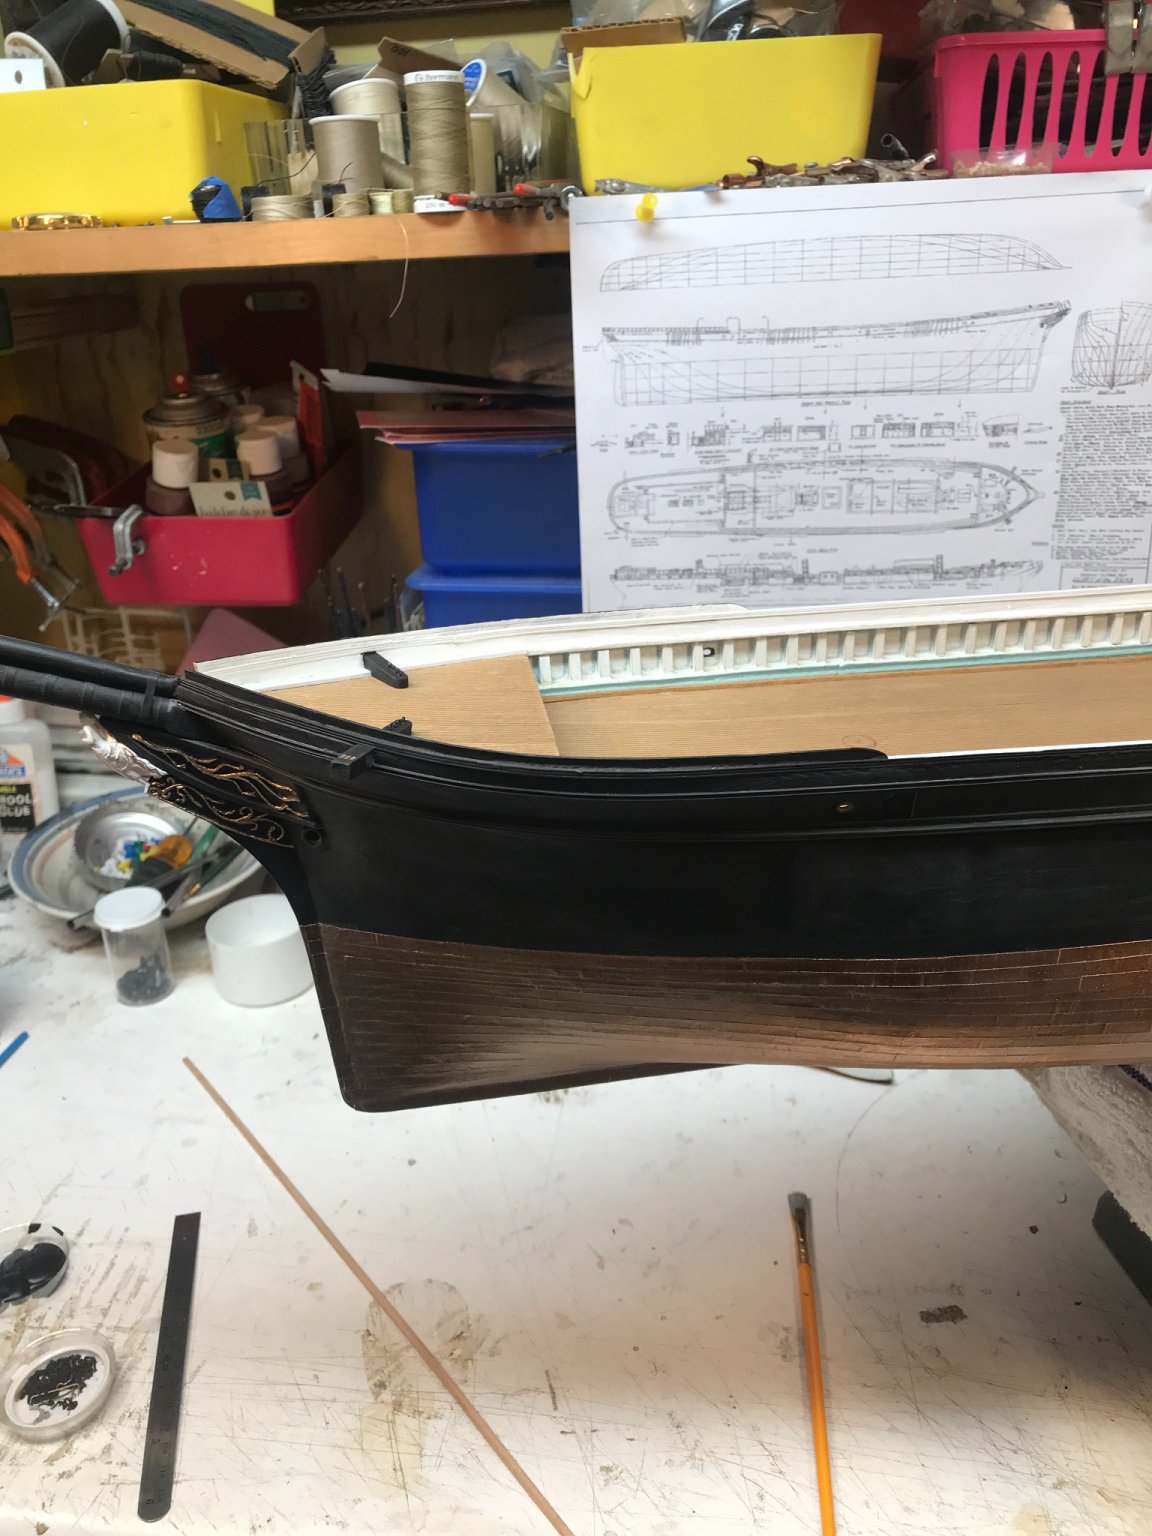
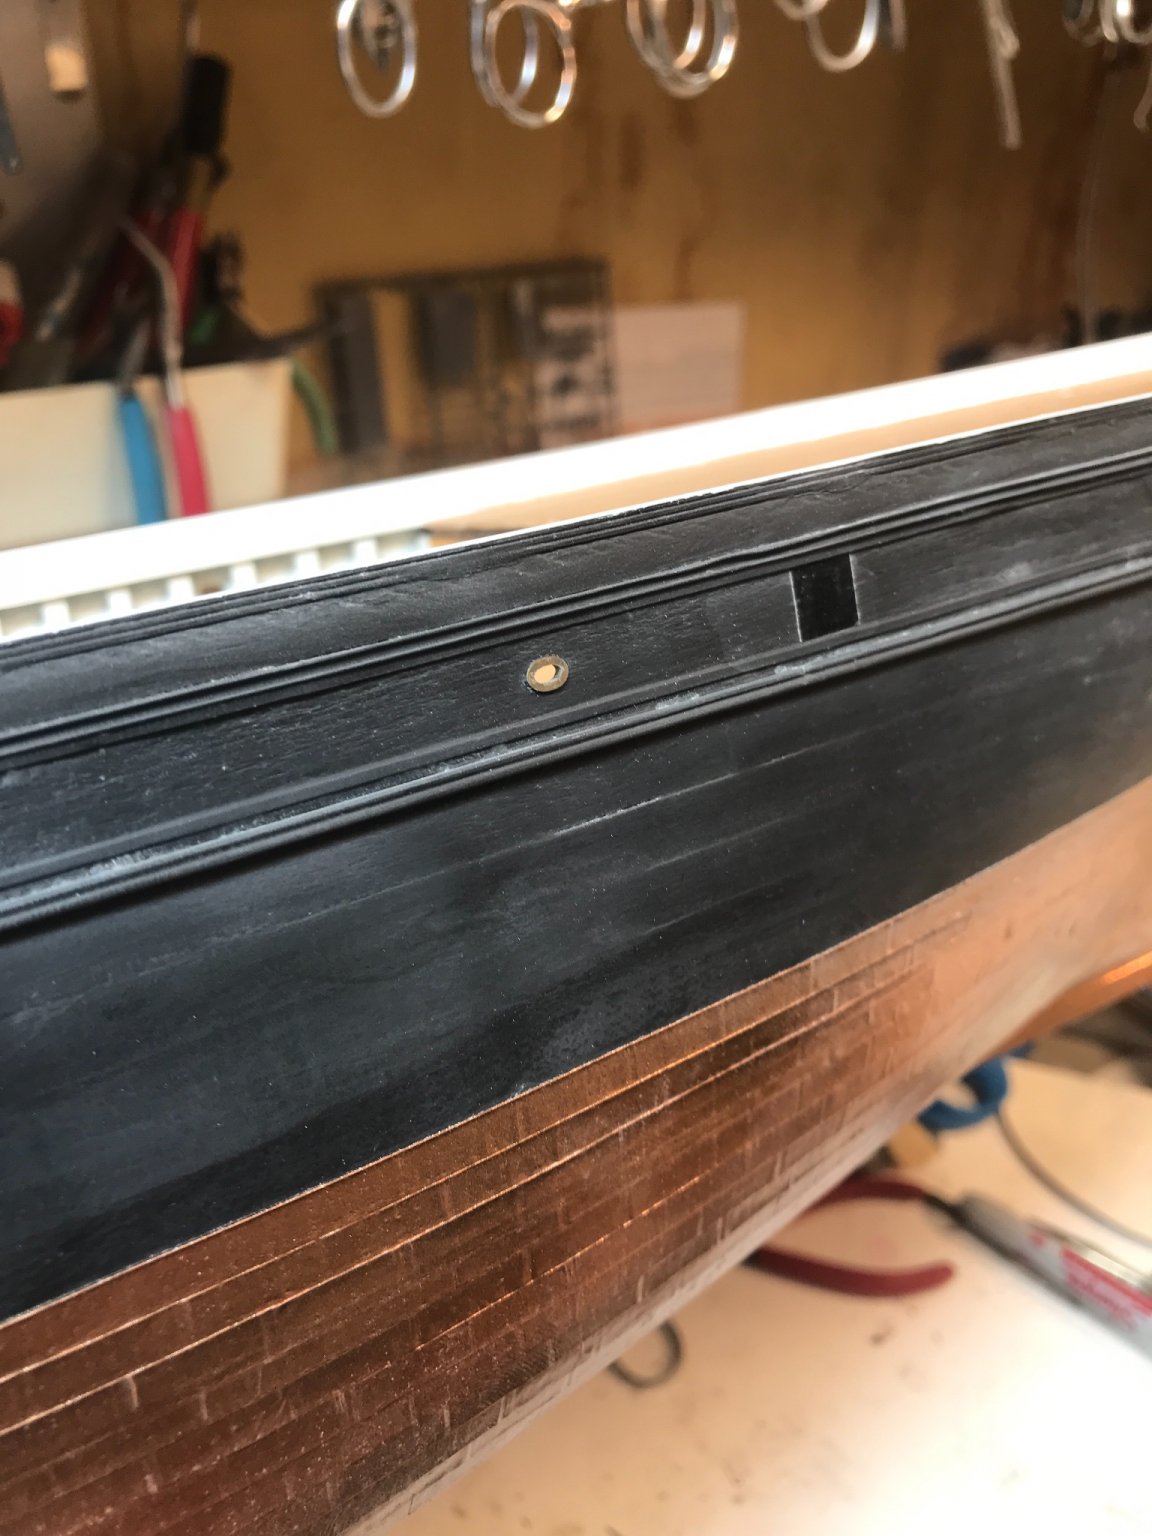
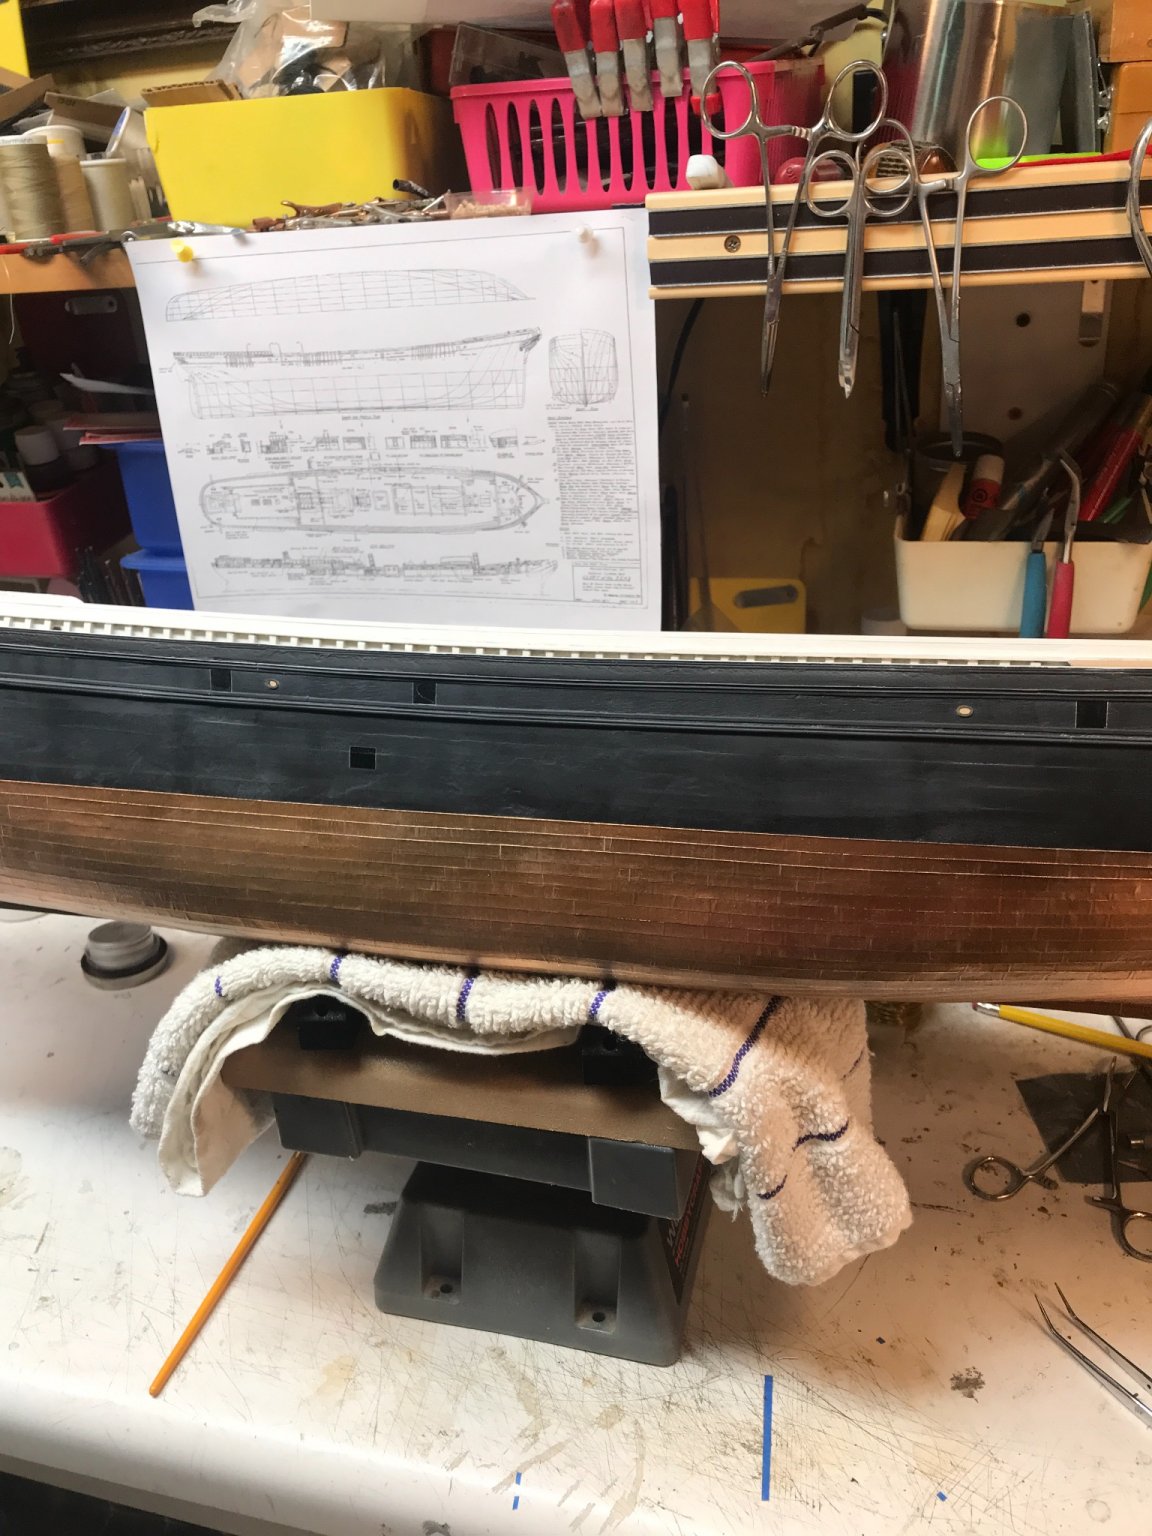
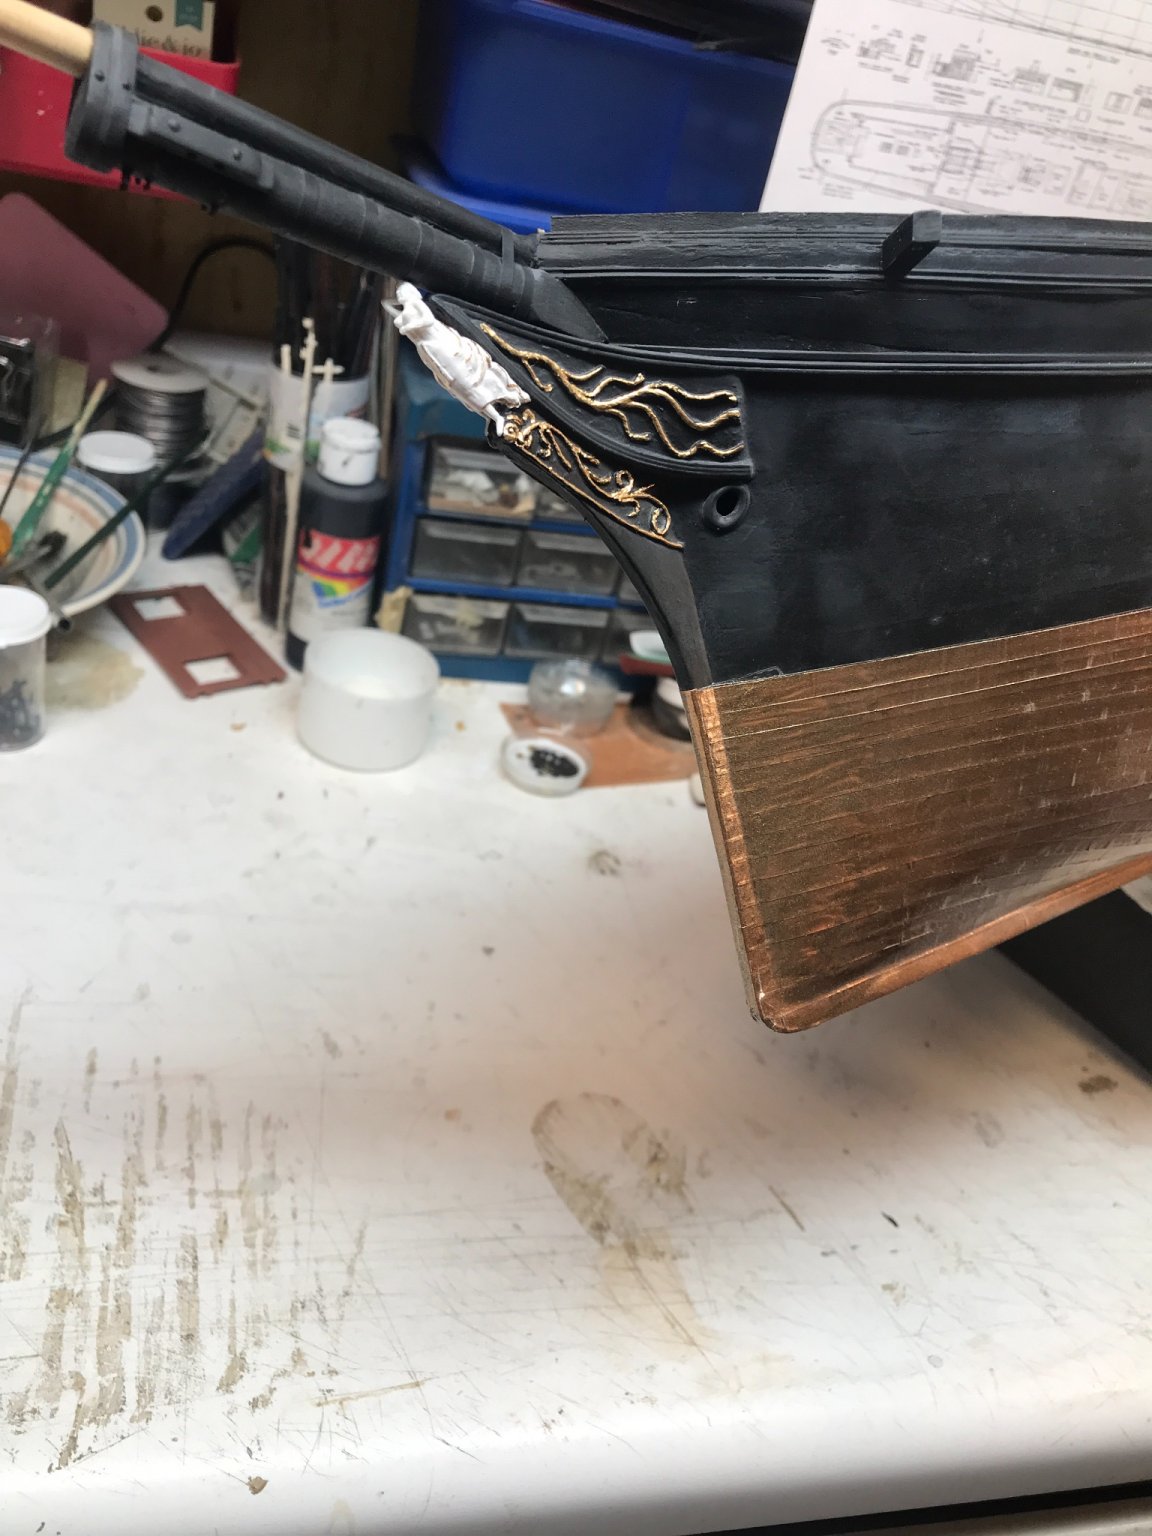
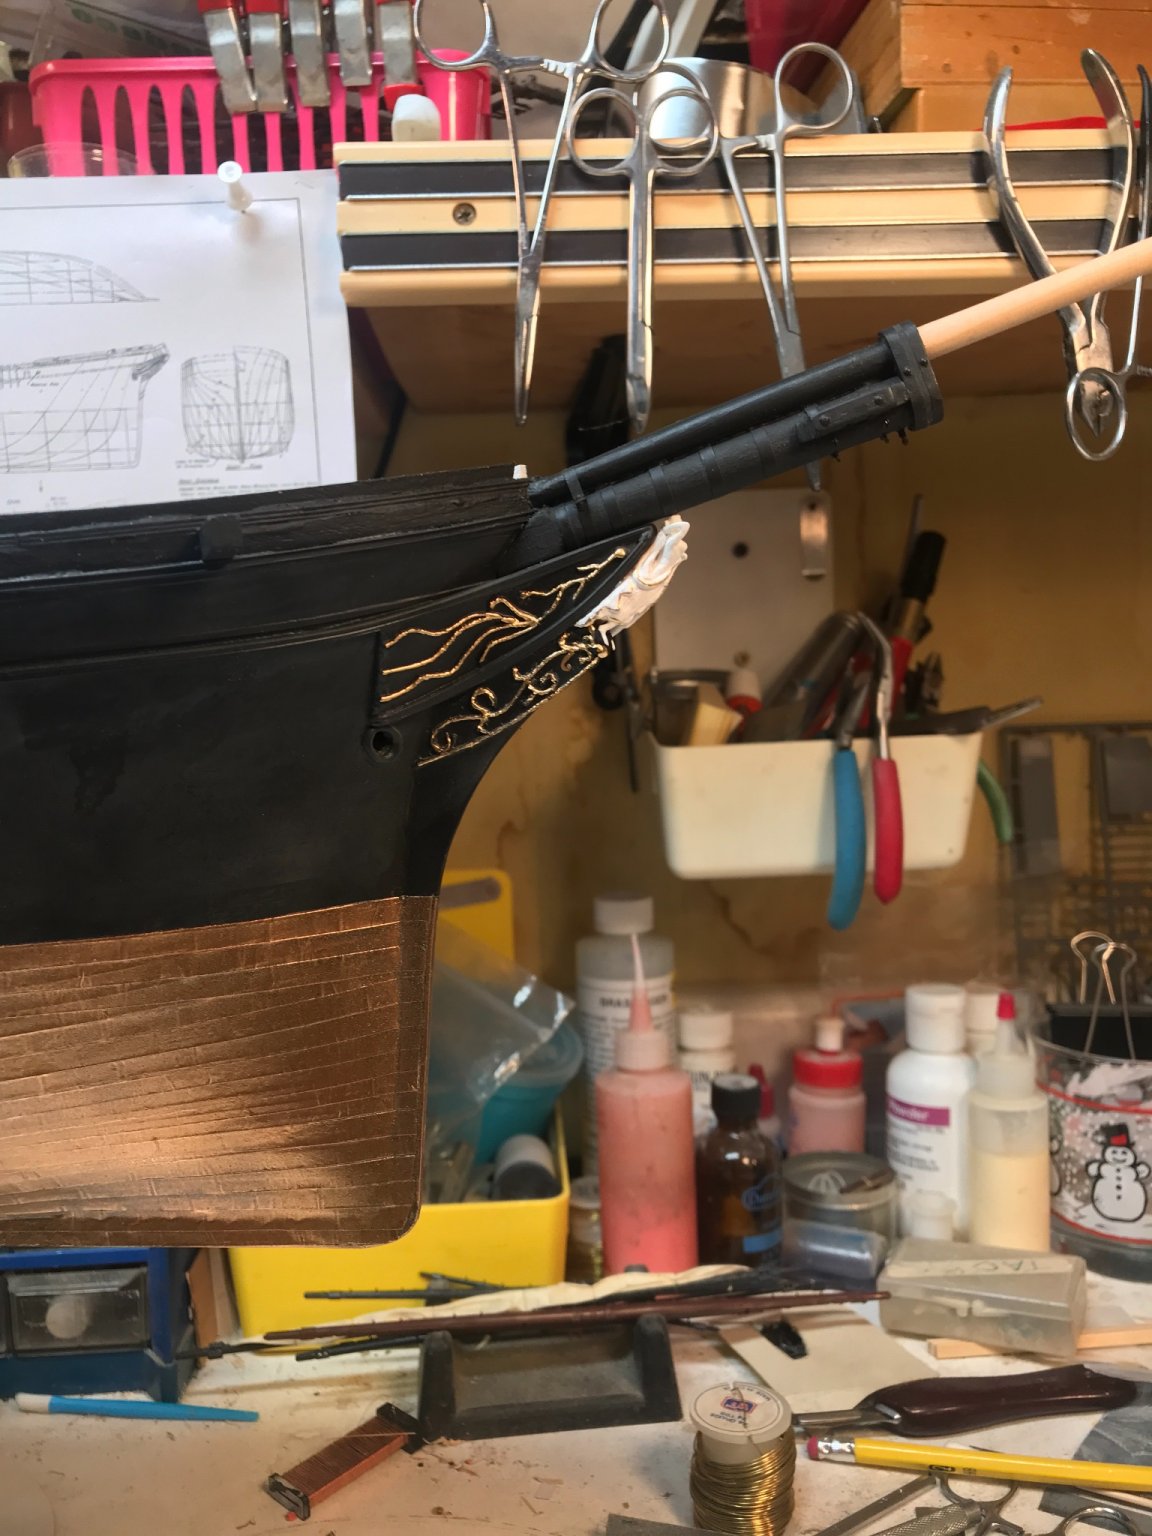
Using tooling steel, I made all the scrapers I needed. Just way to small to find any generic stuff. I have another approach I will be doing to form the house moldings and the inset trim. The aft poop railing will be a trick and will need special math to make....along with a great deal of paying attention to details of its fit/form and function. Rob
- 3,560 replies
-
- 1
-

-
- clipper
- hull model
- (and 2 more)
-
In model railroading it's called *Forced Perspective*. On my bench it's called Paint.........😄 Rob
-
I think the only detail I don't pay close attention to is when my wife cuts her hair. Sorry for the confusion and that you had to find humor in an a supposed oversight. And I did check out your build, (I check it probably 10 times a day), you are making great progress and your trim work is spot on. Are you *scraping* the wood with a tool? Rob
-
Rich and Vlad....I see the confusion. Rich I was commenting to your post #1486 NOT Vlad's post #1487. Which he posted over 7 hours later. I didn't even see that post when I posted my update. I just threw up my update and then turned off the light and went to bed. If I had seen Vlad's post, I would have surely commented and thanked him and even commented on his own magnificent build. I'm not so old that I can't track a simple build log thread....😎. I might be going deaf...but not blind. I hope to spend some time working the anchor quick release mechanism(which is actually undefined and void from any plan), so I will use photographic evidence (and lack of), to build the most logical design. Here is where artistic license comes in. Rob
-
Actually it is both of you......you guys are too nice. Rob
-
That's looking magnificent Vlad. Your trim work is well done. I bet you are getting exhausted with the sanding that is required. Sweet...just sweet. Rob
-
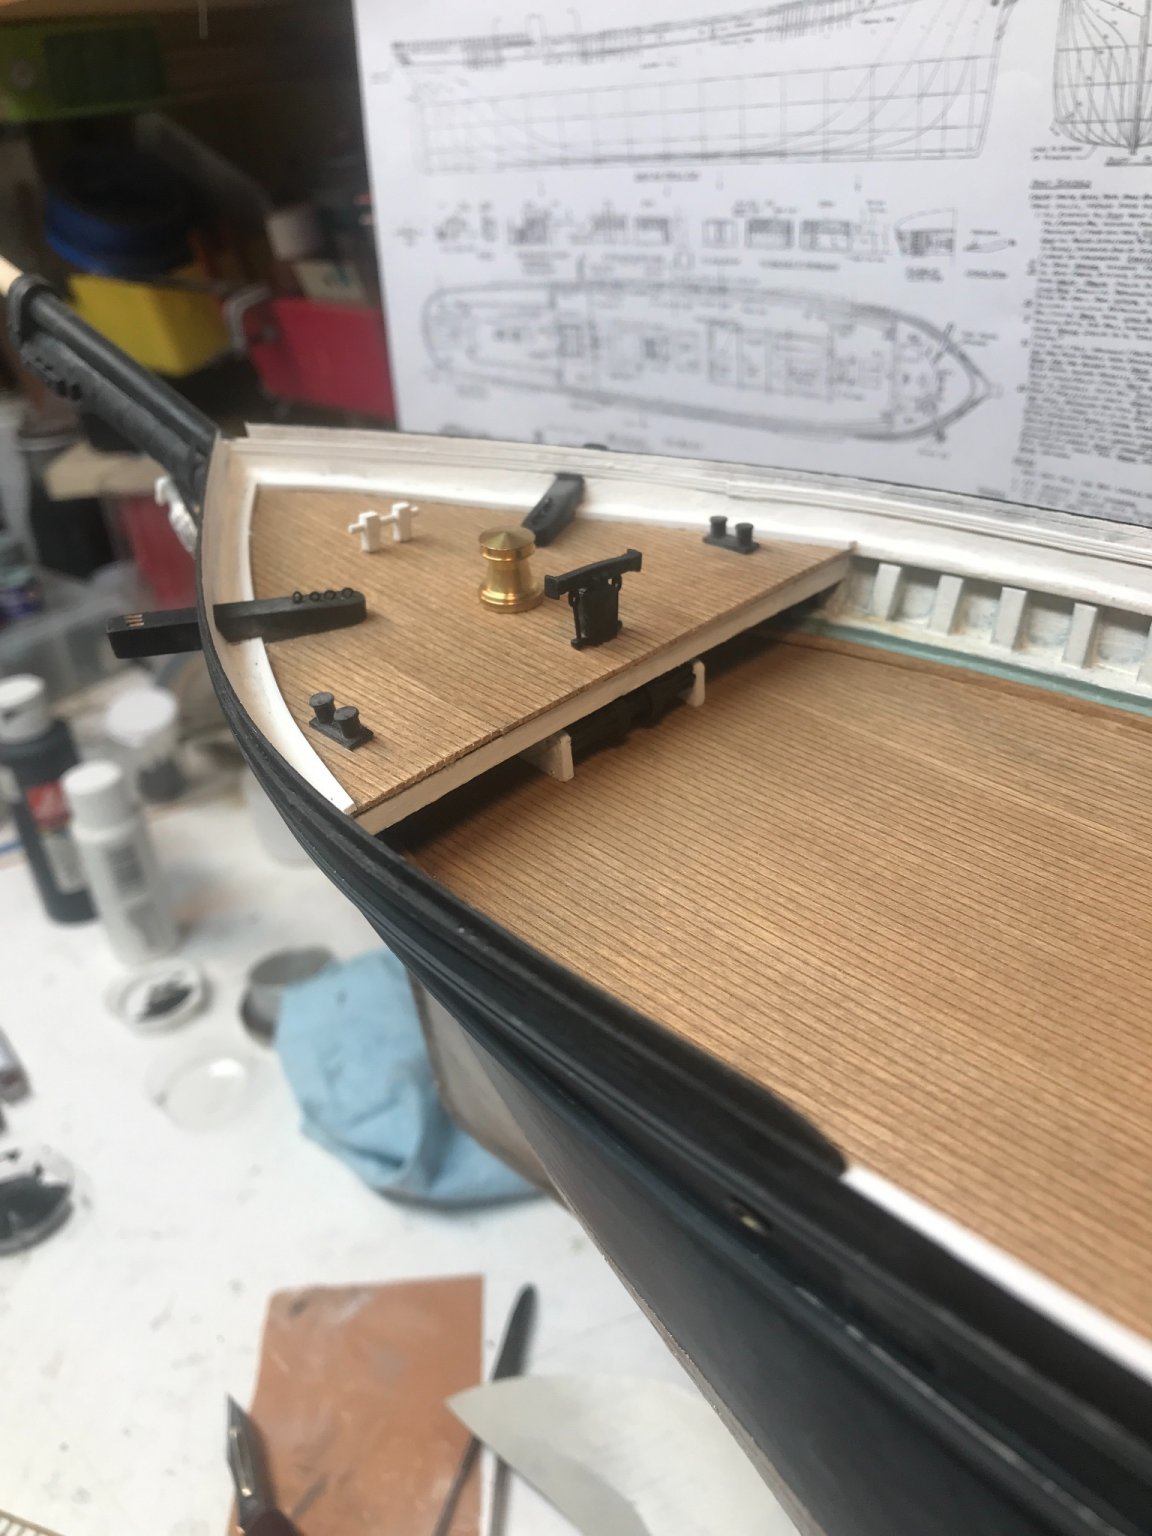
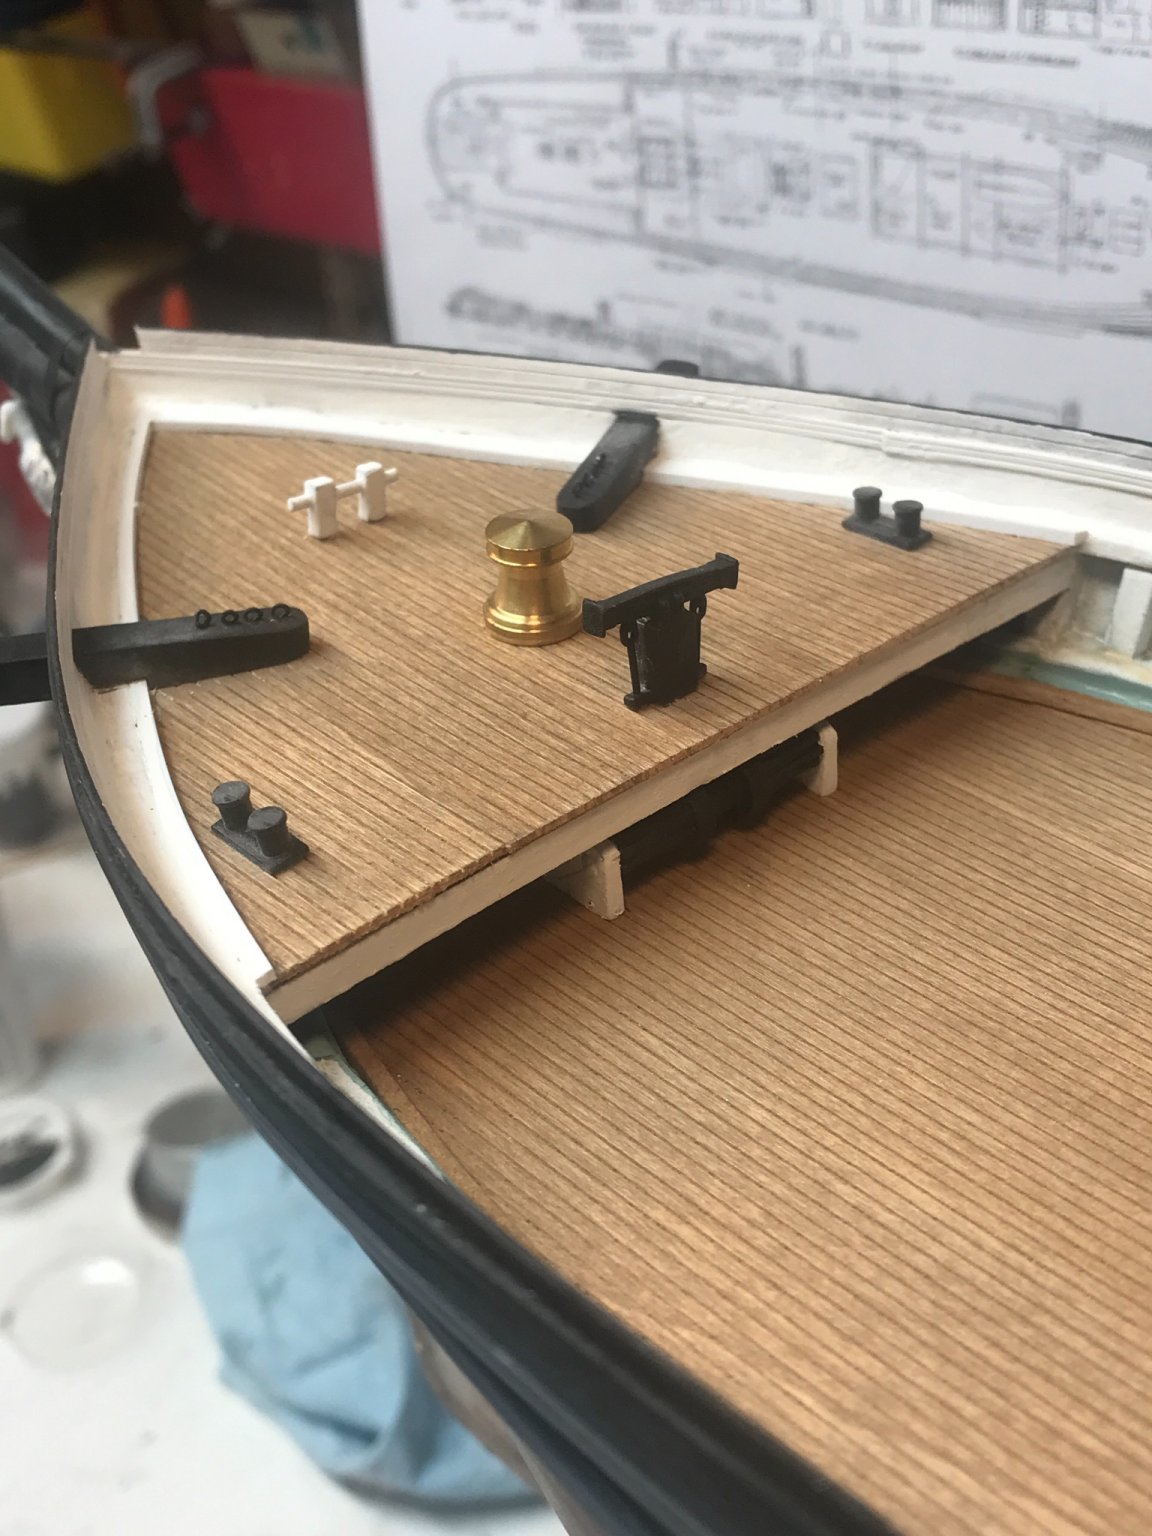
I’m going to oxidize the brass capstan. Rob
-
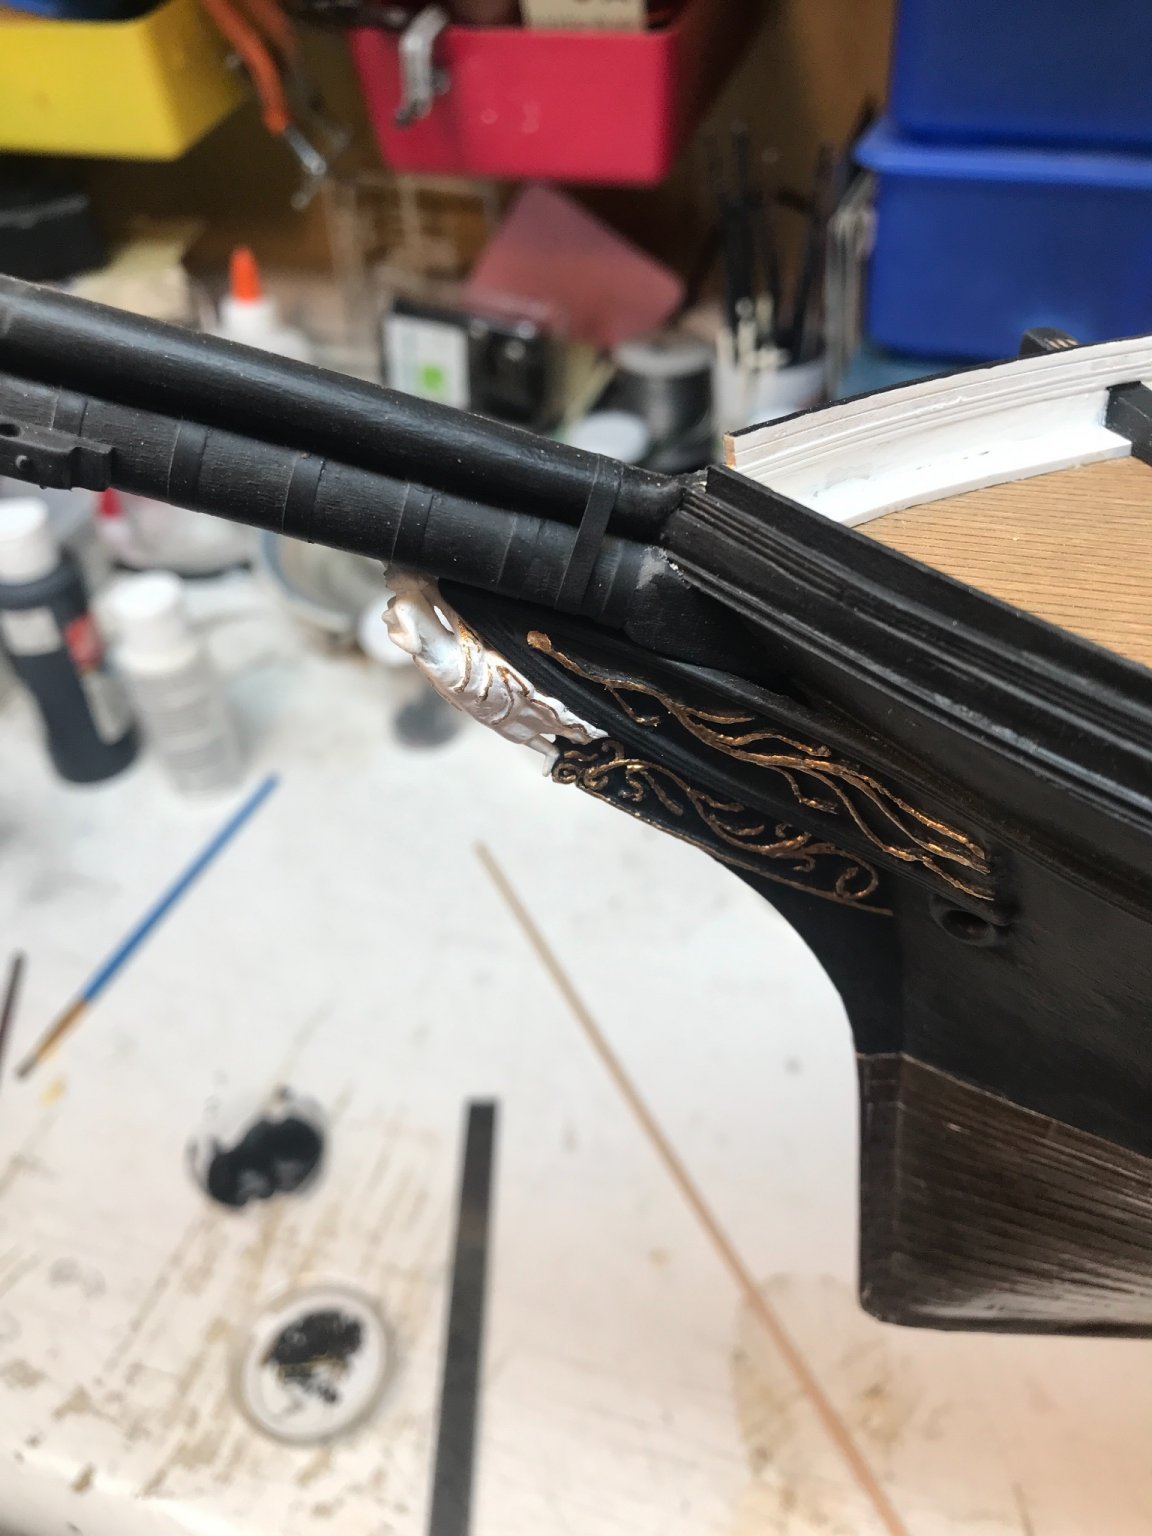
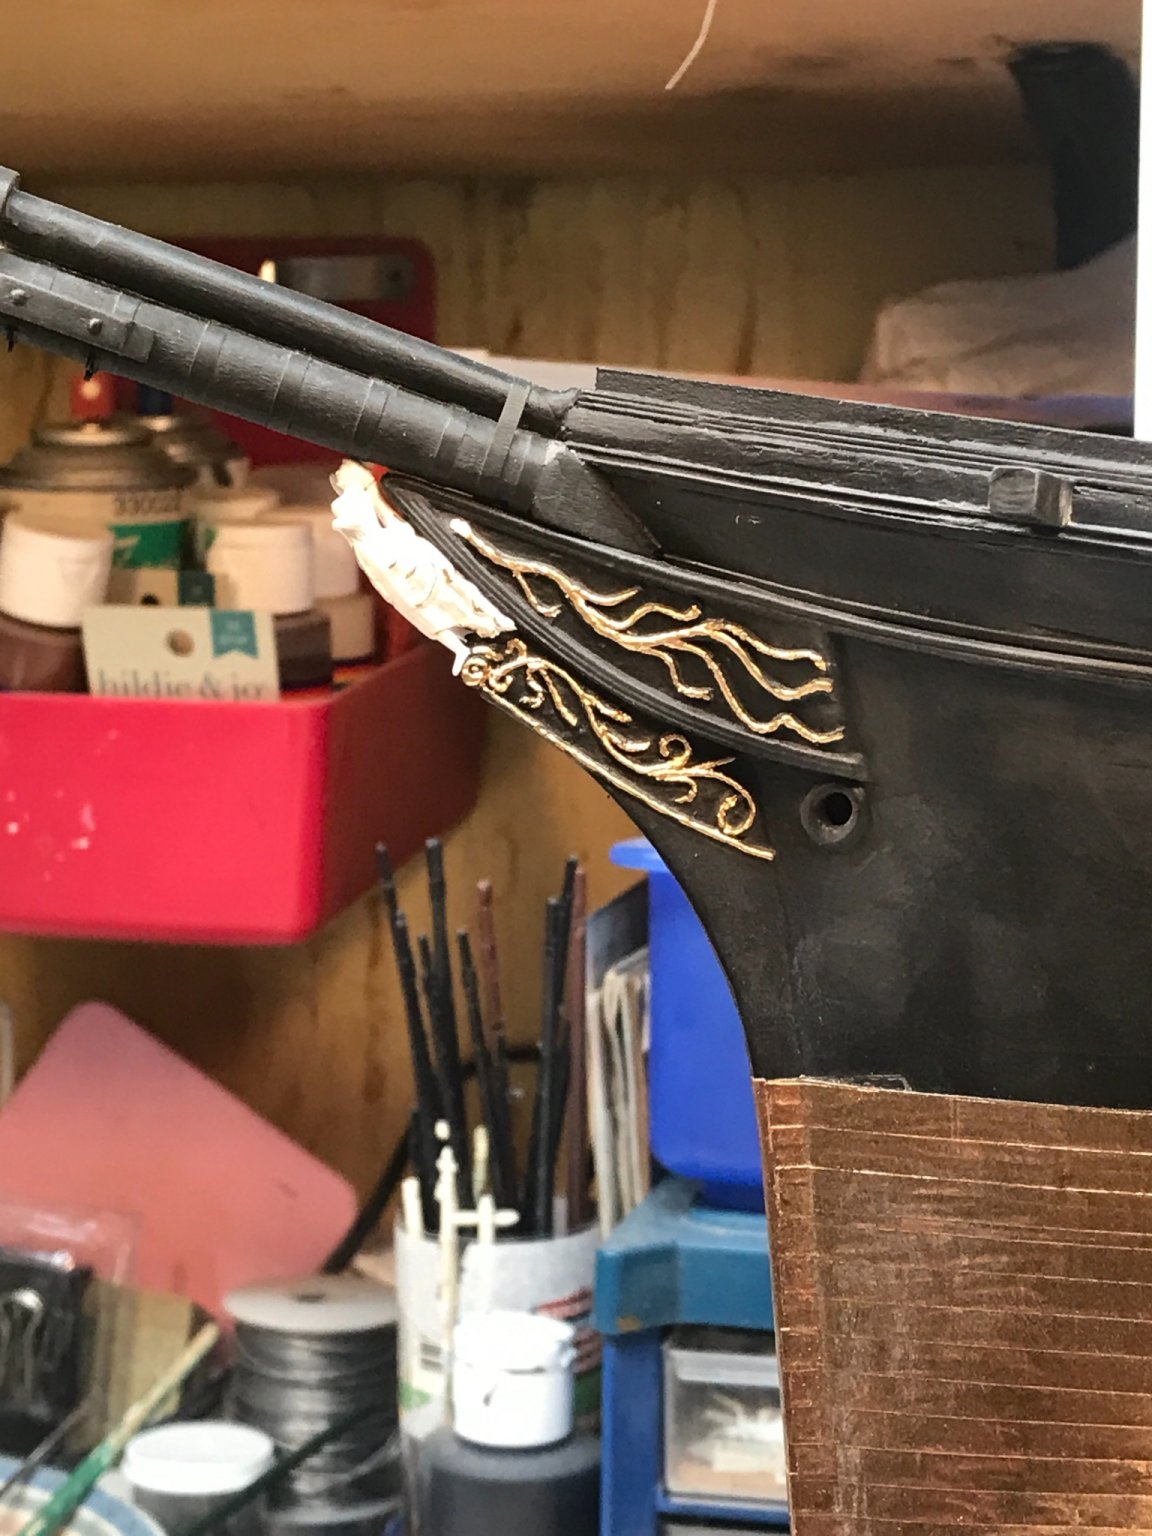
Thanks Rich……that is very nice. I did a little work on the forecastle. Rob


- 3,560 replies
-
- 3
-
-
- clipper
- hull model
- (and 2 more)
-
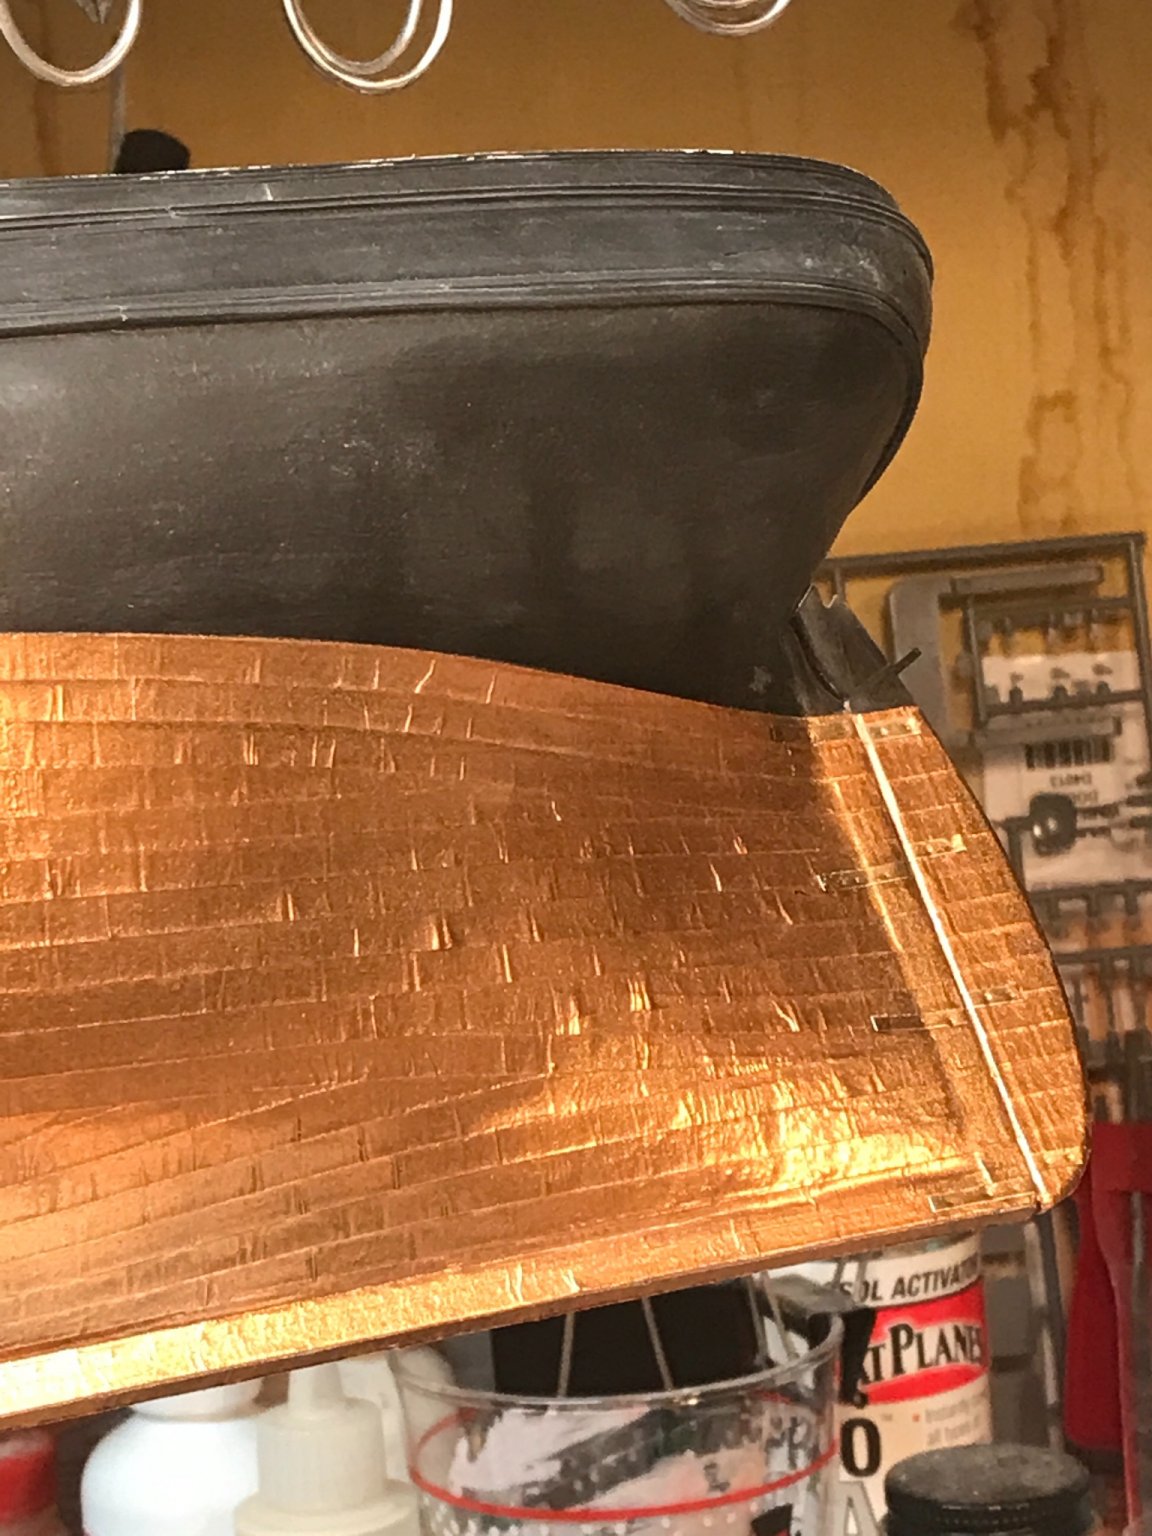
Yes...it is always a challenge for the modeler(Namely myself) to forgo details that at a certain scale would either be impossible or impractical. Nothing worse then adding a detail that is out of scale. However..in some cases it is possible to get away with it, because you can mask the error either in quantity or by way of simple communal acceptability. A good example is fudging with copper plate scale for your model. Personally I expect to attempt to replicate the cabin moldings and box work as authentic as possible....and if not, I will employ the skill of illusion and mimicry. My coat of arms.😄 Rob
-
Rich, I am so glad that you like the model and how it’s coming out I’m glad I can keep it close to the original, it’s been hard, but I think it’s looking pretty good. thank you for your confidence and your compliments.
-
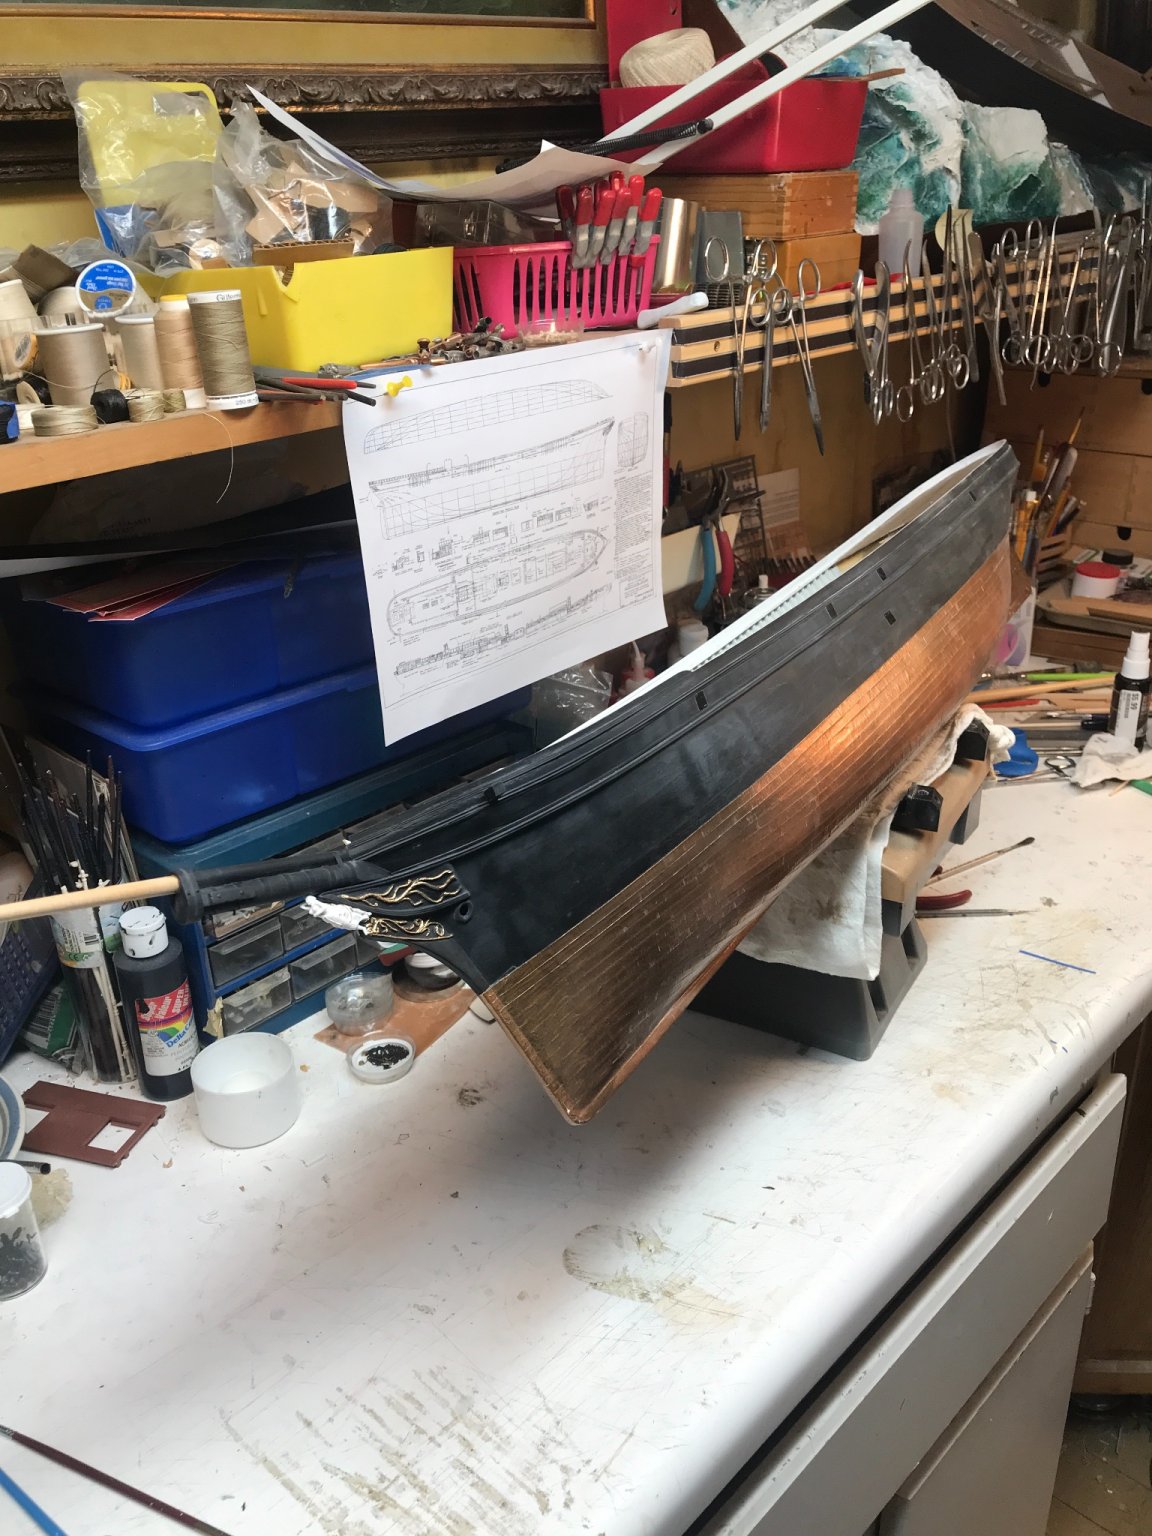
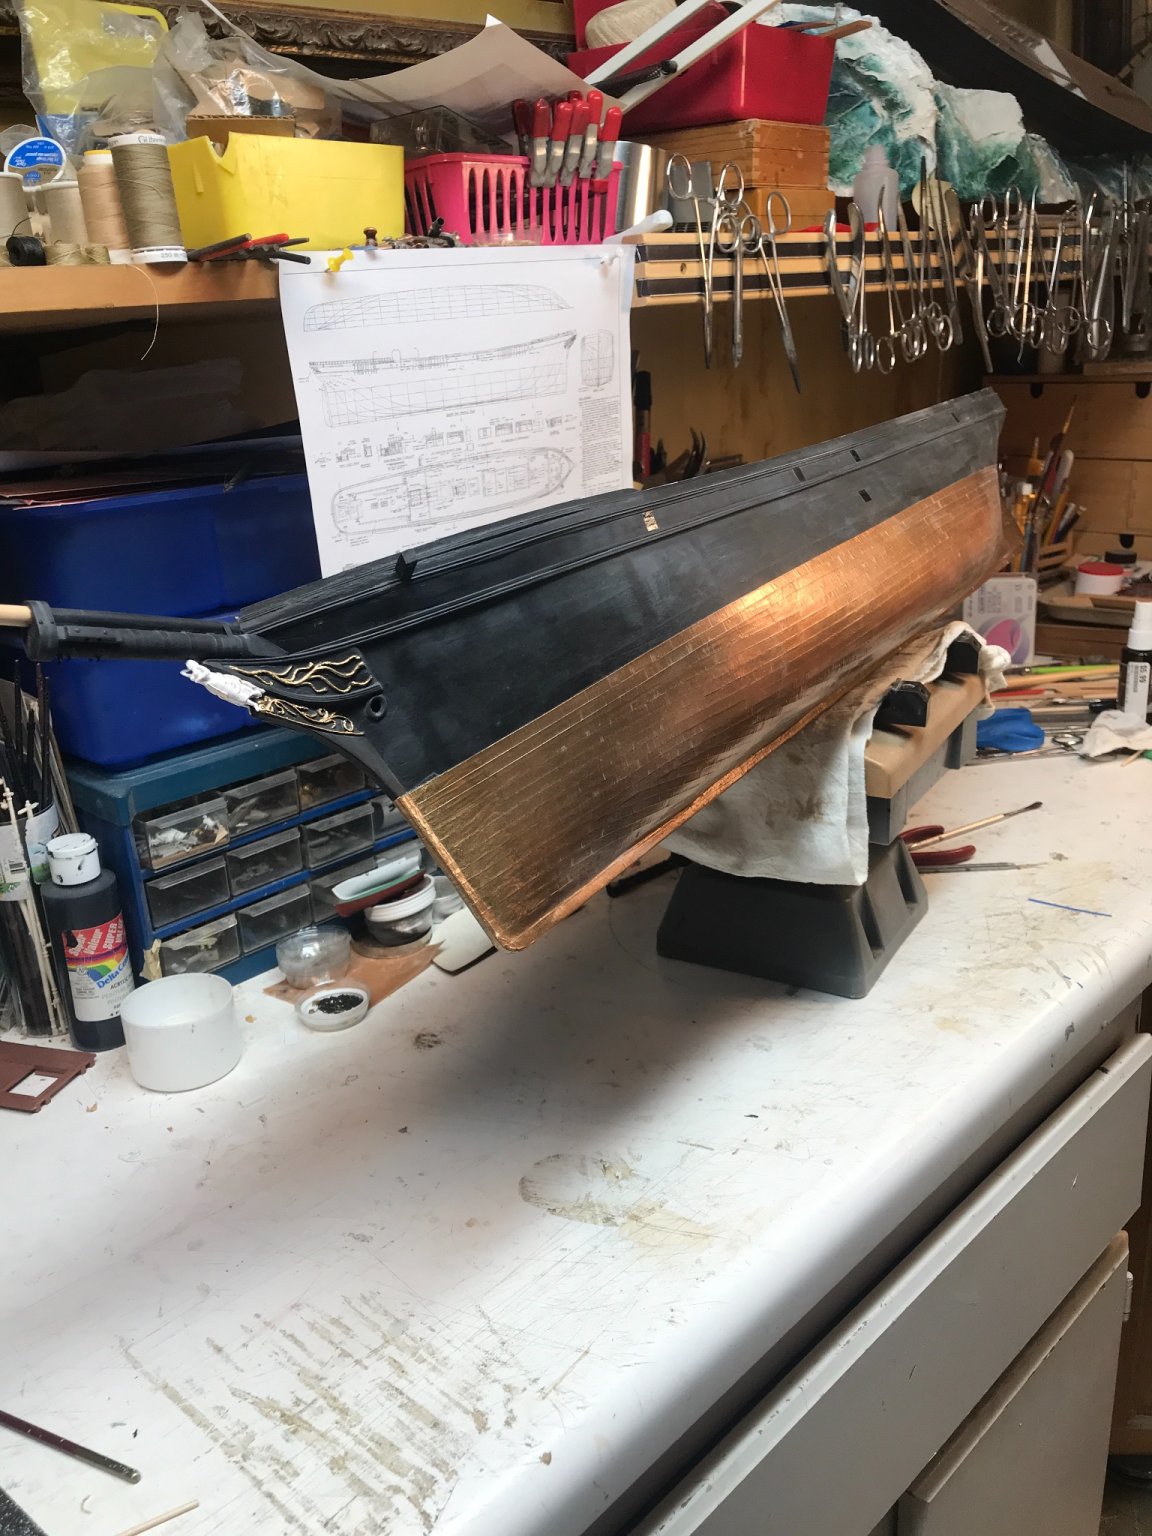
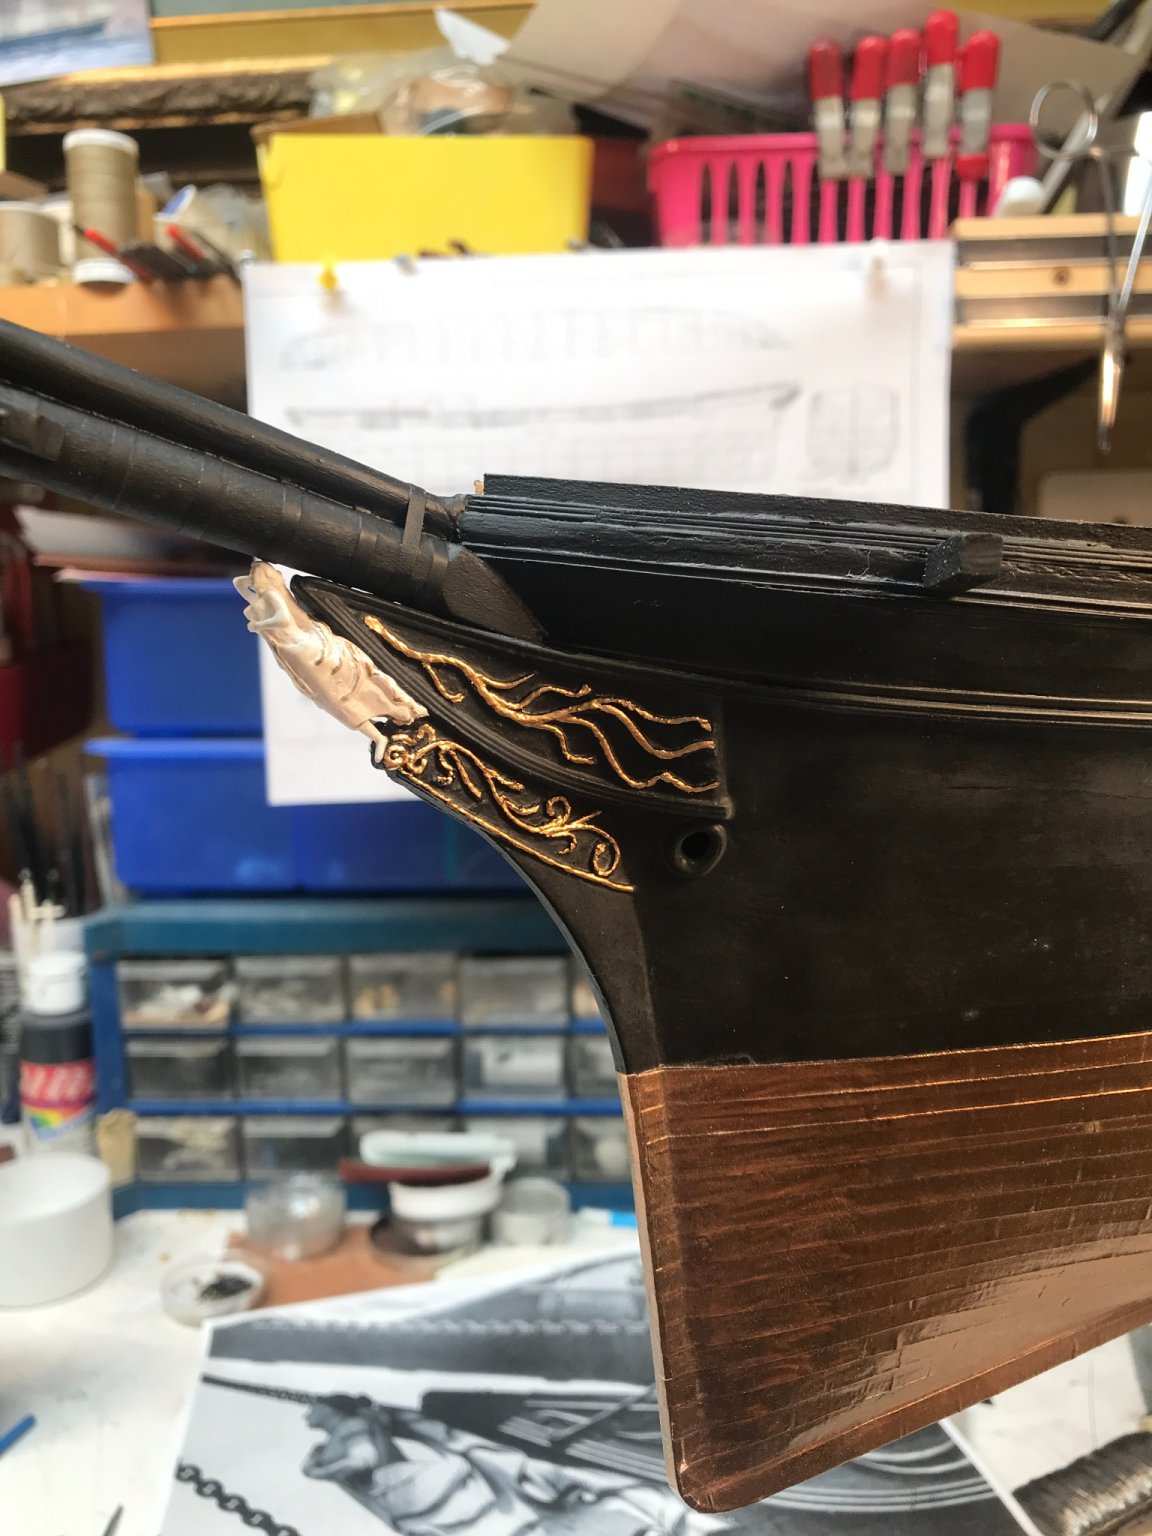
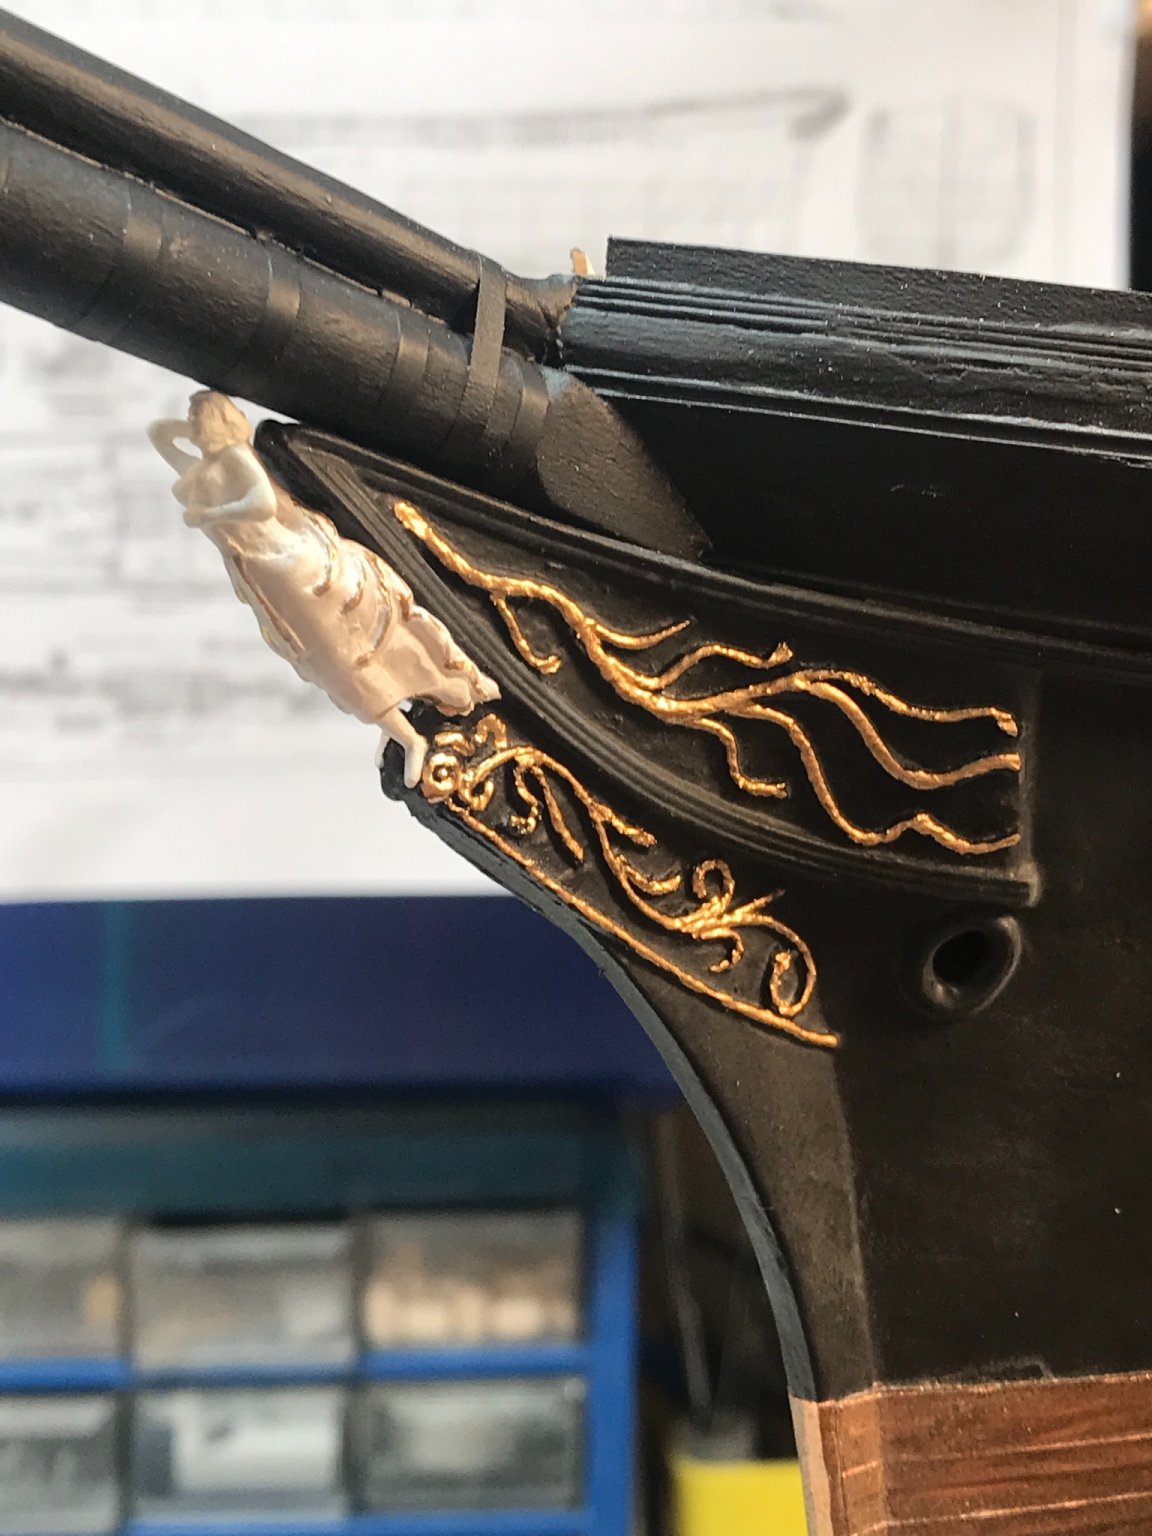
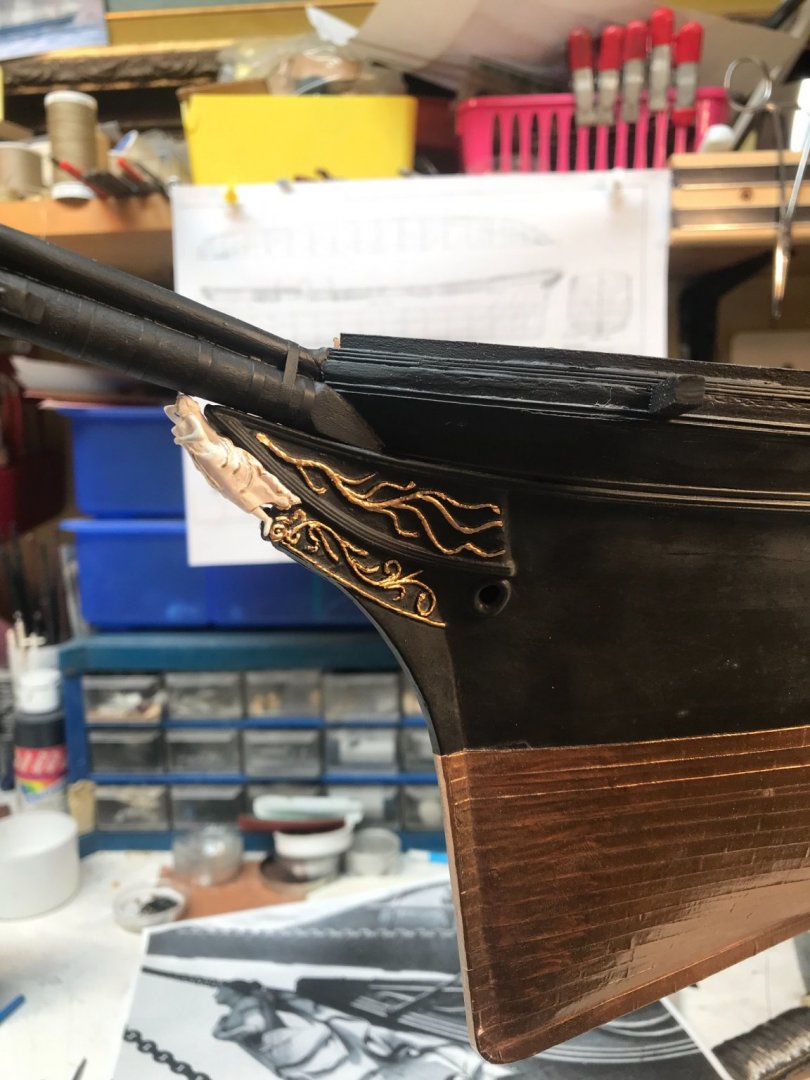
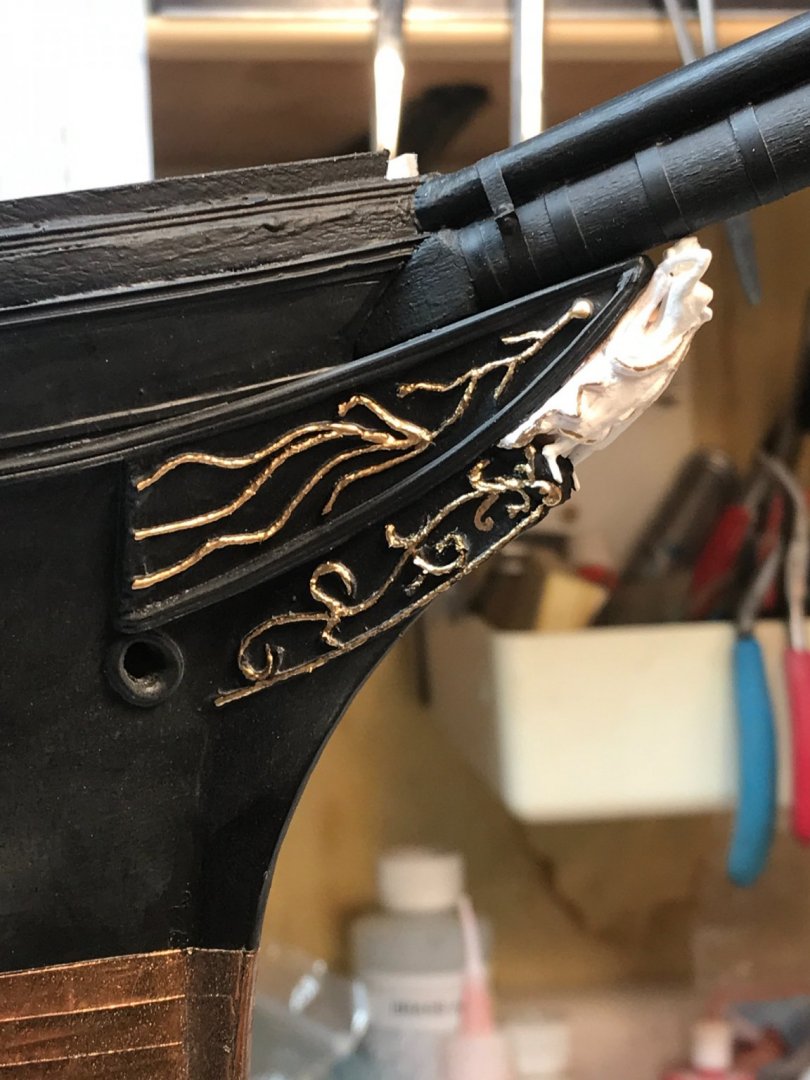
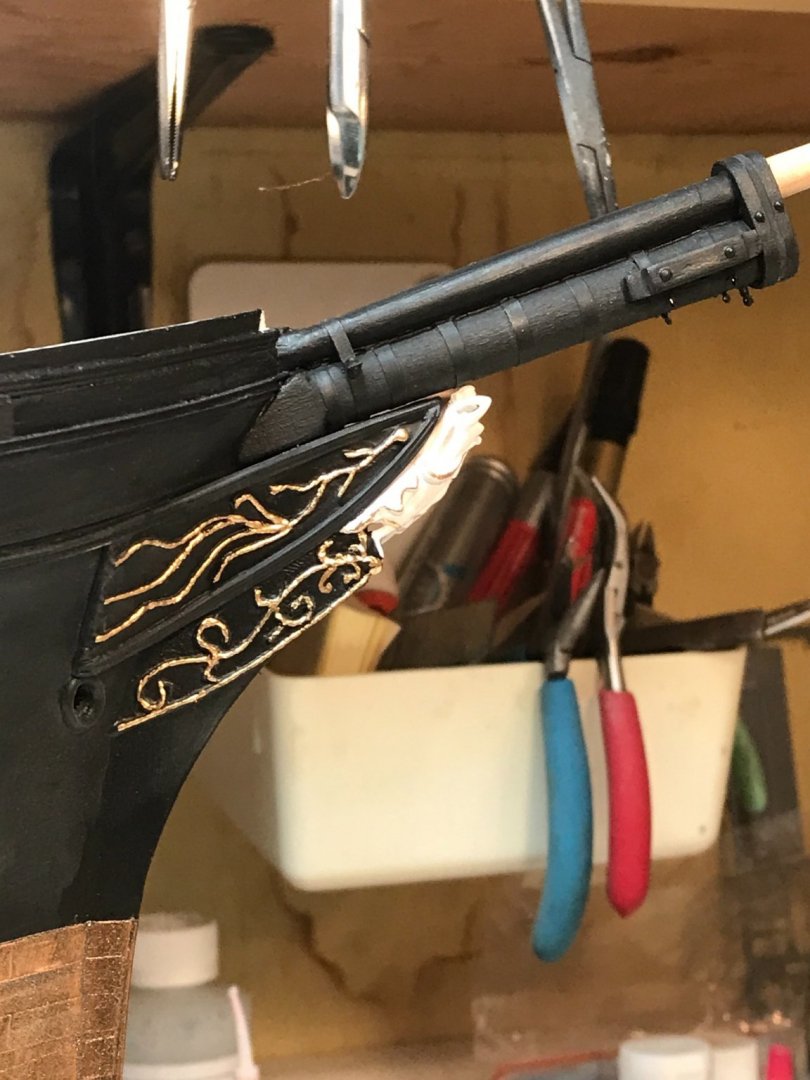
I spent a little time in the shop working out the figurehead getting her mounted and painted here’s a few pictures.


- 3,560 replies
-
- 5
-
-
- clipper
- hull model
- (and 2 more)
-
Great drawing Rich....cept the pin rail stops at the start of the poop deck. Great drawing. Rob
-
Wonderful work....even without all the data. Thanks for posting. I had a dentist apt yesterday so I didn't work on Glory.......I'll have updates tonight. Rob
- 3,560 replies
-
- 1
-
-
- clipper
- hull model
- (and 2 more)
-
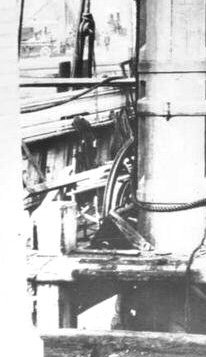
Indeed. Your image of the bulwark with the boy is exaggerated by being out of focus.....look at this image and zoom in on it, it is much clearer and it definitely shows the topgallant and all its details along with the main pin rail. Rob
.jpg.325644f025f5ee20dbb8ff3e738010a2.jpg)
-
Don’t want to forget this image.

-
These closeups on both port and starboard show the pin rail and the fact the top gallant is not open like below the main rail. Rob

-
Just beautiful Vlad...wonderful. Rob
-
How will you create your moldings? Just stack small molding to resemble molded trim? Rob
-
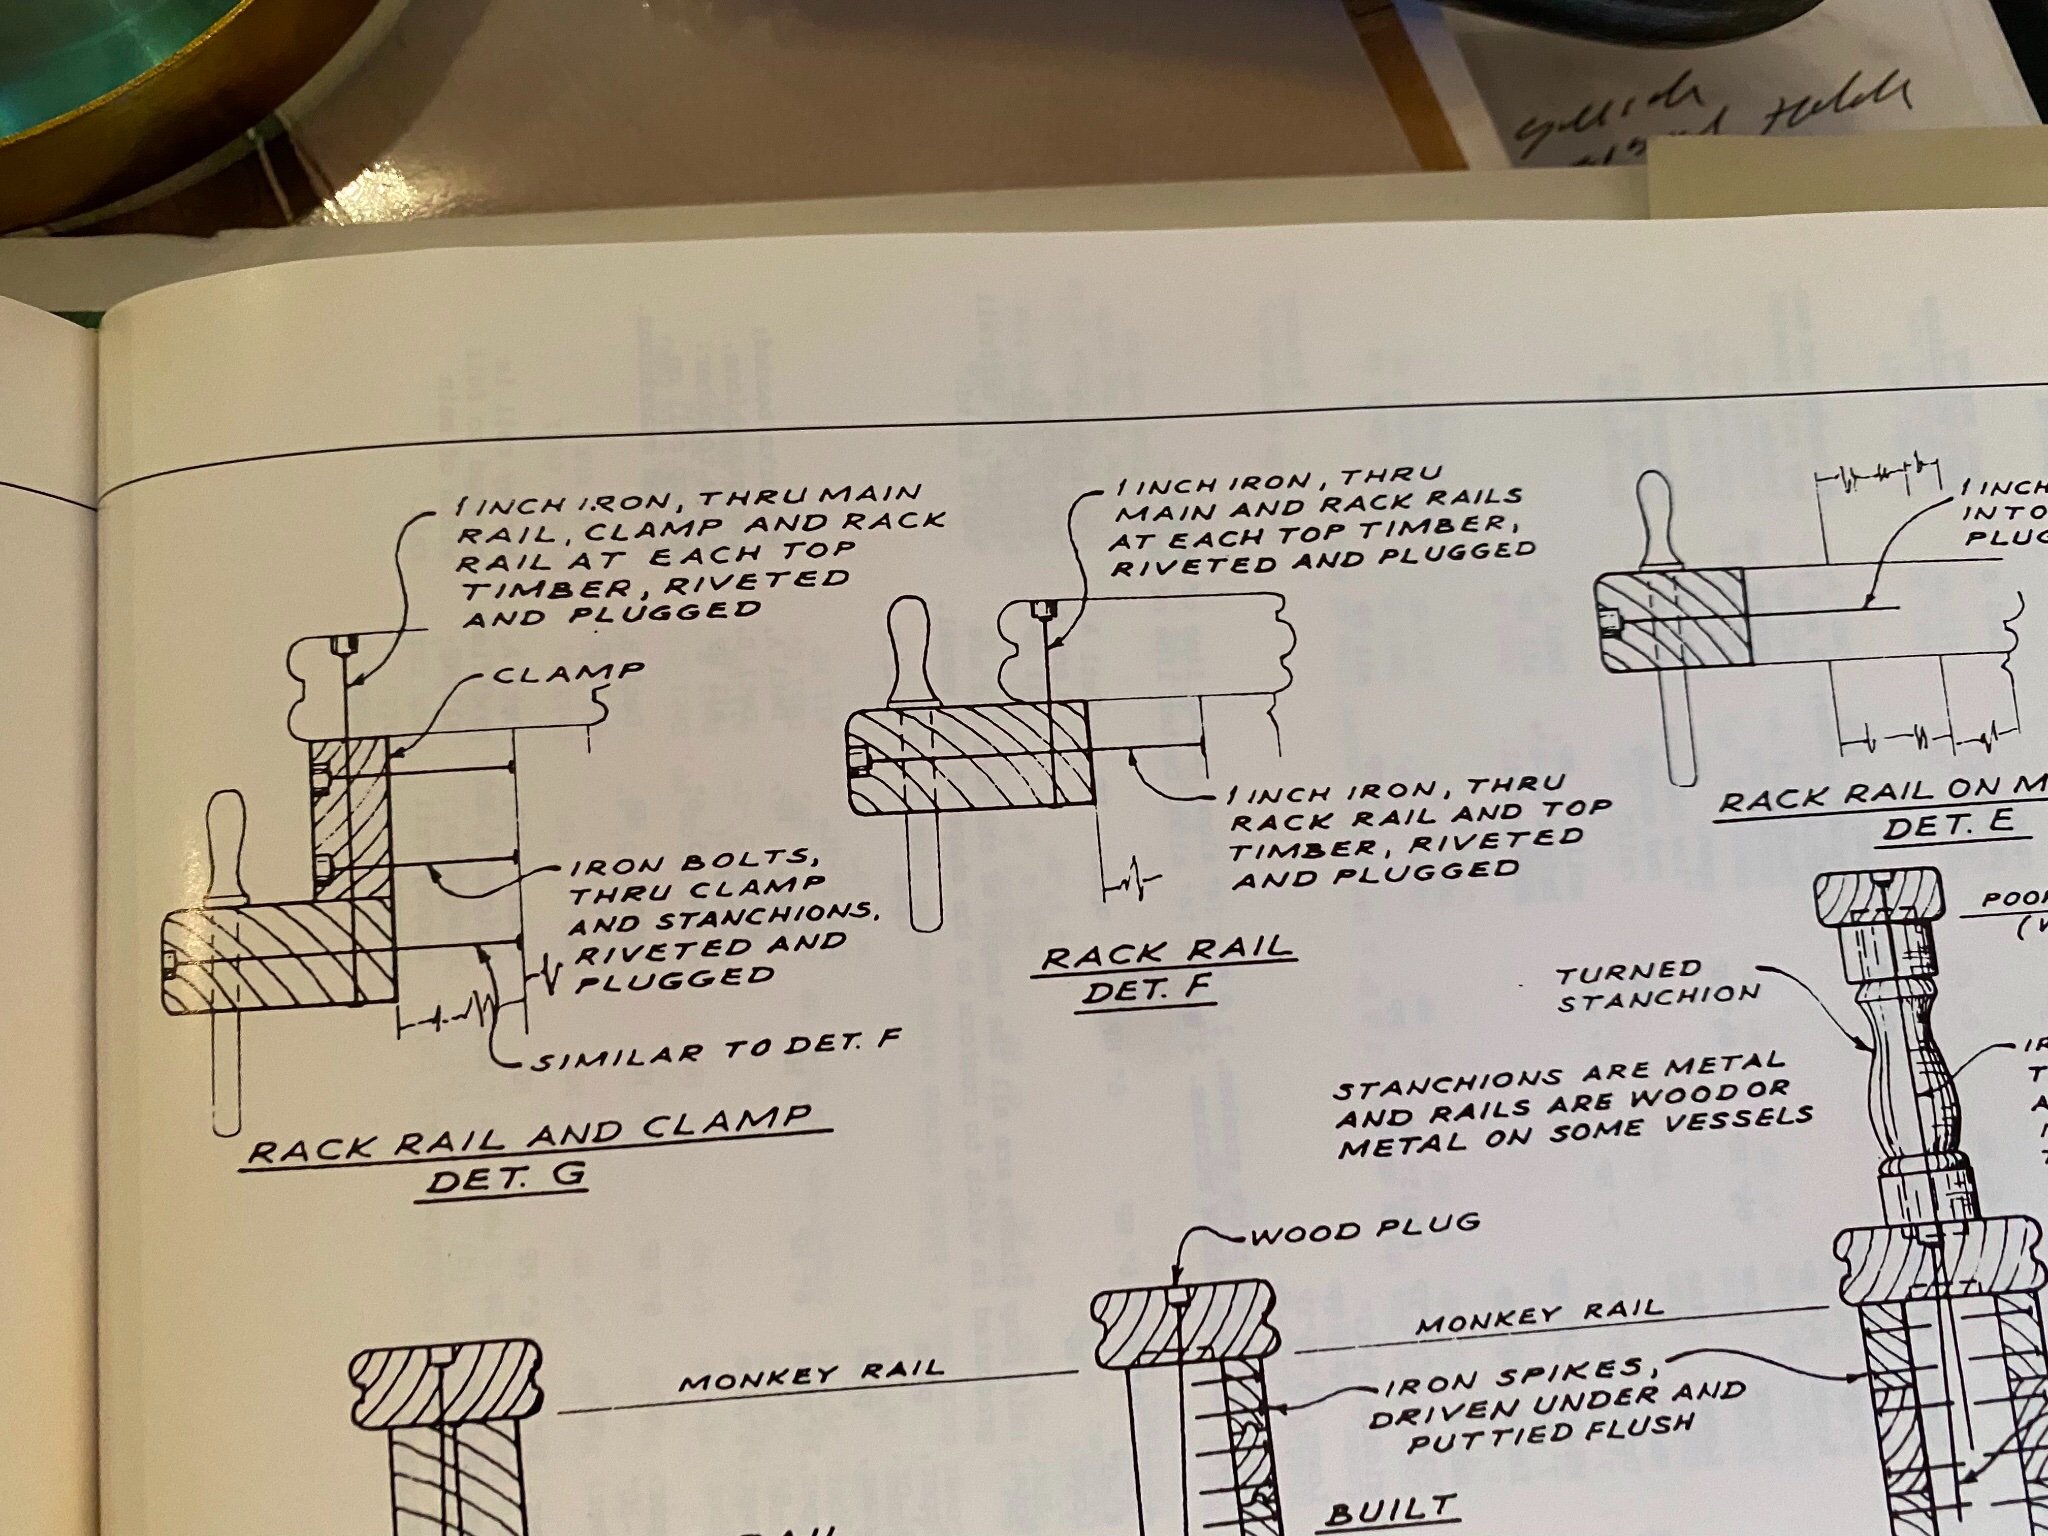
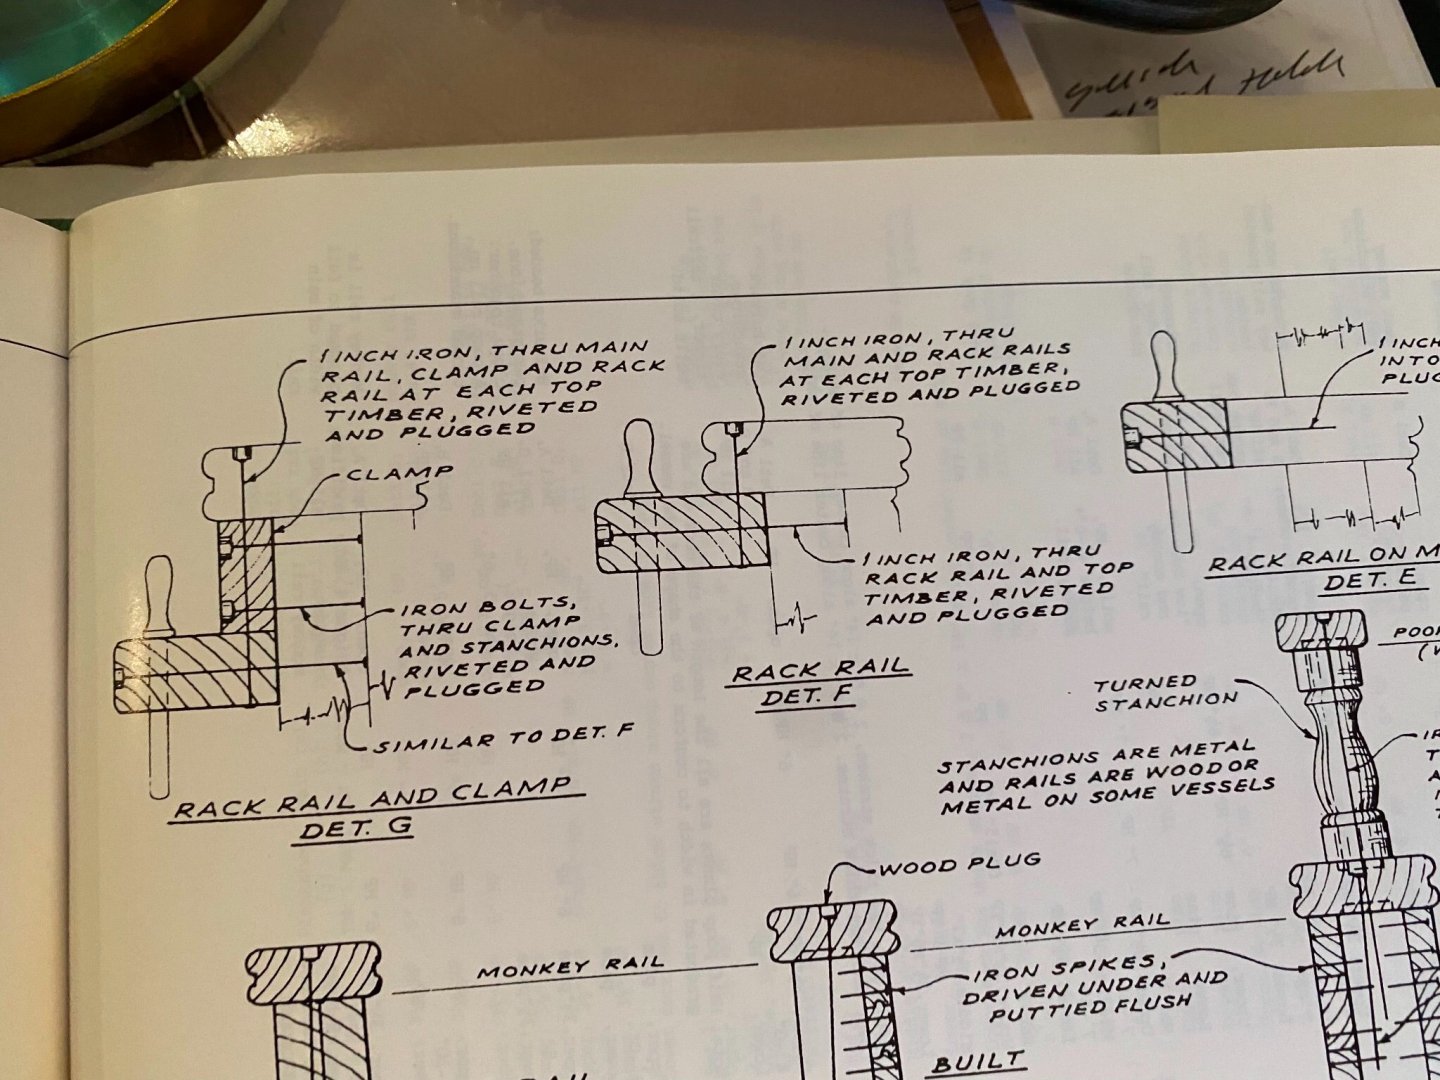
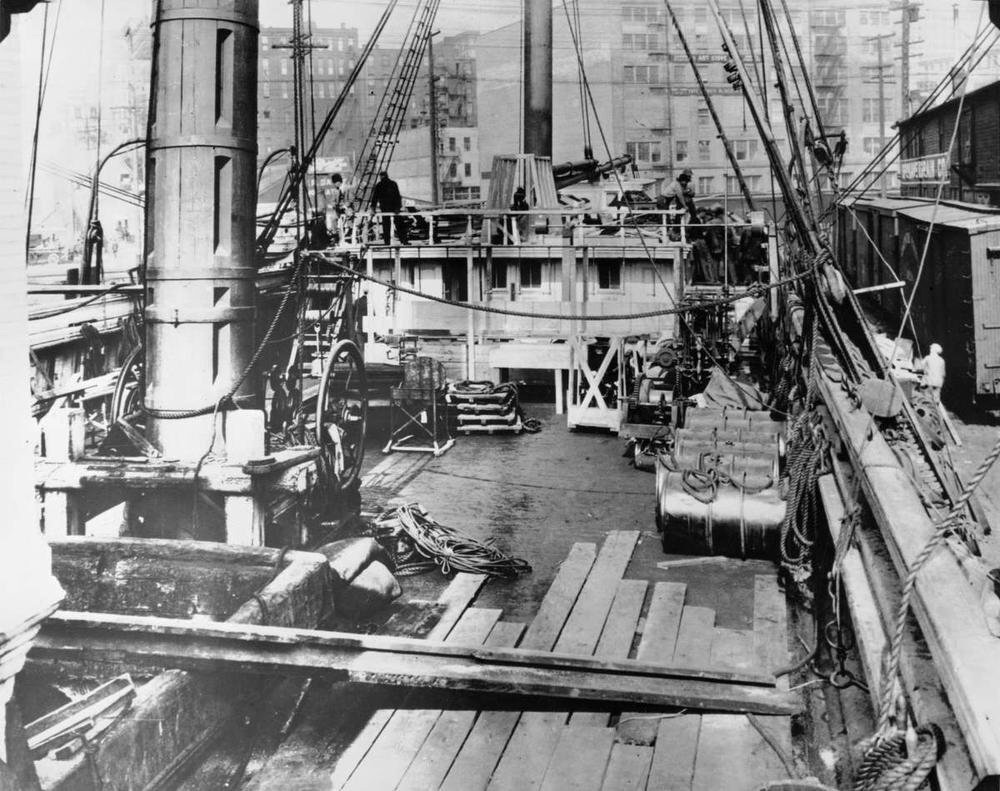
I believe her pinrails were beneath her main rail. See illustration and photo Rob
-
Yep. Even the most accurate can miss hidden details. The photos of her conversion reveals the pinrail. I’ll be adding them soon myself. Rob