HOLIDAY DONATION DRIVE - SUPPORT MSW - DO YOUR PART TO KEEP THIS GREAT FORUM GOING! (Only 68 donations so far out of 49,000 members - Can we at least get 100? C'mon guys!)
×


rwiederrich
-
Posts
5,518 -
Joined
-
Last visited
Content Type
Profiles
Forums
Gallery
Events
Everything posted by rwiederrich
-
Thanks Pat. I don't think you doubted, I think you hadn't opened your mind to other possible ways to do the task, but what you have had experience with. Nothin better then that *ahahah* moment. Your own mantra spells it out quite nicely. *There are many ways to skin a cat*. And I believe that too. Well, it's my mantra too. The details in the weathering as well...she's almost 10 years old by now. She needs to look it and not only does her structures need to look convincing..so does her weathering. Thanks for the fine comments and encouragements...you have been a great support from the beginning. Rob
-
Everything is looking smart Vlad...your nameboards are looking amazing. Funny..my nameboards are about half your size. I'm surprised 1/72 is so different in scale to 1/96. One reason I think I prefer 1/96 is that finer details can be *blured*, if you desire...and if you're like me, you prefer to tackle them. Plus, space is at a premium. since you are not masting your model...you have more options for display. but if you did mast her...you'll need an entire wall space to display her. I just don't have that kinda space myself. Your progressing very fast and I'm quite impressed...great job. Rob
-
Thanks a lot Tblack. Those are boxes that hold sheets of model transfers and decals
-
My oh my …….Vlad. Great work. Love the mods to the ports. Great job on the railing too. You’re clipping along. Fine work. Rob
-
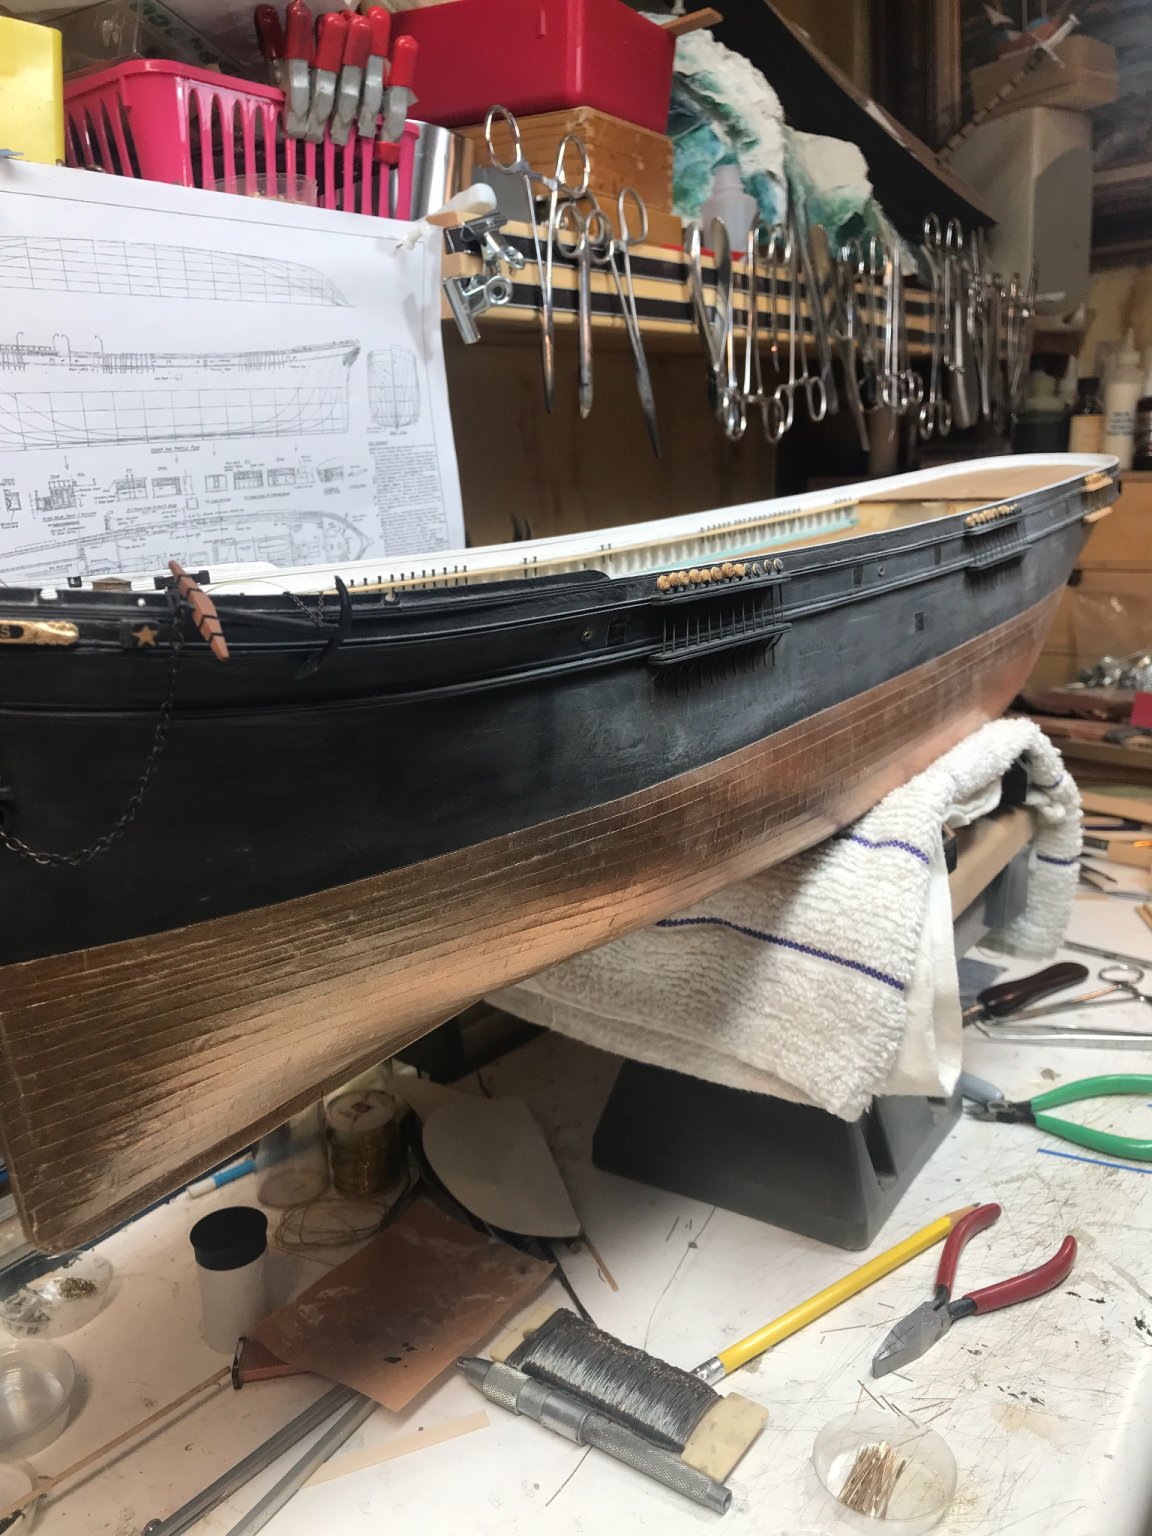
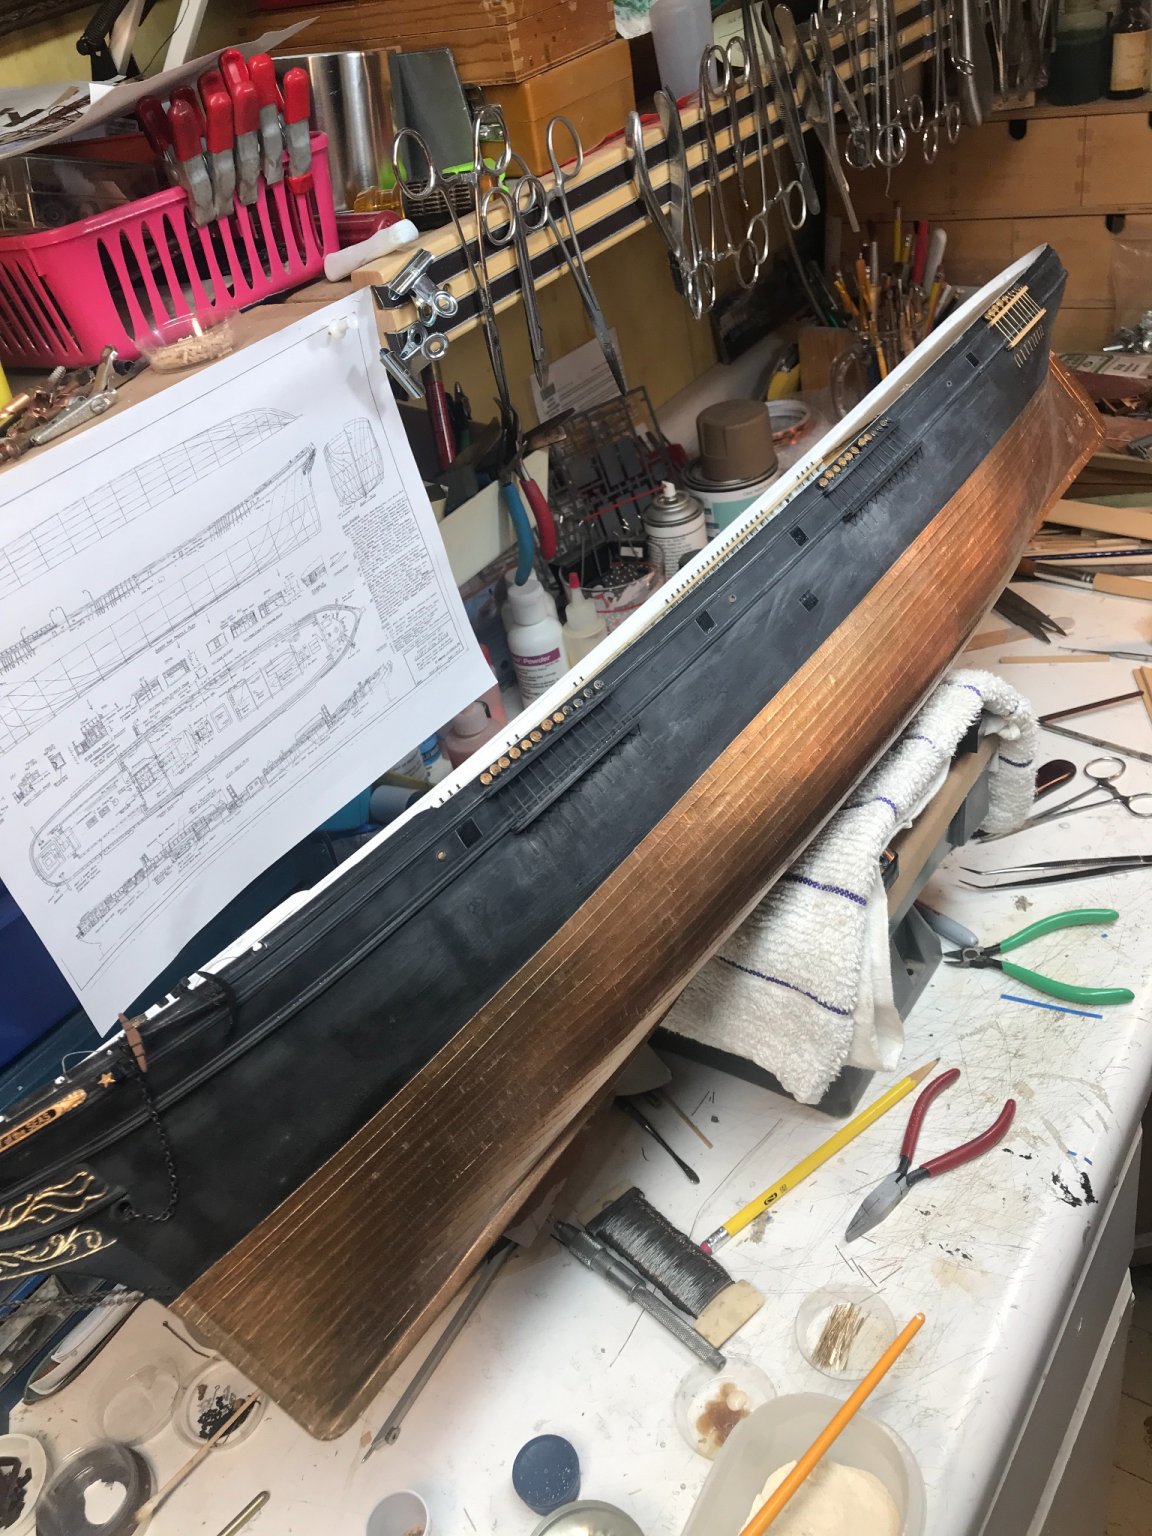
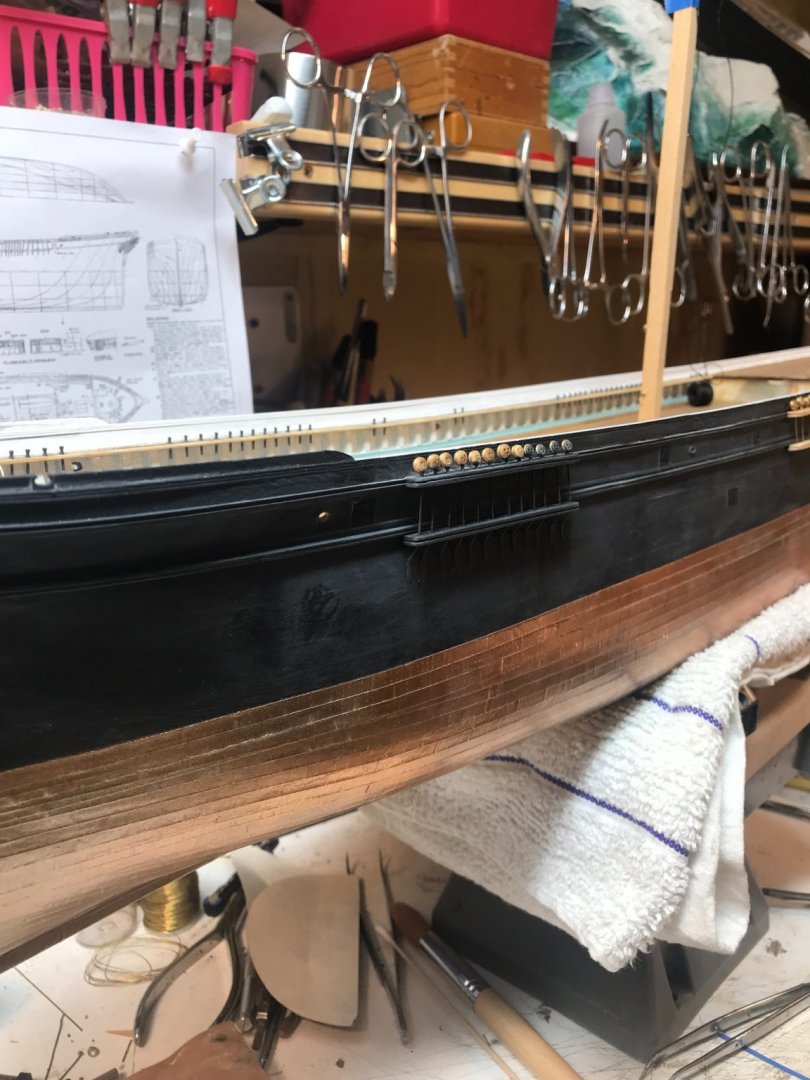
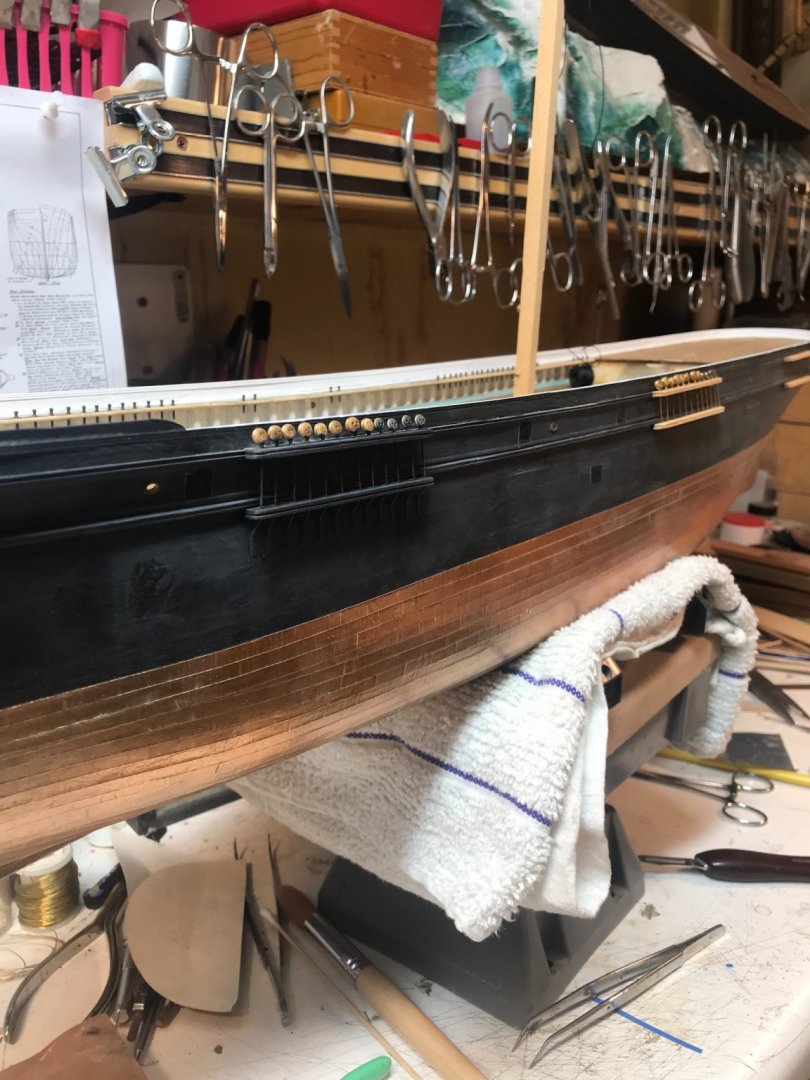
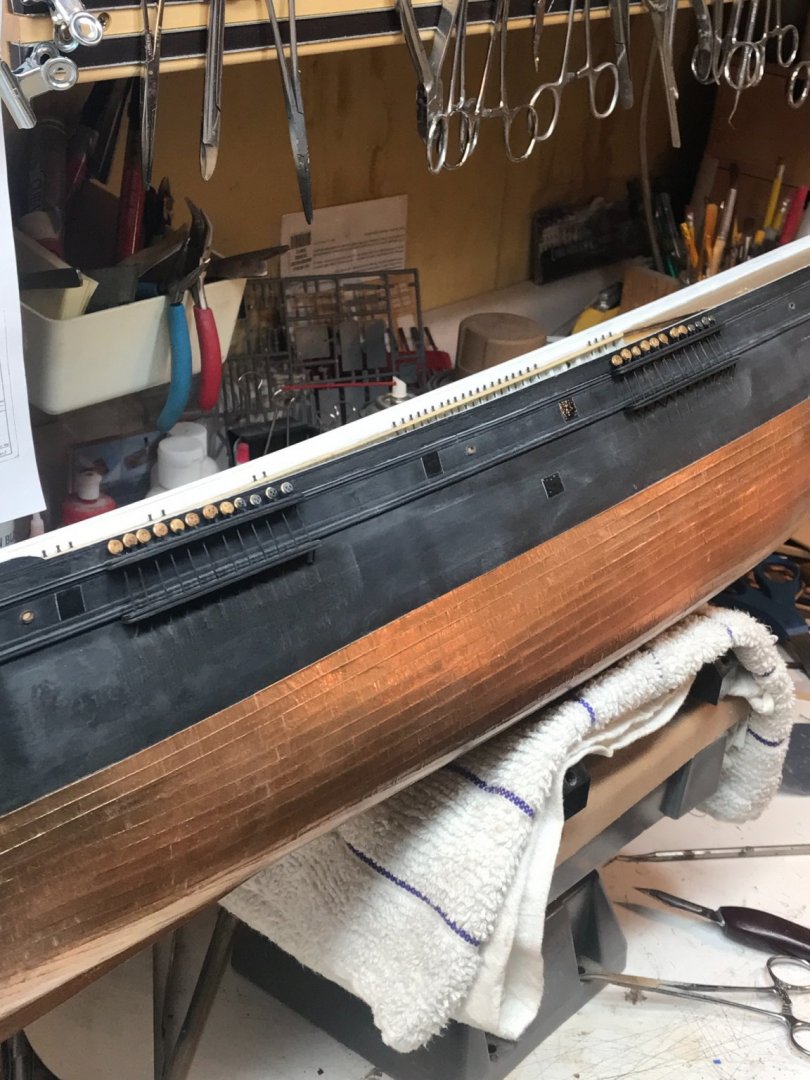
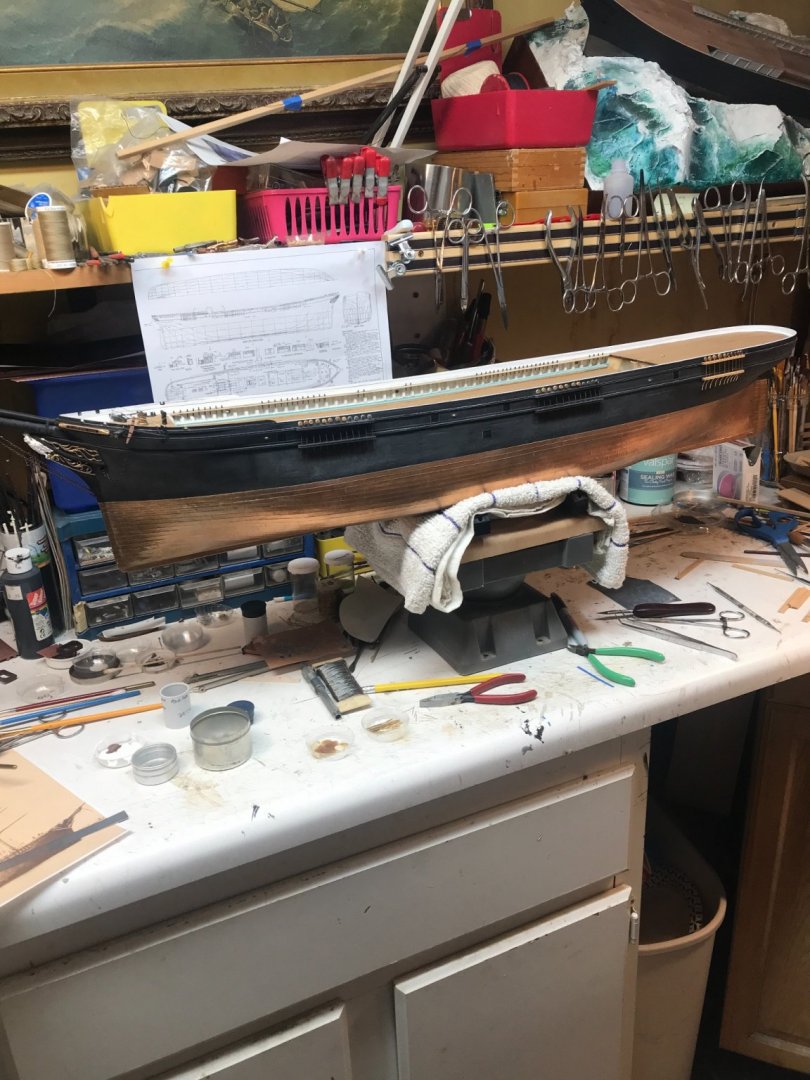
Spent a little time working the fore, main and mizzenmast channels and chain plates. Rob


- 3,560 replies
-
- 7
-

-
- clipper
- hull model
- (and 2 more)
-
Thanks Johnny for the fine compliments and encouragement and Advertisement. I appreciate it very much it’s so fun they have people comment and look back at what I’ve done and to be a good encouragement and I’m really blessed thank you very much.
- 3,560 replies
-
- 1
-
-
- clipper
- hull model
- (and 2 more)
-
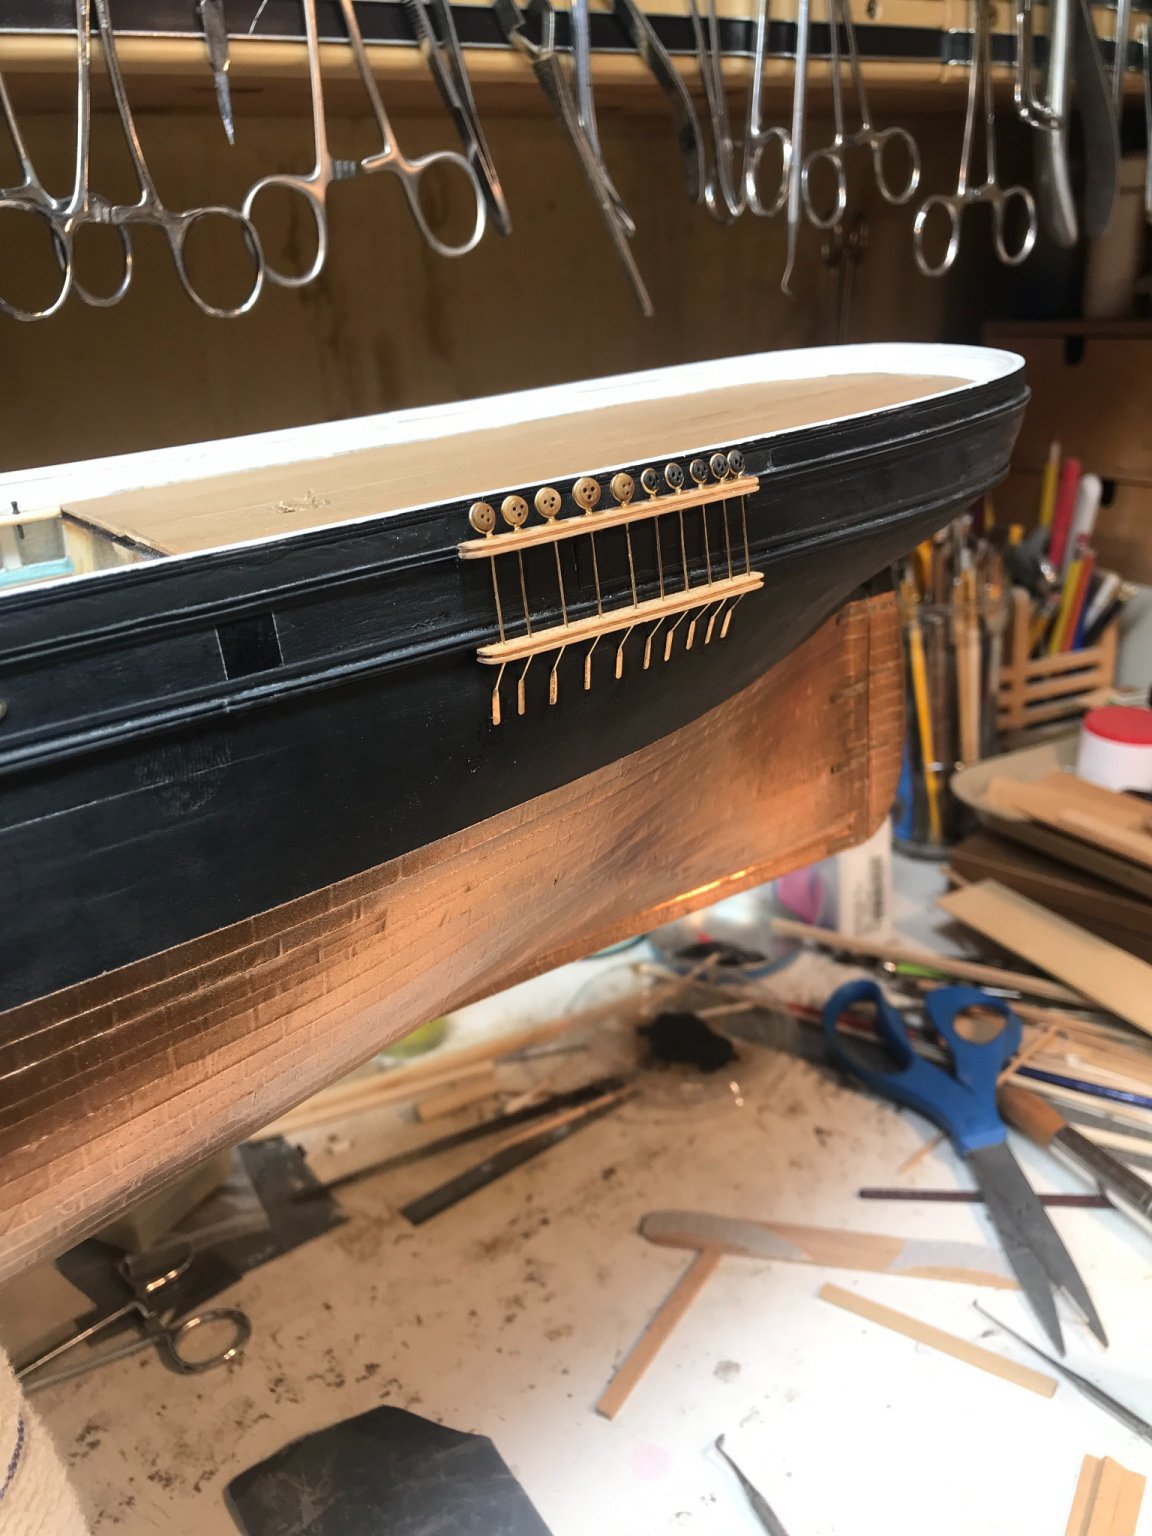
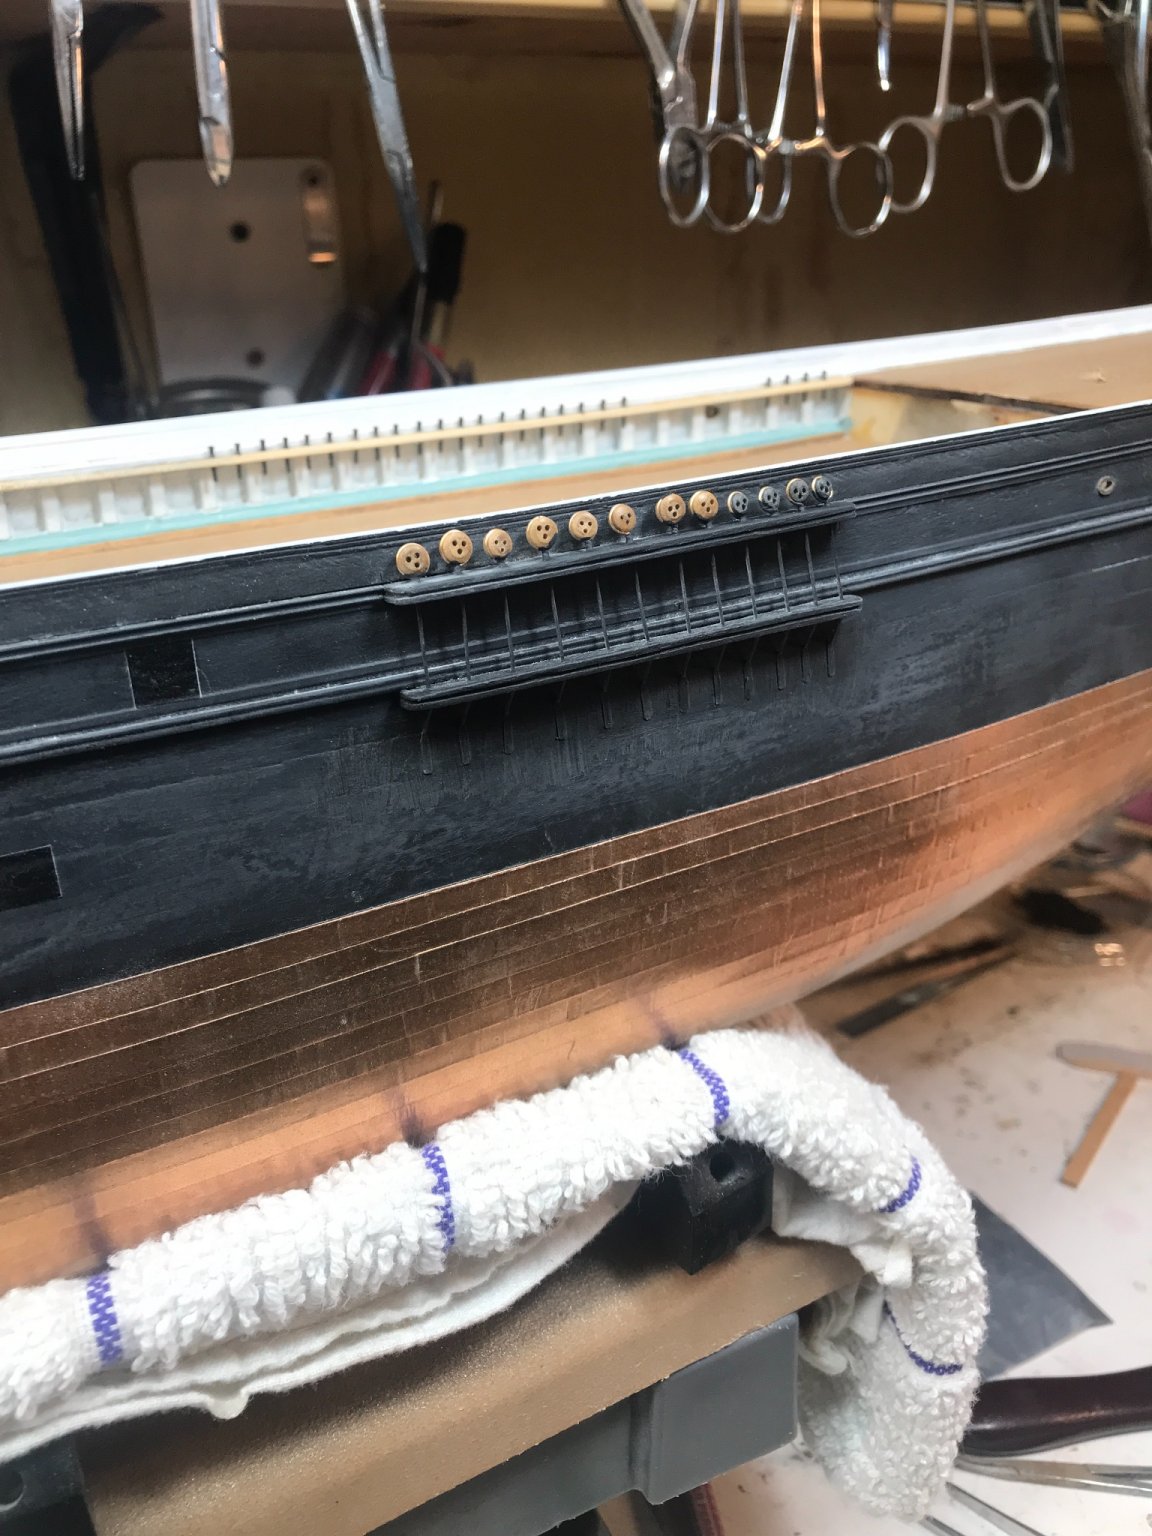
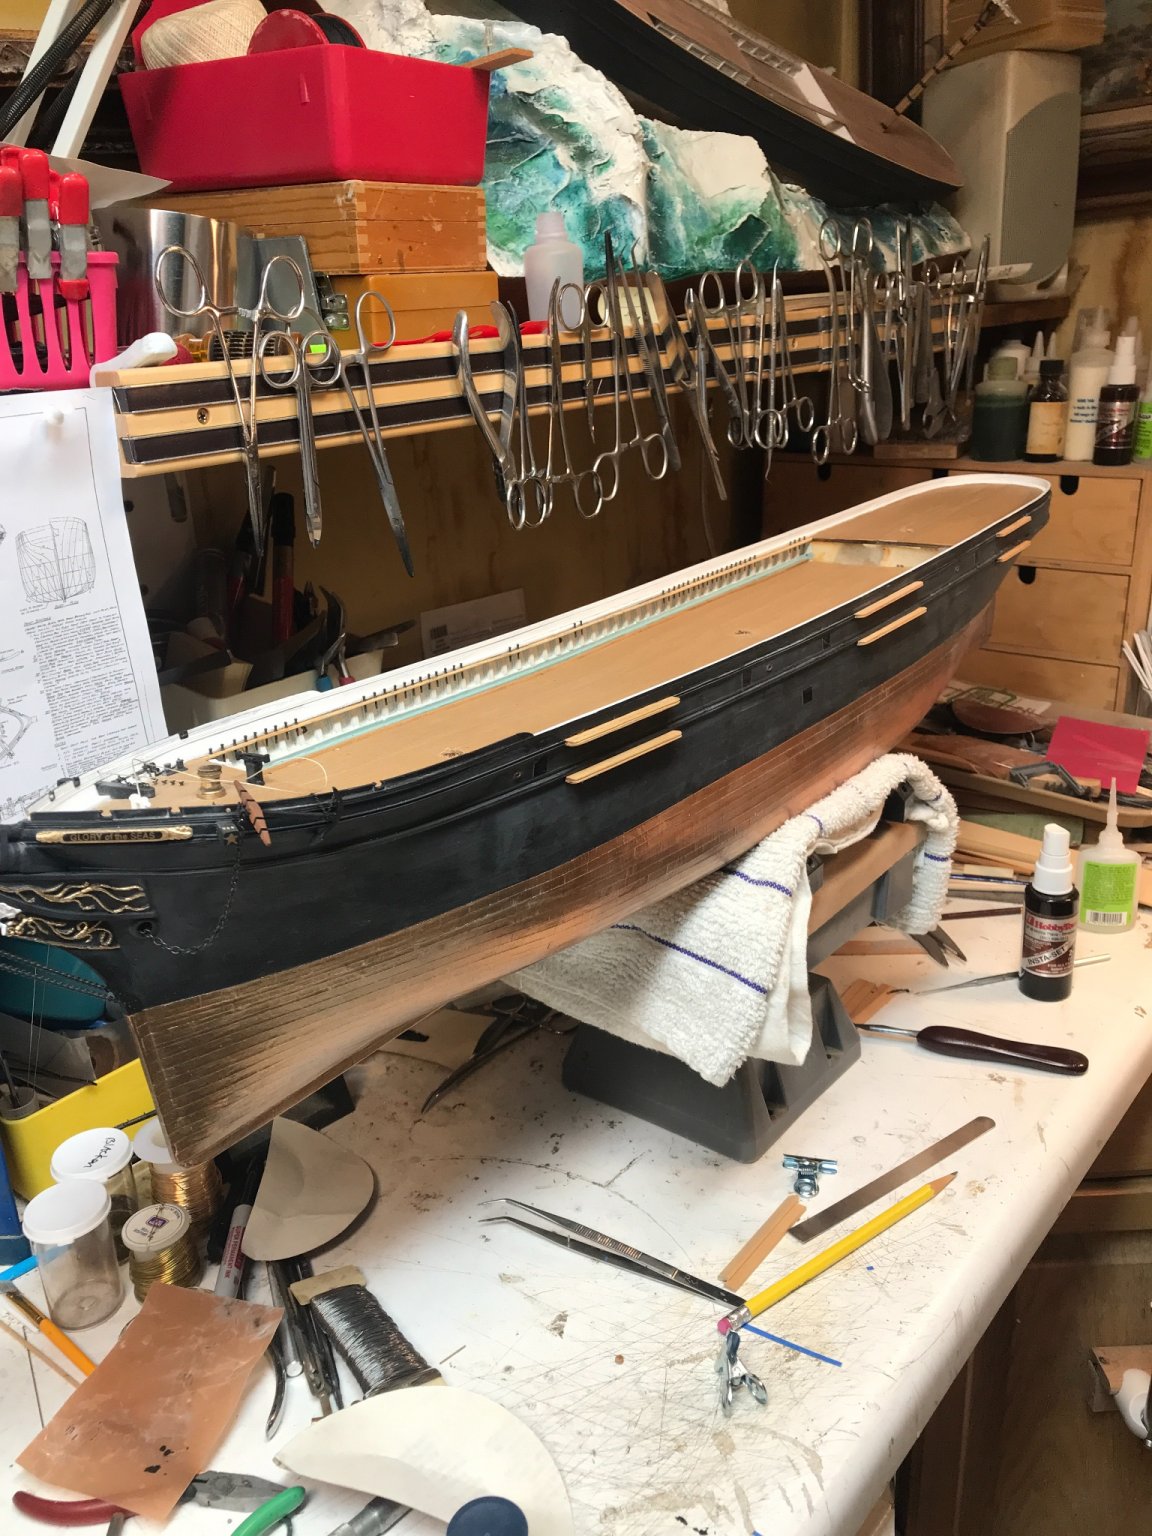
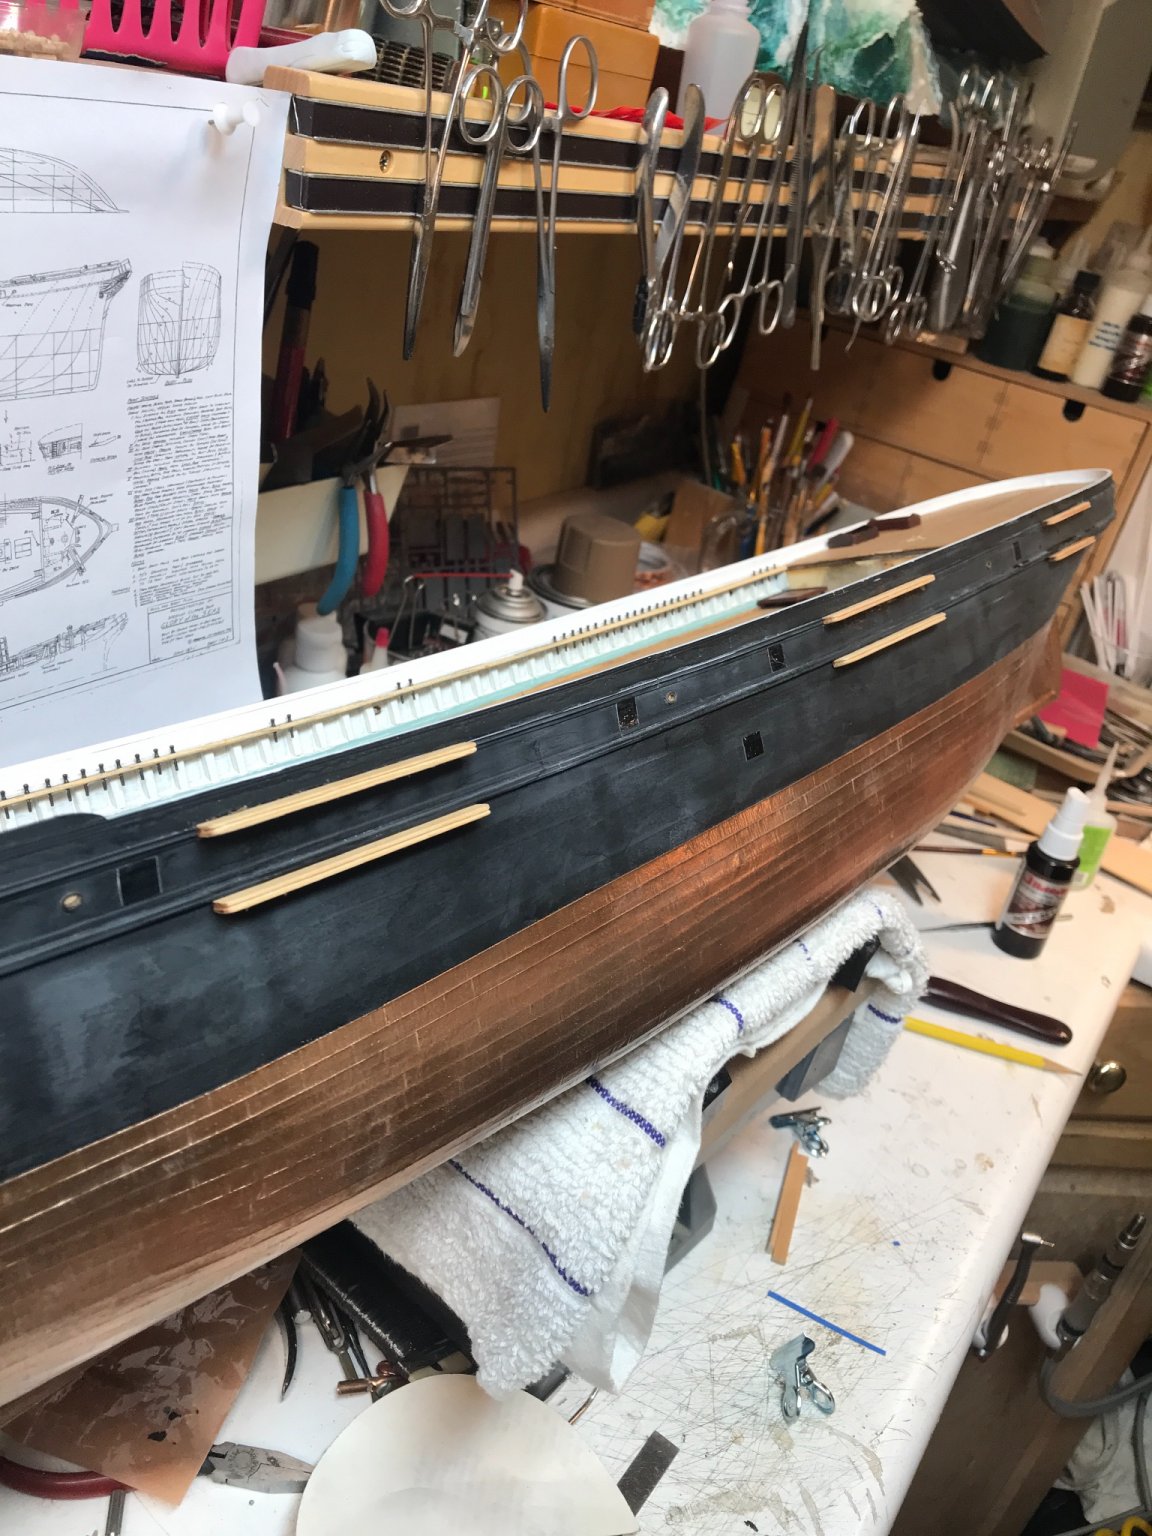
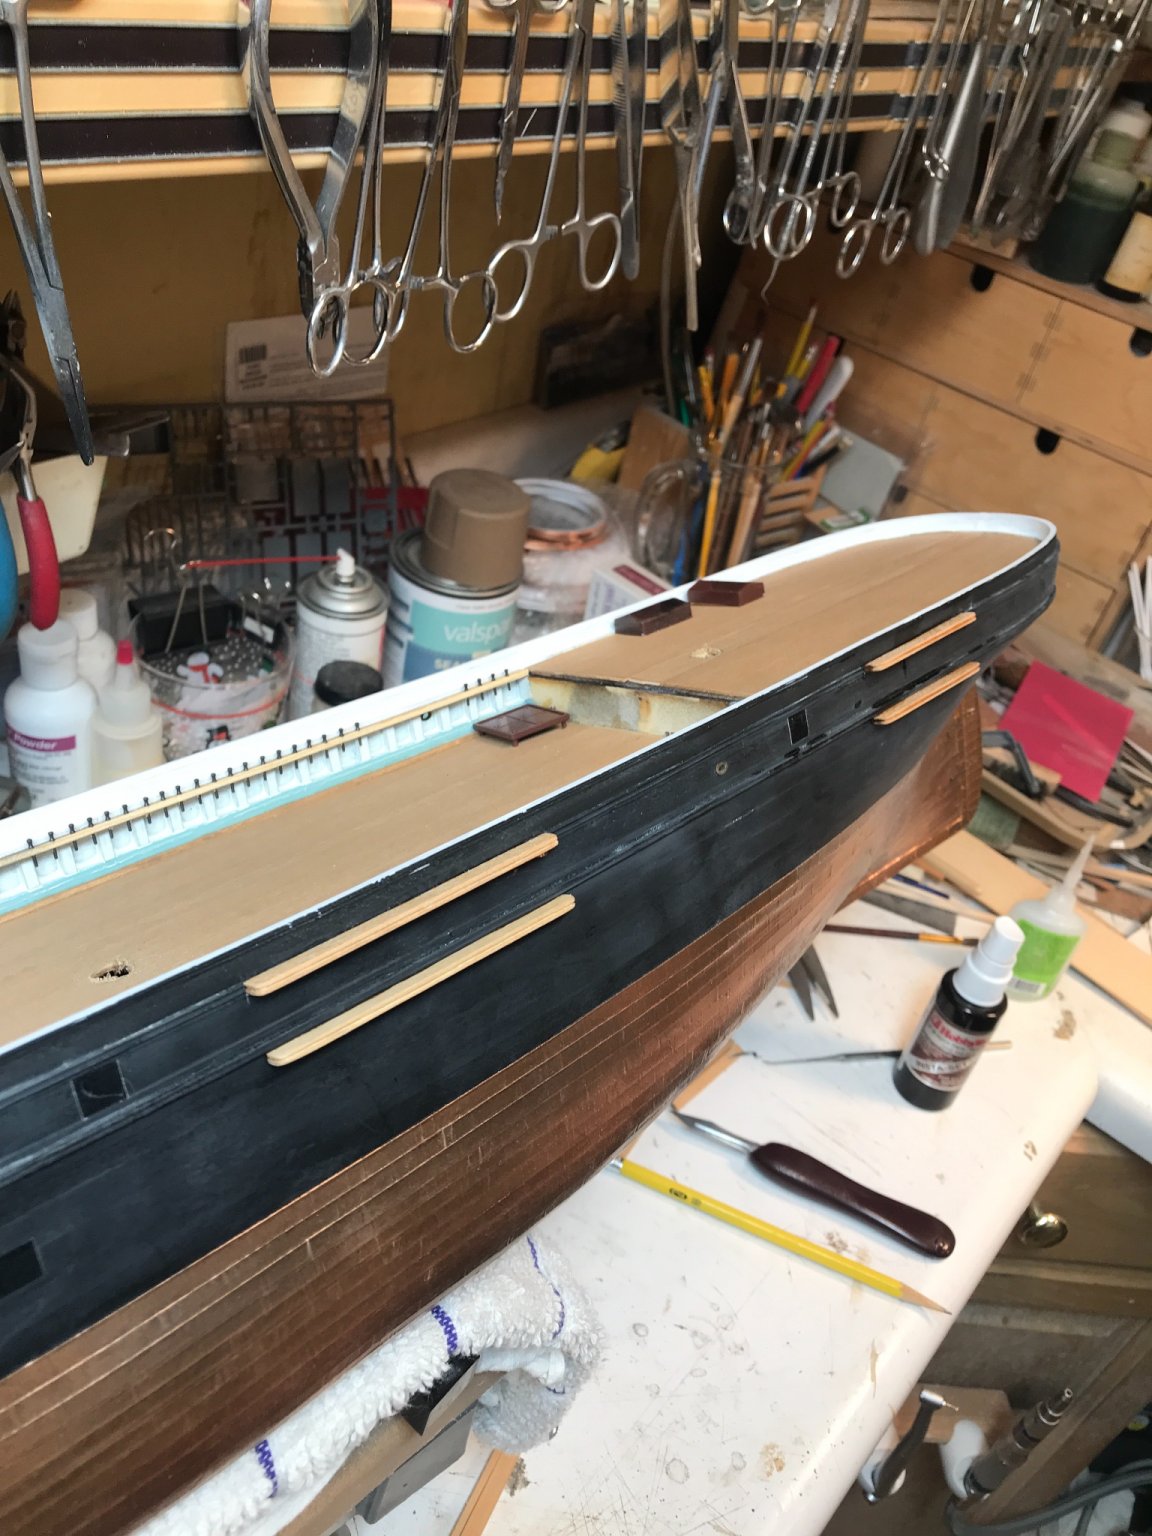
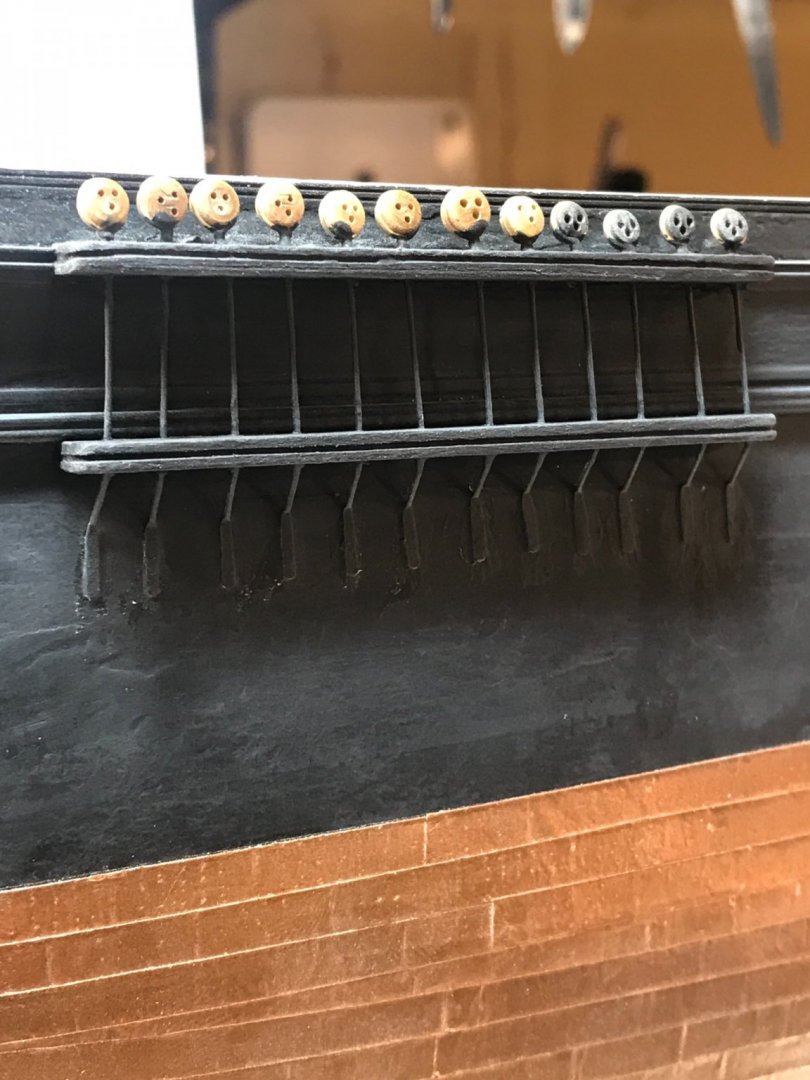
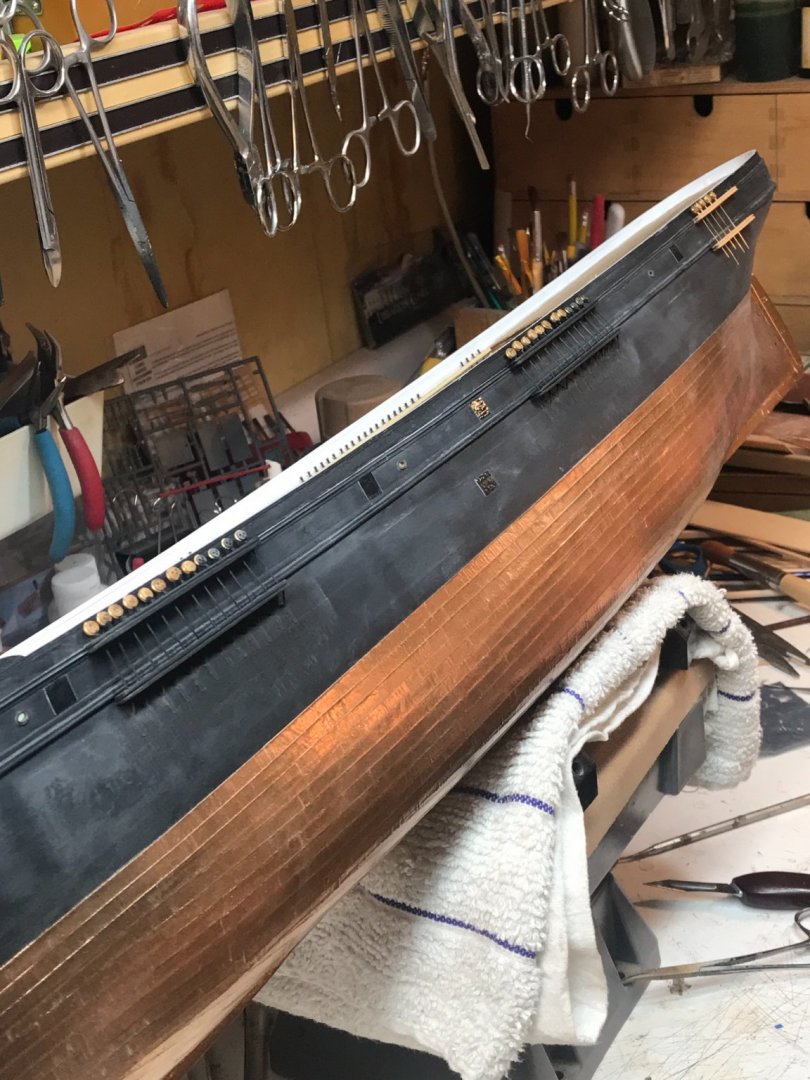
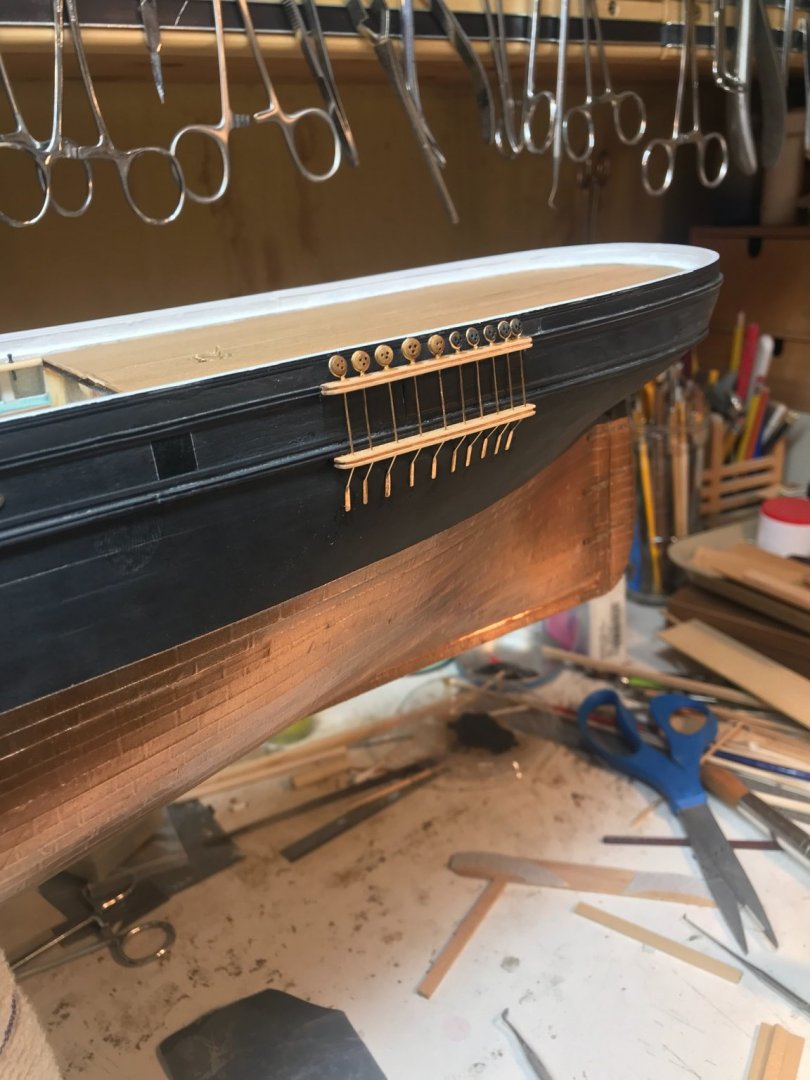
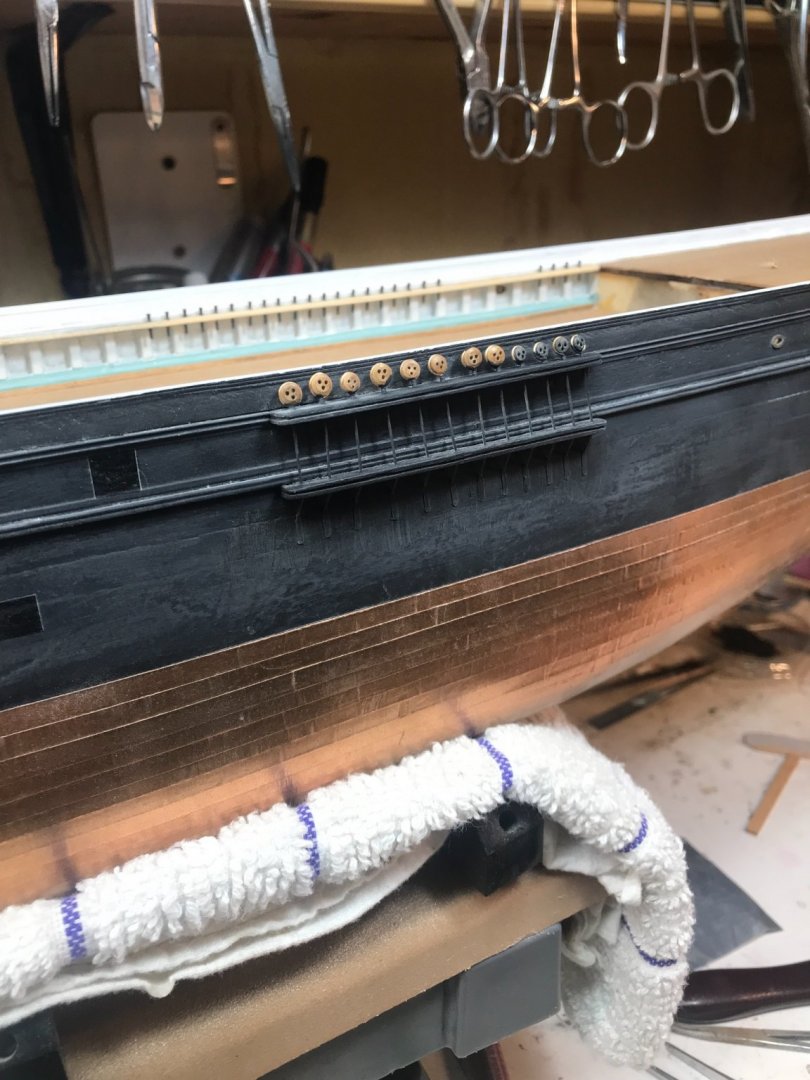
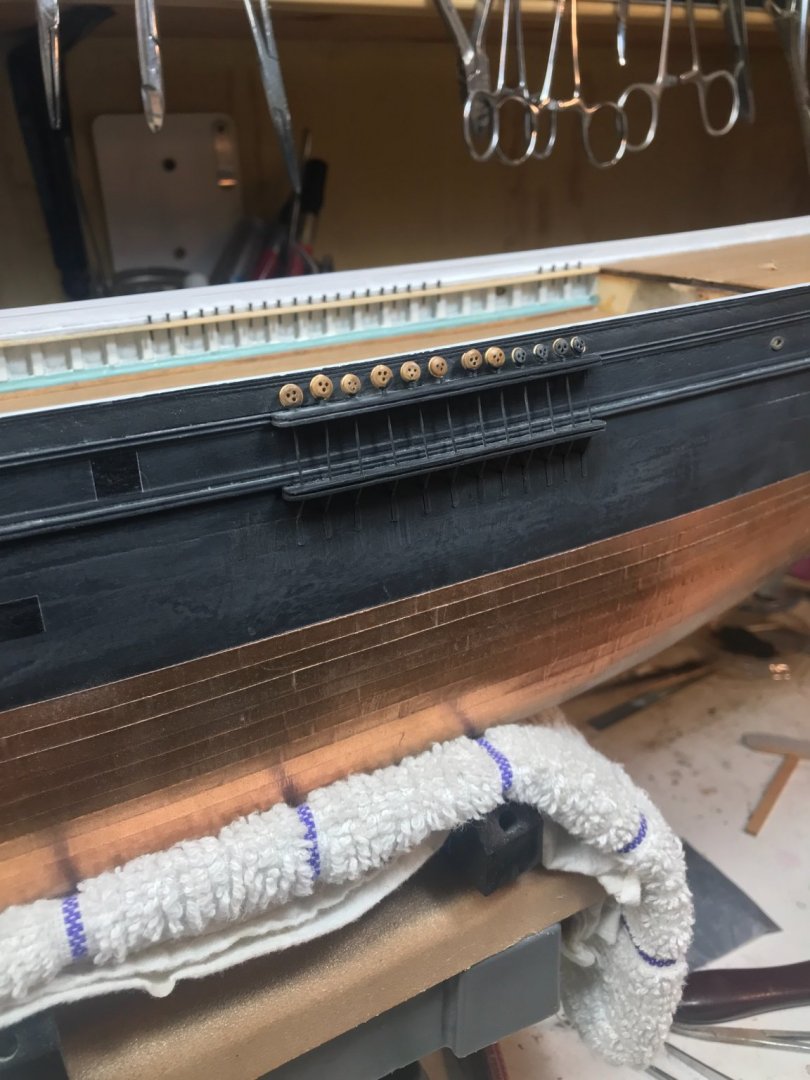
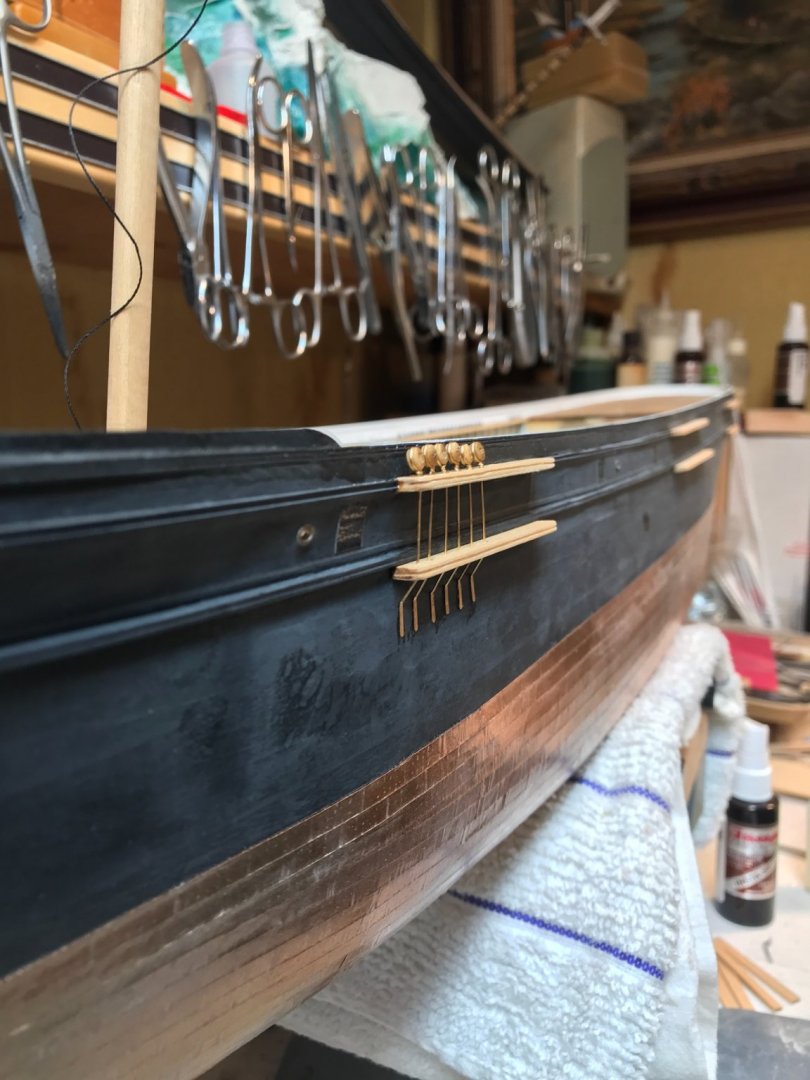
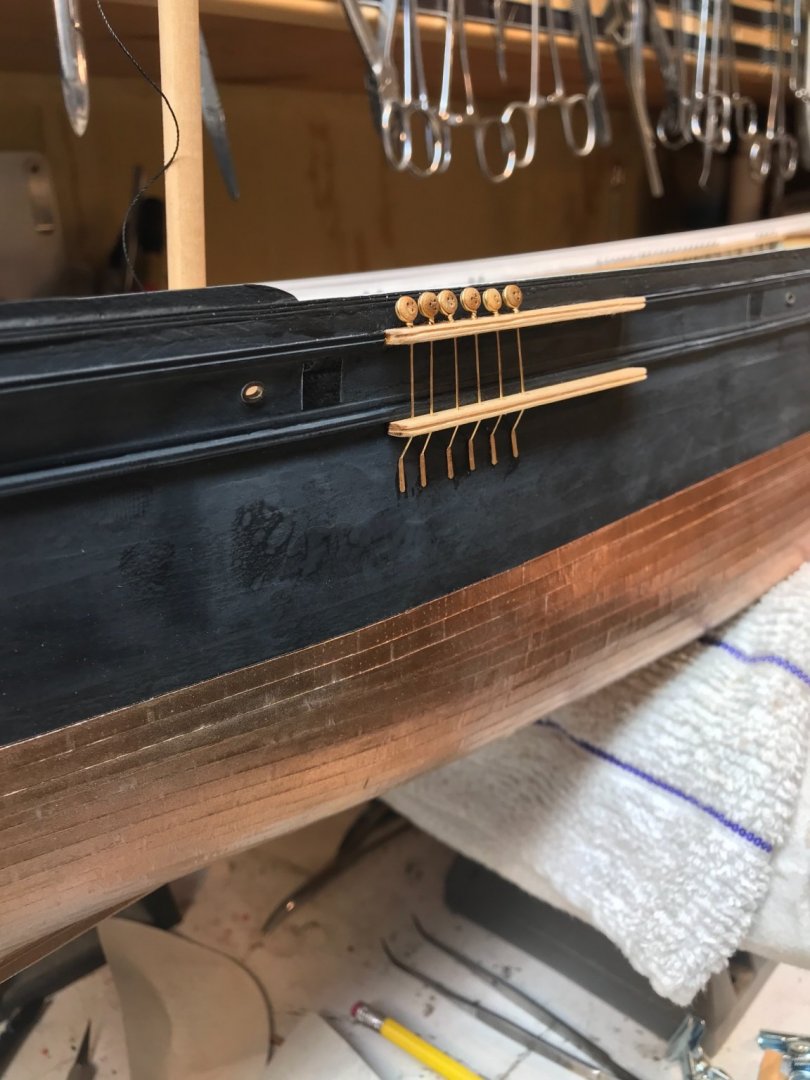
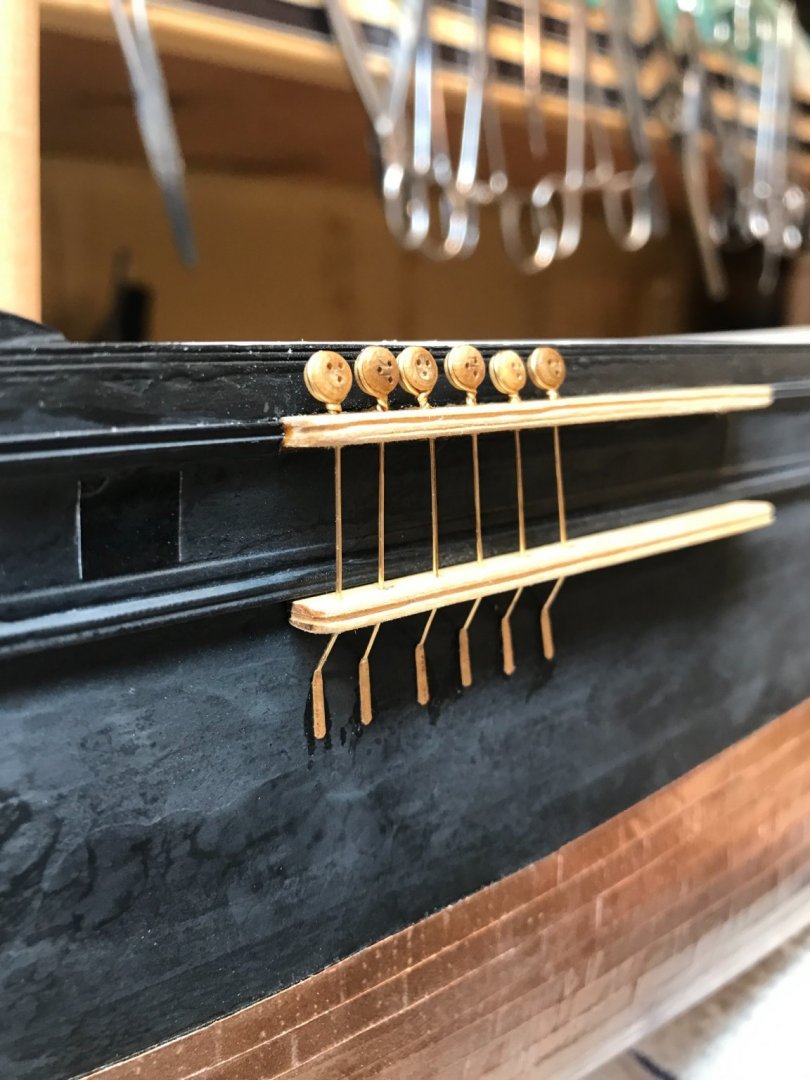
Thanks Rich. Mistakes abound(sic)...but as a whole, the channels and plates are coming along nicely. The real trick is establishing the correct cant of the plates to the correct angle that will align them with the backstay points on the invisible masts. I temporarily install a mast to scale and then project down....using a string to the channels and then mark out the location of the chain plates bisection to both upper and lower channels. It is crude....but when one compares to the actual ship from photographs...it can easily be determined that even they are not *Perfectly* aligned with the backstays. I feel good. Once they are located, I use a very long drill and drill down through both of them at the correct angle and depth from the hull. Last night I finished up making all the preventer plates for all the chain plates for both sides. I wanted to get them done as a small project, because they are tedious work to do. For the pic I took, I simply made 6 to work out the scale and construction process. Now that, that was figured out, I mass produced them. Tonight (Hopefully), I will finish up the fore mast and if all goes well, finish up the main. This is time consuming small delicate work. Each deadeye needs to be stropped to the plate and installed to the channel. Once each channel/chain plate is finished I will paint and weather them....leaving the deadeye unpainted until the shrouds are installed(Much easier without paint on them and in the tiny holes), then the lanyards and the deadeyes will then get painted. Rob
- 3,560 replies
-
- 1
-
-
- clipper
- hull model
- (and 2 more)
-
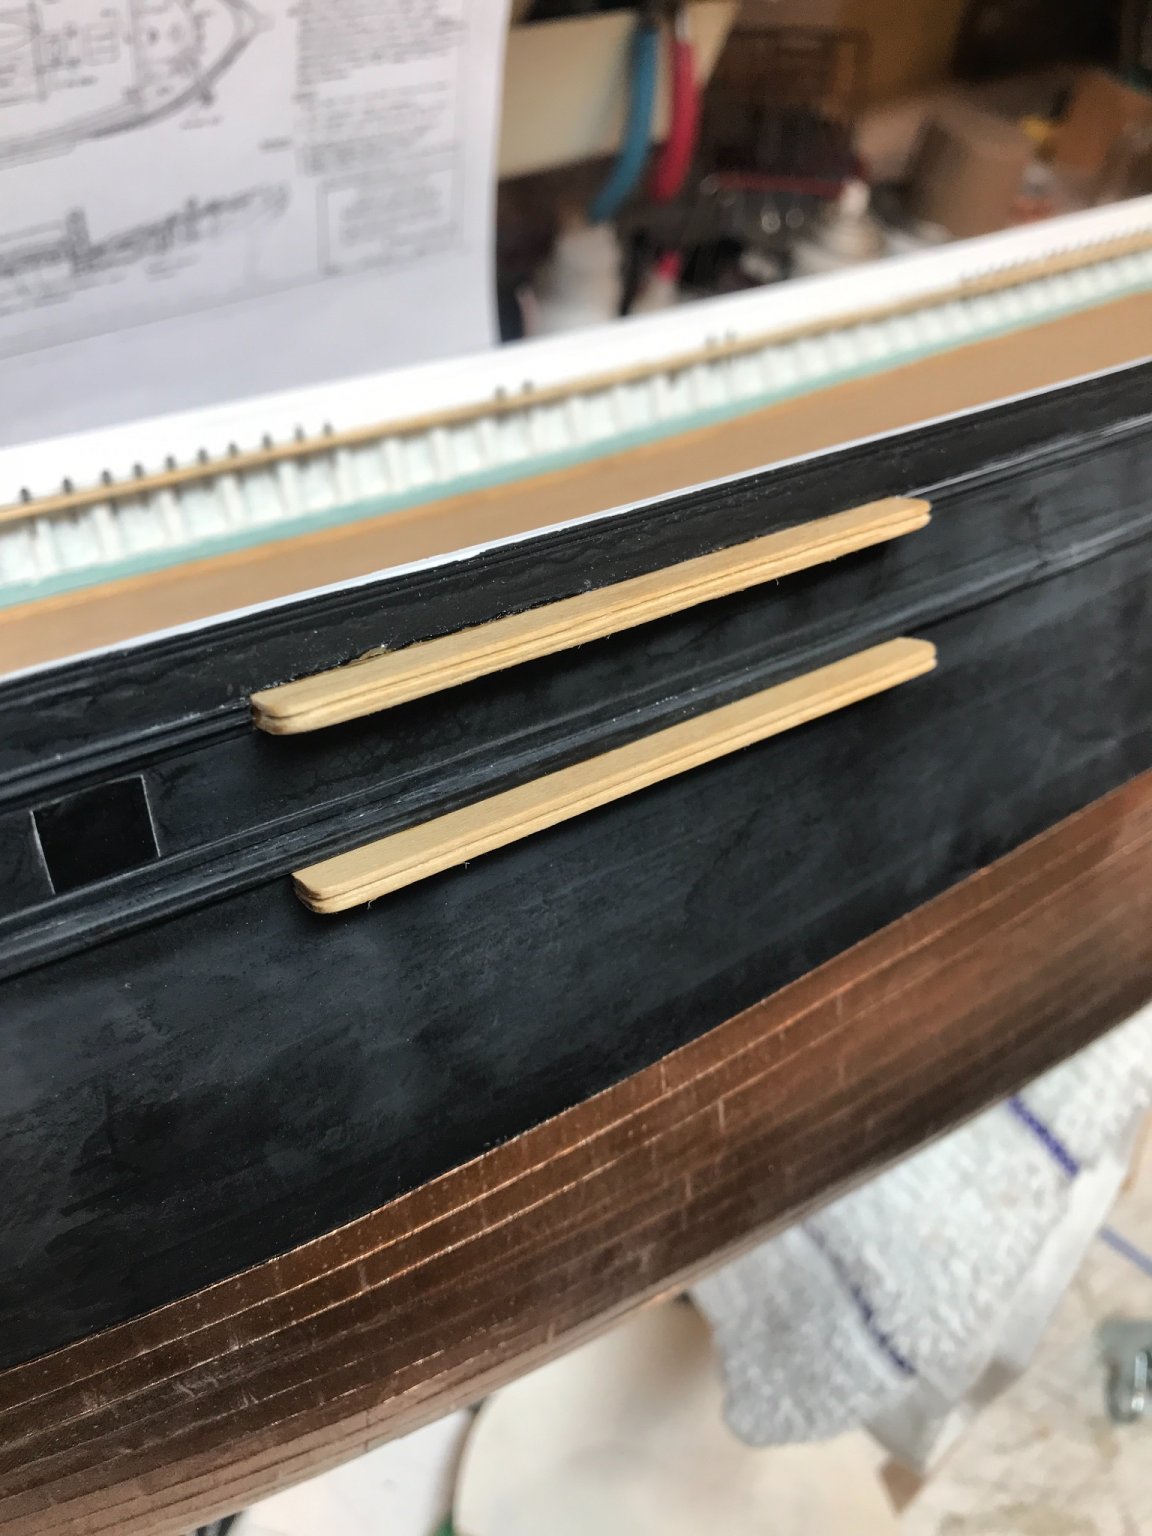
Spent a bit of time working on the fore port chain plates 1/2 done
- 3,560 replies
-
- 3
-
-
- clipper
- hull model
- (and 2 more)
-
I suppose I've worked with *Purist* modelers....modelers who are faithful to reproduce with wood and metal and are faithful to the actual practices of real ship building. I guess I'm overly critical of myself because of so many years of critiques by modeling masters. I skip past the formal approach and use less then acceptable techniques so as far as that particular crowd expects. Or maybe I'm so unorthodox in my approach and so ingenious in my applications that the *purist* is unable to comprehend....my, *There is always another way* attitude. Any way.....enough self loathing. These channels and chainplates will be correct aesthetically. Thanks for tolerating my attitude. Rob
- 3,560 replies
-
- 1
-
-
- clipper
- hull model
- (and 2 more)
-
That would be Darby O'Gill's method.....however, as much as I would prefer to do it that way....I've chosen the more difficult, though less imaginative way. And that my friend is a trade secret. Like McKay, I will keep my shady technique to myself....though I will tell you that it includes the use of wire, bending of that wire, glue and paint. Not to mention the preformed deadeyes. I will, however, entertain any observations you may postulate. A *cheesy hack* never divulges his trickery. I'm sure skilled artisans such as Banyan and EdT would never consider the LOW road when calculating their next move in building their magnificent models. Where, as for me, that is a well traveled road. The best part is, it all turns out well. The prince wins the hand of the fair young maiden and no one is the wiser. Rob(there is a reason someone invented smoke and mirrors)
-
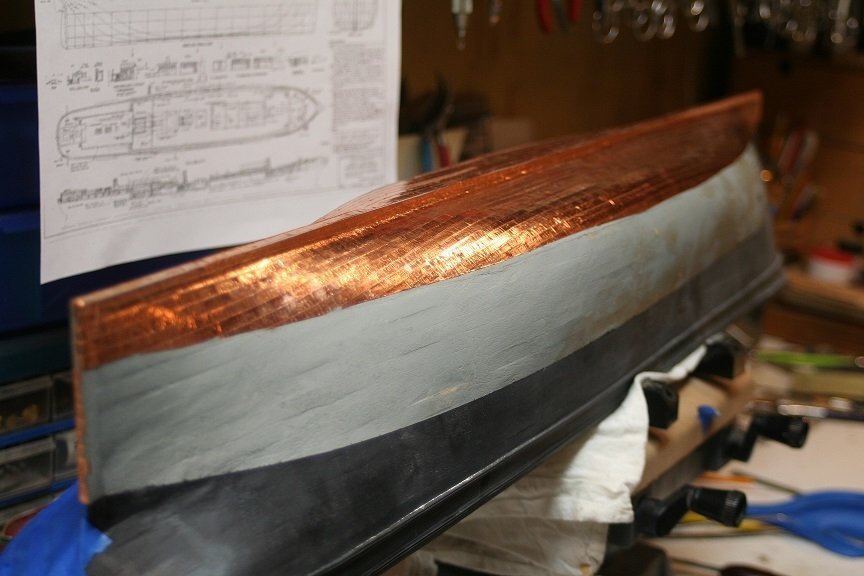
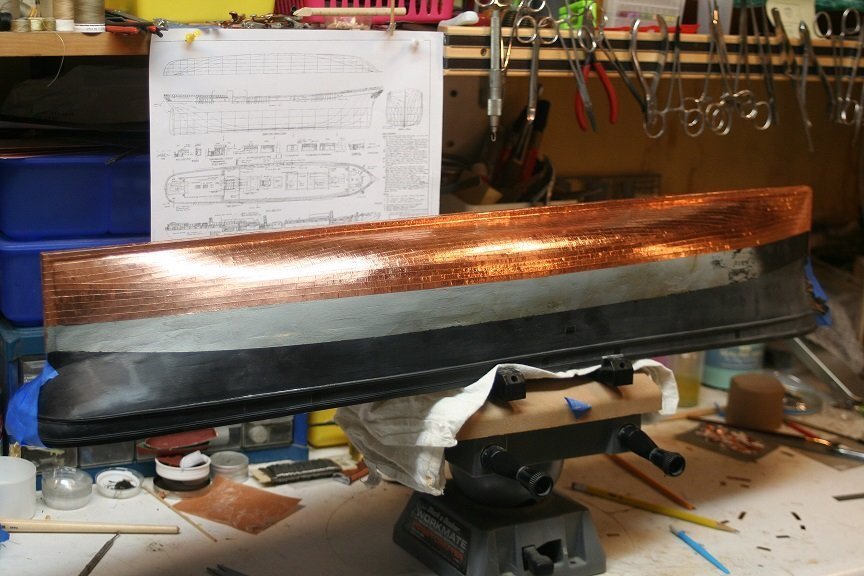
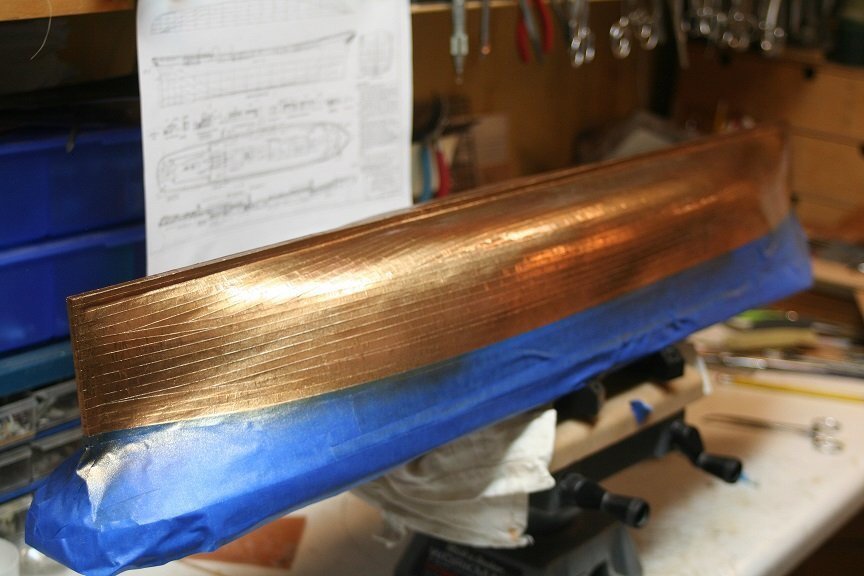
Being so small I could not scrape them with my grooving tool, so I had to hand cut them with a cut-off disc. Keeping the cut straight was the tedious part. Rob
-
Here are a couple of images of the gore lines and the transition from one group to another. There are three groups of plates on my Glory of the Seas
- 602 replies
-
- 3
-
-
- Flying Fish
- Model Shipways
- (and 2 more)
-
You got me all figured out Rich. Now can you tell me how I’m going to do that? Heeheehee Rob
-
Well Pat, I looked at these from several angles. Typically the kit supplied chain plates are laser cut and include mounting plates and nails. You would put on the channel, cut in a groove for the plate and then place a decorative trim to hide the work. Well I’m going a different direction. I’m going to add them like I did on the Great Republic but by drilling holes for the “round” chain plates to pass through. It will all come together, you’ll see. I’ll do the entire port side first, then jump over to the starboard.
- 3,560 replies
-
- 1
-
-
- clipper
- hull model
- (and 2 more)
-
I’m not sure, but it is generally based upon the hull design. It’s curves and depth of hull.
-
Directional change of the plates...from oblate oblong to more of a straight line curve....if that makes sense? Rob
-
Fantastic work Vlad.....just wonderful. What was your final measurements for the fore, main, mizzen channels? Love your poop rail stanchions....super job. Did you pin them? I plan on making the rail itself first then adding the stanchions under it. but first the channels. I am working currently on the chain plates. Your progress is just amazing and I like that you filled in the topgallant rail. So many small details to keep track of. Many eyes are helpful for sure. Impressive....impressive indeed. Rob
-
We're here with ya Vlad. We'll enjoy whatever you update us with. I had a slow weekend myself since we had all 5 of the grandkids over to spend the night... 6,5,4,3,2....what an exhausting weekend. See ya. Rob
-
HMCSS Victoria 1855 by BANYAN - 1:72
rwiederrich replied to BANYAN's topic in - Build logs for subjects built 1851 - 1900
Sall good Pat....its was just a test part...hense the word *TEST*. your soldering job was very nice for sure. Say...how you doing with all the lockdowns there in your neck of the woods........? Makes getting modeling supplies a bit tough. Rob- 1,013 replies
-
- 2
-
-
- gun dispatch vessel
- victoria
- (and 2 more)
-
Welcome........ And great progress on your Flying Fish. I look forward to your continuation on her rigging and masting.......... Great job Rob
-
It would actually be interesting if Mike could get it applied as an *Update* to his new transcript...since it is not gone to press yet(from what I gather). Rob
-
My opinion exactly. My job is hard enough, and I can mask just about any after market item to not give itself away. I kit bash lots of kits as well……using anything I can modify for my purposes. I can look into an item and envision what it must be. Rob
-
I know a couple of guys who 3-D print and to create your own custom printing you need a good 3-D drawing in a supporting software not some off the shelf drawing. And that in of itself, is a task, not for the faint of heart. Love to see all this when it happens. Rob
-
Yeah....I agree. Just because I'm some sorta rabid energizer twitchy squirrel who only knows how to work at *Ludicrous Speed*, no need to feel compelled to try and keep pace. No body deserves that kinda pressure. Real or imagined. Heading into winter, means more time inside. You're exactly where you need to be. Painting (In the fashion you described) and coppering will fill your days. Rob