rwiederrich
-
Posts
5,520 -
Joined
-
Last visited
Content Type
Profiles
Forums
Gallery
Events
Everything posted by rwiederrich
-
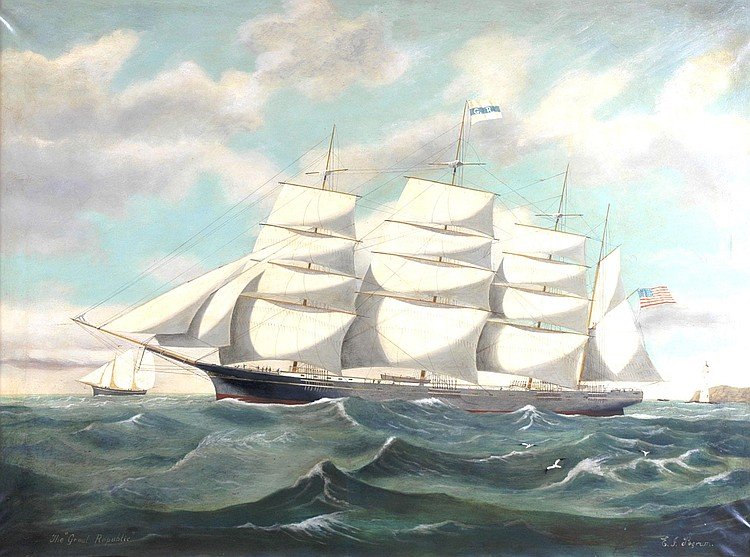
Pat...the rebuilders could not afford the massive timbers needed...the average main yard for a clipper was around 80+ ft...the Original GR had a 120ft main yard. Plus the GR was the brainchild of Donald McKay..based on some assumptions that were not generally accepted at the time.....so caution was the master of the rigger....so smaller sails were used and since the size of her hull required a tall mast to drive her...the skysail was added to compensate for the loss in mass......(note:) The height of her mainmast was shortened by 25ft as well. But her original sail spread was amazingly significant. Big hull, (4555) tons required an enormous spread of canvas. Her original crew was over 100 able men and 30 ships boys. This was reduced to less then half. Rob
- 1,208 replies
-
- 6
-

-
- great republic
- clipper
- (and 1 more)
-
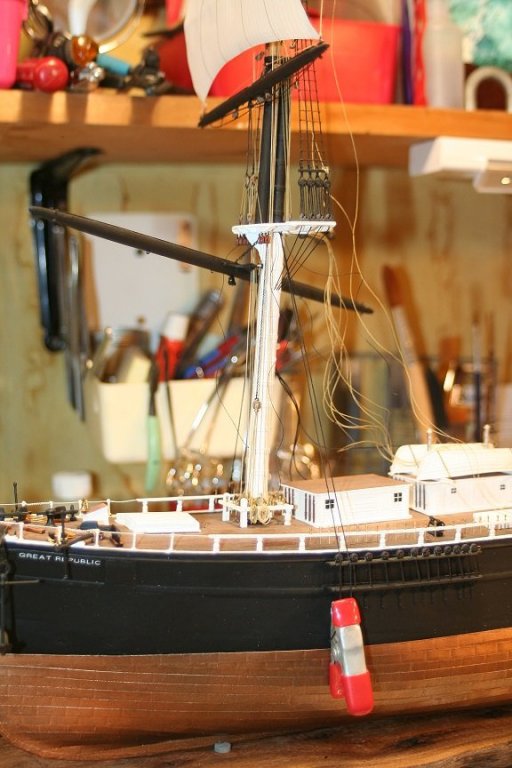
Came across this painting by E. J. Pegrum depicting the original sail configuration of the Great Republic PRIOR to her rebuild where she was fitted out with skysails, like most paintings depict her. She had more sails, but actually had a 25% reduction in sail area, after she was rebuilt. Rob
- 1,208 replies
-
- 6
-
-
- great republic
- clipper
- (and 1 more)
-
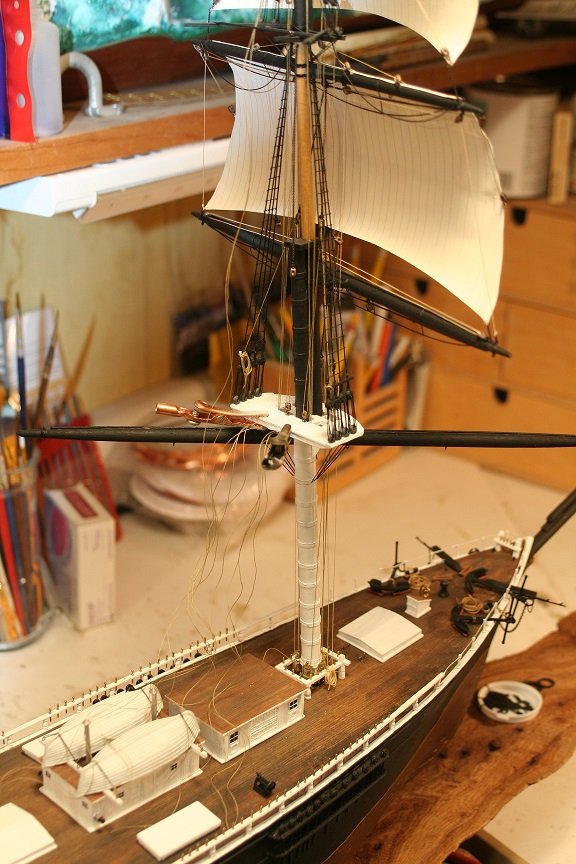
Indeed. At this point I can both directions...forward to work on the head rigging and jib stays.....or aft and work on the main mast. Techniques to reduce the tedium of repetitious work(like adding ratlines, or foot ropes/stirrups) are paying off. I hope to knock out the ratlines in one sitting...so I can move to rig the lower top sail. I'm pretty excited with this technique...first time I tried it. Makes mast construction far more easier, when I can build it off the model, with access to all sides so easily. The experience of having to flip this model around on the bench in my little shops requires moving lots of material and tools and it isn't any fun. Rob
- 1,208 replies
-
- 2
-
-
- great republic
- clipper
- (and 1 more)
-
Pat...did you add sails as well? I'm finding this method quite rewarding...since I don't have to work all the tedium on the model. Just some tedium. Working on the bench were I can rotate the mast is wonderful. Rob
- 1,208 replies
-
- 2
-
-
- great republic
- clipper
- (and 1 more)
-
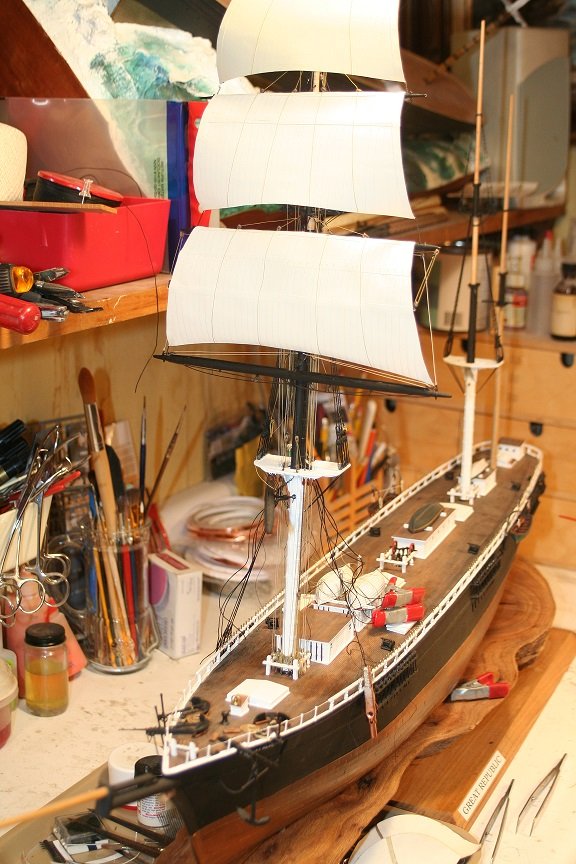
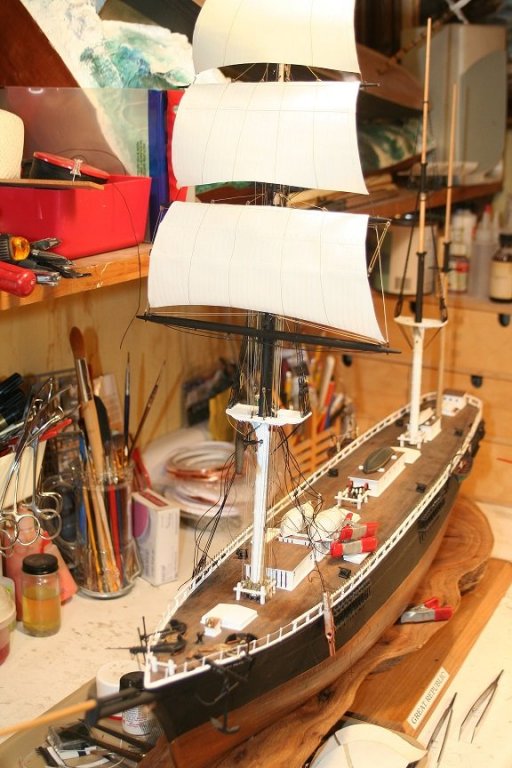
From this point.....I will rig the ratlines and add the fairleads.....run the remaining sail control rigging already rigged. Once done, I'll complete the lower topsail and the main course and of course all their rigging. I've not yet decided if I'll rig the backstays or wait until I finish up the main mast run the stays....then the backstays......???? All I know...is that I am nearly finished with the main portion of the foremast proper. A new technique, I'm trying out....finish an entire mast, sails and all..before moving onto the next mast.......mmmmm...Oh boy. Rob
- 1,208 replies
-
- 3
-
-
- great republic
- clipper
- (and 1 more)
-
A couple of other images of the finished fore mast shrouds.

- 1,208 replies
-
- 12
-
-
- great republic
- clipper
- (and 1 more)
-
Once each side was finished I completed the job with a fresh coat of paint.
- 1,208 replies
-
- 10
-
-
- great republic
- clipper
- (and 1 more)
-
I began with 3 per side to establish even stability..then I finished off each side.
- 1,208 replies
-
- 9
-
-
- great republic
- clipper
- (and 1 more)
-
Now back to the build...... I began to add six shrouds(3 Per side)....
- 1,208 replies
-
- 5
-
-
- great republic
- clipper
- (and 1 more)
-
Thanks Popeye..very much. I've been quite busy making (For my wife), a double(corner) mantle for the living room fire place with recessed lighting to illuminate the brick....so that has kept me away. I hope to begin the shrouds very soon. Rob

- 1,208 replies
-
- 4
-
-
- great republic
- clipper
- (and 1 more)
-
No problem..it was my complete enjoyment to be a help. The painted paper has not discolored...but even if it did..it would become more like original sails then discolor through wear and use. Rob
- 1,208 replies
-
- 2
-
-
- great republic
- clipper
- (and 1 more)
-
Thanks Pat. I've always tried to adopt and develop the easiest way (I think) of producing repetitive parts for my models that are reproducible, as reasonably scale accurate, using common inexpensive materials. With a little practice, anyone can make authentic looking sails for their models...without using lacquers, custom molds/forms....etc.. Being a lazy modeler, I'm always looking for anything that can produce the effects I'm looking for as fast as possible. And since sailing ships are inherently *slow going*....I'm looking to shave off any time spent as I can. I set the bar high for myself by building my hyper detailed 1/96 Cutty Sark rudder repair diorama in just over 3 months. Mind you, it was only partially scratch built. As recommended I will strive to put together a log for the database so my processes can be preserved for other modelers use. Thanks for the fine comment and suggestion. I'VE UPDATED THE SAIL MAKING PROCEDURE! Rob
- 1,208 replies
-
- 2
-
-
- great republic
- clipper
- (and 1 more)
-
Once the edge bands are glued down..determine the location of the reef points and add them by any means you devise. Personally I use a fine nylon flat paint brush and I cut the edge even and then cut out the length of simulated reef points. Collect these for use on other sails. (Modelers note:) Reef bands can be problematic if using string....trying to keep them straight and such. So I use nylon paint brush bristles. Once cut into the desired length....there is no issue in picking up a single strand, dipping it into a drop of glue on an end and placing it on the reef band. Glue dries clear, reef points are straight, even.....done! Reef points are applied after the sail is painted. I paint my sails AFTER I fix clew points to the sail edge and bottom..using fine twisted wire...secured beneath paper seam patches to hide and secure the clew bands, and AFTER billow forming. I use simple canned spray paint in several colors to simulate the canvas color I want. Paint both sides with even and numerous light coats till you achieve the desired color and opacity. (Note); Do not over spray...soaking the sail. You want to achieve an opacity and an even coat...and you do not want to unevenly cover over the panel lines. when you try it a couple of times you'll see what I mean. To achieve the proper billow...I begin to form the sail head using a 1/4 dowel....rolling the sail around the dowel to form the billow(This can take some time and finesse. You are actually rolling the dowel along the paper sail..this will cause the sail to billow. The action is kinda like rolling a cigarette....but not. If you hold the sail in the palm of your hand and with the other hand roll the 1/4" dowel over the sail(Again....this will take some practice). Once proper shape is achieved.......roll the foot edge by means of a metal ball cake decorating tool(Similar to the one I posted earlier). Take your sail and lay it on a soft cloth and slowly and gently rub the edge with the tool(Back and forth....up and down..in small circles).....this will cause the edge to curl..forming the bottom edge of a billowed sail. (This too takes some practice....do so on a practice sail to gain experience. (NOTE to modeler). The ball forming tool used by cake decorators is used to form the edges of fondant edible flowers....it rolls the edge of flower peddles, creating realistic flowers. It works on paper too, but care must be taken to not over stress the paper and create undesirable ripples. Practice. I suggest you try these techniques on a plain piece of paper to gain the experience needed before working on the real sail. Adding buntlines is easily done by wetting the line in glue and gently pressing into desired place beginning from the bottom edge up to the top edge. I hold the glued line in position then lay it down from bottom to top...avoiding any wrinkles and un-evenness. (I lay the sail onto a rolled towel to support it and control the sails curve). Makes application easier. NOTE to modeler; As the paint is drying, it tends to cause the sail to slightly curl....keep it on a flat surface with support(curled paper towel...you know). When dry, you will need to easily reform the sail. It really isn't a big deal, but I wanted to note it. Good luck. Rob
- 1,208 replies
-
- 5
-
-
- great republic
- clipper
- (and 1 more)
-
I would be more then happy....Until, I can provide images....I use simple copy paper.....any printer paper you may have. Take a metal 12" ruler and draw the panel lines of the scale you are making. Panel lines are generally 24" wide. Once the scale is determined...just fill the page with the lines. Then do the back, making sure you draw over the opposite sides opposing panel line. I've tried pencil and black pens for this...I prefer black ball point pens. Then make a photo copy of the *Master* copying both sides. You can increase or decrease the darkness of the copies to help mimic the elusion of the seam. If the lines are too dark..they may appear un-natural...if too light, they may disappear after painting. You decide the darkness. Now you have a sheet of paper that has lines on both sides. Measure, draw out and cut out your sail, making sure the head is on the edge of the paper with the panel lines doing up and down. (One hint) make the sail slightly taller then it would normally be..you need to compensate for the curl/billow you will induce into the paper and you want the sail to fit nicely. Once secured to the yard when you affix the sheets to the lower yard you will have ample sail to preserve the *Billow*. Next, with a separate piece of copy paper cut strips for the bands(ie...footer, clue and reef)...then simply glue them in place on the sail...not worrying about the edges, because you will cut them off...even with the sail edges when they are dry. I use white glue...it dries fast and is workable when still pliable(when rolling the sail). More to follow. Rob
- 1,208 replies
-
- 3
-
-
- great republic
- clipper
- (and 1 more)
-
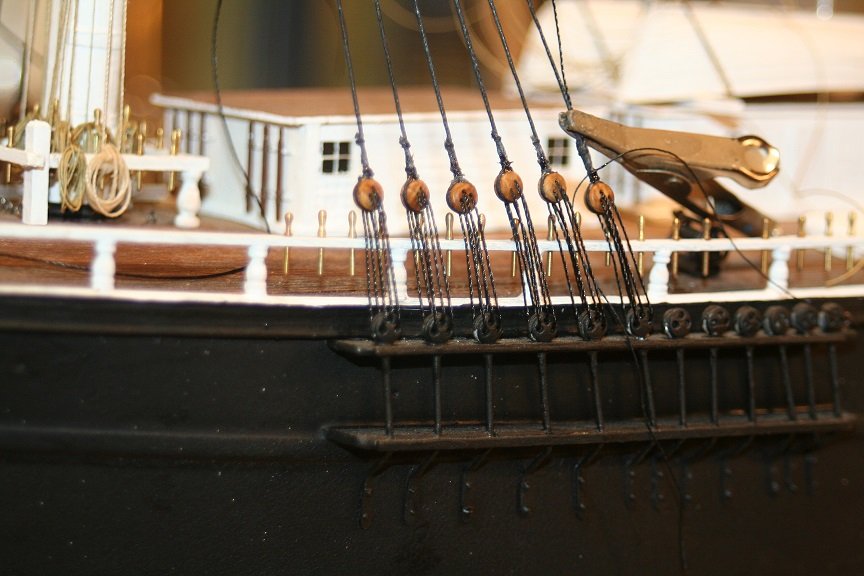
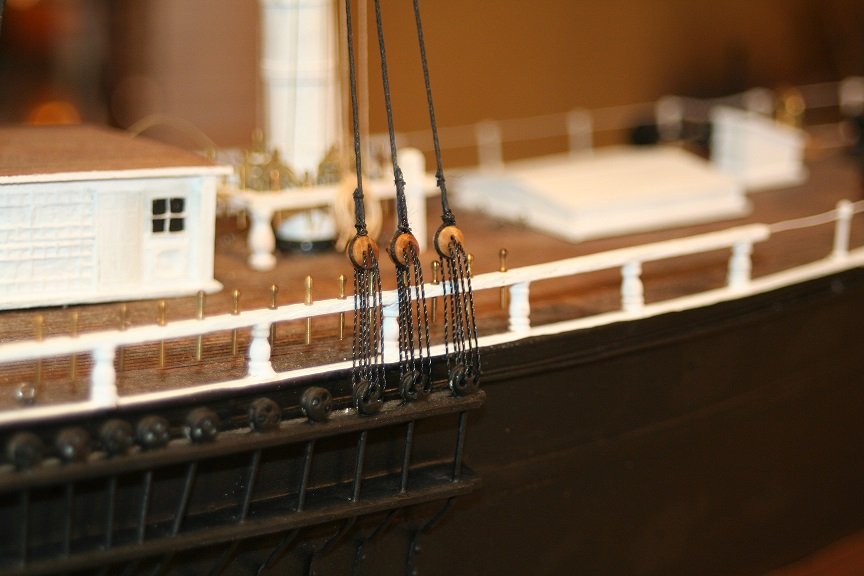
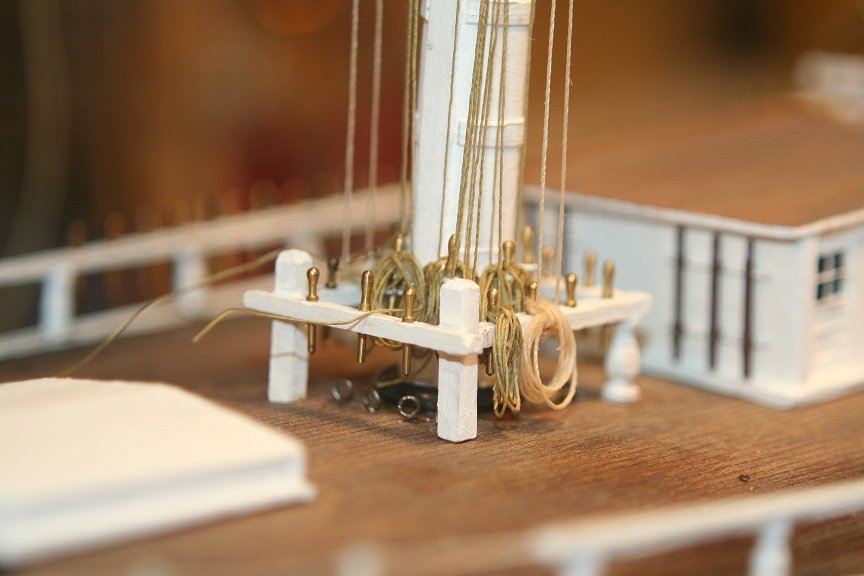
Imagining the enormity of line on a clipper, one would also need to imagine that lines wear out....get replaced. And so it seamed logical to attempt to replicate this fact. It was actually one of the easiest to replicate........the hard part was having the epiphany. Rob
- 1,208 replies
-
- 2
-
-
- great republic
- clipper
- (and 1 more)
-
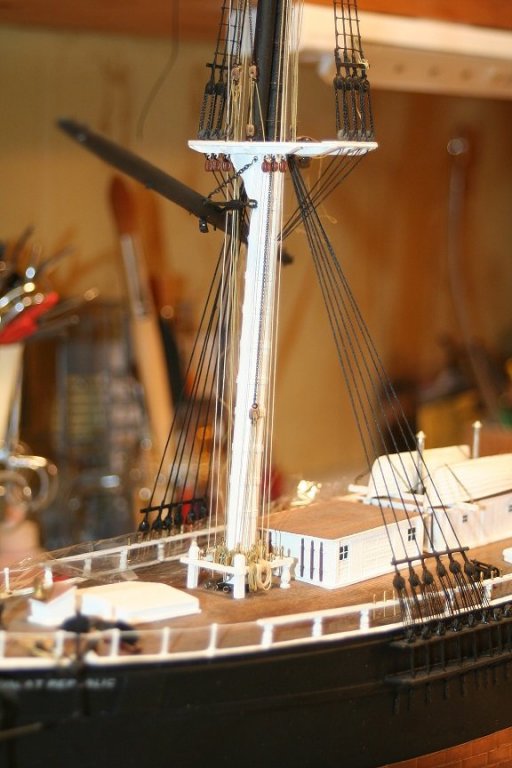
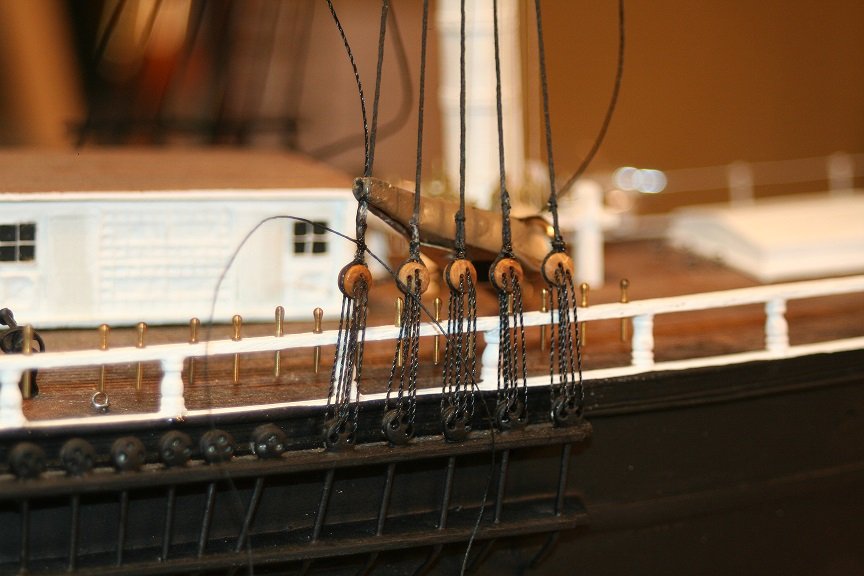
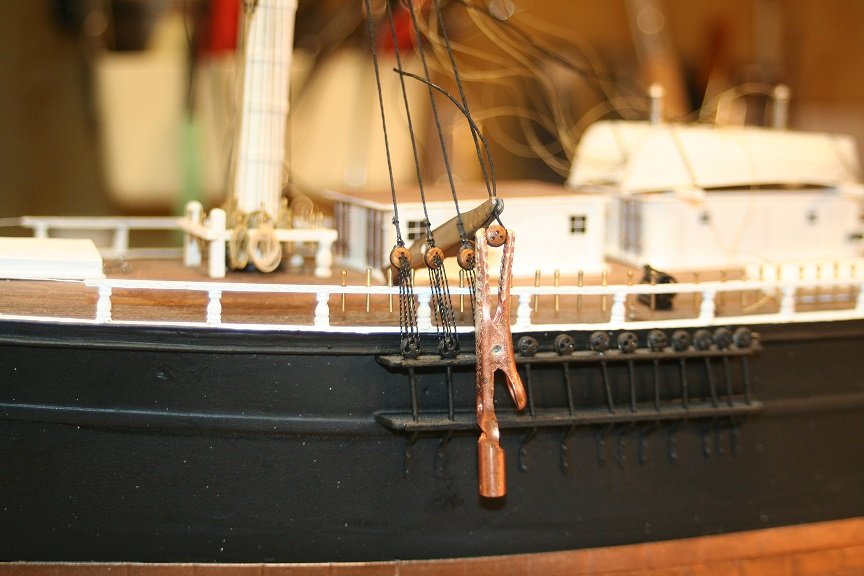
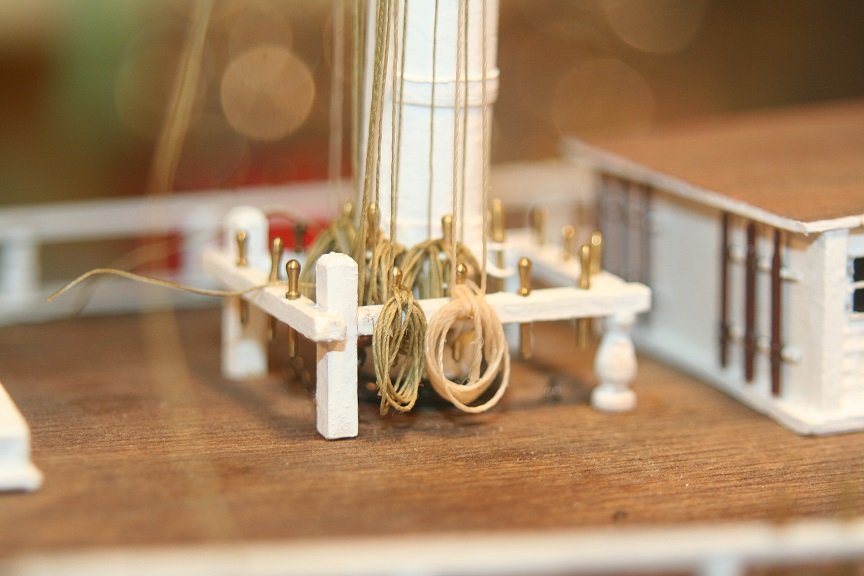
It might cause some to wonder, so I wanted to clear the air on the subject. Why do I use different colored line? The downhauls are larger diameter line and so I chose to model new and older used line... to keep things different. It was not uncommon to see different shades of line...as the older line contrast against the newer. Here is an example so no one thinks I've lost my mind. Rob
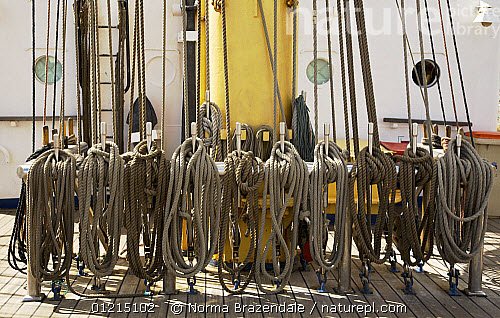
- 1,208 replies
-
- 6
-
-
- great republic
- clipper
- (and 1 more)
-
Fantastic build Nils...and the case will be just as wonderful Rob
- 692 replies
-
- 3
-
-
- eagle of algier
- chebec
- (and 2 more)
-
Thanks for the suggestion Mark. When I ran the lines while I was building the mast, I identified the lines by forward and aft and port/starboard. This means all I needed to do was decipher through 3 or 4 lines...and those from twisting around one another. I would belay a line then follow it back up and make sure it was totally clear. Occasionally I had to unbelay and unfoul the line...but that didn't happen often and wasn't an issue. All the lines that remain will go through fairleads then down to belay pins on the rail. Just making sure I have all the padeyes secured on the mast and nothing is forgotten. Again...thanks for the fine suggestion and your comments. Rob
- 1,208 replies
-
- 4
-
-
- great republic
- clipper
- (and 1 more)
-
I utilized a similar method to Ed's...while creating the rolles off the model and then loop securing them to the pin with an extended end of the rope itself. I will add another lighter rope coil. Thanks Pat for the comment. Rob
- 1,208 replies
-
- 3
-
-
- great republic
- clipper
- (and 1 more)
-
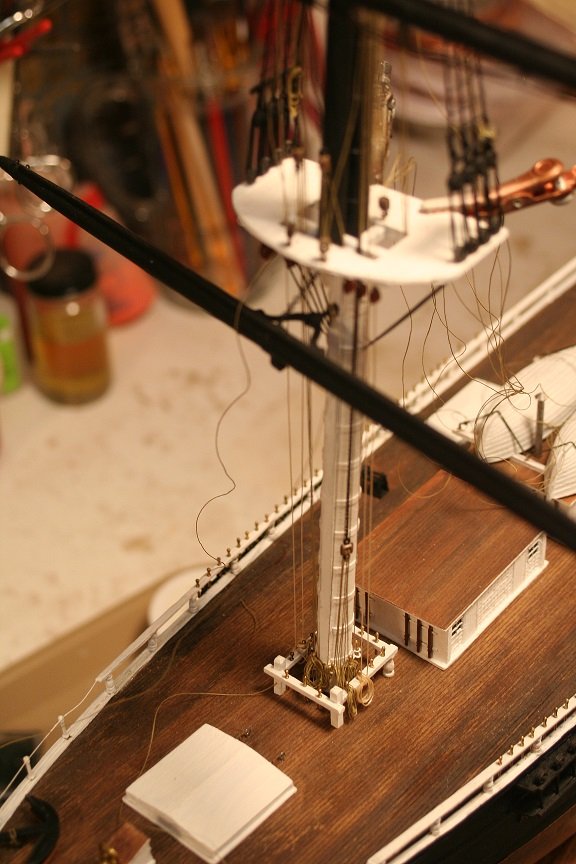
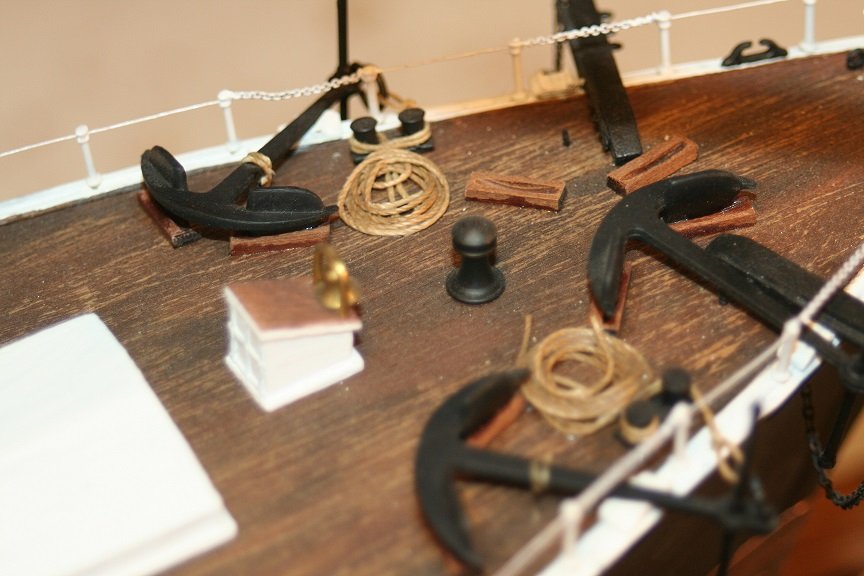
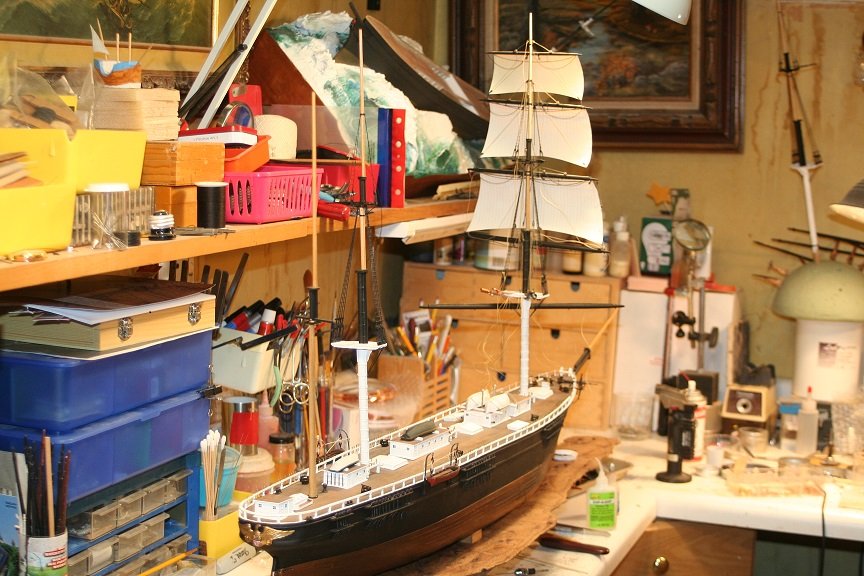
I added some coils around the anchors...another pic before I begin the shrouds.

- 1,208 replies
-
- 11
-
-
- great republic
- clipper
- (and 1 more)
-
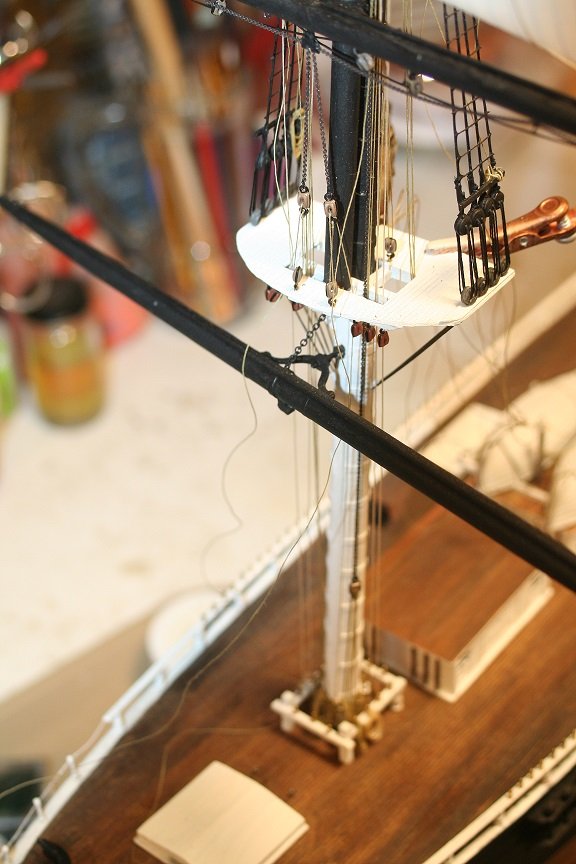
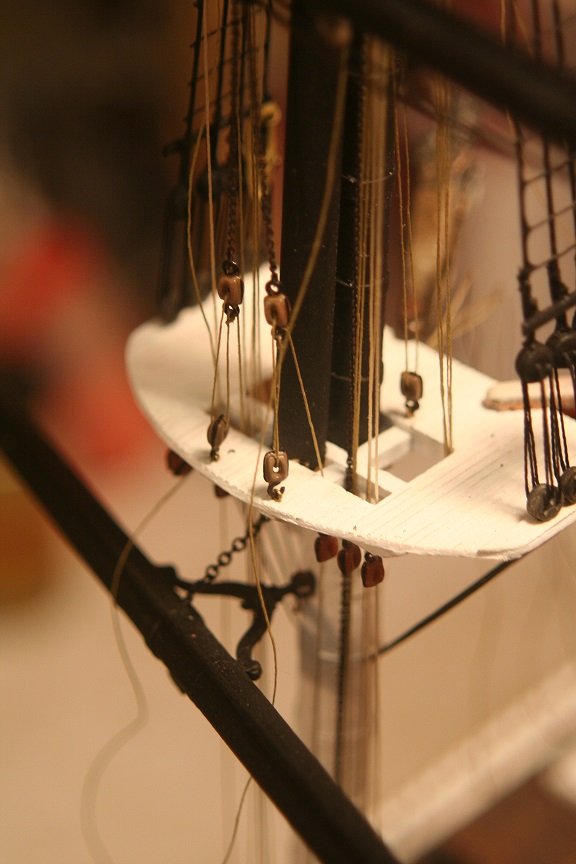
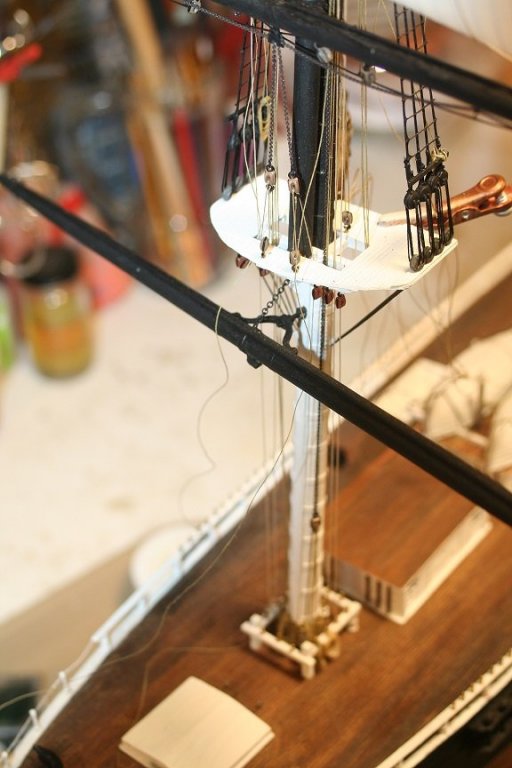
Passing line down through the top can be tricky...and keeping lines from tangling and twisting is a priority.

- 1,208 replies
-
- 9
-
-
- great republic
- clipper
- (and 1 more)
-
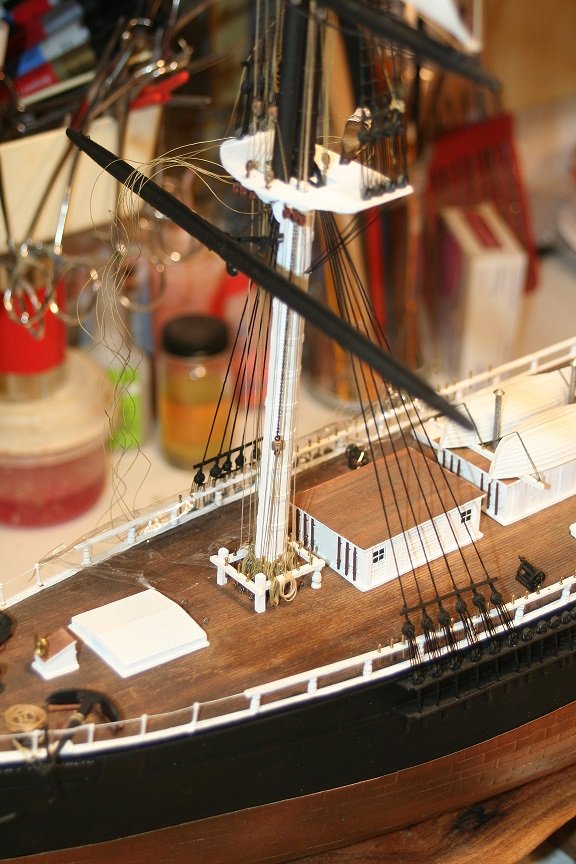
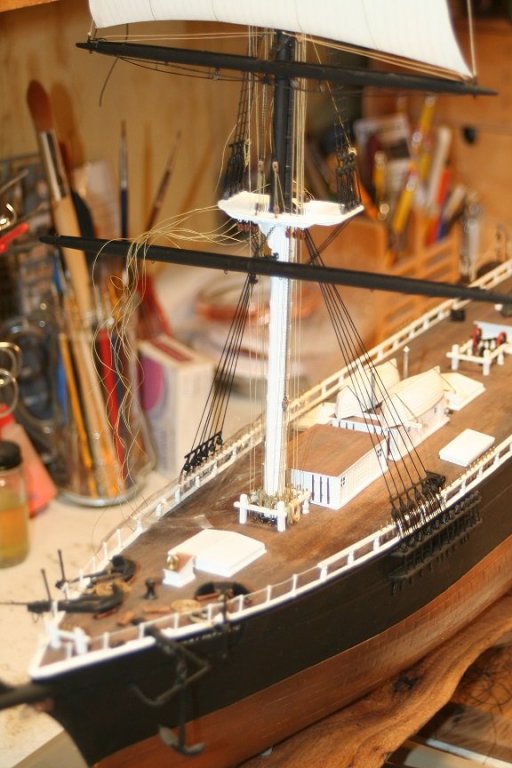
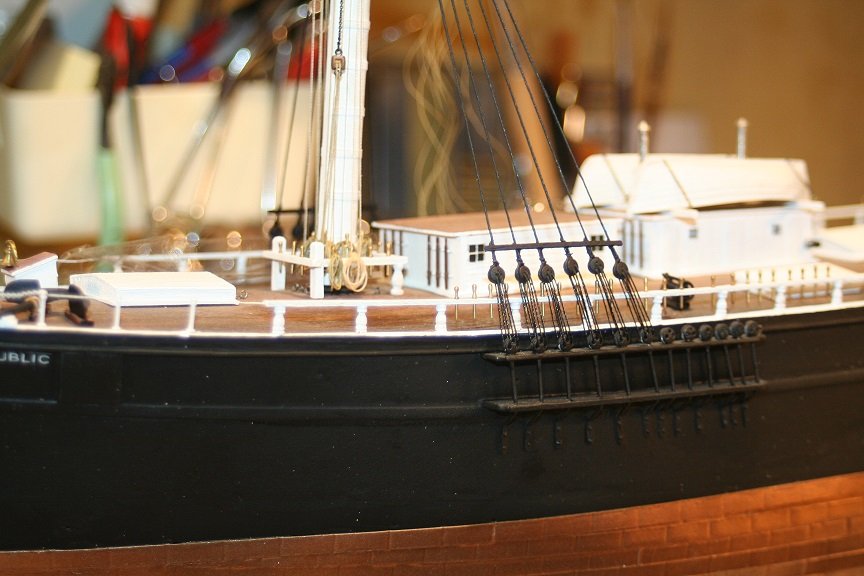
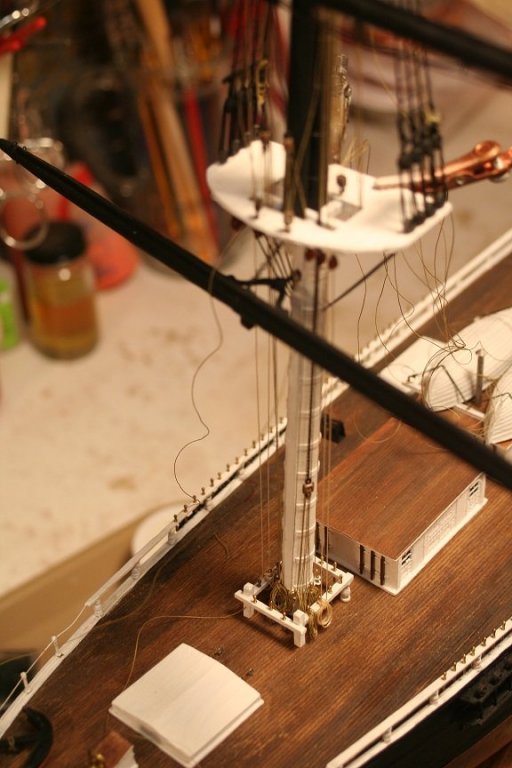
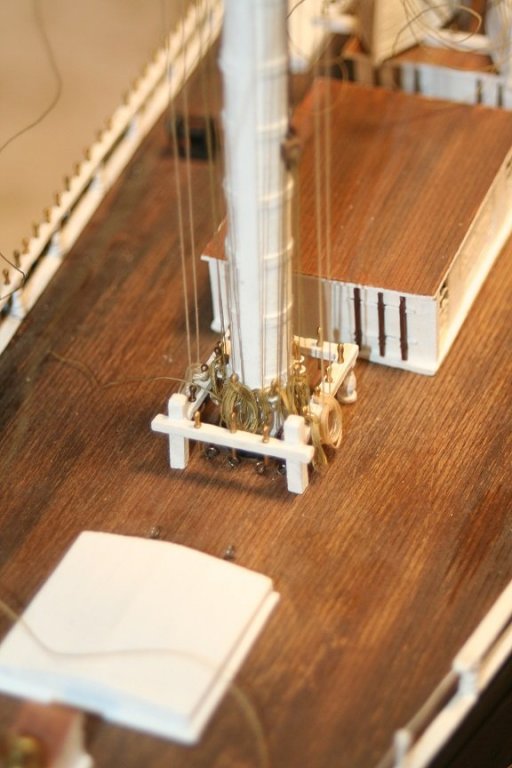
A Little bit of work today finishing up belaying the sheets and downhauls. The buntlines and clews will be kept out of the way with gater clips. I tend to add rope coils at the spider and fife rails when the lines are belayed. All this work gets done under the shrouds and can be troublesome....so I did it now.
- 1,208 replies
-
- 7
-
-
- great republic
- clipper
- (and 1 more)
-
Thanks Gentlemen.....I'm not the superb builder who adheres to the finest detail that many here on these pages are capable of attaining , but I still try to simulate the best I can in the scale I'm working in. Rob
- 1,208 replies
-
- 6
-
-
- great republic
- clipper
- (and 1 more)
-
While I am at it I drilled many holes for the padeyes for the lifts...not to mention the douzens of belay pin holes on the rail(that was tiring). Little bit of progress.....

- 1,208 replies
-
- 7
-
-
- great republic
- clipper
- (and 1 more)